Articles | Page 29 of 59 | Small Boats

Downed Trees and Muddy Feet

As always, there had been a rough sketch of a plan: a 7- or 8-mile row, heading generally northward through the meandering sloughs and backwaters of the Chippewa River delta, the largest contiguous floodplain forest in the Midwest. From there, it would be an easy float down the main river channel to its junction with the Mississippi. Two or three nights aboard, a wandering pilgrimage through 30 square miles of river bottom forest and wetland bisected by only a single road. No need to pack the sailing rig—oars alone would do.

The more I thought about it, the better it sounded. With no charts available, I downloaded a set of detailed topo maps, printed them at 2″ to the mile, and ran them through a laminator. A bit smaller than restaurant placemats, and stiffened nicely by the laminating, they’d be perfect for one-handed use in a small boat—a trick I filed away for future trips. Even better, the maps seemed to suggest that the route I had imagined might actually exist. From a launch ramp 50 yards off the south side of Highway 35, a reasonably open channel paralleled the road eastward for a mile or two, snaking back and forth beneath a series of bridges before entering a thin but apparently continuous ribbon of river leading farther north.

Photographs by the author

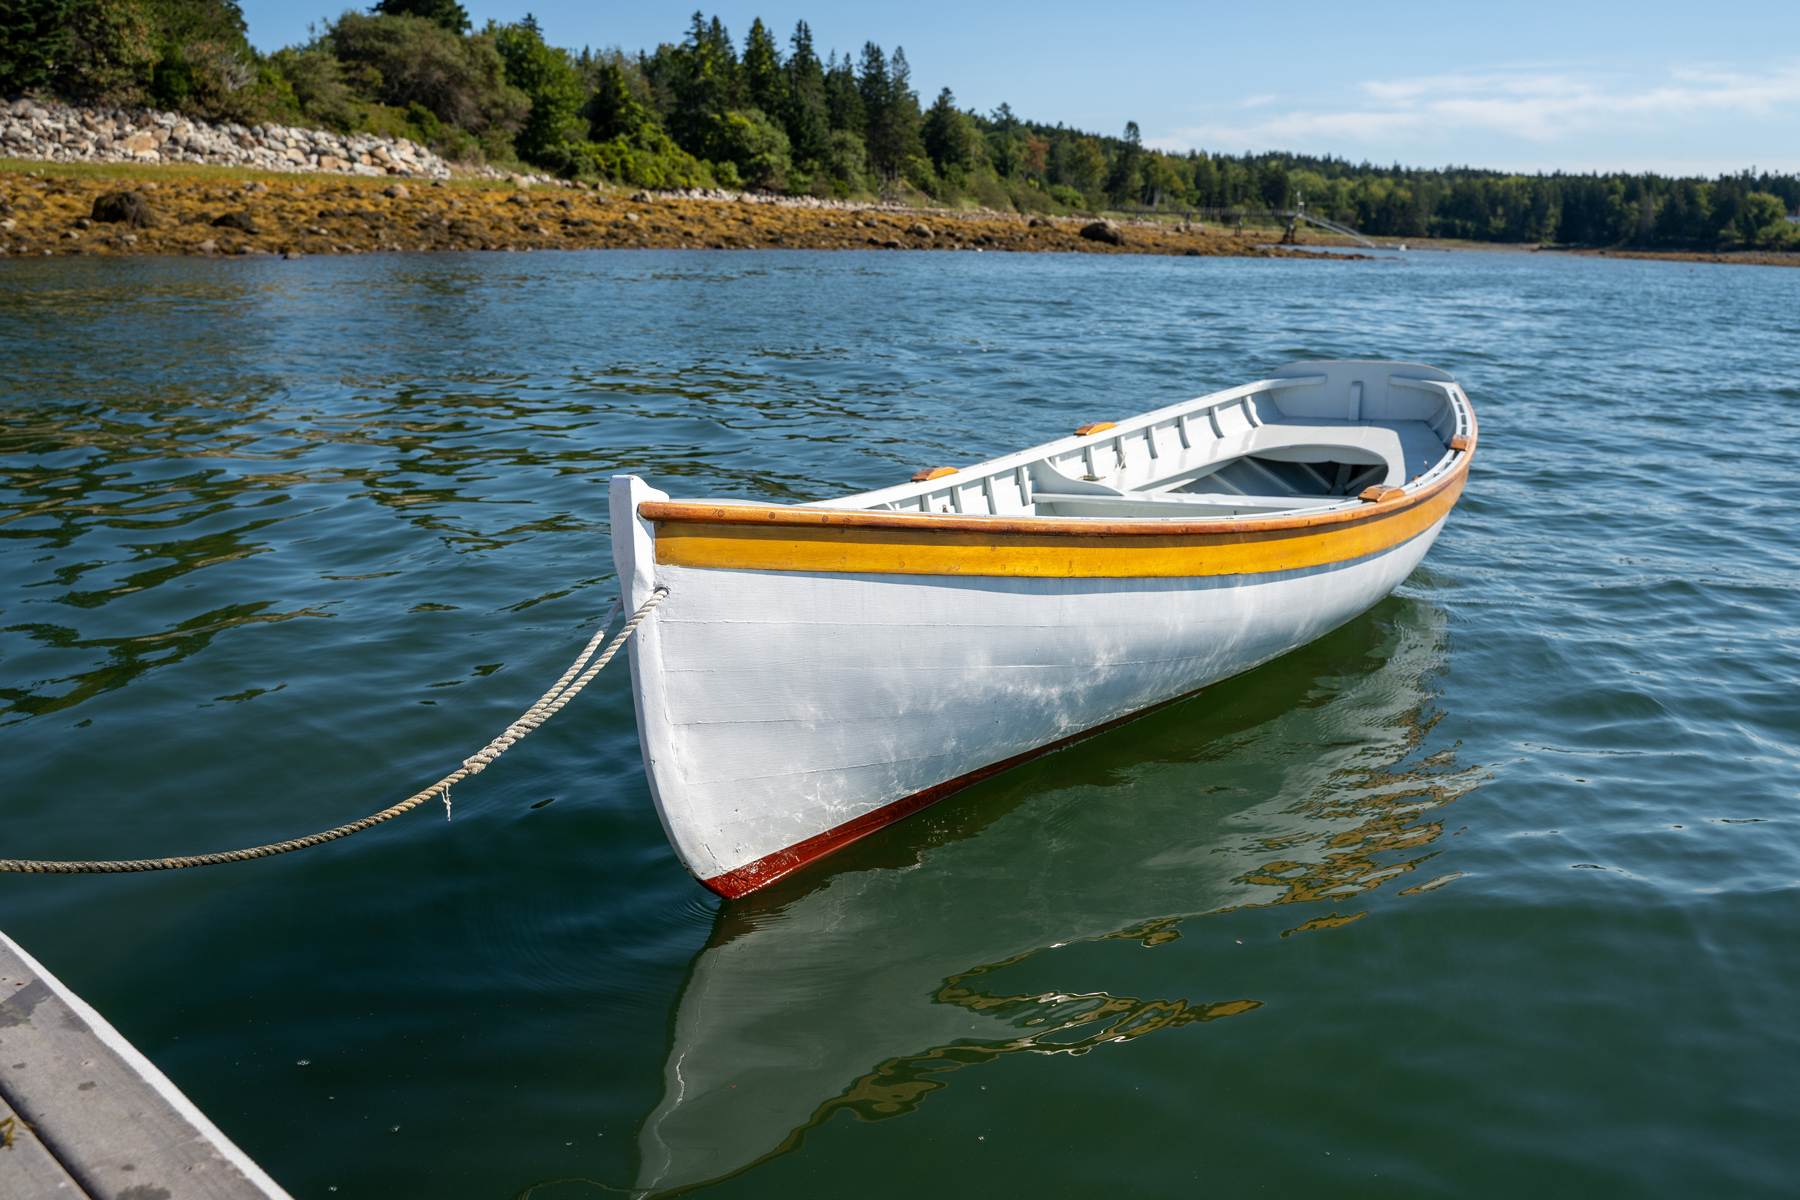
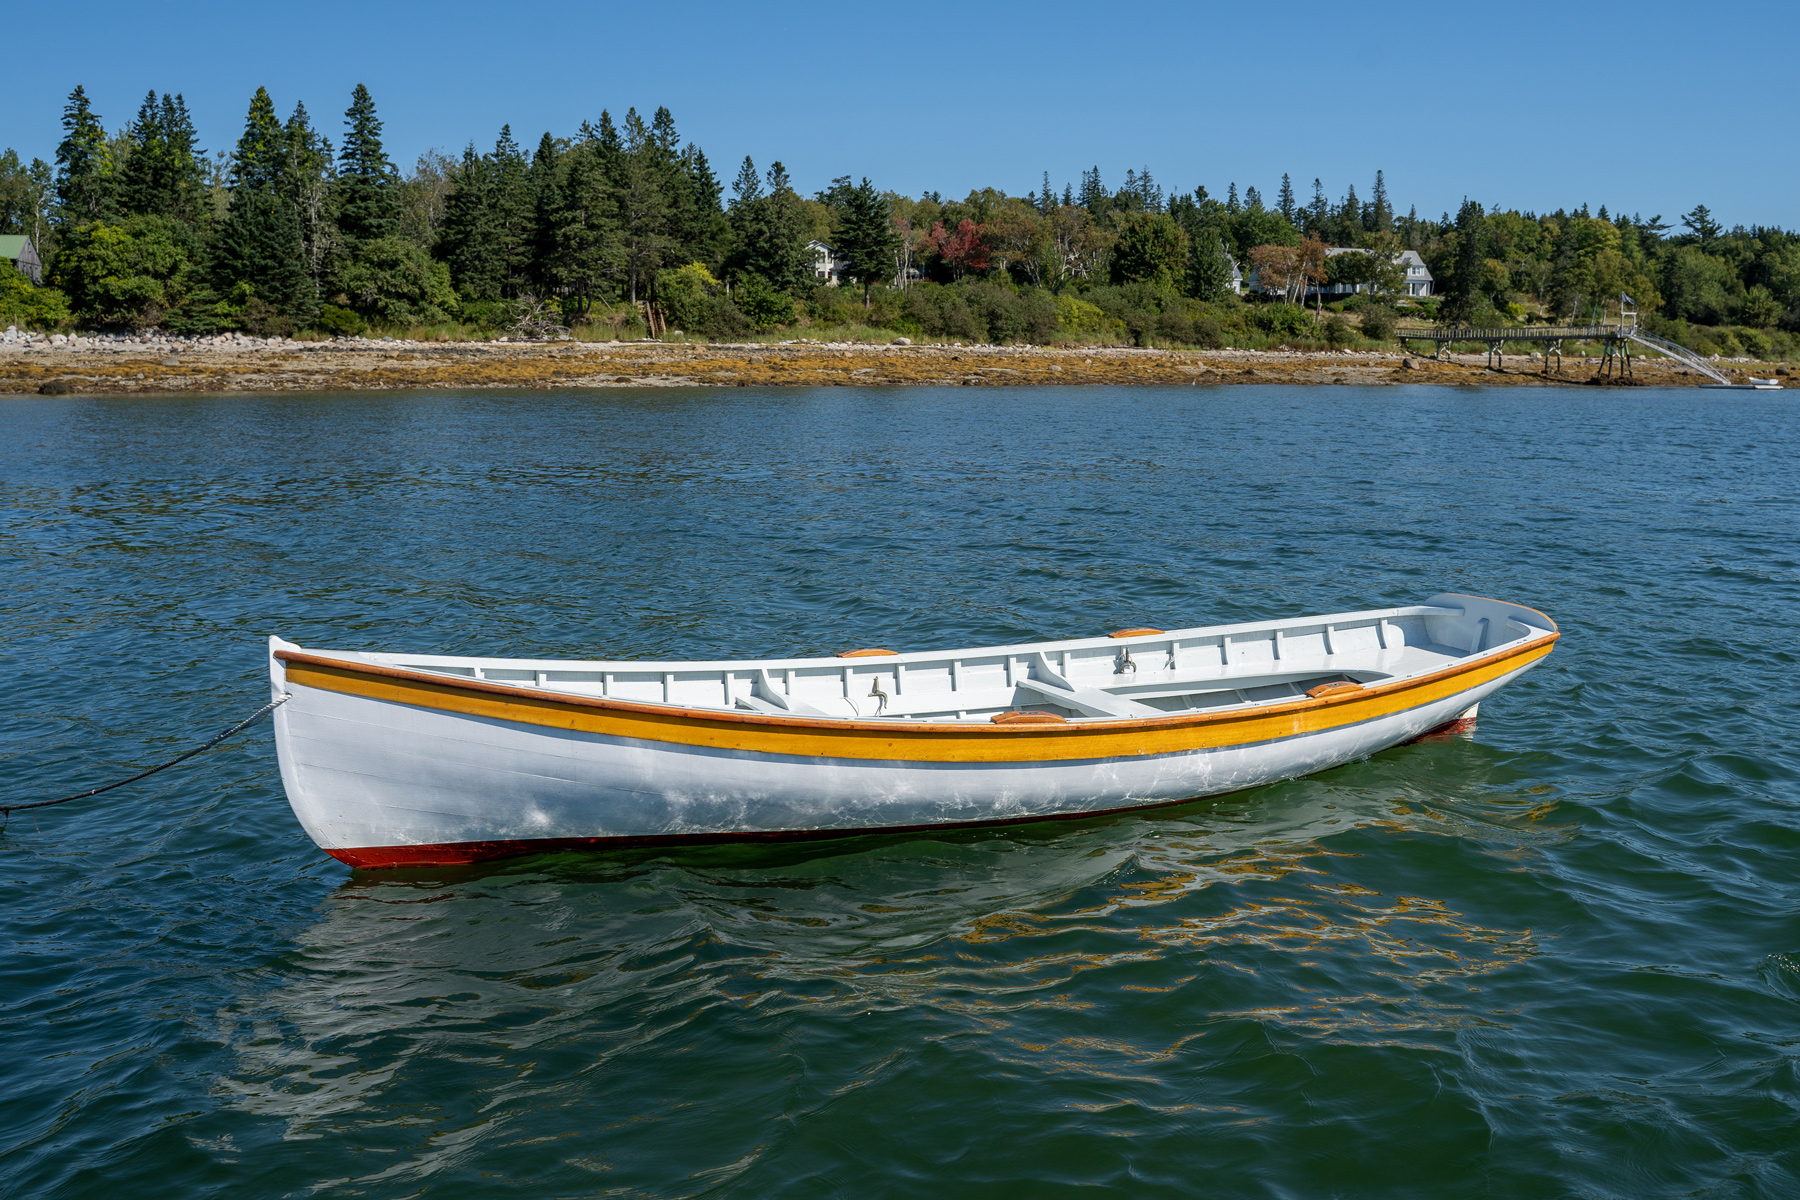
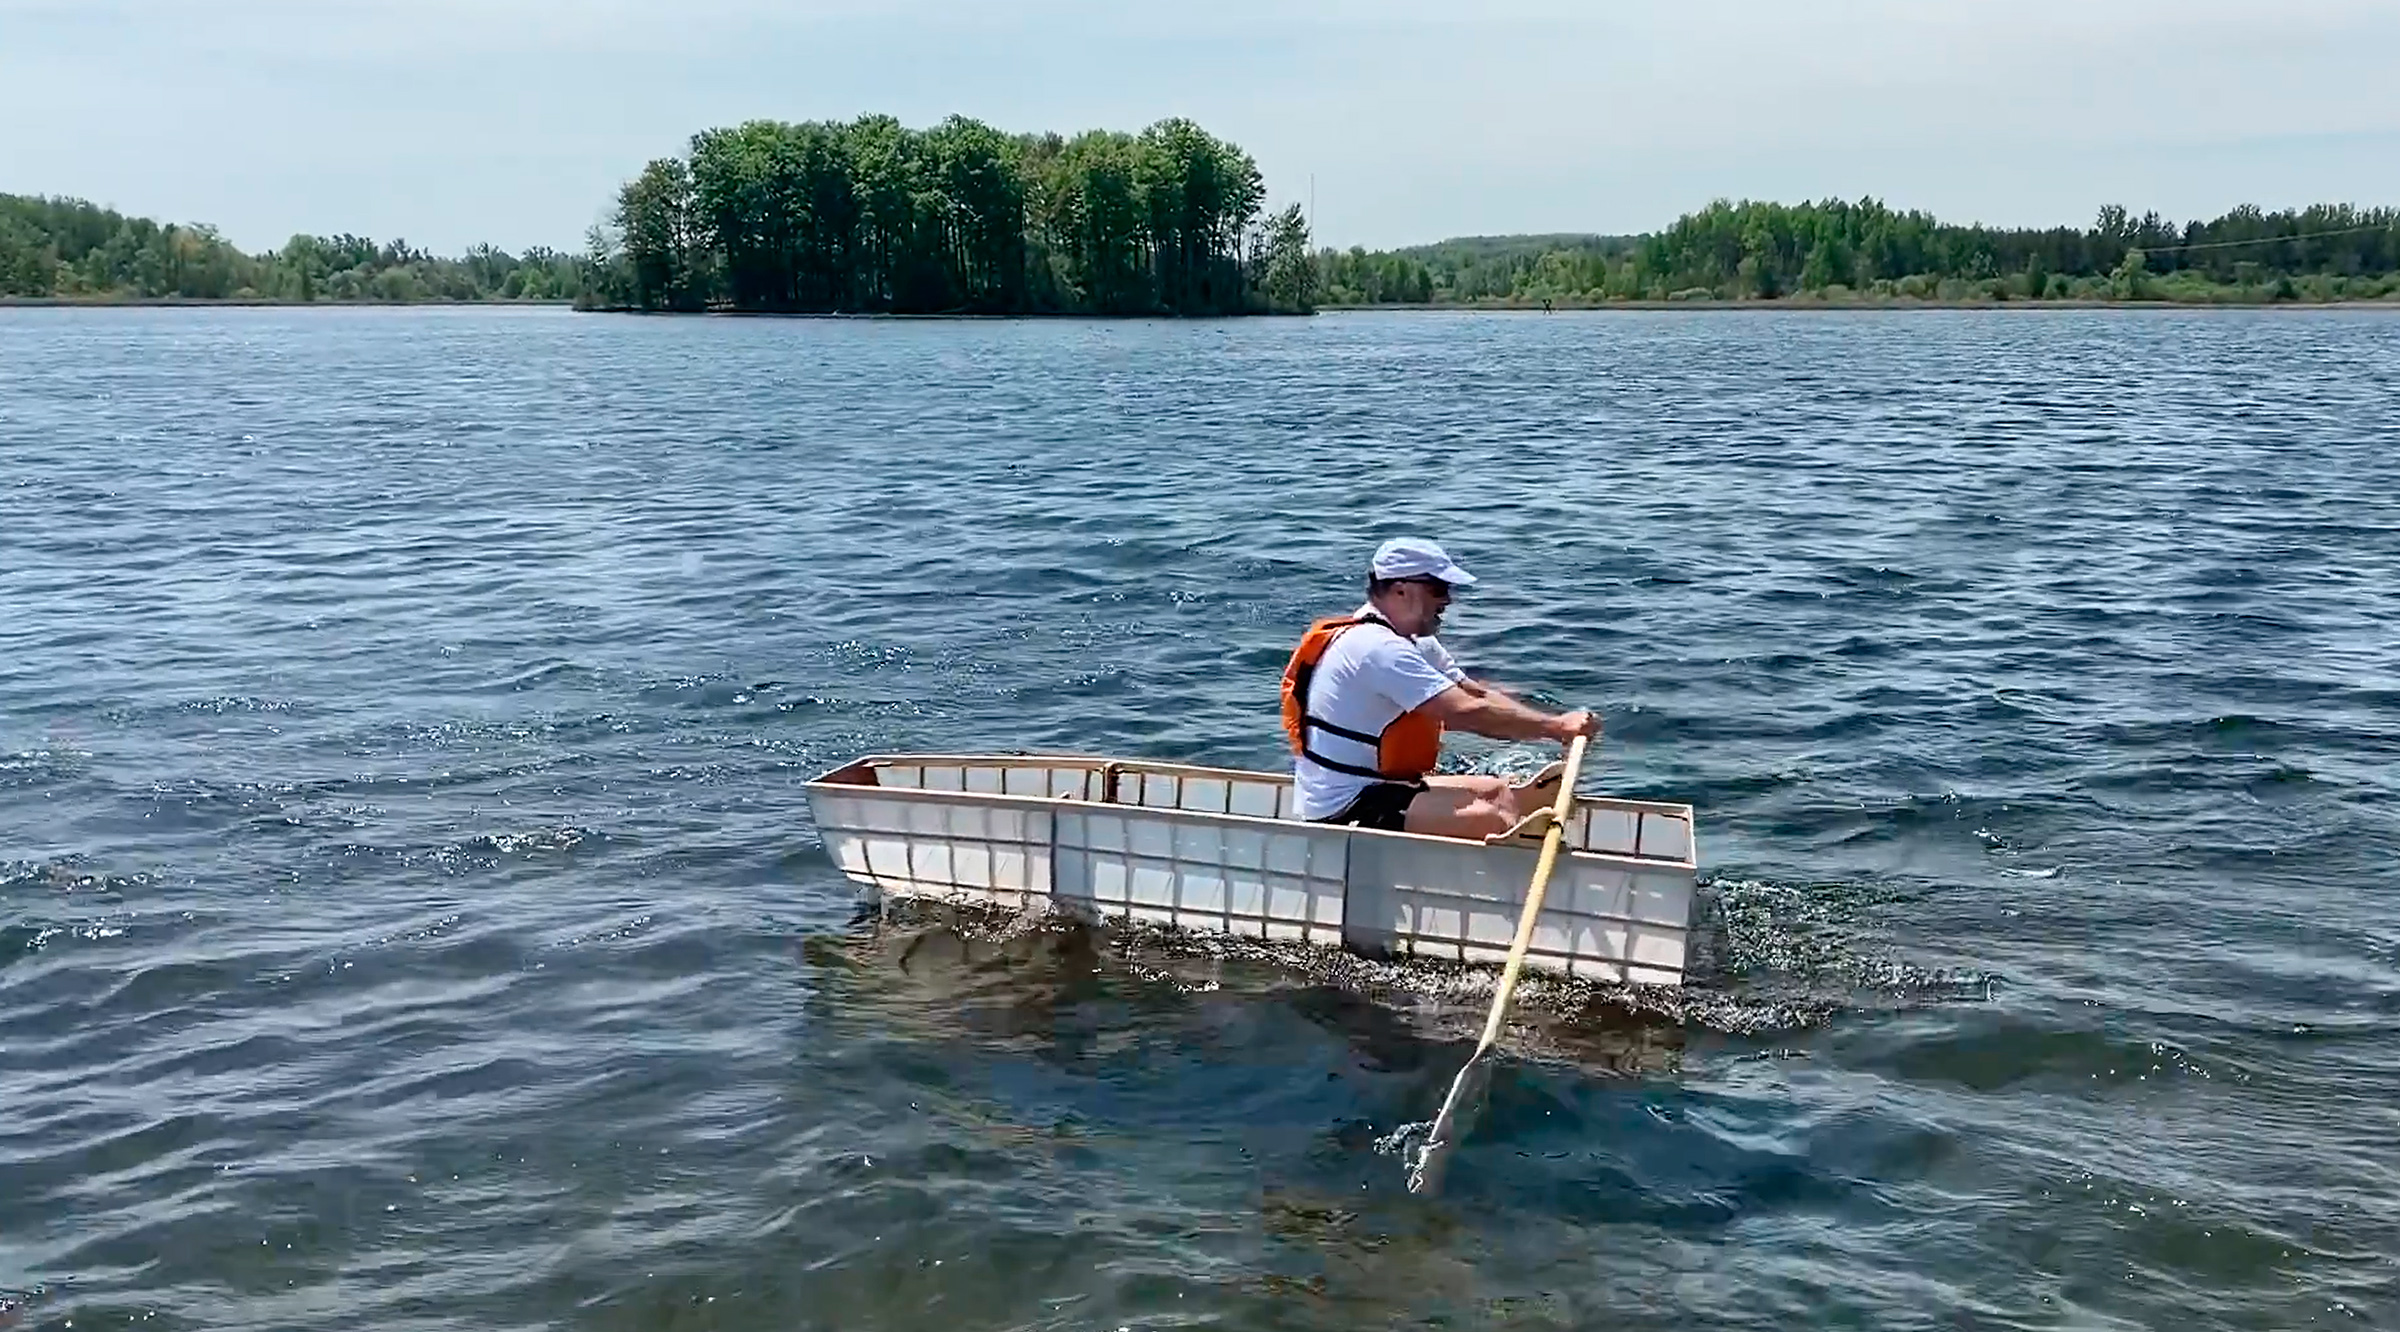
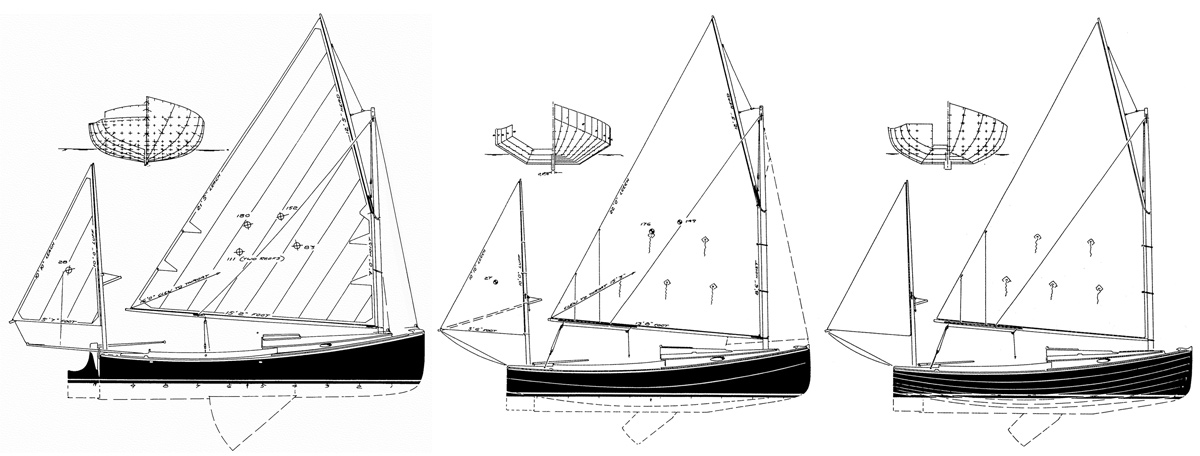
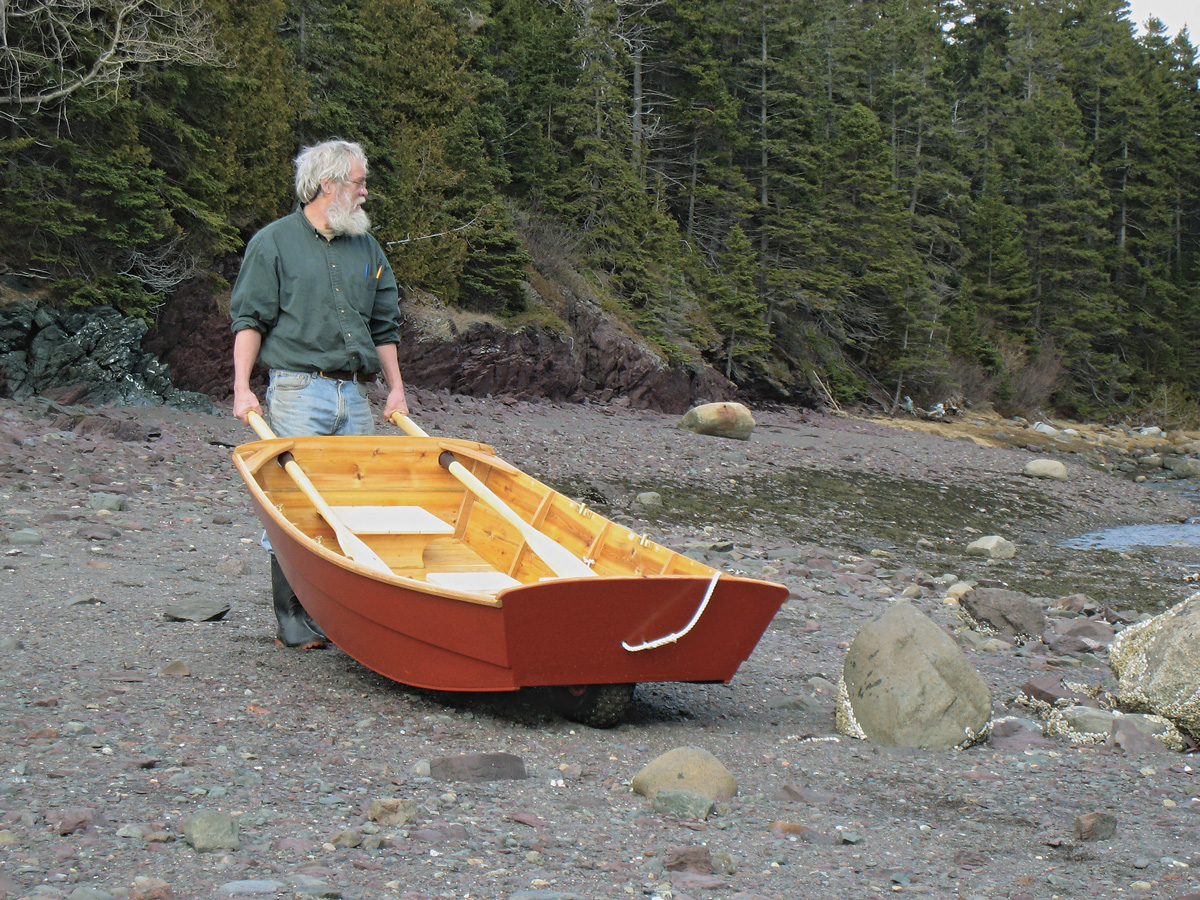
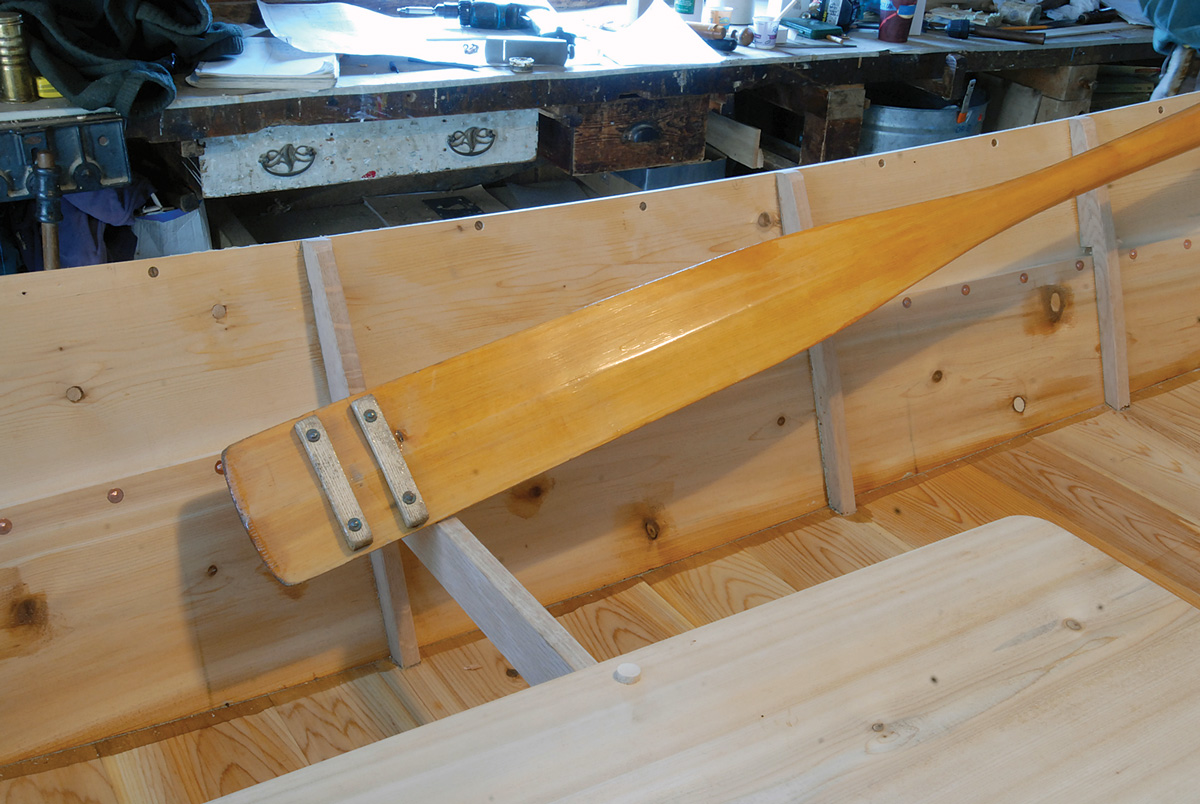
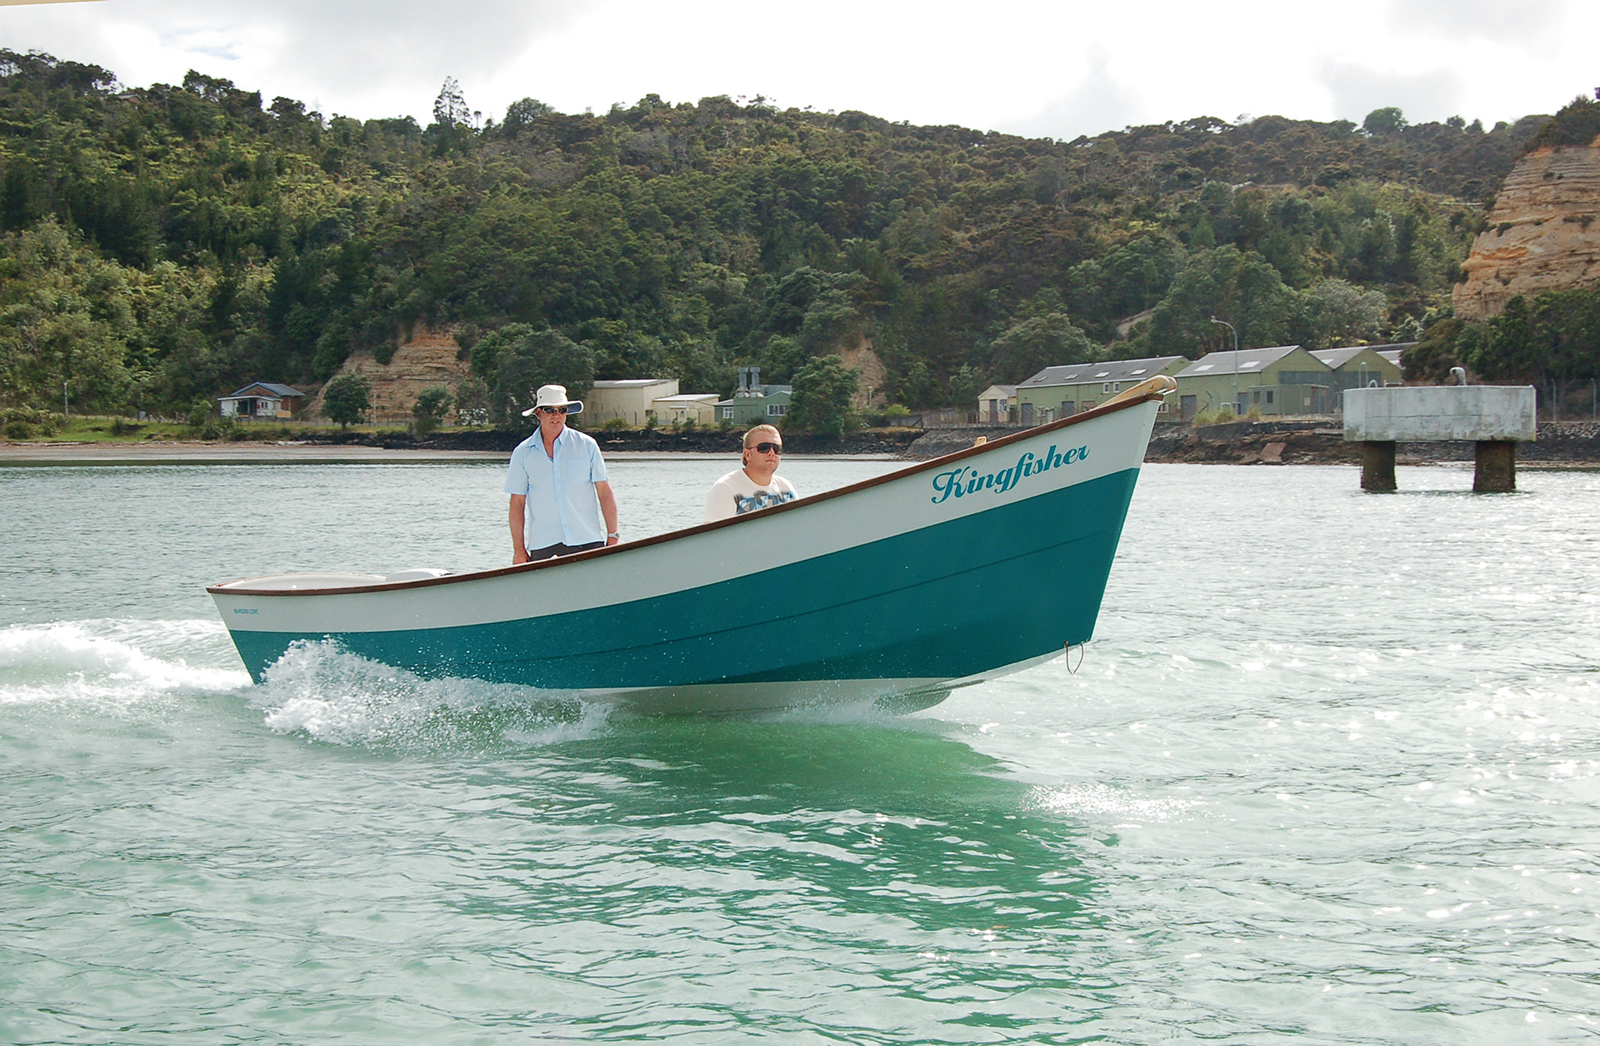
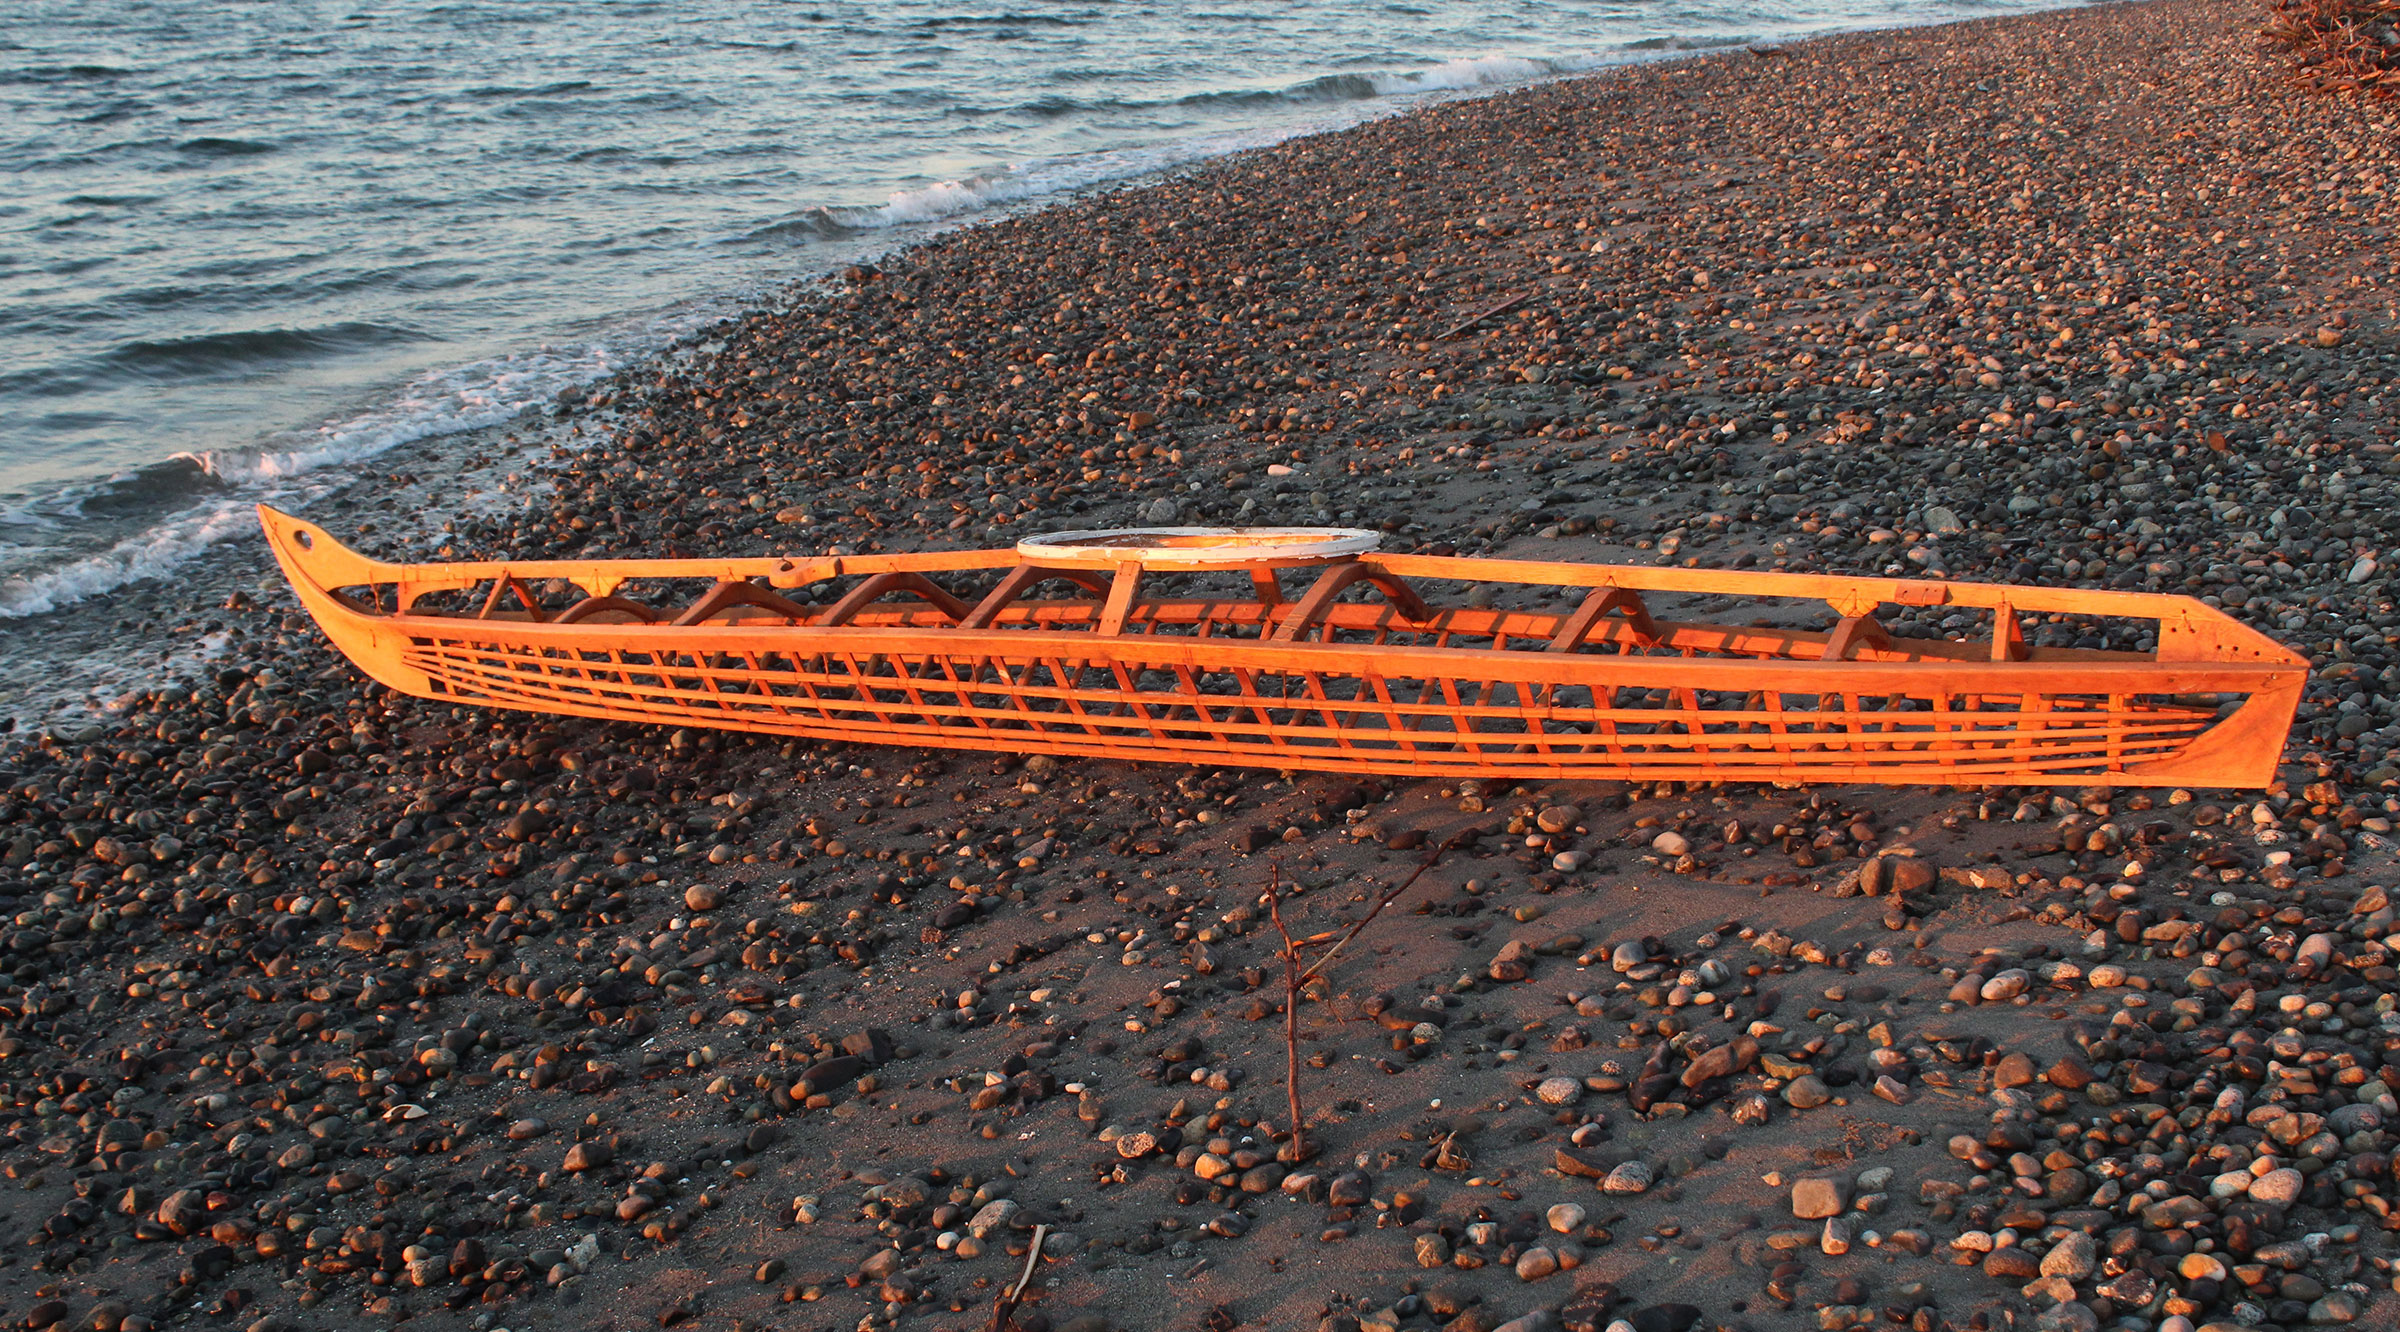
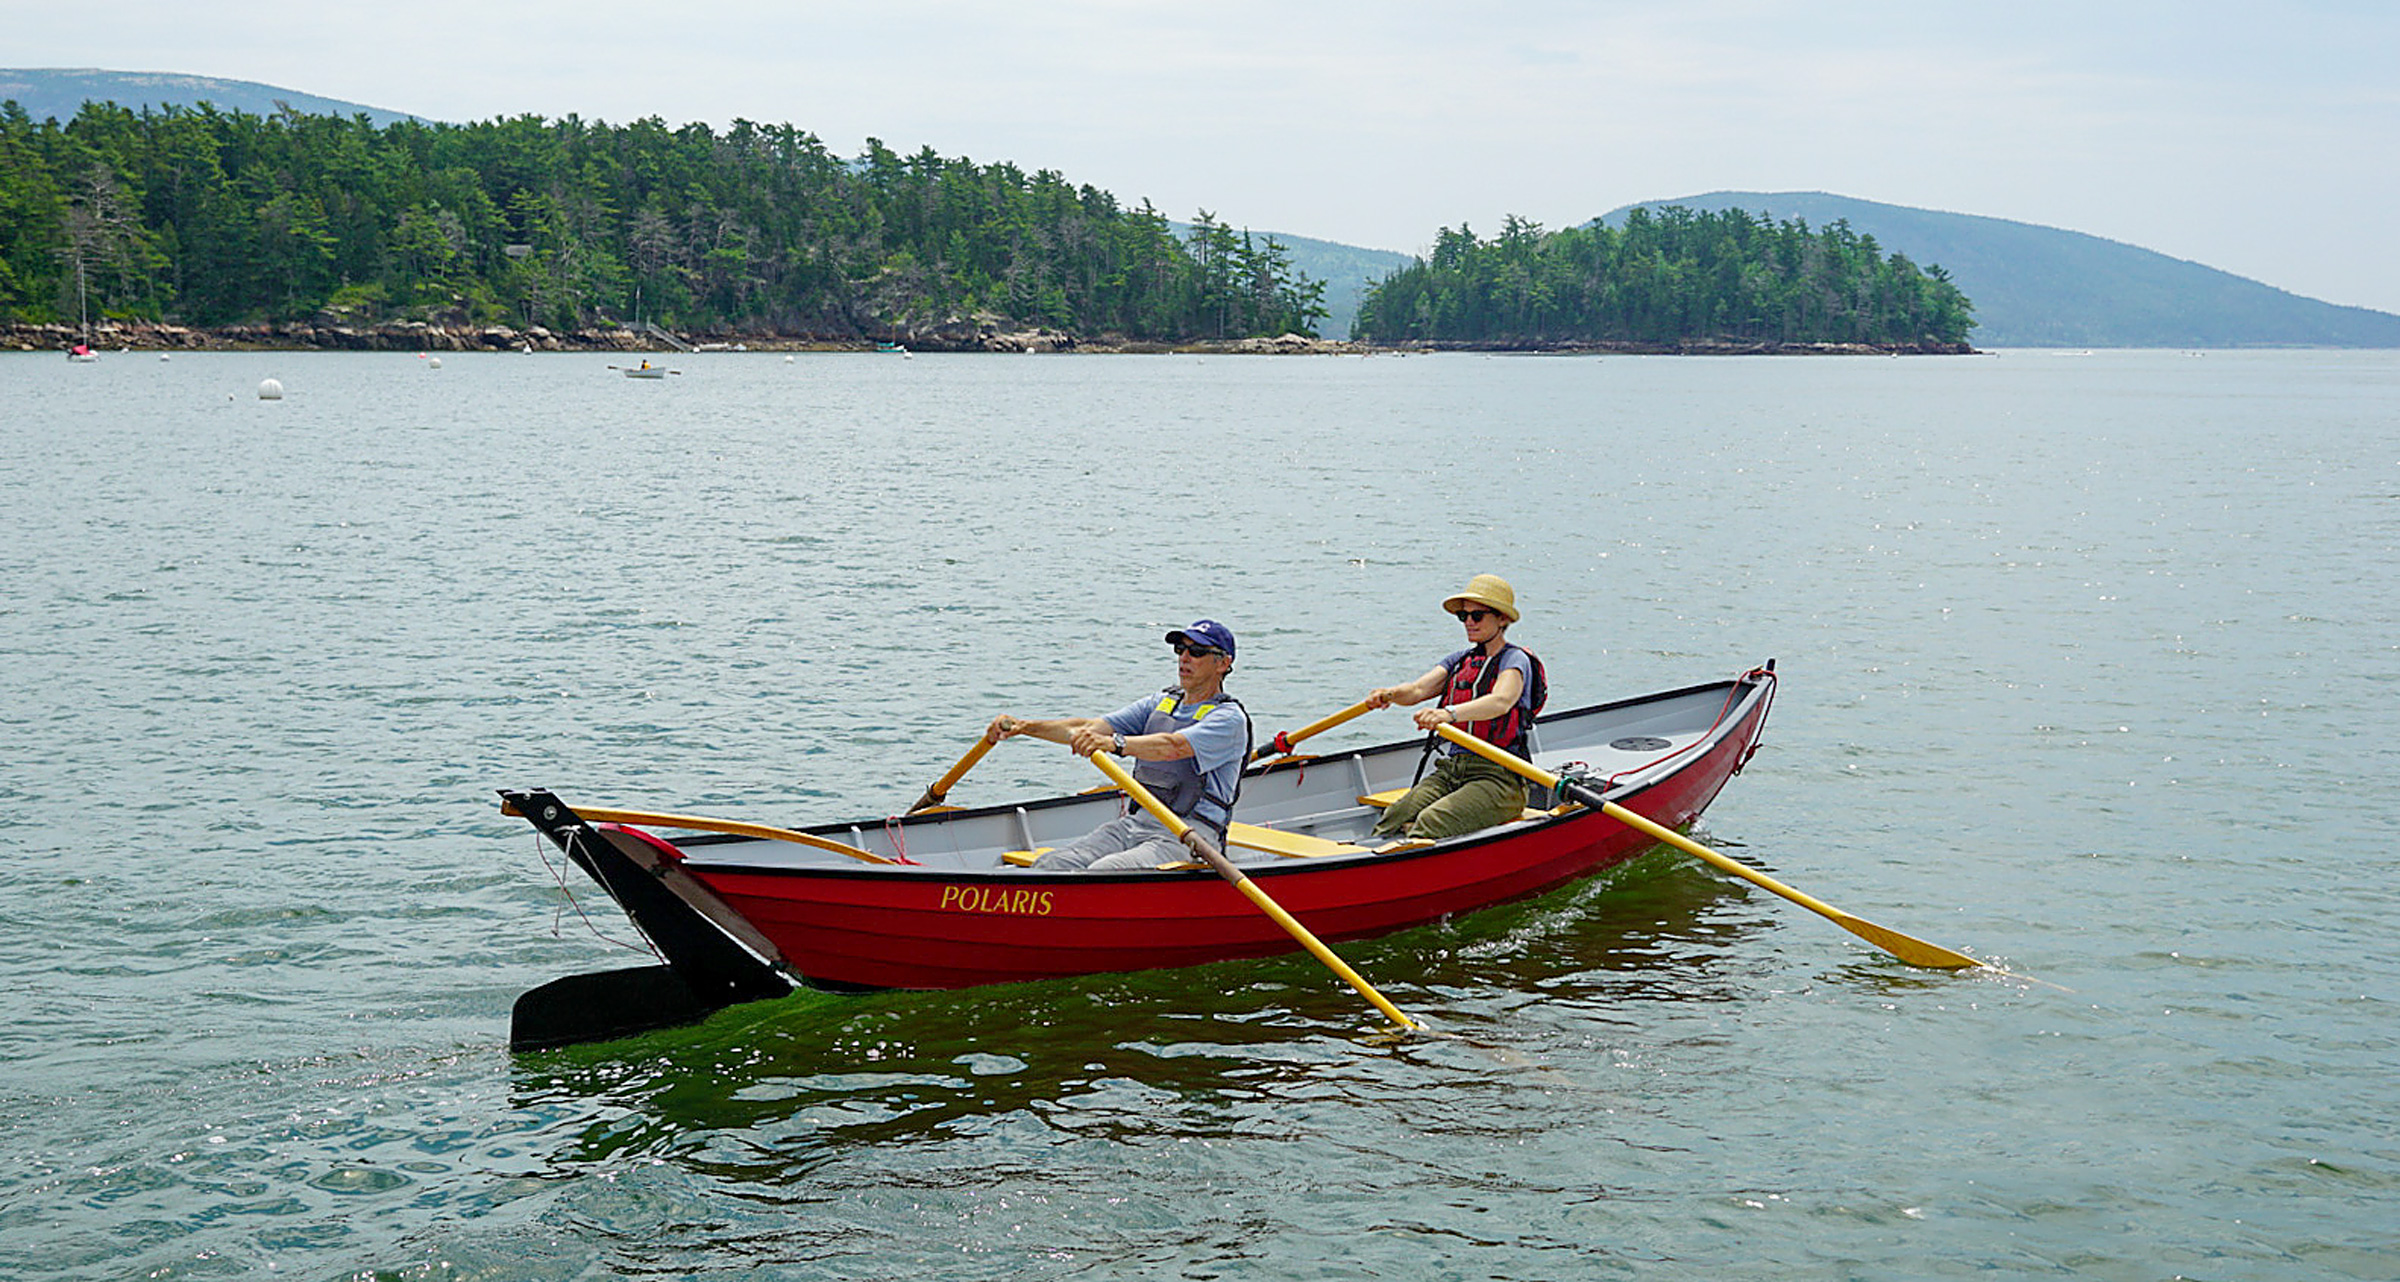
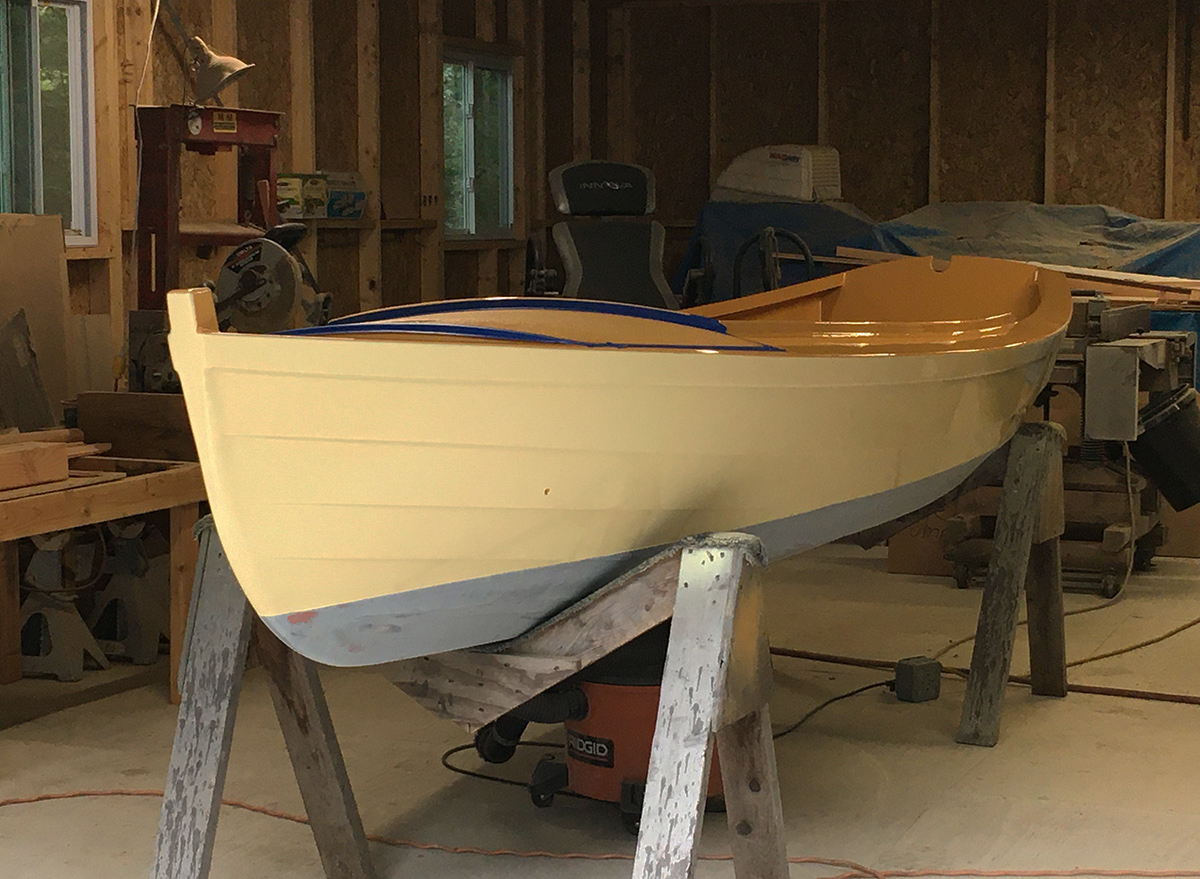
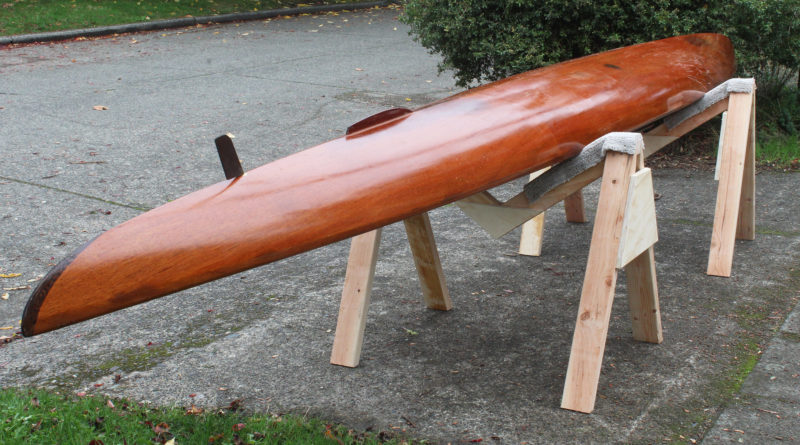
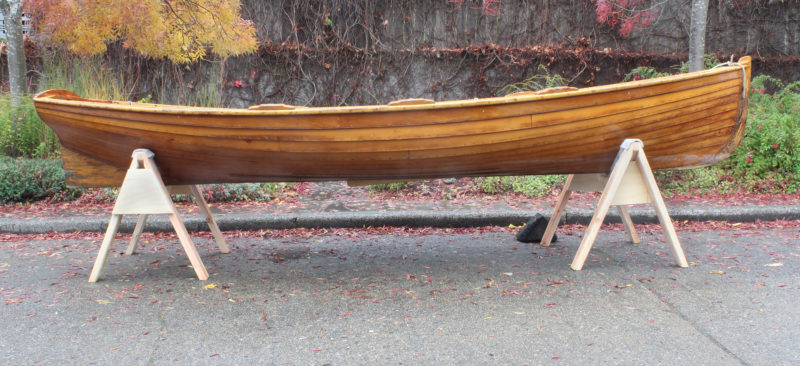
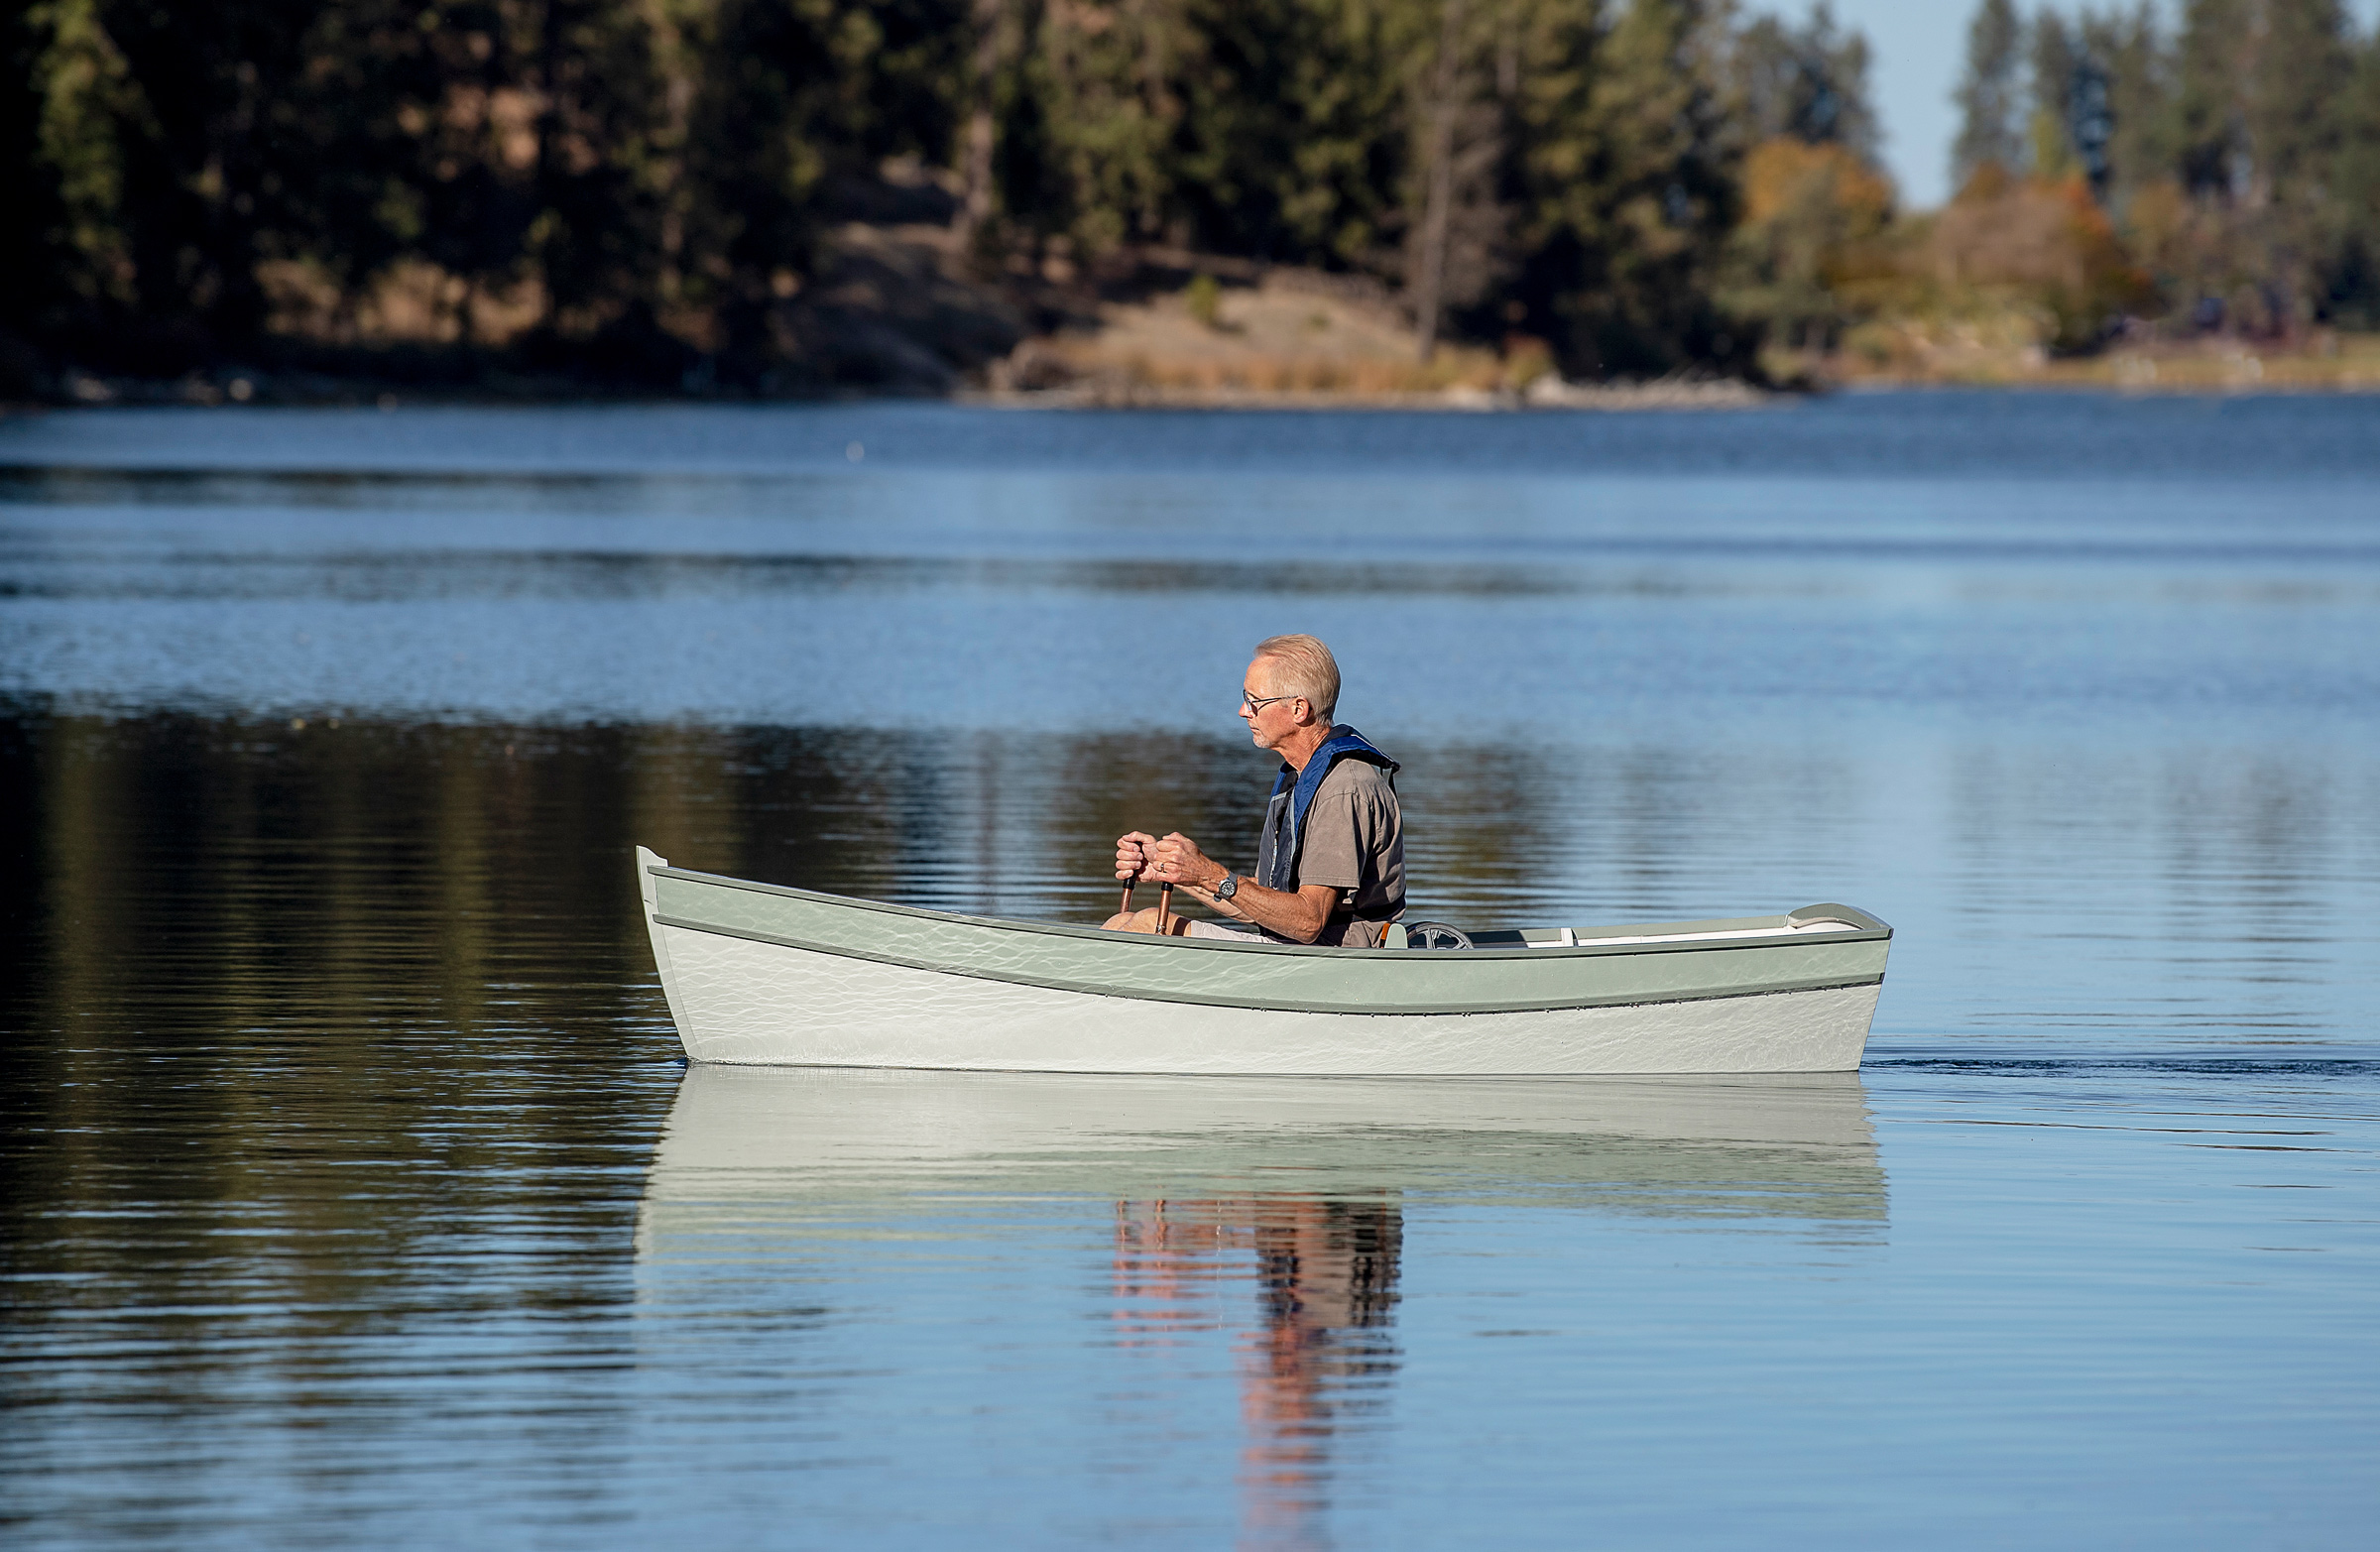
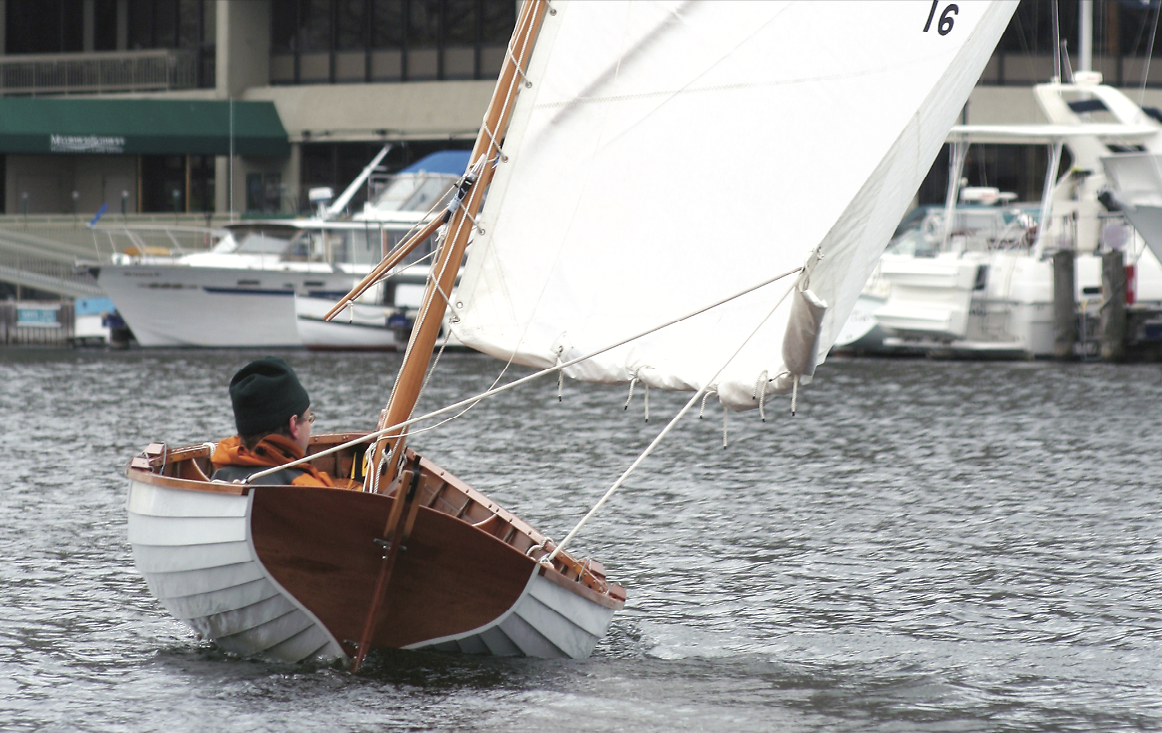
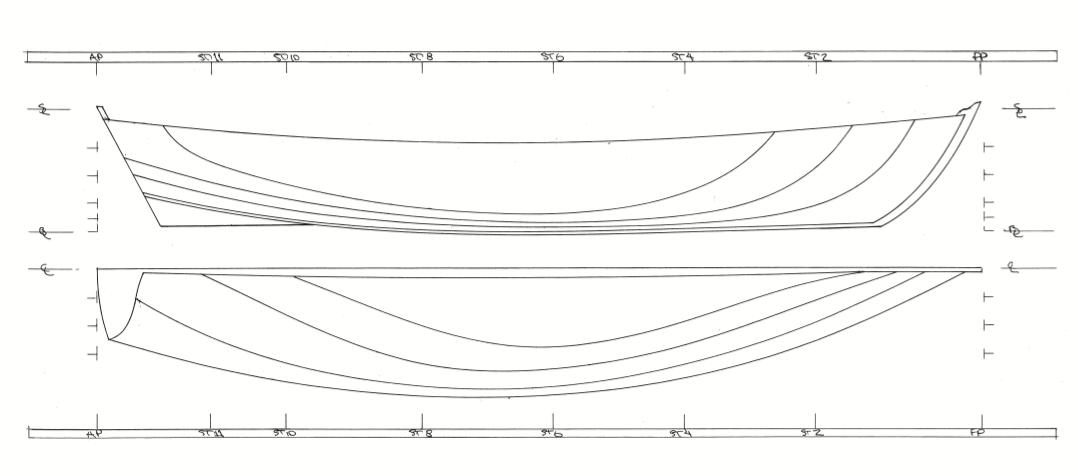
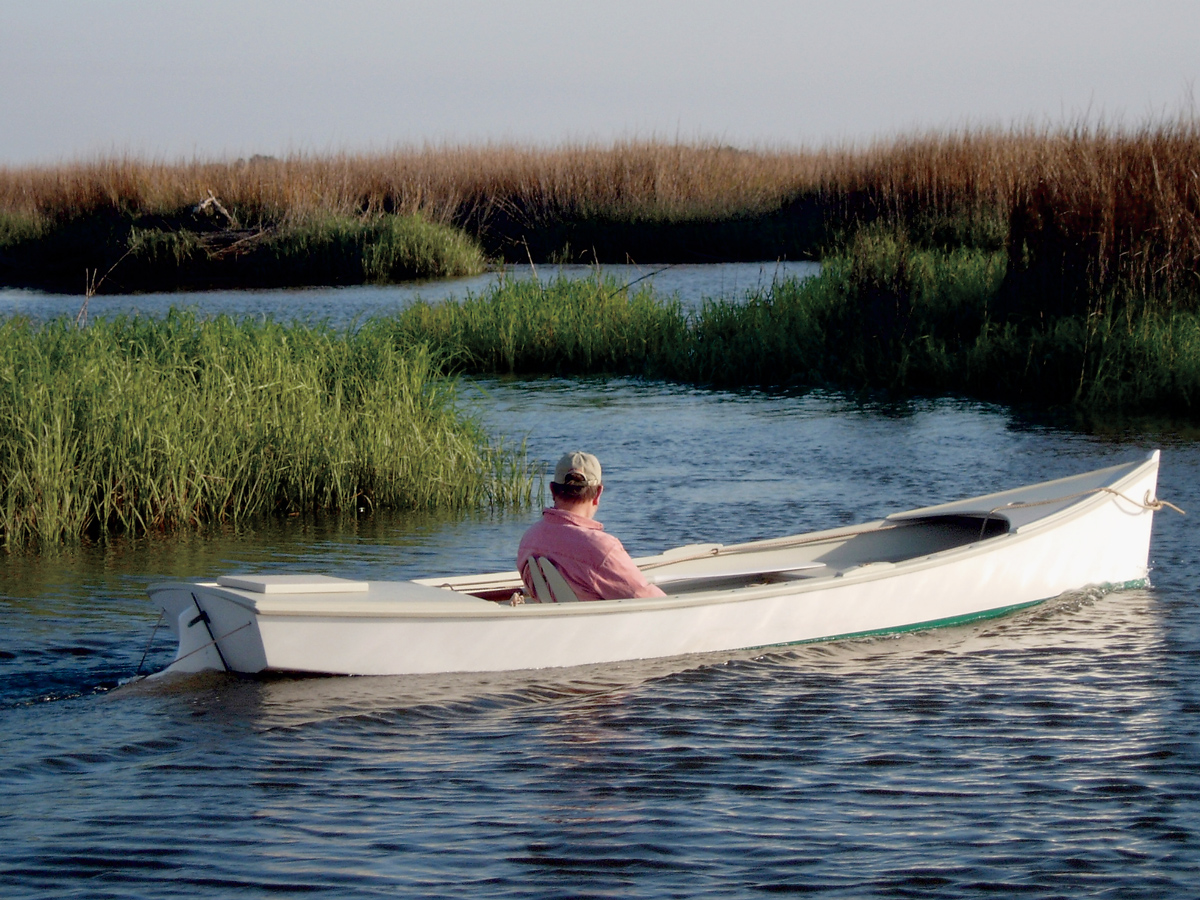
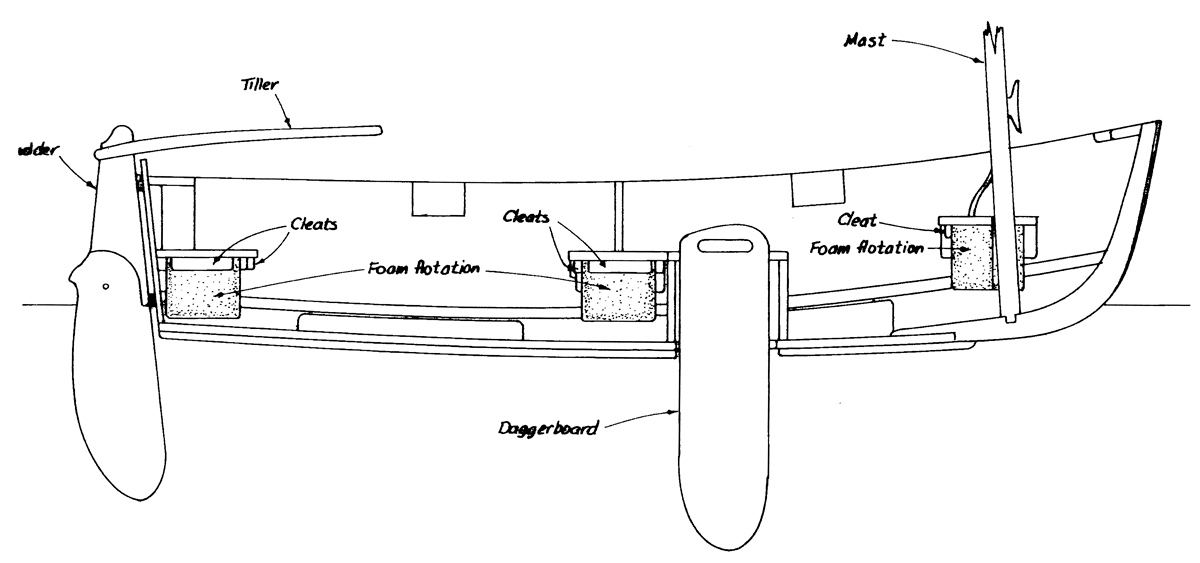
Many of the channels leading north from Highway 35 were so shallow that I could stop FOGG, my Don Kurylko-designed Alaska, in midstream, with no need to tie to shore. Sandbars and shallows were so frequent that wading upstream while pulling the boat behind me often turned out to be the only way to make any real progress.

This channel—Buffalo Slough—ran generally northward along the eastern edge of the delta for several miles, swooping through a series of bends and hairpins and pond filled backwaters to connect with another winding channel—Little Buffalo Slough—that diverged from the 300-yard-wide main channel of the Chippewa 10 miles upstream from the river’s confluence with the Mississippi. I’d anchor there, behind a half-mile-long island at the entrance to the slough, and then have an easy downstream row on the Chippewa. After a second night somewhere near the river’s mouth, I’d close the loop with a rambling track through the lower delta: up Government Light Slough to Smith Slough and on to the ramp, maybe. I didn’t overthink it. A certain degree of ignorance is a necessary component of these ventures, the best plans only vague brushstrokes to be filled in later, a new revelation at each stroke of the oars.

Heading south and into the delta, my route passed broad stretches of reeds and marsh grass at the upper reaches of Smith Slough, one of the widest channels in the Chippewa River delta. With the current giving me a substantial boost on this leg of my trip, I had ample time to stop ashore.

But there are plans, and there is reality. After two hours of rowing back and forth beneath the highway after launching from the ramp, I had failed to find the entrance to Buffalo Slough. Instead, I found a series of obscure channels blocked by downed trees, low water, and strainers, any one of which might have been Buffalo Slough. I hadn’t been able to go farther than a hundred yards up any of them to find out.

Trying to bring a boat like FOGG up Buffalo Slough was ridiculous, really. The channels were barely wide enough for oars as they were twisty, and thickly overgrown. It was the kind of delightfully pointless and uncomfortable outing I might have invented for myself as a kid, when every drainage ditch was a potential adventure, and every thicket an incitement to exploration. Long shallow stretches forced me to wade upstream, pulling the boat behind me like a dog on a leash—hard-earned, sweaty, knee-deep-mud-and-crawling-through-branches yardage. I had to climb ashore and line the boat through a few tight spots where logs or low branches prevented the use of more conventional tactics. This wasn’t a river—it was a forest. Craggy-barked cottonwoods lined the shore, with well-spaced silver maples, basswoods, and ash trees farther inland. Birds were singing everywhere, only occasionally visible as they flashed from tree to tree. Squirrels chattered loudly, scampered off when I got too close, and chattered some more.

Roger Siebert

.

No matter what my carefully assembled maps might have suggested, the sloughs and channels here were shifty things—erratic; devious; not to be trusted. The few inlets that weren’t blocked completely grew steadily narrower and shallower as I fought my way upstream, until all that was left was a trickle of muddy water between undercut banks. I finally gave up, leaving the boat firmly aground in a side channel to explore on foot.

Tall maples and basswoods broke the late afternoon light into a rustling green-gold shiver overhead, and the damp sand of the slough bed was a jumble of tracks: the split-wedge marks of white-tailed deer, web-footed beaver prints, and the peace-sign slash of blue heron feet. The forest floor was pure floodplain and flat as a parking lot, too damp and shady to support much undergrowth—only a scattering of mayapples, and a few trilliums just starting to open into bright three-pronged stars. Farther into the woods, knee-high ferns brushed my legs with a feathery shushing at each step. Circling back to the boat, I found more tracks in the riverbed behind it: the rail-straight line of a keel dragged through the sand, and my own barefoot prints at the water’s edge.

I eventually abandoned the idea of finding Buffalo Slough and headed downstream instead, planning to anchor a few miles south of the ramp in Smith Slough, or Government Light Slough, or some nameless adjacent backwater at the edge of the delta. I’d spend the night just above the Mississippi River and come up with a new plan for tomorrow.

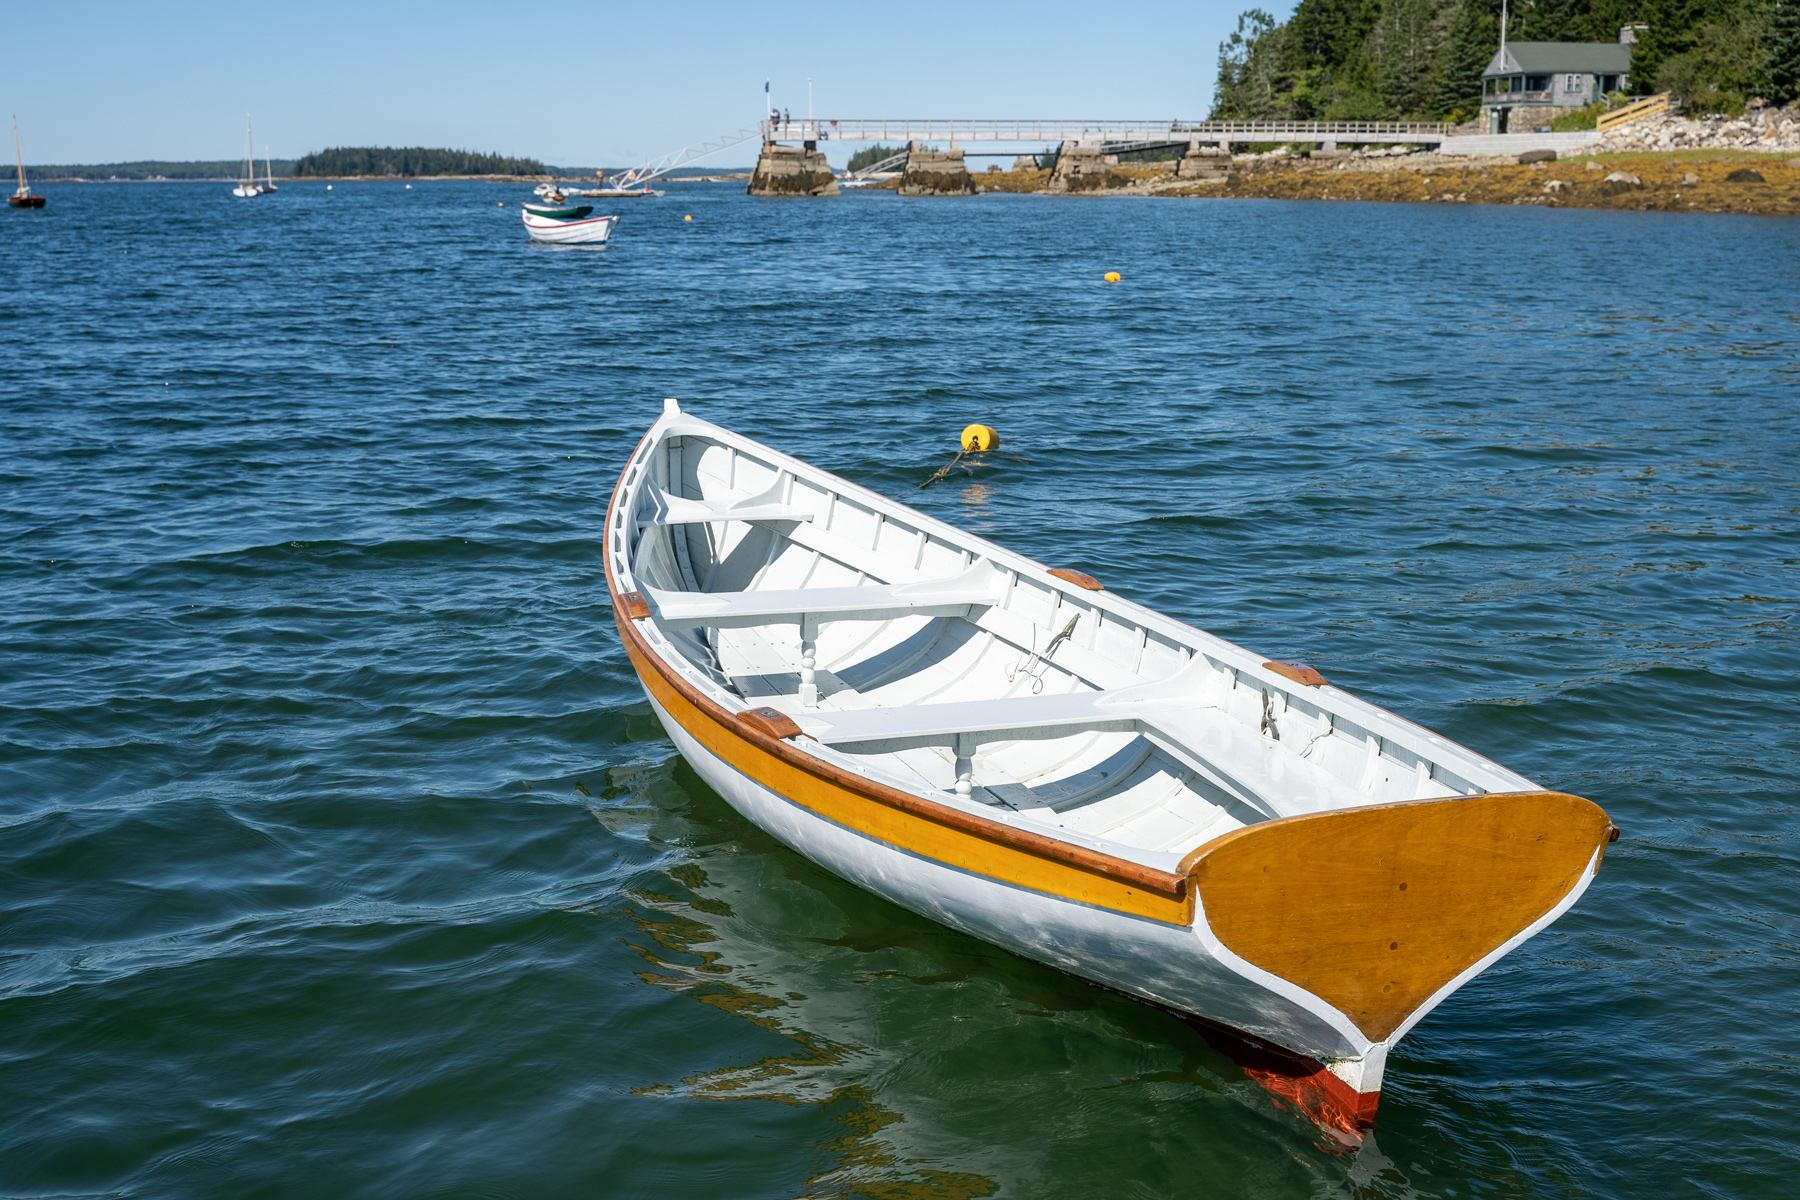
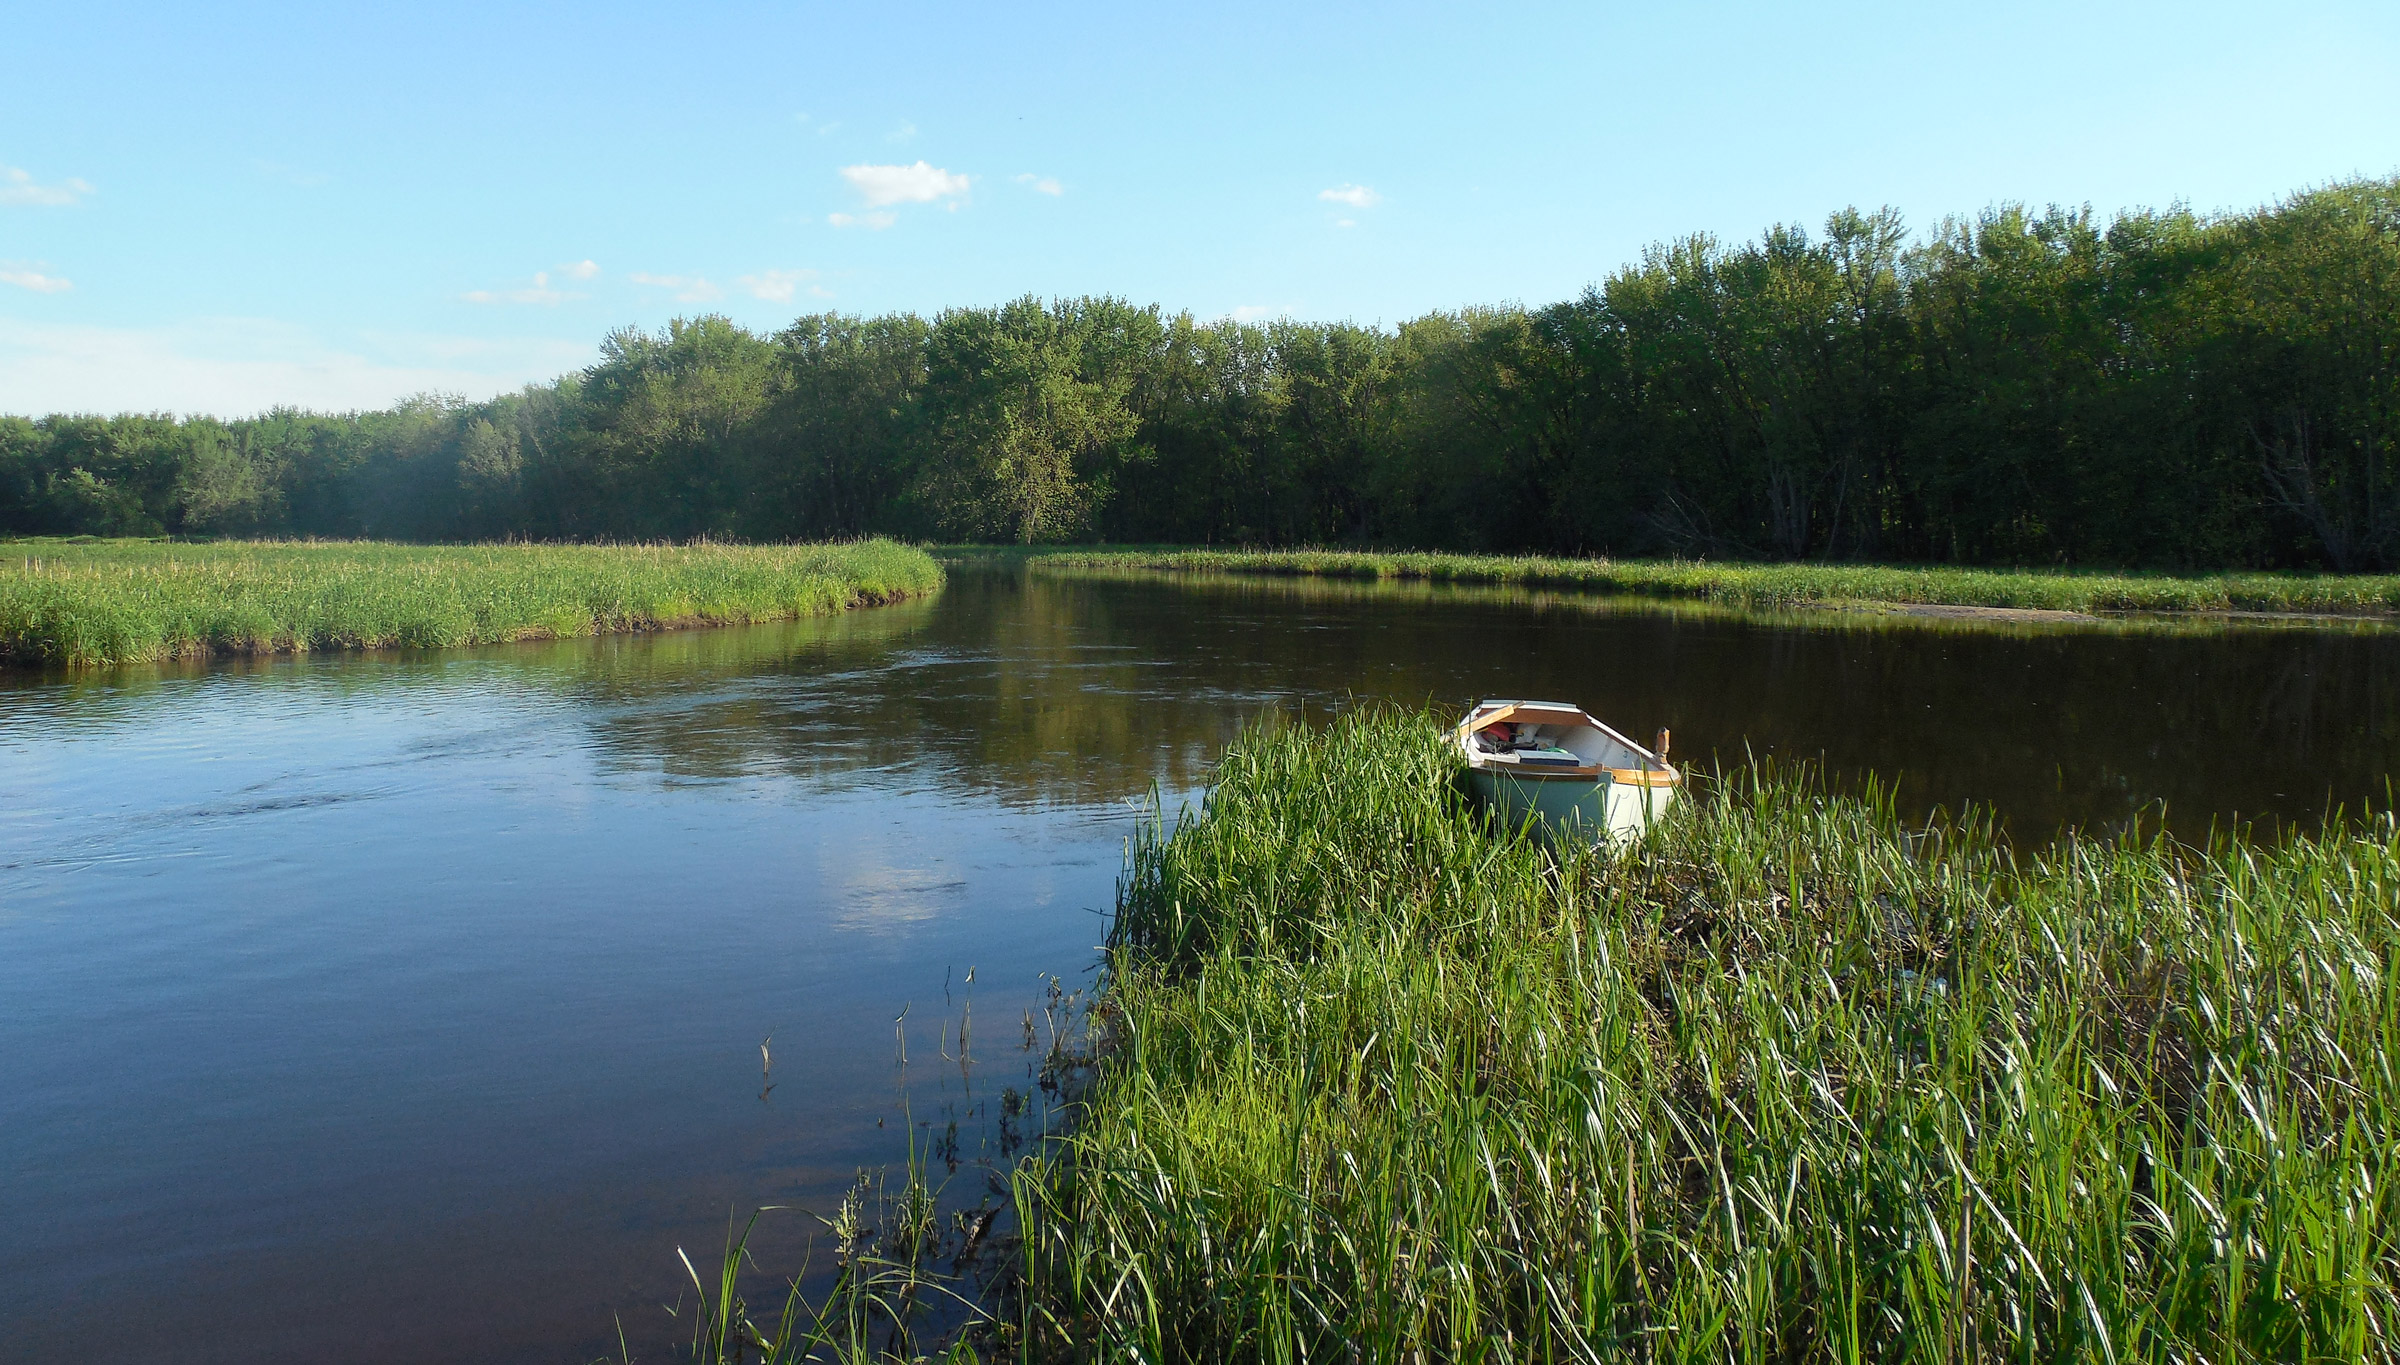
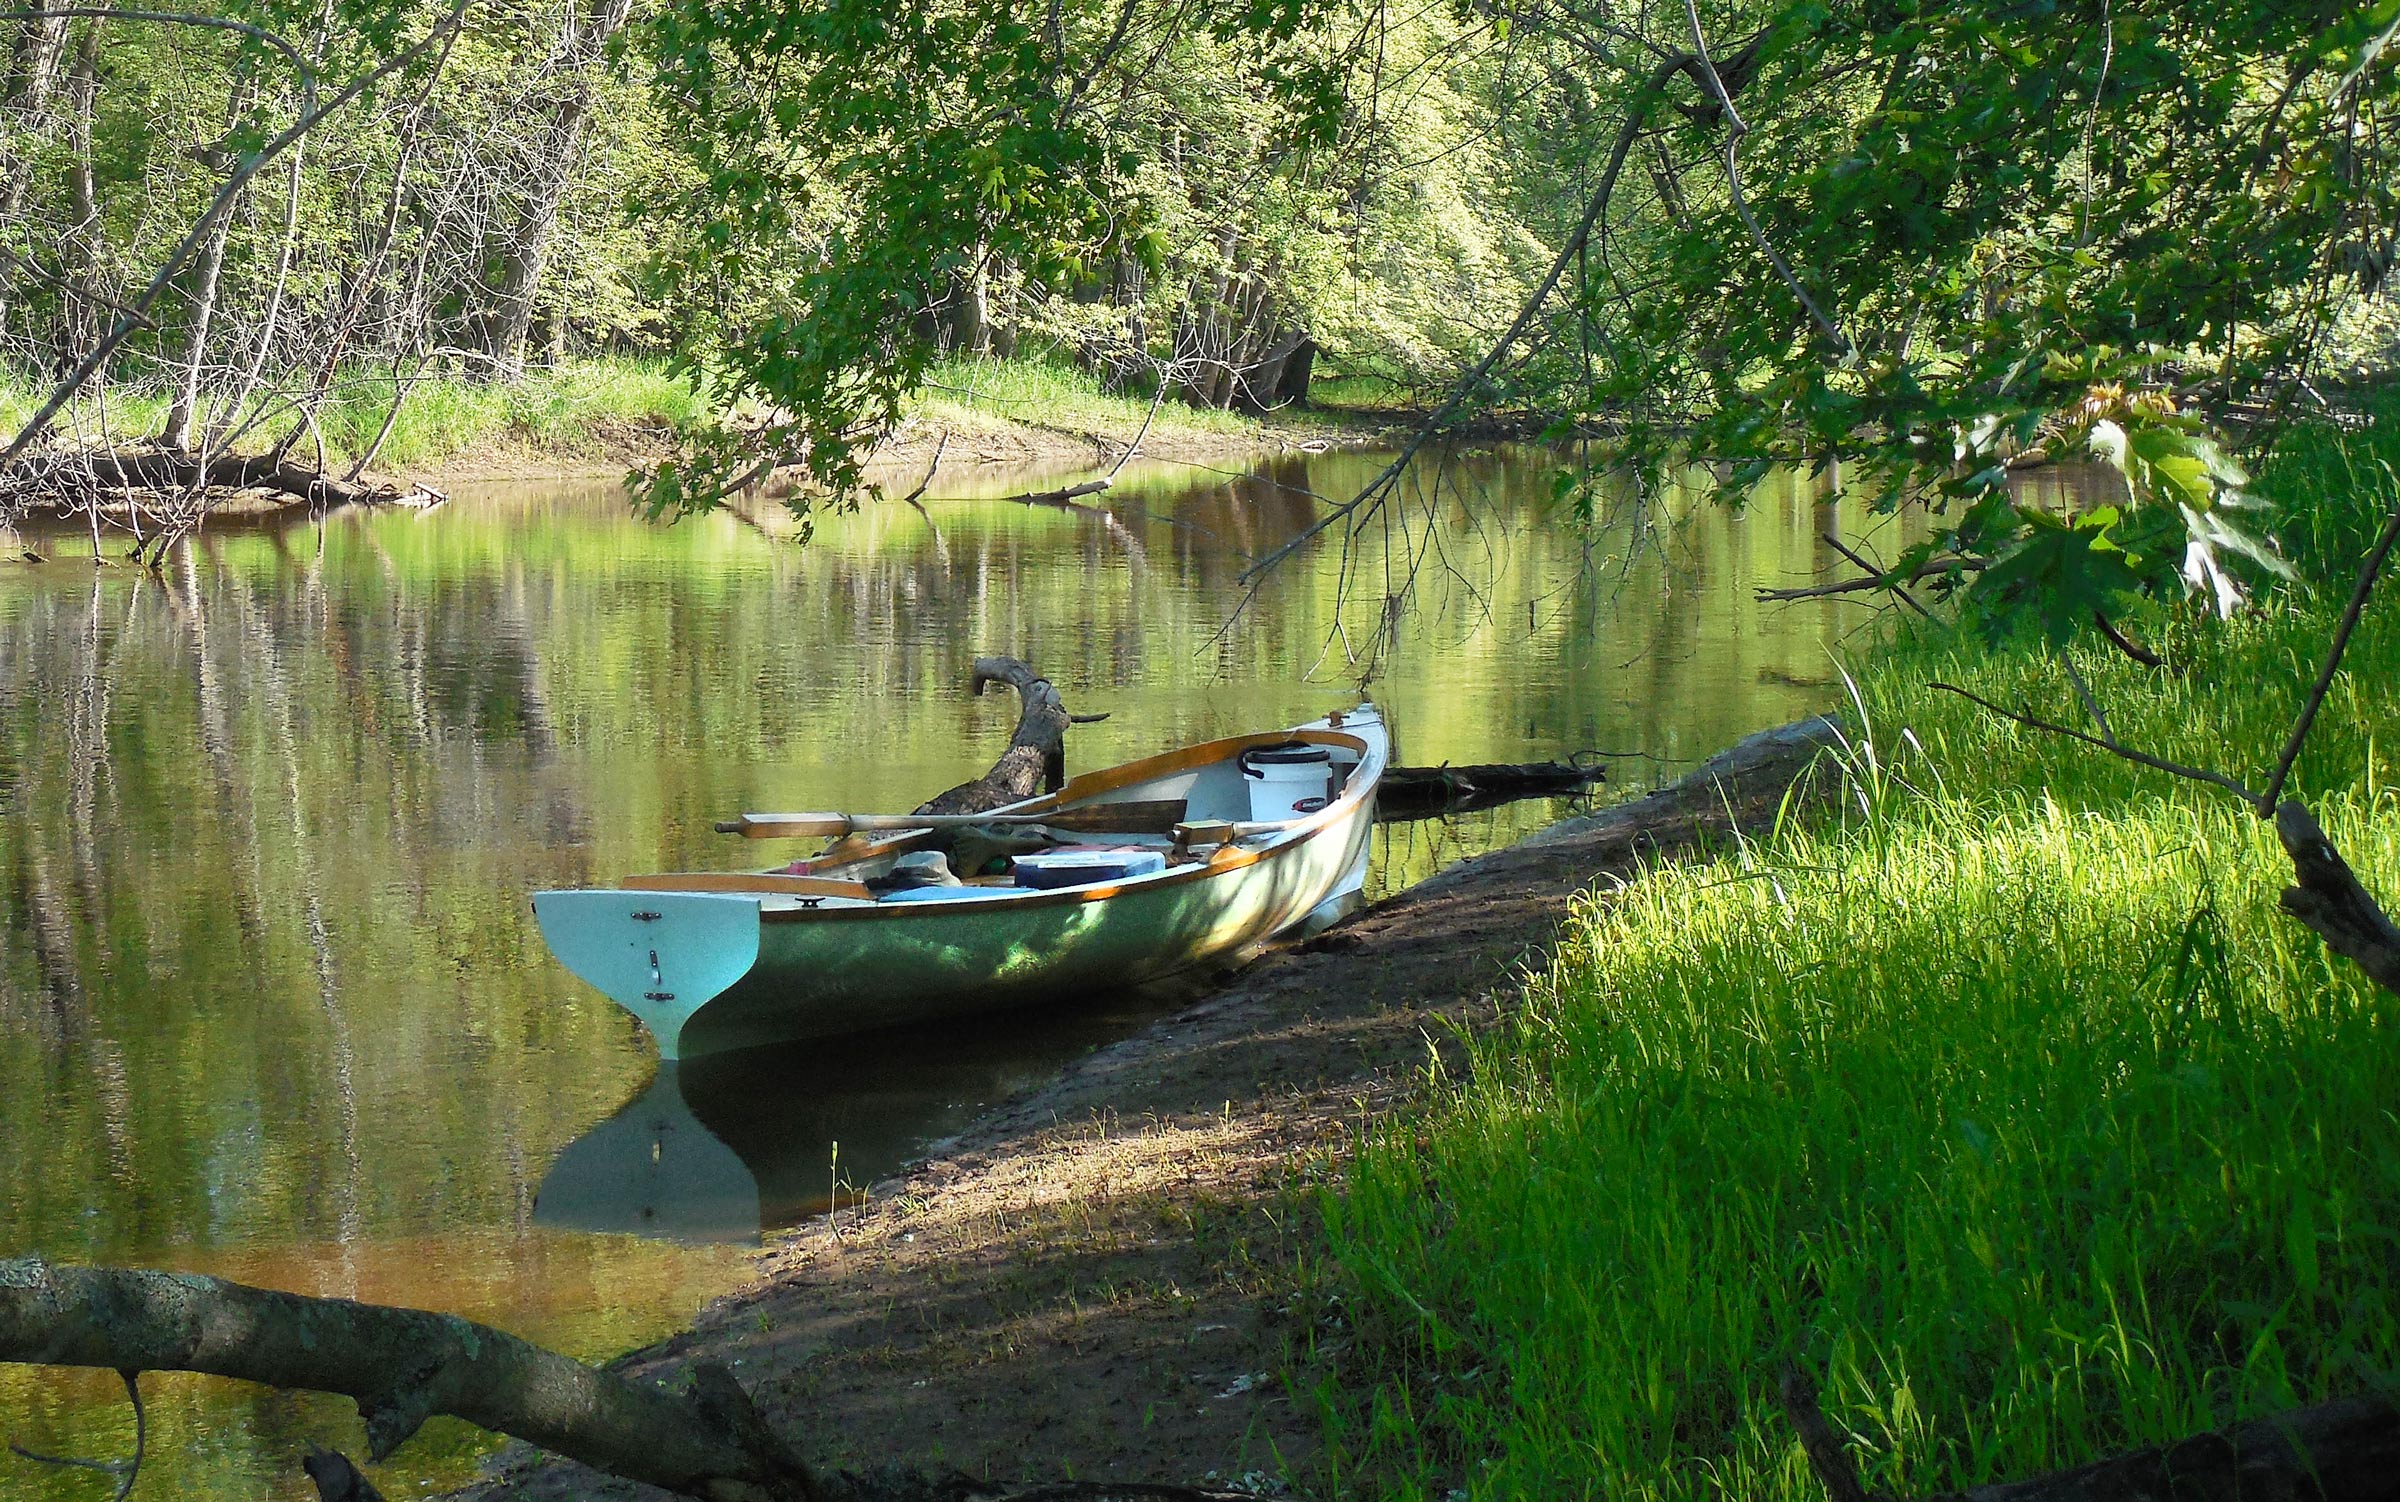
It was still a few weeks to the summer solstice when I started my trip, but days were already growing longer. With more than 16 hours of daylight, I was in no hurry to find a campsite, so I pulled in here to watch two beavers on the opposite bank.

Now that I’d given up on finding a northward route, the channels grew wider—the size of small rivers, and easily rowable—and my map seemed accurate enough. The Burlington Northern rail line ran through the delta on a series of bridges and causeways, and the first bridge I passed under provided a reliable fix to confirm my admittedly hazy dead reckoning. I knew where I was, mostly, if not where I was going.

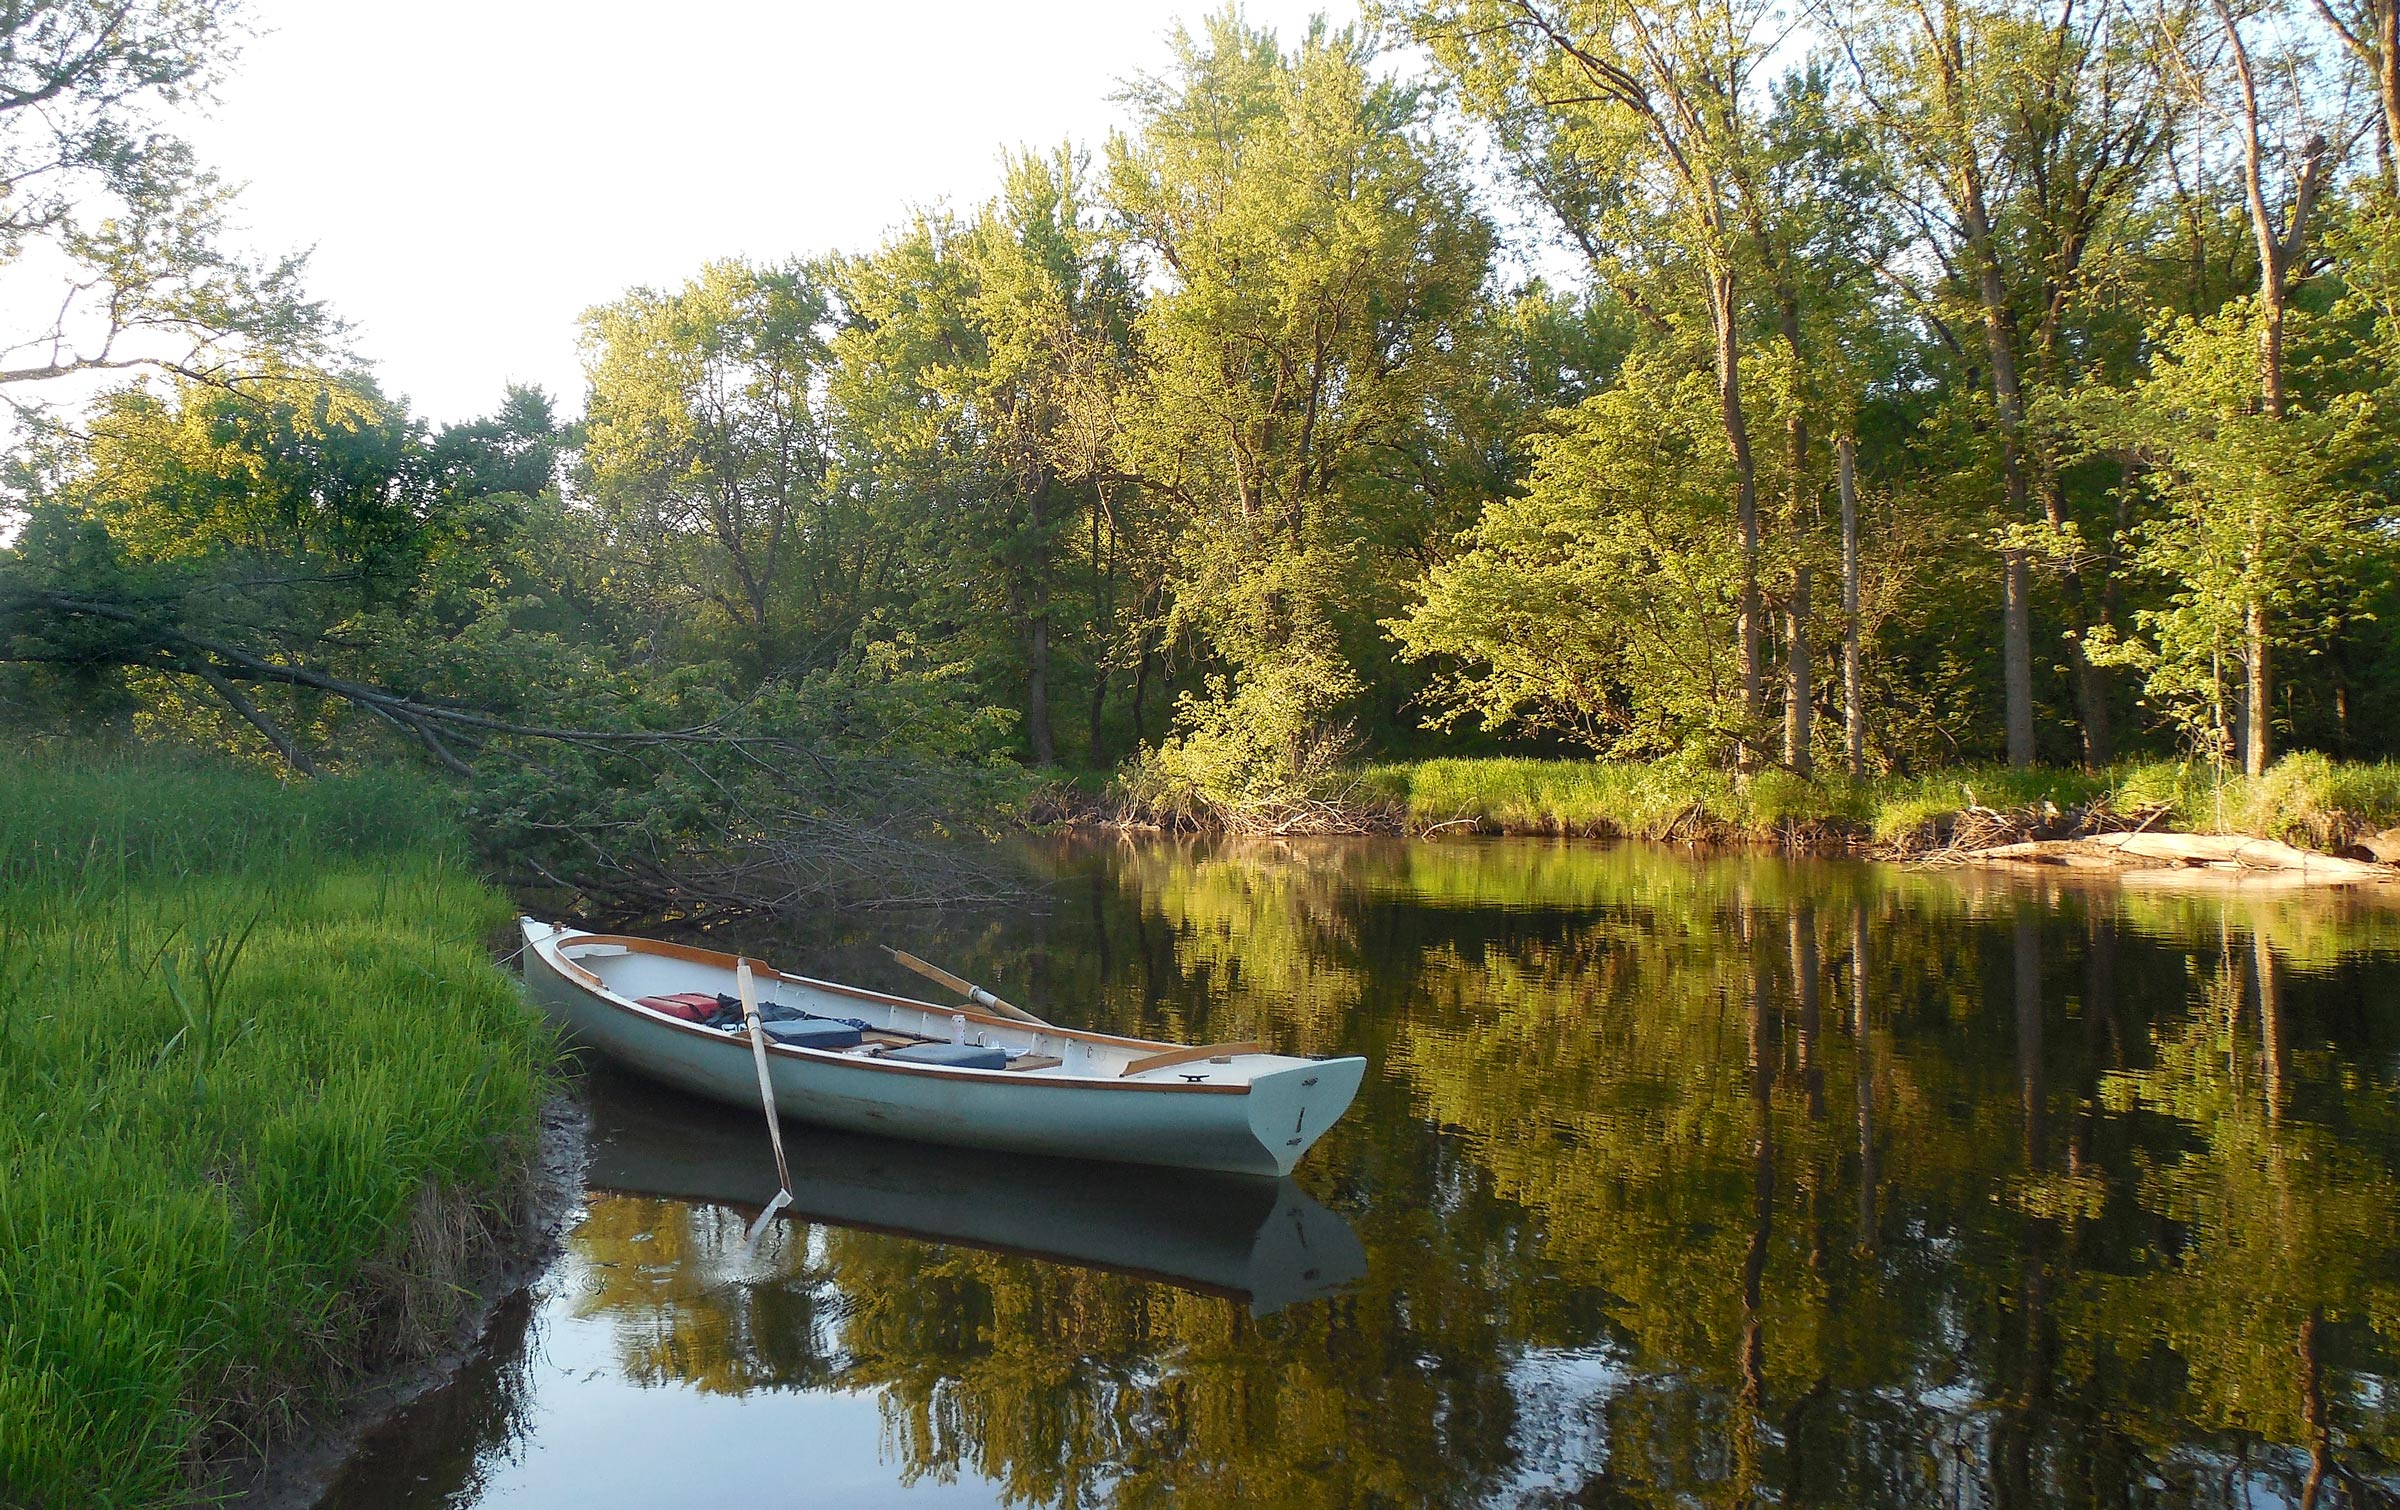
I let the boat drift along at a moderate pace, using the oars more for steering than for propulsion, stopping ashore wherever I felt the urge, or could find a relatively mud-free landing. Other than constant birdsong and the intermittent rumble of passing trains, I was caught up in a wide and rivery stillness: the faint drip of water off the oar blades, the hush of the current rippling along the banks, the breeze stirring through wide expanses of reeds at the water’s edge. After 2 or 3 miles, I pulled into a quiet backwater 20 yards wide, a still pond tucked beside the channel like a mirror sinking slowly into the mud. A few cottonwoods lined the bank, 40′ tall and leaning far out over the water. Their reflections broke into wavering ripples as the boat glided toward shore. I slid the bow up onto a low island at the edge of the pond and stepped out into thick mud.

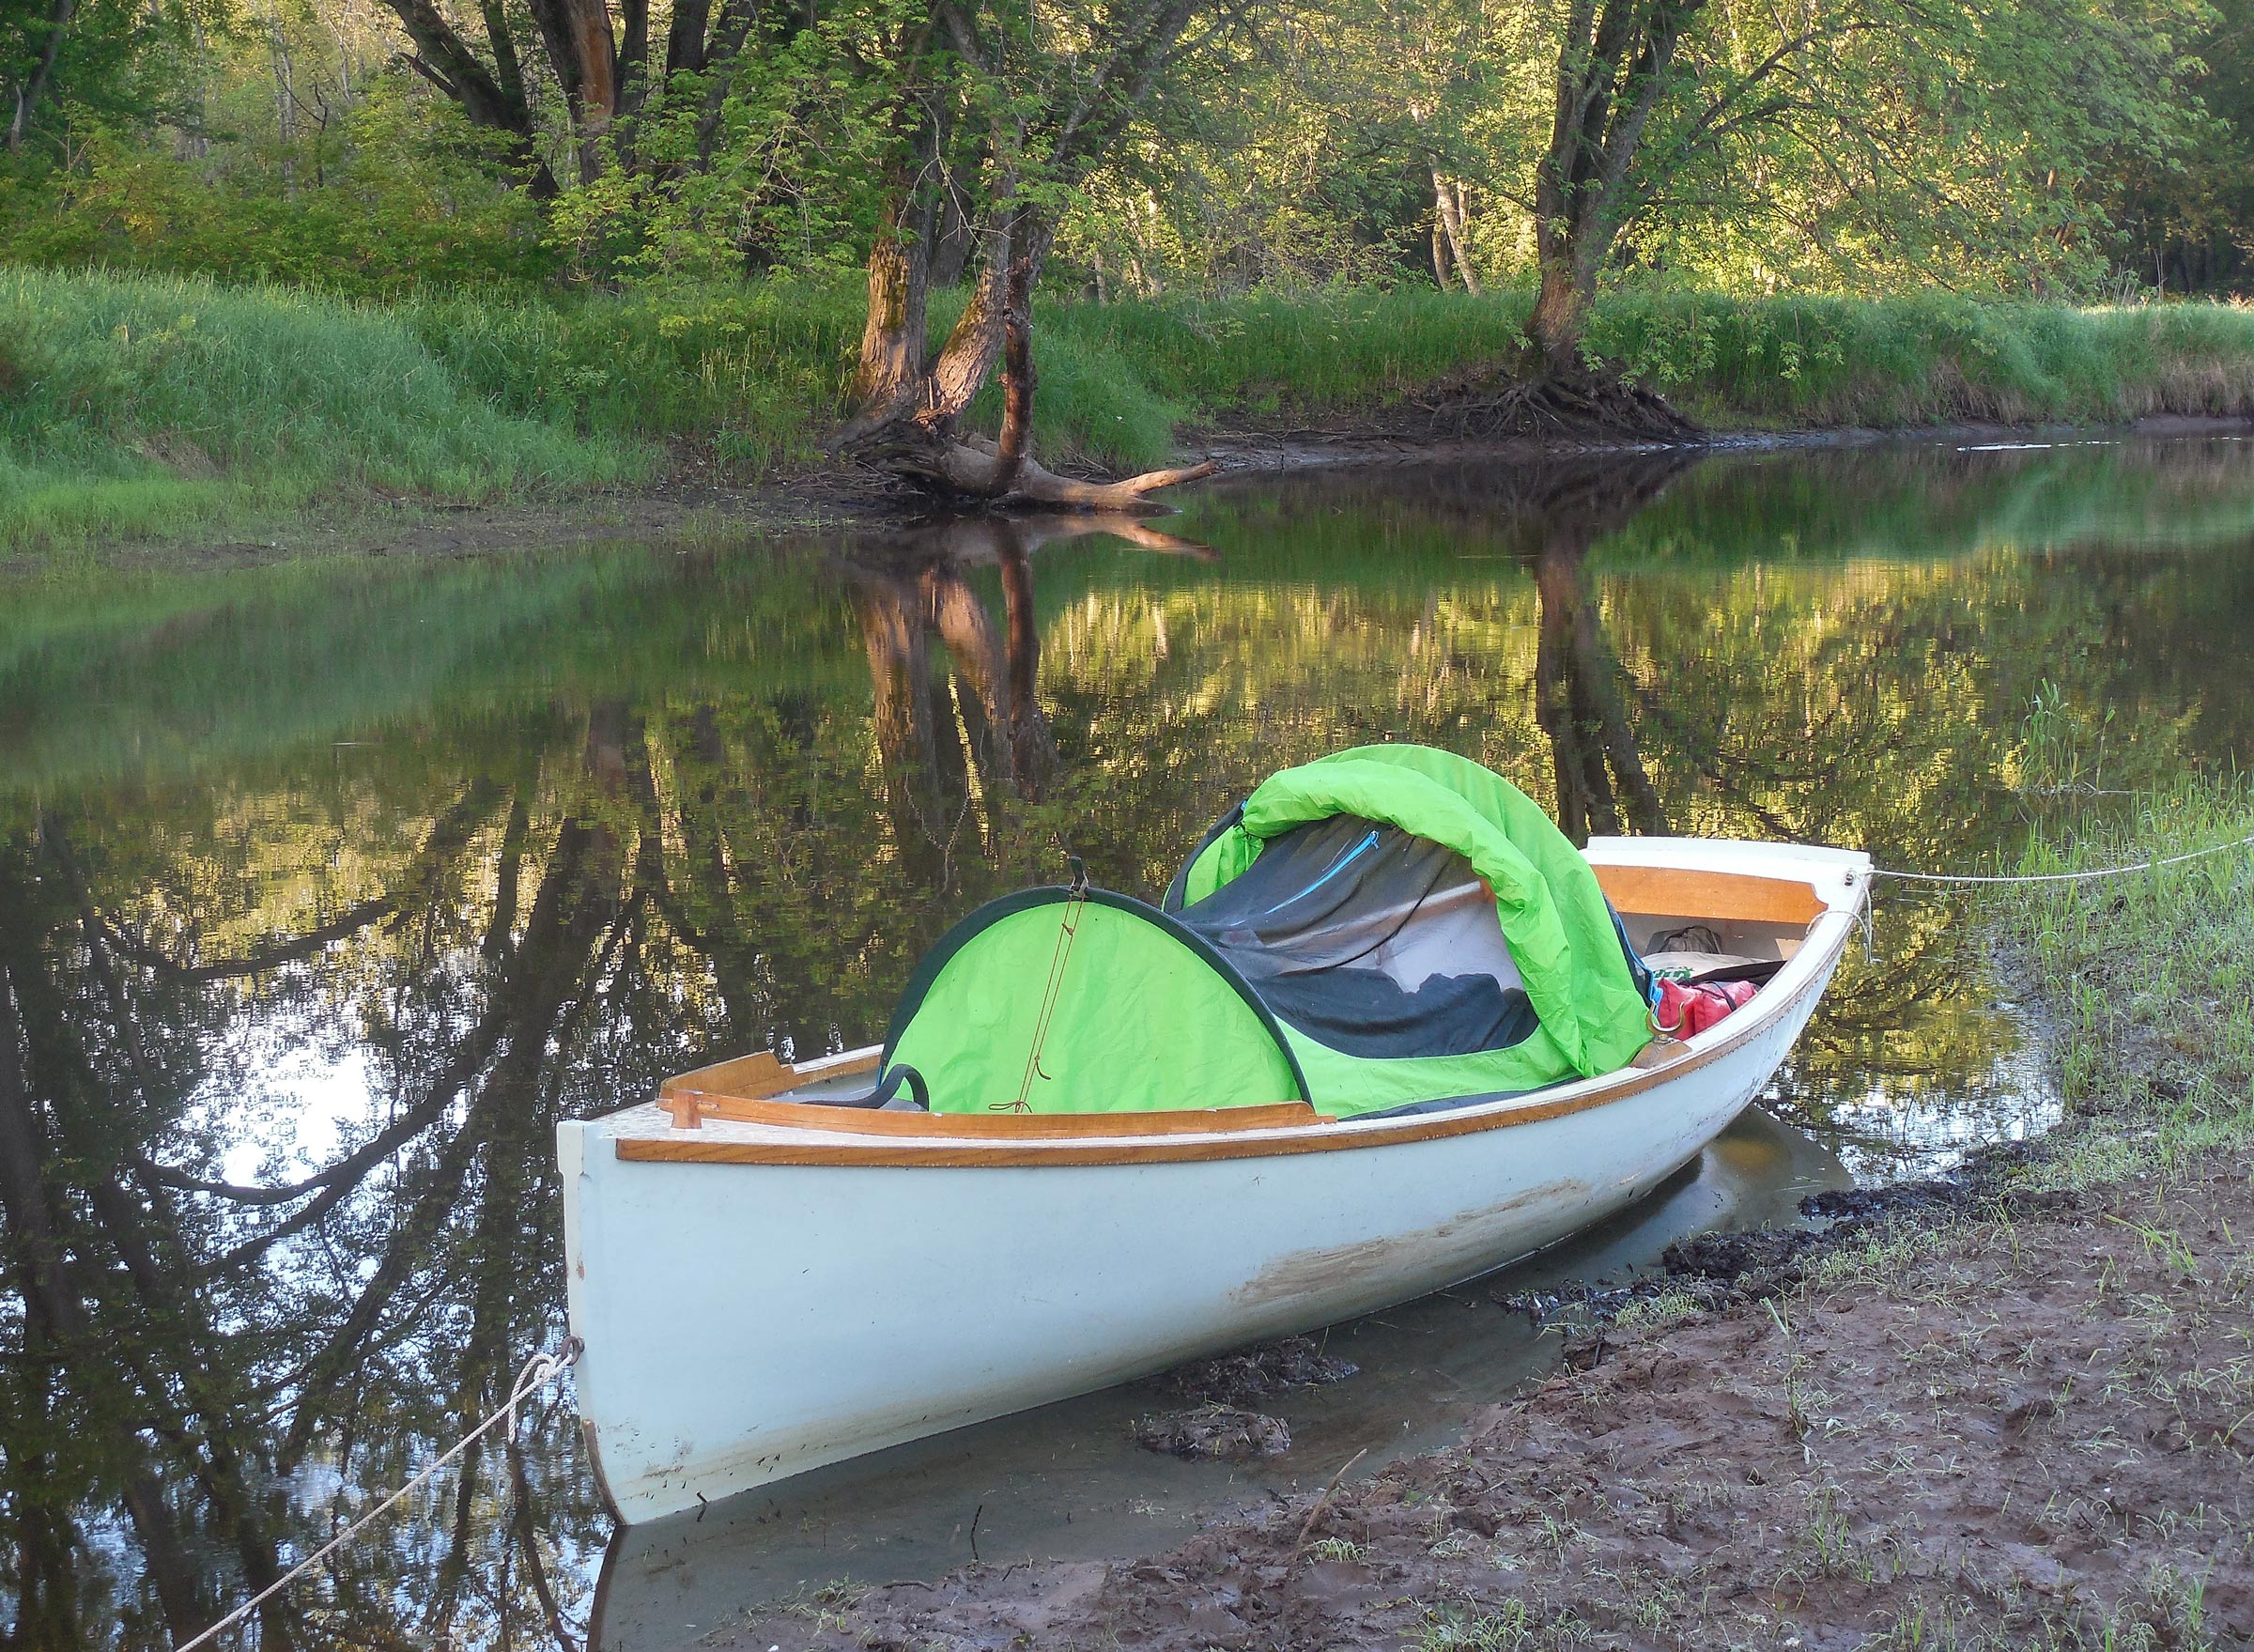
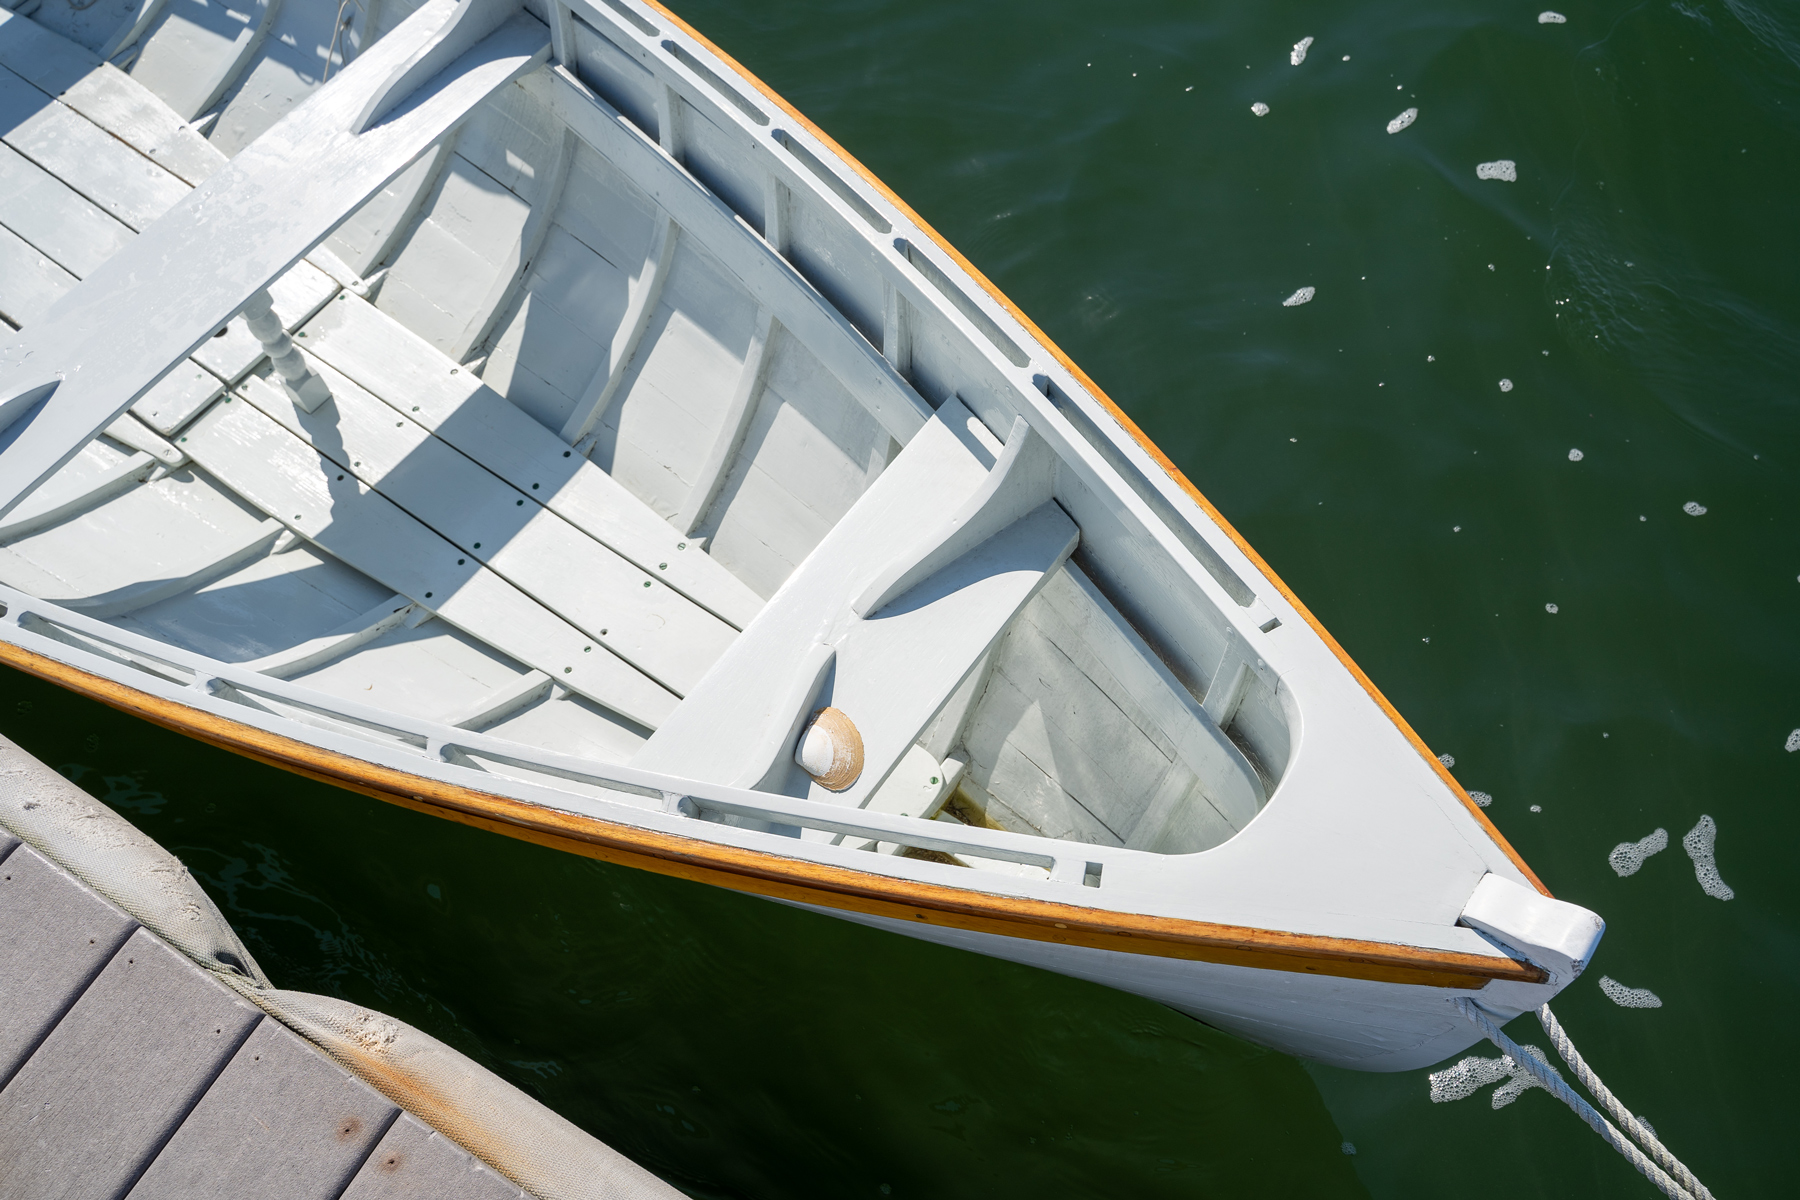
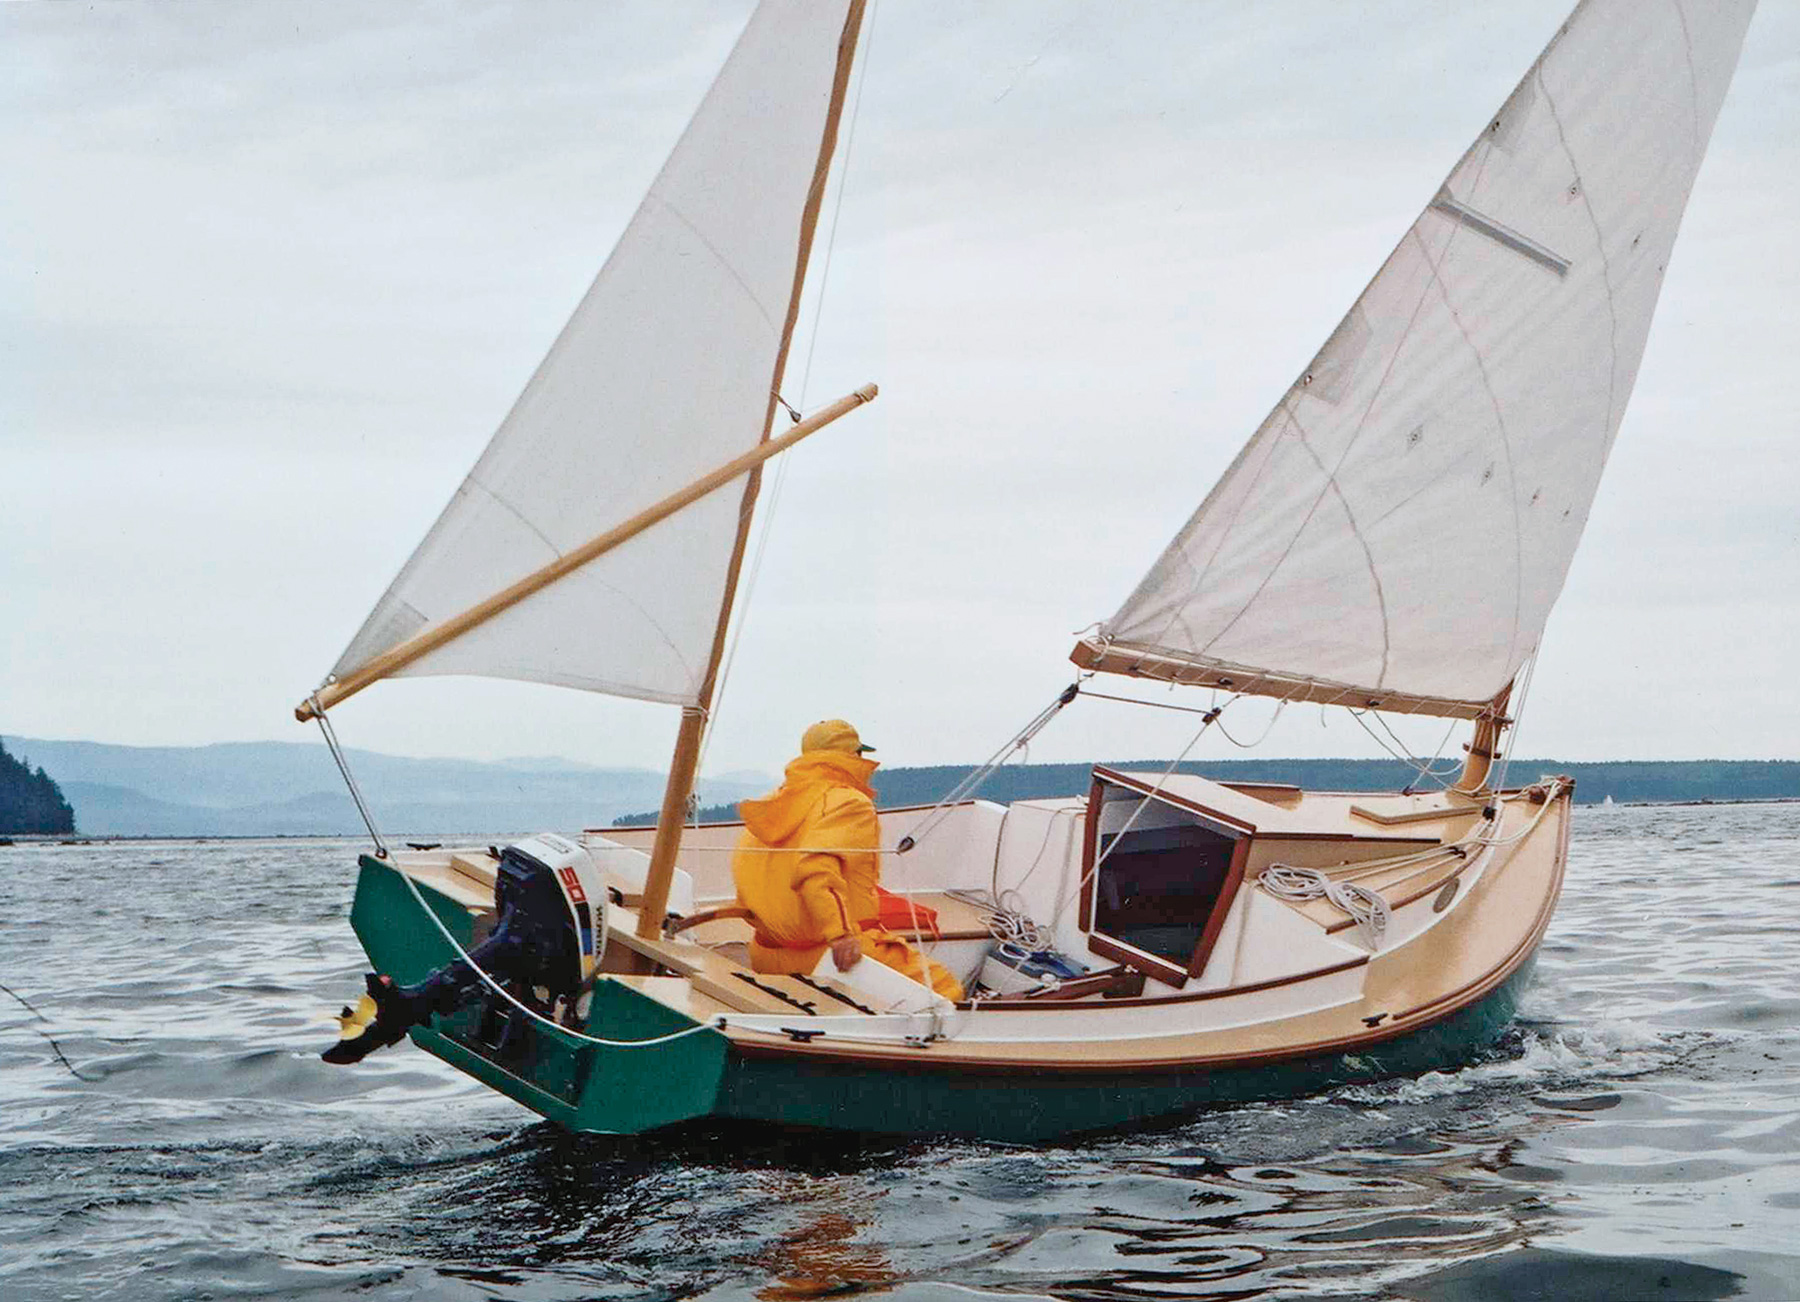
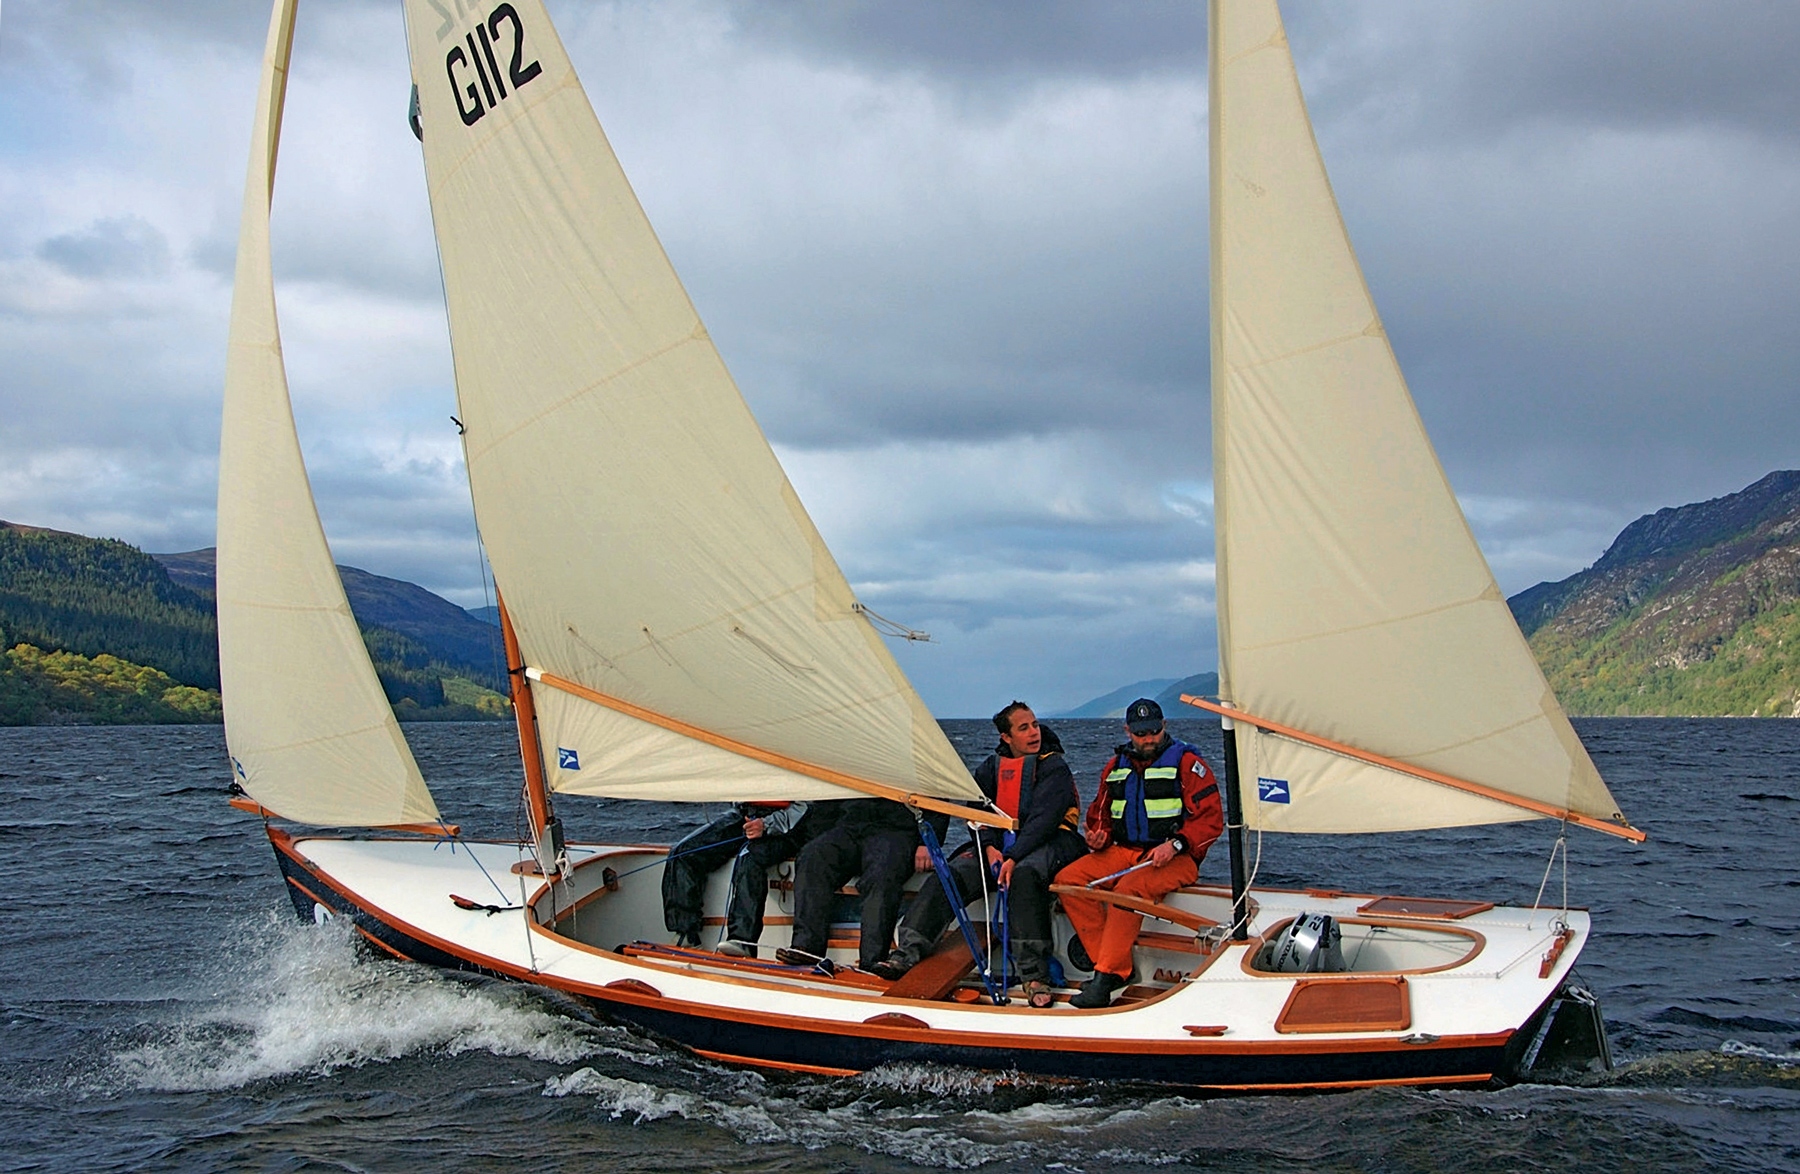
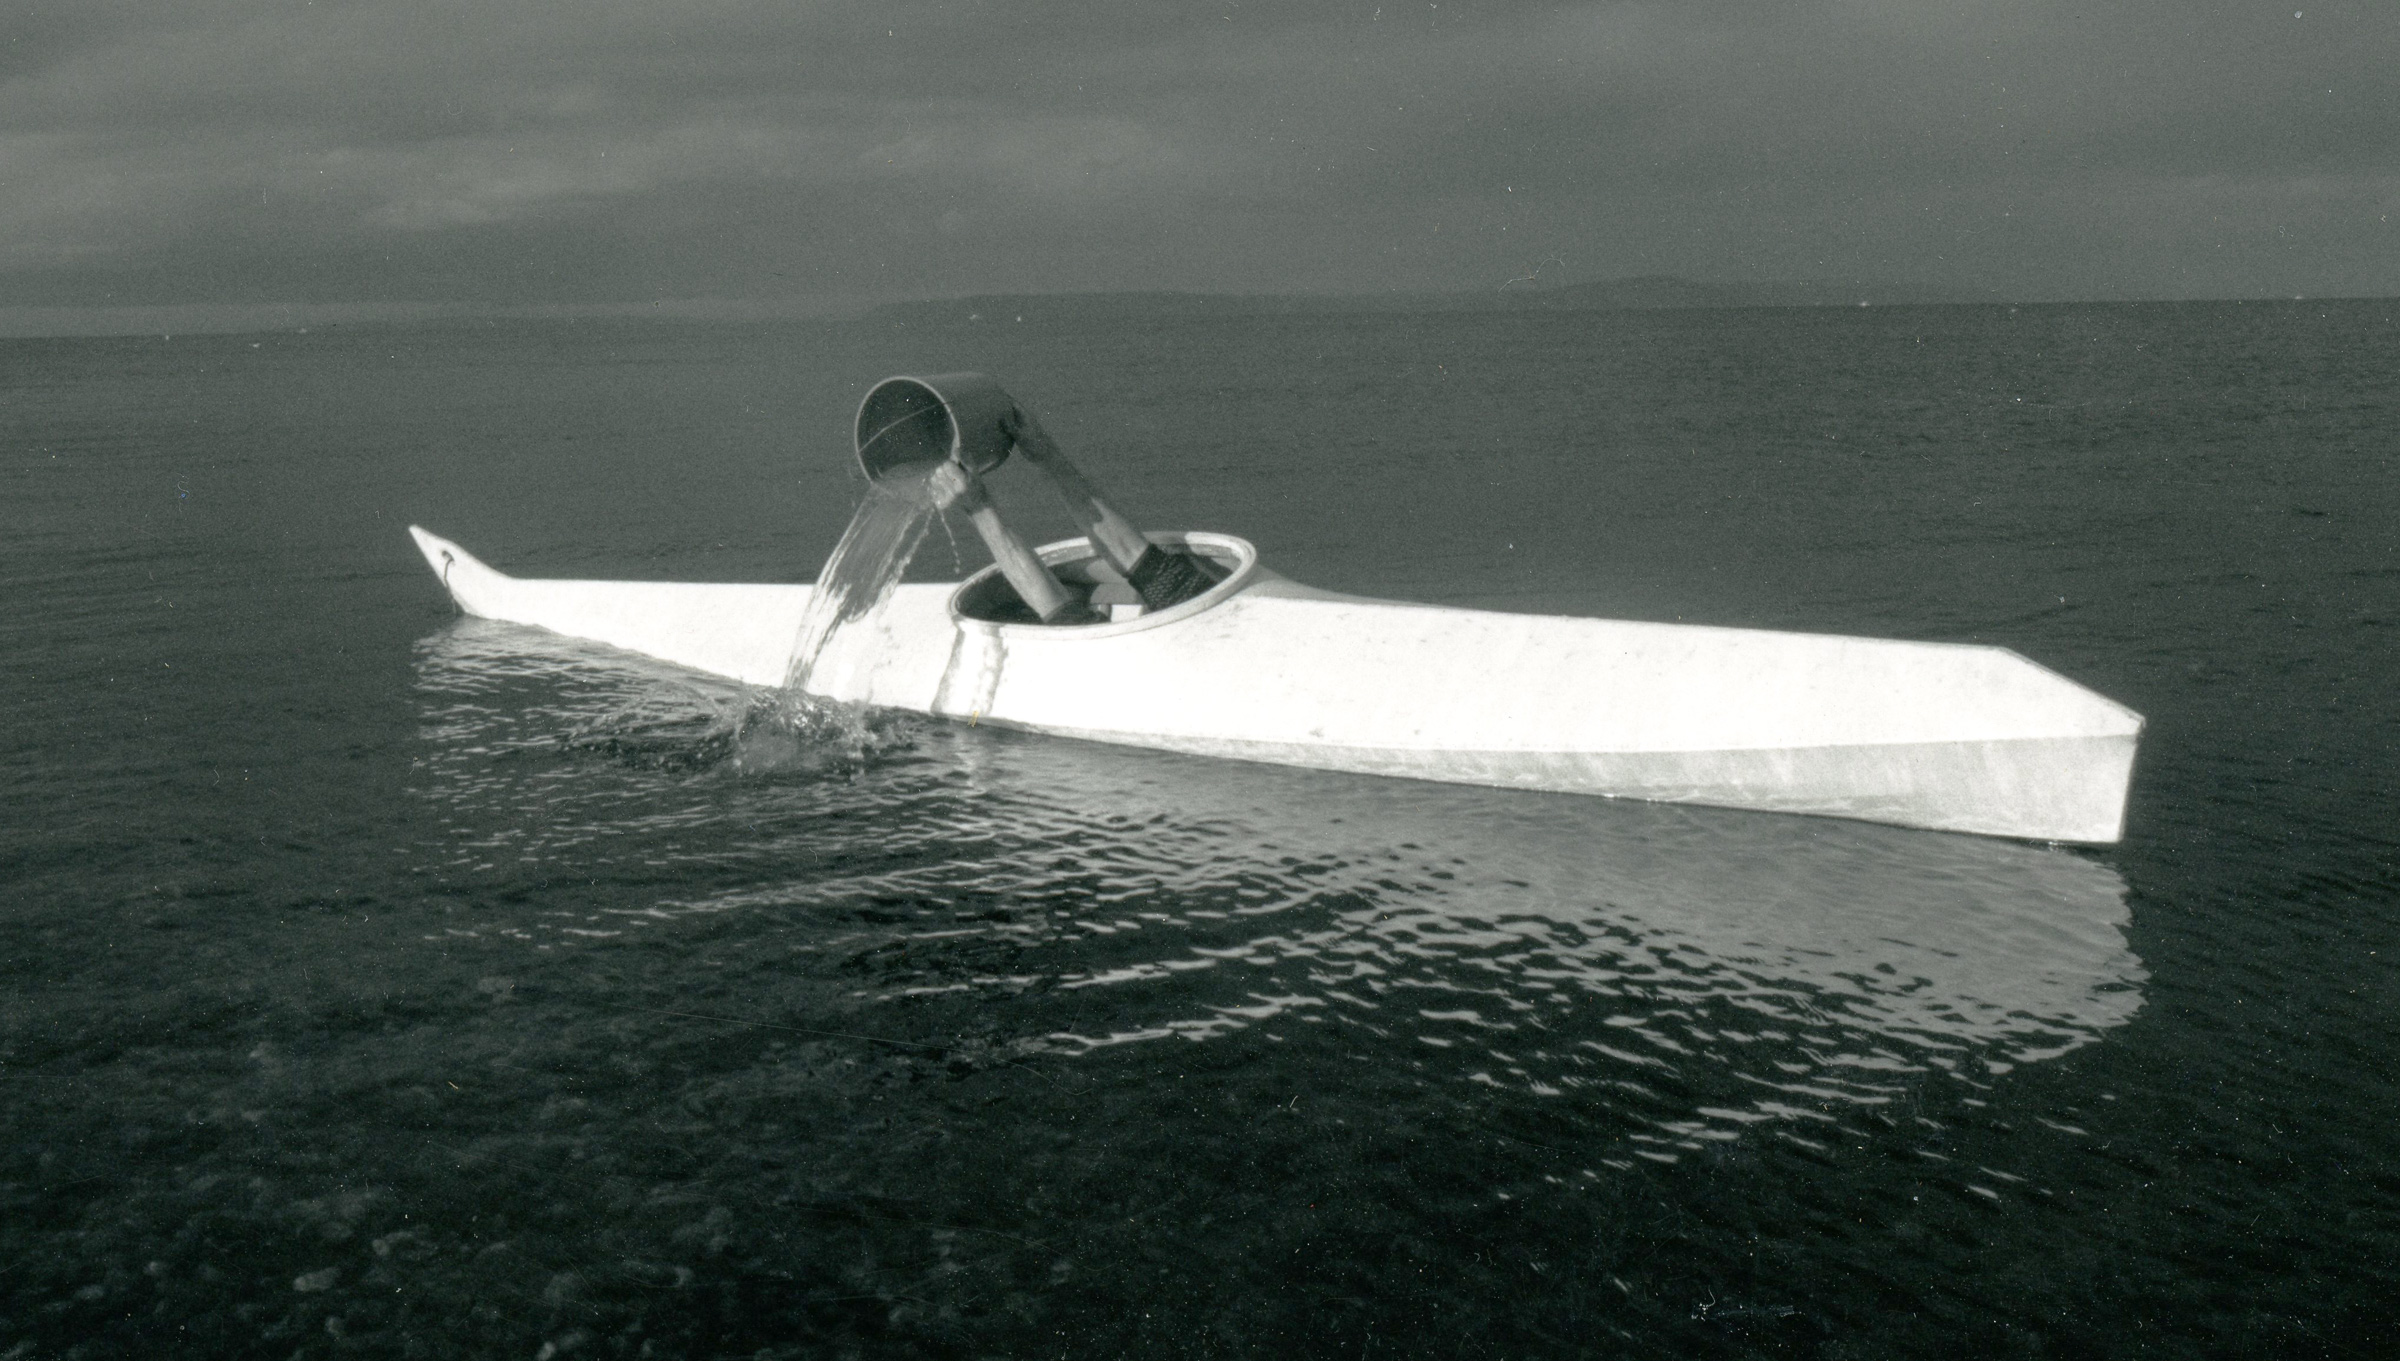
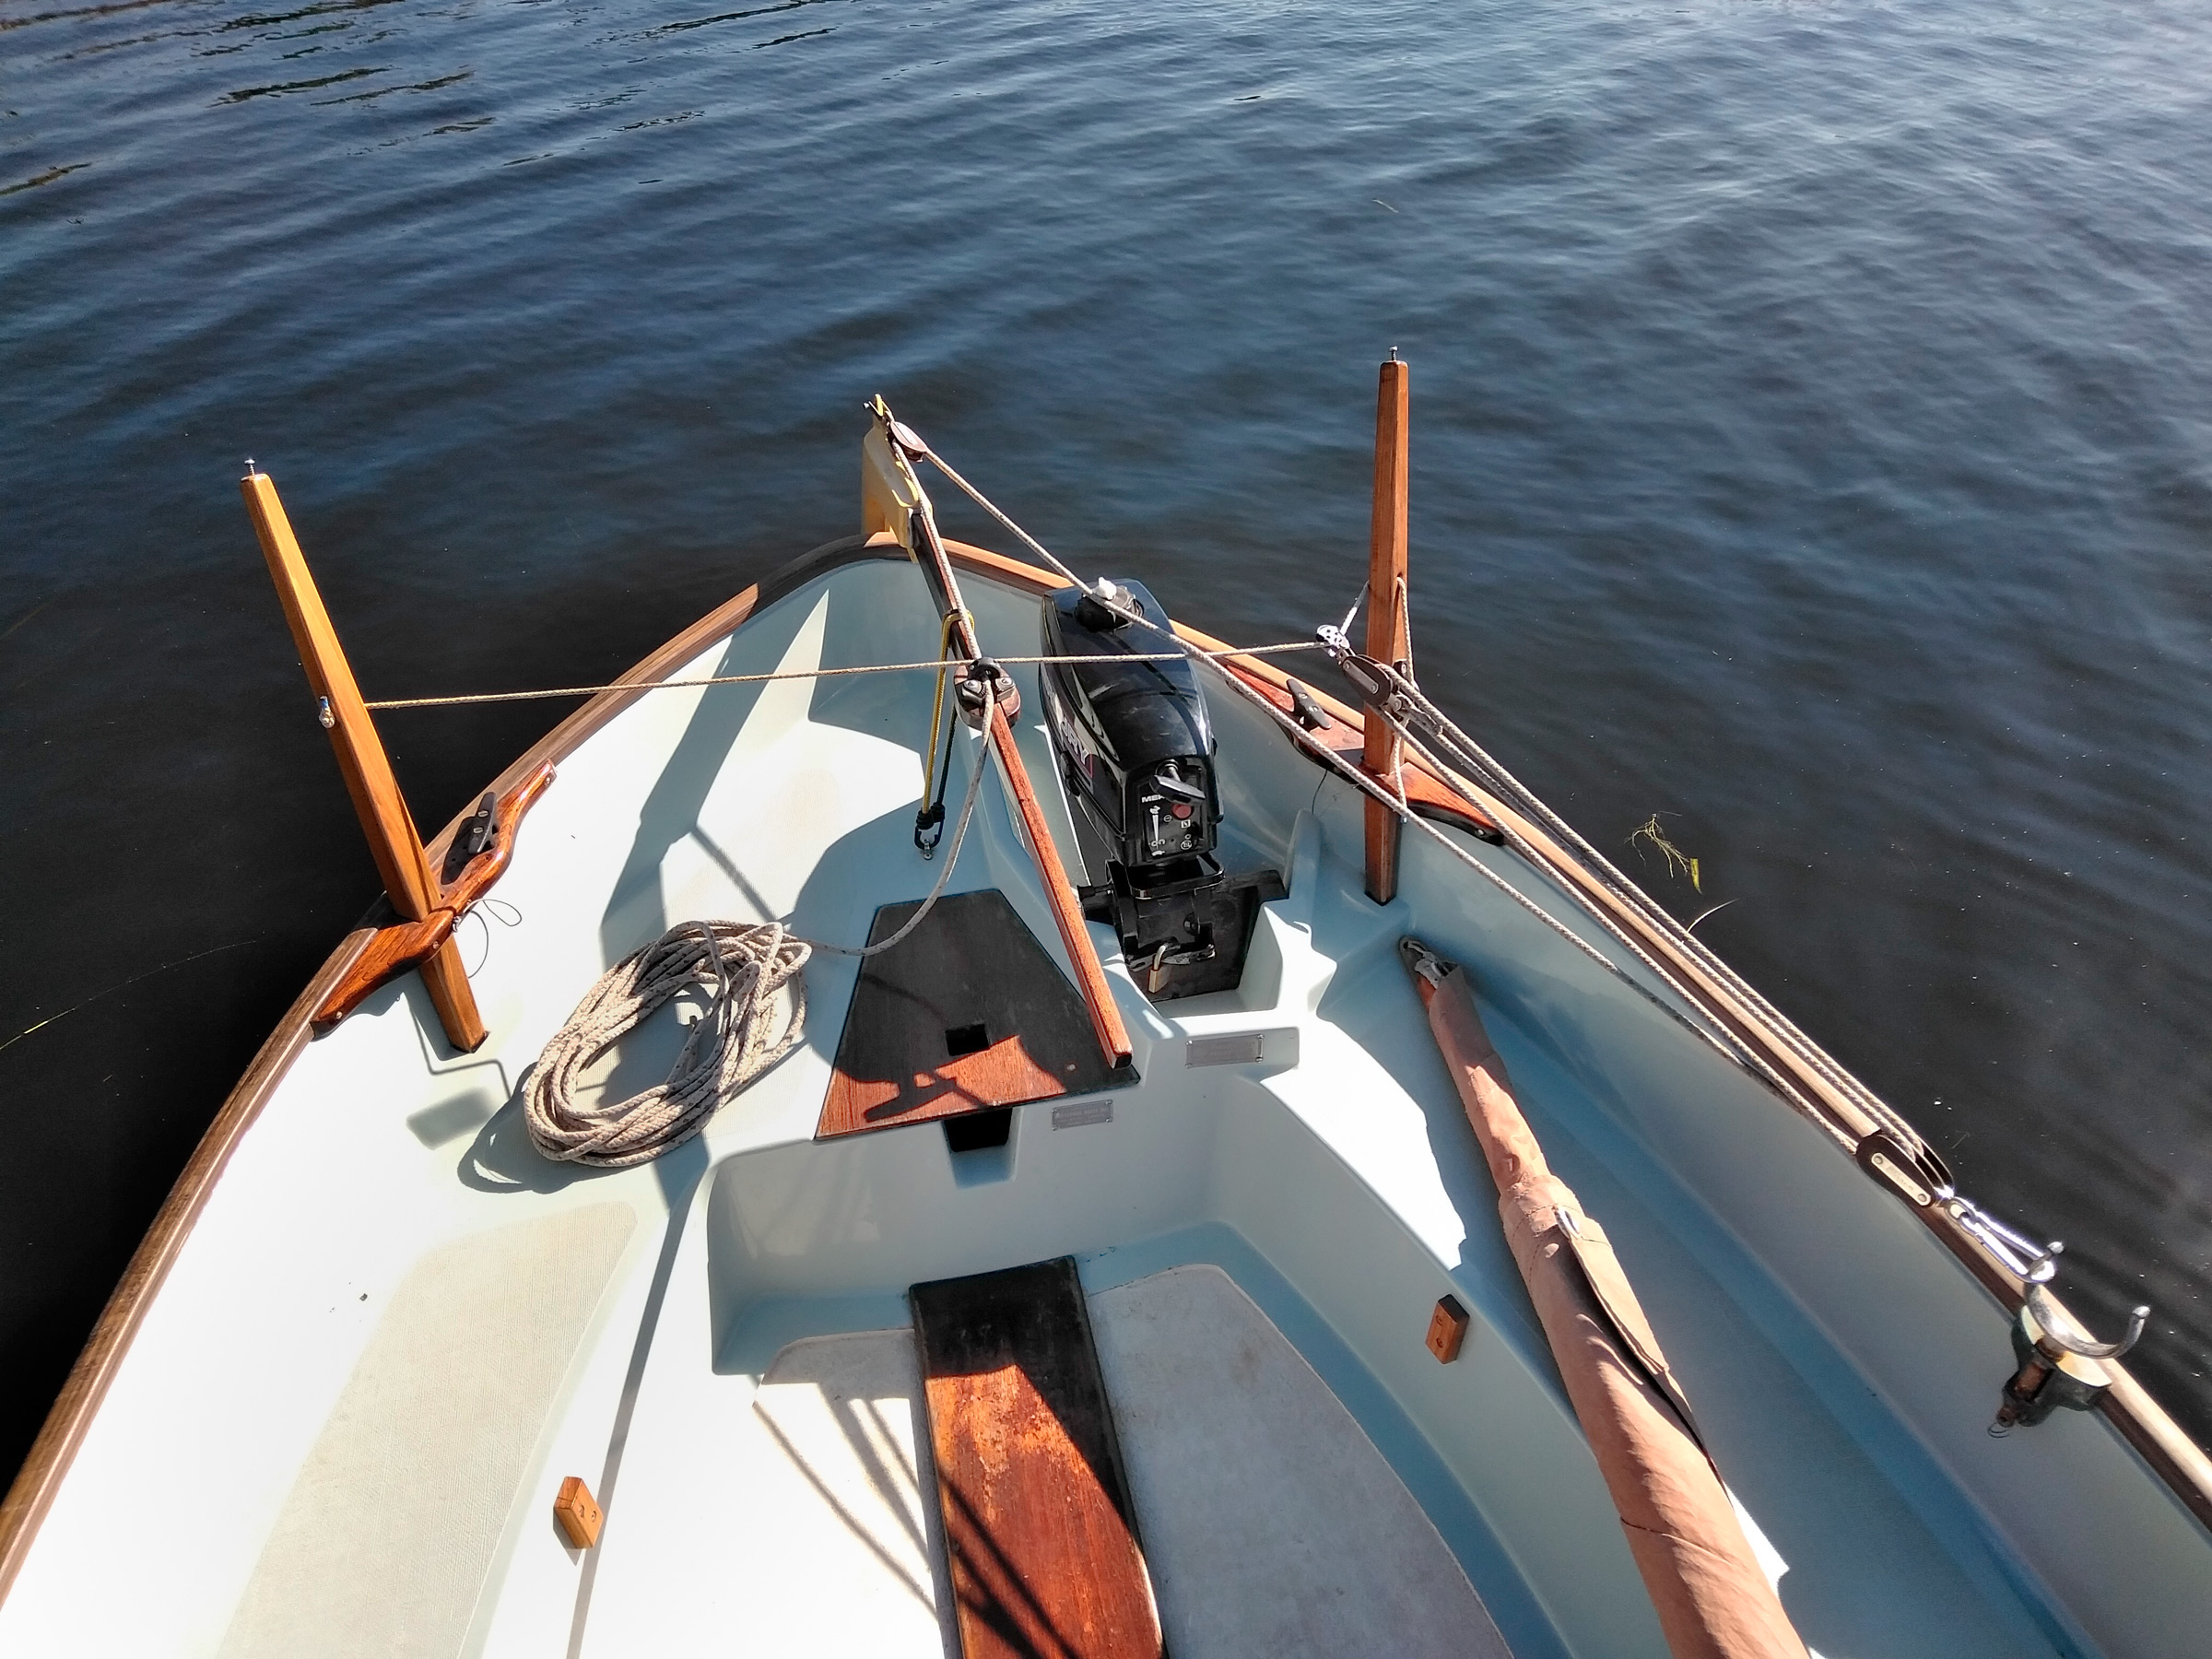
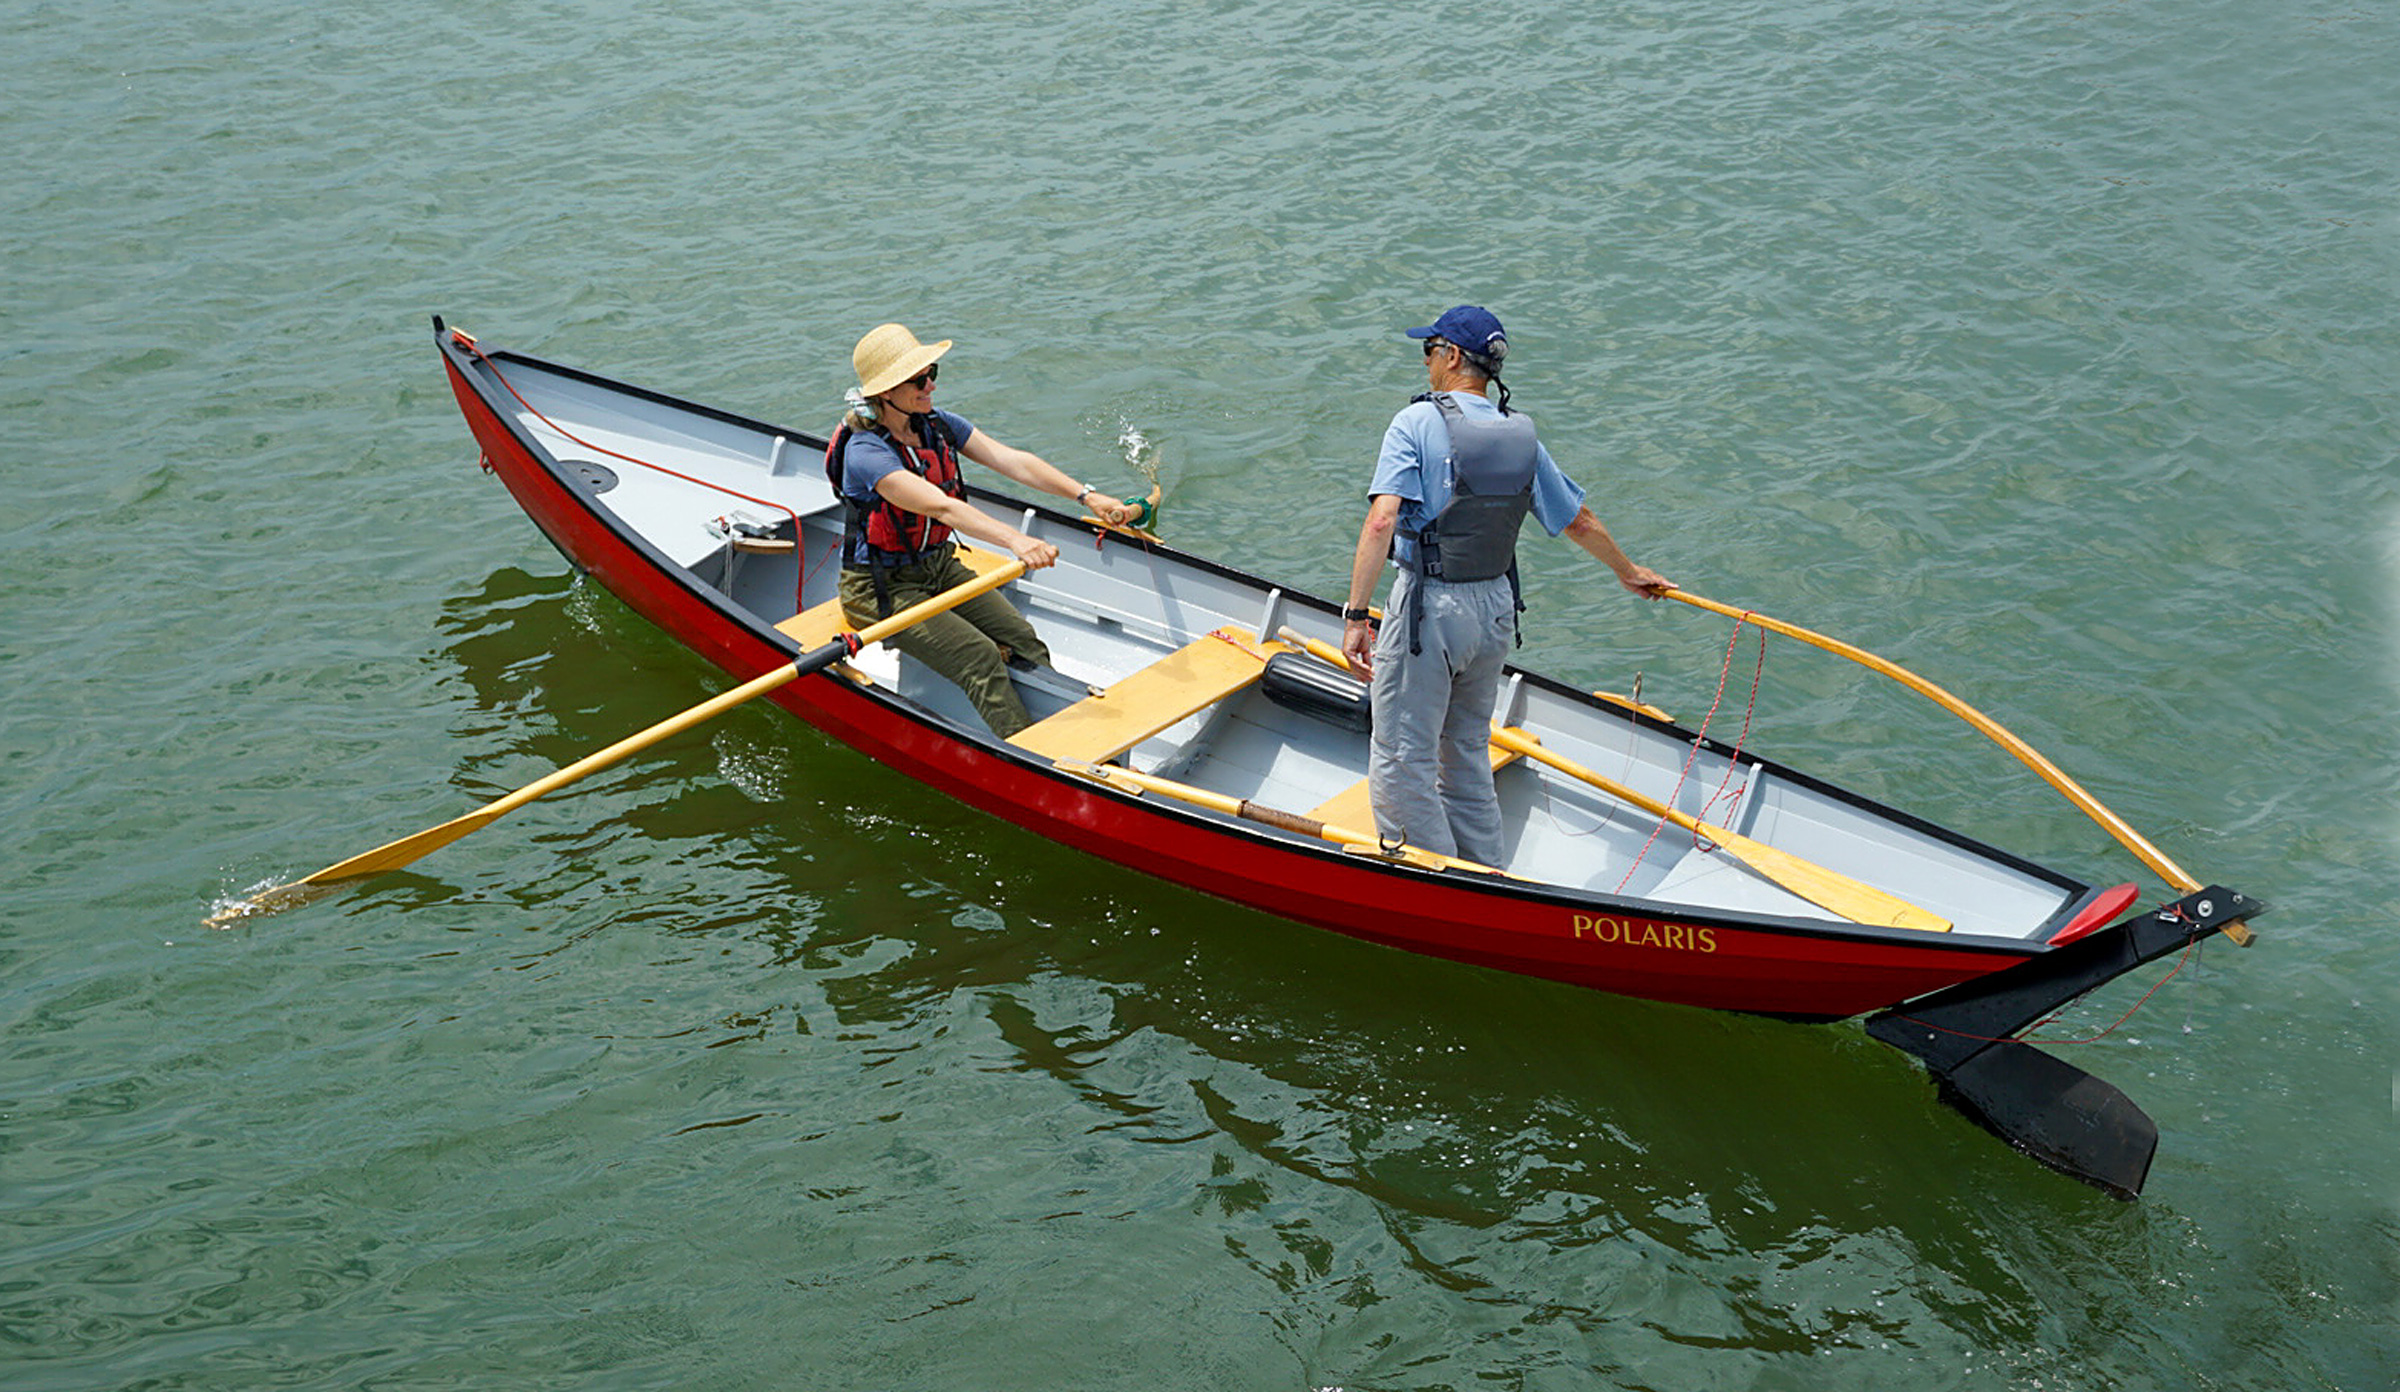
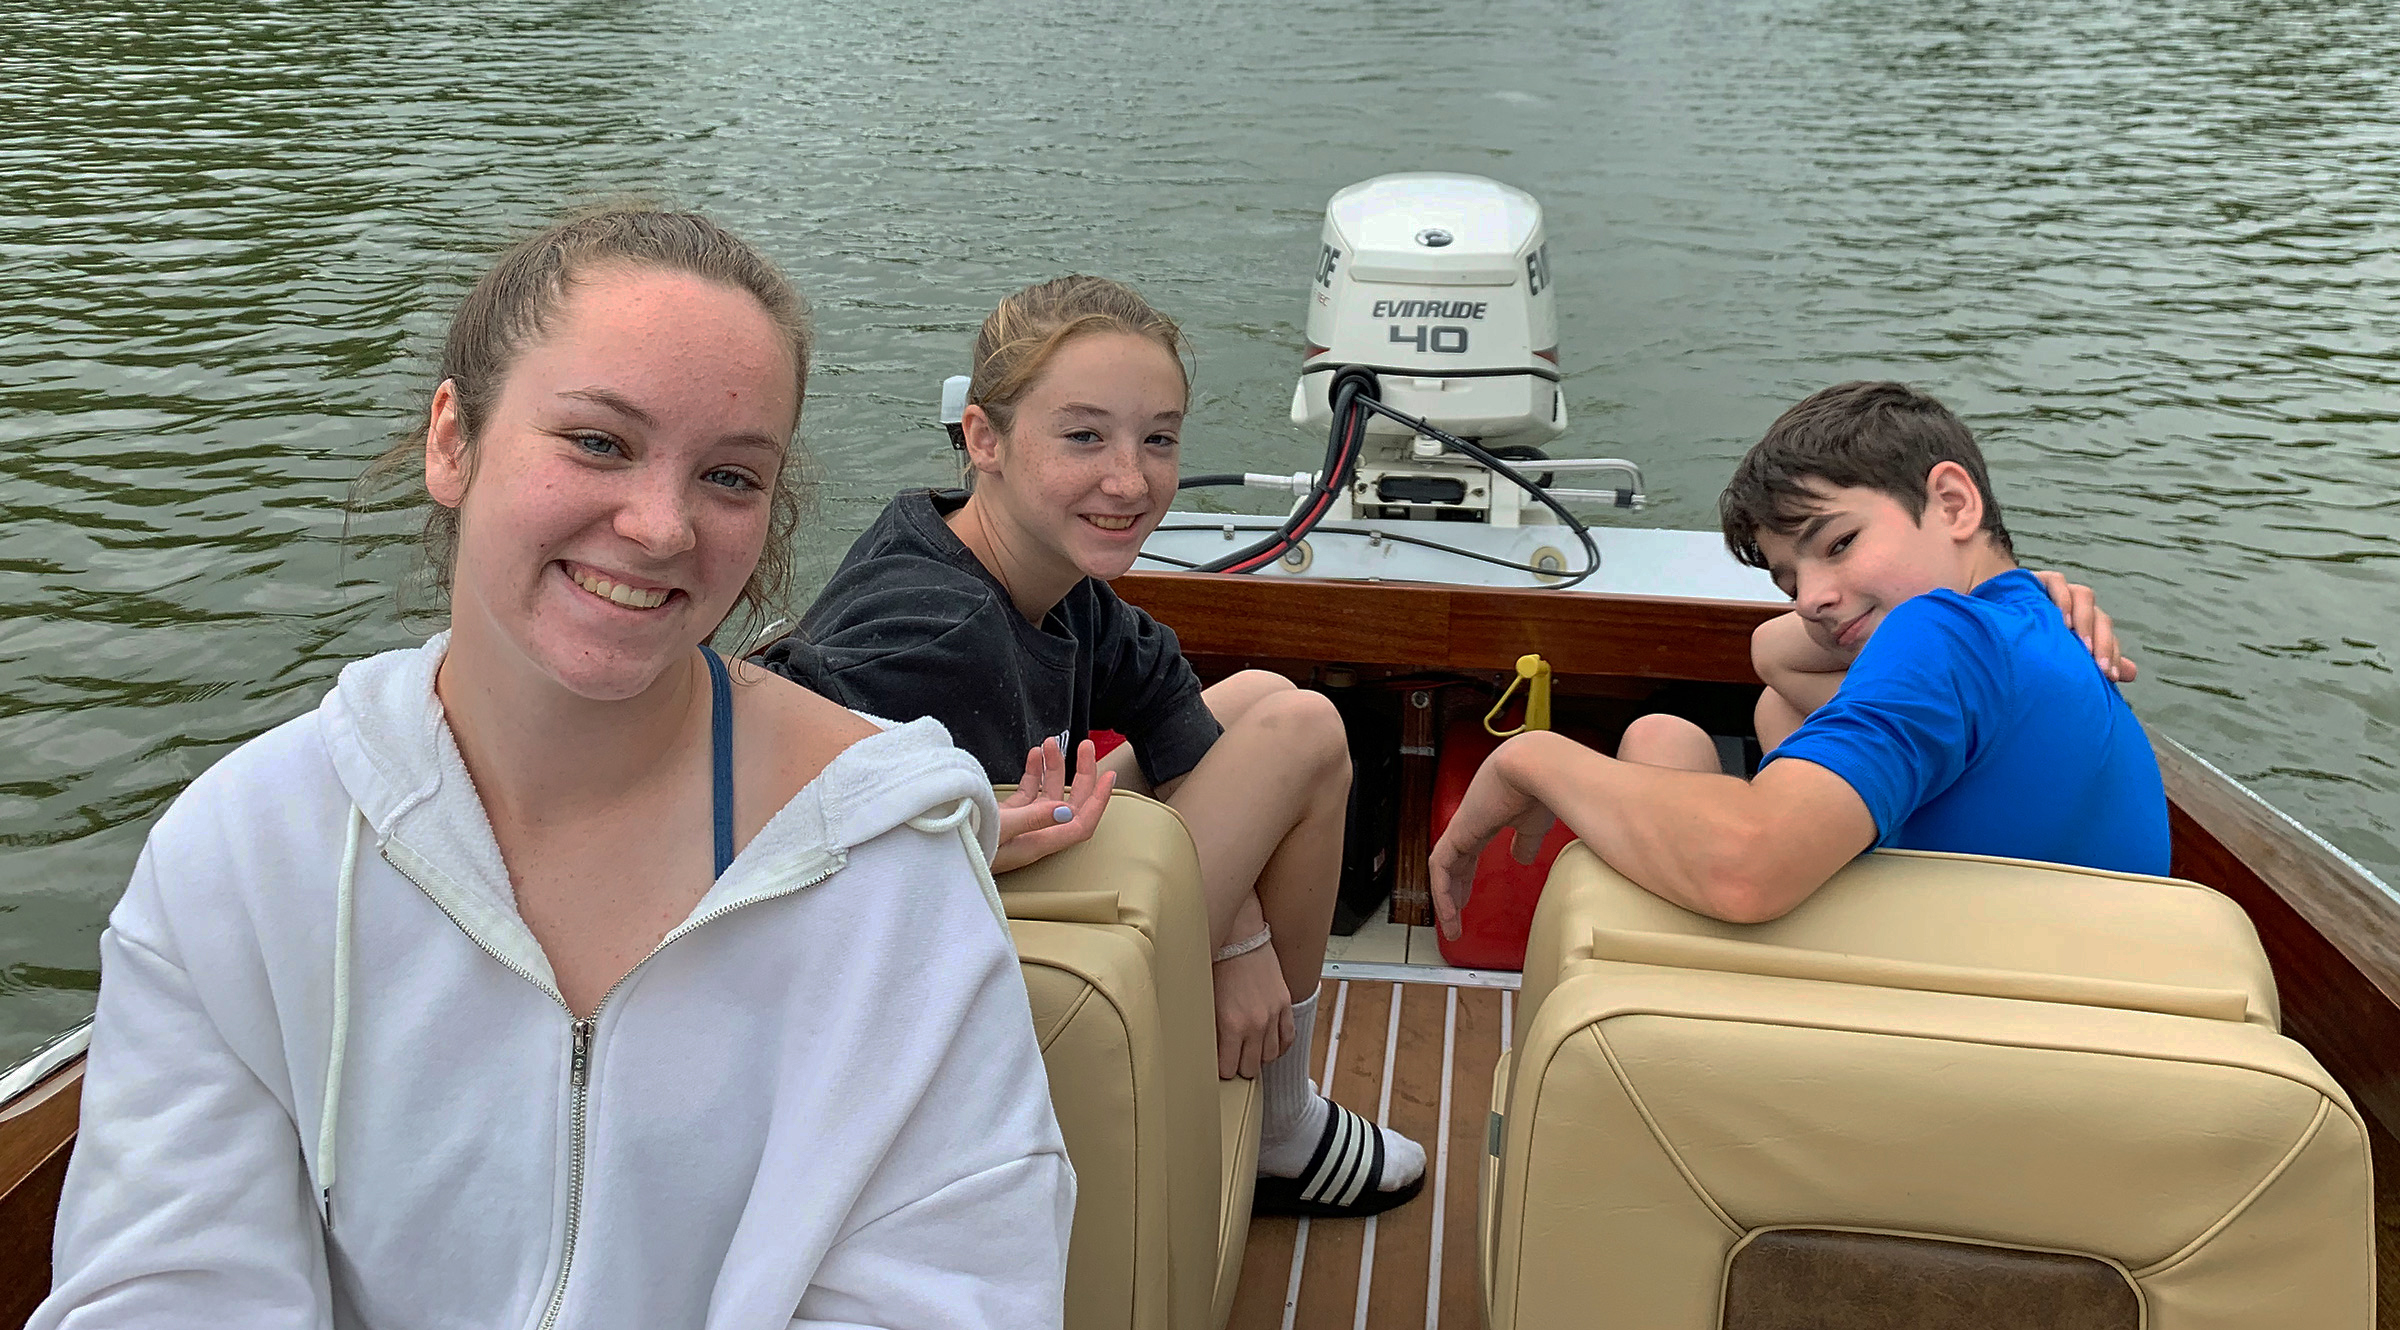
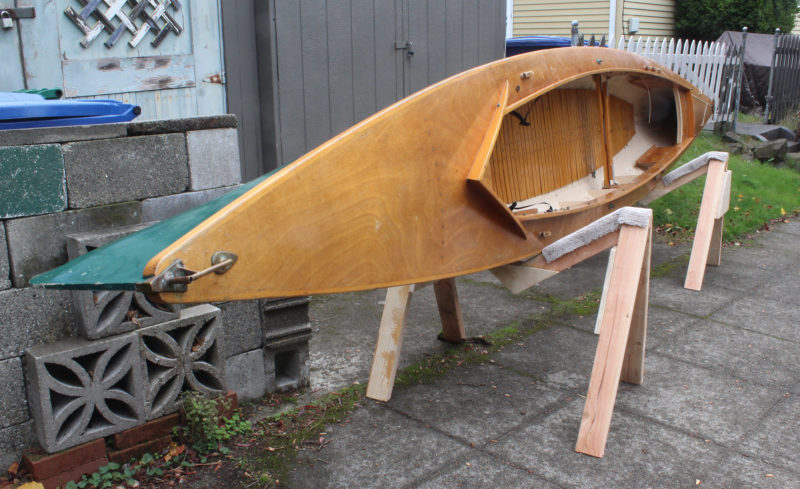
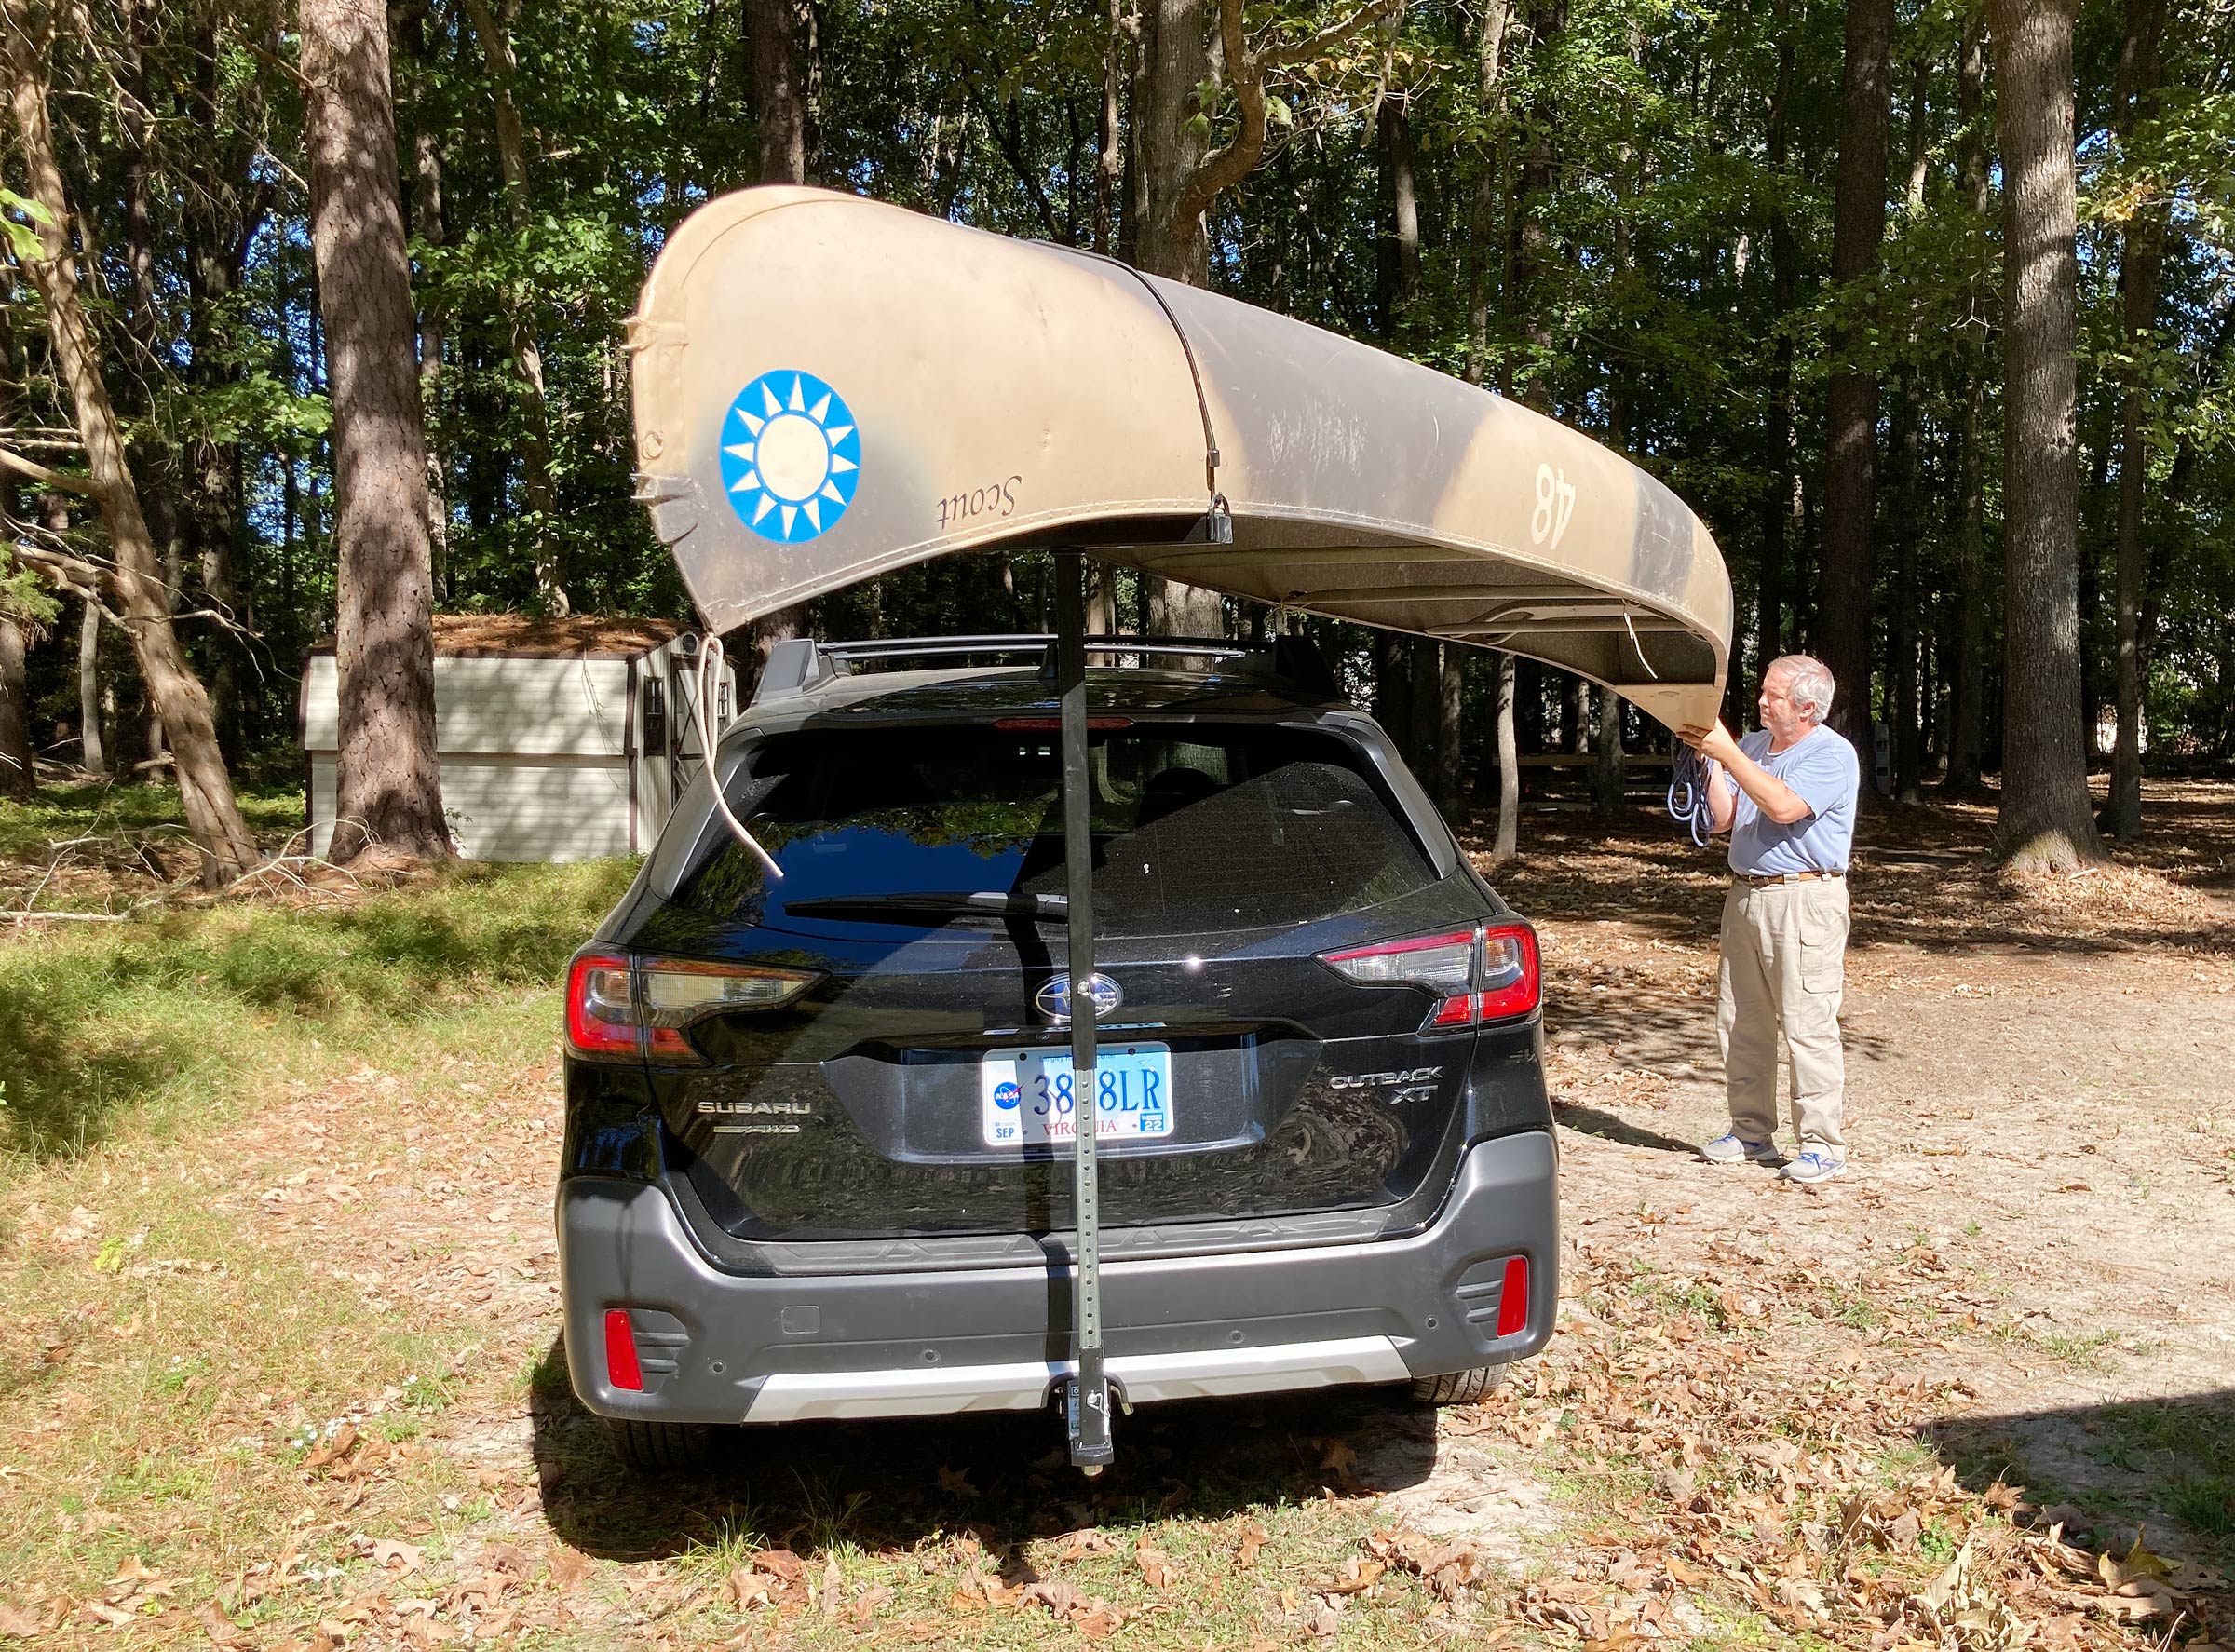
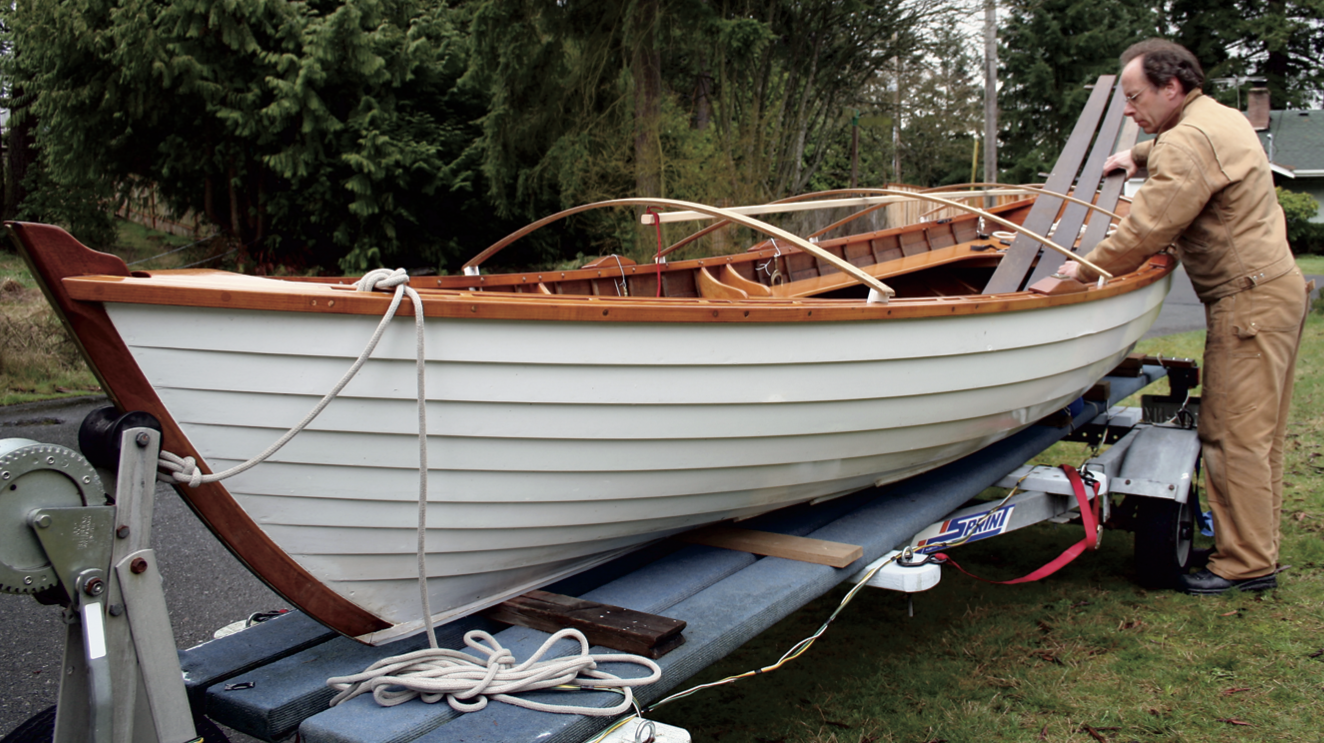
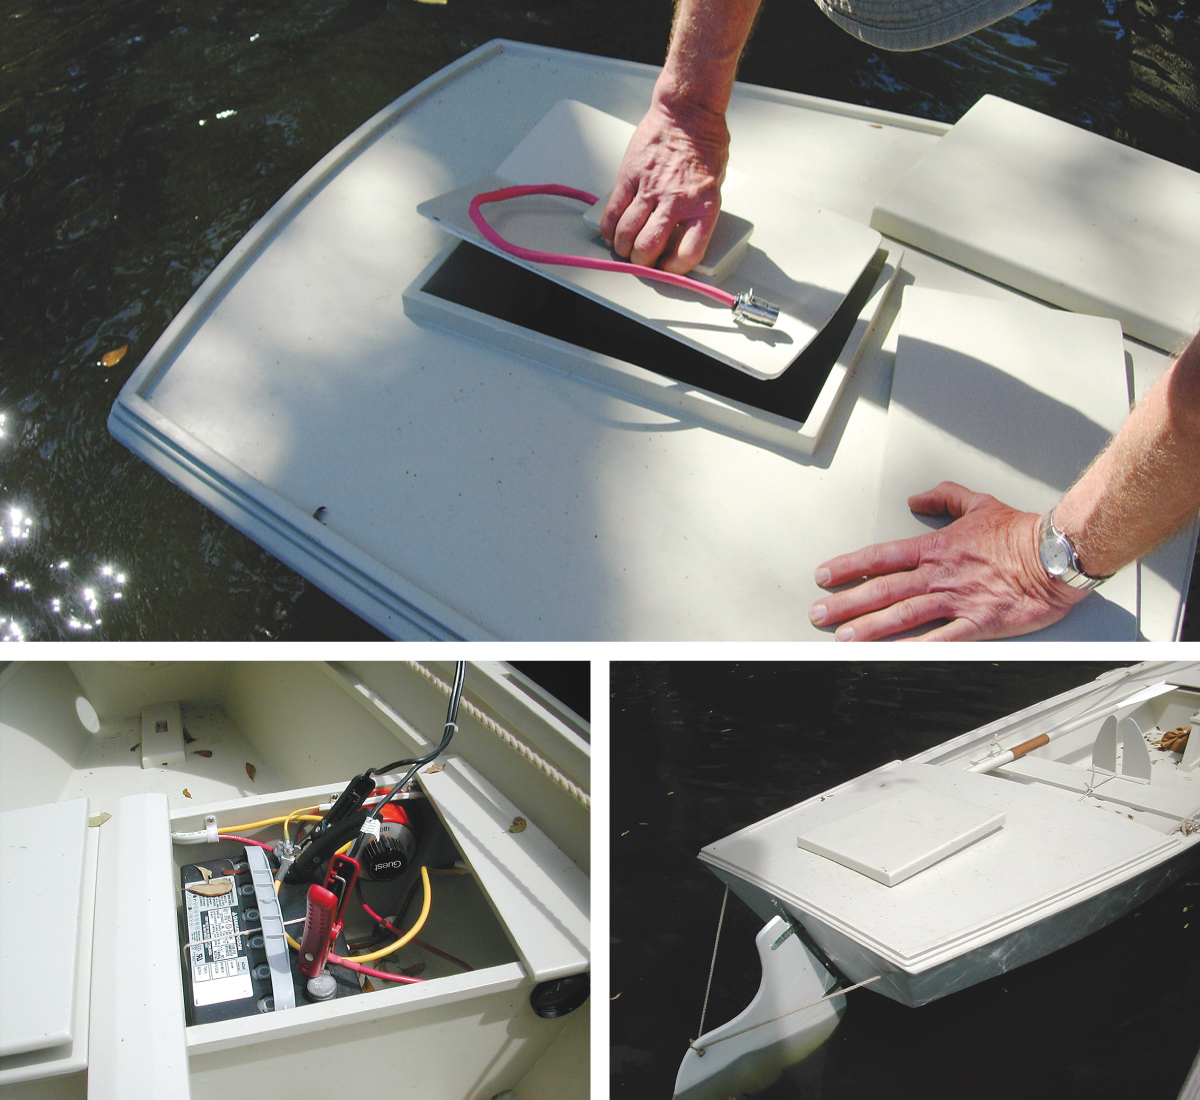
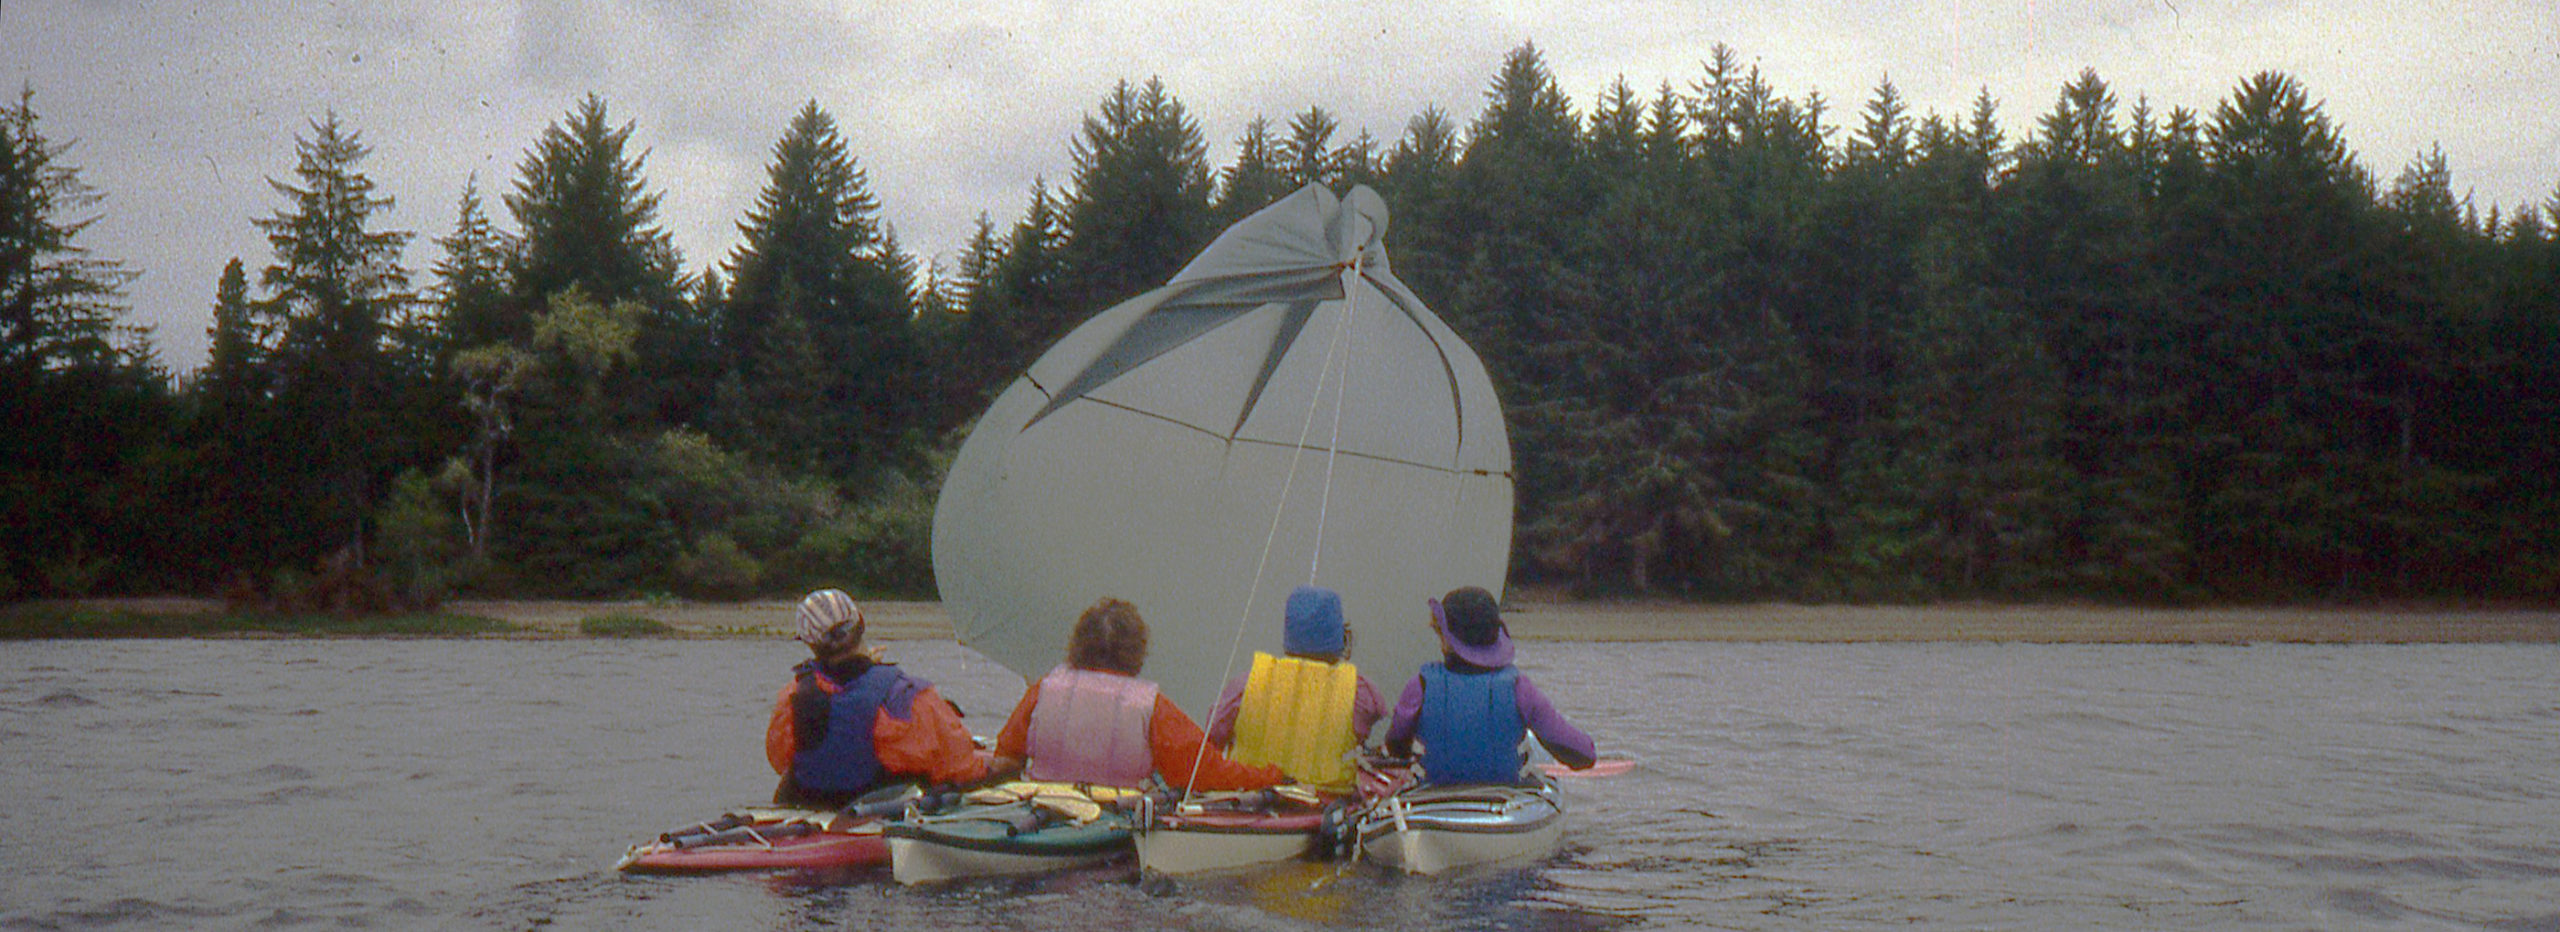
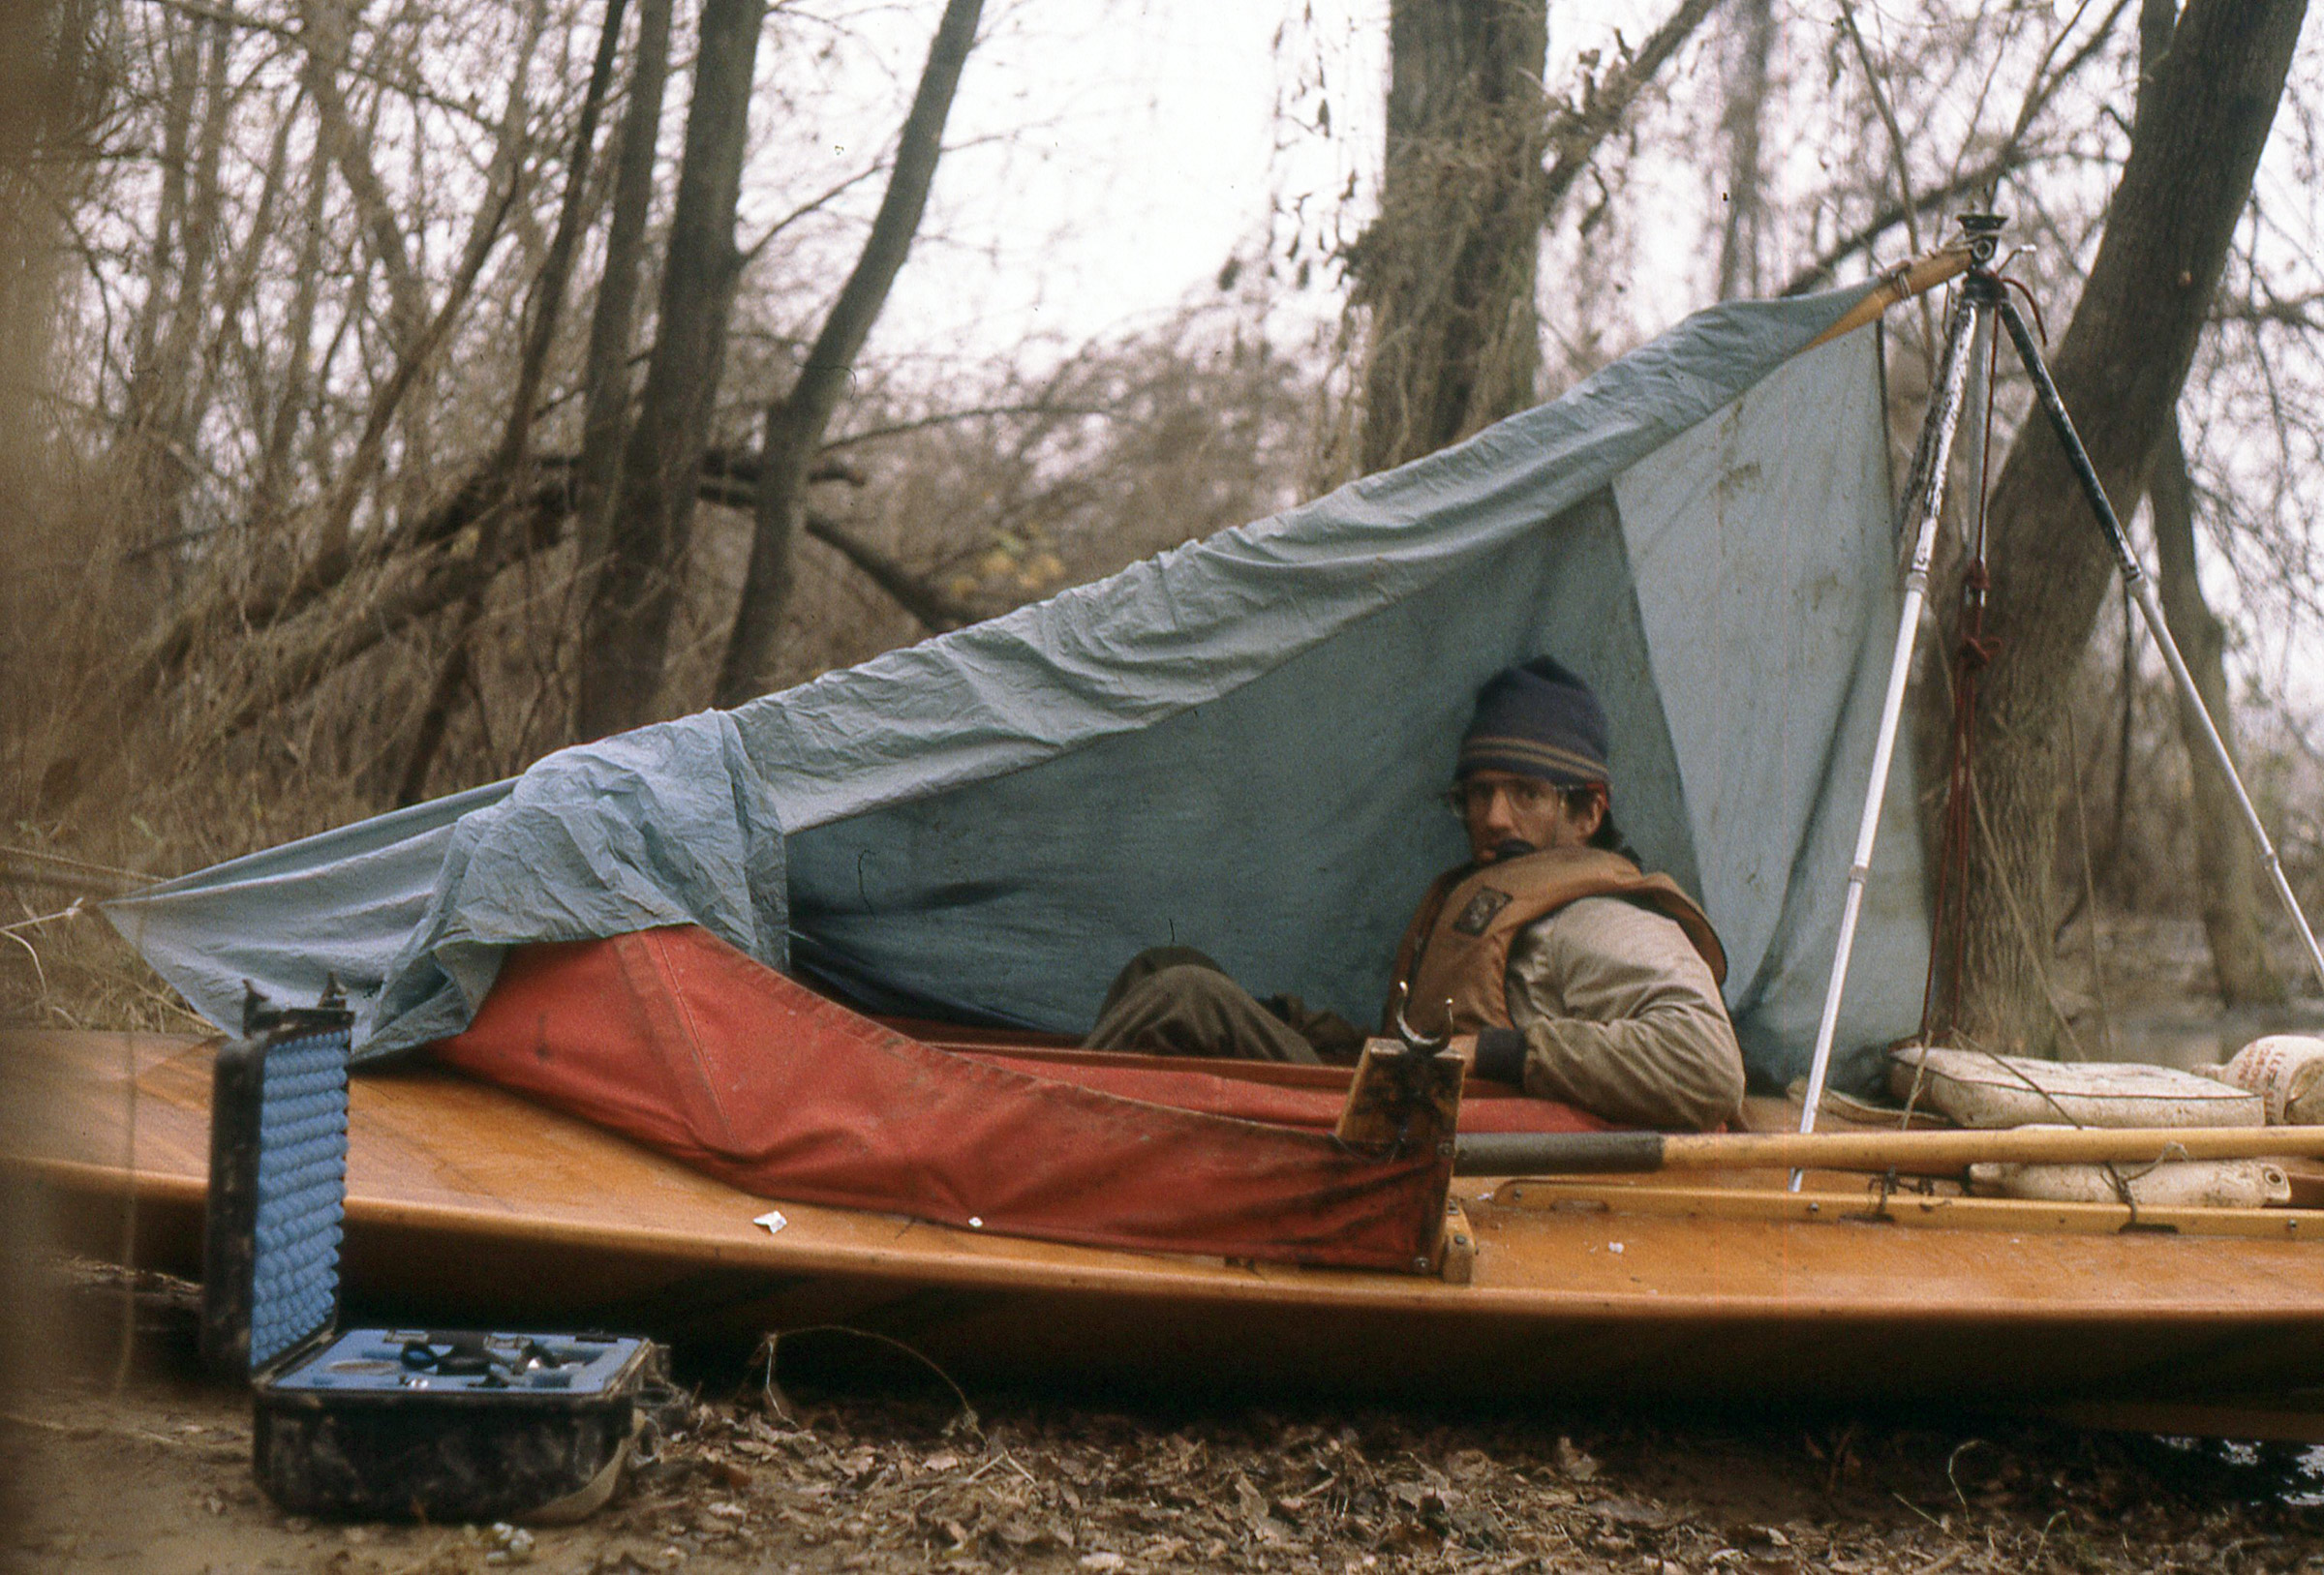
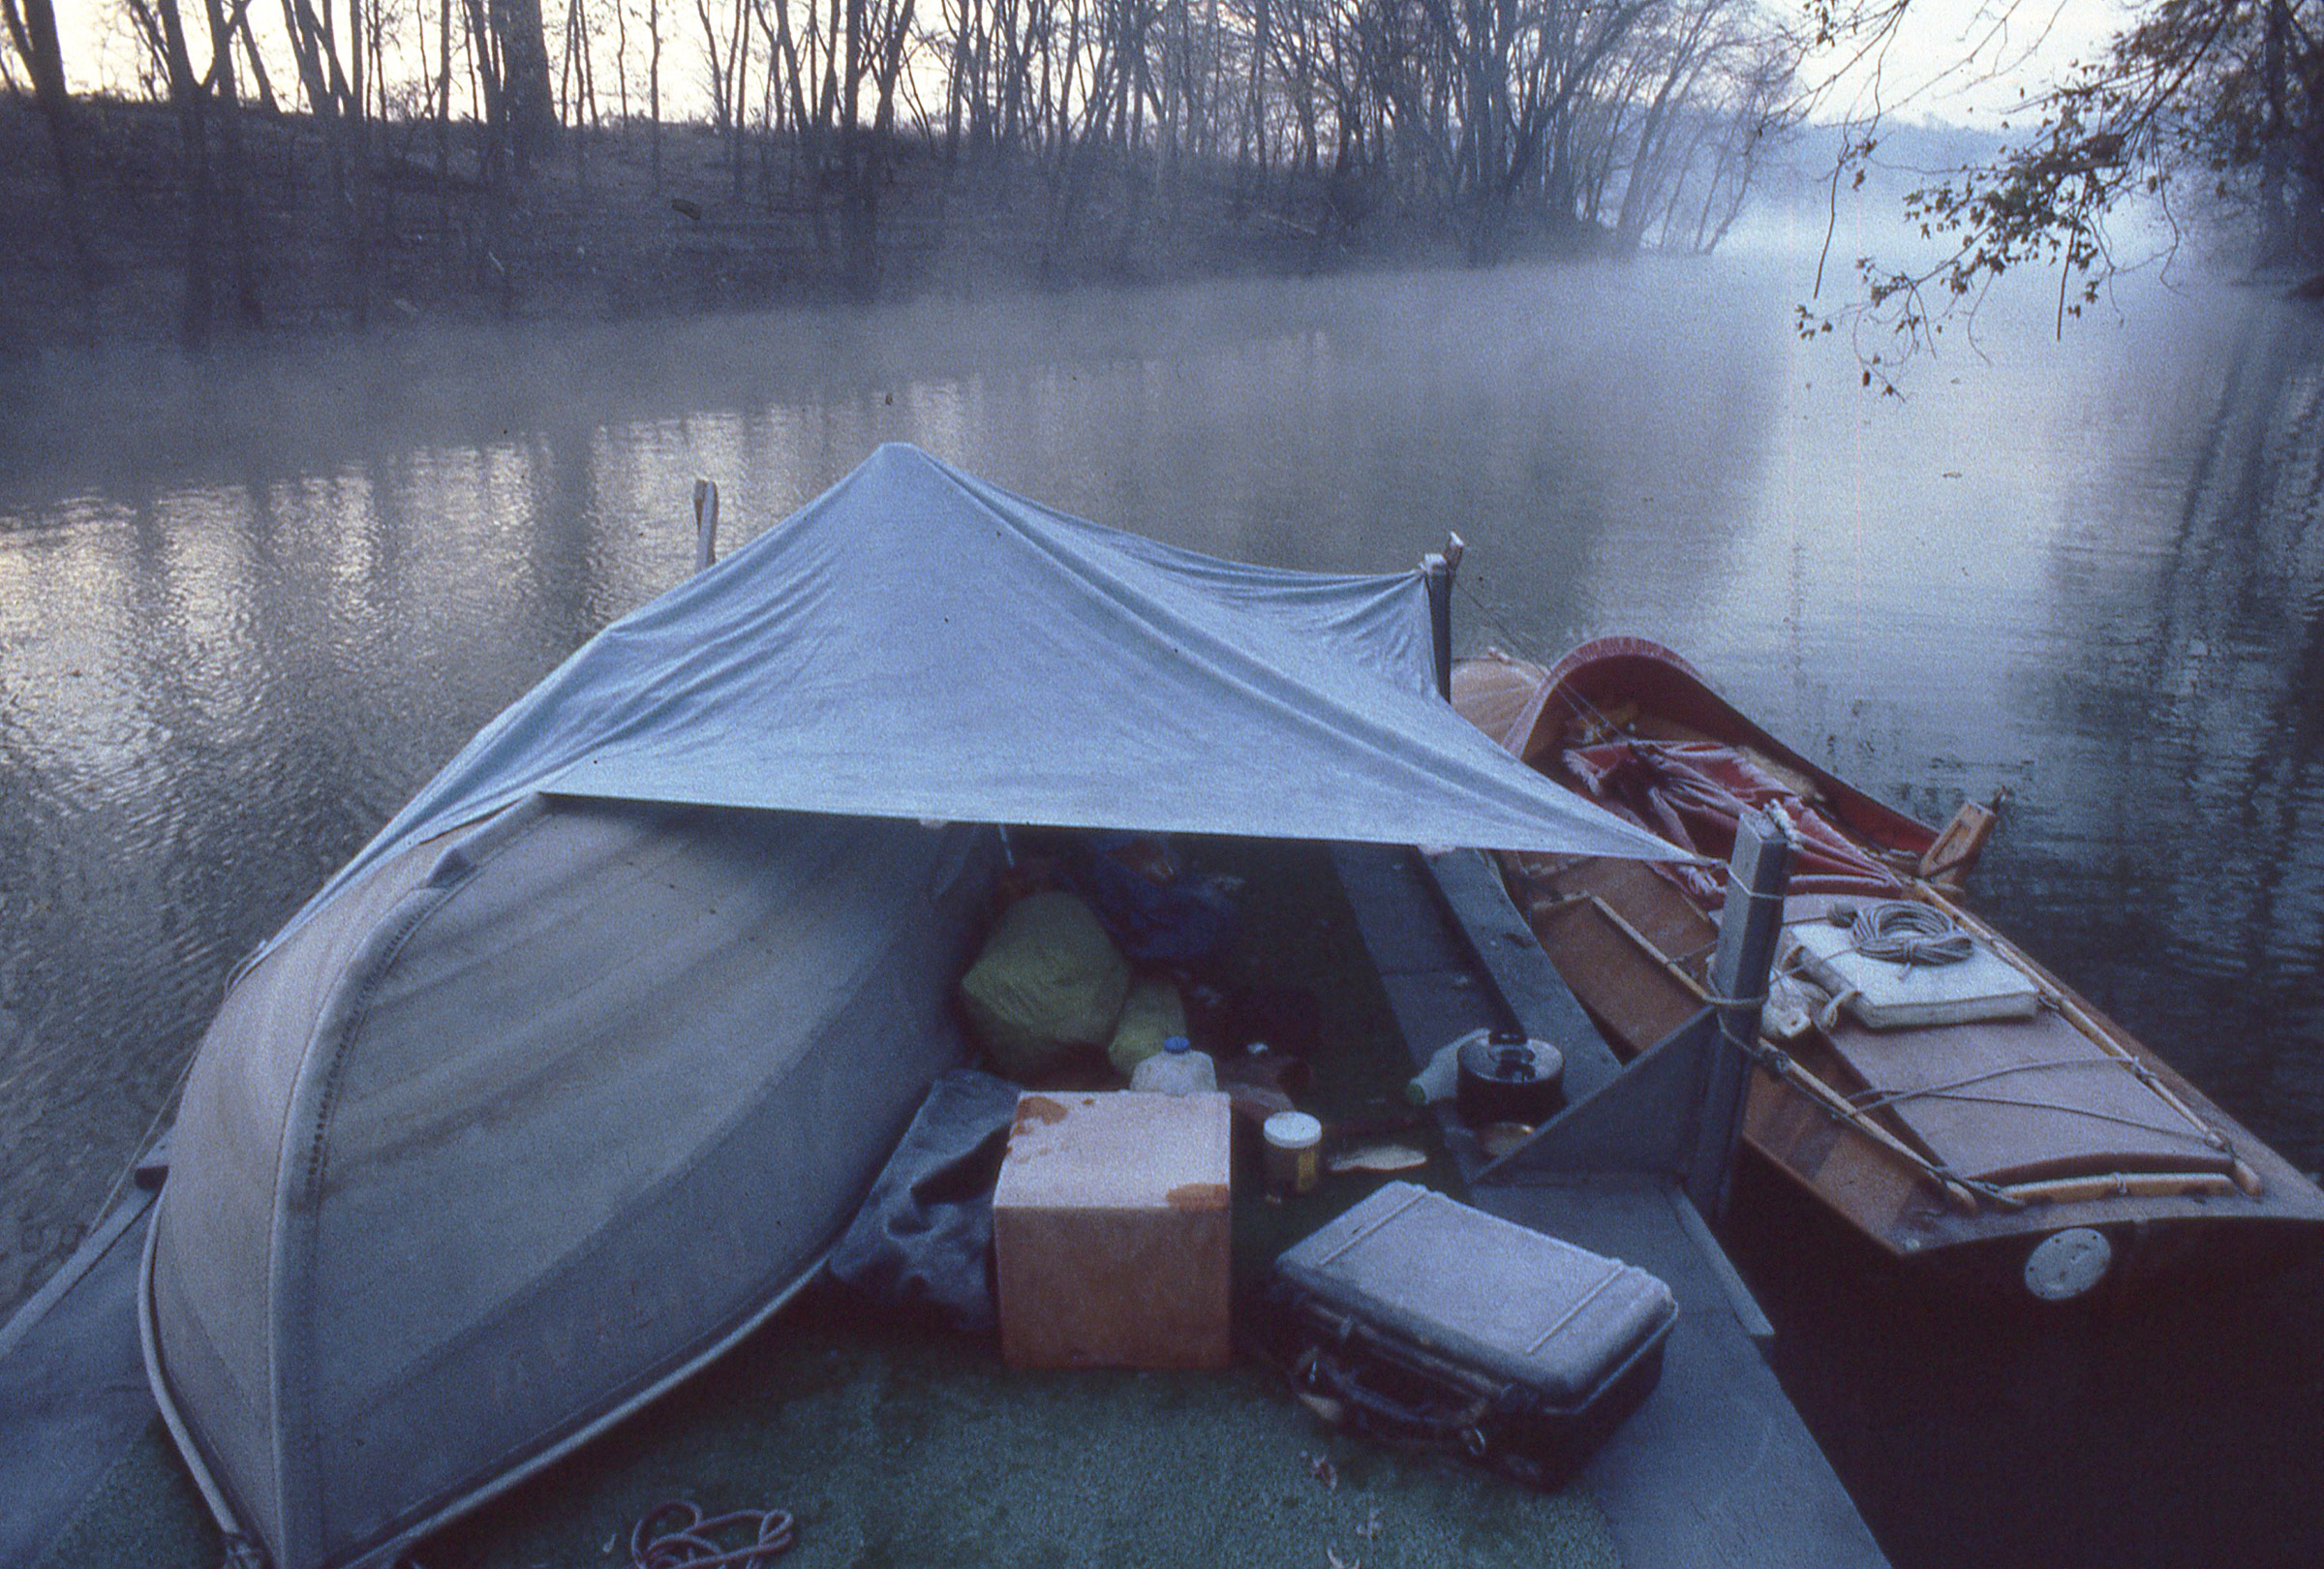
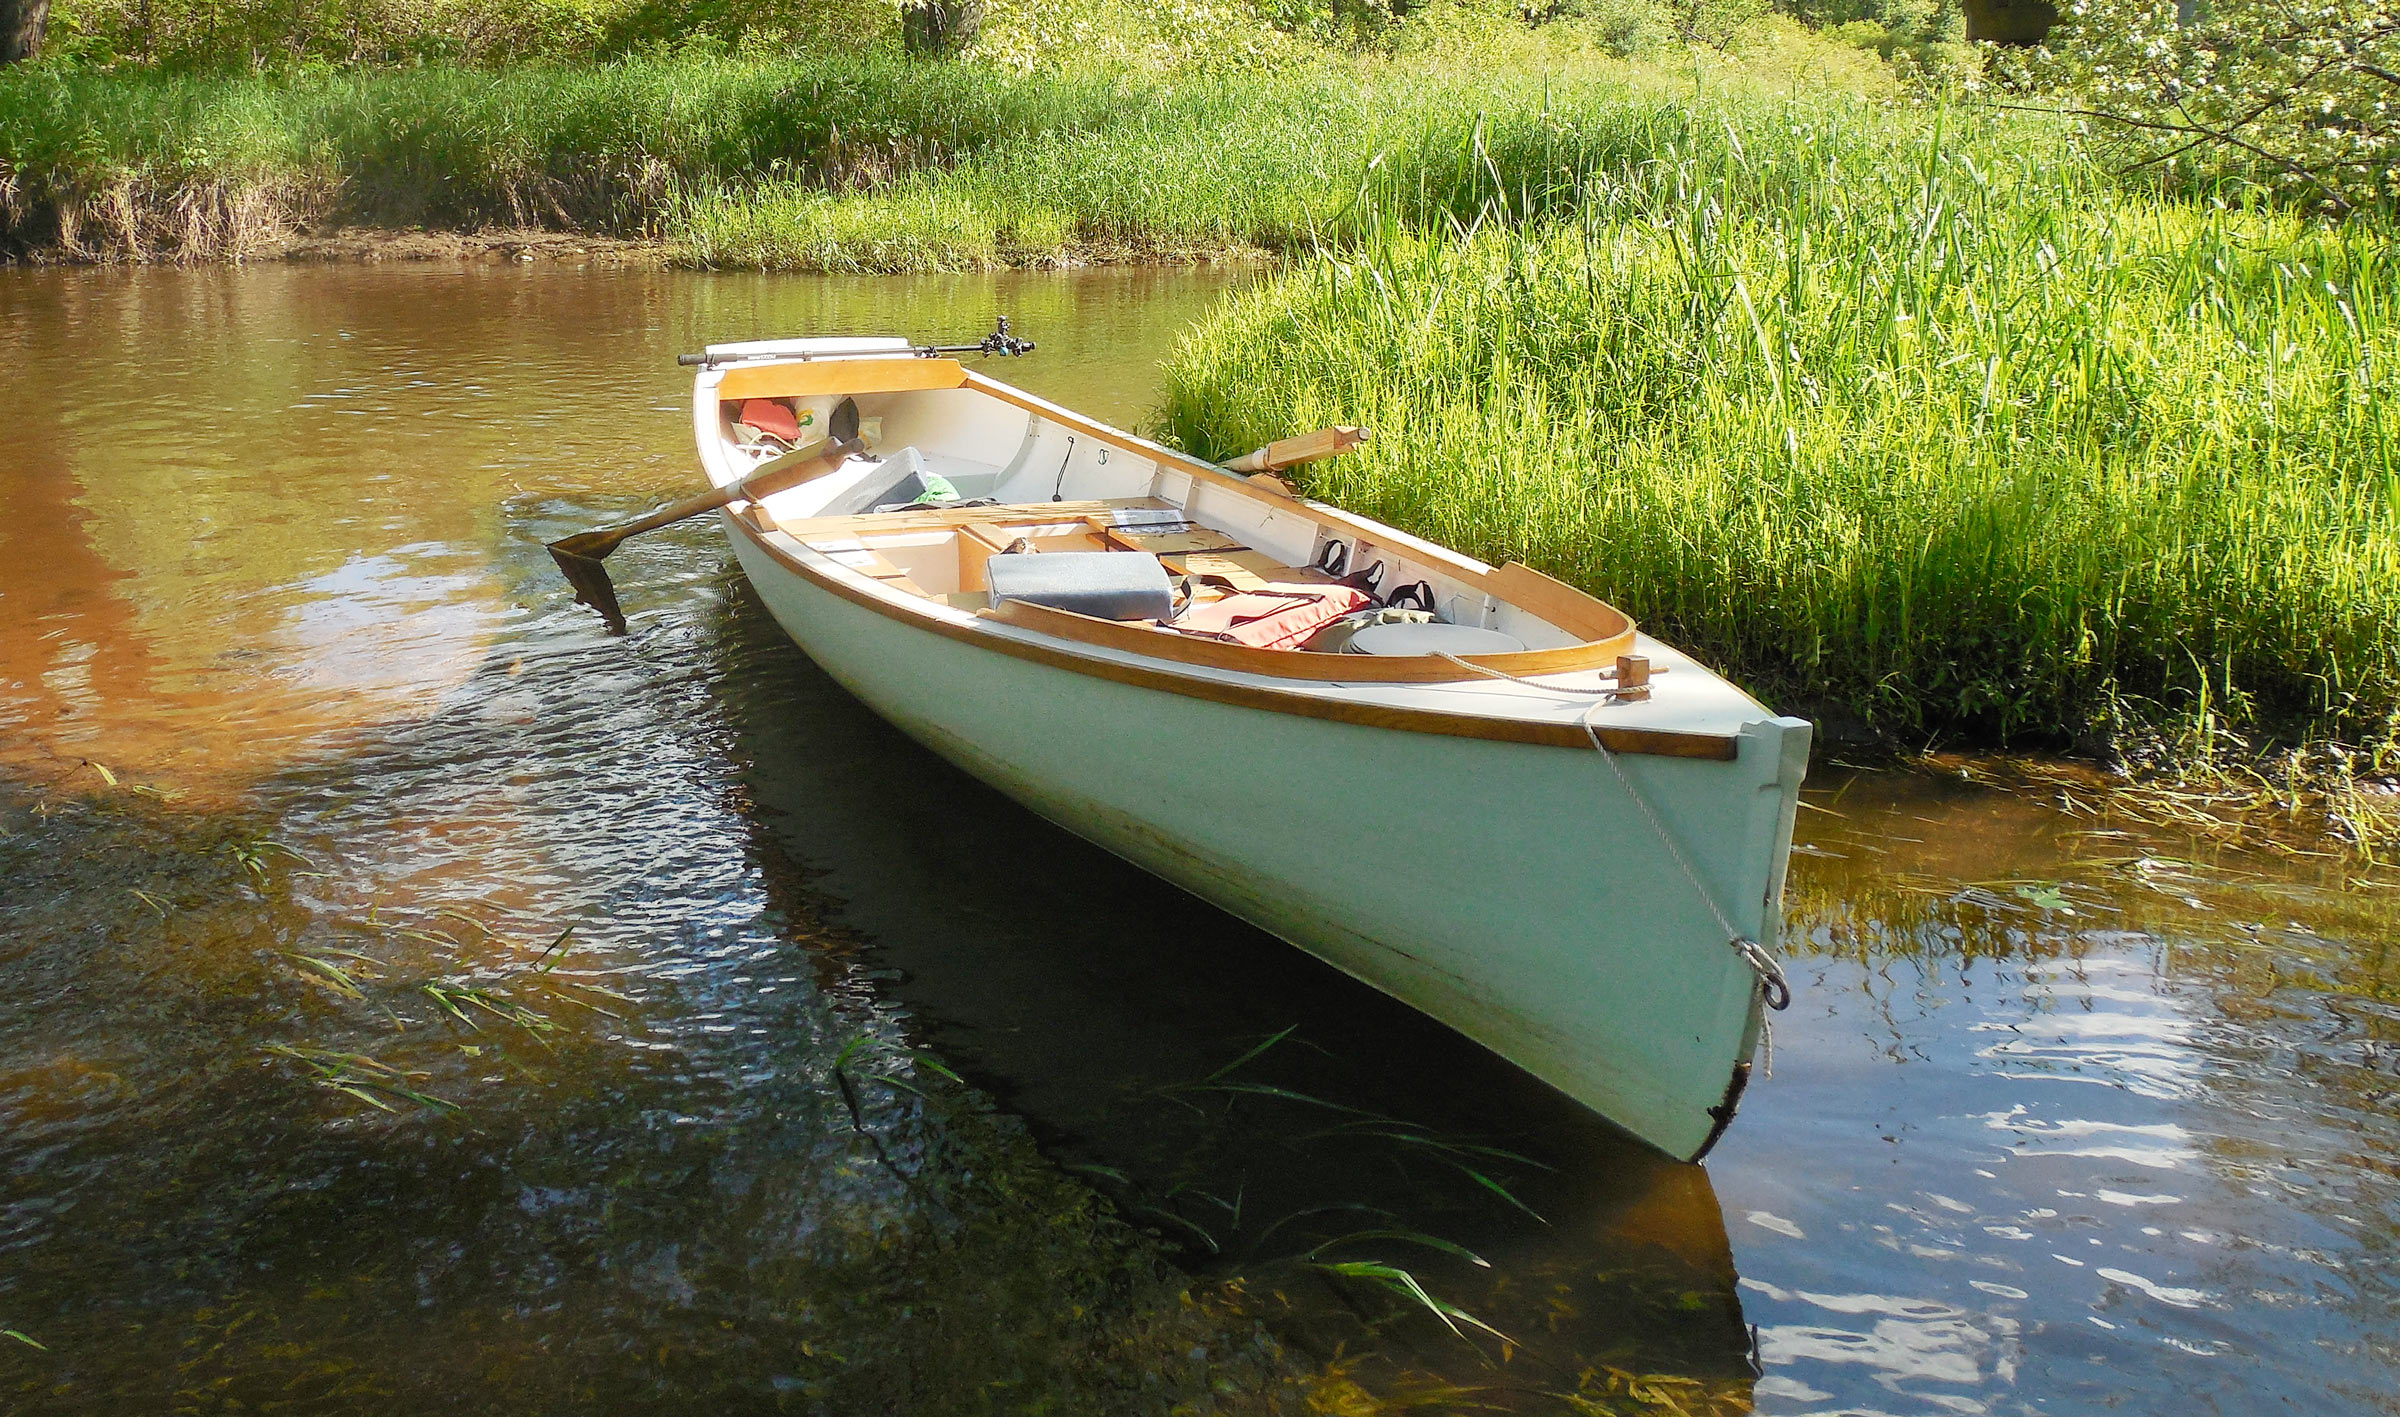
Sleeping aboard FOGG involves a fair amount of gear shuffling to arrange the platform and tent, but it opens the door to overnight trips in areas where dry land isn’t available, or where shore camping is prohibited. While a kayak would have fared better in the shallow channels north of the highway, the added comfort of an onboard sleeping system more than makes up for a heavier, less maneuverable boat.

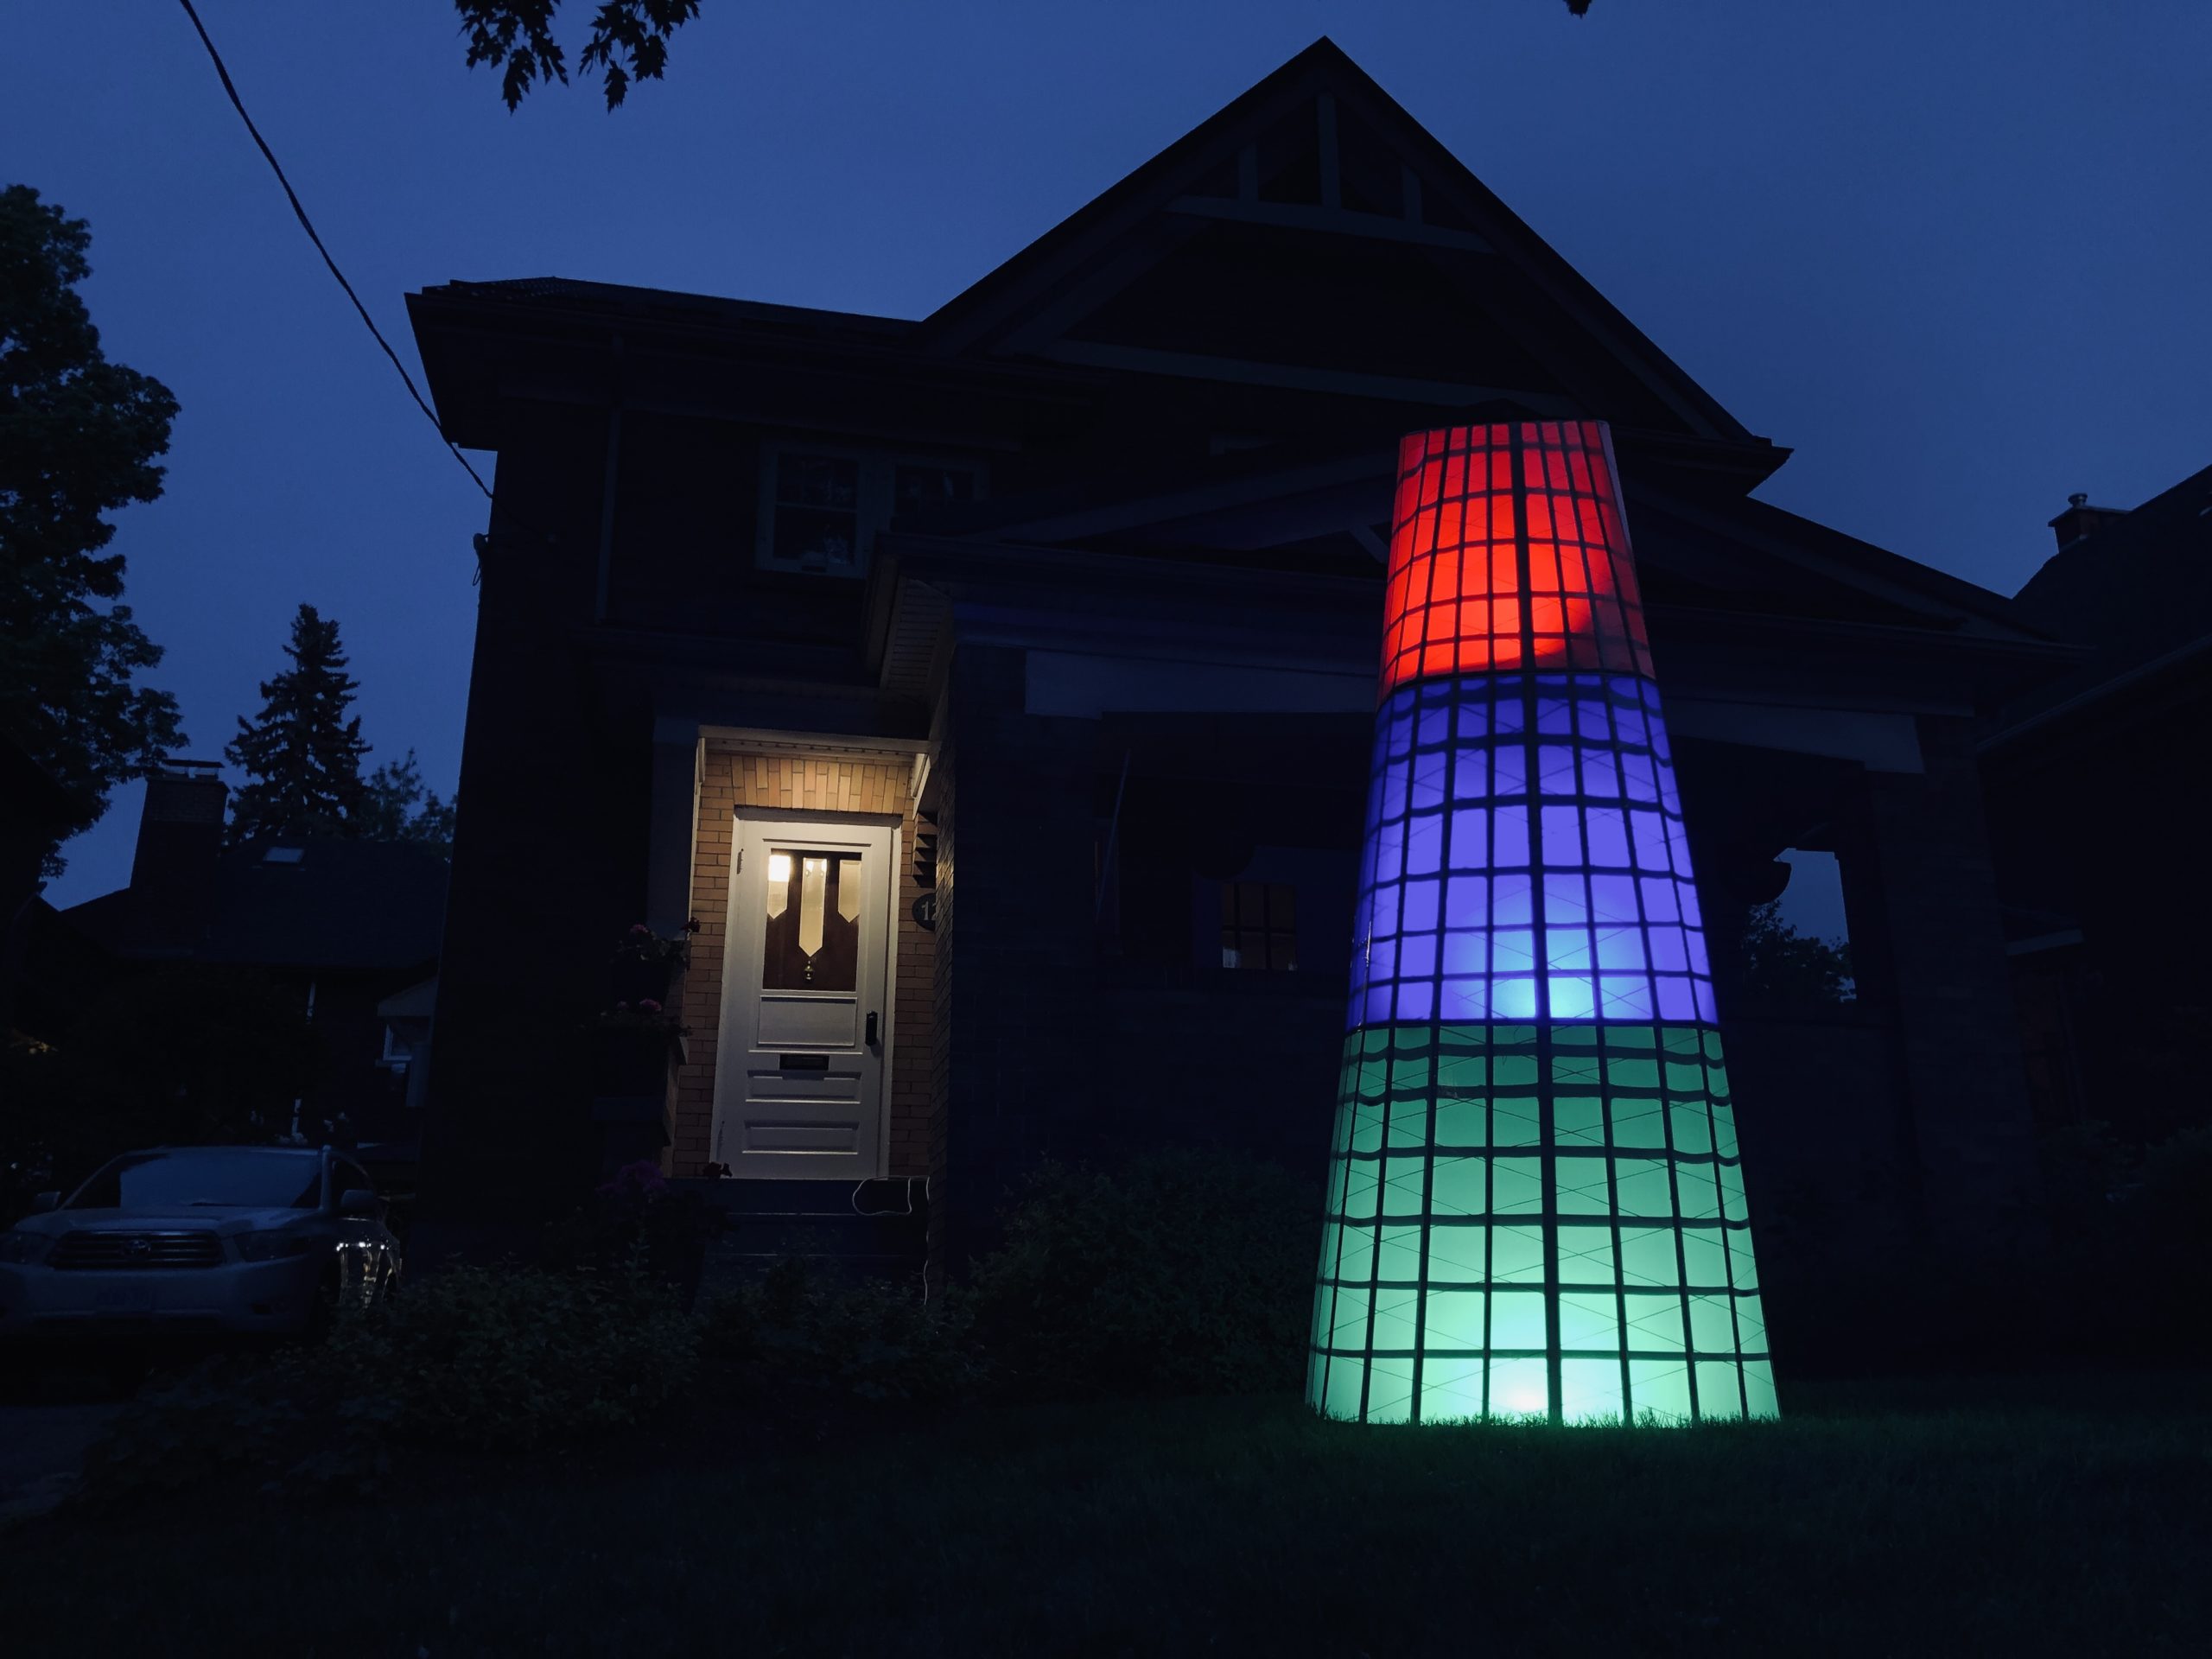
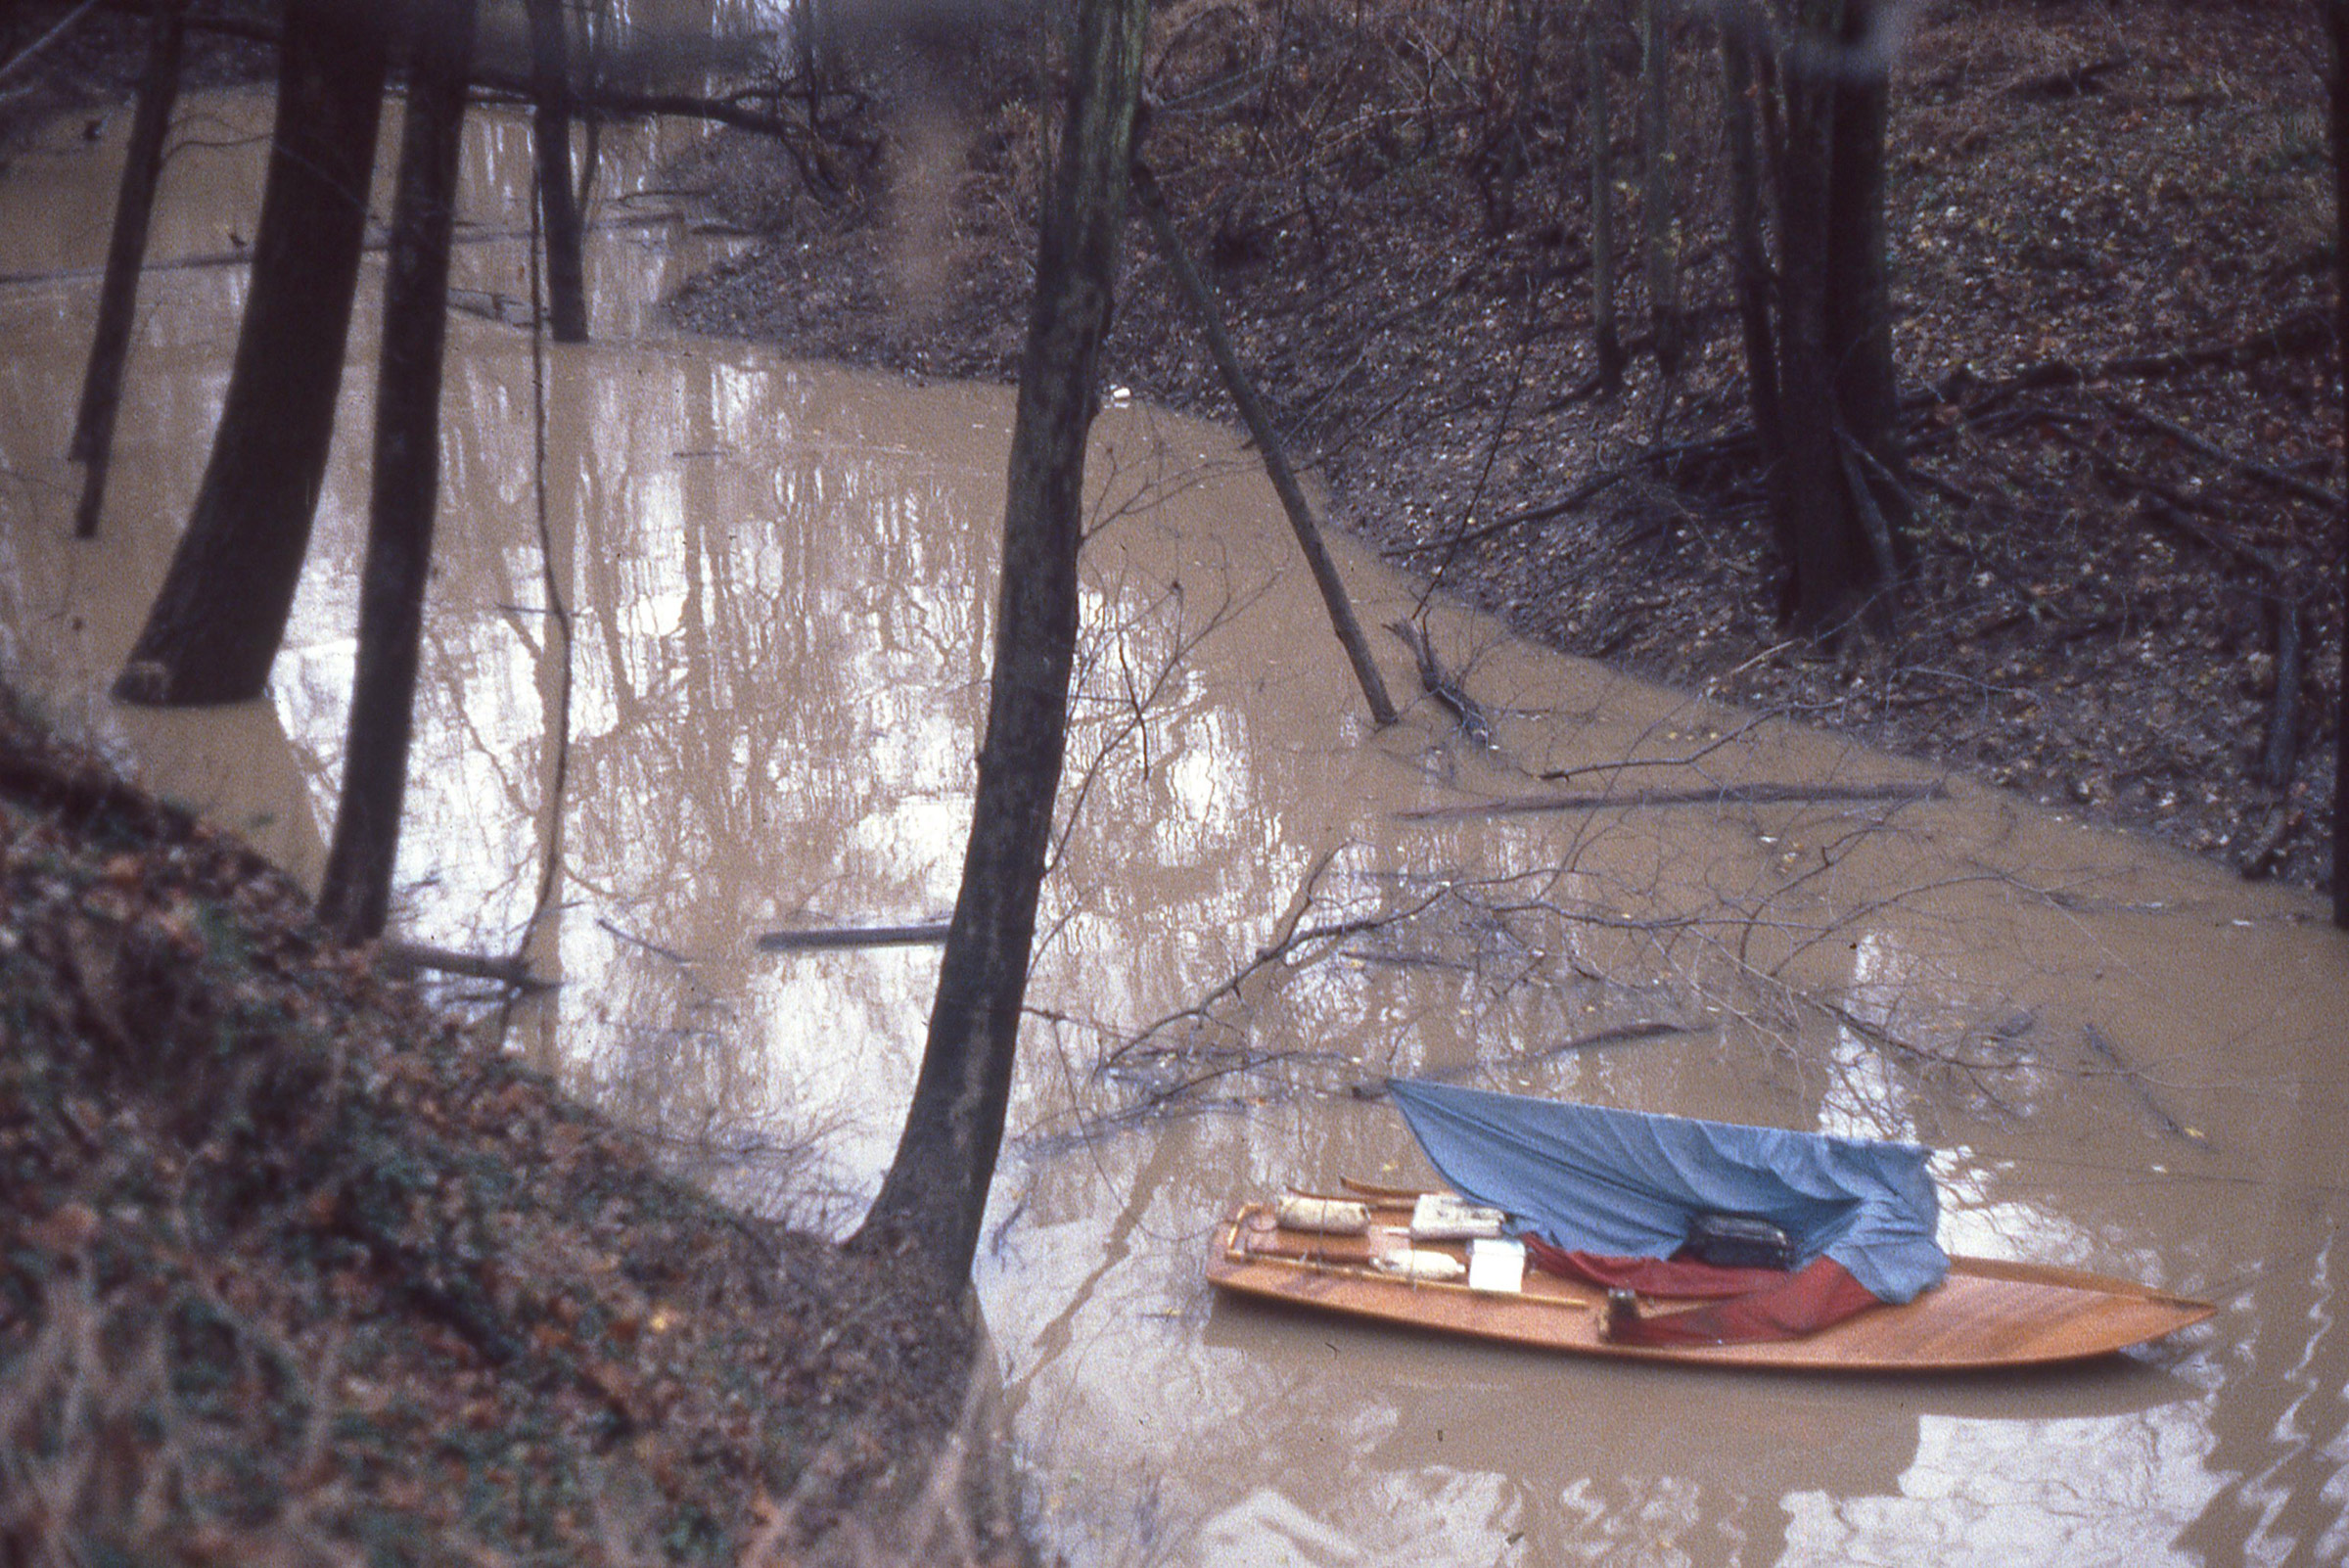
Even well back from the river, where bright green shoots of new grass created the illusion of a carefully tended lawn, the bank was too muddy for tenting. My camp chair, a recent and dangerously hedonistic concession to comfort, sank a few inches into the earth when I sat down, and wouldn’t settle onto an even keel. The “lawn” quickly became a cattle-pen quagmire of muddy footprints as I unloaded my gear. After a supper of rice and red beans, I dragged the boat to a level position, barely afloat at the edge of the pond, and set up a thwart-height platform and small tent for sleeping aboard. I scraped most of the mud off my feet—or some of it, at least—and crawled inside at full dark. I woke again well after midnight to see a foggy glimmer of sky just visible through the leaves, and a bright half moon caught in the treetops.

By morning, after a long scrutiny of maps in the flickering light of a dying headlamp the night before, I had decided on a new plan. I’d continue down Government Light Slough to the Mississippi—less than a mile now—and then upstream past the mouth of the Chippewa River and into the western arm of the delta, an inkblot swirl of channels, oxbows, meanders, and sloughs that might allow me to piece together a loop after all. Fortyacre Lake, Chimney Lake, Swinger Slough: a devious back-channel route leading to the western bank of the Chippewa River a few miles upstream, almost a mirror image of the route I’d originally intended. From there, I could continue down to the Mississippi, up Swift Slough, maybe, and get back to the car.

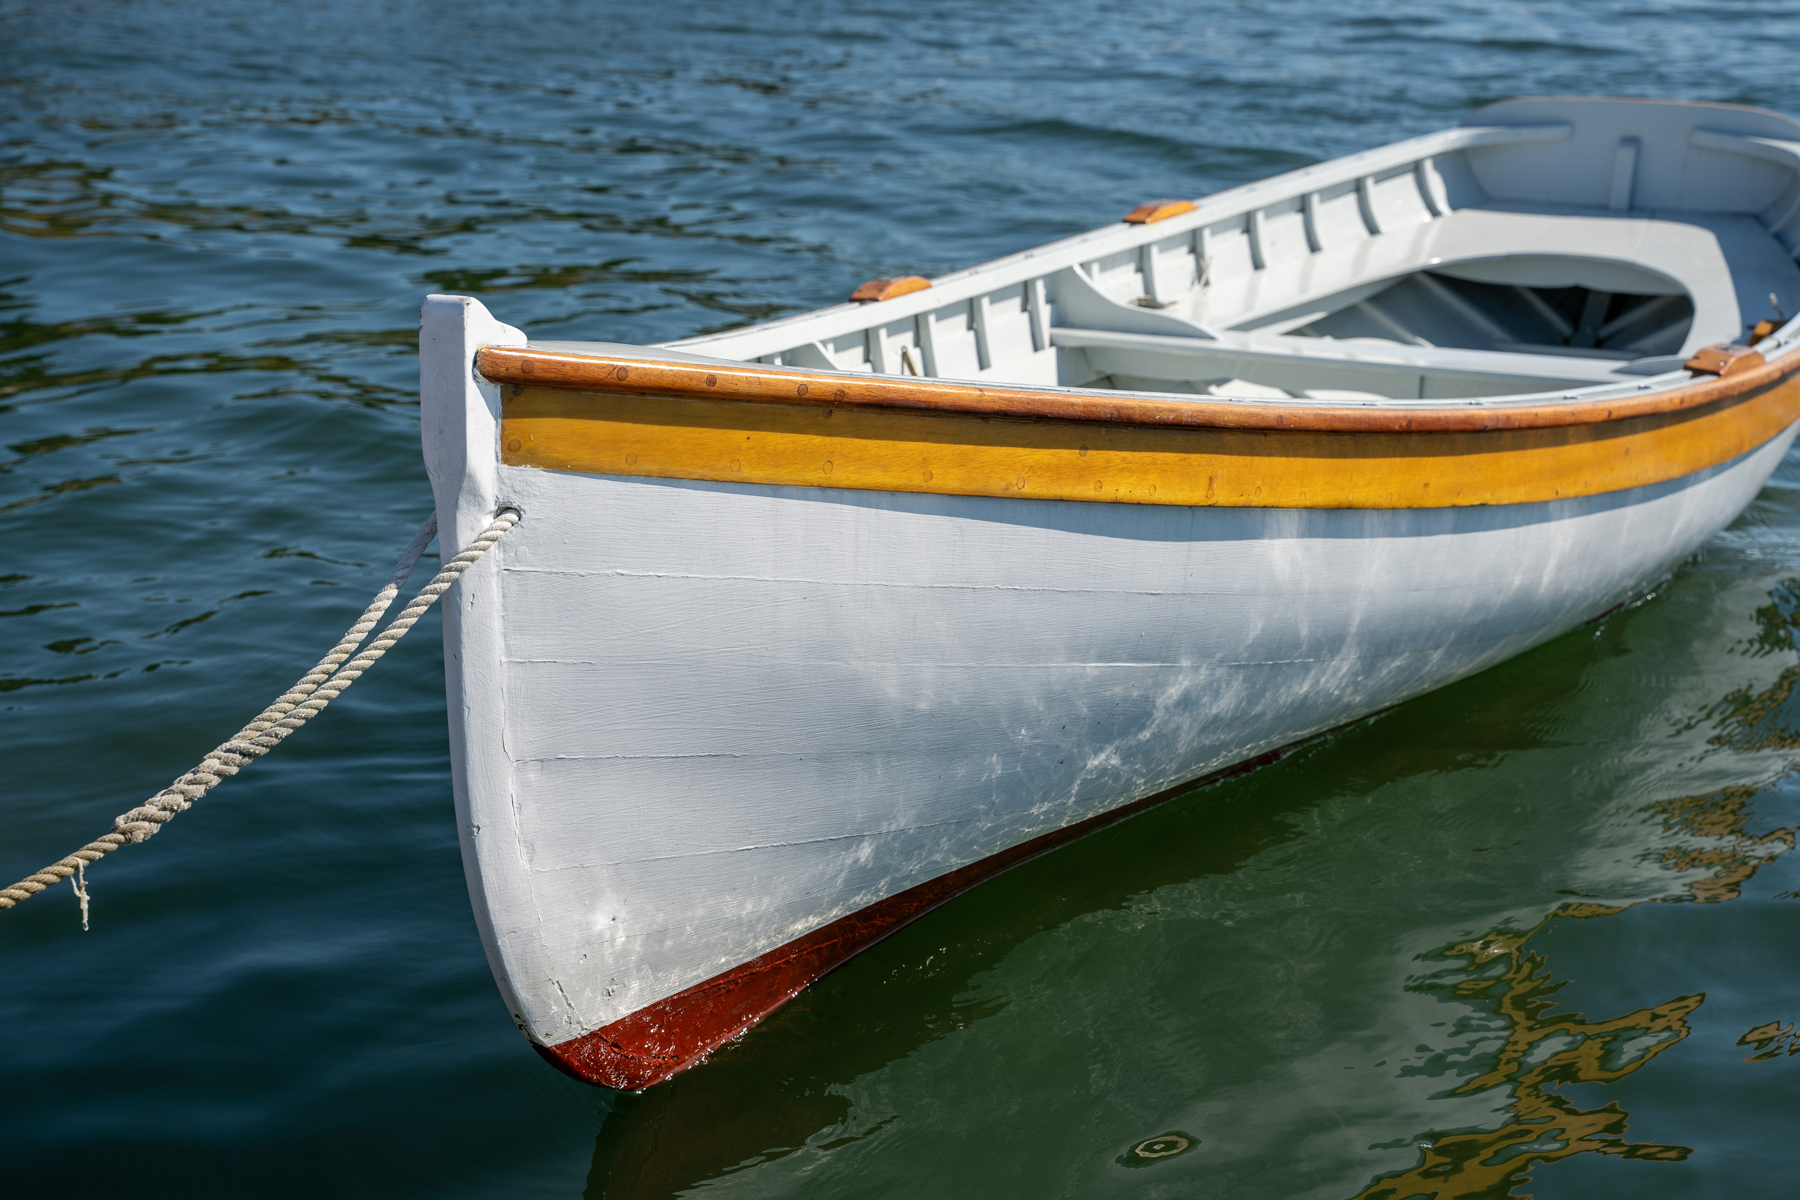
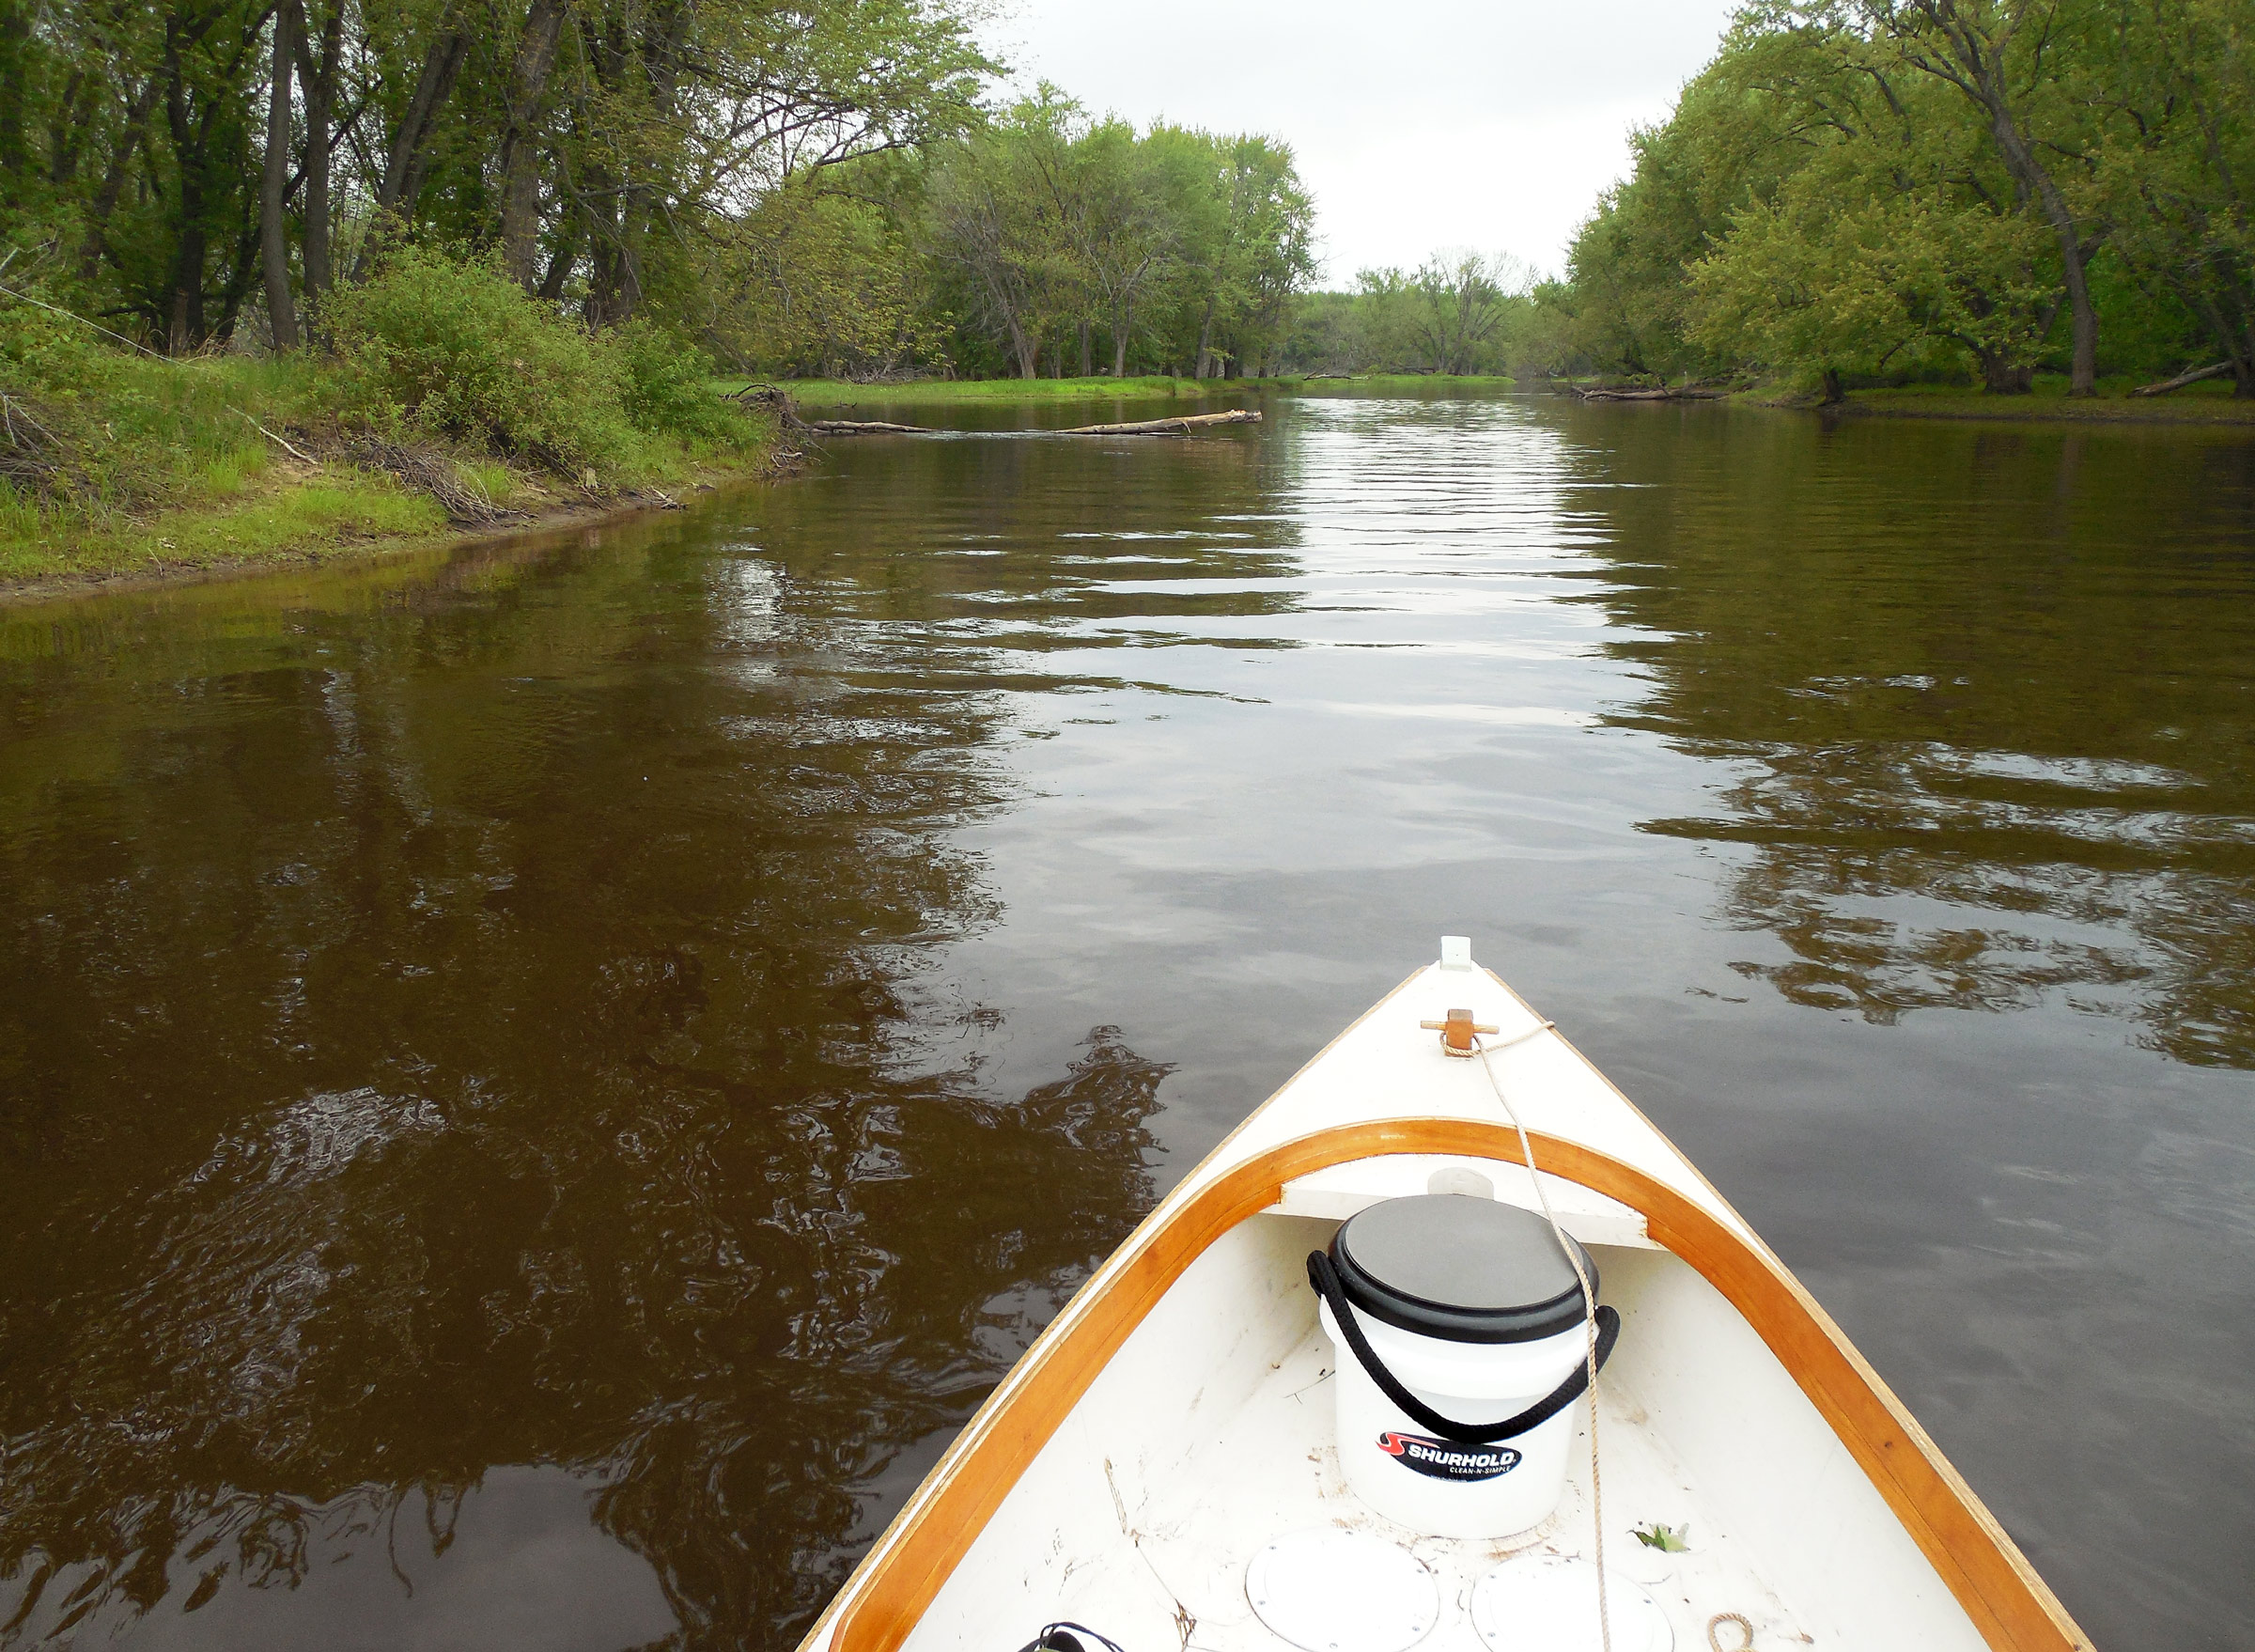
Shortly after leaving my first camp, I entered Government Light Slough, which connects Smith Slough to the Mississippi River. The floodplain’s fluctuating water levels are evident here, with bare muddy banks suggesting low water levels—probably the reason I hadn’t been able to work my way upstream to Buffalo Slough the day before.

I was happy there was still the chance for a continuous loop, however irregular and wandering it might prove. The thought of returning the way I had come would seem like a defeat, and a lost opportunity. But did the loop I saw on paper actually exist in the ambiguous and twisty delta? I had no idea.

The first leg of the day’s journey went quickly. Within 20 minutes of starting out, I reached the end of Government Light Slough and entered the Mississippi. Behind me, flat forest; ahead, wide open water, and the tall bluffs of the Minnesota side. Blue skies, bright sunlight—startlingly bright after the channels of the delta. I rowed 400 yards across the river to the mile-long ribbon of Drury Island and beached the boat as a passing barge tow sent its wake crashing onto shore. Once it was past, I headed upstream again. The current here was sluggish, and it wasn’t difficult to keep the boat moving.

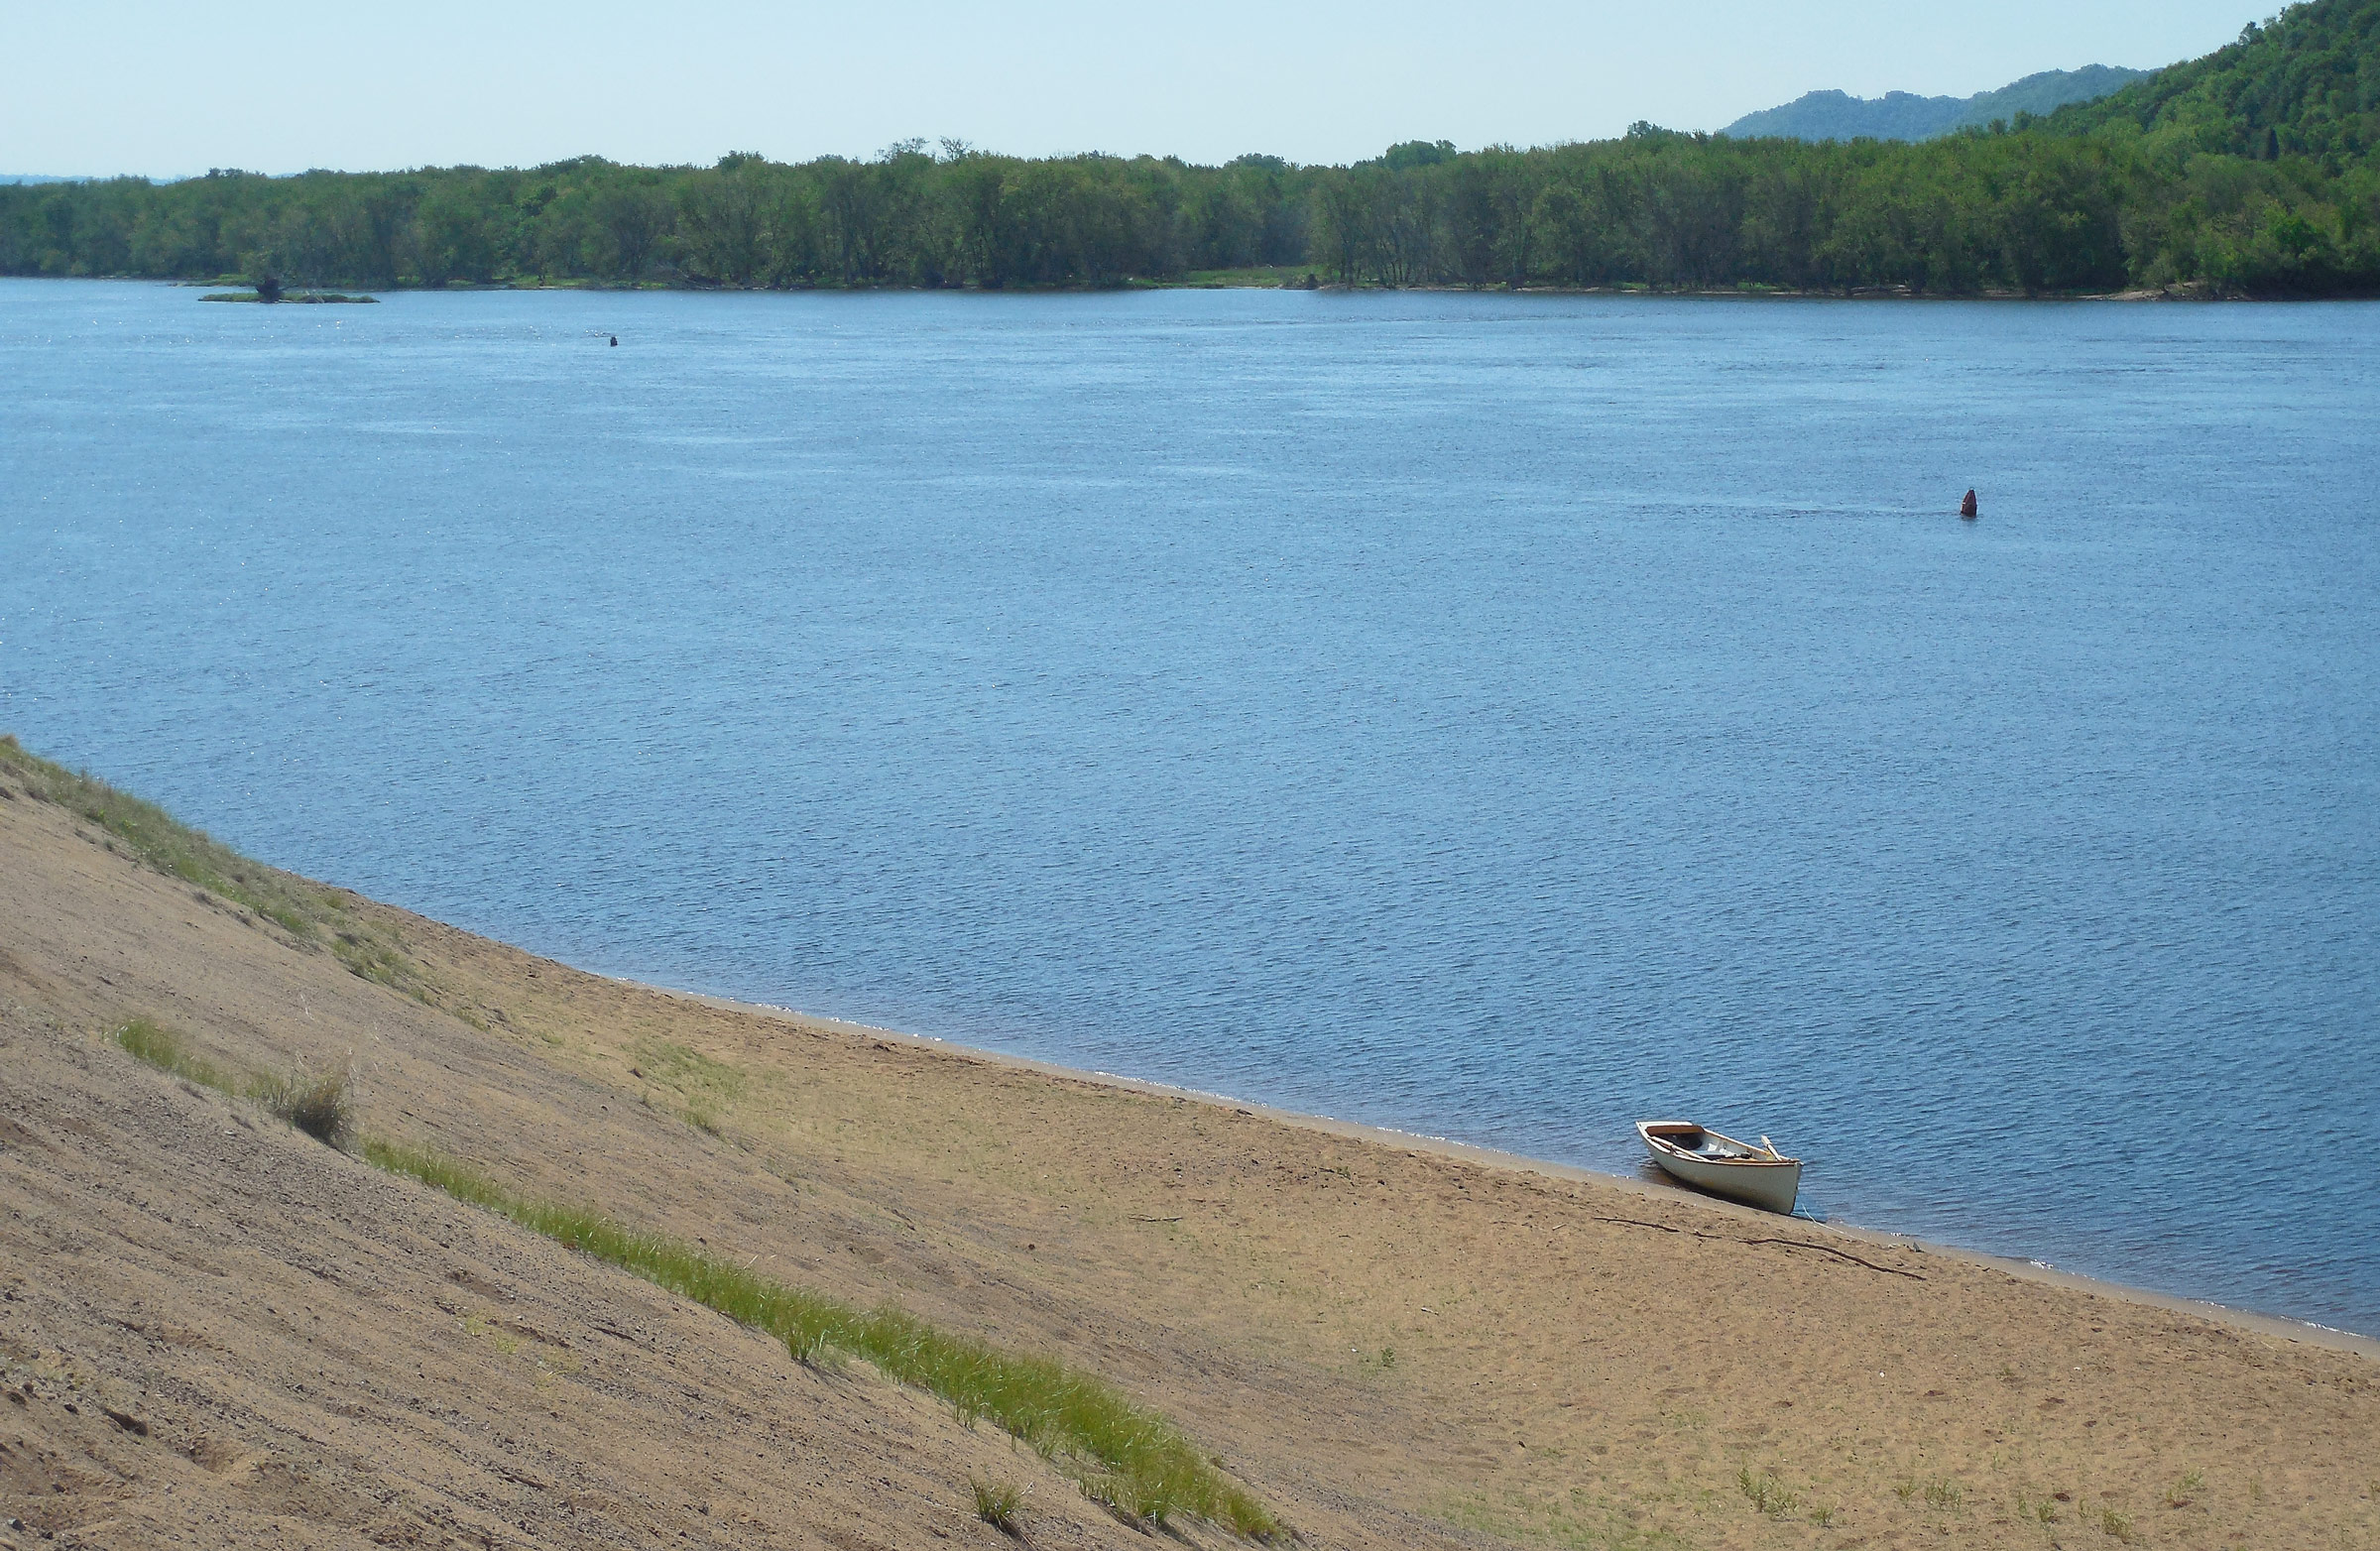
Just past the western tip of Drury Island, a line of high dunes came into view on the Wisconsin shore, steep slopes of bare sand rising 70′ from the river, half again as tall as the cottonwoods lining the bank beneath. Fake dunes, I knew. The Chippewa River runs through the sandy soils of northern Wisconsin for almost 200 miles, draining an area roughly the size of Connecticut. Much of the sand it carries drops to the riverbed where the Chippewa empties into the Mississippi. Fifteen thousand truckloads of that sand are dredged from the Mississippi River here every year and piled onto the bank in a Sisyphean effort to maintain a 9′ channel depth for commercial traffic.

I couldn’t resist a climb to the summit of the sandpile. I beached the boat, buried an anchor on shore, and headed up the slope. The sand was rough and grainy on my bare feet, and I slipped backward at every step, losing momentum, but the sun-warmed sand was already too hot for me to stop moving. When I finally reached the top, I found a barren topography of sand stretching 500 yards from east to west, far above the floor of the delta. To the south, on the Minnesota side, steep bluffs rose 500 feet above the Mississippi, capped with a thin layer of pale sandstone. To the north, the sand heap dropped abruptly to the Chippewa’s floodplain, offering a view into the forest canopy from above, leafy and green with early summer growth. A bald eagle launched from a tree below me, climbed into the sky with a ponderous rhythm of wingbeats, and angled across the river toward Minnesota.

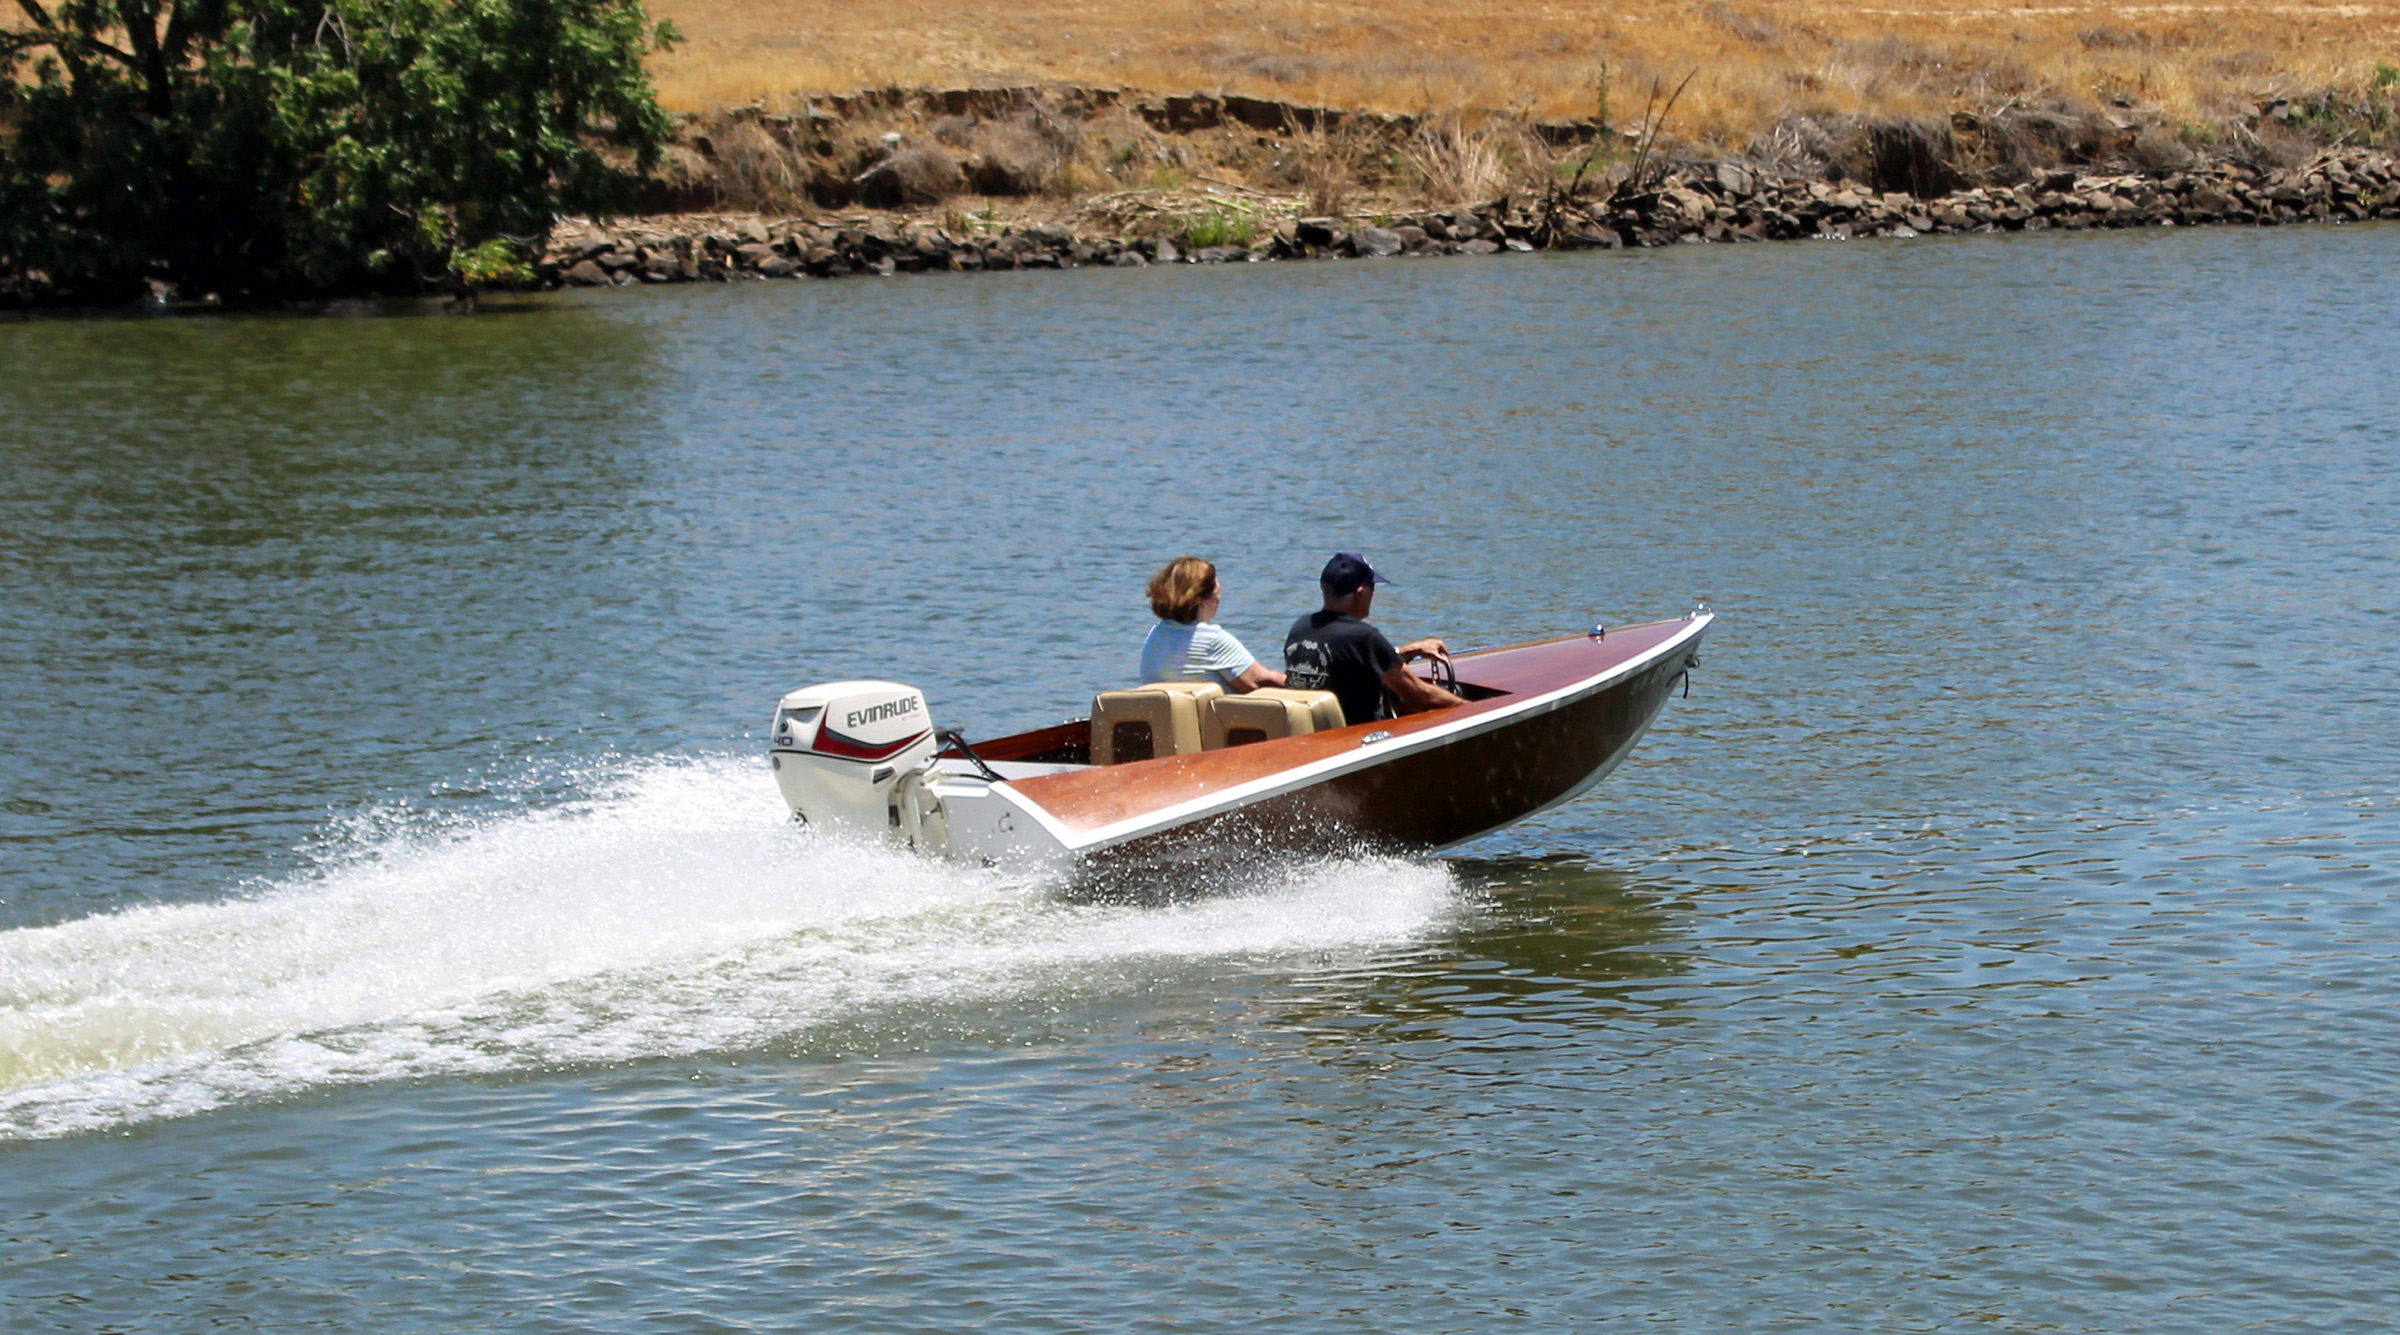
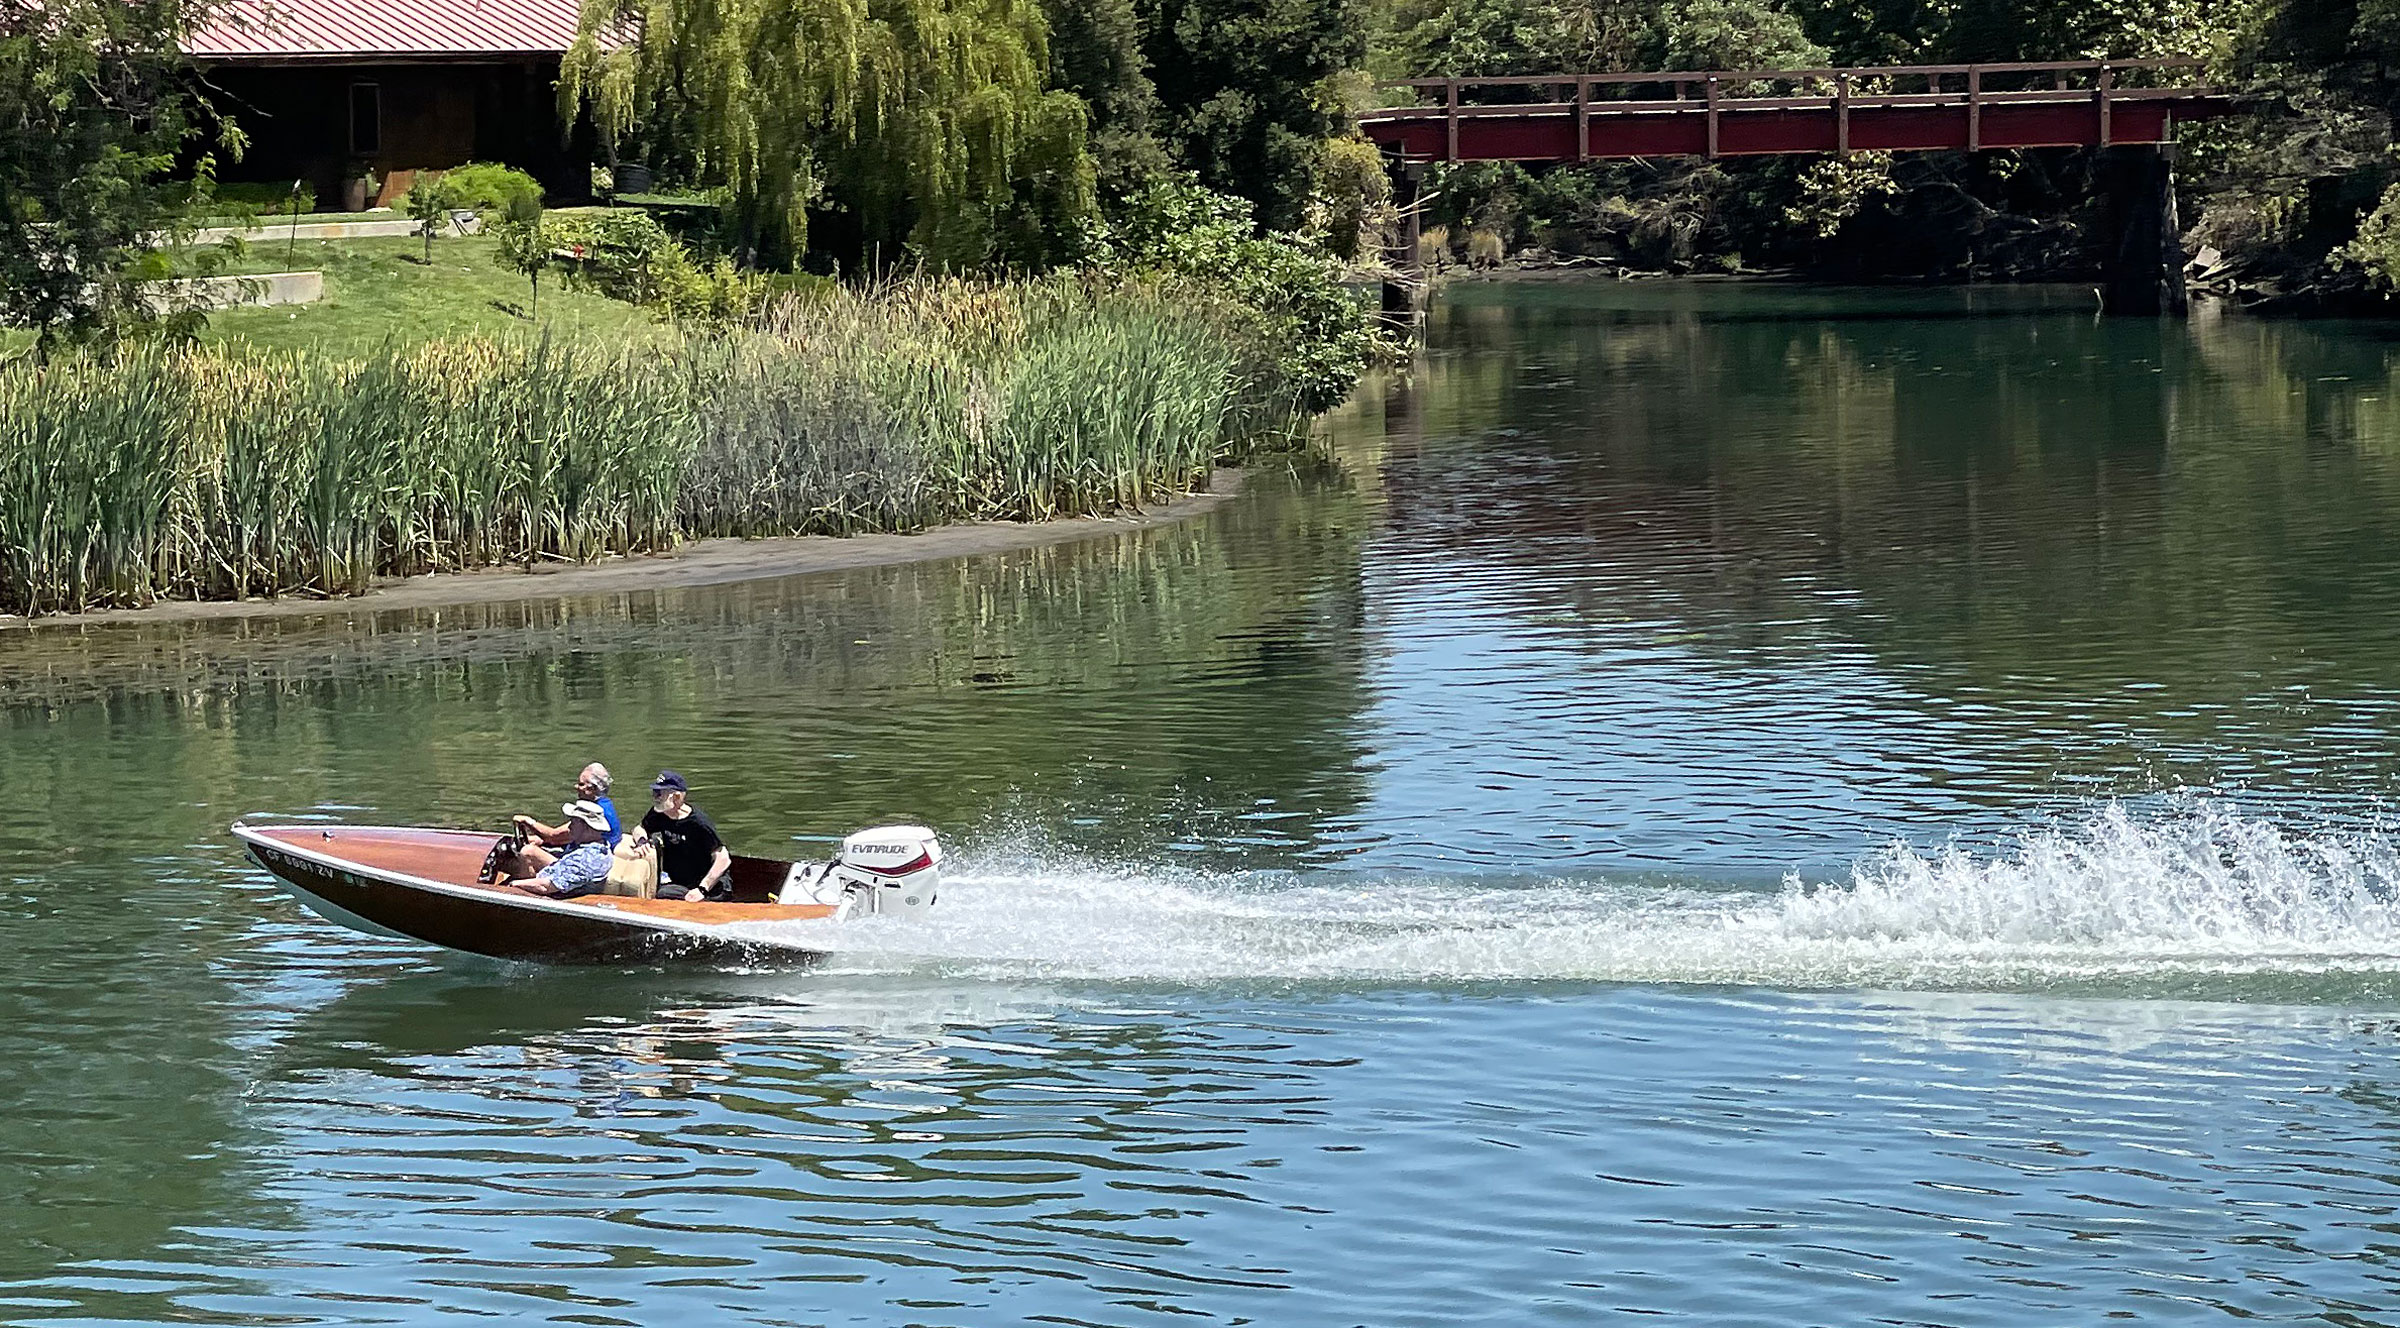
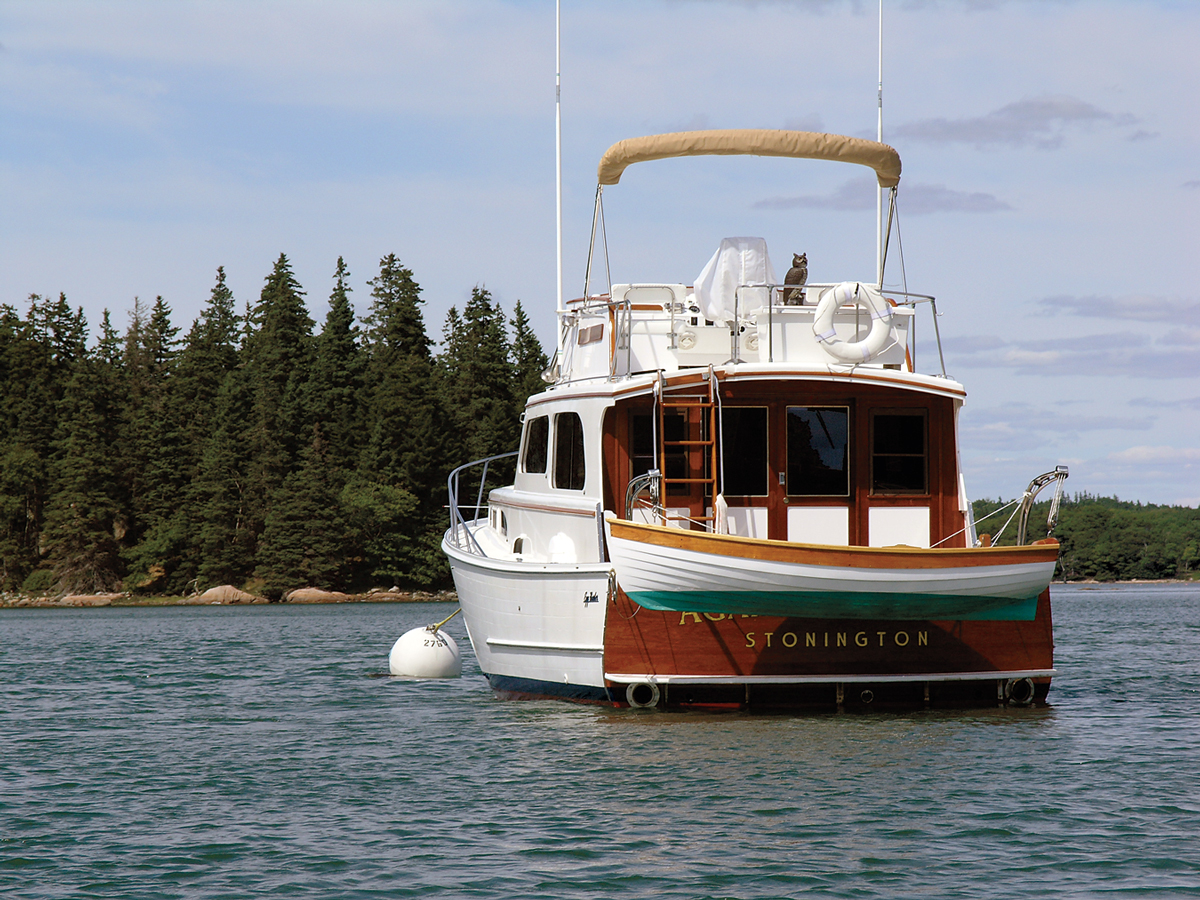
I had visited these dunes just downstream from the mouth of the Chippewa River years before, on a weeklong trip aboard a rented houseboat. While FOGG doesn’t offer the same level of comfort—no flying bridge or hot tub—I wouldn’t be paying $450 to refill the fuel tank at the end of the trip, either.

I returned to the boat in a series of gravity-boosted leaps and bounds that carried me an improbable distance downslope at each step, nearly sending me tumbling headlong a few times. I was tempted—briefly—to climb up again for another go. Instead, I shoved off and continued upstream.

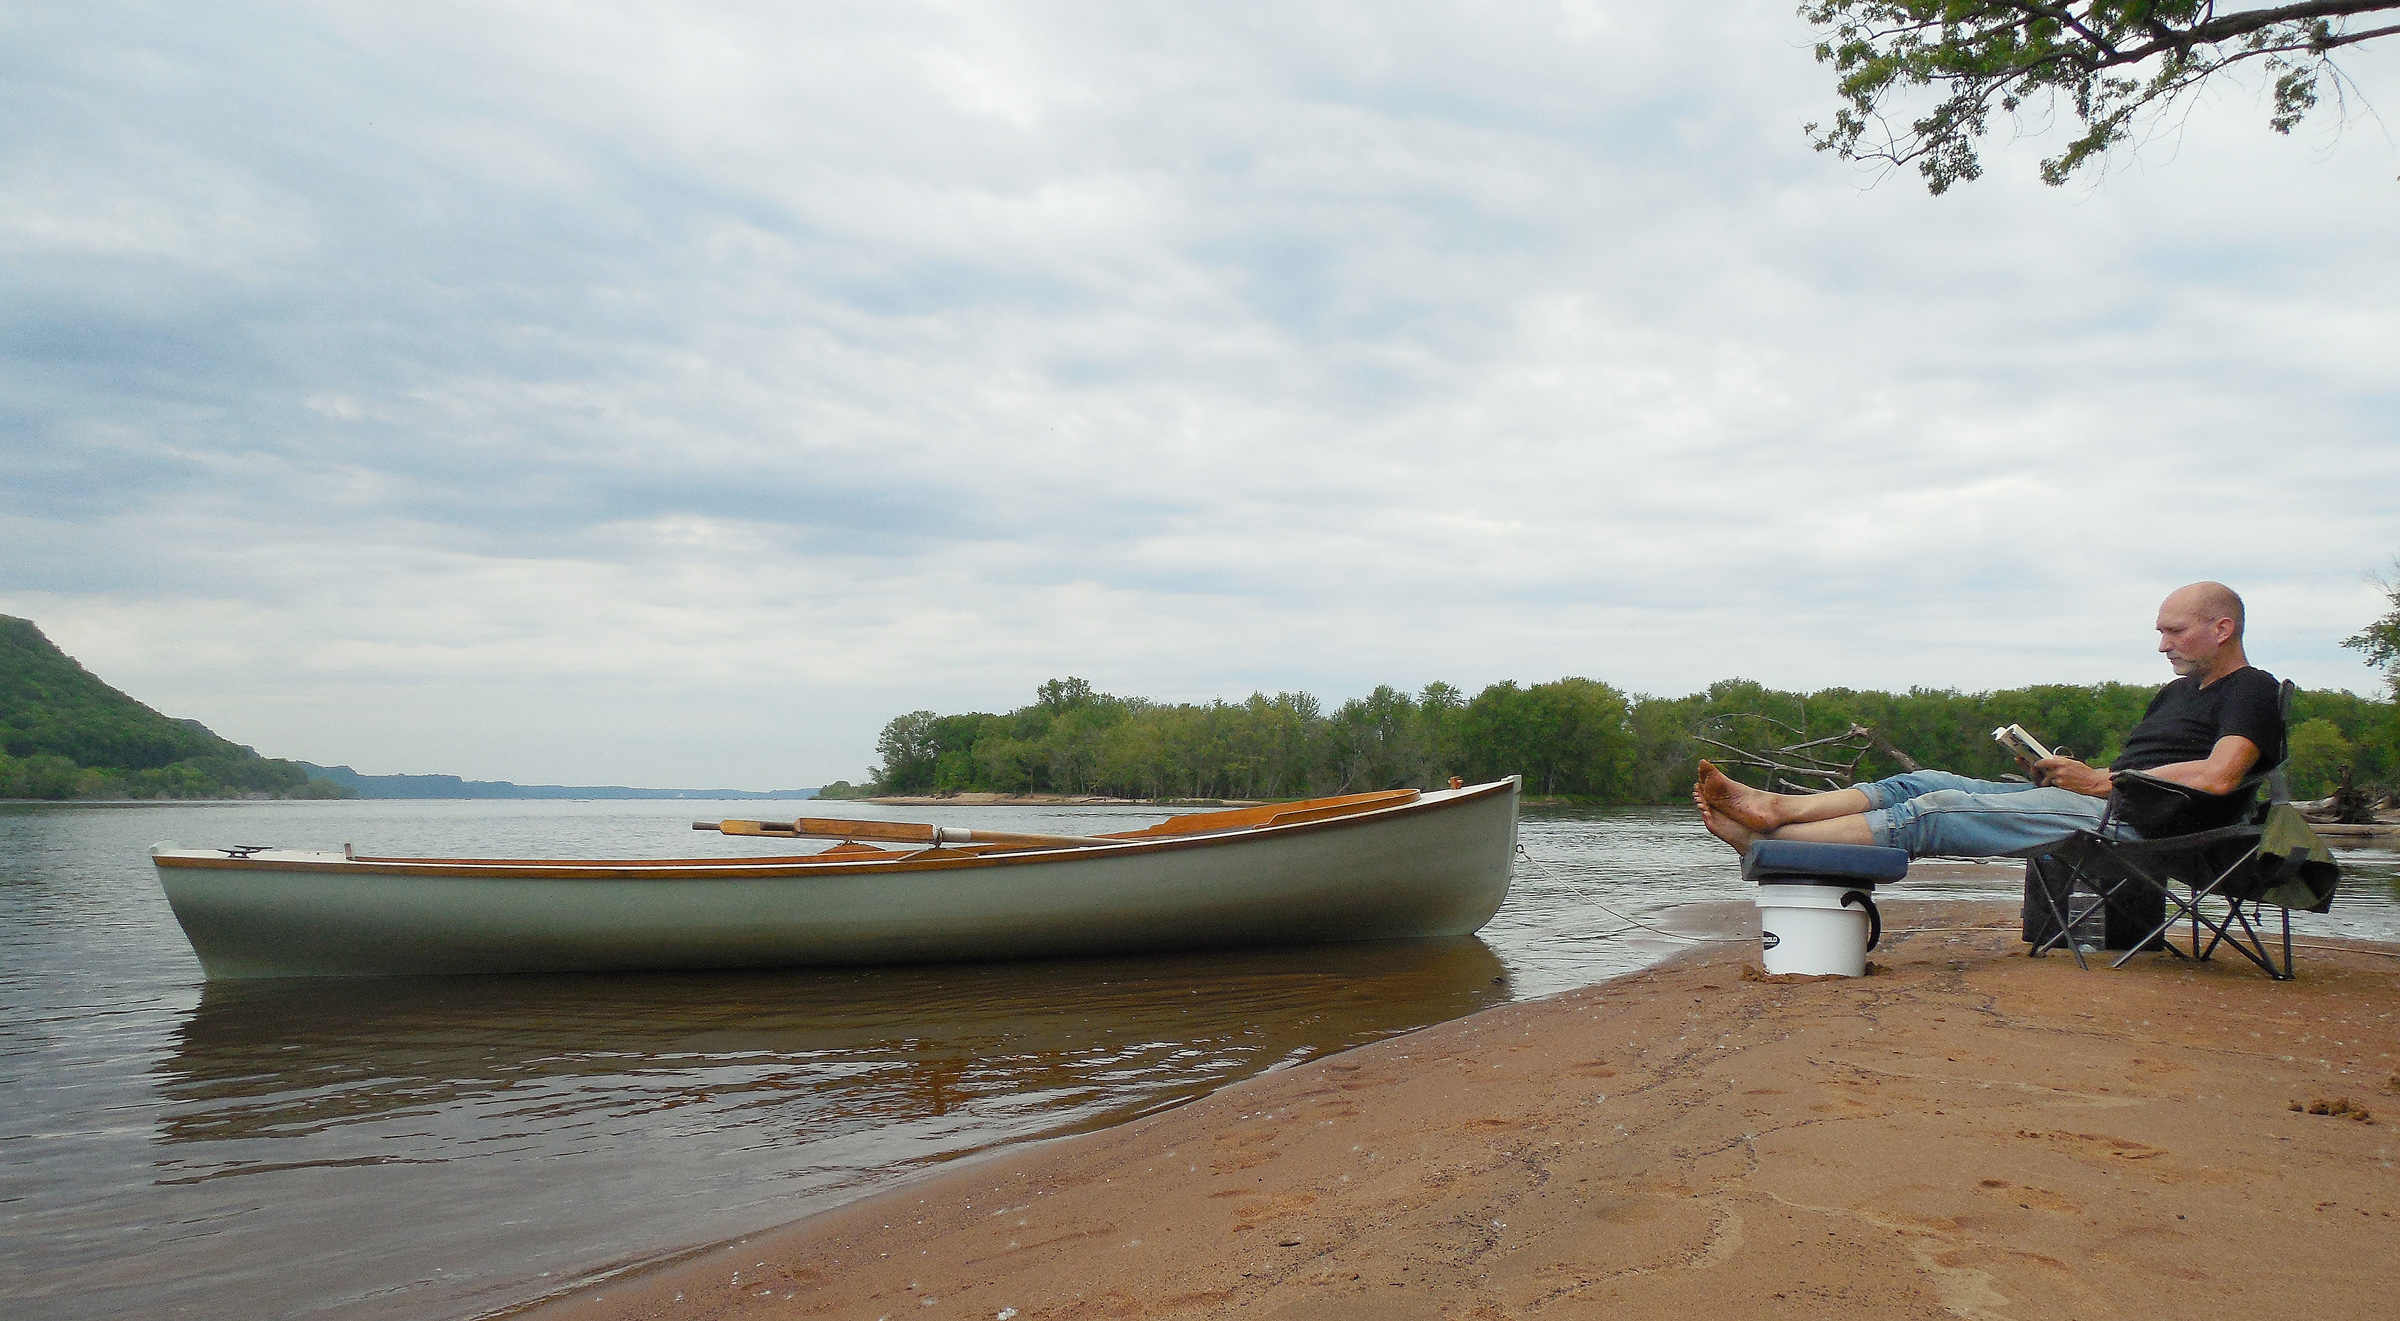
After rowing another half mile up the Mississippi’s eastern bank, I beached the boat at the mouth of the Chippewa River, set up my camp chair under a canopy of cottonwoods on a stretch of flat, firm sand, and read a few pages from George Birkbeck Hill’s Johnsonian Miscellanies, Volume II, a collection of wide-ranging anecdotes and aphorisms related to Dr. Samuel Johnson, one of the leading literary figures of 18th-century England. As an English teacher and writer, I had always felt a nagging obligation to learn at least something about him, so when I found the book in a dusty corner of a used book store, I bought it. With Volume I missing, I could appease my conscience without the bother of reading the whole thing. Besides, a collection to dip into at random seemed better suited to my lack of ambition than James Boswell’s 1,500-page opus, The Life of Samuel Johnson, which sat beside it on the same shelf. Perhaps most important of all, Johnsonian Miscellanies cost $4.50; the Boswell was priced at $65. A little learning may be a dangerous thing, but drinking deep seemed prohibitively expensive.

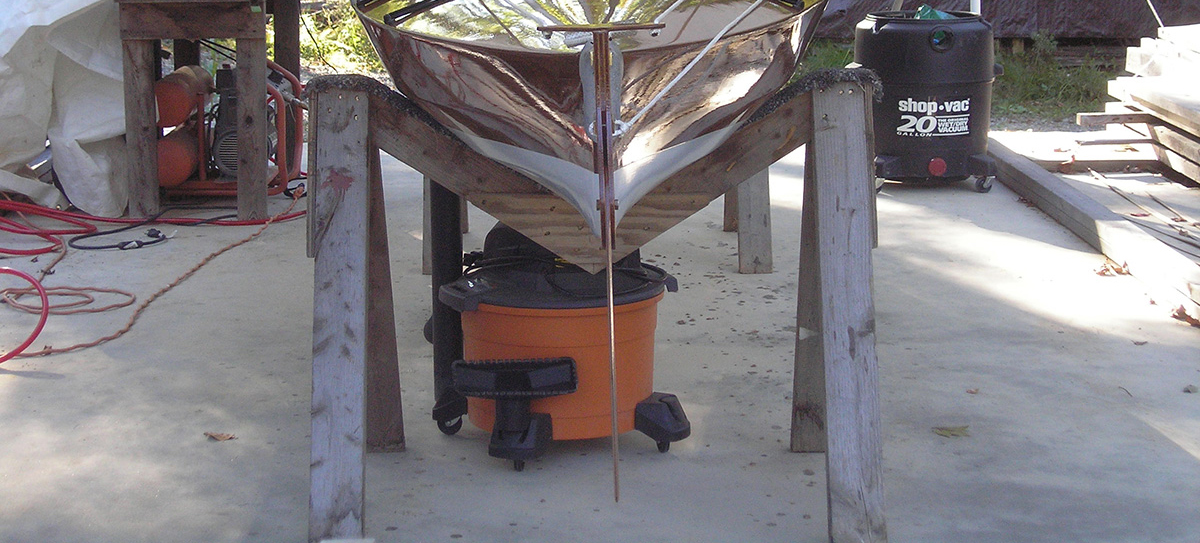
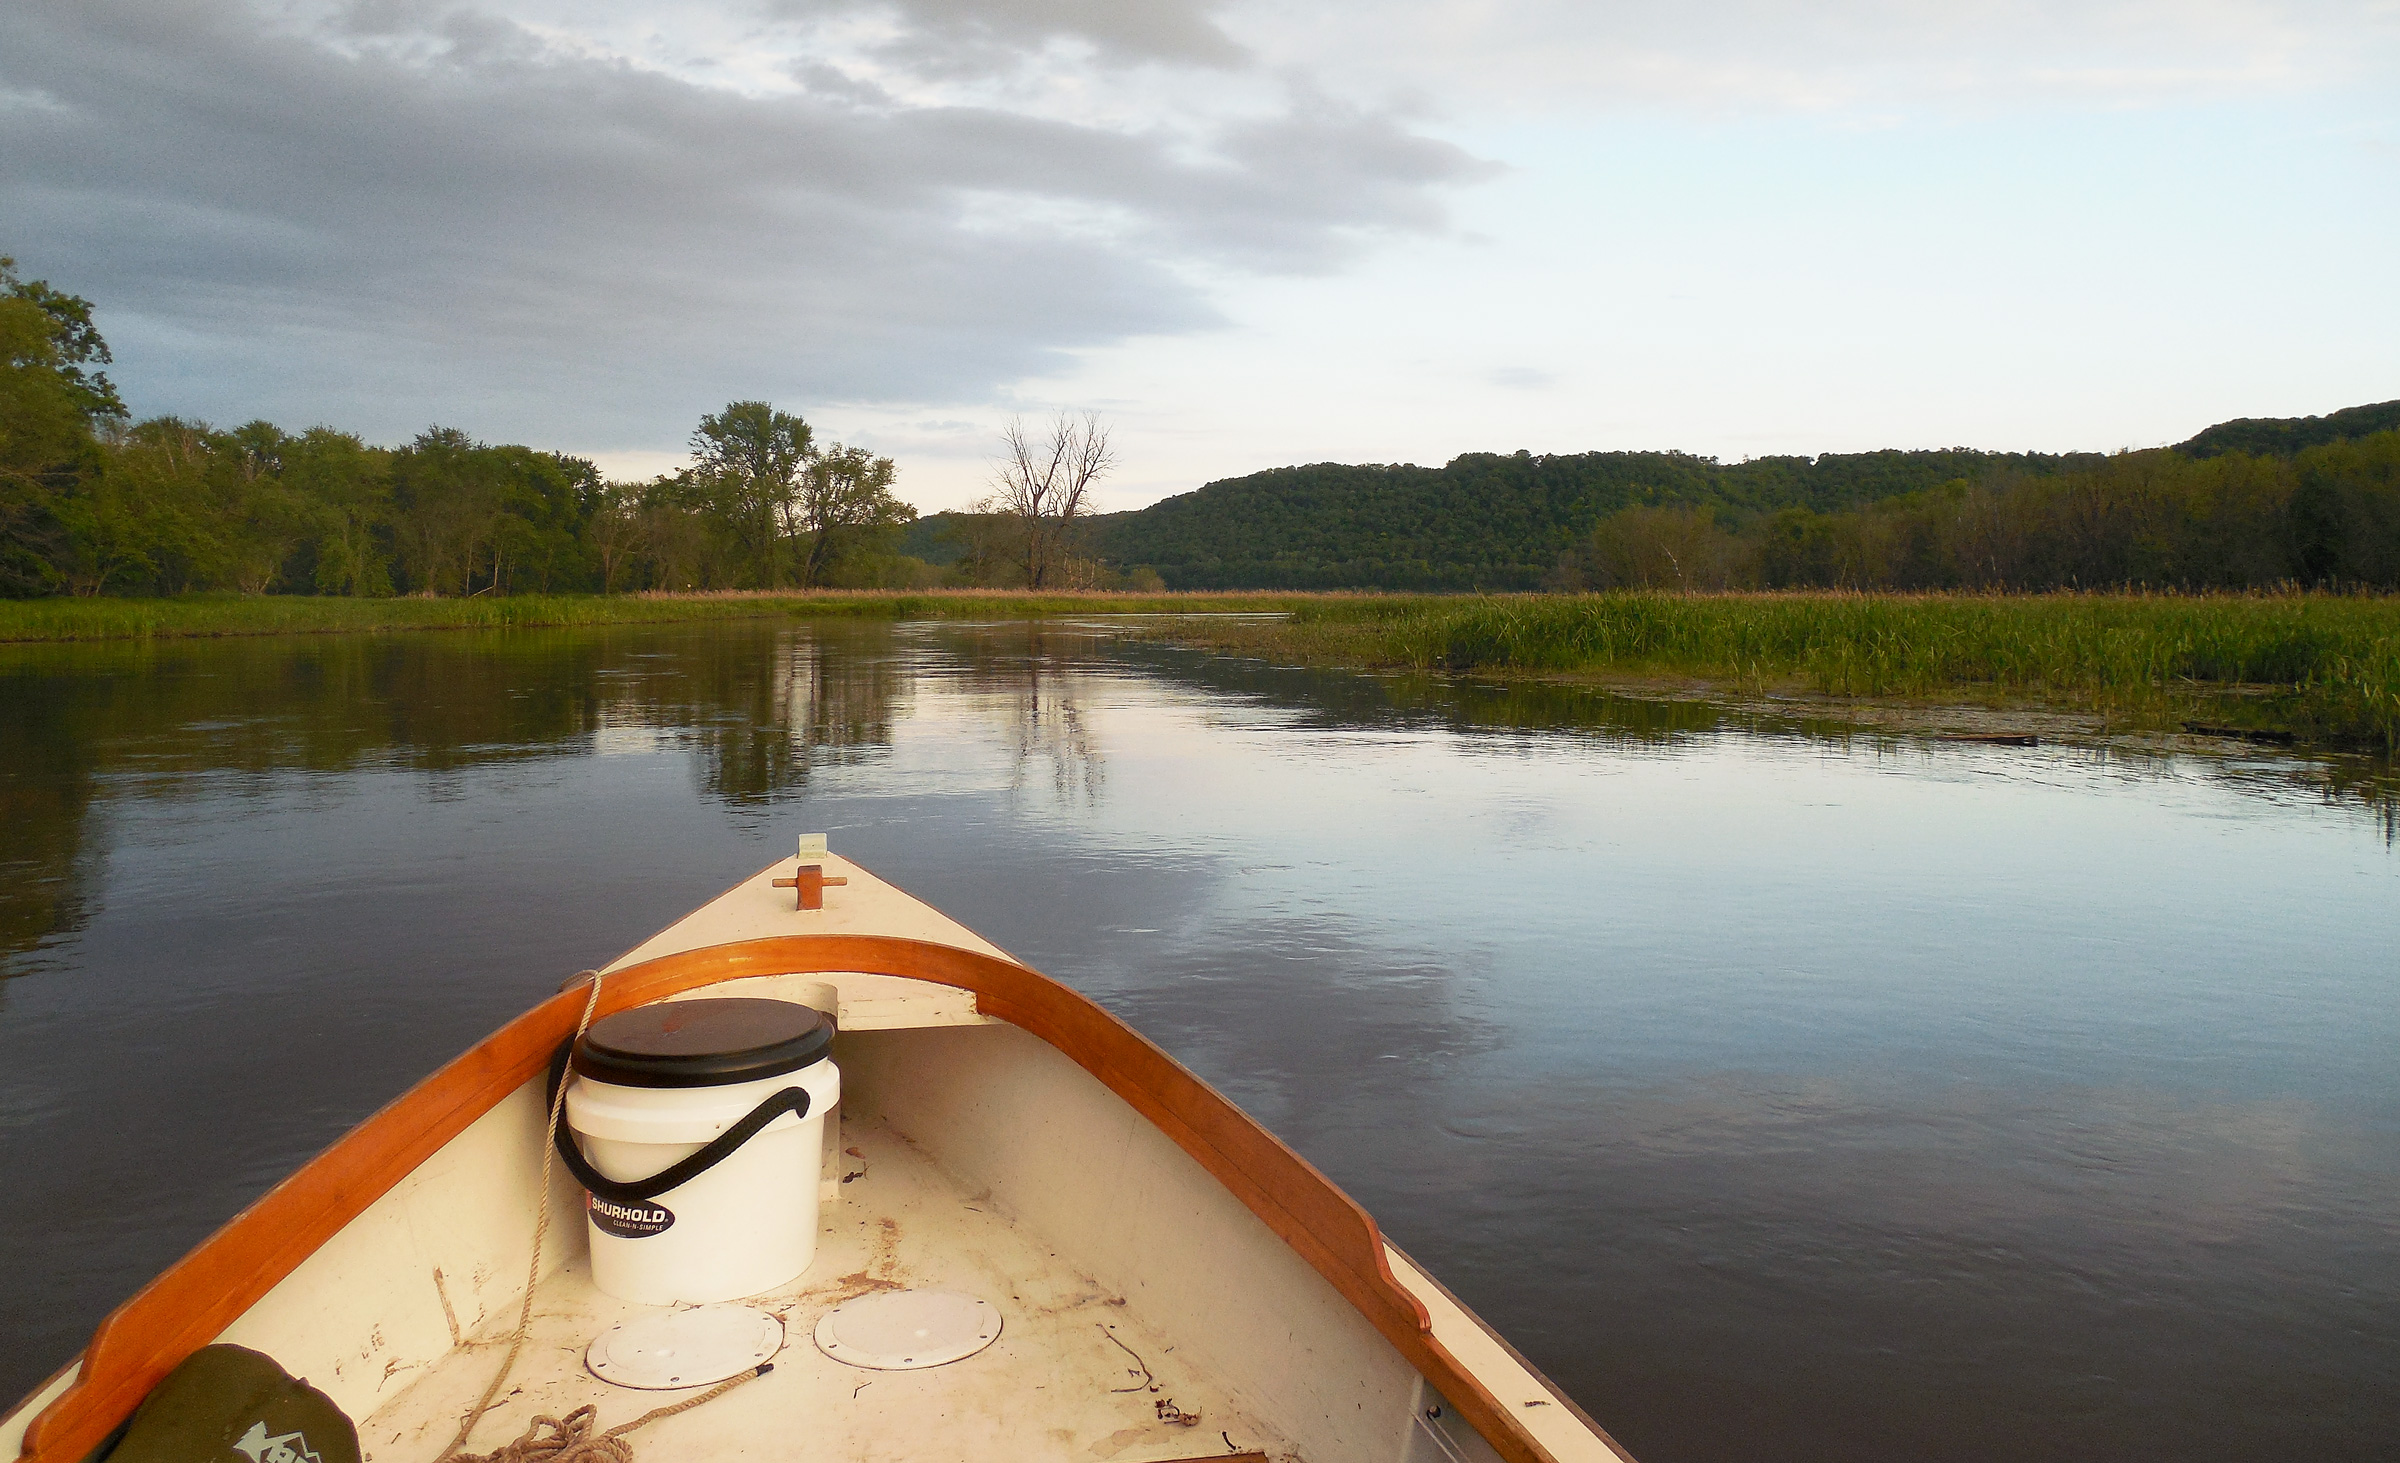
Some kind of waste-disposal system is essential for responsible camping, especially close to water. I use a simple plastic bucket with double-layer anti-odor liner bags that can be disposed of in the trash at the end of the trip. As an added bonus, the bucket makes a comfy footstool.

As it turned out, the unhurried pace of the 18th-century prose and the book’s lack of a continuous narrative thread seemed to mirror my erratic wanderings and ill-defined goals quite nicely, though I doubted Dr. Johnson would have thought much of my trip—at least, not if Hill’s portrait caught the true measure of the man: “He thought that that happiest life was that of a man of business…and that in general no one could be virtuous or happy, that was not completely employed.”

It would have been a nice campsite—level sand for tenting, plenty of shade, and a sheltered harbor for the boat—but the western arm of the delta lay just across the Chippewa River, and I was still fixed on the idea of a loop. A mile of rowing, maybe, would get me to Fortyacre Lake, the first possibility that looked worth exploring. I packed up my chair and the book and shoved off.

Fortyacre Lake went about as expected, a series of winding passages that were more forest than river. There were overhanging branches and leaning cottonwoods, side channels too overgrown or too shallow to enter, a few herons wading the reedy shallows, and finally, a dead end. I ate a late lunch aboard, grounded comfortably on a sandbar, and returned downstream to the delta’s edge to find Chimney Lake.

Fortyacre Lake looked like a dead end on the map, but I figured it would be worth checking out anyway. Despite my best efforts, though, shallow water prevented me from getting more than halfway up the channel before I had to turn around.

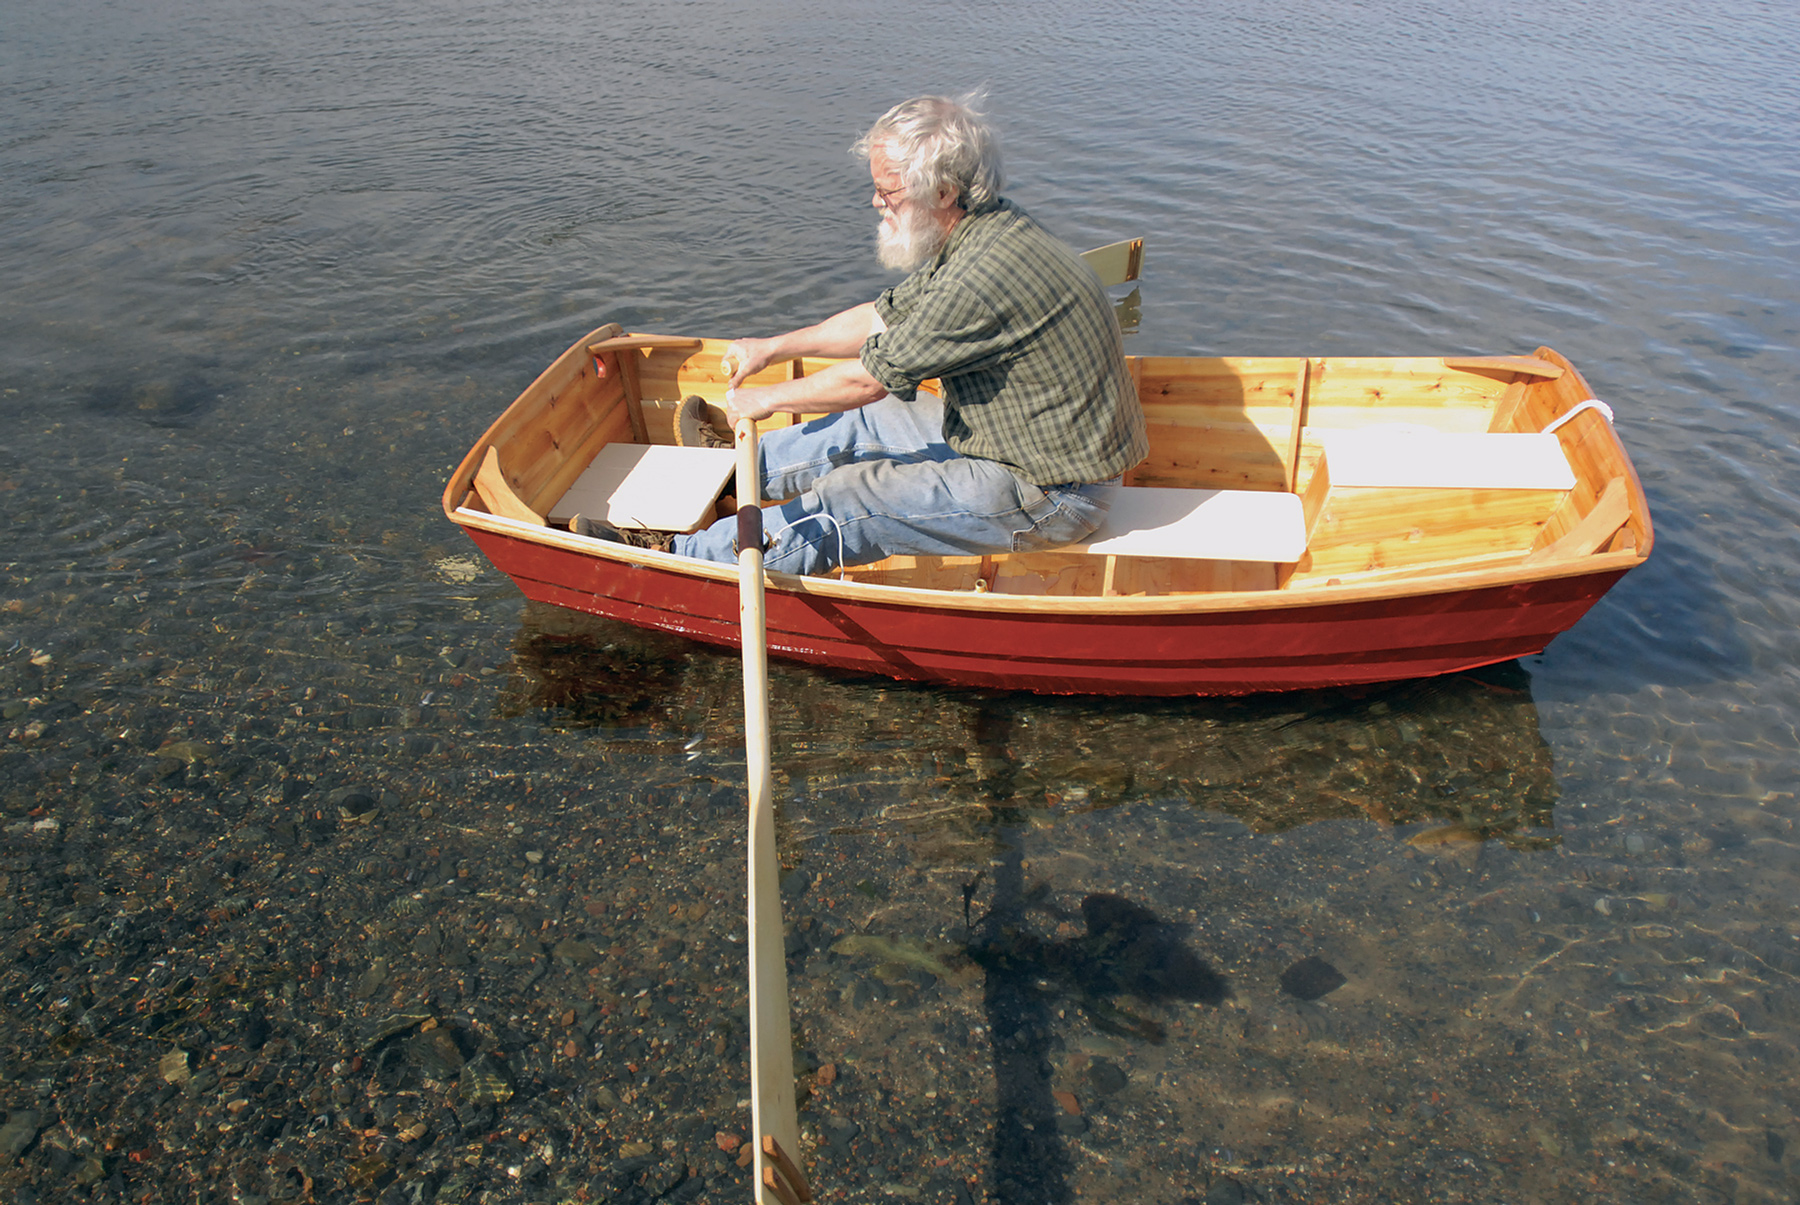
Here I had better luck. The channel leading into the floodplain was hidden behind a screen of reeds, and took some finding, but it kept going. Soon enough I was into a corkscrewing creek that I guessed must form the downstream end of Swinger Slough. I rowed from the aft thwart facing forward so I could weave around sandbars and downed trees without needing to turn my head to see where I was going, but it was a trade-off. The current was fast enough to require strong rowing, and pushing on the oars limited my power.

I was in no hurry, though. It was only about 3 miles along the slough from the entrance to Chimney Lake to the main channel of the Chippewa River, and the absence of downed trees and brush made up for the slow pace of upstream rowing. I pulled into a quiet corner of the woods at the foot of a railroad bridge—another definite position fix—and walked the tracks for a while, balancing on the rails as long as I could, looking for cast-off railroad spikes. The railroad causeway was the highest ground for miles, a long straight line slashed through the forest. Eventually I returned to the boat for lunch—or was it supper? I didn’t care.

The Burlington Northern rail line crosses the Chippewa River delta at the point where Chimney Lake fades into Swinger Slough. As I rowed under the bridge, a swarm of barn swallows dive-bombed me repeatedly. After a narrow escape from the birds, I pulled ashore for a break. Having made it this far, it seemed likely that I’d be able to reach the Chippewa River to complete my loop.

By 7 p.m., with plenty of daylight left, I made the turn into the upper arm of Swinger Slough. From here the route paralleled Highway 35 eastward to the Chippewa River, less than a mile ahead. By now, though, I understood that distance was not a relevant measure in the floodplain. After all, the dirt ramp I had launched from was just 2 miles farther down this same road. Through all my river wanderings, I had been covering an as-the-crow-flies distance of less than a mile per day.

FOGG, however, was no crow. No matter how twisty the channels were, I had no choice but to follow them. From here, though, it would be a straight run to the main channel of the Chippewa River. There was a fierce current against me, but with the end practically in sight, I kept rowing east along the highway, up Swinger Slough—until, with the bridge over the Chippewa River in sight 100 yards ahead, a series of downed trees blocked the channel from bank to bank.

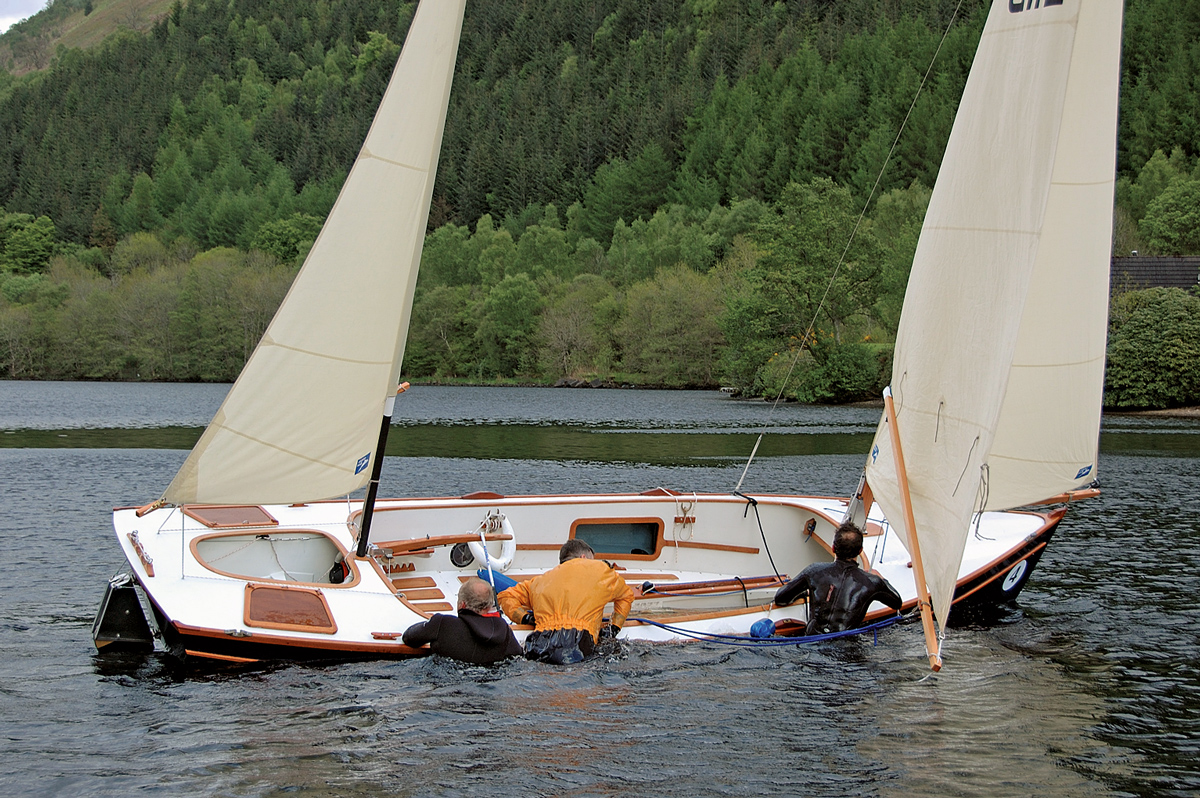
Just after sunset, I emerged from Swinger Slough and re-entered the upper reaches of Chimney Lake. While I had an easy time here on the upstream leg, I wandered off course on the return trip, and ended up rowing through a wide expanse of water so shallow that FOGG’s keel was dragging through the mud.

Was the channel completely blocked? I didn’t want to believe it. It had taken me all afternoon to make it this far; I wouldn’t believe it. But there it was: three leafless and spindly fallen trees, spaced a boat length apart, just tall enough to stretch all the way across the slough—roots on the north bank, treetops on the south. Another dead end.

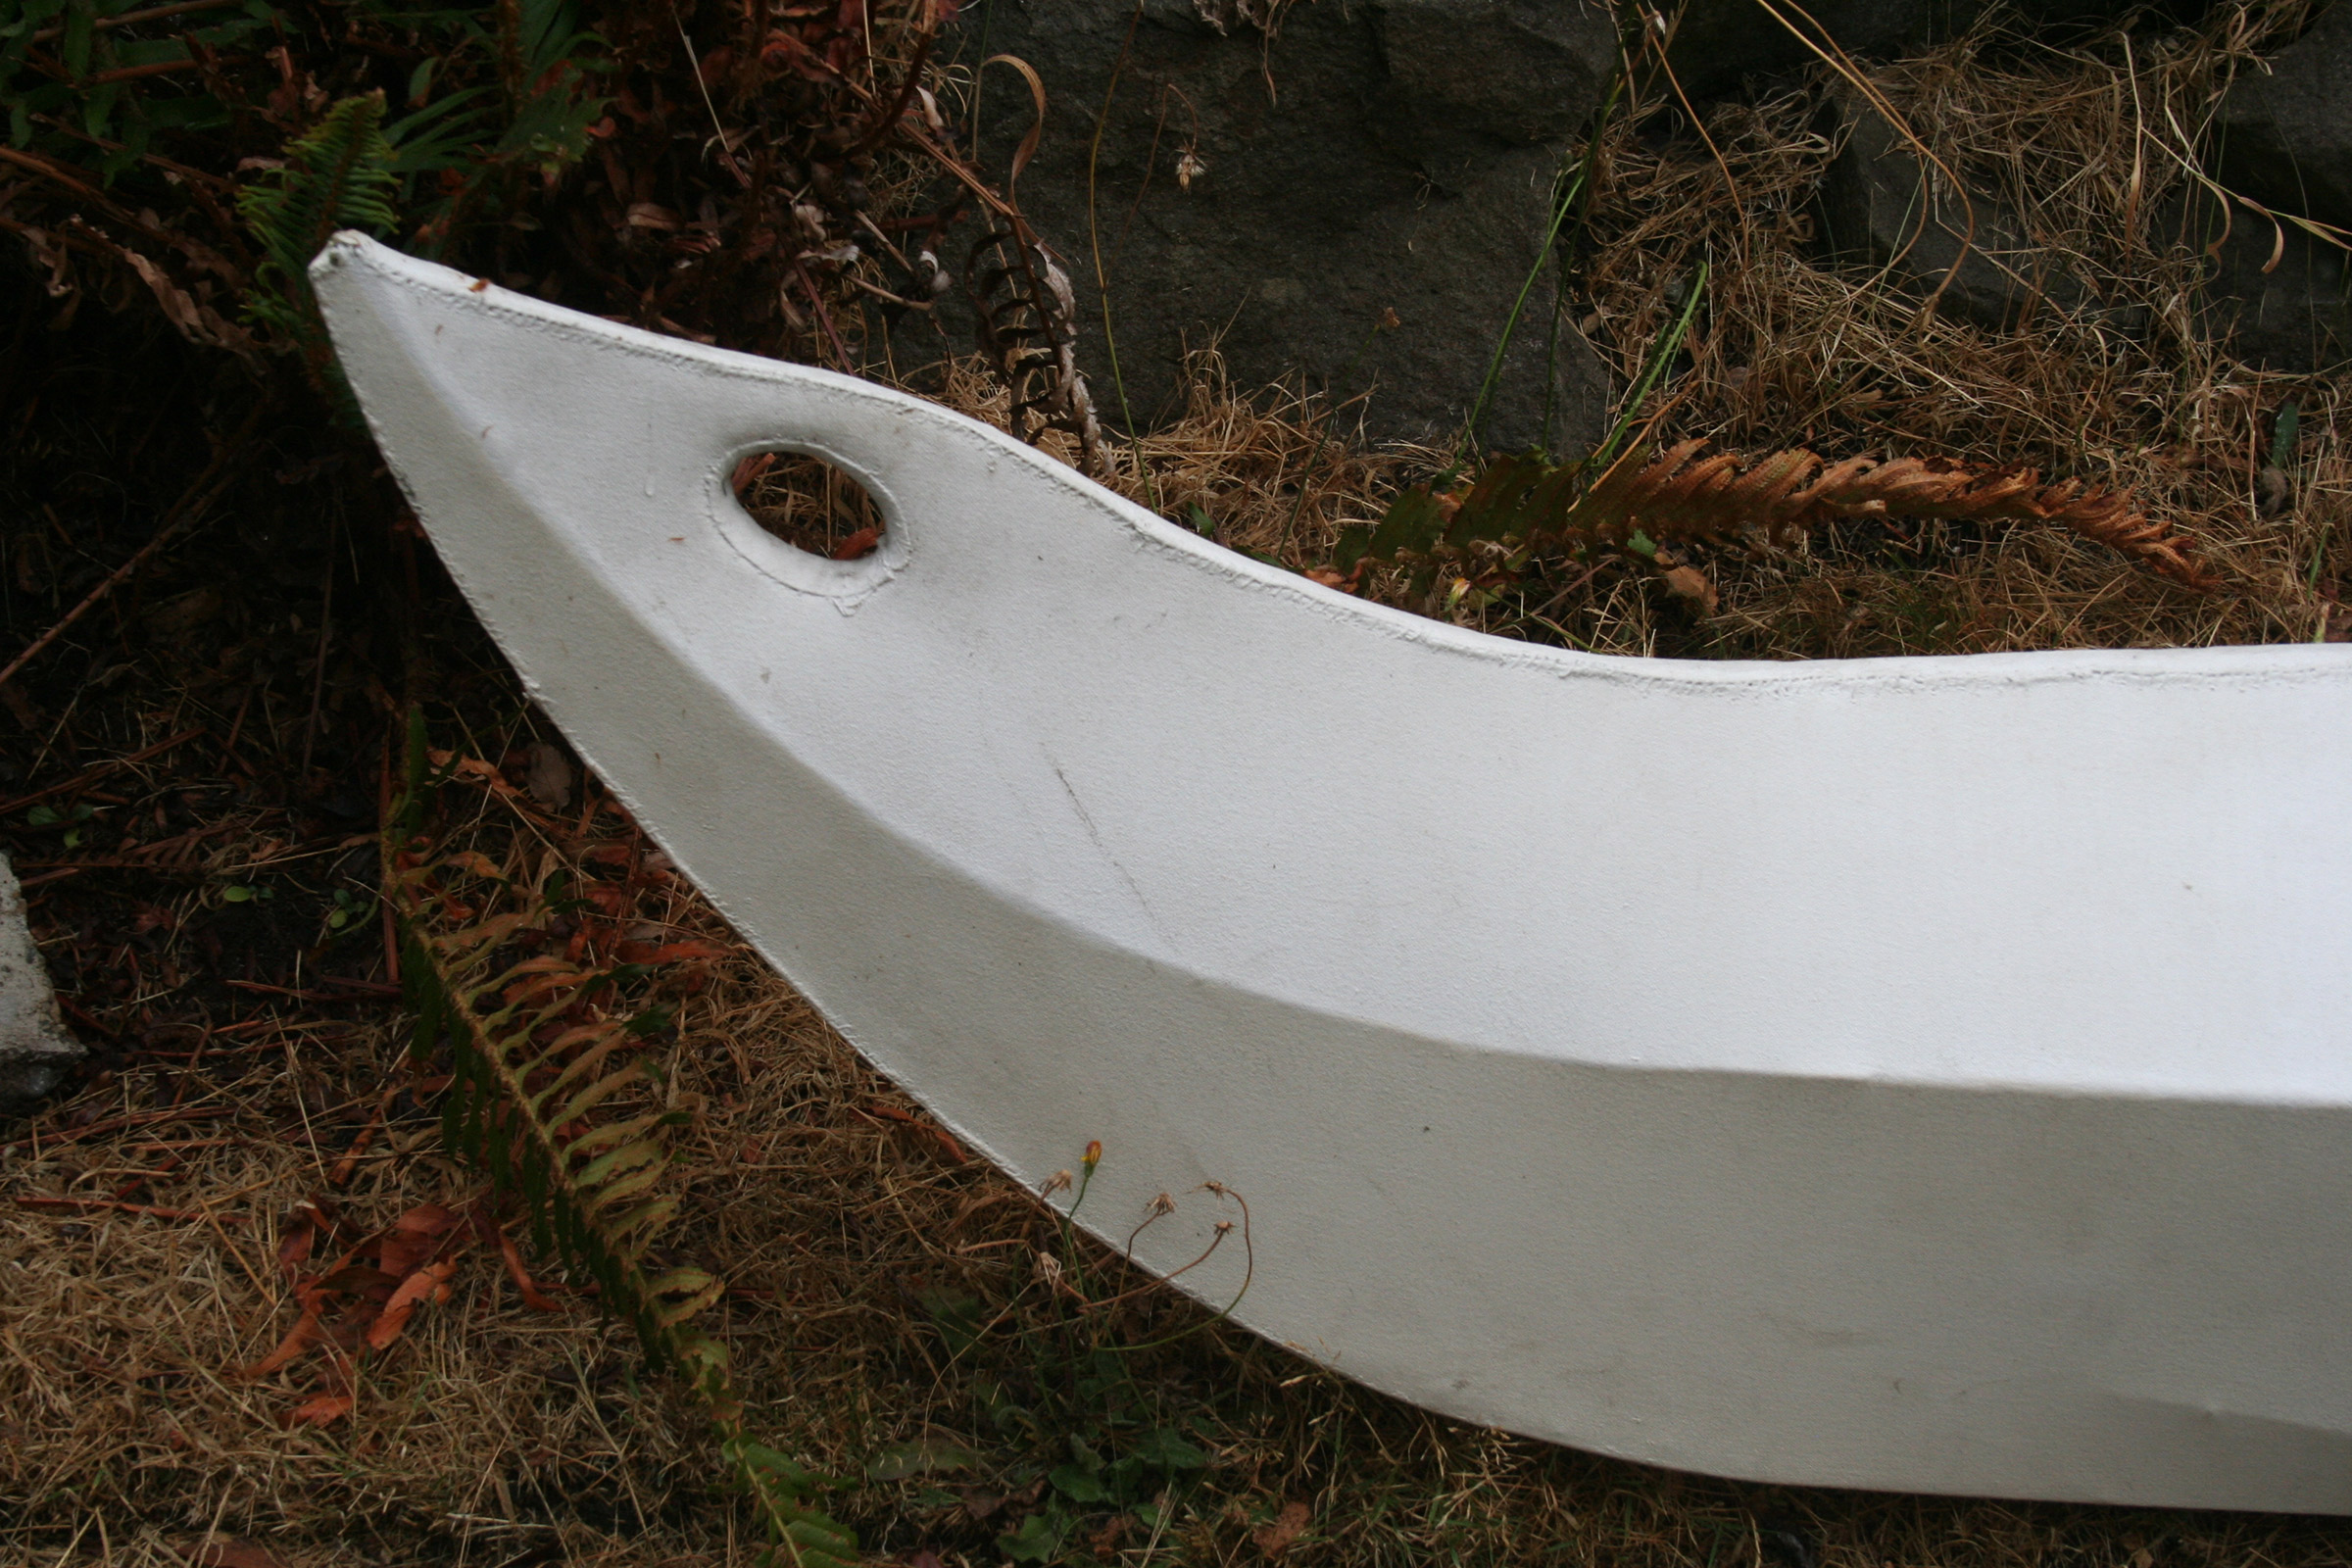
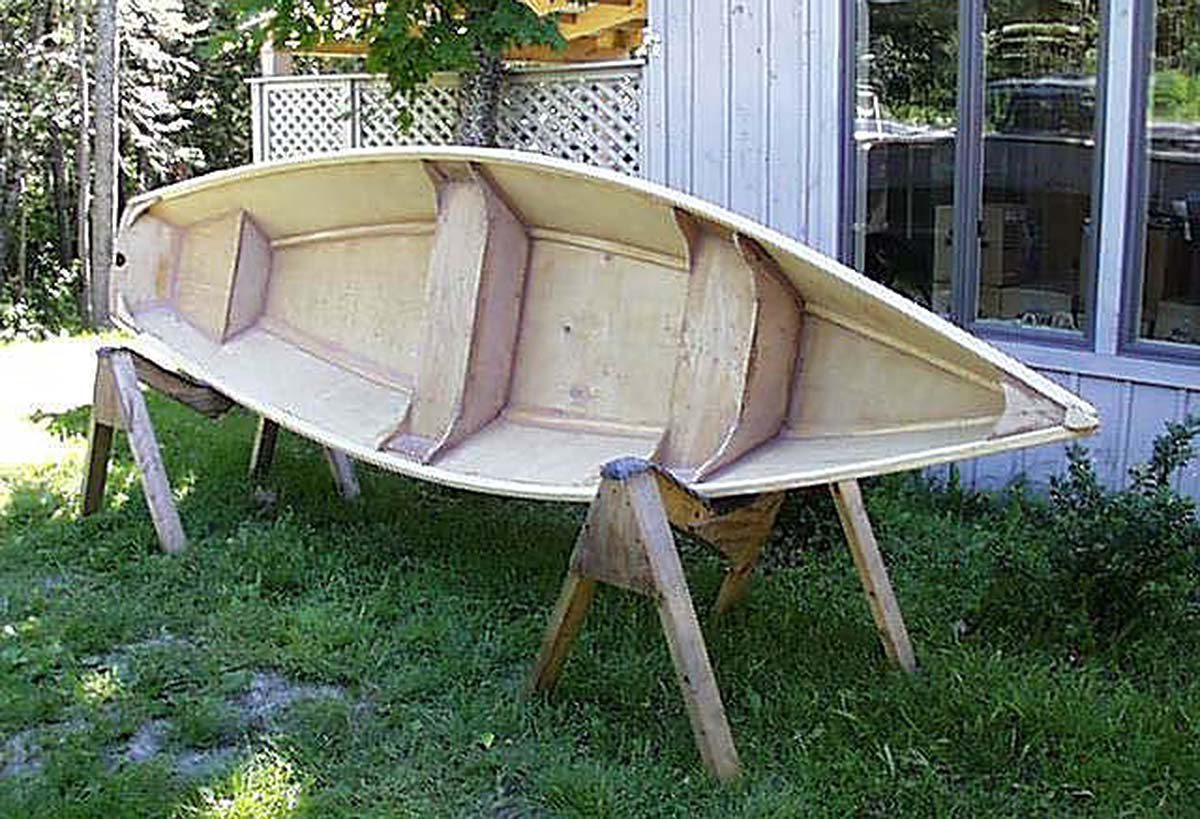
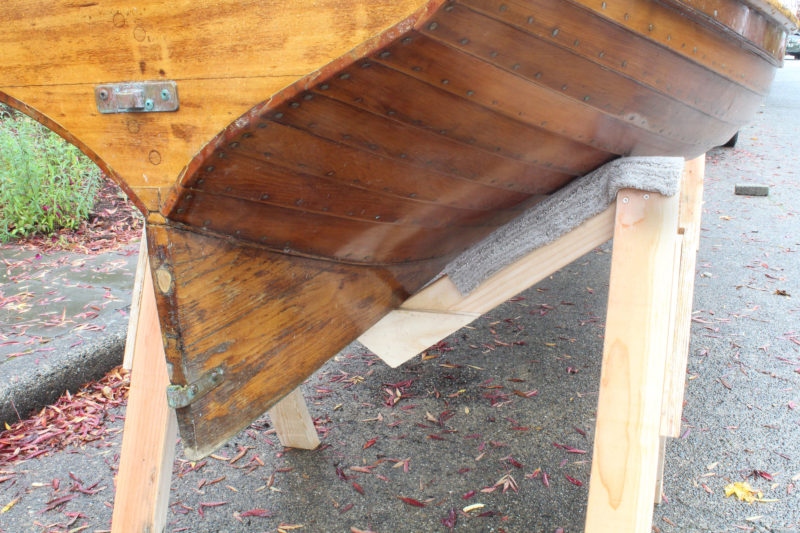
And yet, it might just be possible to drag the boat over the first tree, where the base of the trunk dipped low in the water. Once the idea had planted itself in my head, it proved hard to abandon. I rowed closer. Yes, it might be possible. I tested the depth with an oar—waist deep. It was probably stupid to try. FOGG weighs well over 300 lbs loaded, and I could barely flip the empty hull for painting, even with my wife to help me. But here I was, in sight of the Chippewa River, the last easy link of the loop.

It wasn’t easy. I managed to climb into the water and shove the bow up onto the first log, then scrambled over to the upstream side of the downed tree. The water there was neck-deep, with no firm footing to pull from. Fine. I climbed up beside the boat and manhandled FOGG farther onto the log. From there I see-sawed the boat up and down, and back and forth, walking it across the tree trunk the way you’d move a heavy cabinet across the floor, hoping the Douglas-fir backbone was strong enough to hold the hull together despite the wrangling. It must have been 10 minutes before the boat finally slid free on the upstream side of the log.

I had cleared the first obstacle—the first of three. And the next tree, higher out of the water, would be harder. I rowed up to it—awkward to do with so little room for the oars and with such a strong current flowing—and tested the depth. My 8′ 8″ oar sank all the way to the handle before touching bottom. There would be nowhere to stand for the initial heave up onto the tree trunk.

The bridge that crossed the main channel of the Chippewa was just ahead, a few yards off the right-hand bank. I could even read the green and white highway sign planted on the shoulder near the crossing: Chippewa River. It seemed a cruel blow to force an ending here.

Best to do a bit of scouting before committing to one option or the other, I finally decided. I tied the boat to the tree and climbed ashore. “Ashore,” I immediately discovered, consisted of a broad field of stinging nettles stretching 100 yards along the bank. I was wearing shorts and sandals, and a thin T-shirt. But the river was just ahead, so I waded into the nettle patch, crushing down the stalks with my feet, stomping a path. Nettles sprang back with each step to needle my legs and arms, burning and prickling my bare skin.

I finally reached the end of the nettle patch, hot, itchy, and tired. My survey from the slough bank proved that it would be nearly impossible to wrestle the boat over the second downed tree—I had known that all along, really—and the third tree was even worse. For a moment I had the mad thought of crossing the channel, dragging the boat onto the southern shore—it was cattails and reeds there, and relatively flat—and rolling it past the downed trees along the marshy ground, using my plastic boat fenders as rollers. In the end, it wasn’t prudence or foresight that saved me, but only the discovery that I had left the fenders back at the car. It would be an ignominious defeat, then, with just enough time to turn downstream and find a campsite before dark.

Where there’s a will, there’s a way. Except, sometimes, there isn’t.

The return trip—after I had dragged the boat back over the downed tree—was an easy downriver ride. I let the current carry me along mostly unaided, using the oars only for occasional course corrections. What had taken me several hours on the northward leg took less than an hour on the way back.

Even so, I had turned around none too early. The sun was almost hidden beneath the treetops as I emerged at Chimney Lake, with only a narrow arc of white-orange showing at the skyline. Soon it was gone altogether. I rowed past the delta’s shadowy wall of trees as the evening faded to a purple twilight. The surface of the water grew dark, a pitch of blackness interrupted by the glimmering reflections of the first stars appearing overhead.

I spent the night at the mouth of the Chippewa River, at the campsite I had found earlier. Flat sand, tall cottonwoods, a convenient downed log for a supper bench—perfection, or close enough to it. I sat for a long time outside the tent listening to the chuckle of water as the river slid by, and the murmuring of the cottonwoods, and the long sad whistling of passing trains along the Minnesota shore. Bats swooped and dodged at the water’s edge, and the stars seemed to pulsate with a distant hum. The boat rocked gently just offshore, the painter a long pale swooping curve from bow to riverbank. Somewhere a fish jumped and fell back into the water with a splash that seemed bigger than it should have been.

On the final morning of the trip, I got off to a slow start, brewing a batch of coffee—a rare treat—and taking my time packing up. The magic of a small boat is that you’re never far away from a quiet corner where you can spend the night unnoticed.

“Life must be filled up,” Dr. Johnson insists—a remark that had stuck in my head from the pages I’d read earlier that day—“and the man who is not capable of intellectual pleasures must content himself with such as his senses can afford.”

It didn’t seem like such a bad bargain to me.

Tom Pamperin is a freelance writer who lives in northwestern Wisconsin. He spends his summers cruising small boats throughout Wisconsin, the North Channel, and along the Texas coast. He is a frequent contributor to Small Boats Monthly and WoodenBoat.

If you have an interesting story to tell about your adventures with a small boat, please email us a brief outline and a few photos.


Outboard Winterizing

For some of us, the end of the boating season is the time to turn our attention to the maintenance of our small outboard motors. In our fleet, we have three motors ranging from 2-1/2 to 25 hp, and with the coming of winter we need to make sure they will run properly next year after sitting idle for several months.

SBM photographs

A bucket full of fresh water is sufficient for flushing the cooling system without the need for hose-fed muffs clamped over the motor’s intake.

Putting the outboard away for the winter begins with some basic maintenance. Flush the cooling system as you normally would by running the motor with either the lower unit in a bucket of fresh water or muffs clamped on the lower unit’s water intake with a hose supplying fresh water. Flush the motor long enough to ensure that water circulates through the entire cooling system. Running the motor will also warm the oil, making it easier to drain the oil for the change that will follow. Our 25-hp motor has a thermostat, so we have to run the motor long enough for the thermostat to open to let warm water flow out of the discharge port. Once finished with a flush, keep the outboard vertical for a bit and let the water completely drain out of the port, so that there is no water left inside to freeze over the winter.

The crankcase-oil drain plug for this outboard is set deep in a recess in the engine bottom. Be ready to capture the old oil when the bolt comes free.


Collect the old oil in a bucket and wear gloves to keep it off your hands.

While the engine is still warm, but not hot, open the crankcase drain port to drain the oil. A four-stroke’s oil must be changed every 100 hours, or annually. See the motor’s manual for what type of oil the engine requires and how much it takes to fill it. Two-stroke outboards do not have oil in the powerhead crankcase and don’t require an oil change, but the spark plugs can foul quickly due to the buildup of the oil that is mixed with the fuel. Spark plugs are cheap, and they should be changed during your winterizing maintenance.

Here the gear oil is flowing from the lower unit’s drain hole. The translucent green oil has none of the milkiness that would indicate water intrusion. Note the bolt siting on the anti-ventilation plate. Before it goes back into the vent at the top of the lower unit, the red gasket should be replaced with a new one.


The lower unit is refilled with gear oil from the bottom up. You can buy a hose that will connect the threaded lower unit fitting to the container of fresh oil, but a pump is easier to use. Note the green gear oil puddling on the anti-ventilation plate, indicating that the lower unit is full.

The lower unit’s gear oil must also be changed every year, or every 100 hours. There are two gasketed bolts: the top one is the vent only; the bottom is for draining and filling. Check to make sure the drained fluid is not cloudy, which would indicate water intrusion and that the propeller-shaft seal may need to be replaced.

Remove the prop to check for fishing line wrapped around the shaft. This prop is fine; there are just a few strands of weeds to clear.

Propellers must be removed at each service interval because the shaft needs to be lubricated and the shaft forward of the prop must be inspected for fishing line that isn’t otherwise evident and can damage the seal.

A gas siphon costs  about $10 and is a quick and safe means of emptying the outboard’s fuel tank.

Gas degrades with time and is a common problem for outboards that have been improperly stored without being serviced first. Drain the gas with a siphon or hand pump (don’t invert the motor to pour it out) or run the motor to fuel exhaustion. Drain the carburetor, as well. The internal jets and orifices in small carburetors are sensitive to the gummy residue created by stale gas. Fuel that has been left in the tank for several months also loses some combustibility and will not make a motor happy come time to start in the spring. Remove the drain screw at the bottom of the carburetor bowl to drain any remaining fuel.

The bowl at the bottom of the carburetor has a drain for emptying remaining fuel before the motor sits idle over the winter.

To prevent corrosion inside the motor, consider using marine fogging oil for the cylinders if the motor is to be laid up for extended periods. The pressurized spray is injected into the air intakes while the motor is running and then, with the spark plugs removed, into the cylinders; pulling the starter cord distributes the oil.

The water pump is easily accessed by unbolting the lower unit and pulling it down until the driveshaft is free from the powerhead. A reluctant lower unit can be gently removed by placing a block of wood on the narrowest part of the anti-ventilation plate, close to the motor’s midsection, and tapping it with a hammer. Here, a new impeller has been slipped down over the driveshaft. The old impeller, set on the plate, has seen better days and four of its fins are permanently bent. The tip of a fifth was recovered taking the pump apart. The water intake needs to be checked to see if the sixth fin is hiding there.

The water-pump impeller should be changed every three years, whether it looks serviceable or not. The rubber vanes lose flexibility and effectiveness with age. The impeller maintains the water flow that is essential to cooling the motor, and nothing can kill a motor faster than excessive heat. Service manuals and YouTube videos are available online to illustrate the process of removing the lower unit to access the water pump for a variety of makes and models. Removing the lower unit also provides an opportunity to lubricate the mounting bolts so they don’t permanently seize in place with age and corrosion. You can also lubricate the lower unit’s driveshaft so that it does not freeze into the powerhead’s driveshaft. All threaded fastenings should be coated with a marine-grade Tef-Gel anti-seize compound.

The tip of the grease gun is pointed at a one of the Zerk fittings that need a new application of waterproof grease.

Check the steering and tilt mechanisms, and use a grease gun to lubricate points as needed. Look at throttle linkages, especially the mount’s retaining hardware, for general condition and corrosion.

The new fuel filter in the foreground will replace the existing filter behind it. Pinch clamps on the fuel line make the change easy.

The in-line fuel filter (or water-separator filter, if there is one), should be changed every 100 hours or annually. It is essential to keep fuel as clean as possible.

The sacrificial anode comes off with the removal of a single bolt. This one still has plenty of metal and just needs a bit of cleaning.

Check the sacrificial anode on the lower unit and clean it if it is scaly; replace it if a significant amount of it has eroded.

Make sure that the motor’s exterior gets a freshwater rinse; when it’s dry, touch up any paint chips, and put a coat of wax on the powerhead cover. Coat exposed metal inside the motors with Green Grease, a true waterproof grease, and treat external metal surfaces as needed with a corrosion preventative such as WD-40 but take care to not spray it onto rubber components. For rubber fittings and seals use a synthetic-based grease, not one that is petroleum-based.

When all of the winterizing has been done, the outboard is ready for hibernation. It’s best stowed upright on a sturdy stand.

Four-stroke outboards must be stored either vertically or lying down in the position shown in the manual. If you lay them on the incorrect side, the crankcase oil can get through the air intake and fill the cylinder, causing hydraulic lock and damaging the motor. Two-stroke outboards can be stored in any position. If possible, stow the motor on a sturdy stand and protect it with a non-abrasive cover in an area where critters can’t get into it, lest the motor become a food cache for mice and squirrels, who also like to chew on wires, or attract the wasp-like mud daubers, who are known to plug cooling-system discharge ports. If your motor uses a battery, put it on a smart charger.

With our three motors well taken care of, when the next nice day rolls around in the springtime, we will be ready to head out on the water, confident in the health of a vitally important propulsion system.

Prepare your small boat for winter storage

Now that your outboard motor is ready for a long winter’s nap, you need to protect the rest of your boat so it’s good to go when spring arrives. Follow our boat winterization guide for details on how to cover and store your craft to protect it from winter weather and unwelcome pests.


Audrey and Kent Lewis mess about with their small armada in the Tidewater Region of southeast Virginia. Steve Baum is a U.S. Coast Guard veteran who spent a career on the water surrounded by ships and small boats, and then embarked on another career with the U.S. Army Corps of Engineers to ensure that our waterways are safe for boating.

You can share your tips and tricks of the trade with other Small Boats Magazine readers by sending us an email.

Magswitches

To do efficient and accurate work on a table saw, there are several accessories required beyond the miter gauge and the rip fence that ordinarily come with it. To secure feather boards, stops, and special fences, I’ve used clamps to hold them in place, but the undersides of the table and its extensions didn’t have flat surfaces to accommodate clamp jaws. The same problem makes it difficult to clamp accessories to my bandsaw and drill press tables. When I happened upon Magswitches on the web, they seemed to be the perfect solution, promising they could “secure custom jigs & fixtures anywhere on your table top” with just the twist of a knob.

The Magswitch company’s wide array of devices are built as magnets that can be turned on and off. Most of the products are meant for industrial use; the smallest of them, called MagJigs, are designed for the home woodworker. Inside the steel housings of a MagJig are two cylindrical magnets, one fixed to the housing and the other rotated by the knob at the top of the device. When the poles of the magnets are set north to north, south to south, the magnetic field is activated; when the poles are set in opposition, their magnetic fields almost entirely cancel each other. The steel housing takes care of the rest, and a MagJig that is turned off won’t even pick up fine steel filings.

Photographs by the author

The MagJigs I bought include two 60s (upper left), one 95 (lower left), and a pair of 150s with a universal base and reversible feather board.

I bought three sizes of the MagJig: the 60, 95, and 150. The pair of 150s came in a Starter Kit with a Universal Base and the Reversible Featherboard. There is one more in the MagJig series, the 235. The numbers for each device refer to what the company calls its “magnetic hold force” in pounds. That force is for pulling the MagJig straight up from the surface and will vary with the thickness of the ferrous metal it’s attached to. A thin sheet of steel won’t capture the magnet’s entire field and the MagJig won’t have its full holding power. The cast-iron top of my table saw might not capture the entire magnetic field either, but because it is where I’d use the MagJigs, that’s the holding power that matters to me.

I tested the listed holding power using a hanging scale suspended from a boom vang. In all cases, the MagJigs let go at forces less than listed. Those listings might be more accurate on a thicker table, which can capture the full depth of the magnetic field.

To test each MagJig, I used a digital hanging scale to see how much force it would take to pull the MagJigs off my table saw. I threaded a loop of nylon line through the magnet’s two mounting holes and used the scale connected to a boom vang to pull the MagJigs straight up from the table saw. The 60 popped off at an average of 31 lbs, the 95 at 62 lbs, and the 150 at 106 lbs. So for my purposes, the MagJigs all fell short of their nominal strengths.

The holding force that applies to the uses of the MagJig are lateral. I arranged the boom vang and the hanging scale horizontally to see how much force was required to slip the MagJigs sideways.

When using MagJigs for fences, guides, and feather boards, the holding force that matters is not vertical but lateral, so I anchored the vang to a point level with the table saw top. With a loop of cord around the base of each MagJig, I used the vang to pull it sideways. The 60 slipped at 9 lbs, the 95 at 16 lbs, and the 150 at 22 lbs. The company recommends that the MagJigs be used in pairs to keep forces from rotating them, so I made a loop for the feather board fixture with its two 150s holding to the table saw top. It slipped at 40 lbs.

I use the MagJig 95 to hold devices that I don’t need to count on to stay put. Here it is used to keep a vacuum hose in the drill-press table.

For practical applications I found the MagJig 95 and 150 useful in the shop. The 60 just had too little hold force; the note on the packaging—“secure custom jigs & fixtures anywhere on your table top”—overstated its abilities. The 95, fitted to a block of 3/4″-thick oak, made a useful stop for light work on the drill press. It also worked to hold a bracket for a vacuum hose. The 95’s packaging had a picture of a pair of them used with a feather board, a use I’d recommend only for light work.

The feather board arrangement can resist about 40 lbs lateral pressure. The MagJigs are partially over the miter slot, but still have a firm hold on the table.

The 150s, with their base and feather board, lived up to my expectations. They hold the feather board in place with enough pressure to keep the workpiece against the rip fence. The feather board offers stiff resistance to kickback, but I could pull the workpiece backward (with the saw turned off). The feather board I made from a 2×4 doesn’t let the workpiece move backward.

The back of the universal base can be used as a fence for the bandsaw.


To use the base as a fence on the drill press, I had to use 1/4″ plywood under the workpiece to prevent tearout when drilling. The 3/4″ plywood I usually use is just as high as the base.

The universal base, with the MagJigs in place and the feather board removed, has a straight back edge that can be used as a fence on the cast-iron tables of my bandsaw and drill press. My favorite application of the base is as a guide for ripping on the bandsaw. I can saw to my drawn pencil line until I have the angle of the workpiece set to accommodate any blade drift and then set the base and activate the magnets with one hand.

A shop-made fence uses the 150 MagJigs and its minimal size is better suited to the small drill-press table than the universal base is.

The universal base with the MagJigs does have limitations. The placement of the device is limited to the area of the table it is being applied to. The base takes up some extra room, especially when the back side is used as a fence. You can make your own jigs with 3/4″ stock. The 150s require a 40mm hole, and a Forstner bit of that size is available with some MagJig sets. I used a 1-1/2″ Forstner bit and elongated it by drilling the first hole, shifting the wood by about 3/32″ and drilling again to shave off one side of the hole.

I’m not sure what I’ll do with the MagJig 60s. I may put a bridle and a cord on one to fish for drill bits that roll off the wall side of the workbench. Their bigger brothers will answer a higher calling in the shop.

Christopher Cunningham is the editor of Small Boats Magazine.

MagJigs are manufactured by Magswitch and available from selected retailers. The MagJigs here were purchased from Amazon: the pair of 60s cost $39.99, the single 95 cost $26.50, and the pair of 150s with base and feather board cost $72.00.

Sealskinz

Here in Seattle, Washington, boating season officially opens on the first Saturday in May with a grand parade of decorated boats. Thousands of people turn out for the celebration. The end of the season closes without fanfare, and only a few of us keep boating as the months of cold and rain set in. Even in midwinter, the weather here isn’t often cause for misery as long as you dress properly.

Feeling the chill often stars at the extremities: the feet, hands, and head. Protecting these areas from weather has been the mission of Sealskinz since the company’s founding in 1996. Their waterproof, windproof, and breathable socks, gloves, and hats are designed and manufactured in Great Britain. I started using Sealskinz socks in 1998, and they have performed well and held up for many years of sea kayaking and bicycling.

I have a new pair of Sealskinz socks now as well as their gloves and a knit beanie. They are all composed of three layers; the inner and outer layers differ with the article, but the inner layer of all is a membrane that is waterproof, windproof, and breathable. While there are outdoor fabrics with the same characteristics, Sealskinz products set themselves apart with a membrane and fabrics that stretch.

Photographs by the author

The inside-out sock shows the thicker knit at the toe and heel. What appears to be a seam along the length of the sock is a small pucker of the knit on the membrane beneath it. It flattens when the sock stretches and is soft to the touch.

Sealskinz socks come in ankle length, mid length, and, my favorite, knee length. I find boots awkward for boating and prefer to wear low-cut boating shoes and let knee-high socks take care of keeping my feet dry. Apart from the cuff, the Sealskinz knee-highs have a seamless inner layer with a merino-wool blend in a continuous knit that varies in thickness from toe to heel to cuff. The uppers have a tight, nubby knit for warmth; the toe and heel have a thicker layer of looped yarn for cushioning and extra warmth. The outer layer is nylon with elastane. The socks slip on easily, fit snugly, and there’s enough stretch to tuck pant legs comfortably into them. In the cold and rain they’re very pleasantly warm, and they keep my feet dry while wading at the launch ramp.

The inside-out glove shows the seamless knit of the interior. The tabs on the cuff were used to secure the gloves to packaging. They are soft and seem strong and might serve to tether the gloves.

The Waterproof All Weather Ultra Grip Knitted Gloves are made of materials like those in the socks but have a finer knit. Like the socks, there is a seam at the cuff, but by some miracle of knitting machinery, there are no other seams. The seamless, stretch construction provides a noteworthy advantage over gloves sewn of non-stretch fabrics. The gloves don’t bunch up or crease, creating pressure points that can lead to discomfort and hot spots. The palm and fingers have small dots of rubbery substance for a non-slip grip without compromising the stretch of the fabric. When rowing on a rainy day, I have a comfortable grip on the handles with just as much grip as I have with bare hands. The tips of the thumb and index finger on both left and right gloves have a speckled gray material that is compatible with touchscreens. They work best when fingertips are pushed well into the ends of the gloves.

The beanie is especially warm for a knit cap. Like the socks and gloves, it is machine washable and requires no special detergent.

The knit acrylic exterior of the Waterproof Cold Weather Roll Cuff Beanie Hat looks just like an ordinary knit beanie, but it has the protection of the Seaskinz membrane. The interior layer is a polyester fleece. The hat is deep enough that it can cover my ears with the cuff, and although the cuff is sewn front and back, the sides can be unfolded for even more coverage. I have other beanies, but they’re not as warm and not effective when it’s raining or a strong wind is blowing; the Sealskinz beanie offers good protection no matter what the weather is doing. You can add to its uses with the LED-equipped version of the hat. It has an opening in the cuff that holds a USB-rechargeable headlamp.

These Sealskinz products have made my outings in the off season much easier to enjoy. They are well designed, perform well, and, if my previous experience with their ’90s-era socks is any indication, can last a long time.

Christopher Cunningham is the editor of Small Boats Magazine.

The Cold Weather Roll Cuff Beanie, All Weather Ultra Grip Knitted Gloves, and the Cold Weather Knee Length Socks are available from SealSkinzUSA for $40, $55, and  $55 respectively. SealSkinz offers a variety of  waterproof hats, gloves, and socks.  

Is there a product that might be useful for boatbuilding, cruising, or shore-side camping that you’d like us to review? Please email your suggestions.


Whitehall Tender

AMERICAN BEAUTY is a Whitehall Tender that was built by students at the WoodenBoat School and designed by the Rice Brothers from East Boothbay, Maine. Back in the 1800s, Whitehalls were used as a commercial craft, ferrying materials and crew to shore from large schooners and square-rigged ships. Eventually, the Whitehall entered the recreational world and remains a favorite of amateur boatbuilders to this day.

Whitehall Tender

AMERCIAN BEAUTY’s bow

Whitehall Tender

AMERCIAN BEAUTY

Whitehall Tender

AMERICAN BEAUTY in Brooklin, Maine

Whitehall Tender

Rowing AMERICAN BEAUTY

Whitehall Tender

AMERICAN BEAUTY slices through the water

Whitehall Tender

AMERICAN BEAUTY profile

A Twin Cities Boat

Ontario’s twin cities of Kitchener-Waterloo both have downtown parks that surround small lakes. Waterloo Park, founded in 1893, was built around Silver Lake and upon completion was dubbed the “Jewel of the City.” Three years later and two miles distant, in what must have been a bit of twin rivalry, Kitchener created Victoria Park by transforming a plot of swampland on the site into Victoria Park Lake. Kitchener officials declared that the park built around the lake was “The City’s Crown Jewel.”

Photographs by and courtesy of Matt Morris

For boating lakes that are outside of the bicycle’s range, the boat fits in the back of Matt’s car.

There was, unfortunately, a bit of a lapse in civic pride through the 20th century and both lakes filled with silt from the creeks that fed them. Waterloo’s “Jewel” became known as Mud Lake among the locals and was so foul in the summer of 1995 that hundreds of waterfowl that had settled upon it died of botulism. In the fall of that year, motivated by the dead ducks, the city created a seven-year plan to dredge the lake and restore the wetlands around it. Kitchener eventually followed suit and decided it was time to dredge Victoria Park Lake, and in 2011 scooped over 85,000 tons of sediment from the lake bottom.

Matt tows his trailer behind a folding bicycle. He used to be a teacher and rode the bicycle to get to school where he could store it out of the way in his classroom.

In between the two lakes, on the Waterloo side of the twin-city divide, is the home of Matt Morris. He’s an avid cyclist and the Iron Horse Trail, a bike path that connects the lakes, runs right by his house. The ride north to Silver Lake is slightly less than a mile; south to Victoria Park Lake is over 2 miles. He visits the lakes often and has been watching ongoing improvements to both parks.

Matt parked his rig at the Victoria Park sign that inspired the dream to build his boat and the trailer that transports it.

On one of his rides to Victoria Park he noticed a blue and white sign at the lake’s side. On it were three icons: one with a swimmer and another with a fish swimming under a hook and line. Each of those was crossed with a red X. The third icon pictured a sailboat—without an X. “Each time I was in the area,” he writes, “I started to dream of building a boat that I could tow behind my bicycle.”

Each pair of bulkheads is held together with four 1/4″ bolts, all set in holes above the waterline to avoid the need for gaskets to prevent leaks.

Matt’s dreams remained dreams until Waterloo announced plans for some dredging and the installation of a boat dock at Silver Lake. He would have two lakes he could enjoy with a boat. That set him in motion. While he first thought about buying a kit for a two-piece rowboat, he realized that designing his own boat, and making it nest in three pieces would make the project much more interesting. He began by sketching shapes and construction details for a skin-on-frame nesting boat in a blank book.

While the trailer gets locked up on shore at the lakes, the bicycle folds up small enough to have a place aboard the boat.

His first idea was to make a boat with transoms fore and aft and curved sides. He made scaled patterns from paperboard cut from a Froot Loops cereal box and a Blue Moon Belgian White Ale carton. Unhappy with the shape and the nesting function, he chose to work with an overall plan form of a trapezoid. He could divide it into three smaller trapezoids that neatly fit one inside the other. Packed for travel, the boat would fit in the back of his square-back car or ride on a bike-towed trailer.


Matt started out with a bench that spanned the bulkheads but discovered that a small seat supported by the aft bulkhead provided good trim for the boat. He made his economical oars with construction-grade 2×4s.

With his plans and patterns finished, he cut the boat’s six meranti plywood bulkheads at a friend’s woodshop; the bandsaw and belt sander made quick work of the largest parts of the boats. Stringers set in chisel-trimmed mortices established the shape of the three sections. Matt steam-bent ash frames inside of the stringers and clamped the intersections while they cooled and set. When the ash was dry, he epoxied the intersections of frames and stringers. Kevlar roving, applied on the diagonal like the pattern on an argyle sock, reinforced the framework. Matt applied a skin of 9-oz Dacron and coated it with a two-part urethane.

Boats certainly have a sculptural quality and Matt uses his UB1000 at home as an illuminated work of art in his front yard.

The boat goes by the name UB1000 as Matt’s first version of his Urban Boat. He equipped it with oars and a sail and built the trailer he had envisioned for getting it by bicycle to and from Silver Lake and Victoria Park Lake, documenting the whole process on his blog. He now enjoys rowing and sailing the lakes that are just minutes by bike from his home. The launching of his boat on the two lakes is, perhaps, the realization of the twin-city’s Field of Dreams vision: If you dredge it, they will come.

Do you have a boat with an interesting story? Please email us. We’d like to hear about it and share it with other Small Boats Magazine readers.

To read about Matt Morris’s latest Urban Boat project see

PHEATHER 2, Ultralight Canoe.

The Chebacco Boats

There were three original Chebacco boats, all designed by Phil Bolger for Brad Story. Story was a friend of Bolger’s and a boatbuilder, now retired, of considerable talent in Essex, Massachusetts. All three boats feel very much alike on the water. I’ll make a point of differentiating between them when appropriate, but otherwise comments are true for all three. In fact, on a day of racing them against each other, and trading back and forth to see if any small differences were the result of the people aboard, it was really easy to lose track of which one I was actually on at any one time. They’re that similar. (A fourth, raised-deck version recently joined the fleet.)

The first was an extension—literally—of Bolger’s 15’ Harbinger catboat that Bolger designed for Story in 1975. It was done more to the New York style rather than Cape Cod so that it would row better and need a smaller sail plan. The lines are slack-bilged, especially below the waterline, with significant flare. It’s a fair, easy, dish-shaped, easily driven shape that developed into the sandbaggers. It offers amazing performance in the usual light air of New England (and New York) summers.

The first Chebacco was Harbinger with a 5′ stern fairing and a small mizzen. She was a cold-molded stock design built to order at Story’s shop. The added length gave Chebacco a significantly higher top speed than her predecessor, even better ghosting ability, and allows for a really big cockpit and a small, but quite comfortable cuddy.

Photo by Jamie Orr

The Bolger-designed Chebacco boat is an 18′ cat yawl based on an earlier Bolger daysailing cat.

Other than the mizzen, the rigs of the first Chebacco and Harbinger were essentially the same unstayed gaff cat with a very short luff, and a long gaff and boom. The shape of the main allows for a short mast, which in the cold-molded Chebacco is a very good thing. It passes through the cabintop and into a step on the sole of the cuddy. It takes some commitment to lift even a mast this short into place and luck or patience or another person to get it into the step. Lengthening the mast for a longer luff, or (even more to the point) to get a vang on the boom, only makes the process harder.

These are corky, light, playful boats on the water. They move effortlessly in light air, heel easily but slowly, accelerate quickly, and become very stable as they settle onto their flared sides. They balance beautifully until well off the wind. In fact, the boats can be steered with the mizzen sheet alone anywhere from a beat to a beam reach. They tack in 95 degrees steering with the mizzen sheet, 90 degrees with the tiller. They become harder-mouthed off the wind, but not offensive. The end plate on the shallow rudder works.

Despite how easily the Chebaccos move, they feel quite deliberate. The tiller is firm, her motions smooth rather than flighty. They feel more like keelboats than light trailer boats. Restful rather than athletic, but not boring, these boats feel much bigger than their 20′ and 1,000-lb displacement would suggest.

Above the waterline they are all volume and open, uncluttered space. The Chebaccos’ cockpits run almost the full width of the boats and about a third of their length. The cockpit size is enhanced by depth and a broad expanse of cockpit sole. The floor space and depth invite getting up and walking around, or sailing with the tiller propped against a hip.

The benches are chair height and width, and are angled down and outboard at just the right pitch. The coamings form high seatbacks. The forward faces of the seats are also angled—wider at the sole—to make for more foot room. The boats are delightful to be aboard.

These kinds of boats have to provide more pleasure than almost any other kind. The list of what makes them so wonderful is long, but let me indulge myself, as they also seem to be surprisingly rare.

They are small, simple, and light enough to launch, rig, and sail alone. They don’t need a slip or mooring, and so save the expense and open up many more areas to sail. They don’t waste a week of spare time fitting out in the spring or putting up in the fall. They don’t demand a whole day if there’s only an hour or two to sail, but they are plenty comfortable for the full day if it’s available. They are sailing within 15 minutes of reaching the ramp.

They’ll take a party to a low-tide beach for a picnic. They sail in the most delightful places: water that’s shallow and close to shore, full of minor dangers and great discovery and sport. They are light and shoal enough to push off a mud bank. They can tow a dinghy, but don’t have to. They can be rowed at a reasonable pace, standing, with long sweeps, or can be sculled over the transom, or can take an outboard.

They sail backwards steadily and predictably, or sideways for that matter, should you want to get into tight places or show off. They spin in their own length under sail. With some tweaking, they’ll steer themselves. These boats are capable enough for semi-open water. They’re fast enough to cover distance. They lie-to like a duck under the mizzen alone should a mistake be made with the weather.

They have a dry place for cold crew members, a shaded place for sunburned or sleepy crew members. They have plenty of storage to keep gear aboard and ready to go, but not underfoot.

Young children will find everything aboard to their scale and will feel much their own people, able to sail the boat and not be bored. Adults, too, will feel everything to their scale. What a difficult combination. Everyone aboard will feel safe.

They are strong, stable, dry, and capable. They’ll take adventurers off for a weekend of camping on the water in far greater luxury than most campers put up with, let alone backpackers. And at the end, it’ll only take a half hour to put the boat back on the trailer and pack it up. And everything is aboard, locked up, and ready for the next opportunity to get out.

Photo by Onne Van Der Wal

The Chebacco concept began life as a cold-molded, round- bilged boat (right). A sheet plywood version (left) followed, and on the heels of this came a lapstrake-plywood version (middle).

Despite all of the virtues listed above, the cold-molded boat got to be too expensive to build. Sales dried up. Story went back to Bolger for a less expensive design in plywood that had all the same properties, plus some added conveniences. It was an opportunity to improve a great boat.

The sheet-plywood boat that resulted retains the plumb ends, the broad transom, large cockpit, and uncluttered cuddy. The rudder was moved inboard to allow a free-flooding outboard motor well on centerline so the motor can be both convenient and out of the way. The huge centerboard of Harbinger was replaced with a much smaller board and a full-length, very shoal keel, though the draft remained at 1′. The keel allows some progress to be made with the board all the way up. It also stiffens and strengthens the flat bottom.

The mast on the plywood boat steps through a slot in the cuddy’s housetop. Place the heel in the step and walk the mast up. Since it’s so easy, the mast is 3’ longer, the boom and gaff shorter. Sail area is about the same, though the rig looks better. And it might be faster.

In almost all ways the plywood boat is more functional, convenient, and usable. Aesthetics are in the eye of the beholder. The sheet-ply boat is all angles. Her upper chines are very much in evidence, her sheer- strake plumb, like her ends. I find her, too, very beautiful, but in a different way than her cold-molded sister: where one is smooth and sensuous curves, the other is cutaways and angled flats. Perhaps an acquired taste, but striking from any angle.

Story liked her well enough, but wondered if he couldn’t do a more traditional-looking boat from lapstrake plywood for the same price and time in labor. There are some people who he thought might not like the look of the sheet version. What extra time he used in fitting the planks, he’d save by not having to ’glass and grind. Bolger drew the third Chebacco.

The lapstrake boat has an apple-cheeked, Brit- ish look to her. Her deck and rig are identical to the sheet-ply boat. The materials cost is the same. Labor time worked out to be about 10 hours more. On board, it’s hard to know the difference between the two plywood versions. The sheet boat might feel a little more tender initially, and harden up more definitely when she gets her upper chine in. But it’s hard to say for sure. We never had more than 12–15 knots of air. At 15 we might think about taking the first reef. At a steady 18 we definitely would. It would be interesting to see if the two boats still felt the same as the breeze came up.

Story did get Bolger to draw one more Chebacco boat. This one was a 25-footer, lengthened to provide better accommodations in the cuddy. It’s plywood lapstrake, and looks very much like the others. I’m not convinced that the added length is not a mistake, though. Too much of a trade-off in convenience, both on and off the water. But that’s the subject of another article.

Designer Phil Bolger passed away in May 2009. His legacy of great designs includes the three-boat, 18′ Chebacco series shown here. A later 25-footer, and a still-later 18′ raised-deck version, followed.

This Boat Profile was published in Small Boats 2010 and appears here as archival material. Plans for the 19′ 8″ x 7′ 5″ tack-and-tape version are available from H.H. Payson & Company.

The Ladybug Pram

The Ladybug pram, a small dinghy with a wheel permanently fixed in a case in its bow, allows for a nearly seamless transition from the water to a beach, all the while keeping its passengers’ shoes dry. The boat can be built in either a 6′ or a 7′ model. I first spotted it at The WoodenBoat Show at Mystic Seaport, Connecticut, in 2008, on a visit to designer-builder Harry Bryan’s booth. The prototype Ladybug was perched on the grass in front of Harry’s display. Sitting there on its bottom, with oars-cum-wheelbarrow handles at the ready, the boat’s concept spoke for itself. Harry and I had barely exchanged pleasantries when I handed him $25 for a sheet of plans, and began set- ting up the project in my head. I needed this boat, as I’ll explain in just a minute. But first, allow me a short digression to illustrate this boat’s niche.

Fifteen or so years ago, I went on an evening outing with friends in a 24′ sloop in Maine; they were considering buying the boat, which the builder turned over to them for a few hours. We set out halfway through the tide’s ebb, rowing to the mooring from a gravelly beach—which had grown significantly wider when we returned to it at dead low tide after sailing. The prospect of lugging that dinghy up the beach after our pleasant sail was sheer drudgery. As we were considering our approach to the job, the sailboat’s owner-builder appeared on the beach in his pickup truck, drove to where we were standing, and stepped out of the cab without saying a word. He looped the beat-up fiberglass dinghy’s painter around his bumper hitch, returned to the cab, and stepped on the accelerator pedal. He hit stride at about 20 mph, the dinghy bouncing along behind him.

Harry Bryan wheels his Ladybug pram along a rocky shore.Photo by Bryan Gagner

The Ladybug pram, with a knobby tire permanently mounted in its bow, eases the transition from water to land for beach-based sailors.

It was an impressive, albeit utilitarian, approach to a common problem: Many mooring-based sailors and powerboaters work from the shore without a pier and float, and they need a reliable dinghy system. Some use outhaul anchors, leaving their dinghies afloat and hauling them in to shore when needed. Some use dollies. Some use pickup trucks. And some use brute force, straining their backs and compressing their lumbar discs into sciatic-nerve-tweaking protuberances (ask me how I know). Very few people these days use wheel-barrow boats—an old concept that Harry Bryan revives with the Ladybug.

My wife, Holly, and I live near a gravel beach at the foot of a field with poor road access. We maintain a fairweather mooring off this exposed beach, and for several years have accessed this mooring with a dolly-mounted dinghy. It’s an adequate approach to the beach-dinghy problem, though it typically requires a trip overboard in knee-deep water to secure the dinghy to the dolly. It also requires some awkward lifting of the boat to place the dolly under it. And, the boat must be strapped down before its trip up the beach, lest it be rattled frustratingly askew of the dolly.

The difference in using the Ladybug for this transition from water to land is profound. The boat’s bottom has a pronounced rocker, or longitudinal curvature, at either end, allowing it to settle on dry land before the rest of the boat grounds out. The flat bottom forces the boat to sit bolt upright when it takes the ground, making it easy to step out and onto the beach. If you’ve backed onto the beach—my preferred approach—then you simply feed the oar handles through their respective holes in the transom, cleat the oar blades to the boat’s thwart (the oars are retrofitted with wooden cleats for this purpose), lift the transom, and back the
rest of the boat out of the water on its wheel.

Harry Bryan rows the Ladybug pram in clear water.Photo by Bryan Gagner

Ladybug has ample freeboard when carrying a sole rower; she’ll carry an additional passenger in calm conditions.

Designing the Ladybug

Ladybug’s basic dimensions are based upon a William Atkin dinghy called Tiny Ripple. Holly and I built our Ladybug over the winter in an unfinished spare bedroom in our house. We borrowed the building jig from one of Harry’s WoodenBoat School classes, so I can’t comment on the moldmaking and jig construction—except to say that if you know how to use a tape measure, saw, and screwdriver, you probably won’t find this job too mentally or manually taxing.

The bow and stern transoms are laid out according to dimensions on the plans, fixed to the jig in their exact locations, and then beveled to accept the planking. The planks—just two per side—are likewise laid out according to dimensions shown on the plans, though their shapes can also simply be traced from the jig. The two planks are joined together by a riveted lap. Once they’re fastened, the bottom edges of the garboards are beveled to accept the bottom planking.

Harry offers three different options for the bottom: (1) a single layer of cross planking, with splined edges; (2) a sheet of plywood; and (3) two layers of thin planking, diagonally laid. The third option, in my opinion, is the best, as it makes economical use of short stock and creates a watertight panel that doesn’t rely upon swelling to achieve its watertightness, which is a good thing for a dinghy that spends most of its life on land. Holly and I took a slightly different approach to option number three. Since we had a stack of cedar of adequate length and generous width, we laid the first course of planking athwartships, and placed the second layer (each was 5⁄16″) fore-and-aft. Stuck together with thickened epoxy, the result is a two-ply sheet of cedar plywood.

With the transom, planks, and bottom in place, the boat is removed from the jig, flipped over, and fitted out. The fitout is pretty straightforward stuff: a handful of frames to improve the stiffness of the sides; a stern seat, a rowing seat and its supporting thwart, rails, oar-locks, and knees. The rowing seat is unconventional, as it is oriented fore-and-aft. This allows micro-adjustment to the boat’s longitudinal trim, without requiring the rower to switch thwarts.

The wheel is an off-the-shelf item from Seitech, manufacturer of small-boat dollies. For about $90, you purchase a knobby tire, a plastic rim, an aluminum axle, and nylon bearings. Then you make an axle bracket from plate bronze or stainless steel and oak or locust. The whole thing is affixed to the bottom with four screws, which allows for easy removal for servicing. The wheel lives in a case in the bow which, when viewed when the boat is in the water, could be mistaken for another seat or a gear locker.

A Ladybug bottom is being cross-planked in a single layer of cedar, edge-fitted with splines.Photo by Bryan Gagner

The boat’s bottom can be built in one of several different ways, depending upon available material and personal preference. Here, a Ladybug bottom is being cross-planked in a single layer of cedar, edge-fitted with splines.

Ladybug Pram performance

How does this amphibious dinghy perform? To be fair, we should consider it in both of its media and in the context of its intended purpose; this is a utilitarian dinghy, not a performance rowboat. It rolls over coarse terrain and short meadow grass very well. One can actually load a fair amount of gear into it and use it as a cart. Launching, depending upon the slope of your beach, is easy, too. I’ve found it best to load and unload over the stern transom. Typically the boat is afloat by the time I’m aboard, and little poling is needed. But, if a shallow-sloping beach requires it, a push on the beach with one of the oars is usually all that’s needed to get into navigable water. I lucked into a set of beater oars a few years ago, and these now belong to our Ladybug; it would be rather hard on the conscience to press a pair of new Shaw & Tenney spruce oars into such service on a rocky Maine beach. A dedicated pole would be handy.

And how does she perform on the water? The rowing ergonomics are fine, she glides between strokes, and I forget the wheel is even there. Ladybug is a small boat. Harry has piled three adults into his, and recommends such loading only in dead-flat water. In chop, while settling ourselves into the boat, Holly and I took a small amount of water through one of the oar holes—just once, but enough to warn us of the possibilities if we pushed things too hard in poor conditions. I spoke with Harry about this, and he had been thinking of some sort of flapper cover to stem such flow. I think that’s a good idea, and am mulling over the possibilities in neoprene. The rails are closer to the water than I’m used to; I would not feel comfortable in this boat in a significant chop with a large passenger aboard. I have, however, rowed it in breeze and chop alone, and feel perfectly safe in such conditions.

As with any small dinghy, loading and unloading at the mothership require careful weight distribution. One must adhere to the convention of unloading the ends of the boat before the middle. I’ve found standing from either of the low-slung seats to be a bit of a chore, but I’ve also been spoiled over the years by higher thwarts and larger dinghes. I wouldn’t change the position of Ladybug’s thwarts, as her rowing geometry is quite good as specified.

Photo by Bryan Gagner

For overland transport of the boat, Ladybug’s oars must be retrofitted with wooden cleats; these notch over the thwart, securing the oars to the boat.

Ladybug tows well behind a bigger boat. Her bow is rockered so high that the wheel rides clear of the water—except when surfing downwind. Then, it does have a tendency to catch the surface and spin as the boat scoots down the face of a wave, but with no bad consequences. An ample skeg keeps her tracking straight.

This little dinghy lives up to its promise; it’s changed the way I get on and off the beach. Every time I slide those oars into their wheelbarrow position and roll the boat to the water, I feel a glimmer of satisfaction spiced with disbelief that the transition from shore to sea could be so easy.

Ladybug Pram

This Boat Profile was published in Small Boats 2010 and appears here as archival material. For more information about the Ladybug Pram, visit Bryan Boatbuilding.

Check out these other designs by Harry Bryan

Quite a few Harry Bryan designs have been featured on Small Boats. Here are some of our favorites.

Handy Billy | An outboard out of sight

KATIE | Harry Bryan’s 20′ cruiser

Fiddlehead | A solo canoe for double paddle

Swallow Boats SeaRaider

Swallow Boats is a purveyor of boat kits in Wales. Their SeaRaider combines the best features of the fastest and most seaworthy Raid boats into one new boat. The boat originated in Scotland—one of the best places on Earth to put a small boat through its paces. In the space of a week on this country’s lochs and coast, one is likely to meet a wide range of weather conditions, from varied wind strengths, both upwind and downwind, to sudden rain squalls or katabatic gusts coming off the mountains. This drama is always complemented by enough soft breezes and sunshine highlighting the dramatic Scottish scenery to make one wish to stay longer.

The week of competitive sailing and rowing originally called the Great Glen Raid, now Sail Caledonia, has given Claus Riepe from Hamburg, Germany, and many other sailors, builders, and designers a unique opportunity to watch small boats perform under sail and oar and against each other. Any design or building faults, any glitches or lapses, soon become obvious. Claus thoroughly enjoyed the Raid concept, a week of competition and camaraderie in cruising areas that can be deep sea, shallow lagoon, or narrow canal, and he enjoyed his present boat, but he’d never sailed it in company with other boats of similar appearance. All week he and his crew had sailed their best and rowed their hearts out but were effortlessly overtaken by one boat after the other, always ending up toward the rear of the fleet.

SeaRaiderPhoto by Kathy Mansfield

The SeaRaider, a new design from the UK-based kit boat manufacturer Swallowboats, was purpose designed for point-to-point small-boat racing events called Raids.

“It was a sobering shock,” he admitted. “I first tried to upgrade with every trick I could think of—taller rig with more sail, carbon spars, booms, sliding fairleads—but all to no avail.”

He ordered a new boat, but that didn’t work either. Now ready for a complete change, he remembered Swallow Boats near Cardigan Bay in Wales, known for their small boats with a lovely sheer and performance, and their offer to design and build custom boats.

It was about this time that Matt Newland joined his naval architect father, Nick, at Swallow Boats, after a stint in London, bringing with him an engineering education from Cambridge University, designing skills on 3D CAD software, and the experience of working for a time with yacht designer Tony Castro. Claus visited them and described his dream boat, similar to a Drascombe Longboat but with better upwind ability, a self-tacking jib for singlehanding, room for four oarsmen on Raids, a mizzen that can be handled from within the cockpit, a strong rudder that does not have to be removed before beaching, good watertight stowage, self-draining ability, excellent buoyancy and righting capacity, and more.

The Newlands relished the challenge. Quickly they realized that water ballast was a necessity to achieve a light boat for rowing and racing, and a safe boat with self-righting capability for shorthanded sailing in varying conditions. After just two hours of discussion, a firm order was placed. All through the design process designer and client stayed in close contact, and together developed some innovative ideas and solutions.

The water ballast, for a start, is carefully thought out. “A false floor,” Matt explained, “is sited just above the waterline and inclining aft slightly, so the cockpit can self-drain through self-bailers or a simple twist hatch into the outboard well. A tank underneath this floor can take up to 660 lbs(330kg) of water, equivalent to the weight of four adults lying in the bilges.” Two inflatable buoyancy bags in the tank can be partly inflated to fine-tune the amount of ballast water taken on, a far more versatile system than multiple tanks. “And in effect,” Claus points out, “the boat has several different personalities. I can fish off the west coast of Ireland in a steady boat, or race with a crew in a light boat with its sail area of 196 sq ft and 21′ 10″ length for plenty of fun and excitement.”

There is an ingenious method for filling and emptying the tank. A forward-facing self-bailer within reach of the helmsman means the water can be flooded in, and three self-bailers mounted the right way around can remove it when the boat is moving as little as 3 to 4 knots. The water can also be pumped out with a conventional bailing pump, a small electric pump, or drained off as the boat lifts onto a trailer. I watched a capsize demonstration in Scotland when the water-ballast tanks were full: the boat self-righted so quickly from a complete knockdown that little water entered the cockpit and the crew were back aboard and sailing within two minutes.

SeaRaiderPhoto by Kathy Mansfield

SeaRaider is water-ballasted. As this capsizing demonstration shows, the boat is extremely stable when in ballast. It self- righted during the drill, and the crew was back aboard and in a dry cockpit within two minutes.

Once Matt was happy with the design, he had all the plywood parts cut out by computer-controlled router. “This not only saves time,” he explained, “but also ensures the hull is designed accurately and fits together exactly.” She was built right-way-up over a four-mold construction jig. Her bottom panel is sheathed inside and out with heavy 16-oz (450g) biaxial glass, and the whole hull is epoxy-coated. The construction method is largely self-jigging and relies on internal structure like bulkheads to form the shape and provide stiffness.

Several custom-made pieces of stainless-steel hardware were commissioned for the boat, including the massively strong rudderhead (plywood blade), the tiller joint, and the mast tabernacle. Matt applied his engineering skills to the tiller design—always a problem when a mizzenmast is in the way. Under the aft deck a stainless-steel push rod with stainless-steel ball sockets at each end gives fine-tuned responsiveness without any slack. It feels slightly heavier than an ordinary tiller, but one quickly gets used to it.

The resulting boat is a modern classic, with the graceful looks and lines, lovely sheer, and elegant use of varnished wood for spars, gunwales, and slatted seats that are part of the ethos of the Swallow- boat range. It was important for Claus that they could both design and build his new boat. The SeaRaider has the lean shape and flat run aft of a racing dinghy of the 1960s, her transom narrowed to reduce wetted surface to improve rowing ability. Primarily she is a sailing boat; with a firm turn of the bilge, good form stability, and a flat run aft, she is well able to plane in the right conditions, as we found. She weighs just 716 lbs when the tank is empty, fully 440 lbs less than Claus’s old fiberglass boat of the same length. So, she’s lighter to maneuver, tow, launch, and retrieve, yet just as robust. The boat has an outboard well, sited inboard on the centerline where it should be, with a slit just for the propeller that simply closes with a flap when not in use. The maximum power is 5 hp, but a Honda 2.3-hp short-shaft is sufficient.

The boat, named CRAIC after the Irish word for a good sociable time, was so brand-new when Matt trailered her up to Sail Caledonia to test her, that even Claus had not seen her and was still sailing his old boat. I liked CRAIC’s slim shape and the versatile yawl rig that can cope with strong winds.

The gunter mast can be stepped or lowered down in its hinged tabernacle, its topmast and the mizzen spar being light carbon fiber enclosed in luff pockets like a windsurfer. This reduces turbulence on the leading edge and adds a bit more sail area, and CRAIC sails very close to the wind. The self-tacking jib is set on roller-furling gear and tacks easily with its club boom. For stowage, the mizzen wraps on its round carbon-fiber mast; the mainsail can be similarly furled if the gooseneck is disengaged. The sprit on the mainsail means that the spar is well above head height, yet the sail is well supported. Slab reefing is still possible, with cringles near the mast, or the main can simply be dropped. CRAIC rows well, her topsides are low enough, and the rudder slightly down gives directional stability. The thwarts are removable to clear space for sailing. Everything works so easily.

SeaRaiderPhoto by Kathy Mansfield

SeaRaider’s gunter rig is easily un- stepped and stowed aboard.While primarily a sailing boat, she can be rowed handily when conditions require.

I joined CRAIC the day of her first real trial early in the week on Loch Lochy, on a crisp early summer’s day, the mountains circling the loch rising blue-green into the sky. The wind was gusty, between 8 and 18 knots, and designer Iain Oughtred had been invited to take the helm. The wind died as the race started but then returned strongly, and we set off on an exhilarating tacking duel with the Beetle whaleboat replica MOLLY, 6′ longer than our boat. Claus watched with incredulity as his new boat took off through the fleet “like a knife through butter,” he later told us, and left the rest of the fleet behind.

Our delight simmered down as the unsettled weather and the mountains began to throw longer and heavier gusts our direction, and whitecaps became trailing spume. Gusts up to 33 knots were coming our way, but Iain was curious to see what CRAIC was capable of and kept heading up, spilling a bit of wind when needed. We could have reefed the main, of course, or taken it down entirely; she sails well under jib and mizzen.

We turned onto the downwind leg, and Matt clocked 8.7 knots on his GPS before the boat with its four crew suddenly rose up a few inches and started planing. There was too much spray to read the GPS, but Matt had already reached speeds of over 10 knots in her in Wales. “It’s like a Nantucket sleigh ride, coasting behind a whale,” I thought to myself as I held on tight to my camera. At the next buoy we stopped to put in a reef, and by the time we reached our destination, the wind was an indolent breeze.

But CRAIC’s star had risen, Swallow Boats had achieved their biggest design breakthrough, and Claus was bursting with pride that he had been part of the project. Since then the boat has sailed in Raids in France and Italy, its design adapted to the BayRaider and cabin versions, selling through Europe and now to the U.S., and Claus’s pleasure has only increased.

SeaRaider

The SeaRaider’s lines show a narrow, easily driven, sheet-plywood hull that, due to its water-ballast tanks, is unexpectedly stable. The gunter rig’s spars are built of carbon fiber.

This Boat Profile was published in Small Boats 2010 and appears here as archival material. Swallow Boats is now Swallow Yachts and the Sea Raider is no longer in production. See their website for current models.

The Kingfisher Power Dory

Richard Wilson is a boatbuilding instructor. His smart-looking wooden power dory, Kingfisher, grew out of his desire for a practical inshore craft suitable for sportfishing, flatfish netting, and scuba diving. As a bonus, it also happened to be a good boatbuilding project for his students, which could be completed within the time frame of his course.

Wilson, a master tradesman with years of experience, became a director of his family’s boatbuilding company, Brin Wilson Boats, in 1974, when his father died. In partnership with his brother, he ran the company until 2000, when they made the decision to sell. Today, Wilson is a marine technology tutor at Auckland’s University of Technology, UNITEC.

KingfisherPhoto by John Eichelsheim

Kingfisher is an outboard-powered skiff whose lineage can be traced back to New England dories. Her topsides are planked in lapstrake plywood, and she has a double bottom that provides both flotation and self-bailing capability.

Wilson owns a vacation home at Marsden Cove, north of Auckland on the shores of Whangarei Harbour, a large, deeply indented, flooded river valley with plenty of the shallow inlets, tidal rivers, and extensive sand flats typical of New Zealand’s northernmost regions. Finding himself without a larger boat for the first time in many years, Wilson decided to design and build a dory after being bitterly disappointed in a lightweight 14′ aluminum runabout he’d bought to explore Whangarei Harbour and beyond. “I hated it,” he explained. “It was noisy, hard-riding, and unstable. And there was no room in it!”

Wilson’s first love is wooden boats. He became interested in design at a very young age. Over the years, ten yachts and three launches ranging between 36′ and 41′ in length have been built to his designs. So designing and building a boat of his own was an obvious solution. The dory is his first small design.

“I wanted a boat with a stable hull that was easily driven by a 20-hp outboard, easily handled by just one person, and easy to build. Kingfisher fits all those criteria.” The boat is a traditional-looking dory with a flat bottom and a double chine. Its high bow, sweeping sheer, moderately raked flat transom, and an outboard motor mounted in a well all contribute to its attractive, clean lines. The decision to mount the motor inboard was partly driven by aesthetics—Wilson feels it’s a better-looking boat in profile if the outboard doesn’t show—and partly by function.

One of Kingfisher’s regular tasks is to set nets for flounder, sole, and other flatfish which abound in Whangarei Harbour, for which her shallow draft is ideal. With this in mind, a raised platform is fitted across the boat’s transom to facilitate setting and retrieving a net over the stern. Working nets over the transom is always the safest procedure, but difficult to achieve with a conventional transom-mounted outboard, which gets in the way and constantly tangles in the net. Aboard Kingfisher, working nets is easy, as is accessing the engine when the boat’s afloat. When the engine’s kicked up it remains inside the line of the transom and well clear of the bottom of the boat.

KingfisherPhoto by John Eichelsheim

Kingfisher’s outboard motor is mounted in a well—a decision driven largely by aesthetics. It tilts clear of the water while remaining entirely within the boat.

Kingfisher’s construction is in 9mm and 6mm plywood, her topsides lapstrake planked. The bottom is fiberglass-sheathed to just above the upper chine, and all the boat’s timbers are sealed, epoxy glued, and then painted. Wilson uses single-part paint rather than more advanced two-pack systems, as it is more environmentally friendly and requires a less complex application and touchup.

The main floor—the sole—is also fiberglass-sheathed and then painted with a mixture of one-part paint and Epsom salts (magnesium sulfate) to provide an effective nonskid surface. The solid wood in Kingfisher is macrocarpa, a type of cypress, of which there was a supply in Wilson’s workshop at the time of construction. It is commonly used by boatbuilders in New Zealand; North American and European builders will no doubt require a substitute. A subsequent boat was built using yellow cedar, which bends well, is durable, and is a bit more dense than macrocarpa or red cedar.

Kingfisher’s trim is in mahogany, again because it was available to the school at the time of building. Wil- son prefers teak, which can be left to weather, but it’s expensive. The second boat doesn’t use teak either, for the same reasons. (Mahogany does, however, have the advantage from a boatbuilding perspective of requiring several coats of varnish—another skill for Wilson’s students to master.) The students also fabricated the boat’s solid-lumber details, like the knife holders and wooden bow roller, giving them experience in joinery details.

One of Kingfisher’s more interesting features is a sealed floor suspended 4″ above the bottom and 2″ above the upper chine line—effectively an airtight double hull with a volume of 0.5 cubic meter. Aside from offering a flat floor above the waterline inside the boat, which self-drains via two 2″ holes in the transom, it provides buoyancy and security should the outer hull ever be breached. The boat is also easy to clean, as it can simply be hosed down from the inside. Another benefit of the double-chine sealed-floor design is the form’s stability at rest. According to Wilson, a scuba diver can pull himself over the side of the boat with no risk of capsize. Indeed, the boat heels no more than a few inches. Certainly two adults can move around Kingfisher with impunity, barely altering her trim.

The boat is designed to be transported atop a conventional flatbed utility trailer. Most New Zealand households have access to light general-purpose trailers of this type, used to transport bulky or heavy goods, garden waste, and rubbish. The dory sits on the trailer resting on its twin timber keels, spaced 2′ apart and running the full length of boat’s flat bottom. The keels are 43⁄4″ deep and capped with aluminum rubbing strips to protect against wear and tear from contact with the trailer or when taking the ground.

The keels allow the boat to be pulled up a beach or left to sit on the hard when the tide recedes. They also provide lateral stability when the boat’s underway and give a certain amount of protection from damage in shallow water. When the boat’s on plane, air trapped in the tunnel between the keels acts as a cushion, softening the ride.

KingfisherPhoto by John Eichelsheim

Kingfisher’s twin keels funnel air between them, softening the boat’s ride.The keels also hold the boat upright when beached, and lend great lateral stability when underway.

Kingfisher made easy work of a short, wind against tide chop on Auckland’s Waitemata Harbour, easily soaking up the bumps and delivering a reasonably smooth, dry ride. With two people aboard she achieved a top speed of 14 knots, as recorded on the accompanying photo boat’s GPS. Wilson has managed a maximum of 15 knots with three adults aboard and 12–14 knots with four in ideal sea conditions.

Wilson likes to drive standing up, which is safe enough because the boat is so stable; this steering posture offers better vision forward. When planing, Kingfisher rides on the flat run aft with her bow well up in the air, an impression reinforced by her sheerline. If he’s by himself, the designer employs a simple tiller extension so he can stand or sit farther forward, helping to trim the boat.

In rough conditions, Wilson sits on the timber cross- seat just ahead of the engine box, one of two, painted, solid-wood thwart seats, each pierced with four holes to accommodate fishing rods. Additional angled plastic rod-holders are screwed to the gunwales for a total of 12. This man is serious about sportfishing.

Kingfisher is a remarkably large-volume boat. Unlike some dories, she carries plenty of beam, especially amidships, and her raised floor offers more usable surface area than would be the case if the outer skin were the floor, as is usual.

The interior layout is simple and uncluttered, but very workable: an enclosed locker—essentially an extension of the engine box/well—runs fore-and-aft between the seats down the middle of the boat. A lift-off watertight lid reveals stowage for a portable plastic fuel tank, life jackets, lines, fishing gear, and longer items such as oars and fishing rods. Two inspection hatches in the lock- er’s floor give access to the boat’s airtight under-floor compartment.

Between engine well and storage locker, and part of the same fore-and-aft structure, is an open-topped battery locker. The battery is housed in a proprietary plastic box to protect it from spray or water sloshing around in the lockers, which both drain aft into the engine well. Up under Kingfisher’s short foredeck there’s a self-draining anchor locker below floor level. The solid-wood anchor roller and bollard on the curved foredeck are attractive and functional features.

Kingfisher has been a successful design in every respect: she’s proven to be a capable, safe, stable, and seakindly boat with excellent load-carrying ability. She is economical to run. The design is relatively easy and inexpensive to build, and Wilson’s UNITEC students are able to complete the boat, from lofting to launching, working three days per week over thirteen weeks. Along the way, they learn a useful range of traditional and modern boat-building skills. Best of all, Wilson has created a great little boat that perfectly meets his needs.


Kingfisher Power Dory  Particulars

LOA:   18′
Beam:   6′ 10″
Waterline beam:   5′ 6″
Displacement:   951 lbs

Kingfisher Lines

Kingfisher’s combination of flat bottom and double chines provide ample planing surface and minimal pounding. The boat is built of sheet plywood.

This Boat Profile was published in Small Boats 2010 and appears here as archival material. The contact information in that Profile is no longer valid and we presume that plans are no longer available.

Disappointment

Clayton Wright, who built the pedal-and-propeller powered skiff featured as our Reader Built Boat in this issue, put an extraordinary effort into inventing a drive system for the boat only to discover during sea trials that it fell far short of his expectations. “The boat is back in the basement,” he wrote, “I’m going to throw a sheet over her and try to put her out of my mind.”

The original King Island kayaks were covered in seal or walrus skins. I used #10 duck and painted it with airplane dope.

Most of us who have built boats choose a design and a means of propulsion for it that have been well tested; the pride we take in the project isn’t dashed on launch day. It’s a rare occurrence to build a boat that is deeply disappointing, but it has happened to me too.

The hole in the upper bow is typical of King Island kayaks and gives the kayak an eye to see with and place to get a solid grip on the kayak.

The third kayak I built was a replica of a type built on Alaska’s King Island. A couple of years earlier, in 1979, I had built a Hooper Bay kayak and had developed an appreciation for traditional construction, and the King Island seemed like a worthwhile project. I don’t recall now what plans I used, but there were drawings and scantlings in Bark Canoes and Skin Boats of North America and I could study the specimen that the Washington State Historical Society had in its museum in Tacoma.

One of the few times my King Island kayak was afloat was for this gag photo I took to illustrate an article on bailing. My dad crawled in and I handed him a bucket full of water. I shoved the kayak out—with a line attached to the bow—and told Dad when to pour the water out.

King Island is situated 40 miles from the Alaskan mainland just south of the entrance to the Bering Strait. The waters there are notoriously rough, and the kayakers needed to travel long distances and carry heavy loads home after a successful hunt. Their kayaks have been described in glowing terms: “Of all the Bering Sea kayaks, this type was reportedly the best made and strongest…a great kayak for a person intent on distance paddling.” It seemed like the perfect choice to fulfill my dream of cruising among the San Juan Islands.

I carved the lower bow piece from an Alaska yellow cedar crook, the grain follows the curves extending upward from the keel and gunwales. Between those edges, the surfaces are hollowed out to reduce weight and provide airspace to keep the skin from rotting.

I wanted my King Island to be as close to the original as I could make it, so all the wood that went into it was driftwood that I gathered from the beaches near home. I split spruce for the gunwales and keel and Western red cedar for the stringers, cut the deck beams and carved the bow piece from Alaska yellow cedar crooks. I used power tools as little as possible and trimmed the pieces to shape with a drawknife, planes, and spokeshaves.

I added a maststep and partner and got so far as making the mast and yards for a small squaresail. I never sewed up the sail.

I made a few additions that I thought would be useful for cruising including accommodations for a foot-controlled rudder, a maststep and partner, and a mast and yards for a small squaresail. I couldn’t use seal skin to cover the kayak, so I used #10 duck and sealed the fabric with airplane dope. I’d already carved a single-bladed paddle for the Hooper Bay, so I was ready to launch.

Getting aboard at the beach was awkward, and when I shoved off I knew something was wrong. The King Island was very unstable. It would roll to one side, I’d brace, and it would roll to the other. The dreams I had for the kayak quickly evaporated.

The arched deckbeams were cut from crooks with gentle curves. The ribs were steam-bent from straight-grained yellow cedar.

Unlike the Hooper Bay kayak, which had ribs that were flat across the bottom, the King Island’s ribs were curved and the round bottom wouldn’t provide any stability until the hull had more than my weight aboard to settle deeper in the water and immerse the flare of its sides. With a cruising load the King Island might have offered the stability I needed, but I didn’t want to weigh it down every time I went paddling. I later read somewhere that the King Islanders put beach-stone ballast in their kayaks; I didn’t like the idea of filling a canvas-skinned kayak with rocks.

The framework of the King Island kayak is wonderfully complex and unfortunately gets concealed by the skin that turns it into a boat. With the skin removed, it’s sculpture.

My King Island kayak went into storage for decades at home under the eaves or a tarp. The skin eventually rotted and two years ago I tore it off and put it in the trash. I hadn’t had a good look at the frame in decades and I was pleased by what I saw, especially the beautifully curved yellow cedar bow piece. In every facet left by the spokeshave on the ribs and deckbeams I could see my 30-year-old self at work. It reminded me of the aspirations I had then while building the boat, not of the disappointment I felt after launching it.

Whether or not Clay gets satisfying performance out of his pedal-powered skiff, he may, in time, come to see and enjoy the beauty and ingenuity of the boat he built. Things may not always turn out as we intend, but doing good work is always its own reward.

Devon Scaffie

Some 38 years ago, after a short career in the American Merchant Marine, my need to be on the water prompted me to begin looking for a small sailboat. At the time, I was living on a tidal river that had low bridges between me and open water, so I needed a boat with a mast that could be lowered easily. A friend told me about a Drascombe Scaffie, as the Devon Scaffie was then known, that was for sale in Portland, Maine. It turned out to be the perfect boat for my situation and now after thousands of miles, I am still sailing this very enjoyable and versatile boat.

Tom Hepp

The Scaffie has two unusual horns aft, which support a rope traveler for the mainsail sheet above the tiller and the outboard.

The Scaffie was designed by John Watkinson, founder of the Drascombe line of small boats, and has been in production in the U.K. since 1978. It is 14′9″ long with a beam of 5′9″ and, at 462 lbs fully rigged, ideal for trailering behind even small vehicles. Its 15″ draft allows access to almost any waters. The boomless standing lugsail has an area of 100 sq ft. Two uprights are set in sockets in the stern and support a shoulder-high rope traveler above the tiller. The mainsheet is led through a block on the rudderhead, then led forward along the tiller where it can be cleated or gripped with the tiller.

Michel Maartens

Heeling in a good sailing breeze, the Scaffie shows its windward bilge keel. The leeward bilge keel is providing lateral resistance to supplement that of the full-length keel.

A full keel, along with twin 36″-long bilge keels, leaves the interior of the Scaffie uncluttered by a centerboard trunk for added comfort and ease of movement in the cockpit.

A trailer to transport a Scaffie will generally support the full-length keel with a few rollers and outboard bunks to support the hull between the keel and bilge keels. It takes less than 15 minutes to rig the unstayed mast and sail to be ready to launch. Upon returning to the ramp, securing the rig and loading it onto the trailer is quick and easy. The mast partner is equipped with a gate, so the mast is set in the step, pivoted, upright, and locked by the gate. It is much easier than having to lift the mast to drop through a conventional partner. The partner has cleats for the halyard and the tack’s downhaul. There are two wooden rowing thwarts and molded fiberglass side benches with flotation that can accommodate up to four people.

Ole Helgerson

The center and bilge keels mean that the cockpit is unobstructed by a daggerboard or centerboard trunk.


It takes only a light wind for very relaxed sailing. In steady winds under 14 knots the boat is dry and an absolute delight to sail. The Scaffie was drawn with two reefs to reduce sail when the wind picks up. When I’m sailing solo, I set the first reef at around 14 knots. When double-reefed, the Scaffie can handle steady winds up to 20 knots, especially when there are two or more sailors aboard; that makes for very exciting sailing and you can expect to get wet.

Any small open boat is at risk to be swamped in certain wind conditions and the Scaffie is no exception, even when double-reefed, but with good judgment it can be avoided. In 38 years of experience, I have completely swamped my Scaffie only two times, but the boat remained upright and didn’t capsize. On both occasions the wind was strong and very gusty. The foam-filled molded flotation compartments kept the boat afloat and it only needed to be righted, bailed out, and I was back on my way.

Elizabeth Wade-Brown

The Scaffie carries a boomless 110 sq ft lug rig which can be set up at the ramp and ready to sail in about 15 minutes.

In my logbook is a passage that demonstrates the Scaffie’s extraordinary seaworthiness. I had spent a night high and dry on Steve Island south of Stonington, Maine; the forecast for the following day was for small craft warnings with winds to 20 knots or more from the southwest. The wind was already picking up. Staying among a group of islands that did not provide enough shelter would make for an uncomfortable day, and the best shelter was over 10 miles away with 8 of those miles crossing the open waters of East Penobscot Bay.

With the sail double-reefed, I set out into the bay one hand on the tiller and the other on the mainsheet, closehauled on a port tack. The wind was already at 20 knots or more and seas running up to 4′. Whitecaps were everywhere and one broke against the side of the boat. Spray filled the air but the Scaffie remained steady and rose to the crest as the wave rolled under the hull. For almost two hours, beating on one long tack, the Scaffie averaged 4.6 knots to windward into a heavy sea and took on very little water. At the time, I was in my early 50s and had 12 years of experience sailing the Scaffie. Now 77, I am still confident in my ability to handle this amazing little boat, but I avoid days when the wind is predicted to be 20 knots or more.

Elizabeth Wade-Brown

For rowing, the sail can be dropped and the outboard cocked up while still in the well. The tiller is lashed to the traveler to keep it steady amidships. Scaffie owners use oars ranging from 8′ to 9′ 6″.

The Scaffie normally carries one set of oars and is rowed solo from the forward or the aft station to maintain the best trim. A speed of 2 to 2 ½ knots can be comfortably maintained with the rudder set to ’midship. When not in use, the oars are stowed on the centerline under the thwarts.

An outboard of 2 to 3 hp can provide auxiliary power. The engine well is inboard making access to the outboard convenient and safe. The well is open aft so the outboard can pivot over obstructions as well as be kicked up for rowing and sailing, rather than removed. Scaffies are molded with a well but can be ordered with the opening in the hull not cut out. The Scaffie will cruise with the 2.5-horse at about 4 knots when set at half throttle for best fuel economy. The well is offset to port far enough to permit the use of the rudder for steering while under power.

With simple modifications for overnight, the Scaffie makes an ideal solo beach cruiser. There is plenty of space along the centerline in the bottom of the boat to lay out a pad and sleeping bag, but with such an arrangement there is limited space for gear. My solution has been to replace the thwarts with a 6′-long platform level with the side benches. It provides plenty of room for sleeping with a hatch in its center to provide access to gear stowed below. Crutches installed fore and aft support the mast as a ridgepole, for a cover to provide shelter from the elements.

Most of my overnight and multi-day cruises are on the coast of Maine where the tides are up to 10′. In some locations, I anchor in deep water to stay afloat through the tide cycle; in others, I like to plan overnight stays with high tides in the evening and in the morning, and set the Scaffie parallel to a soft bank to rest on the center keel and the shoreside bilge keel when the tide goes out. The bilge keels are not at the same depth as the center keel, so the Scaffie is made level by coming to rest across a gentle slope. Since the bilge keel on the water side doesn’t make contact with the ground, lines from the bow and stern to shore are tensioned as they are tied off to keep the boat secure and prevent it from rolling away from the bank. The rudder doesn’t extend below the keel line so it can remain in place when beached.

Michel Maartens

The keel makes it difficult to drag the Scaffie out of the water, but the twin bilge keels will keep it from heeling excessively if the tide drops.

The Scaffie is built to last and doesn’t require a lot of maintenance. Mine has always been kept inside when not in use, and at the start of each sailing season, I treat the inside and outside of the hull with fiberglass color restorer that provides UV protection and resists stains. The gelcoat on my nearly four-decade-old Scaffie is still shiny with only minor scratches. Every three or four years, I put a coat of spar varnish on the hardwood trim, tiller, mast, and oars. I am still using the original sail. This is a testament to the lasting quality built into this boat.

After 38 years of sailing the lakes, rivers, and bays of coastal Maine, I trailered my Scaffie to northeast Florida and we will begin to explore the sheltered waters of the St. Johns River, yet another chapter in the adventures of Scaffie hull #109. I take great comfort and security in the boat and enjoy all three ways of propelling it. If you like sailing, rowing or motoring, the Scaffie can do it all.


Tom Hepp has spent most of his life around boats and water. He is a veteran of the U.S. Navy and Merchant Marine and has worked professionally as a boatbuilder for over 10 years. He spends summers on the coast of Maine and winters near the St. Johns River in northeastern Florida. He designed, made cardboard mock-ups of, and built two take-apart pirogue-style boats (see “Nesting Boats”) to take in his van during summer vacations.

Devon Scaffie Particulars

Length:  14′ 9″
Waterline length:  12′ 3″
Beam:  5′ 9″
Draft:  1′ 3″
Weight, complete:  462 lbs
Sail area:  100 sq ft

The Devon Scaffie is available from Honnor Marine for £12,995 ($17,869) and includes foam buoyancy, rudder, tiller, sail, Sitka spruce spars, and bronze rowlock sockets.

Is there a boat you’d like to know more about? Have you built one that you think other Small Boats Magazine readers would enjoy? Please email us!

Deblois Street Dory

Clint Chase of Saco, Maine, designed the Deblois Street Dory in the spirit of New England’s dories. The lapstrake hull, and graceful curve of the bow, the tombstone transom, and low sweep of the sheer are all Swampscott dory.

The first of the DSD dories was built in 2010. A few years later, at Maine’s annual Small Reach Regatta, Clint met JR and Mary Krevans, a couple from Bar Harbor, Maine. They were thinking about a new boat to build, one which could be rowed and sailed with ease, and keep up with the Caledonia yawls in the regatta. Clint modified his original Deblois Street Dory design slightly to fit JR’s and Mary’s needs by making it better suited for sailing. He kept the length at 18′8″ and the beam at 4′10″, but widened the flare on the frames in the stern to make the boat stiffer under sail and able to carry cruising gear. He also drew a bigger standing lug rig with a sail area of 90 sq ft. JR built the boat from a kit and launched it in 2015. The modifications became the current form of the boat.

The kit provides CNC-cut marine plywood pieces; additional kits are available for the hull and spar timbers, the hardware and the epoxy. The 34-page manual included has detailed step-by-step instructions illustrated with color photographs and drawings. For JR, “the kit components fit perfectly and the directions were clear.” The kit’s stem, frames, and transom are all made of multiple layers of precut plywood. Screws driven into predrilled holes keep all the pieces from sliding out of alignment when gluing the stacks together.

Sara Traynor

While the Deblois Street Dory was designed as a plywood kit boat, it is virtually indistinguishable from a traditionally built dory of the Swampscott type with lapped planks and gusseted frames.

Clint, inspired by John Gardner’s The Dory Book, wanted the DBD to be faithful to traditional dory construction, so assembling the hull begins with attaching the stem, frames, and transom to the bottom before setting that structure upside down on the kit’s precut plywood strongback. The 9mm okoume planks for the dory’s five strakes come in two pieces for the garboards and three pieces for the rest. The CNC-cut joints have three steps, with interlocking puzzle joints in the middle step, which will be invisible when assembled. The exposed edges of the joints are gently wavy, to avoid weakening the joints and present a more subtle glue line for a bright finish. Builders working from plans are provided with measured drawings for the planks; no spiling is required. In keeping with traditional construction, builders will cut bevels and gains in the planking laps before securing them with epoxy; battens and temporary screws hold the laps closed while the epoxy cures.

JR noted: “My previous boatbuilding experience was four kayak kits and a 15′ dory, all stitch-and-glue construction. My building time for Deblois Street Dory was about 300 hours spread over six months.”

Sara Traynor

With the aid of rollers, the approximately 225-lb dory can be launched or hauled out of the water. The rudder, with its blade pivoted up, doesn’t need to be removed for hauling out.


The interior is outfitted with three thwarts in typical dory fashion. Airtight tanks in the ends provide buoyancy. The plans include drawings for a daggerboard and a centerboard, both with blades made of three layers of plywood and sheathed with 6-oz ’glass, and a fixed rudder made of laminated plywood. JR built his dory with a daggerboard trunk and used solid white oak for the board. There are drawings for a fixed rudder and for a rudder with a pivoting blade. JR opted for the latter. Whether making the board and rudder blade from solid wood or laminated plywood, the plans and kit include templates for giving them effective foil shapes for low drag and better windward performance. The mast and yard on JF’s DSD are carbon fiber and weigh altogether less than 8 lbs. The plans give the necessary details for making the spars of Sitka spruce or eastern white spruce—solid spruce for the yard and boom; hollow bird’s-mouth construction for the mast.

The DSD plans offer several sail rigs: the 90-sq-ft standing lug that’s shown here, the 88-sq-ft balanced lug with 18-sq-ft mizzen, the 76-sq-ft standard sprit, and the 87-sq-ft sport sprit. JR opted for the lug rig for its acceptably high performance, and ease of singlehanding.

The DSD “trailers easily and is narrower than our Subaru Forester so visibility and tracking are good,” according to JR. “At the ramp, the flat bottom is easy to load on and off the trailer.” I joined JR for a sail on Mount Desert Island’s Somes Sound and I was impressed, once the boat was afloat, by how rapidly the mast, lug, and sprit boom could be raised in one 30-second swoop, and how quickly we could leave the dock, which was 30 seconds after that.

JR finds the dory “initially a little tender, but the flare carried back from frame 3 to frame 5 allows great use of the skipper’s body position to keep her steady. The hull is only about 220 lbs empty and we do not carry ballast, so the crew does definitely need to balance the boat.”

Sara Traynor

The dory is offered with four sailing rigs: standing lug (shown here), balanced lug with mizzen, standard sprit, and the larger sport sprit. Note the skipper is well positioned for solo sailing with one hand on the tiller, the other on the sheet, and weight close to the windward rail.


JR and I sailed out in 5 to 10 knots of wind, and I immediately felt like we were sailing in one of the modern racing dinghies of my youth, but, miraculously, we were also staying dry. We zipped around in the protected cove at the head of Somes Sound at up to 5 knots. The sprit boom is self-vanging and set high enough so it’s not likely to hit you in the head during an unexpected jibe. Closehauled, the DSD tacks through about 100 degrees. “Going off the wind in a breeze,” notes JR, “the hull starts to lift in the water and exceed 5 knots; that is the only time I feel a need to put down my coffee cup and keep weight low.”

I quickly got a sense of its excellent responsiveness. The boat reacted to every minor adjustment of the tiller and weight shift, tacked and jibed with ease, and came to a quick stop when luffed into the wind. JR finds that there is only minimal weather helm unless the DSD is sail-heeled well over. On a couple of occasions he and Mary sailed the lee rail under, but the dory rounded up nicely and took on very little water.

Though we didn’t need to reef, JR showed me the process, which took us only three minutes to lower the sail, reef, and raise it again. Color-coded lines eliminated confusion from the loose ends clustered on the floorboards. JR and Mary generally put the first reef in at about 10 knots of wind. They take the dory out in anything up to 15 knots, but they are double-reefed at that speed. When sailing downwind in heavier winds, they have an 18-sq-ft storm sail made from a tarp. JR reports they’ve “put three people on the windward rail and nothing has given out yet.”

Sara Traynor

The designer recommends 9′ oars for the dory. The stations for tandem rowing have plenty of space in between them to minimize clashes if the rowers get out of synch.

We could switch from sailing to rowing within a minute or two; the sail and spar easily fit in the boat off to one side. JR designed a plug that goes into the daggerboard trunk to help prevent water from splashing up through the slot. The plug projects below the hull about 1″ and is about 1 1/2′ long, creating a skeg of sorts that helps the boat track better while rowing. The dory glides along quickly with a low effort on the oars; rowing was very satisfying. JR has measured speeds around 3 knots with one person at the oars and up to 4 knots with both of them rowing over a distance. The blade of the rudder kicks up with a pull of a line next to the tiller, to allow the boat to navigate shallow waters.

Sara Traynor

The tiller detailed in the plans is nearly 7′ long and allows steering from the center section of the boat, where the beam can support the weight of the skipper and maintain proper trim.

JR and Mary have had their Deblois Street Dory, POLARIS, for six years now and in most conditions, they are able to keep up with the Caledonia yawls while rowing or sailing, falling behind only in heavier winds. Clint has joined JR and Mary a couple times, including for a 42-mile circumnavigation of Mount Desert Island, which took them about 13 hours. JR and Mary always carry a fair amount of gear in the boat, including extra safety gear, a throw rope, two bailers, and extra flotation in the form of a couple of big fenders. They find that they can sail the boat with a complement of three and some safety gear, or just the two of them and a lot of camping gear. They often beach the boat by rolling it up above the high-tide line on the large fenders.

After rowing and sailing the Deblois Street Dory, I came away thoroughly impressed. The boat’s aesthetics are rooted in tradition, but it moves with the quickness of a modern racing dinghy. I think the DSD would be an excellent boat for a single person, a couple, or a young family to enjoy in a variety of ways—from day sails in moderately protected waters to overnight coastal camping trips. JR and Mary enjoy the versatility of the boat, from rowing to sailing for the day, to loading it up with gear and going camping for a couple days along the coast and among the islands. “The hull is supremely seaworthy,” notes JR. “Using the boat is a joy.”

Arista Holden is a longtime seamanship instructor for programs including Outward Bound, NOLS, Atlantic Challenge USA, and WoodenBoat School. She is a frequent contributor to WoodenBoat, and is at work compiling a book about the Apprenticeshop and its founder, Lance Lee. She holds a 100-ton USCG license and lives in Belfast, Maine.

Deblois Street Dory Particulars

[table]
Length/18′6″
Beam/4′ 10″
Width on DWL/37 ½″
Depth amidships/18 ⅜″
Draft, loaded to DWL/6″
Hull weight (no gear)/225 lbs
Sail Area/90 sq ft

[/table]

Standing Lug

Plans and kits for the Deblois Street Dory are available from Chase Small Craft. Plans are delivered as a digital download and are priced at $250. The complete kit is $6,821.

Is there a boat you’d like to know more about? Have you built one that you think other Small Boats Magazine readers would enjoy? Please email us!

A Tale of Two Boats

It was the fall of 1962, and I had just started my junior year of high school. I subscribed to Popular Mechanics magazine and was always excited when each new monthly issue showed up in my mailbox, since it contained all kinds of stuff that was interesting to this 16-year-old technically oriented guy. The cover of the August 1962 issue pictured “The Supersonic Helicopter of the Future” (well, that didn’t happen) and teaser—“Build a 38 m.p.h. Fun-Boat—for $38.”

SBM

The August 1962 issue of Popular Mechanics had 202 pages for just 35 cents. The top billing went to new cars and highlighted the ’63 Studebaker Avanti.

I immediately turned straight to page 140 and read the article. It described how to build a neat little 13′9″ outboard runabout, a PM-38. The “PM” was for Popular Mechanics and the “38” came from a boat speed of 38 mph, a materials cost of $38, and a build time of 38 hours. “Hey,” I thought, “I can do that!” I showed it to my dad, and he said that if I could build the hull, he would find an engine for it.

SBM

The article on the PM-38 packed a lot of information, drawings, and photographs into 7-1/2 pages.

Our home in the Sunset District on the west side of San Francisco had a two-car garage, but we had just one car, so I had space to build the hull. My grandfather Kelly had a construction business and much of the framing material came from his scrap pile; I saved my allowance of $3 per week to buy other materials and plywood, saving some money by Pa Kelly using his contractor’s discount for the Douglas-fir exterior-grade plywood used for the hull planking. I don’t know how much I spent, but it was likely less than $38.

Most every weeknight after dinner and homework, I would go down into the garage and spend an hour or two working on the boat. Not much got done on the weekends—Friday was “date night.” Dad didn’t help much with the construction. Although he was a very competent woodworker, he felt that this was my project and believed I would learn more by making mistakes and figuring out how to fix them. More than once, I had the unfortunate “measure once, cut twice” experience. Once or twice each week, Dad would look over my work, and explain what I was doing right, and point out where I could do better. Occasionally, my friends would drop by to see what I was up to; they were always amazed that I would even try to build a boat.

For the previous two summers, I had worked as an apprentice carpenter in my grandfather’s construction company, so woodworking was not completely new to me, but building the boat was a real stretch of my skills. I built it on a pair of sawhorses, instead of the two A-frame supports called for, and used secondhand power tools: an old 1/4″ single-speed drill, a beat-up circular saw that Pa Kelly had given up on, and a tiny jigsaw of my dad’s. I bought a carpenter’s framing square, a decent rasp, and a block plane.

The forward ends of the plywood bottom panels required steaming to bend and twist them into place. I borrowed my new stepmom Mildred’s steam iron for this task and managed to burn it out. She and my dad had been married less than six months, and she was not impressed.

There were nearly 400 screws in the boat, all driven in by hand. The magazine article called for caulk on all the joints below the waterline, and Weldwood waterproof glue elsewhere, but my dad suggested that I should use the glue for all the joints. Weldwood Plastic Resin Glue, a urea-formaldehyde formula, is nasty stuff. It’s a brown powder that, when mixed with water, turns dark, and has the stinging, eye-watering smell of formaldehyde. Unless just the right amount of water is mixed in with the powder and the joints are gap-free and put under a lot of clamping pressure, it won’t have any strength at all. At the right consistency it’s a sticky mess and gets all over everything. The only thing that was worse was Dad’s suggestion to fiberglass the hull. He did spring for the fiberglass cloth, resin, and catalyst, but he left the messy job of sheathing the hull to me. The polyester resin in common use then was “aromatic” to put it mildly, and everything in the house soon absorbed the smell of the resin. Again, my poor new stepmom was not impressed. I knew she was irritated by the situation, but she never made a big deal out of it. She knew that the project was important to me and was always supportive. She was an exceptional person, a great stepmother, and we eventually became very close.

Courtesy of the author

I have very few photos of my first PM-38, TERRY’S FERRY. I’d give a lot if I had a picture or two with the boat in the water, but they just don’t exist. Back then, in 1963, I didn’t have a camera, and my folks weren’t much into photography. That’s 16-year-old me at the helm. In this picture the lack of any paint on the interior is clearly evident.

Dad found a used 1959, 40-hp Elgin outboard motor in the boat department of the Sears store on Geary Street in San Francisco. Yes, our local Sears and Roebuck store did actually have a boat department. Elgin, the Sears in-house brand, was made by Scott-Atwater and would provide plenty of power. The Popular Mechanics PM-38 pictured in the magazine was powered by a 28-hp Johnson and could do 38 mph; and the boat was rated to take up to a 45-hp motor.

Courtesy of the author

These shots were taken in the driveway of our house, likely the day Dad and I loaded the boat onto the trailer and mounted the Elgin outboard.

It took me eight months to build the boat, working around six hours per week on it. The math says I spent somewhere around 180 to 200 hours total. I don’t think it could be built in 38 hours.

Terry McIntyre

My stepmom and my dad were impressed by what I had built and were proud to pose with the boat.


I finished the PM-38 in April 1963. We named it TERRY’S FERRY. After school on Friday, May 3, 1963, my best high school friends—Bill and Dave —and I towed the boat with my grandfather’s F-100 pickup to Lake Berryessa, a 15-mile-long reservoir in Napa County, about 75 miles north of San Francisco. We set up a tent in the campsite at the Berryessa Marina. It rained all that night; our campsite was a muddy mess. It was chilly the next morning, but the sun came out, we launched the boat without much fanfare, and all three of us piled into the boat and motored away from the dock. The first thing that happened was the propeller shear pin failed, and I had to get into the water to replace it. (Fortunately, I always bring a tool kit the first time out.) The hull was watertight, but in a tight turn, water just poured in through the hull-to-deck joint. On top of that, the old cable-and-reel steering system was wasn’t working properly. I muttered something like, “Well, what else could go wrong?” and leaned back; the helm seat snapped loose from the bottom and I tumbled into the back of the cockpit. In spite of all the problems, we all did get water-skiing that day—I conned the boat while kneeling on a flotation cushion.

Popular Mechanics did not lie about the boat’s performance: it was indeed fun and fast. The boat would show its transom to most anything; it would flat-out fly. It was a great ski boat, hardly any wake, although a good slalom skier—like my buddy Dave—could get the boat to fishtail a little when he made a tight cut.

I finished the hull with white oil-based house paint scavenged from Pa Kelly’s scrap pile. I had varnished the deck but it was made from interior-grade mahogany plywood and deteriorated quickly. After two summers, I ’glassed the deck and repainted the whole boat with pencil-yellow marine enamel. I also replaced the original bucket seats with a back-to-back bench, upholstered with slick black Naugahyde. Big mistake—the black seats got really hot in the California summer sun!

We did not have a good experience with the Elgin outboard. About every second or third outing, something went wrong. Scott-Atwater outboards have a reputation for being great runners when they run, but they are finicky. The Elgin 40 was a two-cylinder engine with twin carburetors, and the carb floats would often stick, and then the engine would simply refuse to start. I got into the habit of picking up the trailer tongue and dropping it on the ground prior to taking the boat out—this would sometimes unstick the carb floats. In the spring of 1965, my dad and I took the boat fishing on San Francisco Bay, and on the way back to the launch ramp, the engine suddenly developed a rattle like a handful of bolts being shaken inside a coffee can. The engine got us home, but in the garage, we took it apart and found the crankshaft had broken. Fortunately, the break was oblique and inside one of the engine’s main bearings so the shaft could still deliver power to the propeller. To its credit, the engine hobbled along and got us to shore that day, but it was a goner.

Not long after the Elgin died, I passed by a small boatshop in our neighborhood and noticed a used 1960 Johnson 40-hp Sea-Horse in the front window. I went in and inquired about the price: $200. I was then a freshman engineering student, but I had a part-time job that paid $100 a month and, to my amazement, they let me purchase it on credit—$20 down and then $16 a month for 12 months. The Johnson, unlike the Elgin, was bulletproof. It powered TERRY’S FERRY for the next eight years, and two subsequent boats, until I turned it in on the purchase of an Evinrude 75-hp engine on my first “real boat”—that is, one that I didn’t build myself—in 1982.

All through a five-year courtship with Antoinette, my college girlfriend, we often took the boat water-skiing at Lake Berryessa. Summer days with a hot boat and a pretty young woman in a red and white polka-dot bikini sitting next to you—well, if that doesn’t make you a happy guy, I don’t know what will.

In late August 1965, Bill, Dave, John, and I—inseparable friends from high school—got together for a day on the lake before heading back to our separate colleges for our sophomore years. By that time, Antoinette and I had been dating for 15 months, and were starting to get pretty serious and would eventually get married. Bill brought this cute redhead he had been dating for a month—they would get married three years later. John brought Rosie, a classmate whom we all knew. Dave didn’t bring a date, but he brought beer even though we were all 19 and below the legal drinking age.

It took three trips out to a small island near the marina with the people and gear: beach chairs, a couple of ice chests, a grill, and charcoal, not to mention the skis and ropes, and towels and the like. We set up our little day-camp site near the shore under oak trees for some shade. Four people was the most the boat could seat, so we used the campsite as a base while we water-skied with just the driver and observer aboard. We got all the girls up on two skis. Dave tried to teach me to do a “beach snatch”—getting up on a single water ski from the beach without getting wet. I just couldn’t get the hang of it—I either got the tow handle pulled out of my hands or did a face plant into the water. We barbecued hamburgers and hot dogs, ate Antoinette’s chocolate chip cookies, and drank Dave’s Colorado Kool-Aid (that’s Coors beer for the uninitiated).

It was a Sunday afternoon, and we had intended to pack up and head home around 4, but we were all having such a great time that we lost track of time. Around 6:30 or 7, sunburned, tired and happy, we realized that we needed to get going. Instead of the three trips that we took to get to our campsite, we ended up with all seven of us and all the gear in the little boat heading back to the marina. I was at the helm, all the equipment was in the cockpit, the gals were sitting on the side decks with their legs inside the boat, and the guys were sitting on the front deck. Maybe the boat had 6″ of freeboard. There was no way even the Johnson 40-horse could get the PM-38 on plane, and even if it could have, it would not have been safe with the boat so terribly overloaded! It wasn’t far, mostly inside the 5 mph “no wake” zone anyway, and we made it back to shore safely. We loaded the boat on the trailer, all hugged, said our goodbyes, and promised each other we would do it again next year. But by the next August the war in Vietnam would raise its ugly head. Bill and Dave, who were in the Navy reserve, would be called up to active duty, and I was in USAF Officer Candidate School. While my buddies and I remained lifelong friends, that was the last time the four of us would be together. It was one of my best boating days, ever.

By the summer of 1971, the PM-38 had seen the last of its good days. The inexpensive materials used in construction and the lack of paint on the interior led to framework decaying, particularly around the transom. It was also starting to leak badly. Antoinette was pregnant with our first child, so the boat didn’t get used much that summer. After eight years, its time was almost up, but it had been a great little boat, worth every bit of $38, and every hour it took to build.

Courtesy of the author

In May of 1972, I had nearly completed ORANGE CRATE– a Glen-L Rebel that was the PM-38’s replacement. My college lab partner, Ron, and I moved the PM-38 hull from my trailer onto his new trailer, and the Rebel off its building form and onto my trailer. Then we mounted my “bulletproof” Johnson 40 hp Sea-Horse on the transom of the new boat. Right after this, Ron and I took out a circular saw and cut the back end off the PM-38 hull. I don’t recall that Ron ever renamed the boat. The car in the garage is my 1956 Chevrolet Bel Air sports coupe. It was my car during my undergraduate college years, and I used it to tow TERRY’S FERRY for most of the boat’s life. After it cracked a piston, I had every intention of tearing down the engine, but life got in the way. When we moved to San Jose in ’73 I sold the car, not running. Big mistake—that car would be worth big bucks today!

Over the winter of 1971–72, I built another, bigger, ski boat—a Glen-L Rebel—to replace the PM-38. When the Rebel was near completion, I asked a college friend to help me put the new boat on the trailer, mount the engine, and take the old PM-38 to the landfill. Ron agreed to help, but then asked if he could have the boat instead of dumping it. “Sure,” I said. He bought a trailer and engine (a 40-hp Merc) and we used a circular saw to cut the back 6” off the boat to get rid of the worst of the rot. We fabricated and installed a new transom and put a new layer of fiberglass tape and resin on all the seams. Ron used the boat for another three summers. The last time he used the boat he was running it at speed when the joint between the front and rear bottom panels failed, and half the bottom peeled off. The boat sank like a stone. Ron and his wife were both wearing life jackets and were quickly picked up by a passing boat, and everyone was okay. As far as I know, my PM-38 is still at the bottom of Lake Mendocino.


A half century and several other boats have passed since the good times with my PM-38. I follow a couple of wooden-boat and boatbuilding pages on Facebook, and one day the original 1962 Popular Mechanics article popped up along with a story about someone building a PM-38. It brought back all these great memories. Today, Antoinette and I have a genuinely nice 27′ express cruiser that we motor frequently on San Francisco Bay—and I need another boat like a hole in the head—but the post about the PM-38 got my attention. I didn’t intend to build it, but the retired mechanical engineer in me got thinking about what I would do differently if I did. My original intent was to maybe build a 1/12 scale model.

Alan Scott, the designer of the PM-38, had gone all-out to minimize the hull weight, as the 1962 article put it: “Since everyone knows that weight is one of the most important performance factors, our designer laid out plans for a fast planing hull and then hacked off weight wherever possible.” In doing so, I think he built in some structural weaknesses. The original design does not have a true sheer clamp: the deck and sides are joined on a 3/4″-square sheer rail screwed to the outside of the hull. That seam nearly always leaked, and frequently popped loose. Likewise, the spacing between the rearmost frame and the transom was nearly 4′, and the side decks became a little spongy over that span. Outboards have also changed, and a 20″ shaft is now the standard, rather than the 15″ shafts they had back then.

The possibilities for improvements became my checklist. I started with sketches and then some scale drawings. When I got to the point of lofting some full-sized patterns for the frames and other components on heavy paper, Antoinette said something like, “Go ahead and build it, you know you will be unhappy if you don’t, and you want to take the grandkids skiing, don’t you? Just make sure that my car will be in the garage every night when you are building it!”

I got serious about designing. To make the sheer-to-deck joint more robust, I added a breasthook, deepened the hull by 3″ to accommodate a 20″-shaft outboard, and notched the top of the frames for a 1-1/2″-square sheer clamp. To bridge the gap between the transom and the original rearmost frame, I drew in an additional frame 18″ forward of the transom and tied it into the transom knee. With the deeper hull it was possible to add a self-bailing motorwell, and I added a drain plug in the transom. After a day of water-skiing in the original, we would have to use a bucket and sponge to get all the water out of the bilge. I’ve gotten too old for that.

Terry McIntyre

In March 2020 the boat was just about ready to plank. Here you can see many differences between my new version and the original—the framework was assembled on a stout building form on casters instead of scrap lumber A-frames, and the sheer rail and breasthook have been installed. The rear partial frame that I added is tough to see, but it’s there, connected to the transom knee.

These modifications only moderately increased the weight of the hull (from about 200 to perhaps 225 lbs) but made it far more structurally sound. The beam increased by almost 6″ and the length by 3″. When I ran these numbers through the formulas in the U.S. Coast Guard “Safety Standards for Backyard Boat Builders” I was pleasantly surprised to find that these seemingly minor changes would increase the recommended maximum load by nearly 500 lbs, and the maximum engine size from 45 to 60 hp.

I started construction in the fall of 2019. To meet Antoinette’s requirement that her car be safe in the garage at night, I built a stout, wooden construction frame on casters, so that I could roll the project outside and cover it with a tarp when I was not working on it. The boat turned out to be my COVID-19 “sanity project” during the lockdown.

I’m no longer a kid on an allowance, and money is not the issue it was for me in 1962; I used much better materials this time around. The framing is all kiln-dried clear straight-grained Douglas-fir, and the planking is BS1088 meranti marine plywood. Wood is still wood, but adhesives have greatly improved in 60 years. The entire boat was assembled with marine epoxy, with the screws all removed after the adhesive had set, since the epoxy alone provides the needed strength. The hull exterior is covered with fiberglass, and the entire interior is encapsulated in epoxy, to ensure that the wood remains dry and avoids the rot problems encountered in the original. This boat will likely outlive me.

My plan was to make the hull white with a mahogany deck, like the 1962 version, but when I got the hull planked, Antoinette looked at the meranti ply and said, “You aren’t going to paint that gorgeous wood, are you?” It was a lot more work preparing so much of the plywood to be finished bright. The results just scream the 1960s. The crowning touch would be a wraparound windshield similar to one from a ’57 Chevy—but I have not yet been able to find one.

Antoinette found some nice back-to-back pontoon-boat bucket seats online. I had to shorten them a bit, but they are serviceable and the brown and tan complement the hull’s finish. I also added floorboards to the interior, topped with faux-teak-decking carpet. The boat has running lights and full instrumentation, making it more complete (and legal) than the original.

Terry McIntyre

TERRY’S FERRY did have a bow light on the front deck. I have no idea where it came from—I must have salvaged it from somewhere—it never was connected to a power source. A speedometer or tachometer would have cost far more than I could afford. In the second PM-38, I installed the tachometer and engine monitoring that came with the new Evinrude, a trim gage, and pitot-tube speedometer. Switches for the running and anchor lights are to the right of the wheel. The steering is a modern no-feedback rack-and-pinion system instead of the cable-reel-and-pulley type I used in the 1960s. The handrail on the dash makes it much easier for a passenger in the front seat to hang on in a turn.

The cost for the hull materials, not including the hardware, seats, and steering, came to about $900, which was substantially more than I spent on the original. I took the article’s Materials List from the original PM-38 and priced the lumber, plywood, fastenings, and adhesives on a home improvement store’s website to see what they would cost today. An inflation calculator says $338. The big-box store materials came to $450. I spent about 300 hours building the new PM-38, about 100 more than the first one. Most of the increase over the original was in the work to prepare the hull and interior for a bright finish: eight coats of spar varnish, wet-sanded to 2,000-grit. It was far from a 38-hour build but worth the effort

I was initially undecided about how to power the boat. A period engine would carry the vintage look from stem to stern, but in the end, I decided that I’m too old to fight with a temperamental 60-year-old motor, and new engines are far more ecofriendly. I found a new 40-hp Evinrude E-tec which fit the new motorwell and promised plenty of power. It weighs nearly 250 lbs, over 100 lbs more than my 1960 Johnson. The original engine had a rope-pull start, and the new one has an electric start that requires having a 50-lb battery aboard.

We launched the boat for the first time in late April 2021. I considered towing the boat to the ramp with my classic ’69 Chevrolet Camaro, the car I bought new as my college graduation present to myself and used to tow my first PM-38 50 years ago, but decided on towing with my more powerful and less precious Chevy 4WD pickup. We poured some champagne on the bow and christened her RETRO-ROCKET. At the dock, the additional 200 lbs of weight of the engine and battery made the transom sit a little lower in the water than I would have liked. I was very glad I had added depth to the hull and its load-carrying capacity.

Terry McIntyre

When I got my undergrad engineering degree, I treated myself to a brand-new 1969 Chevrolet Camaro. I put a trailer hitch on the Camaro, and it became my tow vehicle for the summers of ’69, ’70, and ’71. I’ve kept the Camaro stock and original, and it still looks and runs great. I couldn’t resist hooking up the new boat to the Camaro and driving it around the block.

There were several folks on the launch ramp, and they immediately started commenting on how nice the boat looked and asking what it was. “That’s a cool old boat, what year is it?” has been the most common question.

Terry McIntyre

Tied up to the dock, the new PM-38 is overboard for the first time. Whenever we have it at the dock, it gets lots of attention. The accent stripe down the middle of the deck is unstained mahogany—I had to put the stripe in, because I wasn’t happy with the panel joints on the deck. I milled out the strip with my router and added the new piece. I was pleased with the result.

With just me aboard, the Evinrude brought the boat on plane nicely, but as the speed approached 30 mph it started to porpoise badly. I returned to the launch ramp and had Antoinette step aboard. While the porpoising was noticeably reduced with her aboard, I was not comfortable in pushing the boat any harder, and we called an end to the first sea trial.

Terry McIntyre

I was shocked by how fast the boat is. Here, Antoinette and I are running flat out with the speedometer showing 46 mph. The USCG allowable power calculation shows that the boat would be approved with a 60-hp outboard. I can’t imagine how fast it would be with that power.

On the web I discovered that porpoising is a common problem with late-’50s and early-’60s boats repowered by modern outboards. I moved the battery forward to under the front deck, and added a set of automatic trim tabs; the combination both eliminated the porpoising problem and improved the at-rest trim. Like the original, the new PM-38 “runs like a racer’s dream,” just as the Popular Mechanics article had promised. The boat is scary-fast— with just Antoinette and me in the boat, the pitot-tube speedometer indicated 46 mph flat out! With four adults on board, she hit 40. At speed, with the engine trimmed out, the boat throws a spectacular “rooster tail.” I haven’t tried to pull up an adult water-skier yet, but my teenaged grandkids get popped right up!

Terry McIntyre

My grandchildren were the raison d’être for the new PM-38. Here are three of my four grandkids with Moira, the eldest at the helm. Josh, to port in the back, was the most excited of the bunch, and was the first one we got up on skis.


Marion Speed

The engine is trimmed way out, raising the bow, and we are about to do a screaming 180-degree turn with an impressive rooster tail while three mid-septuagenarian “kids” relive a day from a long time ago

For our first real outing with the boat, we met with a group of old high school and college friends (including four of the seven who were there on that day back in 1965), for a day on the water in the California Delta. Racing along in the reincarnation of the PM-38 was a fabulous experience. For most of that day, I was 19 again. Not all the tears in my eyes were from the wind.

Terry and Antoinette McIntyre live in the small town of Morgan Hill, California, 75 miles south of San Francisco. They have been married for 52 years and have two grown children and four teenaged grandchildren. Terry holds mechanical engineering degrees from San Francisco State University, the University of California and Stanford University, and is a licensed professional engineer in California. He retired from General Electric Power Systems in 2002 after a 33-year career as a research and development engineer and project manager, designing and building nuclear power plants. He has been a boater since 1960 when his father got involved with a group of co-workers who were boaters and waterskiing enthusiasts. Terry has owned seven boats over the past 60 years, four of which were homemade wooden boats. Terry and Antoinette boat primarily on San Francisco Bay in their 27′ power express cruiser, and are looking forward to using the new PM-38 runabout in the California Delta.

If you have an interesting story to tell about your adventures with a small boat, please email us a brief outline and a few photos.

Drop-Center Sawhorses

Many years ago, while building small craft, I sought a solution for securing a hull under construction in different positions. It occurred to me that V-shaped sawhorses would maintain a V- or round-bottomed skiff in a secure working attitude whether upright, inverted, or in between. This would also work for a flat-bottomed hull, as long as the bottom was narrow near the ends, as a dory is.

Consequently, I quickly and haphazardly conceived a simple design that could be implemented rapidly and cheaply, using standard 2×4 lumber. I build most of my sawhorses with legs cut to an acute angle on the flat on the upper ends, and cut to an obtuse angle on the bottoms, parallel to the shop floor. The upper angles are hard to cut through the width of a 2×4, so you rarely see sawhorses made this way. I do it because the horses are light, simple and strong, and use a minimum of material. I often gusset the ends with whatever scrap plywood is lying around the shop.

Reuel Parker

The drop-center sawhorses were an improvement on my standard sawhorses which have survived at least 15 years of use outdoors. The old and the new horses have the same beveled connection between the legs and crosspieces.


To make conventional horses, I cut four 2×4 legs to the height I desire—usually 24″ or 27″, and one 2×4 crosspiece to the width I desire, usually 36″ or 48″. To cut the upper ends of the legs, I use a bevel square set arbitrarily to an angle of about 25 or 30 degrees. I mark one side of all four legs and cut the line carefully with a circular saw set to near maximum depth. I cut the rest of the way through using a bandsaw with a wide blade (3/8″ or 1/2″). I screw the legs to the crosspiece using 2″ to 2 ½″ self-drilling exterior-grade screws or, in some cases, air-nail them with #10 ring-shank nails. I set the horses on a flat, level surface, and trace the feet parallel to the floor with a carpenter’s pencil or Sharpie pen. I set my circular saw to that angle and cut the feet. This makes them more secure but encourages rot from rainwater. If I am in a hurry, I just leave the bottoms of the feet square. These sawhorses seem to last well, and I have some that are at least 20 years old, having been in constant use, much of it outdoors. Occasionally, the bottoms of the legs rot, and I simply cut them a little shorter and keep using them.

Reuel Parker

Twenty years ago I used drop-center sawhorses while building a 14′ dory in my shop in Maine.

To make drop-center sawhorses, I make the legs the same way, but make the crosspiece from two components, joined in the middle by plywood gussets on each side. The angle of the V can be tailored for a specific boat project or can be generic for general use. I have only made one or two sets of drop-center sawhorses, and I can’t remember when, or for what project. They are more than 20 years old.

To make the V components, I cut my 2×4 crosspieces to an angle of about 55 degrees where the halves join, and I trim the top outer edges to 35 degrees for the 3-1/2″ width of the legs. I do this so that I have flat surfaces at each side of the finished sawhorse for resting plywood or temporarily adding a plank across the top to use as a conventional sawhorse. To protect the boat, I carpet the tops of the horses with synthetic carpet stapled in place.

This Sea Bright Skiff sits upright, safely cradled by a pair of carpet-padded drop-center sawhorses.

The horses are versatile in that they will secure a boat project in various attitudes and positions. The coarse carpeting aids this as it prevents slipping.

Reuel Parker is a yacht designer, boatbuilder, and author who regularly contributes to WoodenBoat and Professional BoatBuilder magazines. A lifelong cruising sailor, he currently lives in the Bahamas aboard PEREGRINE and sails seasonally between Maine and Florida. He ventures farther as time and tide permit.

Editor’s Notes

For many of my boat-repair projects I used ordinary sawhorses with straight crosspieces on top. To keep boats from rolling around, I used the foam cradles designed for carrying a kayak on a car’s roof rack. They worked marginally well but didn’t hold the kayak securely. Reuel’s drop-center sawhorses are perfectly suited to working on small boats, so as soon as I had his text and photos in hand, I made a pair for my shop.

I made a few departures from Reuel’s instructions for a better fit for me. I wanted the boat to be held a little bit higher, so I made the legs 32″ long. Angled at 30 degrees they would make an equilateral triangle with an equally wide base. A 32″ span between the feet seemed a bit wide. I settled on a 24″ span and, using an online right-triangle calculator, plugged in a 32″ hypotenuse and a 12″ base to get the 22-degree angle for the top of the leg and 68-degree cut for the bottom.

An 8′ 2×4 will provide three legs with no waste. A full set of eight legs will consume all but 32″ of three 2×4s. The leftover piece and a fourth 2×4 will provide the rest of the lumber required.

I opted to used a 12″ chop saw for most of the cuts. In retrospect, a band saw would well too, cutting by eye to lines drawn with a bevel gauge. The chop saw lent itself better to guides and stops for quicker, more uniform cutting.

A chop saw can’t be at 22 degrees to the fence for the acute angle at the top of the leg; angles are measured from 0 for a square cut. I set the saw to 22 degrees and cut a scrap 2×4, on the flat, to make a guide. With the chop saw set back at 0 degrees, I clamped it to the fence with a piece of plywood to serve as a stop. (Without it the saw could easily bind if the workpiece shifted, as it likely would if merely handheld.) I set the guide back about 1/8″ from the line of the cut to leave some enough of the 2×4 to stay secure against the plywood stop.

A longer guide assured the leg would be secure at the 22-degree angle. A block of wood clamped to the outer end served as a support.


With the chop saw set up to make safe, uniform cuts, it made quick work of the eight leg-top angles.


The chop saw’s 12″ blade can cut through a 2×4 on edge in one pass.


With the tops cut, the guides can be removed and the saw can be set at 22 degrees to cut the bottom angle with the 2×4 set against its fence. A stop speeds the work and assures uniformity.


These are my patterns for the 2×4 crosspiece components and the plywood gussets, two of each piece for a sawhorse. The diagonals are cut from a 22-1/2″ length of 2×4.


To align the two halves and mark the area for gluing, I drew lines at the top of the cut, horizontally out from the top corner.


I had lots of 3/4″ plywood scraps, so I used them instead of 1/2″ plywood. Titebond III and galvanized air-gun nails did the fastening.


A rectangle of plywood, with the ends cut square, gets temporarily screwed to the legs to hold them parallel and at the right spacing while the tops are screwed to the crosspieces. A tool tote holds the plywood high to get the legs at the right angle to be fastened to the crosspieces.


To make the two horse stackable, I put the braces on the inside of the legs of the bottom horse and outside on the top horse.


To keep the horses from having too tight a fit when stacked, I made 1/4″ spacers for one of the ends and glued and air-nailed them on.


Stacked, the pair of sawhorses take up half the space. For long-term storage, the horses can be taken apart by removing the screws holding the legs and crosspieces together. Mark the pieces so they can be reassembled using the same screw holes.


I did three major repair jobs of this Danish-built training K-1 on standard sawhorses. If I’d had drop-center sawhorses, the work would have gone much faster with fewer frustrations.


The rounded contours of the K-1 hull and deck make it unstable on ordinary sawhorses. The drop-center horses cradle it securely.


My 80-lb decked lapstrake canoe rests nicely on edge simplifying some tasks, including washing the interior and bailing out the water, which hides under the floorboards when the canoe is upright.


This 14′ New York Whitehall rests at a good height for working on the interior.


The Whitehall’s stout skeg puts the boat’s weight on the sawhorse while the planking just makes contact for stability.

When I first saw photographs of Reuel’s drop-center sawhorses, I knew it would be well worth building a pair. They exceeded my expectations and my only regret was that I didn’t know about them 40 years ago.

You can share your tips and tricks of the trade with other Small Boats Magazine readers by sending us an email.

A DIY Roller

I have several roller stands that I’ve used to support long pieces of lumber and plywood as I feed them through the table saw. They work, but they’re not without shortcomings. On the infeed side, I have no complaints. I set the stand up with the roller at table height and feed the workpiece through. I do the same with the stand on the outfeed side but if the workpiece is flexible, the leading edge will sag and butt into the roller rather than cross on top of it. It’s an awkward moment when I have the blade whirring and I can’t finish the cut. And crosscutting with the stand out to the side of the table saw is out of the question. Last year I came across a better system, a washer roller. It’s easy to make and for many tasks works better than a roller stand.

Photographs by the author

Stacking three washers with the lower two providing a gap for the top washer’s hole establishes the spacing for the nails. Walking off the interval with dividers simplifies the process. If you’re marking the spacing with a ruler, you can use a more convenient interval if it is a slightly larger spacing.

To make one you’ll need a length of common 2×4, fender washers (either 1″ or 1-14″), and 1-1/2″ hanger nails. I made rollers 32″, 22″, and 19″ long. The longest one is the most useful. Start by cutting the 2×4 to length. Then, determine where to drill holes for the nails that the washers will spin on. Hold a washer on the side of the 2×4 with about ¼″ of it extending past the edge. Mark the hole. The circle will be larger than the hole you’ll drill for the nail; the top of the hole will be at the top of the circle. Mark the center point for the drill and draw a line through it parallel to the edge of the 2×4. Set two washers side by side and a third on top. Move the pair apart until the hole of the top washer no longer overlaps the washer beneath it. Measure the distance between the holes and with a divider set at that distance, pace off the locations of the holes along the line on the 2×4. Pressing the point of the divider into the wood will help center the drill bit, especially if you’ll be using a handheld drill. A 5/32″ bit will make holes just big enough for the hanger nails to be pressed in my hand. Drill the holes, stopping just short of going through the 2×4.

Drilling the holes accurately will keep the washers all at the same level. A drill press with a fence will make quick work of the drilling. The bottom edge of the fence is beveled back to keep drilling debris from pushing the workpiece out of position.


The drill press has its drilling depth set just shy of coming through the back of the 2×4.

The washers will be aligned best if you use a drill press with a fence. A wooden fence with its bottom edge beveled will keep any sawdust created by the drilling from pushing the holes out of alignment.

After drilling the holes, cut the kerf for the washers in the edge of the 2×4. Set the table saw’s depth of cut to match the diameter of the washers. If a single pass doesn’t provide a loose fit for a pair of stacked washers, move the fence slightly to take another pass, perhaps cutting with just a fraction of the saw blade. The washers need to be held loosely but close to vertical.

Washers are set on alternating sides to spin freely and guide the workpieces straight.

Set one washer at a time in the kerf and press the hanger nail into the hole and through the washer. The 1-1/2″ nails don’t need to be driven flush and thus poke out the back side of the 2×4. The heads can stand slightly proud. Alternate the sides of the kerf the washers are on.

I use a Workmate, which has a clamping table top, to hold a washer roller with a piece of 3/4″ plywood screwed to it.

To keep from adding more clutter to a crowded shop, I didn’t make dedicated stands for the washer rollers. I added a few pieces of lumber to one roller to slip over the edge of the top of a sawhorse. Another roller has screwed to it a piece of plywood that I clamp in my Workmate. A cleat screwed to the lower end of the plywood serves as a stop that sets the washer tops at the correct height. If I’m using my crosscut sled, a lift set under the cleat adjusts the height.

The end of a board dropping beyond the table saw can be picked up by putting a slope on the front end of the washer roller. A Workmate is holding this roller by clamping the piece of plywood that is screwed to the 2×4. A cleat screwed to the plywood sets the roller at the required height for a quick setup.


A few bits of lumber created a saddle to fit over the top of a Krenov-style sawhorse.


Washer rollers can be set at the back edge of the table saw to catch pieces immediately and continue to provide support.

The washer rollers can be set close enough to the back side of the table saw to catch the wood being sawn before it sags, and a roller set off to the side will work for crosscuts. With the end of a workpiece supported, I can focus on guiding it through the saw blade and not divide my attention and effort to pushing the wood down on the table.


A sled is a better table-saw accessory for many cross-cutting tasks. A washer roller helps it handle longer pieces of lumber.


I’m not sure where my old roller stands are. I haven’t seen them in months and haven’t felt the need to look for them, knowing the washer rollers are handily tucked under the table saw.

Christopher Cunningham is the editor of Small Boats Monthly

You can share your tips and tricks of the trade with other Small Boats Magazine readers by sending us an email.

A Hitch Mount Canoe Loader

When we moved and no longer had a waterfront of our own, we became trailer-sailors again and needed to make it easier to transport our various boats to the launch ramp. One challenge was our 17′ Grumman Double-Ender canoe. Trailering it seemed overkill, and cartopping would be the way to go if only the 70-lb canoe didn’t require pressing a crew of two or three to load or unload it. We purchased and installed the Reese Towpower Hitch Mount Canoe Loader, and now I load and unload the canoe by myself while Skipper supervises from a comfortable chair in the shade.

The loader weighs 18 lbs and consists of a lower receiver tube, adjustment tube, upright tube, a 21″ cross support with rubber strip, a shock cord, and a hardware packet that includes a hitch pin, hex bolt with locknut, and a 3/4″-diameter square-head bolt to attach the lower receiver tube to a hitch drawbar. The hitch drawbar must be purchased separately to fit the vehicle’s receiver. The cross-support can be adjusted from 36″ to 60″ above the center of the receiver. This height should be sufficient for most vehicles except for very tall vehicles with high roof racks.

Photographs by the authors

With the loader taking a bit more than half the weight of this aluminum canoe, loading and unloading it is a lot easier.

To load the canoe, I move the canoe stern to the rear of the car, with the bow pointing off to one side. I roll the canoe upside down, lift the stern onto the swiveling cross support, which has a rated capacity of 100 lbs, and secure the canoe with the shock cord. I then move to the bow, lift it high enough for the canoe to clear the roof rack, and walk it to the front of the vehicle. The canoe is then secured to the roof rack, and while the canoe loader can stay attached to the hitch receiver and canoe during transport, it is not intended to be used as the rear tie-down.

While the loader comes with a bungee with hooks to engage the loops in the cross bar, the boat must be secured to both roof racks to stabilize it.

Once the loader is installed, hatchbacks cannot be opened until the canoe and loader are removed. On a newer vehicle with an automated hatch, it is a good idea to disable the system while the loader is in place. There is an adapter included that can be used to offset the canoe loader from a hitch ball, so the loader can be used in conjunction with towing a trailer.

The loader is made of heavy-duty materials and assembles easily with basic hand tools. The loader has been easy to use, even one-handed once the aft end of the canoe is secured to the cross support. We are looking forward to exploring our local gunkholes with the help of this handy loader.

Audrey (Skipper) and Kent Lewis mess about in the gunkholes of the Tidewater Region of Virginia, following the paddle strokes of Pocahontas and the early English settlers to this region. Their adventures are logged at Small Boat Restoration.

The Hitch Mount Canoe Loader by Reese Towpower is available from retailers listed on their website. Prices vary from $50 to $80.

Is there a product that might be useful for boatbuilding, cruising, or shore-side camping that you’d like us to review? Please email your suggestions.

HIYU and CLATAWA

It’s often said that necessity is the mother of invention, but even a casual look at early U.S. patents makes it clear that the needs were as much inventions as the inventions themselves. Did anyone ever really need a helmet with shelves inside for potted cactus plants to supply oxygen to the wearer? Probably not, but in 1986 Waldemar Anguita was granted U.S. Patent No. 4,605,000 for it. If not need, what? The British philosopher Alfred North Whitehead came closer to the driving force behind invention: “Inventive genius requires pleasurable mental activity as a condition for its vigorous exercise.”

Clay Wright found that pleasurable mental activity in imagining ways to equip small boats with pedal propulsion. “I have a strong interest in unconventional human-powered boats and enjoy sketching offbeat propulsion systems.”

SBM

Clay’s HIYU is a Fiddlehead canoe, designed by Harry Bryan for double-bladed-paddle propulsion.

That interest led to his building of a 10′6″ Fiddlehead, a decked canoe designed by Harry Bryan. The canoe was designed to be used with a double-bladed paddle, but Clay had something else in mind for his Fiddlehead, which he christened HIYU.

SBM

The combination of pulleys in the cockpit with the gears beneath the hull give the system an 1:11 drive ratio, so pedaling at 50 rpm spins the prop at 550 rpm.

He devised a pedal drive that used a long V-belt from a large die-cast pulley on the horizontal pedal axle to a small pulley on the forward end of an outboard’s propeller shaft. On the outside of the hull was the outboard’s lower unit rotated 90 degrees with the skeg pointing forward and the driveshaft facing aft, with the propeller attached to it.

SBM

An old outboard motor gearbox was reoriented for use on HIYU. The skeg is pointing forward and the shaft that once was driven by the motor now drives the prop.

The mechanism was simple, but there was an ergonomic problem that could be easily overlooked in the design process: “Lifting one’s horizontal leg on the upstroke of a pedal-powered boat is an issue,” Clay discovered. “The first ten minutes of any cruise I take in little HIYU makes my quads burn, and I think there is no way I can keep it up.” In time Clay grew accustomed to the unusual cycling position, but HIYU’s performance was only a qualified success. HIYU, but the way, is a word in Chinook jargon, the 19th-century trade language of the Pacific Northwest. It means “plenty,” but in this case, plenty wasn’t enough for Clay.

Steve Navratil

CLATAWA is a Monk plywood skiff with a few changes Clay made to enhance the boat’s curves.

He started again from scratch and built a 9′ flat-bottomed skiff, designed in the 1940s by Edwin Monk as an easily built rowboat. Clay christened the finished skiff CLATAWA, a Chinook verb meaning “to go.”

His “vigorous exercise” of invention resumed with a new focus for the drive mechanism. “My main objective was to find an alternative to rotary input, i.e. bicycle pedals, which virtually everyone who builds these vessels employs, including me with my double-ended canoe. Reciprocating foot pedals and hand levers could provide linear inputs much like an elliptical exercise machine.” Clay recognized that reciprocal motion applied to a human-powered boat would be nothing new. Another Bryan design, the Thistle, is a slightly larger boat than the Fiddlehead and is equipped with a reciprocating-pedal drive that wags a flexible fin like a fish’s tail. And the highly successful Mirage Drive for sit-on-top kayaks uses pedals that move back and forth to power its flexible fins. But as Clay noted, “I’ve never seen reciprocal motion be converted to rotary motion to rotate a propeller.”

Clay Wright

Nearly complete but still in the works, Clay’s mechanism is wonderfully complex.

Clay made a mockup with PVC pipe for the frame that would occupy the bow of the boat and support the pedals and hand levers that would supply the power to a new drive system. The skiff’s power would come from the skipper operating the system like, as Clay put it, “a seagoing elliptical exercise machine.” He followed the mock-up with construction of working mechanical systems in metal. In the shop, everything worked as it was intended to.

Steve Navratil

The copper-pipe pedal system has pedal pads and hand grips for leg and arm power. The levers on the seat are used for steering by shifting each propeller between forward and reverse.

What Clay calls “the engine room” is even more complex. Here’s how he describes it: “The large pulleys are plagiarized from Phil Thiel; the near pulley is fixed to the copper shaft and therefore a driver. The far pulley is a freewheeling idler that returns the twisted V-belt. The little pulley is mounted to and drives a 1/2″ shaft which passes through the wooden tower. The aft small pulley receives the V-belt and turns a 3/4″ tube that encloses the 1/2″ shaft.  Therefore, we have two shafts on a common center that are rotating opposite directions.”

Steve Navratil

The black drum at lower right is wrapped with the cord that is connected to the pedal system in the bow. These drums are equipped with bearings that spin in only one direction. One of the large pulleys transmits the power to the center fore-and-aft shaft. The other large pulley is free-spinning. The shifting between forward and reverse is accomplished by the upright pins that move the yellow drive belts between the center drive shaft and the propeller shafts.

The yellow drive belts move to switch the prop rotation from forward to reverse. Again, here’s Clay’s description: “The horizontal bars on the clutches move the nylon rollers forward or backward to shift the belts. Note the pulleys on the propeller shaft that have one wall sawn off. Mounted in front of them are simple bearings. When either of the belts is shifted to its respective pulley, the propeller shaft is driven. The other belt is simultaneously shifted onto the bearing, where it freewheels helplessly and doesn’t drive the shaft. In this way, forward and reverse cannot be engaged at the same time.”

Clay Wright

Twin counter-rotating propellers provide power and eliminate the need for a rudder.

CLATAWA’s early sea trials did not live up to Clay’s hopes. After the first outing, he reported: “I am very disappointed with the boat. She just wouldn’t cooperate. One problem after another (the drive is overly complex), weeds clogging the propellers, etc., and I could hardly get the boat to go at all. I’m feeling that the boat is a failure. The boat is back in the basement. I’m going to throw a sheet over her and try to put her out of my mind.”

Steve Navratil

While Clay may have been disappointed with his prop drive, his boatbuilding yielded pleasing results with a shapely hull that sits in perfect trim with him aboard.

If the boat were the point of the exercise and designing the drive was simply a means to an end, CLATAWA might well be considered a failure. But it took only a few days for Clay to recall the project’s beginnings: “I concocted this admittedly impractical design for the challenge.” And he confirmed the connection between “pleasurable mental activity” and invention: “I had a great deal of fun puzzling out the challenge of converting linear movement into rotary motion.” The poor performance of CLATAWA was not a dead end but a path to escape the disappointment by taking up the challenge again.

One of the factors that had hampered the drive system’s performance was the nature of reciprocating motion: while a circular motion can continue without interruption, a reciprocating motion comes to a brief stop every time it changes direction. This isn’t an issue with the Mirage and Bryan fin drives—the fins also have a reciprocal motion and it’s what makes them work. But the propellers have a rotary motion, and they come to a stop and create drag rather than propulsion when the pedals change direction. Clay considered a flywheel to store energy and keep the props spinning in between pedal strokes. Unfortunately, he estimated that a flywheel for his drive system “would need to weigh about 80 lbs to be effective, and the boat weighs a ton as it is with all that mechanical nonsense. I think what would help the most is maximizing the pedal stroke length so the propellers would get in a good, prolonged spin before slamming to a halt. I’ll ponder a little more over the winter.”

CLATAWA’s drive system is not yet finished, but it is being worked on even if Clay is only thinking about it. The creation of something new is an essential human pursuit. The pondering is the point.

Do you have a boat with an interesting story? Please email us. We’d like to hear about it and share it with other Small Boats Magazine readers.

The AF4 Beach Cruiser

Seeing an AF4 on the water for the first time is a bit of a surprise. At a distance, the raised deck profile fools you into thinking you are looking at a classic cruiser from a bygone era. As the boat gets closer, you realize she is smaller than you thought, and that she is built of plywood. When you get a closer look at her elegantly utilitarian form, you think that maybe it is a classic after all—a new kind of classic.

As a young aerospace engineer, Jim Michalak moved from his native Massachusetts to work at a missile plant in St. Louis, Missouri. Finding a flat land of broad lakes and rivers, his attention wandered to boats. After building a Gloucester Light Dory and the prototype Bolger Birdwatcher, there was no going back. Jim now has nearly 100 designs to his credit, and the AF4 is one of the most popular, for this simple cruiser is among the most accessible designs available.

What do I mean by “accessible”? Most obviously, external-chine “Instant Boat” construction is conceptually simple for the beginner, as well as quick and easy to build for anyone. Yet this simple construction provides a purpose-designed beach cruiser with about 4″ draft. This creates access for boating in places many of us haven’t even considered. With a low trailer, an AF4 has cruised where few motorboats can even launch.

Man and woman riding in a red AF4 beach cruiser.Photo by Rob Rohde-Szudy

AF4, an outboard powered beach cruiser with 4″ of draft, can boldly go where most boats can’t.

Ease of launch touches on another element of accessibility: setup time. Jim stresses that a boat that can be launched quickly and easily gets used more—sometimes a lot more. Consider how much more boating time the average working person has available if a weekday evening can be a meaningful outing. After the necessary errands, twenty minutes’ setup time can derail the whole thing; the AF4’s setup time is under five minutes.

Of course the flat bottom is not very capable on wide, unprotected water, but this is intentional. The AF4 is optimized for the sort of boating that is most accessible and appealing to most people: cruising protected waters on nice days. The AF4 is more capable than she seems, however. Flatties have a reputation for pounding in a chop, but AF4 owners feel that at 15 mph she pounds about like a deep-V hull does at 35 mph. Getting every- one to sit on the same side also eases the ride by using the chine as a shallow V.

Another element of accessibility is cost. Cheap and easy repairs encourage us to forget about resale value and use the boat. Inspired by Bolger’s Instant Boat work, Michalak designs all of his boats to be built with common lumberyard materials. These materials are not meant for continuous immersion, so I would not leave such a boat at a mooring; indeed, Jim’s Birdwatcher is kept on a trailer under cover and looks great after 20 years.

Man and two kids aboard an AF4 beach cruiser.Photo by Rob Rohde-Szudy

AF4 is a simple boat. Her designer, Jim Michalak, was unabashedly influenced by the late Phil Bolger, whose Instant Boats work inspired legions of amateur builders.

Michalak keeps his plans prices extremely low. At little more than the typical cost of study plans, he puts construction plans in the hands of dreamers so they can immediately become builders. He also lends confidence with information through his online boat-design articles (www.jimsboats.com) and his book, Boatbuilding for Beginners (and Beyond!) (www.duckworksbbs.com/ media/books/michalak/index.htm). Fuel efficiency makes for longer trips. As an engineer, Jim thinks a lot about things like power-to-weight ratio, efficiency, and range. The AF4’s flat bottom gets her on slow plane at 10–11 mph with about one horsepower per 80 lbs. This means a whole family doesn’t need more than an 18-hp engine, and a solo trip can get by with less. Jim makes this speed solo in his own AF4 with a 50-year-old 7.5- hp motor, yielding 15 mpg. A modern motor should do better. Even if you can afford to feed a go-fast boat, there is a limit to how much fuel you can carry. The AF4 lets you carry enough fuel to go a long way without resupply. Range—getting away—is an integral part of the designer’s concept of a camp-cruiser.

“Getting away” was, in fact, the whole reason for this design. Jim originally designed the AF4 as an efficient camp-cruiser for his own use. In this role, the AF4’s flat bottom is not just a simple method of construction. Jim is known for his spartan interiors— his cockpit contains only a folding lawn chair. This minimalist approach not only saves weight, but also provides lots of usable space for sleeping and stowing camping gear. This boat truly sleeps two in the cabin. The flat bottom also lets you creep into tiny, secluded waterways and beach gracefully. Indeed, you can pole her into places where canoes run aground.

Top view of AF4 beach cruiser displays its sizable cabin.Photo by Rob Rohde-Szudy

The “slot top” allows passengers to walk nearly the length of the boat without leaving the safe confines of the cabin.

A cabin allows you to bed down with less fuss than a cockpit tent, but at the price of stooping. This cabin is an exception. A full-length “slot top” lets you walk upright all the way to the bow. Personally, I don’t know how I ever got by without this feature. When beaching, you simply walk forward, lean on the foredeck, and swing your legs out to plant your feet on dry sand. You can even fish from this slot, and its mechanics are handy when a hooked fish crosses under the boat. A few builders have made boarding even easier (myself included), modifying the cabin with a dropboard entry to the self-draining forward anchor well. Recently Jim went even further with his own boat and added a fold-down door in the side of the well. It looks a little odd, but kids and old joints appreciate it greatly.

That anchor well is very useful for muddy shoes, clothes, fishing gear, or anything else you don’t want messing up the cabin. If you run out of space there, the motor is mounted in a slop well with space for fuel tanks and reboarding after a swim. Keeping the tanks in a draining well is a nice touch, since vapors drain overboard to eliminate the risk of explosion.

A sailor seeking a powerboat tends to be uncomfortable replacing the quiet bliss of sailing with a noisy, expensive gas-guzzler. The AF4 strikes a balance, as the motor is small, quiet, and economical. She is small enough that you still feel in touch with the wind and water, but you can cover much more distance in the time available. And Jim is right—with no rig to fuss with, most people go boating more often.

A Johnson 18 outboard motor next to a red gasoline can.Photo by Rob Rohde-Szudy

A well forward of AF4’s outboard motor provides a secure, remote place for fuel; a high transom at the end of the cockpit keeps water where it belongs.

The AF4 is capable of 25 mph, but not comfortably. She is happiest at slow planing speeds of 10–15 mph, and there is no apparent “hump” in getting to them. This is her most efficient range as well, creating less wake than many motorboats do at “no wake” speeds. Wakeboarding wouldn’t be much fun behind an AF4, but it can pass a canoe at slow plane without causing the paddlers much trouble (crew coaches take note).

I was on the water one day in my AF4 Breve—the 15-1/2′ version of the original 18′ AF4—when a group of folks in a raft of large powerboats waved me over to ask about my boat. Apparently they had been impressed with her looks and performance in the day’s light chop—and were even more impressed that we had only a four-gallon fuel tank. The fellow I was talking to started listing those advantages, along with cost savings on fuel, storage, mechanical work, slip fees, and maintenance. Apparently, the fuss and fuel cost associated with boats like his lead many to use them essentially as lakeside cabins. Friday after work they motor out a short distance and raft up with friends, then get around in the dinghy all weekend.

Boater pilots a red AF4 motorboat on the water with one passenger.Photo by Rob Rohde-Szudy

AF4 at speed. The specified power plant is small enough to keep noise and vibration to a minimum, allowing passengers to enjoy their surroundings.

The AF4 (or AF4 Breve), the man suggested, would be a welcome improvement over the typical dinghy in this application. Kids and groceries ride out of the weather, and the adults can stand in the slot and lean on the cabintop while chatting with fellow boaters. The slot top makes easy work of docking and coming alongside, as well, which is very welcome after staying up too late chatting. Perhaps best of all, meaningful day trips become possible without moving the big boat.

The AF4, in short, is a weekend cruiser that gives you everything you need and nothing you don’t. Whether you are a neophyte or salt-crusted, this efficiency equates to accessibility. Accessibility means you get on the water more often.

And what about the name? It sounds like a jet-fighter moniker, but it isn’t. Rather, AF4 is the fourth design named “Alison’s Fiddle.” Jim was fortunate enough to witness firsthand the development of a young Alison Krause in regional fiddle competitions. And what is Alison’s fiddle but a cleverly crafted wooden box that can do amazing things?

Profile and arrangement line drawings of an AF4 motorboat.

AF4’s construction requires five sheets of 1⁄4″ plywood and four sheets of 1⁄2″ ply, joined by nails and glue.

This Boat Profile was published in Small Boats 2010 — for more information, visit Duckworks.

The Hvalsoe 16

Since he launched his design and boatbuilding career in 1981, Eric Hvalsoe has been seeking “the Holy Grail of traditional small craft design”: a boat that rows and sails equally well within the limitations of its length.

It took him 20 years and several variations on the theme, but he may well have found it in the Hvalsoe 16. This plank-on-frame lapstrake dinghy, first produced in 2001 by Eric’s company, Hvalsoe Boats in Shoreline, Washington, receives rave reviews both from owners who row it exclusively as well as from those who love to sail it—even as its designer and builder considers it “the great compromise” because of the choices he made to ensure the viability of both modes.

“For my uses, it’s the perfect boat,” says owner Michael King of Seattle, who purchased his Hvalsoe 16 in 2003 for the purpose of rowing on Puget Sound. Owner Denis Norton opts for the same adjective in calling his 2007 Hvalsoe 16 “just perfect” for sailing the glacial lakes of central Idaho. High praise indeed for a “compromise” boat.

Photo by Shelly Randall

Although its construction is substantially different from the classic Whitehall pulling boat, representing as it does a compromise between good rowing and sailing performance, the Hvalsoe 16 is squarely in the tradition of the historical type.

Designing the Hvalsoe 16

The genesis of the Hvalsoe 16 was the Hvalsoe 13, designed in the early 1980s, which Seattle reviewer Chas. Dowd described thus: “Narrow at entry and run for easy rowing but with healthy ’midship sections for sailing stability, the design worked even better than anyone had a right to expect.”

I’d say the same of the Hvalsoe 16—it surpassed my expectations.

Its shippy appearance, however, would lead anyone to expect the best. With its raked stem, graceful sheerline, and heart-shaped transom, “it always gets compliments,” according to Michael. Subtle details, like the convex curvature of the floating breasthook mirroring the curve of the transom, convey the designer and builder’s aesthetics and attention to detail.

And it’s truly a Pacific Northwest boat, having been informed by and designed for Northwest waters by a man who himself was born, raised, and educated in Washington state.

Inspired by the Whitehall type, among others, but designed for a client who wanted “something other than a Whitehall” for both rowing and sailing, the Hvalsoe series was developed with a generous beam, a strong mid-section, and a high, soft bilge. The hulls are slender but with good buoyancy. “I don’t want to say it’s lightly built, but it’s efficiently built,” says Eric of the Hvalsoe 16. “It’s a fast boat. Compared to a heavier boat, it accelerates well and feels pretty sporty.”

The Hvalsoe 16 handles nicely under sail with three adults, or two adults and two children, and under oar power with one to four adults (it has two rowing stations). Two strong people can carry it, but it helps to have four people for a longer carry.

Photo by Shelly Randall

A plank keel makes the boat not only a fine one for beach landings but also for hauling by trailer to the next destination.

The Hvalsoe 16 is actually 15′ 9″ long with a 4′ 6″ beam and a minimum draft of 1′ 6″. It weighs 185 lbs with the centerboard and trunk, and carries an 85-sq-ft spritsail. For comparison, the Hvalsoe 13 is truly 13′ in length, but the beam and draft are the same as the 16’s. It weighs 155 lbs and the spritsail is 65 sq ft. “Either of these boats is a capable near-shore boat within the confines of common sense,” says Eric.

The Hvalsoe boats are available in several sizes. “The development of the 16 from the 13 was an evolution by experience and eye, which included an intermediate stage, the 15,” Eric explains. He simply stretched the 13 to get the 15, using the same sections spaced farther apart, but then felt the hull could use more buoyancy in the stern, so he redrew the body plan by eye to get the 16. However, the midsection of all three boats is the same. He is now considering adding an 18′ or 19′ version.

Photo by Shelly Randall

A foredeck provides a bit of stowage underneath.

Eric builds these boats with 3⁄8″ Western red cedar planking over white oak bent frames. The stem, transom, centerboard trunk, and knees are mahogany; the keel and riveted rubrails are also hardwood. All fastenings are copper and bronze, with the exception of stainless steel hardware for the pop-out rudder.

The Hvalsoe 16 would be an ambitious project for an experienced amateur boatbuilder, but construction and sail plans are available. All Hvalsoe plans require lofting. Those who would prefer to commission Hvalsoe Boats to construct a boat—starting at $24,000 fully finished and rigged—would be hard-pressed to find better craftsmanship.

Taking the Hvalsoe 16 on the water

Eric recently had the opportunity to buy back Hvalsoe 16 hull No. 1 from a former client. It’s the first boat this career boatbuilder—who turned 50 this year—has ever actually owned, and it’s the one I tested on Seattle’s Lake Union.

We launched from a dock at The Center for Wooden Boats, but Eric tells me the Hvalsoe boats will stand upright on the beach with their wide plank keel. We took some time to talk about the hull, which is protected with tough UHMW (ultra high molecular weight) plastic grounding shoes on the keel and skeg and rubbing strips on the first three laps. Eric meticulously finishes the hull interior with SeaFin Teak Oil and then covers all the brightwork with a urethane coating. To further enhance longevity, he offers a custom all-weather boat cover stretched over laminated arch supports. He’ll also supply a galvanized marine trailer with carpeted supports and tie-offs of his own design.

“When he gets done with it, it’s a custom trailer for the boat,” says Michael, who tows his Hvalsoe 16 with his Volkswagen Vanagon, assuring me that the van “doesn’t suffer at all” with the light boat and minimalist trailer. “It’s really easy to launch and to put back on the trailer. It’s no effort, really.”

Photo by Shelly Randall

Simple footrests give the oarsman a better chance to row hard without slipping off the thwart.

I was intrigued by the adjustable and removable individual foot stretchers that Eric designed to catch a frame and fit between the floorboard planks. Having suffered many barely passable foot stretchers in fixed-seat rowing boats, I found they were just about the handiest thing I had ever seen. They provided comfortable braces for my feet when rowing and popped out and out of the way for sailing.

Unfortunately, the weather on our trial day was not comfortable, but at least the gray and gusty March day provided a good test of the Hvalsoe 16’s capabilities. Eric wisely reefed the loose-footed spritsail, and as we headed out onto the lake, I was immediately taken with the boat’s stability. The tiller was responsive in the big puffs, and when we heeled, there was ample freeboard. I found it most comfortable to sit low, on a cushion on the floorboards as opposed to the thwarts. Eric had dipped the rail earlier that day, but there was only a little water in the bilge, and the raised floorboards kept my seat dry. On the light-air edges of the lake, we roll-tacked, and Eric showed me how he lets go of the tiller during a tack to concentrate on the sheet. The rig is so well balanced that the rudder recenters itself on a close-hauled point of sail. Eric sometimes “cleats” the sheet between his knees, and I noticed why: the line doesn’t always run smoothly in the vertical cleat on the aft face of the centerboard trunk. But overall, the galloping sail was exhilarating and I could imagine how the boat with its full sail area would move satisfyingly in a light, steady breeze.

When it came time to row, the Hvalsoe 16 converted from a sailing to a rowing boat in minutes. We returned to the dock, used the brailing line to collapse the sail against the mast, and effortlessly unshipped the unstayed mast, which is made of lightweight Sitka spruce. One per- son standing on the dock can easily lift out the mast, sail, and spar bundle. These fit entirely within the boat if necessary, but I left them on the dock. Then out came the oars, also made of Sitka spruce. Rowed solo from the center thwart, the Hvalsoe 16 was light and responsive and had a tight turning radius. I followed Eric’s advice and dropped the centerboard a couple of inches. She was tracking beautifully, even in a crosswind, until I experimented briefly with raising the centerboard. I was rowing into a strong wind at the time and the bow was blown off immediately. After a minute of struggling to regain my course, back down went the centerboard, and rock-solid stability returned.

Photo by Shelly Randall

A simple, boomless sprit rig allows the sail and sprit to be easily brailed up and lashed around the mast while at the dock or while rowing through a calm.

If you’re in the Seattle area, you can get a feel for Eric’s designs by visiting The Center for Wooden Boats on south Lake Union. The livery has a donated Hvalsoe 13 and a student-built Hvalsoe 15 available for rental. If you have more time, you can take one of Eric’s traditional plank-on-frame lapstrake courses offered at the center. Recent classes have participated in lofting, framing and planking a Hvalsoe 16.

“I like being in the increasingly unique position of a traditional plank-on-frame builder,” Eric says. “I don’t seem to be strongly motivated to design or build simpler projects, or make lapstrake ‘easier’ by going to plywood for the home builder—not that there is anything wrong with that. Given time, I imagine I would develop some simpler models, but…time is what it is.”

In recent years he has had more customer interest in the Hvalsoe 16 than in the 13, but he continues to build both and delight his clients by presenting them with “the Holy Grail” many of them have also long sought.

“It’s just an amazing boat,” says Michael. “I’m always reminded when I get out on the water how good a boat it is.” He pauses, reflecting on his two young children, in whom he hopes to instill a love of both rowing and sailing. “This is a boat that will be inherited,” he says finally.

Blending good characteristics for both rowing and sailing, the Hvalsoe 16 has a fine entry at the bow, a comparatively flat bottom for upright beaching, and weighs only 185 lbs.

This Boat Profile was published in Small Boats 2009 — for more information, contact Eric at [email protected] or (206) 533-9138.

Is there a boat you’d like to know more about? Have you built one that you think other Small Boats readers would enjoy? Please email us your suggestions.

Hvalsoe 16 particulars

LOA:  15′ 10″
Beam:  4′ 6″
Draft:  20″
Sail area:  84 sq ft

Expert insight from Eric Hvalsoe

Eric Hvalsoe has contributed a number of articles to Small Boats, including expert techniques and stories from his own adventures on the water. Read them below, and be sure to check out our profile of his Hvalsoe 18 design.

Cruising the Broughton Archipelago, four for oar and sail

Removable Floorboards, removable panels to protect and preserve

Tacking for Rowing, an unusual use for a centerboard

The Hird Island Skiff

Hird Island is surrounded mostly by marsh grass, but along its easterly face a meandering deep-water creek sidles close to shore where a few dwellings and docks have sprung up. Here it’s quiet except for an occasional outboard motor. Ashore, you travel in electric golf carts instead of autos. You’re in the heart of Georgia marshland—tidal, sheltered, and, most of all, silent where the call of birds is apt to be the loudest sound you’ll hear.

Because of the island’s proximity to the Atlantic, there’s a surprising current from the incoming and outgoing tide, so rowing isn’t always the best way of exploring, and the winding nature of the meandering creeks (there are miles and miles of them) oftentimes makes sailing a challenge. To fit in appropriately, Doug Hylan (who has a cottage on Hird Island) selected electric power and a simple skiff of plywood with a centerboard and small sail to be used when the wind suited. He keeps her in a shed when he’s away, which is most of the year, but in only a few minutes after arriving he is able to launch and set her up for use.

Photo by Anne Bray

The reedy shallows of Georgia call for a shoal-draft boat that can easily navigate the channels—and with its electric motor, this skiff can do so without disturbing the peace and quiet.

Energy, of course, comes from batteries, a pair of 12- volt, deep-cycle ones housed under the forward seat in dedicated compartments each side of the centerboard trunk. They connect to a Minn Kota Endura 30 trolling motor that’s been cut down to fit within a capped well, completely hidden from view. The motor can be hoisted clear of the water and a plug inserted in the opening, which reduces drag when sailing or rowing. So rigged, the motor still lives inside the well. A transom-mounted rudder steers the boat; the motor is fixed in the straight-ahead direction. The rudder operates by means of a continuous steering line easily reached from anywhere in the boat. You just grab the line (it runs through a series of eyes mounted on the inwale) and pull or push on it to move the rudder and steer the boat—and it works under sail and oars as well as under power. Initially, it’s not as intuitive as a wheel or tiller, but you soon get used to it, and steering this way becomes as natural as any other method. One of its advantages is that there’s enough friction in the system so the rudder stays where you put it and the boat holds its heading without your having to tend continuously to steering.

Motor speed and direction (i.e. forward and reverse), while normally controlled by twisting a stock trolling motor’s steering handle, here are operated by rotating a knob mounted on the side of the boat within easy reach of where you sit. A setup like this requires some rewiring and extra carpentry, but is well worth it in terms of convenience.

Watertight compartments in the bow and stern keep the heavy batteries from sinking the boat if for any reason she should accidentally fill with water. The motorwell is a box within the aft compartment accessed by a deck hatch. (You can access the compartment itself through a door in the bulkhead.) Between the permanent forward and aft seats, there’s a removable thwart for rowing. Being flat-bottomed, this is an easy boat to walk around in, although you’ll find yourself sitting side-by-side with your companion most of the time, leaning comfortably against the backrest and enjoying the view—and the silence of electric power.

Photo by Anne Bray

When there’s room to tack and depth to lower the centerboard, the skiff’s dead-simple but very effective lugsail lets the breeze do the work.

In using the boat, Doug usually goes electric: “While I first envisioned this skiff as doing a fair amount of sailing, in fact our usage has evolved in two other directions, both based on electric power. The first is wine-and-cheese sunset cruises with my wife, Jean. Here the quietness of the motor and the private proximity of the passenger pro- mote lovely conversations (perhaps helped along by the wine). Our second favorite use of this boat has been for wonderful moonlight cruises. Sailing has receded partly from my own laziness, but also because the range under batteries has turned out to be far more than I expected.” The range has been more than four hours at maximum speed.

Although Doug used stitch-and-glue construction for the boat he built for himself, he decided that conventional chines would be easier, so he has drawn the plans that way, with station molds 2′ apart erected on a ladder-type frame to define the hull shape. The forward half of the hull is absolutely flat on the bottom, but as it approaches the stern, the bottom takes on a shallow V-shape to reduce its drag, especially while heeled under sail.

Photos by Maynard Bray

Top—The skiff’s electric motor, which is nicely hidden away in an aft compartment, and can be hoisted out and replaced by a fitted cap to reduce drag when rowing or sailing. Above left—Batteries reside underneath the rowing thwart. Above right—The rudder line runs in a continuous loop just below the gunwale, always in easy reach.

Doug Hylan’s drawings consist of six sheets: a sail and spar plan; lines and offsets; construction; building jig and stem patterns; plywood panel layouts; and molds, transom, and rudder patterns. The set includes basic instructions and a CD of photographs. The skiff’s sides are of 1⁄4″ plywood, and the bottom is of 3⁄8″. In building, you begin by gluing two sheets of each thickness together for length, then marking and cutting out the pieces. Seven molds are needed, and their shapes come from full-sized patterns. They’re set up on the ladder frame as depicted and described in the notes, along with the inner stem and transom. Sides are bent around, the chines are added, then the bottom—and, before you know it, you have a hull. From there, with the boat turned right-side-up, it’s a matter of adding the remaining items like centerboard trunk, bulkheads, decks, etc. In all, it’s a pretty straightforward building job suitable for first-timers.

After watching Doug build the first of this design and admiring its characteristics (and how quickly it went together), I was eager to try it out. This happened at Doug’s place in Georgia. We sailed her and ran her under power along those narrow, marsh-grass-bordered creeks and found her perfectly suited to calm water and moderate winds. Speed is fine propelled either way, the sail being large enough to make her move well and respond, and there being enough thrust (30 lbs at full throttle) to be more than sufficient to move along at a good clip even against an adverse current.

But, best of all, was the silence!

Hird Island Skiff Particulars

LOA:   15′ 3″
Beam:   4′ 0″
Draft:   approx. 9″ (board up) and 2′ 6″ (board down)
Sail area:   58 sq ft

Doug Hylan’s plans for the Hird Island skiff are characteristically easy to follow and complete. The hull is marked by its simple construction and good looks.

This Boat Profile was published in Small Boats 2009 — for more information, visit Hylan & Brown Boatbuilders.

More from Hylan & Brown Boatbuilders…

The Point Comfort 18, a modern deadrise skiff

Beach Pea, tender, daysailer, trainer

Little Crab, Doug Hylan’s 13′ V-Bottomed Skiff for Sail and Oar

GRACE’S TENDER

I’m a boat nut. I’ve built and rowed, sanded and sailed, painted and paddled most of my life. One of my favorite activities is gliding around a harbor in a dinghy, rowing or sailing, working up an appetite for steamed shellfish. Another favorite is my job teaching boatbuilding at The Carpenter’s Boatshop in Pemaquid, Maine. This offers endless hours of boat talk, swapping stories, and trying to convince the listener that your way of doing it is the best solution. Well, the opportunity to talk with Arch Davis and take a look at his latest design, GRACE’S TENDER, allowed me to indulge both interests. Davis honed his design and building skills in New Zealand and has since brought both to the waters of midcoast Maine. GRACE’S TENDER was designed as a project to be completed by his daughter, Grace, now 12, with the close support of her dad and his workshop.

The boat has been drawn wide to provide initial stability. There is a nice transition from a shallow V-bottom shape in the middle of the boat to a deeper V forward that requires about as much twist as you can demand from plywood panels. This yields lots of interior space on a very short waterline. Don’t ask to put too much adult weight onboard without affecting performance. At 55 lbs, the hull is lightweight, easy to carry, and can be cartopped with the appropriate rack. The rig is a standing lugsail that puts up a generous area on short spars for portability and easy storage.

Construction is glued-and-screwed marine plywood, a system used for many modern small boats. This renders a light and strong hull that won’t leak when launched after extended periods ashore. The strongback on which the temporary building frames are attached is quite rigid, yet the frames seem to flex until the bottom and planking are attached. In my opinion, the whole setup may benefit from an additional temporary brace or two. The stem is an interesting lamination of plywood and softwood. The plywood inside gives cross-grain stability, while the softwood sides provide an easy-to-carve landing for the planking.

GRACE’S TENDERPhoto by Arch Davis

GRACE’S TENDER is a kindly little plywood boat that Arch Davis designed to build with his daughter, Grace. This handsome and capable craft is an exceptionally good first boatbuilding project.

The joint between the bottom and the topside planking changes from a lap at the chine to a butt in the area of the stem. This sort of mimics the gains in traditional lap-strake construction. Achieving a smooth transition here may be a challenge to a first-time builder, but the description and details are well laid out in the plans.

I’m not a great fan of daggerboards, having seen the results of altercations between rocks and boards on larger boats; however, this boat is the right place for one. While daggerboards require some attention in shallow water, contact with the mudflats in a boat this light should just bring you to a halt and remind you to pull up a bit sooner. Daggerboards are also slightly easier to build and install than centerboards. Arch has chosen a kick-up rudder. Although more complex to construct, kick-ups protect this vital piece of equipment from damage when sailing in thin water, and allows continuous directional control.

The building package for GRACE’S TENDER consists of an 80-page manual with over 100 photos, a section on material sources, discussion of tools, a complete glossary, and sage advice on building and using small boats. Also included are full-sized Mylar patterns for every piece, something any builder will appreciate. No lofting, no paper patterns to tear or stretch, and no small-scale drawings that require careful scaling up. The gem of the package is the optional DVD documenting each step of construction, starring Grace Davis, my nominee for an Oscar.

Photos by Arch Davis

Amazing Grace. While her dad took on more dangerous jobs like ripping long pieces on the tablesaw, Grace did the majority of the boat’s construction herself.

A few photos lack detail, but in combination with the text and the DVD, almost every aspect of construction is covered. The exception is painting. While building and woodworking techniques are somewhat consistent, there are many different ways to finish off a boat. Here, your personal style calls the tune. Anyone wishing for a yacht finish should consult one of the many good books and articles on painting and varnishing. Someone like me might be so anxious to get this duck in the water that a couple of coats of leftover marine paint would do the job, thank-you-ver y-much, and pass the oars please.

With plans in hand you can search out your own lumber and fastenings, or you can opt for the kit that comes complete with all plywood, lumber, epoxy, fastenings, and sailing rig. While these options are available from other designers, the vast amount of detail provided makes GRACE’S TENDER stand out. Back at The Carpenter’s Boatshop, I asked one of our first-year apprentices to look through the package to gauge whether she felt it contained all that was necessary to build the boat. She agreed that it is a clear and thorough set of plans and instructions.

Photo by Arch Davis

While GRACE’S TENDER is a fine boat for a youngster to sail in light winds, she also makes an able yacht tender.

Finally, I feel that a very important aid in any boat-building project is having access to the designer. While not always possible, it’s really nice when you can connect. When you call Arch Davis Design, you get Arch Davis on the phone. His personal interest in each boat is evident and he will talk you through the sticky places.

As a first boatbuilding effort or as a several weekend adventure with the kids, GRACE’S TENDER is close to the ideal. Now, clean out one side of your garage, go forth and build, and when you’re done, keep an eye out for those perfect harbors and steamed shellfish.


GRACE’S TENDER’s inboard profile plan clearly shows the major fitting-out components: seats, kick-up rudder, daggerboard, mast, and the all-important foam flotation. The foam provides an extra margin of safety for kids learning to sail and row.

This Boat Profile was published in Small Boats 2009 — for more information, visit Arch Davis Designs.

More boat designs by Arch Davis…

Jiffy V-22, an outboard cruiser with a lobsterboat look

Bay Pilot 18, A garage-built pocket cruiser

Penobscot 14, an Arch Davis classic

Sunshine

For some people, the meaning of life seems forever to be bound together with a quest for the perfect yacht tender. There is no such perfection, of course, since the just-right fit for one person will be completely wrong for the next, and boatbuilders and boat owners seem never to lack opinions. These days, however, it seems a great many people find perfect contentment with a less-than-comfortable, less-than-attractive inflatable with an outboard, and they are to be found trailing astern of even the most elegant classic yachts. And yet others have never faltered in their quest, and they know without hesitation the characteristics of a fine tender when they see one.

Such is the case for Sunshine, a Walter Simmons design based on a 1915 boat a client brought to him for restoration years ago. Simmons delivered the bad news that the boat was too far gone to restore—better, he advised, to take what was good about her and build a new boat. He proceeded to take the lines of the original hull, which had been built in Stonington, Maine. During some available winter hours, he faired up the lines and worked up construction details.

Photo by Tom Jackson

With excellent load-carrying capacity and rowing characteristics, low weight, and great looks, the Sunshine design makes a wonderful yacht tender.

What was good about the original has been universally hailed by all who have used the boat before or since. She’s burdensome, but not at all ungainly, 10’6″ boat with a 4′ beam, about 6″ more or less of draft, and very seakindly ways. “She just does everything you want her to do,” Simmons says. “She’ll take any load, any way you want, and would ride the back of a stern wave all day long.” Simmons himself has built about 40 of the boats, and he has sold plans to builders far and wide, some as far away as New Zealand. Many more boats have been built by those who bought the plans.

For anyone driving the winding road down to Brooklin, Maine, in recent years, a small roadside sign saying “North Brooklin Boats,” and often a boat itself, would always catch your eye. Eric Jacobssen, the proprietor, decided some time ago that he was going to pursue his ambition of starting a small-boat business. The first design he looked at (with some friendly advice from his friend Mike O’Brien, former senior editor with WoodenBoat) was Sunshine.

“It’s a truly great boat,” Jacobssen says. “I’ve never ever for one moment been unhappy with the boat I chose. It looks nice, and it really rows superbly. Good yachtsmen have confirmed that for me.” He builds boats the way he prefers to: pick a good design, build it well, and the clients will follow. He has built 15 of the boats by now, and every piece is patterned and jigged up. But still, he estimates that it takes him 300 hours of work to build one, given the quality of work and finishes he strives for. “There are some shortcuts I could take, but I just feel it’s not what the market wants in this boat. It just takes more time, but it’s just kind of what I feel like doing.”

Art Rocque was one of the people who noticed Jacobssen’s shop, after driving home “the long way” to Stonington one night after dinner. He had recently had his wooden-hulled Egg Harbor 27 restored, and when he saw a Sunshine alongside the road in front of Jacobssen’s house, he saw what he wanted to have hanging from his davits. He called to inquire about the boat, which had already been sold. But, yes, Jacobssen could surely make another.

I walked with Rocque down the mossy trail to the shore from the home his grandfather had built on Deer Isle, Maine. The boat was as lovely as could be, trailing from an outhaul. Hauled ashore to a little scrap of sand between the rocks, she nosed in easily, allowing a dry-feet entry.

Photo by Tom Jackson

Drawing only inches, the tender can easily be brought ashore by an outhaul—and the same characteristic would make her a great gunkholing boat.

I took a turn at the oars, and I can fully attest that she’s a fine rowing boat. She balances very well with two people aboard, and she gave the impression of being ready for much more. The freeboard seems just right to me for a tender—with a good load of all the cruising provisions and a couple of guests, she would still row very comfortably. I wasn’t able to try a sailing version of the boat, but I’d be willing to wager that she’d be a fine gunkholer, too, just the ticket for getting into those tight, private spaces and tempting beaches where the big boats can’t go. She has the stable and solid feel of a no-nonsense boat going about her task with competence and honesty.

Rocque had Jacobssen fit lifting rings to the boat—two on the transom and one at the inside of the forefoot near the stem—so she can easily be hauled out of the water with the block-and-tackle rigged to davits on his big boat. At about 120 lbs, the boat comes aboard easily. He later also had Edgecomb Boat Works install a stainless-steel bracket on the Egg Harbor’s rail aft, into which a fitting on Sunshine’s gunwale slips, easily allowing the boat to be held very securely in position.

Photo by Carol Rocque

Hanging in davits off the stern of a finely restored Egg Harbor 27, the tender looks right at home.

“She hangs on davits very easily,” Rocque says. “She actually tows, and if you’ve ever towed a tender, you know what a pain in the rear end that can be. If you give her enough tether, she will tow perfectly straight and stay dry. People walk by and say, ‘Geez, that’s a wonderful little tender,’ which is always better than having an inflatable hanging off the stern. What would it look like having an inflatable right here? They have no shape, they’ve got no style. You can’t row them, so you’ve got to have an engine on it. They’re nasty as hell if you’ve got anything resembling a chop. They don’t carry any type of load. And as I say, when was the last time you had somebody walk past a plastic inflatable and say, ‘Boy, that’s a nice- looking dinghy’?” Strike three.

Rocque purposely avoided having a sailing rig, too. The man likes to row. “She doesn’t need a sailing rig,” he says. She balances so well on the oars—a fine pair made by Shaw & Tenney in Orono, Maine—that he sees no need for any further propulsion. Taking to heart family concerns that maybe he was rowing too much, he bought a 5-hp outboard for one of his earlier boats. “I have actually contemplated using it for a mooring block. It’s noisy, it’s smelly, it’s not fun to run, and it cavitates like hell unless the balance is exactly right. In fact, Eric asked if I wanted to use an outboard on this boat; he would have been willing to make some modifications. I told him, ‘Not likely—not even at gunpoint.’” Now, that’s Eric Jacobssen’s kind of customer, and no doubt Walter Simmons would nod his approval, as well.

Walter Simmons of Duck Trap Woodworking in Lincolnville Beach, Maine, based his Sunshine design on a 1915 boat. So good were her qualities that Simmons ended up building 40 of the boats for clients.

This Boat Profile was published in Small Boats 2009 — for more information and to purchase plans, visit Duck Trap Woodworking.

MARCUS NOER

MARCUS NOER is a particularly fine example of a traditional double-ender from Denmark, with a shapeliness to her hull that will take your breath away. The design is one descendant—one of many—of a Nordic boatbuilding tradition that should properly stand beside the great cathedrals of the world and the sculptures of antiquity as among the loveliest creations ever made by man.

This design is not for beginners. It is, however, absolutely a design that any beginner should aspire to, in my view. A boatbuilder young in experience should choose a much simpler boat first, or maybe a succession of two or three, perhaps working with other builders or taking one of a number of specialized classes before attempting such a boat. But as he does so, he should know that each saw cut made straight and true and each plank line sweeping an honest curve will contribute to the understanding of something greater. Each boat built should contribute to the understanding for the next boat.

This 17′ 81⁄2″ lapstrake-planked double-ender can stand comparison to the finest of yacht design, and yet this hull comes down to us from an everyday craftsman for a common fisherman. The original “jolle” was built in Frederikssund in 1900 for one Marcus Noer of Ejby, in Isefjord, Denmark. His catch, sole, and flounder, was kept alive in a wet well, essentially a box built into the hull, which had holes bored in the planking to allow water to fill the box. This replica, built in 1980, is faithful to the original design and all-oak construction—with the exception of refraining from boring holes in the planking.

Photo by Tom Jackson

The lovely curves of a traditional Danish Frederikssund jolle are accentuated by the lapstrake planking lines.

MARCUS NOER is one of the boats in the collections of the Viking Ship Museum in Roskilde. This museum, which is in a mid-sized town about an hour’s train ride west of Copenhagen, is noted for its archaeology and its exacting replica constructions, but it also has amassed an impressive collection of small craft, several of which would be excellent examples of boats for home builders. These boats inherit and share characteristics that came down remarkably unchanged from Viking times. The museum boatyard’s purpose is to preserve traditional skills in addition to the boats themselves.

Anyone who doesn’t want to take the time—which would be considerable—to build one of these boats can have one custom-built, and not just MARCUS NOER. Want an exact replica of the faering, or four-oared boat, that was recovered with the famous Gokstad Viking ship in the 1880s? The museum boatshop can build one. Among the small-craft collections, any number of boats would be likely candidates, but for me, MARCUS NOER has that “just right” feel. I see that I’m not alone in this, because when I was at the museum in May 2008, two of these Frederikssund boats were on the pier, newly constructed for private clients and ready for shipping. Inside, a similar type called a Lyneasjolle was days away from launching, and an ancient-looking faering was in for restoration.

Søren Nielsen, the boatshop director, says that he builds the boats right-side-up over molds. “Traditionally, that was, as you know, not the way to do it,” he says. “Our plan is, however, after we have built a few more of these boats, to throw the molds away and build them ‘as in the old days’—without molds but with a few measurements in the right places. You just have to have some experience before you do that, because you have to know exactly where the important measure has to be taken to build a good boat.” The boat’s rounded stern presents challenges even for experienced builders.

The interpretation of the Frederikssund jolle plans would be a challenge in its own right. For openers, the particulars are typically reported in metric measurements, but the plans sheets themselves, drawn by historian Christian Nielsen in the 20th century, are in feet and inches. However, if you do the calculations, you’ll see that the translation doesn’t quite work out. Take the overall length as an example: 5.4 meters equals about 17′ 81⁄2″. But on the plans sheets—which were completed before Denmark adopted the metric system—the length is clearly shown as 17′ 3″. Why the difference? The answer is that the Danish inch was historically a little longer than the English inch—26.17mm instead of 25.4mm. (There’s one more reason the metric system took hold!) Just interpreting the plans sheet will involve some understanding of the history of changing measurement systems and will call for judgment on the part of the builder.

Photo by Tom Jackson

The boatshop at the Viking Ship Museum in Roskilde, Denmark, builds boats for clients, and two Frederikssund jolles just like MARCUS NOER, built almost entirely of oak and newly oiled, were among the boats constructed in 2008.

The plans are available on a CD supplement to a book published by the Danish Maritime Museum; getting them onto a plans sheet that would be useful might involve a trip to a printing or engineering office that has a large printer. (Here at WoodenBoat, we had trouble opening the CD in a Macintosh computer.) In the end, redrawing the plans to a chosen scale may be the best way to go and will significantly ease the task of lofting the plans out full-scale, which will be essential in any event. Builders will also notice that these plans do not have an accompanying table of offsets, that list of all-important measurements—or at least if they ever did, they haven’t survived. From redrawn plans, the builder might be well advised to develop his own table of offsets before lofting.

Sourcing materials could also be difficult. White oak planking, which is the traditional choice, would be excellent because it steam-bends so beautifully. Where white oak is scarce, finding adequate stock would be difficult or expensive. But larch and pine also have been used to good effect. For the backbone timbers, any good structural wood—superior Douglas-fir, say, or purpleheart, or angelique—would do nicely.

The builder willing to accept up-front complexity will be rewarded later by the simplicity of the boat’s setup. With a couple of exceptions, fitting out would be simple. There are no complicated systems. The jibsheet fairleads are the simplest imaginable, hewn of wood. Other than copper rivets, the boat uses very little metal, and the original fittings were meant to be simple and inexpensive. The museum boatbuilders use galvanized steel fittings for the two complex metal pieces (the exceptions mentioned above): the stemhead fitting and the rudder gear. Galvanized steel won’t last nearly as long as bronze, but it’s in keeping with the ways of the original boats. Of course, with the price of copper and bronze heading for the stratosphere these days, maybe it’s time to leave off this demand for bronze in every instance and think seriously about a return to galvanized ferrous metals for certain kinds of boats. Not every boat has to be a yacht.

The finish on this boat is equally simple: a 50:50 blend of pine tar and raw linseed oil. The mix stays tacky for a while, hardening in a few weeks, especially in the sun. It turns the wood black as can be, but on this boat that just seems natural and right. The entire interior, the spars, and the topsides are all finished this way. The only paint on the boat is bottom antifouling.

This boat is heavy, at about 1,984 lbs, with a very deep keel—what the Danes call a “high” keel. Getting the boat on and off a trailer would be difficult, but doable: the museum tows the boat to various festivals, near and far. But launching off a trailer isn’t something you’d want to do every day. Paying a yard to haul the boat with a Travelift would make easy work of it, but the fact is that this boat would be happiest in a marina or at a mooring.

Now, I know what you’re thinking. That heavy old fish boat, oh, my God, she’s going to sail like a slug. You’ll have to get an oar out to work her around every time you tack, and while all your friends with super-lightweight plywood-epoxy craft are out there on the beach finishing off their lunch, you’ll still be back in harbor trying to tack your way clear.

Think again. She’s an amazingly sprightly sailer and a joy to handle. She comes about like a dinghy, with a light touch on the tiller. The jibs have to be backed briefly, but the boat comes about cleanly and with little fuss. She picks up speed right away on the new tack. Her topsail sets and strikes easily, with no specialized gear. The snotter—that sling that holds the heel of the sprit—is held by friction alone, so adjustment is dead easy: push the sprit heel up to gain some slack, then slide the snotter wherever you want it to increase or decrease sail tension.

Photos by Tom Jackson

Left—Tholepin rowing, combined with a simple shroud tie-down and a wooden jibsheet fairlead, show the simplicity of MARCUS NOER’s fittings. Right—Hemp rope has such good friction that no mast fittings are needed to set the snotter line, a sling holding the heel of the sprit.

I sailed MARCUS NOER on a cloudy day with moderate breezes off Roskilde with Dylan Coils, a New Zealander who has worked at the Viking Ship Museum as a sailing teacher for years, and with Max Vinner, a retired curator. Max never tired of sailing MARCUS NOER, which for his many years at the museum remained his boat of choice for singlehanded daysailing after work.

With her broad hull, MARCUS NOER is stable and powerful. The very broad side decks give her the equivalent of a great deal of freeboard, and yet her sheerline is low, originally to give the fisherman easier work in hauling his catch. Those side decks give the crew a very comfortable seat when the breeze requires a bit of weight on the weather rail. With both jibs and her topsail flying, all set with the simplest of gear, she takes the wind like a stallion. We would not expect her to point to weather like a modern racing yacht, and yet her windward abilities would come as a serious surprise to racing sailors.

Ashore, her rig is easily handled. The time-honored way to furl the sprit mainsail is to remove the sprit heel from the snotter, sway it aft until it is parallel with the mast, and then, starting with the leech, roll the sail up in the sprit like a carpet until it comes right up to the mast. A simple length of line binds it all together neatly. The topsail rolls on its spar, too, and that bundle fits inside the cockpit. All very simple, with a minimum of fittings. There are lessons in these workings for boatbuilders of any kind.

At the time I sailed MARCUS NOER, I was in that odd position of being simultaneously almost finished with one boat and just on the cusp of looking around for what might be next—after a respectable interval of time for house projects, of course. I suspect that for my next boat I’ll look no further than MARCUS NOER.

Among us there are some—and perhaps, quietly, many—for whom the number of boats built, measured in total or over a given period of time, is of no consequence. We may be professional in other things, but not in this. At the end of the day (to take a weary cliché back to its original meaning), we hang measurable outcomes and paradigm shifts on hooks alongside our hats and coats. In our own workshops, we work a piece until it pleases the eye and feels good in the hand, and for this one part of our lives that is our only unit of time. To those who prefer to work in this way, the only boat design that makes any sense is one that makes our hearts yearn. This Frederikssund jolle is such a boat.

The Frederikssund jolle was documented at a time when Danish inches were still in use; therefore, interpreting the lines and construction plans will pose some challenges. For a motivated person with some experience, the result will be worth the effort.

This Boat Profile was published in Small Boats 2009 and appears here as archival material. If you have more information about this boat, plan or design – please let us know in the comment section.

A Light-Blue Tarp

I’ve been exploring my local areas by bicycle for as long as I can remember. In the mid ‘70s I was living in Edmonds, Washington, and took a ride about 8 miles north to the outskirts of Mukilteo, a town on the shore of Puget Sound with a little-used airfield on its eastern inland side. An industrial park had been established in the two-story white clapboard buildings that had been left behind by the Army Air Corps. JanSport occupied one of the larger buildings with its production facility and customer service was housed in a smaller one with unpainted cedar siding, which had turned almost black with age on its south-facing side. A large green dumpster was set right alongside the larger building; it was about 18′ long and 7′ high, so I had to climb the welded-on ladder rungs to see what was inside. 

What I found wasn’t at all garbage. All of the sewing scraps from the shop in the upper floor had been tossed through an open window. There were remnants of ripstop, coated nylon, Cordura, leather, webbing, zippers, cord—everything that went into the backpacks and dome tents that JanSport was making then. There were also rolls of new fabric still on cardboard tubes, thrown out because there wasn’t enough left to supply the pieces needed.

I’d been raised by parents who lived by a credo that my sisters and I adopted: Don’t buy what you can make, make do with what you can find. I’d been sewing since I was 10 and in the dumpster I found everything I’d need to outfit myself for backpacking in grand style. I couldn’t carry anything home by bicycle, so I decided to return with my mother’s car to make a haul. 

I borrowed her navy-blue Volkswagen squareback and came back that evening and loaded it up with everything I thought I could use to make my own outdoor gear. That was the first of many trips. I kept a low profile and watched the buildings before approaching the dumpster. I noticed that the people working in customer service would fill a garbage can with returns and damaged products before leaving for the day at 5. About 30 minutes later, a truck would come and haul the contents of the garbage can away. At a quarter past 5, I’d take what I could carry, leaving the can half full to avoid suspicion, and walk it back to the car. 

Almost everything from customer service had been slashed with a razor or utility knife, I assume to assure employees wouldn’t collect it or sell it, but the damage wasn’t a deterrent for me. The tents had been slashed while in their stuff sacks so the damage to the tents themselves was quite irregular. I repaired two 3-person dome tents, a wedge tent for two, and a few backpacks of different sizes. They all had an Edward Scissorhands look after I sewed them up but were as functional as they were when new. 

I made many visits to the dumpster over the course of a few months, but the harvest came to an end when it was replaced by one with a screened lid and a padlock. I wasn’t too sad about it—I had collected enough material to make a lot of gear—nor was I too surprised. My father had told a few of his students, kids about my age, about the dumpster and I suspect they had been less discreet than I had been.

I had a dozen or so roll ends of fabric. One of them had several yards of light-blue coated nylon. I recognized it as the material JanSport used to make the tent rainflies I’d salvaged and I used it for stuff sacks, rain chaps, and a tarp. I didn’t use the tarp for backpacking because my tent and fly were my shelter from the rain. But I did take the rainfly on my first small-boat cruise. I brought it mainly as a ground cloth for shore camping and hadn’t anticipated the many other ways it would make itself useful when I had to sleep at anchor or wanted to make use of a light breeze. The tarp became part of my regular kit and accompanied me for over 4,000 miles of cruising and even provided a couple of hundred miles of surprisingly effective service as a sail.

The simplest use of the tarp was as a boom tent. Rather than use the mast to support the boom, I made crutches from driftwood. The mast tended to thump when the boat rocked, a noise that kept me from falling asleep. I took this photo during a 700-mile cruise of the Inside Passage.


On that first Inside Passage cruise, I rowed and sailed a 14’ Chamberlain dory skiff. For light following wind I used the blue tarp as a spritsail and set it opposite the boat’s regular spritsail, using the topmast as a sprit. While spritsails usually have a high peak, Norwegian snekker have spritsails that are very nearly rectangular. The tarp nicely balanced the sprit mainsail, set here, but mostly out of frame to the left. With the nearly symmetrical rig, the skiff had a neutral helm.


Set on a line spanning a creek that empties into the Ohio River, the blue tarp was my shelter for a rainy night spent in my sneakbox.


One of the other shelters I made with the tarp used the camera tripod for  support.


I picked a raft as a place to sleep on an especially cold night just off the Ohio River. The tarp kept some of the frost off me but nothing more. I didn’t sleep at all. I would have been better off sleeping in the boat where I would have found a bit more protection from the cold.


On a downwind run off Florida’s Gulf Coast, I ran with the main set to port and the blue tarp to starboard, helped out with a board I found on the beach to serve as a whisker pole.


When the sneakbox took the wind over the starboard quarter, I sailed on a broad reach and moved the whisker pole forward. With the tarp, jib, and main all drawing well, the sneakbox got up on plane.


I hadn’t finished the squaresail for the Gokstad faering I built for my second Inside Passage cruise and it took a few evenings of sewing to get it ready. In the meantime, the tarp served in its stead, using the tiller extension as a yard and the squaresail’s yard as a mast.


Alaska’s Seymour Canal is a 34-mile-long inlet that separates Glass Peninsula from Admiralty Island. When a very light breeze from the south ruffled the water, I was ready to take a break and sail. The squaresail wasn’t providing much speed, so I rigged the tarp to quicken the pace. The only way to hoist it was to tie its gathered end on the mast’s backstay; an oar tied to the tarp’s bottom edge spread it out.


With the tarp to starboard and the tiller extension holding the squaresail to port, the faering caught as much wind as it could and moved a bit more smartly.


I joined a group of kayakers for a three-day outing/paddling tour of Ozette Lake on Washington’s Olympic Peninsula. When the morning of the second day offered a wind that would take us directly to our next camp, I was reluctant to pass up the free ride and talked the group into rafting-up to sail. There were six of us when we began sailing, but the kayaker who had been on the left side got peeled off when we got up to speed and couldn’t catch up. I dropped back to take some photos and with a short sprint I was able to rejoin the group.

It has been over 40 years since my JanSport dumpster dives and the tarp, the rain chaps, the stuff bags, and the tents are all gone. The coatings peeled off and the fabric took on an unpleasant odor. All I have left is a backpack with the stitched-up scar running from top to bottom. I still don’t buy what I can make—there’s great satisfaction in that. And I still make do with what I can find, nurturing an appreciation for a generous world’s gifts of serendipity.

Continue Reading - Enter your email to log in or subscribe

New to Small Boats? Create a free account to get our weekly emails and two free articles each month.

Yes! I would like to access this article and the Small Boats newsletter.