At the conclusion of a complex build, the energy, ingenuity, and budget for an elegant floorboard installation is sometimes lacking. In a traditional dinghy it is not unusual, for example, to see floorboards fastened directly to the hull’s steam-bent ribs.
 Photographs by the author except as noted
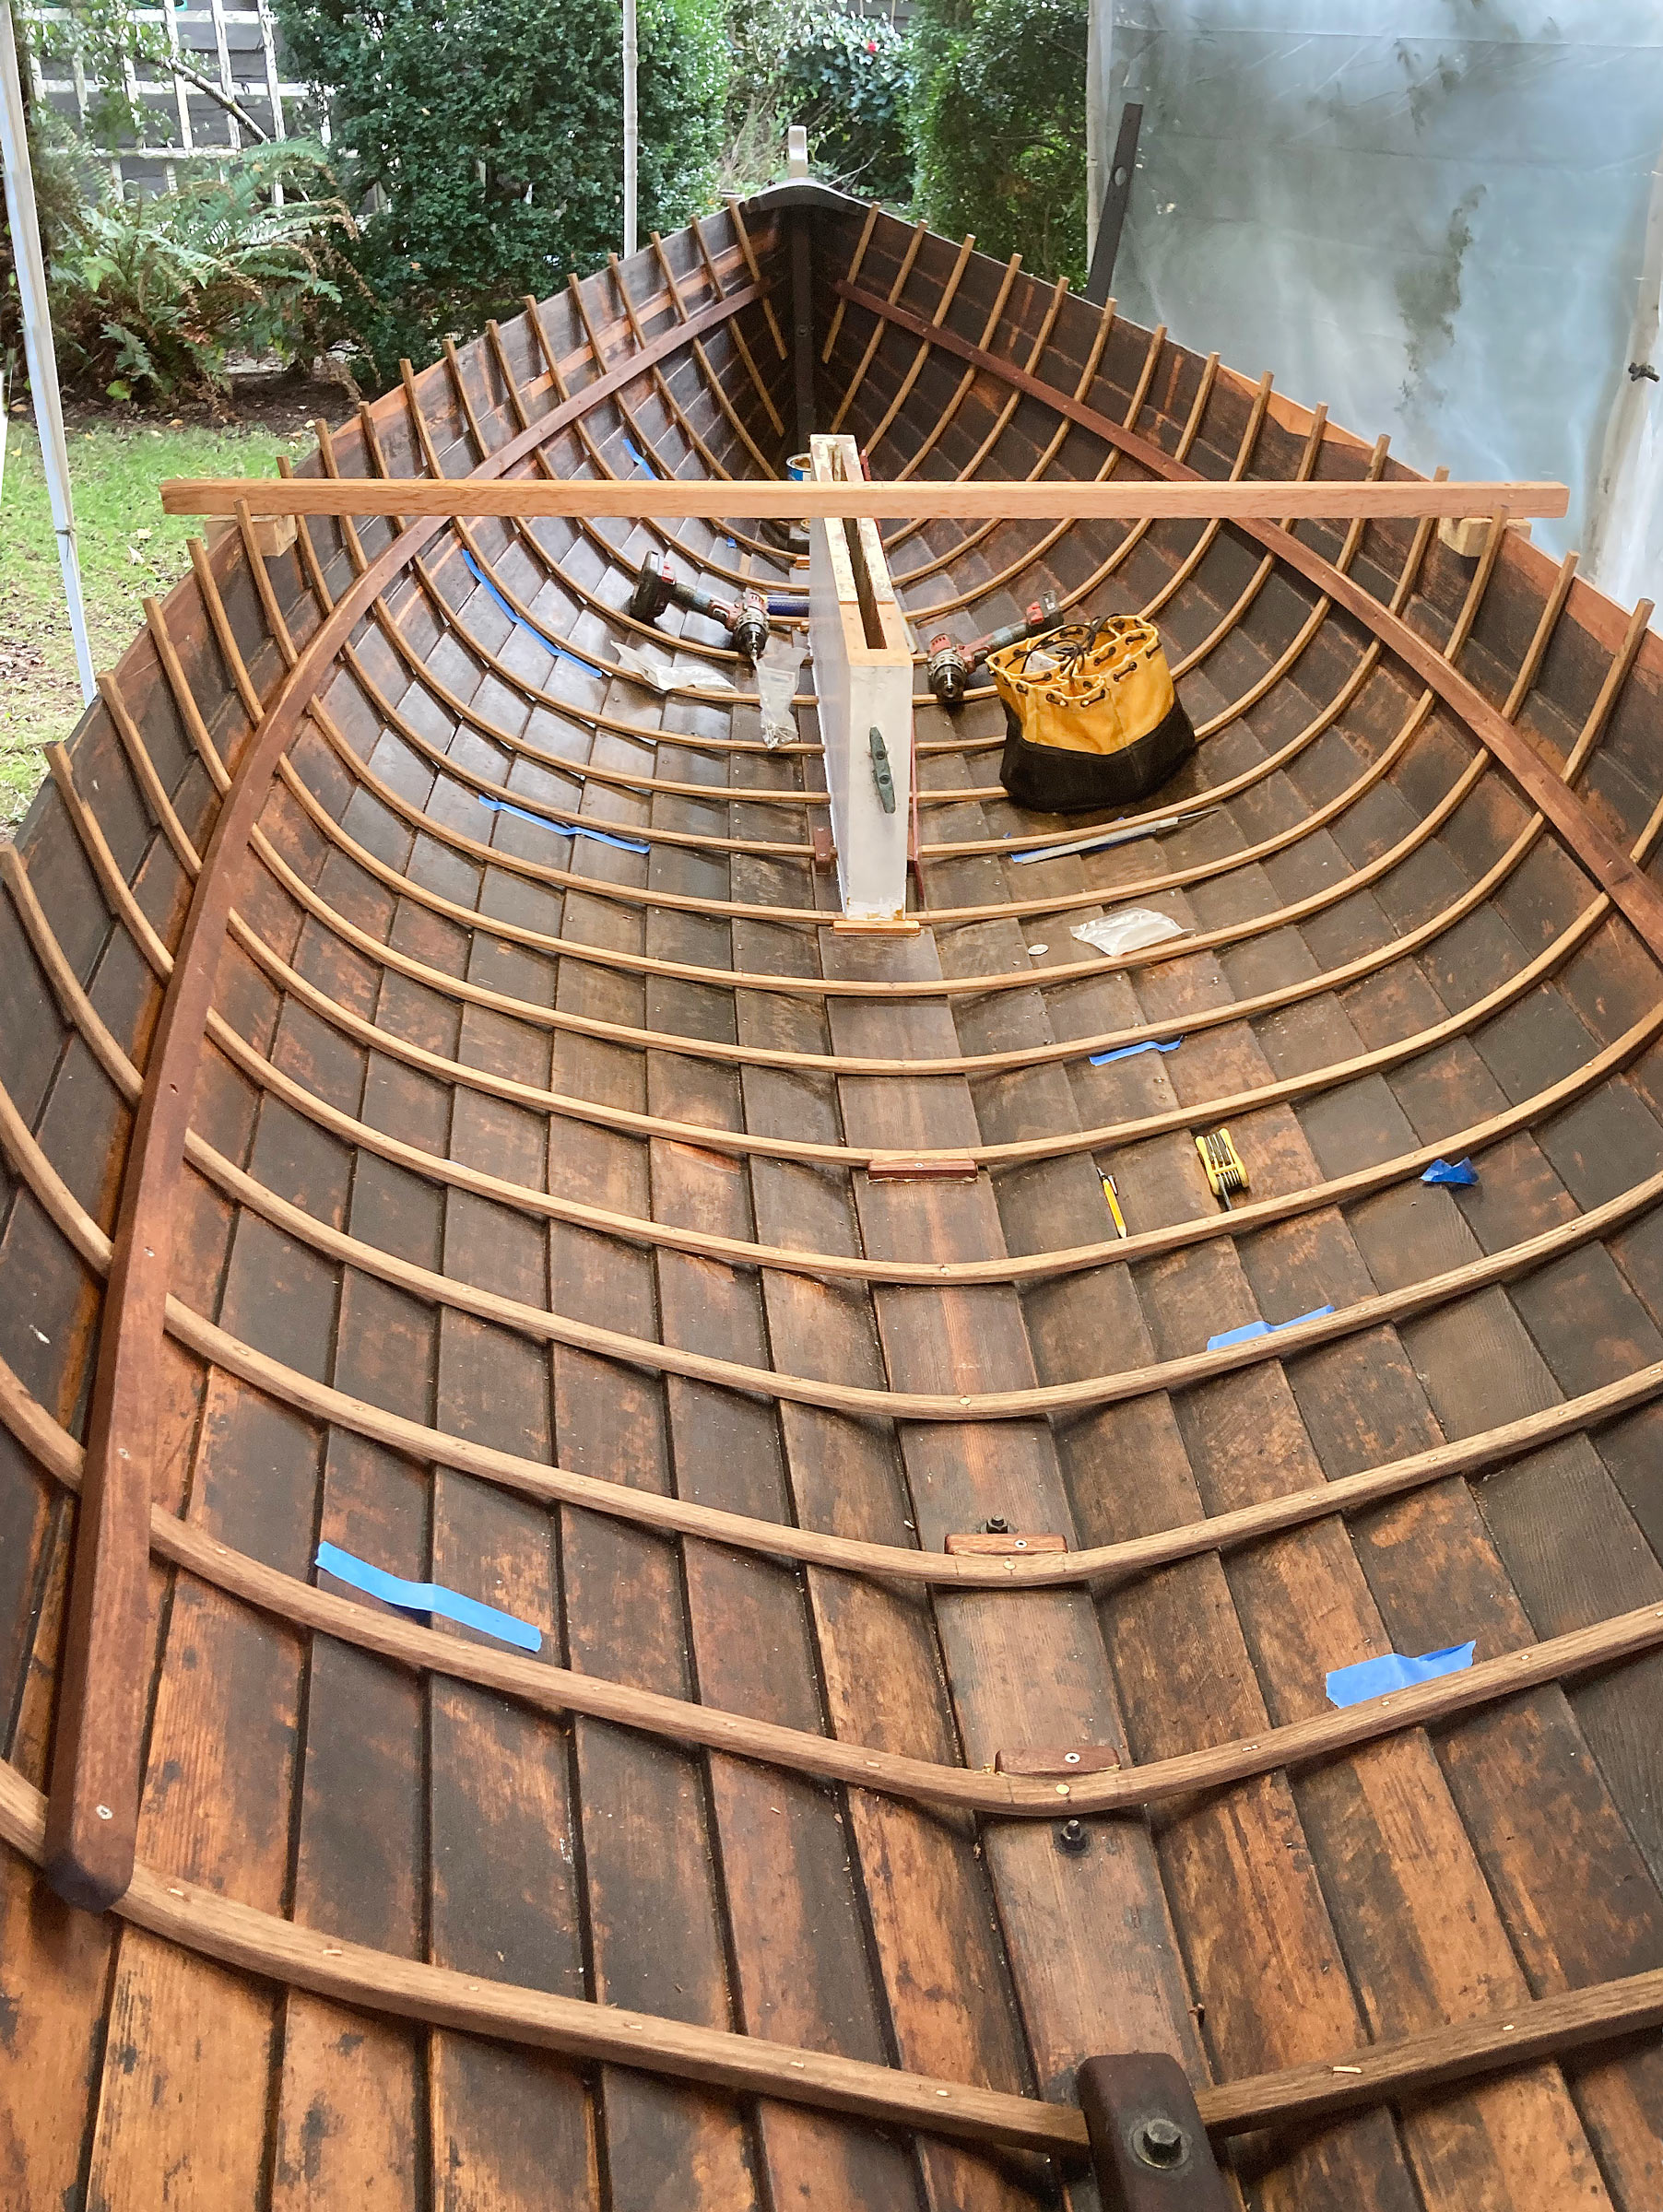
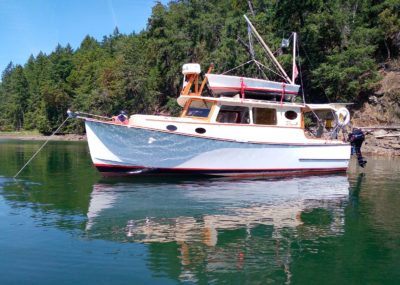
My traditionally constructed Hvalsoe 13, 15, and 16s are cedar-planked lapstrake hulls with 3/8″ by 3/4″ oak ribs bent from gunwale to gunwale across the apron.
A very solid structure is achieved when thwarts are anchored to the centerboard trunk, and to the gunwales with hanging knees. The boats don’t have floor timbers, which provide a flat surface for floorboards in some boats, because they reduce valuable internal depth and stability.
While it may be common practice with plank-on-frame construction of this sort to fasten floorboards to the ribs, the floorboards are then a nuisance to remove, and repeated removal of the screws will damage the oak ribs. I’ve seen this death-by-floorboards phenomena in a few small boats.
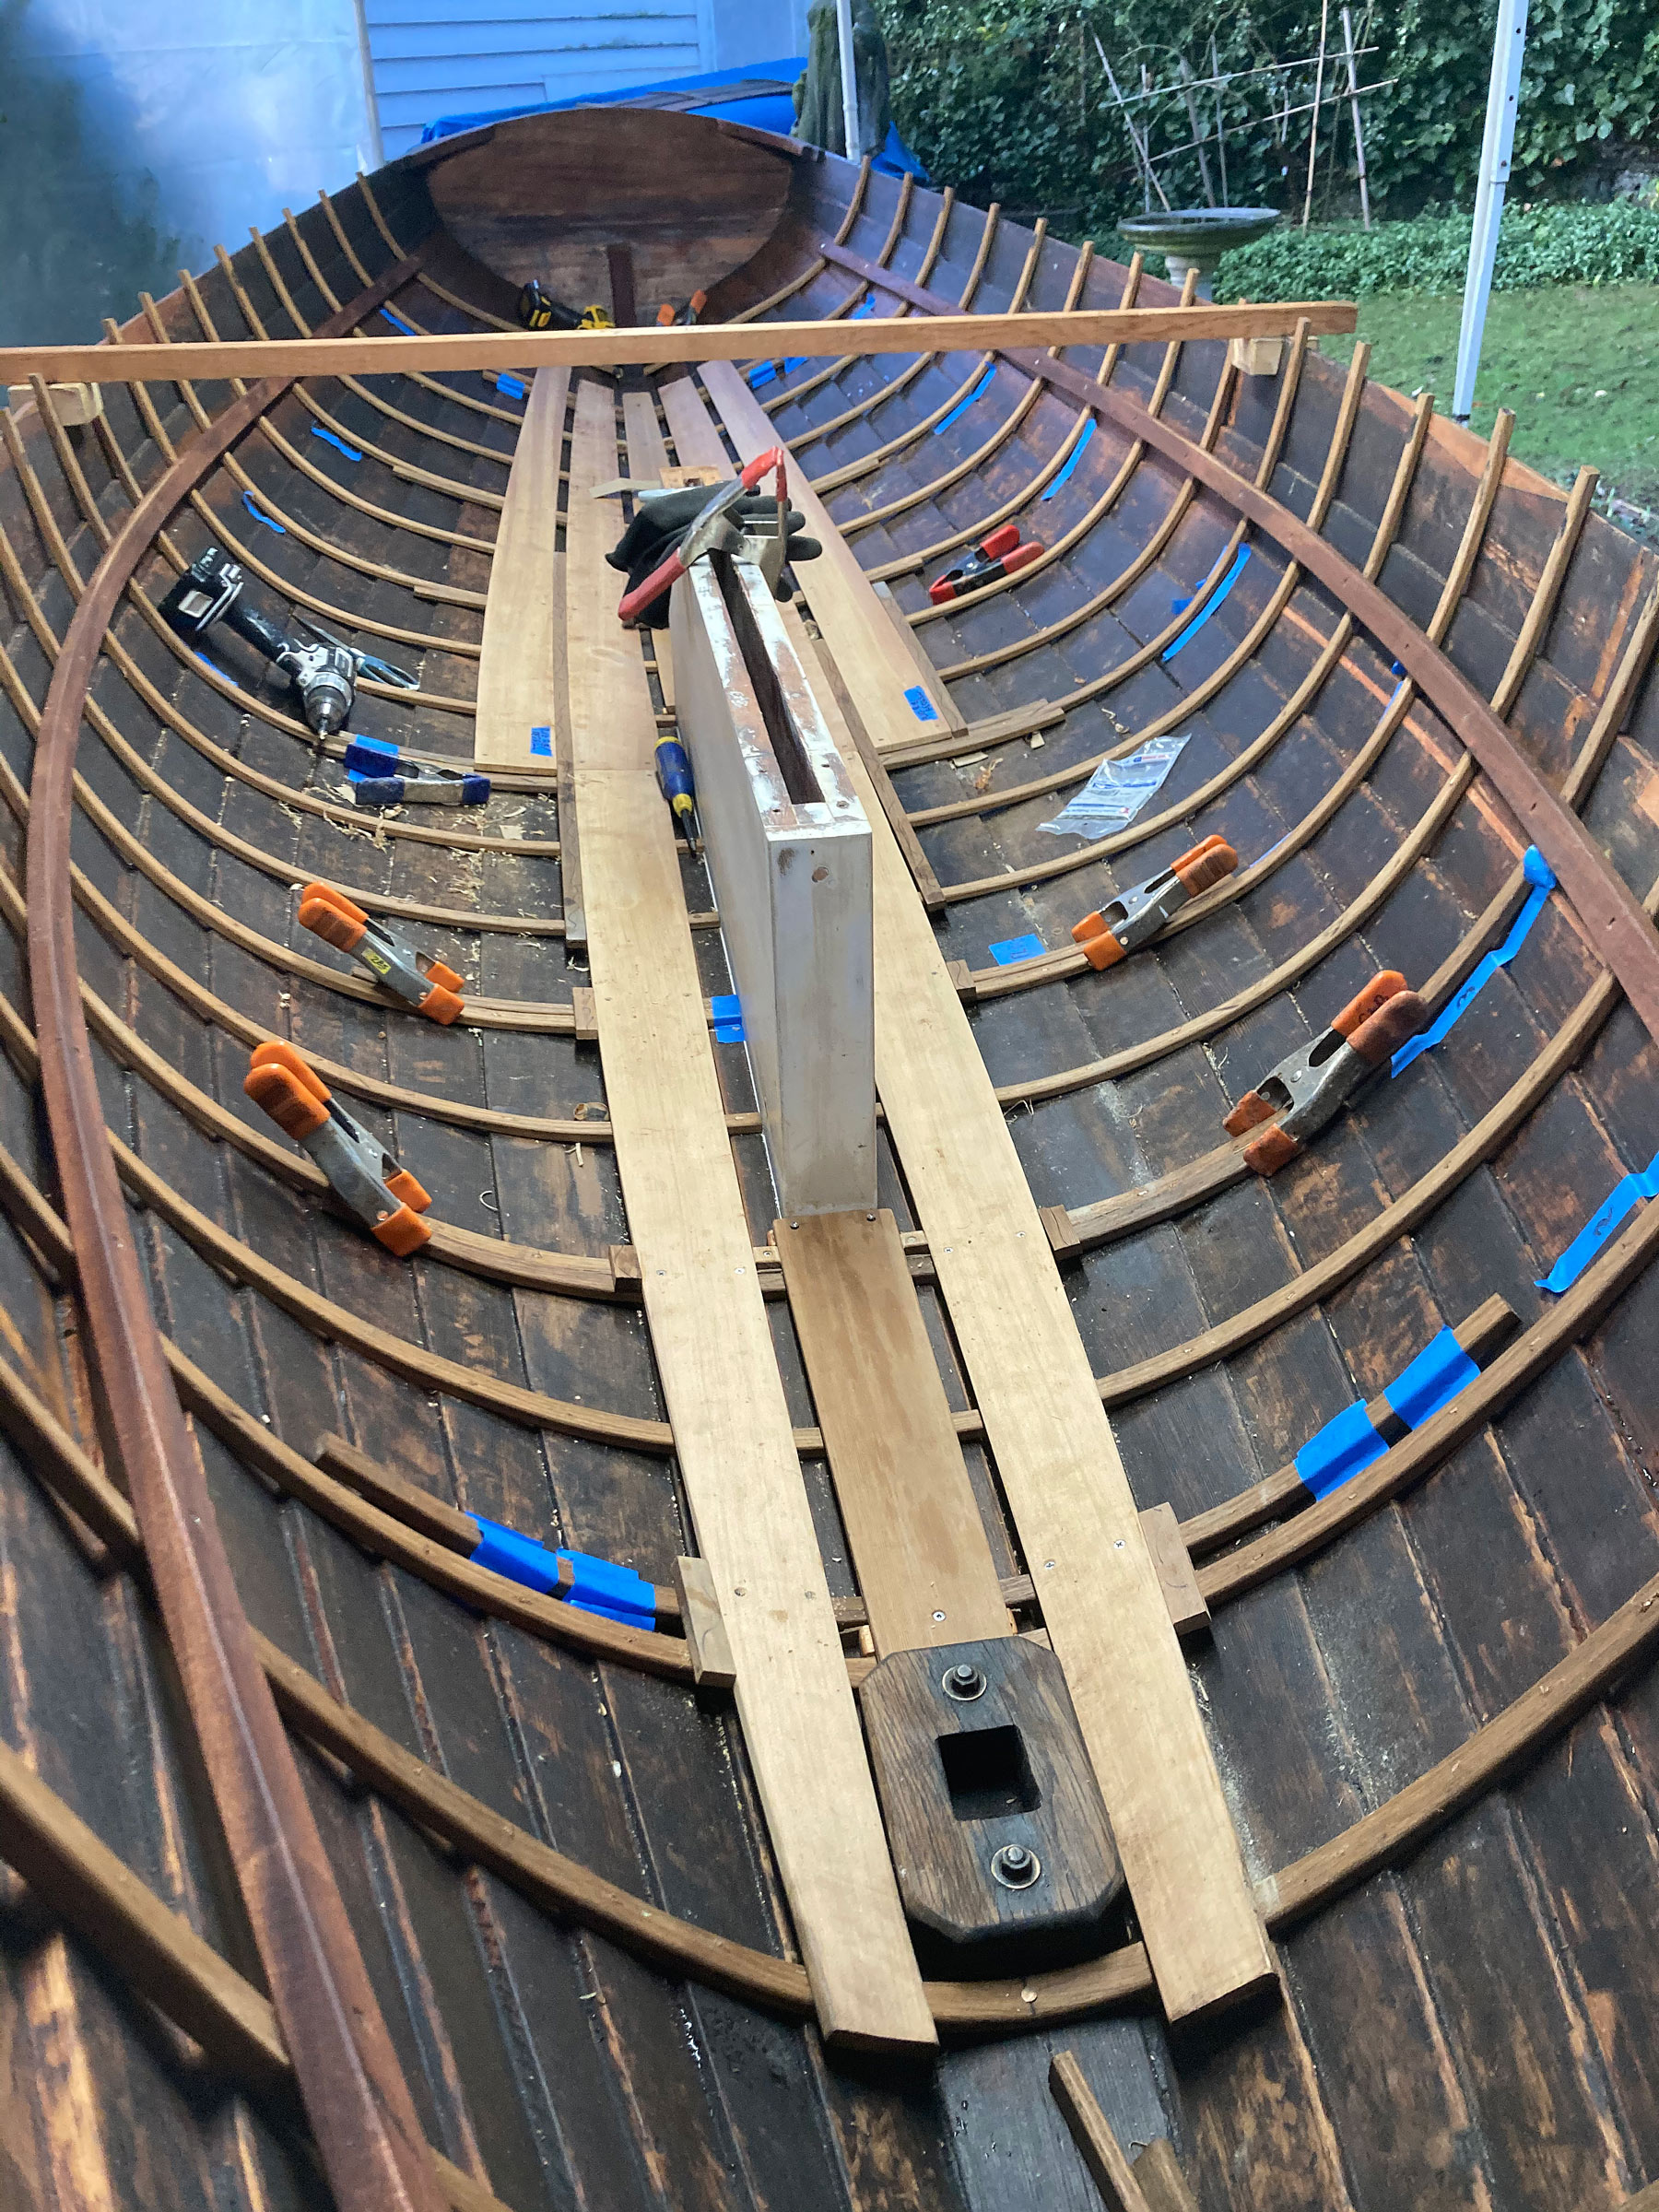
A better solution is required to avoid treading all over the cedar hull, and to promote maintenance and longevity. My answer is a set of four easily removable panels conforming to the shape of the hull interior. I make the panels using the same materials that go into the hull construction—3/8″ clear vertical-grain, freshly cut western red cedar, and bending oak identical to the hull ribs.

I begin with center floorboard pieces that mimic the outline of the apron. They are set forward and aft of the centerboard trunk, just touching the hull ribs.

The center floorboards are secured with a minimum number of screws to cleats that are fastened to the apron.

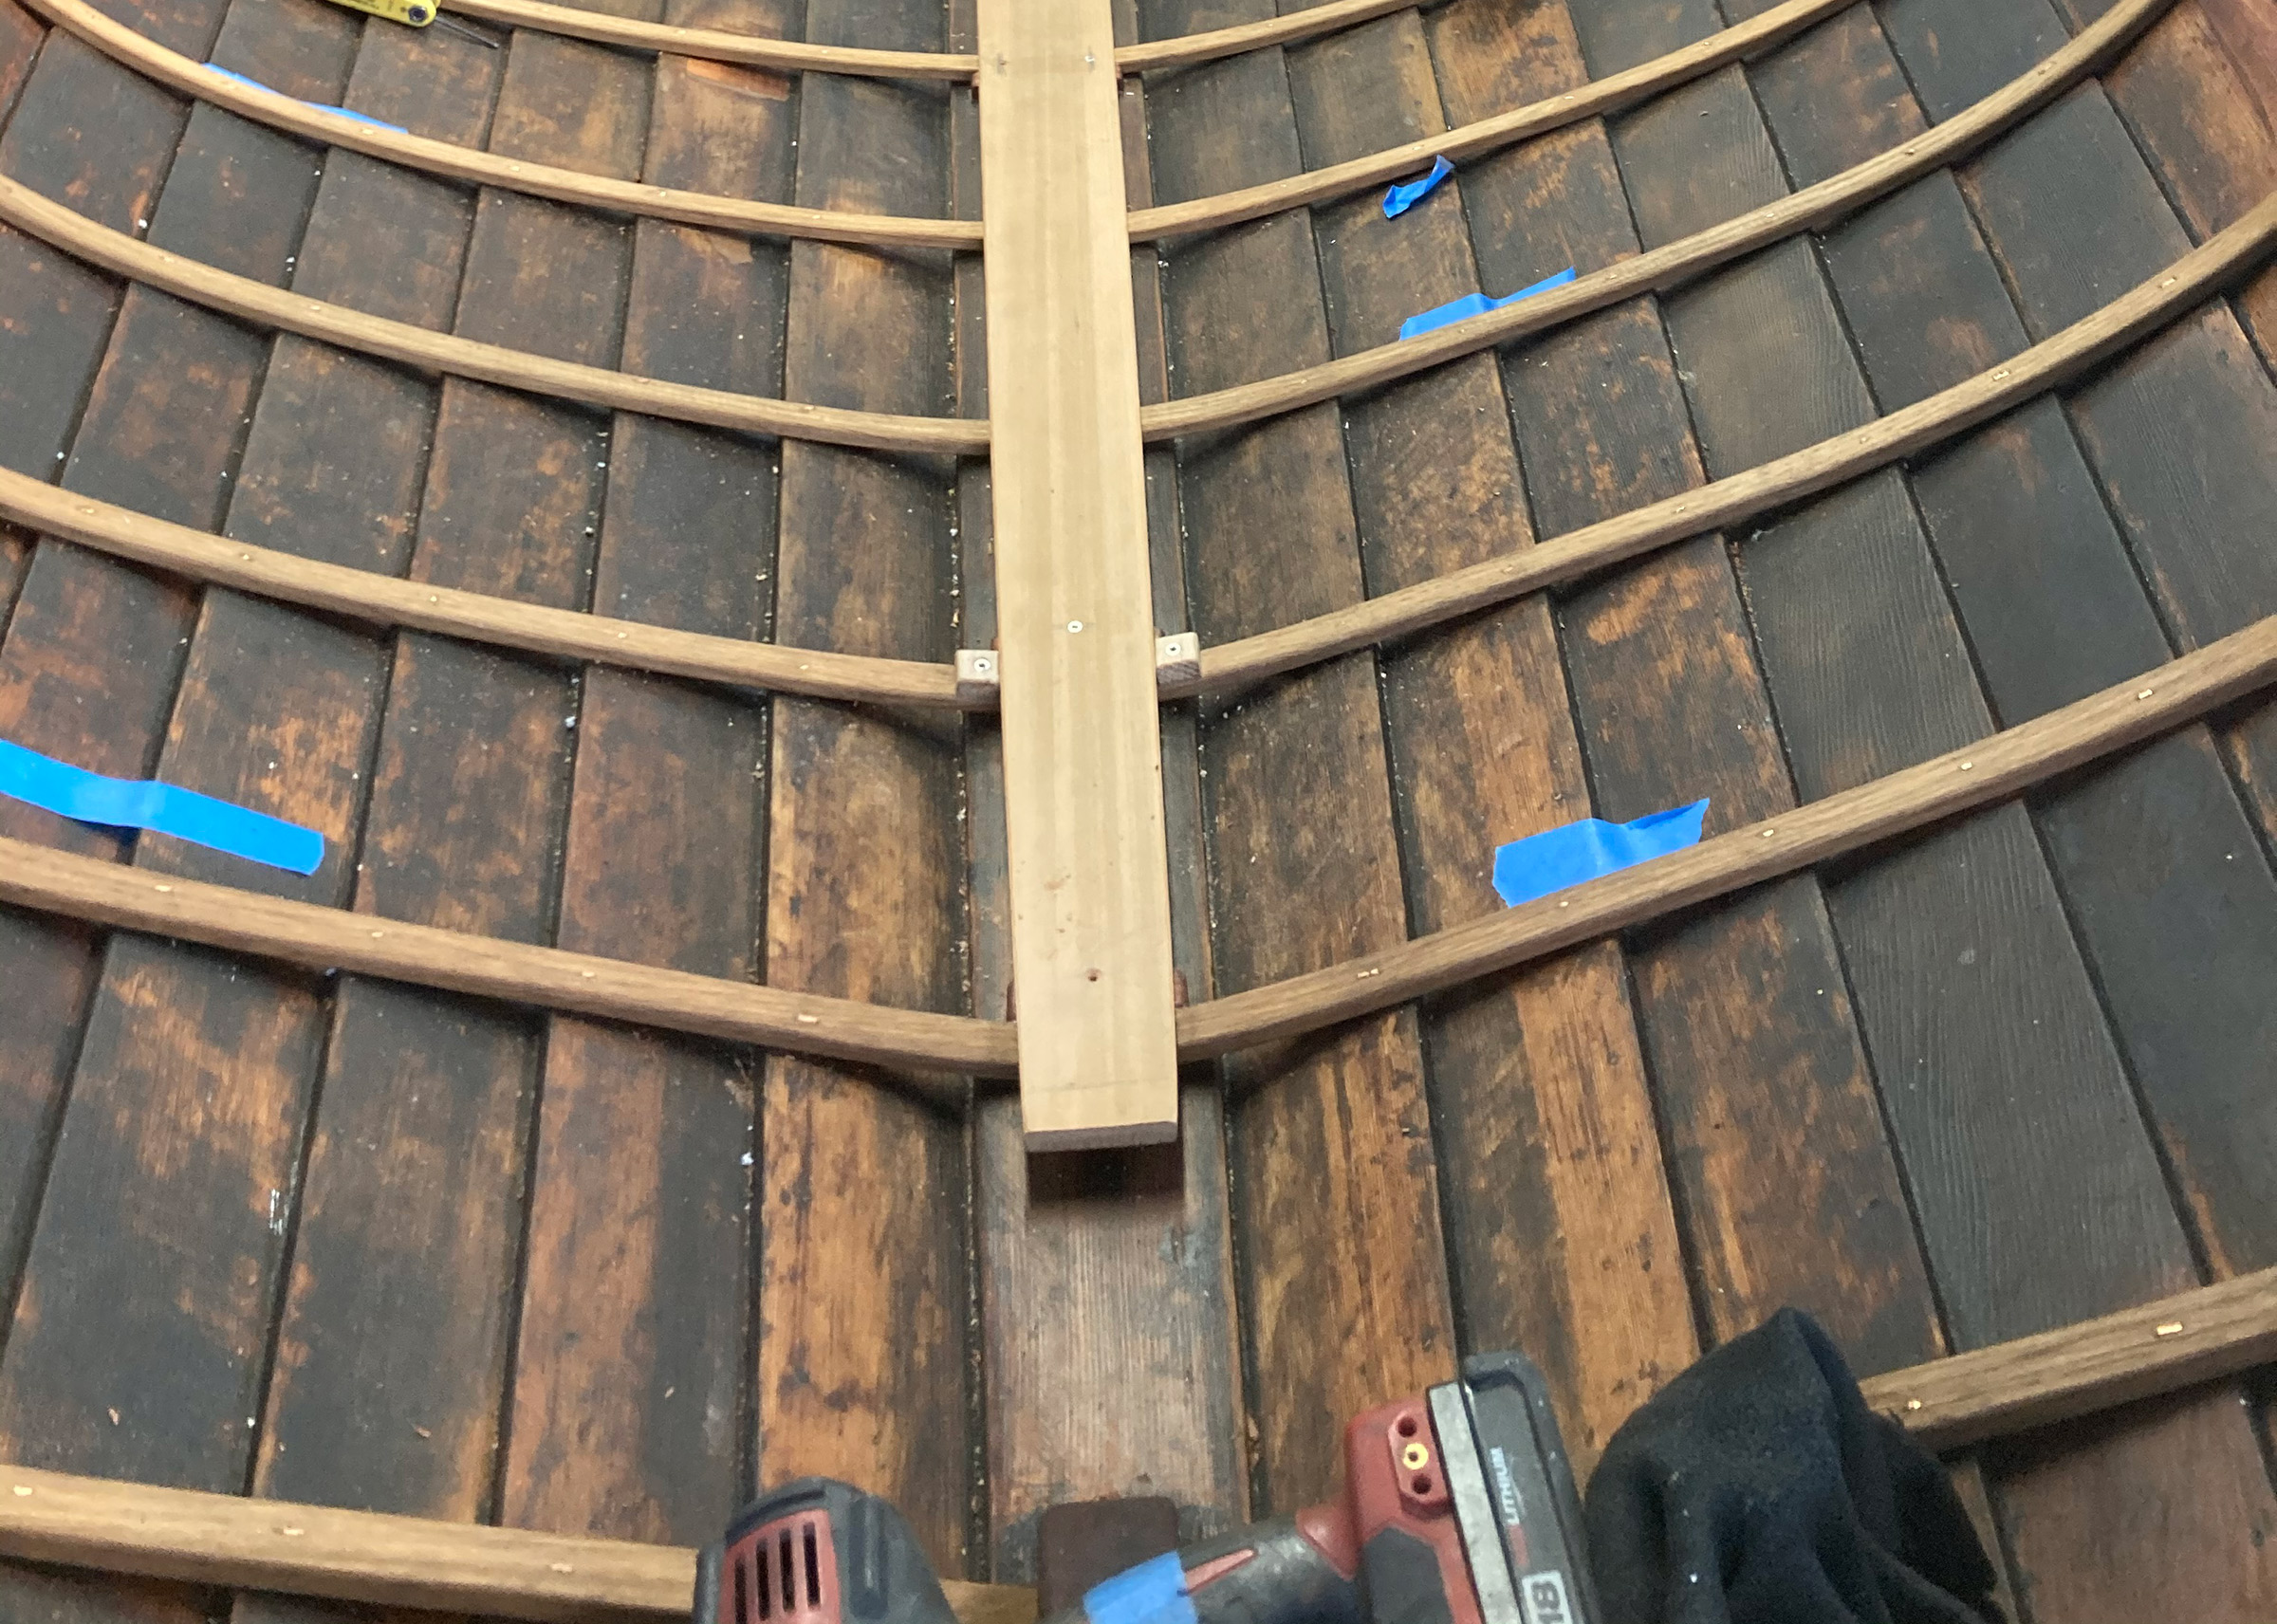
Mahogany “bridge” pieces on each side of the centerboard trunk straddle a hull rib where the floorboard panels will butt together. The bridge pieces will hold the panels out from the trunk and capture the ends of the panel ribs, and stand slightly away from the trunk to avoid creating a trap for water and debris.
 caption
At bow and stern, the finished panels are held at the appropriate spacing from the center floorboard by oak tabs fastened to the hull’s ribs. These spacers also align and ensure that the center floorboard pieces easily return to their original position after being removed for maintenance.
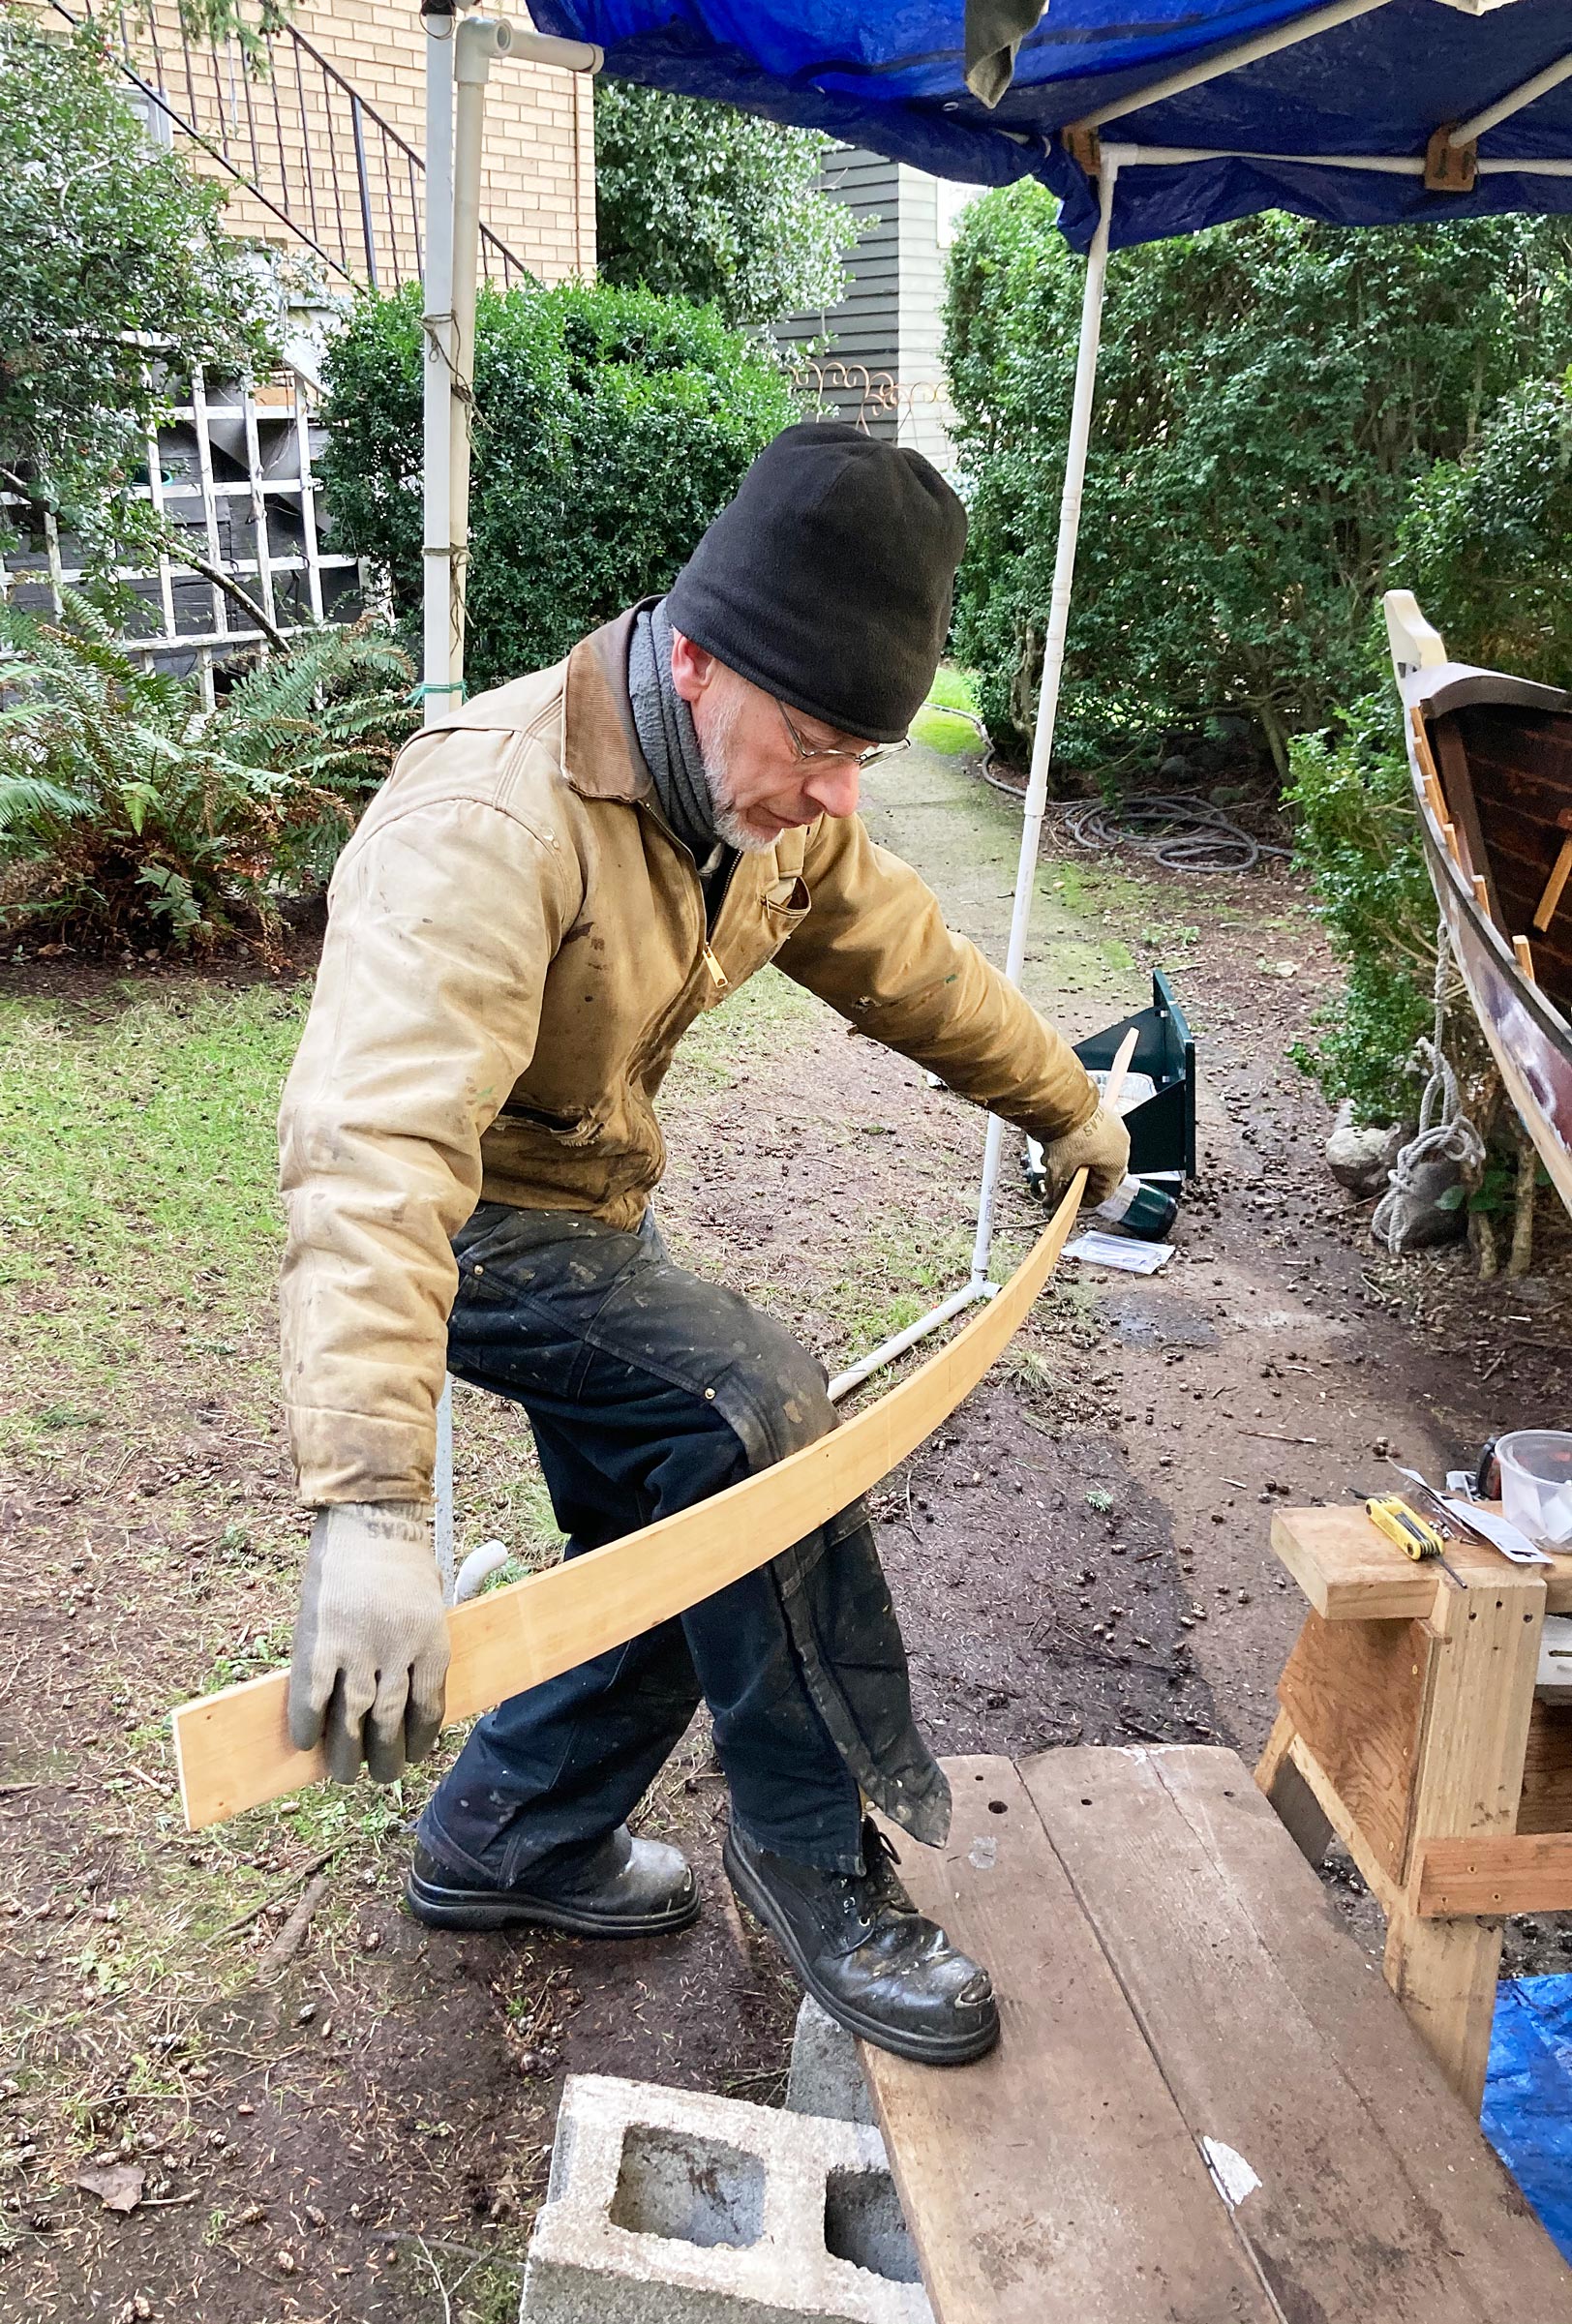
The individual floorboards will mimic the curvature of the first three hull strakes, with the overall panel footprint falling somewhere above the third hull strake. Rib stock to join the individual floorboards into panels is first cut roughly to length to cover this area, erring on the long side. Each panel will have four ribs. The floorboard ribs are steamed, then bent freehand until they fit nicely around the bottom of the boat. They are located alongside the hull ribs to prevent forward and aft movement of the finished panel. The tips of these short ribs extend to slip under the center floorboard and bridge piece. I slide them under about 1″ and ease the bottom corner so that the rib can rock up and down a small amount when the panels are removed. For now, the new panel ribs are left long at their upper end. They are clamped to adjacent hull ribs with small shims to provide space that will ensure the panels can be easily removed.
Starting with the first course alongside the centerline and trunk, the individual floorboards are shaped to mimic the run of the first three hull strakes. I use thin plywood for pattern stock, and a combination of scribing, spiling, and eye work to arrive at the shapes. For example, the lower edge of the first floorboard course can be scribed directly alongside the center floorboard.
The top edge of the first course might be spiled, or scribed with an offset block, to roughly follow the garboard/broad. One begins with a general sense of layout and proportion, the eye to follow.
 Gary Brewer
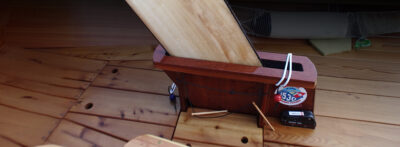
I bend the individual planks freehand right out of the steambox. The hot red cedar is quickly molded to shape, first with a twist, then forward-and-aft curvature. This is all done outside of the boat within a few moments.
 Gary Brewer
Forward, the floorboards are considerably over-twisted immediately out of the steambox.
There is just time for a couple of test fits before the plank relaxes perfectly into the shape of the hull.

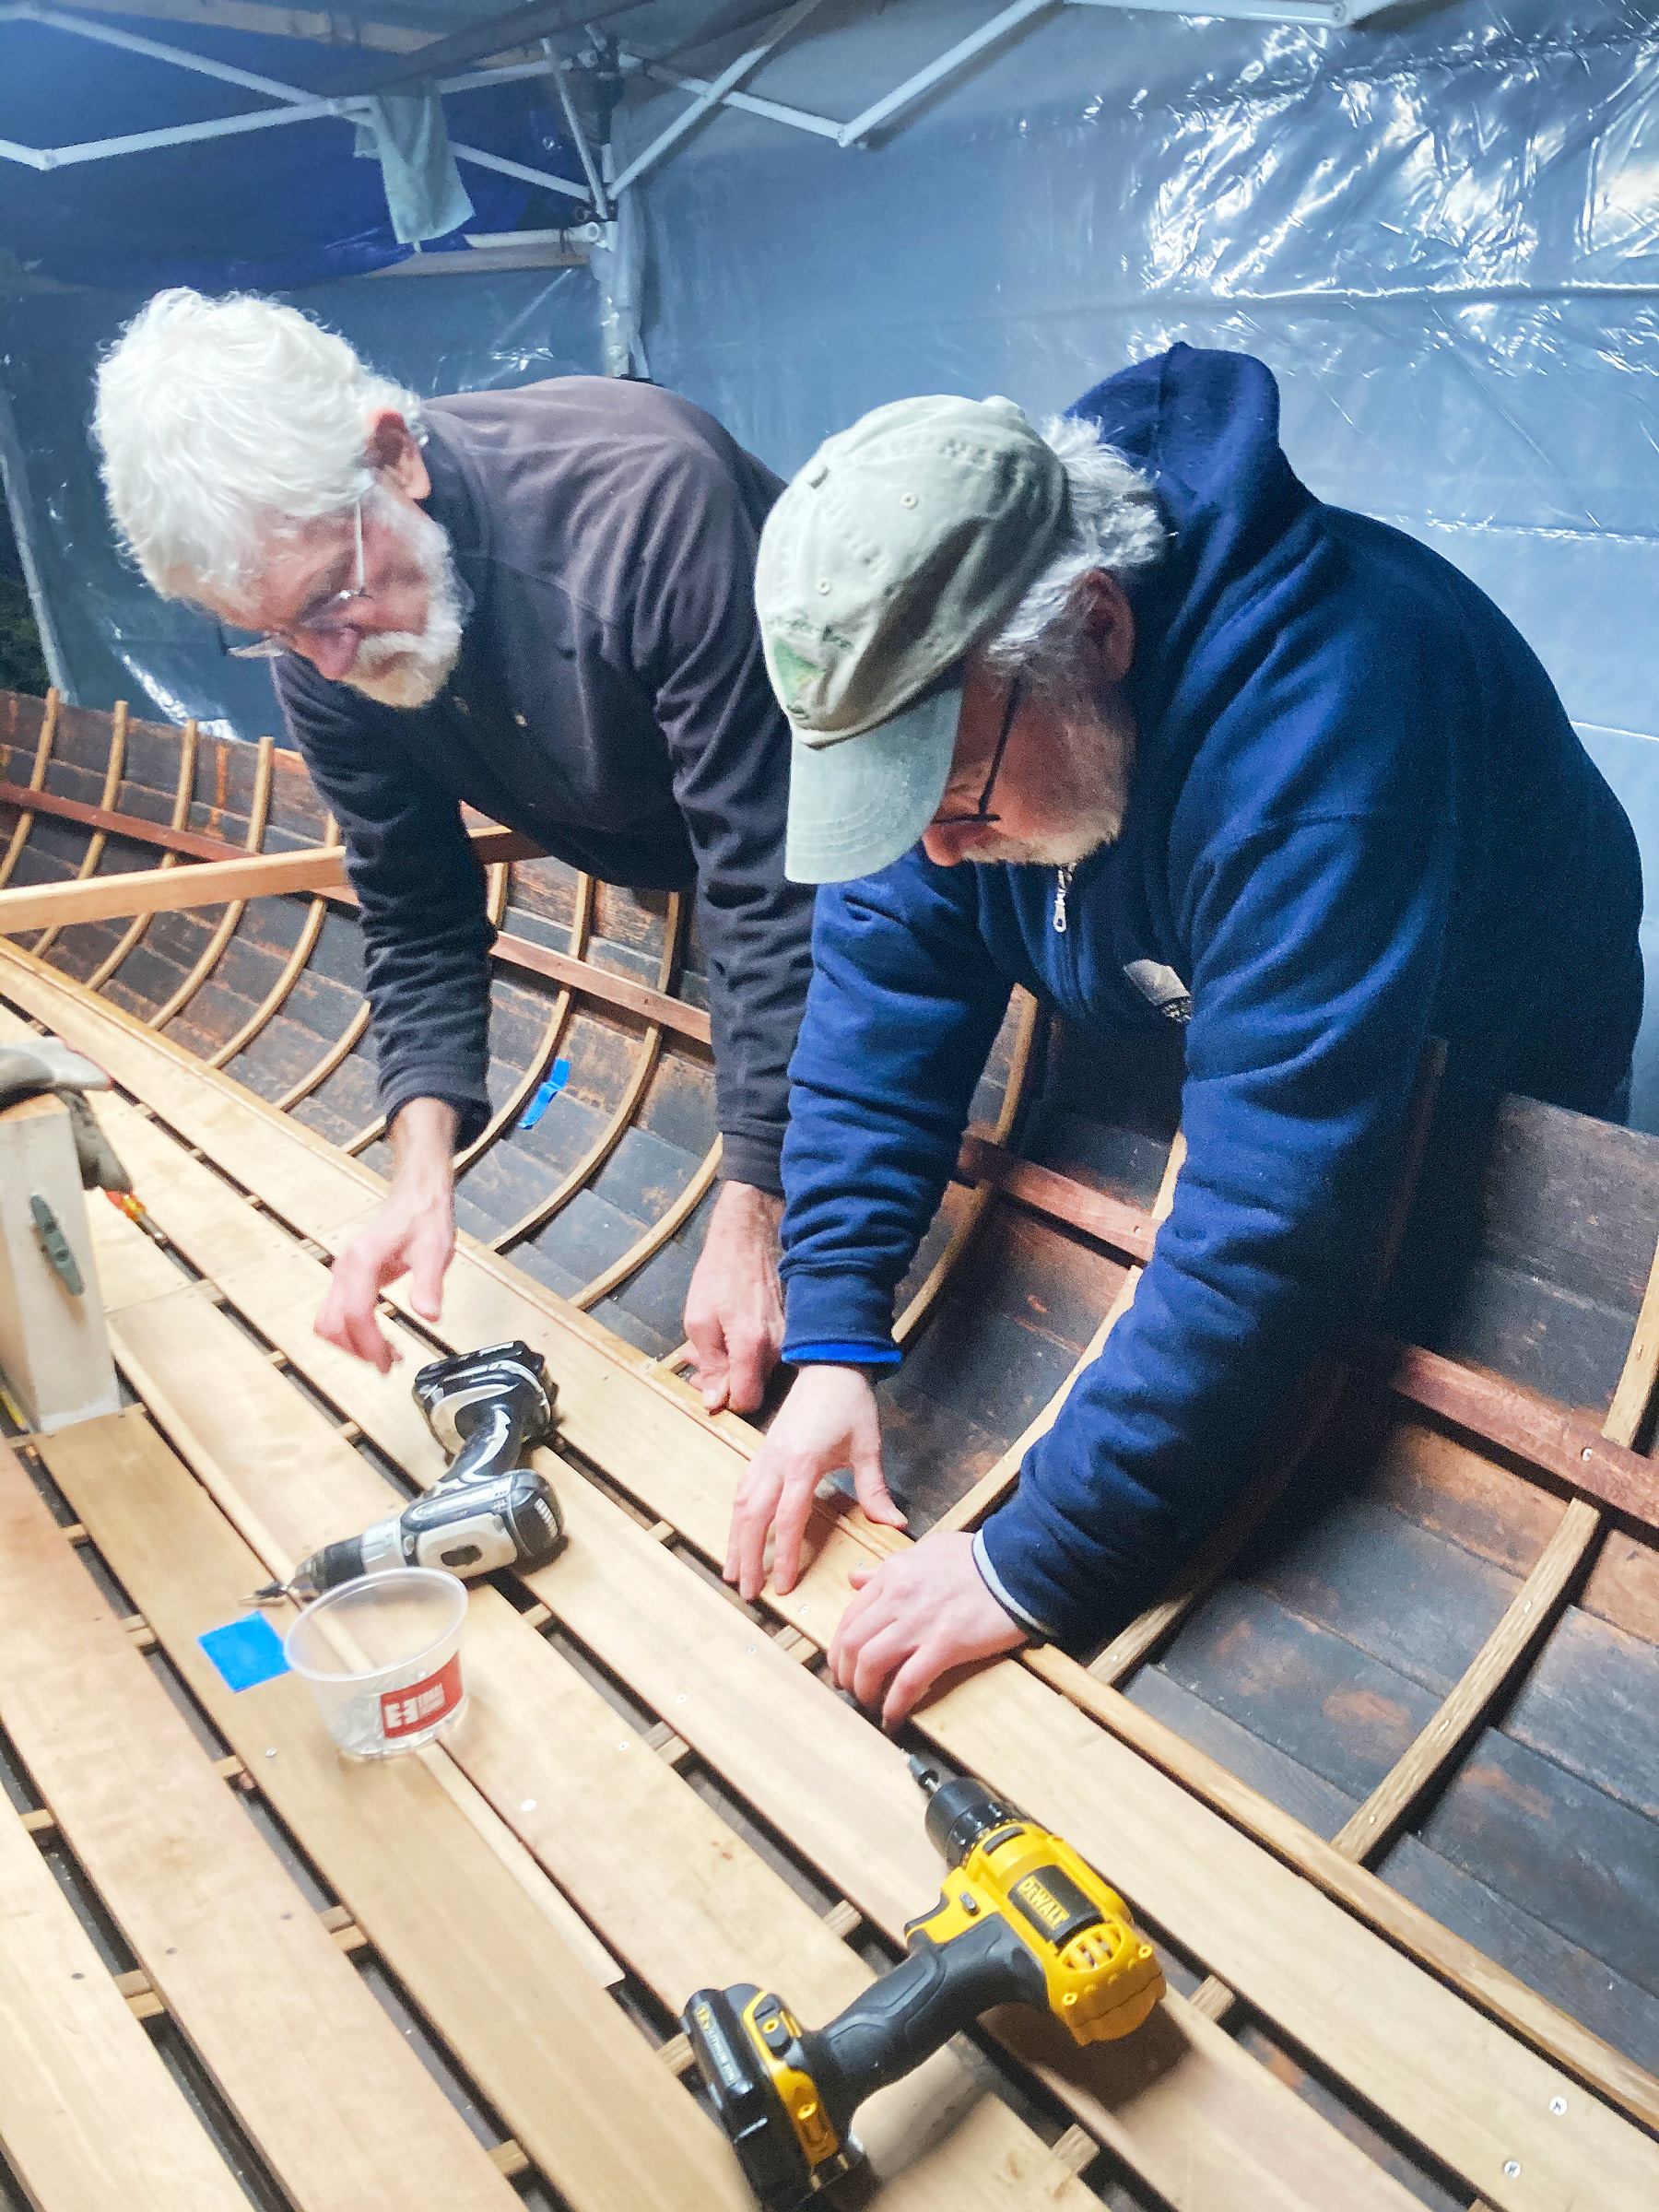
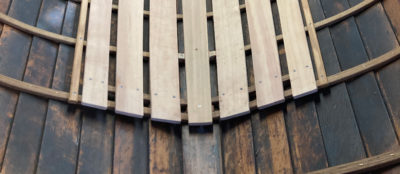
Floorboard planking proceeds, working out from the centerline, and butting forward and aft courses over the ’midship hull rib spanned by the bridge pieces.
While fastening to the panel ribs, the courses are separated by temporary 3/4″ spacers. This is wide floorboard spacing. The gap is keyed to heel rests which I have designed, featuring a tongue projecting below the floorboard to brace against a rib. The 3/4″-wide tongue provides more bearing than a 1/2″ tongue. The floorboard spacing can be whatever suits an individual builder.
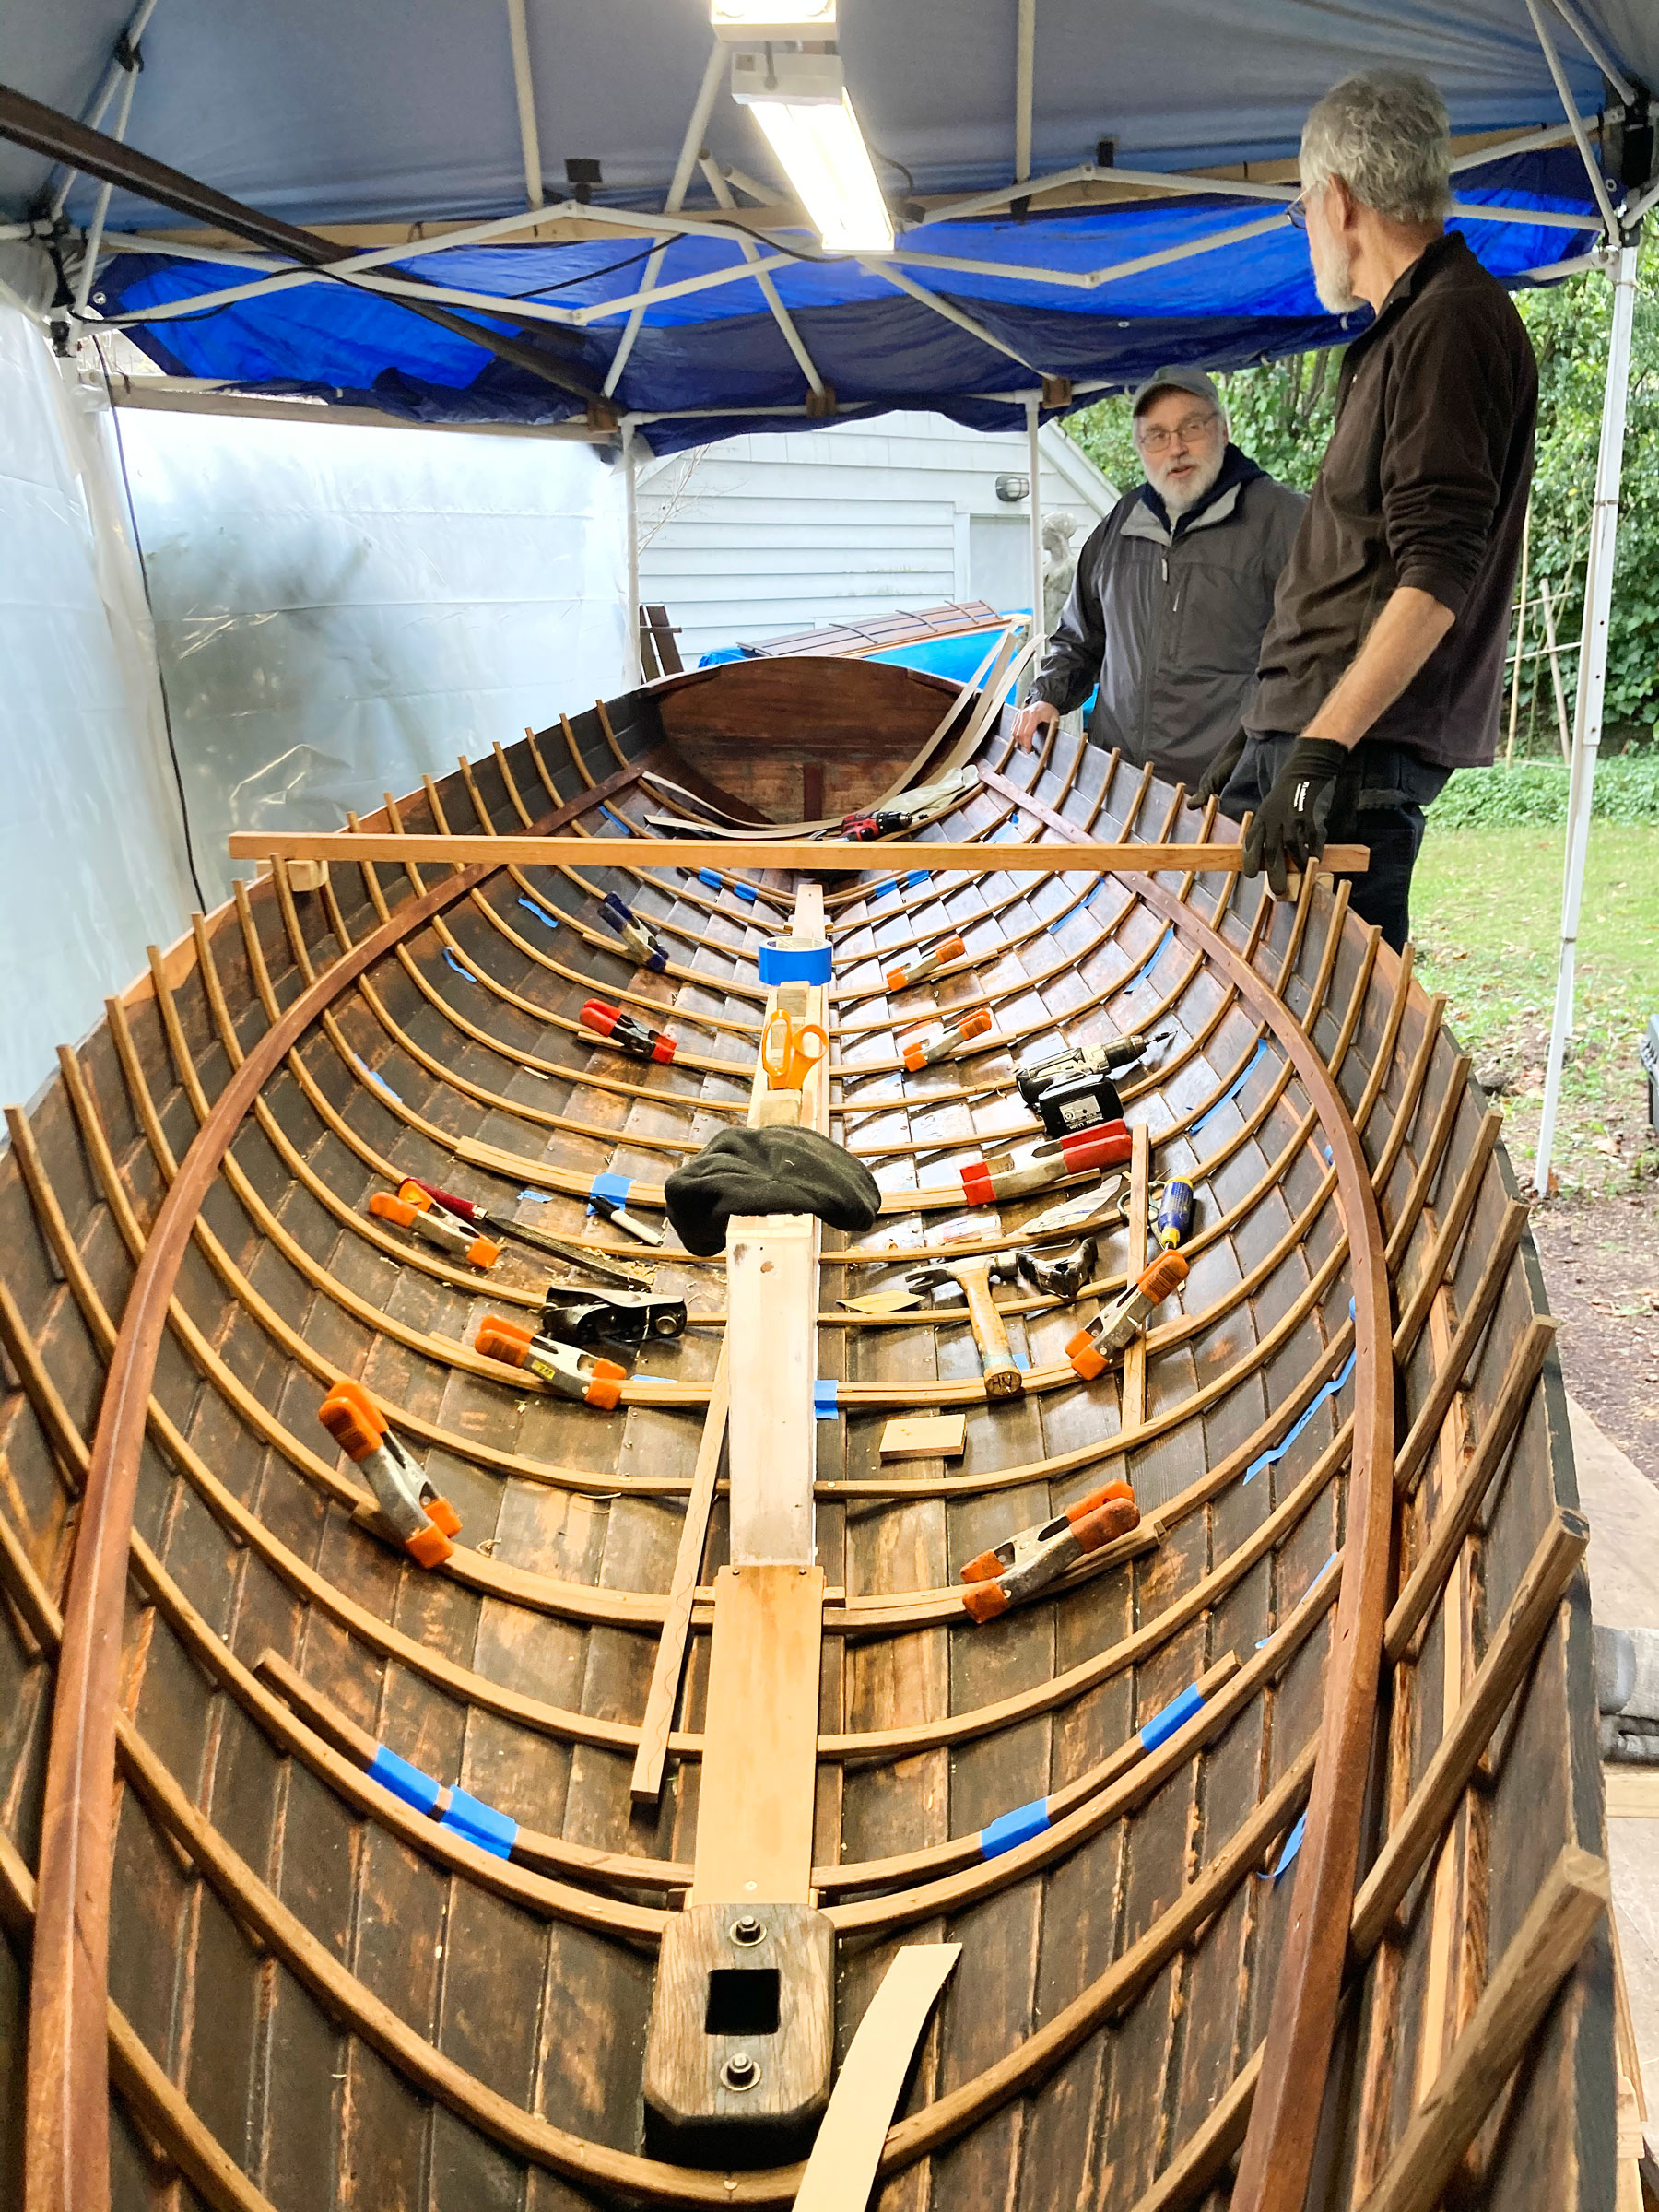
After all three floorboard courses are fastened to their respective panel ribs, the completed panel is removed from the hull, and the outboard rib ends are trimmed flush. A slight under-bevel and easing here of the rib end will later help ensure the panel easily slips in and out. With 3/8″-thick cedar and 3/8″-thick ribs, I use 5/8″ screws. I prefer full-thread stainless-steel sheet metal screws for their firm bite.
With the panels in place, 3/8″ by approximately 5/8″ hardwood margin strips are bent in place cold and fastened to the hull ribs just outboard of the panels. While I use about a 1/4″ spacer to set the margin strip clear of the panel, the gap could be even a little less.

The panels should easily lift out, then drop back into place with the lower rib ends tucking under the center floorboards and bridge pieces.
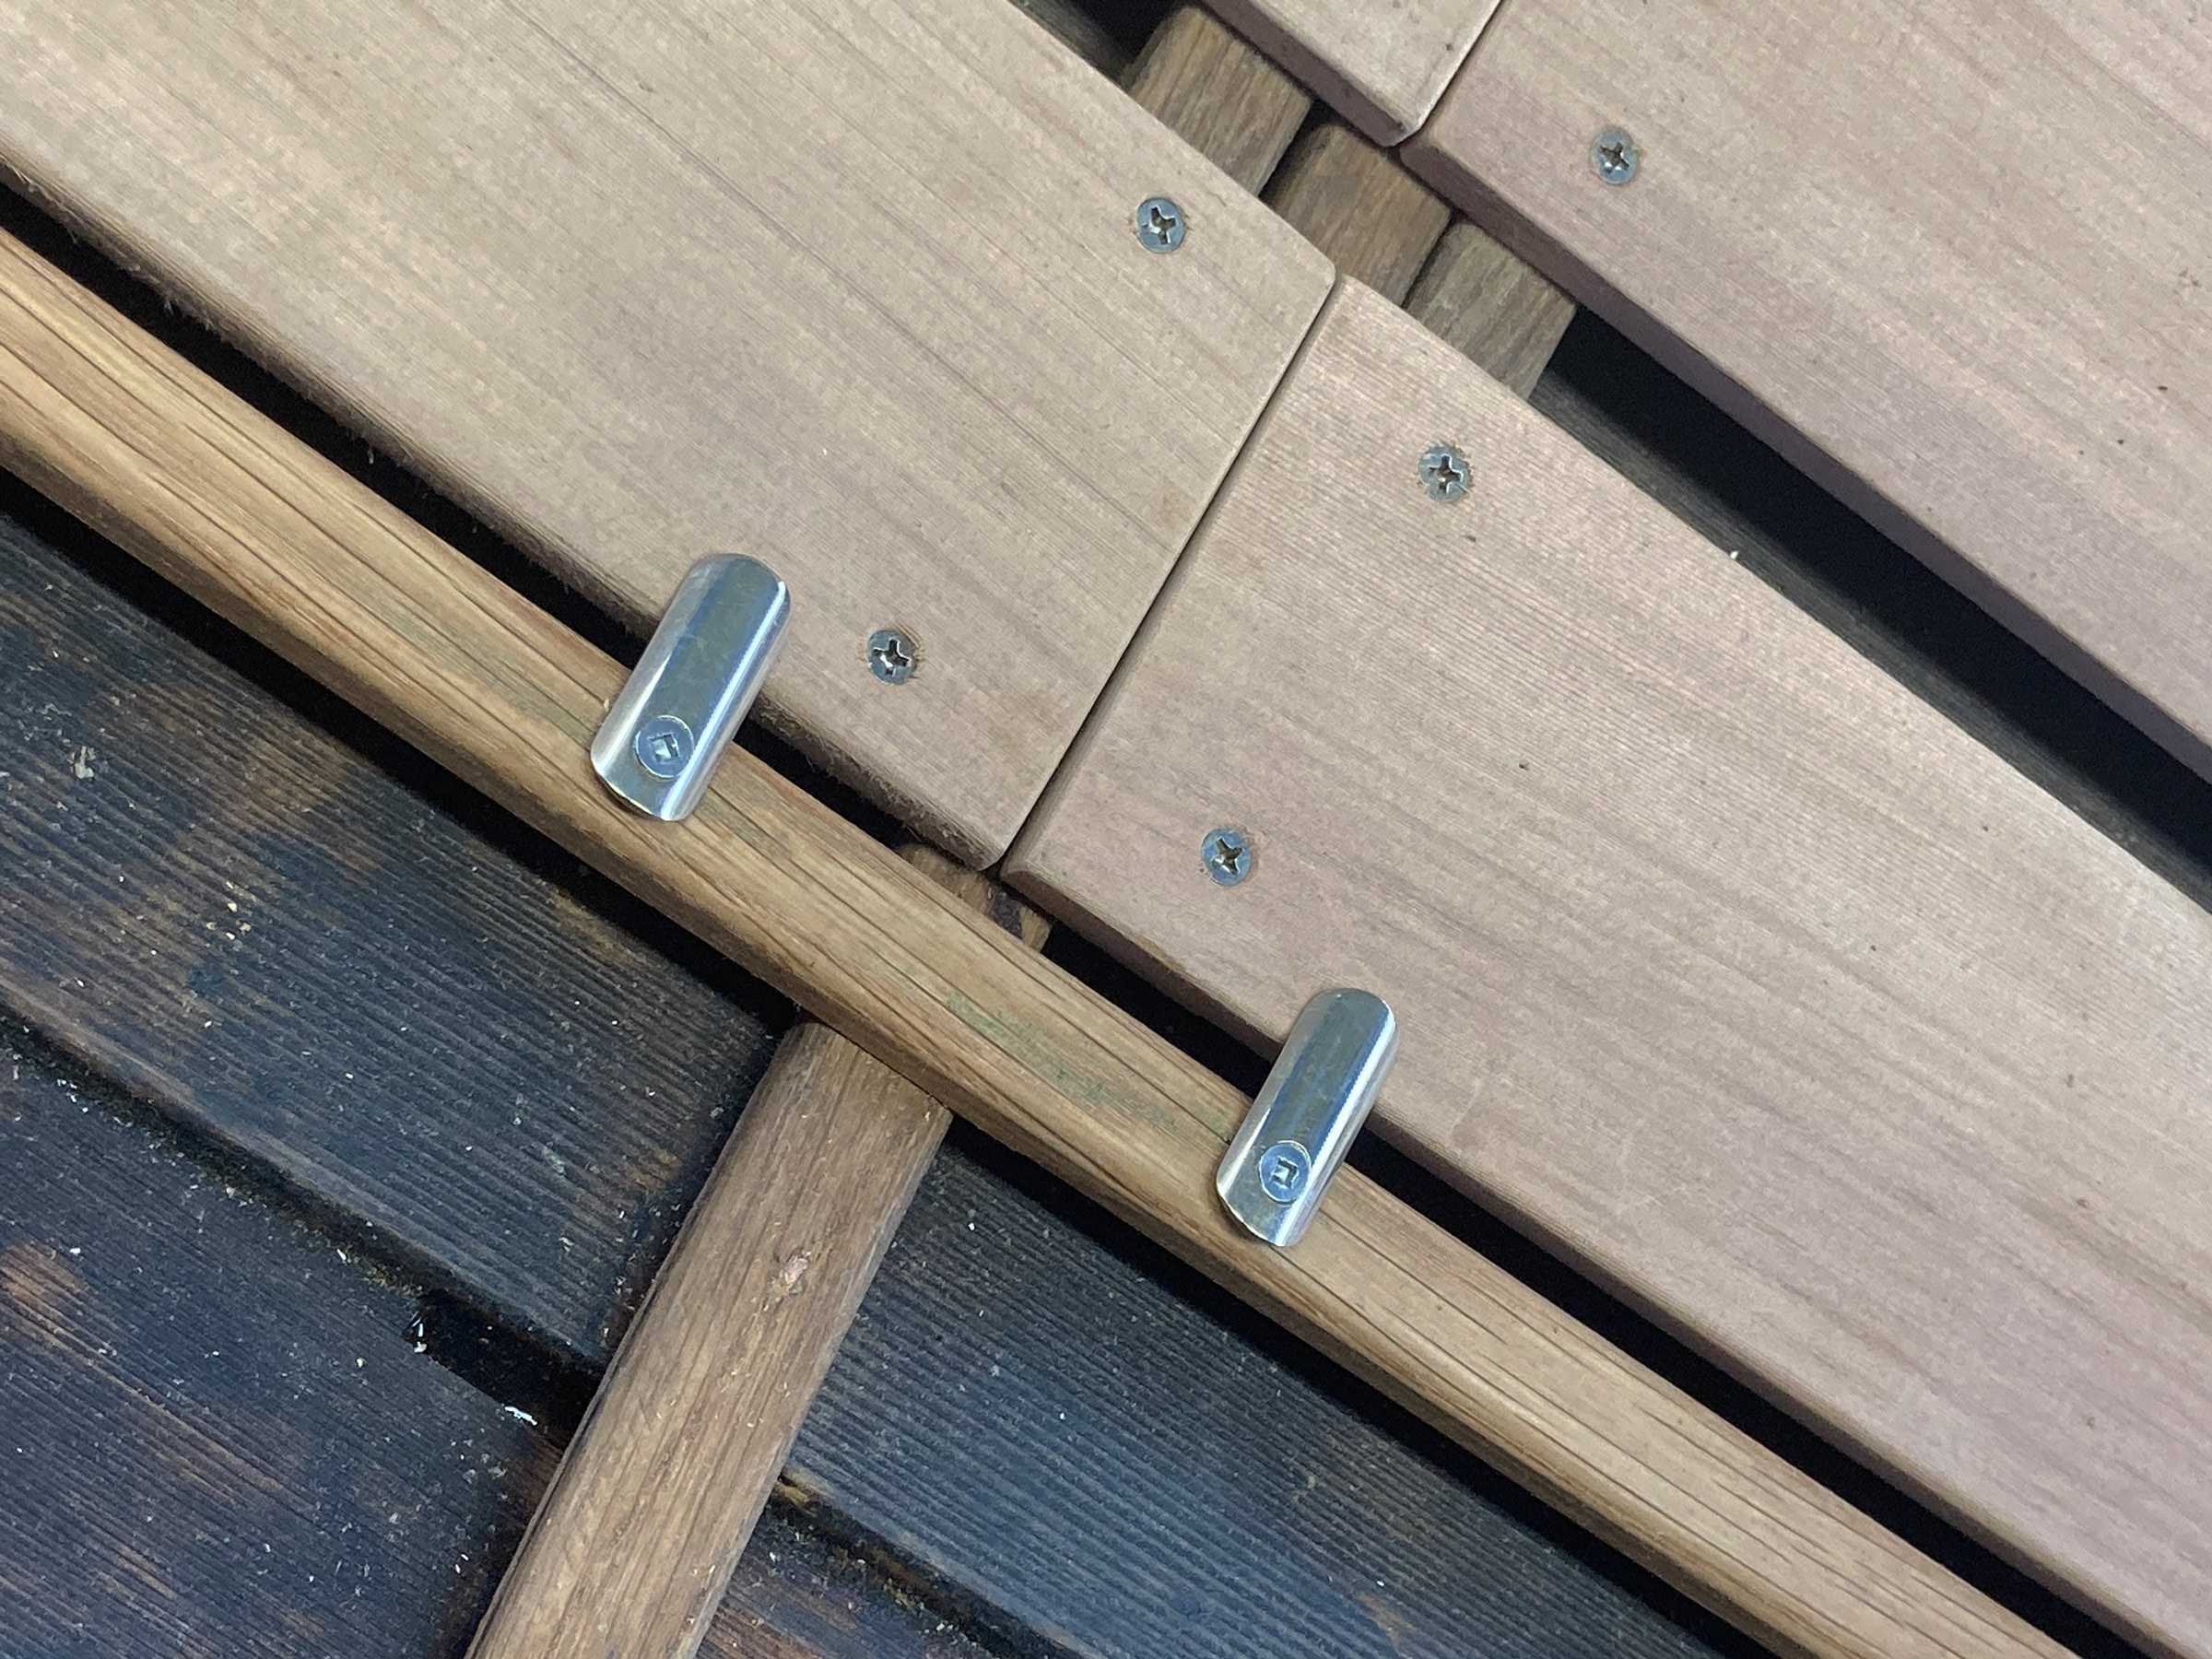
To secure the panels in place and prevent them from being floating by bilge water, I fabricate small swivel tabs out of 1/2″ brass half-oval. The tabs are fastened to the margin strip at each corner of the panels—eight tabs in all. When done right, the panels lie down in the hull without being held by the tabs, but there may be a little spring at one end or the other of a panel.
One element favoring this arrangement is that the hulls of this line of boats are clench-nailed through laps and ribs, so there are no roves obstructing the lay of the floorboards. If your boat has the planks riveted at the frames, you can put the floorboards in place, then tap them against the frames to get the peened rivet heads to dent the floorboards. Use a small gouge to create hollows in the backsides of the floorboards to accommodate the roves. The panels need to slide outboard a wee bit as you remove them. You would need to accommodate for this movement when making these divots on the underside of the floorboards mostly, I think, for those roves closest to centerline.
The panel system prevents damage to the boat’s ribs and planking and offers quick, easy access to practically all of the interior hull. Removing and installing the floorboard panels involves no fastenings, no tools, no guessing, no springing into place, and no errant holes. Maintenance of the boat is encouraged rather than discouraged, and the large area covered by the floorboards is a plus for small boats that are often sailed while sitting on the floorboards.![]()
Eric Hvalsoe grew up in a boating family near Seattle, Washington, and got glimpses of the San Juan and Gulf islands, and northern British Columbia waters, at an early age. He later revisited some of these destinations, including the Broughtons, in sea kayaks and, most recently, traditional sail-and-oar craft. As Hvalsoe Design, Eric has been designing, building, repairing, restoring, and maintaining wooden boats since 1980. His home and shop are located in Shoreline, Washington. Eric teaches traditional boatbuilding and lofting skills at Seattle’s Center for Wooden Boats, where the collection includes some of his designs: the Hvalsoe 13, 15, and 16. His family of sail-and-oar designs has expanded to include the Hvalsoe 18. For a while longer yet, Eric hopes to continue exploring the Salish Sea in non-motorized craft.
You can share your tips and tricks of the trade with other Small Boats Magazine readers by sending us an email.


Floor flats as the Delaware boat builders called them, I love them. This was the style going back to at least the Civil War used on duckers, railbird boats, tuckups and hikers. The floor flat on my 40-plus daggerboard-equipped ducker comes out in one piece, running up on either side of the daggerboard trunk. I have cleats on top at the ends and a few amidships to secure the gunning box from which you row. The after cleat acts like a low stretcher. Those cleats on the top hold the flat together with no ribs on the bottom. Two padeyes fastened to blocks on the keel keep the flat in line. While the floor flat has been repainted a few times, the interior of the ducker has never been: it’s looking a bit faded, maybe I’ll get to it this year.
Did the same thing with my Tony Dias designed Harrier row/sail boat. It has a pair of flats on either side of the dagger board trunk, and a third aft. We left a frame bay open amidships to make bailing easy, and I’ve incorporated adjustable heel high stretchers into the forward floor boards, while the after one holds down the floorboard. In this case there are ribs underneath the flats like Eric describes.
Eric notes that he’s seen a few boats damaged by the installation and removal of fixed floor boards. Having intimate acquaintance with many museum boat collections, I’ve seen more than a few.
It’s a little extra work making them but in the long run you will be well rewarded.
My 1964 vintage GP14 uses a similar system. Of the 7 floor boards, 5 are secured to the ribs with screws, the two closest to the centreboard trunk are held down with toggles that slot up through the board and then turn to secure them into place. I wish I had seen this article three years ago when I restored my “Geep,” I would have used this method.
Just when I was coming to the point of designing floorboards for the dinghy I’m building, I come upon this article. Timing is everything! Thank you Eric for sorting out my brain while I was struggling to come up with something useful and simple. Now I can finish my build and get it in the water. Thank you so much!
This has a nice clean technique. Will use on my future Rob-Roy build I’m planning.
Thanks for sharing,
Tom