How to Build a Small Boat Yourself
Small boats are not small undertakings, not if we are contemplating their creation in our own garages from piles of wood. If we’re amateur builders, particularly first-timers, the prospect is daunting, maybe even frightening. We don’t know how to do this. We don’t know if we can do it. We’re about to commit epic blocks of time, money, and emotional capital to a project with no guarantees, except that—trust this formula!—it will cost twice the estimated budget and four times the projected hours to complete it. But if we stick it out, we will have not only refined our problem solving and tool skills, but also burnished our character. And we will have a boat to be proud of.
 Courtesy of WoodenBoat School
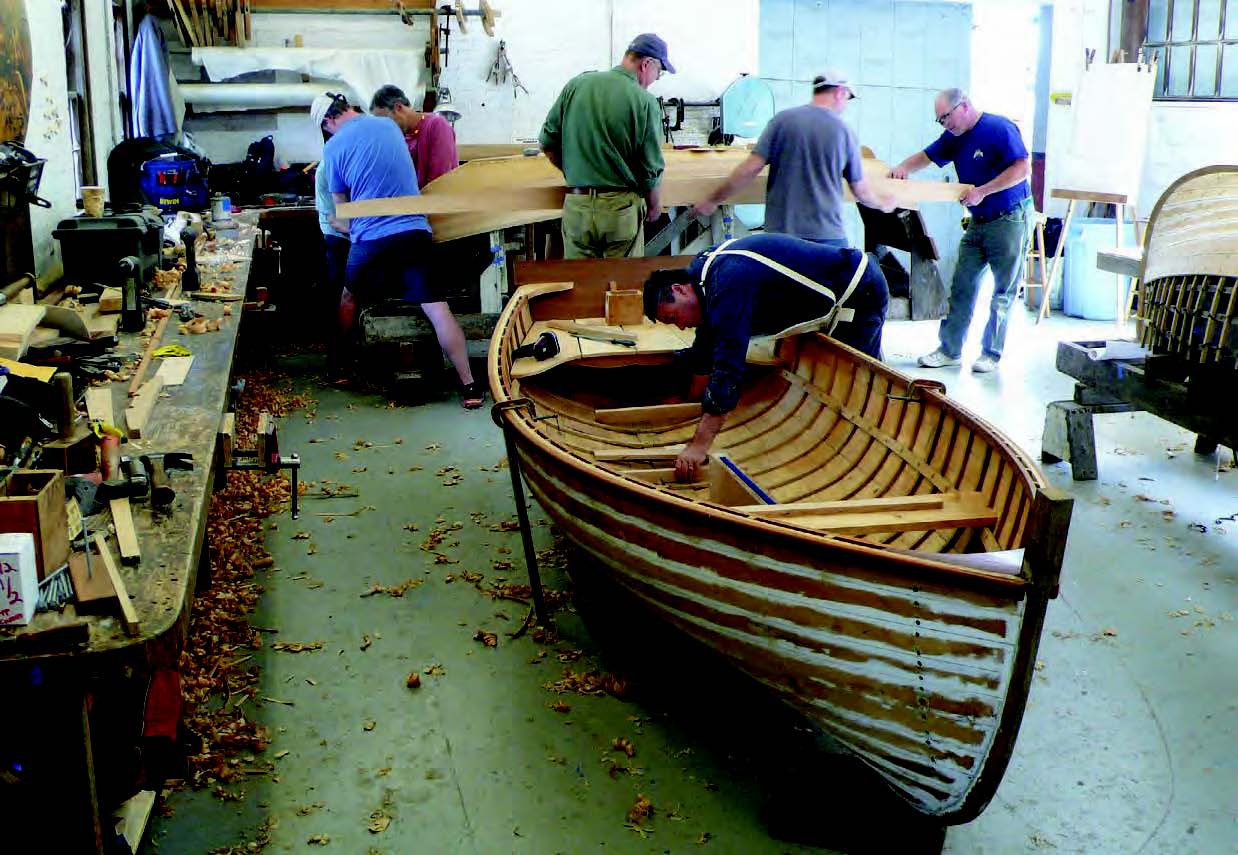
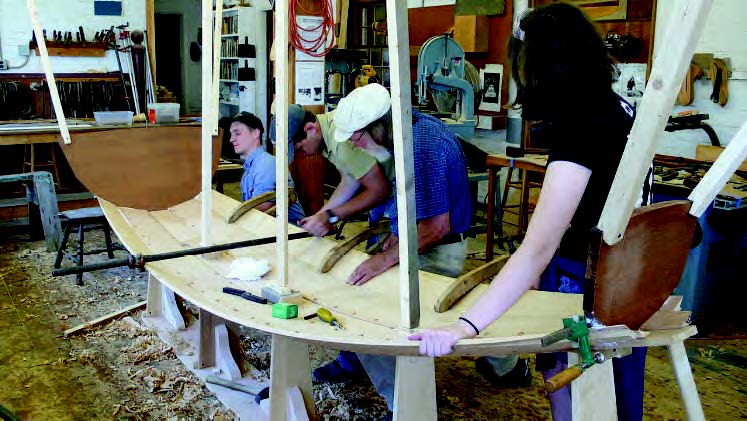
One way to gain an understanding of various methods of construction is to take a class. At WoodenBoat School in Brooklin, Maine, for example, students in a two-week Fundamentals of Boatbuilding class learn several styles of traditional hull construction. In the foreground, a students fits a floor timber to a carvel-built boat, while in the background students fit a lapstrake plank.
The question of how to build this boat is a basic one that has to be parsed at the outset, while we’re sorting through designs and deciding which to build. There are about six ways of building wooden boats today, with variations on each. Our choices have proliferated just since 1950, thanks to the innovations of plywood, epoxy, and synthetic fabrics. No particular method can be proclaimed the best; each comes with its own suite of advantages and drawbacks. The type of boat and its intended use figure in. Even more does the level of skill and mindset of the prospective builder. A powerful determinant of whether we’ll end up with a real boat is perseverance, which is most sustainable when we find joy in the work. Some people will love the painstaking process of carvel planking, inserting themselves into a continuum of craft that has hardly changed in 500 years. Others will find this ancient discipline ludicrous, and will really groove on epoxy’s magic. For obvious reasons, it’s wise to contemplate all this before making the commitment.
There are serious passions and partisans afloat in these waters, so I expect challenges and complaints. I will try to stay objective and keep my own prejudices in the locker. I’ve built strip-planked and stitch-and-glue boats, and currently am engaged in a glued-lapstrake daysailer, so I’ve had experience with three of these six methods. I’ve also been hanging out at the Northwest School of Wooden Boatbuilding, observing several boats being built with other methods, and I’ve been pumping the instructors for information (see WoodenBoat magazine No. 241). They’ve been generous in sharing both knowledge and opinions.
If you are a serial boatbuilder, you’ll find that your craftsmanship and problem-solving skills rapidly improve from one boat to the next. This is particularly true if you stick with one method. It’s like visiting France again and again—you feel more secure navigating; you begin to understand the nuances of the culture. But there’s also a powerful argument for exploring the new and unfamiliar. As the Zen teacher Shunryu Suzuki proclaimed: “In the beginner’s mind there are many possibilities, but in the expert’s there are few.” Who’d have predicted, back in the 1950s when the future of pleasure boats appeared to be a sea of white plastic, that the 21st century would offer so many new ways to begin a wooden boat?
Here are the six common ways to build a wooden boat:
 Cathleen Adkin
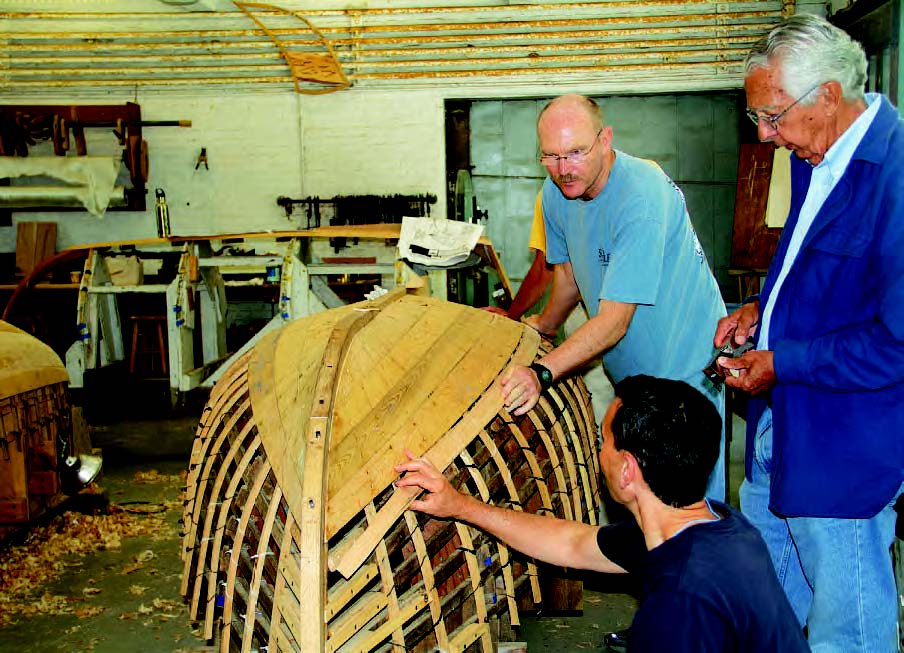
Carvel-planked small boats are typically built upside-down over a building jig. First, the backbone is installed and frames bent into place, then the planking starts. At right, students use a “spiling batten” to determine the necessary curvature of the next plank.
1. Carvel Planking
This, one of the classic methods of wooden boat construction, is what made Columbus and Magellan possible. Since a carvel-planked boat derives most of its structural strength from its frames—the rib cage, in effect—its size is not limited by the length of the available timber. A shiplength strake can be made from several shorter, butt-joined planks. Hence the astonishing 262′ WILLIAM D. LAWRENCE, a carvel-planked square-rigger launched in Nova Scotia in 1874. The largest wooden ship ever built in the United States, just short of 330′ on deck, was the six-masted schooner WYOMING, launched at Bath, Maine, in 1909.
But for our purposes here, we’re talking about small boats. Until the mid-20th century, many rowboats and sailing dinghies of 10′ to 20′ long were also built with carvel planking. They were probably better suited to that time than today, because boat owners tended to leave their small boats in the water all season, which allowed the planks to swell with water, closing up the seams. A carvel-planked boat left in the driveway on the trailer will dry out in the summer sun; as the wood dried, the planks shrink, allowing its seams to open, and only a few days in the water will close them up again. That’s not an ideal scenario for impulsive trailer-sailing.
 Cathleen Adkin
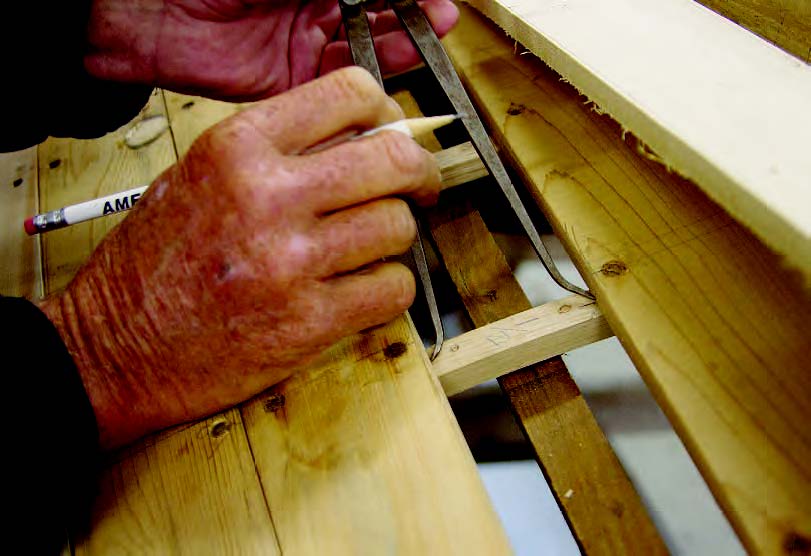
Carvel planking requires close fits; here, a student working on the final plank, called the “shutter,” uses inside calipers to determine the exact width at a frame.
But carvel planking still has its adamant and loyal partisans. Jeff Hammond, who has taught traditional for 30 years, believes it’s still the best medium to teach craftsmanship. “It’s complicated,” he says. “Every step requires you to stop and think about what comes next. A lot of care has to go into each piece.”
And here’s the clincher, for Hammond: “It’s a relatively pleasant experience, as opposed to covering yourself in goop all day long.”
But the word “complicated” remains embedded in any discussion of carvel planking. It’s hard to describe the whole process in a digestible paragraph, but at terrible risk of oversimplifying, here goes: Set up a regiment of molds (cross-sections of the hull form at regular intervals, typically one foot apart) over which the boat will be built upside-down. Connect them with temporary stringers called ribbands. Steam or laminate the frames, which are the structural ribs, to precisely fit outside the ribbands. Sculpt the planking around the frames to form the skin of the hull, precisely beveling each plank edge to mate with its neighbor, leaving a slight gap on the outside as a caulking bevel. Screw or rivet the planks to the frames, bung the fastening holes, caulk the seams, and assiduously fair the outside surfaces to eliminate any unevenness.
 Cathleen Adkin
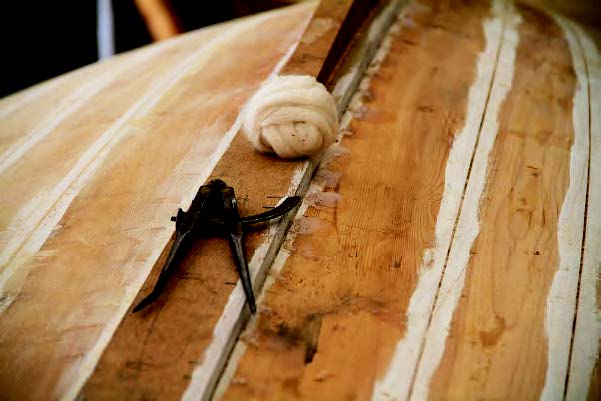
Planks fit tightly together on the side of the hull but are given a deliberate bevel—a “caulking bevel”—so the seams can be caulked with cotton, followed by primer paint and then seam compound.
The most difficult part of the operation is likely to be the rolling bevels on the planks. The builder will cultivate the patience for many trial fittings and excursions back to the workbench—with each one of the 16 or 20 planks typical on a small boat. Sometimes planks have to be steam-bent. Sometimes they crack during the final fitting and you start all over. If one is meticulous about fitting and caulking, however, the leakiness that plagues some carvel-planked boats may be spectacularly absent: They can be built so tightly that they don’t ship a drop.
Pros and Cons to Carvel Planking
Pros
- Teaches the builder to cultivate excellent craftsmanship
- Many classic designs available
- Damaged planks can be replaced with relative ease
Cons
- Heaviest method of construction
- Complex and difficult to master
- Happiest living in the water, not on a trailer or in seasonal storage
- Suitable materials may be difficult to find
 Courtesy of WoodenBoat School
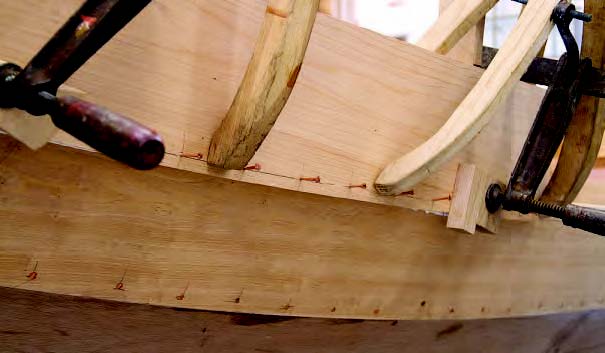
Lapstrake construction sometimes involves building right-side up— and in the case of traditional Scandinavian practices, without any cross-sectional molds. Few frames are required, and along with floor timbers and other interior structure, they are fitted as the planking proceeds or after it is all finished.
Examples of Carvel-Planked Boats
2. Traditional Lapstrake
Lapstrake planking is cool for several reasons, but the most obvious is aesthetic: Small boats constructed of shapely overlapping planks are inherently attractive. The parallel flow of sweeping lines with their tiny shadows creates a rhythmic vitality and makes the hull form seem more like an organic creation. We are naturally attracted to repetition in lines and forms; it’s an aesthetic principle that seems rooted as deeply in boatbuilding as it is in art, architecture, music, and even the written word. Perhaps it makes complex things more understandable by breaking them into their component forms.
How complex are lapstrake boats? Lining off the individual planks, warns boatbuilding author Greg Rössel, is “more art than science.” Individual planks, off the boat and on the workbench, may assume unbelievable, bizarre shapes—some will be fingernail-clip crescents, others vague, squashed-snake S-curves. If these planks aren’t lined off with care and precision, the boat will take on a misshapen, bloated appearance. It will, however, still function as a boat: lapstrake forgives small imperfections more graciously than carvel. Some designers have begun making full-sized Mylar patterns available for cutting the planks, which greatly enhances the amateur builder’s chances for accuracy. After the planks are shaped, they must also be beveled or rabbeted on their edges so they mate tightly with their neighbors, and beveled again at the forward ends so the strakes become almost a flat, carvel-like surface as they flow into the stem. These can perplex like the very Devil’s bevels.
The tradition of lapstrake construction reaches even farther back in history than carvel. The Norse Nydam boat, excavated in present-day Denmark, has been dendrochronologically dated to A.D. 310–320. The modern builder echoes its manner of construction closely, even down to the rivets or clench nails used to fasten the planks to each other at the laps. Why not epoxy the plank overlaps together? Because the solid wood planks used in traditional lapstrake (today, typically cedar or sapele) will swell and shrink, so the fastenings need to allow for slight movement. The unyielding hold of epoxy, which can cause planks to crack, must be reserved for use with another contemporary material, which enables the lapstrake variant we’ll discuss next.
 Cathleen Adkin
To secure one plank to another, copper rivets are driven from the outside through holes bored in the two planks and also through a washer-like “rove.” Once the fit is tight, the rivet is nipped off short and peened over the rove.
Enthusiasts like to point out the uniquely pleasant sound, a little sonatina of chuckling, that a lapstrake-built craft makes as it parts the water. The hull efficiency is a matter of debate. The ridges of a lapstrake hull present more resistance to the water than does a smooth hull. But its light weight may let it float higher in the water, reducing the wetted surface area. Even if it’s less efficient, for some of us the simple beauty and immersion in a millennia-old tradition well compensates for reaching the day’s destination a few minutes later.
Pros and Cons to Traditional Lapstrake
Pros
- Grace and beauty, including the possibility of a bright-finished (varnished) hull
- Comparatively light weight
Cons
- Complex, exacting craftsmanship needed in lining off and beveling the planks
- As with carvel construction, suitable materials may be difficult to find
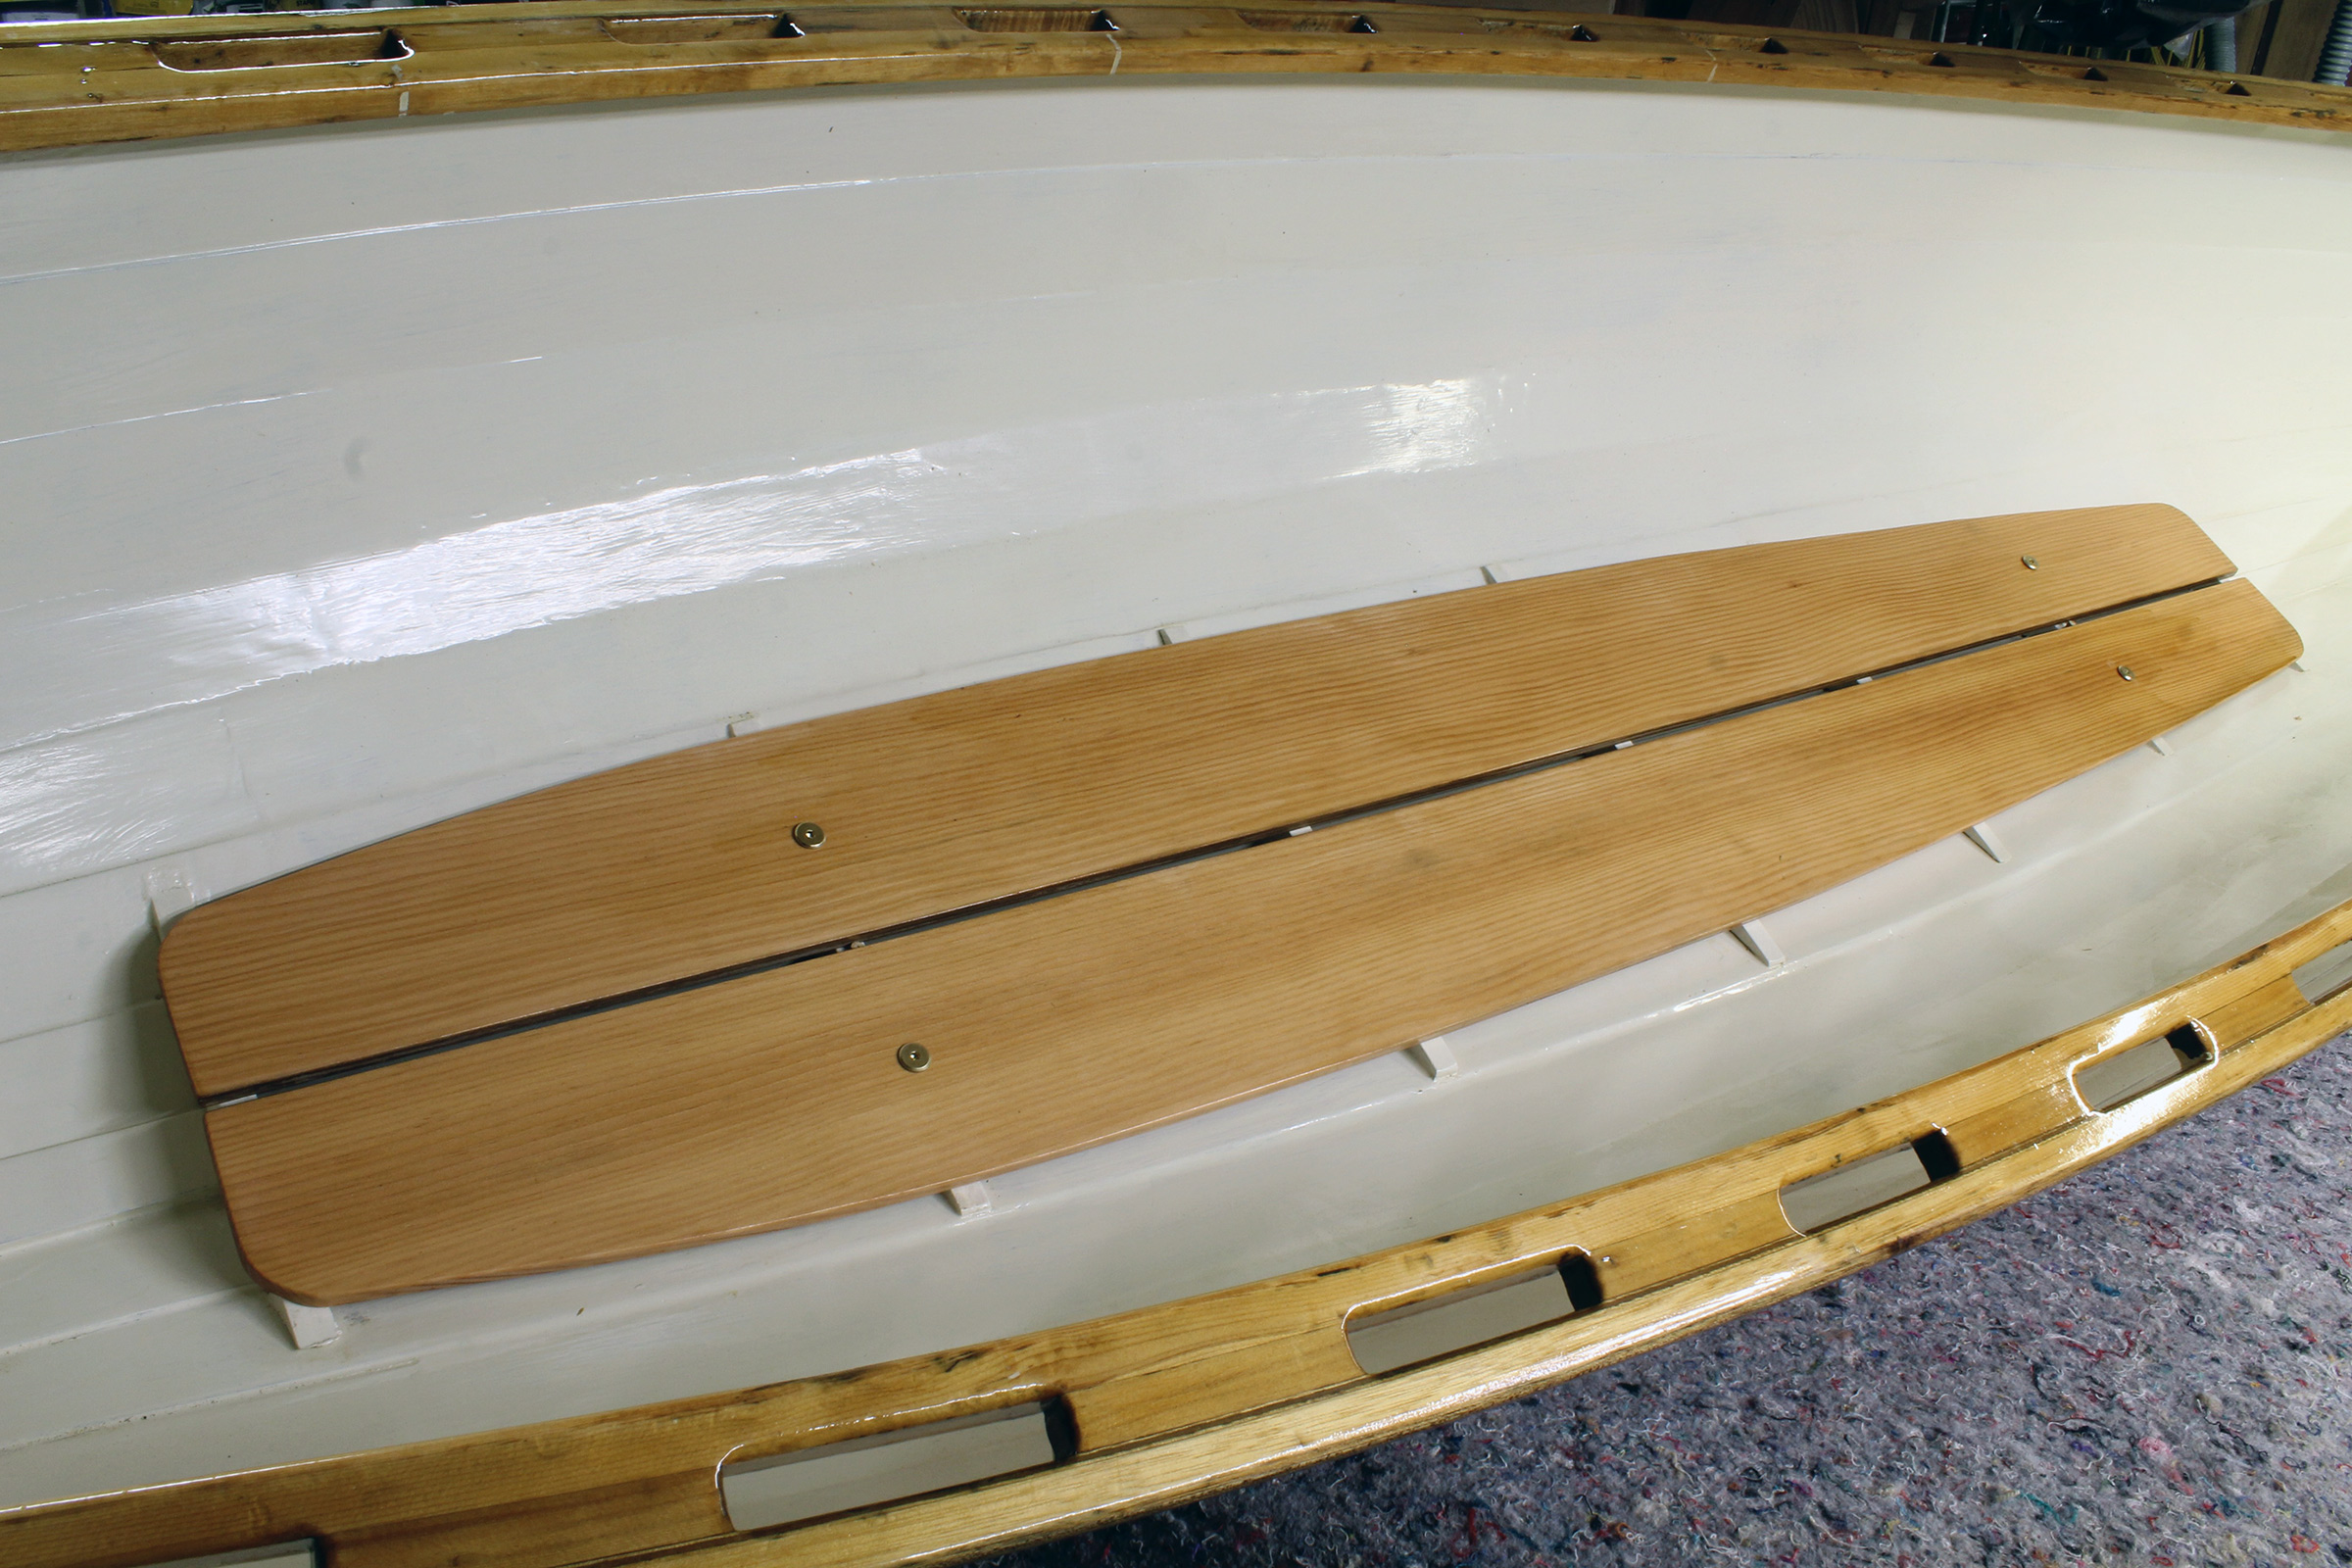
 Courtesy of WoodenBoat School
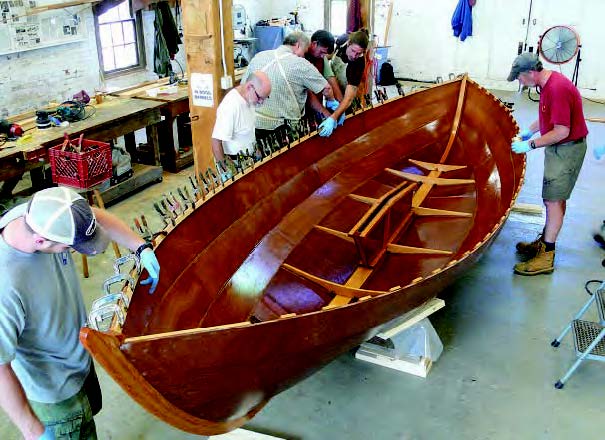
Using plywood, glued-lapstrake relies on epoxy instead of mechanical fastenings to secure the plank overlaps, making a very strong hull and an exceptionally clean interior, with widely spaced frames.
Examples of Traditional Lapstrake Boats
3. Glued Lapstrake
This is becoming an increasingly popular construction method for small sailing dinghies, rowing boats, and even canoes. In this modern variation of lapstrake construction, marine plywood is used for the planking, and epoxy is used to glue the pieces together and seal them against water intrusion. Many designers in North America and Europe these days are deploying an even newer technology, pre-cutting pieces using CNC (computer numerically controlled) routers to achieve machine-perfect tolerances and thus supply the amateur builder with a kit for the hull. For do-it-the-hard-way purists who may disdain the idea of a “kit,” be assured that there will still be plenty of fabrication to do, such as the interior fitout, various hardwood pieces, and spars if it’s a sailboat. And many, many bevels.
Because the rigidly glued overlaps essentially function as longitudinal stringers, these hulls need little in the way of interior framing; they are more or less monocoque structures where the stressed skin of the hull creates its own structural integrity. They are wonderfully light and stiff. There is a lot of epoxy work—goop—involved, however, and it demands careful attention. If any exposed edge grain of plywood—any—isn’t thoroughly sealed, it will wick in water, inviting delamination and rot.
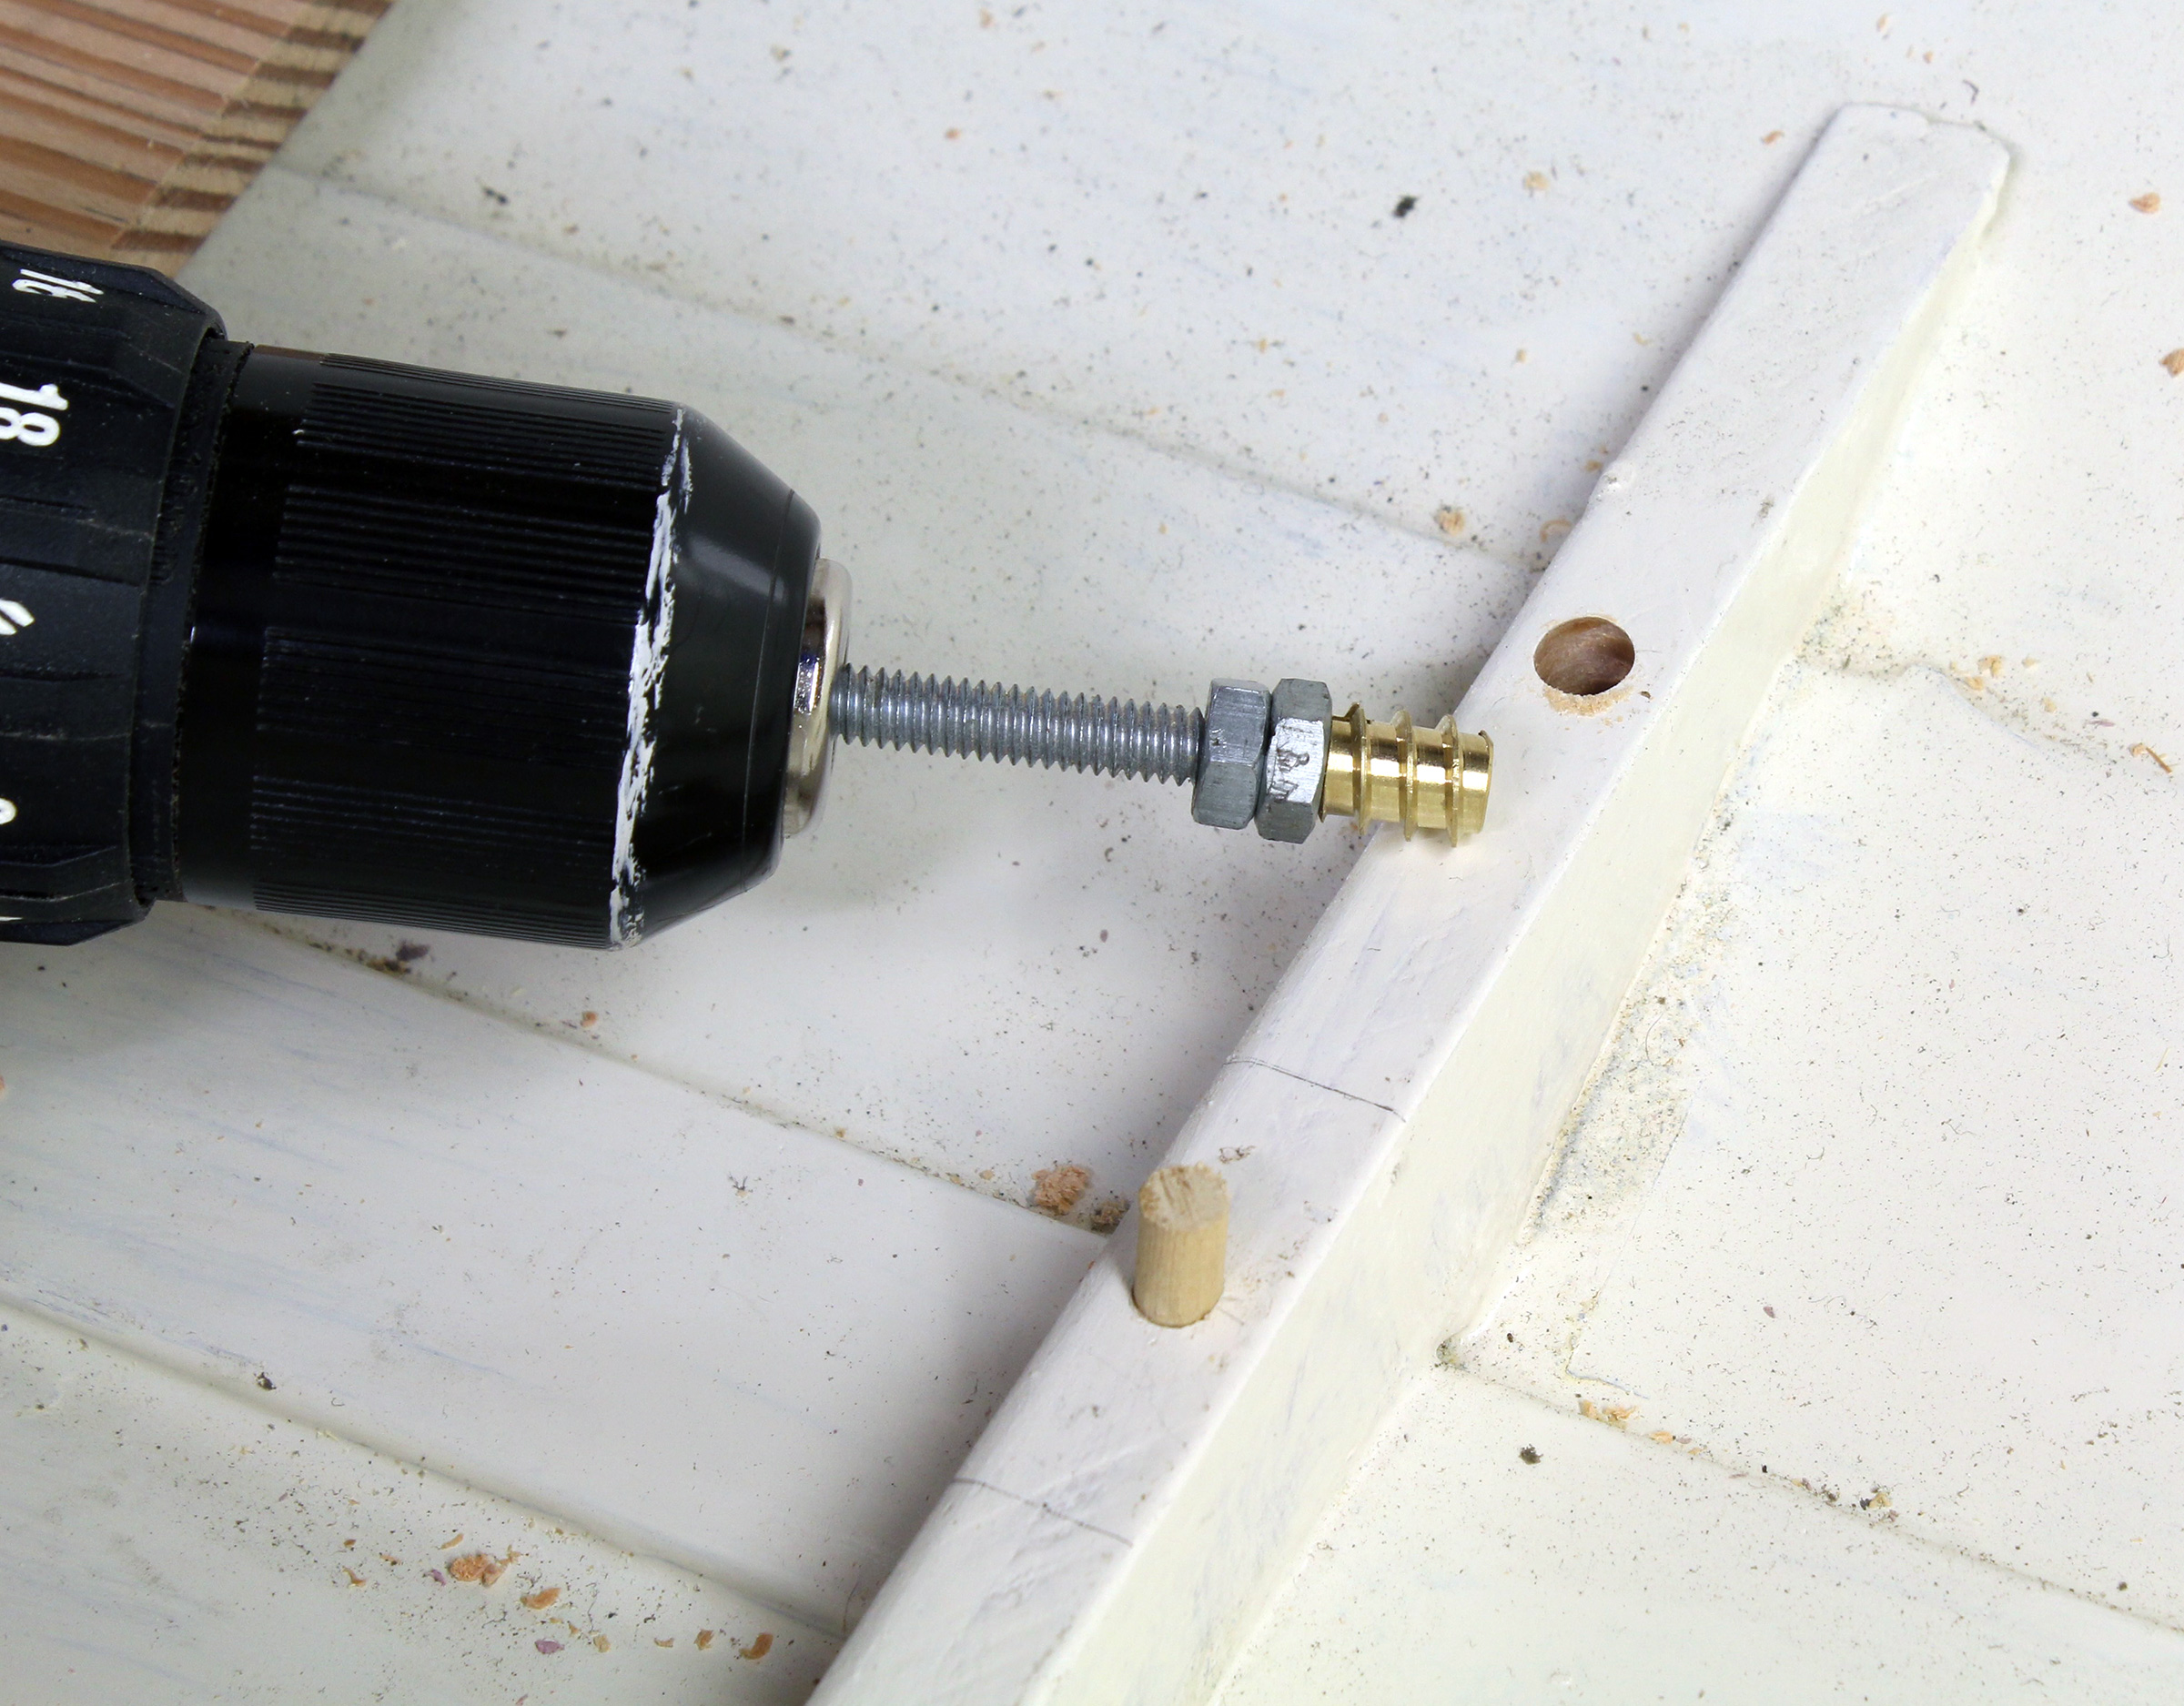
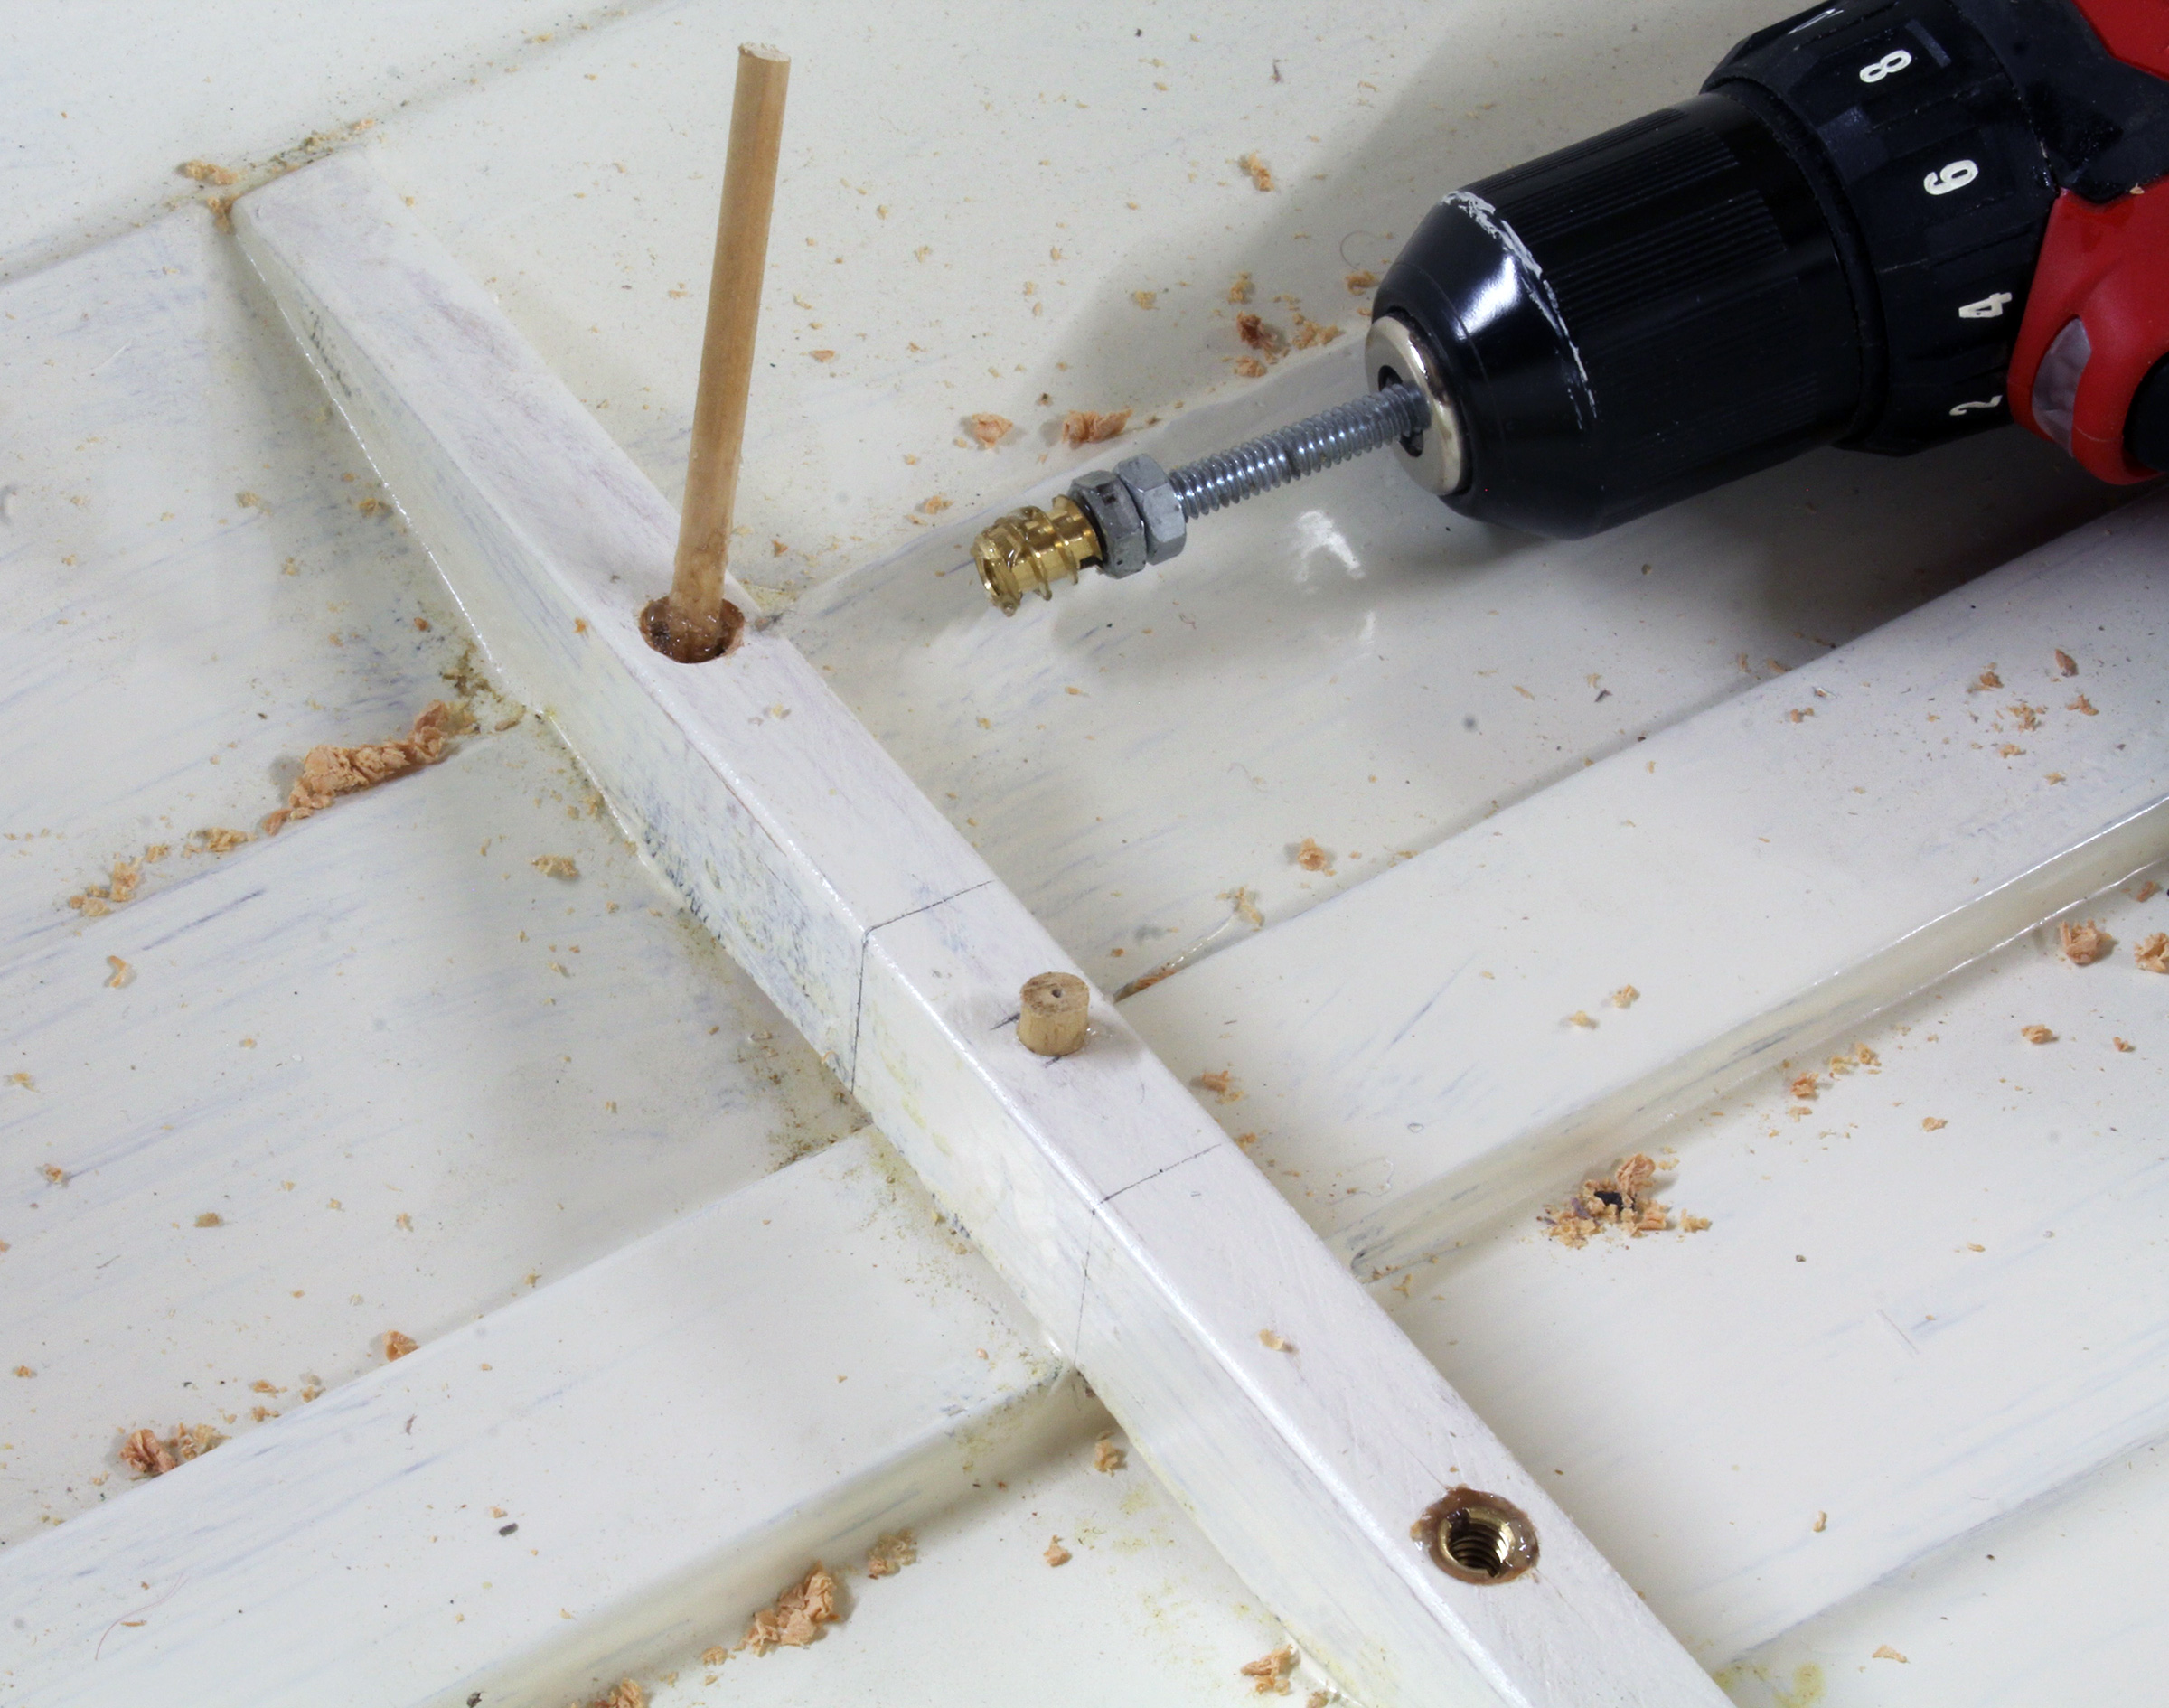
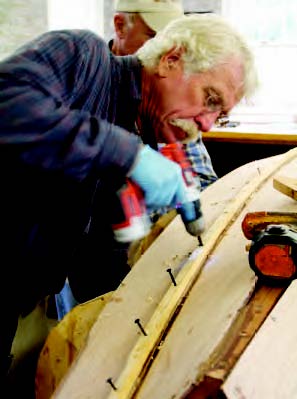 Cathleen Adkin
With glue spread on the overlapping part of
both planks, a batten is temporarily screwed in
place to clamp the seam together until the glue sets.
Some small-boat builders take a further step into composite construction by sheathing the garboards (the planks adjacent to the keel) with fiberglass cloth set in epoxy for better abrasion resistance in places vulnerable to damage when a boat is dragged onto a beach. A deep scrape by a rock or barnacle could allow water intrusion into plywood. At the Northwest School, instructor Bruce Blatchley recently oversaw the construction of a 22′ “glued-lap” Drascombe Longboat in which each plank on the entire boat was individually sheathed this way, sidestepping the impossibility of making the cloth stairstep over the plank laps. Purists may howl, but the result was one extremely tough, rigid, and lightweight hull.
Pros and Cons to Glued Lapstrake
Pros
- Light weight
- The grace and beauty of lapstrake
- Rigidity and excellent sealing against water and weather
Cons
- Except for the smallest boats (under 10′ ), the plywood must be scarfed; bright finishing is impractical
- Major repairs will be difficult
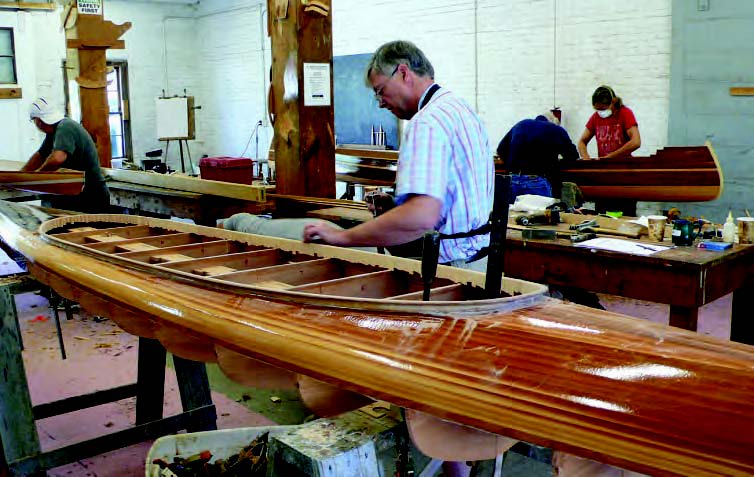 Courtesy of WoodenBoat School
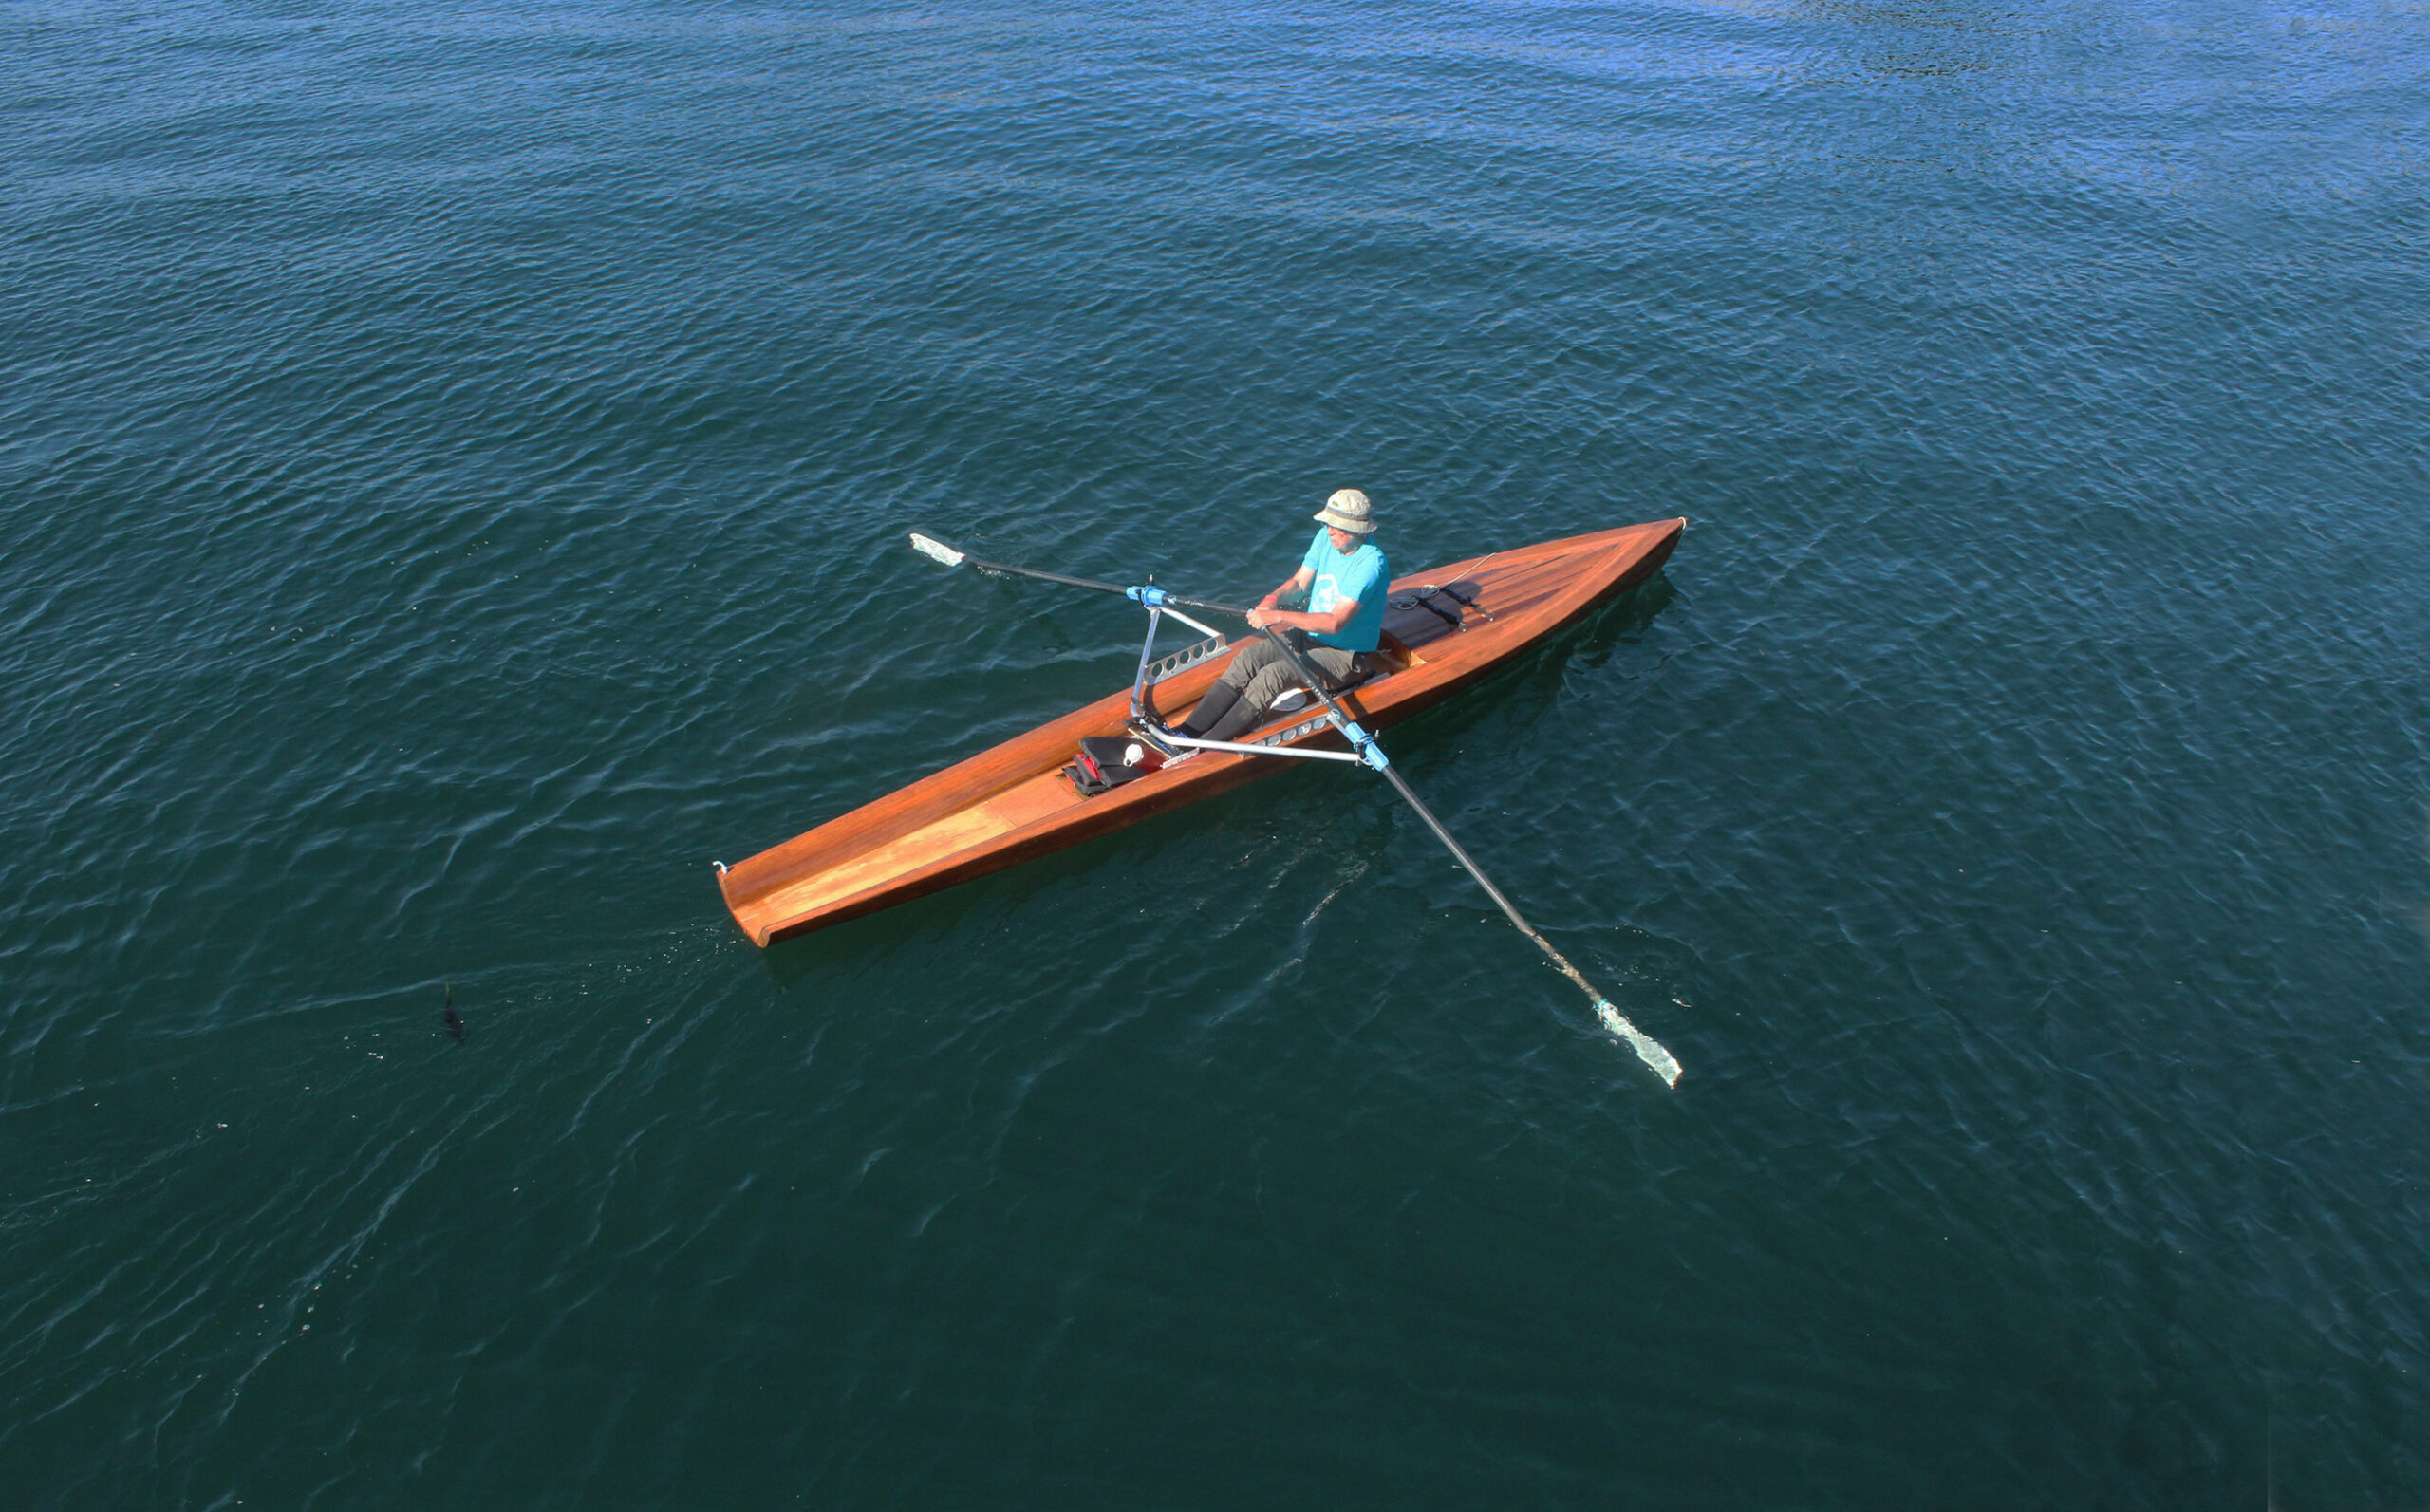
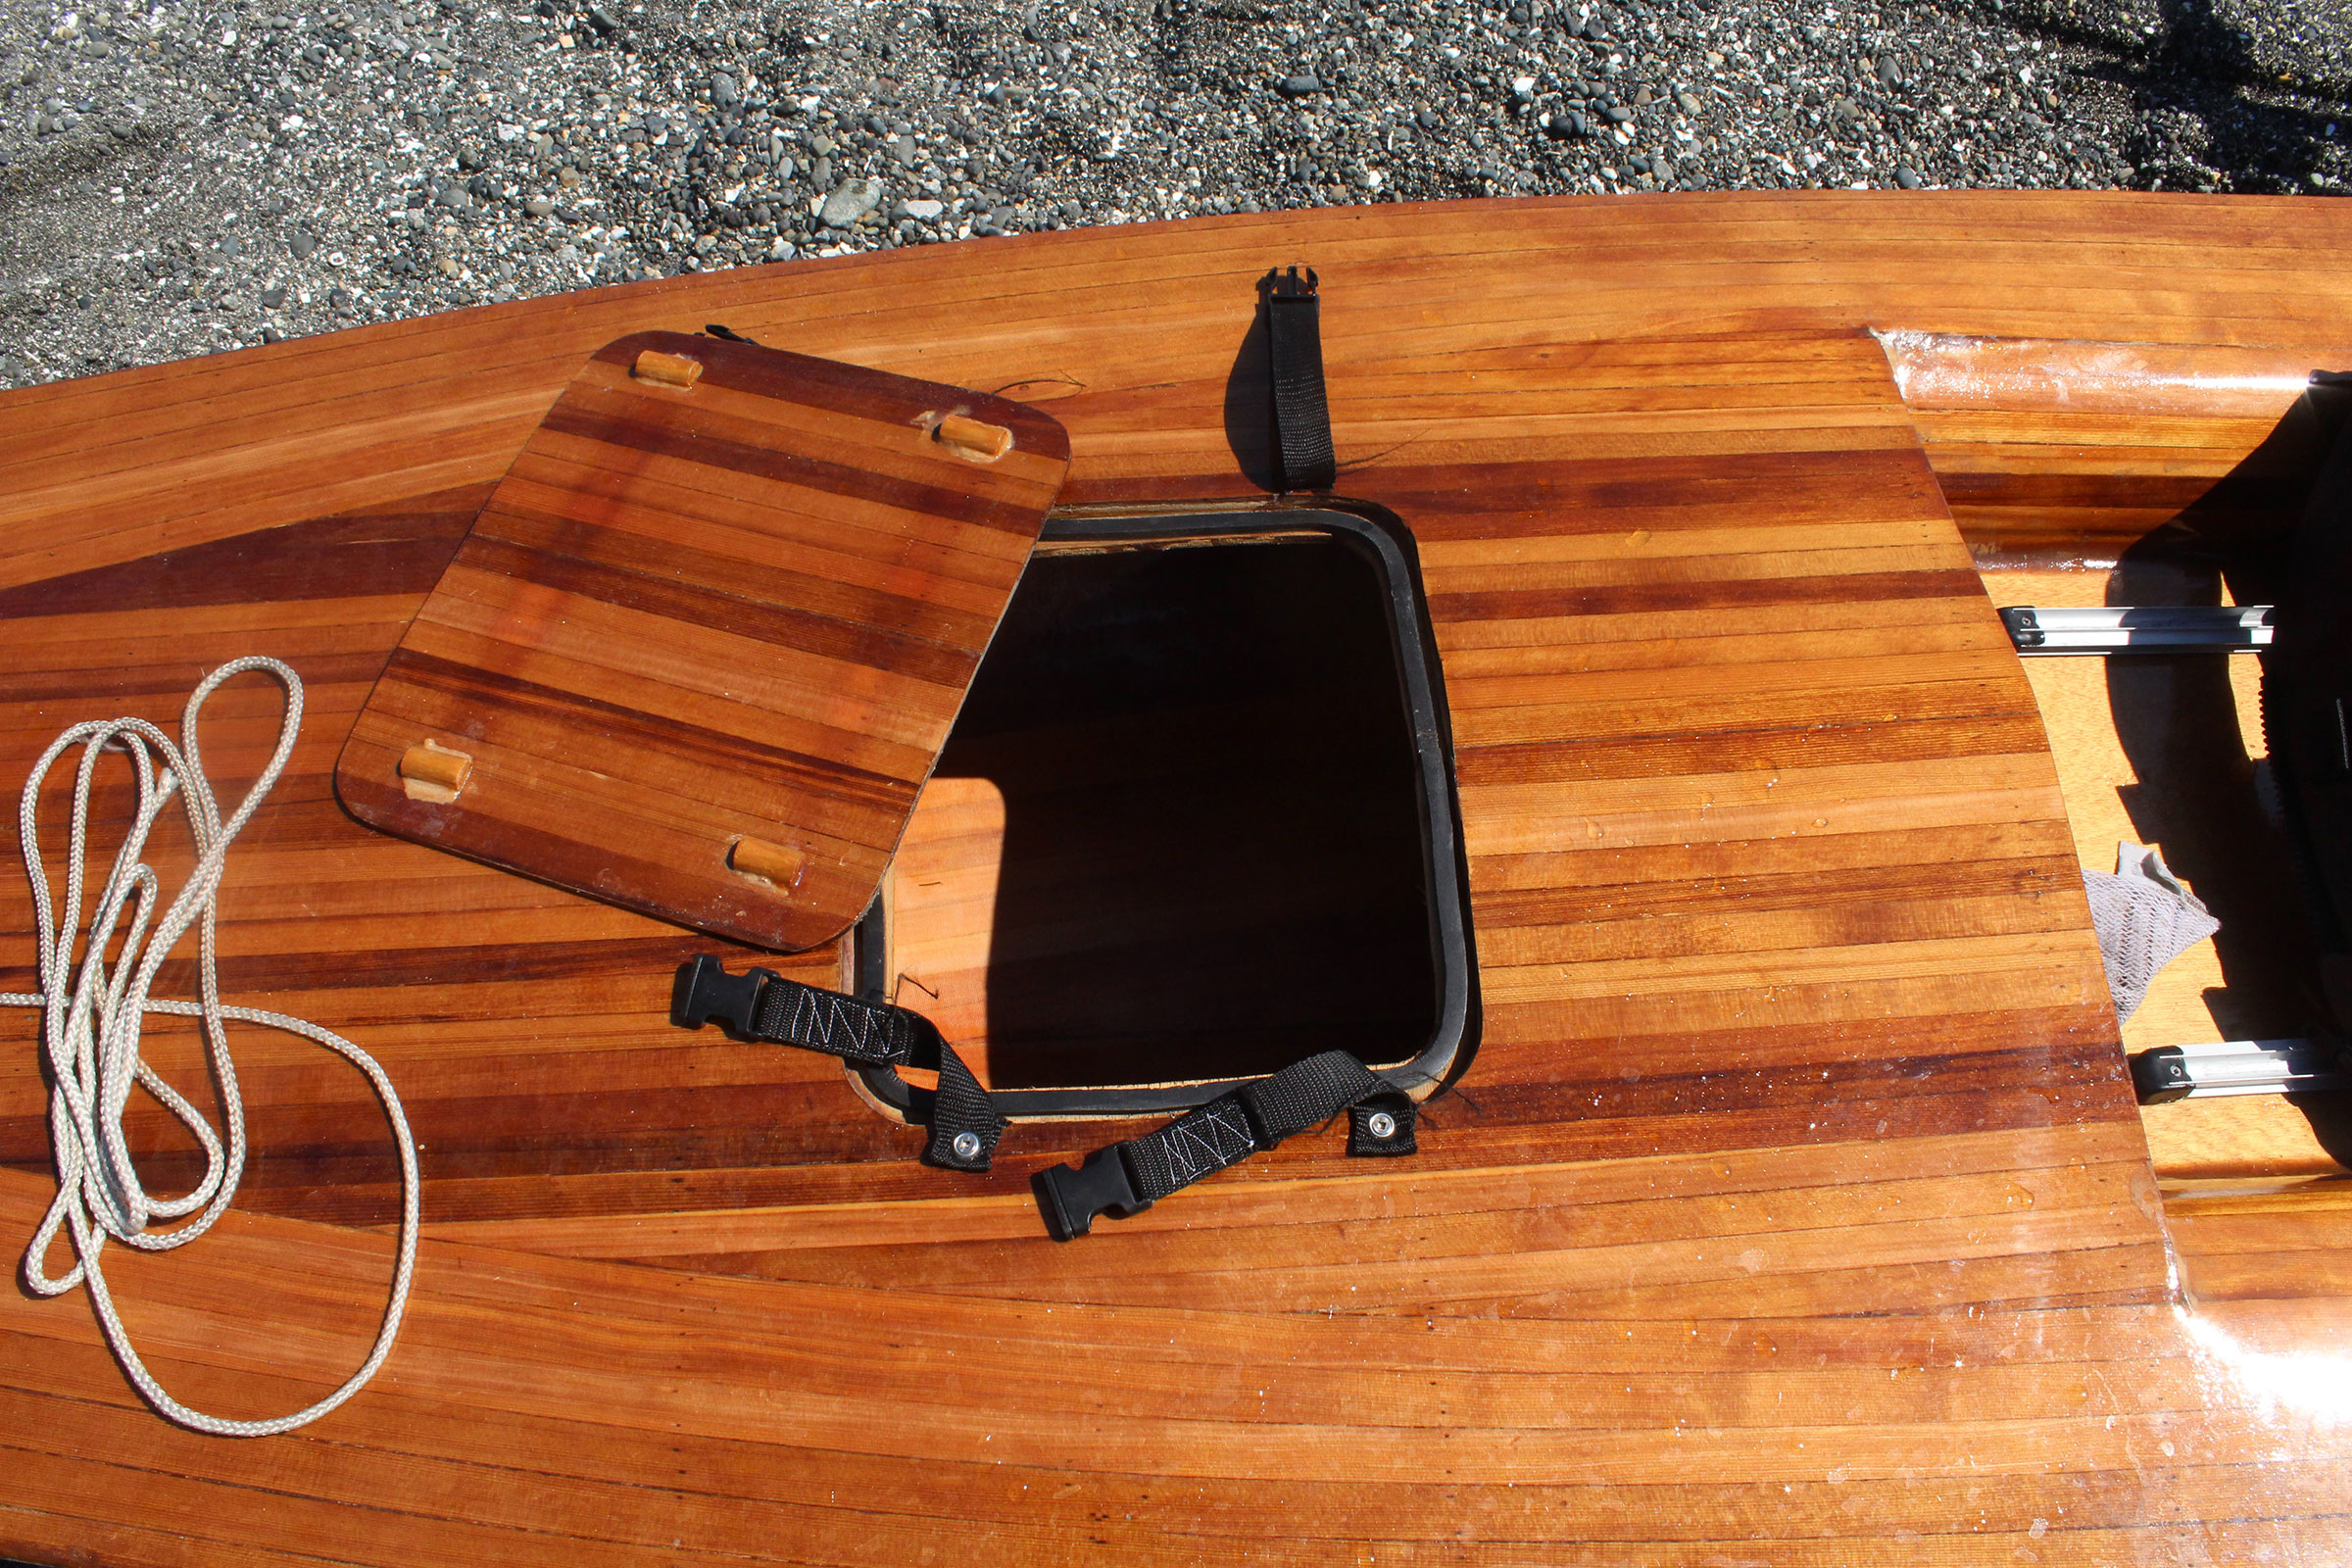
Strip-planking can be used for boats large or small, but it is especially practical for canoes and kayaks because of its very light weight. Woods of various colors can be used to accentuate the hull, often with great beauty.
Examples of Glued Lapstrake Boats
4. Strip-Planking
Maybe you’ve seen a strip-planked kayak on a beach somewhere—kayaks and canoes are the most common products of strip-planked construction today—and after recovering from the shock of its sheer ravishing beauty, you worked up the nerve to ask what it cost. The answer, if a professional built it, will likely be in the range of $8,000 to $12,000.
If an amateur built it, however, it might consist of as little as $500 worth of materials, including wood, fiberglass cloth, and epoxy. The disparity, of course, represents the labor, of which there is a lot. Strip-planking is conceptually simple, but it takes a lot of time and care to execute it well.
You’ll first cut a series of molds from plywood or MDF that look like cross-sections of the boat, much as in traditional carvel construction. Mount them on a strongback (a stiff wooden rail) so the hull can be built upside-down, and line their edges with plastic to keep stray glue from adhering to them. Then you’ll prepare a flock of identical strips, which for a kayak could be as thin as 3⁄16″ and ¾” wide—and a little longer than the boat. Strips for larger boats could be significantly thicker and wider, but they should be able to bend to all the boat’s designed curves without steaming. The most elegant way to nest them on the hull is to cut a cove and bead into the opposite edges of each plank, which is easy if you have a table-mounted router.
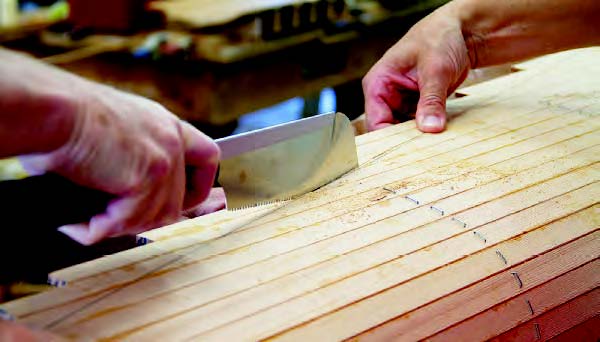 Cathleen Adkin
After the first half of the hull is completed, excess strip length is carefully cut away at the centerline. Staples hold the planks to the molds until all the planking is done and the glue sets.
The fun comes in bending, twisting, and nesting the strips into place around the molds, and the beamier the boat, the more interesting the problems. A wide beam will require some very odd shapes for fillers. This isn’t a terrible problem if the boat will be painted, but everyone begins a strip-planked boat with visions of a lovely varnished hull.
After the hull is glued up, you’ll remove the molds, spend several days cleaning up excess glue and fairing the surfaces, then sheathe it with fiberglass cloth set in epoxy.
Strip-planking isn’t limited to kayaks and canoes. A student at the Boat Building Academy in Lyme Regis, England, used fir strip-planking for an adaptation of Joel White’s famed Haven 12 1⁄2 daysailer, originally designed for carvel planking. The Northwest School recently completed a 62′ strip-planked daysailer designed by Bob Perry— though with a beam of just 9’10”, the boat, named SLIVER, resembled a gigantic canoe, or a cedar moon rocket.
Pros and Cons to Strip-Planking
Pros
- Light weight
- Relatively inexpensive woods (cedar, fir, sapele) can be used and will yield a beautiful bright-finished hull
Cons
- Labor intensive
- Major repairs will be difficult
 Cathleen Adkin
Diagonal planks are shaped and stapled in place. Plastic prevents inadvertently gluing planks to the temporary building jig.
Examples of Strip-Planked Boats
5. Cold-Molding
If this treatise were a series of car commercials for TV, this is the episode that might be flagged “Professional Driver—Do Not Attempt.” It’s best suited, frankly, to professional shops and to producing multiple hulls from a single mold. Still, amateurs with the right mixture of patience, courage, and willingness to deal with large acreages of glue can successfully build in this way. Unlike driving a car sideways on a city street, cold-molding won’t kill anyone—but you must properly protect your skin and lungs from the toxic effects of epoxy.
When you build a cold-molded boat, in effect you’re fabricating a very large, exotically curvaceous sheet of plywood in the shape of a hull. First you create a form that consists either of a strip-planked inner hull or a mold with a great many stringers. Then you’ll bend diagonal strips of veneer, typically 1⁄16″ to 1⁄8″ thick, over this mold and laminate several thicknesses together with epoxy. It’s vital to apply even, consistent pressure to these skin layers to avoid air pockets between them. A professional shop will use a vacuum bag; home builders are likely to resort to staples—hundreds or thou-sands of them. After the epoxy cures and the staples are removed, the hull is faired and the exterior often sheathed in still more epoxy, this time with fiberglass cloth.
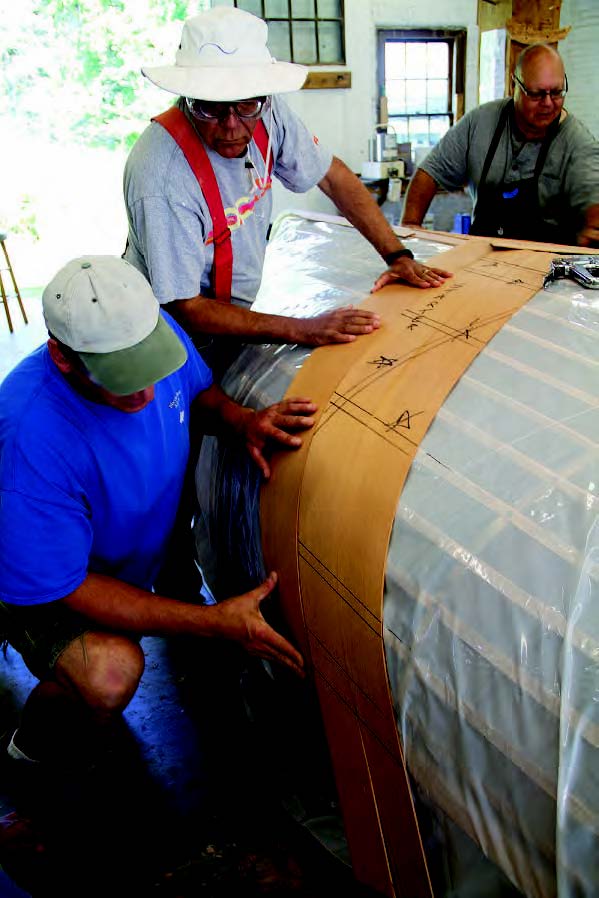
 Cathleen Adkin
The second layer of planking is spiled for the opposite diagonal. For even pressure, such hulls are often vacuum-bagged in a single gluing operation.
Pros and Cons to Cold-Molding
Pros
- Strong, lightweight, watertight hull
- Adaptable to nearly any hull form
Cons
- Very labor-intensive and messy
- Critics complain that the hulls look “too perfect,” like production fiberglass boats
- Major repairs will be difficult
 Courtesy of WoodenBoat School
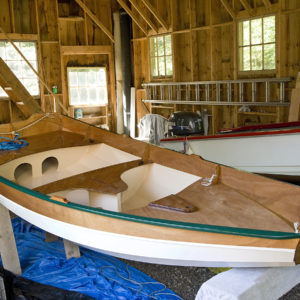
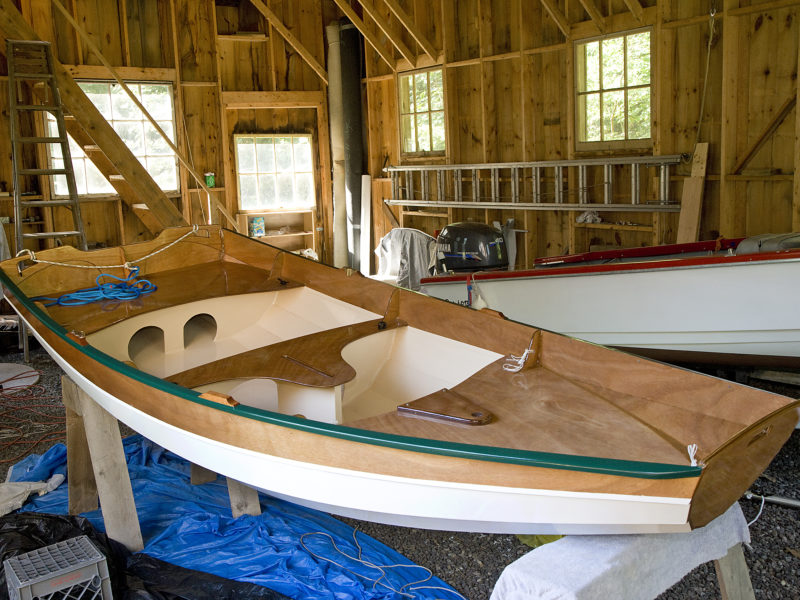
Stitch-and-glue is similar to glued lapstrake in that it relies on epoxy to secure joints; however, in this
case planks are butted together at the seams and secured by epoxy fillets.
Examples of Cold-Molded Boats
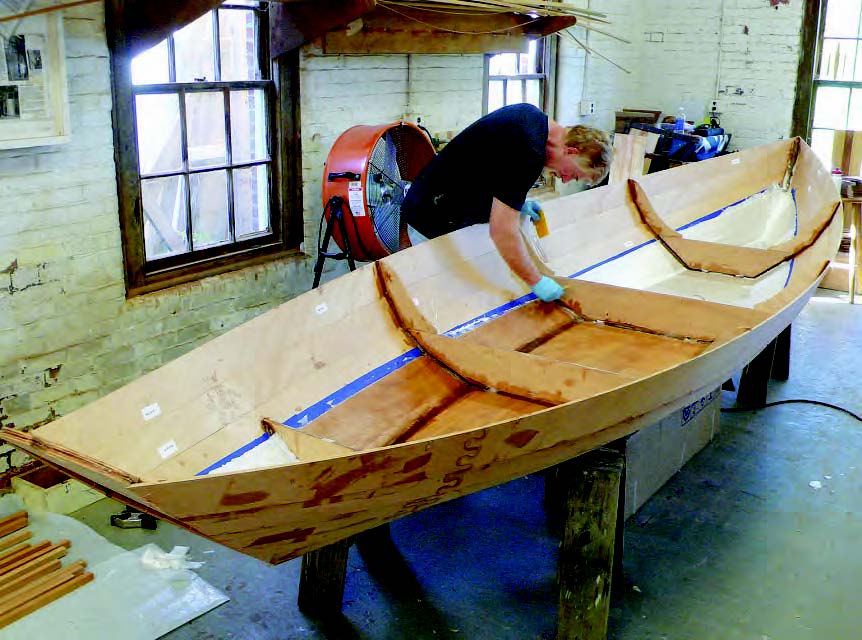
6. Stitch-and-Glue
This technique may have originated with the Mirror dinghy, concocted as a promotion by the London Daily Mirror in 1963. It was an extremely simple racing and recreational sailing dinghy that amateurs with little or no woodworking experience could build in around a hundred hours, and it was so successful that the Mirror now estimates that about 70,000 have been built around the world.
There is no simpler way to build a wooden hull. Cut five panels from plywood sheets—two sides, two bottom pieces, and a transom—drill pairs of holes a half inch inboard of the seams-to-be, and stitch the panels together with wire twists. The wires function as temporary clamps to hold the panels together. Then fill the gaps and fuse the joints with thickened epoxy, remove the stitches, and reinforce the seams with layers of fiberglass tape set in more epoxy. Most stitch-and-glue boats are then sheathed on the outside with fiberglass cloth set in epoxy, and the inside, too, is sealed with epoxy.
The medium is more versatile than the ubiquitous Mirror dinghies and kayak kits suggest. Sam Devlin, who designs and builds boats in Tumwater, Washington, has built stitch-and-glue motor cruisers up to 48′ and displacing 32,000 lbs. Since plywood thicker than 1⁄2″ is nearly impossible to bend into boat-like shapes, stitch-and-glue hulls longer than 25′ can be built up to the appropriate thickness by cold-molding additional plywood sheets onto the original hull form. This is possibly where stitch-and-glue construction’s easy-building appeal to the amateur begins to ebb, with the big boats best left to the pros.
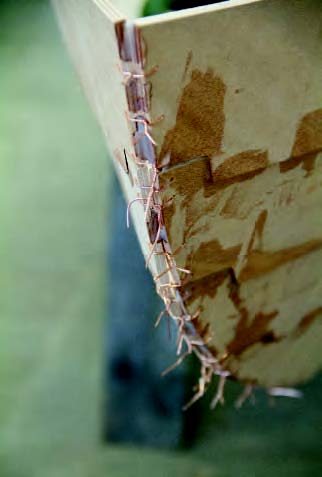 Cathleen Adkin
Short lengths of copper wire make good “stitches”
because if necessary they can be cut flush, and since the bits of wire left in the joint won’t rust, they’ll do no harm.
How easy, honestly, is stitch-and-glue? The basic technique is extremely simple; even if you’re a jigsaw goofus you can cut the panels safely wide of the line, then trim with a block plane and sanding block. Stitch-and-glue’s particular devil, however, is in the sheathing. There is a learning curve with fiberglassing a hull, and first-time builders may be doing a lot of tedious sanding to achieve a smooth and fair hull form. And stitch-and-glue boats more complicated than a Mirror dinghy will require the same kinds of appendages and furniture that any boat does.
One of the appealing qualities of a stitch-and-glue boat is its remarkable rigidity. All the interior components such as bulkheads, berth flats, and even cockpit seats become part of an eggcrate-like structure within a monocoque skin, so you don’t hear any groaning or creaking from pieces flexing and moving against each other. This also means good trailering durability. If you appreciate groaning and creaking as part of the intrinsic romance of wooden watercraft, you probably didn’t get past the word “plywood” in the second paragraph, anyway.
Pros and Cons to Stitch-and-Glue
Pros
- Relatively easy and rapid hull construction
- Strong, lightweight, abrasion-resistant and (nearly) rot-proof hull
Cons
- Some designs (certainly not all) look relatively clunky; hard chines are inevitable
- Since the entire hull and interior structures are essentially fused into one unit, some repairs and modifications are difficult
We launched this discussion some pages back with the admonition that “small boats are not small undertakings,” and the shower of phrases such as “labor intensive” and “exacting craftsmanship” that followed surely underscores the point. Do not be discouraged. Thousands of amateurs have successfully built their own wooden boats, some to extremely high standards and prodigiously ambitious plans. (A man on the Puget Sound island adjacent to the one where I live built a 43′ schooner as his first boat. However, it took him 33 years.)
If you’re in love with a particular design but not its intended method of construction, there is often room to maneuver. Designs of traditional carvel-planked boats can almost always be adapted for strip-plank or cold-molded construction with no external change in their hull shapes. Traditional lapstrake boats, which employ solid wood planks, can usually be executed in glued-lapstrake construction using marine plywood.
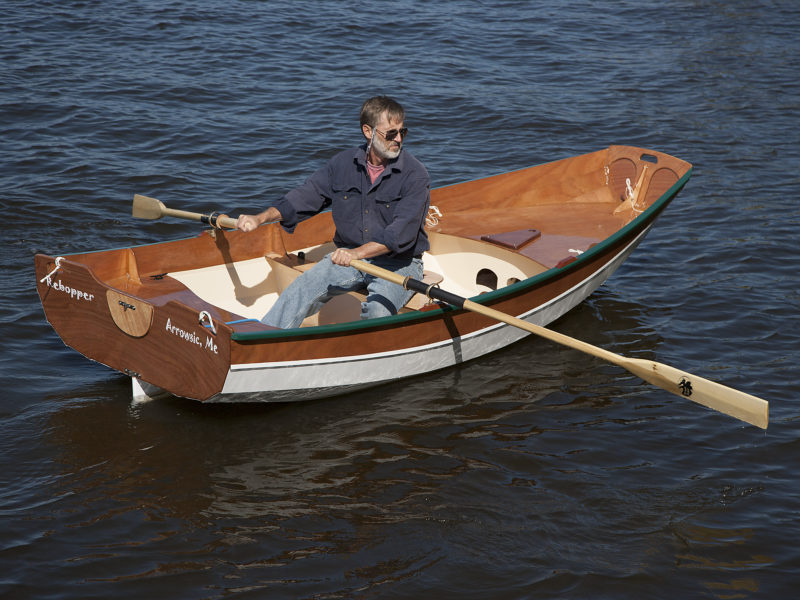
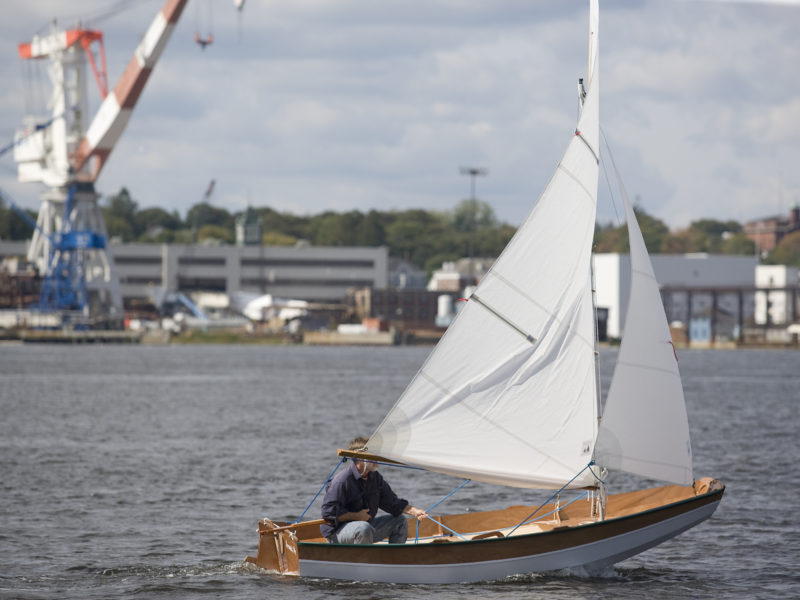
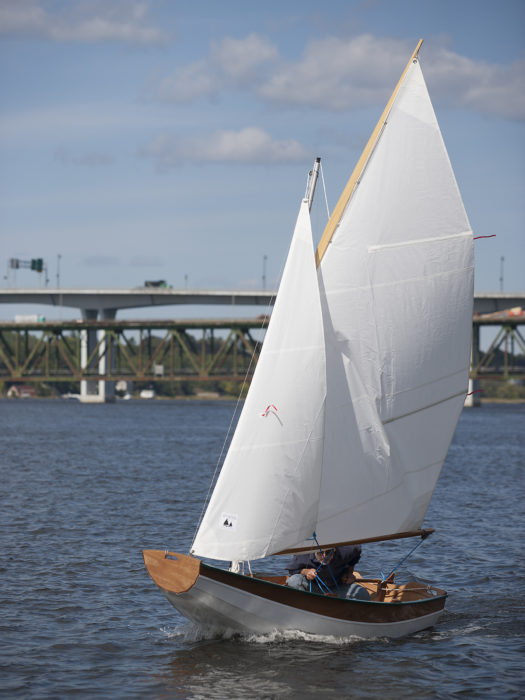
Examples of Stitch-and-Glued Boats
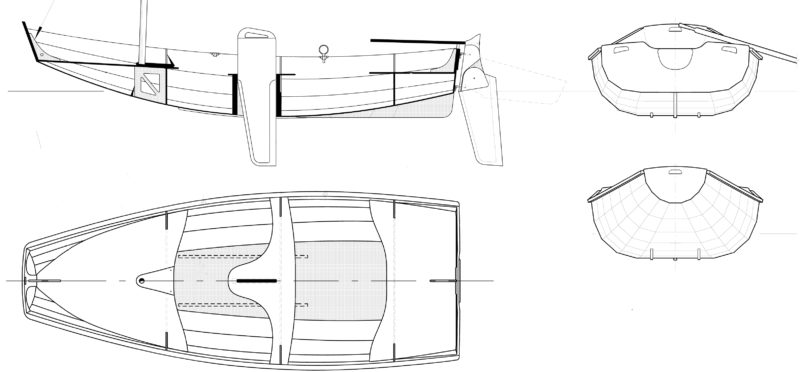
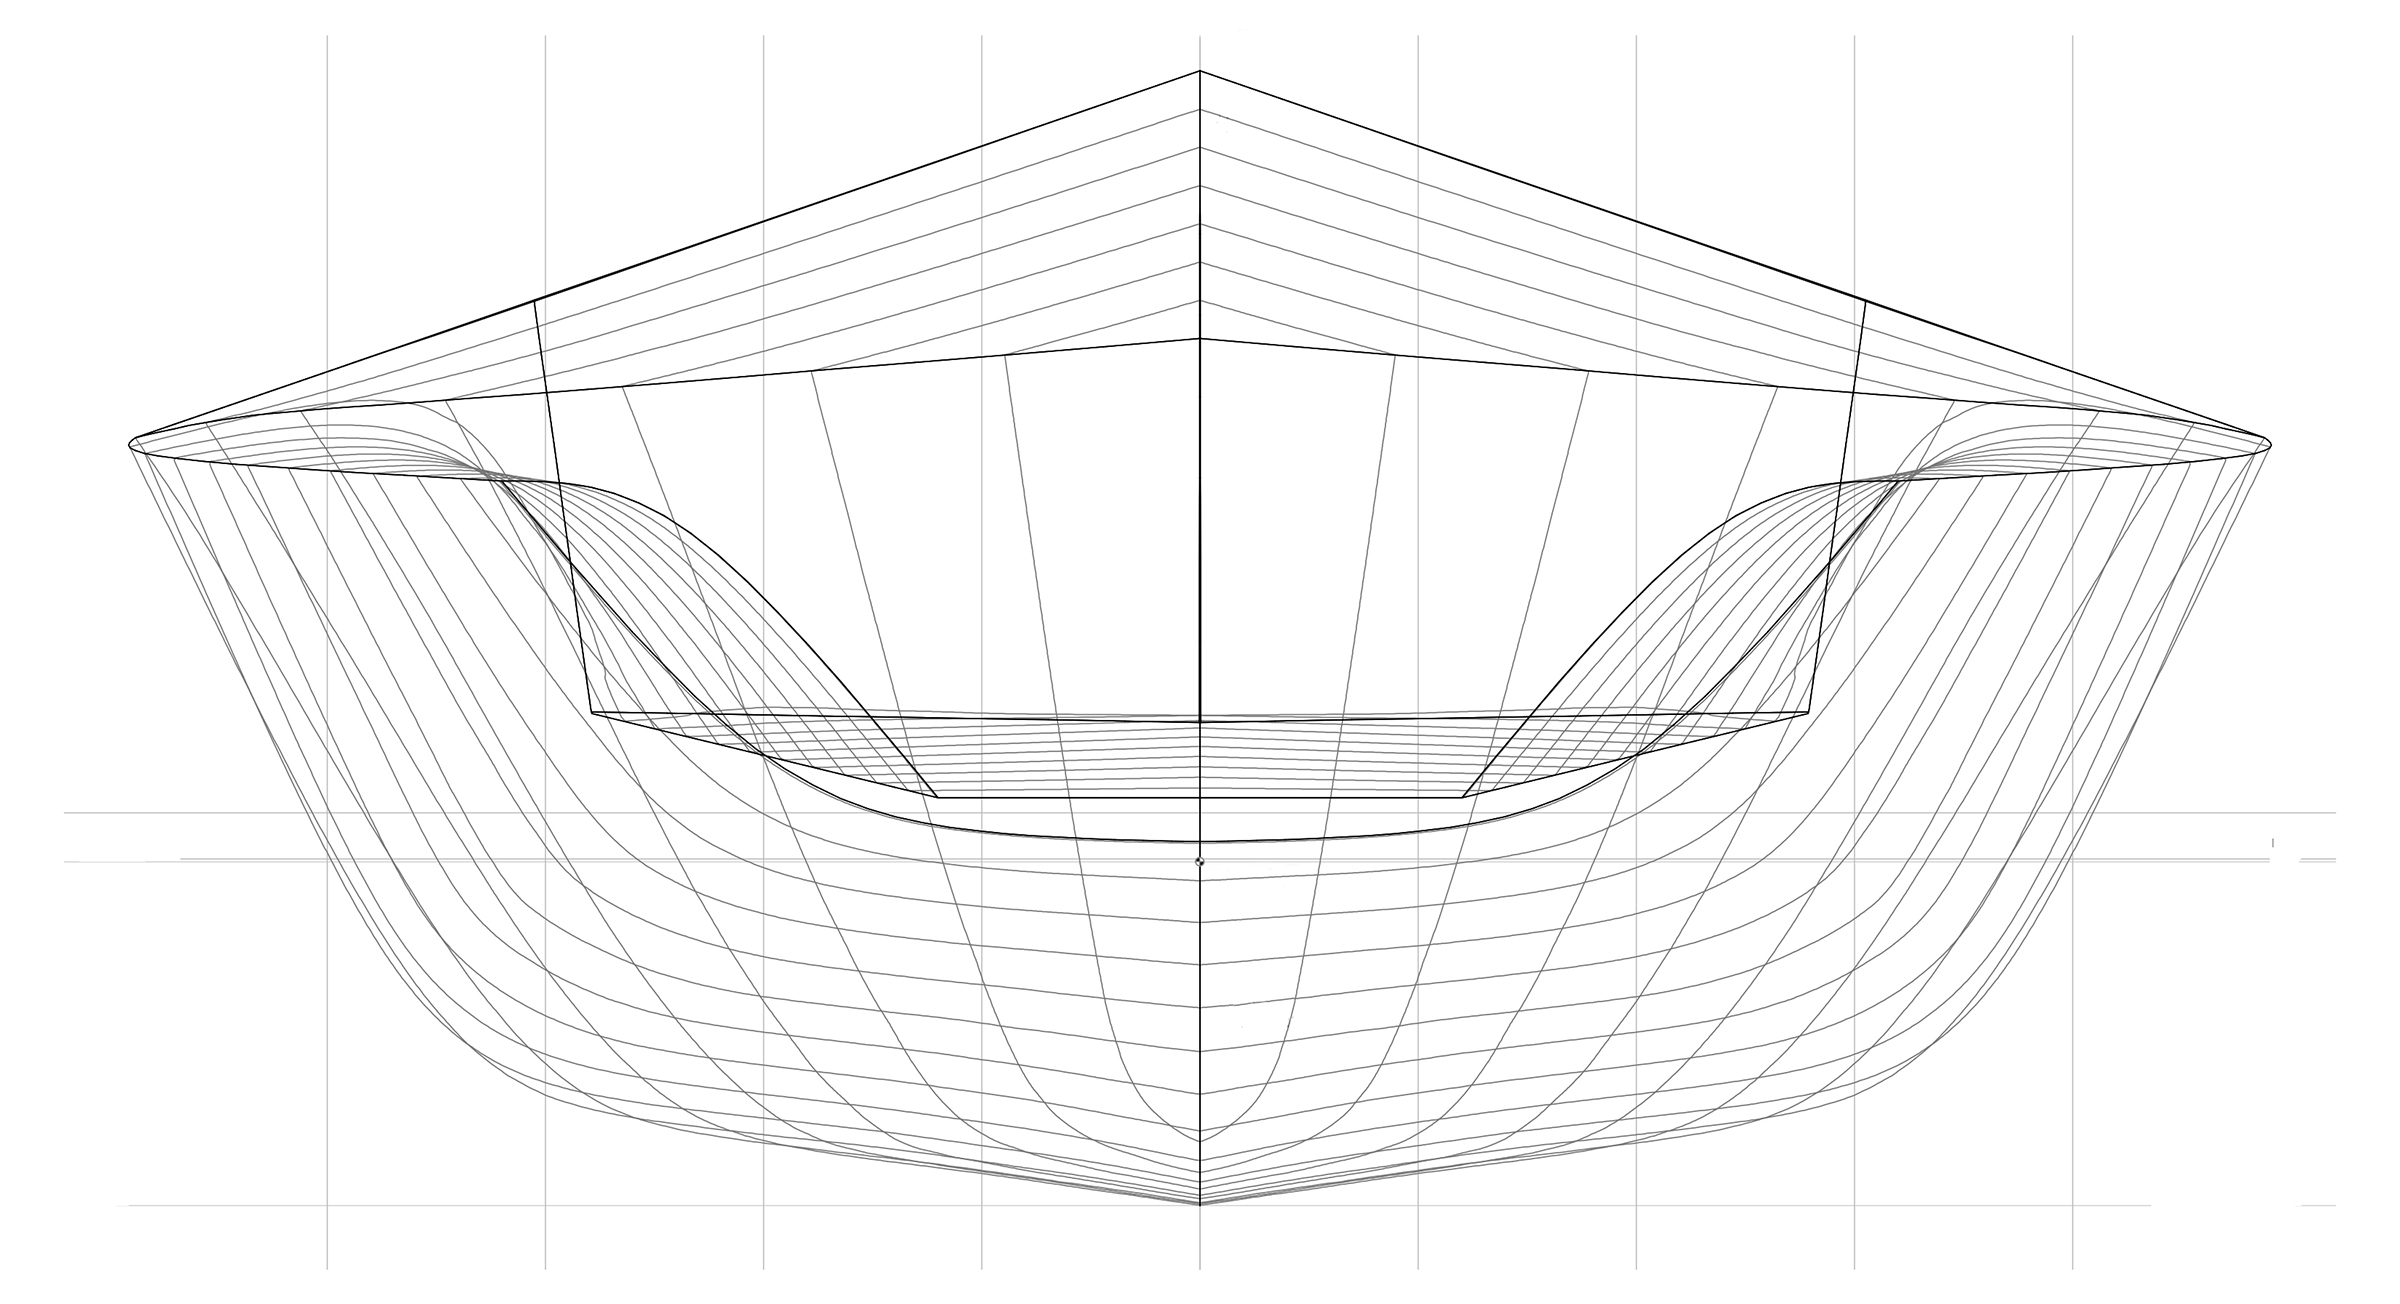
All Wooden Boat Construction Projects Start With a Plan
Whichever building method you decide on, you will discover one constant: You’ll begin with a vision of perfect beauty in your head, and if you’re an ordinary mortal, limits of time, money, and skill will inevitably force compromises along the way. Rather than plunge into a funk, the smart builder will set priorities: There are certain things that must be done right, those involving structural integrity or seaworthiness, while certain other details relating to aesthetics and the builder’s ego can be let go. Creating this rational hierarchy of values helps you keep momentum through the long process, and helps you feel good about yourself, even at the high tide of imperfection.
More Techniques for Building a Small Boat
Have a boatbuilding project in mind? Here are a few more articles to help you achieve your goal.
- Build a DIY Drop-Center Sawhorse to better support your boat hull
- Use External Frames for Strip-Building
- Assemble DIY Gantry Cranes to lift and roll a heavy hull