When I decided to build my first bead-and-cove strip kayak, the whole build process seemed pretty straightforward and I didn’t really anticipate any troubles. I had decided to use a variety of beautiful woods to complement and contrast each other, I wanted to inlay a laminated waterline stripe, and I was not going to use nails or staples through the strips, leaving hundreds of dark nail holes showing through the wood.
I discovered that it was easy stripping the topsides since there was just a gentle curve near the sheer and I could easily clamp the strips’ ends at the stems, but the bottom was a lot more challenging. Each strip had a considerable twist going from flat along the bottom amidships to nearly vertical at the stems. And as the planks tapered into the ends at the waterline, there wasn’t enough space to place clamps to the molds where the torsion was worst.
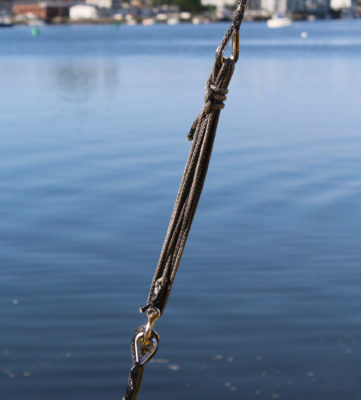
For this first kayak, I looped lines around the hull, tightening them with sticks to create a Spanish windlass at each mold. Under the tightened ropes, I used wedges to apply pressure where needed. But while this worked to some extent, it didn’t force the strips down to the molds nor against each other as tight as I would like. And I could do only two strips every few hours, since I had to wait for the glue to dry before proceeding to the next pair.
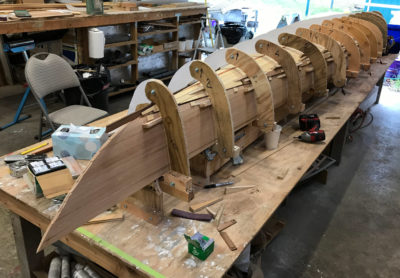
 Photographs by the author
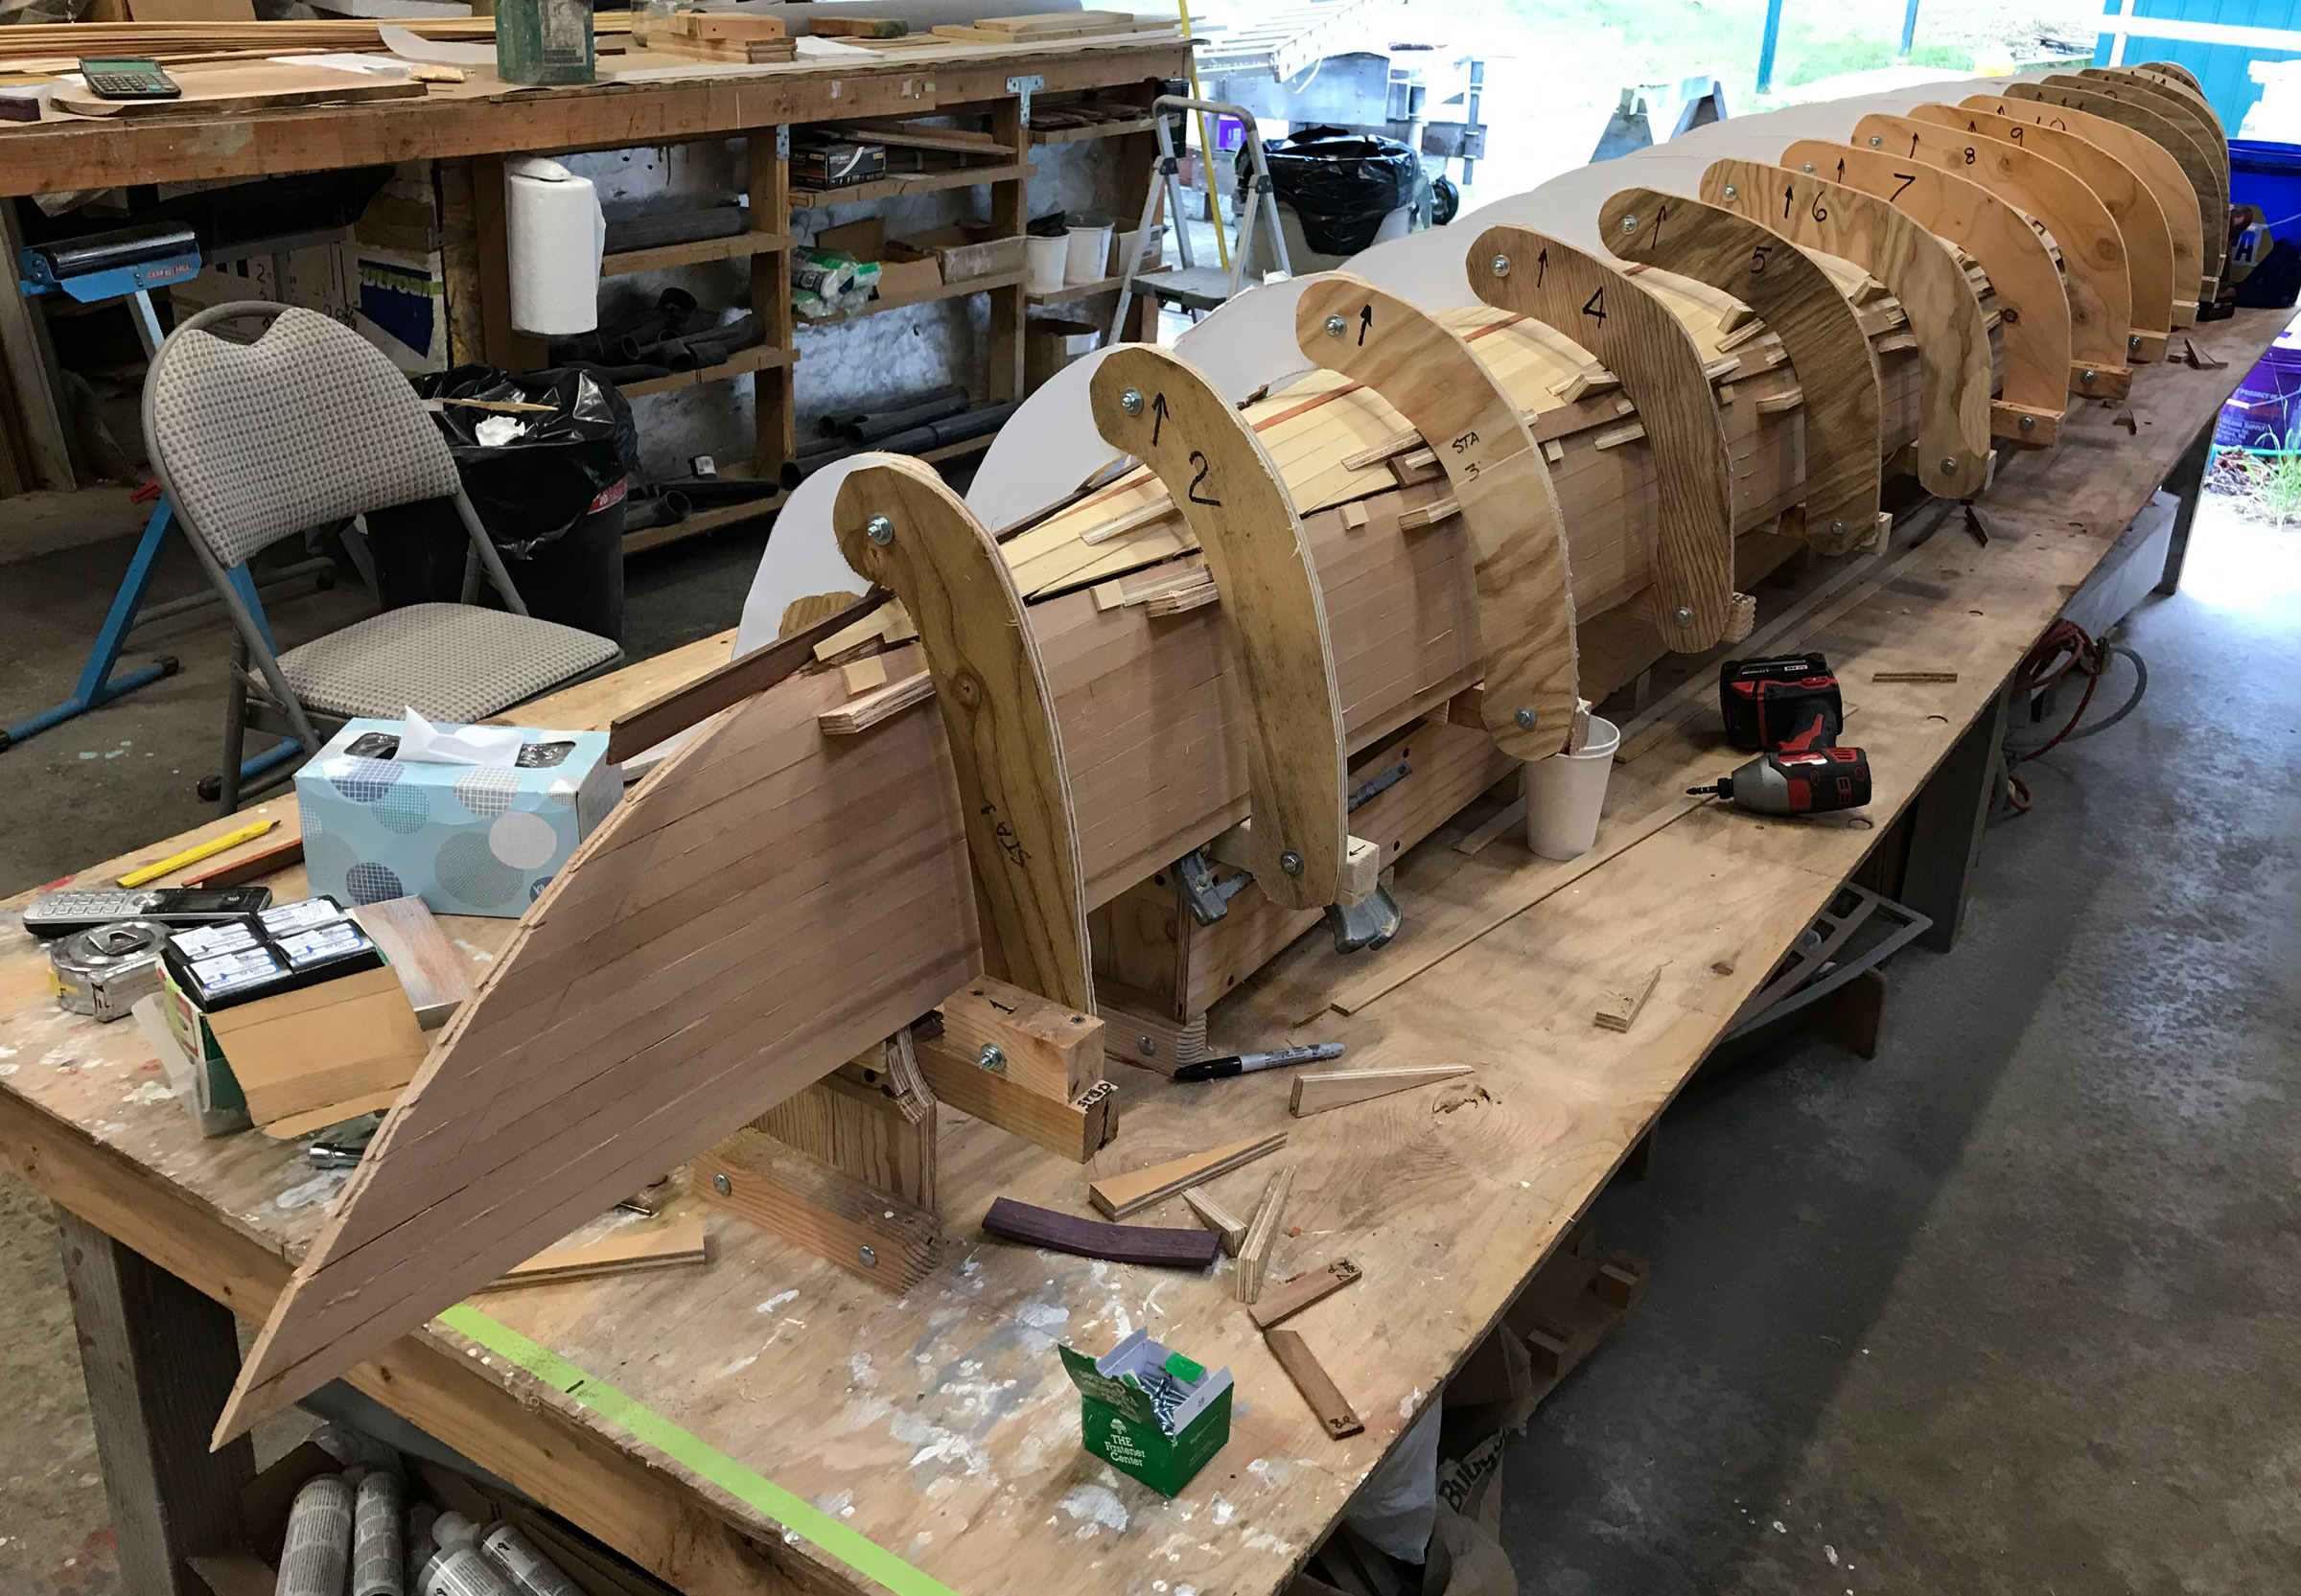
External plywood arches over each mold provide a way to apply multiple strips with each round of gluing, without resorting to staples or nails to hold them.
When I got ready to build my second kayak, CELESTE, I figured there had to be a better way. I had a lot of different ideas, but what I came up with was building an external frame over each mold in order to drive wedges against the strips. Each of these arches was made of two pieces of inexpensive 1/2″ CDX plywood connected with 1/4″ bolts and anchored to a 2×2 screwed to the base of the mold.
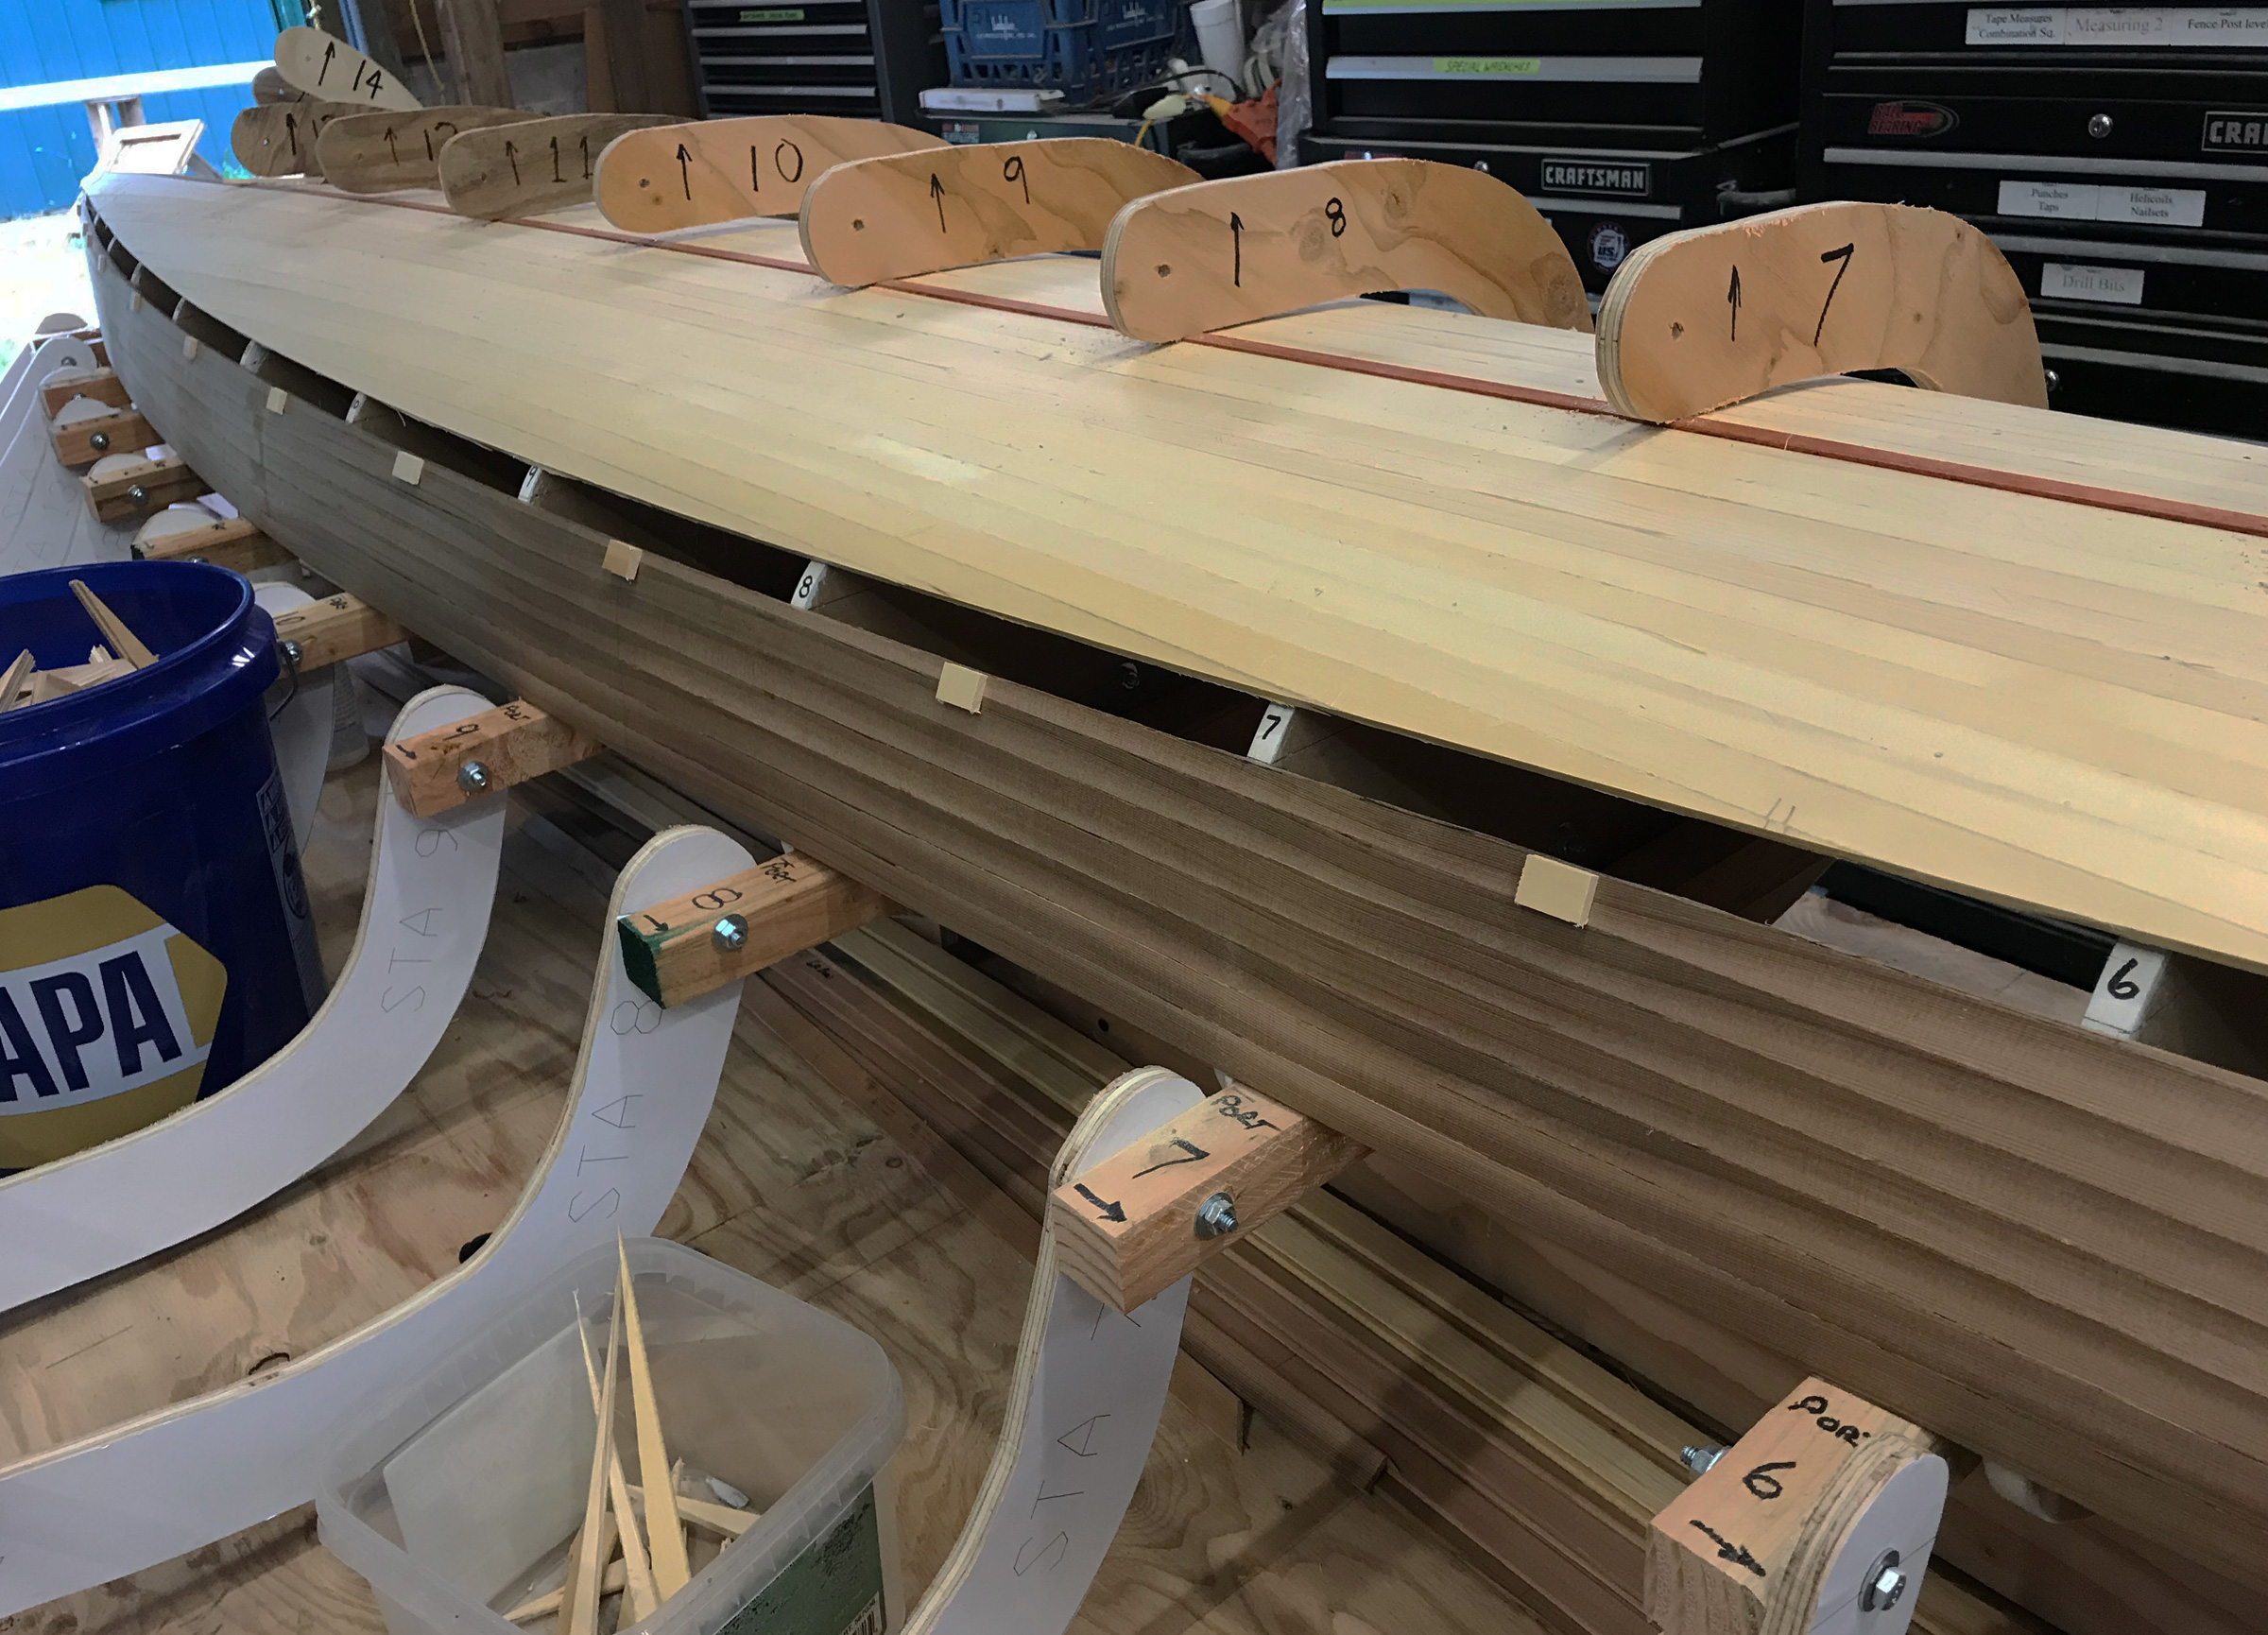
The center bolts holding the two halves of the arches together can be removed to provide access to the hull.
The arches could be assembled and disassembled quickly and wedges tapped inside of the frame, thus clamping the strips against the mold. I had designed and drawn the boat in AutoCAD so I could easily make patterns for the arches with a 3/4″ offset from the hull. The tolerance isn’t critical, so you can sketch the patterns freehand and they would work fine—the wedges will allow for very loose tolerances. A little time with a bandsaw and drilling some 1/4″ holes, and I was done.

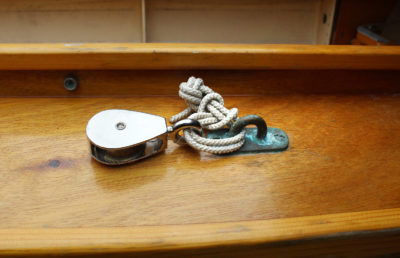
Wedges, these cut from scraps of plywood, provide firm pressure on the strips being applied. They can even edge-set the strips without making it impossible to apply the next strip.
With the arches and wedges I was able to apply a tremendous amount of force on the strips if needed but still finesse the beads into the coves very easily, all without damaging the soft wood strips. The system was much easier and more accurate than any other method I had tried, and because it allowed me to do all of the strips without waiting for glue to dry, I was able to complete the bottom in a day whereas previously it had taken almost two weeks to do the 28 strips.![]()
Dan Newland has been building boats from the age of 12. He lives in Port Hadlock, Washington, not far from the Northwest School of Wooden Boat Building. He has taught advanced composites at the school and serves on the school’s Program Advisory Committee. His wife, Linda, is on the board of directors. Dan designed carbon fabrics and high-tech sailcloth for several AMERICA‘s Cup projects. He has won the Singlehanded Transpac three times, twice in boats he designed and built.
You can share your tips and tricks of the trade with other Small Boats Magazine readers by sending us an email.


I’ve built a half dozen strip boats with staples. Congratulations for your creative idea, and thanks for sharing.
Hi Richard
Thanks, glad you liked it! Being similarly afflicted, I hope you continue to build and make the world more beautiful with your creations.
Dan
What a great process. I suppose it could be applied to most any strip-built type of boat.
Hi John
Yes, I I imagine there are any number of ways it could be used for any number of boats. Maybe even plywood that was really tortured and thus avoid nails. The amount of force that can be applied is pretty massive if needed.
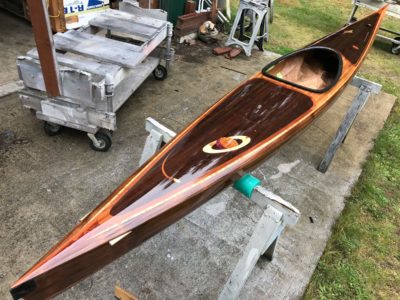
I congratulate you on a beautiful kayak. When building anything, a person has to balance the effort with the results. You have to ask, is bead-and-cove worth it? Is trying to build with no staples worth it? If it becomes so time consuming and complicated that you give up and do not finish the project, then all is in vain. I think that building a wood-strip canoe or kayak is a big challenge for most folks, so why make it more complicated. You will not see the staple holes from 20′ away. If you are paddling past a strip canoe or kayak, you will not see the staple holes when the canoe is in the water. For your first strip boat, build it with staples or just use a small brad and have one small hole. You will still have a beautiful craft.
Hello Ken
Thanks for your comment. You bring up an important point that everyone in a creative medium has to consider: “What is right for me?” This was pre-Covid but I have hosted T37 build parties at my shop, (the T37 is a 37″ RC sailboat that a bunch of us build from wood kits and race. You can go Google “T37 builder’s guide” for my videos or go to the Tippecanoe boats website). We always try and have fun but we mix the experienced builders with newbies. For many, building a little 37″ “toy” boat is simply a few evenings’ work to relax and blow off steam. However, to many others, they buy the boat, open the box and think “Oh my, what have I gotten myself into?” But they learn how to work with glue and sandpaper and all of the other things many of us take for granted.
When you see some of these on the race course, many are fairly crude compared to others, but these builders put their hearts and souls into these boats, learned and conquered their fear of the unknown and pushed themselves. These are the folks that are the “heroes” in my book since they went into the unknown and did something that in many cases was a lot more about overcoming their fears, plunging into new territory and leaving their comfort zone.
So, in answering your comment, each builder must decide how much they can or can’t do and my degree of complexity isn’t necessarily anyone else’s. CELESTE was a lot more about art than boat building. In the end, it isn’t about what I can do and whether I could have done it better, it’s what the person doing the building can do. To a person leaping into the unknown on the biggest building project of their life, building with staples or anything else is huge and my hat is off to them. It may not be what I would have come up with but I say “Good for You!”
Thanks for your kind comments. I have been teaching strip canoe building at North House Folks school for 13 years, and we build a canoe in six days. So staples are the way to go in the class. During this COVID Crisis, I have watched some webinars with Fine Woodworking. One of the guys who has been teaching and building furniture for over 40 years, had comments at the end of the webinar: first, square is overrated and second, perfect is overrated. One other comment from me that you will enjoy, a quote from Saint Francis of Assisi. In 1600 he said “a man who works with his hands is a laborer, a man who works with his hands and his mind is a craftsman. A man who works with his hands, his mind, and his heart is an artist.” Your kayak work of art, says that you are indeed an artist.
Thanks,
Ken
Hi Dan,
Great technique article. Seems to me you got 2 for one: a faster build and a beautiful boat sans any holes. With your background, I suspect you could get not only the molds but at least one full external frame and most of the mirror frame. A butted ‘scab’ piece would complete the partial frame and make it whole.
Cutting all with a 3/4 cutter on a CNC router would reduce the time even more. This technique would save most weekend builders hours of precious time and get them on the water sooner.
Great job!
Bill Siwik
Hi Bill
Thanks! I think you are right, there are any number of ways this could be tweaked. Along those lines, more and more companies are providing CNC machining. I had just finished designing CELESTE when I was called away to SF Bay to work on a 35′ kite foiler trimaran and had access to a CNC so a trip to Home Depot for some MDF and a couple of six packs later to a friend and I had my molds all machined, (But I hadn’t come up with the external frame idea yet, Damn!)
Now, Edensaw, my “drug dealer” of choice here in Port Townsend and where I bought many of the woods in CELESTE, has started doing CNC milling. They can save a tremendous amount of time and as stated earlier in the CELESTE article, I finally realized “All mistakes are fixed with sandpaper.” That ought to teach precision early on and it doesn’t get much more precise than with a CNC! It is becoming a lot more common and the price might surprise you.
Dan
Brilliant! 🙂 I’ve built a couple of cedar-strip canoes during my life and had come up with many a scheme over the years for doing exactly what you did here (stapleless construction). Will have to keep this one in mind if I get back to strip projects. Congrats on bringing to fruition a great idea!
Hi Tim
Thanks! Boat building is always challenging and a lot of the fun is coming up with new ways to solve problems. Good luck and never stop building!
Dan
Well after 30 years and more than 100 strippers I thought I had seen every way of going stapleless. I was wrong. It looks like added work to me, but as long as you are happy, that’s all that counts. And your finished kayak is a beauty. Like you, my training is as an artist, so beauty is at the top of my list.
Forcing 1/4″ strips to twist at the stems frustrates many strip builders.
In my youth I portaged a heavy canoe on many trails. My main reason for starting to build strippers was to have a lightweight boat. So, I started with 3/16″ thick strips to reduce weight and got lucky because they are significantly easier to twist.
Over the years I found additional ways to place strips without force and without staples. Follow the links below for that information if you wish.
Live Long and Paddle,
Rob Macks
Laughing Loon Custom Canoes & Kayaks
Shop tips
Hot Glue
Twisting Strips
Hi Rob
I checked out the links and LOVED IT! I can’t wait to try some of those! Isn’t it great that we can build so many sailboats, power boats, kayaks and everything else and still learn new stuff? That’s what makes this so much fun.
Nice-looking kayaks by the way, just gorgeous!
Dan