Floorboards are wonderful things for keeping us out of the bilge, but they are traps for dirt, leaves, and the other detritus of small-craft adventures, so it’s best when they can be easily removed for cleaning. Wood screws can hold floorboards in place, but they’re not suited for being removed and reinserted. Wooden turn-buttons are an effective approach in many cases, but in smaller craft, where floorboards double as seating, they can be obtrusive.
I searched for a method of securing floorboards that has a lower profile, permits easy removal and contributes to structural strength, and adopted threaded brass inserts. They can be purchased in a kit with the proper-sized drill bit and a tool for installing them. A hole is drilled in the floor and the insert is simply screwed into the hole until flush with the top of the floor. Matching machine screws secure the floorboards.
 Photographs by the author
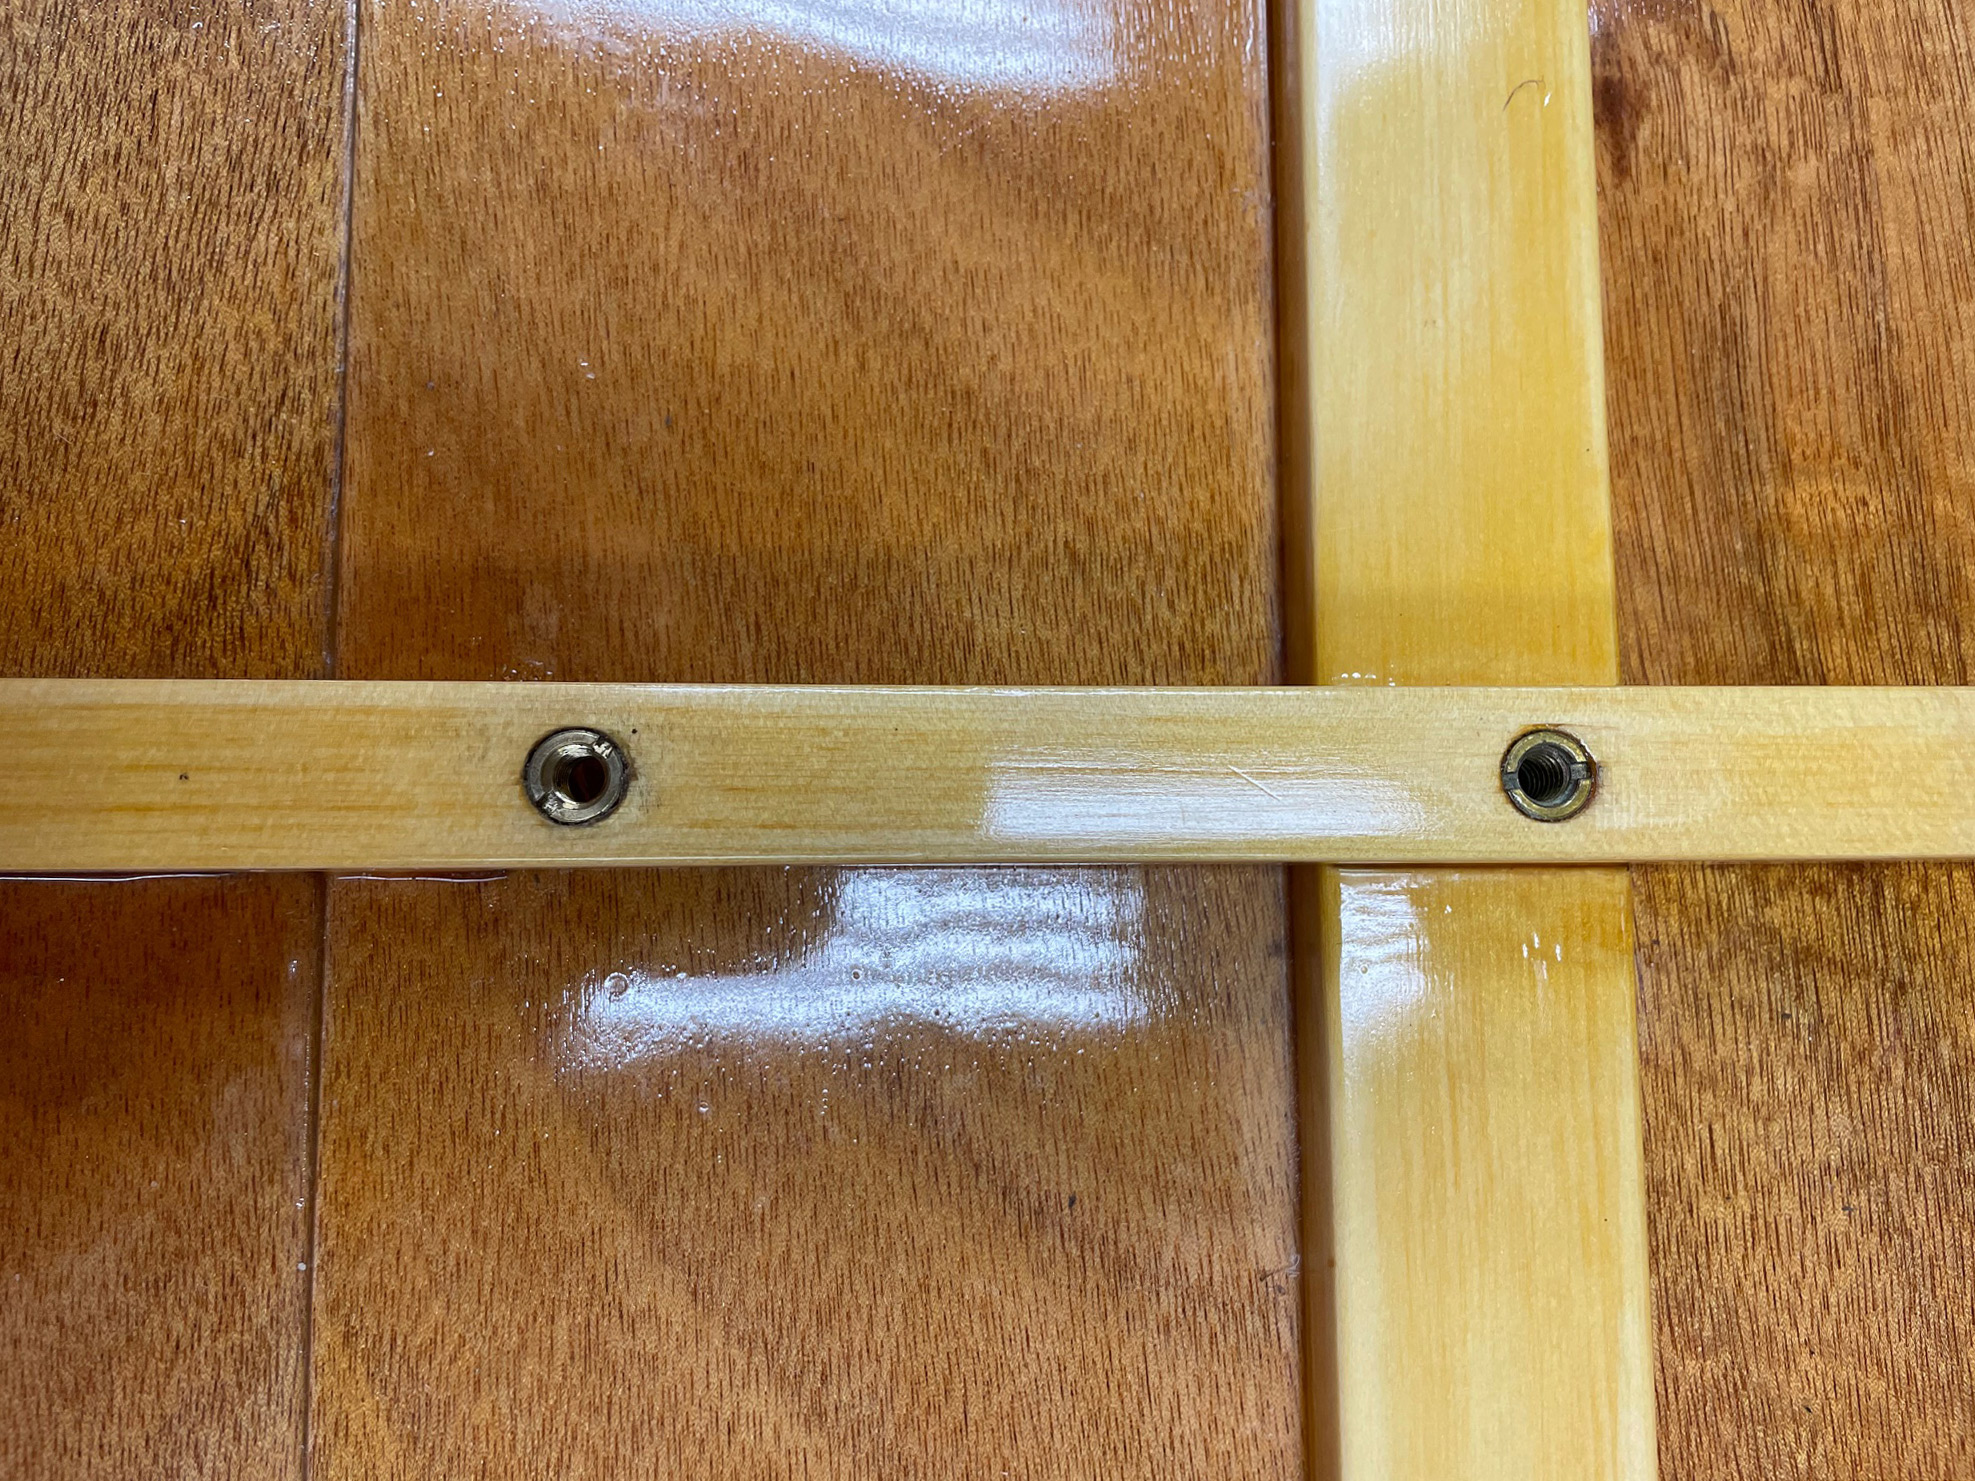
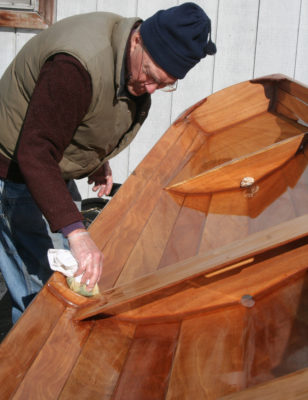
The brass inserts provide a durable connection between a small boat’s floorboards and floor timbers and they don’t wear out like holes for wood screws can.
The process is straightforward enough, but I have a few suggestions. Before driving in the inserts, coat the hole for the insert with epoxy to seal the wood grain against the intrusion of water. The inserts have a very aggressive outer thread and are equally happy being inserted at an angle as they are straight, so whether using the installation tool or a screwdriver, take care to align them properly as you begin to drive them in. The brass inserts are somewhat soft, so if using a screwdriver, be sure it is a good fit for the insert’s slots and go easy to avoid camming out.
On new construction, it is much easier to install the inserts in the floor timbers before they’re installed in the hull where they’re harder to reach and keep aligned.
Bear in mind that the strength of the inserts depends upon the strength of the surrounding wood. For floorboards, they are more than adequate but the inserts are not recommended for use in plywood or in higher-load applications.
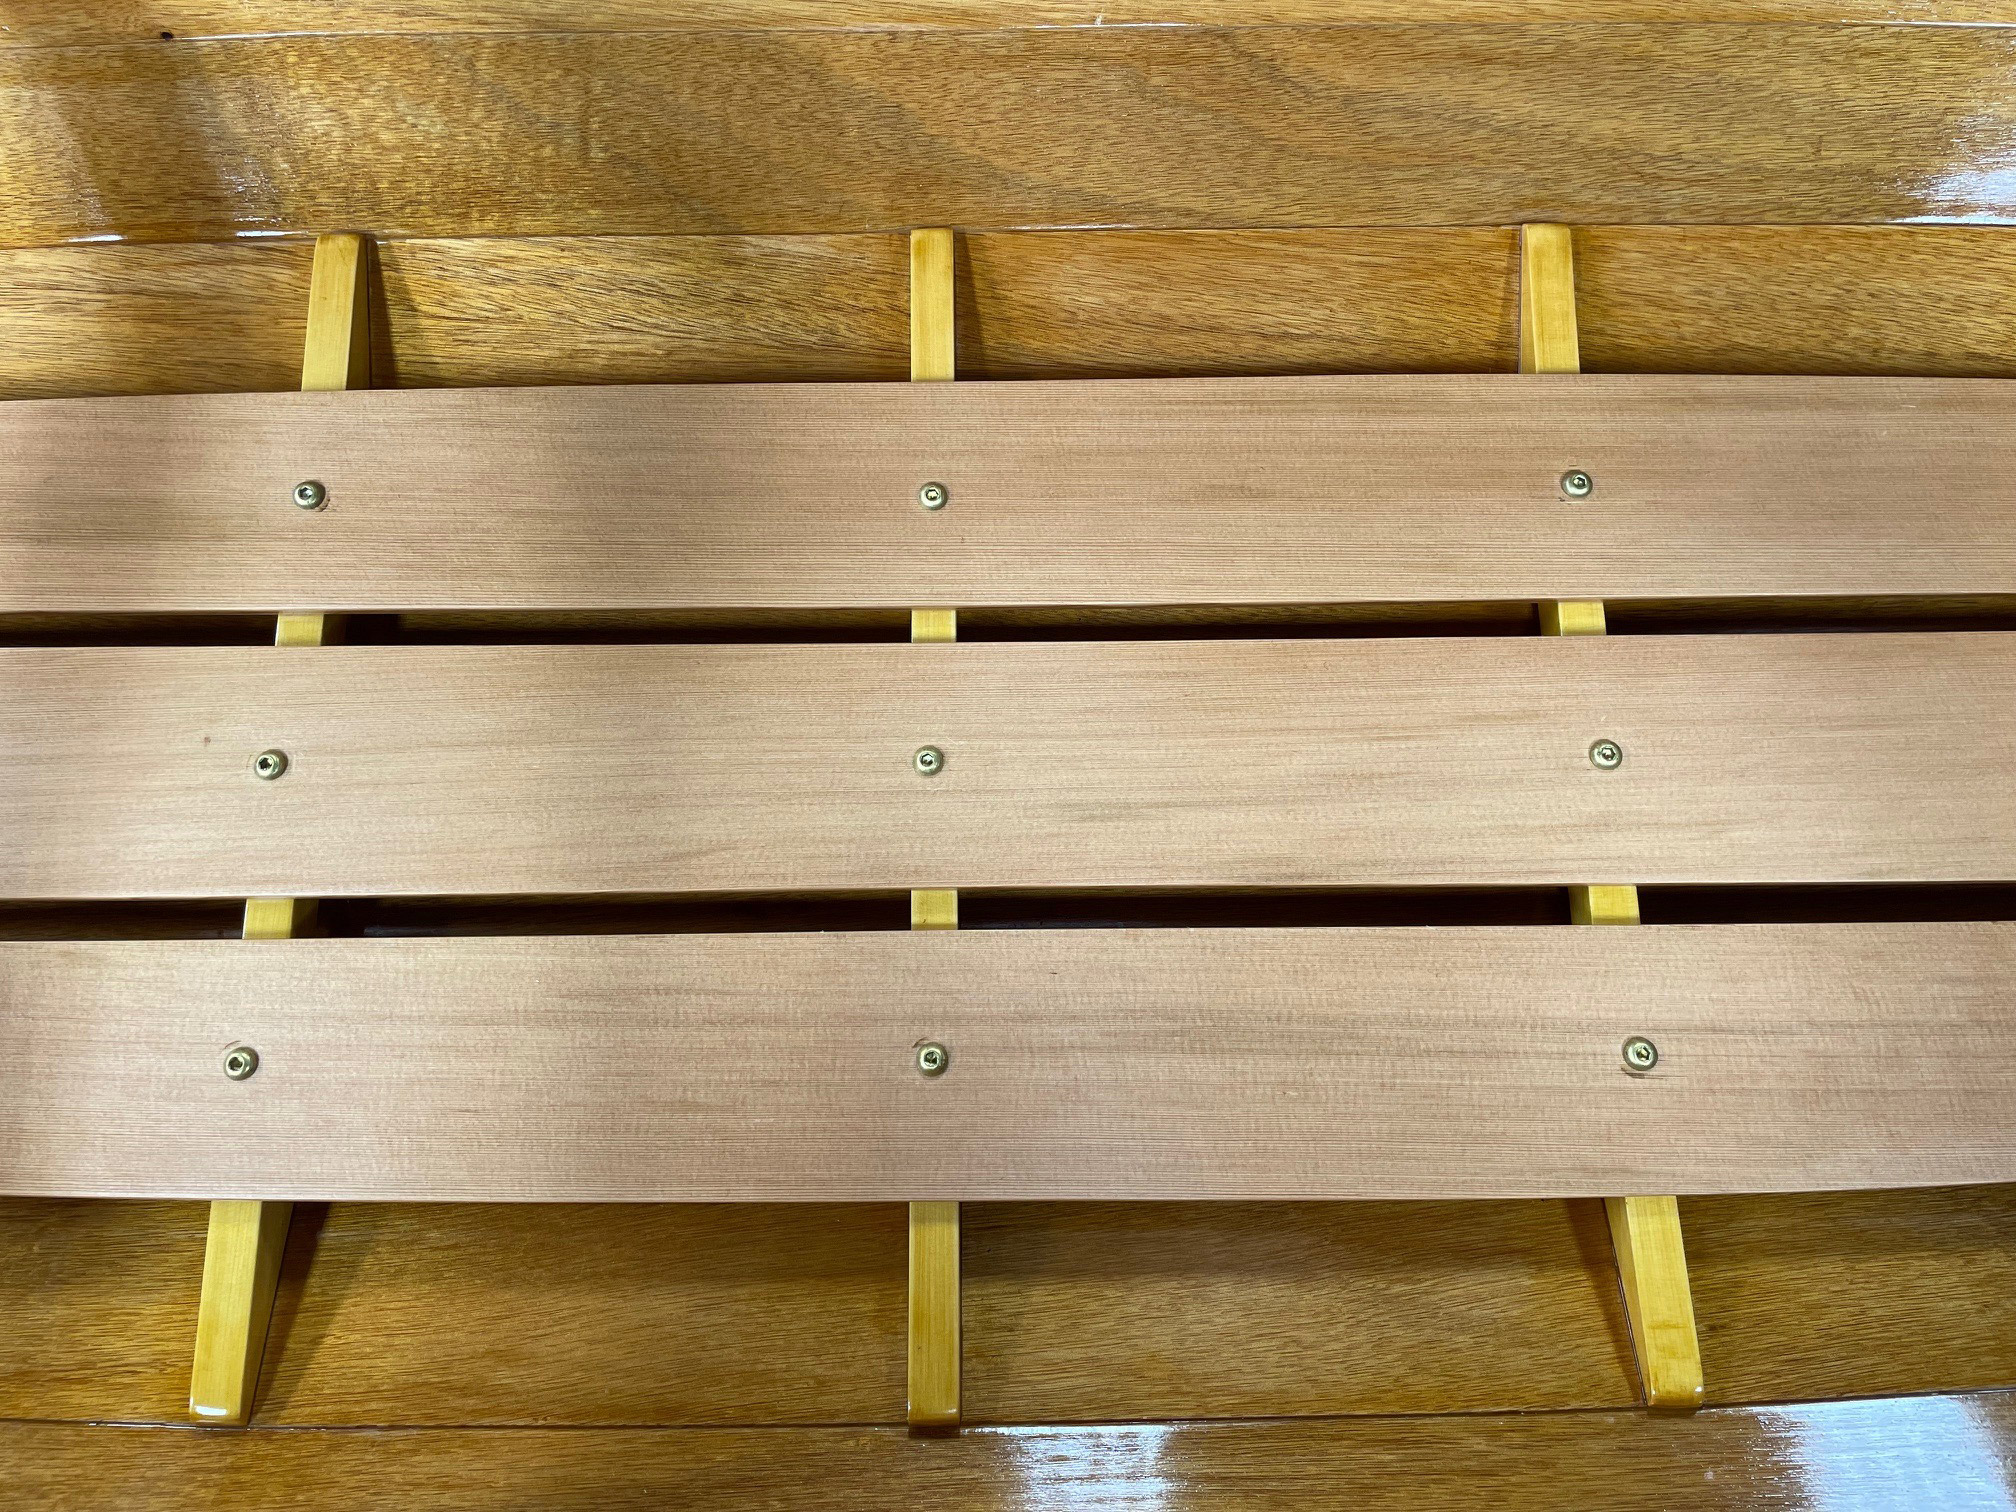
Floorboards can be secured with a few inserts to keep them in place or with inserts at every floor timber to have the floorboards strengthen the hull.
Locating a source for a suitable machine screw to secure the floors took some searching. For my first attempts I used large-head steel furniture bolts. These had nice broad low-profile heads, but they quickly corroded and left deep stains in the floorboards. I have since switched to brass button-head hex-drive screws, which hold up much better and have a more traditional appearance (assuming one doesn’t look too closely).
The result is floorboards that are solidly secured but that can be removed in a jiffy to clean out the bilge or carry out other maintenance. It’s a great relief to be able to remove them as often as necessary without the worry of stripping out the threads from wood screws.![]()
Walter Gotham operates Chadwick Pond Boats, a small shop in Haverhill, Massachusetts, specializing in lapstrake plywood small craft.
Threaded inserts (EZ LOK or similar) can be readily found from most hardware suppliers or online. They are available in stainless steel as well as brass.
The brass button-head hex-drive screws shown here are available from McMaster-Carr.
Editor’s Notes
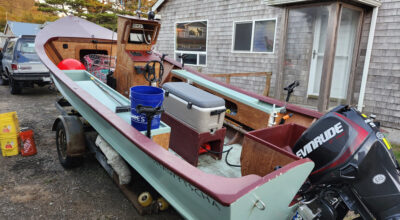
After I installed floor timbers in my secondhand Piccolo lapstrake canoe I began to mull over ways to fasten the floorboards I’d made to them. I had secured floorboards in a different canoe with screws, an unsatisfactory method, and I wasn’t drawn to the labor required for making toggles. When I saw Walter’s method it seemed like the obvious choice. I saw that brass inserts are available online and at the big-box hardware stores, but I bought a set at my local hardware store. The inserts were brass and the furniture connector bolts were, as I later found out, brass-plated steel.
Before installing the inserts, practice on scraps of wood that are the same as the floors to ensure you can drive them in without damaging the wood. My tests on mahogany went smoothly; driving inserts into Douglas fir required developing measures to avoid splintering. The inserts have slots that make them removable after you do a few trial runs.
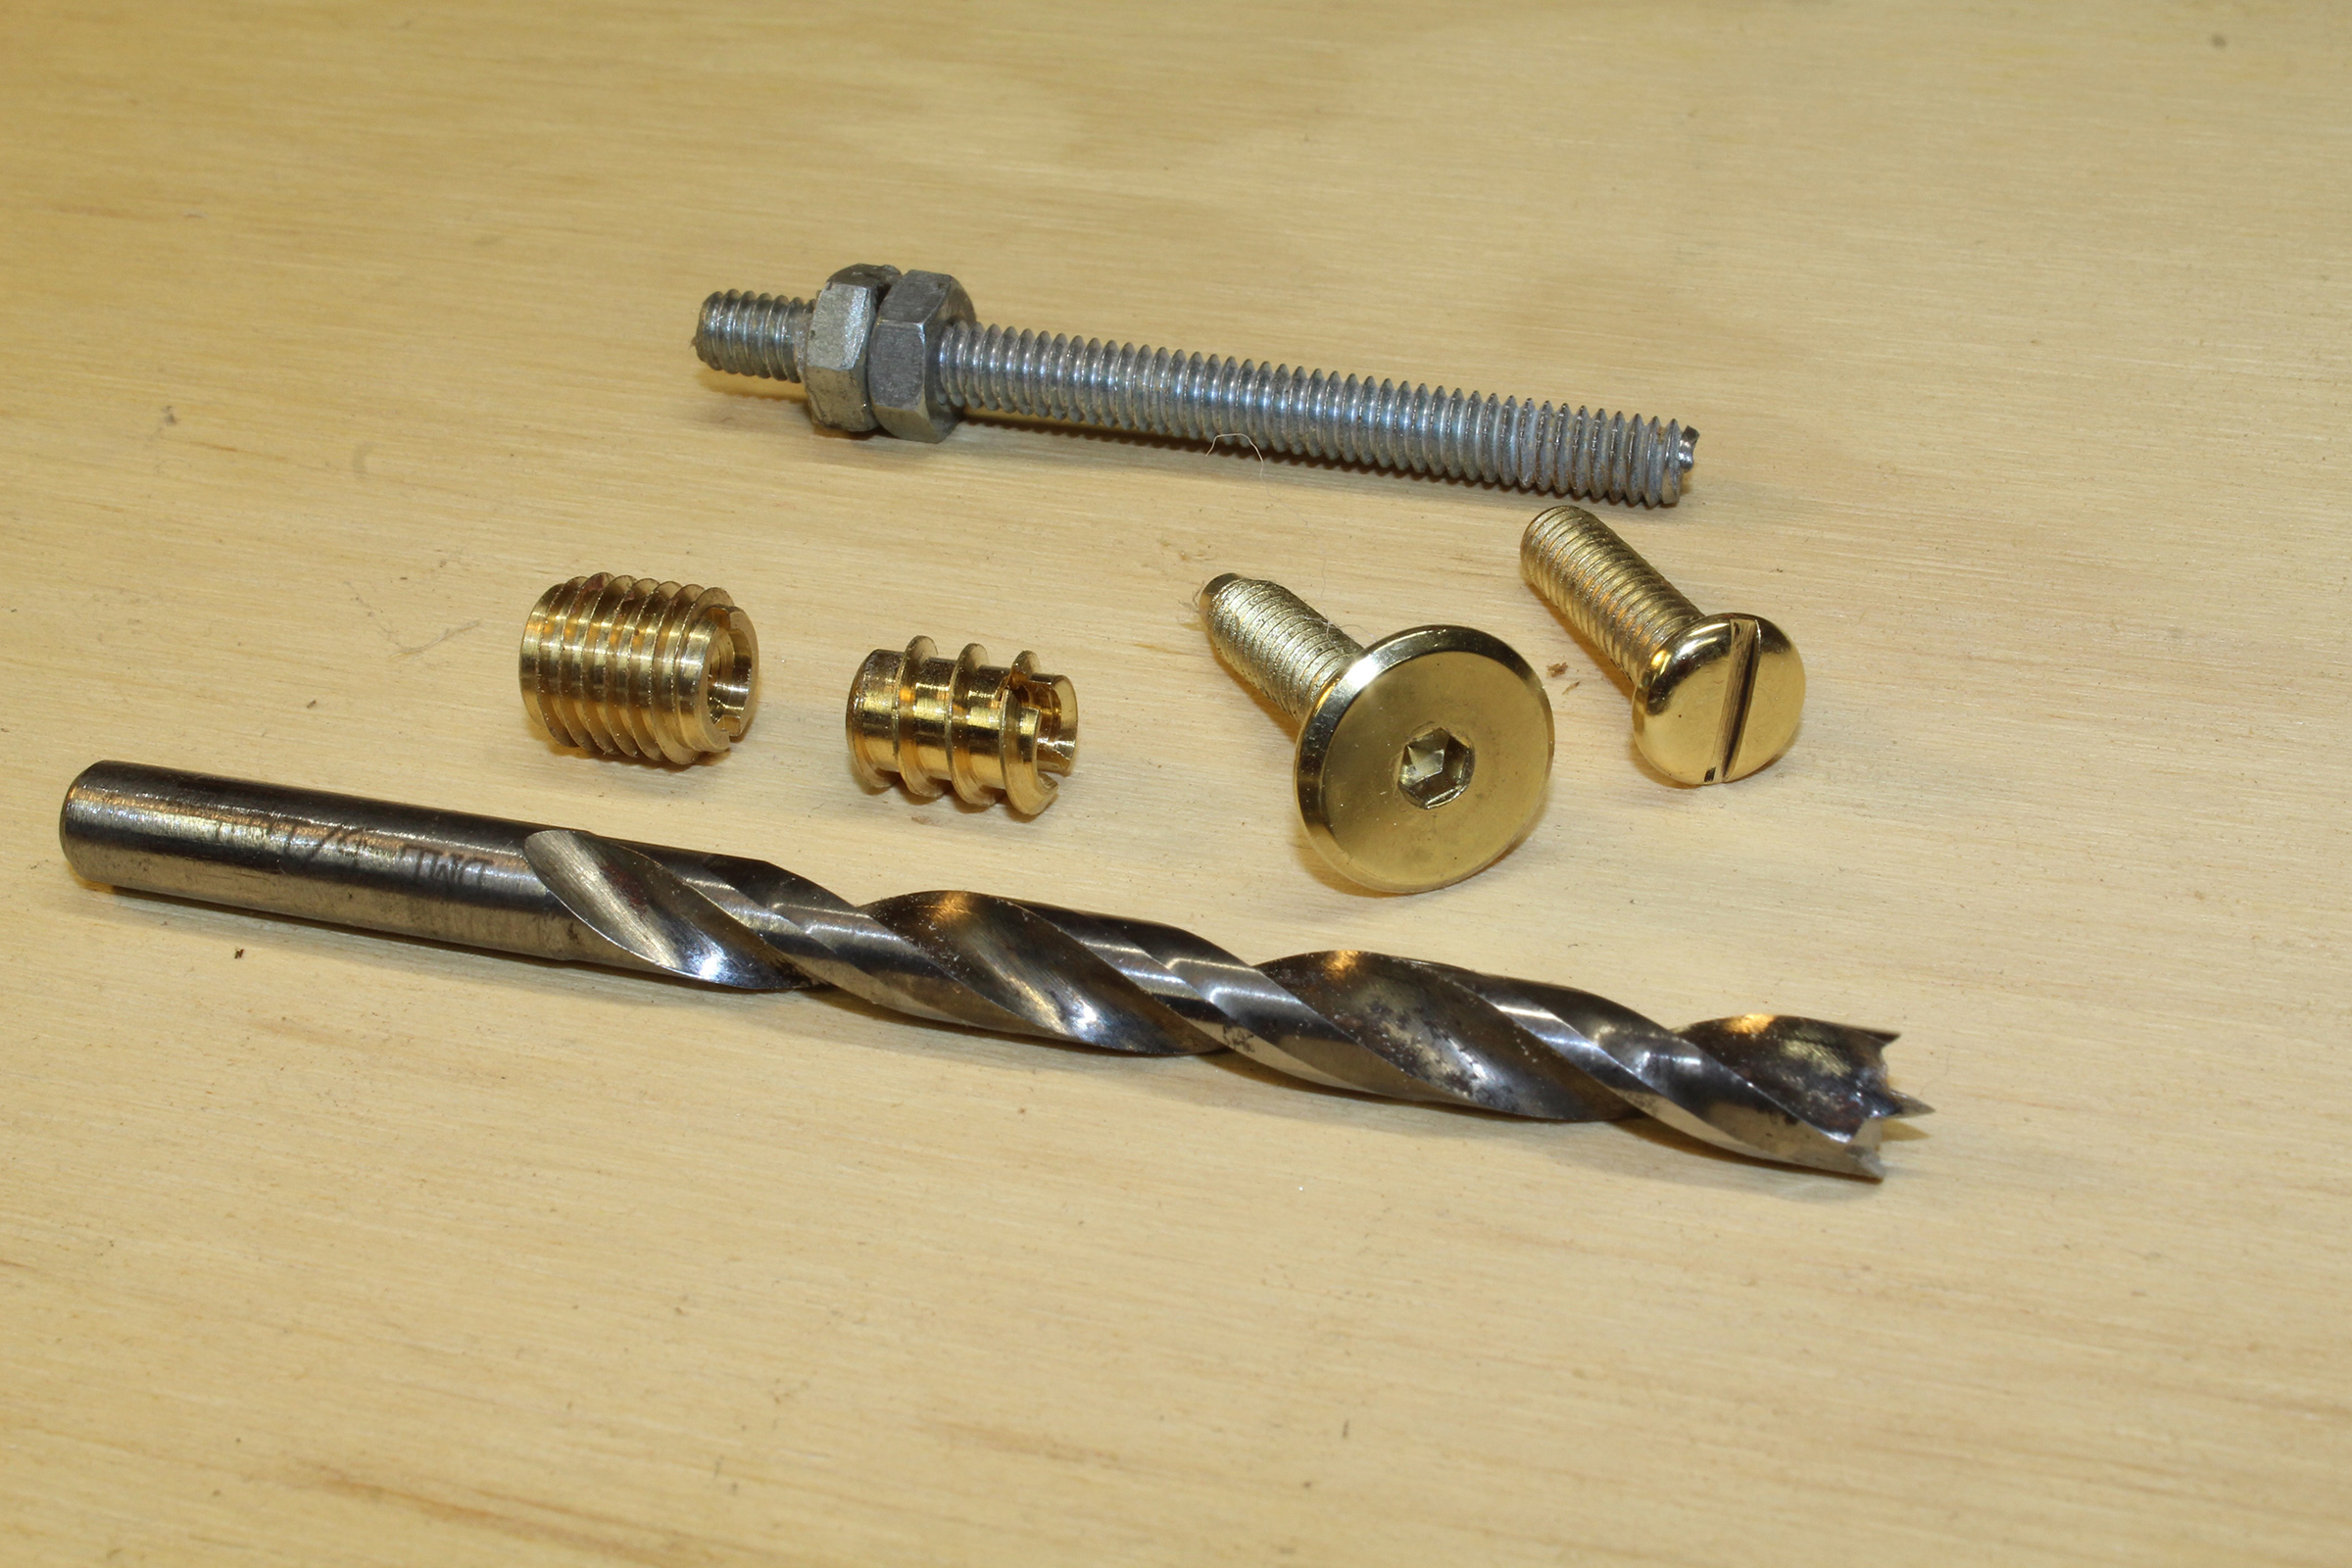 This and all following photographs by Christopher Cunningham
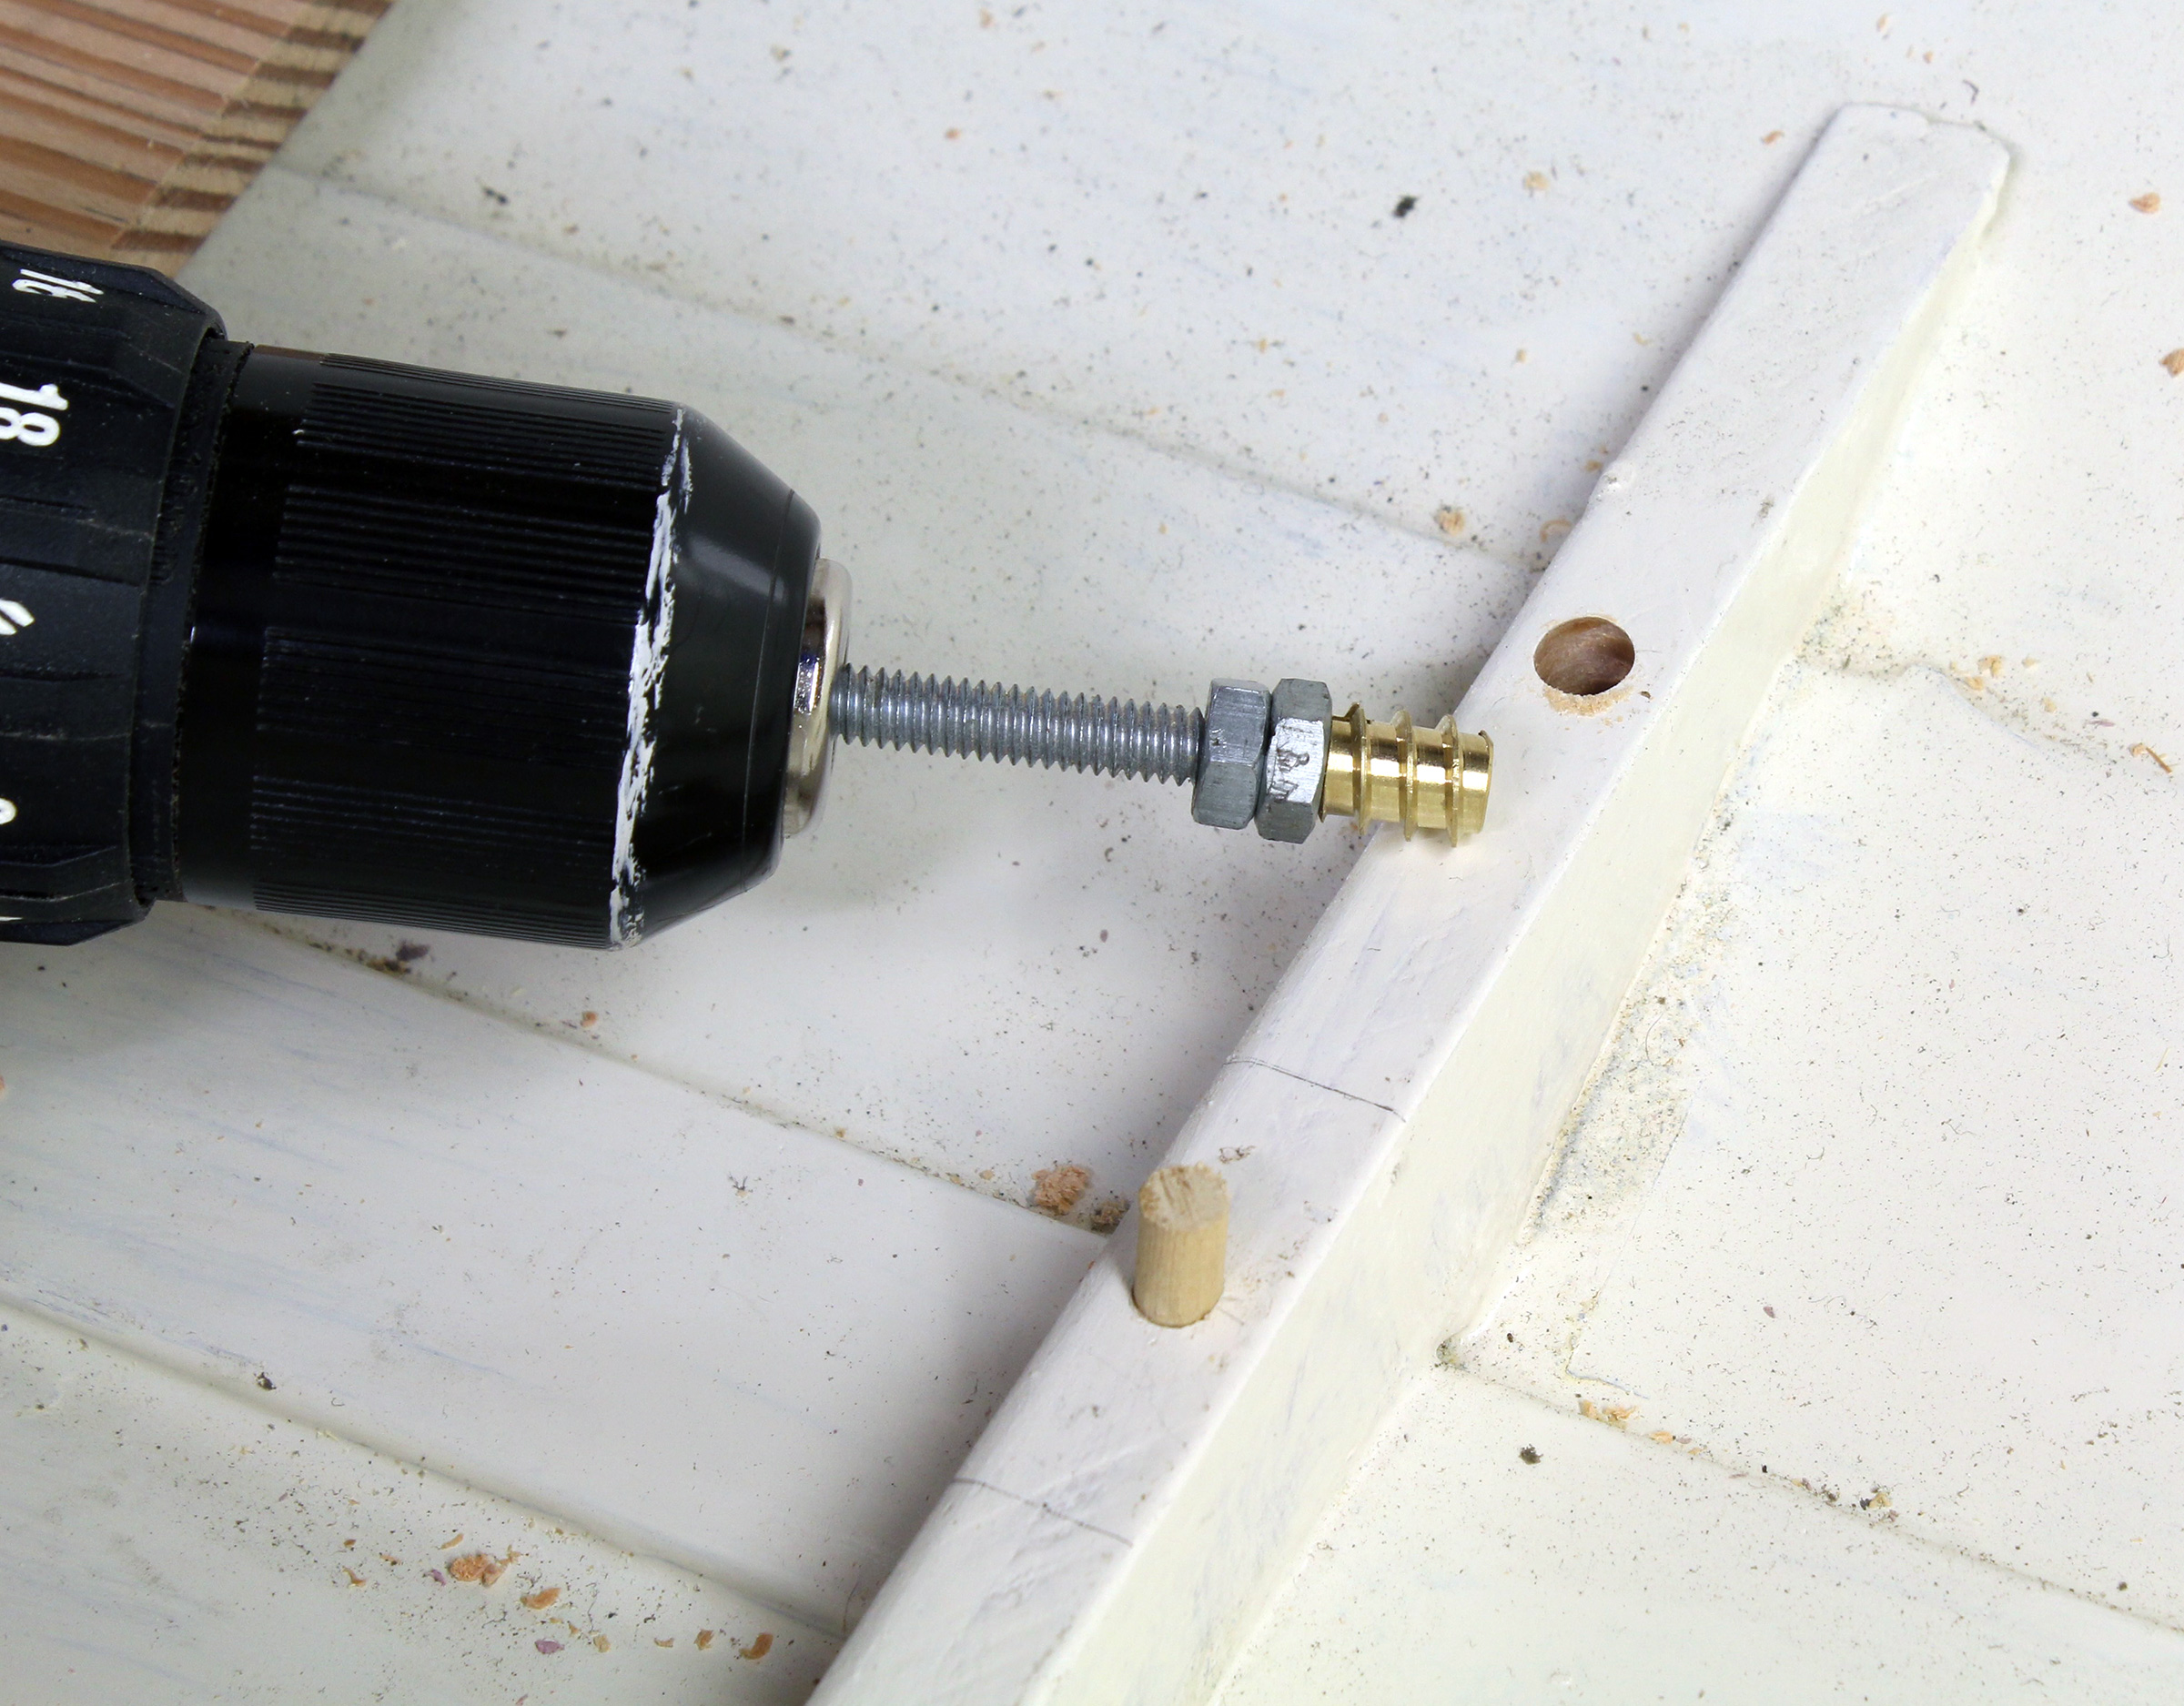
The tools for the job included, from front to back, a brad point drill bit, brass inserts and bolts, and an insertion tool made of two nuts locked on a bolt with its head sawn off. The inserts may have fine threads or coarse, like the ones I used. The furniture connector bolts with the large flat heads were brass-plated steel, vulnerable to corrosion, so I modified round-head brass bolts.
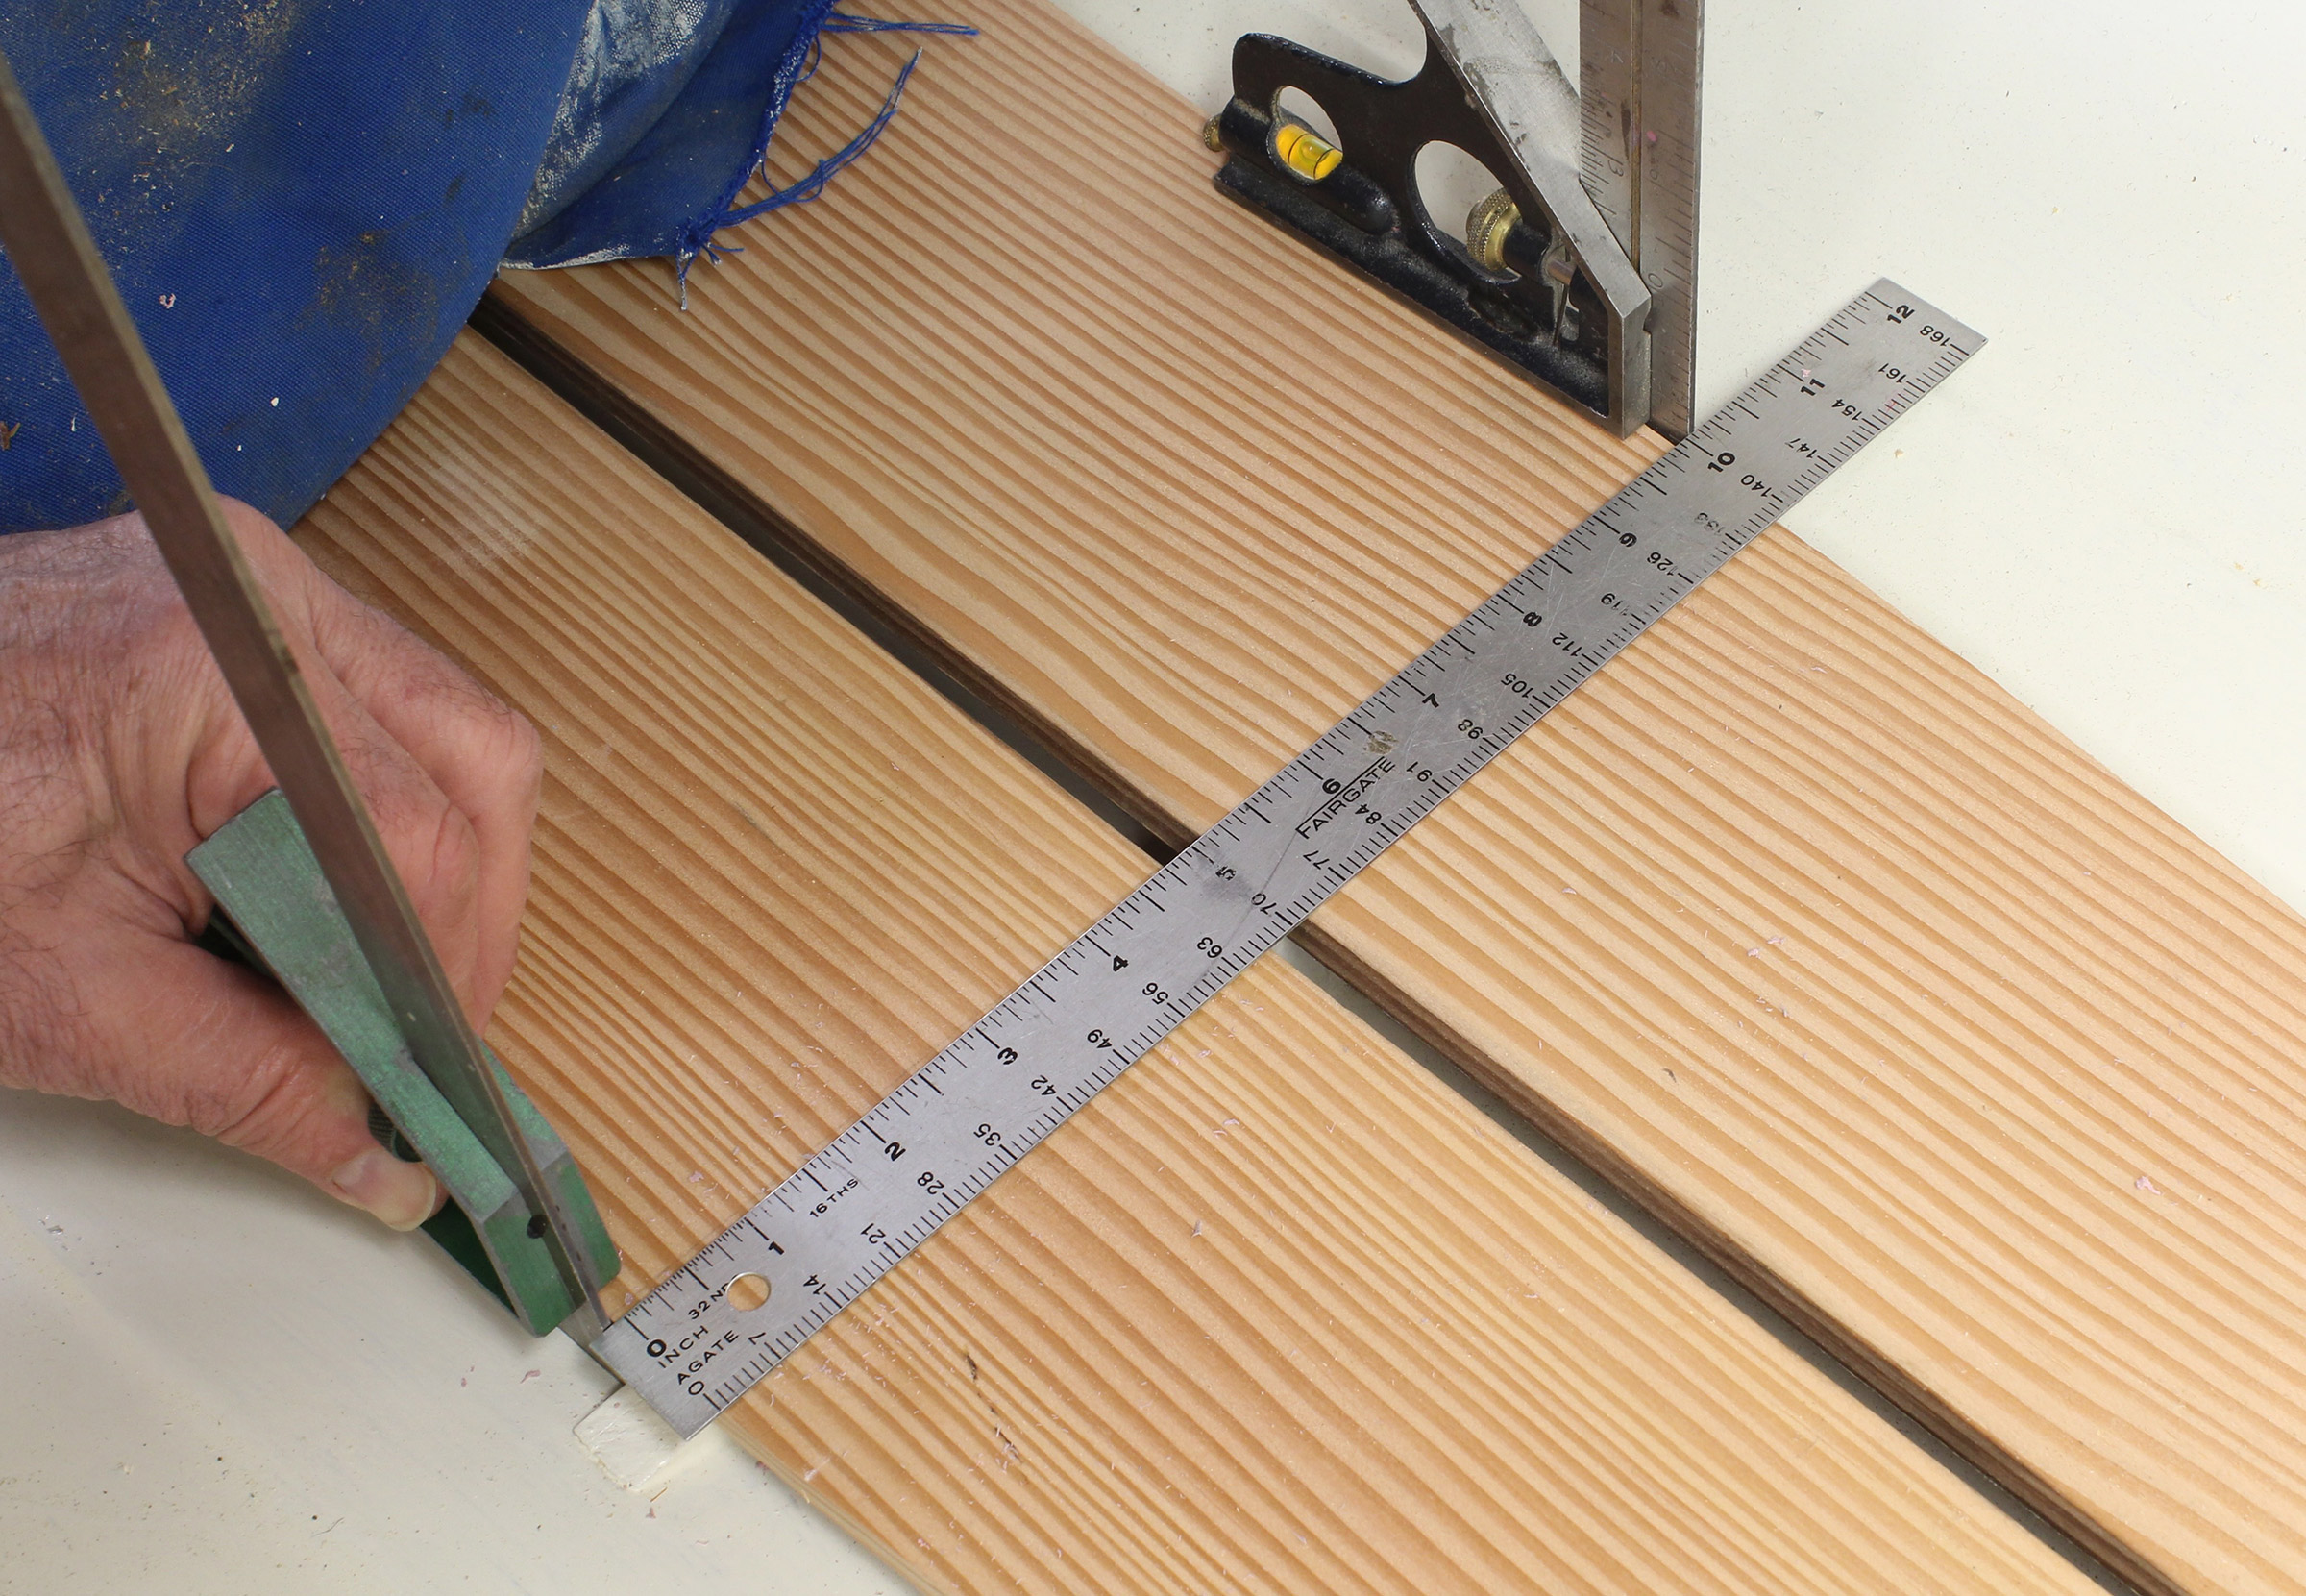
I set the floorboards in place on the floor timbers with a 1⁄4″ gap between them and weighted them down with sandbags. I set combination squares with the blades set to bump up against the side of the timber and used a ruler, set against the blades, to transfer the timber location to the top of the floorboards.
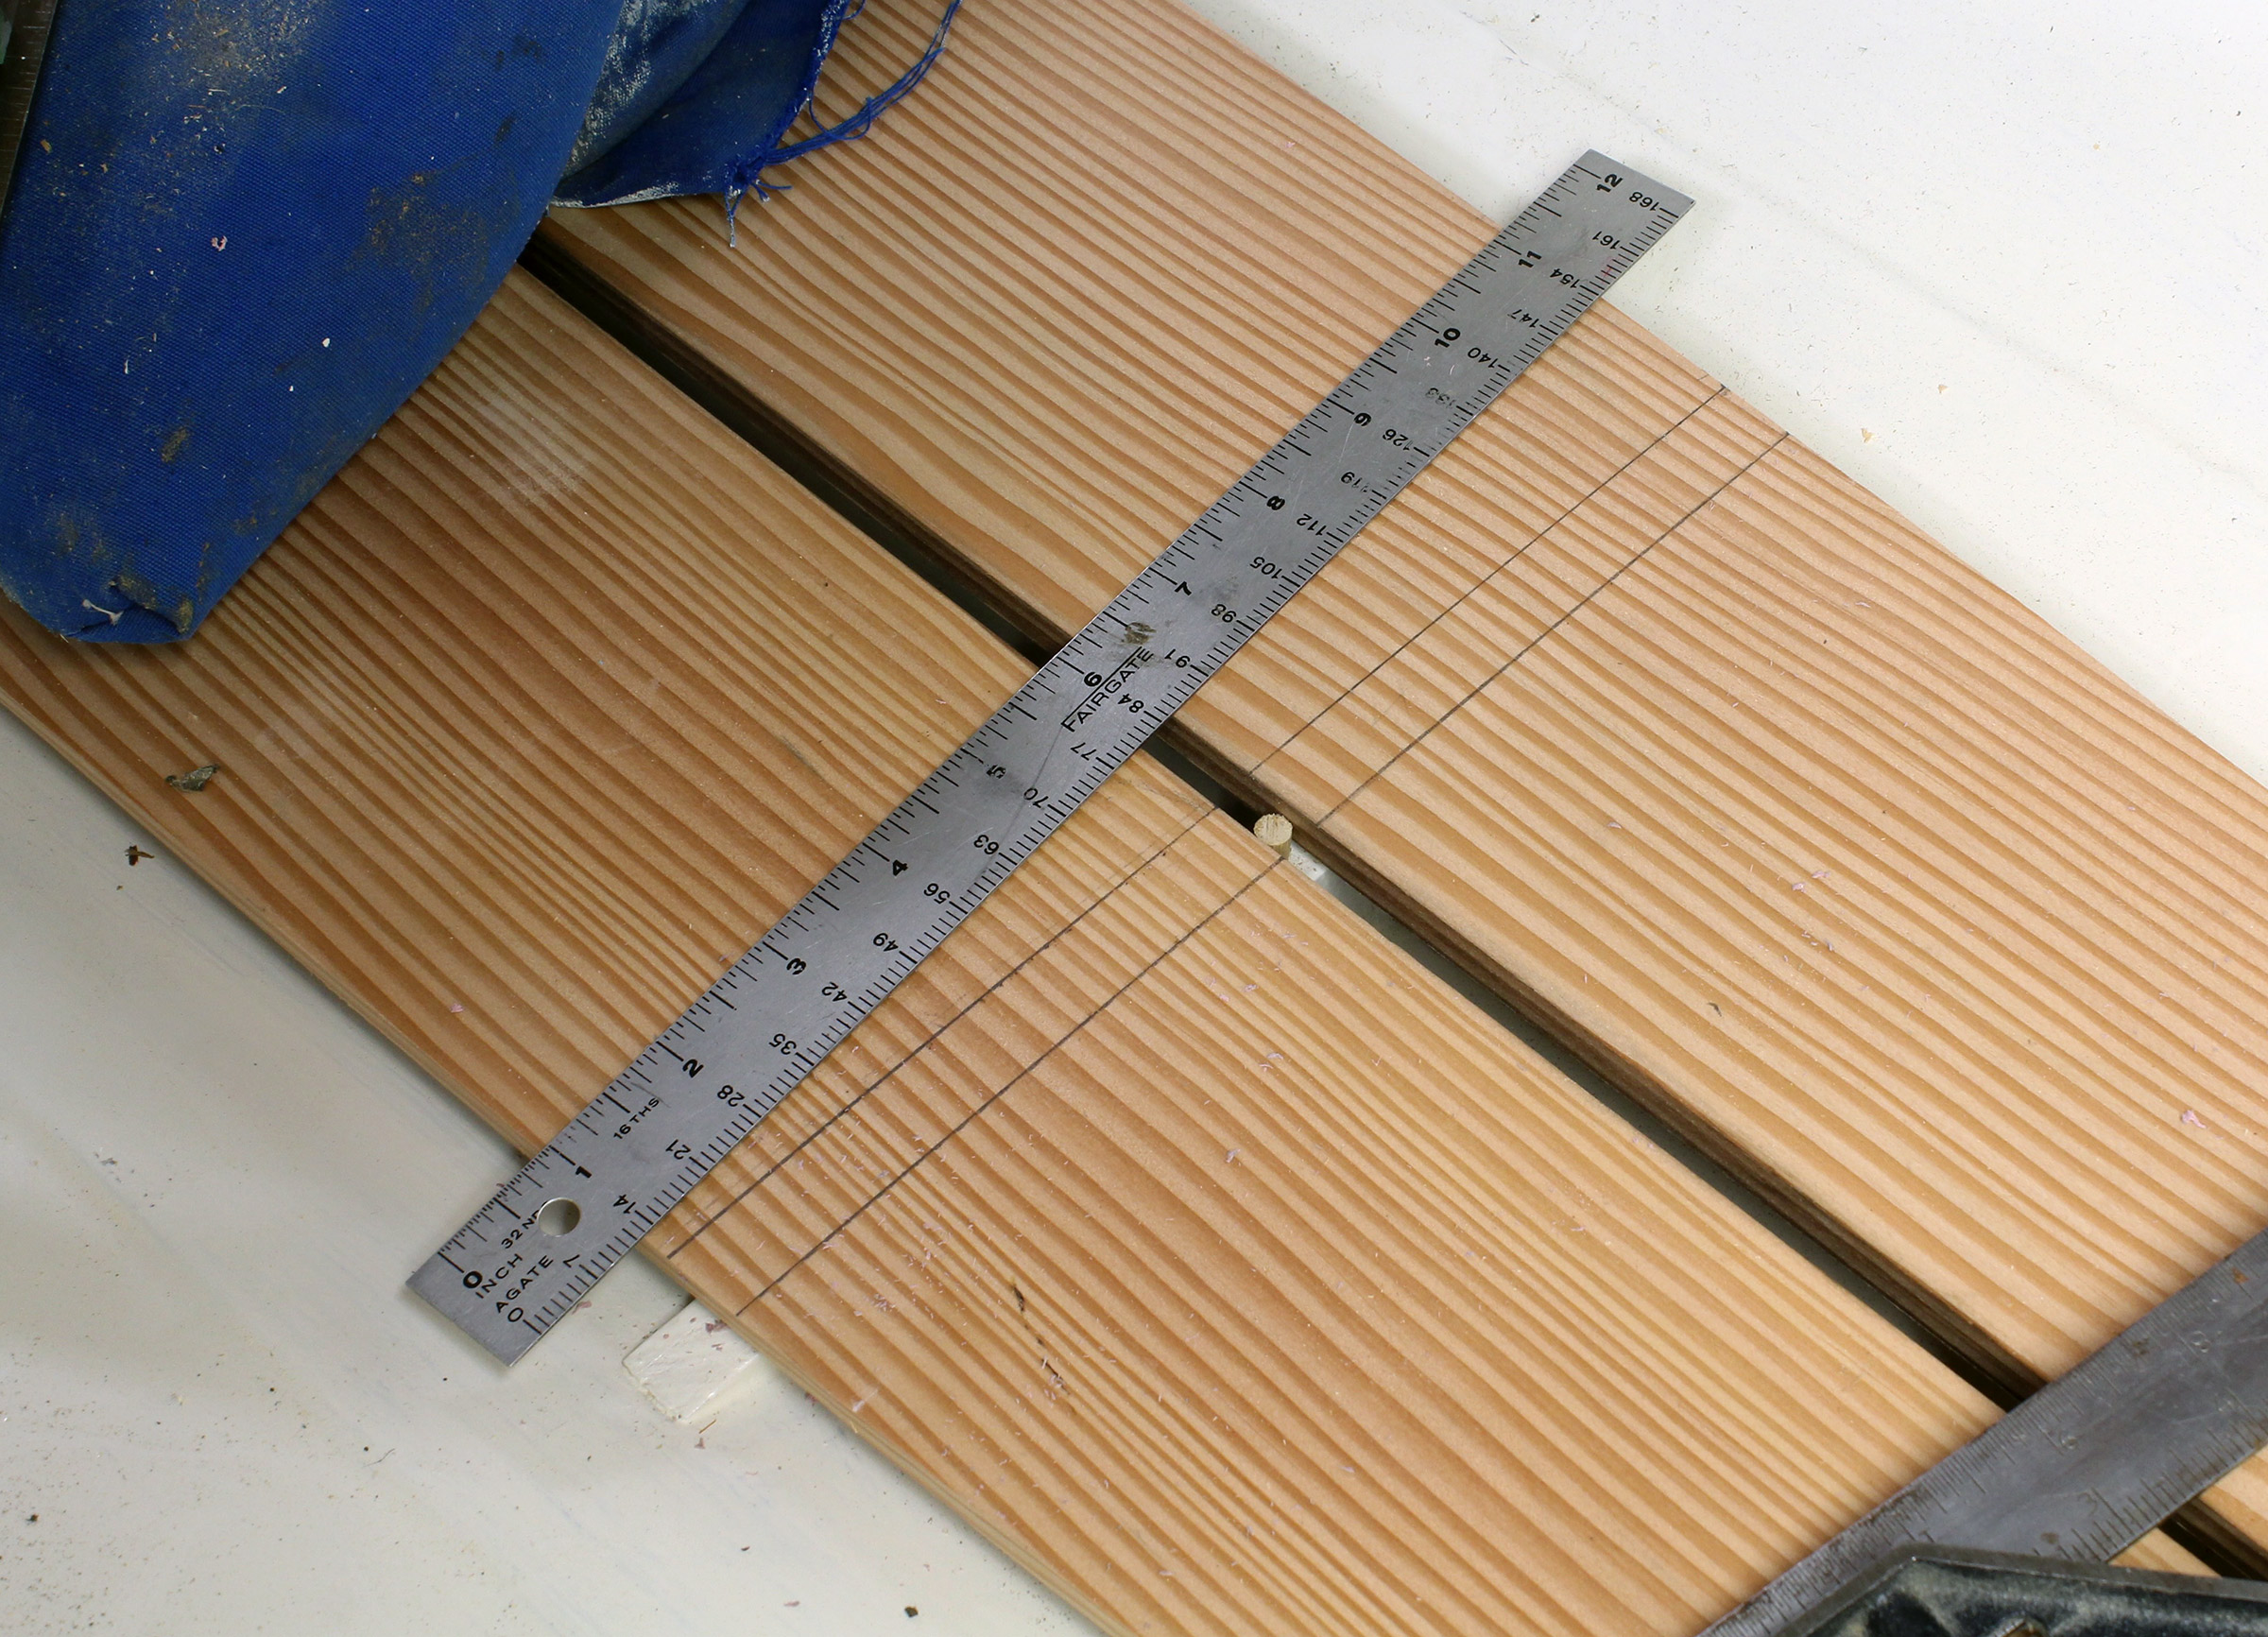
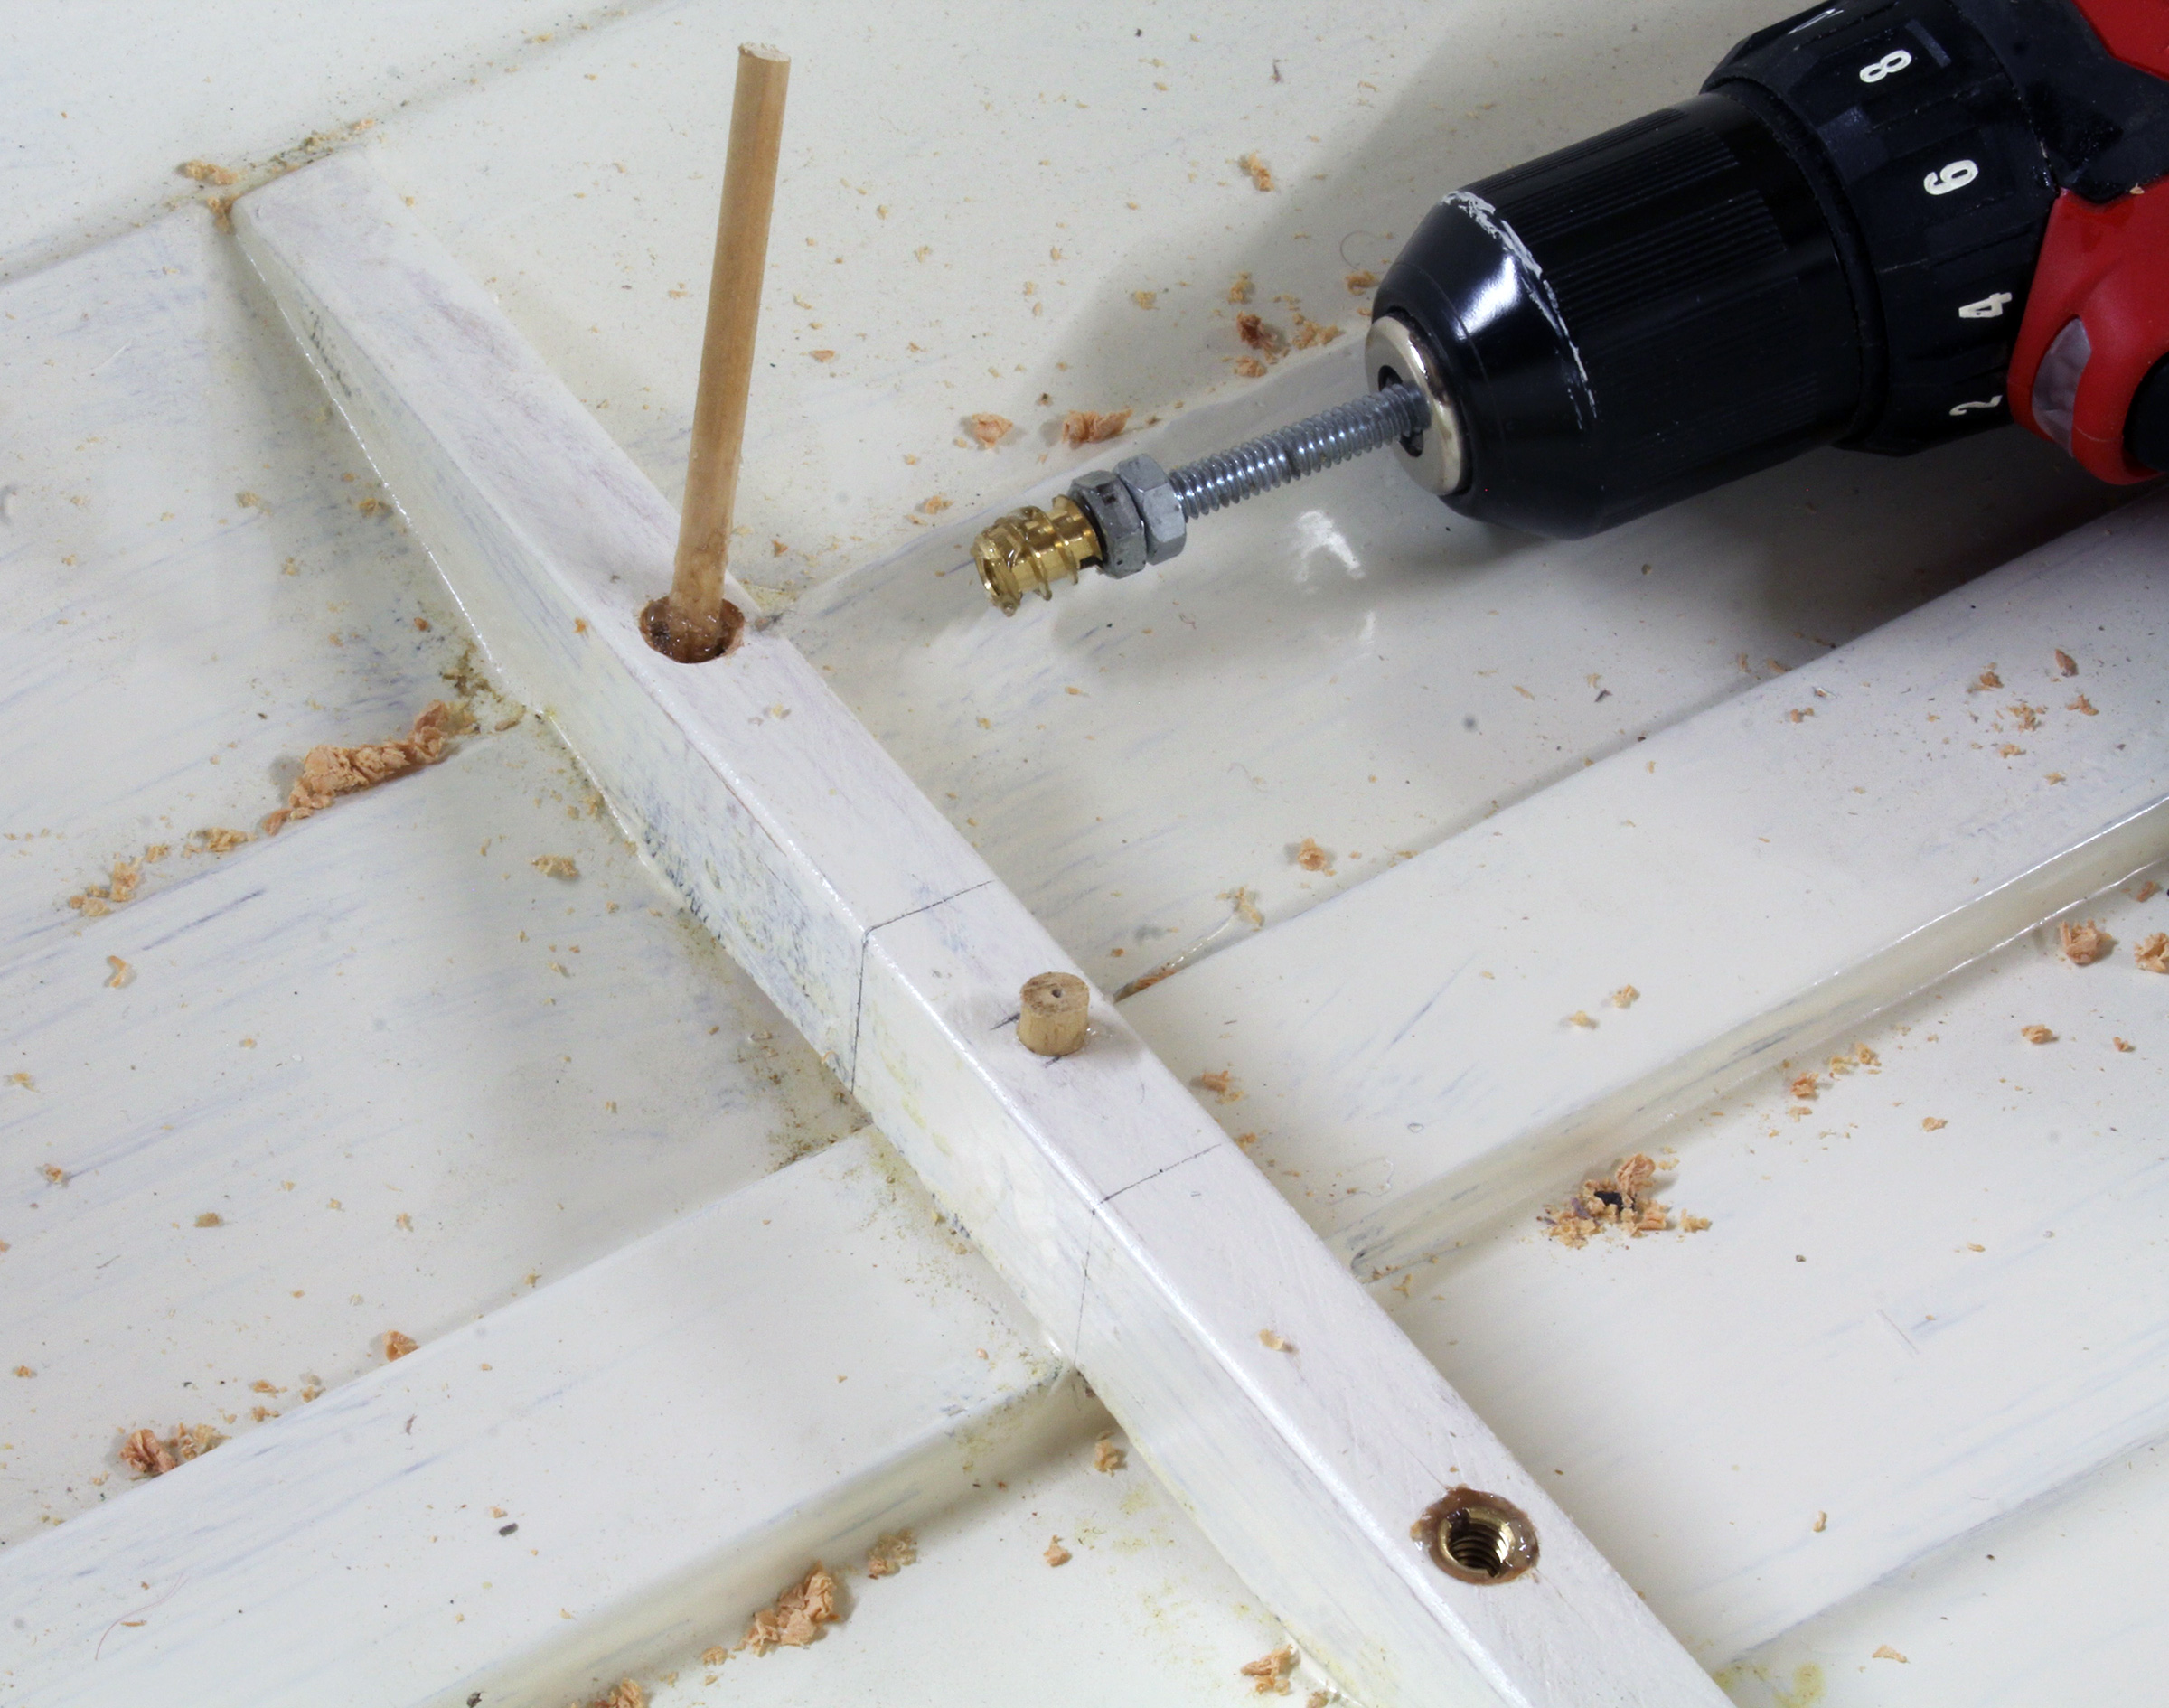
The lines transfer the location of the floor timber to the top of the floorboards. The 1⁄4″ space between the floorboards is narrow enough to keep pencils and pens from rolling through. I put a short 1⁄4″ dowel in the two floors where I’d install inserts, to hold the floorboards apart not just for drilling the inserts but also to make it easier to reposition the floorboards when they need to be removed for maintenance.
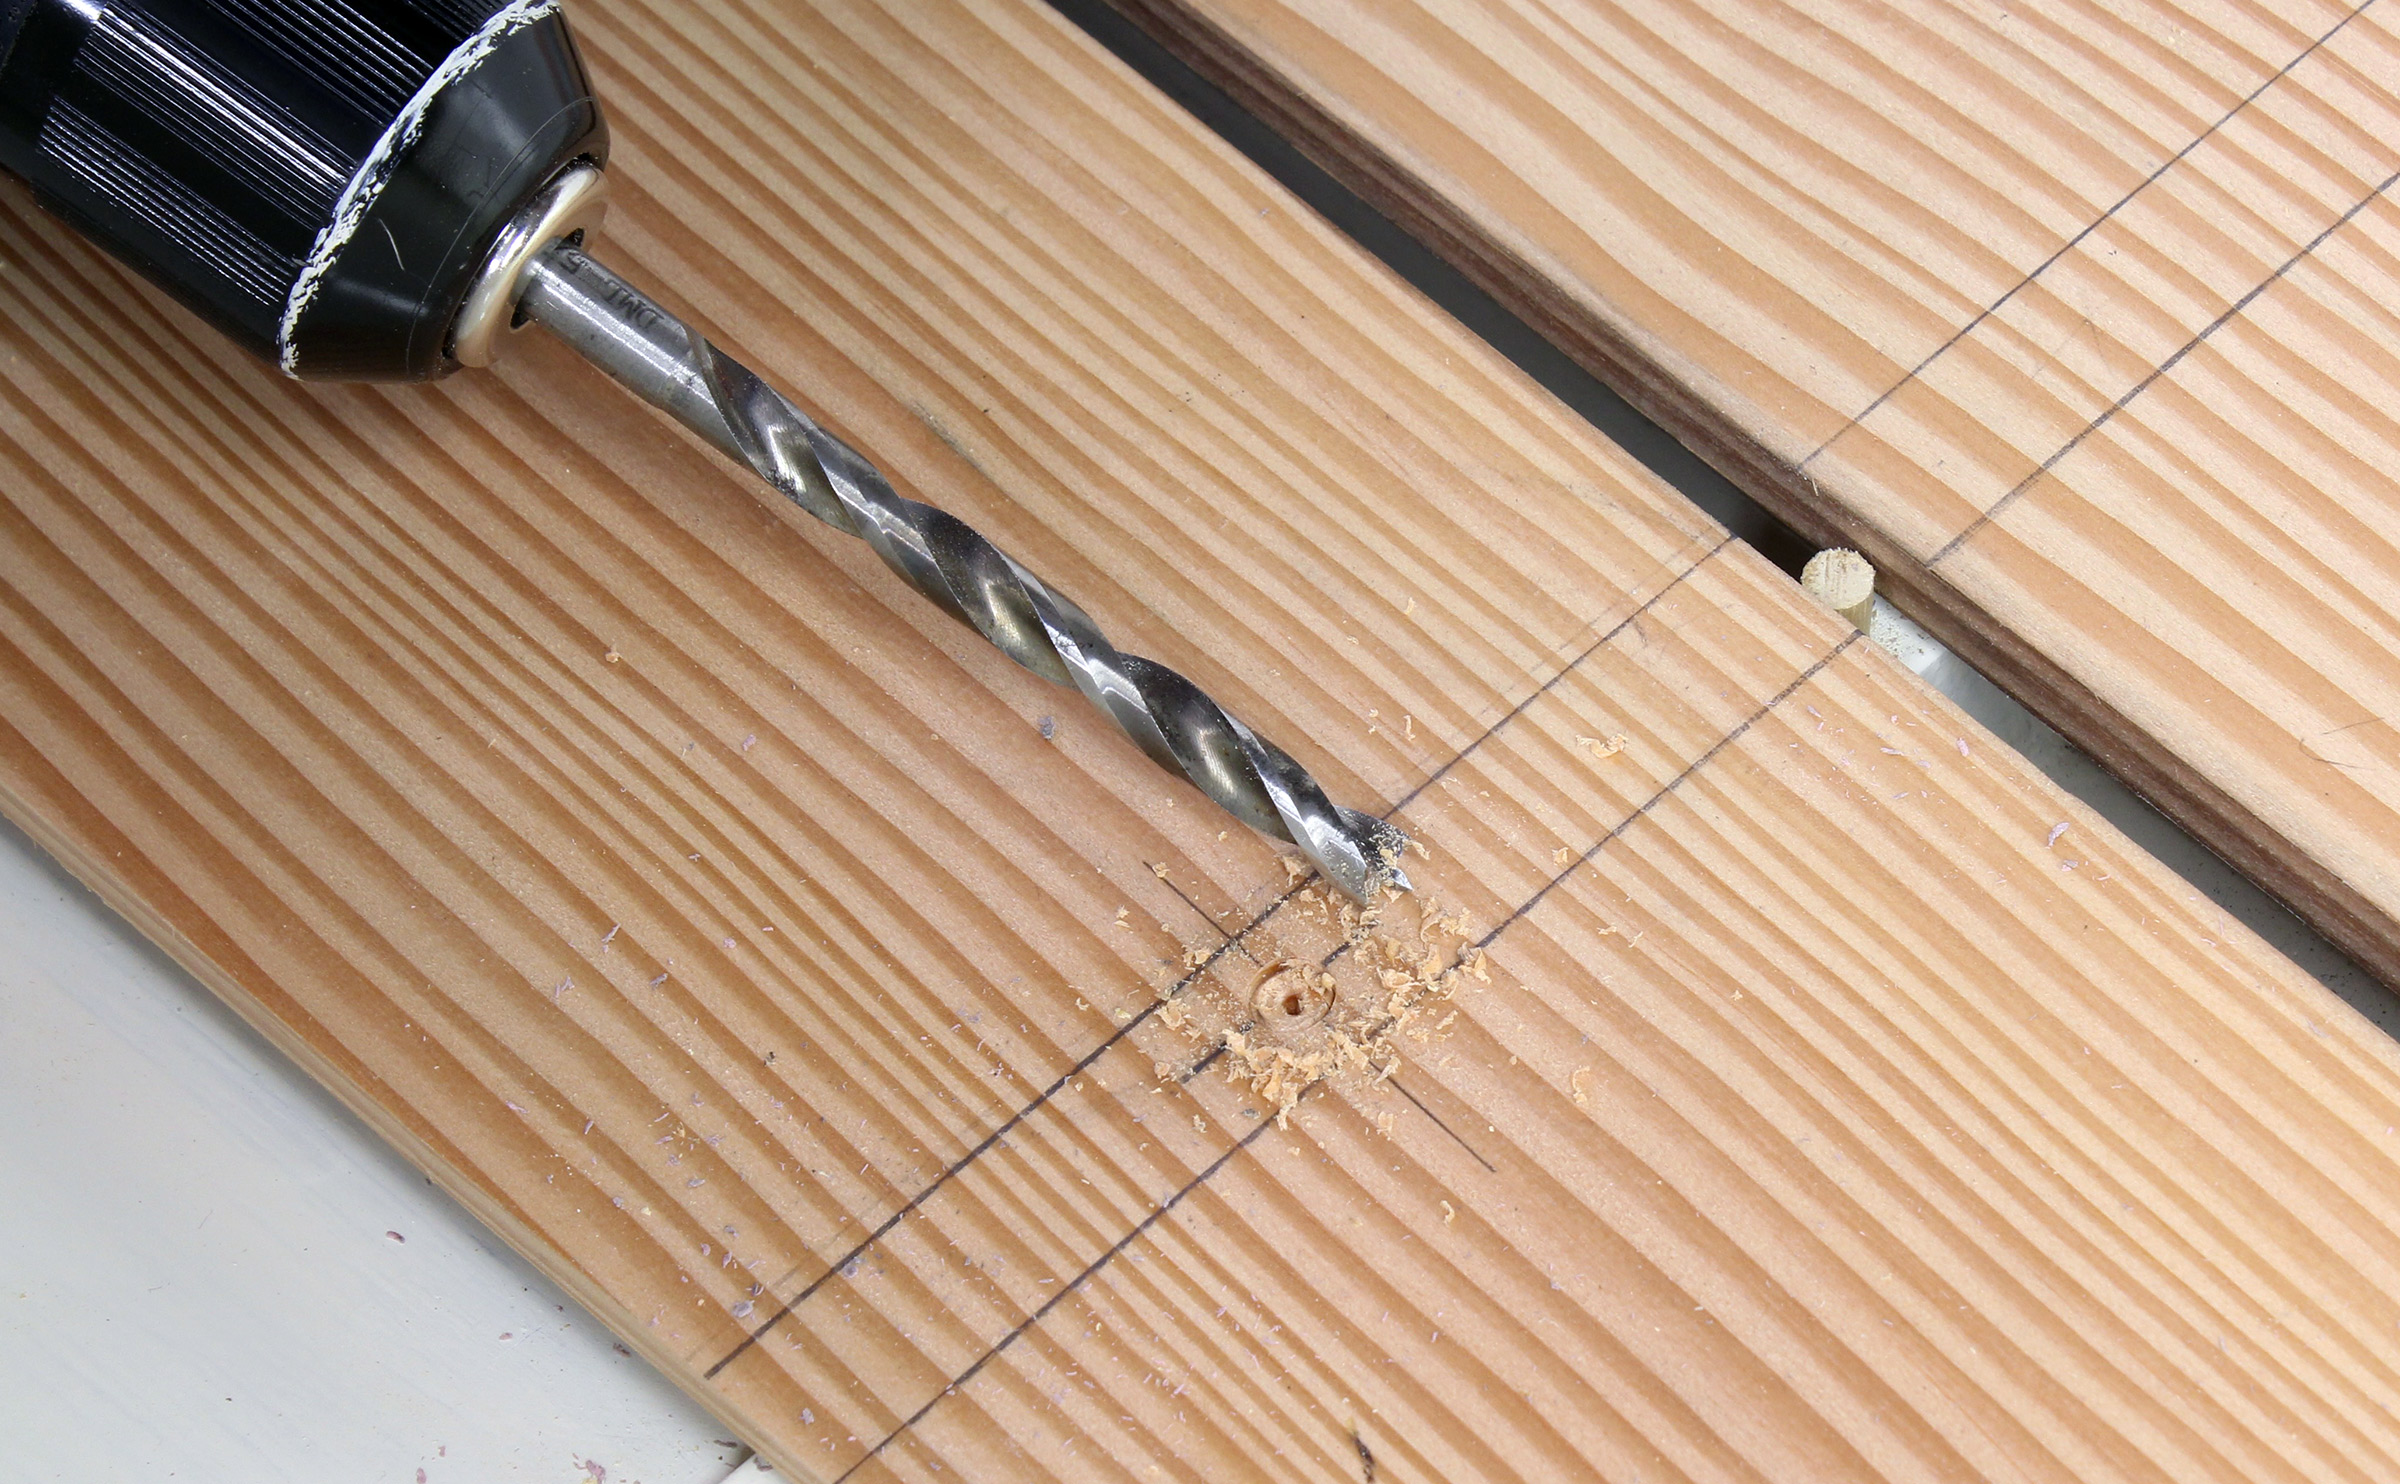
I marked the location of the insert at the midpoint of the outlined area of the floorboard. For this step, I drilled just the start of the hole. The inserts I bought require a hole drilled with a 5⁄16″ bit. I used a brad-point bit because its sharp point makes it easier to get the hole started in the right place. I would drill through the floorboard and into the floor timber at the same time. The hole in the floorboard is oversized for the 1⁄4″ machine screw that fits the insert, but the extra space will later make it easy to position the screw and get it threaded into the insert.
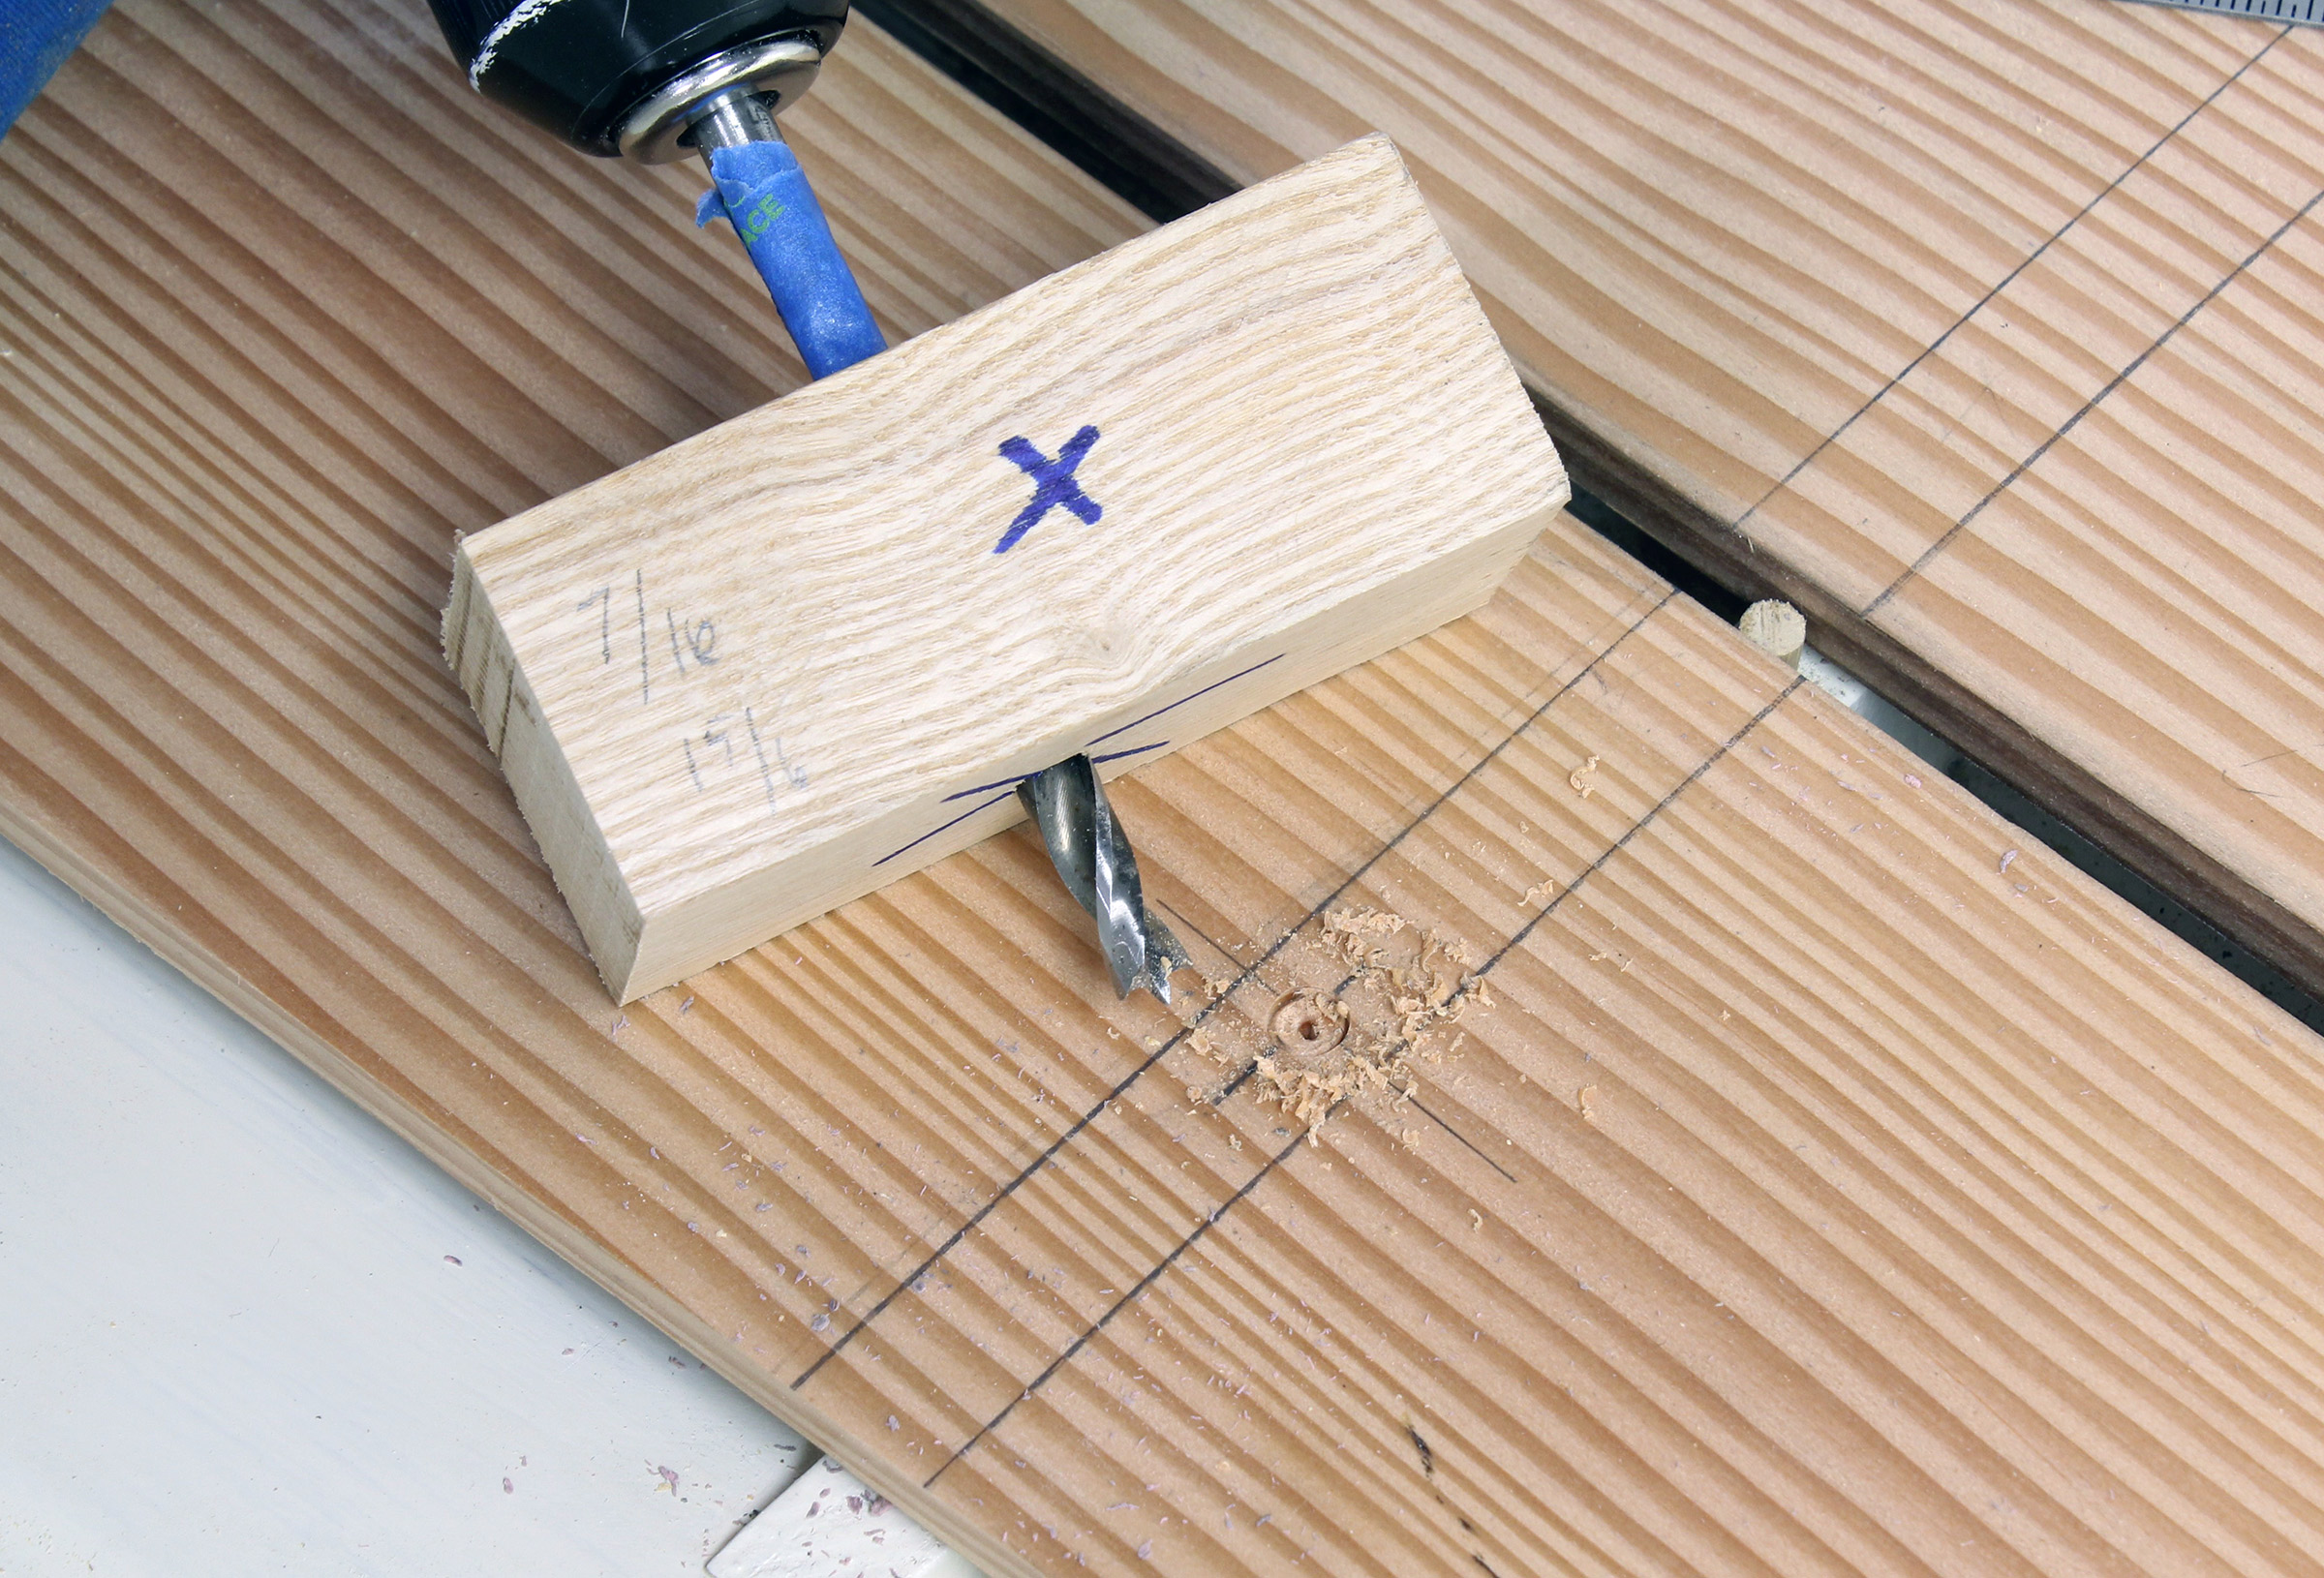
Keeping the bit anchored in the dimple, I slipped the block to the floorboard and held it firmly as I drilled through the floorboard and into the floor timber. When the tape hit the block, the correct depth had been reached.
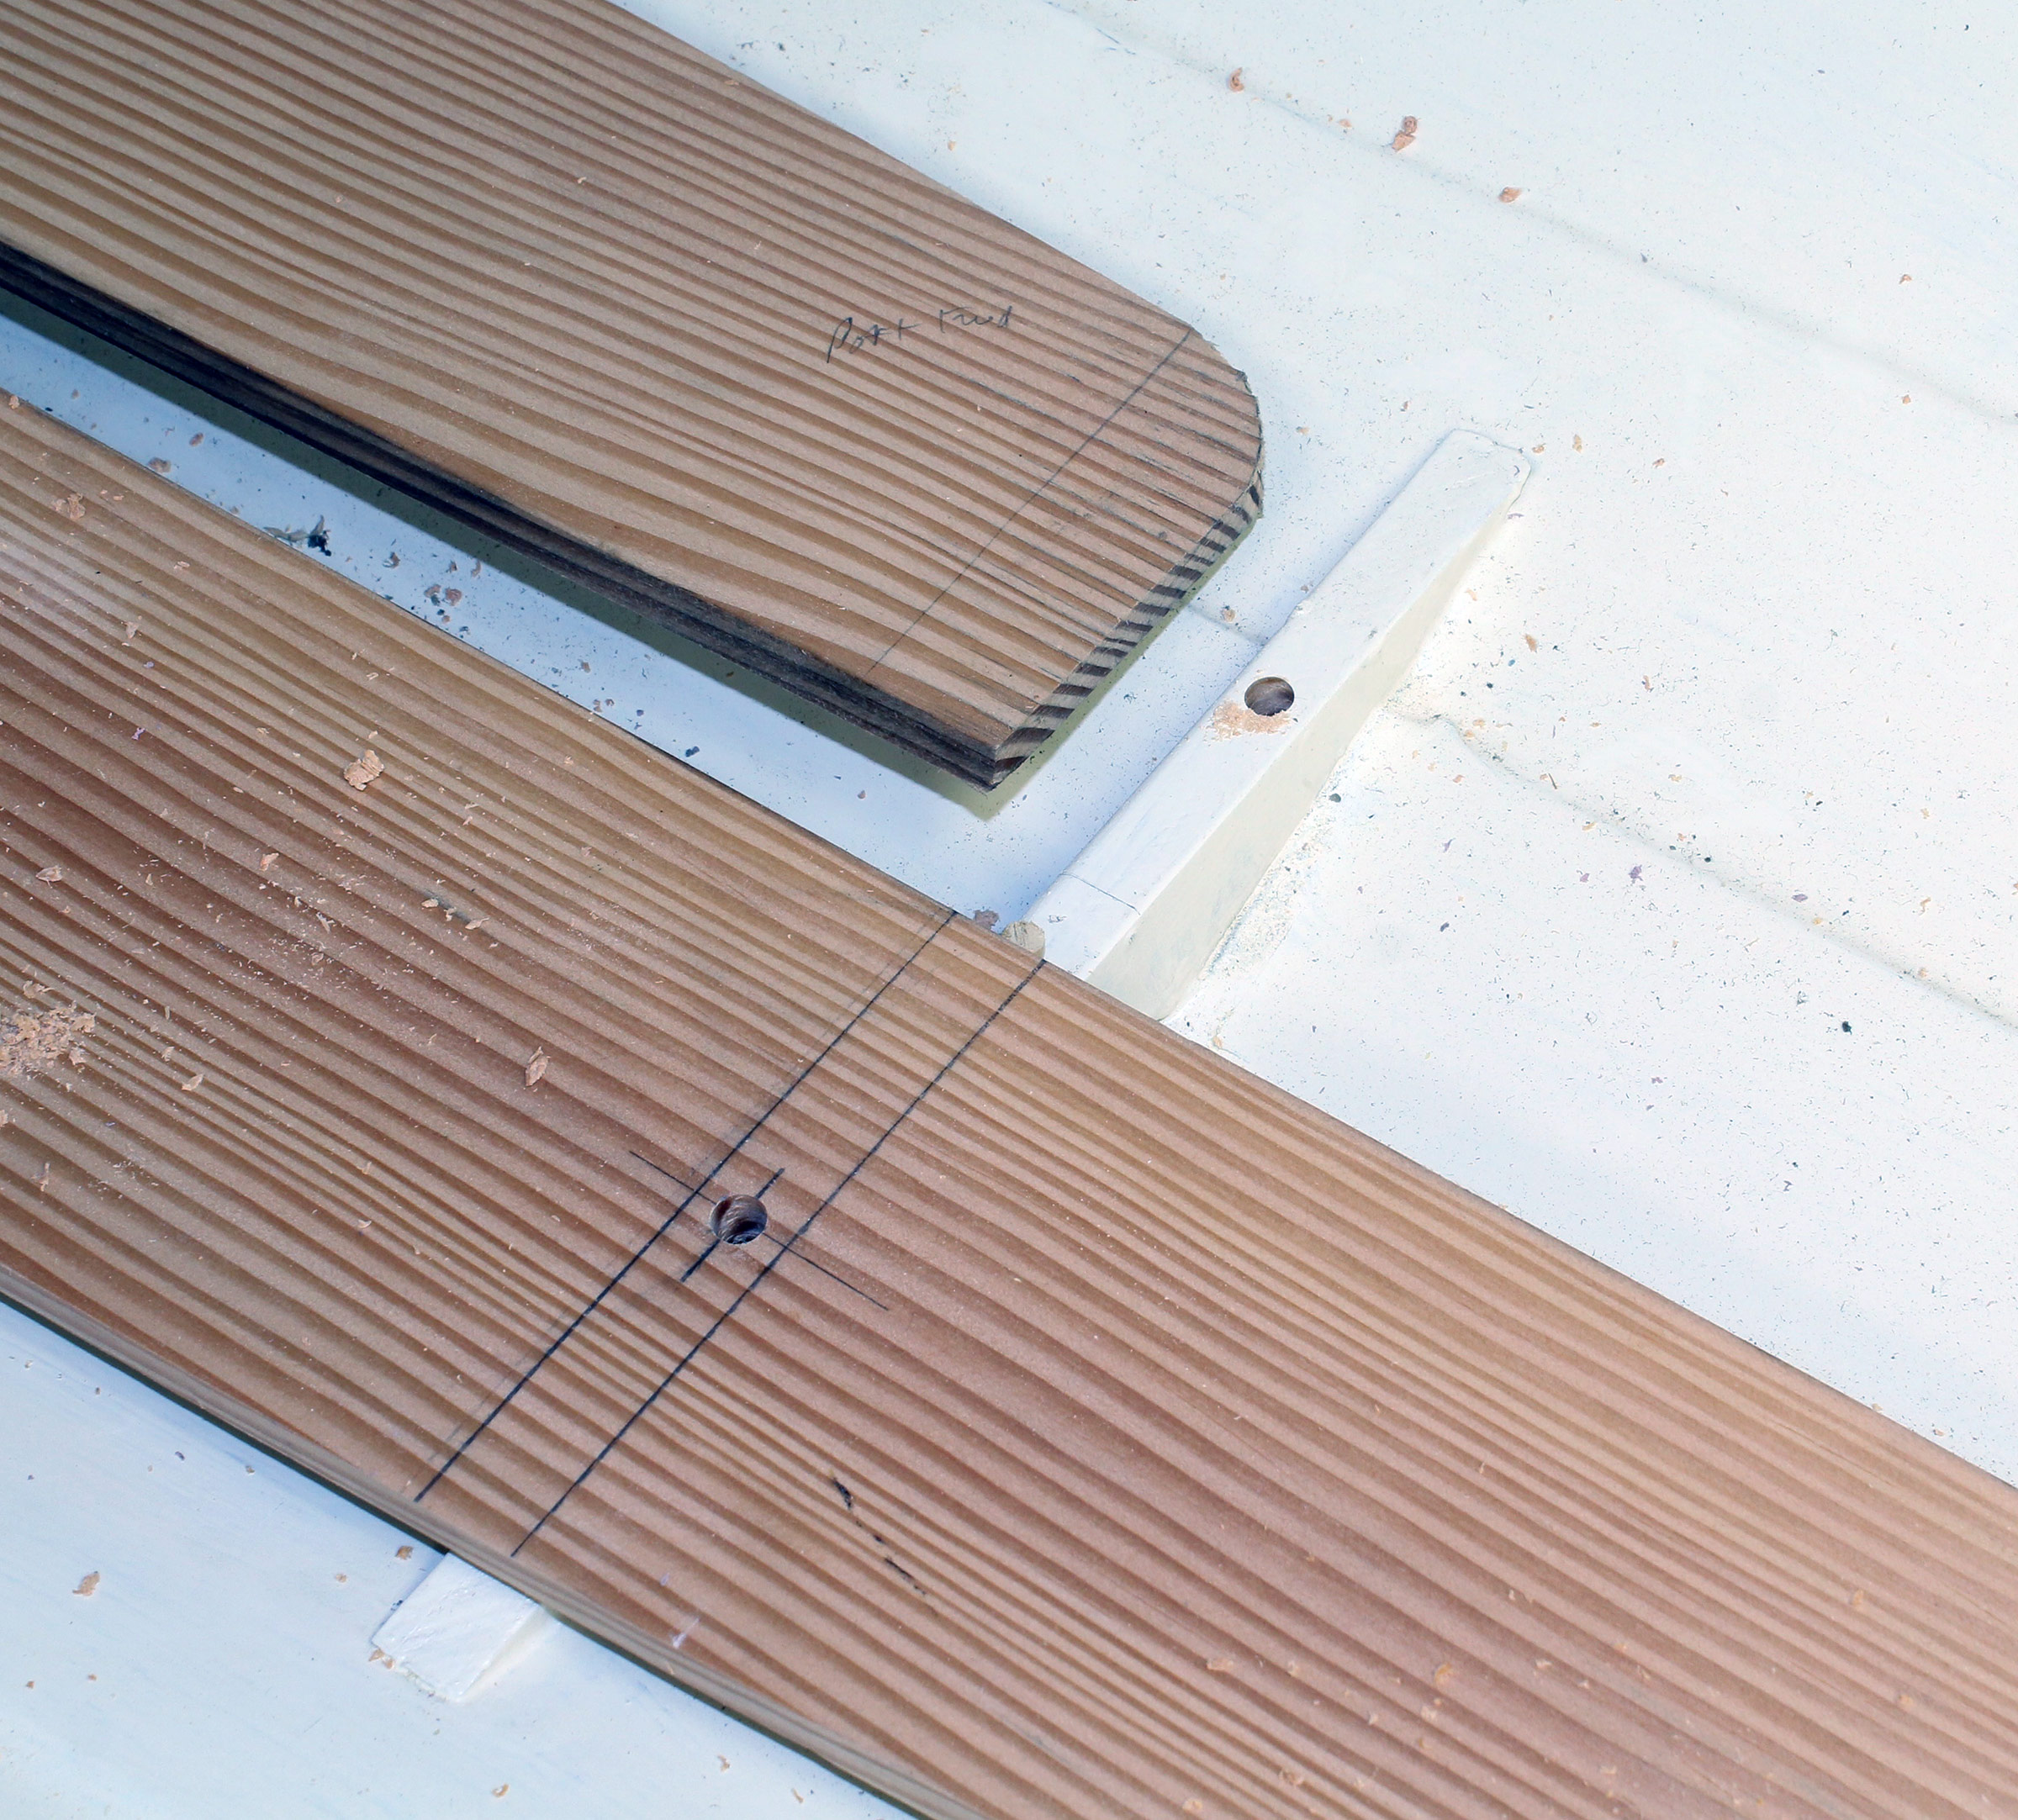
The floorboards can be removed for the installation of the inserts.
There are tools for installing the inserts but you can make one that is just as effective: it’s a 1⁄4-20 machine screw with the head hacksawed off with two nuts locked against each other. The screw extends ½″ beyond the bottom nut, the same length as the insert. The inserts have slots, which will accept a screwdriver, but the threads tend to set the insert at an angle as the lead thread cuts into the wood. I found a screwdriver was useful only for removing an insert for trial runs on scrap wood. When installing inserts where they are meant to stay, I think it’s best to get them driven in right the first time. A second effort will most likely make an additional unnecessary cut in the wood. The insert’s threads are sharp and as they slice into the wood they can lift splinters as the insert begins to advance. Adding a countersink to the hole gets the thread started deeper in the wood and can eliminate the splintering. (Countersink bits cut more smoothly when they precede the drilled hole, but in this case the 5⁄16″ hole has to come first. The countersink bit will chatter less at a slower speed.) Get the insert centered in the hole, push down hard, and start the drill.
The inserts don’t require glue to give them holding power, but a coating on the outside of the insert and the inside of the hole drilled in the wood will prevent water from making its way in and causing rot. Epoxy would be the usual choice but I had a waterproof one-part adhesive handy and used that. I applied Vaseline to the threads of the machine screw insertion device to keep the epoxy from getting inside the insert.

The inserts will be hidden under the floorboards, but I’ll paint over them to finish them. I’ll thread a 1⁄4-20 into the insert while I do the painting to keep the threads clean.

When I hacksawed one of the furniture connector bolts (left) to shorten it, I realized it was brass-plated steel. That turned out to be the standard for the type. I like their broad, flat heads but I’ll replace them, as Walter did, with brass bolts to avoid corrosion. Brass round-head 1⁄4-20 bolts (center) are common. With a drill and a 1″x30″ belt sander I lowered the profile of the round heads (right) and polished them so they would be less apt to snag.
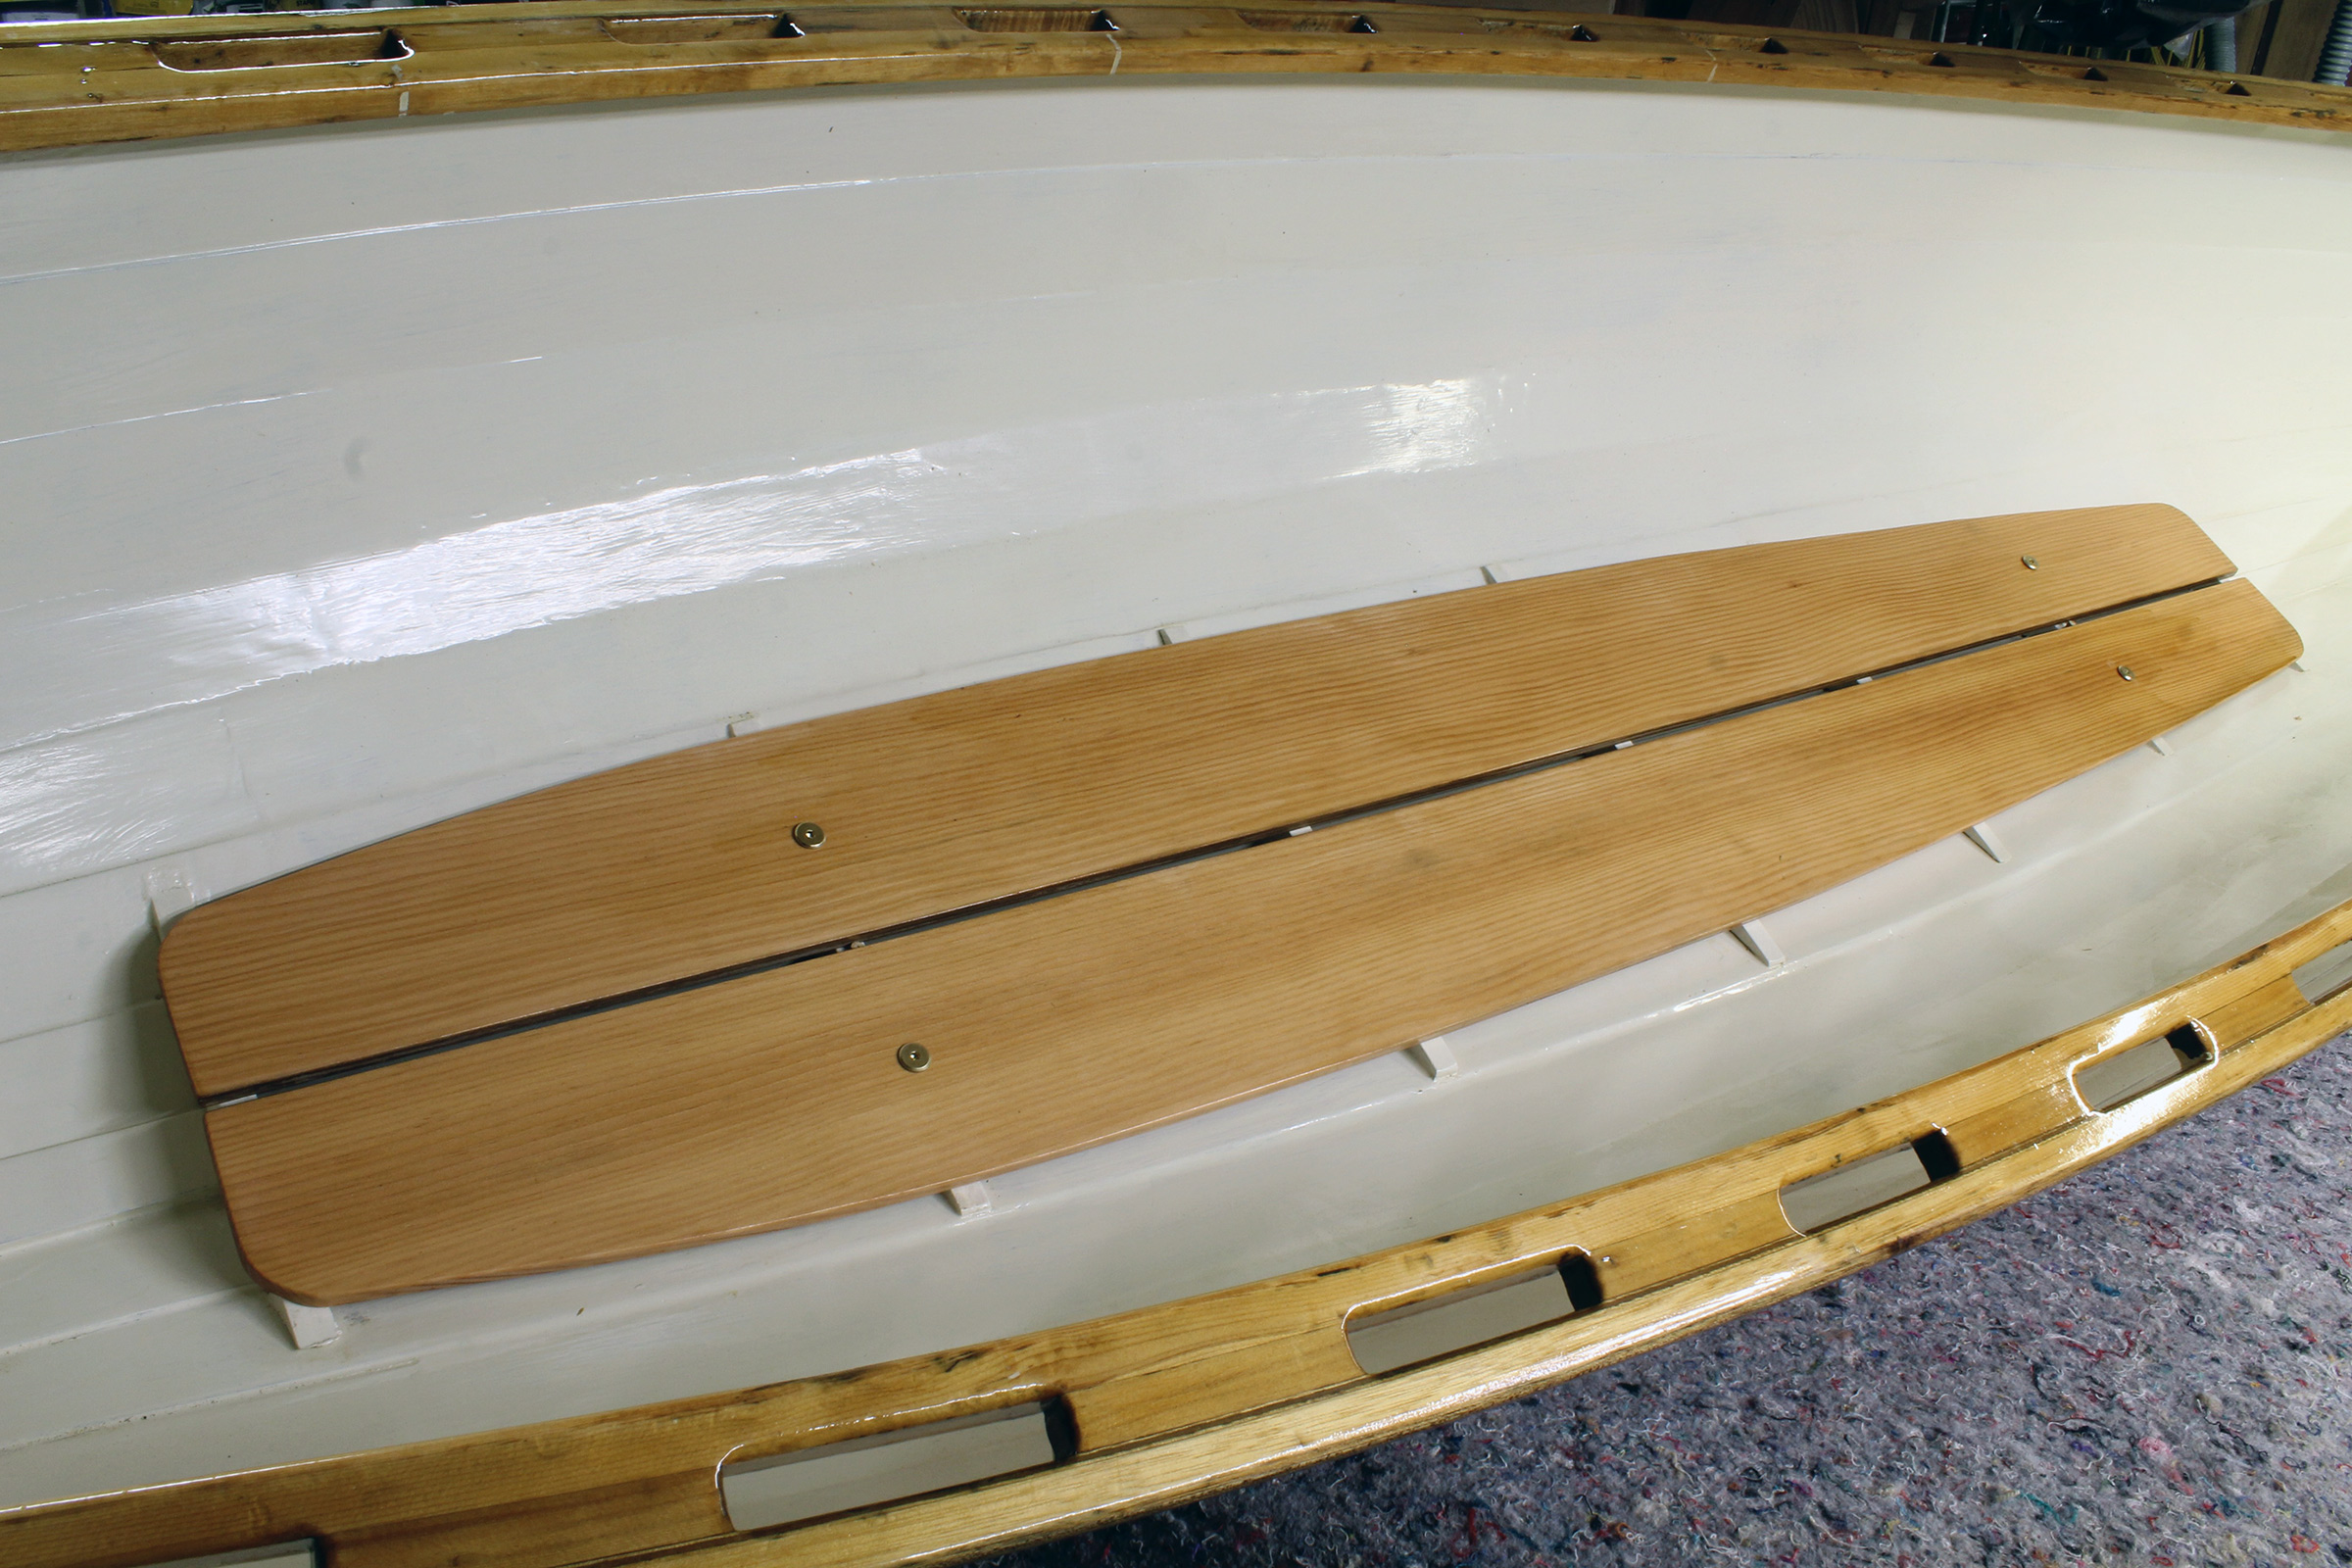
My canoe didn’t need the additional strength that liberally-fastened floorboards can provide, so I used only two fastenings for each floorboard.
![]()
Christopher Cunningham is the editor of Small Boats.
You can share your tips and tricks of the trade with other Small Boats readers by sending us an email.


If you don’t mind adding the step of countersinking, McMaster-Carr carries flat head brass screws. Currently $14 for 25 1″ 1/4-20.
The countersinking allows the screw heads to be completely flush with the flooring.
Nice helpful article and great photos showing how. This could come in handy if we decide we want floorboards on the Wyman 13s, which is sort of a design-as-you-go project.
I find a magnet is the fastest way to tell if steel is under that nice brass coating. Quality stainless steel is also not magnetic.
I’m just starting into a kayak build, but as I look ahead, I think I might try these inserts. I will probably use sidewalk bolts, as I like their large area and low profile. They are available in 18-8 SS.
Over the very long haul, anything into the ribs or floors weakens them. I like my floorboards to be able to be removable which is more work. The inserts are kind of a compromise, makes it possible to pull them for maintenance but still weakens ribs and floors.
To create machine screw threads in wood I have used the brass inserts, but if the boat is in saltwater the same type is available in stainless steel which should last longer. McMaster-Carr, of course, carries many types of threaded inserts, these are in 18-8.
It is best to avoid blind holes which trap water. Make through holes or drill limber holes from the side if possible.
If the back side of the mounting is accessible, I like to use stainless round-base weld nuts epoxied in. These are like tiny T-nuts, but without the prongs which do not work so well in hard woods. They have very high pull-out strength.
I painted the back of the flanges a copper color and used these in 8-32 to back up machine-screw snaps for a dodger and tent:
I recently used brass threaded inserts, along with flat-head, slotted silicon-bronze machine screws to secure the new cockpit sole on my vintage runabout restoration. Concerned with the possibility of standing water, like Mr. Thompson recommended, I used a through-hole pilot for the inserts. I was reasonably satisfied with the profile of silicon bronze finish washers to spread the load of the machine screws. Not two weeks later, I saw Fair Wind Fasteners offers Silicon Bronze Flush Countersunk Washers. They look very nice and would have allowed a completely flush installation. Maybe next time. The good news is I have taken up portions of the sole multiple times, as I finish out the restoration; the removal and reinstallation is a breeze with this technique.
A couple of suggestions: Use flat or oval head screws with countersunk washers (McMaster has these). Lee Valley sells countersunk washers that are actually counterbored into the substrate, so they don’t protrude. Both help resist splitting. Both seem like they’d be somewhat easier underfoot.
McMaster Carr also sells what they call “sidewalk bolts“. They have a large diameter, low profile slotted head. I haven’t used them in a boat yet, but I find them handy to have around the shop for other projects.
Are there any concerns about weakening the floors?