The tempered-steel guide has holes precisely sized to allow bits to spin freely and without wobbling.
I can count on my drill press to drill holes square to the workpiece, but there’s a limit to the size of what I can put on its table. I have a device that attaches to a hand-held electric drill; it has a round base, two vertical steel rods, and a chuck-equipped slider that’s guided by the rods. It works, but it’s cumbersome to use, and often too bulky for the jobs I need it to do. I’ve made a lot of wooden guide blocks on my drill press, but they get chewed up quickly with use and become less accurate as the hole I’ve drilled in each of them widens.
The groove on the bottom straddles corners and cylinders to align the guide. The wooden guide here is one I made before buying the V-DrillGuide. Having served its purpose—drilling a single hole for a lag bolt—it’s on its way to the fireplace.
The day before after I happened upon the V-DrillGuide on the web, I had made a wooden block guide for drilling a pilot hole for a lag bolt to support a bathroom shelf I’d made. That guide was, like all the others that preceded it, destined for the pile of wood scraps that would go into the fireplace on a cold evening. The V-DrillGuide looked like a much longer-lasting tool.
It comes in several sizes for both metric and imperial drills. I bought the 1/8″ to 3/8″ tool with 17 holes in 1/64″ increments. It’s made of steel that’s heat-treated for durability. I tried drilling a hole in it with an 1/8” bit and its tip just skated across the surface leaving only a faint scratch that is barely visible and almost undetectable to the touch.
Clamped to a flat surface, the guide keeps the bit on target. The hashmarks on the bottom edge of the guide are aids to placement.
The guide is 5-1/2″ long and 3/4″ wide at the largest hole. The markings are imprinted so they’ll never wear away. Even the fine print on the side is etched into the steel to make it permanent. Those instructions note: “Never hold the V-DrillGuide by hand when drilling—Always clamp V-DrillGuide securely before drilling any holes.”
The smaller bits, up to 1/4″, quickly bore into wood and stabilize themselves so with them I’m comfortable holding the guide by hand and the results are fine. Larger bits cause the guide to wobble as their tips start to get buried. I’ve achieved good results by locating the bit on the mark, getting the hole started, and then setting the bit up with the guide.
Even though the grove on the bottom is not quite 3/8″ wide, it aligns the guide perfectly when clamped to this 2-1/2″ pipe.
The V-notch on the bottom is about 3/8″ wide and parallel sided so the guide is self-aligning on round objects. Pipes and dowels lend themselves to clamping so that’s the best way to proceed. I was surprised that the narrow notch worked so well on 2-1/2″ pipe. Clamping the guide put it in perfect alignment.
Clamping the guide to the edge of a wide board would require special arrangements for a clamp, but the guide is steady enough on corners to be held by hand.
The groove fits right-angled corners, and with square stock, clamping is easy. Wide boards are awkward to clamp, but holding the guide by hand is enough to make it quite steady, even with a 3/8″ bit. I can’t think of a time when I needed to drill into a corner, but if the task ever comes up, I’ll be ready for it.
The guide is also useful for sizing drill bits. Even if the jaws of my drill chucks haven’t smeared the size markings on a bit, they’re hard to read. Finding the hole that fits on the V-DrillGuide is a quick way to sort a bunch of loose bits.
The packaging for the V-DrillGuide has the red “As seen on TV” logo; I might have found my way to the tool sooner, but I cut my cable and got rid of my TV years ago. I’m happy to have it in my toolbox now. Better late than never.
Christopher Cunningham is the editor of Small Boats Monthly.
To get the best from our small boats we like to keep them shipshape. We often beach launch and have sand and water to clean up after returning to shore, so to make the chore easier we bought a Porter Cable Cordless 20V Max 2-Gallon Wet/Dry Vac. It does a great job, and we have been pleasantly surprised with many other jobs that it takes care of in our shop and home.
The vacuum weighs just 7-1/4 lbs (without battery) and is very portable. The 7′8″ hose is sturdy and flexible, and wraps neatly around the power head when not in use. A crevice tool stores in the power head and a wide-nozzle tool stores on the side of the tank. The battery clips into the end of the power head.
Kent and Audrey Lewis
The vacuum carries a crevice nozzle in the handle and a battery on one end of the case. When not in use, the wide nozzle here clips into a recess in the other end and the hose snaps into hollows around the whole case.
One of our favorite uses for the Vac is cleaning up sanding dust left over from fairing a hull. It can also collect dust when its hose is attached to our random-orbit sander. With the hose switched to the exhaust port, we use the Vac as a blower to get debris out of bilges or to test the Sunfish sailboats that we restore for air leaks.
You can quickly convert the Vac from dry mode to wet by unlocking the two latches on the power head, removing the large, washable air filter, and replacing the head. The 34-cubic-feet-per-minute suction makes quick work of the bilgewater in our Penobscot 14; it will fill the tank in a couple of minutes.
The vacuum is quieter than a regular shop vac, and its small size makes it easy to store and to move between our different saws. There is no bag to dump, so it’s quick to empty. The 1-1/4″ hose will fit common vacuum accessories; a soft brush head is a good addition to the provided attachments.
The 20V lithium-ion battery and charger have to be purchased separately. We bought two 1.5-Ah batteries; they have about 20 minutes of run time and take 40 minutes to charge. The charger has LED lights to indicate charge status and overload protection so batteries can stay in the charger indefinitely. Larger 2-Ah and 4-Ah batteries with longer run times are available, and they all work with other Porter Cable 20V tools. The battery power is our favorite feature—no electrical cords around wet boats! We liked the Vac so much in the shop that we bought a second one for the house to do small jobs such as cleaning stairs and dewatering air-conditioner drains.
Kent and Audrey have a small fleet of boats, canoes, and kayaks to maintain after spending time on their home waters in Florida. They log their adventures on their blog Small Boat Restoration.
The Max 2-Gallon Wet/Dry Vac is available from various retailers. Prices vary widely, from $49.99 to about $79.99. Batteries and charger, which power a number of Porter Cable cordless tools, must be purchased separately.
Is there a product that might be useful for boatbuilding, cruising or shore-side camping that you’d like us to review? Please email your suggestions.
Middle schoolers have the privilege of taking MSS BROOKWOOD out rowing on Cutler Pond on the edge of the school grounds.
Halfway between Swampscott and Gloucester on the Massachusetts North Shore is Brookwood, a private school serving students from pre-kindergarten to the eighth grade. Located in an area with a rich maritime history, it was, perhaps, inevitable that boatbuilding would work its way into the school’s curriculum. The idea had been floating around the school’s faculty for a few years and when one of the school’s classrooms was scheduled to be vacant during the 2015/2016 school year, the space was available for a workshop.
Sven Holch and his fellow fourth- and fifth-grade teachers took the opportunity to introduce 90 students to “design thinking and project-based learning” under the guise of hands-on boatbuilding. The students were divided into nine “watches” with maritime names like Stellwagen, after the Stellwagen Bank fishing grounds. Every week, each watch would gather in the Boatyard, as the classroom had been named, ready to do some boatbuilding.
The design chosen for the build was the 9′ canvas-on-frame double-ended tender designed and built by Ned MacIntosh back in the 1940s when he and his wife were living aboard their Atkin cutter STAR CREST in Panamanian waters. The boat caught on among other cruisers, especially after Ned added a sailing rig. Soon there was a fleet of about 20 of them. When STAR CREST returned home to New Hampshire Ned made more of these lightweight tenders. Maynard Bray, an author of many books on boatbuilding and a frequent contributor to WoodenBoat, saw the tender, took a liking to it, and measured one of them to create drawings to work from to build one for himself. His plans were the starting point for the Brookwood project.
Boatbuilding was new territory not only for the students but also for some of the teachers who participated in the project. “We’re all starting from ground zero,” said Sven. “Building a boat together is the perfect place to practice not knowing anything. We’re using the boatbuilding project as a way to teach about learning styles—metacognition. The kids can think about their thinking at this age.”
From the very beginning, the students kept journals documenting their progress:
“Today I learned about a stern. At first I thought that it was the front of the boat but I learned that it was the back of a boat.”
“Today I also built replicas of the boat. They were nine inches. We had to scarf the stringers. We had to cover it with paper. And use popsicle sticks to make seats.”
The hands-on project gave student real-world connections to academic studies. “The math, science and classic STEM curricula tie to the project in numerous ways,” Sven noted, “including but not limited to displacement, angles, scale, joinery, characteristics of water, measurement and more.”
The canvas boat has held up well for the three years it has been used by students to practice rowing on the school’s pond.
The boat was launched on Cutler Pond, situated between the school and its soccer fields, and christened MSS BROOKWOOD in a ceremony led by Head of School Laura Caron, made Admiral of the fleet for the occasion. The MSS stands for Middle School Ship. Students took turns rowing around a duck-sized schoolhouse—complete with a Brookwood-style cupola—that floats in the middle of the pond. Rowing became the next learning opportunity after the boatbuilding.
The boat’s bow bears the heron from the school’s logo. The pond is a good habitat for herons, so the school chose it as its symbol when the school was founded in 1956. This version is now “old school,” as the logo was updated this summer.
Since its launching, MSS BROOKWOOD continues to rule the pond unchallenged and hasn’t leaked a drop.
I first met Phil Thiel in 2009. My son Nate had just graduated from high school and was eager to build a boat, so we decided upon Phil’s 18′6″ Escargot canal boat. We paid a visit to him at his home, only a half dozen miles from ours, and he led us to his basement shop where he had his stock of plans, all stored in cardboard tubes. Over that summer, I coached Nate and his friend Bobby through the build and kept Phil up to date with the progress.
I continued to keep in touch with him after BONZO, a slightly modified Escargot, was launched in October. Phil was ill, with no hope of recovery, so I visited with increasing frequency, offering to help in any way I could; I had several of his plans sets scanned so they’d more easily made available. I had lost my father suddenly the year before, so I knew how important my remaining time with Phil would be. When I was offered this job, working with WoodenBoat as the editor of Small Boats Monthly, I knew how happy that my father would have been for me, but he was gone. I told Phil, and I got the smile I needed from him.
I was with Phil, his family, and a few friends when he passed away on the evening of May 10, 2014. Since then I have had the privilege of visiting Phil’s shop and have kept in touch with his family—wife Midori and children Kenji, Tamiko, and Kiko. It is with their kindness that I can share a few glimpses of my absent friend.
You could say Phil’s shop is “organically” organized. His tools and materials aren’t separated into categories, they’re intertwined like the roots of a tree, and the juxtapositions—waxed paper, an old brass scale, and a padlock, or tarred marline, a trailer ball, and toothpicks—have an engaging, even poetic quality. Over his home’s front door, there is a sentence, one of many written in all caps in white chalk on the dark exposed ceiling beams, that reads: “A LOT OF WHAT I DO GROWS OUT OF WHAT I’M DOING.” The shop fosters that sense of unexpected possibilities and is fertile ground for the imagination.
Phil bought this machinist’s lathe, used, on November 24, 1987. It’s a South Bend C9-10JR, manufactured in South Bend, Indiana. Its original owner purchased it in 1949. The headstock needed some work and a few parts were missing, so Phil wrote to the manufacturer on January 9, 1988, beginning with: “Ladies and Gentlemen, I have recently achieved a life-long ambition and at age 67, a few weeks before retirement from teaching, acquired a South Bend Lathe.” The motor, here hidden from view, delivers power to the lathe with a flat leather belt, seen on a three-step pulley.
For woodturning projects there is a small lathe driven by a motor mounted underneath the workbench. Here, it has a sanding disc attached to the headstock and a wooden table on the tool rest. His daughters have fond childhood memories of spending time in their father’s shop using this lathe.
The anvil was made from a section of railroad track and fastened to a short timber. It was portable and could be set on the basement’s concrete floor rather than a workbench, which would bounce and rattle everything else on the bench top.
The pedal drive in Phil’s Sanpram required a propeller specifically designed for modest power and a peddler doing about 60 rpm, so Phil designed a wooden prop of stacked plywood. The pattern for the plywood rests on the workbench. Stair-stepping the pieces according to the marks on the paper pattern creates the proper pitch. The long cone on the finished prop reduces drag.
Phil made a lot of paper models as he developed his designs. This one appears to be the 22’9″ Joliboat. He used a similar angled roof as an option to provide more headroom in the L’Ark version of the Escargot. The drawing below is a freehand sketch of the 22’9″ Friendship.
Phil kept busy right up to his last days. This is his desk as he left it. I haven’t been able to figure out what his last drawing was about.
For all his technical prowess, Phil never went digital with his work. He did all of his drawings by hand, inked them flawlessly, and then taped pieces together to make masters to be photocopied. The year before he passed away, I took the originals drawings for his small wooden boats to a copy shop and scanned them. The digital files will assure the survival of his work and make his boats more easily and widely available. The red stamp has a propeller and bicycle pedals joined and set inside a circle. It’s an indication of Phil’s interest in Japanese culture. In Japan, a Kamon is a symbol of one’s clan and has been used since the 12th century. It’s like a European family crest but with a broader set of relationships. Designs in circles are a common form of Kamon. Phil had another circular symbol—a snail, set on ripples of water, with SERENDIPITY written in an arc to complete the circle. His serendipitous snail is a reminder to go slow while boating and to leave yourself open to chance.
Sitting on ledge near the drafting table is a stack of paper models: a tombstone-transom dory at left and a double ender sitting in a pram at right. The two long models at the bottom are for the 15′ 7″ Skiffcycle, one of the smallest of Phil’s “pedal-powered boats for the flâneur-afloat” and designed for a commercial Sea-Cycle drive. Phil’s graph plotting boat speed and pedal rpm shows the Skiffcycle reaching 5 1/2 mph, though Phil, a flâneur himself, wouldn’t dream of rushing about at such a pace, missing all of the sights, sounds, and scents to be taken in at a more leisurely pace. On at least one occasion, he furrowed his brow when I told him I usually paddled my kayak at 6 mph.
Models for the 15′ 4″ Aphasia (left), designed in 2006, and the 12′ 4″ Sanpram, designed in 2011, are resting on drawings for the Escargot. The Center for Wooden Boats in Seattle has had the first-built Aphasia in its rental fleet for many years and it’s the most popular boat in the fleet. It is equipped with two Sea-Cycle pedal drives, making the boat extremely maneuverable. With one drive pedaled forward and the other in reverse, it can spin around in its own length. The Sea Cycle drives are expensive, so for the Sanpram, Phil designed a drive for the do-it-yourselfer. Bicycle pedals and cranks turn large pulleys and V-belts transfer the power to a small pulley and an idler on the propeller shaft. The propeller is made of stacked plywood, like the one on his workbench.
Phil kept the tools he treasured most in a locked file cabinet. This is the first time the drawer has been opened since his passing. In the wooden box to the left is a proportional divider. To its right are two dial opisometers, or curvimeters, for measuring lengths long curved lines. I don’t know what the three devices with handles are. The black one to the right, made by Nikkor, has a lens that provides a fisheye view. The two with wooden handles are Phil’s home-made versions using wide-angle door viewers for lenses. The leather case at the bottom holds one of many slide rules.
I only knew what this was because I have one was passed down from my grandfather, a civil engineer. It’s a polar planimeter used to measure the area of shapes on a drawing. The top arm has a pin with a weighted disk to hold it in place. The other arm has a pointer that is used to trace the shape’s perimeter. The cylinder on the lower left has a polished steel wheel that both rolls and slides as the pointer moves. By some miracle, the area shows on the scale when the outline is complete. The planimeter can be used in boat design, for example, to measure the areas of hull cross sections.
This second model of the Aphasia was Phil’s most recent development of the design and did away with the expensive Sea-Cycle drives, adopting instead the DIY system of the Sanpram. I found the remains of two moths in the cockpit, the only passengers to ever get aboard the redesigned boat.
There are no markings in this half hull. Phil did some work designing commercial vessels and this may be one of them. It hangs in a room adjoining the shop, a windowless room lined with bookshelves.
Among the models in the shop is a steel passenger ship of unknown origin (Identified by a reader as the SS Tacoma. See Clayton Wright’s comments below.) and a freighter with a nesting barge. As I recall from my conversations with Phil, he designed the freighter while working as a naval architect. The idea was to create a system where cargo carried by two different means did not have to be reloaded. It’s like the freight trains that carry trailers or containers that are also hauled by truck or by ship. A barge used for inland waters could be floated aboard this purpose-built sea-going vessel.
Phil did a lot of international travel and has bookshelves full of photo albums and file cabinets full of slides. His interest in boats of all kinds is evident in his photographs.
Hidden in the library was this painting. On the back is written in Phil’s hand: “Philip Thiel, late ’40s, early ’50s while student at M.I.T.” His oils were applied quite thickly, giving the painting rich texture. I knew he could draw well, but this was the first indication I’d had that Phil was, among everything else, a talented painter with an exceptional feel for color and free-flowing forms. It was a side of him that I discovered only after he was gone.
Henry Rushton, of Canton, New York, was a preeminent boatbuilder in the late 19th and early 20th centuries. Living and working between the St. Lawrence River and the Adirondack wilderness, and his skill in designing, building, and marketing small boats allowed him a long career. Rushton may be best remembered today for his lightweight cedar canoes. His Wee Lassie is still a popular hull design built in all manner of methods. Maybe less well known these days are his pulling boats. According to Atwood Manley in Rushton and His Times in American Canoeing, rowing craft accounted for the bulk of his trade.
Photographs by the author
In the original boat, the planks were clench-nailed to the frames through the laps. Here they are riveted. A single copper clench nail secures the laps between frames. These planks have glued scarfs; the drawings show plank sections joined by scarf joints set in varnish and held with clenched 1/2″ copper tacks.
The Ruston 109 is an old-fashioned guideboat type combining lightness, good looks, and easy rowing. It’s a double-ender with nearly plumb stems, a lapstrake hull, and sweeping sheer. The boat is 14′3″ long with a beam of 39-1/4″. Many of Rushton’s pulling boats were offered as rowing/sailing combinations with a compact folding centerboard and a rudder with a yoke and steering lines. The plans for the 109 show no accommodation for sailing but do offer a rudder design. No doubt the fashion of the late 1800s allowed a fellow to pull hard on the oars, not seeing where he was going, while his amiable companion pulled the ropes.
My wife, Tina, and I have long enjoyed fishing the lakes, bays, and rivers of the mid-Atlantic states and northeastern U.S together. We’ve spent many fine days afloat in an aged, lumpy, chopped-off canoe that’s as slow as a slug. Last winter, with my shop idle, I decided to upgrade our fleet by building a spry fishing boat for two that we could also enjoy rowing solo. Anything much longer than 14′ would not fit in my work space. I’d never built anything with a transom, and I like the looks of double-ended craft. Happily, I came across Ben Fuller’s 87 Boat Designs: A Catalog of Small Boat Plans from Mystic Seaport’s Collection and found, on pages 56 and 57, a Rangeley Lakes Boat and the A.L. ROTCH, Rushton’s 109. I had an affinity for the Rushton; as a boy, I spent summer vacations with my family at a camp on a lake not far from where J. Henry plied his trade.
The plans for the Model 109 come from Mystic Seaport on three sheets: lines, offsets, and construction details. The hull is symmetrical fore and aft, so lofting half of the boat is all that’s required, though to ensure fair curves I did run my battens beyond the middle station. While lofting, I changed the vertical keel to a 4″ plank. The Rangeley Lake boat is built this way, and I had read that Rushton’s sailing canoes called for red-oak plank keels. I might one day want to add a folding centerboard and sail rig, but am now heeding the advice of Mr. Fuller that this would be “more successful in a longer and wider model.”
The plans call for all of three thwarts to be 5/8″ oak, like the center thwart here, but the cane seats, meant for a canoe, are lighter and more comfortable.
Station spacing on the plans is 14”. I set up five molds 28” apart, with two stem-end molds 68” from the center mold. I got out the 13′3-1/4″ keel from 4/4 ash and worked the rabbet. The plans indicate a steam-bent, two-piece stem, but I laminated them with ash strips and made two bending forms so I could glue them both up in one day. The stem-keel marriage was bedded with 3M 5200 and riveted. The backbone was then attached to the molds, and the stems plumbed and secured for building the hull upside down.
I began planking by spiling a pattern for the garboard, keeping an eye on the plans for plank width. Each plank has one scarf, as my northern white cedar stock ran mostly 8’ to 10’. After the garboards were bedded and screwed in, the rest of the planking continued. I fastened the 1/4″ planking with 5/8″ clench nails, being mindful of the spacing of the ribs, which would be installed later. I beveled the stems as I went, first clamping planks to the molds at their lining marks and filing for fit. Planks were bedded and screwed at the stems. There are eight strakes, and the sheer is especially shapely.
The center thwart can serve as a stretcher when the boat is rowed from the forward station.
With planking complete, I cut the plank ends flush with the inner stems and then bedded and attached the outer stems. After plugging the countersunk screws, I turned the hull upright for planking. The plans call for clench-nailed 1/2″ x 1/4″ half-round elm ribs spaced 2-1/4″ on center. In Appendix B of Atwood Manley’s book there is a detailed description of the method Rushton’s crew used in framing. One held a specially grooved backing iron while another quickly hammered home the clench nails in the short time the rib remained pliable from steaming. Because I generally work alone, I’m more comfortable riveting frames. I can bend, clamp, and screw steamed ribs to the keel while they remain supple and return after they’ve hardened for riveting through the planks. I spaced 9/16″ x 1/4″ rectangular white oak ribs 3-1/2″ apart and fastened with 14-gauge rivets. The flat face of the frame gives a solid landing for the burr, and the heavier scantling allows a wider spacing while retaining strength and minimizing weight.
The breasthook (“deck” in canoe nomenclature) and rails are of white oak. The rails I attached as a set, fastening one end of the outer rail with screws through the planking and into the breasthook, and then setting the inwale in place and clamping all together following the sheer sweep. I placed 10-gauge rivets through every other frame. The remaining frames were fastened through the inner rail with ring nails. The thwarts were placed according to plan: white oak for the center and cane seats for the bow and stern. As work progressed, I sealed and primed where appropriate.
The depth amidships is 11″ and the stems rising 13″ above that, giving the sheer a deep and dramatic curve.
The bronze oarlock sockets are patterned on Rushton’s original design and made by Bob Lavertue, proprietor of the Springfield Fan Centerboard Company. He does fine reproductions of many Rushton accessories and owns a Rushton-built Iowa. I enjoyed making the brass mooring-ring assembly shown on the plans and also cold-hammered and bent some 3/8″ bronze rod for center thwart stiffeners. After finishing the removable floorboards, I fashioned an adjustable foot brace as depicted in Rushton’s Rowboats and Canoes: The 1903 Catalog In Perspective, by William Crowley, and made 6’6″ spruce oars.
To get our boat to the water, I made some trailer modifications to cushion the lightweight hull. Tina and I can easily place the Rushton on and off the trailer and carry it where we want. Trailering the boat also makes it easy when I launch solo at a boat ramp. It’s a bit overweight to manhandle alone but can certainly be cartopped. For long road trips I would prefer the boat riding on top to having it on a trailer getting peppered with gravel kicked up by the truck.
Getting aboard the Rushton is a lot like getting into our old canoe, though with its flat bottom, the 109 is steadier. Still, we generally board while holding the gunwales and make sure to plant our feet on the narrow floorboards, keeping our weight centered. Pushing offshore, the wide keel takes the grind instead of the planks. There are two sets of oarlocks. The center station is for rowing solo. Rowing from the bow balances the boat nicely with a passenger in the stern.
With these two adults aboard, the Rushton 109 sits in perfect trim.
You sit low in this boat. There hull amidships is only 11-½” deep between the floorboards and top of the gunwales, and the center thwart sits just 5-3/4″ above the floorboards. With the dramatically curved sheer, the oarlocks are far enough aft from the middle to have some extra elevation to give plenty of room for the rowing stroke with your legs straight out. I am 6’ tall and comfortably row solo at a steady pace with my heels planted on the foot brace. Tracking is superb in this light, fine-entry double-ender. A few short strokes get you going, and then it’s easy to maintain a rate that’s faster than walking speed.
With two aboard, rowing from the bow, I’ve found that the center thwart is ideally placed for bracing my feet. The 109 responds to the added weight favorably, carrying beyond a boat length with each stroke. And it’s a nimble craft. I can turn the boat 360 degrees from a standstill with nine pulling and backing strokes. The aft seat is 7-½” above the floorboards, and Tina reports that it is quite comfortable for an afternoon cruise, though the tight quarters in the stern make an all-day fishing trip feel a little bit cramped.
One day, I took two young neighbors out for a row in the Rushton. There was plenty of room for the three of us on board while we poked about looking at lily pads and little fish. I imagined myself at a camp in the North Woods, sitting in the stern seat, with my dad rowing and brother in the bow with a coffee can of worms between us and our fishing poles restlessly waiting for a strike. The Rushton 109 is that kind of a boat.
Tom Devries and his wife Tina live in New Braintree, Massachusetts. Now that both of their kids are off to college, Tom DeVries spends more time in Beyond Yukon Boat and Oar, his woodworking shop, and imagines that away he and Tina will be spending more time together fishing, paddling, and sailing in little boats. In years gone by, Tom has pirogued on the Congo, canoed on the Yukon, fished commercially in Alaska, and sailed his skipjack on the Chesapeake.
Plans for the Ruston’s Pulling Boat Model 109 come as a set of three pages and include lines, offsets, sail plan, and construction details. They are available from Mystic Seaport for $75.
Is there a boat you’d like to know more about? Have you built one that you think other Small Boats Monthly readers would enjoy? Please email us!
It was still dark when I woke, and all of Calvert Island and the anchorage it surrounded were eerily still. I shifted my weight and GAMINE moved with me. We were still afloat. Above the gunwales, the faint light of early dawn had just separated the sky from the silhouettes of the forested hills. I drifted in and out of sleep for another hour and when I sat up, beads of dew trickled off my bivi bag. With RAINBOW gone (read about RAINBOW in Part I), I was alone in Pruth Bay, a cruciform inlet with three half-mile-long coves at the head of its entrance to the east. I was cold and rowing would be the quickest way to warm myself, so I prepared to get underway before breakfast. As I reeled the anchor in, the rattle of the chain against the gunwale echoed across the bay.
Photographs by the author
Ward Channel was quite still and GAMINE’s wake was the only thing disturbing the water. I couldn’t bring myself to row fast any more than I’d break into a run in a cathedral.
The 4-mile row to the north end of Calvert Island brought me to Hakai Pass, its waters rising and falling with the ocean swell as gently as the chest of someone still asleep. I made the crossing in about an hour and entered Ward Channel, a 1-1/2-mile-long alley just a few hundred yards wide. The swell diminished and the black water along the shore mirrored the band of gray rock beneath the trees; the closer to shore I rowed, the harder it was to distinguish the presence of water from emptiness. A raven flew by dozens of yards away; I could hear the faint crinoline rustle of its feathers.
I entered Fitz Hugh Sound where it was about 5 miles across to the mainland shore, and felt the beginnings of a southerly breeze. It filled in, pleating the water a darker blue, and I raised the mast and set sail in the first following wind I’d had in two weeks. I was making fair progress with the main and jib set, but I thought I could do better by raising the light nylon boom tent as a spinnaker. I had threaded the end of a halyard through the webbing loops on one end of the tarp when I heard the hollow rush of a whale’s exhalation.
Forty feet to port, a long, low streak of black broke the water’s surface. A low knuckled fin, traveling the length of the streak before submerging, identified the whale as a humpback. I pulled the tarp aloft and it bellied forward opposite the main. The wind continued to freshen and GAMINE churned northward, making quick work of Fitz Hugh.
Roger Siebert
.
I turned west into Lama Passage. There the wind was against me, but I felt strong even rowing 5 miles against the chop to Canal Bight, a twin-lobed cove on the north side of the pass. I’d covered more than 33 miles since leaving Calvert, but I’d sailed most of the way and had had a long break from rowing with my stay at Port Hardy and sailing with RAINBOW. I put GAMINE ashore to cook dinner and thought I’d spend the night at anchor, but the bight was not protected from southerlies. There were two nooks tucked around corners that would be safe if the wind came up during the night, but both would dry out with the early- morning low tide. The air was still and to the west the warming amber tones of sunset silhouetted the lacy fringe of tree line that surrounded me.
It was almost 9 p.m., but only 5 miles lay between me and Bella Bella. The tide would carry me northward and the gibbous moon, gleaming in the indigo sky to the east, would light the way. I rowed around Twilight Point, appropriately, at twilight and as I turned north the moon’s reflection splintered in the ripples of my wake. A seiner, southbound, slowed and came alongside; the skipper, having seen my light, asked if I was okay. I replied, “Yes, thanks, I’m doing great.”
When I reached Bella Bella, I tied up at the end of one of the two docks, hiding beneath the ramp to the pier a dozen feet above. I thought I’d be safe there, tucked out of the way, but after I had rearranged the boat for sleeping, a group of teenagers, judging by the sound of their voices, tromped down the ramp. Two of the boys among them were there to have a fight; the rest came to watch. All the shouting and goading was making me a bit anxious, so I quietly packed up, slipped my lines, and rowed away through the pilings beneath the pier.
A few dozen yards to the south, I found a mooring buoy and gambled that the owner wouldn’t be needing it that night. Dew was beading up on the boat and my gear, but I warmed up as soon as I was in my sleeping bag. The fights on the dock were still going on and I heard another similar commotion to the north. Around midnight the waterfront lapsed into silence and I was able to sleep until 4 a.m., when there was yelling and swearing again coming from the pier.
At daybreak, Bella Bella was at peace as a man in a red-and-black plaid coat rowed a diminutive plastic dinghy out to one of the fishing boats moored near GAMINE. I said good morning and introduced myself; he returned the greeting, identified himself as Kelvin, and invited me to come ashore for a cup of coffee. He rowed over to pick me up, but when I stepped aboard the dinghy, which was full of holes, it started filling with water. I tied a long line to it so he could go ashore first and I could pull the dinghy back out for my turn.
Kelvin’s house, built on slender stilts over the intertidal, was a short walk along a weathered boardwalk with several planks missing. His living room was well kept, with shag carpet and dark paneled walls, decorated with only a framed photograph of a young girl—his daughter—and a painting of Jesus. As we sat at the kitchen table with a plate of homemade bread his wife had made that morning, the washing machine, running just outside of the kitchen, went into a spin cycle and the whole house shook as if an earthquake had rumbled under Bella Bella.
The southerly that had helped me get to Bella Bella brought clouds, and when I left it began to rain. I sailed under the boom-tent spinnaker to Seaforth Channel. Visibility in the rain and mist was poor, but I was always able to steer clear of fishing boats and cruise ships and make out the landfalls along the north side of the channel. GAMINE was moving well, but sitting in the stern, inactive, I was getting chilled. My nylon rain jacket was saturated with rainwater and pressed heavily against my back and shoulders. The cold seeped through, at first numbing my hands and arms, then making me shudder. I lowered the rig, set the oars between the tholes, and began to row, waiting for the exertion to warm me.
Port Blackney wasn’t the refuge I’d expected it would be. GAMINE is tethered at the far left and somewhere behind the thick wall of trees there is an old log cabin being consumed by the rainforest.
After 3 miles under oars I turned north-northeast into Reid Passage, a 170-yard-wide channel separating Cecilia Island from the mainland peninsula it parallels. At the north end of the passage was a place marked on my charts as Port Blackney. I expected to find a harbor of some sort where I take shelter and warm up. What I found there, nearly invisible in the dark woods along the south side of the cove, was a one-room cabin, its log walls cinder-black with decay and its roof swaybacked under a thick layer of moss and duff fallen from the cedar trees that loomed over it.
My hands showed the effects of spending 10 hours in the rain. My sense of touch was quite dulled, and in the evening I had to dry the skin over my camp stove before I could use my hands less clumsily.
Worried that the cabin might yet appeal to bears or wolves, I resumed rowing along the mainland shore and made my way to Mathieson Channel. I had covered about 25 nautical miles when I pulled into Tom Bay to anchor for the night. It had been raining the entire time I’d been underway, and my hands had been wet for 10 hours. My palms were as rough and almost as white as raw cauliflower. Every fingerprint ridge was in high relief, and where rowing had peeled away a layer of skin there were craters surrounded by ragged edges. I could scarcely feel anything with my fingers, and I fumbled with the tarp, getting it stretched over the cockpit. Before I cooked dinner, I held my hands above the stove until the heat rising from its blue flame brought them back to normal.
The ride up Mathieson Channel went quickly with a benevolent tailwind, though the rain and gloom were dragging me down.
In the morning I woke well before sunrise as the first light was sifting through the fog and drizzle. I was under way at 5 a.m., dreading another day of being cold and wet, but again needing to get moving to warm up. There was a good following wind in Mathieson Channel, strong enough that I set only the mainsail to drive GAMINE north the 7 miles to Jackson Passage. Flanked by 1,000’-high ridges, the nearly 6-mile-long east–west passage spans not quite a half mile in a few places, but most of it is just a few hundred yards wide.
After I’d been rained on for the best part of two days, the mist began to lift over Jackson Passage. During the trip, I took very few photos of myself from a distance. The camera’s self timer gave me only 10 seconds to get into the frame and running across seaweed-covered rocks in this little cove off the passage was flirting with injuries I could ill afford.
There was no wind in the steep-sided landscape, so I brailed the main and rowed. Cedar trees, growing thick just above the water, had their lowest boughs evenly trimmed by the tides, like an orchard grazed by deer. The rain had stopped, and the water was dark and as smooth as oil. While the sky was still overcast, far to the west, beyond the end of the passage, the sun had reached through an unseen gap in the ceiling, setting the overlapping ridges of Swindle Island aglow and dappling them with the shadows of clouds.
When I entered the channel that led to the village of Klemtu, I found a cove that seemed to be where fishing boats past their usefulness were left to die.
When I emerged from Jackson Passage there was a westerly on Finlayson Channel, so I dropped the bundled mast, mainsail, and sprit and began rowing across to Swindle. In mid-channel I passed a blue plastic tarp floating at the water’s surface. Thinking it would help me get through another spell of rain more comfortably, I fished it out of the water and tucked it away.
Klemtu was a small native village, home to about 200 people and accessible only by boat. Running in front of the houses at left and toward the white building at right is an elevated boardwalk that served as the main street.
Klemtu was a small village with a single row of white clapboard houses arrayed along the curve of the shoreline, and a boardwalk set on pilings over the intertidal zone and serving as the village’s main arterial. I stopped long enough to buy some apples and cookies at the grocery store, and was underway again at 3 p.m.
In the late afternoon a northwesterly arose briefly, staying only long enough to sweep the dull gray overcast. With the sky cleared and the air stilled, I kept rowing well into the evening. The moon rose above Sarah Island and lit my way along Tolmie Channel to a narrow inlet on Princess Royal Island. About 200 yards in, I stopped rowing and GAMINE slowly drifted backwards in what had to be the outward-flowing current of a river. I could hear fish jumping and guessed that salmon were heading to the river to spawn.
It had been a very long day—I’d covered 33 nautical miles since leaving Tom Bay—and I needed a good night’s sleep, but when I settled into my sleeping bag it was still wet from the rain two days ago. It took a long time to get warm, and I kept worrying that GAMINE would drag anchor and drift into the traffic in Tolmie Channel. The repeated knocks of salmon running into GAMINE’s hull made it that much harder to get to sleep.
I did nod off eventually and slept so soundly that I missed my alarm in the morning. When I woke I could still hear the salmon on the move, but instead of splashing, they were making a swishing sound like an oar blade pulled only half submerged. Then a sharp rap of wood against rock shook the boat. I bolted upright and saw the water was only inches deep; the salmon barely had enough to cover their backs. I was surrounded by fins. I got dressed quickly in the chilly morning air, hauled the anchor aboard, and let GAMINE drift into deeper water.
I’d rowed only about 4 miles to the north when several packs of 10 to 15 southbound commercial trollers rushed by, pushing piles of white foam at their bows. I took some wakes bow-on and rowed through them, but others were so high and steep that I had to lunge for the stern sheets to raise the bow enough to keep from spearing through them.
I stopped to stretch my legs at Swanson Bay on the mainland side of Graham Reach. There had been a pulp mill there, built around 1900. All that was left were a towering square brick chimney and the ruins of two concrete buildings, one with a pair of squirrel-cage fans 8’ in diameter at the base of rusted metal bars five stories high.
Marked on my chart was the point where the tides meet behind Princess Royal Island, and I rowed toward it from Swanson with the last of the flood, anticipating the ebb would carry me the remaining 10 miles to Butedale. But a northwesterly wind had given the flood tide flowing in from the north end of the island enough momentum to continue flowing south during the ebb. With wind and current against me, I had a long hard pull to get to Butedale.
I hiked to Butedale Lake on the steep boardwalk built alongside the wooden pipe supplying water to the generator that provides electricity to all of the buildings. A wrapping of wire kept the tarred staves from bursting under the pressure.
Tucked in a 1/3-mile-wide cove and built up against the steep slope of Princess Royal Island, Butedale was built as a cannery and was in operation for three decades before being shut down in ’50s. When I arrived, almost all of the buildings for fish processing and the residences for the workers were empty, but the general store, a two-story white clapboard building at the top of the ramp angling up from the dock, was still open for business. Dan, the man running the store, was a Seattlite like me, and he had just bought Butedale, all 72 acres along with the houses, the dining hall, a bunkhouse, the fish-packing buildings, and the hydroelectric plant. I bought an ice cream sandwich from him, and he invited me to spend the night in the bunkhouse.
I brought my gear up from GAMINE, took a long, hot shower in the bunkhouse, and made myself at home in the dining hall. I was the only one in the building, but the steam radiators were keeping it warm and the air was redolent with the aromas of old wood, paint, and linoleum. I didn’t need to use my camp stove for cooking, as I had a working institutional kitchen at my disposal.
I woke in the bunkhouse clean, dry, and well rested. A southeaster had moved in during the night, bringing rain. I was in no hurry to leave and the tide wouldn’t be in my favor until midday, so I took a walk around the village. Lights were on everywhere, even in the unoccupied worker houses. The turbine driving the electrical generator was always spinning, driven by water from Butedale Lake descending through a tarred wood-and-wire pipe 3′ in diameter. To keep the turbine at a safe rate there had to be a constant load on the generator from the electrical grid.
At noon, I left Butedale and rowed into a confusion of chop as two sets of waves were met at right angles to each other and bounced off the shore’s near-vertical slabs of bare rock. In Fraser Reach, a 12-mile-long furrow between ridges on either side rising from the water in uninterrupted slopes as high as 4,000 feet, the wind picked up, so I set the main and jib. GAMINE took off down the channel. Rain was seeping through leaks in my foulweather gear, so I wrapped myself in the blue tarp that I’d picked up in Finlayson Channel.
As I was settling in on the stern sheets, an errant gust slipped in behind the main. I ducked under the boom as it slammed across, but the sheet snapped tight across the back of my neck and pinned me on the now leeward side. Wrapped in the slippery wet tarp, I couldn’t get much traction and had to scramble to get my weight to windward. I managed to get to the high side before any water could come pouring over the rail; when I got GAMINE settled on the new tack, she made great speed, and the white-veil waterfalls draped over the steep flanks of Princess Royal Island raced by.
I rounded Kingcome Point at the intersection of Fraser Reach and McKay Reach and coasted into the island’s lee. A 1-mile row brought me into a cove that would be protected as long as the wind didn’t swing around to the north. It was only 5:30 p.m. and I had covered just 15 miles, a short day. The fog had lifted, the water was silky-smooth for as far as I could see, and although I had fallen into the habit of making miles whenever I could, the next safe haven was a long way off. A mooring buoy in the cove would simplify settling in for the night and set aside my anxiety about dragging anchor, so I settled in my nest on the floorboards dry, warm, and happy.
In the wee hours of the morning, I was awakened by a dull thud that shook the boat. A drifting log had struck GAMINE and stuck, balanced across her stem. It took several hard pushes with an oar to slip it free.
The gap in the hills ahead is the entrance to Grenville Channel, a 45-mile-long corridor that funnels winds and tides.
I got up at 4:30 and was under way at 5:00 under clear skies and on calm seas. I rowed with the tides in my favor and made good speed covering the 20 miles from McKay Reach and across Wright Sound. Two miles into Grenville Channel, a 45-mile-long ice-age-plowed trench between Pitt Island and the mainland, I was feeling fatigued and pulled into a narrow notch in the north shore to wait out the worst of the ebb; it would reach speeds upwards of 5 knots and make progress impossible. It didn’t take long for gnats to find me at anchor. I wrapped some netting around my head, pulled my bivi bag over the rest of me, wrote an early journal entry, and eventually lay down for a nap.
Waiting out an adverse tide on Grenville Channel, I had to wrap up in a piece of netting to keep the bugs off my face while I wrote in my journal. In cool weather I dressed in wool: heavy socks, Army surplus pants that I had turned into knickers for backpacking, a long-sleeved shirt, and a Cowichan knit hat that I’d found half buried in the intertidal sand on a Puget Sound beach.
When I woke an hour or two later, the backs of my hands were dotted with pinhead beads of blood and GAMINE was crowned with erratically circling gnats. I rowed out of the inlet as fast as I could, swinging at the bugs tucked into my slipstream. It took a mile of hard rowing to leave them all behind.
I’d been getting used to the fatigue—rowing was just what I did every day, often all day—and my hands had toughened up, but my mind was feeling the wear and worry of the travel, especially in the long channels where anchorages were scarce and adverse currents and winds were a daily struggle. September was just a few days away, and the crests of the ridges and peaks that surround the Inside Passage were now being dusted with snow. In another week I could cross the U.S. border, but as appealing as it might have been to say I had rowed to Alaska, as a goal, it had become meaningless. The scope of my concern was much narrower and more practical. Keeping warm and getting safely from one anchorage to the next were the only things that mattered.
Nettle Basin, in the farthest reach of Lowe Inlet, is quite remote but I found lots of good company there. The couple cruising with the St. Pierre dory (left) was quite generous. They brought me aboard for breakfast and before they left they gave me three big Dungeness crabs they’d caught.
I rowed another dozen miles along Grenville, and in the mid-afternoon I entered Lowe Inlet, a 1/4-mile-wide gap in the 2,000′ ridge on the north side of the channel. Two miles into Lowe, I came to Nettle Basin, where a waterfall tumbled out of a valley in the farthest reach of the inlet. The top of Verney Falls was nearly level with the band of blackened rocks that separated the forest from the intertidal, and, with a spring high tide, the falls would be no more than tongue of dark jade water slipping quietly into the inlet.
The tide was rising when I arrived at Lowe Inlet and salmon were gathering in Nettle Basin, waiting for the peak of the tide before attempting to swim up the waterfall.
I beached the boat, carefully picked my way across the rock slope, and sat down at the edge of the falls. I had seen salmon surfacing at the base of the falls when I had approached with GAMINE, and suddenly dozens of them were darting out of the water in low arcs above the rush of whitewater, flexing their tails rapidly even though airborne. They had been waiting for the peak of the tide to help them get past the falls to their spawning grounds farther inland. Some of the salmon, attacking the falls on my side, flew by inches from my boots.
I sat watching salmon at Verney Falls for the best part of an hour. As I was doing research for this article, I found a photograph of the waterfall showing a black bear waiting to catch a fish at the very spot where I had been sitting with my back to the woods.
Nettle Basin was a popular anchorage for working vessels and pleasure craft. GAMINE, by far the smallest boat there, drew a lot of interest and generosity. A couple aboard a St. Pierre dory gave me two slabs of salmon that I cooked for dinner; the skipper of the tug LADY JODY let me spend the night in the fo’c’s’le. In the morning I was invited aboard the dory for breakfast and given three Dungeness crabs. A woman aboard a motor cruiser handed me some cookies and a banana, and a family of nine Tsimshian First Nations people invited me to join them for a beach picnic of spareribs and crab cooked over a campfire.
That second night in Nettle Basin was quite still, and rather than get ready to sleep, I started rowing out of the inlet, planning to take advantage of the nighttime tides in Grenville Channel. I rowed about a mile and had misgivings about spending the night underway; I and turned around and spent the night at the anchorage.
When I woke the next morning, black flies had found me. They were as big as raisins and their bites were quite painful. I had to wait until noon for the tides, so I pulled the bivi bag over my head while I had breakfast in bed.
I shared Grenville Channel with yachts, fishing boats, and cruise ships such as PACIFIC PRINCESS, featured in the TV series “The Love Boat.” After stardom, she got caught up in a drug smuggling ring in the Mediterranean and was ultimately scrapped in 2014.
I reentered Grenville Channel and rode the ebb tide, sailing wing-on-wing in a moderate wind. For hours I sat on one of my 5-gallon paint buckets with one hand on the tiller; I passed Klewnuggit Inlet, 11 miles along, where I got my first glimpse of the end of Grenville Channel, still some 20 miles away. I stopped in Kumealon Inlet on the north side of the channel after covering 25 miles. The anchorage was deep and the tides were running 15’ between high and low, so I asked a couple aboard a sailboat already anchored there if I could spend the night with a long painter tied to their stern, assuring them I’d be on my way at dawn. They agreed, and I made preparations aboard GAMINE for cooking dinner. I boiled the three Nettle Bay Dungeness crabs, one at a time, and ate all of them, picking them clean in 45 minutes. For dessert I had a peanut butter sandwich and two bowls of cereal.
I cast off from the sailboat at 6:00 a.m. and rowed back out to Grenville Channel. It was still early in the morning when a southeasterly funneled between the steep mountain slopes flanking it. I set sail and GAMINE again made good speed with the main and jib set wing-and-wing. The wind stiffened, making it harder to steer against the turning force of the mainsail. At the mouth of Grenville, just as I drew abreast of Gibson Island, the wind caromed off the island got behind the main; I saw the leech curl and dove for the floorboards as the boom slammed over to port. The sprit had crossed forward of the mast, raising the foot of the sail and pulling the boom jaws off the mast. Nothing had broken, and the self-scandalized sail reduced its area by at least a third and made it easier to steer.
I turned into the lee on the north side of the island to put things back to rights. I rowed the patch of slick water to a beach of rocks the size of bowling balls. After I put the boom jaws back on the mast and removed the sprit, I folded the mainsail from clew to throat, making it a low triangle with less than half the area. The next landfall, Porcher Island, was obscured from sight by the rain and low clouds, but I saw few whitecaps outside of Gibson’s lee, so it appeared that the wind had moderated.
I pushed off and drifted slowly out of the lee. A hundred yards out, the wind slammed into the sails and they turned as rigid as if they’d been made of steel. The mast bowed and GAMINE accelerated out from under me, rolling me into the stern. Both sheets were cleated on the centerboard trunk and now out of reach; I dared not go forward to reduce sail or round up to the wind, fearing the dory would pitchpole or capsize. GAMINE climbed up the backs of waves and stuck her bow out over the maws of deep troughs before dropping into them. There was no wallowing in the troughs pausing for following seas to lift the stern. GAMINE was outrunning the waves. After surfing the face of one wave, she just plowed into the next. As the bow drove forward into the back of a wave, I pushed myself tight against of the crown of the transom to keep the boat from being swallowed by the berms of green water raised up on either side.
The mainsail was set to port, and even though it was a fraction of its full size, it still overpowered the jib, set to starboard. I had to pull the tiller with both hands to keep the main from shoving the bow into a broach and a capsize. My arms and shoulders burned with the effort. Water around the dory rushed by in a blur that I could not bring into focus. I stole glances at the chart only to find that the part of Porcher Island I was headed for ran along a fold in the chart where the paper that had worn away. I had no choice but to aim straight at the land and accept that I might be driven against an abrupt rocky shore. Even that, I reasoned, gave me much better odds than a capsize mid-passage.
Beneath the stern sheets was the orange bag that contained a survival suit; I visualized grabbing it if I capsized. GAMINE plowed into one wave so sharp that it couldn’t support the weight of the boat amidships and poured water in over the gunwales. Gusts tore the tops off the waves, streaking them with spume. The rain and spray that hit my face stung so painfully that I had to stop looking aft to protect my eyes.
In spite of the speed, the dory skiff never broke loose on plane. If that had happened, the rudder, only as deep as the skeg, would have lost its grip and I’d have surely capsized. Water was boiling up astern, covering the transom nearly up to the gunwales and completely burying the rudder blade.
As I quickly closed on the land ahead, I saw a deep recess in the shoreline. It was dead ahead, but with each gust GAMINE veered to starboard, pushing my course toward the rocks on the east side of the gap. If I inched carefully back to port, I risked a jibe that I feared would, at the very least, break the mast.
Racing into the gap, GAMINE tore through a kelp bed without the least indication of slowing down. Kelp hammered against the bottom and the ends of wrist-thick stalks cut by the centerboard flailed up through the frothy white wake. The band of bare gray rock at the edge of the passage streaked by scarcely more than a boat length away.
After the crossing, GAMINE rests in Kelp Passage. With the sprit removed, the main is much smaller, but I’d have been better off running under bare poles, better still waiting for a better day.
The wind, weakened by its collision with the land, eased and GAMINE slowed. A quarter mile into the narrow gap I’d chanced upon—Kelp Passage, separating Porcher Island from Lewis Island—I turned to starboard into a 100-yard-wide cove. The sails and sheets went slack, and the dory coasted to a stop with the bow nudged against the shore. I stepped over the side and felt the cool, comforting squeeze of the mud around my boots.
I made it ashore in one piece but I was deeply shaken by the crossing from Gibson Island. The decision had been made for me; it was time to bring an end to this voyage and go home.
It was only 10:00 a.m., but I was certainly done for the day. The tide was nearing low slack. I left GAMINE where I’d come ashore and let the water slip out from under her. I dropped the rig, set up the boom tent, and heated a bowl of soup for an early lunch.
My accommodations were spartan at best. I slept on the floorboards with my legs tucked alongside the centerboard trunk. To roll over, I had to pull my legs back, lift them over the thwart, and tuck them on the other side of the trunk. All that required waking up. Here in Kelp Passage, the tide is rising as my last night of the voyage approaches.
I spent most of the day aboard the boat, and once she was afloat, she kited back and forth at the end of the anchor rode. The wind was blowing unabated and howling in the trees surrounding the cove. Tide would rise more than 20′ from the low and would lift me out of the lee, so in the afternoon I rowed deeper into the passage and anchored in larger cove better sheltered from the wind.
I spent the rest of the day aboard the boat tidying up, eating, and resting. At dusk, as I was settling in for night, the falling tide set GAMINE gently on a muddy plain. Grounded, I’d sleep well and be afloat in the morning. I awoke just before midnight and looked out from under the boom tent. The gibbous moon, just four days past full, was illuminating the landscape; as far as I could see, there was no water anywhere in the passage.
To the south, the islands were being swallowed up by fog.
When I woke, GAMINE was afloat and the air was still. I packed up and left in a hurry, not wanting to waste good rowing weather. As I headed north, Kelp Passage broadened and became Chismore Passage. Clear of Chismore’s north end, I set a course across Arthur Passage toward Smith Island, 4 miles away to the northeast. To the south, islands were turning pale and then disappearing as they were being enveloped by an approaching fog bank.
The horizon had disappeared behind a chalky haze, and when two pilot whales rose in tandem, their hooked black dorsals were the only marks on a dimensionless amalgam of sea and sky.
GAMINE’s bow is aimed at Alaska, hidden in distant fog bank beyond the gap between the northernmost islands of British Columbia. It would remain out of reach.
I rowed hard as fog wrapped around the south end of Smith Island and veered north by degrees, completing the crossing just before losing sight of the island. I crossed to Lelu Island and found my way along its western shore blocked by a sandbar that had been uncovered by the low tide. The bar stretched all the way to Kitson Island, a full mile to the southwest.
Prince Rupert is a busy port and I didn’t know where I’d be able to come ashore. In the midst of all of the oversized commercial facilities, I found the Prince Rupert Rowing and Yacht Club. I was welcomed there and allowed to stay for several days while I made arrangements to take GAMINE back home.
After I rounded Kitson, the fog cleared, and to the north I could see the last of the islands on the British Columbia coast stretched out along the horizon; beyond them lay Alaska. As close as I’d come to it, the weather had made it clear that it was time to stop. As I made my way to the port city of Prince Rupert, the sun broke through a ceiling of clouds the color of tarnished silver. I rowed the last 7 miles bathed in sunlight.
Epilogue
Wanting it to be over
I took this picture of myself during a break from rowing Grenville Channel. Thinking that I’d look back on this experience in a few years with fondness, I wanted to have something to remind me how difficult it was and how often I was either wet, cold, tired, hungry or all four.
After 31 days, having travelled over 700 miles aboard GAMINE and almost 100 miles with RAINBOW, I was relieved to be in Prince Rupert and on my way home. I hitched a ride back to Seattle; GAMINE came along on top of the van. I never did another cruise aboard her and eventually sold her.
I spent several days in Prince Rupert waiting for a ride back home to Seattle. No longer burdened by cruising, GAMINE and I both felt a bit lighter.
For a while I gave up on cruising, but when I saw maps of other inland waterways, the same stirring that had compelled me to build and sail GAMINE came over me. Between 1982 and 1987 I built three more boats for three more inland cruises. The first of those cruises was longer—2,500 miles over the course of 4 ½ months— and the one that followed was more challenging—2,400 miles in 2-1/2 months in the middle of winter. Eventually I returned to the Inside Passage and made it to Alaska.
During all those cruises I never came up with a good answer to the question—”Why?”— posed to me by young Bergie while I was aboard GAMINE in Nanaimo. I had no goal, at least not one that I could find within me, let alone express. To be sure, I had many memorable experiences, but they took on meaning only in retrospect and even the sum of them couldn’t account for whatever it was the kept me coming back to travel by boat. If I had known what I was looking for, I might have taken the quickest path to it and, having achieved it, set out for something else. When I was looking at maps of the British Columbia coast I must have seen the convoluted course of the Inside Passage not merely as a waterway leading north, but as a path I could follow to explore what I was capable of and perhaps discover something about myself.
Christopher Cunningham is the editor of Small Boats Monthly.
If you have an interesting story to tell about your adventures with a small boat, please email us a brief outline and a few photos.
When I retired, my wife and I decided to move from the middle of Wales to Modbury, a town in Devon, England, just 4 miles from the coast; the prospect of a move and more time on the water with my family encouraged me to look for a slightly roomier dayboat than my 14′ 6″ Oughtred-designed Whilly Boat. I spent many happy hours studying designs from France, America, Australia, and, of course, nearer home here in the U.K.
I became increasingly interested in the work of the British naval architect Andrew Wolstenholme. Two of his lapstrake plywood dinghies, the 11′ Coot and the 12′ Mallard, really caught my attention. Both were already very popular owing to their lovely lines and excellent performance under sail. I approached Andrew to persuade him to design a bigger dinghy for estuary use in Devon. The boat needed to be light enough for easy trailering but big enough to take care of itself on a mooring for the summer months. Andrew agreed and produced a set of plans for a new 15′ gunter-rigged dayboat, the Swallow.
photographs by Mike Wynne-Powell
Airtight chambers along the boat’s entire perimeter give the hull stiffness and ample buoyancy in the event of a capsize.
The lines of the Swallow seemed to offer an ideal compromise of lightness, speed, and roominess. The plans are suitable for skilled amateurs, as there are no step-by-step instructions or patterns for planks. Lofting isn’t required—full-sized patterns for the molds and transom are provided with the plans—but the hull must be lined off and the plank shapes spiled. When I realized each sheer plank might have to be scarfed together from three pieces of plywood, I asked Andrew to reduce the overall length to allow for two 8′ lengths of ply, joined by 10-to-1 scarfs, to have sufficient length for the sheer planks. Andrew agreed, and the dinghy became 14′ 6″. The straight stem and slightly raked heart-shaped transom, coupled with epoxy-glued planking, give the Swallow a very traditional appearance.
Fairing the planking lines on a new design is quite time-consuming, and I spent many hours peering at a batten laid over the hull while I tried to visualize how the boat would look when turned the right way up. The plank widths were worked out for the stem, ‘midship mold, and transom. The marks for other molds were determined by laying a batten through the known points and then marking the remaining points where the batten intersected with the molds.
Throughout the planking process, the 13 molds kept the lightweight 6mm marine plywood fair. I sometimes used up to 30 plywood U-shaped, wedged clamps to hold each new plank in place until the epoxy hardened—they have the reach to get around the plank, cost next to nothing, and are lighter than metal clamps, whose weight could distort the planks. Each plank has a 20mm-wide beveled edge which provides ample gluing surface for the subsequent plank.
The Swallow has 10 strakes, making 20 planks to cut, trim, and bevel before fitting. The backbone is a substantial keelson in khaya laminated to a sapele keel. The 7/8” sapele transom is faceted rather than curved, so each plank end can lie on a flat beveled surface for a perfect fit. The gunwales and inwales are substantial, with three laminations of sapele sandwiching the sheer plank.
The Swallow carries a gunter main with an area of 94 sq ft and a jib with 29 sq ft.
The interior layout is simple and comfortable, with the aft seat at the same height as the side benches, making it relatively easy to slide from one position to another inside the boat. The foredeck is above the bench level, but well below the sheer, and supported at its aft edge by a 12mm ply bulkhead. A large hatch on the bulkhead gives access to the watertight storage area under the deck. I stow the jib there, along with fenders and clothing. The rear compartment is accessed through two small hatches mounted on the bench and is used for stowing cordage, a chart, outboard motor parts, and safety equipment.
A pair of longitudinal buoyancy chambers span the bulkheads in the bow and stern and are fitted with removable hatches for ventilation and access. These chambers greatly increase the rigidity of the hull and comply with the EU Recreational Craft Directive regulations on safety. A pair of 7/8″ sapele knees at each bulkhead and at the center thwart secure the gunwales strongly to the hull. The centerboard case is topped by a 6″-wide 1/2″ plank, forming an additional perch in the middle of the boat. A 3’-deep swinging centerboard was fabricated from edge-glued sapele and carefully worked into an efficient foil from the plans. A 3” lead disc, epoxied in, provides some slight negative buoyancy. The nicely profiled kick-up rudder, offered in the plans as a full-sized pattern, is controlled by an uphaul and downhaul. The tiller projects from the rudderhead through an elliptical hole in the transom.
The boat carries a gunter rig, and the spars for the tall mainsail stow within the length of the boat. The mast is supported by two shrouds and a forestay. The plans call for a mast set in a tabernacle, but I opted for a strong bronze hinge. In raising the main, the yard is pulled tightly and parallel to the mast, in effect acting as a Bermudan rig. During windier conditions, the yard can be lowered about 18″ for attaching the main halyard with a quick-release pin to a second, higher slot on the yard when the sail is reefed.
Shrouds to the masthead support the rig when the Swallow is sailed hard.
Under sail, the Swallow is very responsive and light on the helm. The underwater profile of its hull not only gives a good turn of speed but the well-rounded shape, with a beam of 5′ 6″, is very stable when being boarded or sailed. There is room enough for up to four adults; with an agile crew of two aboard, the Swallow can be sailed very fast under full sail. On the Salcombe estuary in Devon, in a wind of Force 3 to 4, my wife Linda and I managed to keep completely dry despite the choppy conditions.
When sailing single-handed, the helmsman is provided with the main halyard and centerboard adjustment to the starboard of the centerboard trunk. A boom downhaul, with a 2-to-1 gun tackle to tighten the luff, leads to a cam cleat on the port side of the trunk. The Swallow sails wonderfully under main alone when going solo. I have experimented with leading the mainsheet to a block anchored on the centerboard trunk, but prefer handling the mainsheet as it comes from the boom end in the present arrangement. A kicking strap could be added to prevent the boom lifting, but I prefer less clutter. In recent years, I have fitted an auto ratchet block on the end of the boom to take the load in windy conditions. The mainsheet is led from the boom end around a block attached to a 2′ traveler on the transom.
With a beam of 5′ 6″, the Swallow needs long oars. The pair here are 9’6″.
The Swallow has a single rowing station at the center thwart and, with 9′ 6″ oars, rows with ease, but I stopped carrying oars some years ago and use an outboard for auxiliary power. I stow a Honda 2.3 outboard on the port side horizontally under the center thwart over a wooden block that protects the larch floor boards. To use the motor, a special two-piece plywood mounting fits over the transom, covering the hole for the tiller and protecting the mainsheet traveler. The outboard is then quickly clamped on the centerline and can be used in minutes. The motor powers the boat so easily that I rarely get to half-throttle.
With the rudder removed, the Swallow will take a small outboard for auxiliary power. Half throttle is all it takes to get the boat up to speed.
Over the past 14 years, I have appreciated and enjoyed Andrew Wolstenholme’s timeless design for the Swallow—a traditional-looking dinghy which could happily sail in the lightest airs. I had originally wanted a dayboat that was roomy with easy lines and ideal for exploring the estuaries of South Devon, but I got that and so much more.
Nick Hanbury was a cartographic surveyor with Ordnance Survey, Great Britain’s mapping agency, and spent all his working life making maps. In 1992, he joined John Kerr at his boatyard in West Wales for a week and was introduced to concepts of lapstrake building. In 1997, Nick’s Whilly Boat won the Amateur Shipwright Award at the Wooden Boat Show at Greenwich. His Swallow, christened LUCY, went to the Boat Show at Beale Park in 2004 and won 3rd overall and special prize for Best Constructed Boat. He is grateful to Linda for her support during these projects. He’ll be happy to share more about his building and sailing experience through correspondence directed to nickhanbury62@gmail.com.
Swallow Particulars
[table]
Length/14′ 6″
Beam/5′ 6″
Draft, board up/7.5″
Draft, board down/3′ 9″
Sail area, main/94 sq ft
Sail area, jib/29 sq ft
[/table]
Plans for the Swallow are available from Wolstenholme Yacht Design for £125 ($162 USD) for e-mailed PDF files, and printed for an additional £20 ($26 USD) plus shipping.
Is there a boat you’d like to know more about? Have you built one that you think other Small Boats Monthly readers would enjoy? Please email us!
The Skipper and I launch our small sail-and-oar boats from our beach and dock, and coming and going we have to negotiate several obstacles. With the boathook we may pole off the beach, fend off from our beach groins, or push off the dock. We’ll also paddle to and from the dock and in and out of the wind shadow created by the shoreside trees. We like to carry as little gear as possible when sailing, so we created a combination paddle and boathook, which we call a “padook.”
Photographs by the authors
The blade of a Greenland paddle is narrow enough to provide a good grip when using the boat hook, but has plenty of area for power when used for paddling.
We liked the bronze boathook that we ordered from The WoodenBoat Store and attached it to a wooden shovel handle. Handle and hook together measured 5′, a length that worked well for our Penobscot 14; it had a good reach length and was easy to store and use, so we set that as the length for the padook. We bought another bronze hook and made a new shaft with a paddle blade shaped like that of a traditional Greenland paddle.
We both prefer using Greenland paddles for kayaking; used properly, the long, narrow blades have a powerful stroke and are very well suited for sculling techniques. The slender blades, unlike those of conventional paddles, are sized to provide a good grip in the hand and would also make the padook a little easier to stow aboard our small boat.
We started with a piece of white pine, trimmed it for finished overall length of 5′, and tapered the shaft end to fit in the boathook socket. The bronze hook is secured with two silicon-bronze wood screws. The wooden paddle part measures 1-3/8″ diameter at the hook end, transitions to a 1-1/8″ by 1-3/8″ oval at the paddle throat, and flares to 2-5/8” wide at the paddle tip. The blade is 34” long, tapers to 1/8″ at the edges, and has a center chord that tapers from the 1-3/8″ thickness at the throat to the 1/8″ tip. The edges have shoulders where they meet the loom, and for paddling this provides a good grip that’s easily oriented by touch in the dark, as well as a secure handhold when we have to pull hard with the hook.
As it is with Greenland paddles, the padook works best when the blade is moving slightly edgewise through the water. It will flutter when pulled hard straight back, but still provide power. Think of it as the blade of an airplane propeller instead of a plank on a paddle-wheel. The blade is very well suited for sculling; we can provide a constant pull and avoid having to pull the blade out of the water. Coming back home we use the hook end of the padook to fend off the dock and grab dock cleats.
With the boat hook weighting one end of the padook, the blade rises above the water making it easier to see and to retrieve.
Like a proper boathook, the padook floats vertically—the weight of the hook pulls the loom down; 16″ of the blade sticks up above the surface, much easier to see and grab than a boathook that floats flat. The padook also aligns with our goal of having boating gear that serves multiple purposes. Maneuvering a boat around a dock usually requires a paddle and a boathook, and we like having a single device in hand that takes the place of both.
Audrey “Skipper” Lewis and “Clark” Kent Lewis enjoy small boating along the bays and rivers of Florida’s Emerald Coast. Their adventures can be followed on their small boat restoration blog.
Editor’s notes:
I was intrigued by the Lewis’ padook and decided to build one for myself. It was an easy and familiar shop project—I’ve made several Greenland paddles in the past and described the process in a book I wrote, Building the Greenland Kayak. Here’s how I went about making my padook:
Photos and video below by Christopher Cunningham
The fir that I used was a 2×3 (1-1/2″ x 2-1/2″) so I glued pieces to the sides to get the 3-1/2″ blade width I felt was a good fit for my hands. If I’d started with a 2×4, the additional wood wouldn’t be required.
At the throat, I marked the inboard end of the blade for a 2″ width. The 1-1/8″ width of the loom marked here, with the full 1-1/2″ thickness of the 2×3, creates an oval loom that is a comfortable and secure fit in the hand and aligns the strongest dimension parallel with the direction of pull when paddling.
At the hook-end of the shaft, I marked the tapered of the loom out to 1-1/2″ to match the outside diameter of the hook’s socket.
After cutting to the outline of the loom and blade, I marked the loom with an eight-siding gauge and drew parallel lines for a 3/8″ thickness at the blade edge.
The tapered thickness of the blade is marked for cutting the bulk of the wood away on the bandsaw. The marks at the end are a bit wide of the blade width markings to avoid unintentionally sawing away too much wood.
The faces of the blade are planed to to a taper from the 1 1/2″ loom to the 3/8″ tip.
The loom is cut to the eight-siding-gauge marks and the blade has a rolling bevel between the centerline marking the spine and the parallel lines at the edges. The rolling bevel is best worked with a spokeshave and with small planes held on a diagonal to shorten the area of contact with the wood.
Spoon-bottom planes can work the hollows between the center ridges and the edges. The tool resting on the blade is a Japanese wooden plane; beneath the blade is an old Stanley palm plane.
A 3″ sanding drum (see review, January 2018) chucked in a cordless drill had a good shape for hollowing the blade between the edges and the center spine.
I measured depth of the hook socket and used that dimension to mark a shallow kerf for the shaft’s shoulder. To get the right taper, I scribbled pencil marks inside the hook socket, then twisted it over the shaft. Pencil lead would transfer to the high spots where I needed to remove more wood.
The finished shoulders are rounded and sanded smooth. They provide a good grip and at night indicate the orientation of the blade.
I made a padook with some straight-grained Douglas-fir. After the initial shaping it had too much buoyancy for the hook and floated flat. I puzzled over what to do to get it to go vertical. Trimming wood on the hook end would reduce buoyancy and eventually let the hook sink, and trimming the top of the blade would reduce the weight holding it flat on the water. It seemed that shaving both the shaft and the blade would do the trick. I trimmed everything down and the second float test worked. Kent and Audrey used white pine, a wood less dense than Douglas-fir and got about 16” of blade above the water. I got about 12” of my padook blade showing, using the same hook as they did.
You can share your tips and tricks of the trade with other Small Boats Monthly readers by sending us an email.
Cooking at anchor aboard a small sail-and-oar boat can be a challenge. Some make dedicated boxes to hold their stove, fuel, and cooking utensils, and while they may be convenient, finding a place to stow them can be difficult, especially in a boat already crowded with gear for a long trip. In my boat, FIRE-DRAKE, my critical gear goes through 9″-diameter hatches into the watertight compartments, so a galley box is out.
photo and video by the author
With the pot locked on the stove and a folding tripod base clipped to the fuel tank, the Jetboil system behaves itself while cooking at anchor with the boat rocking.
Jetboil’s Flash Cooking System is pot, stove, and fuel all in one tidy package that stows easily. Since acquiring mine a couple of years ago, I use it for 99 percent of my cooking. It is very quick to boil water and simmers well enough for the meals I make with it. My cooked meals are generally simple: porridge in the morning and dried pasta or rice for the evening meal, with soup occasionally.
The pot is a 1-liter aluminum cylinder with nonstick coating and a base that connects it to the burner. It has a neoprene insulating sleeve to retain heat and a webbing handle so you don’t need a pot gripper. Welded to the bottom of the can is a corrugated aluminum heat exchanger that greatly increases the efficiency of the heat transfer from the flame to the pot, so much so that the flame doesn’t melt the neoprene. The burner has a built-in piezoelectric lighter; its isobutane fuel canisters are available in 100g, 230g, and 450g. The insulating sleeve has a window with an indicator that changes color as the water comes to a boil. It works, but you can hear when the water boils.
Disassembled, the stand, burner, and a 100g fuel canister all fit neatly inside the pot, kept in by a silicone lid. There is also a plastic measuring cup that fits on the bottom to protect the burner.
Assembled, it looks a little unstable, but having the stove and pot connected make cooking much less precarious, and a fold-out base with sticky feet, snapped to the fuel canister, steadies the stove. If you fill the Jetboil to no more than the recommended fill line (500ml, or 2 cups) it seems to be adequate for the normal motion of an anchored boat. I did accidentally kick mine once and partially knock it over, but that is a risk with any stove used in confined quarters.
It only takes about 50 seconds to assemble the stove and get the flame lit. Then in just over 3 minutes, 2 cups of water will come to a boil.
For most of my meals I boil the water, add the ingredients, partially cook it at reduced heat, then shut the stove down, put an additional stove insulating cap (made for another stove but it fits the Jetboil Flash nicely) over the top, and let it finish cooking. The method saves fuel, and the extra insulation keeps the food hotter. By turning the stove off before cooking is complete, a 100g canister will last about a week.
Should you want to cook anything in a pan, Jetboil makes a pot support that fits on the burner assembly.
I’ve used the Jetboil Flash for over 80 cruising days now, and it has performed flawlessly every time.
Alex Zimmerman is a semi-retired mechanical technologist and former executive. His first boat was an abandoned Chestnut canoe that he fixed up as a teenager and paddled on the waterways of eastern Manitoba and northwestern Ontario. He started his professional career as a maritime engineer in the Canadian Navy, and that triggered his interest in sailing. He didn’t get back into boatbuilding until he moved back to Vancouver Island in the ’90s, where he built a number of sea kayaks that he used to explore the coast. He built his first sail-and-oar boat in the early 2000s and completed his most recent one in 2016. He says he can stop building boats anytime.
The Flash Cooking System is available from Jetboil for $99.99 and from many outdoor retailers.
Is there a product that might be useful for boatbuilding, cruising or shore-side camping that you’d like us to review? Please email your suggestions.
Modern double-braid line, with its shiny white weave and colored tracers, isn’t a good match for the subtle earth-tone elements of a traditionally built vessel. For SOLVI, with her bright-finished cedar and her bronze hardware, we wanted a low-stretch, smooth-running twisted line that had the aesthetics of a traditional hemp cordage and the strength of synthetic line, but without the slippery plastic feel.
Photographs by the author
The P.O.S.H. line splices well, coils neatly, and looks right on a wooden boat.
After some Internet searching we came across P.O.S.H. (Portside Out, Starboard Home) manufactured by Langman Ropes. It has a soft feel that’s easy on the hands and a natural-looking tan color that looks right with our boat’s bright-finished wood. The three- or four-strand polyester twisted line that is UV-stabilized, pre-stretched, and made with spun yarns rather than filament yarns—think knitting yarn versus monofilament fishing line. The spun and twisted polyester yarns in P.O.S.H. are not as stable as filaments, therefore in order to meet the grade set by modern double braids they must go through the additional processes of heating and stretching to lower their elongation under load. The line then reaches a mere 2 percent stretch at 20 percent load of its breaking strength. This is better than New England Rope’s classic Sta-Set double-braid, which has a 3.5 percent stretch under the same load.
P.O.S.H. has good resistance to abrasion and chemicals, and its strength is not diminished when wet. We find its handling characteristics when wet are well above the typical double-braid; because it’s less slippery, it requires less grip strength. The spun yarns are not as strong as filaments—10mm P.O.S.H. has a 3,500-lb breaking strength versus 4,400-lb for double-braid—but the line is well suited to uses aboard small boats, and the aesthetics and the comfortable feel make for a worthwhile compromise.
The strands keep their shape when spliced; the cut end can be melted with a hot knife to prevent fraying below the whipping.
Aside from the intended use as running rigging, P.O.S.H. lends itself to decorative knots and ropework. What I like most about this line is the ease with which it splices. All of our sail controls—outhaul, reefpoints, halyard—are done with simple spliced toggle shackles, and all of our blocks are attached to the boat with spliced loops. Splicing P.O.S.H. line requires no special tools and is something that can be done quickly and easily. When untwisted for splicing, the three strands resist unraveling, allowing for a tight and tidy splice. With a little practice I found that I could even neglect taping the strand tips and, if necessary, could easily retwist the strands or even the line itself. The soft shackles we make take the place of metal shackles, which can clang around and scratch a carefully laid finish and can be dangerous when whipped around by the wind. A little pleasant work with P.O.S.H. reduces these risks and saves money while also producing fittings that look just right on our lug-rigged boat.
After more than 1,000 miles of sailing with this line for every piece of running rigging on the boat, we had no problems or complaints. It held up well to both fresh- and saltwater conditions, constant sunlight, and the chafe of everyday use.
Danielle Kreusch grew up in Salt Lake City, Utah and spent a lot of time hiking and camping in the mountains. After moving to Florida to finish her BA in Psychology and Child Development, Danielle met Kyle Hawkins, who took her sailing on their third date. Their Mississippi River trip was their first small-boat excursion, and they have both fallen in love with the idea of continuing to travel in small boats.
The first time Harvey Hamel retired as a contracts director for a Fortune 500 engineering and construction firm, he designed and oversaw the construction of the house he and his wife Leslie now live in. That was in 1999. The following year he went back to work with the same firm and then retired again in 2013. In the fall of that year he went to Port Townsend, Washington, less than an hour’s drive from his home in Kingston, for the annual Wooden Boat Festival. He had done some woodworking and had always been intrigued by the complexity of wooden boat construction. Seeing all of the traditionally built boats at the festival got him thinking that he might try his hand at boatbuilding. Before heading home, he bought a used copy of John Gardner’s Building Classic Small Craft.
Photographs by Harvey and Leslie Hamel
To make it easier to assemble the plank sections, Harvey built a long worktable along one wall of the garage.
Leafing through the pages of the book was all it took for him to get hooked on the idea of building a boat. It would be the perfect retirement project. Leslie was the daughter of a Coast Guard captain and moved frequently while growing up, but spent many of her summers at the family beach house on Camano Island, plying the waters there in a dory. She had fond memories of it, so Harvey decided he’d build a dory. He bought Gardner’s The Dory Book and was drawn to the chapter on the Chamberlain gunning dory.
Prior to cutting the bottom to shape, Harvey set the frames and stems in place to make sure everything fit the outline he’d cut.
Harvey spent a few months poring over The Dory Book, soaking up the 71 pages of Chapter 5, and buying tools, hardware, and lumber. Gardner supplies detailed drawings of the dory’s frames, and since the six frames and the stems were the only building forms required, lofting wasn’t necessary. Except for a 1-5/8″ height difference the stems are identical, and the three frames forward are identical with the three frames aft, so Harvey only had to make one pattern for the stems and three for the frames. In anticipation of the work on the planks, he made a 19’ workbench along one wall of the garage.
With the garboards in place, a three-piece blank for the broad strake, scarfed and glued, was set on the forms to get the marks for its sheer-side edge.
Finding suitable lumber at an affordable price wasn’t an easy task. After searching for several months, he came across a Craigslist ad for white oak and clear, old-growth vertical-grain Douglas-fir, which had been properly stickered and stored in a warehouse in Lake Stevens, Washington, for 15 years. Harvey bought seven 20′-long 2x12s of the old-growth fir, two 12′ lengths of 2×8, and four 20′ lengths of 1×4 oak. Harvey milled the oak on his 12″ planer for sawn frames, bent frames, stems, inwales, outwales, breast hooks, and false stems. He sent the fir to Edensaw in Port Townsend to be resawn into 1/2″ planking stock and 1″ boards for the bottom and thwarts.
With the hull complete, the gunning dory is ready for the interior accoutrements.
Harvey also bought some old planes, some new planes, a 14″ bandsaw, and what would become a steady stream of clamps. Sawdust and shavings first fell on February 20, 2014, when blades and boards came together to produce the three-plank bottom. Harvey worked largely alone, sussing out each step in the construction by watching YouTube videos, reading blogs, and studying boatbuilding books. Progress on the uphill side of the learning curve was slow, and the project dragged out for months, then years. The stream of friends and relatives who visited the shop slowed to a trickle; they gave up asking when the boat would be finished.
Four years in the making, ODYSSEY is finished and ready for the water.
Each boatbuilding mystery that Harvey had to solve led to what he called a “sabbatical,” and then he’d eventually find a solution and return to the project. In December 2015, he had finished the planking, a significant milestone, but after he flipped the hull right-side up to work on the interior he was confronted with a whole new set of challenges: steam-bending frames, fitting the two breasthooks, and springing in risers, inwales, and outwales. Overwhelmed, he took a prolonged leave of absence. It came to an abrupt end one night in June 2016, when he bolted awake at 2 a.m. hearing a voice in his head shouting, “Just build it or burn it!” That morning he got back to work on the boat.
On a cool October afternoon, Harvey takes to the oars and glides gracefully into retirement.
As the project neared the end of its fourth year, it became clear that it would come to a successful completion and the boat was going to need a name. Leslie, mindful of the long and transformative journey Harvey had made to turn a stack of lumber into an elegant boat, came up with ODYSSEY.
At the end of the project Harvey began to feel his efforts had breathed life into lumber, screws, rivets, and varnish and in spite of all of the difficulties, the build had been the best way to begin his retirement. It had kept him healthy in mind, body, and spirit. His only regret was that he hadn’t started building boats 60 years earlier.
This time he has decided he’ll stay retired.
Have you recently launched a boat? Please email us. We’d like to hear about it and share your story with other Small Boats Monthly readers.
In my tweens my father let me play with a model steam engine that my grandfather had built, so I was told, from a Stuart Turner kit from England. I’d occasionally take the engine, its boiler, a small crescent wrench, a box of matches, and a handful of black licorice and set up on the concrete patio in the back of the house.
Stuart steam engine models date back to 1898. I’d guess that my grandfather’s is now about 90 years old. It doesn’t have a lot of hours on it and still runs smoothly.
After removing the pressure-release valve I could trickle water into its fitting until the water showing the gauge on the front of the boiler was almost to the top of the glass tube. I’d replace the valve, then fire the boiler with either an alcohol burner that Dad bought for it, a can of Sterno, or wood scraps. I preferred wood for the glowing golden flames at the mouth of the fire chamber and the plume of smoke issuing from the chimney.
The model is powered by a copper boiler secured to the plywood base over a circle of fire-proof jeweler’s soldering board.
As the pressure built, some of the fittings on the boiler would begin to hiss and spit. The whistle on the top of the boiler was my only means of checking the pressure. It would lisp when the pressure was just beginning to build, and with good head of steam, it would scream shrilly when it was time to open the valve to send steam to the engine. The brass flywheel might’ve also needed a bit of a nudge to get it spinning.
The engine never propelled anything, but it was pleasure enough just to watch it and listen to it—I’d sit by it eating licorice until the water level in the gauge dropped to the bottom and it was time to extinguish the fire.
When John Leyde invited me to take a run in a steam-powered boat up the Ebey Slough from Marysville, a half hour north of Seattle, I was eager to watch a steam engine put to use. John helped a friend build ATNA, an Adirondack guideboat that was featured in our January 2018 issue.
The propane burner in the boiler has not yet built up a head of steam, and all’s quiet.
The steam launch E. SCOTT HAMMOND is just one of the many boats John has built. Its lines were inspired by a Karl Stambaugh cruiser that John scaled down to half for an electric launch, then stretched to 18’ for the HAMMOND, launched in 2009, which was initially diesel powered and then converted to steam on 2016. The switch was one John was destined to make; his father worked with a logging crew in the Washington forests and ran a steam donkey, a powerful seething machine with a tall boiler and a powerful winch, all mounted on a pair of hip-high log skids.
courtesy of John Leyde
John’s father, Ralph, here sits on the winch drum of the steam donkey he operated. Grandfather Leo is behind him, and John’s uncles, Paul and Glenn Leyde, are in shirtsleeves standing in front of one of the log skids. The donkey was behind hauled between work sites where it was to be set on the ground, resting on the skids.
The engine for the HAMMOND was built in 2004 by a steam buff in Oregon. It has a 2-1/2″ bore with a 3″ stroke, making it a 241 cc engine, although it’s not just the top of the cylinder that does the work. The piston gets pushed by steam from above and below.
John’s steam engine pushes the HAMMOND along at about 4 knots.
The piston is lubricated not by oil, but by water condensed from the steam flowing into the cylinder, and the water is recycled in the hot well beneath the boiler where it will be turned into steam again. It is possible to use oil to lubricate the cylinder, but the water to be recycled gets contaminated with oil. John tried an oil-lubrication system once, and to filter the water before it reached the hot well, he ran it through a homemade filter: pantyhose filled with hair clippings from his local barber shop.
The boiler is propane fired, so there’s no smoke coming out of the stack. There are two propane tanks secured under the foredeck. With two tanks, John can switch as one becomes cold, even icing up, and interrupting the delivery of fuel as it is consumes at about 1-1/2 gallons per hour. There is a freshwater tank under the HAMMOND’s aft deck, and the water it supplies goes through a heat exchanger warmed by the engine’s exhaust to make the boiler more economical in the amount of fuel it consumes to create steam.
A bronze 16×20 propeller pushes the HAMMOND along at about 4 knots. It’s a good thing that she doesn’t go much faster, because John spends about half of his time tending the engine, checking the boiler, and going forward to check on the propane tanks. “Never take a date out on a steamboat,” he said, “you’d just be ignoring someone.” I took the initiative to keep an eye on our course up the serpentine bends of the slough, and often reached across the cockpit to turn the wheel, mounted on the portside coaming. I too let a lot of shoreline slip by without notice. Watching a steam engine is very much like staring into a campfire: it’s soothing, almost mesmerizing.
I’ve been using a very reliable 2.5-hp outboard for a dozen years, and as happy as I have been with it, I don’t really take pleasure in it because it doesn’t make for good company. With two of the boats we use it on, I’ve abandoned its tiller and put some distance between the helm and the motor so I don’t have to put up with its constant thrumming and quivering. John’s steam engine is a much better companion, soft-spoken and more open—it doesn’t hide behind a cowling and an engine block.
I’ve often thought I’d make a model launch scaled for the Stuart Turner engine, but while I might enjoy seeing the boat underway, I’d miss watching the workings of the engine.
It is hard to capture the feeling of a good pulling boat, but perhaps the best way to sum it up is to say that some boats just glide and will cover great distances on the water with seemingly no effort at all. A few pulls are all that are needed to reveal a well-designed wherry. With the skin-on-frame Ruth, Dave Gentry has created an interesting adaptation of a classic rowing wherry that captures that elusive quality of glide.
The Ruth, with its fabric skin, and well-thought-out, easily built wooden frame, keeps the weight down to around 45 lbs, light enough for this 18-footer to be singlehandedly cartopped with ease. Gentry’s plans are a complete, well-illustrated, easy-to-follow, and include paper templates for the plywood frames.
The structure for the Ruth is a combination of plywood and lightweight western red cedar stringers. The 1/2″ marine-plywood stem, frames, and transom are notched for the full-length strips that bend from bow to stern and give shape to the wherry. Joining frames to stringers takes only a bit of thickened epoxy and stainless-steel screws. Even the most inexperienced builder with basic tools can have a frame built in just a few hours. The plywood breasthook and various supporting knees are laid out in the paper templates as well. They are essential strengthening elements and relatively simple to add with a bit of beveling and finesse.
The fabric skin goes on with a combination of stainless-steel staples and only a bit of handiwork with needle and thread. The plans recommend 8-oz polyester. Nylon durability is well regarded among the skin-on-frame kayak builders; Gentry mentions it as an acceptable alternative with a precaution that it does not heat-shrink as well as polyester.
A good pneumatic or electric stapler makes short work of the hundreds of staples that a fix the skin along the entire gunwale, but a hand stapler would also adequately do the job, albeit with a bit of fatigue at the end of the day. An extra set of hands for the skinning step is helpful. You can do the job solo, keeping the skin in proper alignment with push-pins straight along the keelson. The addition of the gunwale later on hides the staples, but care should be taken to set them consistently at a depth that holds and doesn’t cut or pull the cloth askew at each staple.
Jim Dumser
The author’s Ruth is rigged with a home-built rowing rig for solo rowing and is without floorboards and a seat for a passenger. A false transom covers the edges of the fabric skin for a tidier appearance.
The skin wraps around the transom and particular care should be taken to do a neat job with the folds and the copper nails; they will be visible when the boat is completed. On my build, I first used upholstery tacks as a decorative touch, but they didn’t hold well, and the folded fabric edge wasn’t as tidy as I’d hoped. I decided to hide the fabric and the staples with a false transom of 1/8″ plywood. It added very little weight and looks tidy.
The only stitching required for the skin is at the bow. Even for the uninitiated, this short section can be accomplished rather easily. In addition to the supplied directions, helpful video tutorials are available online. Since polyester can easily unravel once cut, the edges need to be heat-sealed. If you don’t have a hot knife specifically made for the task, a flat cutting tip on a soldering gun works like a charm.
After the skin is attached to the frame, the gentle use of an iron will remove wrinkles and pull the skin taut. The polyester fabric needs to be sealed to become fully waterproof and the instructions call for oil-based paint or varnish. Inexpensive latex porch/floor paint, a favorite of many skin-on-frame builders, seems to hold up well, and can always be touched up or recoated. Marine topside paints, aside from being more expensive, are hard when fully cured and don’t seem to fare well applied to a flexible fabric surface.
Kyla Dumser
The length and enough fullness in the ends keep the Ruth in trim as the rower’s weight shifts back and forth on a sliding seat.
Once the skin is on, the rubrail and skeg round out a finished hull. Although the skeg is attached with screws through the skin, no leaks have developed and reinforcement by way of a short piece of brass fixed along the trailing edge of the skeg and the transom has proven ample support.
The plans detail an interior layout that consists of a rowing station and passenger seats. Designer Dave Gentry opted to rig his own Ruth with a fixed seat with simple outriggers as laid out in the original plans, a good option if you’re building on a limited budget. Fixed-seat rowing will require a pair of locks and simple plywood outriggers attached to the gunwales. A pair of 7′ to 7′ 6″ oars are a good fit.
The plans also include guidance on installing sliding-seat rowing units. I equipped my Ruth with a custom-built sliding seat rig that was designed around plans and a hardware kit ($299) from Colin Angus. Ready-made drop-in rigs like the Piantedosi ($595) have been successfully employed by many Ruth builders.
Kyla Dumser
The author has been able to bring the Ruth up to 6 knots in a short sprint and can hold 4 to 5 knots at a sustainable effort.
My Ruth weighs 55 lbs with the addition of the built-in rowing rig. The boat is very comfortable on flat water and can take on a bit of chop. I can easily sustain a cruising speed of 4 to 5 knots using a 9’6” pair of carbon-fiber hatchet-blade sculls. Top speed for me is a little better than 6 knots, but the extra effort to sustain the sprint seems hard to justify when rowing for pleasure.
Getting aboard is not difficult, but care does need to be taken about foot placement to protect the skin. The plans detail lightly constructed floor boards for a fixed seat; I omitted them because they would have interfered with the placement of the sliding-seat rig.
I usually launch in shallow water and get aboard by sitting on the seat first and then swinging my legs into the boat. Under way, the stability is very good and the Ruth provides a dry ride even when things become a little rough. The craft’s light weight lets me come up to speed very quickly in just a few strokes and the sharp bow ensures that I can maintain speed even in modest chop. The skeg assures that hull will track well underway and yet allows for reasonable maneuvering in tight quarters.
Kyla Dumser
While this Ruth isn’t equipped with a seat for a passenger, the reserve buoyancy created by the transom will support the additional weight without putting the hull well out of trim.
The greater freeboard of the wherry design, compared to a traditional scull, does lend itself to a little fight in a crosswind, but weathercocking is not excessive and easily corrected. At 18′, the Ruth does an admirable job avoiding the tendency of shorter craft to hobby horse as a rower’s weight shifts fore and aft with the sliding seat. I built my Ruth for solo outings and didn’t install the passenger seat.
The 8-oz polyester skin specified in the plans might make one wonder about its long-term durability. There isn’t much between the rower and the water, but after three years the skin is still in good shape and has no tears or punctures. In the plans, Gentry mentions the option of adding a skim coat of a polyurethane adhesive along areas where abrasion is likely. The challenge is to keep it thin enough not to bubble up while curing, but, when successful, it provides an additional measure of security.
Dave Gentry’s capable Ruth is a winner. Few homebuilt boats will get you on the water as quickly and as inexpensively. The simple construction method, plainly written guide, and complete plans ensure that even a first-time builder will succeed.
Jim Dumser is a husband, father, teacher, and boatbuilder who is lucky to have had the opportunity to share the art and love of boats with his daughters and his students for the past decade. Building boats is the natural extension of his time spent starting and teaching the Wood Arts program at North Carolina’s Community School of Davidson where students have built a number of boats from canoes to a St. Ayles Skiff.
Ruth Particulars
[table]
Length/18’
Beam/33”
Weight/45 lbs
Maximum capacity/375 lbs
[/table]
Plans ($65 for paper, $55 for digital) and kits ($500) for the Ruth are available from Gentry Custom Boats.
Update: The Gentry website seems to be down. Duckworks has plans for the Ruth. 7/14/22
Is there a boat you’d like to know more about? Have you built one that you think other Small Boats Monthly readers would enjoy? Please email us!
Sam Devlin’s boat designs always major in strength, practicality, and versatility. But Sam is an artist, a complicated, self-contradicting, cigar-smoking romantic, and frequently he can’t help himself: He draws a boat that’s as unapologetically cute as it is strong. This describes the Winter Wren, one of his older designs (the earliest example dates from 1980), and the one that lured me down a life-changing path a decade back.
I had already built a smaller and simpler Devlin boat, the 13′6″ Zephyr daysailer, a project that seemed plenty challenging at the time. The Winter Wren, while employing the same stitch-and-glue composite construction that I’d begun to get comfortable with, added the complications of cabin, outboard motor, electrical system, much more structure, and vastly more rigging. Listen, this rig is stout. One day I was scrutinizing a 24′ production sloop whose owner was embarking on a bluewater cruise to Hawaii, and I noted that the much smaller Winter Wren’s standing rigging was far more robust. This gave me a warm feeling.
Lawrence W. Cheek
The Winter Wren II will take an outboard between 2 and 4 hp. The transom motor-mount cutout—the author’s design and not in the plans—does allow about 15 degrees some swiveling in each direction, which is used in concert with the rudder for maneuvering inside marinas.
The original Winter Wren, still available in Devlin’s plans catalog, is a full-keel gaff-rigger measuring 18′8″ on deck, 22′7″ overall, with a 6’10″ beam. The Winter Wren II wears the same dimensions except for a 7′ beam, and it substitutes a daggerboard for the full keel. Both versions weigh about 1,800 lbs and carry 685 lbs of lead ballast, all lodged internally. Plans for the latter include both marconi and gaff sail plans, either measuring 176 sq ft. I chose to build the gaff daggerboard Winter Wren II with visions of trailer excursions to sailing destinations around the Pacific Northwest. I now know that was unrealistic. The Winter Wren II is too big and complicated to serve routinely as a trailer-sailer: it takes me 2 hours to wrangle the rig up or down; plus, I’ve learned that I hate trailering. If I had it to do over, I’d opt for the full-keel outfit, which is stiffer under sail and enjoys more unencumbered cabin space.
Although it’s one of Devlin’s older, hand-drawn designs, the Winter Wren II is now available as a CNC-cut hull kit. If you build from scratch you’ll have to scarf plywood sheets, loft the hull panels, and craft your own building jig. While some of this is fun, a kit offers advantages in precision and saves considerable time. Either way, this design teeters on the cusp of being a reasonable first build for the amateur: maybe so for someone with substantial woodworking and some sailing experience; probably not for the woodshop rookie. I had built a pair of kayaks and the Zephyr daysailer, so I was moderately confident starting out—and I still came to spend many nights awake at 2 a.m., questioning my judgment and competence. In an effort to drown the doubts, midway through construction I named the boat NIL DESPERANDUM, “Nothing to Worry About.” It did not help.
Dennis Ryerson
The Winter Wren II’s sail area of 176 sq ft is good for light summer breezes, and the entirely feasible addition of a topsail would make it even better.
I made a couple of changes in the design—one practical, one aesthetic. I sacrificed some storage to build in 14 cu ft of positive flotation, equaling about 900 lbs of saltwater. I’ve never even approached capsize, but in a worst-case scenario, I’m confident NIL DESPERANDUM would stay afloat. I also wanted to invite more daylight inside, so I built competing cabin side mockups with Devlin’s one and my two portlights and photographed each on the boat. I emailed the photos to eleven friends, all either sailors or architects. Eight voted for the two-light version, so I felt I had authorization, though I didn’t ask Sam.
The plans don’t call for a ceiling (a wooden liner around the inner hull), but I felt it would make the cabin visually warmer, so I built one of 1/8”-thick vertical-grain fir planks screwed to battens epoxied to the hull. It was worth the effort. Even with just 43″ maximum sitting headroom, the cabin is a pleasant place to hang out. The Winter Wren II’s main drawback as a minimalist cruiser is that storage space is likewise minimal. On the several multi-day cruises I’ve taken with my wife or a friend, we’ve stashed our accumulations on the V-berth during the day but had to shuttle some of them out to the cockpit when sleeping time arrived. Even if deploying sail covers over the banished goods, this tends to be a soggy solution.
Lawrence W. Cheek
Everything falls easily to hand in the cockpit for singlehanding: all lines, the tiller, and motor controls. A folding plywood boarding ladder stashes under the starboard coaming and side deck.
The most difficult aspects of the construction, looking back, were the hull fairing after the ’glassing—long, tedious, and ultimately imperfect; I have since discovered the blessings of System Three’s Quikfair—and the rigging. I had no experience with rigging, and I was determined to bring all sail control lines into the cockpit, which added complication. I took camera and notebook to marinas in Seattle and Port Townsend, haunted the docks, and studied. Helpful reassurance came from a friend who’s a retired professor of physics and a sailor. “The loads on a rig like the Winter Wren’s are so small that almost anything you do will work,” he said. He was right.
The Winter Wren II splits accommodation space between cabin and cockpit perfectly. The 6′6″ cockpit seats welcome four adults for daysailing, and are tolerable for sleeping if you carry a boom tent (we’ve accomplished two-day cruises with three aboard). There’s a bridge deck 16” deep with storage underneath for a porta-potty and quick-access miscellany such as tools and first-aid kit. The footwell is too deep for self-draining, so an automatic bilge pump or a cockpit cover is essential. My only ergonomic criticism is that the cockpit is slightly too wide for comfortable tiller management; a short-armed helmsperson can’t quite lounge back on the coaming and hold the tiller on center. Curving the aft side decks in 2″ more would solve the problem.
Summer sailing in Puget Sound asks for boats that are satisfying in light air, and the Winter Wren complies. It starts sailing with 3 knots of poke, feels alive in 5, and can make her official hull speed of 5.3 knots on a close reach with about 8 knots of breeze. I reef at around 10 knots of wind when the boat is beginning to feel a bit harried. I have a second row of reefpoints on the mainsail but no longer use them; the Winter Wren doesn’t seem to like a double-reefed main. What works best is to take the first reef at 10, roll up the jib at 15, and start heading for home if it seems likely to rise much further.
Lawrence W. Cheek
The Winter Wren’s cabin acreage is mostly given to the V-berth, which is punctuated with the mast compression post, a 1″ steel tube dressed up with a mahogany sheath. The daggerboard case, slightly offset to starboard, bisects the rest of the available space.
Like any self-respecting gaffer, the Winter Wren II resists being ordered tight to the wind, like a distinguished dinner guest being asked to do the dishes. It tacks in 100 degrees and makes rather gradual progress if you have an actual destination from which the wind is huffing directly at your nose. One strategy in such cases is to fire up the outboard—I have a 4-horse four-stroke, which is adequate—and run it quietly just above idle, which will tighten up the close-haul vector by 4 or 5 degrees. In compensation for its windward reluctance, the rig is an efficient delight on a broad or beam reach, or even a downwind run. In light air, I love to clip a preventer line to the boom and sit out front on the cabin roof, poling out the jib with the boathook for a wing-and-wing configuration. It’s so peaceful out there.
The great joy of the Winter Wren is its responsiveness. Every nuance of change in air or water conditions translates into some sensation transmitted directly through the tiller, sail controls, or seat of pants. There are no filtering mechanisms such as winches between controls and fingers, so every input has a tangible effect that you not only see but also feel. Tiller touch is light; when you find the groove there’s barely a fingertip’s worth of weather helm. You’ll frequently choreograph the crew to change sides, sometimes during a tack, and tinker constantly with the mainsail shape by playing the peak halyard, outhaul, and mainsheet. For me, this is what sailing is about: savoring the multi-sensory array of interactions between natural environment and machine, and learning to gracefully negotiate among them. On days when conditions are reasonable for small boats, the Winter Wren feels like an extension of your body, an organic being in itself.
Dennis Ryerson
The rig has its complications—four halyards and five stays—but the 20′ mast pivots on a bolt in a tall and beefy tabernacle, which makes it reasonably easy to raise and lower. NIL DESPERANDUM’s solid spruce mast weighs 40 pounds, but hollow birdsmouth construction would save about 15 pounds.
Devlin’s shop will cheerfully build you a Wren if you ask. I have a copy of the January 1984 Small Boat Journal in which a Devlin-built Winter Wren was the cover story, and it then carried a base price of $10,980. I hardly have to add that today’s bill would be several times that, which is why few pocket cruisers are being professionally custom-built now. I spent about $20,000 for parts and materials to build NIL DESPERANDUM in 3,000 hours over three years from 2008 to 2011, including motor, sails, covers, and cabin cushions. In heartless economic terms, that makes no sense—I could have bought a used production pocket cruiser in good condition for half that.
Some paragraphs ago I wrote that NIL DESPERANDUM had lured me into a life change. I have built two boats since, one smaller, one larger, and I am now more boatbuilder than writer, my previous lifelong profession. This is my career now, regardless of the fact that it consumes income rather than generating it. But building boats, like owning them, is never about heartless economy.
Lawrence W. Cheek is a journalist, frequent contributor to WoodenBoat magazine, and serial boatbuilder. He lives on Whidbey Island, Washington, and since 2002 he has built two kayaks, three sailboats, and currently is at work on a fourth: 21′3″ Song Wren, a Sam Devlin–designed gaff cutter.
When I set out from Mukilteo, Washington, late in July of 1980, the wind was light, barely ruffling the silvery expanse of Possession Sound. I set all sail—the sprit-rigged main, the jib and flying jib, topsail and jib-topsail—but no one would think of GAMINE as a topsail cutter. She was just a 14′ dory skiff, the first wooden boat I had ever built. Aside from her broad plywood garboards, she was traditionally built, with western red cedar planks on both sawn and steam-bent white oak frames. While I’d been day-sailing her for about a year and adding sails one by one until there was no room for more, I’d never done an overnight cruise in any small boat. Now I was headed north to sail the Inside Passage with no particular destination. There was no telling how far I’d get.
photographs by the author and from his collection
Moments before setting out from Mukilteo, GAMINE sits ready with all sails ready to catch what little breeze there was.
Stepping aboard, I kicked aside the tangled tail ends of sheets and halyards, and jammed my boots between the gear-filled 5-gallon plastic paint buckets that took up most of the space in the cockpit. I bore away on starboard tack and set the bowsprit over the low, thickly wooded shores of Whidbey Island. Halfway across Possession Sound I began to wonder how I was going to come about. There were seven sheets to tend to and too much clutter in the way to shift my weight across the crowded cockpit.
I gave up on the idea and just held my course until I’d run the dory up on Whidbey’s gravelly eastern flank. I brought the topmast down, and with it the topsail and jib topsail, made some more room for myself in the cockpit, and pushed off on port tack. After a two-mile crossing to Hat Island, I took an afternoon break on a beach fronting a row of single-story summer homes. The wind had been building, so I set out with just the main and jib, and beat across to Whidbey again, came about, and sailed for the south end of Camano Island, two miles to the northeast. I was soon on a beach beneath the headland’s steep, 300′-high bluff.
I would have been content to call it a day there, but because the high tide line was right up against the slope there’d be no room to camp. I’d have to make the crossing back to Whidbey. The last tack took me through the wind funneling between the two islands. Spray flew up from the bow, and as GAMINE heeled sharply with the puffs, water poured in over the lee rail. The topmast got loose and was dragged half overboard. I tucked into the lee of the marina at Langley, relieved to be out of the wind and off the water.
With the skiff pulled up on the narrow strip of sand, I set up housekeeping on the pale gray driftwood at the top of the beach. Dinner, it appeared, was not destined to bring order and comfort to the day. After I’d diced onions and russet potatoes, I discovered my camp stove was missing the piece that held the fuel line to the gas flask. I had a pair of pliers in my tool kit and found a nail that I could bend to make a replacement part. The stove, the one I used for winter backpacking, was good for melting snow, but terrible at sautéing. It took just a minute or two to turn the onions brown and gelatinous and char the potatoes, leaving them as crisp as apples on the inside.
I intended to camp on the beach and anchor the boat by means of a long loop of line run through a block attached to the anchor float. It was a method I’d seen described in a boating magazine with a tidy illustration of a boat hauled out to anchor, like laundry on a clothesline. The 200′ of 1/4″ twisted polypropylene I’d bought for the loop was the least expensive rope I could find, but it wouldn’t relax, and 90 minutes of trying to duplicate the drawing in the three dimensions of water, sand, and darkness left me with a wild scribble of yellow rope and emerald-green seaweed. I pulled the mess out of the water and dropped it dripping into the bow to sit until morning, when I would have more light and the wits to untangle it. I’d have to sleep at anchor; in the dark I gathered up the gear I’d brought ashore—goring the top of my foot on the jagged broken end of a driftwood branch in the process.
I sculled the dory off the beach and dropped the anchor. Before I turned in for the night, I used my bleach-bottle bailer to scoop up the water that had come aboard during the day and when I emptied it over the side, the water glowed a bright blue. I dipped an oar in the water, swept it side to side, and the bioluminescence lit it up like a propane flame.
Despite all of the time and effort I devoted to GAMINE’s sailing rig, I’d spend most of my time rowing.
The morning that followed my inauspicious shakedown was mercifully uneventful. The air was still and the water was flat. The sun had but one unbroken reflection, a small bright disk that skimmed the surface of the water alongside of the dory as I rowed. My bare legs began to feel the sting of the sun, so I covered them with my chart. After a stop for groceries at Utsalady, on the north end of Camano, I saw a southerly wind had darkened Skagit Bay to the north, so I raised the topmast and set sail. Beyond the glassy lee of the island, the wind filled the sails and the topmast bent forward. The tide was with me, too, and GAMINE sped toward the Swinhomish Channel. I scanned the land ahead looking for the entrance and saw only a rock jetty. Just when I thought I’d have to steer west to parallel the rocks, I saw a gap. It was only 10’ wide and water was pouring through it. I steered for the middle and the current spat GAMINE out on the other side. The wind skipped over the hills guarding the waterway, so I dropped the sails and took to the oars. The current was running about 3 knots, so there wasn’t much work to do.
As I rowed out of the north end of the channel, the colors of the sunset left in their order: red and orange first, lavender and indigo last. A full moon illuminated Padilla Bay in monochrome and spilled its mercurial light in a streak upon the water.
The tide was falling when I pulled GAMINE on a broad tide flat outside of the Anacortes marina. I set my alarm to wake me before the morning’s flood would lift GAMINE from the slick carpet of seaweed around her. I’d had a long row and fell quickly asleep.
At 2:30 a.m., the din of an unmufflered car engine woke me. The grass on the crest of the bank above the beach shone green as the roar grew louder and the bright circles of the car’s headlights popped above the crest and blinked out, leaving only the glint of the moon in the chrome grill-work. The doors opened, and the figures of six teenage boys arrayed themselves along the bank.
I waited for the inevitable.
“Look, there’s a boat!”
“No way, man. It’s a rock.”
I tried to look more like a rock.
“It’s a boat. Let’s take it for a ride.”
The six scrambled down the bank and stumbled across the slick rocks. When they were just a few yards away I sat up in the stern. The rising of my mummy-bag-wrapped figure brought them to a quick stop.
“What are you doin’ here?”
“Trying to get some sleep.” They lined up around the gunwales, three to port three to starboard. They asked about my row and looked over the equipment in the boat.
“You alone?”
“Yes.” The boat was too small to lie about the size of the crew.
“Well that’s cool” said one of them. Then he told the others, “Let’s let him get some sleep.” Five walked away from the boat. The sixth, standing unsteadily over the port tholepins, stared at me. He turned and called after the others.
“Let’s kill him! Hey you guys, let’s kill him!”
The five ignored him, scrambled up the bank, and ducked into the car.
“Aw, come on, let’s at least throw some rocks at him.” The sixth finally returned to the car. Its engine blared and the roar echoed from the flanks of Cap Sante; the car disappeared, leaving a cloud of dust that glowed red in the shine of its taillights. I did not slide back down into the dory but sat in the stern with my eye on the shore. I waited for the tide.
I was afloat at 4:30 a.m. and eager to get away, even though dawn was still a long way off and the air was quite chilly. With my sleeping bag cinched up under my armpits, jacket over that, and a paper grocery bag for a hat—I couldn’t find my real hat—I started rowing. I couldn’t pull hard because my fingers were quite tender from the previous day’s row. The north end of Anacortes was crowded with shipyards, marinas, and commercial vessels but I found a gentle slope of sand where I could come ashore. I jogged into town to shop for breakfast and a roll of first-aid tape. Before I shoved off I put wraps of tape, two dozen of them, around my fingers and thumbs.
Roger Siebert
.
I left Anacortes on the ebb tide, headed for the San Juan Islands. The southwest wind was pushing a fog bank around the distant forested summits of the archipelago, so I took a more northerly course toward Thatcher Pass to avoid the fog, but I had misjudged the strength of the ebb. The tidal exchange was not great, but the flood tide pushes 130 miles up into the far end of the Strait of Georgia, and all that water has to strain back through the San Juans. Crossing Bellingham Channel and Rosario Strait pushed me south much faster than I could compensate for the drift. I cleated the sheets to keep the sails pulling and began rowing to avoid getting swept into the fog. For the last two miles I was rowing due north as hard as I could, straight into the current, with the oars dully hammering my cadence against the oak thole pins. When I reached Thatcher Pass I tucked into a small cove to catch my breath before heading west again.
Well protected from wind and tides, my passage through the middle of the San Juans went smoothly. I made my last stop in the archipelago at Reid Harbor, and tied up on the Stuart Island State Park dock. With a bit of time on my hands before crossing into Canada, I went through my gear and left two of my 5-gallon buckets, filled with things I could live without and that campers would be glad to have, at the top of the stairs leading down to the dock.
I left Reid Harbor at 6:30 the next morning, rowed the mile and a half east to its mouth, turned west, and then set sail for Sydney, British Columbia, due west. I had a fair wind and GAMINE cut a wake of white froth across Haro Strait at slack tide. The nine-mile crossing slipped easily by and by 9:30 I’d cleared customs and began working my way north through the Canadian Gulf Islands.
I spent the rest of the day sailing, and after eight hours underway I reached Wallace Island, a 2-1/2 mile long sliver just 300 yards wide. The visit was a bit of a pilgrimage: my parents had honeymooned on the island in 1949.
Above the boulder-strewn shores, the trunks and limbs of madrona trees were rough with rust-red bark peeling back in curls to reveal a pea-green inner layer. A 50-yard-wide gap in the southwest side of Wallace opened to a well-protected cove elongated parallel to the island’s axis. I tied GAMINE at the dock and introduced myself to the young couple serving as caretakers. When I told them about my parents’ visit to the island they walked me to the cabin that was customarily rented to honeymooners. It was surrounded by radiant orange calendula and pale purple mallow in bloom.
That night, under a dark moonless sky, I lay belly down on the dock and peered into the water. It was filled with pin-pricks of cool blue light in pulsating rings—thimble-sized jellyfish invisible but for their bioluminescent fringes.
Bergie, the youngest of the crew aboard the yawl SVENSK, asked me why I was cruising in such a small boat. Three decades later I heard from him; he had taken to cruising small boats and answered his own question.
At the end of my first week I arrived in Nanaimo. The harbor at Newcastle Island was crowded with cabin cruisers and sailboats and the only small boats around were either stuck like limpets to the transoms of cruisers or propelled by small outboard motors that sounded like long-winded Bronx cheers. I docked next to a sleek yawl that hailed from Washington’s Bainbridge Island and from its rail two small boys and their parents watched me fuss with my gear as I answered their questions. The father translated for his youngest boy, Bergie:
“This man has come just as far as we have and he’s rowed all that way in that little boat.”
“Why?” Bergie asked, his eyes fixed upon me. I was suddenly mute. Bergie’s mother, sensing the awkward silence, filled in the blank:
“Oh, Bergie, he’s doing it because he enjoys it.” Enjoyment hadn’t immediately come to my mind. I thought of the bits of tape I had to wrap around the pads of my fingers every morning to protect them from the sting of holding the oars, and of my new habit of easing myself onto the rowing thwart, as if I were lowering myself into a tub of painfully hot water, to bring on the itch and tingle of salt-pickled skin by tolerable degrees. I thought of charred potatoes.
The next morning the yawl and I left the harbor at the same time. Bergie was wrapped in his mother’s arms as his father raised the spinnaker to catch the northwest wind for the voyage home. Driving in the opposite direction, to windward, GAMINE spat froth as she bit into the waves on the edge of the Strait of Georgia. I rowed with the hiss of the cold wind raking my ears and hearing the echo of “Why?”
The northwesterly brought clear, cool air and the foothills of British Columbia mainland and crests of the Coast Range, dappled white with glaciers and snowfields, appeared deceptively close, just perched on the horizon, despite the 20-mile breadth of the Strait. I turned east to make the crossing.
I set a course for Smuggler Cove, as far north as I could point on the mainland on a single port tack. I had the main, jib, and flying jib set and made good speed. The strait was lumpy but not choppy so I didn’t take a lot of spray over the bow. It was good sailing but after a while it became wearing. I was stuck at the helm, keeping my weight to windward and stretching to reach the tiller hour after hour. I finished the crossing with daylight to spare, but I was exhausted.
I slipped through the 25-yard wide, rock-strewn entrance to Smuggler Cove and rowed a few hundred yards south among the score of larger boats already anchored there. They all had stern lines to shore to keep them from swinging at anchor, so I had to pull ashore to set up one for GAMINE. I grabbed the tortured coil of polypropylene rope and tried to back an end through the mess enough times to tease out a length long enough to be of use. A woman on a cabin cruiser had been watching me with her binoculars and my exhaustion and frustration must have been evident. She rowed her tender over and invited me to join her and her husband for a bowl of hot chowder. I followed her, and tied up GAMINE alongside. The chowder was excellent and the use of their boat’s bridge for the night’s accommodation was just what I needed.
Al and Ada Priest
I stopped in Madeira to visit some lifelong friends from my home town, but reluctant to miss the good sailing breeze that day, I stopped only briefly. About my green sails: I had taken Peter Culler’s advice to sew my sails of cotton boat drill and treat them with Cuprinol, a copper-based preservative. I never liked the color. It made my sails look like I’d cut them from old canvas tarps.
The wind shifted overnight and when I left Smuggler Cove I had a southwesterly in my favor. I headed up the mainland coast on a broad reach, making a brief stop in Madeira Park, and when I got back out on the open water of the Strait of Georgia, the wind was out of the southeast and strengthening. With the boom crutch serving as a whisker pole to spread the jib wide, GAMINE ran briskly, wing on wing. Waves were beginning to crest and, as they lifted the stern, GAMINE shot forward, plowing up two curls of green water that rose amidships and fell away in hissing white froth.
Log booms made the cove at Stillwater an especially quiet anchorage. On the north side of the cove is a hydro power plant built in the 1920s. The tall structure above it is a surge tower that regulates the water pressure in the 1-1/2-mile-long pipeline from Lois Lake to the power plant.
At Stillwater I tucked into a quiet cove that was crowded with rafts of logs waiting to be towed to sawmills. The shore was rocky and steep-sided so I tied GAMINE alongside one of the log booms, securing the bow and stern lines to the rusty cables binding the bark-bare logs together. I set up my kitchen and began cooking a piece of salmon given to me by my hosts at Smuggler Cove. There was enough to feed four, but I had no trouble downing it all.
My stay at Stillwater was how I’d imagined I’d spend my evenings—good food, a little music—but the steel strings on the guitar rusted and I rarely had time to play it.
I spent the night in the boat, slept well, and woke to a flat calm. I left the mast up, hoping I’d find a breeze, and headed out under oars at 6:30. I rowed along the coast for about 20 miles before heading west across the top of the Strait of Georgia. The air was still and stifling, the sunlight stinging on my bare shoulders and back. My hands, fortunately, had finally toughened up and the once-tender skin was now hardened with calluses.
The Straight of Georgia flattened for the afternoon that I crossed from the mainland to Mitlenatch Island.
I had rowed the four-mile length of Savary Island when a breeze filled in from the south, dappling the strait with dark cat’s paws of wind-scratched water. I set sail and headed toward Mitlenatch Island, some five miles distant, a dingy grey smear on a horizon between a sparkling sea and a luminous bank of cumulus clouds. The wind came around behind GAMINE and I eased the sheets and let her run. As she caught up with the wind, the air around me grew oppressively hot.
I left the mainland at 6:30 and rowed in a flat calm for 8 1/2 hours, covering 26 miles before the wind piped up and let me sail the remaining 5 miles to Mitlenatch Island.
Mitlenatch is a First Nations—Coast Salish—word meaning “calm water,” an appropriate name, as the island is where the tides wrapping around the ends of Vancouver Island meet without creating any currents. The water just rises and falls. North of Mitlenatch the ebbs, not the floods would be in my favor. Another native name for the island is Mahkweelayla: “The closer you get the farther away it appears.” It seemed that way to me in my long crossing to it.
The only company I had on Mitlenatch, aside from the birds, seals and sea lions, was an ornithologist who was doing research on ravens, or, as he put it, “plumbing the depths of the corvine brain.”
After spending the night at anchor, I left Mitlenatch at 5 a.m. Even at that early hour it was too rough for rowing, but I was eager to reach Campbell River, a town on Vancouver Island, to resupply. Gamine shook and rattled as she bulled into the waves and white fans of spray shot out from the rails. Every drop into a deep trough brought me to a stop. With the oars clawing at the water, I could feel the sluggishness of 600 lbs of boat and cargo. In my left hand there was a gritty sensation of my palm delaminating, epidermis sliding over dermis as if there were a layer of sand between them.
I set my course a bit off the wind to ease the pitching into the troughs, but the diagonal approach just made the dory roll too. As I tired, I found it difficult to sit upright and the gyrations of the boat worked my spine like a whip, snapping my head in all directions. The roll of the gunwales pried the blades of the oars from the water in the middle of the stroke and drove the handles into my kneecaps on the recovery. I screamed at the boat: “Move, dammit!”
After four hours making that miserable eight-mile crossing, I reached Willow Point, where I pulled the dory on to a malodorous mud flat. The anger I had felt on the water turned to shame. My fight against the weather had been an even match, but while I had been at my limit, the weather was only mildly foul. I was lucky that making myself miserable was the worst that had happened to me.
For the next six hours the tide would be in flood, and the current against me, but I was eager to get to Campbell River in time to buy supplies and get out of town well before dark. I got aboard and rowed close to shore, taking advantage of the back eddies as I worked my way north.
Seymour Narrows can be a dangerous spot for any boat the the current is at its peak. I came through in the early stages of the ebb and was eased into the north end of Discovery Passage.
After my shopping expedition, I rowed six miles on an ebb that swirled around Race Point and accelerated GAMINE through Seymour Narrows, a 3-mile-long, 1/3 mile-wide bottleneck where currents can reach 15 knots. Though I was tired and my hands still burned from the morning row, I was drawn into the narrow corridor between steep cedared slopes. It was the Inside Passage as I had imagined it: long avenues of water where the tides ran like shuttles beneath the stone and snow architecture of the mountains. The sun lingered above the crest of the ridge to the west and its amber light set GAMINE’s cedar planking aglow.
At dusk I pulled into Elk Bay, well shy of Chatham Point at the north end of Discovery Channel, and secured the dory alongside a log boom on the south end of the bay. As I was crawling into my sleeping bag a cruise ship passed by, a silhouette perforated with rows of bright portholes. I pictured myself on the other side of one of the portholes looking across the water toward GAMINE. Even in daylight, the dory would be too small to be noticed. For the first time on this voyage I felt lonely. Long after the ship had passed, its wake rolled gently beneath the boat and hissed along the gravel beach.
Just after midnight, I was shaken out of sleep by the pounding of GAMINE against the log boom. A cold northerly had furrowed the south side of the bay and I had to move to the north side to get into the new lee. Without getting entirely out of the sleeping bag I let slip the loops of line that held the dory to the logs and positioned myself on the thwart to row. As soon as I got GAMINE moving, luminescent spray from the bow shot out like tracers and spotted the waves with pale glowing bull’s-eyes. The wake was a path of light above the curved silhouette of the transom.
It was too dark to see how close I was to north shore; I rowed until I heard the squeak of salt grass against the hull at the north edge of the bay. Letting the boat drift, I sounded with the anchor until I had two fathoms under the hull, enough to keep me afloat until the alarm clock would rouse me to relocate before the morning low tide.
Having slept through my alarm, I was stranded on the tide flats. Here I’ve dragged GAMINE to the water’s edge and she rests at the far left. I’m standing where I was stranded, gathering gear to shuttle across the mud until it was all back aboard.
At dawn the boat was quite still and I felt well rested, but when I rolled over to catch a bit more sleep before the alarm sounded, the boat didn’t rock. I sat up and looked over the rail. The water was 70 yards away and GAMINE was firmly planted in the middle of an oyster bed. I glanced at the clock and saw that the alarm had been shut off. I must have hit it and fallen back asleep.
I set the floorboards across the mud and the sharp-edged oyster shells and piled my gear upon them. With the boat empty, I lifted the bow and the hull rose from the mud with a sound like the last of a milkshake sucked up a straw. With the painter tied in a harness around my shoulders, I leaned forward in the shin-deep mud and headed for the still-receding water. On eel grass GAMINE slipped along nicely, but on oysters she moved slowly, leaving a trail speckled white with bottom paint and crushed shells.
Getting the boat to the water was the easy part. The tide was still falling and I raced back and forth ferrying gear. With every load I dropped into the boat, I had to move it back out to get it afloat once again. A dozen sprints back and forth across the flats got everything aboard and left my legs bloodied and muddy. Sweat trickled down my face as I began rowing the 3-1/2 miles to Chatham Point.
The tide had turned and the west-flowing flood in Johnstone Strait was working against a stiff easterly. Waves were coming from all directions and crossing, making pointy crests like rasp teeth. I wasn’t able to make much progress rowing so I retreated to small cove west of Chatham to wait for a break in the conditions.
Figuring that I’d be stuck for hours, I threw a handline over the side to try my luck at fishing. After a half hour or so had passed, I heard an odd hollow, almost metallic whooshing sound behind me and turned around to see what appeared to be a length of black plastic pipe, slowly rising and falling in the water. I guessed the noise was the rush of air in and out of a steel tank submerged beneath the pipe. Whatever it was, it seemed to be drifting with the current as it was quickly closing in on me. I pulled the fishing line in and took a few strokes to get out of the way. It disappeared beneath the waves and when it surfaced it was just 20 yards from me. It suddenly veered and what I thought was a pipe broadened into the tall black scimitar of an orca’s dorsal fin. I grabbed my camera and searched through the viewfinder for the whales next rising, and a mere boat-length away I saw a slick, black dome breaking the surface and approaching the boat. An electric surge of adrenalin rushed up from my core and made my scalp tingle. I snapped the shutter and lowered the camera into my lap to face whatever was going to happen to me. I stared unblinking at the black shape, now only 5’ away, and noticed it didn’t have a blowhole. It had treads and whitewalls. People say their encounters with whales are profound, even life changing. It might have been that way for me if I’d been able to distinguish mine from drifting through an aquatic junk yard.
After my “close encounter,” with this orca, its dorsal fin visible in the center, touching the horizon, left me and headed west along Johnstone Strait.
At the peak of the flood, the current raced by the point I’d taken refuge behind at about seven knots. A line of a dozen seagulls rode it as disinterestedly as people borne by an airport’s moving walkway while GAMINE’s hull resonated with the sound of rocks tumbling past underwater.
Trapped by an adverse flood tide, I took refuge among the kelp in a quiet cove as seagulls raced by riding the current.
When the tide turned in my favor, I worked my way west along Johnstone Strait to Kelsey Bay. I left GAMINE in the harbor, ran a mile and a half along a dirt road to a grocery store, and hitched a ride back with a bag full of food. Another boat, the 72′ RAINBOW, arrived in the marina and docked near GAMINE. The skipper, Wayne, told me she was built as a racing 12-Meter and retired as a training vessel, re-rigged as a ketch. He and his complement of Sea Scouts were soon on their way again, sailing north along the Inside Passage headed for the Queen Charlotte Islands.
RAINBOW left Kelsey Bay ahead of me and I expected I’d never see her again.
I was eager to get to smaller, tamer channels and crossed Johnstone bound for Port Harvey, the bay between East and West Cracroft Islands. My chart showed a narrow passage between them that would lead to the cluster of small islands in the Broughten Archipelago. I rowed to the north side of Johnstone and there I was overtaken by a tug pulling a log raft that carried an enclosure made of poles and plywood. As the raft went by, I saw a big brown bull inside the enclosure. The tug was headed for Port Harvey, so I raced to the raft and tucked into its broad churning wake. As I had hoped, the water trailing the ends of the logs was creating a back eddy; I set GAMINE’s bow on one of the logs and the backwash held it there.
The bull this raft was carrying was making the rounds doing doing stud service at settlements scattered along the Inside Passage.
When we reached Port Harvey, the tug came to a stop and I rowed to the notch separating the forested hills of the Cracrofts. I found no passage there, and the brush growing in the valley made it clear that if there was once a waterway there, the land is now above the reach of the tides. So much for the 2-1/2-mile free ride. I had to row out of Port Harvey then round East Cracroft to get to Minstral Island. I arrived at 10 p.m., exhausted, and yet I was underway again at 5:30 a.m.
The weather was fair and calm when the sun rose, so I got an early start leaving Mistral Island.
The settlement on Turnour Island was unoccupied, but many of the buildings remained standing amid the encroaching underbrush.
At Mamalilikulla, the settlement on Village Island, this totem pole was standing and beauty of its carvings was undiminished by age and weather.
The smaller waterways west of Minstral did offer easier going, but I was tired and finding it increasingly difficult to stay at the oars. I made brief stops at unoccupied native villages on Turnour and Village islands and called it a day at Swanson Island after rowing about 20 miles. After a two-hour struggle with the polypropylene rope clothesline system, I managed to get GAMINE set at anchor.
GAMINE rested placidly in a Swanson Island cove, but I was feeling the strain of the travel and not feeling so peaceful.
Sleeping ashore turned out to be a mistake as the mosquitoes found me at sundown. I pulled the bivibag over my head and managed to fall asleep. In the middle of the night I woke up and felt myself rocking. I peeked out and saw water all around me. I starred intently at the flood surrounding me and I couldn’t understand what was happening. I reached out to touch the water and what I felt was not water but grass. The hallucination disturbed me, but I was too tired to stay awake.
When I woke in the morning, I was hemmed in by fog. GAMINE had been set on the rocks by the falling tide. I decided to head home. I’d had enough.
When I left Swanson Island I made crossings only when I could see the island I was heading for.
I left Swanson hopping from island to island when the fog lifted enough for me to make out the next landfall. On Malcolm Island I stopped in the village of Sointula and stocked up on food and fresh water. I called home and talked to my parents before heading back to the boat to spend a quiet night sleeping under a rack draped with drying gill nets.
Port Hardy was home to a large fishing fleet. I was considering bringing an end to my voyage here, but chance encounters led to continuing.
The 25-mile row from Malcolm Island to Part Hardy was my first experience rowing in ocean swells. The gentle rise and fall was a pleasant sensation and a welcome break from the battle against wind-driven chop.
In Port Hardy I was still uncertain about whether I would continue north. Whatever I decided to do, I’d need more money so I called my parents to arrange a wire transfer. I visited the town’s hardware store and while I was browsing I overheard a man asking the clerk for the Evergreen Cruising Guide, the book of charts I’d been using. When the clerk was attending to another customer, I whispered to the man: “Wanna buy a used Guide?” He and I then left the store together. His name was Don; I rowed him in GAMINE to his boat. Instead of taking cash for the guide I took Don’s charts for the B.C. waters to the north of Port Hardy. The deal tipped the balance toward continuing my voyage north. When we were rowing through the harbor, Don had pointed to RAINBOW, so when I left him, I rowed alongside her. Wayne recognized me and invited me aboard for dinner.
I had lightened the skiff by putting a lot of my gear aboard the ketch and leaving some of GAMINE’s in the stern to keep her bow riding high under tow.
Wayne and I spent the following day wandering Port Hardy. He asked me about my plans and I said I was considering continuing north, though I was worried about rounding Cape Caution, a rare stretch of the Inside Passage that is fully exposed to the Pacific Ocean. Wayne invited me to come along aboard RAINBOW to the Queen Charlotte Islands. I jumped at the opportunity.
I was worried about GAMINE towing well pulled by her bow eye, so I made a bridle for her that was anchored to the tholes and risers and pulled tight to hold the towline low on the stem. That kept her bow riding high.
GAMINE was in tow, skipping wildly at the end of her tether as RAINBOW sailed out into Queen Charlotte Sound. The beat to windward was into a steep 10’ swell that pitched the 72-footer and churned the crew’s stomachs. The skipper, the first mate, and I took turns at the helm while some of the scouts, who can be forgiven for their ignorance of naval etiquette, one after another hung their heads over the windward rail and painted the white topsides with their breakfast. The first mate set a proper example by losing his meal to leeward.
I took shifts at the helm as RAINBOW charged through 10′ swells.
With RAINBOW exceeding 10 knots, GAMINE leapt over the wind waves but survived the crossing of Queen Charlotte Strait.
The strong wind tore RAINBOW’s mainsail and bowed her forestay.
We raced along at a steady 11 knots as RAINBOW’s bow dove into waves sending green water 6′ up into the genoa. The peak of the main developed a tear that quickly worked its way from leech to luff. Wayne made the decision to bear away from the Queen Charlottes and head northeast into the shelter of the Inside Passage. We anchored in the right-angle intersection of two half-mile wide channels separating Calvert Island from Hecate Island.
With the rough passage across Queen Charlotte Sound and past Cape Caution behind us, RAINBOW reached a calm refuge at Calvert Island.
It took the rest of the day and most of the next for the crew to repair the mainsail. The lost time meant they’d have to turn away from the Charlottes and return to Victoria, RAINBOW’s home port. That night I reloaded the dory and at twilight got back aboard and said goodbye to the crew as RAINBOW set out under power to take advantage of the midnight calm.
With RAINBOW gone and the stars masked by a black veil of clouds, the emptiness of the darkness and silence surrounded me. I looked over the side of the boat hoping to see the bright constellations of bioluminescence, but the water was invisibly dark. I aimed my flashlight over the side and its beam fell upon countless large yellow polka dots. The boat was surrounded by jellyfish that looked like yolks and whites spilled from eggs as big as basketballs. As far as the beam of my flashlight could reach, the bay was cobblestoned with their undulating domes. Afloat on the unstirred makings of an immense omelet, I settled into my sleeping bag, cradled on a living sea.
When Kyle and I decided to build our own boat to take on a trip down the Mississippi River, we decided to make, rather than buy, as many of the bits and pieces as possible to save money and make the build and journey on the boat even more meaningful. We needed five blocks for SØLVI’s sailing rig and looked to see what was available on the market. Traditional bronze blocks were beautiful but heavy and expensive. High-tech blocks for dinghy racing, made of stainless steel and fiber-reinforced plastic, were light and smooth-running, but expensive and not in keeping with the classic look we wanted. Our research led us to L. Francis Herreshoff’s Common Sense of Yacht Design, where we found drawings of blocks that we could adapt to meet our requirements.
While Herreshoff called for cast bronze sheaves, we decided to buy Harken’s Delrin ball-bearing sheaves. They are strong, smooth-running, and affordable. We ordered six—one for a prototype and spare—sized for 3/8″ line. The sheaves cost $10.99 apiece (less expensive sheaves, without ball bearings, are available in nylon or bronze from Duckworks). We purchased a 12″ x 12″ sheet of 0.062″ naval brass (C464) for $54 (and needed only half of it; a high silicon-bronze—C655—would also work), 36” of 1/4” bronze rod for $18, and a package of 100 bronze cotter pins for $5.
Danielle Kreusch
The paper pattern has small holes to locate the position of the holes to be drilled in the cheek plate. The straight portion of the pattern needs to be long enough to assure there will be enough clearance for the line.
Herreshoff made his blocks with two flat cheek plates joined to a third piece of bronze; we’d make both plates in one piece, bent to fit around the sheaves. The bend would have to provide enough clearance for the 3/8″ line to run freely. Rather than use the expensive bronze to get the right dimensions for creating a pattern, we used a piece of 1/16″ aluminum flat-bar to determine the distance needed between bend and the sheave axle. Our bending jig for the flat-bar, as well as for the plates we’d bend later, was a scrap of oak a bit over 1/2″ in thickness to match the sheave and with one end a half-round.
The bronze will spring back after it has been shaped to the jig and must be finished by hand. The fit isn’t critical as it would be with a simple, non-ball-bearing sheave. With the Harken sheave the cheek plates can be squeezed tight against its round inner circle; the outer ring will still spin freely.
After making a pattern on stiff paper, we went to work on the cheek plates, tracing the pattern in fine-point marker and cutting the line carefully. Cutting bronze sheet with a jig saw requires some care to keep the blade from binding in the tight turns and deforming the metal; any damage was easily fixed with a hammer. We then made the four holes in each cheek with a cordless drill; three 3/8″ holes were to make blocks lighter and more aesthetically pleasing, one 1/4″ hole was for the sheave axle. This prototype proved perfectly serviceable, and we went to work on the rest.
Danielle Kreusch
Homemade blocks met our goals for weight, affordability, and a classic look. The two blocks at the left share a single axle, creating a double block.
We decided that spending $14 on a new metal-cutting blade for our bandsaw was a good investment in the project; while not a necessity, it was more efficient than using the jigsaw. We smoothed the edges of the bronze sheet with a disc sander, something that could also be accomplished with files. After bending the cheek plates on the jig, we installed the sheaves with 1/4″ naval bronze rod axles, held in place with cotter pins on the ends.
We had intended to use bronze shackles with the blocks, as Herreshoff did, but decided they would add unnecessary weight and expense. We ended up splicing loops of line to the blocks or lashing them in place.
Our blocks were just half the cost of cast bronze blocks, and were not only lighter but also smoother rolling. After over 1,000 miles of sailing and use, we found the blocks to be durable and attractive.
Danielle Kreusch grew up in Salt Lake City, Utah and spent a lot of time hiking and camping in the mountains. After moving to Florida to finish her BA in Psychology and Child Development, Danielle met Kyle Hawkins, who took her sailing on their third date. Their Mississippi River trip was their first small-boat excursion, and they have both fallen in love with the idea of continuing to travel in small boats.
You can share your tips and tricks of the trade with other Small Boats Monthly readers by sending us an email.
My wife and I are rowers who train on Lake Union in the heart of Seattle, Washington. This urban lake is often a chaotic dance of human-powered craft, sailboats, powerboats, and floatplanes. Having to turn around to look over the bow is disruptive to our rowing rhythm and makes it difficult to see directly ahead. Even with a bicycle mirror it is hard to keep track of everything that is going on around us.
Bill Bowden
The author used optional mounts: the monitor mount instead of the rail mount for the monitor and the tall mount (for better visibility over the bow) for the camera instead of the flush mount.
When I discovered Hyndsight Vision Systems online, I purchased two of their Cruz wireless camera systems. The system is composed of a monitor, camera, two antennas, two chargers, a monitor mount, camera mount, cleaning cloth, and manual, all packed in a custom-fit foam-lined case. There is a range of optional accessories for mounting; we added the tall mounts so the cameras sit high enough to see over the cockpit splashguard.
The monitor and camera have robust housings with a nicely textured finish that provides a good grip even when wet. The mounts are well designed and easily adapt to fit different boats. The monitor screen is simple with few icons: mirrored or normal viewing, signal strength, battery levels of monitor and camera (once paired), and a screen brightness level that’s visible only when changing the setting. Five buttons across the bottom access all of the functions.
Hyndsight claims a operating range of 1,760′ between camera and monitor; the best I observed was a distance of 1,500’, more than enough for my uses. The manual states that a full battery charge on both units will provide 4 to 5 hours continuous use. This did not disappoint; my test showed 5 hours to signal loss. Interestingly the camera battery-level indicator displayed no bars after 2 hours and turned red after 3-1/4 hours, but the camera continued on for another 1 hour, 45 minutes. The monitor and camera will float and are rated IP65, water-resistant; the manufacturer notes: “They can withstand short term, accidental submersion up to 2′ and are not recommended for underwater use.” While both units do float, they don’t have much reserve buoyancy, and if they go in the drink with any kind of additional attachments they would sink. A tether would then be in order. I checked the camera for submersion, holding it about 12″ deep for 10 minutes, and found no signs of leaking.
The system is simple and easy to use, and the only setup is an initial pairing of camera and monitor. On a really sunny day, it loses contrast but is still usable. With a little overcast or clouds the monitor is bright and easy to see. The ability to mirror the image is really nice, so what you see on one side of the monitor is the side the object is on.
Bill Bowden
The author tried both the tight-angle camera (its image shown on the monitor on the left), which is standard with the Cruz kit, but opted for the standard-angle camera (image shown on the monitor on the right).
Hyndsight makes three cameras: a tight-angle (23º), a standard-angle (45º), and a wide-angle (95º). The Cruz comes with the tight-angle camera, Hyndsight’s recommended camera for rowing. For rowing on a river or someplace not as busy as Lake Union, it would be an excellent choice. Hyndsight kindly sent us a standard-angle camera to try, and my wife and I agree that it gives us a much better view ahead. You can request either the tight- or standard-angle when ordering the Cruz system; Hyndsight advises against using the wide-angle for rowing.
Hyndsight Vision Systems
The Cruz kit comes with a flush mount for the camera. If the suction-cup base isn’t appropriate for a particular installation, other mounts are available.
While we use the Cruz system for rowing, it could be useful for lots of things: backing a trailer, hitching up to a trailer, monitoring a load in a trailer, or watching a child in the backseat. We cartop our 32′ double shell on our 16′-long car; there is a lot of boat behind me that I can’t see while I’m driving, and the Cruz can fill in that blind spot. It is a joy to use and has become part of our standard rowing kit.
Bill Bowden is a Mechanical Engineer living in Seattle. Rowing keeps him fit, connects him to the water, and has led to friendships around the world.
Last month, when Tropical Storm Gordon was drawing near our home in the Florida Panhandle, we went shopping for a few additional flashlights and happened upon the AR-Tech LED Flashlight + Lantern by Life Gear. We bought two, and they have turned out to be great additions to our boating adventure kit. Lightweight and battery friendly, the AR-Tech is packed with useful features.
Kent and Audrey Lewis
If the flashlight gets dropped overboard, it will float and automatically start flashing the red light in its handle.
The flashlight is 7.8″ long and weighs in at a very light 6.25 oz. The body of the flashlight is water resistant and impact-rated for a drop from 1 meter. A flange on the front end keeps the flashlight from rolling and has two holes for a lanyard. The flashlight’s LED puts out 100 lumens, sufficient illumination for walking our dock and shoreline, or to find items in and around our boat. The beam will also illuminate objects 50′ away and can be seen from several hundred yards.
The translucent handle is a 50-lumen lantern that provides all-around, softly diffused light; very handy for sorting through gear prior to a dawn launch or when tending to camp duties before turning in during an overnight cruise. The handle can also glow red, good for illuminating a boat without compromising our night vision. One button cycles through the AR-Tech’s five functions, which, in addition to the lantern and flashlight functions, include a red flasher and flashlight plus the flasher.
SBM
The inner workings, removed by unscrewing the flashlight’s bezel, hold three AA batteries. The two bright dots on the black housing are the electrical contacts that activate the red flashing light when submerged. Holding the flashlight under a bathtub’s shower didn’t activate the red light, but If it does happen to go on, pushing the button turns the light off.
The flashlight and lantern use energy-efficient Light-Emitting Diode (LED) technology, and three AA batteries provide 20 hours of lighting. After one hour, the light will automatically turn off to help conserve battery life.
The AR-Tech won’t sink, floats horizontally, and rides half out of the water if dropped into the drink. If the flashlight goes overboard at night, it will be easy to find. Two electrical contacts sense the contact with water and automatically turn on the red flasher with water contact. This function could be a lifesaver in a capsize, leading the rescuers to a swimmer.
For our adventures in small boats, we need lightweight, multifunctional gear. The AR-Tech flashlight has a price that comes under $11, including batteries, and helps us see and be seen.
Audrey and Kent Lewis maintain a fleet of small boats and enjoy messing about in the Florida Panhandle’s bays and bayous. They chronicle their adventures on their blog.
The AR-Tech Flashlight + Lantern is sold at many major retailers, and can also be ordered directly from Life Gear.
Is there a product that might be useful for boatbuilding, cruising or shore-side camping that you’d like us to review? Please email your suggestions.
Patrick MacQueen of Hancock, New Hampshire, got a great package deal on an aged 12′ aluminum skiff, Evinrude outboard, and trailer. He counted his $500 as well spent: “Aluminum boats are rugged and have great utility,” he wrote, “but they sure can be ugly.” The interior was painted gray with black and white flecks, and the exterior was chalky with oxidation. Decals, cracked and peeling, identified the outboard skiff as a MirroCraft.
Patrick MacQueen photographs
The old aluminum boat wasn’t much to look at but still had plenty of life left in it.
The Mirro Aluminum Company got its start in Manitowoc, Wisconsin, making kitchen cookware—aluminum pots and pans—and in 1956, confident that their experience making stove-top vessels that could keep water in, decided to manufacture boats that could keep water out.
The first steps in the transformation of the MirroCraft were a paint job and the addition of a faux sheer strake in ash.
Patrick, approaching retirement and seeing boatbuilding would fill the leisure hours he’d have ahead of him, thought the skiff would be a good winter project and decided to do much more than put a new finish on the still serviceable hull. He pulled out the factory-installed aluminum seats. They were covered in mahogany-brown vinyl, and as unpleasant to sit on as they were to look at. They’d be replaced with warm, bright-finished cedar thwarts. After giving the boat a three-tone paint job, Patrick add faux sheerstrakes of varnished ash. The skiff’s flat sheerline made it possible to get the nearly straight planks out in one piece from long ash boards.
The core of the wheel is aluminum salvaged from the original seats after they were removed.
Earlier in the boat’s life, it’s likely that the skipper sat in the stern, steering the with outboard’s tiller, and with all that weight aft, the bow would have been well out of the water. Patrick decided to improve the trim by moving the helm forward so he could pilot the boat from the center thwart. He decked the boat, creating two cockpits separated by the dashboard. The deck’s 3/16″ plywood substrate was gussied up with strips of cedar, an ash coaming, and a mahogany rail.
Cedar decks, trimmed in ash and mahogany, completed the transformation.
The original thwarts that Patrick removed didn’t go to waste. He used the aluminum for the wheel and trimmed it with maple and walnut. More bits of the aluminum were pressed into service as the thwart-mounted throttle and shifter.
BUTTERFLY, all dressed up, now gets admiring looks, which had never come her way in her previous life.
The name BUTTERFLY graces the transom, appropriately, and the transformed skiff has been on just about every lake within a 30-mile radius of Patrick’s home. That’s a lot of lakes, and a lot of people have seen and admired the boat, never guessing that its ancestors were pots and pans.
Have you recently launched a boat? Please email us. We’d like to hear about it and share your story with other Small Boats Monthly readers.
It’s September and the boating season here in Seattle is just about over. And I’m ready. It’s not that I’ll stop boating, but the seasonal boaters will.
I row and paddle year-round along the city’s ship canal. There’s a 7-knot, no-wake zone all along its 7-1/2-mile length, and during the summer, especially on weekends, the canal sees a lot of pleasure-boat traffic, the majority of it power boats. Most abide by the limit and trail a rolling corrugated fan of waves. If I’m paddling my kayak and taking an oncoming boat’s wake head on, I’m through in a few strokes without breaking cadence. The wake of an overtaking boat, moving along the canal about two knots faster than I’m paddling, stays with me longer and each passing crest nudges my bow toward the concrete and riprap banks of the canal. A series of sweep strokes on the shore side keeps my kayak’s delicate hull, a thin four-layer laminate of mahogany veneer, from getting stove in.
Just beyond this boat’s bow there is a big sign alongside the canal that reads: “Watch your wake. Wish everybody did.”
Some power boats, designed to go fast, drag big wakes even at 7 knots. The first half dozen waves astern may even be cresting, so I’ll bring the kayak to a stop and angle the bow to the oncoming waves to keep from getting drenched. Taking the waves over the stern may require bracing with the paddle to keep from getting capsized. Faced with these wakes, stand-up paddlers, canoeists, kayakers, rowers, and scullers, all brace for impact. In some parts of the canal it’s a one-two punch when the wake bounces off concrete walls. All of this drama plays out well after the wake-throwing skipper has passed by and has gone on his way in blissful ignorance of the ill-will generated by his passing.
I grew up rowing and sailing, not motoring. In a rowboat. the view is over the stern; you have to look over your shoulder to see what’s ahead. Most of the boats I’ve sailed have had tillers, not wheels, so I’m usually seated sideways with as good a view astern as forward. With either kind of boat, speed is not an option for avoiding an approaching threat, whether it’s a squall, a freighter, a ferry, or a powerboat. I learned at an early age to scan all 360 degrees of the horizon. That might not have happened if powerboats had been my introduction to boating.
This boat is typical of the summer traffic on Seattle’s ship canal. At around 7 knots, the stern sits deep in the water and creates a wake that forces the many kayakers, canoeists, stand-up paddlers, and rowers sharing the canal to break rhythm and steer through.
In most of the powerboats I meet on the canal there is a helm very much like the driver’s side of a car with a forward-facing seat, a steering wheel, a windshield, and a dashboard. But there are no rear-view mirrors on the boats. If speed is on your side and you have the right of way over any vessel passing you, there’s not much to compel a skipper to make a habit of glancing over the stern for their own safety, let alone that of others. This summer, only one skipper looked back to see how I was faring as his wake caught up to me. He had, as you might expect, slowed down and moved toward the far side of the canal as he had passed by me.
While not dragging much of a wake here in the canal, on Puget Sound a boat like this can raise a tall, steep wake that will toss a small boat around.
I credit small boats with teaching me a lot of valuable lessons: patience, because destinations are not quickly reached, perseverance, because sea miles are often hard won, humility, because small boats are vulnerable, and equanimity, because the wind and waves may demand it. It’s that last one, equanimity, that I try to draw upon when a wake on the canal washes over my deck and my bow slews toward the rocks, or when the cresting waves of a passing of a speeding cabin cruiser slap the wind out of my sails. It’s all too easy to dwell on what might be instead of what is, but there is nothing I can do to make negligent skippers more mindful any more than I can improve bad weather, and I haven’t been doing so well when it comes to equanimity on the canal. Next May, when Opening Day signals the start of next year’s boating season, I’ll have another opportunity to practice.
If you are anywhere near the water, it has probably been hard to overlook the explosion in popularity of the stand-up paddleboard (SUP). Derived from surfboards, the larger and more stable SUP allows a paddler to stand in relative comfort and cruise along the water using a long paddle. Many wooden boat designers have taken notice and have answered the demand for good-looking, wooden SUPs.
My wife grew up inland and doesn’t have the deep affinity to the water and wooden boats that I do, but that changed one day a few summers ago when we rented some SUPs on a local river. She took to stand-up paddling with enthusiasm. It was fun, easy to learn, and offered an exciting way for her to get on the water; I saw a good opportunity for me to combine her interest in stand-up paddling with my passion for building wooden boats.
Right about this time, the Australian-born designer Michael Storer developed a wooden SUP and named it Taal after a lake near his home in the Philippines. The boats and canoes he designs are light yet strong, and while they may appear to look simple at first glance, they are actually sophisticated, elegant, and fast. His 12′ 6″ Taal is no exception. While many production SUPs resemble surfboards, they are rarely used for riding waves; they’re most often used on flat water. The Taal is designed like a displacement hull rather than a surfboard and optimized for speed, tracking, smoothness of ride, and stability on flat water.
I downloaded the PDF manual from Duckworks. It’s a comprehensive 72-page book with excellent instructions, color photos, and measured drawings. It is important to follow the plans exactly in order to achieve the boat Storer has designed. This build is more complex than most of his others and is not recommended for a first-time boatbuilder with no prior stitch-and-glue or epoxy experience. Precision in shaping the pieces and thorough epoxy application are the keys to a successful build. Dimensions in the manual are given in metric measurements—one millimeter is a finer measurement than the 1/16” mark on most tape measures.
The Taal requires three sheets of 3mm okoume plywood and some 8mm western red cedar. I was able to cut all the plywood parts out with a utility knife, as suggested in the instructions. The board is built a bit like an airplane wing with six bulkheads, a transom, and a longitudinal center plywood web that defines the shape of the board. A template for the deck camber assures that the tops of the frames all have the same curve. A second template, a half bulkhead, ensures uniform placement of stringer and deck-cleat notches.
Christophe Matson
The frames are concentrated in the board’s midsection where they support the paddler, leaving the ends and the overall weight light.
The deck, side, and bottom panels are drawn from the offsets in the plans, given at 400mm stations. The two pieces of each panel are joined with butt straps. The plans do offer advice for scarfing the plywood pieces together, but they state a preference for butt joints as they’re easier to align and have a cleaner appearance under varnish. The bulkheads are reinforced with 8mm-square cedar framing. The hull is stitched together using plastic zip-ties. The builder will go from a pile of small fiddly bits to a boat in the course of an afternoon. The deck is supported on 19mm x 8mm stringers that run longitudinally and rest on the cedar framing of the bulkheads. Weight is then transferred to two long stringers that run along the bottom of the board. I followed the plans include instructions for installing a commercial fin box and made a fin to fit it.
Christophe Matson
The vertical cutwater and the sharp V sections forward eliminate the slapping that surfboard-style paddle boards are subject to.
One fun task is using a shop-made “torture board,” Storer’s term for a flexible fairing board, to sand the support stringers to meet the deck’s graceful curve. The booklet gives both very detailed instructions for using the torture board and a template for the deck’s curve so the builder can get the stringers beveled just right.
A layer of 150 gsm (4.42-ounce) fiberglass is laid underneath the main walking area of the SUP deck which stiffens the deck considerably in this area. The deck is glued onto the hull with packing tape and a few well-placed weights. For me it was a two-person job. Be sure to watch for the slight compound curve in the forward 800mm where the crowned deck takes an upward curve to the bow.
There are a few challenges, such as placing the fin box or using a temporary bulkhead to get the correct dimensions and shape for the bow, but this is part of the pleasure of building wooden craft. I found the build to be immensely enjoyable and satisfying work.
Allison Grappone
The carry handle is offset to starboard, and taller paddlers with long arms would carry the board with the greater part of the beam under their arms. A paddler with shorter arms would carry the Taal flipped over to put the handle on the high side.
My Taal came to 30 lbs. I think I might be able to make the whole board lighter next time if I took extra care to use only an amount of glue that is strictly necessary. While I also bought a rubber nonskid adhesive mat to stand on, Storer offers instructions for making an anti-skid area by applying a coat of varnish with sugar sprinkled on it, letting the varnish cure, and then dissolving the sugar with water. That approach could be a few ounces lighter than a mat.
The handle insert is set off-center, providing a comfortable carry for long-armed paddlers on one side and short-armed paddlers on the other. I located the handle on my Taal a bit forward of the board’s center of gravity so that it would carry slightly bow high, which I find easier to handle than a bow-down board. The hard 90-degree chines make long carries slightly irritating, but this is easily alleviated with a towel draped over the board to cushion the edges.
Allison Grappone
The author has plenty of freeboard. The Taal is designed to carry up to 250 lbs.
Once on the water the Taal shows its strengths and design pedigree. It is fast, stable, light, and tracks true. It is important to figure out where to stand to get the correct trim because, as with a rowboat, you do not want to drag the transom. A spotter looking at the board as you move fore and aft can help with this. The trick is to be forward enough to clear the stern but to stay within the reinforced section of the deck. The Taal eats boat wakes without drama when taken head-on. The knife-like stem cleaves the wave, the bow buries but the full body shape immediately lifts the SUP back up and over the wave with a surprising amount of ease. There is no slapping as there is with surfboard-shaped boards. The Taal has excellent initial and secondary stability for a SUP. Getting on the board requires standing in the center and pushing off. There is initially a bit of wobble until the paddler gets situated, and then they Taal settles into a very solid ride with no surprises. The board inspires confidence and the paddler can focus on the stroke and the paddle rather than the task of staying right side up.
Allison Grappone
The flat bottom amidships transitions to a V cross section at both ends. The ample rocker brings the transom out of the water to minimize drag. The elevated chine adds stability when the board is heeled.
The Taal is really designed for tracking straight and covering distance while cruising. You can make course adjustments easily, but it takes some effort to turn the Taal smartly around. For a tight turns, you’ll need to use the SUP pivot turning technique, stepping back on the board to sink the stern and raise the bow. There will be a distinct wobble with every step, but the secondary stability will kick in before you’ll get thrown off. When the pivot turn is performed correctly, the Taal will then execute a 180-degree turn in its own length. When walking the board to change trim, it is important to remember that the forward and stern sections of the deck outside the center four bulkheads are only lightly reinforced, so walking the full length of the deck is not recommended.
Storer limits the Taal carrying capacity at 250 lbs. My wife and I both got aboard one day and paddled across a lake, and found we still had freeboard with our combined 280 lbs.
Everyone who has paddled our Taal has been impressed with its speed and stability. It’s a luxurious platform to paddle on, and it also looks gorgeous on the water. With the gentle curve of the deck meeting the distinctive transom, the sharp stem, and that classic look of wood, the Taal exudes style.
This is our second full season on the Taal, and we are completely satisfied with its performance. When my brother and I visit our parents in Connecticut, we like to cruise out into the local harbor on our SUPs and check out the boats at mooring which pique our fancy. When I’m home in New Hampshire I’ll meander with the Taal around the local rivers and lakes. My wife loves to paddle out 100 yards from shore with a book, lie down, and sunbathe high and dry with little fear of falling off. The Taal is her own private beach floating in a lake surrounded by the green hills of New Hampshire.
Christophe Matson currently lives in New Hampshire. At a very young age he disobeyed his father and rowed the neighbor’s Dyer Dhow across the Connecticut River to the strange new lands on the other side. Ever since he has been hooked on the idea that a small boat offers the most freedom.
Taal Particulars
Length: 12′6″
Beam: 30″
Weight: 18lbs to 31lbs depending on materials
Crew capacity: 150lbs to 250lbs
Lying in a hospital bed in 2014 after a short illness, I decided it was time to tackle one of my lifelong dreams, building my first-ever boat—from scratch. Since our boating consists of leisurely trips on lakes and rivers, I wanted plans for an open cockpit design with space for four deck chairs. After a lot of research, the Albion seemed to be the answer. Along with the plans I ordered, Spira included his 50-page Illustrated Guide to Building a Spira International Ply-On-Frame Boat. His website has an extensive collection of photos, blogs, and videos for ideas. One builder had even contributed a very helpful series of videos of his Albion build to the Spira website.
I started working on the boat in February 2015. To make sure the Albion would provide us with enough room, I drew a chalk outline of the boat on the garage floor. After I put four deck chairs on the area we’d have in the cockpit, I realized I needed an extra foot of deck space to be able to space the chairs comfortably. I contacted Jeff and he was completely amenable to this change—he notes that most of his designs can be stretched by 10 percent without having much effect on performance or cost—and worked out a new plan for the placement of the frames, adding a bit more than 1” to the span between each to add 1’ to the length.
The plans recommend using “standard dimensional lumber” for the frames, but I decided to use clear Douglas-fir from a specialty lumberyard in our town. I thought the straight, uniform grain would be easier to work and that the fir would be less prone to rot than some of the species sold as common lumber. The frames are 2x4s and the decking beams 1x4s.
I was able to find a 22′-long, knot-free 2×8 at the same lumberyard, perfect for the 20′-long piece needed for the keelson. This saved having to scarf two shorter pieces together. A Douglas-fir board this length was an amazing find for an East Coast lumberyard!
I used top-grade Douglas-fir plywood: 5/8″ for the bottom, 1/2″ for the sides, 5/8″ for the transom, and 1/2″ for the foredeck I added to the otherwise open cockpit. I built the strongback out of wood I had in my shop, and put wheels on it so that I could move it inside or out.
The boat can be built without lofting, so, using the measured drawings/offsets in the plans, I made full-sized templates on kraft paper for each of the 11 frames and the transom frame. The plans stress that the accuracy of each frame is the most crucial aspect of the build, and I wanted to be sure that I got it right, so I precisely lined up the frame pieces on the templates when drilling the holes for the bolts that hold the pieces together.
When building the transom frame, I missed the note on the plans that for a standard-shaft motor, the motor bracket frame member should be 5″ lower on the transom frame. Because of this error, I bought a long-shaft, 60-hp Mercury outboard, the smallest long-shaft motor Mercury makes. I originally wanted to buy a motor in the 30–35 hp range.
photographs by the authors
The framework is made up of common construction lumber: 2x4s for the frames, a 2×8 for the keelson, and 1x4s for the sheer clamps and chine logs.
Hull assembly begins when the frames and transom are placed in position on the strongback. The longitudinals—keelson, chine logs, and sheer clamps—make the structure rigid enough for the plywood to be bent over the frames.
The forward end of the keelson has to be bent to bring it to the attachment at the stem. I didn’t have a steambox, so I wrapped the keelson with towels and poured boiling water on the bundle several times, then slowly pulled the keelson down to meet the stem.
The plywood panels for the sides are bent around the framework first; the chines, sheer clamps, transom, and stem give them their shape. The bottom follows. The panels for the sides and bottom are butted together to achieve the full length and the seams are later reinforced with plywood backing plates, secured with screws and epoxy. After the plywood bottom and sides are screwed and epoxied to the frames, two layers of 6-oz fiberglass cloth, saturated with epoxy, cover the entire hull. The plans called for sanding the second layer of fiberglass cloth smooth, but I had a person from the local auto body shop apply an epoxy coating to the bottom. This made the bottom smooth without sanding, and I felt this would be a more durable finish. I then painted the bottom with two coats of George Kirby marine paint which includes UV inhibitors.
I added a 2×2 PVC keel, 16′ from the stern forward. The plans did not call for this, but I grew up rowing flat-bottomed boats and found that those with small keels seemed to track better.
At this point, the hull was ready to be turned over for placement on the trailer. My friends and neighbors helped, with excellent advice from a video on the Spira website, to gently roll the boat over with the aid of ropes and my tractor.
I followed the plans for forming the sides to the stem. Then I screwed on a stainless-steel bow plate that I had fabricated and polished. This was both for aesthetics and to add protection to the bow; I got the idea from the old inboard lake boats of the ’40s.
I was on my own for outfitting the interior. Jeff had learned that each builder inevitably has their own ideas for the interior, and so the handbook he provides with the plans simply states, “There are infinite possibilities, so have at it and enjoy,” and that is exactly what I did.
The drawings indicate optional caprails that cover the frame heads, sheerstrake edges, and outwales, but I extended those caps to 8” wide, allowing us to sit on them and swing our legs over the side to board and deboard the boat when it’s nosed up on the beach. As an added bonus, the side decks provide seating all along the sides of the boat. The canvas gunwale guard I installed along the sheer is easy on the legs when stepping over the side and protects other boats we may come alongside.
The plans leave designing the interior up to the builder. This off-center console offers easy passage from bow to stern; the carpeted area forward has enough room for four folding chairs.
The side decks curve into a 2′-long foredeck that creates space for locker in the bow section to store life jackets, cushions, and other gear. The compartment also includes an area for stowing the anchor rode, and I mounted a roller on the bow, allowing the anchor rode to go into a pipe and feed into the locker below. The foredeck also provides a safe platform while handling the anchor at the bow.
Jeff calculated the weight of the Albion hull to be 980 lbs; the decks, floorboards, and console I added brought my boat in at 1,420 lbs, and 1,680 with the motor installed. With the maximum displacement listed at 4,800 lbs, there was plenty of capacity left for crew and cargo.
I applied one coat of clear epoxy to the interior sides and two coats to the bilge area. I hired a professional painter to spray the interior sides with Raptor’s tan pickup-truck bed liner, which contains UV protection. This completely covered and sealed the wood, giving a nicely textured finish while concealing imperfections.
The plan suggested 1x2s for an optional cockpit sole; I chose to use 1×4 Douglas-fir to make six removable panels for bilge access. I coated those with Penofin Oil Finish, then assembled the panels and installed both those and some permanent floorboards.
The broad buoyant stern can easily support the weight of a 50-hp outboard.
I purchased a prebuilt fiberglass center console into which I installed the steering controls, electric control panel, horn, and GPS. To make the wiring as invisible as possible, I ran all the wiring and motor controls under the side decks and into the console. Wires for the running lights run through a PVC pipe under the deck then up inside the console.
Finally, I hired someone to apply an epoxy coating to the hull and deck, then primed and painted them with the same marine paint as was used for the bottom.
This 60-hp outboard can get the Albion moving at 29 mph.
My trials in a local lake proved that the boat trailered, launched, and performed remarkably well. The bottom is 5′ 9-1/8” at its widest point, and because of the narrow beam at the waterline, I feared the boat would be rocky, but was pleasantly surprised by its stability. Having the helm 13-1/2′ from the bow on a 20′ boat and off-center does not seem to hurt the performance or the balance. Even with the added foredeck and side decks, the cockpit is still quite open and we are able to move around freely with no obstacles or wires and cables to trip over (most important at our age!).
Forward of the helm, there is ample space for four people to sit comfortably in folding chairs, my main purpose for building this boat.
Coming up on plane, the bow stays low and doesn’t obscure the view forward.
Powered by the 60-hp motor, the Albion gets up on plane pretty quickly and does a GPS-measured 29 mph. It stays flat, even when climbing on plane, allowing me to have full visibility ahead. Sharp turns at full throttle, with weight in the back half of the hull, go very smoothly without any side skidding.
With the outboard at full throttle, the Albion carves turns without skidding.
We don’t encounter any rough water as all of our boating is done on small lakes and rivers, so we have no complaints about the flat bottom. One of the reasons I chose this design was because it would allow us to get up on the beach and disembark without the boat tipping.
Our aluminum trailer was designed to handle the Albion. We back the trailer into the water over the fenders and the boat floats off. When we reload, the boat floats on easily between the guide posts.
No matter where the boat is, on land or in the water, it draws a lot of attention. People are in awe and want to know what it is, where I got it, if I built it, where I got the plans, and how it handles. This build, transforming a pile of wood into a thing of beauty, has been the most satisfying project I have ever done.
June and Al Dettenrieder of Lunenburg, Massachusetts, have been messing around in boats all 58 years of their married life. They started with a rowboat with a lawnmower engine and a washing-machine transmission that Al rigged up. There were many boats after that, even a 38′ sailboat. Now they enjoy puttering and picnicking in local lakes and rivers in the outboard dory Al built at 79 years of age. His Albion dory won Best Power Boat in the “I Built It Myself” event at the 2018 WoodenBoat Show in Mystic, Connecticut.
Albion Pacific Power Dory Particulars
[table]
Length/18′ 10.9″
Waterline length/16′ 2.5″
Beam/7′ 10.6″
Draft/7.8″
Maximum displacement/4800lbs
Hull weight/980lbs
Recommended horsepower/50hp
Maximum horsepower/150hp
[/table]
Update: Jeff Spira passed away unexpectedly in the spring of 2022. His website is no longer operating and it is presumed that his boat plans are no longer available.
Is there a boat you’d like to know more about? Have you built one that you think other Small Boats Monthly readers would enjoy? Please email us!
The east side of the Bustard Islands was all shoals and breakers, with a broad band of granite shelves and outcroppings stretching half a mile or more offshore. Typical for Georgian Bay, I knew, where the safest routes run well outside to avoid the rocks, or follow the well-buoyed passages of the charted small-craft route that traverses Georgian Bay’s eastern shoreline.
Here in the Thirty Thousand Islands region, only kayaks and canoes—or a sail-and-oar cruiser with her board and rudder up—can manage to sneak through to the shore in most places. And even boats like my as-yet-unnamed Don Kurylko–designed Alaska beach cruiser have to pick their way carefully. Passing through the northern end of the Bustard Islands on my approach from the west, I had seen a few cottages and sailed past half a dozen larger boats in the main anchorage between Tie Island and Strawberry Island. Out here on the east side of the Bustards I was completely on my own.
photographs by the author
Like most of Georgian Bay’s eastern shore, the Bustard Islands are a compact collection of long narrow channels running parallel to each other, divided by low ridges of the Canadian Shield’s exposed granite topped by mature white pines. After I made it through the wide band of rocky shoals offshore, I threaded my way into Tanvat Island’s east side.
Holding a close reach well offshore, I eased the sheet until we were barely moving, fore-reaching along at half a knot. From a mile away it was almost impossible to identify any features of the low-lying islands behind the band of shoals, but I made my best guess at identifying an inlet that might mark the channel I wanted and took a bearing with my hand compass. Things would become clearer as I got closer, but I wanted to have at least some idea where I was headed before starting in.
Roger Siebert
.
On the chart, Tanvat Island is a spiderweb of long-fingered inlets and peninsulas reaching out to the north, south, and east; long ridges of pine and granite surrounded by hundreds of smaller islands that made it difficult to recognize the underlying shape. It looked like I should be able to skirt along the northern edge of the shoals and work close to shore in mostly open water. Worth a try, at least. I sheeted in to gather speed and pushed the tiller over to put the boat on a port tack, then steered toward the east side of Tanvat Island, watching the compass closely. I was trying for a course just south of west, but soon I was detouring around slabs of granite lying just beneath the surface and dodging half-submerged rocks almost completely hidden in the waves. After a few minutes, I gave up. “Mostly open water” or not, it would be foolish to try to sneak in any closer under sail. Turning into the wind, I dropped the sail and unclipped the halyard. It would be oars from here.
I pulled up the centerboard and rudder and slid the oars into the locks, then glanced again at the chart as we drifted slowly toward shore. I had managed to judge my entry well, despite my somewhat rough combination of eyeball navigation and compass bearings. At least, I thought I had judged well. But the chart might as well have been an inkblot test, a convoluted scrawling of rocks, islands, and narrow channels that twisted around each other like snakes crawling through a maze. When I put the tip of my finger down about where I thought I was, it covered more than a dozen islands. I wasn’t about to put any money on which one was which.
It didn’t really matter, anyway. I was almost through the reefs and safe along the east side of Tanvat Island—if I could manage to figure out which one it was. The narrow passage opening before me was lined with tall pines and granite slabs, and surrounded by a chaotic jumble of rocks, islands, hidden bays, and gnarled peninsulas. Was this the channel I had hoped to hit? I’d find out soon enough. Either way, I had reached the Bustards. It had taken me four days and a hundred miles, but finally, I was here. I moved to the aft thwart so I could row while facing forward—an advantage in avoiding the countless uncharted rocks and shoals I knew I’d encounter here—and made my way slowly deeper into the maze.
I had launched in the center of the North Channel, at the municipal marina in the small town of Spanish, Ontario, a ten-hour drive from home. Another four or five hours in the car would have gotten me to Georgian Bay two days sooner, but from my previous visits I knew Spanish had what I needed: a good ramp, showers, a laundromat, and, most important of all, hassle-free parking for a car and trailer for weeks at a time. Although I wanted as much time in Georgian Bay as I could get, that alone made Spanish a worthwhile trade-off.
After spending the first night on East Rous Island I woke to the flat calm of a typical North Channel summer morning. Three hours later, after rowing 6 miles and stopping briefly in the town of Little Current, a slight breeze arrived and I could stow the oars and raise the sail.
I had covered 60 miles in the first two days, broad-reaching on the starboard tack for hours on end, bypassing towns and marinas and overnighting in out-of-the-way backwaters, places too shallow or too small to see much traffic. At East Rous Island, a few miles west of Little Current, I anchored in knee-deep water outside the crowded main anchorage and slept on the Alaska’s full-width sleeping platform; at Thebo Cove a mile outside Killarney, I tied to shore and set up a freestanding tent on a granite slab.
This rocky beach on the west side of West Fox Island, 7 miles east of Killarney, offers a convenient place to land a boat, but lies completely exposed to the prevailing westerlies. Overnighting here is best left to kayaks and canoes—lightweight boats that can be carried up the beach. I had lunch here and headed north to spend the night in better protected waters.
The third day had brought me 7 miles east of Killarney to the Fox Islands, a favorite destination from earlier trips. Here, finally, was Georgian Bay, wild and rocky and filled with possibilities: high granite domes rising from the water, broad smooth slabs of Canadian shield granite sweeping up to jagged skylines of tall pines, trees that have withstood the prevailing westerlies for so long that they remain forever bent and twisted toward the east as if reaching out in supplication to some unseen power. After a lunch ashore on West Fox, I set out again, ghosting along in winds so light that I could barely feel the breeze.
A mile north of West Fox Island, the cluster of islets around Anchor Island and Solomons Island offers dozens of protected campsites for small boats. With an open boat, sleeping aboard is a good option only if you have foolproof mosquito netting. I opted to spend the nights in my tent.
Well, so be it. I’ve learned to enjoy what the day gives you rather than worrying about what it does not. This would be no 30-mile day. Instead, I worked my way slowly northward toward a cluster of islands only a mile away. With the wind behind me, and rocks all around, I sailed carefully, centerboard up, through cliff-lined channels less than a boat-length wide, sneaking through passages barely deep enough for my boat’s 7″ draft. And there, in a tiny shoal-draft backwater tucked in between Anchor Island and Solomons Island, I tied the boat to shore and unloaded my gear. This would be camp for the night. An afternoon ashore, scrambling among the rocks and climbing to the island’s tall summit, a long swim in the pleasantly cool water, and a quiet night at camp. After two days in the boat, it was exactly what I needed.
But now, 30 miles farther on and ready to make my landfall in the Bustards, I needed to figure out where I was. With no GPS—I try to avoid machines that purport to do our thinking for us—that might not be easy. But I knew it was almost always possible, even in a complicated setting like this. Here. The channel I was following split into two branches, then split again. I looked closely at the chart, turned it to align with the compass. A cluster of rocky islands here, a lone rock there. This was it—I had managed to find the passage I had been looking for. All I had to do now was follow the channel’s right-hand shore—Tanvat Island, I was fairly sure—through every twist and turn, as if working my way through a labyrinth with one hand on the wall. I kept rowing. A few more rocks and islands that matched the chart precisely confirmed it. Amazingly enough, I knew exactly where I was.
My fourth day began with cold rain and a strong breeze. Fortunately, the boat’s boomless standing lugsail is easily reefed: simply roll up the foot and tie it in place. With the first or second reef tied in, the boat performs well to windward; the deep third reef keeps things in control when running for shelter.
Twenty minutes later, rowing along a long narrow bay that ran between two ridges of granite topped with dark pines, I found my campsite: a broad smooth slab of gray stone that swept up from the water to a stand of gnarled pines above. Behind the trees, the ridge dropped down again to a dark pond dotted with white-flowered lily pads. The water here, so deep inside the maze, was perfectly calm with only the slight wake from our passage rippling through the reflection of the rock and sky and trees. I shipped the oars 10 yards out and let the boat glide slowly into shore, then stepped out into knee-deep water and tied the painter to a beaver-chewed stump at the water’s edge.
It had been another long day—30 miles of non-stop sailing on a close reach, and a half-hour of rowing. There was plenty of daylight left, but I felt no need to go farther. Instead, I stood barefoot on the stone and felt the rough texture of the granite, the curling lichen underfoot. Breathing deeply, I listened to the world around me. It was not silence, not completely, but a quiet stillness that seemed to hang heavy in the air. A whisper of shifting branches overhead, the faint ripple of water. And somewhere, a moment later, the call of a loon. I unstrapped my dry bags from the boat and carried them to shore.
I woke the next morning to a world blurred by gray mist and shrouded in silence. The water was still and dark at the foot of the rocks, a liquid mirror unruffled by the faintest hint of motion. Far out at the eastern edge of the islands, fog lay so thick on Georgian Bay that there was no horizon, no up, no down. It was no day for offshore sailing, but it would be perfect for exploring the maze of backwaters, narrow passages, hidden coves, and islands that made up the east side of the Bustards.
Moving as quietly as I could, I got my raincoat and water bottle and set them in the boat, then untied from shore. I stepped aboard with a gentle push, easing myself onto on the rowing thwart as the boat slid away from shore. As I lowered the oars gently into the water, I realized that I hadn’t even bothered with breakfast.
The fog held through the morning, painting the world in a palette of muted grays and blacks all around me as I rowed. A hundred oar strokes, a hundred paintings. The foreground of each scene came into sharp focus as I moved through it, the background forever hazy and indistinct. A vague darkness of pines; an oddly serrated slab of rock revealed itself to be a line of gulls standing and muttering to themselves as I rowed closer. From overhead came the rattling cry of a sandhill crane.
Hidden in the complex web of Tanvat Island’s surrounding maze is a wealth of potential campsites and anchorages. This perfectly sheltered inlet, my base camp for two nights, was tucked well back inside the Bustards, more than a half mile from the open waters of Georgian Bay.
My 18′ Alaska had been designed with exactly this in mind. With its Whitehall lines and narrow double-ended waterline, it was a decent sailer, but a flawless pulling boat. Built of 1/2″ planks, edge-nailed and glued—traditional strip planking—she was heavy enough to hold the momentum of each stroke. The oar blades dropped silently into the water, again and again, and glided through the maze with little effort and even less noise. At times the channel I was following pinched down to a passage so narrow there was no room to row, but the Alaska glided through easily, the hull’s weight preserving forward motion while the long keel kept her straight.
The layout of the maze become clearer in my head as I explored, my perceptions shifting to bring the chart and the world around me in line with each other. I had camped in the center of a long irregular peninsula that stuck out from the east side of Tanvat Island like a pair of weirdly twisted, frog-like legs. North of the peninsula was a large bay filled with so many islands that it was hard to recognize that it was, in fact, a large bay. By lunchtime I had explored it thoroughly under oars, making the discovery that the “peninsula” I had camped on was, in fact, an island—water levels were so high that a small circular inlet just west of camp had become a passage through to the other side. At least, a passage for boats with extreme shoal draft. Even the Alaska managed to scrape her keel as I slipped past.
A foggy morning on Tanvat Island’s east side inspired a lengthy rowing expedition before breakfast. On the chart, this bay was a dead end, but high water levels on Lake Huron and Georgian Bay allowed me to row all the way through and out the other side.
I returned to camp for lunch, a meal of red beans and rice I had prepped in my Thermos the night before. After eating, I set out again, this time following the southern edge of the peninsula. The day was still hazy and windless, the water flat and dark. I followed the shoreline of the peninsula until I reached its base, where I rowed far back into a fish-hook bay filled with lily pads, the shores strewn with beaver-gnawed branches. I had rowed 2 miles to get here, but the hook of the bay was dug so deeply into the island that a ridge of granite a few yards wide was all that separated me from the north side where I had spent the morning exploring. I had rowed for several hours and was barely a quarter of a mile from my campsite.
The Bustards, I realized, were a world of infinite possibilities.
Two hours after leaving camp, rowing steadily all the while along a circuitous route, I was still less than a mile from camp as the crow flies. The Bustard Islands hold more possibilities per mile than any other cruising area I’ve experienced.
One of the great joys of traveling by one’s self, I’ve learned, is that much of the need to plan ahead is negated. The solo traveler—the solo sailor—is free to act on a whim, and can keep all options open. By the time I had eaten a quick bowl of oatmeal the next morning, I still had no idea how I would spend the day. I suppose that many people would find that level of uncertainty unsettling, or annoying. Perhaps even foolish. I find it liberating.
I loaded everything into the boat—tent and gear, food and sailing rig—to keep my options open. First I’d row out to the mouth of the bay, where I could get a look at conditions on Georgian Bay proper. If the wind was good to continue south and east along the coast, I’d be ready to sail. If not—
Well, if not, I’d find something else to do. Just to be on the safe side, I surveyed the crew about my plan’s lack of specificity. No one objected. Taking a last look around camp to make sure I hadn’t forgotten anything, I rowed slowly out the channel toward the open water beyond. After ten strokes, the granite slab where I had set up my tent had vanished into the mist.
My technique for rowing the channels in the Bustard Islands was to keep the boat running straight with the help of a bungee-and-cord tiller tender and go fast enough to coast through the narrow spots.
As soon as I reached the edge of the bay, I knew that I wouldn’t be heading offshore. Fog had settled so thickly on the open waters of Georgian Bay that I doubted I’d be able to see the faintest hint of the Bustards from a hundred yards offshore. A chart and compass would suffice to get me to the next landfall, I knew—the ominously named Dead Island 3 miles to the east, where First Nations tribes had long ago interred their dead in the treetops, according to some sources I’d read—but it wouldn’t be the height of good judgment.
Besides, I was far from done here. On my only previous trip here, I had only stayed one night. This time I wanted more. But more what? I had already explored most of the eastern side of Tanvat Island, and retracing yesterday’s paths seemed less interesting than trying something new. I pulled out the chart. Tanvat Island, the largest in the Bustards, lay spread out across the page in two monstrous, squid-like lobes separated by a narrow isthmus where a deep bay cut into the shore on the western side. The area around Burnt Island just to the west housed a number of cottages, and the Bustard Island Headquarters for French River Provincial Park. There’d be other boats, other people. Burnt Island was, in other words, better to avoid.
The pond behind my Tanvat Island campsite—you can see my yellow tent through the fog—was too shallow for the boat’s 7” draft, and the entrance too narrow for the hull. It was a rare dead end.
But Tanvat Island itself? Possibilities. Tracing my finger around its convoluted outline, I wondered about a circumnavigation. But Tanvat’s northern end was pinched so tightly together with Strawberry Island that their outlines on the chart were touching. And Tanvat’s southern end was an endless scattering of rocks and shoals. Then too, there was a wide band of blue—the color used to indicate depths too shallow to bother marking—surrounding the entire island. I knew from yesterday’s explorations that not even my Alaska could always float across that blue band, and at 250 lbs for the empty hull, I wasn’t going to portage her. With water levels as high as they were, I thought my chances were good, but there would be no guarantees.
Gripping the oars lightly, I turned the boat north along the east side of Tanvat Island to begin—a counterclockwise circumnavigation. Or an ignominious failure. Either way, it’d be a good day.
The interior waterways of the Bustard Islands seem far removed from the open waters and offshore passages of Georgian Bay, but a good sail-and-oar cruising boat is equally at home in either world.
By late afternoon I had returned to the east side of Tanvat Island and pulled into the wide bay just south of my previous campsite, circumnavigation complete. I had seen no one. No one, that is, except for a few beavers, a pine marten (the first I’d ever seen in the wild), a northern water snake, a blue heron, a curious mink who swam out to the boat to stare wide-eyed at me for a moment before vanishing underwater, and an eastern massasauga rattlesnake that sidewinded its way across the surface of the water and crawled up onto the rocky dome where I had stopped for lunch.
The best thing about a long cruise is that there’s never any reason to hurry. With the fog gone, I enjoyed a quiet evening in camp after my all-day circumnavigation of Tanvat Island.
In the center of the bay I made camp at a cluster of three islands—in my head I had taken to calling them the Three Brothers—and rigged lines to keep the boat in shallow water without banging against the rocks. After a long swim and another Thermos-cooked supper, followed by a second course of instant mashed potatoes, I set up my tent on the island’s eastern summit, a bare granite dome overlooking the bay from ten feet above.
On my last night in the Bustards, I chose a tent site that faced east over relatively open water. As a result, the morning light woke me well before the sun cleared the horizon.
The sun was setting behind me, and the sky filled slowly with pinks and blues and wisps of purple clouds. The reflection in the still waters below was no less vivid. A sandhill crane flew past, wide wings flapping silently. Its rattling call was answered by another from deep within the dark pines of Tanvat Island. And then, silence.
Looking east from camp on my final morning in the Bustard Islands, it was easy to see a clear route out to the open waters of Georgian Bay to continue my journey.
I stood for a long time watching the sky grow slowly darker, until the first stars began to appear overhead. Tomorrow would be a fine sailing day and in the morning I’d be heading south along the shores of the Thirty Thousand Islands, sailing deeper into Georgian Bay. Being fogged in among the Bastards had seemed like an interruption at first, but the delay had forced upon me a mist-muted world where time and distance had become irrelevant, ambiguous, uncertain. For three days I had moved through a veiled, endless now, where each stroke of the oars only held me more firmly in place in the moment. Whatever lay beyond the mist remained out of reach no matter how far I rowed. When I woke the next morning to blue skies and bright sunlight, the Bustards felt like another world entirely, one made finite by its startling clarity.
Tom Pamperin is a freelance writer who lives in northwestern Wisconsin. He spends his summers cruising small boats throughout Wisconsin, the North Channel, and along the Texas coast. He is a frequent contributor to Small Boats Monthly and WoodenBoat.
If you have an interesting story to tell about your adventures with a small boat, please email us a brief outline and a few photos.
Clay bars are available at auto parts stores. They come in different grades (this blue bar is a #1/Fine) and sizes (at 100 grams, this is one of the smallest). It cost around $12 and comes in a resealable pouch to keep it from accumulating grit.
Tim Murfitt of Norwich, U.K., bought a classic car a few years ago, and while researching how to improve the paint work came across the clay bars car detailers use. Later, when he did the paint work and varnish on his Savo 650 in the same dusty shop he built the boat in, he was disappointed with the flaws to the finish and thought he would give the clay bar a go. It only took him 30 minutes to do the whole boat inside and out, and he was amazed at the transformation. It left both the paint and varnish feeling silky smooth.
SBM
This apple-crook breasthook is a lovely piece of wood with a lousy dust-flecked varnish job.
SBM
The clay bar needs a bit of soapy water on the workpiece to lubricate it and keep it from dragging. The bar is quite malleable and will contour itself around the workpiece.
SBM
After a quick rubbing with the bar, the varnish is smooth and glossy.
Editor Chris Cunningham bought a bar of detailing clay and unexpectedly got a chance to try it out sooner than he expected. He’d made a new bathroom cabinet with nice Douglas-fir, varnished it, and accidentally dropped the mirror frame while it was drying. It picked up a lot of dust so he let it dry a couple of days and just took the clay bar to it. A quick rub with the bar and some soapy water took off the imperfections and didn’t dull the shine.
Varnishing oars
Ben Fuller
A pair of sawhorses make contact with only the handles and the leathers, leaving the rest of the oars free for varnishing.
If you find oars unruly subjects for varnishing, you can get them to behave themselves, as Ben Fuller of Cushing, Maine, does by cantilevering them on a pair of sawhorses. With the leathers resting on one, and the handles tucked under the other—weighted if necessary—nothing is in contact with the areas you’ll varnish. Spring clamps either side of the leathers keep the looms from rolling while you’re varnishing one side and allow you to turn the oar over to brush the other.
Rope cinches
Christopher Cunningham
With a rope cinch, you can wrap the line around something like a sleeping bag, tie the rolling hitch, and then put the squeeze on. That’s easier than compressing something and trying to tie a knot at the same time. And unlike a bungee cord, the rope cinch has an unlimited range of adjustment.
Our editor occasionally uses a piece of rope as a belt, but it’s hard to get and keep it sufficiently tight while he ties a reef knot or a shoelace bow. A rolling hitch (Ashley Book of Knots, #1734, page 298) makes a belt that he can tie, cinch up, and have it stay tight. With repeated use the sliding knot will get tighter, so it’s best to start the next day retying the belt. Smaller versions of the rolling-hitch belt can take the place of straps and buckles for cinching sleeping bags or bundling spars and sails.
Christopher Cunningham
Start by taking two full turns around the standing part of the line. The standing part’s end is at the bottom; the cinch’s loop side is at the top.
Christopher Cunningham
The working end then crosses over itself for another wrap, tucked under itself. The rolling hitch is like the more common clove hitch with an extra wrap.
Christopher Cunningham
Tightened, the rolling hitch creates friction and when the cinch is tightened, the hitch puts a kink in the standing part, locking it in place.
Slotted Foredeck
Patrick MacQueen
The slotted foredeck makes it easy to step the mast and raise it. For trailering, the spars all fit inside the boat by tucking one end under the aft deck and slipping the other down through the slot.
Patrick MacQueen of Hancock, New Hampshire, set out to build a Herreshoff Coquina and decided that wider decks for sitting and hiking out while sailing would be an advantage. The deck required another modification. Ordinarily the mainmast partner is set right into the breasthook and the narrow decks taper up to its corners. It didn’t seem to Patrick that the taper would be an elegant resolution for the wider side decks.
Patrick MacQueen
Patrick MacQueen’s slotted foredeck and modification of the Herreshoff arrangement for the decks maintained the boat’s original functions and gave it a different but fitting appearance.
A foredeck would look better, but would make stepping the mainmast far more difficult. Patrick struck upon making a narrow slot running up to the partner at the rear of the breasthook; it would allow for easy stepping and unstepping. The Coquina’s decks had to look pretty, of course, so he glued 1/8”-thick strips of mahogany and ash on the 3/16” marine ply decks and finished them off with ash coamings.
Farrier’s Rasp
The farrier’s rasp that Tom DeVries, of New Braintree, Massachusetts, bought at an antique shop for $3 was designed for trimming and shaping horse hooves, but it also works beautifully for tapering ash stems, bringing oak bungs down flush, and rounding spruce oar handles. It’s quick, quiet, and relatively safe.
Tom Devries
One side of the farrier rasp is a double-cut file for finer work.
One face has rasp teeth and the other is a double-cut file. The rasp side cuts even hardwood quickly down to size, and with a flip he can use the file face to finish smoothly. Tom has used his 17” farrier’s rasp to shape beveled stems on the double-enders he has built.
Tom DeVries
While the file side is working a hardwood stem, the teeth of the rasp side are visible.
The long, keen, shearing cut of this big file makes fairing bungs flush faster, with little of the risk of tearout created by chiseling bungs. He tapes the end of the rasp to prevent inadvertent scratches as the bung comes flush.
Tom DeVries
Tom took a grinder to this edge to remove the teeth, making a safe edge that could ride on an adjoining surface, like the shoulder of he loom, without cutting into it.
Both edges of a farrier’s rasp have teeth; Tom used a grinder to make a “safe edge” he can use to work tight to an adjacent surface. It comes in handy for working and oar’s grip up to the shoulder of the loom. Farrier’s rasps are readily available from many online sources.
You can share your tips and tricks of the trade with other Small Boats Monthly readers by sending us an email.
The No-Spill gas can has several features that make it easier to avoid overfilling at the gas station and spills aboard the boat.
I’ve grown rather fond of the little 2.5-hp outboard motor I bought 15 years ago, not long after small four-strokes became available. I couldn’t see myself using a two-stroke, sneering as I do at the sight of outboards trailing an acrid blue fog. The four-stroke is easier on the environment—it has a two-star, “very low emission” rating from the California Air Resources Board (CARB)—so I’m always ashamed when I overfill the little one-quarter-gallon internal fuel tank and leave a rainbow sheen on the water and adding noxious vapors to the atmosphere.
The gas cans I’ve accumulated have all been messy affairs. The oldest had a nozzle that stored inside the can, which was dripping with gas from the get-go,and an air vent on the handle, which were banned in 2009. A more recent can has a flexible nozzle with a locking valve in the handle. Both cans require knowing when to stop pouring as the level of gas rises to the fuel-tank opening. At least with the newer model I can release the valve to stop the flow, but the gas keeps coming until the nozzle has drained itself. A third can has a spring-loaded nozzle you’d hook over the mouth of the tank, and the gas is supposed to stop flowing when it covers the end of the nozzle. It isn’t very reliable, so I no longer use it.
The nozzle has a flange, seen here resting on the left edge of the jar, that supports the weight of the can while pouring. With the valve’s button pressed, the fuel (colored water here) stops flowing when the it reaches the nozzle opening.
The No-Spill Gasoline Can has been a great improvement. I bought the 1.25-gallon size. There are 2.5- and 5-gallon sizes, more fuel than I usually need and too heavy and awkward to hold out over the transom to get to the motor. The HDPE can has notably thick walls and is quite rigid compared to my previous cans. It has a translucent vertical stripe at each end for a quick visual check of the level of fuel in the can. Its fill opening is 2-1/8″ in diameter, providing a much better view into the can when filling than the 1-3/8″ opening of my previous cans. Inside is a flame mitigation device (FMD), a white plastic insert like a skinny colander, that works to saturate the space with the gas vapor, crowding out the oxygen and making the mixture so rich that won’t ignite with the introduction of a spark or flame.
The locking ring for the cap has the usual ratchet to prevent children from opening the can. I found the ratchet difficult to disengage; its teeth are painfully sharp, so I sanded the points a little. When the cap is tightened, the ratchet goes well past the tab on the can. I’ve been used to having the caps on other cans come tight mid-ratchet. That’s what’s suggested by the instructions on the No-Spill can, but I found the lid sealed about an eighth of a turn beyond the engagement of the ratchet.
The nozzle has a cap that’s connected to keep it from getting lost. (If my older cans had caps, they’ve all taken a hike, allowing vapors to escape and grit to get in.) There’s also a molded flange to hook over the lip of the fuel tank’s fill spout, steadying the pour and taking the weight of the can.
Opposite the nozzle there is a green valve plunger. Depressing it allows gas to flow; releasing it stops it. The flow will also stop automatically if the fuel in the tank rises to cover the nozzle. A vent built into the nozzle is then prevented from letting air into the can, a partial vacuum is created, and the fuel stops flowing. After releasing the valve plunger, the pour spout can be removed from the tank without any spillage.
When I first tried the can, I filled it with water before filling it with gas. Several times the flow didn’t stop automatically. Air was somehow getting into the can, allowing it to continue to pour. I thought I hadn’t seated the cap thoroughly but that wasn’t the case. Air was getting through the hole at the top of the valve button when I didn’t have my thumb squarely over it. With my thumb sealing the hole, the can works perfectly.
The No-Spill can isn’t quite fool-proof, but it is sturdy, well designed, and can keep the fuel where it belongs—contained.
Christopher Cunningham is the editor of Small Boats Monthly.
The No-Spill cans are available from numerous retailers and online sources. Prices range from $21 for the 1.25-gallon can to $36 for the 5-gallon.
Is there a product that might be useful for boatbuilding, cruising or shore-side camping that you’d like us to review? Please email your suggestions.
Subscribe For Full Access
Flipbooks are available to paid subscribers only. Subscribe now or log in for access.

 Photographs by the author
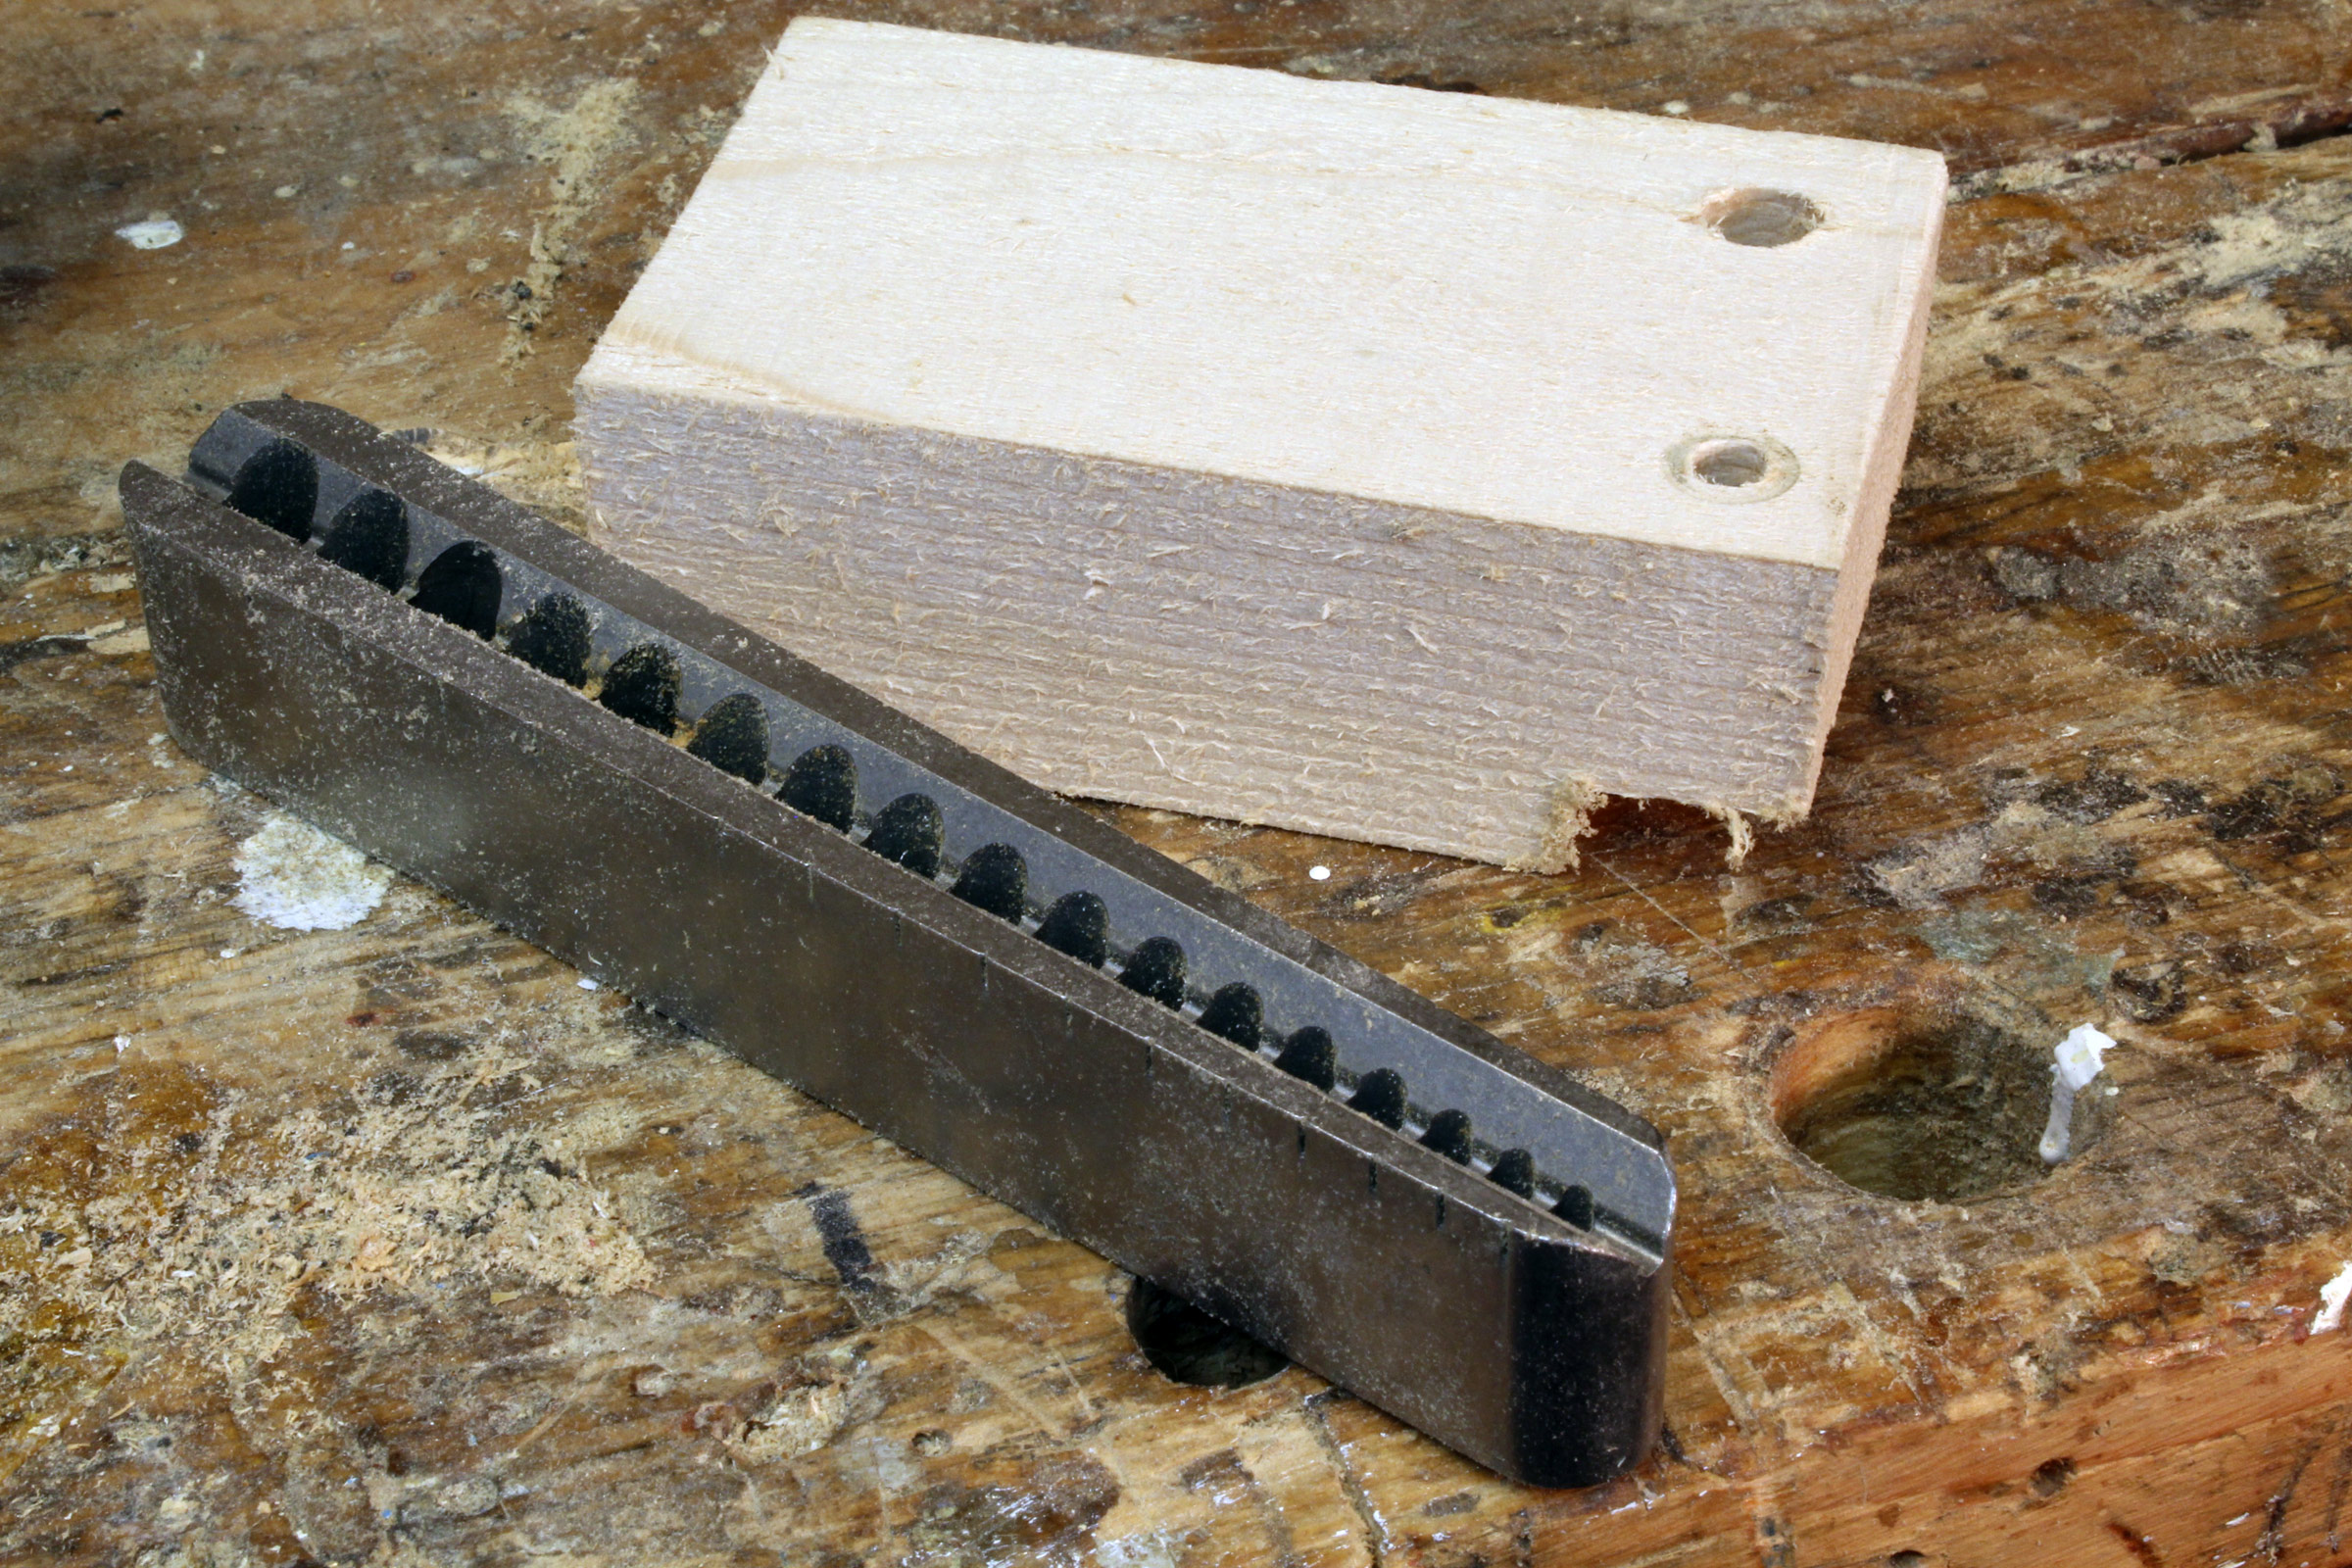
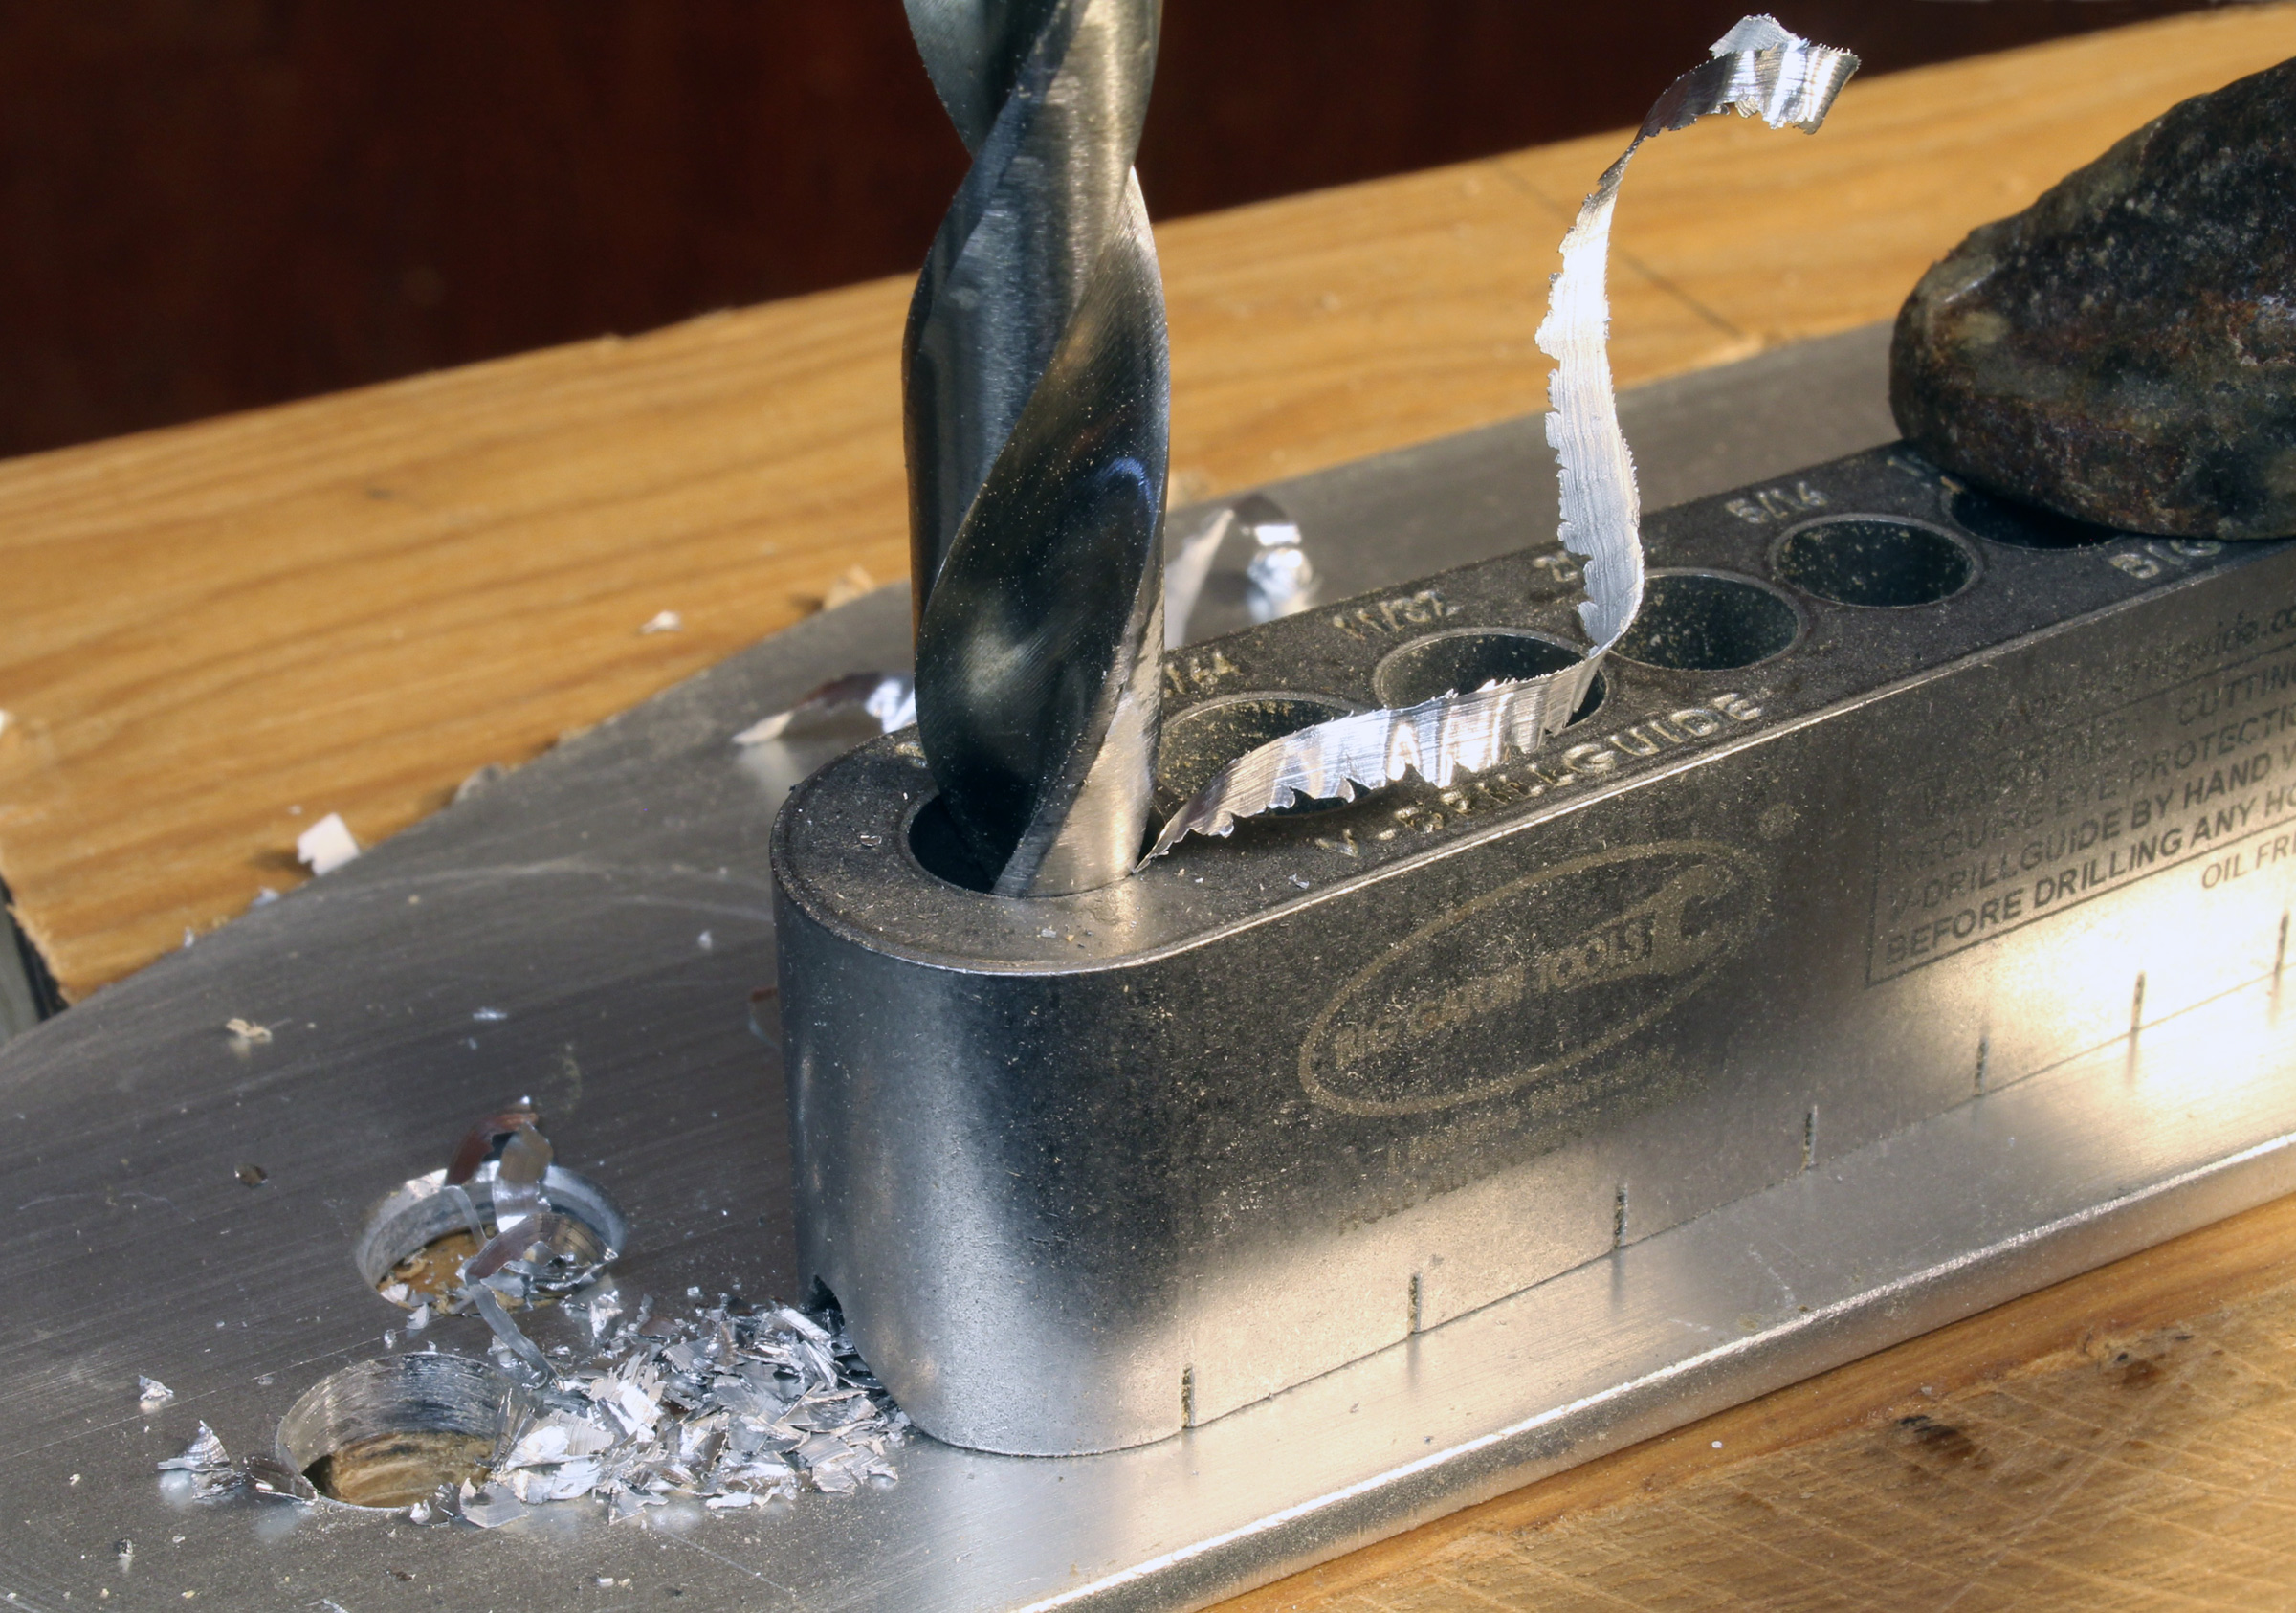
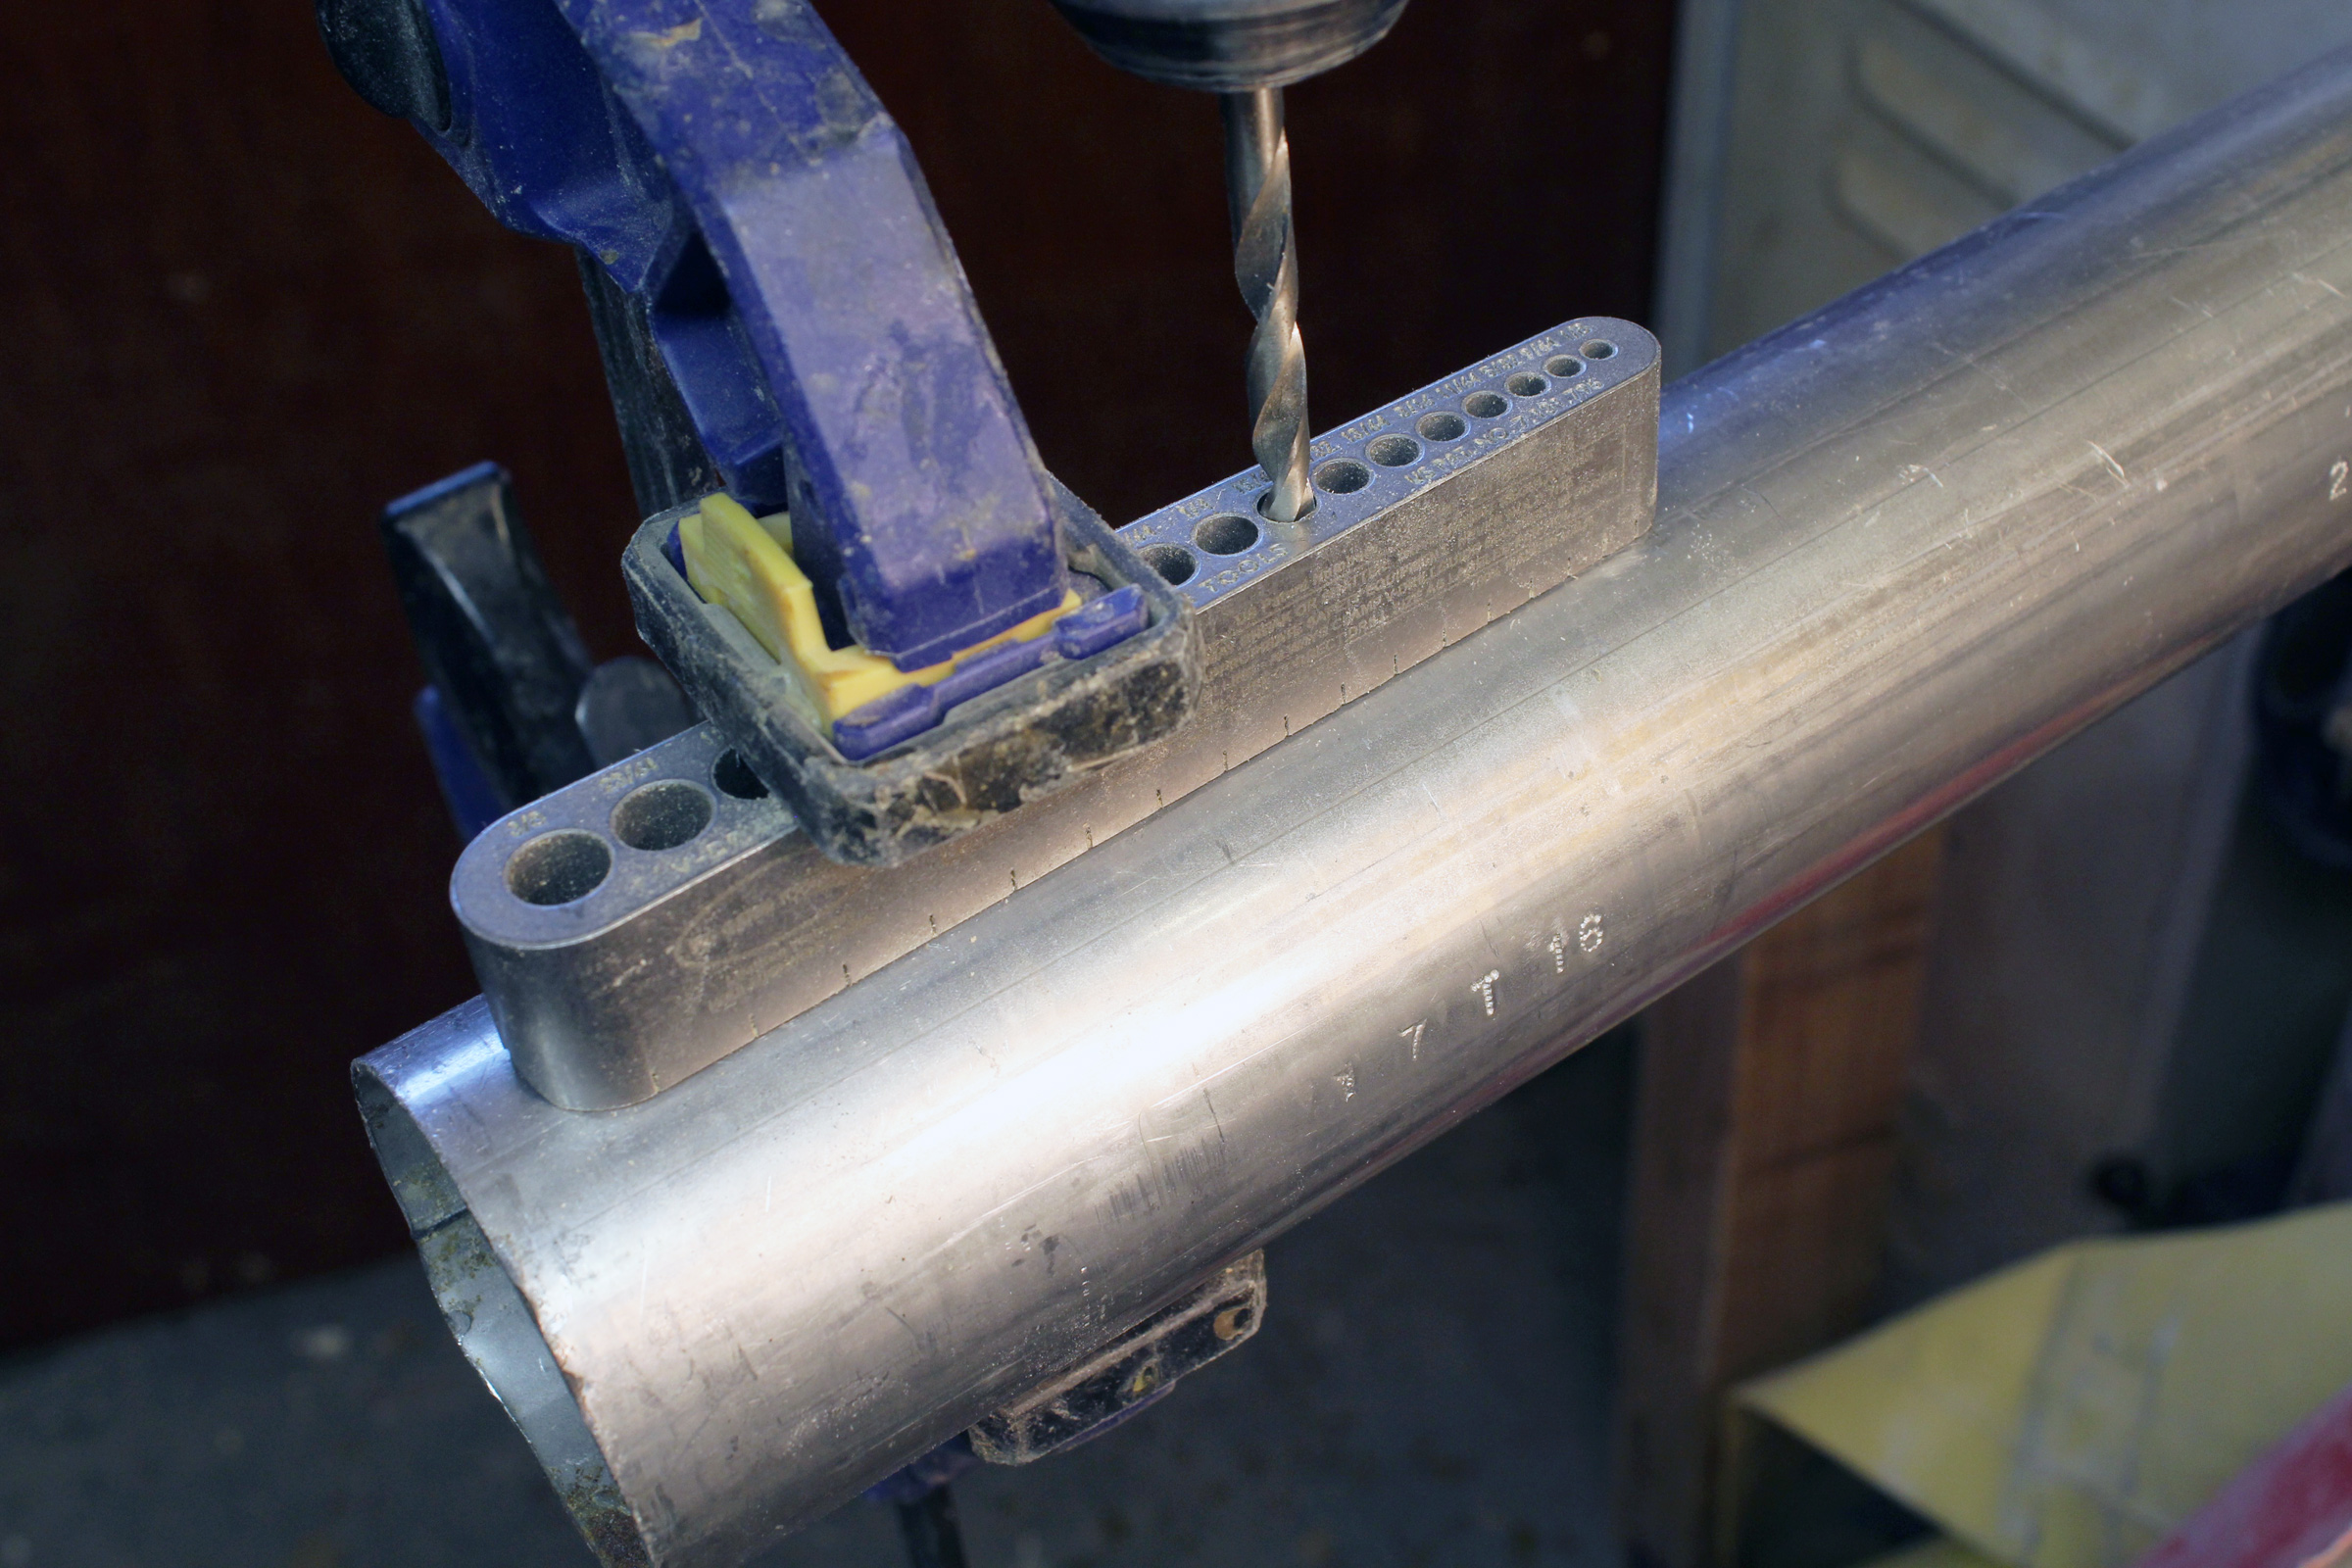
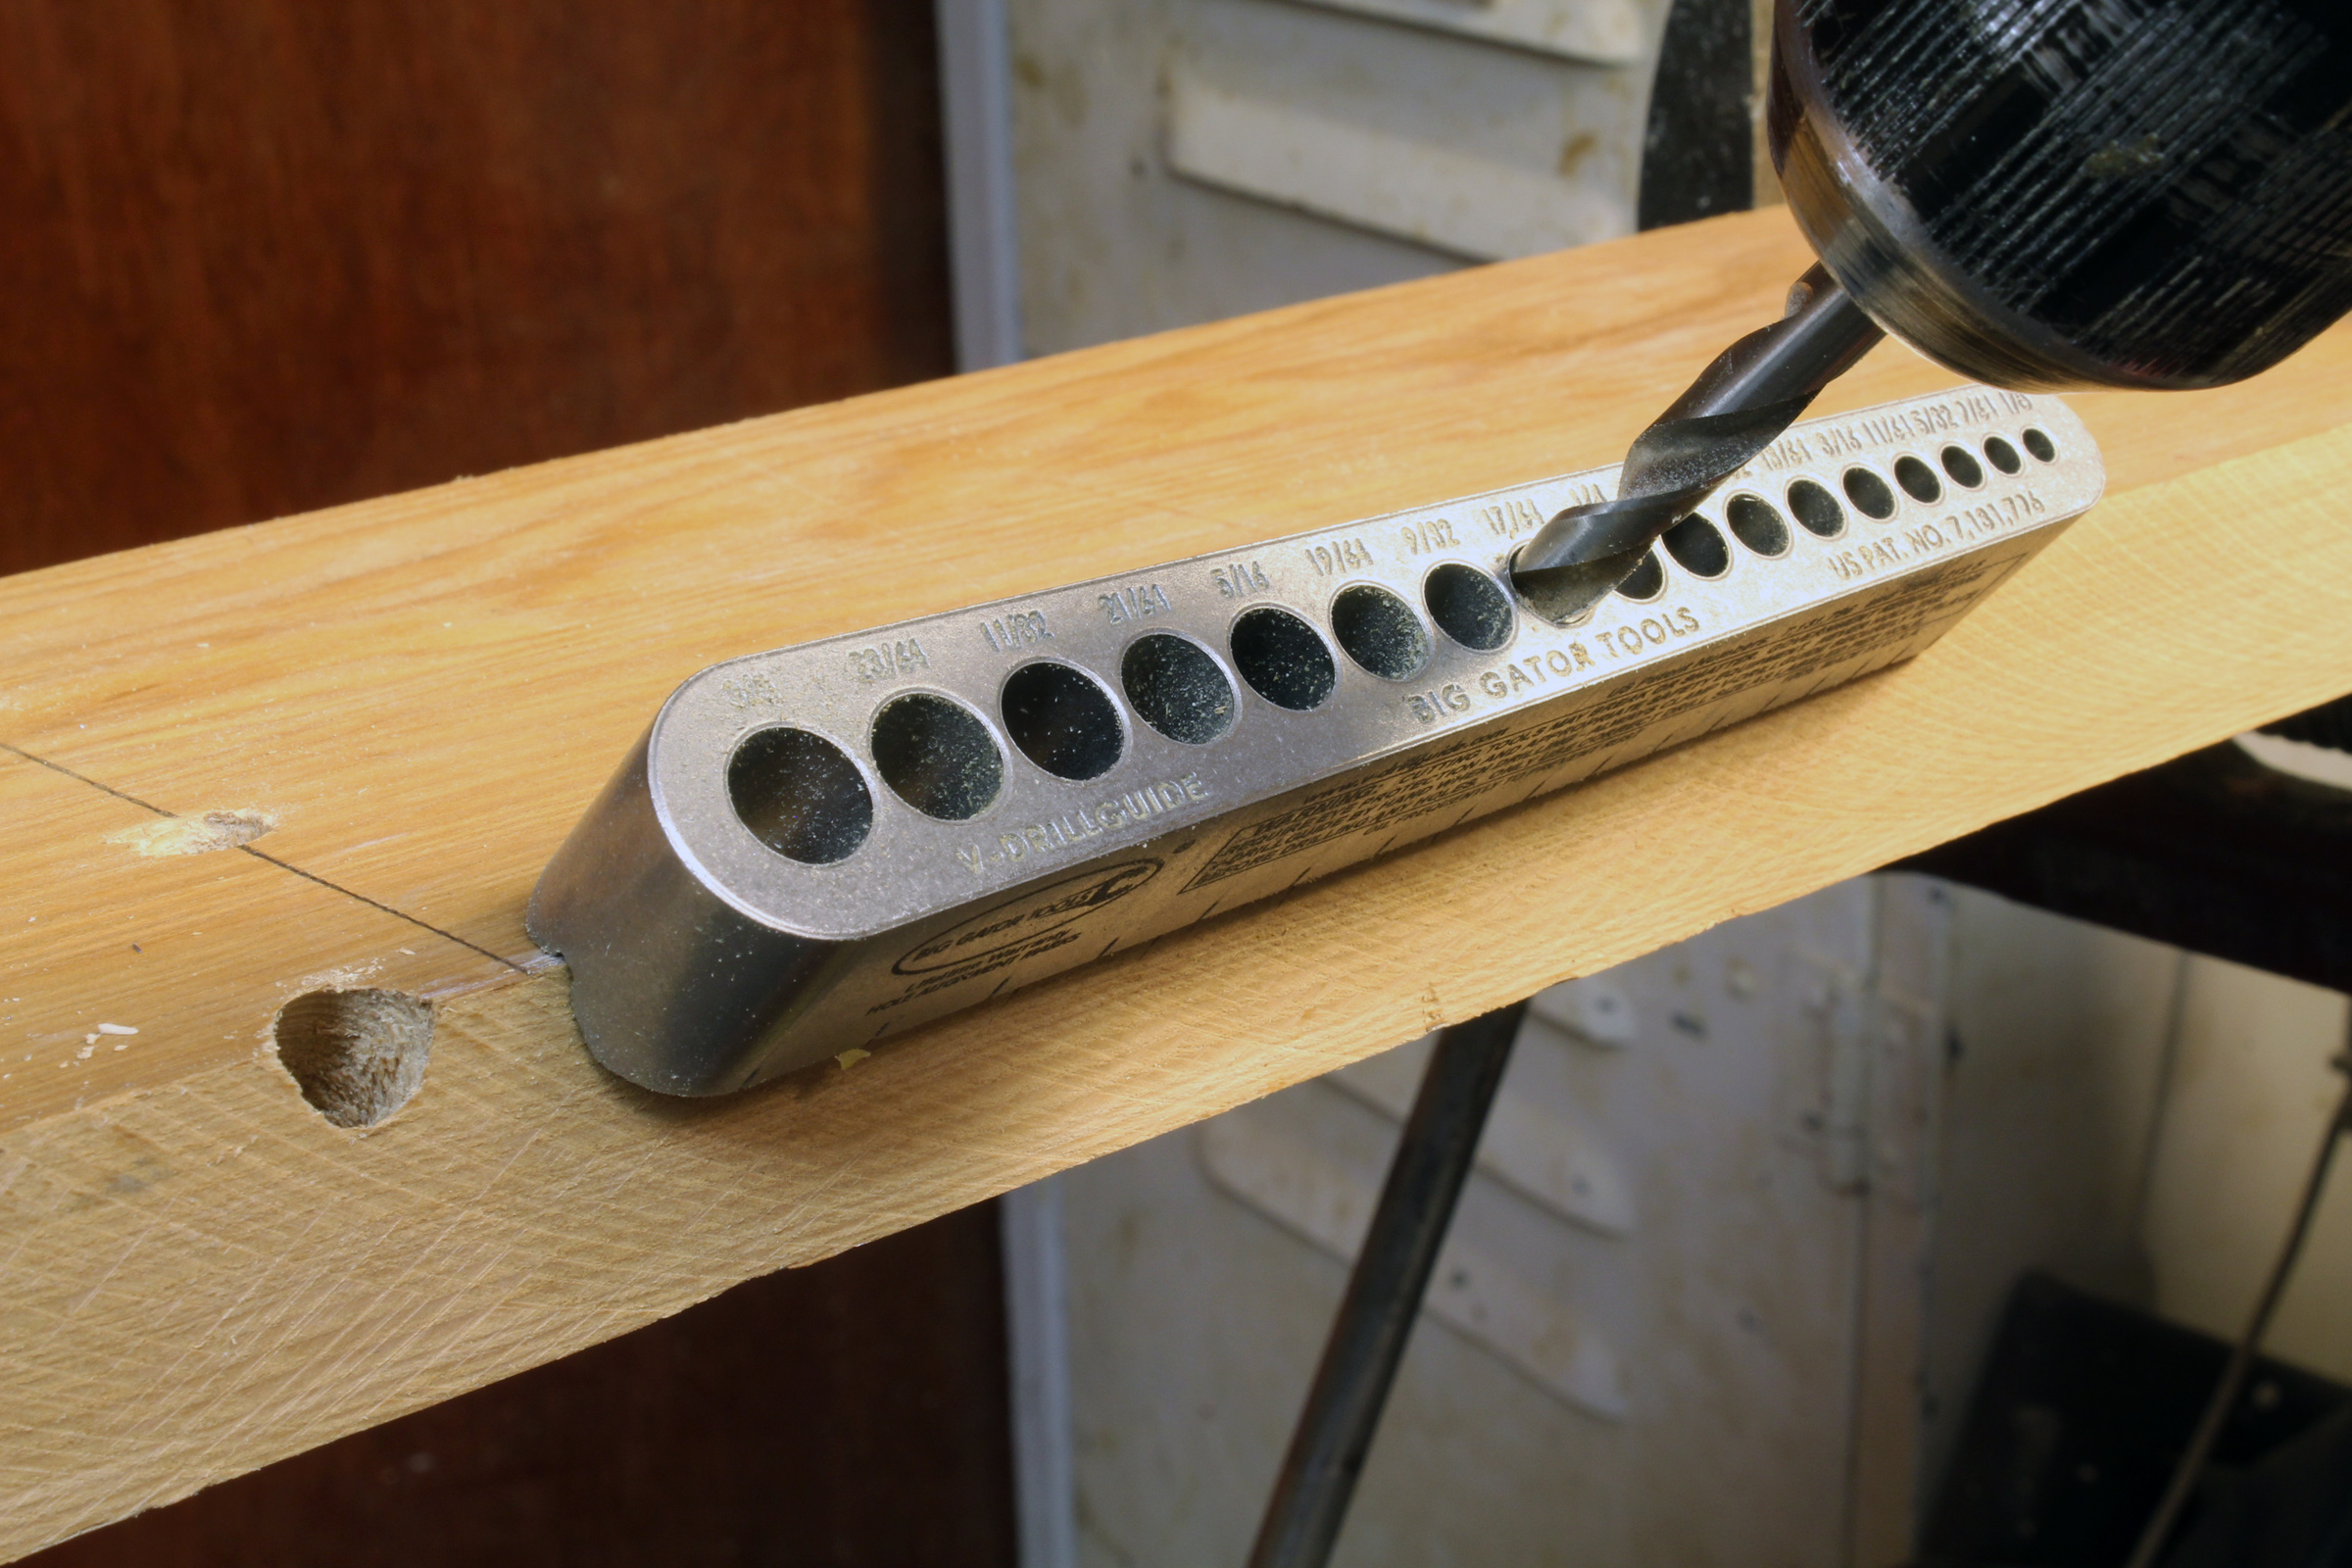
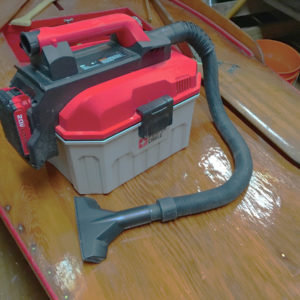
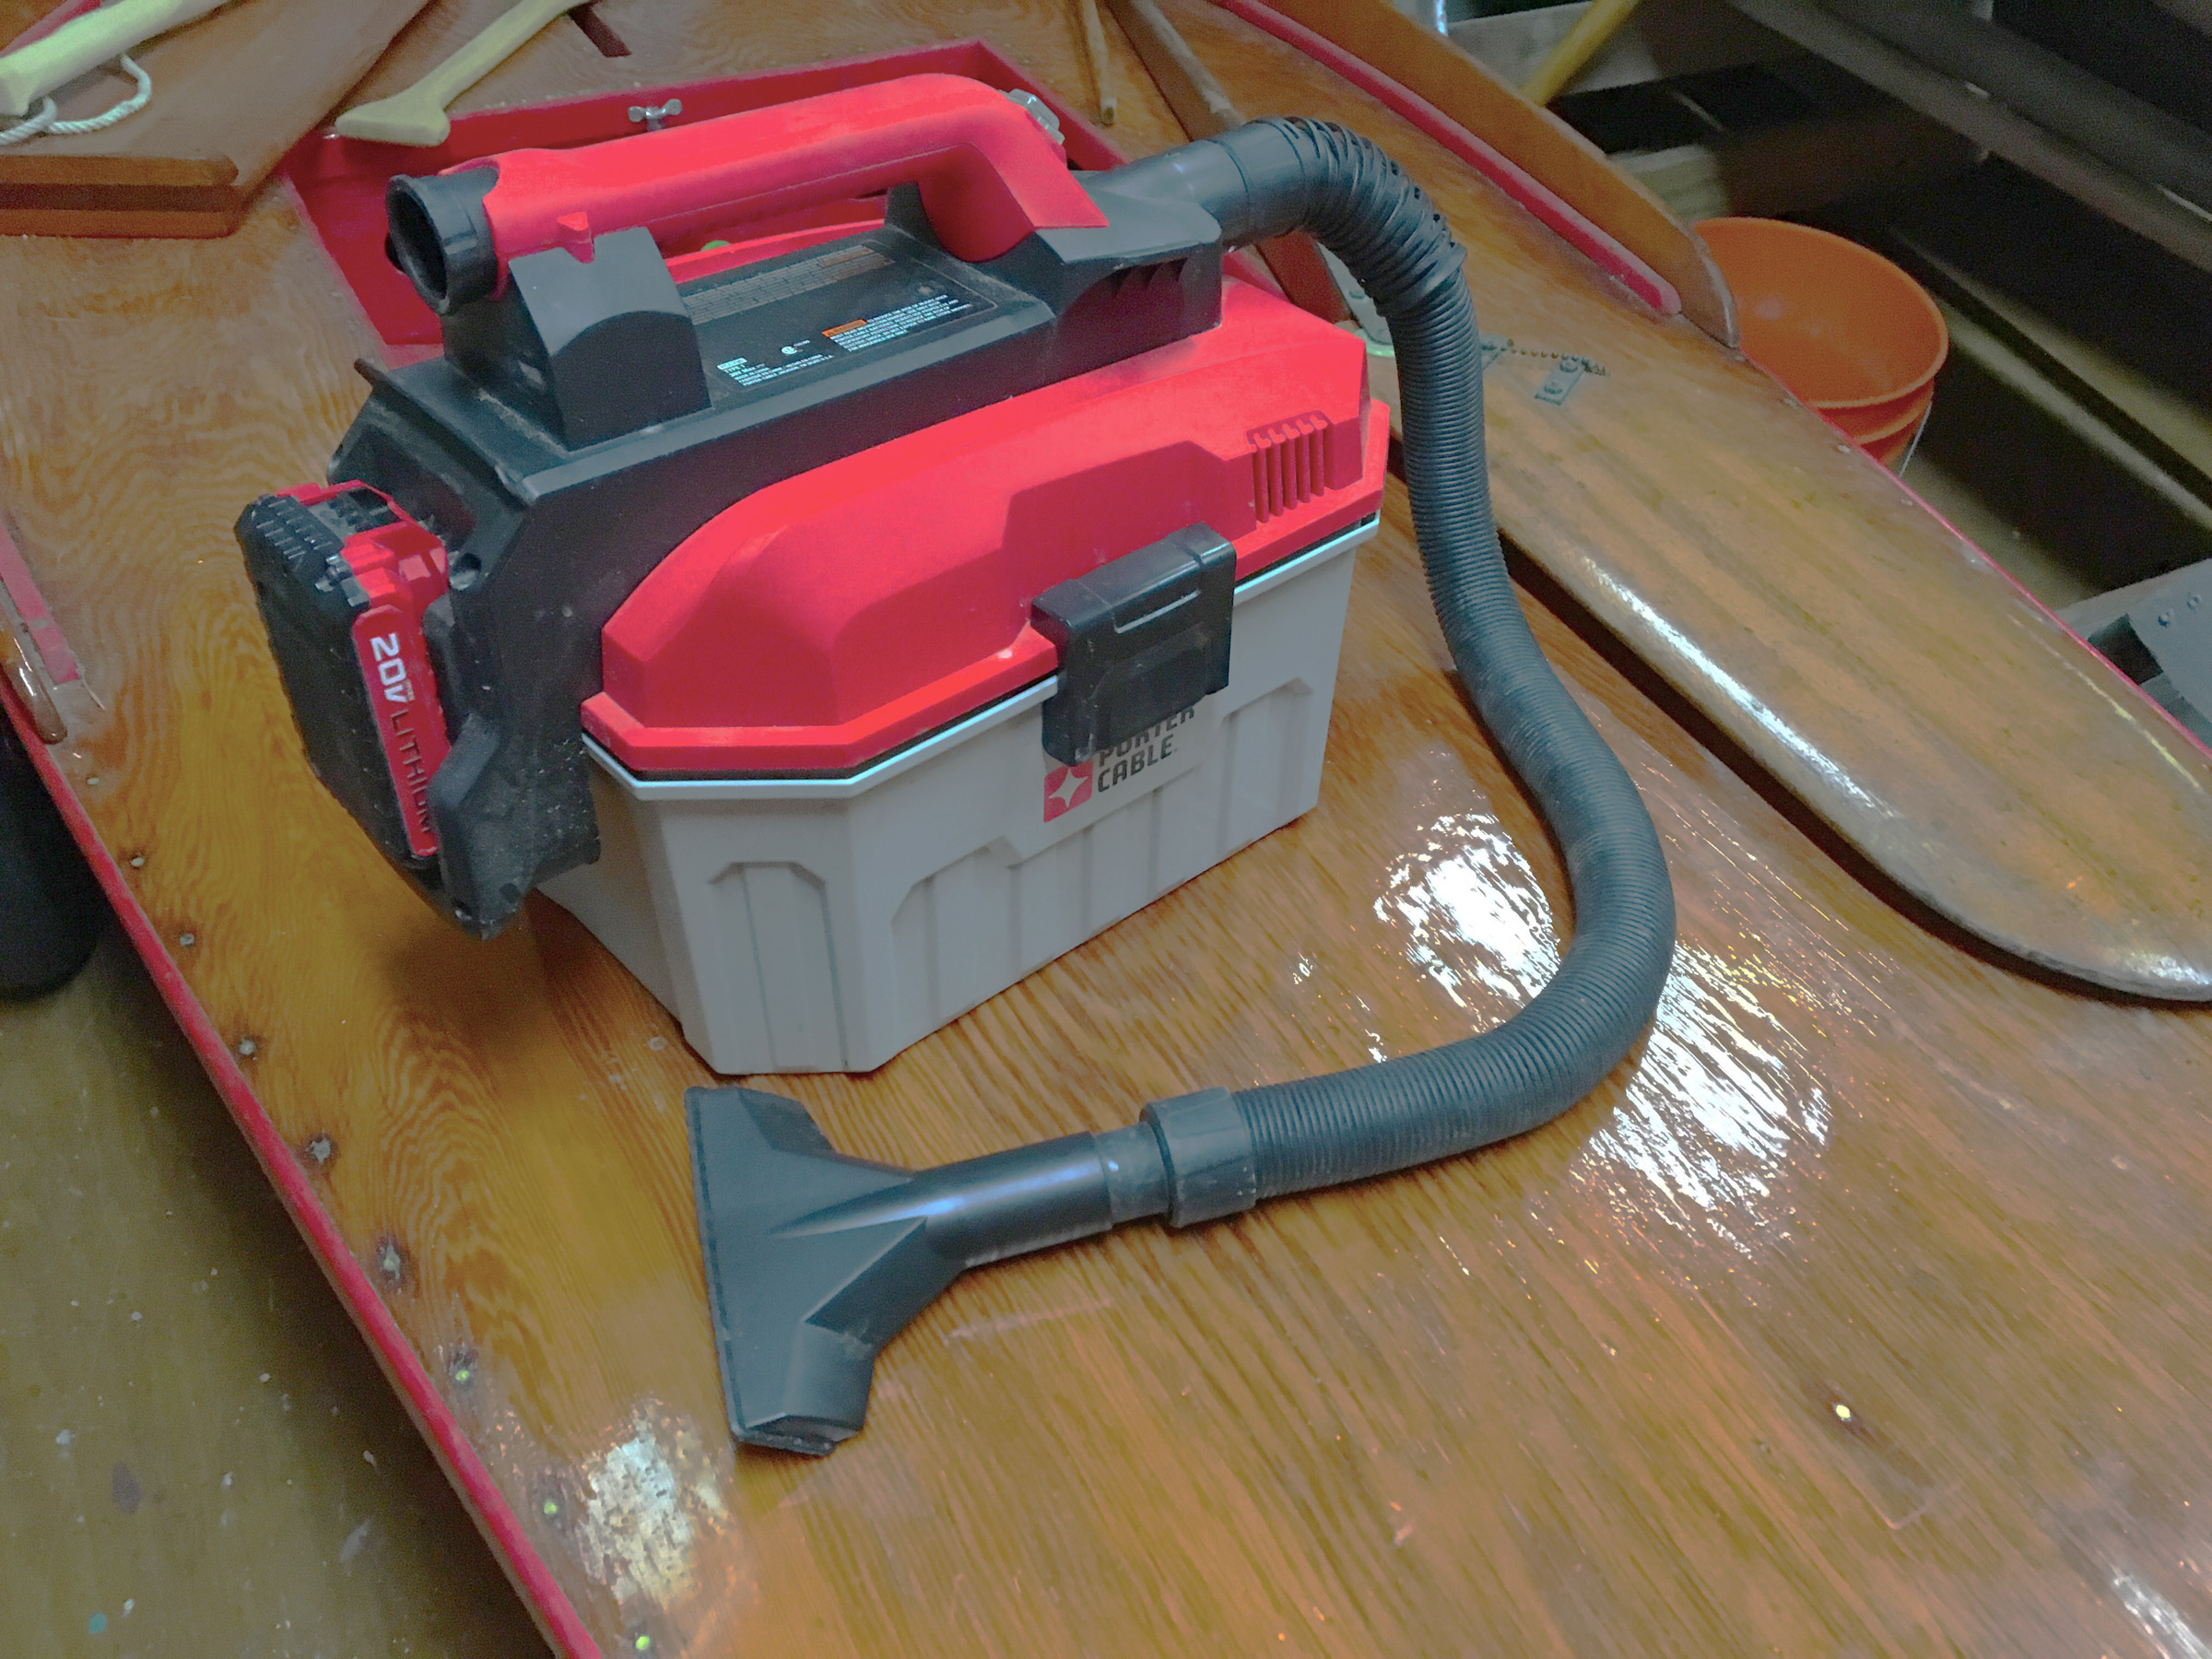

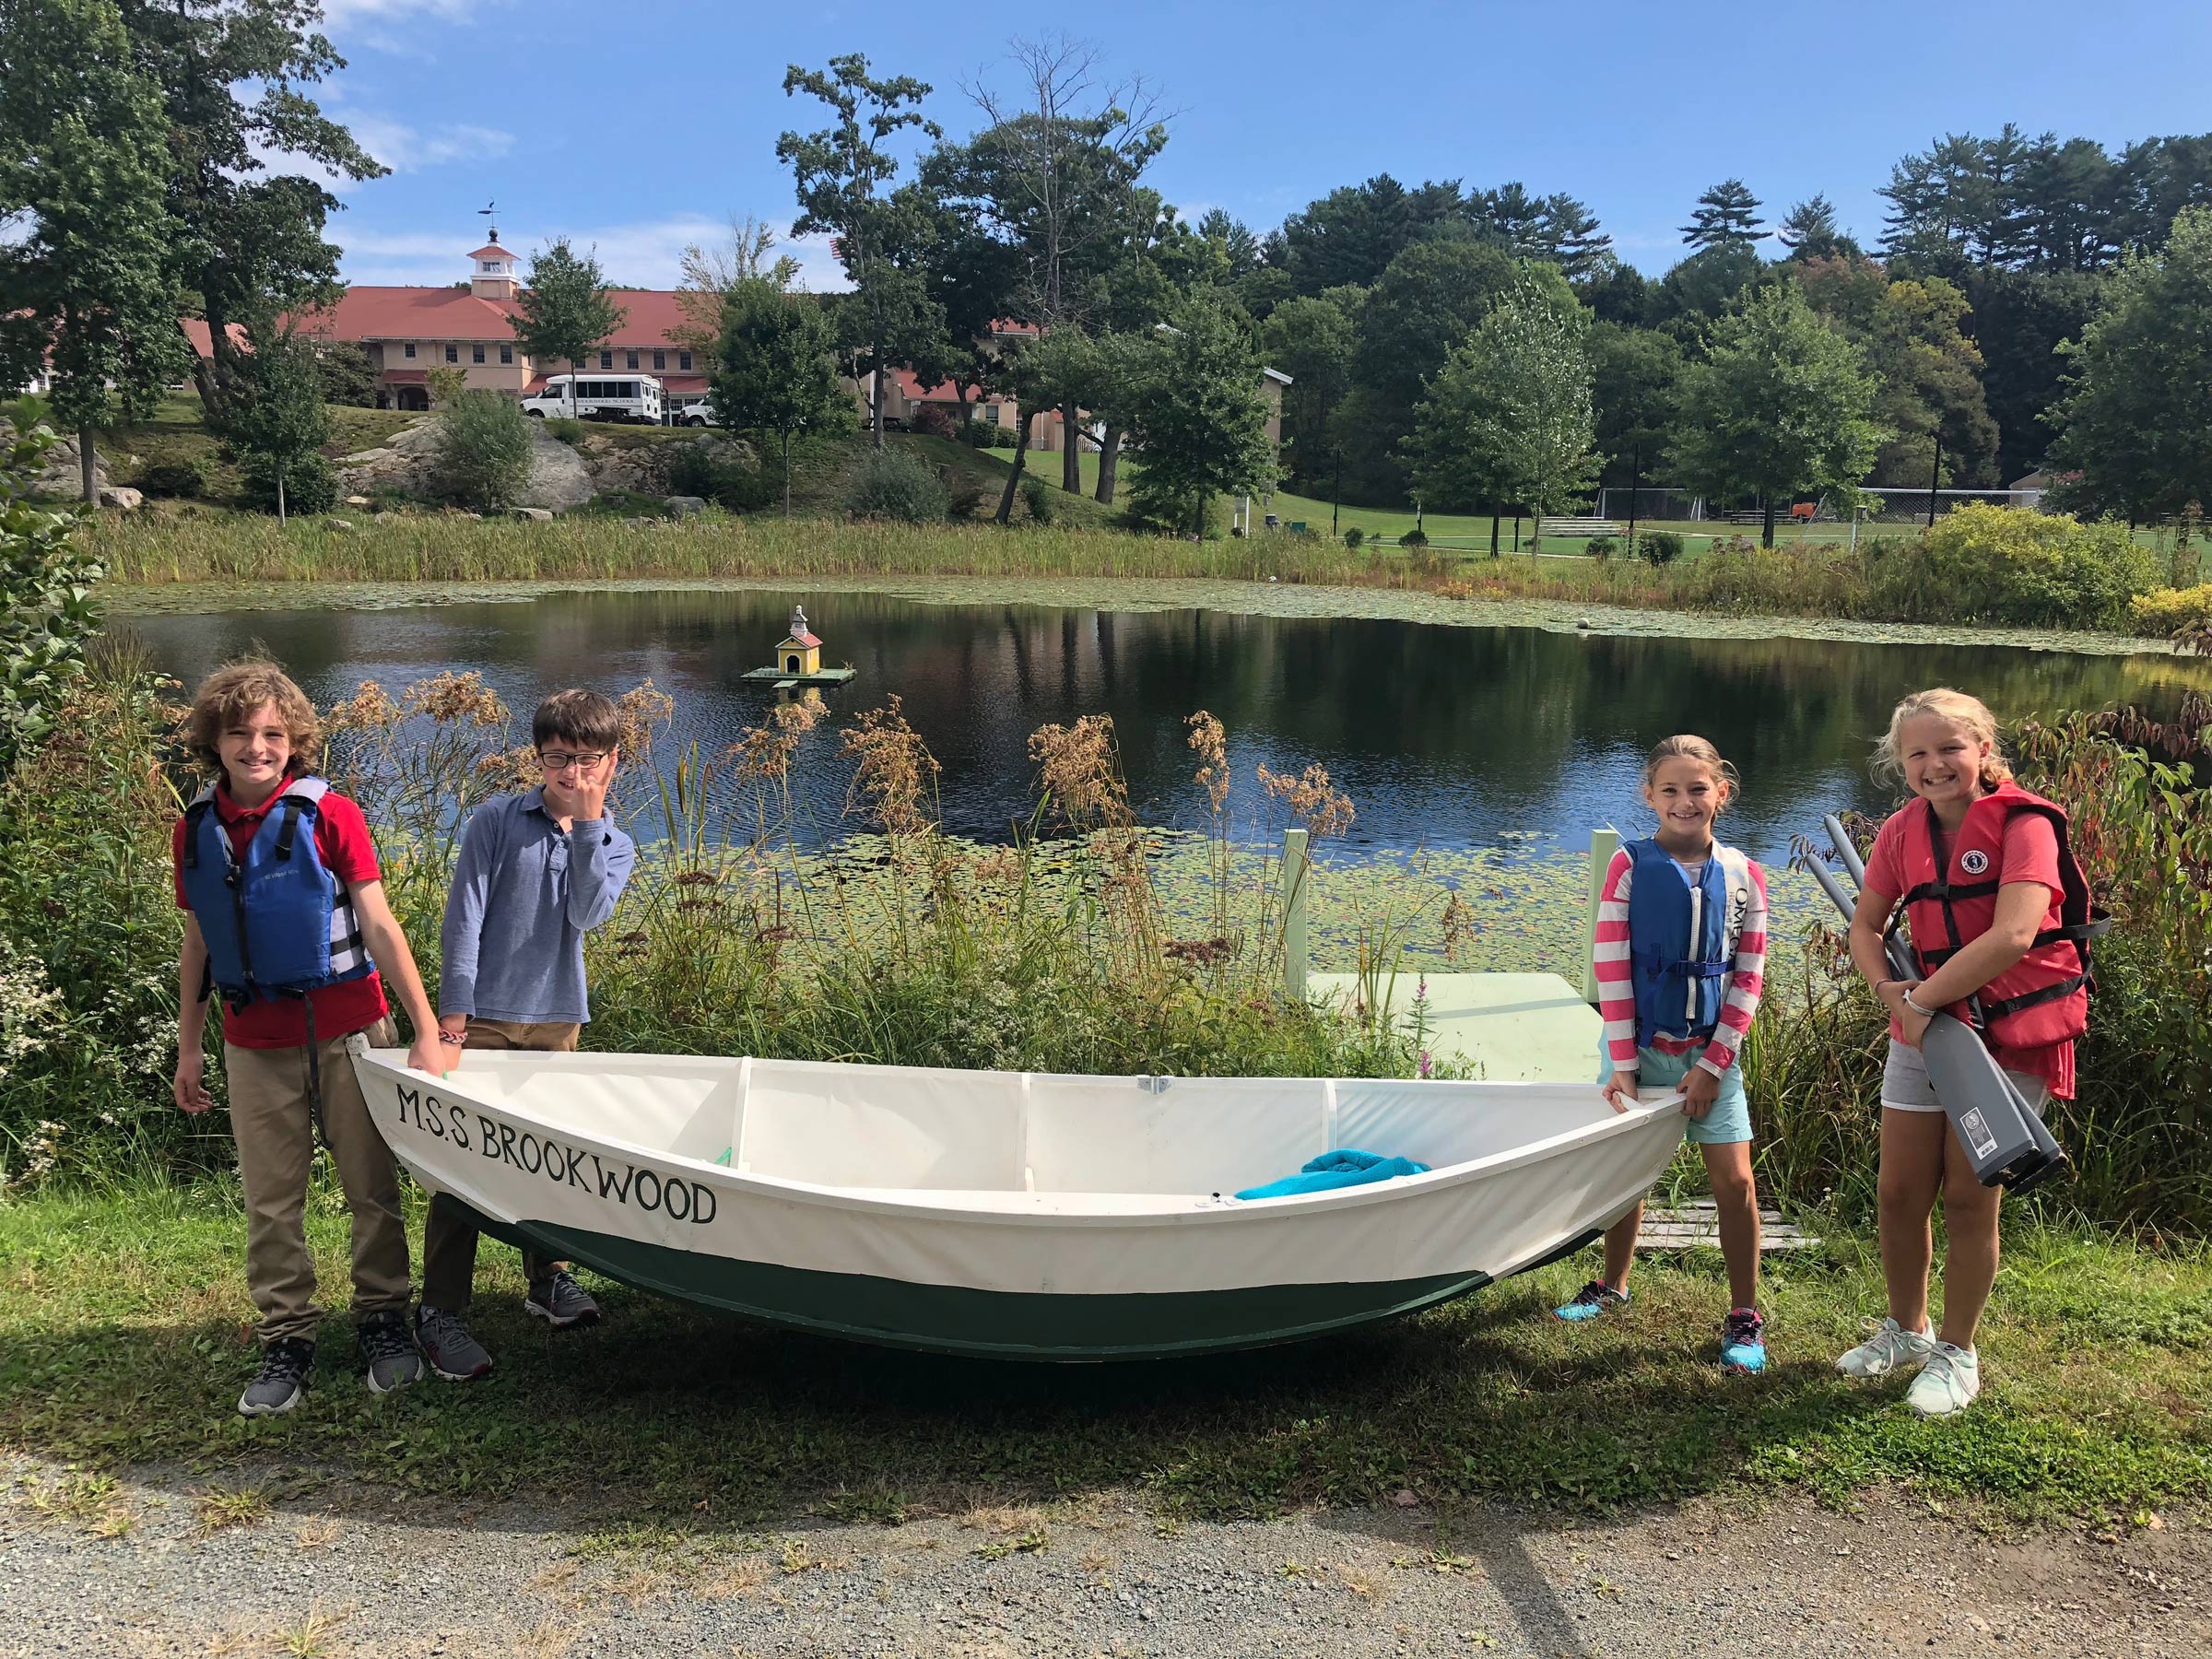
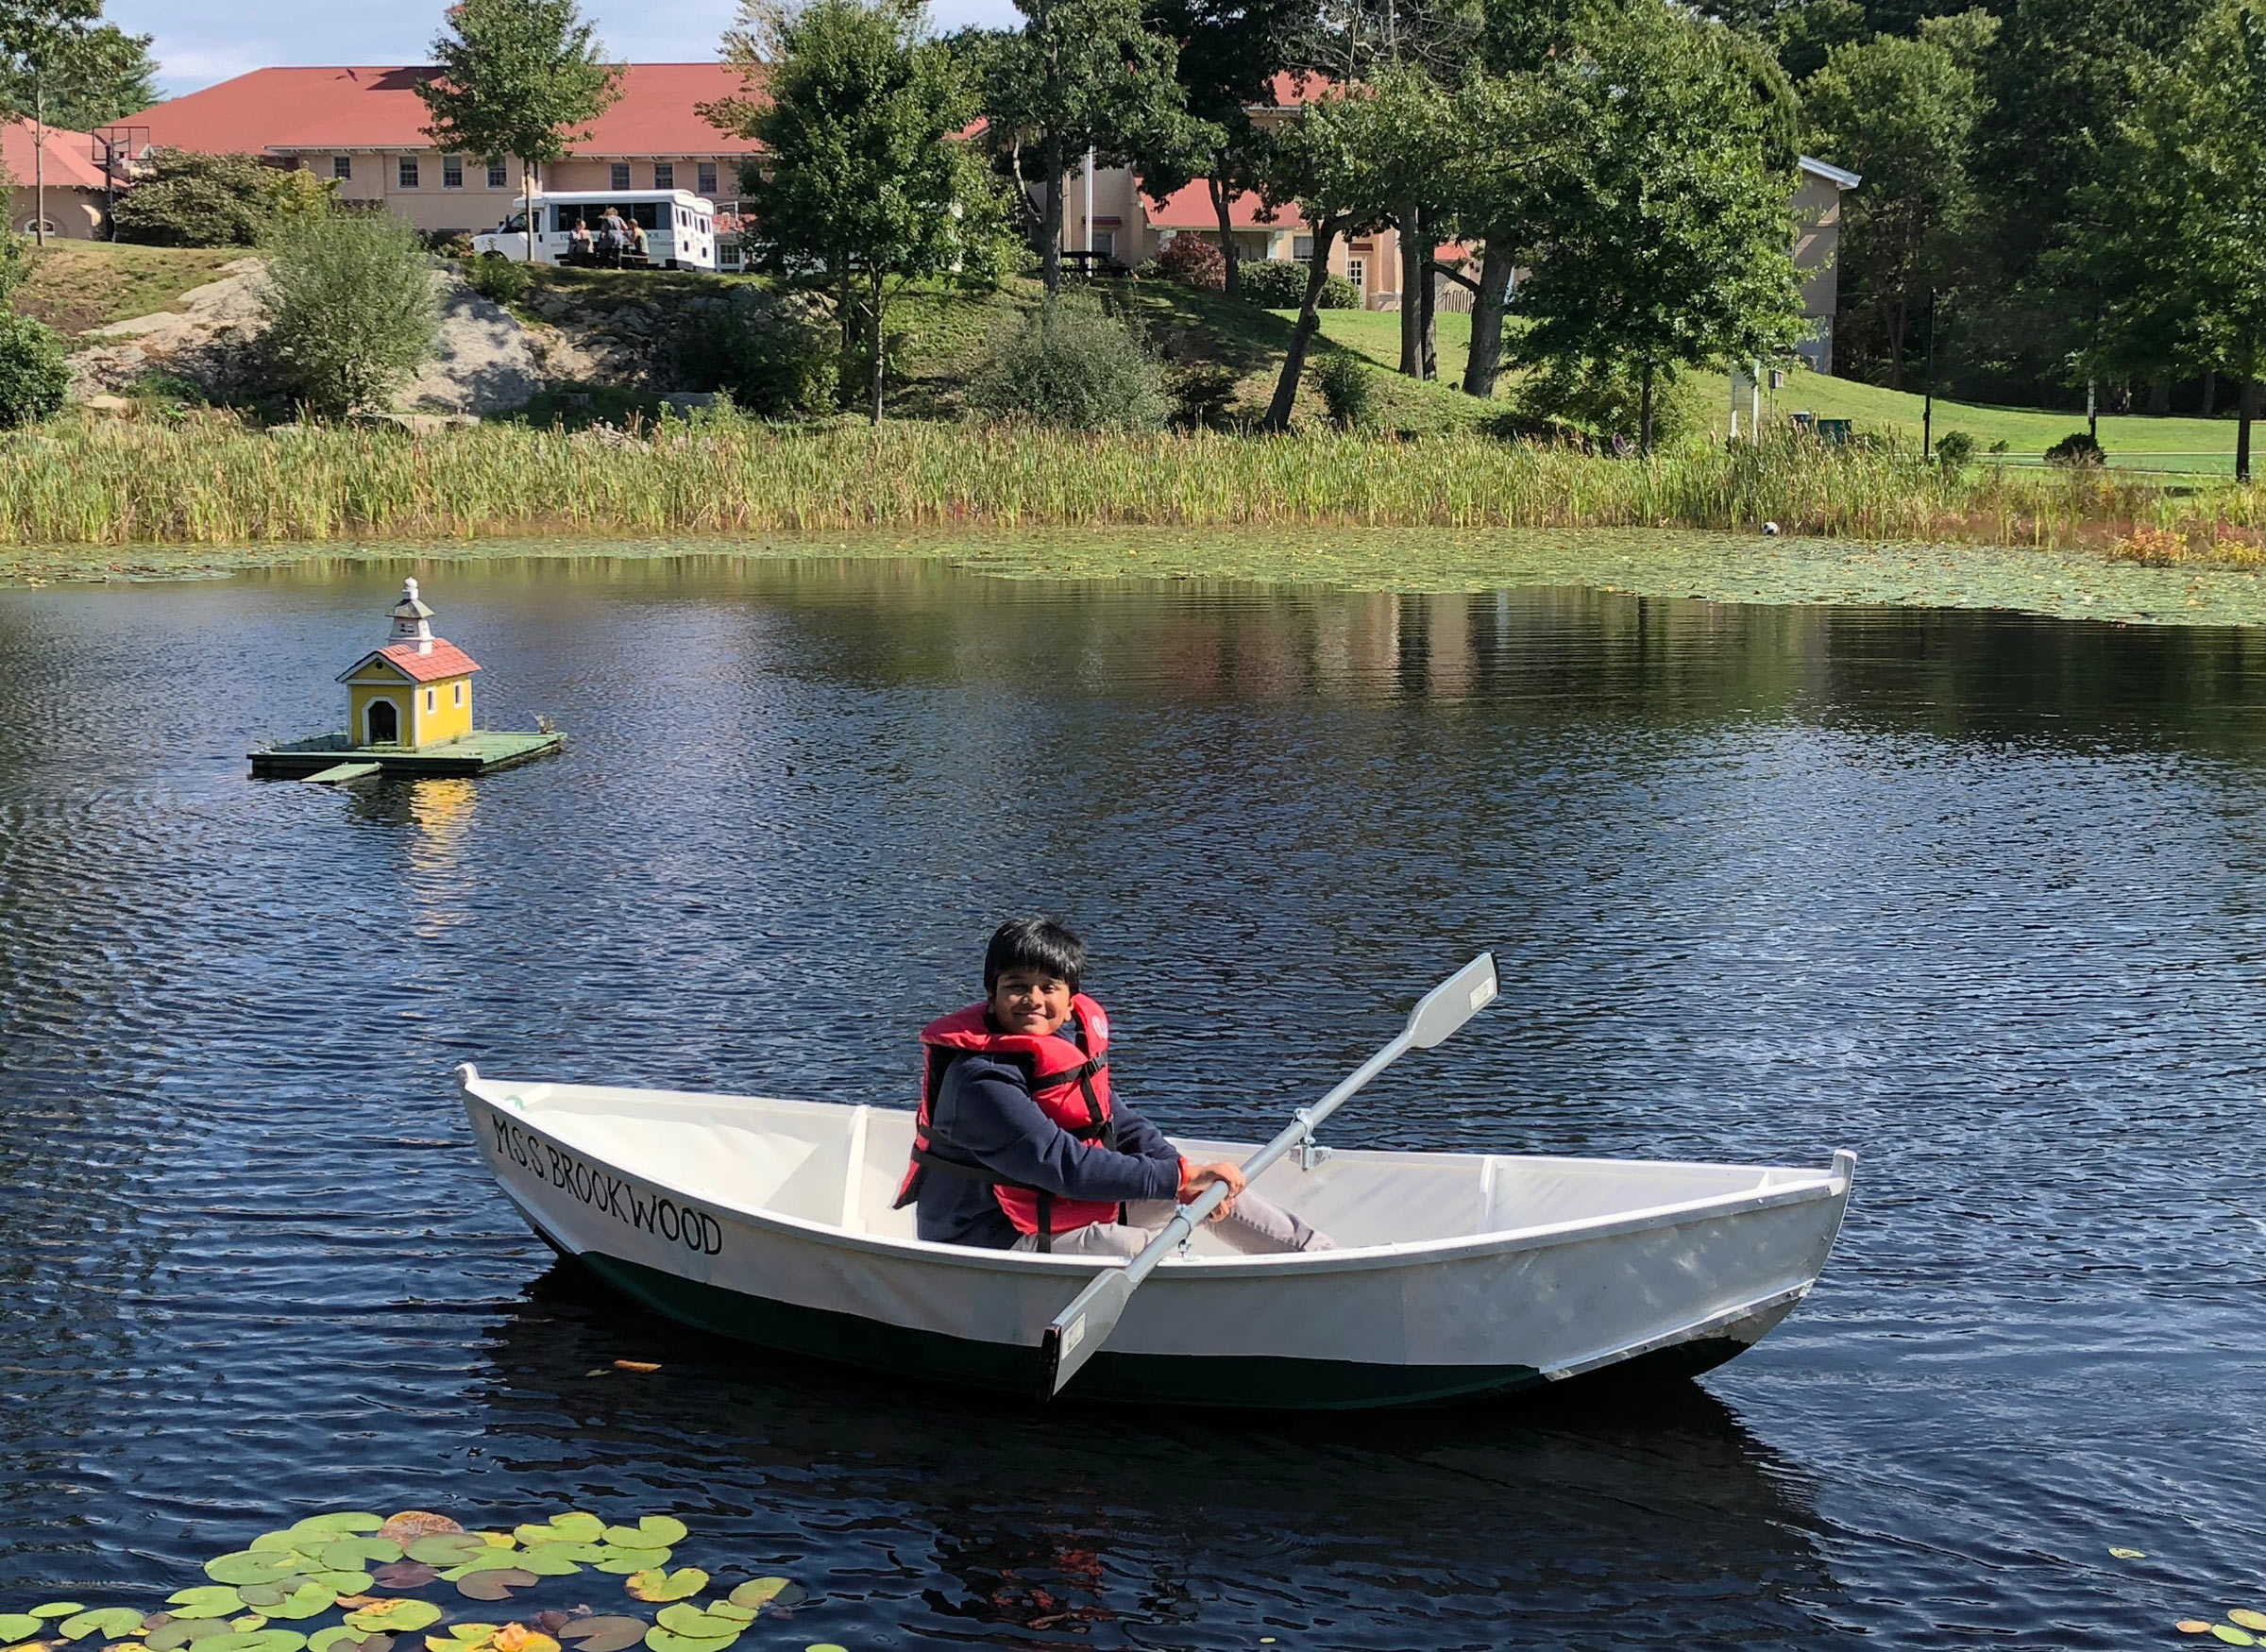

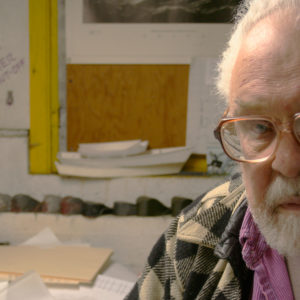
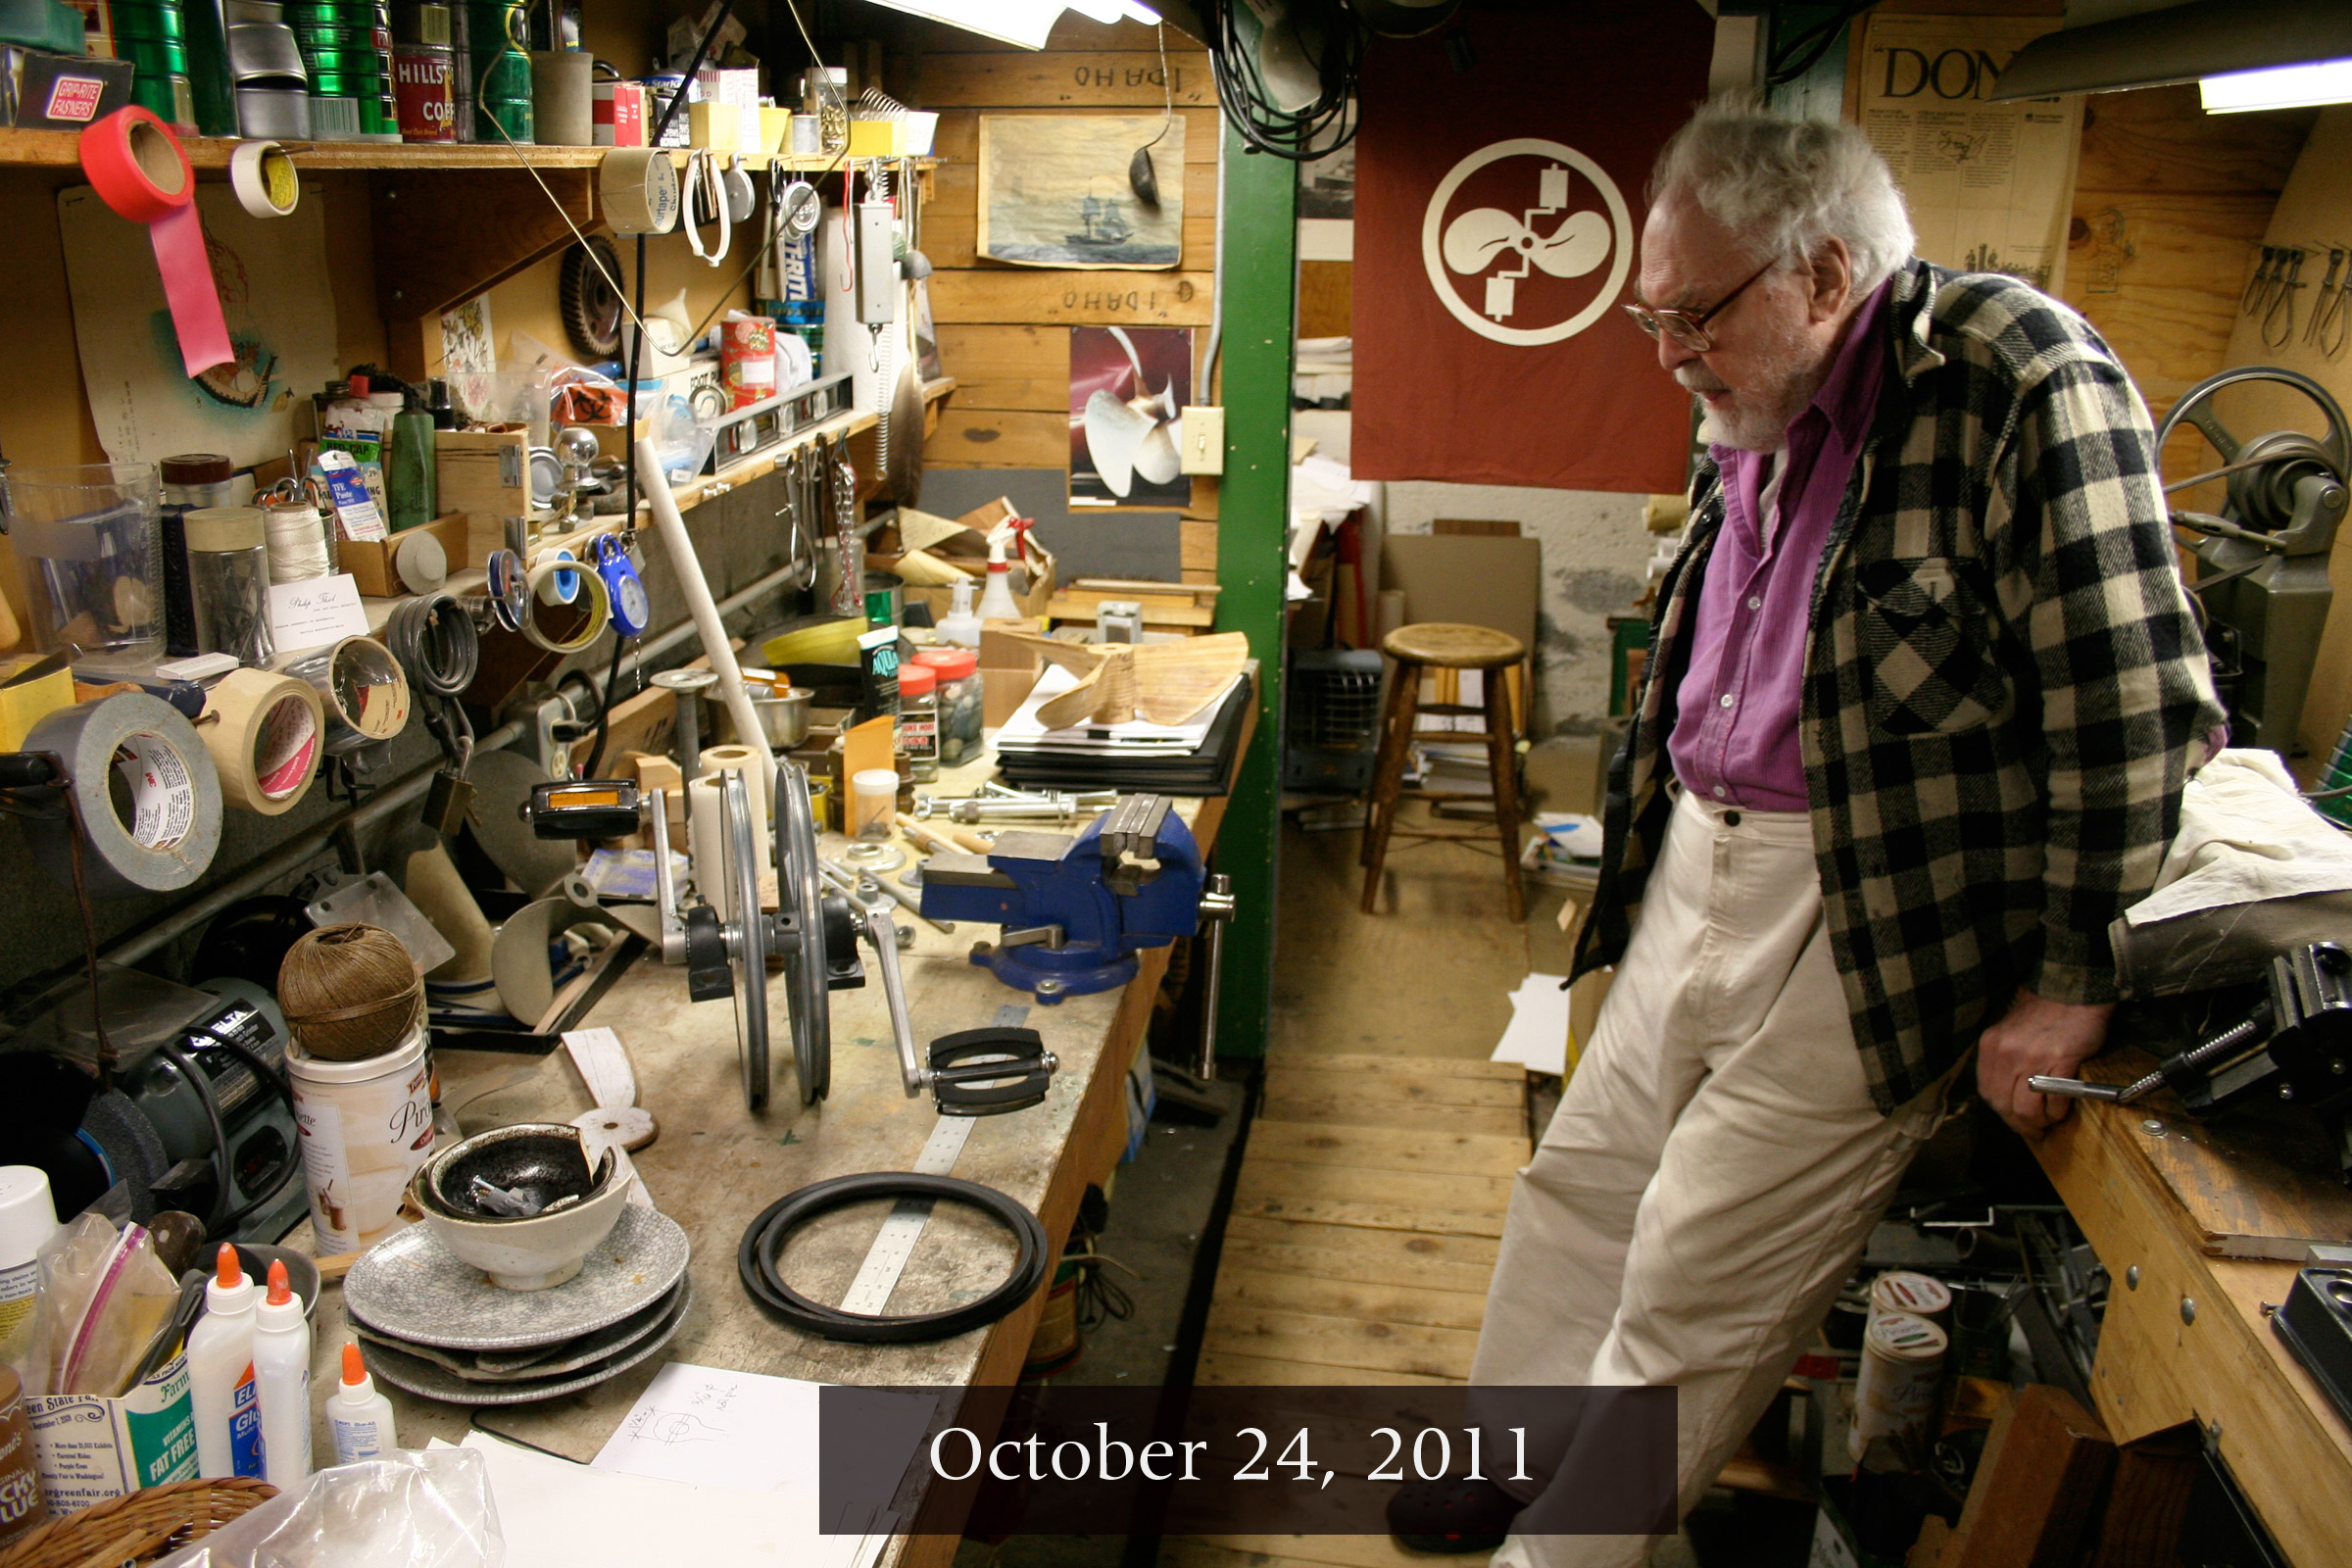
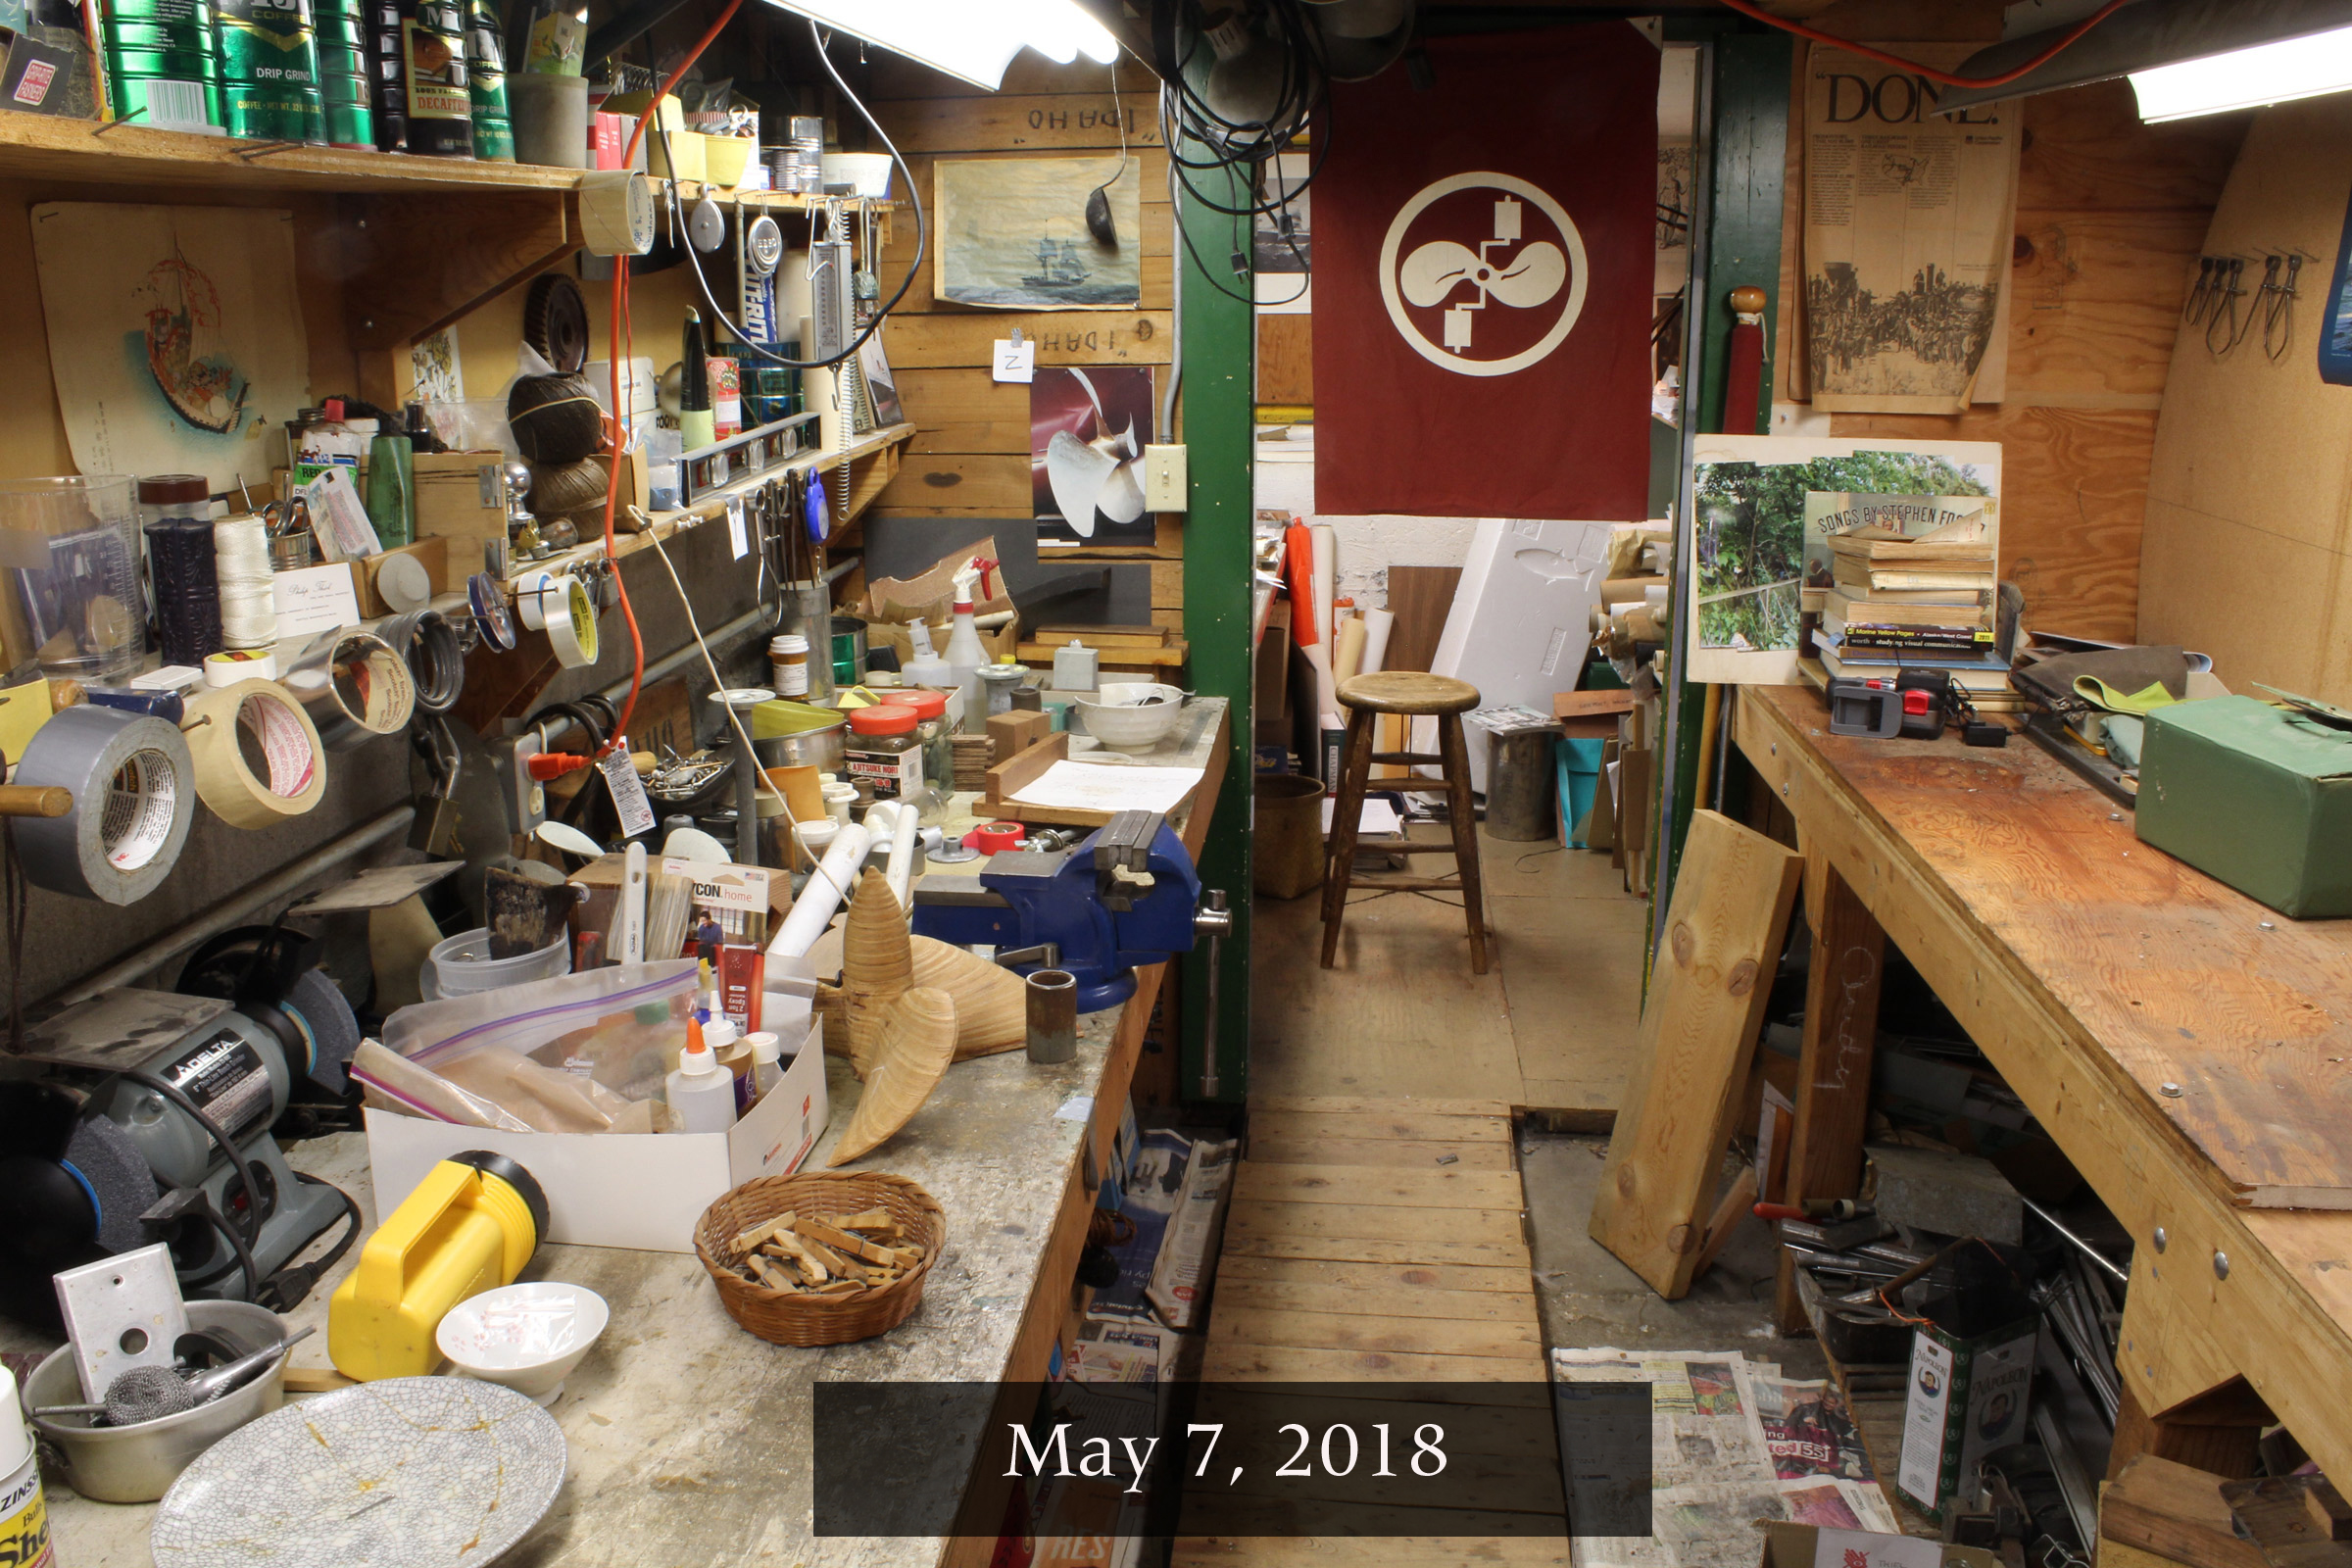


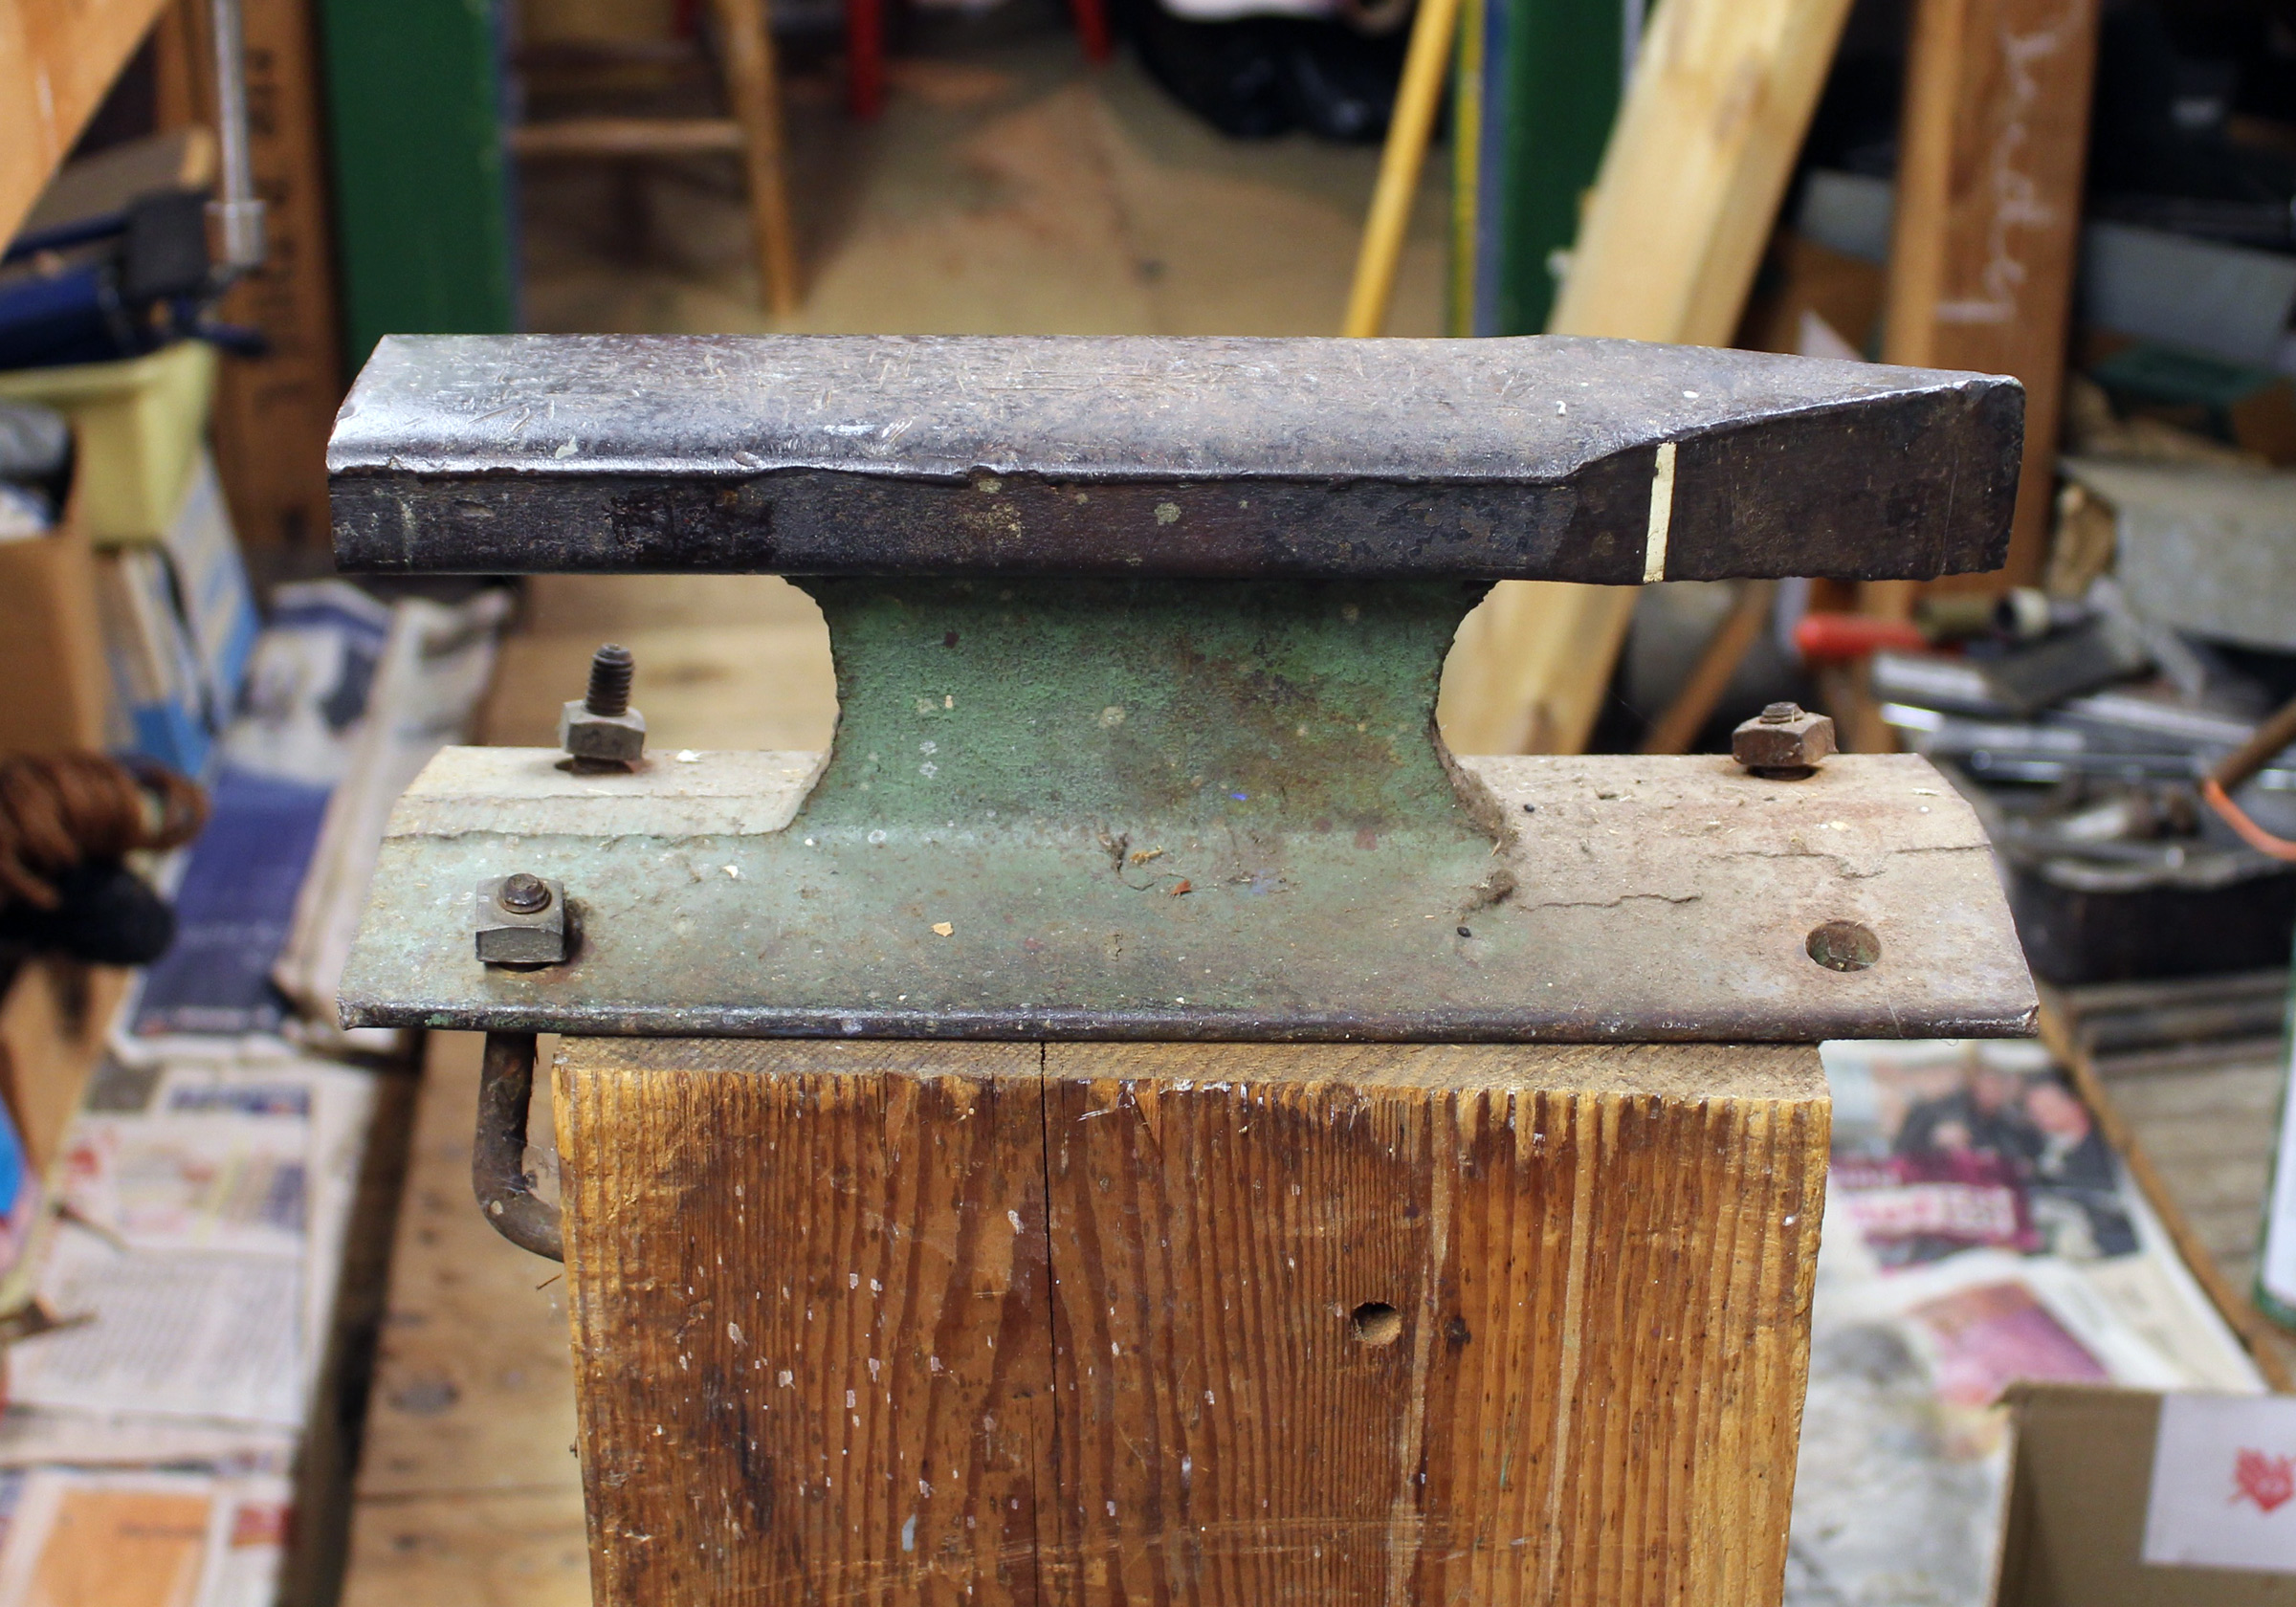
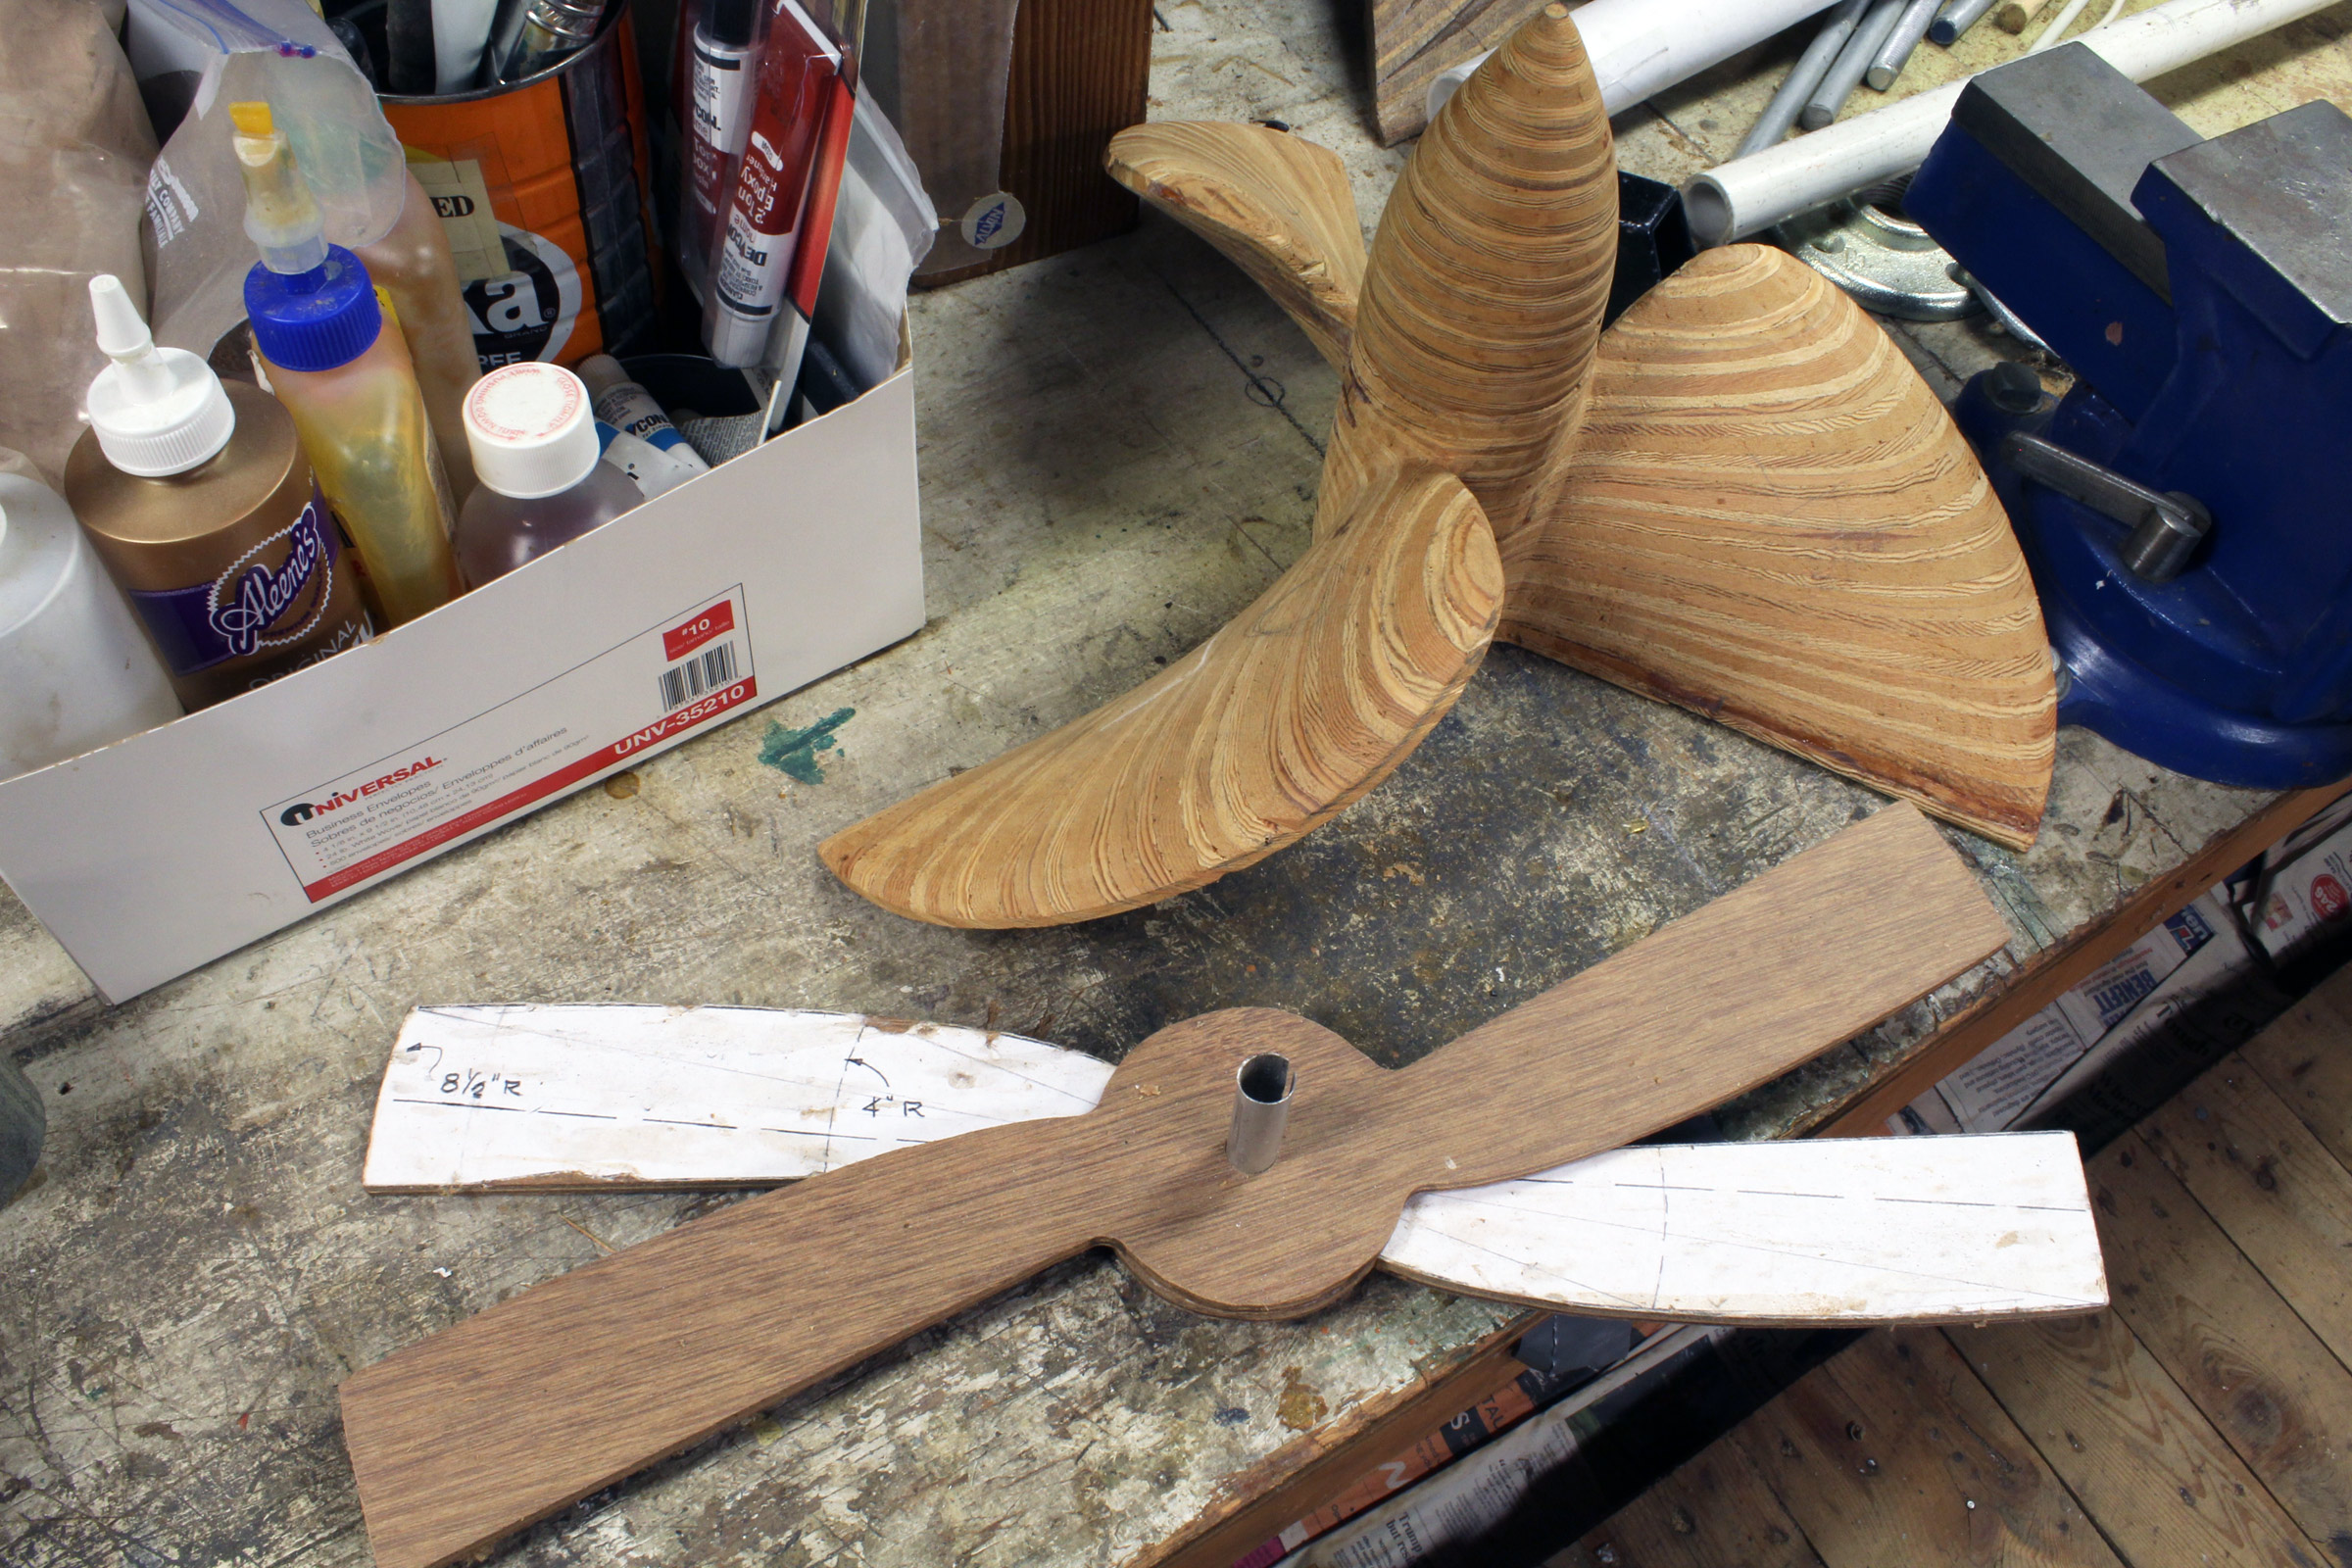
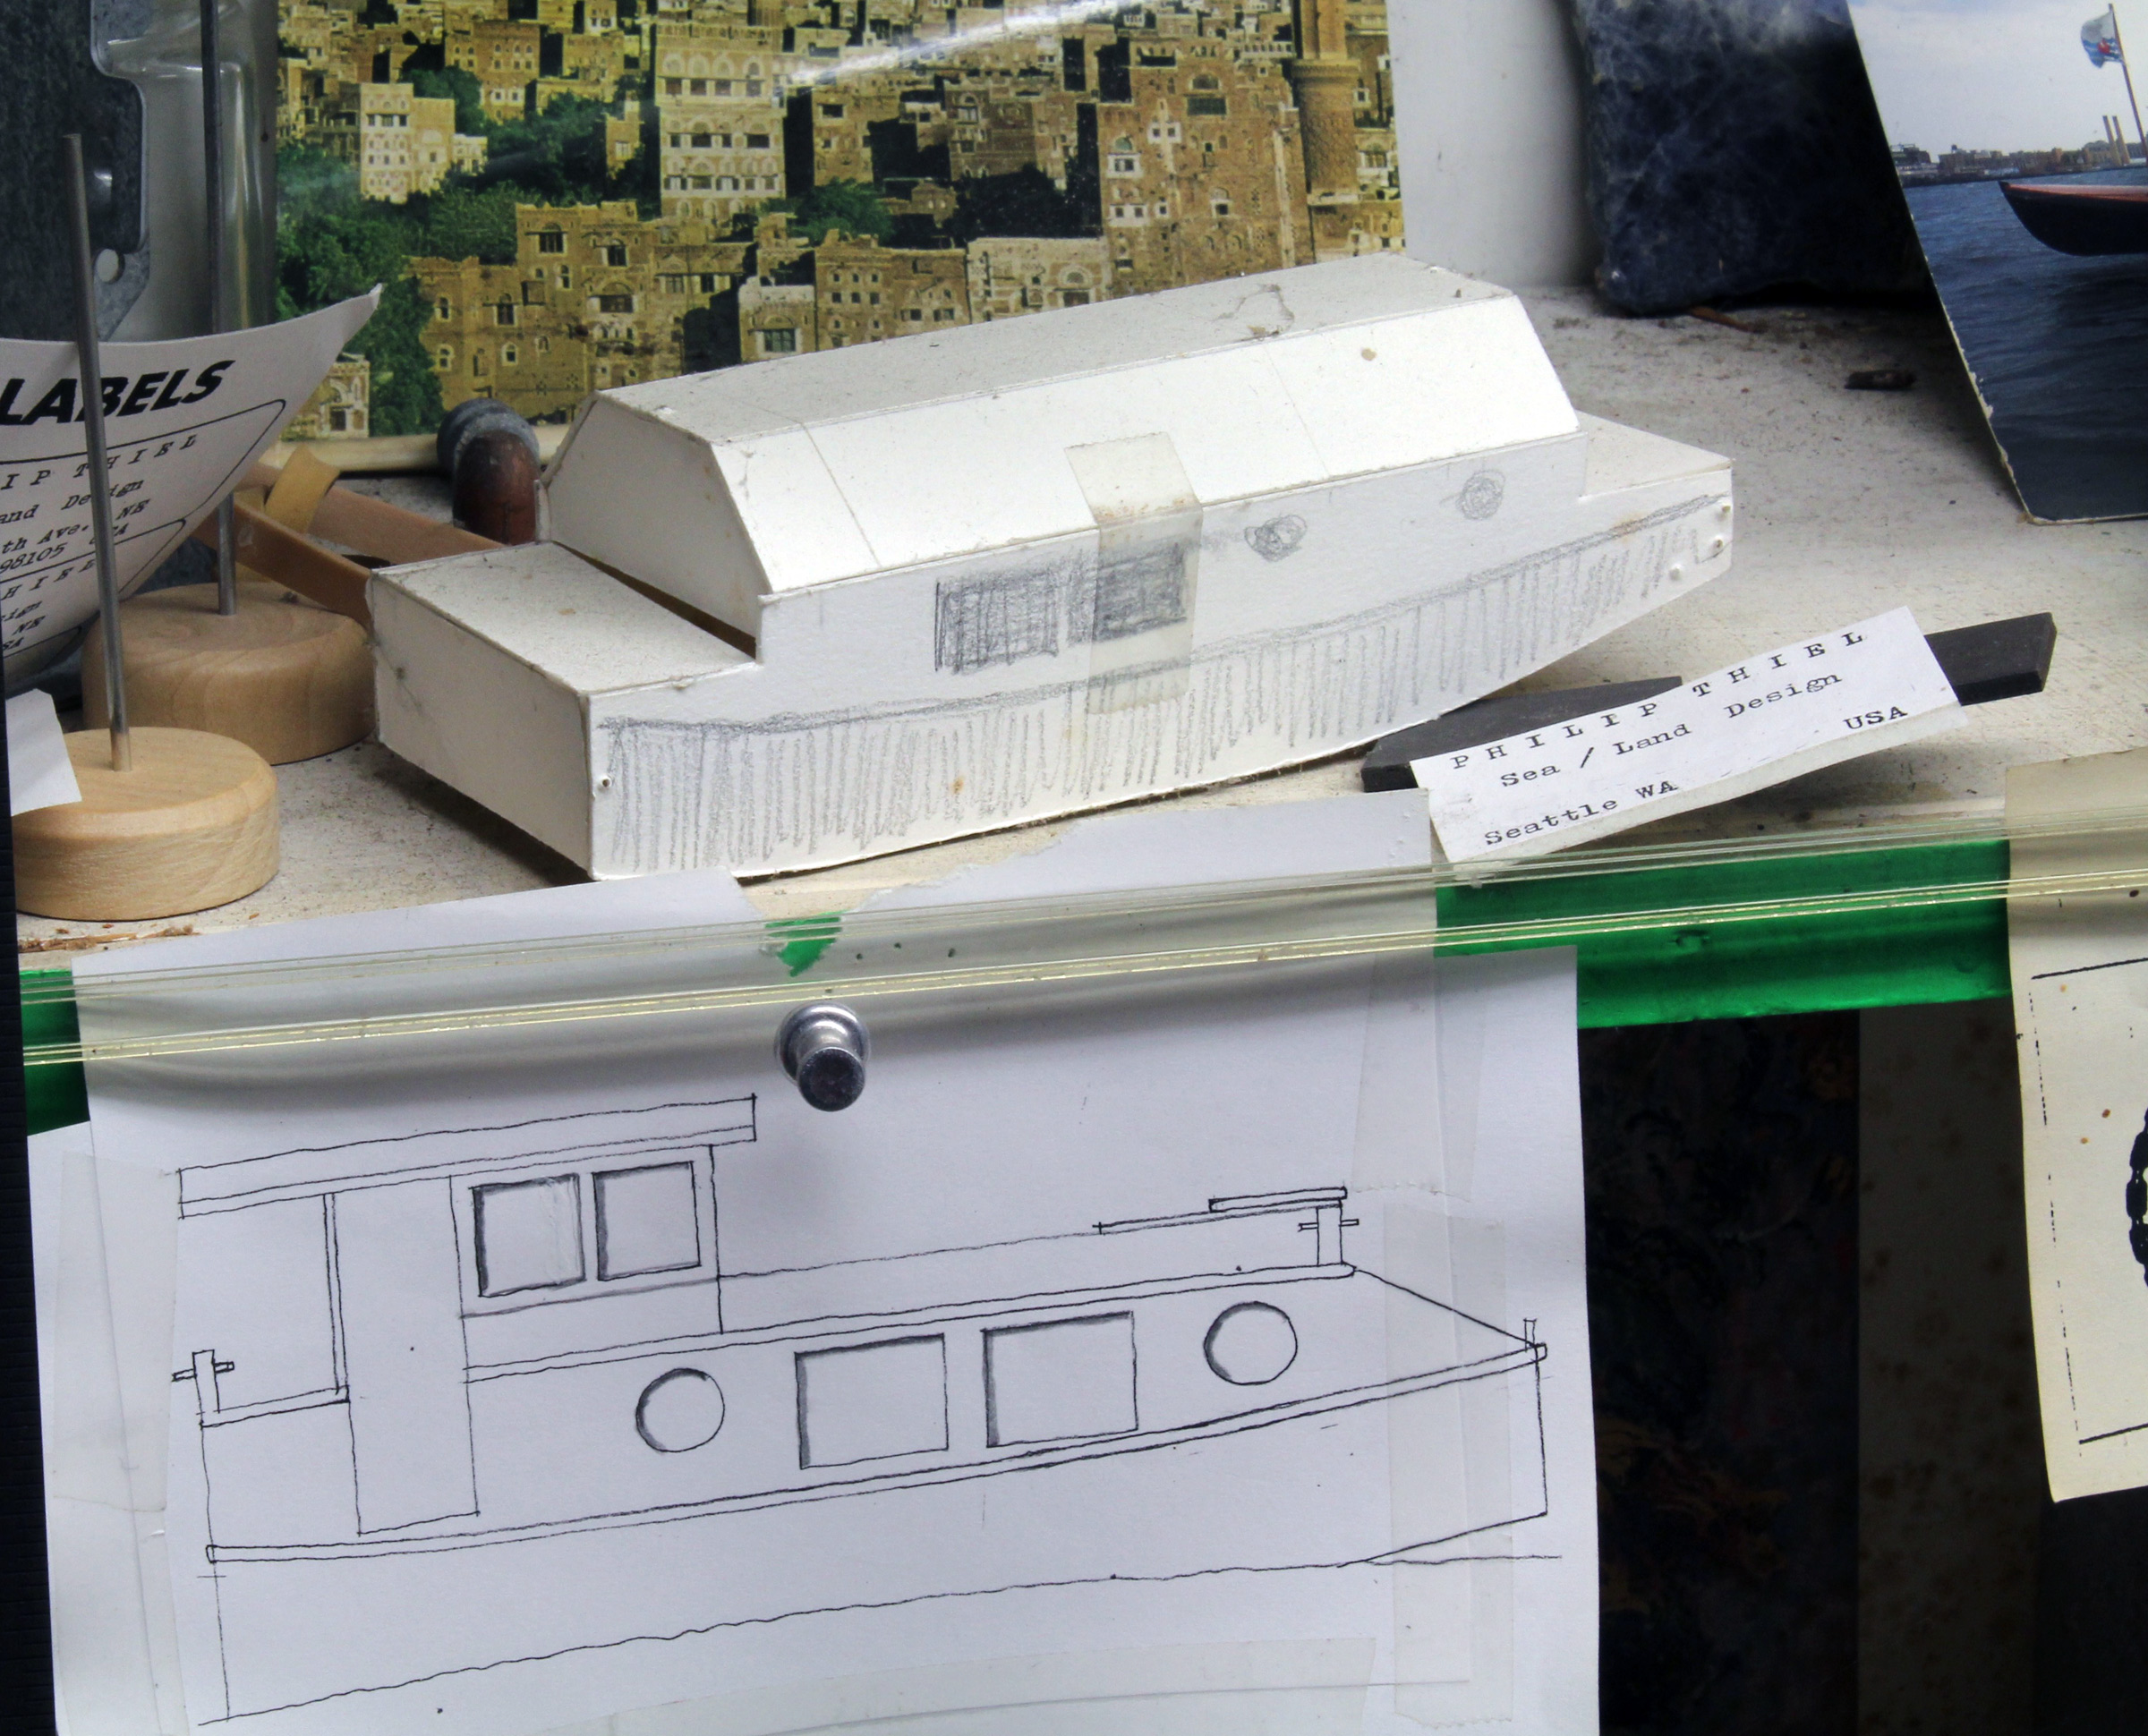

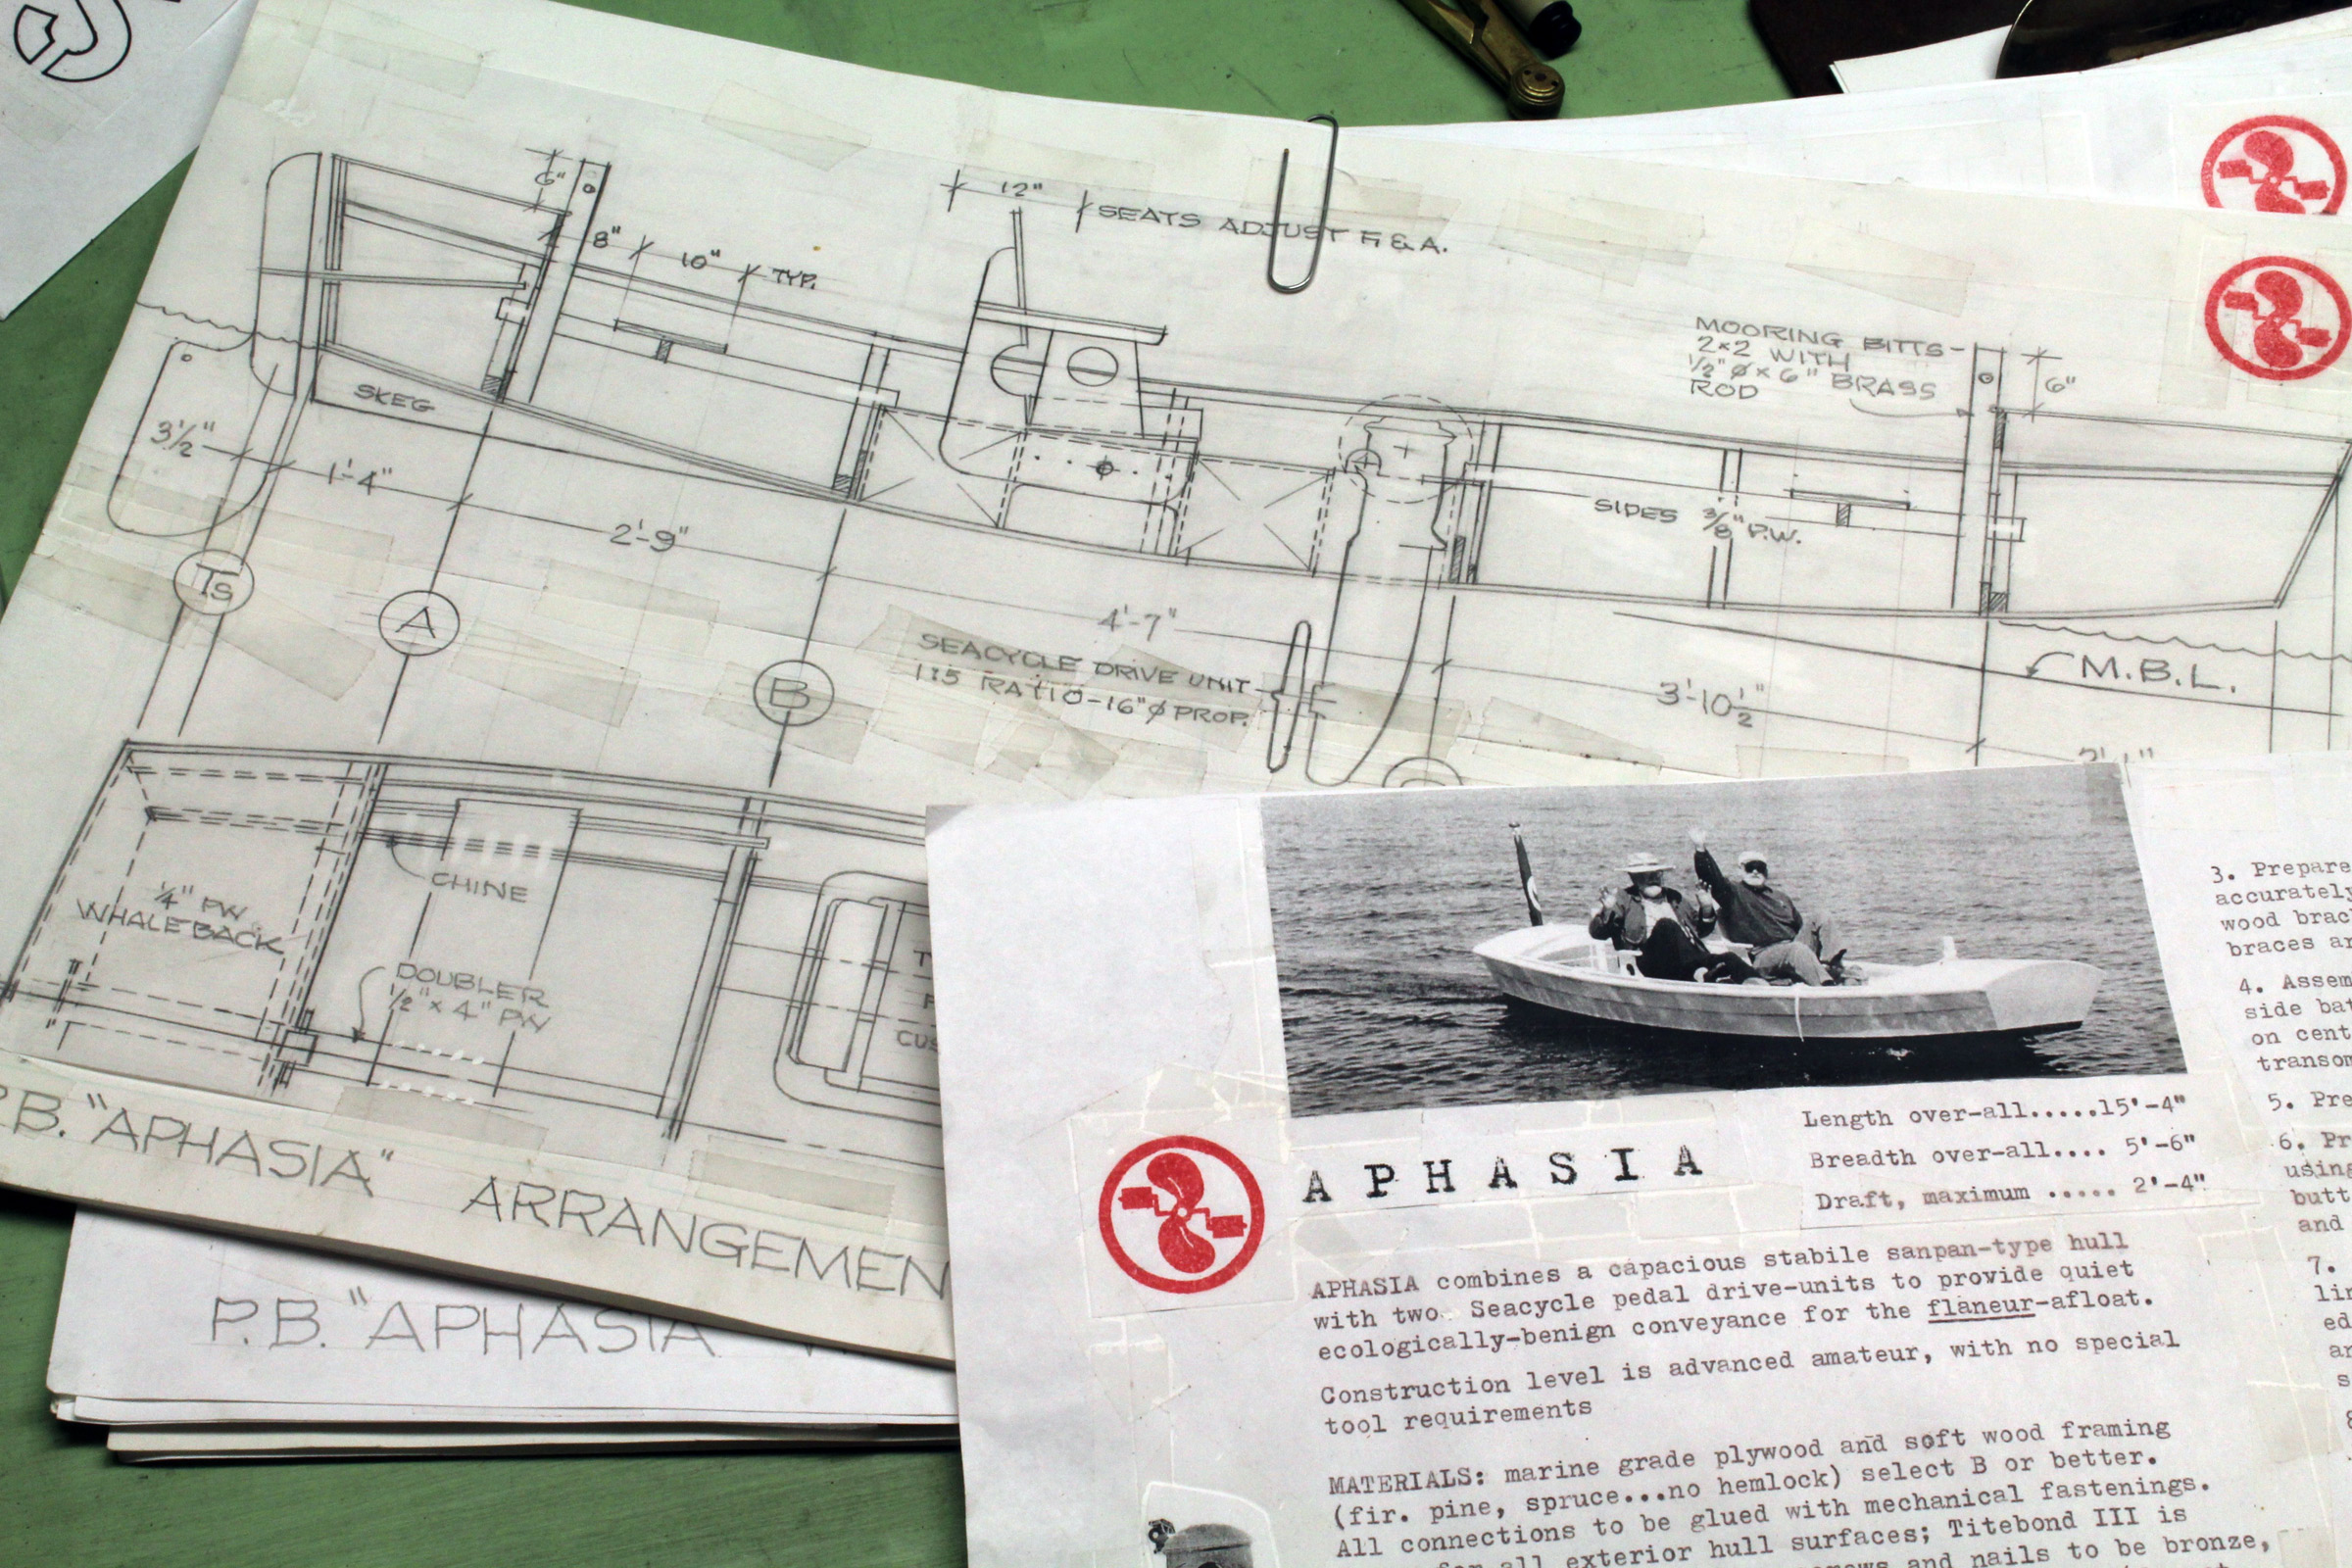


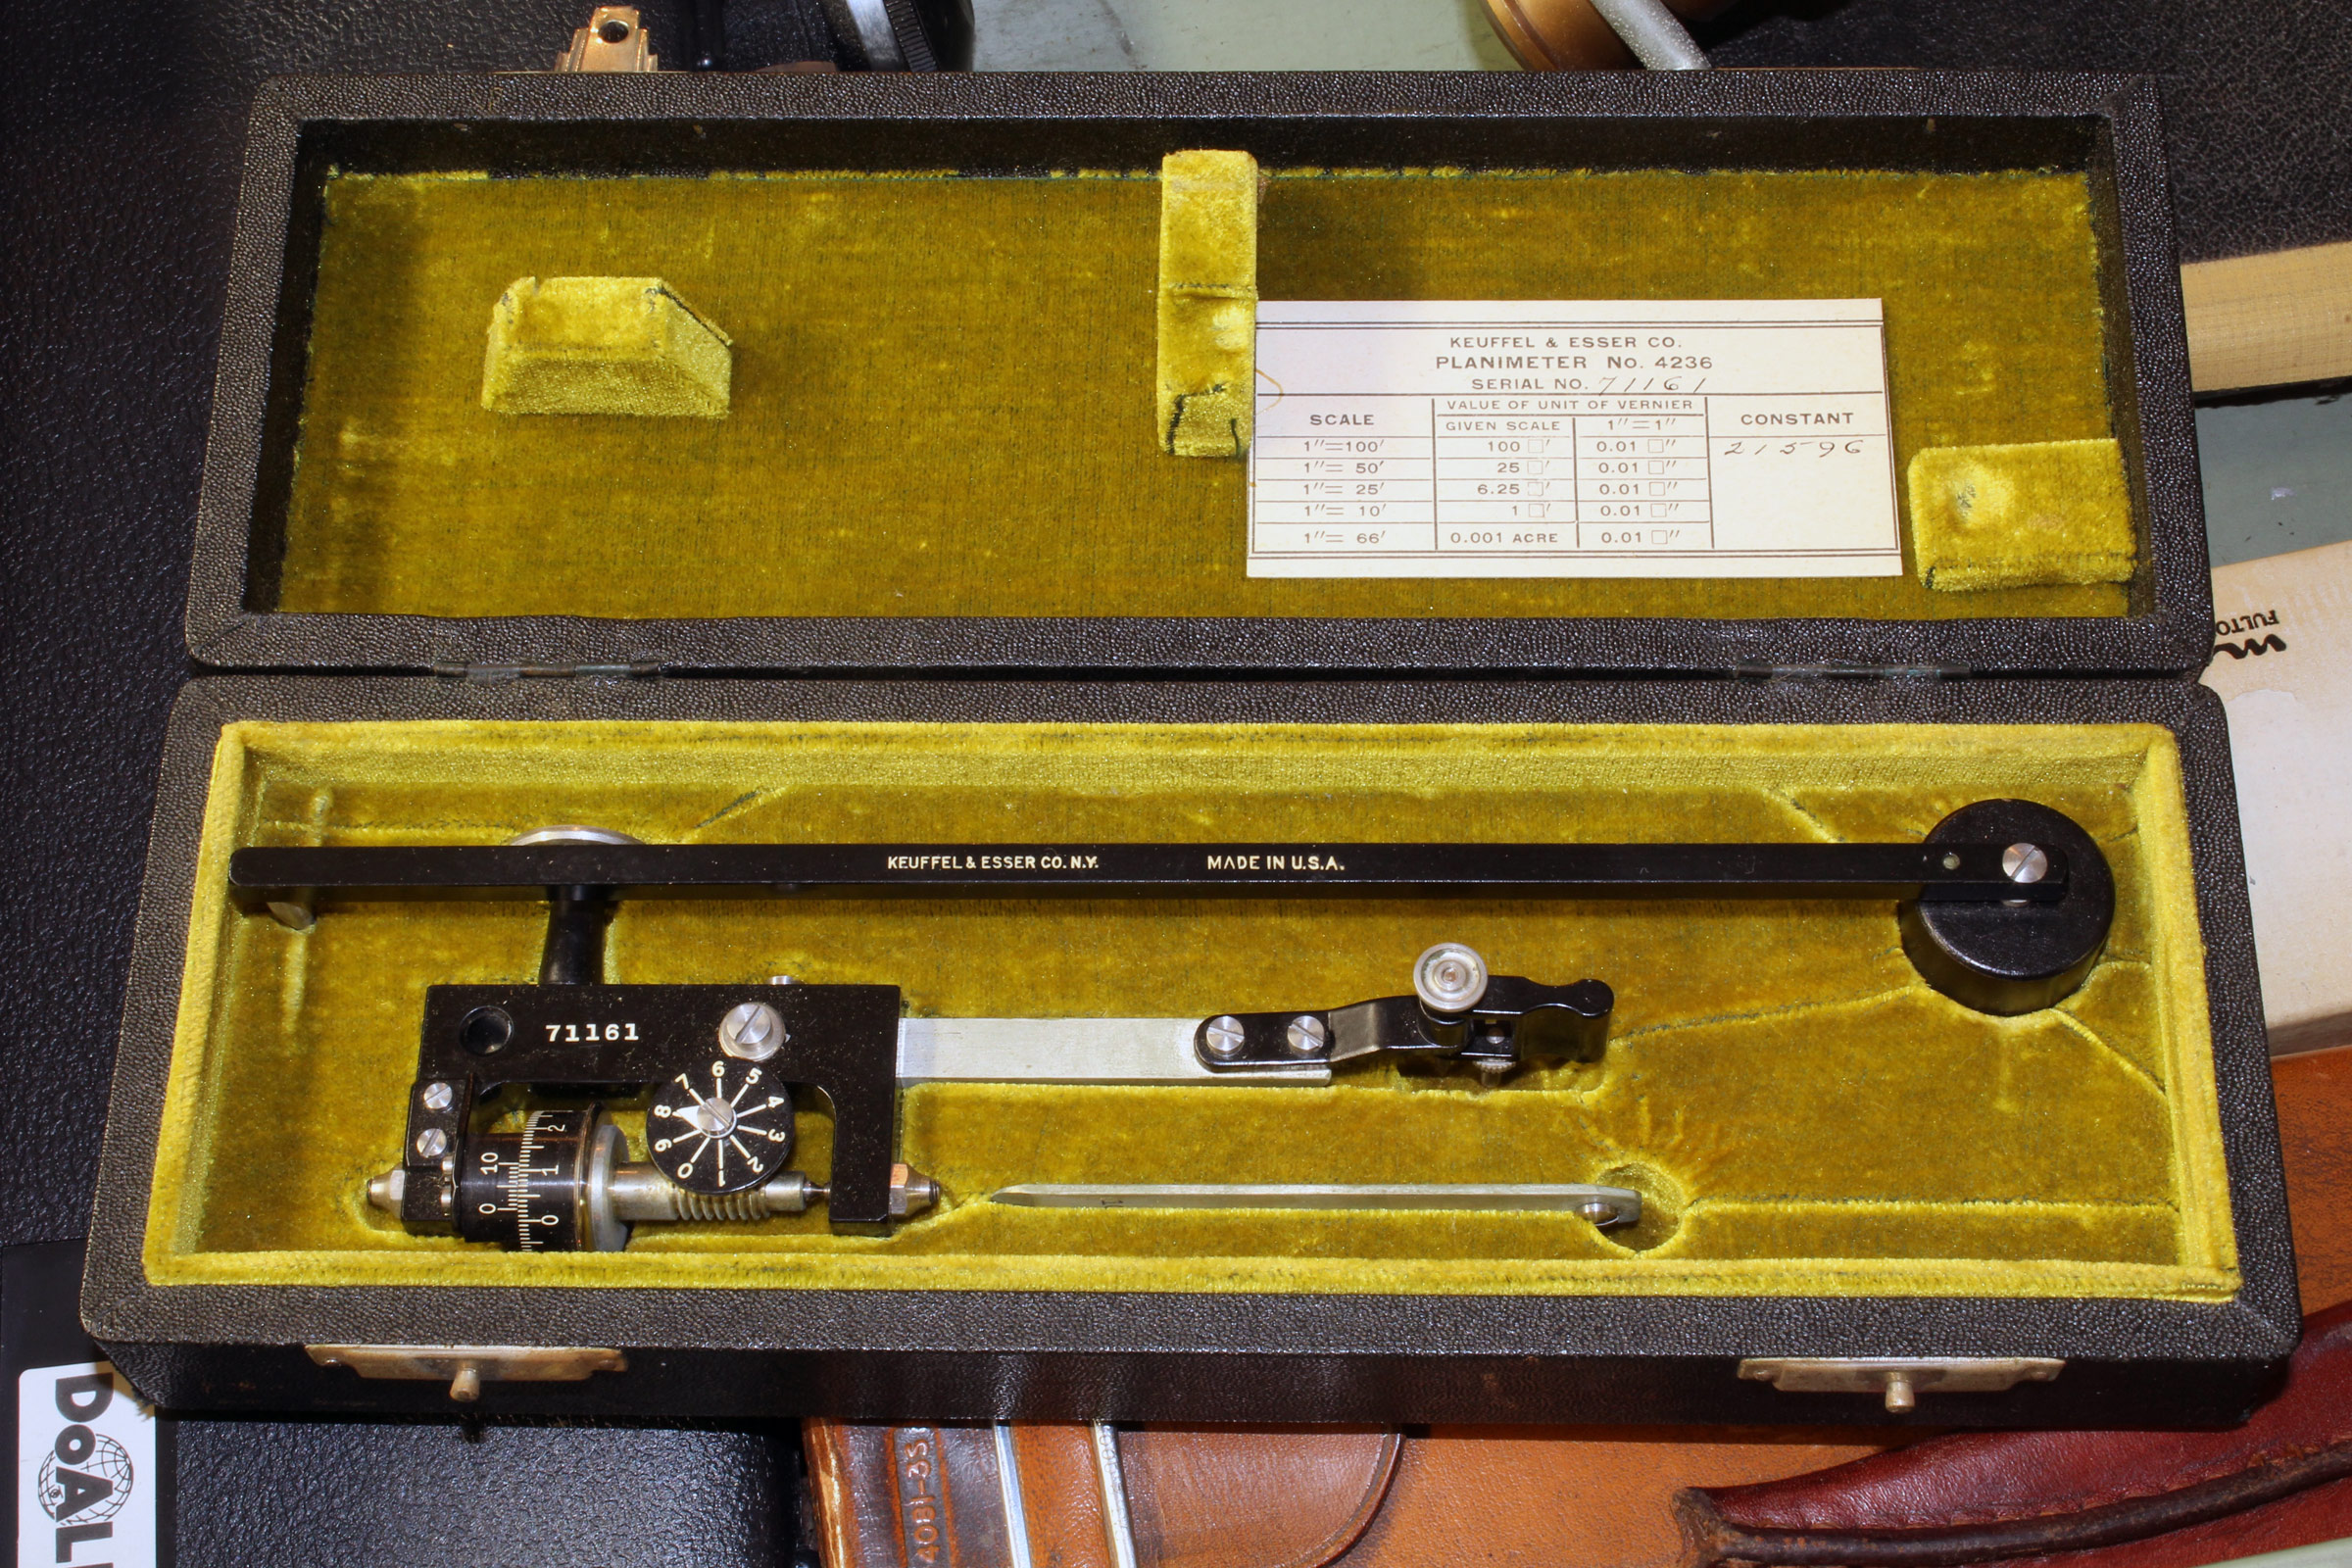


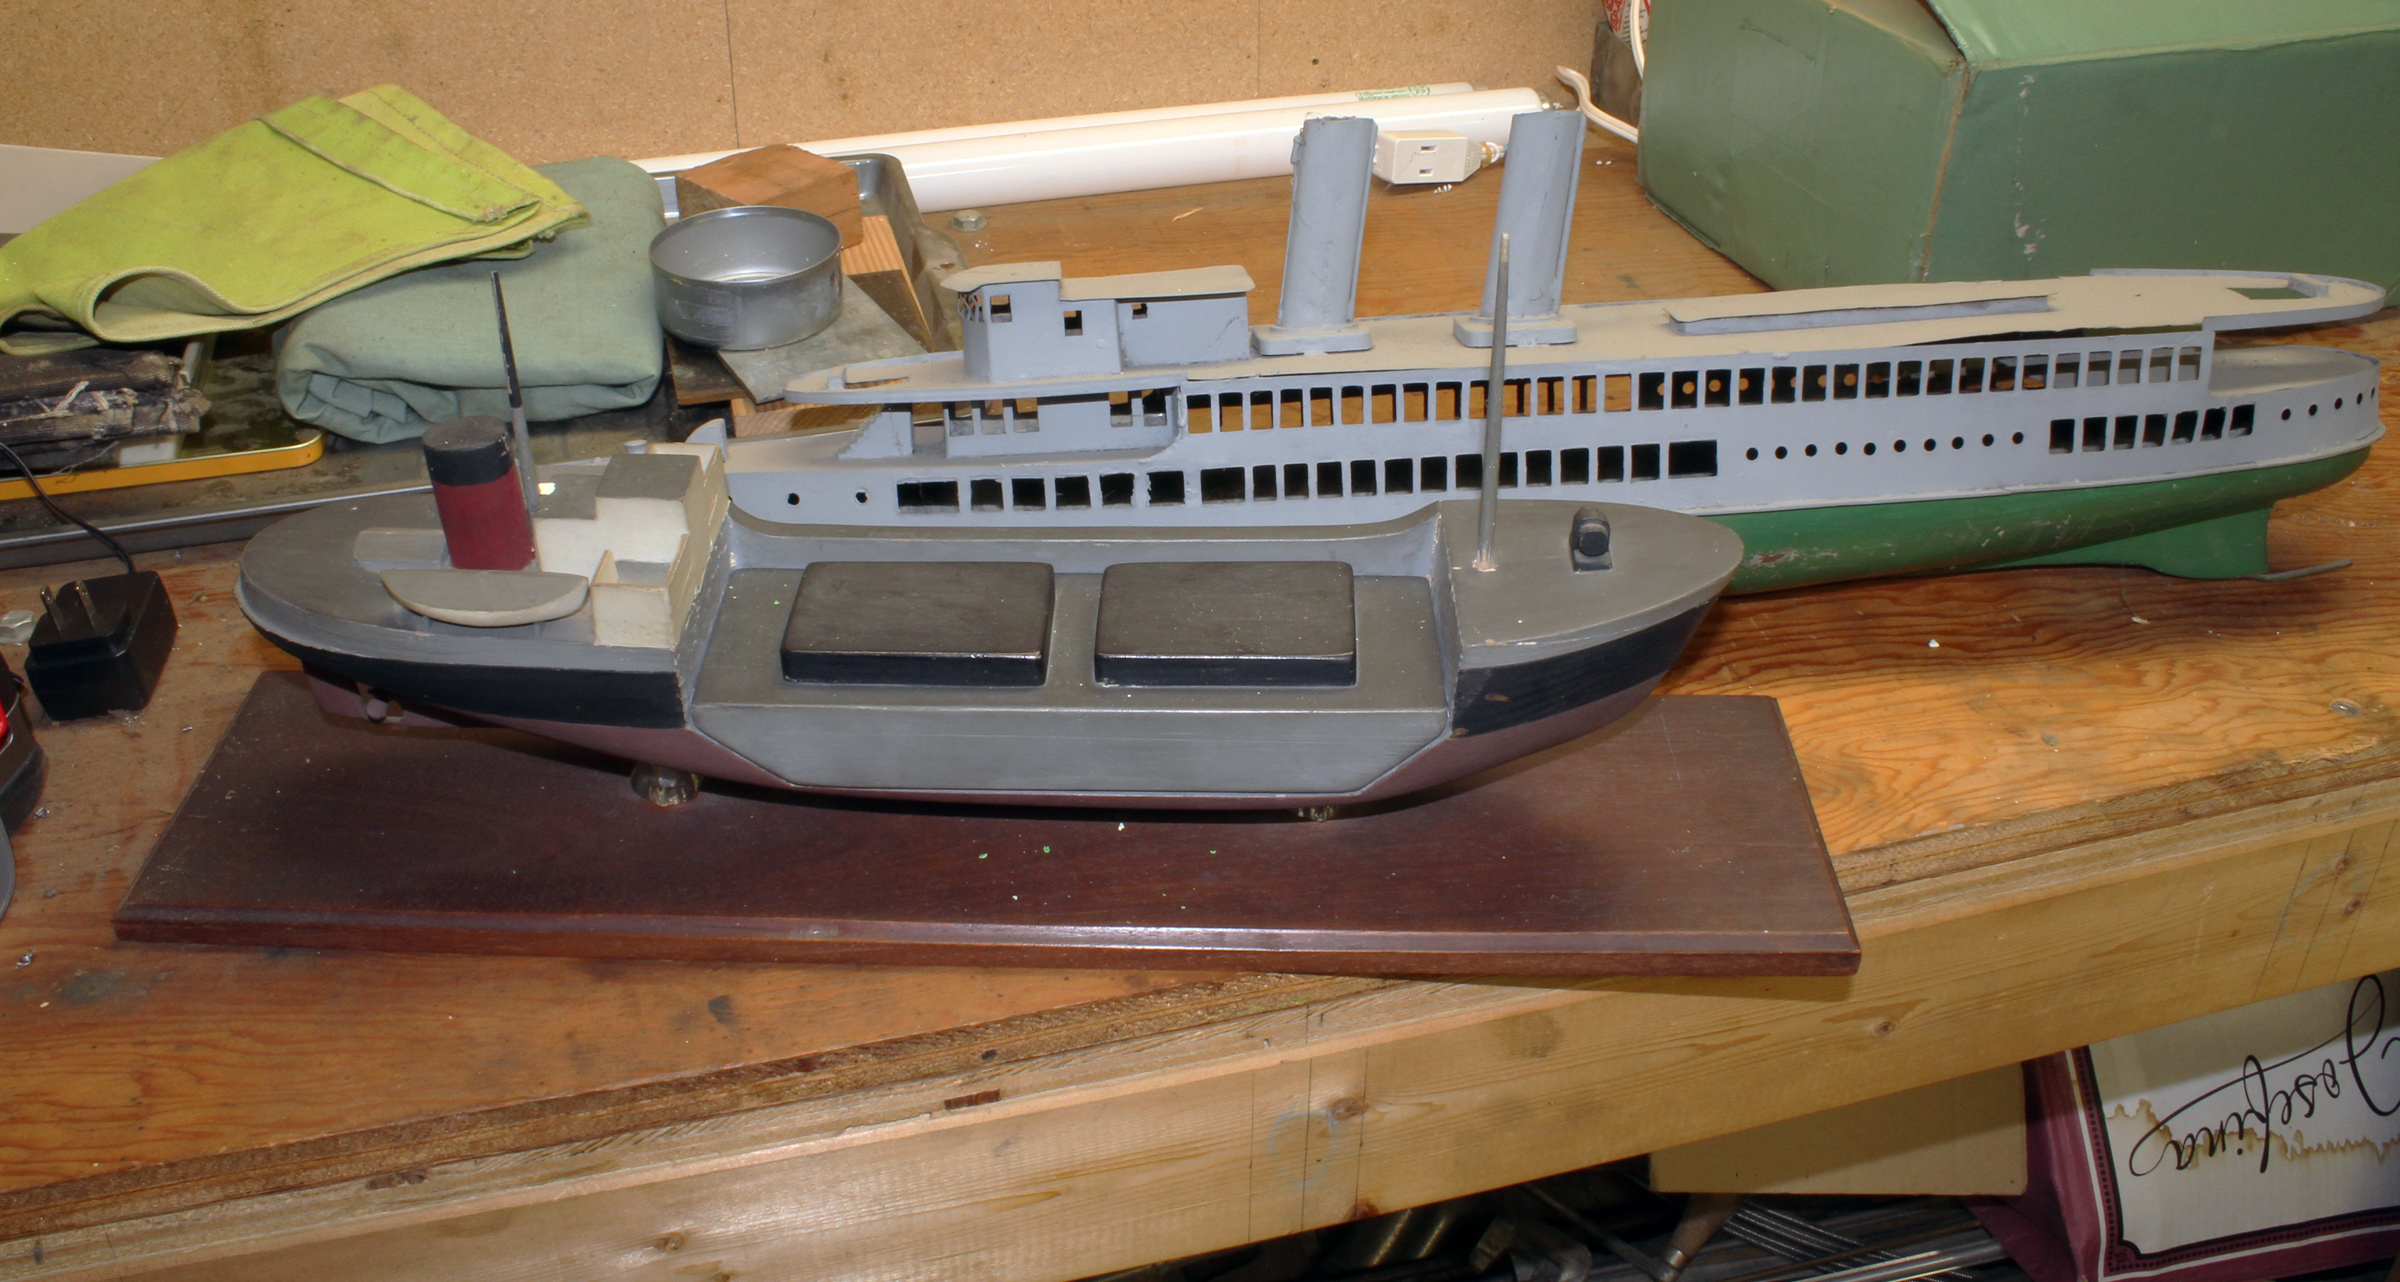
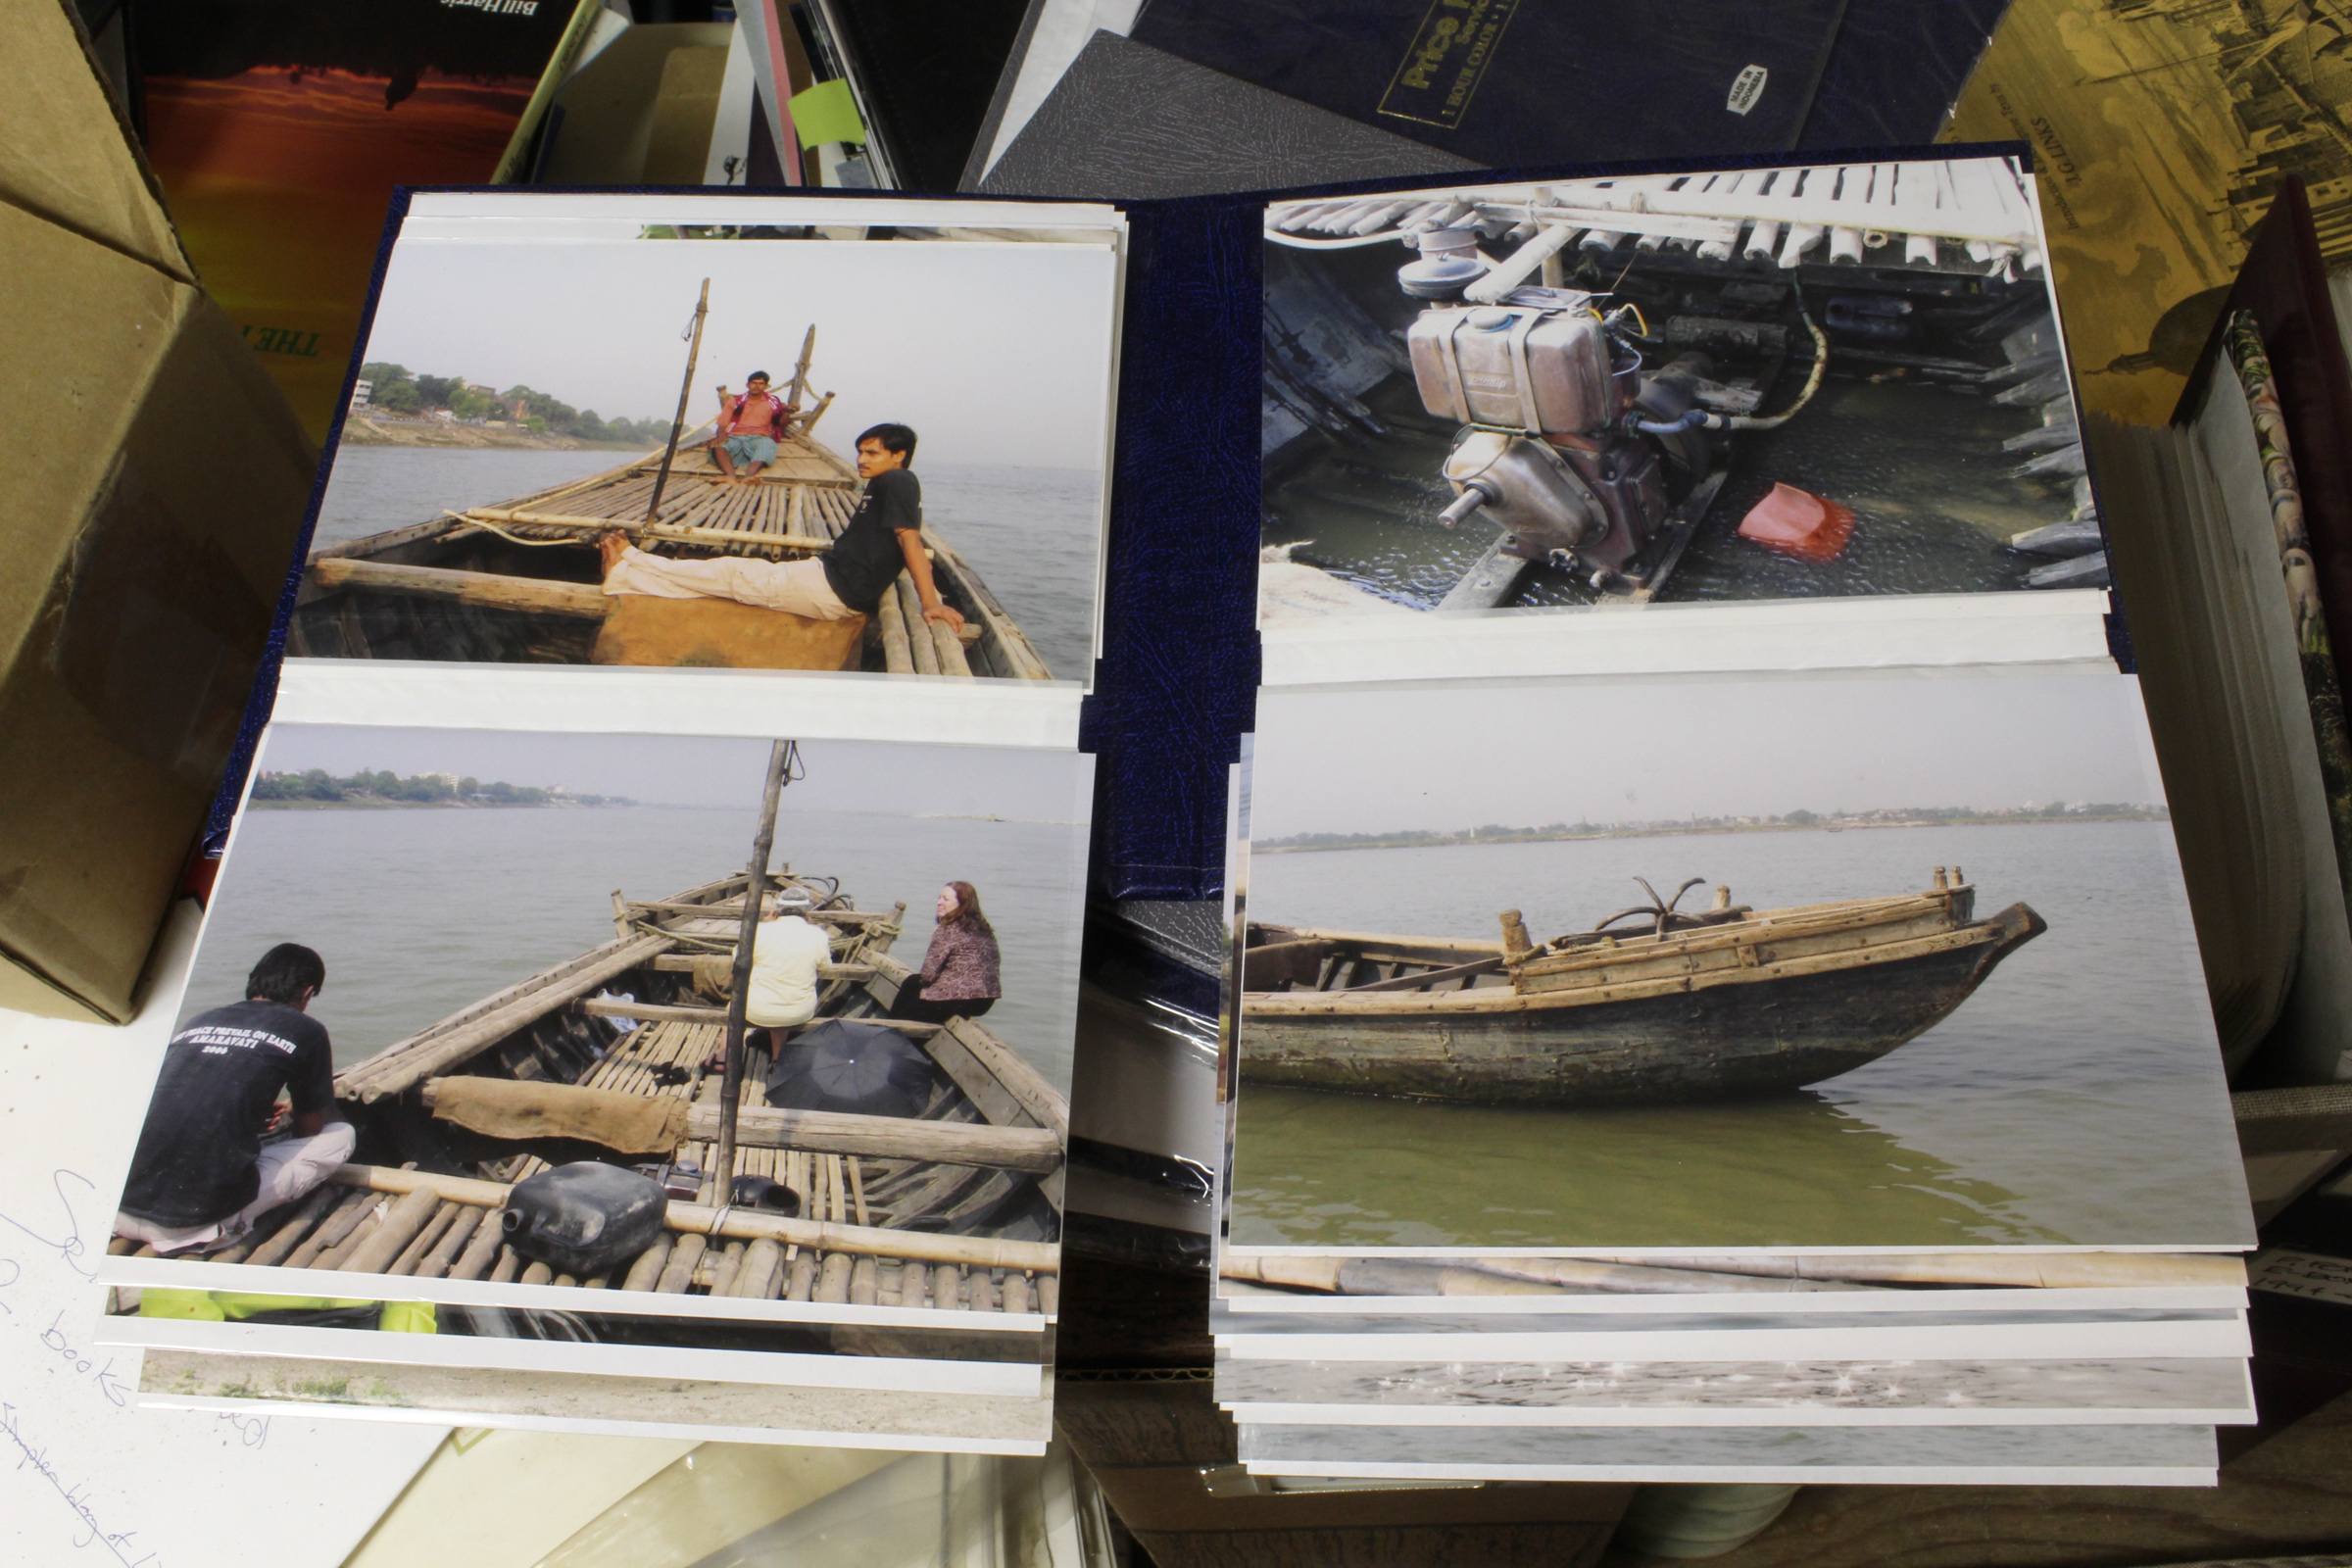
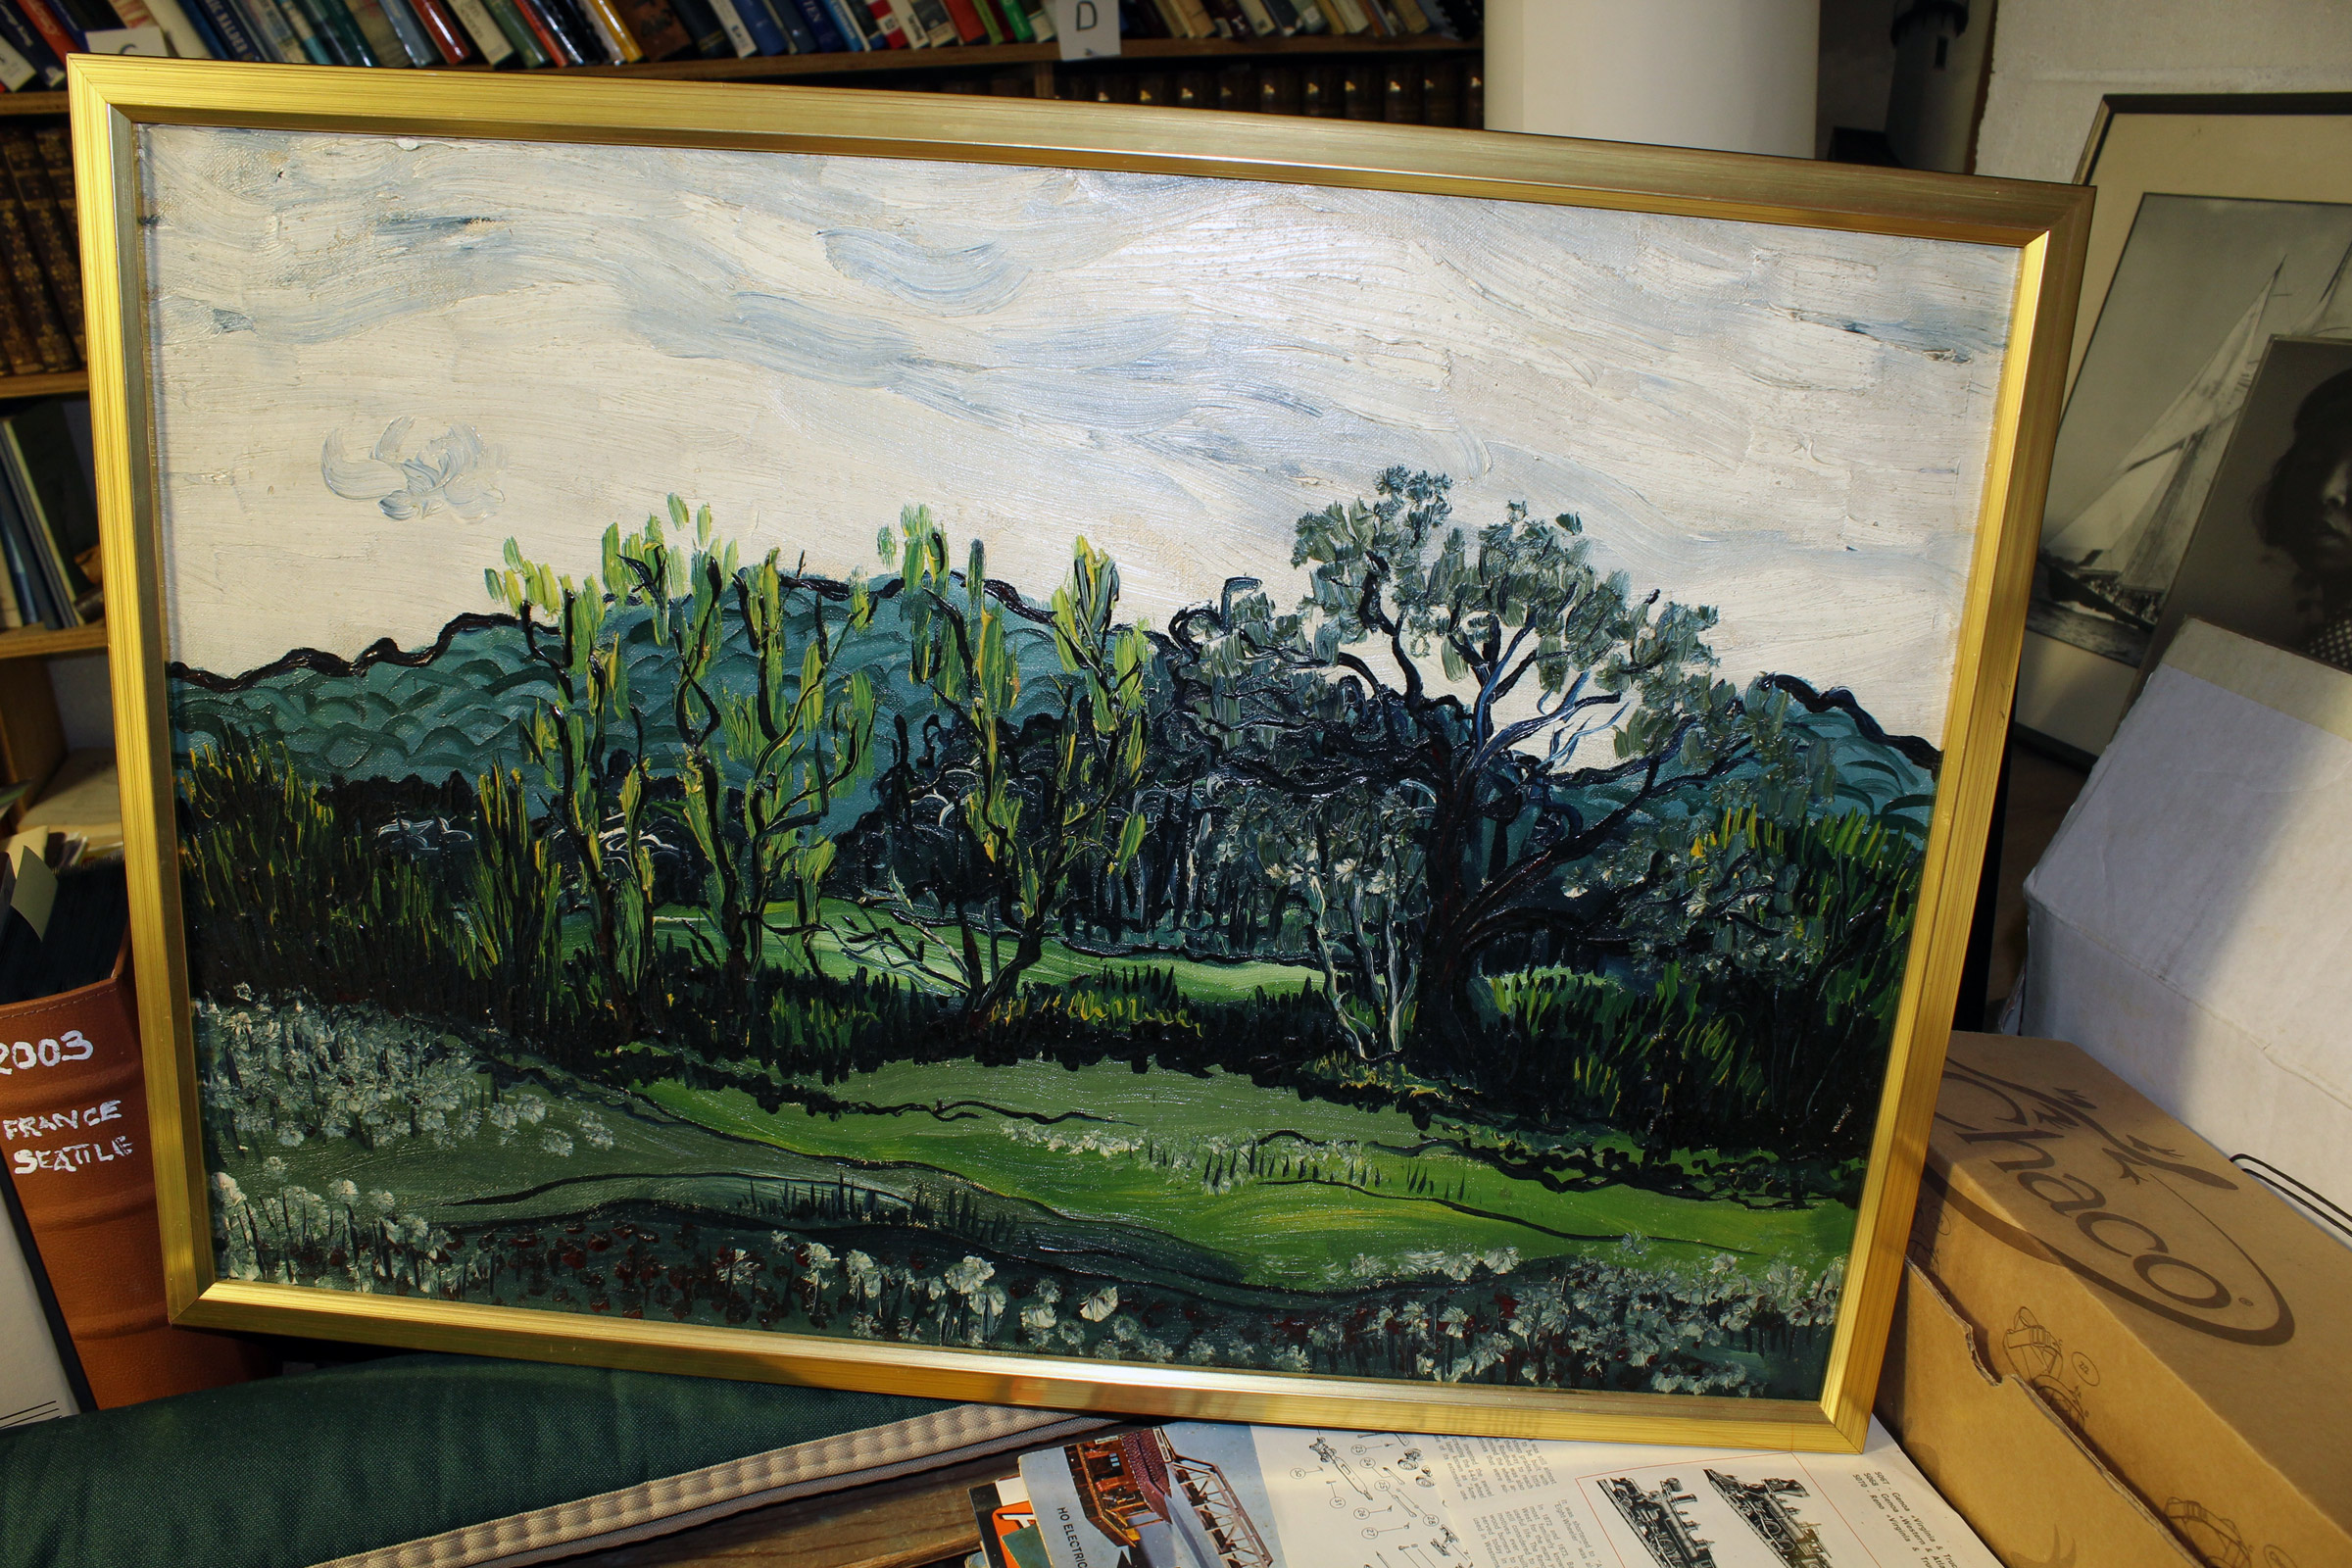

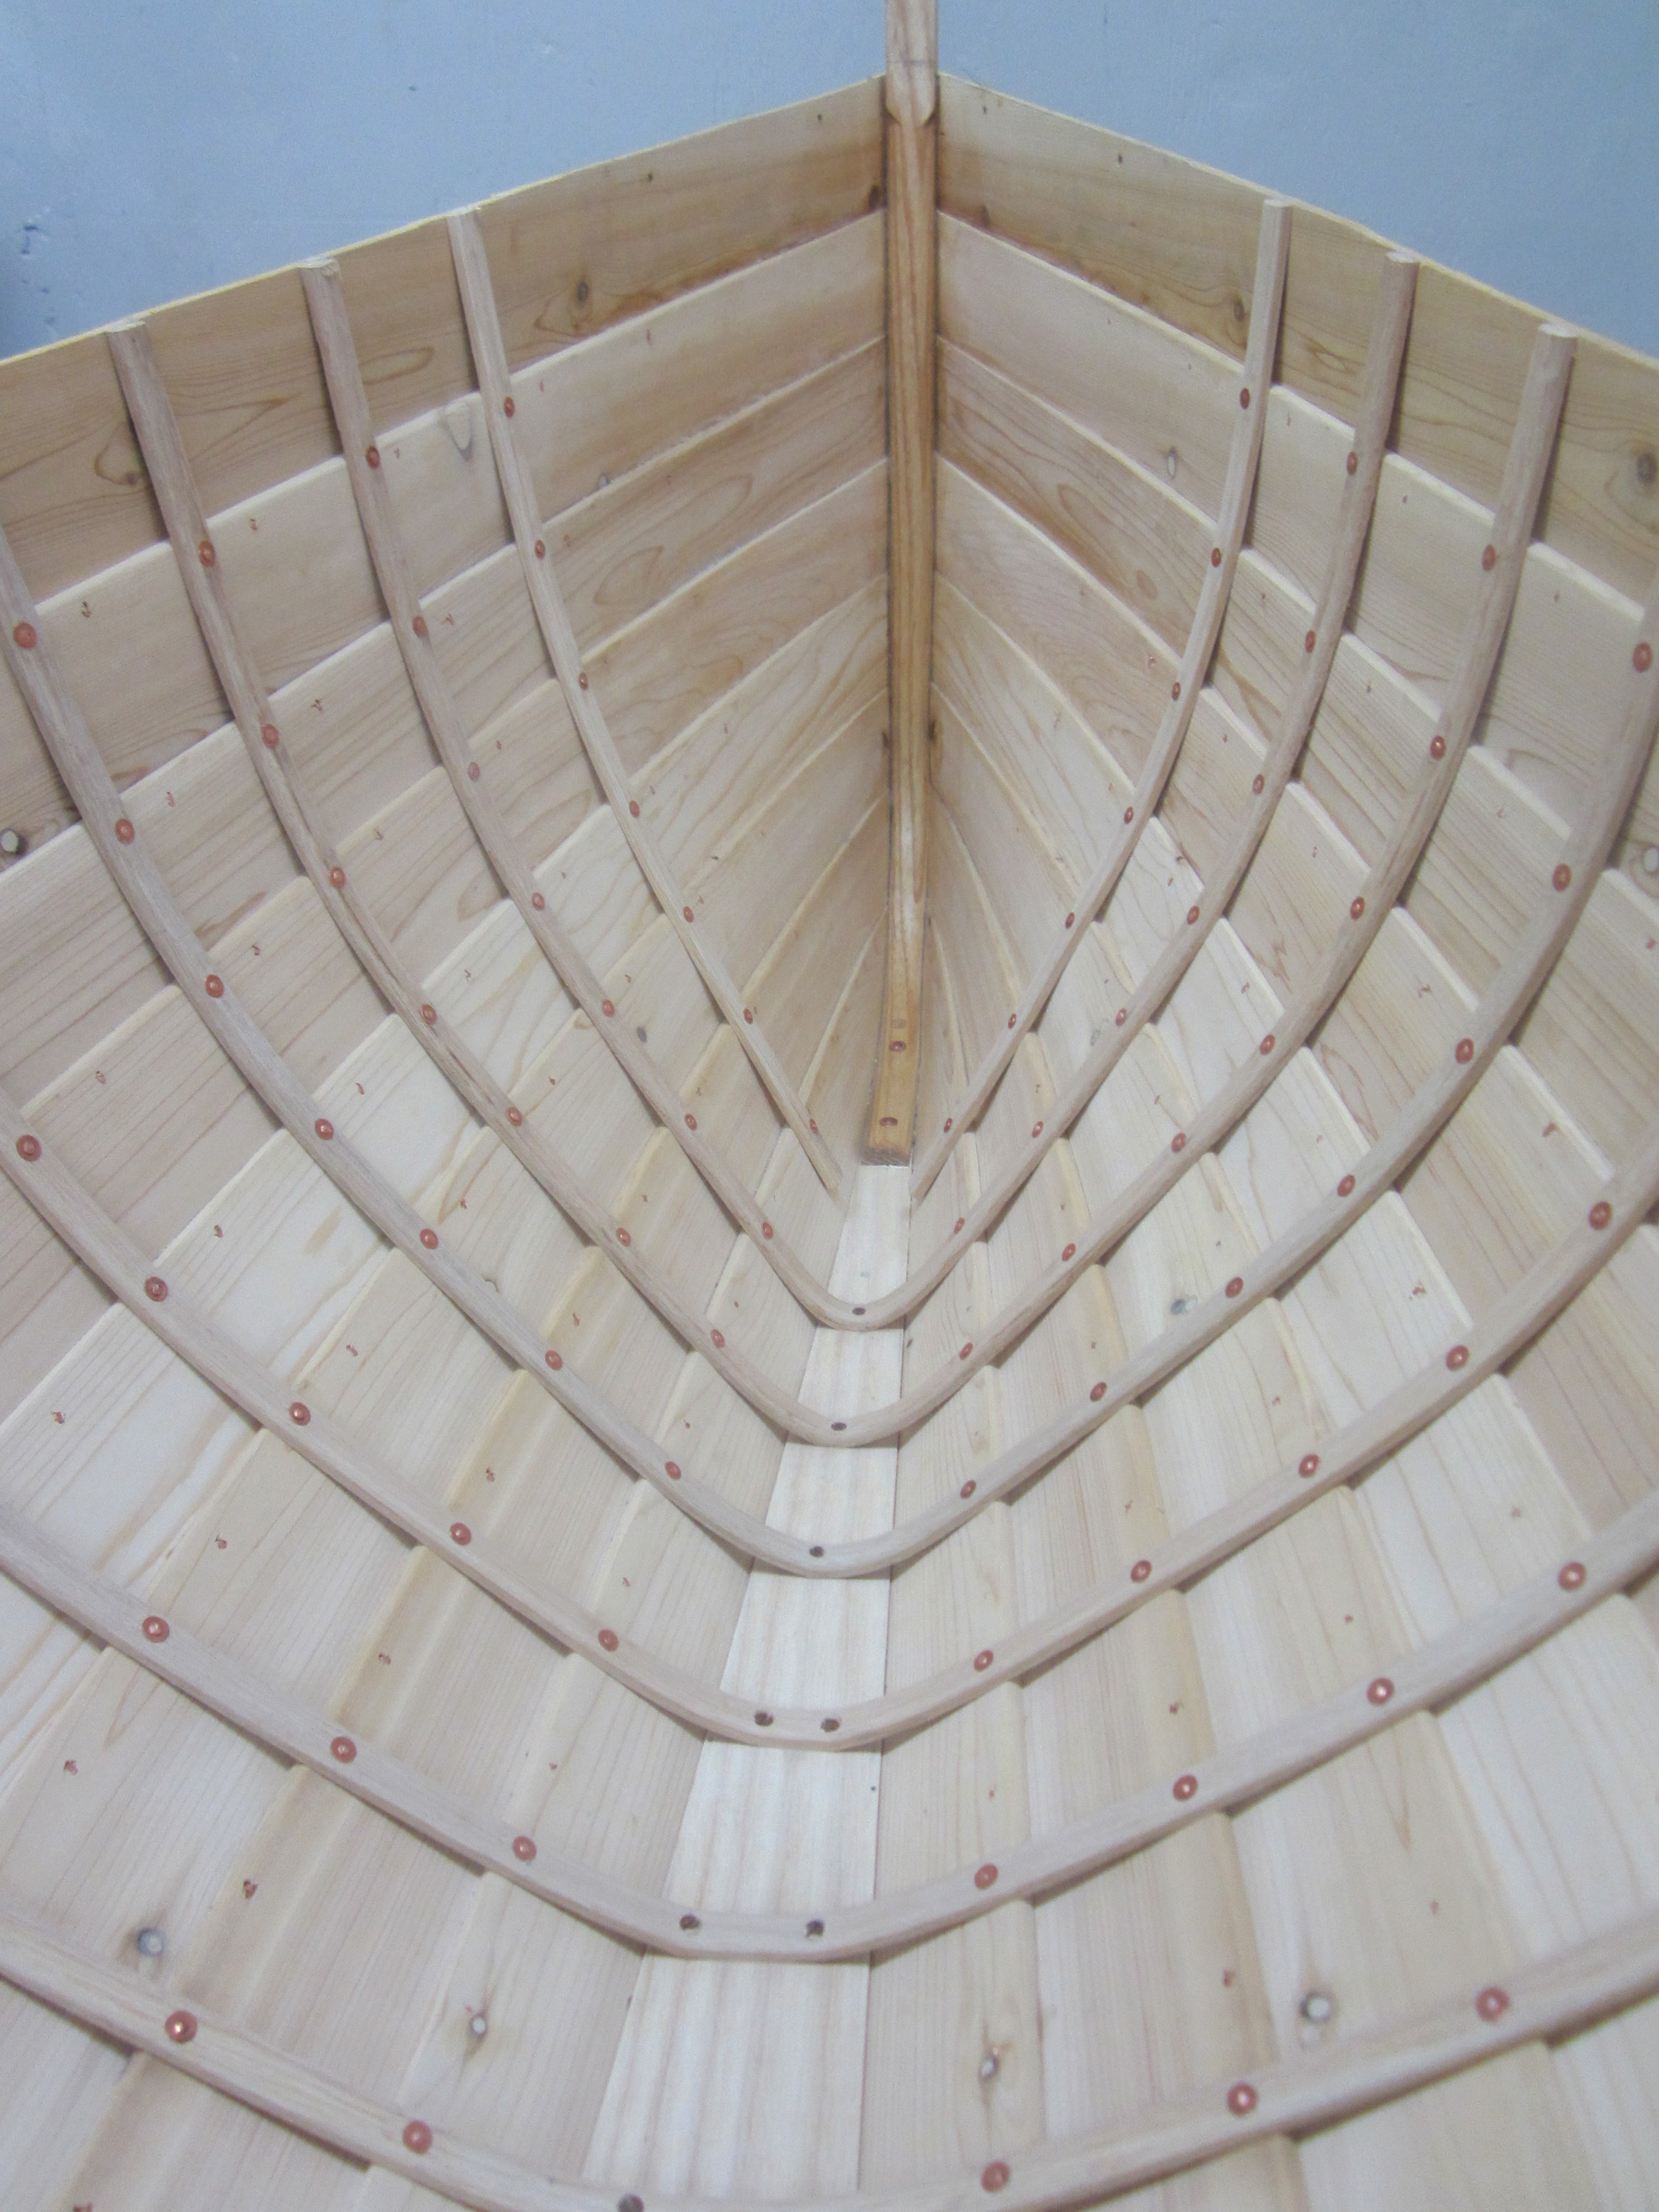
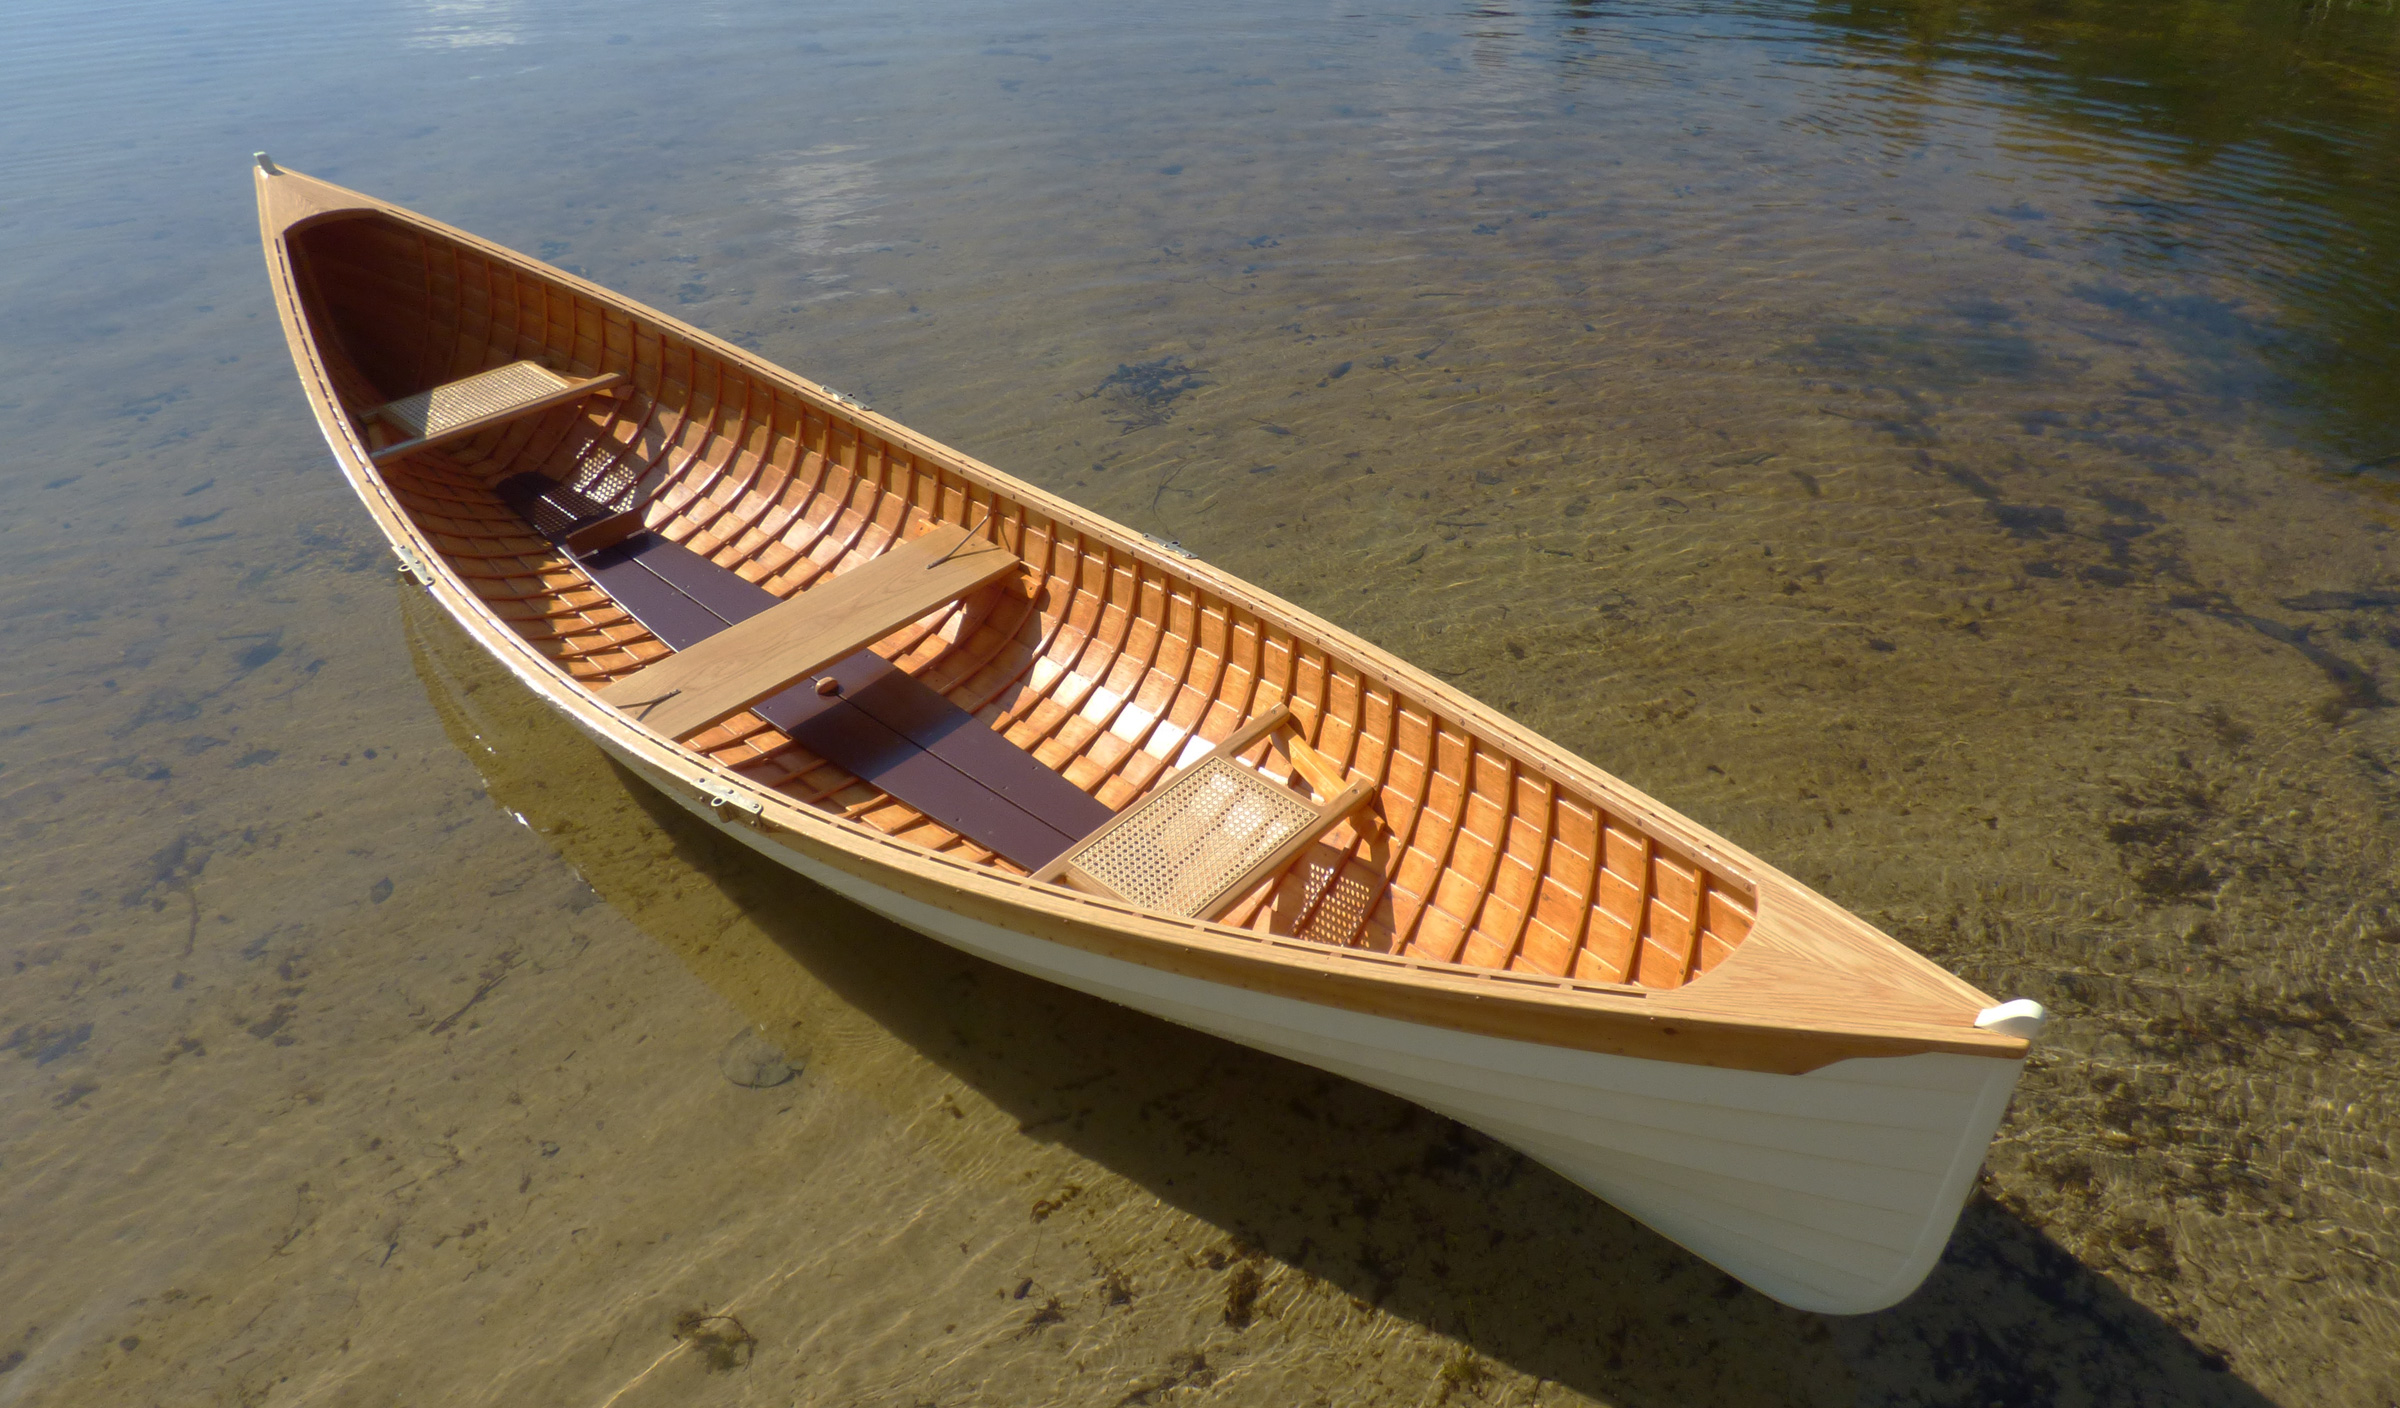
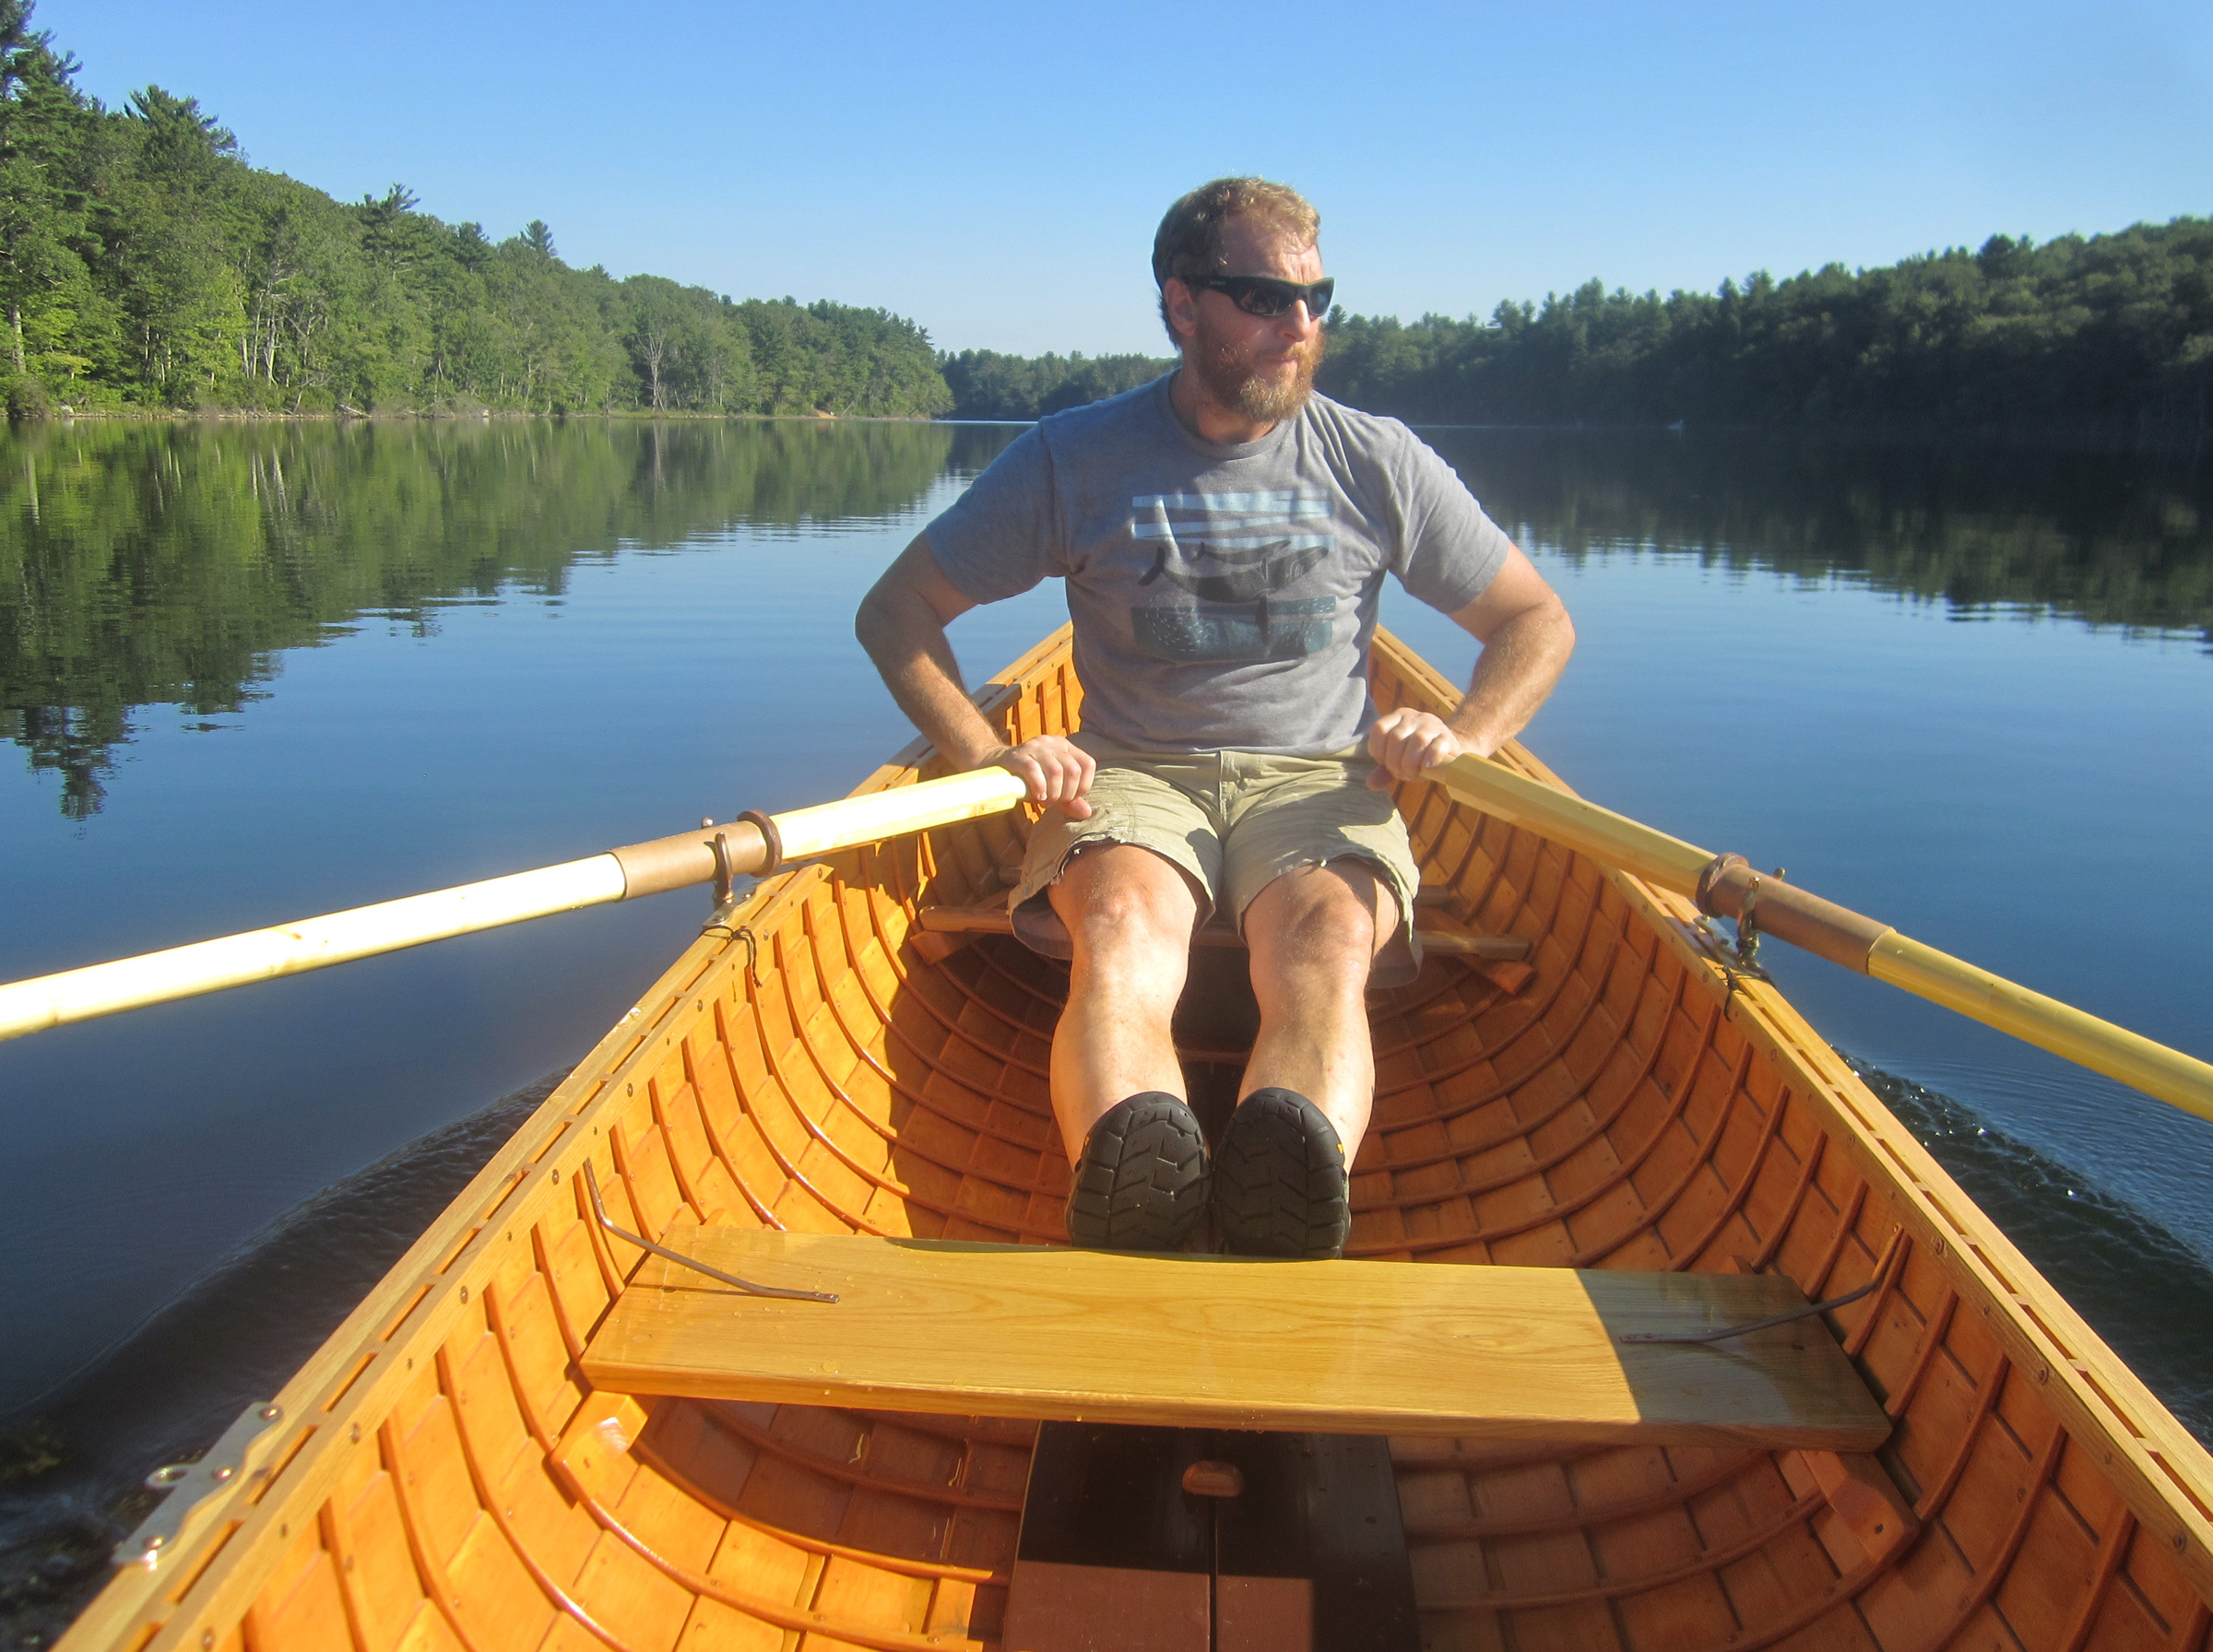

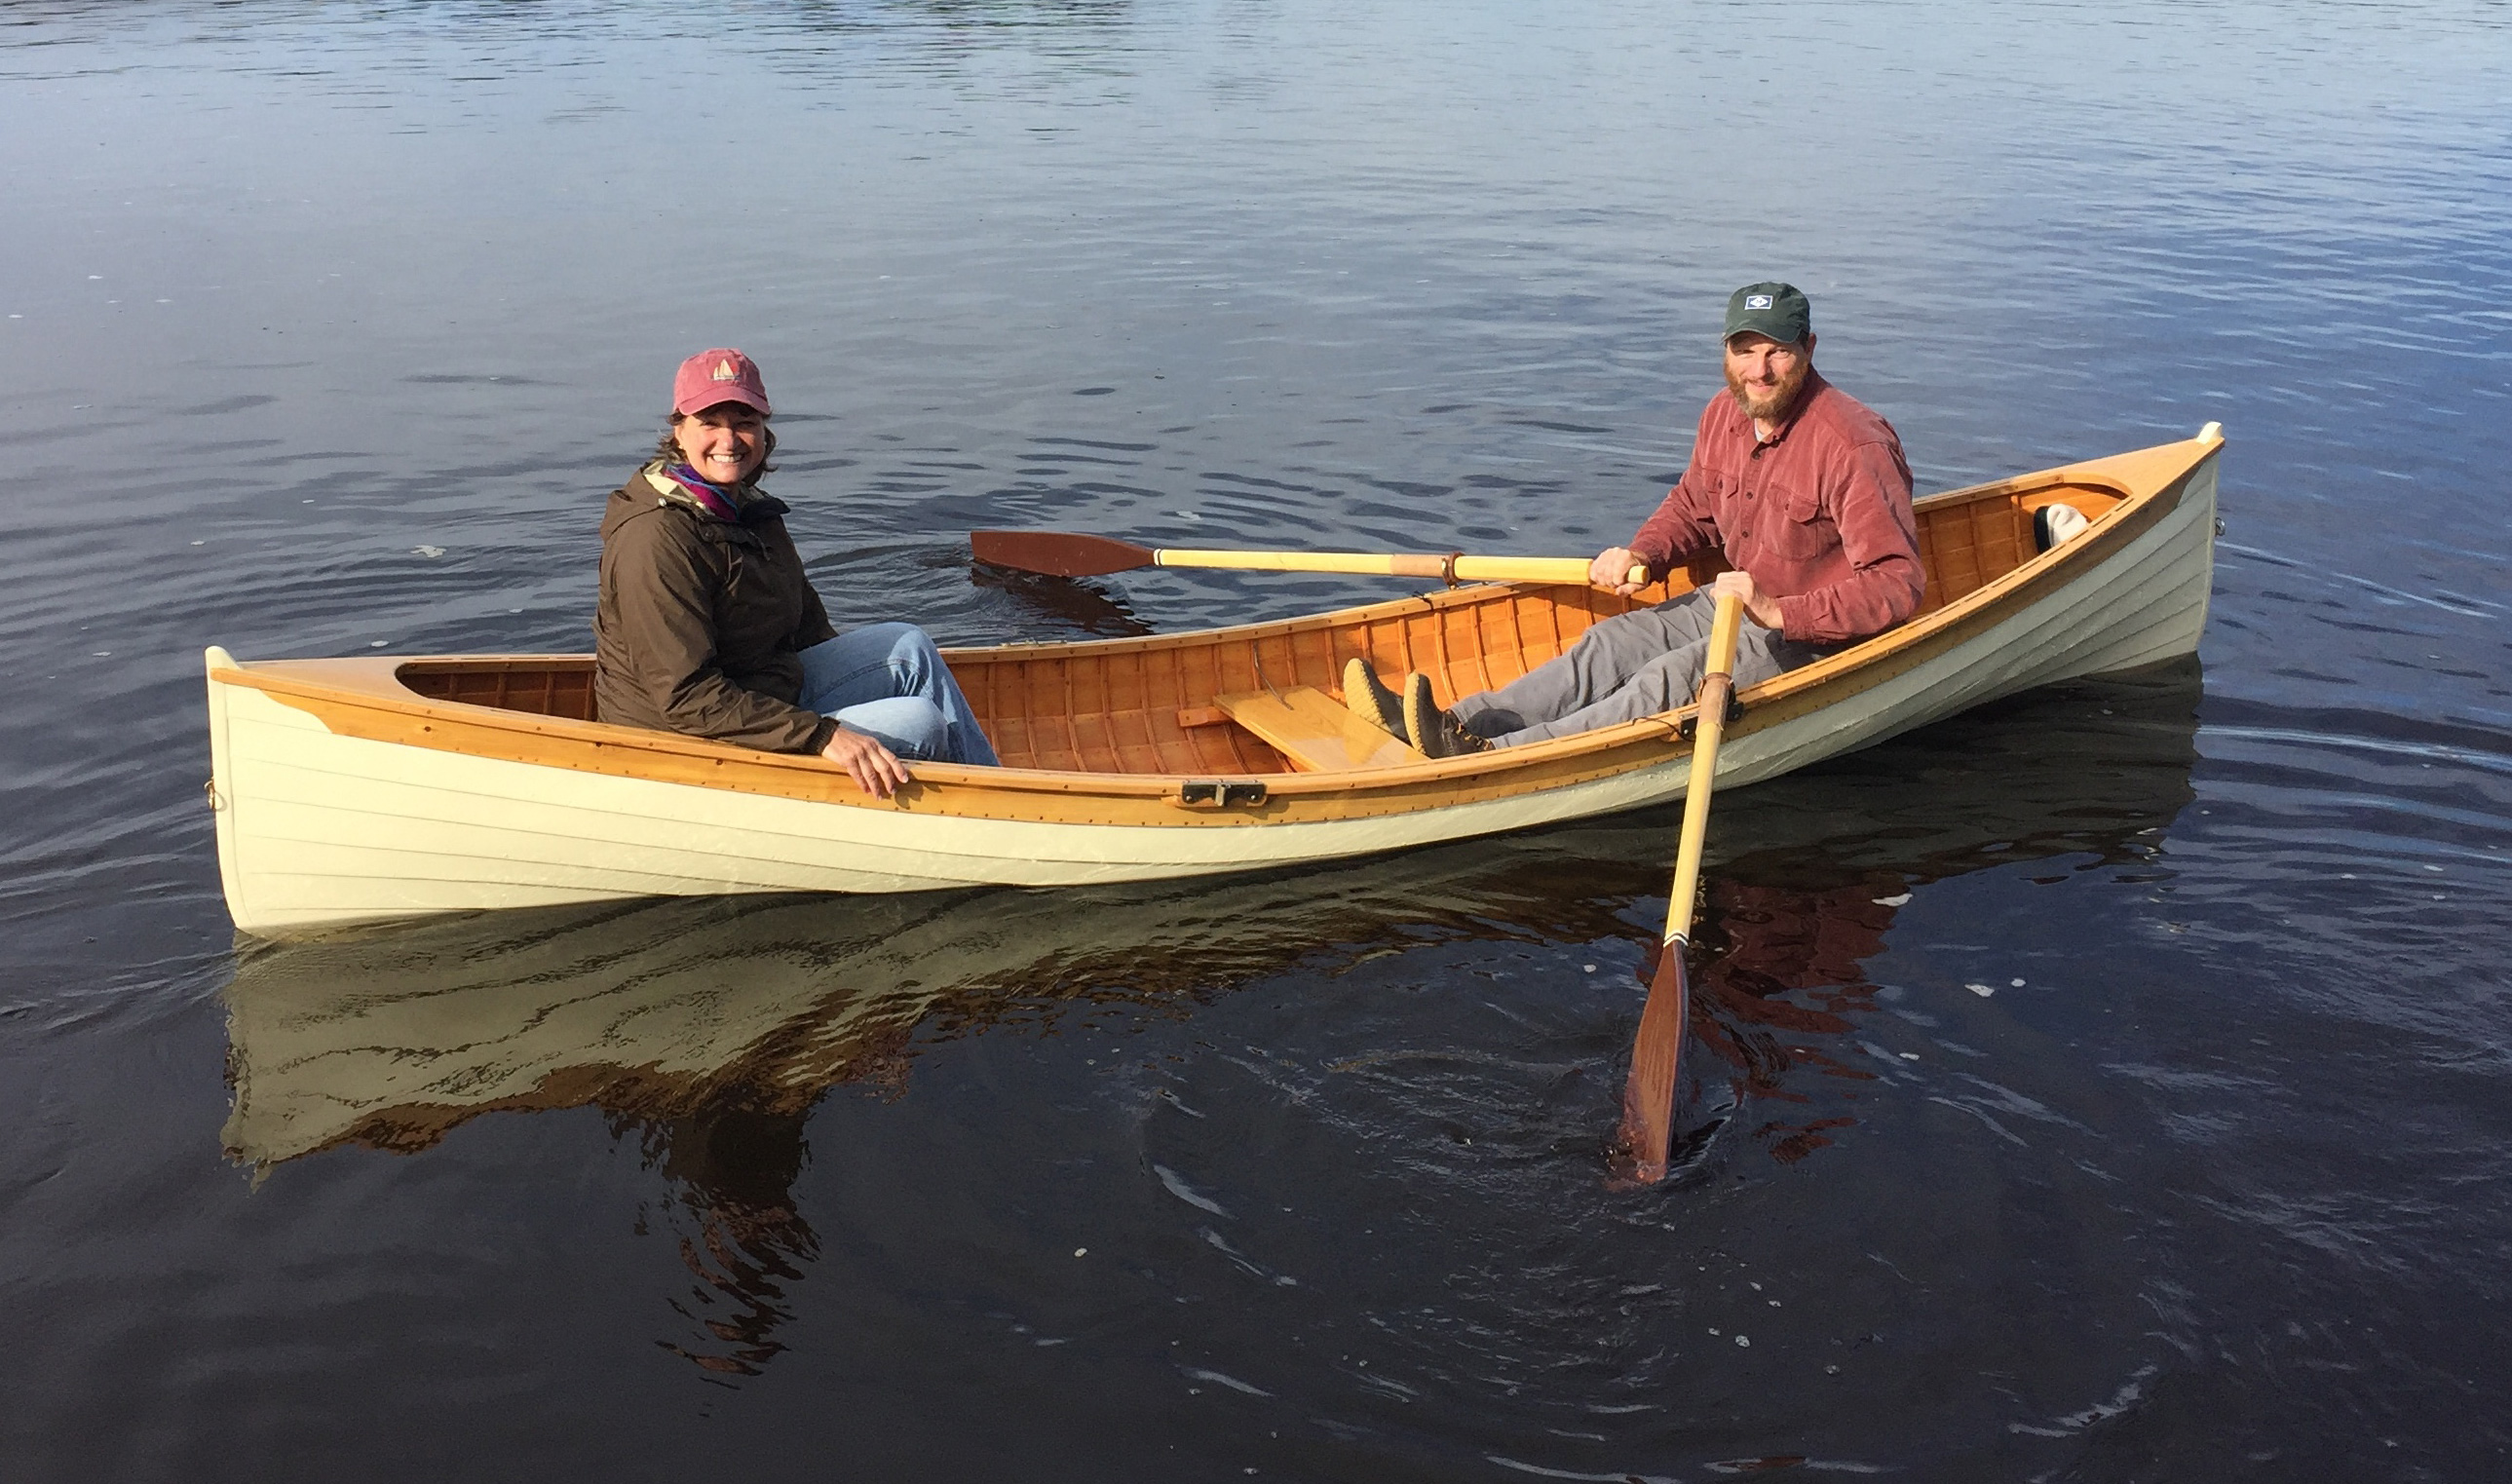
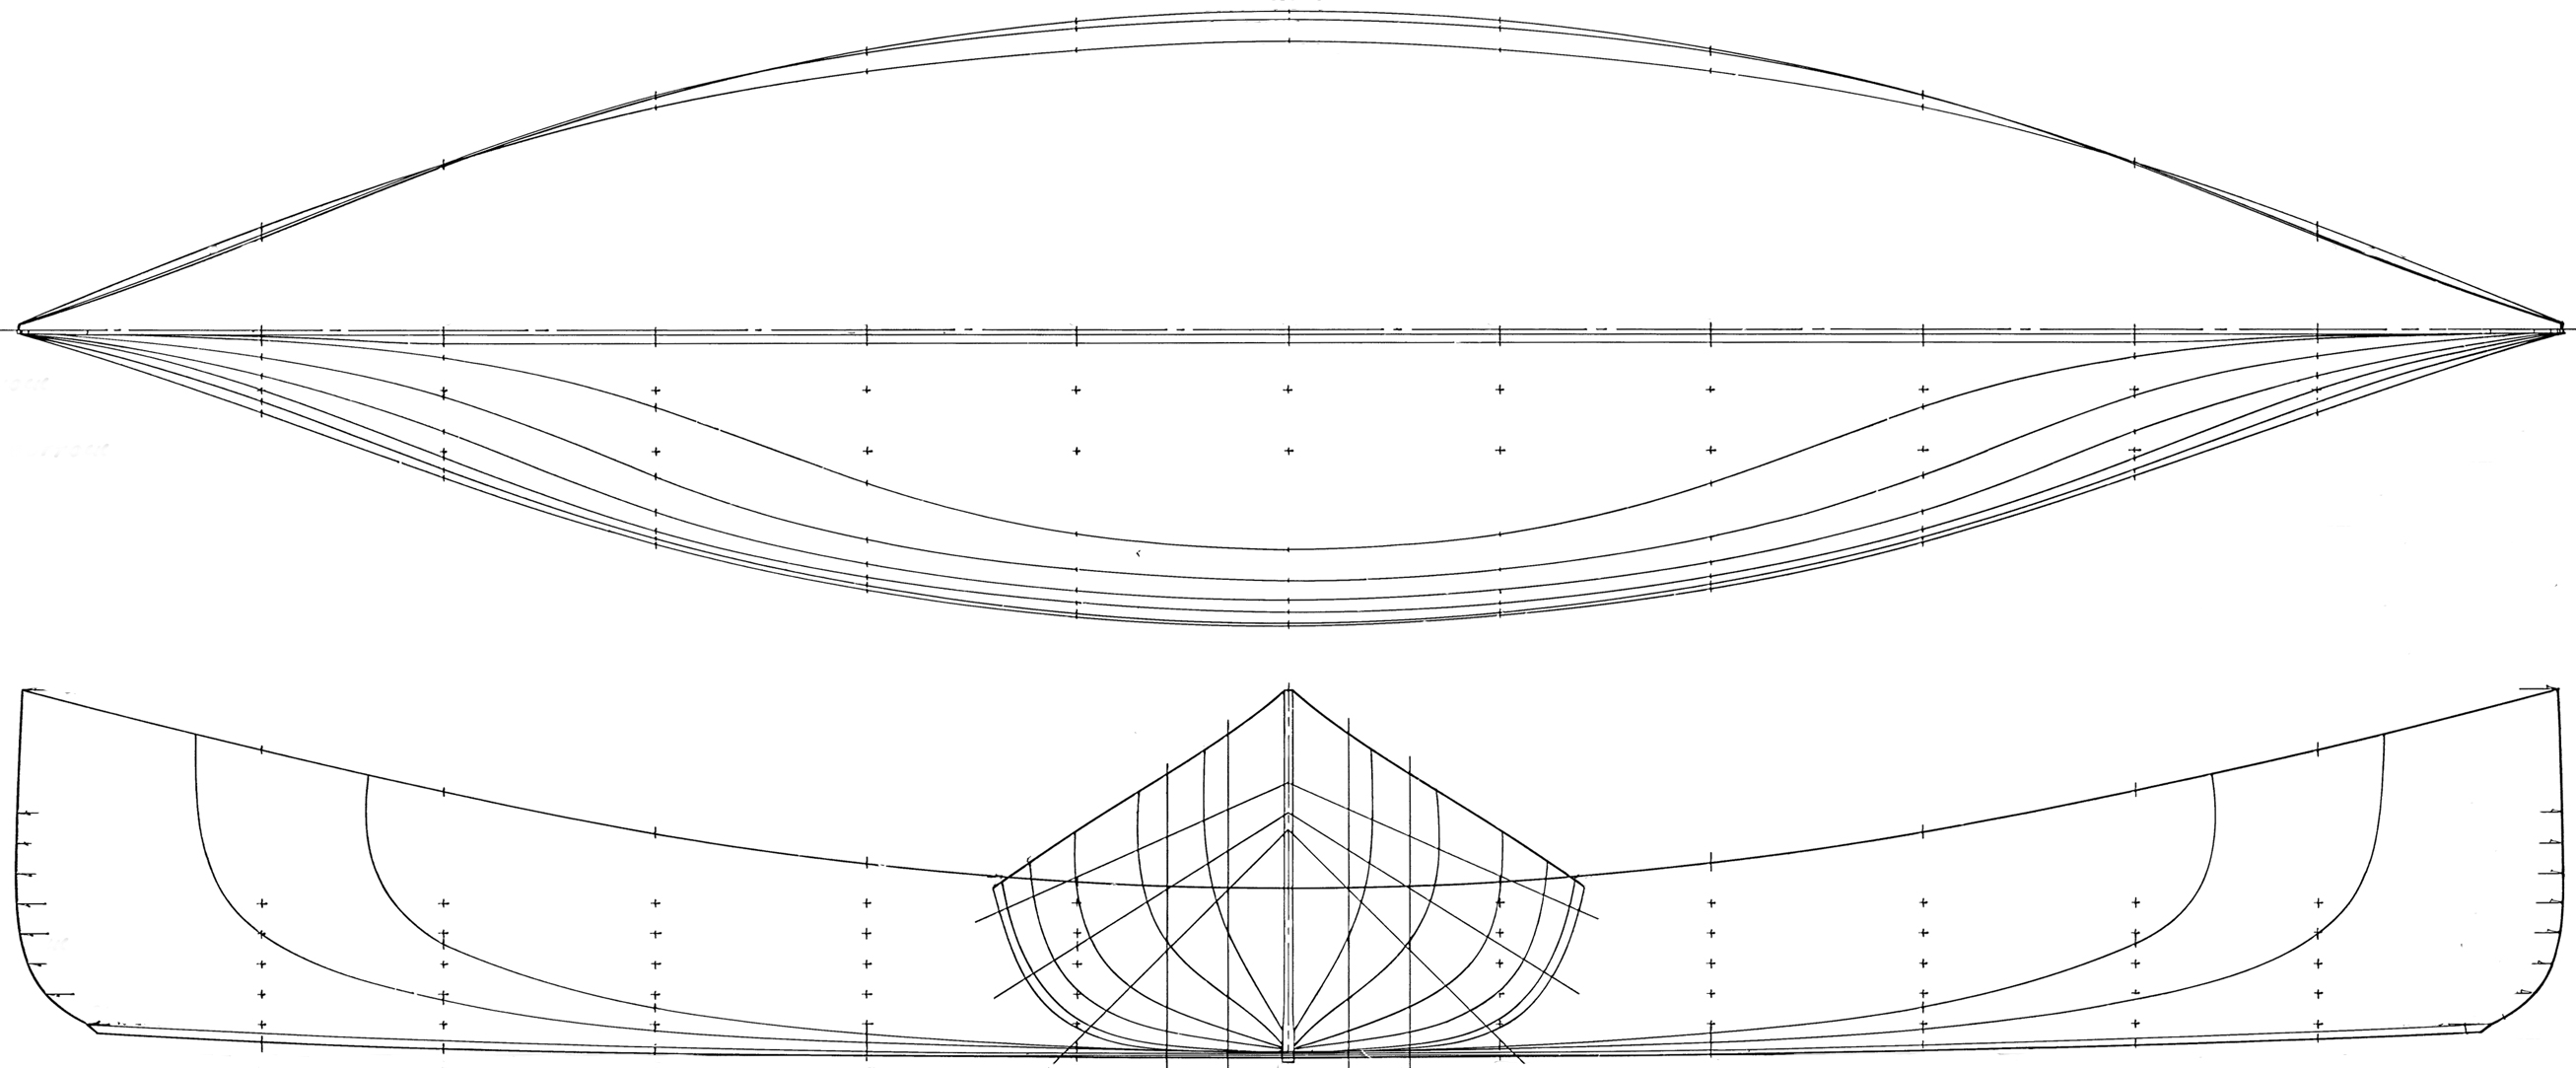
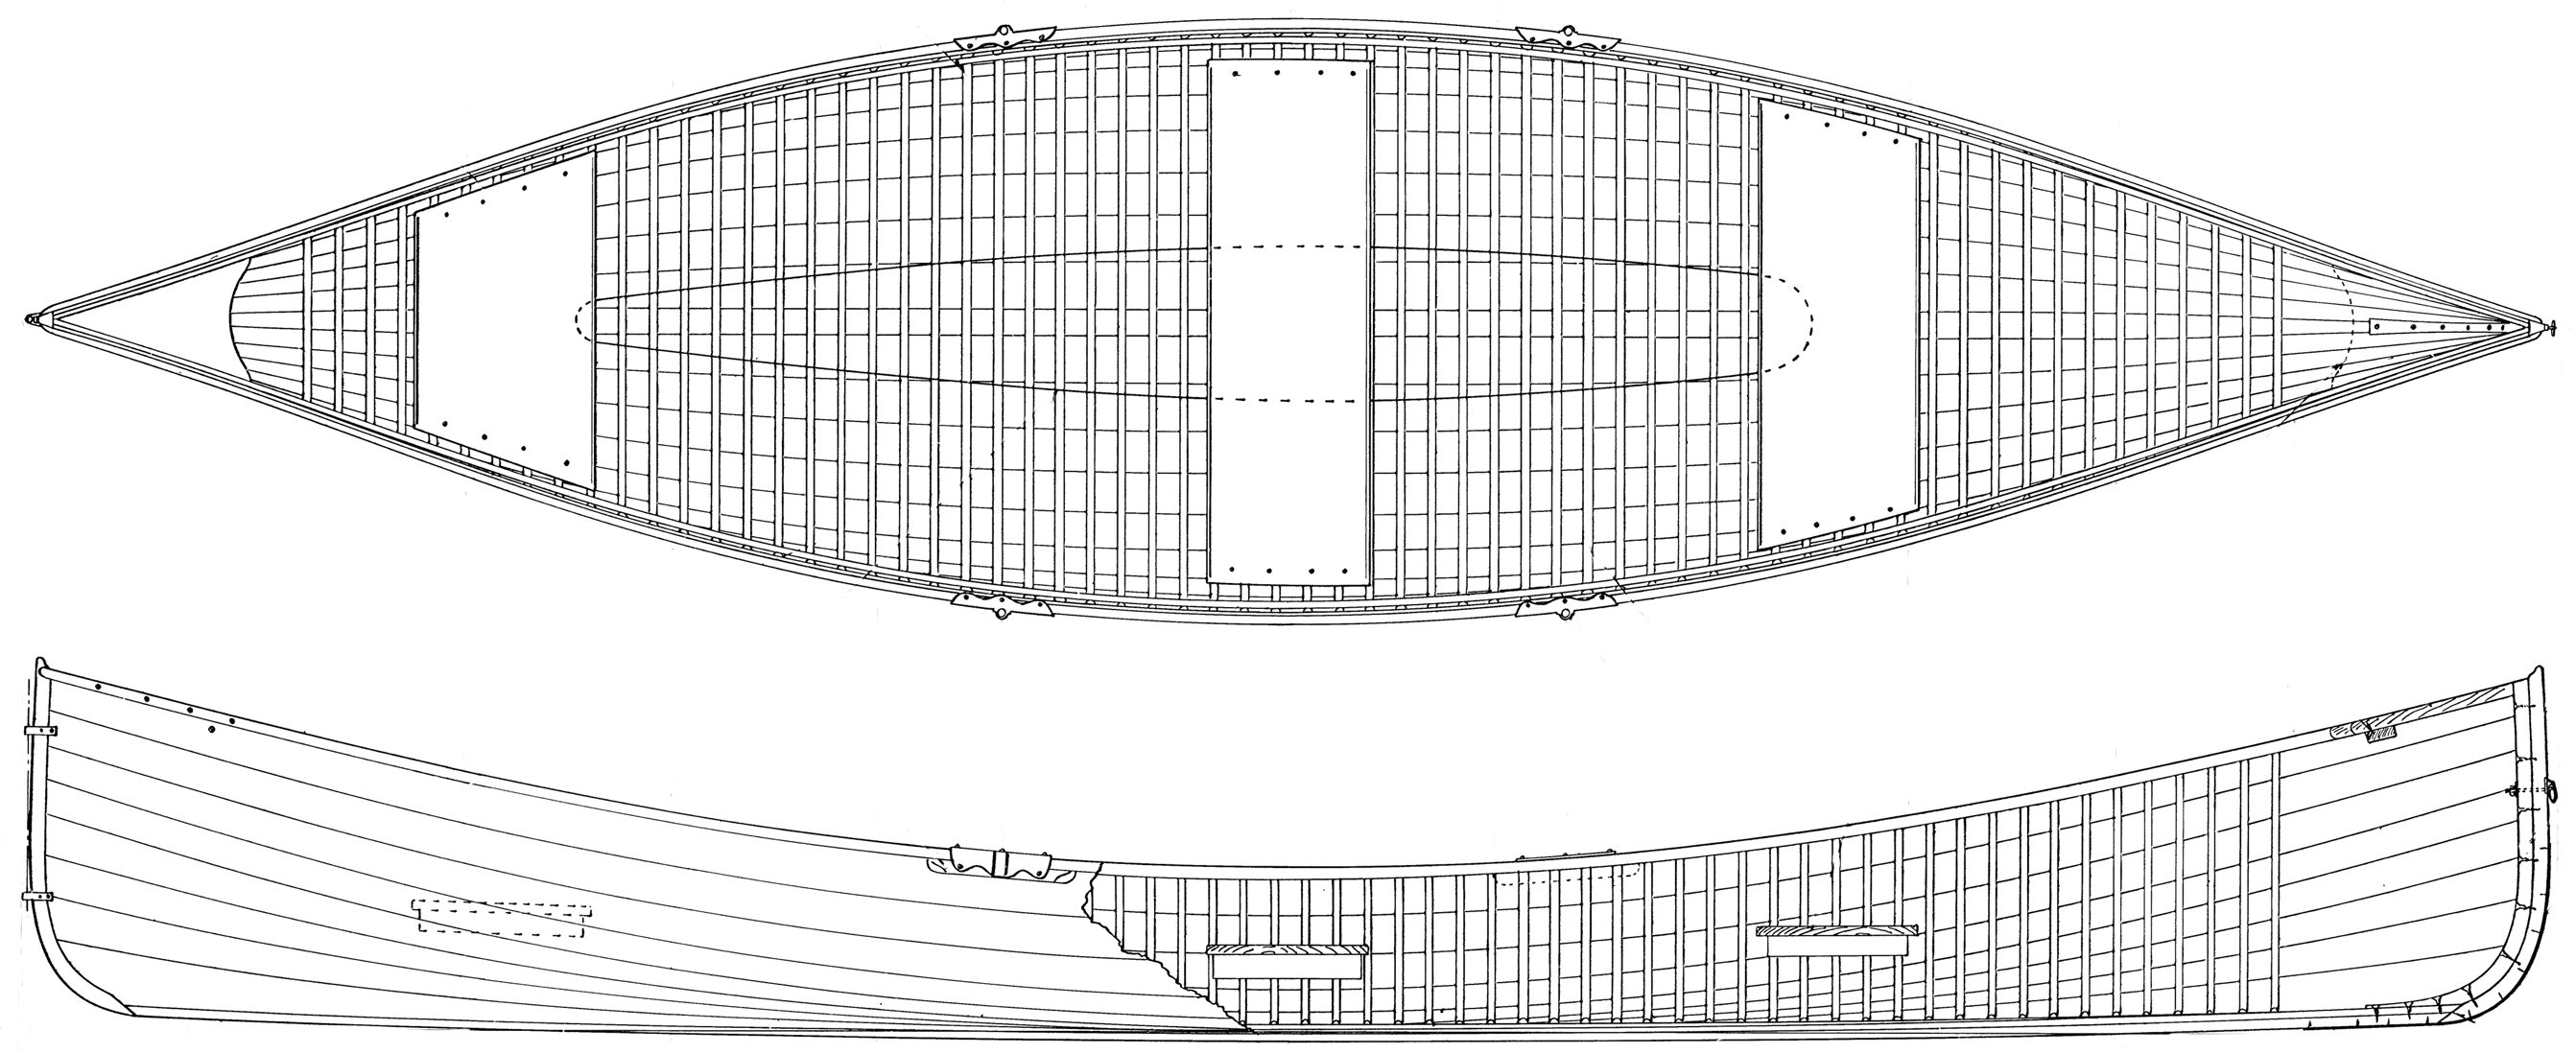
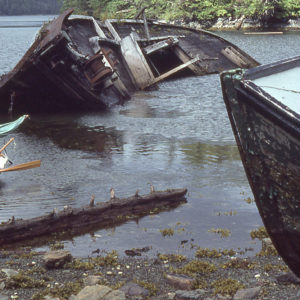

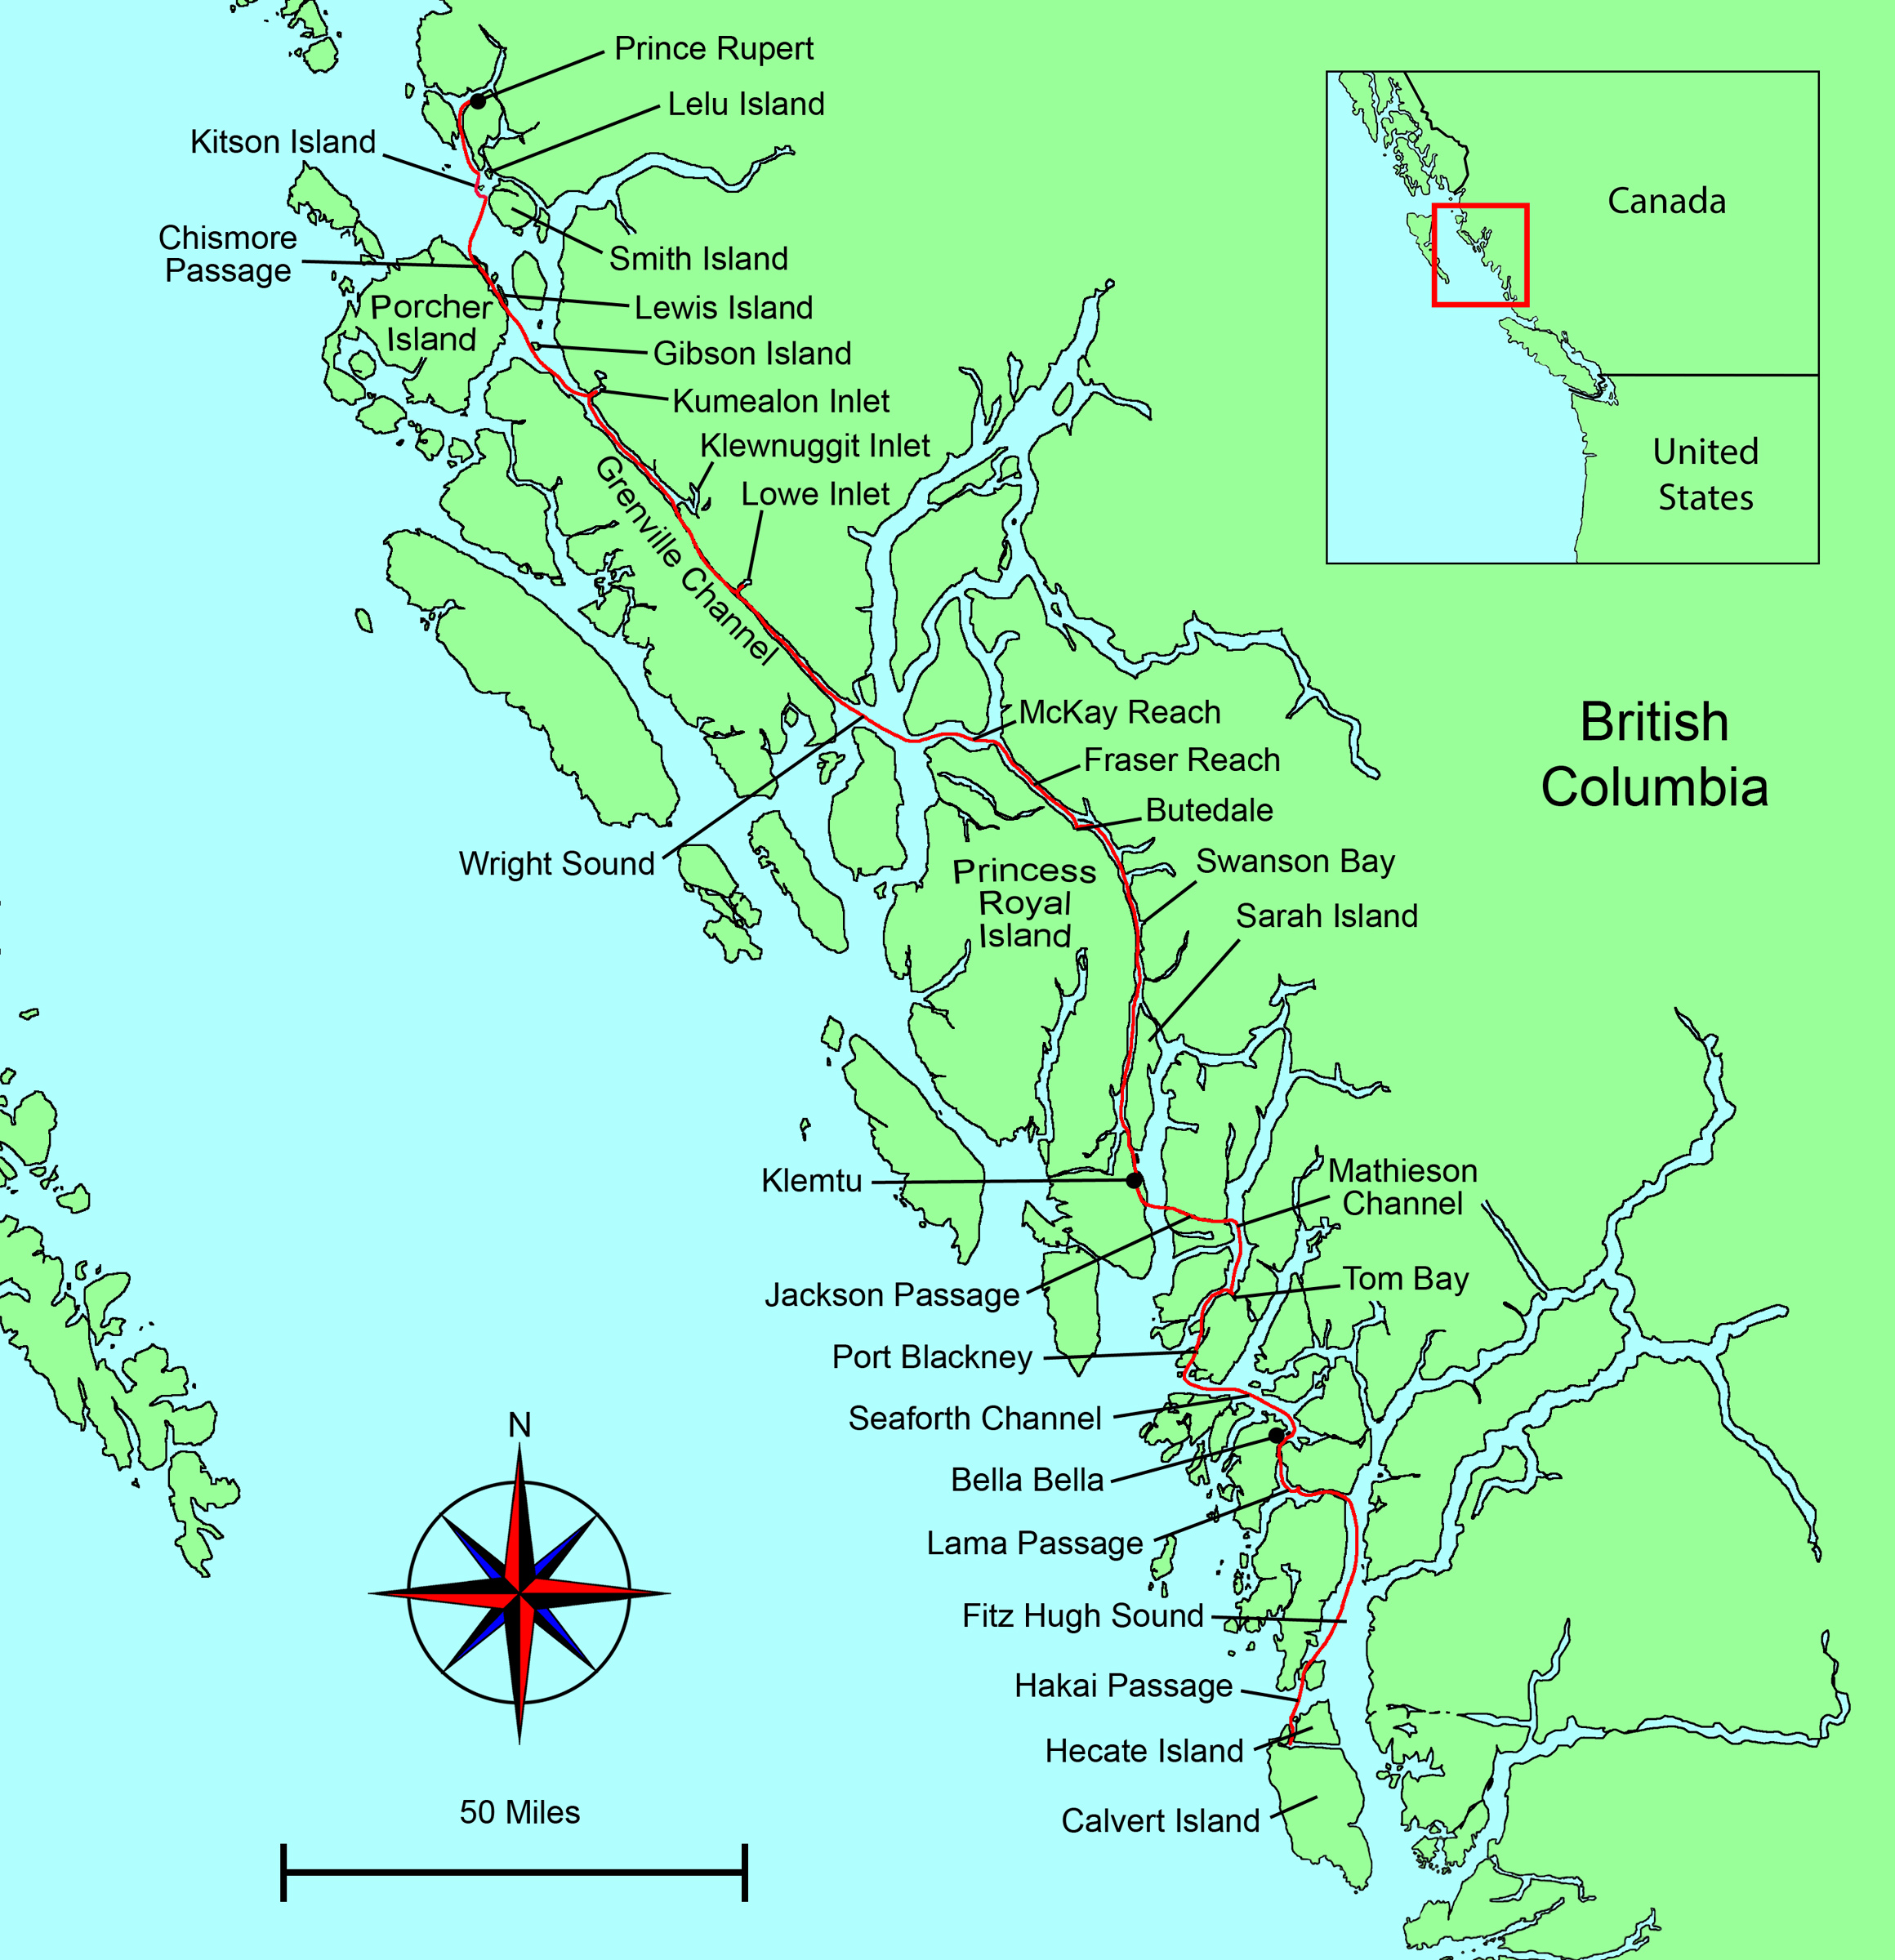
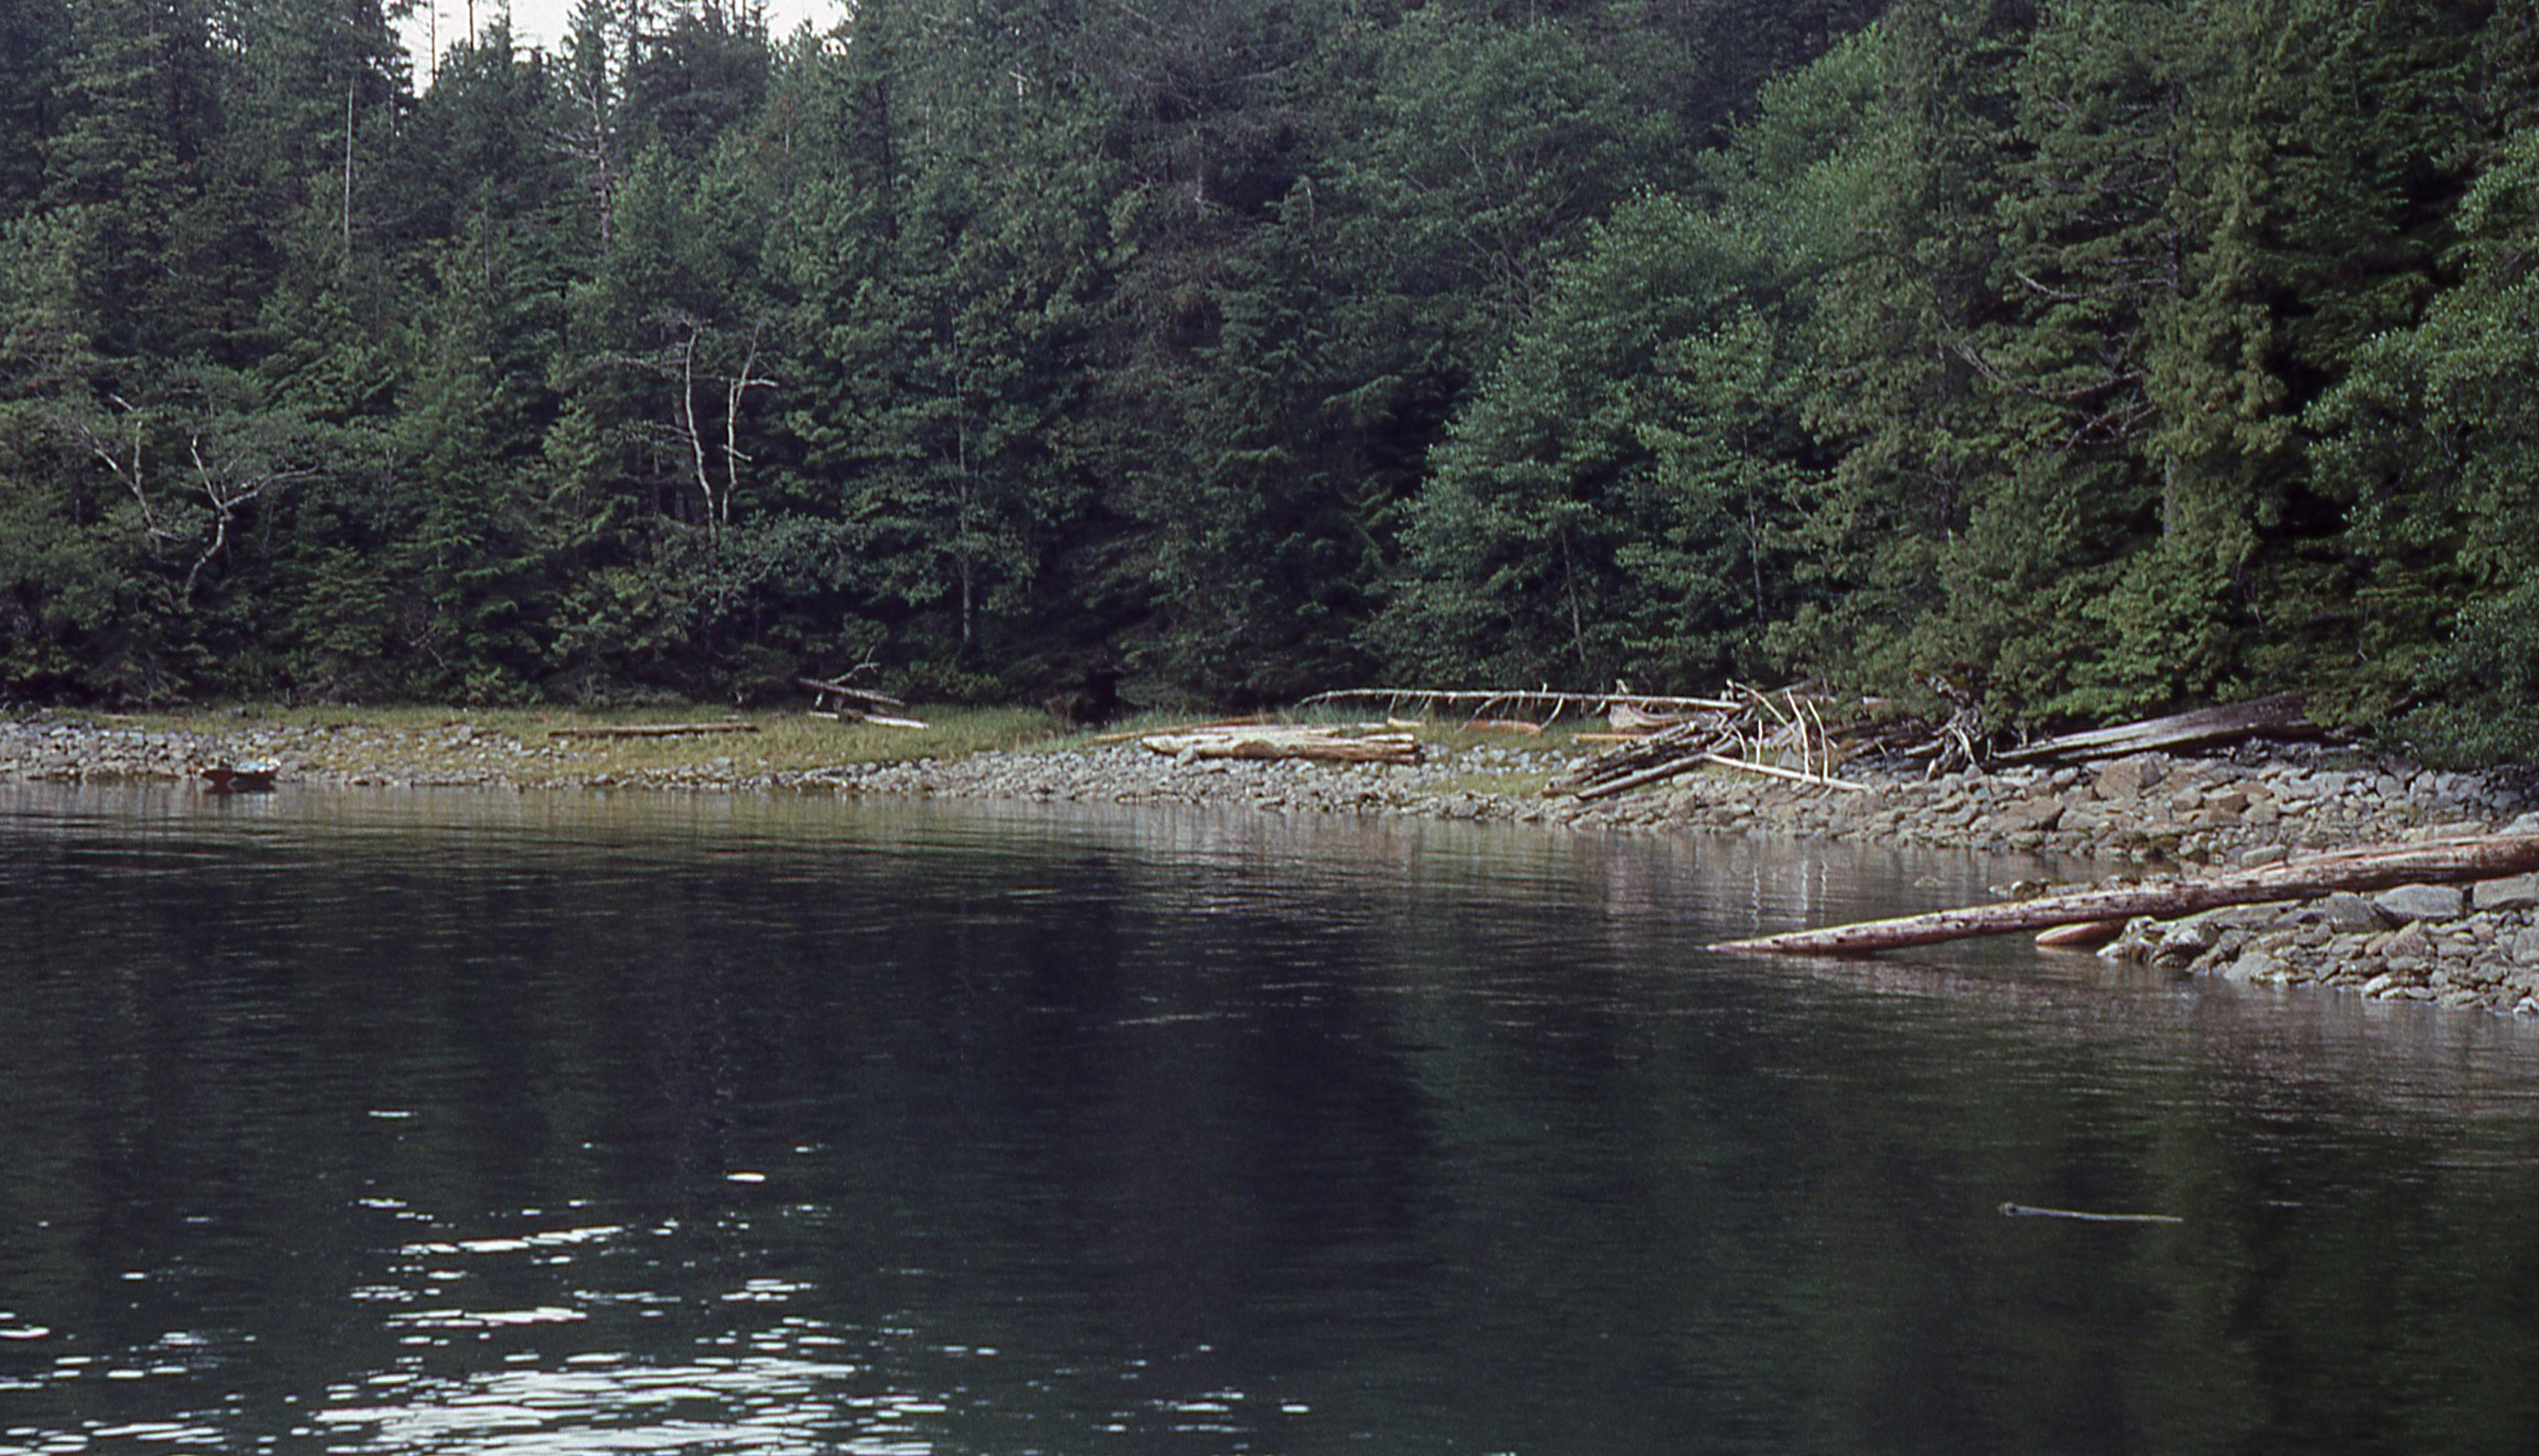

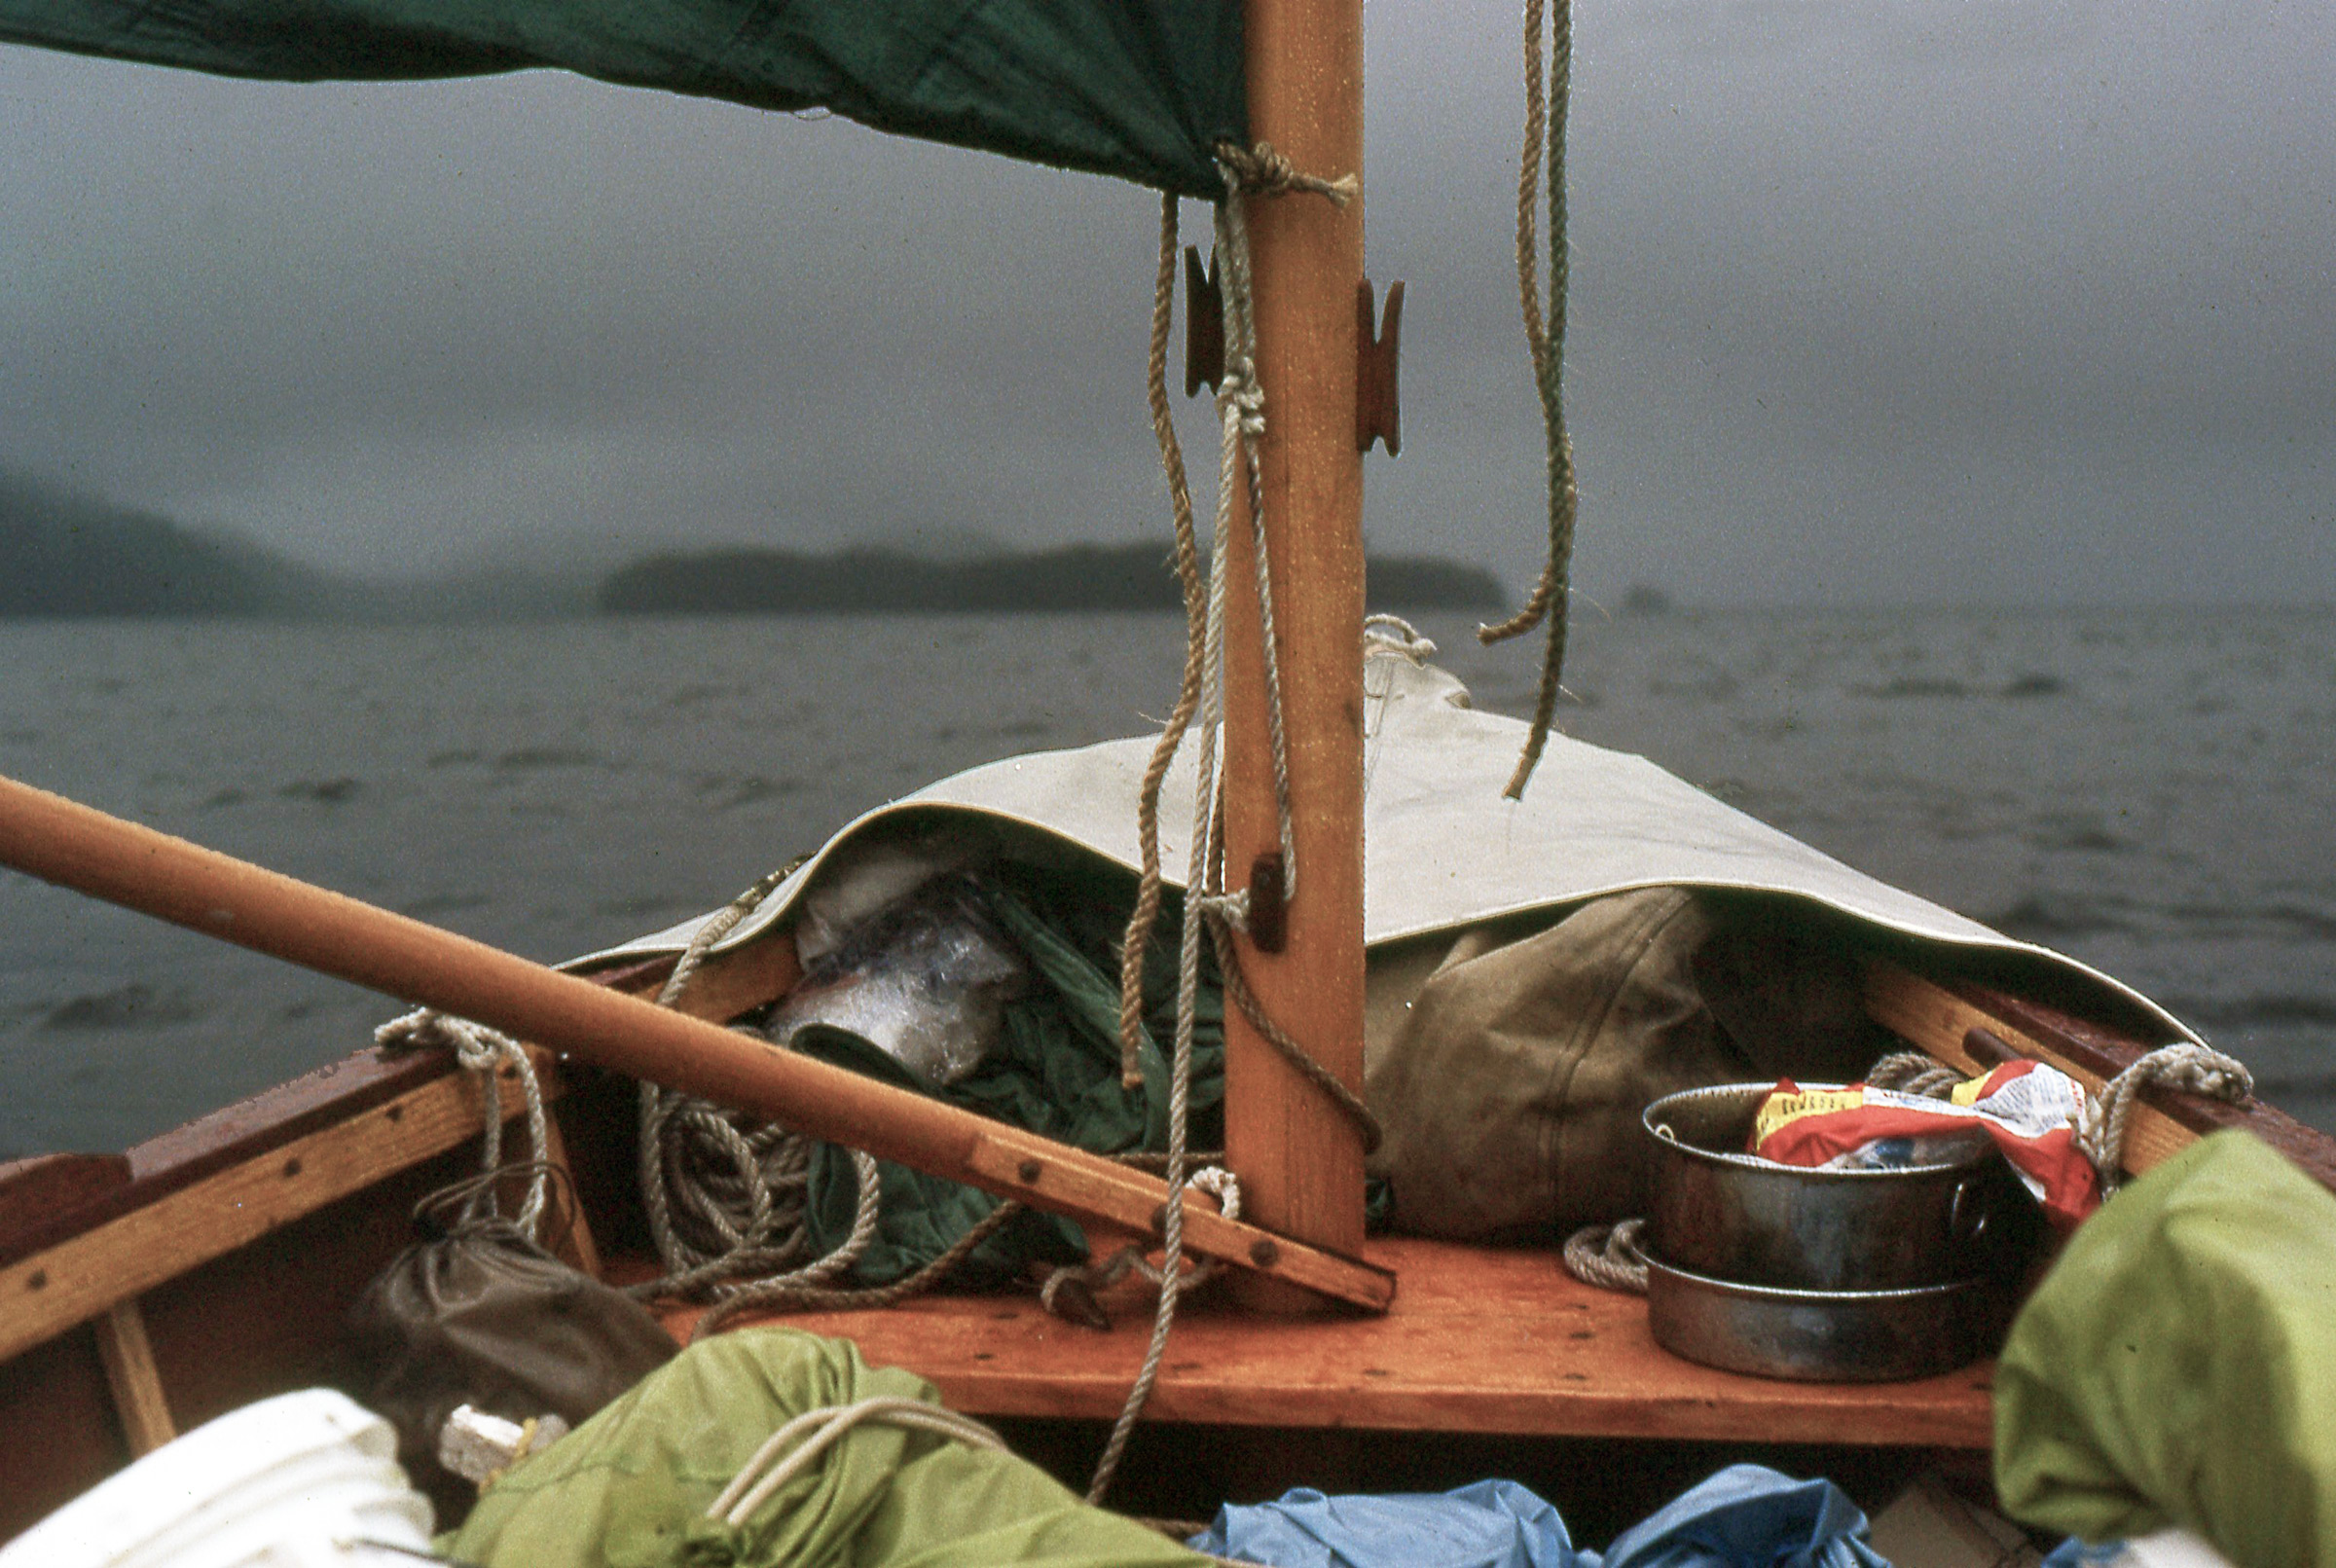

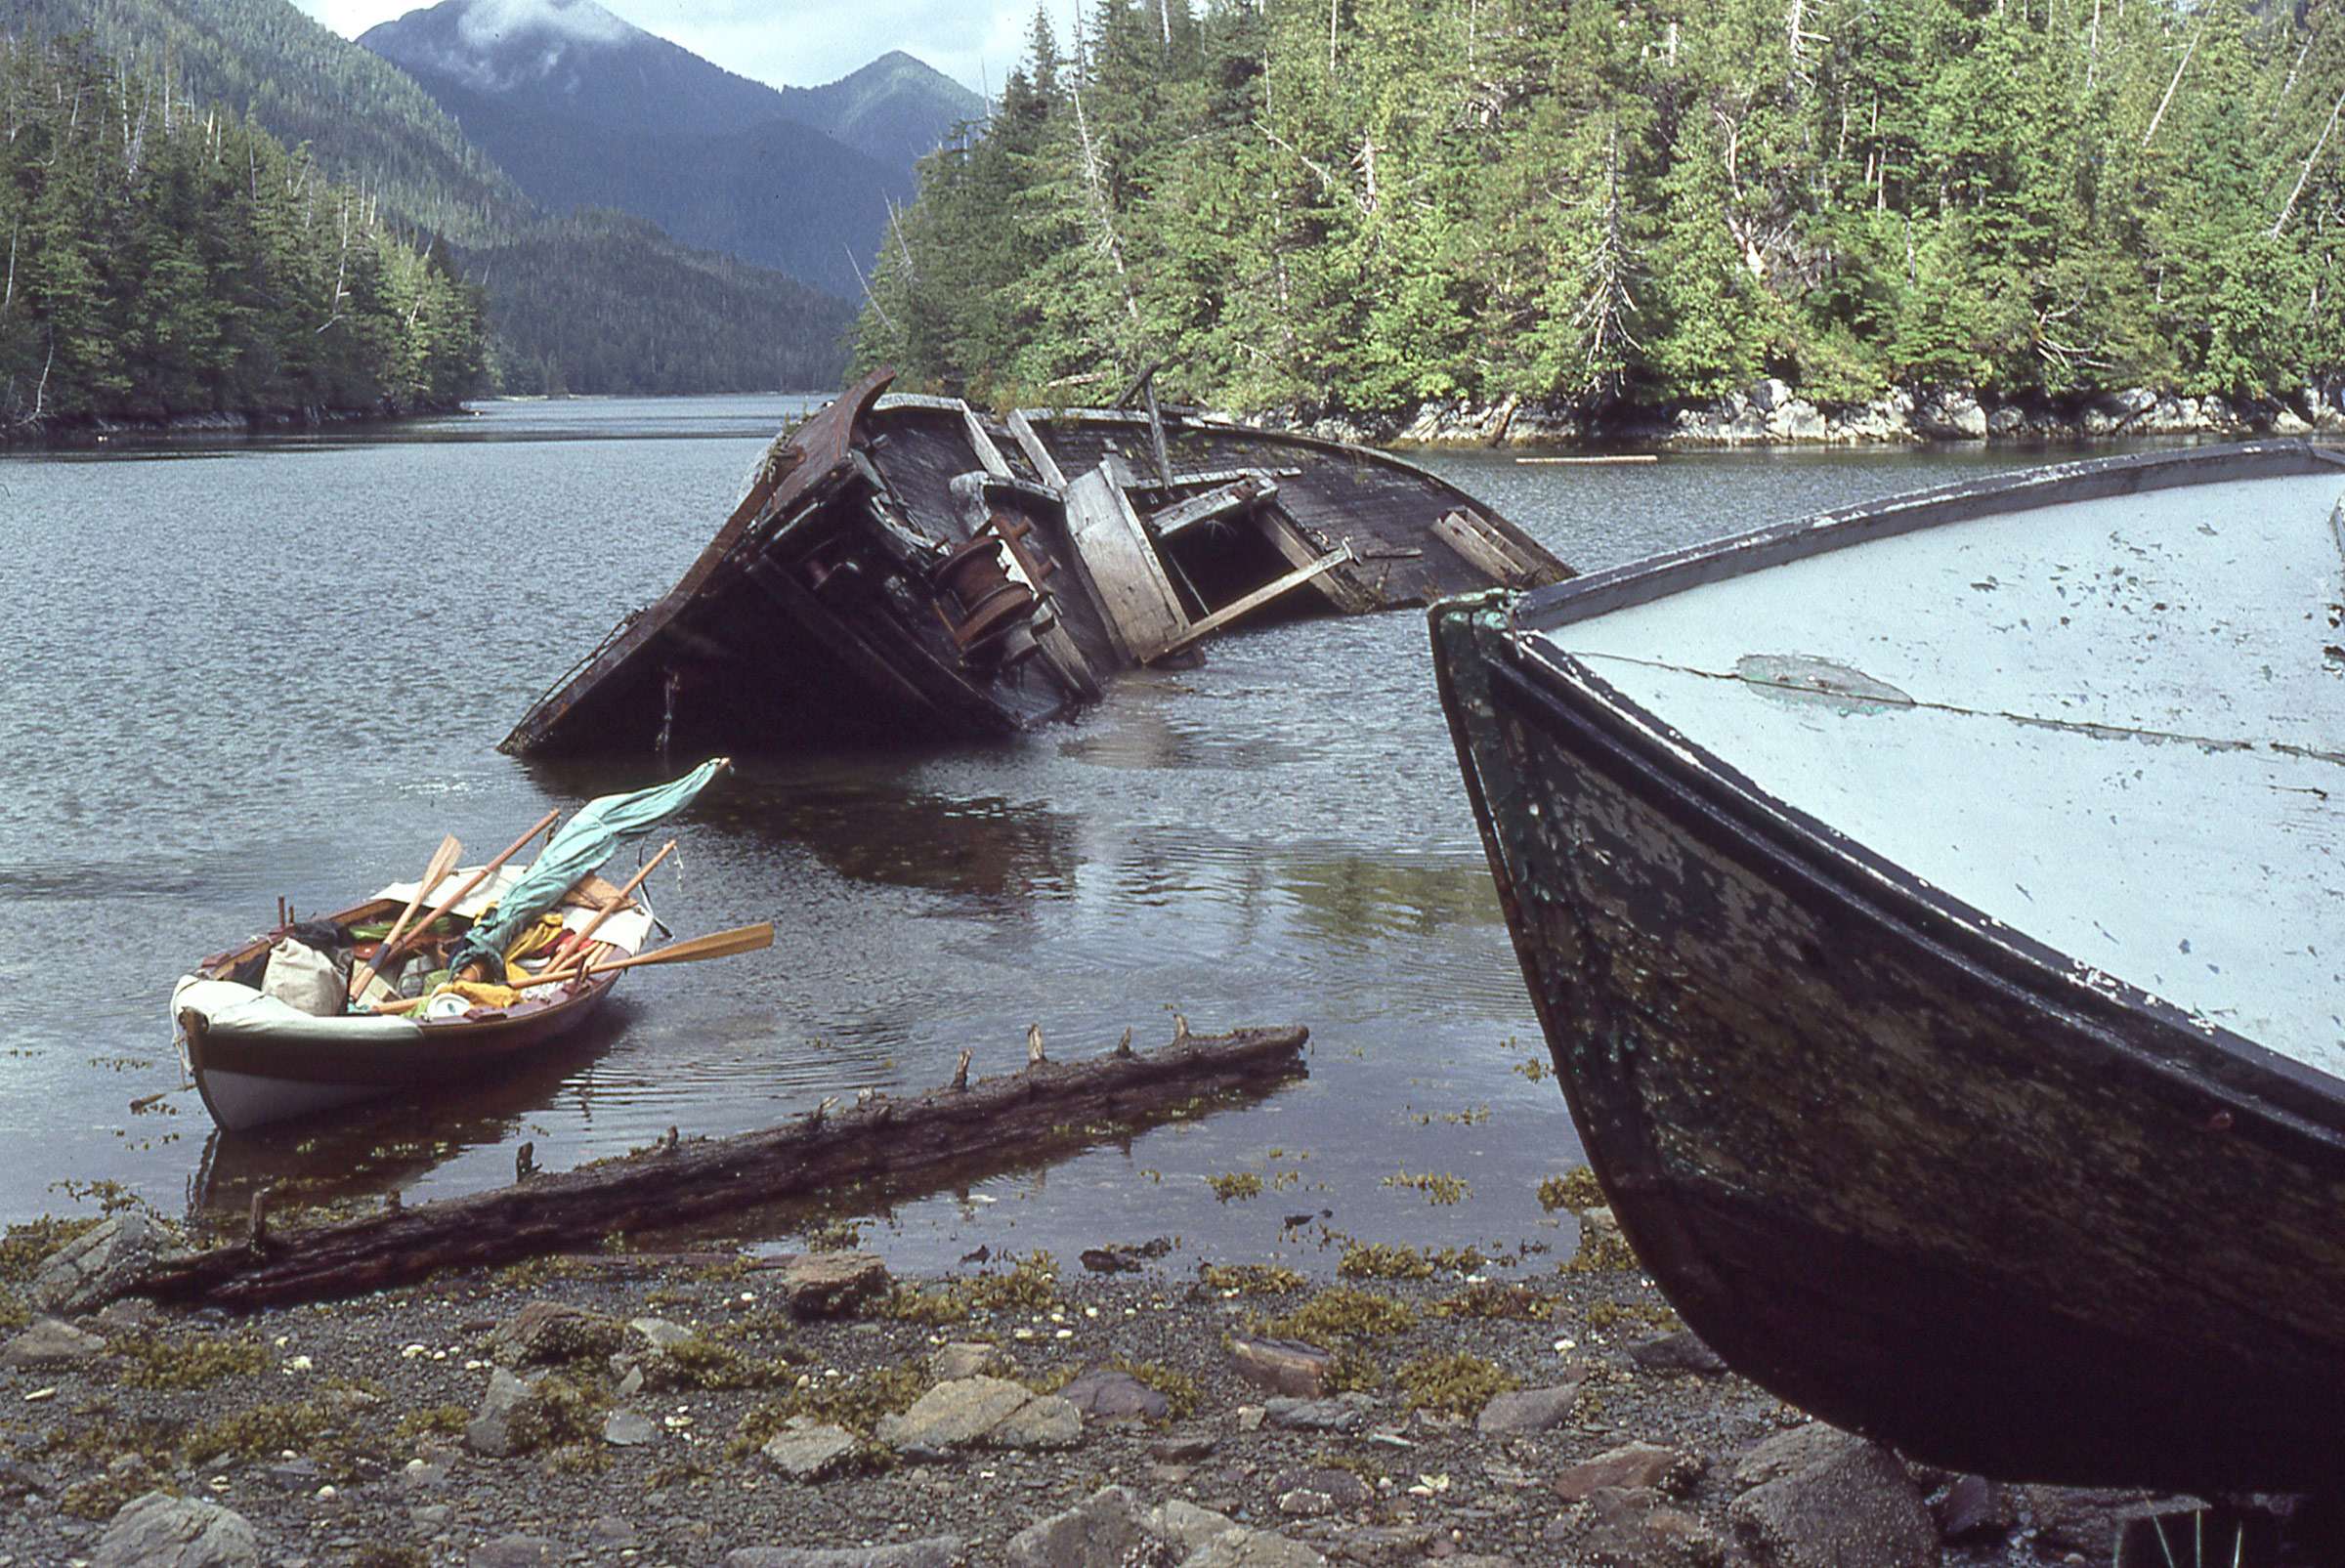
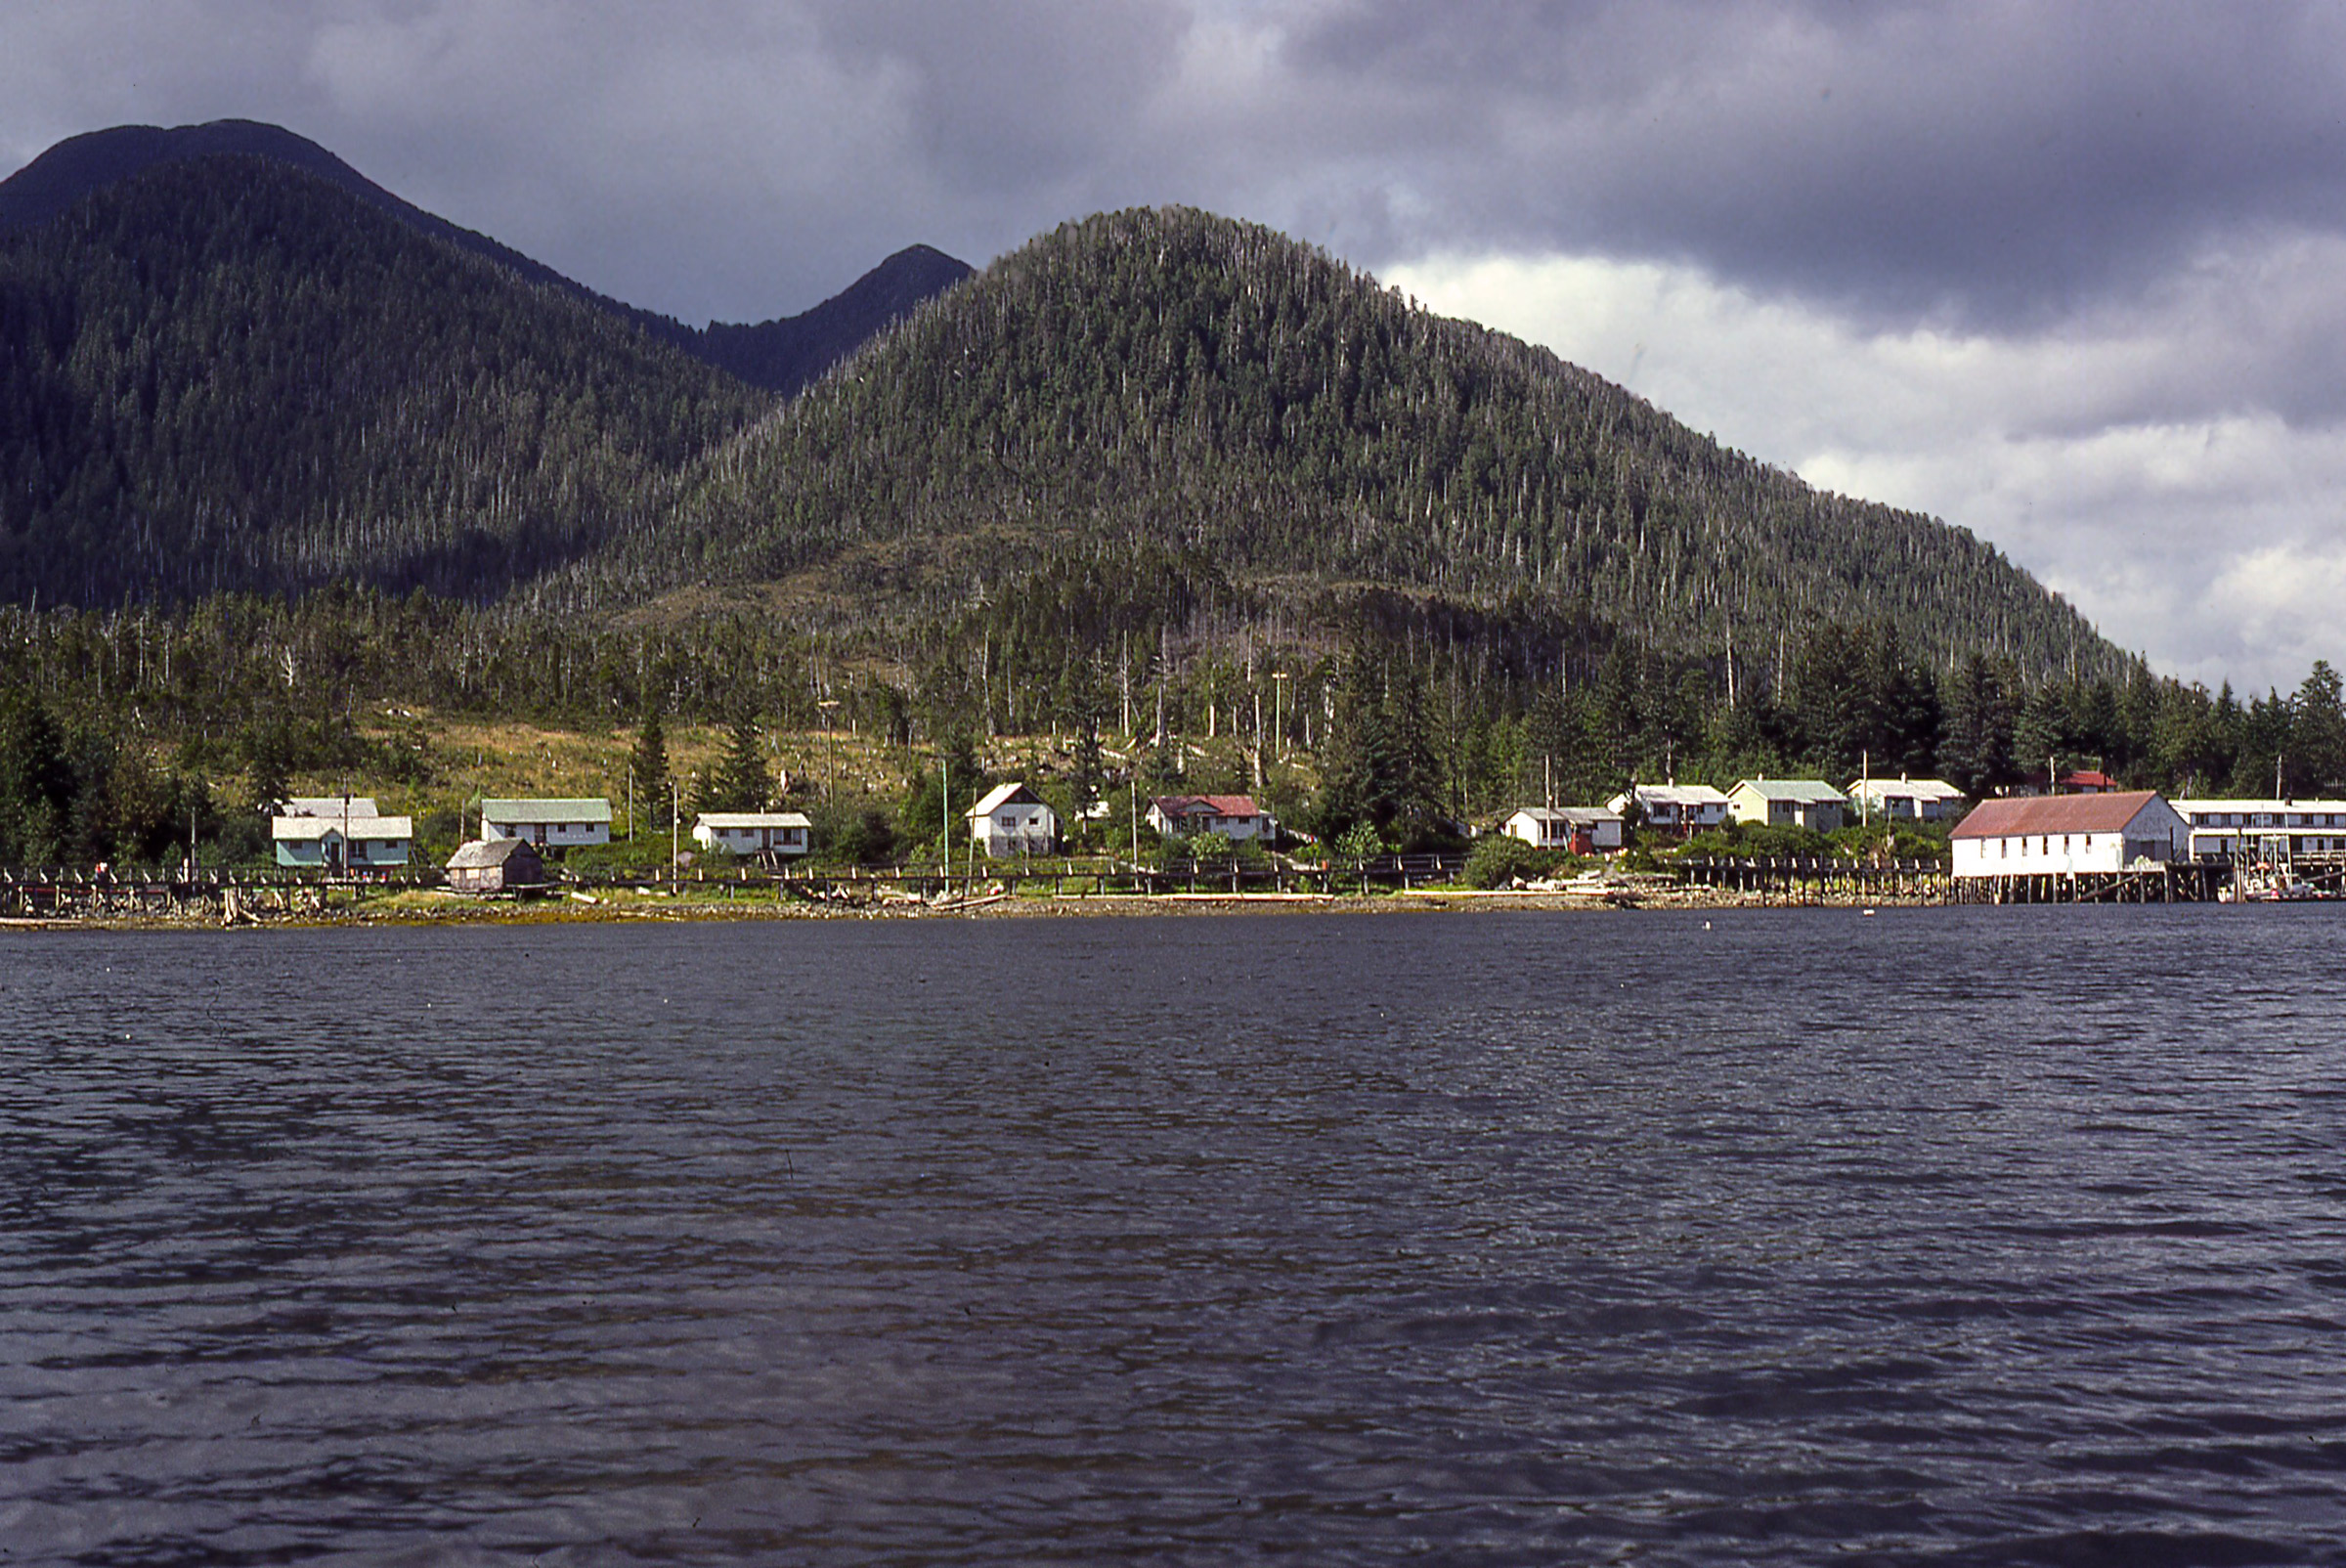

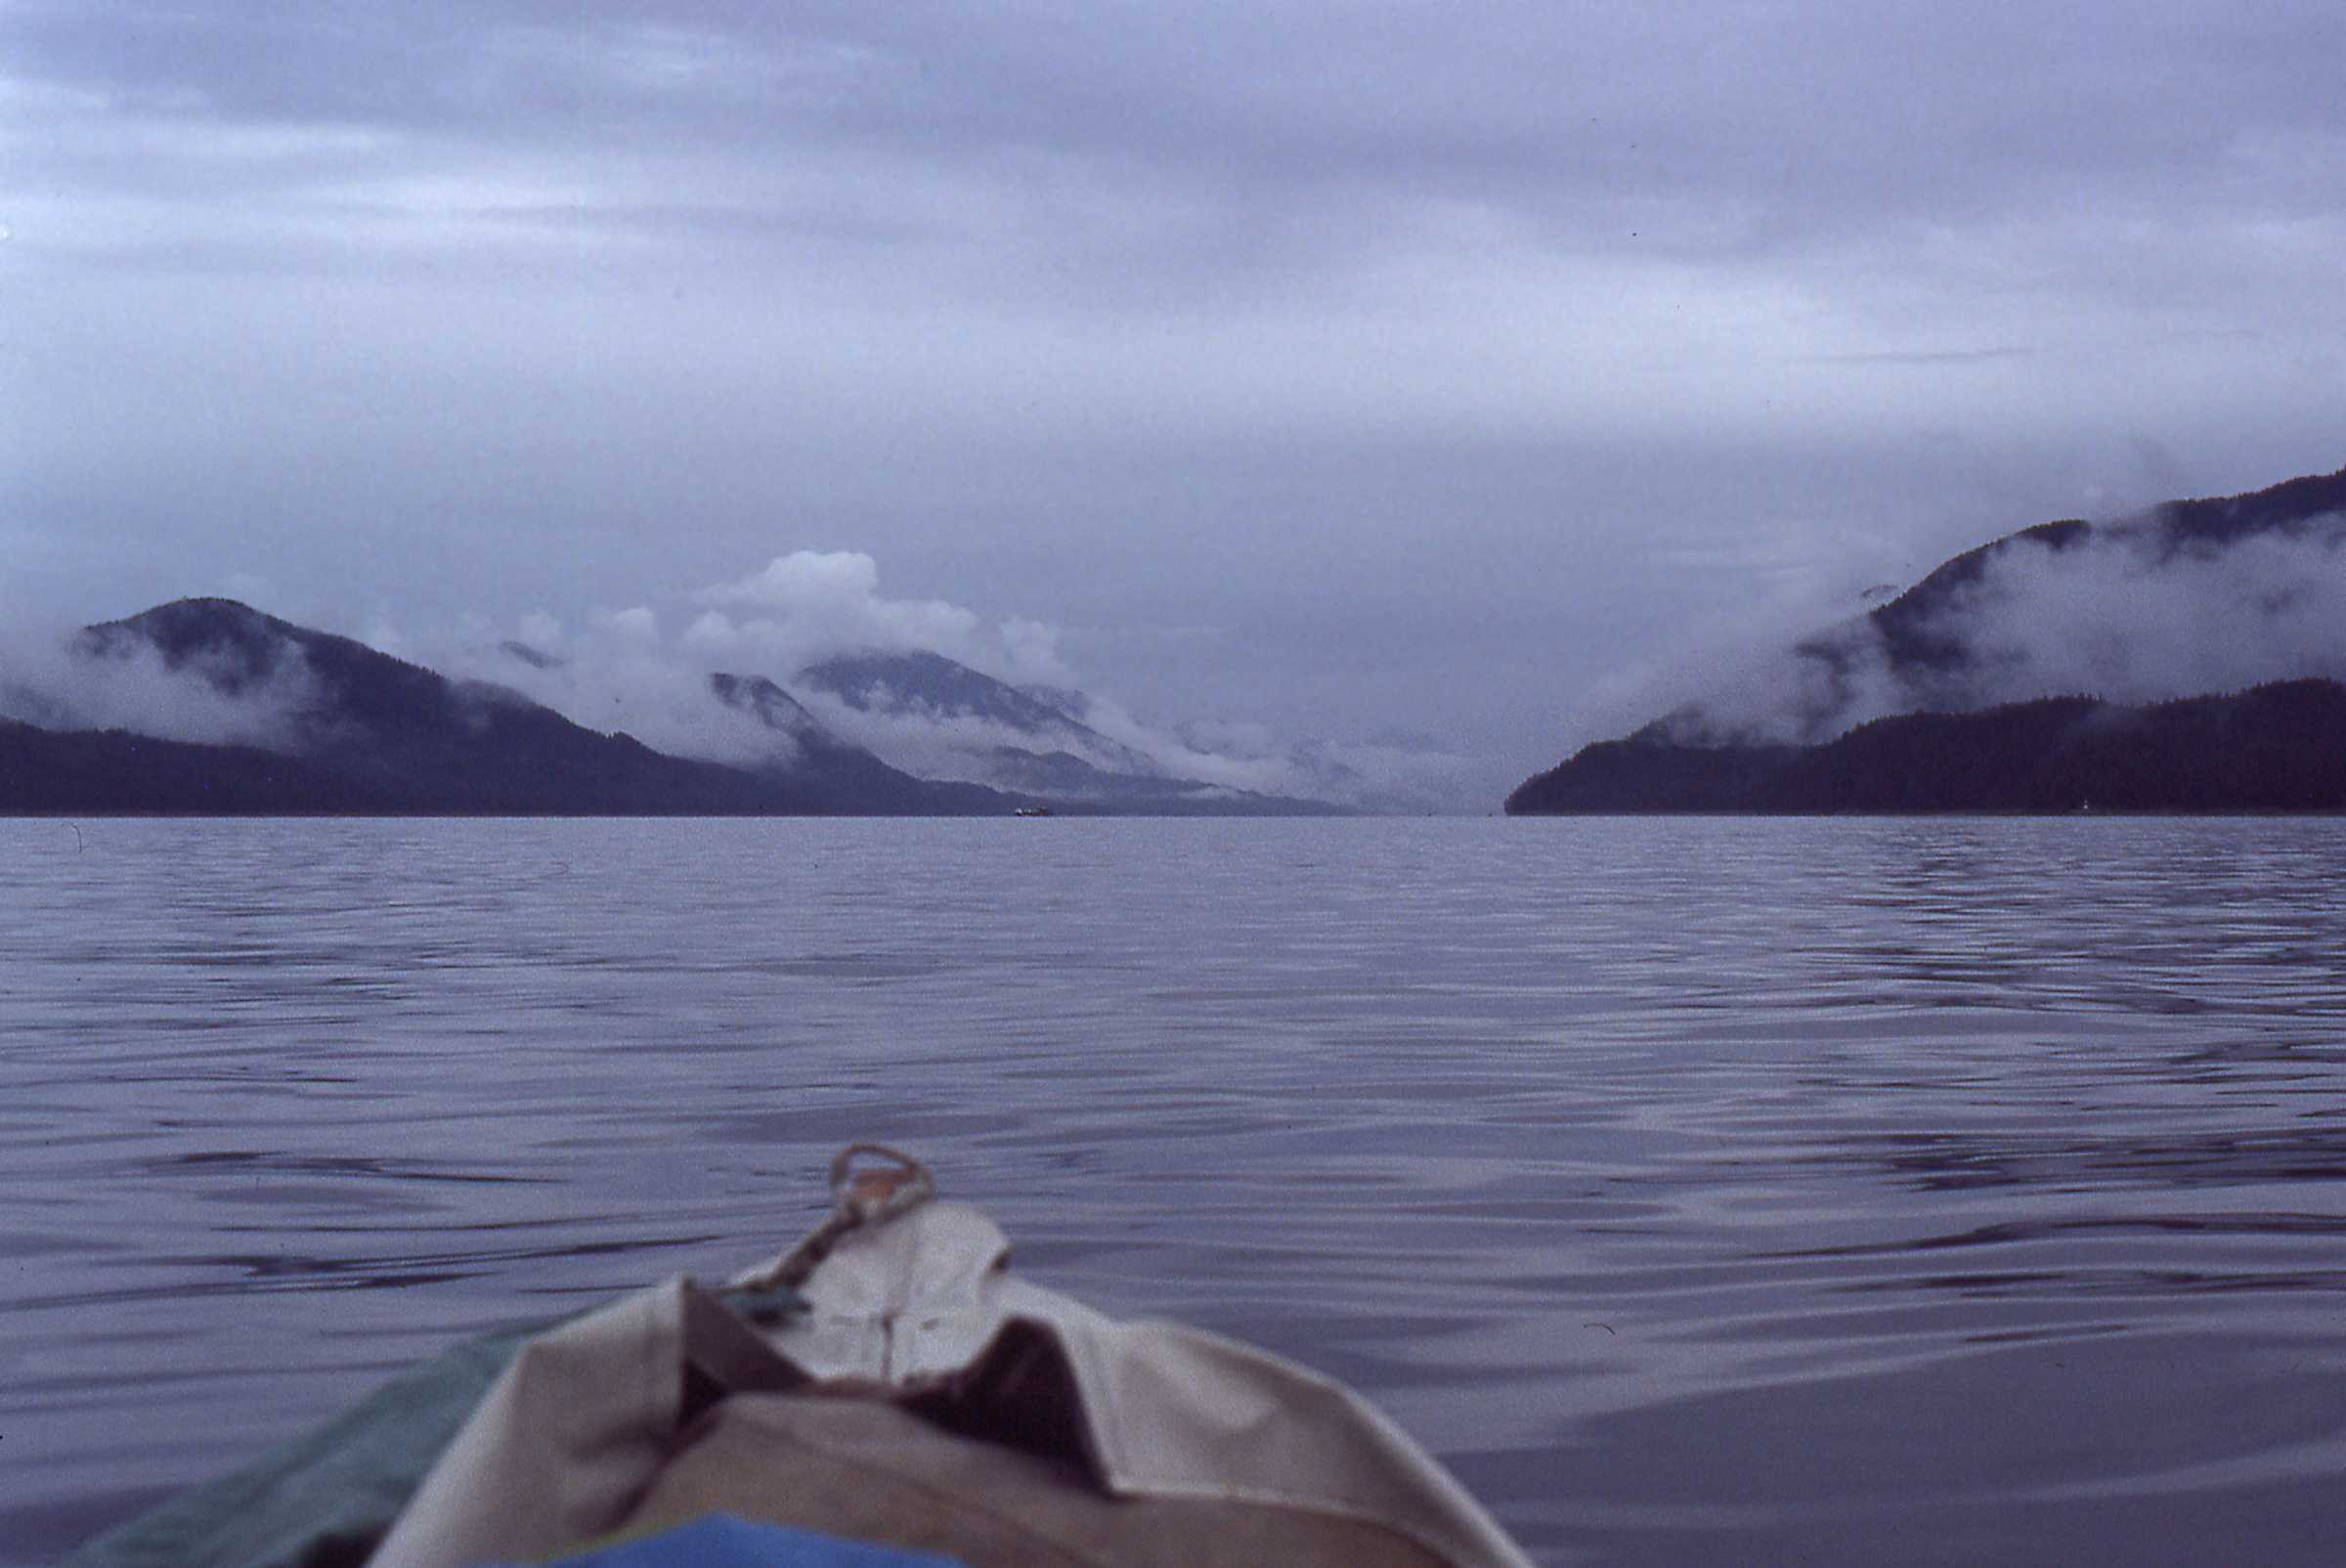
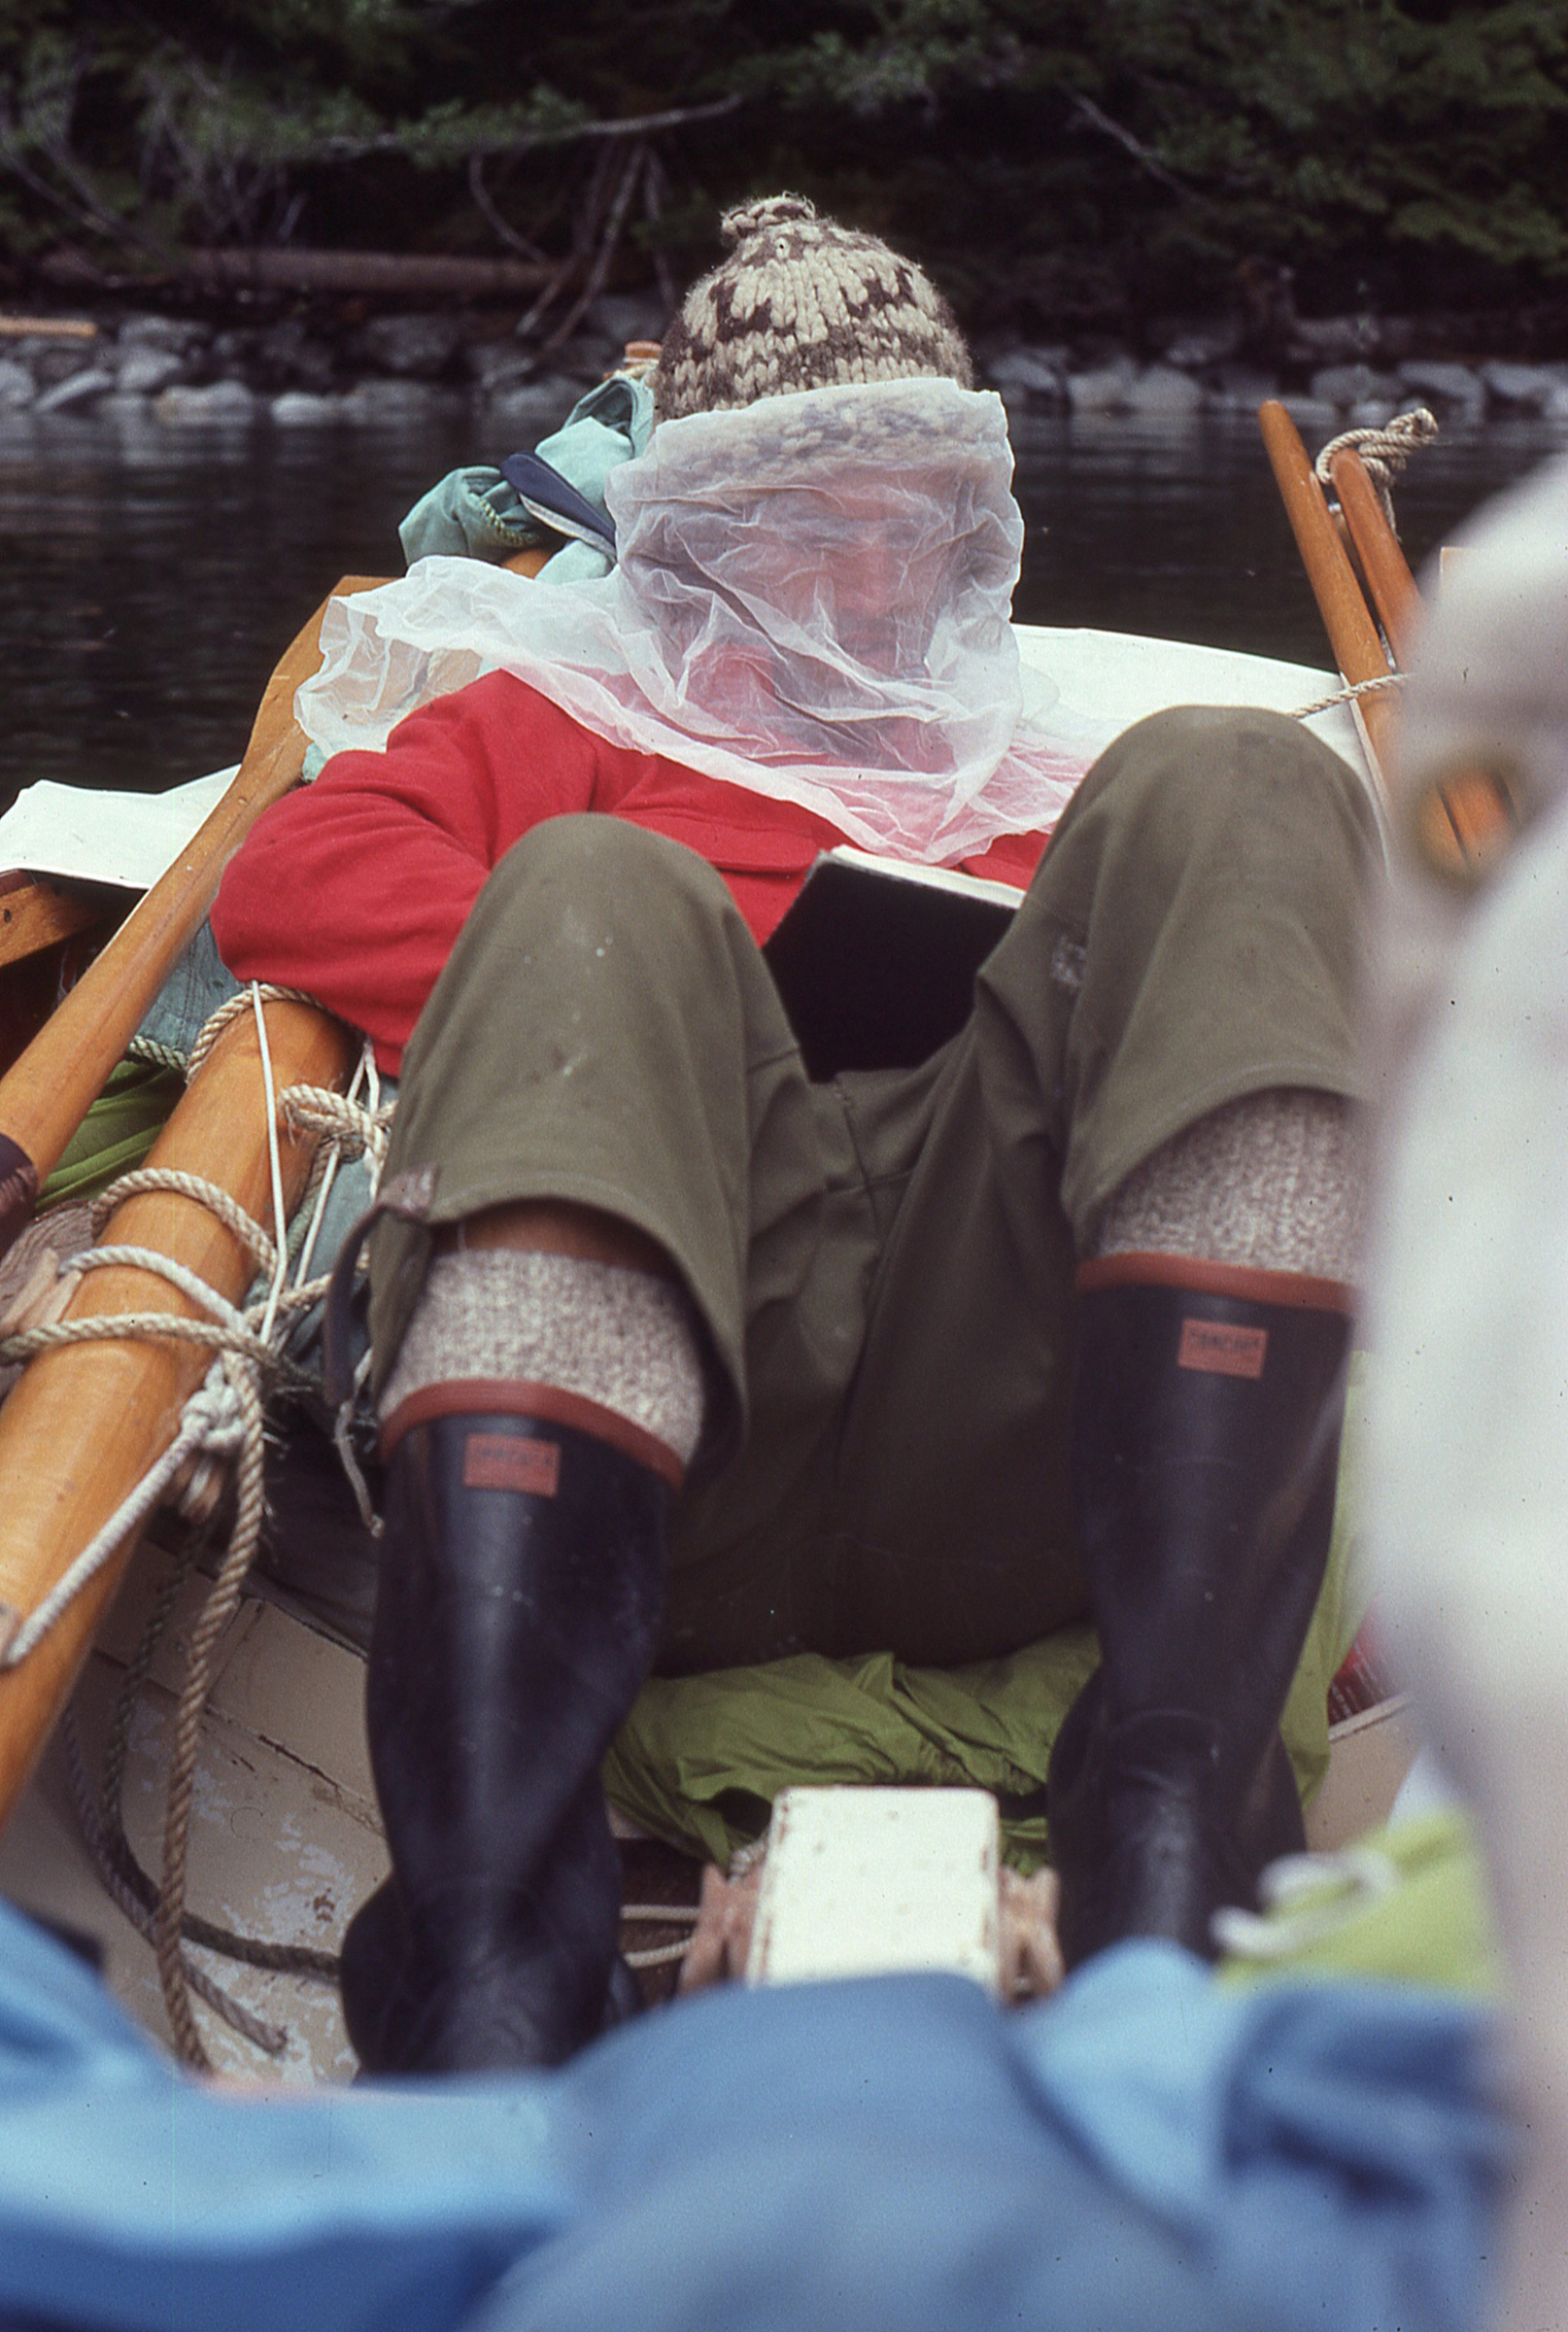
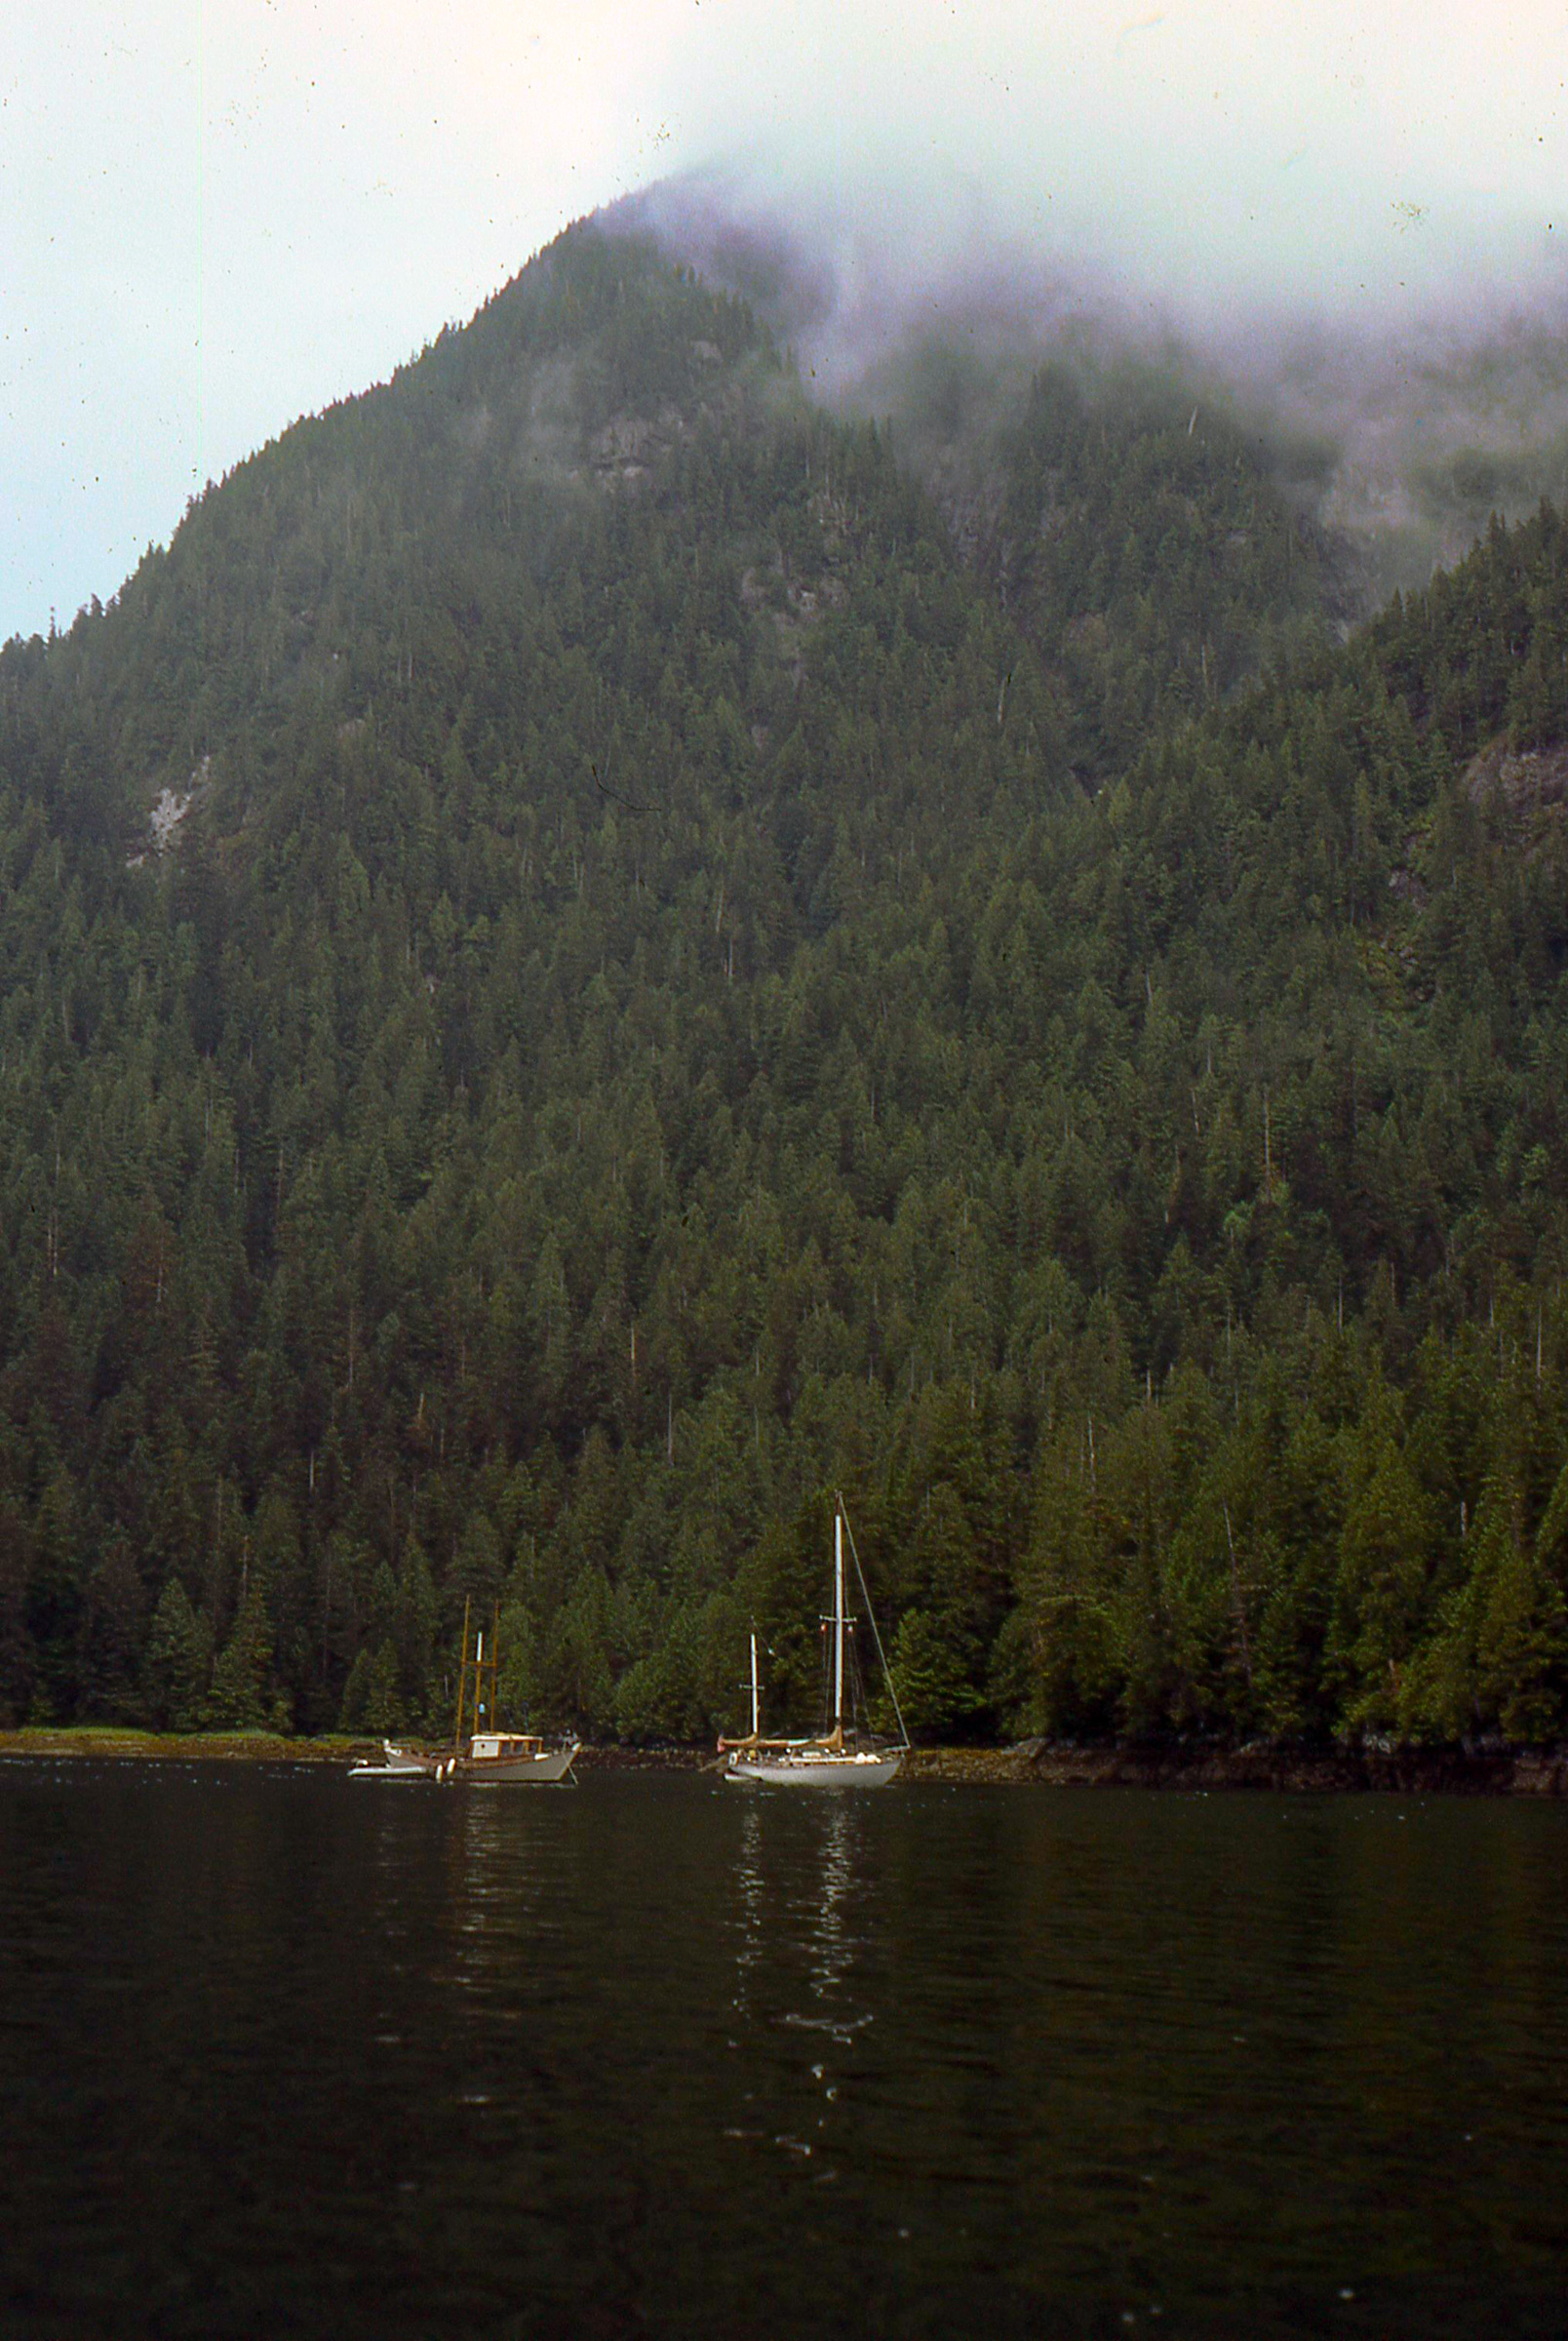
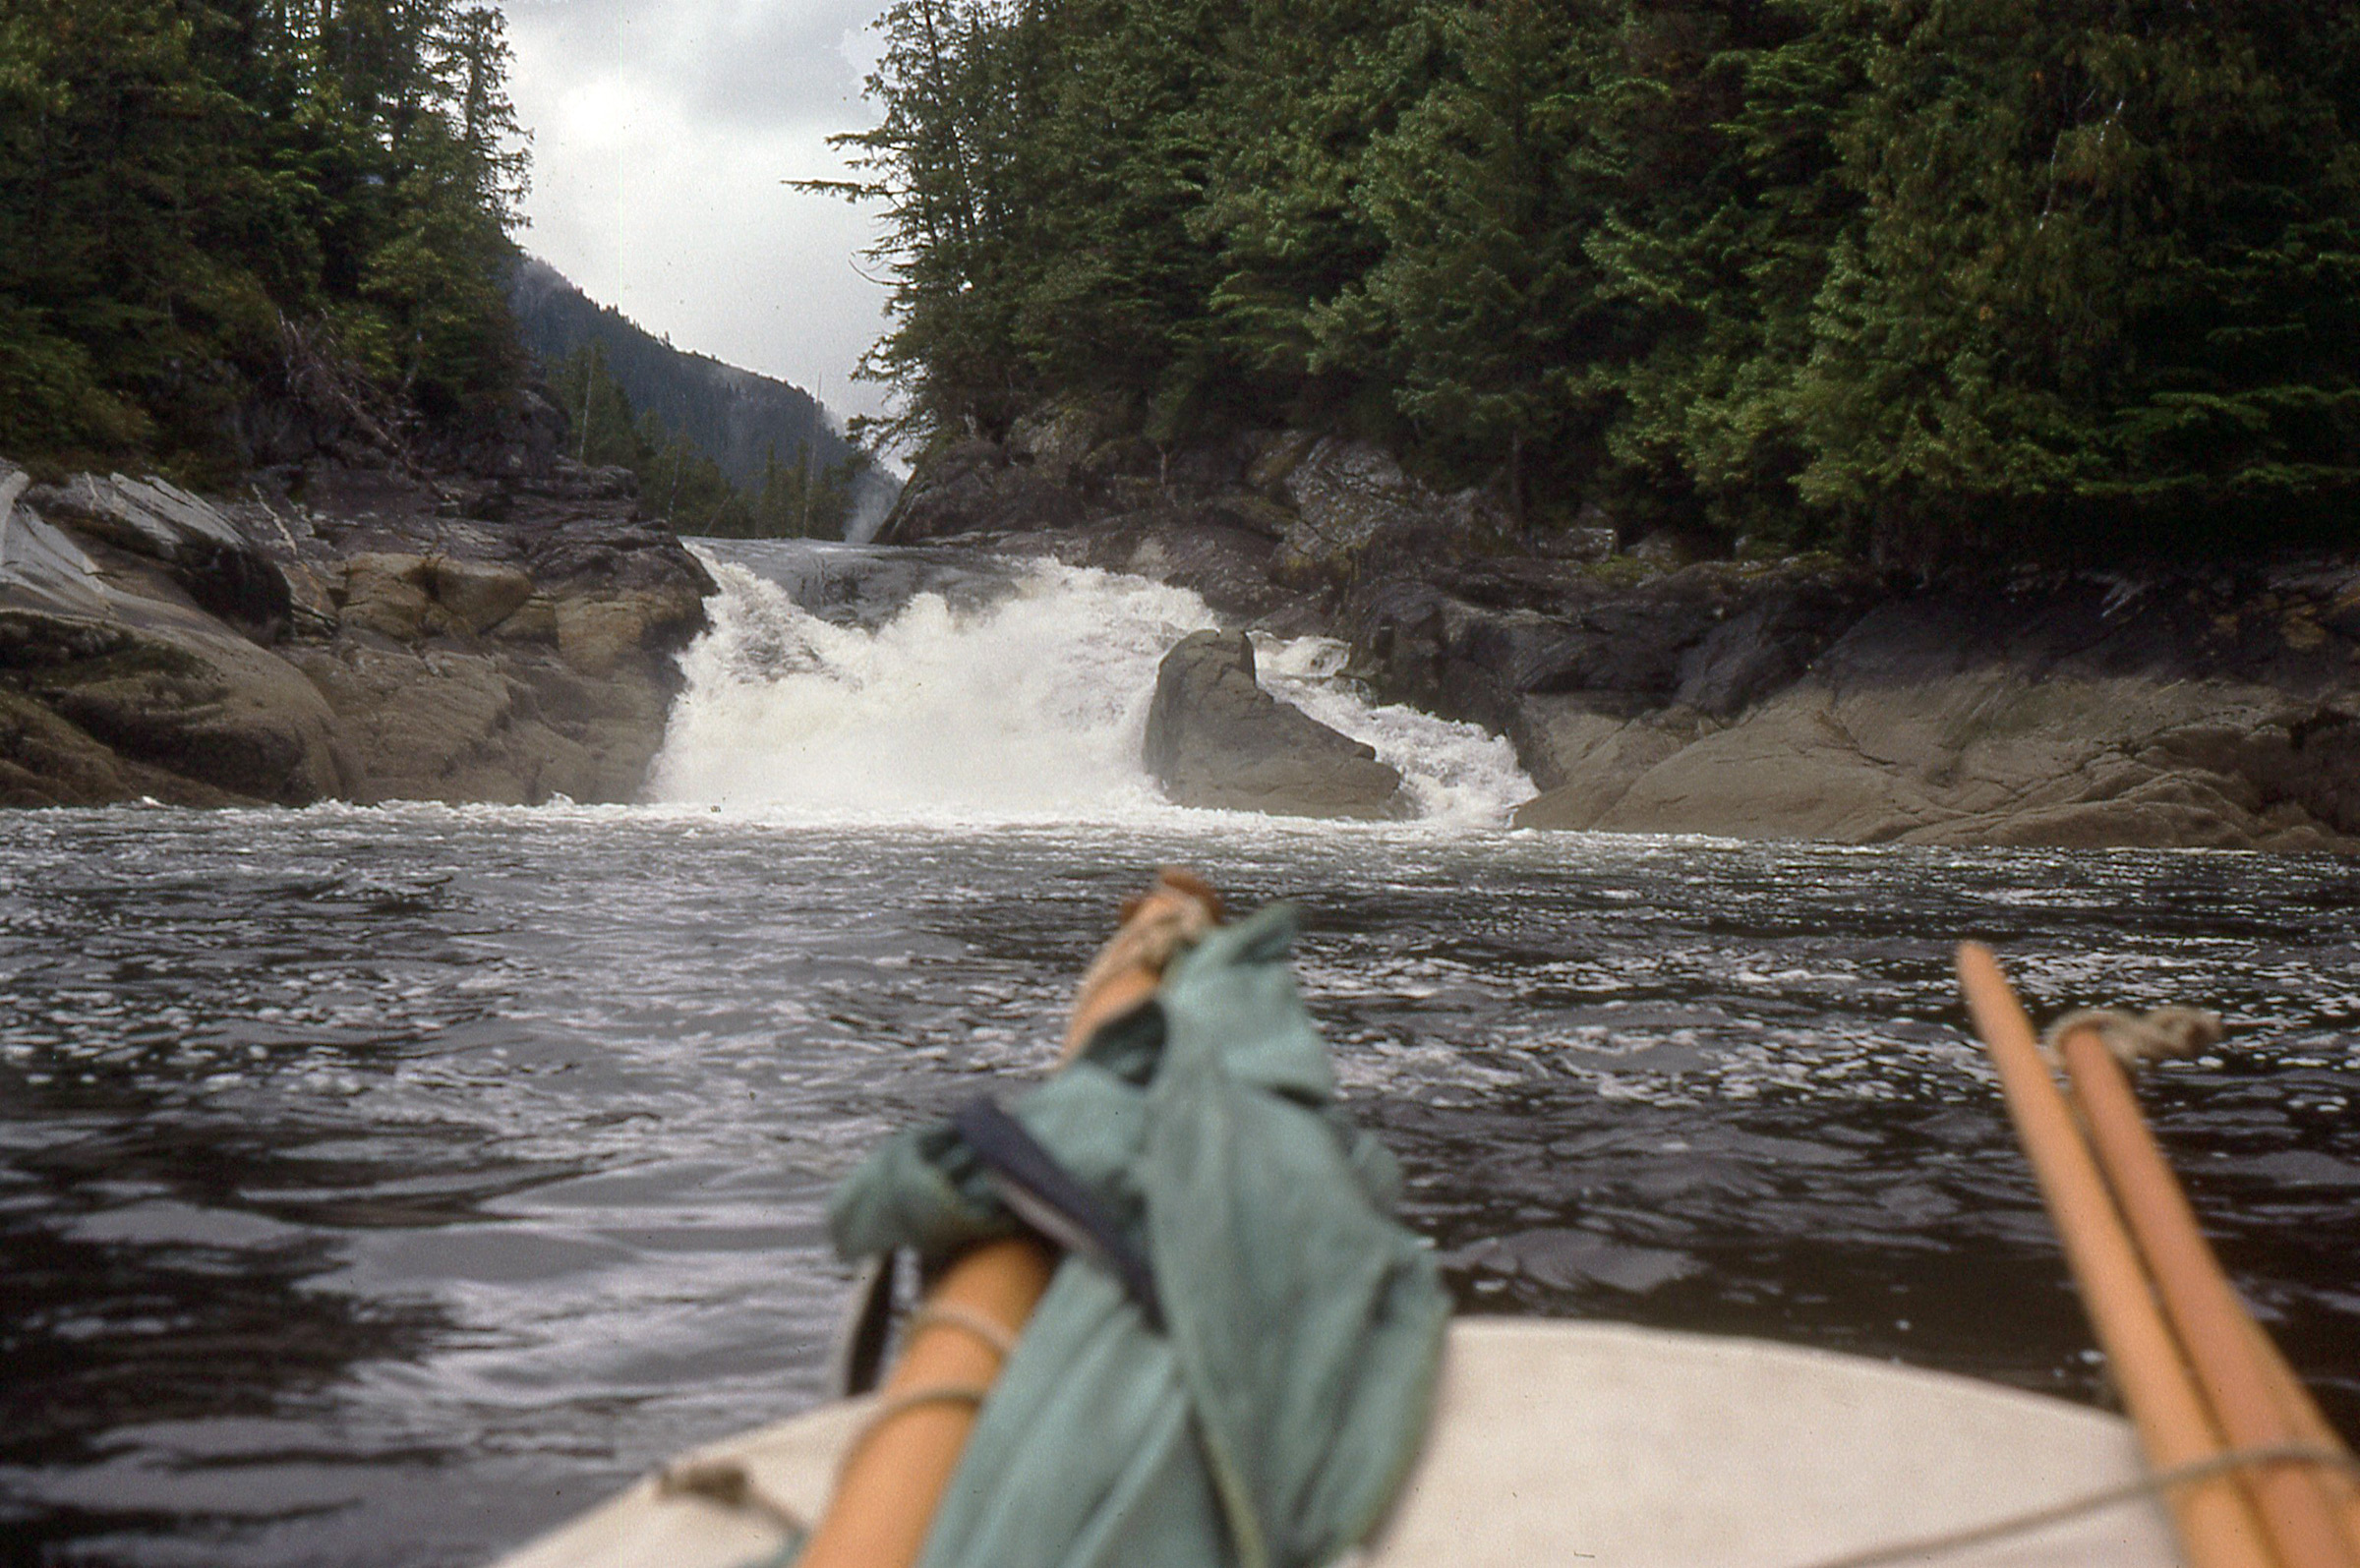
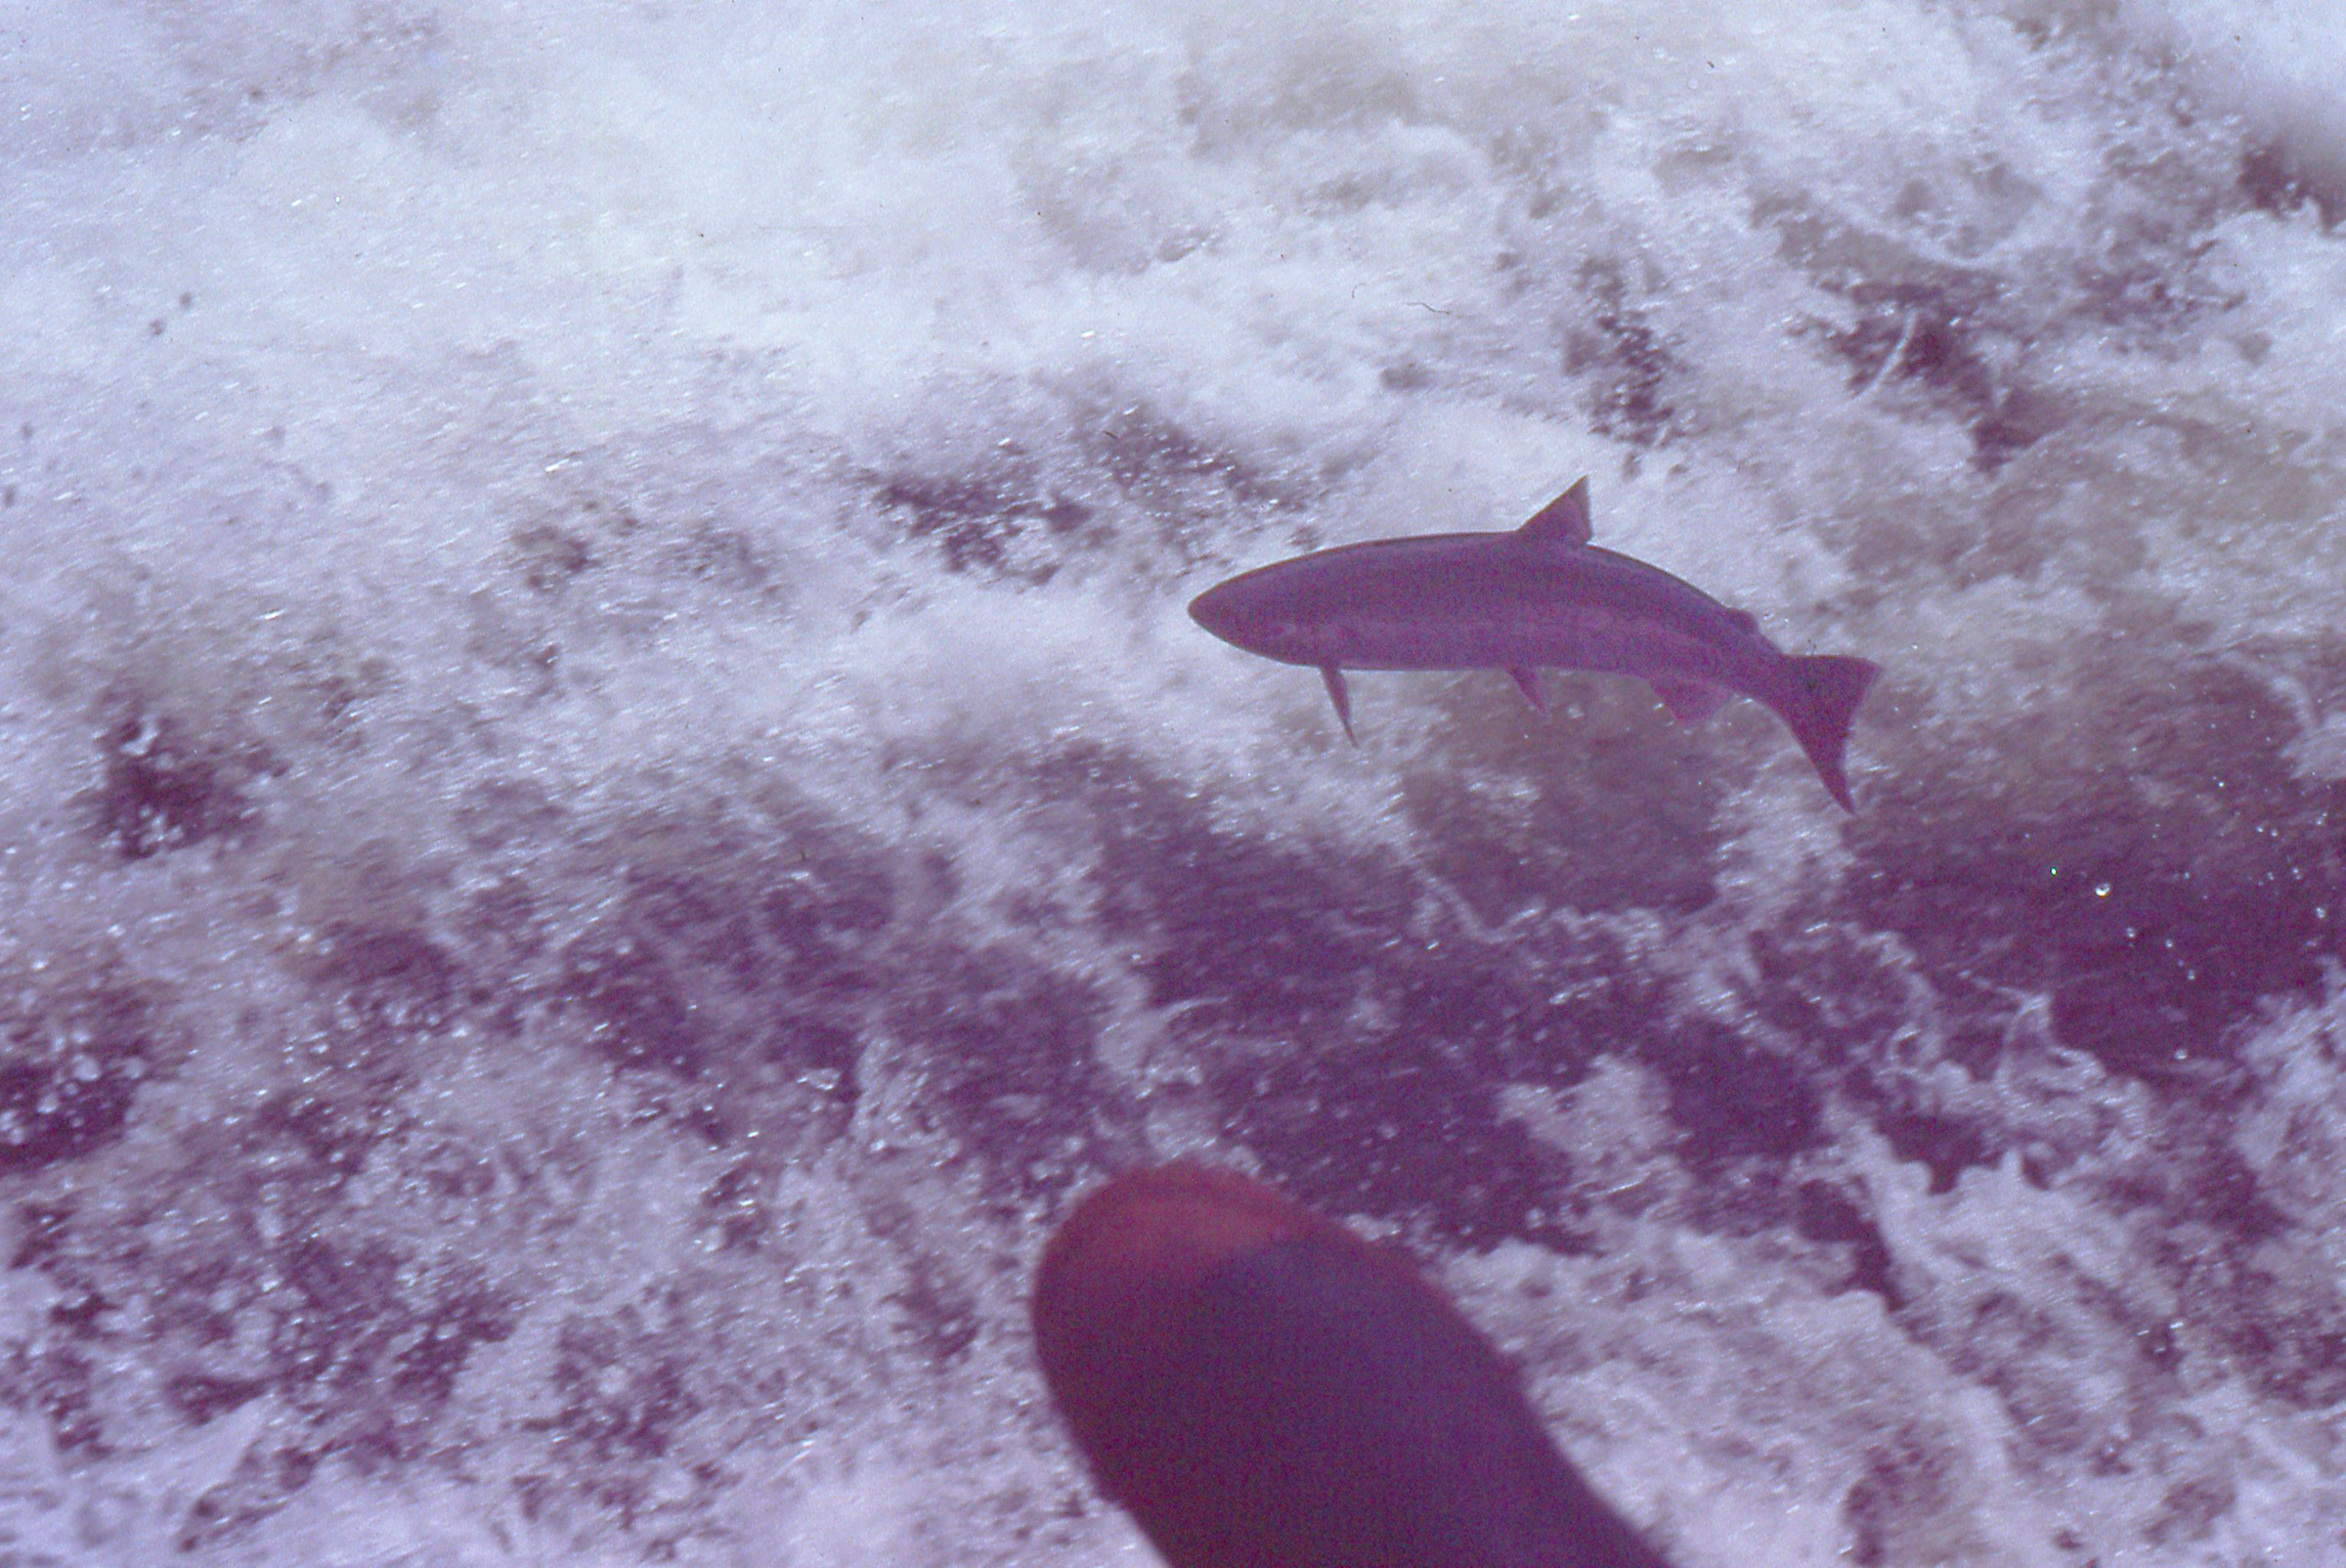


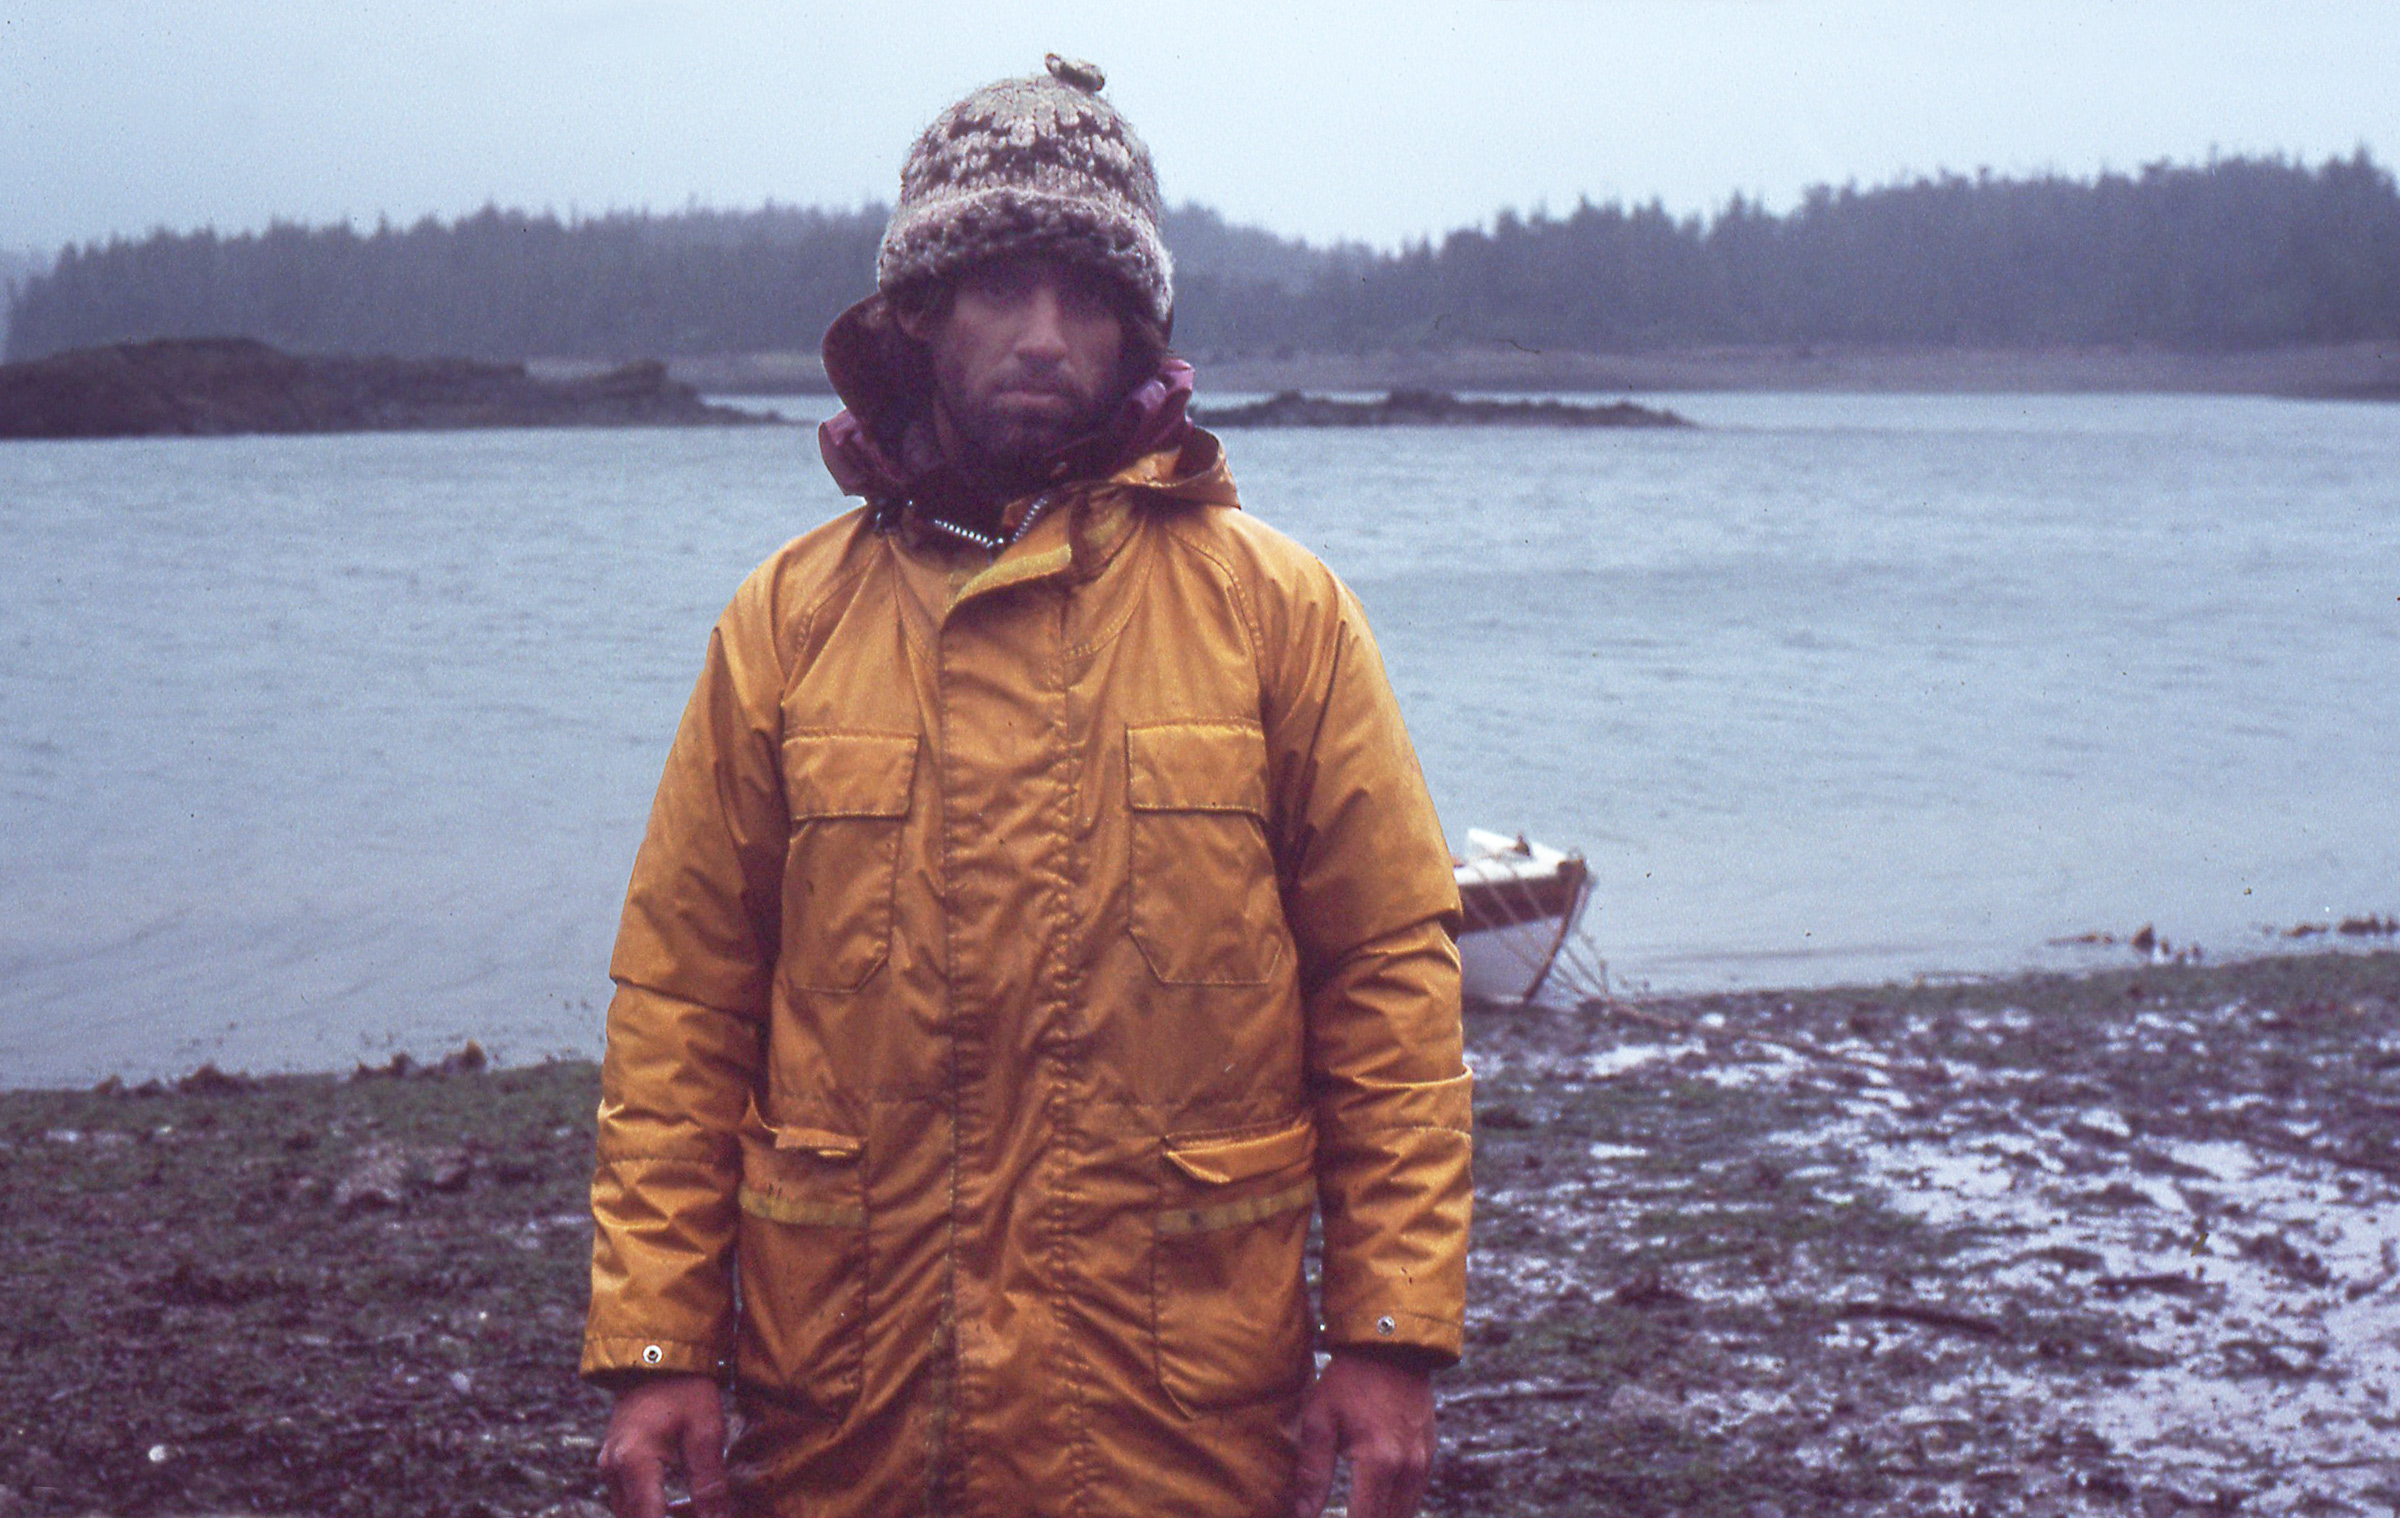
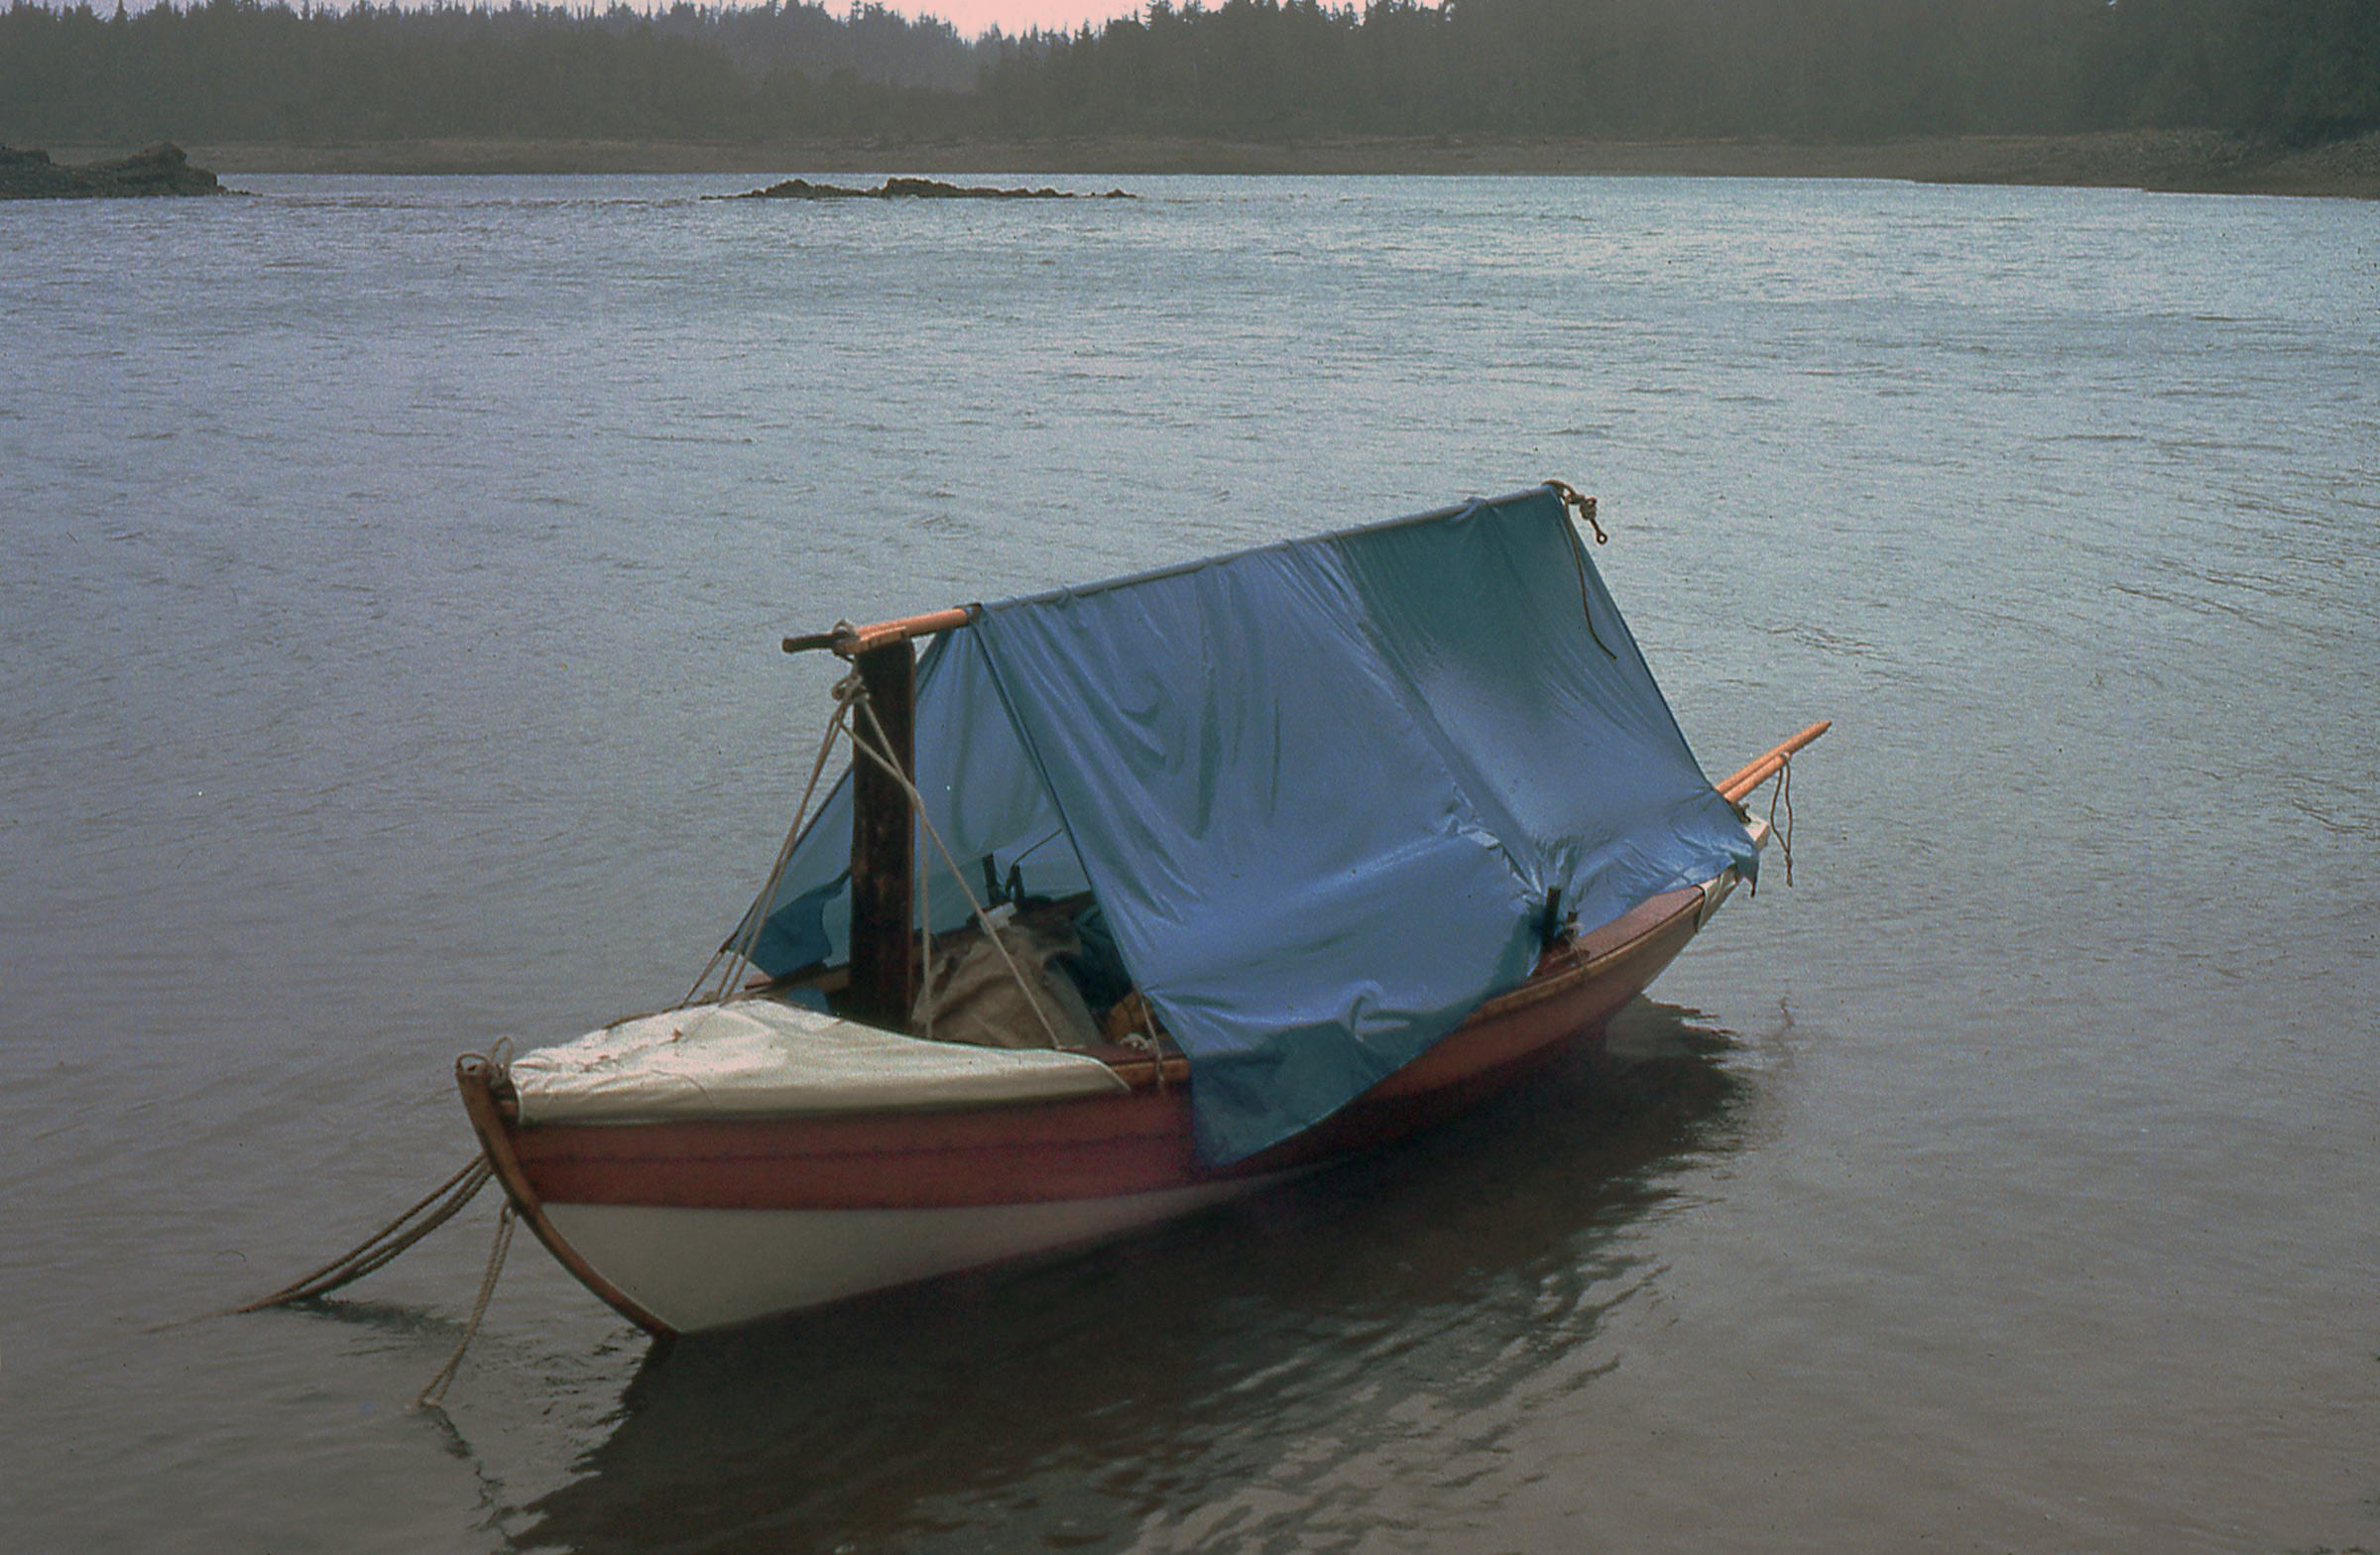
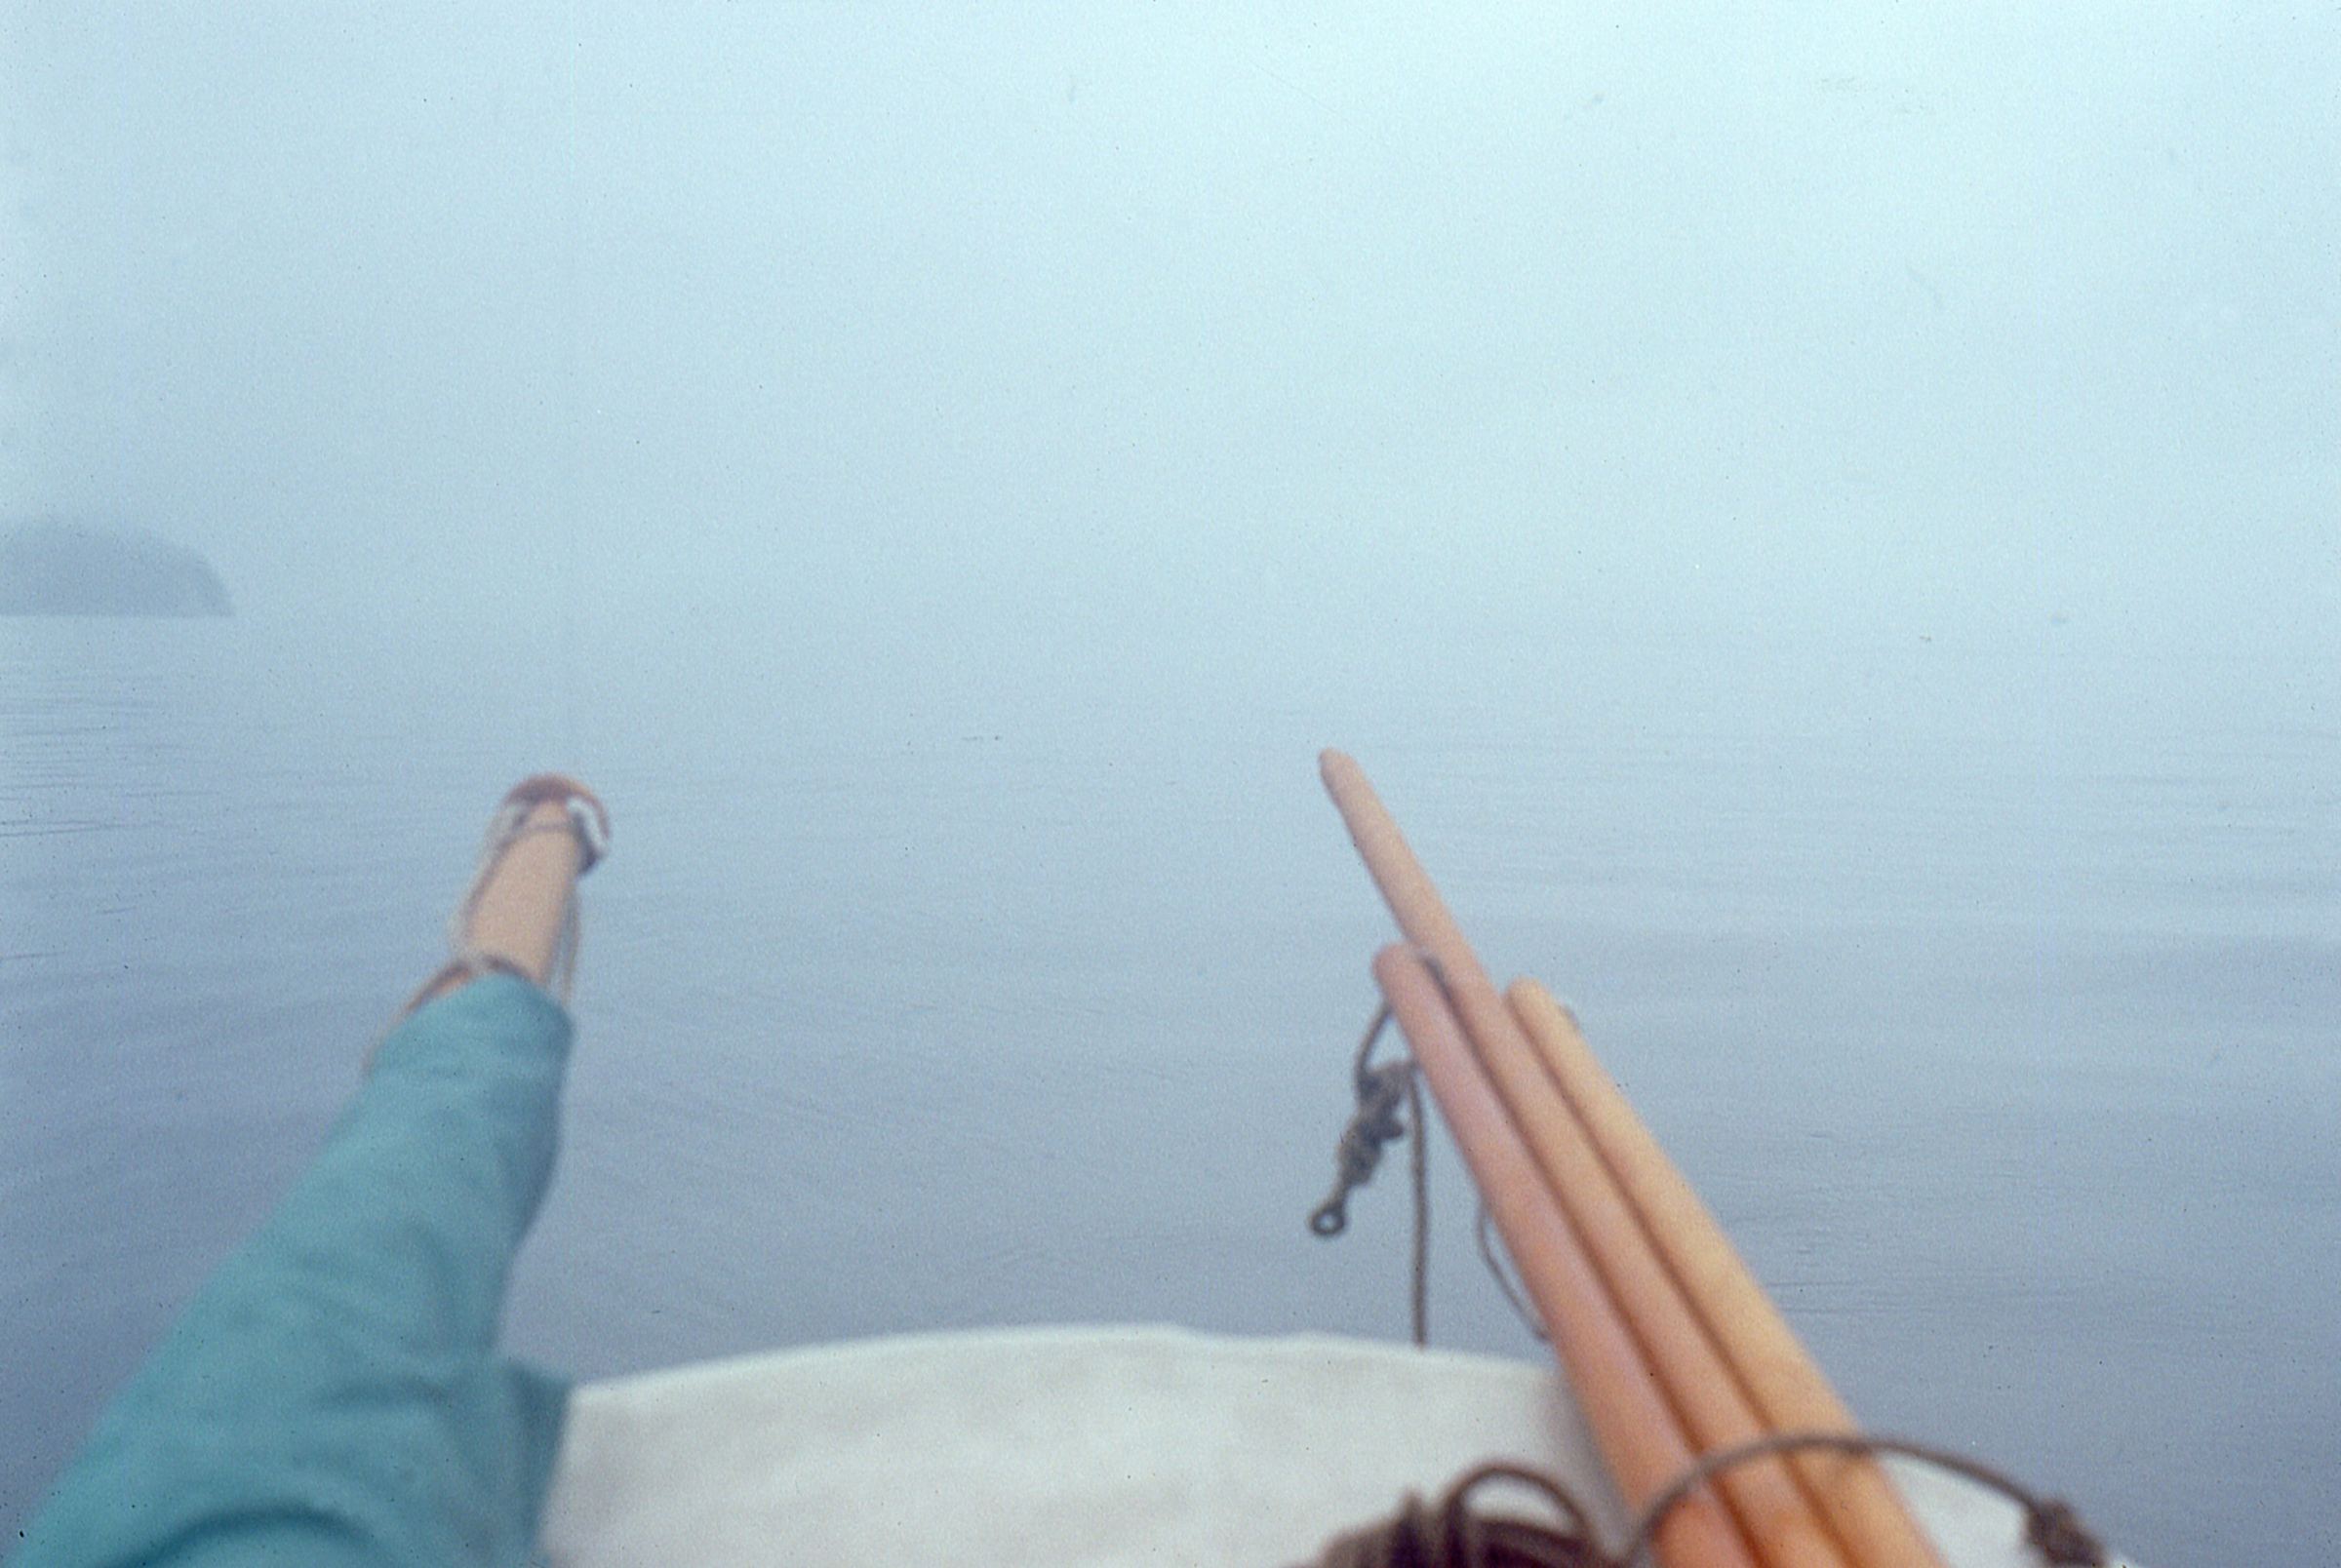
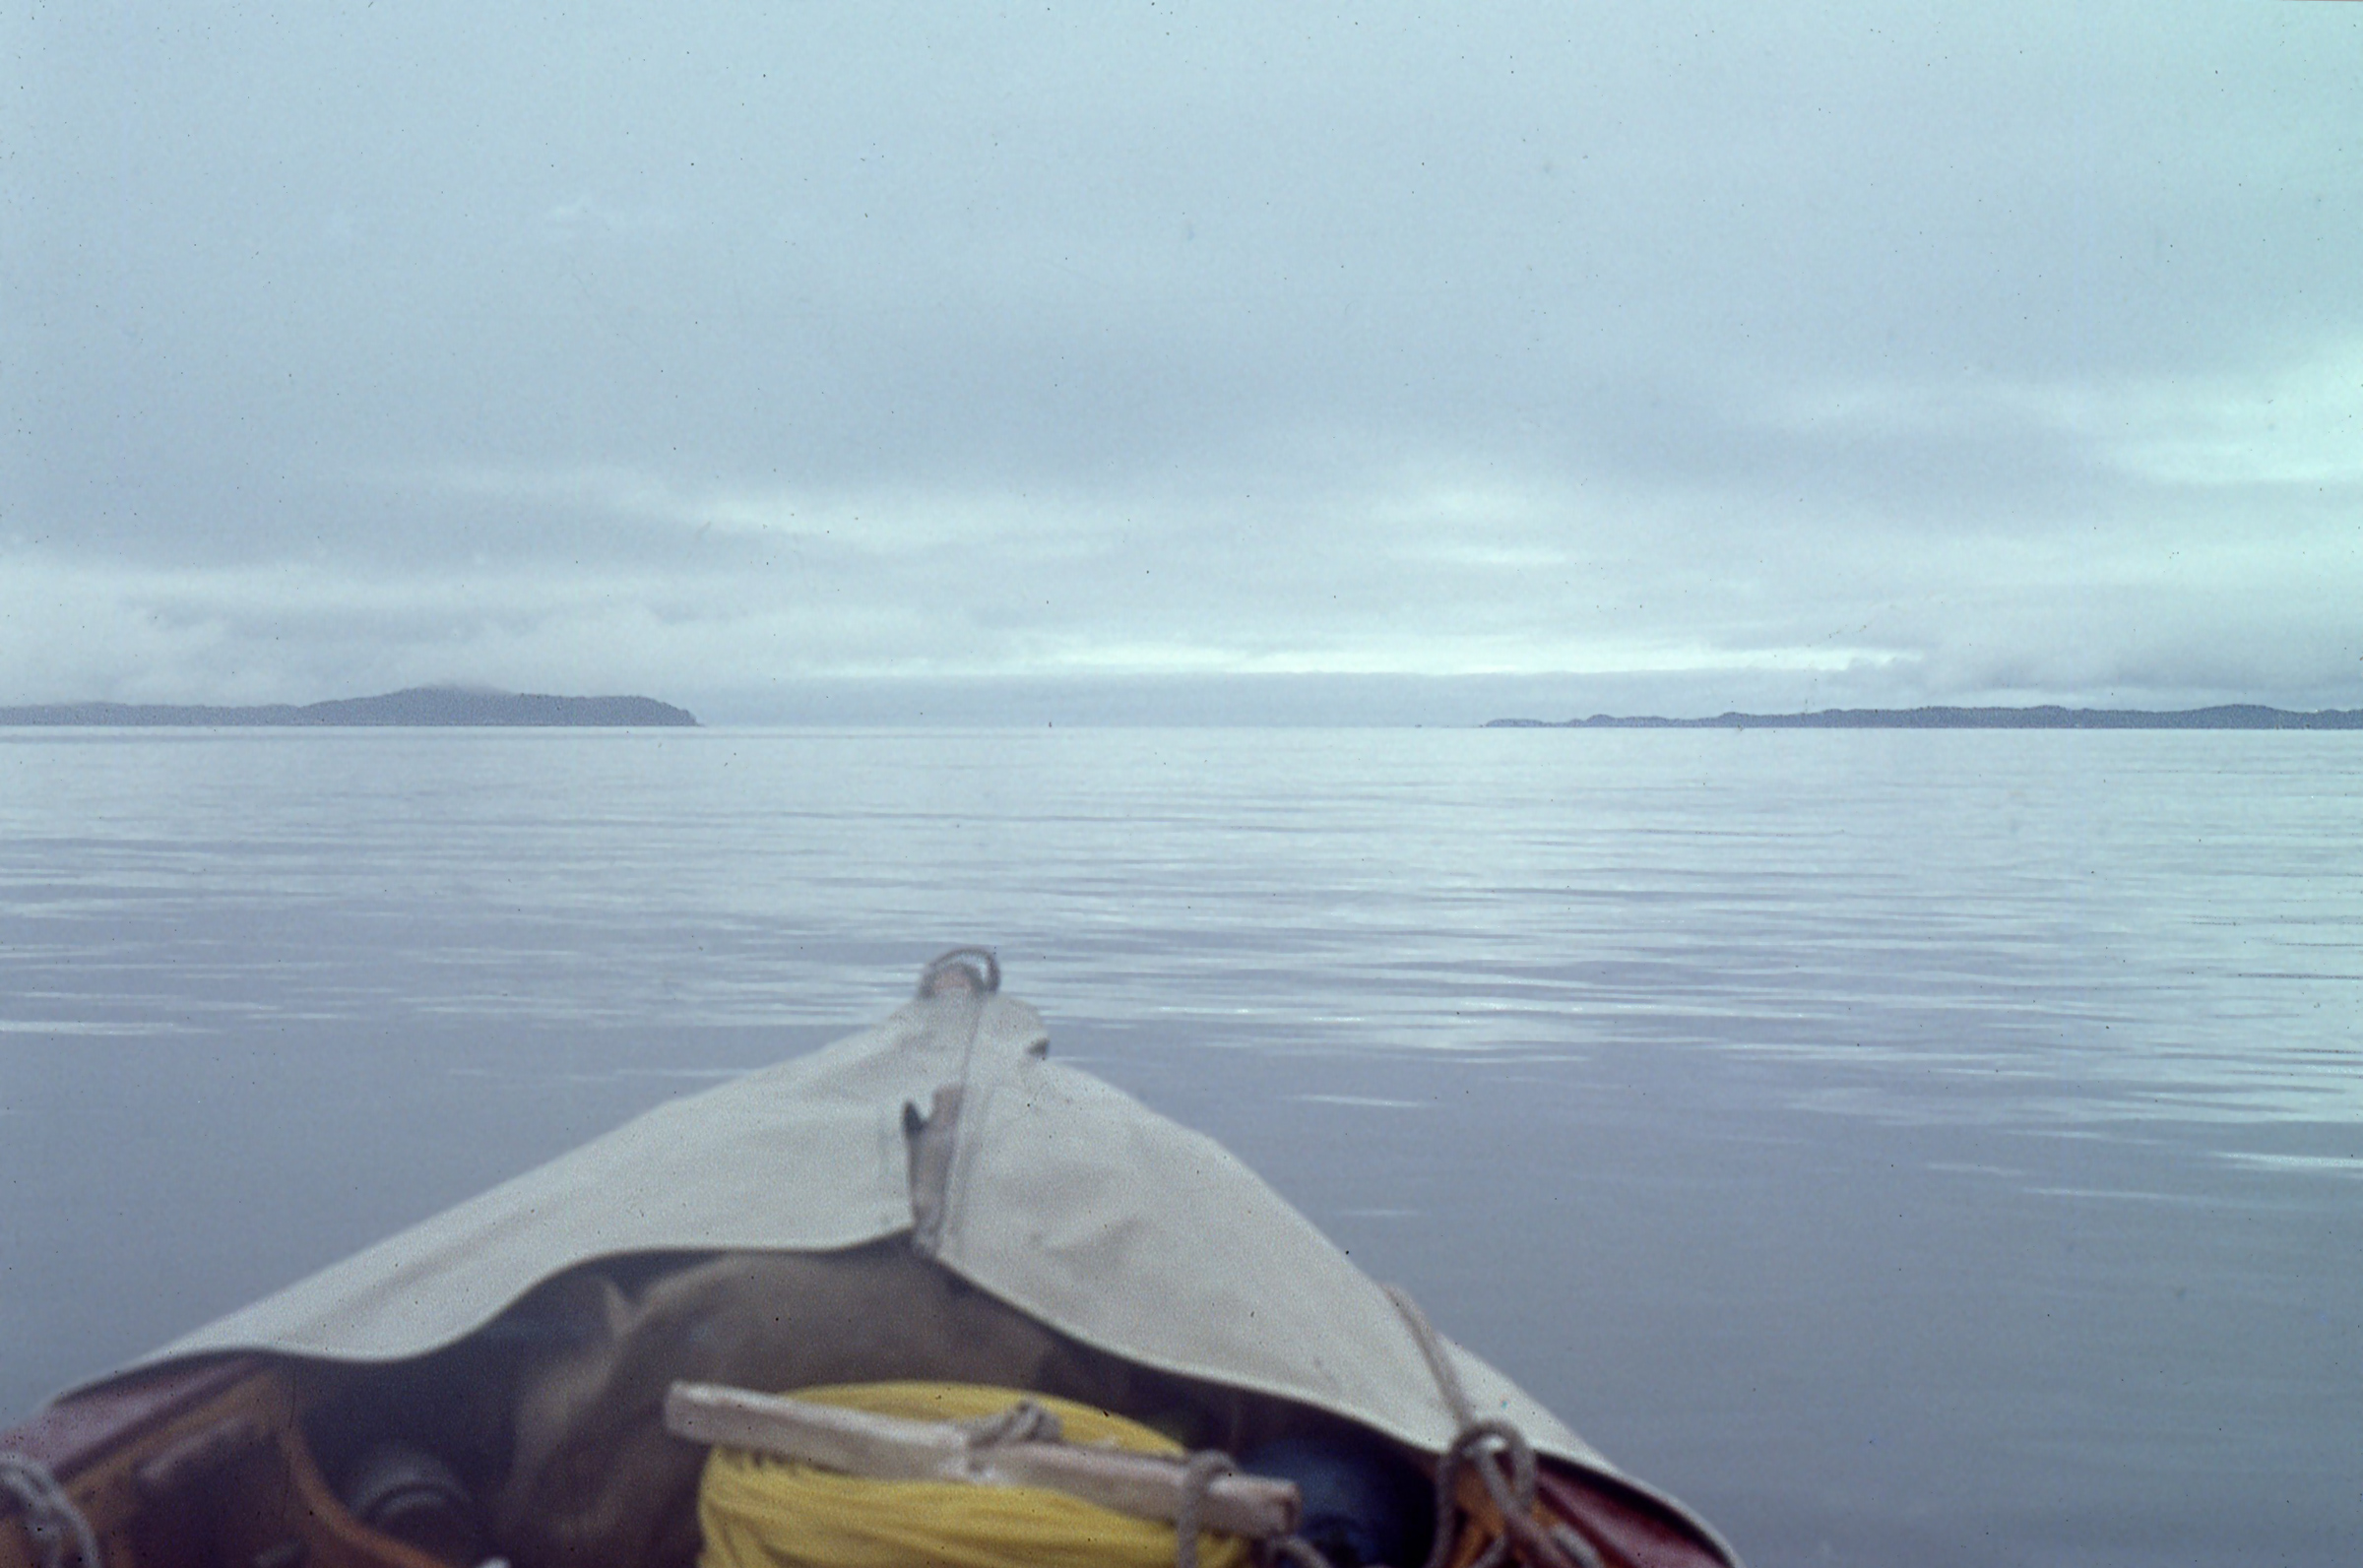
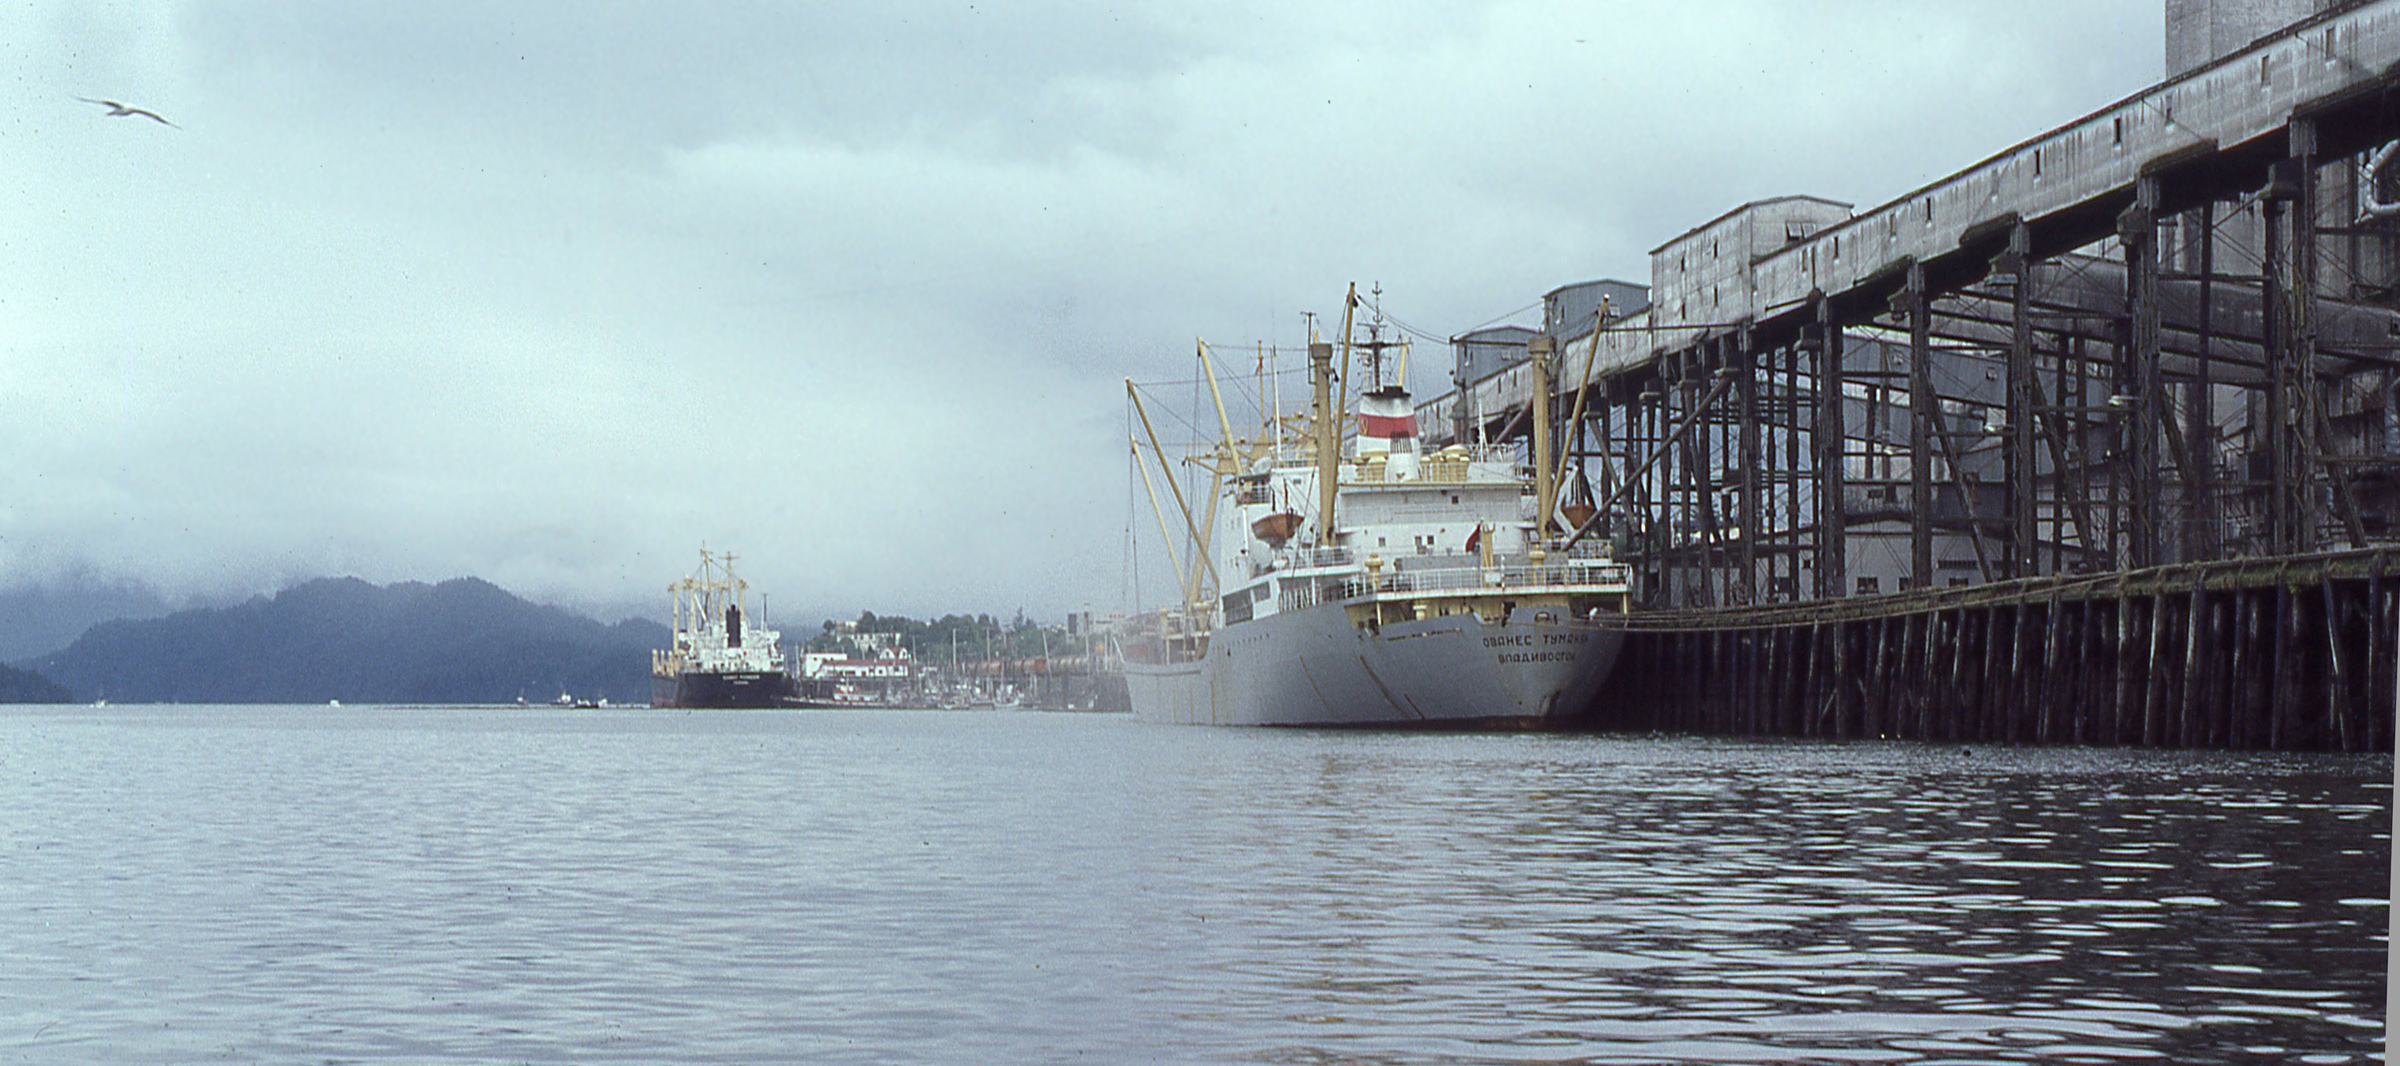

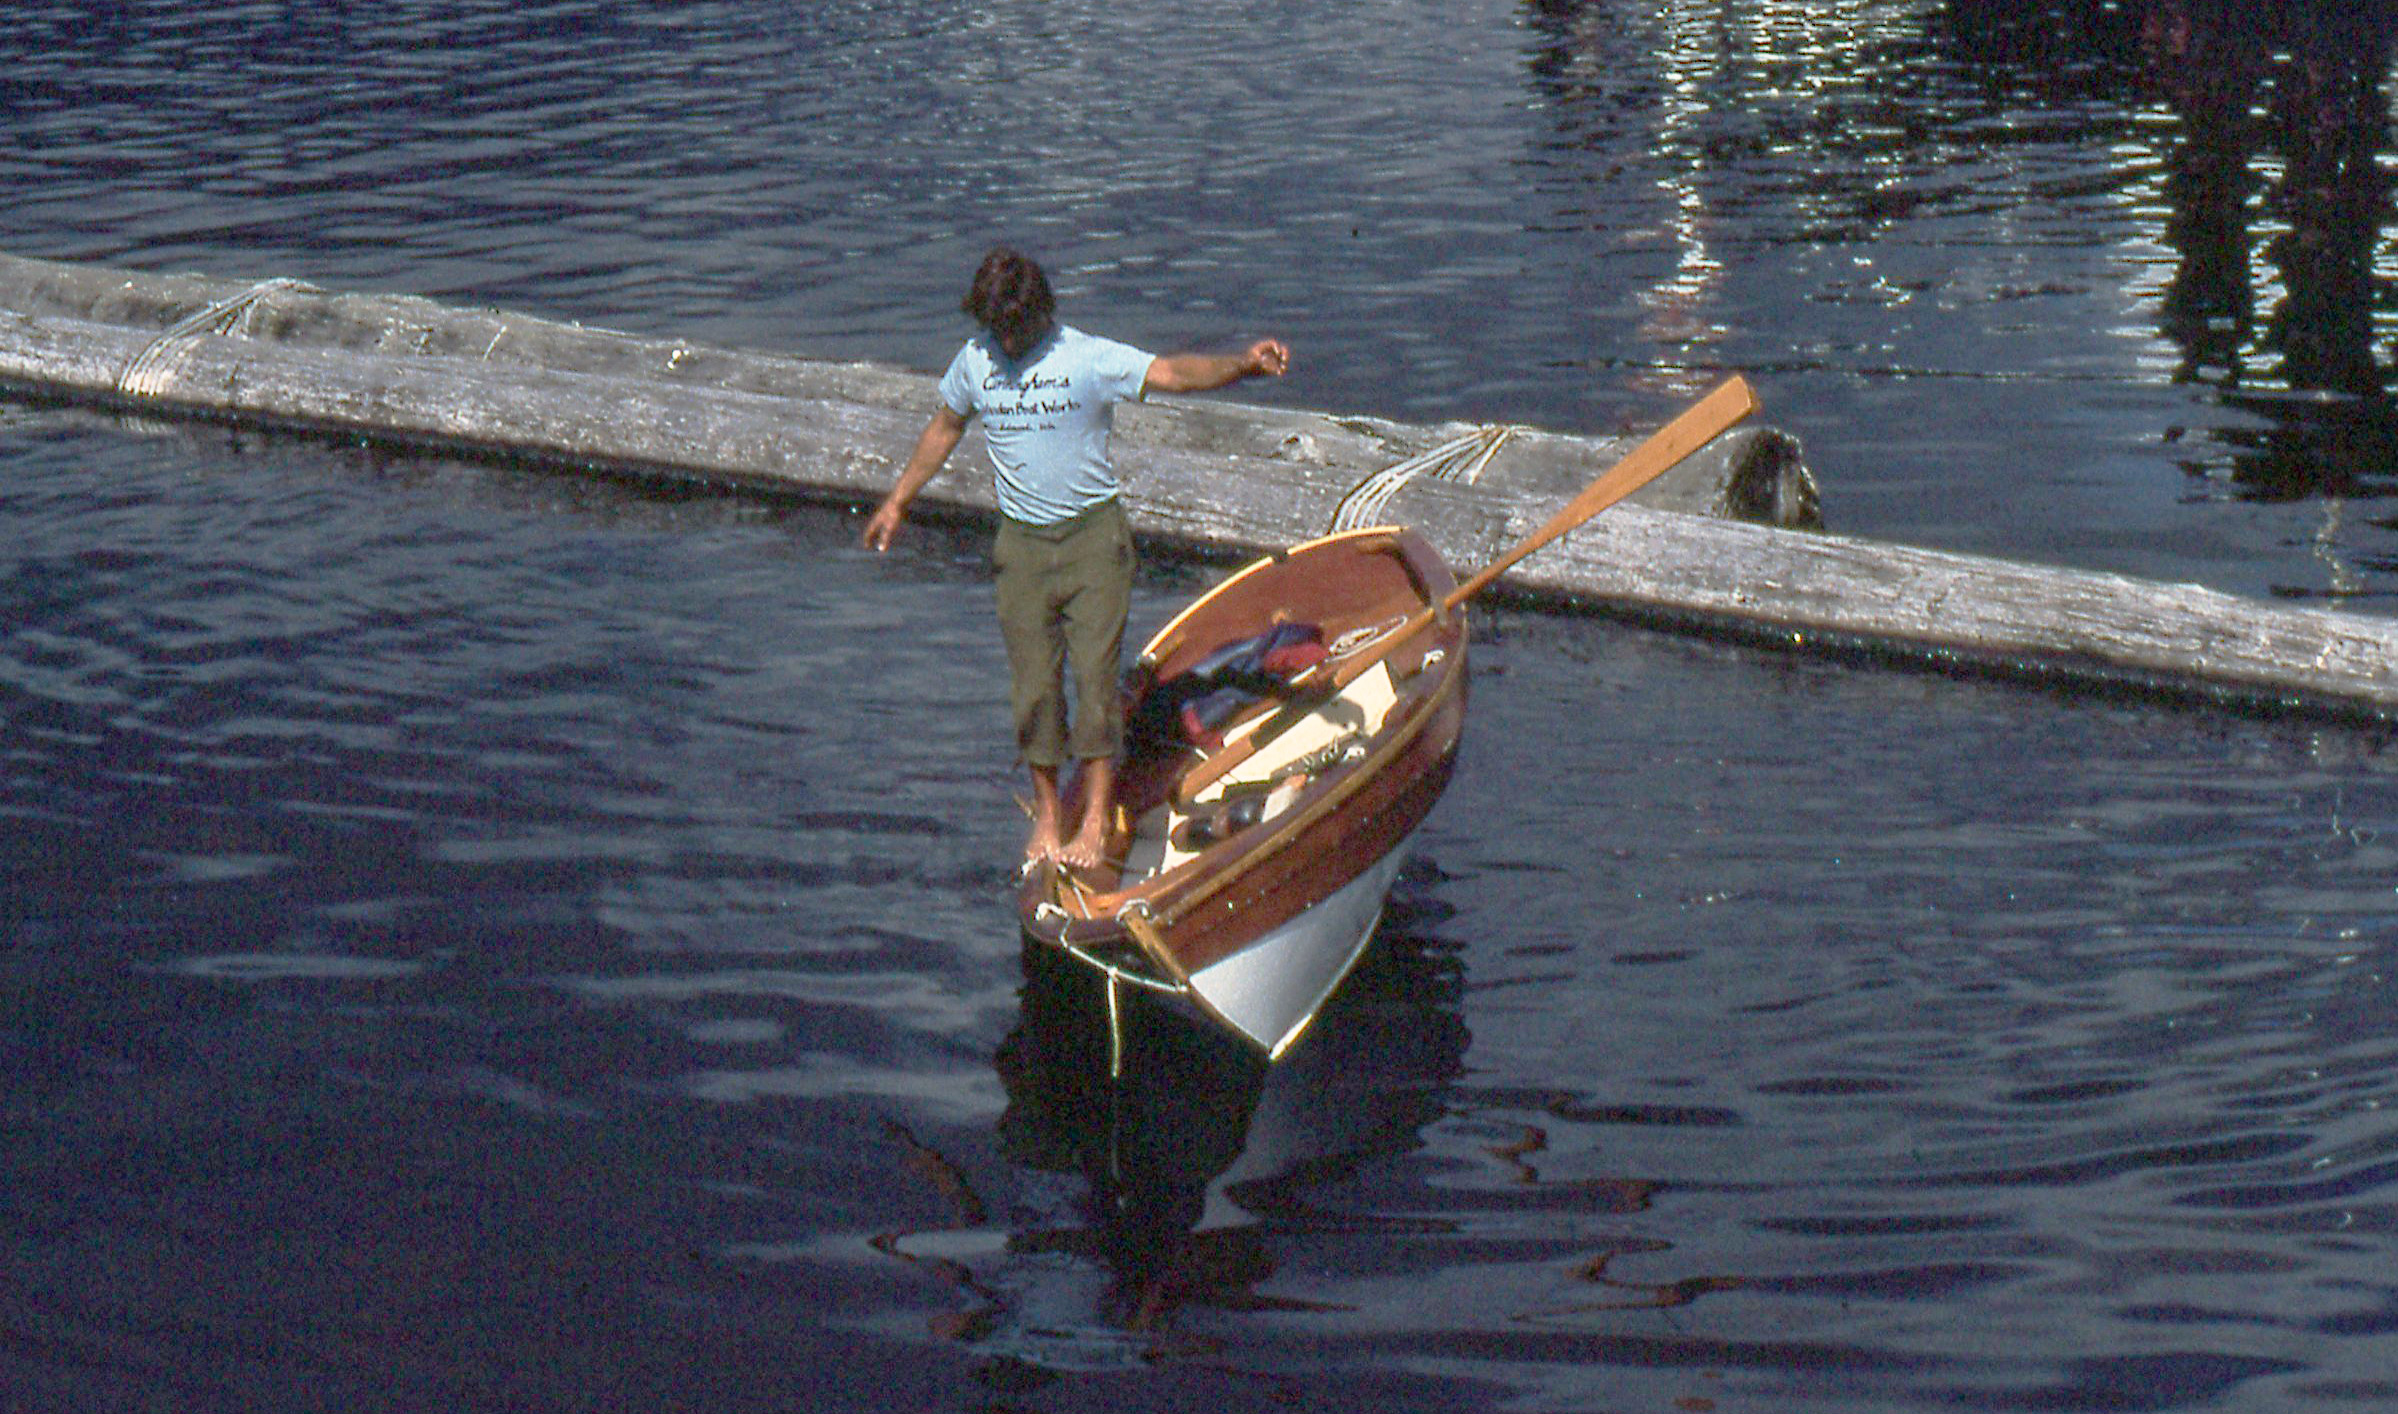
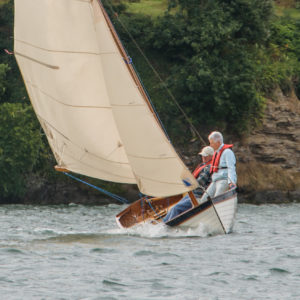
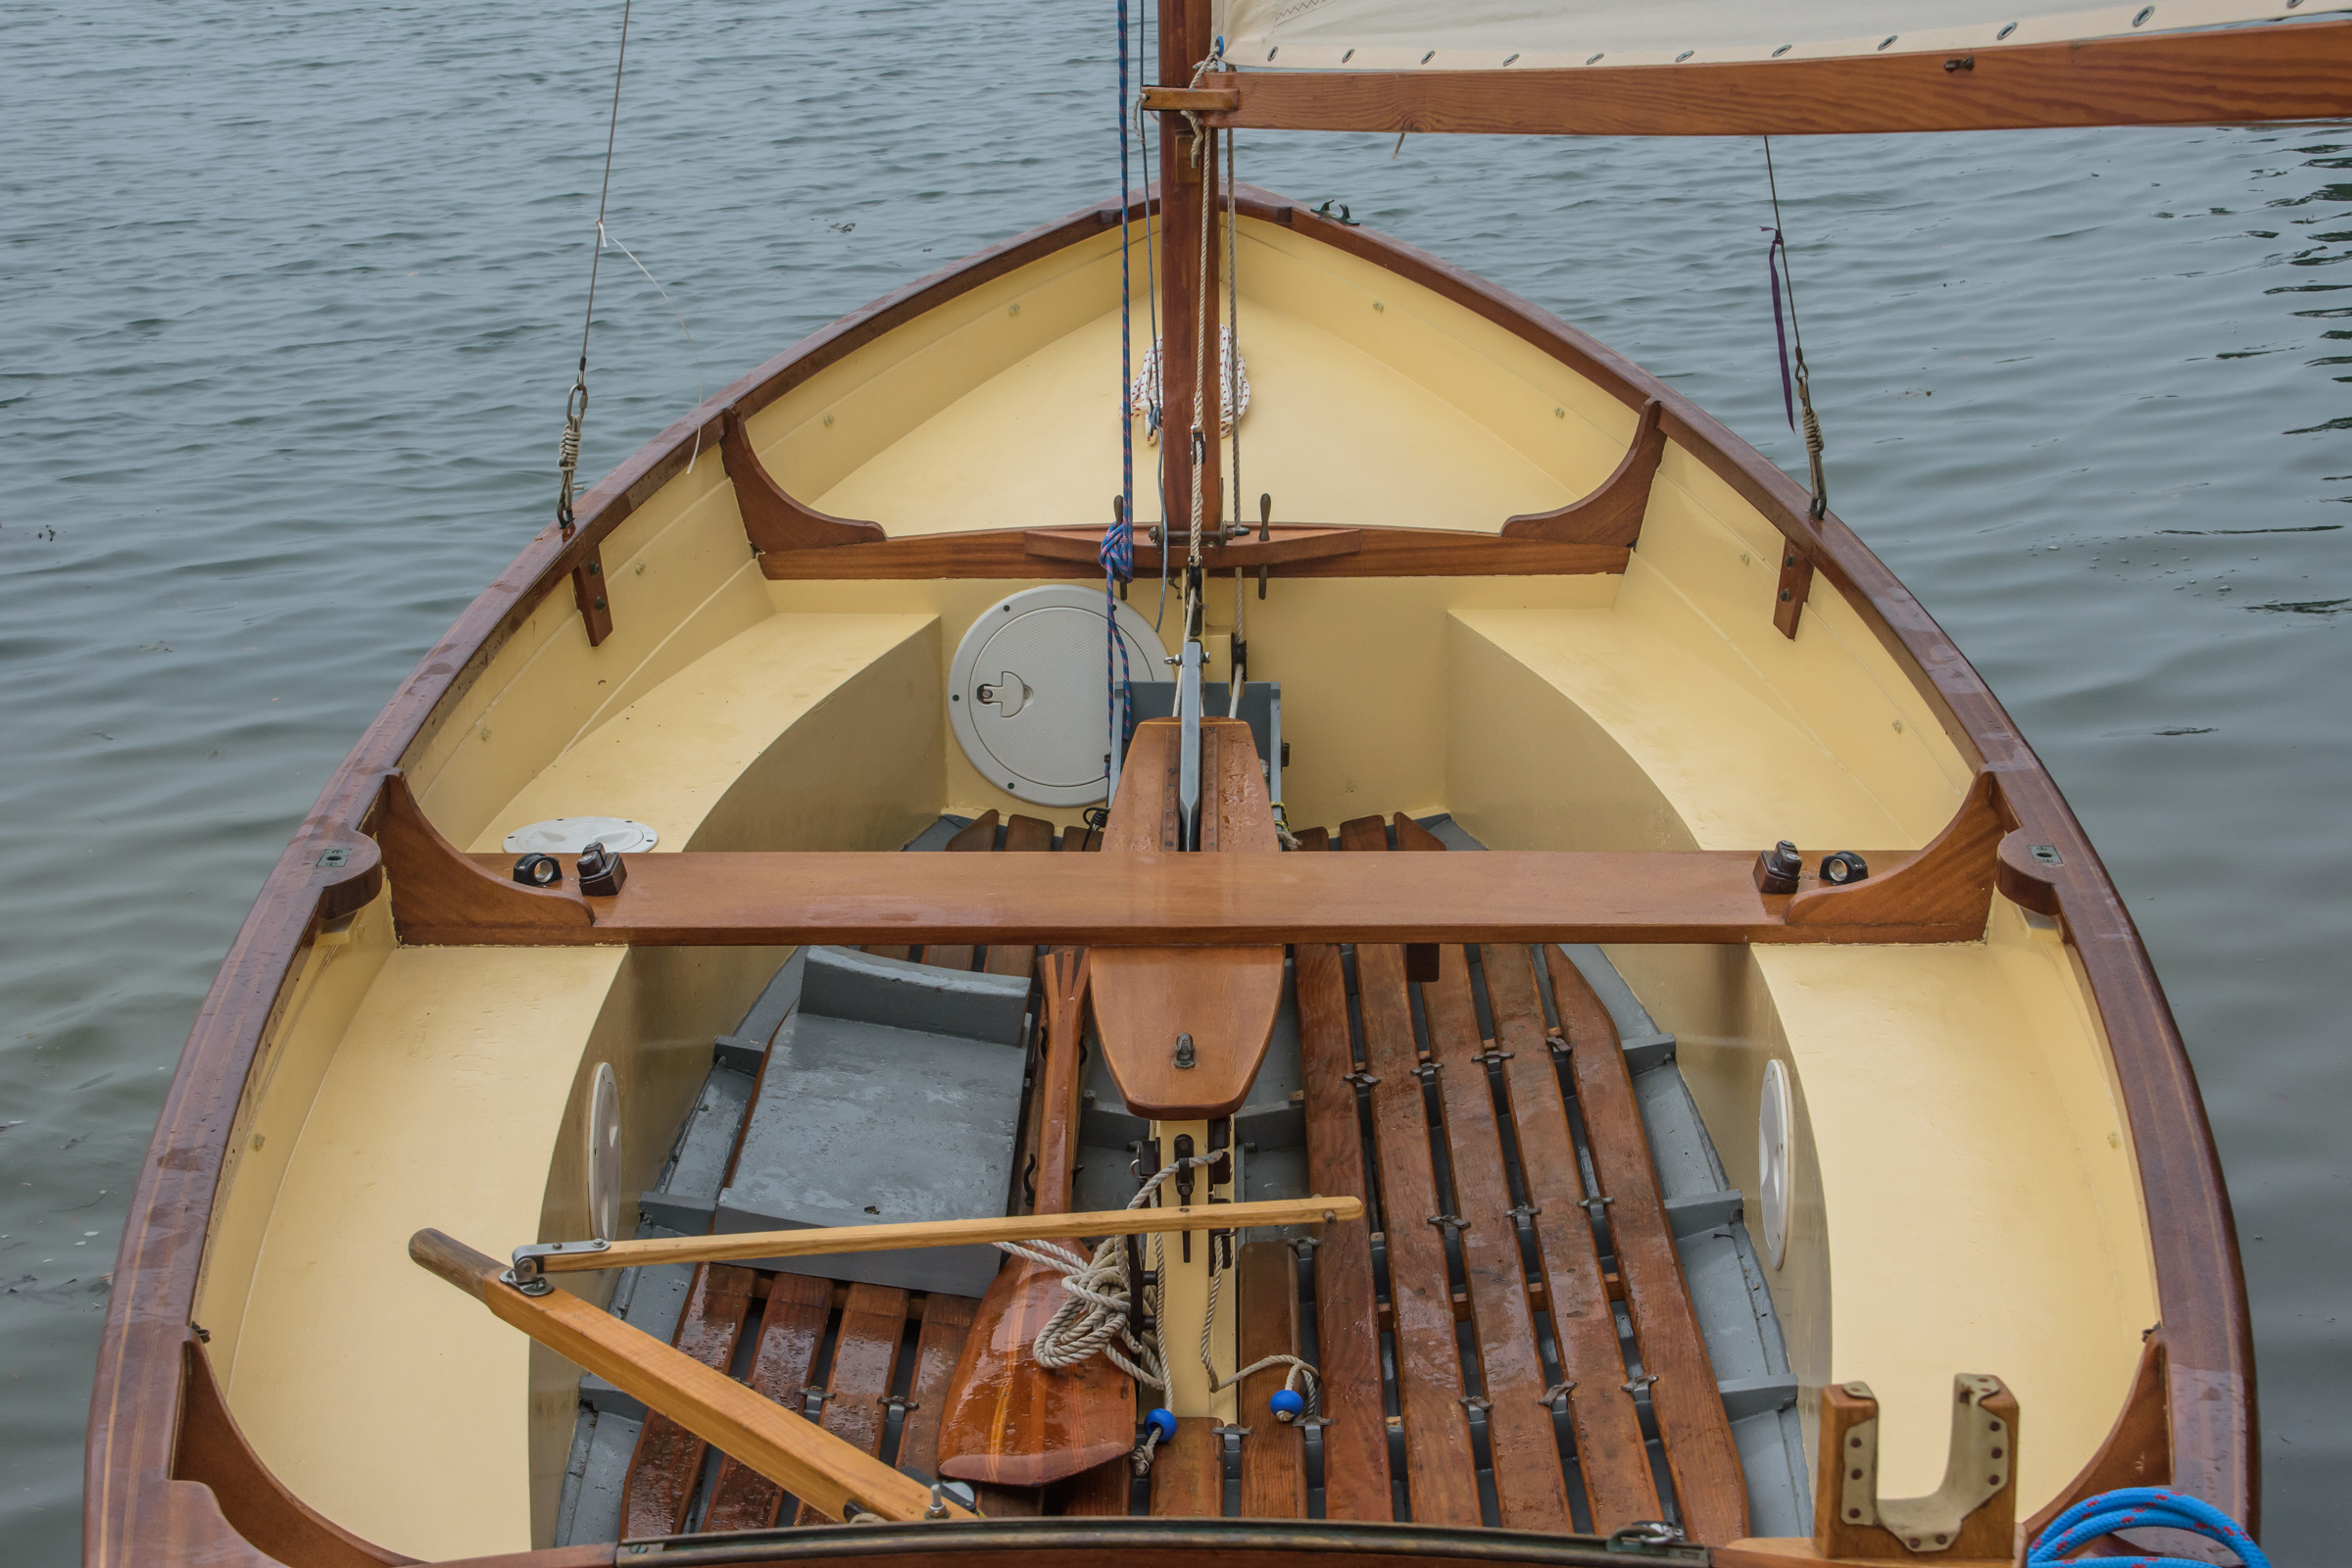
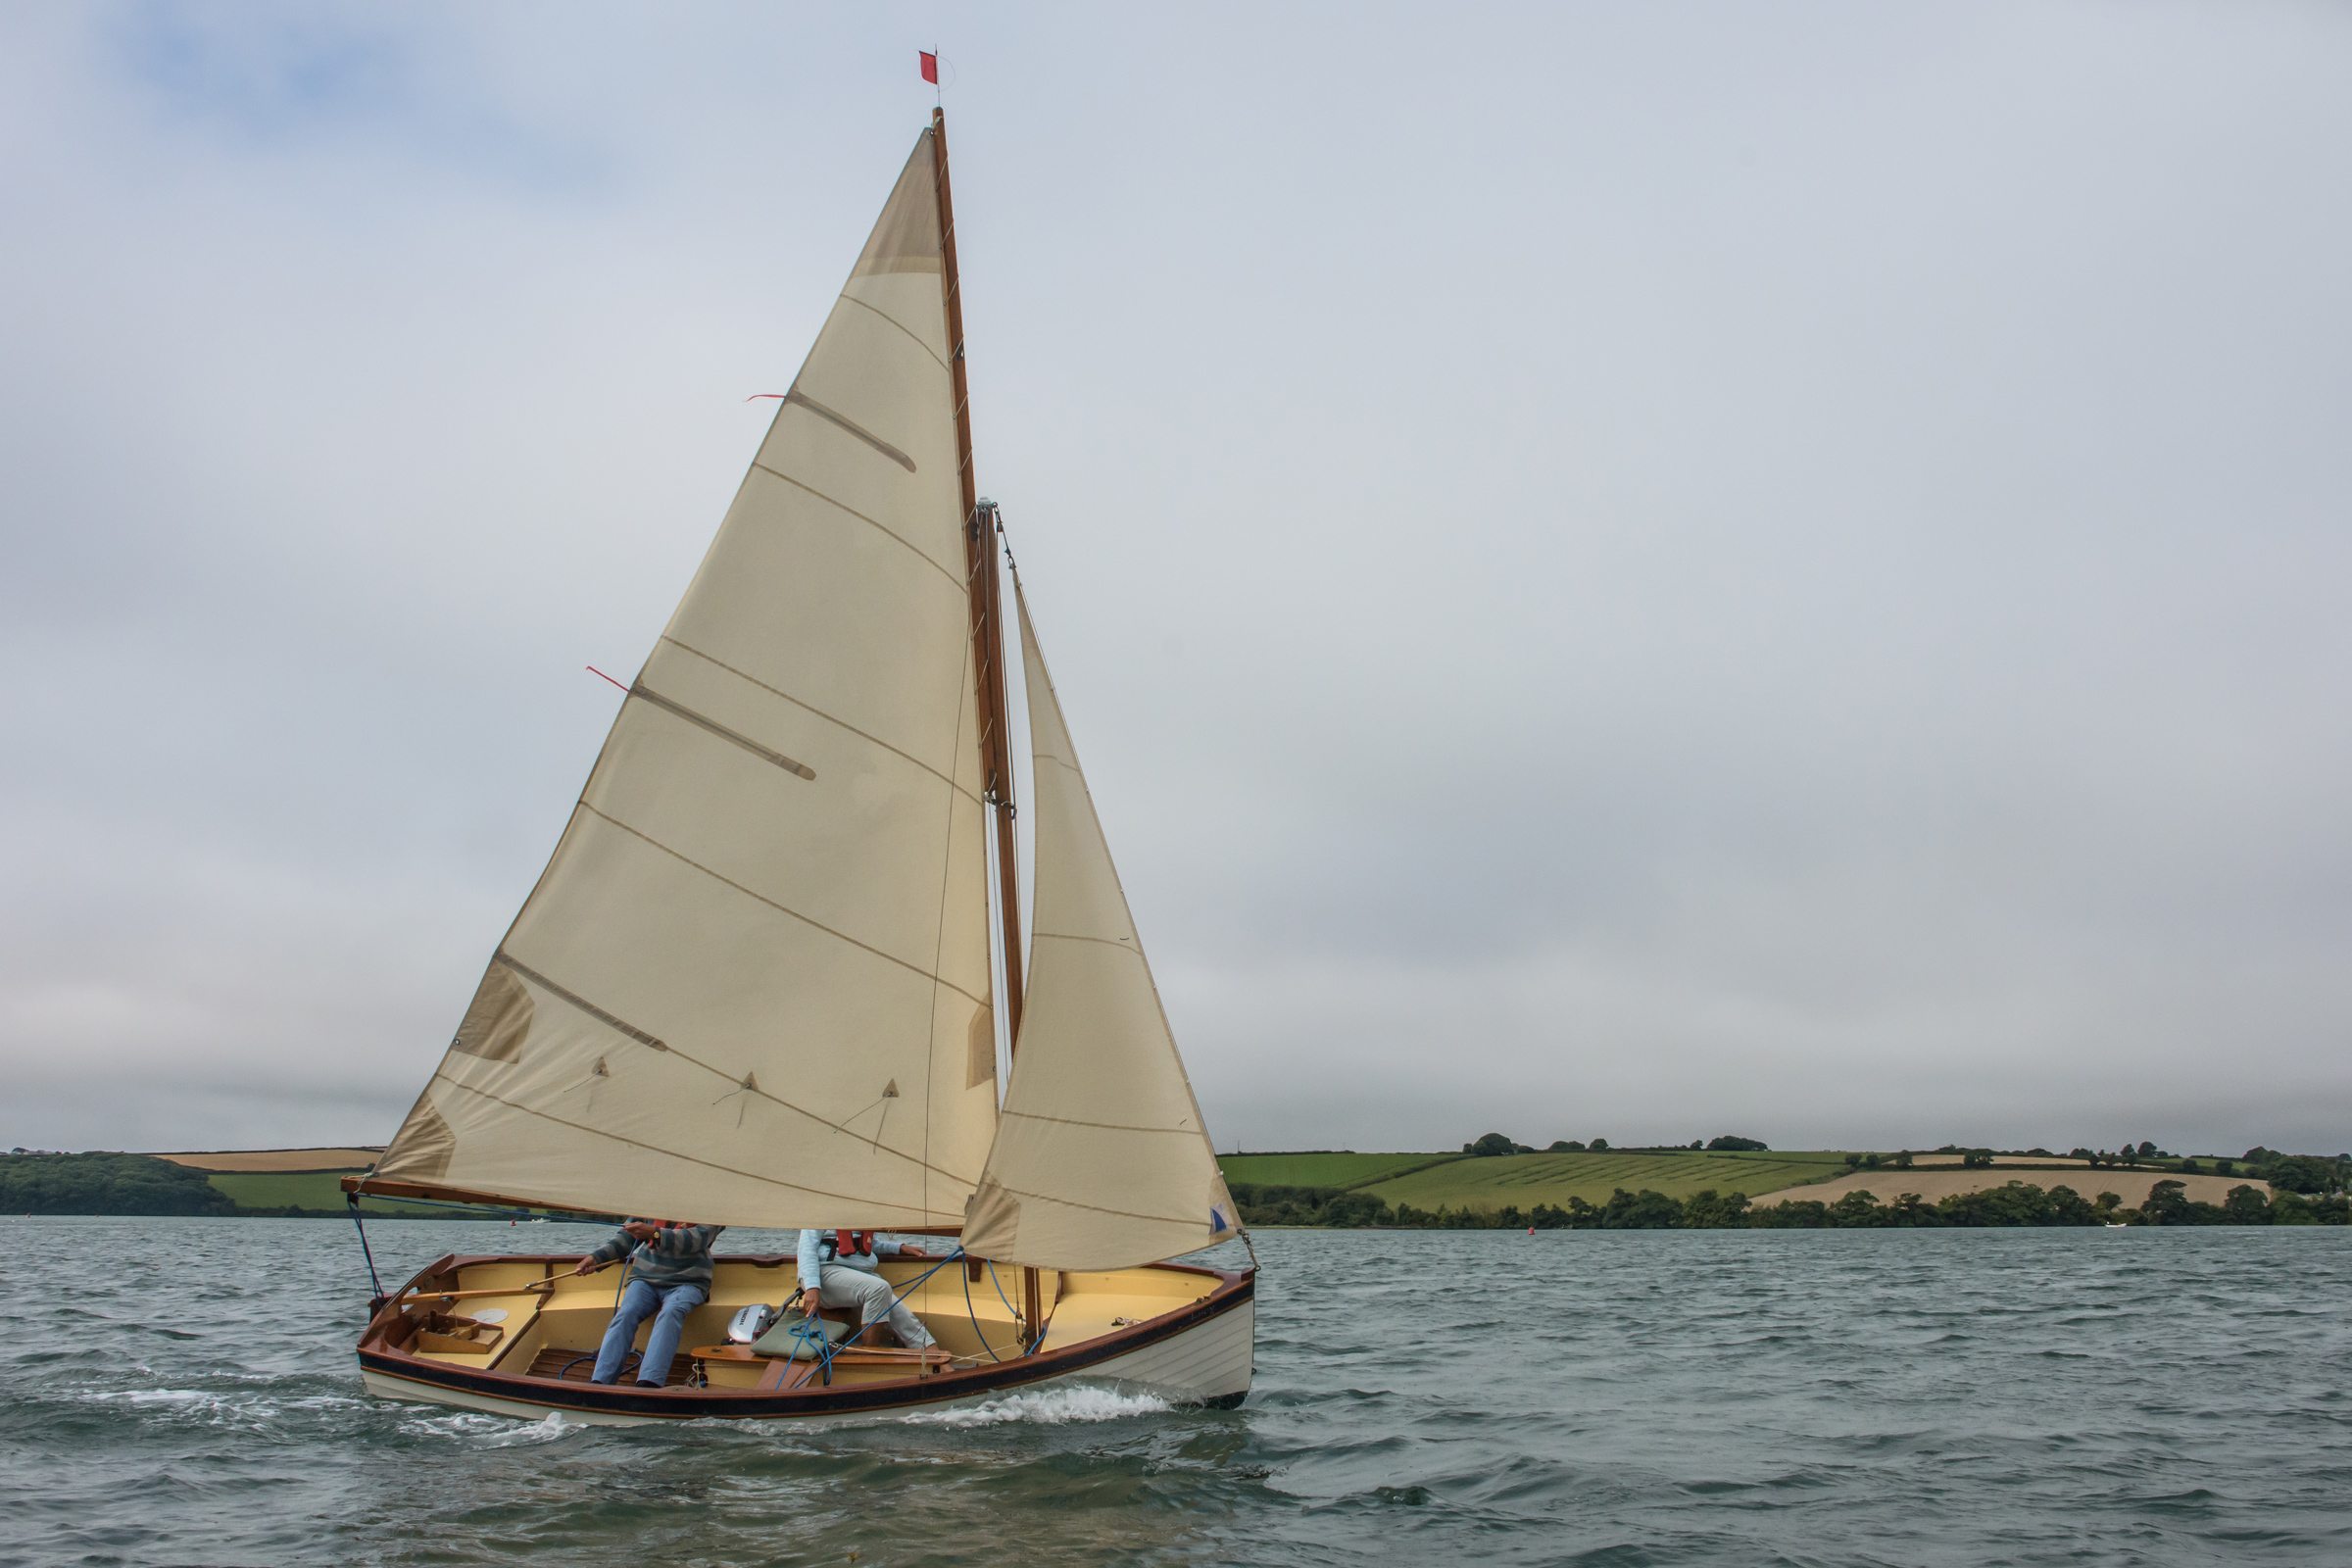
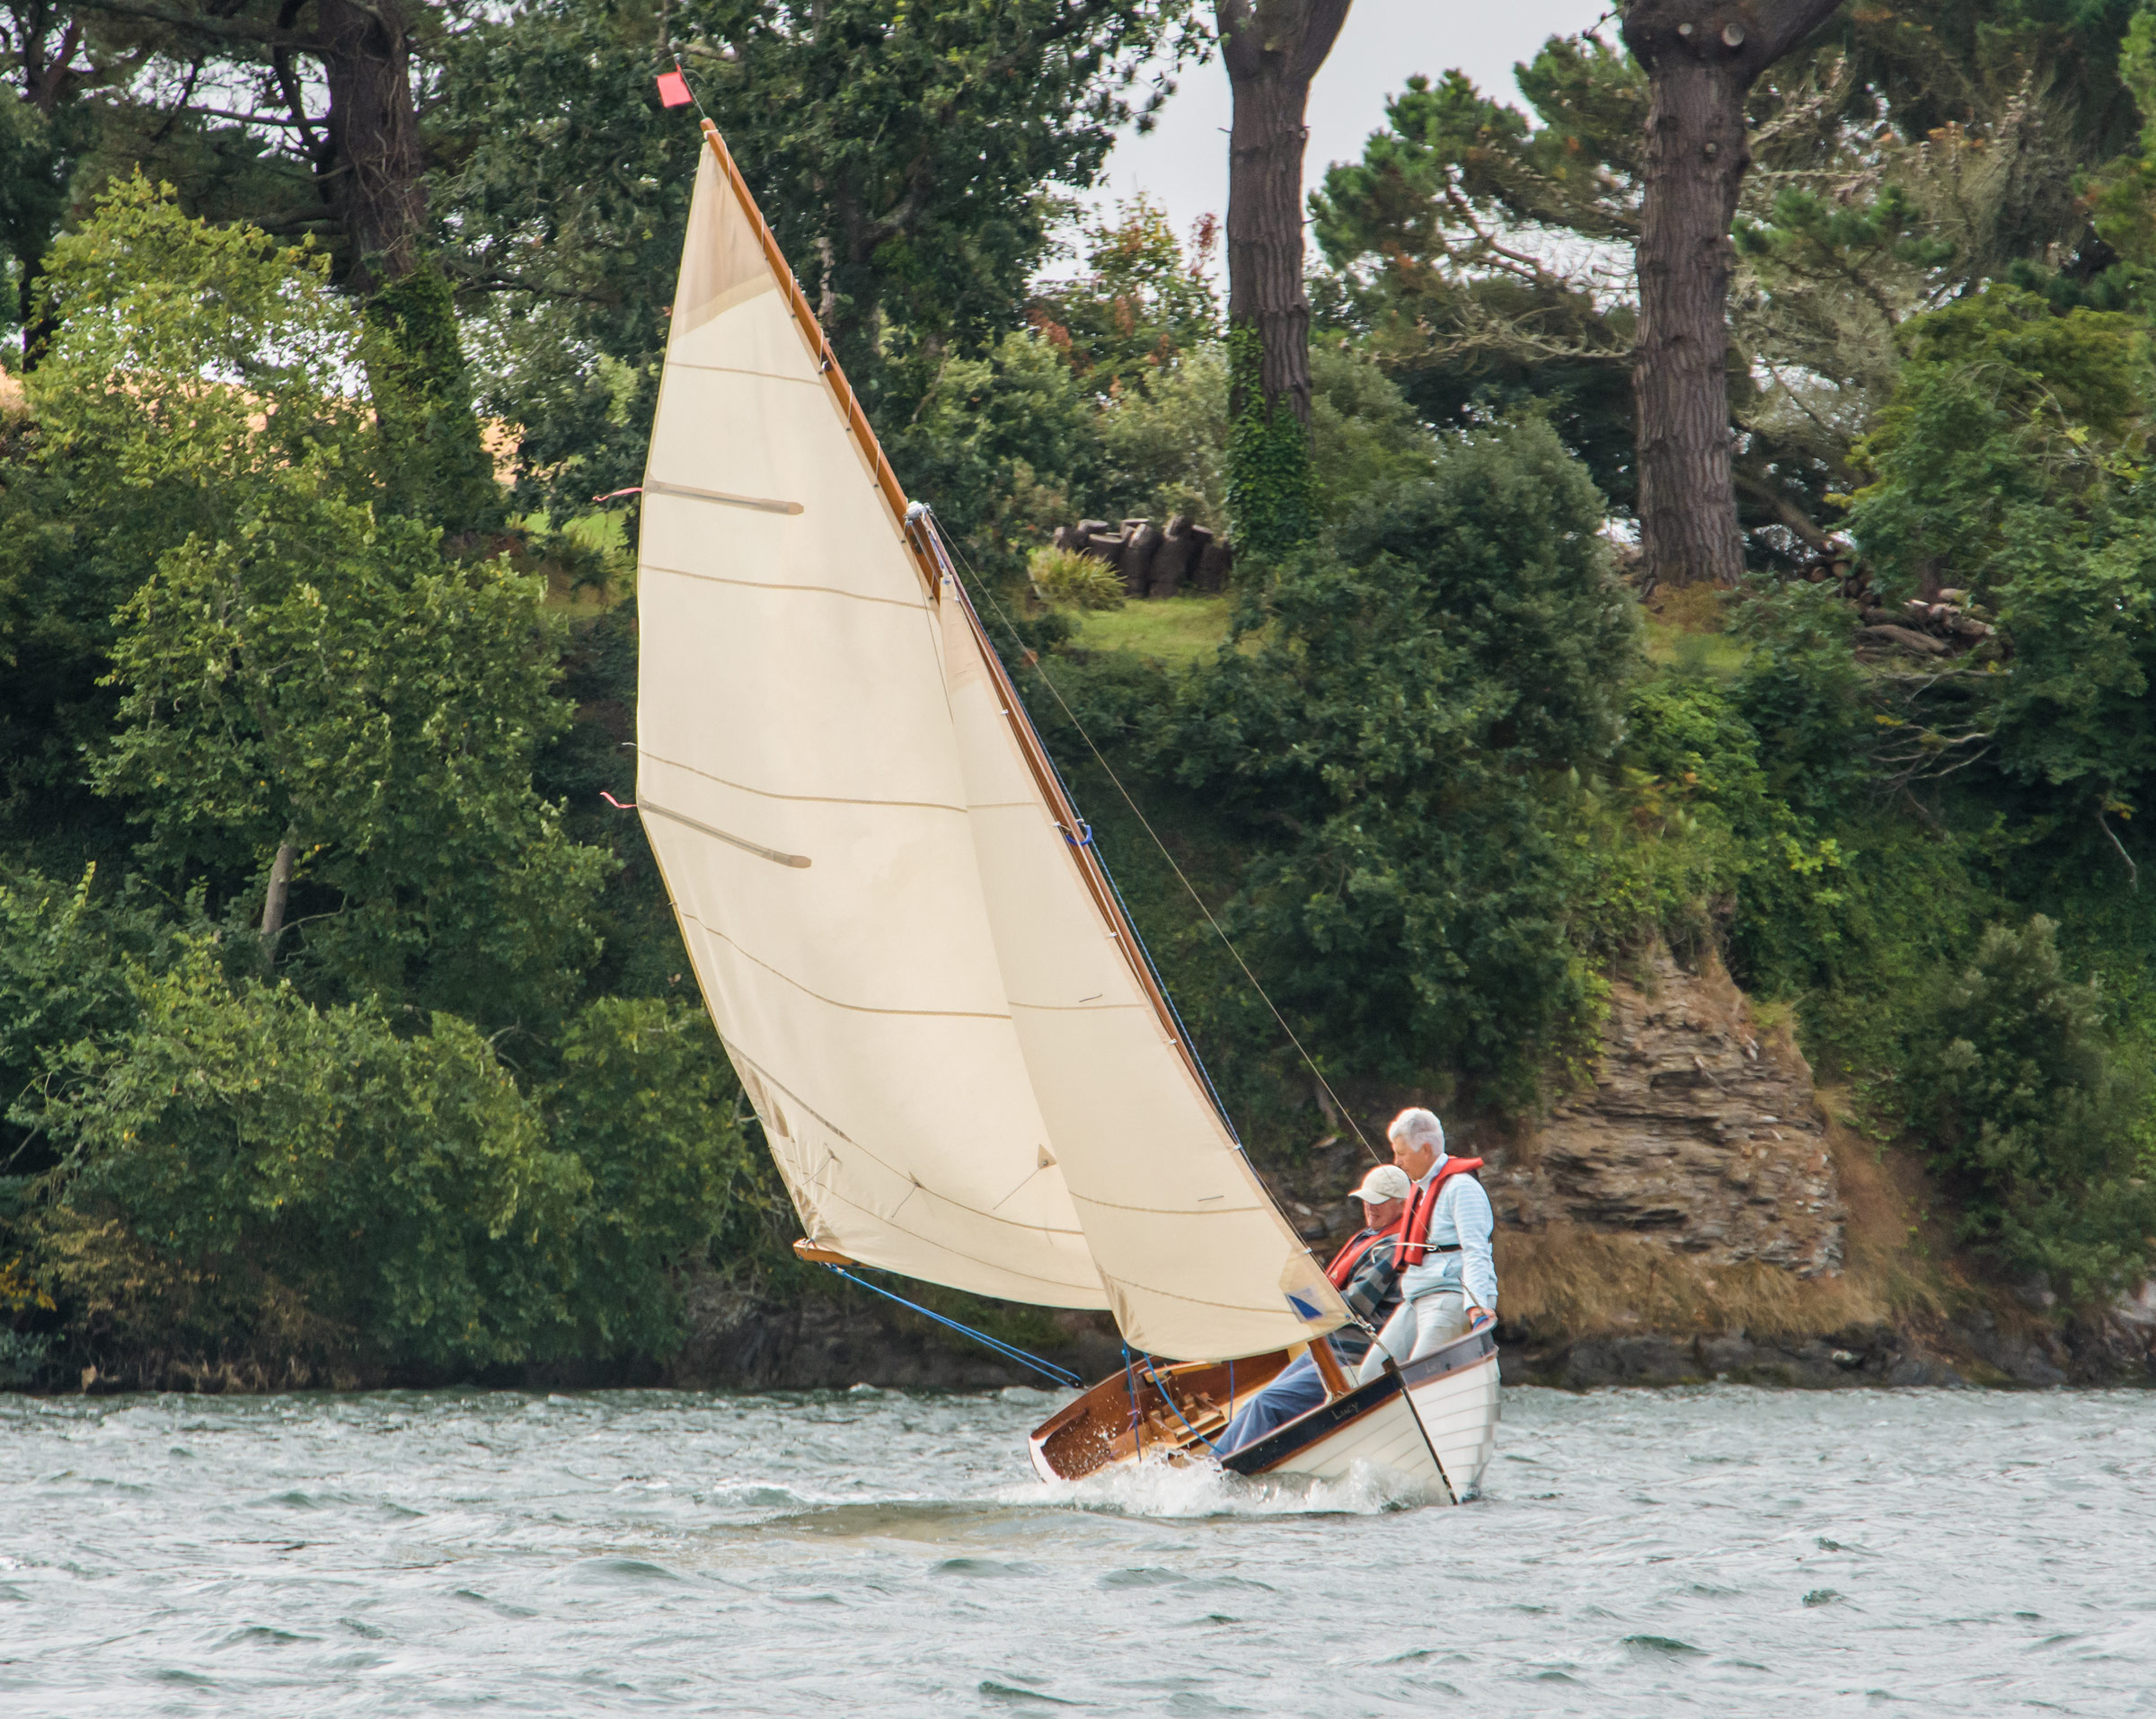
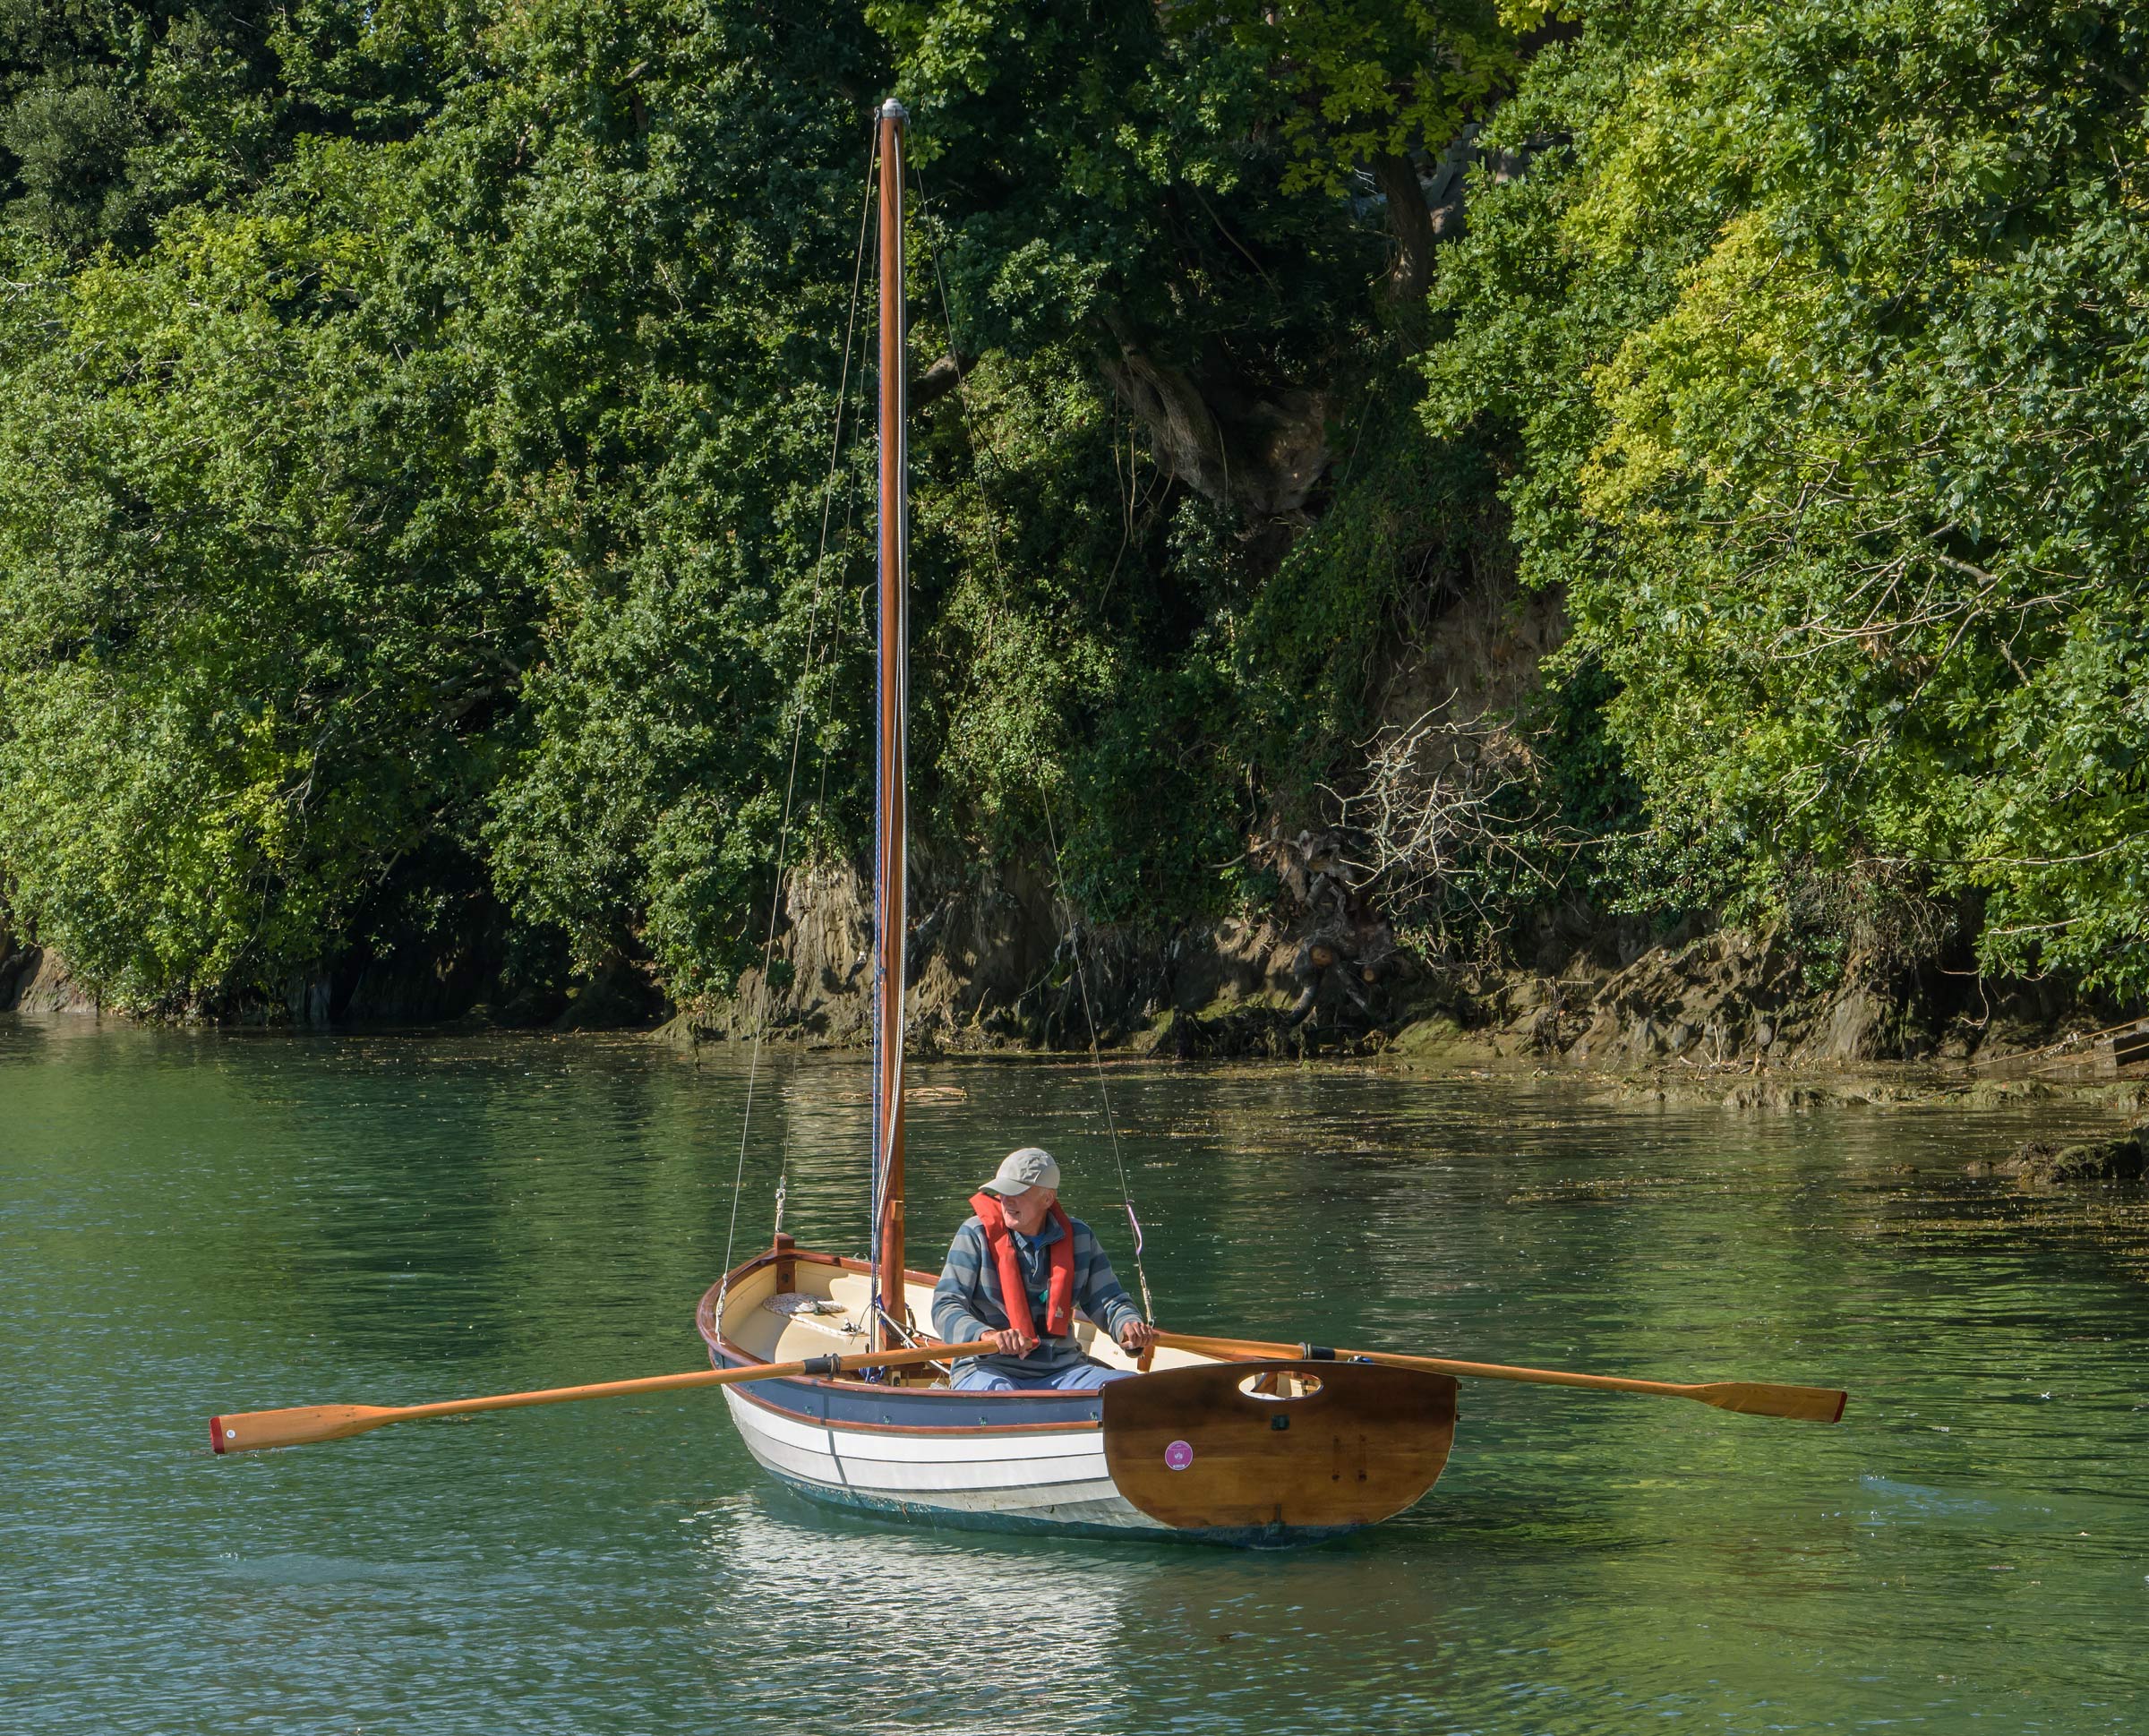
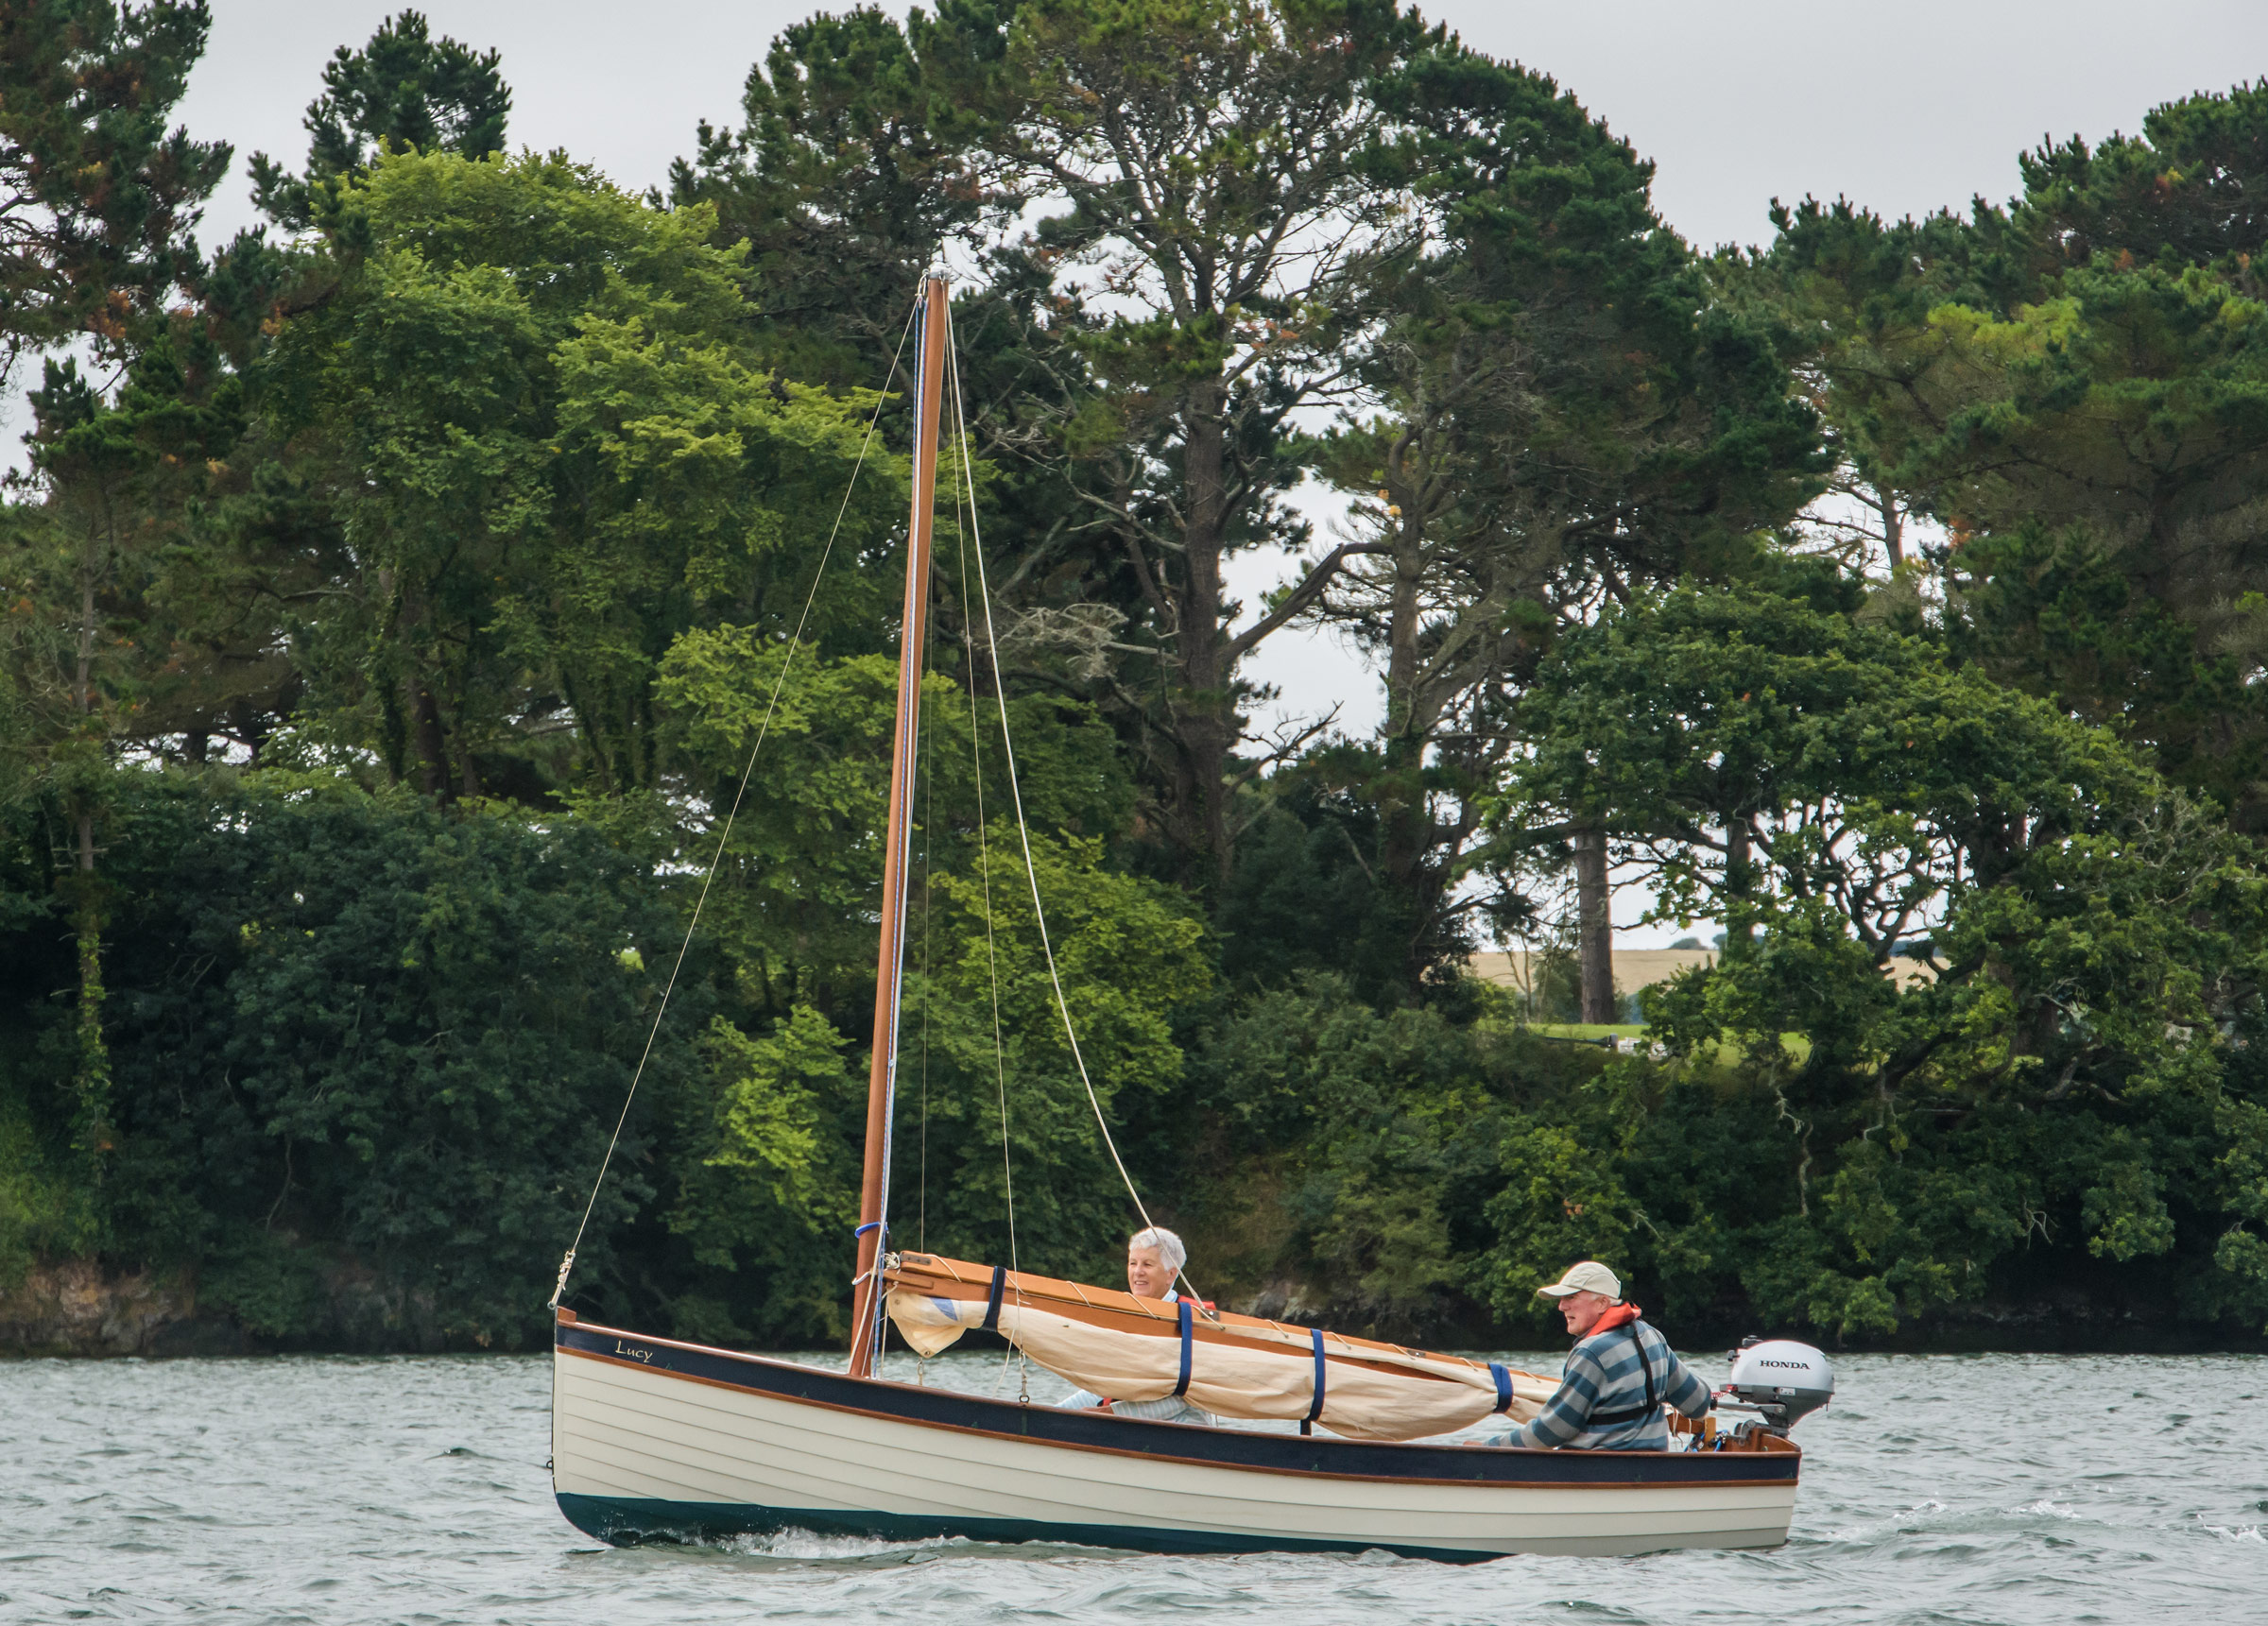
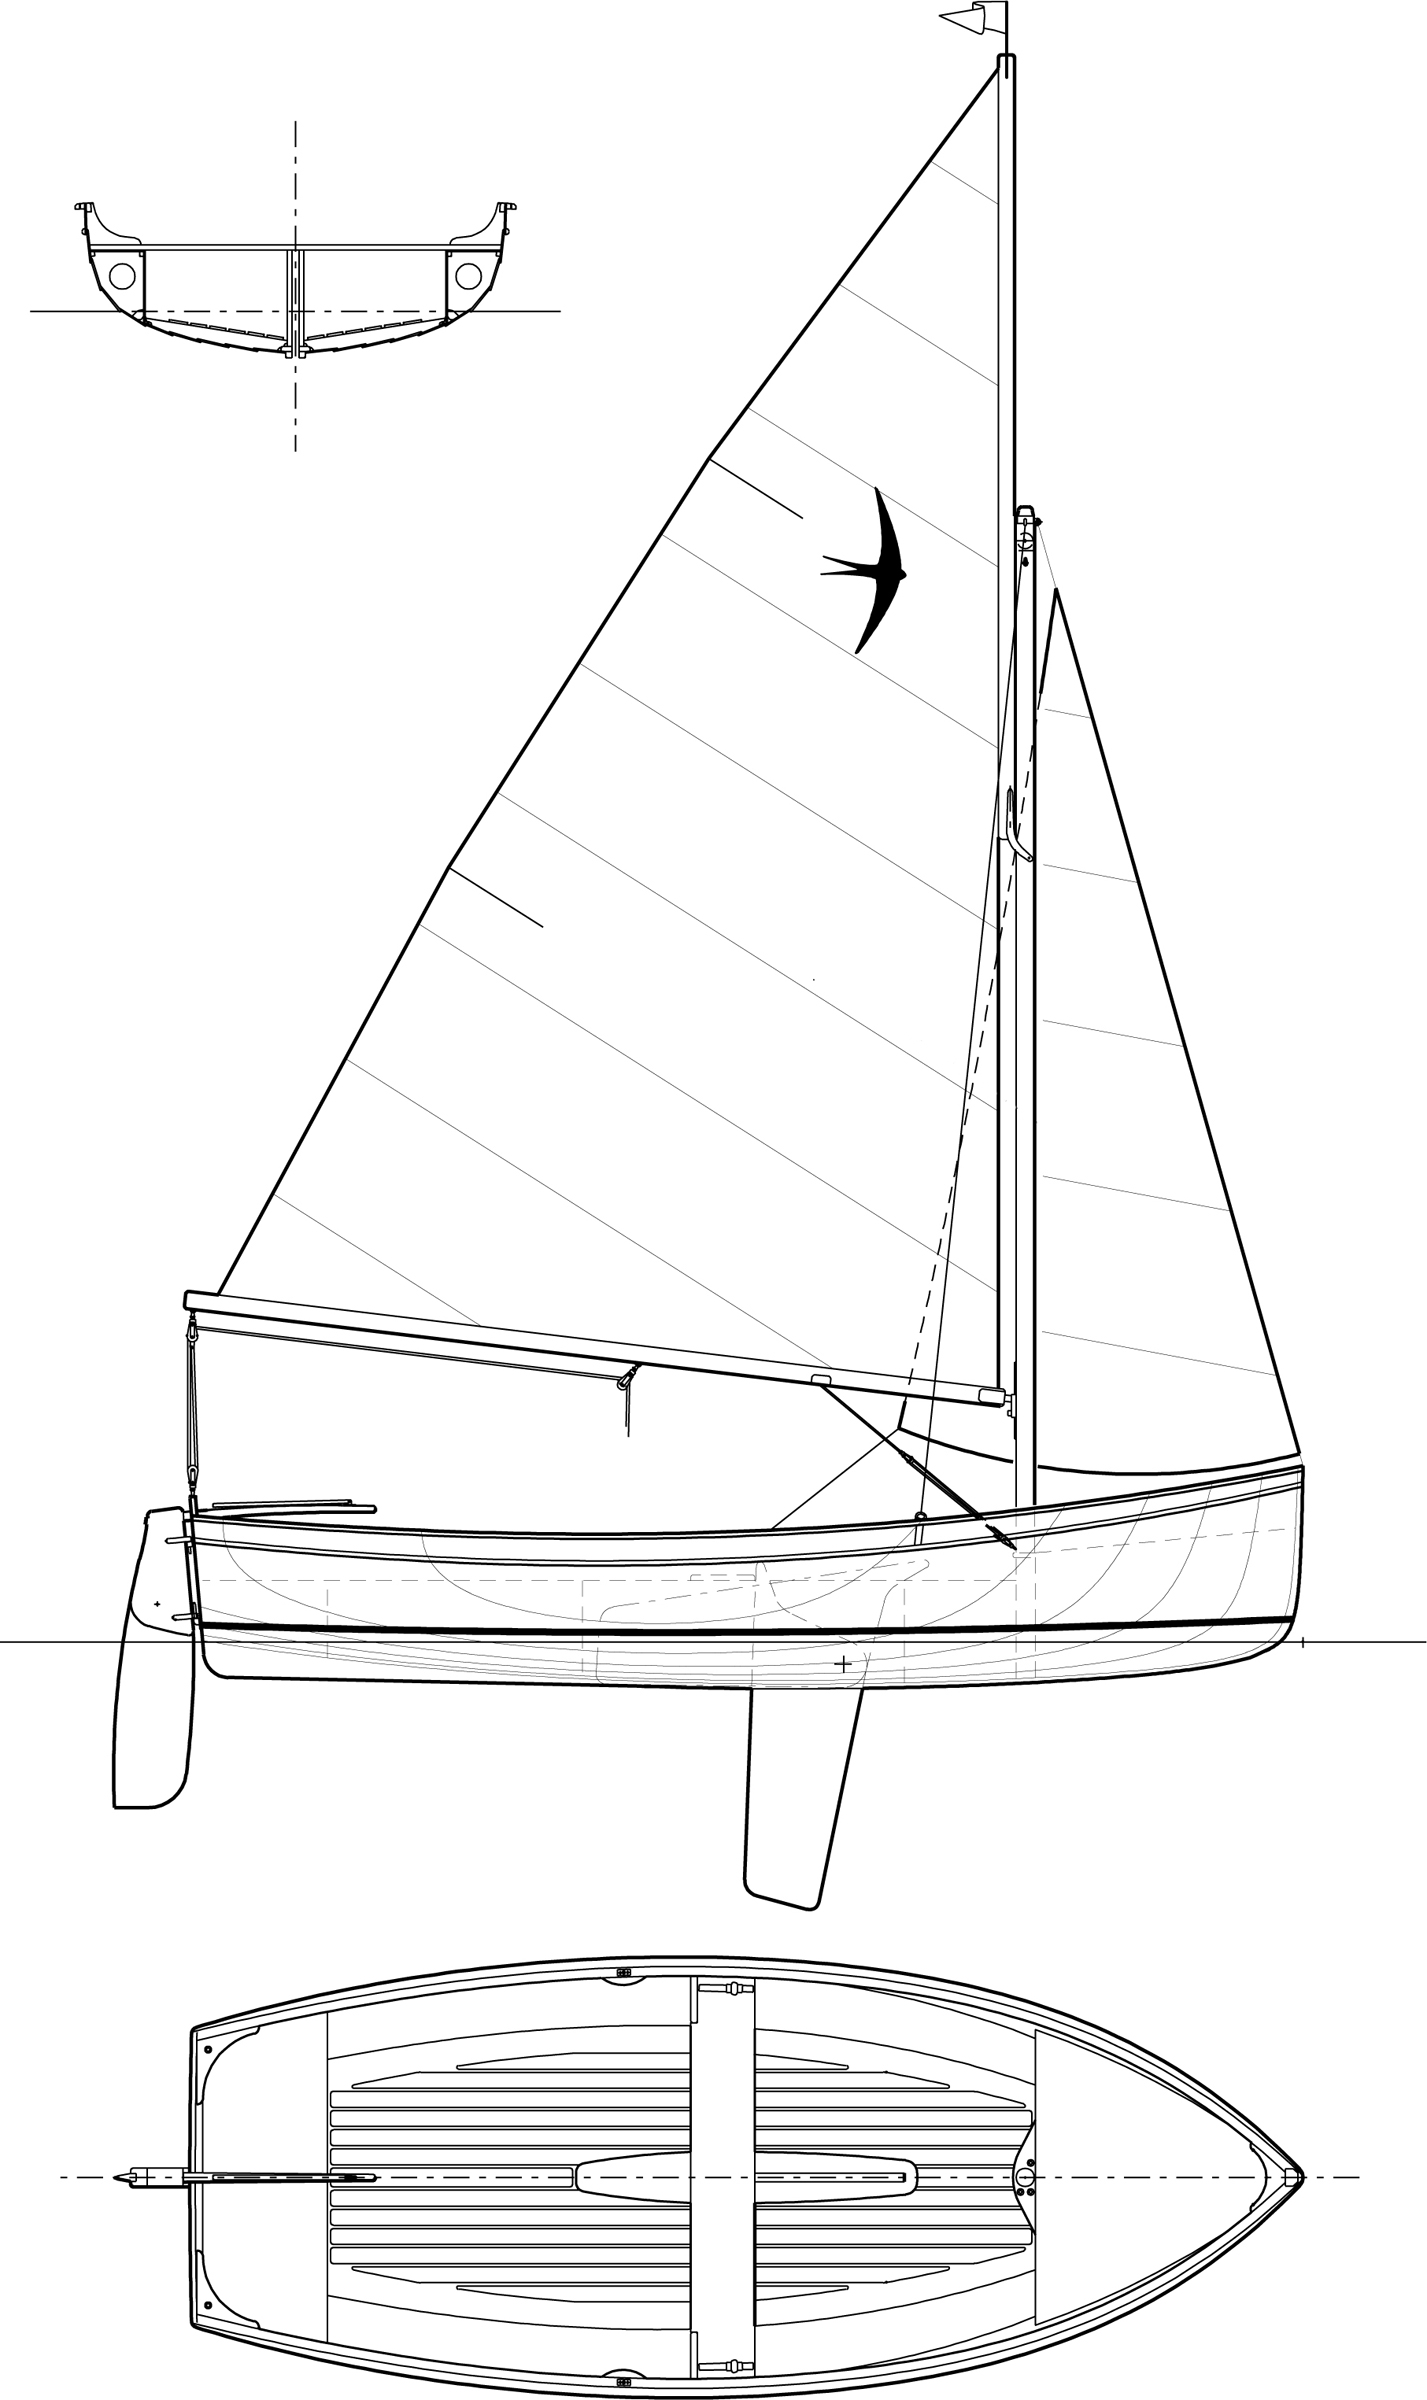
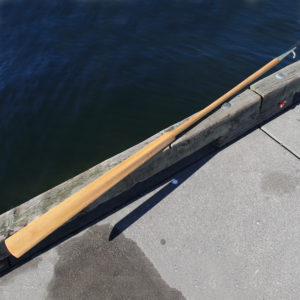


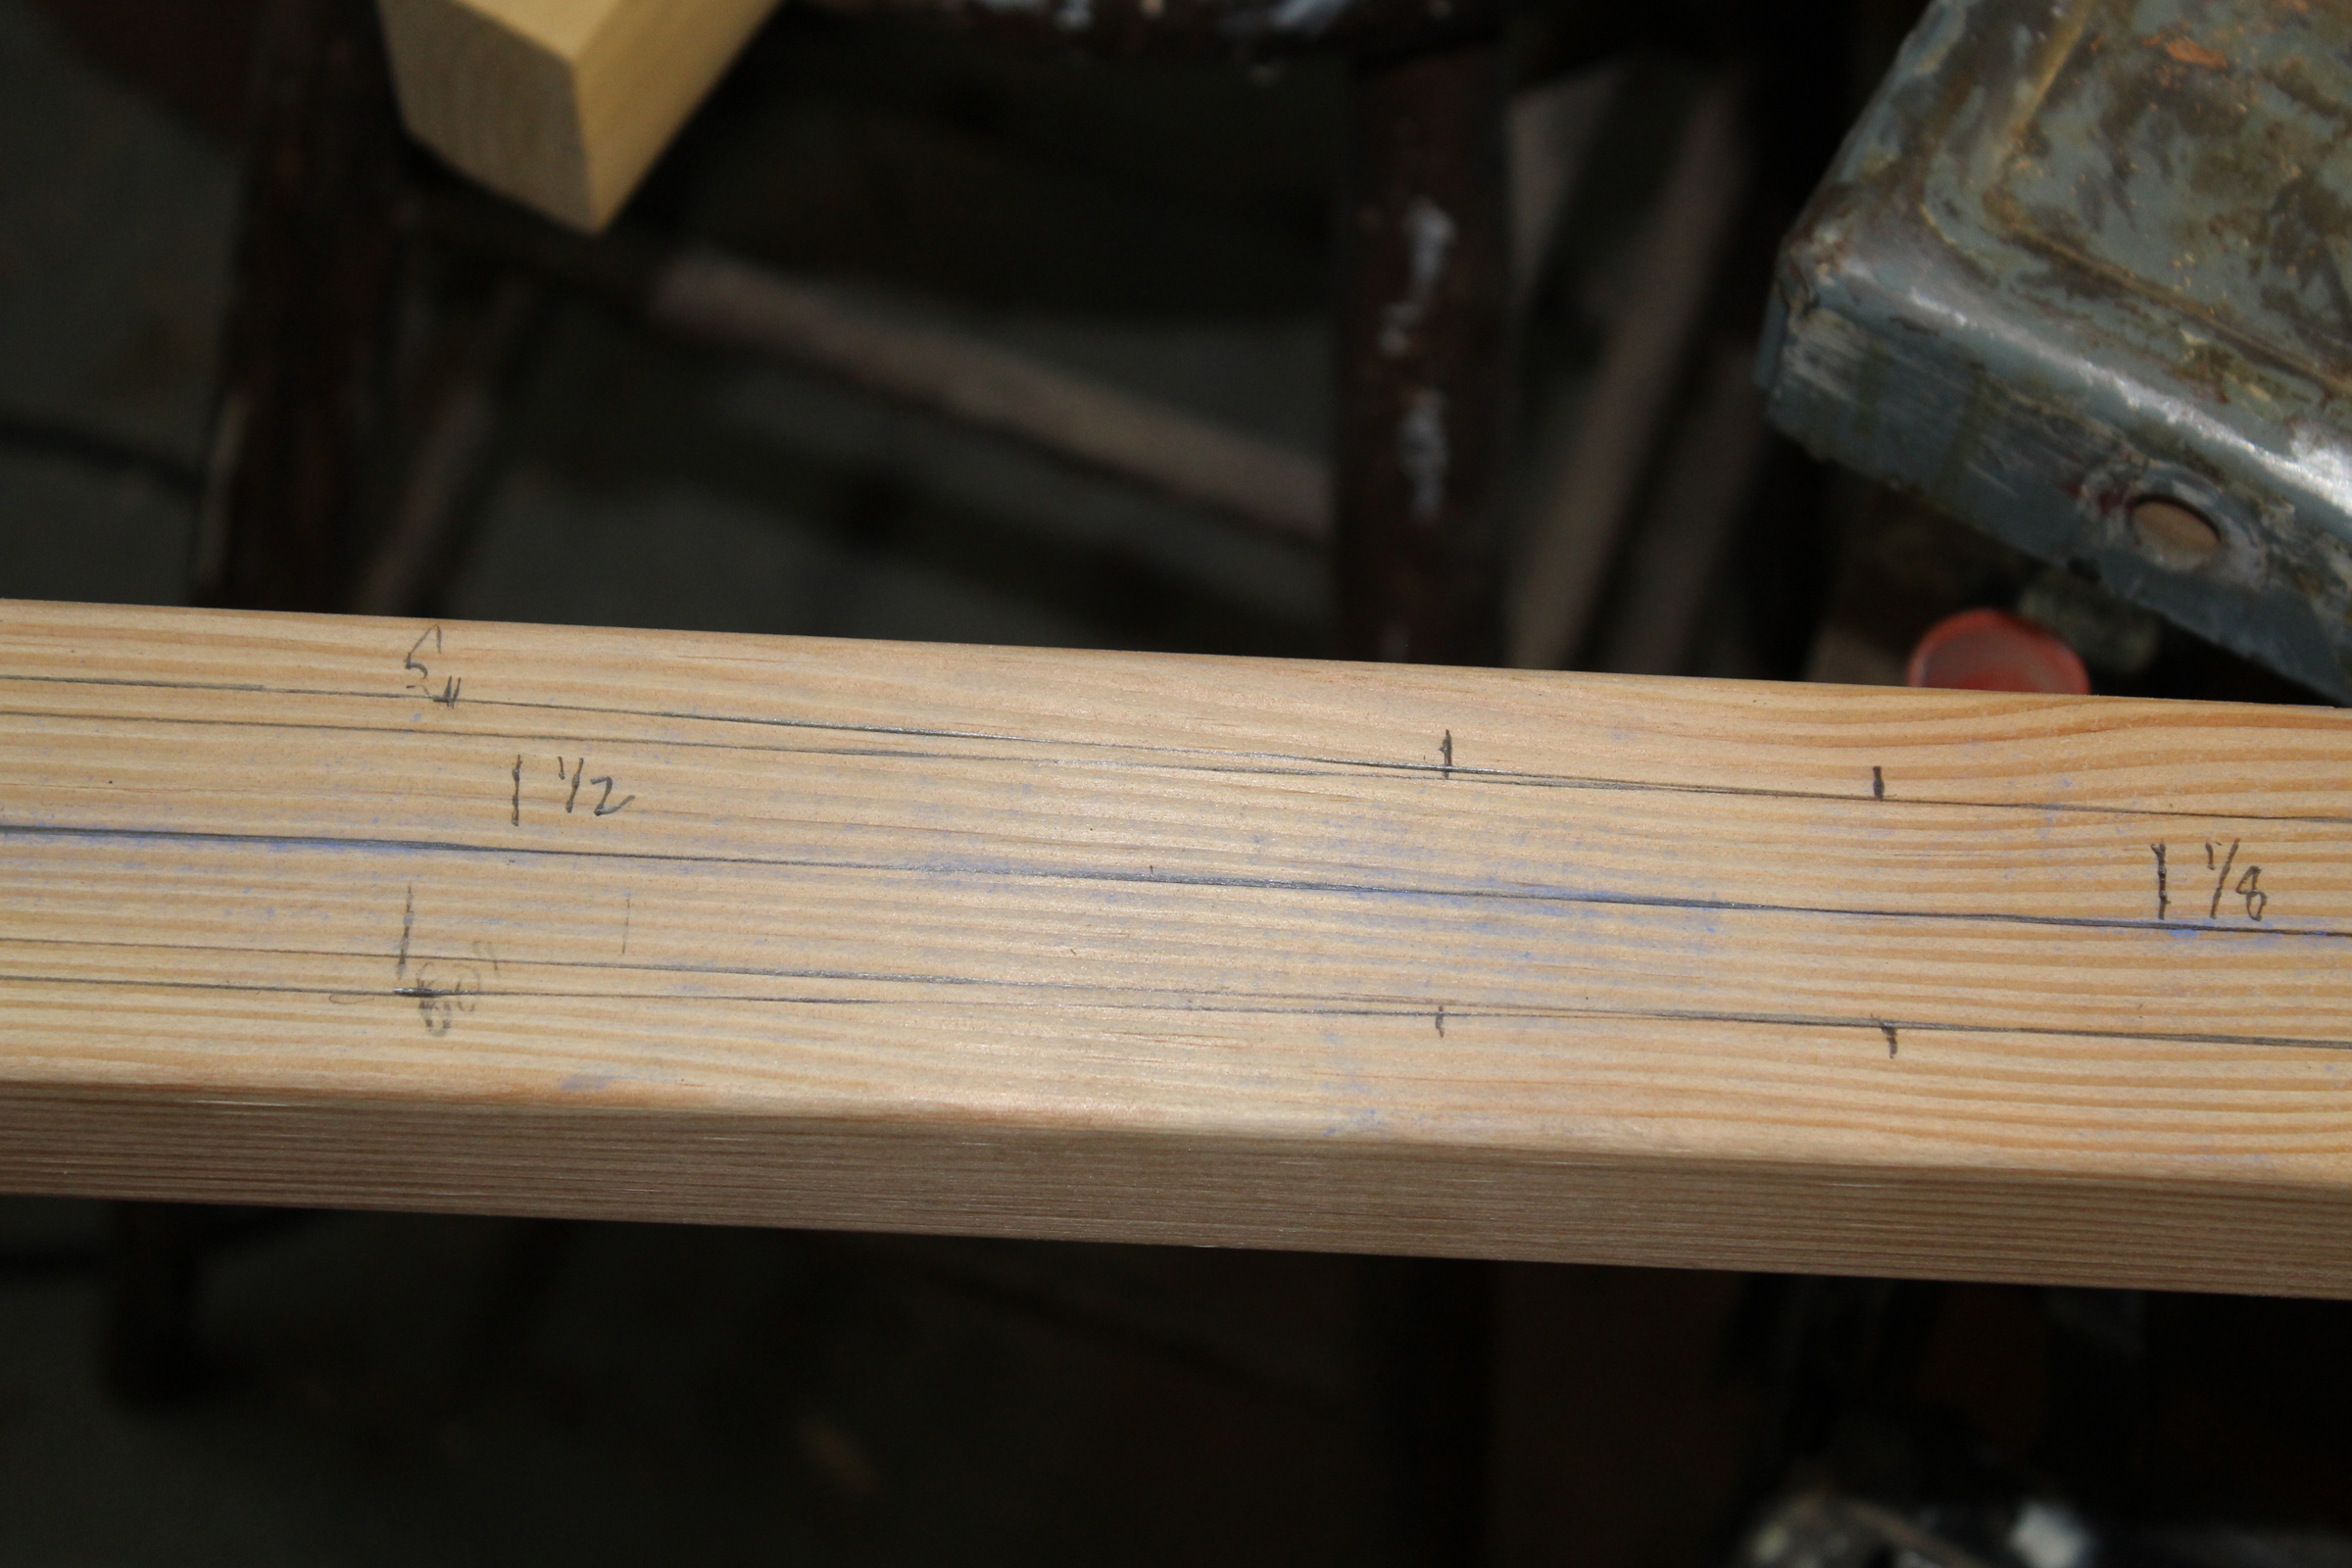
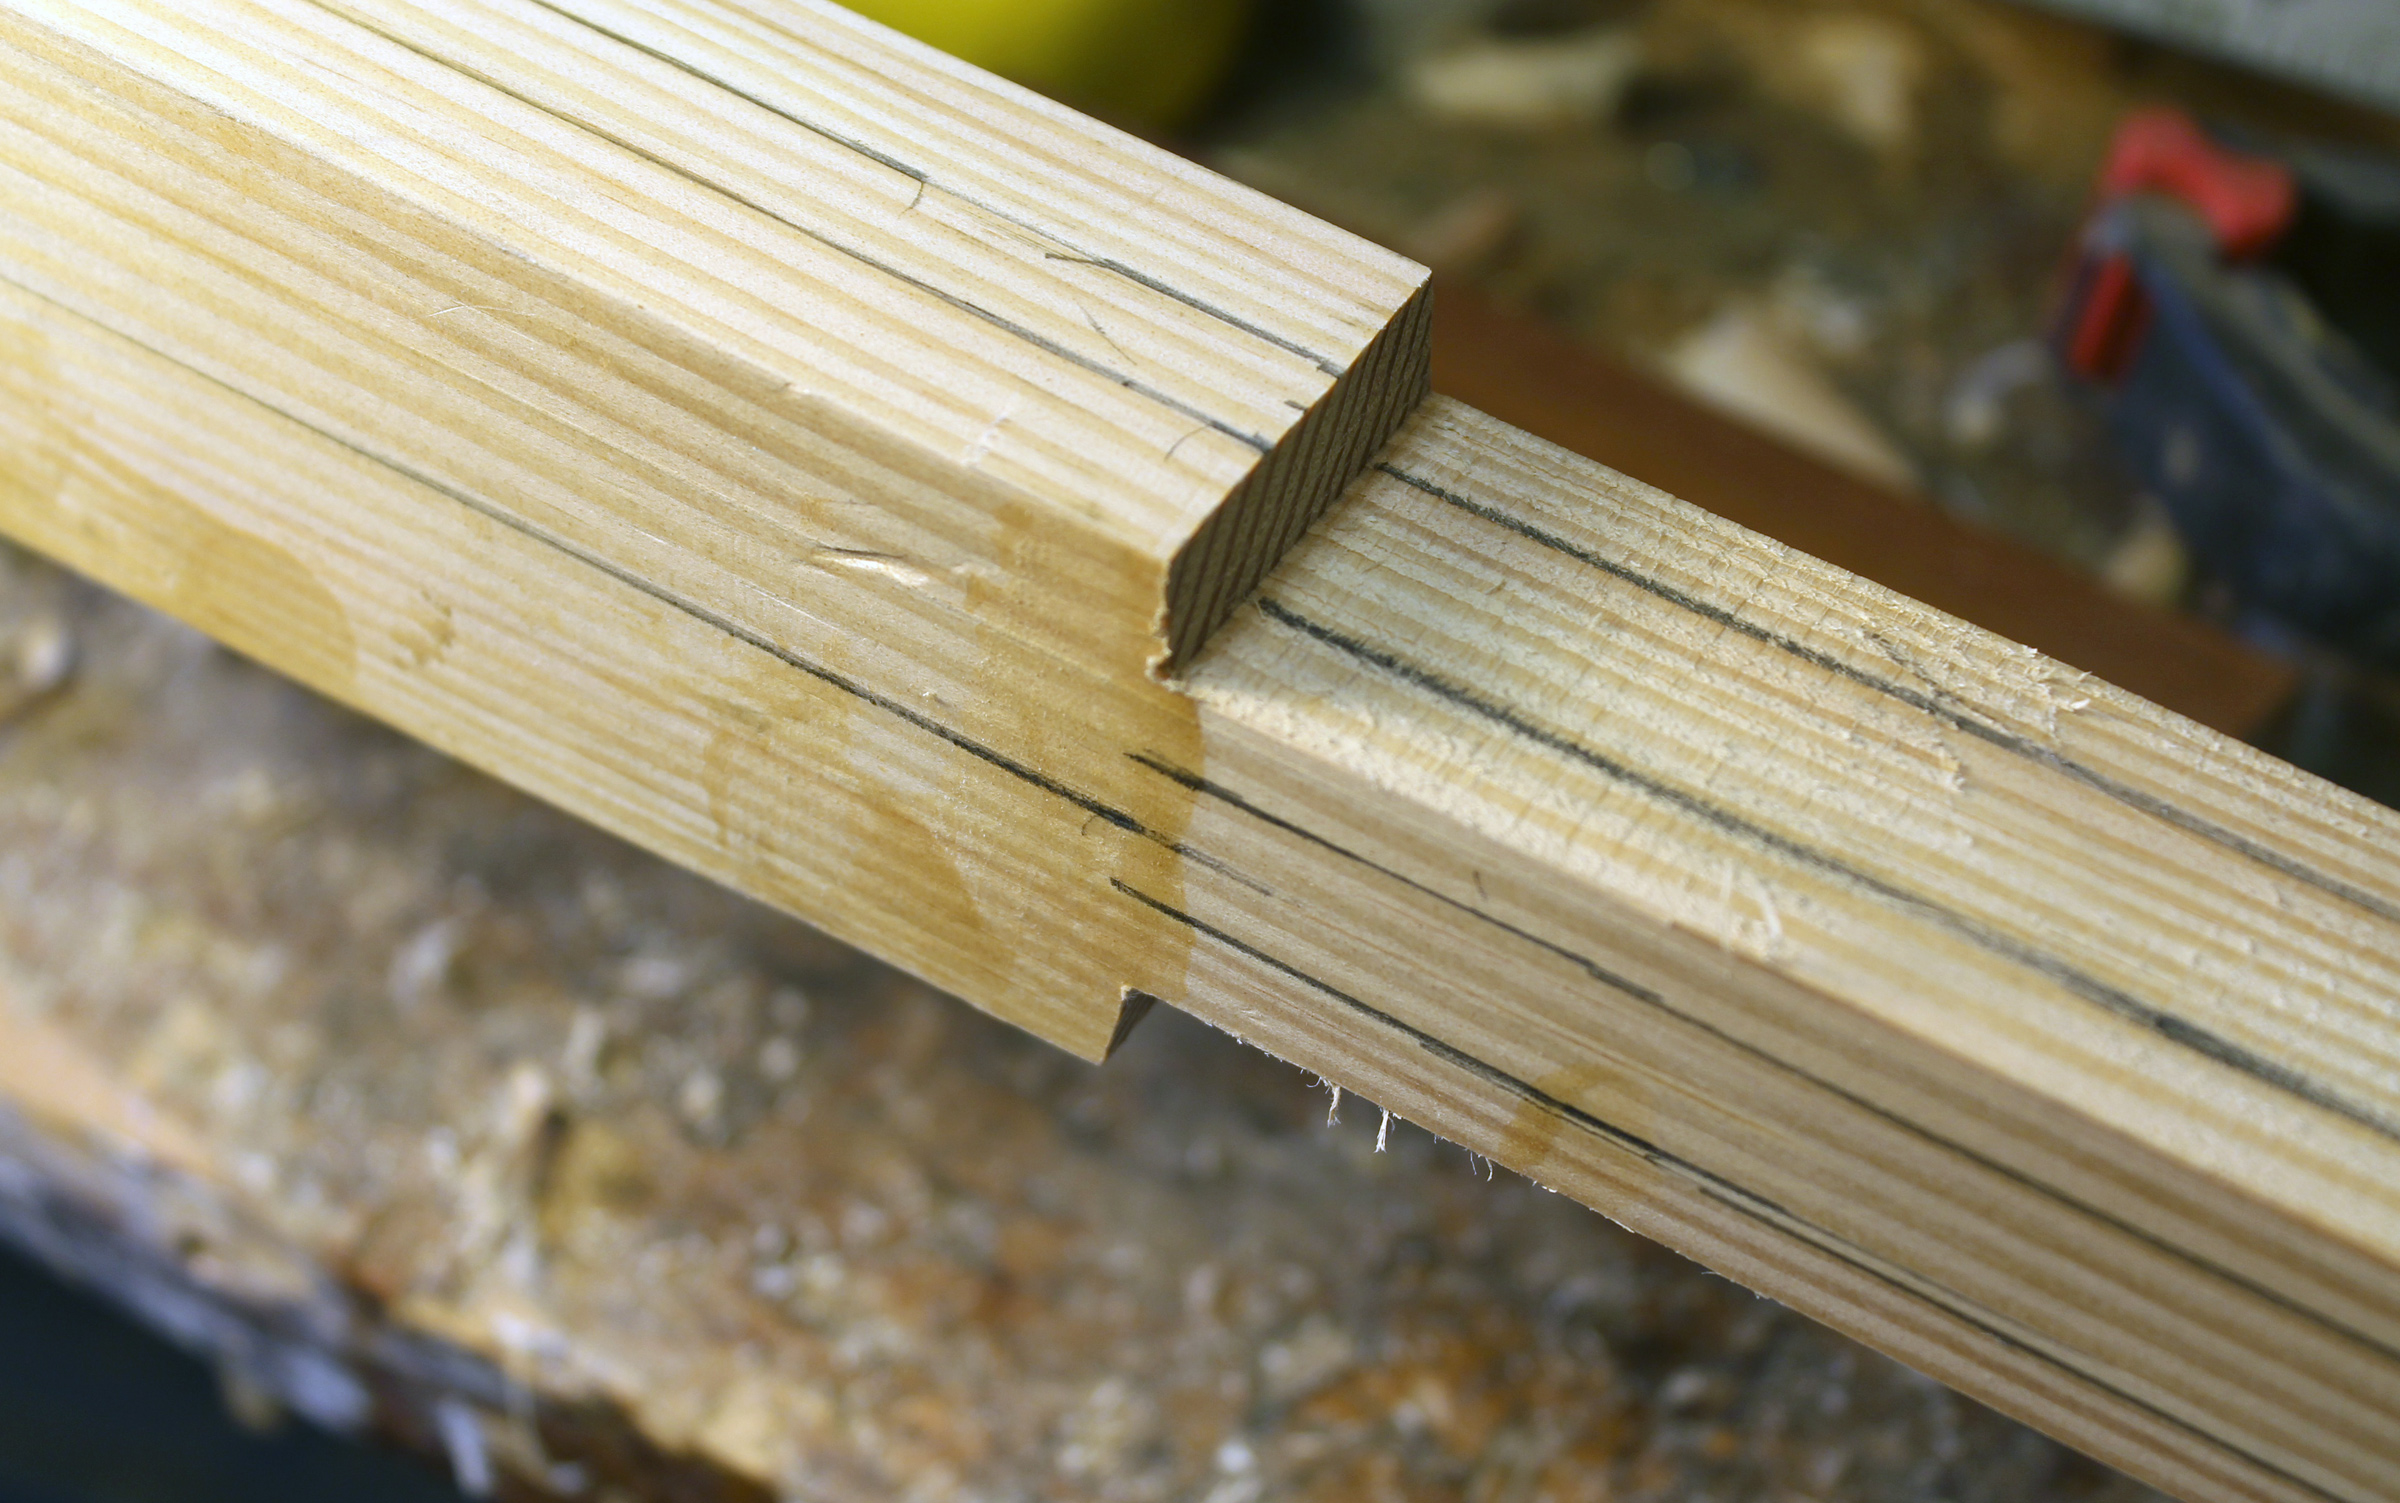
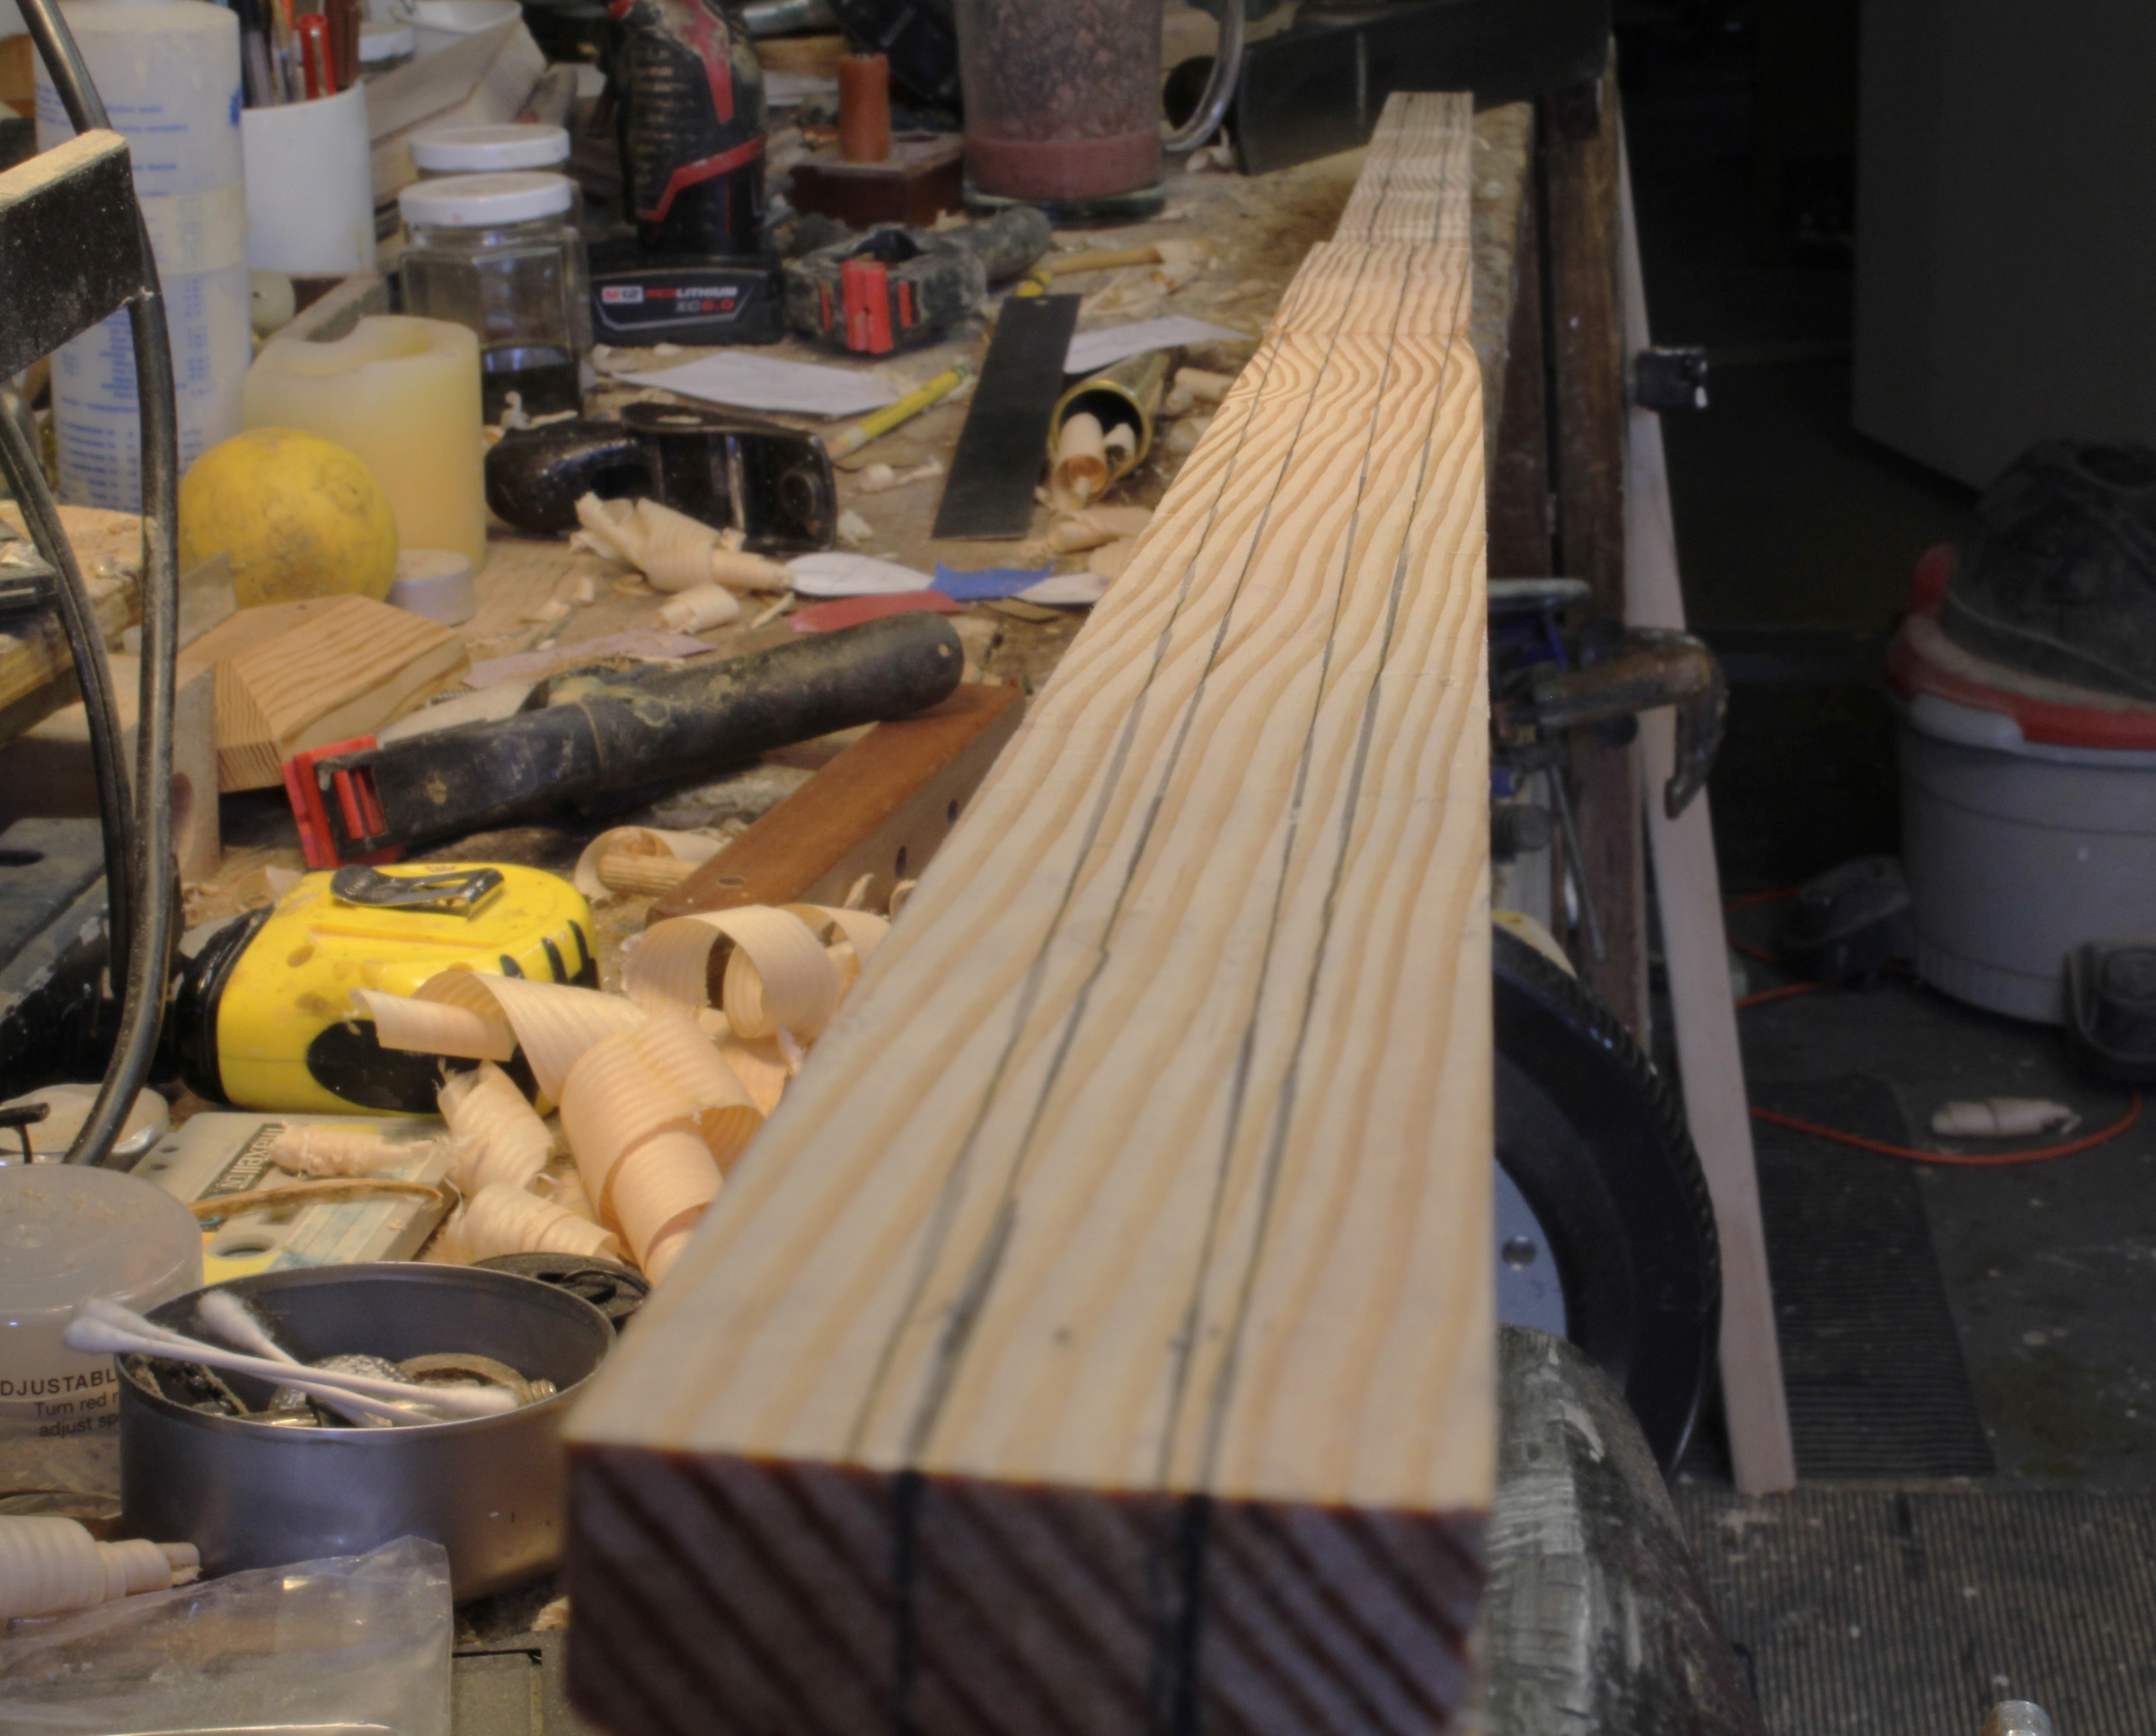
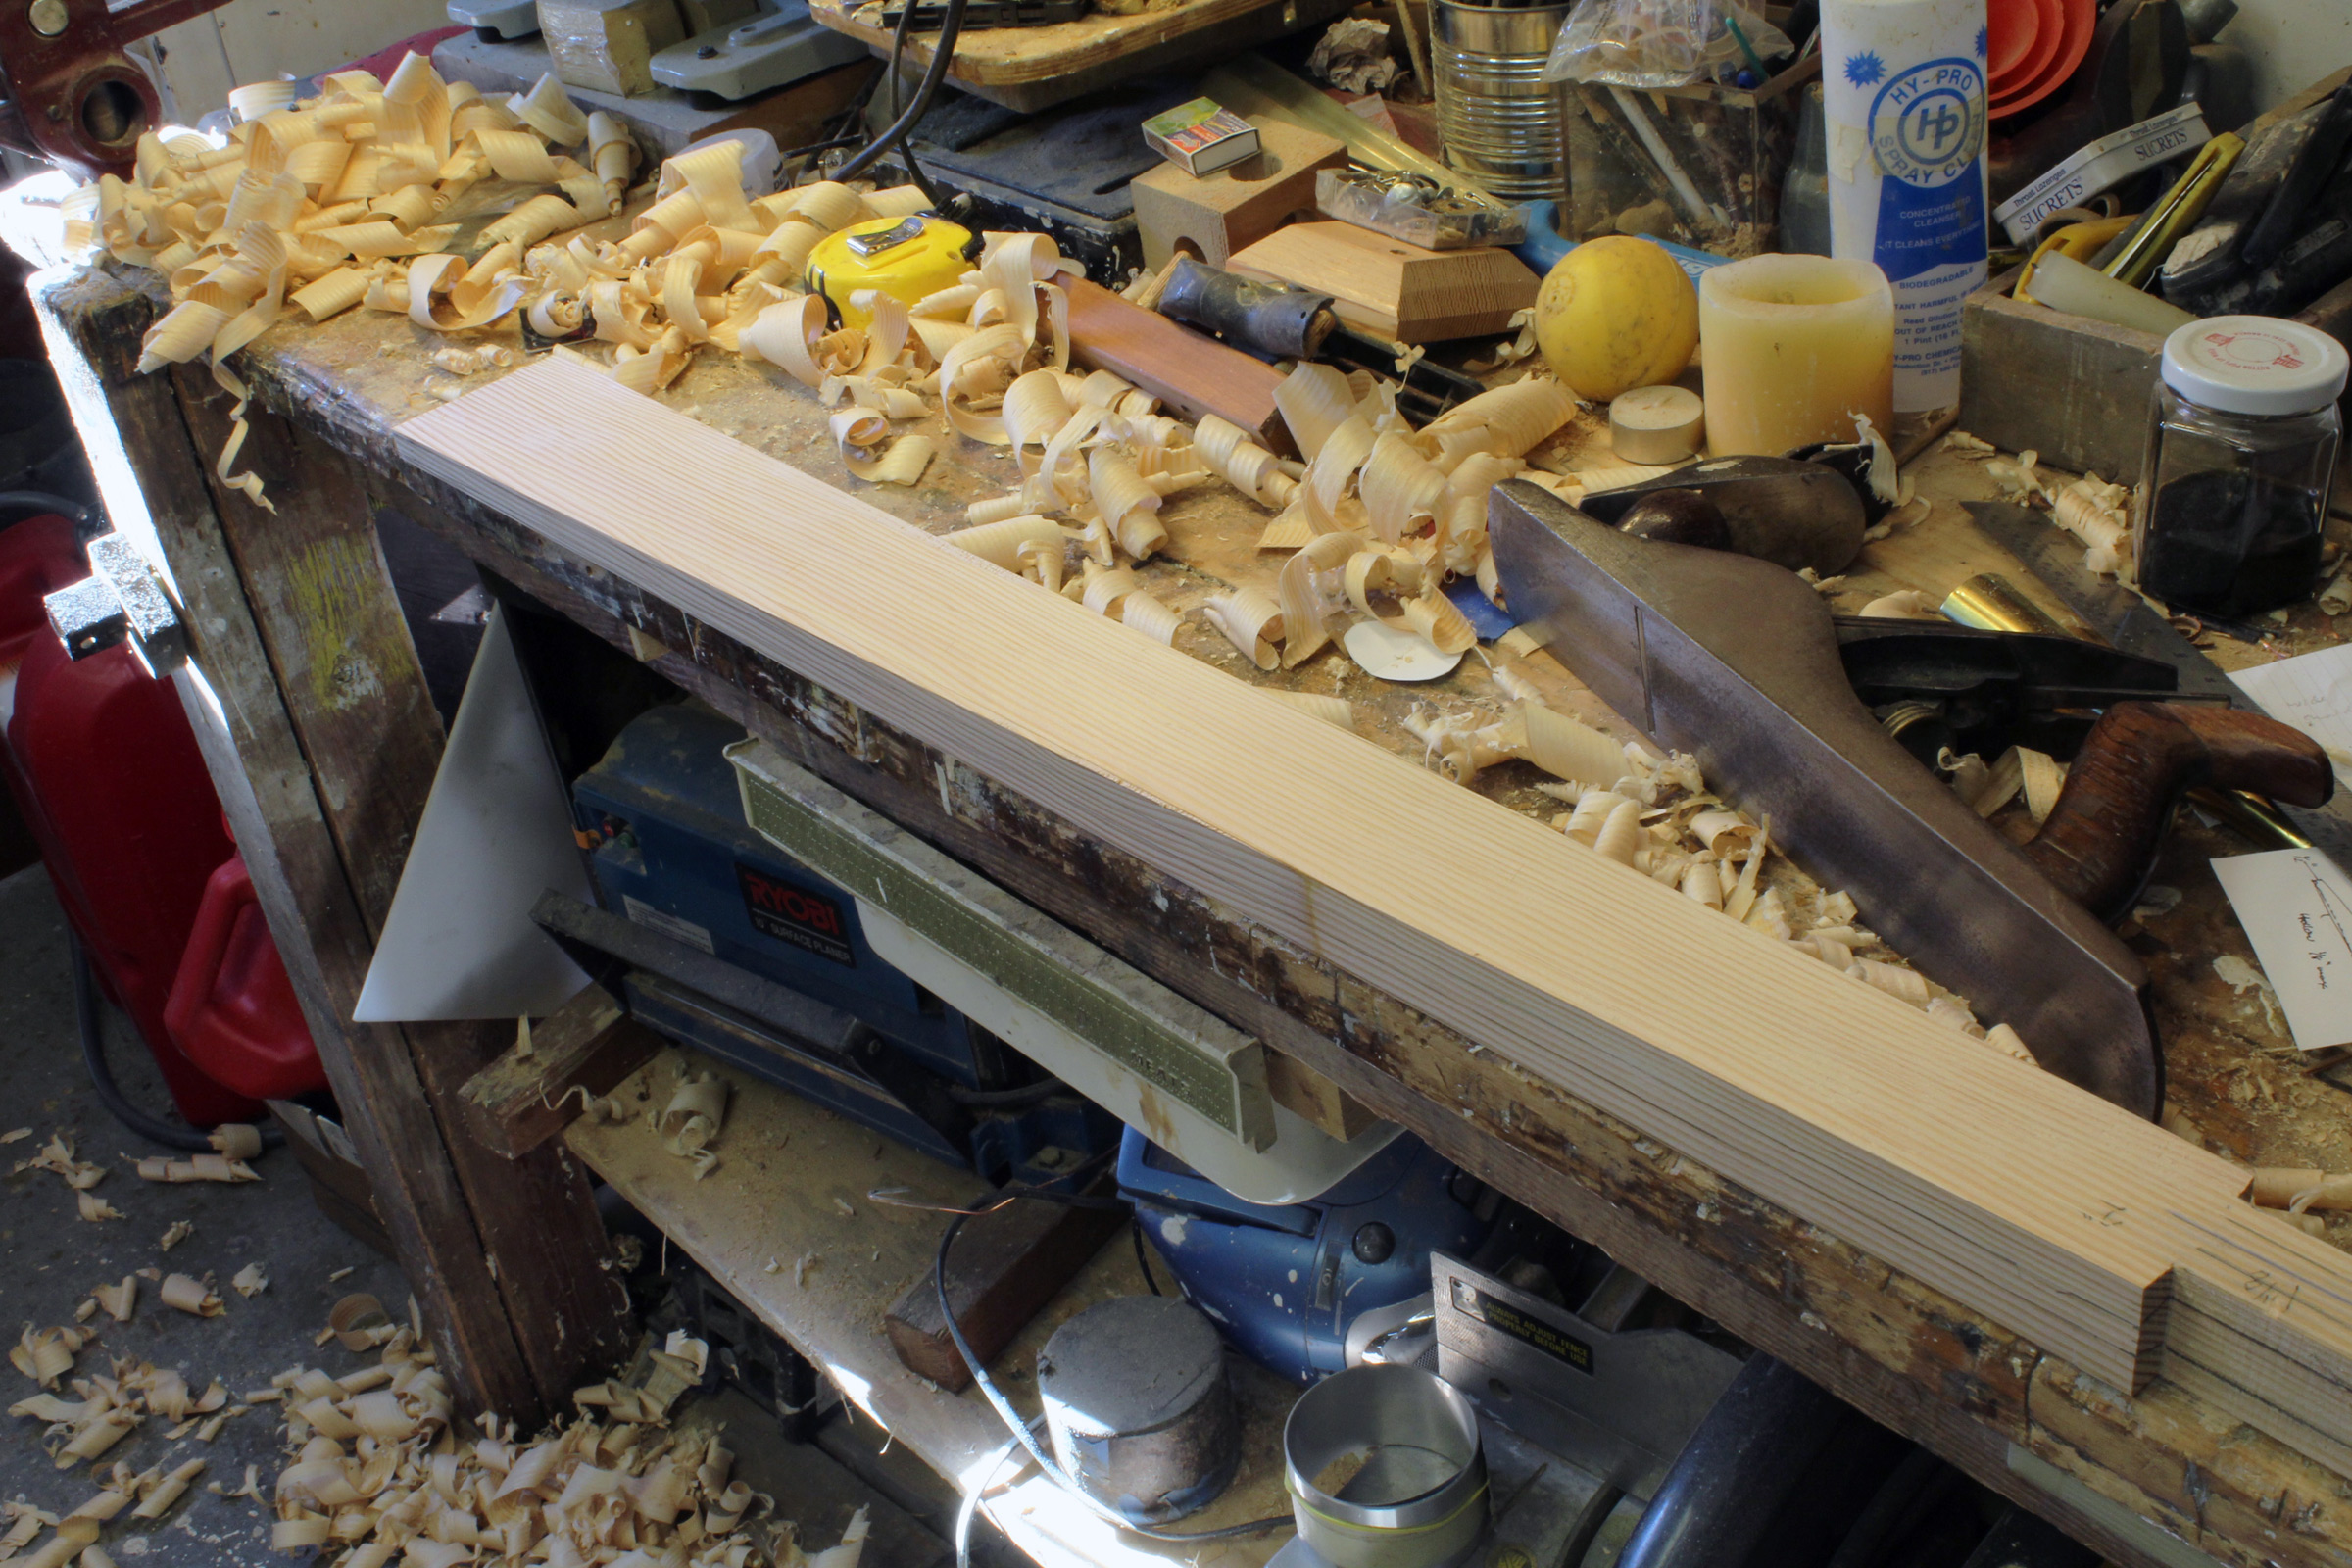
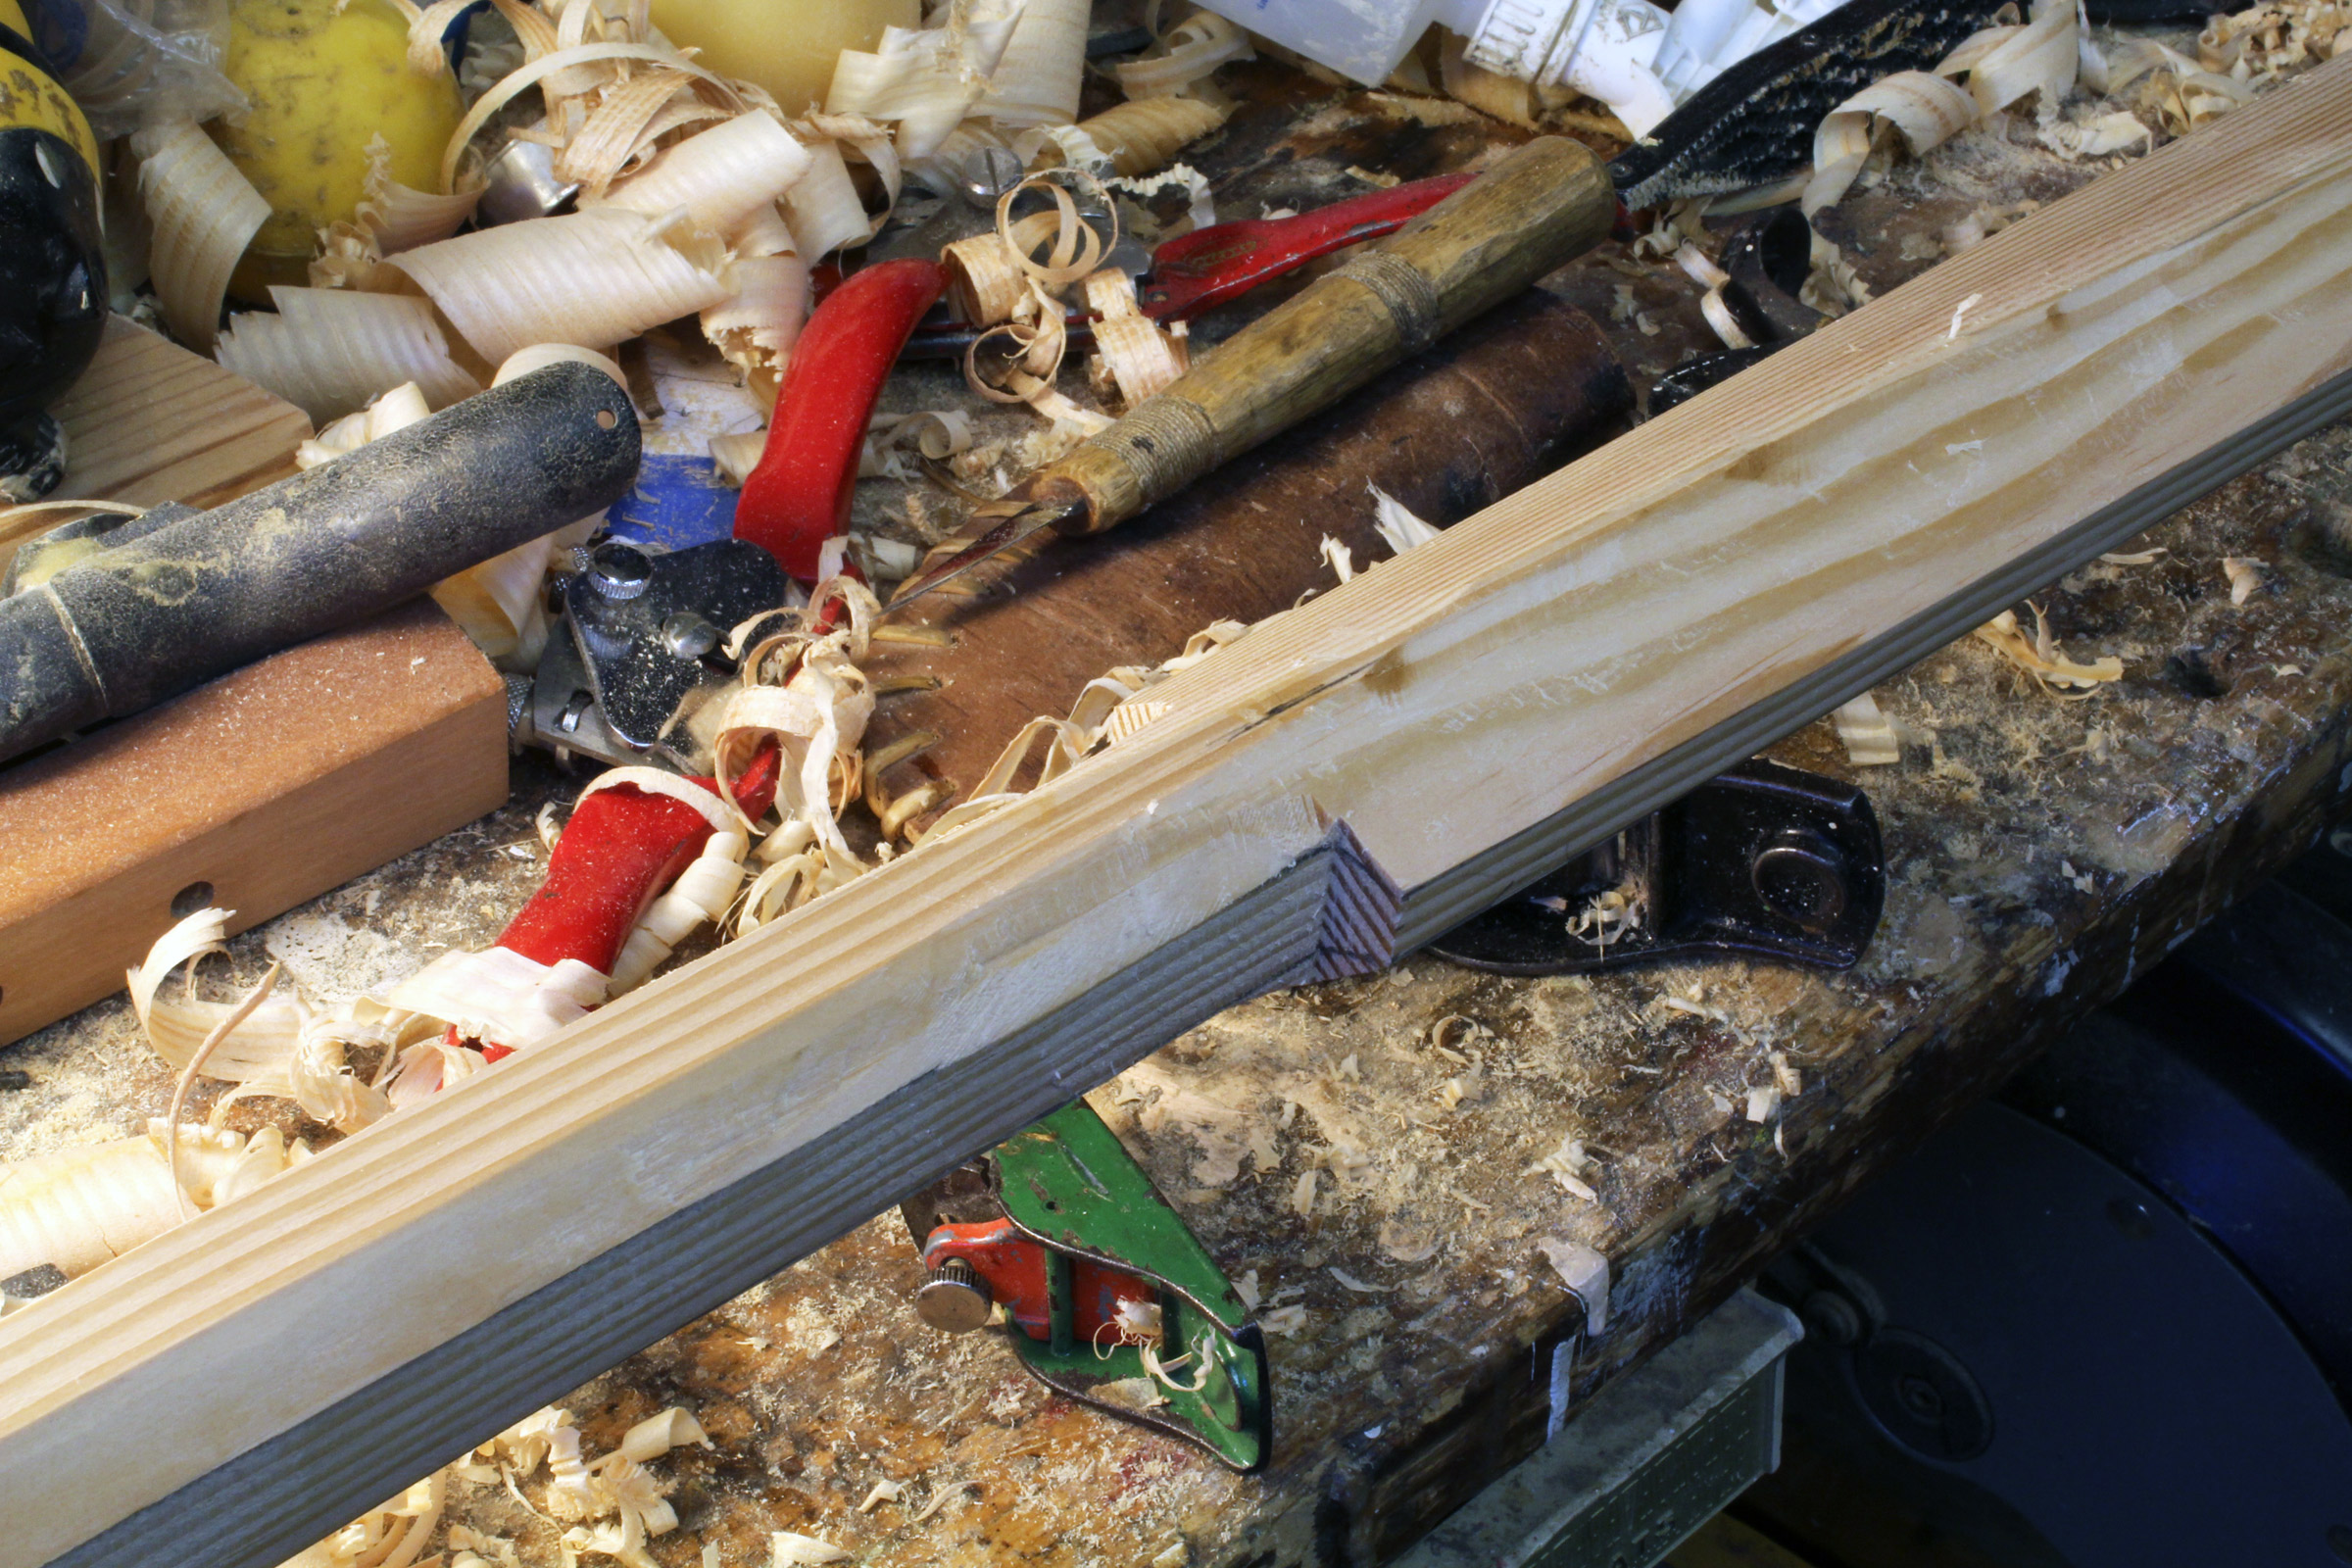
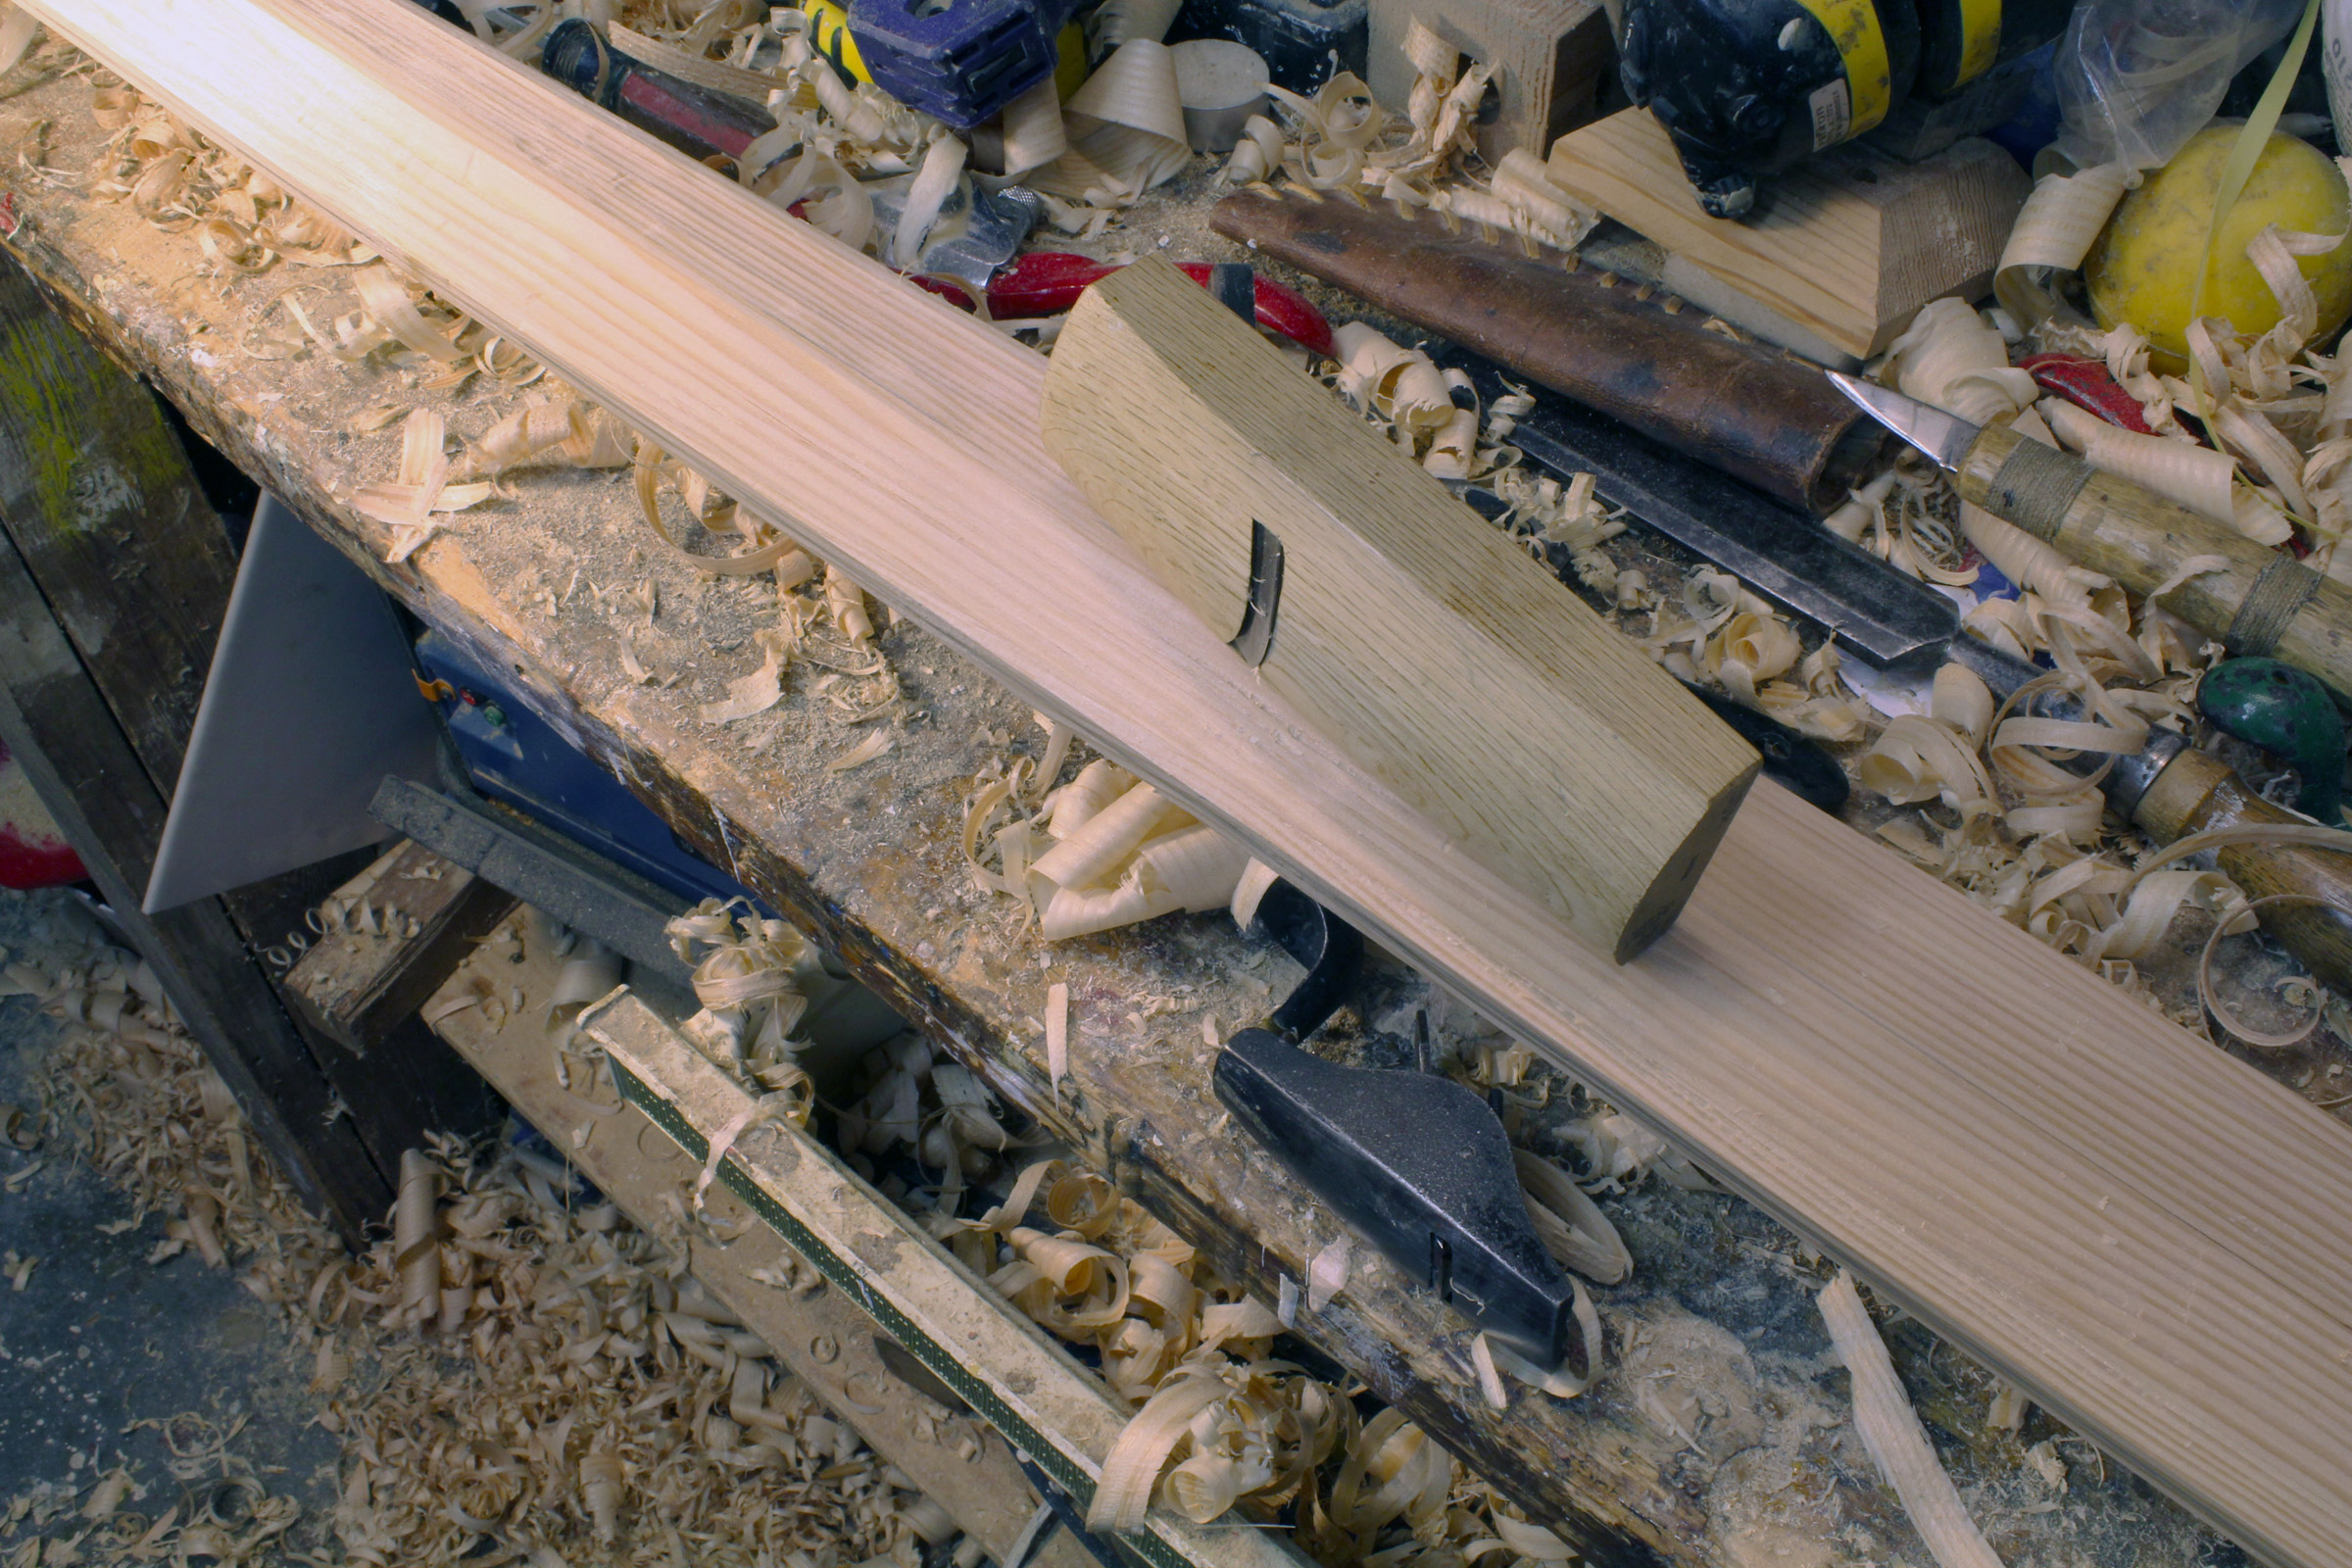
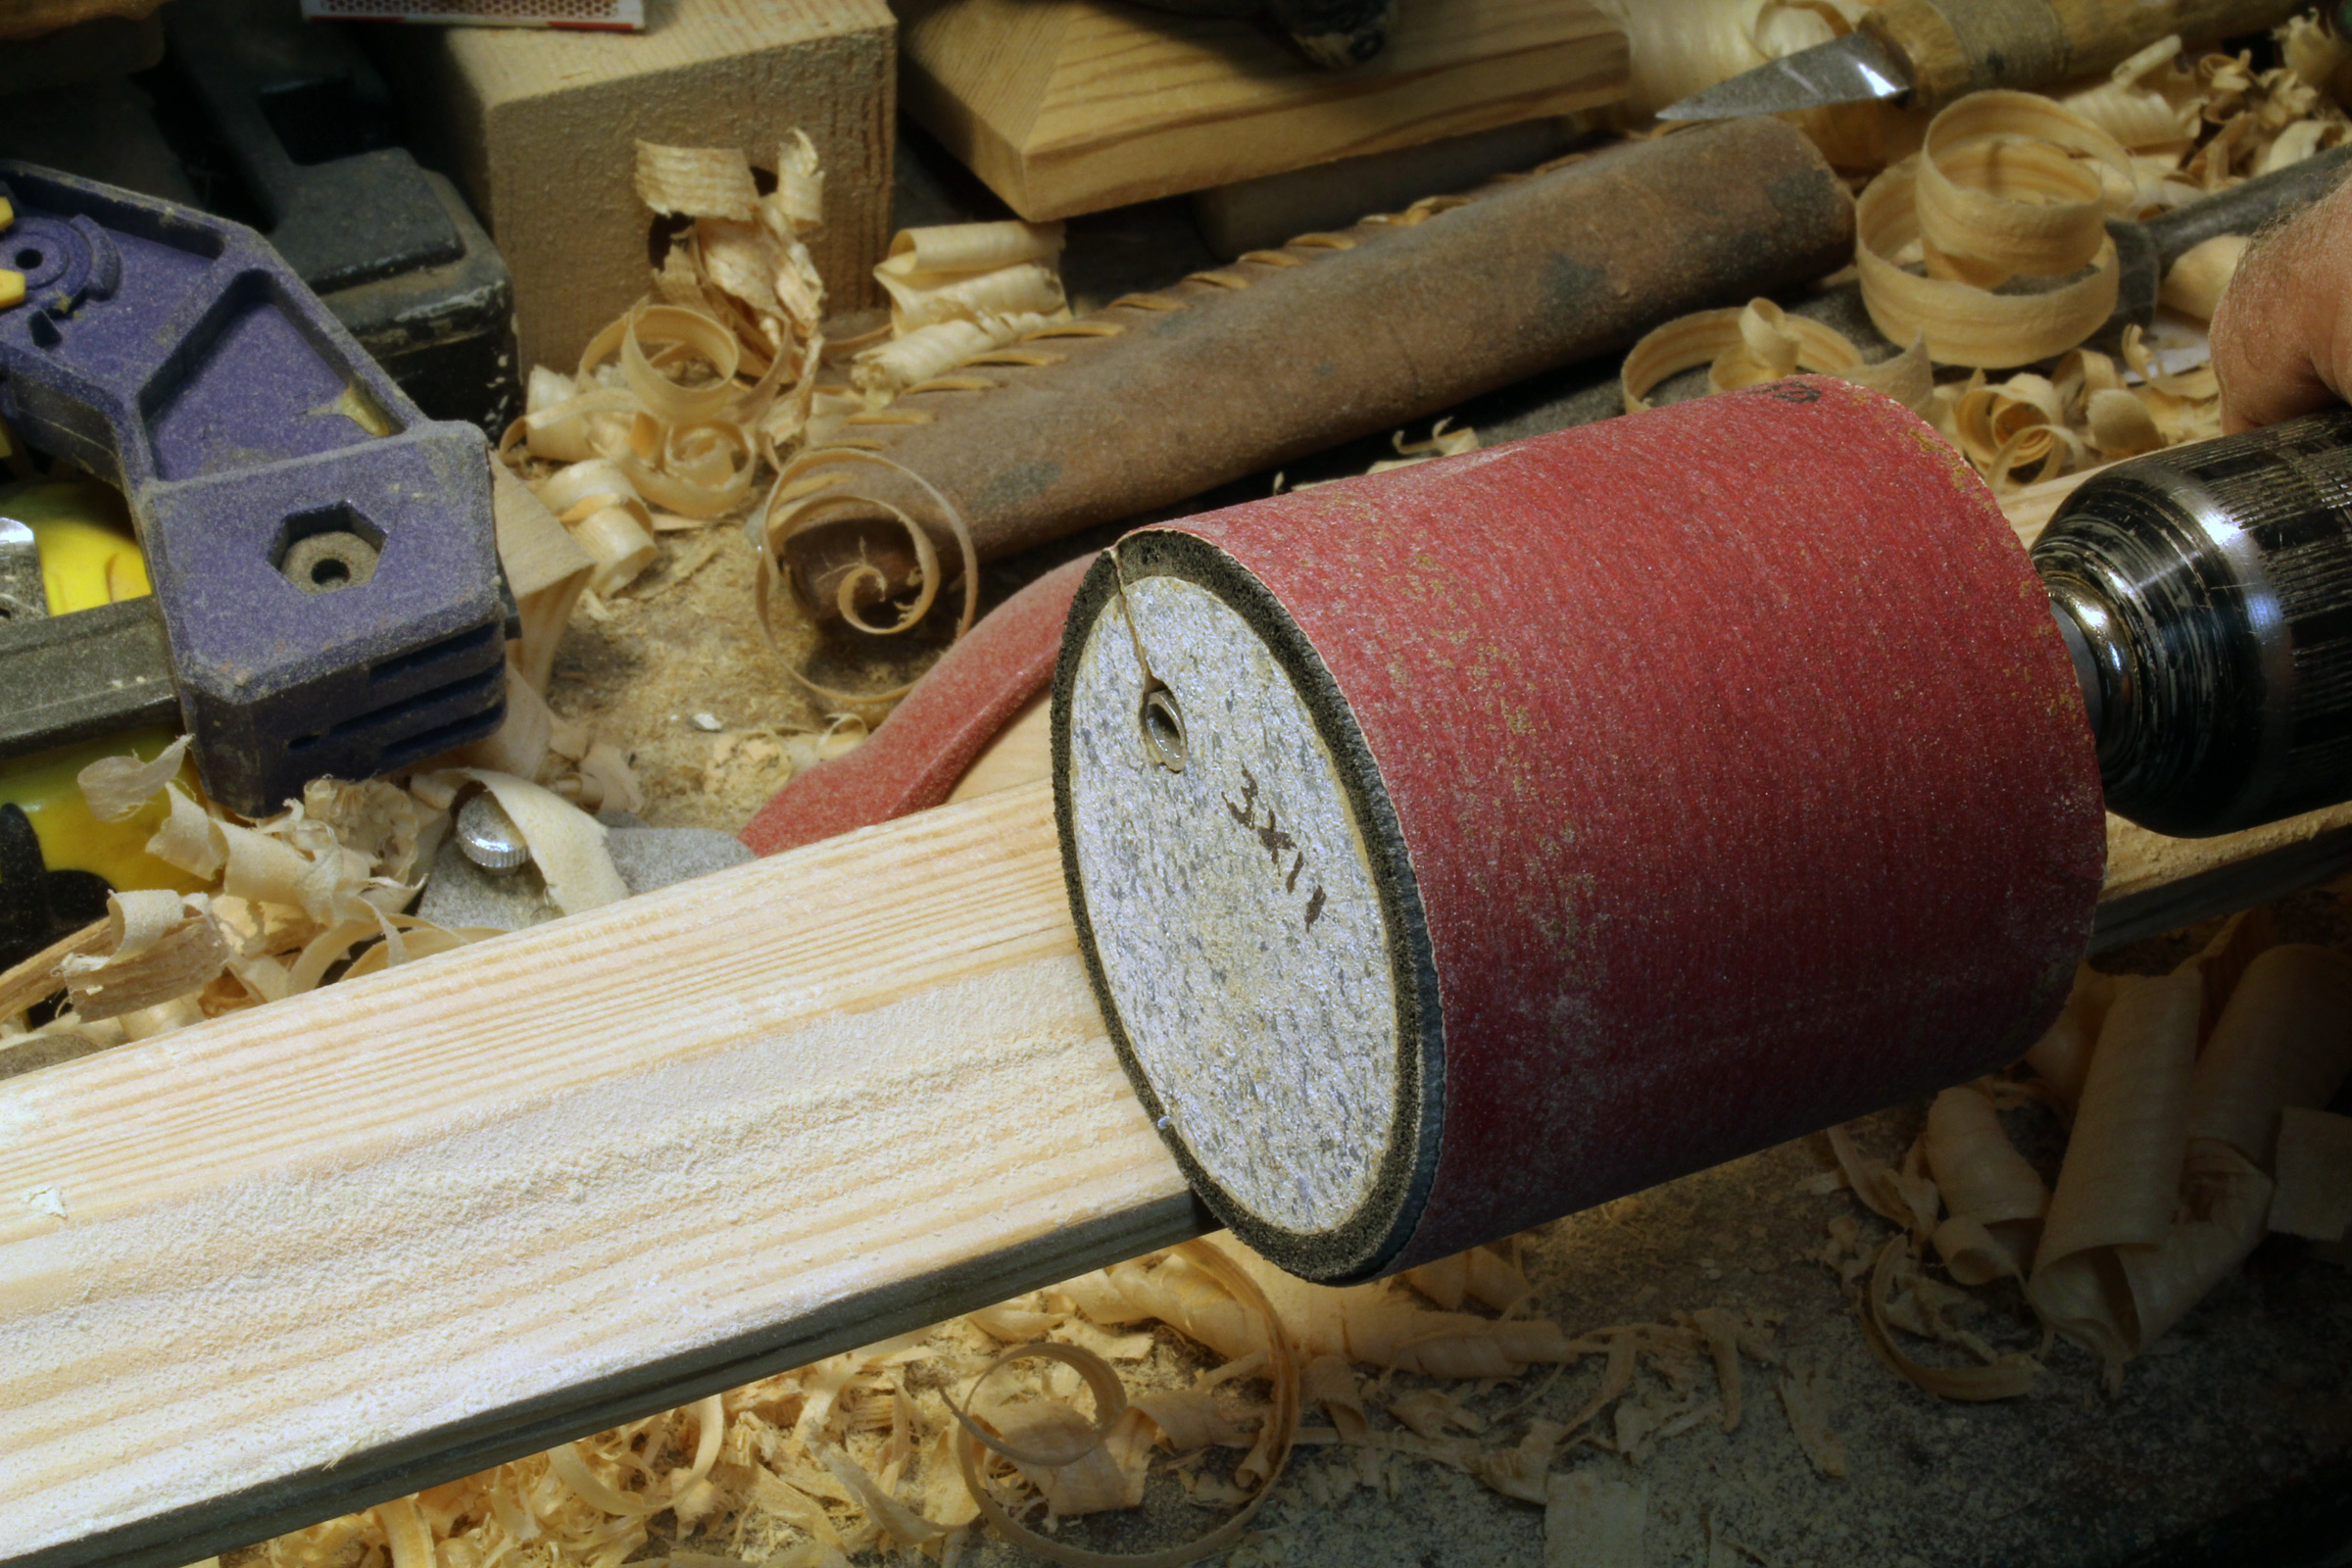
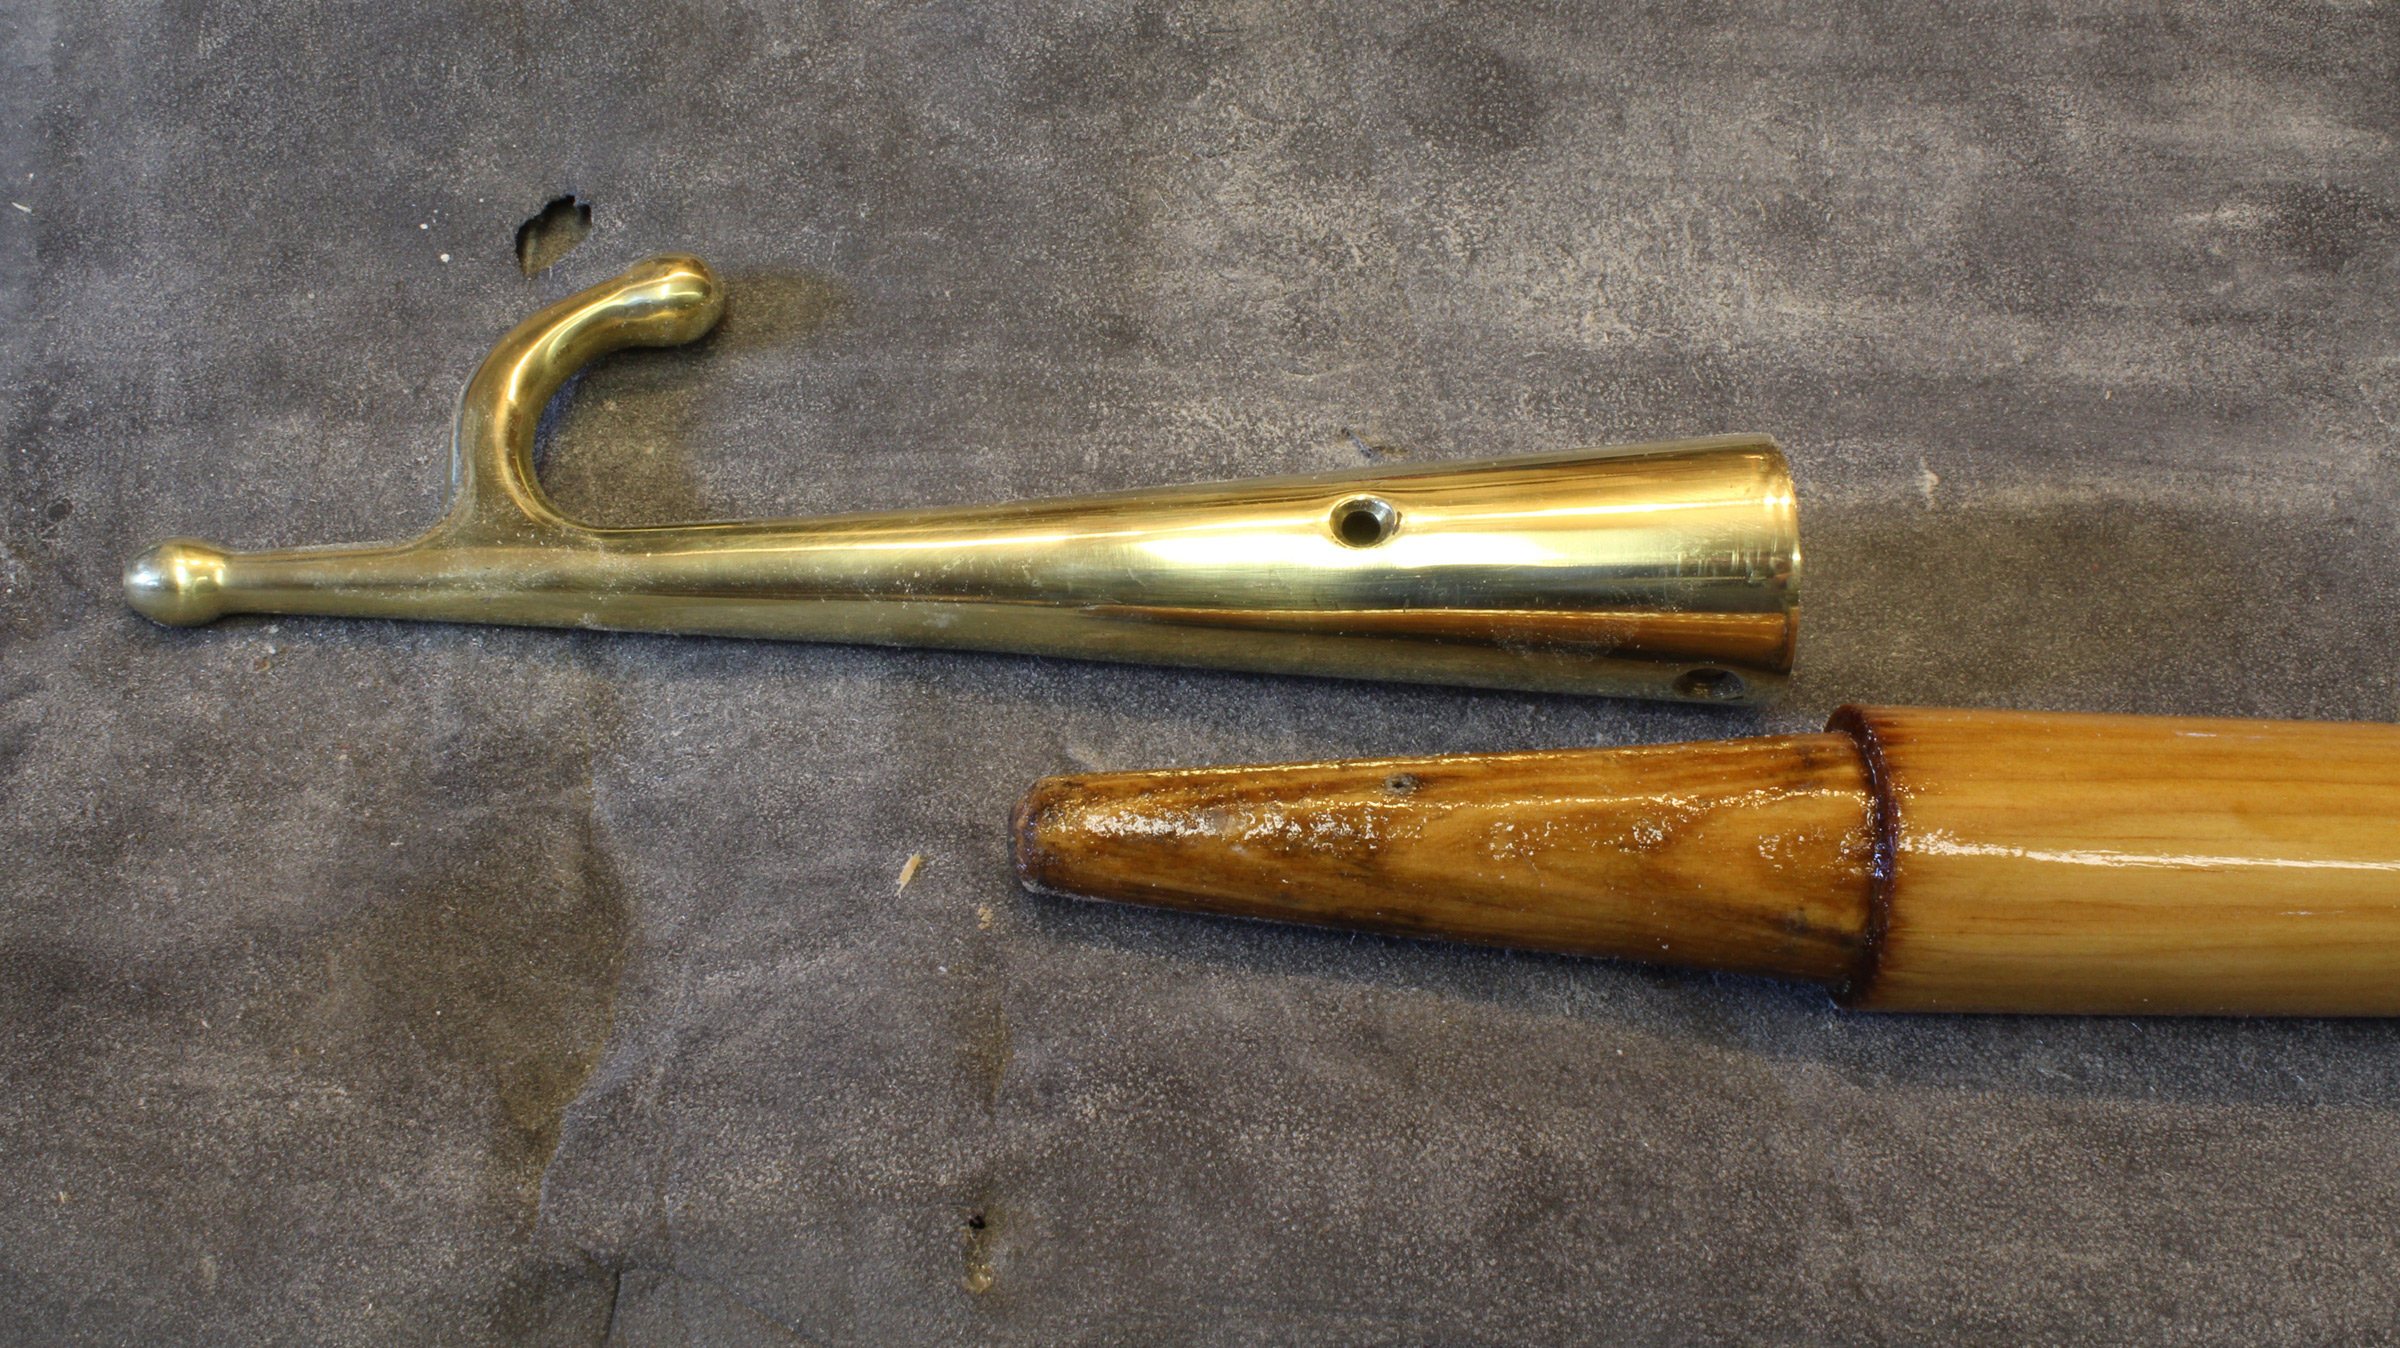
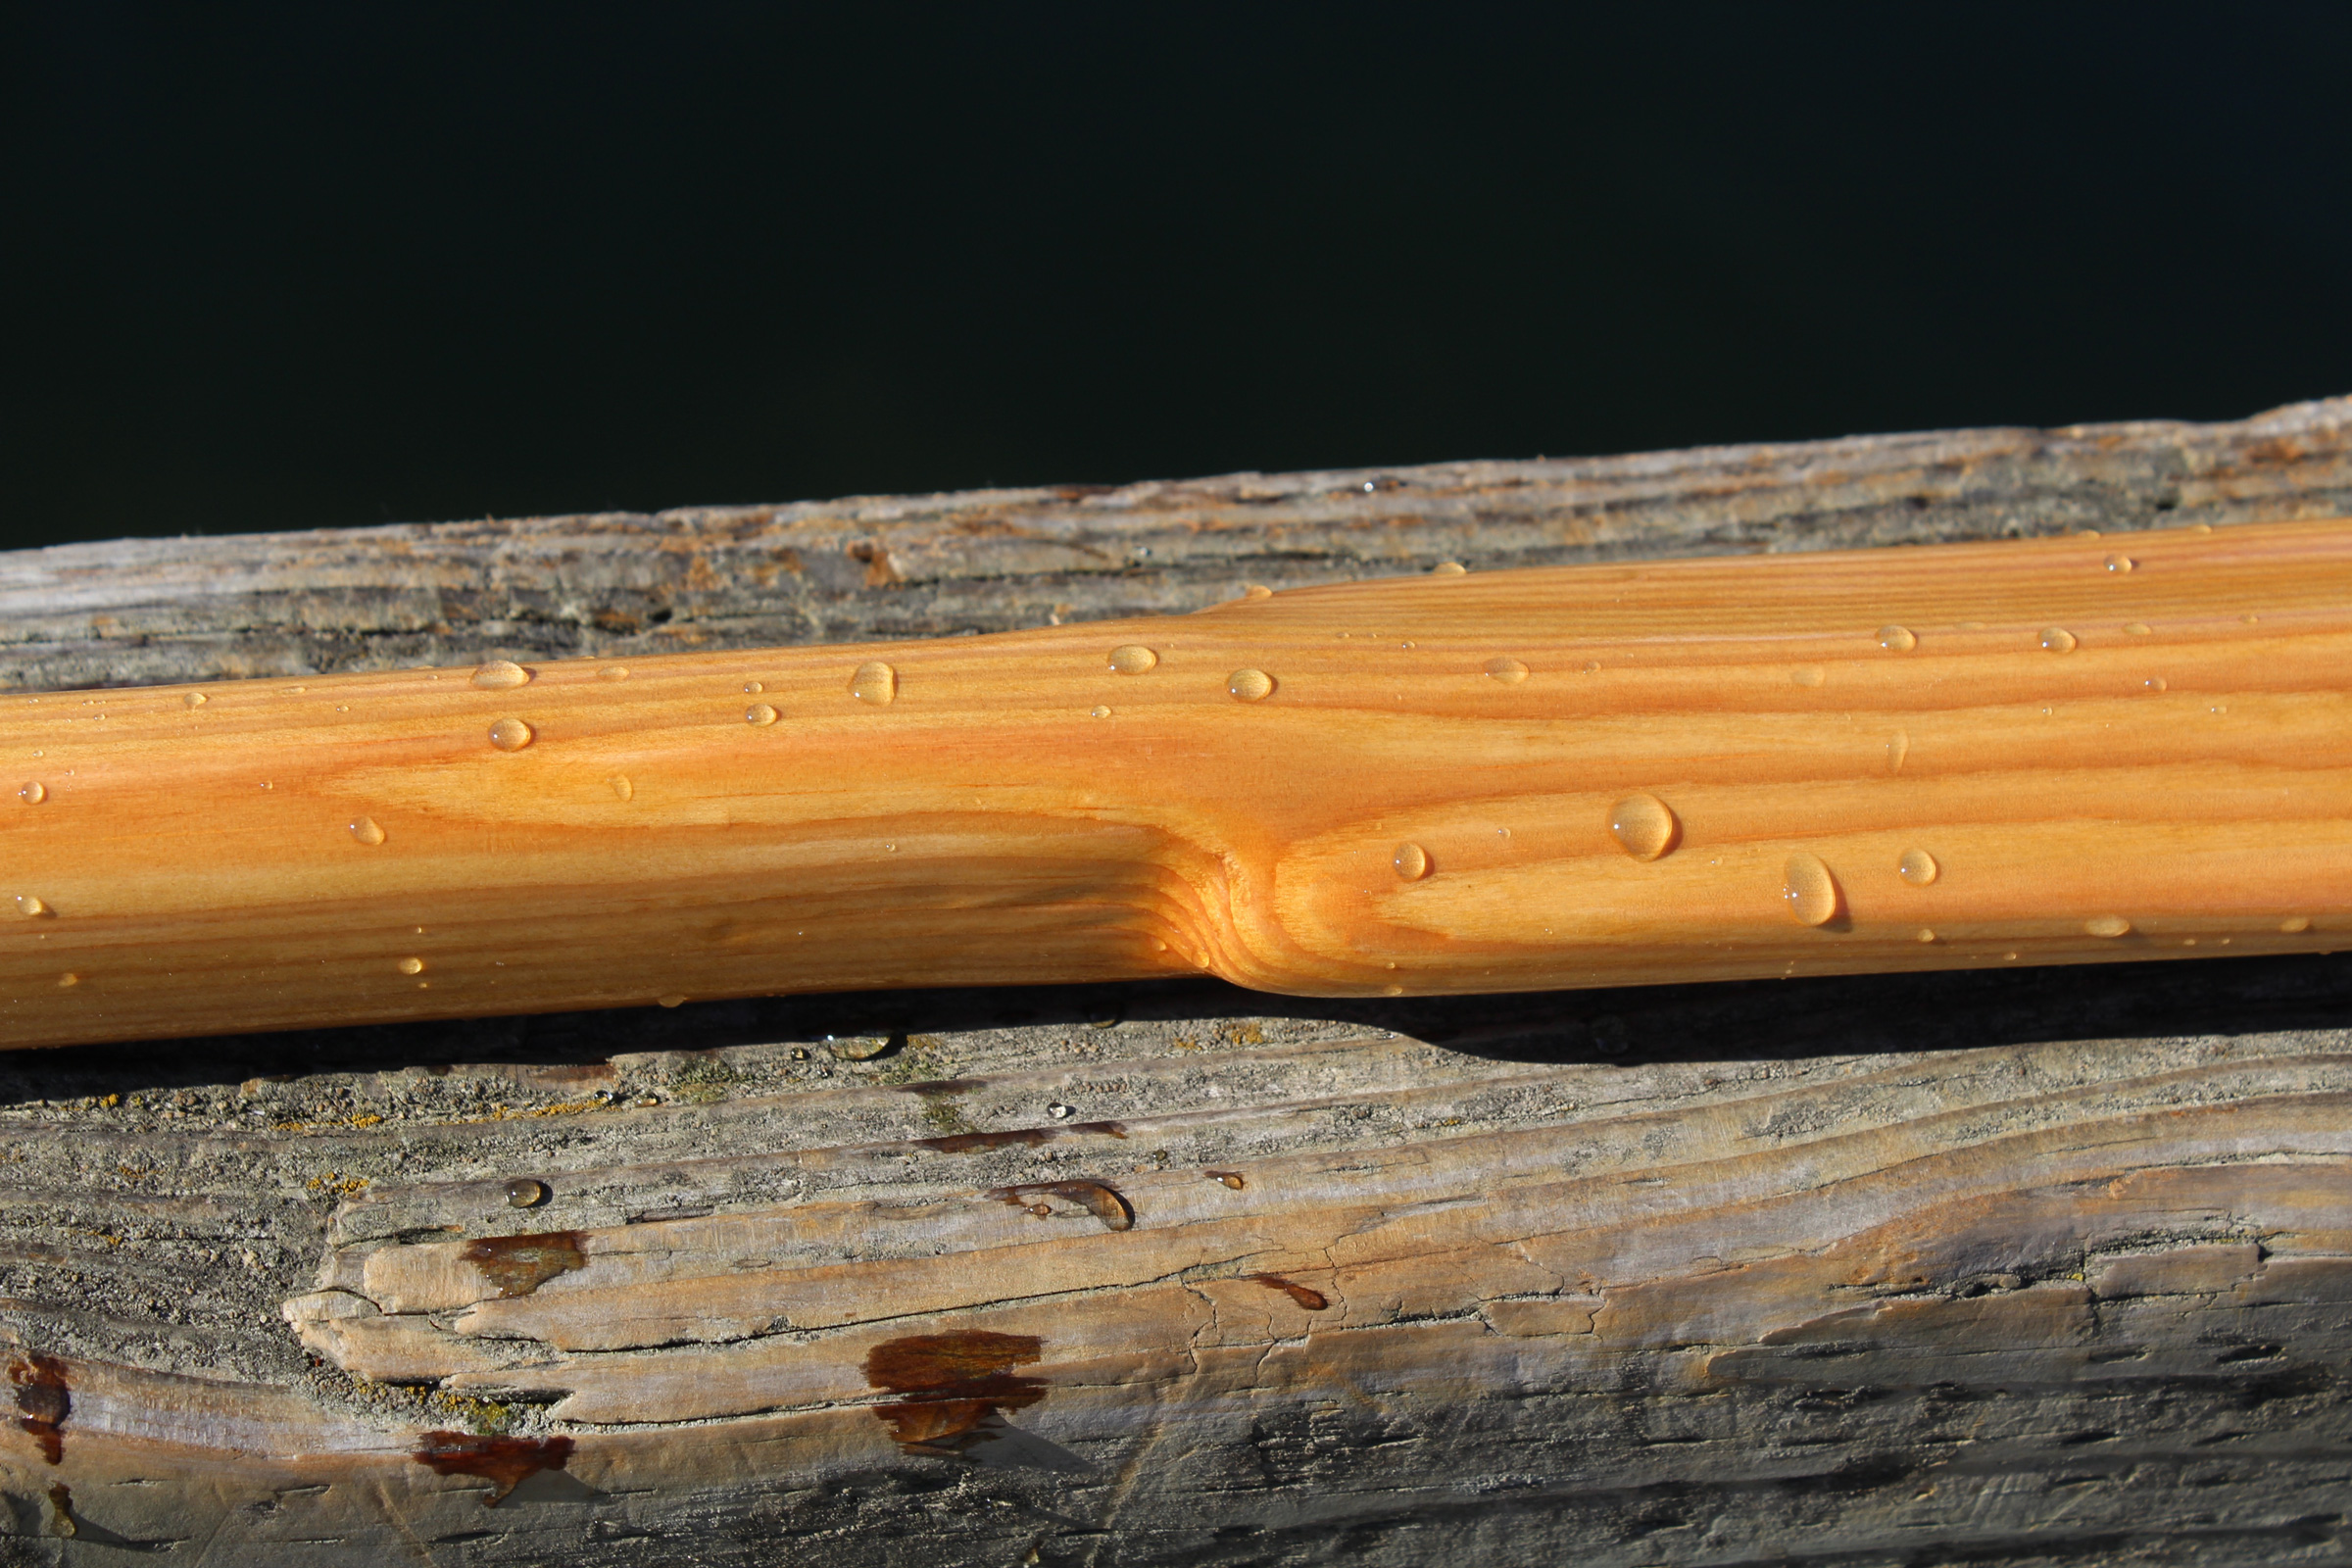
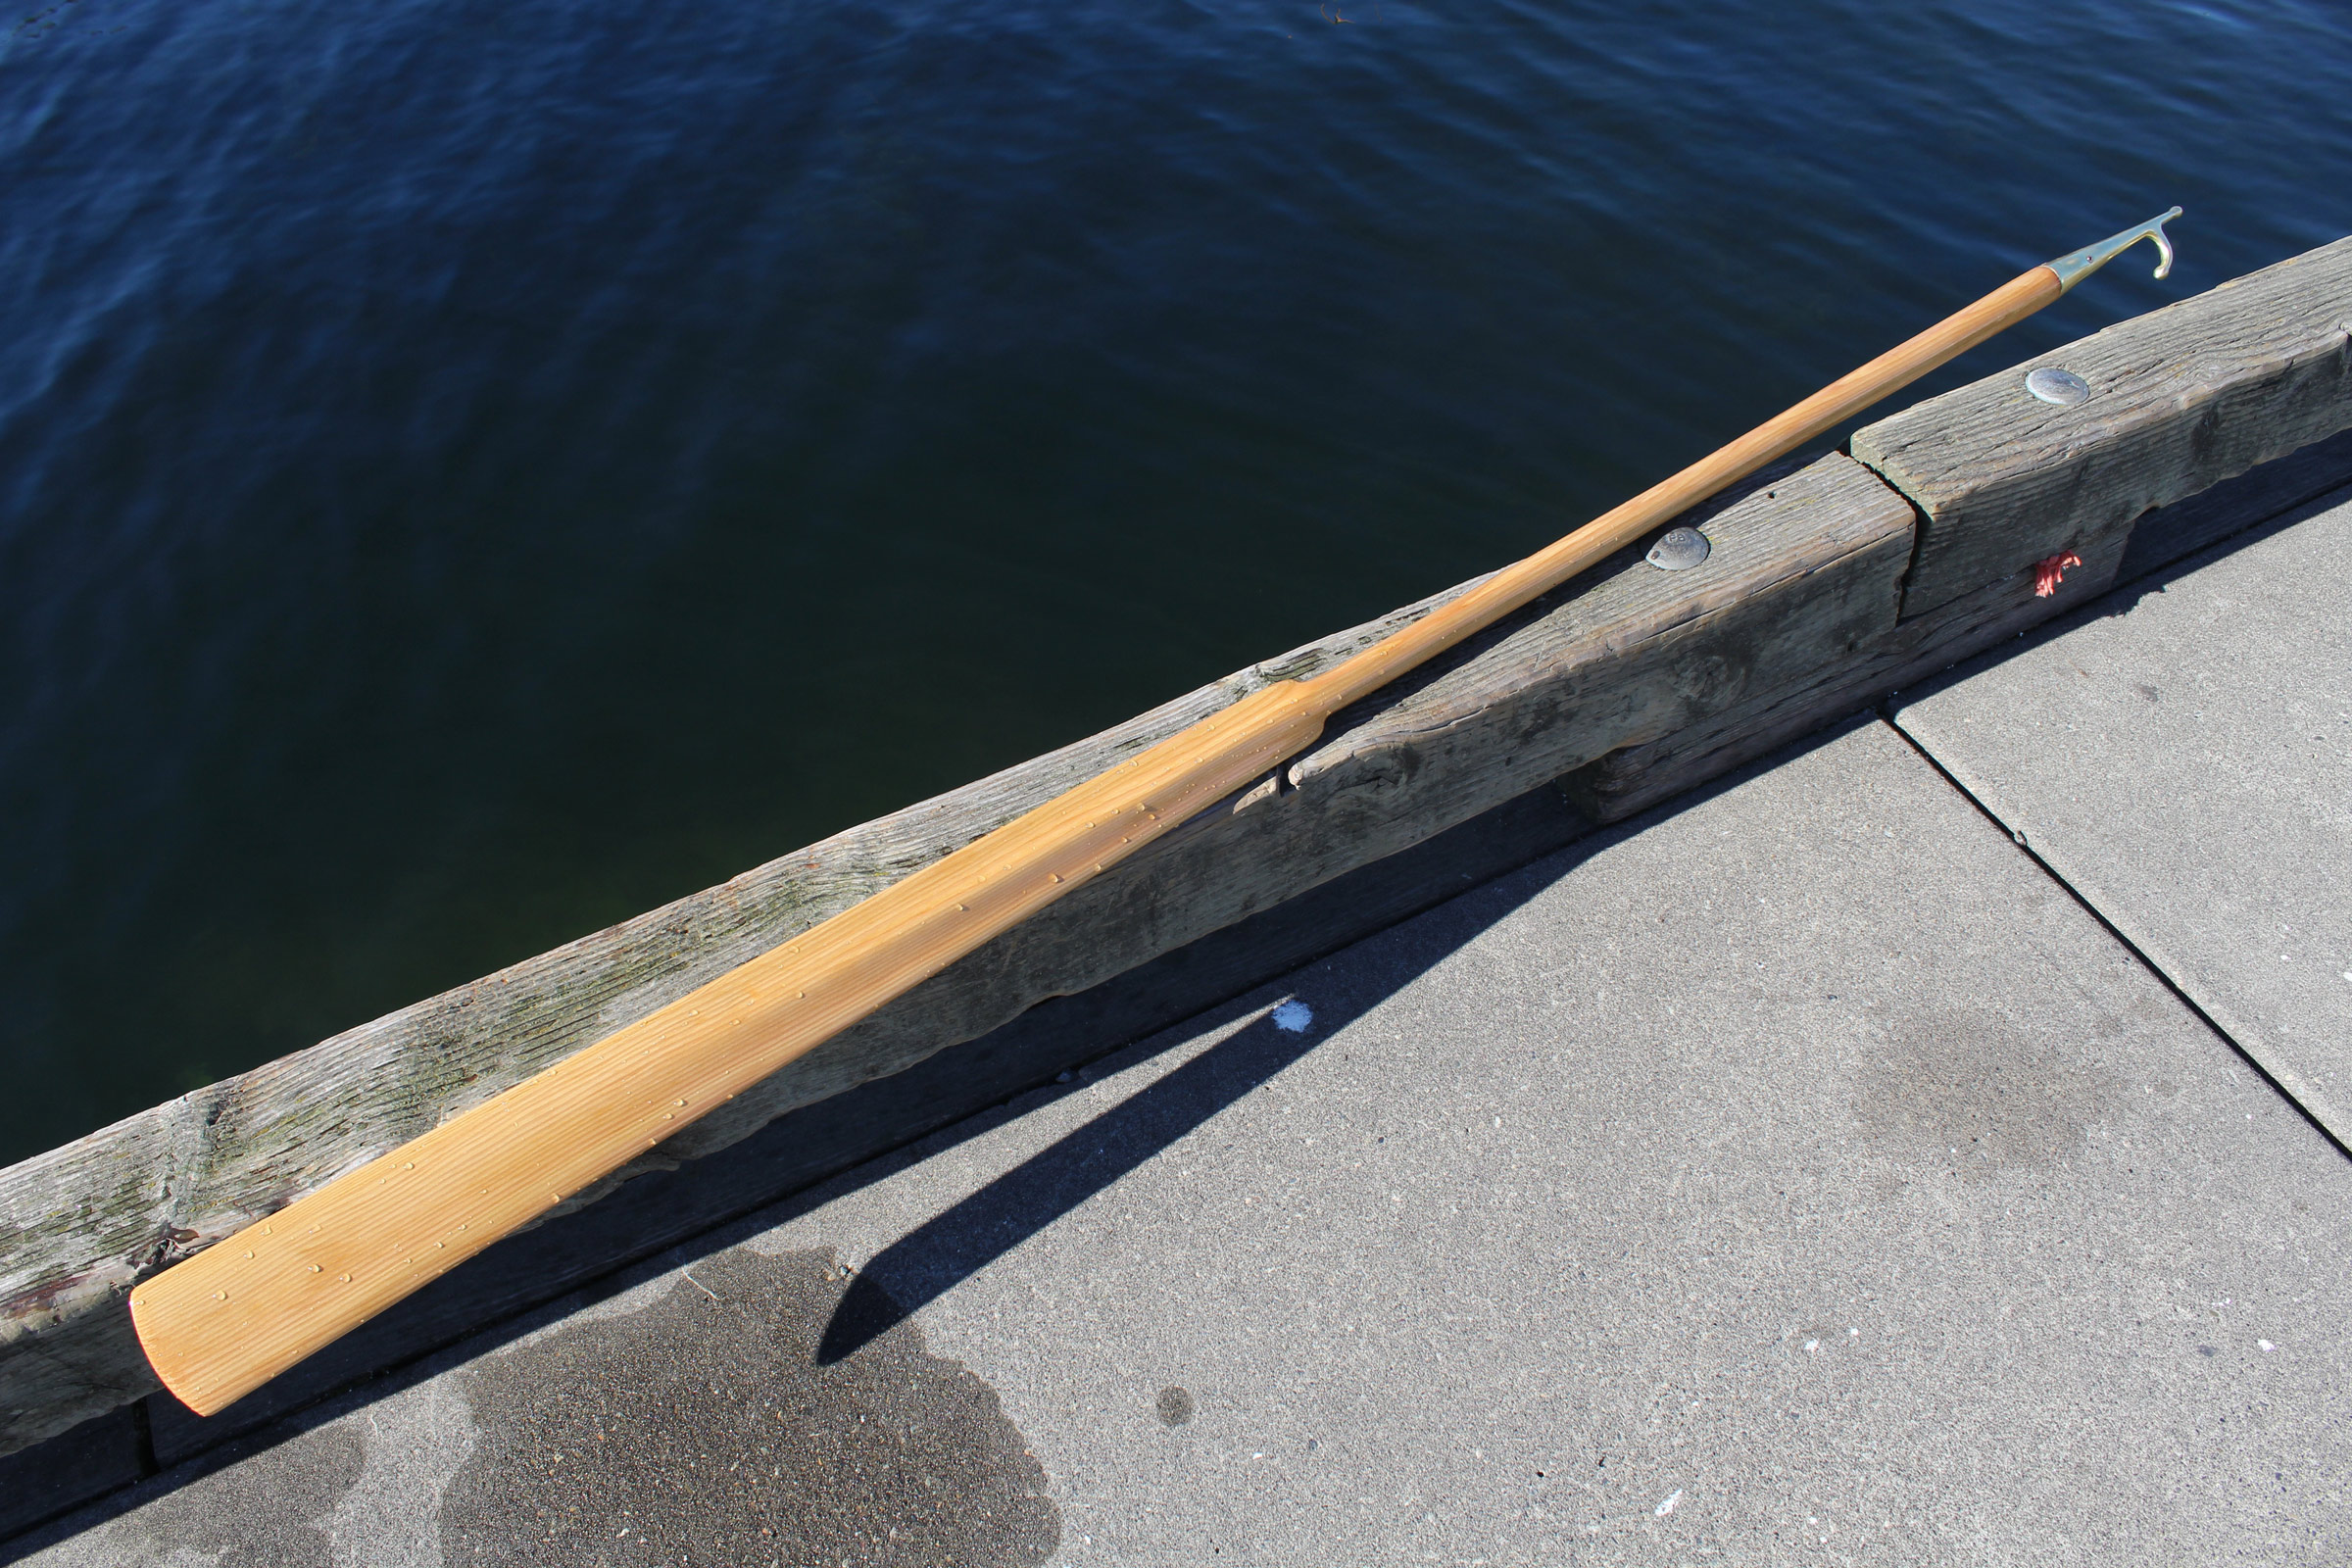
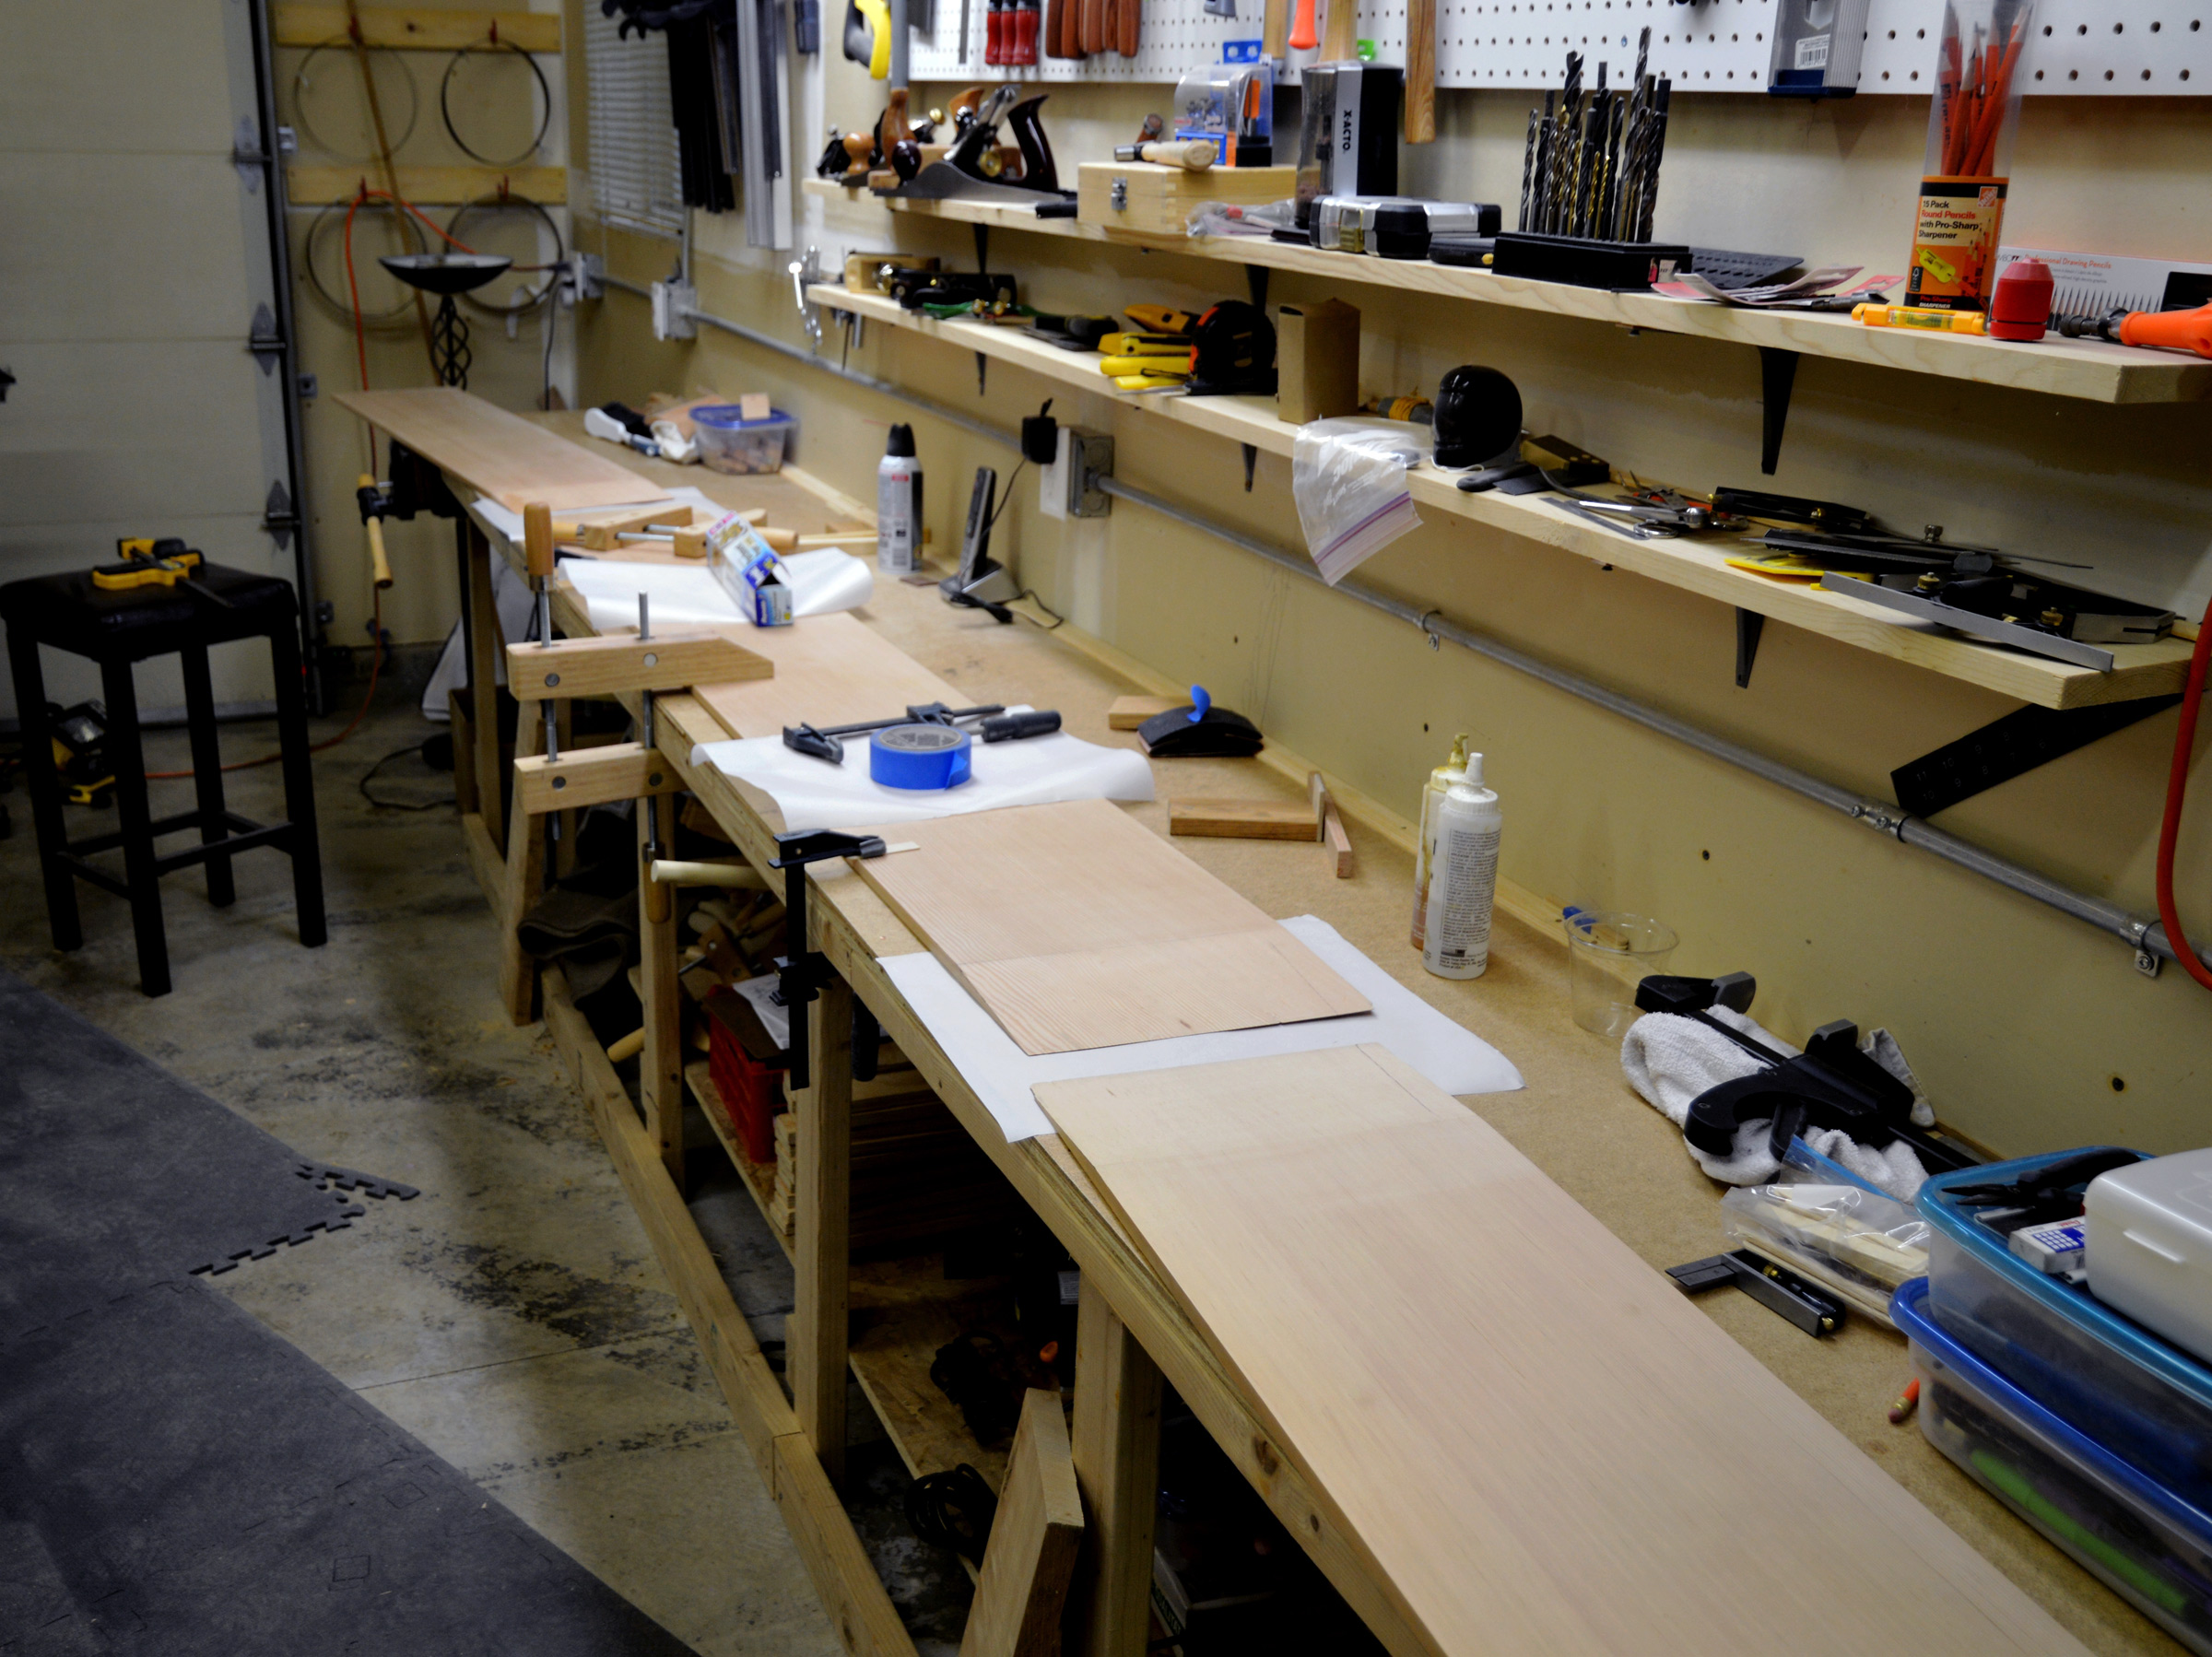
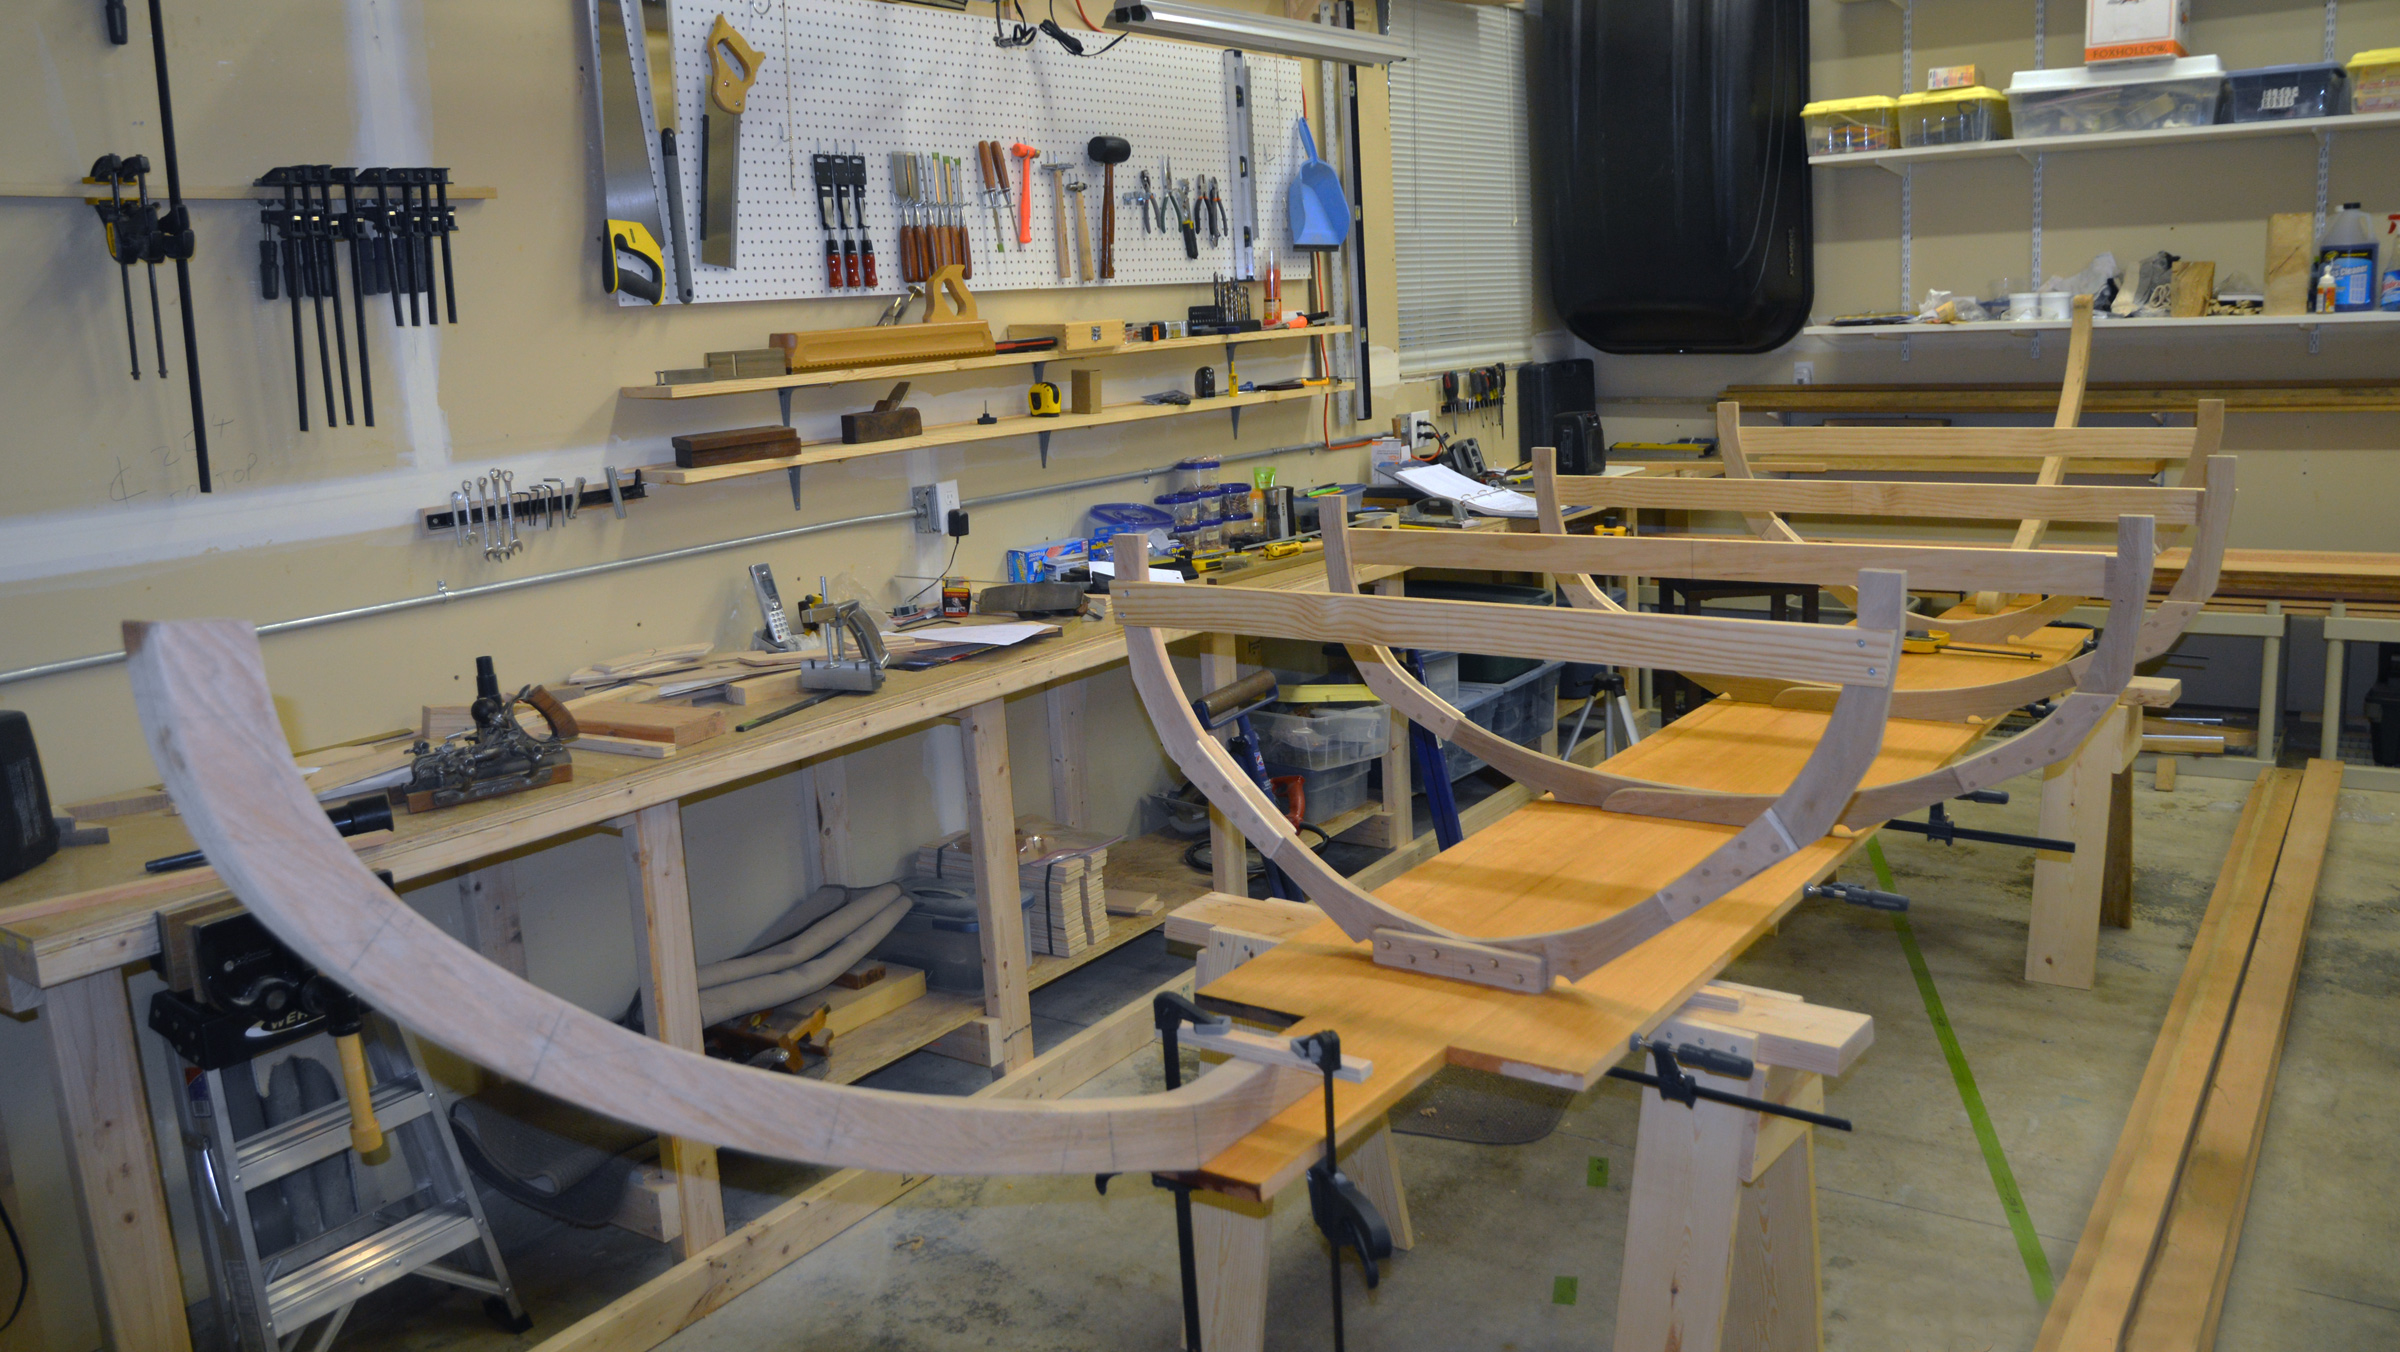
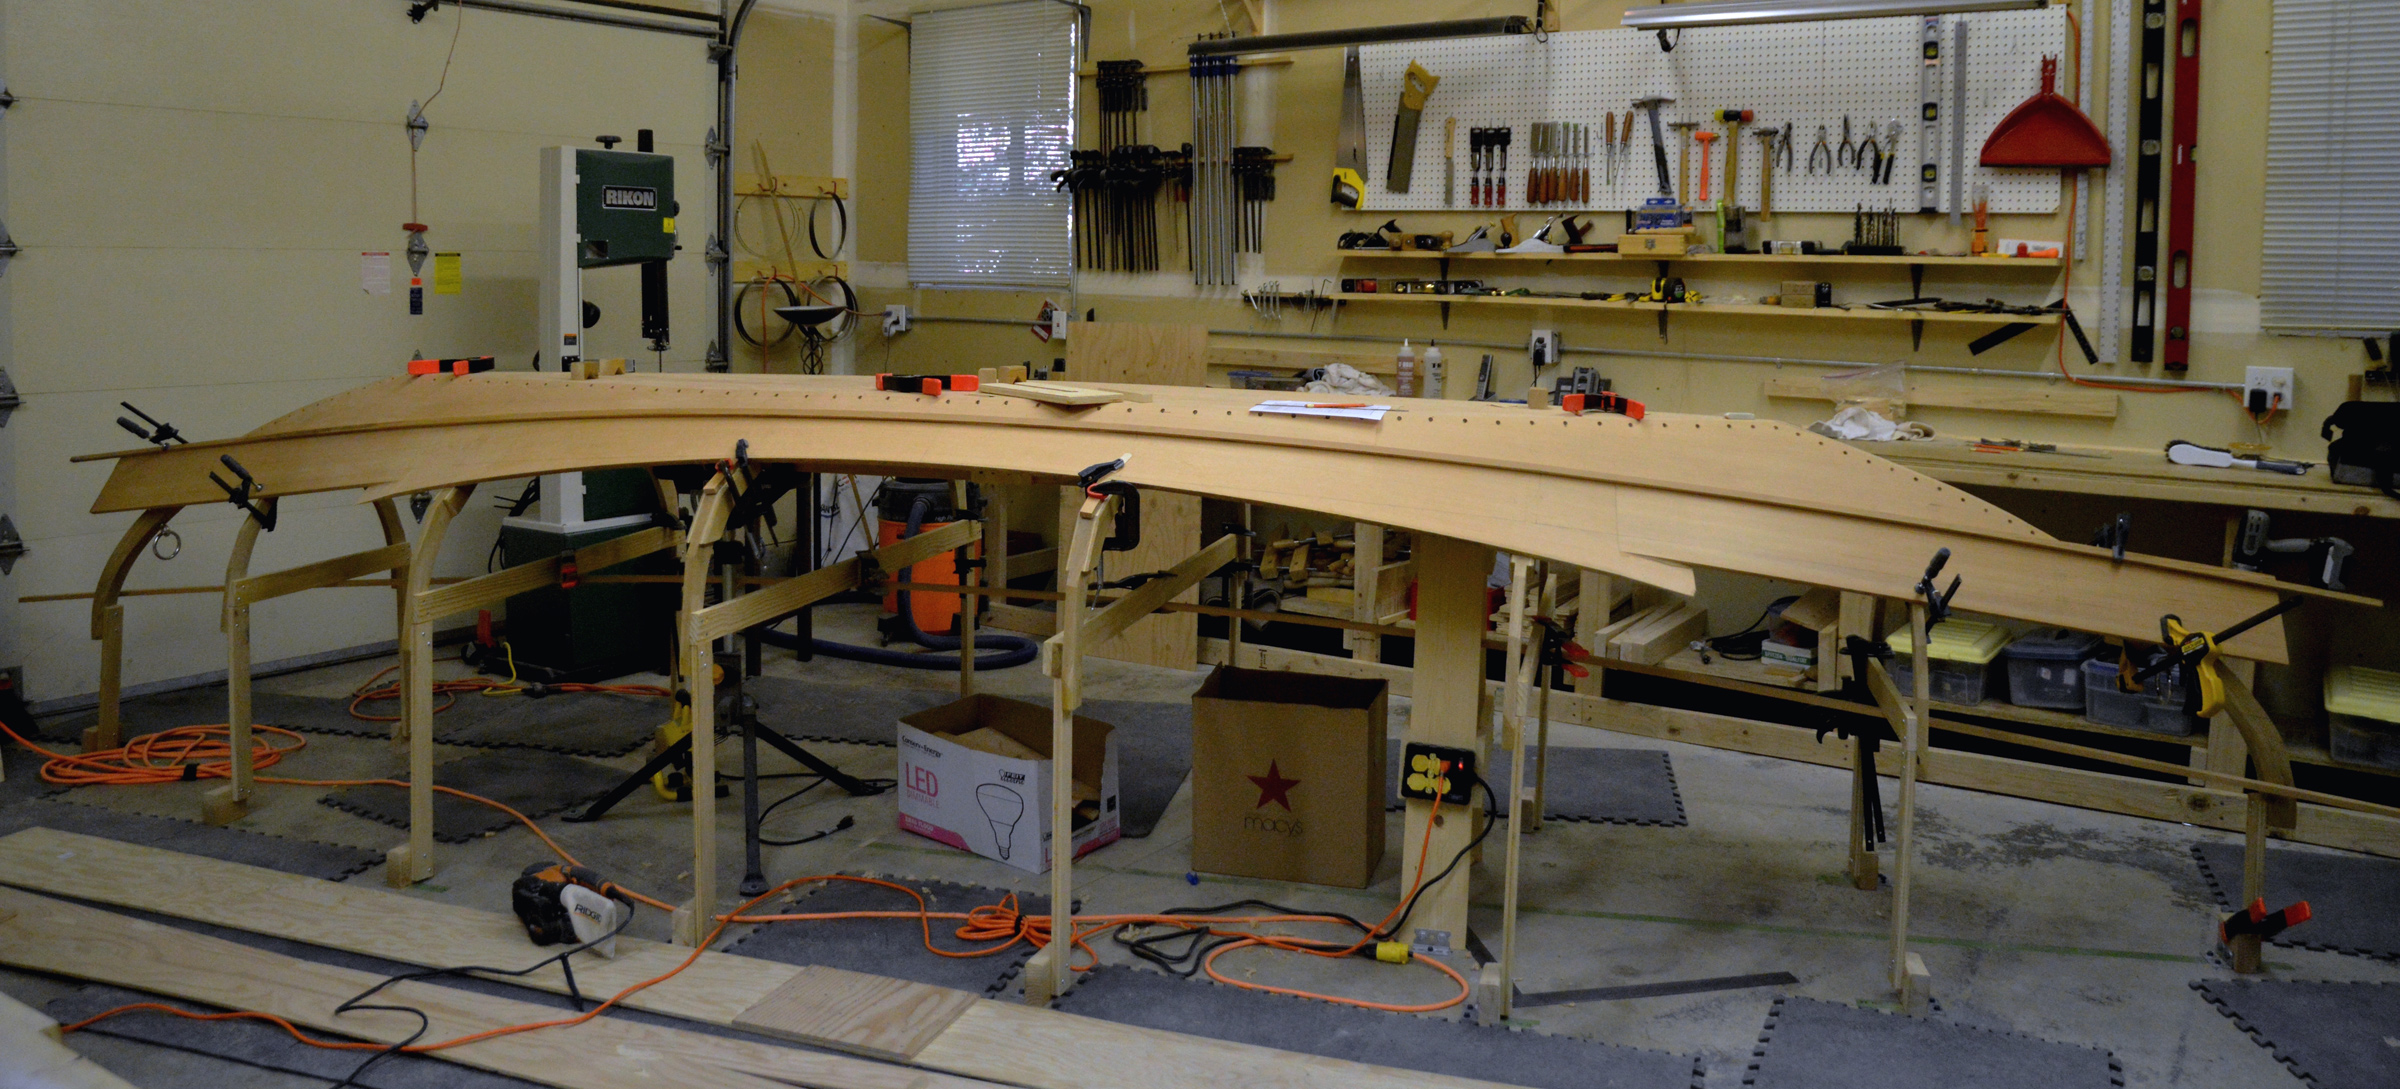
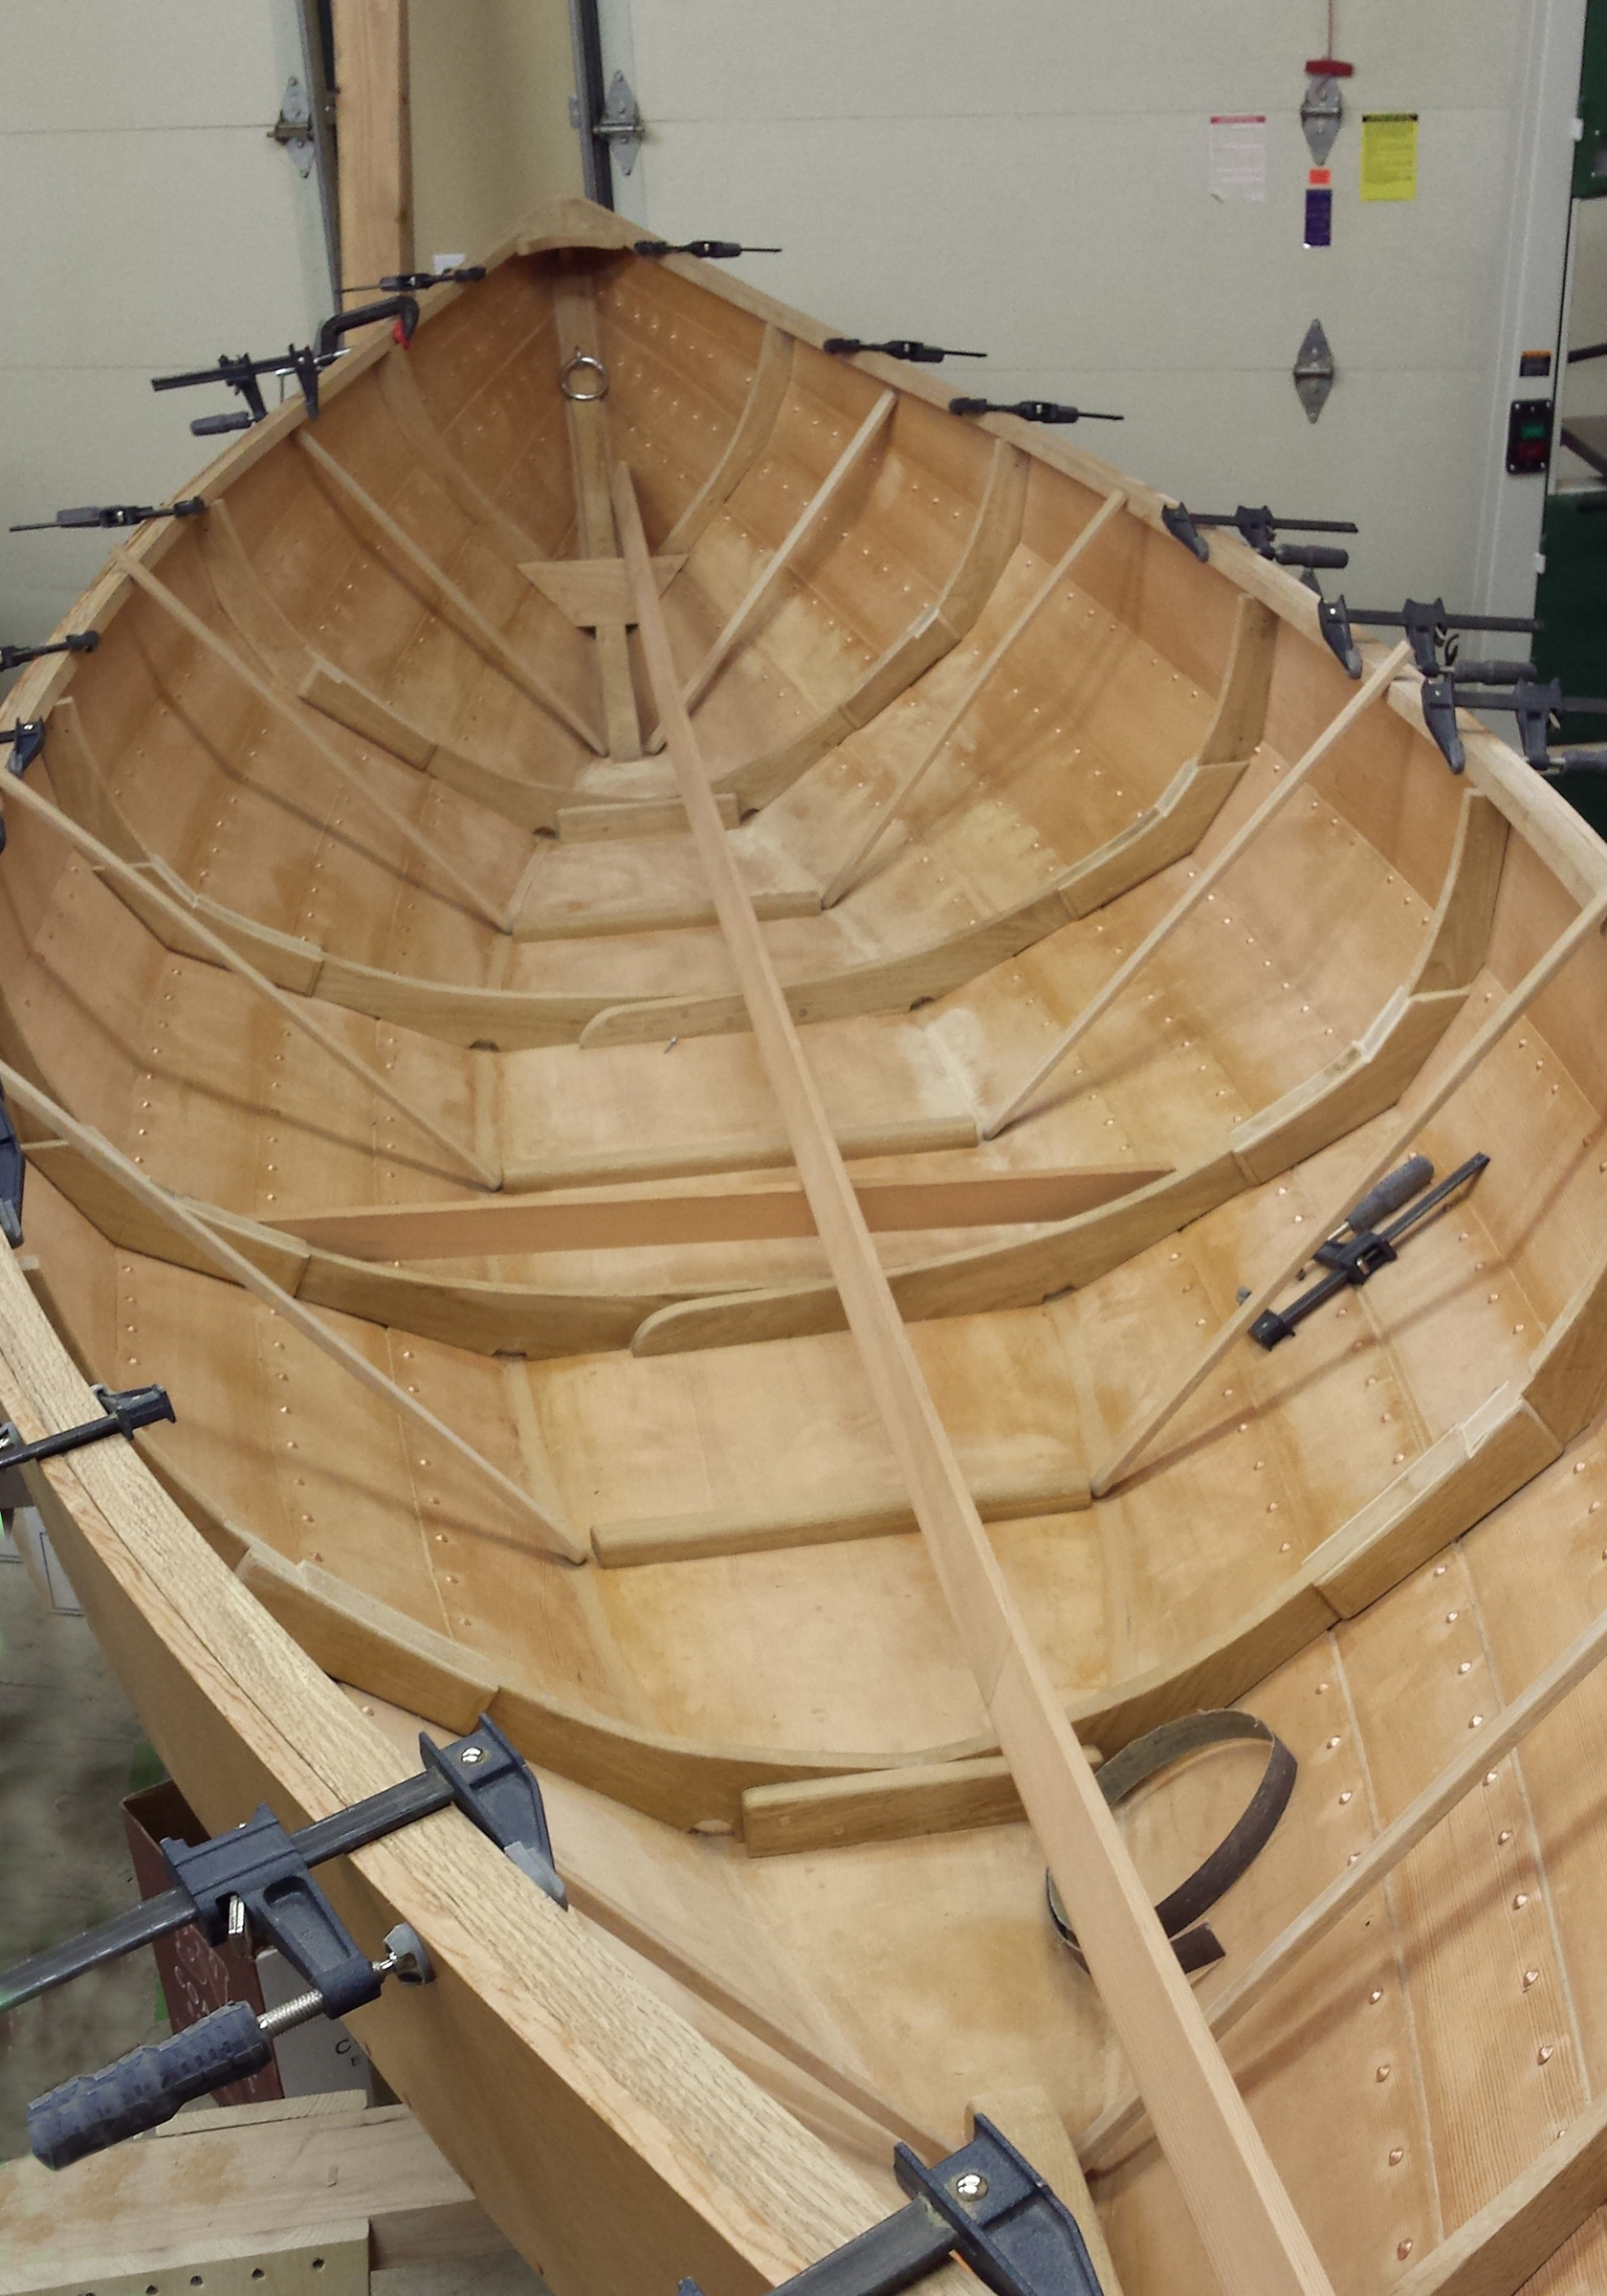
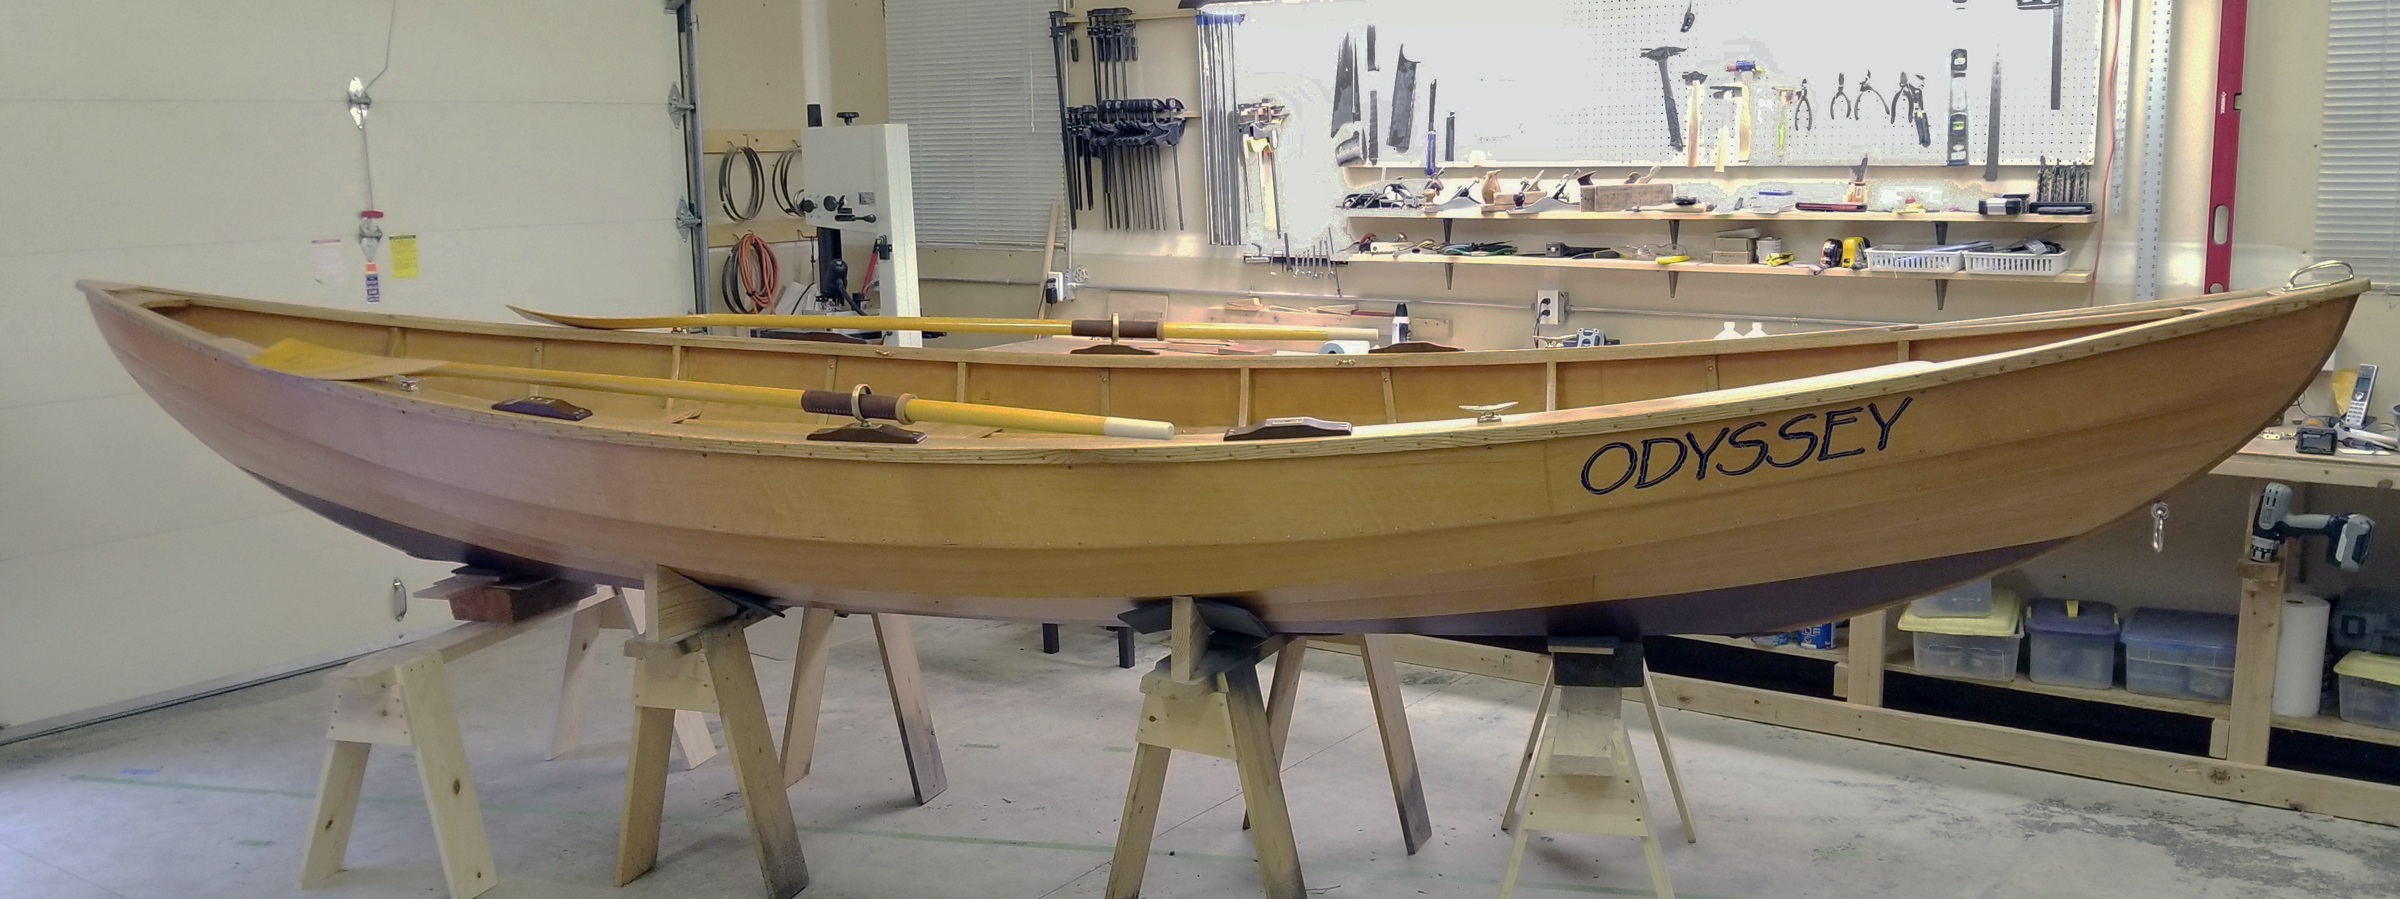

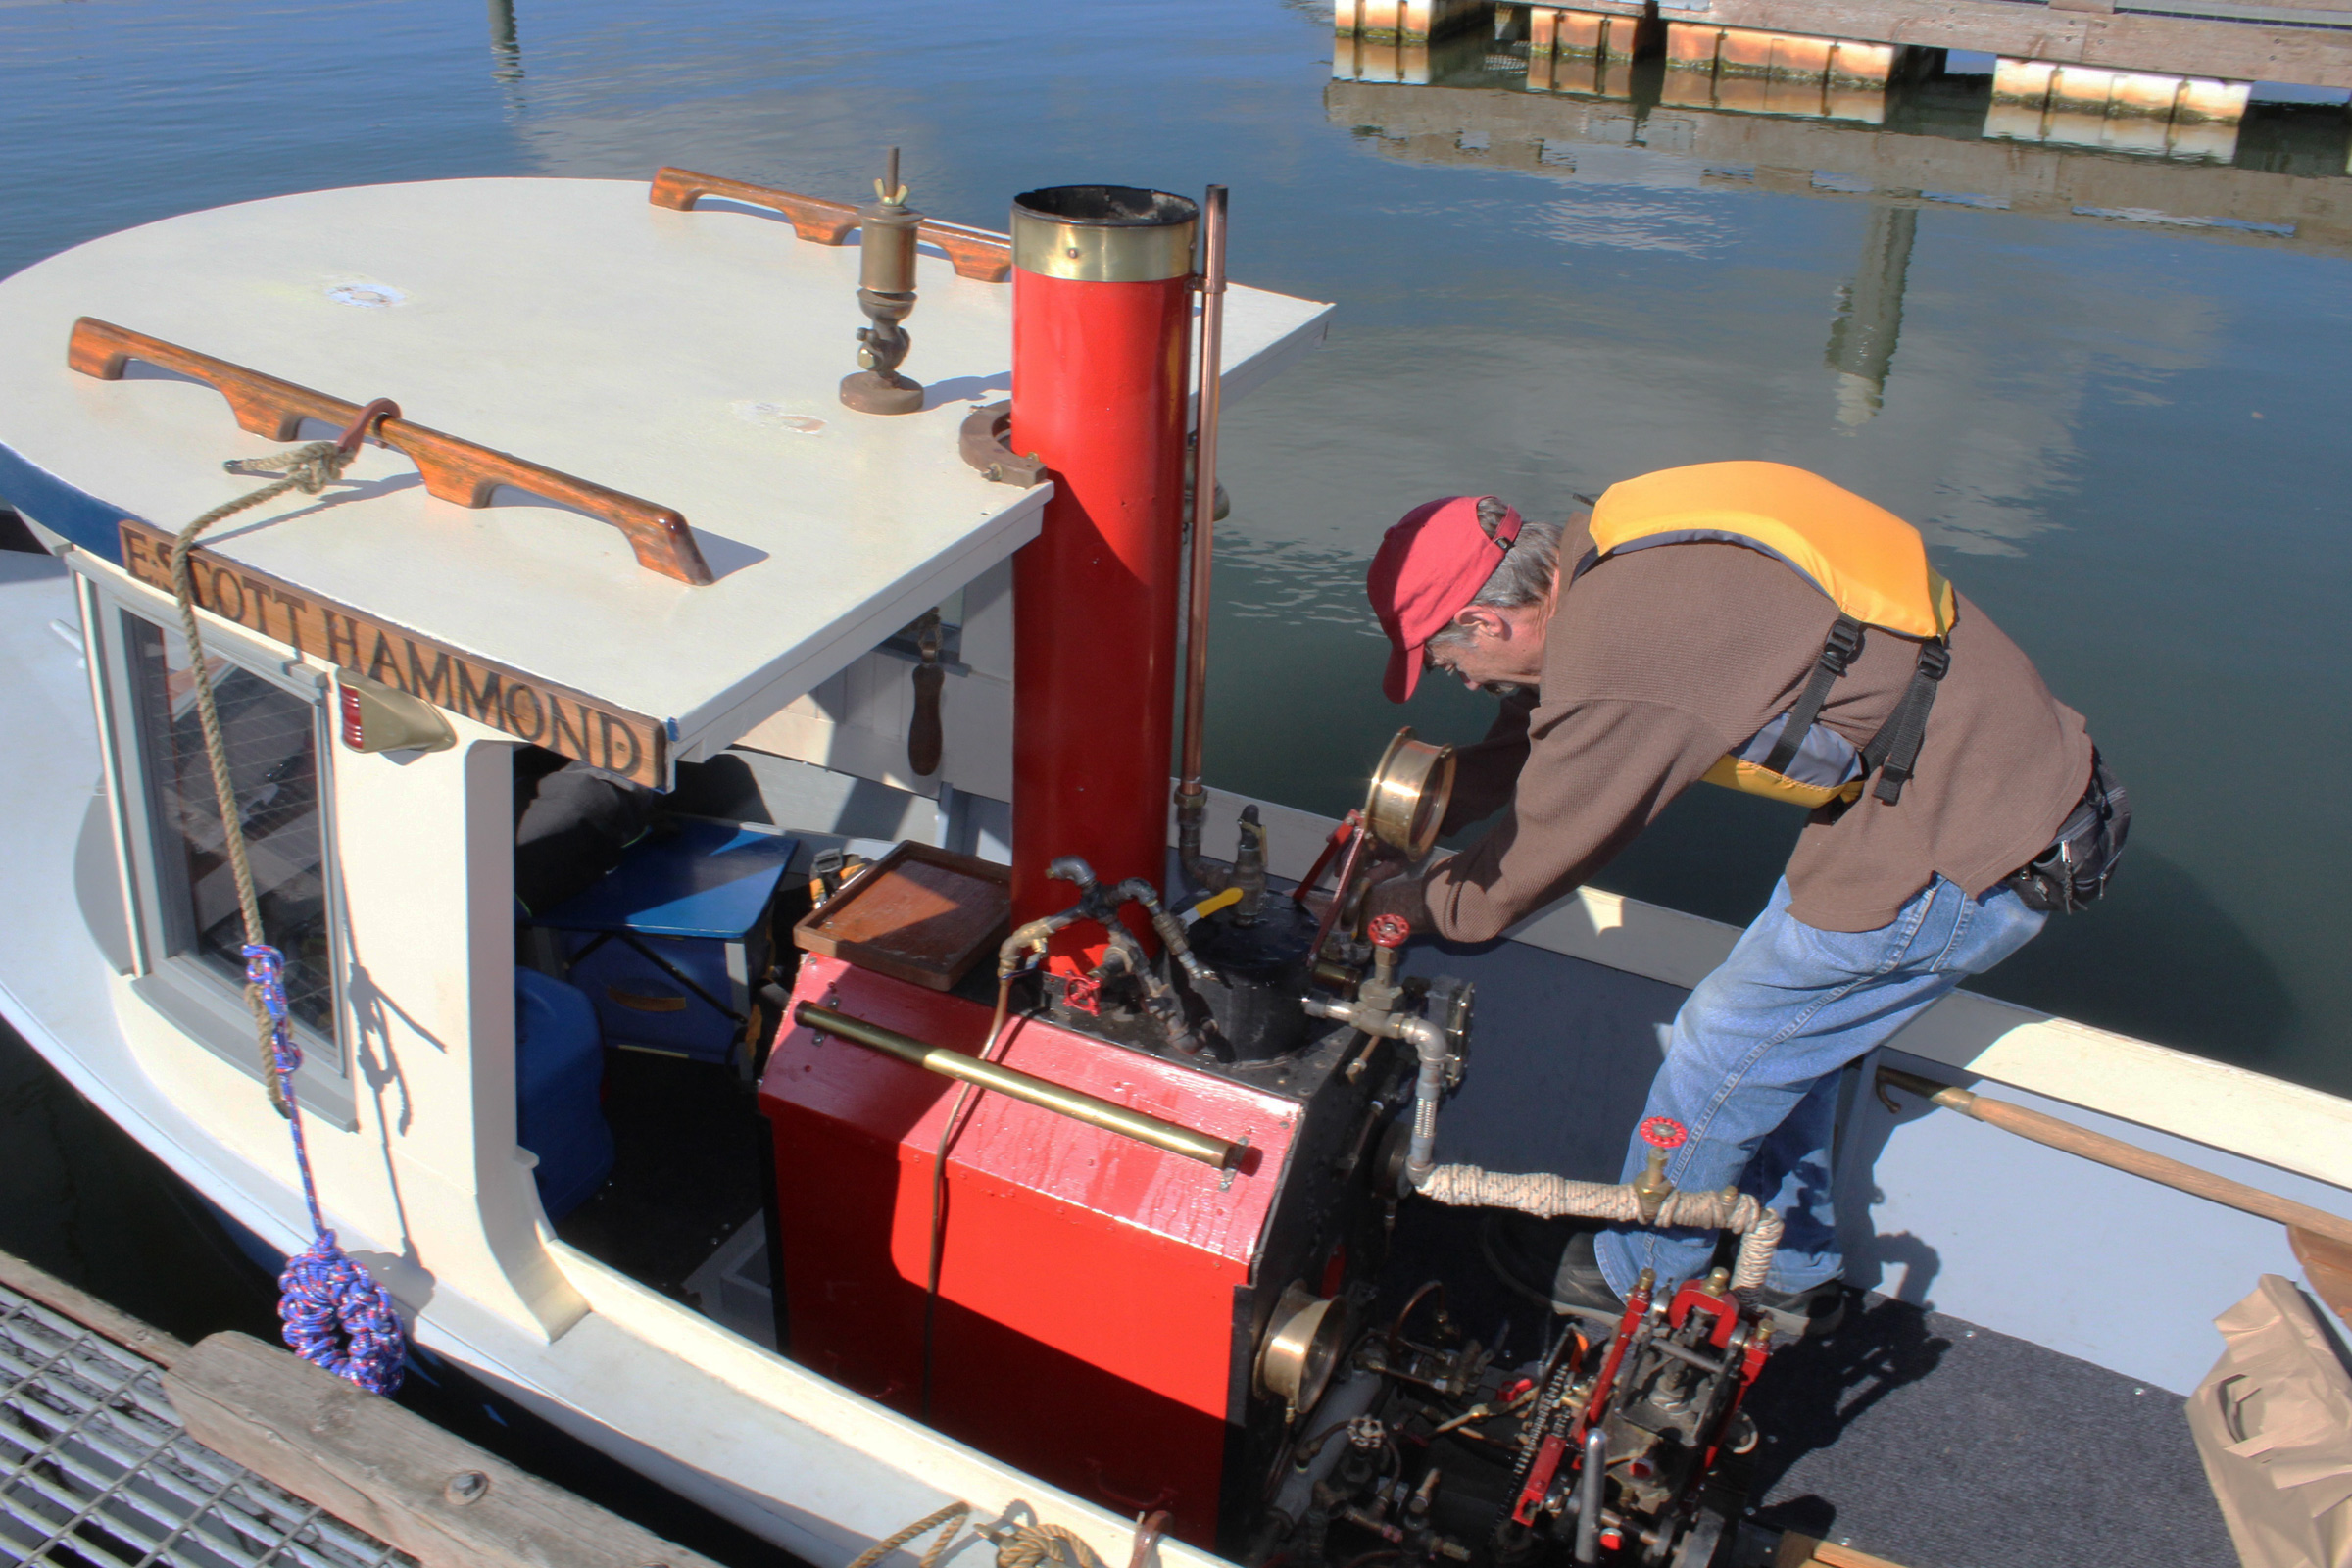
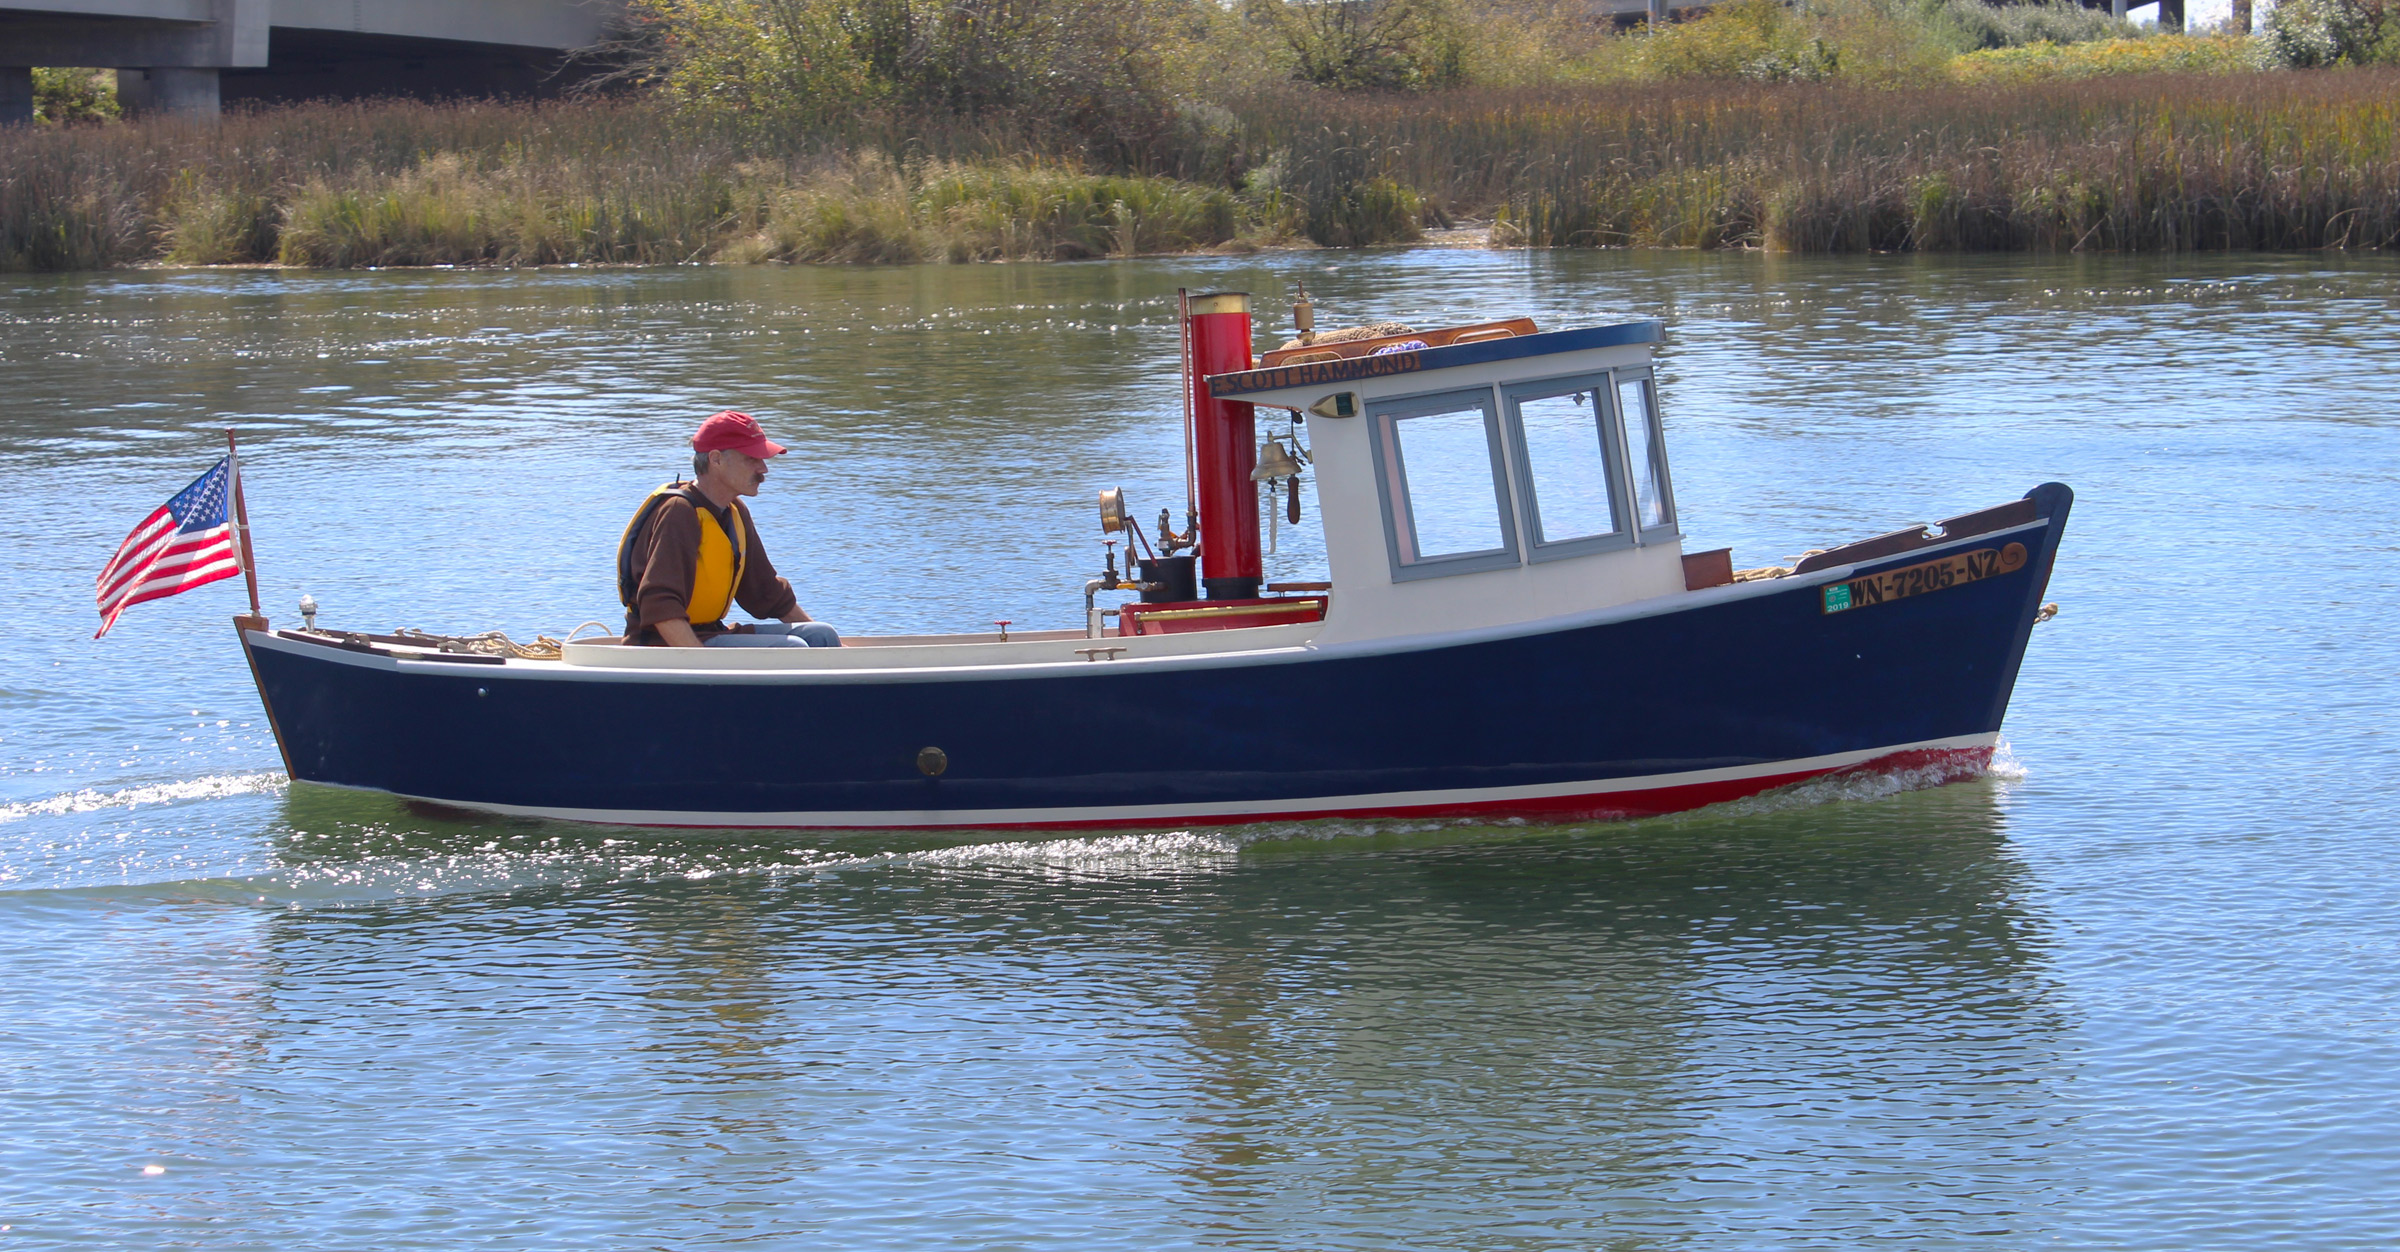
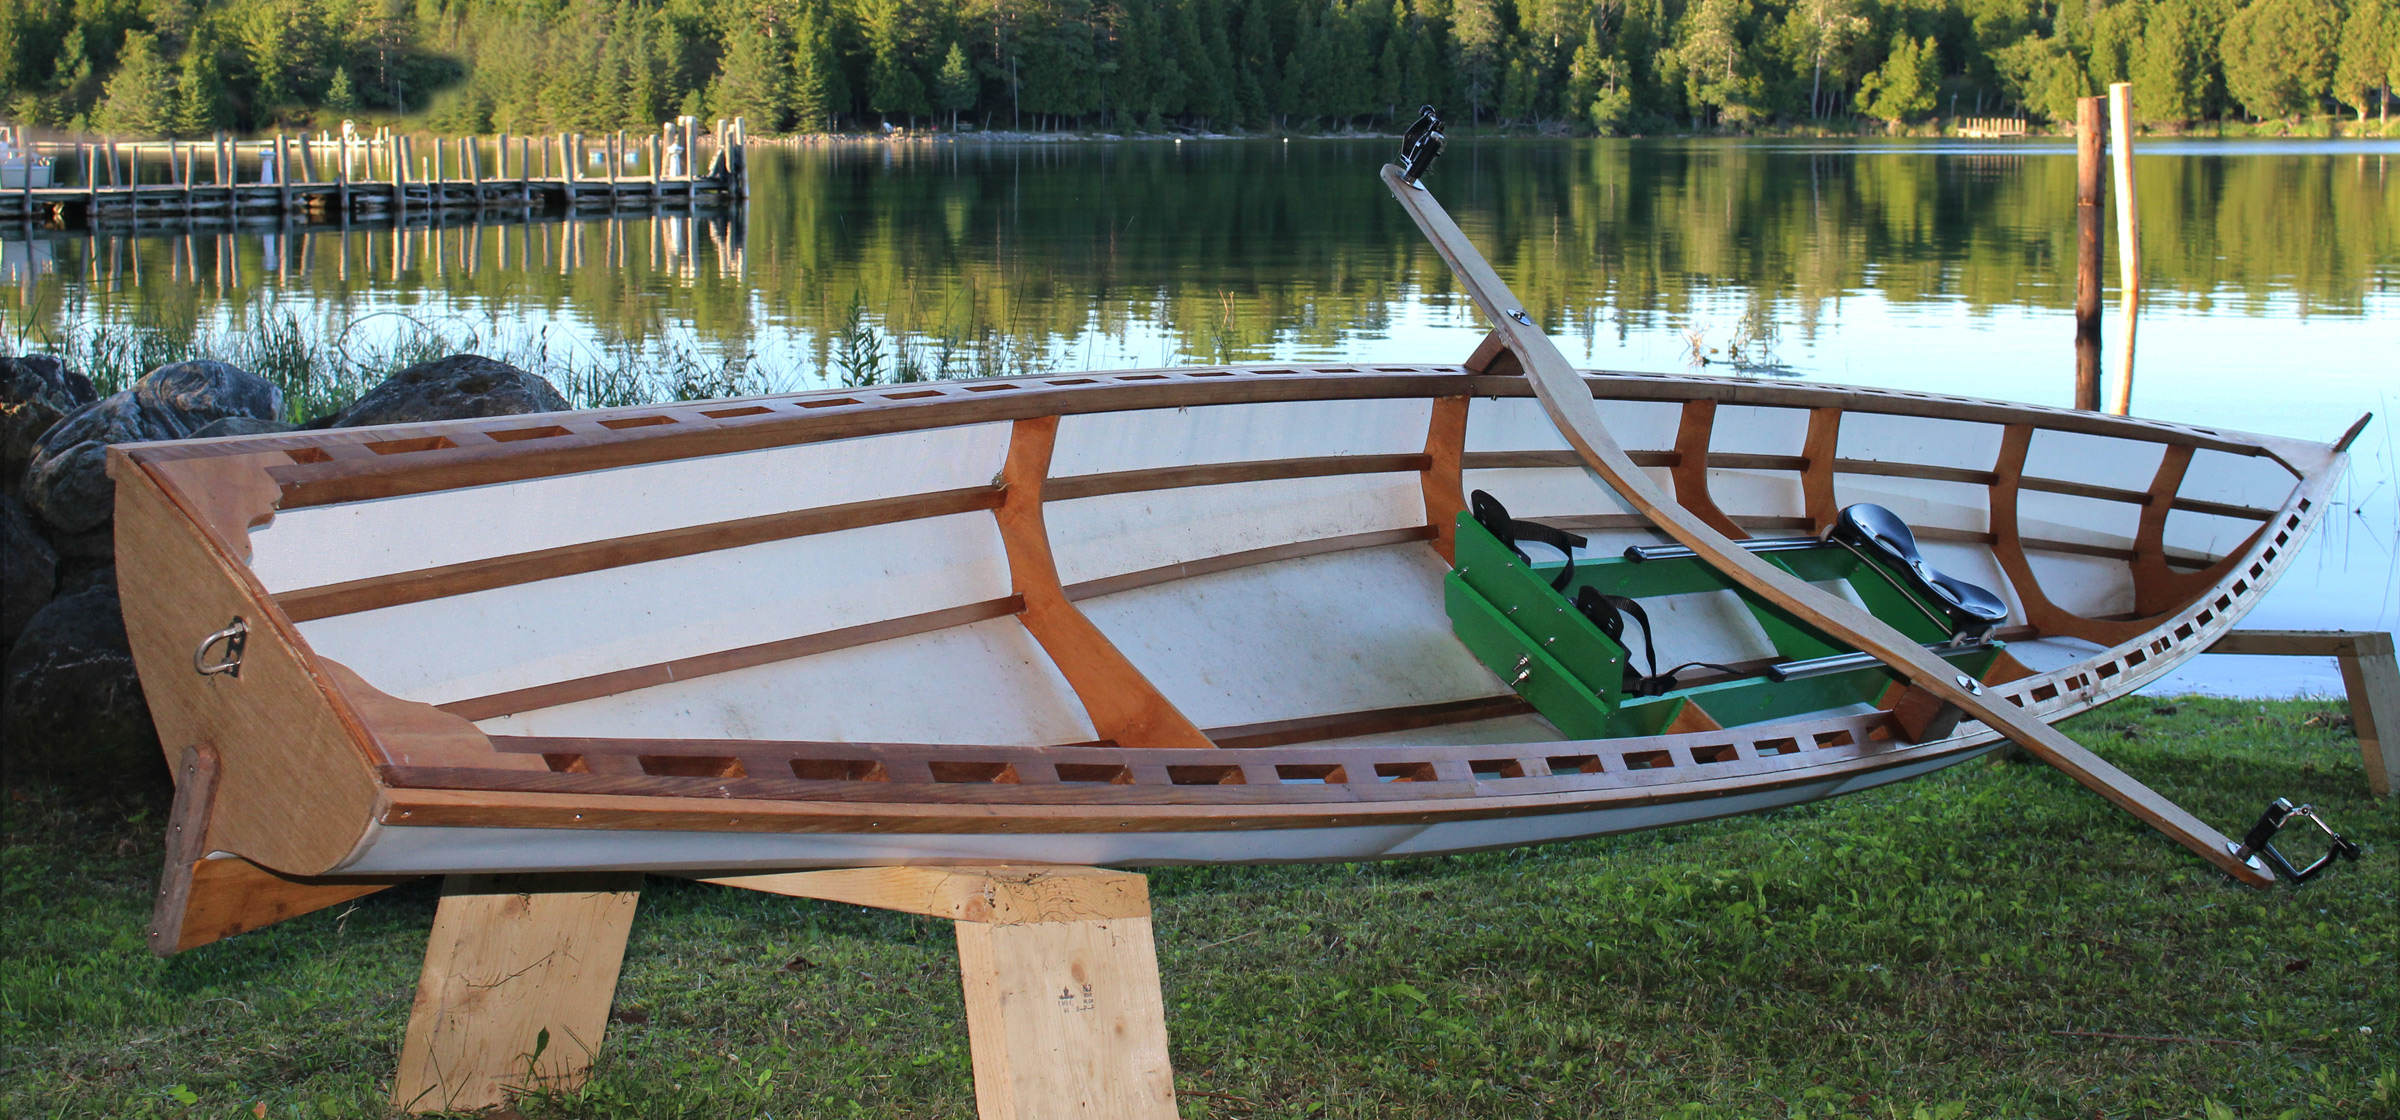

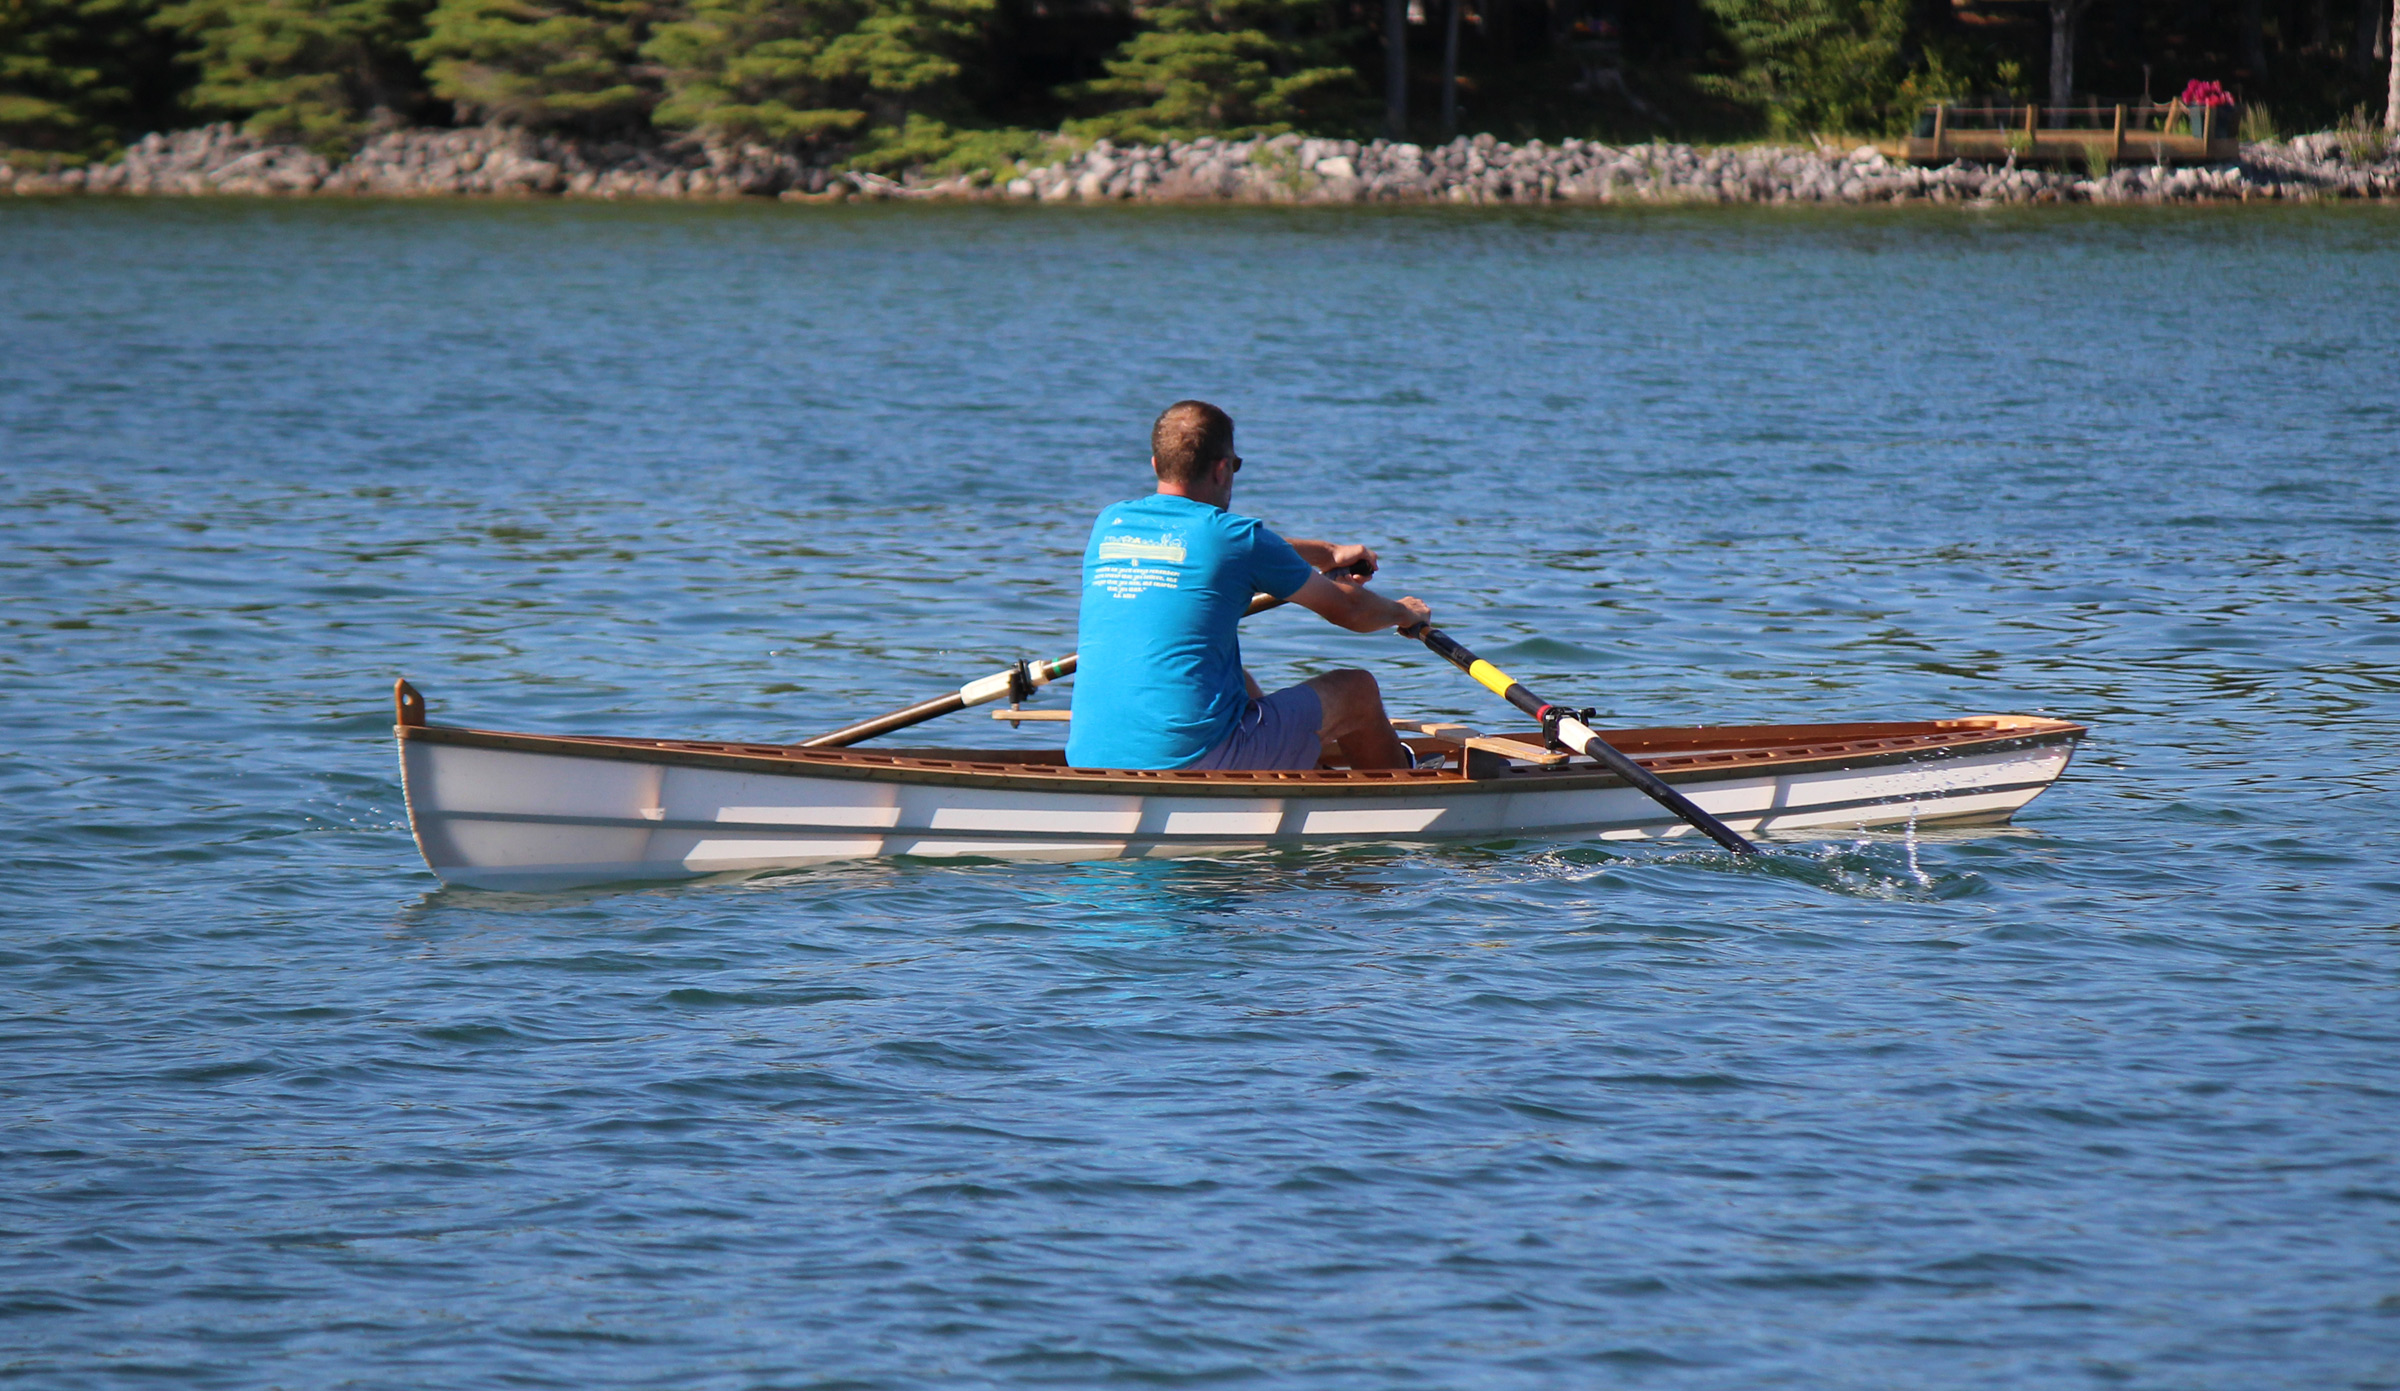


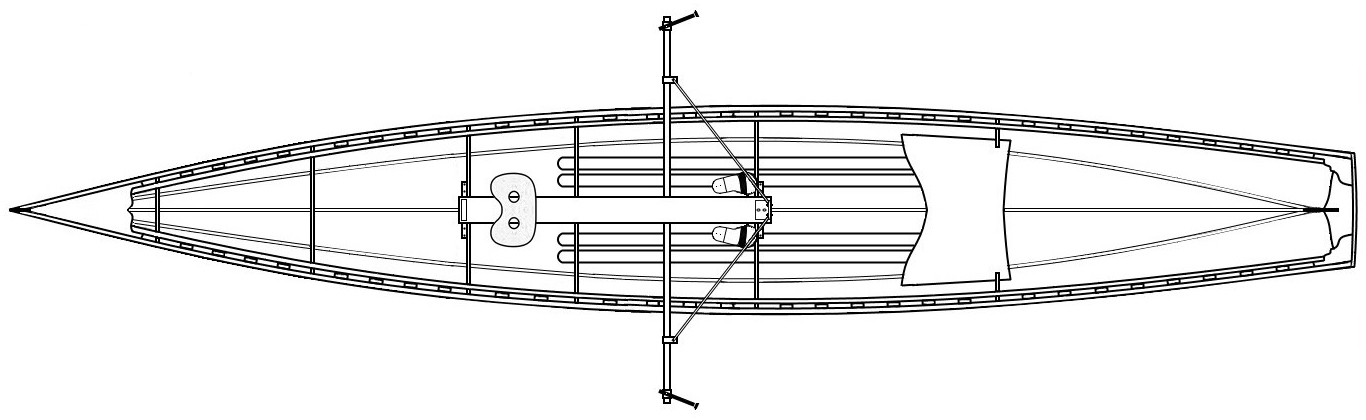
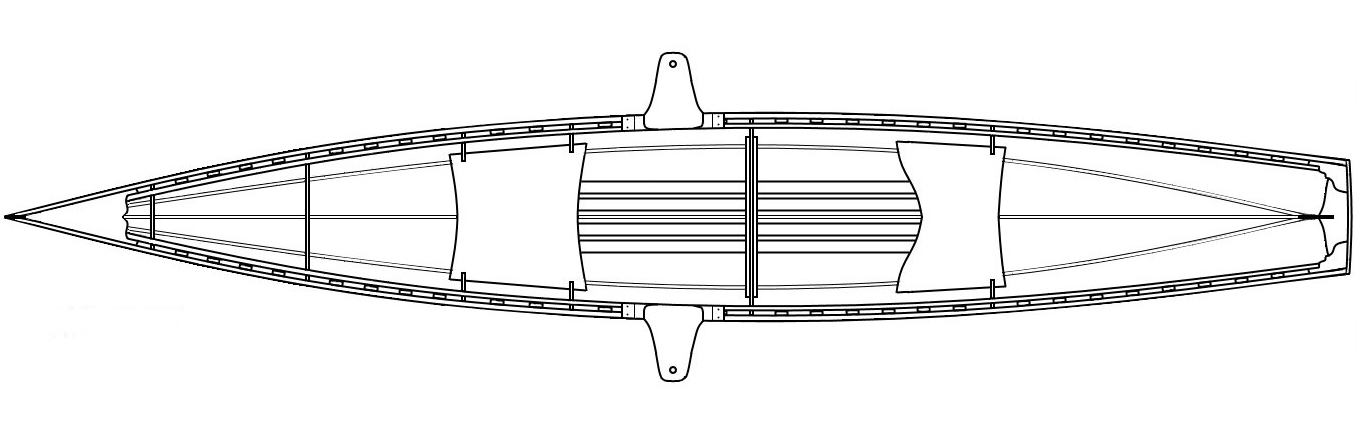
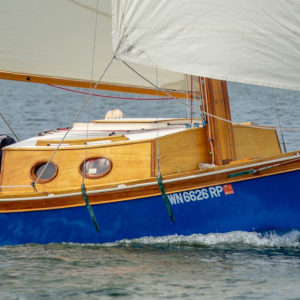
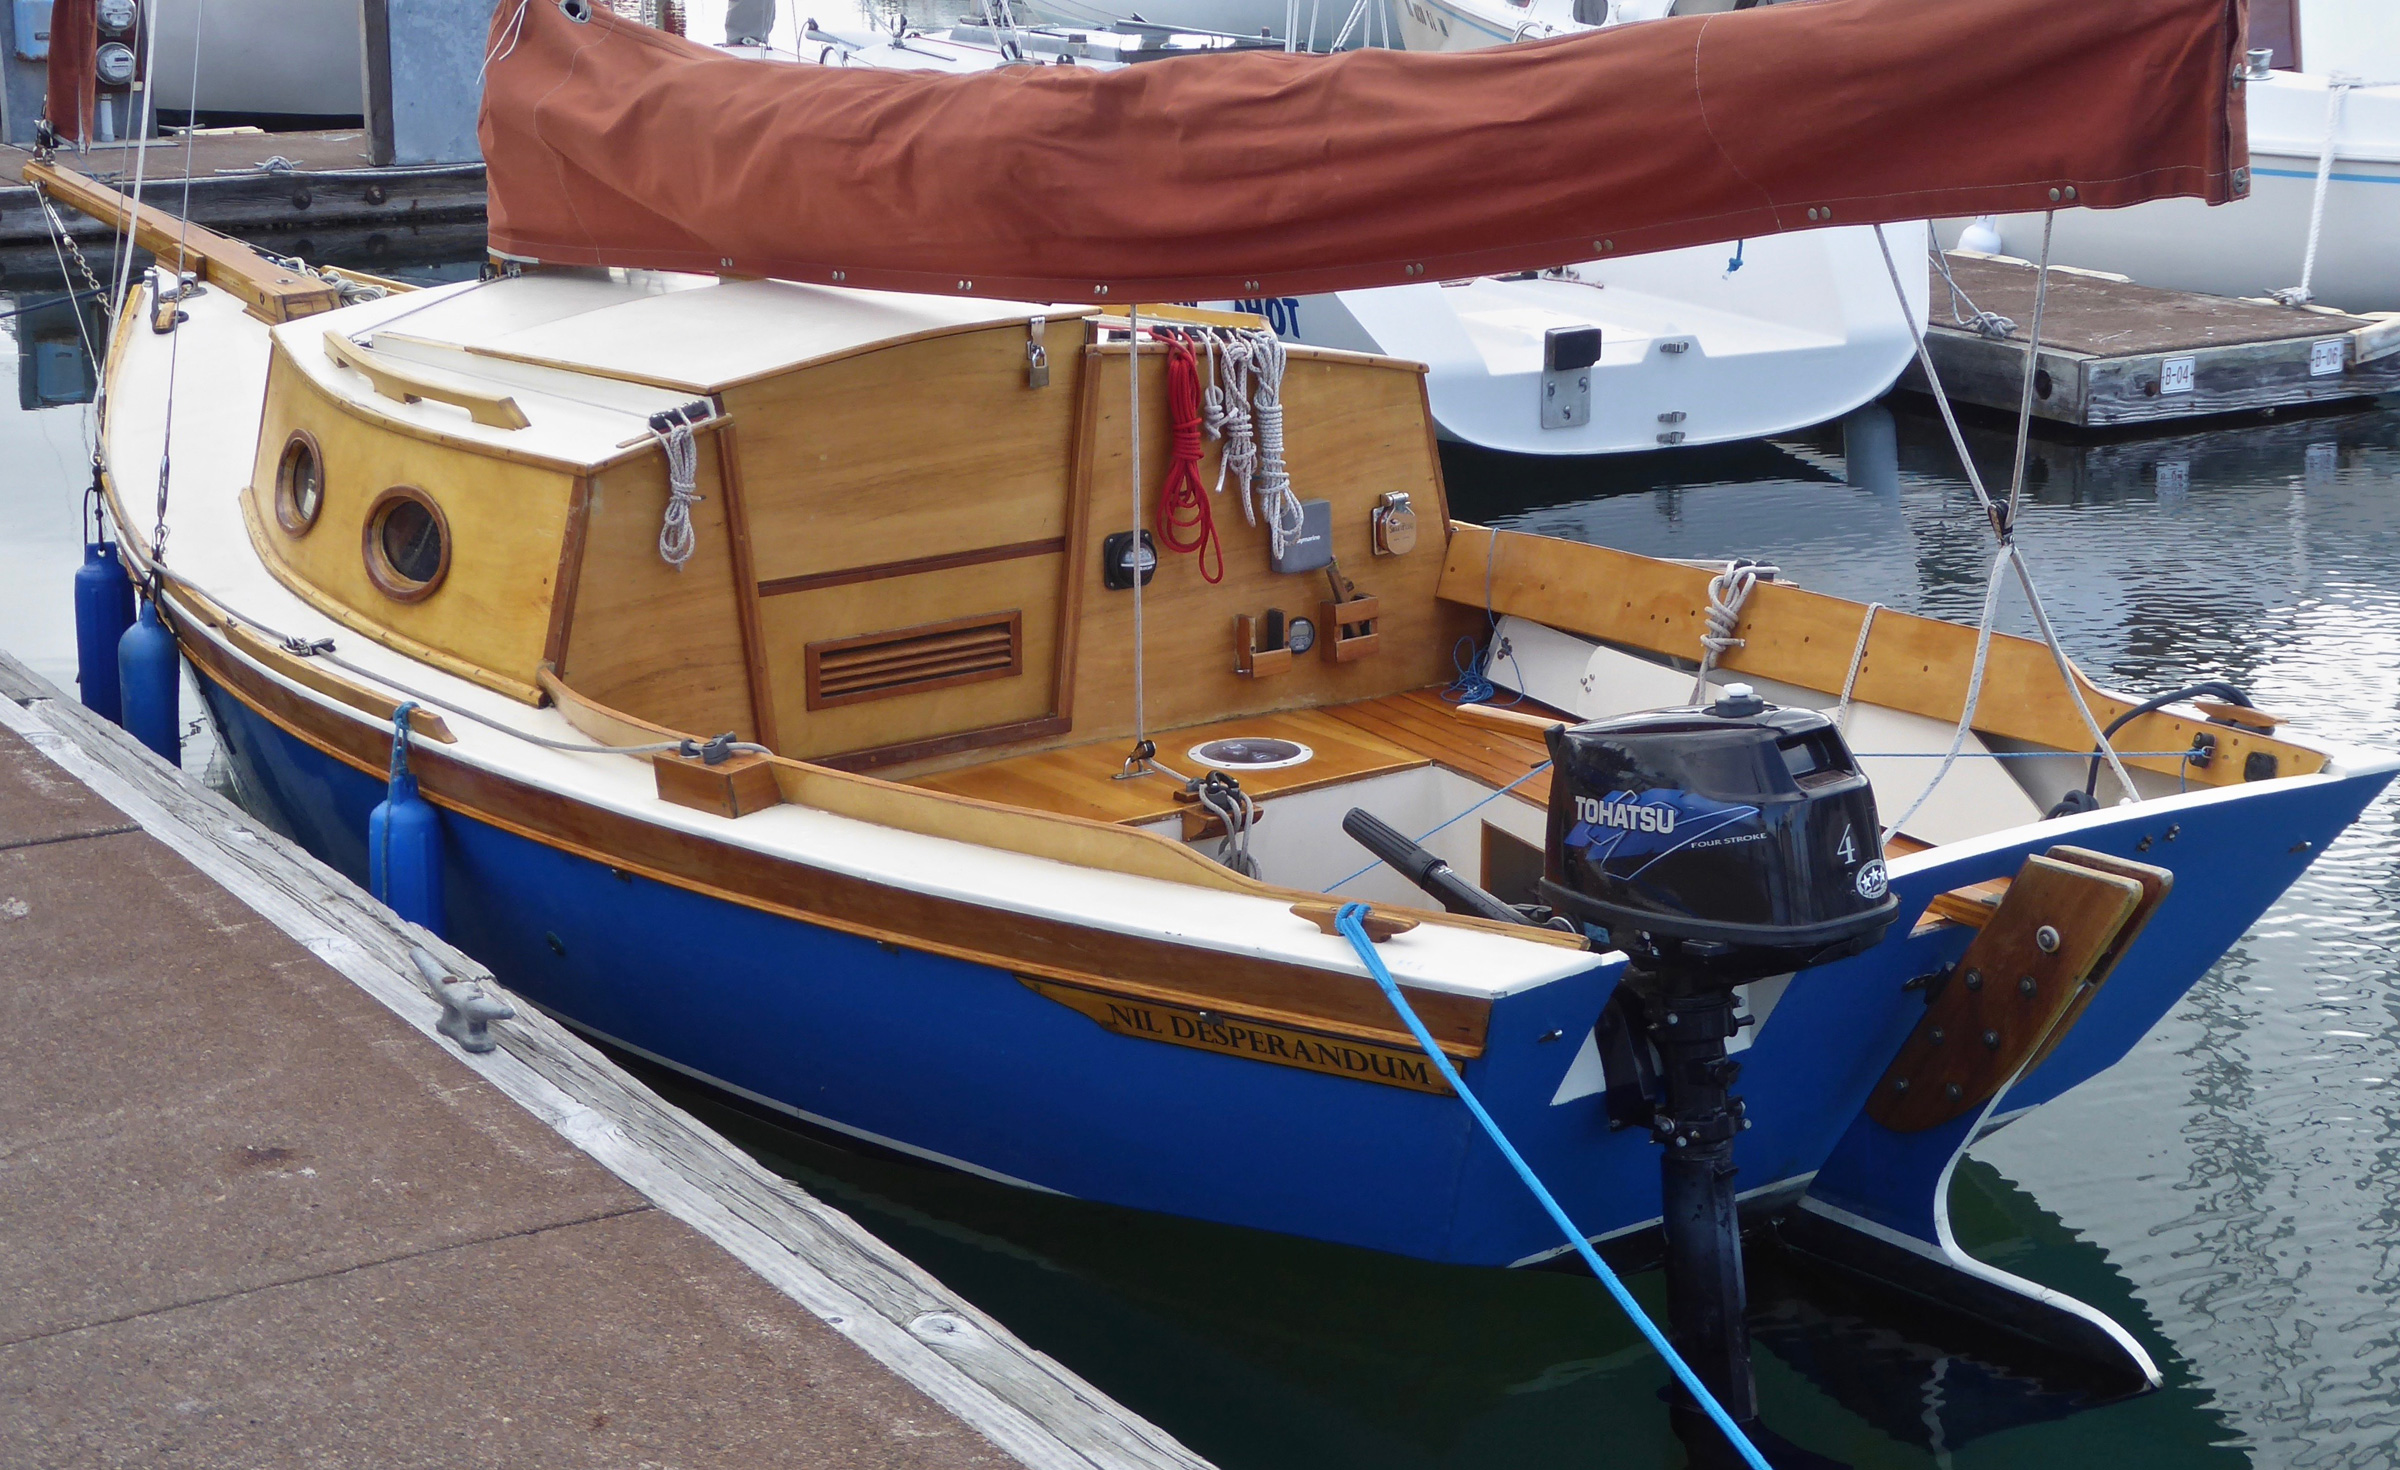

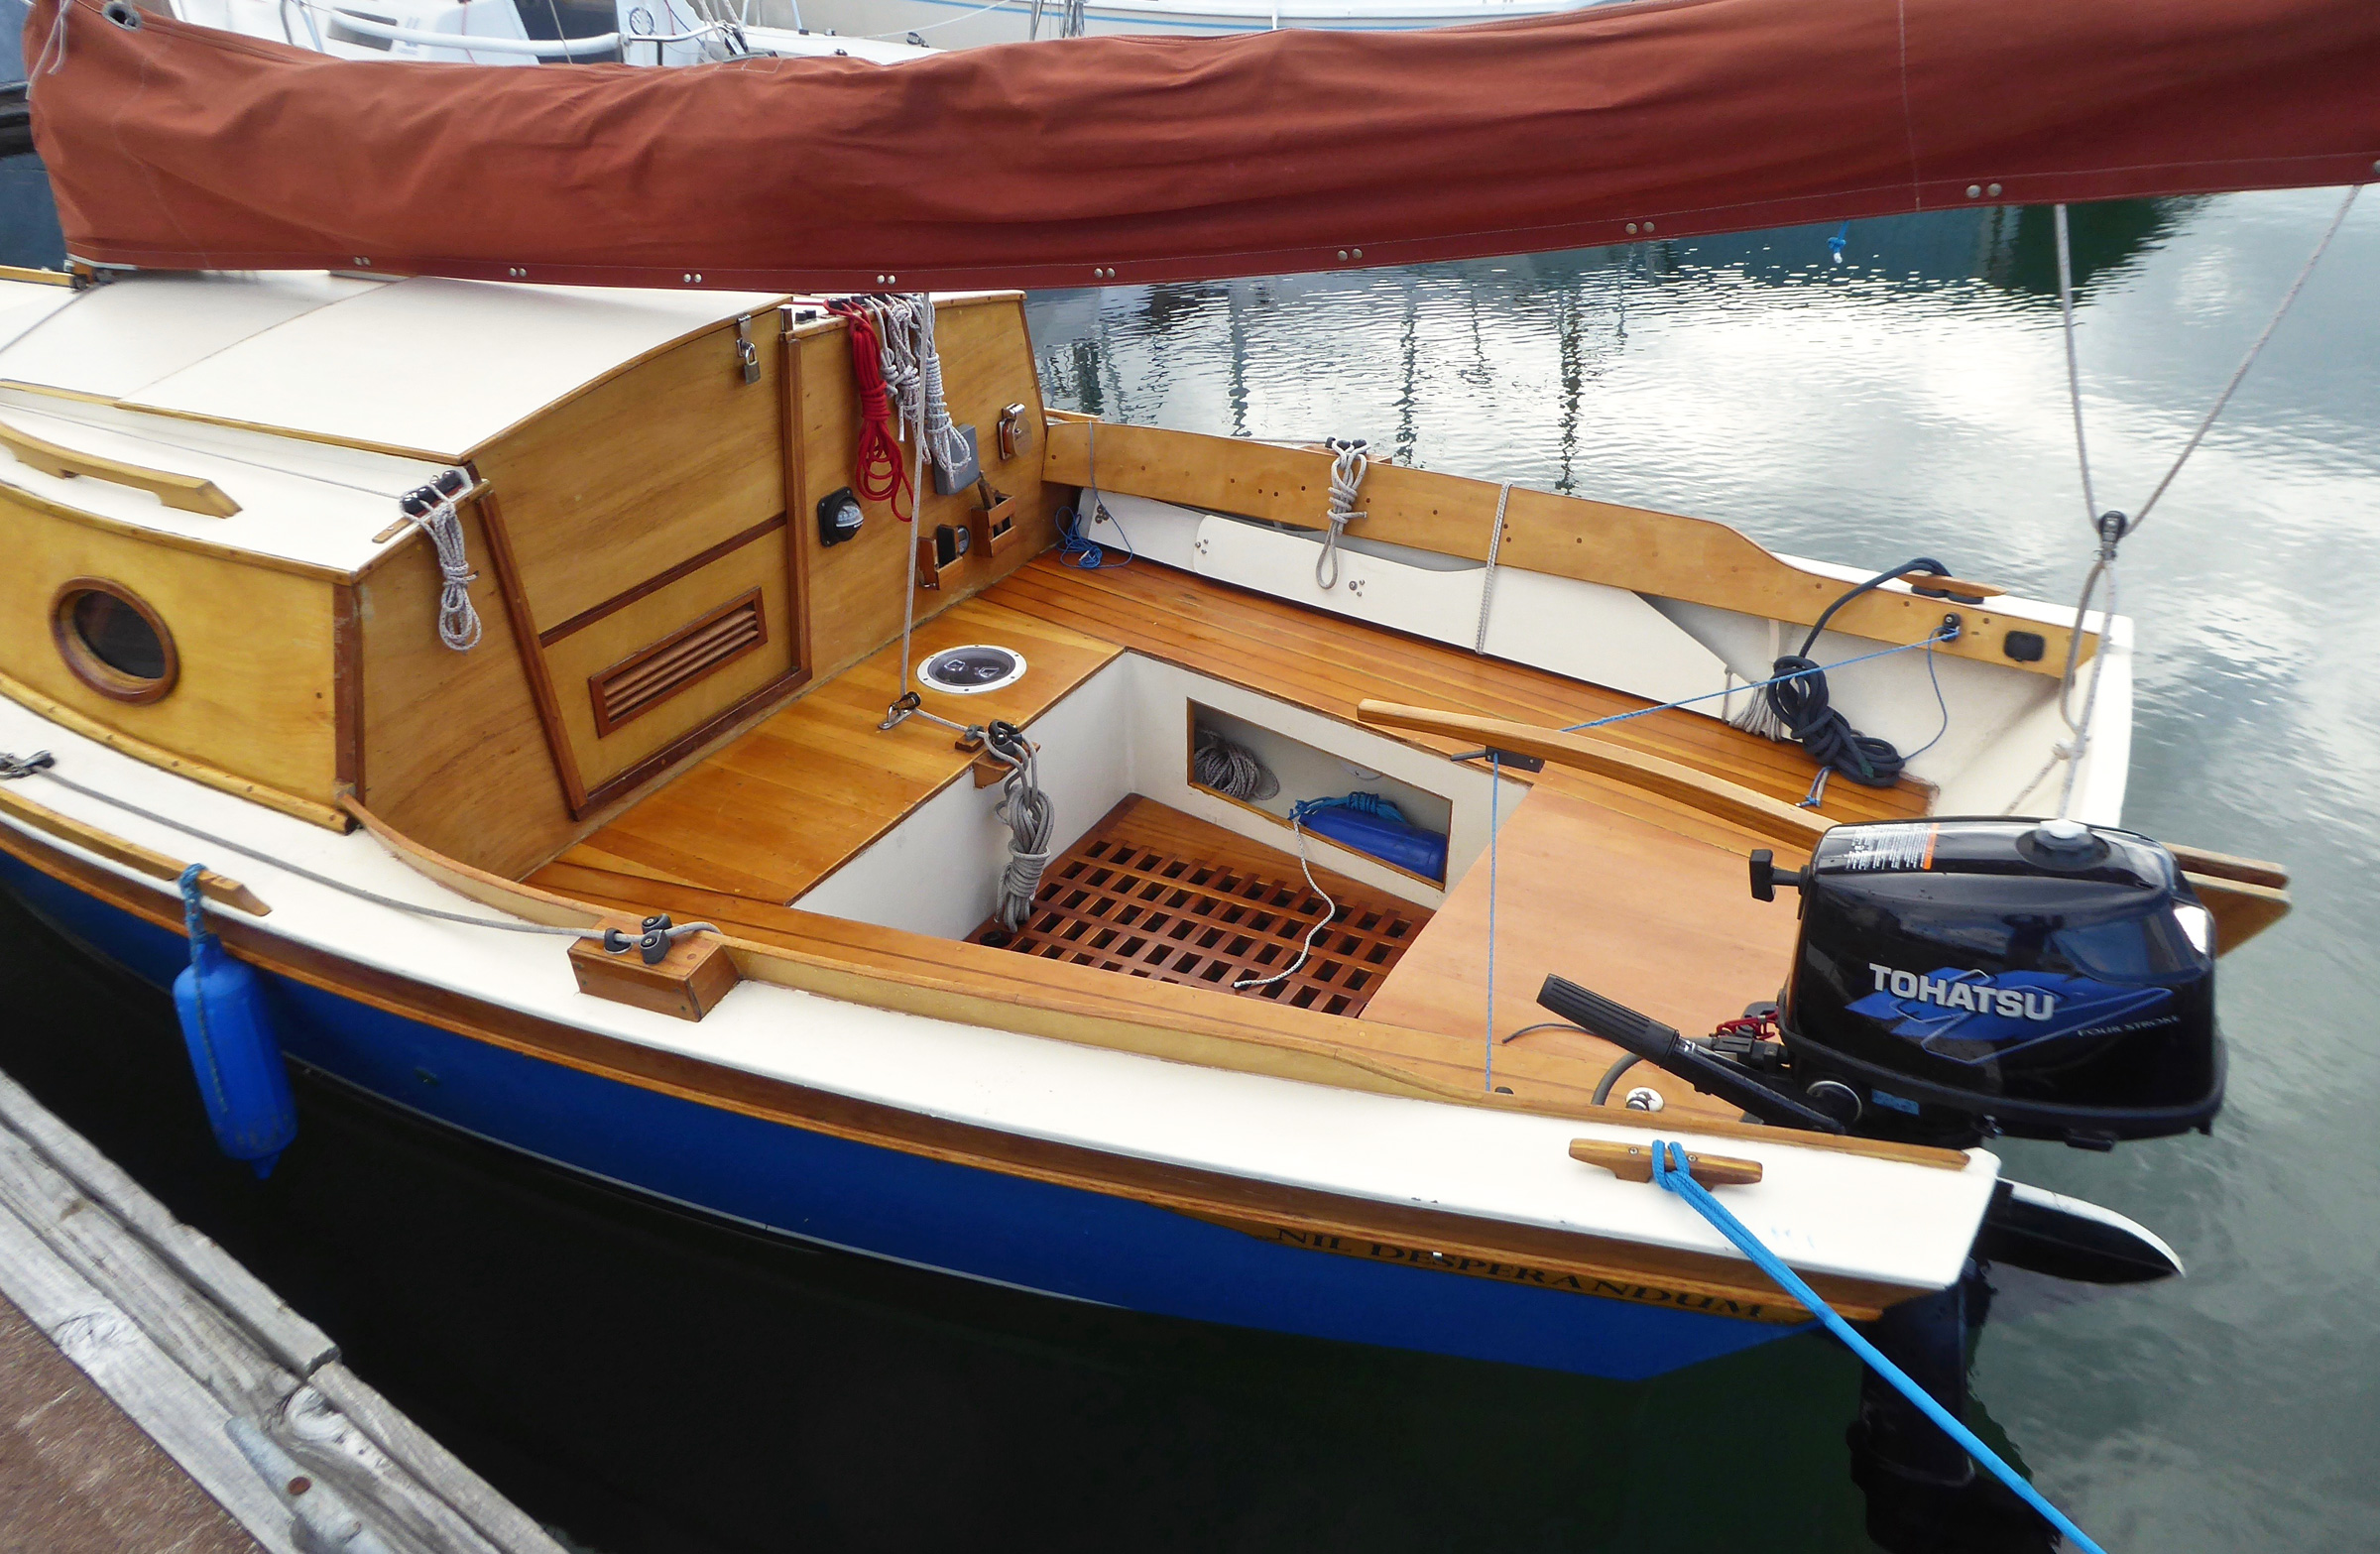


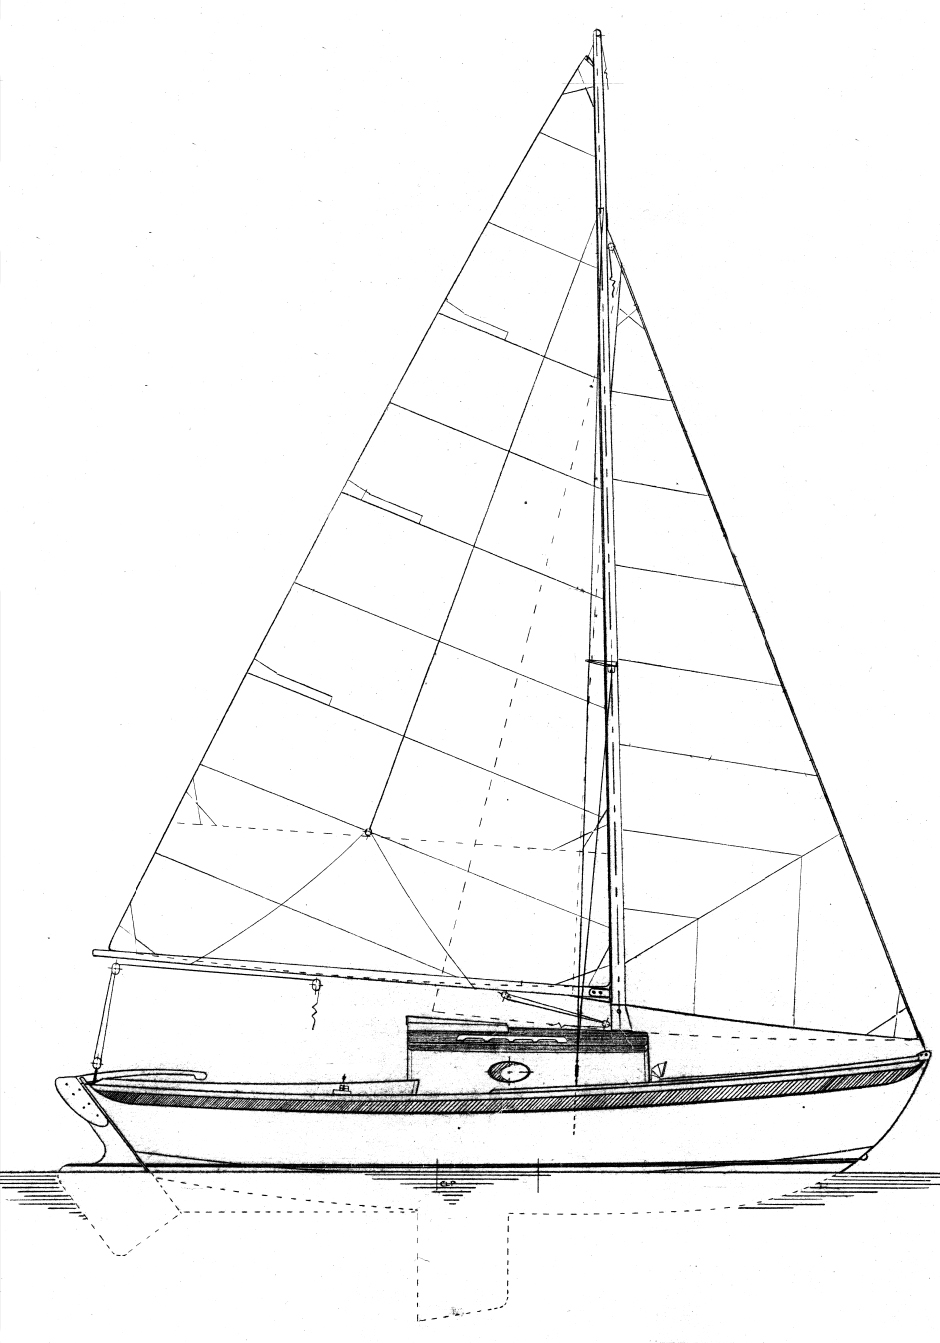
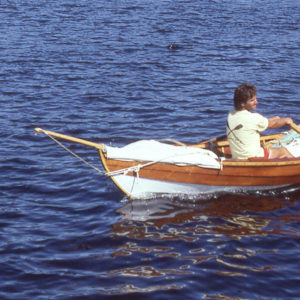
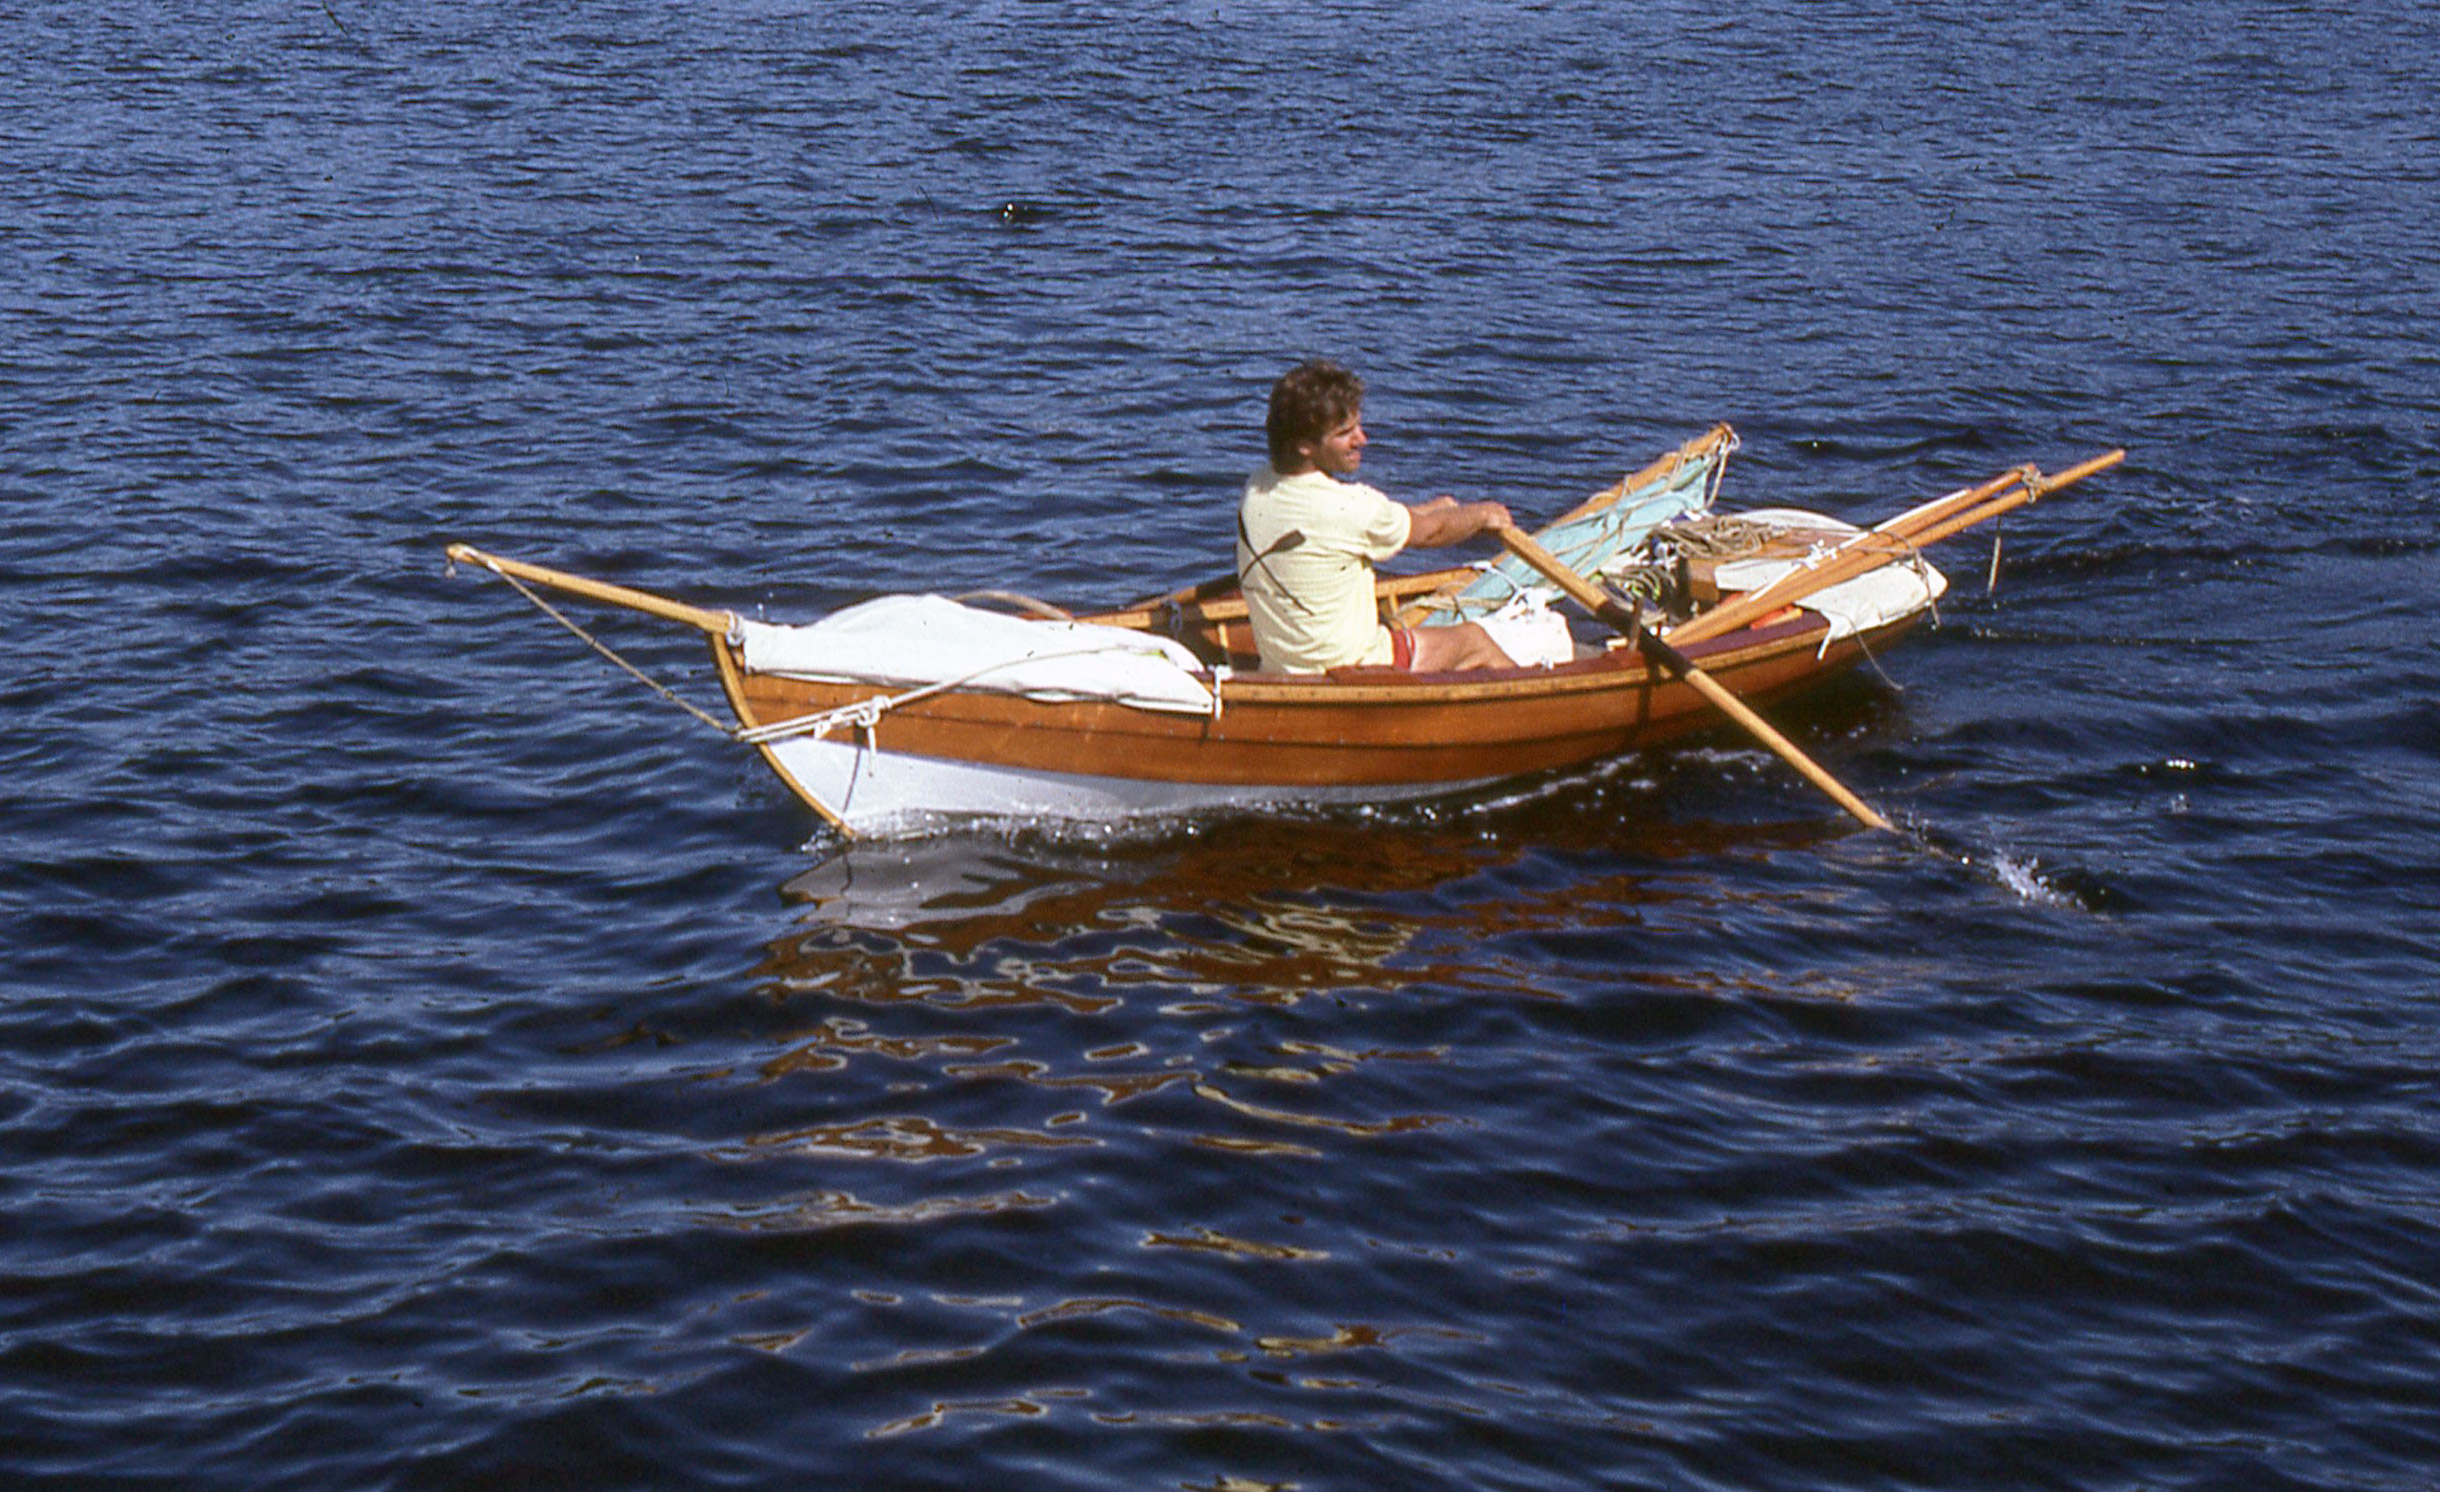

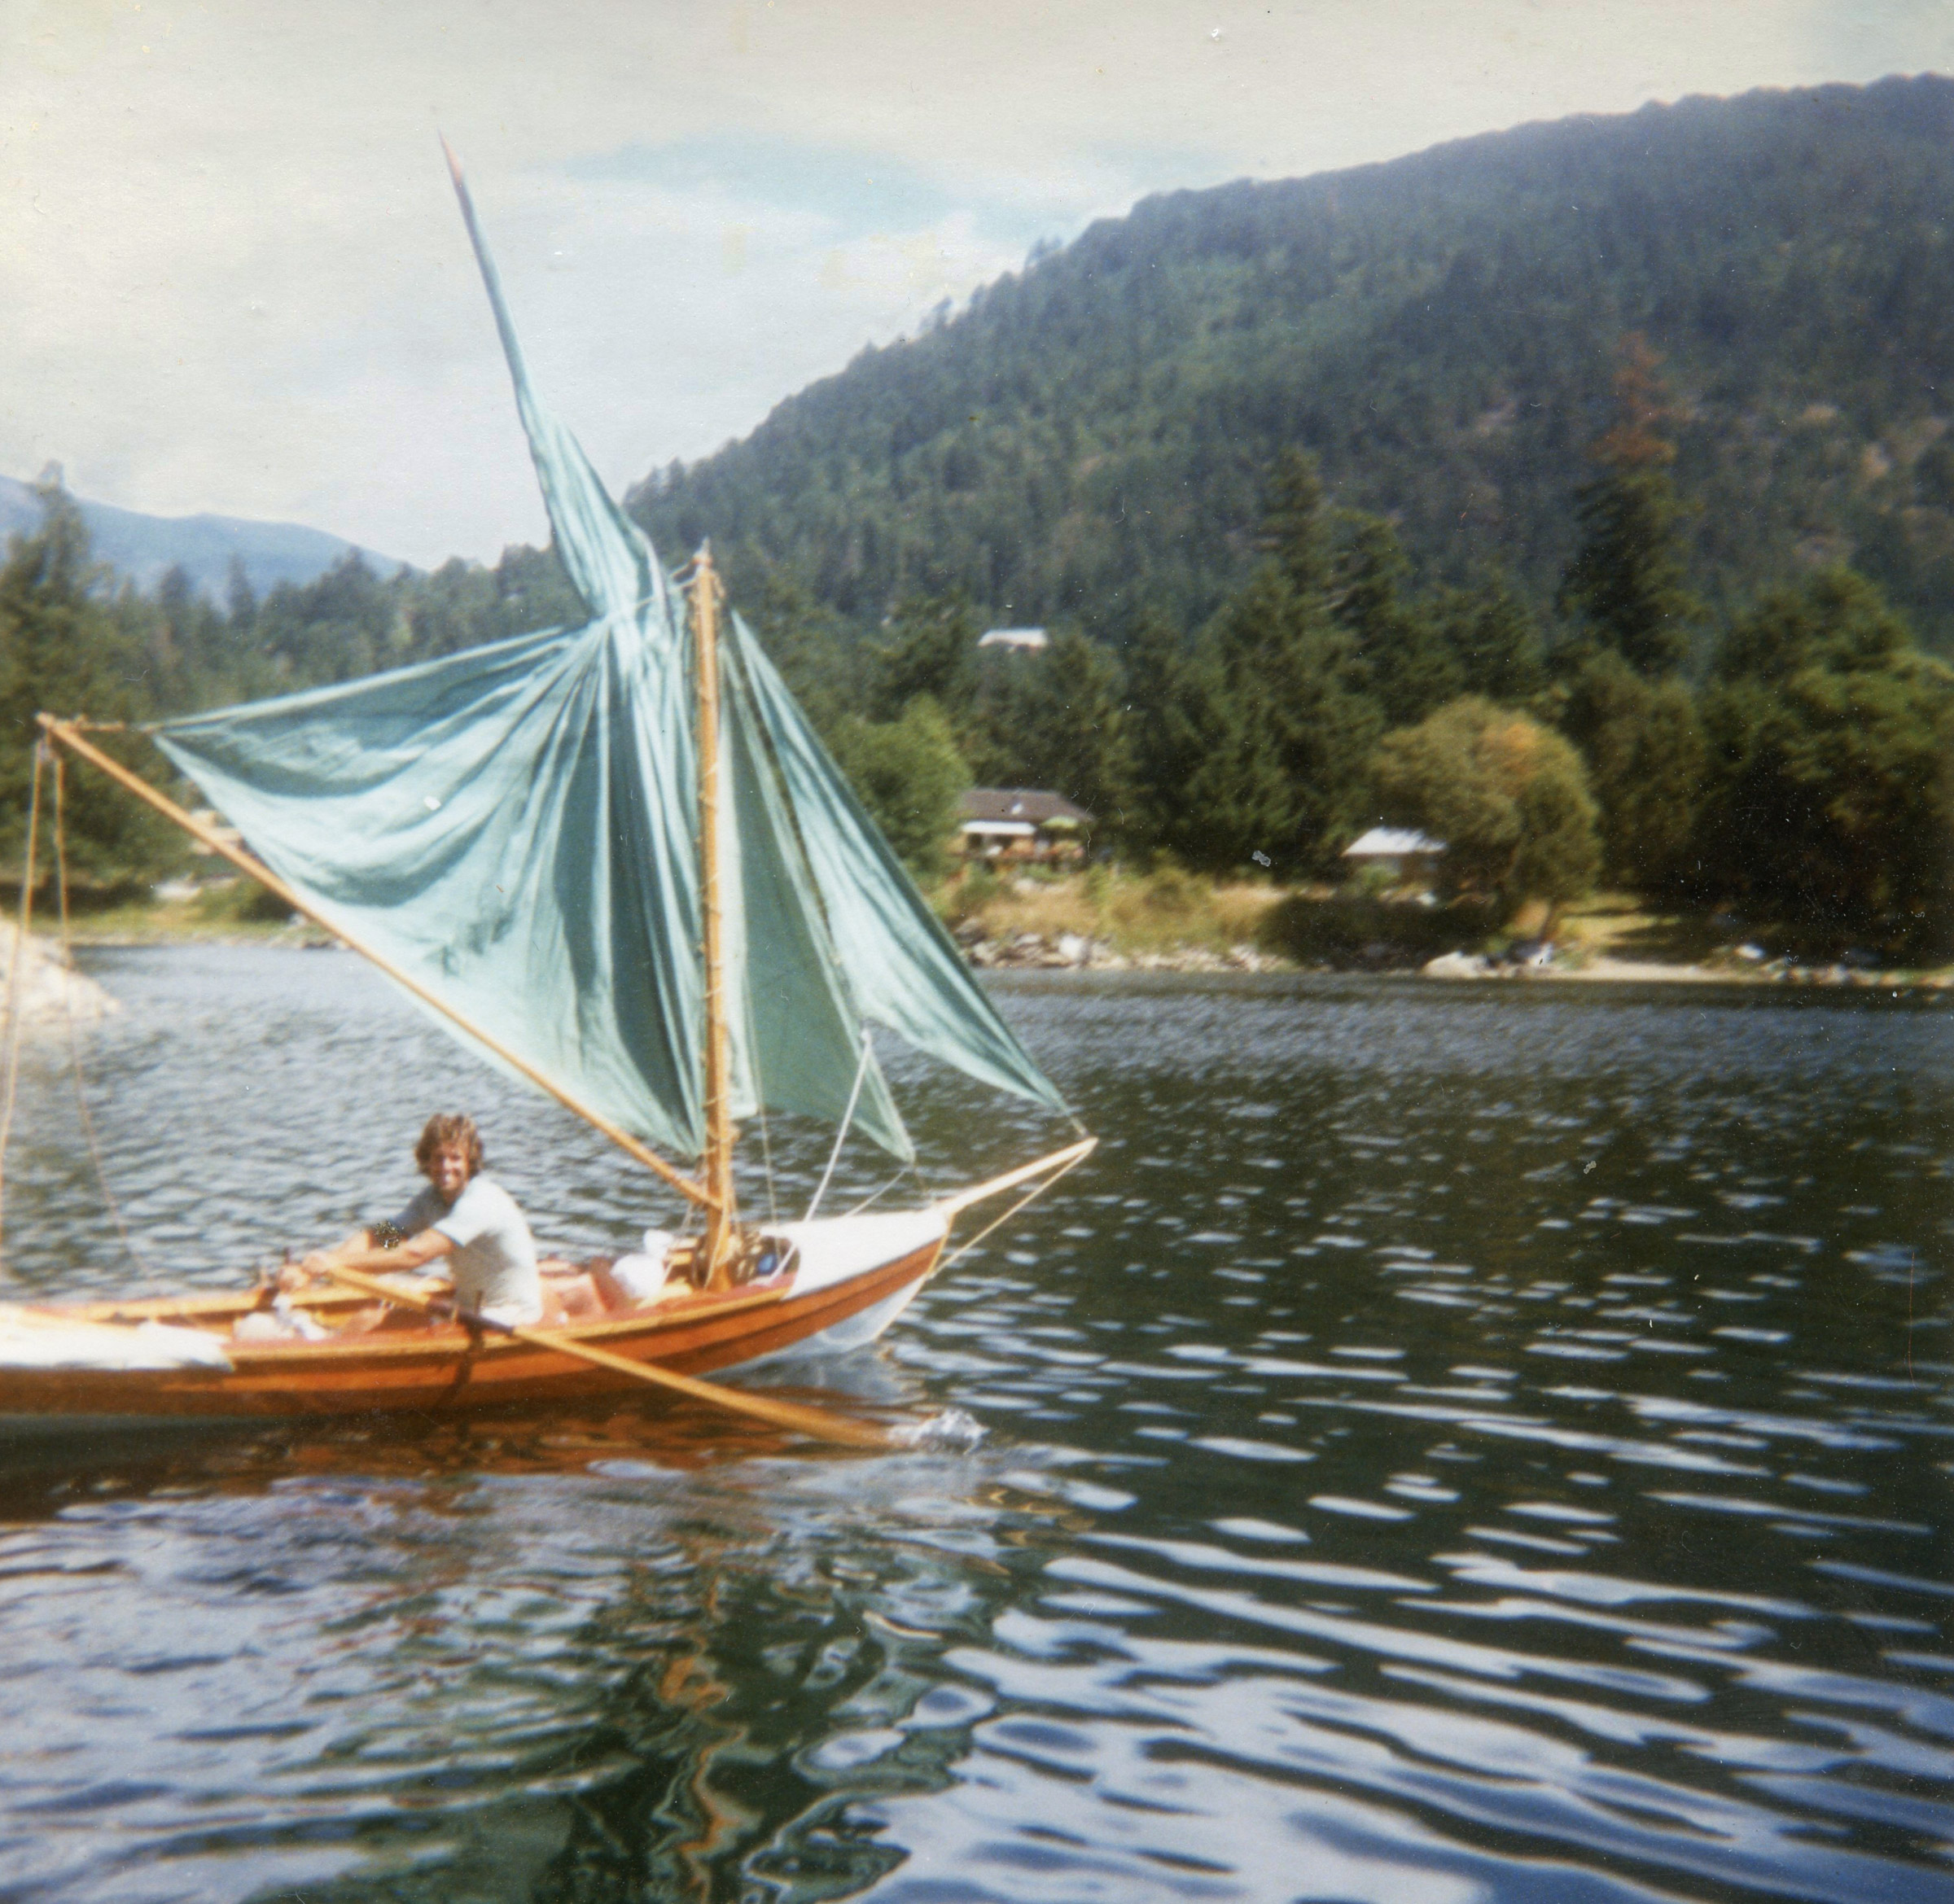
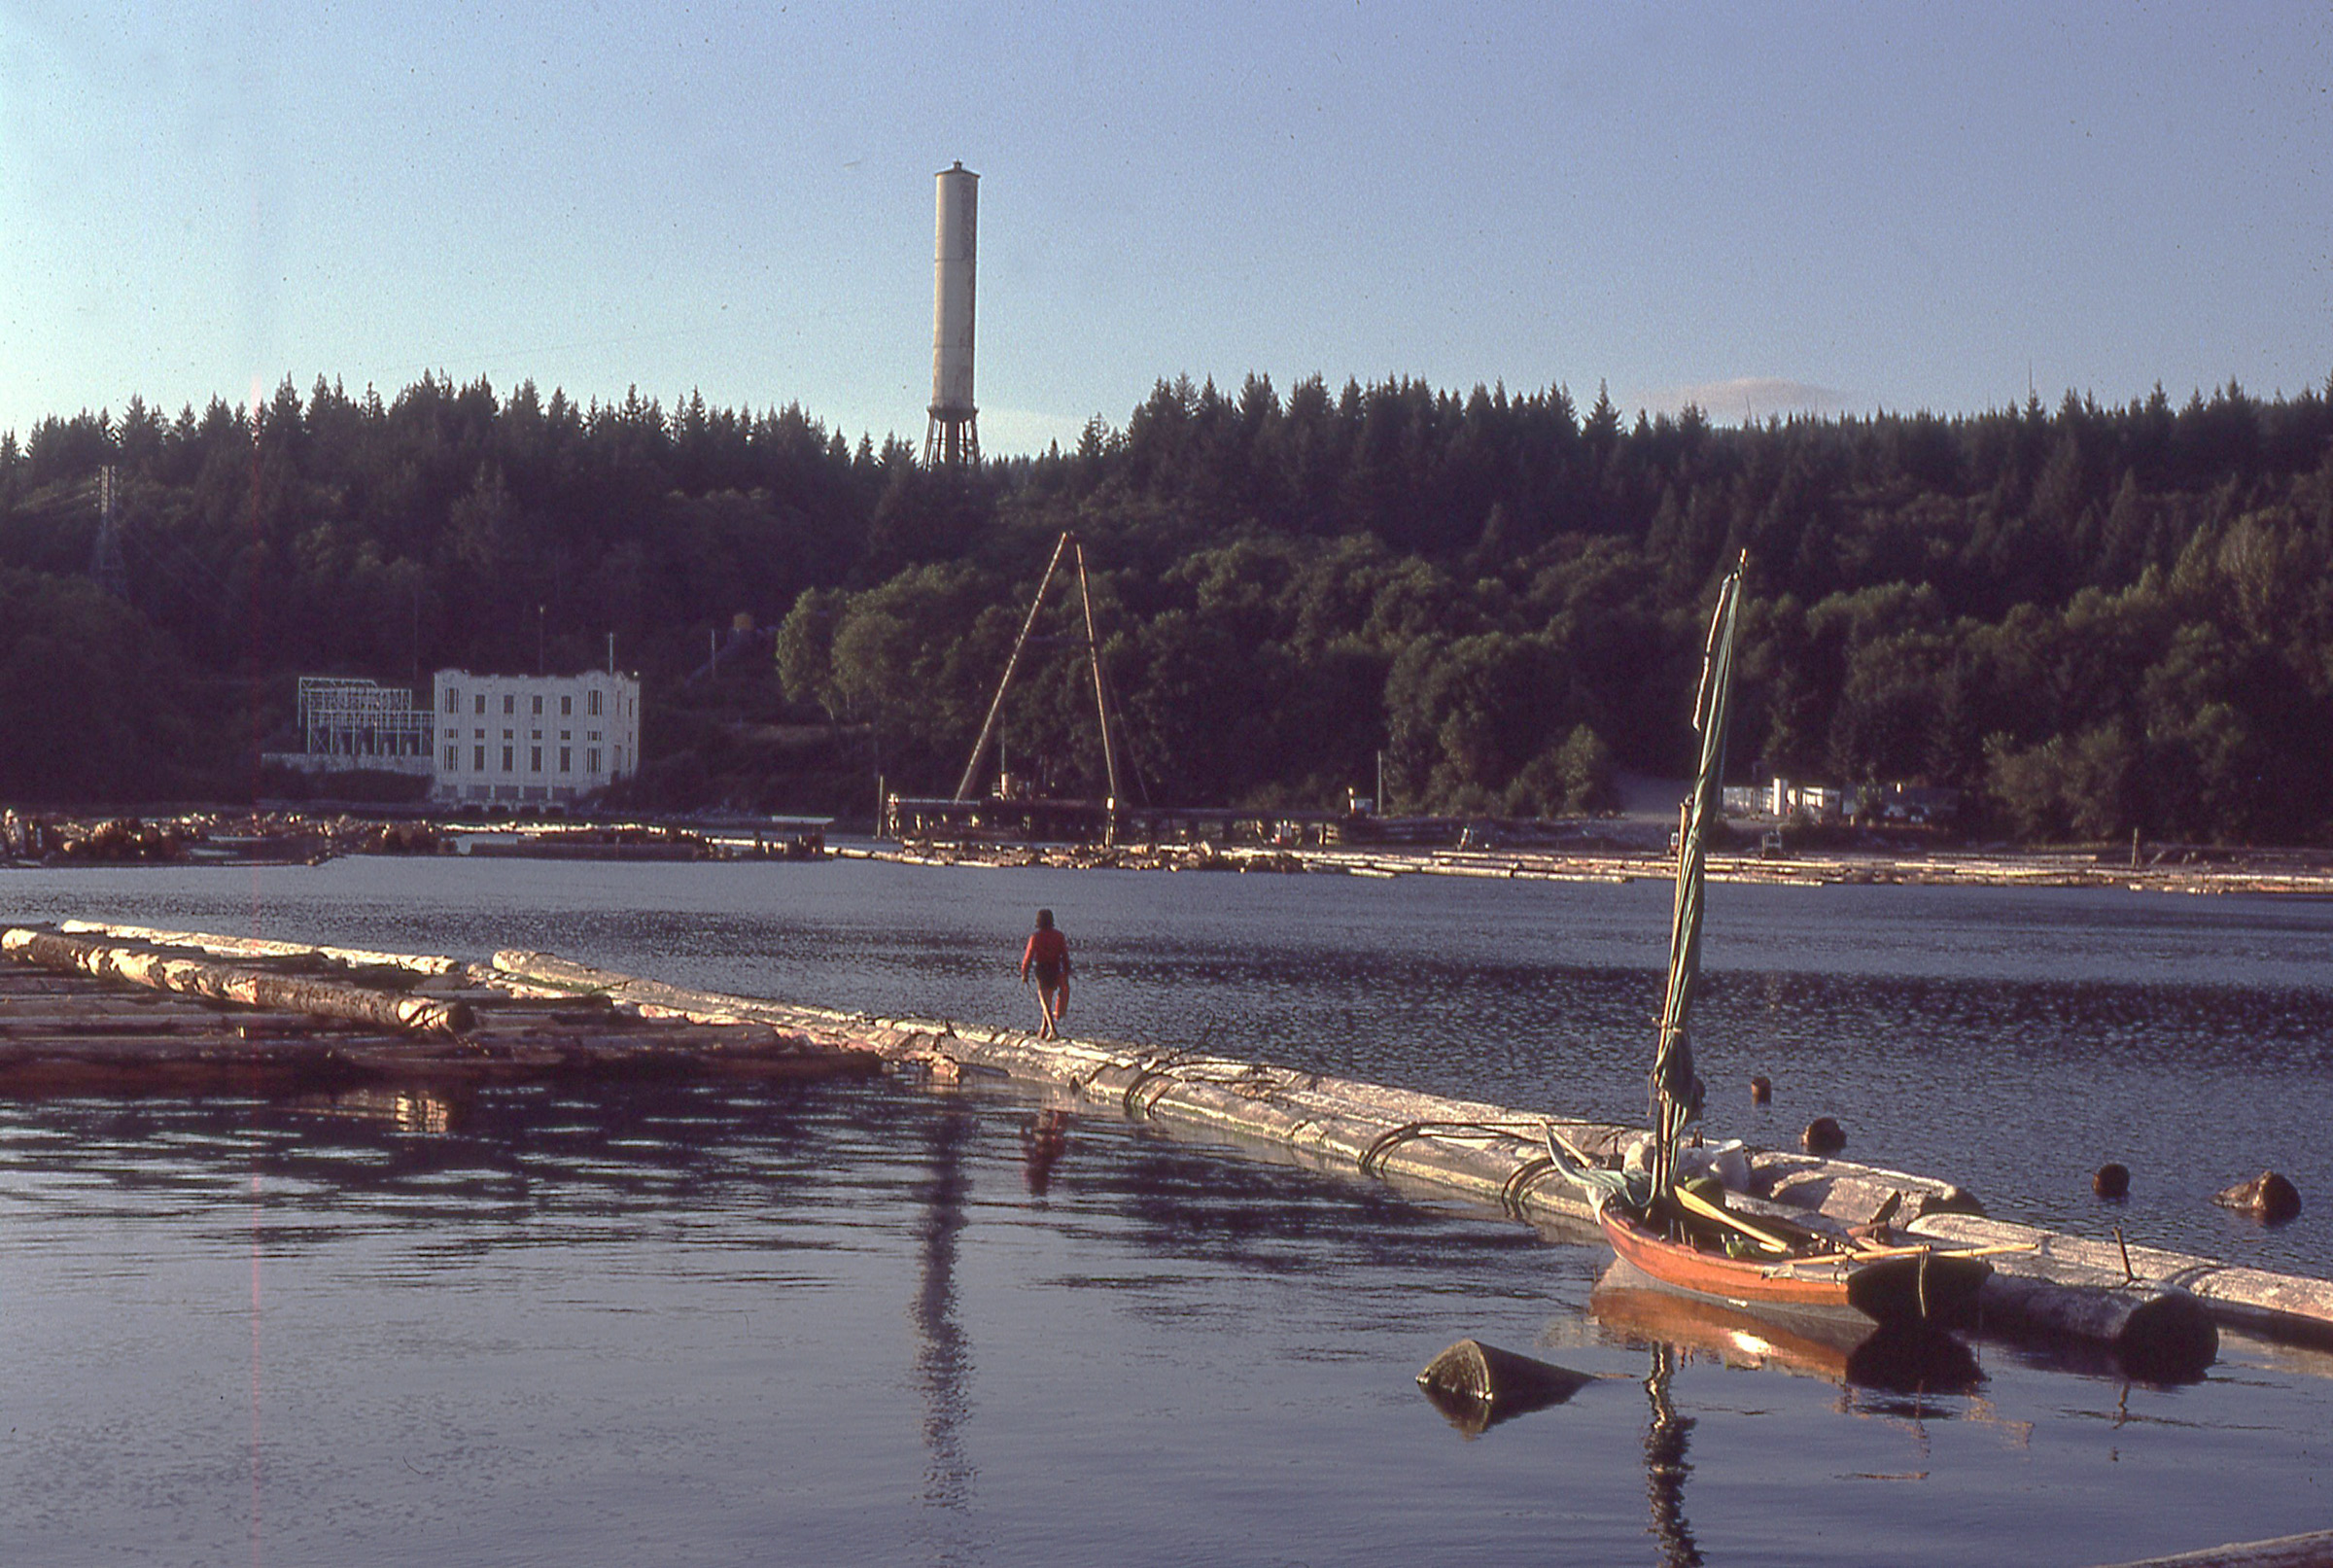
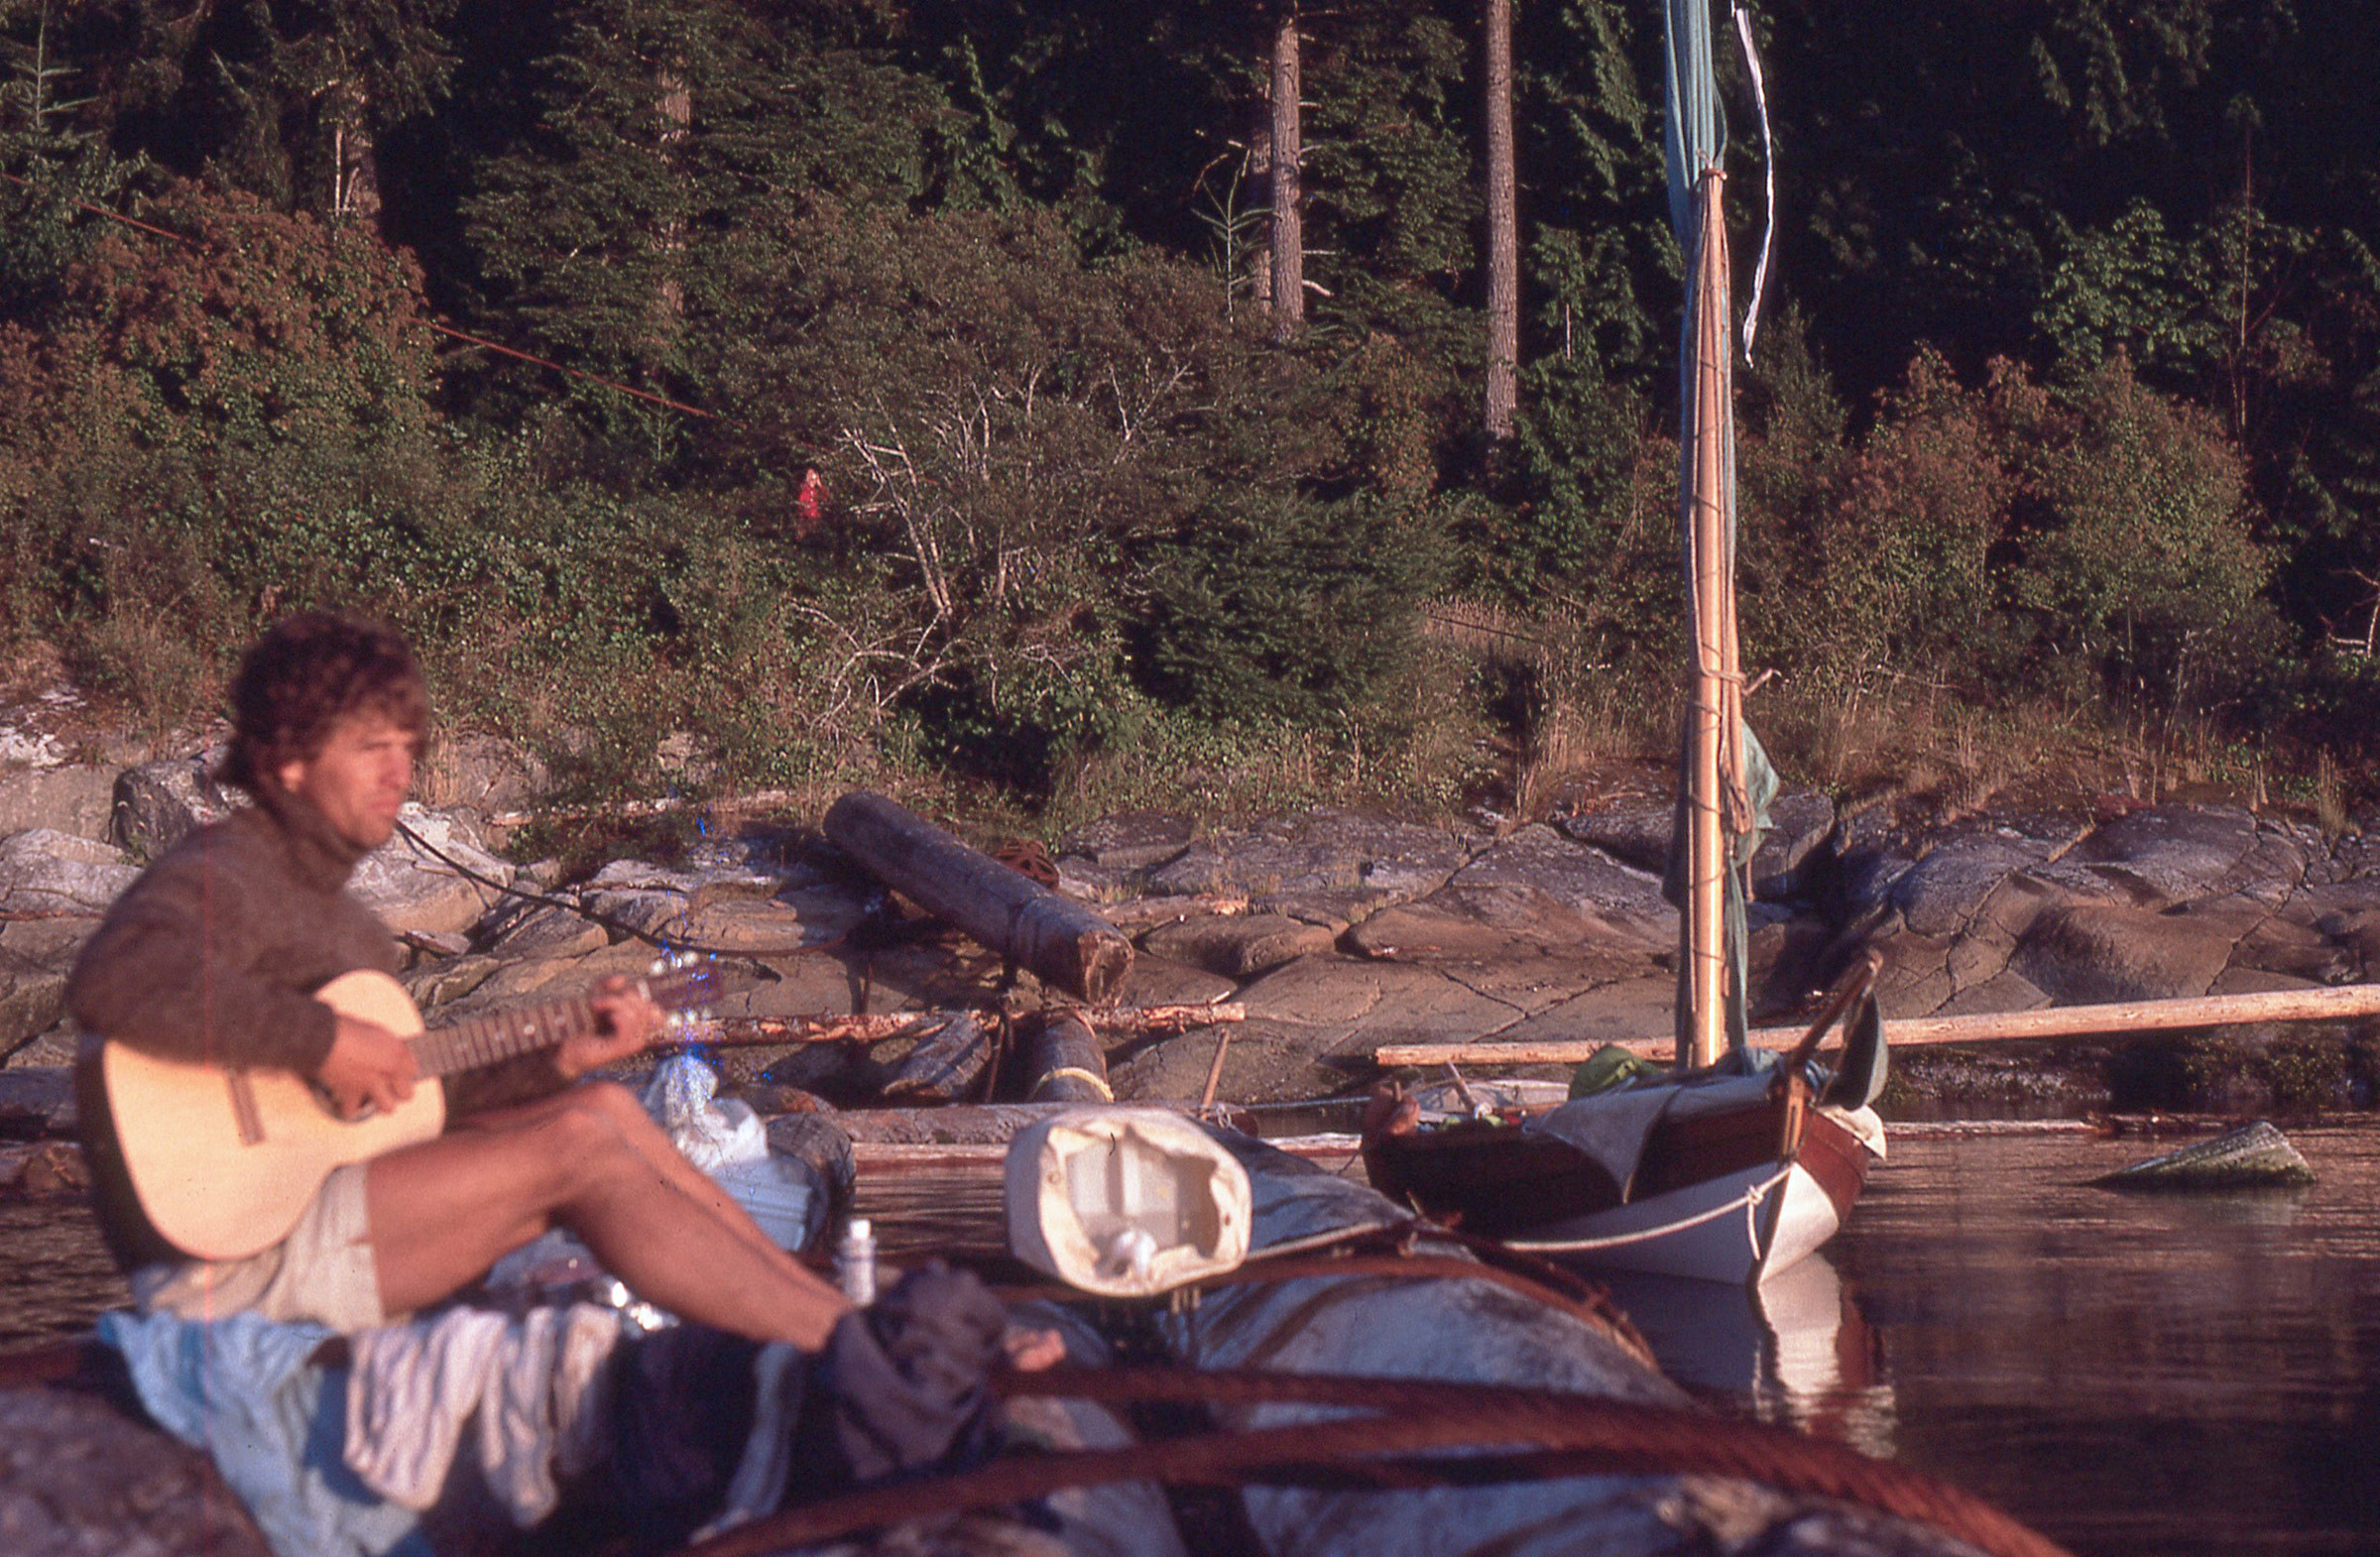
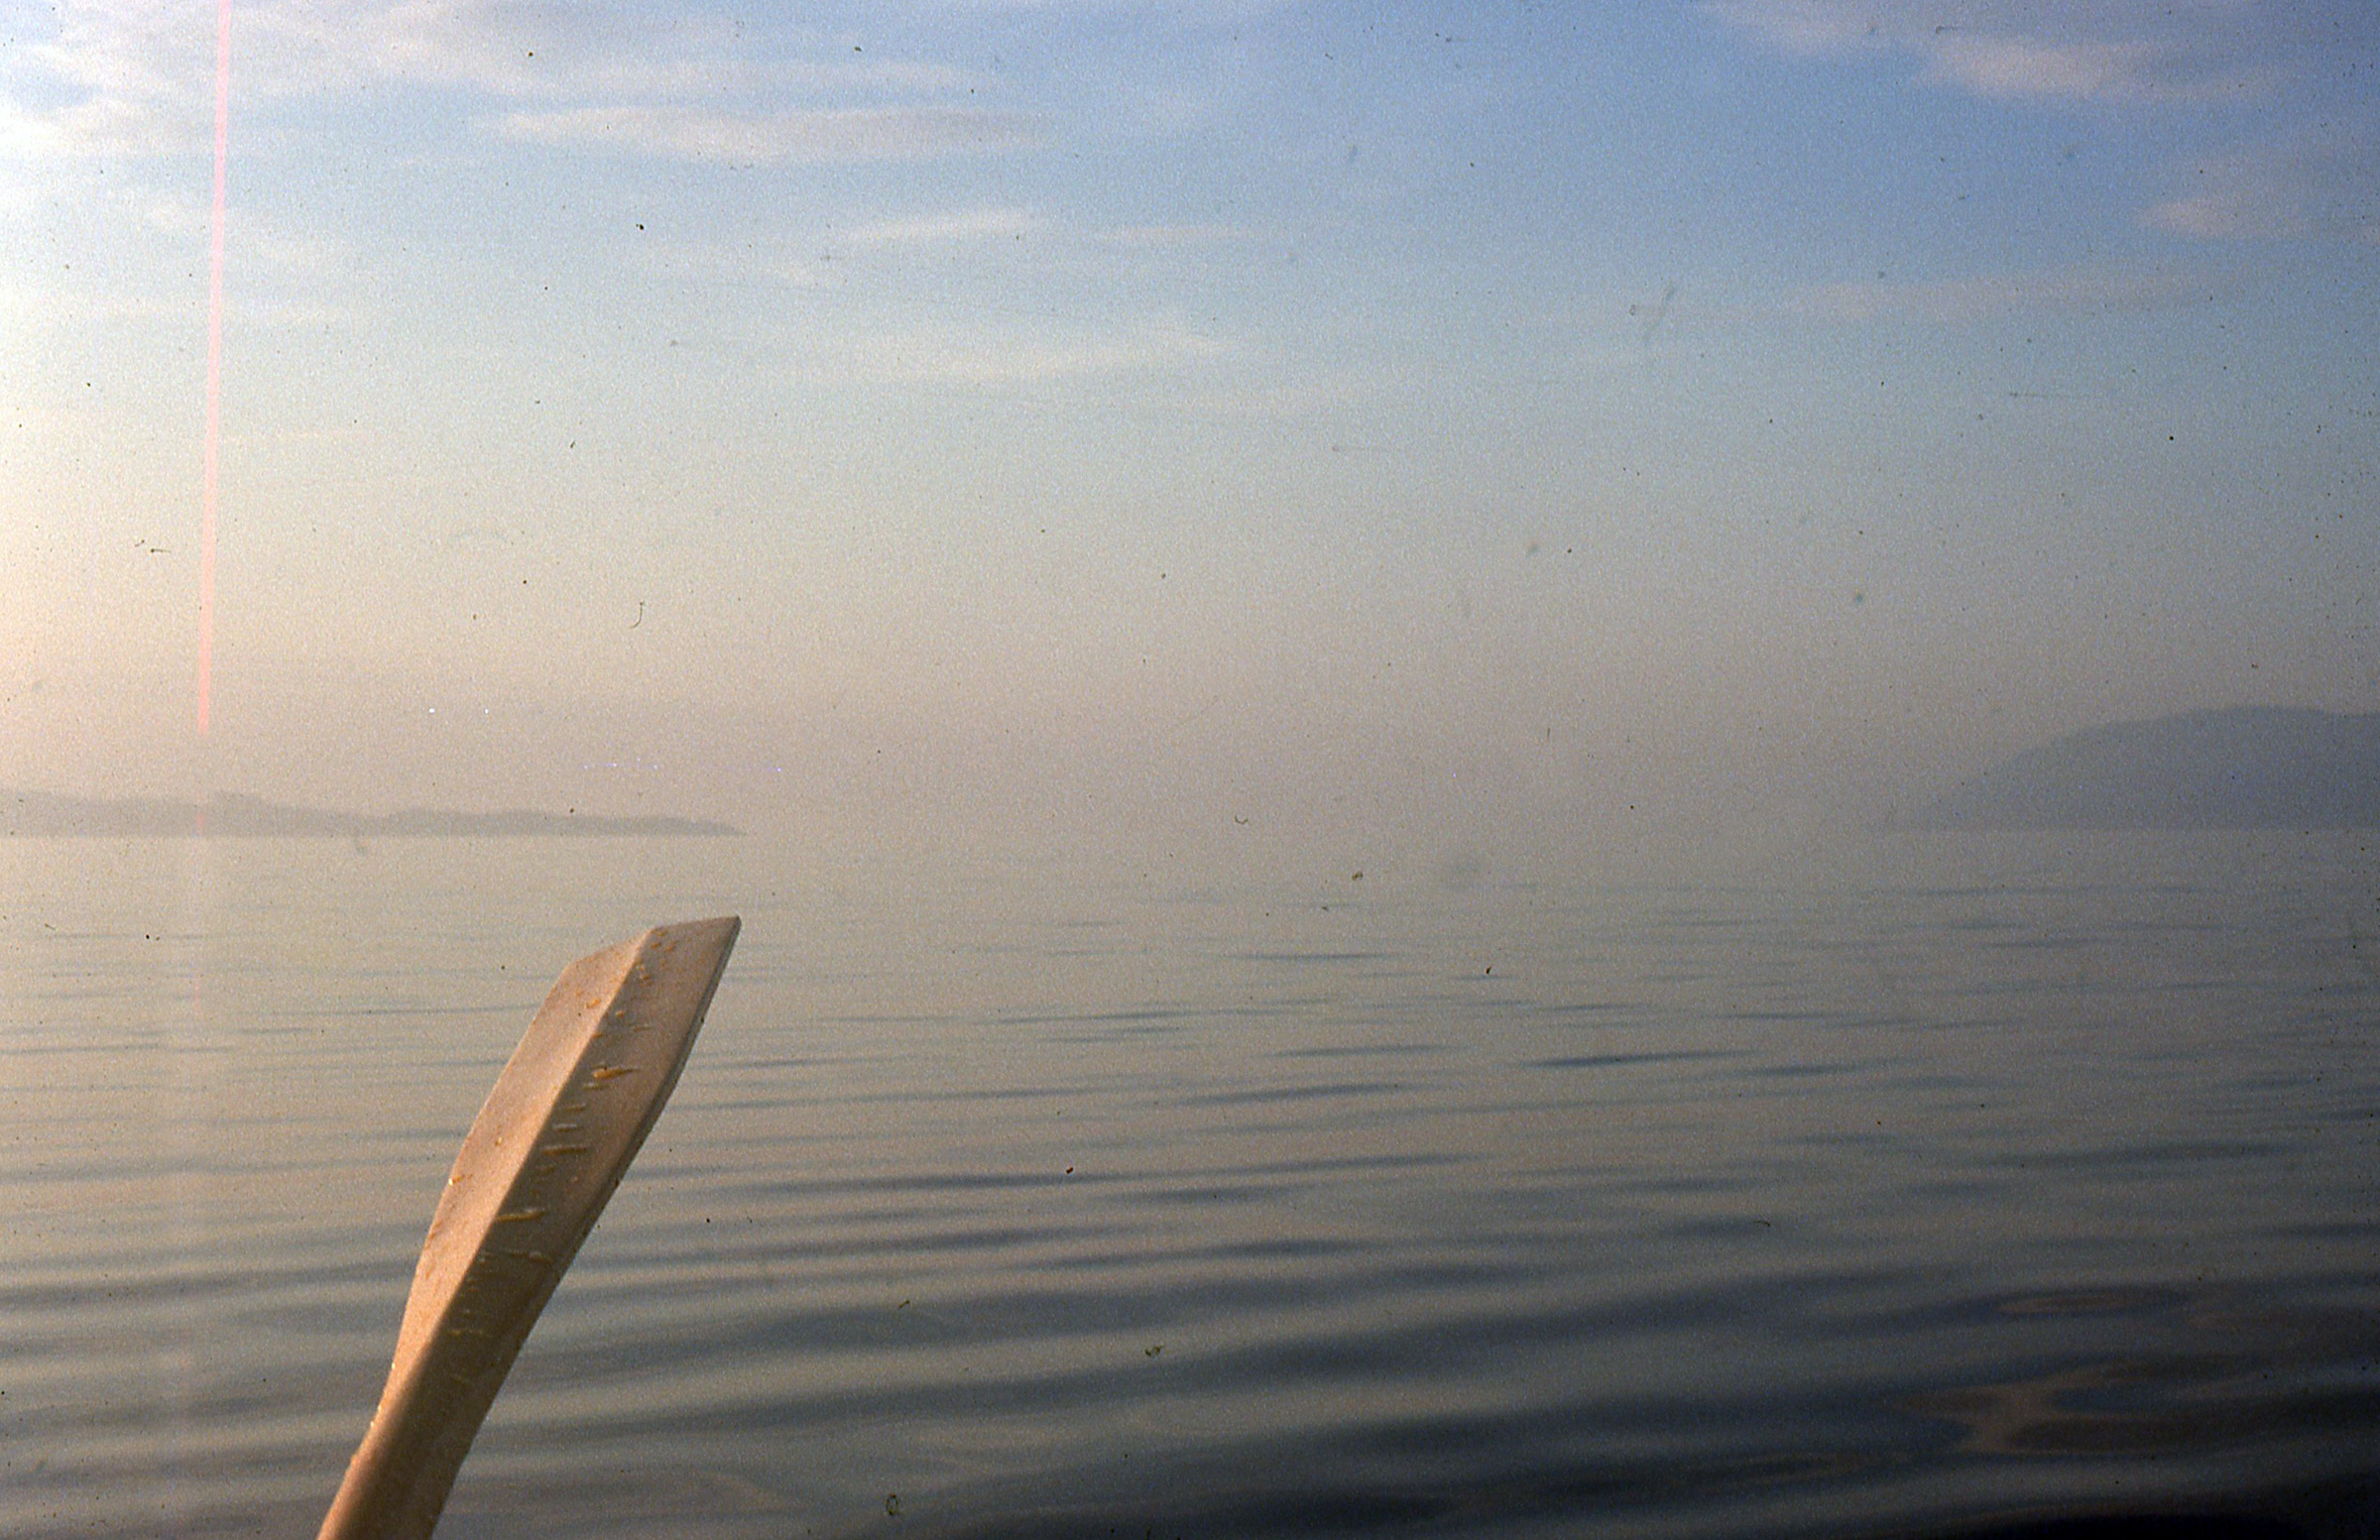
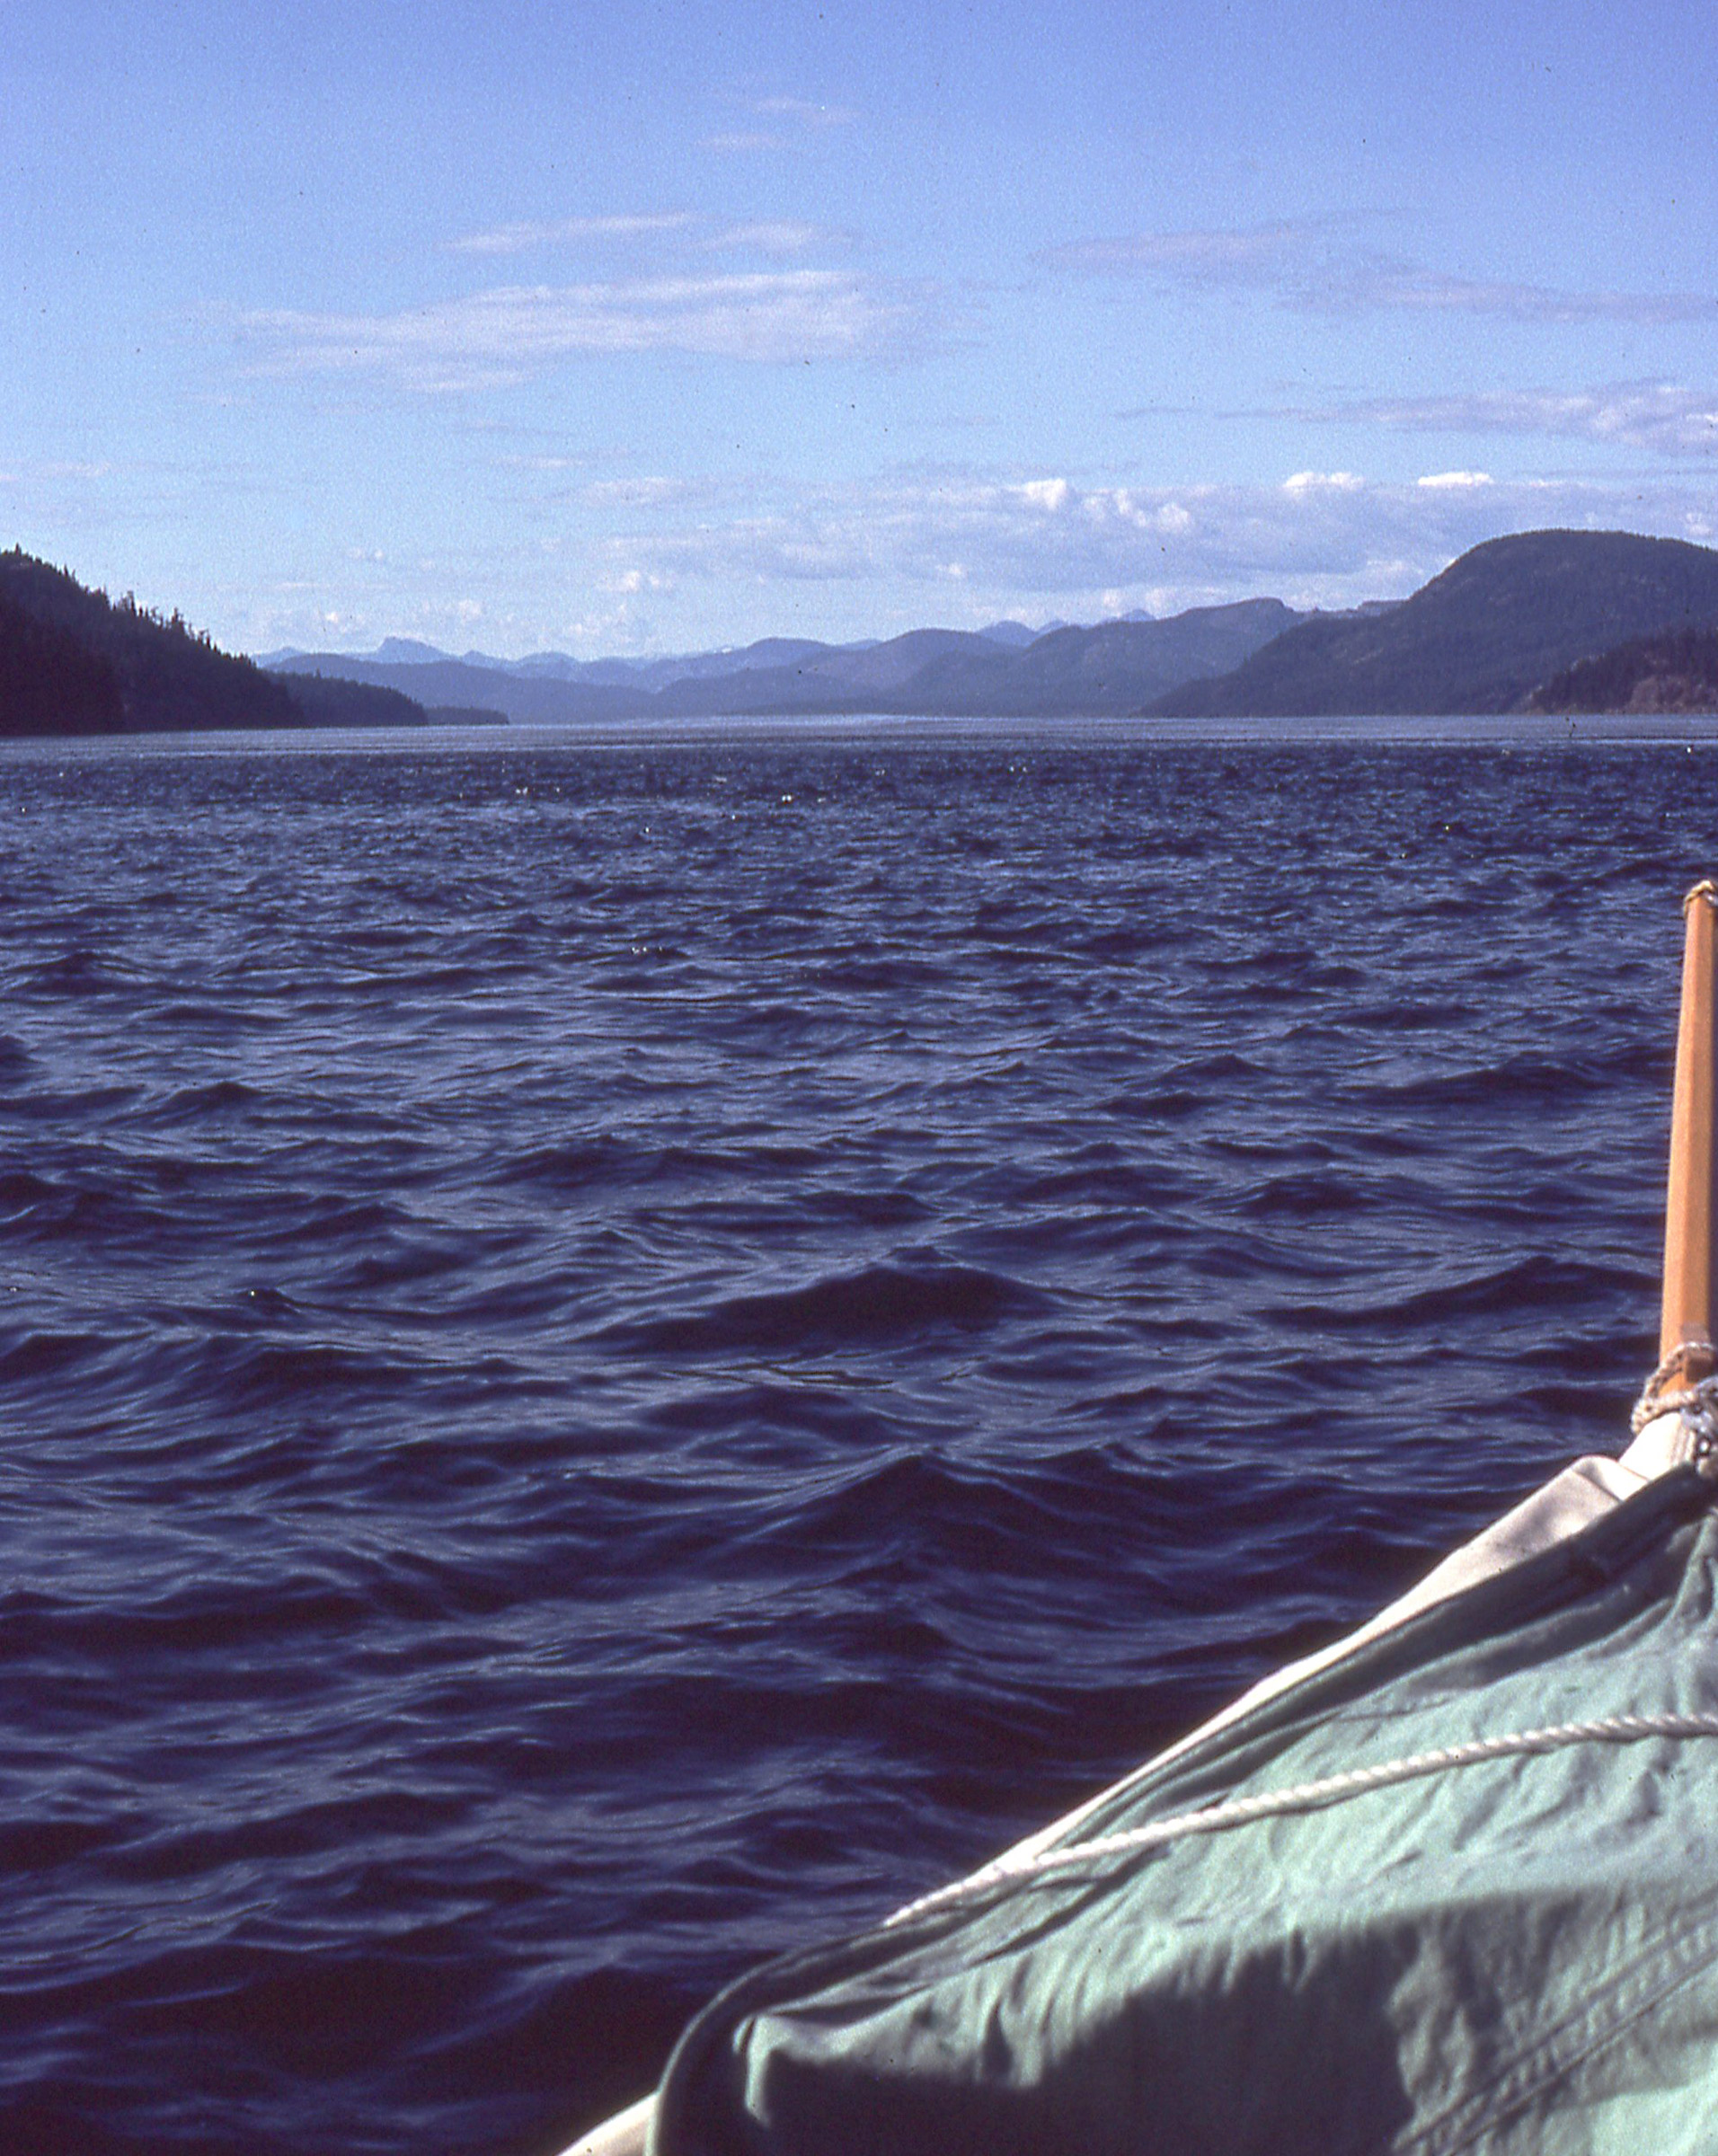
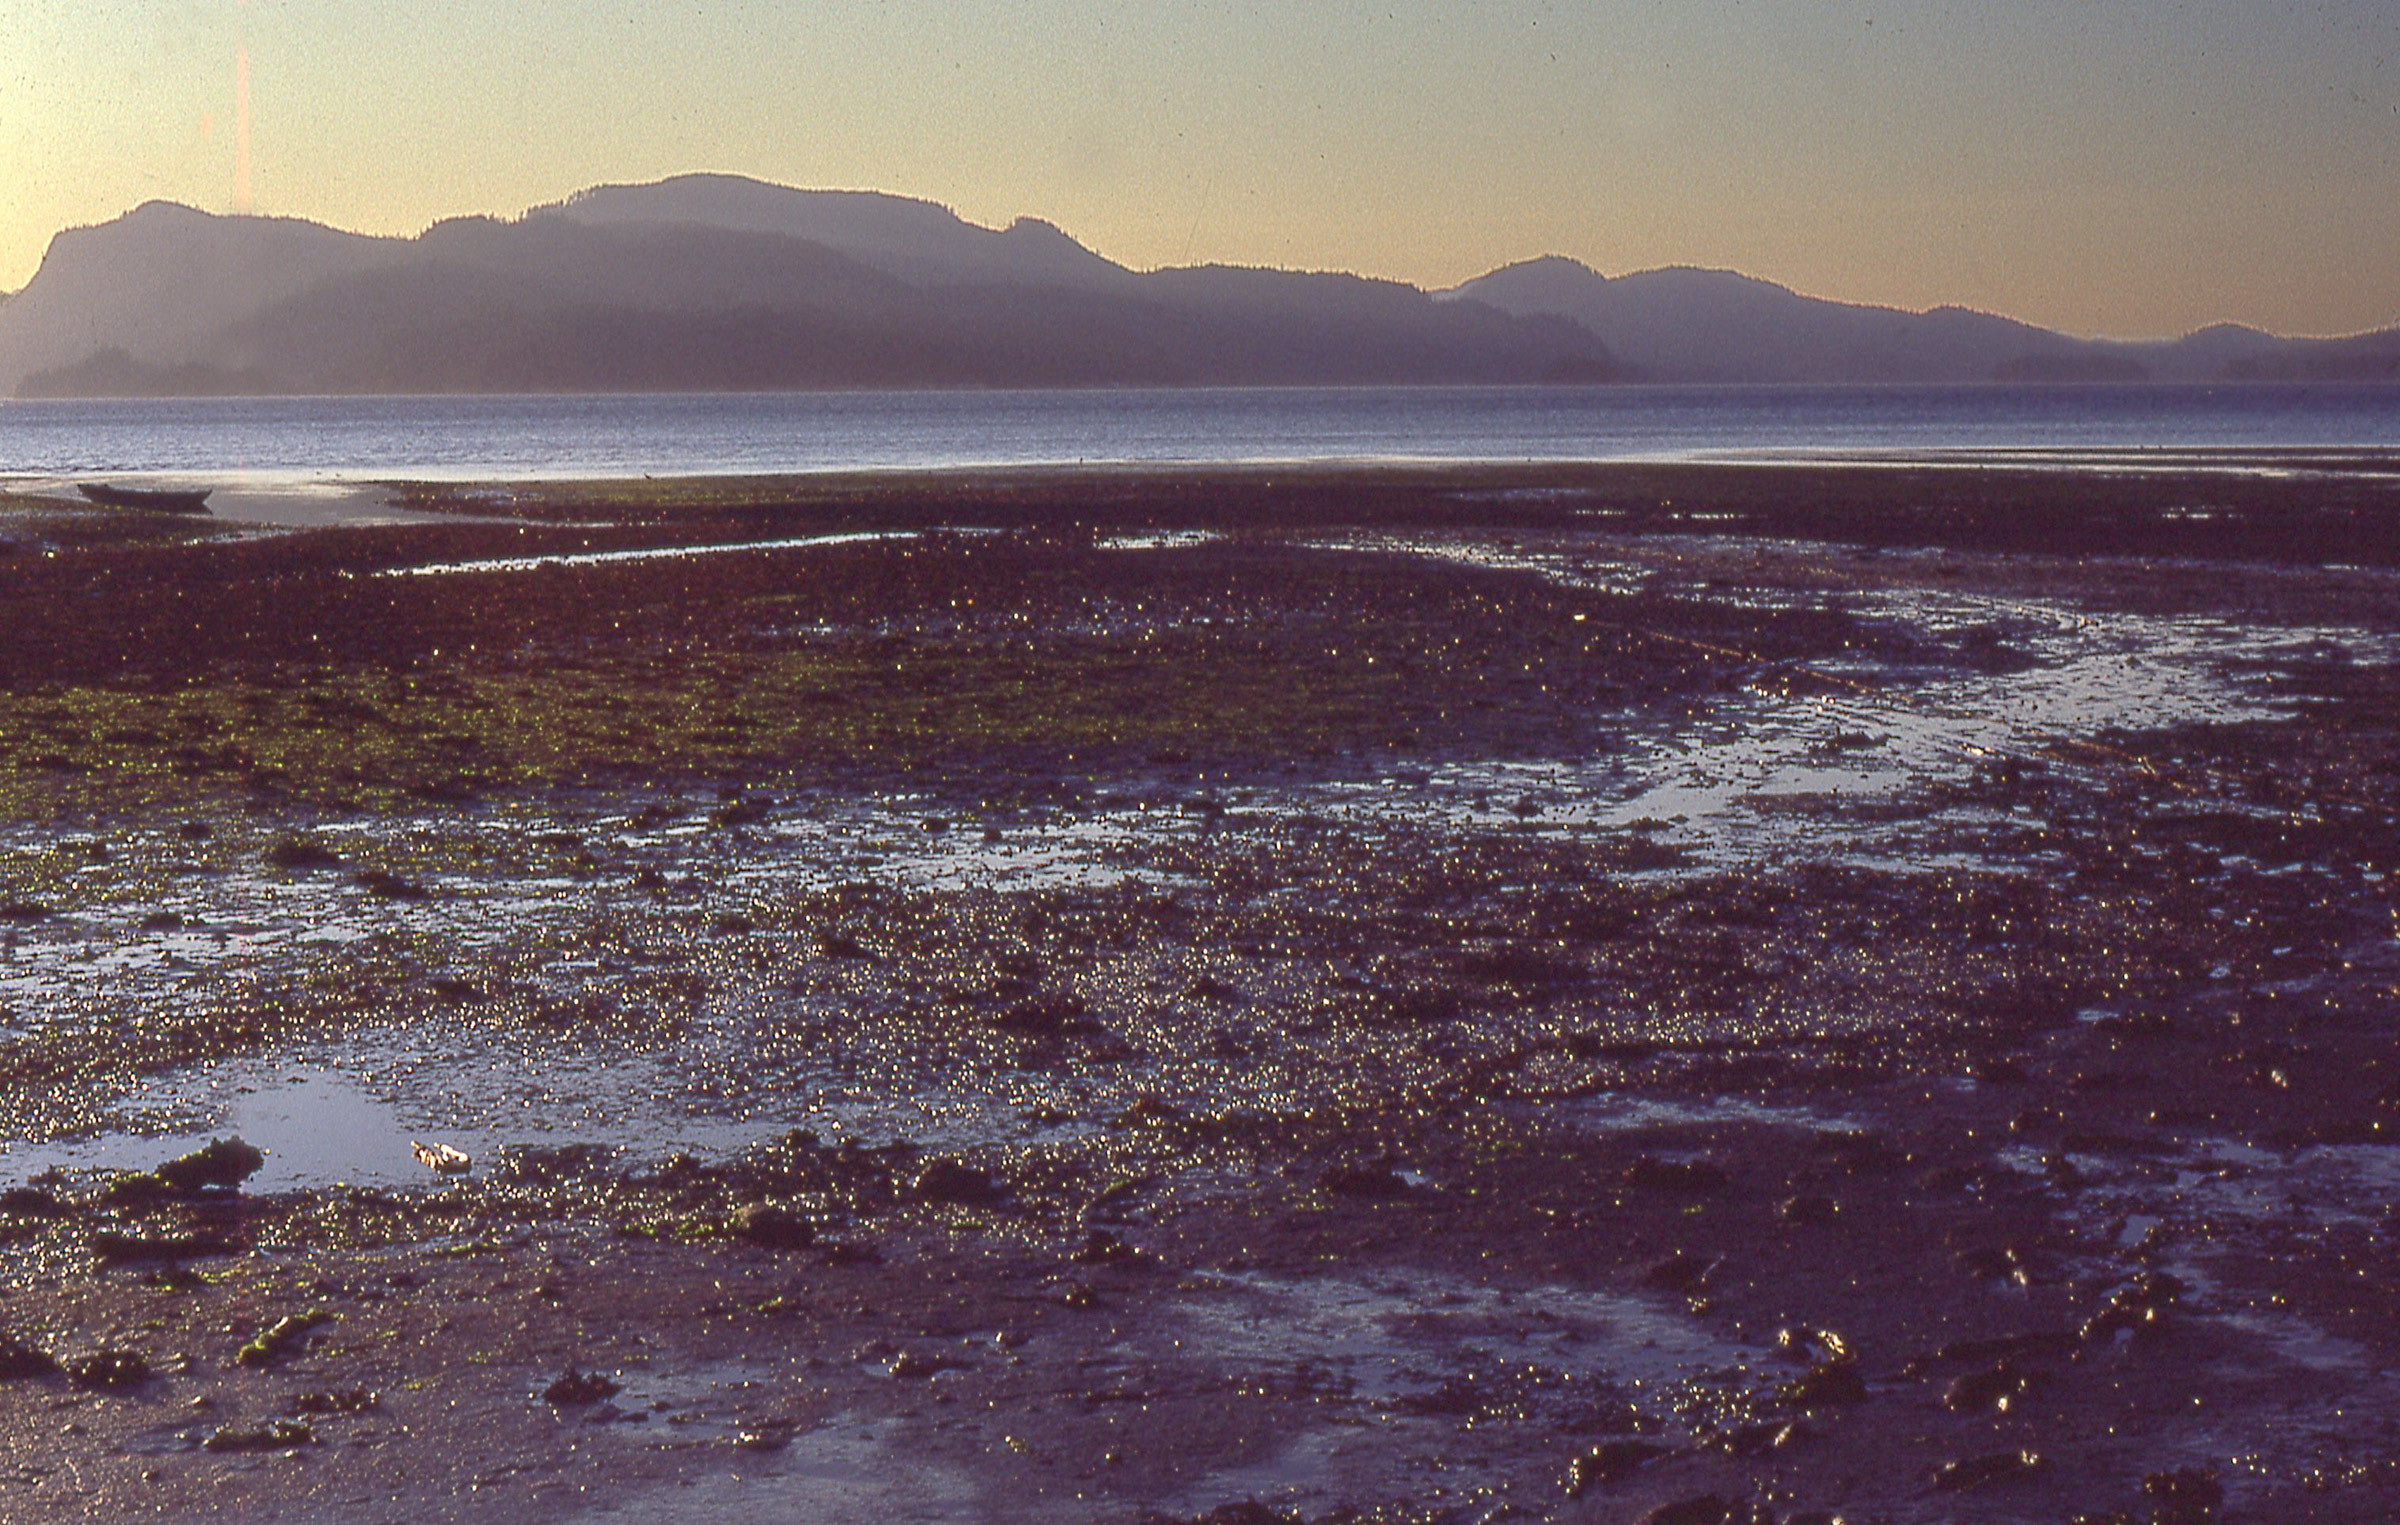
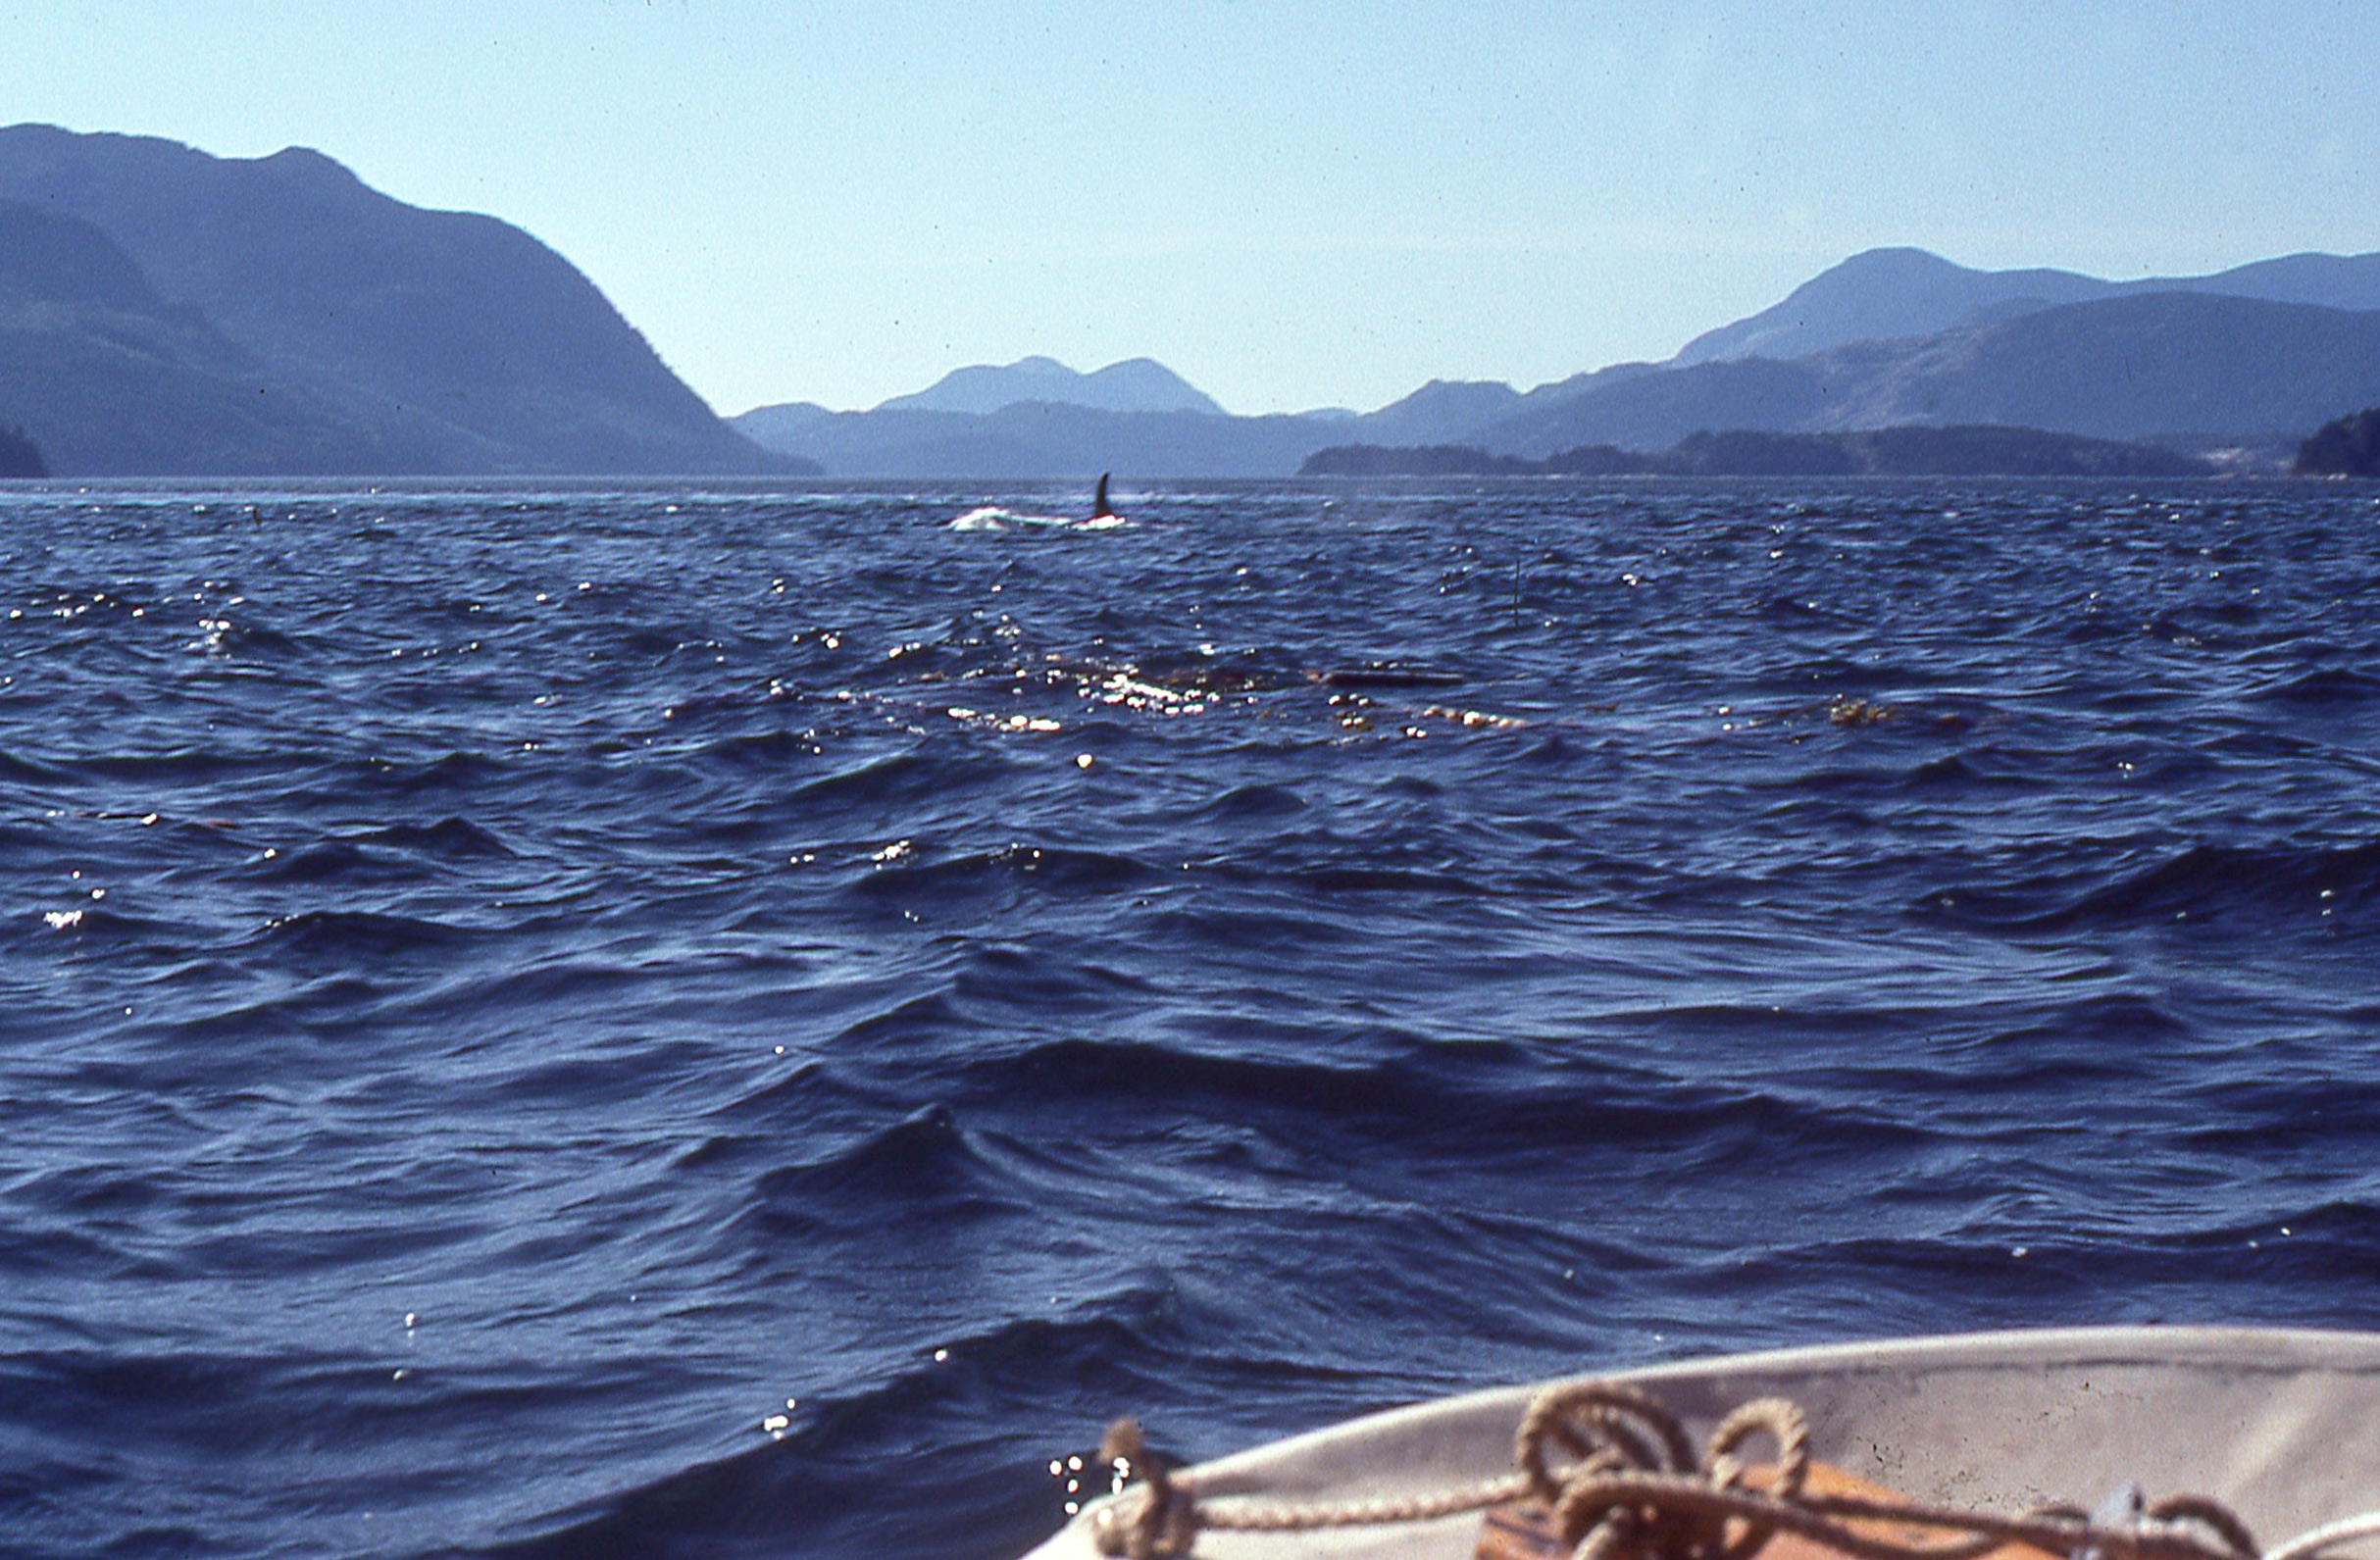

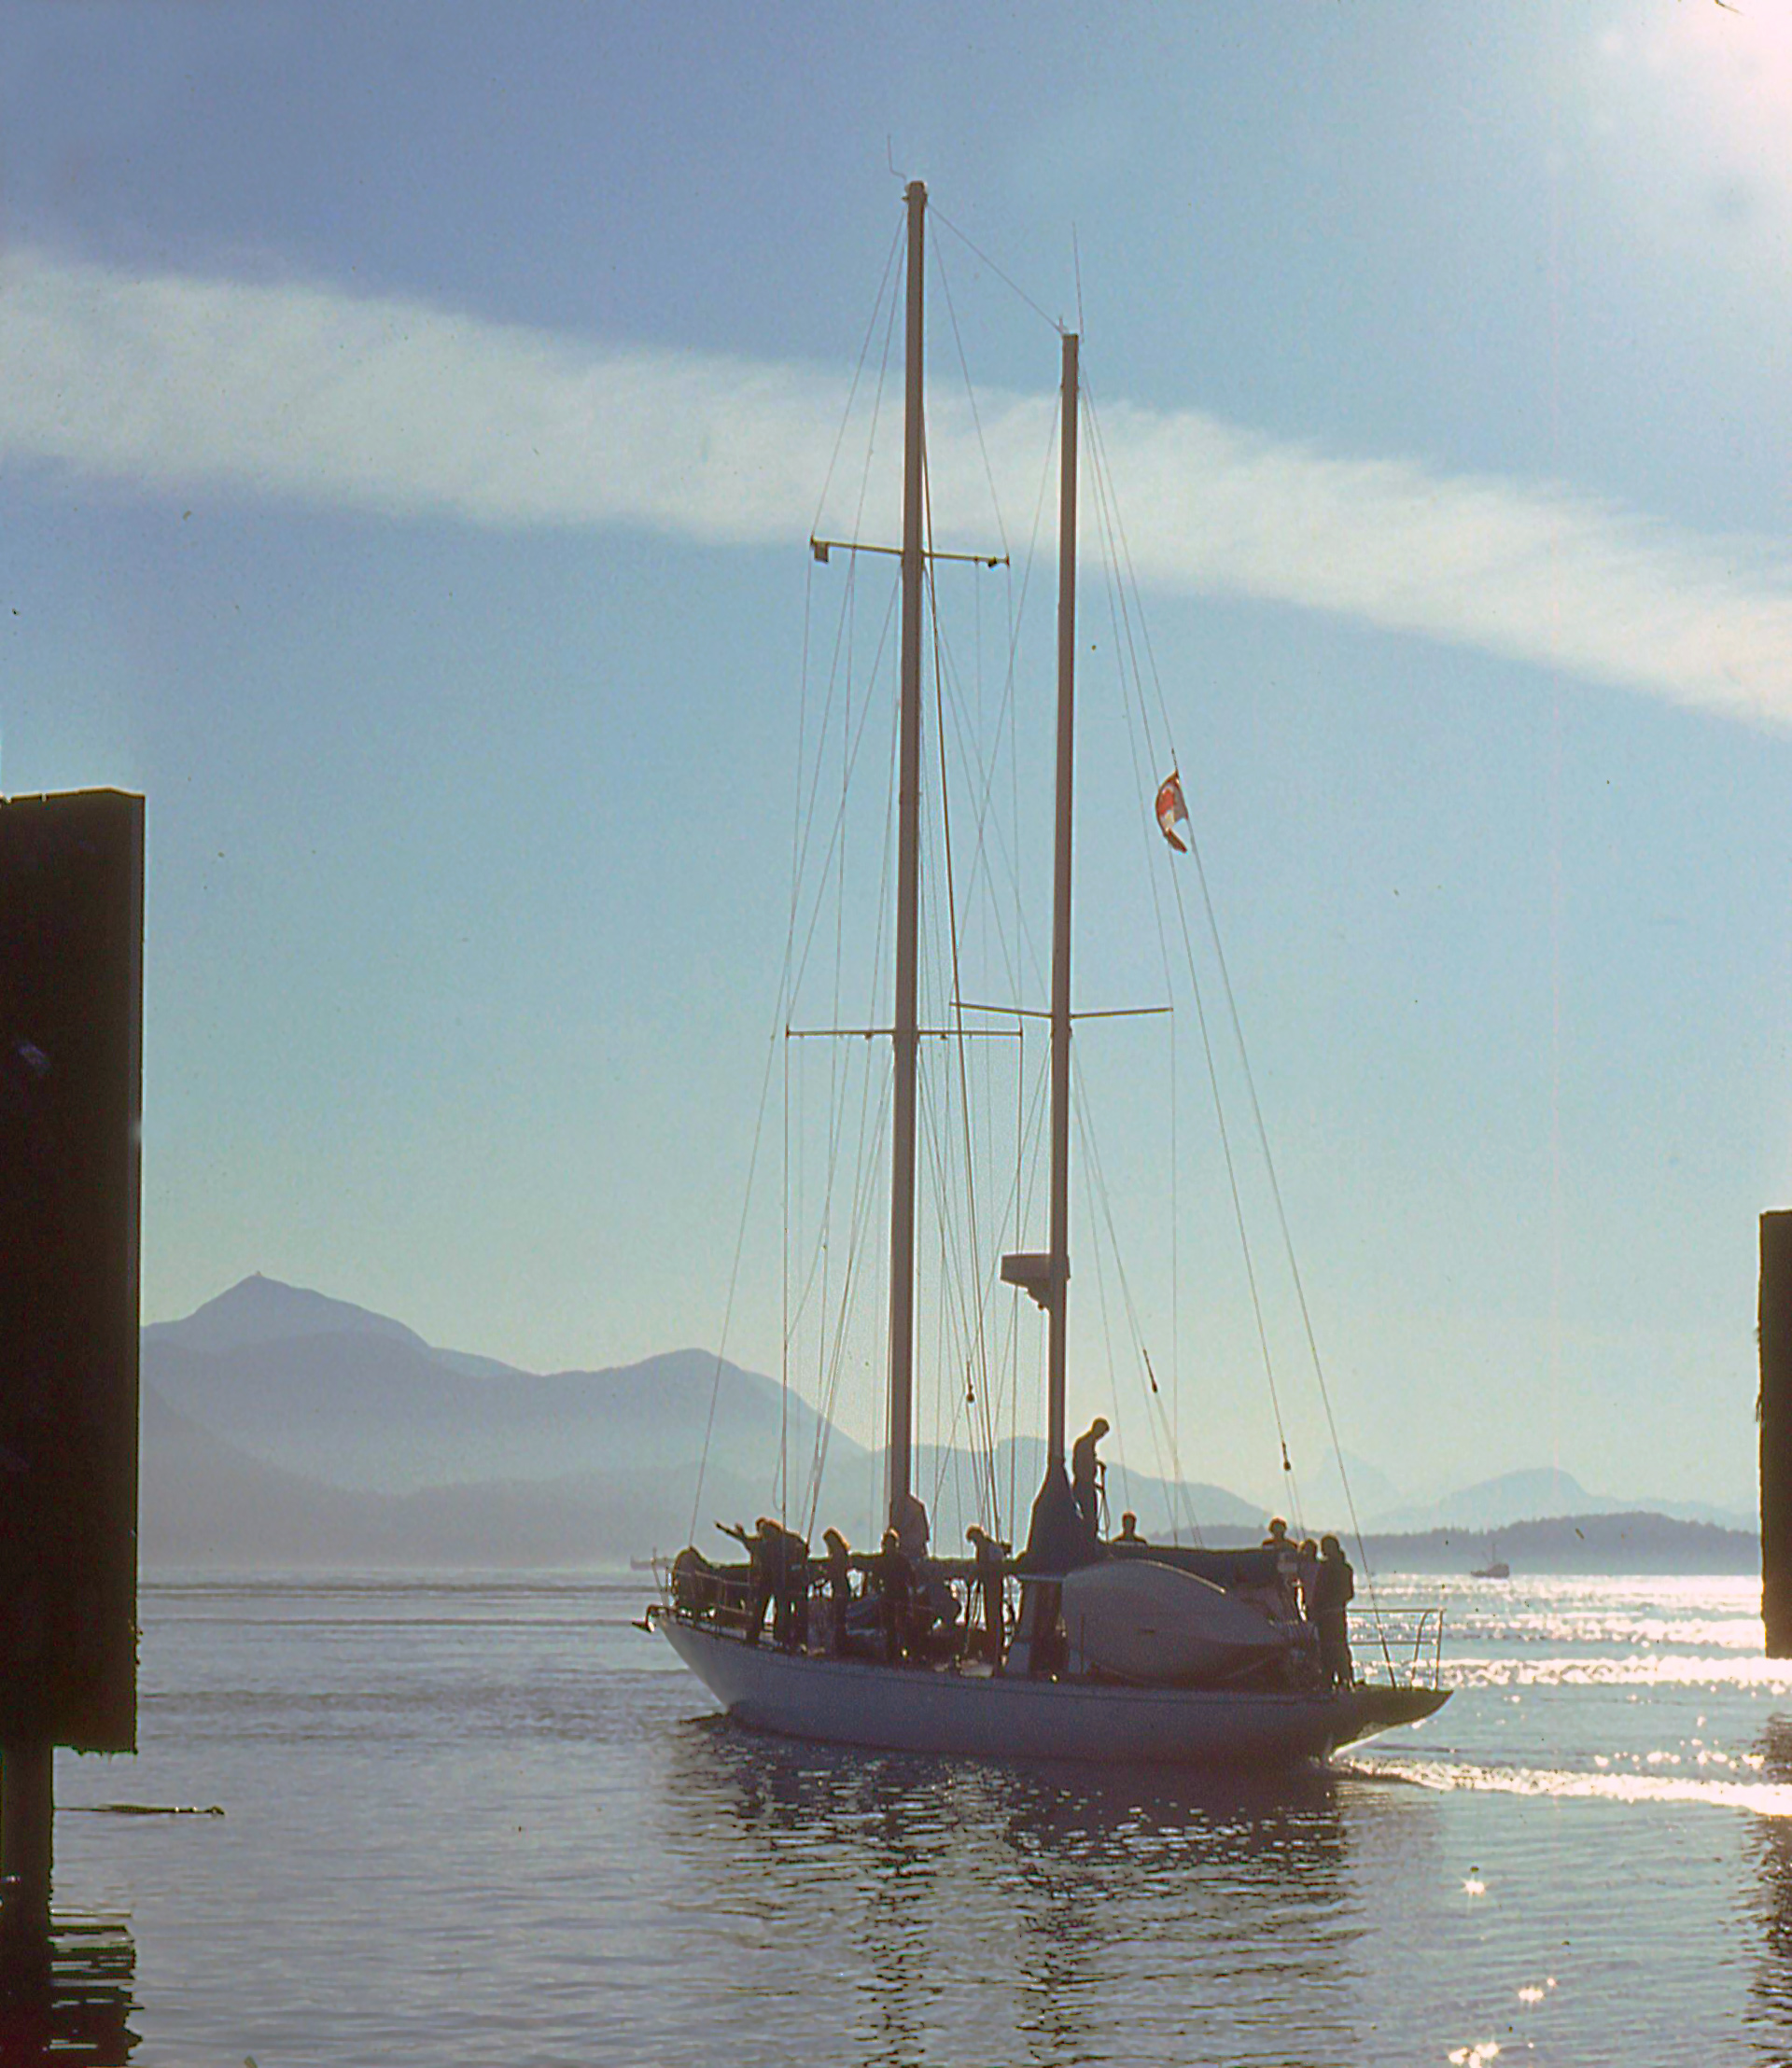
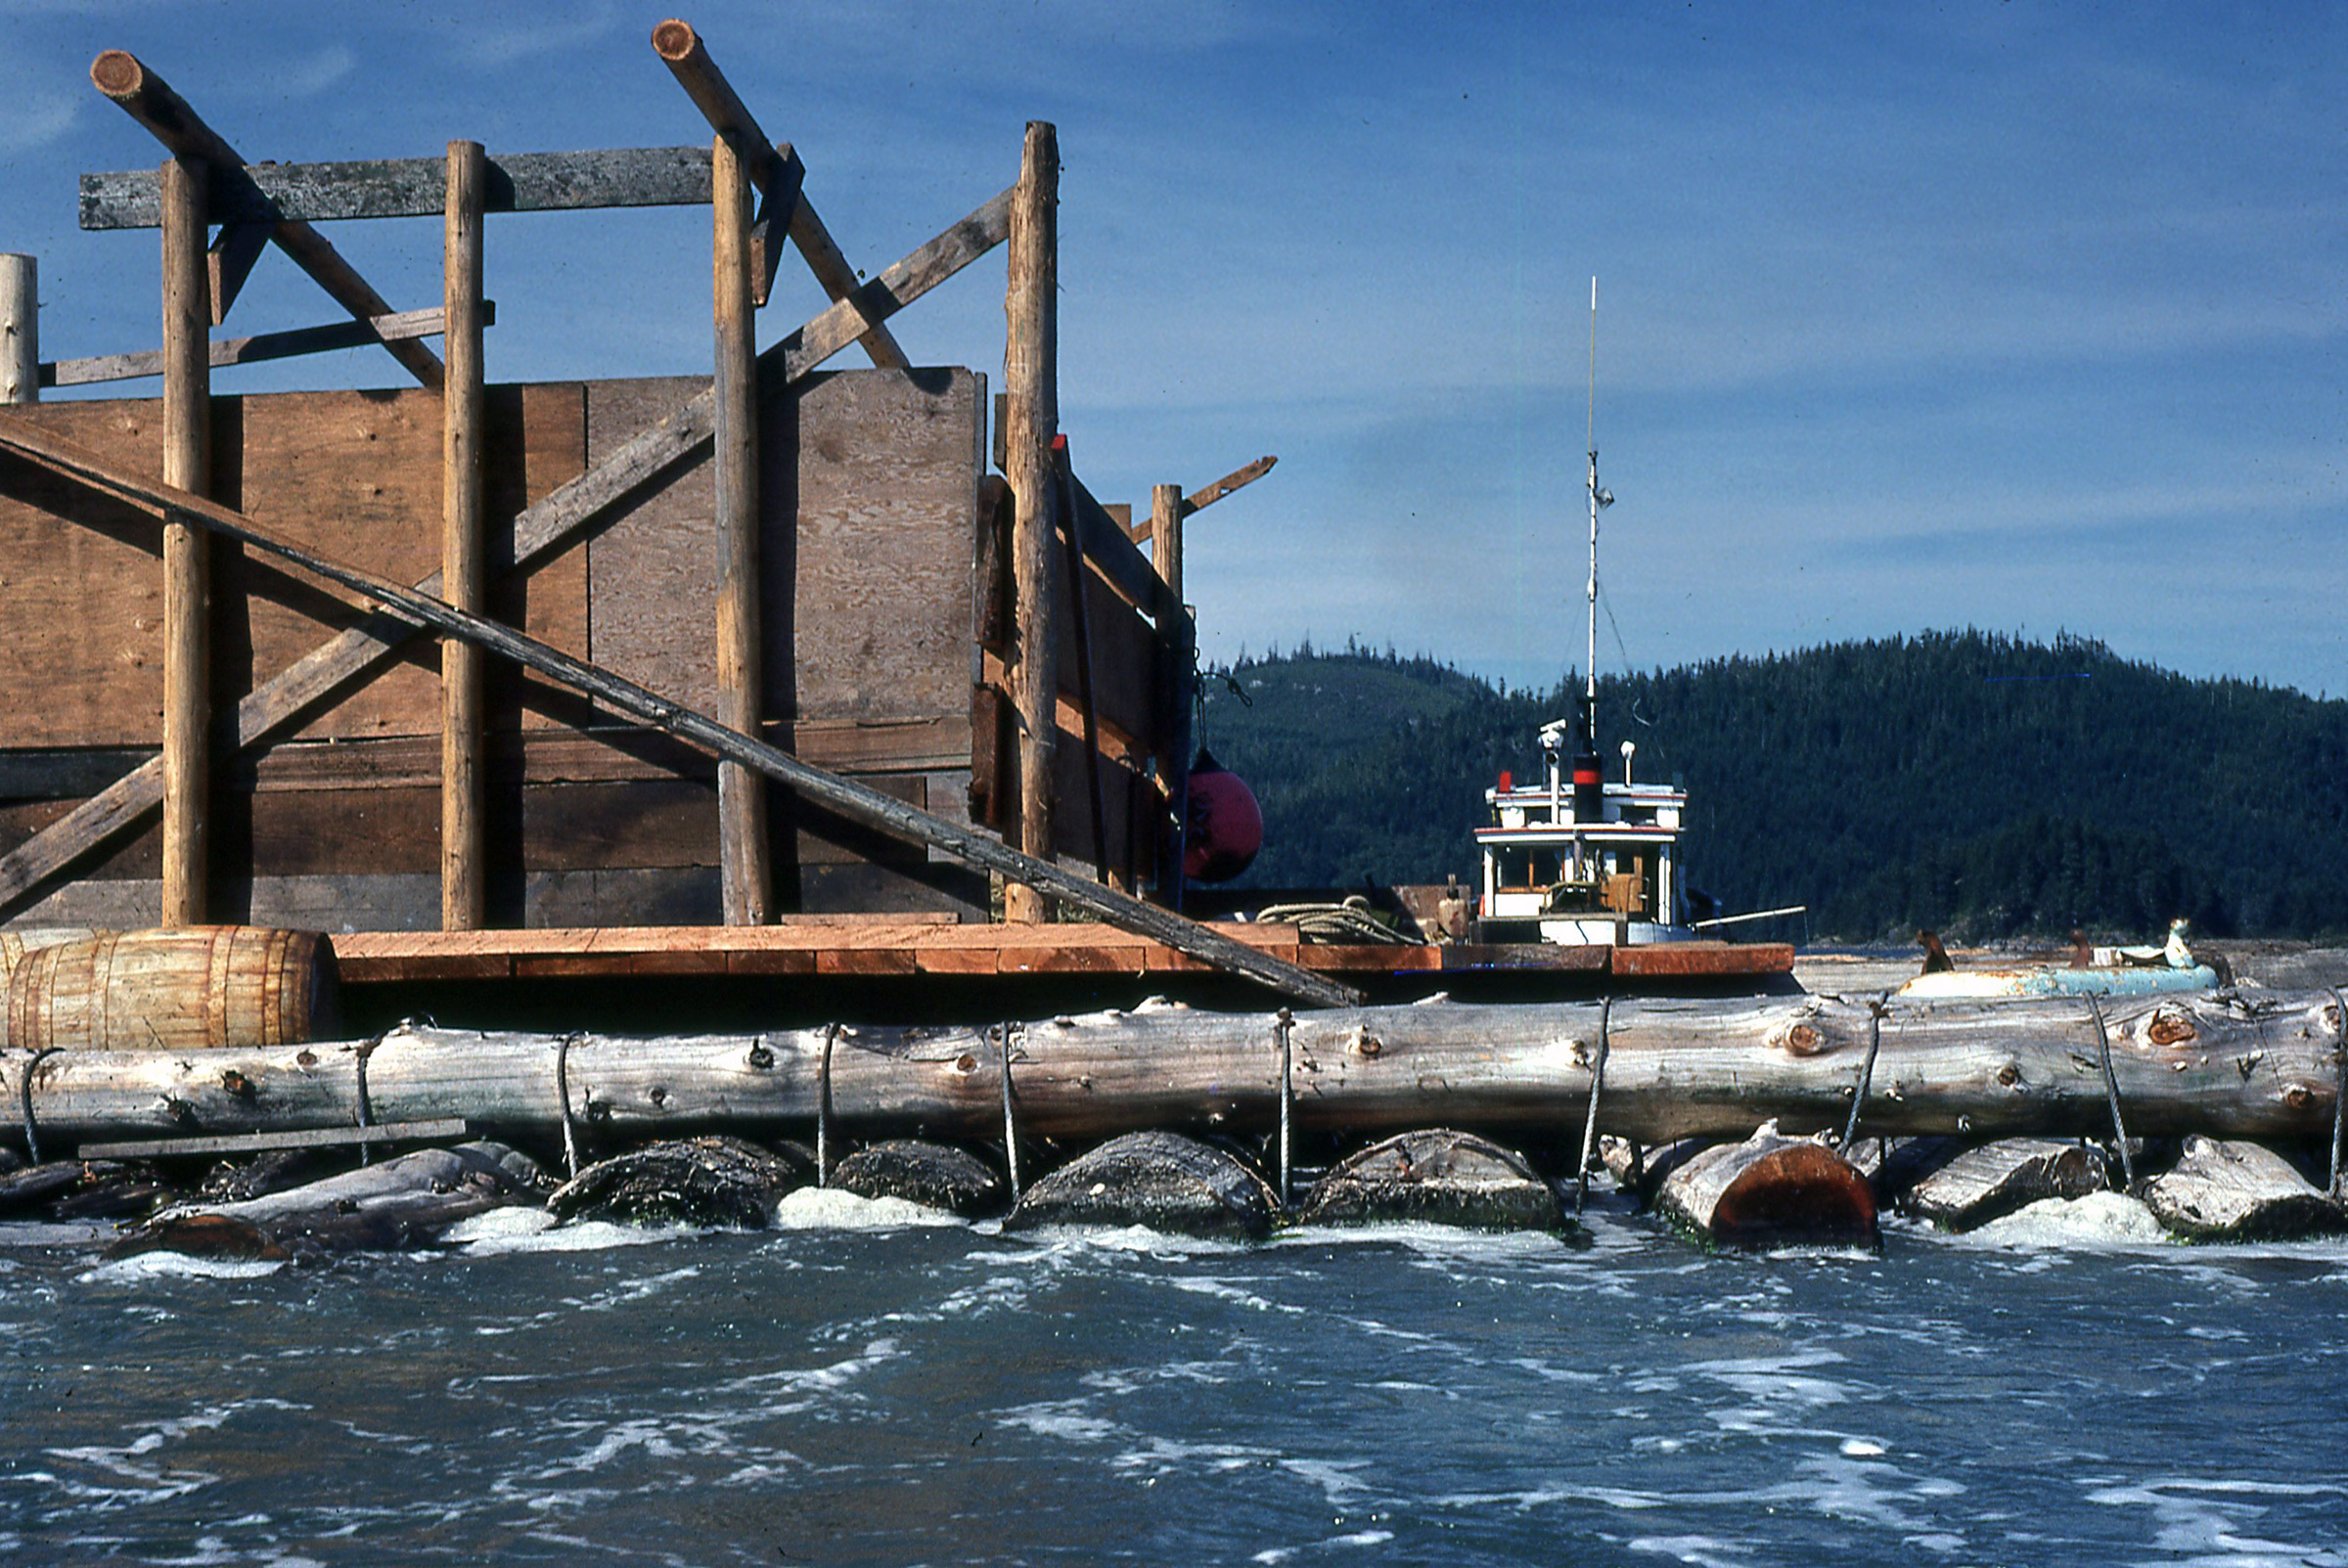
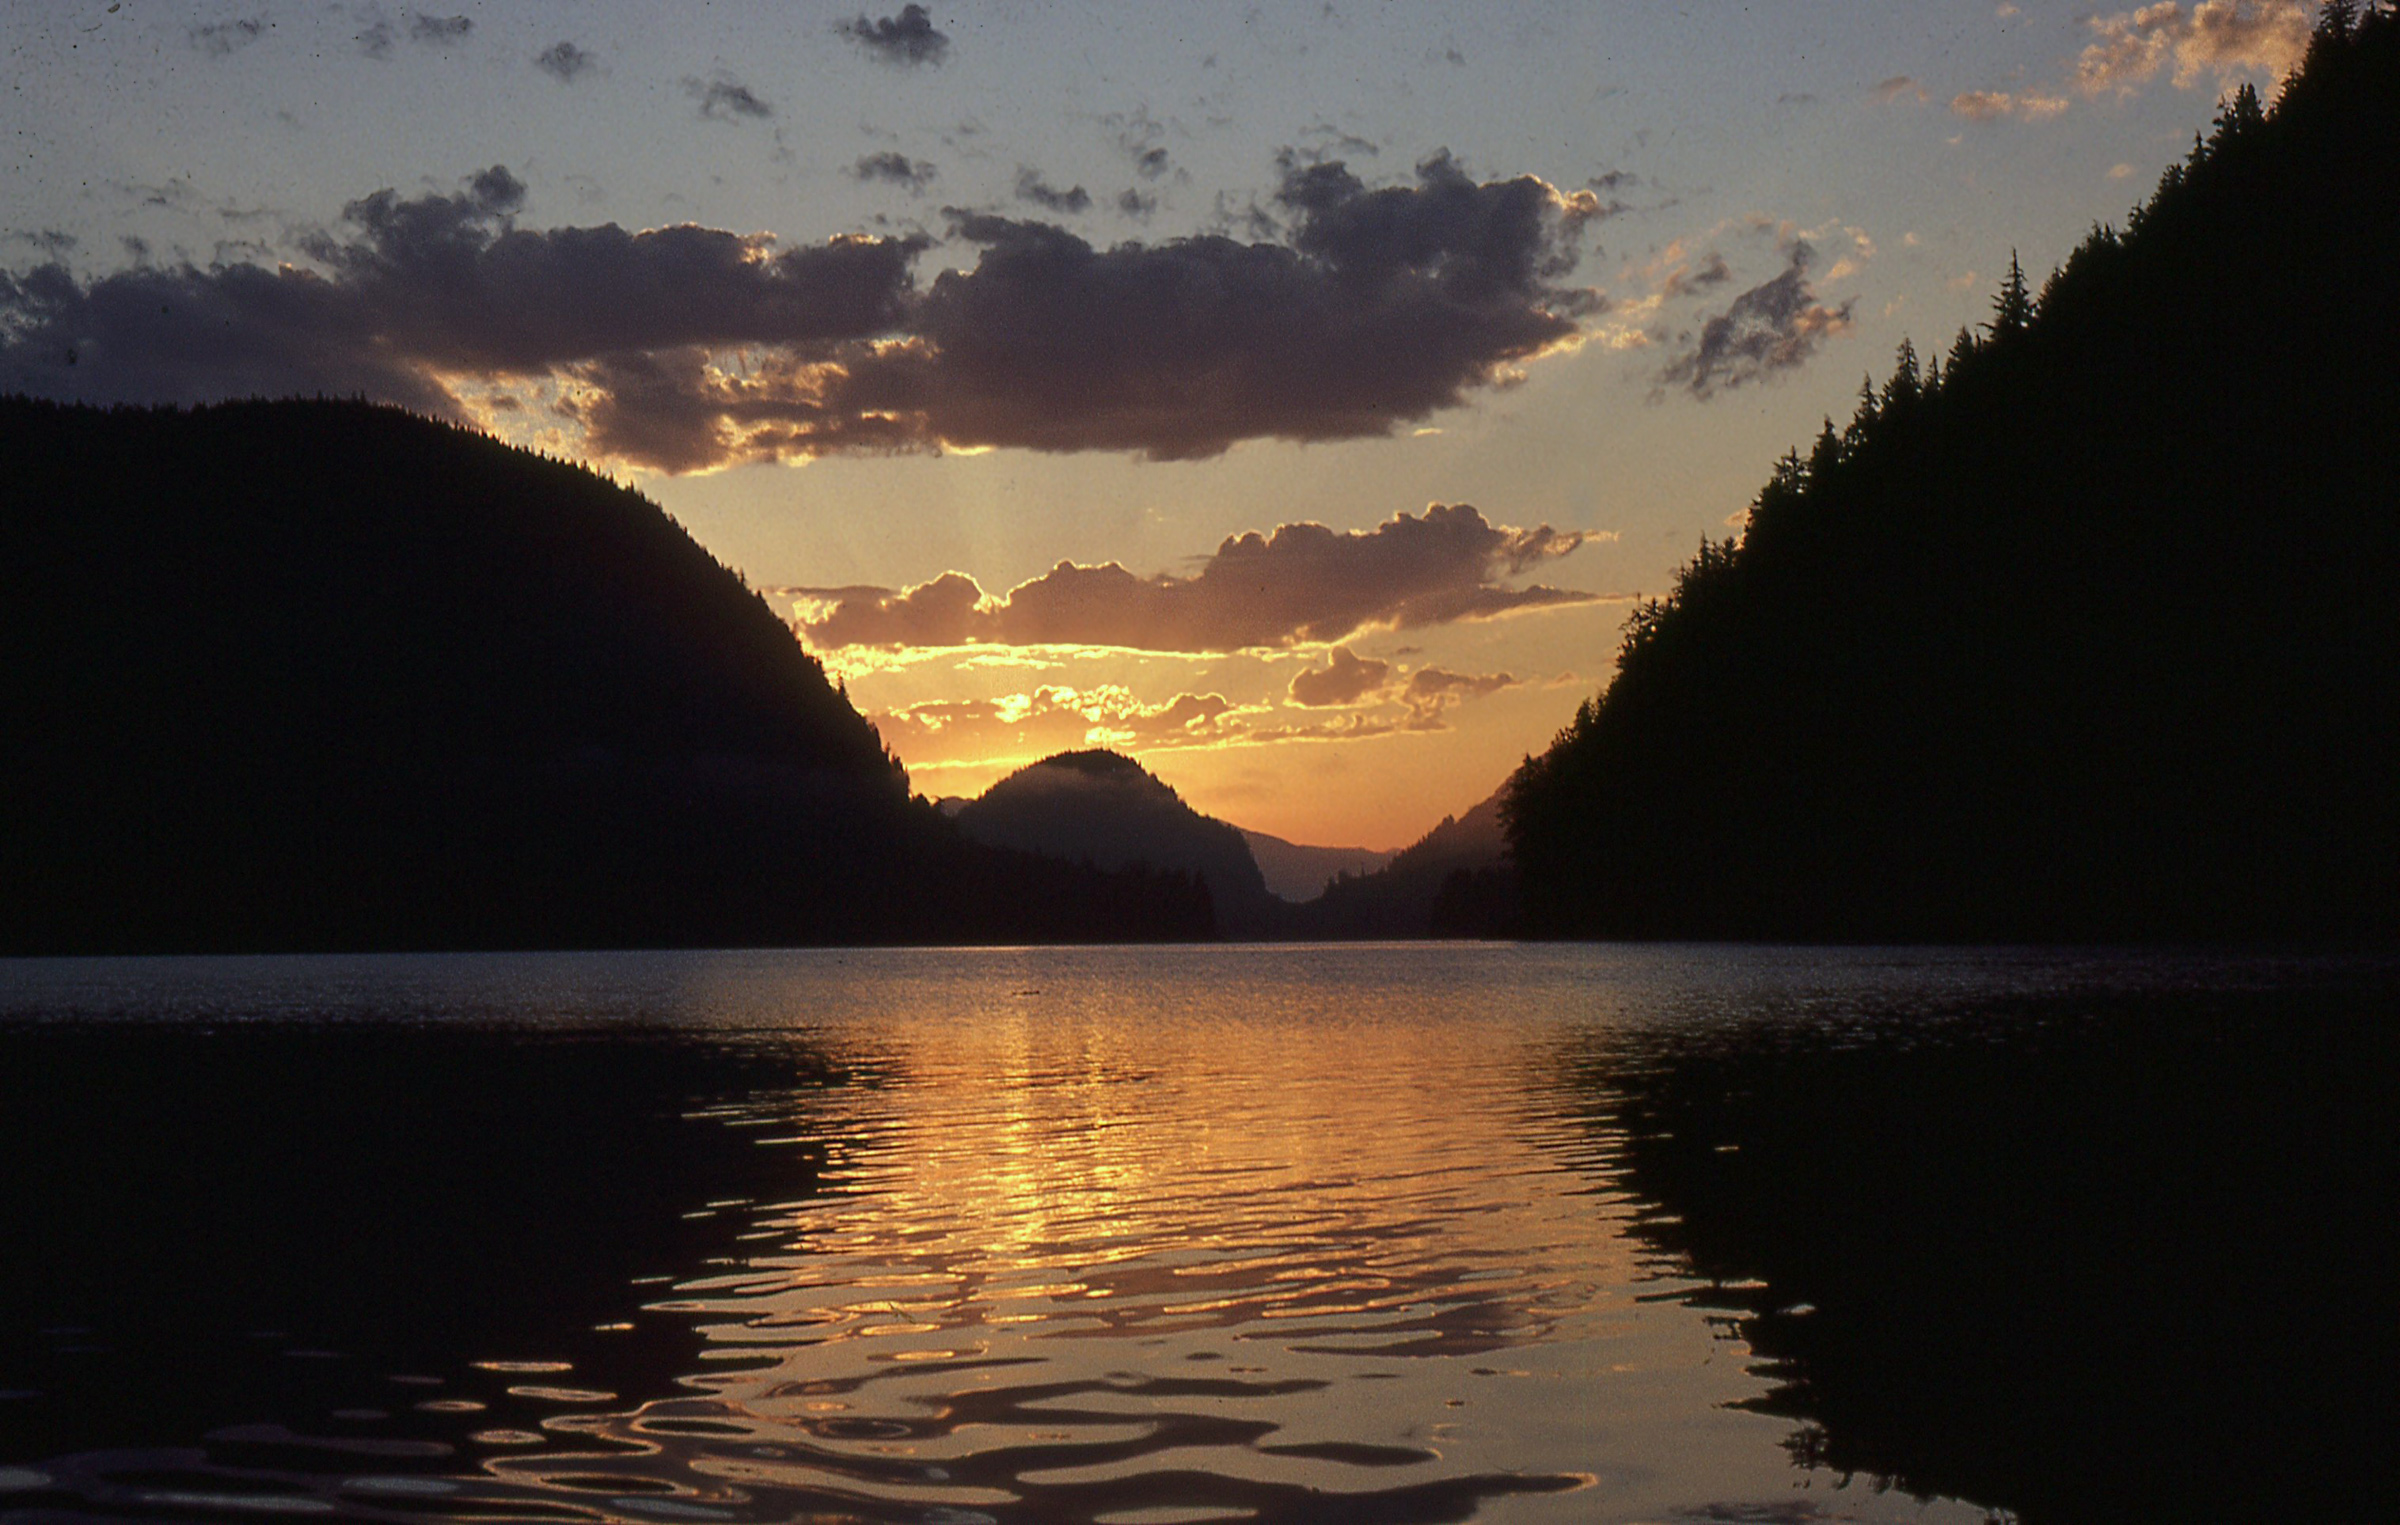
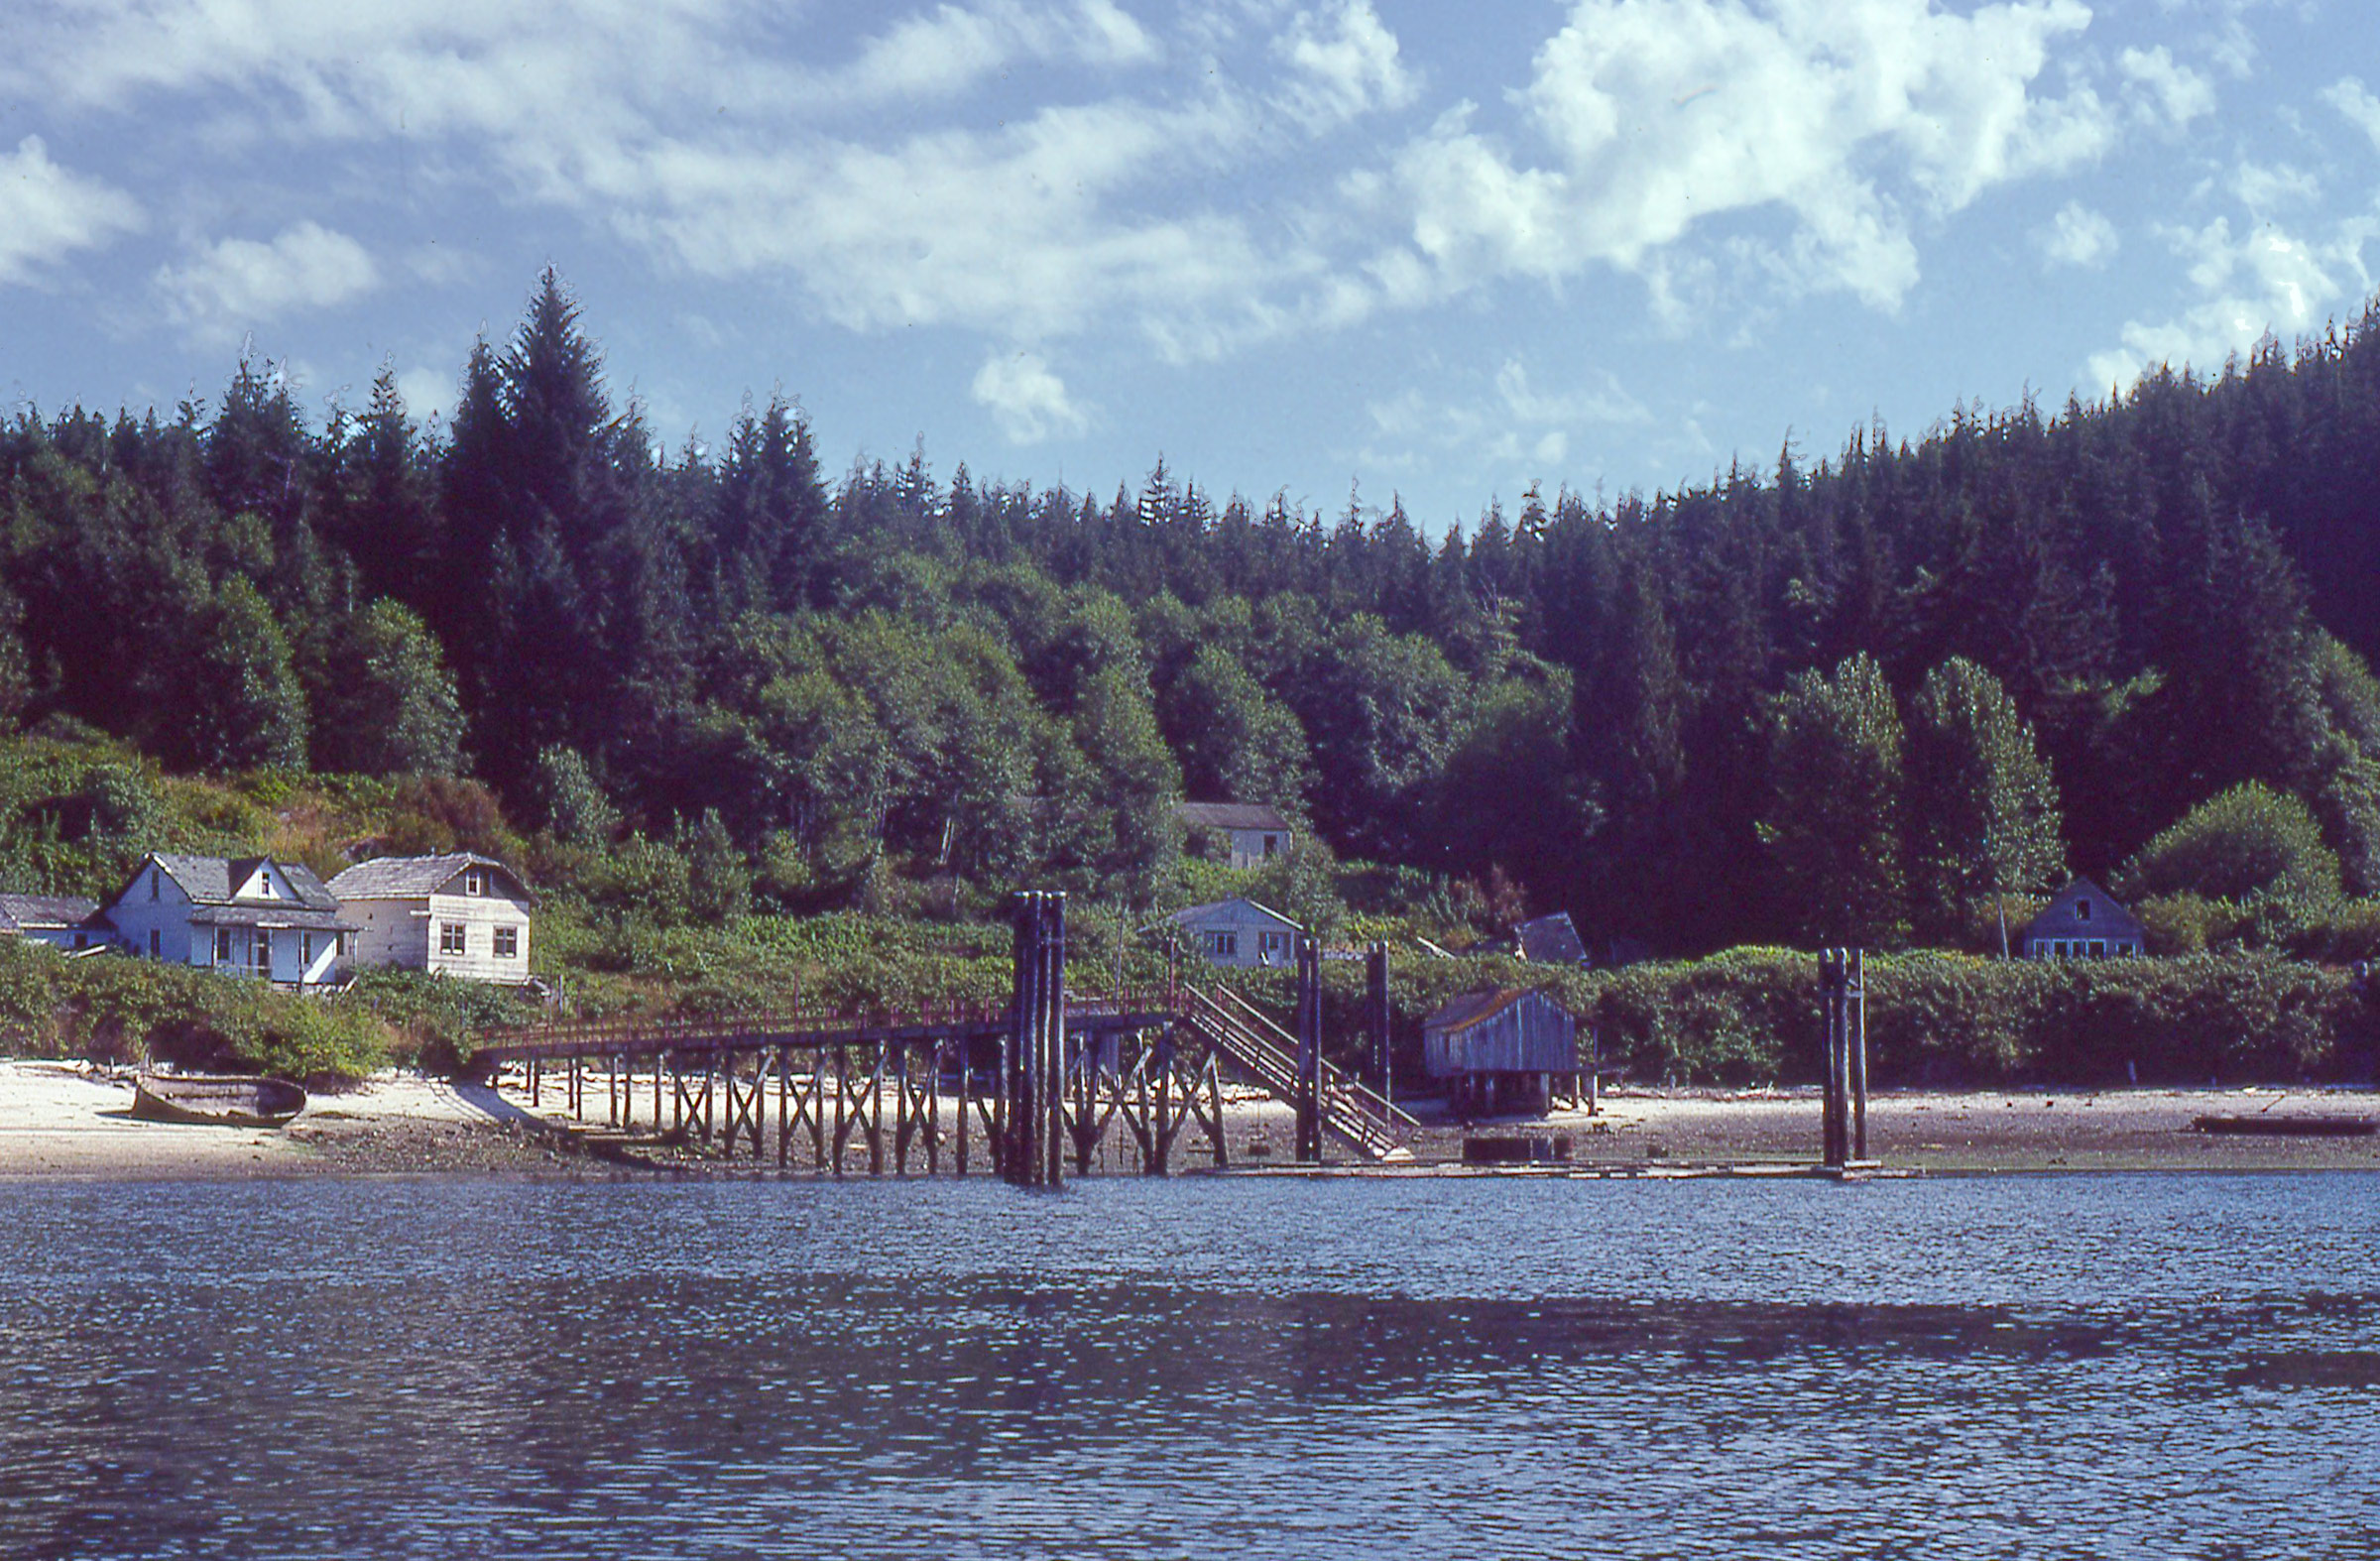
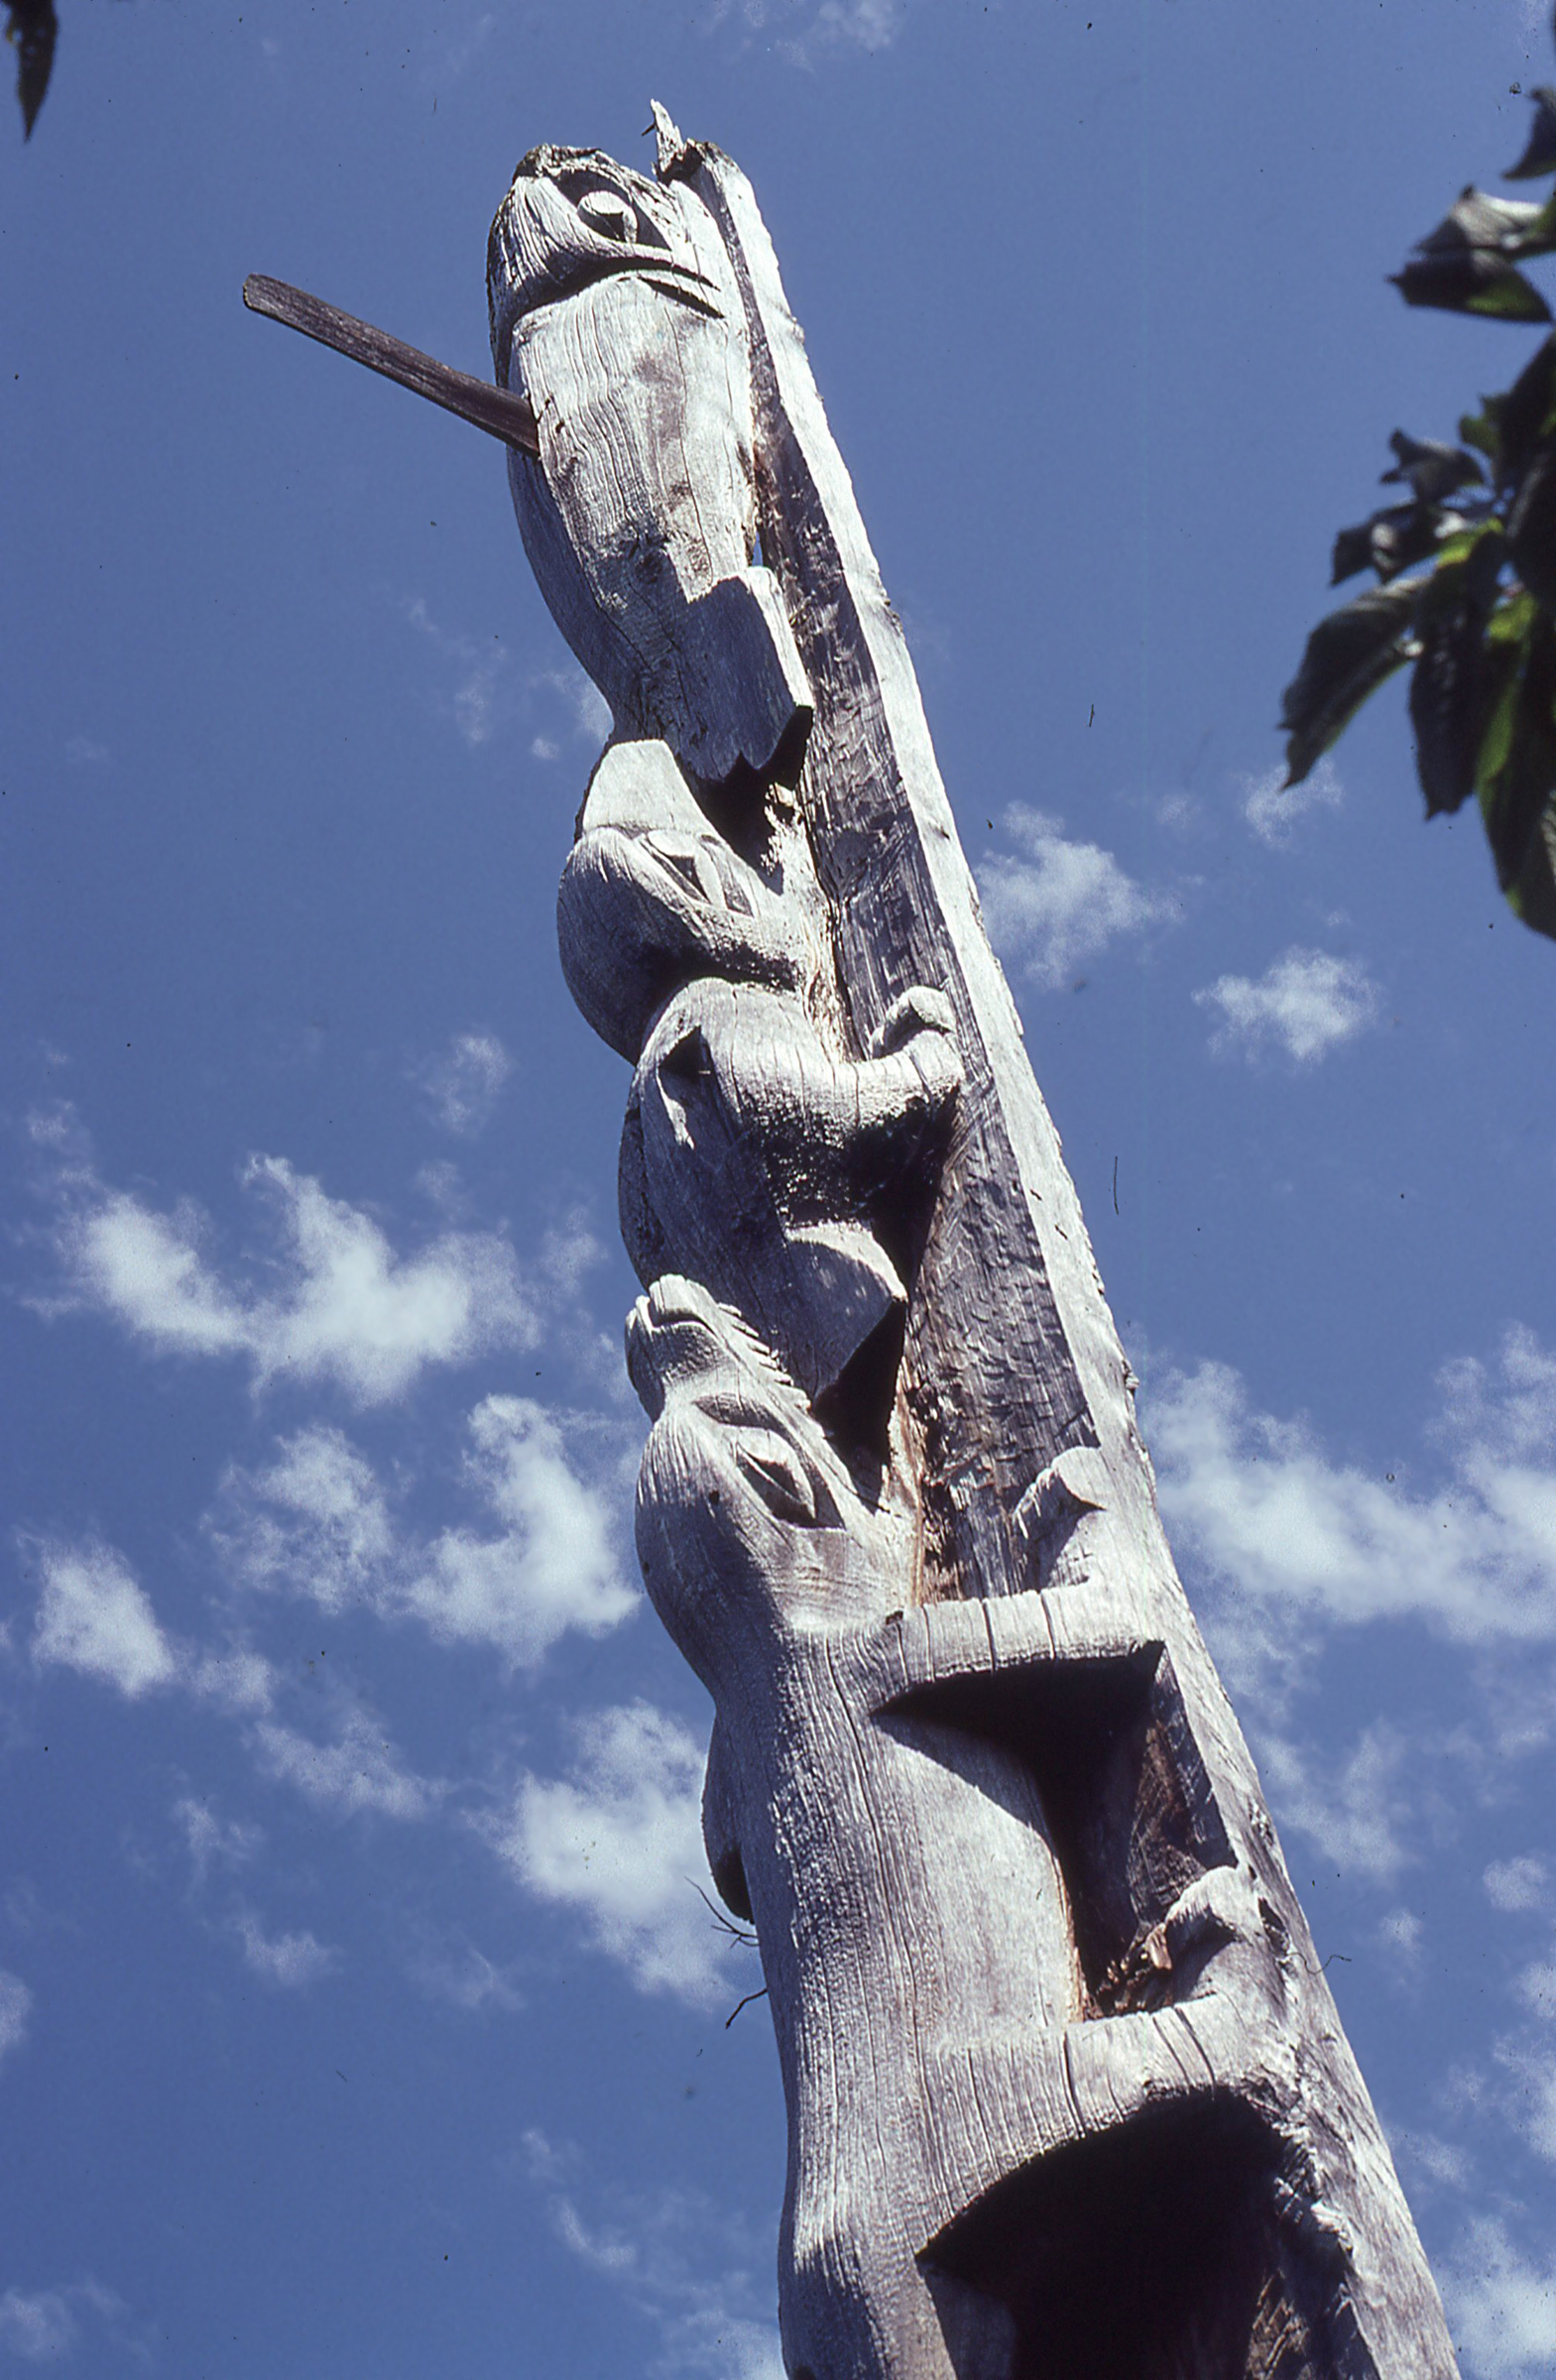

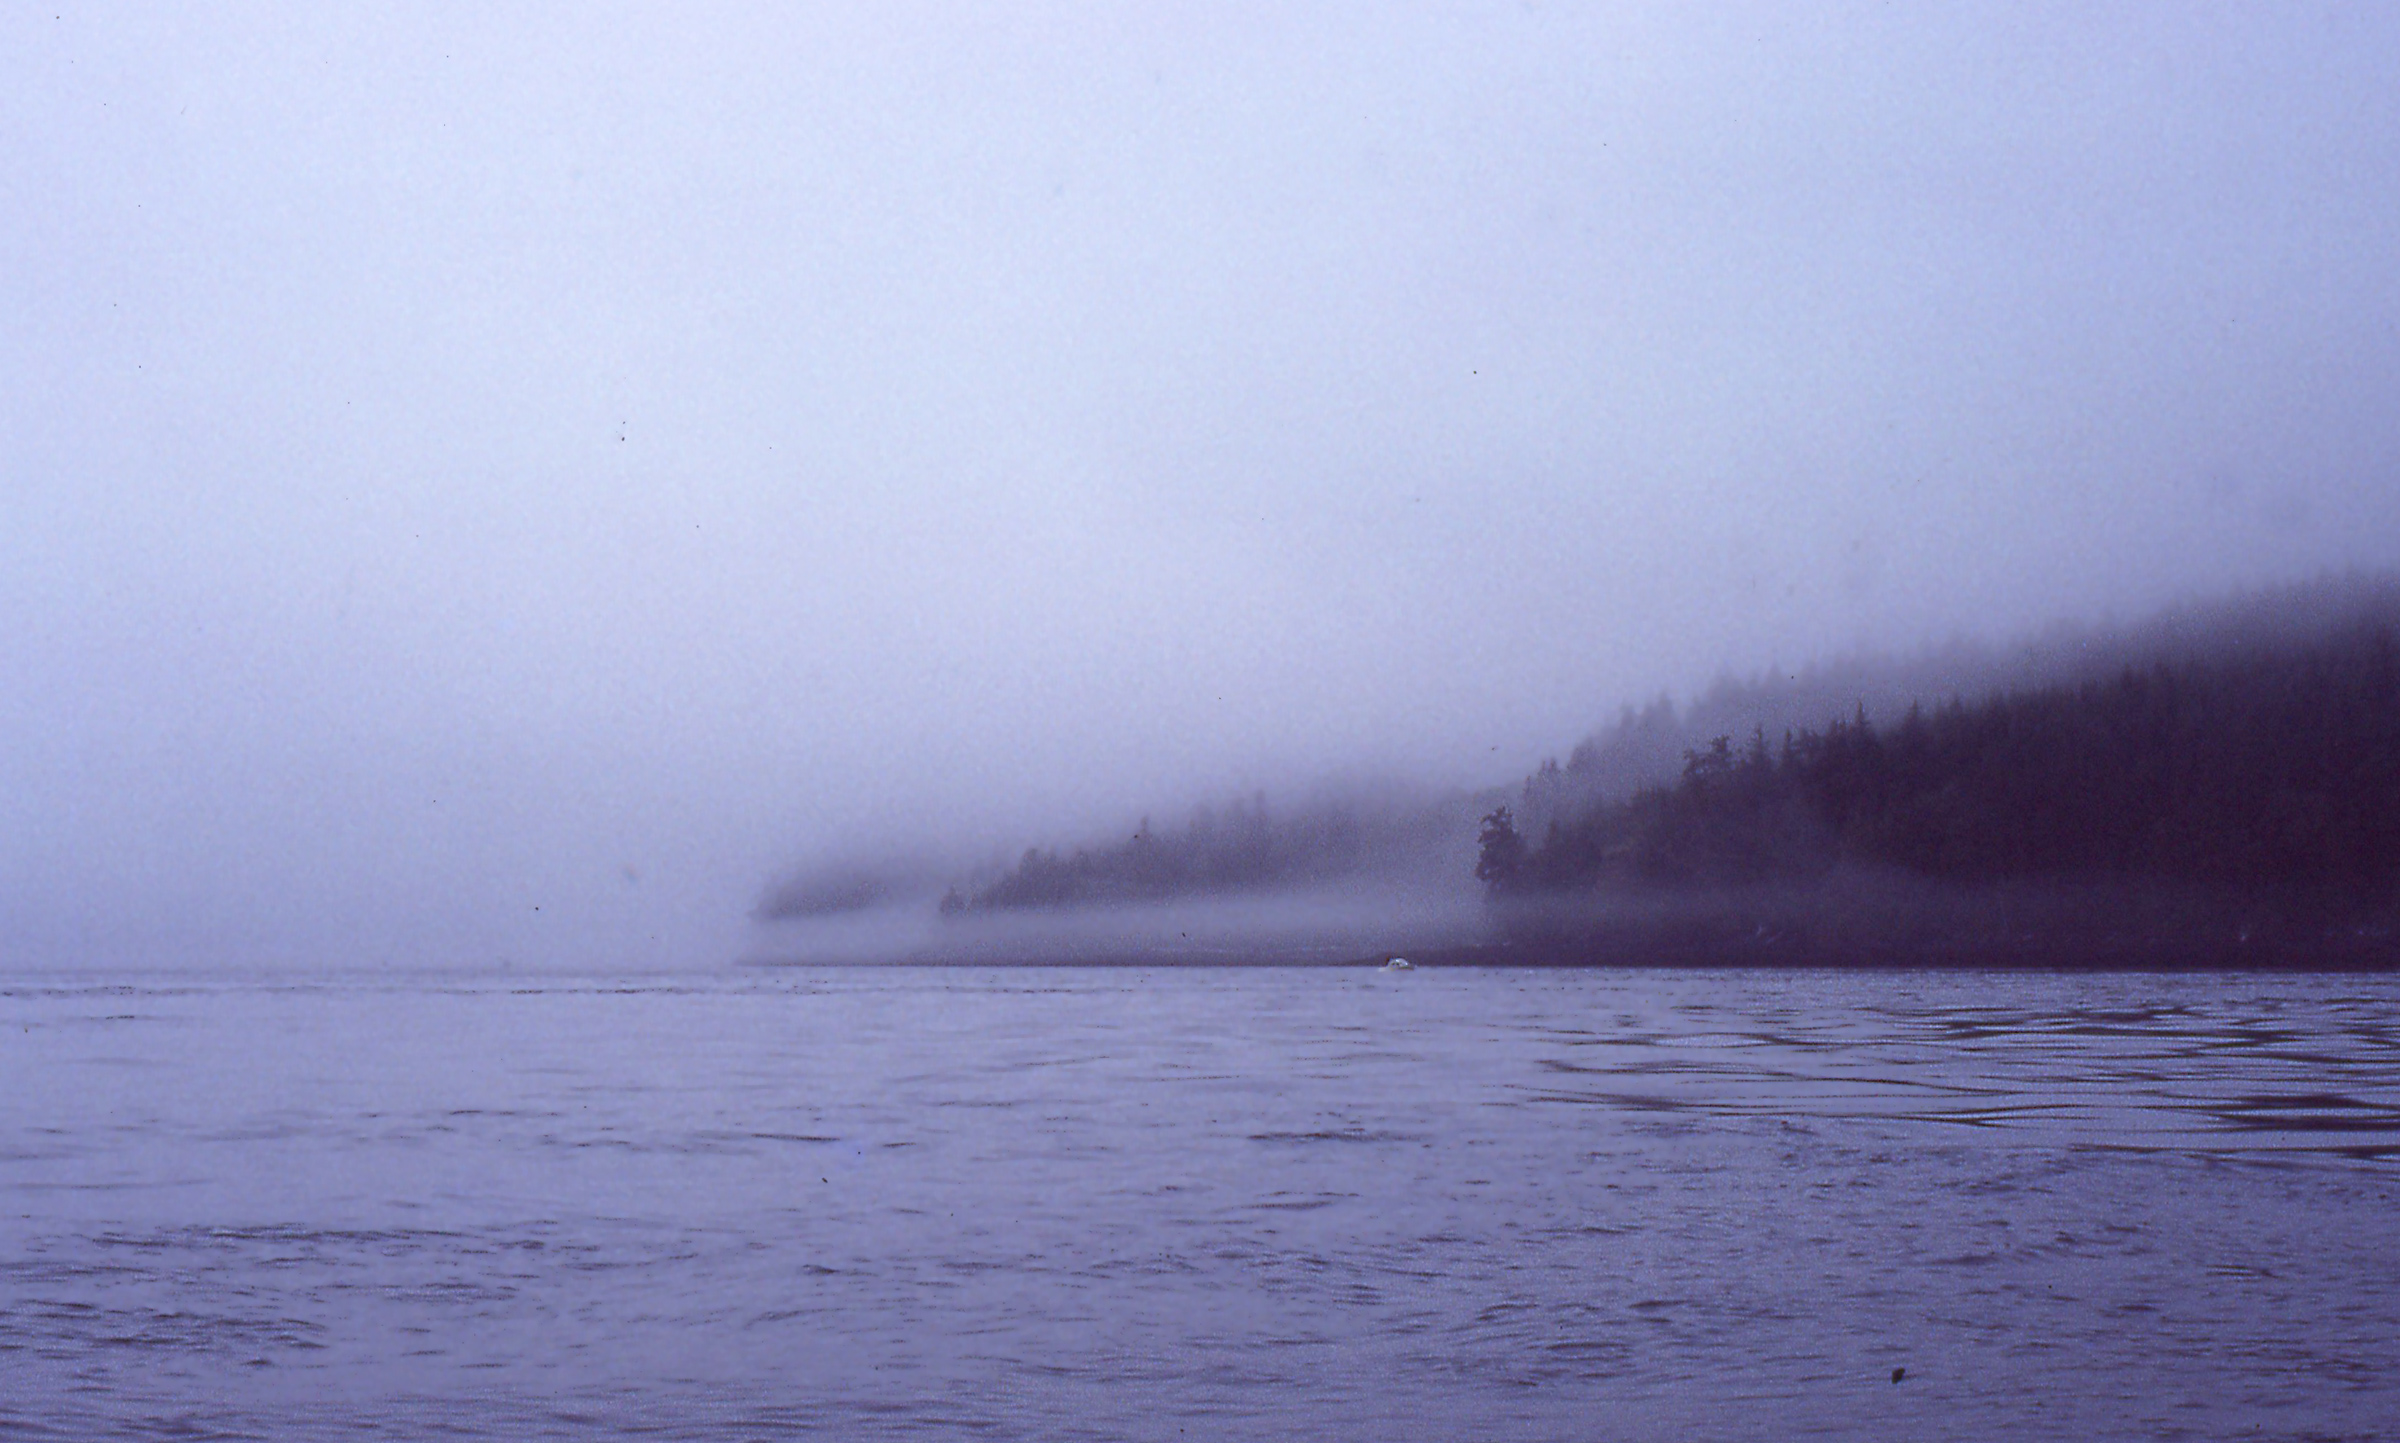
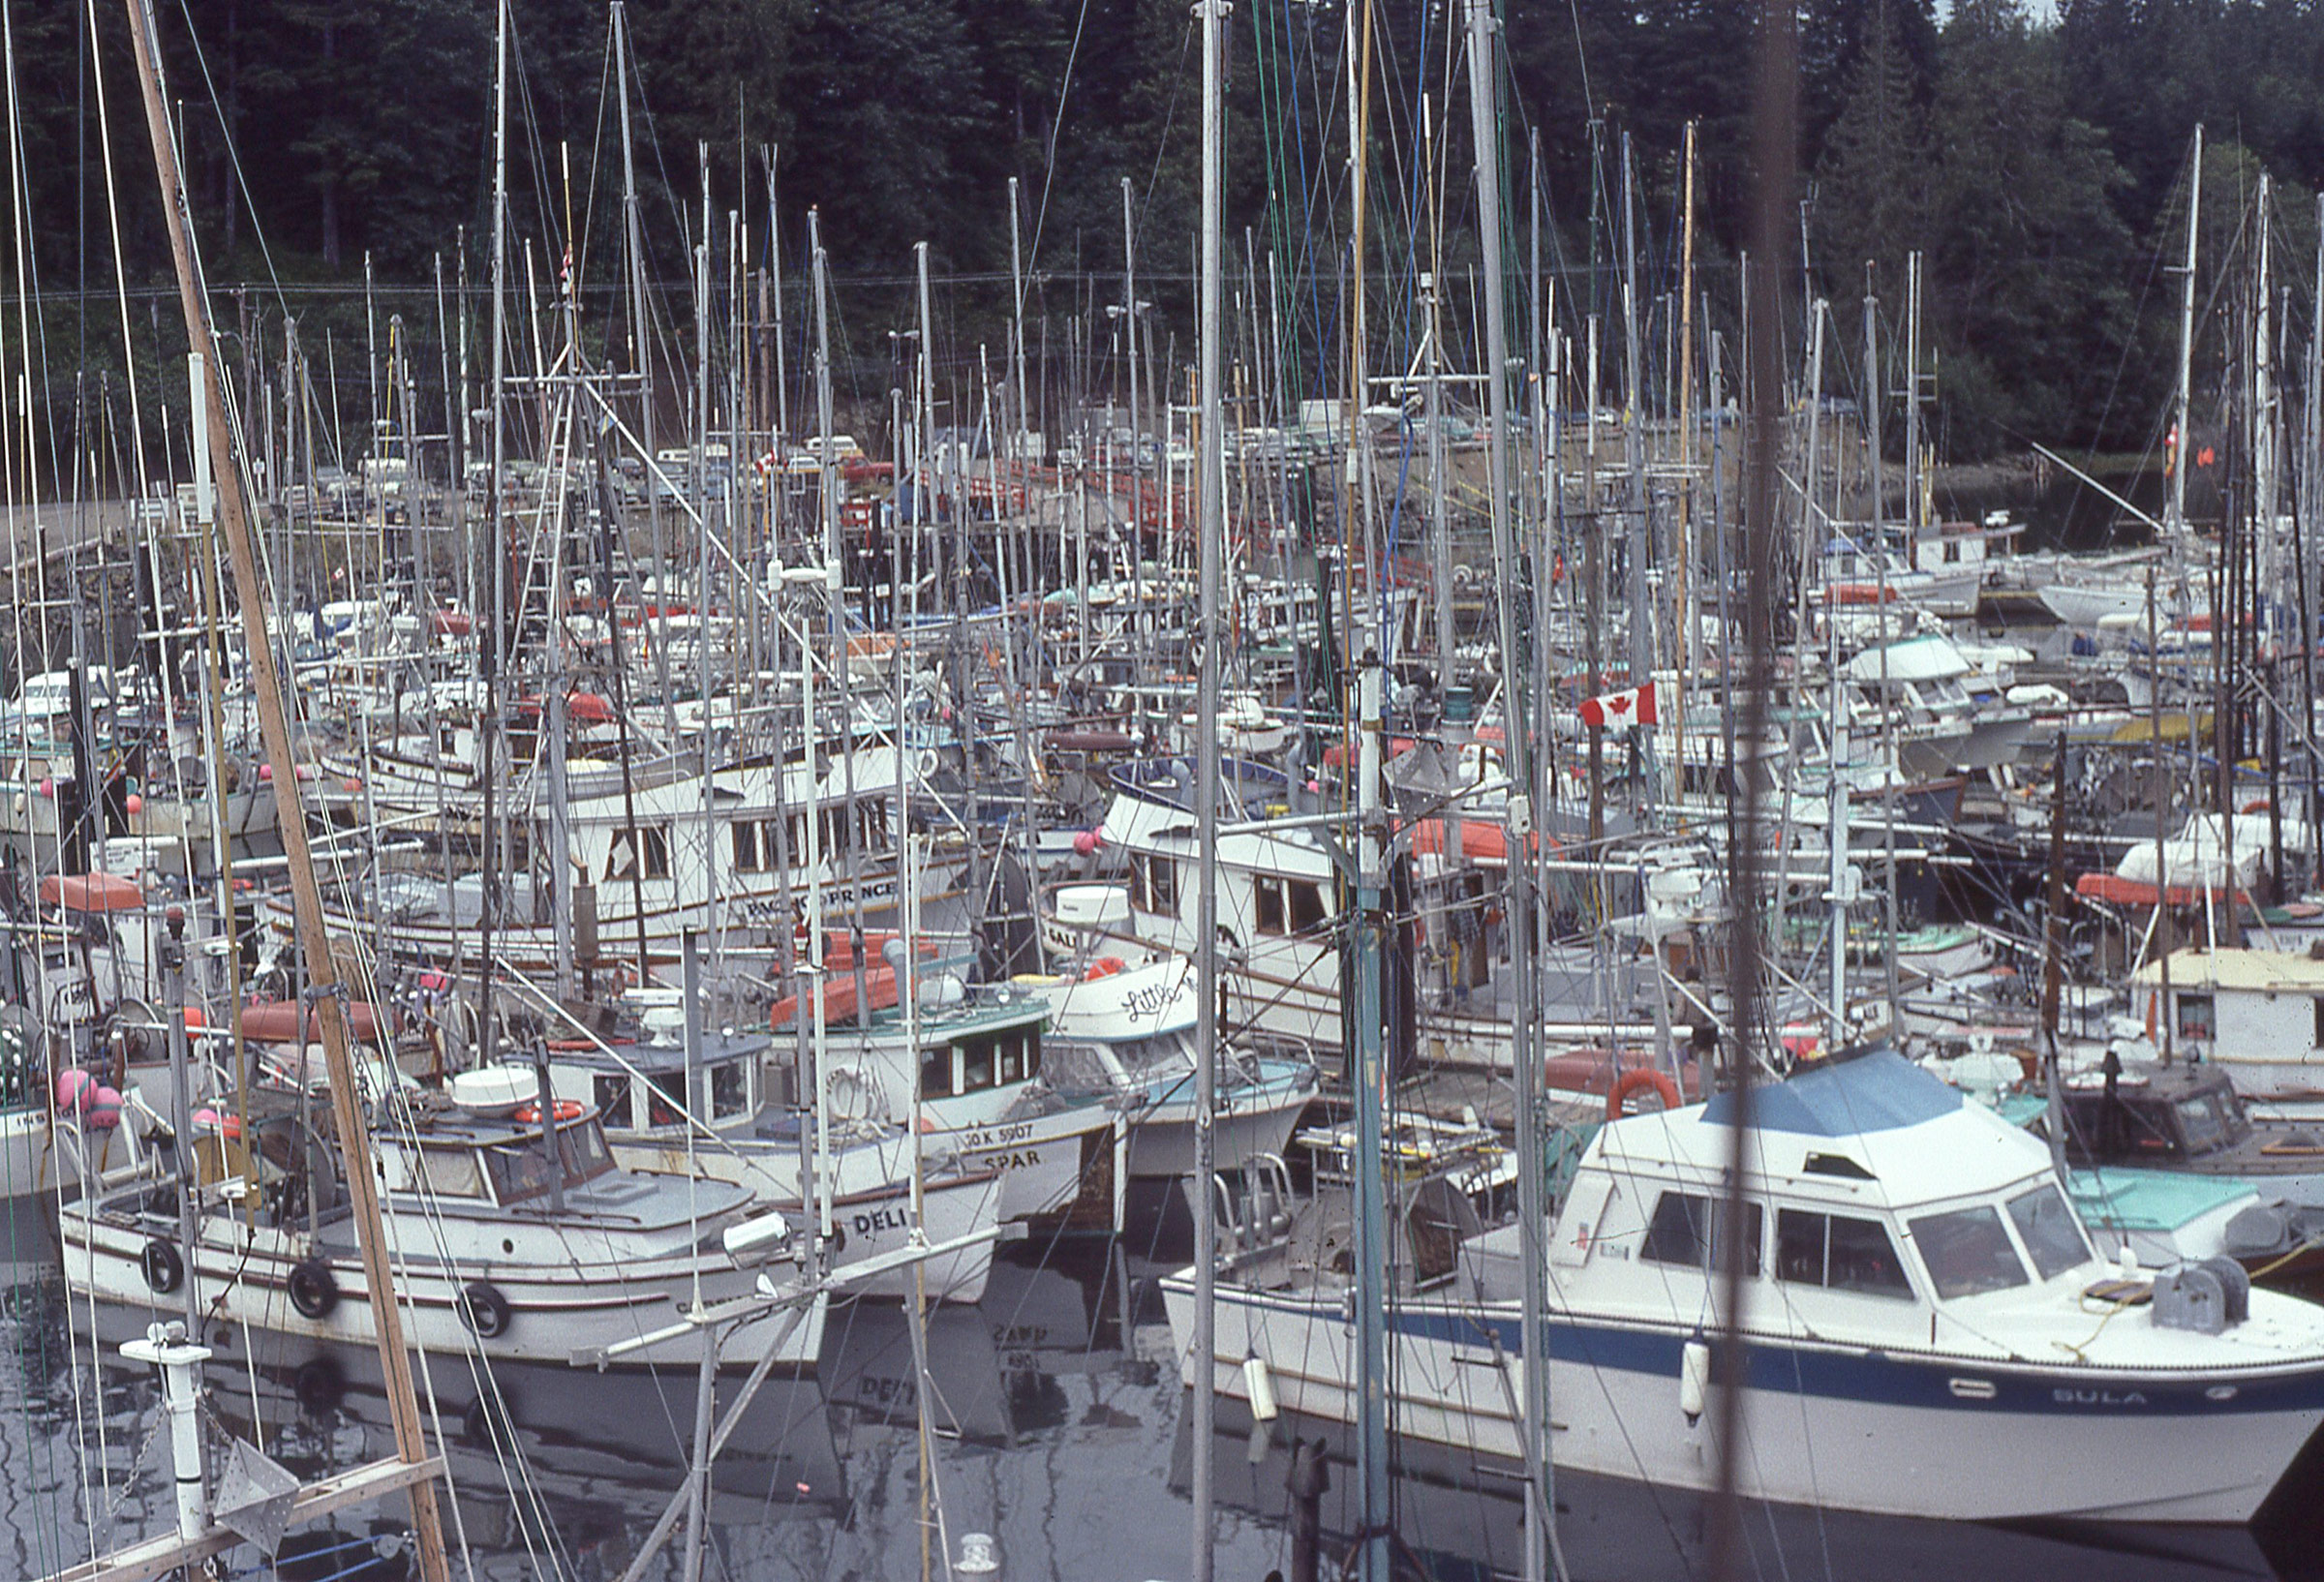
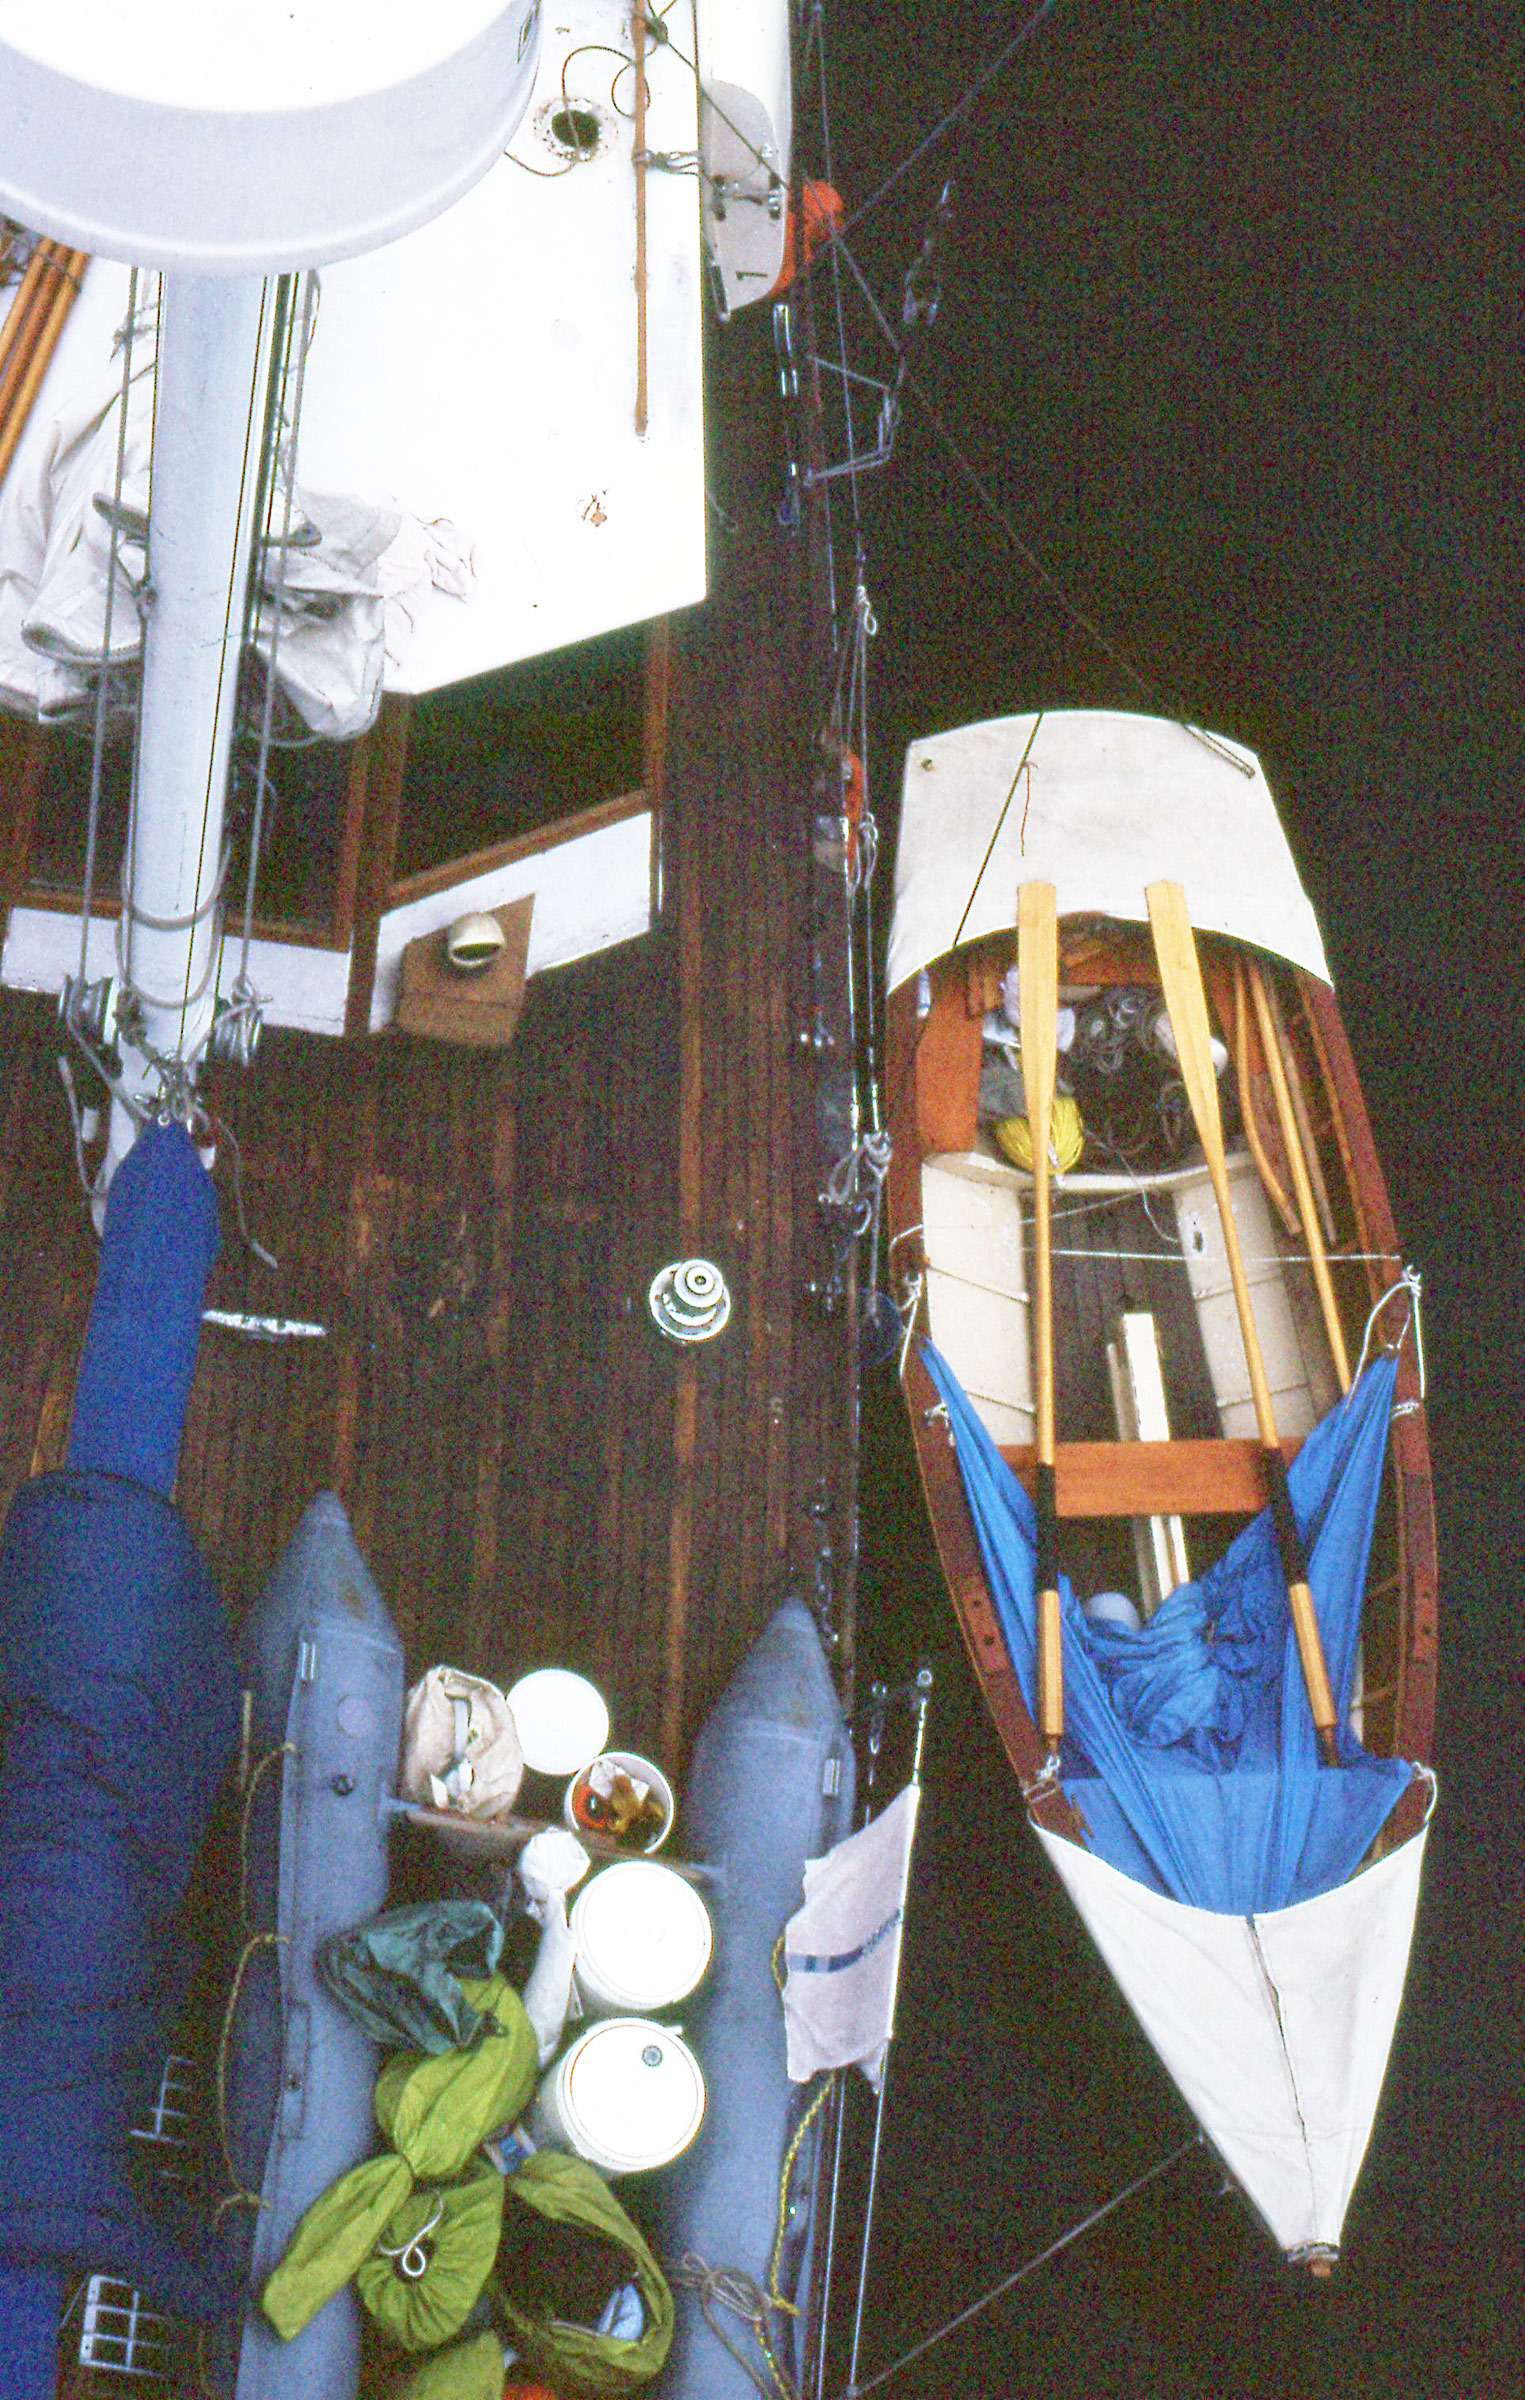
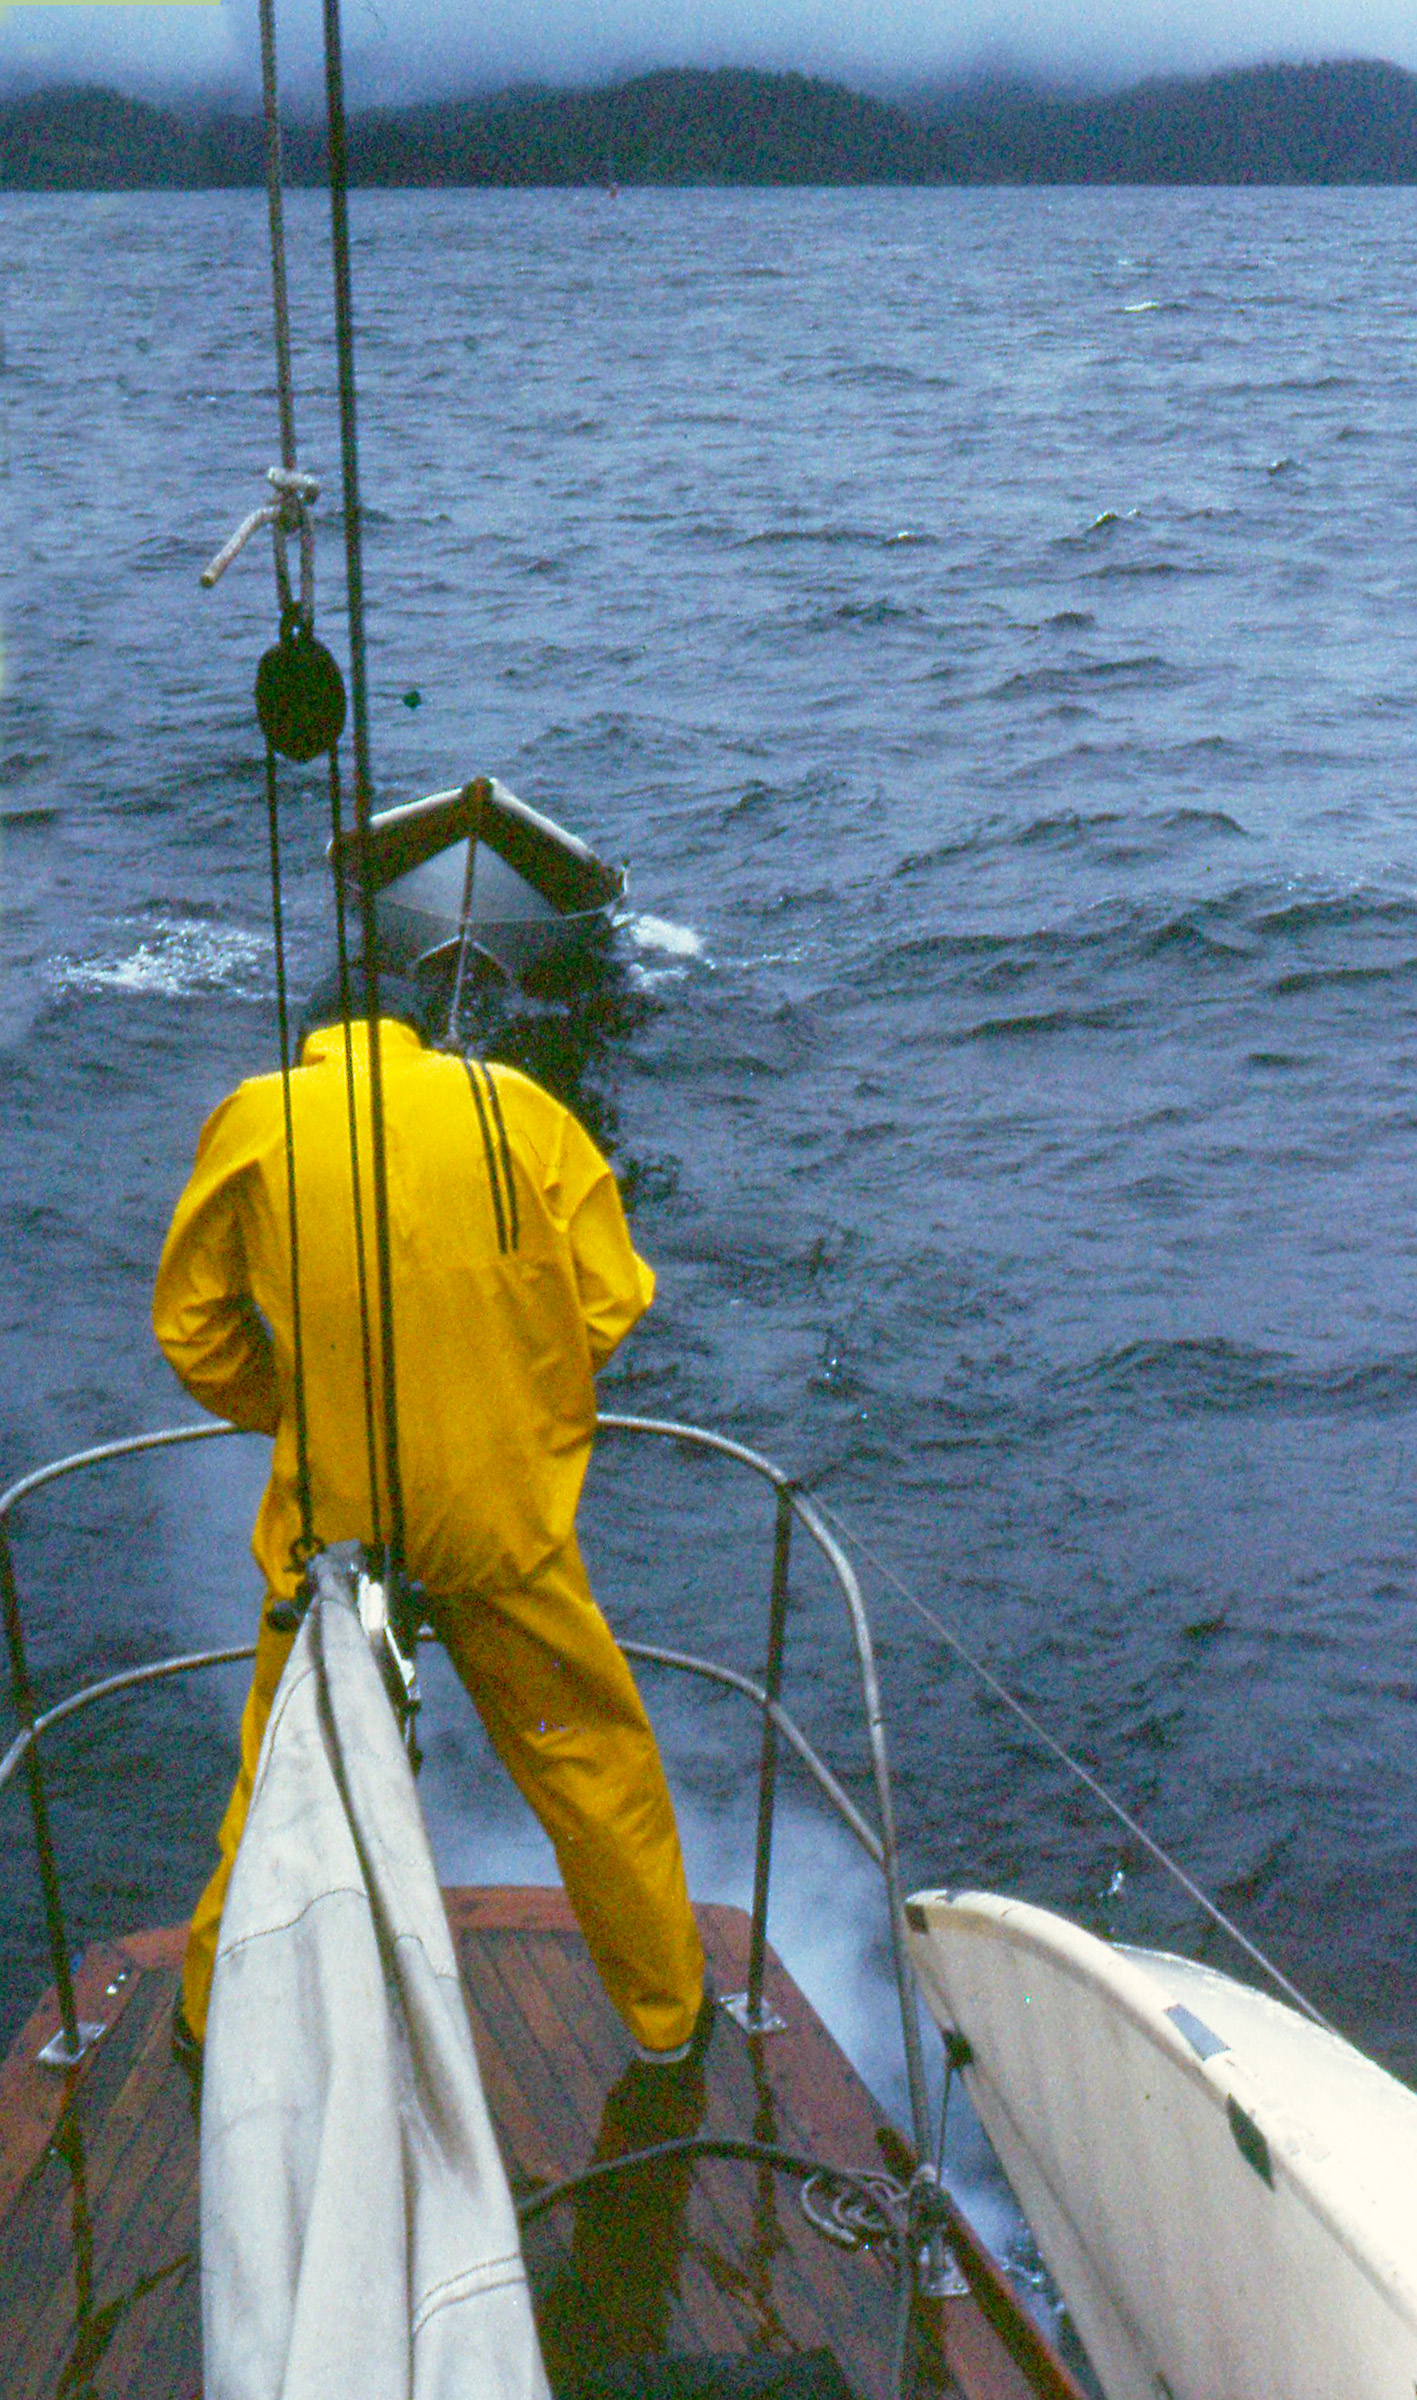

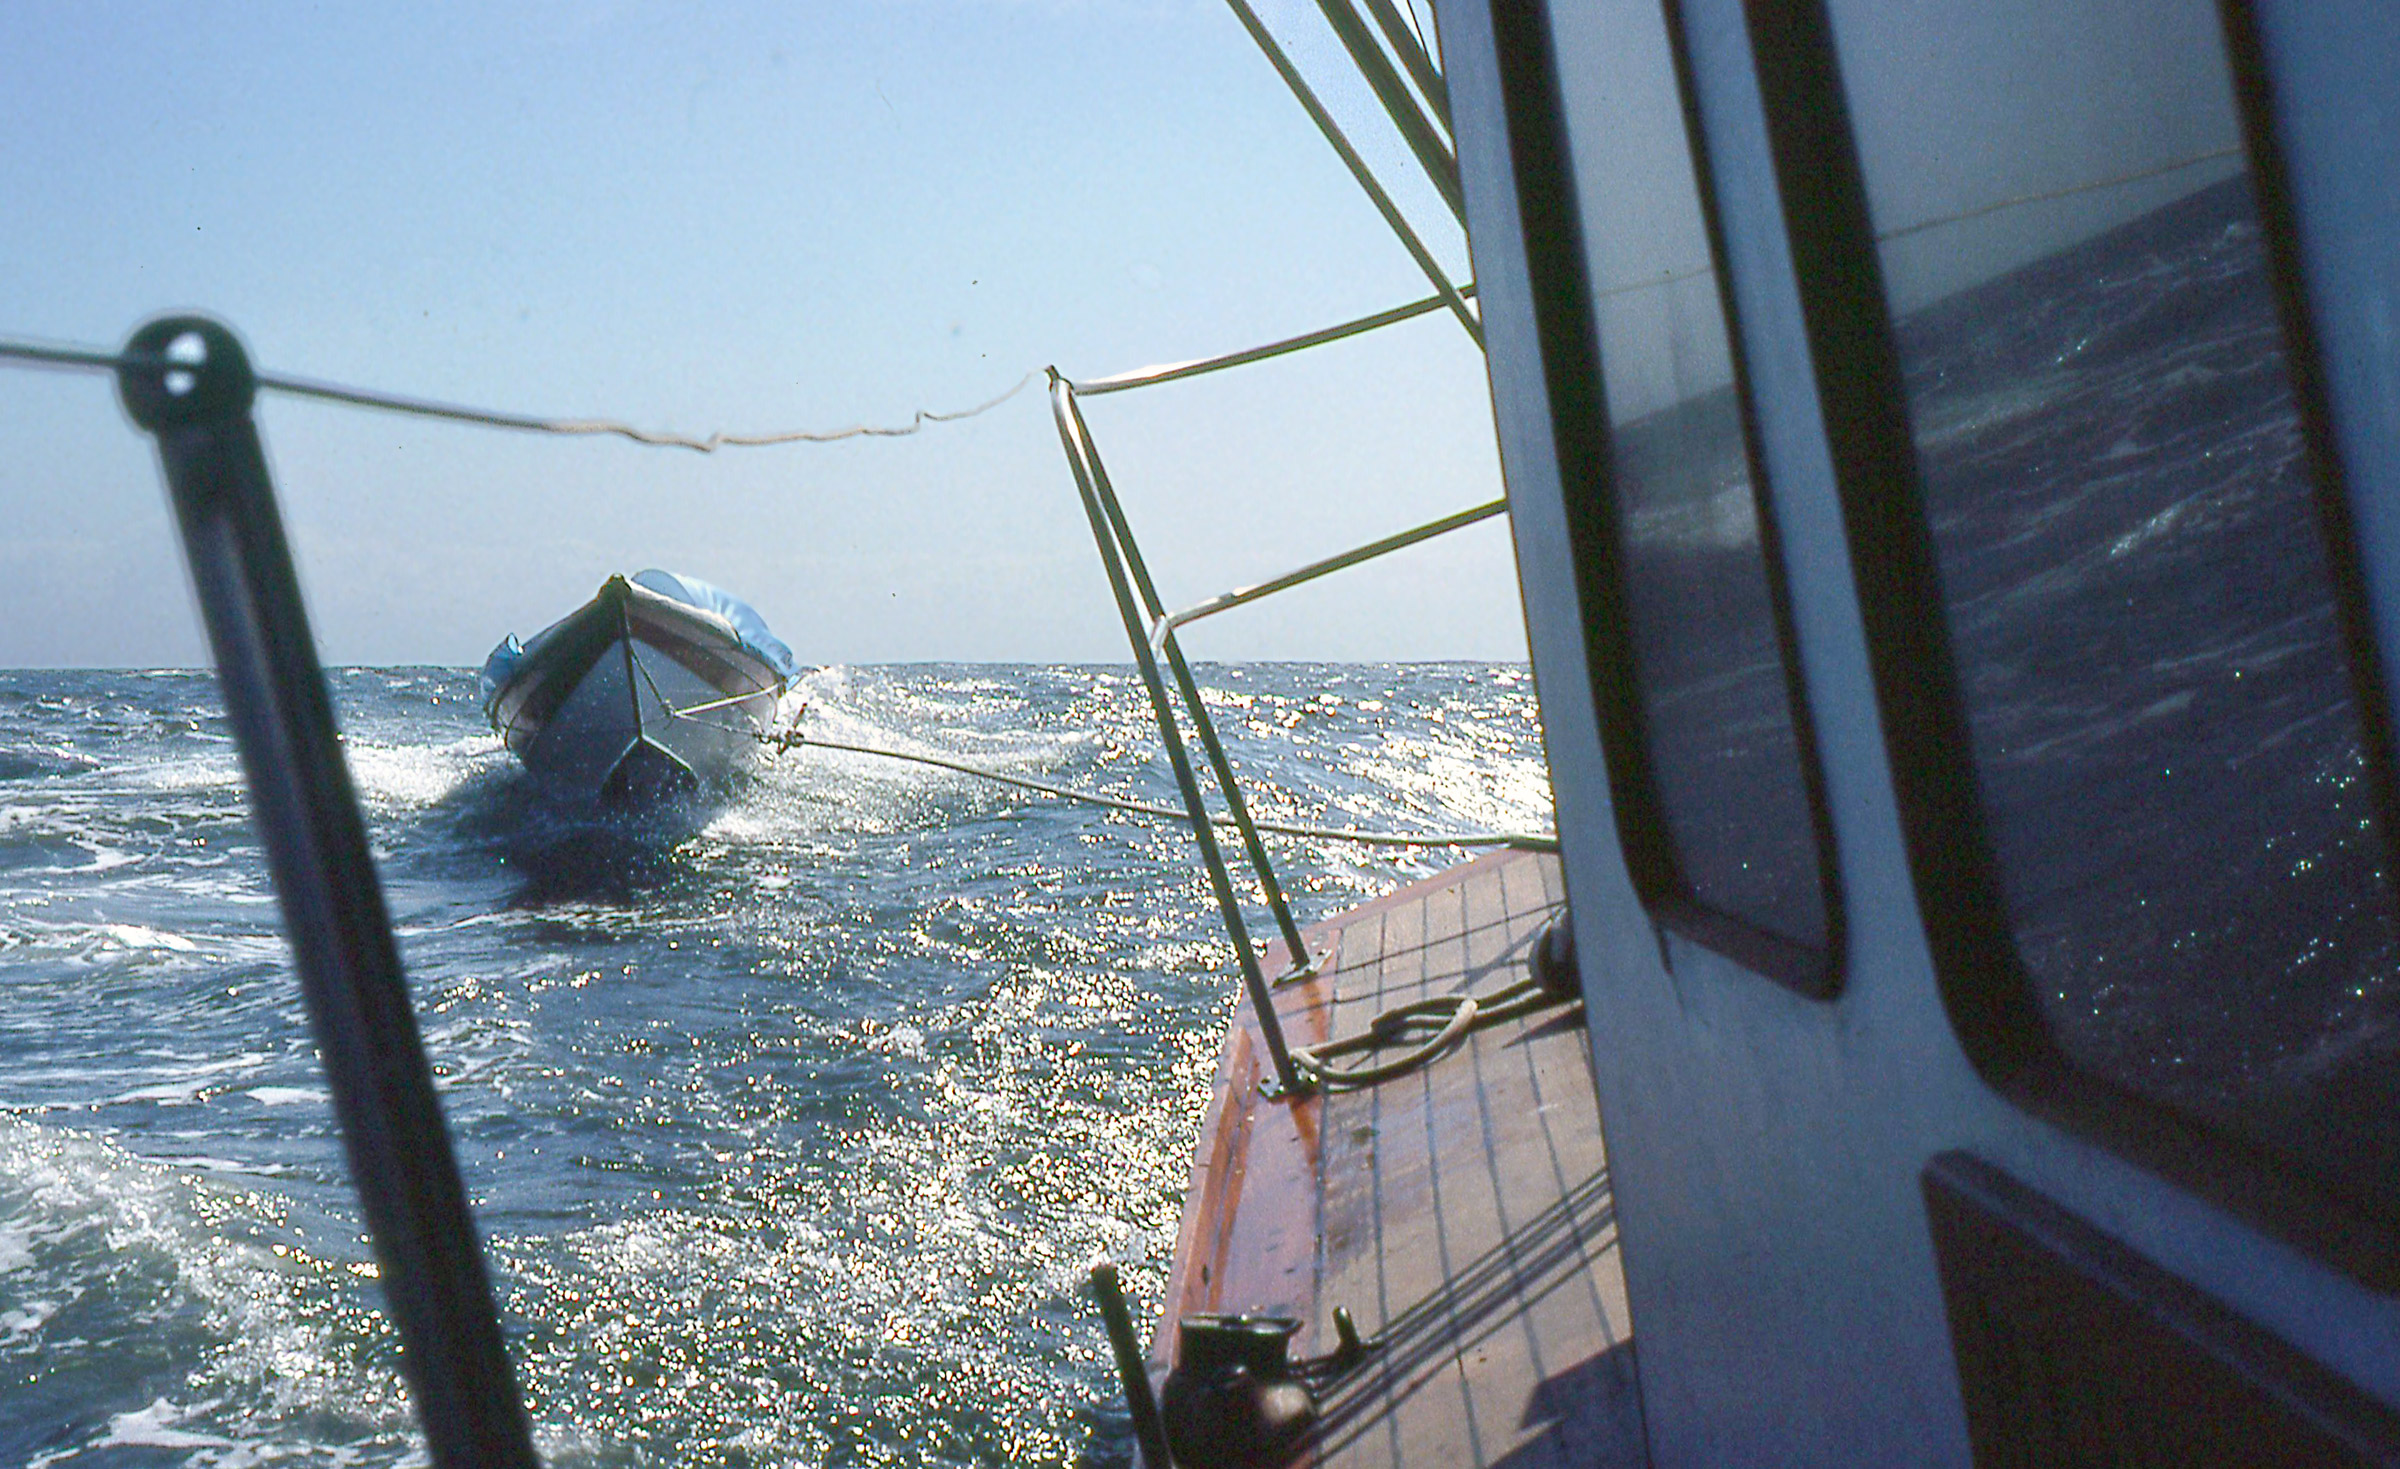
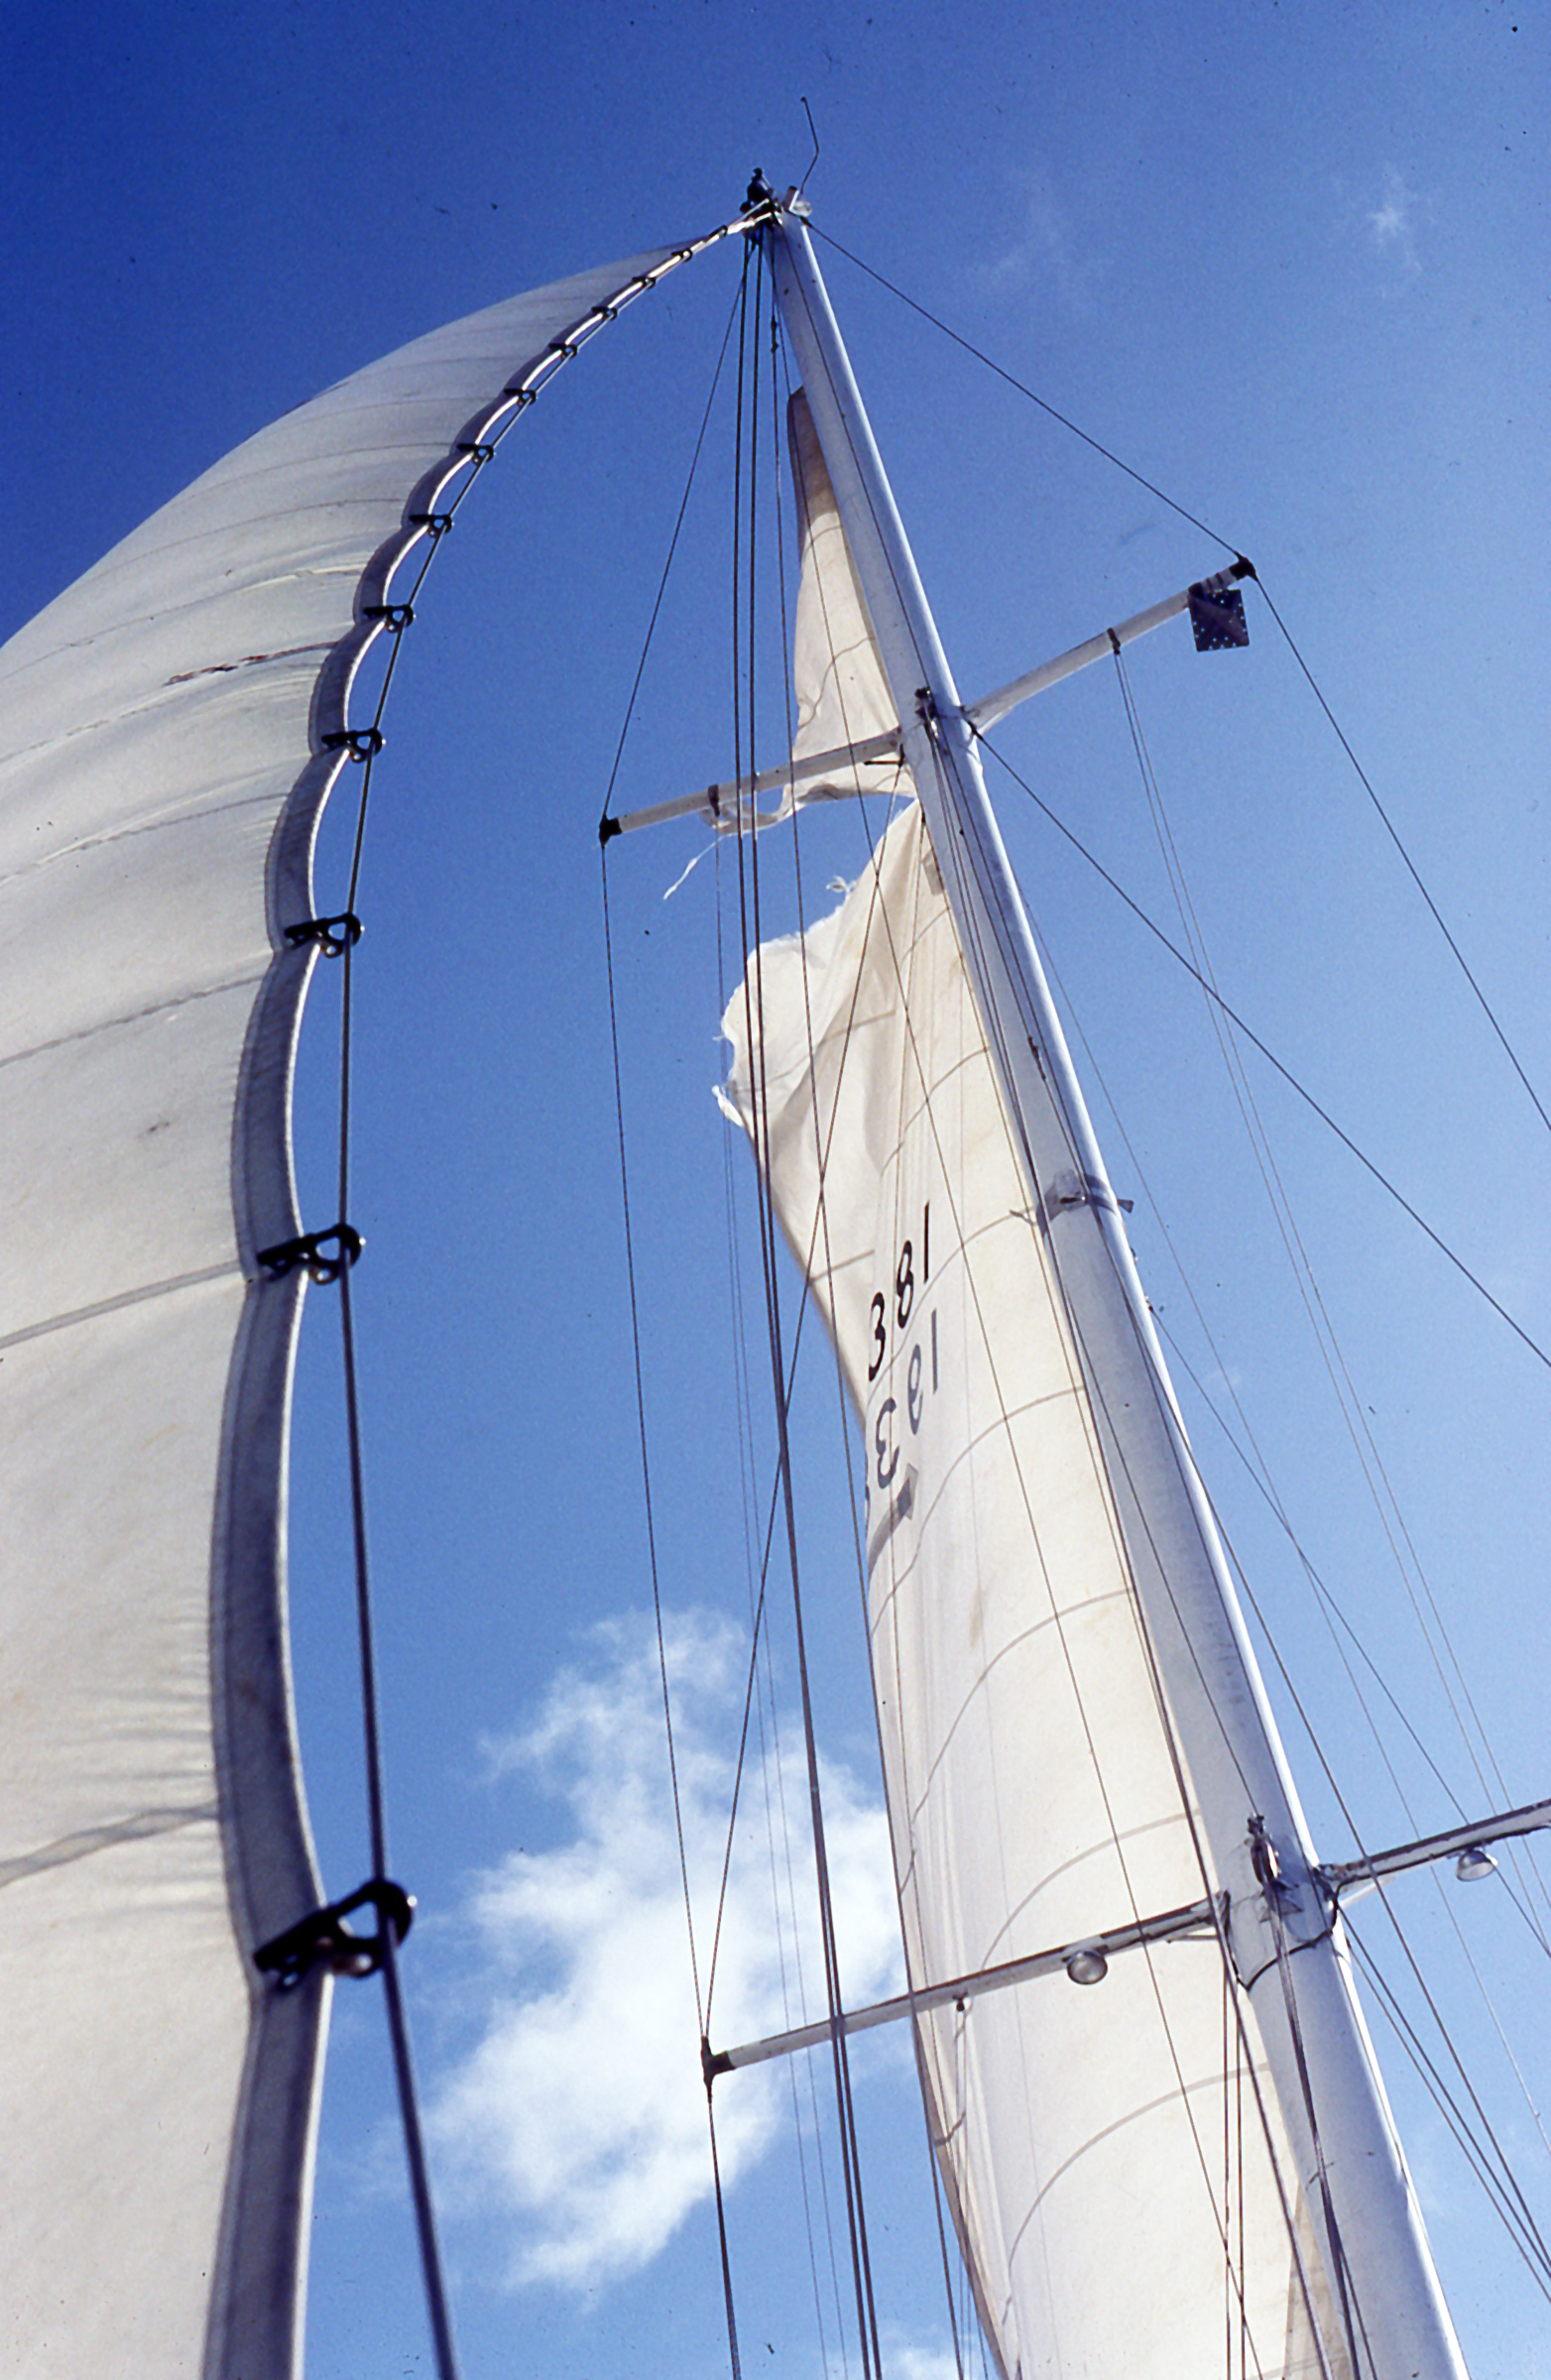
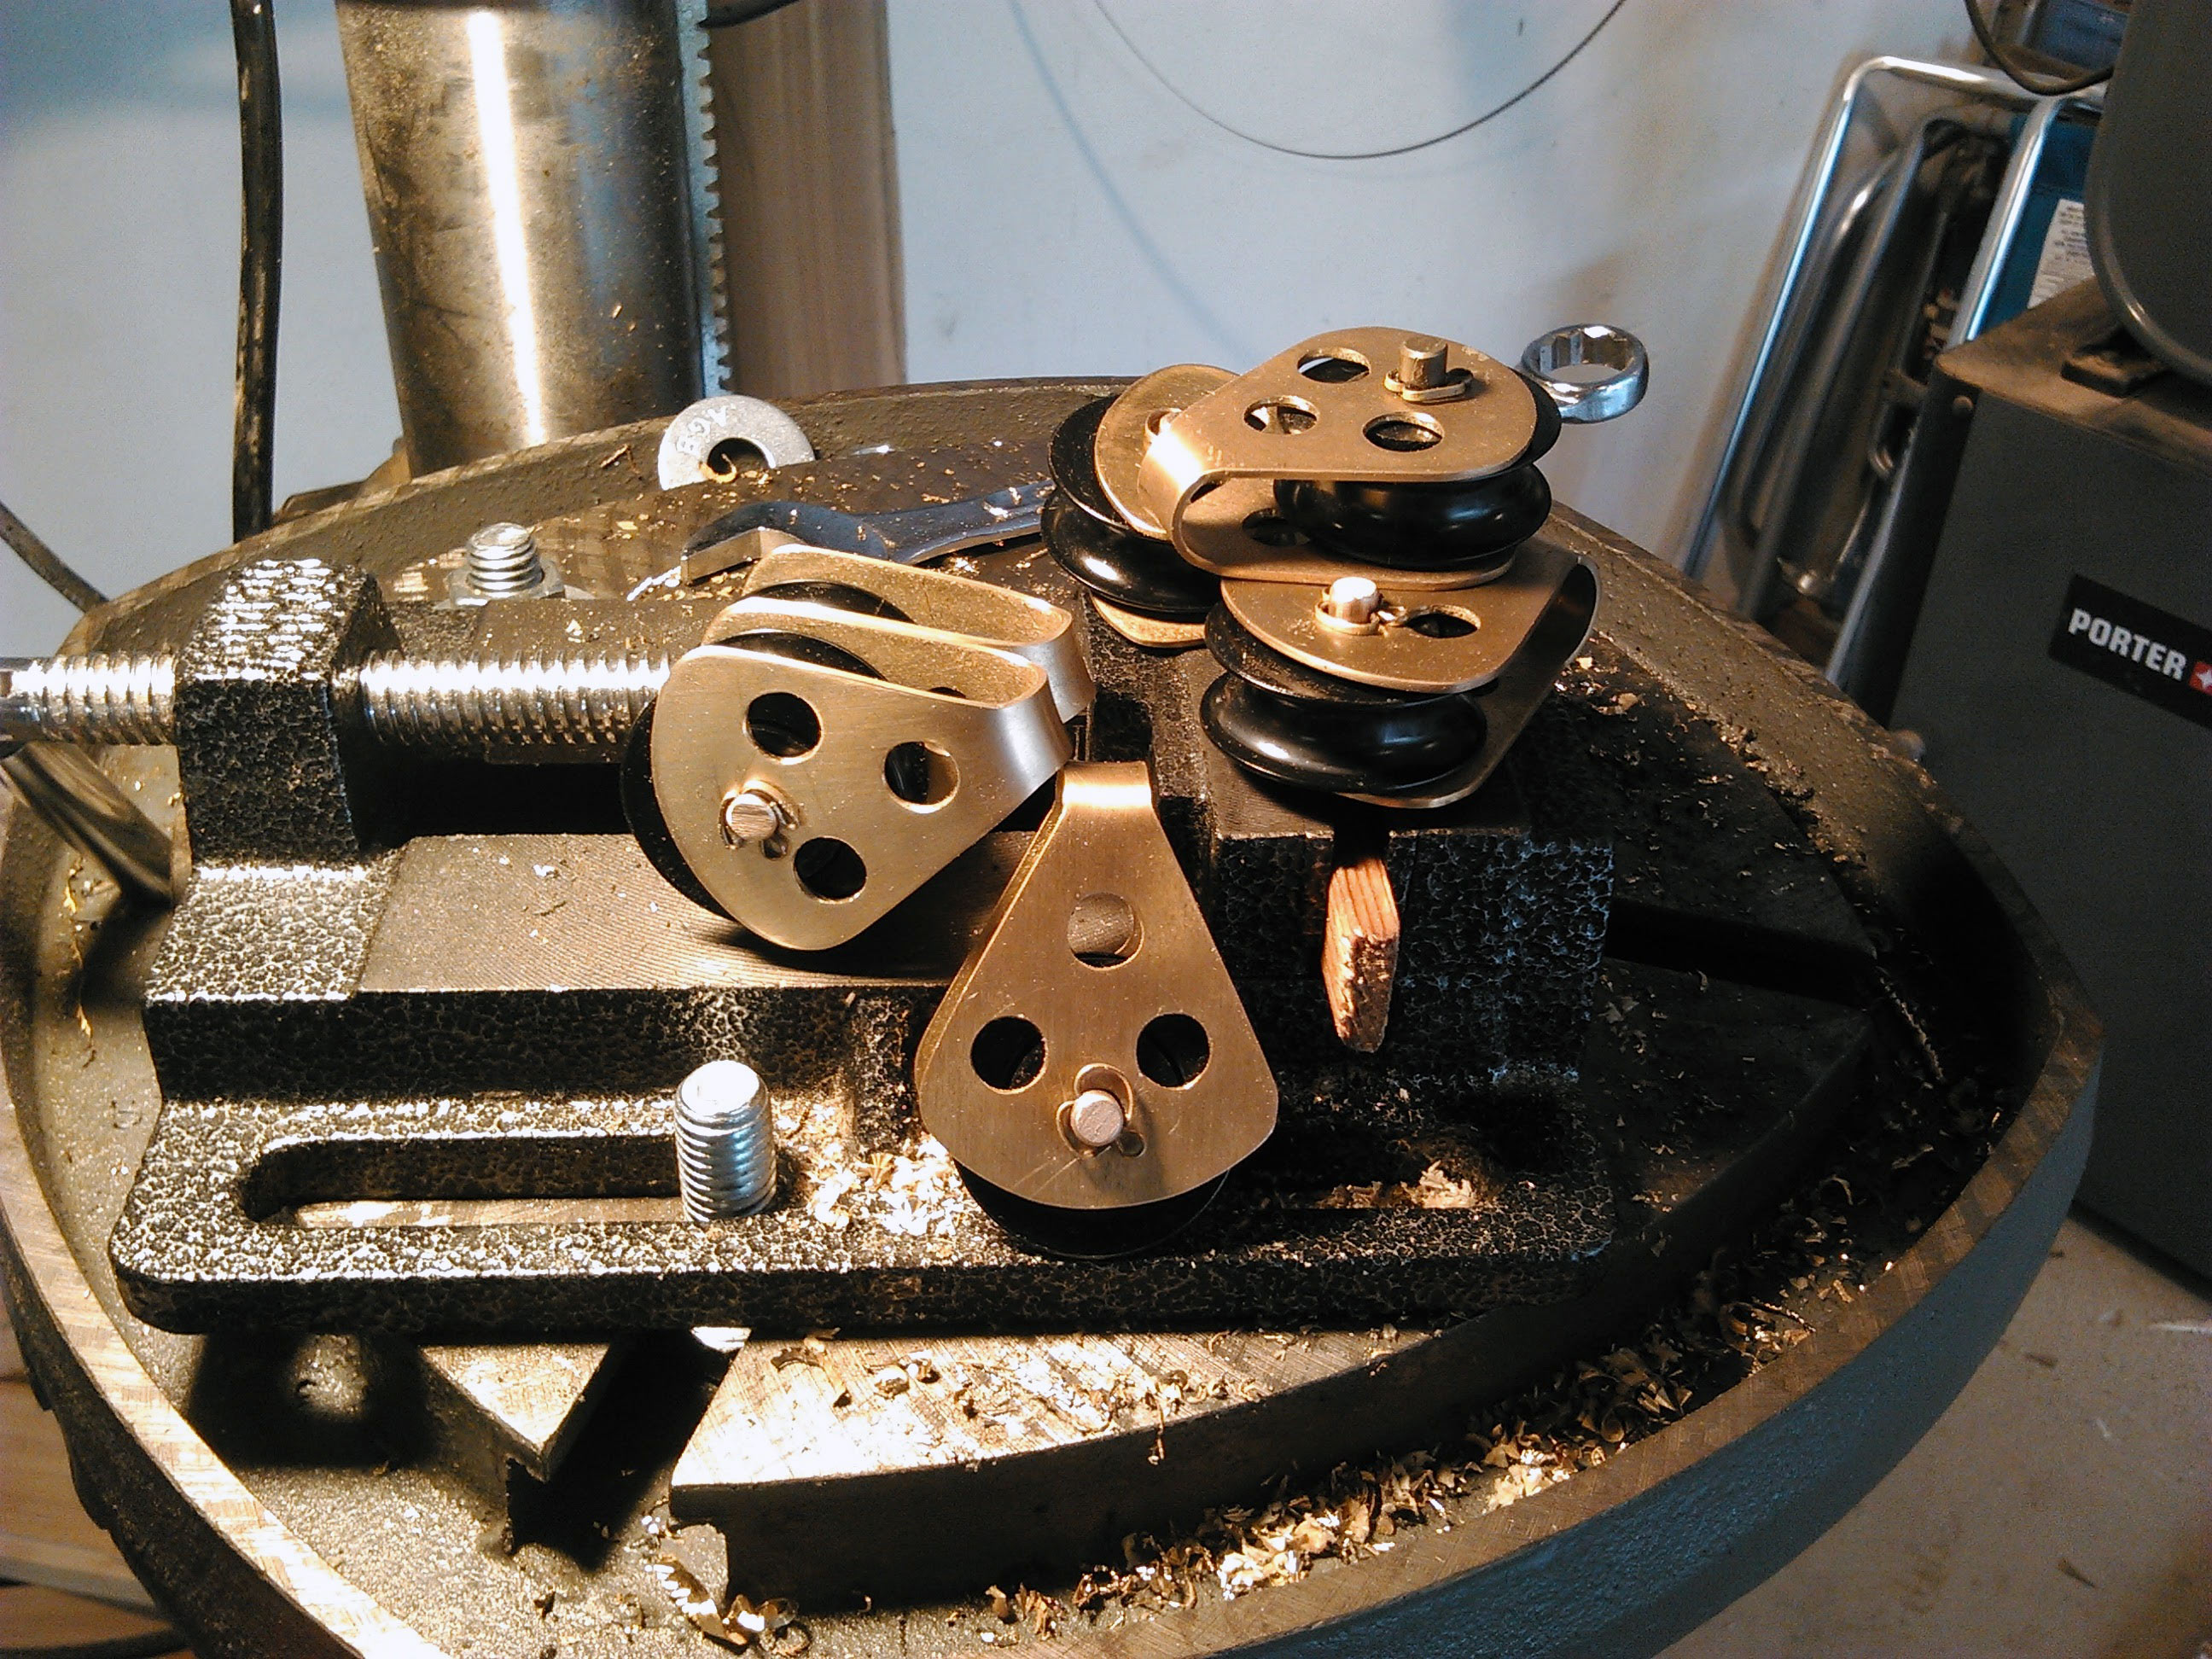


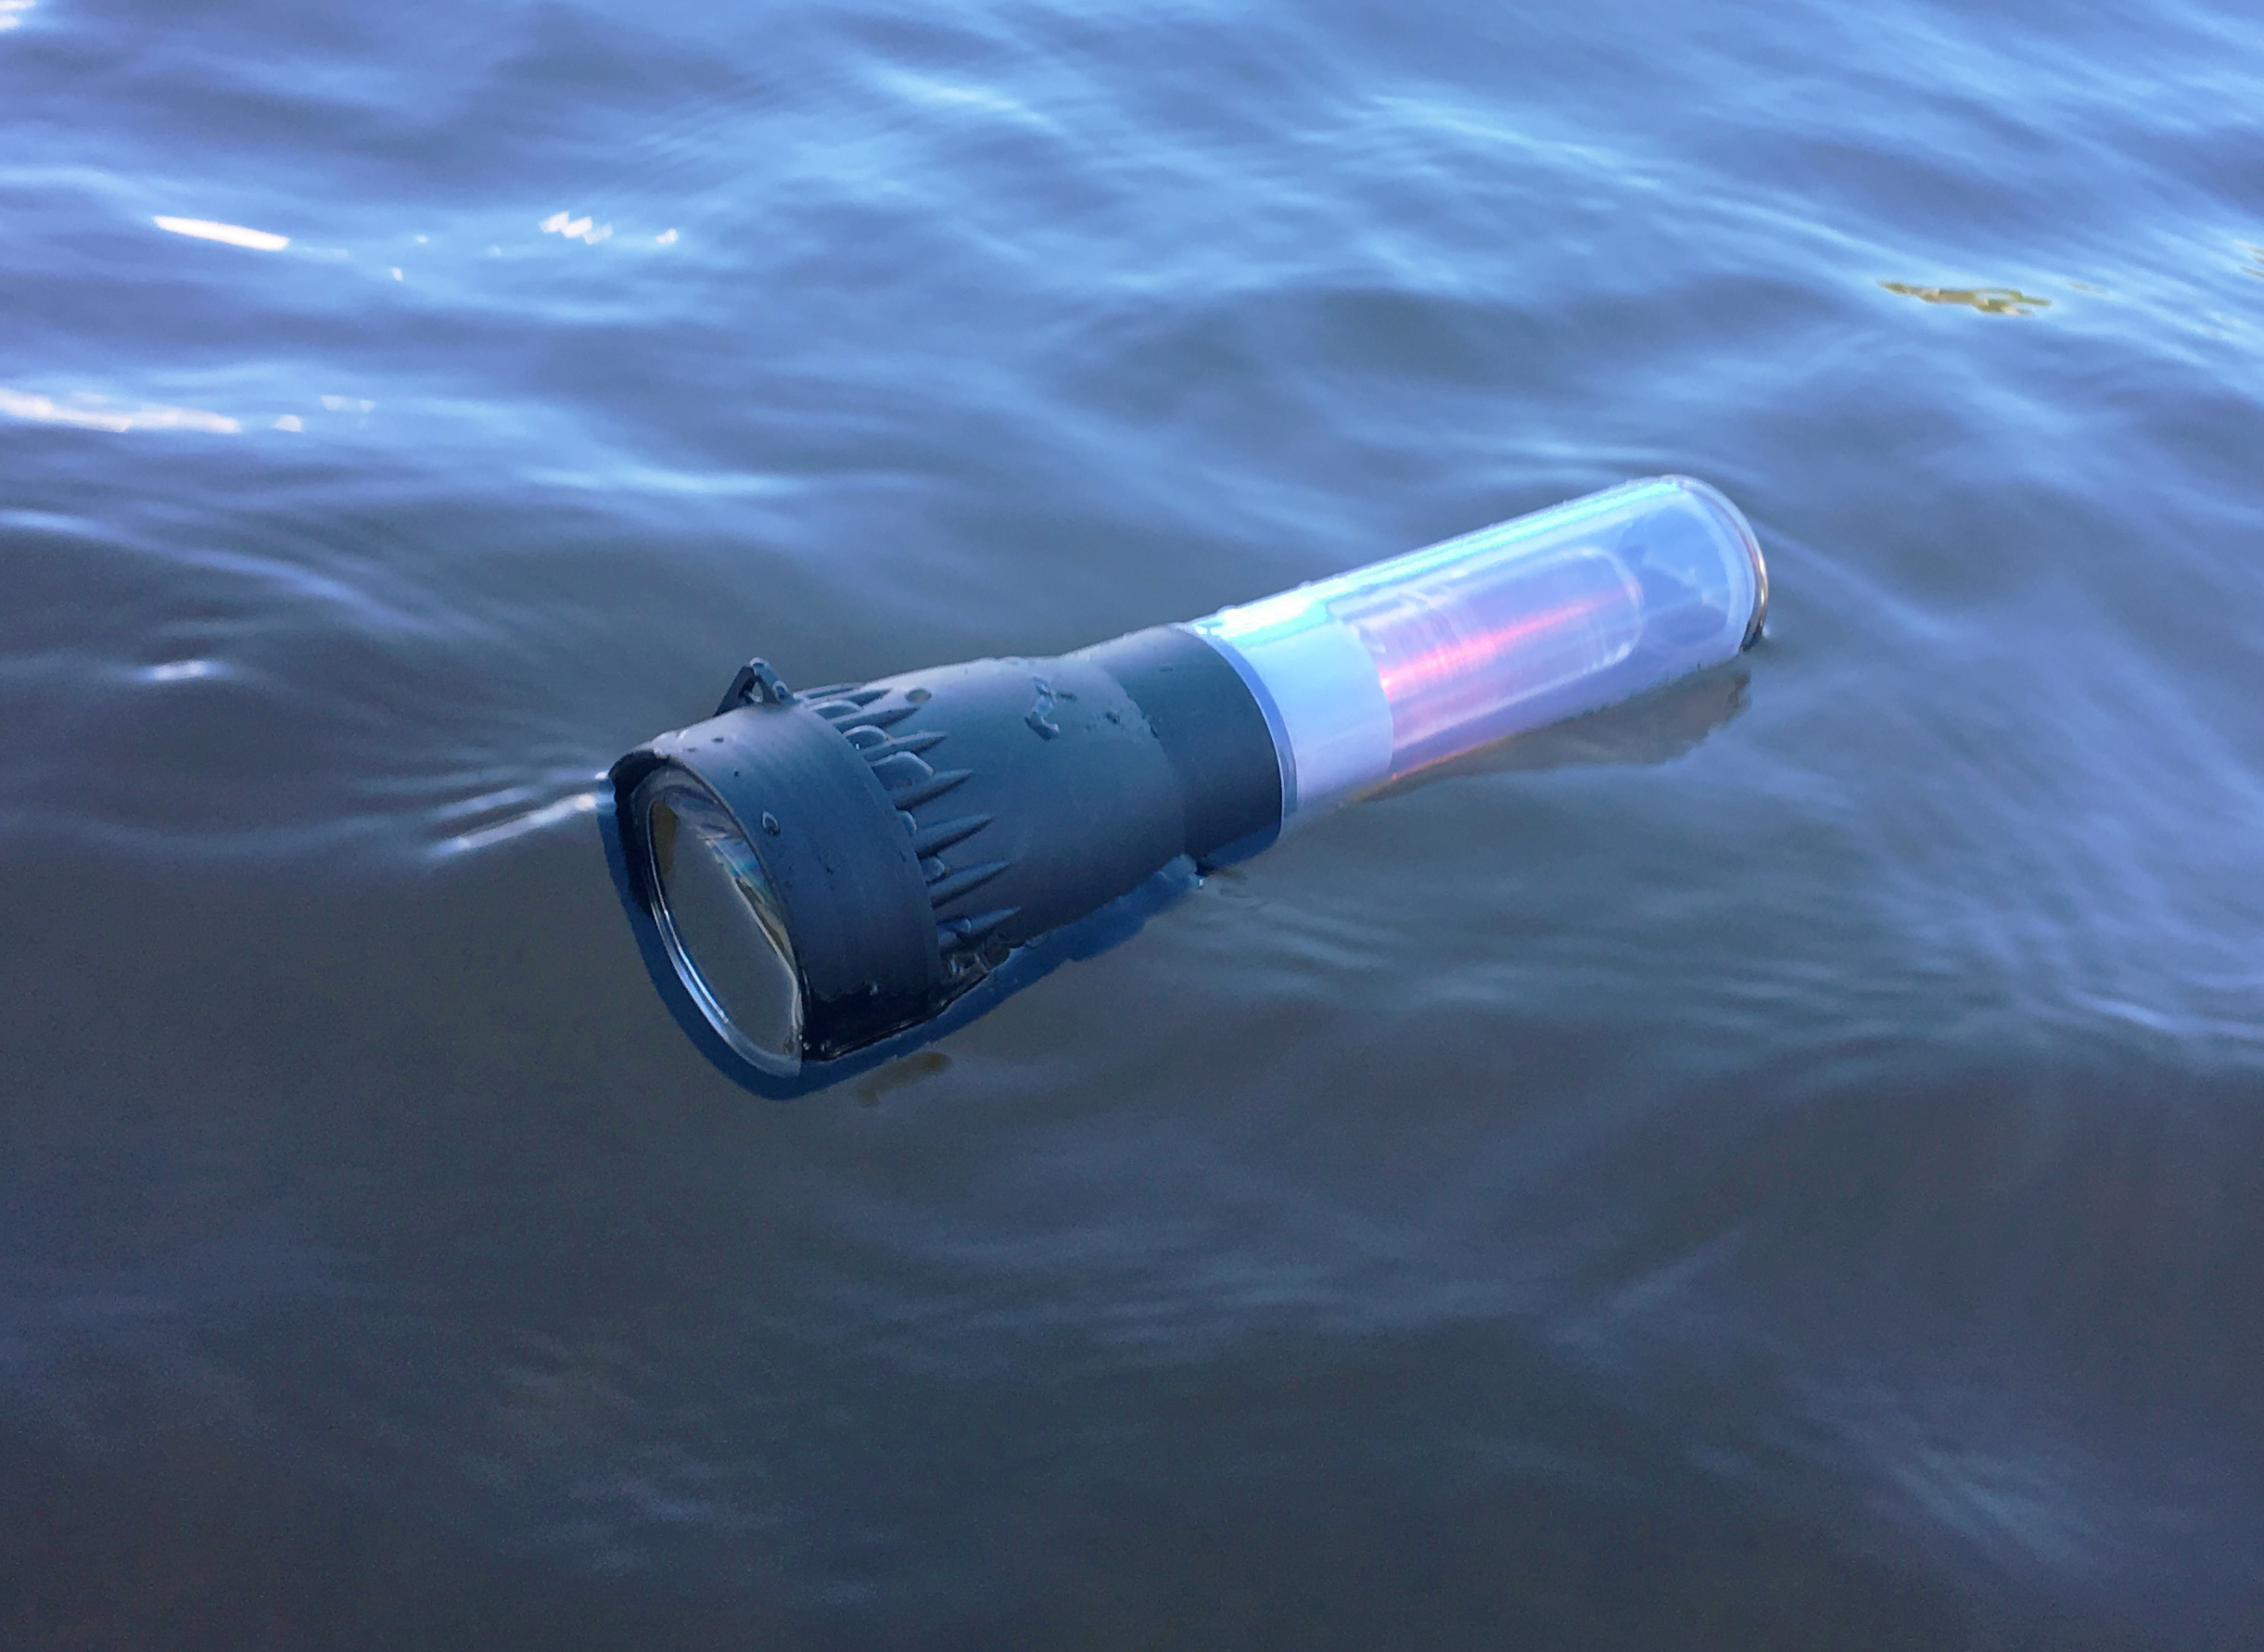
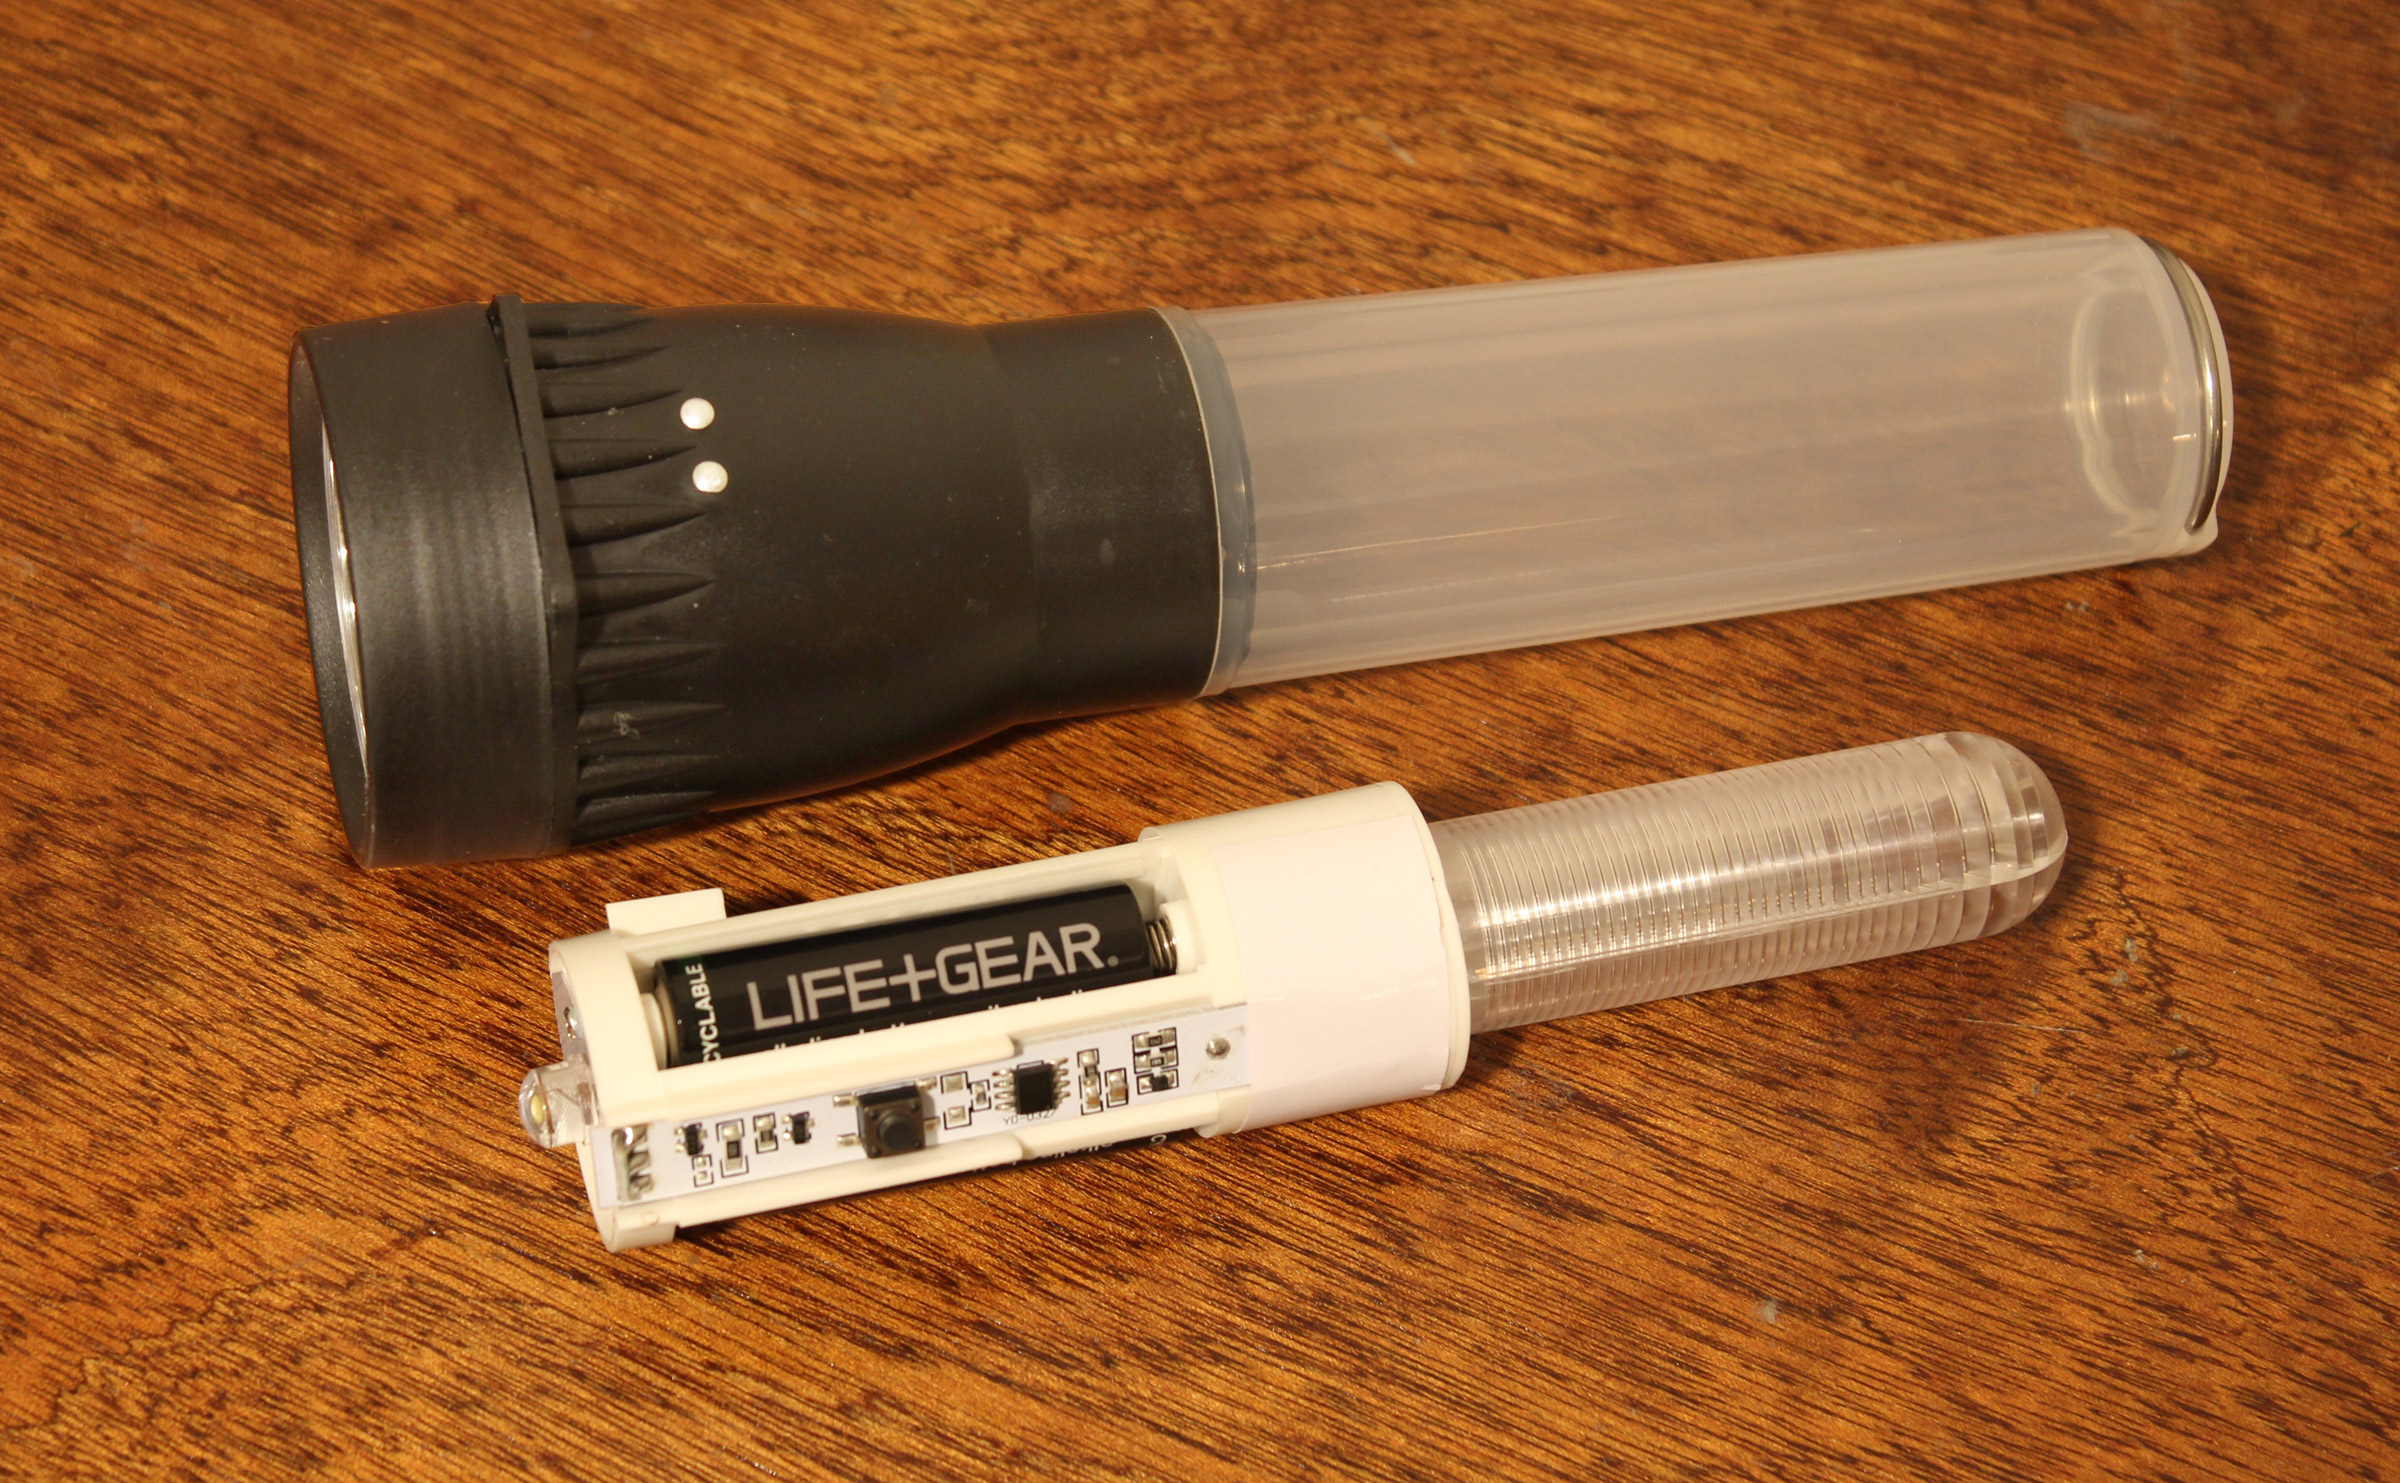

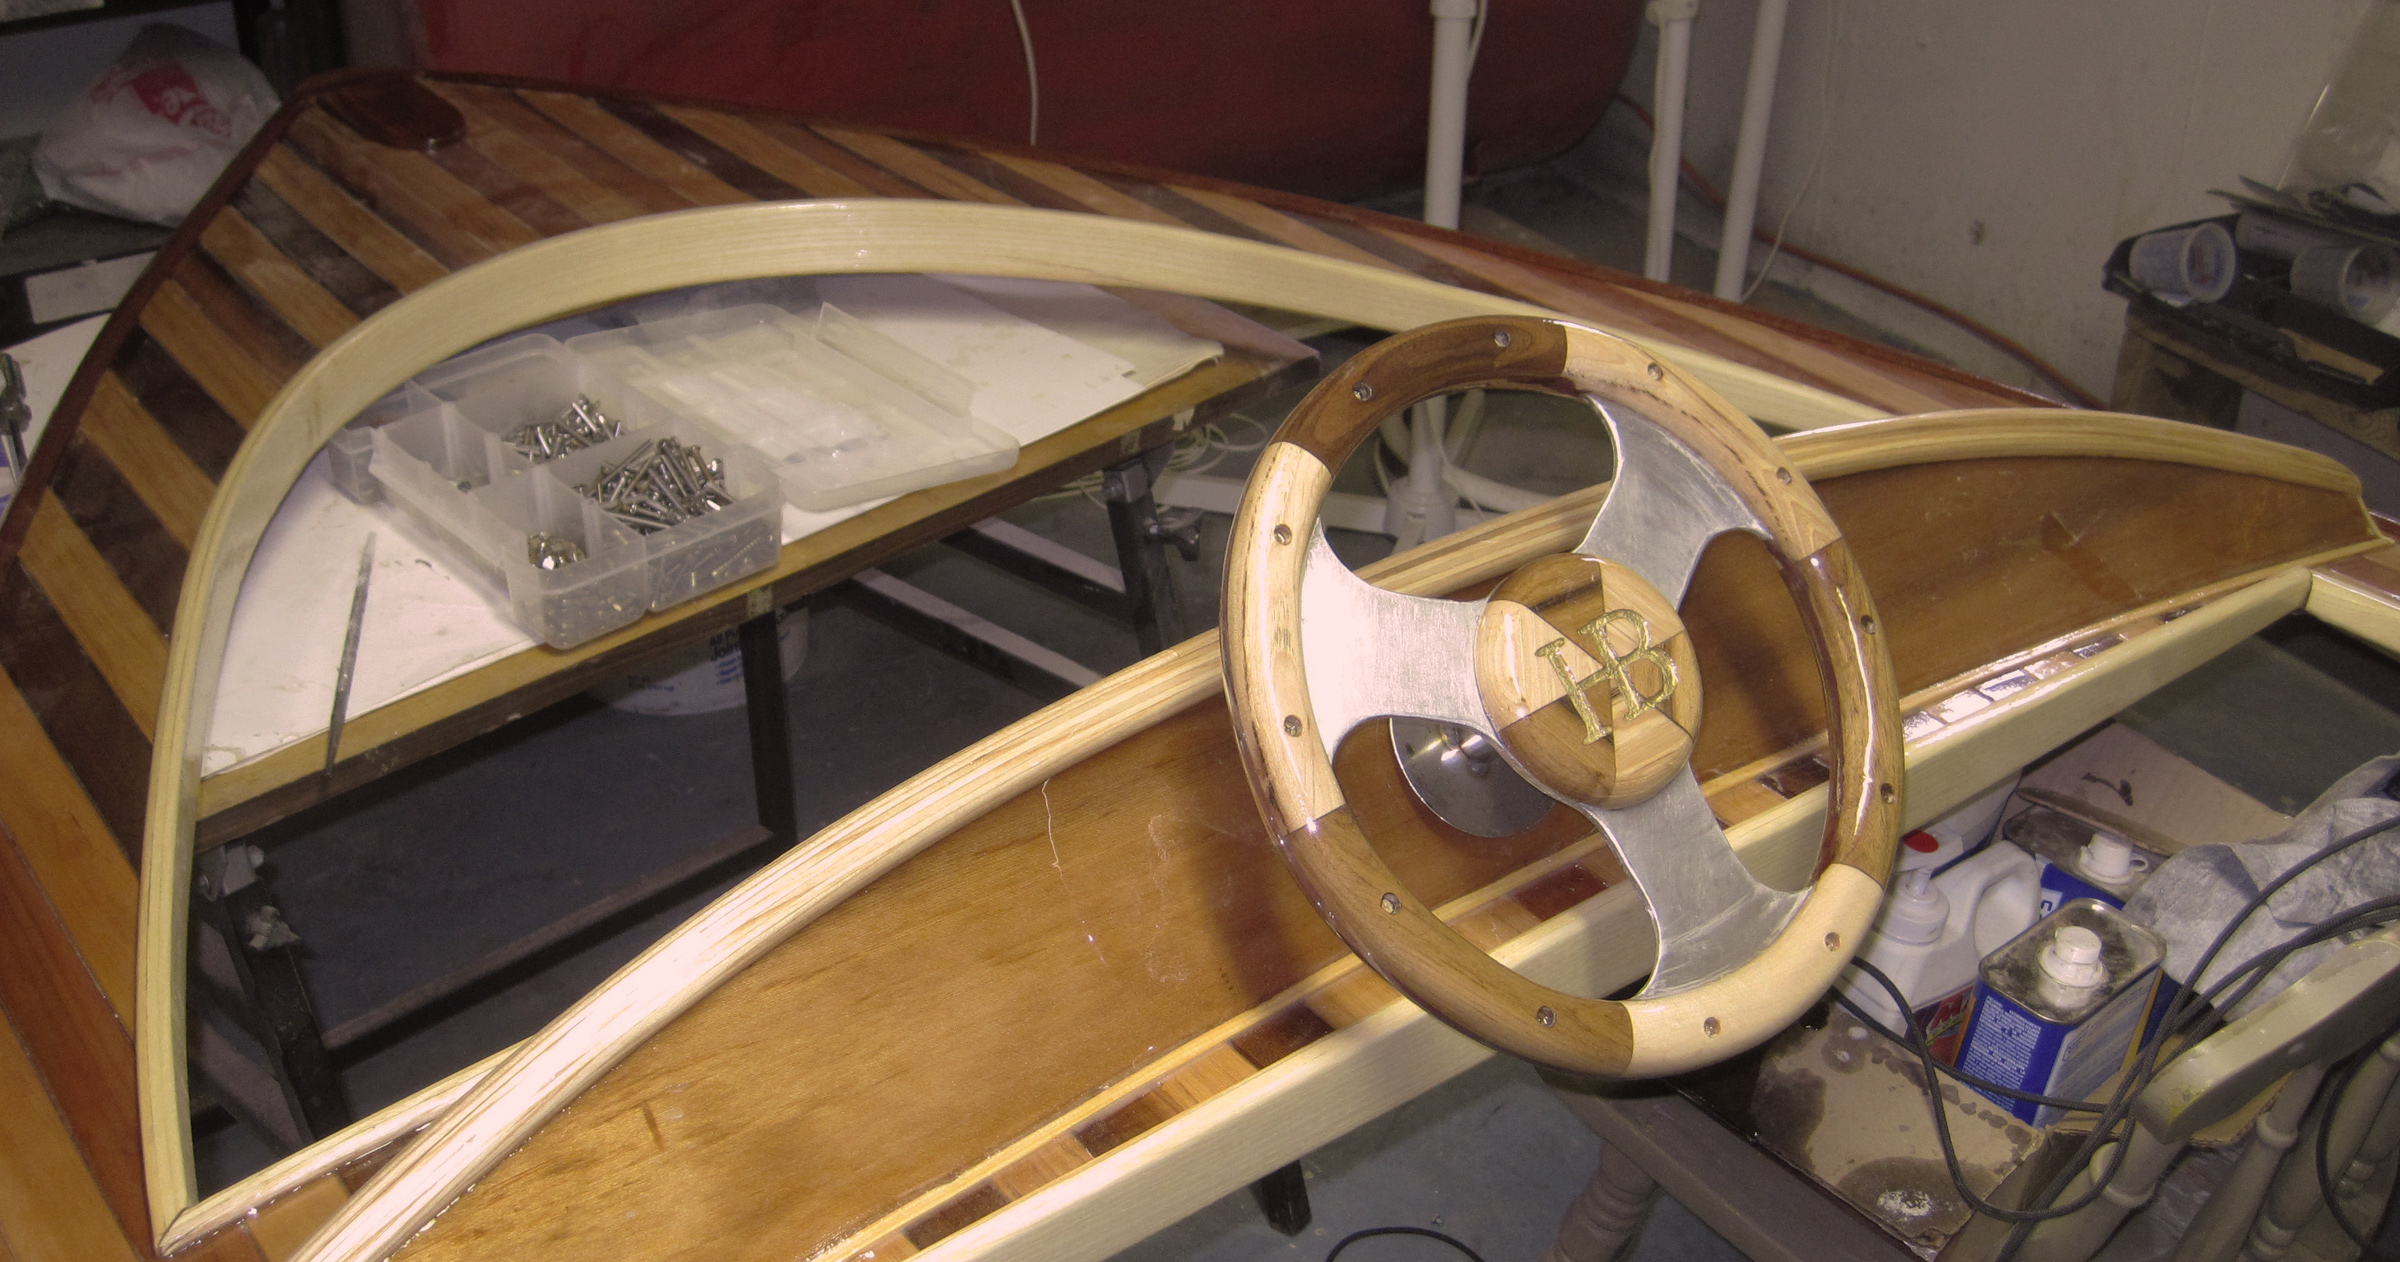
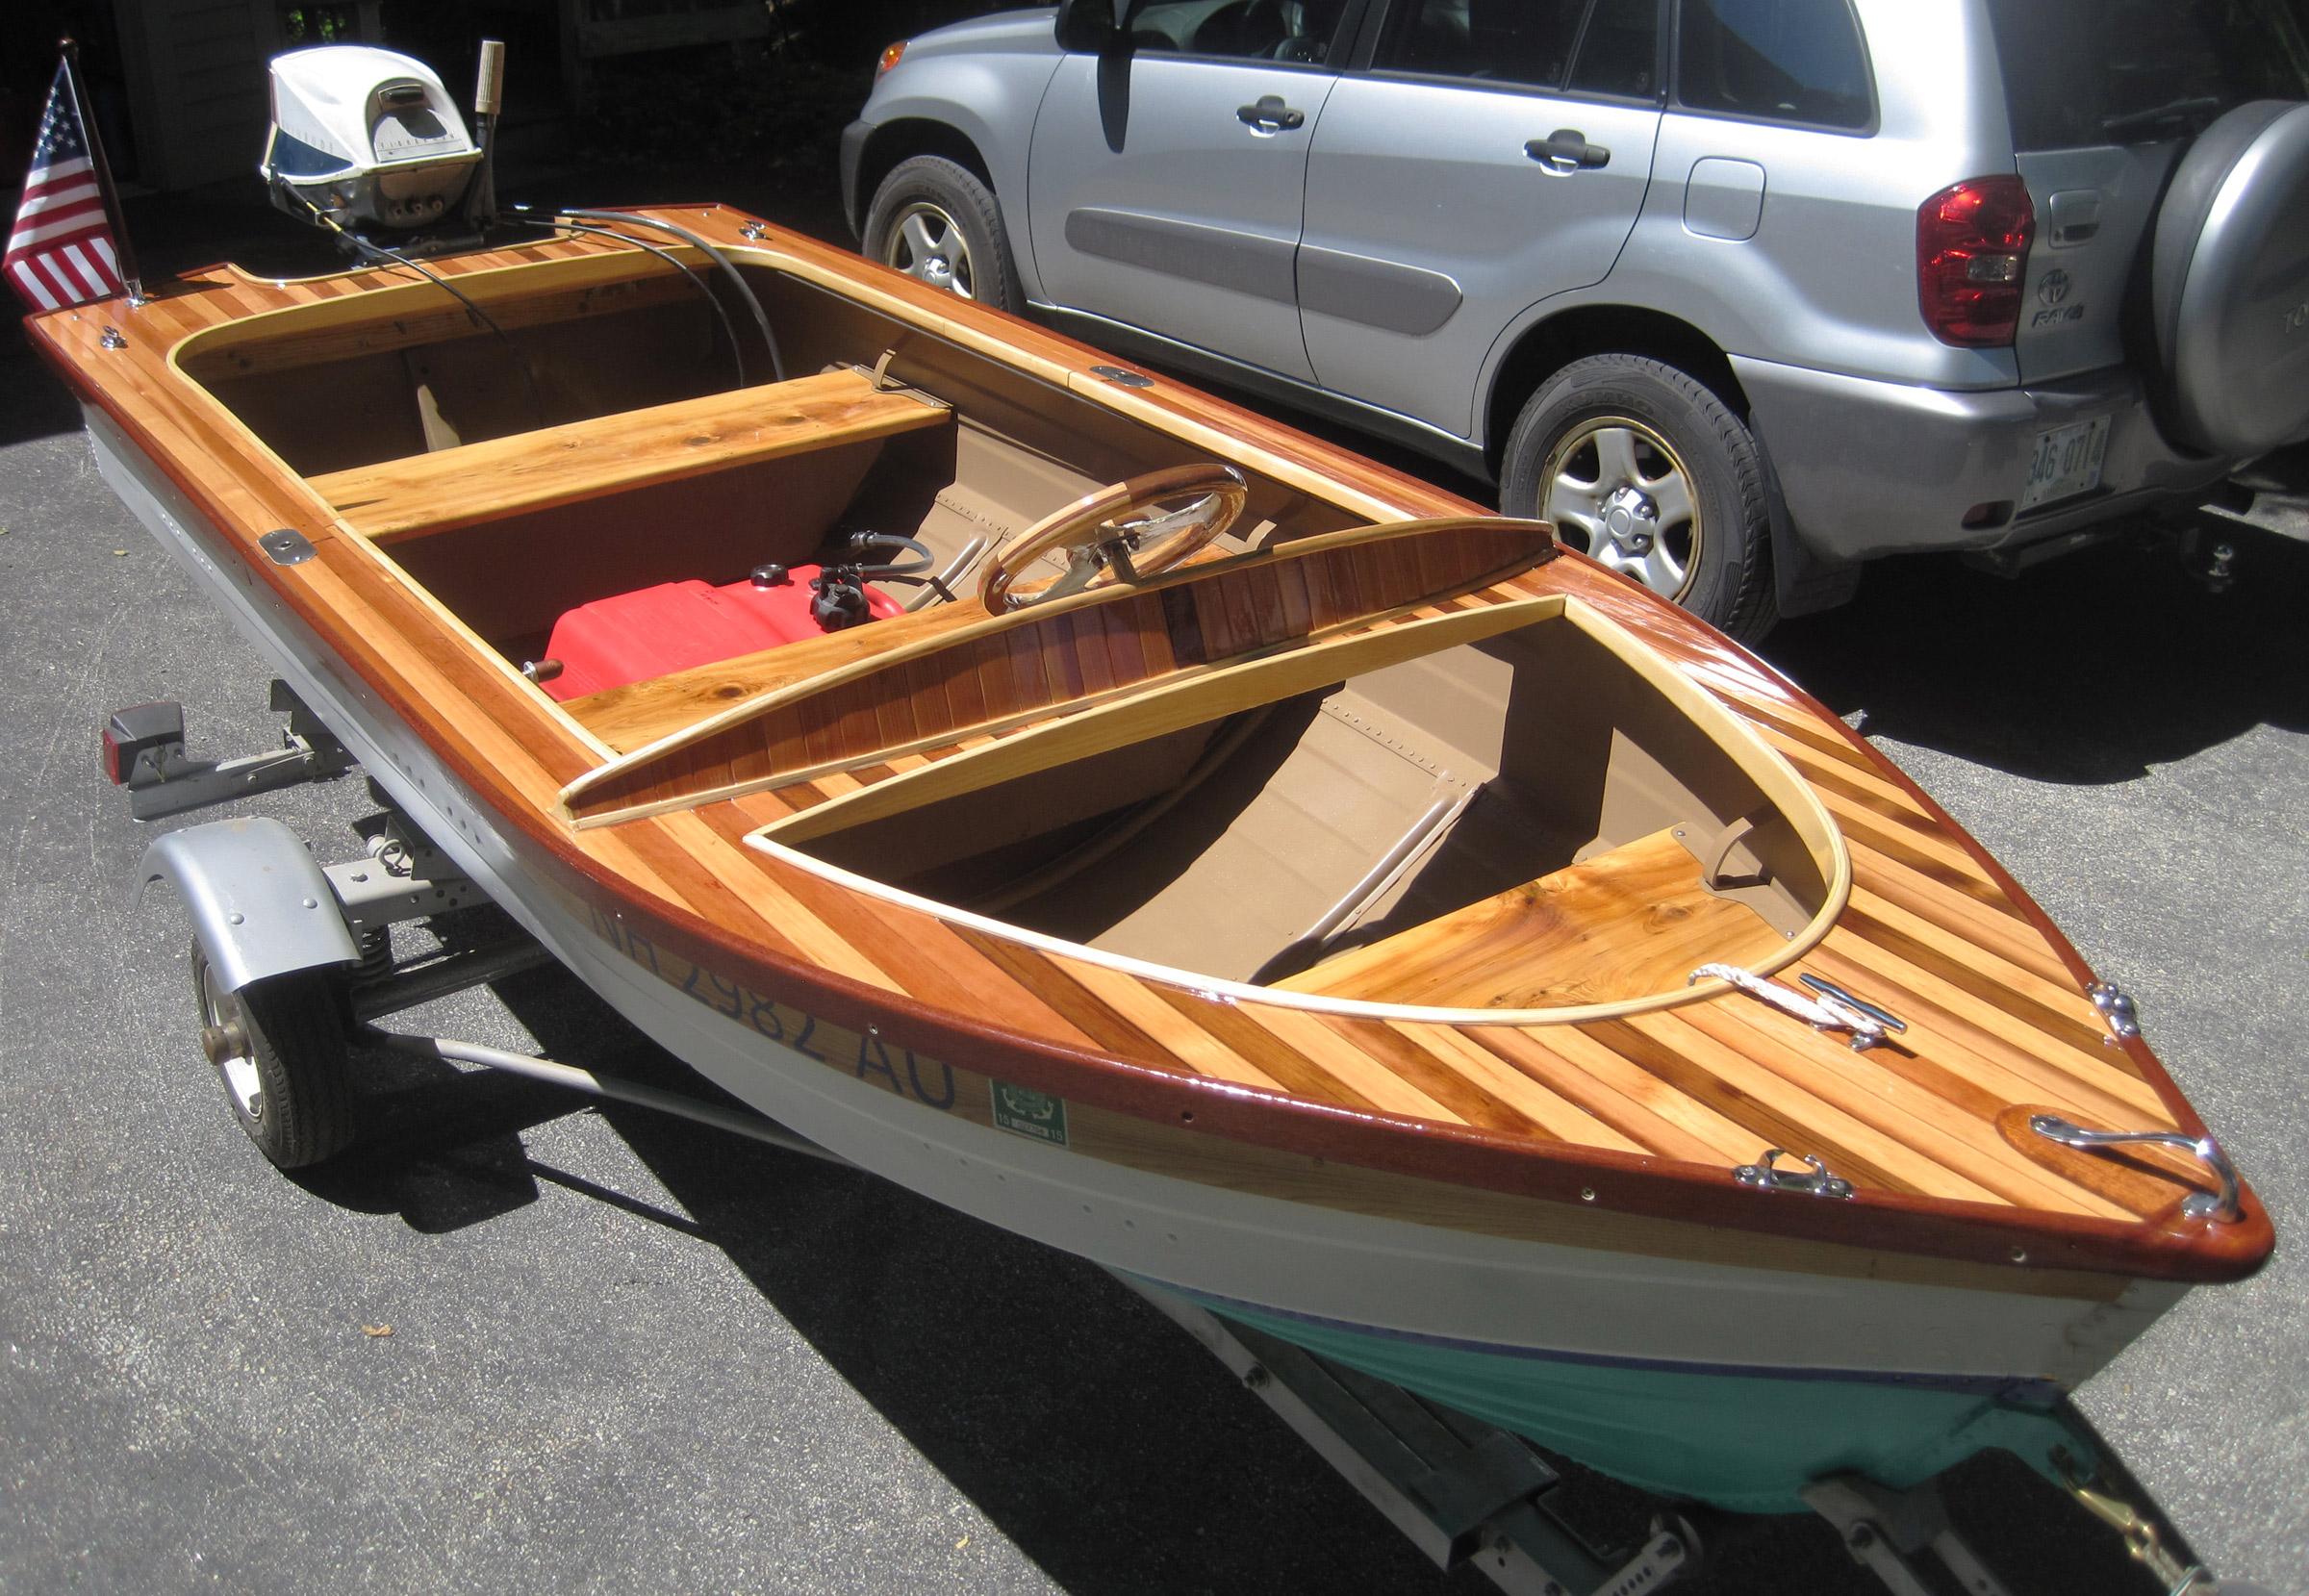
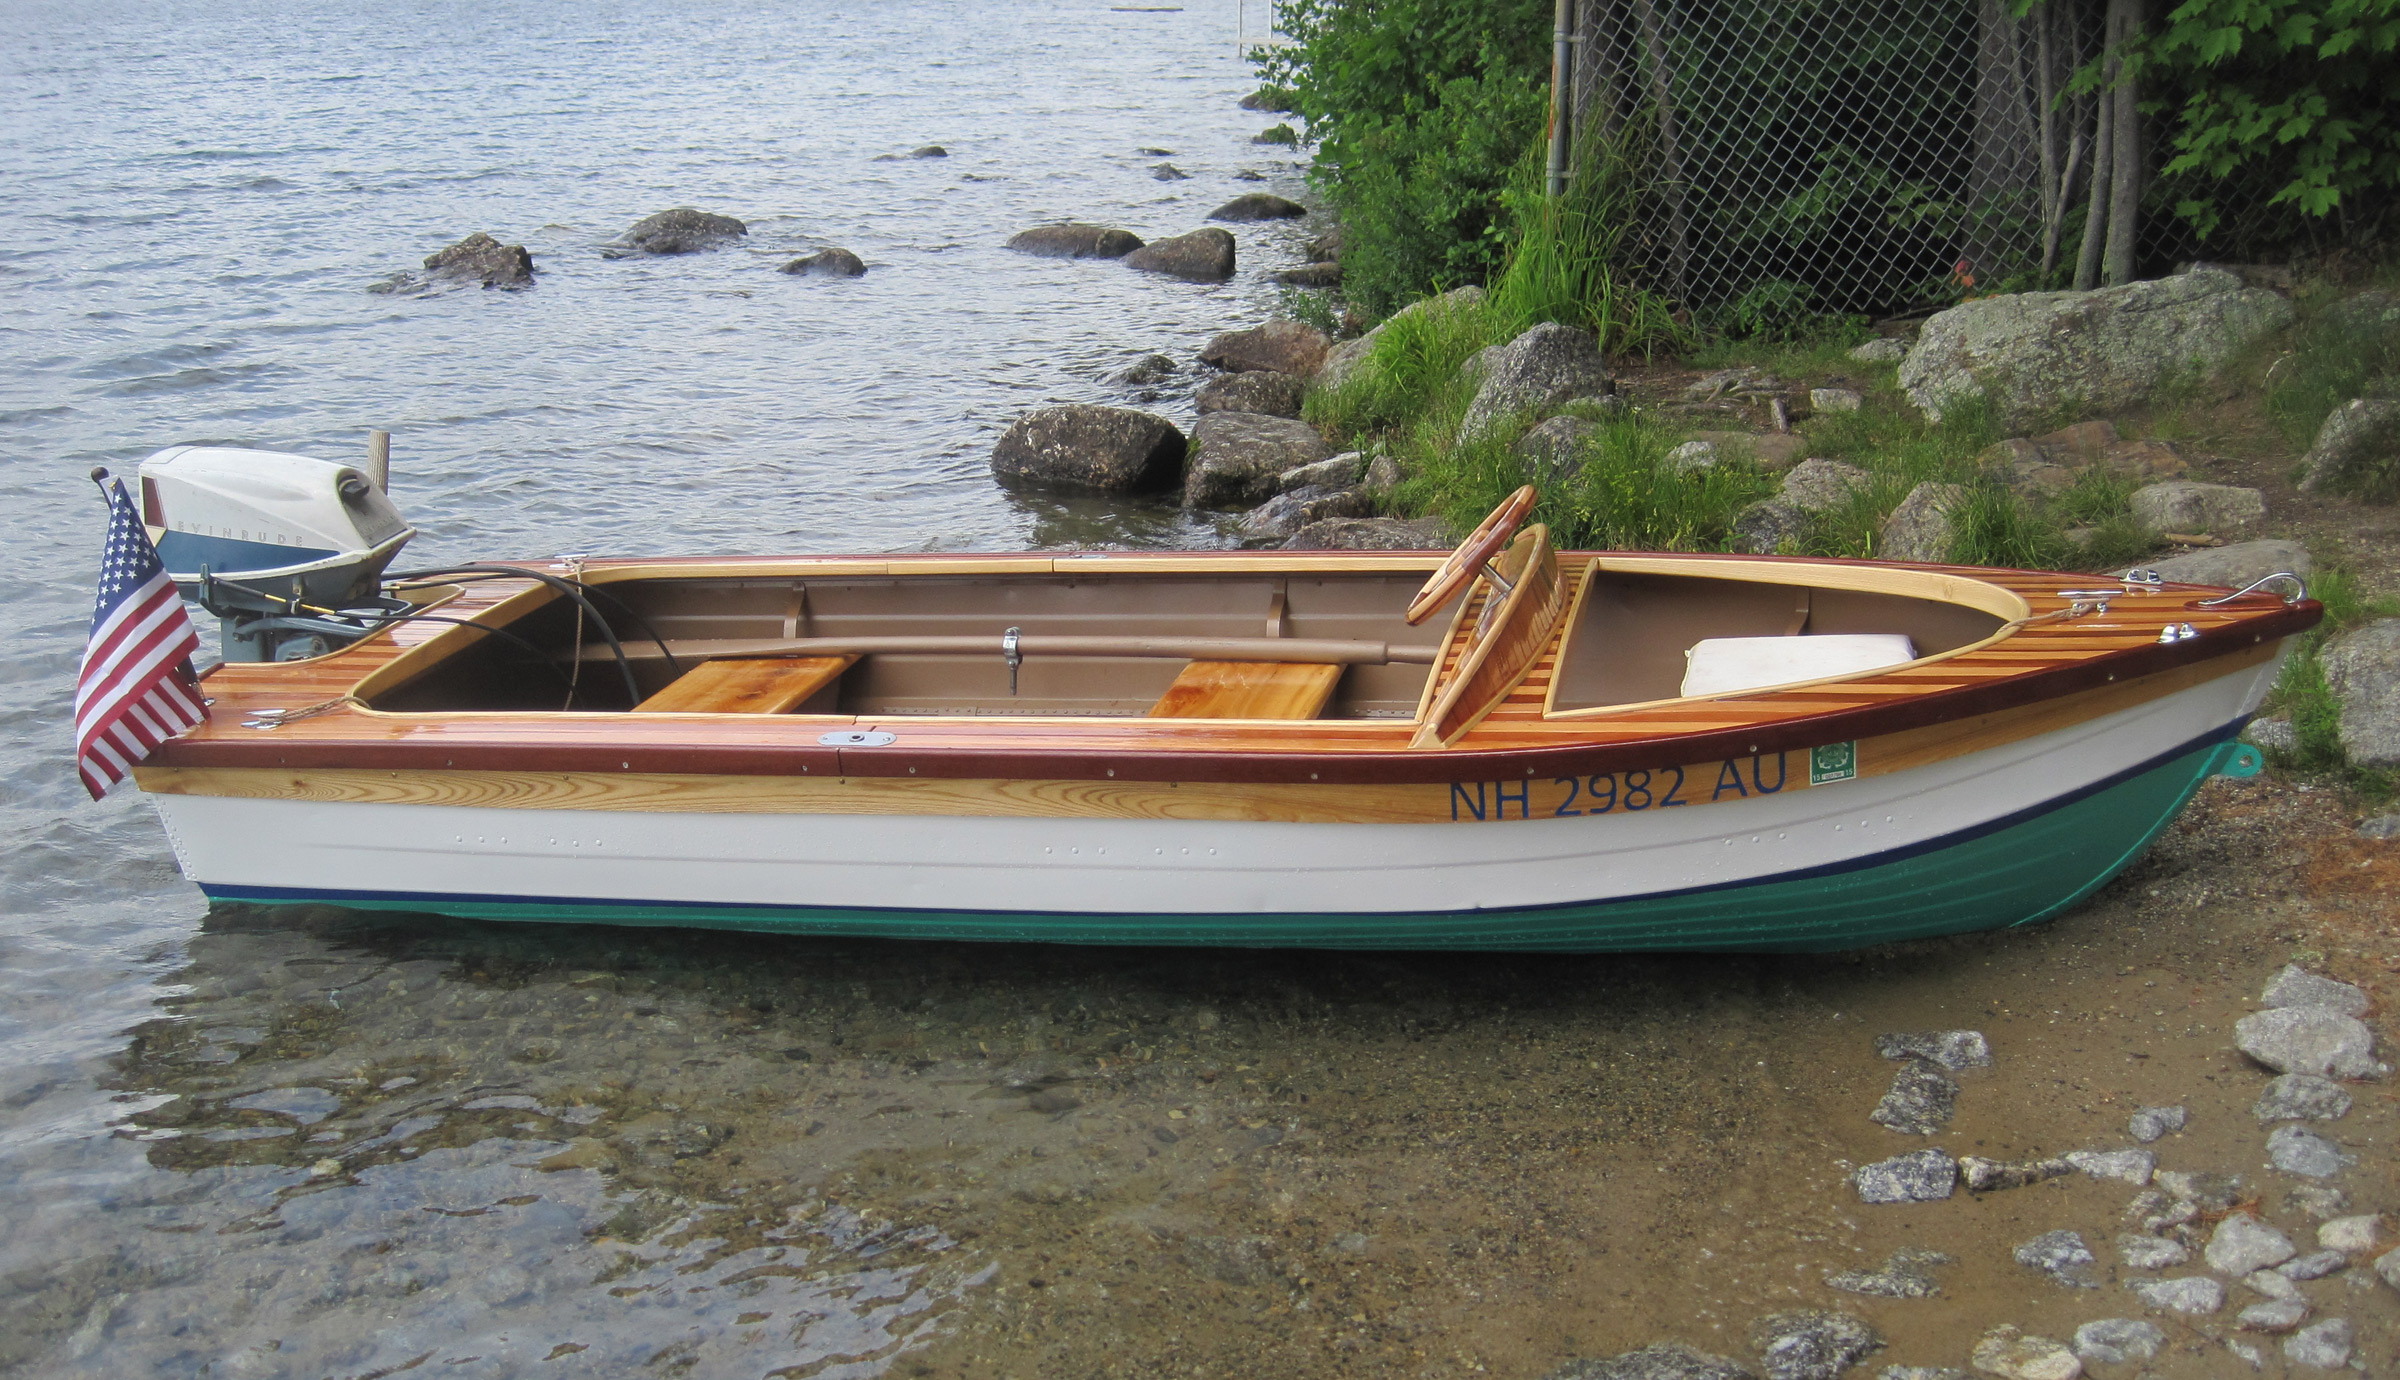
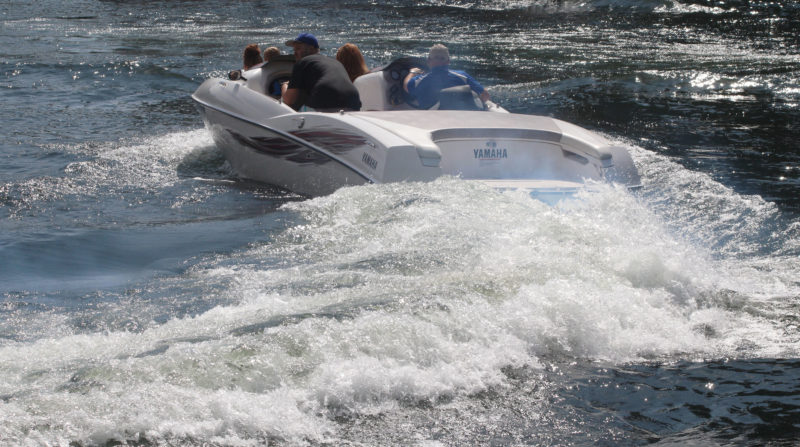
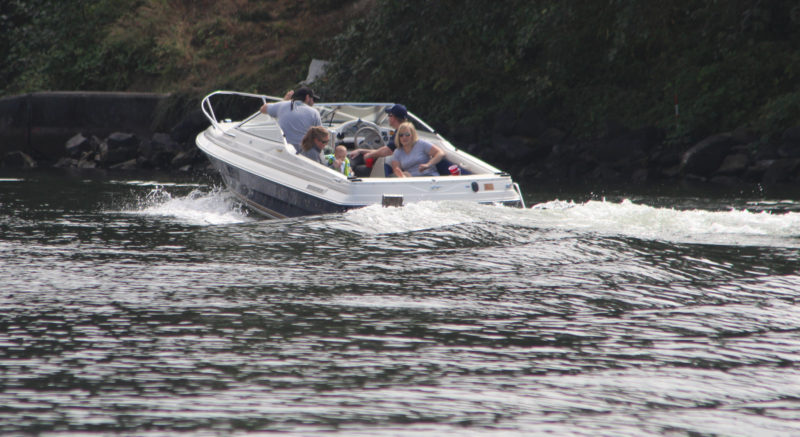
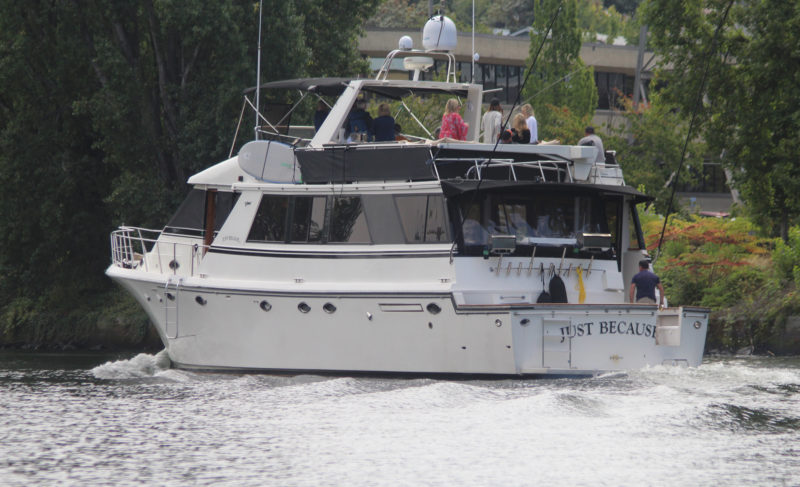

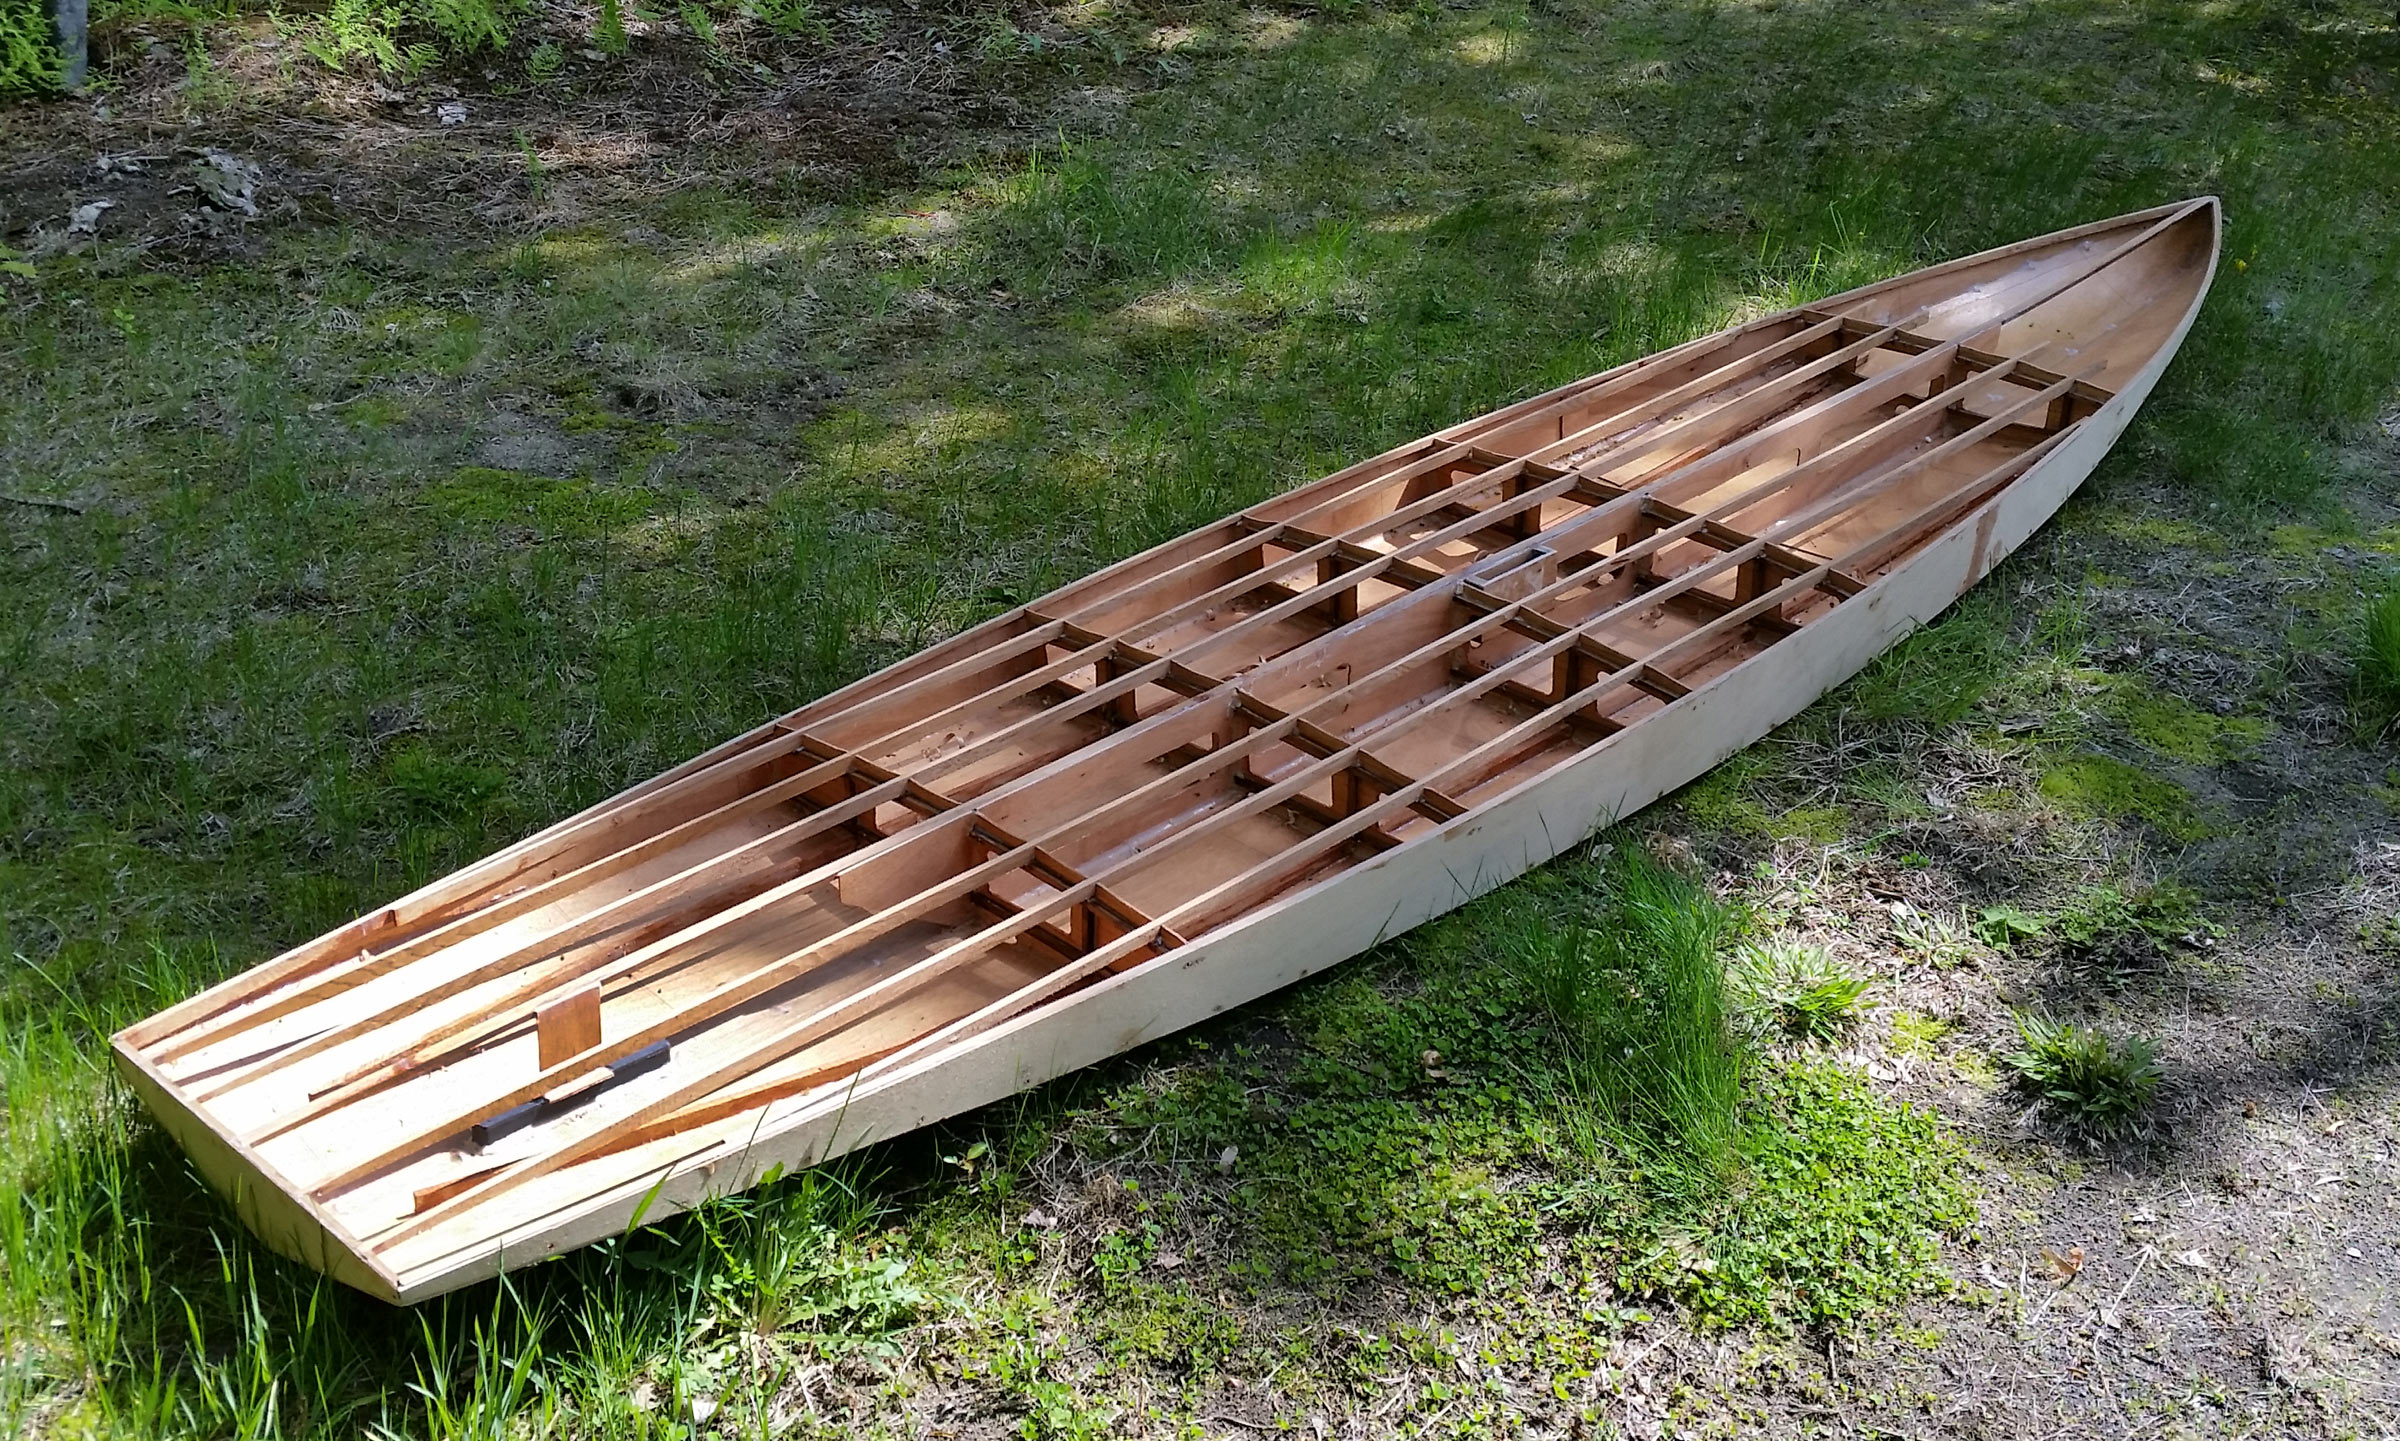
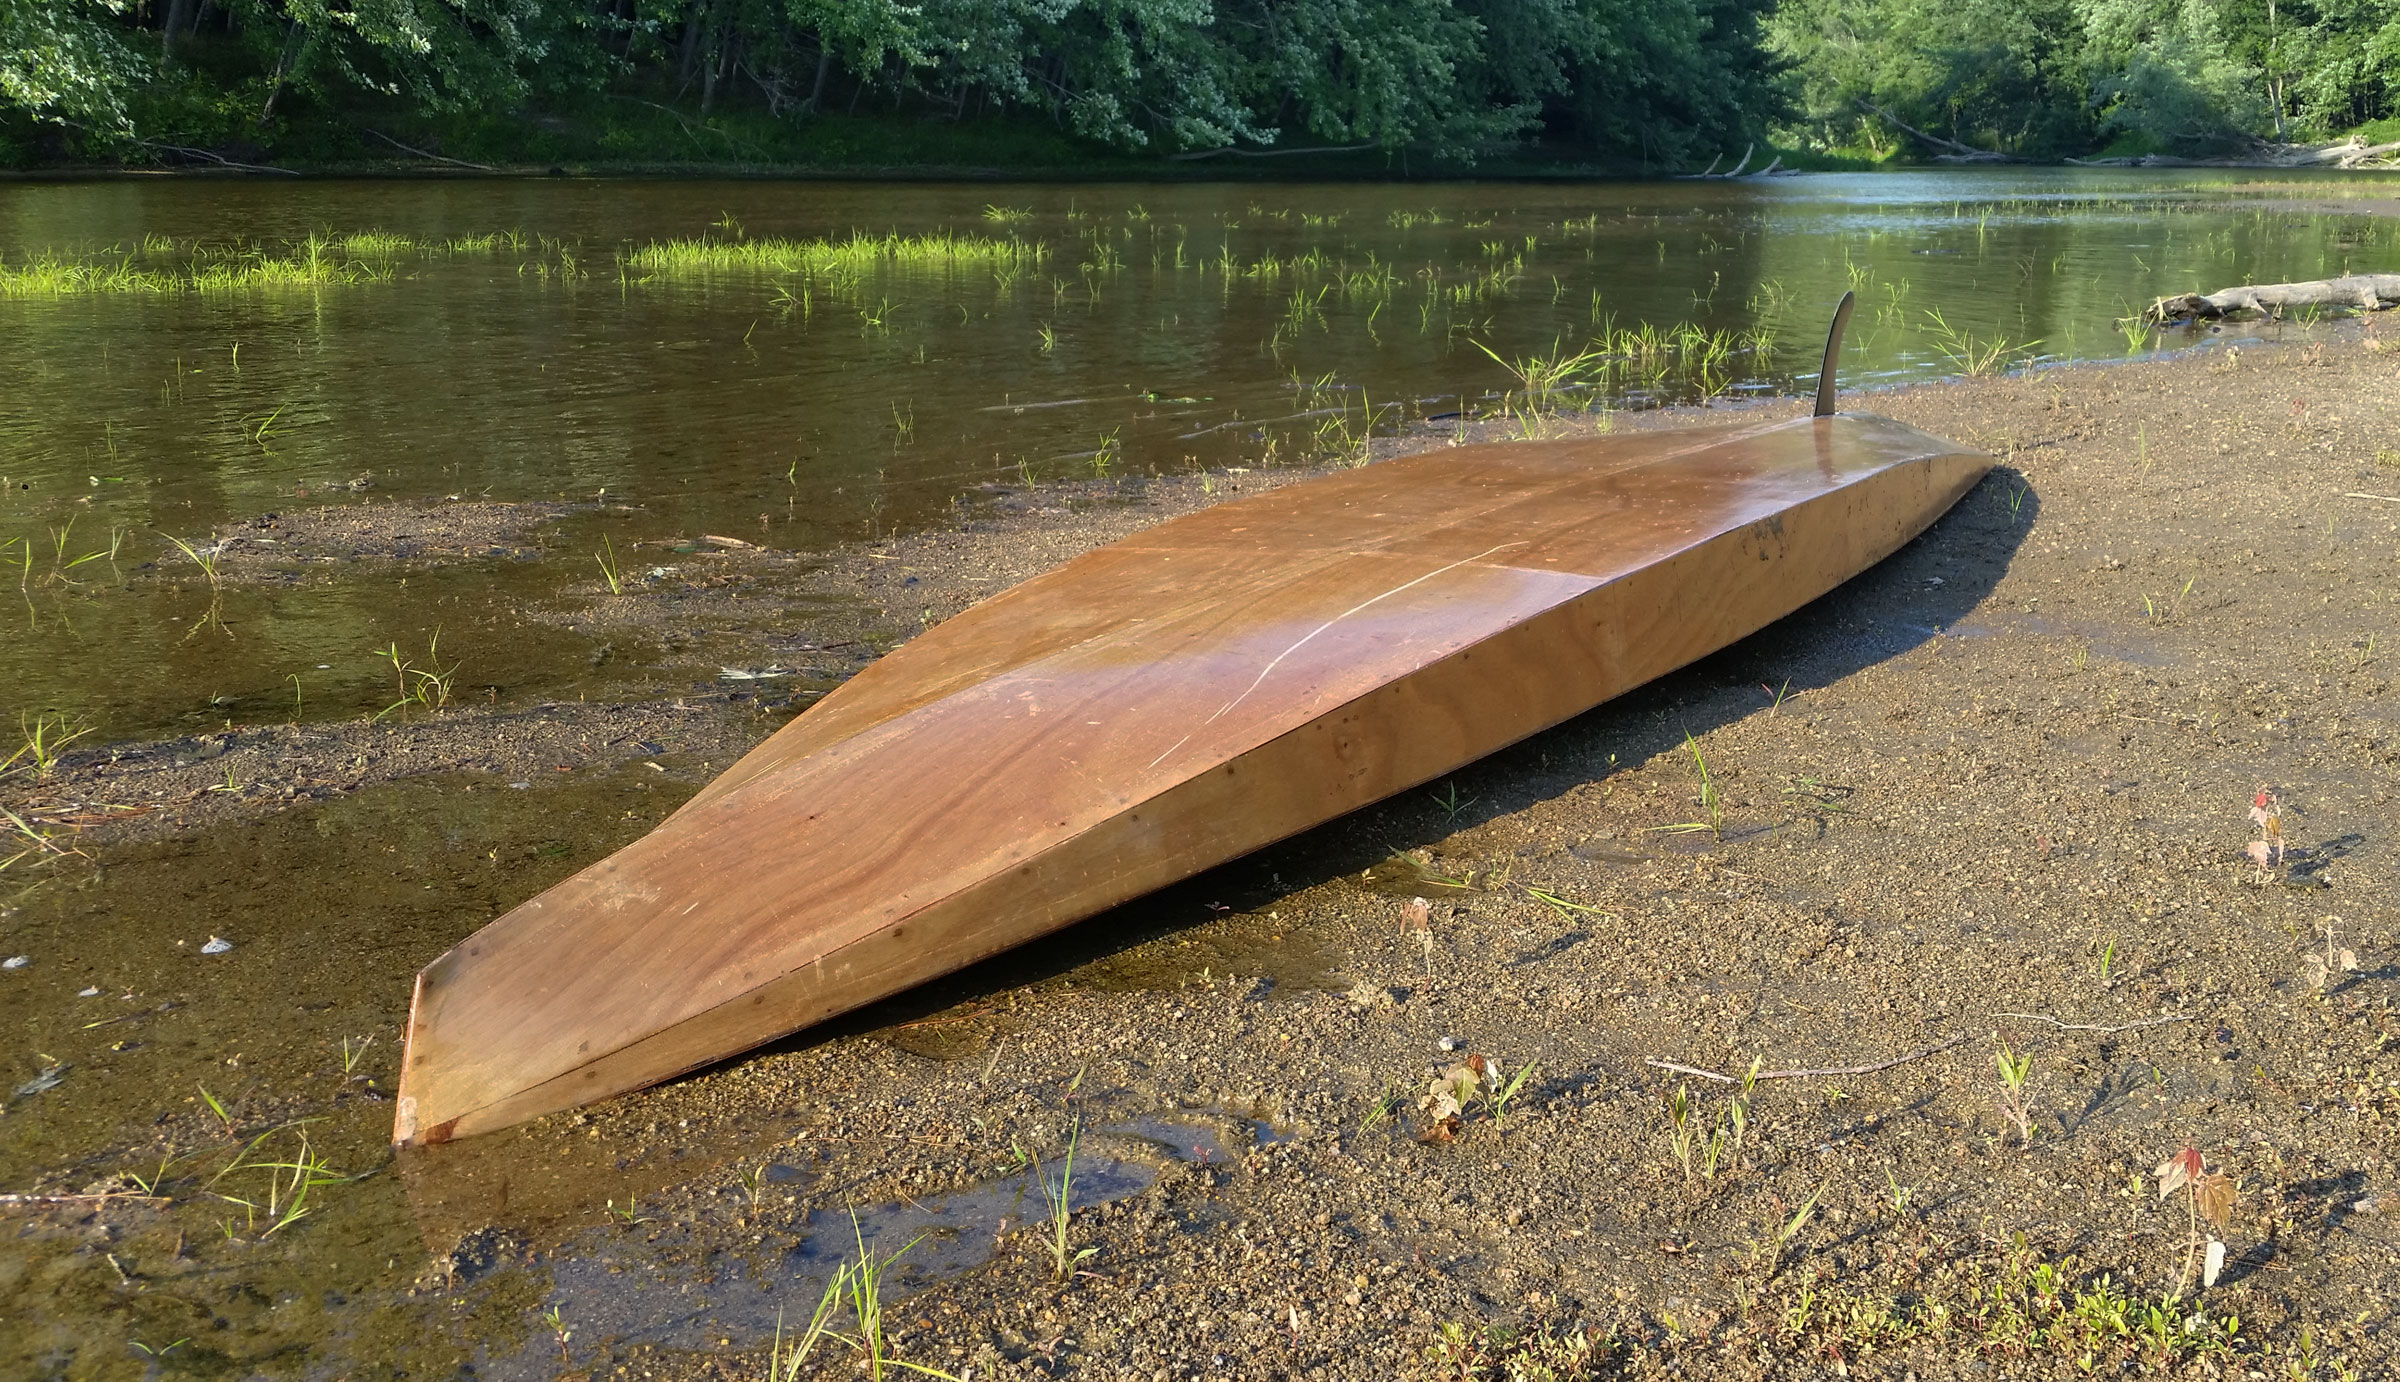


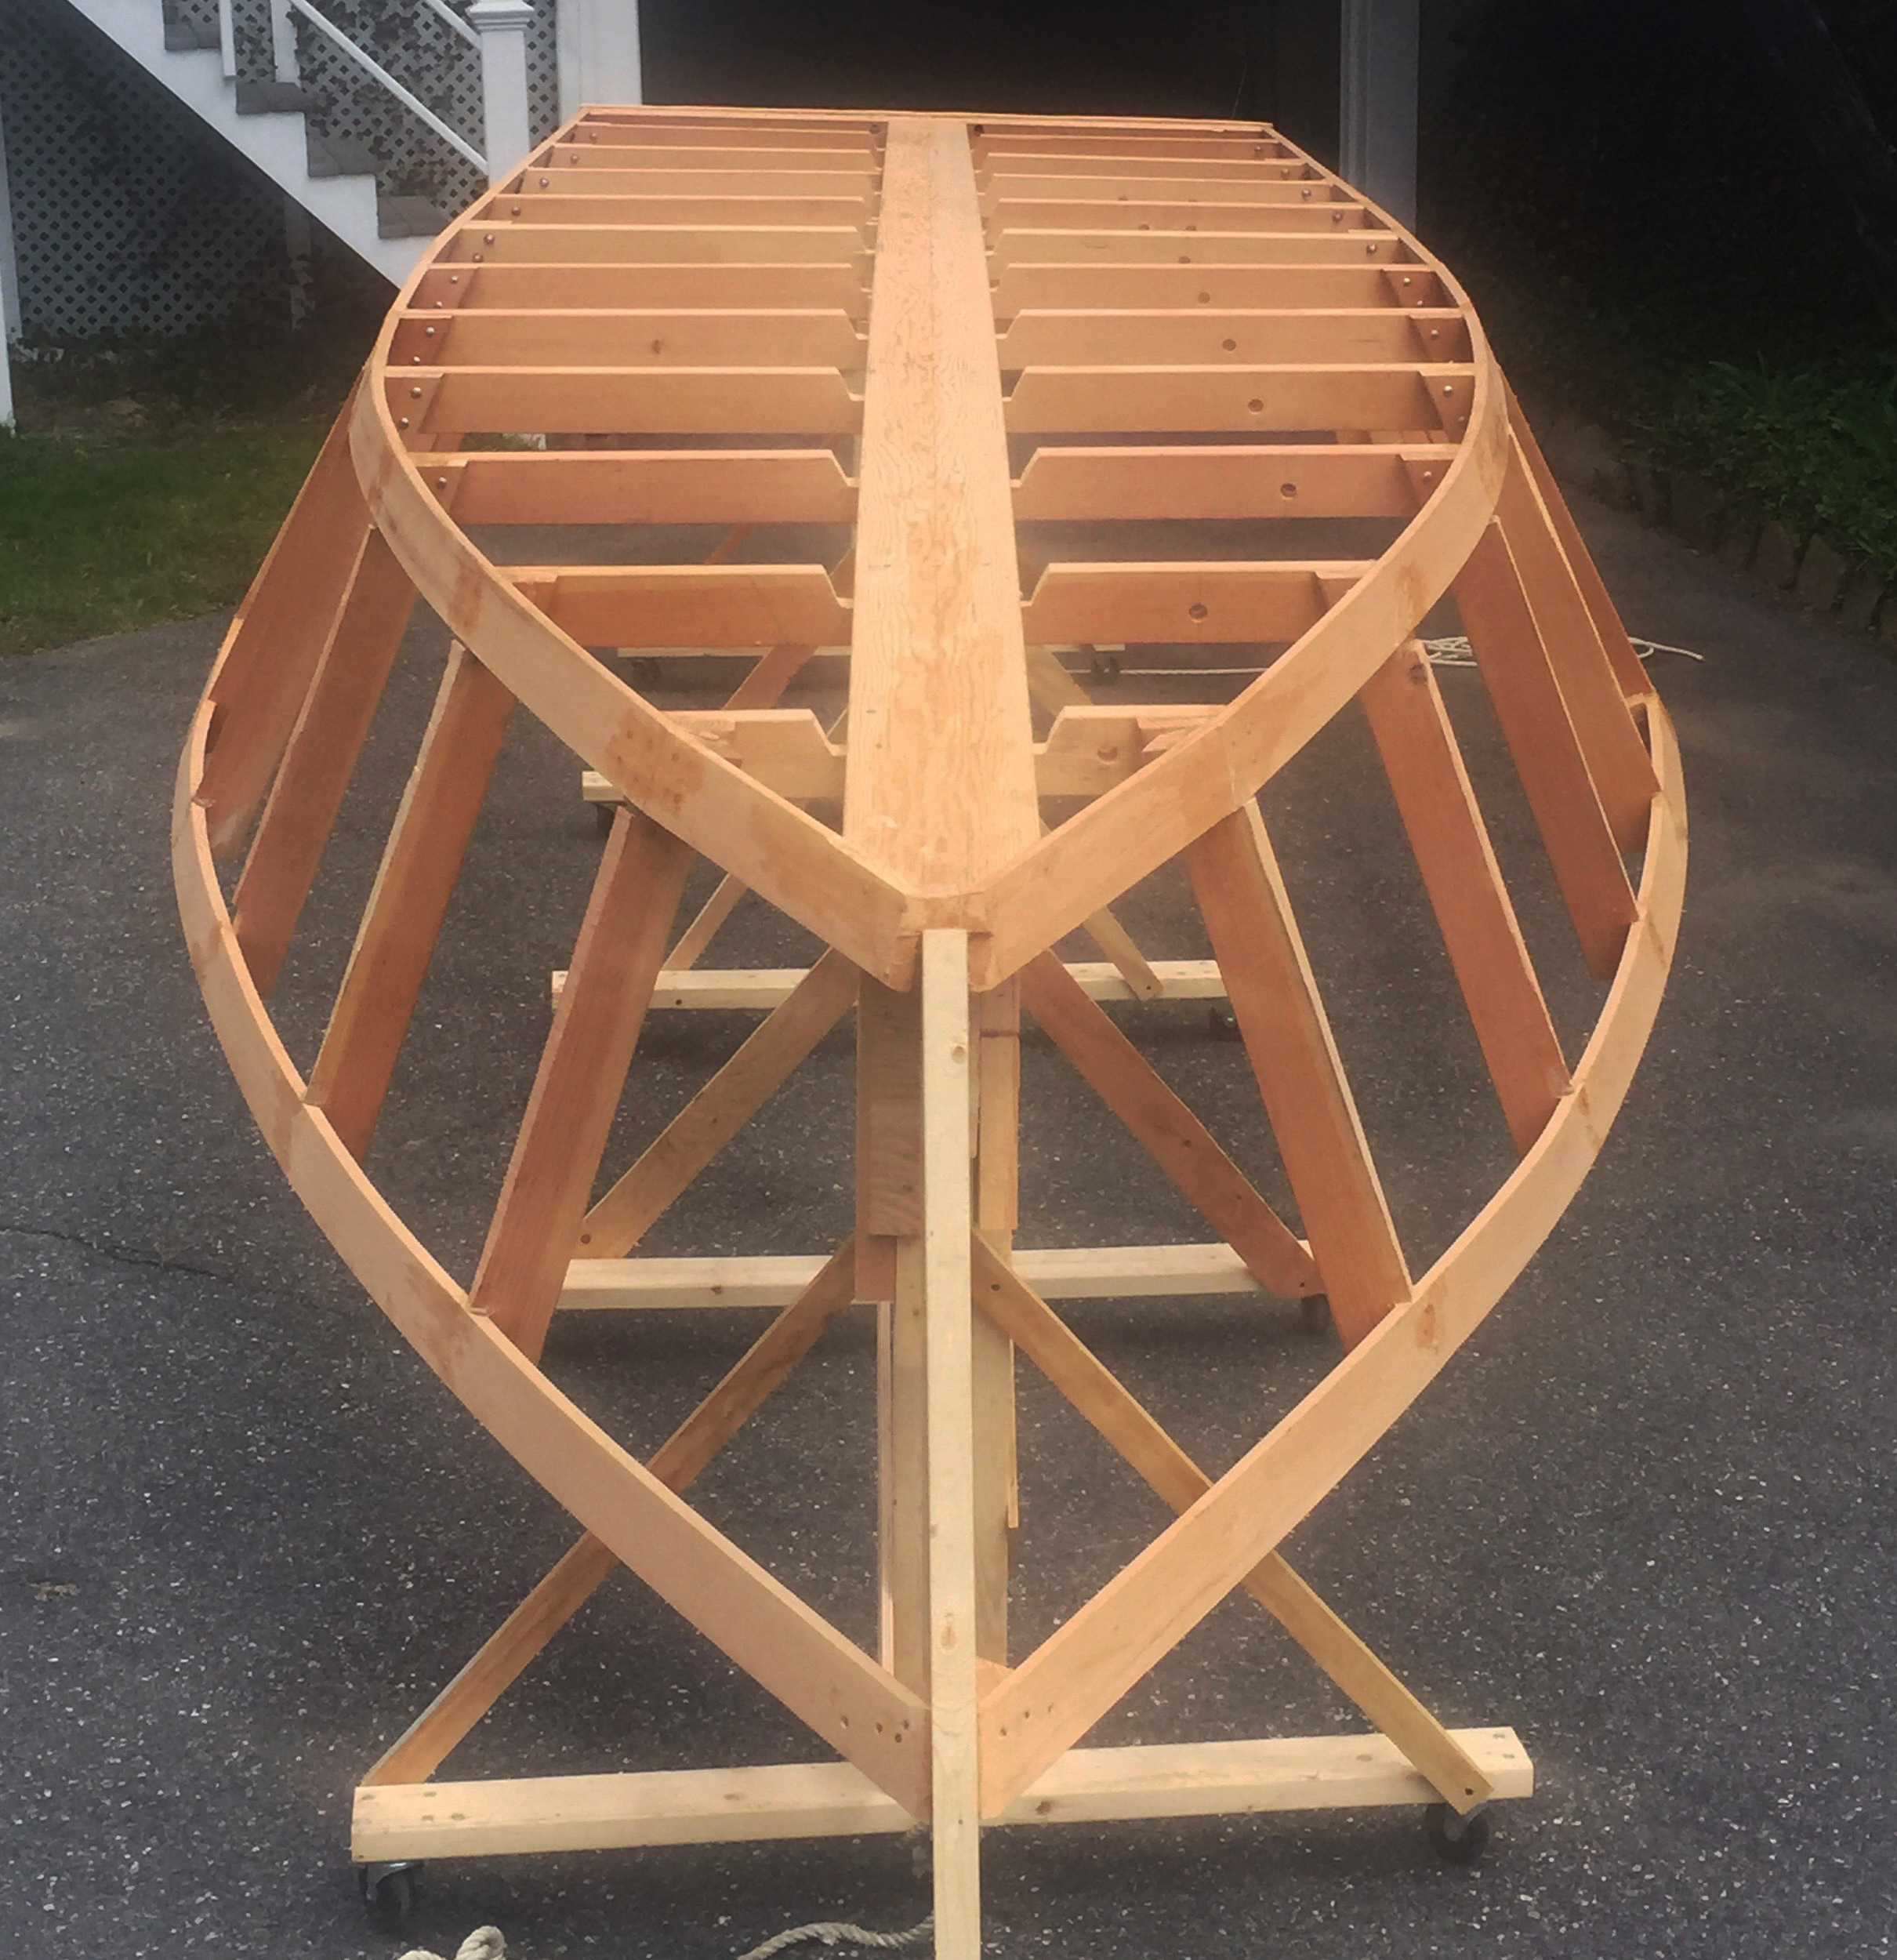

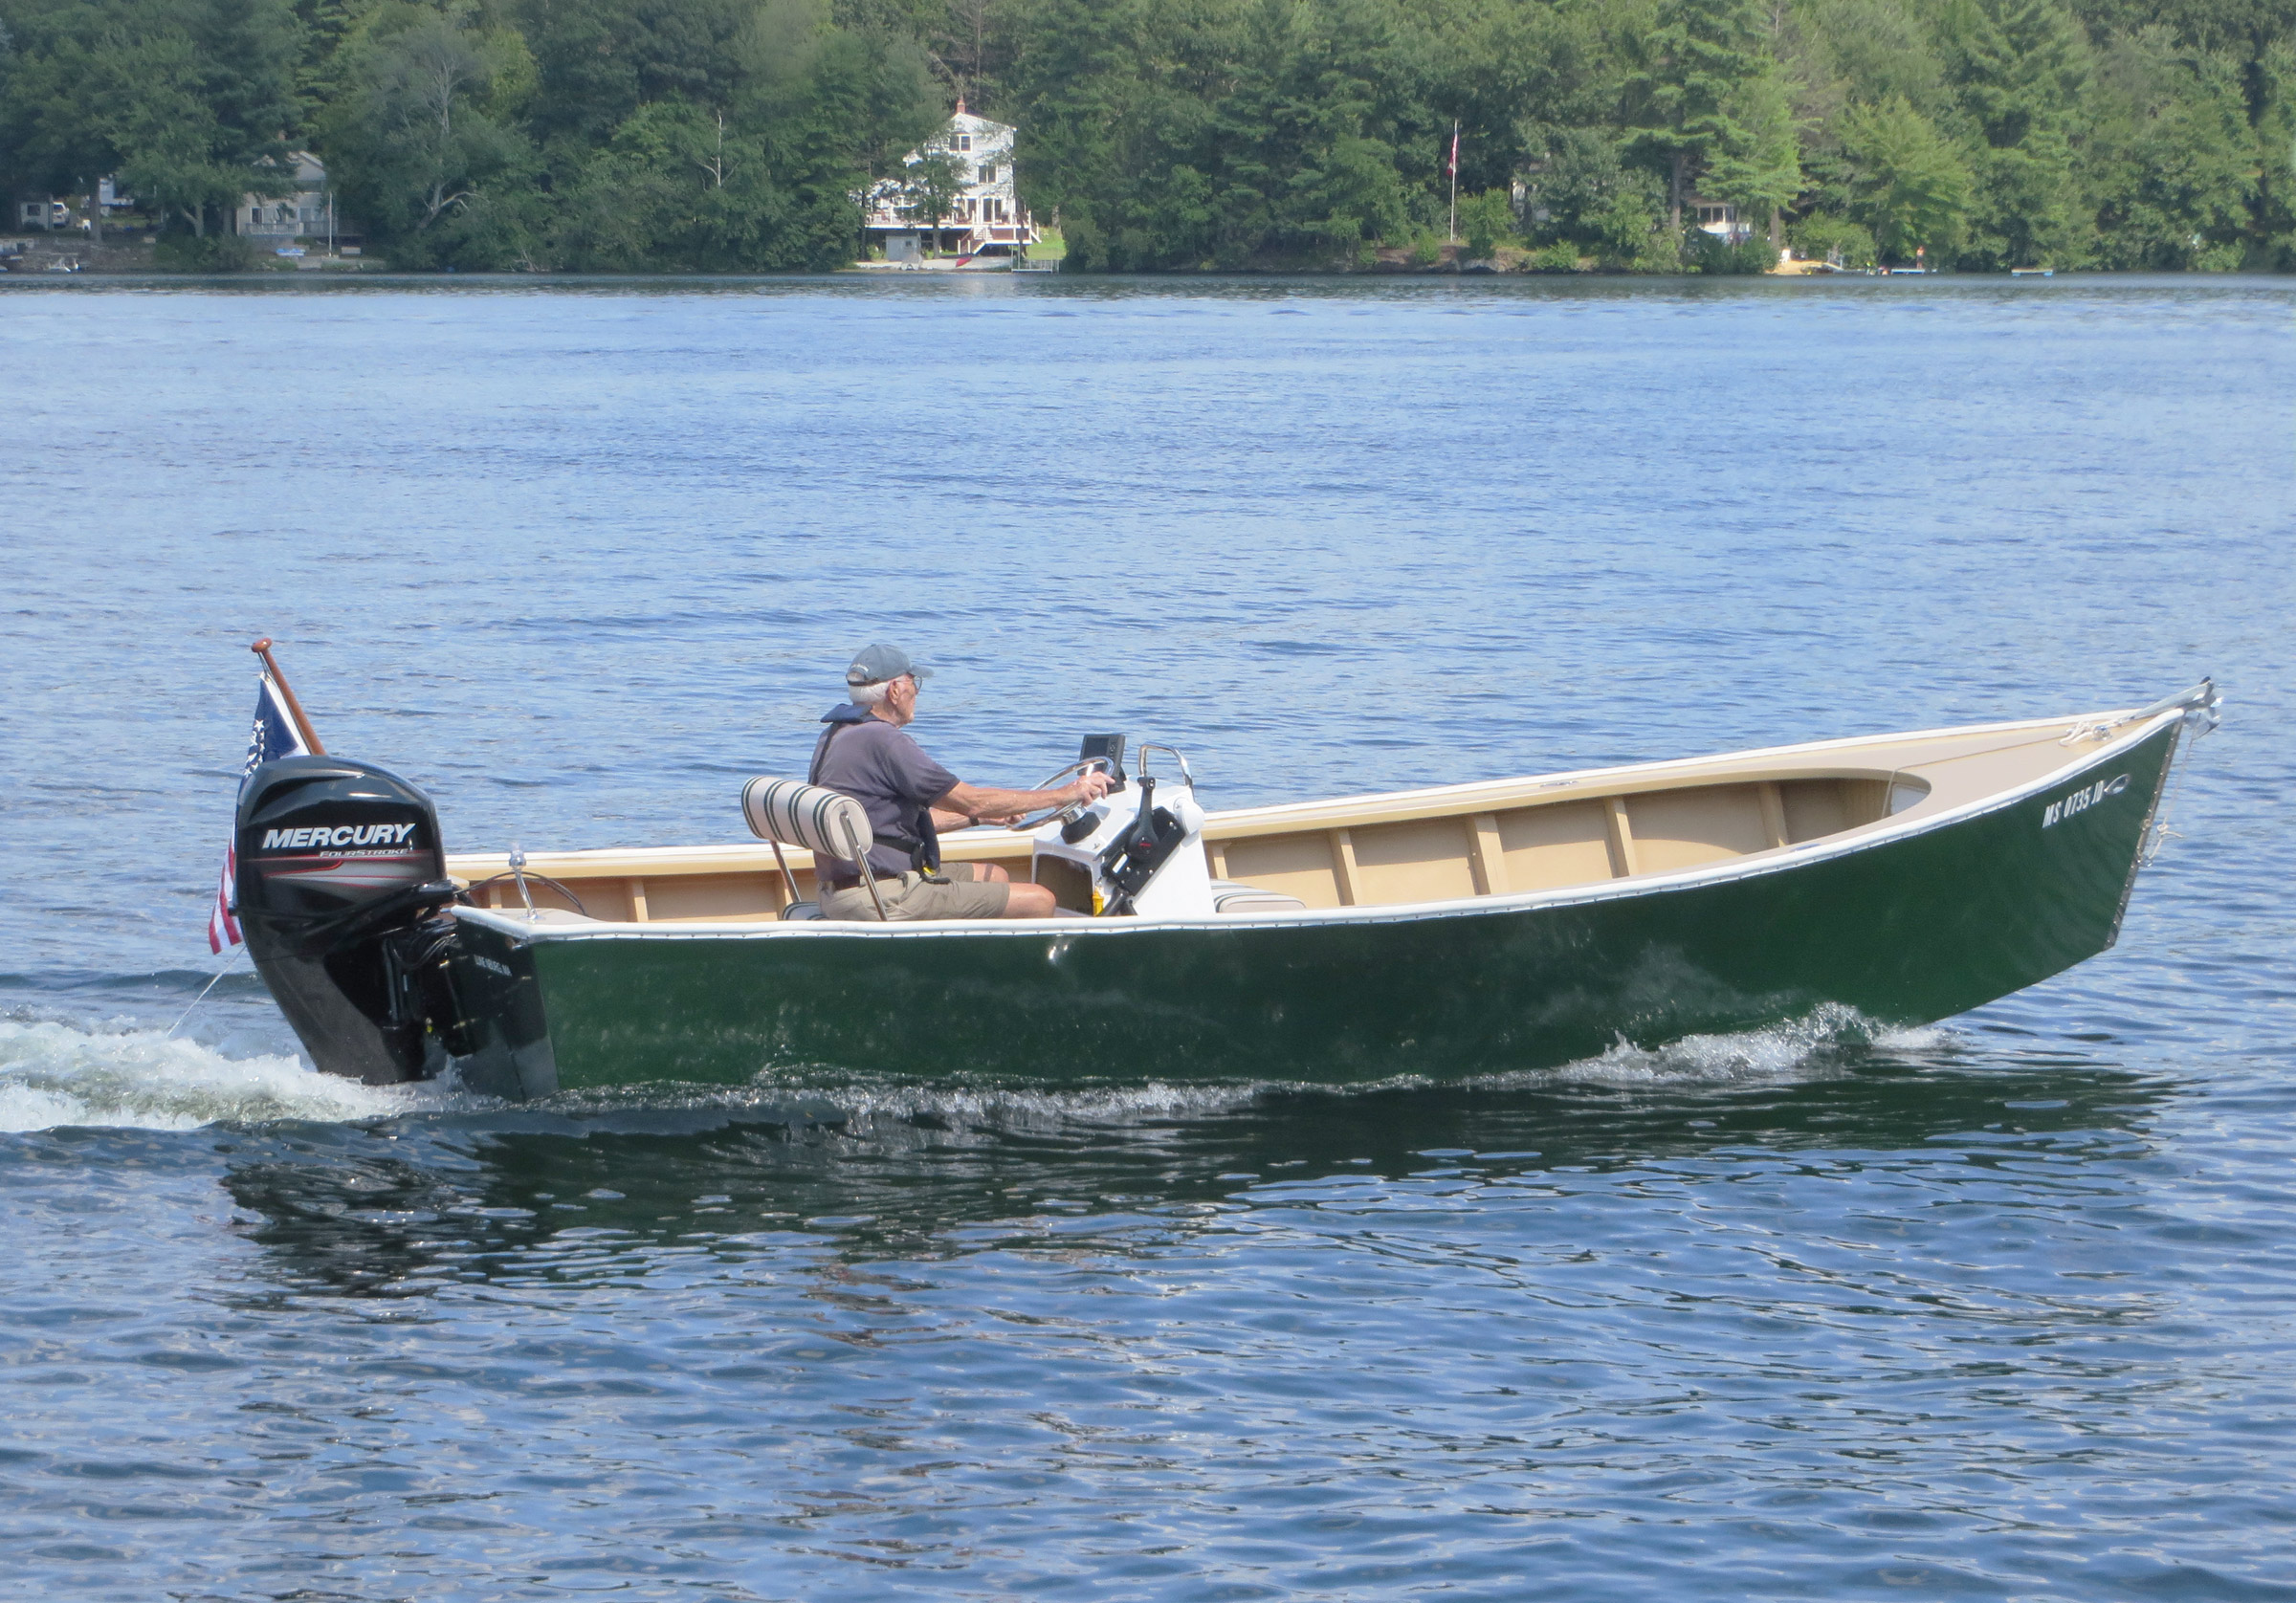
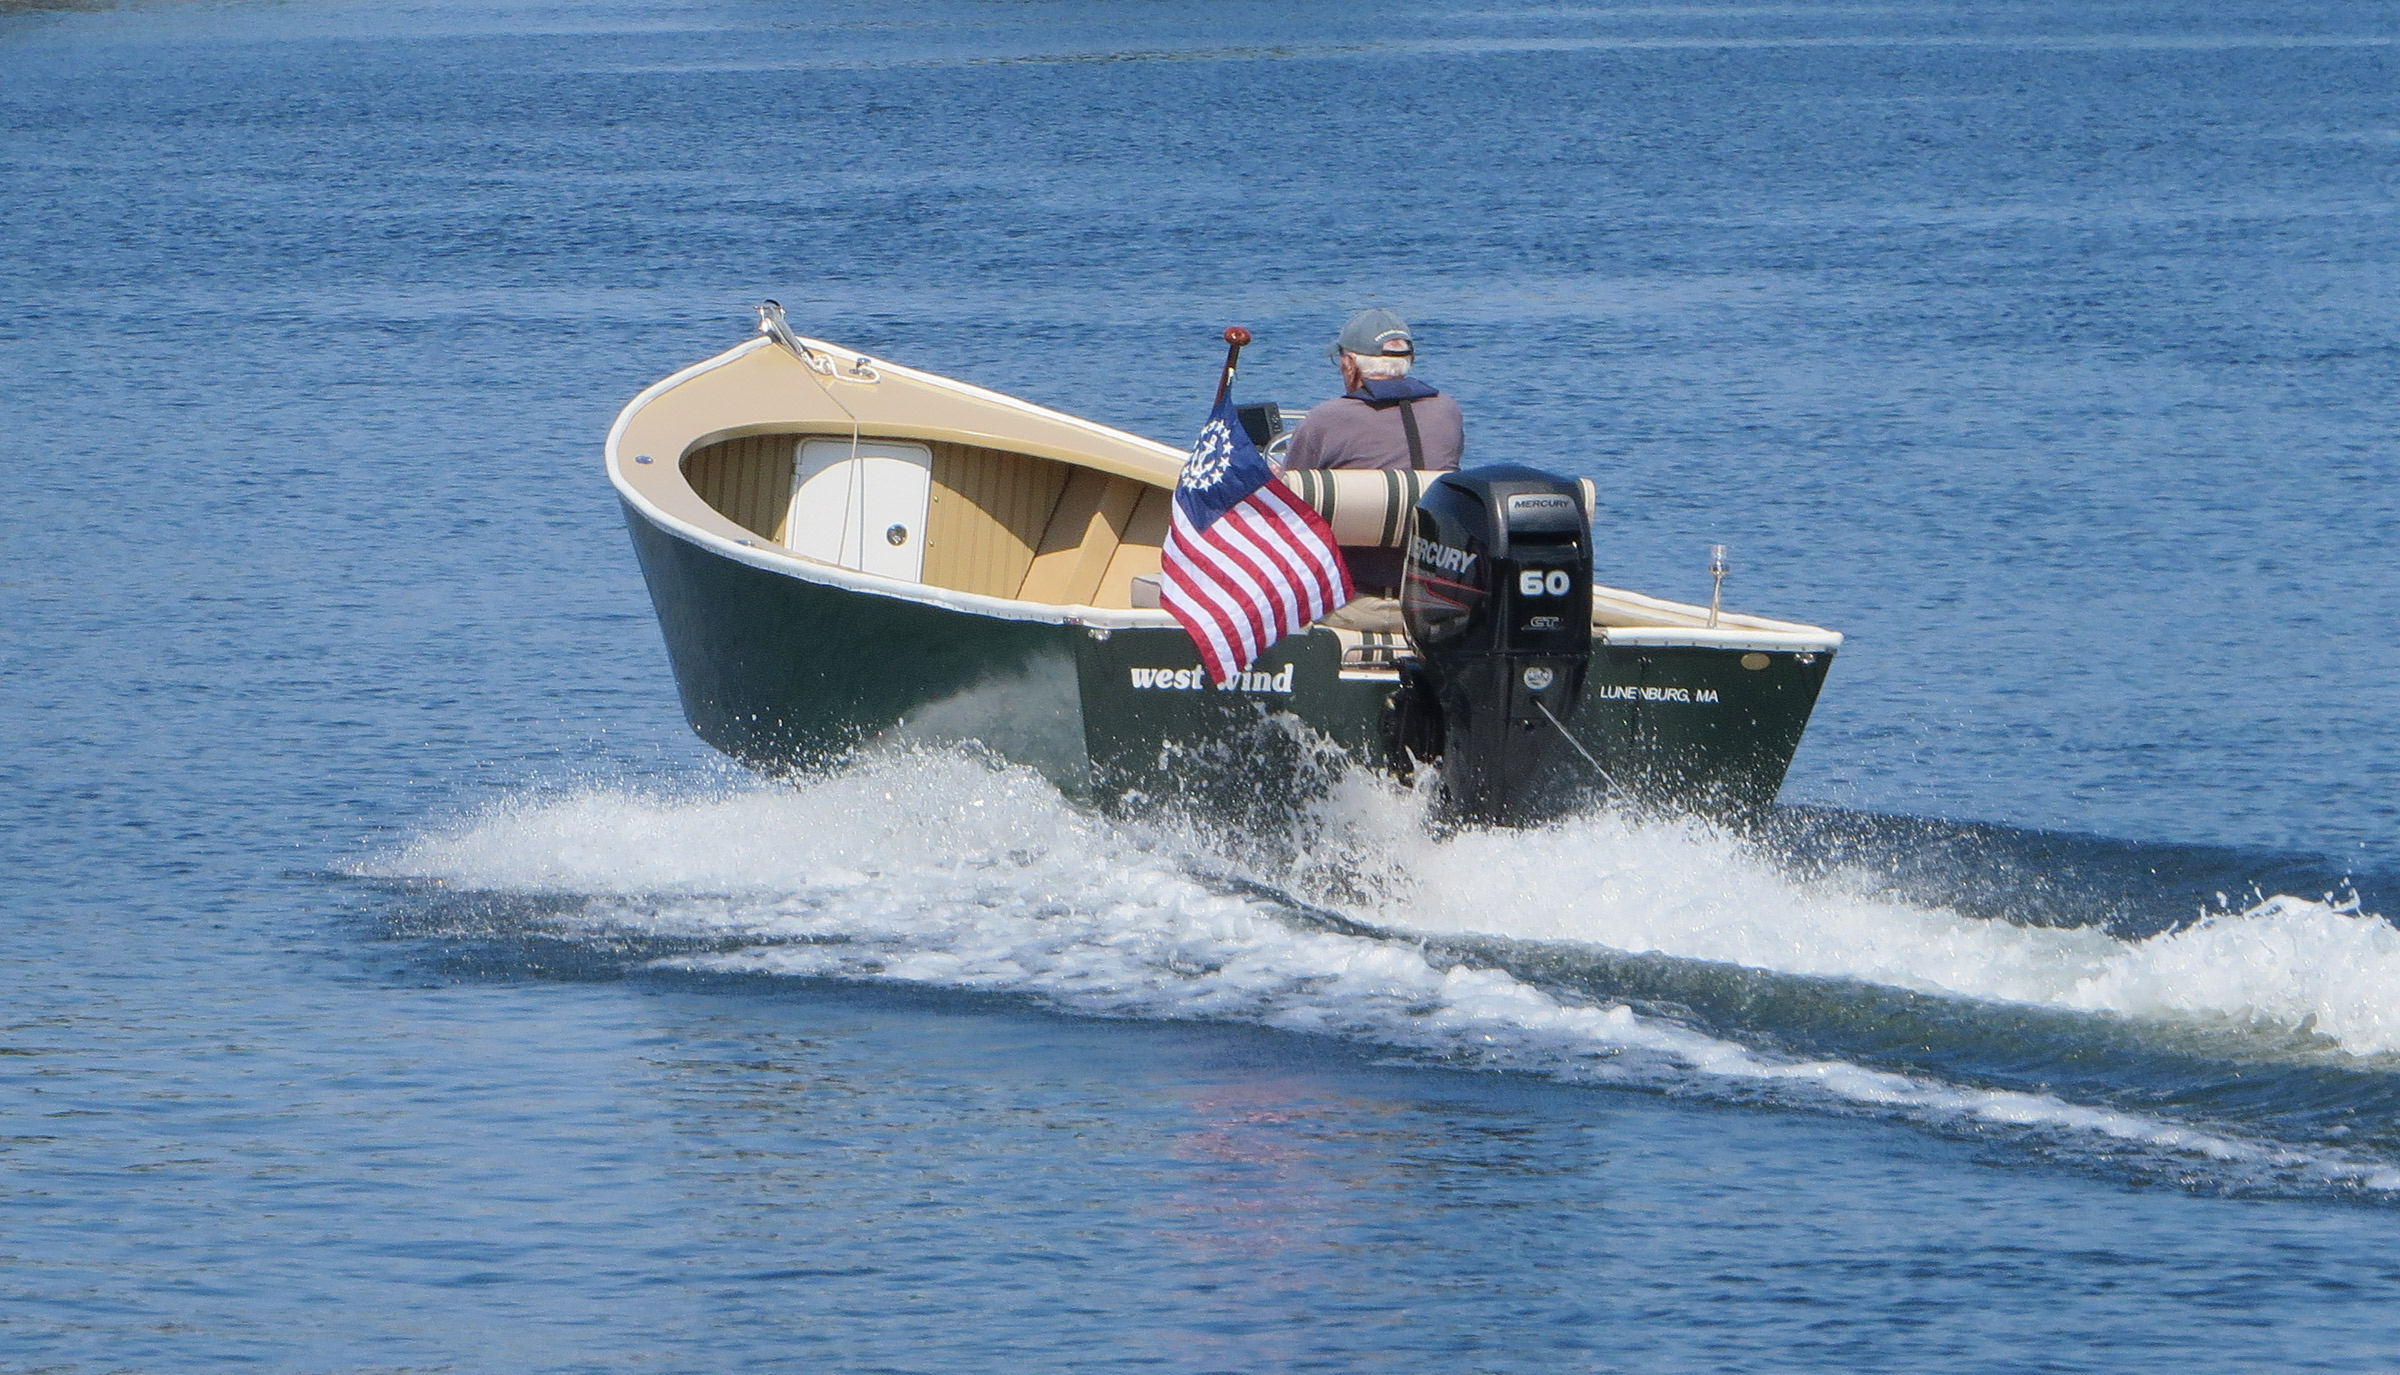
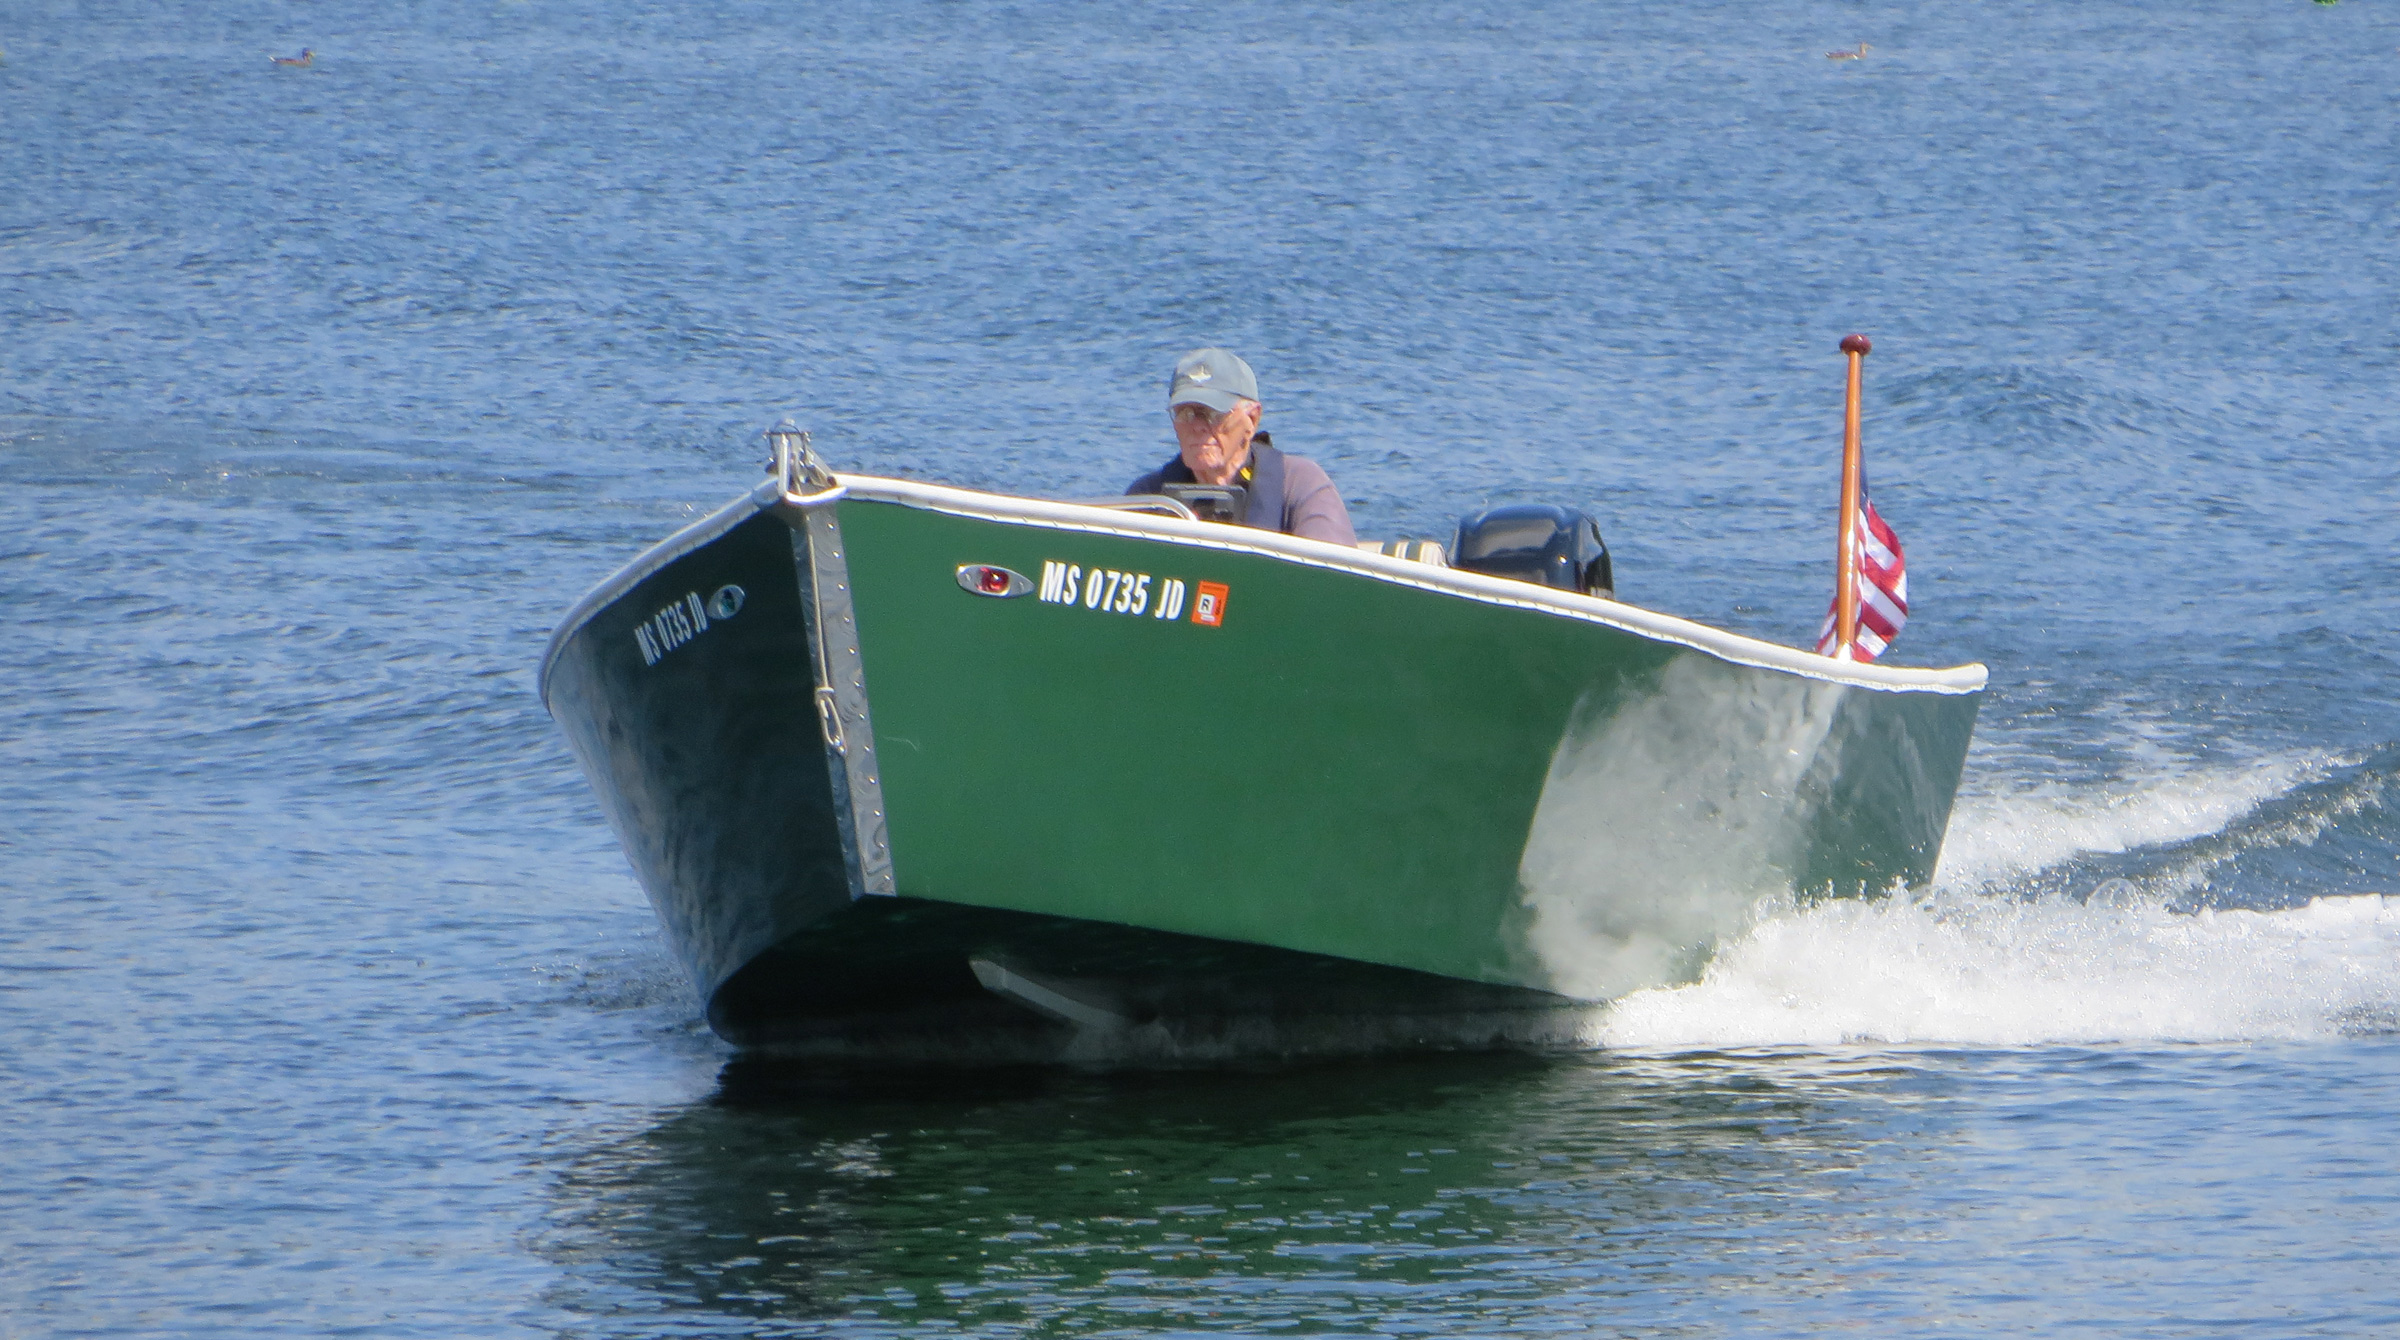


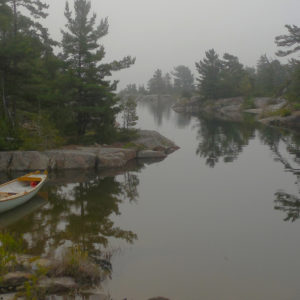
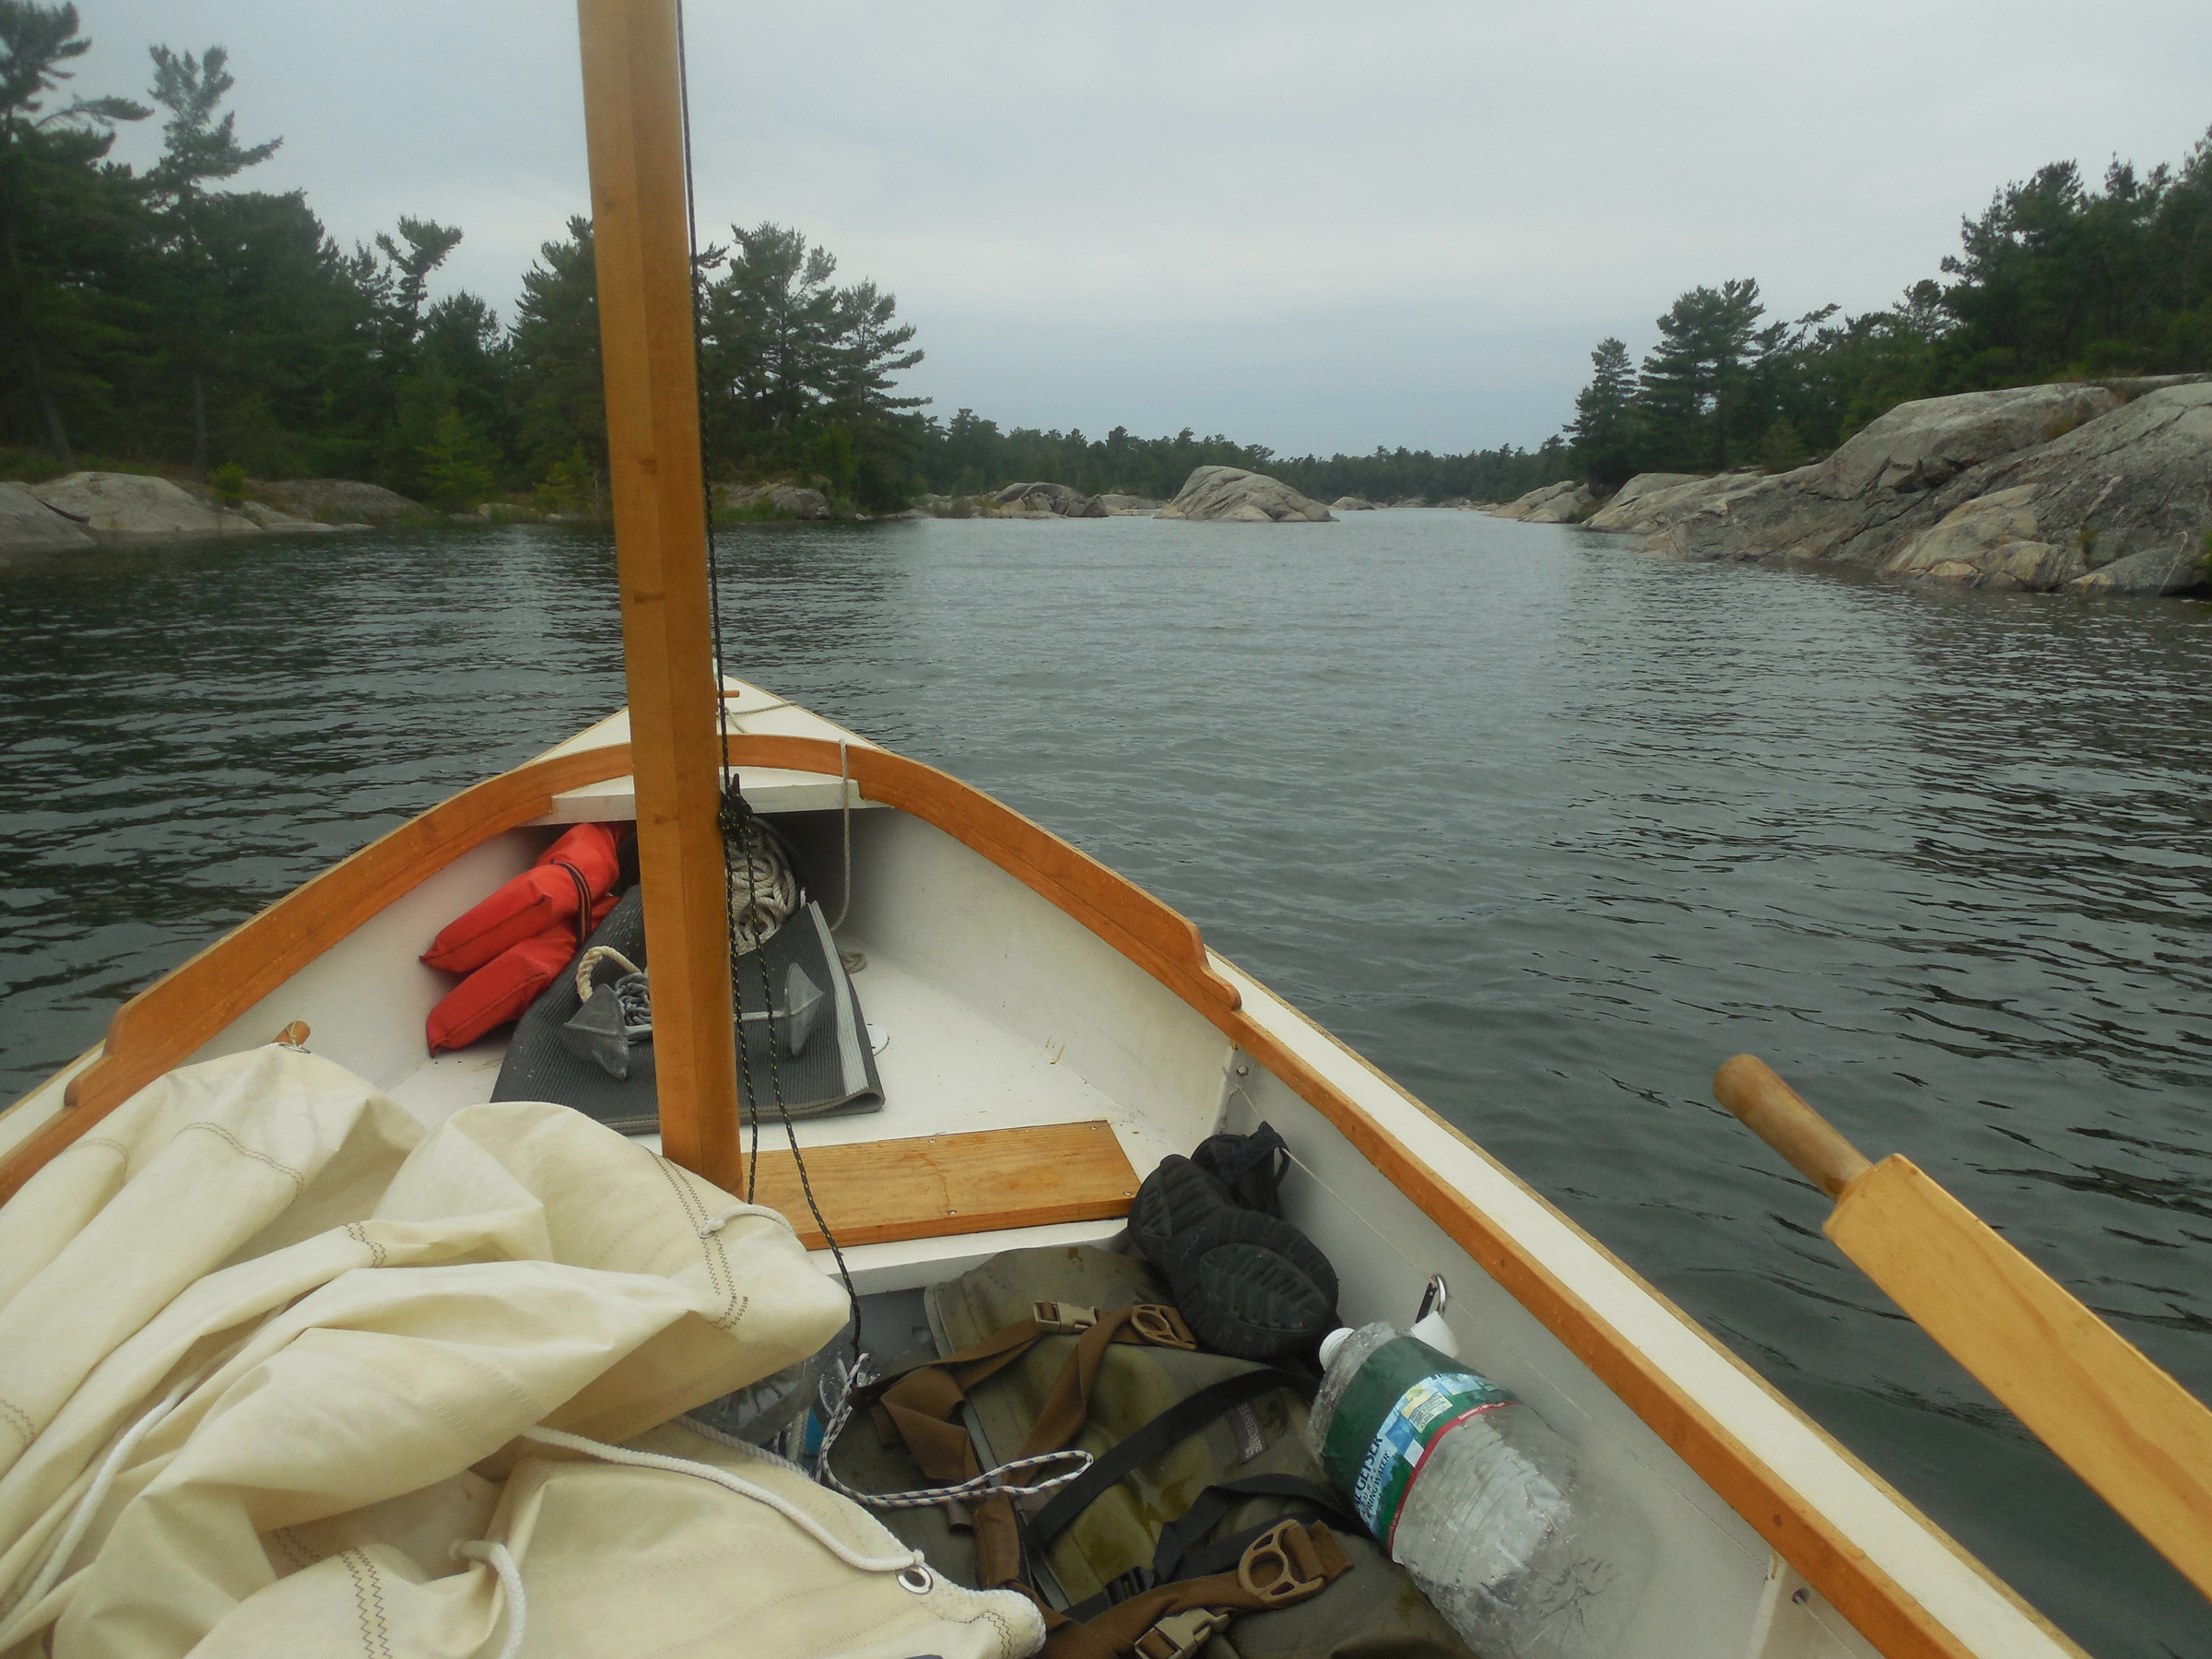

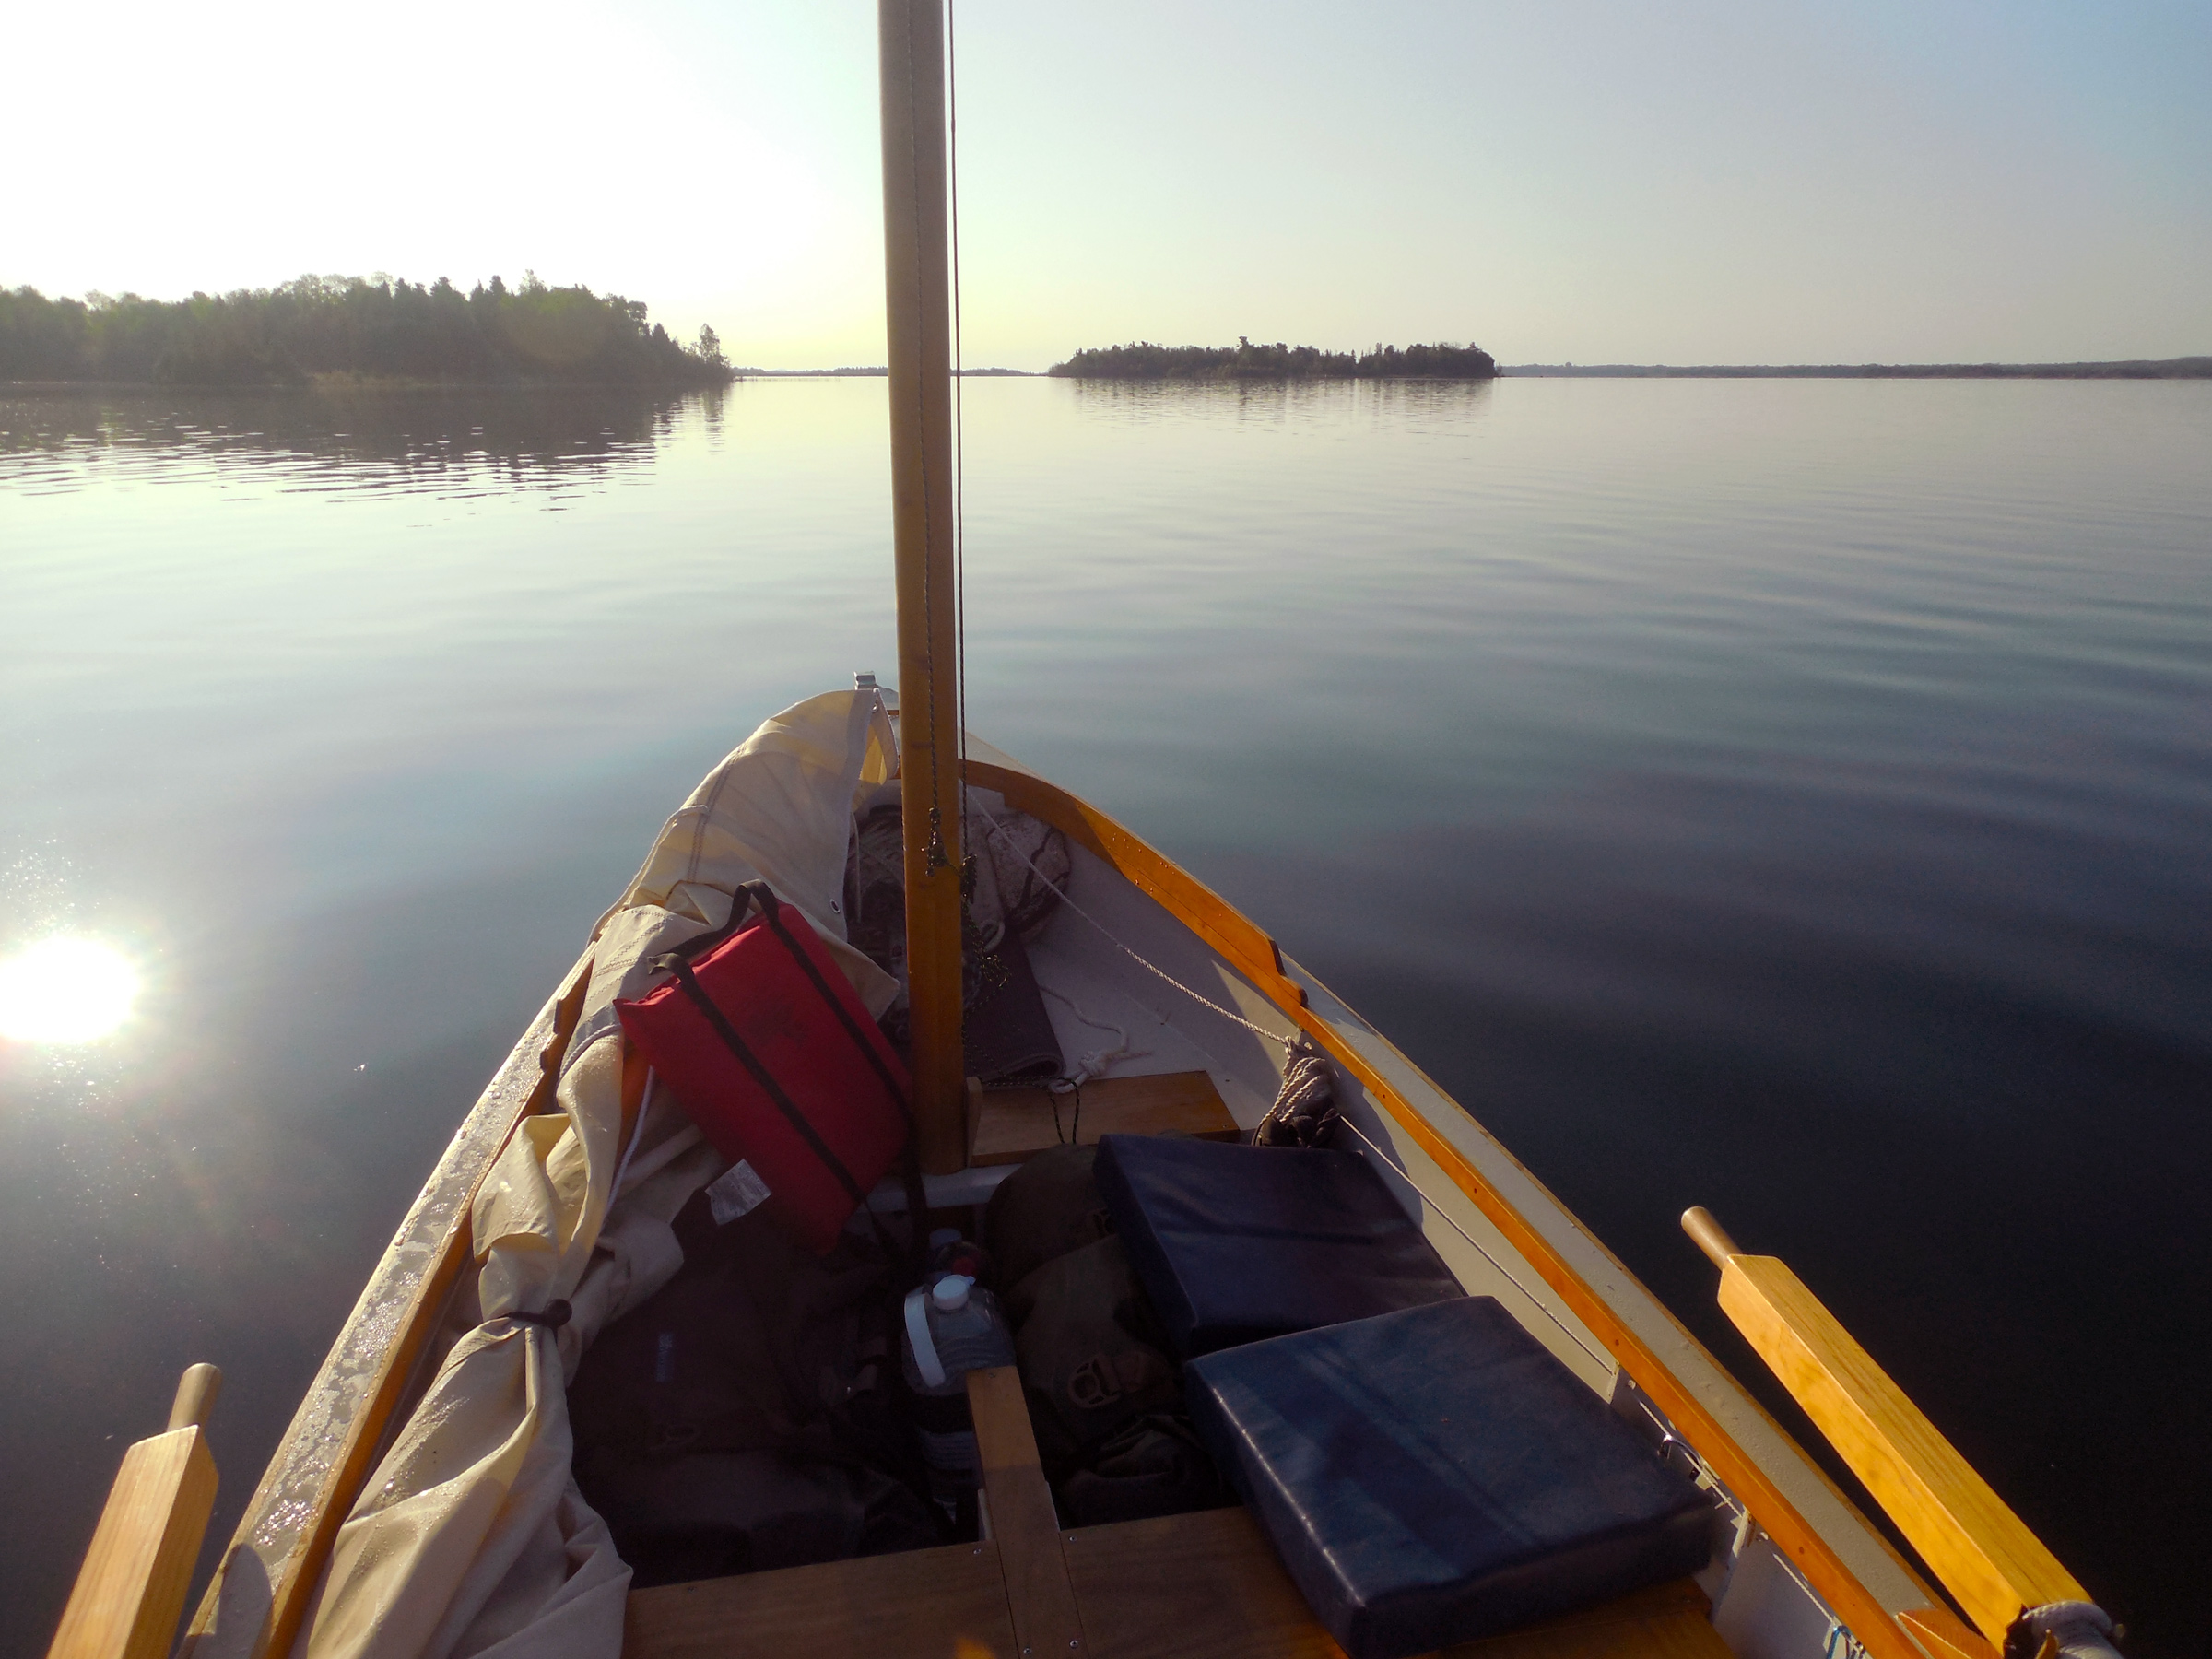
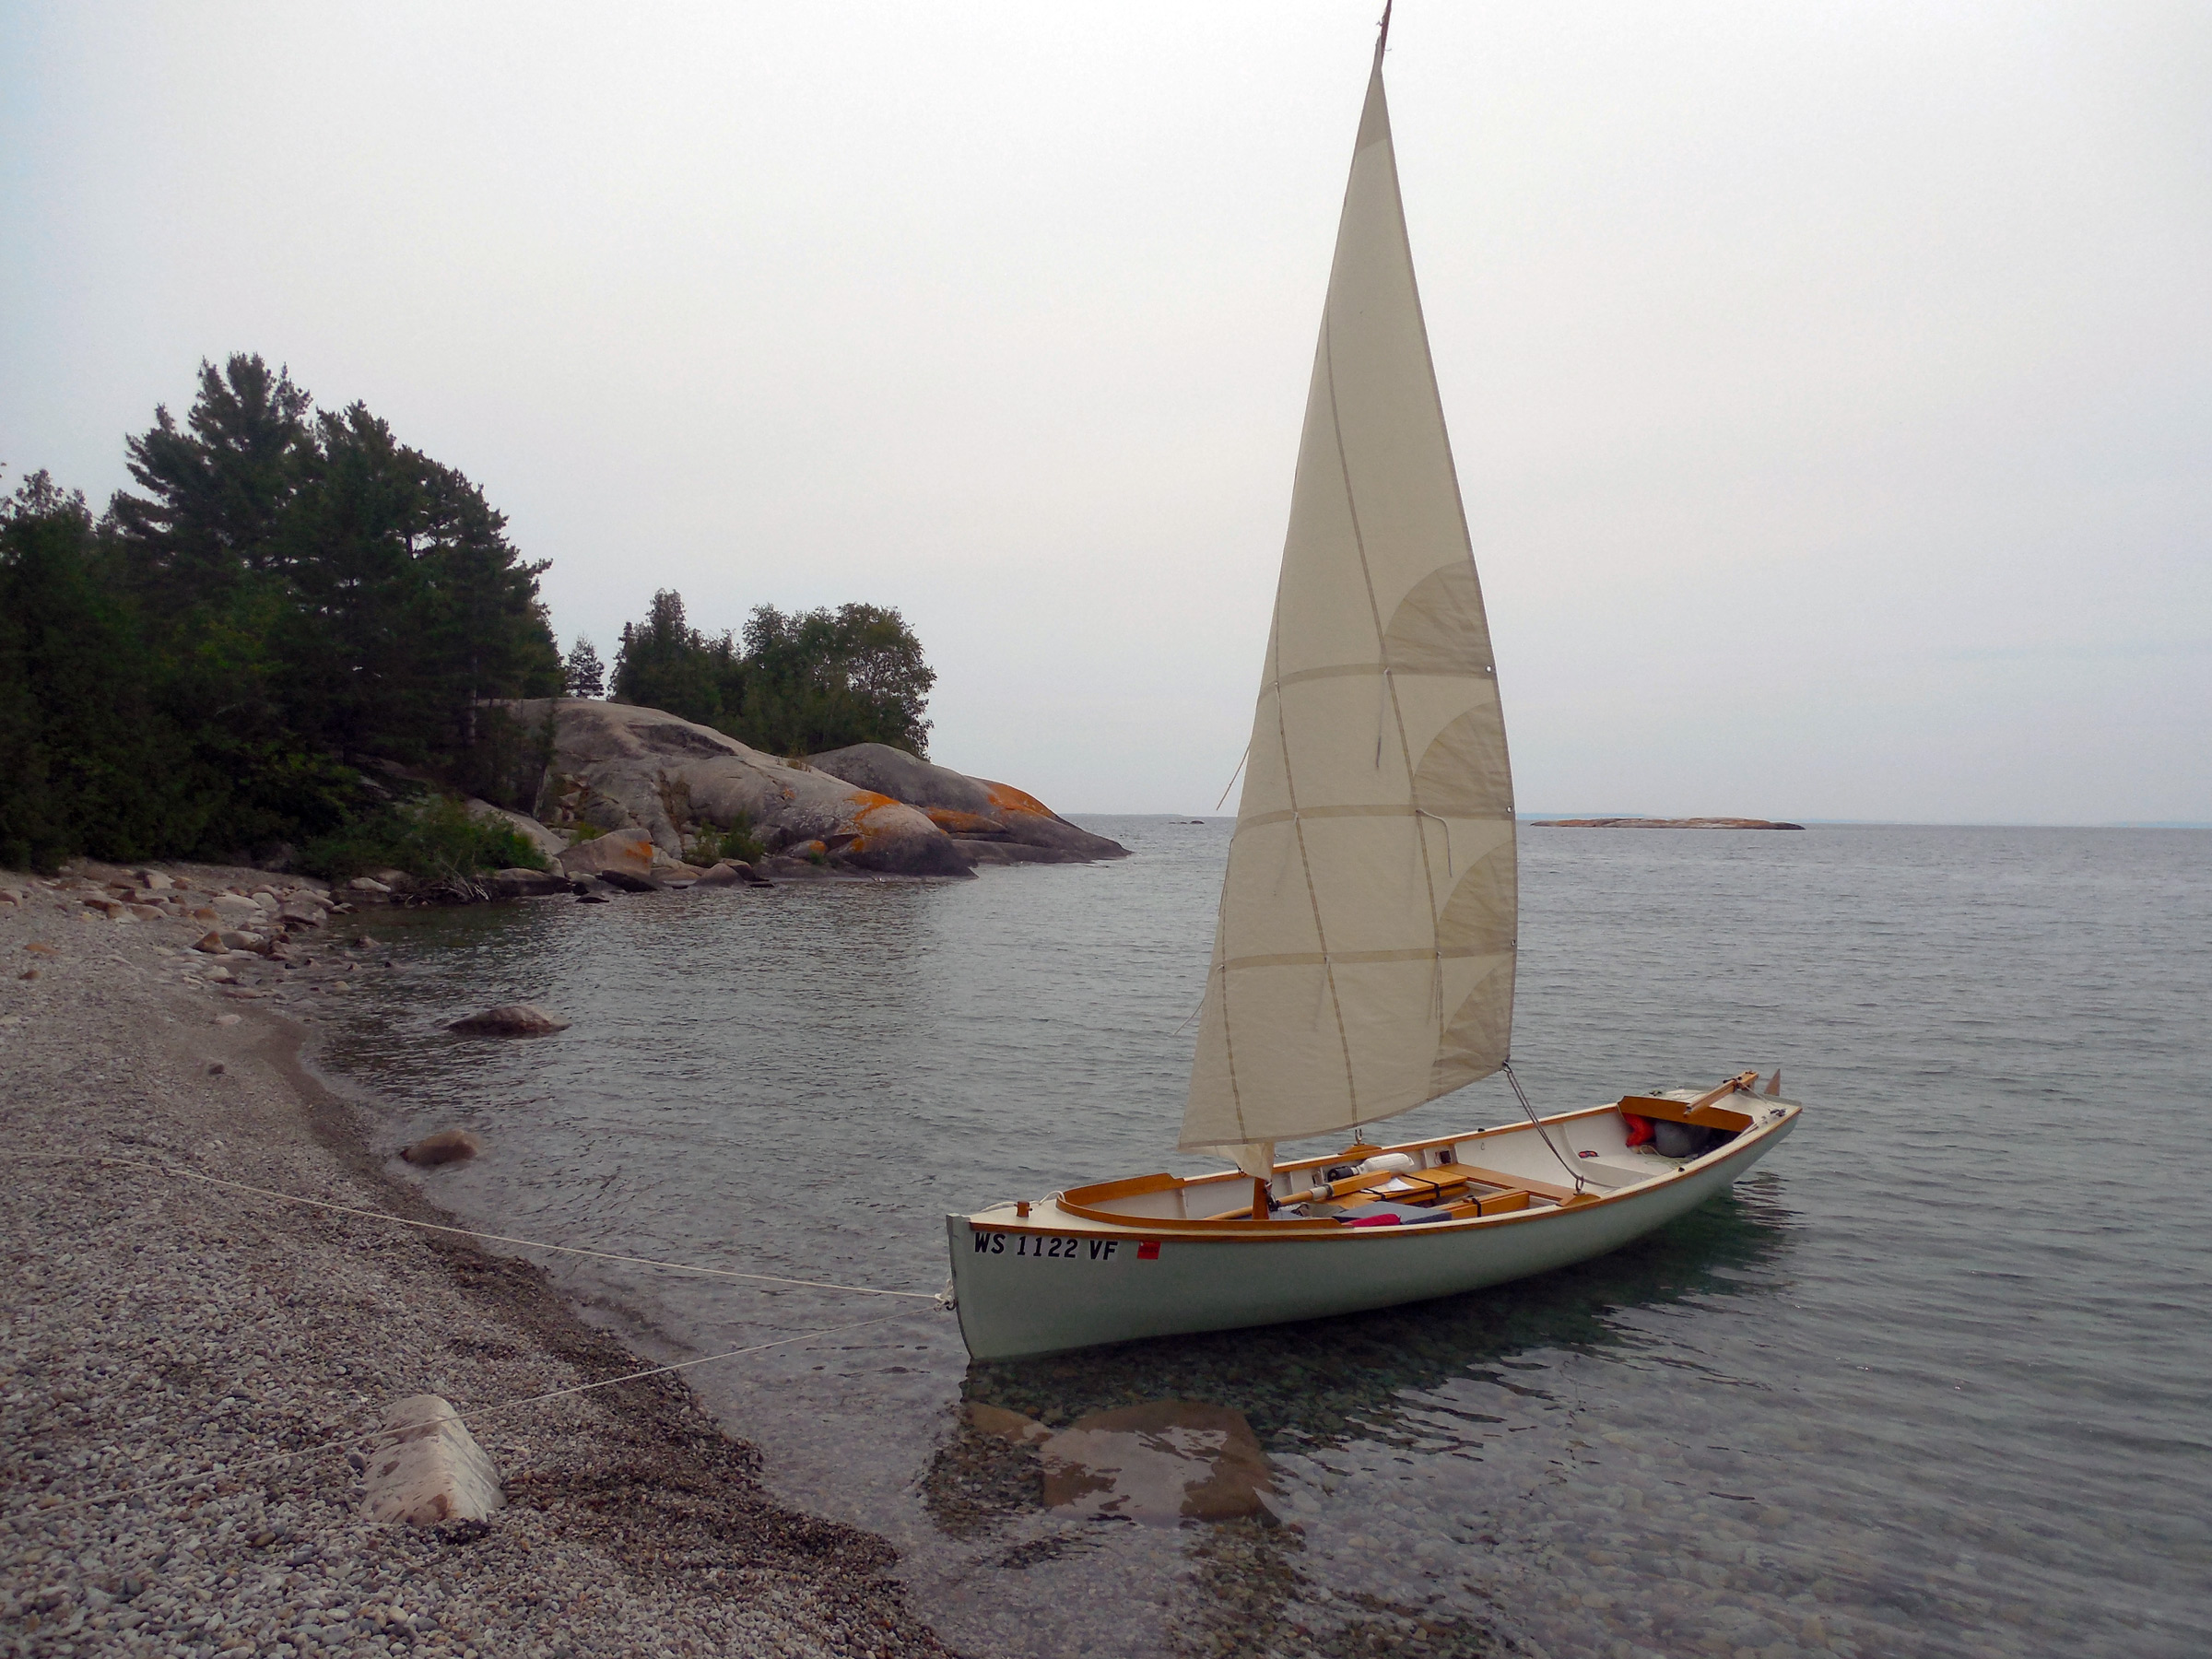
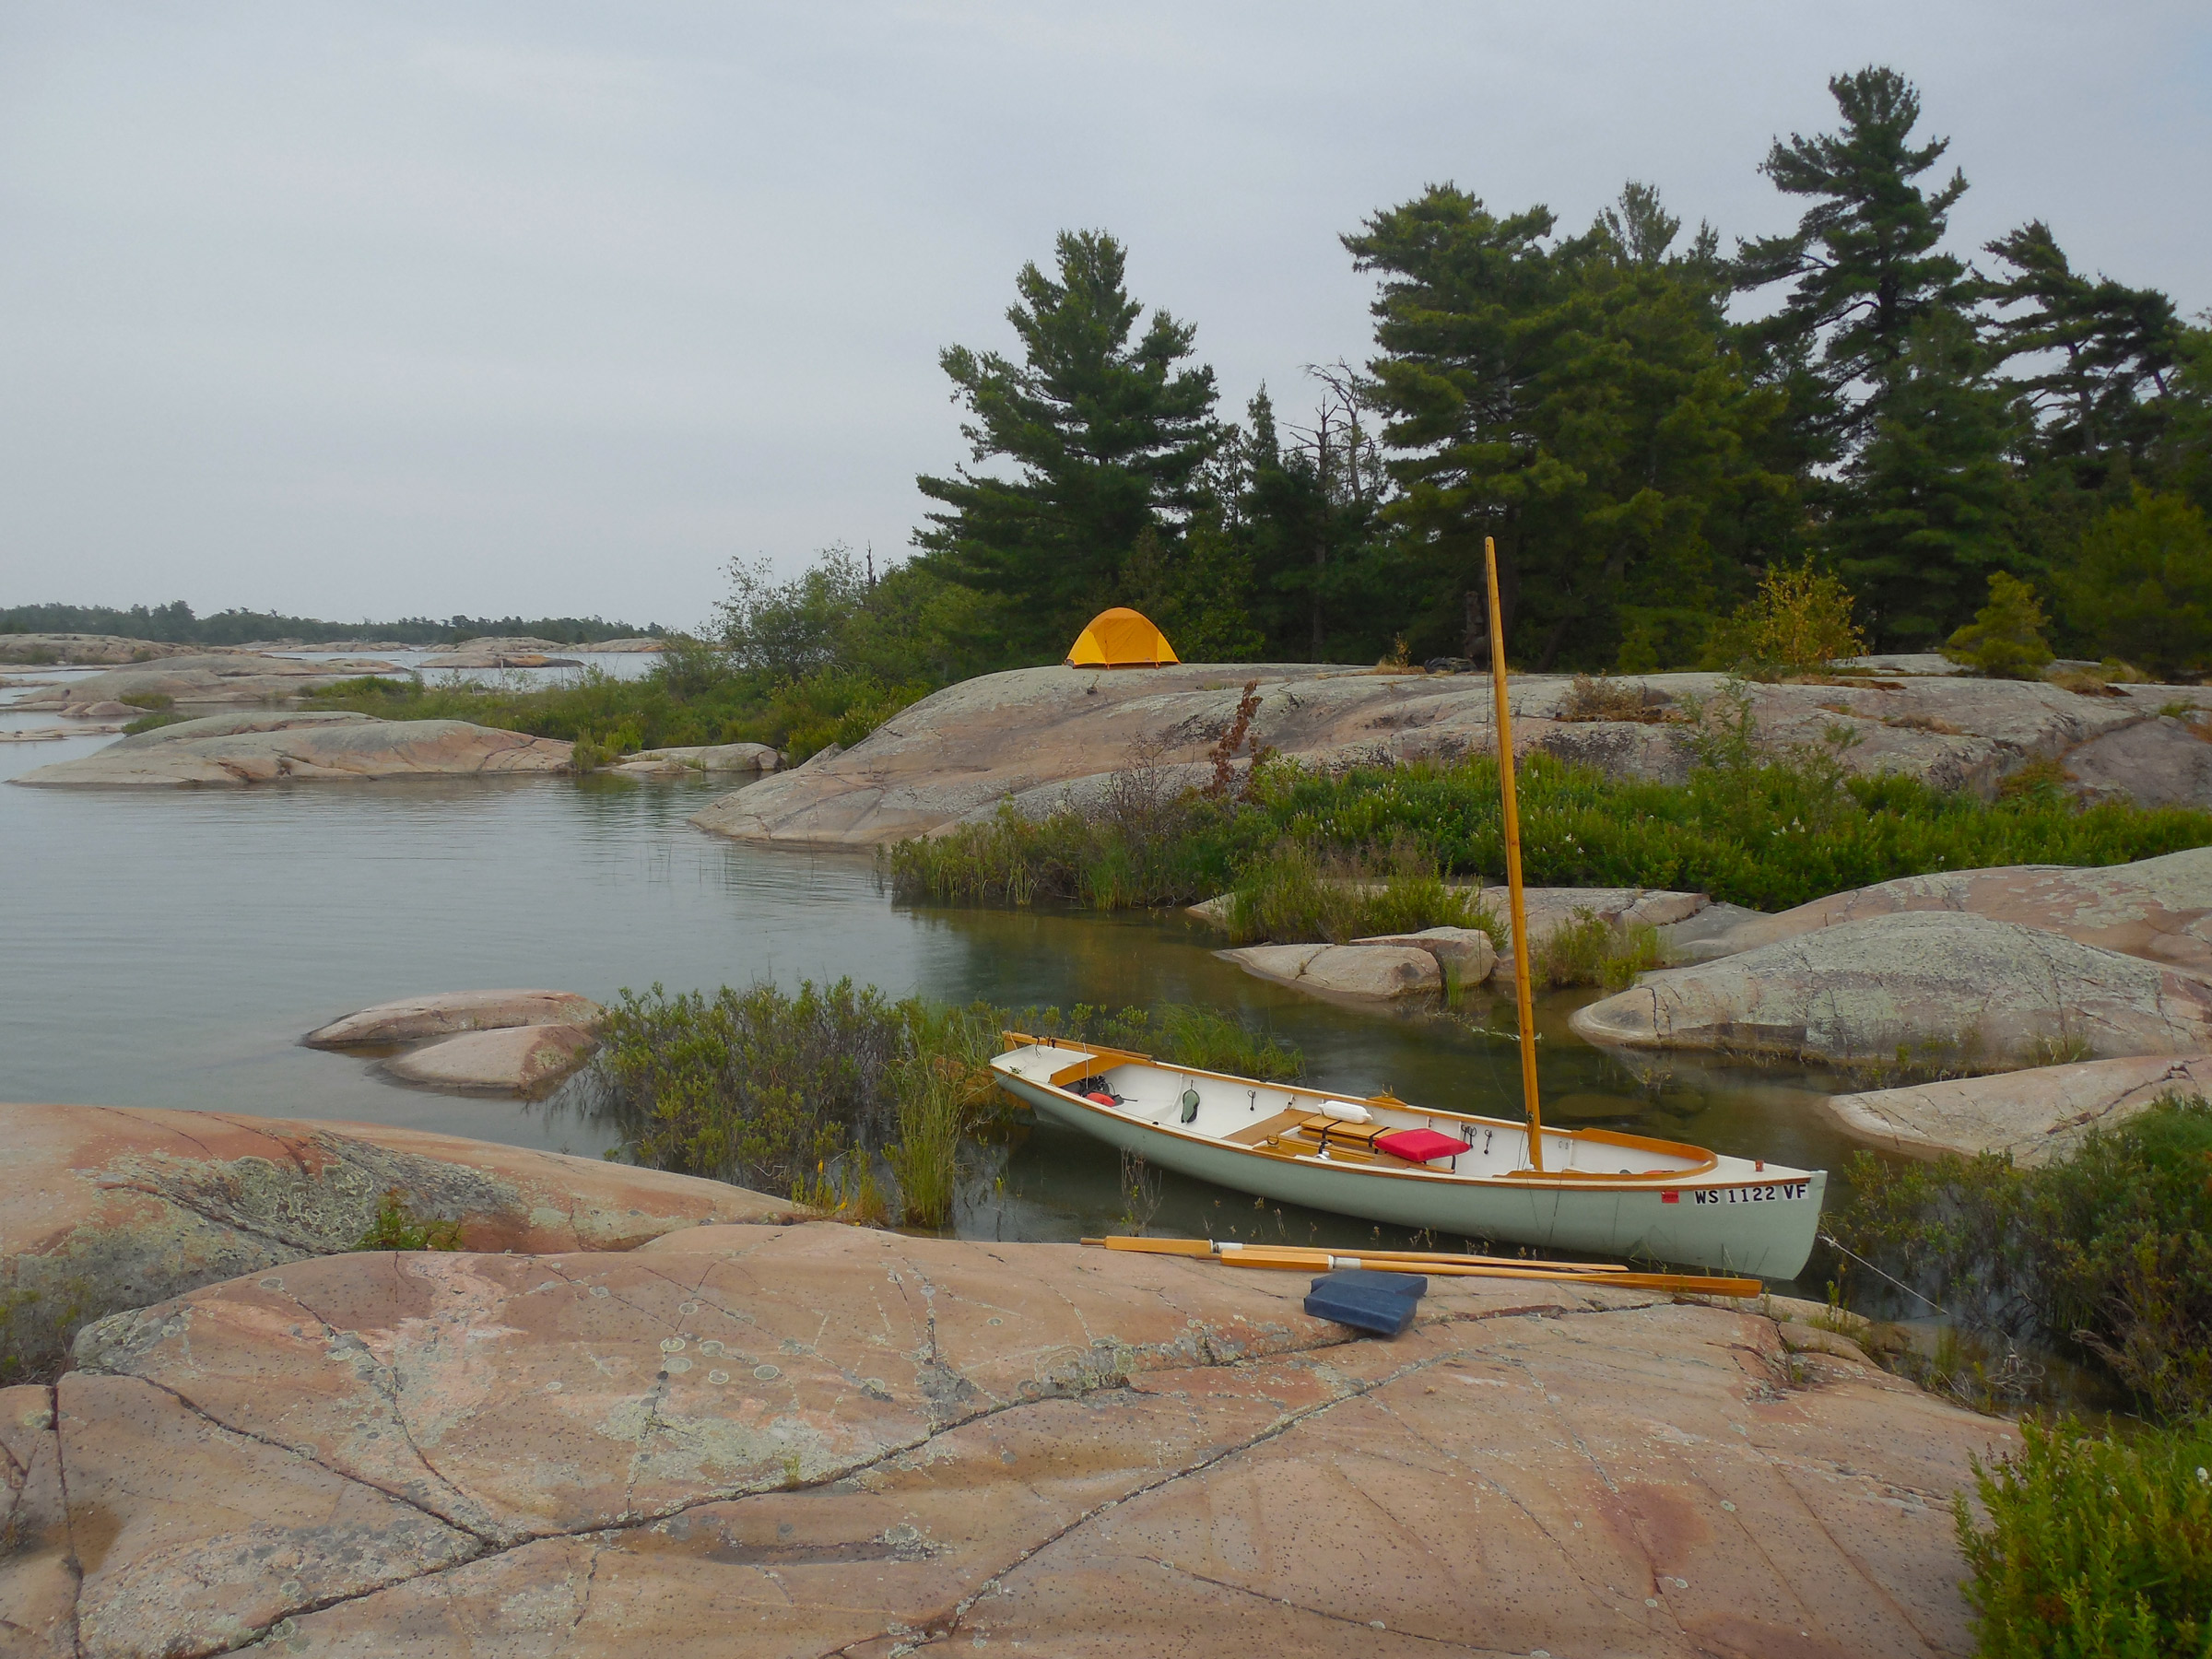
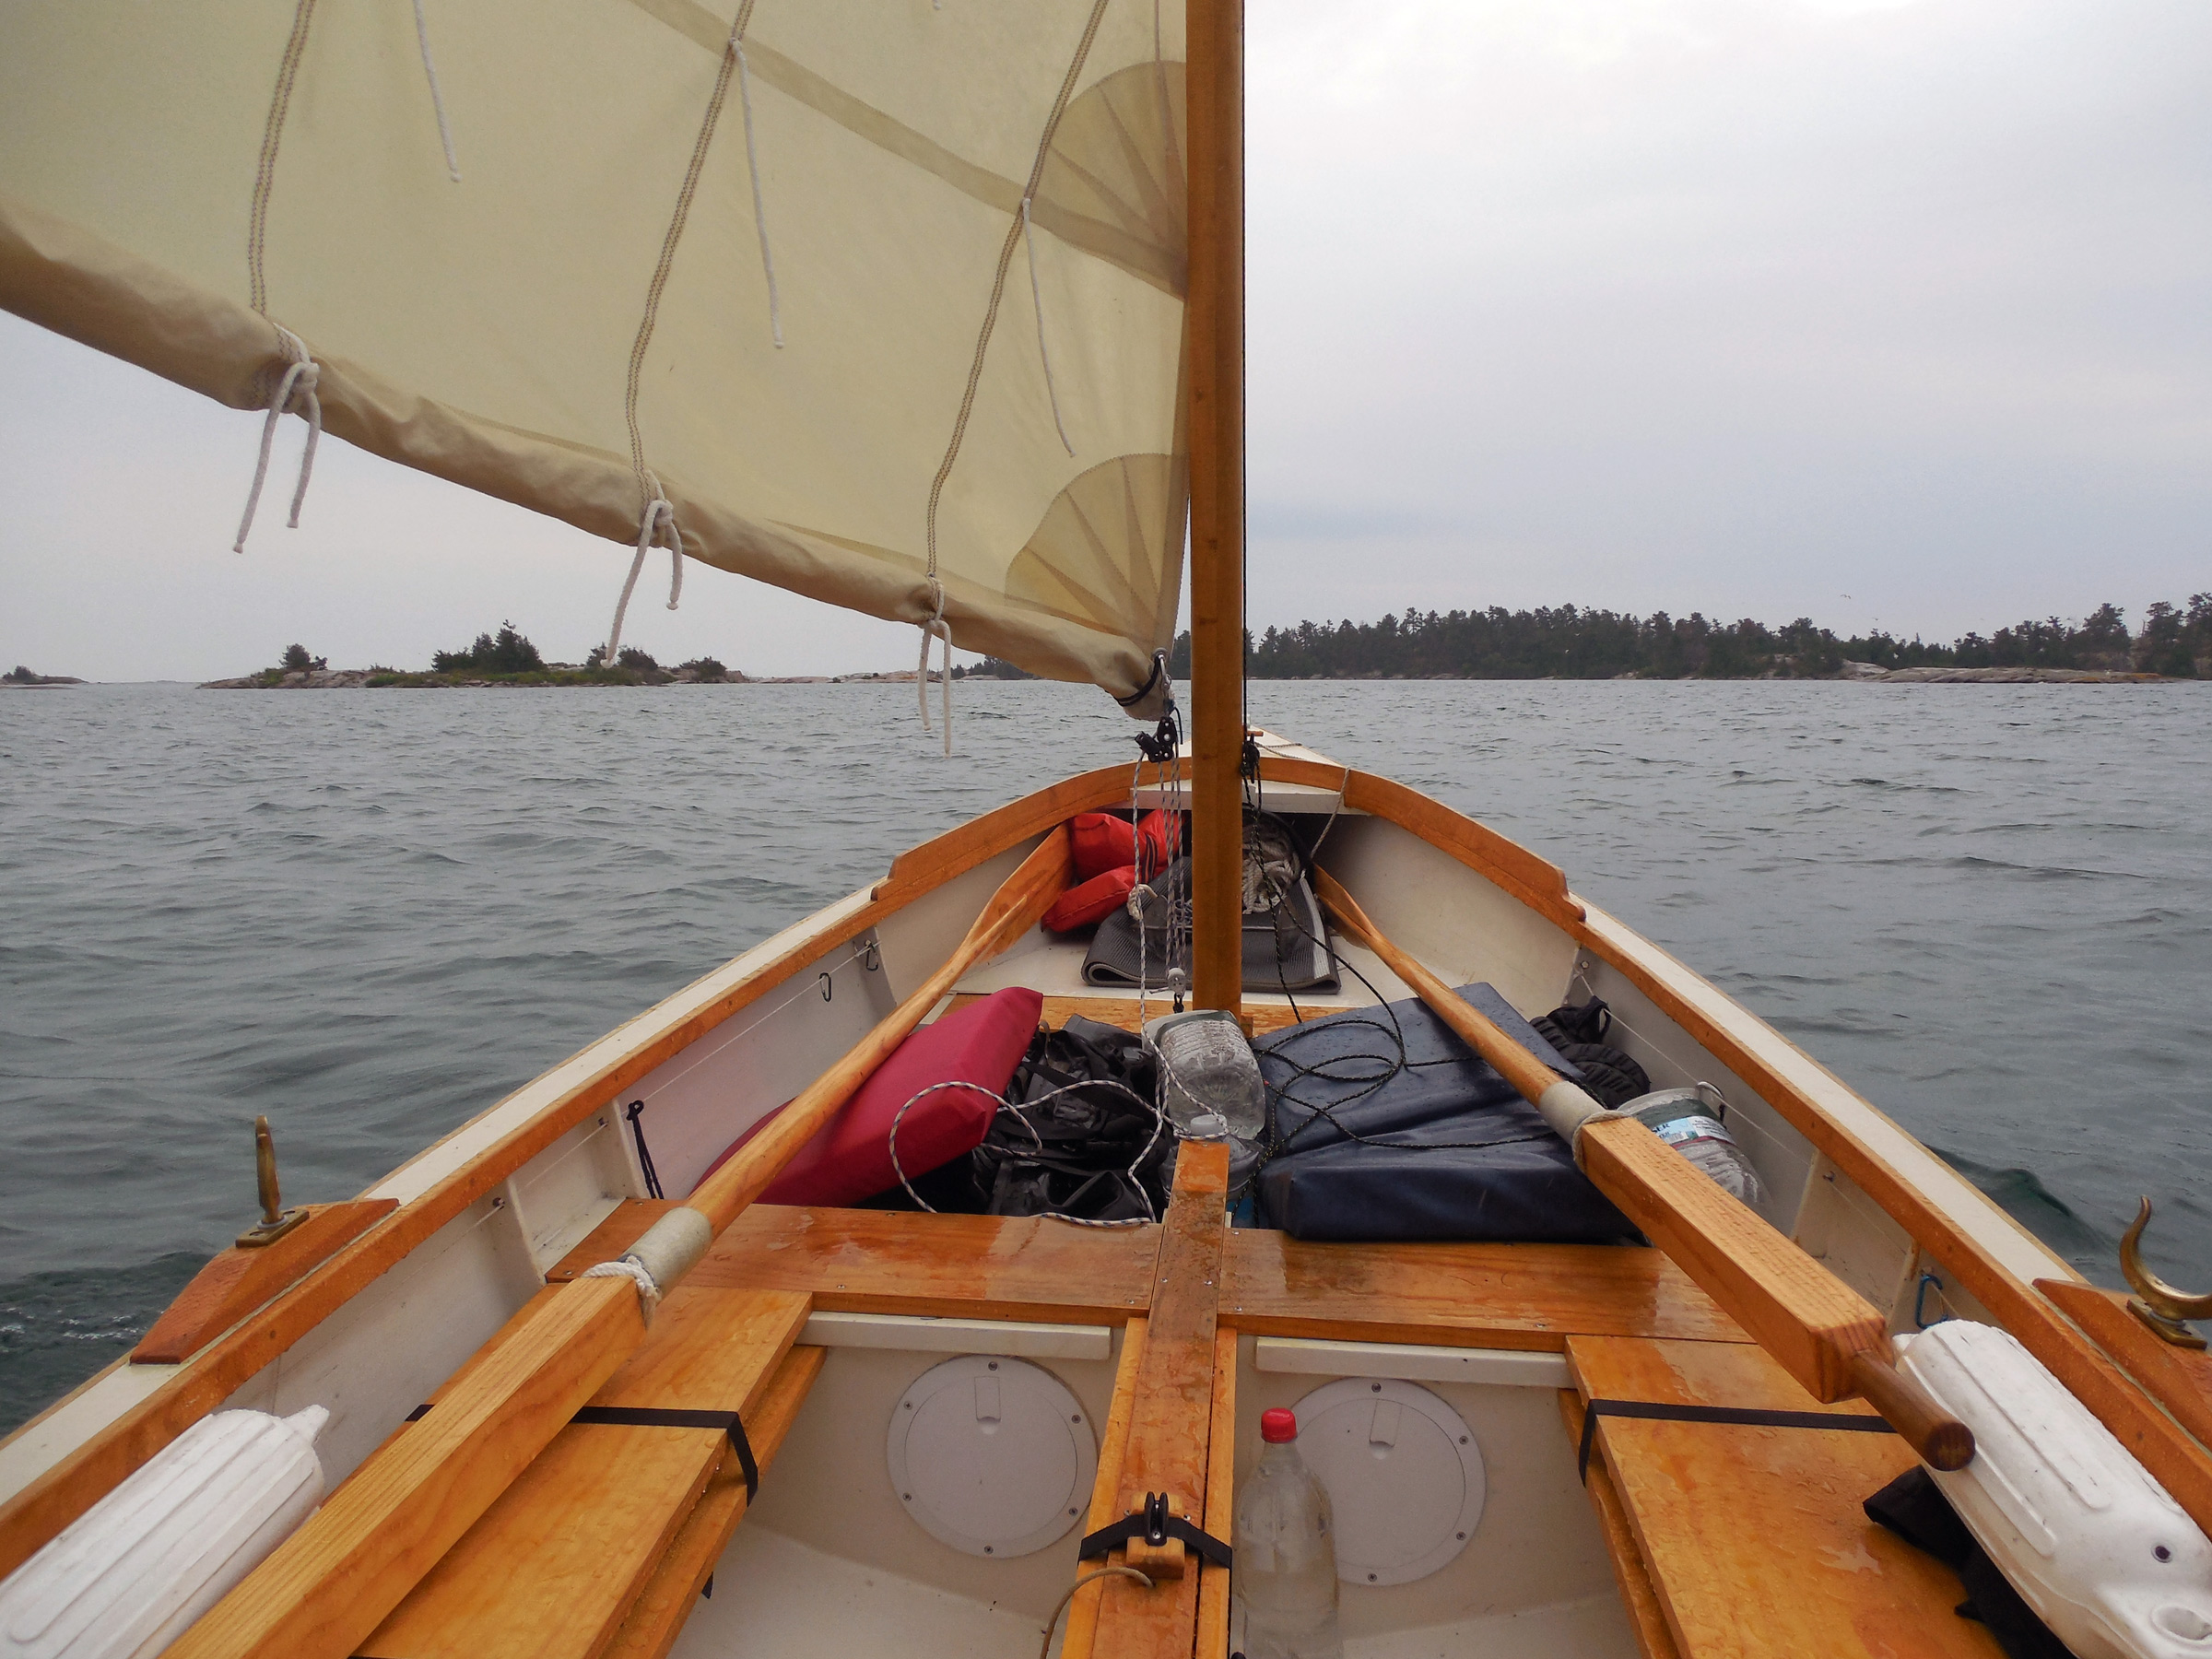
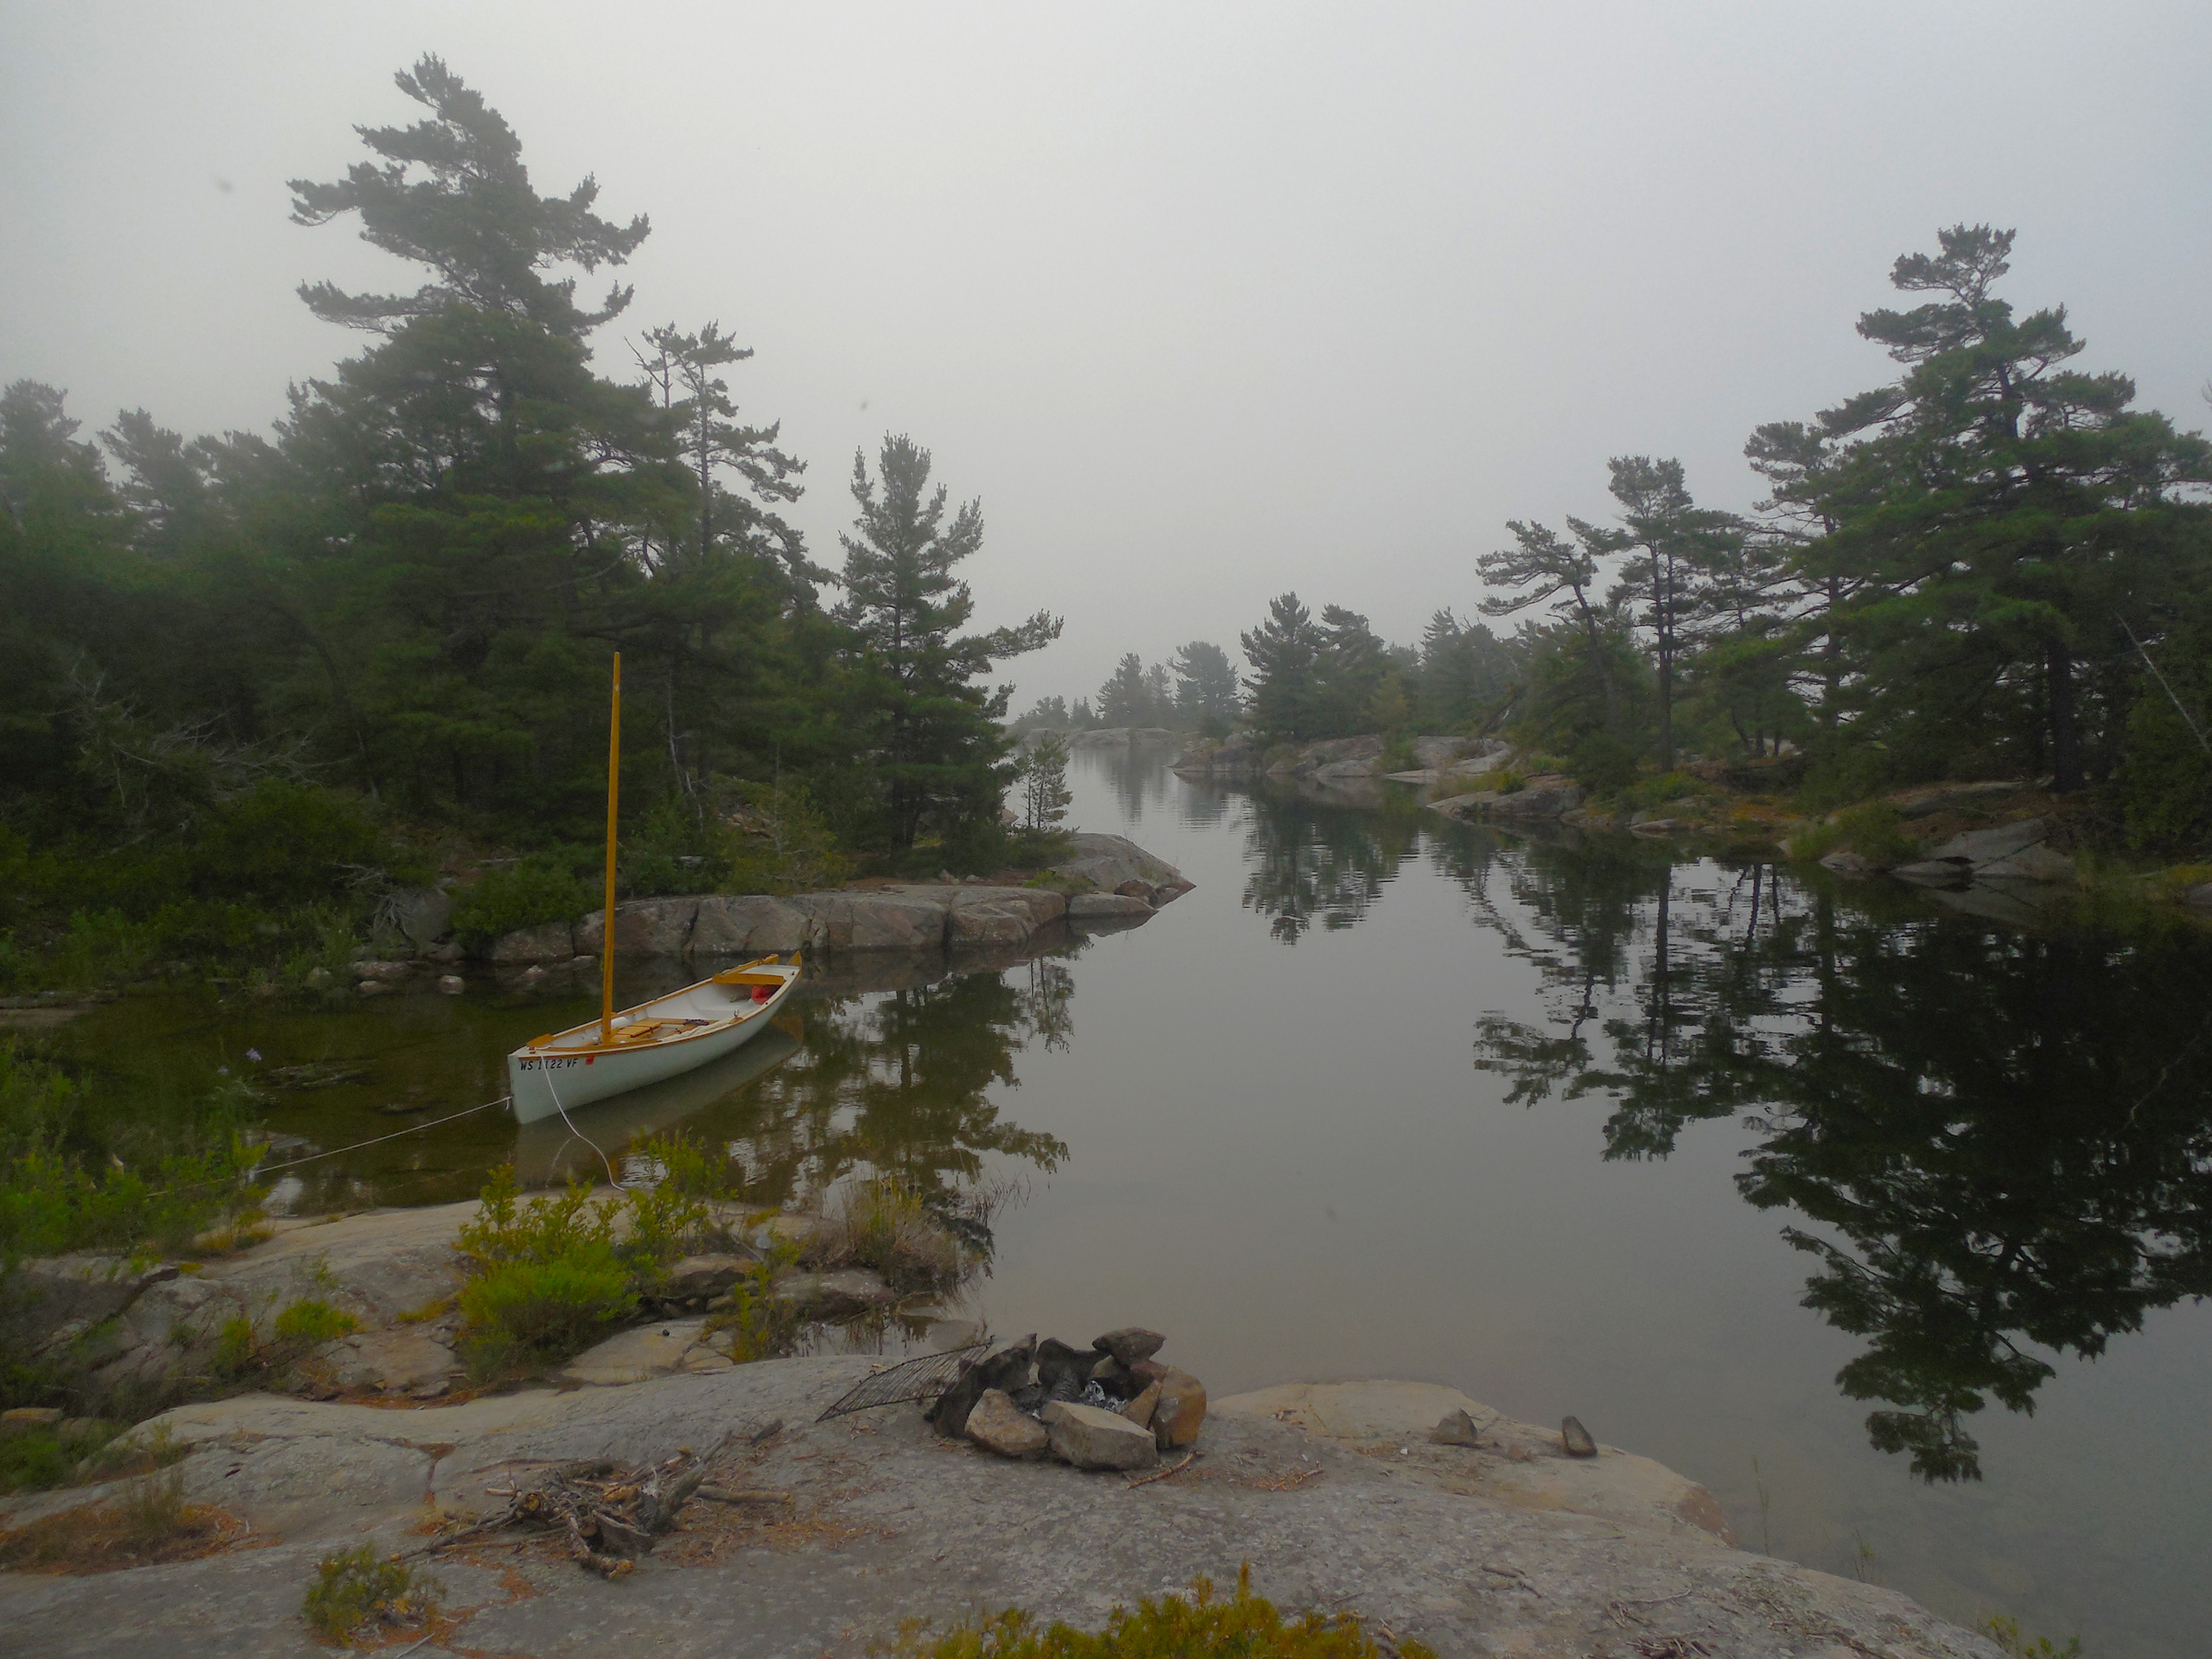
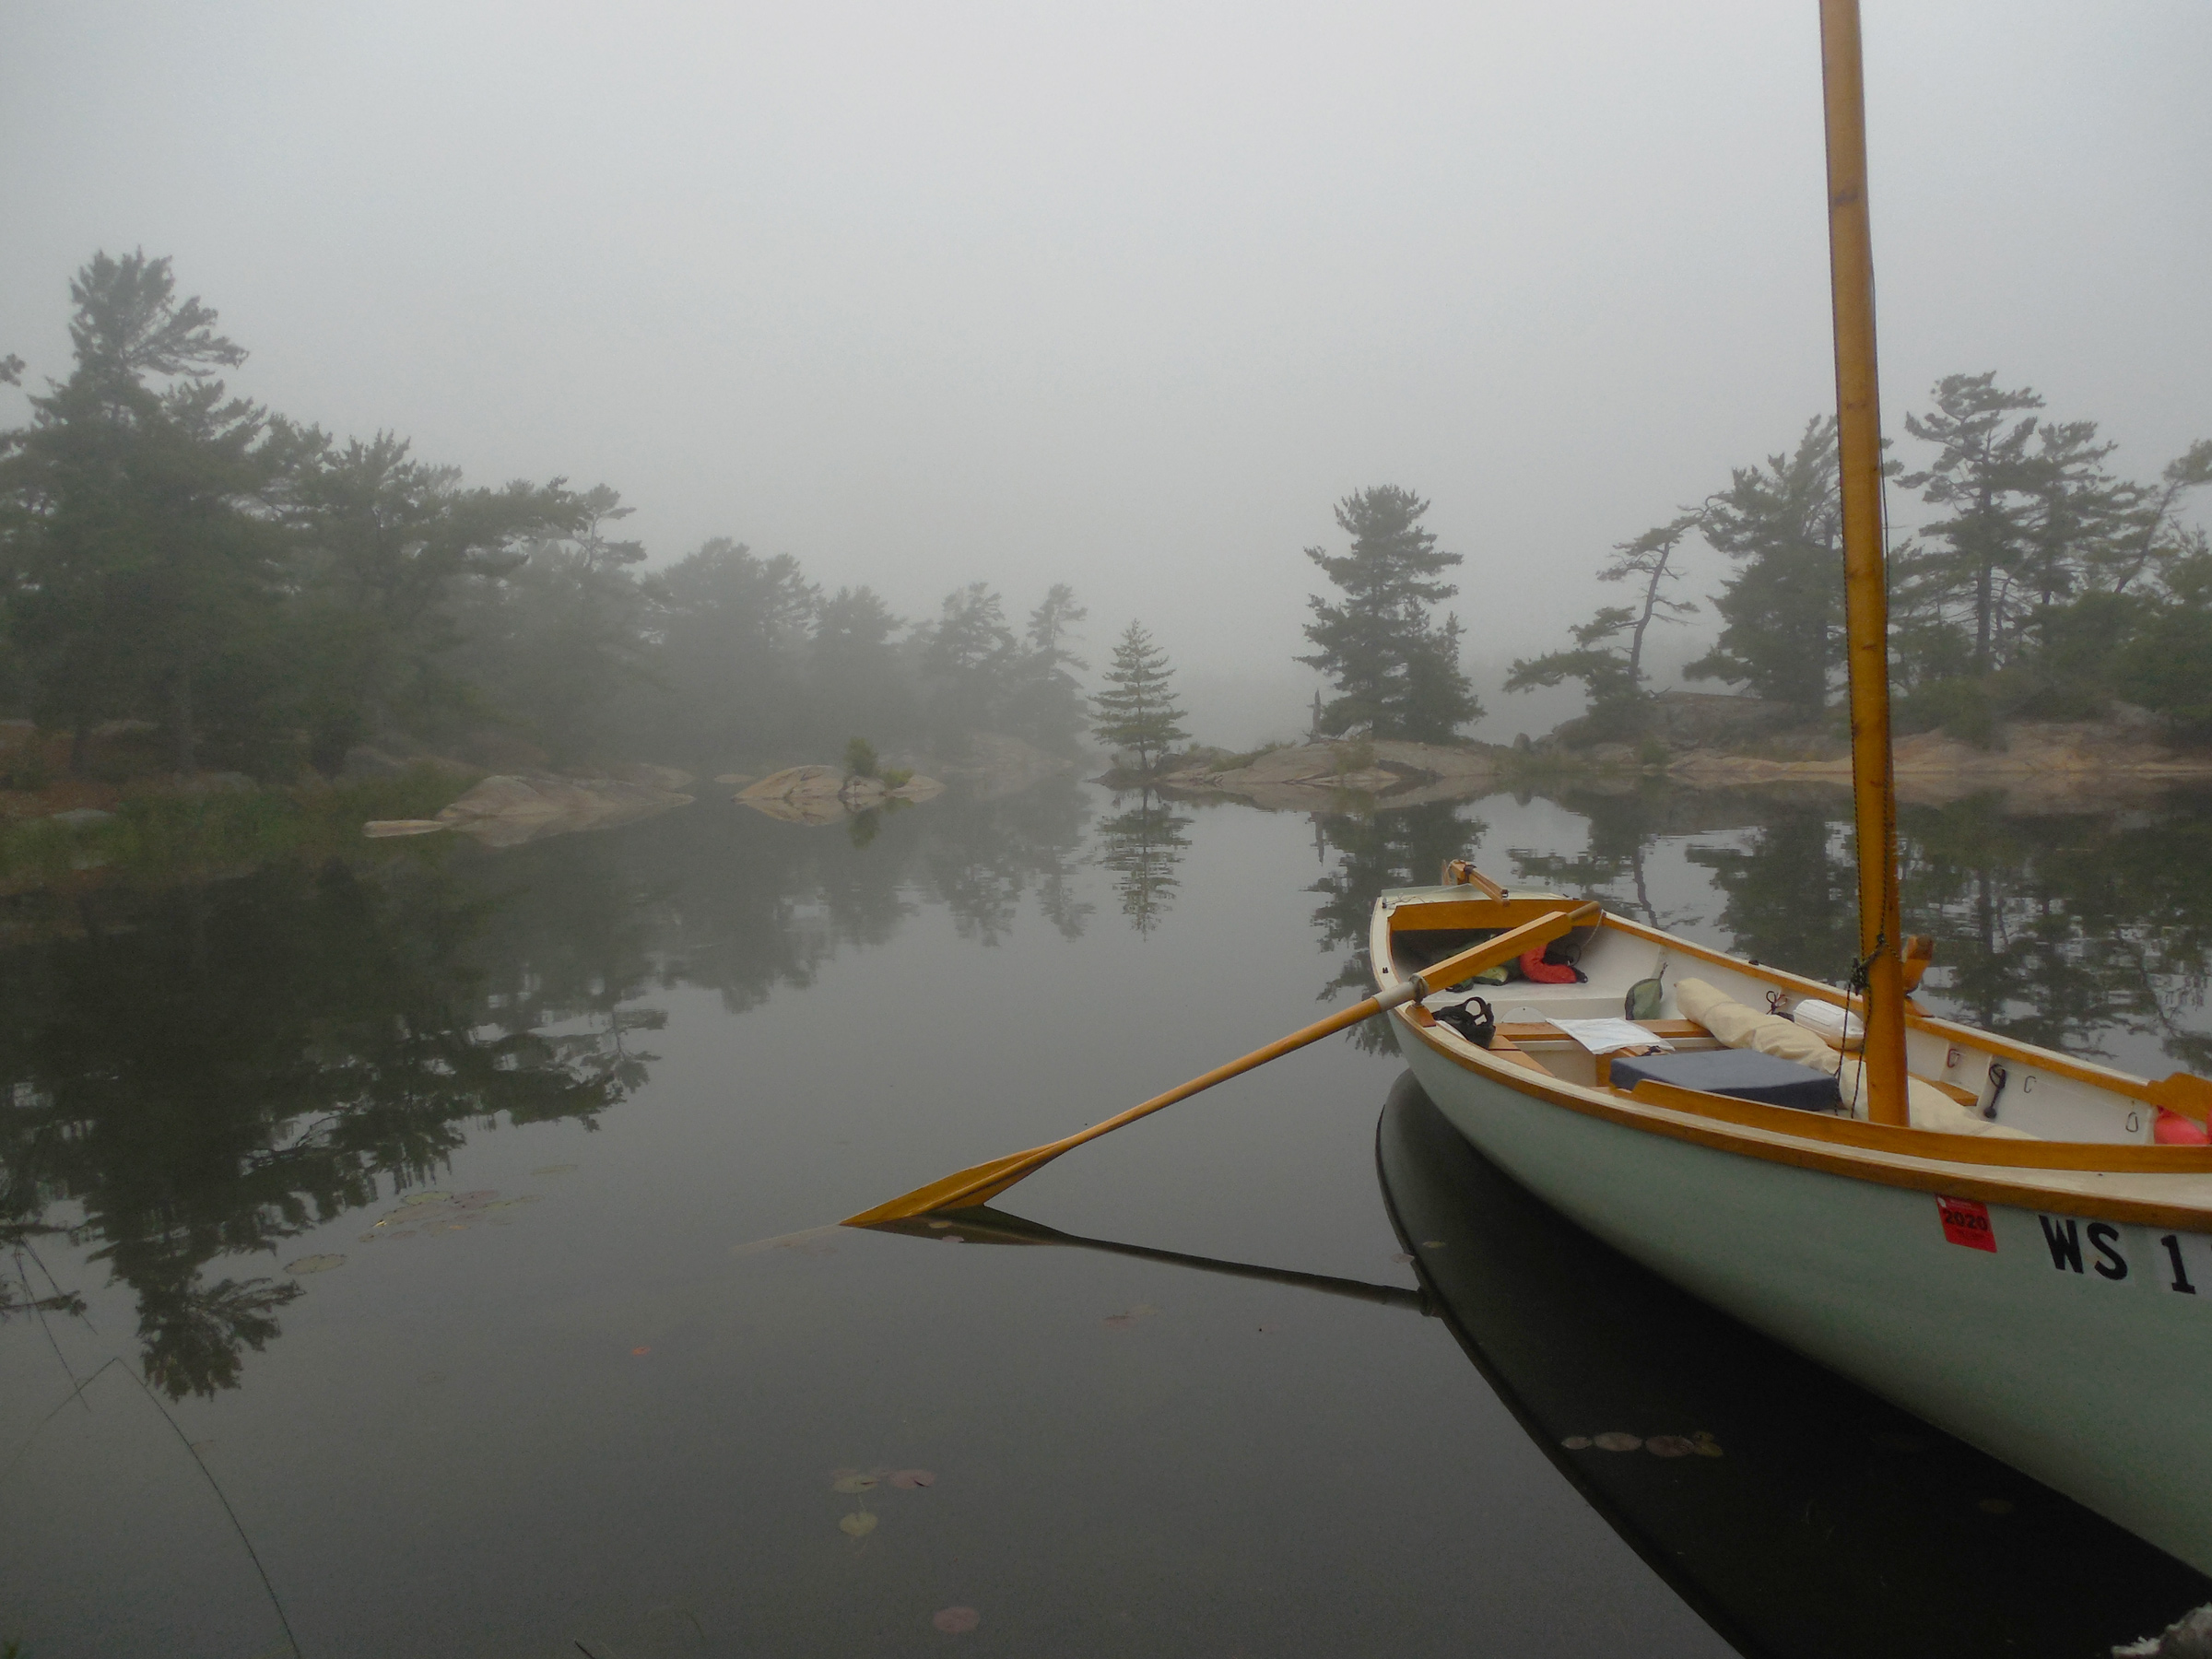

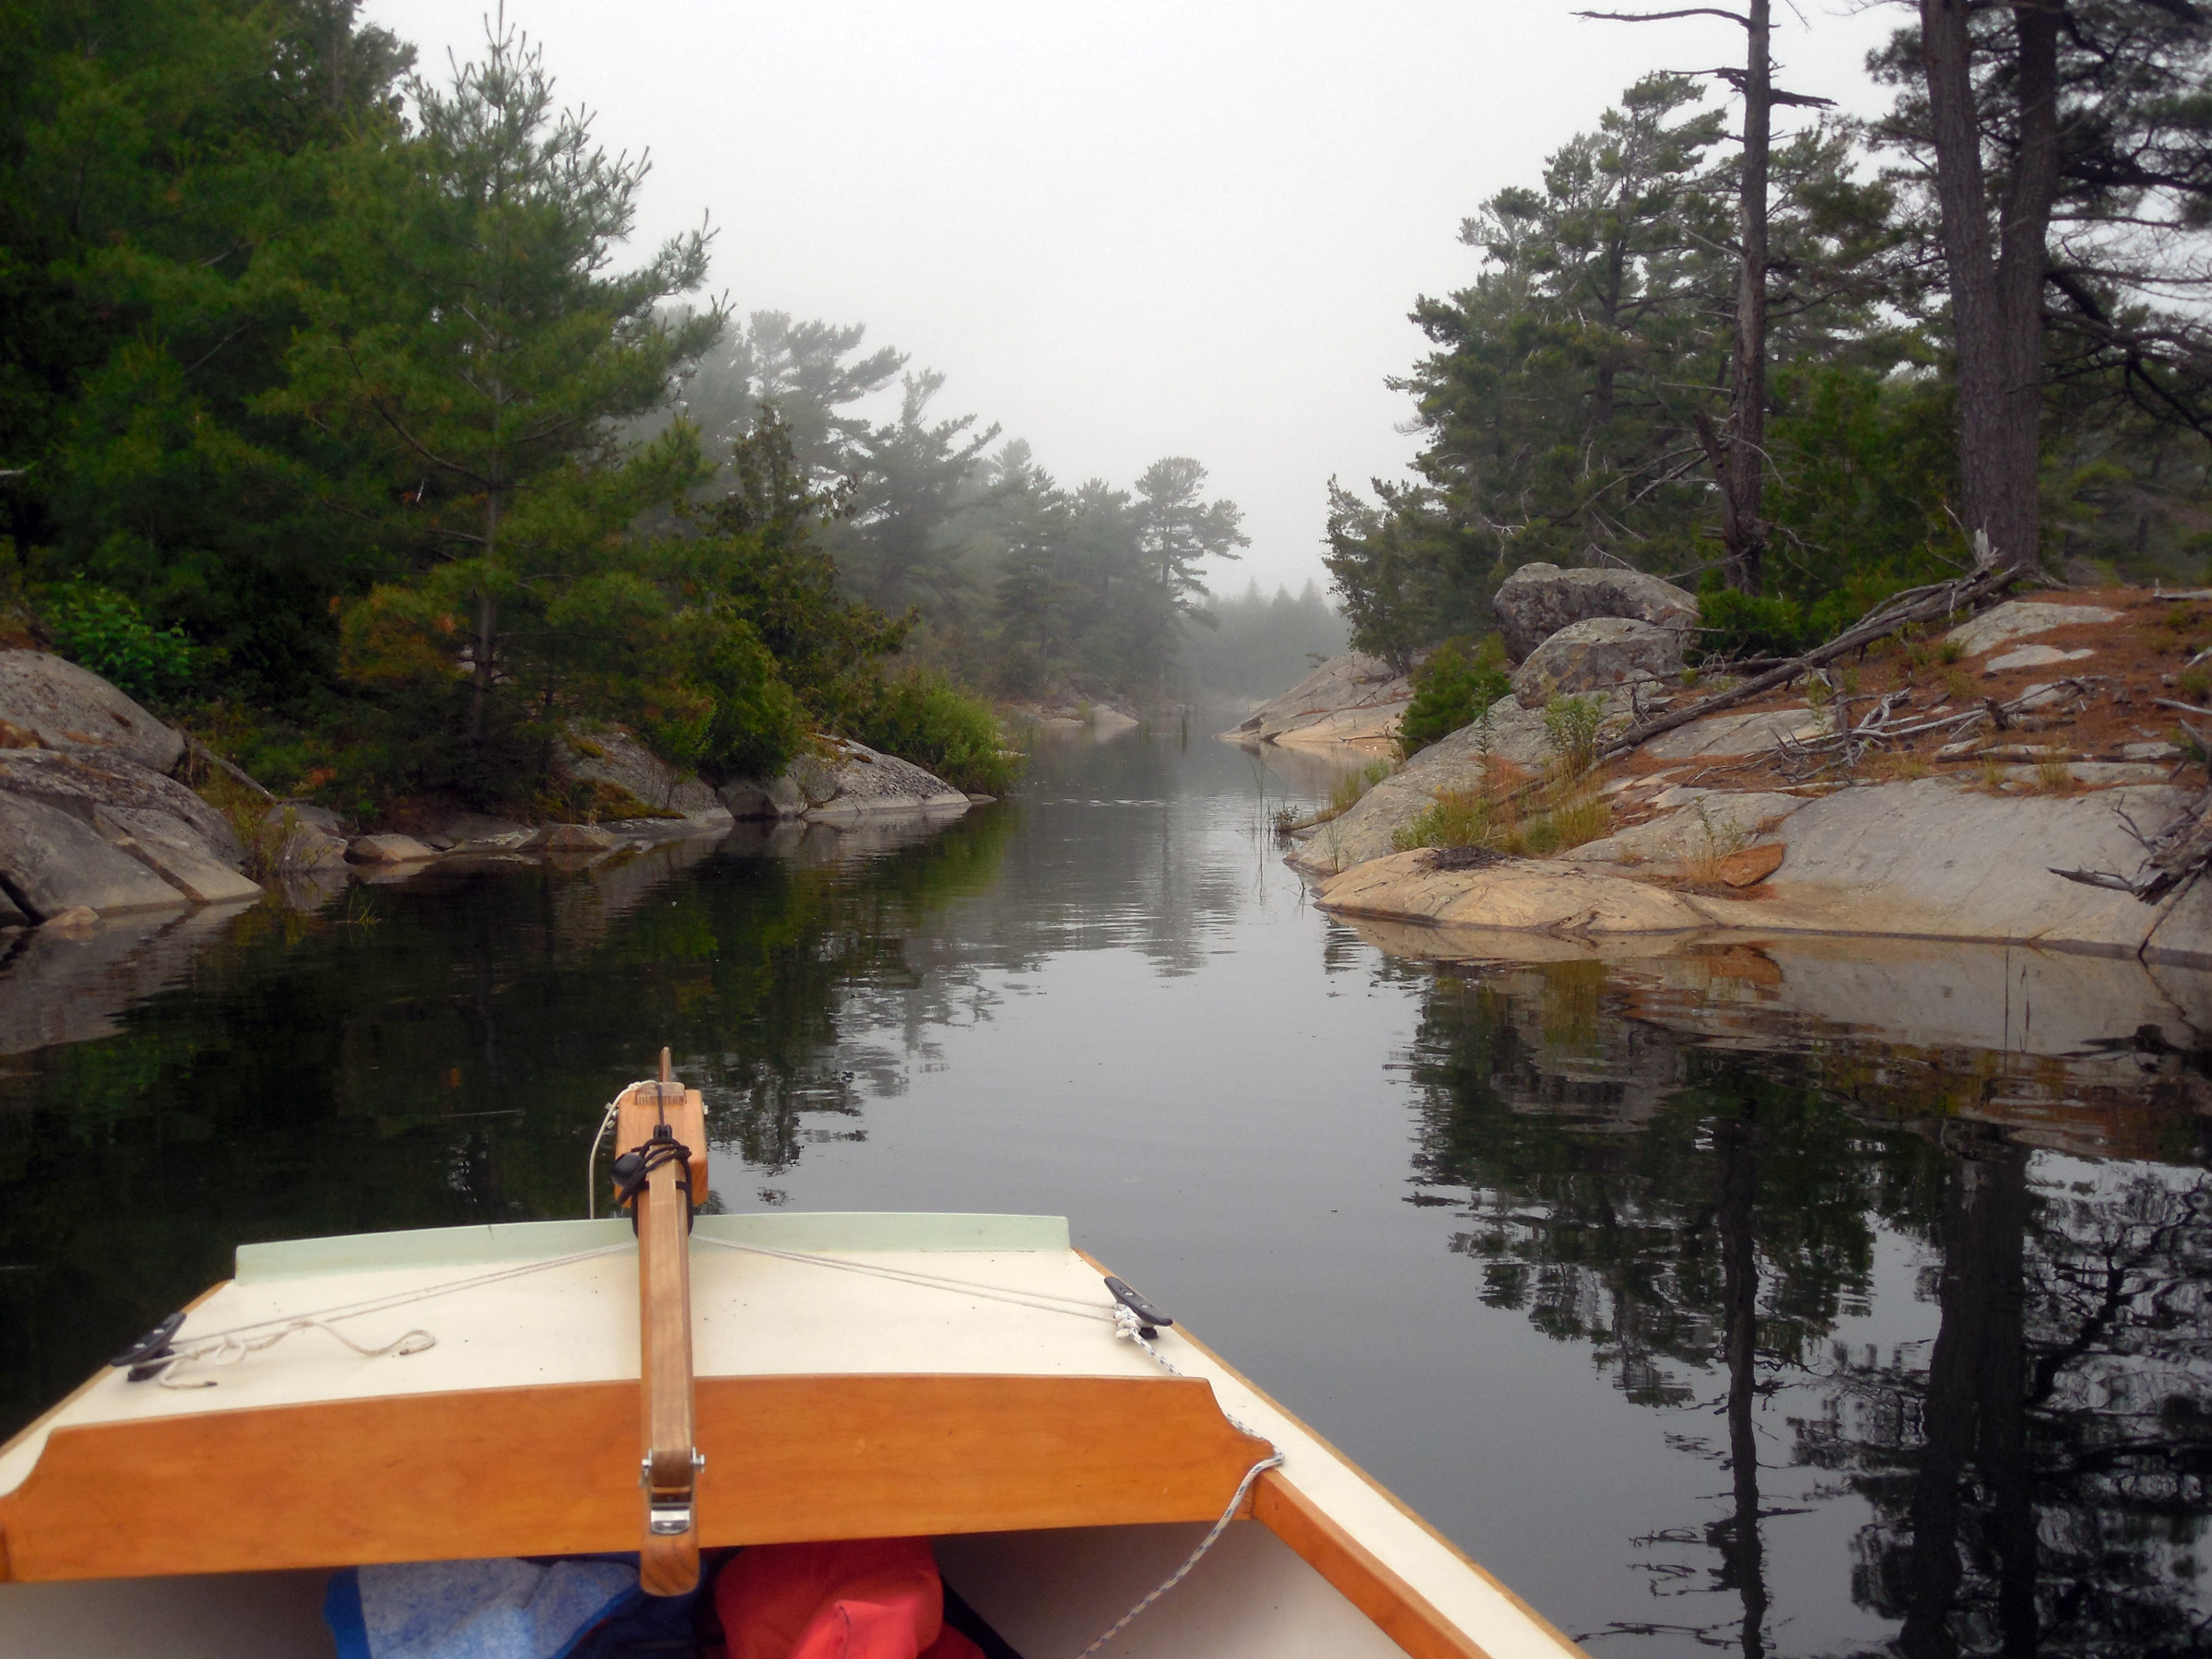

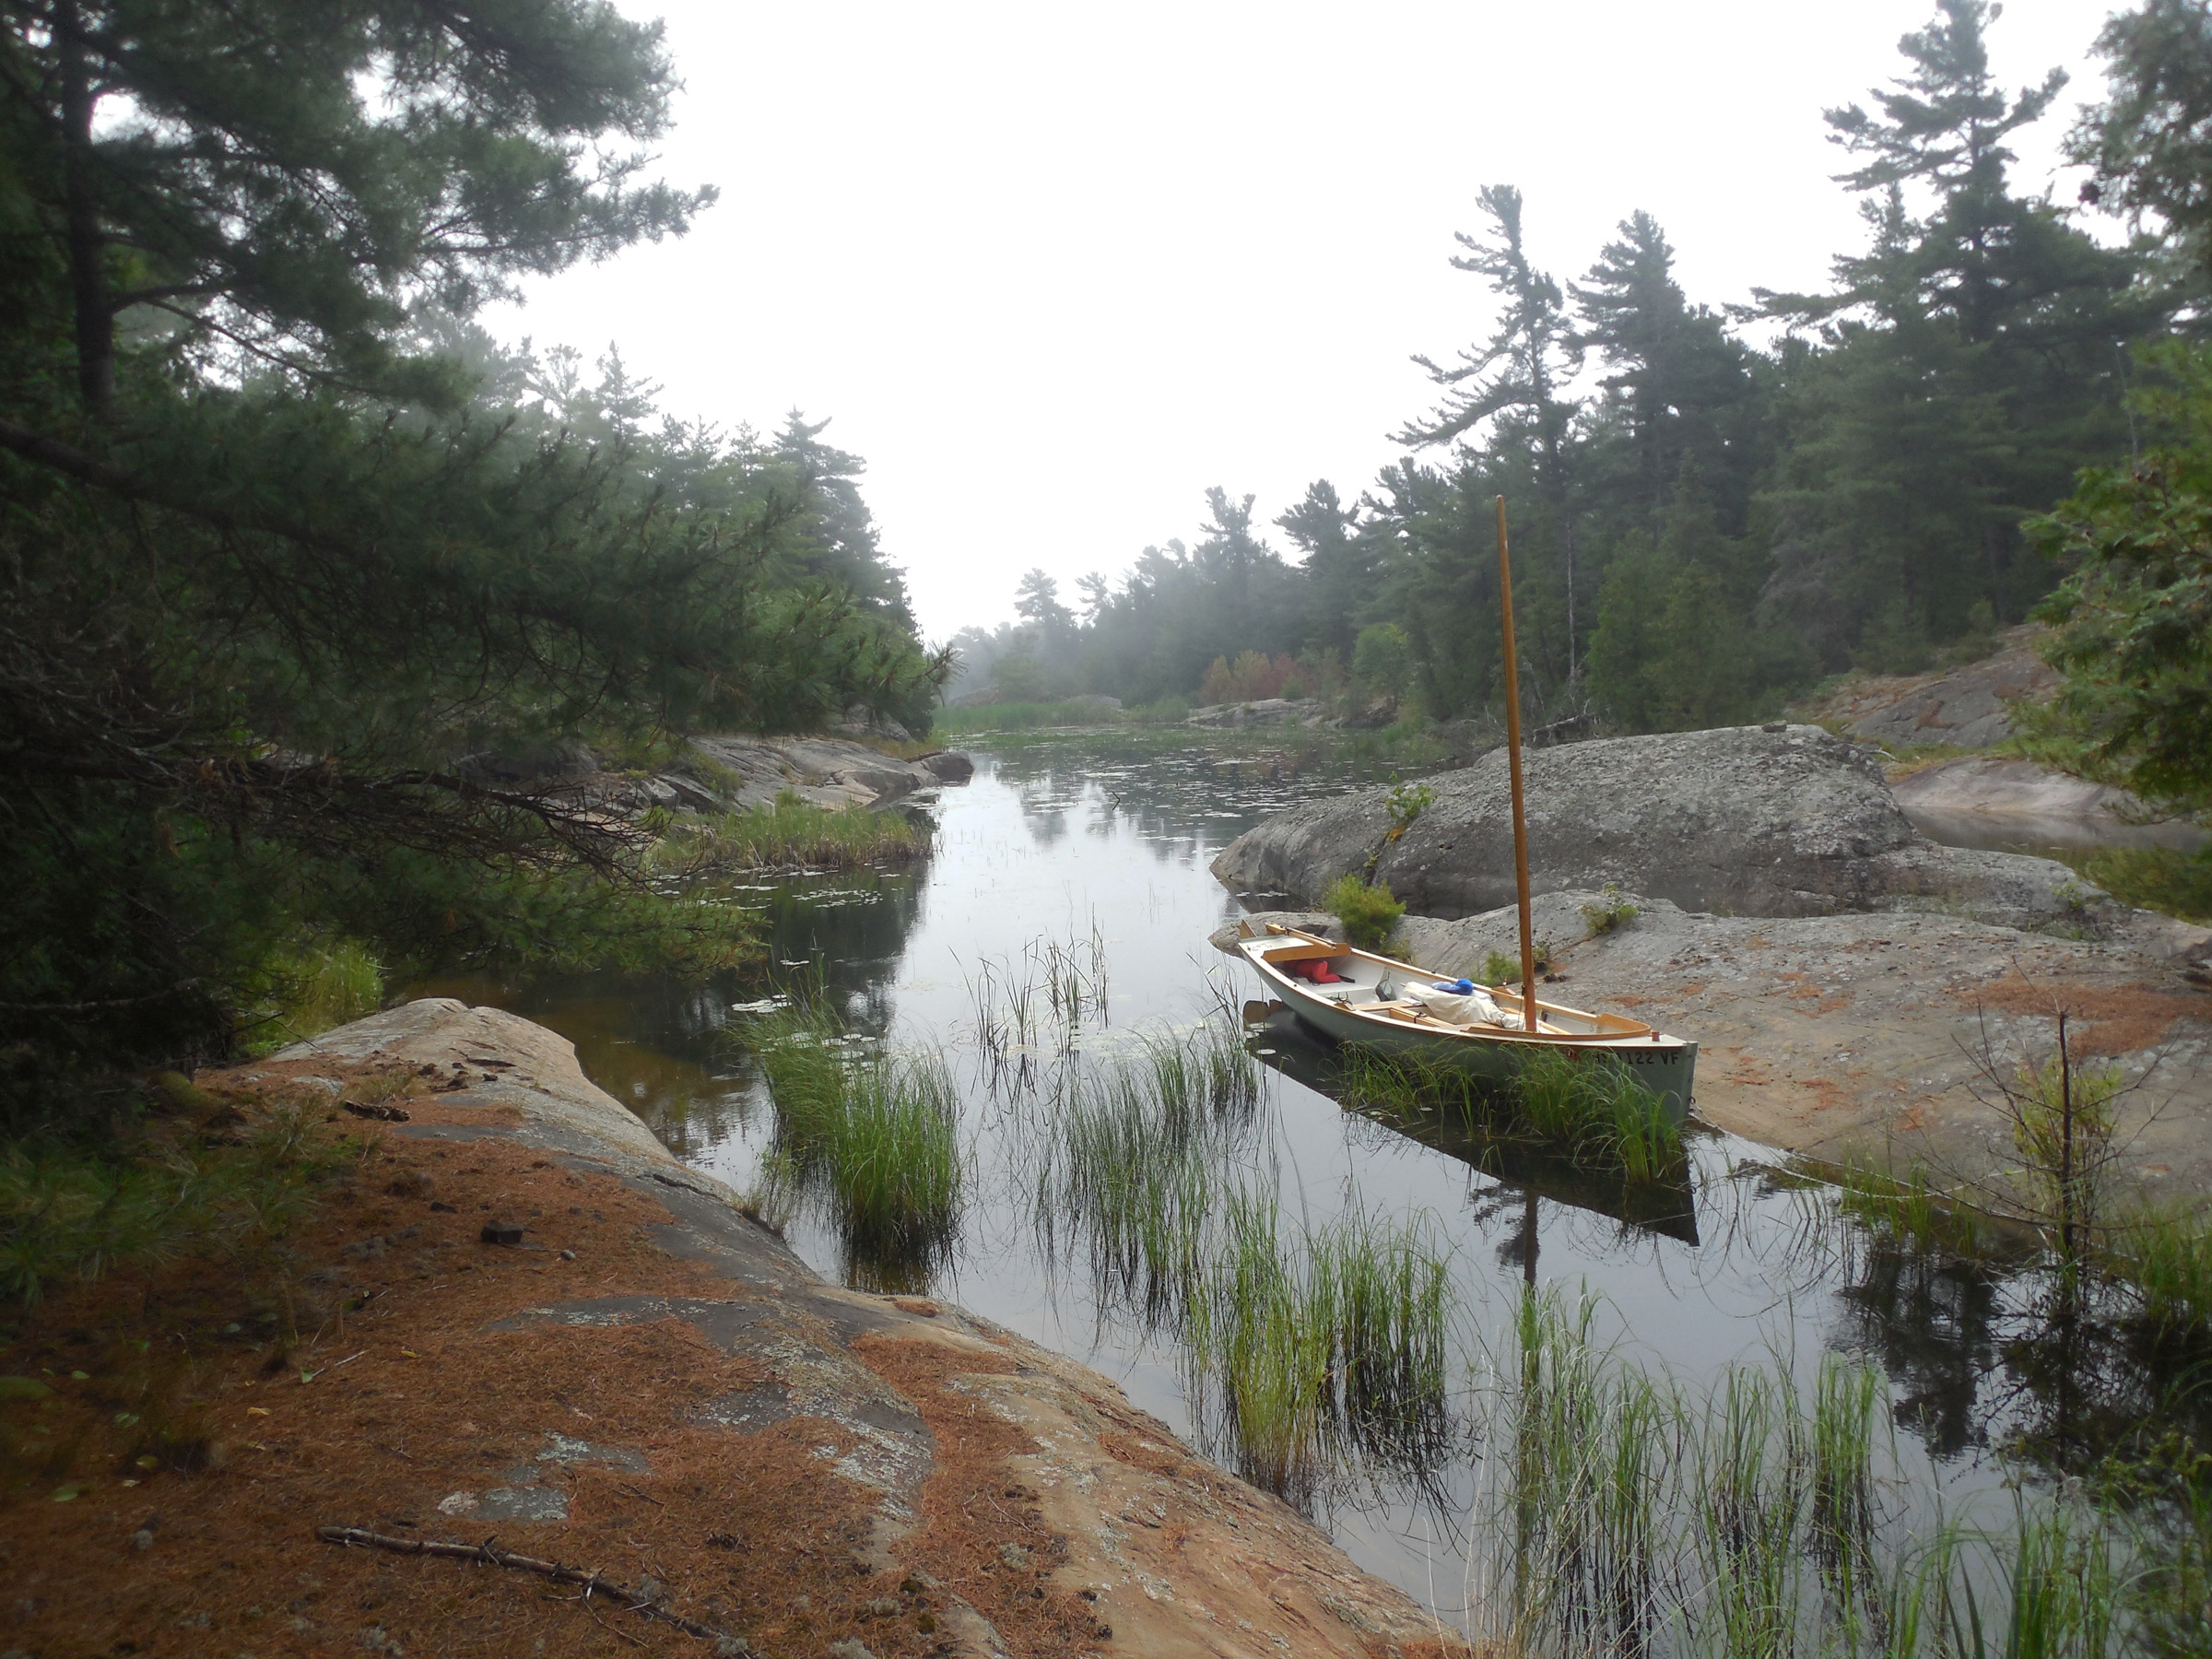
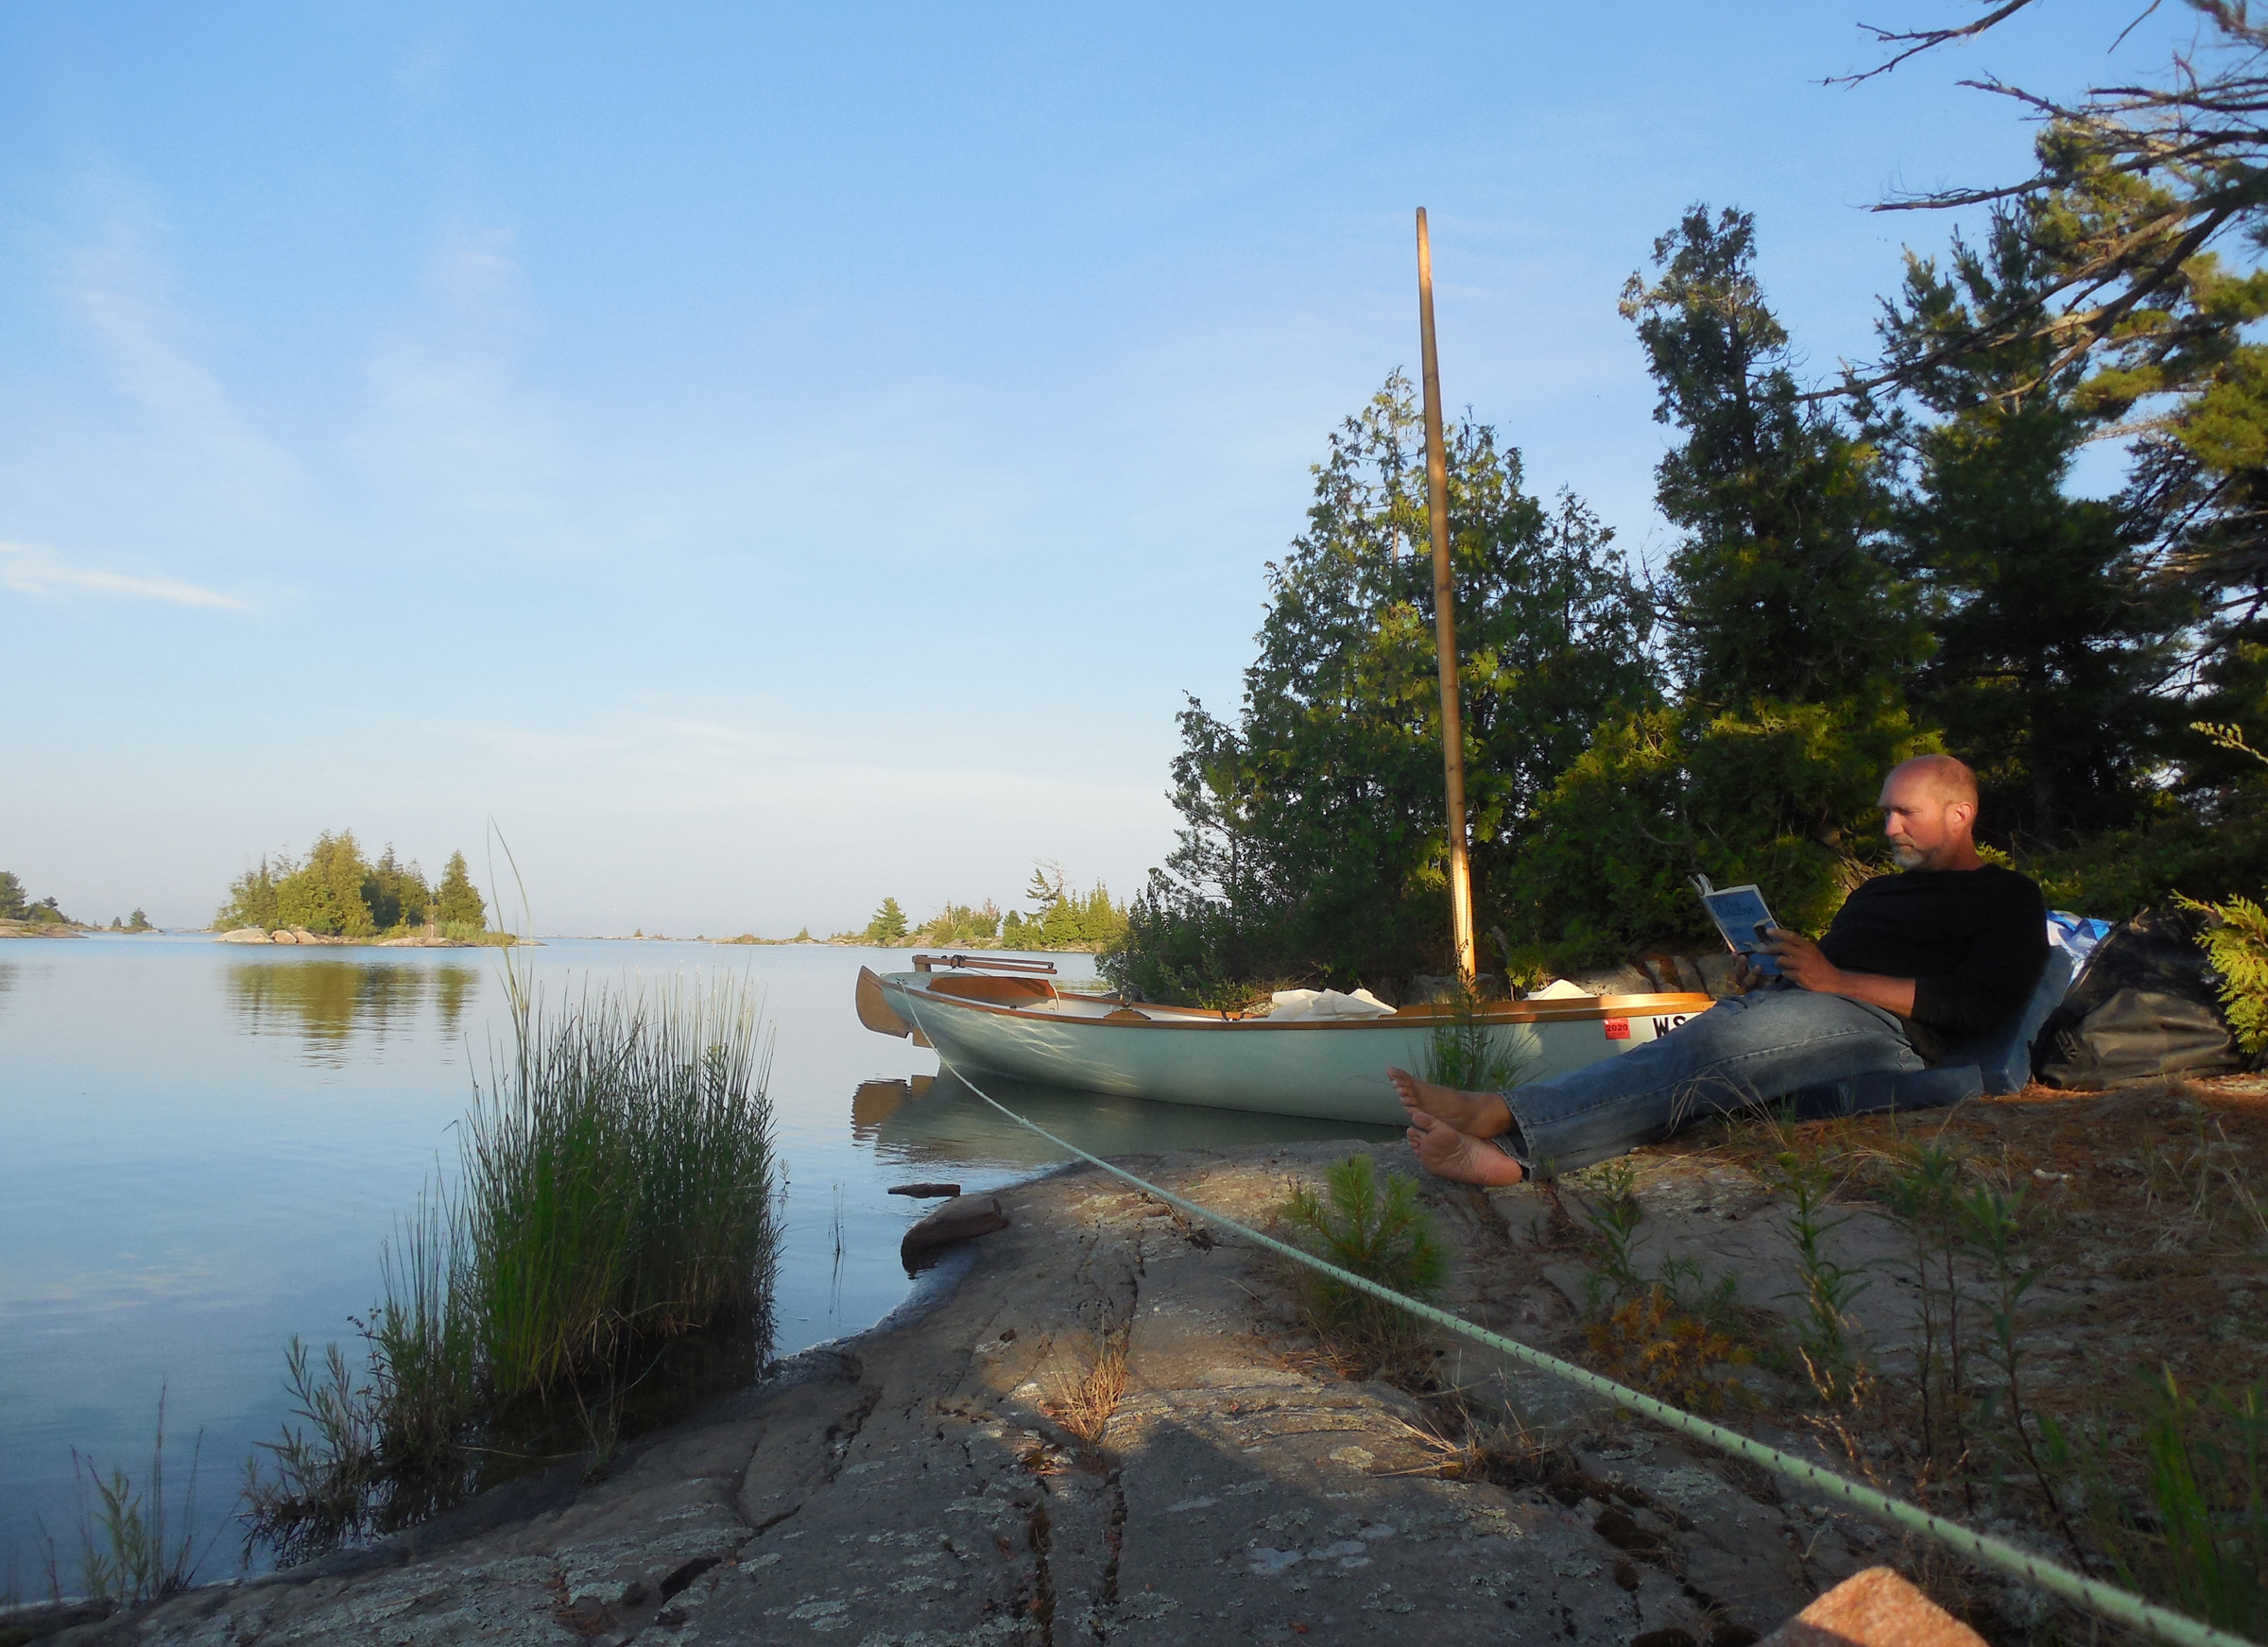
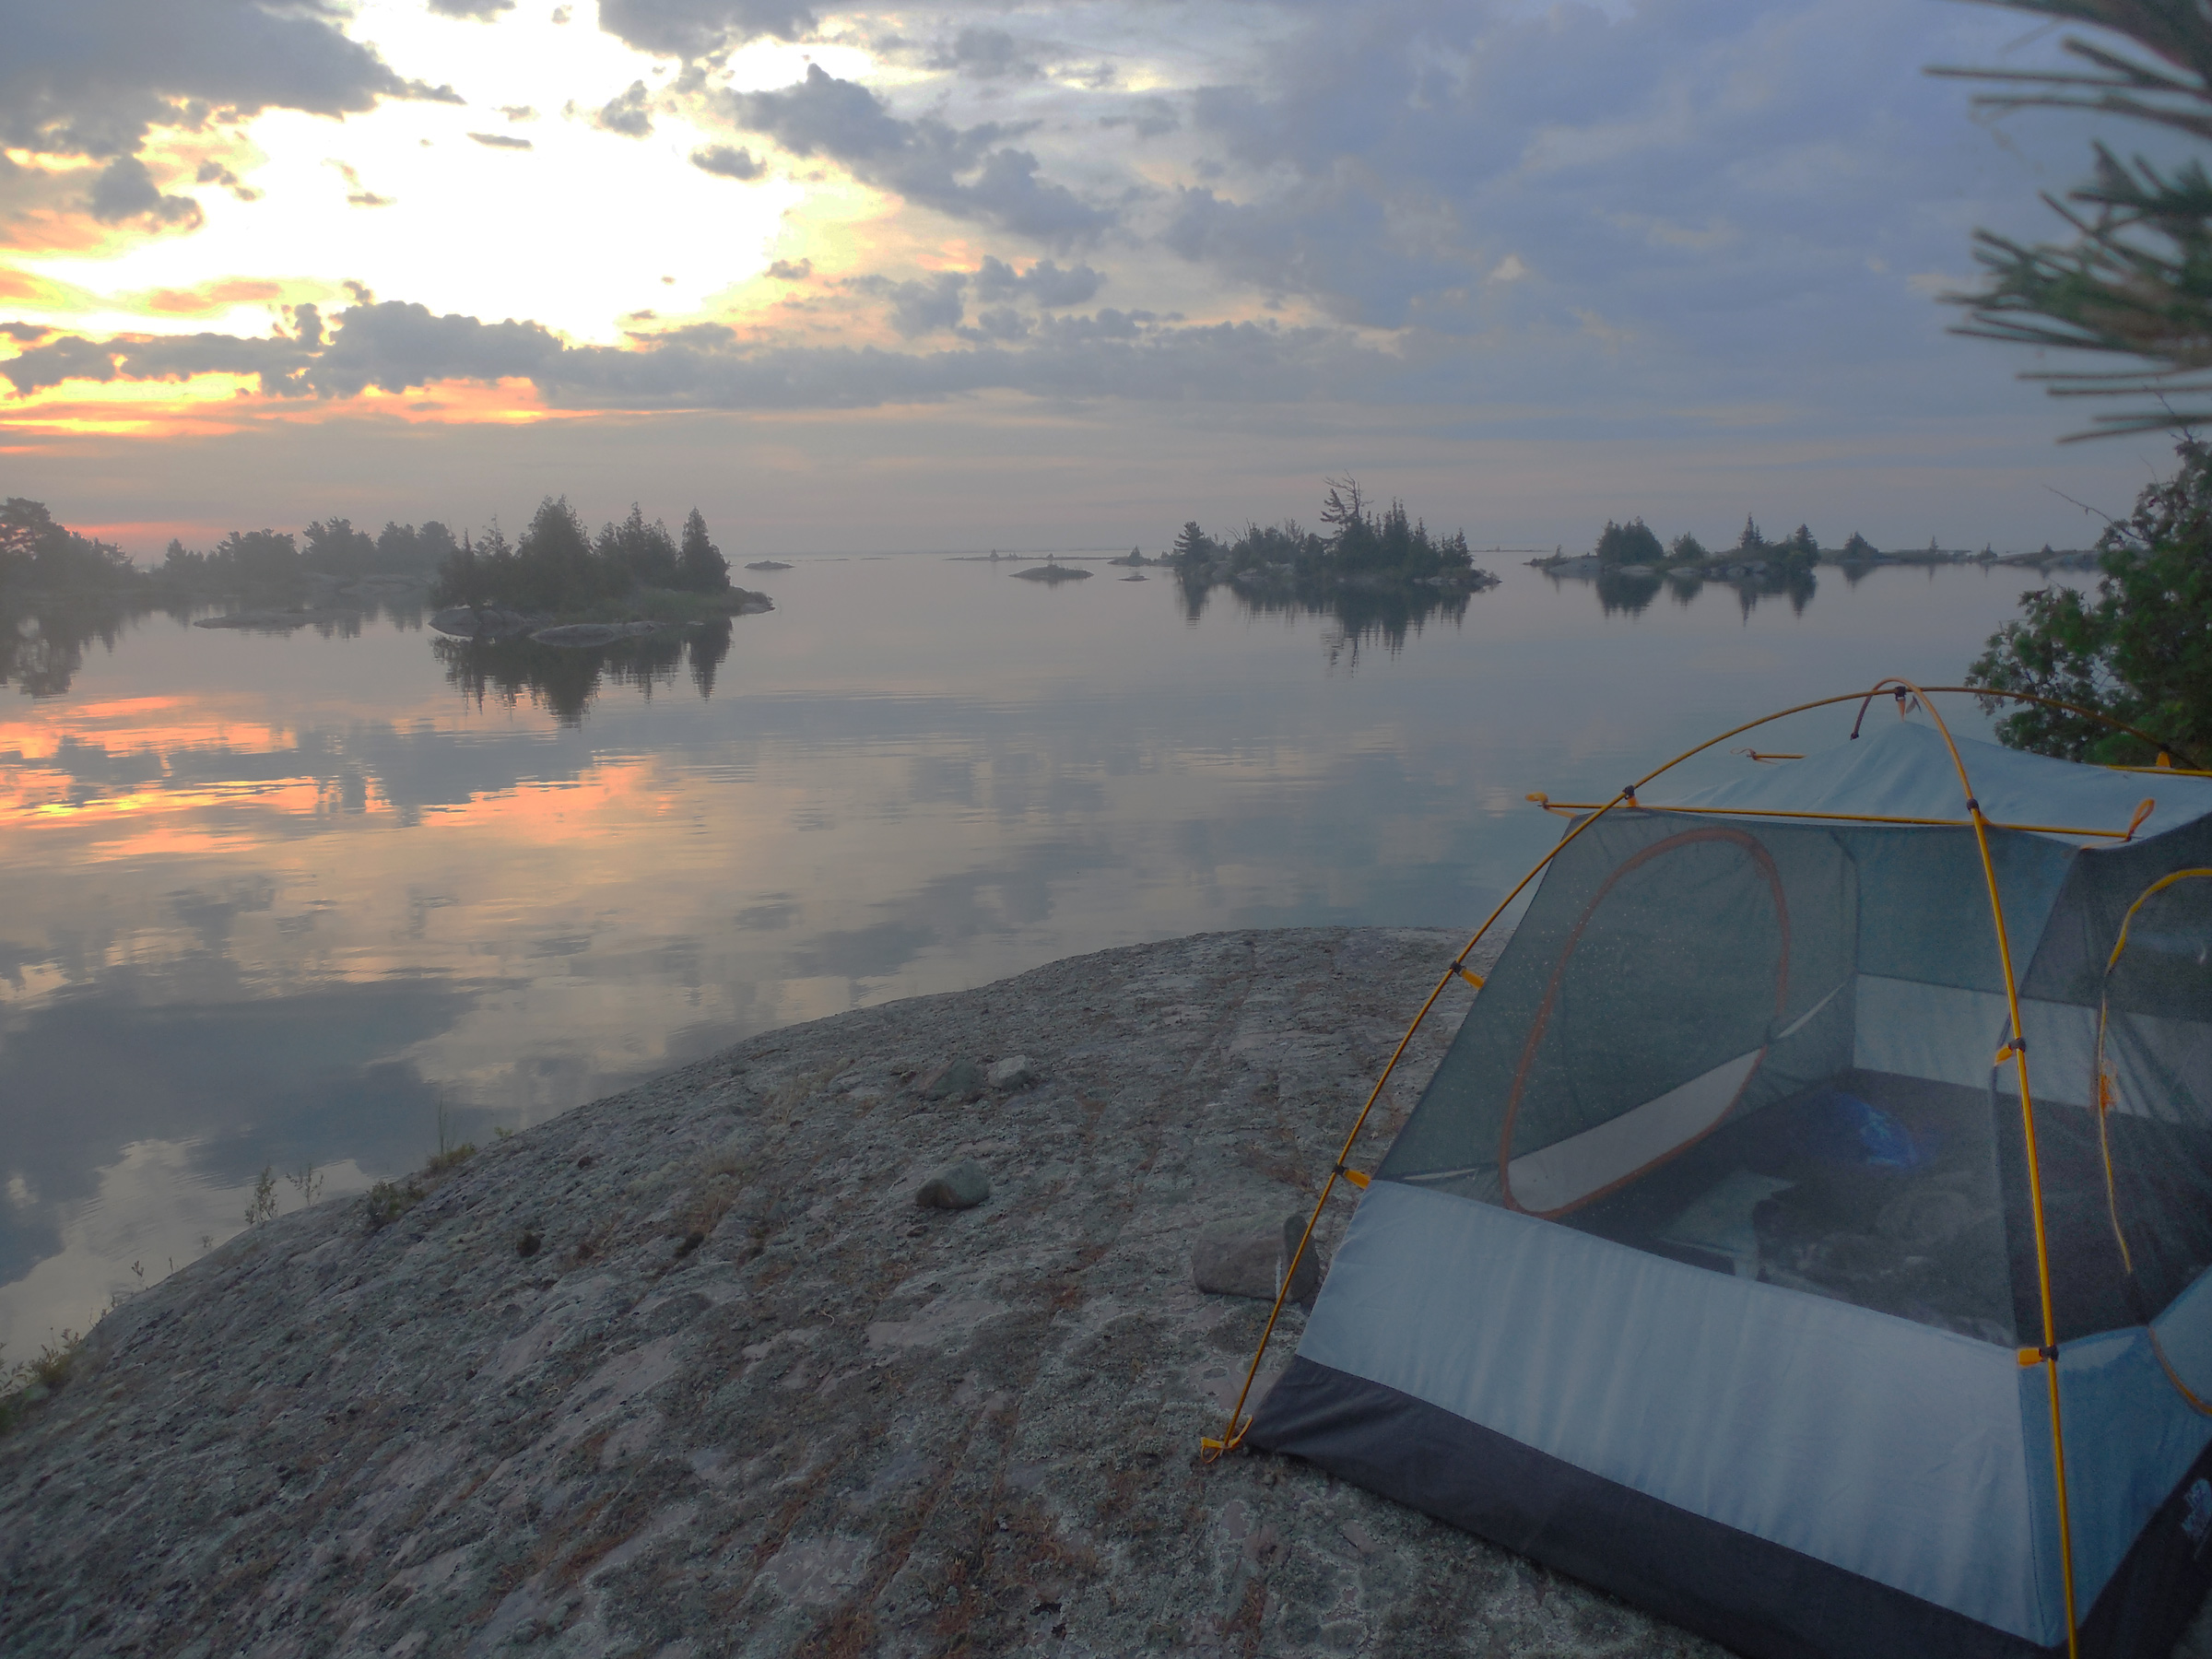

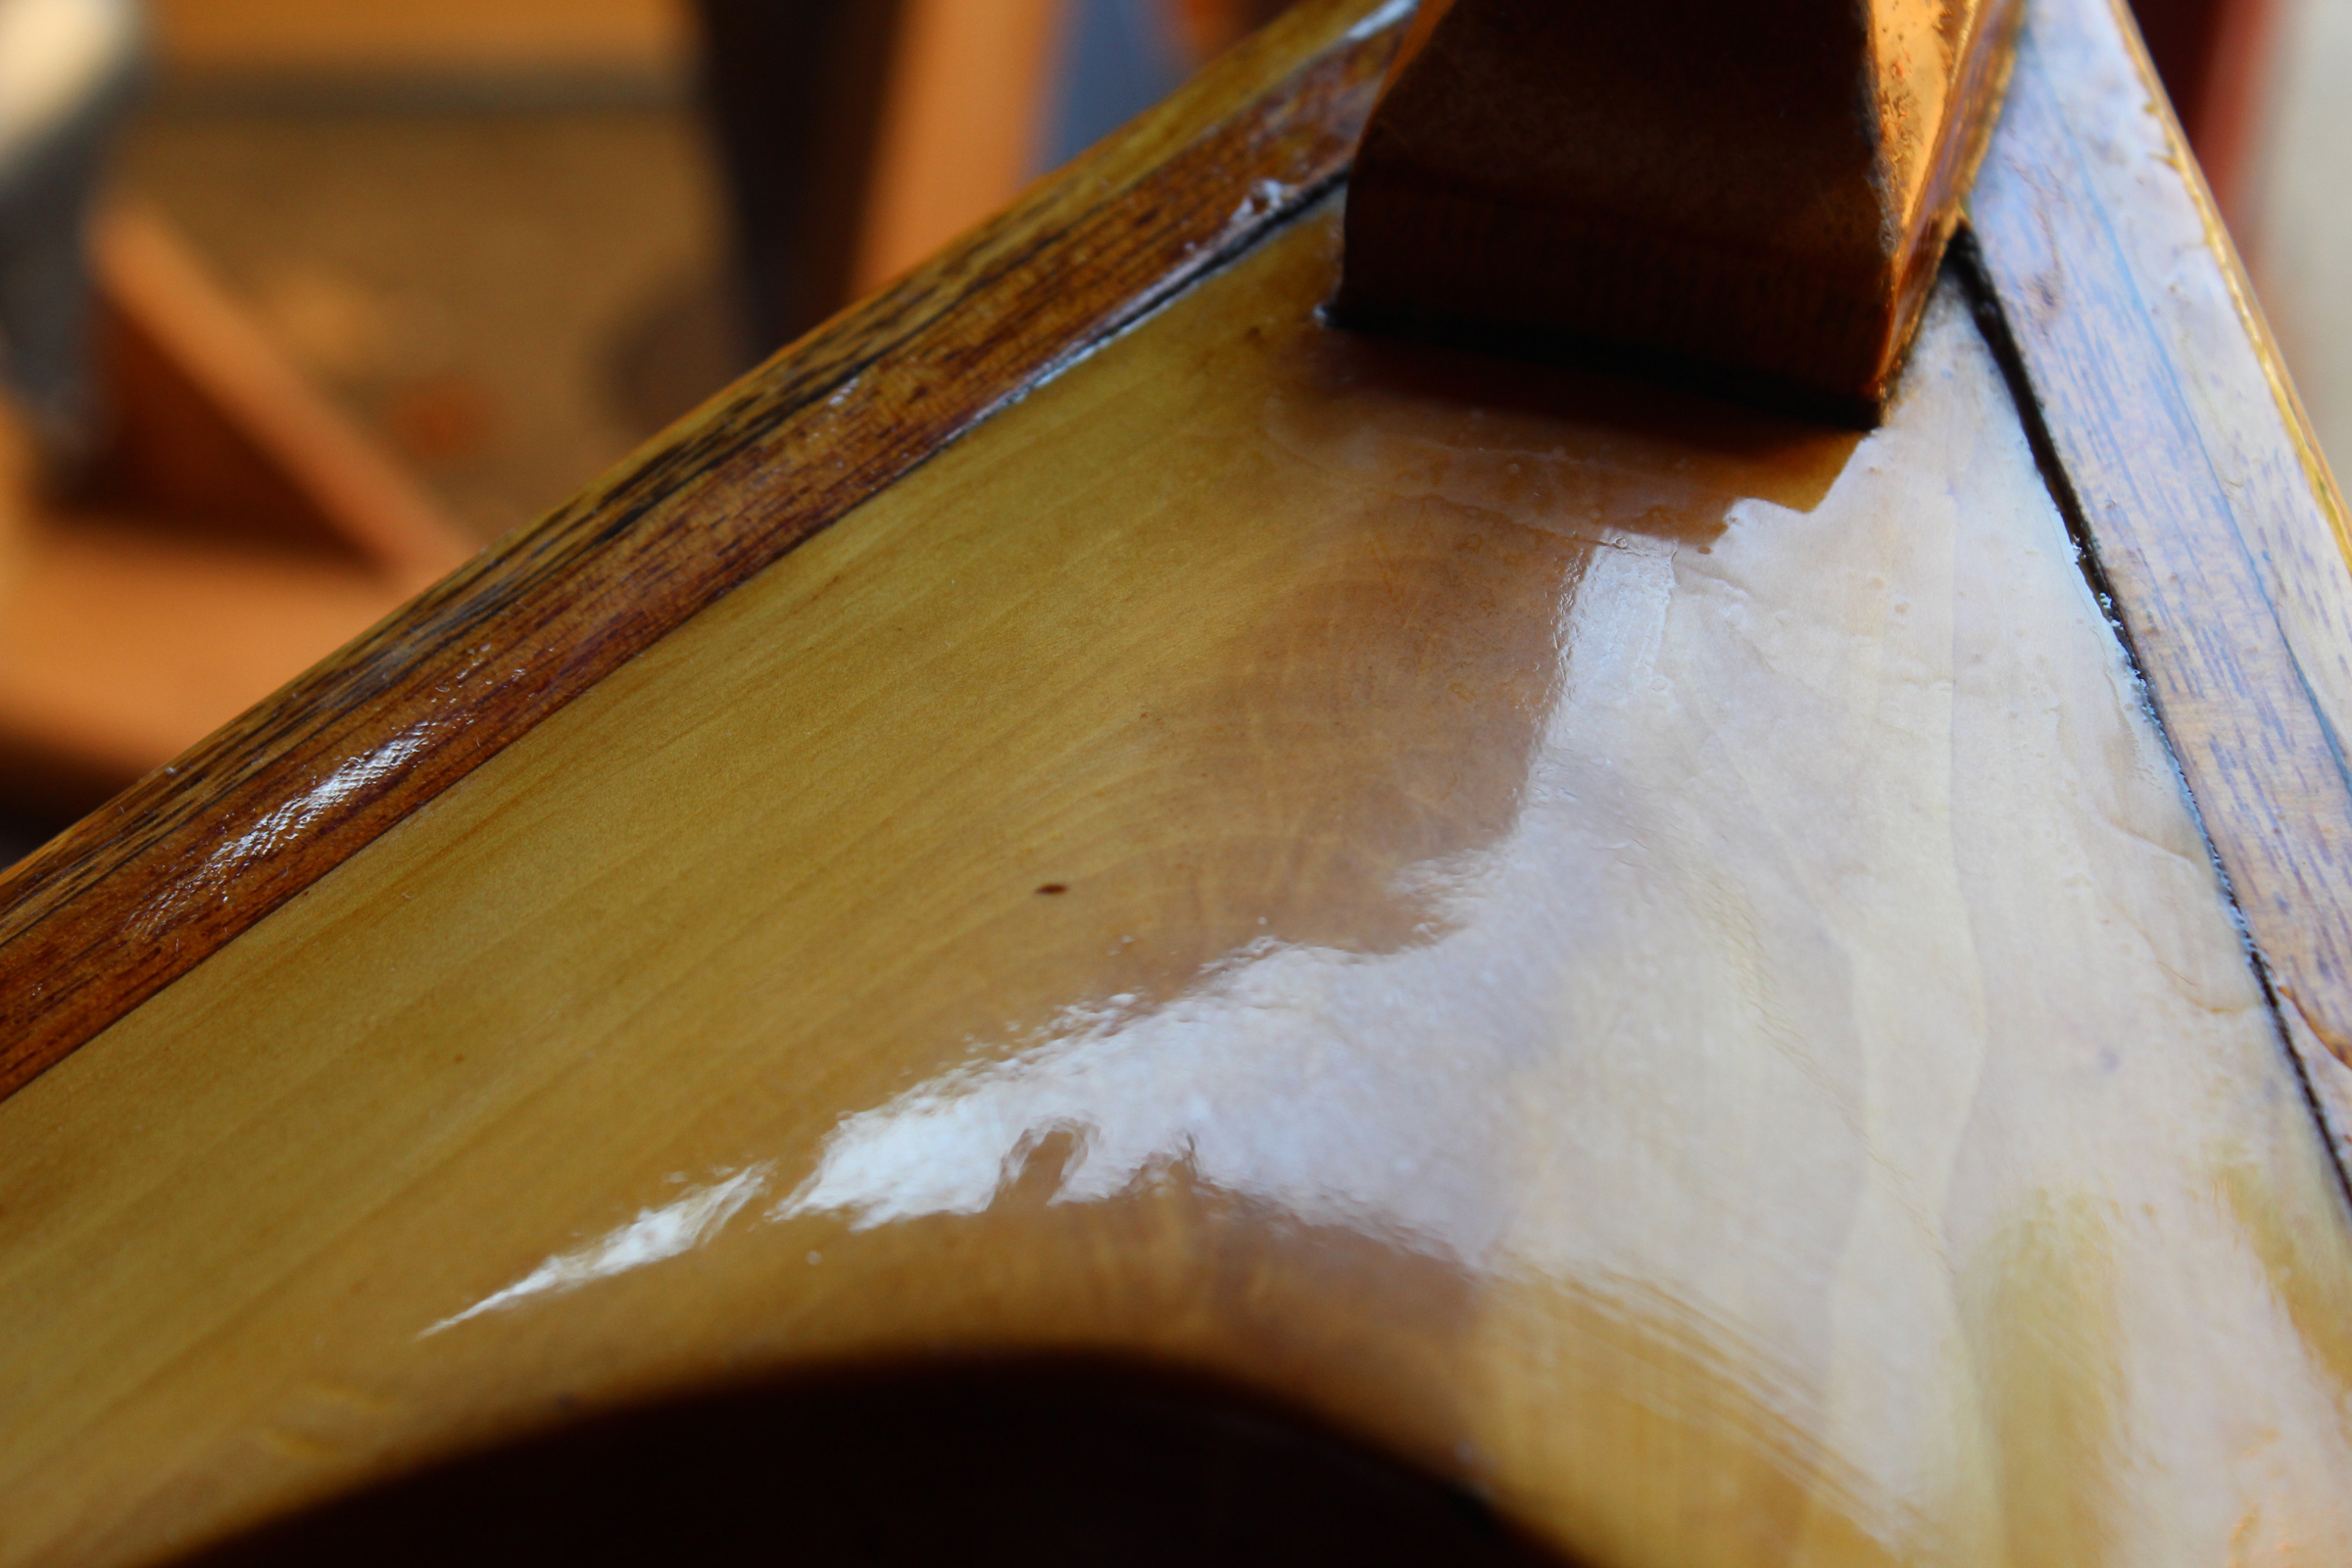
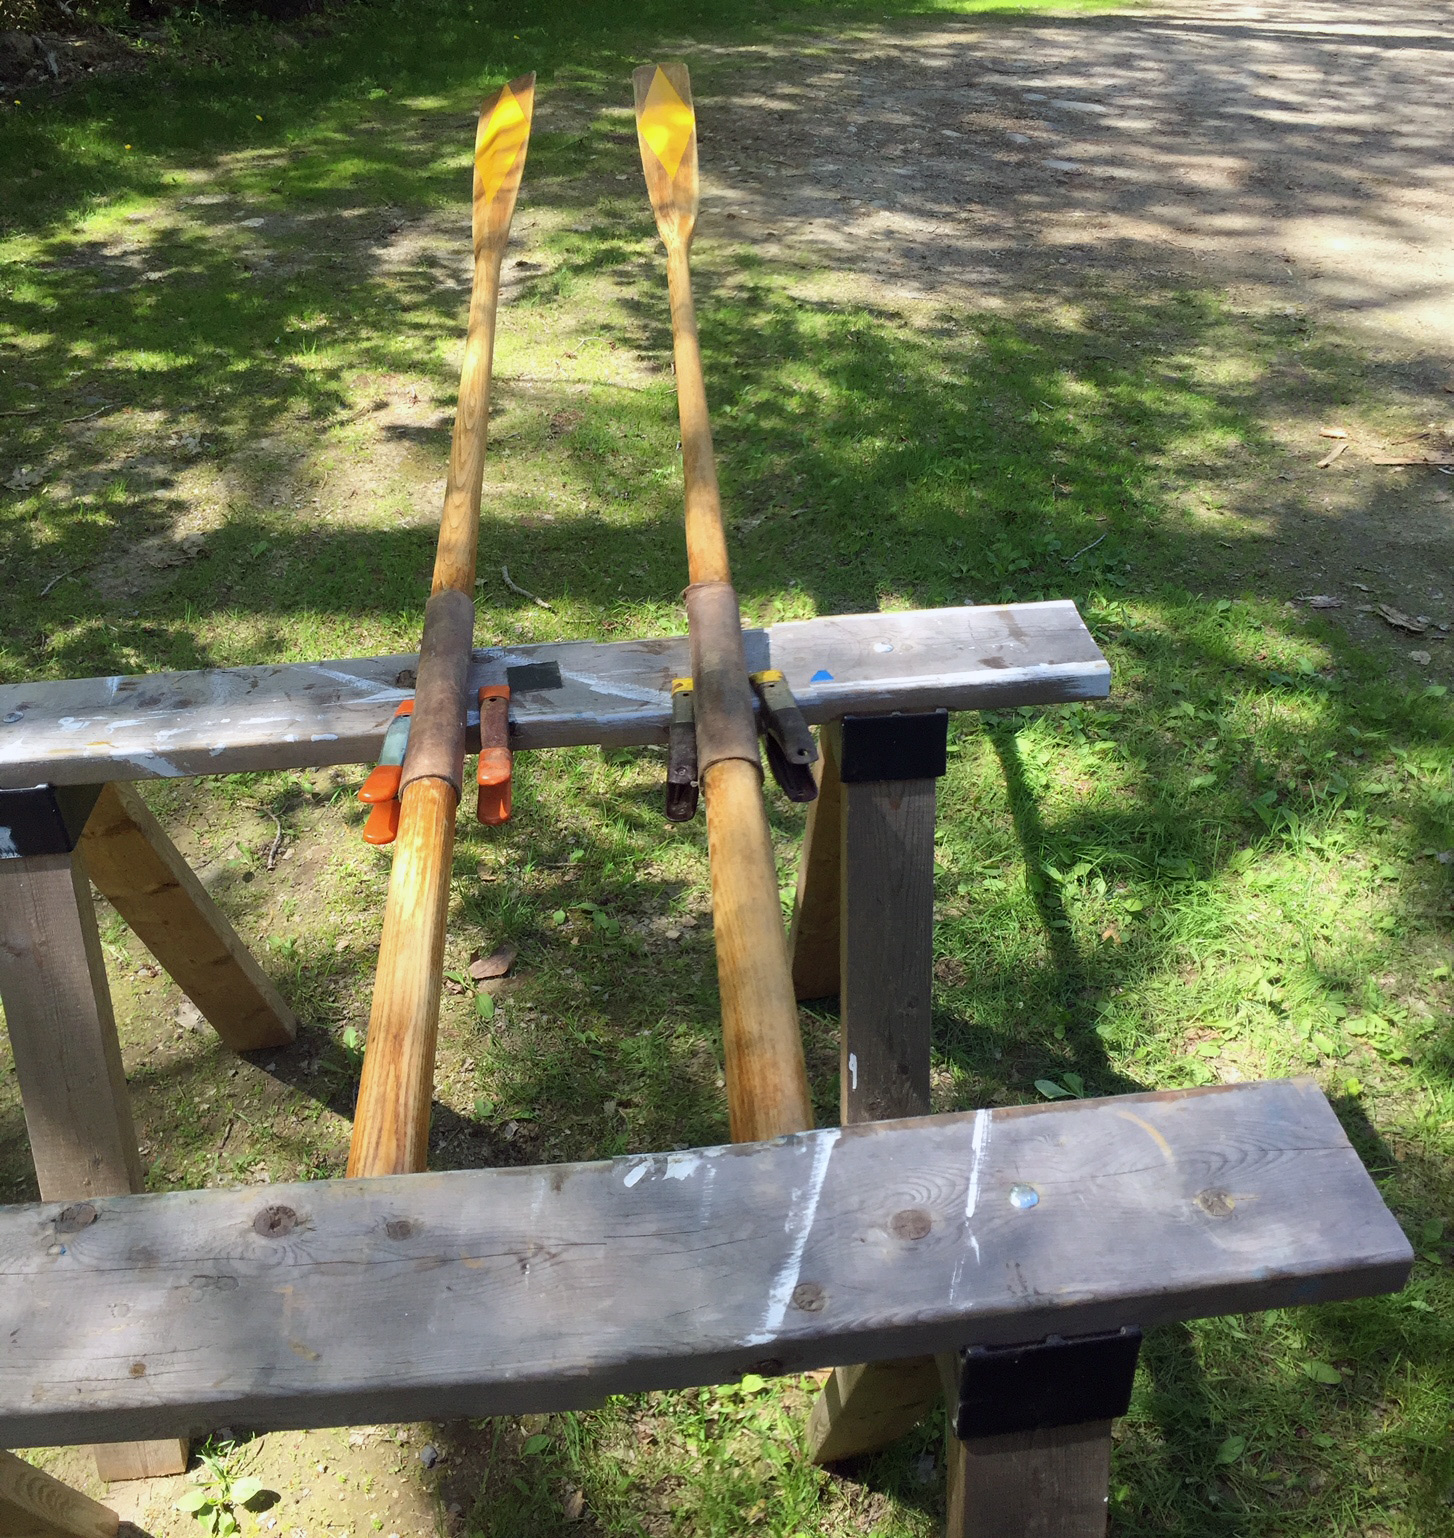


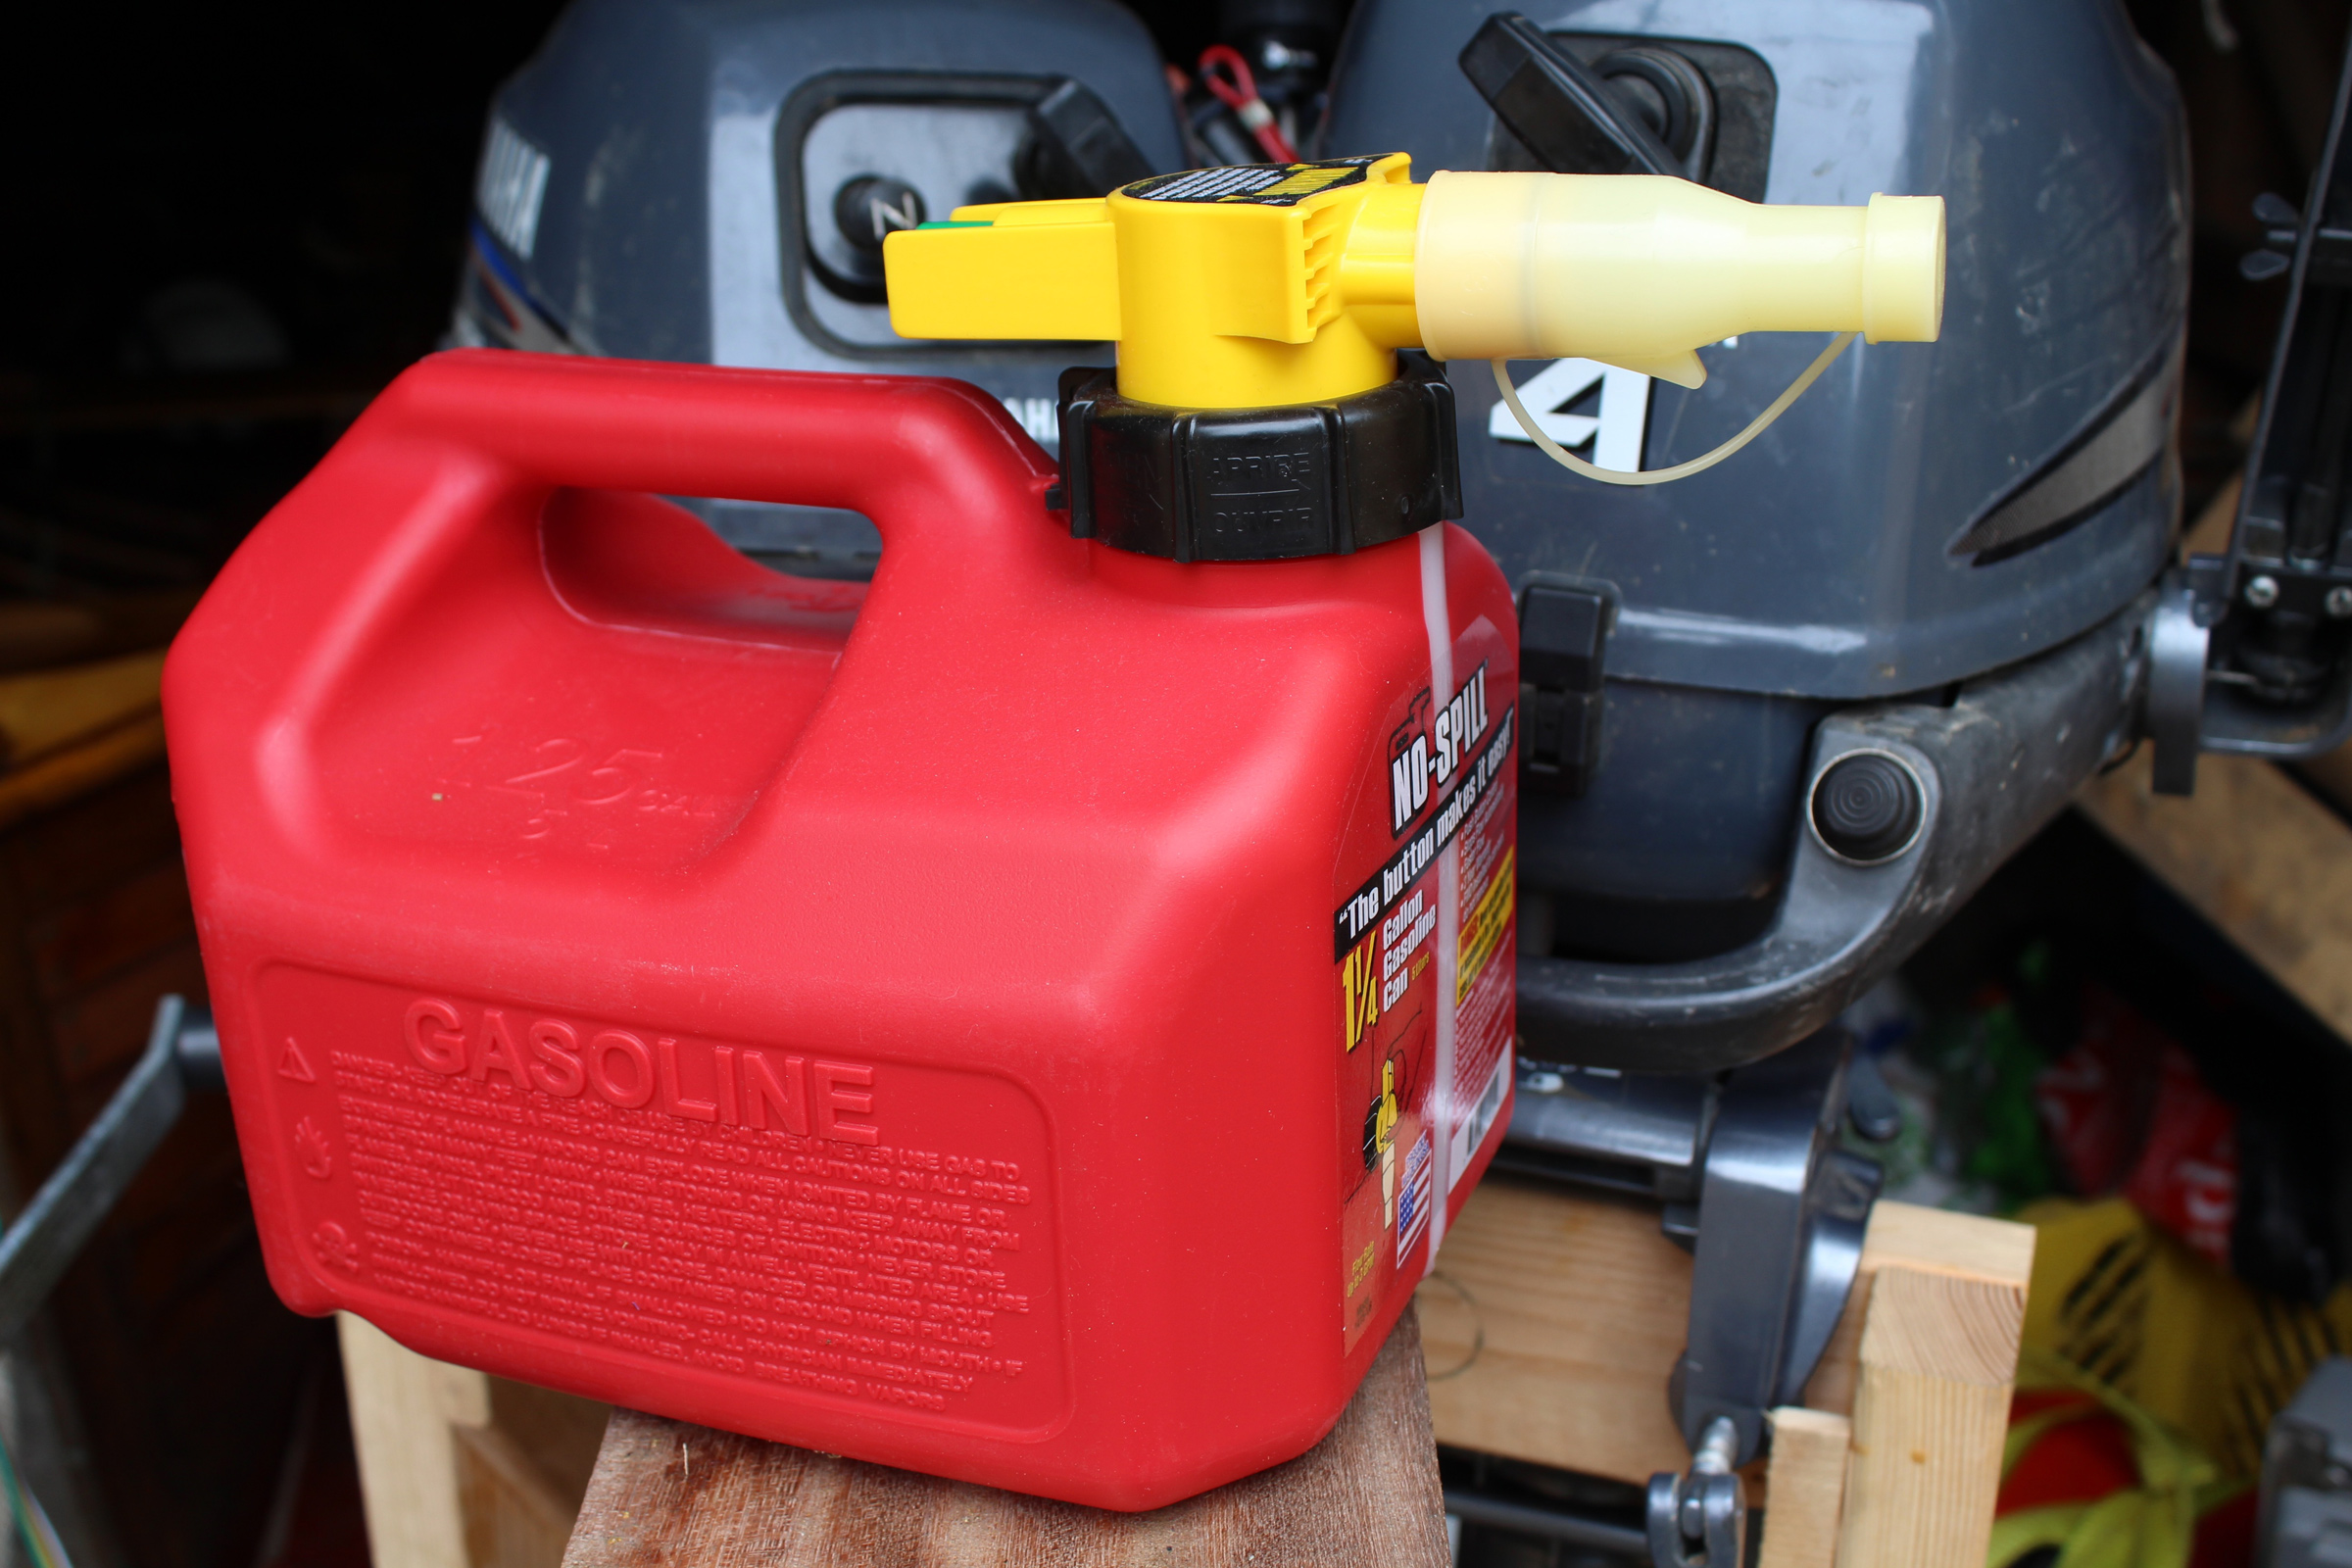
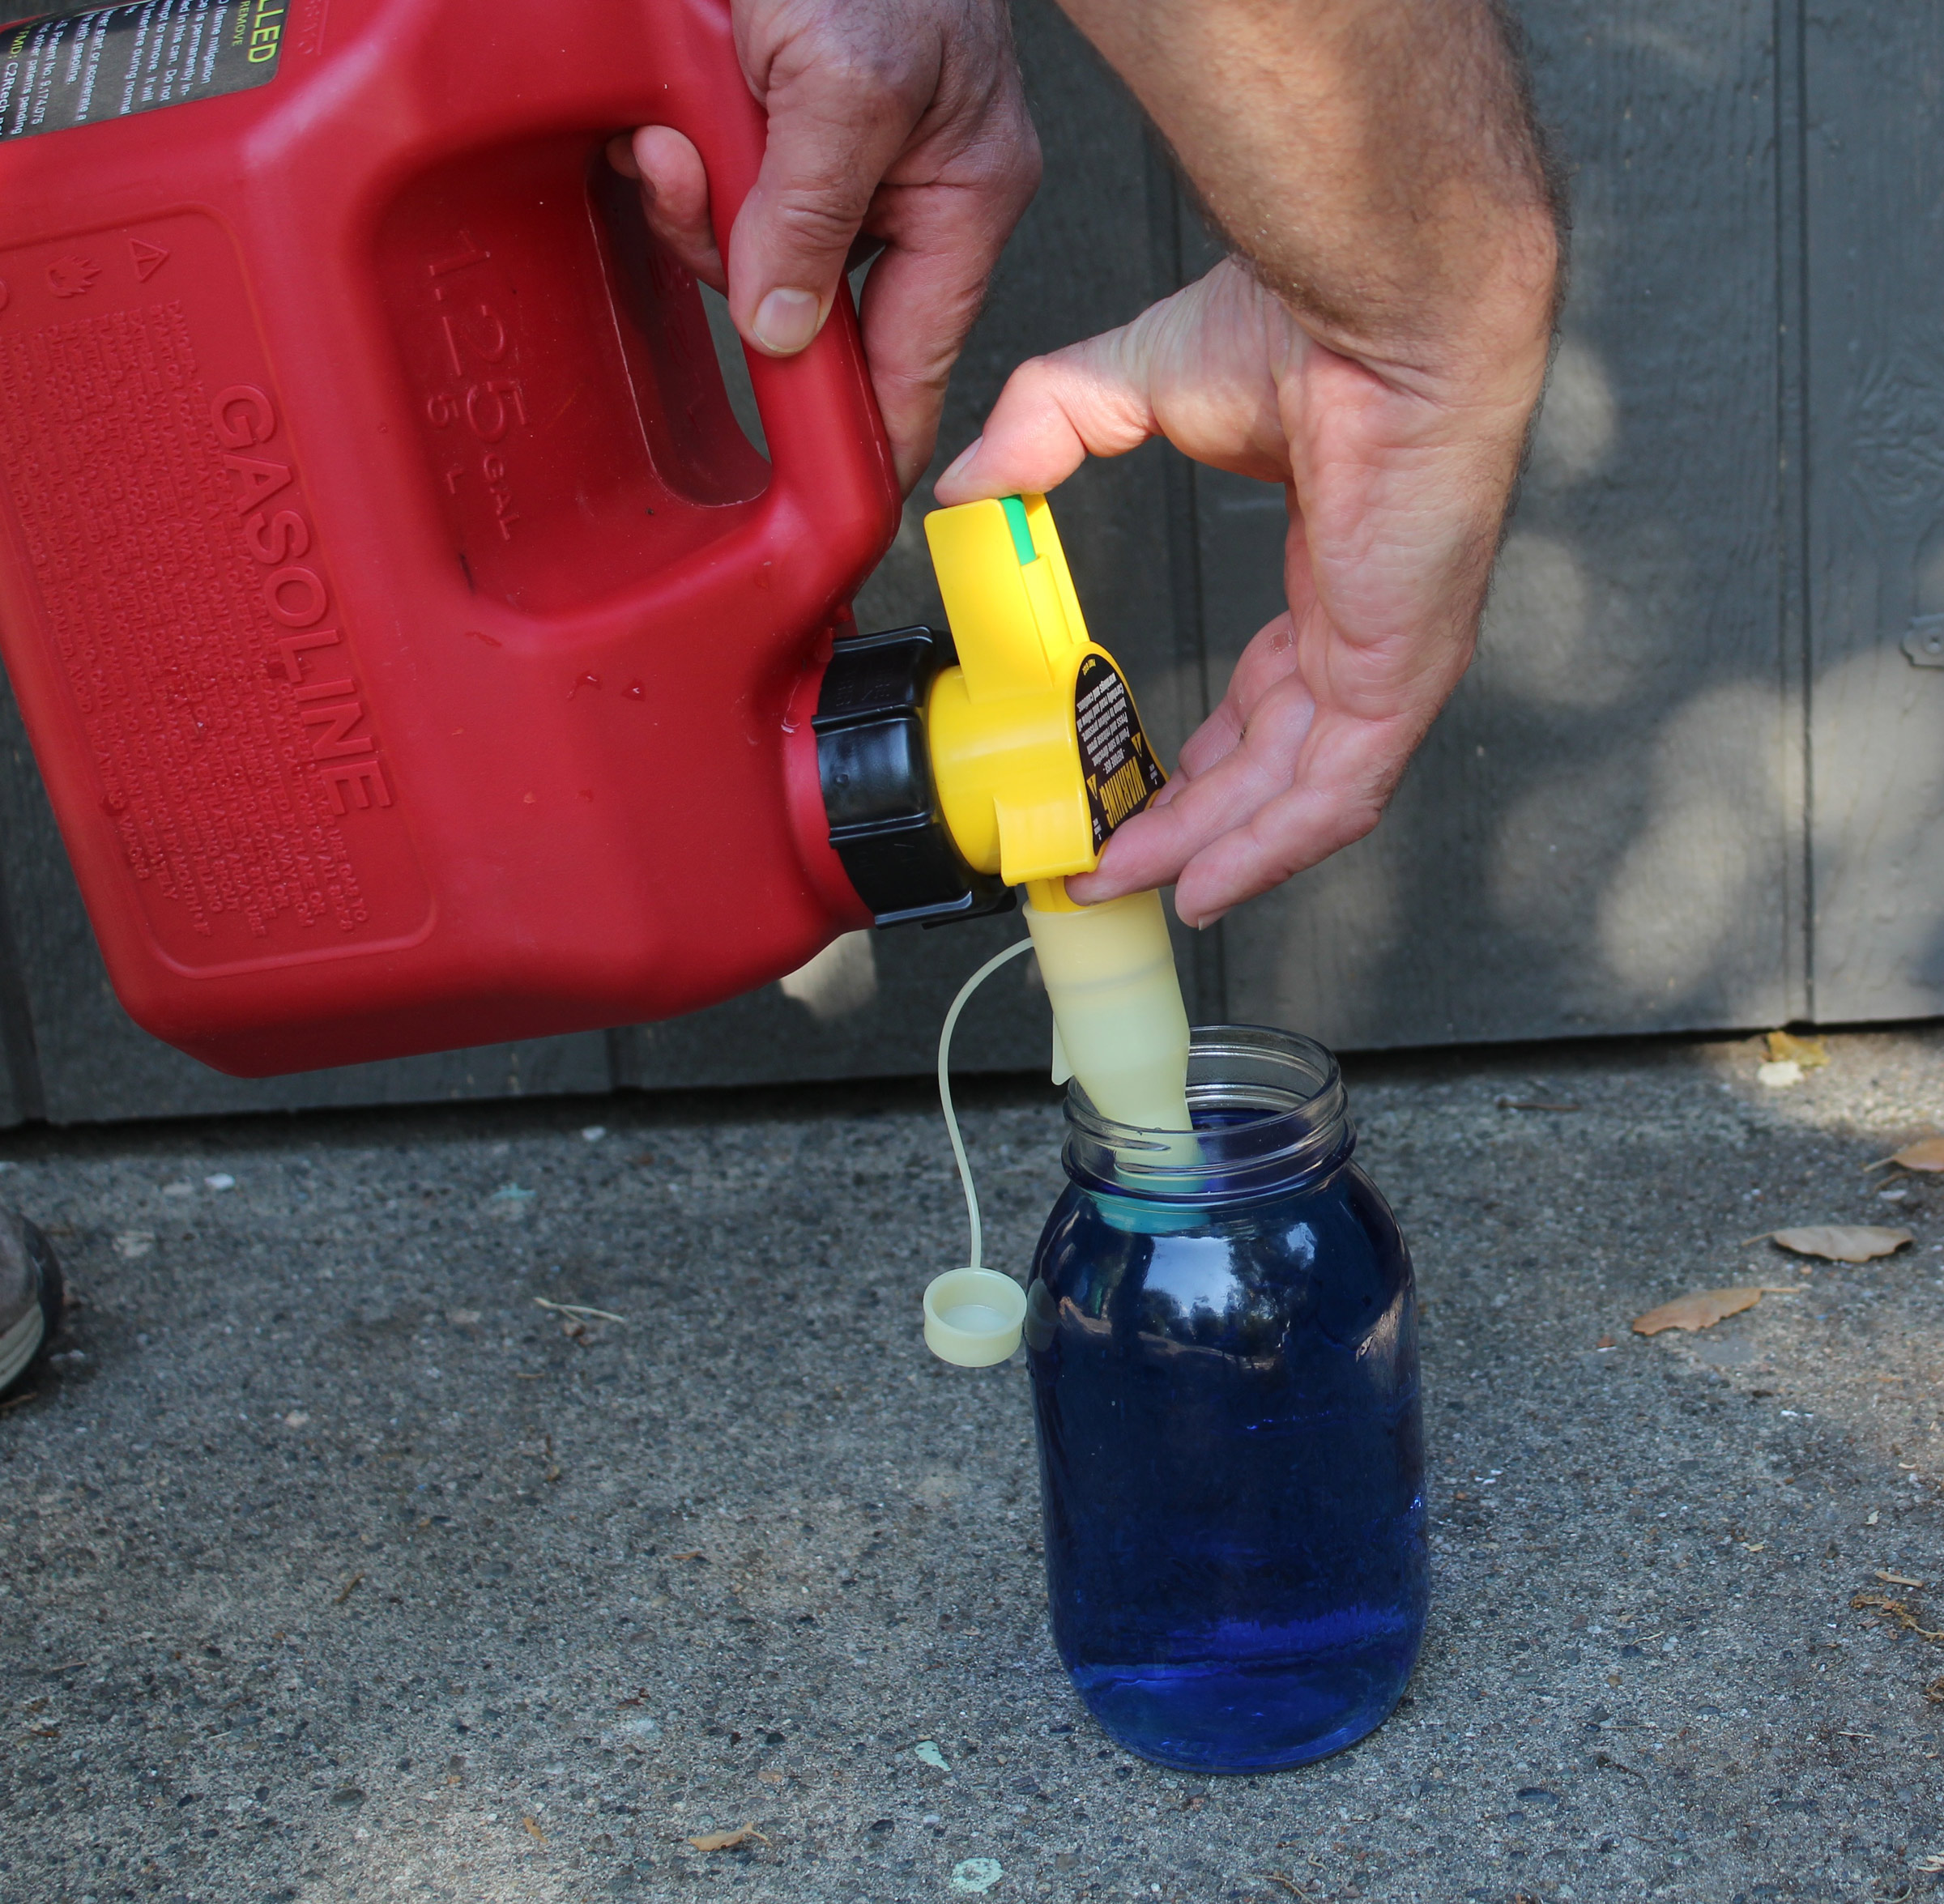