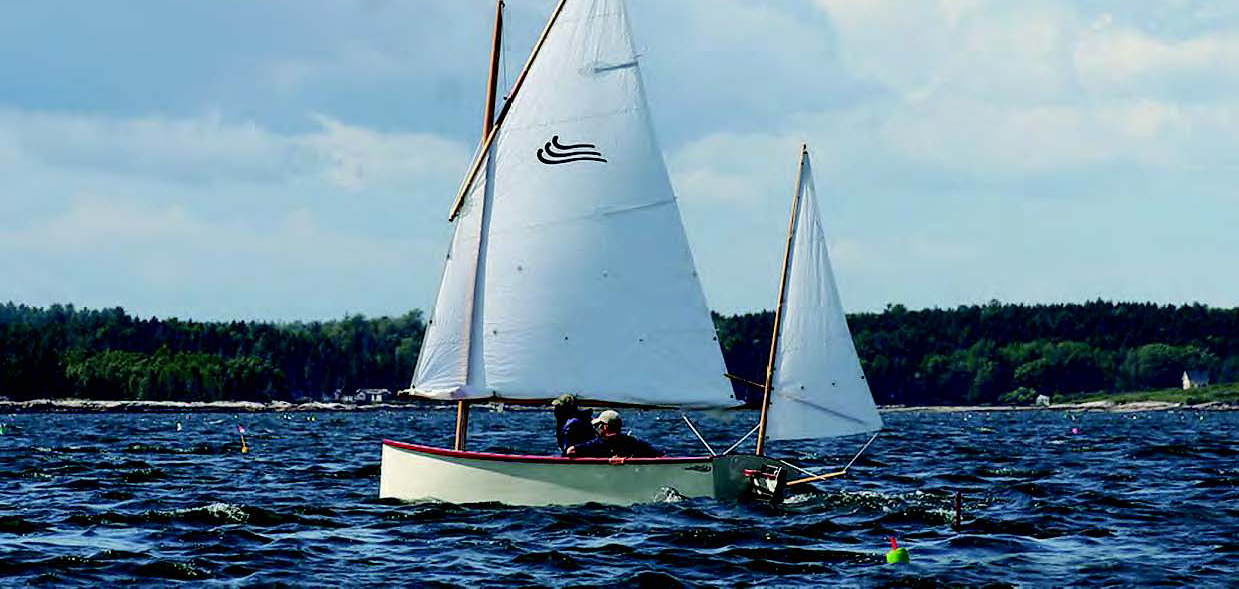
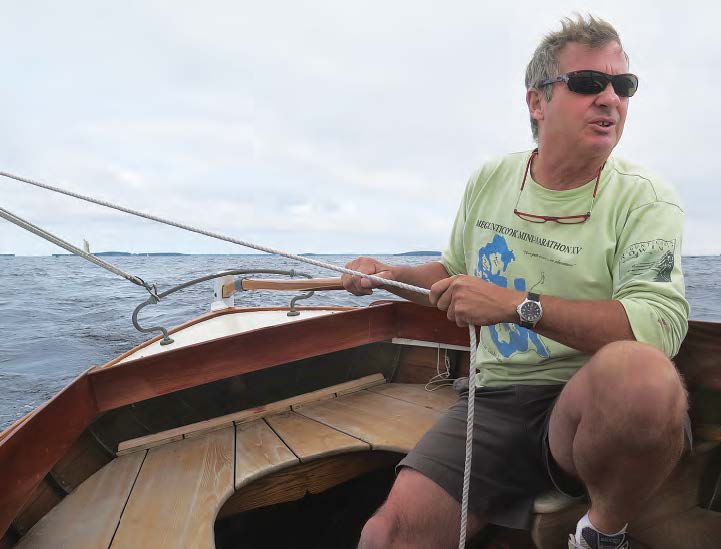
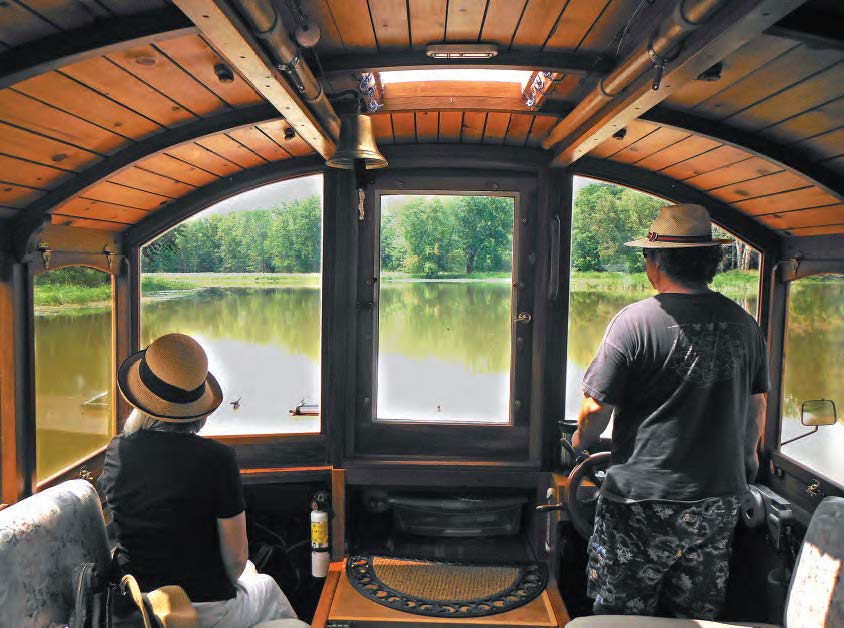
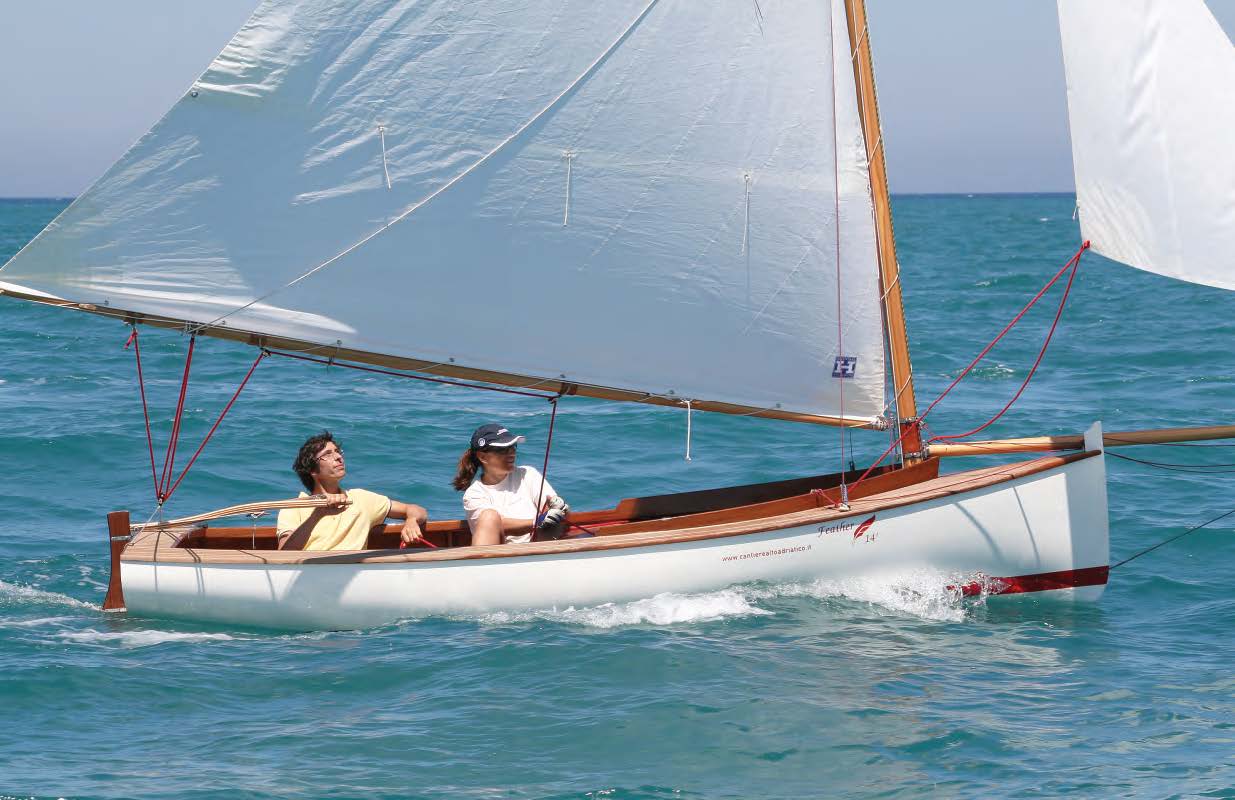
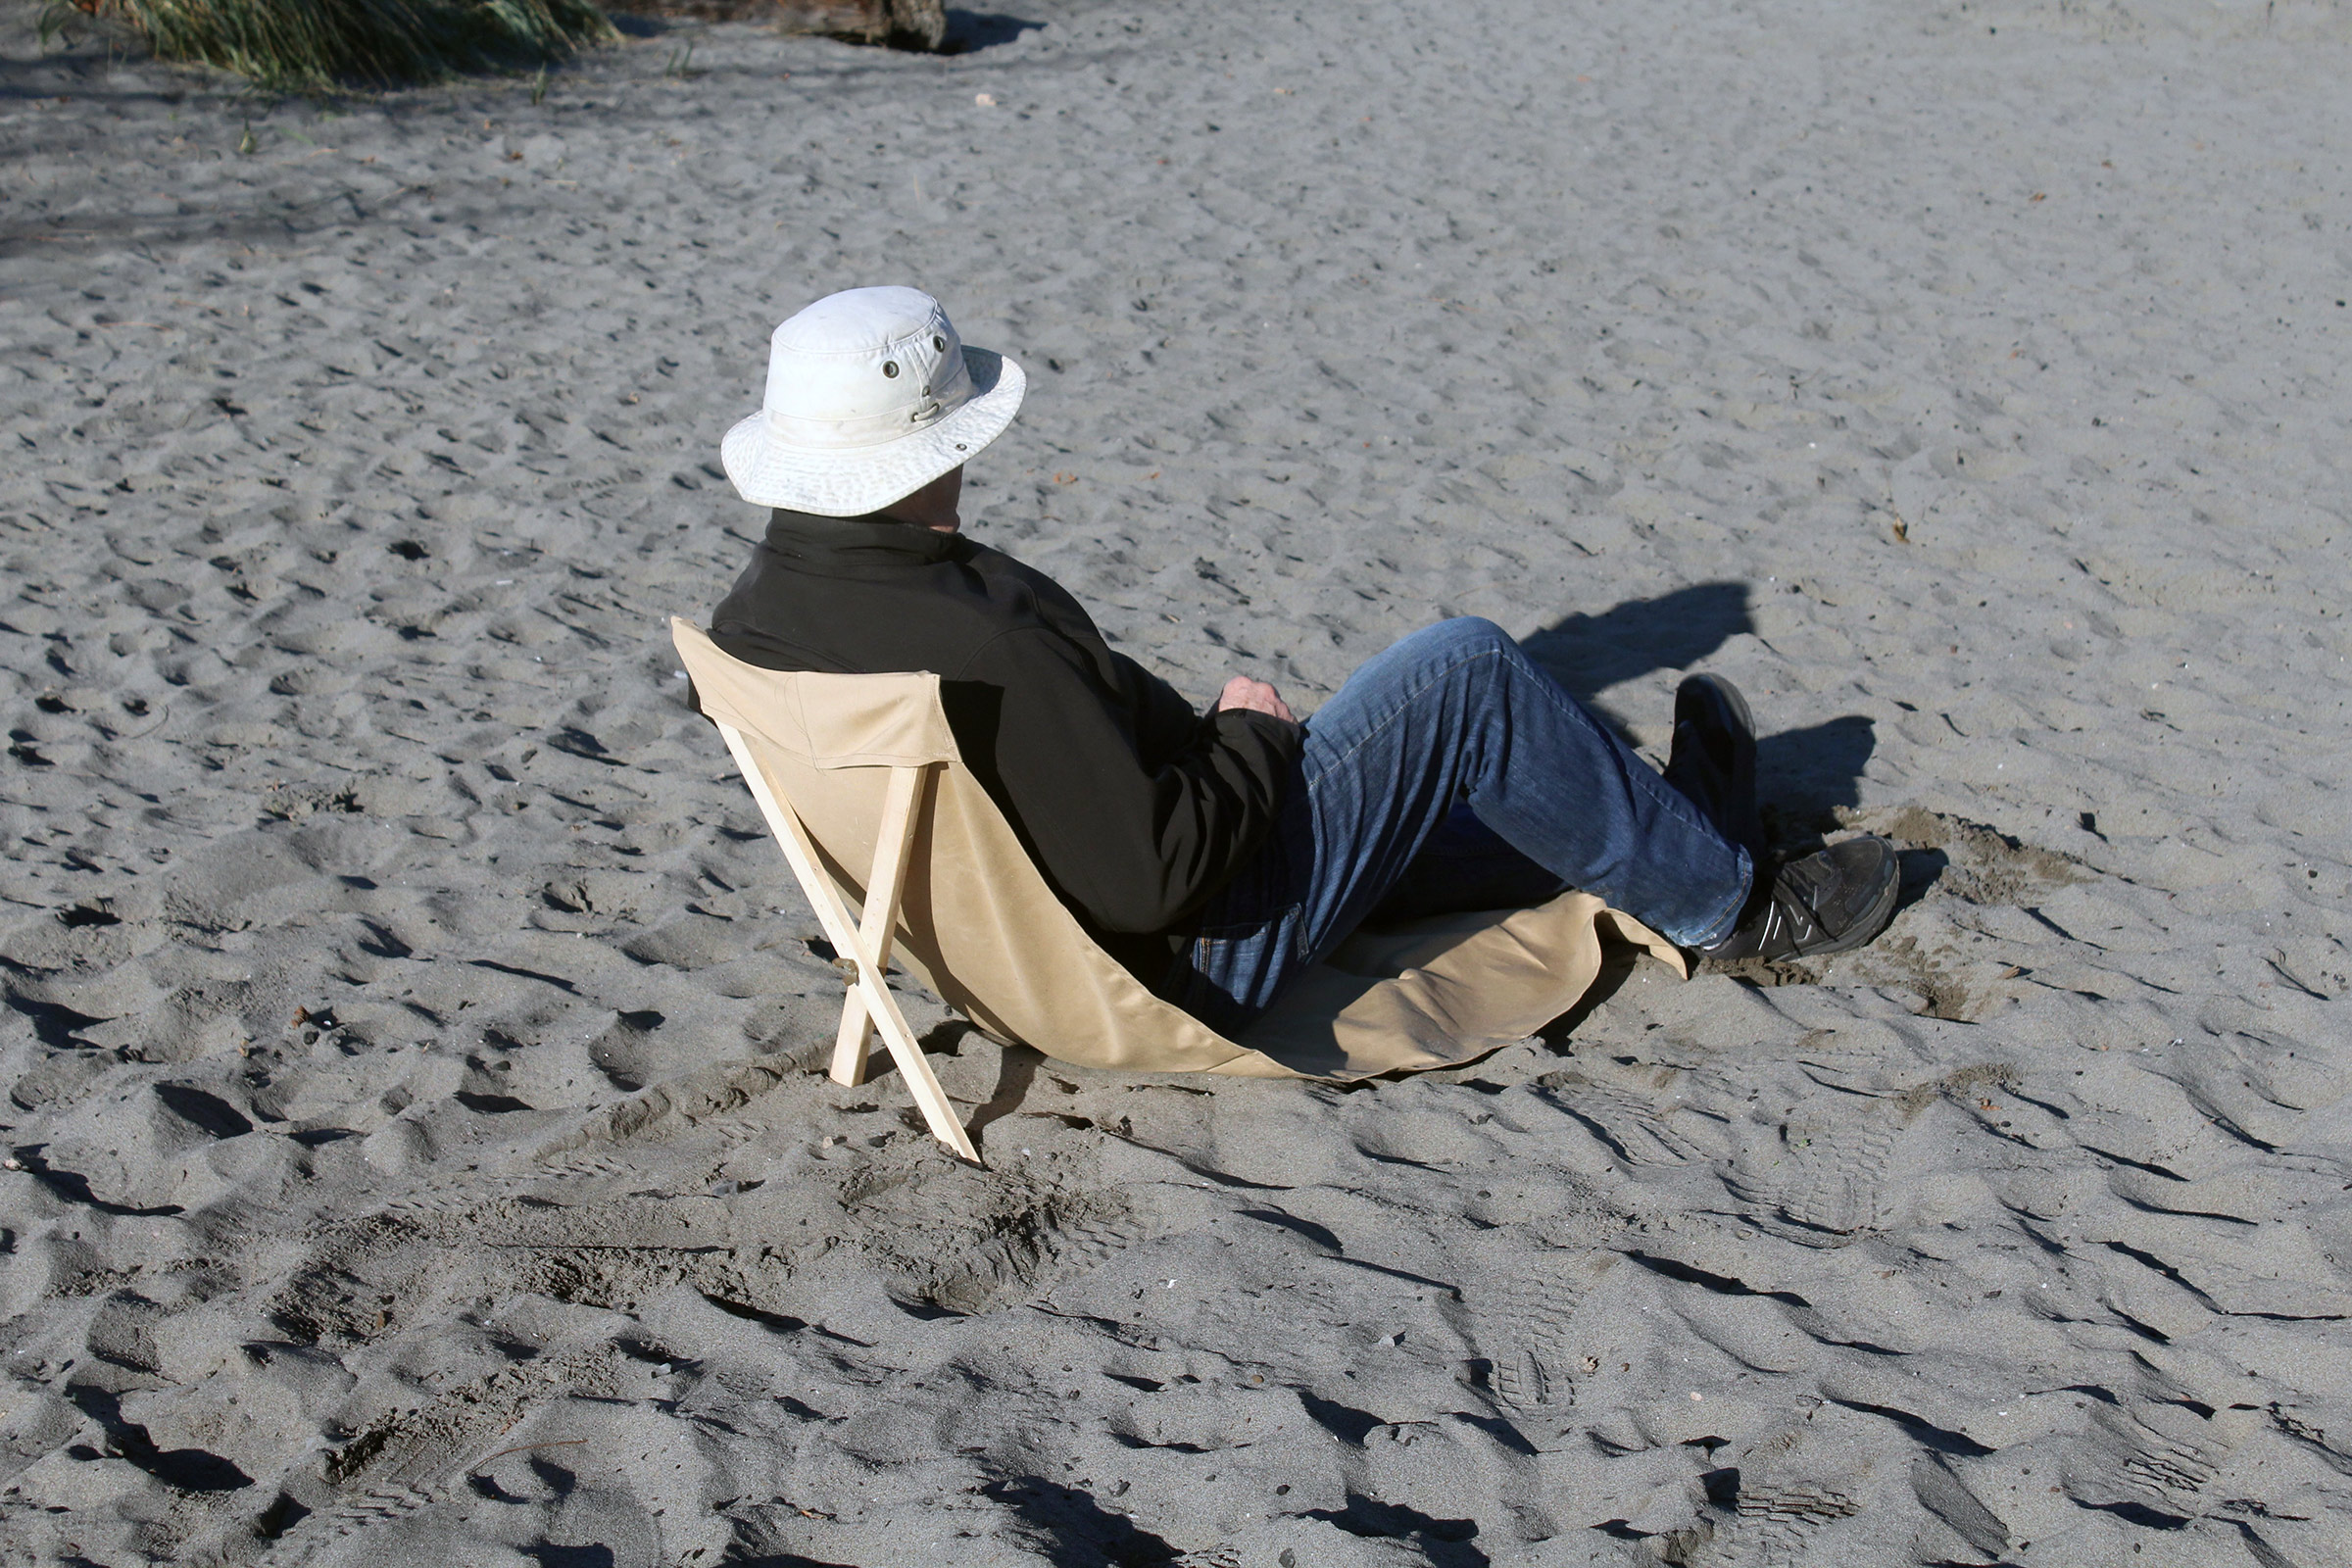
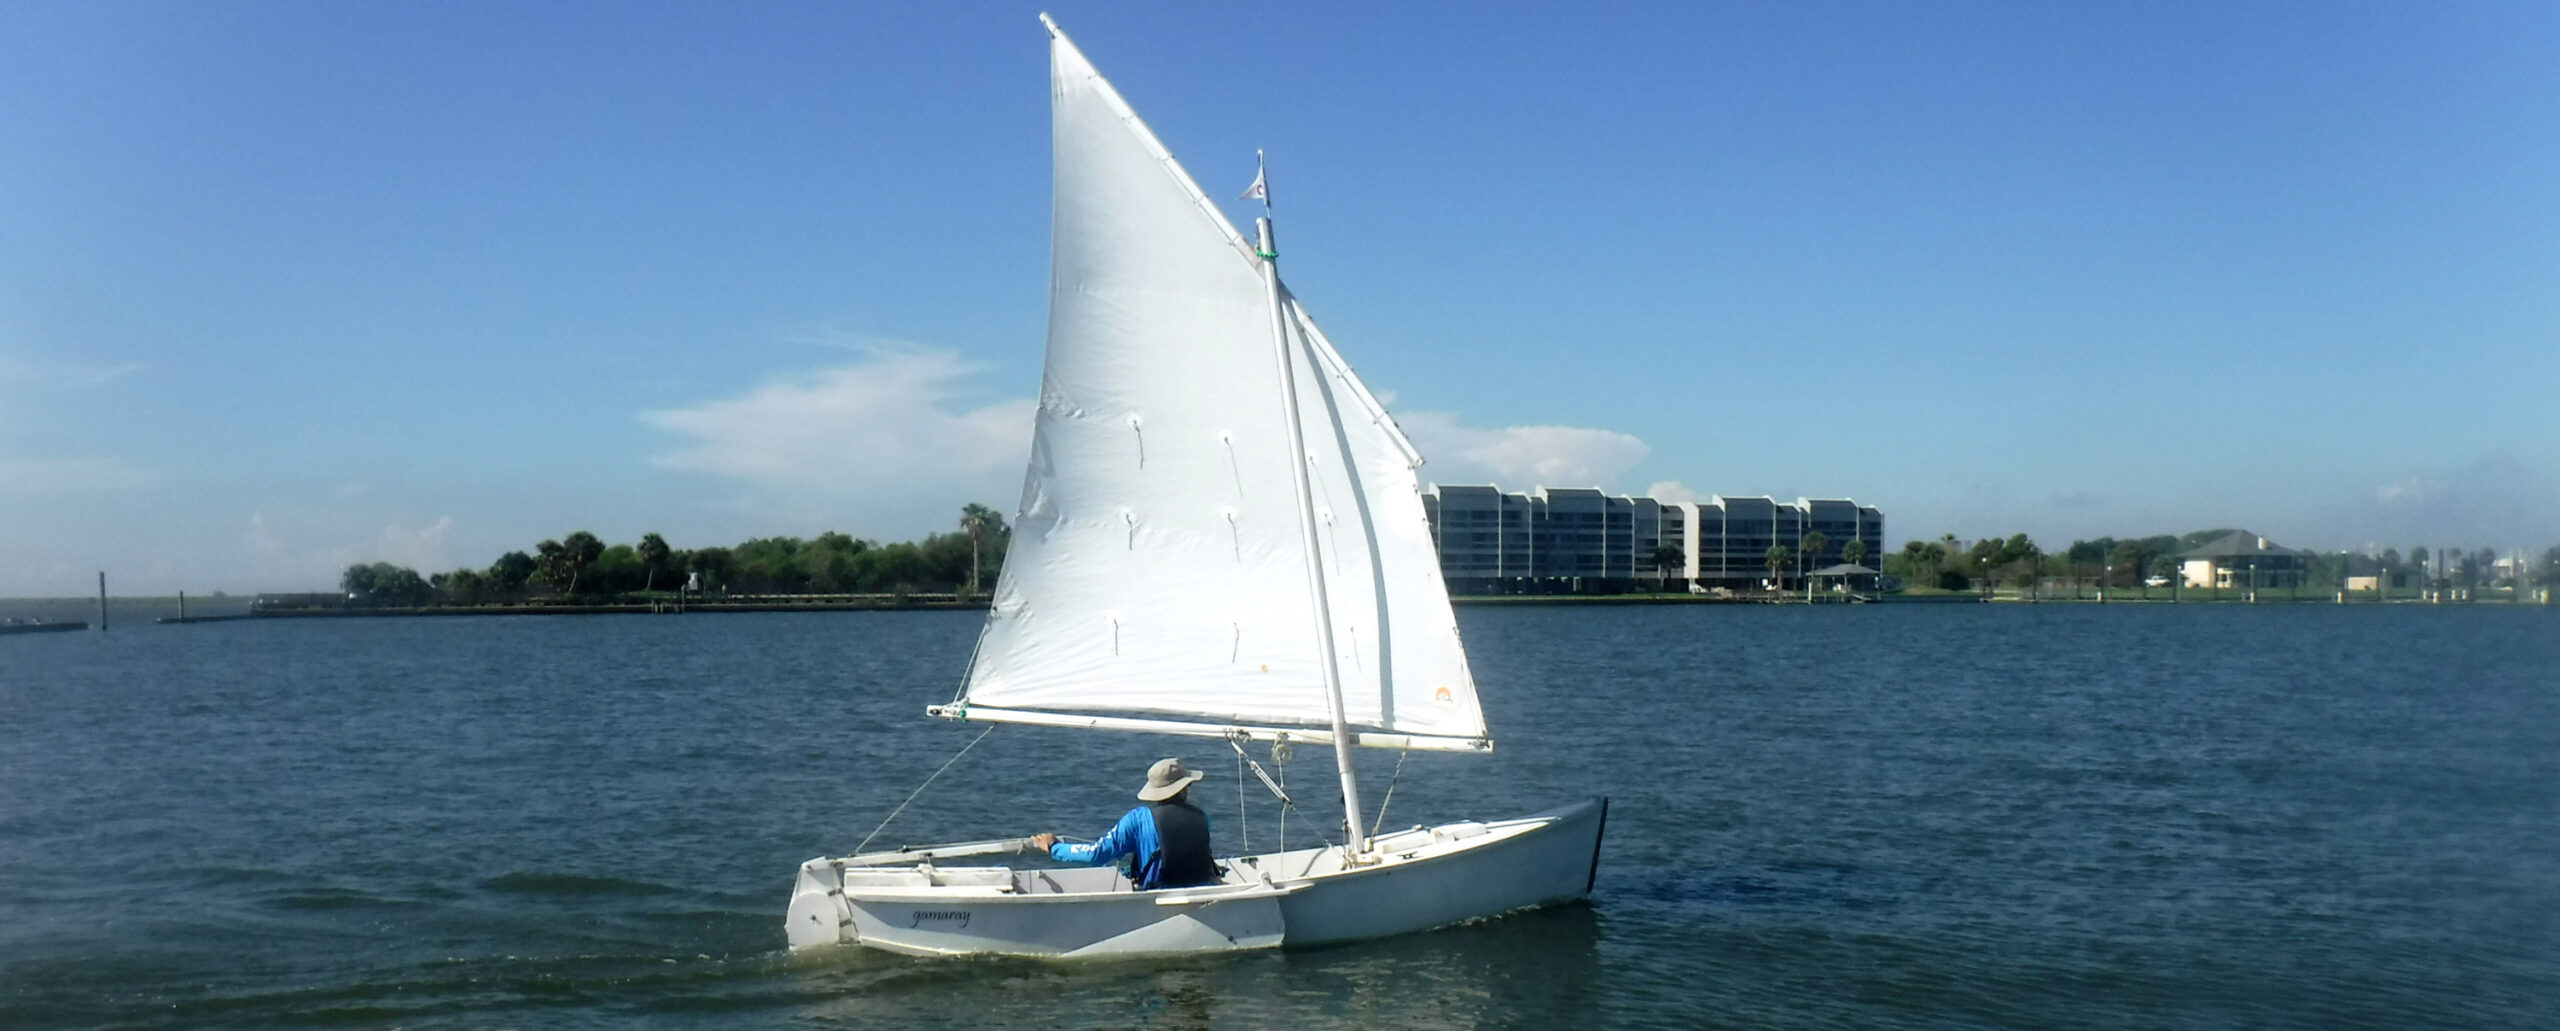
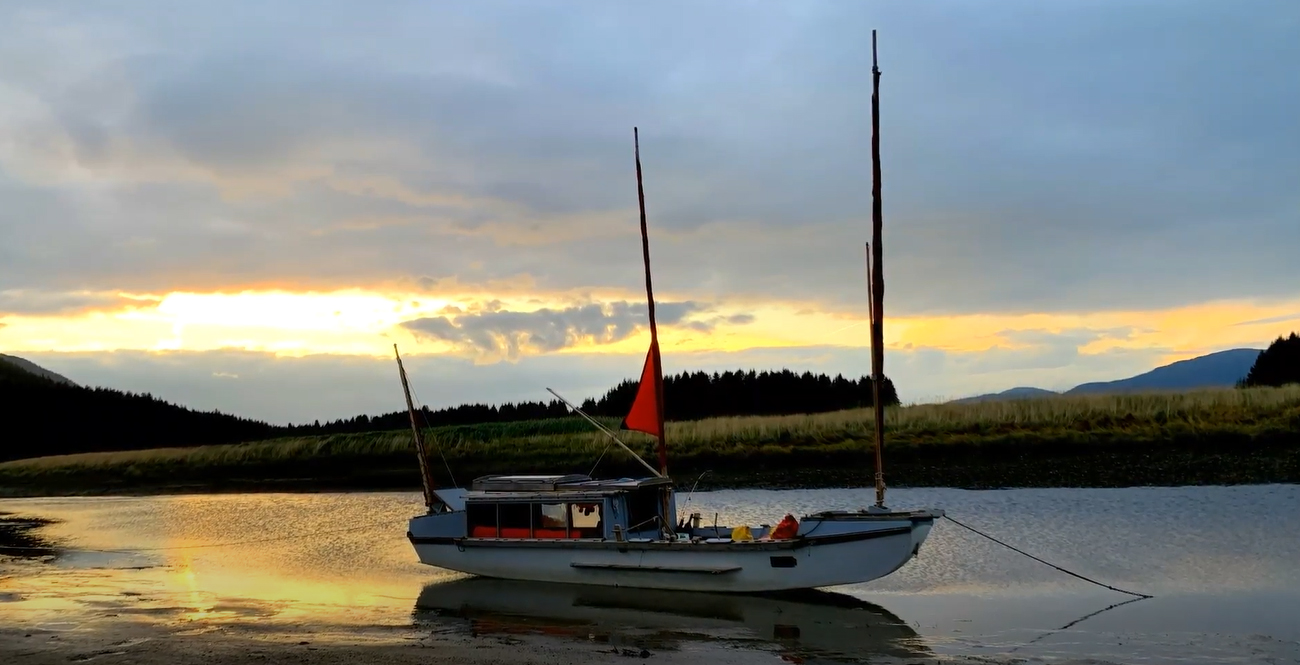
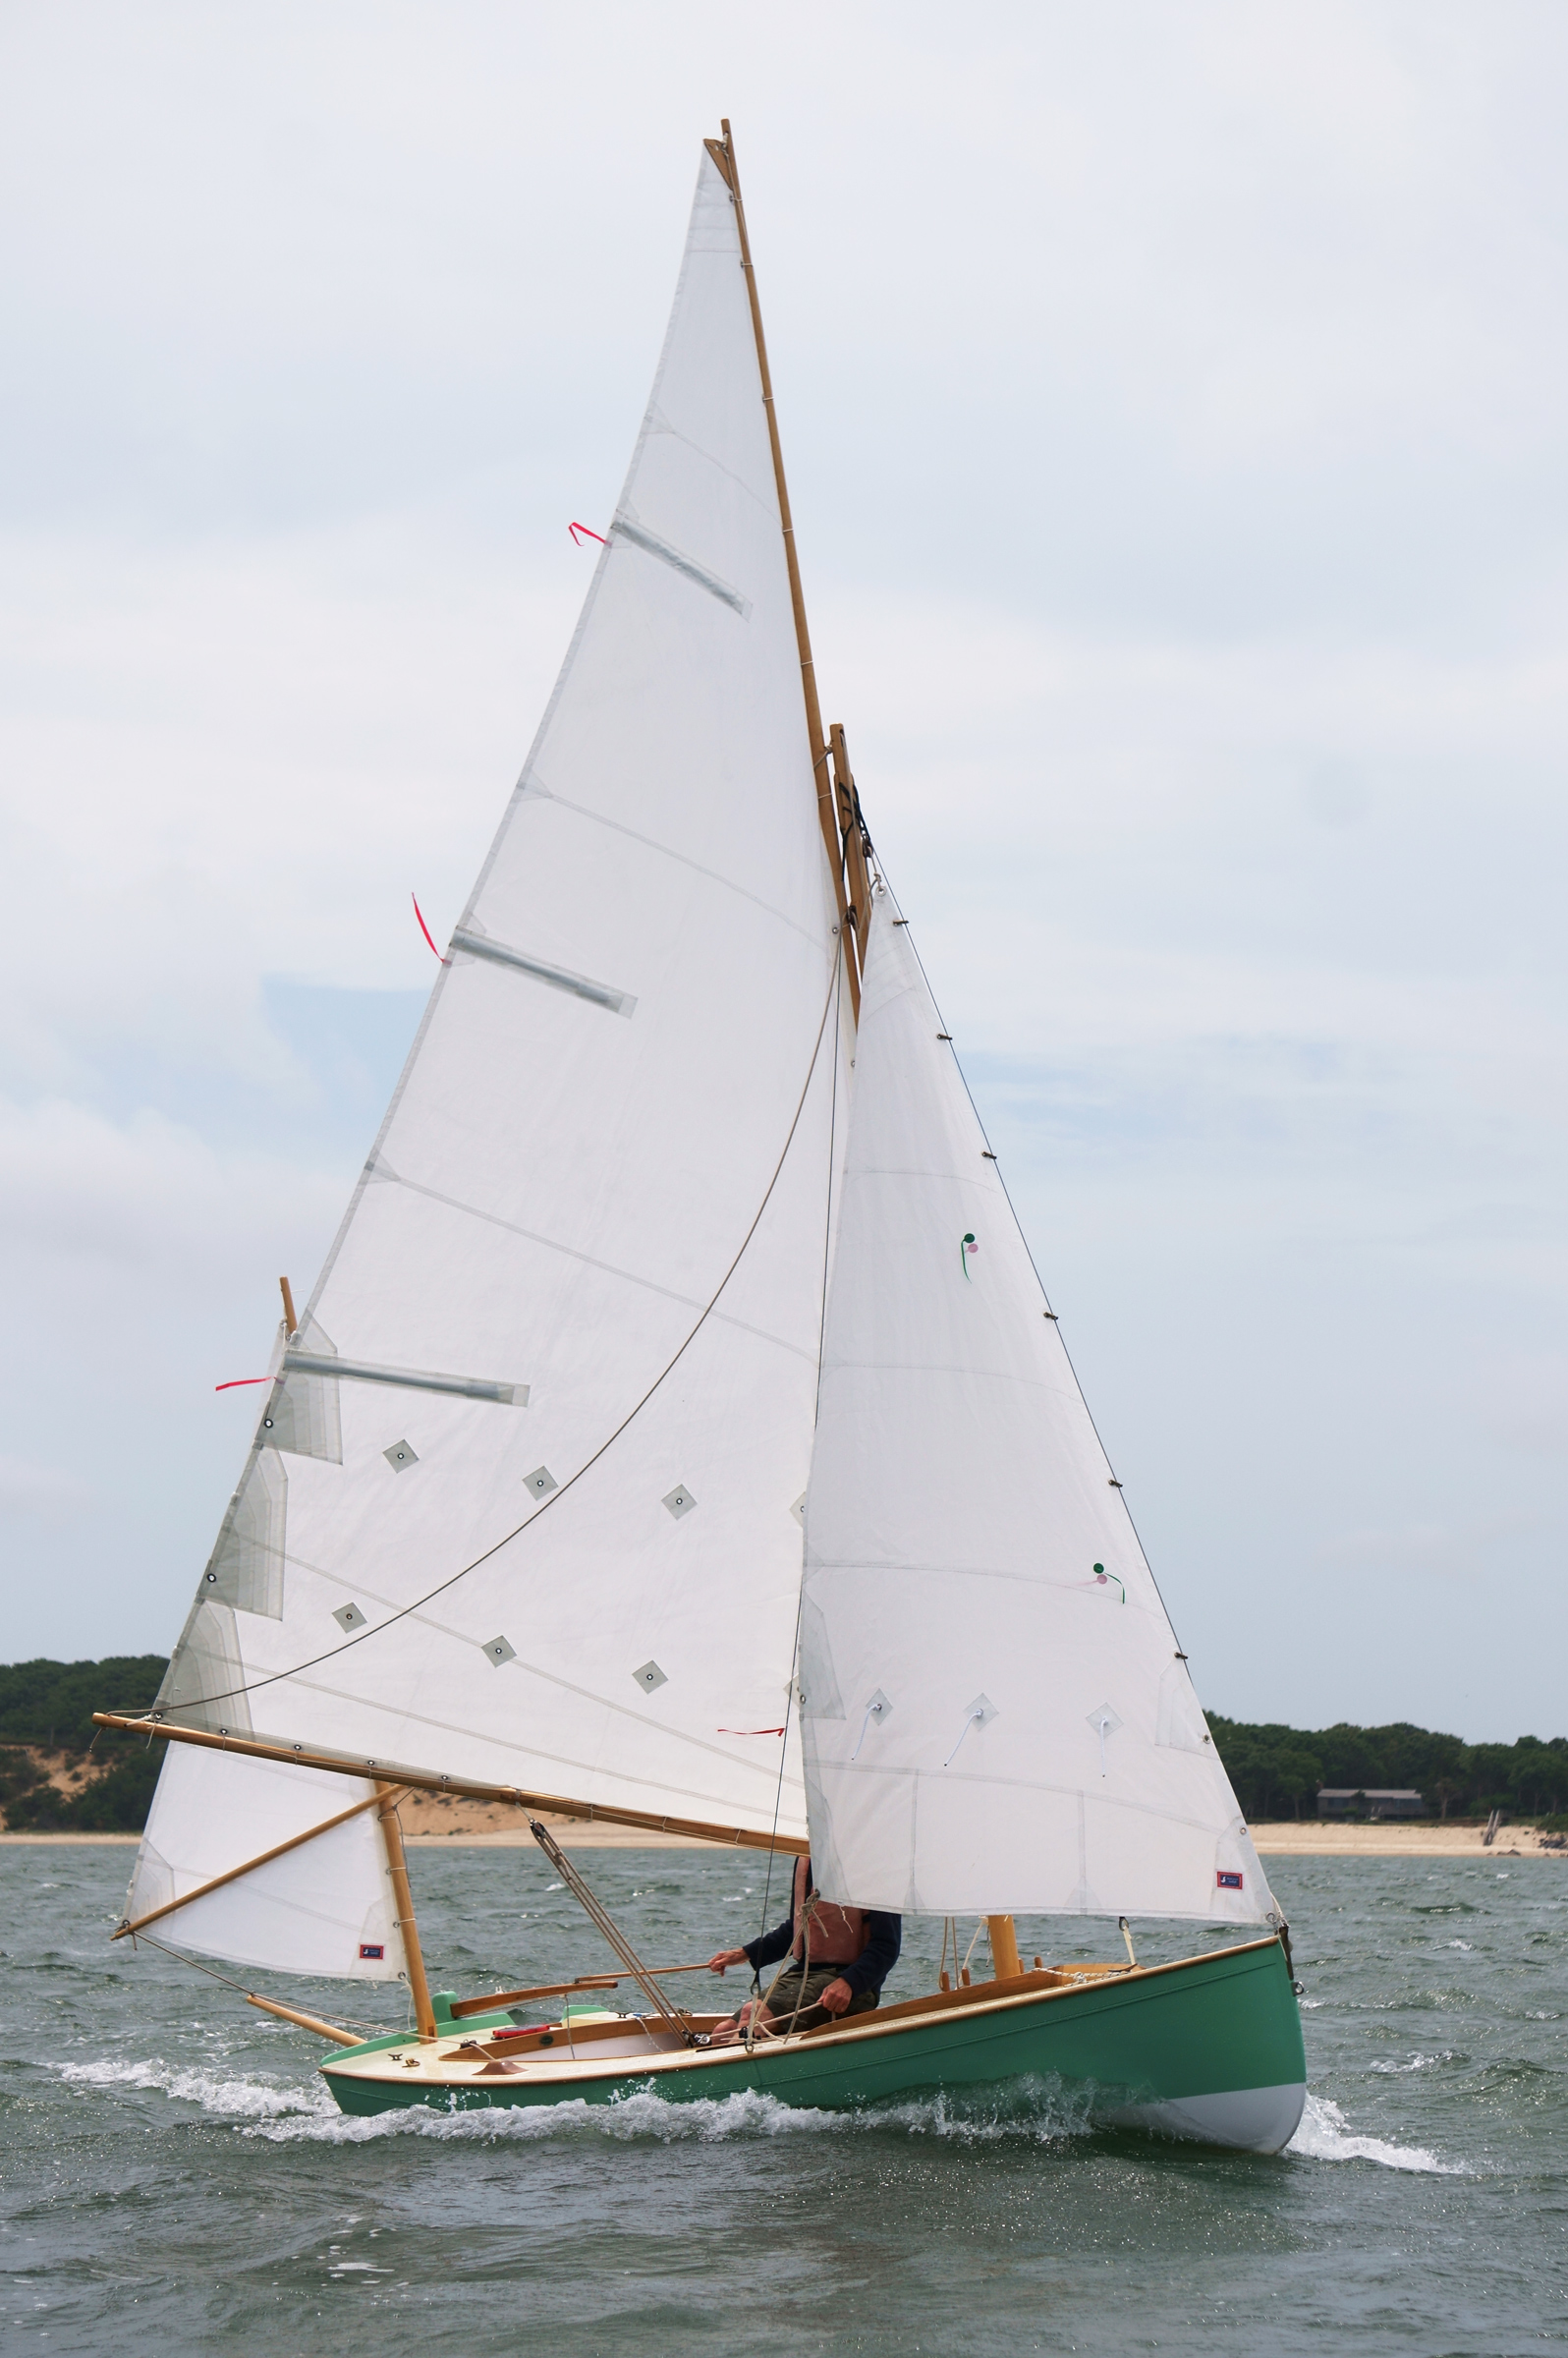
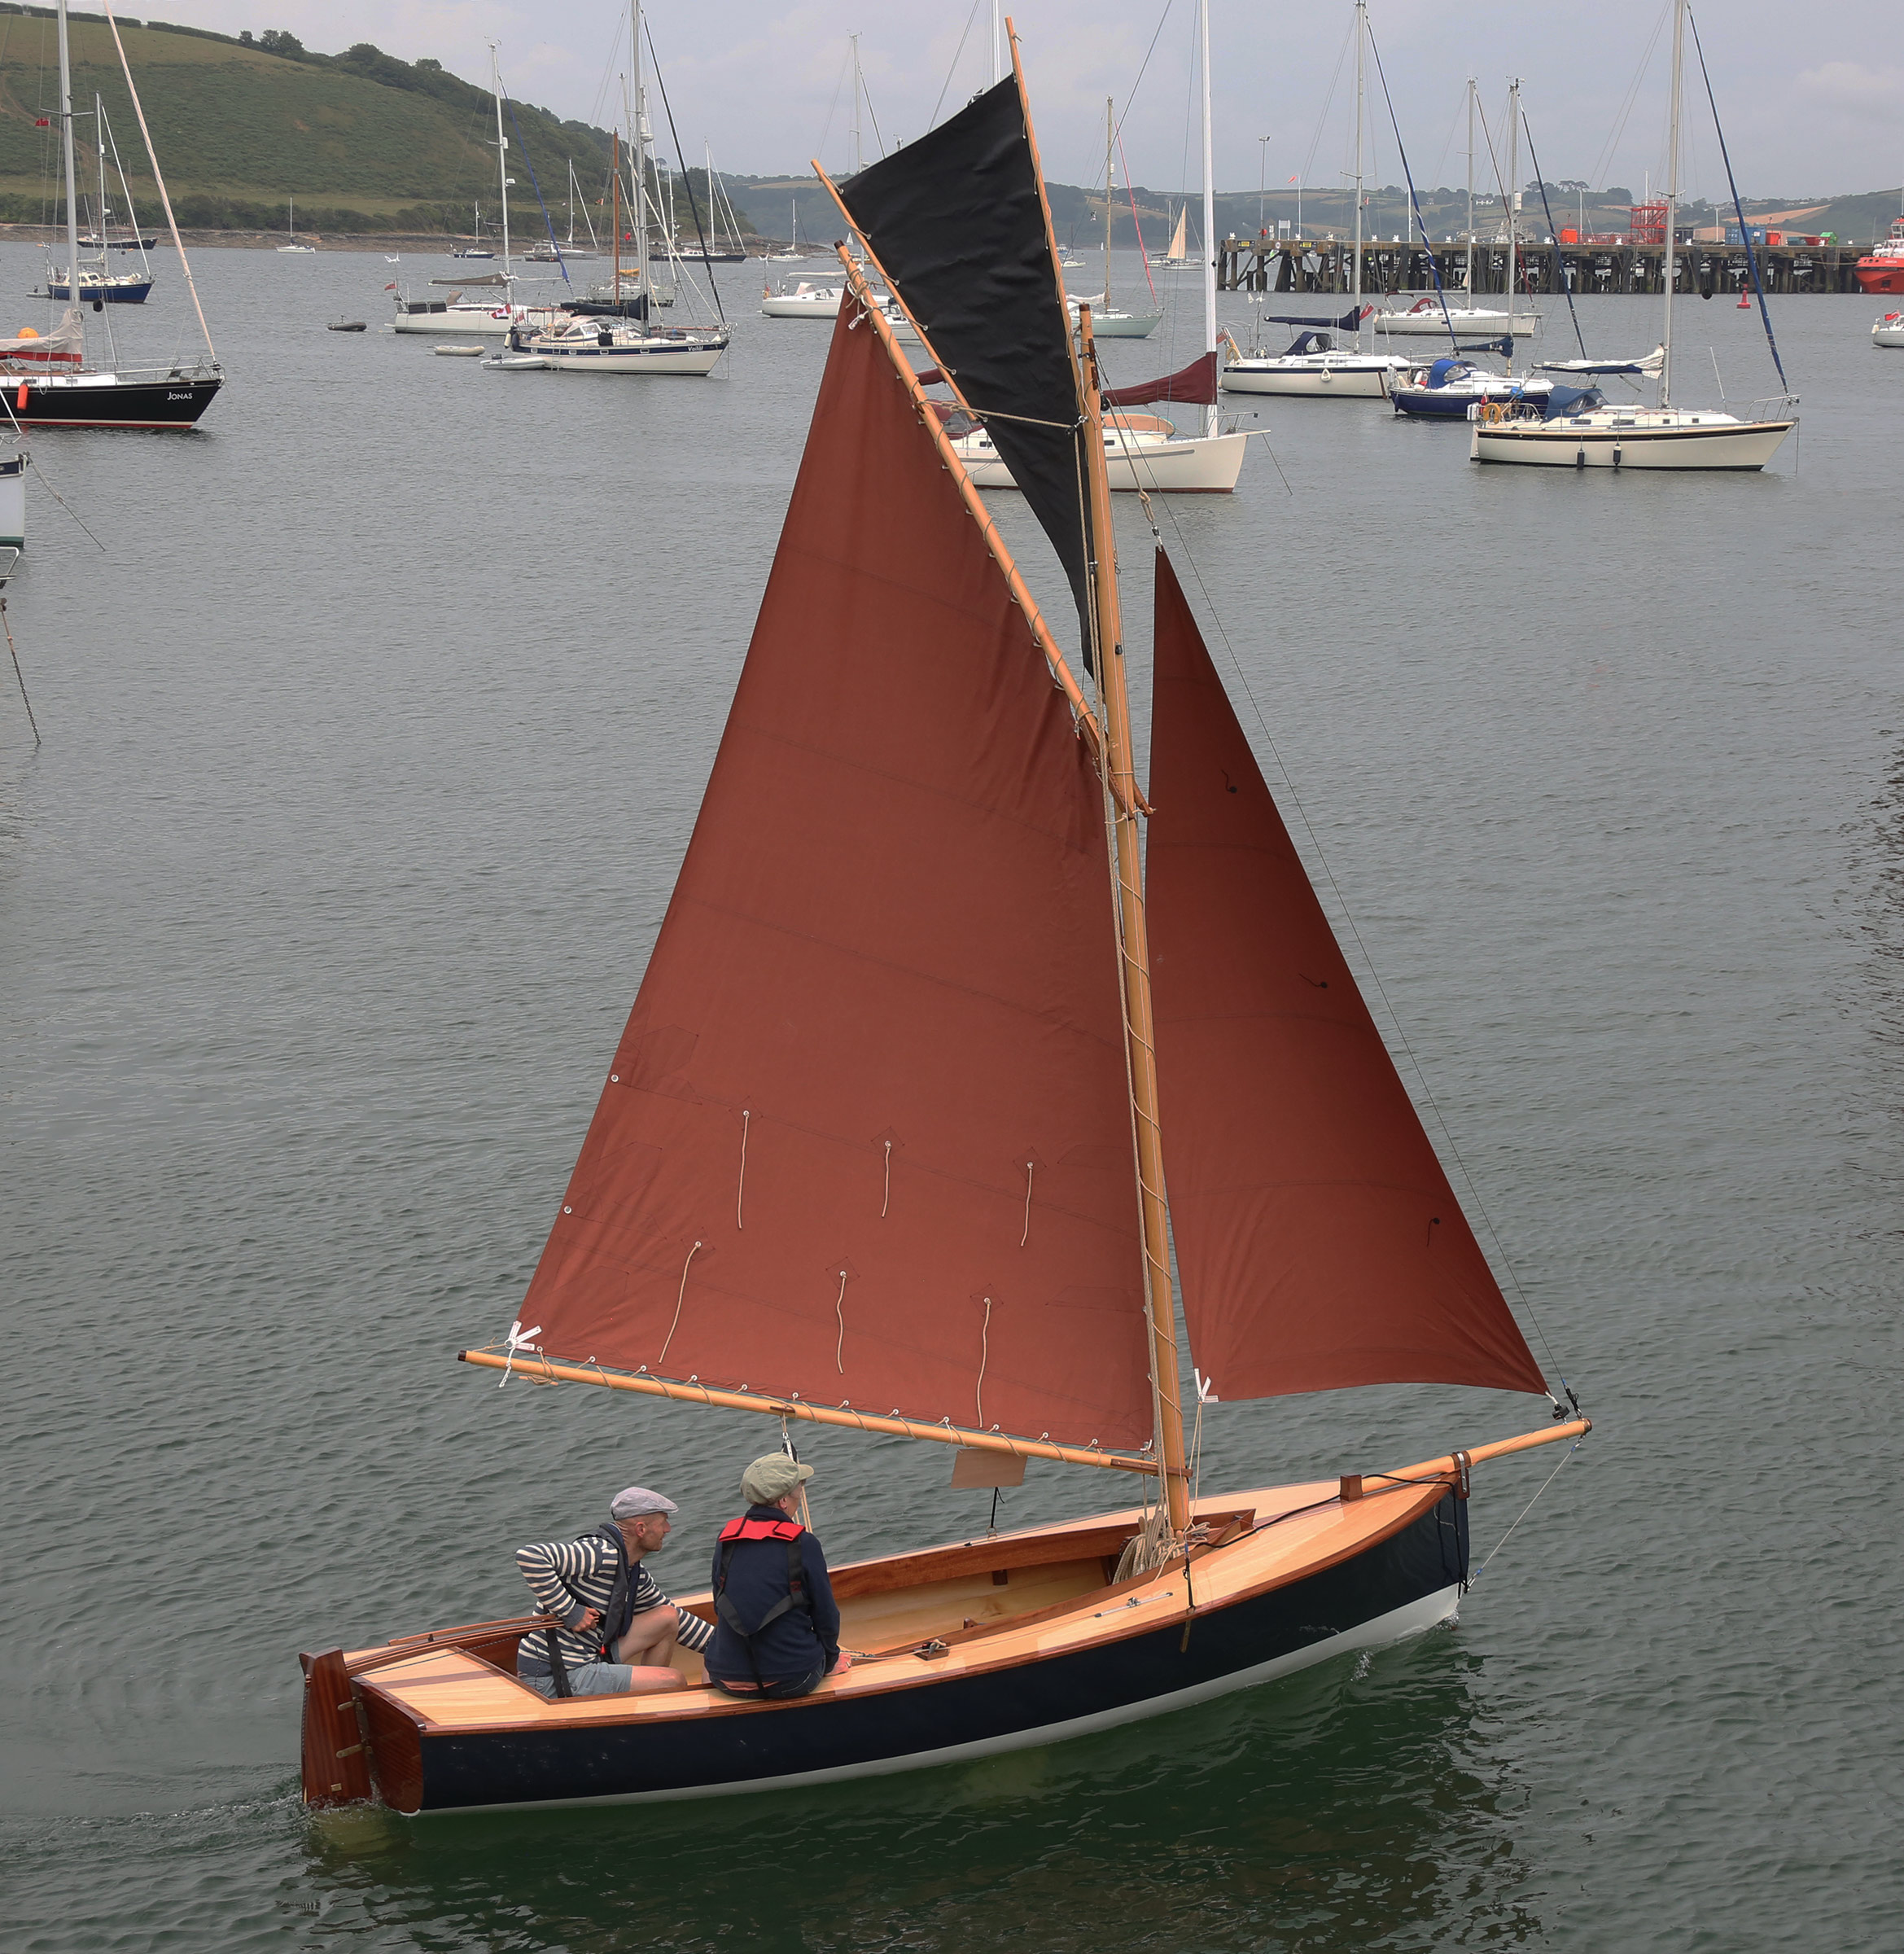
A sandbox with a sail? The Puddle Duck racer may be humble in appearance, but it gets people on the water quickly for satisfying sailing.
It’s easy to be dismissive of the Puddle Duck Racer when you first see it. I usually describe the slab-sided 8′ × 4′ boat as a sandbox with rocker, a description that’s not entirely tongue-in-cheek. And yet, among its builders, who proudly refer to themselves as Puddle Duckers, this boxiest of all box boats has achieved a degree of popularity that is difficult to understand—until you try sailing one. The truth is, despite their boxy, unsophisticated looks, Puddle Ducks are pretty darn fun.
Of course, not everyone is able to suspend judgment long enough to make this discovery, something that Puddle Duck designer David “Shorty” Routh is well aware of. “They kind of look at it and say, ‘That’s not a real boat,’” he admits. But the Puddle Duck’s ultra-simple appearance is quite purposeful. “Really, I’m trying to pull in new people to get them to go in the direction of building wooden boats,” Routh explains. “The Duck is kind of like the free candy you give out to get people addicted. It had to be very unassuming looking, so anyone would look at it and think, ‘Yeah, I could probably build something like that.’”
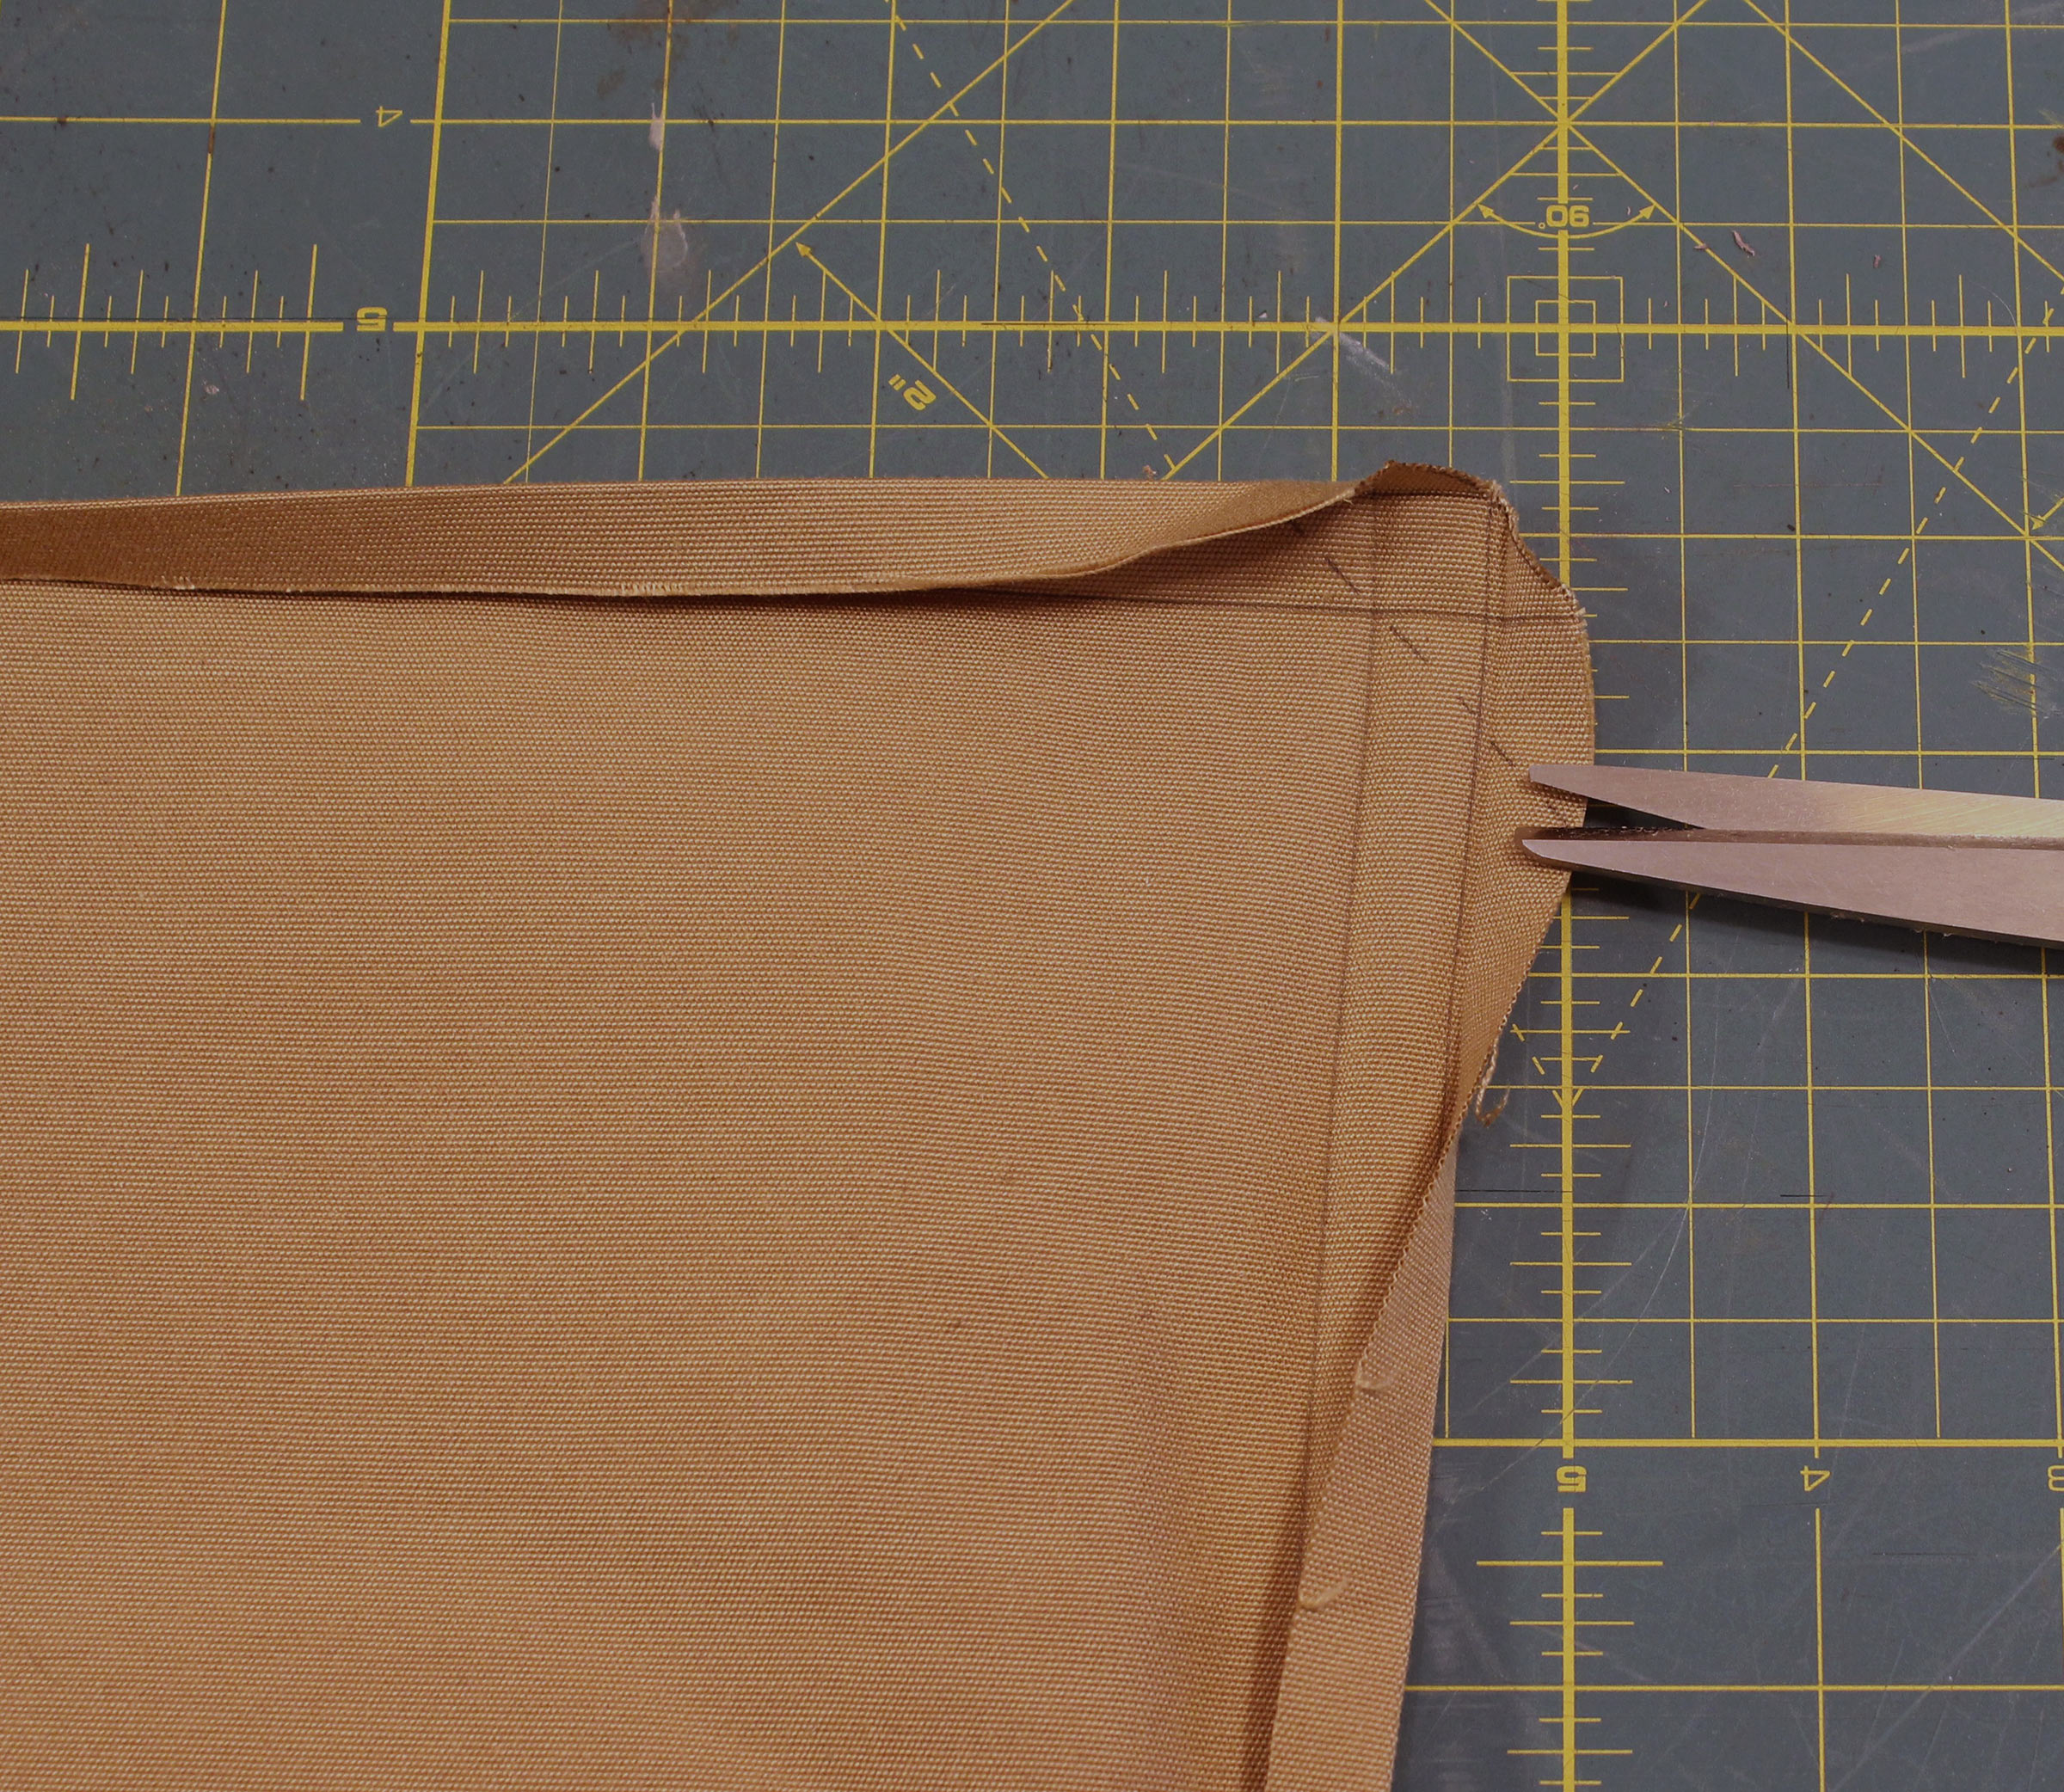
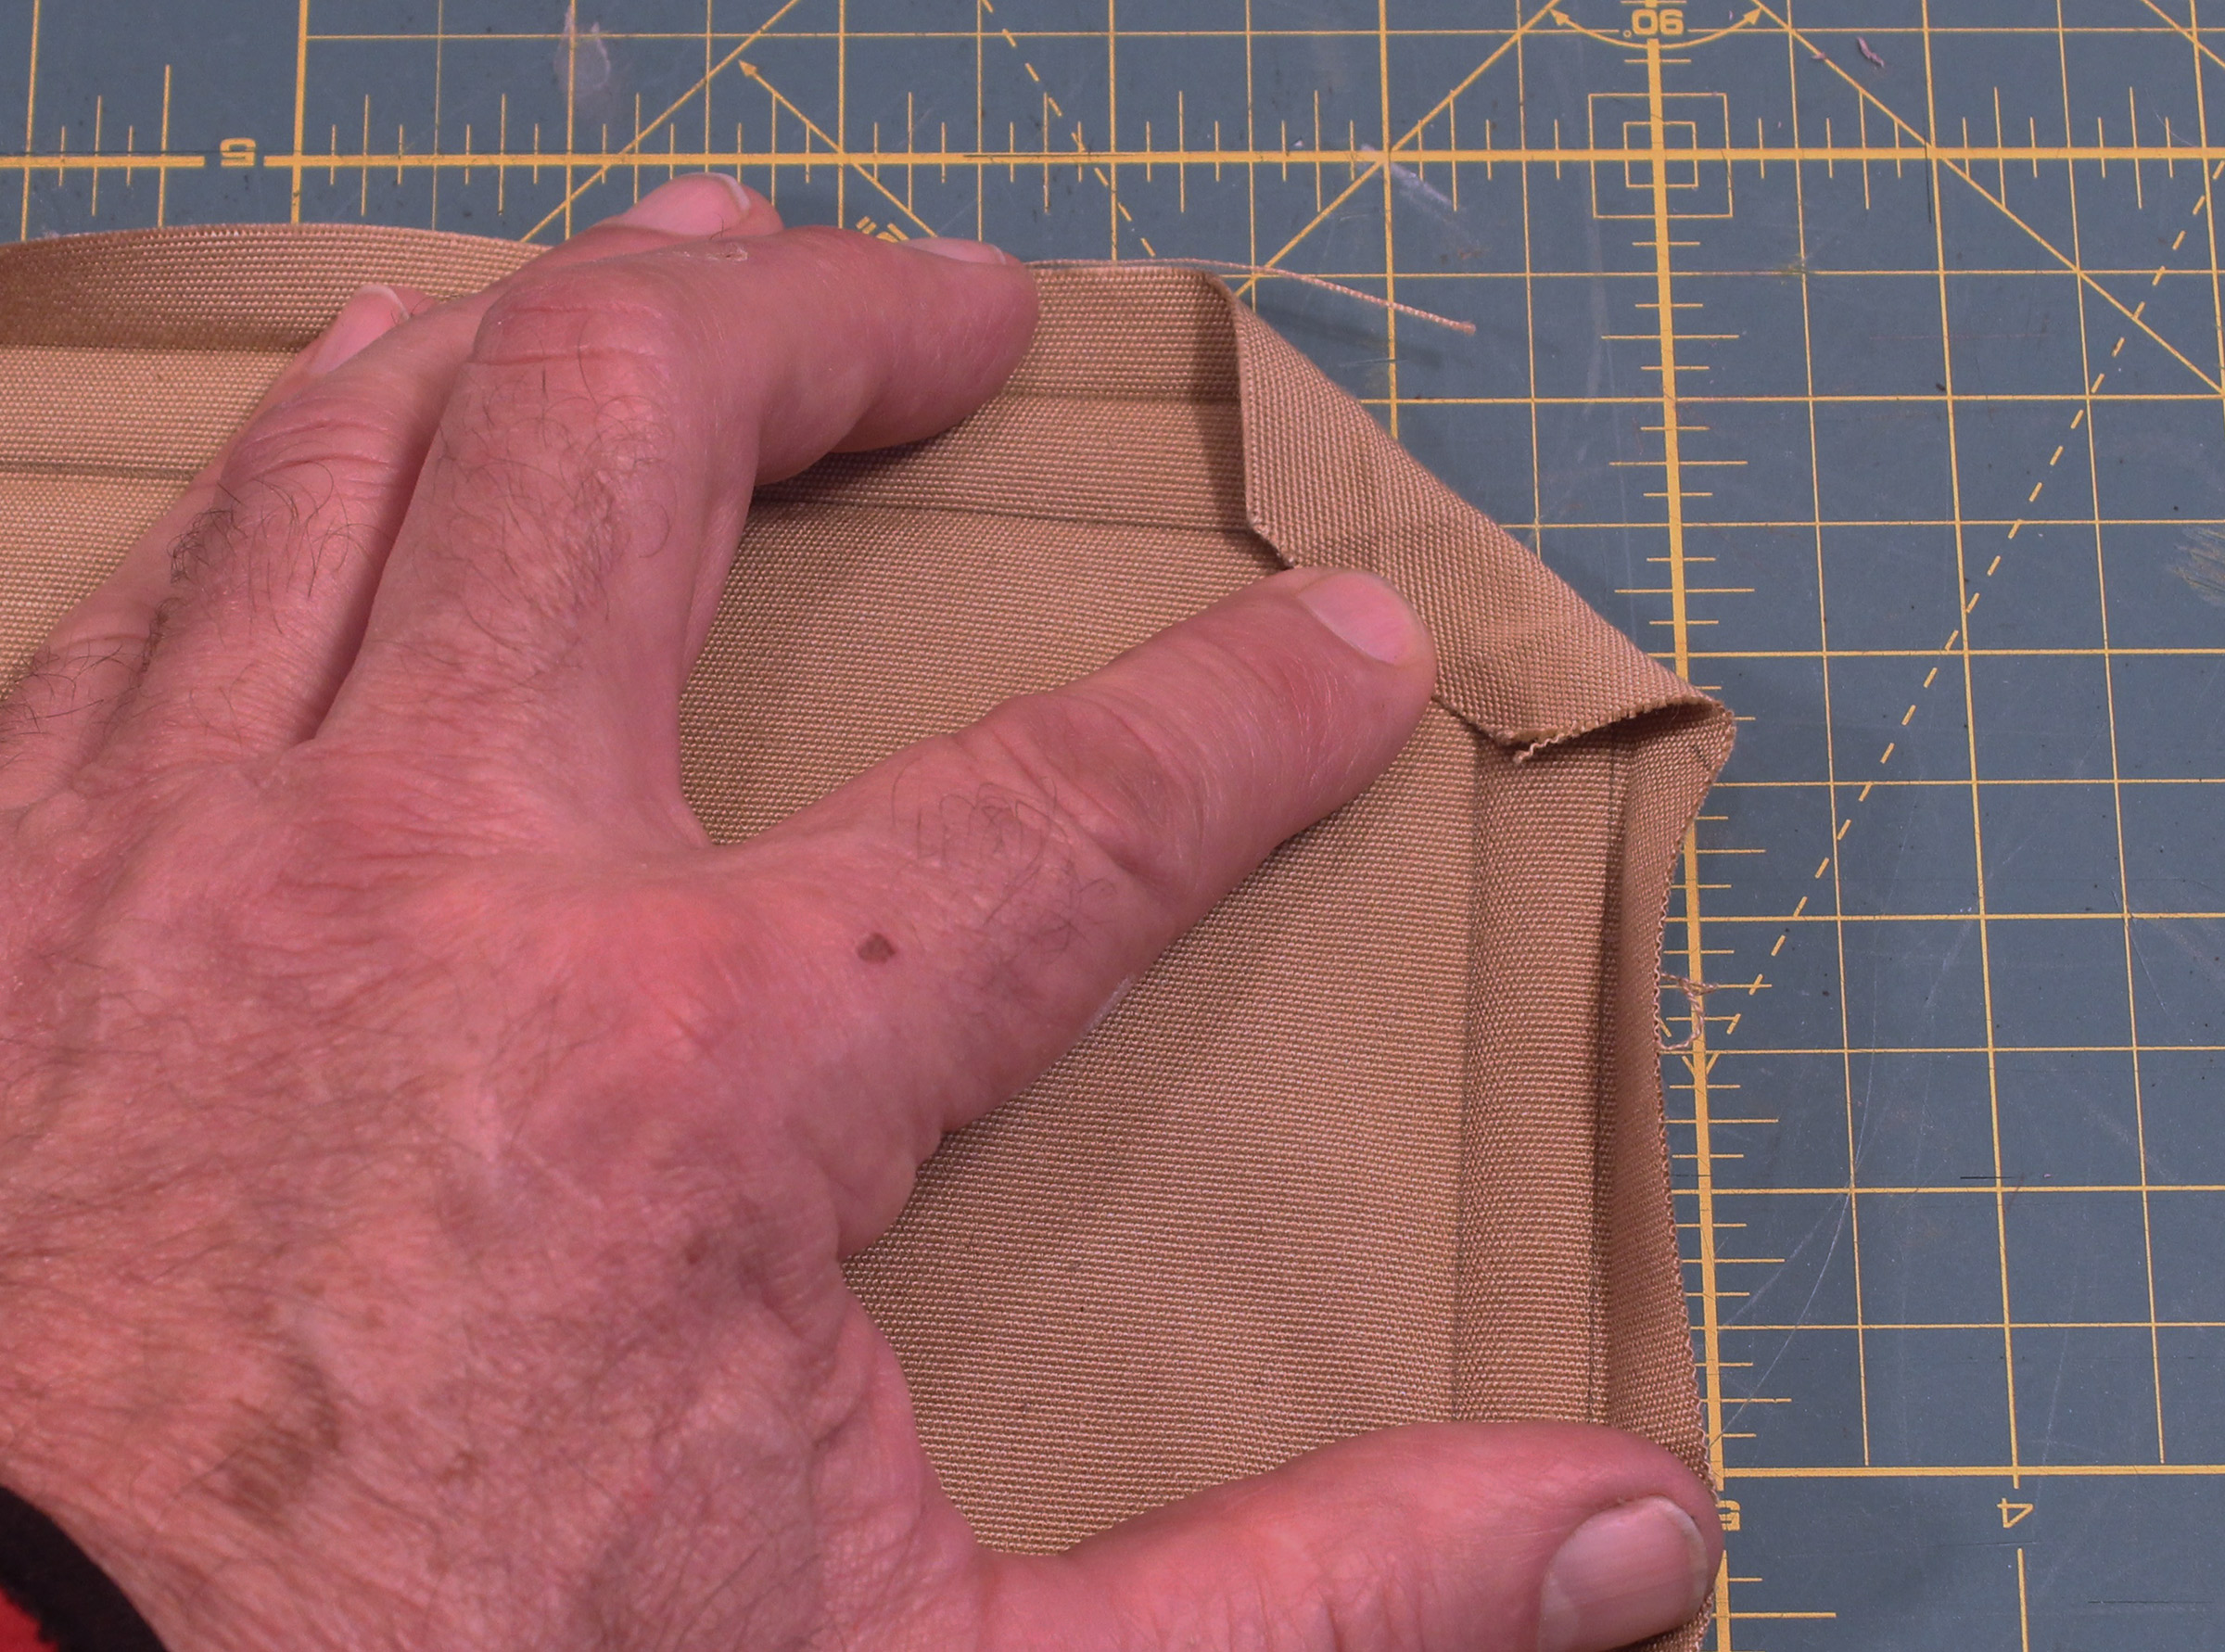
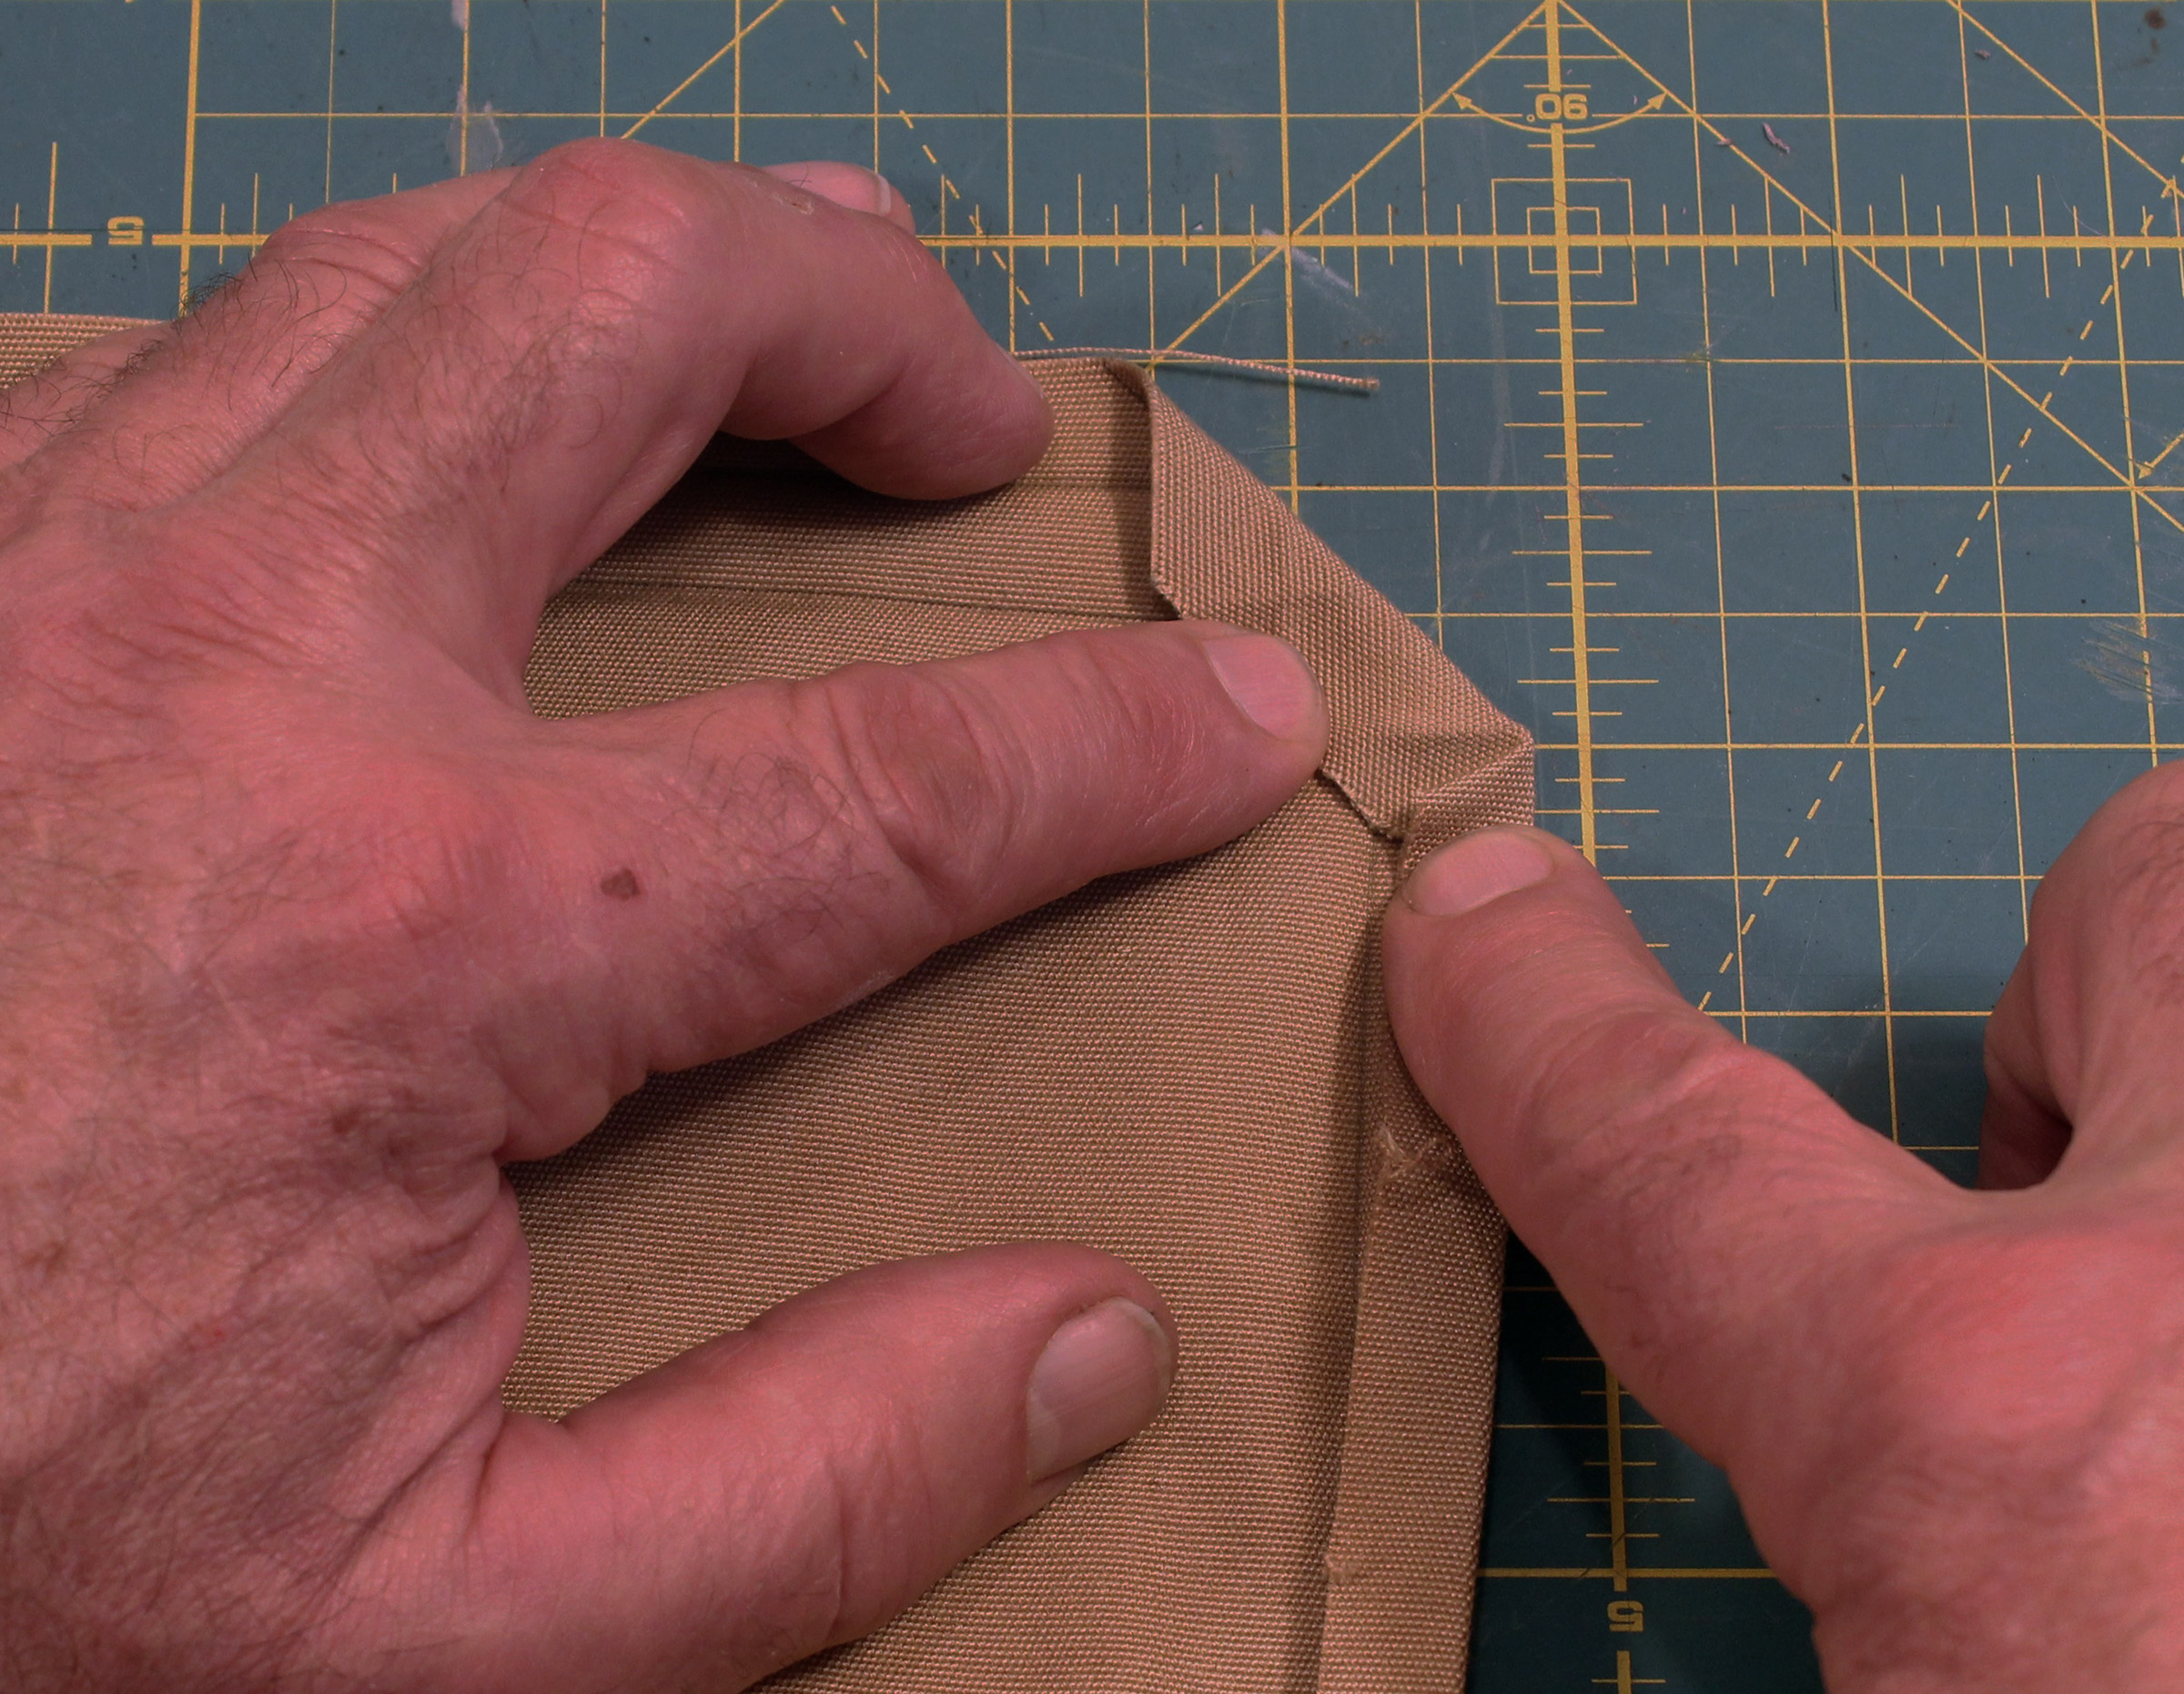
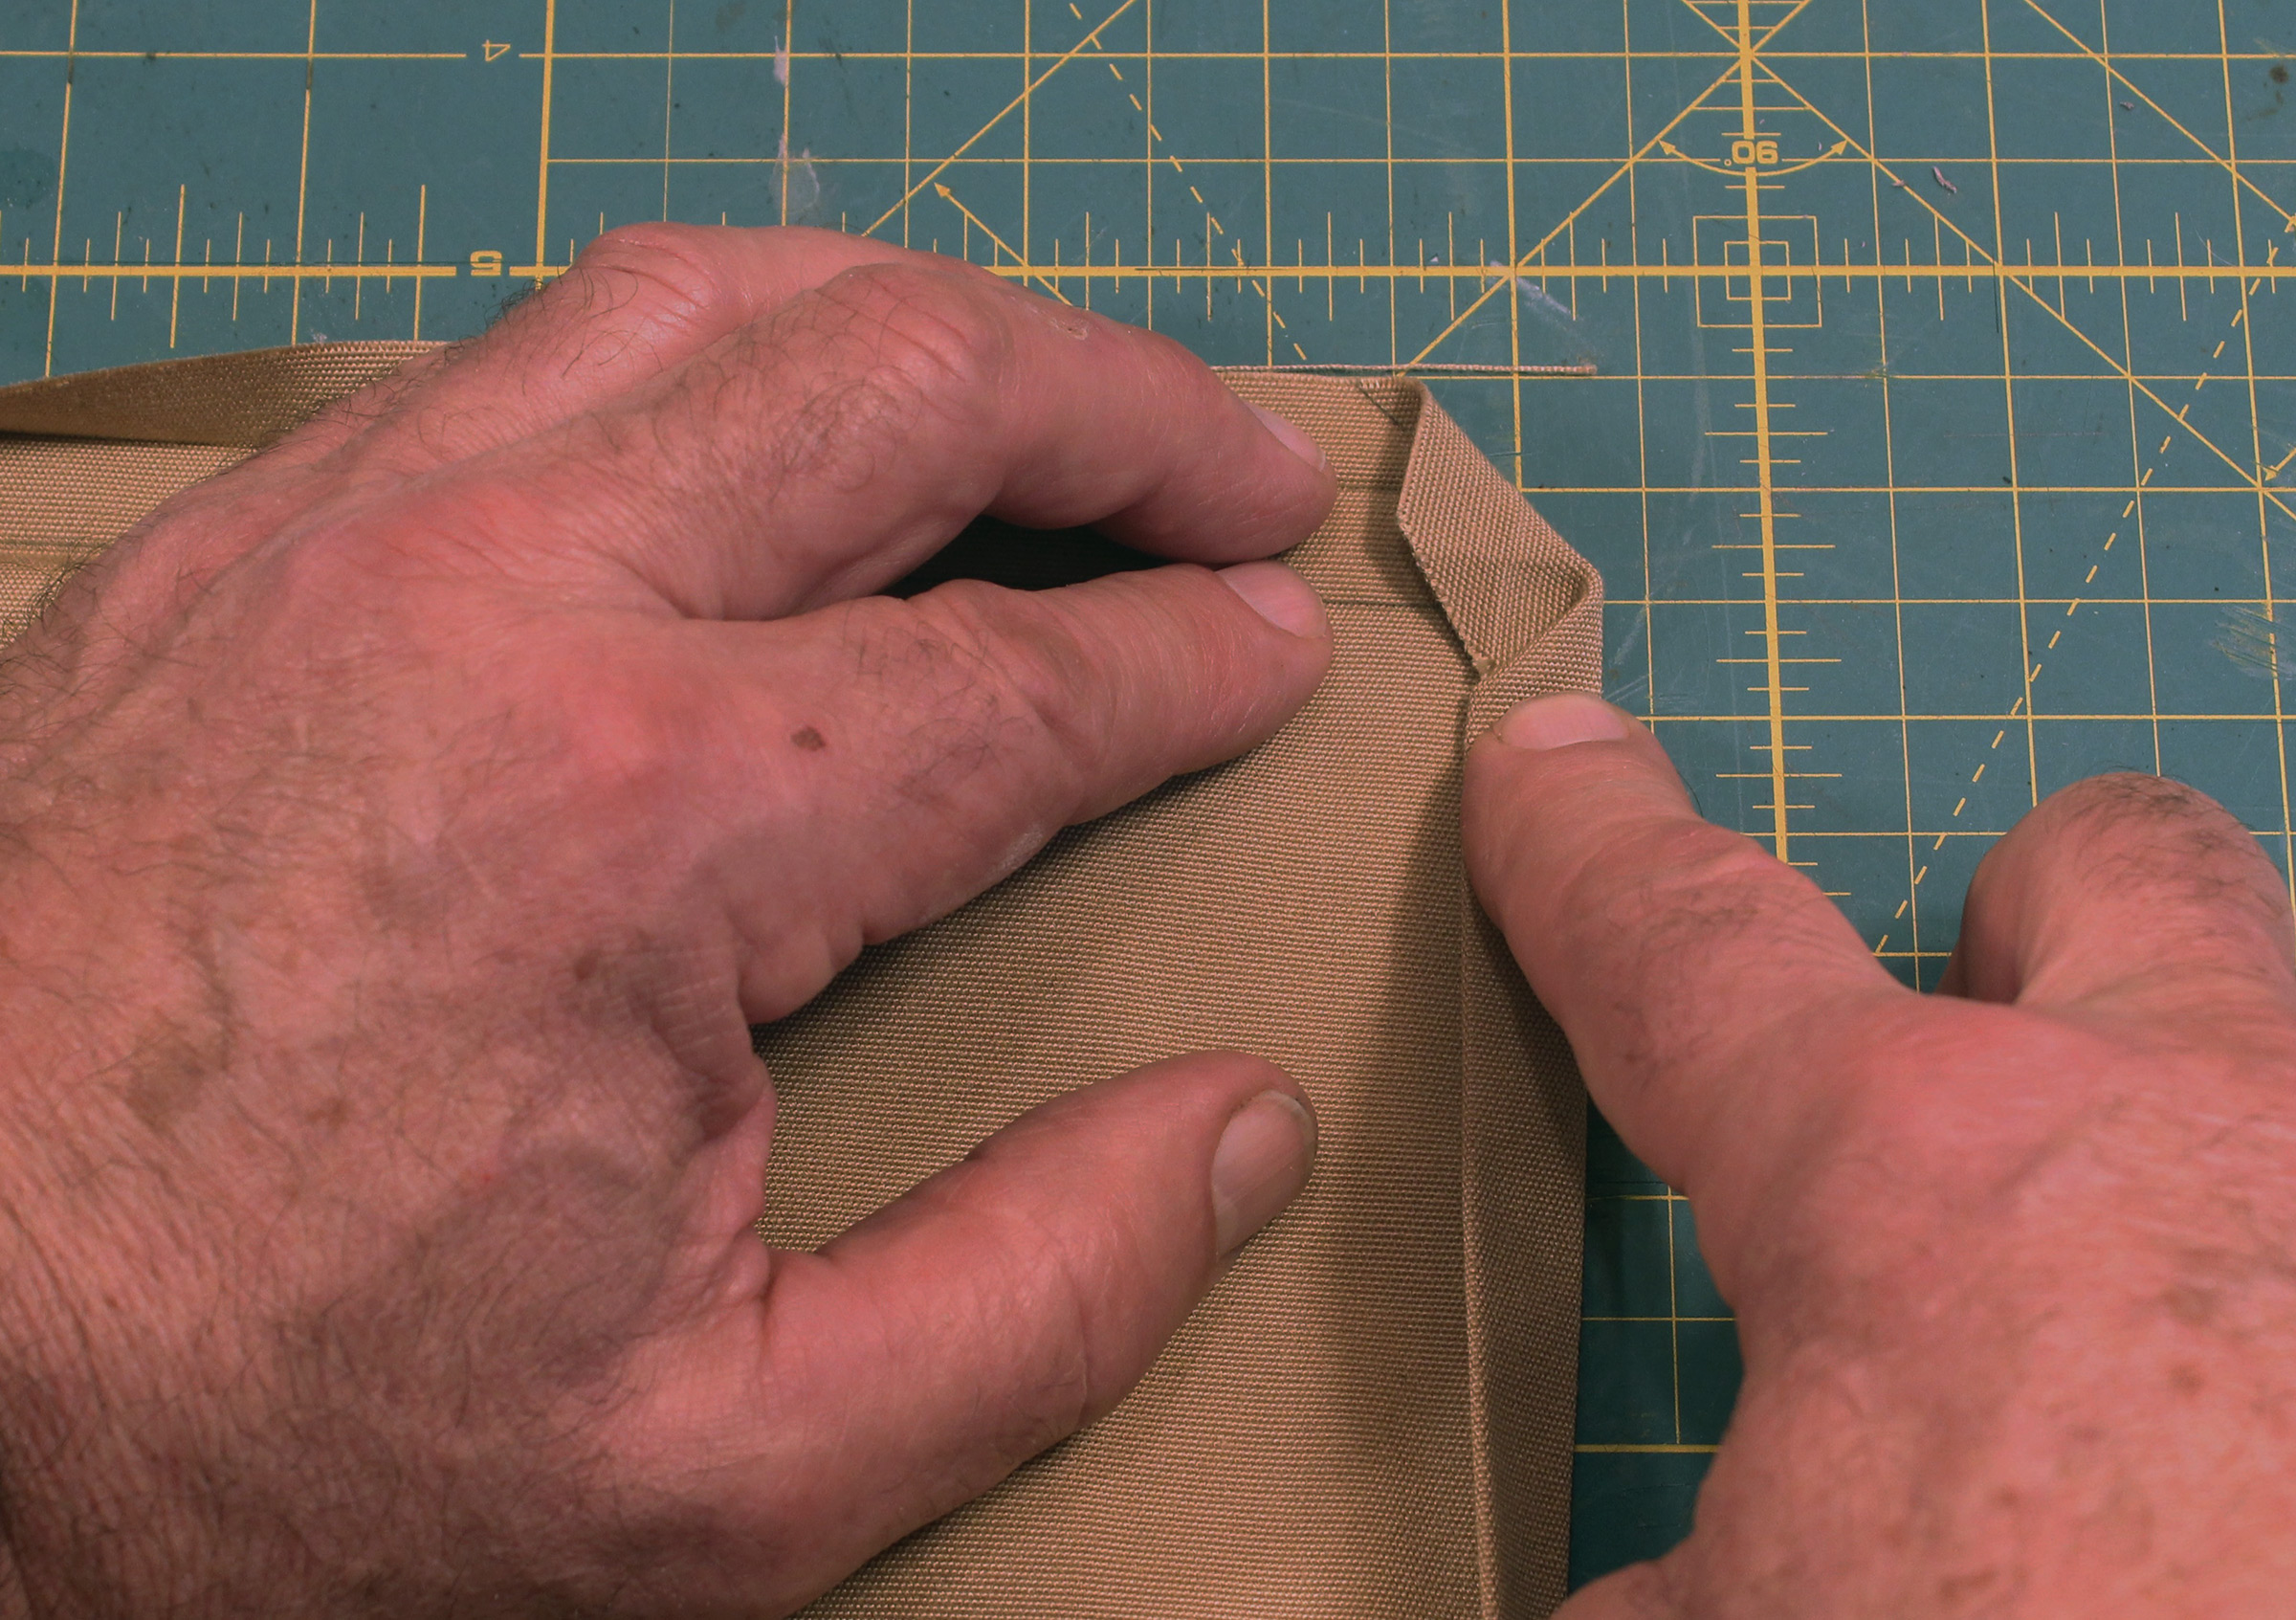
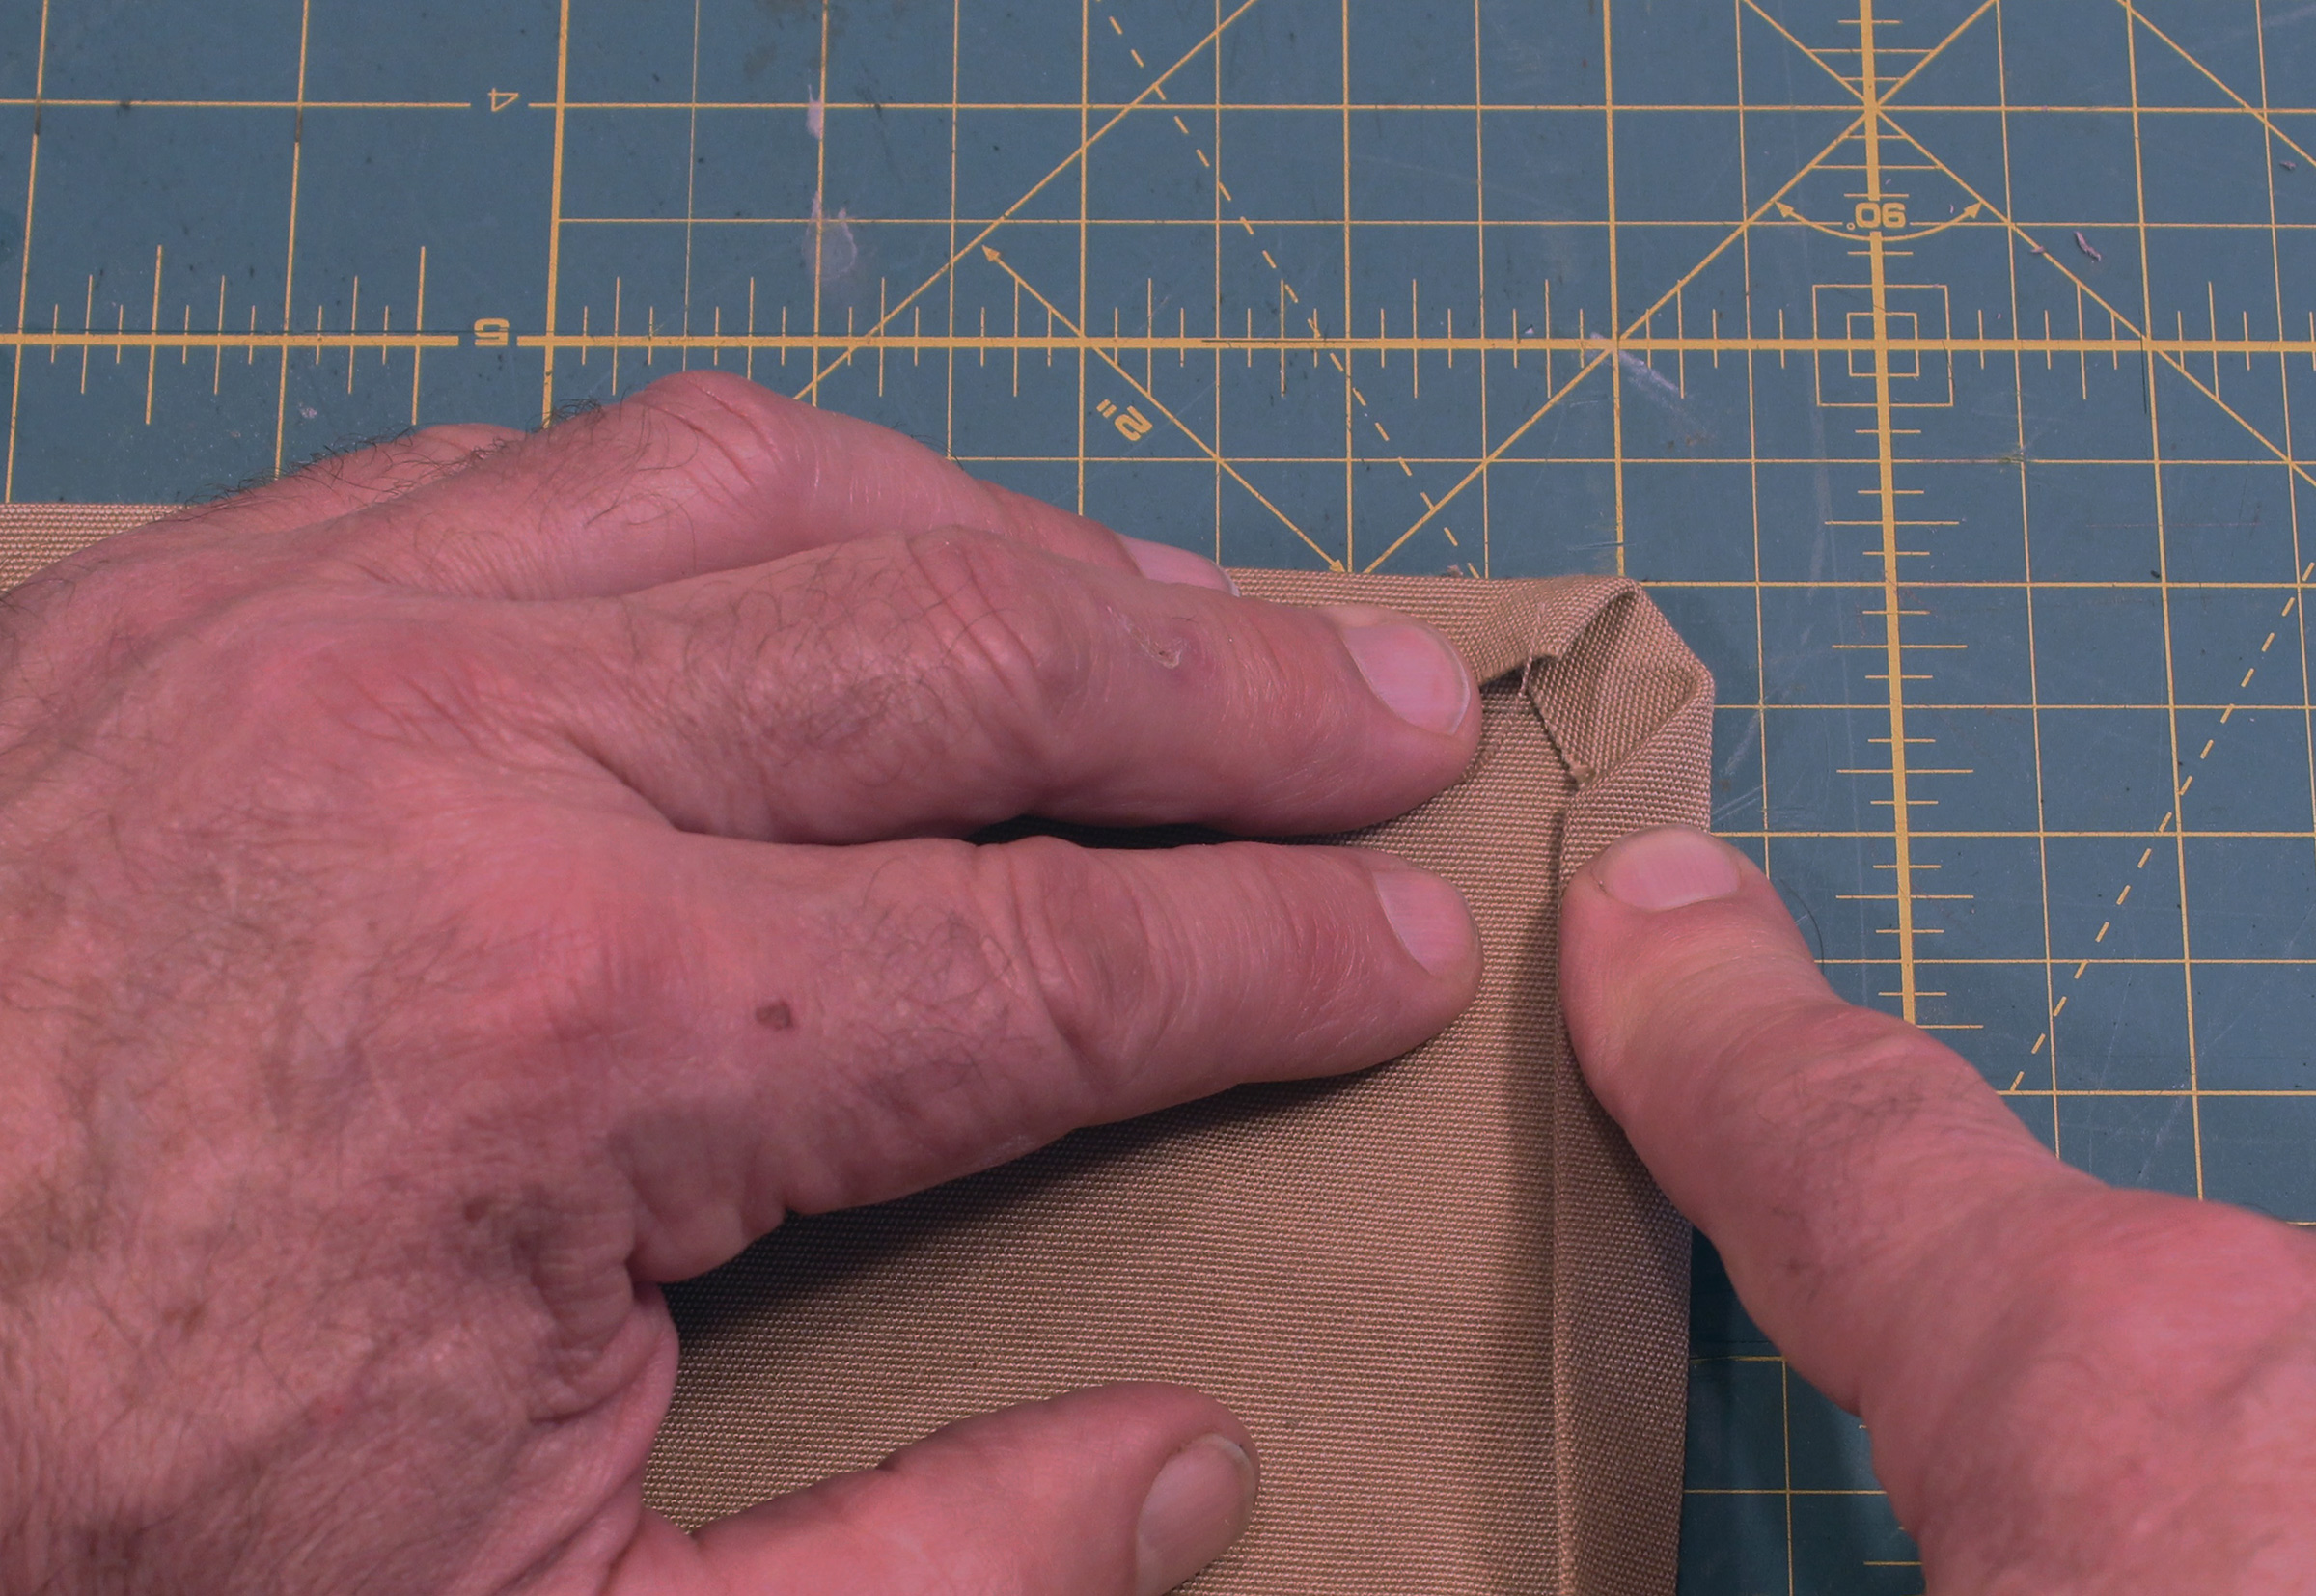
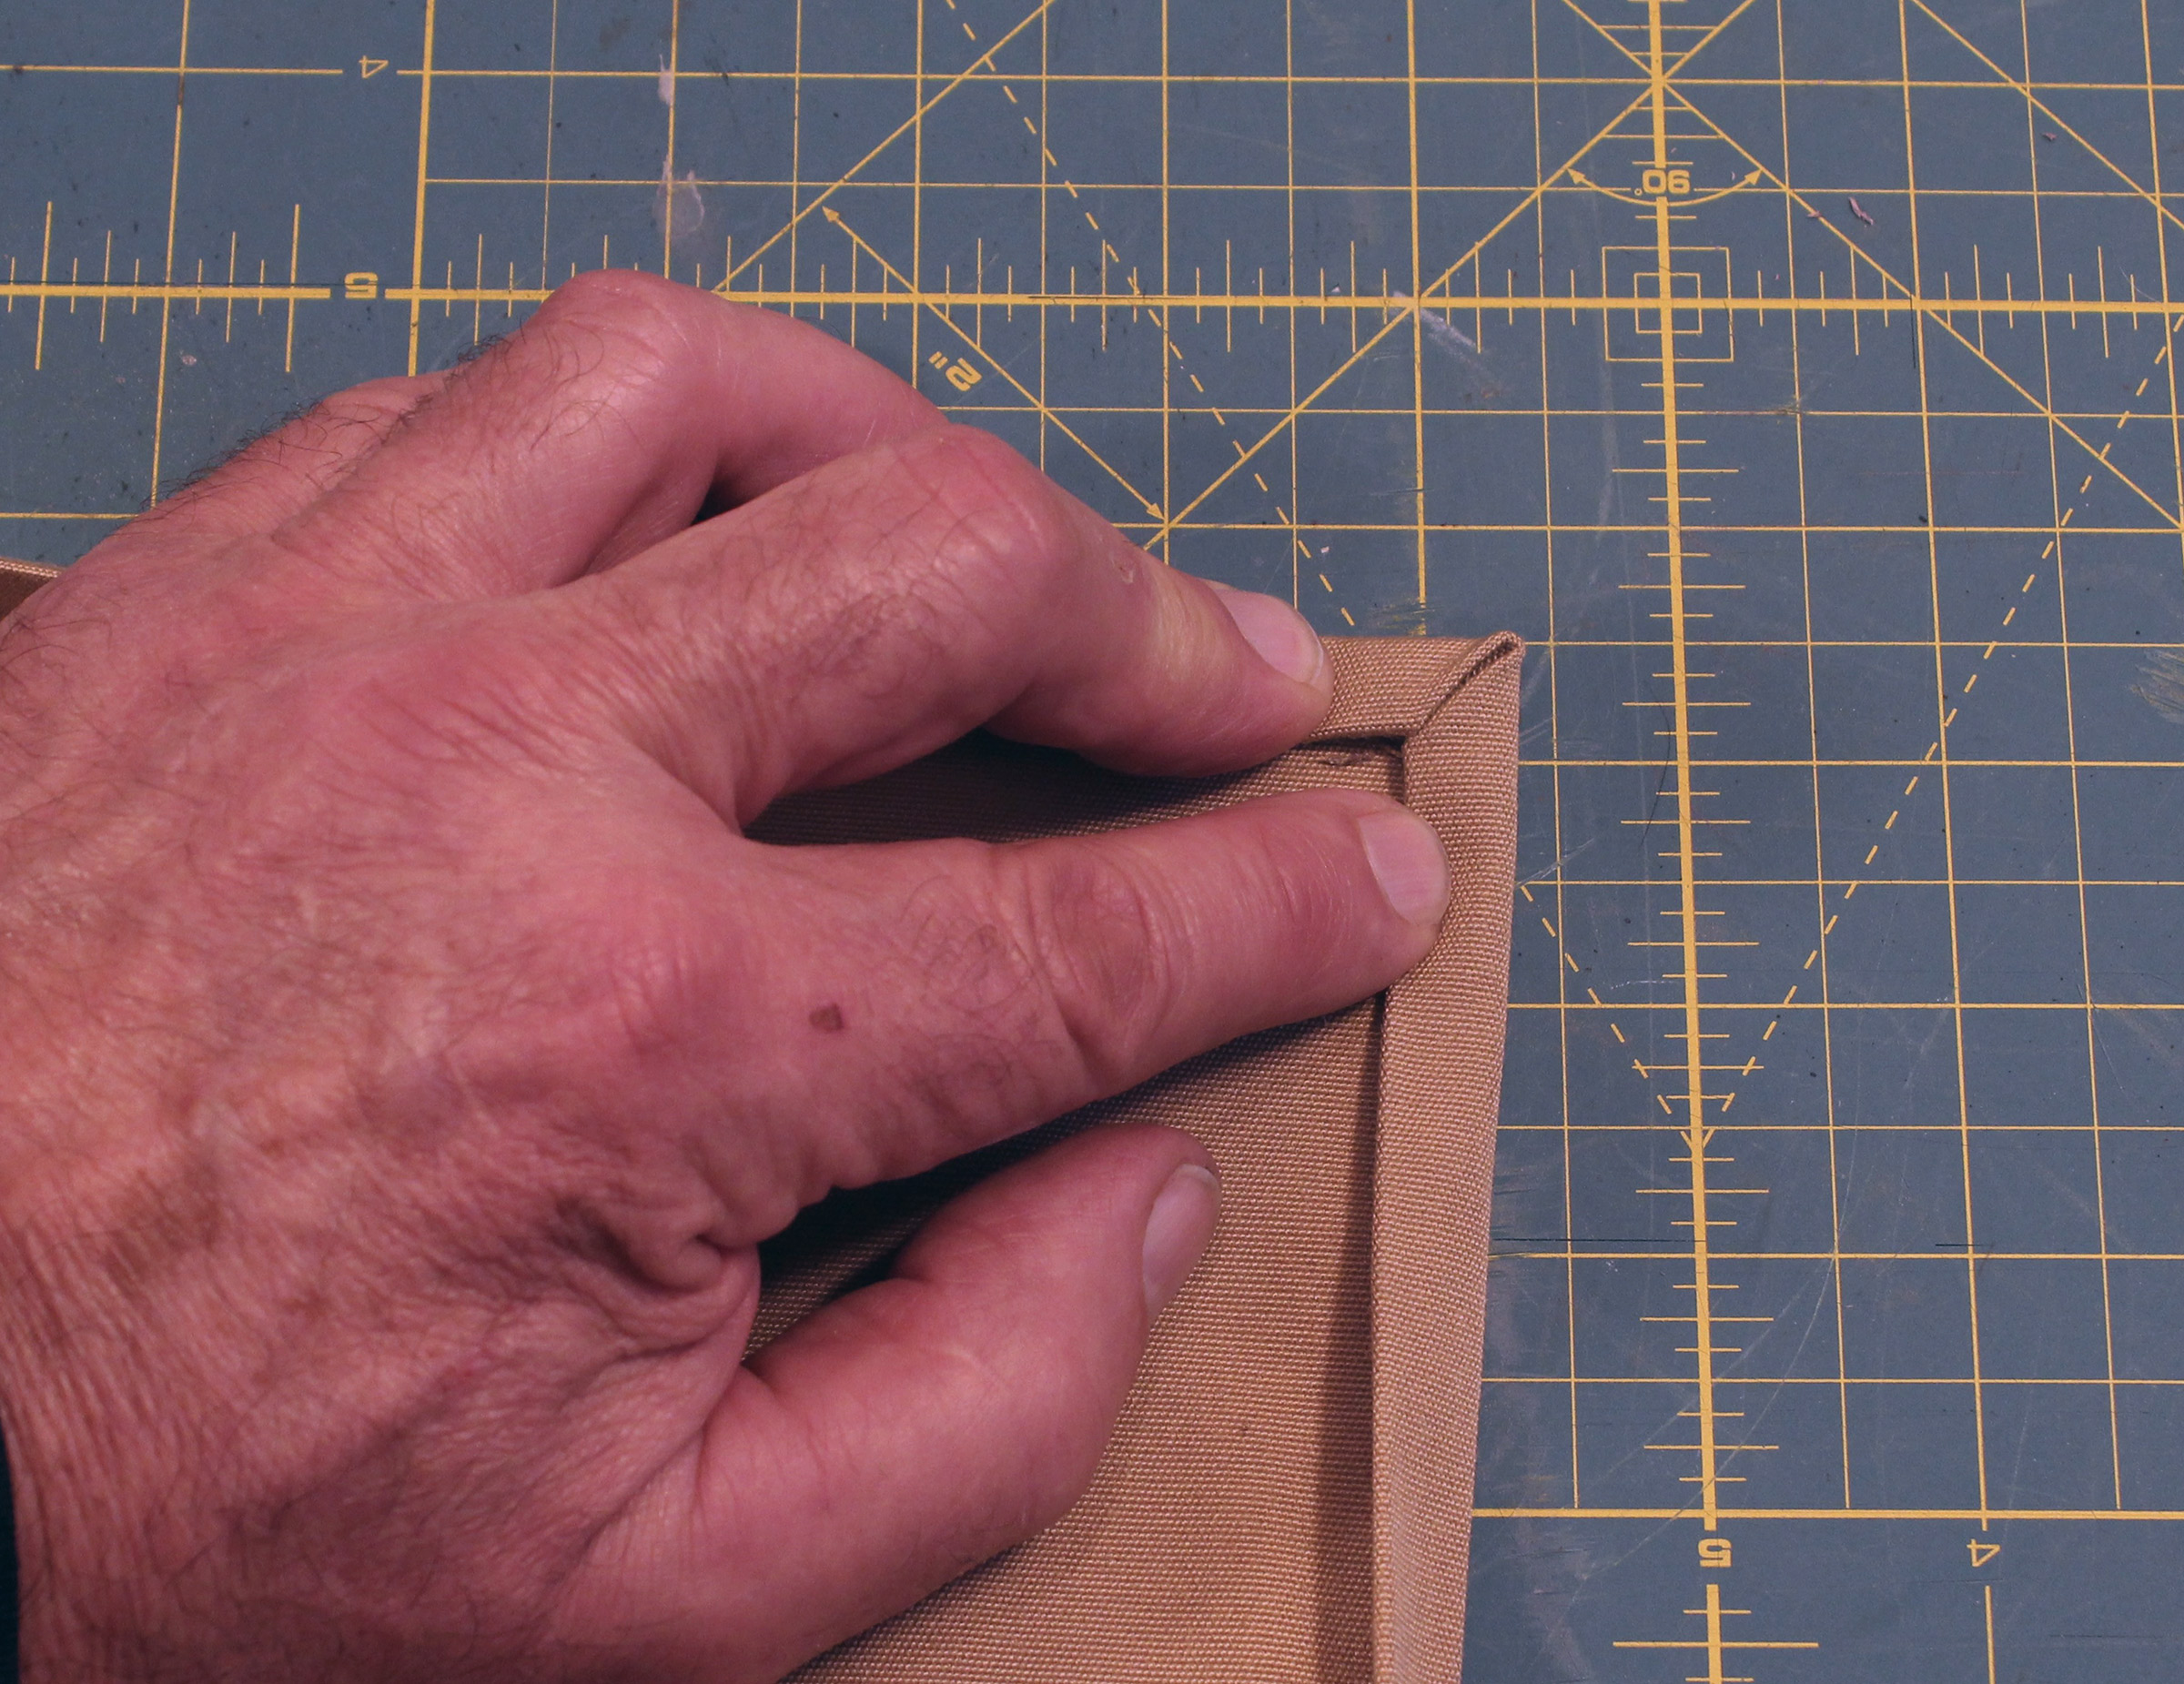
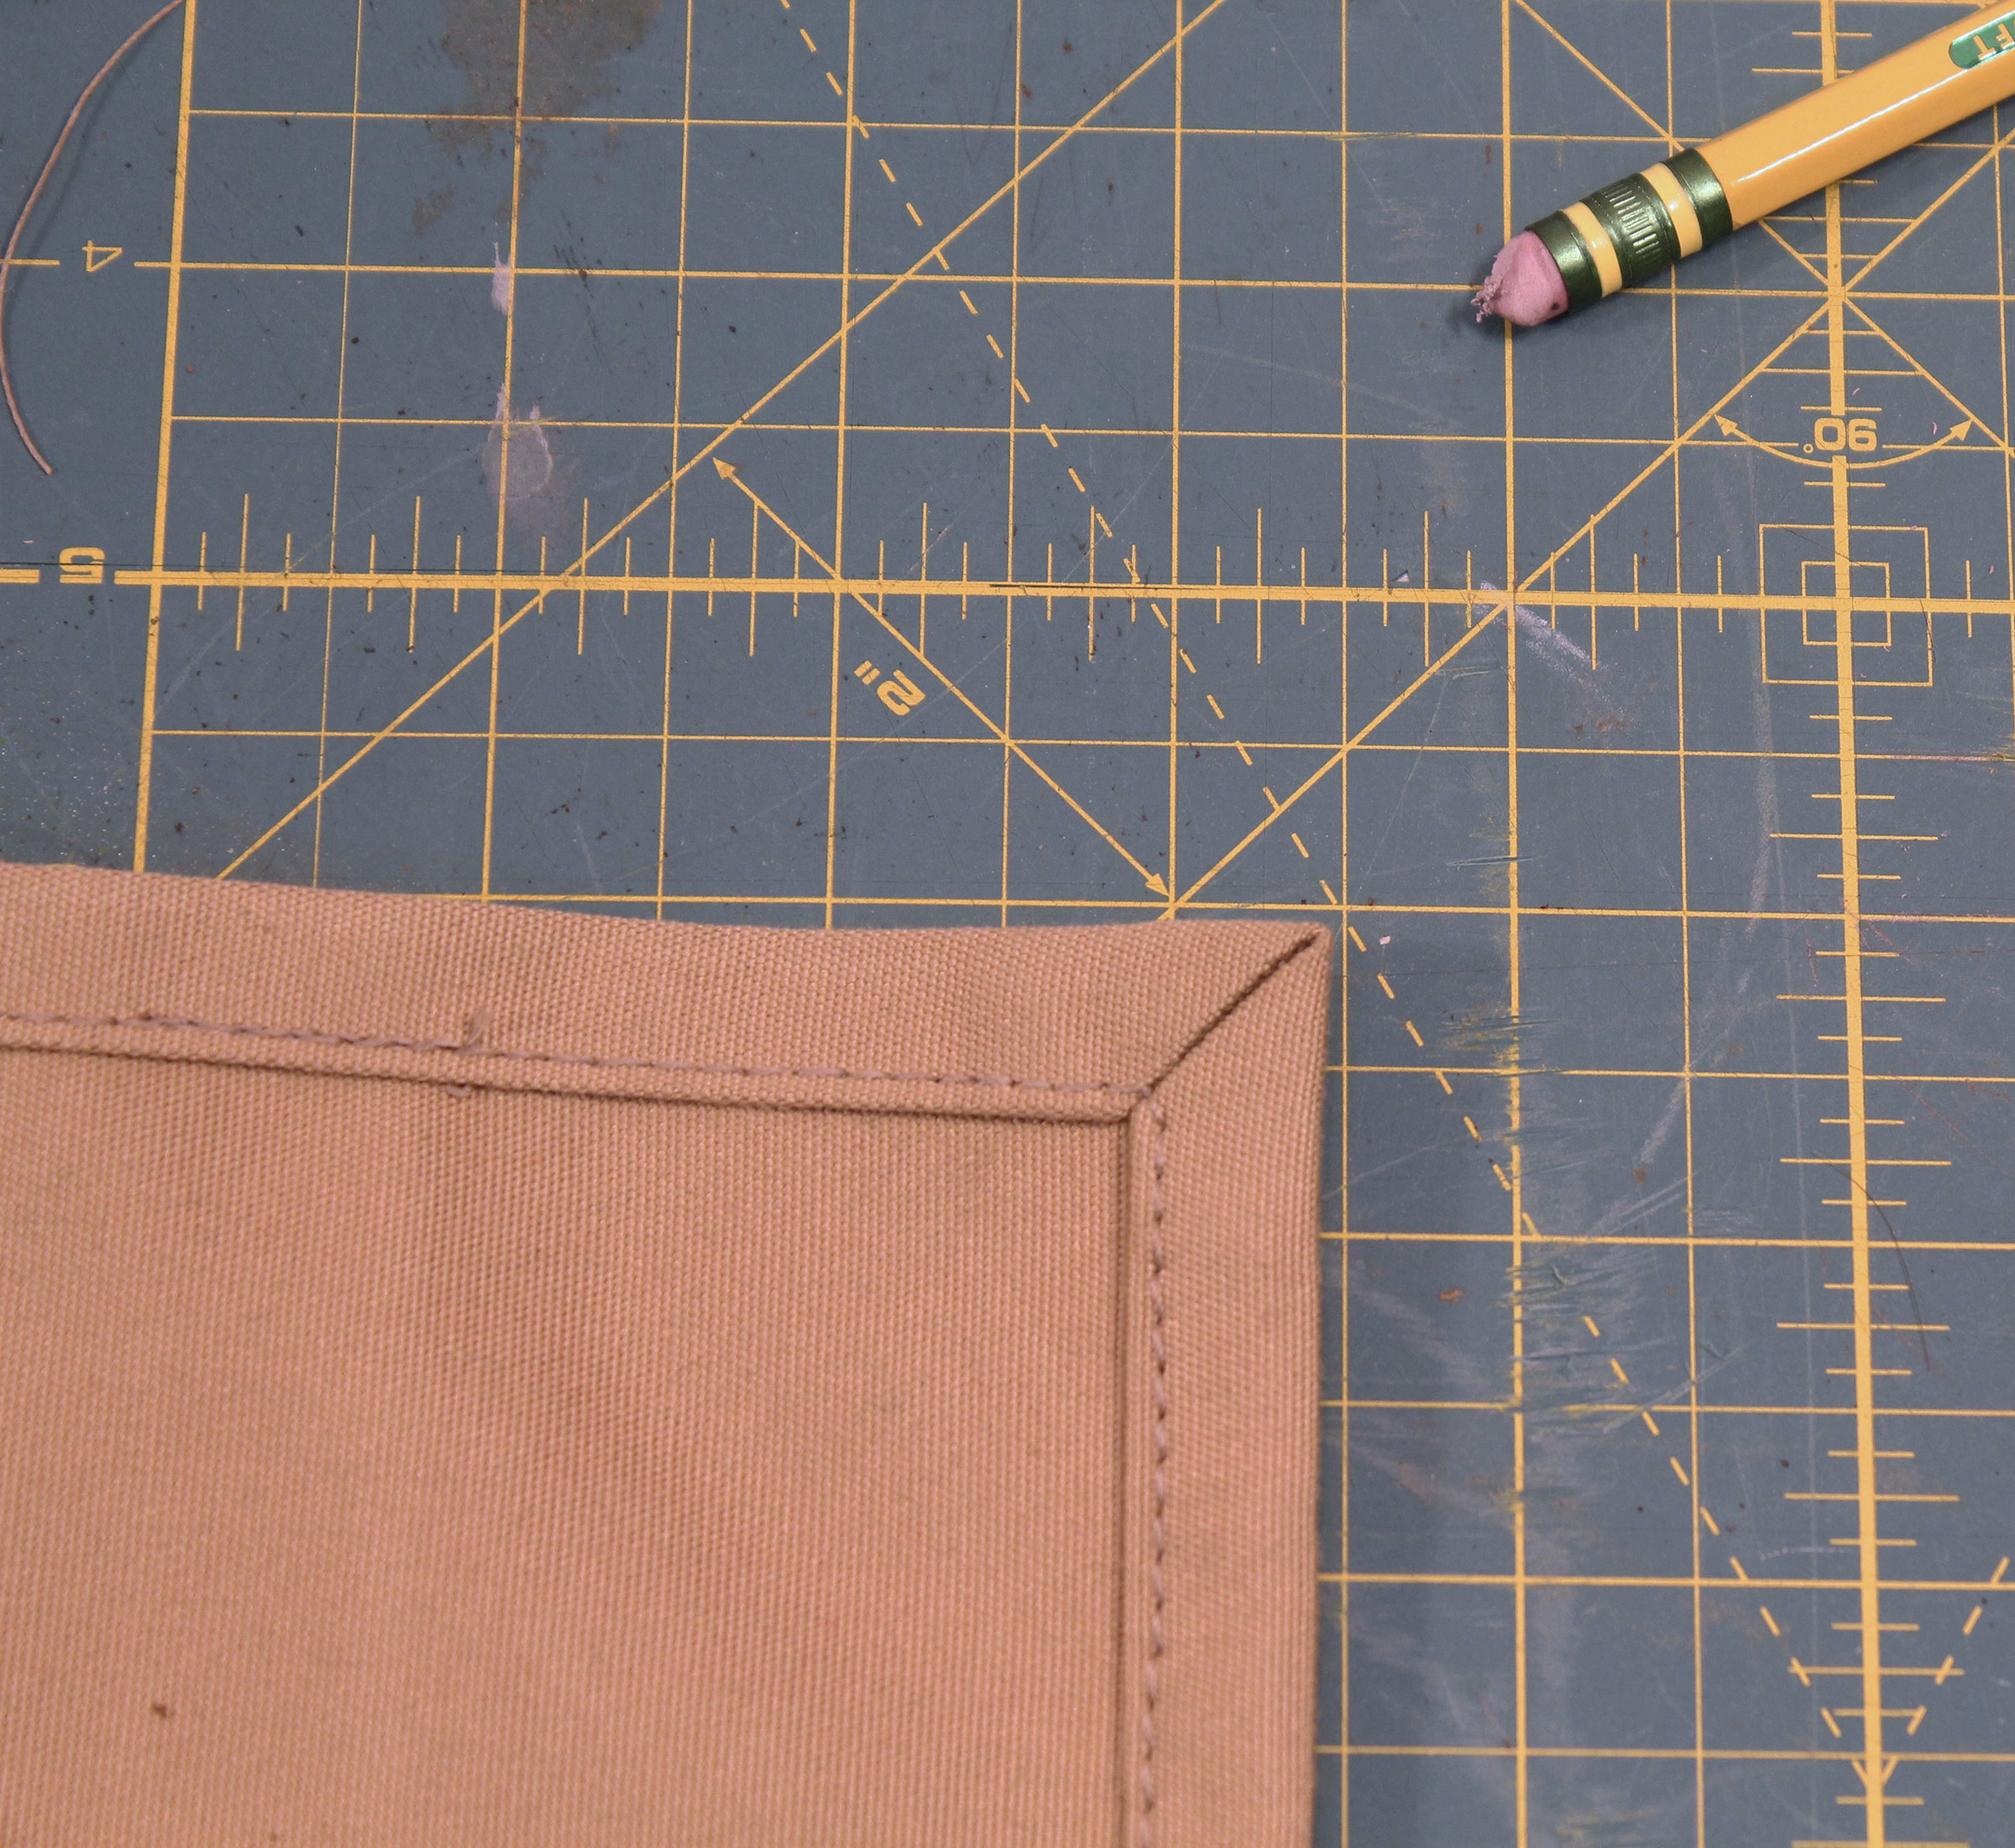
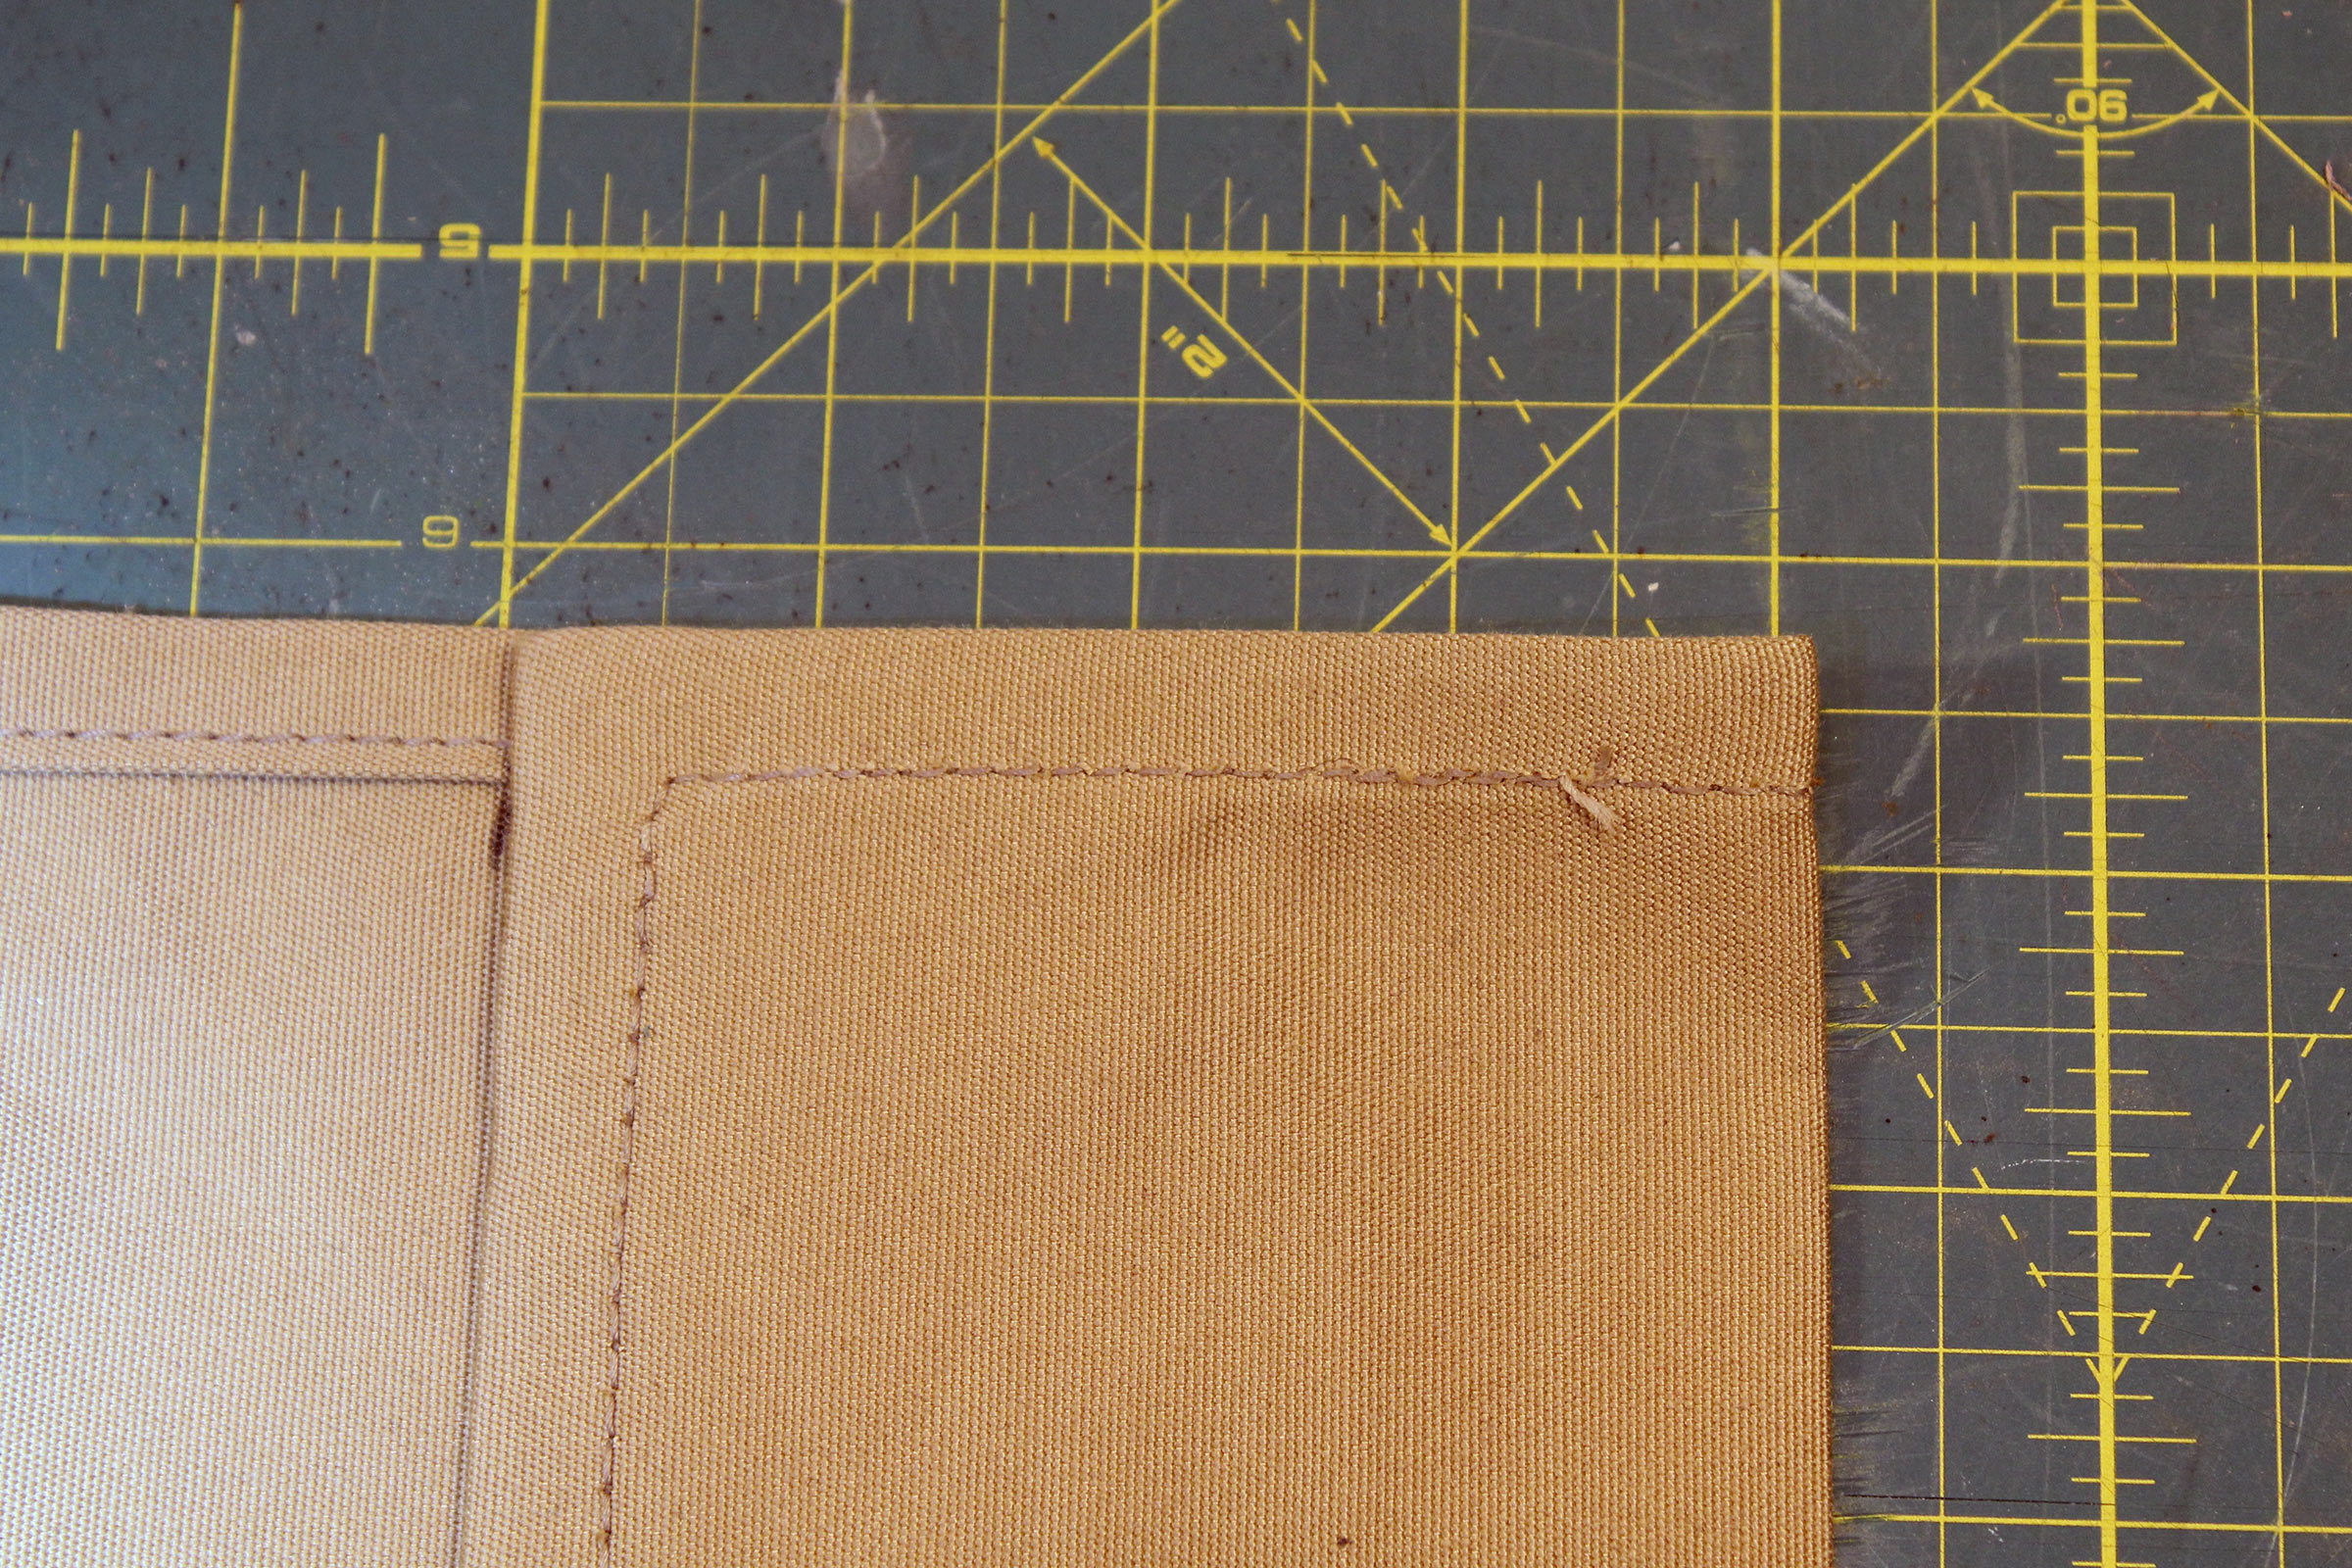
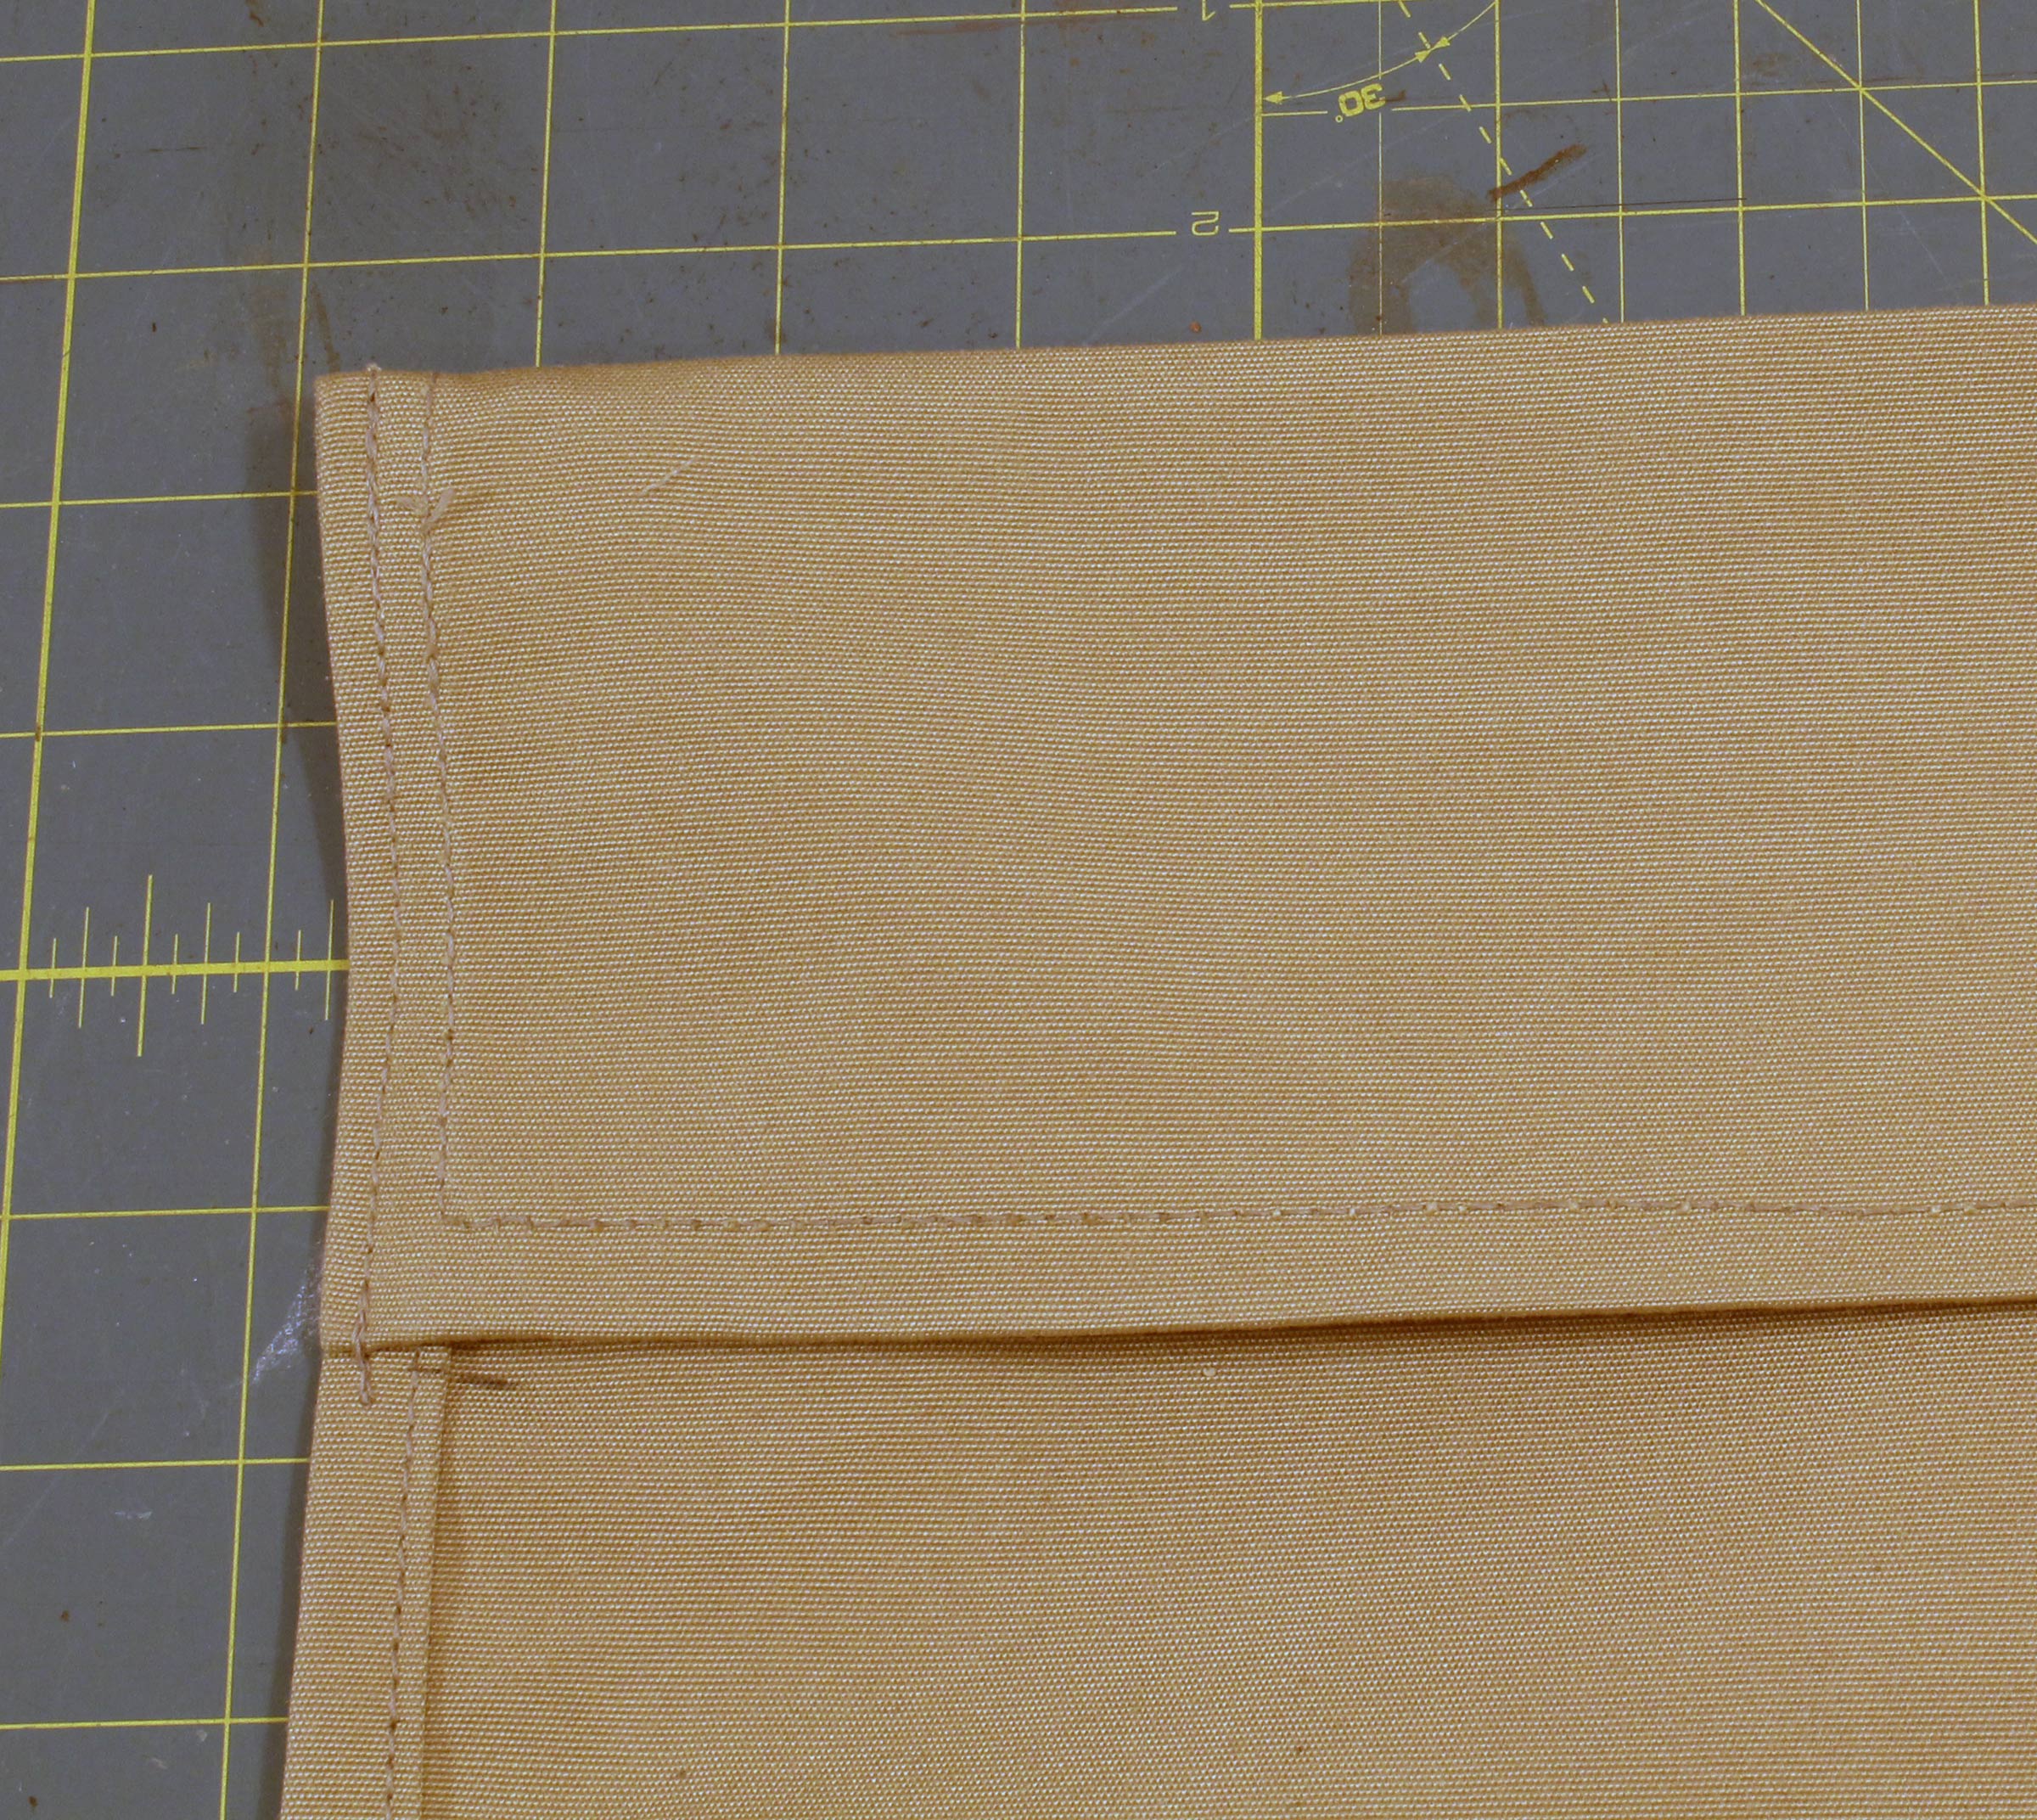
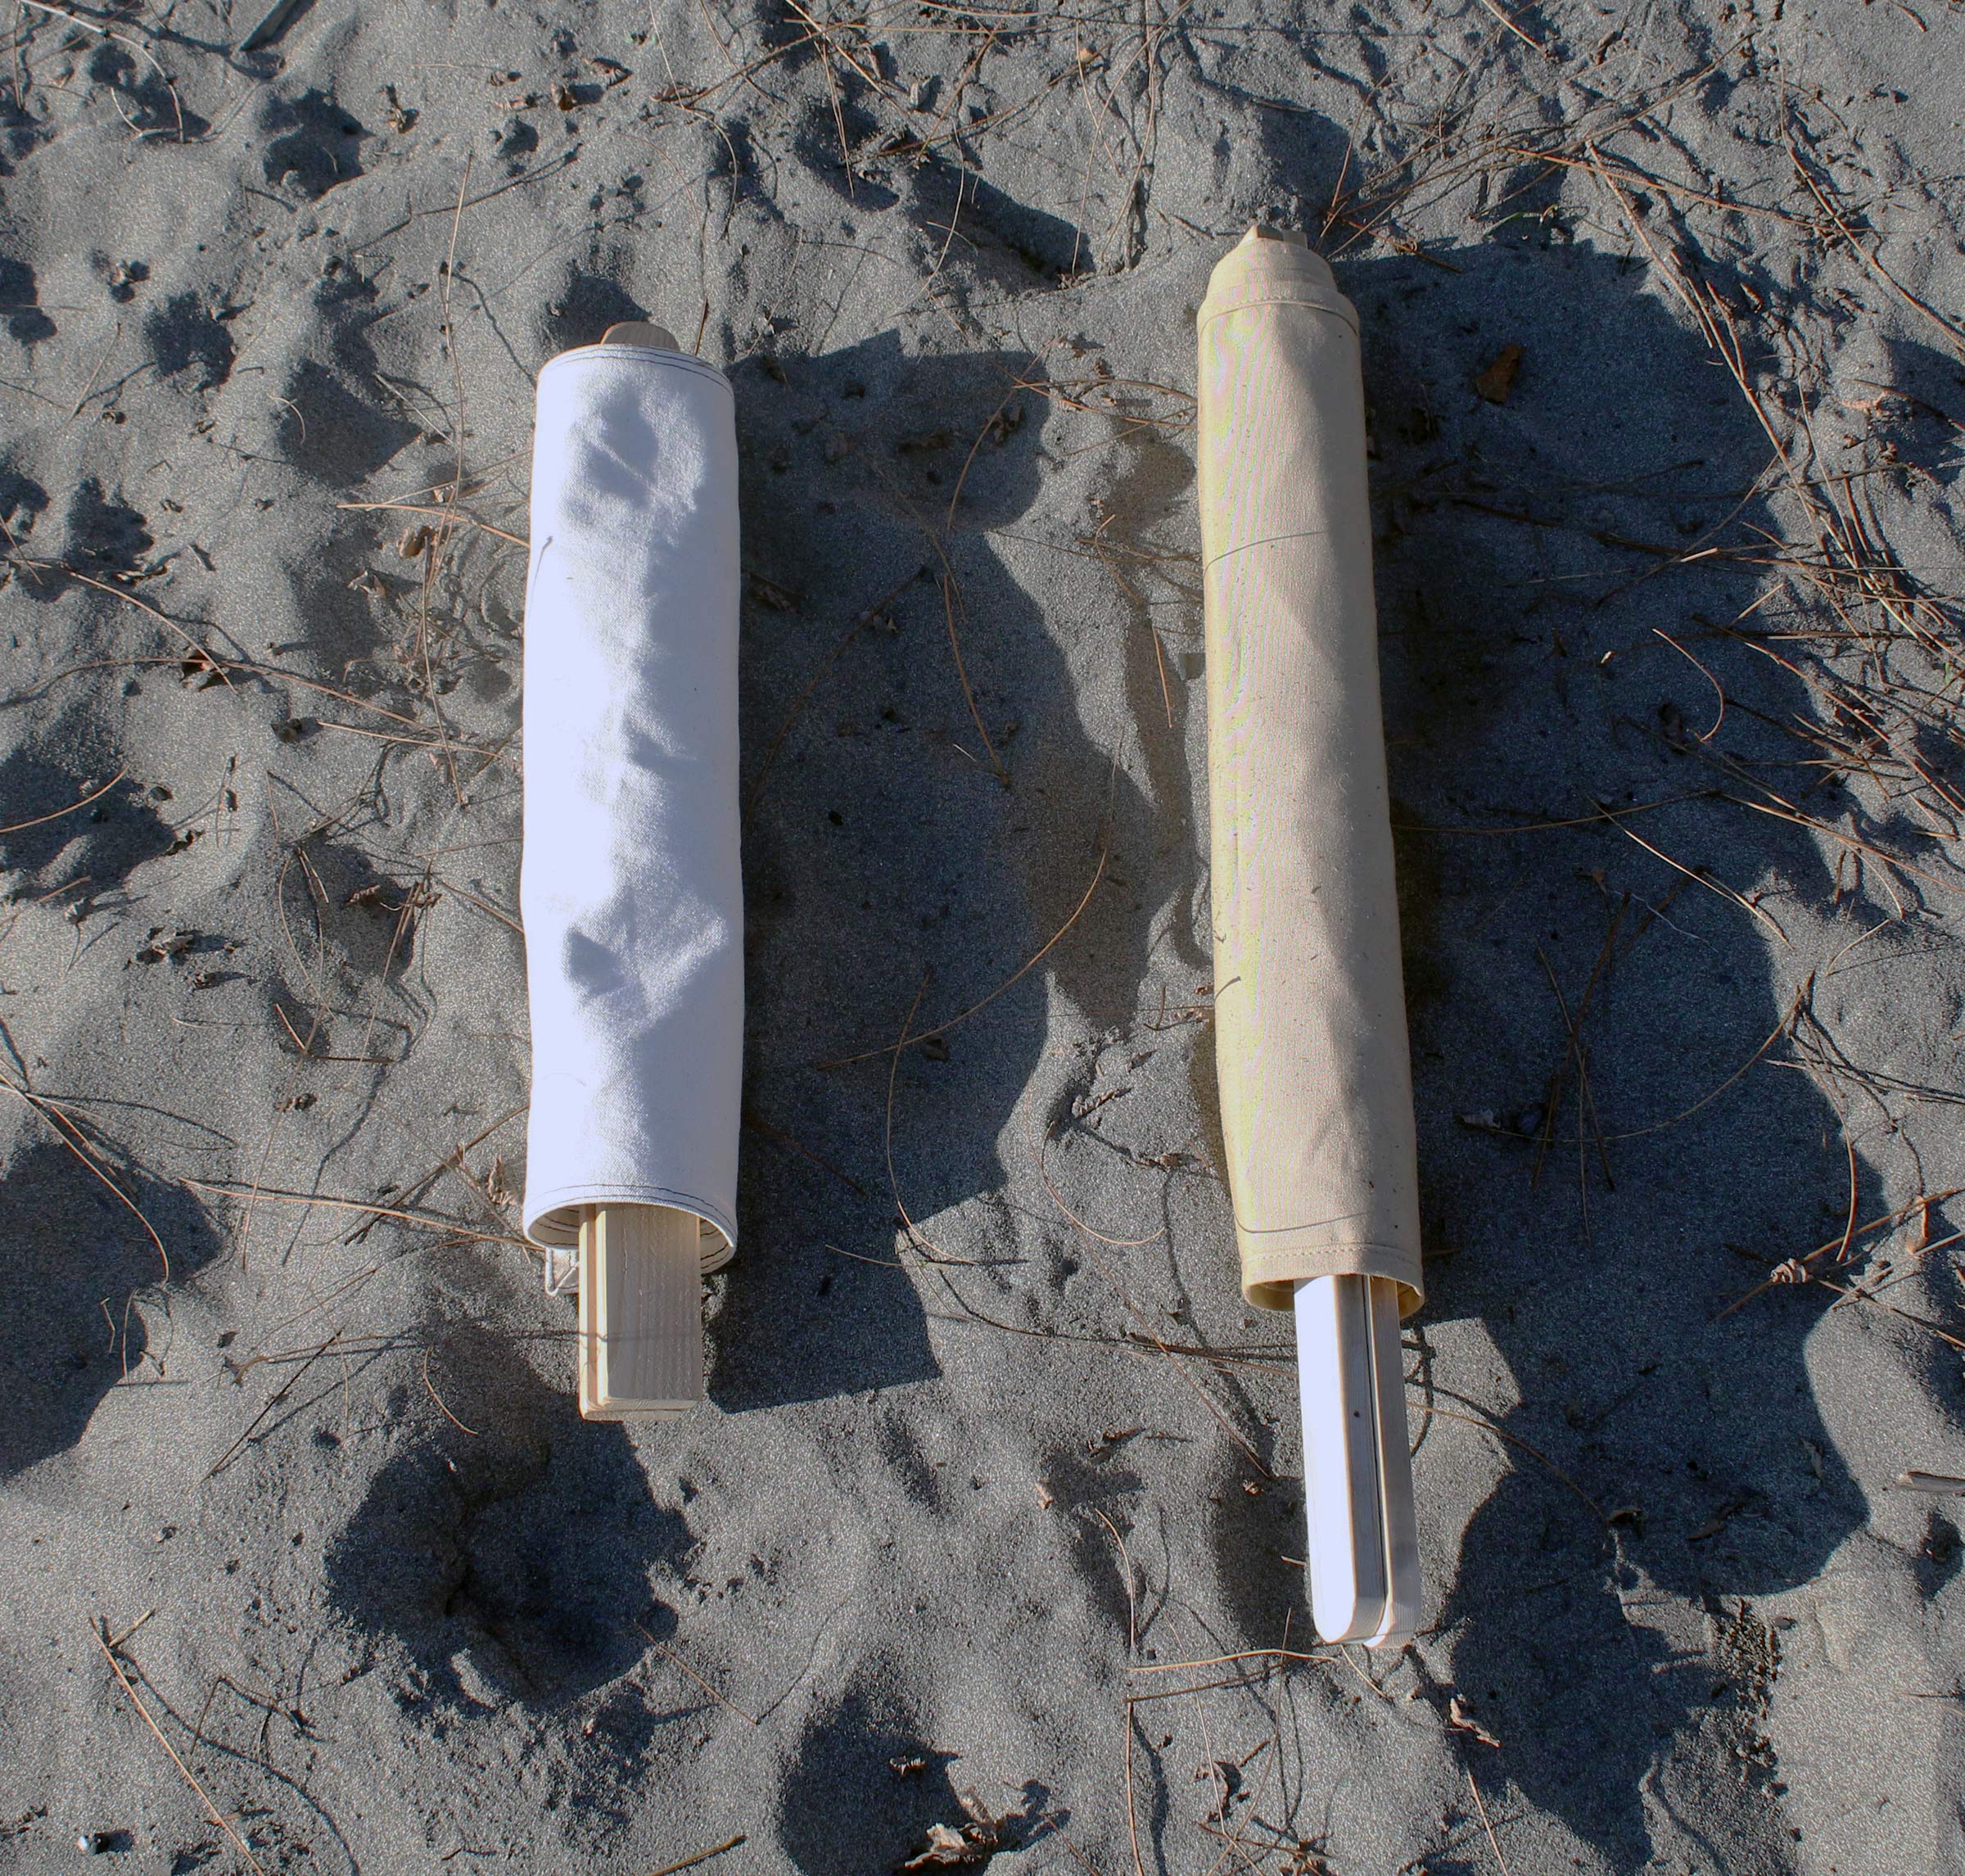
The Puddle Duck succeeds brilliantly on that score. It’s probably not absolutely the easiest boat in the world to build—hulls with at least some flare can actually come together in the shop a little more easily—but that doesn’t matter. What matters is that to someone who has never built a boat before, someone intimidated by curves and bevels, the Puddle Duck looks simpler than other boats. And its flat-bottomed glue-and-screw construction does make it a very simple, fast build. When I talked my brother into building hull No. 892 for his kids, he was able to finish it in just five evenings, spending well under $200 (we reused the rudder, daggerboard, mast, and standing lug rig from another boat).
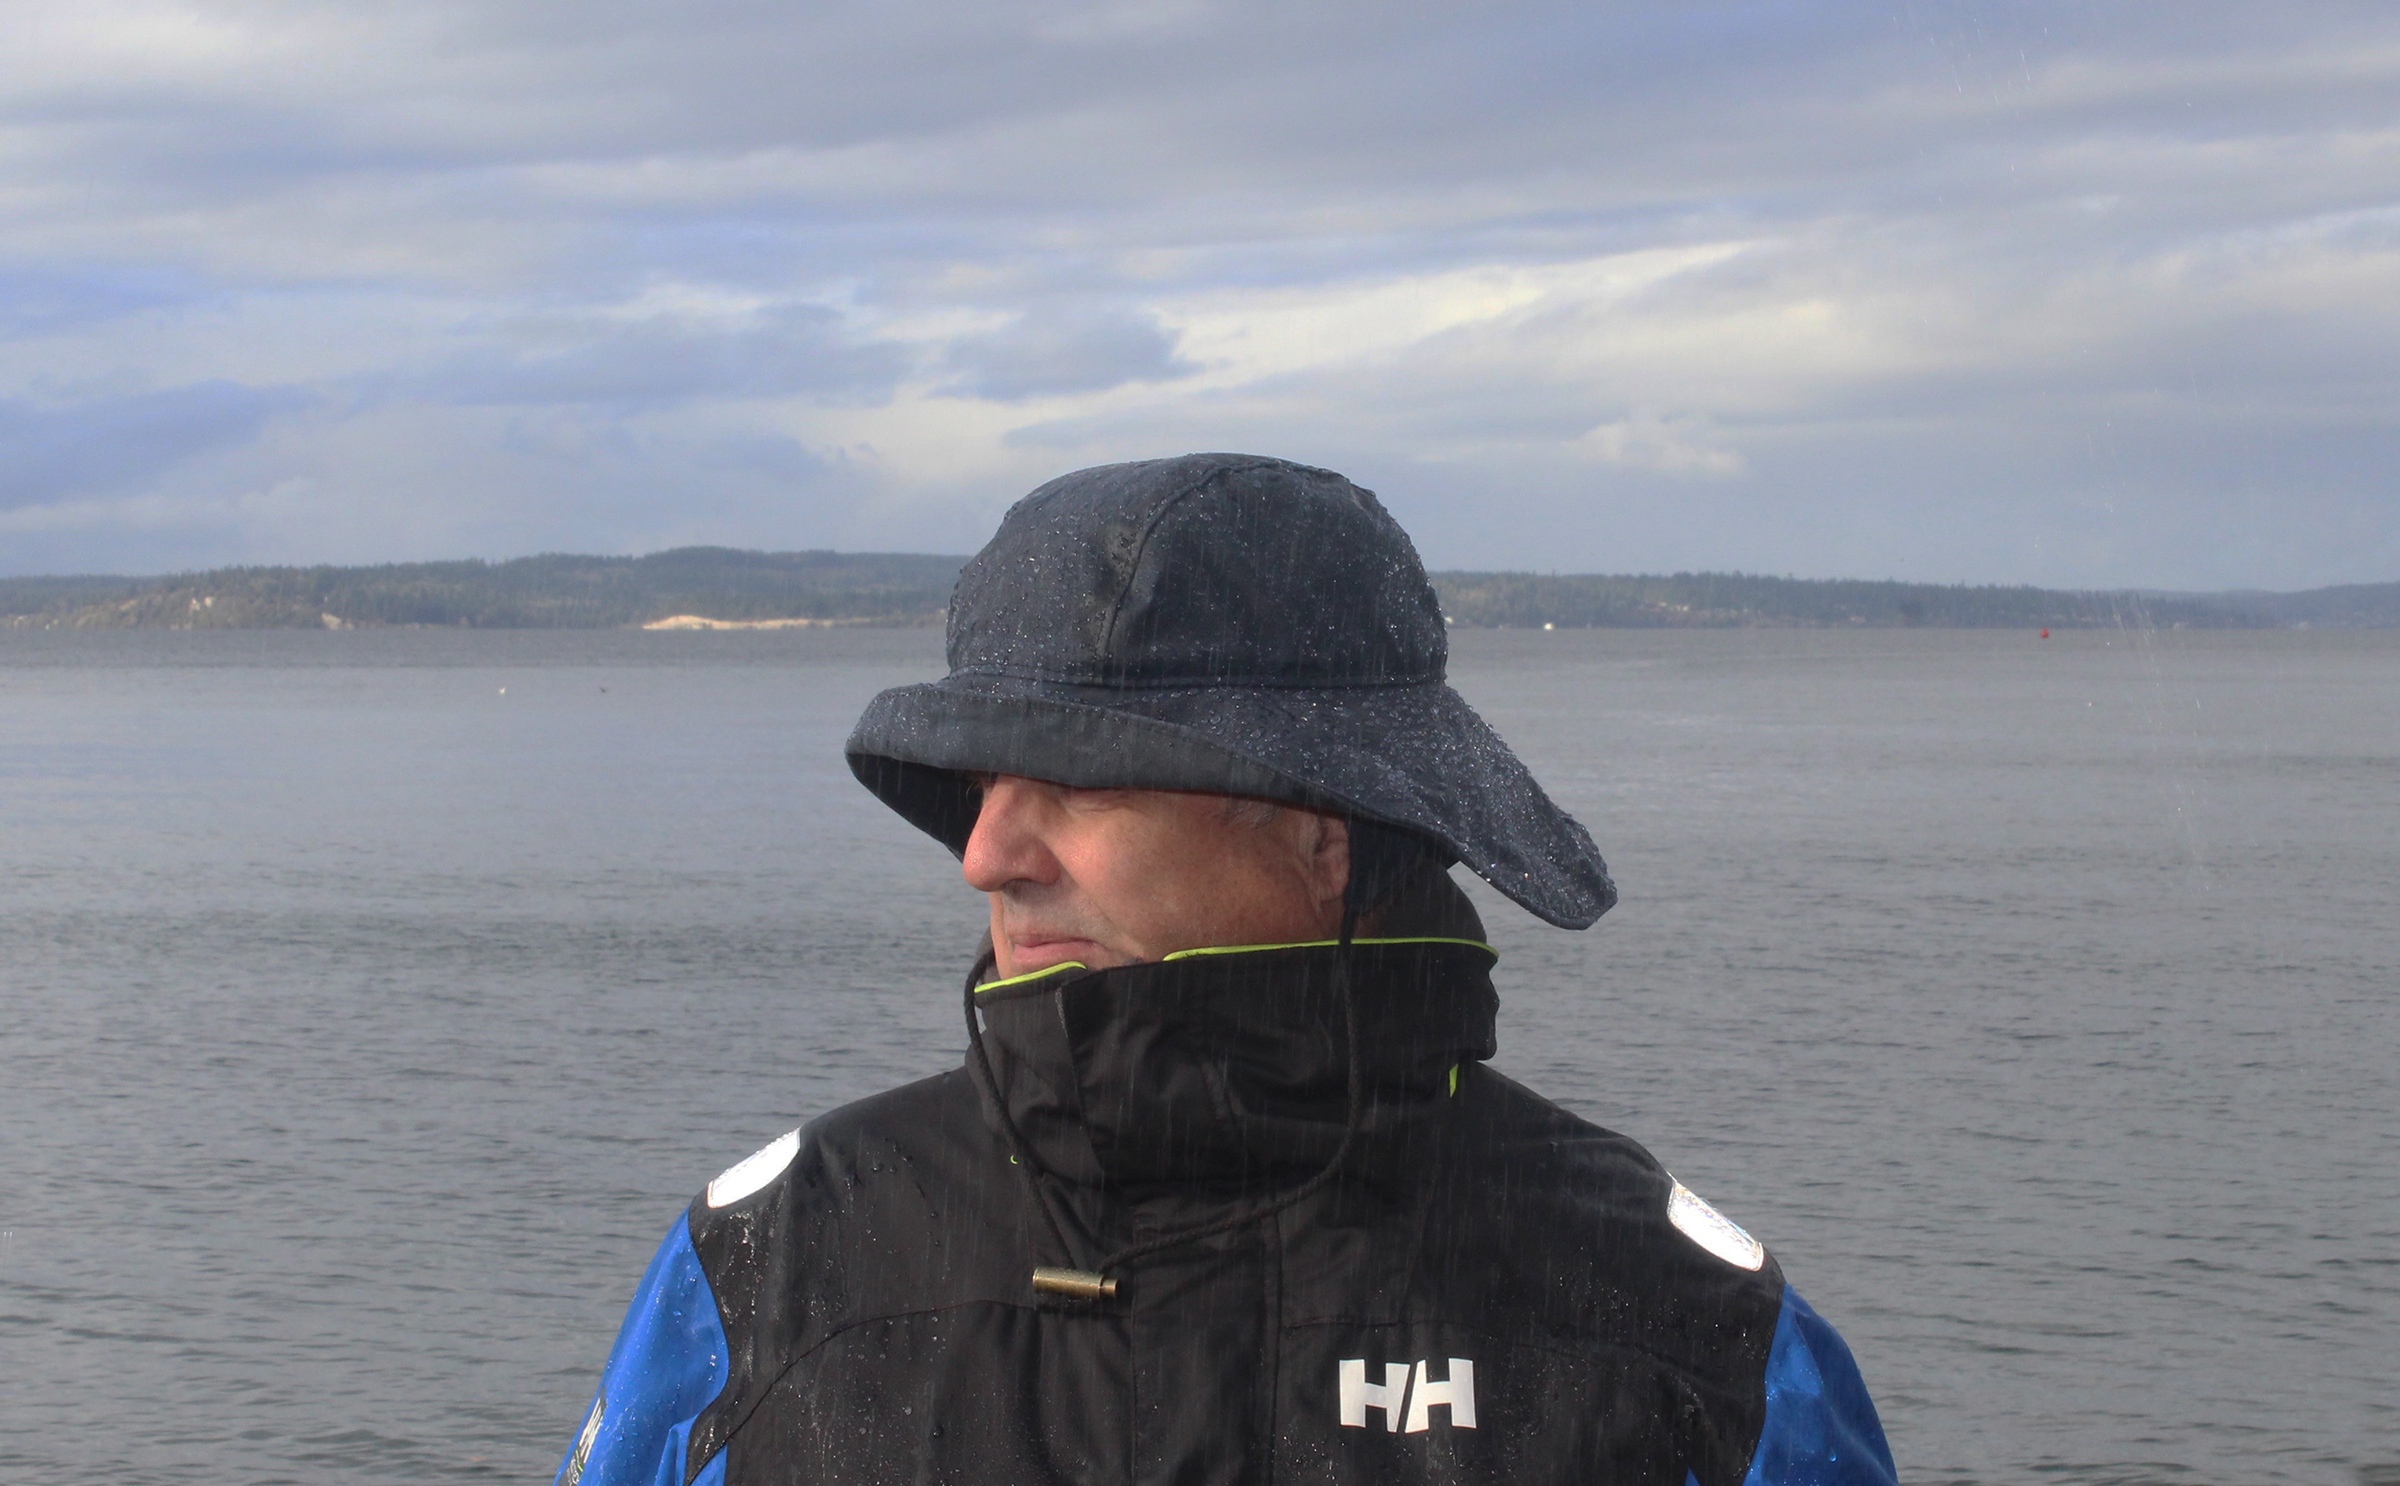
Tom Pamperin
With a buoyancy chamber built into each side of the boat, a Puddle Duck is easy to right after a capsize.
David Routh has no formal training in boat design, but he has spent a lot of time sailing and racing, and he knew what he was after when he created the Puddle Duck Racer in 2003: a way to get more people having fun sailing without needing to spend much money. But he wanted something more formal than the typical messabouts he started attending in the 1990s, which he says were “like a bunch of cats wandering around.” What he needed was a cheap, easy-to-build racing class that would provide an excuse for people to actually sail together, instead of just walking along the beach admiring each other’s boats. The Puddle Duck was his answer.
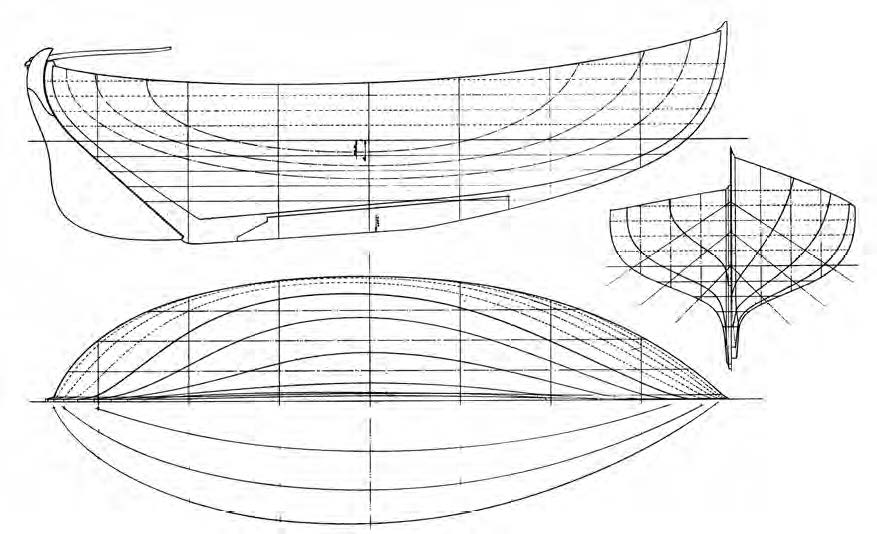
Routh describes the Puddle Duck as a developmental one-design class. The lower 10″ of each hull must be identical, with the same beam, length, rocker, and vertical sides. At official Puddle Duck events, each hull is measured to make sure it is class legal (a ¼” builder’s tolerance is allowed, and hulls that fail are allowed to compete with a penalty). Everything apart from the hull, though—rig, rudder, foils, sheer, superstructure (yes, there have been Ducks with usable cabins), and interior layout—is fair game for experimentation.
And while the Duck’s basic shape looks crude, there’s more going on with that boxy hull than might be immediately apparent. The rocker is more extreme at the ends, but flattens out in the middle—an attempt to blend the characteristics of a displacement hull and a planing hull. As a result, the boat sails better than it seems to deserve, reaching speeds up to 6 mph off the wind without too much fuss. The fastest recorded Ducker so far is Kenny Giles, who has hit 9.2 mph by GPS, using a 59-sq-ft leg-o’-mutton rig on a windy day.
“I really like the idea of having your building skills be part of the competition,” Routh says of his rules, which attempt to strike a middle ground between the arms race of open-class racing and the tight strictures of one-design classes. “It’s not about the limitations of the rules, it’s about the creativity of everything else.”
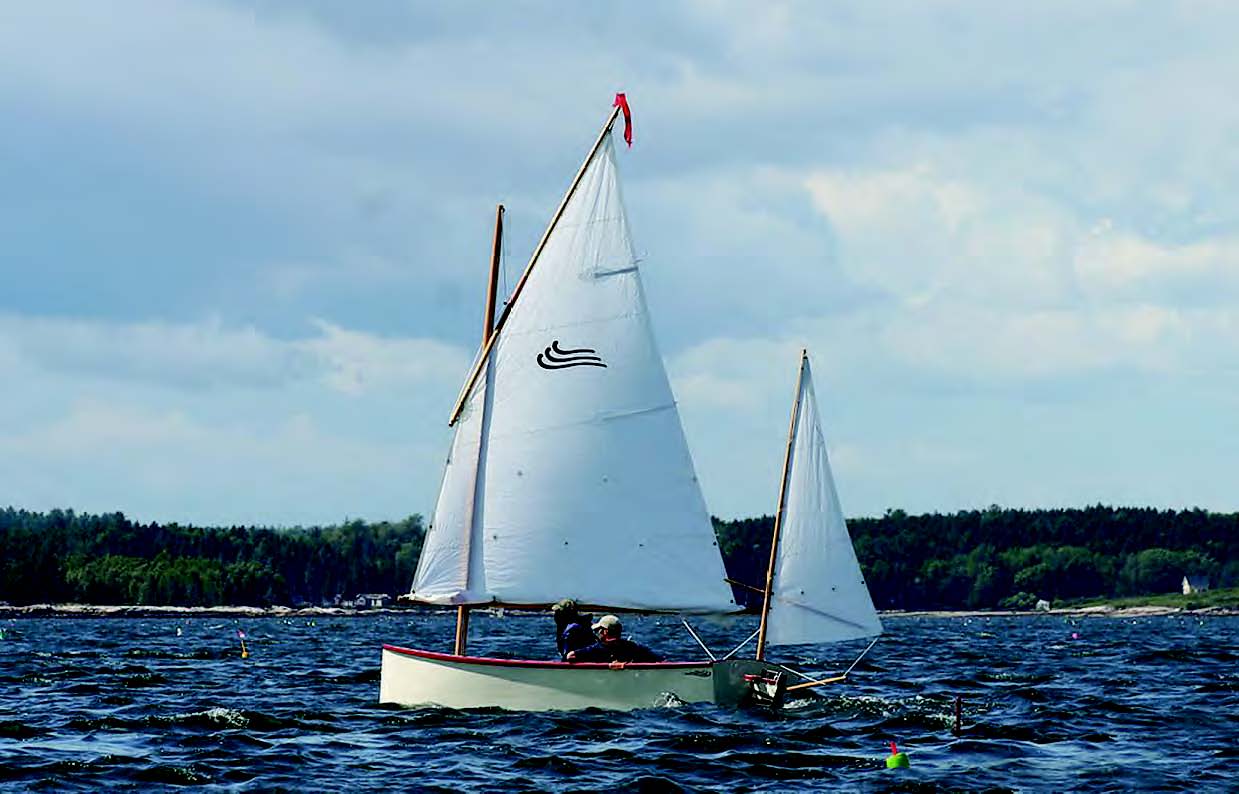
As a result of the class’s intentional openness, each Duck is laid out a bit differently within the basic shared hull shape. But it’s the rig where the developmental aspect of the class is most obvious. I’ve seen gaff-sloop Ducks, leg-o’-mutton Ducks, balance-lug Ducks, Chinese lug Ducks, lateen Ducks, standing-lug Ducks, sprit-sail Ducks, Ducks with repurposed windsurfing rigs, and one Duck rigged as a staysail cat. Routh has heard of even stranger rigs: wingsails, biplane rigs, and even a variant of the Micronesian-style proa rig described by writer and wild food forager Euell Gibbons in his book The Beachcomber Afloat.
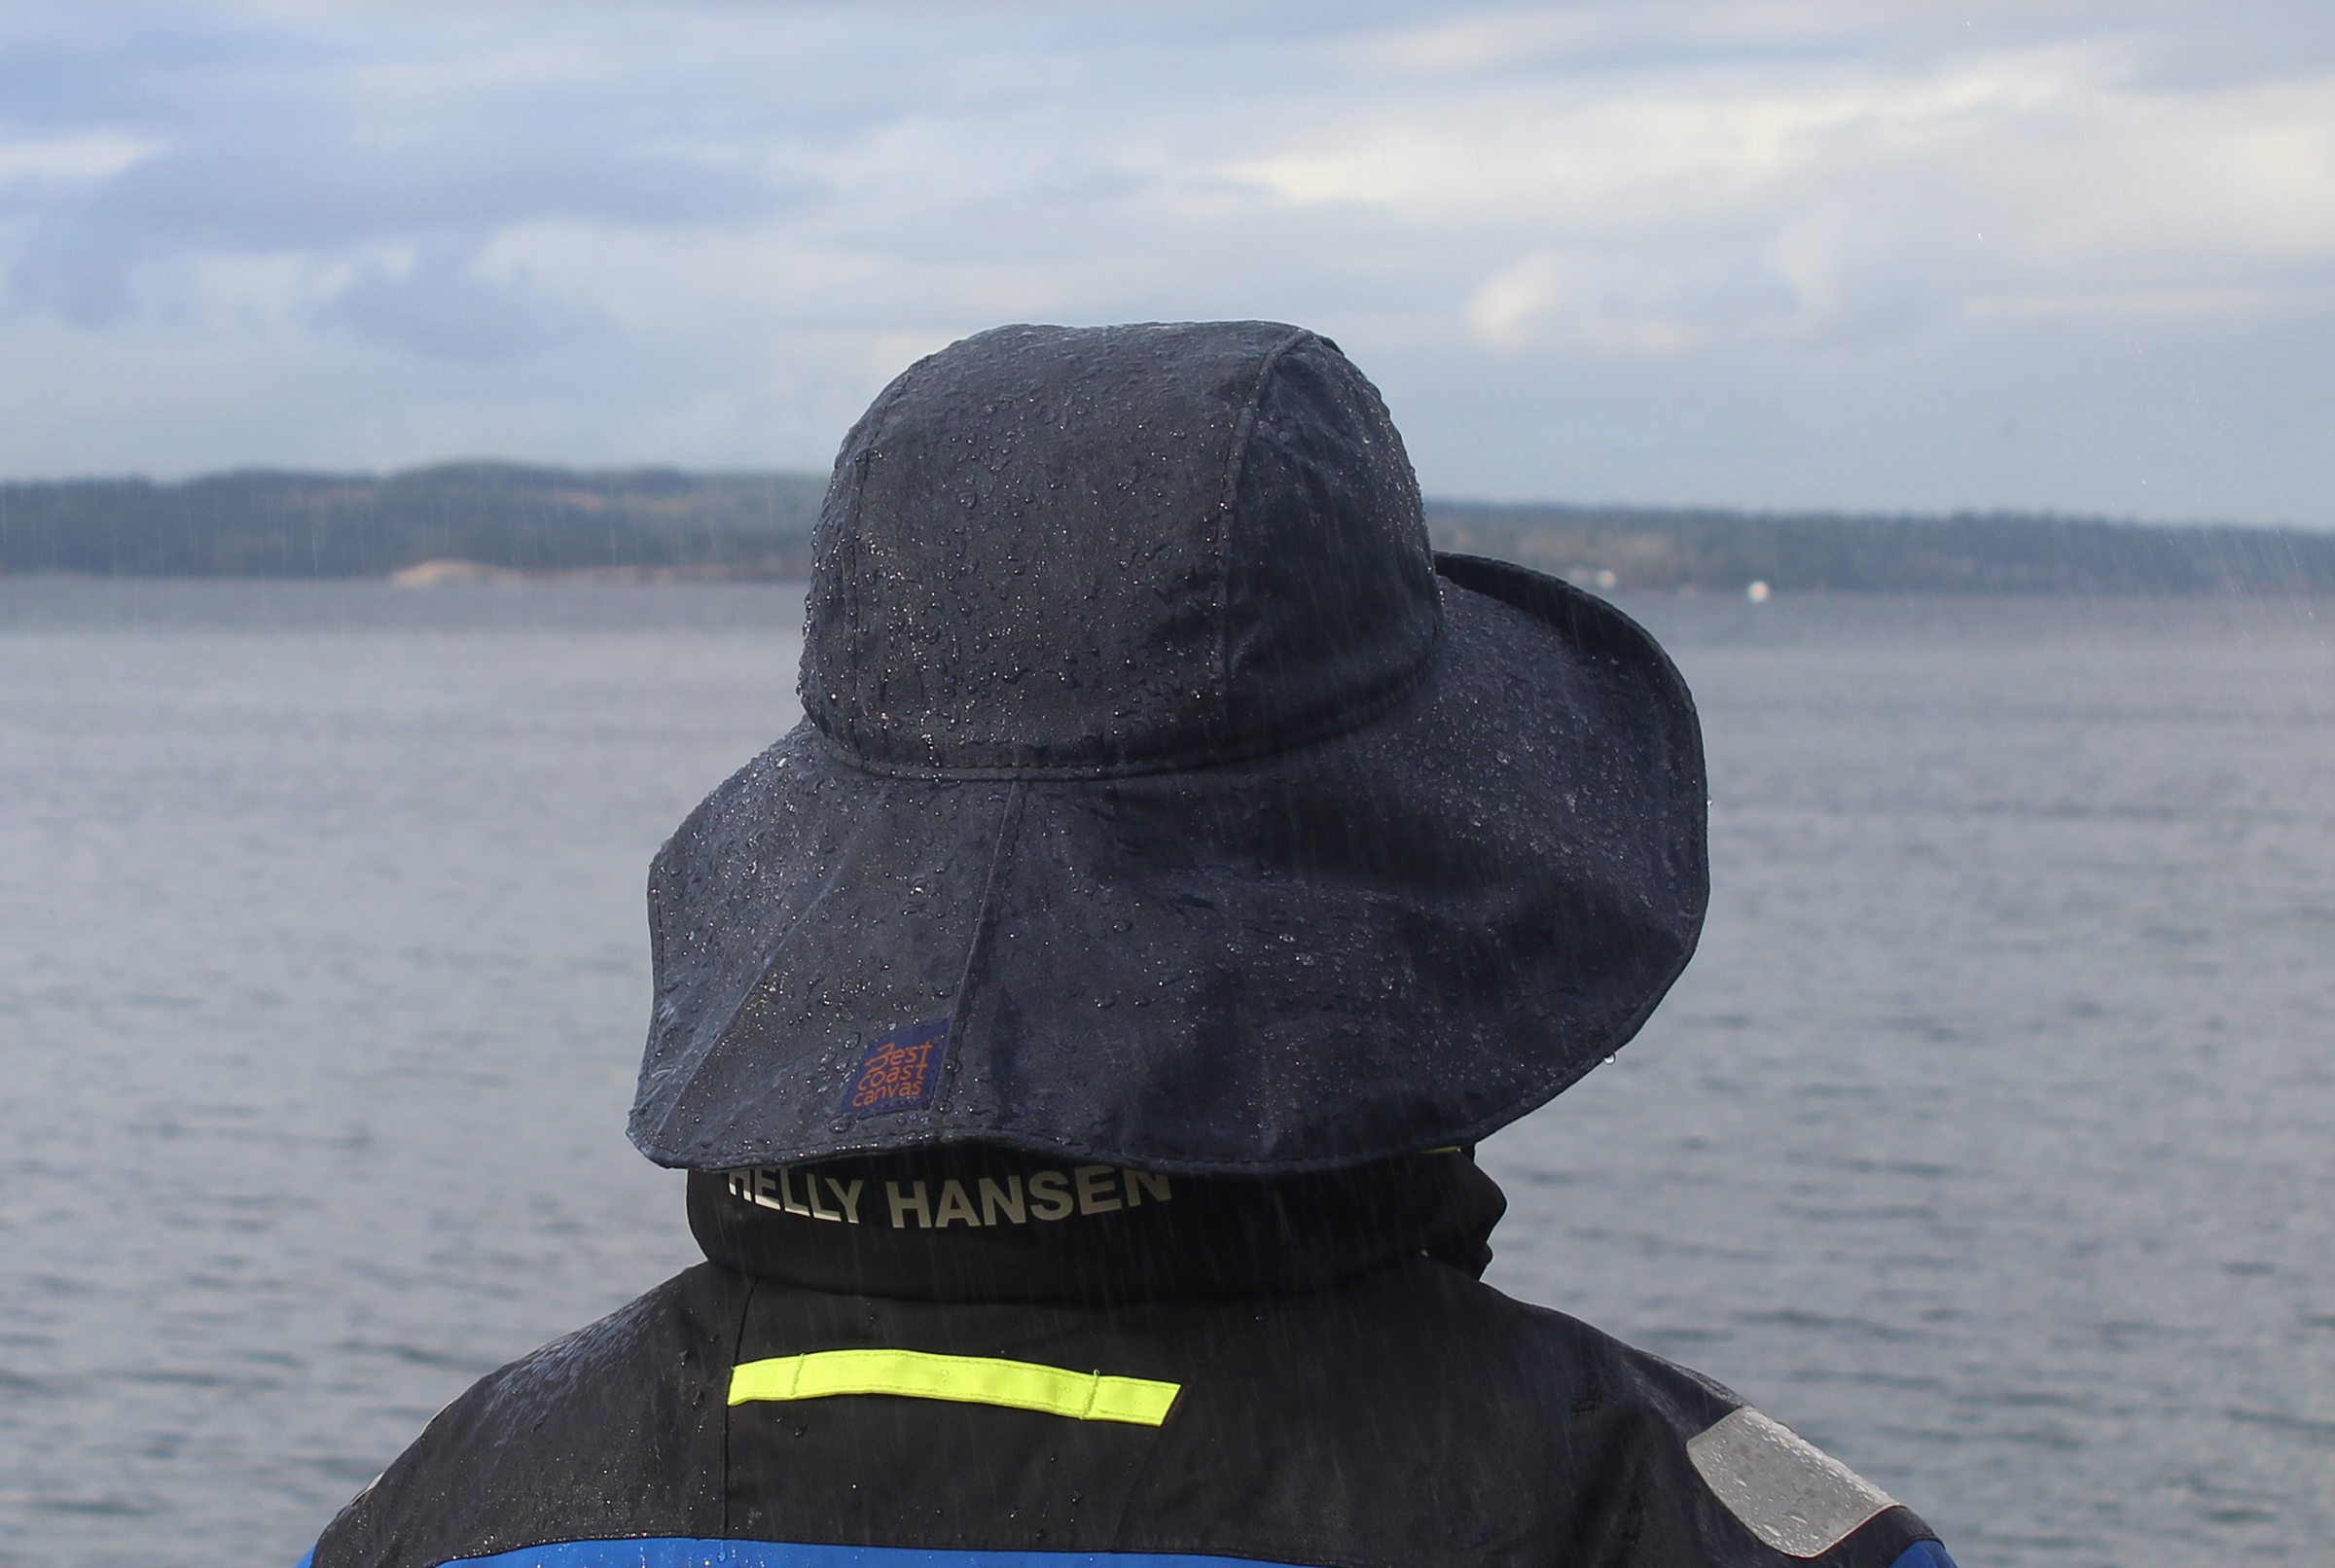
Tom Pamperin
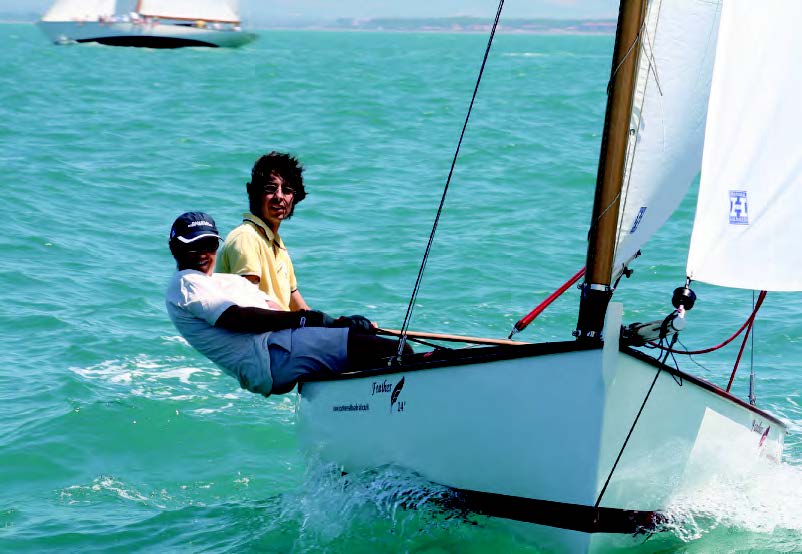
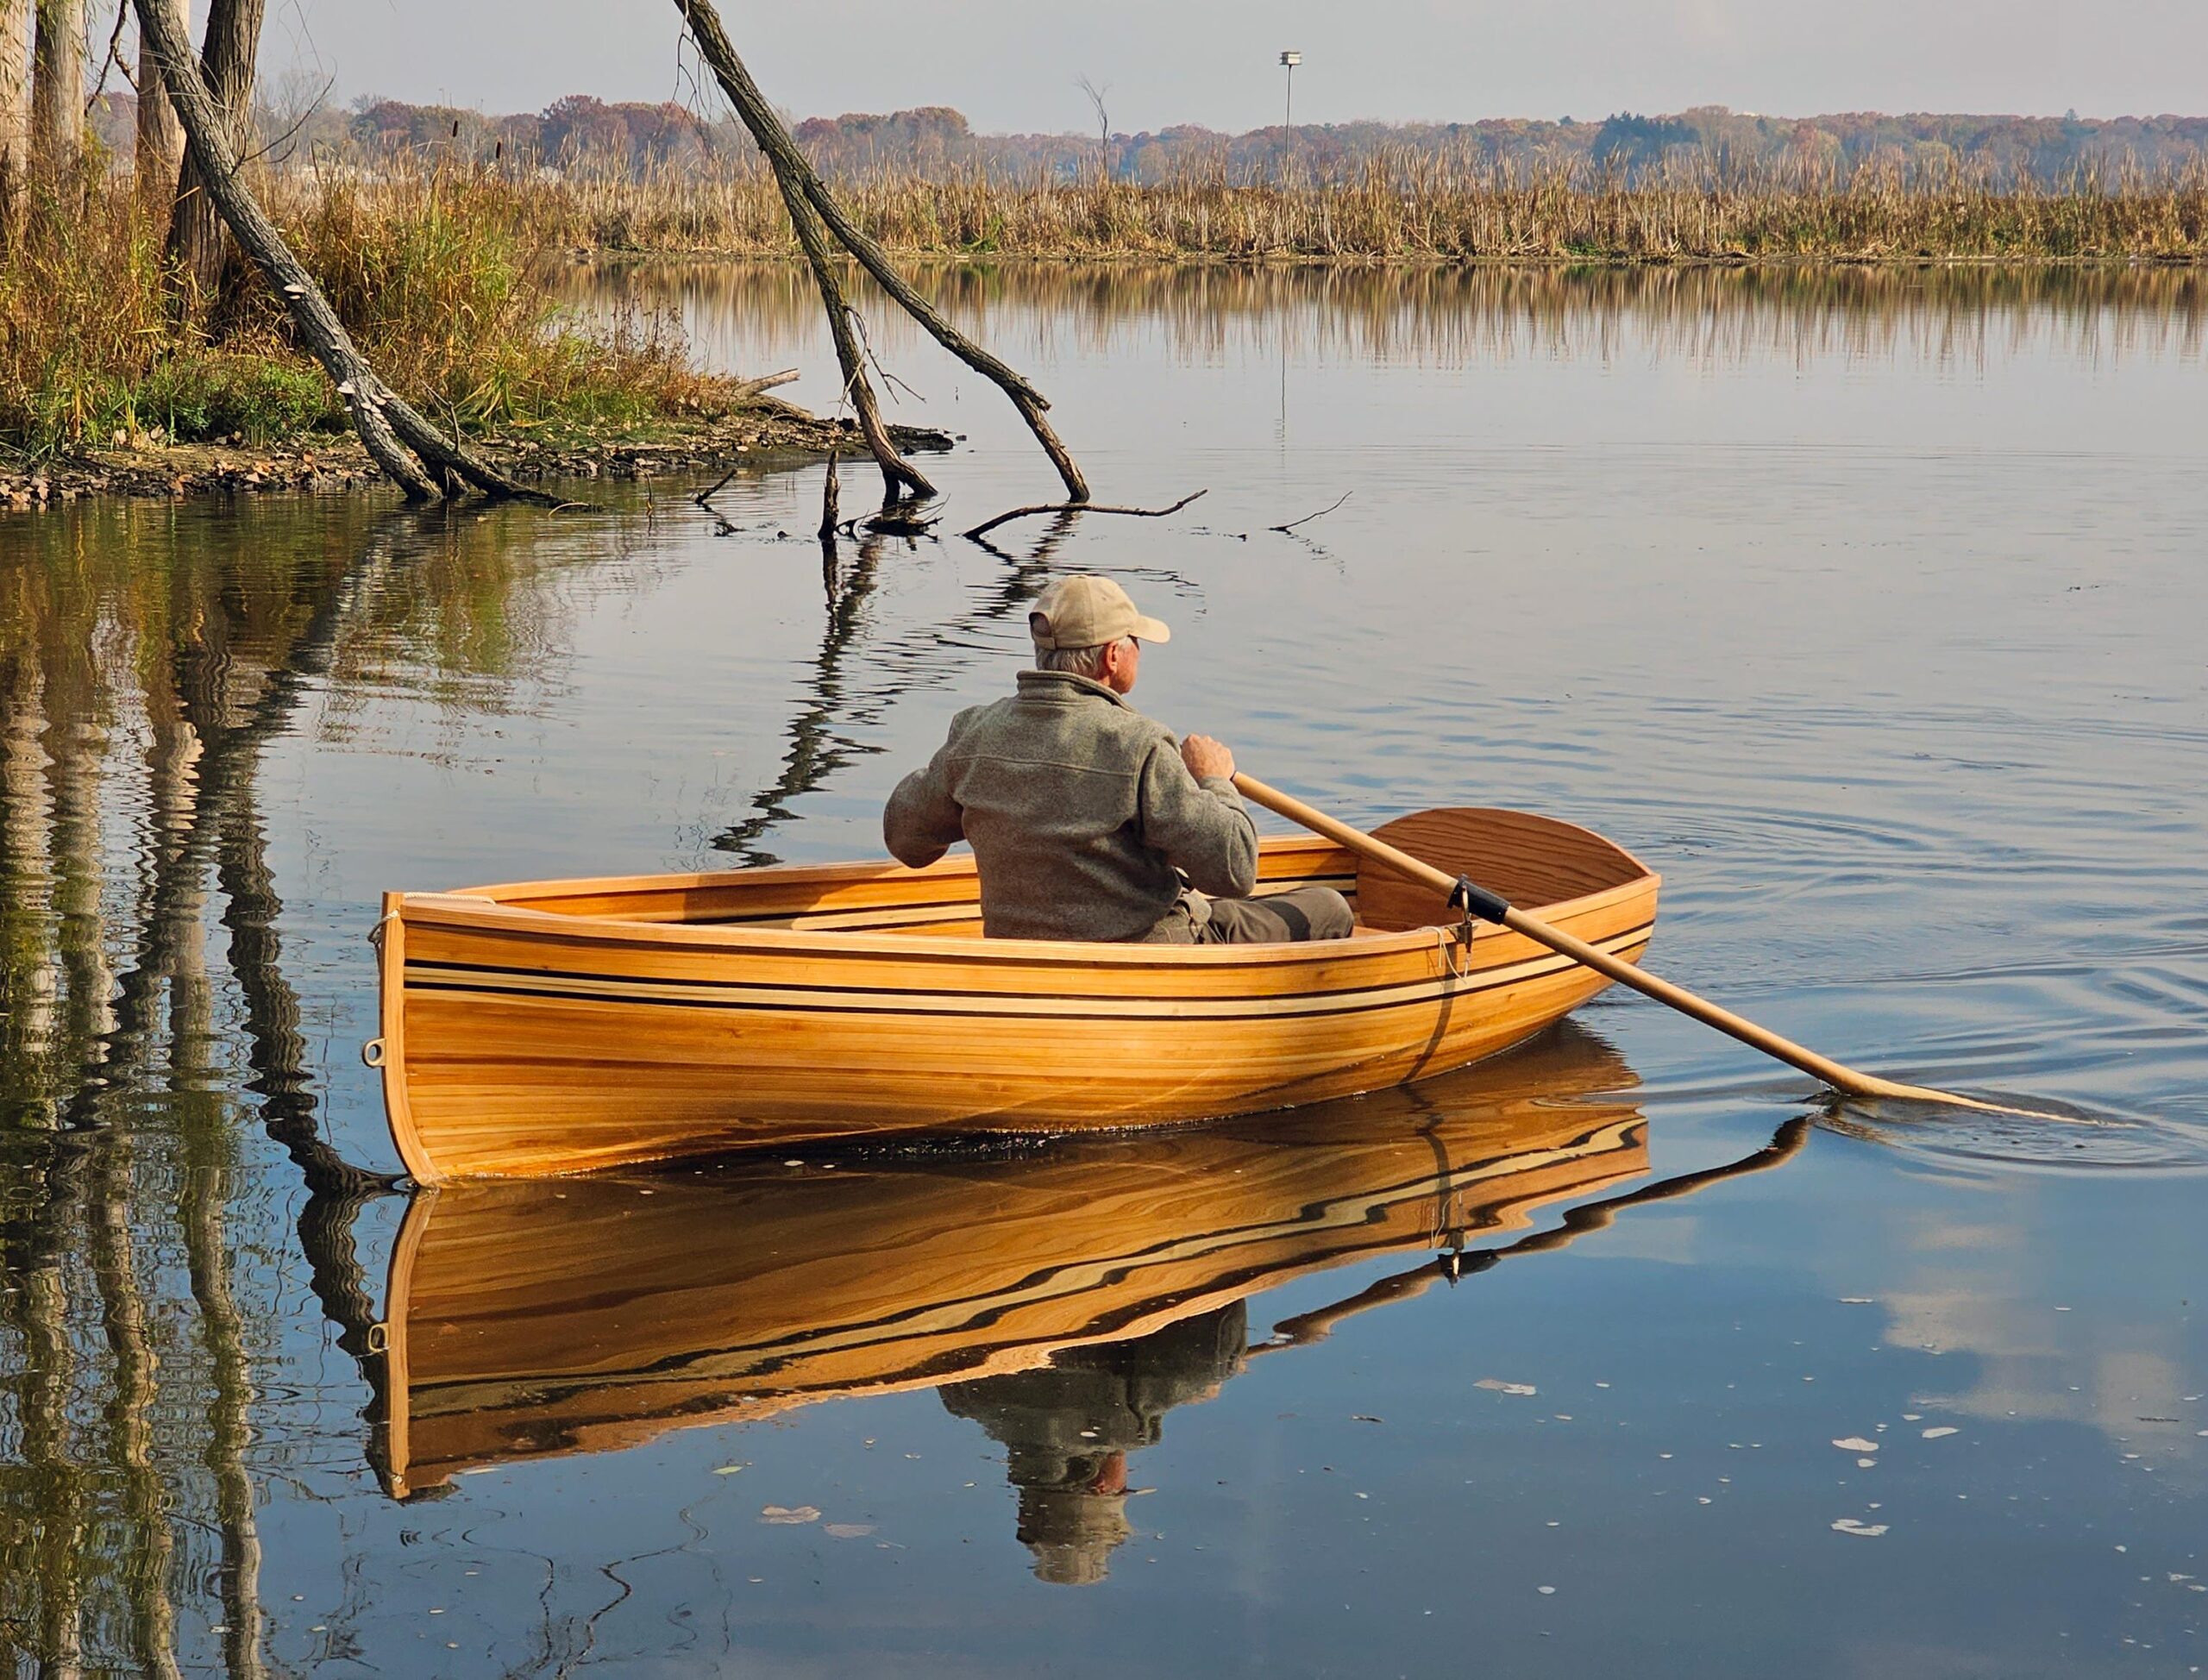
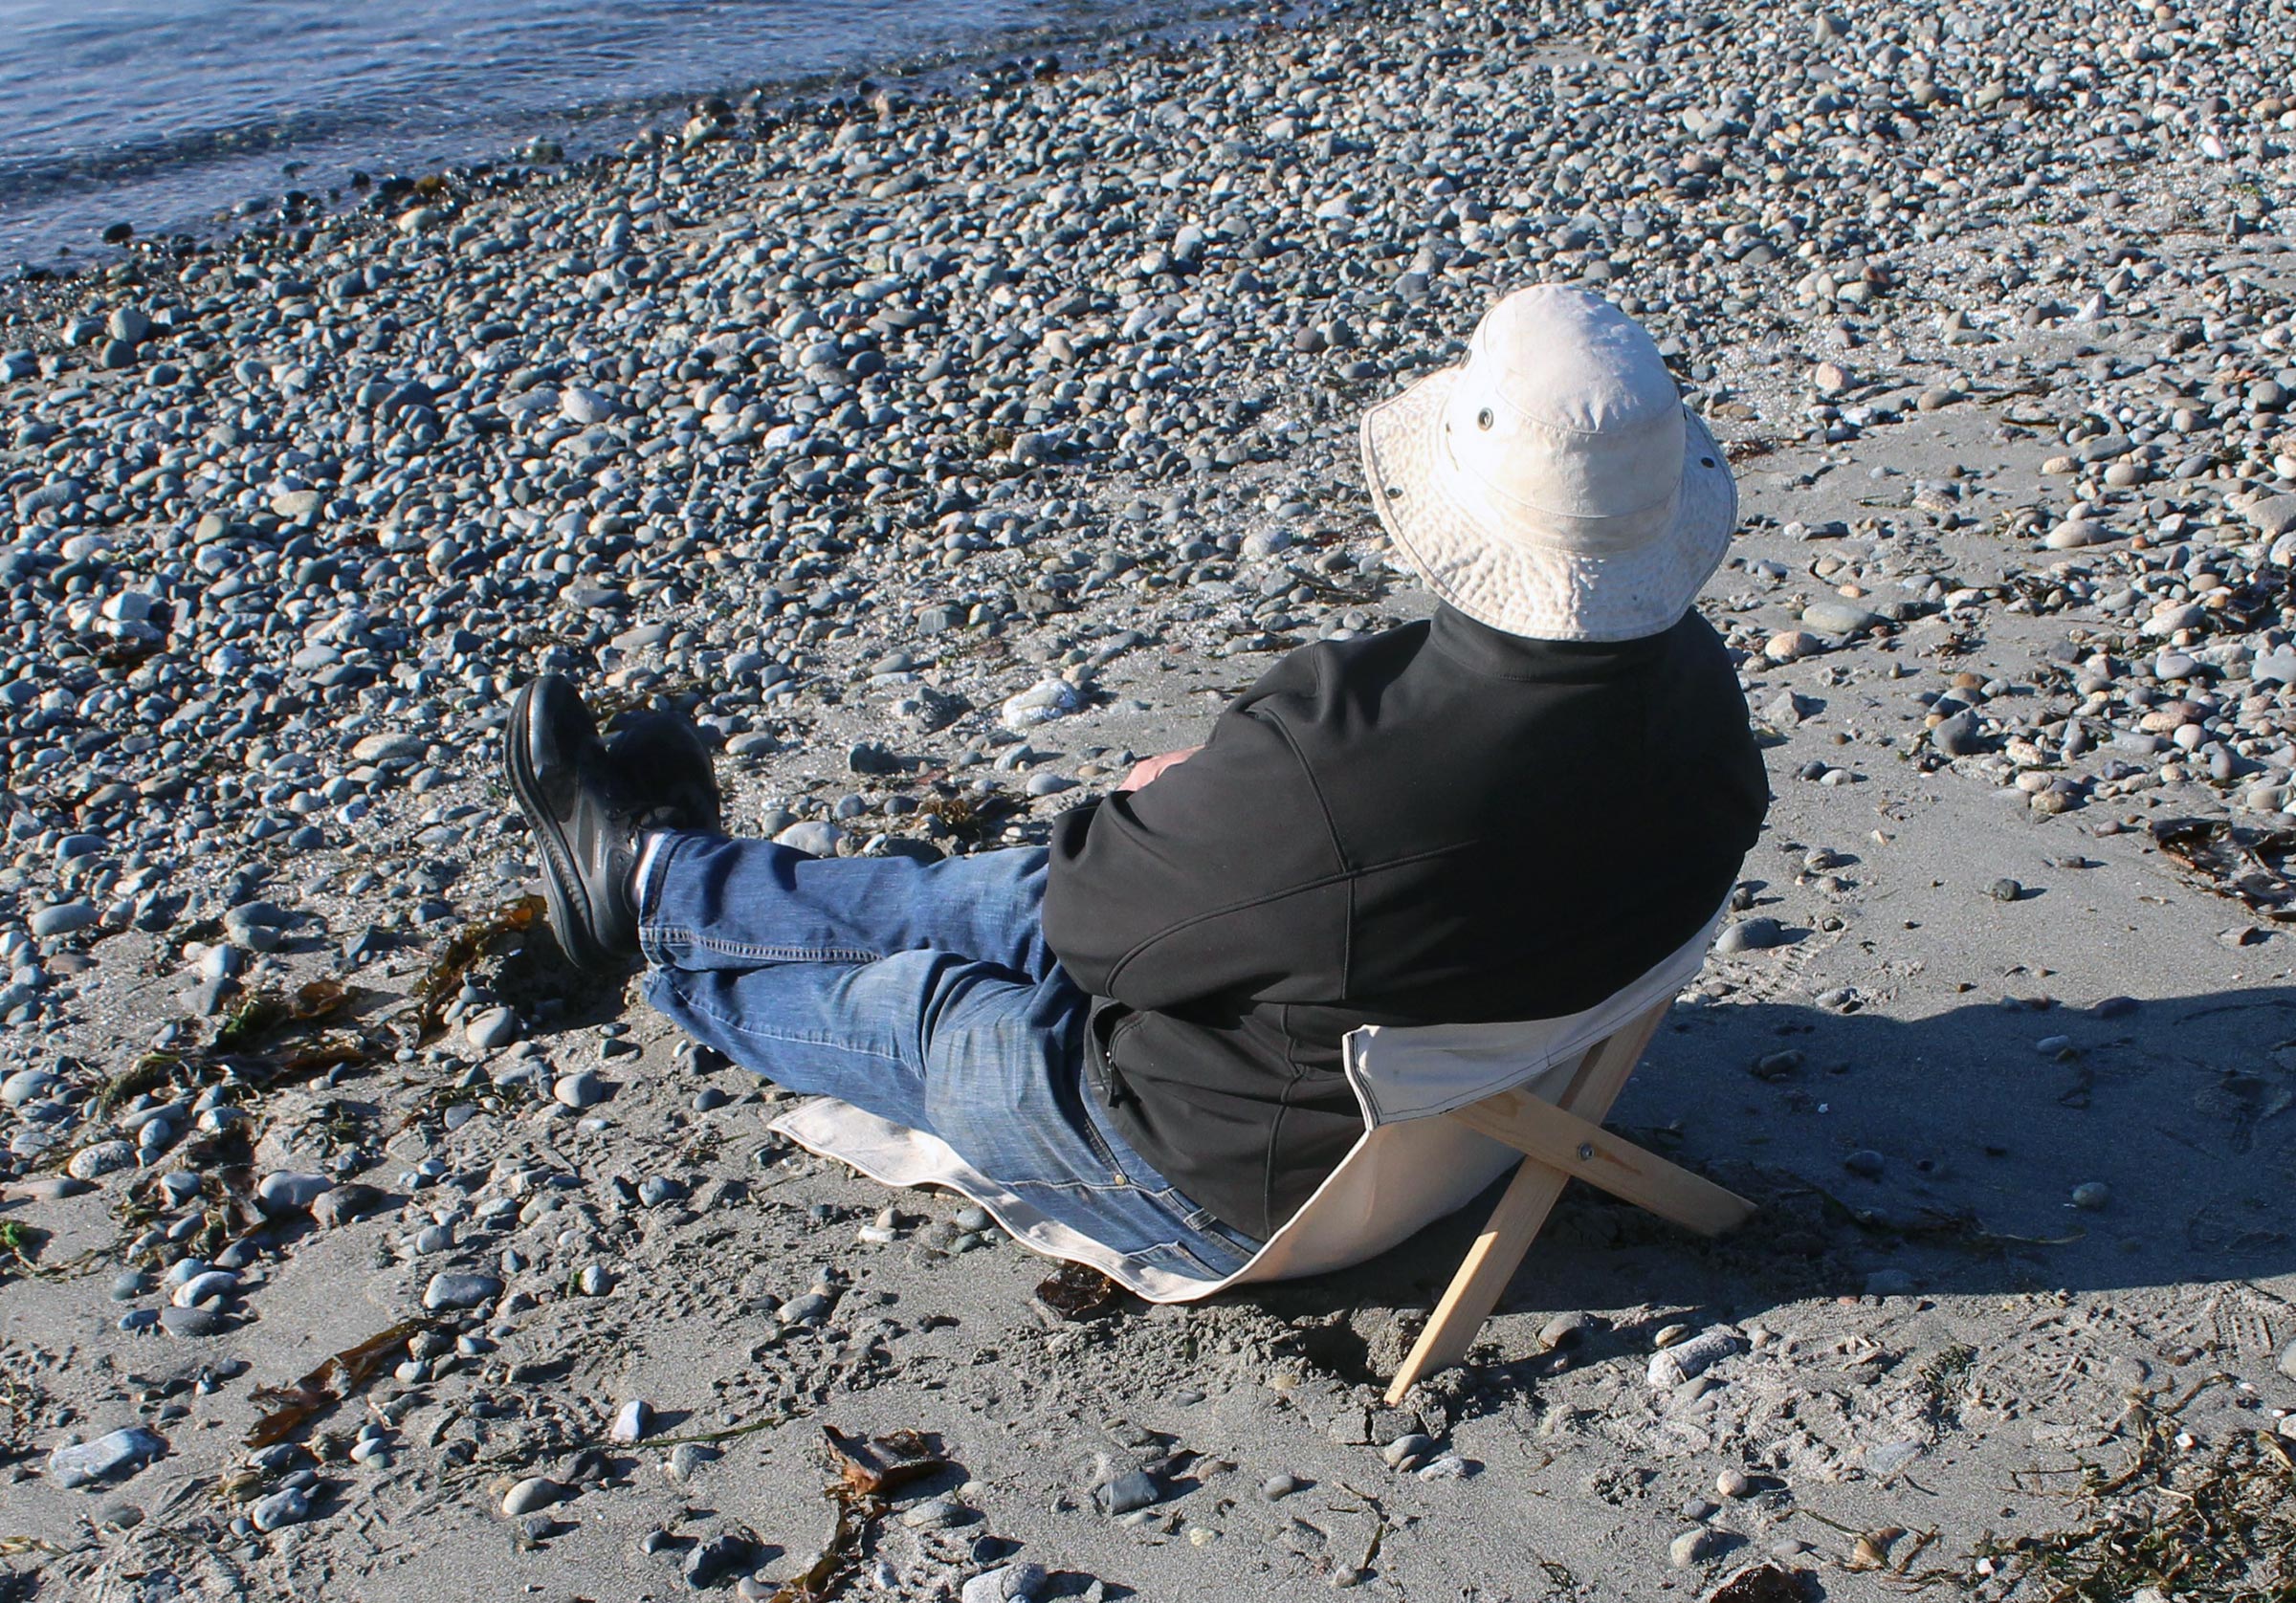
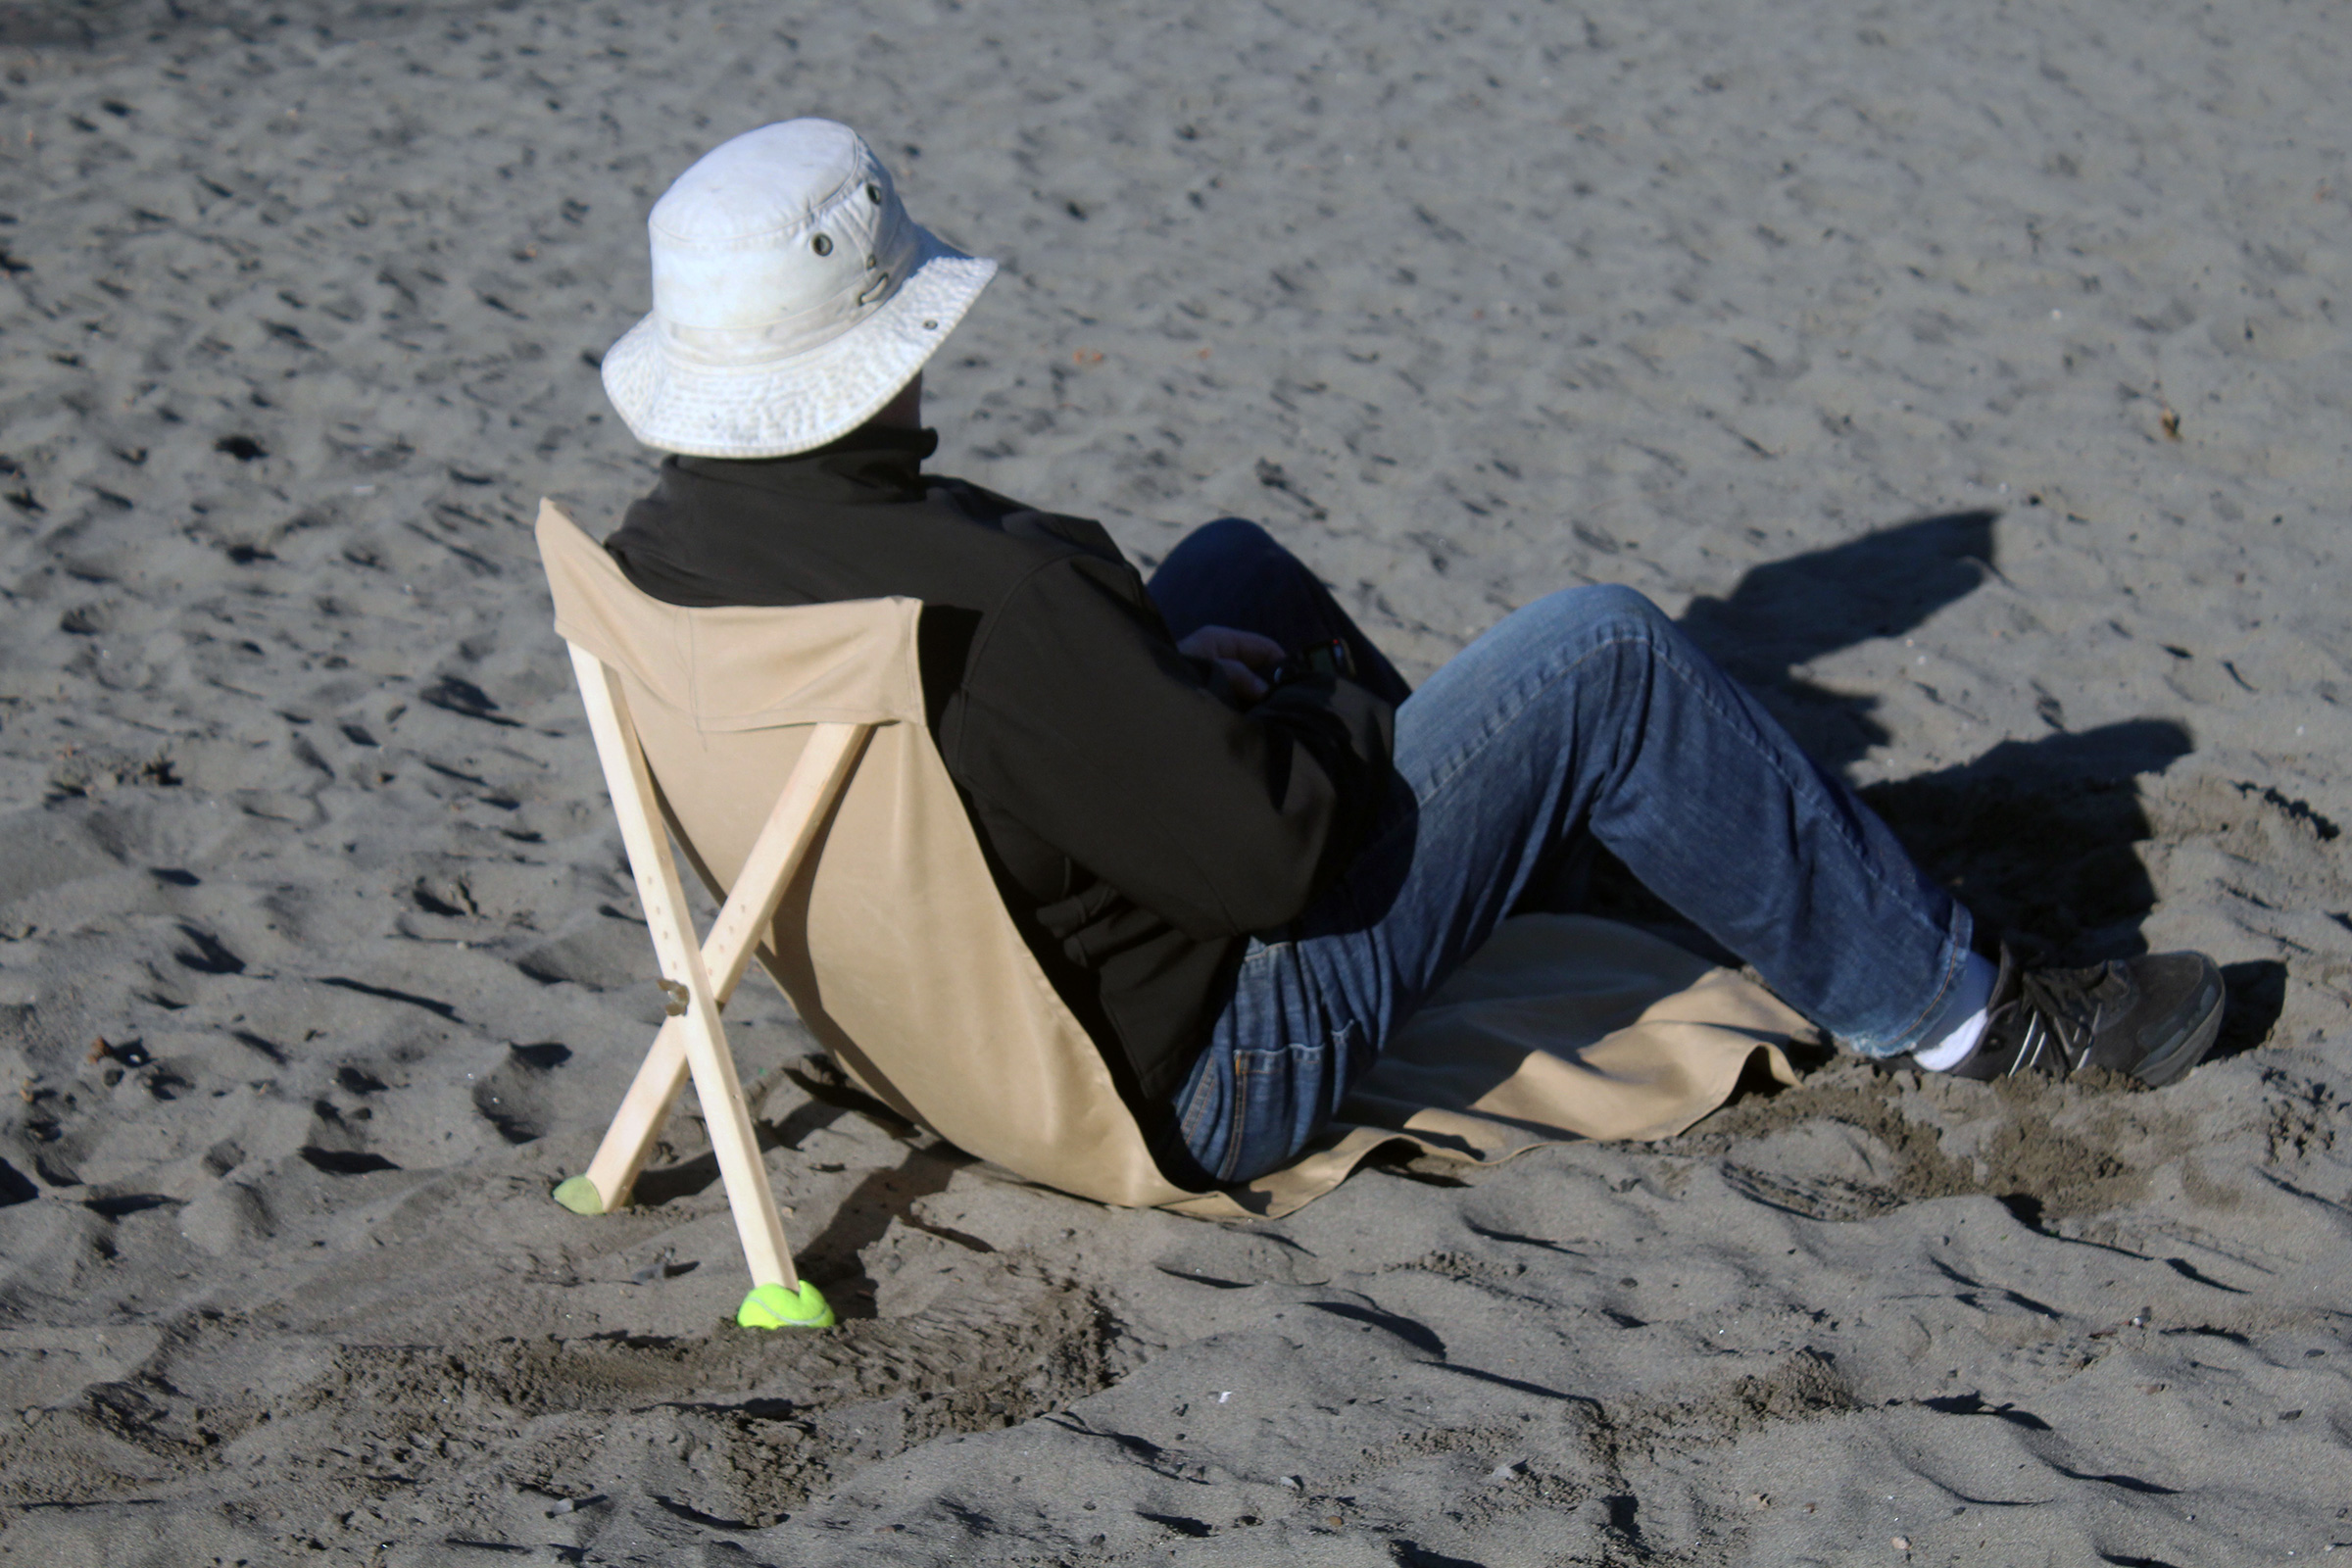
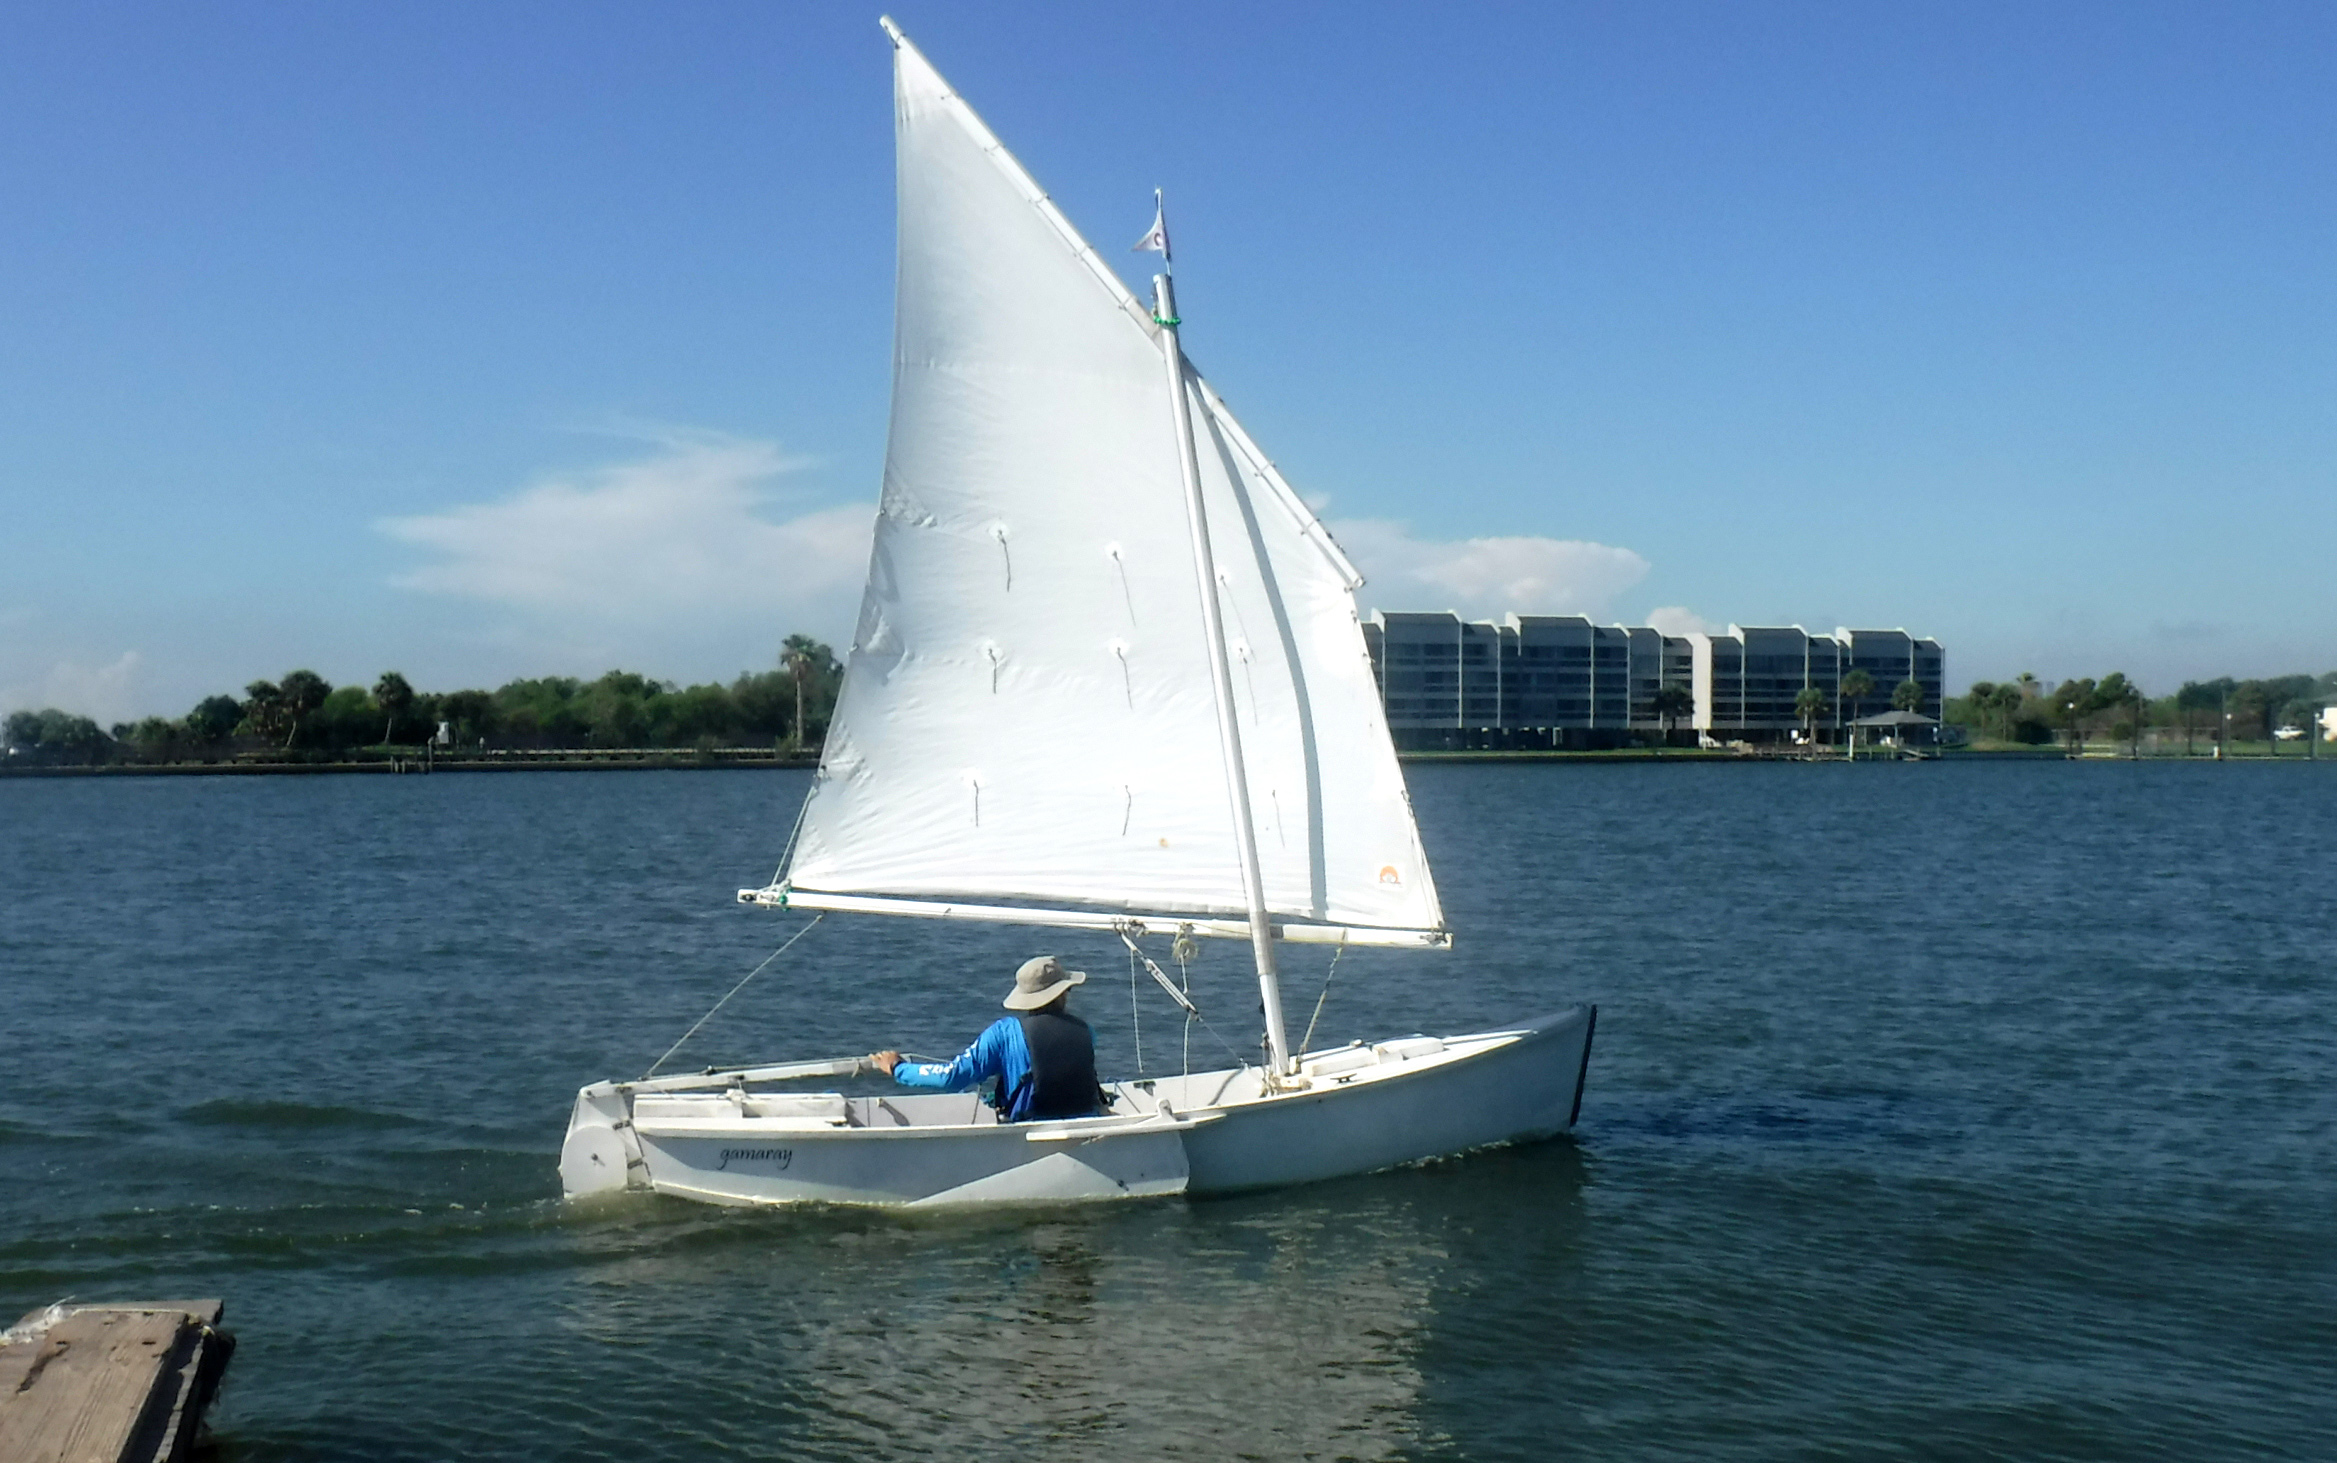
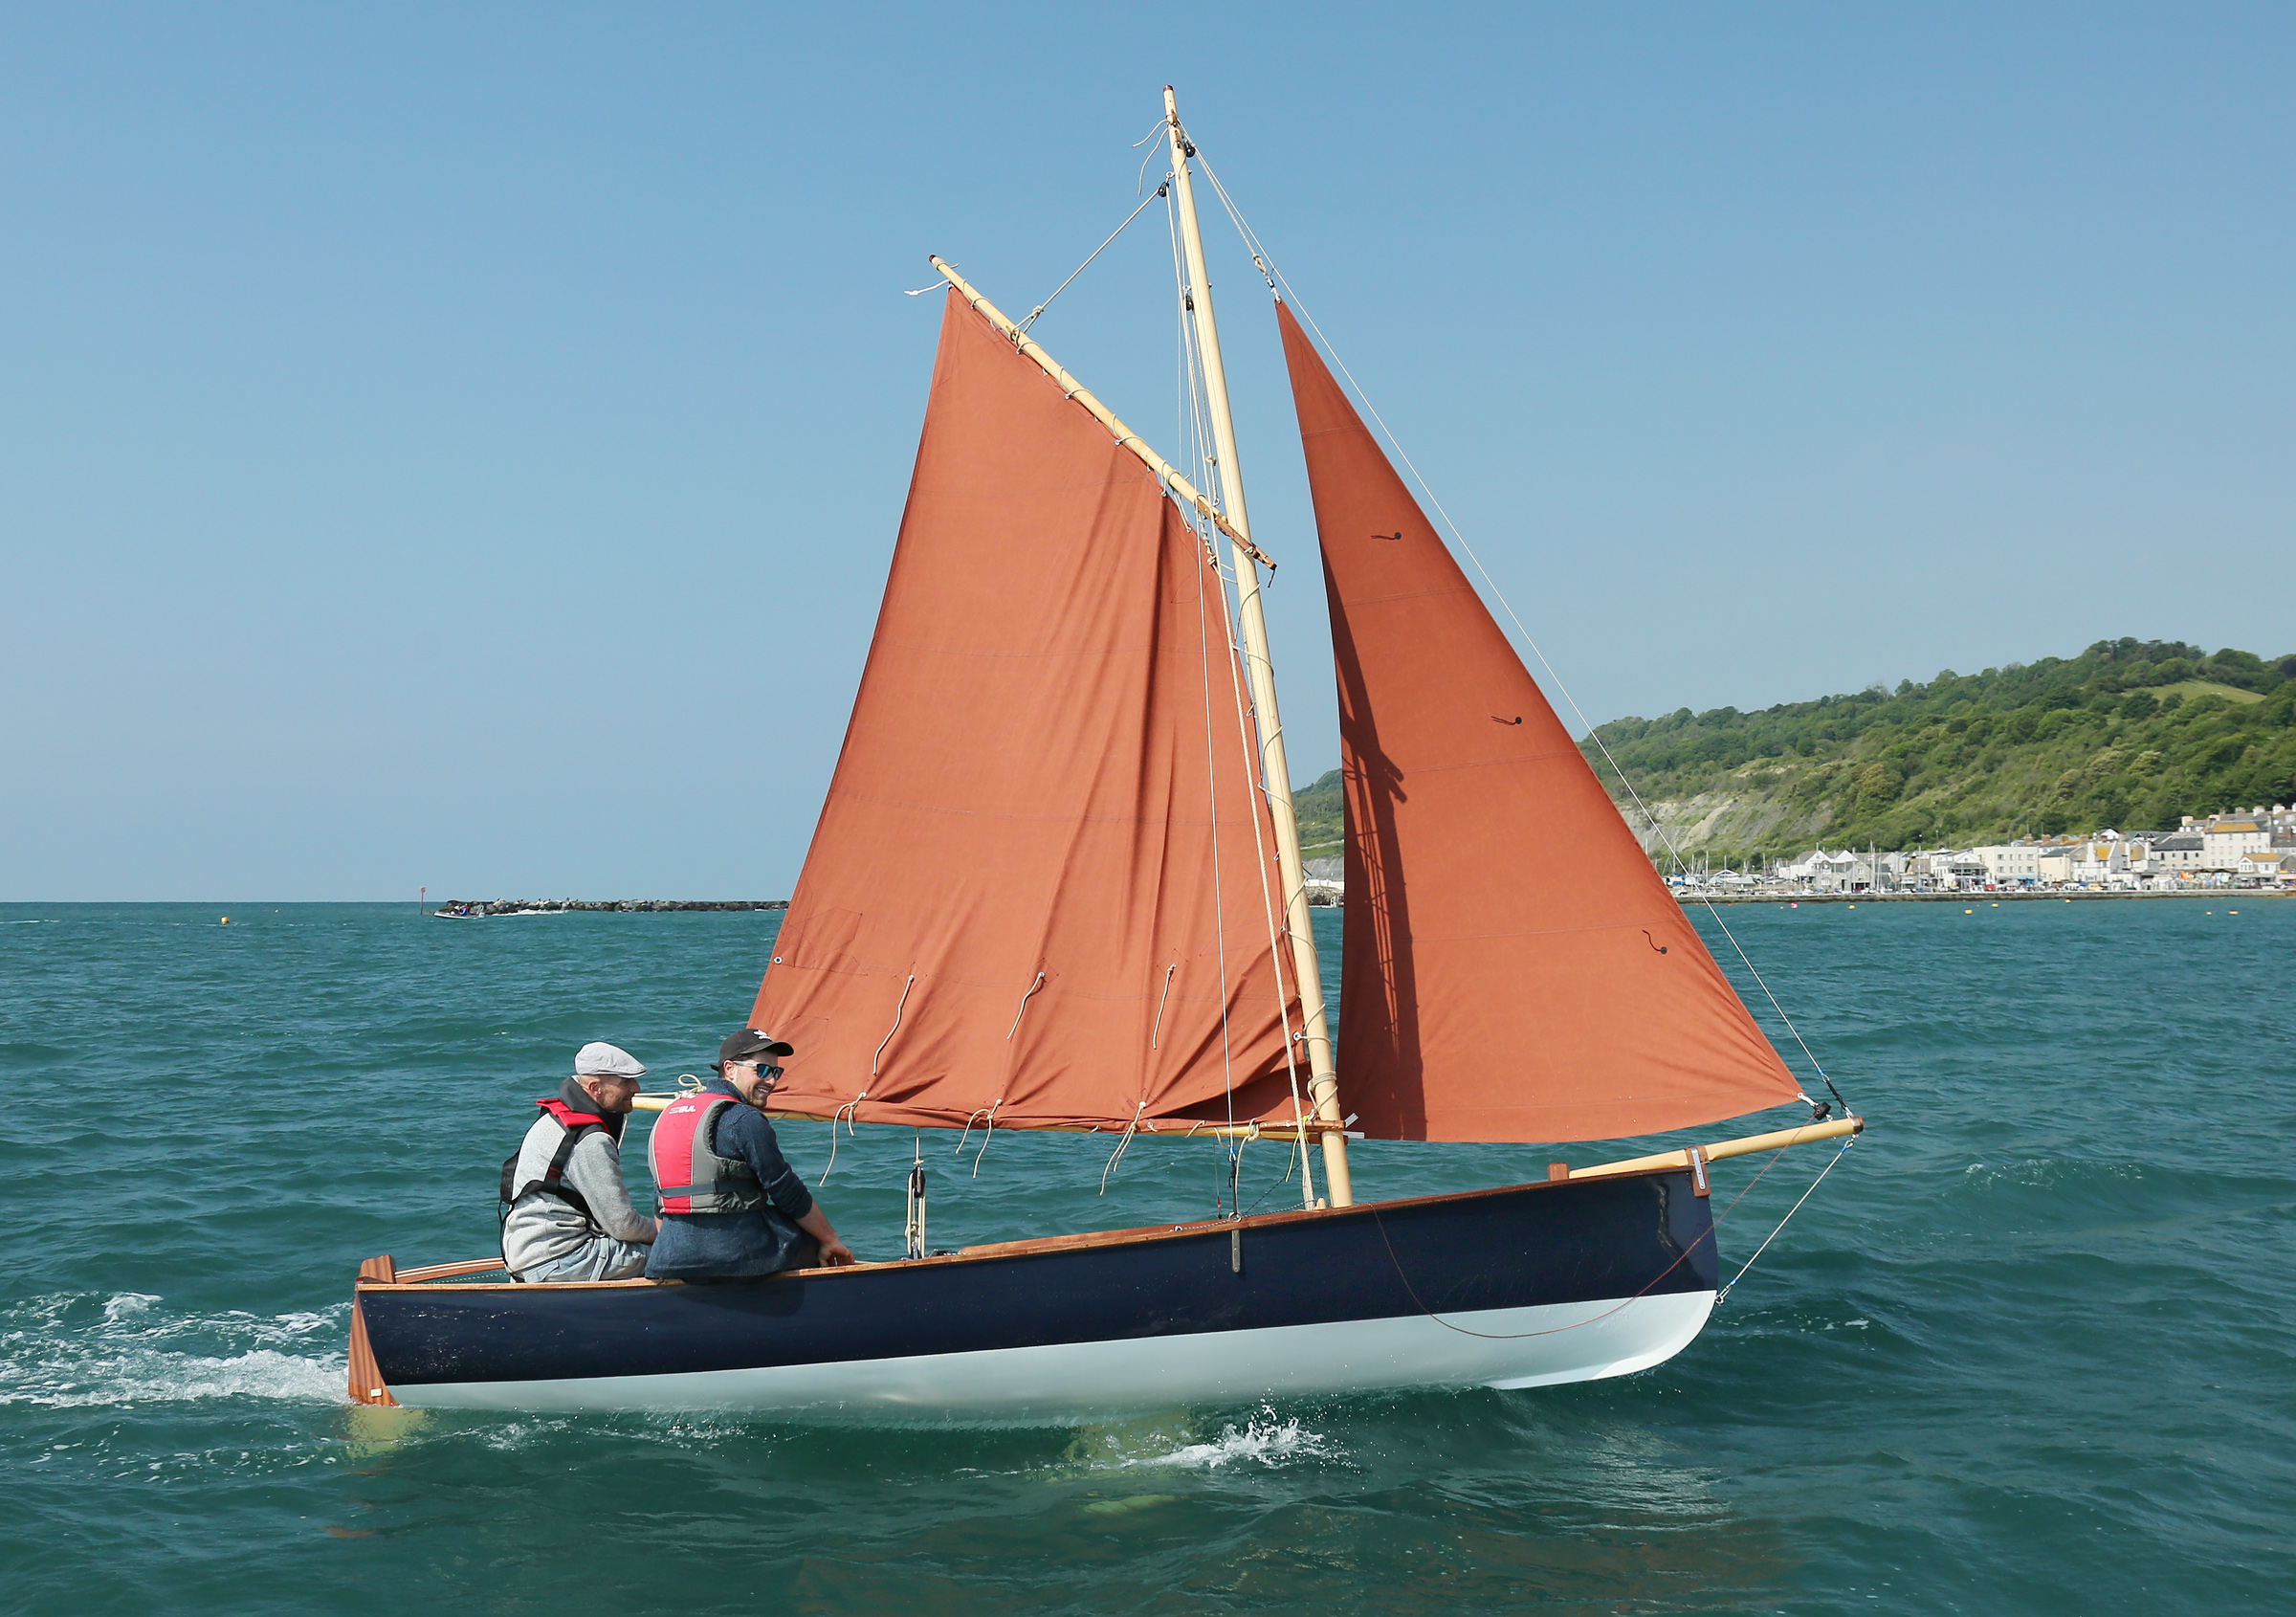
When sailing off the wind, a Puddle Duck feels luxurious to its solo skippers.
Like most unballasted dinghies, the Puddle Duck should generally be sailed as flat as possible, some-thing its wide flat bottom makes a little more automatic than it would be with a more sophisticated hull shape. But the Duck’s rocker makes it extremely sensitive to fore-and-aft trim, which makes it an excellent boat to learn on—Duck skippers are punished for their mistakes in very obvious, yet relatively benign ways. Keep your weight too far forward and the bow transom will dig in deeply, the Puddle Duck’s characteristic “pig rooting” behavior. With your weight too far back, you’ll bury the transom and feel the speed drop off dramatically. Someone new to sailing, or new to dinghies, will quickly learn that small boats demand constant weight shifts and awareness of trim for optimum performance, a mindset that’s not easily learned by crewing on heavily ballasted keelboats.
With its flat bottom, and a length-to-beam ratio under 2, the Puddle Duck’s initial stability is quite high—another feature that beginning sailors will appreciate. And most Ducks are designed and built with two large buoyancy chambers (fore and aft, or one on each side), making the boat easy to right after capsizing. The use of a single externally mounted leeboard, probably the most common choice, allows builders to avoid the complications of daggerboard cases and pivoting centerboards if they prefer. Plenty of Ducks use daggerboards and centerboards, though, often set into a side buoyancy tank to save legroom.
Tom Pamperin
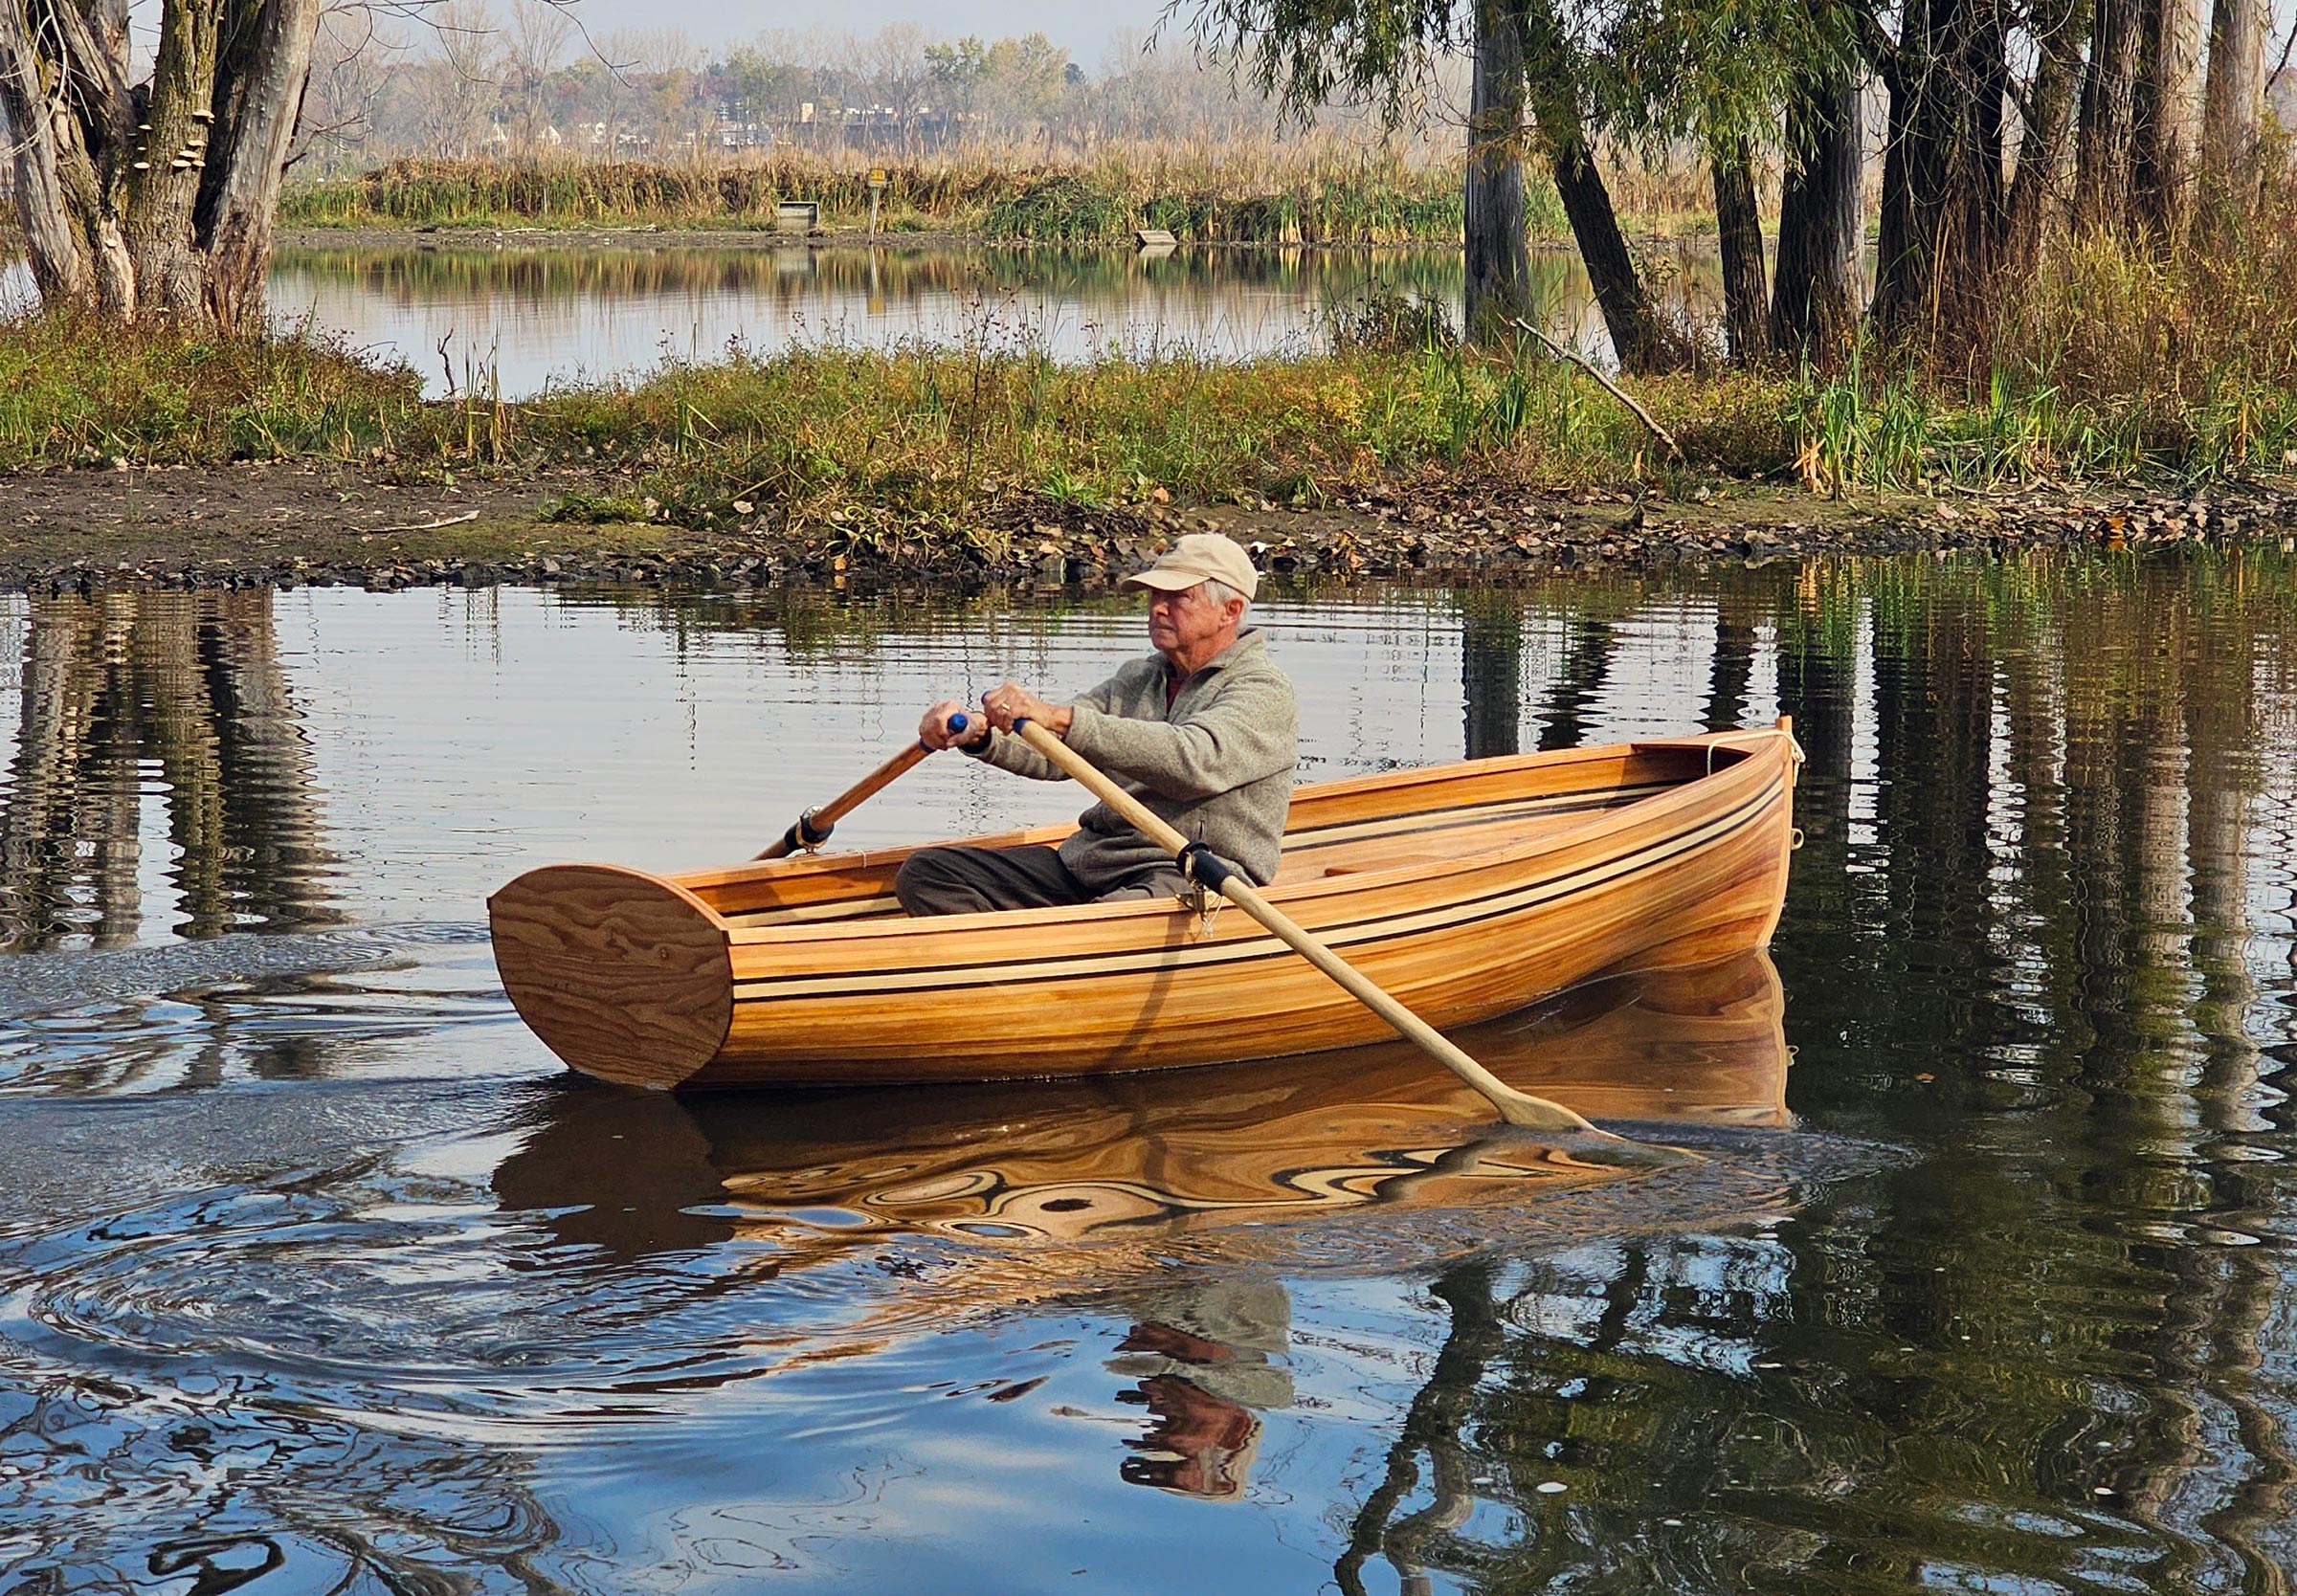
The Puddle Duck’s popularity has drawn serious racers to a growing number of competitive events.
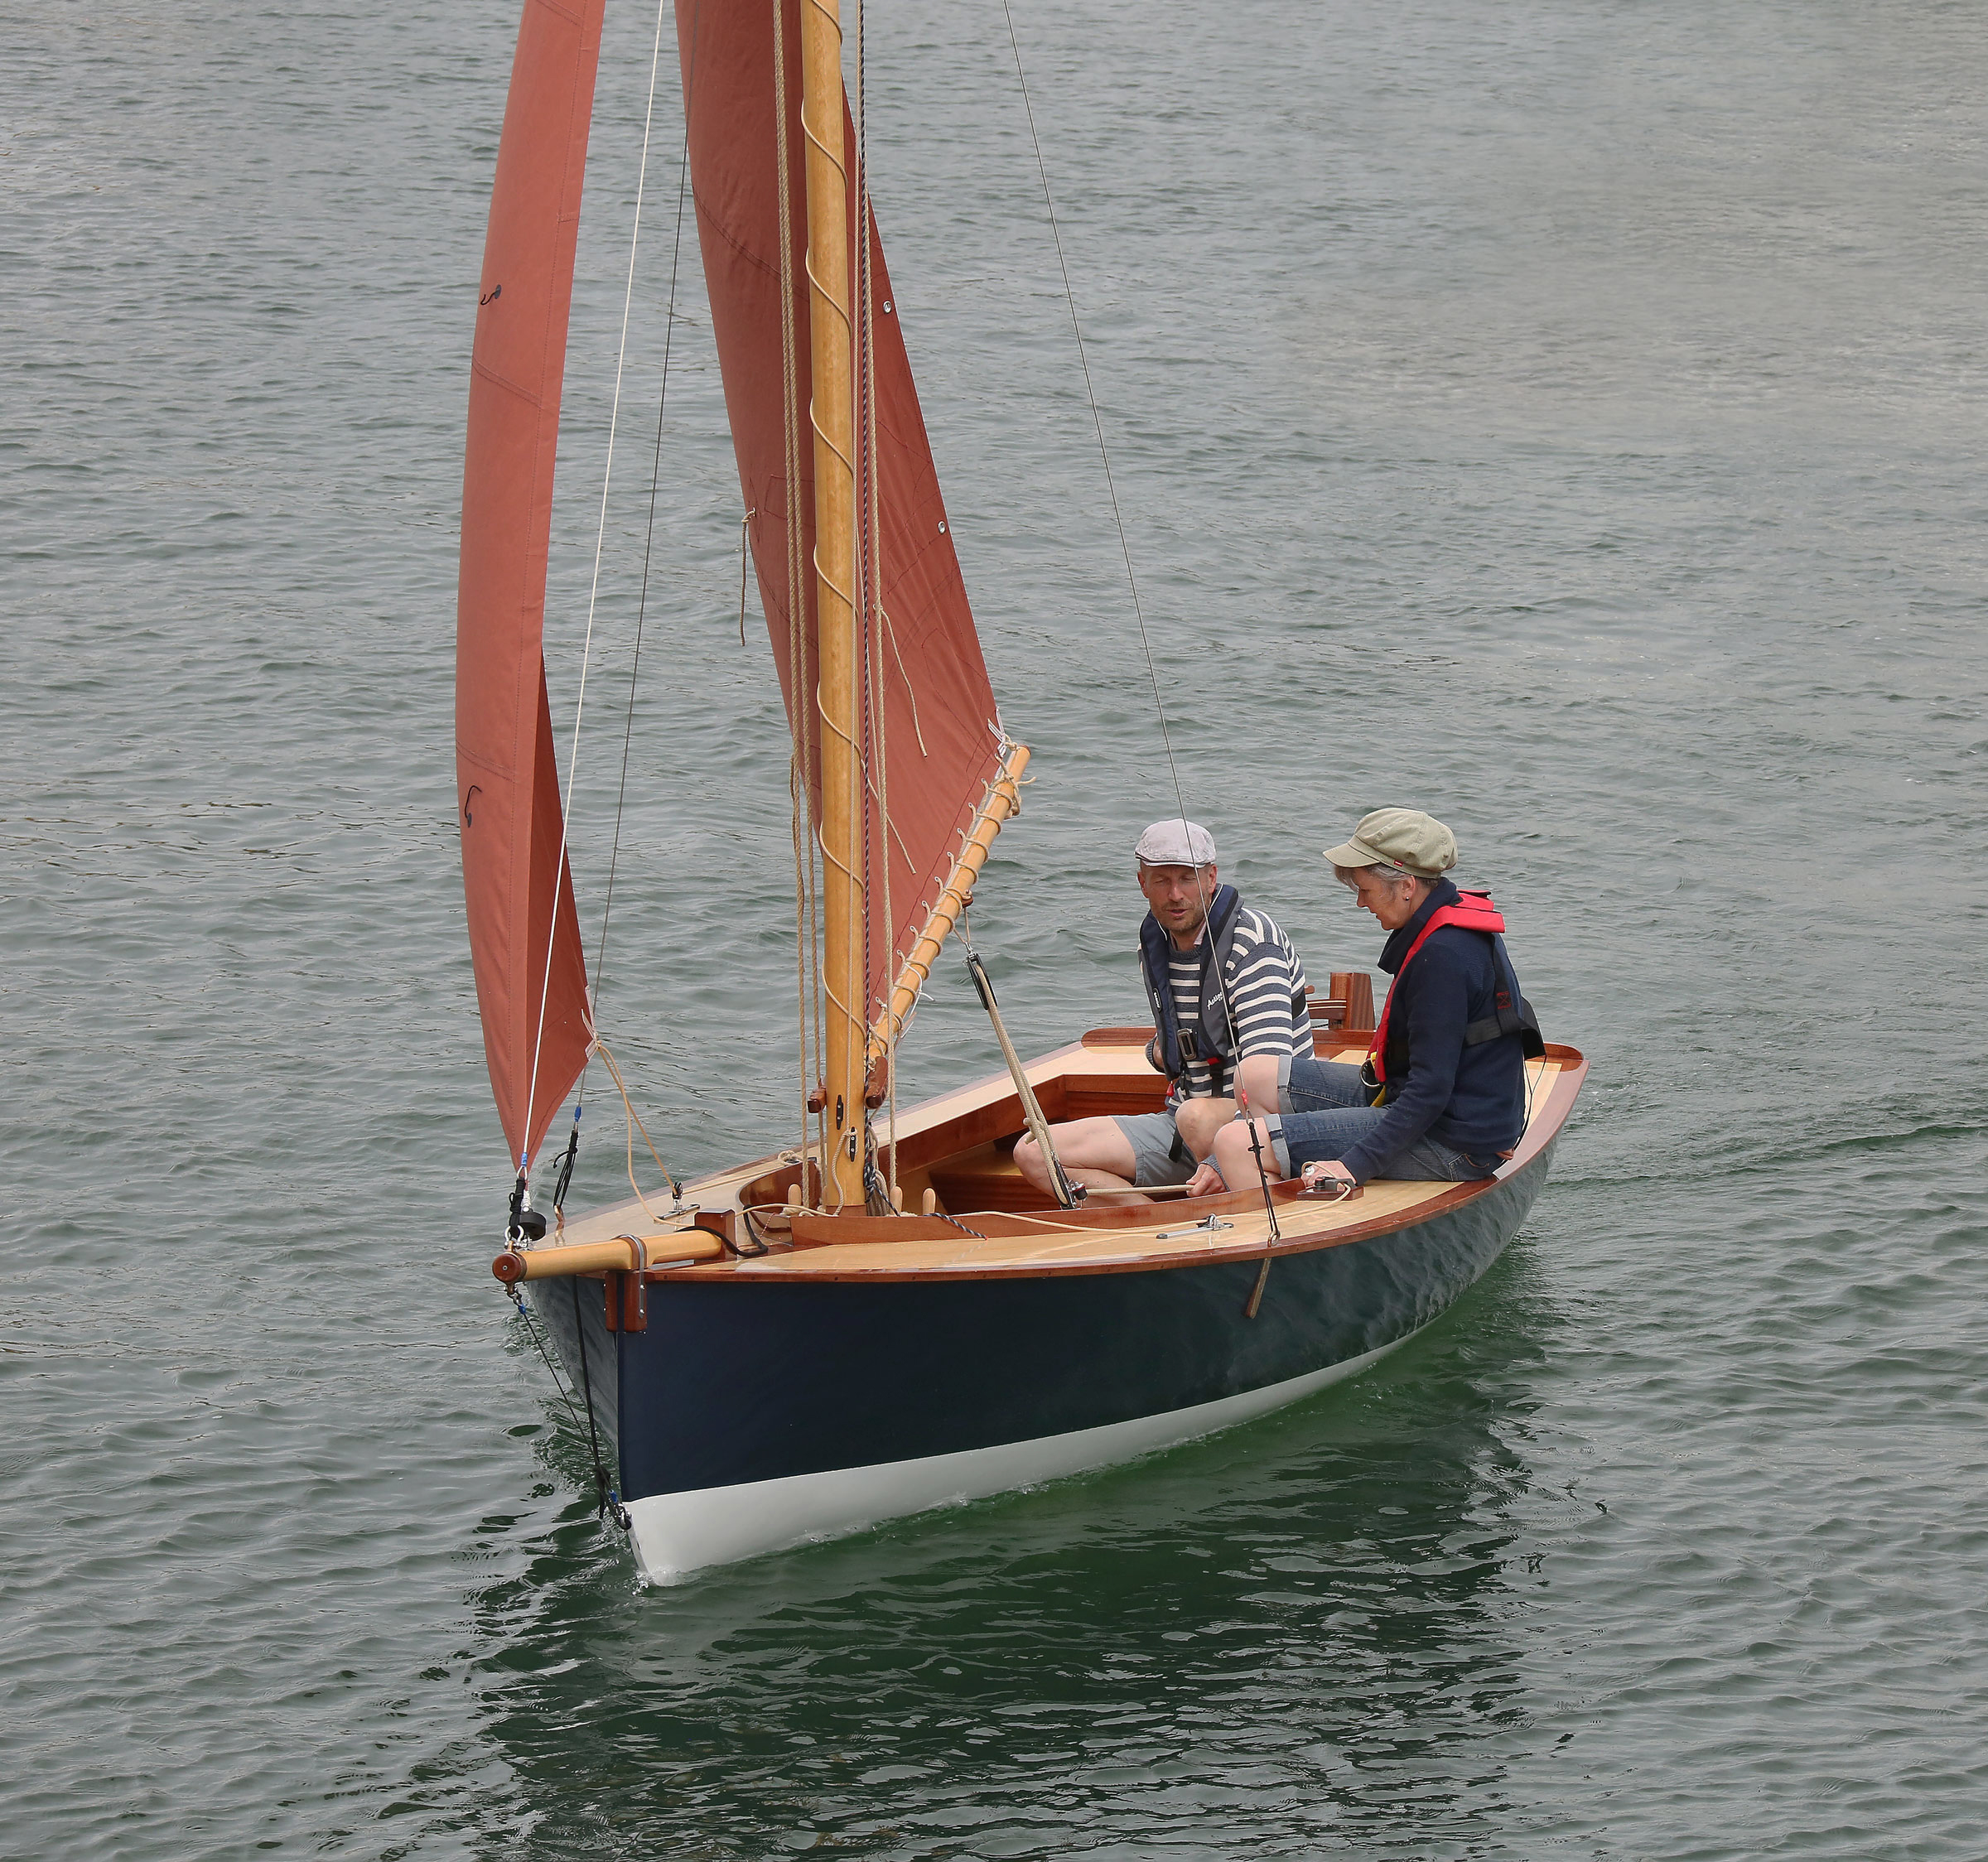
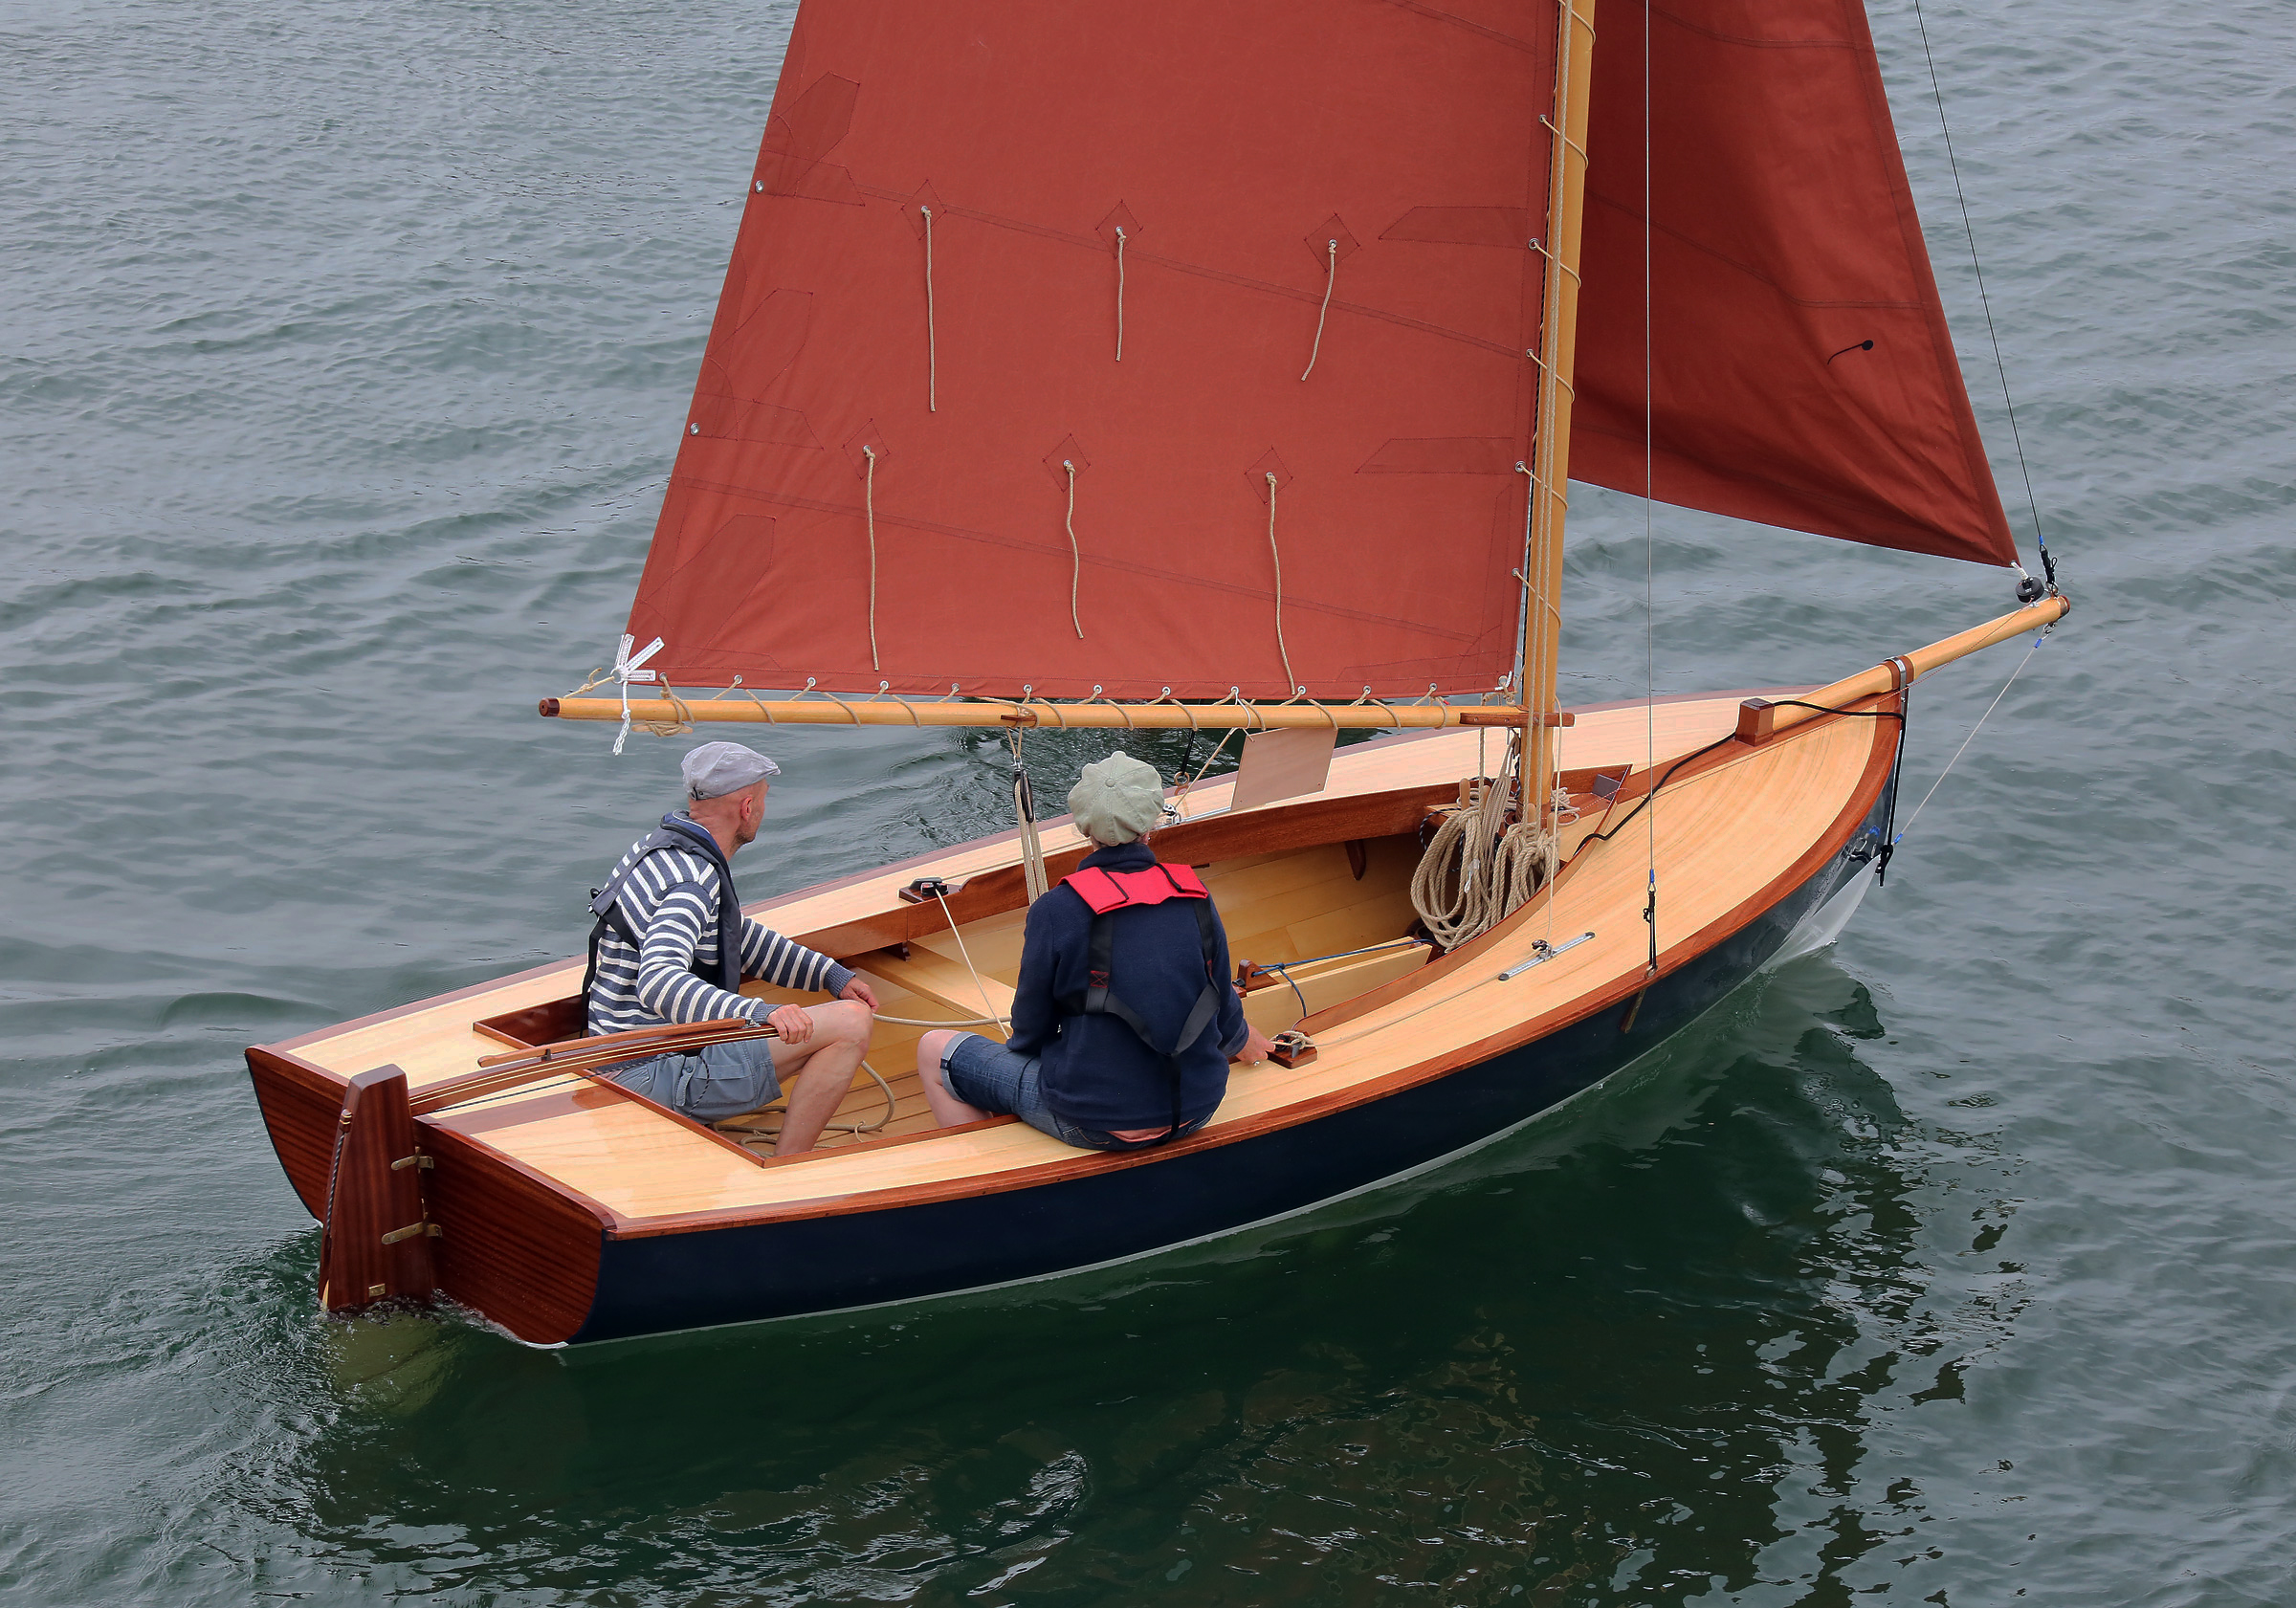
Despite its awkward appearance, the Puddle Duck is a surprisingly comfortable boat to sail when it’s not bashing its way through the waves—its lack of streamlining and short waterline can make fighting a steep chop seem like riding in an unbalanced washing machine. Off the wind, though, or in flat water, a Puddle Duck feels luxurious. After his first sail in Duck No. 892, my brother described it as “an old man’s boat”—the side buoyancy tanks offer extremely comfortable seating, and the off-center daggerboard leaves plenty of room to stretch out. With a designed displacement of 630 lbs, it could easily take two adults without dragging the bow or stern. A better option, though, would be to build a second Duck. It’s such a simple design that there’s little excuse not to.
But, simplicity aside, the real genius of the Puddle Duck is the childlike innocence it brings to sailing. Tearing along at 3 knots as if possessed by a wide-eyed eagerness to seek out the unlikeliest, most ridiculous way to do things, the Puddle Duck is a boat designed for play. I’m struck by the design’s utter lack of pretension. It’s a bit silly—and at the same time endearingly naïve—that a boat with a theoretical hull speed just over 4 mph would bother to register for a Portsmouth Yardstick rating (with a handicap of 140, it’s the slowest boat on the list), but there are serious racers among the Puddle Duck crowd. On the other hand, I was able to borrow a Puddle Duck at the 2012 World Championships (the first races of any kind that I ever competed in) and place seventh overall—far behind the leaders, but having a good time all the way.
Tom Pamperin
Puddle Ducks have made some serious voyages-incompany for an 8’ boat. In 2014, 12 of them finished the grueling five-day Texas 200.
Other Puddle Ducks have been used for voyages more ambitious than simple round-the-buoys racing. Completing the five-day Texas 200 in a Puddle Duck, for example, has become something of a rite of passage—12 Duckers finished the event in 2014, a record number. Upping the ante considerably, Scott Widmier attempted the 300-mile WaterTribe Everglades Challenge in his EC DUCK in 2012, reaching as high as fifth place in his class (sailing monohulls) before high winds and bad weather forced him to abandon the race (conditions were so challenging that only two mono-hulls managed to finish). Like a Chihuahua challenging a Rottweiler, the Puddle Duck just jumps in and goes at it, without seeming to realize it might look a little silly to observers. Or maybe it just doesn’t care.
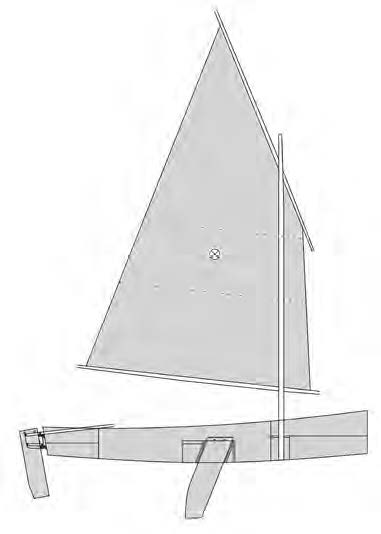
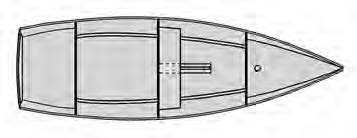
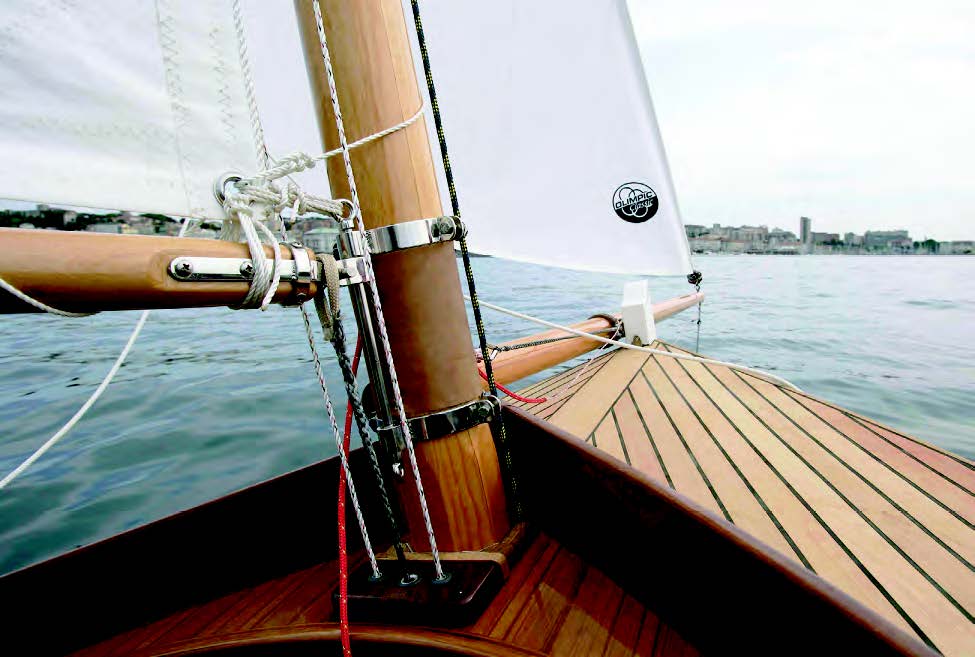
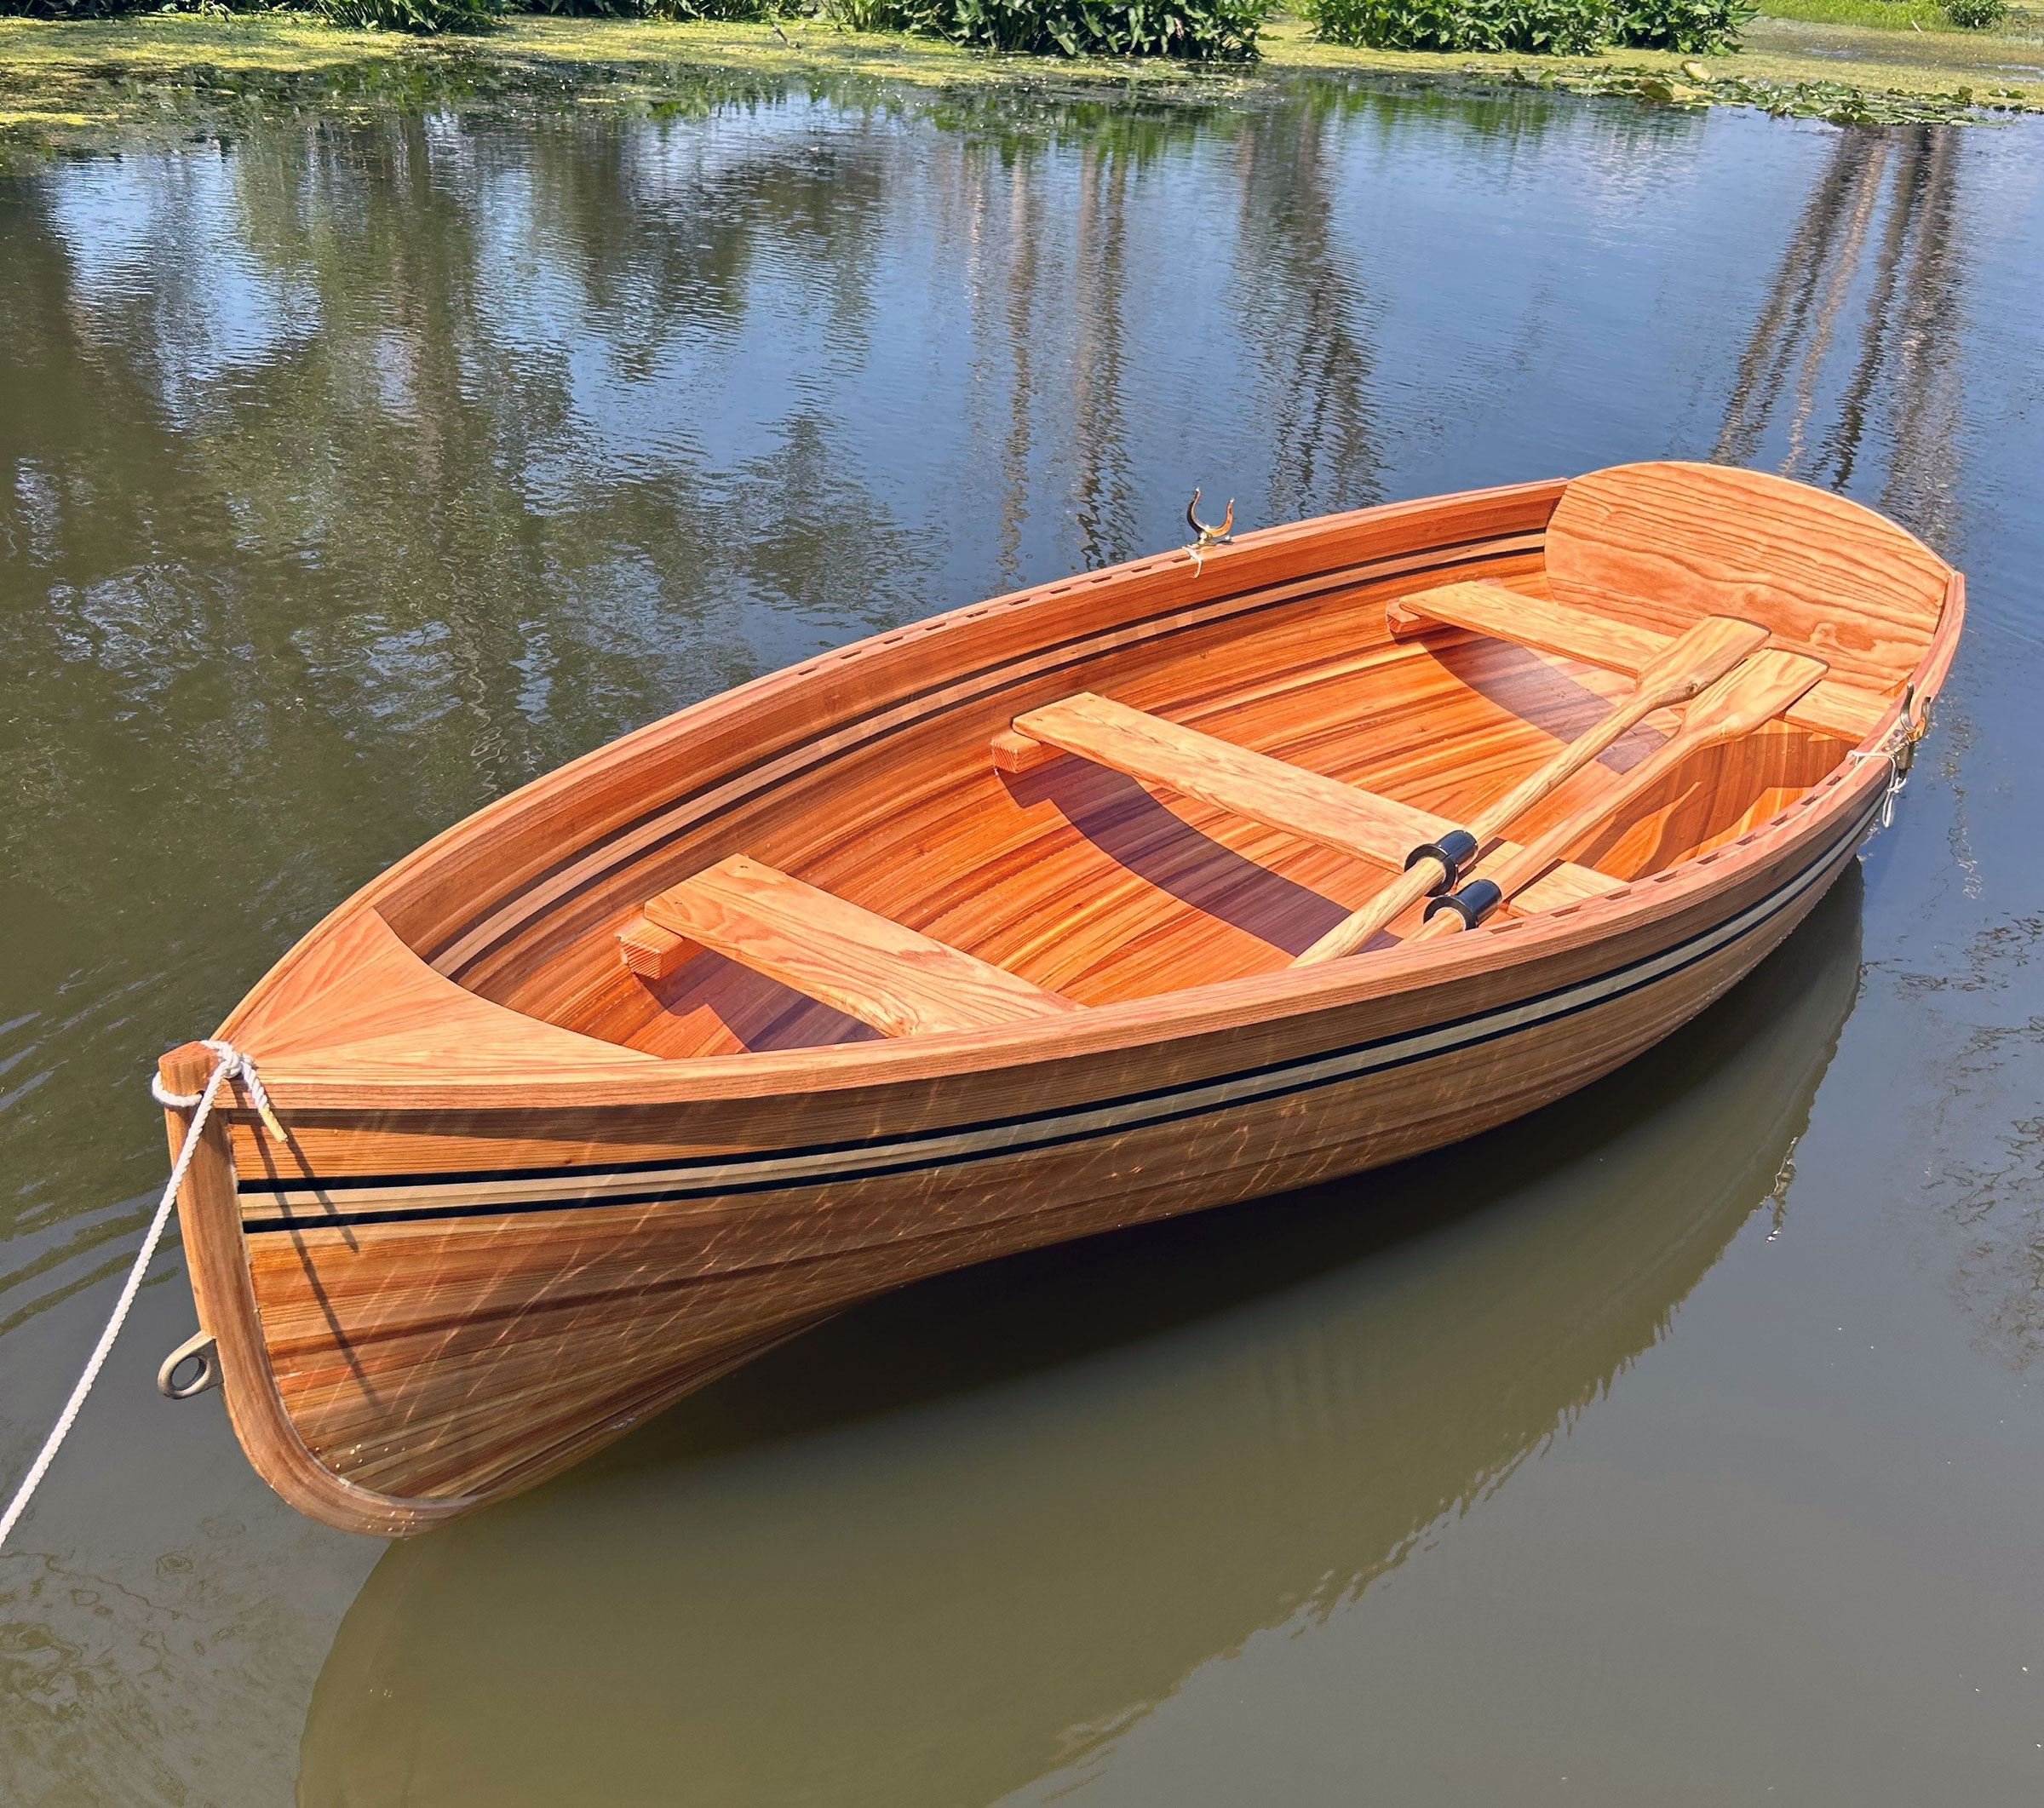
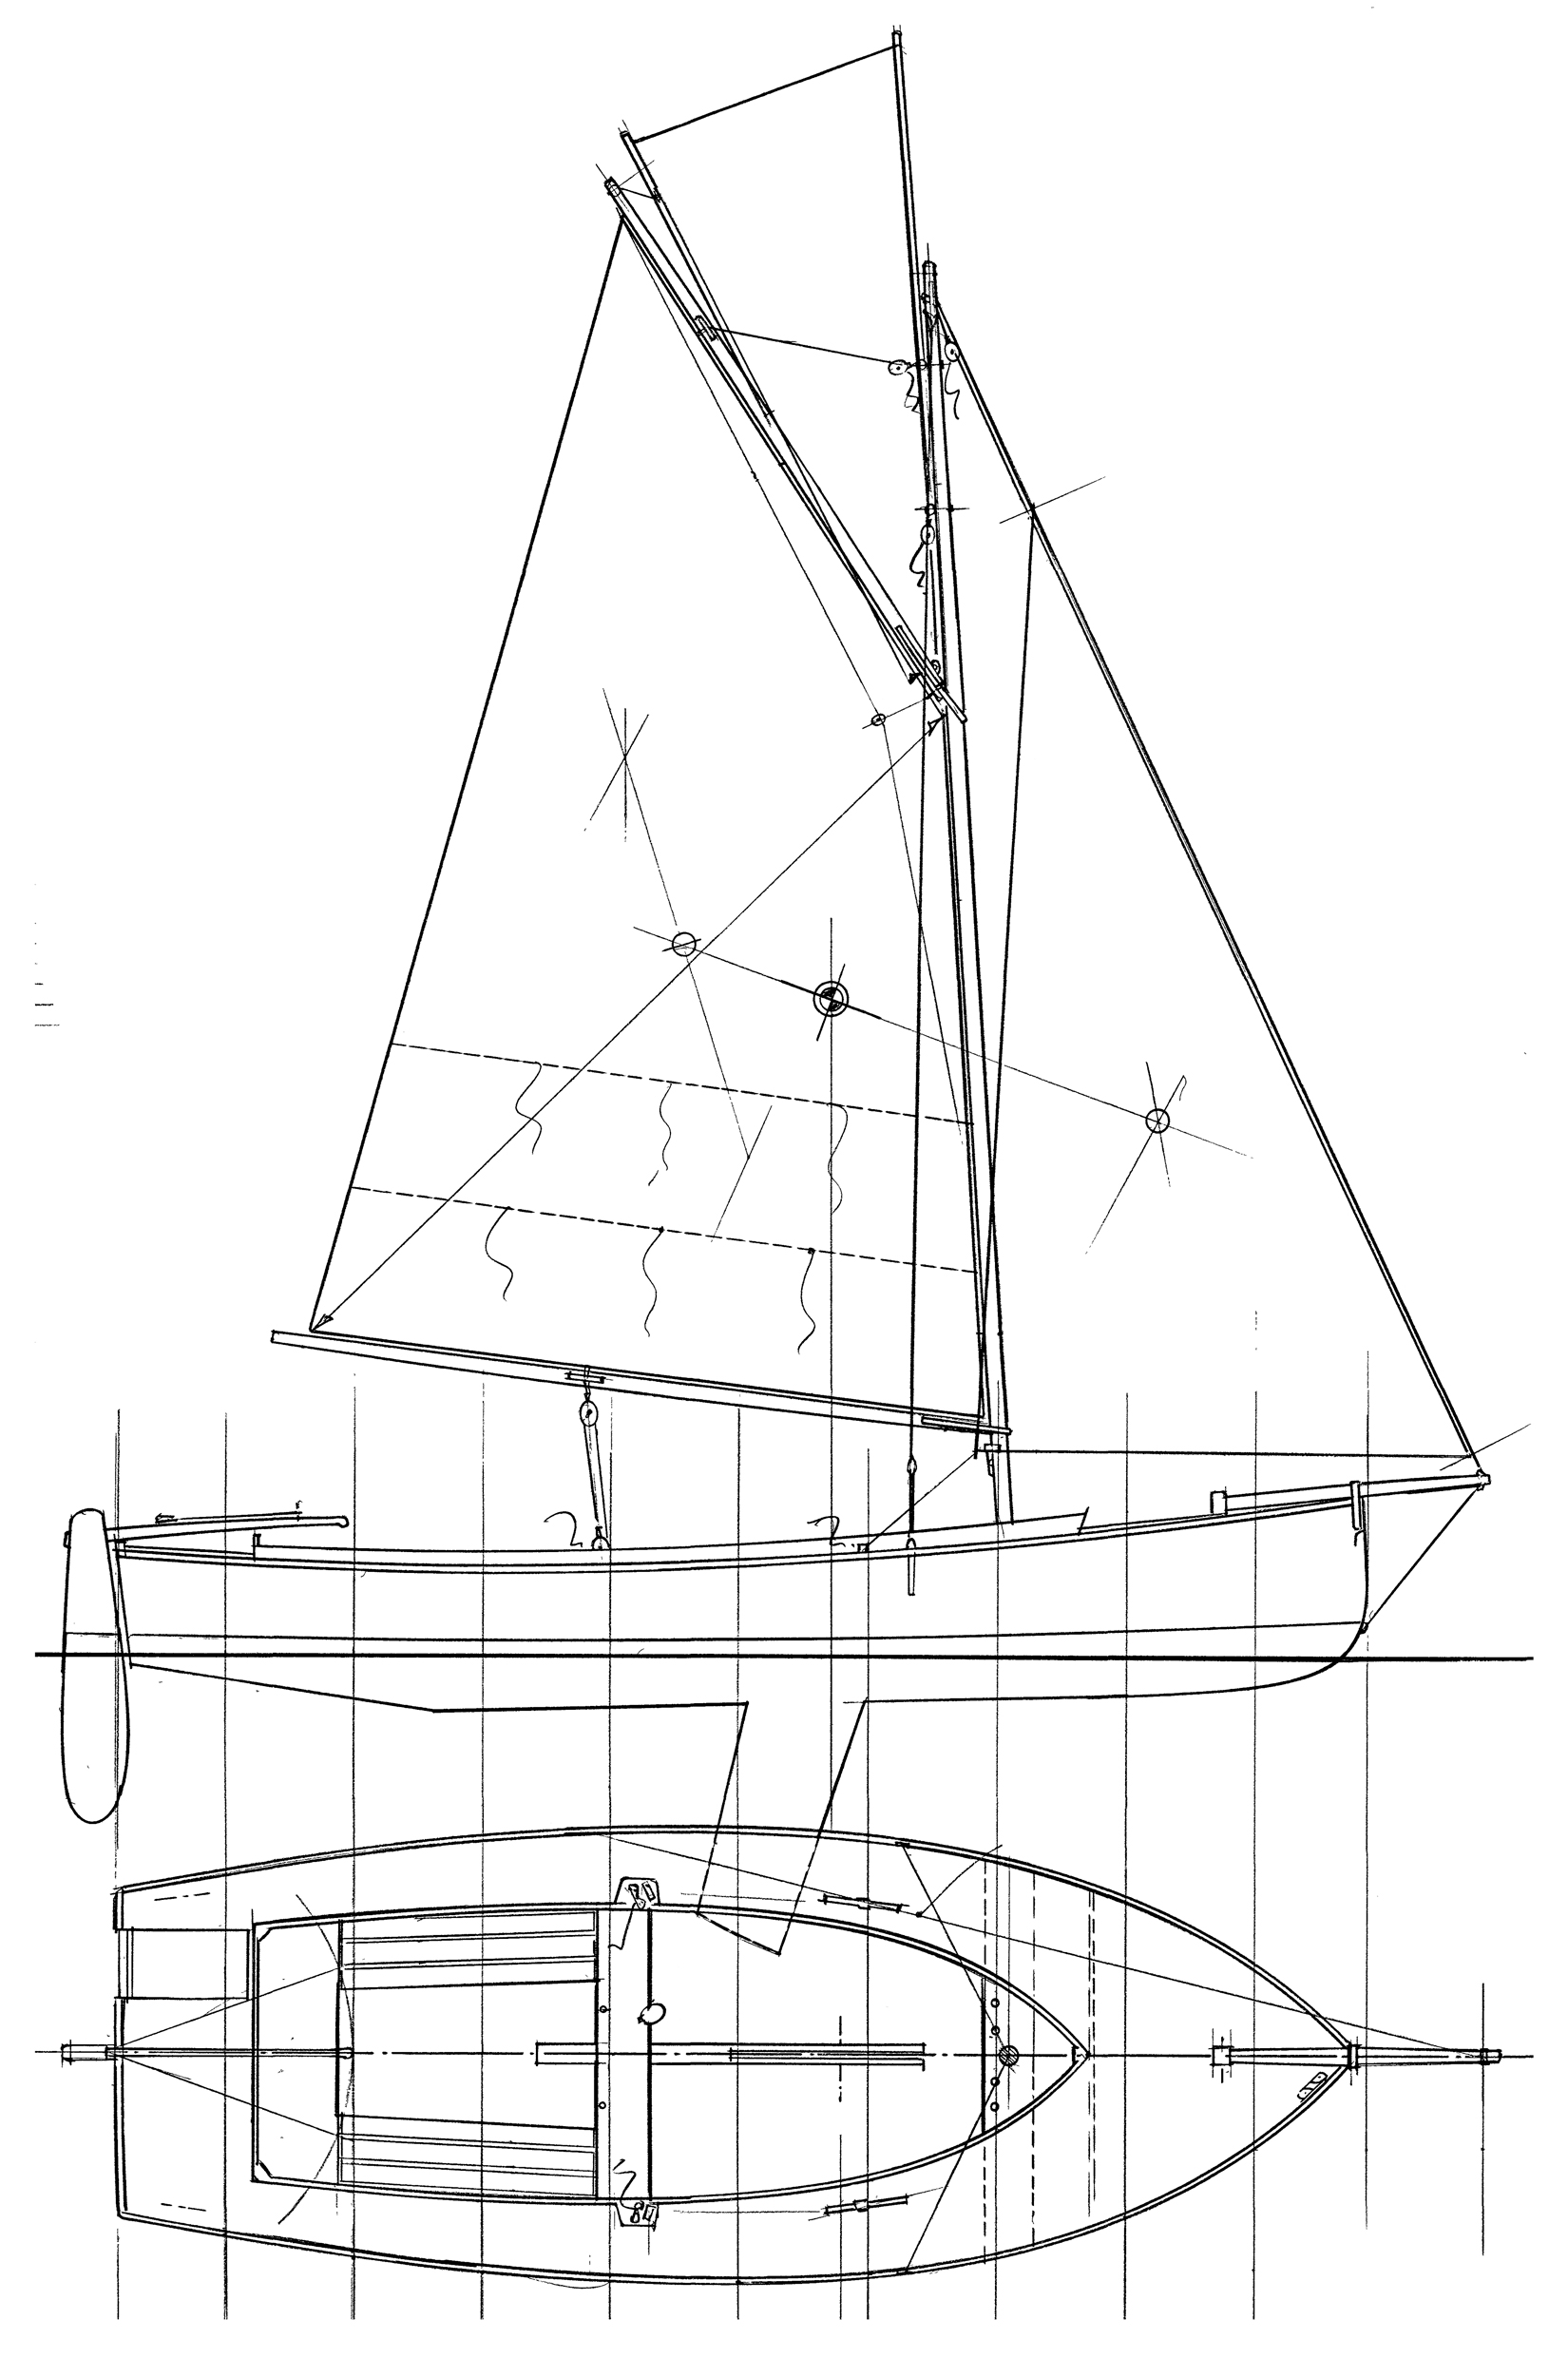
The Puddle Duck is not a strict one-design; rather, it’s an open class, meaning that boats must be designed within broad measurements rather than be identical. Here we see the Catbox design, which you can download, along with others, at www.pdracer.com/free-plans.
Tom Pamperin
Puddle Duck Particulars LOA 8′ Beam 4′ Sail area 69 sq ft
Though Michael Storer’s plans call for a single balance-lug sail, boatbuilder Clint Chase added a mizzen to better keep the boat headed into the wind when reefing the main.
Twenty years ago, Australian designer Michael Storer drew up the Goat Island Skiff, which he named for an island in Sydney Harbour. Steeped in the Australian design and DIY traditions, he intended it to be light, fast, and easy to build. It was a successful idea, as to date around a thousand skiffs have been built in 27 countries. Over the course of two decades, the plans have evolved into a detailed how-to-build book, and it is now possible to get the Goat Island Skiff (GIS) in kits.
In Australia, dinghy weight standards are 8–10 lbs per foot of length—much lighter than the European and American standards set in the 1960s by relatively heavy fiberglass boats. A GIS, at 130 lbs, is about half the weight of a Finn dinghy (designed in 1949), but it has the same sail area. It is about the same weight as a Laser (designed in 1970), but with 25 sq ft more sail. Its 5′ beam gives a singlehander more power to carry that sail, but unlike a Finn or a Laser, the GIS can t ake a family sailing. The flat-bottomed skiff shape is relatively skinny on the water line, and with its significant sail area and light weight it can ghost nicely—much better than one would expect of a relatively high-wetted-surface hull.
A balance lugger, the GIS has some tweaks to make the sail set efficiently. The specifications call for the mast to be as unbending as possible, which is critical to a well-setting luff. A powerful downhaul controls draft. In some boats, this control has been moved aft to work as a vang as well, with a line around the boom and mast; this so-called “bleater” keeps the boom from going forward.
Storer recognizes that the skiff shape may not be the best for rowing, and he states that 9′ oars are needed to make a 5′ beam boat work under oars. The oars will fit in the boat’s bottom, or can be stored on the top of the bow tank, blades at the stem, handles held by the ’mid-ship seat knee.
Despite having heard of the Goat Island Skiff for years, I’d never sailed one until last summer, when I encountered two at the Small Reach Regatta in August; one of those boats was owned by amateur builder Paul Hayslett of Branford, Connecticut, and the other by Clint Chase, a professional from Biddeford, Maine. There was also a former GIS owner, Christophe Matson, from Bow, New Hampshire, on hand; he’d had his boat for four seasons before moving to a camp-cruiser he could sleep aboard.
Paul and Cristophe are experienced sailors who were looking for an inexpensive, yet sophisticated, boat to satisfy their skill levels. Both were first-time builders, but it doesn’t take much to build a Goat Island Skiff. The plans come with detailed instructions, and the materials amount to, essentially, six sheets of 6mm plywood.
Storer’s website goes way beyond the usual designer’s offering, providing information about boat tuning and links to other online resources including Facebook pages, blogs, and sites maintained by builders and sailors. Storer also monitors his own Goat Island Skiff Facebook page as well as the WoodenBoat Forum (forum.woodenboat.com), and responds fully to email questions.
The builder assembles the sides, bottom, and transom to complete the basic hull. Three seats and their supporting bulkheads form the internal skeleton for the hull structure and built-in flotation tanks. Everything is coated with epoxy; no cloth is needed. Skids provide bottom protection for beaching. The daggerboard, breasthook, quarter knees, and rails finish the boat. This minimal list of parts keeps the hull light. And that’s the impression I got when I stepped aboard Clint’s boat, BLEAT, for the first time: Everything seemed light.
Clint Chase
The Goat Island Skiff has a clean uncluttered interior, with flotation and storage compartments under the bow and stern thwarts.
To get the boat underway from the beach, a long, well-shaped daggerboard and rudder need to be shoved down once the water is deep enough. The rudder is unusual; it’s an extremely efficient vertical blade with an ingenious kick-up system. The balance lugsail goes up easily, and the powerful downhaul working against a stiff, light, hollow mast lets you control the draft. Clint and many other GIS owners are rebuilding their booms to take the loads of a loose-footed sail, a sail that will set better than one laced on. The wind was light on the day of my trial: 5–8 knots with a small chop.
Going to windward, the boat accelerated quickly in the puffs—puffs that were strong enough for me to sit on the rail with a foot hooked into a convenient spot that Clint built into his center thwart. Skiff owners usually have a Y-shaped toe strap, or a pair of hiking straps, which Clint will be fitting into his boat. A tiller extension is essential; Clint made one with a bit of string coming out of a hole in the end for a truly universal joint. If sitting on the bottom or a side seat and not moving around much is your sailing style, you would be better served by a heavier boat. Fore-and-aft positioning wanted me to be on the rail or sitting on the seat amidships. The feel of the helm was very light, with just a hint of a tug to weather.
Clint added a small mizzen to make it easier to lie quietly to the wind while reefing or moving about the boat. I played with fore-and-aft trim and the amount of heel needed to work into the light breeze. Flat-bottomed boats tend to slap as the waves hit the windward chine. Most of that effect is removed when the boat is trimmed with the bow down.
The boat tacked easily. A bit of a roll, something common in dinghy sailing, helped speed her through it in the light stuff. I could just drop the tiller to leeward, hesitate a beat or two as she swung up and through the wind, and then switch tiller and sheet hands and move to windward.
In light conditions, sailing off the wind was simple. The wind was so light that I didn’t bother retrimming the mizzen. Jibing was a non-event: Simply steer to leeward and give the sheet a yank. As the boom came over, a small S-turn to the new leeward side countered any tendency to round up. The big efficient rudder helps. When sailing downwind I found, like on a Laser or most other modern dinghies, a bit of heel to windward made steering with the rudder superfluous. Upwind in light air, steering by heeling a bit to point up and flattening out to head off also worked well.
In discussing capsizing, Paul noted that building a boat yourself gives one the confidence to fi x things. He’d gone over on a gusty day and righted the boat, but was too close to a lee shore to climb in with the sea that was running. In hitting the beach he put a couple of cracks in the bottom. Once the boat was bailed out, he sailed home, looked at the cracks, looked at the season to come, put some duct tape on them, and went sailing. Permanent repair waited until the off-season.
The fact is that any light boat can be capsized. The Goat Island Skiff has pretty high sides, which make it harder, but it can be done. She is easily righted with the daggerboard floating pretty close to the water and the hollow mast keeping her from turtling. Righted, she floats with the daggerboard trunk out of the water. Getting back in can require some agility. If I had problems I might rig a step that could drop into the water off the transom the way it’s done in sea kayaks. With the boat drifting sideways, a yank on the mainsheet could balance pushing down on the weather side, a common practice in other singlehanded dinghies.
Paul was rowing while we discussed his experience, while I was paddling my kayak alongside. His crew was sitting on the bottom of his skiff just ahead of the stern seat. The trim for rowing was perfect; I could just see the edge-grain in his plywood bottom with virtually no transom drag. I also watched Clint and his crew rowing. He was more heavily loaded with his full camping kit, and might have been dragging ½” of transom.
What is really unusual for such a relatively high-performance boat is that you can take a family for a sail. With a crew of two or more, the skiff settles right down. On the long broad reach home on day two of the Small Reach Regatta, the wind had come up to white-caps and a number of boats reefed. Clint didn’t reef, although he has a well-organized jiffy reef for his first reef. His passenger simply rode the center seat, facing forward, and Clint sat on the rail. With puffs, he was well positioned to hike out a little and his passenger could slide up or down to keep the boat level. Later, when BLEAT sailed to the ramp for haulout, Clint’s passenger was comfortably sitting on the bottom ahead of the center thwart reading and handing out cookies.
It’s hard to imagine a more versatile small sailing boat. Her performance in racing against modern dinghies is impressive, with handicap numbers like a Laser radial or OK dinghy. But you can also sail sedately, taking along friends. While rowing is not the boat’s strong suit, it is acceptable and the GIS can even take a small outboard. If I were not over-boated already (by some standards), I’d think about adding one to the fleet.
Plans for the Goat Island Skiff are available at https://www.storerboatplans.com/boatplans/goat-island-skiff-simple-sailing-boat-excellent-performance-lightweight. You can see pictures and contact other builders at www.facebook.com/groups/GoatIslandSkiff. Kits are available from Clint Chase at https://www.chase-small-craft.com/.
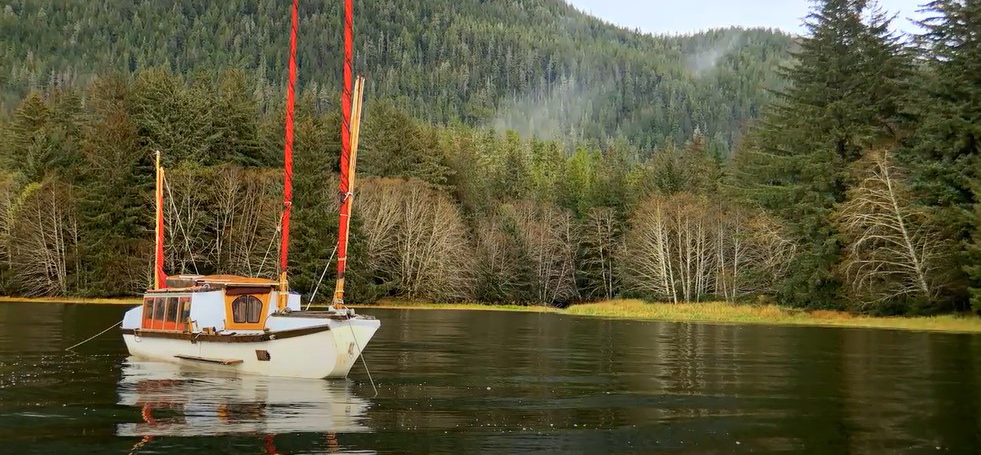
LEILU, the first boat completed to François Vivier’s Jewell design, promises both excellent daysailing and the possibility for adventures, all in a cruising sailboat under 20’ long.
Striking a balance between seaworthiness and ease of use in a small craft can be challenging. A too-small cabin can be claustrophobic, but a hull designed around a comfortable interior can be ungainly. Too large a boat can overpower a vehicle’s towing capability; too small, its usefulness may be limited. Too tall, a rig is hard to set up; too short, the boat’s performance may be a continual frustration. With Jewell, however, French naval architect François Vivier seems to have struck an impeccable balance.
Vivier worked up the design in consultation with Clint Chase, a boatbuilder of Portland, Maine, who relayed what people were telling him they were looking for in a boat. The U.S. kits are CNC-cut by Hewes & Company of Blue Hill, Maine. As of this writing, a single hull had been completed to the new design, and another was close to launching in Switzerland.
Frank Kieliszek of Norway Lake, Maine, owns the first completed Jewell, which he named LEILU. Rather than building it himself, he sought economy by buying a boat kit and a quick completion by having it constructed by French & Webb of Belfast, Maine. It was an unusual project for a company known for its fine custom yacht construction.
Vivier’s thorough designs are conceived with amateur builders in mind, and the computer-cut kits are meant to simplify and hasten the all-plywood construction. The hull is glued-lapstrake, using 9mm okoume plywood over an egg-crate-style structure of interlocked bulkheads and stringers, all epoxy-filleted. She has a box keel that contains the ballast and also makes her readily trailerable.
Kieleszek wanted a boat finished to high standards, but he’s more interested in sailing than construction. The French & Webb builders report that the kit went together easily, even though Vivier hadn’t finalized the instructions at the time. “I think they were pleased,” Kieleszek said. “The pieces that come precut, the CNC pieces, fit amazingly well. They had some little things they would do differently,” but overall the problems were few. LEILU launched in August 2013.
Tom Jackson
Unassisted, owner Frank Kieleszek winched LEILU onto the trailer rollers with ease, and his six-cylinder pickup provides ample towing power on the road and the ramp.
Kieleszek lives year-round at the head of a five-mile-long lake, and LEILU stands ready at the end of a small dock. “When I come home from work, the boat is already rigged, so we just hoist sail and push off,” he said. He had small sailboats before, most notably a Flying Scot—but he wanted something safe, stable, and not requiring as much athleticism to sail. Kieleszek also wanted a boat that he could transport to salt water for exploring and weekend cruises among Maine’s alluring islands. He saw a presentation that Chase made at the Small Reach Regatta one year about sailing with Vivier in France. He started visiting websites regularly. When he saw the Jewell design, all the pieces fi t together.
For Kieleszek, LEILU has lived up to her promise. Joining him in Belfast Harbor for a daysail, I came to appreciate the boat’s qualities as well. Small-boat cruisers have a long list of things they look for in a boat, and I can’t think of any criterion that this design fails to meet. And it meets them all with style.
The boat is a centerboarder rigged as a gaff-headed yawl, in Vivier’s words, “firstly because it is beautiful, and also because Americans are fond of yawls.” She has a roller-furling jib whose tack attaches to a stemhead fitting, without the need of a bowsprit. The high-peaked gaff mainsail sets easily, reefs easily, and provides ample power. The triangular, sprit-boomed mizzen sheets to a pole boomkin that is easily removed for trailering.
Tom Jackson
A Torqeedo electric outboard, with a built-in battery pack, stows in a cockpit locker and slips easily into place. Once the boat is rigged and the outboard and the rudder are kicked up, the boat is ready to back down the ramp.
Yawls with outboard rudders present one difficulty: steering often calls for either an offset mizzenmast or elaborate mechanisms to get around the mast to the rudderhead. Vivier’s response was to step the mast through the short afterdeck into a fitting and a step mounted on the inboard face of the transom. The S-shaped tiller passes under the afterdeck and through a transom aperture below the step. The aperture is far enough down to give the mizzenmast sufficient “bury,” and a built-in well, much like an outboard motor recess, drains overboard aft to prevent water from coming into the cockpit. By using this simple solution, the mizzen is stepped amidships, where it should be.
Although there is nothing technically difficult about setting up the rig, it takes time, up to two hours. The boat could easily live on its trailer, but this kind of setup and take-down time greatly favors the kind of user who has in mind weekend adventuring over regular daysailing off a trailer. The mast is housed in a stainless-steel, deck-mounted tabernacle, and Kieleszek is able to raise it by himself. The shrouds set easily, using high-tech line through simple deadeyes. The jib attaches simply to the stemhead fitting. Its halyard, which passes through a block at the peak for mechanical advantage when hoisting, leads to a cleat on the cabintop to port of the companionway slider. For the mainsail, the peak and throat halyards, which also reeve through blocks for advantage in hauling, lead to cabintop cleats to starboard. Modern rigging fittings provide appropriate strength, minimal profile, and ease of handling.
With the jib and mizzen rolled up and the main furled, and the permanently placed rudder kicked up to vertical, LEILU launched easily. On retrieval later, I was surprised at how very easily she winched up onto the trailer rollers, and Kieleszek’s six-cylinder pickup hauled her out without a hint of complaint.
Frank Kieleszek
As a new boat, LEILU doesn’t have much of a “lived in” look. She‘s awaiting, for one thing, her V-berth cushions. A cooler and portable toilet stow under the bridge deck to each side of the centerboard trunk, ready to slide out when needed.
Like many of Vivier’s designs, Jewell has an ample cockpit, much larger than you often see in boats of this length (19’8″). The boat’s width—7′ 3″—accentuates the cockpit’s volume. She feels and handles like a much larger boat. She has side seats aft, with lockers under-neath, and a bridge deck, making a T-shaped cockpit sole that greatly simplifies jib handling while tacking. Seating is comfortable for four or more. The coaming is a comfortable back support but is low enough for side-deck seating when the crew goes to the weather rail. The electric outboard is stowed in the starboard locker. Kieleszek has a model with a removable battery pack at its head, eliminating any need for heavy batteries aboard. The outboard provides a couple of hours of motoring time.
The cabin is also commodious for a boat this size. Chase, who is 6′ 6″ tall, encouraged Vivier to include long bunks. The V-berth layout is practical not only for tall people but for stowage. Compact lockers to port and starboard aft provide accessible stowage and minimalist counter space. The centerboard trunk’s intrusion into the interior is slight, forming a useful step that doubles as a place to sit while slicing salami. Stowage under the bridge deck alongside the center-board trunk easily accommodates a small portable toilet on one side and a cooler to the other, both nicely out of the way when not in use. With the addition of a boom tent to keep the cockpit bug- and rain-free, a couple could easily cruise comfortably for days, yet the boat would be easy to handle solo.
Frank Kieleszek
The first completed Jewell hull was built upside-down over molds and bulkheads at French & Webb in Belfast, Maine.
Frank Kieleszek
Cut by computercontrolled routers at Hewes & Company in Blue Hill, Maine, the kit components came together quickly.
In one spring afternoon sail, Kieleszek and I experienced just about everything. We sailed downwind out of the harbor on a pleasant breeze. However, we could see lines of dark clouds forming, portending gusts. The boat balanced handily and maneuvered through tacks and jibes with ease. At length, we turned windward for the homeward leg, and soon we found it necessary to reef. We hauled the mizzen tight and rolled up the jib so the boat would ride head-to-wind while we cinched up the topping lift to control the boom, eased the main peak and throat halyards together, made off the leech reefing line, got the luff cringle on its hook, and made off the reefing nettles around the loose-footed sail. In no time, we hoisted the main again and rolled out the jib.
After a while, the wind subsided, so we shook out the reef. Before long, a particularly dark line appeared, obviously carrying rain and strong wind. Kieleszek made the wise call to douse the main entirely, and when that strong breeze hit, we sailed very comfortably on the jib and mizzen, a classic yawl strategy for heavy weather. After the squall line passed, we were able to hoist full sail again and sailed back to port on a pleasant breeze under a warming sun.
She handled all of that with grace. I found myself toying with the old ideas: Why not this one? I envisioned her loaded with dry bags and baskets of edibles, outward bound. Her simplicity has a strong appeal. I’ve been an admirer of Vivier’s designs since coming to know them at Raid Sweden in 2005, and periodically I visit his website to daydream about one design or another. There is something about this Jewell design—economical, towable, manageable, “doable”—that has that just-right feel to it.
For information about Jewell and other designs by François Vivier, see his website at www.vivierboats.com. Plans are available from the designer. Kits and completed boats are available in France from Icarai, www.icarai.fr/index-en.html.
François Vivier
Jewell Particulars LOA 19′ 8″ LWL 17′ 9″ Beam 7′ 3″ Draft board up 1′ 3″ board down 4′ Displacement 1,367 lbs Ballast, in keel, 265 lbs in centerboard 66 lbs Sail area 237 sq ft
François Vivier
Designer François Vivier has developed a number of “randonneurs,” or trekking boats, over the years. With amateur construction in mind, he designed Jewell to be relatively simple to build, using glued-lapstrake plywood construction. The boat is easily trailerable. Its shoal draft, only 15” with the board up, will allow close explorations of islands and coastlines, and her broad beam helps her stay on her feet and also permits relatively generous cockpit and accommodations for a boat under 20’ long.
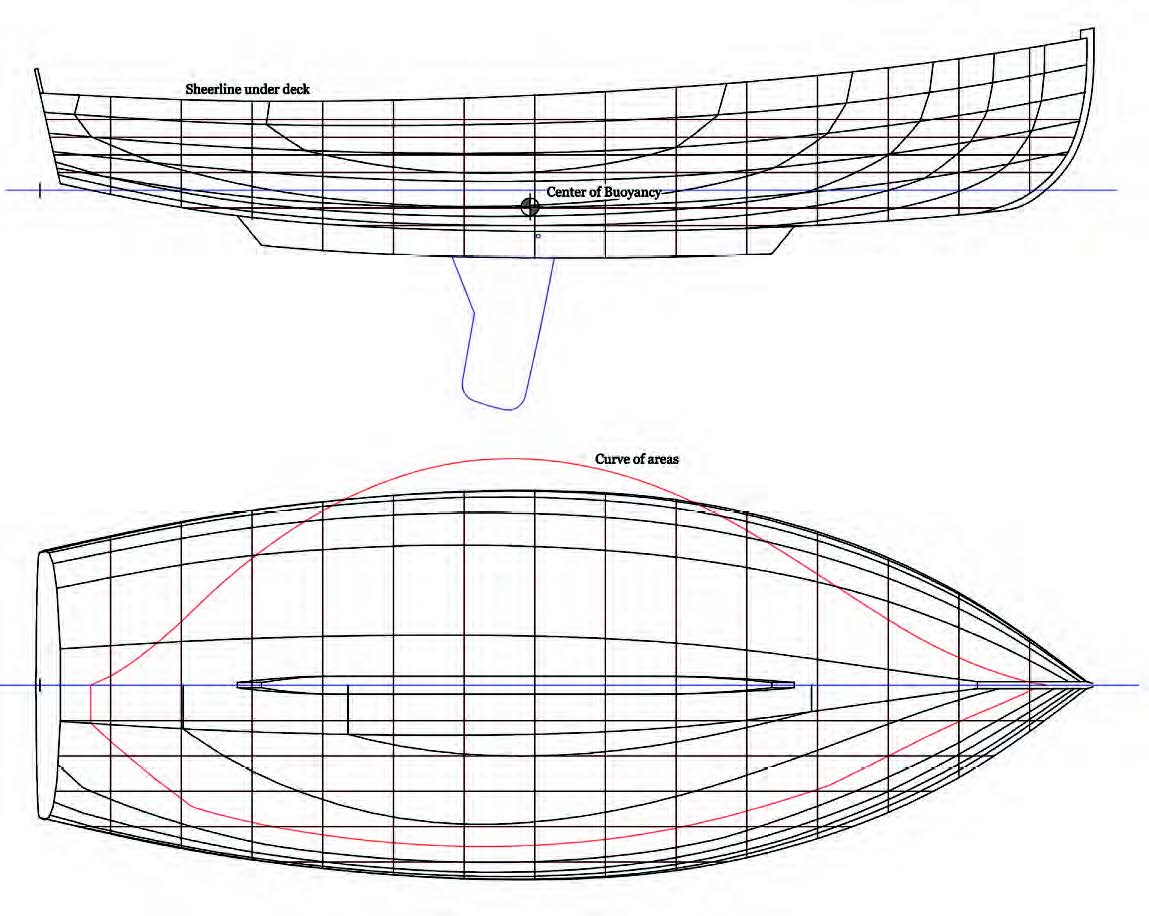
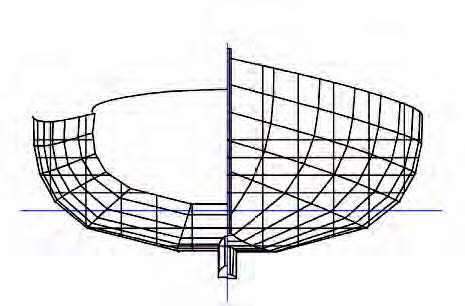
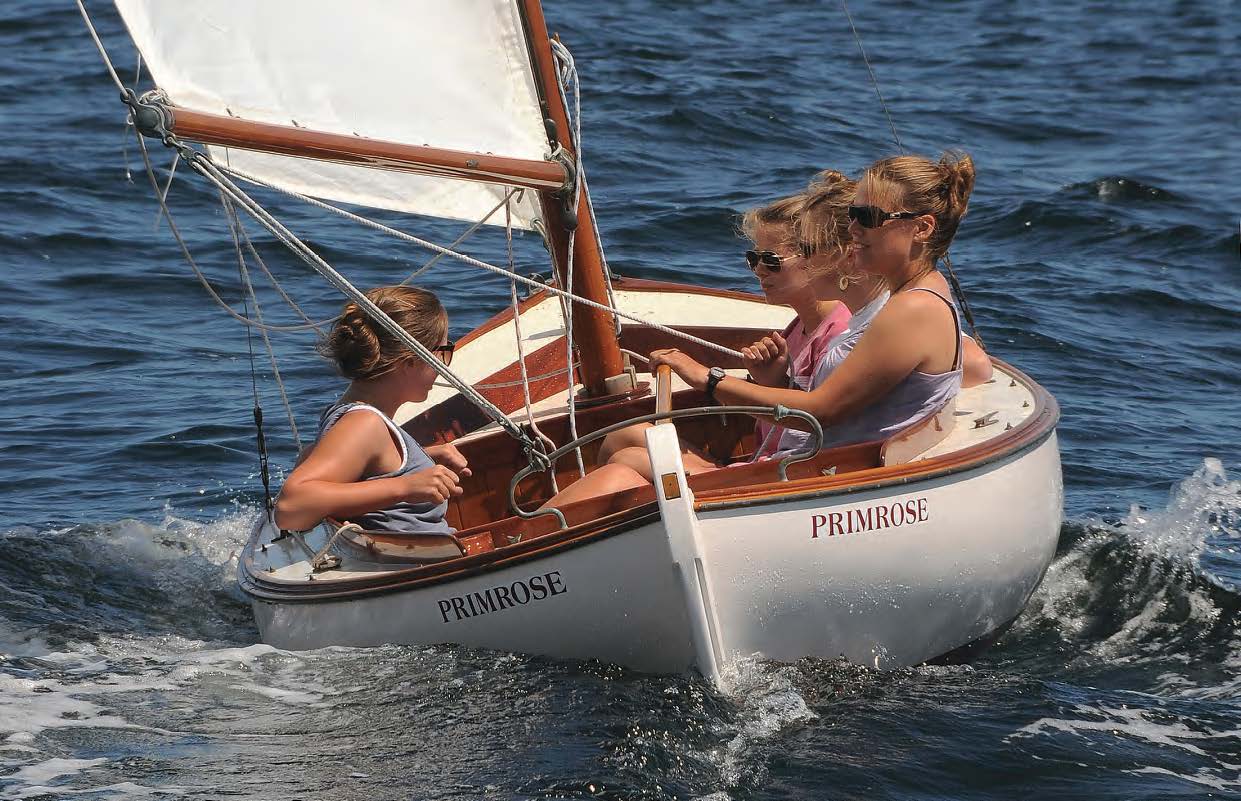
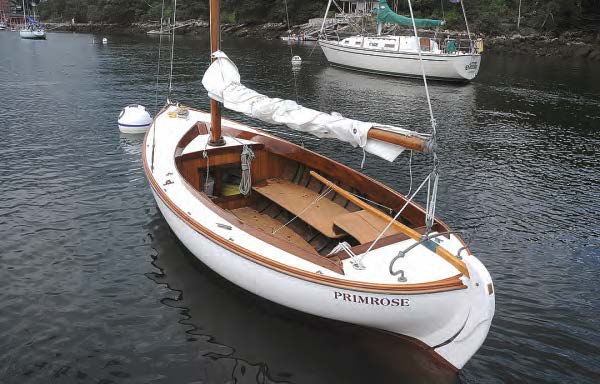
At only 15’ long, PRIMROSE is a commodious and seaworthy small yacht. Designer K. Aage Nielsen was instrumental in introducing the double-enders of his native land to the United States.
Aage Nielsen mastered many different styles during his career in yacht design, but he never forgot the lovely shape of the double-ended hulls he grew up with in Faaborg, Denmark. He was largely responsible for bringing the style to North America, not only by adapting historic workboat shapes for pleasure boats but also by refining them in new ways. PRIMROSE, at just 15′ LOA and launched in 1936, is the smallest of his designs of this type.
Full-bodied, double-ended hulls would have surrounded Nielsen during his youth. He was 21 years old in 1925, when he emigrated to the United States to take a job with John G. Alden Company in Boston, Massachusetts. It was a golden age, when many talented young designers brought Alden’s ideas to fruition. Nielsen went on to work with his friend Murray Peterson during the Great Depression and later in the Boston office of Sparkman & Stephens, where he earned Olin Stephens’s highest respect. After World War II, Nielsen went out on his own. Throughout, he continued periodically to find inspiration in the double-enders of his native land.
He designed a wide range of them, their sterns very nearly works of sculptural art. It’s a difficult shape to draw in two dimensions, and it has to be done right if the drawn shape is to have the right look when constructed in three dimensions. But Nielsen had learned boatbuilding before going into design, having completed a rigorous apprenticeship with roots in the European guild system. His knowledge of construction served him well as a designer throughout his career, and he held his builders to exacting standards.
Boats built to Nielsen designs tend to be highly prized by their owners. PRIMROSE is no exception. The owner of the unique little yacht—and yacht she is—is Tom Kiley of Camden, Maine, whose family has owned her since his father bought her in 1980. “This boat is a keeper,” he said. His children have grown up with the boat, and no doubt when the time comes his grandchildren will do the same. “It takes a half a pint of varnish, half a pint of white paint, and leftover bottom paint,” Kiley said, and he can take care of the usual seasonal maintenance himself. The boat has no engine or systems, nothing to get in the way of sailing. How often does he sail her? His answer is simple: “Never enough.”
Kiley is a true aficionado of Nielsen yachts, having owned four of them over the years. In addition to PRIMROSE, he still owns SNOW STAR, a 36′ 9″ sloop of 1967. In the past, he has also owned two keel-centerboarders: WINSOME, a 1959, 35′ 9″ sloop; and STAR SONG, a 1965, 43′ yawl. He pays attention to his boats: PRIMROSE was extensively refit in the 1990s at Ballentine Boat Shop in Massachusetts, which among other things replanked her using white cedar to replace the original Philippine mahogany, with plank scarfs glued with epoxy to avoid using butt blocks.
COURTESY of TOM KILEY
As a traditional plank-on-frame hull, PRIMROSE is happiest spending the season on her mooring in Camden Harbor, Maine.
PRIMROSE rides at a mooring in Camden Harbor, ready for any fine afternoon of daysailing. There, I caught up with Kiley and the boat in late July 2014. Kiley rowed us out to the mooring, and the familiar, unmistakable stern that Nielsen mastered so perfectly hove into view amid the crowded summer fleet. In a minute, we had cleared away the boom tent—a necessity, since the cockpit is not self-draining. In another minute, we had the jib hanked on, the marconi mainsail set, and we were ready to cast off.
In relatively light air, the boat moved very well, reminiscent of the best of the full-keeled small daysailers, boats like the widely admired Herreshoff 12 1⁄2. PRIMROSE has a waterline length of 13′ 5″, a foot longer than the Herreshoff, but like the 12 1⁄2, it has the feel of sailing a larger boat. Its 5′ 6″ beam makes the cockpit commodious and gives the boat very good reserve stability. Like the 12 1⁄2 and its Joel White–designed cousin the Haven 12 1⁄2, PRIMROSE has a cuddy forward for stowage.
Kiley has two tillers to choose from, and most often he chooses the longer one so he can keep his weight forward, especially when sailing solo. The cockpit seats, now of teak instead of the original painted pine, are set higher aft than forward. This practical layout puts the helmsman a little higher than the crew, ensuring good visibility forward. A centerline rail on the floorboards provides comfortable footing when heeled over.
Kiley’s eye for a boat and attention to detail comes from a lifetime in yachts. He has a deep respect for Nielsen’s designs. On PRIMROSE, he points out some-what apologetically a stainless-steel shackle riding on the bronze horse traveler, saying he hasn’t yet found a suitable bronze one. But, the traveler itself is bronze, having replaced the original galvanized version. A mast break many years ago—before his family’s ownership—was repaired by scarf-joining the sound Sitka spruce upper portion to a Douglas-fir lower portion, something he says Nielsen—a famous curmudgeon in his own times—would likely have frowned upon.
We tacked pleasantly out of Camden, the boat han-dling easily. The mainsheet leads to the helmsman’s hand, with no cleats to tempt anyone to make it off. Kiley has found it necessary to cast off the sheet immediately to get the pressure off the mainsail in strong gusts, which is important in a ballasted, open boat. “If we take water in here, we sink,” he said. “I have a canoe airbag I actually inflate, because if the boat fills up with water, it’s gone.” The fairly small jib tacks easily, the sheets reeving through fairleads and coming aboard over the coaming, whose top edge is armored with lengths of half-round brass to resist chafing the varnish.
The tiller slips between cheek pieces at the head of the rudder, which is mounted on a very steeply raked sternpost, with the rudderhead sweeping forward to follow the profile of the stern. Such outboard rudders are typical of Danish double-enders. For a small boat, tiller steering is clearly the way to go, but for large double-enders Nielsen retained tiller steering only for NORTHERN CROWN, a 1956, 35′ 5″ sloop. For other larger yachts, he adapted the stern for use with wheel steering, with lines leading to a quadrant belowdecks. In these yachts, the rudder is set on a sternpost that is farther forward and not as steeply raked as in the traditional boats, making in effect a counter stern.
Tom Jackson
Seated on the raised sternsheets, owner Tom Kiley has clear forward visibility from the helm. The mainsheet is never cleated off, allowing immediate depowering when needed.
PRIMROSE is a one-of-a-kind, built at the Simms Brothers yard in Dorchester, Massachusetts. (Nielsen found better success with a similar, but larger, 18′ 3″ double-ender with a small auxiliary engine, four of which were built, including FERN for author E.B. White.) Nielsen during his life was very particular about boats built to his plans. A boat such as PRIMROSE would be a challenge to get right, and Nielsen knew it. The difficult planking lines and hull shape aft require quite a lot of steam-bending and careful fitting. Hav-ing the shape look right depends entirely on building it right. Nielsen originally designed PRIMROSE to be lapstrake-planked, and she would be handsome that way; however, her client preferred carvel planking.
Nielsen always favored wood construction, shunning the industry’s move to fiberglass. He insisted on person-ally supervising each construction. By the time he died in 1984, he felt that the kind of work he demanded was becoming a thing of the past, and he stipulated that no further boats should be built to his designs. In many ways, it was an unfortunate choice, at an unfortunate time. In his final years, a resurgence in wooden yacht construction ushered in a new golden age, both in traditional construction and in “composite” construction using wood veneers and epoxy to make cold-molded hulls. His plans are not generally available for use in building new boats of any kind.
Tom Jackson
PRIMROSE was largely reconstructed at Ballentine Boat Shop in the 1990s, but much of her gear is original, including the Merriman Brothers bronze roller-reefing fitting for the main boom.
However, in the course of the production of the biography Worthy of the Sea: K. Aage Nielsen and His Legacy of Yacht Design (Tilbury House, Publishers, and Peabody Essex Museum, 2006), his family decided to pay homage to his legacy by authorizing limited permission for new construction. Nielsen for much of his career favored two yards: Walsteds Baadevaerft in Thurø, Denmark, and Paul Luke in East Boothbay, Maine. Walsteds still builds in wood, but Luke turned to aluminum in the 1970s. Following Nielsen’s own pattern, new construction can now be done at Walsteds, or Rockport Marine in Maine. The latter came into play because Rockport’s owner, Taylor Allen, cares not only for his own double-enders NORTHERN CROWN and FERN but also about a dozen Nielsen yachts for customers, the largest single concentration of Nielsen yachts anywhere. Someone looking for a new boat to the PRIM-ROSE design, therefore, could have a boat built professionally in the United States or Europe.
A classic yacht seems to transcend its own times. Sailing on their own or in regattas, Nielsen yachts still hold their own, in appearance and handling. “I have a great regard for that, as a sailor,” Kiley said. “I look at the design of HOLGER DANSKE [a 1964 double-ended ketch, 42’6″ LOA] or STAR SONG, and I think, wow, that was such a long time ago, and to get it so right so early, on the first try, was unbelievable. The tweaking, the little things, have changed it. They haven’t made it better. Things like self-tailing winches, and epoxy—those aren’t my ideas, that’s just staying current. But boy, to change that boat? How to make it better? I don’t see how.”
PRIMROSE stands as proof that Nielsen put as much of himself into his small boats as his large ones, and she is as timeless as any of them.
For more information about the construction of the Double-Ender 15 and other designs by K. Aage Nielsen, contact Rockport Marine, www.rockportmarine.com; or Walsteds Baadevaerft, www.walsteds.dk.
PEABODY ESSEX MUSEUM/K. AAGE NIELSEN COLLECTION
PRIMROSE Particulars LOA 15′ 1″ LWL 13′ 5″ Beam 5′ 6″ Draft 2′ 3″ Sail Area 133 sq ft Displacement 1,720 lbs Ballast 500 lbs outside 200 lbs inside
PEABODY ESSEX MUSEUM/K. AAGE NIELSEN COLLECTION
K. Aage Nielsen drew the plans for the Double-Ender 15 in 1935. She was originally intended for lapstrake construction, but the only hull known to have been built under Nielsen’s supervision—PRIMROSE, built by Simms Brother in Massachusetts in 1936—was built carvel, or smooth-skinned. Her full-keel hull form is directly inspired by the workboats Nielsen knew in Denmark during his youth. In adapting the type for pleasure use, he paired a refined version of the traditional hull form with a modern fractional marconi rig, giving the small yacht comfortable seating and excellent performance for daysailing. Nielsen, a masterful draftsman who was trained in construction, was known to be a stickler for personally overseeing the boats custom-built to his designs. Although new boats can be built by permission at Walsteds Baadevaerft in Denmark and Rockport Marine in Maine, his plans are not available to others for construction.
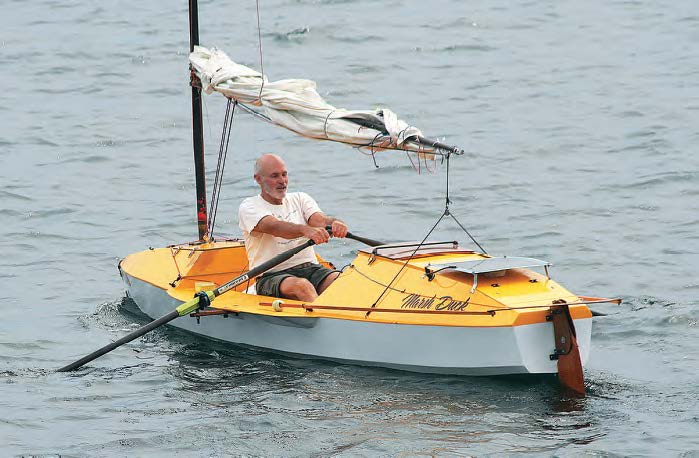
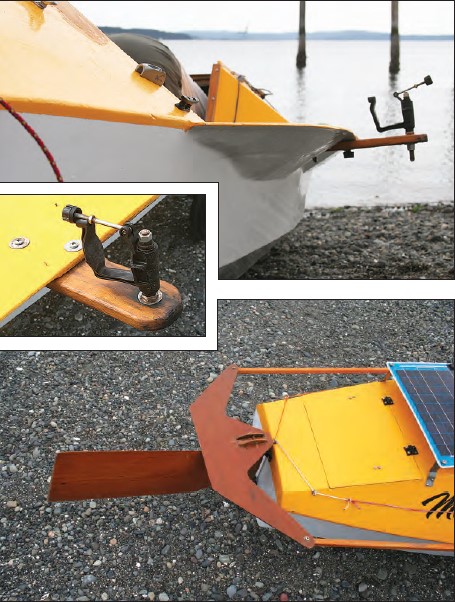
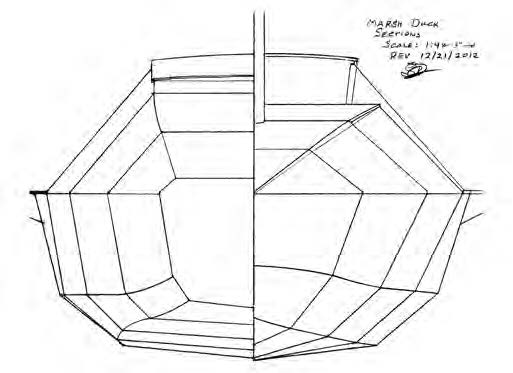
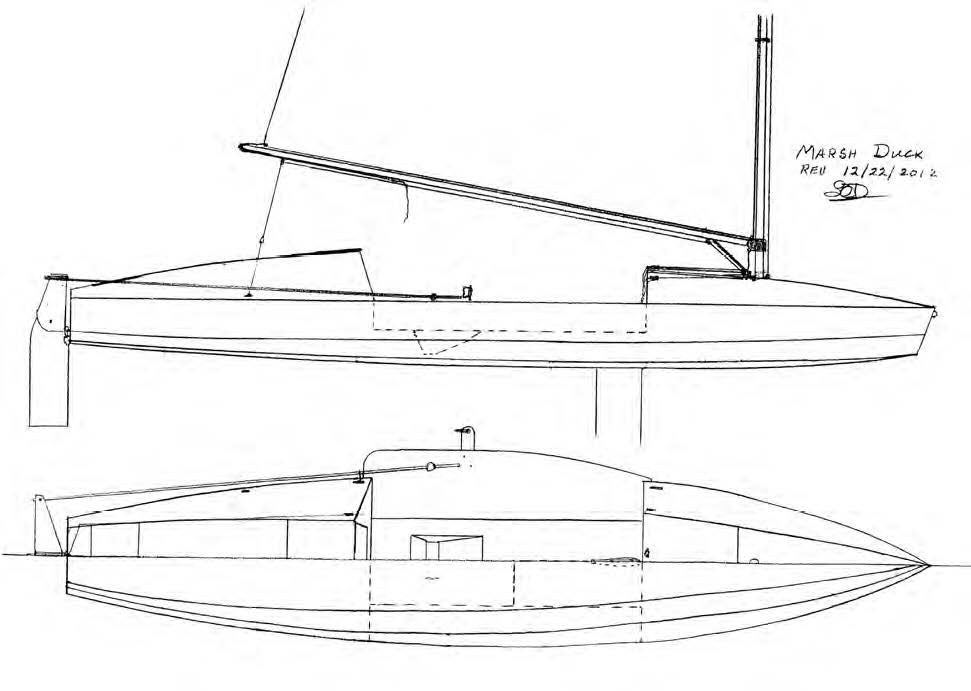
Marsh Duck, designed by Scot Domergue, combines the performance of a sailing canoe with the range of an expedition camp-cruiser.
Scot Domergue wanted a boat that didn’t exist. It had to have accommodations for sleeping aboard under a solid roof and the performance of a sailing canoe. It had to be burdensome enough to carry supplies for extended solo cruising yet easily driven with sculls and a sliding seat; tough enough to drag across a rocky beach yet light enough to tow on its traler behind a bicycle. He went to the drawing board and worked up about two dozen designs. The last one, the narrowest he dared draw, became the Marsh Duck.
The boat is 18′ long and has a beam of 43″. The integral wings amidships increase the span to 54″. Short, easily removable outriggers add another foot to the beam. Fiberglass and epoxy over stitch-and-glue construction with 1⁄8″ and ¼” plywood brings the boat in, without sailing and rowing gear, at about 130 lbs.
Sailing performance was Scot’s primary focus when he was designing the Marsh Duck. His initial concept was inspired by the YAKABOO, a sailing canoe Frederic Fenger used to cruise the Caribbean in 1911. The Marsh Duck’s hull form was adapted from that of a more modern sailing canoe, the IC–10—an international class of sailing canoe. Scott converted the IC–10’s hull to a double-chined form appropriate for construction in plywood.
Christopher Cunningham
Under sail, the boat is steered via two push-pull tillers.
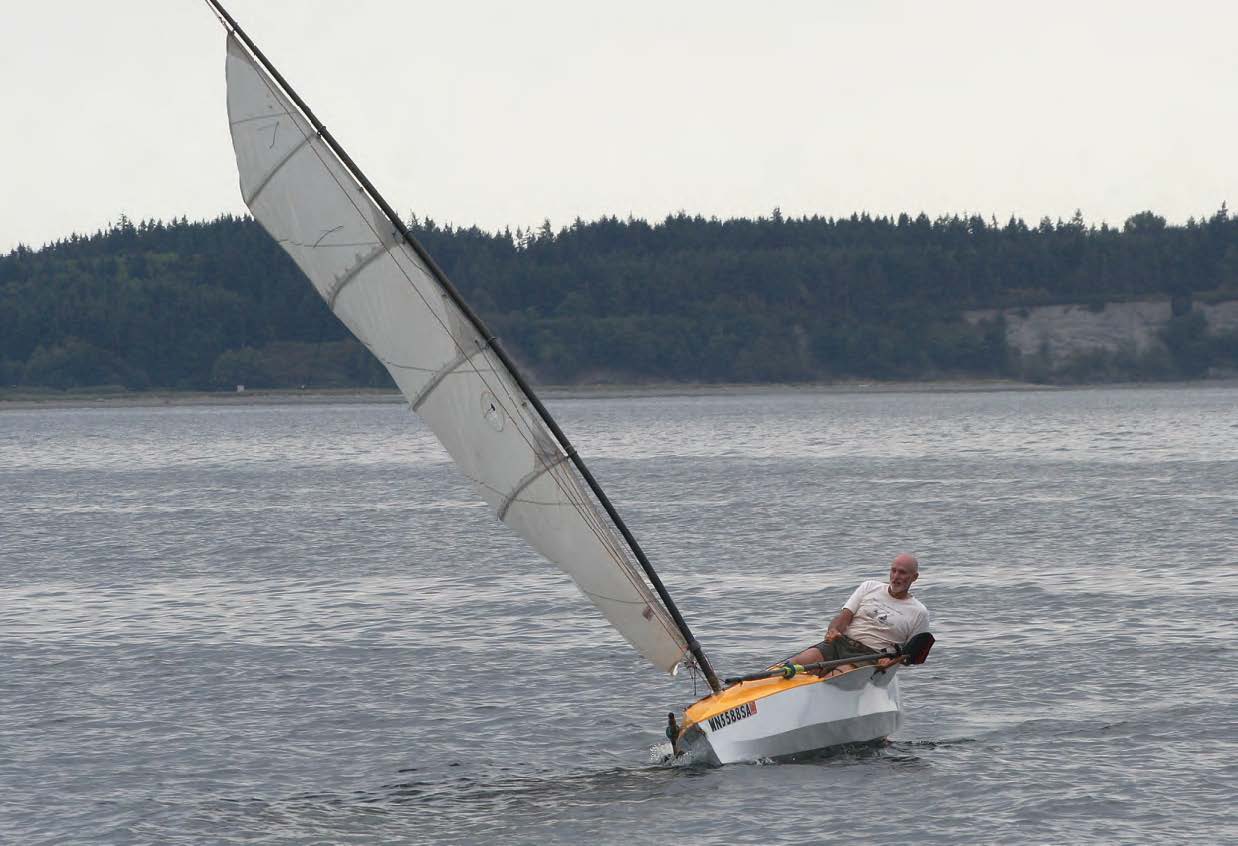
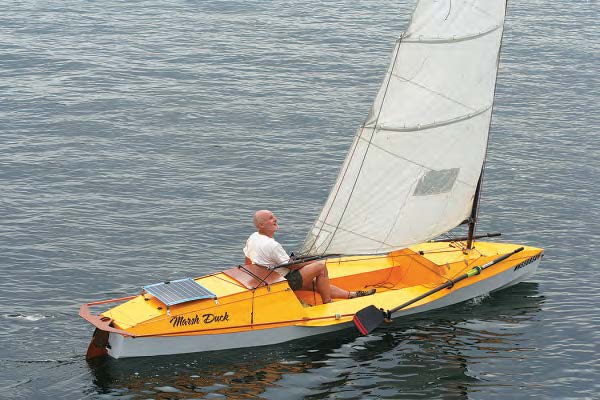
Under sail, the Marsh Duck’s canoe ancestry is evident. Sailing requires you, the live ballast, to look lively. The side decks provided me a good windward perch when the sail powered up and the Marsh Duck took off. Under the 107-sq-ft mainsail, the Marsh Duck was quite sensitive to the rather fluky offshore breeze, so I shifted my weight often and kept the sheet out of the jaws of its fairlead/jam cleat. The rudder, fully deployed for sailing, provided instant and dramatic response to my touch on the twin push-pull tillers. One of my own boats is equipped with a single push-pull tiller, so I thought I’d adapt instantly to the Marsh Duck’s system. I did, but only on the starboard tiller. On the port side I steered with starboard side reflexes, and the Marsh Duck responded by darting about like a housefly. More time at the helm would solve that problem. When I had steady wind and steered a smooth course, the Marsh Duck flew along and provided an exhilarating ride.
I had no trouble keeping the boat upright during my sailing trials, but I did a capsize drill to see how easily I could recover from a dunking. The mast and sail kept the Marsh Duck from completely turning turtle, and she floated high on her side. After making sure that the main sheet was free, I swam around the stern and grabbed the daggerboard. It didn’t take much of a pull to get the boat upright. Getting back aboard was very much like reboarding a kayak after a capsize and wet exit. To keep from pulling the Marsh Duck over on me, I had to kick and lunge to get my weight quickly amidships. A bit of tidying up in the cockpit, and I was ready to get underway again.
Christopher Cunningham
For rowing, the boom is lifted clear of the oarsman. Foot straps are unnecessary, as the seat is inclined aft to ease recovery.
Scot keeps the carbon-fiber mast up and the sail furled on the boom while rowing, which he normally does in calm conditions, preferring to sail whenever there’s a useful breeze. I had plenty of clearance under the boom for rowing. A recess in the cockpit floor serves as a foot brace. It’s fitted with a mating plug to provide a flat floor while sailing. The recess is simple, effective, and comfortably angled. There was no need to have my feet strapped in, as in a racing shell, because the tracks for the sliding seat are set on long wedges that had enough downward slope to bring me aft through the recovery of my stroke.
The rowlocks are standard for racing shells. The gates that close over the looms keep the oars from popping out of the locks, but if the boat rolls excessively they’ll push the oar handles into your thighs. Scot’s not as big as I am, so the locks weren’t set at a height that fit me well. While I had no trouble rowing at right angles to waves, I did get hung up when the waves were at an angle and induced some roll. A simple fix would be to mount the outriggers above the wings instead of below them. Builders should check the rowlock height and adjust as necessary—it’s essential for open-water rowing. I should mention that I’ve never been a fan of using a sliding seat and outriggers on open-water rowing boats. They were designed for fast, light boats racing on flat water. On rough water the overlapping handles of long sculls aren’t well suited for a rolling boat. Rowing a heavy and relatively slow boat with a sliding seat is hard on the knees. A fixed thwart and a shorter stroke, in my experience, are a better match for waves.
Christopher Cunningham
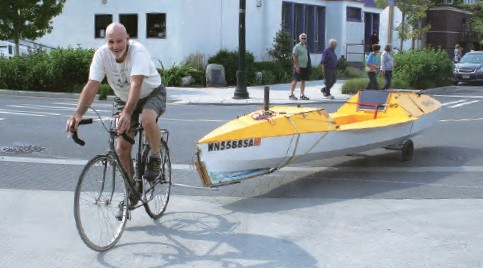
Designer-builder Domergue transports Marsh Duck on a bicycle trailer.
When I rowed across the wind the tall, bare mast and the furled sail on the boom caught enough wind to make the boat heel, enough to push the downwind oar handle to my thigh. The sliding seat rig, normally centered on the cockpit floor, can easily be set to the windward side to level the boat. On flat protected water I rowed at a relaxed 4 knots, sustained 5½ knots, and topped out just shy of 6 knots. The light, narrow hull of the Marsh Duck is easily driven, but when there’s enough wind to scuff up the water, it’s time to let the sail take over the work.
The Marsh Duck’s bottom is a wide, well-rockered panel without a skeg, so the boat can spin around without much provocation. It relies on the rudder for tracking. The rudder is rigged with two push-pull tillers, each captured alongside the cabin with a thin, cleated line that offers a little friction so I could set the rudder straight or at angle and the line would lightly hold it. Over a long haul, that works, but in close quarters that require a lot of maneuvering, every adjustment of the rudder is an interruption to rowing. Another lesser issue is that the rudder, while nicely foil-shaped to reduce drag, is extra wetted surface to pull through the water. I’d prefer to have it retracted. With the rudder up I could steer with the oars, but the stern tended to swing wildly as it lifted between strokes because my weight would slide forward at the end of the stroke. When I rowed with the rudder partially retracted, leaving the leading edge angled slightly down and immersed a few inches, it provided tracking while still allowing me to steer with asymmetrical pulls on the oars. While the absence of a fixed skeg offers more nimble steering while under sail, I’d suggest adding one to keep the stern in line while you’re rowing.
Christopher Cunningham
Marsh Duck’s rowlocks are standard racing shell equipment. The shop-made outriggers are mounted on wings built into the hull. The rudder is retractable for rowing, and provides sensitive steering under sail.
The Marsh Duck has two large compartments with watertight hatches. The forward compartment can hold quite a bit of equipment. More gear can be tucked into the space under the cockpit; heavy items such as water, food, and cooking equipment stowed there can provide additional stability and keep the bow light to lift over oncoming seas.
The aft cabin felt quite roomy to me, vastly more spacious than my sneakbox, where there’s scarcely enough vertical clearance for sleeping on my side. The Marsh Duck’s cabin doesn’t have sitting headroom, but I didn’t find it at all claustrophobic. From transom to bulkhead there’s 6′ 4″ of length, plenty of room for me, at 6′, to stretch out in. There was enough width along that length to lie with my knees tucked up. Holes in the bulkhead forward provide access to the storage space under the cockpit so the cabin doesn’t need to get cluttered with gear. The companionway door is plexiglass and lets in plenty of light. The sliding hatch overhead can be moved aft for extra ventilation or stargazing. There’s a solar panel on the cabin roof to charge an electrical system for cabin lighting.
Having comfortable sleeping arrangements aboard the Marsh Duck will save a lot of time you’d otherwise spend setting up camp ashore. You can sleep at anchor or pulled up on the beach and in the morning be ready to get underway in just a few minutes.
The Marsh Duck, one of a new breed of solo cruisers, combines the compartments and the profile of an ocean rowing boat with a fast slender hull. It would be best for someone who’d enjoy, and develop the skills for, high-performance rowing and sailing. In the Marsh Duck you could ably answer the call of lifelong coastal cruiser Audrey Sutherland: “Go simple, go solo, go now.”
Plans are available from Duckworks Boatbuilder’s Supply, www.duckworksbbs.com/plans/domergue/marshduck/index.htm.
Christopher Cunningham
Particulars LOA 18′ Beam 3′ 6″ Draft 4″ – 8″ Sail area 107 sq ft
Christopher Cunningham
Marsh Duck combines the best elements of a sailing canoe, an ocean rowing boat, and a racing dinghy. She carries three reefs, and her 107 sq ft of sail may be quickly reduced to 25 sq ft.
In the early 1970s, Greg Morley, left, decided to leave a career in forestry and park management to make a living building cedar-strip canoes. More than 40 years later, his son Steve, right, is continuing the family business, driven by his own passion for small boats.
One doesn’t usually think of Montana as a hotbed of boatbuilding…in any medium. And it’s not. But there are a few dedicated individuals designing and building small craft worthy of note. One of them, Jason Cajune’s Freestone drift boat, was featured in the 2008 edition of Small Boats. While most Montana waters aren’t deep, especially rivers such as the Yellowstone, Madison, and the Big Hole, they are reputed to stock trout at 5,000 a mile, which attracts fly fishermen from all over the world. A strong catch-and-release ethic keeps them coming back. In many ways, the drift boat is the ideal design for such pursuits, but hardly the only choice. For many, the canoe is a more versatile investment, not only capable of running rivers but also an extremely competent means of traversing lakes.
Designed and built by Morley Canoes in the north-west corner of the state, the cedar-strip-planked Guide is such a boat. Company literature touts it as a “tough working canoe” that is “well known for its wonderful reliability over so many water conditions,” capable of carrying “heavy loads with ease through churning rapids or across a windy lake.”
Morley Canoes was founded in 1972 by Greg and Anne Morley, who that year made a very conscious decision about their lives: to spend more time doing the things they loved, and high on the list was paddling lakes and rivers in canoes and kayaks of their own making. Unlike too many folks, they made good on their vow.
Dan Spurr
Greg has collected two pedal-powered jigsaws built by Barnes of Rockford, Illinois, in 1876. He finds them ideal for cutting the fragile wood for inlays.
It’s not as if Greg had been mired in a corporate sweatshop. Armed with a degree in forestry from the University of Montana, he’d been a parks and recreation superintendent in Montana and Oregon, lastly acquiring land for a greenway along the Willamette River. A longtime woodworker, he began making canoes as a hobby. Then, after Anne asked him to build her a 16′ touring kayak so she could “get away,” he wondered if he could make a living at it. The answer, 42 years later, is: yes.
The Morleys moved to Corvallis, in Montana’s Bitterroot Valley, and a few years later headed north to the Swan River Valley, seeking more water on which to paddle. In the hamlet of Swan Lake they bought the old Silver Spur Bar and an acre of land, and set to work.
“The Department of Commerce wanted us to grow the business and hire employees,” Greg says, “but we weren’t interested in that. We wanted a comfortable living, but time to pursue the outdoor activities we enjoy. All of our children know how to run rapids and now, even our grandkids. Twelve-year-old Bryn does whitewater in her 12′ solo canoe.”
Bryn is the daughter of Steve Morley, Greg’s son who is taking over the business. On the day of my visit he was covering a canoe exterior with one of its two layers of 6-oz fiberglass cloth. “I grew up in this shop,” he says. “I got into sailing and windsurfing. And, of course, I built my own boats—with Dad’s help.” He also took to surfing and moved to Hawaii for 10 years, where he and his wife started their family. When it came to choosing the best place to raise their kids, they chose the “last best place”—Montana.
Dan Spurr
The shop is located on Highway 83 in Swan Lake, Montana, where boats parked out front on the lawn lure passersby. The Morleys build 15 or so boats per year.
The Guide was designed by Greg, who taught himself by assiduously studying the shapes of others and modifying them to suit his own taste. One learns a craft or art by first mimicking the masters, like Old Town and Chestnut. With canoes, the key elements are beam, rocker, stem profiles, and tumblehome—adjusted by on-the-water experience—wrestling with the age-old compromise: maneuverability versus tracking. Greg says WoodenBoat magazine has been an important educational aid, as well as the early Canoe magazine, in which particular designs and their performance were well covered.
The Guide is available in lengths from 15′ to 18′. It’s a general-purpose design, capable of carrying supplies for a week of camping on a river, and it can handle waters from riffles to rapids. Standard rocker is 1″, although depending on how the customer plans to use the boat, Steve can easily add another inch of rocker. A symmetrical hull, it has a bit of flare forward to deflect spray, transitioning aft to modest tumblehome for easy paddling.
In the early days of the business, Greg made all the boats the same; today, he says that won’t satisfy many customers. By necessity, each one is custom, and that’s okay by him. Adjustments include weight, keel, depth, bow height, bow shape, square stern, optional sail thwart, and thwart placements. One can even specify an inlaid design, and he has received orders for some odd ones—from the likenesses of dogs to a buzzard smoking a cigar. Trout, loons, and swans are popular images. Customers, who have come from as far afield as Germany and New Zealand, send old photos and say, “Make it like this.” Inlays are drafted and routed on the cedar before construction, since routing on compound surfaces is too tricky. The inlay wood is about 1⁄10″ thick and glued in place.
Dan Spurr
The Guide is the Morley’s most popular model, designed for good all-around performance on both flat and rough water. As with all of their boats, it can be customized to individual preferences in both shape and trim. Particulars: LOA 16′ Beam 35″ Weight 60-65 lbs Capacity 900 lbs
Construction of the Guide is a proven system that has evolved with Greg. In any of the four lengths, these canoes are built on a strongback that’s stored in the back of the shop. It’s on wheels, so when a new boat is begun, it’s rolled into position in the center of the shop where there’s room to swing a brush and a drill driver, if not a cat. Forms are attached into 1⁄2″ slots cut into the strongback. It’s set up so any of the models can be built on the same strongback, using the right frames in the right slots.
Strips of western red cedar purchased from a supplier in Washington State are cut from 2×4s and 2×6s on a bandsaw with a powerfeed. Measuring 1⁄4″ thick and 7⁄8″ wide, the strips have a bead routed into one edge and a cove in the other for a snug edge-to-edge fit. They’re edge-glued to each other and temporarily glued to the molds with thermoplastic glue, supplemented by big rubber bands until the glue cures. When the two layers of exterior cloth are bonded to the strips, the cloth is invisible and the shape is locked in and becomes extremely rigid. After the hull is turned over, the molds are removed and the interior is faired, after which the interior is sheathed with one layer of 6-oz fiberglass cloth set in epoxy.
The rails are trimmed with hardwood, which could be oak, ash, cherry, or whatever the customer prefers. Thwarts, foot braces, and woven rawhide seats are added with bronze fastenings.
Steve Morley had no difficulty shouldering the 70-lb 17-footer across the road and down to the Swan Lake shore. We took turns paddling. (The Morleys make their own light and beautiful cedar paddles.) I paddled along the lakeshore, sitting on the aft seat for a time, and then at Greg’s and Steve’s suggestion, kneeling just forward of it for better trim. In either position the boat felt light and easily driven; the far side of the lake didn’t seem too much of a distance to go. Tracking and turning so nicely, one doesn’t want to quit…just keep the rhythm, just keep on paddling.
Morley Canoes, 22030 Highway 83, Swan Lake, MT 59911; www.morleycanoes.com.
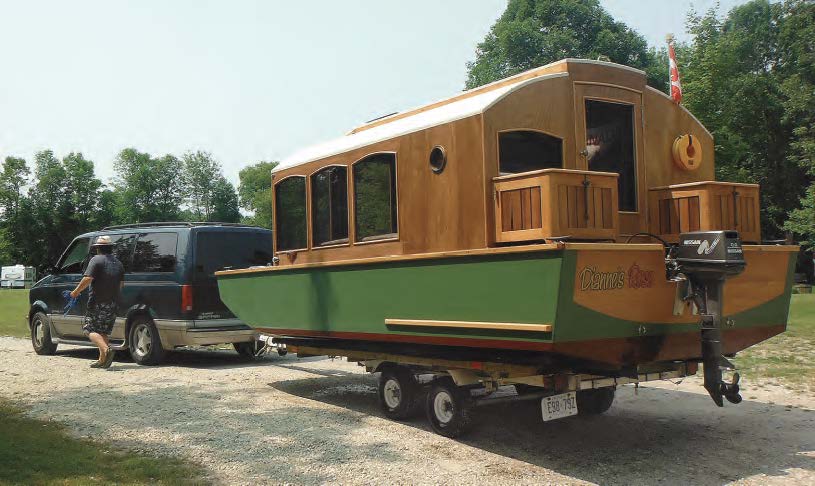
After Dianne Schreyer told her husband she’d spend more time on the water if they had a more stable boat, Roy built DIANNE’S ROSE. The couple are on the water all the time now.
If you’re like most people, you probably enjoy relaxing in your living room, and why wouldn’t you? The furniture is comfortable, you can put your feet up at the end of a long day, and there are always snacks and beverages close by. If you can imagine having all this, enjoying nice scenery moving gently by outside the windows and having a pleasant breeze blowing through, you’ll know what it feels like to go for a cruise on DIANNE’S ROSE, Roy Schreyer’s charming 17′ houseboat. A day with Roy and Dianne on their boat resembles nothing so much as taking your living room out on the water with you.
After years of beach cruising in a modified Star-class sailboat that he rescued from a farm field, Roy responded to a comment from his wife, Dianne, that a more stable boat would get her out on the water more often, and so he designed and built DIANNE’S ROSE. Roy calls his new cruiser a house/camp boat, and he and Dianne find that DIANNE’S ROSE is equally comfortable on the water or on the trailer in a campground on the way to the water. He professes a fondness for near-shore, shallow-water adventures, sliding under bridges and going as far up the creek as he can before running out of water (and, according to Dianne, even a little farther on occasion), and in this small boat he has created an ideal platform for these kinds of adventures.
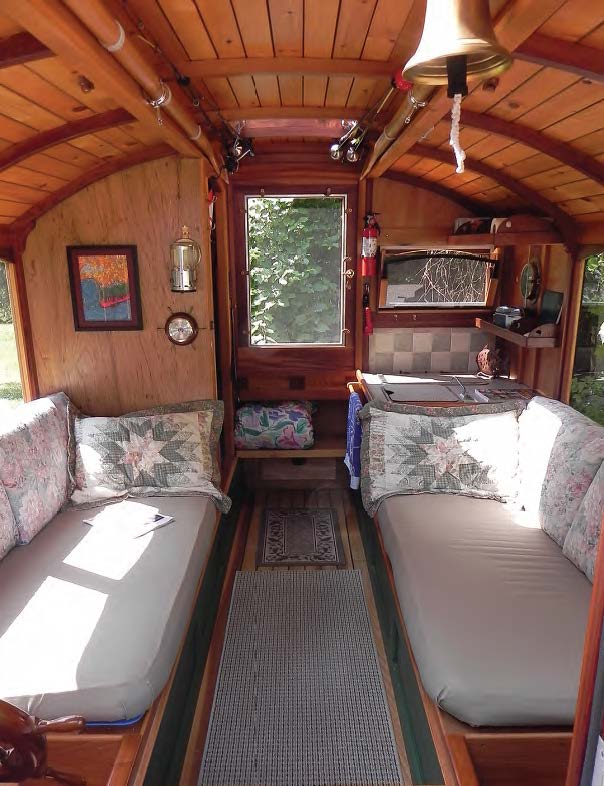
This is a big little boat, and every inch of the interior volume is available for use. Because there are no side decks, the cabin is almost 7′ 6″ wide. Even with the decks at the bow and stern, it is still 10′ long inside. The designer has made good use of the basic construction of the hull to support the interior functions. The hull is a barge with a flat-bottomed center section and a garboard plank on each side that rises through 6″ of deadrise to form a chine at the waterline. In profile the bottom sweeps up to make a pram bow, and the full-width transom is slightly raked.
John Summers
The arched roof of the cabin adds to the feeling of spaciousness in the cabin as Roy and a passenger enjoy the view of the Nottawasaga River in Wasaga Beach, Ontario.
Construction is common lumber and marine ply-wood covered with epoxy and fiberglass cloth. The main hull components can all be built on a flat bench before being assembled, and with the hull being rectangular in plan there are very few curves to deal with in layout and assembly. Joints are mechanically fastened and filleted with epoxy, and the housetop is sheathed with fiberglass cloth and painted white to reflect heat.
Two full-length longitudinal bulkheads built from plywood with lumber doublers on the edges make up the basic egg-crate structure of the hull and also define the cabin layout. The space between the two bulkheads creates the central sole and makes up the edges of the settees. Because these two bulkheads continue fore and aft under the end decks, they provide out-of-the-way stowage for the table in its lowered position. Other filler pieces slide fore and aft on these bulkheads, and when locked into place with deadbolts they offer a step up and out onto the deck at bow and stern. At the stern, the bulkheads define the galley cupboard and the head area, and their interior faces are nicely finished with raised-panel wainscoting to add some decorative appeal.
John Summers
Roy Schreyer’s 21 pages of plans include detailed drawings of every piece on DIANNE’S ROSE, along with directions and images of each step of construction.
John Summers
Particulars LOA 17′ 0″ Beam 8′ 0″ Draft 6″ Interior height 6′ 91⁄2″ Displacement 1,500 lbs empty Power 9.9-hp to 50-hp outboard
It is at the forward end of the accommodation that Roy has done his best design work. The settees stop short of the forward end of the house, leaving a foot-well for the captain (to starboard) and first mate (to port). The view forward and to either side is panoramic, and even on a short cruise I could see how these are best seats in the house. With the window removed and a screen inserted in the doors to the deck at bow and stern, there is a delightful through-breeze on even the hottest of days. When we were out on the river, the boat was covered in deerflies, and yet we were perfectly cool and comfortable inside the bright, airy cabin. A small afterdeck houses the motorwell and two tidy wooden deck boxes, one for gas and one for propane for the galley stove.
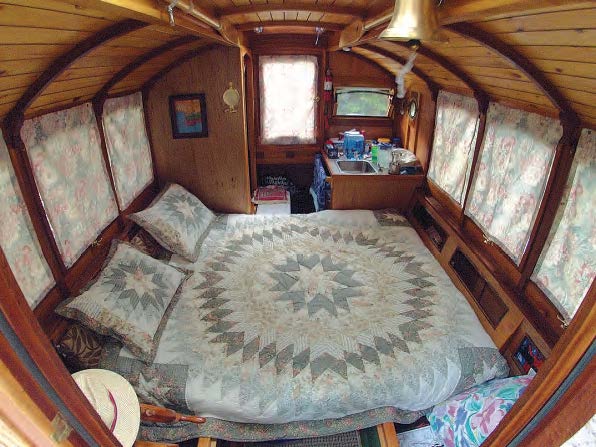
When the settees are used for sleeping, one of the back cushions on each side covers the well to make up the length required for two fore-and-aft berths. In a nice bit of design work, these same two filler pieces can also be placed between the settees to form a transverse queen-size berth.
With its longitudinal tongue-and-groove planking and raised center section, the overhead was inspired by old railway cars. Two skylights keep the interior bright, and if one were so inclined chocks could be fitted port and starboard for a dinghy or a little canoe, and maybe a couple of steel-shod setting poles for really-shallow-water work. Roy has recently added a pair of oars, which mount to oarlocks on the forward sides of the house, for low-speed (or out-of-gas) maneuvering, and these too stow neatly inside the cabin along with the fishing rods on either side of the raised center section of the overhead.
The galley has a small sink with a water pump and a two-burner propane stove that can also be dismounted and used outside. Stowage shelves above and below the counter, and an opening window in the aft bulk-head, complete a very functional little space. The head is equipped with a composting toilet, its own portlight, and, of course, a magazine rack stocked with boating publications. A transverse line of hooks in the overhead allows the entire aft section to be converted into a private bathing and changing room. In keeping with Roy’s thrifty free-cycling approach to boatbuilding, the galley shelving and stove were salvaged from an uncompleted Phil Bolger Martha Jane sharpie, the galley tile was left over from their kitchen renovations, and the aluminum-framed screens for the doors at the bow and stern were cut down from old screen doors.
Roy Schreyer
Roy Schreyer built the hull from common lumber and marine plywood. The divisions between the bulkheads form flotation compartments and space for stowing gear.
How does she handle? Well, like a barge, really, and about how you would expect a boat to handle that’s virtually flat-bottomed and almost half as wide as long. There are four metal-shod runners on the bottom of the hull to protect against abrasion during beaching. Extending about 1½” below the bottom, they probably improve the tracking somewhat, but I still felt the want of a skeg to keep her on course. Turns are best accomplished by applying a small degree of helm and then meeting the turn with opposite helm almost as soon as it’s started, lest you overcorrect. On your first trip, you’ll want to leave some space on either side of you until your wake straightens out. Roy’s boat is powered with a 9.9-hp longshaft two-stroke outboard, which will give about 6 knots at three-quarters to four-fifths throttle, according to the GPS.
Although it’s unquestionably good on gas, this little outboard works awfully hard to push nearly a ton of boat through the water, and as a result it is distractingly noisy underway. If I were to build one of these boats, I would be inclined to up the horsepower to 25 or 30 and run the motor throttled way back to keep the noise down. I’d also want to find a high-thrust, low-speed prop and, if the budget would stand it, upgrade to a four-stroke for quieter and more efficient running. A wooden hood over the outboard might cut the noise down even further. Even with a larger motor, however, this will still be a very economical boat to run, particularly if she lives on a trailer in your driveway when she’s not on the water. Her decks are clear fore and aft, and a boarding ladder at the bow helps to get back on from the beach. I might add a low bulwark at the bow to give the hull a little bit of sheer in profile and some protection from chop. This would also give you a secure place to stow the anchor and let you keep the docklines out of the cabin. The boarding ladder works well, but it might be even more fun to have a cross-cleated plank to deploy for a real riverboat feel during bow-on landings.
John Summers
DIANNE’S ROSE is under 8’ wide, weighs about 1,500 lbs empty, and can be towed by the average six-cylinder family utility vehicle.
DIANNE’S ROSE measures 17′ LOA × 8′ beam, and draws but 6″. There’s 6′ 91⁄2″ of headroom in the center alleyway of the cabin, and her air draft is only 7′, allowing her to pass safely under all but the lowest of bridges (if, of course, the captain remembers to lower the flagstaff). Empty weight is 1,500 lbs, and she can be towed behind an average six-cylinder vehicle. With her shallow draft, launching and retrieval can be handled by one person if necessary. The angled outer edges of the bottom help get her centered on the trailer. Both times I saw Roy launch and retrieve, she came out of the water perfectly arranged on the trailer, though he was honest enough to say that it doesn’t always happen that way. If she does need to be shifted while on the trailer after retrieving, a small jack and a couple of boards will get her aligned properly.
The original boat was completed in about 700 hours, spread over two years of weekends working outdoors from spring to fall. Roy estimates that with the comprehensive plans he has now prepared, the boat could be completed in about 600 hours. Costs are always difficult to estimate because they depend so much on the degree of fit, finish, and quality that suits an individual builder, but according to Roy he spent about $5,000 on DIANNE’S ROSE, including the trailer but not the motor.
Roy Schreyer
The cabin contains two large comfortable settees for use underway.
Roy Schreyer
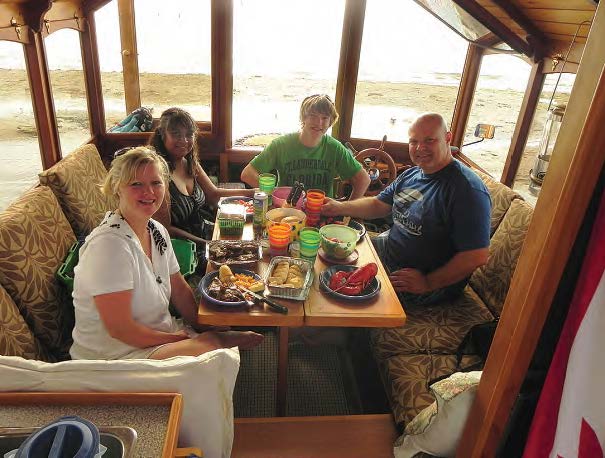
At mealtime the convertible table will seat the whole family.
Roy Schreyer
In the evening, the settees transform into a queen-size bed.
If you are looking for a charming, easy-to-build, and relatively economical way to get on the water, and a sure-fire way to start a conversation at every gas station, rest stop, campground, or launch ramp you visit, then DIANNE’S ROSE might be the boat for you.
You can read more about the design and construction of DIANNE’S ROSE, see designer and builder Roy Schreyer’s cabinetmaking and kitchen design work, and order plans on his website at www.roydesignedthat.com or by emailing him at [email protected]. If you enjoy small, cozy spaces that you can build yourself, be sure to check out both the Tiny House blog at http://tinyhouseblog.com/ and Lloyd Kahn’s new book Tiny Homes on the Move: Wheels and Water, which features DIANNE’S ROSE.
Roy Schreyer
Roy and Dianne enjoy camp-cruising at its best with DIANNE’S ROSE beached beside their campsite.
Complete building plans, including 21 sheets of drawings, detailed construction notes, photos, and full-sized patterns for some parts are available as hard copy ($285 USD plus postage) or PDF ($230 USD) from the designer, as are study plans ($30 USD, $35 USD overseas). Send a check or money order to Roy A. Schreyer, 177 Antigua Dr., Wasaga Beach, ON, L9Z 2S2, Canada.
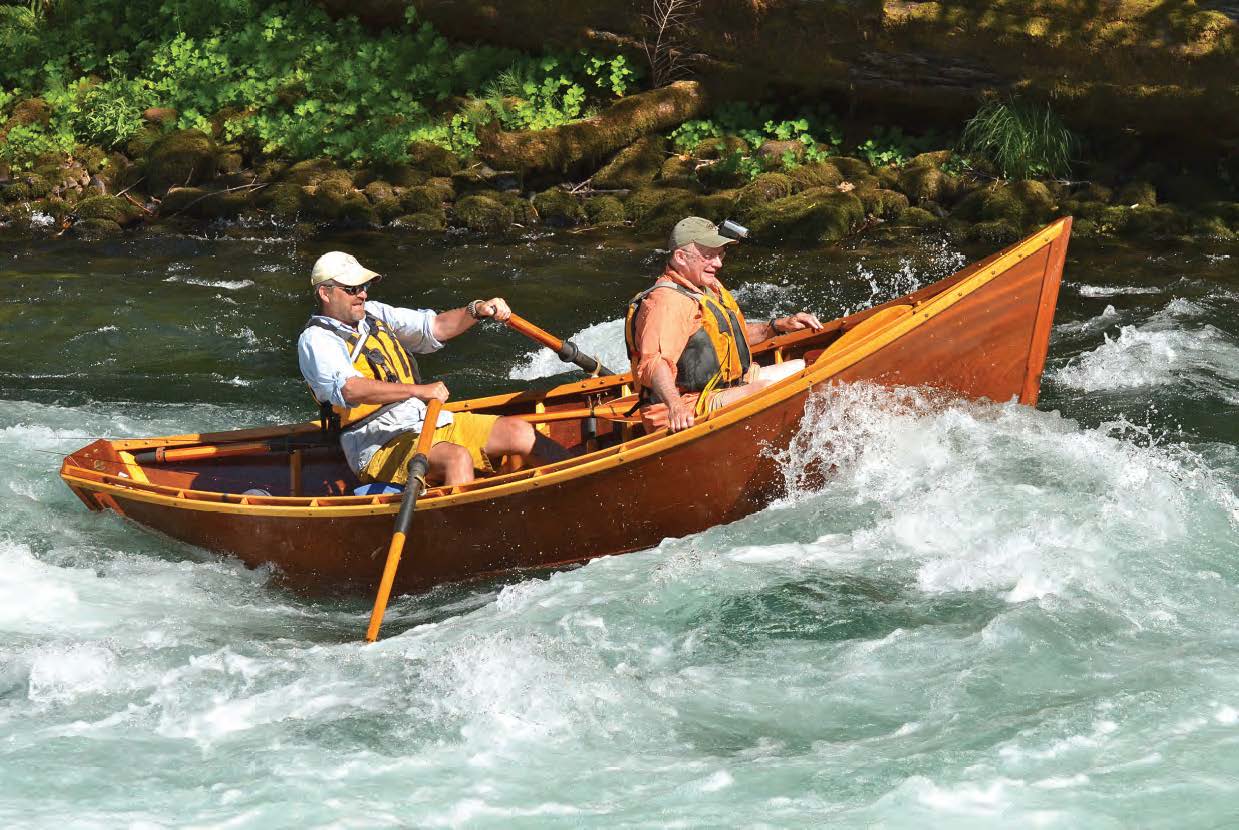
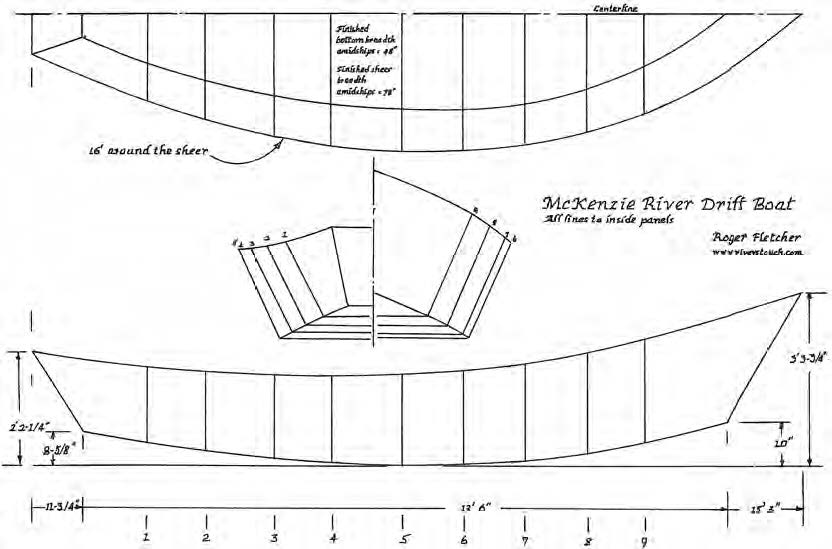
A sweeping sheerline, together with ample “rocker,” or bottom curvature, give the McKenzie drift boats the ability to deftly run whitewater such as Marten’s Rapids on the namesake river in central Oregon.
Marten’s Rapid on the McKenzie River in Oregon is a great example of a Pacific Northwest “technical” rapid. Running Marten’s requires quick moves, good judgment, and steady hands by the oarsman. Such rapids also demand the right kind of boat to navigate them safely. The drift boats that emerged on the McKenzie River are built to handle challenging whitewater and have become the boat of choice for Northwest river runners—particularly among fly fishermen pursuing trout in the upper stretches of these rivers where the drops are steep, boulders are common, and the water runs fast and cold.
These boats trace their heritage back to the early 1900s, when guides started taking fishermen down the McKenzie. The type evolved as legendary boatbuilders such as Tom Kaarhus, Woodie Hindman, Keith Steele, and others each put their own mark on the style. By the late 1950s, the McKenzie drift boat had pretty much reached its modern form, and its descendants continue to take fishermen places other boats can’t reach.
I’ve rowed a lot of guests through Marten’s Rapid in my handmade wooden boat. It is a perfect rapid to demonstrate how a McKenzie runs rapids safely while staying “relatively” dry. Its flat bottom has no vulnerable rudder or keel to resist lateral movement, allowing quick moves to avoid obstacles. Its extreme sheer permits the boat to dive down into holes and ride up the other side. Its flared sides keep water out when moving laterally or when splashing through steep drops. The exaggerated rocker, or fore-and-aft curvature of the bottom, lets the boat float like a leaf on the water and gives it high maneuverability. Take away any one of these characteristics, and a boat would probably capsize in a rapid such as Marten’s.
LILLIAN HOWARD/WEST COAST ACTION PHOTOS
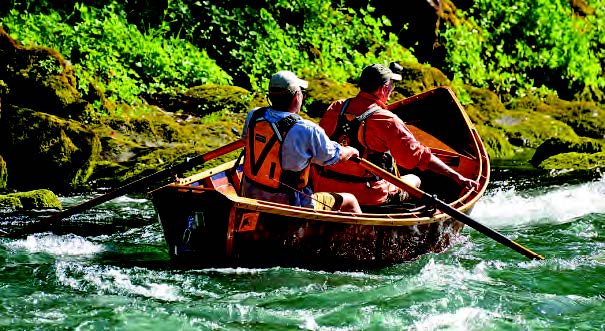
In drift boats, the oarsman rows facing the bow and downriver for a controlled descent of rapids. An anchor hangs off the transom for use in holding position while in calm stretches while fi shing.
Within the “family” of McKenzie boats, some are double-ended, others transom-sterned. Freeboard can be high or low. The right configuration depends on how the owner plans to use the boat and on which rivers.
Most professional guides prefer a relatively wide, transom-sterned McKenzie to carry ample gear and to give guests elbow-room for fi shing. Many boats are built with high sides and splash guards forward. The variations are heavily influenced by the favored river and the style of fi shing.
Thirty years ago, a variety of boatbuilders on the McKenzie River sold plans, kits, or finished boats. That is not so today, as wood has given way to fiberglass and especially aluminum. A few wooden boat shops still build drift boats and sell kits and plans, for example Mike Baker of Bend, Oregon (see www.bakerwood driftboats.com).
At the same time, interest in preserving the heritage of wooden drift boats has been renewed. Eagle Rock Lodge in Vida, Oregon, hosts a McKenzie River Wooden Boat Festival each April (see www.eaglerocklodge.com) drawing as many as 50 handcrafted drift boats. Owners and enthusiasts from all over the country share stories and admire the boats. A website (www.woodenboatpeople.com) keeps them connected, and a McKenzie River Drift Boat Museum is envisioned at Vida.
Many of the most traditional designs can be found in Roger Fletcher’s book, Drift Boats & River Dories (Stackpole Books, 2007; see a review in WoodenBoat No. 197 and his article about early drift boats in WoodenBoat No. 151). The book traces the history of the boats and the families that perfected them over the years.
GREG HATTEN
McKenzie drift boats are built to be able to handle whitewater, but they are all about fi shing. The author’s OBSESSION is neatly organized for one guide at the oars and a fl y fi sherman or two forward, and on its Baker Trailer Company trailer designed specifi cally for drift boats, it travels comfortably on remote dirt roads.
My boat, OBSESSION, is a traditional McKenzie-style drift boat that I built in my garage shop in 2004. One of my favorite rivers is the McKenzie itself, the birthplace of the type. The McKenzie has many Class II and III rapids and is home to one of the most beautiful strains of native redside rainbow trout in the West.
I chose five-ply marine-grade African sapele plywood about 1⁄4″ thick for the sides and seven-ply sapele about 1⁄2″ thick for the bottom. My frames are of Alaska yellow cedar, which contrasts with the dark plywood for a striking appearance. Sapele and yellow cedar are hard to come by in my area, and finding the right wood was my first lesson in boatbuilding patience. I used white oak for the chine logs, the gunwales, and the “dash,” the forward coaming that gives the fishermen something to lean against and blocks spray.
GREG HATTEN
A section of brass tubing, recycled from an old barroom footrest, provides a stout foot brace when rowing in rapids.
The dimensions are pretty standard for a McKenzie: a little over 15′ LOA, with a beam of 6′ at the sheer and 4′ at the chine. Despite its small transom, the boat is considered a double-ender. I put a 1⁄4″-thick “shoe” of 1⁄4″ UHMW (ultra-high-molecular-weight) plastic on the bottom to protect the wood and to help the boat slide over rocks.
It took me more than 600 hours to build a boat that most guys could’ve built in half that time. I’m slow, my tools are old, I didn’t take a shop class in high school. I “redid” a few things I wasn’t happy with. For example, the stainless-steel screws I first used to fasten the mahogany sides didn’t look quite right, so I replaced every single one of them with brass. This boat challenged my patience, my creativity, and my woodworking ability. In the end, it was more about persistence and passion than skill.
GREG HATTEN, INSET: TIM HATTEN
Seats have built-in lockers to keep fishing gear dry and organized. Inset—When fishing, an angler stabilizes himself by leaning into a thigh brace on the aft coaming of the foredeck.
My boat was finally finished one morning when I ran out of things to put on a “to-do” list. Honestly, it kind of snuck up on me. When it was over, I missed the smell of fresh-cut wood, the first coat of varnish, the problem-solving, the orbital sander accompanied by Steely Dan. I missed going to the garage with my first cup of coffee in the morning to critique what I’d done the night before.
I missed all of it—until I put it in the water in the summer of 2004. Right away I had a new obsession, running rivers in a boat I built with my own hands. Moving with the water, flexing the oars on a deep pull, and hitting a perfect line through a rapid is a thrill. So is using the boat as an extension of the rod to move a fly on a graceful arc, enticing a steelhead to strike.
TIM HATTEN
Steelhead trout are a favored quarry for fishermen—the author, in ths case—on Pacific Northwest rivers. Aboard OBSESSION, a first steelhead catch is an occasion for a celebratory fine cigar.
Right after launching, I learned that OBSESSION wasn’t really finished at all—which is one of the best things about wooden boats. The more I rowed and fished, the more improvements I thought of. My boatbuilding project entered a whole new phase.
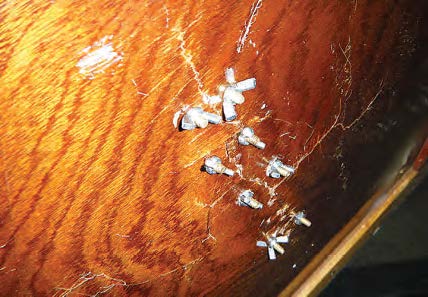
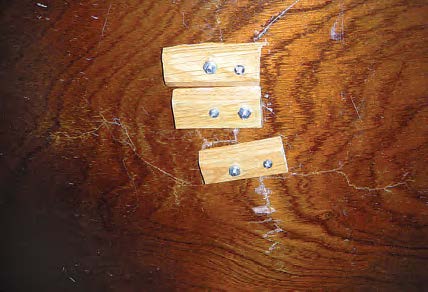
When the rain settled in for the winter, I gathered my notes, doodles, and sketches of “boat applications” for OBSESSION. I picked through scraps of mahogany and yellow cedar, then happily went to work again. Using leather, I made a simple sling to hold the spare oar out of the way but ready for use. I made covers and drains for the gear compartments to keep fishing supplies dry, as well as drawers and better ways to keep things organized. After an incident in which an oarlock popped out along with its bushing and cotter pin, I made blocks of mahogany attached to the oarlock with an S-hook to prevent them from pulling through under stress. I also added tethers I like, made by Phantom Fire Pan and Oar Tethers in Estacada, Oregon.
GREG HATTEN
The stern-setting anchor makes it simple to stop at a promising fishing hole. The oars, which have substantial buttons to keep them from slipping out of the oarlocks, trail alongside, out of the way and ready for immediate use.
I have a “bar” on my boat. At a junkyard, I bought a 2′ piece of brass footrail of the type used in old barrooms, which I mounted to the floorboards as a footbrace. The wilder the rapid, the more I use the brace—it’s one of my favorite “boat apps” because it helps me to row out of danger. I have cup holders to keep cans and bottles in place, along with the occasional cigar that gets lit up when a fisherman celebrates his first steelhead catch. I bought rubber mats of the type used in restaurant kitchens and cut them to fit the floor to protect the wood and provide springy comfort for fishermen who stand up almost all day.
GREG HATTEN
Dory-style construction relies on a flat bottom and straight sides of plywood, making drift boats comparatively simple to build.
Oars can take a beating on dirt-road rides to the river, so I built holders to keep them from banging around. I can also padlock them in place while leaving the boat unattended to shuttle gear. With a bracket made of sapele and yellow cedar, the oars also make a handy tripod where we can hang a 1962 Coleman lantern at camp.
Fly-rod holders are essential because your hands are on the oars all day. I’ve caught hundreds of steelhead with a setup I created using bamboo, sapele, yellow cedar, and a leather strap. When we run particularly challenging rapids, my guests need both hands free to hold on, bail, snap a picture, or tighten their life jackets, so I built a couple of simple rod holders behind their thwart. As soon as we clear the rapid, they can return to fishing immediately.
One removable floorboard doubles as a cutting board to take ashore when it’s time to clean fish, and another doubles as an onboard table.
GREG HATTEN
Wooden construction also makes boats comparatively easy to repair. After an encounter with a rock, the author used bolts (later cut off flush) to clamp an epoxy repair. The stitched-together wound left an honorable “scar.”
The most sickening sound in the middle of a rapid is a dull thud like a sledgehammer hitting the bottom, followed by wood splitting. I’ve heard it. It hurts. A lot. My first thought is never about the repair, it’s always sorrow that I hurt my boat again and disappointment that I didn’t avoid it. But in reality, when you row on Class II and III rivers, you’re eventually going to hit a rock. I remind myself again that I built this boat to run rivers, not the garage.
I use epoxy with fillers for repairs, sometimes augmented by fiberglass cloth or even a plywood backing plate if the break is bad. Normally my repairs are as smooth as glass. To fix one bad 1′-long slice, I used brass machine screws with wing nuts through blocks of wood to bring the plywood fair. After the epoxy set, I cut the screws off flush, which showed through the varnish later, like stitches in a wound. The result was a subtle scar—the mark of a boat with character and experience, one that has been somewhere and has stories to tell.
RANDY DERSHAM
A wooden drift boat seems to correspond particularly well with the outdoor lifestyle of the Pacific Northwest, here on the Snake river with the Grand Tetons beyond.
This boat will continue to collect stories and scars as I row the rocky Northwest rivers. I’m told my OBSESSION is perfectly named—and I couldn’t agree more.
For more on McKenzie River drift boats, see Roger Fletcher’s book Drift Boats & River Dories (Stackpole Books, 2007) and his website.
ROGER FLETCHER
The design the author used to build OBSESSION was by a company no longer in business. Roger Fletcher, author of Drift Boats & River Dories, has drawn a very similar hull, a type known as a transom-sterned double-ender. His book has details and plans for a wide variety of drift boats, plus details of construction and use, with drawings by veteran WoodenBoat illustrator Sam Manning. Particulars: LOA 15’3″ Beam at shear 6’6″ Beam at chine 4′ Draft not much
Drawing on a wide variety of influences, among them American racing sandbaggers and local traditional raceboats, Federico Lenardon developed a fast daysailer for the waters of Trieste, Italy.
The history of cities on the Adriatic Sea such as Trieste, Italy—or any city on this ancient waterway—is hard for an American to comprehend. Even the rich recent history of yachting in the region has been shaped by hundreds of years of practical on-the-water experience.
During a recent trip to the northern Adriatic, I had the opportunity to meet Federico Lenardon, a designer from Trieste who not only embodies this history but helps to shape it. He shared with me the story of one of his designs, the Feather 14, an ultralight, cold-molded skiff with roots going back into the heart of the Adriatic Islands and the legacy of the captains from the Croatian archipelago.
I met Federico in the Yacht Club Adriaco, where he keeps the Feather. The walls were adorned with maps and images dating back to the Hapsburg Monarchy. They showed names of islands in a dialect no longer used and etchings of harbors along the Adriatic archipelago filled with sailing vessels of every variety.
The south side of the ancient stone pier was reserved for wooden boats, where they are best protected from the “Bora,” a strong and gusty wind that blows from the north. Along this side of the pier, there were many perfectly maintained wooden yachts up to 50′ long, several of them from the board of the famous Italian designer Carlo Sciarelli, who was born in Trieste.
Sciarelli, with whom Federico had apprenticed, was a master designer whose yachts were not only renowned for winning regattas but also for a unique aesthetic informed by form and fluid lines rather than following the wave-form theory that was emerging in his day.
Sciarelli saw the same utility for speed in some local boats in the Adriatic, basing some of his first designs on the Passera from Mali Losinj, which was home to many captains who sailed the world on merchant vessels during the age of sail. As the story goes, when these captains returned home, they asked the local builders to build a small boat similar to the styles they had seen in their travels. The result was a magnificent sailing boat with a heart-shaped transom, a shape likely borrowed from similar transoms found in many American boats. Federico recognized this, and by exploring the roots of the Passera he became enamored with many aspects of American traditional small-craft design, especially the works of historian Howard I. Chapelle.
PAOLO MACCIONE
The Feather 14’s broad, low-freeboard hull relying on crew weight to stay upright is reminiscent of sandbaggers, in which crew transferred sandbags from one side of the boat to the other during tacks to keep the boat on its feet (see WoodenBoat Nos. 135 and 118).
In the Feather, not only the technical aspects but the traditional details were rich in variation and utility. Each part and portion of the Feather came with a story. As Federico described it, each was a “quote” from a boat, a builder, a design, or an era that became a particular inspiration for him.
“When designing the prototype for the Feather, I wanted to ‘quote’ these sources,” Federico said. “Similar to how an author incorporates references into a work. I was inspired by these elements, and I wanted to include them in my design.”
There are several such elements throughout the boat. However, the initial inspiration did not come from a design, but from artist Winslow Homer’s famous 1875 painting Breezing Up, showing a catboat under sail. Federico said this painting started the creative direction for the project and allowed him to incorporate elements from his favorite types—the Passera of local renown and 19th-century American sandbaggers from Chapelle’s drawings. He said his intention was to design a broad and shallow boat with a fine underbody. These characteristics are similar to many of the boats from the islands, but for Federico this type also marks a departure from the influences of Sciarelli, who has been noted for designing boats that cut through the water rather than planing.
One of the first elements he incorporated was the transom. “This is a quote from Passera, extending just a bit deeper than the sandbagger or catboat,” Federico said. The heart-shaped transom of the sailing Passera disappeared as the type evolved to accommodate marine engines, which required great bearing surface aft to keep the boat from squatting. The earlier sailing boats of the type had a transom that seemed to define its ability as a fast and able sailing vessel.
FRANCO PACE
Halyards are led through deck-level fairleads, and the rigging fittings are distinctly modern. Yet, with its bowsprit offset to reeve through a stemhead fitting and with its sliding-gunter rig, the Feather 14 clearly pays homage to tradition.
The boat’s sectional shape amidships is a quote from sandbaggers, broad, shallow centerboard racing craft so named for their use of sandbags as shifting ballast. “I used this shape but flattened it just a bit,” compared to the 15°-deadrise in sandbaggers. During tank tests of a prototype model, he was impressed how the combination of these elements in the hull design affected wave shape. “It does not have a deep wave at hull speed like other boats.” He also pointed this out in pictures, and the wave seemed almost flat.
Federico also used quotes in the details. One boat that has been very influential in his life is BAT, an English cutter built in 1885. This was Sciarelli’s boat, and Federico was working on the restoration when he caught Sciarelli’s eye and subsequently became the designer’s apprentice. He used several elements from the English style, including the cutaway forefoot and some rigging elements, including a topping lift that wraps under the boom.
The rig is also a quote from Passera, a sliding-gunter mainsail that originated in the Portuguese tradition. This enabled a comparatively large sail plan using spars that will still fit inside the boat for trailering. Having a high-aspect rig also allows for this ultralight boat to sail on the commonly light winds of the Gulf of Trieste.
JAMES BENDER
Plywood knees attached to minimal laminated frames support the side decks and coaming. A through-deck chainplate on each side attaches to the inboard face of a frame, enabling good jib sheeting angles and keeping the topsides clear of fittings.
During my visit the Bora was screaming down the mountainside and rattling the rigging of all the boats moored at the club. It was difficult for me to envision a calm Gulf of Trieste. One of the most famous maritime events in the region is the Barcolana, in which hundreds of boats sail together in a race that has said to have over 2,000 participants. The locals say that in the Barcolana, it is common to have either too much wind or none at all. The Feather 14 is ideally suited to these conditions and can sail circles around other boats in the light air common to the Gulf of Trieste in the summer.
The boat, 14′ LOA, weighs just 320 lbs, including spars and sails. The hull is built using cold-molded construction, using three 1.5mm (3⁄32″) layers of mahogany veneers, making the planking thickness 4.5 mm, or just over 1⁄4″. The construction is of the highest quality, as one may expect of Italian craftsmanship. The bright spruce spars make a nice contrast to the traditional white hull. They are light and hollow, with the mast weighing in just over 10 lbs. With a total sparred length of 18′ 6″, the rig provides enough power to glide across the water in the least of breezes.
As the wind increases, there are many ways to shorten sail. “In 15 to 18 knots, the first reef in the main is a good idea, also it would be good to have three people in the boat,” Federico said, with a combined crew weight of about 500 lbs. “With a crew of three, you can sail in just about anything and it balances well with reefed main and no jib.”
COURTESY OF CANTIERE ALTO ADRIATICO
To build the Feather 14 hull, first a strip-planked mold was constructed, over which three layers of mahogany veneer were cold-molded, using epoxy.
COURTESY OF CANTIERE ALTO ADRIATICO
The monocoque construction makes the boat light and fast.
The boat handles superbly. One particularly interesting characteristic is how well it tracks. You can completely let go of the tiller at almost every point of sail and the boat tracks like a full-keel cruiser, aided by a rudder and daggerboard shaped to modern foil cross-sectional shapes. This can be a great attribute when sailing shorthanded or when leaving the helm briefly.
Federico describes the Feather as a modern boat with a traditional heart. He used the design tools that had been given to him by Sciarelli, which enabled him to “feel” the lines as they were laid down on paper. Then, he transferred them to computer to develop templates for pieces to be shaped by computer numerically controlled cutting for use in laminations.
With Federico, the discussion gave light to many expressions that we normally wouldn’t use in English, but somehow fit superbly. In addition to quoting inspiring vessels and the “tailoring of the craft,” he spoke of a design element that has become his signature in boats design, the “bird’s back hand.” “It is a curve that aligns with the trailing edge of a bird’s wing,” he said. Characteristic of the shape and style of the Feather, the composite curve of is the perfect metaphor for the boat: two curves combining to form one shape. In the Feather, this is a combination of American and Adriatic elements, an ultralight boat that can be sailed in adverse conditions and a modern construction incorporating traditional design. It is possible that other designers will be quoting Federico for generations to come.
FEDERICO LENARDON
Particulars: LOA 14’3″ LWL 14′ Beam 5’6″ Draft board up 6″ board down 4’3″ Sail area 170 sq ft Displacement 320 lbs
"Did you build it?” is, by far, the question I am most asked when someone sees me with one of my boats whether I’m in the back yard, at the ramp, or on the water. I can’t help but feel a bit of pride when I can reply that I did. So, it has surprised me that I’ve taken great interest in refinishing the Piccolo lapstrake canoe I was given, unexpectedly by strangers, this past summer. I’ve only taken it out paddling three times, each in an out-of-the-way place. No one has asked me “the question,” but that time will come, and I’ll have to say “No.” I’ve been uncomfortable imagining how less satisfying those exchanges might be.
The Piccolo showed no signs of hard use but it was showing its age with the gloss of its paint and varnish long gone.
I have not found out who built the Piccolo. Kelley and Samantha, the couple who gave it to me, got it from Rob, who had bought a 1970 Newport sailboat and the canoe came with it. He wanted a kayak instead and gave the canoe to Kelley.
The bright-finished interior showed that much of the plywood had been stained by age. The outwale had lost almost all of its varnish.
When I decided to refinish the canoe, I began to learn a bit about the builder, and even to like him, whoever he was.
John, as I’ll call him here, built the canoe from scratch. The Piccolo was designed by Bob Baker for traditional construction: 1⁄4″ cedar planks on steam-bent frames with breasthooks cut from grown crooks. John went the glued-lap-plywood route and may have been guided, as I was when I built my 18′ lapstrake canoe in the late ’80s, by Tom Hill’s Ultralight Boatbuilding. He would have lofted the boat from Baker’s offsets and, after he set the molds up, lined off the seven strakes with battens. It’s not an easy task getting the plank widths right and the curve of the laps fair. When I did it for my canoe, I had to use large mirrors hung on the basement walls to get a line of sight along the battens to adjust them. At first glance the Piccolo’s planking looked fine, but on both ends the third broadstrake flares a bit and pinches the fourth. It’s a minor complaint, and if the Piccolo was John’s first boat, he did well.
The planks were lined off with fair curves, but their spacing at the ends was not quite on target.
Without the leg up provided by a kit’s computer-generated, precut parts, he would have had to spile the planks to get their shapes from the battens, another traditional boatbuilding skill that takes patience to do well. When I sanded the hull, I saw the telltale feathered glue lines of scarf joints John had made to get the full-length plywood blanks for the planks. He had done the joints properly and they were smooth on both sides of the planks.
Before I started refinishing the Piccolo, I installed seven floor timbers to brace the bottom of the hull and support a pair of floorboards.
In theory, it should be simple to make a symmetrical hull by duplicating planks, one on top of the other, before separating them to put them on the building form. When I added seven floor timbers to the Piccolo to support a set of floorboards, I noticed that there were differences port and starboard. The starboard garboard, for instance was 1⁄8″ wider than its port-side mate. I had a similar problem planking my Whitehall: the steam-bent plank keel had a slight twist in it and I had to spile the port and starboard garboards separately to accommodate the asymmetry.
And the bevels on the Piccolo’s stems weren’t quite right. The angle between them wasn’t as acute as it should have been to get the plank ends to lie flat. John had had to force the hood ends home, and the planks hook into the stems with a slight bulge. I’d built a few boats before I realized that curving a fairing batten past the stems can create that problem. The planks have nothing to hold them curved to the bitter end, so the lofting batten should be allowed to run straight after it passes the stem, rather than being made to curve.
Sanding the Piccolo gave me an opportunity to better appreciate the canoe and its builder. I used the rabbet plane and the scraper to remove loose epoxy from the underside of the outwale.
I spent several hours sanding the Piccolo and as I studied and ran my hands over the work John had done, the signs of the struggles he’d had were all very familiar. I don’t know why he stopped working on the canoe when he had the hull finished. He had done all the most challenging work—lofting, lining off, spiling, scarfing, cutting bevels and gains on the planks—and he had done it well enough to pass muster with anyone who has built a boat. With my first boats, I thought finishing the hull must be the halfway point or even a bit more, but I eventually learned it was close to the one-third mark, if that. Baker designed the Piccolo with a cat-ketch lugsail rig, backrest, footrest, and a rudder with tiller, yoke, and foot-pedal steering options. John may have realized that completing the boat to the plans was more than he wanted or needed to do.
The Piccolo is in my basement getting some long overdue attention.
John’s Piccolo doesn’t have a builder’s plate. He let the canoe go without his name and without a name of its own. I don’t know how many years and how many hands it had passed through, and I wonder if those who owned it thought of it as just a wooden canoe. It has become more than that to me. John left his mark on the Piccolo, enough for me to regard him as someone I would recognize, even admire. When people ask me if I built the canoe, I’ll have to say “No,” but I might add, “A friend did.”
During the first two decades of the 20th century, yachting was a particularly popular sport among men of standing and means. Each yachtsman wanted a tender worthy of his yacht. It needed to row and tow well and travel with efficiency and stability while carrying considerable weight in a range of sea states. It also had to have pleasing lines and be built to the highest standards of craftmanship. For this clientele, cost was not a consideration.
Charlie Lawton of Marblehead, Massachusetts, built some of the finest tenders meeting these requirements. John Gardner was a coworker and friend of Lawton’s, and when Lawton retired sometime in the 1940s at age 90 he gave Gardner the lines, table of offsets, and some patterns for the Lawton Tender. Gardner eventually put this information together as a detailed set of plans and instructions for building the boat and published them in the January 1978 issue of National Fisherman. They were also included in Building Classic Small Craft: Complete Plans and Instructions for 47 Boats, published in 2004.
Lawton built his tenders with carvel planking over delicate bent-oak frames. Newfound Woodworks worked from Gardner’s offsets, lines, and descriptions of Lawton’s building techniques to produce plans for a Lawton Tender built with cedar strips and covered with fiberglass cloth and epoxy resin. There is a sense in which these modern materials respect the original aesthetics of Lawton Tenders. Newfound Woodworks says that a Lawton Tender built with their kit materials weighs about 70 lbs, which is indeed light. The strip-built boat does not require frames, knees, or breasthooks, although they can be added if you want your tender to look more like Lawton’s.
Stephen Bowen
Applying the strips from the bottom up is straightforward for the first two-thirds of the hull, but eventually, the ends are butted against the inner keel and at that stage there is a tight bend for each strip. An alternative method is to plank down for about 20 percent and then plank up to close the gap. The author milled his own red-cedar strips.
I built a Lawton Tender from Newfound Woodworks’ plans with no intentional modifications. As fits its purpose, the tender is a short, stout craft with an overall length of 10′, an overall beam of 45″, and a capacity of 575 lbs. I bought the “standard set of plans,” which includes full-sized half-drawings of the form station outlines with several stations’ outlines superimposed on each plan sheet. Using carbon paper, the outline for one side of a station is traced onto 1⁄2″ MDF, then the sheet is turned over and the mirror image is traced to outline the full station form. Conveniently, the tallest stations are just under 24″ so at least four station forms can be made from a 4′ × 8′ sheet of MDF cut into four 24″ × 48″ pieces. Full-sized station outlines that do not require you to turn over the sheet and justify it to the centerline are available at an additional cost.
Included with the plans is a booklet consisting of 12 pages of step-by-step instructions, a bill of materials for the kits that Newfound Woodworks can provide, and some 32 pages of general information on strip-building techniques. These instructions are meant to be sufficient for experienced builders, but those with limited experience are urged to first get the Pre-Kit consisting of the book Woodstrip Rowing Craft by Susan Van Leuven and two instructional videos, Cedar Strip Boat Building and Applying Fiberglass and Epoxy, in DVD format, with additional strip-building notes (the company hopes to offer the videos in streaming format, too). I had built a cedar-strip canoe so didn’t get the Pre-Kit and already had the book, which I found invaluable in answering questions, but I haven’t seen the videos.
Matt Bowen
Whereas the Newfound Woodworks kits for the Lawton Tender use white cedar, the author chose to use his own red cedar with a contrasting accent stripe. The fine entry and aft skeg help the boat to track well despite its light weight and shallow draft.
Newfound Woodworks can provide a kit that includes nearly all the materials needed to build the boat: station forms, wood, fiberglass cloth, and epoxy. The woods they provide are specifically chosen for this boat. Most of the strips are white cedar, which is more flexible than red cedar and quite helpful when stripping the hollow forefoot and the most-curved section of the stern. Many of the pieces are pre-cut to the final dimensions. The kit is the practical option for builders who do not have access to a joiner, planer, router table, and table saw. I chose to use wood I already had or could obtain locally. I made strips from red cedar, and for the rest of the boat I used the wood of a Kentucky coffeetree that blew down in my yard a decade ago. This ring-porous wood has the same density as white ash. I’m sure there are woods that would have been easier to work with, but I liked the coffeetree’s golden-blond color.
The boat is built upside down on 10 molds, a stem form, and a transom support set on a box-beam strongback. The first step is to laminate the inner stem and assemble the transom, which is made up of 1⁄4″ plywood sandwiched by 3⁄8″ hardwood. Once they are attached to the form, stripping begins at the sheer and works up toward the keel.
Stephen Bowen
The strip-plank construction lends itself to a clean interior without frames, knees, or breasthooks, although these can be added for a more traditional aesthetic.
There are two ways to attach the strips to the stations: with staples or with clamps. I chose the latter to avoid all those staple holes, and applied a 1⁄2″-wide band of MDF beside the exterior edge of each station to hold the clamps, as recommended by Van Leuven. Simple spring clamps worked for most strips and didn’t mar the cedar. Given the degree of bend and twist required, it was essential to use straps between stations to hold the strips in place while the glue dried. The twist involved in attaching strips at the hollow forefoot and the transom is particularly challenging, and Newfound Woodworks offers some clever suggestions that helped me. A possible benefit of using staples is that they stay in place until all the strips have been applied, whereas clamps are removed after each strip. In applying strips to the forward half of the boat from the center to the keel, I found that the straps pulled the completed section away from the station forms and it did not fully return after the straps were released. Had I recognized this earlier, I would have used some small screws at a few points to secure the completed section to the station forms. Newfound Woodworks assured me that this relatively small departure from the intended shape would not affect performance.
As the first two-thirds of the strips are attached, they overlap the stem and transom and are easily trimmed once the glue has cured. Farther up the form, the ends of the strips have to be fitted as they butt against the inner keel. Fitting is difficult because these strips must be bent quite a bit. An alternative recommended in the building notes is to build about 20 percent of the hull by starting at the inner keel and working down. This section is not initially glued to the keel so that it can be lifted off the form. Then strips are added from the bottom up progressing to the point where they overlap the area covered by the top-down panel. The panel is put in place, scribed from underneath against the completed section of the hull, and cut to fit. The building notes provide more detailed instructions for this approach.
Matt Bowen
With its high freeboard the Lawton Tender has excellent load capacity, but can be adversely affected by a strong crosswind.
When the hull is completely stripped, it is faired and sanded, sealed with epoxy, ’glassed, and varnished. The outer stem, skeg, and outer keel are added and sheathed with more ’glass. The boat is then removed from the form and supported right-side up as the inside of the hull is faired, sanded, and ’glassed. The inwales and outwales are installed and a small deck is put in place. Finally, the seats and oarlocks are installed. My finished boat weighs 89.5 lbs.
Ibought a Trailex aluminum trailer that is a perfect fit for the 10′ Lawton Tender. The boat and the trailer are light and very easy to handle. For those with the strength, the 70-lb boat could be cartopped but with a center depth of nearly 20″ don’t forget it’s up there when you are pulling into the garage.
Stephen Bowen collection
The Lawton Tender has proved ideal for lake fishing with 125 lbs of grandchildren on board.
I chose the Lawton Tender as a small, easily handled boat for getting out on nearby lakes and rivers; sometimes fishing and sometimes taking out the grandkids. I’m pleased with its stability and balance. Because it is so light, I tend to treat it like a canoe and not stand too far away from the centerline, but I’ve never felt like it was in danger of flipping. I was surprised at how fast I can row it with about 125 lbs of grandchildren occupying the forward and aft seats; we covered 1 mile in 22 minutes. It tracks well, but with its ample freeboard is affected by wind.
I’m happy I chose this project. Building the boat was more challenging than building the canoe, and I learned a lot in the process. Newfound Woodworks was very responsive to questions either by email or by phone. Their Lawton Tender has lived up to my expectations and is getting quite a bit of use. I would recommend it to anyone who wants a small rowboat.
Stephen Bowen is a retired aquatic scientist, professor, and dean. For his research career, he had a series of nearly indestructible Boston Whalers. In retirement, he shares a 34′ sloop with his son for sailing Lake Michigan and he now has a small, easily transported boat for West Michigan’s inland lakes and rivers.
I am by nature a solo kayaker and seize the chance to go paddling when time and weather allow. While I’d enjoy the company and help of a paddling buddy, lining one up doesn’t seem to work with my spur-of-the-moment planning and will-of-the-wisp exploring.
As a 69-year-old lake lover with spinal alignment issues, I’d been able just to manage loading my 12′, 42-lb rotomolded kayak on my 2004 Subaru Impreza by myself. I’d prop the bow on a folding sawhorse, lay a rag rug over the hatchback window, then shove the kayak up onto the upright J-carriers on my roof racks. I’d done this for quite a few years, and it worked well.
This spring, it was time to replace my dear Impreza, but the newer ones were too low-slung so I bought an Outback. It has the clearance I need for the semi-remote gravel roads I travel, but it’s slightly taller than my old Impreza. The extra height and the spoiler would make loading more challenging. I bought a suction-cup-mounted kayak roller to get me “over the hump” but, worried the struggle would send me to the chiropractor, never tried it. I enjoyed paddling the chain of lakes where my husband and I have a rustic camp, but it was a frustrating summer not having an easy way to go kayaking elsewhere.
Photographs by the author and Richard Washburn
Folded in half lengthwise and then in thirds horizontally, the kayak easily fits into the trunk of the author’s Outback along with a heavy-duty plastic sheet on which to drag the kayak from the car to the launch, a 230-cm one-piece Malone feathering paddle, a life jacket and miscellaneous gear, and the kayak’s duffel bag, which holds the seat, pump, and other accessories.
In late September my dad sent me a link to an online review of inflatable kayaks, with the suggestion, “When cartopping gets to be too much of a chore, maybe this would work?” Two days later I had a serendipitous encounter with a kayaker bringing his inflatable ashore at a nearby lake. His enjoyment of his boat and the freedom it allowed him with its easy transport and setup inspired me to look it up online. It was well rated, but he’d admitted it wasn’t great in waves, so I shopped further and found a few other candidates in my size and price range. I kept coming back to the sweetly designed 10′ 6″ AdvancedFrame Sport Special Edition from Advanced Elements. With its semi-enclosed cockpit, moderate 32″ beam, and enthusiastic reviews, it seemed a kayak I’d feel comfortable and safe in. The reviews promised a paddling experience more like a hard-shell kayak than other inflatables, with better tracking and handling in waves due to the internal aluminum ribs and deck inserts that sharpen and define the bow and stern. At 26 lbs, it would be a bit heavier than other inflatables I had my eye on, but it seemed important to choose a boat I’d enjoy paddling, which, as my husband, Richard, told me, “is the whole point.” I ordered an Advanced Elements AdvancedFrame Sport Special Edition from an outdoor equipment retailer.
Before setting off on my first sea trials at a local pond, I asked Richard to help me set the kayak up on the lawn at home, to get the hang of inflating and deflating it. The kayak came fully assembled from the factory, neatly folded in a waterproof duffel bag with an owner’s manual, adjustable folding seat, repair kit, double-action pump with built-in pressure gauge, and other accessories.
After spreading it out and identifying all the parts, despite all the clear directions and diagrams about the spring and twist valves and proper inflation of the boat’s four chambers, it took us an hour to figure out how the pump worked with its various adapter tips and inflation/deflation ports. The pump came with four different adapters attached on a plastic loop tie to prevent losing them. Good idea, but confusing and in the way when I’d only be using the two adapters that fit my boat’s valves. We cut the cord and tied just the two tips I’d be using back on.
In comparison to other inflatable kayaks, the AdvancedFrame Sport is somewhere between ultralight and heavy. Although it can be carried folded into thirds and fourths, it is an easier lift if the kayak is inflated and then rested on the bearer’s shoulder. In that position it is well balanced and easily handled.
The kayak’s air chambers are inflated in a particular order while watching the pump’s gauge carefully to avoid exceeding the recommended pressure for each. There’s a learning curve to the valves and pumping process, but having inflated the kayak a few times, I now find it’s a snap and takes only 5 to 10 minutes to pump up the four air chambers. With both feet on the pump’s foot flanges, and both hands on the handles, I watch the pressure gauge as I pump, and slow down as the needle nears the right pressure. Clip in the seat, and I’m good to go.
A caveat in the manual is to be mindful of water and air temperature, as on a cold day the chambers may lose pressure and the kayak may sag, while “in hot weather or prolonged sunlight, the air inside it will expand. You must let some air out of the appropriate chambers to prevent the kayak from failing due to overpressure.” It wasn’t a concern during my October trials, but the warning is one I’ll take seriously in the summer.
The beauty of any kayak is being able to paddle through the shallows and pull up onto a sheltered beach away from the crowds. Despite being an inflatable, the tough three-layered skin of the AdvancedFrame Sport is rugged enough to be pulled (gently) ashore.
The hull is made of three layers of PVC tarpaulin material (polyester fabric with vinyl bonded on both sides) for puncture resistance, with reinforcing material covering the welded hull-to-deck and bow and stern seams. Both for safety and longevity, I’m careful how I launch and land, to protect the bottom from abrasion. When getting in and out, I wade the kayak into the shallows, bracing my hands forward on the sturdy cockpit coaming to hold my weight as I step one foot in the center of the floor. (The 32″ beam is too wide for me to straddle for a seat-first entry.) Then, with my hands bracing behind, I bring my other leg in as I sit down.
The accommodations are amazingly comfortable, with a nicely made, cushioned, buckle-in folding seat with high backrest. The trick is sitting down in the center of the seat, in front of the hinge, with the backrest nearly vertical, for the most comfortable position. Once I’m in, I can adjust the backrest angle with the straps, but it’s hard to shift the seat base back and forth with my weight on it. If I get in and the seat position doesn’t seem quite right, I try again until I find the sweet spot. Once I’m seated comfortably with the backrest upright, it’s a great seat and I can paddle quite a ways before wanting to come ashore and stretch my legs.
There is a cargo area behind the seat and a small amount of storage under the aft deck. Elsewhere, D-rings (as seen here on the aft deck) and bungees (on the foredeck), offer a variety of options for carrying gear. At both the bow and stern, reinforced nylon-strap handles can be used to lift the ends of the boat or for carrying by two people.
The seatback has a sewn-in mesh pocket, which came with a repair kit tucked inside. I carry a sponge in the pocket to mop up any puddles from drips or rain if caught in a shower. I also carry an oval piece of blue sleeping-pad foam to protect the inflatable floor from getting scuffed by sand and grit as I step in and out of the boat.
The cockpit is perfectly sized for easy entry and comfortable paddling, with just the right leg room. There are no foot braces, but I can easily adjust the seat straps so I can rest my feet against the air chambers in front if I want that sense of support I’m used to in my hard kayaks. I’m finding the trim feels better, though, if I adjust the straps to put me an inch or two farther aft. This still leaves plenty of storage space in the cargo area aft of the seat.
The AdvancedFrame Sport kayak is remarkably stable. The author was surprised by how far she could lean over while still feeling on the “safe side of capsizing.”
I find the kayak reassuringly stable, both in its initial stability when I’m getting in and out of the cockpit and in its secondary stability when I lean to the side. I was amazed how far I could lean over without tipping, the water just grazing the hull-to-deck seam. That boosted my confidence in the boat’s safety. The Sport’s 32″ beam seems just right—wide enough for stability plus a good width for the 230 cm feathering double-bladed paddles I already have for my other kayaks, and indeed, they are perfect for this boat, which is a little beamier but shallower.
A molded skeg is attached to the stern (at right) to aid tracking and another attachment at the bow has a lower profile and protects the hull when coming ashore.
The Sport is a pleasure to paddle. Properly inflated, it tracks remarkably well for a 10′ 6″ boat, with the frame in the bow providing a sharp entry and a skeg fused on the bottom aft. I find the bow yaws 2″ to 3″ with each stroke, but not annoyingly so. I had thought I might have to buy the optional “backbone” (a tubular keelson) or drop-stitched floor to stiffen the hull, as recommended by some reviewers, but for my weight (120 lbs in a hull of 250 lbs total capacity) it seems to handle just fine with only the built-in floor (twist-valve chamber #2), inflated to the recommended 1 psi. It cruises along quite well, almost as fast as my 12′ rigid kayaks. I’m strictly a flatwater paddler, and prefer poking along protected lake and pond shores, exploring sandy-bottomed coves, admiring the vintage camps, scenery, and geologic features, and botanizing. Sometimes I’ll cut across open water in light wind and waves, and the little blue inflatable has handled well so far in those conditions.
I’ve been impressed with how well the kayak is designed and made. Its shapely, attractive lines are accented by the curved gray-fabric coaming and black-fabric edging along the seams. Advanced Elements shines as an innovator in inflatable construction, with its well-thought-out performance-first design, quality materials, sturdy construction, and valve system, and all the thoughtful touches and accessories that make the Sport a stylish, safe, user-friendly boat. It includes all the features I enjoy on my hard-shell kayaks—rugged bow and stern handholds, bungee deck rigging—plus neoprene paddle guards, Velcro paddle holders, and ample cargo space. The only thing missing is a watertight hatch, but a small drybag could be stowed under the aft deck.
The AdvancedFrame Sport kayak has a semi-enclosed cockpit with enough room for easy entry but surrounded by reassuringly wide side decks. Unlike many inflatable kayaks that have shallower cockpits and raised seats, here the generous depth of the cockpit, with its cushioned seat resting on the inflatable floor, helps to keep the kayak stable when getting in and out and when paddling in breezy conditions.
Best of all is the Sport’s ease of transport and carrying. I can most comfortably carry the kayak when it’s firmly inflated, with the cushioned coaming resting on my shoulder. Even though the kayak weighs only 26 lbs, when deflated and folded it’s a little more unwieldy, but I’m getting adept at grasping and lifting it in the middle, folded first in half lengthwise, then in thirds, with the bow and stern overlapping in the middle. This makes a manageable bundle about 48″ long by 18″ wide by 8″ thick, which fits nicely in the back of my car.
To fit in the duffel bag, the manual recommends using the pump to fully deflate the air chambers, then folding the kayak in half lengthwise and quartering horizontally into a neat package 30″ long by 17″ wide by 14″ thick. It also emphasizes the importance of drying the kayak thoroughly before folding for extended storage.
I’m delighted with my AdvancedFrame Sport Kayak and being free to follow my watery whims without the stress of cartopping. I consider it a great value and look forward to a new world of paddling adventures next season.
Jane Crosen lives in Penobscot, Maine, where she publishes her hand-drawn maps and other map products as Jane Crosen, Mapmaker. She writes and copy-edits books and publications including this magazine. This is her first article for Small Boats.
There is something deeply satisfying about prolonged outdoor physical exercise when your body is injury-free and working well, when your muscles, tendons, and bones have overcome their initial protest at being asked to do the unaccustomed work and become conditioned to it. Long-distance cyclists and marathon runners know this, and as a former enthusiast of both of those pursuits, I, too, know it. However, for me, long-distance rowing delivers the most gratifying way to experience that ineffable feeling that comes from spending days and weeks at a time in the natural world moving under my own power. Thinking back over the various small-boat journeys I’ve made through the years, there is one day in my memory that epitomizes that feeling of fulfillment. It came aboard FIRE-DRAKE, my 18′ sail-and-oar boat, 10 days into a cruise south from Prince Rupert along British Columbia’s Inside Passage.
Early in the morning, under the last remnants of the overnight rain and with the roar of Butedale Falls receding beyond my boat’s transom, I rowed away from a ramshackle float at the abandoned settlement of Butedale. It was just another day of cruising in Princess Royal Channel, the steep-sided narrow trench between Princess Royal Island and the mainland, where the outer-coast weather forecasts only loosely corresponded to the actual weather in the passage. The previous day’s sailing wind had given way to calm in the morning, but I was grateful it was not a headwind. Although the flood tide was making against me as I rounded Redcliff Point and turned south along Graham Reach, I knew that I could make progress if I worked close to shore in the back eddies created by the small points and indentations resulting from the folds of the mountains where their feet met the sea.
Tim Yeadon
Alex Zimmerman was on a 300-mile cruise, with his friend Tim Yeadon in July 2016 when they called in to Pender Harbor on the east side of British Columbia’s Strait of Georgia. Before his AFib diagnosis, Alex thought nothing of long-distance rowing cruises, whether in company or alone, and relished the challenge of a multiple-day expedition under oar and sail.
The chill of the damp morning yielded to broken cloud with glimpses of sun between the mountain peaks. I shed a layer, drank some water, planted my feet firmly on the stretchers, and settled into my all-day pace of about 25 strokes a minute. Each stroke was a cycle: pushing the oar handles aft, dipping the blades of the oars into the water, pulling with extended arms, then completing the stroke by bringing the handles to my chest. The repetition soon became nearly as automatic as walking or running. I breathed easily in the crisp, clean air and the rhythm induced a kind of moving meditation, where the awareness of my body’s working was present but not uppermost. My mind was free from whirling jumbled thoughts, free to just be, and to absorb what was happening around me. Rowing close to the shore, I noticed all the little trickles, rills, and streams that would otherwise be hidden by the overhanging cedars, whose lower branches were trimmed by the high tide as neatly as by any gardener. The aural liquidity of a Pacific wren’s song, the scold of a Steller’s jay, and the hollow “quock!” of a raven testified to the unseen presence of deep-forest inhabitants. For some reason there was no other boat traffic that morning, and I felt that all this had been laid on especially for me.
The hours wore away, and the landmarks of my progress along the channel successively ticked by—Aaltanhash Inlet, then Asher Point guarding the entrance to Khutze Inlet to port, a brief puff of wind at Griffin Point that nearly tempted me to raise sail. Carrol Island came up to starboard, and I rowed through the narrow channel behind the island just because I could. In late afternoon, nine hours after I had started, as I approached Netherby Point at the mouth of Green Inlet in search of an anchorage, I was physically tired, but I had a profound sense of accomplishment and felt there was no other place or time I would rather be.
As I coasted into the bay, I was supremely grateful that, even at the age of 66, I was still physically able to do this. I was grateful to have been able to arrange my life to be there in that place at that moment, to row a loaded boat that I had designed and built down this storied stretch of coast. The experience was a privilege that few can access, and I believed I could keep doing it for years to come.
Dave Lesser
Alex designed and built FIRE-DRAKE to replace the Whitehall he had rowed and sailed for seven years. The new boat sailed well to windward but at times Alex found the best option was to lower the rig and row. But the characteristics that gave her better sailing abilities in comparison to the Whitehall—more beam and wetted surface—also made her harder to row. For Alex in recent years, that extra work became too much.
It wasn’t to be. Several years before that cruise south along the Inside Passage, I had experienced some intermittent heart-rhythm fluctuations that came and went. As an otherwise fit amateur athlete who had never smoked, never been overweight, had low cholesterol and normal blood pressure, I didn’t think much about it. I put the episodes down to too much caffeine and cut back somewhat. I woke up one night at home, however, with another of these episodes, and by the following afternoon it hadn’t gone away—my heart had not gone back to its normal rhythm as it had before. I finally had to admit this was not normal. My wife drove me to the hospital emergency department where we checked in and sat in the waiting room with others who, like me, showed no obvious symptoms but didn’t look well.
Eventually, the verdict was delivered—I had atrial fibrillation, AFib for short. It’s a condition where the electrical signals for the heartbeat are extremely irregular, weak, and usually rapid. I learned that there were several varieties of AFib and that mine was paroxysmal AFib, which happens unpredictably in distinct episodes. I was administered a cardioversion, a mild shock to jolt my heart back to normal rhythm, and while it did not reset the rhythm, my blood pressure wasn’t too low and I wasn’t feeling as bad as most people apparently do, so I was discharged. I went home where, 16 hours after the start of the AFib, my heart rhythm reset on its own.
After that visit to the ER, I went through tests and consultations with specialists. Stress tests revealed that my heart had the strength and stamina of a much younger man. That was gratifying. Given that my AFib was intermittent, my doctor prescribed a drug that I could carry with me and take whenever I had an episode; it should reset the rhythm. I was also told to drink more water and add a little salt (which I had avoided for years) back into my diet. That regimen seemed to work pretty well, at least for the next few years. There was one two-year period, in fact, during which I had no episodes at all.
Tim Yeadon
In FIRE-DRAKE Alex would often row for up to eight or nine hours a day, frequently alone, and sometimes in bad weather and remote places. Here he is north of Yaculta Rapids in the channel between mainland British Columbia and Vancouver Island.
I wondered what had caused my AFib and why I, who had led a very active life, had it. I learned, to my dismay, that I may have been too active by exercising too hard and too long for too many years. One doctor pointed me to a couple of studies that found that the incidence of AFib among marathon runners and cross-country ski racers in Europe was three to seven times that in the general population. Later, a friend recommended The Haywire Heart, a book that details heart problems among athletes, especially AFib. It confirmed and amplified the findings of those earlier studies. There was a high likelihood I had unwittingly caused the problem. More to the point at this stage, was that if I continued doing what I had always done, I was likely to make the AFib worse.
I did not want to hear that nor admit it to myself, and it took me a long time to accept it. It was something of an existential crisis. I had always defined myself, at least in part, by what I could do physically. I was the guy who had more stamina than most, the one who could persevere and make it through just about any physical challenge. If I could no longer do that, who was I? Now I had a condition where doing that could harm me. I’m a little thick sometimes, but eventually it sank in that going out and rowing for eight or more hours a day for weeks on end during a cruise was no longer a recipe for growing old gracefully. I grieved for the man I once had been, and belatedly accepted I could no longer do what he did.
I caved in and bought a 2.5-hp outboard to propel FIRE-DRAKE in the calms, but after a number of weeklong trips, I found it was not a congenial match. The boat was relatively lightly built, and I worried that the vibration from the motor might do long-term damage to the structure. The stern was not suited for the outboard—it had to be mounted on the gunwale, which I found very ugly, and taken off and stowed every time I wanted to sail. Stowed, it took up room on board that could be used for other gear. After much pondering about whether I could build a well for the outboard (awkward given the existing structure, plus it would eat up stowage space), or convert to solar electric (not enough area for needed solar panels and a lot of added weight for batteries), I concluded that if I wanted to keep making extended voyages along our wonderful British Columbia coast, I really should do it in a different boat, a motorsailer of some kind. I still wanted to sail when the wind served, but the boat should be happy motoring all day in the calm and/or the rain that we get up the coast. The rain also meant that if I could find something with a small cabin, so much the better. I could have bought a used, small, production cruiser, but I liked having an excuse to build another boat. I made this decision a few short months into the COVID-19 pandemic, so it would be a project to keep me occupied during the lockdowns.
Alex Zimmerman
Alex’s sketch of CAMAS MOON gives no sense of a man taking the easy life as she cuts through choppy waters under a reefed mainsail but full jib and mizzen.
Which boat to build? As I would mostly be cruising solo, I didn’t need a big boat. I didn’t want the expense of a boat that had to be kept in the water, so it had to be trailerable. FIRE-DRAKE, at 18′ long and 5′4″ wide, was the biggest boat I had built in the shop. After re-examining the space, moving things around, and offloading a radial-arm saw that I didn’t use much, I figured I could build a boat of about the same length, but a little wider. All these considerations led me to Tad Roberts’s Pogy 17 design, which is, as he puts it, “a minimum coastal cruiser for one or two people.” When I contacted him and said I was ready to order the plans, he told me that the detailed plans had never been developed, as nobody had yet built one. Tad proposed designing a slightly different solution for the same mission, and it sounded like an even better fit for what I had in mind. He named it the CoPogy 18, an 18′ gaff yawl with a pilothouse cabin and an outboard motorwell. I started the build in September 2020 and, at the end of August 2022, launched CAMAS MOON.
My shakedown voyage in September 2022 was a two-festival cruise, first motoring the 8 miles from my local launch ramp around to Victoria’s inner harbor for the Victoria Classic Boat Festival. Then I motored in the calm and the heat across the U.S. border, through the San Juan Islands, and south across the Strait of Juan de Fuca to take part in the Port Townsend Wooden Boat Festival the following weekend. After that, I returned home the same way, a 140-mile round trip. I came away from the cruise with a list of nearly three-dozen fixes, modifications, and improvements to be done over the winter. I got started right away. What also got started that fall was a return of my AFib episodes, which had been absent for two years. My meds still worked to reset my heart, so I wasn’t too worried, and the rest of the winter passed without more episodes. At the end of May, I had another major episode at home, but the drug still worked. Not so the episode that came three weeks later. The drug not only didn’t reset my heart rhythm, it turned the atrial fibrillation into atrial flutter, apparently a more dangerous condition because the heart beats even more rapidly. I checked myself into the emergency department again and was successfully cardioverted back to normal sinus rhythm.
I had planned an extensive summer cruise for 2023 and was eager to see how the boat would perform with my modifications, but this last episode had me worried. In a follow-up talk with my doctor, he thought that the risk of it happening a second time was low and that the meds could still work if it happened again. Accordingly, I planned a cruise for late July.
Galen Piehl
CAMAS MOON, with Alex at her helm, sailed in the Victoria Classic Boat Festival during their shake-down cruise in September 2022.
The morning of Thursday, July 20, I launched CAMAS MOON at the public dock in Sidney, B.C., and headed out. I had a very pleasant warm-weather sail in sunshine and light winds, with some motoring, over to Bedwell Harbour on South Pender Island, and arrived in midafternoon. As I was raising the centerboard, I heard a bang—the lift pennant had broken. I had to fix it somehow, and after thinking about it, came up with a jury-rig solution using the materials I had on board. It took me three hours down in the cabin in the heat, to complete the repair. By then I was tired and somewhat dehydrated. I drank some water, but probably not enough. As the sun went down, I moved CAMAS MOON over to a park mooring buoy, which was a little more protected from the swell that had started to roll into the anchorage. I went to bed a little early but woke at 11:15 p.m. to the familiar disturbed rhythm of AFib. I took my meds right away, but the AFib didn’t reset on its own. I was up to pee every hour through the night, one of the effects of AFib, which likely aggravated my dehydration. I got up for the last time at 5 a.m. and although I didn’t feel too bad at that point, I decided I couldn’t continue the trip. I needed help.
I slipped the mooring buoy and motored back to Sidney in the calm. I arrived at about 7:30 a.m., and luckily got a berth in the nearly full marina. The only spot left was on the very last float at the end of the last dock, 500 meters from the office and ramp. I called my wife to come to pick me up. I made three trips back and forth to the office to check in, back to the boat to fetch stuff that I didn’t want to leave on board, back again for a couple of important items I forgot, and then back up the final time, feeling more tired each time, having walked nearly 2.5 kilometers by then. I was feeling more and more light-headed as we drove to the emergency department at our local cardiac hospital. About three-quarters of the way there, it was so bad that I had my wife pull over and call 911. I was dizzy, nauseated, sweating, and apparently my color was not good. I felt like I came very close to passing out. I got out of the car and laid down on a lawn.
Paramedics arrived very quickly, first a fire truck, then an ambulance. My blood pressure had become very low, just 80/60. They loaded me into the ambulance and took me to the emergency department. It was very busy, so it was nearly three hours before I got to see a doctor. I was dehydrated and very thirsty, and my heart had gone into a flutter again, but at a higher rate than it had a month before. The paramedics got a drip going in the ambulance and dripped in about 1.5 liters of saline. As I waited, my blood pressure started to come back up. According to the ER doctor, it is likely that at least part of the unusually low blood pressure I experienced was due to low blood fluid volume. More of the usual tests followed and once again cardioversion was administered, which restored sinus rhythm with just one jolt. By then it was 2 p.m., nearly 15 hours after the AFib had started.
Alex Zimmerman
After leaving Victoria, Alex motored south through the San Juan Islands and across the Strait of Juan de Fuca to the Port Townsend Wooden Boat Festival. The 140-mile round-trip cruise is the only long-distance voyage Alex has completed in CAMAS MOON but he’s still hoping there are more cruising adventures to come.
Would the AFib have had such a severe effect on me if I had remained properly hydrated? I can’t answer that. The other big unanswerable question I have, of course, is what if this had occurred later in the trip, when I was more than a couple of hours away from a marina? I’ve always hoped I would never have to call on the Coast Guard to get me out of a situation I could have avoided through better judgment or decision-making, but I am not ready to take the consequences of a bad decision and “die like a gentleman” either, rather than call for help. And if I had been even farther away when I called for help, what then? I might not be here to tell the tale.
It is early November as I write this, and while my AFib situation has clearly taken a turn for the worse, I feel fine at the moment and day-to-day. But I feel as if I am tethered to an emergency department. After more consultation with the cardiologist, I now have a treatment plan for my AFib that, if it works as well for me as it has for others, should allow me to get out and voyage solo again. I should know within a few months.
Through all this, have I experienced some transformative epiphany around affliction and aging? Not really. Everyone who has ever lived has been born under a death sentence. I think it took me longer than most to internalize that, and to recognize that my end might not come suddenly but via a slow decline. Regardless, I believe life is to be lived to the best of my abilities. If age, infirmity, or both mean those physical capabilities no longer include taking on tough challenges, then I will do what I can with my intellectual capabilities for as long as I can. Writer André Malraux wrote: “A man is the sum of his actions, of what he has done, of what he can do, nothing else.” I think I still have something to contribute, so perhaps I will pursue my writing more seriously, or gain competence with my recently begun artwork, or take up my guitar again. Regardless of to what degree I’ll be able to continue my cruising adventures, I may finally be developing a sense of self-worth that is based on what I have done and what I can still do, not on what I cannot.
Alex Zimmerman is a retired executive and engineering consultant who became enamored with the sea and sailing after he learned basic seamanship in the Royal Canadian Navy. From his home in Victoria, along the coast of British Columbia, he has put several thousand miles under the keels of the various small boats he has built for himself. His book, Becoming Coastal, chronicles many of those journeys. He continues to write about wooden boats and the people who build and sail them.
If you have an interesting story to tell about your adventures with a small boat, please email us a brief outline and a few photos.
Almost anywhere land meets water there’s a view to be taken in and the best way to do that is to sit down, stretch your legs out, and lean back on something comfortable. A portable homemade beach lounger makes that possible wherever you come ashore. All you need is a piece of canvas, a bit of wood, a machine screw with a wingnut, and an hour or two to devote to sewing.
I had some leftover bits of cloth—some canvas (#10 duck/15 oz judging by the weight of it) and a piece of marine Sunbrella (9.25 oz/sq yd)—and made two loungers. I was able to get a 19″ × 46″ piece from the canvas and a 27″ × 60″ piece from the Sunbrella. Any size in between would work though I much prefer the larger lounger. For sewing, use heavy-duty thread and a strong sewing-machine needle (100/16). If the mitered corners are new to you, they look good and reduce the number of layers you have to sew through.
Photographs by the author
All four edges of the fabric will have a double-fold hem. Lines drawn 1″ in from the edges provide a guide for the first fold. A second set of lines, drawn 1⁄2″ from the edges, need only be drawn at just one corner. They’ll be used for making a mitered corner between the hems on the intersecting edges and to produce a template for the three other corners. The mitered corners are much neater than having double-folded hems folded over each other and reduce the number of layers of fabric the sewing machine needle has to push through.
Draw two lines as shown. The solid line will be cut, and the dotted line is for a fold.
Make a stiff paper template of the triangle formed by the dotted lines and the corner of the fabric, and use it to mark the remaining three corners quickly. Cut the corner off at the solid line.
Fold the paper template along the line that indicates where the cut is to be made. Open it and lay it flat on the corner of the fabric. Trace the diagonal on the fabric, fold the peak of the template, trace the shorter diagonal along the fold, and then cut along the short diagonal. Repeat for the last two corners.
Fold the edges of the fabric to the 1″ lines, steam-ironing as you go to make the creases sharp. Put the second fold in along all edges; there won’t be a pencil line to fold to, but you’ll be able to guide the fold by feel along the tucked-under edge of the fabric. Iron the second folds to set the creases. Open to folds at the corners.
Fold the corner in along the dotted diagonal line. You’ll lose sight of the line, but you’ll be able to make the fold in the right place by setting the obtuse angles of the fabric on the 1″ pencil lines. Iron this corner fold flat.
Refold the first fold of one of the hems, making sure to tuck the folded corner fabric neatly into the hem.
Refold one of the hems, the second hem fold, again tucking in the fabric as needed. You’ll get a neat diagonal fold at the end of the hem. Iron it flat.
Repeat the process for the other hem, starting with the first fold.
Refolding the second hem finishes the miter corner. Iron it flat.
With all four corners folded and ironed, sew the edge of the hems, making the right-angle turn at each corner.
With the hems now sewn, fold 4″ of one end of the fabric over, iron the crease, and sew the doubled-over hems to create two pockets for the legs.
The folded top is sewn along the left and right edges. This involves eight layers of fabric and may require a stout needle in the sewing machine; I used a size 100/16. Backstitch at both ends of each line of stitching.
Sew across the middle of the fold to separate the two leg pockets.
To get the length for the legs, fold a corner across to the opposite side and use the length of the diagonal fold. I initially used dowels for the legs, but they sank easily into soft ground. Lengths of 3⁄4″ stock cut to a width of 1 1⁄2″ to 1 3⁄4″ have a larger footprint and aren’t as prone to sinking. A 1⁄4 × 20 machine screw serves as the pivot. A wingnut provides enough pressure to keep the assembled legs locked to one another with their upper ends fixed in the fabric pockets. I drilled 5⁄16″ holes for the 1⁄4″ machine screw (the next drill size up makes it easier to insert and remove the screw).
The upper ends of the legs are rounded to avoid wearing out the fabric while the lower ends are squared to help the corners get a bite into the ground. For both the small and large lounger, the middle hole is at the midpoint of the leg. For the large lounger, I drilled two more holes at 1″ intervals on either side for adjusting the height of the legs when joined. The upper holes make the lounger back lower, the lower holes make it higher.
For storage and transport, the lounger parts roll up into compact bundles.
With the top ends of the legs in their respective pockets and the wingnut tightened to keep them there, the lounger is ready to use. Here, the machine screw is in the lower holes, making the back higher.
The small lounger doesn’t rise as high in the back, but still offers good support.
In soft sand, the legs can sink a bit.
A pair of old tennis balls, slit along one side and slipped over the bottom ends of the legs, will effectively limit sinking and maintain the height of the back support.
To set the lounger up, spread the tops of the legs into the pockets and tighten the wing nut. Spread the fabric on the ground with the legs upright. Hold the legs upright as you pivot into the lounger. Once seated, you can reach behind to adjust the position of the legs. Sit back, relax, and enjoy the view.
Christopher Cunningham is the editor of Small Boats.
You can share your tips and tricks of the trade with other Small Boats readers by sending us an email.
In 2011 I built a Mayfly 14 as designed by Jim Michalak. He recommended “that my customers sew their own sails either from common polytarp…or real Dacron sailcloth. I can do it and so can you.” So, I made a polytarp 76-sq-ft balance lugsail from the Mayfly plans. I sailed with it in the 2011 Texas 200 where it quickly started coming apart due to my terrible workmanship. After the 2011 event, a friend sent me a Mayfly 14 sail that he had made of Dacron sailcloth, which was a vast improvement, but five 200s and many other cruises in high winds took their toll on that homemade sail. I turned to Michael Storer, a well-known small-boat designer with expertise in balance lug rigs, for advice. As luck would have it, he had recently opened a sail loft called Really Simple Sails, which specializes in sails for small boats, especially lugsails. I decided to order the sail from RSS.
Chuck Pierce
The RSS lugsail combines time-honored reinforcing including leathered corners and stitched corner patches, with modern 4-oz sail cloth. The corner grommets are pressed stainless steel with plastic inserts.
I had some specific requirements for my sail. Given the high winds that are routine on the Texas coast, I wanted sailcloth that was heavier than normal for a sail of this size. I requested three reefs, with the third reef essentially making the sail a lateen. The cringles for the third reef needed to be angled up as they went aft so that the boom would not droop when the sail was fully reefed. The sail was to be loose-footed for draft control and, lastly, I asked for a heavily reinforced tack to accommodate the loads from the downhaul. Michael had me measure the amount of bend in the yard and boom under moderate downhaul pressure, and I sent him drawings of how those were built so that he could factor the curve of the spars into the sail design.
The sail arrived in May 2018. The build quality was excellent. RSS had used 4-oz cloth, and the three laser-cut panels that made up the sail had a single row of triple-stitch zigzag stitching that was straight and consistent, with uniform panel overlap. The tack, clew, throat, and peak were all reinforced with patches on one side, as were the reefpoints and reef cringles on the luff and leech. Grommets for the corners and primary reef grommets were pressed stainless steel with plastic inserts. The reefpoints were conventional nickel-plated brass spur grommets. Around the sail perimeter there was 2″ Dacron tape folded in half and stitched.
Chuck Pierce
The reef cringles are heavily reinforced as befits parts of the sail that will become the heavy-lifters in strong winds.
I used the sail for the first time when I entered the 2018 Texas 200. On the first day of the event, I played with the set of the sail and discovered that it liked to be a little farther forward than the old sail, so I moved the halyard attachment point on the yard aft about 4″. The sail performed quite a bit better than the homemade sail, powering my Mayfly 14, GAMARAY, up to a degree that I had not experienced in seven years of sailing her. Downwind she was a bit faster, and by afternoon the winds were high enough that she would occasionally plane in gusts, which had never happened with the old sail. By the afternoon of the first day, winds hit 30 mph (according to the NOAA weather station I was monitoring) so I pulled ashore at the turn into the Mansfield Cut and put the third reef in. I then tacked up the channel for about 6 miles to the camp. Out of the 13 boats that made it to the camp, there were only three others that sailed up as opposed to motoring. The lugsail did a great job on all points of sail, even to windward, whether under full sail or reefed.
Kathy Pierce
The author shows off his well-set RSS balance-lugsail. When he used it for the first time in the 2018 Texas 200, the winds rose to about 30 mph. He pulled ashore, put in the third reef and sailed upwind for 6 miles.
Over the past five years, I have used the RSS sail on my Mayfly 14 for four Texas 200s and on a Michael Storer 16′ Quick Canoe trimaran for this year’s 200. I’ve also used it on my 8′ David Routh Puddle Duck Racer. Once it was positioned correctly in relation to each boat’s center of lateral resistance, the sail performed well on all three.
My custom-built lugsail has been a rugged workhorse and RSS decided to make it a standard offering—the Mayfly 14 Pierce Expedition—and has sold it for use on a variety of small boats. It works very well when set up properly; balance lugs are easy to deal with, even for a singlehander.
The balance lug is not the only type of sail made by RSS. They can design and build sails for any small boat. The quality of workmanship is very good, sail shape is excellent, and although mine has been heavily used over the past five years, the RSS materials and workmanship have held up quite well.
Chuck Pierce is retired and lives in Beaumont, Texas, with his wife Kathy and Stella the Crazy Dog. He plays music, repairs and restores old analog synthesizers, brews beer, and builds stuff, including several small plywood boats. He goes on as many sailing and paddling trips as he can.
Really Simple Sails offers stock sails direct and through Duckworks. RSS also makes custom sails upon request. The Mayfly 14 Pierce Expedition sail, custom-built for the author, is now a stock sail. It sells for $456 in white, $475 in tanbark.
Is there a product that might be useful for boatbuilding, cruising, or shore-side camping that you’d like us to review? Please email your suggestions.
Throughout my childhood there was a framed print of Winslow Homer’s oil painting “Eight Bells” hanging in the hallway between my bedroom and the bathroom. It depicts two New England mariners standing at the bulwarks of a sailing ship on a heaving sea with the dark lumpy clouds closing over them and threatening rain. Both men are wearing sou’westers. That set the standard for me at an early age and sou’westers have been the only kind of wet-weather hats I’ve worn while boating.
For the past few decades, I’ve worn a Black Diamond Sou’wester. It’s made of canvas and painted with a black rubbery coating. Mine was showing signs of age—the rubber coating was beginning to peel. The Black Diamond is no longer being made so I had to go looking for something else to replace it. In my search I saw that Best Coast Canvas (BCC) had recently added to its lineup the Nor’wester, a version of a sou’wester named for BCC’s home in the Pacific Northwest. I’d been impressed by BCC’s Verksted Apron and was eager to try the new headgear.
Photographs by the author
Folding the brim up creates a gutter to direct rainwater to the sides so it doesn’t drip in front of the eyes. It still provides good protection for the face.
The Nor’wester is made of waxed cotton canvas and lined with wool. The sewing is first rate. The earflap, also lined with wool, has a cotton drawstring and a spring-loaded toggle. The brim has two layers of waxed canvas sewn over a third layer of canvas sandwiched inside for additional stiffness. That said, the Nor’wester is not at all as stiff as other sou’westers I’ve owned. Facing a 25-mph wind, I could feel the front of the brim put a little pressure on my forehead, but the Nor’wester didn’t flutter and stayed firmly planted on my head. Unlike many sou’westers, including the Black Diamond, the Nor’wester is crushable and can be rolled up and tucked in a raincoat pocket when it’s not needed.
The tail end of the brim has plenty of length to protect the neck and keep rainwater from flowing down a jacket collar.
The sizing guide on the BCC website worked well for me: the XXL is just the right fit, neither too loose nor too tight. The wool liner is very comfortable and warm, even after I poured water over the wool. It soon felt warm again against the bare skin of my ear. The front of the bill can be worn extended downward to shield the eyes or folded up to make a gutter to divert rainwater to the sides of the hat.
The interior of the crown and the ear flap are lined with a thick and warm woolen fabric.
The BCC website notes the Nor’wester is “not waterproof but is water resistant.” It kept me dry in a gully washer that overwhelmed my street’s gutter drains and poured over the curbs, but the downpour lasted only 20 minutes. To make a longer-lasting trial, I had to resort to simulating a steady rain in my bathtub with a small electric fountain pump. For my first trial, I let the water splatter over the hat for three hours.
A bathtub, a small water pump, a length of tubing, and a gizmo I made from a coat hanger and a disc of copper create hours-long showers for evaluating the Nor’wester’s waterproofing.
Halfway through, I saw a few small beads of water forming on the underside of the back half of the brim, and by the end of the session there were more beads. But the wool-lined crown of the hat remained dry. In actual use, I imagine that any water that might collect under the long tail of the Nor’wester would shake off and fall onto the raincoat I would be wearing.
Prior to a treatment with wax, the waxed canvas is dark blue and water is partially absorbed without leaking into the crown.
The BCC website adds: “You can make it more water resistant by re-waxing it over time as needed with wear and applying wax to the seams.” I applied a coating of the wax BCC offers in a 40ml tin. The wax goes on easily with a soft cotton cloth. After I had waxed the outside surface of the hat (paying special attention to the seams) I rubbed it with a bare hand, thinking the warmth would help the wax further penetrate the canvas. When I finished, the fabric had a glossy sheen, was dry to the touch, and had darkened from dark blue to black. I liked the transition; it gives the hat the more traditional look of early foulweather gear, which was once waterproofed with a formula that included lamp black.
An application of wax turns the canvas from blue to black and gives it a glassy, water-repellent surface. Note how water beads up without getting into the weave of the canvas.
During a second trial, the wax treatment made the water bead up and roll off. After six hours in my artificial rainfall, once again there were a few beads of water on the underside of the bill, but when I pressed the canvas, there was no evidence that the water was coming from the inside of the bill. It’s likely the water splashed up from dripping into the tub. The crown of the Nor’wester was once again completely dry.
The Nor’wester could easily pass for a sou’wester painted by Winslow Homer in 1886. It is handmade of natural fibers, can be treated indefinitely to maintain its waterproofing, is comfortable to wear, stands up to a downpour, and has plenty of character.
Christopher Cunningham is the editor of Small Boats.
The Nor’wester is made and sold by Best Coast Canvas for $97. It comes in five sizes, from Small (for 21″ head circumference) to XX-Large (25″). All sizes come in Best Coast Blue; XL and XXL are also available in Plank Brown.
Is there a product that might be useful for boatbuilding, cruising, or shore-side camping that you’d like us to review? Please email your suggestions.
For about six years, until 2016, Jeff Ambrose worked at the Colorado Railroad Museum in Golden, Colorado, first as a volunteer and then as Restoration Manager responsible for the restoration and upkeep of all the museum’s rolling stock and its roundhouse. Over the years he was assisted by around 65 volunteers. They included his A-Team, the “Tuesday Group,” some 10 volunteers who came weekly to help Jeff with a variety of projects. In 2016, Jeff left the museum. For the Tuesday Group it was the end of an era, one they were all reluctant to leave behind.
Rick DeWitt
Eric Robison, Jeff Ambrose, Jim Curtis, and Rick DeWitt (from left to right) glue up the second lower chine block. In the background, under a blue tarp, is a Night Heron kayak, which Jeff was also building at the time.
“We really enjoyed working together,” Jeff says, “so I suggested we continue the relationship by having them come over to my shop in Littleton once a week to build stuff. For about a year, maybe more, they’d come over and work on small projects—furniture, toys for grandchildren, that sort of thing. But then we ran out of projects, and we needed something to do. It didn’t really matter what we built. The object was to get together, develop our skills, and enjoy being around each other.”
Jeff had learned boatbuilding skills over a four-year period taking classes taught by Harry Bryan and Eric Blake at WoodenBoat School, and when he now suggested building a boat, everyone in the group was in favor. But what would they build? “I brought in plans and ideas, but nothing really lit them up. Then I remembered: a year or two earlier, Mike had shown me a boat that he thought was really cool.”
John Conover
Jim Curtis inspects the lower chine block, a three-layer piece glued-up in place. The boat’s framework was built over a jig. Frames were of solid ash with marine plywood gussets and bulkheads. The step in the lower stern portion of the hull is very evident here.
Mike is Jeff’s brother-in-law. He lives about 1,400 miles from Littleton, in Lake Havasu City, Arizona, and grew up around boats. When Mike was a kid, his father had built a couple of ski boats and finished a 30′ cabin cruiser, but Mike knew little of boatbuilding or woodworking; instead, his interests leaned to the mechanical. After his retirement, Mike had begun restoring and customizing older motorcycles, usually with his friend, Bob Fouts.
John Conover
Jim Curtis, Jeff Ambrose, and Eric Robison (from left to right) consider the next steps in construction. The boat had been moved from the back yard to the side yard where there was less space to move around but it could be easily covered by a tarp strung from the fence to the house. Parts of the boat were painted at this early stage because the builders realized they would never be so accessible again.
When Jeff called to ask about that cool boat, the conversation evolved quickly.
“I told him the guys were looking for something to do,” says Jeff, “and what would he think if we built a boat up in Littleton and then got it down to him for the mechanics?”
Mike was in.
The boat Jeff had been thinking of was the Crandall Flyer 15, designed by Bruce Crandall in 1936 to the “135 cu in” C-class rules established that same year. The article Mike had found was written by Willard, Bruce Crandall’s brother, and was published in the July 1936 issue of Motor Boating. In it, Willard described the 15′ 2″ single-step racing hydroplane as being “designed to give maximum speed, but maximum speed under normal competitive conditions. Factors of design giving straight-away speed, turning ability, and ability to ride rough water have been so proportioned that in an actual race a high peak of speed is reached…” The Flyer 15 was, Willard Crandall continued, “designed on the principle of carrying most of the weight on the foreplane, so that a wide afterplane is not necessary.” The resulting hull is narrow, without flare, and streamlined with a torpedo stern.
Eric Robison
Rick DeWitt (above) and John Conover (below), measuring up for the first diagonal layer of mahogany veneer on the port side.
Jeff took the article in to show the guys. “They were excited from the start. It really is a cool-looking thing. So off we went.”
The boatbuilders were a group of seven, including Jeff. Six had met through the railroad museum and the seventh was Rick DeWitt, a neighbor who “mistakenly stopped by one day to see what we were up to,” remembers Jeff.
John Conover
The boat was moved into Jeff’s garage for the winter. Here, Jeff applies the first diagonal layer of mahogany veneer to the foredeck.
Deciding to build the Crandall Flyer 15 was the easy part; more challenging was finding lines drawings. The Motor Boating article included some drawings and a table of offsets, and Jeff was considering lofting the Flyer when, in one of his many forays through the internet, he found Classic Wooden Boat Plans, an online business that has, within its catalog of plans, a set for the Crandall Flyer 15 that includes full-sized plans and a digital 3D model, “which allowed us to spin the boat around and see it from all angles.” Jeff bought the set and recalls, “we did run across some issues in the plans but that’s all part of boatbuilding. On the whole, they were good.”
The Willard Crandall article described the construction of the Flyer 15 and while Jeff adhered to the original dimensions and scantlings, he veered away from some of the proposed building materials. “The article said that the boat’s frame should be in spruce,” says Jeff, “but that’s not the easiest wood to work with or to source, so we switched to ash. There was also talk of lapping the joints on the frames, but we opted for glued and stainless-steel-screwed butt joints with plywood gussets. The hull was originally batten-seam planked, but with today’s materials we decided to cold-mold it instead: three layers of 1⁄8″ mahogany—the inner layer laid fore and aft, the next two on opposing diagonals. The bottom of the boat, aft of the step, where there’s almost no curve at all, we fashioned from 3⁄8″ marine plywood, and for the deck we used 1⁄8″ plywood topped by 1⁄8″ mahogany. In all it’s probably heavier than the original, but we were going for durability rather than a true lightweight racer.”
John Conover
Curtis Cain, one of the original members of the Tuesday Group, fabricated the turned metal for the vintage-look instrument panel.
In recent years there have been discussions on classic-boat and yacht-design forums as to the safety of the Flyer 15’s design and its apparent instability if taking tight turns at high speed. But the building team in Colorado was in it for the look of the boat. “We didn’t put a lot of thought into what we’d do with it when it was finished,” says Jeff. “It really was just a matter of ‘what a neat project this would be.’ I don’t know that it does perform that well as a [practical] boat, but as a woodworking project, an art object, it’s perfect.”
The Colorado building team began work in 2017. By early 2019 the boat was finished. All it needed now was the engine to be installed. Around the time the project was winding up, Jeff was busy relocating to North Carolina and, he says, “in a spirit of generosity one doesn’t expect from a brother-in-law,” Mike drove up to Denver and trailered the boat back to Lake Havasu City. It was time for the mechanical phase of the project to begin.
MIke Slattery
The difference in the size of the two restored vintage engines is obvious when seen side by side. On the right is the Gray Marine Phantom 45, which was physically the perfect size but underpowered for the boat. On the left is the Gray Marine Fireball 90, which delivered sufficient power but required some structural adjustments.
Finding an engine had been a challenge. “It’s a small boat,” says Mike, “and the engine compartment is very confined, so the power options weren’t limitless. We needed a vintage flat-head marine engine with an integral transmission. Anything else wouldn’t fit.” While the boat was still in build, one of the building crew located a period-correct 45-hp Gray Marine Phantom 445 engine. It was in Michigan, sitting on a rack where it had been for the past 30 years. Thinking it would be perfect Jeff, Mike, and Jim Curtis, one of the boatbuilders, drove east to get it.
Mike Slattery
A vintage rudder was located at a shop on Lake St. Claire, Michigan. Mike is considering extending the rudder shaft to better position it in the water flow beneath the hull; it is hoped that this will improve the boat’s maneuverability at speed.
Over the next few months, as the build had been drawing to a close in Colorado, Mike had taken the engine apart, rebuilt it, and got it running. When the boat at last arrived in Arizona, the engine was ready, and the boat was ready to receive it. Mike had never done a mechanical installation on a boat before, but with 10 years of working on vintage motorcycles and having done a “ton of research and talking to people,” he was confident that, with Bob’s help, he could do what was needed. “Working on engines,” Mike says, “keeps us busy and interested in waking up the next morning.”
Mike and Bob installed the engine—making their own motor mounts—and in September 2019 they took the boat for a speed trial on Lake Havasu. “We quickly found out that 45 hp wasn’t going to get the boat up onto a plane. I don’t know what speed we were getting but the engine just wouldn’t turn over more than 2,100 rpm and peak horsepower in the Phantom 445 can only be achieved at 3,000 rpm.” Searching for solutions and still hoping they could get the engine to work, Mike installed a smaller propeller with less pitch to see if that would help. It didn’t, he says, “and at $480 a pop I wasn’t about to start buying propellers on spec.”
John Conover
The engine compartment is a very tight fit. Because the second engine was larger than the original, a vent was added to the engine cover, and a bite was taken out of the frame.
Mike considered his options. For a while he thought about getting a modern engine and shoehorning it into the Flyer. He even went as far as buying a $300 boat that had a “really nice MerCruiser 120-hp, four-cylinder engine.” He cleaned up the engine, got it running, cut up the old fiberglass boat, and took the pieces to the dump. However, once he had extracted the engine from the boat and was able to measure it properly, he realized that its weight would be too far forward and too high. He sold it and moved on. “I made a couple of bucks, so it was okay.”
The Mercruiser idea a dud, Mike was back on the hunt for a period engine. At last, on eBay, he found a Gray Marine Fireball 90, “an engine,” he says, “made for high-performance boats in the 1940s.”
MIke Slattery
Mike Slattery and Bob Fouts finished painting the hull in Mike’s shop in Arizona. The group had chosen the classic racing colors offset by the varnished deck, but it was Mike and Bob who perfected the finish.
In January 2022, the Fireball was shipped from Massachusetts to Arizona. “It had been sitting in a warehouse and was completely frozen,” Mike says, “so I had to tear it apart and do a complete rebuild. Fortunately, it didn’t seem to have too many hours on it, plus I was able to get all the parts I needed.” During his research, Mike had come across David Van Ness at Van Ness Engineering in Fairfield, New Jersey. “When Gray Marine went out of business Dave bought all their hardware, so he’s the source for all things vintage Gray,” Mike says. “He’s not the easiest to get in touch with but he’s very generous with advice and information, and through long-distance phone calls he led me through the rebuild. Thanks to him I got it back up and running.”
Mike Slattery
The completed boat ready to be towed back to Colorado on a used trailer that Mike and Bob customized. Mike chose the boat’s name because the paint color reminded him of the well-known steak sauce.
When Mike and Bob relaunched the Flyer in September 2023 it “jumped right up on plane.” But, Mike says, there’s still room for improvement. “It still doesn’t go very fast because the prop is now too small and doesn’t have enough pitch to get the most out of the new engine. I’m sure if I spent another $500, I could get a more appropriate propeller and then we could start pushing the boat into the zone for which it was designed.” Which, adds Jeff, “scares the hell out of both of us.”
John Conover
Although the cockpit layout is true to the original, the seat back—which is removable to allow access to the fuel tank—was designed by the Tuesday group and laminated over a mold in Jeff’s shop. The cushions were upholstered by Diane Slattery.
For now, the Flyer, with its undersized propeller and under-performance stats, remains in Arizona. Mike and Bob did trailer it up to Colorado in the fall so that everyone who had helped in the build could drive it around on a local reservoir. “It wasn’t the best outing,” says Mike. “Because of the higher elevation in Colorado the engine ran very rich, but it was still a lot of fun.” There are still one or two small mechanical issues to be fixed, which Mike was planning to do as soon as the daytime temperatures in Arizona eased up, but after that no one is quite sure. Lake Havasu, which straddles the border between Arizona and California, has no speed limit and, says Jeff, “is the hydroplane capital of California.” It might be an appropriate place to put the Crandall Flyer 15 through its paces.
Kathy Ambrose
With Jeff at the helm, the A-1 was finally underway at Chatfield Reservoir, Colorado. This was the first opportunity for the Colorado building team to see the boat finished and to try it out on the water.
“Without question the project has been a success,” Jeff says. Its creators were separated by almost 1,500 miles, and “start to finish, it’s taken nearly seven years—not many projects can be sustained so long.” What happens next may be undecided but, Mike says, “I think I’d like to drive it around at least once when it’s actually performing properly. Then I guess we’ll sell it and maybe we’ll all go out to dinner some time. It really was the challenge of doing the thing.”
The Crandall Flyer 15 building crew in Colorado were: Eric Robison, Jim Curtis, Rick DeWitt, Curtis Cane, John Conover, Bob Wilson, and Jeff Ambrose; and in Arizona: Mike Slattery, Bob Fouts, and Diane Slattery—who upholstered the seat and its custom-designed curved back.
Jenny Bennett is managing editor of Small Boats.
Do you have a boat with an interesting story? Please email us. We’d like to hear about it and share it with other Small Boats readers
We made it! You made it!! Six hundred nautical miles later—a conservative estimate—we’d like to sit down with you and take a look back.
How did this rowing sailing contraption of ours work out? What went well? What would we do differently? Are we still on speaking terms? What’s the take-away?
Well, there is a moral of sorts.
We’re not the brightest bulbs, the best builders, the best sailors. We’re neither tough nor intrepid nor especially courageous. What is it that gets and keeps us on the water—limitations notwithstanding—vessel after vessel, year after year?
Dreams. Determination. Persistence.
We all have dreams. Once we determine to pursue them, we are determined. If we persist, one measly step at a time, we will look back to find that we have the persistence we need.
It’s nothing special. It’s within our reach, one and all.
It’s time, for real, to get our sweet bippies out of the wild.
Snowline descends from no longer naked peaks. We wake to ice on the overhead. The stove warms cabin…boils coffee. We relish the thermal rush a hot mug imparts to cold hands. We blow steam till we can drink it down.
First we have to cross Icy Strait at its widest and perhaps most difficult point. We wait out a storm. We wait for a window. We get a fair forecast. We hop and go.
Well, the forecasts falls short around here, often as not. We take what we’re offered. We pay the toll in muscle and make the crossing.
We ratchet our way along Chichagof’s shore until fair wind finds us. All too soon, we round the corner that rounds the voyage.
Cruisers with any sense at all would call this a fine adventure and head home.
After all, it’s late in the year. Equinoctal gales are uncharacteristically late. But when they do arrive, they’re only the warning shot across the bow, presaging autumnal storms. And that’s just regional weather.
Lynn Canal, the largest fjord in North America, has a reputation. It squeezes between two jagged mountain ranges, funneling and amplifying wind and water flows between them over a four-fathom range of tide. Ocean-born lows vie with Canadian interior highs.
That is to say, the wind do blow.
But we’ve been having such a great time! We hear news of a family gathering up that way, and we’re invited. It’s only 60 nautical miles distant. It’s really been unseasonably mild, right? And we know the ground. Probably sailed it a dozen times. If need be, we can duck down.
We return to inside waters with a double sigh of regret and relief.
Icy Strait is a hydrological wonder. Deep and wide to the east, kinked in the middle, and shoal and narrow to the west, it connects Lynn Canal/Chatham Strait with ocean waters. The tide drive temendous flows across convoluted land and bottom contours. Right angle feeds collide in sudden rip fields. Fresh water flows over saltwater, dragging across tides. Bores, rips, and whorls abound. Add winds driven by glacier cooled downdrafts from northern quarters.
We’ve been learning how to sail this glorious mess over the years, one awkward passage at a time. But we slip through easy, this time. Sort of.
This past August, while I was riding my bike along one of my usual routes through Seattle’s northeast neighborhoods, I saw a moving truck backed onto the gravel parking spot in front of a white-clapboard single-story house. Sticking out from the back of the truck were four wooden rods with stainless-steel sleeves on the ends. I thought they looked like the ends of take-apart paddles and coasted up to the truck to take a closer look. I met the young couple, Kelly and Samantha, who were in the process of loading the truck, and when I asked about the paddles, they showed them to me and Kelly said, “If you want them, they’re yours.”
The paddles were homemade and very long. I was about to say that I didn’t need them when Kelly added, “If you want the canoe they’re for, you can have that too. It’s in the back yard.” I wasn’t expecting to be interested in it either, but it was a plywood lapstrake canoe and I recognized it by its straight raked sternpost as a Piccolo, designed by Robert Baker. I biked home, got my car, and drove back for the canoe and its paddles.
As I was in the last few days of getting this issue of Small Boats finished, I needed to take a break and took the canoe to paddle around Foster Island, part of a park on the shore of Lake Washington. The island is just a third of a mile long, surrounded by marsh and waterlilies, and separated from the mainland by only a creek-like passage that is shallow enough to wade across.
When I arrived at the parking lot closest to the launch site there was only one spot left but it was taken up by a green ride-share bicycle and scooter. I got out of the car and moved the bike. When I pushed the scooter out of the way, I had my head down and didn’t notice a low branch sticking straight out from a maple tree; I plowed into it with the top of my skull, which made my ears ring and, as blows to my head always do, put a damper on my mood.
The launch site is just a short walk down a gravel path from the parking lot.
I set the canoe on the cart I’d brought and, as I was tying it on, the cart rolled over and the canoe thudded to rest on the cart’s side. I crawled under the canoe, lifted it, turned the cart upright, and this time got the canoe tied down. At the launch site I set the canoe in the water and filled three dry bags with lake water to use as ballast. The only other times I’d been afloat in the canoe was with a single-bladed paddle instead of the double blade for which it was designed, and with my weight off-center to reach over the canoe’s 30” beam with a too-short paddle, I didn’t feel very stable. I could easily imagine why someone would happily give the canoe away.
I put the largest of the three bags, carrying about 30 lbs of water, into the stern. The other two bags were compression bags, and after I filled the first one and put it in the bow, the one-way valve to purge air sent an arc of water in against the side of the hull. I rolled the bag to put the valve on top and that stopped the flow. When I loaded the second bag on board, its top, which is like a soft-sided bowl attached by four straps as part of the compression system, scooped up a half-gallon of water and spilled it into the canoe. I hadn’t brought a sponge and needed some sort of bailer, otherwise I’d have to pull everything out, roll the canoe on its side, and start packing again.
At the top of the path leading to the launch site there was a garbage can. I peeked in but there were no cups that could serve as bailers. I found a 12-oz seltzer can in the car, cut off the top with a pocketknife and used that to scoop the water out. I’d brought a folding camp seat, the kind used to provide a cushion and a backrest when sitting on ground, and as soon as I’d set it in the boat I realized that I’d need both hands on the gunwales to get aboard and wouldn’t be able to hold the seat open to get into it. This was not turning out to be the restorative break from work that I’d had in mind. I used a line, stretched across the gunwales, to hold the seat back upright.
The passage around the southeast corner of Foster Island was darkened by a canopy of trees and obstructed by the submerged and semi-submerged trunks of trees that had fallen years ago.
I finally got underway to make a clockwise circumnavigation of Foster Island and headed to a path of open water between expanses of lily pads. I had paddled only a few dozen yards before getting stuck in the mud. I made the mistake of turning around rather than backing out and it was several minutes before I got free again. I headed in the opposite direction and entered the narrow passage on the island’s southeast side. It is shallow and the bottom is littered with fallen tree limbs that are invisible in the mud. I could only feel them nudging the bow sideways or bringing the canoe to a stop. Not quite 300 yards in, I was stopped by a log about 8” below the surface. I made several attempts to get by, but it spanned the entire width of the passage.
I turned around again and took a different route through the lily pads on the southwest side of the island. Beyond the lily pads the water was more open and I paddled under a footbridge that connects the northwest corner of Foster Island to the much smaller Marsh Island. When I reached Union Bay Passage, the waterway that connects Lake Washington to Lake Union, I retrieved a can of root beer from the dry bag in the stern and took a break. Between sips of root beer, I tucked the can into the front of my PFD and paddled to a second footbridge on the other end of Marsh Island.
A walking path connects Foster Island, on the right, to Marsh Island, on the left. Beyond it is Union Bay.
In the short time I’d been paddling, I’d begun to relax. I paddled up close to a raccoon busily gnawing at its backside, a great blue heron watching me with the full golden circle of its eye, and hooded mergansers with their extravagant black-and-white crests sprinting across the water as they took flight.
I was just less than a half-canoe-length away from this raccoon before it took a break from chewing on its backside to look at me. I backed off before I got so close that it could have jumped on board.
When I coasted by this great blue heron, it raised its head to keep an eye on me. Although I was only about 20′ away, the bird didn’t take flight.
At the point where Lake Union Passage enters the Montlake Cut stands the original University of Washington shell house where the crew made famous by the book The Boys in the Boat stored their racing shells.
The two overpasses of Washington State Highway 520 carry traffic over the backwaters of Lake Washington’s Union Bay to the 2-mile-long floating bridges across the lake itself.
Along the shoreline there were many places where trees had fallen into the lake. The beavers living in this island-like lodge are the likely culprits.
Before I returned to the launch site, I paddled into one of the fields of lily pads, let the canoe come to a stop, and untied the seat’s backrest to lie down in the canoe—a test to see if it was well suited for sleeping aboard. As I stretched out, my butt slipped off the pad and into the water that remained in the bilge. I scooted back onto the pad and tried again. This time it was my shoulder that was suddenly wet. I sat up and looked for the water, but there was none, neither in the bilge nor seeping from the water-filled dry bag. Slowly, I laid myself down again and again felt wet not only on my shoulder but also on my chest: it was root beer pouring out of the can that I’d tucked in my PFD.
The Piccolo was surprisingly roomy and I could lie down with just enough room to keep from feeling cramped. I’m a side sleeper and the canoe could accommodate me if spending a night aboard.
I drank what was left, crumpled the can, and tossed it into the bow. I lay down again, damp, slightly sticky, and smelling like sassafras, but very comfortable. The canoe was so still it could have been aground. With the only sound coming from a bird with a one-note chirp, I let the quiet sink into me and imagined spending a night in the canoe in places not so easily reached in my larger boats, boats that had so many elements that somehow kept me busy throughout a day of cruising.
Once back at the launch, I took all the gear and water ballast out of the canoe and paddled it in the open water near the shore. With the long double-bladed paddle, the canoe was much more stable than I’d previously given it credit for. I packed up and drove home at ease, energized by the future I saw for the Piccolo and me.
Paul Gartside originally produced his Beach Cruiser, Design #226, in 2017, “as a fast, light, lug-and-mizzen boat at 17′ overall for a fellow on the coast of Texas.” The following year, for a customer in California, he built a 16′ version with a gunter main, jib, and mizzen: Centerboard Yawl, Design #226A. In 2022 that 16-footer appealed to Andy Weimer of Zurich, Switzerland, when he enrolled at the Boat Building Academy (BBA) in Lyme Regis, England. “I liked the shape of the hull and the plumb stem—I am a bit of a sucker for West Country working boats—but I didn’t like the gunter-yawl rig, so I asked Paul if he could draw a gaff rig with a topsail and bowsprit.” Paul obliged and the result, the Centerboard Sloop of Design #226A, is the same 16′ hull as the Centerboard Yawl, but with the mast and centerboard moved forward to balance the new rig.
Courtesy Paul Gartside
Design 226A was originally conceived as a yawl with a gunter-rigged mainsail, overlapping jib, and leg o’ mutton mizzen set to a short boomkin. Paul Gartside drew a new gaff-sloop sailplan for Andy Weimer.
Paul specified edge-glued carvel strip-plank construction for the 16-footer designed for Andy. While both previous versions of the #226 were strip-planked, Paul noted “strip-planked construction has its place (working best on long, narrow hulls) but is very much an amateur method. Edge-glued carvel is structurally the same thing but just looks a lot better with plank lines in harmony with the hull shape. We wanted a varnished interior on that boat, so it was important. I suggested Andy do the same thing on his as it would be a more profitable learning experience. Lining out and then backing out and rounding planking are useful skills to acquire.”
The five sheets of plans supplied by Paul consisted of a sail plan, lines plan, table of offsets, setup plan, and a construction plan with scantlings and suggestions for materials.
As required for student projects at BBA, Andy started with lofting, and from there the nine building molds, the transom, and a template for the stem were produced. Although the plans show the inner stem in three pieces of solid pine, it was thought that it would be stronger if laminated in one piece. The outer stem (specified as laminated in the plans) and the inner stem were laminated together using 1⁄8″ sapele veneers with sheets of polyethylene separating the two elements.
Nigel Sharp
The plumb stem, short bowsprit, and tan-bark sails all reflect the influences of Andy’s much loved small traditional working boats from England’s West Country.
Once the molds and transom were secured upside down on a building base, the keel was laminated over the molds from 5⁄8″ sapele (two laminations over the whole length and up to five where the extra thickness is needed aft of the centerboard trunk) and then removed after the glue had set. The shaped inner stem was fitted into notches in the forward two molds and then the 5⁄8″-thick single-piece sapele hog/keelson was scarfed to it and laid into notches in the remaining molds and transom. Battens were used to line-off the planking on the stem, molds, and transom.
After carrying out some experiments it was decided that, rather than starting with thicker timber for the planking and then hollowing out the inside faces to match the shape of the molds and later doing a major fairing job on the outside, the curves across the grain would be achieved by steaming the planks. This allowed the use of 3⁄8″-thick timber, which came out of 16′ × 8″ × 1⁄2″ yellow cedar. The stock was long enough to make one-piece planks for six strakes and the remaining three strakes required planks in two pieces scarfed together.
The planking started with the garboard and the sheerstrake and then progressed down and up toward the shutter plank. The garboard and sheerstrake were epoxied to the stem and transom (and the garboard also to the hog); subsequent planks were also edge-glued to each other. There were nine planks each side. The garboard and two adjacent planks had to be steamed at their forward ends to cope with the twists at the bow.
The outside of the hull was sanded fair with long boards. A 2″-wide by 1⁄8″-deep rebate was machined into the perimeter of the transom face to allow the hull’s sheathing of 6-oz ’glass and epoxy to be extended into it. After being shaped, the keel (with the centerboard slot already cut into it) and the outer stem were fitted. While the plans specified a 1⁄4″ outer plywood face to cover the transom’s ’glassed perimeter and provide a smooth, flat exterior surface, Andy had some nice-looking 1⁄8″ sapele veneer on hand that would do the job, and vacuum-bagged it to the transom; the sapele had an attractive color and grain. The ’glassed hull was then faired, coated with five coats of primer, and the transom was finished bright. After the hull was turned right side up the molds were removed and the inside of the hull was sheathed in 123gm/m2 ’glass and epoxy.
Nigel Sharp
The contrast in wood tones is particularly evident in the centerboard trunk—the sides are 7/8” yellow cedar, while the top cap and end pieces are sapele. The curved face of the laminated aft end piece reflects the shape of the bottom edge of the centerboard. The double-purchase centerboard uphaul is led aft and cleated off on the port face of the trunk where it is close to hand for the helmsperson.
The sides of the centerboard case were made from 7⁄8″-thick yellow cedar with the logs, end pieces, and top cap in sapele, all biscuit-jointed together. Its aft end piece was laminated to form a gentle curve, partly for appearance but also to match the shape of the bottom of the centerboard itself. After the slot was cut into the hog/keelson, the case was fitted. Nine 1 1⁄4″-thick sapele floors were fitted, three of them were notched into the centerboard case logs. The forward two would later support the maststep while the others would also act as cockpit sole bearers.
The plans call for 1⁄4″ plywood bulkheads to seal two watertight flotation compartments, one in the bow with a 9″ access port, and the other in the stern under the seat and aft deck with a similar port in the deck, though Andy chose to leave the deck uninterrupted.
A central thwart in solid cedar provides seating amidships and braces the centerboard trunk. Between it and the stern seating, Gartside has drawn 3⁄4″ cedar-slat side benches. Andy chose not to fit these as he thought he wouldn’t likely need them.
A deck of 3⁄8″ white cedar is shown in the plans. Andy opted for a 1⁄4″ plywood subdeck supporting a 1⁄4″-thick yellow-cedar laid deck with sapele covering boards. After the kingplank was added, the whole deck was cleaned up and sheathed in ’glass and epoxy.
With the topsides painted, the 1″ × 1 1⁄4″ rubbing strake was fitted (Andy used sapele instead of the locust specified). The strake was bedded rather than glued so it can more easily be replaced if damaged. After the sapele coamings were fitted everything else was varnished. For the sole boards Andy used iroko.
Nigel Sharp
Seen from above, the unusual line of the cockpit coaming is apparent: its height is reduced aft of the jib-sheet fairleads so that the crew can comfortably sit up on the side deck, but kept high forward to keep water coming over the bow from flowing into the cockpit. Also visible are the darker tones of the sapele rubbing strake, kingplank, coaming, and transom that contrast with and compliment the lighter tones of the yellow cedar.
The 1″-thick rudder blade is laminated from cedar and sheathed and epoxied. The 1 3⁄8″-thick centerboard is shown in the plans as white pine vertical laminates sheathed in Dynel and epoxy and weighted with 25 lbs of lead. The spars are spruce: the 18′ 1″ mast is hollow while the boom, gaff, and bowsprit are solid. Andy made the bowsprit 4″ longer than designed to allow room for a furling gear with the jib tack in designed position and the forestay forward of it.
Nigel Sharp
The gaff-sloop rig, complete with small topsail, is traditional. The mainsail is low-tech: laced to the boom, gaff, and mast, and reefed with two rows of simple nettles. Less traditional is the jib’s roller furling mechanism, installed by Andy for easier control from within the cockpit. To accommodate the gear but still have the jib tacked to its designed position, Andy lengthened the bowsprit by 4″.
Andy and I took the sloop for a sail on a squally day on the Penryn River near Falmouth, U.K. When trailering the boat, the boom and gaff can fit inside the hull with the mainsail attached to them, while the mast rests in the stern and on a slightly offset mast support at the forward end of the trailer; the bowsprit is left in place. It takes about 20 minutes to step the mast (which Andy has found he can do by himself by initially standing it upright outside the boat), secure the standing rigging with lashings, lace the mainsail’s luff to the mast, and do everything else that is necessary to be ready to hoist the main and gaff, and unfurl the jib. One person can hoist the 1:1 peak and throat halyards simultaneously and, of course, the furling gear for the headsail makes life simpler. We didn’t set the topsail that day, but even with its jackyard and luff pole it can be easily hoisted with its halyard and sheet, and then tensioned with its downhaul.
There was plenty of room for the two of us, but there would also be room for two more people sitting on the central thwart, on the side decks forward, or just on the cockpit sole. I didn’t miss the side benches that Andy chose not to build. In their stead, the side decks certainly offered comfortable seating and good visibility and, with the tiller extension, effective steering.
The wind direction allowed us to sail away from the dock easily; Andy was due to fit oarlocks to allow the boat to be rowed.
Nigel Sharp
Reefed down on a blustery day, the sloop remains comfortable, heeled but still well-balanced. The fine finish of the carvel-planked hull is testament to the many hours Andy spent fairing and sanding.
The wind strength varied between a gentle 10 knots and a fierce 25 knots and, once we were underway, I initially found myself wanting to play the mainsheet with some urgency in the gusts and lulls, but I soon realized that the boat didn’t heel as much as I expected it to. It accelerated easily in the gusts and, with a reefed mainsail, jib, and no topsail, the helm was neutral. The boat tacked easily with no suggestion that it might get into irons. We were sailing in flat water, but Andy told me that the previous weekend he and a partner had sailed the few miles across Falmouth Bay to the Helford River in a 10- to 15-knot southwesterly and “quite a swell” from the south. He said that the boat slowed down a bit going into the swell on starboard tack but he enjoyed a bit of surfing on port tack and always felt safe. Andy is happy with the Centerboard Sloop’s performance and is looking forward to trailering it home to Switzerland for sails on Lake Zurich.
Nigel Sharp is a lifelong sailor and a freelance marine writer and photographer. He spent 35 years in managerial roles in the boatbuilding and repair industry and has logged thousands of miles in boats big and small, from schooners to dinghies.
During the pandemic I was, like many folks, stuck at home with only a few quick trips out when necessary, and I spent lots of time on the computer, watching video after video. It eventually occurred to me that something good could come out of all the “alone time,” and I went back to one of my favorite pastimes of the last 50 years or so: researching the possibilities of owning a boat, something special that I could pass down, and would last generations. I stumbled on Giesler Boats, and there was something about the company that struck a chord with me.
In October 2022, after exchanging emails for several months with Gerry Giesler, the third-generation owner of B. Giesler and Sons Ltd. in Powassan, Ontario, my wife Theresa and I went up for a visit to his shop. Taking in the smell of the wood, varnish, and sawdust on the floor, I was hooked, and asked Gerry where I should send the deposit
Al Lyall
The Giesler hulls are made of western red cedar shiplap strips, whch are then sanded using both electric palm sanders and hand sanders. Bottoms can be fiberglassed as an optional extra.
We ordered the Georgian Bay, an 18′ cedar-strip runabout, which would include a 60-hp Yamaha high-thrust four-stroke outboard with electric trim. The base model of the boat, without any of the options offered on the Giesler website, is perfectly fine and I would think it would do well with a 40-hp, but our lakes are large and deep and can be choppy, so the bigger, tougher motor was better suited to our needs.
Theresa and I wanted a real beauty, so we had Giesler Boats add a mahogany coaming to wrap around the top rails and around the front deck. I wanted a solid wood cockpit sole (or at least something other than the standard cedar and pine slats), but that didn’t happen as Gerry wasn’t enthusiastic about the change.
While we selected a long list of upgrades from the Giesler website, we didn’t think that the extra touches were particularly expensive considering the affordable base price of the boat. Gerry thought, based on how we intended to use the boat, that we should add a couple of inches to the freeboard, a longer front deck, and a rear deck with a splash well. There were also some cosmetic additions, which is where Giesler boats really shine as no two are alike.
Al Lyall
No two boats are the same. Here the foredeck is longer and the freeboard was raised a couple of inches. The mahogany sidedeck that wraps around the cockpit and foredeck was requested by the author. The wood brackets for the custom windshield were made in-house, and the oak strip laid into the center of the decks complements the oak dashboard.
Most of the wood—cedar, maple, oak, pine, walnut, and mahogany—is sourced from North America, as locally as possible. The boats are hand-built using molds/frames that have been around for almost 100 years (with some repair along the way as constant use wears down the wooden molds) but the design and building technique have not changed much.
The hulls are made of western red cedar shiplap strips measuring 3⁄8″ × 1 5⁄8″ and clench-nailed to the frames. The strips are applied on steam-bent 11⁄16″ × 3⁄8″ oak frames and fastened with thousands of copper nails. The hull is then sanded smooth by hand or with a palm sander. Giesler Boats offers the option to have the bottom fiberglassed and painted with antifouling paint.
The transom is mahogany, the dash oak, and the seats are pine. Gerry added a decorative oak and walnut stripe down the center from foredeck to transom, a very nice touch. The wood brackets for the custom windshield are made in-house.
Gerry and his crew always had time for us: we went to see them every two weeks once the build started, and while we always had lots of questions, they never seemed to get tired of us. They started our boat on April 2, and we put it in the water on June 24.
Al Lyall
With two bench seats aft of the bridge deck as well as the bench seat forward, there is comfortable seating for as many as six passengers. The cedar slat floorboards that mirror the strip-planked decks, are standard. The fuel tank is behind the aft bench.
Once the boat was complete, it went over to Giesler Marine, run by Gerry’s cousin Mark, for the mechanical end of things. They do an in-water boat test, give you a full tank of gas, help hook up the trailer to your vehicle, and have the boat ready to launch when you pick it up. Gerry even registers the boat in your name and has the identification numbers ready to go on the sides as well as the plates on the trailer.
The boat, motor, and trailer come in at just under 1,500 lbs, so I can tow it with my 2021 Rav4 which is rated at 1,500 lbs max for towing. We found it easy to tow the boat and put it into the lake at the ramp. We were lucky enough to get a slip at a local marina, so we don’t have to trailer from lake to lake.
My wife and I have both been around boats all our lives and have driven many but always with the owner present. It’s a whole different thing being on our own, but this little beauty makes it easy. It handles well, is not too powerful, and can take the rough water we get in our lakes. The wide beam and taller sides make it feel much larger than it is. At only 500 lbs you would think it would feel light and bounce around, but it has a solid, heavy feel and instills confidence.
Theresa Lyall
With plenty of curve at the bilge, the boat banks into turns, a motion that will feel unfamiliar to drivers more used to the sliding motion of a hard-chined planing hull.
The boat has what Gerry calls “pretty much a displacement hull.” To me, it’s like a Maine lobsterboat with a big V in the front and flat on the back. It pushes through the water nicely at low speed, about 12 mph, and when you hit the throttle, it pops out of the water right away and comes up on plane around 19 to 21 mph.
It’s a nice soft ride as the boat pushes through the water, and very comfortable anywhere from 21 to 30 mph. It has a top speed of 33 mph with the 60-hp outboard at full throttle. I have played with the trim angle to bring the bow up a few degrees to get a bit more speed, but the boat will porpoise fairly easily from 23 mph on and I find that I have to trim back down. I was told by Gerry to just leave the trim all the way in to keep the bow down all the time, but I sometimes push it a bit on a calm day.
The hull, with its ample radius at the turn of the bilge, banks into turns made at speed. It’s a strange feeling at first, as it seems to slip out under you—very different from a planing hull with hard chines that slide through a turn. The Georgian Bay’s cornering is very forgiving and just plain fun.
Theresa Lyall
Despite weighing only 500 lbs the boat handles well and has a surprisingly heavy feel that inspires confidence in its seakeeping abilities.
The boat inspires confidence, as rough water does not seem to bother it. The sound of the water against the hull has surprised us at times as we remembered there was only ⅜” of cedar between us and the water. The whole experience soon becomes second nature, and the sound melts away. You can get a bit of spray if going through a big wake as it rides up the wake and comes down hard. I usually try to roll with a big wake or just avoid it all together.
The total draft is 22″: the boat draws 8″, and the motor trimmed all the way down adds 14″ so we can go between islands and look down through crystal-clear water to rock shelves close below. The shallow draft allows us to get into quiet bays, enjoy the landscape, and slip slowly between the islands dotting the Muskoka lakes.
I really could go on and on about this boat—it’s just that good. It is a solid, seemingly invincible small boat that’s mostly old school with just the right amount of modern safety and convenience. At the price you just can’t get any better. B. Giesler & Sons was started in 1927 and after almost 100 years of building boats, let’s hope they never stop.
Al Lyall is a retired corrections officer living peacefully in Muskoka with his wife, Theresa (who still feels the need to work). He enjoys spending time with their adult children and grandchildren. A longtime dreamer of owning a classic boat, Al is now making up for lost time out on the lakes of Muskoka, Ontario.
"Atmospheric river” was the term used for the sheer volume of rainfall in Tacoma, Washington, at 6 p.m. on June 10th an hour before the start of the 2022 SEVENTY48 boat race. At the moment of that downpour, I was sitting at a bar and grill, less than 50 yards from where my boat was docked at the starting line. I watched out the window as others walked by clad head-to-toe in exposure suits of all kinds. Is that person in the drysuit part of the race or are they just dressed for the weather? It was hard to tell.
Our table at the restaurant was more than a dozen-people deep with mostly family who had flown in from across the country. They came to show their support as I was about to embark on the SEVENTY48 race for the second time.
Courtesy of the author
On a training run south of Whidbey Island, I focused on getting more comfortable crossing large channels and the hazards that come with them. Rain, low visibility, and boat traffic all added to my anxiety as a fairly new rower. The only way to get beyond those fears was time on the water and experience at the oars.
SEVENTY48 is a human-powered boat race from Tacoma to Port Townsend (roughly 70 miles) with a 48-hour window in which to finish. Which route racers take is up to them. As the website states, “the rules are simple: no motors, no support, and no wind.” Masochists from around the country show up in Tacoma every June (since 2018) to participate in vessels ranging from tried-and-true to, let’s say, experimental. The starting line is a mixed bag of sea kayaks, rowboats, paddleboards, 20-person canoes, and tandem pedal barges. There are two kinds of racers: those who are in it to win, and those who are in it for the experience and adventure. I am among the latter.
This was the second year that I sat at the restaurant, just above the docks, anticipating the start of the race. The previous year I had entered the race with my 15-year-old wooden sea kayak, a reliable and sea-tested boat that I purchased at the height of the pandemic in 2020. In my first go at the race in 2021, I saw 5′ whitecapped waves, endured 30-knot winds, and tested the merit of my eBay drysuit with DIY patches. Of the 92 teams that started in Tacoma that year, only 43 finished the race, myself included in 32nd place. I arrived in Port Townsend at 12:34 a.m. Sunday, just shy of 30 hours after the starting gun went off. Soaked to the bone and missing critical safety gear after a capsize early in the race, I stood on the dark beach and told myself that once was enough.
Then my resolve wore off. Racers from previous years had recounted their Zen-like experiences on a glassy Puget Sound through the night. Why couldn’t I have one of those? I decided to give the race another try but I wanted a new vessel—something more stable, more comfortable. I spent a few months researching and settled on building an Expedition rowboat designed by Colin Angus of Angus Rowboats. There had been a few of them in the race in 2021, including a pair rowed by a father and daughter who finished minutes ahead of me. The Expedition is not likely what you picture when you think of a rowboat. At boat ramps and on the water, it’s often referred to as “that thing.” “What is that thing?” “How do you paddle that thing?” “Why do you sit backward in that thing?”
Samuel Hendrix
Bainbridge and Blake islands were my primary training grounds leading up to the race. Here, looking east from Blake Island toward West Seattle, I beached my boat for a quick break before making my way back home on one of my longest training days, about 30 miles.
The Expedition is long, narrow, and almost completely enclosed by decking, save for the small cockpit where the rower and sliding seat are positioned. Three large, watertight hatches, one at the stern and two forward of the cockpit, provide ample storage for gear as well as buoyancy in the event of a capsize. It’s truly a boat designed to keep you afloat in even the worst conditions. After my experience in 2021, that’s what I was looking for.
As the 7 p.m. race start approached, my nerves heightened as the rain fell. I said goodbye to friends and family as I ran down to the dock for last-minute preparations. The rain had let up quite a bit from the hour prior, bringing a glint of positivity to the evening. As quickly as I was feeling better about things, I was brought down by the sight of my gloves and socks lying on top of the boat, completely soaked from hours of rain. Fortunately, one of my biggest takeaways from year one was to always have spares. I grabbed a dry pair of each, donned my rain jacket and pants, and kicked off the dock to queue with some 130 other boats for the start. All the boats take team names for the race; mine was Team Bogus Journey, a reference to the sequel of the Keanu Reeves classic movie (my father-in-law competed as Team Excellent Adventure in 2018 and 2019).
Dean Burke courtesy of Northwest Maritime Center
Moments after the starting gun fired paddlers, pedalers, and rowers fanned out through the narrow confines of Tacoma’s Thea Foss Waterway. I’m in the orange jacket just to the left and ahead of the stand-up paddler wearing a blue and black drysuit. As a rookie rower, and not used to being surrounded by so many others, I made frequent glances over my shoulder to avoid collisions. With well over 100 vessels competing for space, the first mile of the race would feel crowded until I reached Commencement Bay.
The Race Boss fired the starting gun at 7 sharp and off we went. One of the coping mechanisms I subscribe to for a long-distance race is chunking sections of the course into smaller, more manageable goals. Each of these chunks has its own characteristics unique from others throughout the 70 miles. The first 7 miles or so, from the start at the Thea Foss Waterway to Owen Beach, took me around 2 hours to cover and was defined by a crowded course, bumping oars, and constantly checking over my shoulder. It’s also where I got a surge of adrenaline to sustain me for the first third of the race. While daylight still hung in the air, the waterway was lined with fans who had come from all over to cheer on the racers as we pushed north. As racers began to spread out and settled into their paces, it could be an opportunity to meet new racers and old friends along the way. I caught up with 2021 race veterans Team Ted (a stand-up paddler) and Team PWS Sea Otter (a sea kayaker) for about an hour as we made our way together through the 2 ½-mile stretch of riprap-lined beach along Ruston Way toward the first checkpoint at Owen Beach, a mile from the tip of thickly forested Point Defiance.
Roger Siebert
.
At the checkpoint, racers make sure all the required SPOT satellite trackers are working. The race organizers plot the positions of each boat on a website chart and spectators at home can watch their favorite racers progress digitally up the course. After a quick shout with my team name to the checkpoint boat, the race marshals confirmed my live status on the tracker. I pointed my bow north.
Vicki Beaver
As I made my way into Commencement Bay with the Port of Tacoma in the background, I was able to settle into my pace with less fear of running into others. At this point, the pack had spread out significantly, giving racers room to breathe and better strategize their plan for the course. The rain continued to fall as my muscles warmed up and I found my rhythm.
The next 14 miles of the race run the length of Colvos Passage, the slightly kinked, mile-wide channel between Vashon Island and the Kitsap Peninsula. I started up Colvos at around 9 p.m. as the last glimmer of the sun set behind the darkening silhouette of the Kitsap hills to the west. The descent into darkness would accompany me for the next several hours; the half moon wouldn’t rise until 1:45 a.m. Racers’ headlamps and navigation lights dotted the water like floating lanterns all around me. A handful of fireworks rose and glimmered in the distance astern.
Before my eyes had adjusted to the darkness, it was nearly impossible to judge how far anything was from me. Sounds seemed to come undiminished across the water, tricking me into thinking conversations were happening a few feet from me when they were likely a hundred yards away; a light bobbing up and down in the distance turned out to be a paddleboarder drafting in my wake just a few feet behind me.
As engaging as the transition into night was, the row up Colvos Passage was a slog. The continued rain and overcast sky made it especially dark, much darker than in 2021, and the west side of Vashon Island includes several false summits, giving me the impression that I’d reached the end when I still had miles to go. Racers who had been thronged at the start found their pace and had spread out here. My intention through the last few miles of Colvos was to find a buddy to pair with for the upcoming crossings from Vashon to Blake Island, and then to Bainbridge. These are the longest and most exposed open-water crossings of the route and coincided with the darkest part of the night. Ferry traffic and unpredictable seas can make this a particularly scary part of the race.
I adjusted my pace, both speeding up and slowing down, attempting to pair up with headlamps that looked as if they were relatively nearby. After a couple of tries to flag down other racers, and a near miss with an old pier, I assessed the conditions and determined that I would just keep moving forward, even if that meant solo.
Samuel Hendrix
At one point in Commencement Bay, I snapped a quick selfie while asking myself why I was doing this. It wasn’t the last time I’d consider the question over the next 18 hours. The rain was beginning to let up but would still linger for a few more hours into the night.
Blake Island lies just over a mile north-northwest of Vashon and is a popular place for racers wanting to catch a few hours of sleep. One of my biggest regrets in 2021 was stopping at the island to stretch and regroup. Weather and crashing waves on the beaches at Blake that year caused me to roll my boat and lose some critical gear, including my VHF radio. This year, I had decided I was going to bypass Blake entirely if conditions allowed. As I reached the north end of Vashon, Blake, just 1 1/8 miles wide, loomed large and dark in the distance. Seas were fairly calm at this point, and the wind and rain had finally let up. I was able to strip off my raingear. Just around midnight I set a compass course north across the surprisingly friendly waters and continued to row.
The crossing from Vashon Island was uneventful. Bypassing Blake and crossing straight from Vashon to Bainbridge Island came up just shy of 5 miles and took about 75 minutes to row. Aside from the headlamps and audible chatter as I rowed by Blake, there was hardly a sign of anyone out there at all, making it all the more eerie. For the first time in this race, I felt truly alone and no longer connected to other racers. I settled into a steady rhythm and rowed at a comfortable, sustainable pace.
As I neared the southern end of Bainbridge Island, a few different things snapped me from my trance. The south side of the island is marked by a rocky shore. I knew I was coming close and could hear waves crashing against the rocks. When I turned my head to check my course, I was blinded by my own navigation lights. As dark as it had been, this was the first time I realized how bright my bow light was. It prevented me from seeing anything beyond the bow of my boat. I decided to play it safe and give the shore a wider berth. This was a wakeup call to keep a better mental log of where I was and of upcoming landmarks to ensure I wouldn’t make any costly mistakes like running aground.
Samuel Hendrix
On a training row outside of Seattle, I kept my eye on a cruise ship that appeared to be coming right for me. I was relieved when it made a turn away from me.
As I adjusted my course and let my night vision recover, I caught sight of a cluster of dozens of bright pinpoints of light to starboard, traveling west from Alki Point on the Seattle side of Puget Sound. It was moving fast and heading my way. It took a few seconds before I realized it was the Seattle-to-Bremerton ferry, probably the last westbound ferry of the night. It crossed only a couple hundred yards aft of me. Had I been only 10 minutes slower, I would have been right in its path, a realization that spooked me giving me the wake-up call I needed. I had assumed that I would be crossing the ferry lane late enough that the Bremerton and Bainbridge ferries wouldn’t be a concern. Had I known the ferry would have been coming through around 1:30 a.m., I would have better planned my crossing to avoid it. But, even knowing the schedule, picking out a ferry against the backdrop of the Seattle city lights and their sea of reflections can be a lot more difficult than I had expected. I moved north up Bainbridge Island with more caution as I approached the Seattle-to-Bainbridge ferry crossing at Winslow. Fortunately, I had missed the last run of the night and was clear to continue rowing without fear of ferries until Kingston, 13 miles farther north.
Fay Bainbridge Park, at the northeast end of Bainbridge Island, is roughly the halfway point of the race and another popular spot for racers to stop, have a snack, or catch a few hours of sleep. I had covered the 10-mile length of Bainbridge in about two hours and reached Fay Bainbridge at 3:30 a.m. The park is easy to miss from the water, but I knew I was getting close when I heard in the distance voices I could safely assume were racers. When I saw headlamps moving up and down the beach, I turned my bow toward them to make a quick stop to stretch and eat. I neared a particularly dark section of shore and hopped out, avoiding the piles of driftwood on the beach. As I turned my headlamp on to secure the boat, the light suddenly revealed a face no more than 6’ in front of me. A fellow racer had emerged from behind a large piece of driftwood to lend a hand getting the boat ashore. Having a stranger’s face pop out of the dark when I thought I was alone, got my adrenaline going and I no longer needed the break. I thanked the racer for his kind offer and let him get back to his beach nap. As quickly as I had pulled to shore, I was kicking off and ready to tackle the last half of the race.
Courtesy of the author
Blue skies peeked through the clouds as I made my way across Port Townsend Bay just a few hundred yards from the finish. Friends and family lined the docks and beach to welcome me home.
Beyond the north end of Bainbridge Island lies Port Madison, a 3-mile-wide bay that can be tricky for racers unfamiliar with the race route. In morning fog and with sleep deprivation, the open water there can send even seasoned racers off course. The best bet is to head north-northeast from Fay Bainbridge and point your bow toward Point Jefferson—if you can see it. The crossing can feel like big water with large rolling waves spilling over from Puget Sound. Fortunately, I made my way across Port Madison at 4 a.m., in calm seas as dawn was beginning to illuminate from behind the Cascade Range on the eastern horizon. As I rounded Point Jefferson, I passed the flank of a parade of four or five cruise ships making their way south into Seattle. One was adorned with garish purple lights and was blaring party music at this pre-dawn hour.
As I began to cross Appletree Cove at 5:30 a.m., I knew ferries would likely be running soon to and from the Kingston terminal on the cove’s north shore. These ferries move fast—16 to 18 knots—and I had two options. I could hug the shore, crossing the ferry lane near the dock in Kingston. This would add quite a bit of rowing distance but would allow me to cross the ferry lane where it narrows and the ferries are moving slower. Or I could cut across the cove on a more direct route. Having been awake for nearly 24 hours, rowing for the last 10, and loath to row any farther than I had to, I chose the latter. While I made my way across the bay, I focused acutely on the ferries docked at Kingston, looking for any sign that one might depart and head my way. A fisherman who had been watching racers come by motored alongside to let me know the morning ferry was broken down and wouldn’t be running for a while. This was a huge relief, and I took the opportunity to have a breakfast of leftover pizza and cold-brew coffee concentrate while gently bobbing at the cove entrance with no ferry worries. While enjoying my pizza in the morning light, I began to see several racers spread out astern, continuing their march north.
Courtesy of the author
When I crossed the finish line at the Northwest Maritime Center docks in Port Townsend an airhorn blew, signaling that I was done—18 hours and 4 minutes after leaving the starting line in Tacoma—the 32nd overall finisher. Filled with relief, I coasted the last few yards to the beach.
The next stretch of the race, the 7 miles from Apple Cove Point to Point No Point (yes, that’s the real name), were the most monotonous, tedious miles I’ve ever rowed. The weather was clear, the sun had come up, and the rowing conditions were perfect as I rounded Apple Cove Point. From there, Point No Point is the farthest visible point (yes, there’s actually a point) on the shoreline to the west. As long as I kept my bow in that heading and made forward progress, I couldn’t miss it. But I felt like I was fighting a current and Point No Point never seemed to get any closer, always looming in the distance. Yet the stretch took just under two hours to complete, matching my average pace for the race. Whether I could chalk my mental struggle up to sleep deprivation, or the pizza I had for breakfast, this chunk of the race will linger in my memory as the most difficult and most mentally challenging. Reaching the lighthouse at Point No Point felt like a huge accomplishment and built momentum for the final stretch to Port Townsend.
I had convinced myself that the worst was over, that I was almost done. I bought into the lie I told myself to keep moving forward. At Point No Point I was not almost done. On the chart, I could more or less draw a straight line to Port Townsend, but I still had at least 18 miles to go in what can often be the most volatile waters of the racecourse—Admiralty Inlet. Its north end connects directly to the Strait of Juan de Fuca, and its swells and currents funnel between Marrowstone and Whidbey islands and dump into Admiralty Inlet, creating conditions not suitable for most of the small boats in the race. Though the 12-mile stretch through Admiralty Inlet can be serene, with no warning it can become whitecaps. In the previous year, I had spent about 8 hours beached 4 miles west of Point No Point near the appropriately named Foulweather Bluff waiting out a hailstorm, catching up on sleep, and hoping the weather would improve. This year, I rounded Point No Point and saw nothing but clear skies and calm waters ahead. I could have used the break and a burger in Hansville, the village a mile west of Point No Point, but opted to use this weather window to keep pushing on. I passed Foulweather Bluff and made my way toward the Port Townsend Canal, 8 miles to the northwest.
The Port Townsend Ship Canal is a narrow ¾-mile-long passage built in 1915 between the mainland and Indian Island to open access to and from the south end of Port Townsend Bay to Admiralty Inlet. The reversing tidal current in the 150-yard-wide canal can run up to 6 mph. I arrived at the south entrance at 11 a.m. with a steady 2 to 3 mph current flowing…in the wrong direction. My family and friends had lined up along the canal to cheer me on for the last push I needed to fight the current and break through into the bay. With their encouragement and a surge of adrenaline, I kicked up the rowing for the final leg.
Courtesy of the Northwest Maritime Center
The last thing to do was ring the bell. A volunteer offered her congratulations as she held the bell out for me. It was an exciting moment, made especially so as I had not rung the bell in 2021 because I finished late at night.
In 2021, I had emerged from the canal at 11 p.m., rowed the final 6 miles of the course, and finished at the Port Townsend beach just after 12:30 a.m., having rowed for 29 1/2 hours and finishing in 32nd place. This year the sun was high, the sky was clear, and the snowfield-draped Olympic Mountains loomed over the horizon. Schooners and sloops tacked across the bay. The beach at the Northwest Maritime Center was lined with locals, friends, family, fans, racers, and event volunteers who had come together to welcome the racers. Even more spectators had lined the docks and paddleboarders came out to encourage racers over the last few hundred feet.
I pulled onto the beach and rang the finish bell at 1:04 p.m., 18 hours and 4 minutes after the start, and once again the 32nd boat to reach the finish line. Tired, blistered, but in surprisingly good spirits, I gave my family a round of hugs, including my newborn daughter, and thanked them for all the support while I accomplished this silly goal for a second time. I was quickly congratulated, handed a beer, offered a place to shower, rest, and eat. After a few minutes to stretch my legs, I was ready for another cold drink and joined the crowd to cheer on the rest of the racers. It wasn’t long before I began strategizing on how to improve for the next year’s SEVENTY48.
Samuel Hendrix is a Midwest transplant now living in Tacoma, Washington, who has spent the last decade exploring the waters of Puget Sound. When he’s not rowing Commencement Bay or dreaming of his next boat build, he can likely be found bike touring with his wife and daughter at one of the many beautiful parks in the Pacific Northwest.
If you have an interesting story to tell about your Adventures with a small boat, please email us a brief outline and a few photos.
Subscribe For Full Access
Flipbooks are available to paid subscribers only. Subscribe now or log in for access.
 Lance Pamperin
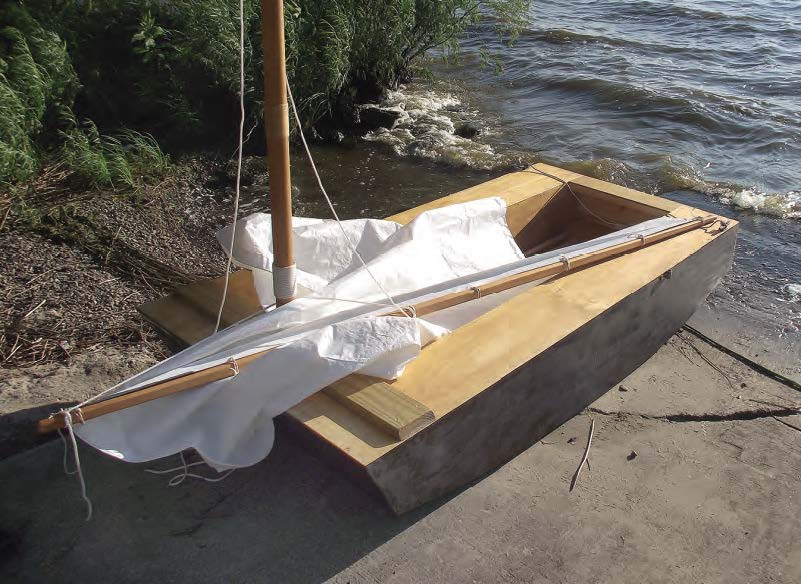 Tom Pamperin
 Tom Pamperin
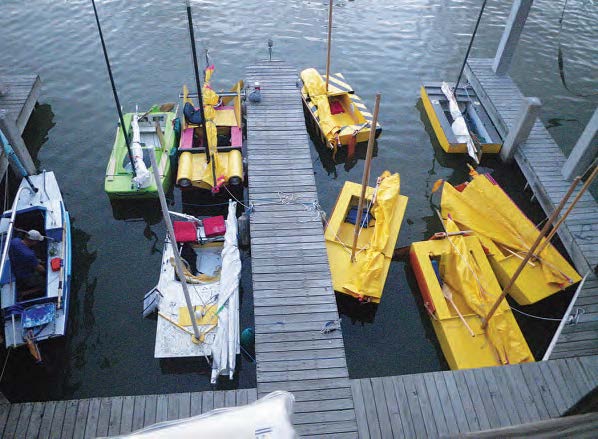 Tom Pamperin
 Tom Pamperin
 Tom Pamperin
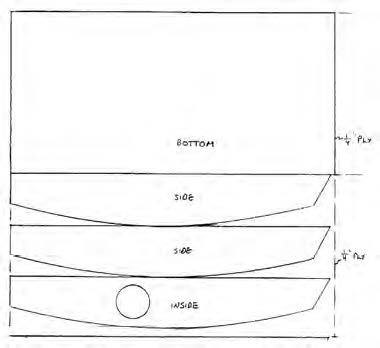 Tom Pamperin