Almost anywhere land meets water there’s a view to be taken in and the best way to do that is to sit down, stretch your legs out, and lean back on something comfortable. A portable homemade beach lounger makes that possible wherever you come ashore. All you need is a piece of canvas, a bit of wood, a machine screw with a wingnut, and an hour or two to devote to sewing.
I had some leftover bits of cloth—some canvas (#10 duck/15 oz judging by the weight of it) and a piece of marine Sunbrella (9.25 oz/sq yd)—and made two loungers. I was able to get a 19″ × 46″ piece from the canvas and a 27″ × 60″ piece from the Sunbrella. Any size in between would work though I much prefer the larger lounger. For sewing, use heavy-duty thread and a strong sewing-machine needle (100/16). If the mitered corners are new to you, they look good and reduce the number of layers you have to sew through.
 Photographs by the author
All four edges of the fabric will have a double-fold hem. Lines drawn 1″ in from the edges provide a guide for the first fold. A second set of lines, drawn 1⁄2″ from the edges, need only be drawn at just one corner. They’ll be used for making a mitered corner between the hems on the intersecting edges and to produce a template for the three other corners. The mitered corners are much neater than having double-folded hems folded over each other and reduce the number of layers of fabric the sewing machine needle has to push through.
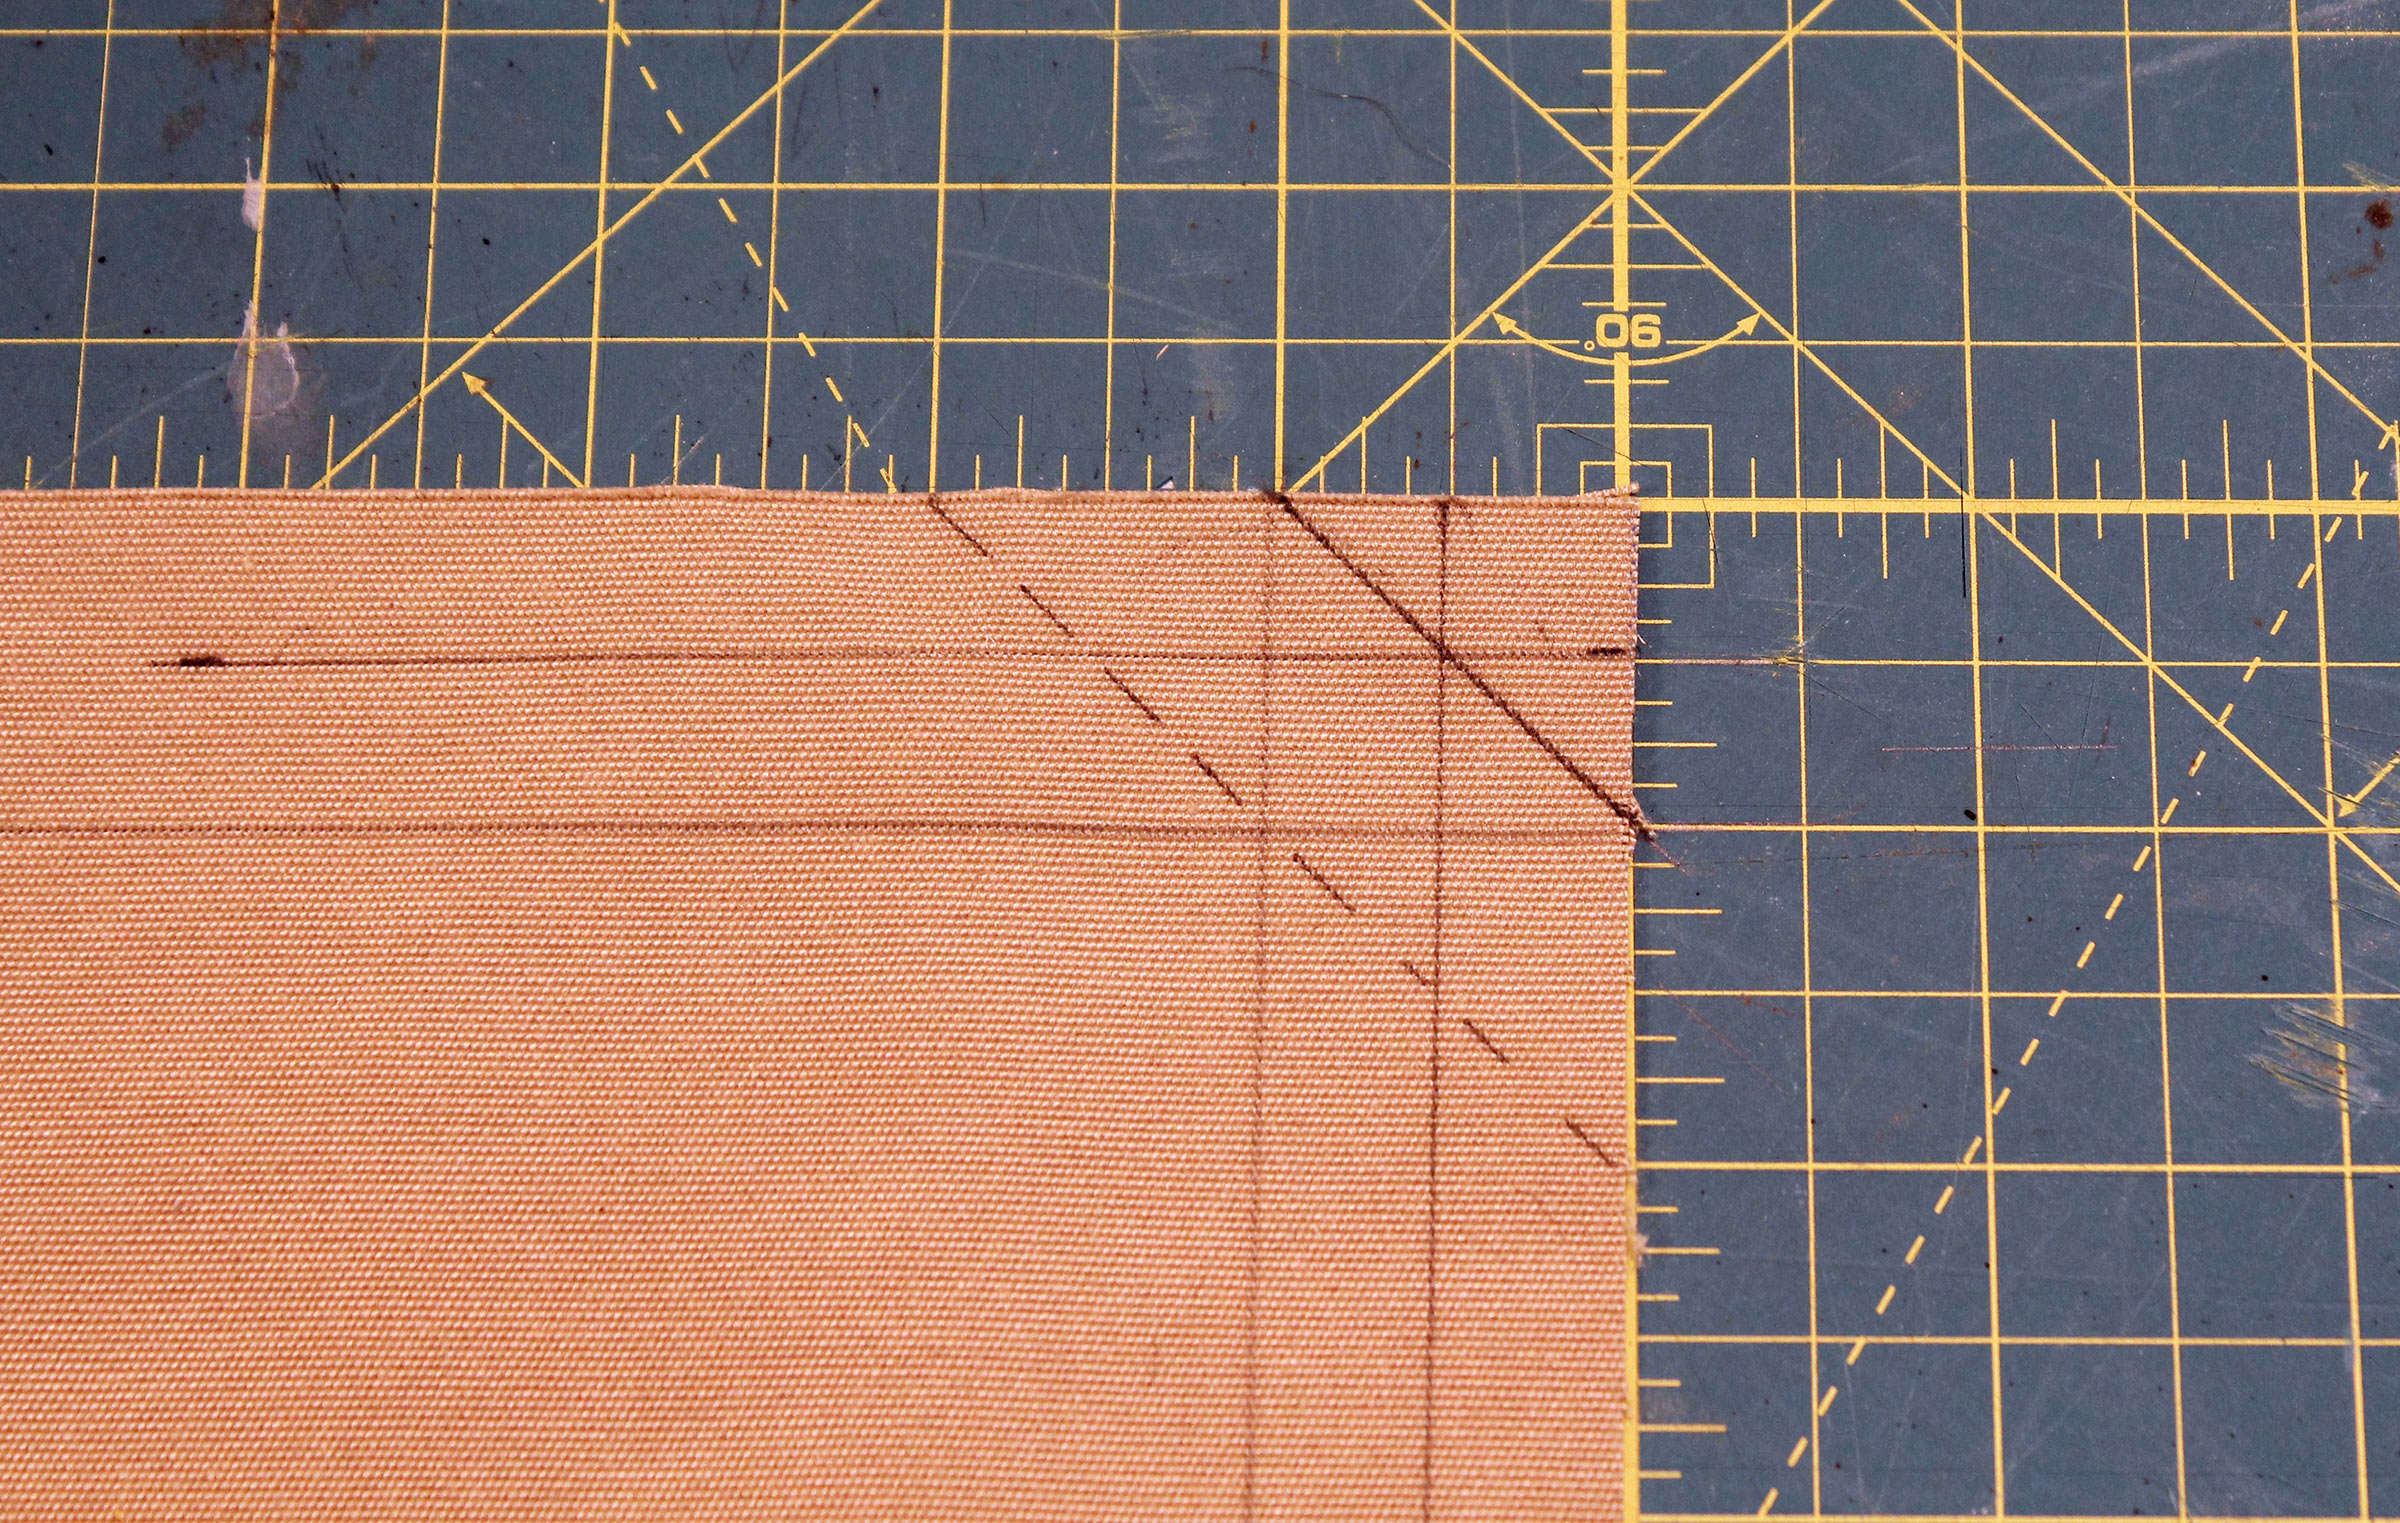
Draw two lines as shown. The solid line will be cut, and the dotted line is for a fold.
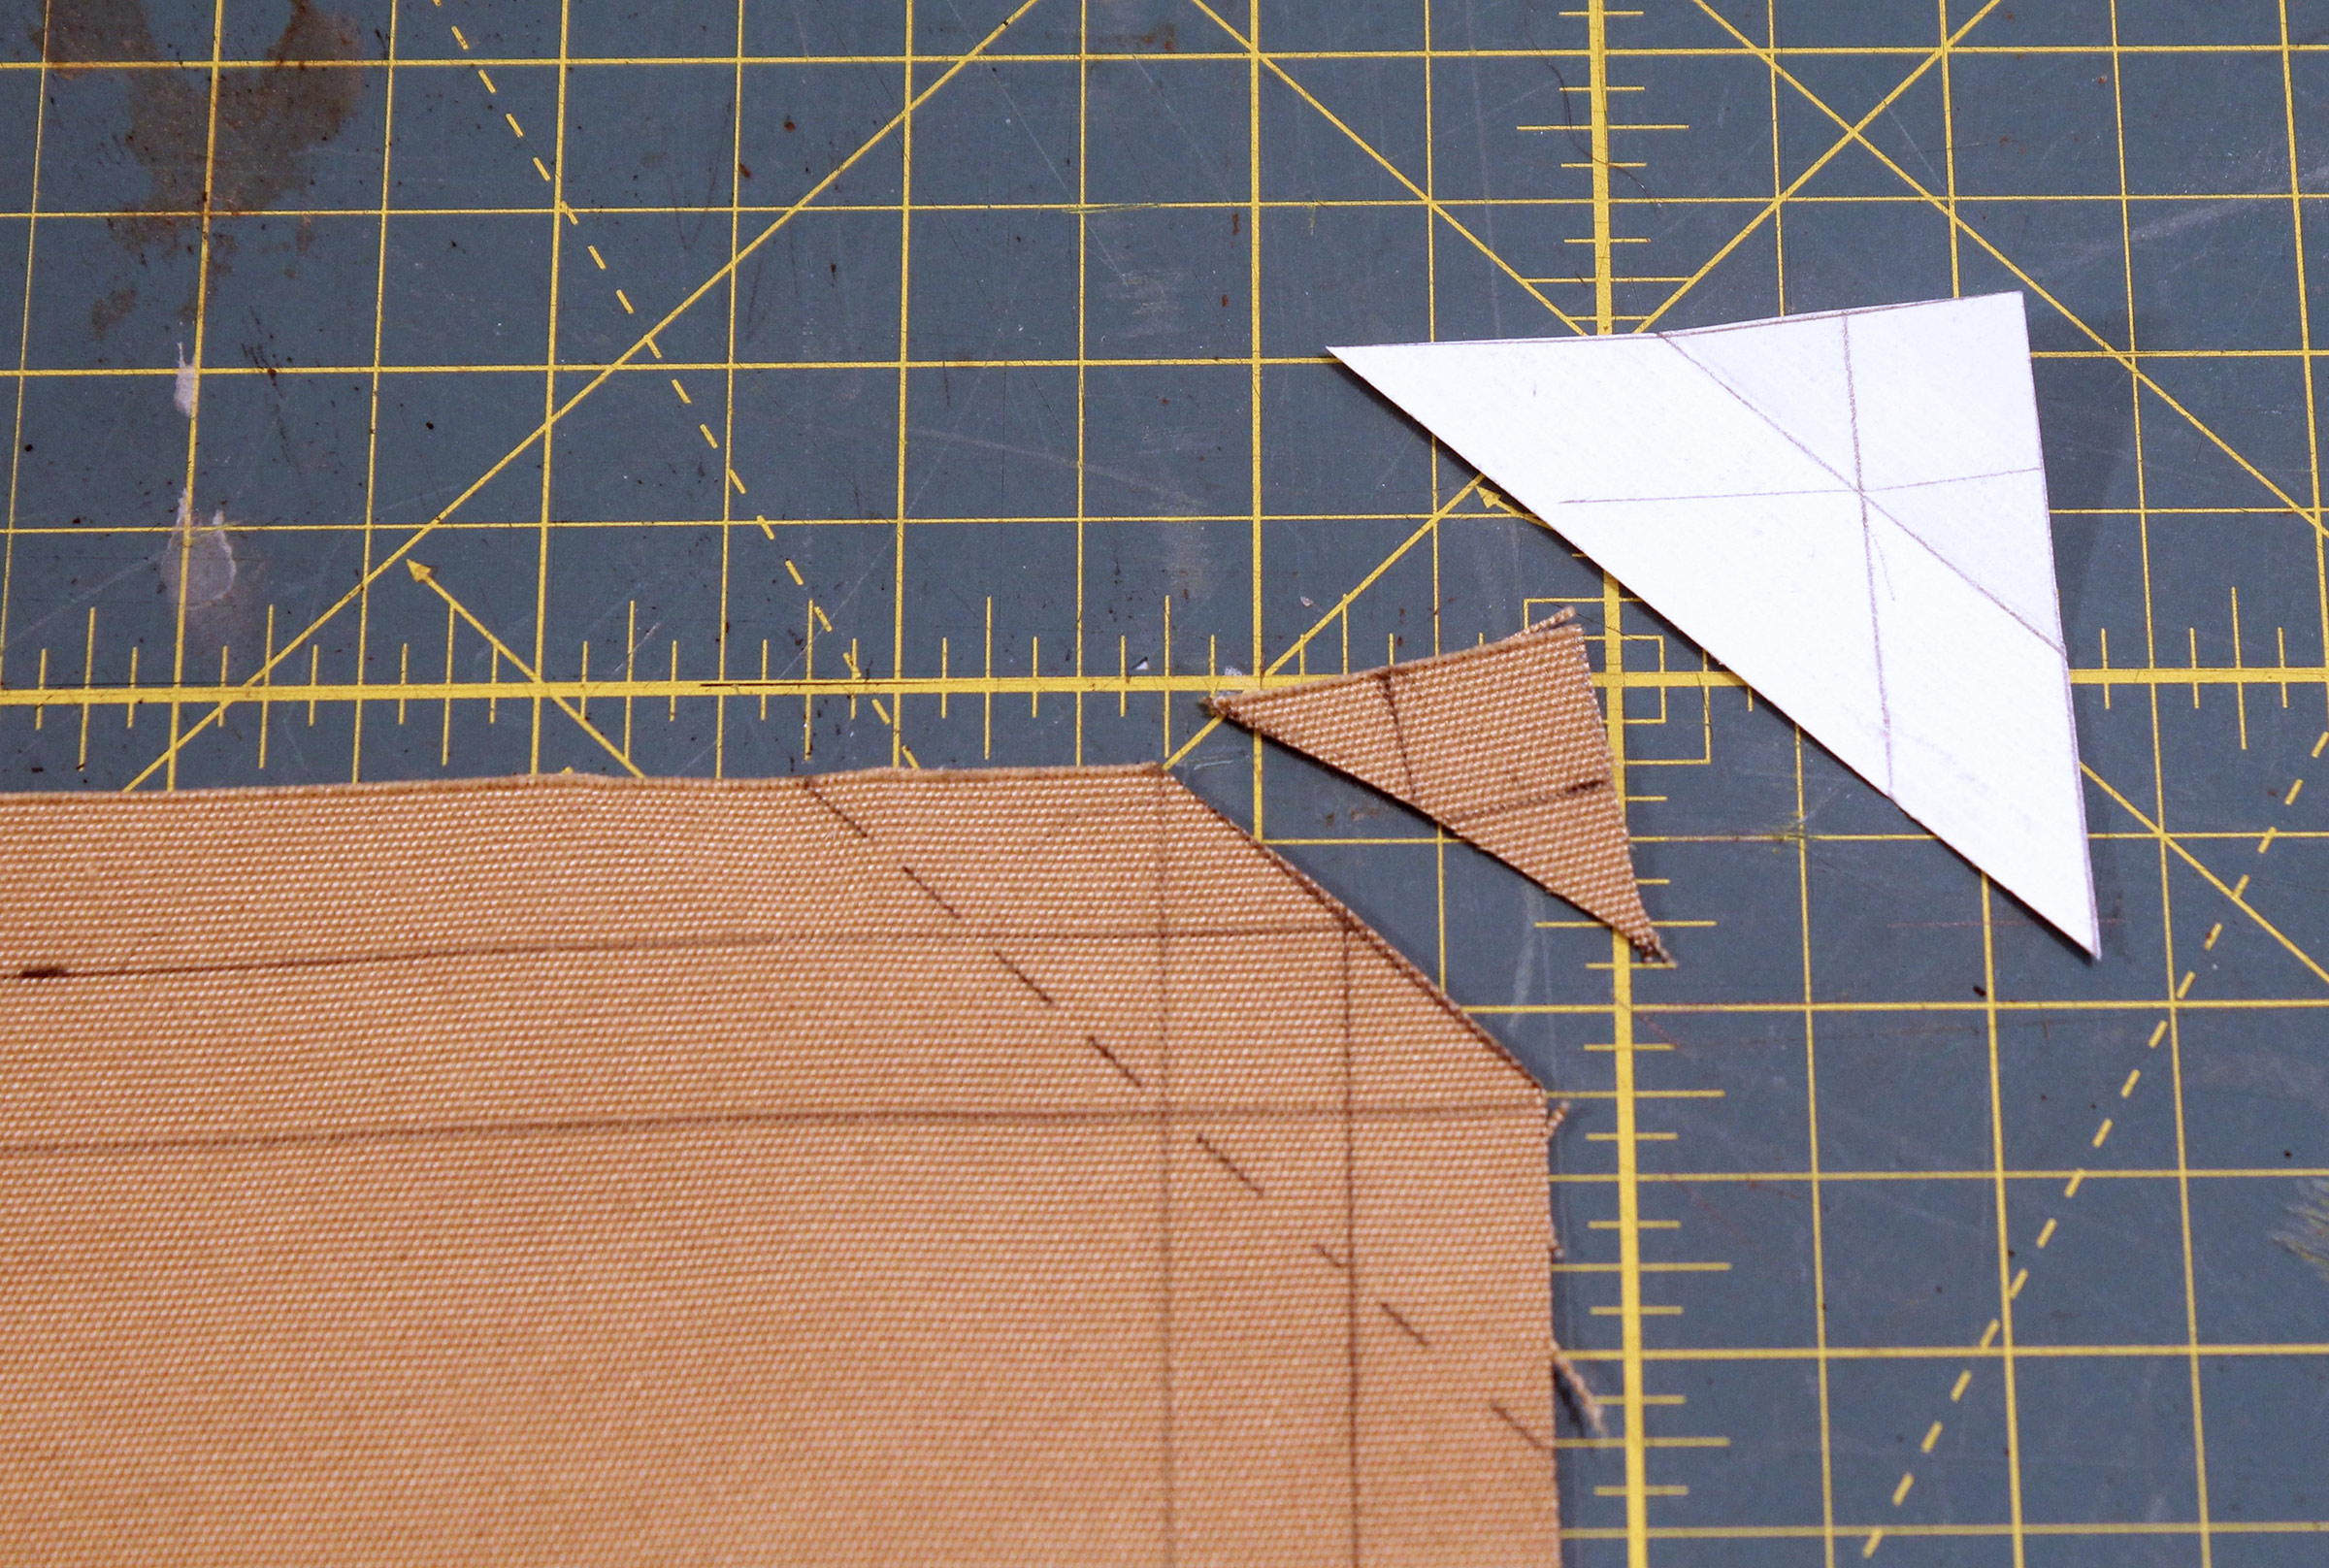
Make a stiff paper template of the triangle formed by the dotted lines and the corner of the fabric, and use it to mark the remaining three corners quickly. Cut the corner off at the solid line.
Fold the paper template along the line that indicates where the cut is to be made. Open it and lay it flat on the corner of the fabric. Trace the diagonal on the fabric, fold the peak of the template, trace the shorter diagonal along the fold, and then cut along the short diagonal. Repeat for the last two corners.
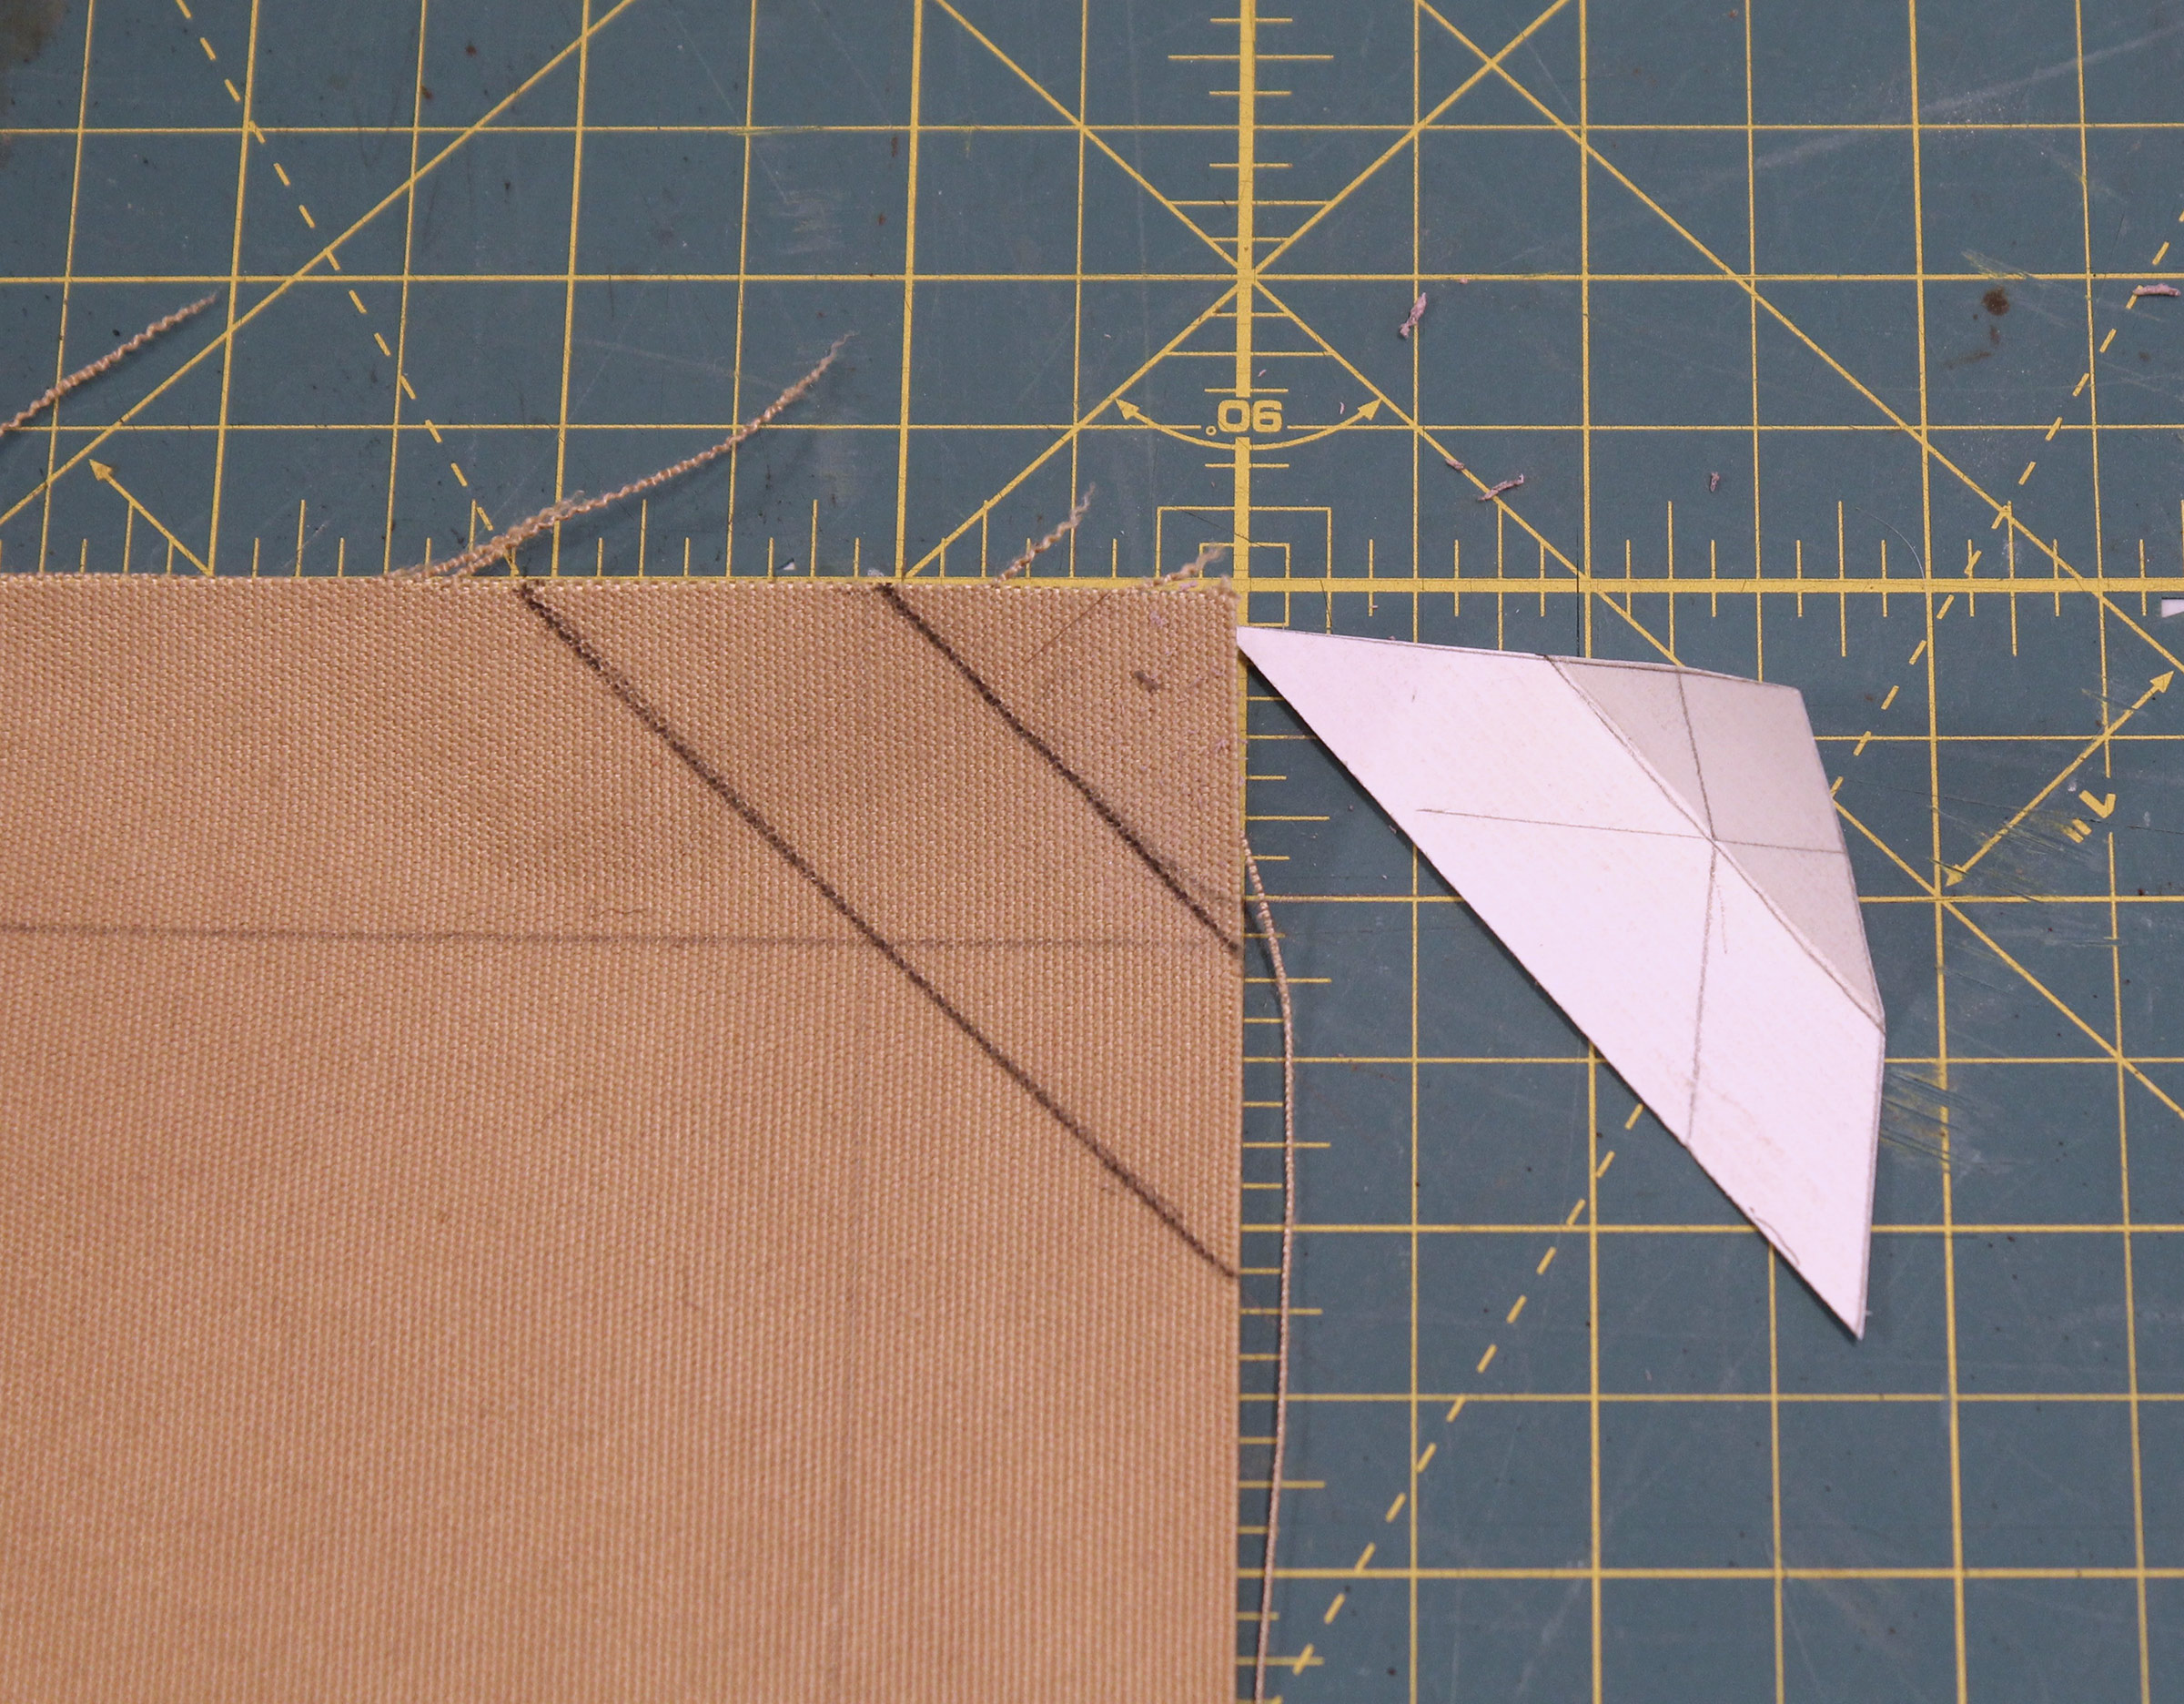
Fold the edges of the fabric to the 1″ lines, steam-ironing as you go to make the creases sharp. Put the second fold in along all edges; there won’t be a pencil line to fold to, but you’ll be able to guide the fold by feel along the tucked-under edge of the fabric. Iron the second folds to set the creases. Open to folds at the corners.
Fold the corner in along the dotted diagonal line. You’ll lose sight of the line, but you’ll be able to make the fold in the right place by setting the obtuse angles of the fabric on the 1″ pencil lines. Iron this corner fold flat.
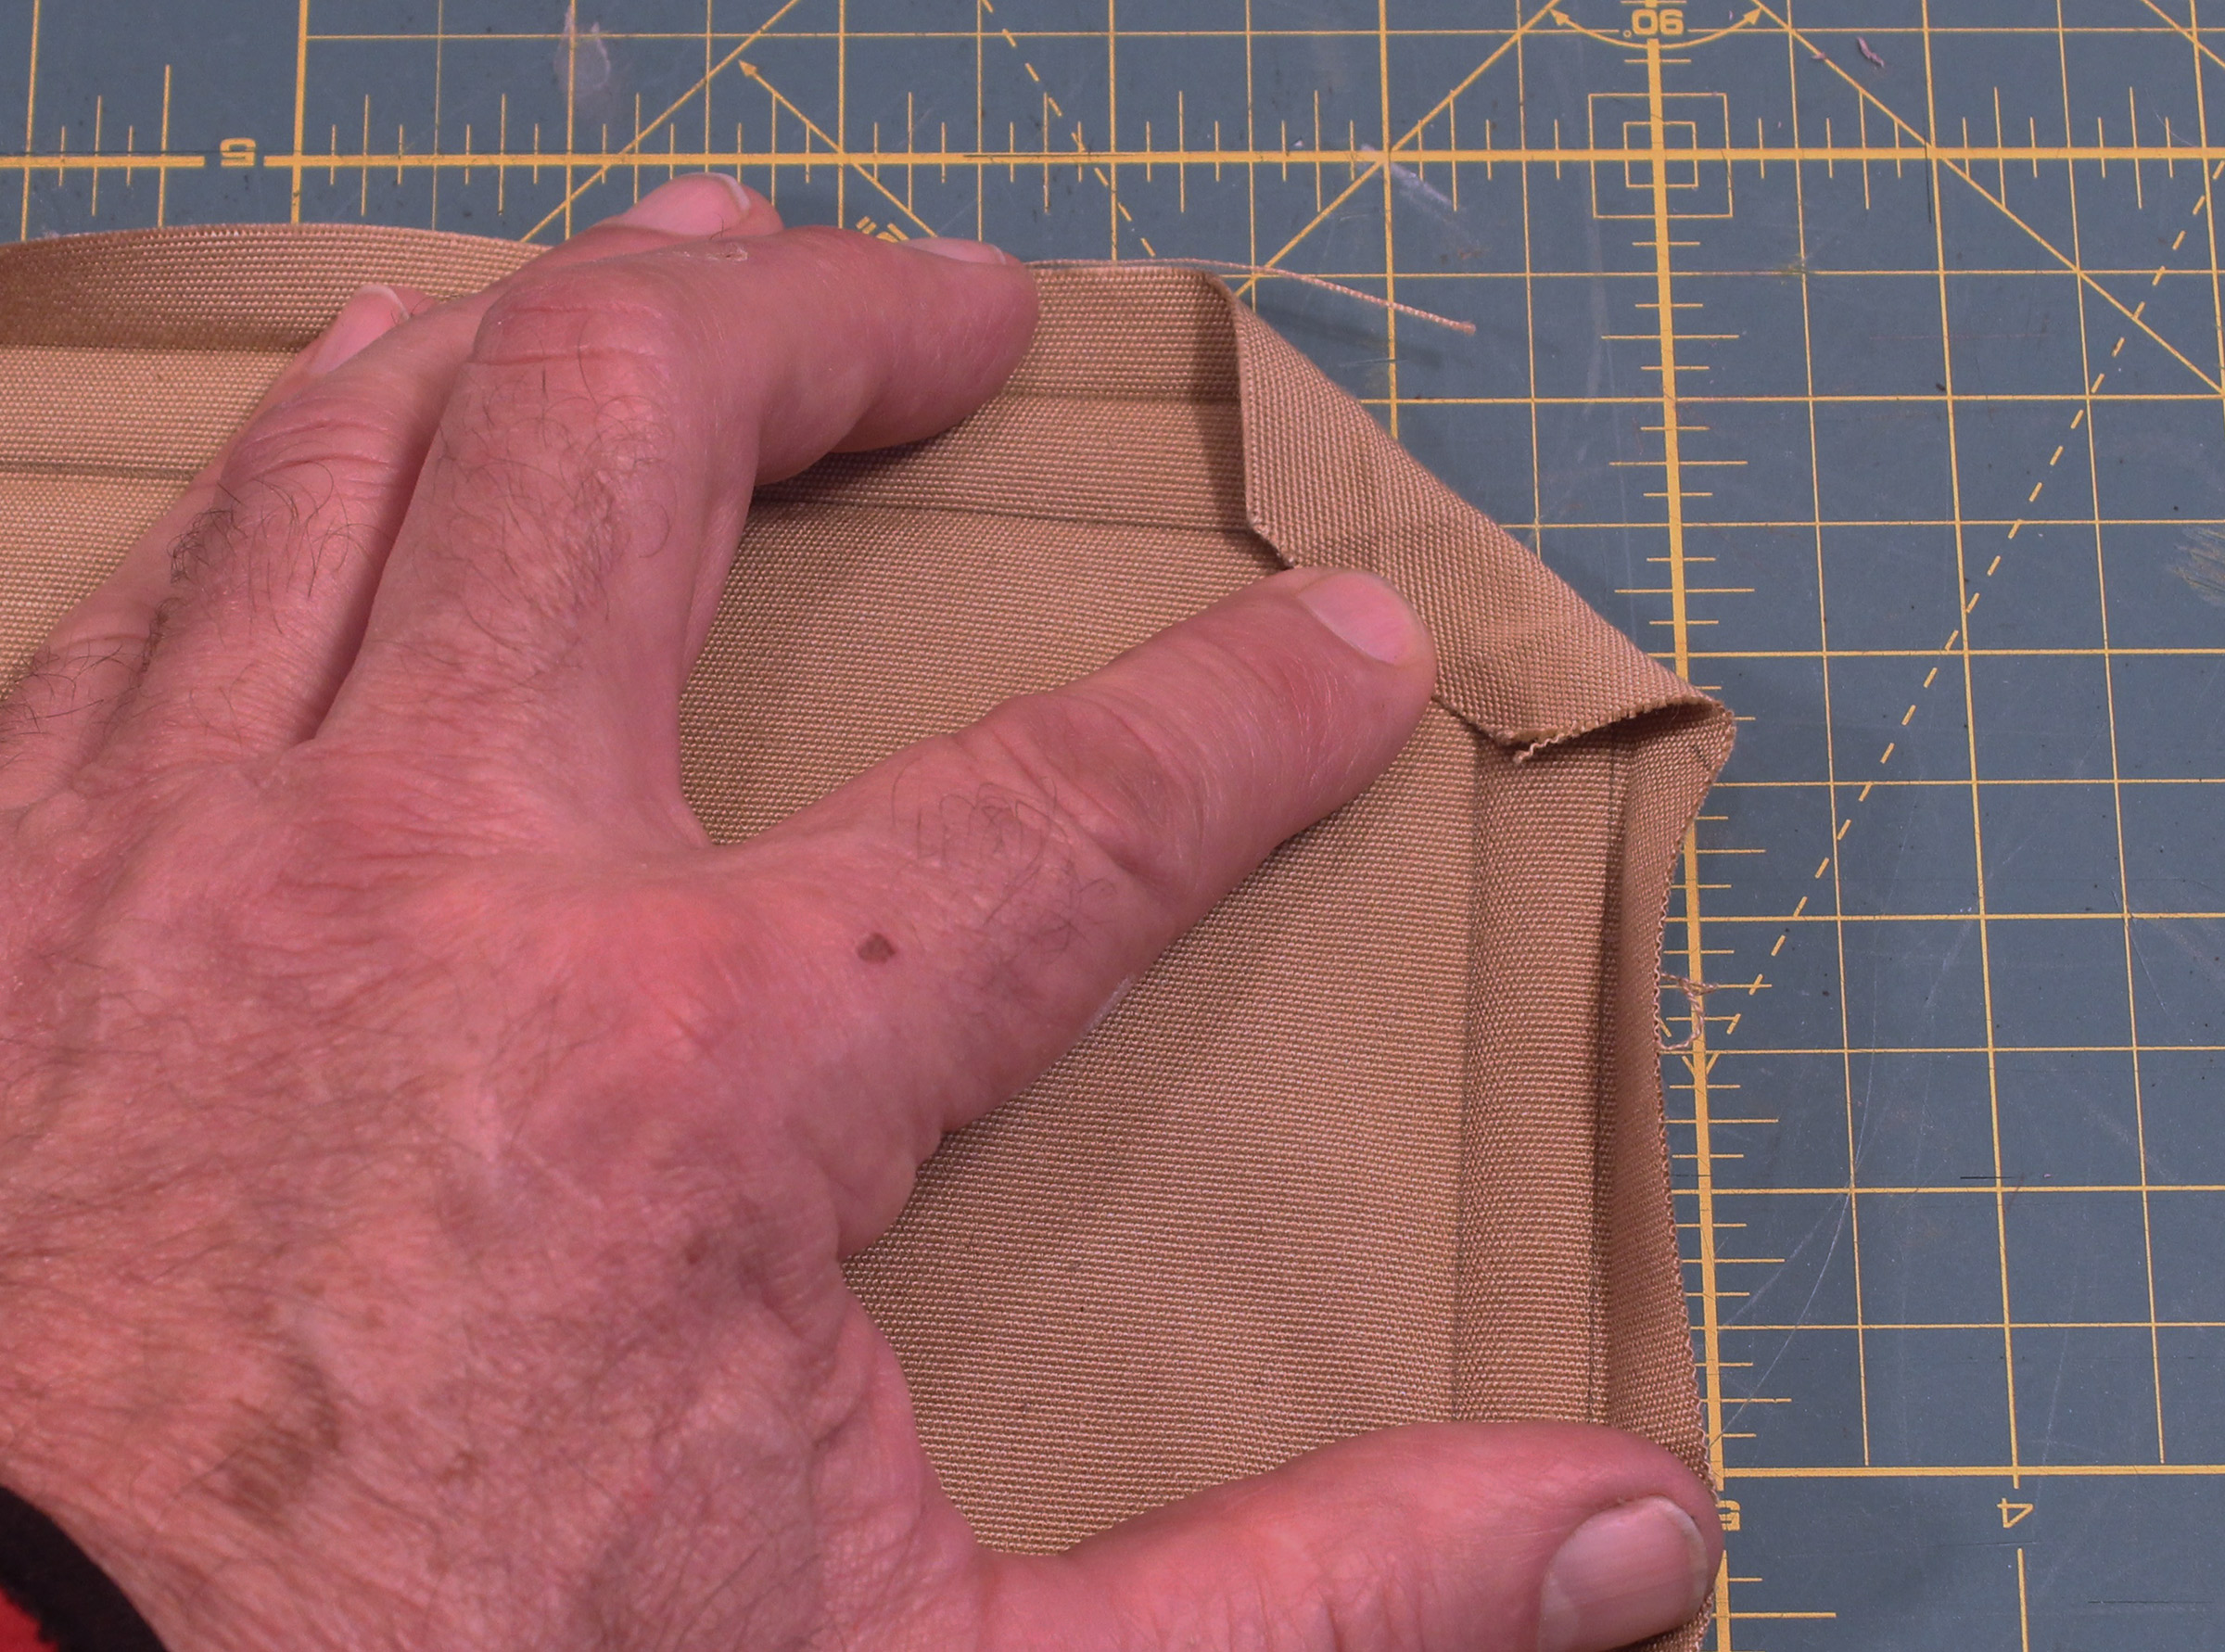
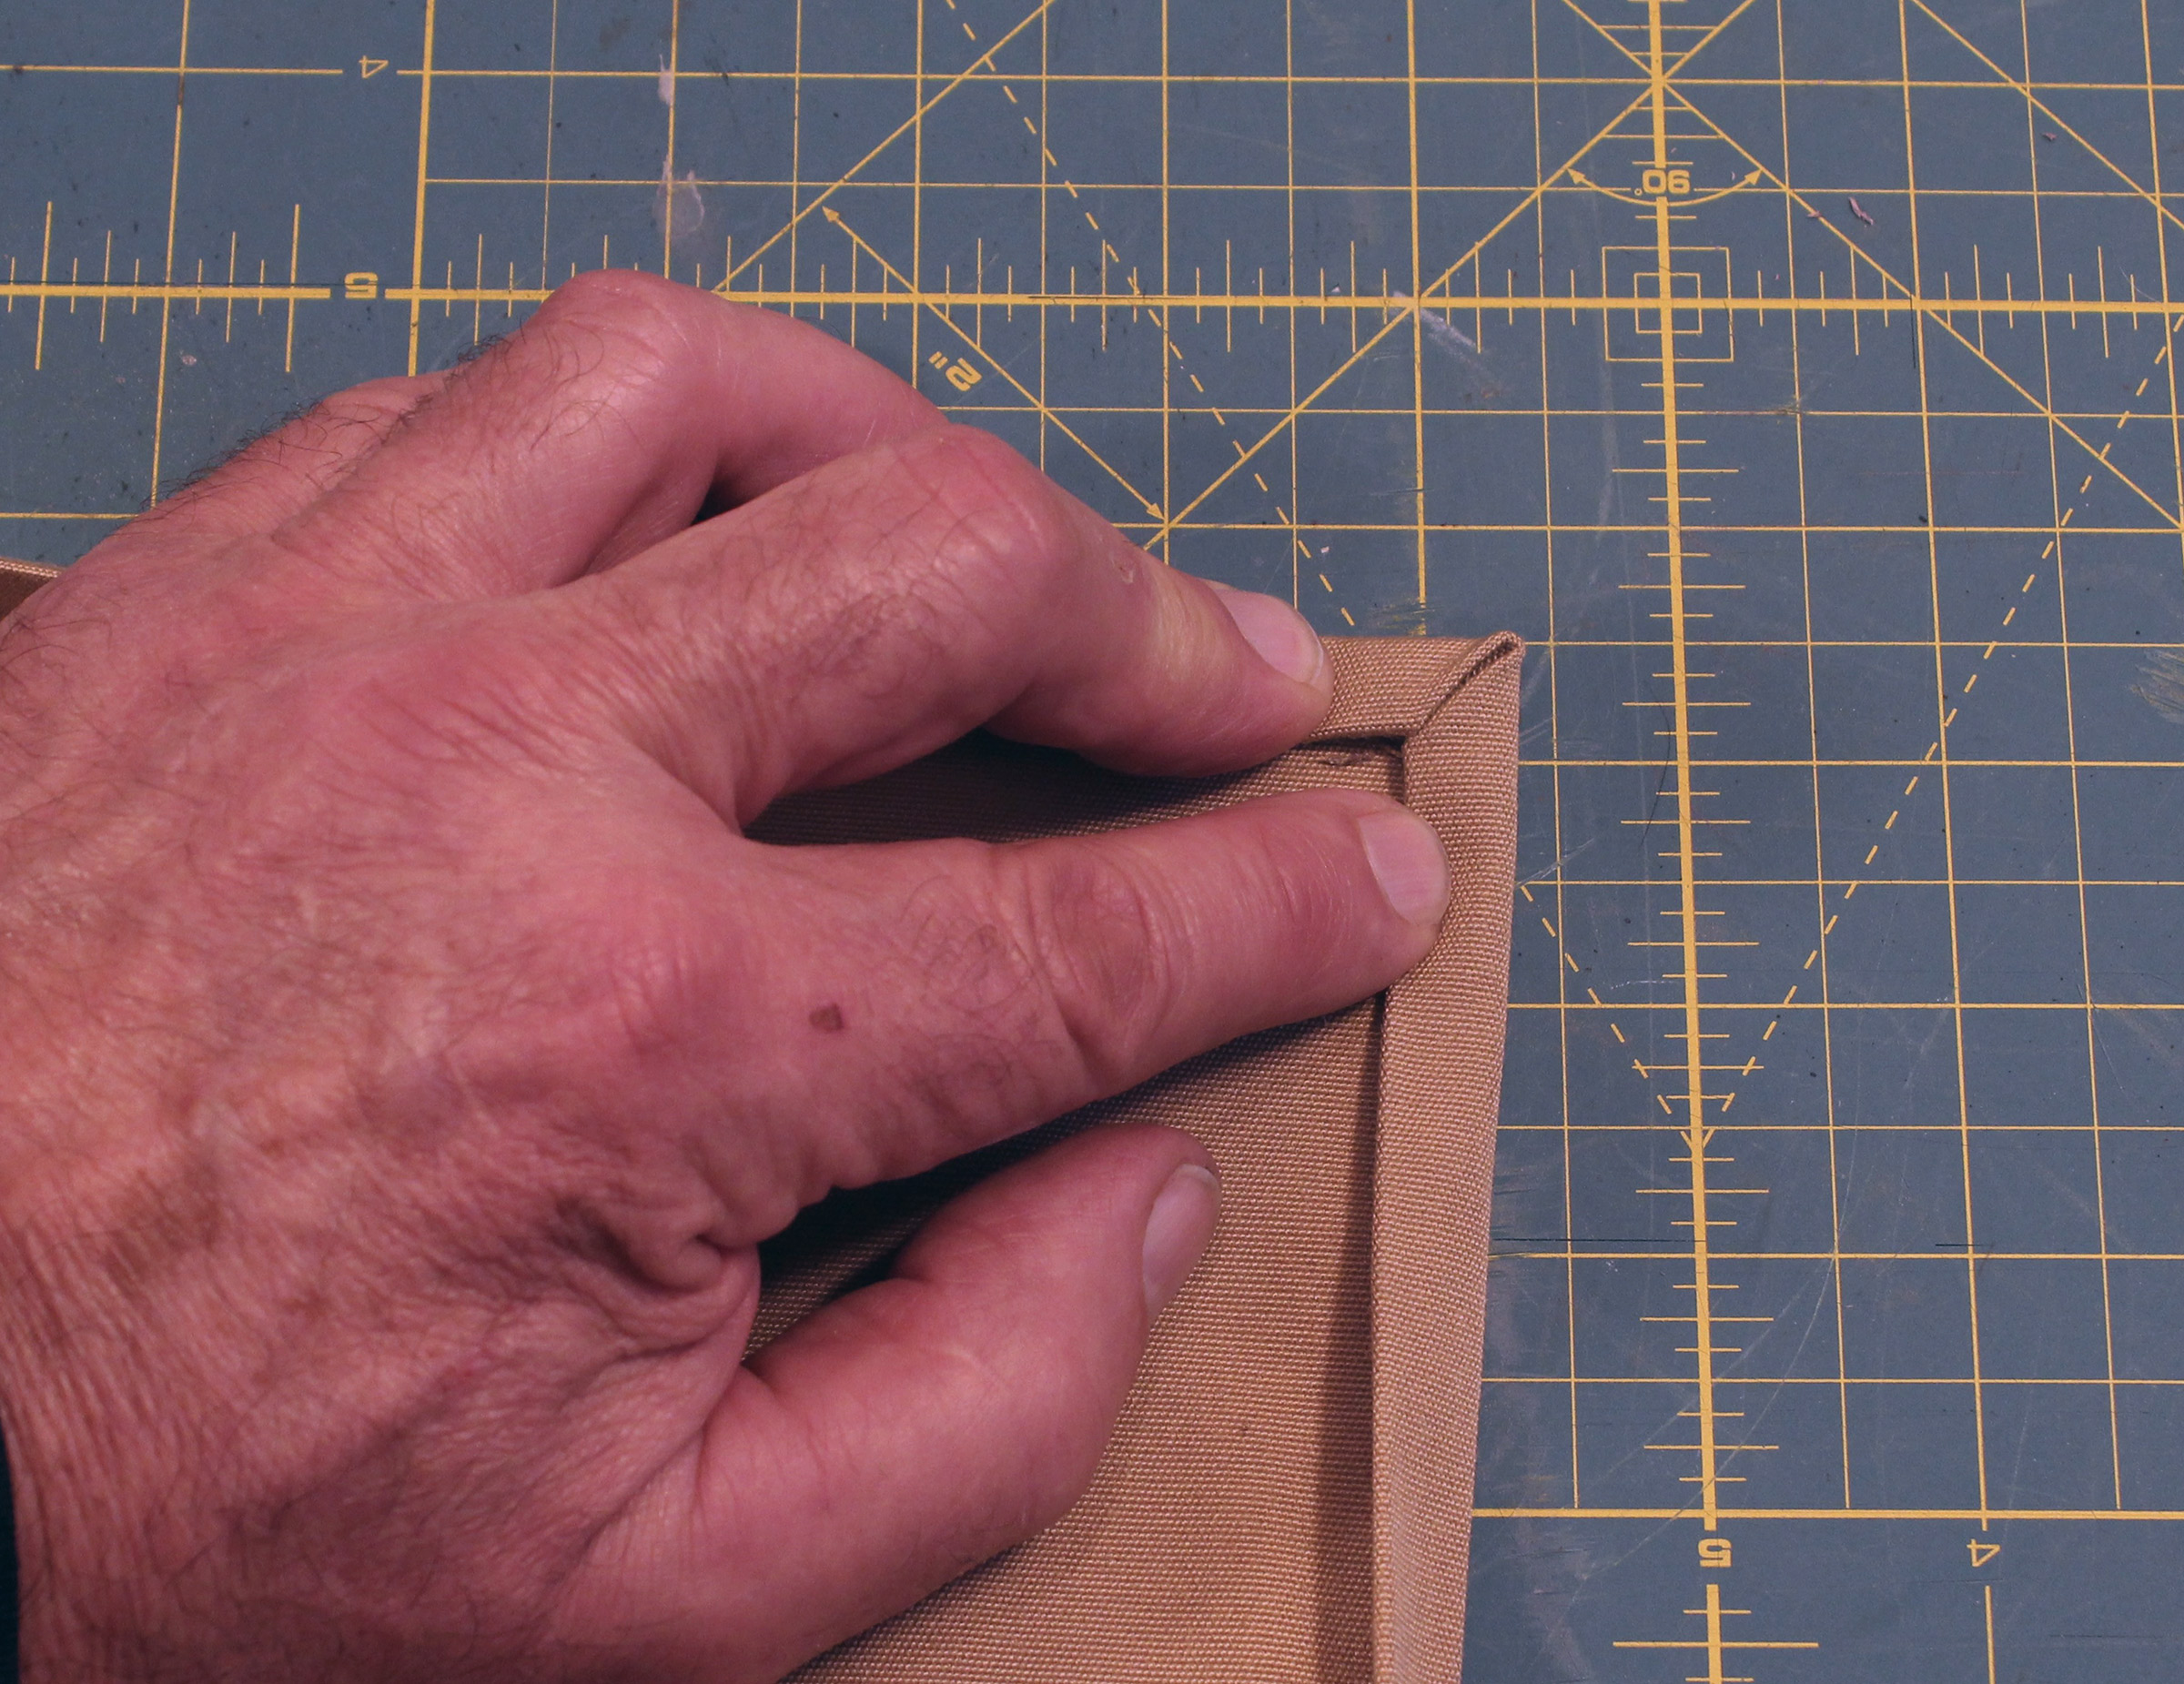
Refold the first fold of one of the hems, making sure to tuck the folded corner fabric neatly into the hem.
Refold one of the hems, the second hem fold, again tucking in the fabric as needed. You’ll get a neat diagonal fold at the end of the hem. Iron it flat.
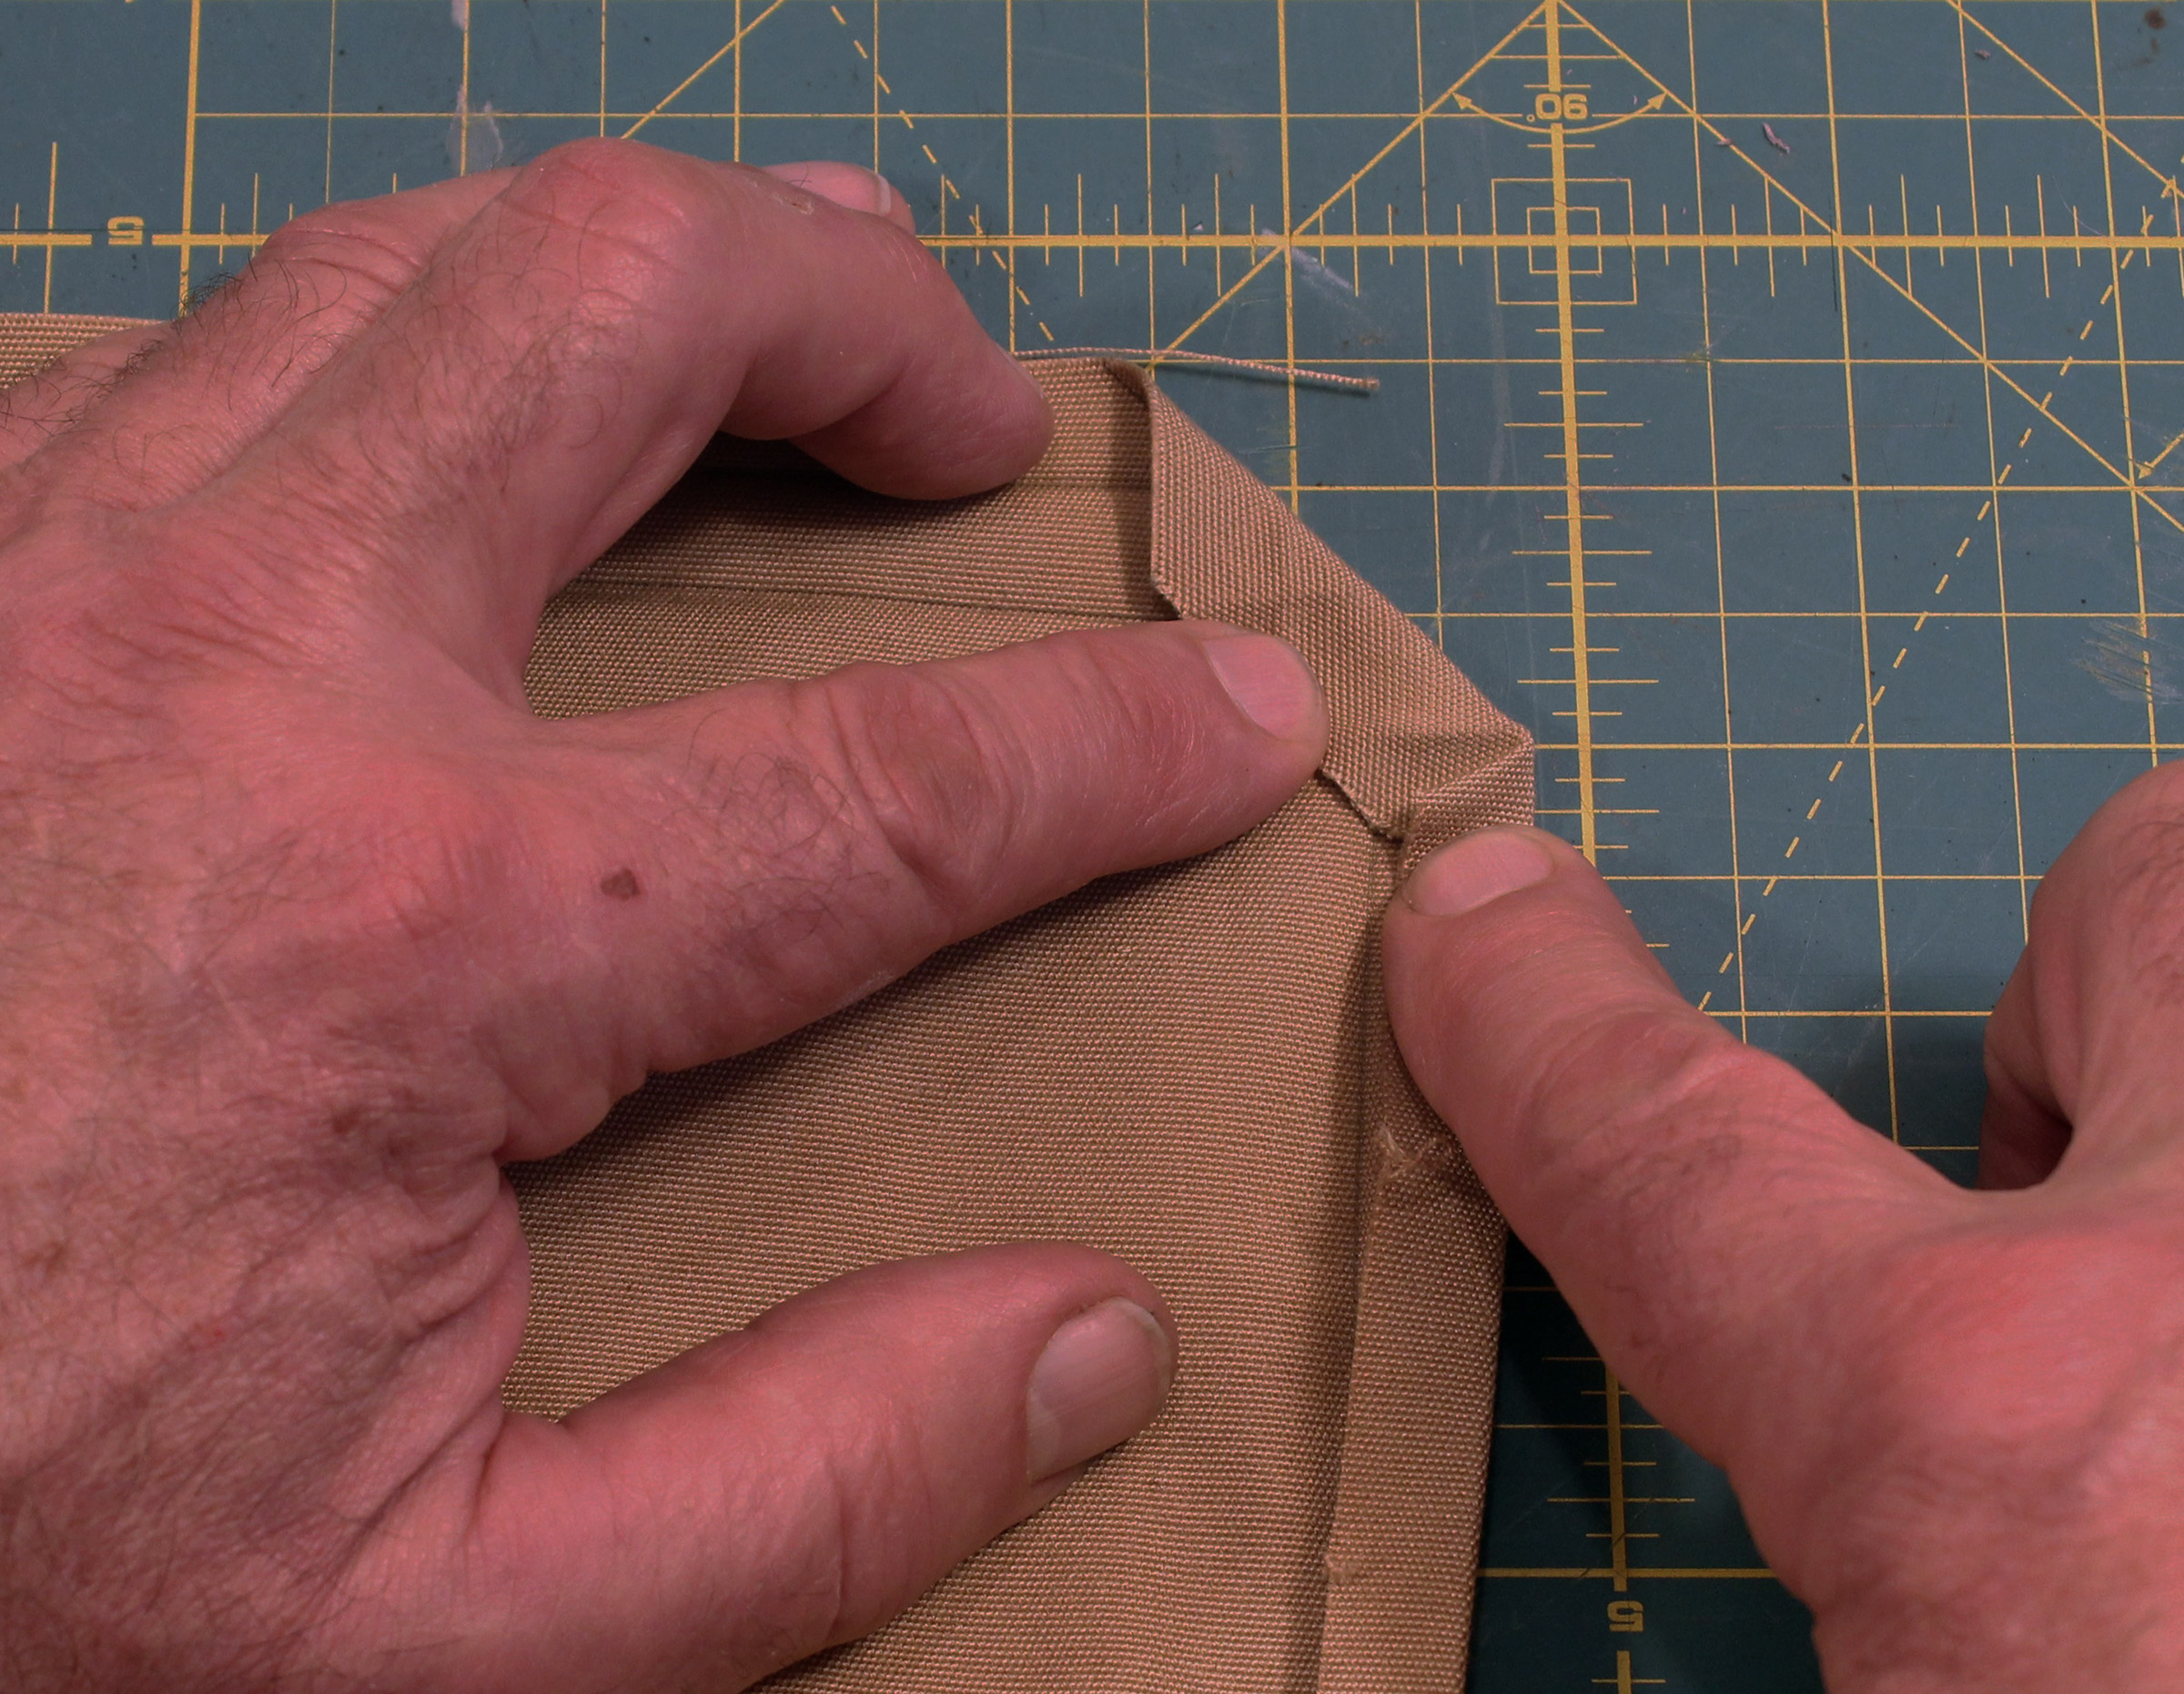
Repeat the process for the other hem, starting with the first fold.
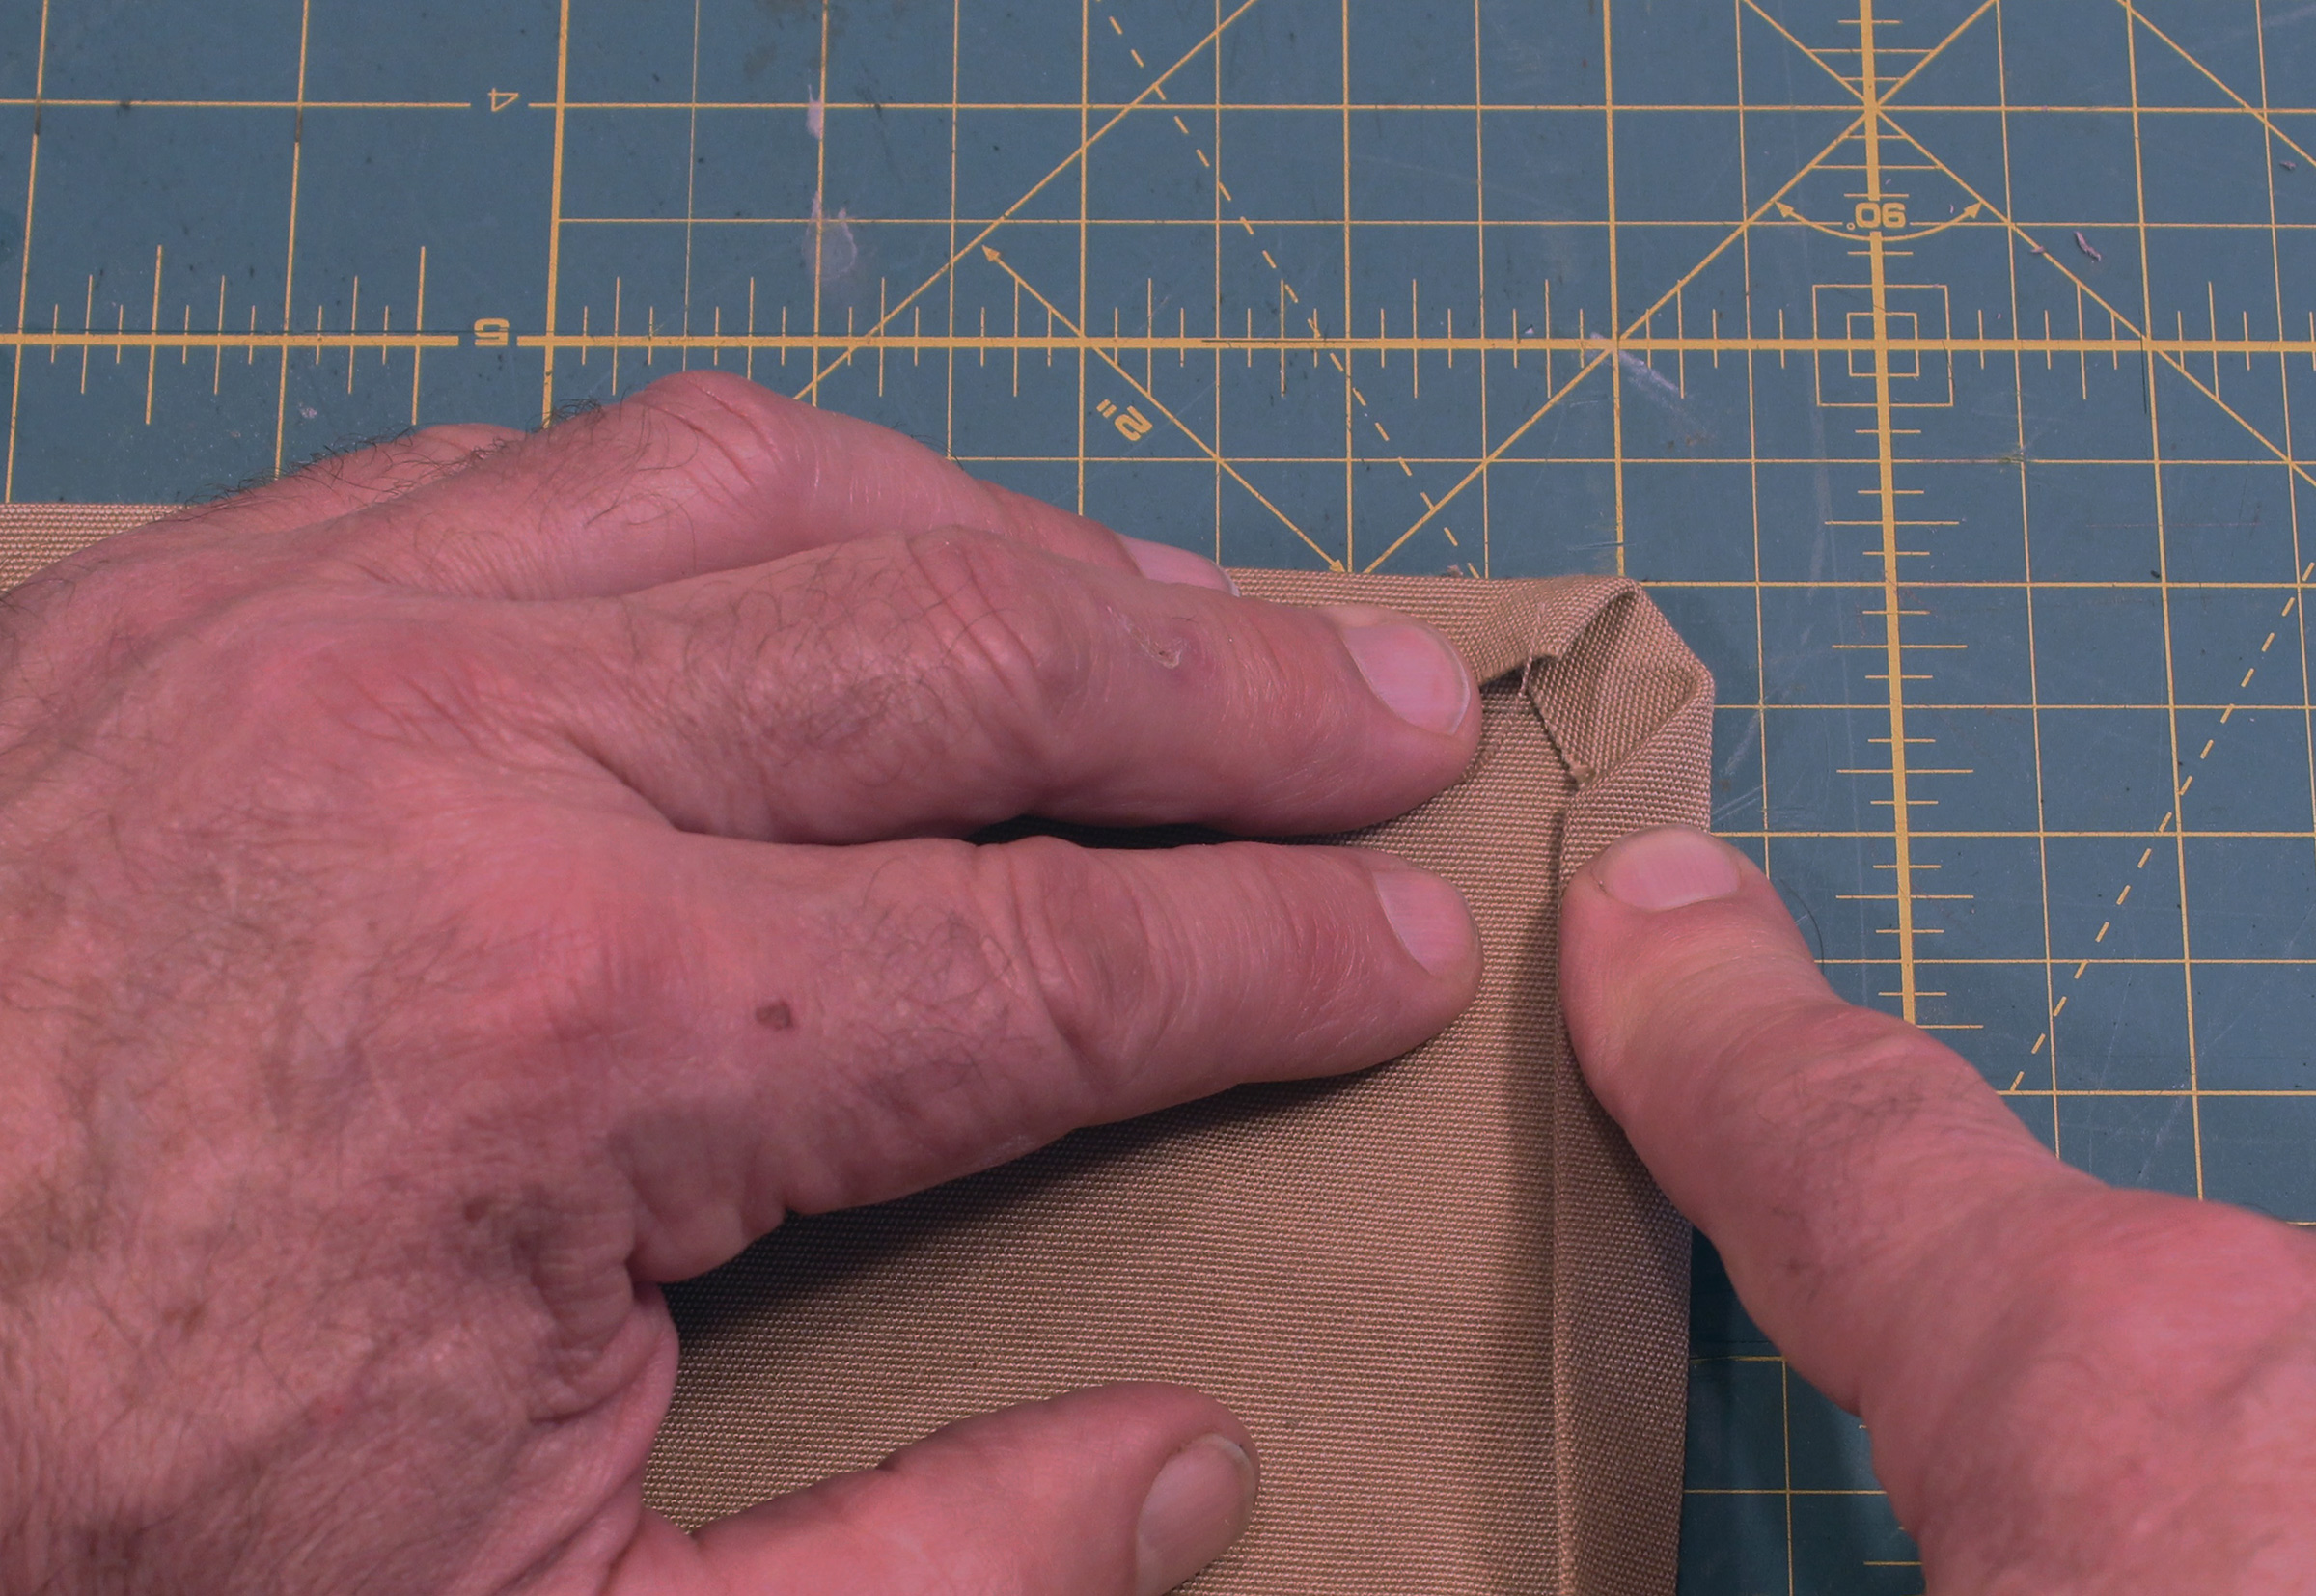
Refolding the second hem finishes the miter corner. Iron it flat.
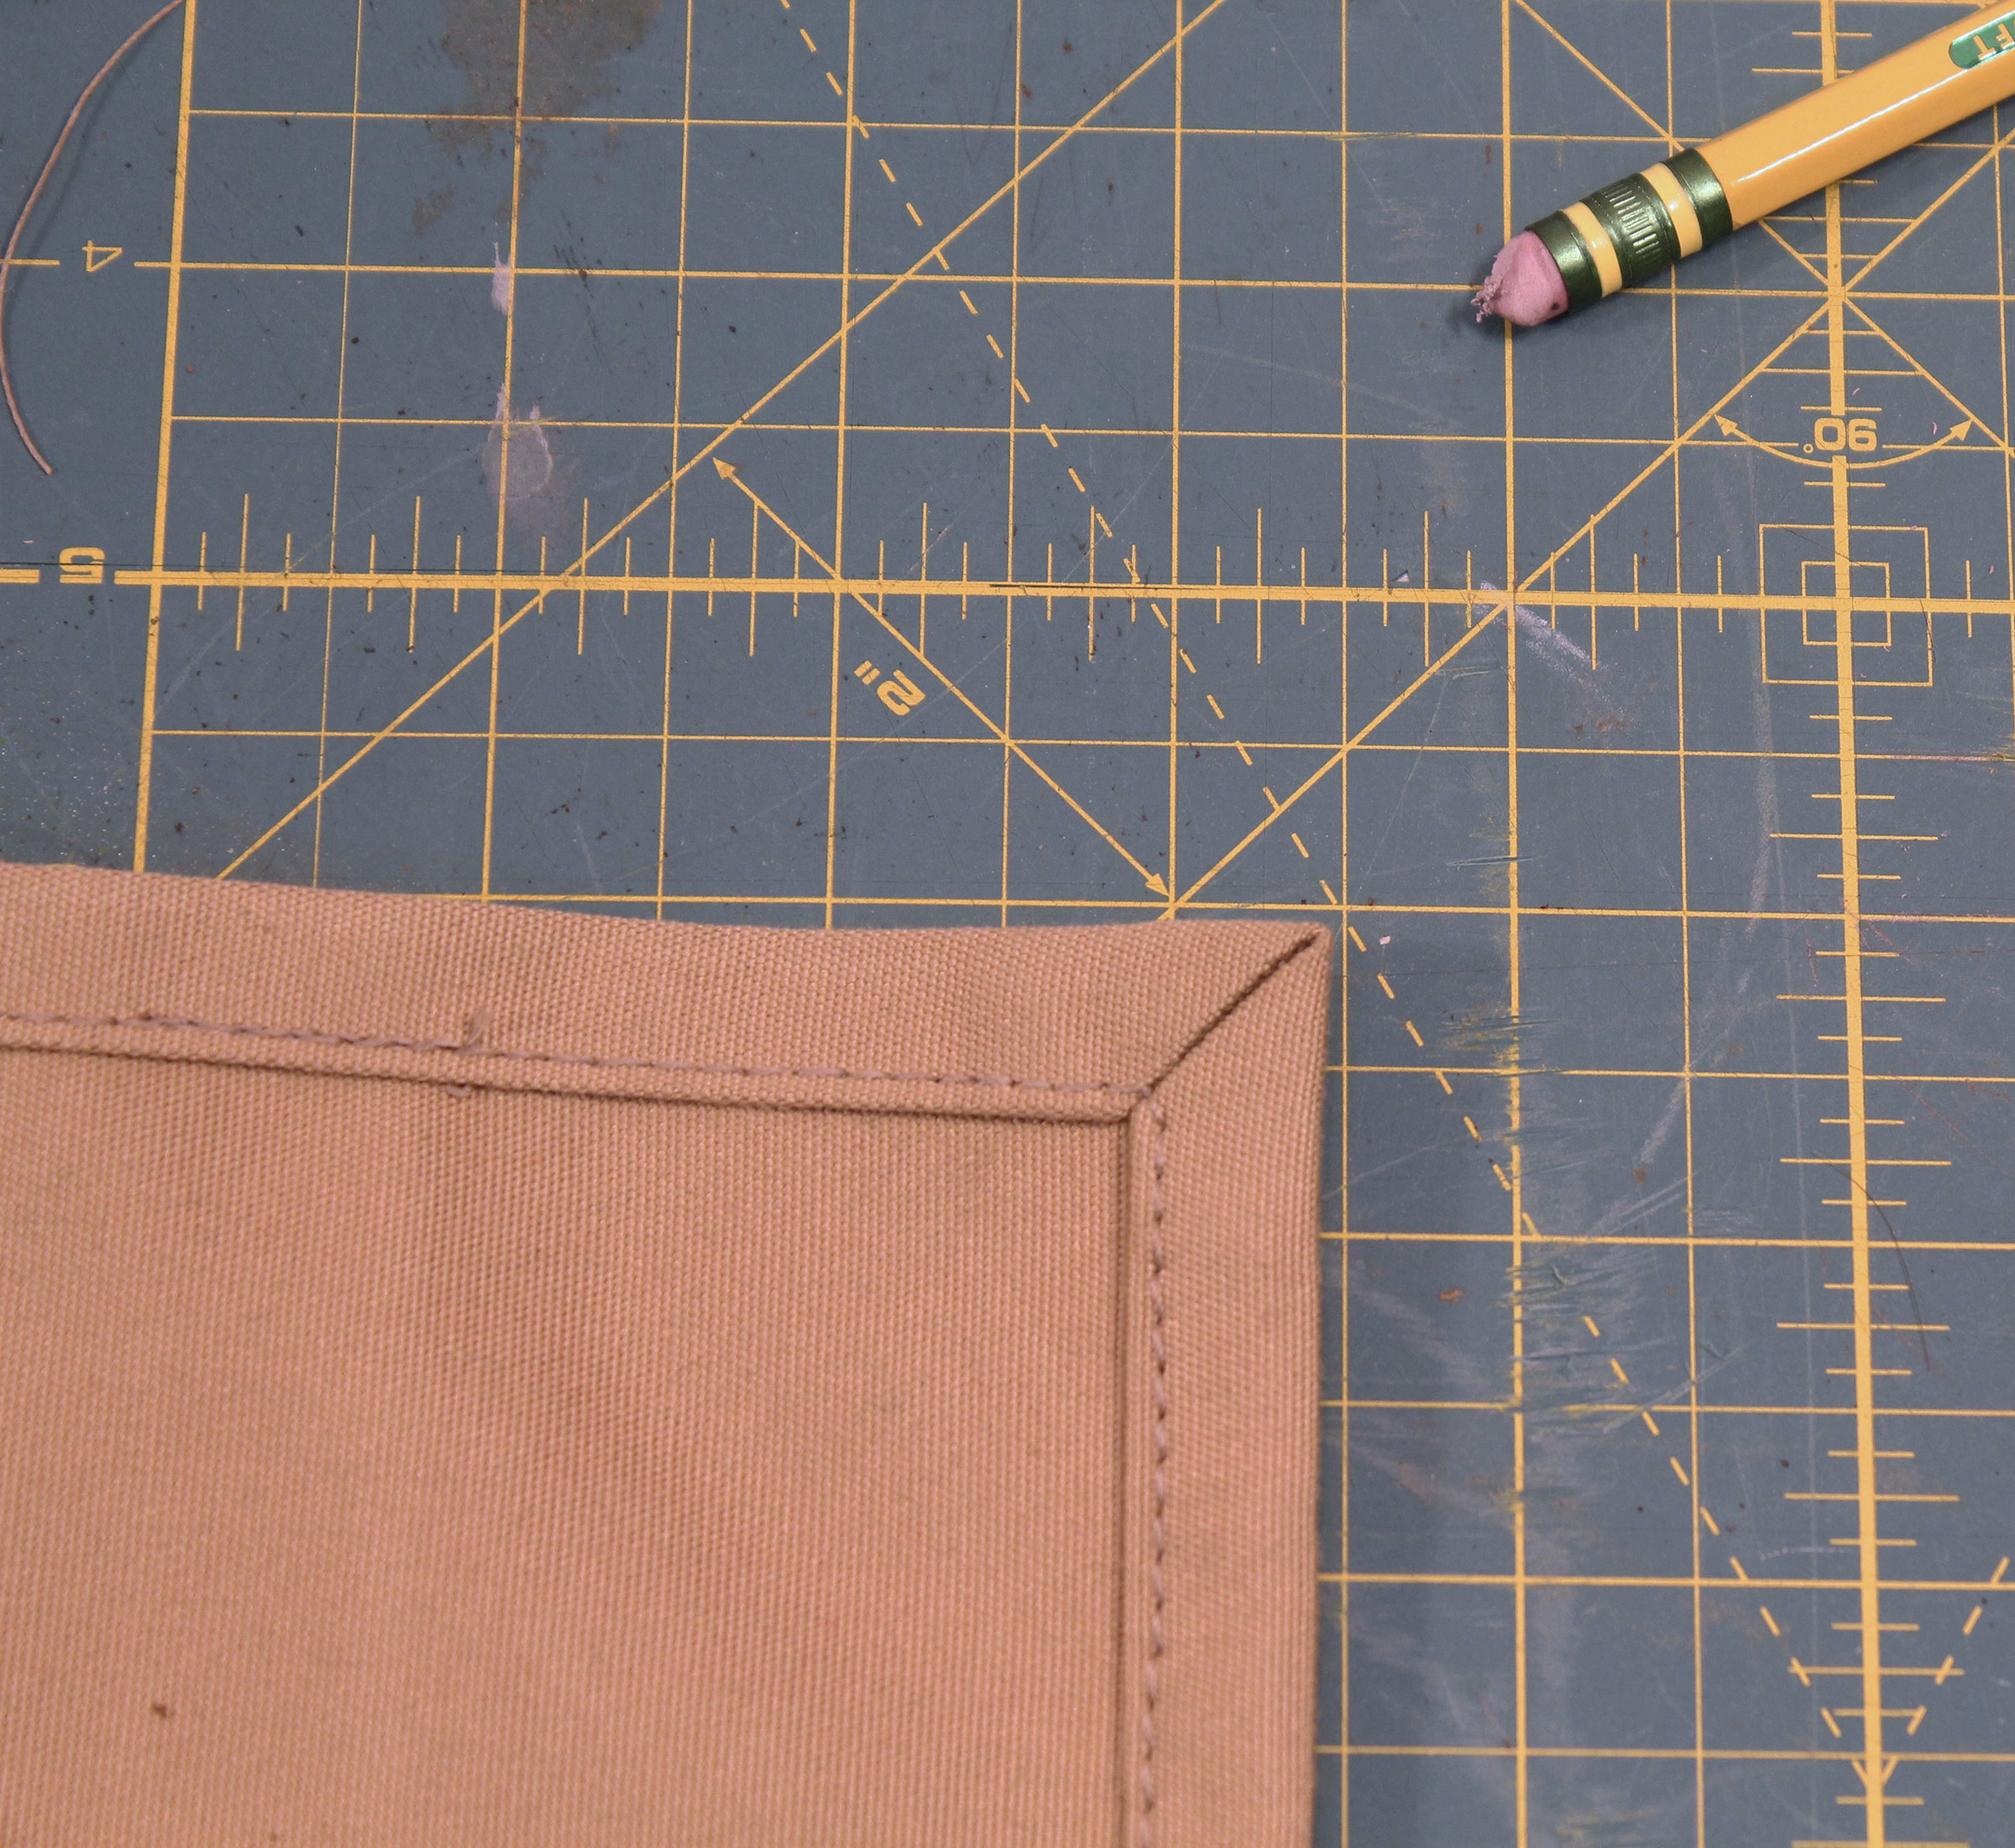
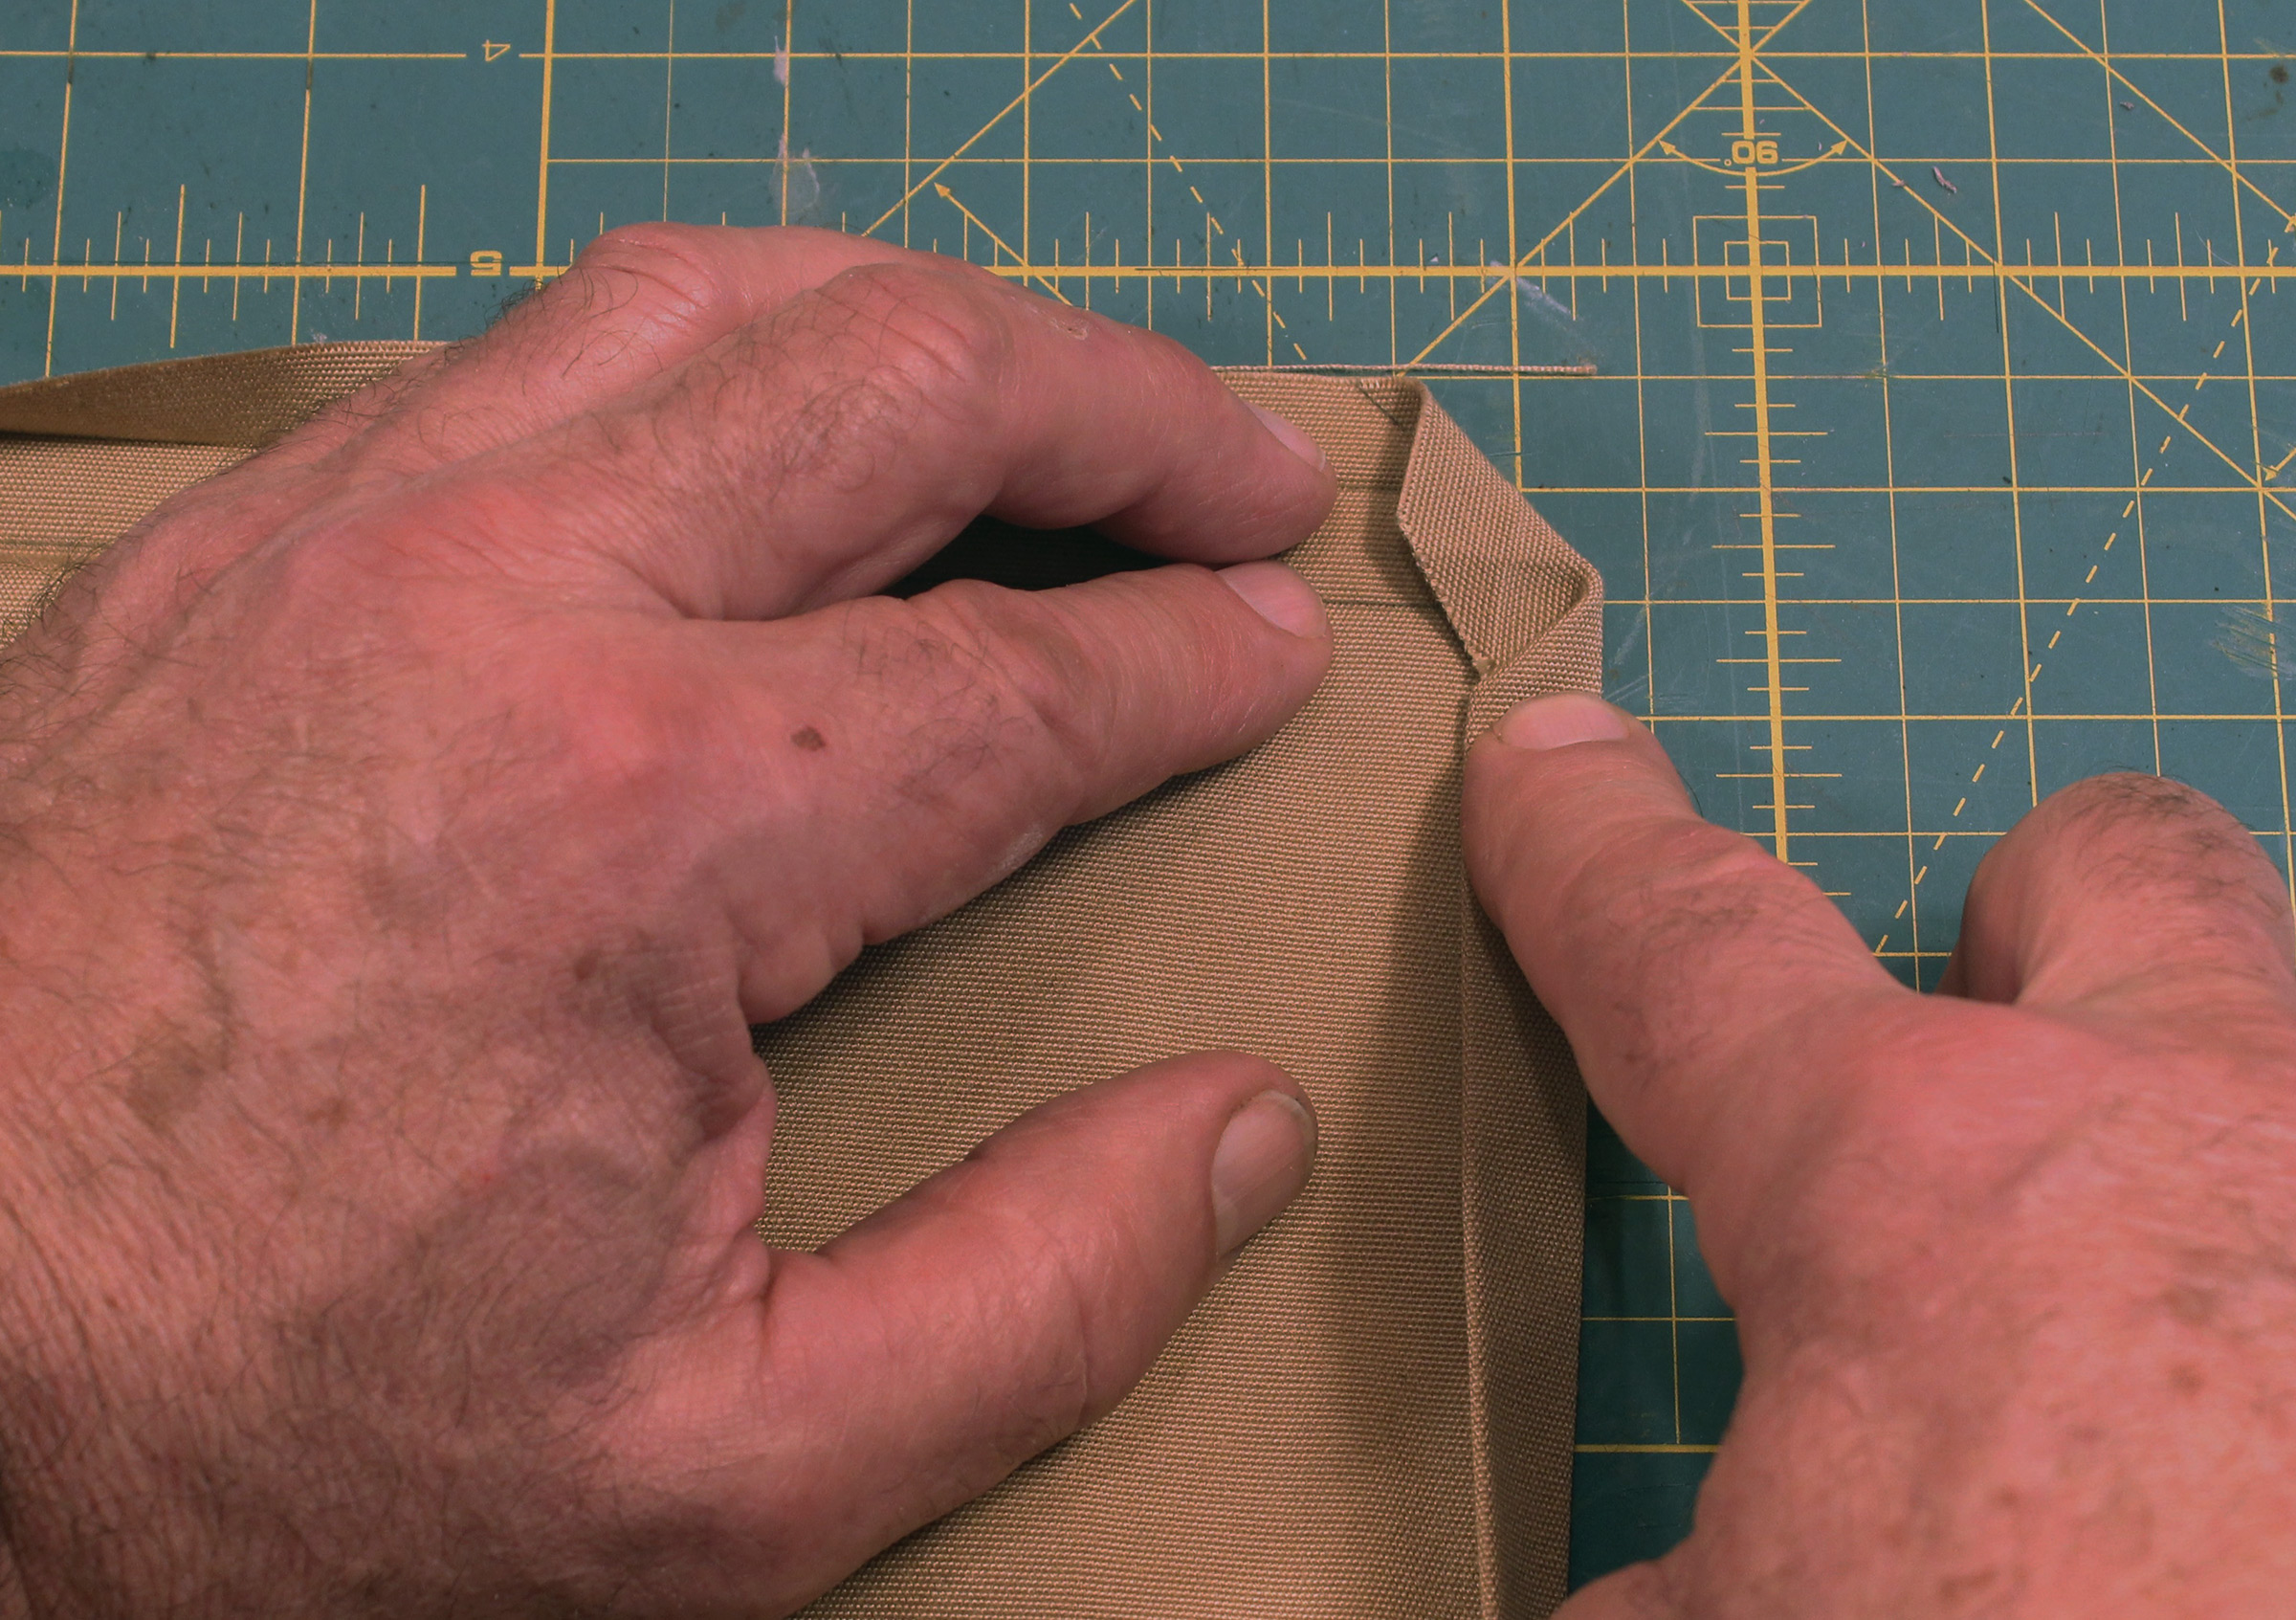
With all four corners folded and ironed, sew the edge of the hems, making the right-angle turn at each corner.
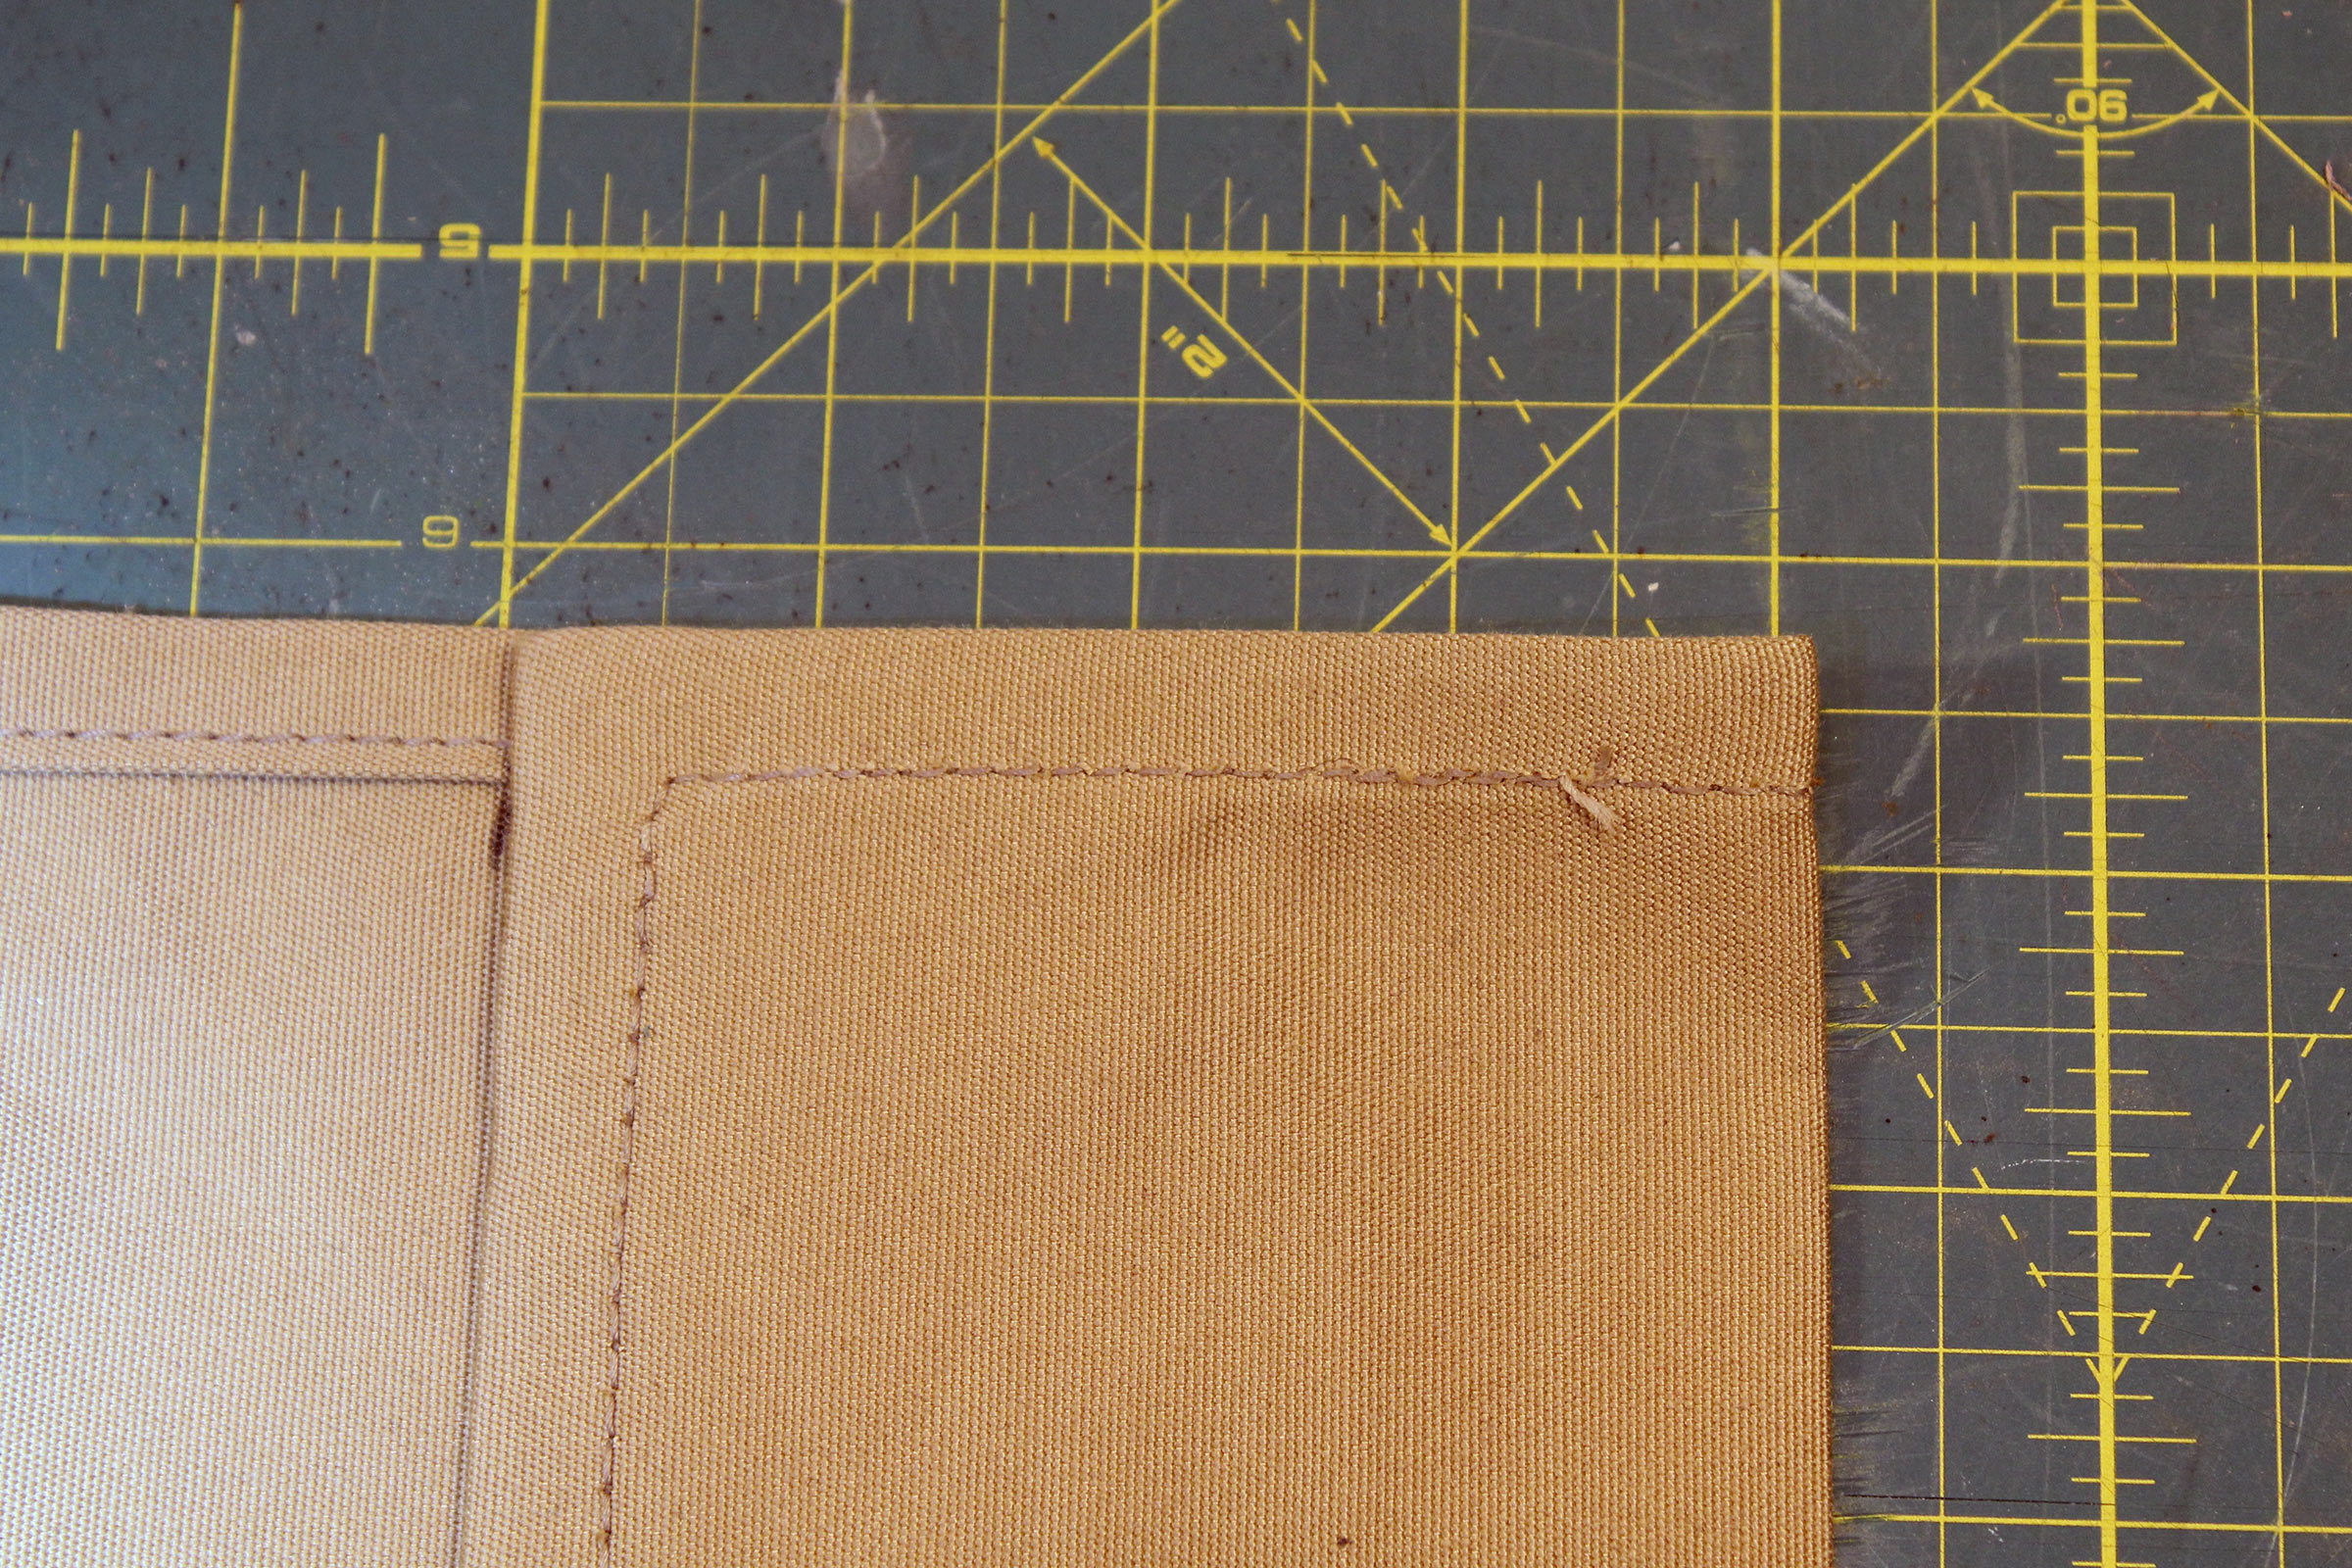
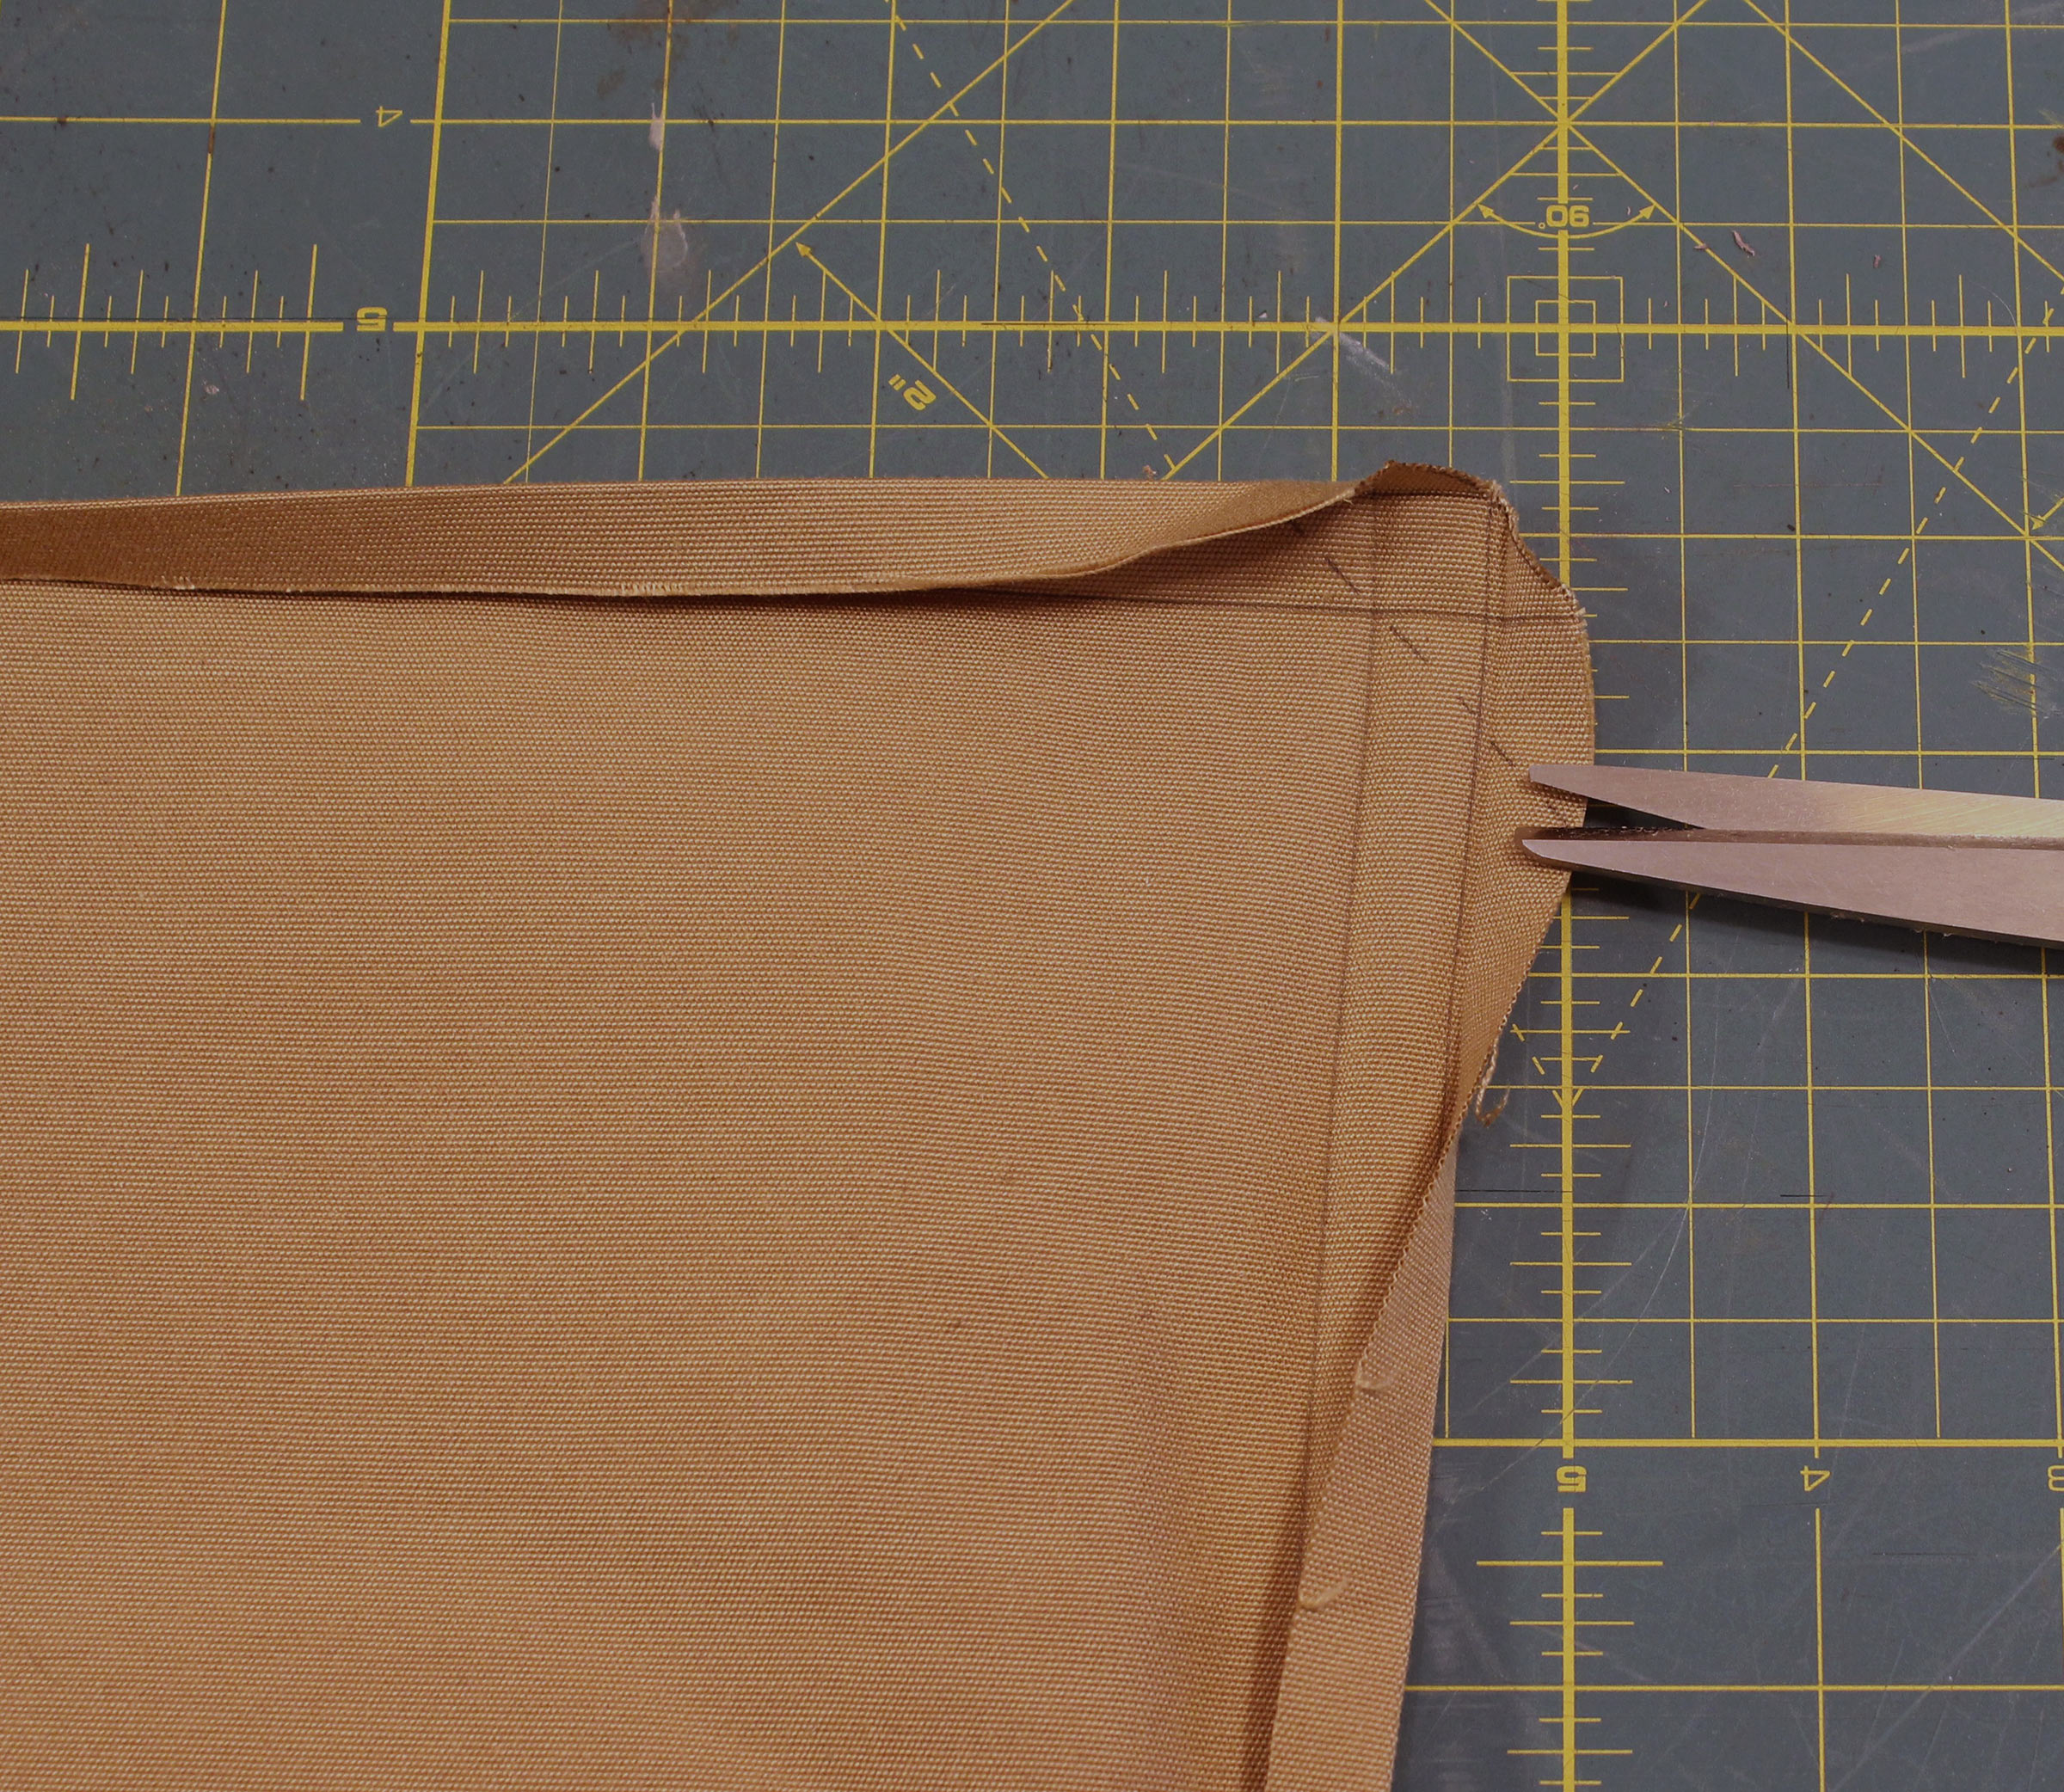
With the hems now sewn, fold 4″ of one end of the fabric over, iron the crease, and sew the doubled-over hems to create two pockets for the legs.
The folded top is sewn along the left and right edges. This involves eight layers of fabric and may require a stout needle in the sewing machine; I used a size 100/16. Backstitch at both ends of each line of stitching.
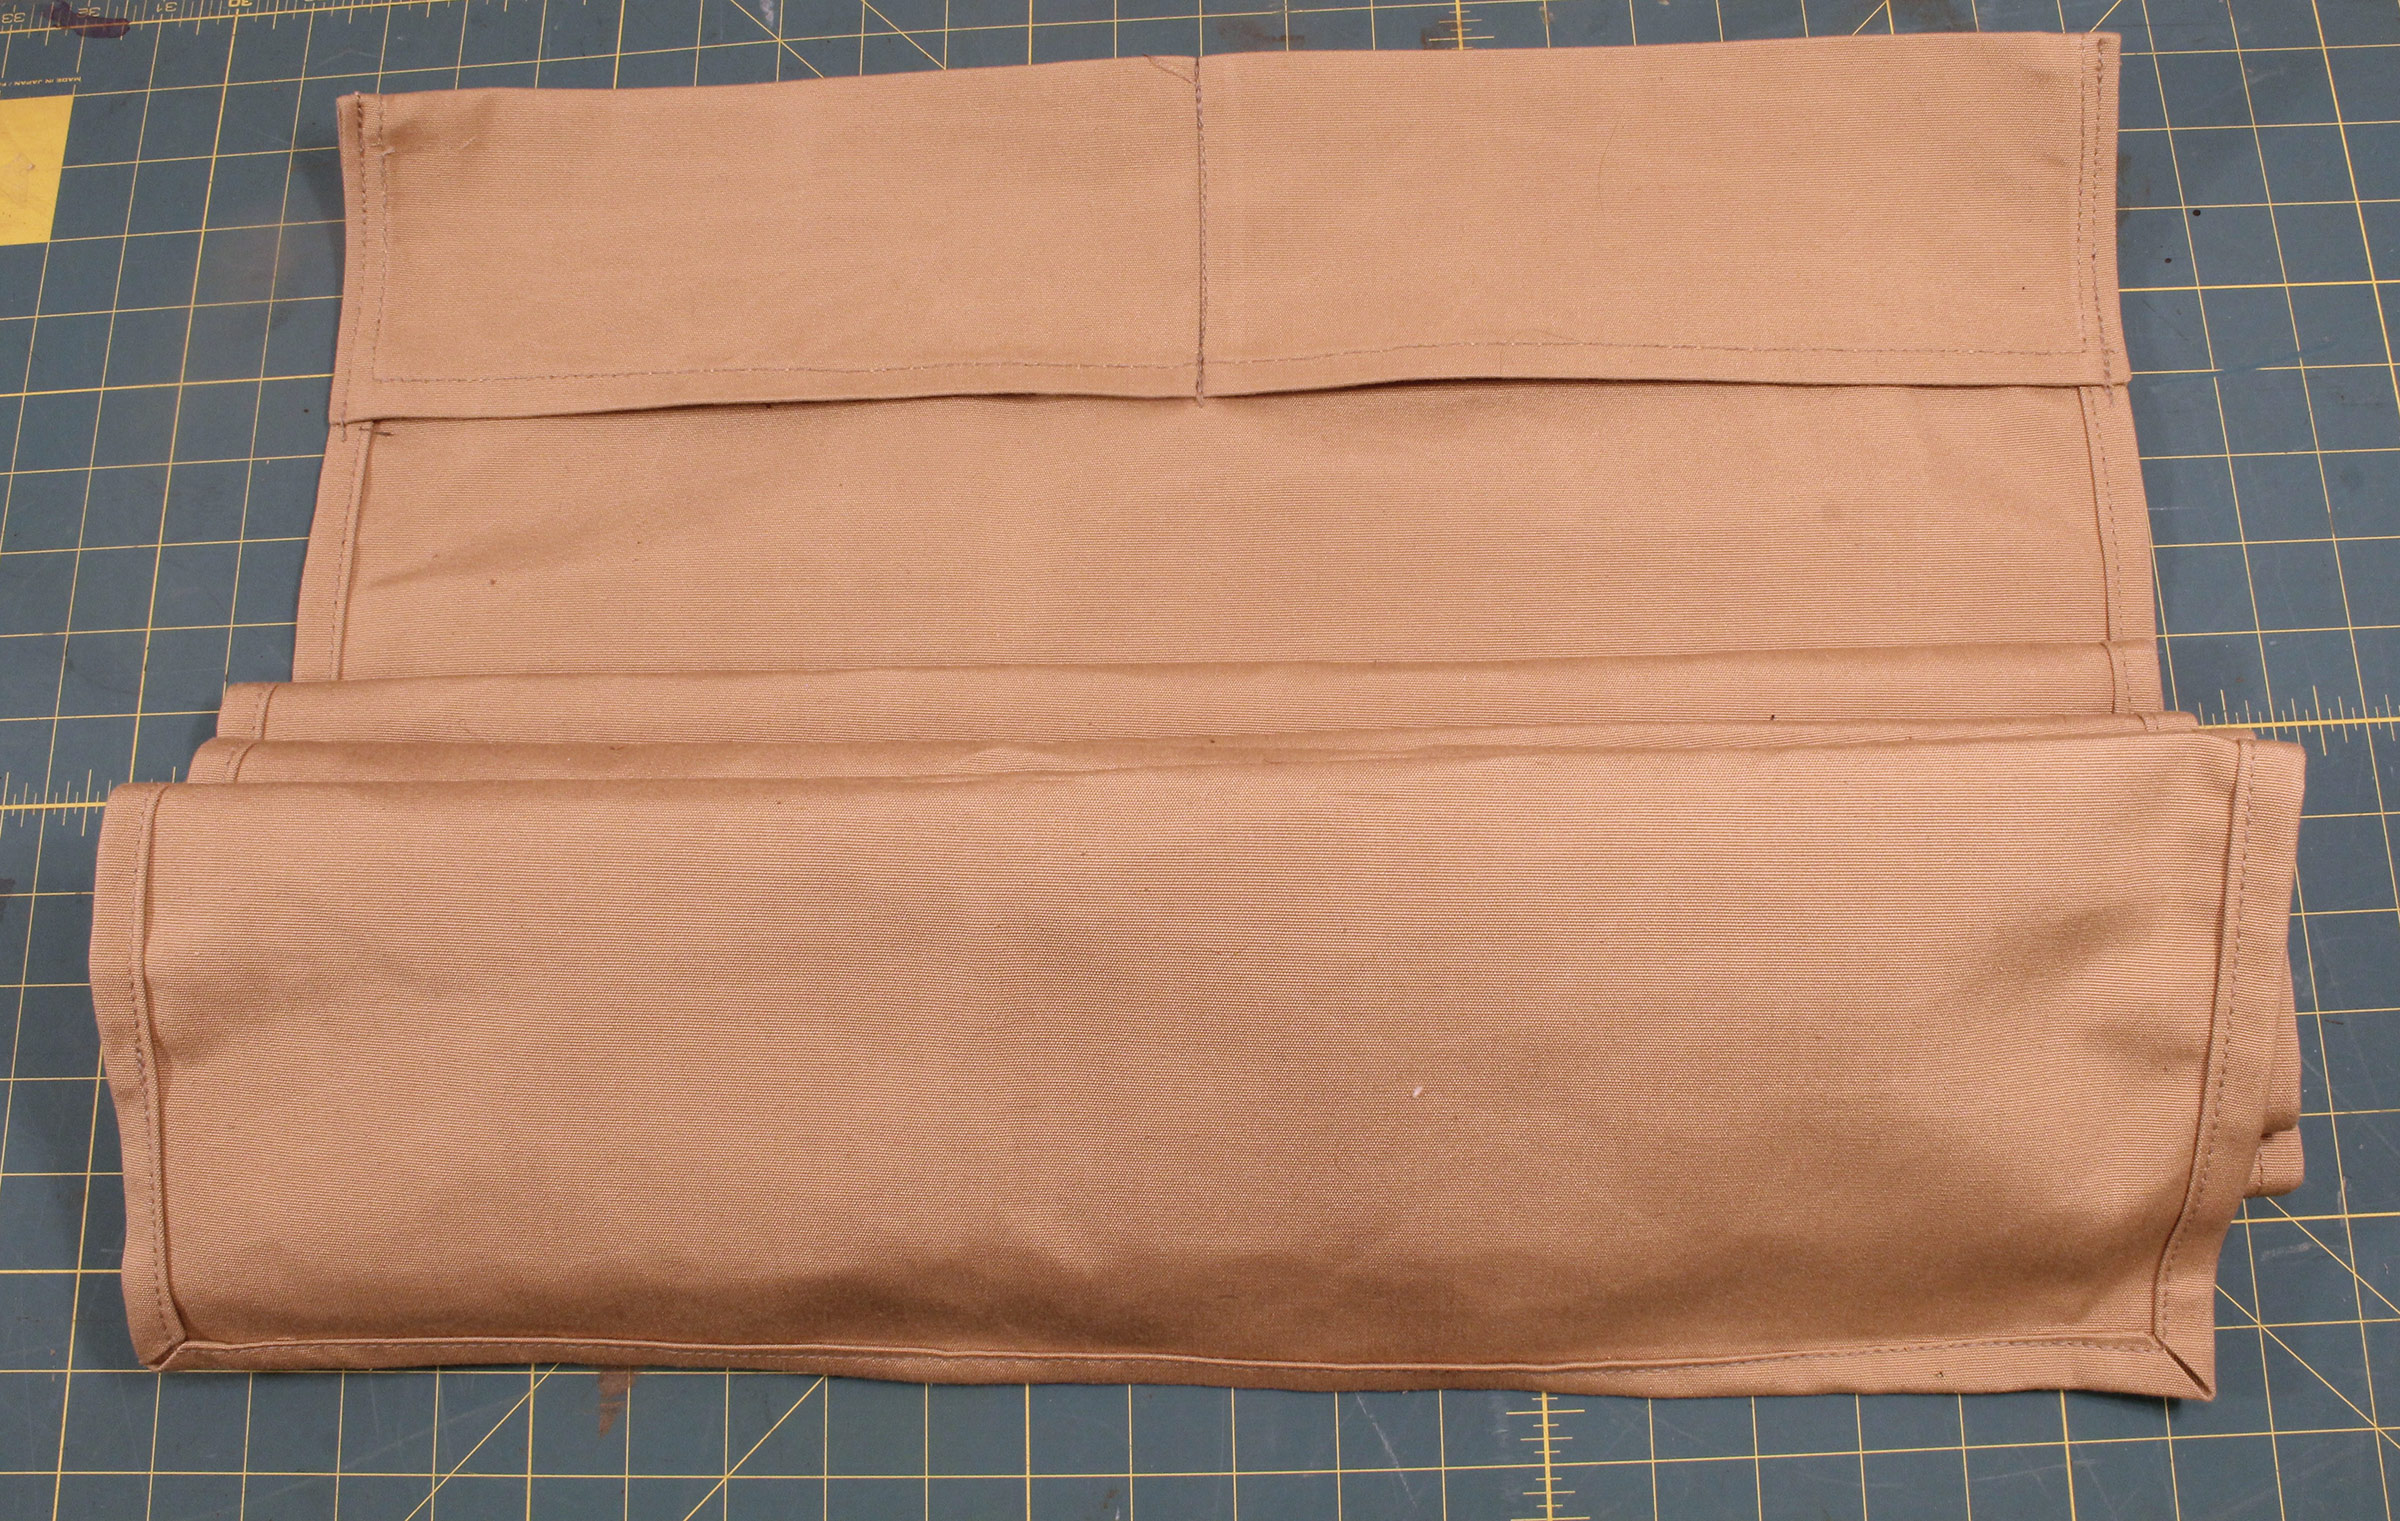
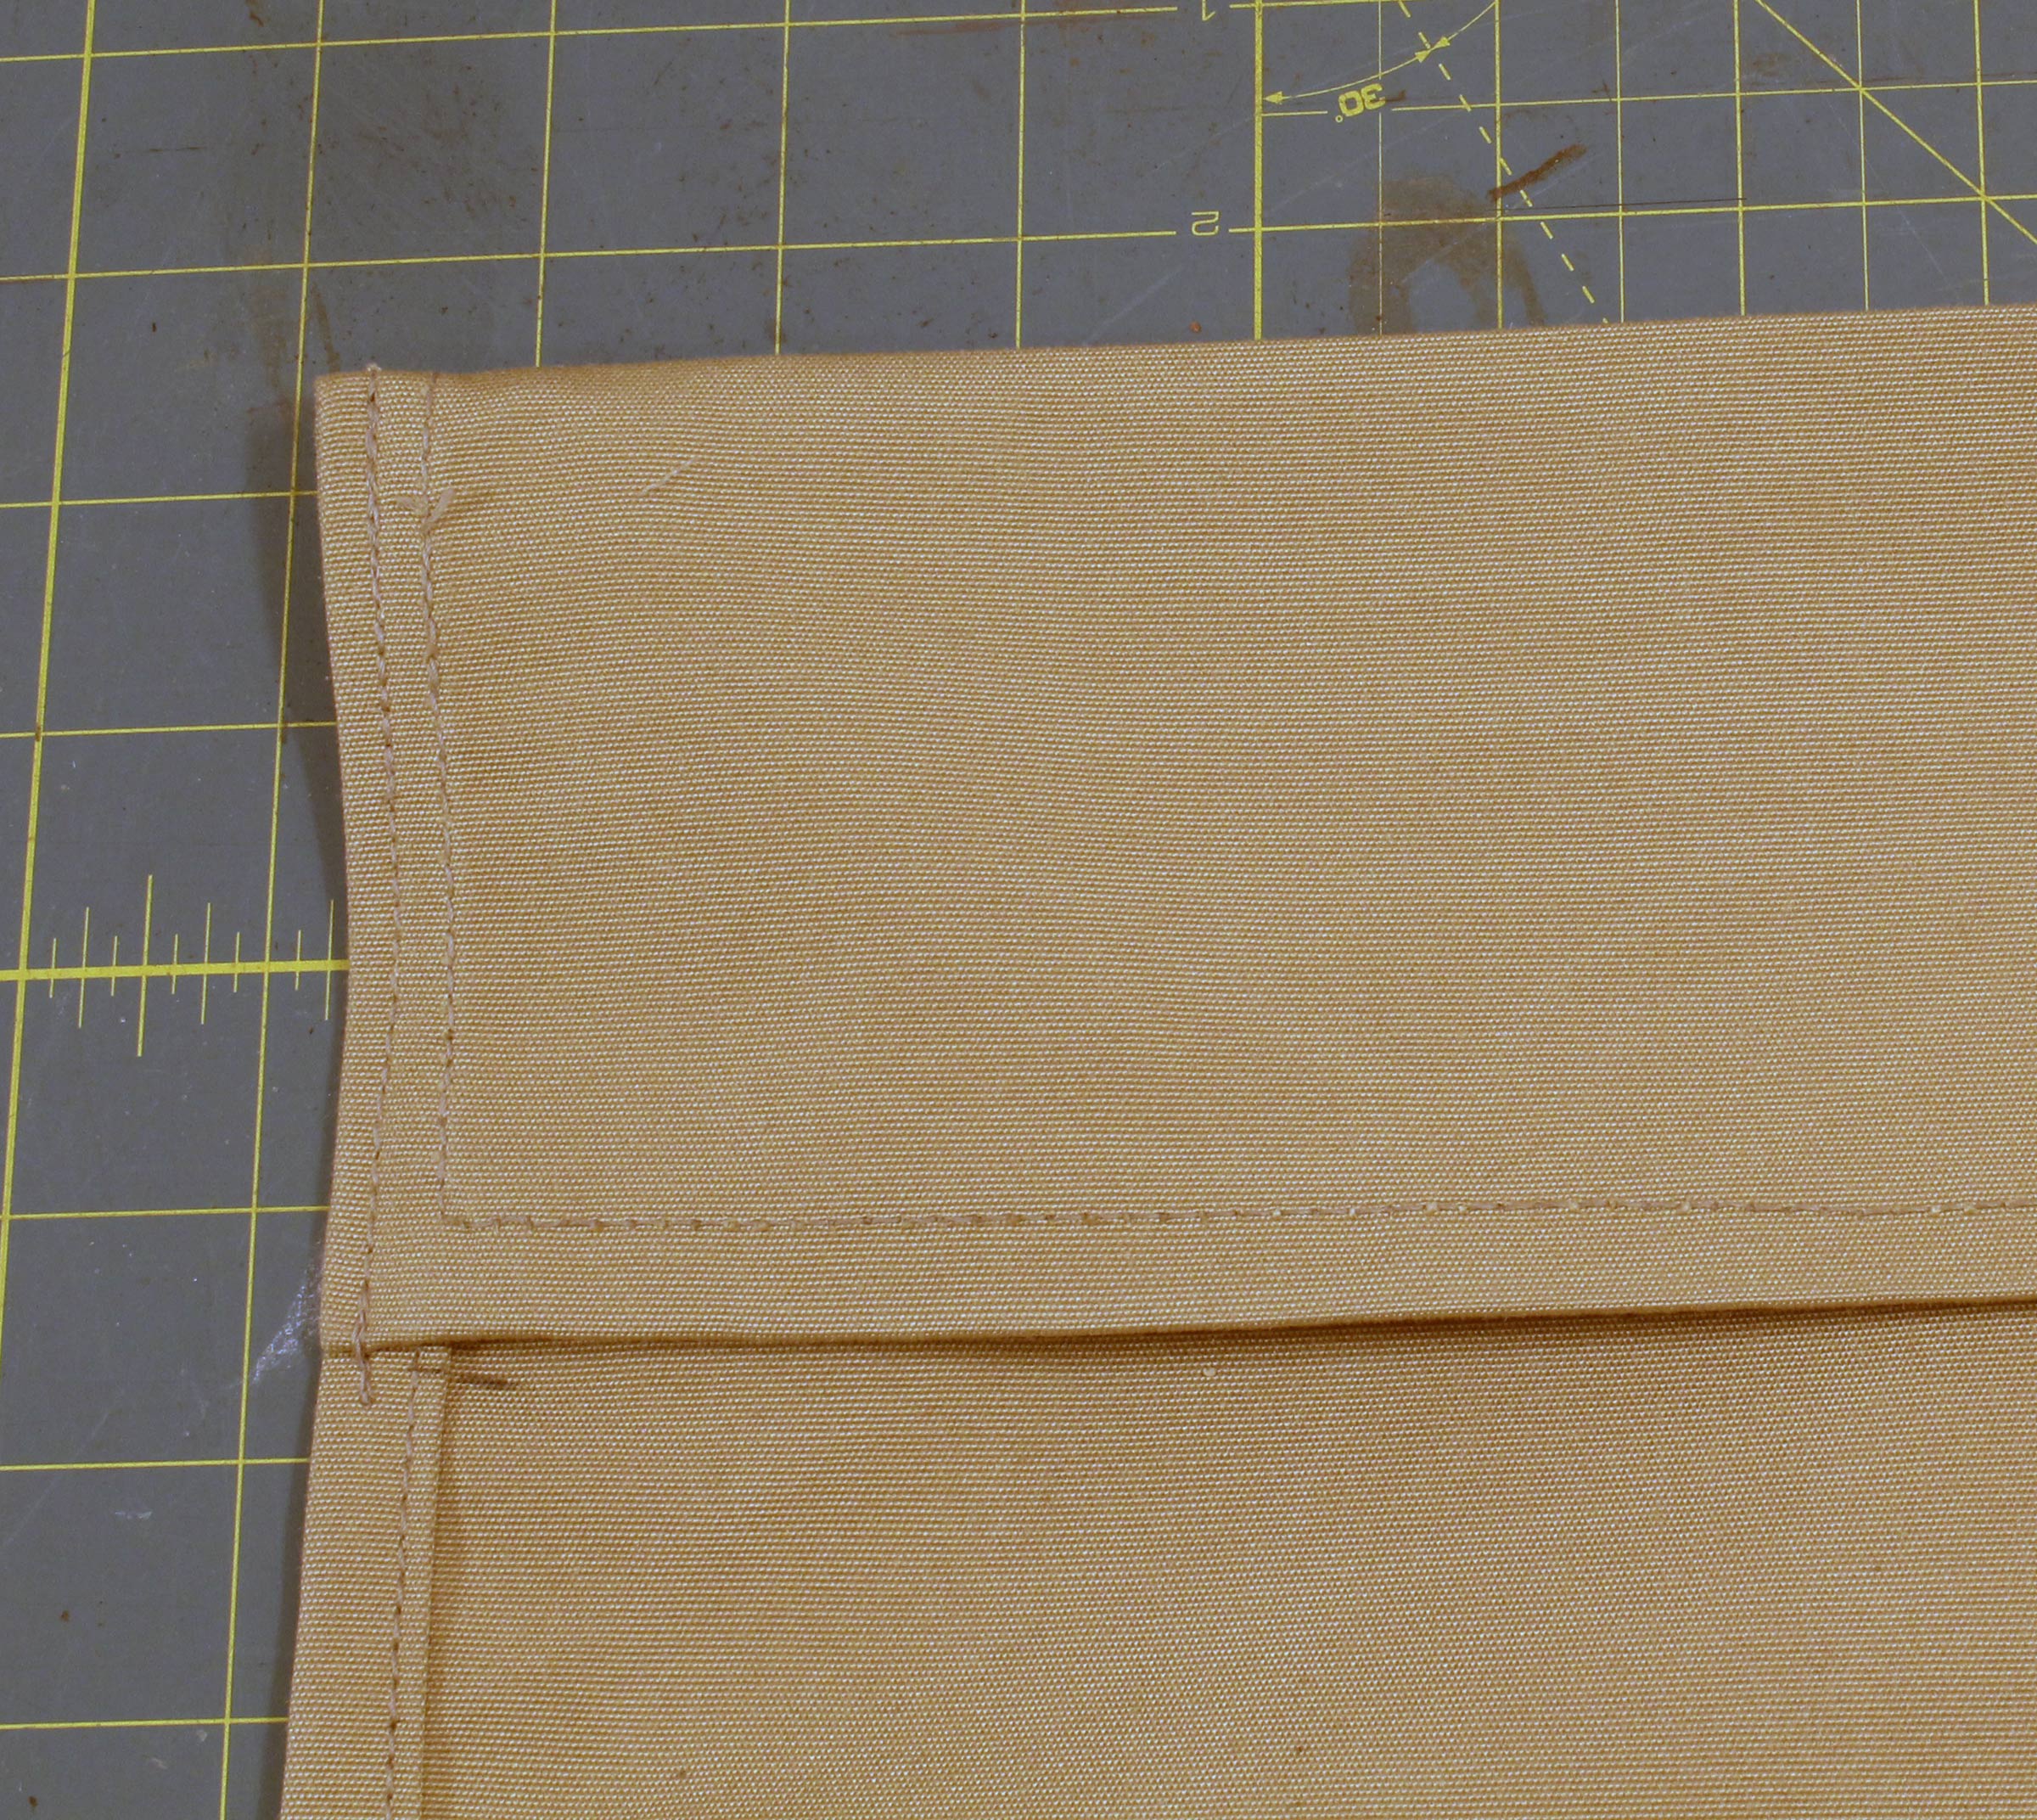
Sew across the middle of the fold to separate the two leg pockets.
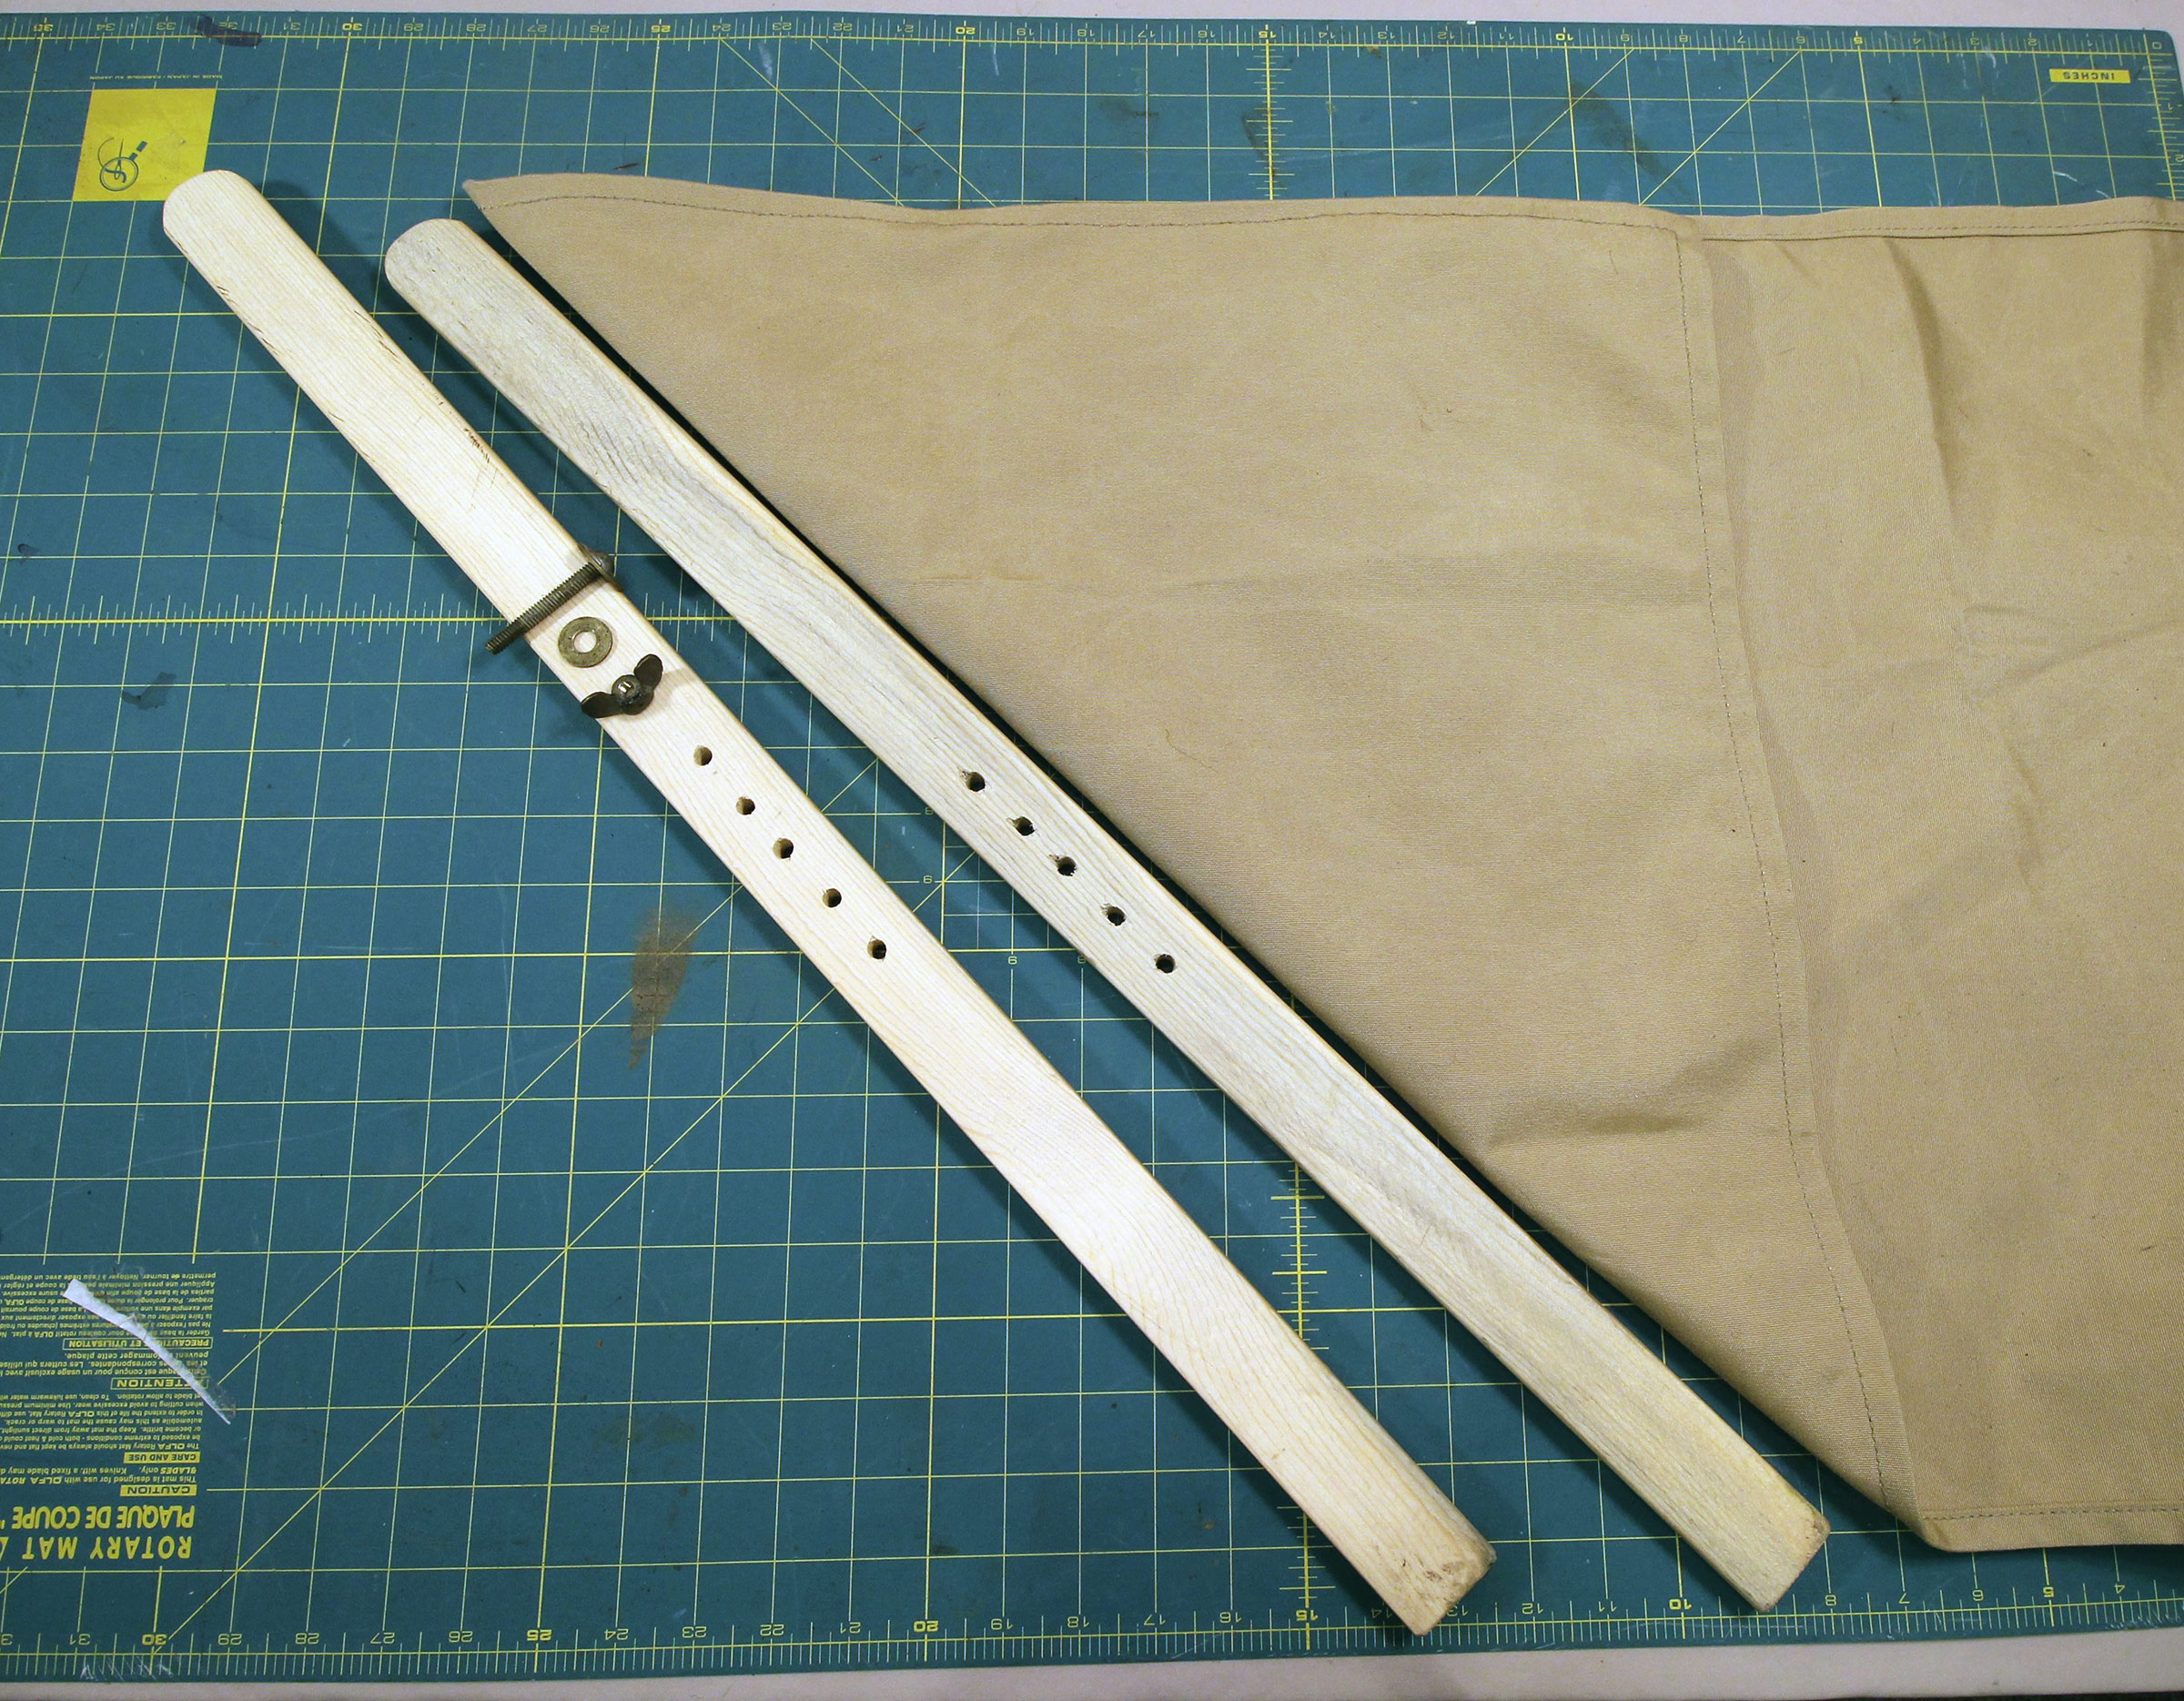
To get the length for the legs, fold a corner across to the opposite side and use the length of the diagonal fold. I initially used dowels for the legs, but they sank easily into soft ground. Lengths of 3⁄4″ stock cut to a width of 1 1⁄2″ to 1 3⁄4″ have a larger footprint and aren’t as prone to sinking. A 1⁄4 × 20 machine screw serves as the pivot. A wingnut provides enough pressure to keep the assembled legs locked to one another with their upper ends fixed in the fabric pockets. I drilled 5⁄16″ holes for the 1⁄4″ machine screw (the next drill size up makes it easier to insert and remove the screw).
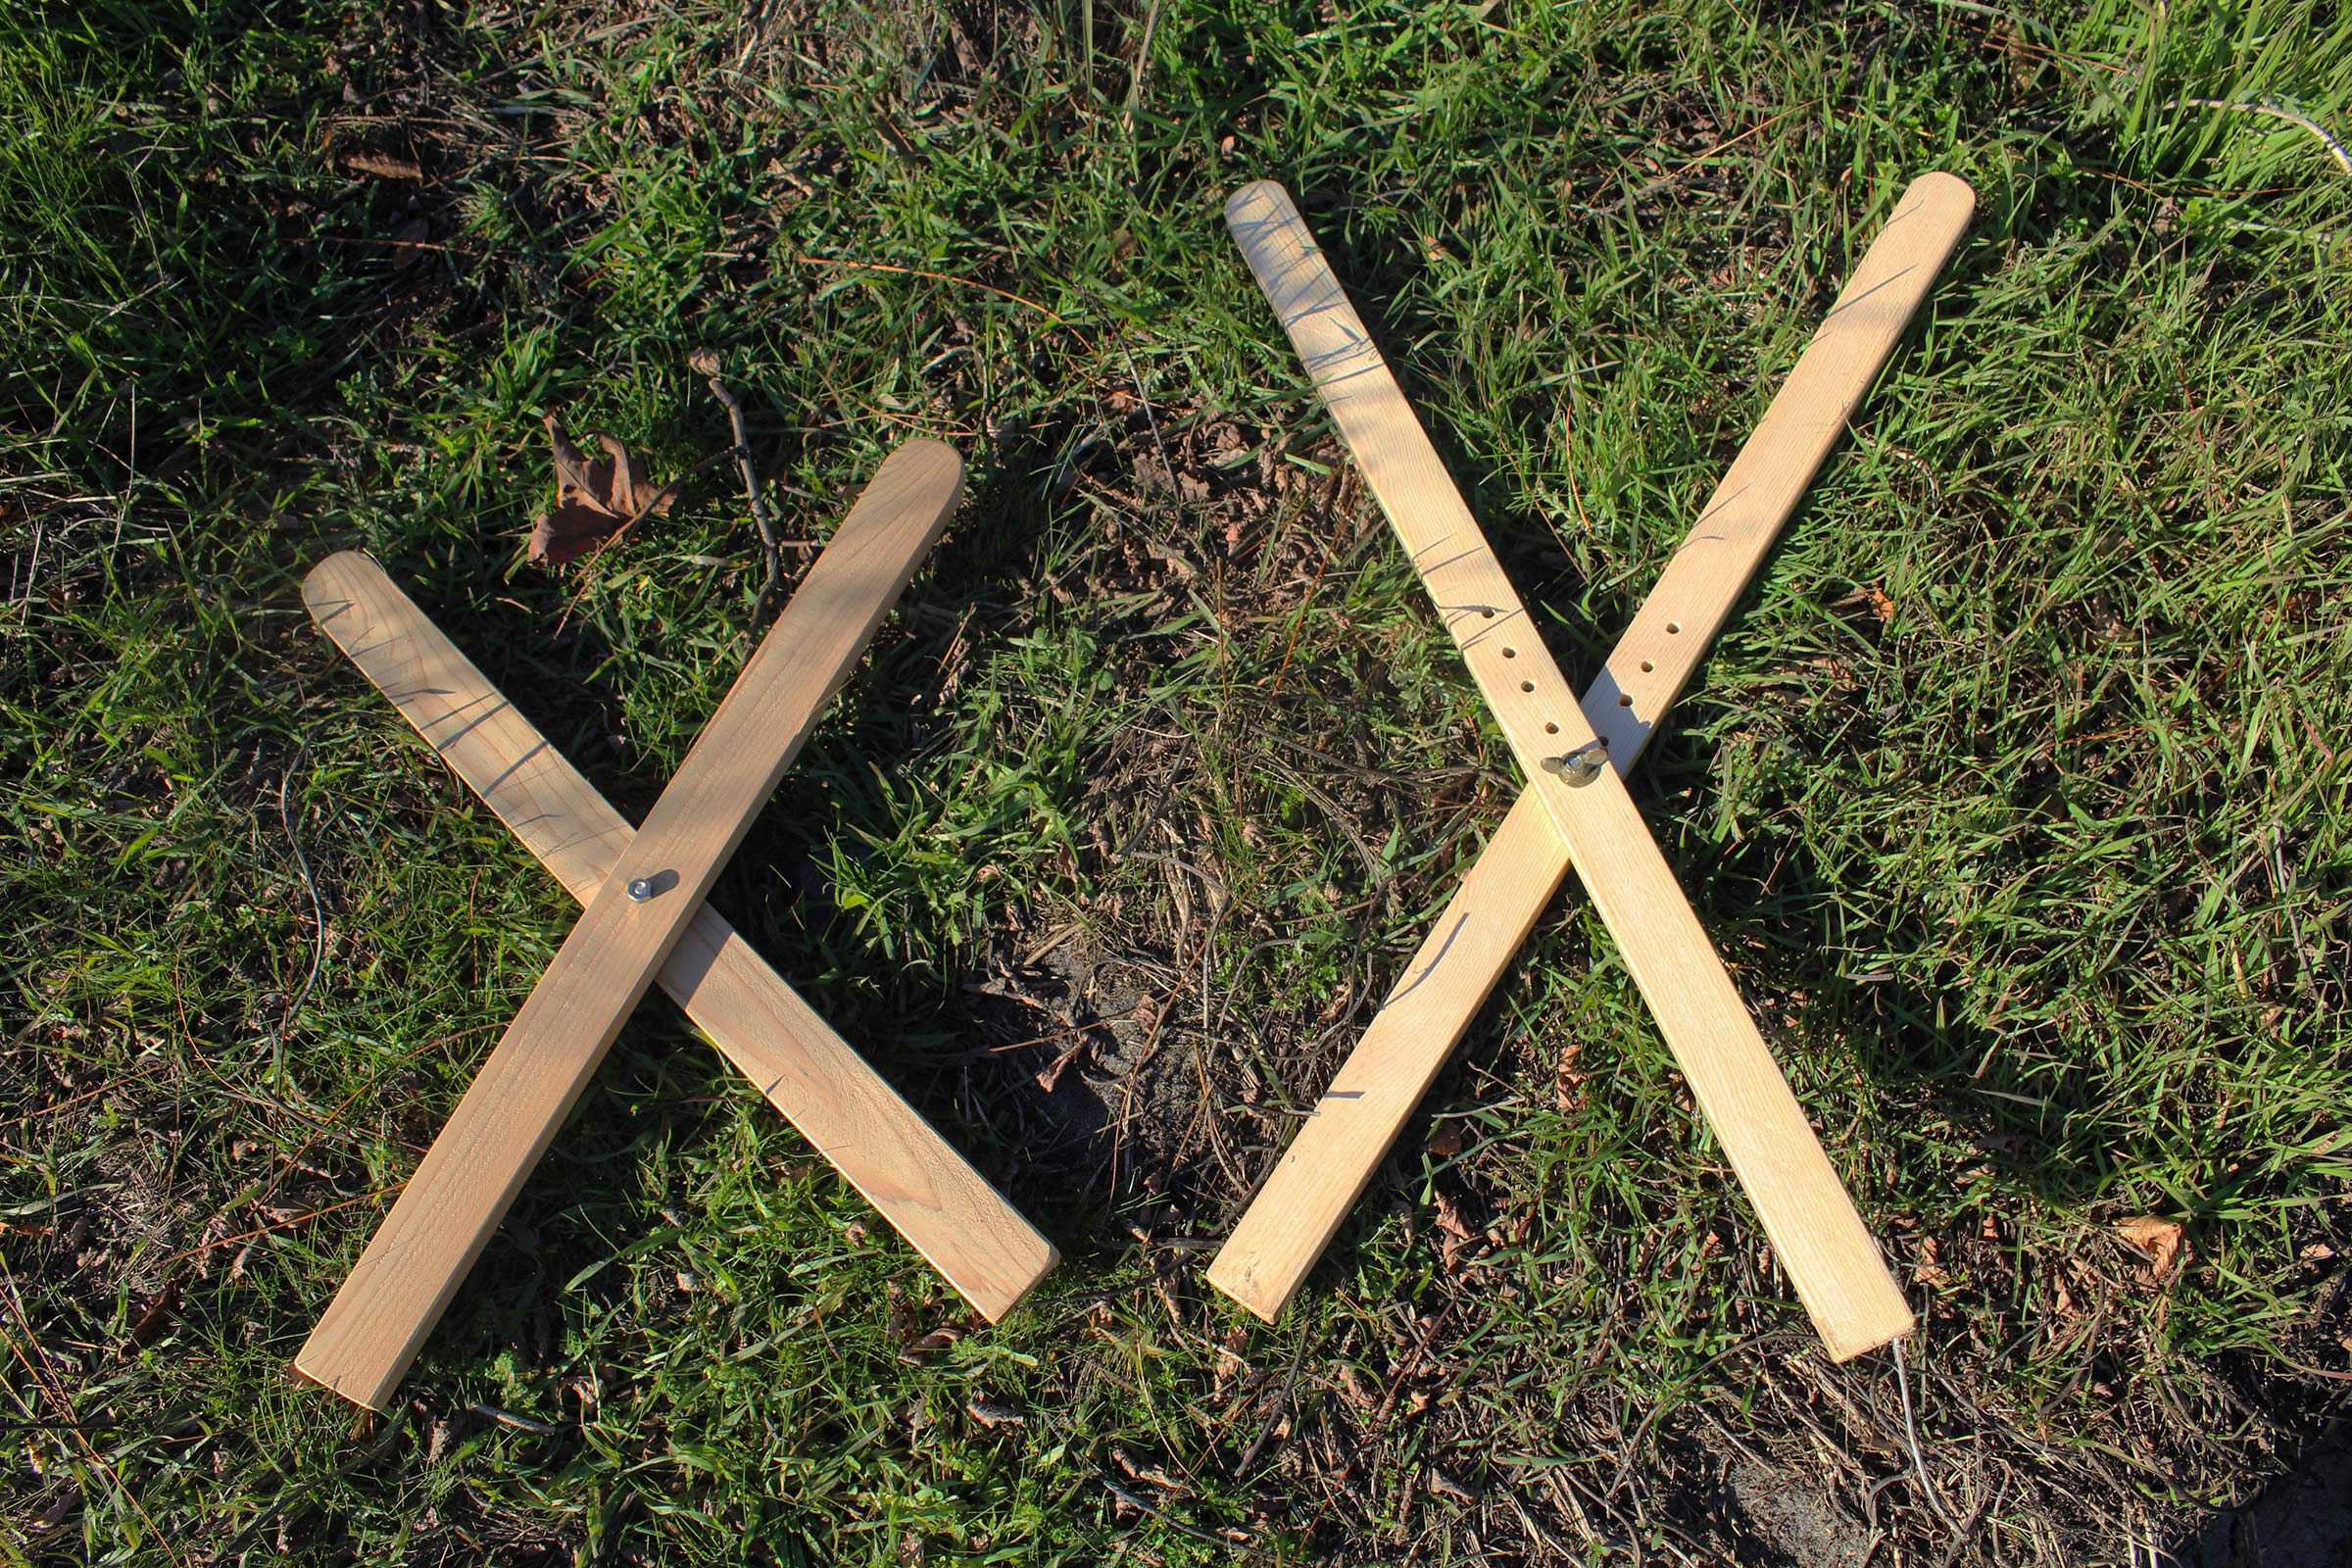
The upper ends of the legs are rounded to avoid wearing out the fabric while the lower ends are squared to help the corners get a bite into the ground. For both the small and large lounger, the middle hole is at the midpoint of the leg. For the large lounger, I drilled two more holes at 1″ intervals on either side for adjusting the height of the legs when joined. The upper holes make the lounger back lower, the lower holes make it higher.
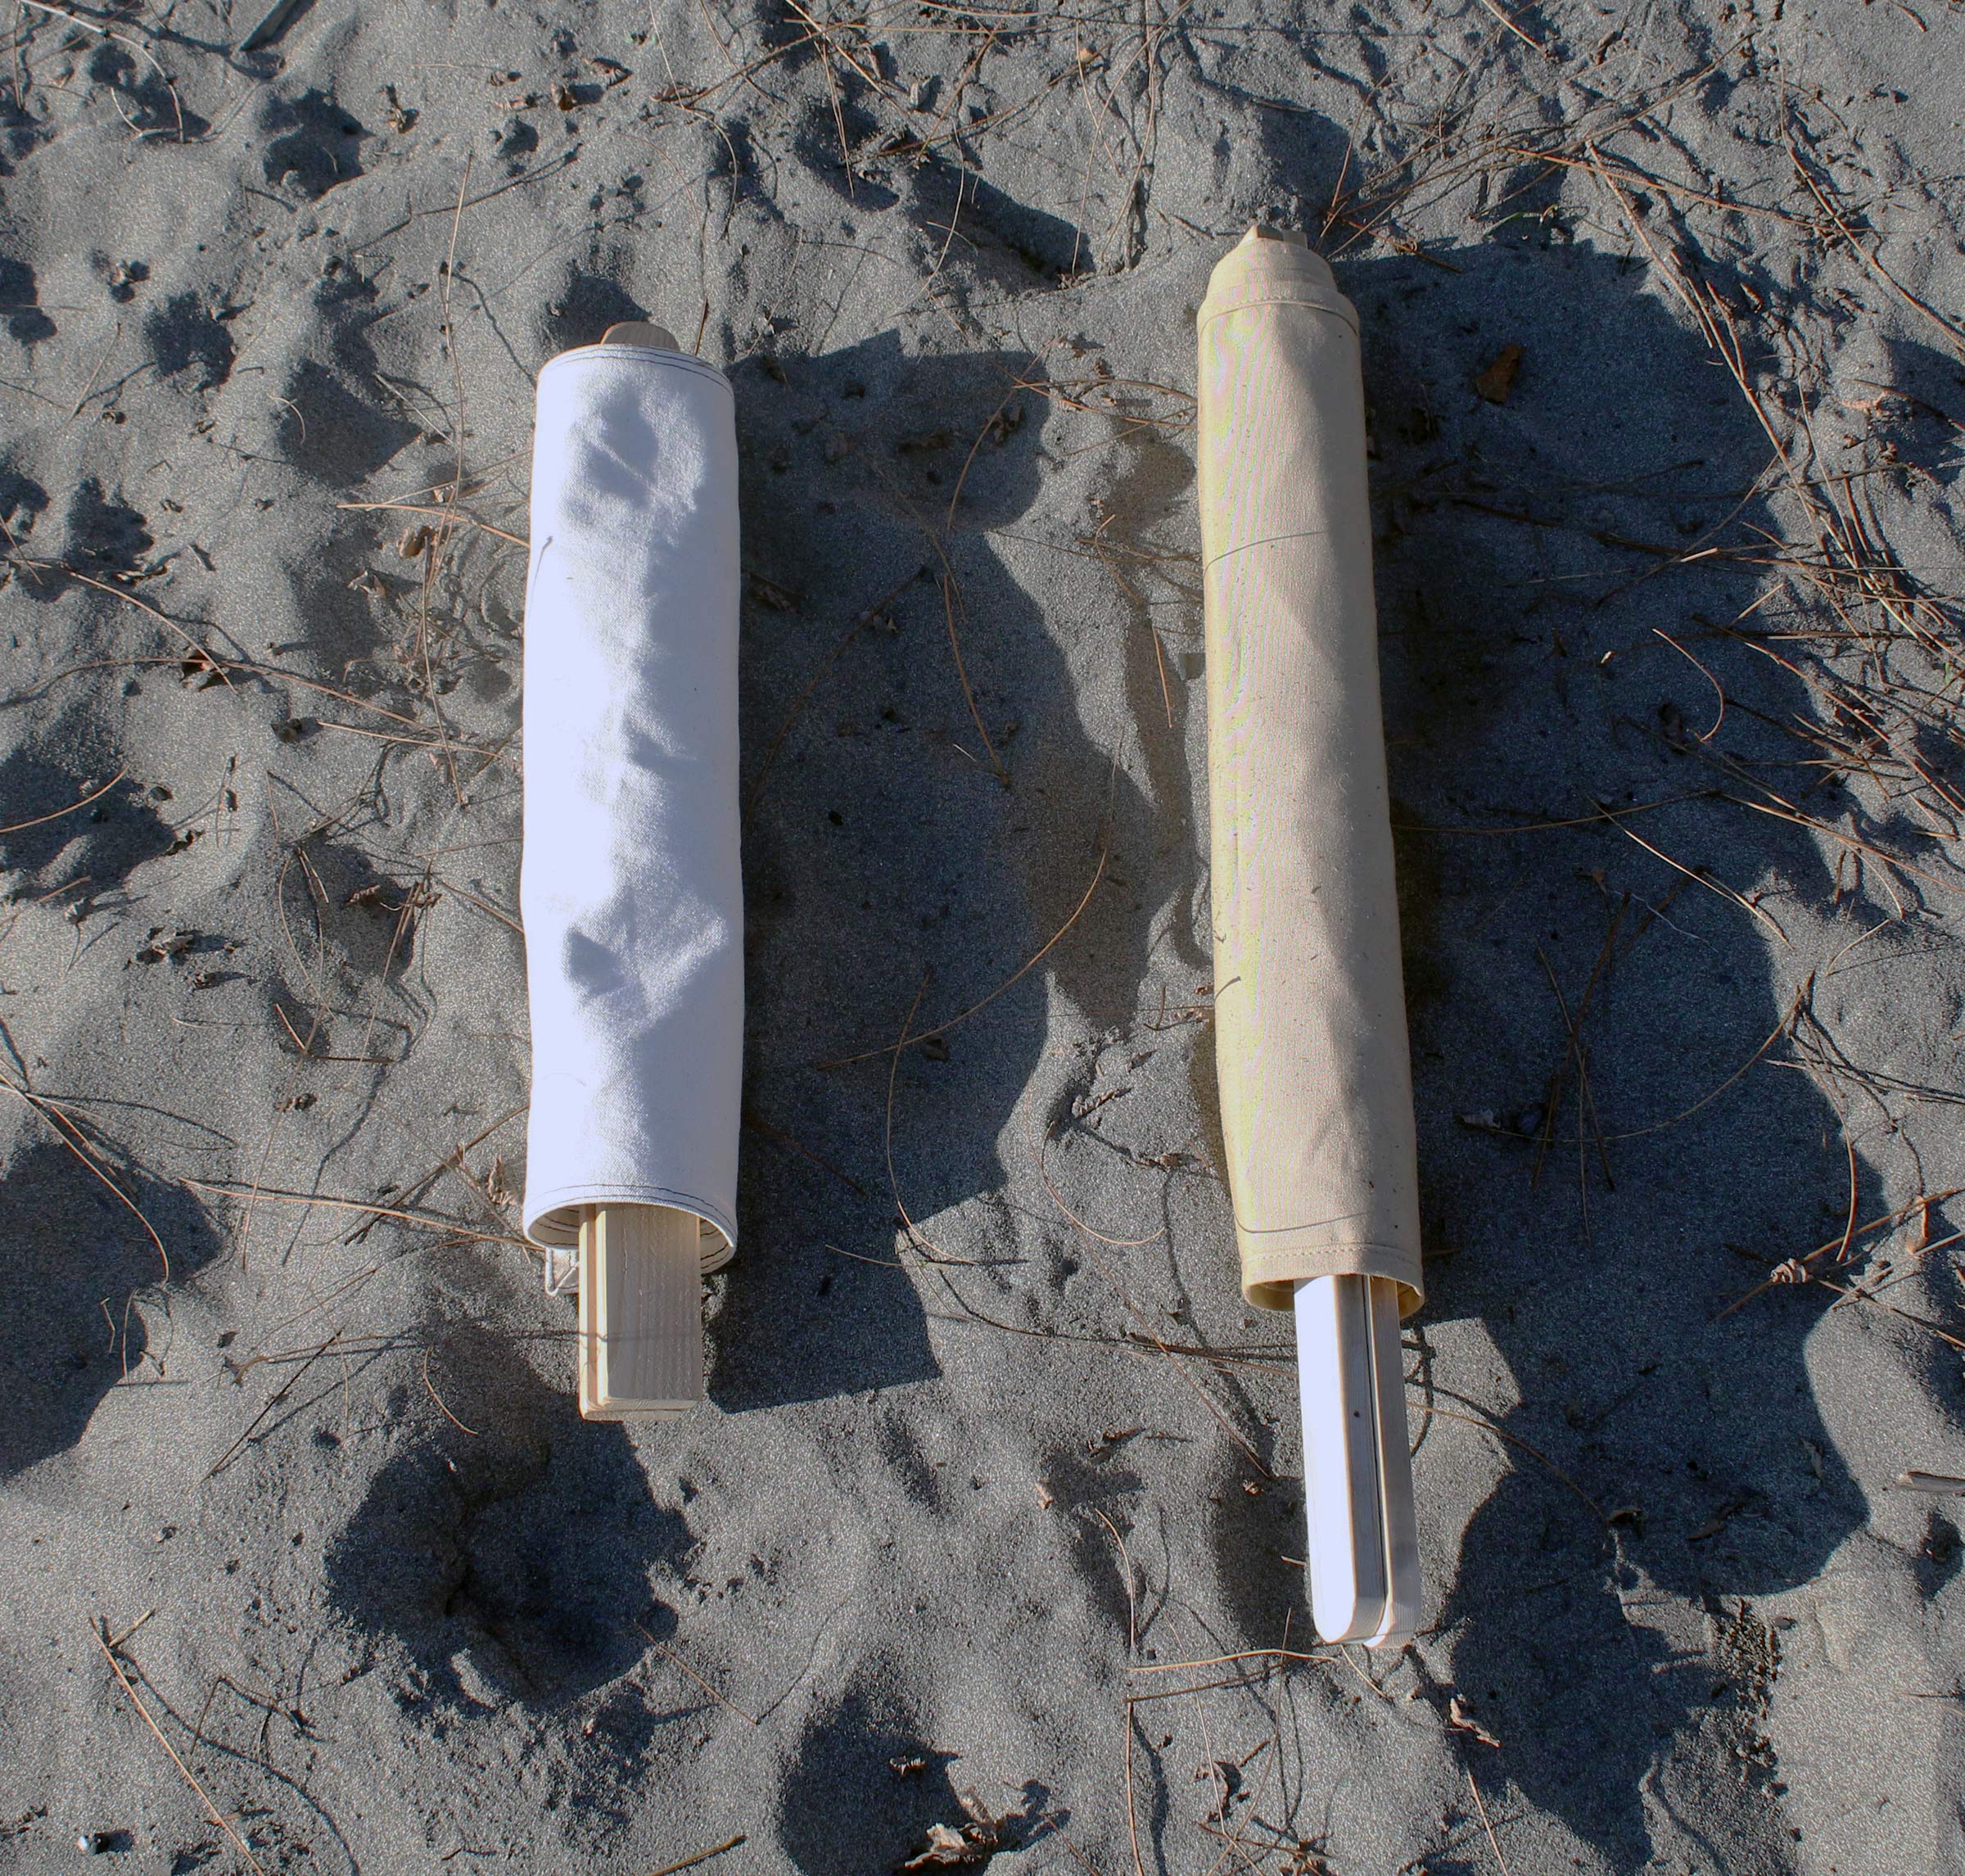
For storage and transport, the lounger parts roll up into compact bundles.
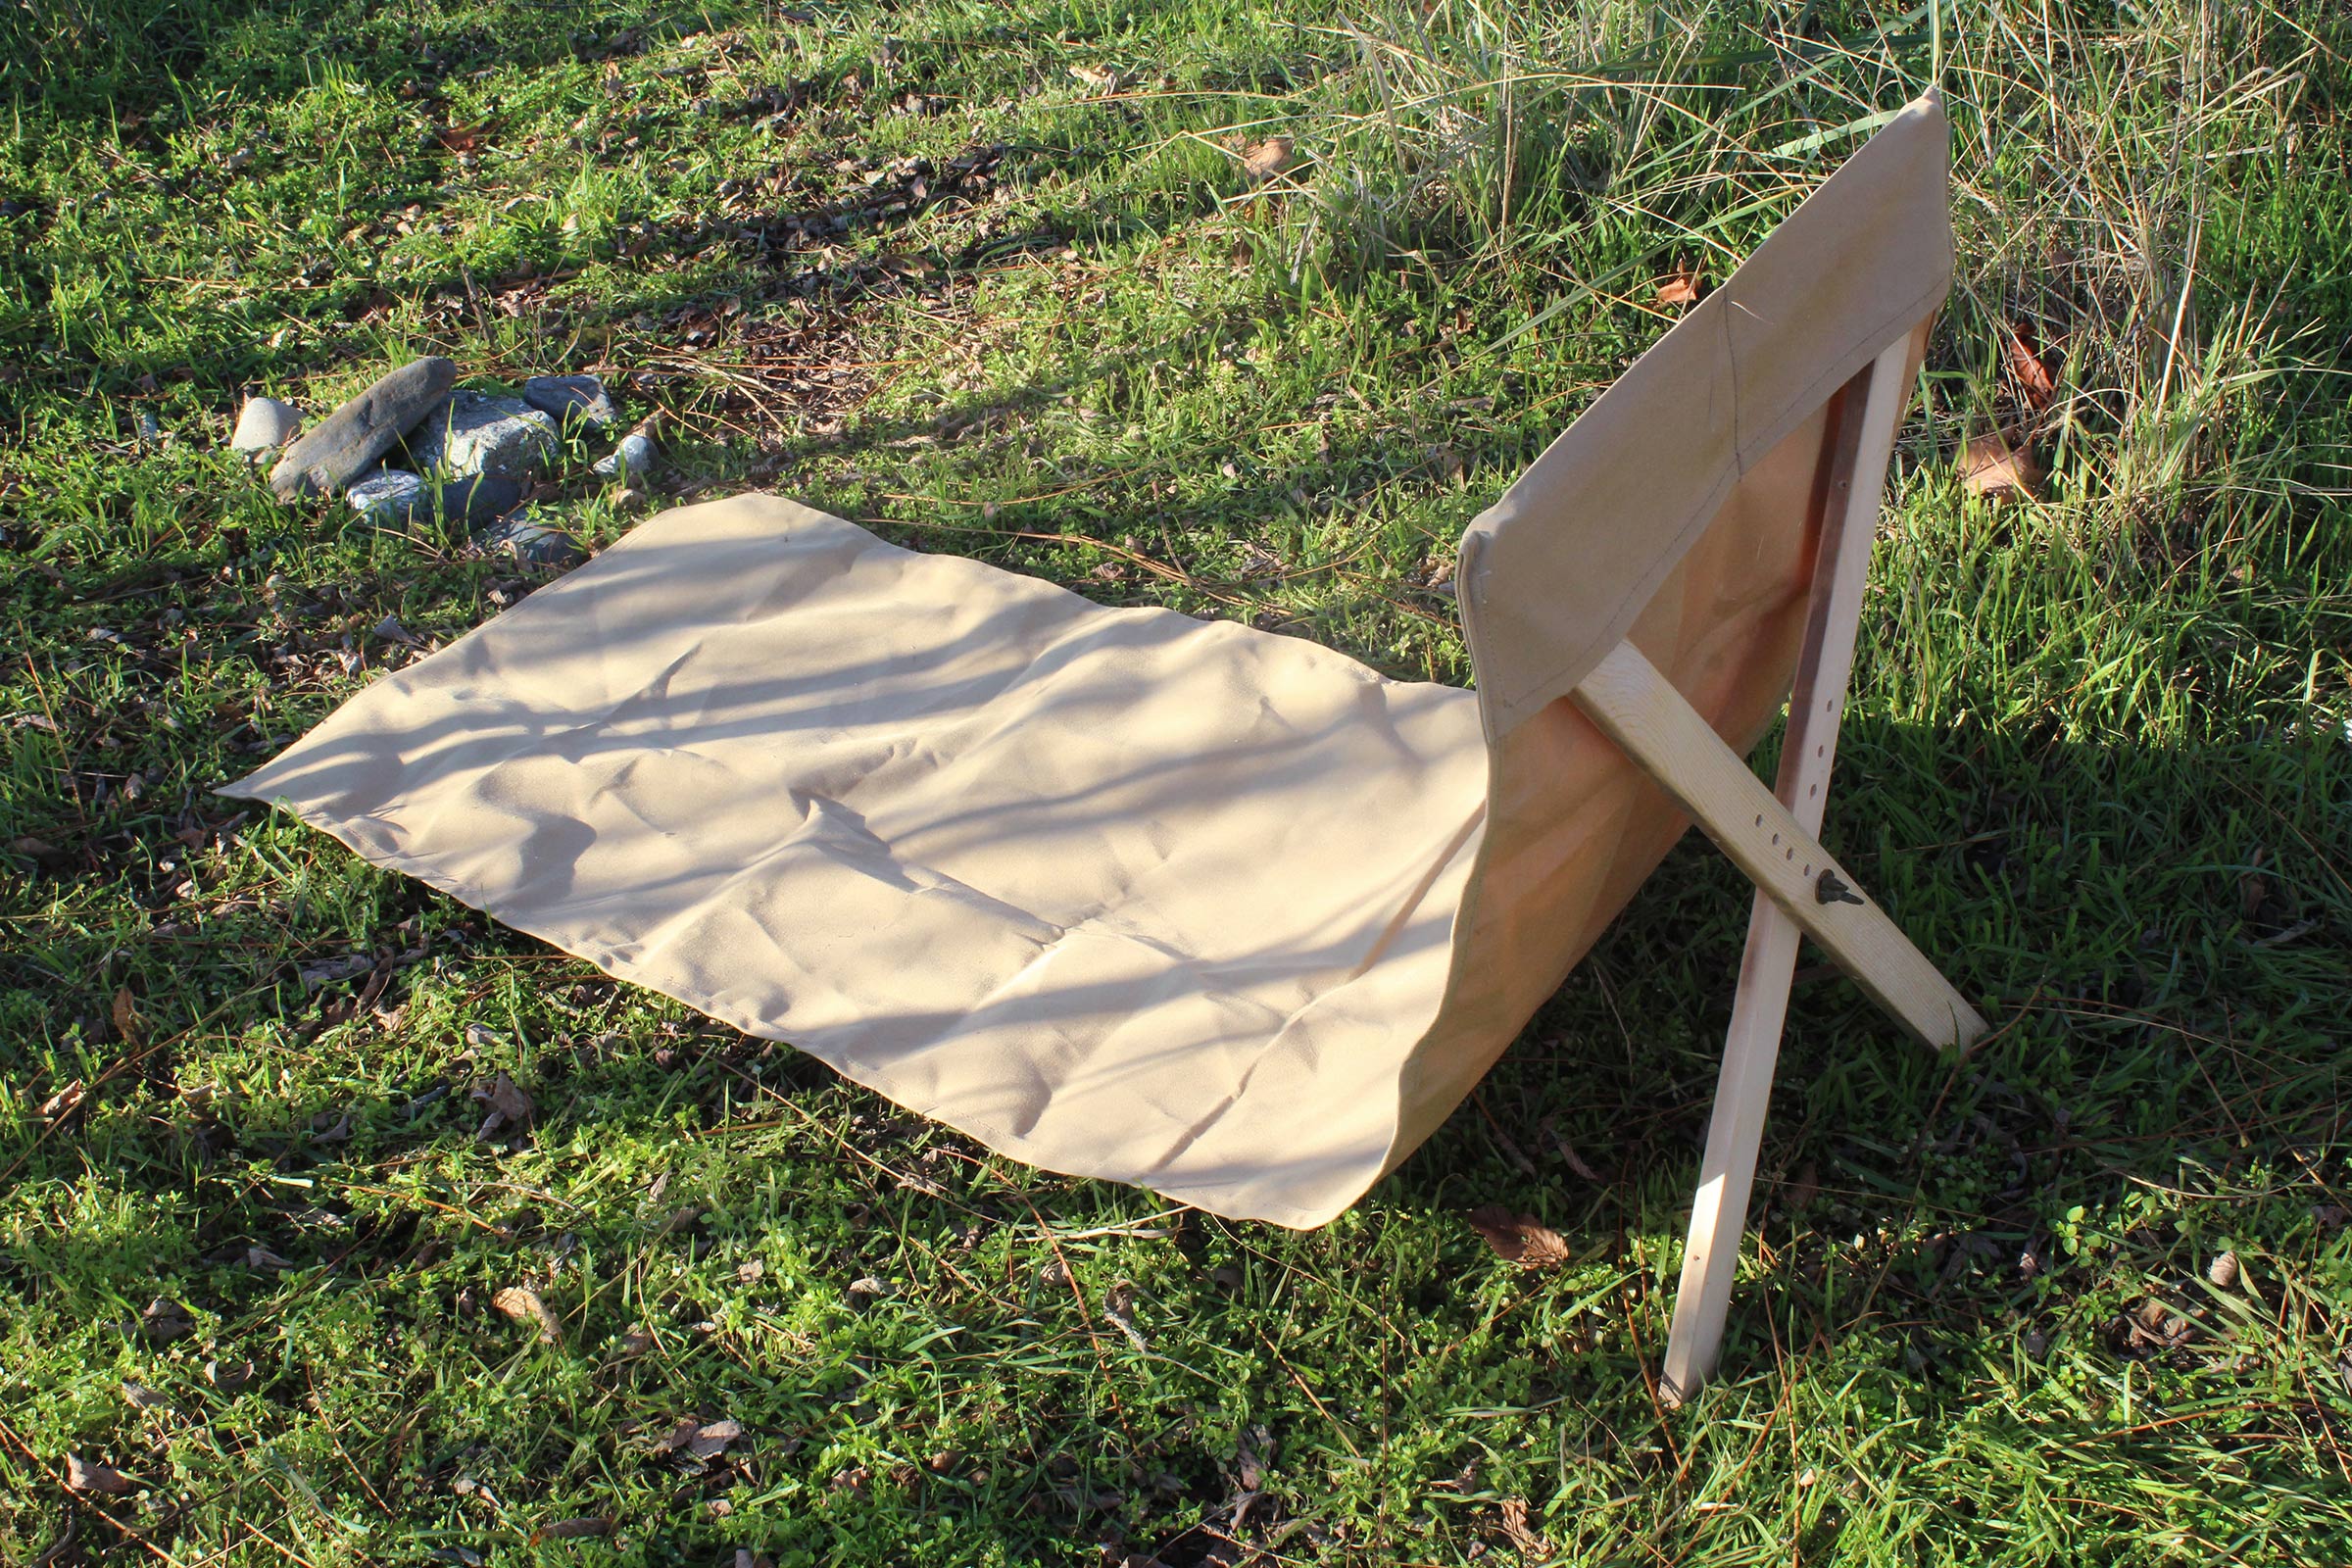
With the top ends of the legs in their respective pockets and the wingnut tightened to keep them there, the lounger is ready to use. Here, the machine screw is in the lower holes, making the back higher.
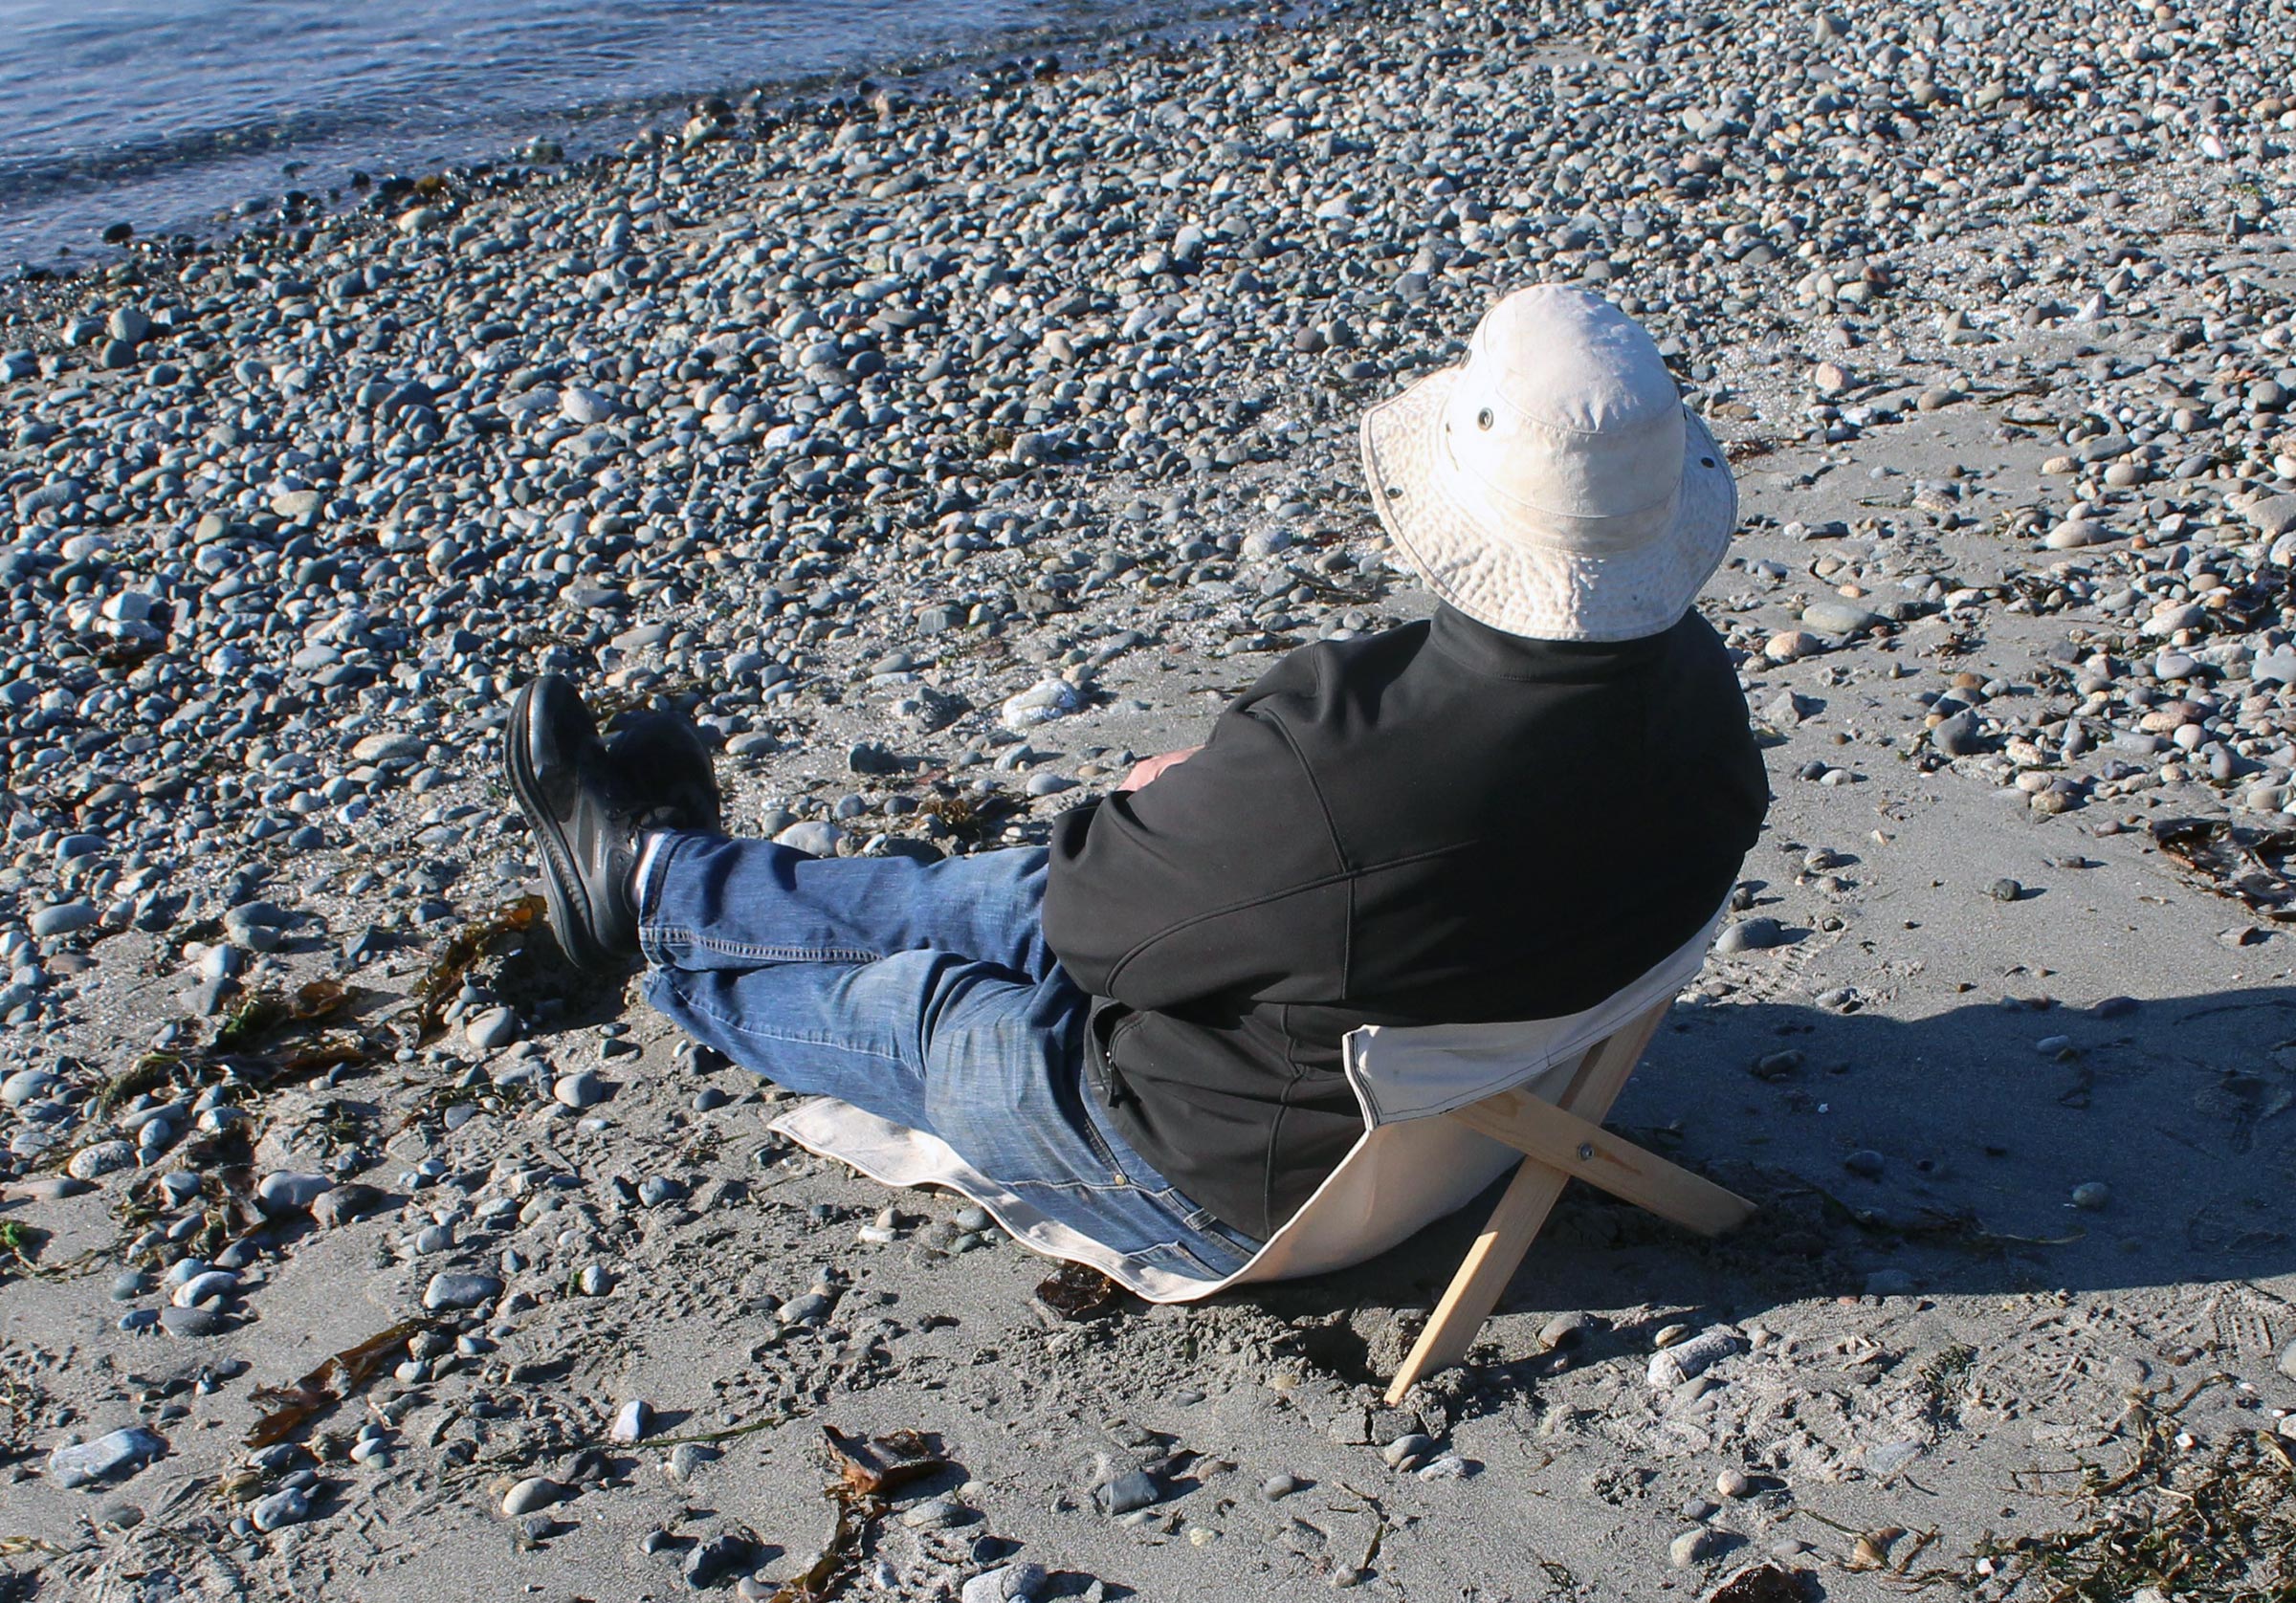
The small lounger doesn’t rise as high in the back, but still offers good support.
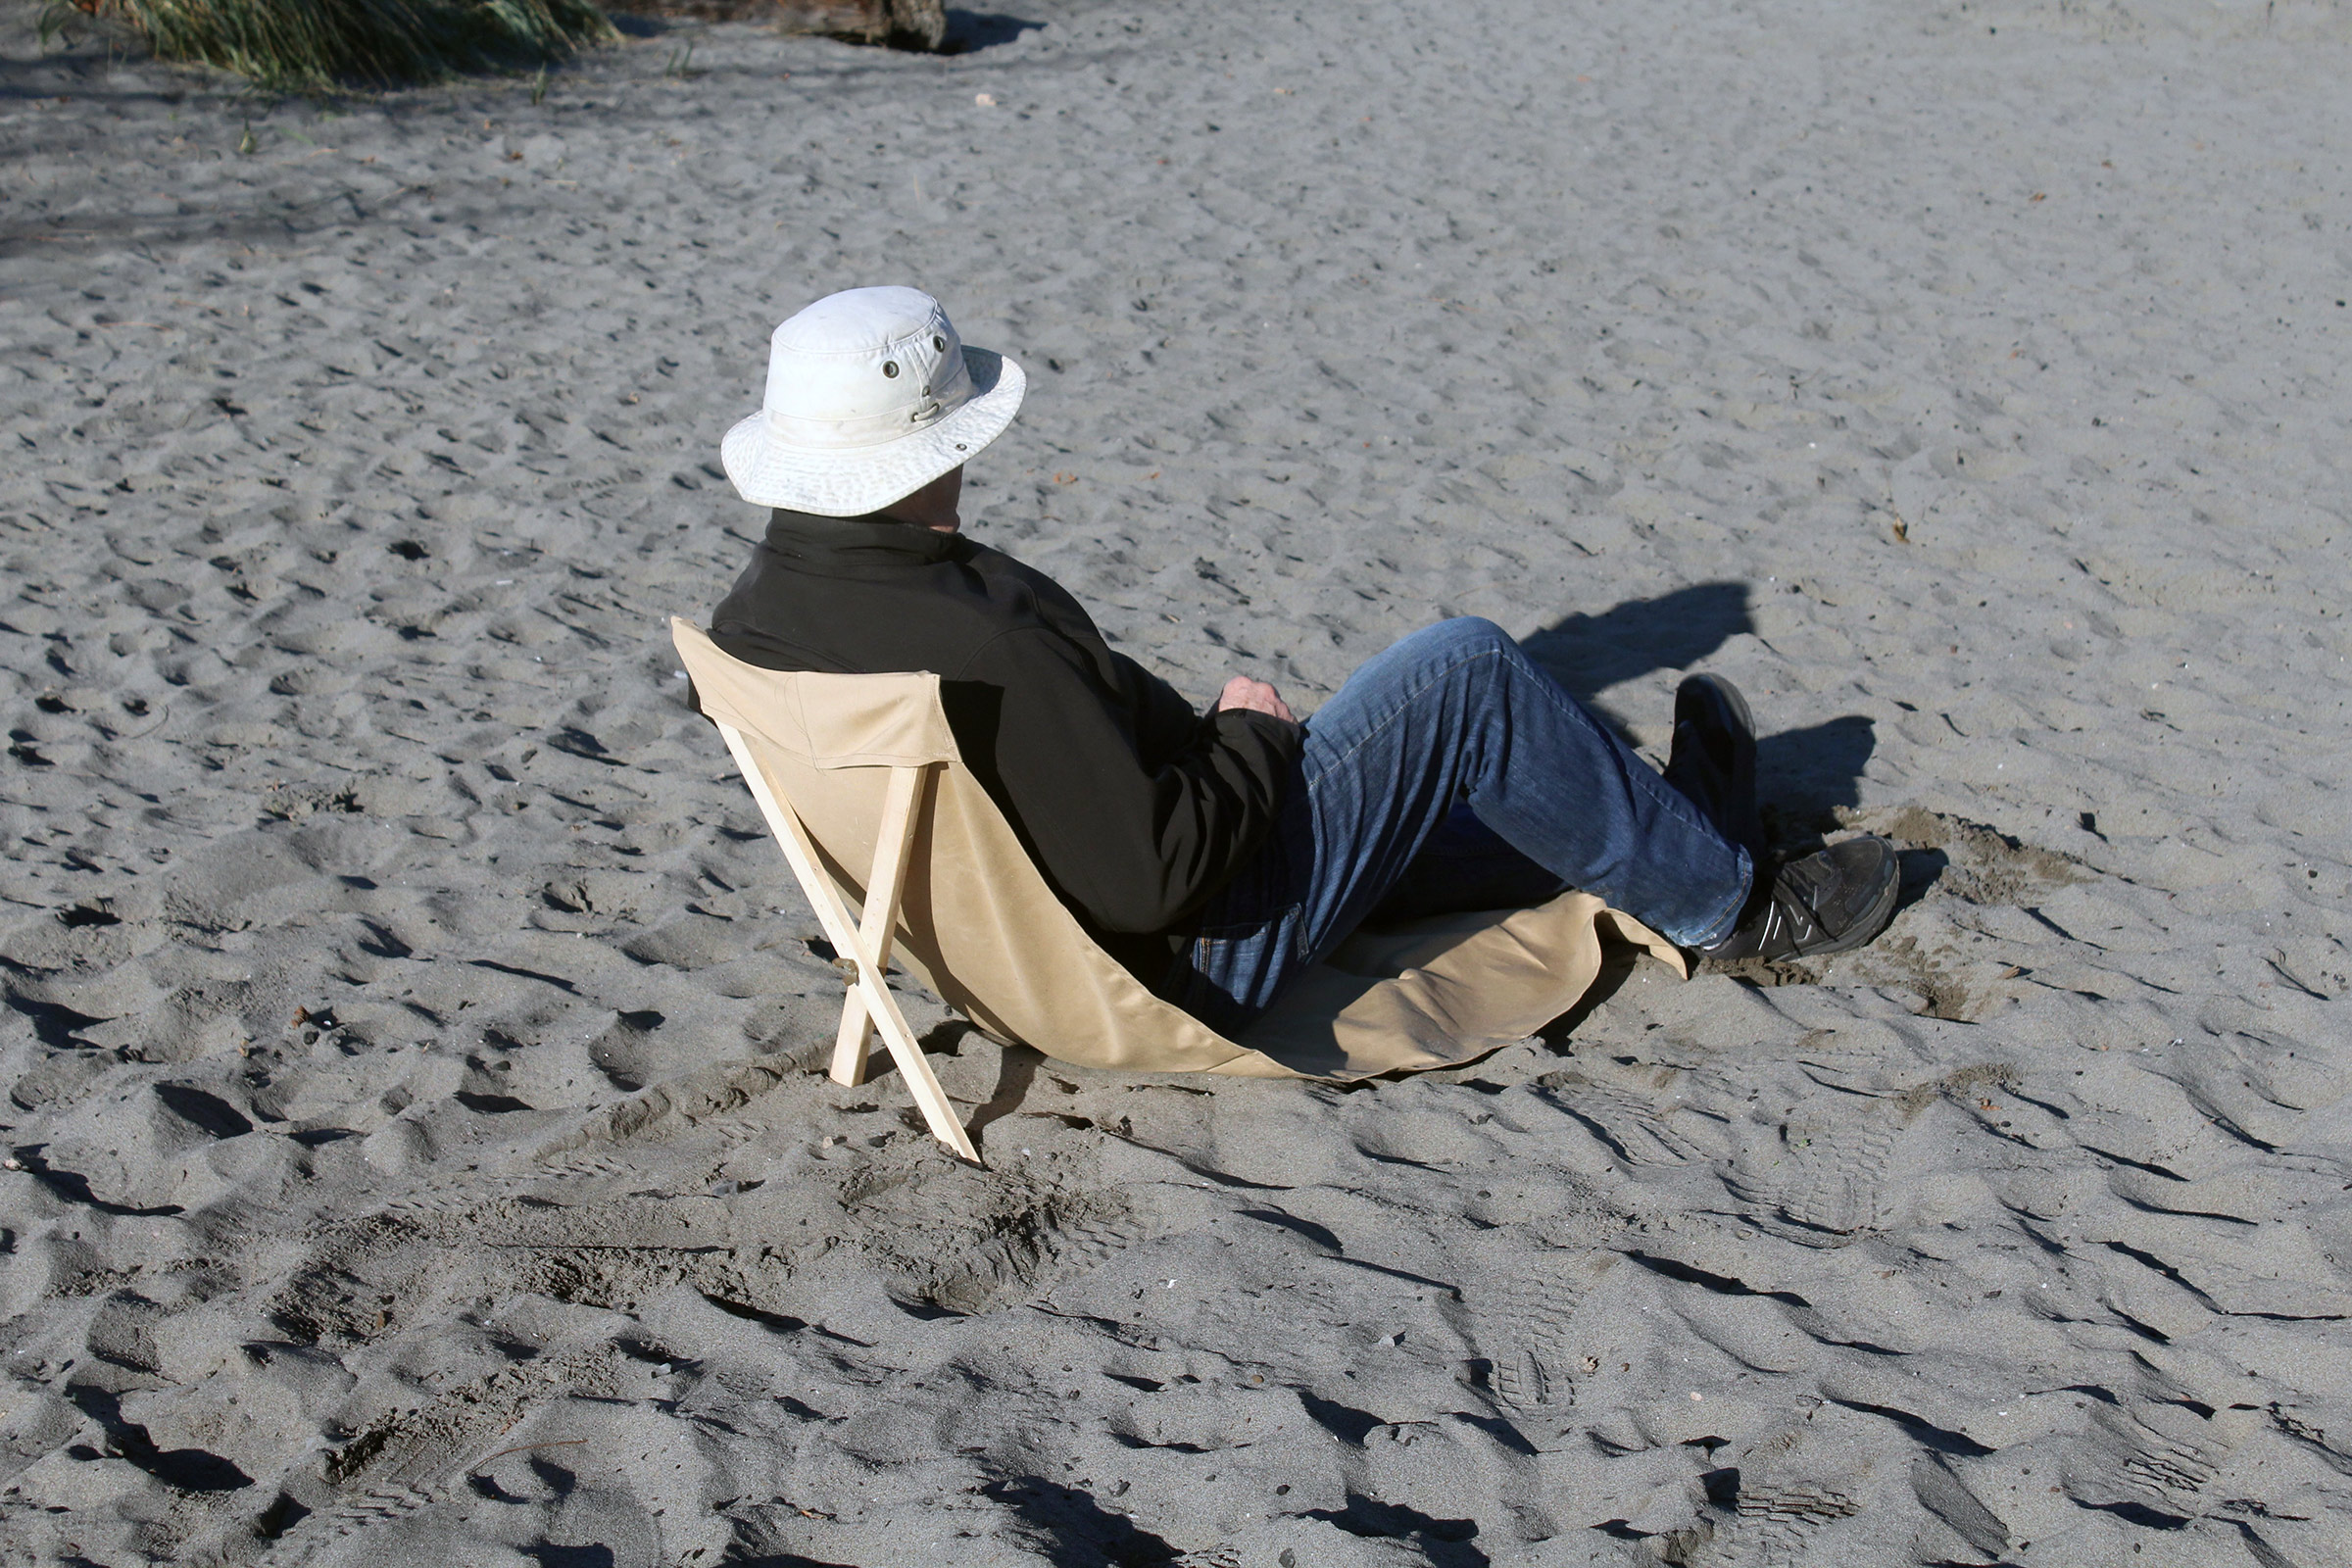
In soft sand, the legs can sink a bit.
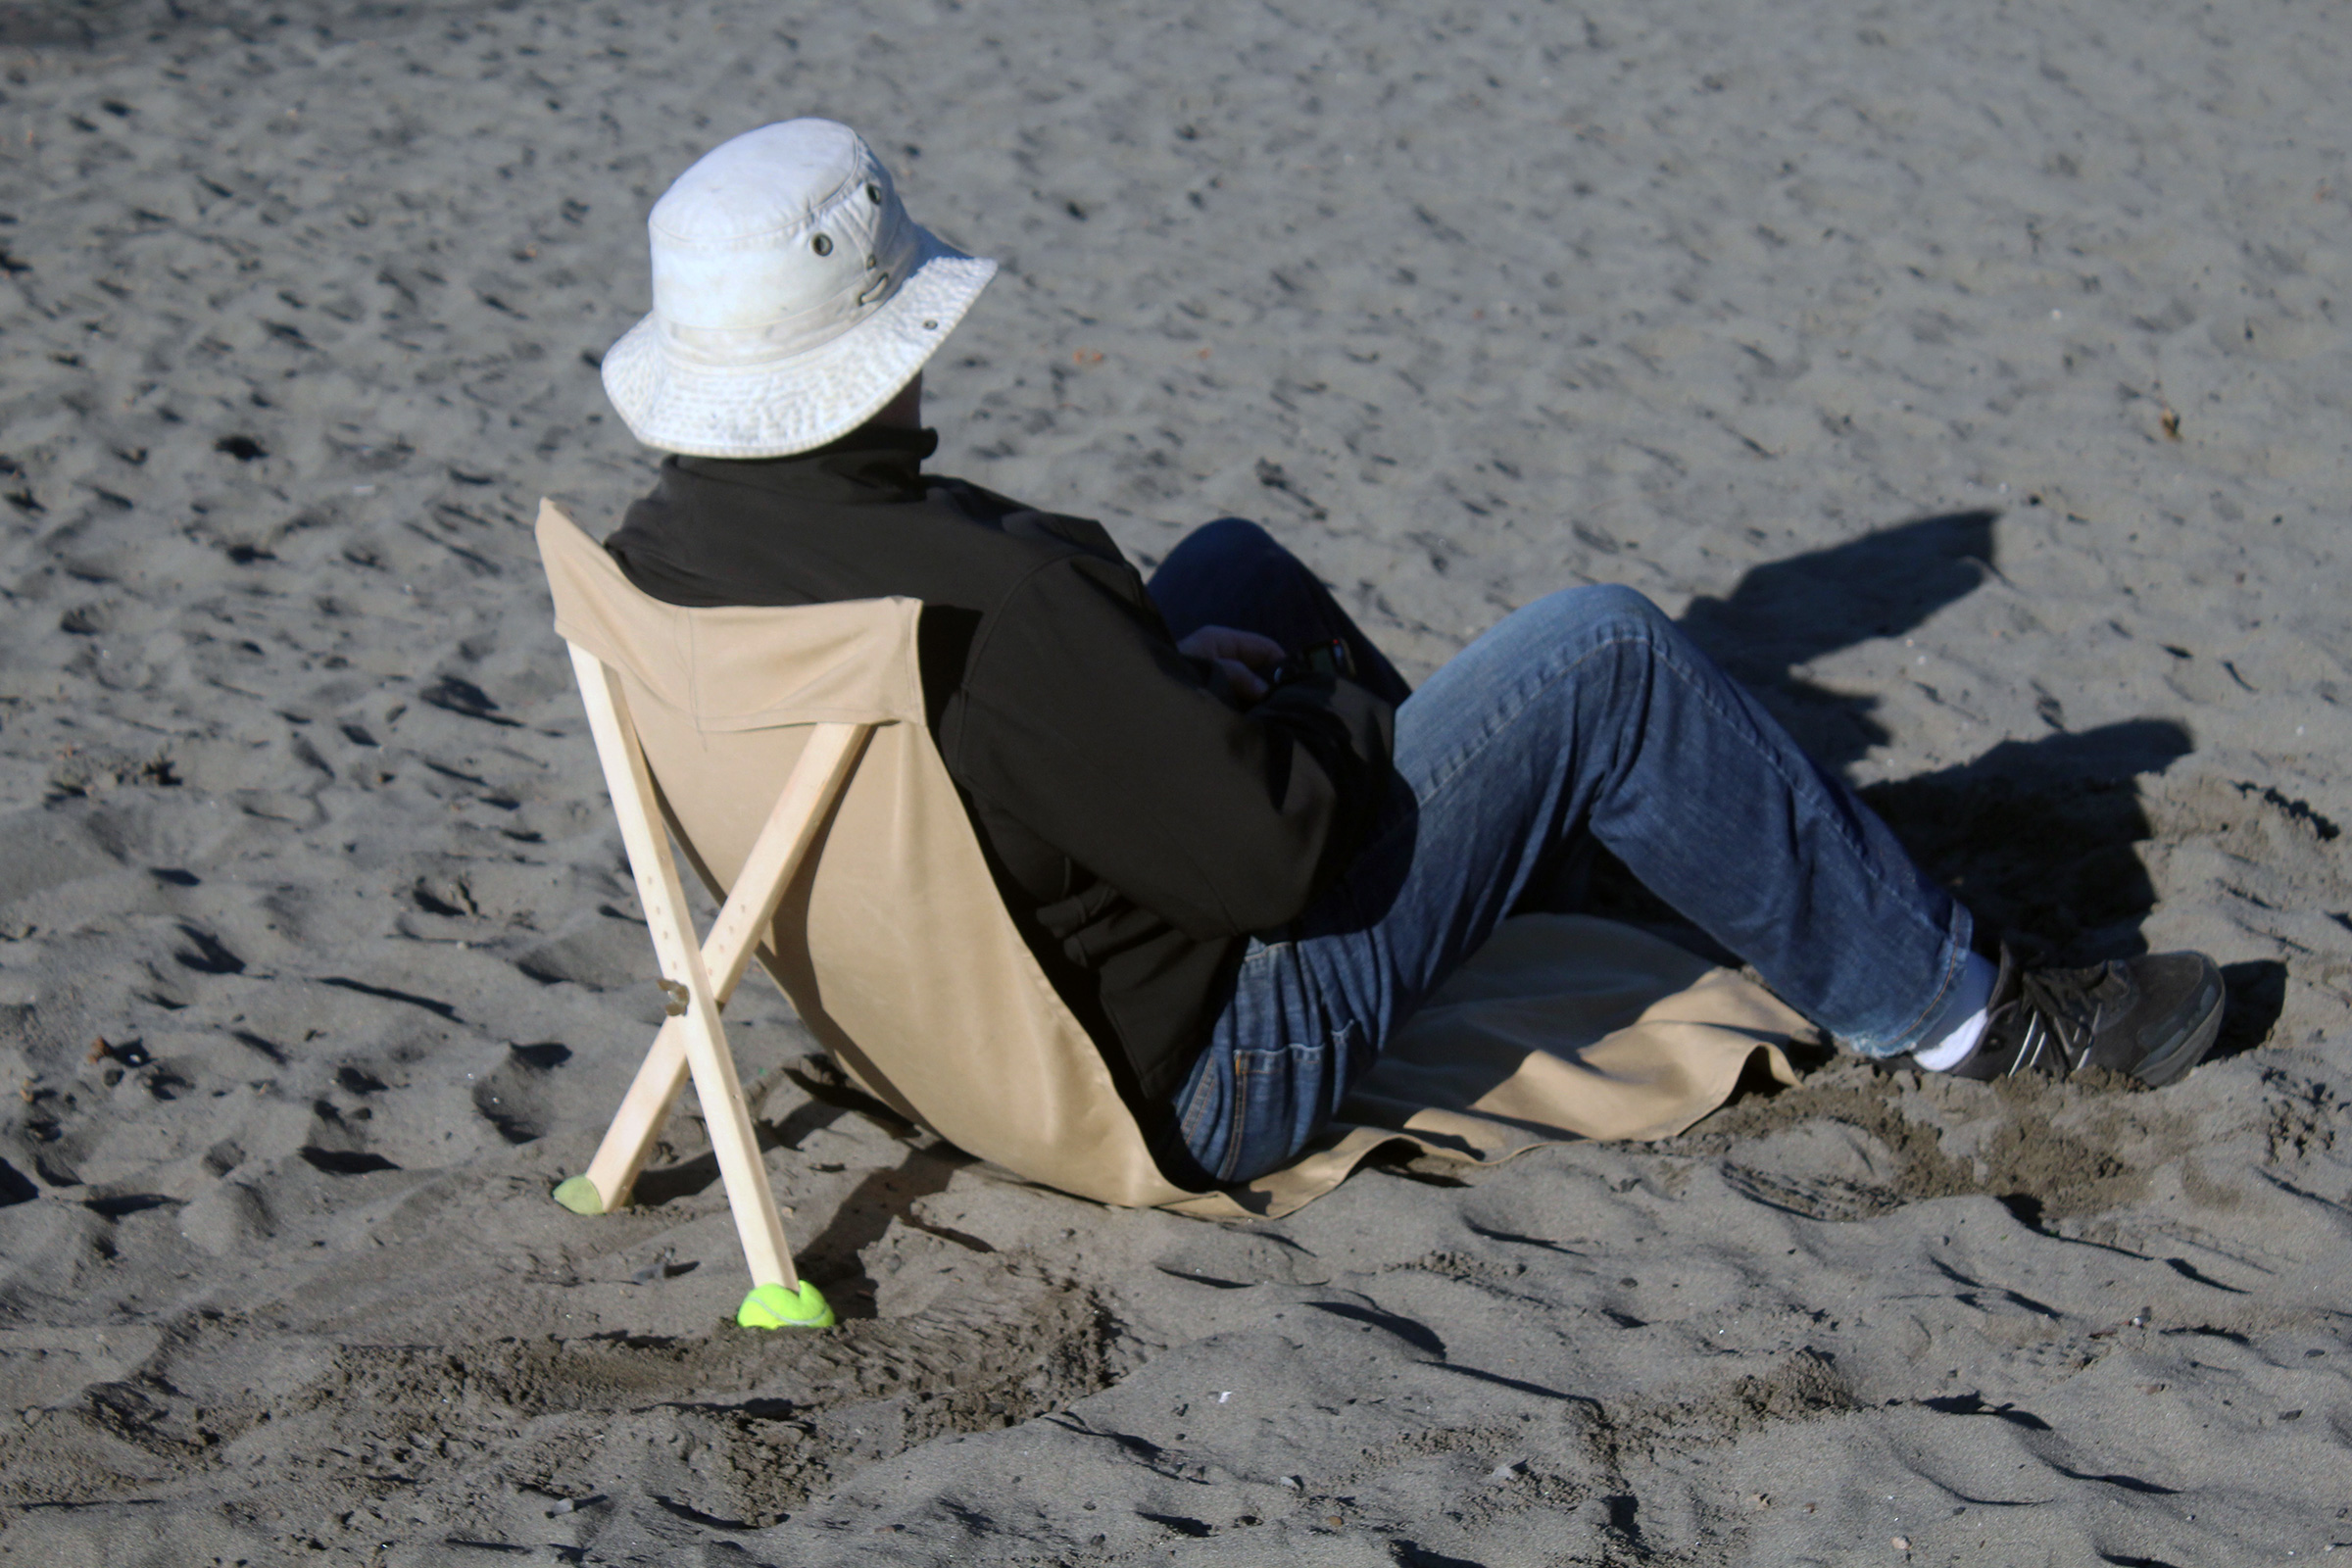
A pair of old tennis balls, slit along one side and slipped over the bottom ends of the legs, will effectively limit sinking and maintain the height of the back support.
To set the lounger up, spread the tops of the legs into the pockets and tighten the wing nut. Spread the fabric on the ground with the legs upright. Hold the legs upright as you pivot into the lounger. Once seated, you can reach behind to adjust the position of the legs. Sit back, relax, and enjoy the view.![]()
Christopher Cunningham is the editor of Small Boats.
You can share your tips and tricks of the trade with other Small Boats readers by sending us an email.


Very interesting. Thank you.
This is a great article. Thanks for the quality of the photos and step-by-step instructions.
What a neat, simple, and portable idea!
Thank you for sharing.
Nice, simple idea. Will probably try to make a couple of these!
Thanks!