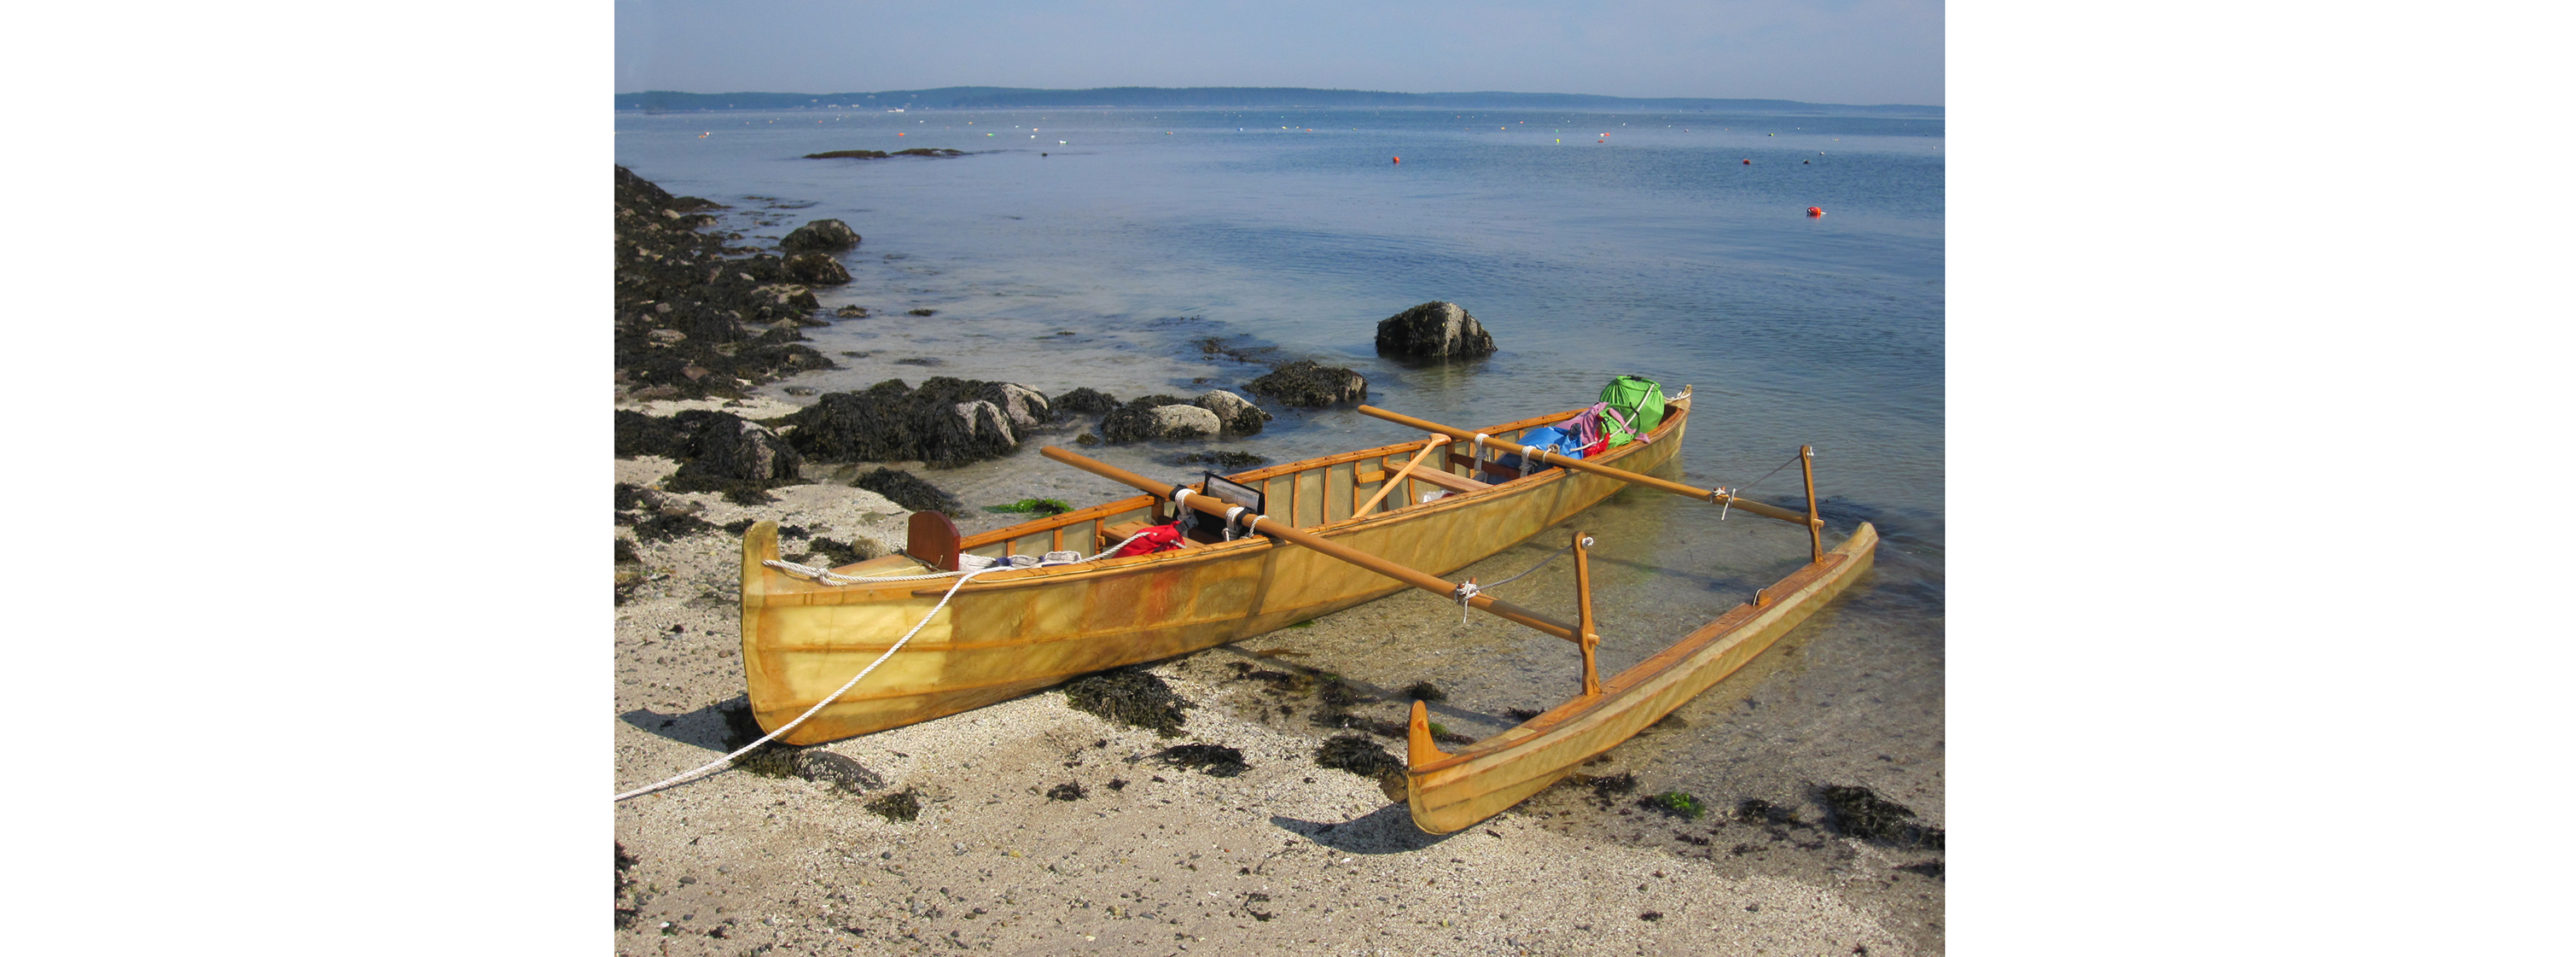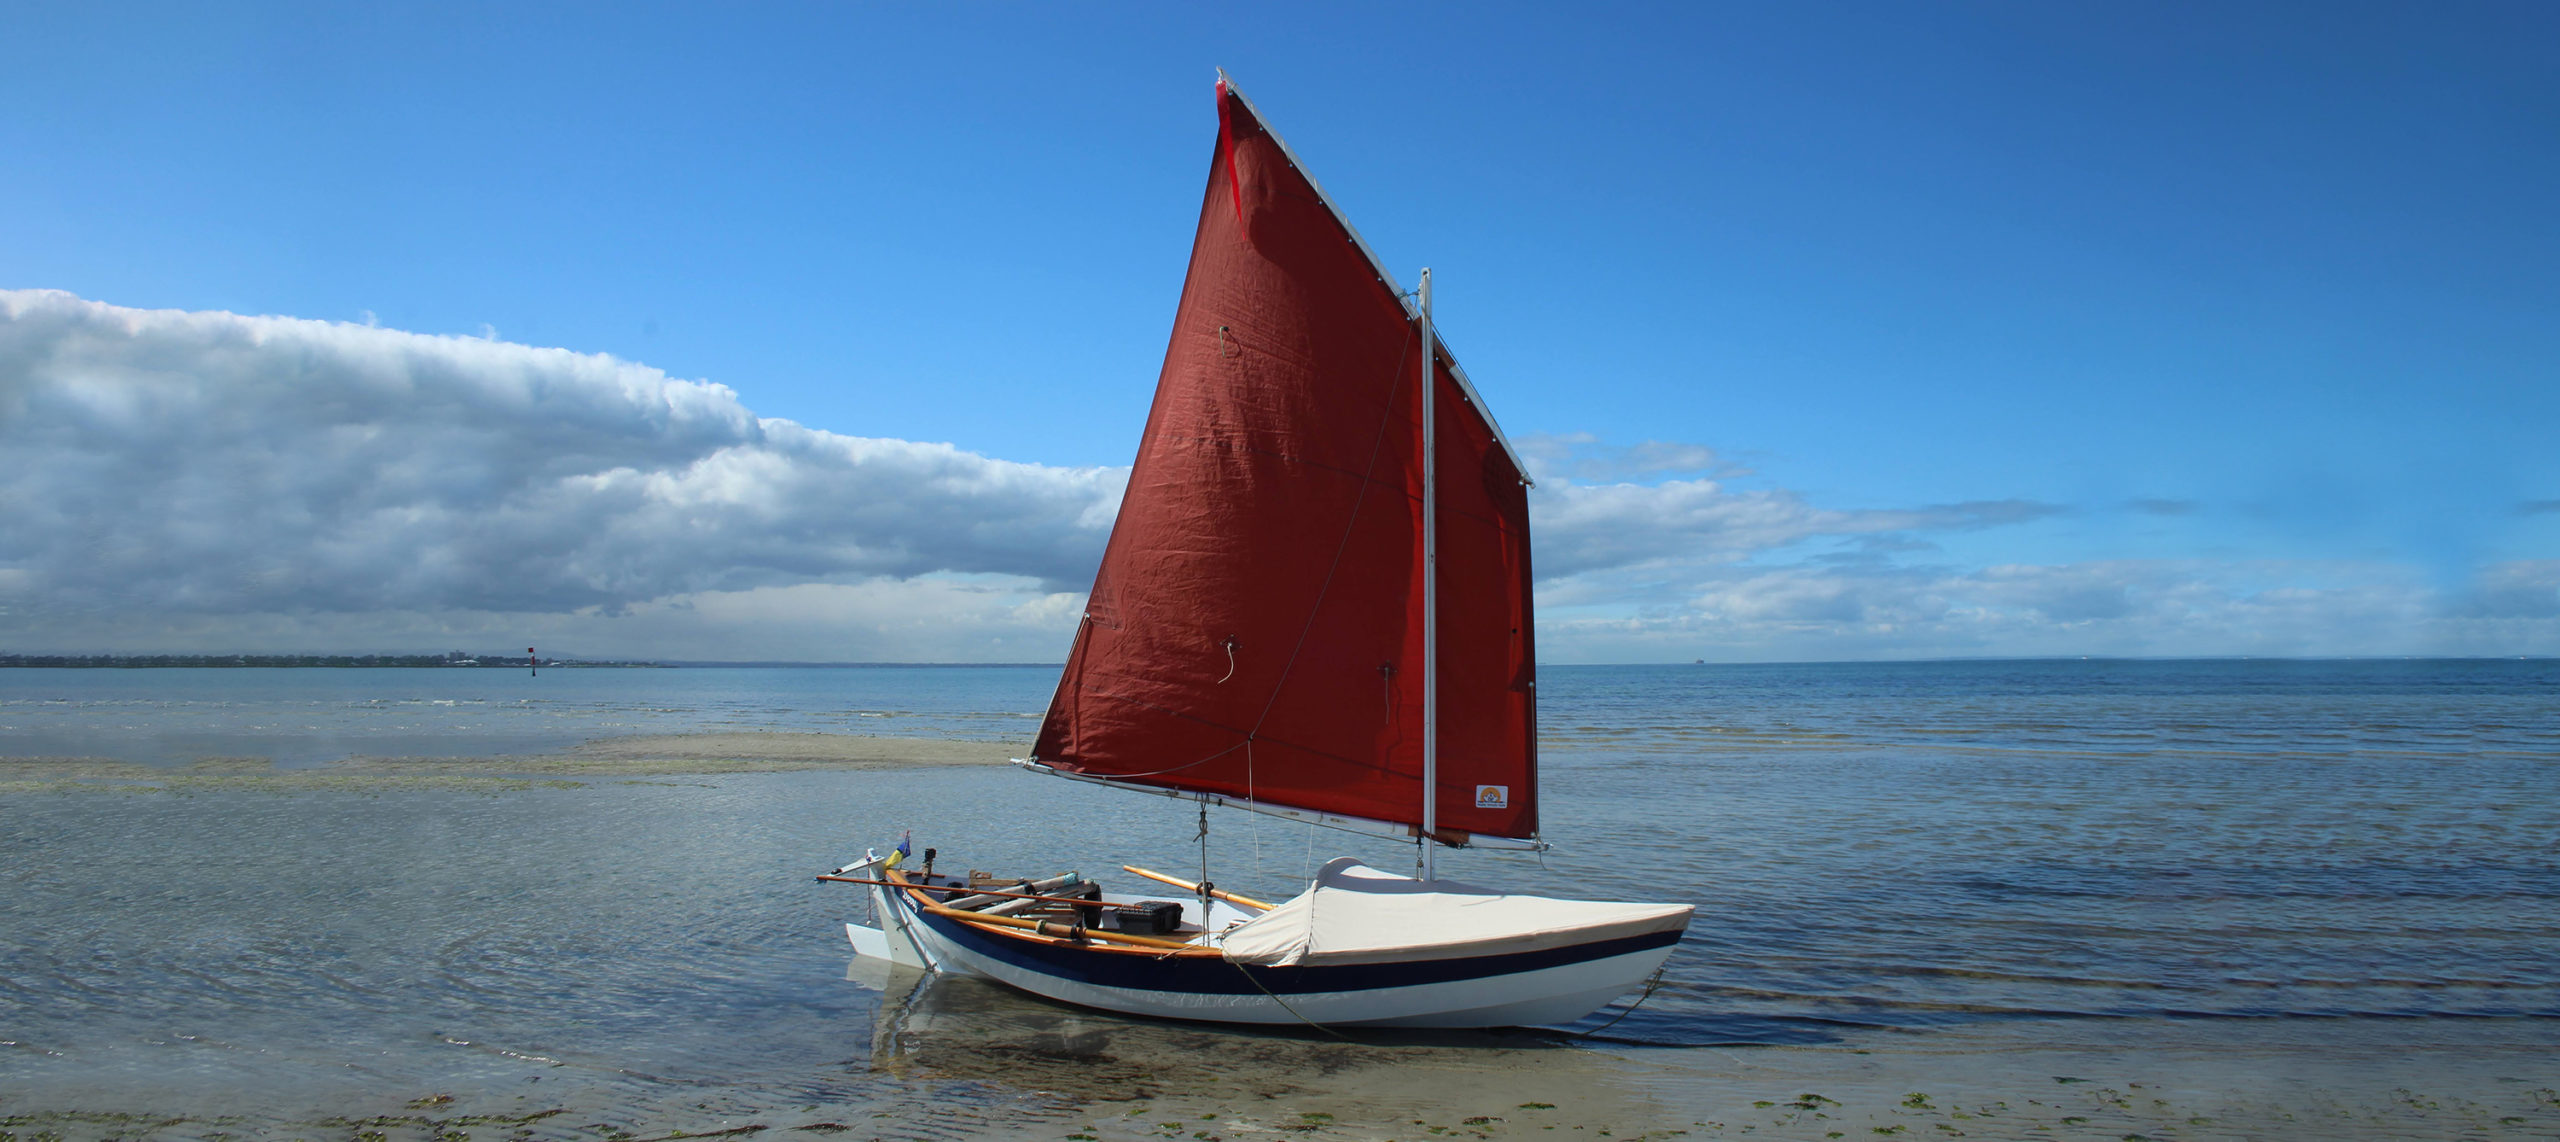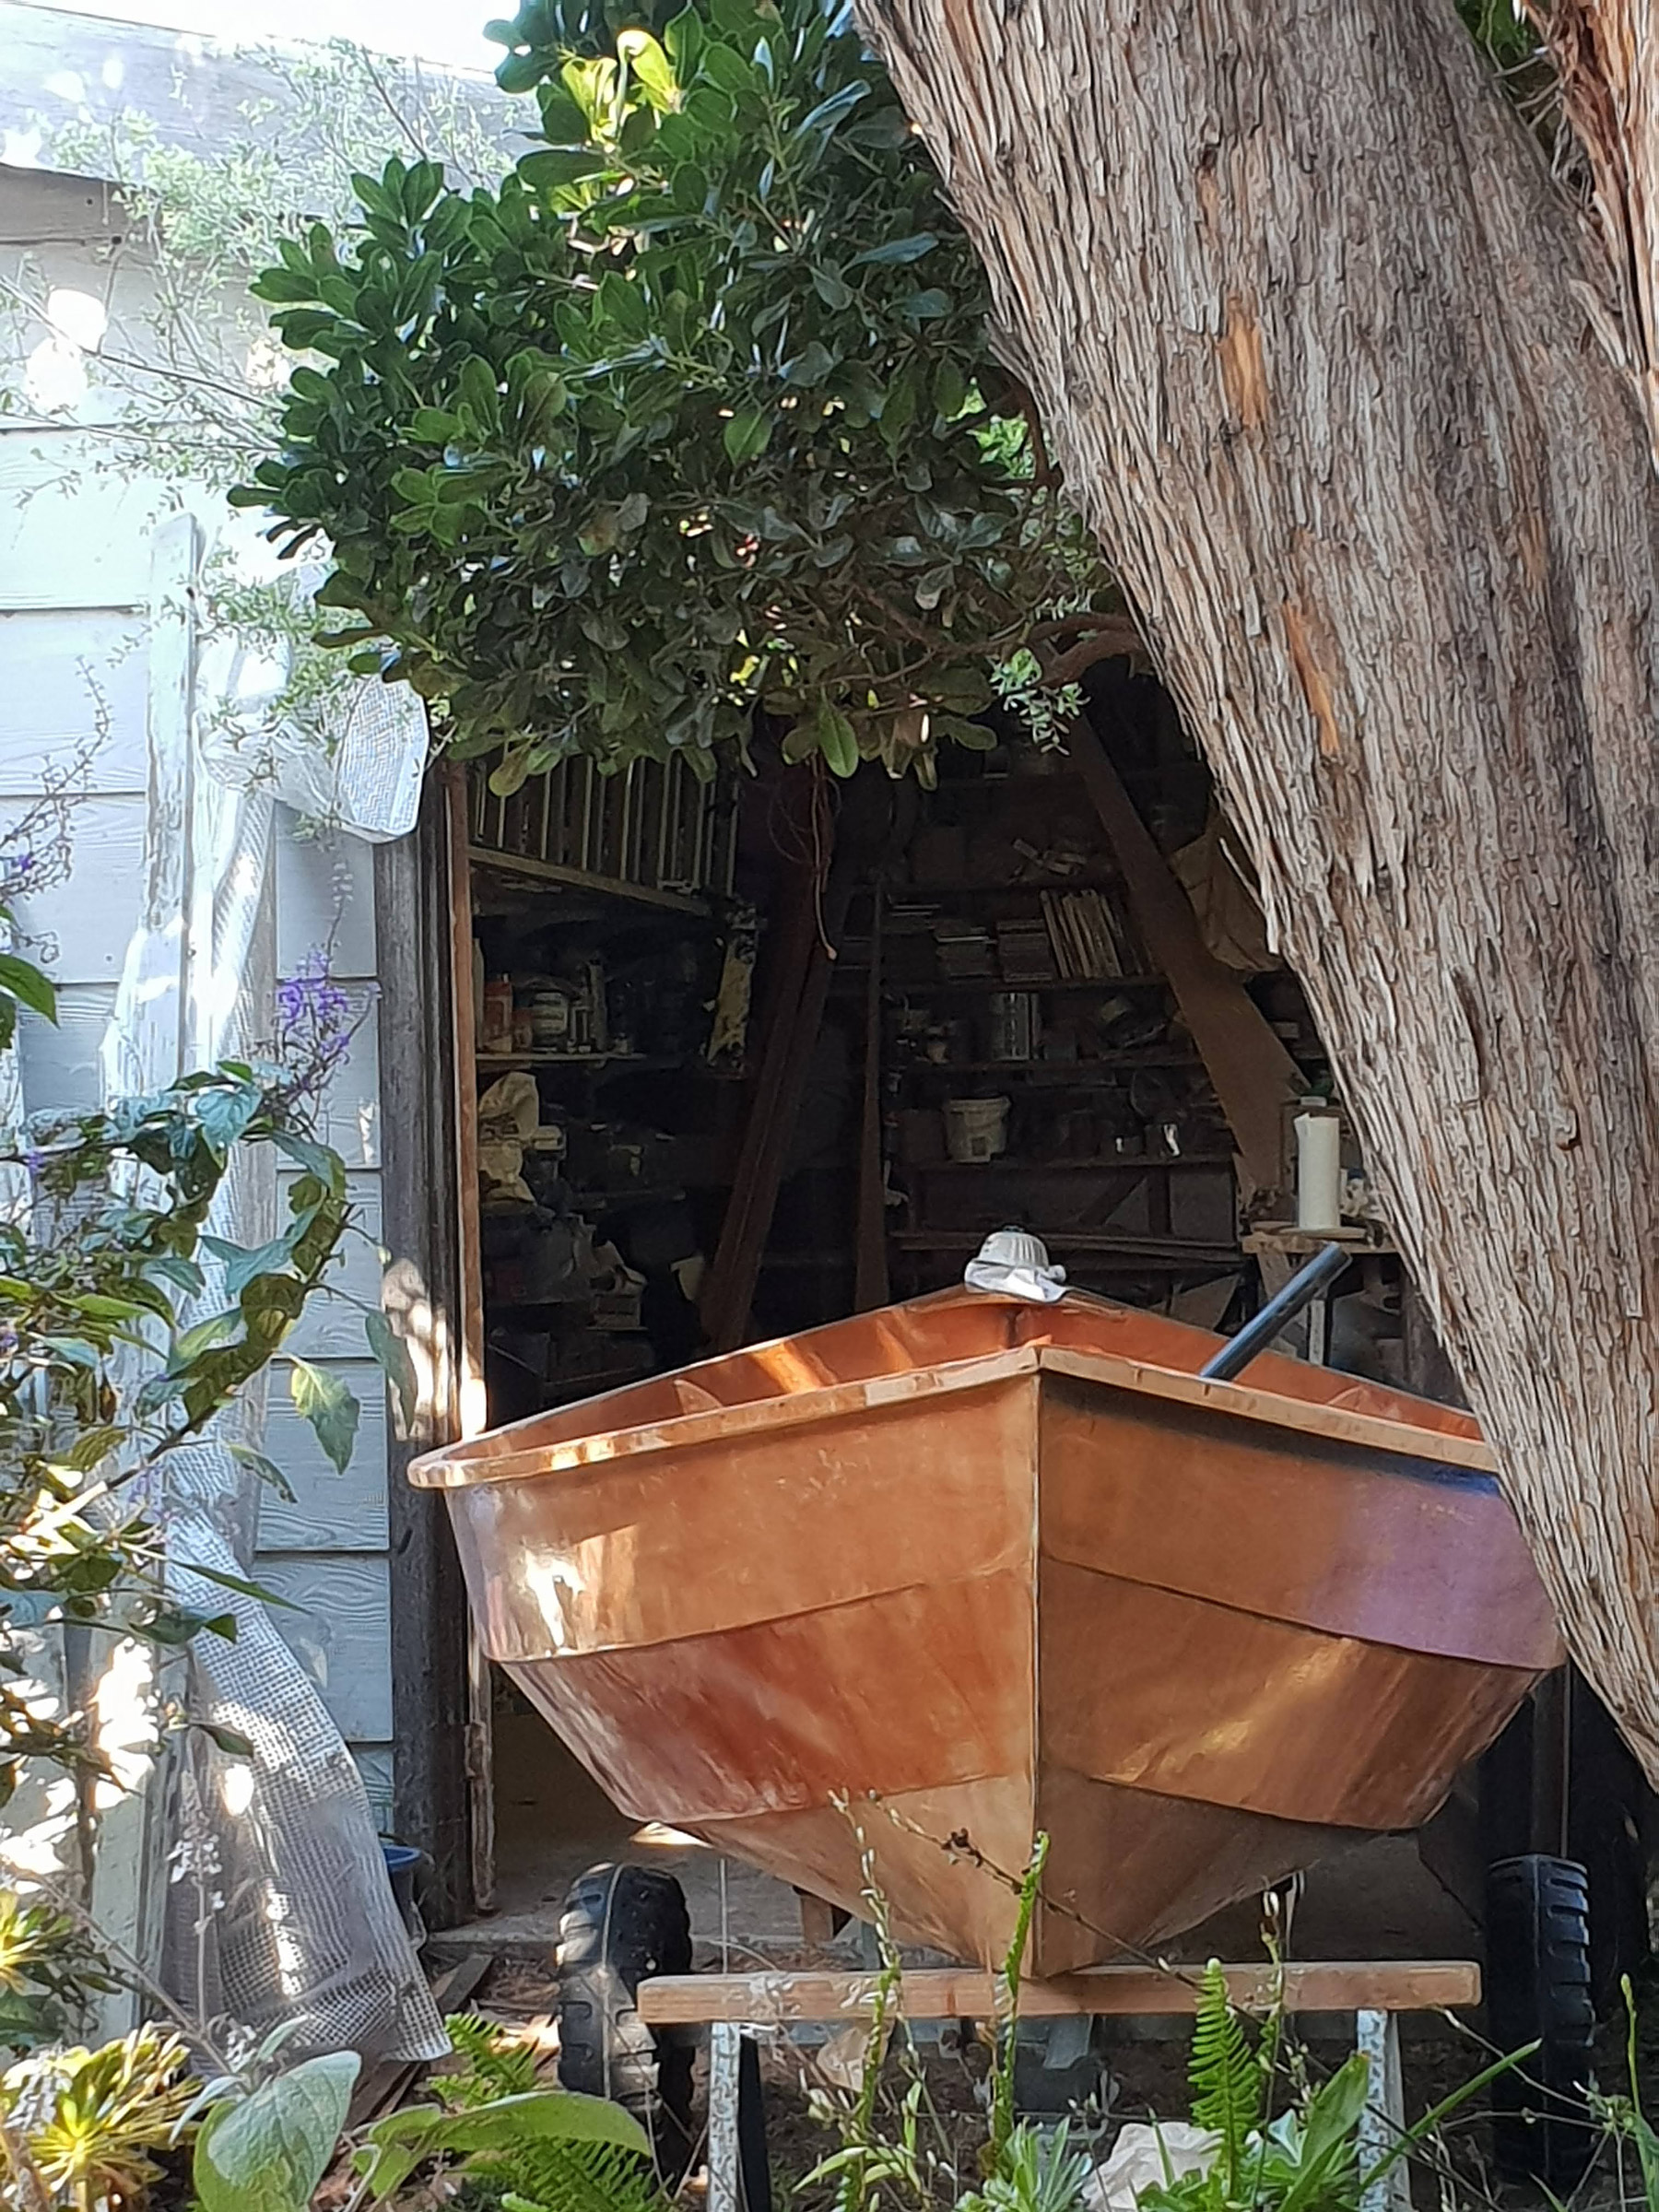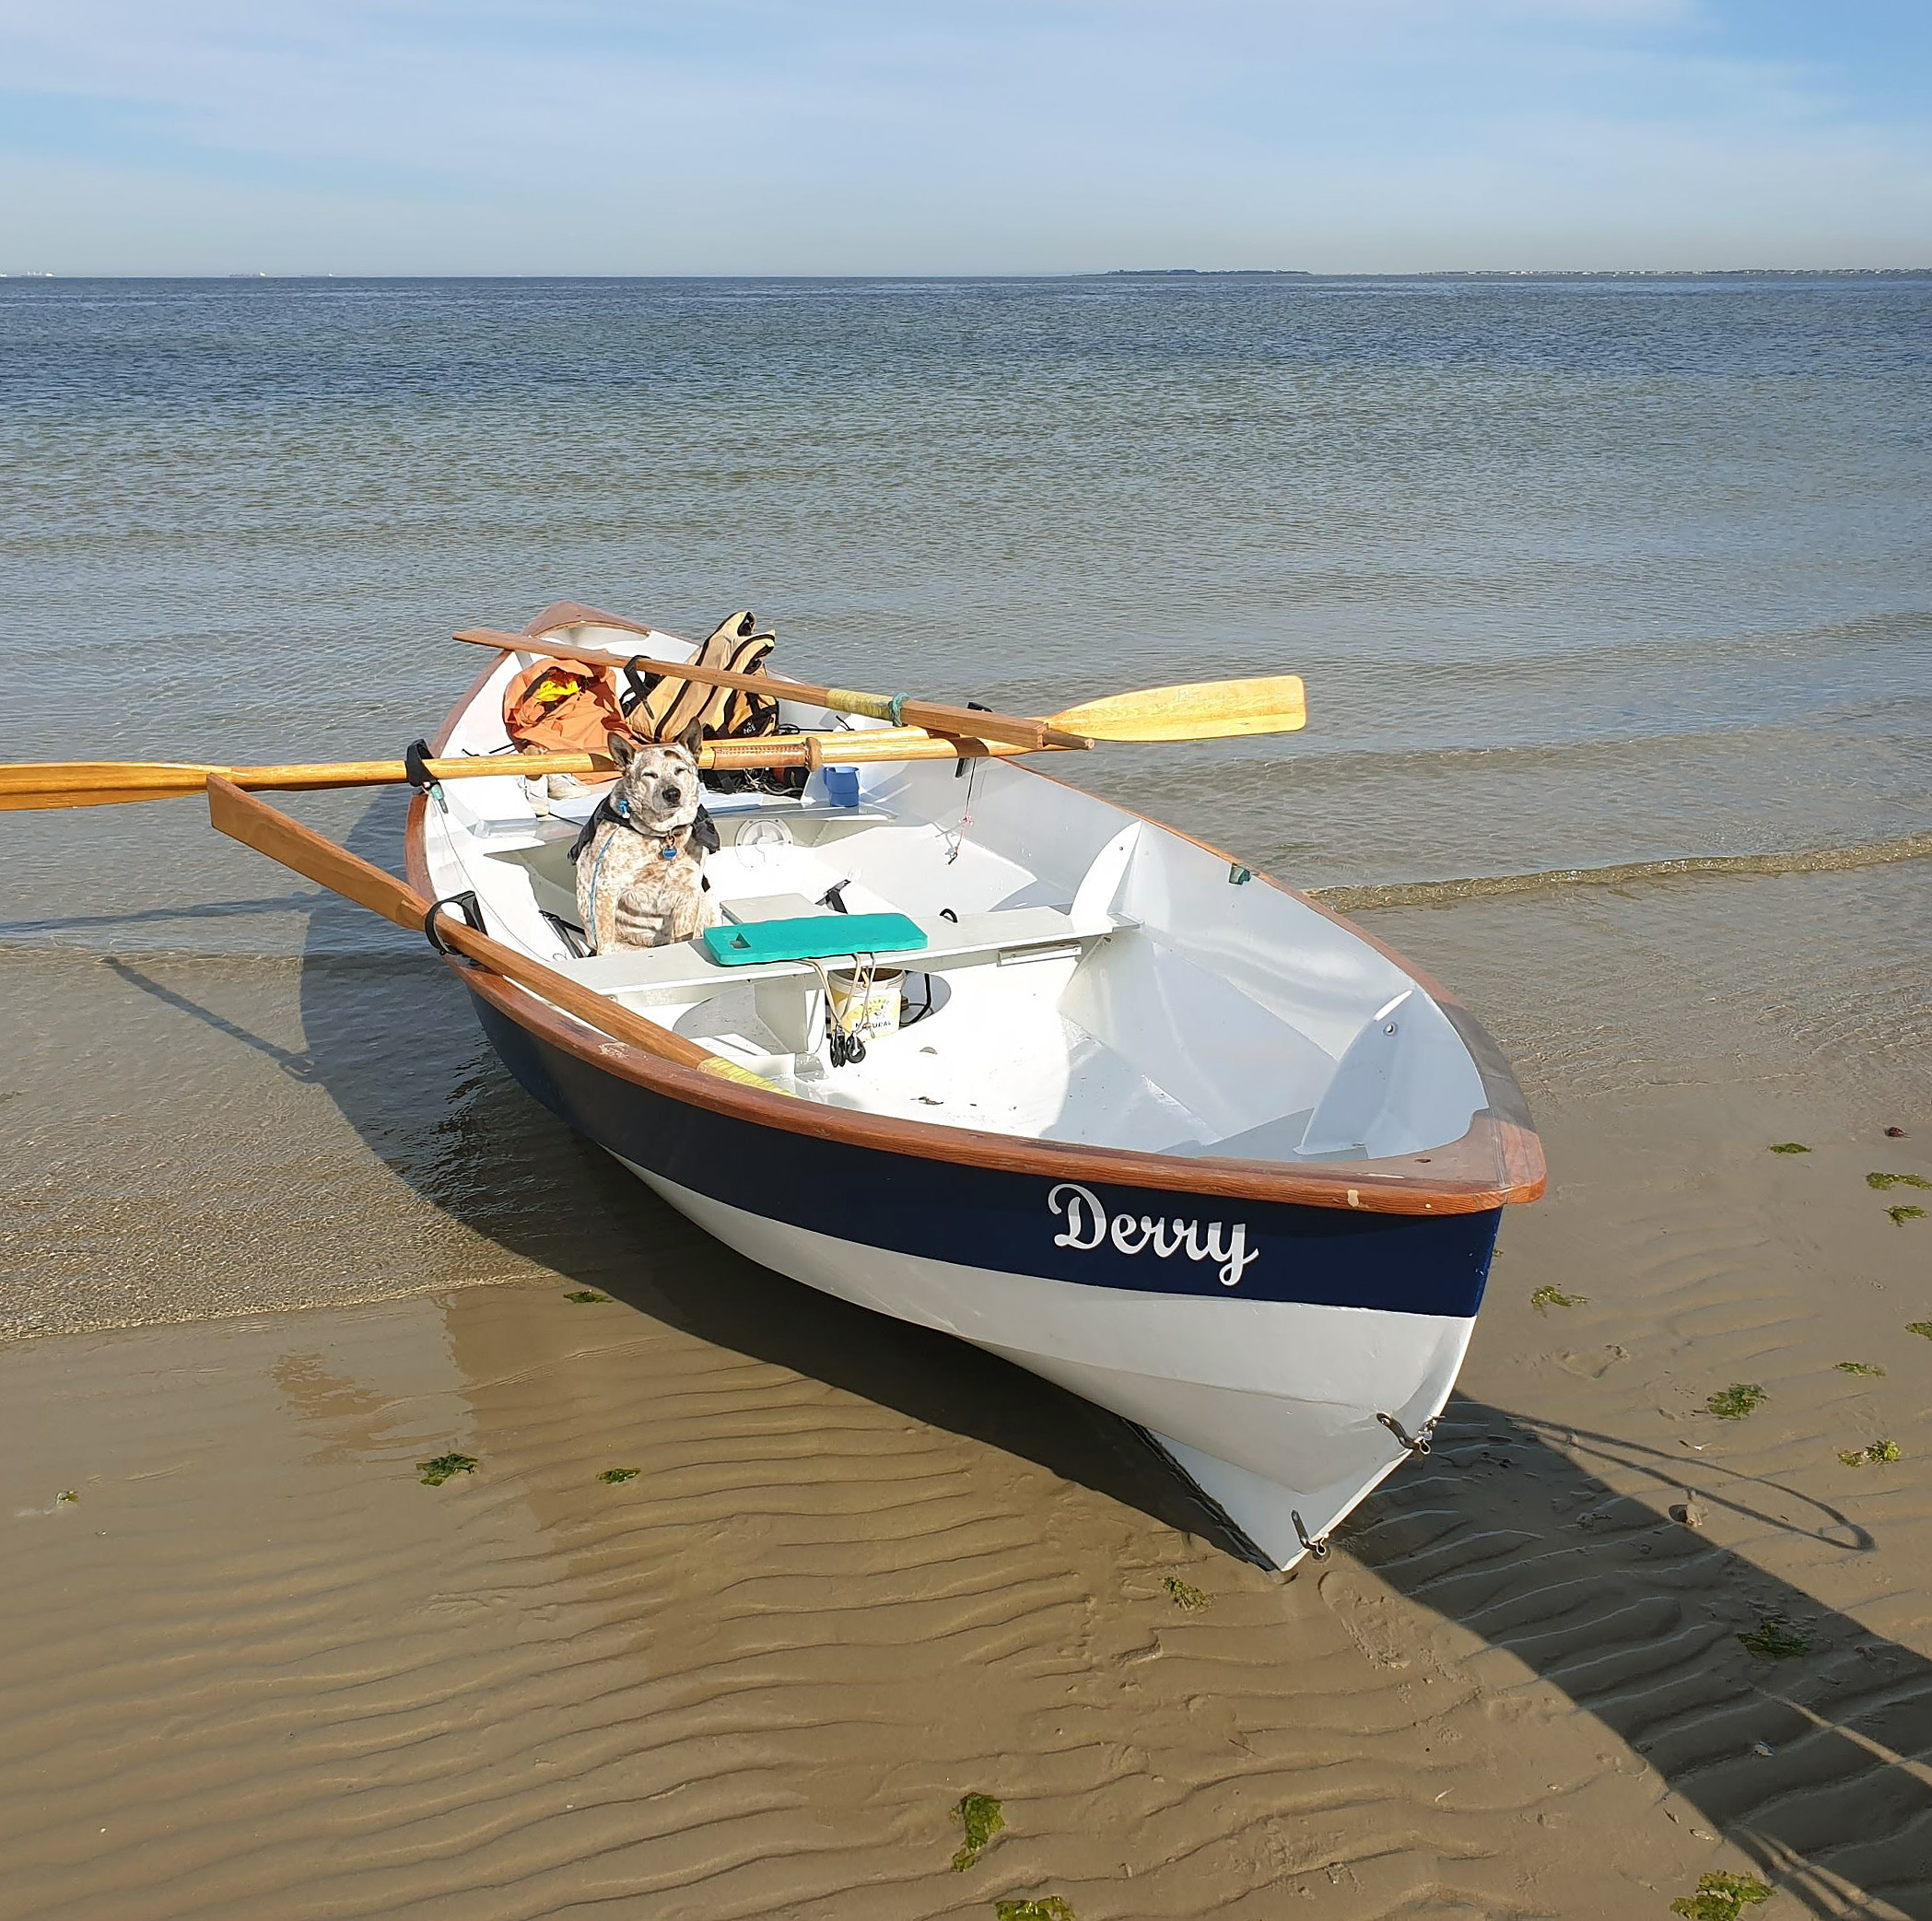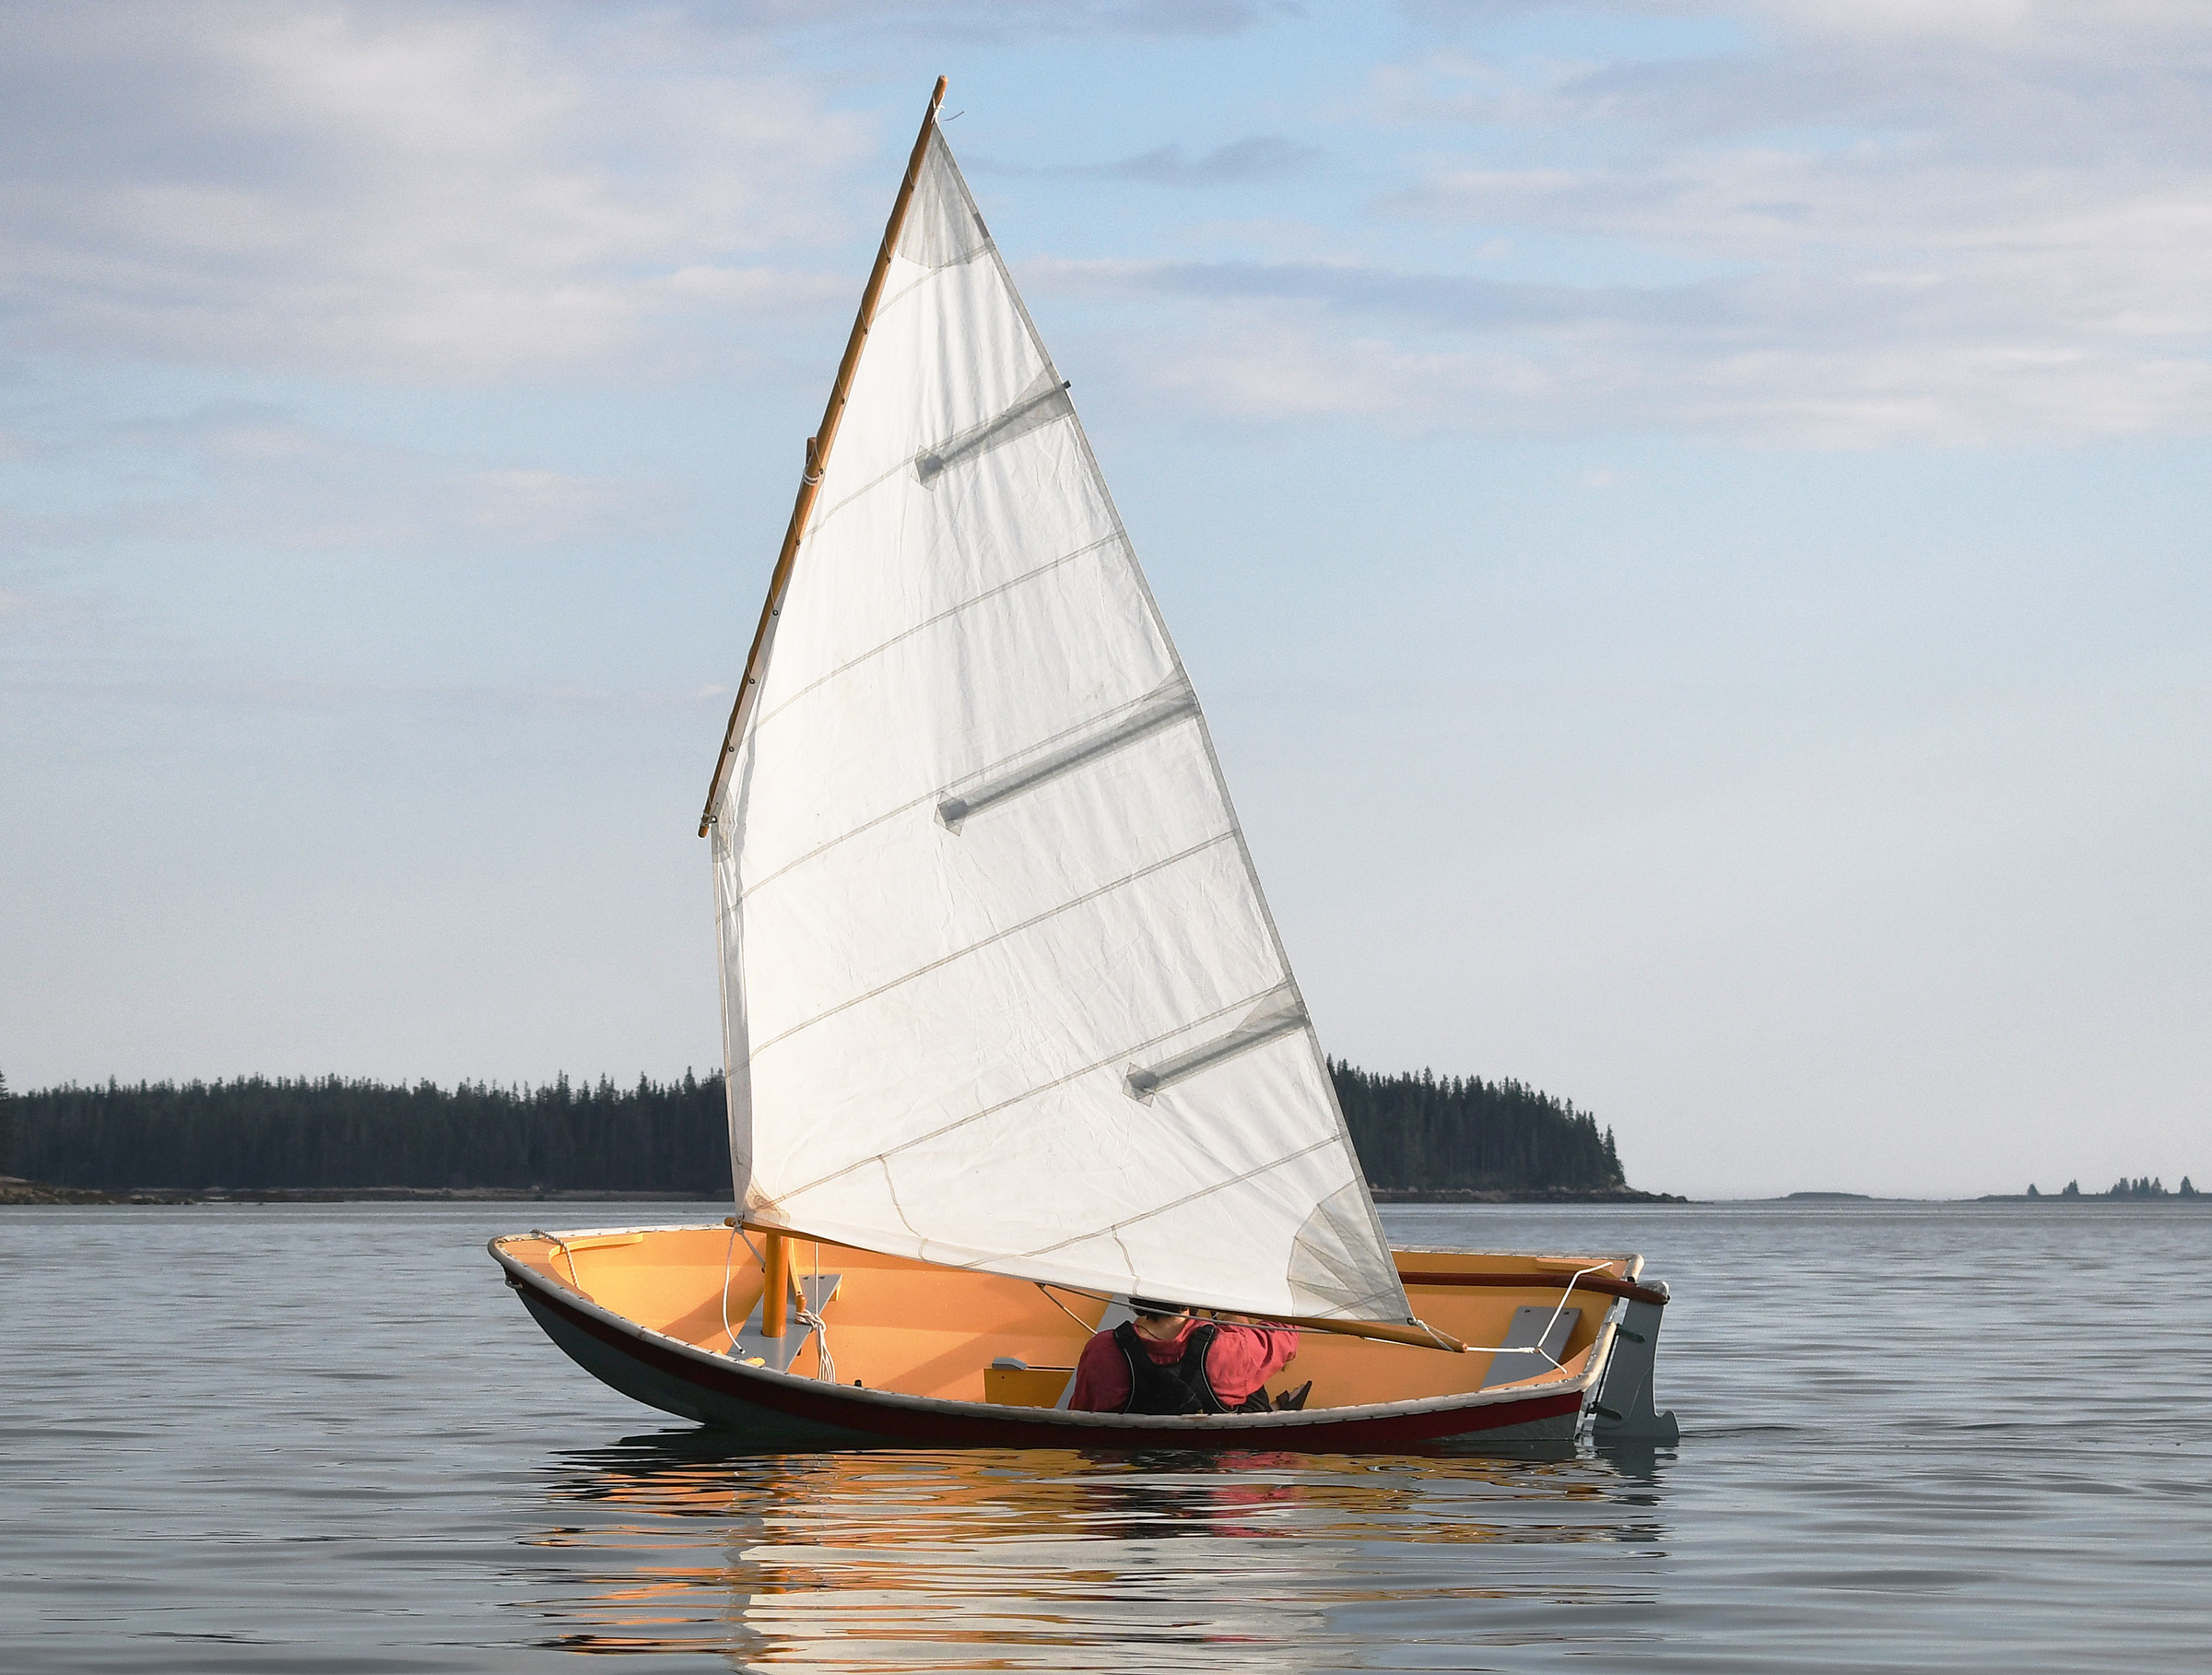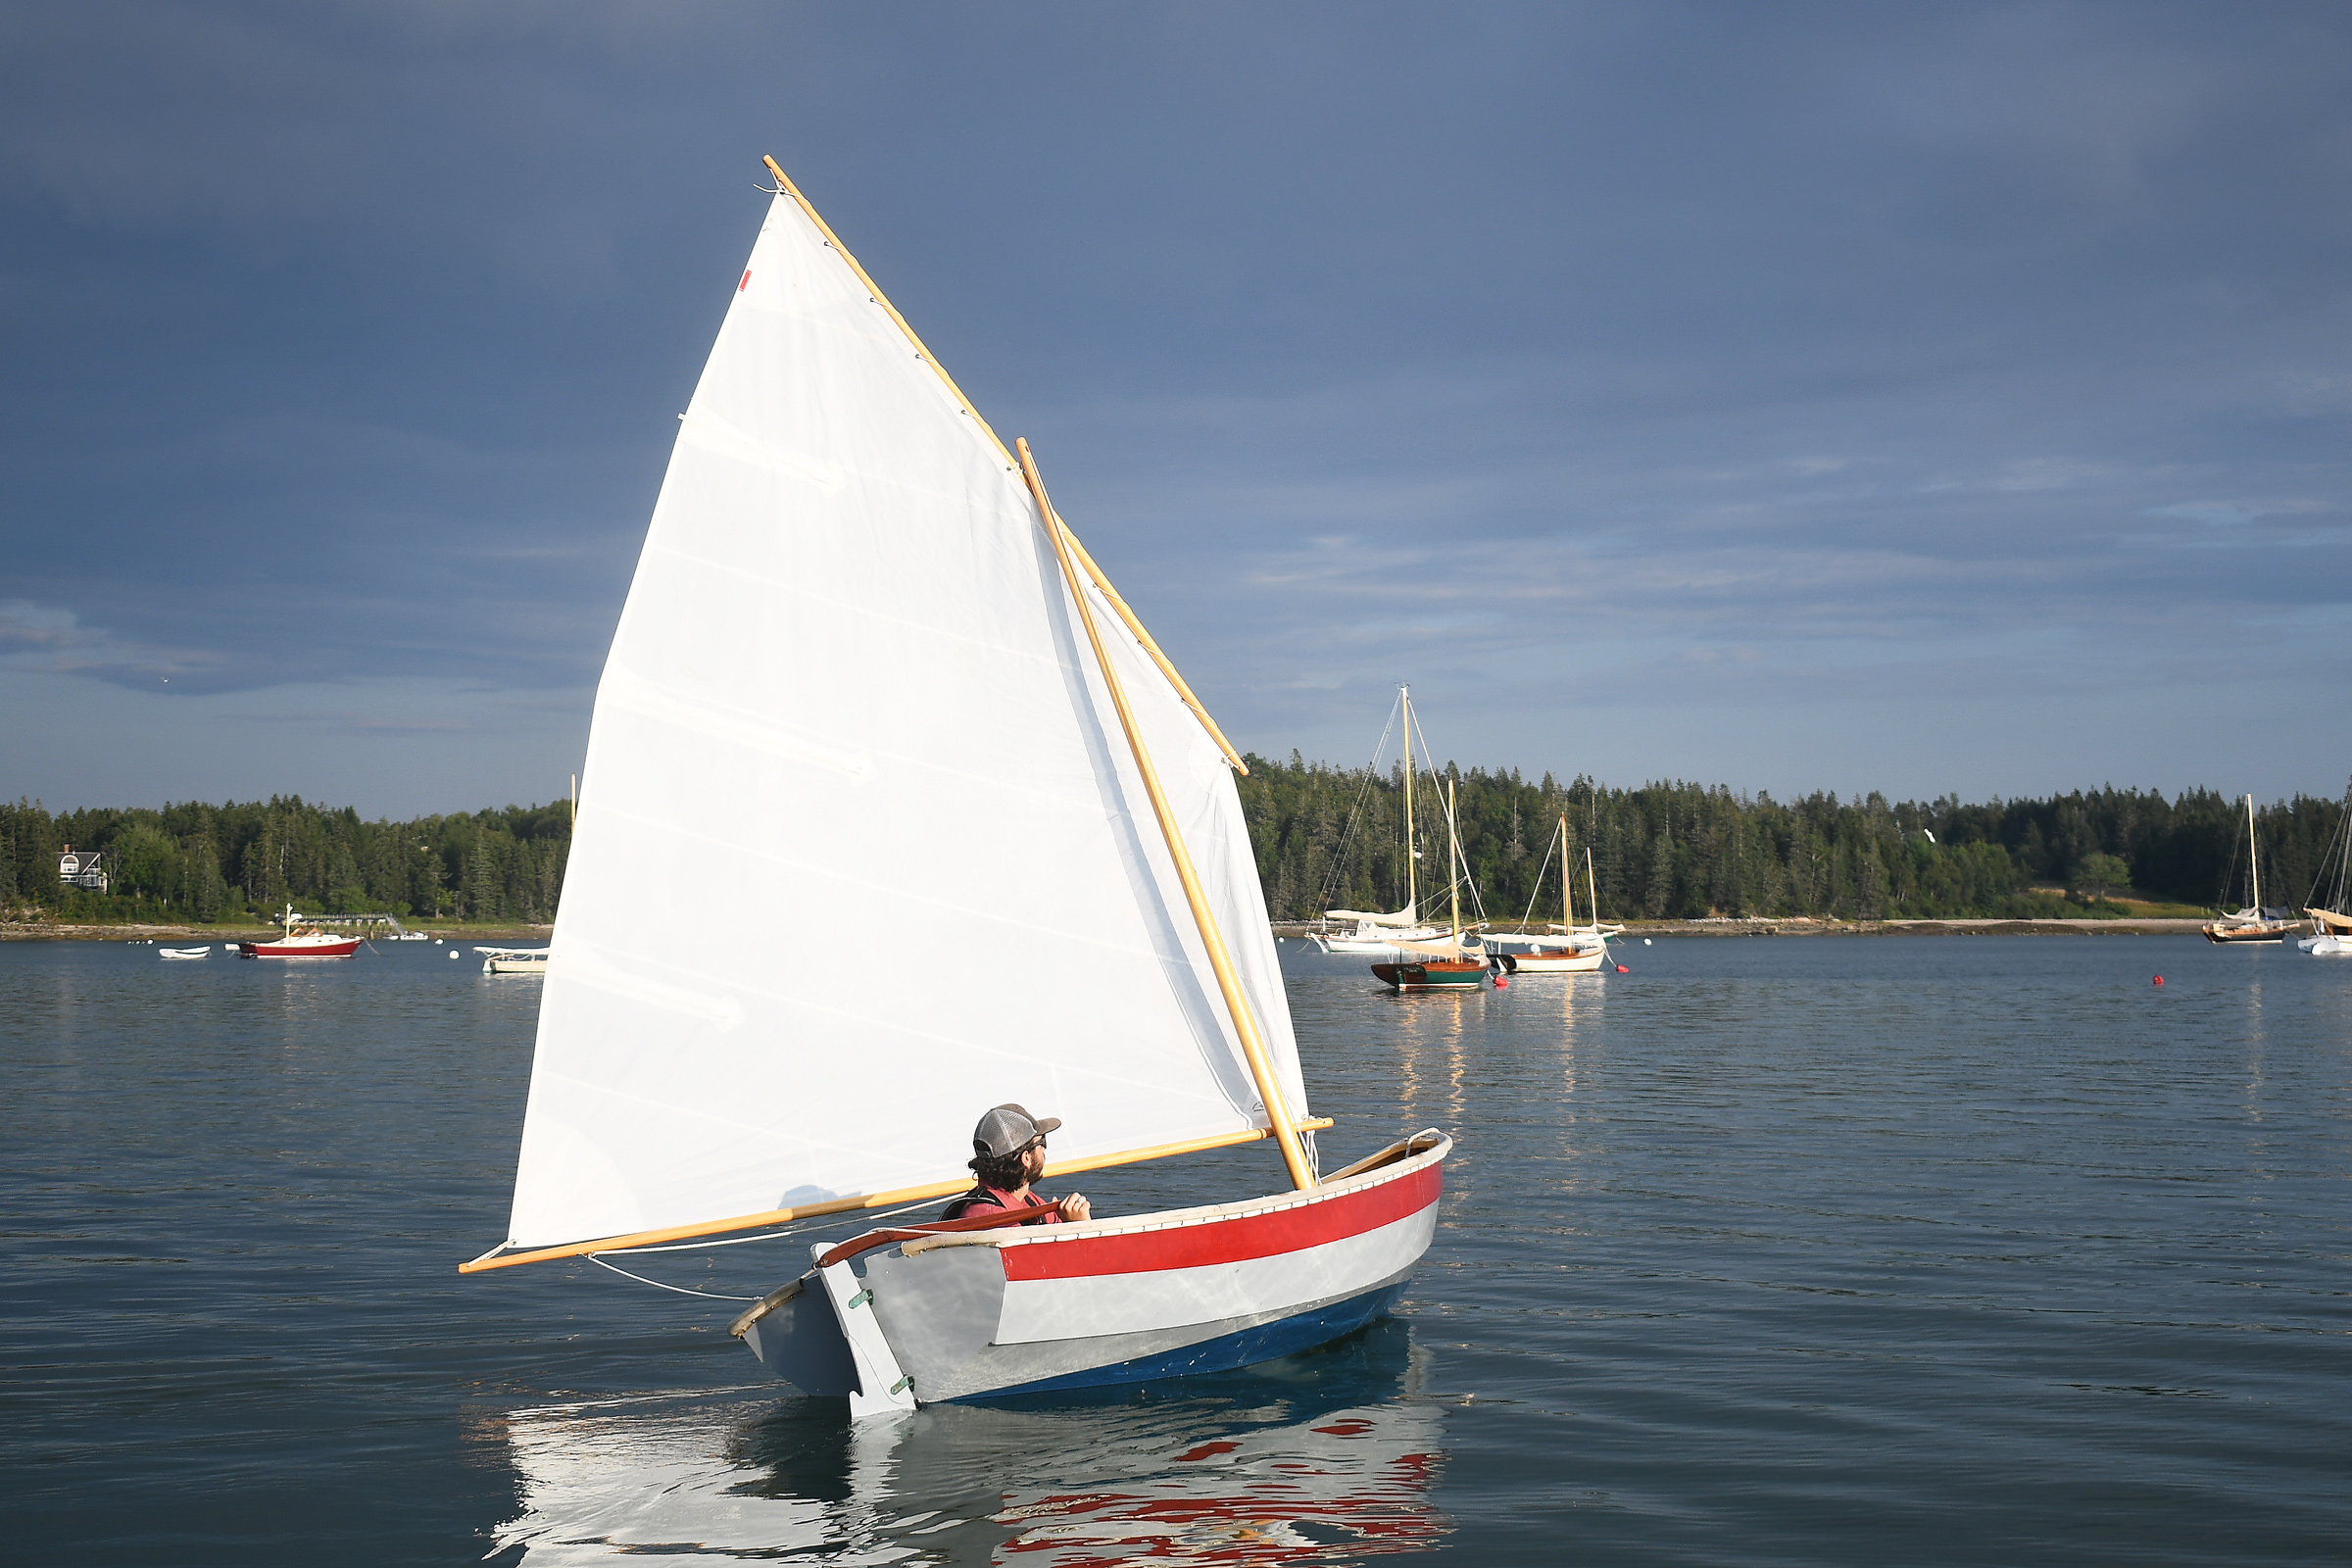
With TRAMP, our 16′ double-ended pulling boat, on top of the Volvo station wagon, Ben and I had driven for days through vineyard-draped landscapes dotted with chateaux to reach Castets-en-Dorthe, a one-post-office, one-pharmacy village about 80 miles inland from where the tides of the Atlantic meet France’s Gironde estuary and flow past Bordeaux and into the river Garonne. We stopped near the first of the 53 locks of the Canal de Garonne to look for a slip to launch from and spotted a lockkeeper in a cobalt-blue T-shirt bearing the emblem of Voies Navigables de France (VNF), the authority managing the inland waterways. When we told him our plan to row along the Two Seas Canal to Sète and the Mediterranean Sea, he told us that we couldn’t use the locks in a non-motorized boat. Not once in our nearly two years of research in French and English had we found this rule, though we had heard from a rower who had secured official permission and had still been denied entry to the locks. After some discussion, the lockkeeper admitted that he really wasn’t sure and suggested we come back the next day when he could check with his boss.
In the morning, on our drive from our campground, we crossed the single-lane road-bridge over the 100-yard-wide river Garonne. Just upstream the dark stone walls of the first lock’s twin corridors on the river’s left bank rose above the water. Set between the walls two sets of dark metal gates in parallel V-shapes at either end of the chamber pointed toward the canal. Beyond the locks, in the shade of the regularly spaced trees flanking the canal, the bottle-glass-green canal water lay still barely a foot below the flat grassy banks. We found the same lockkeeper standing next to his white VNF van just beyond lock 52. He phoned his boss and after a brief exchange, still holding his phone to his ear, gave us a thumbs-up.
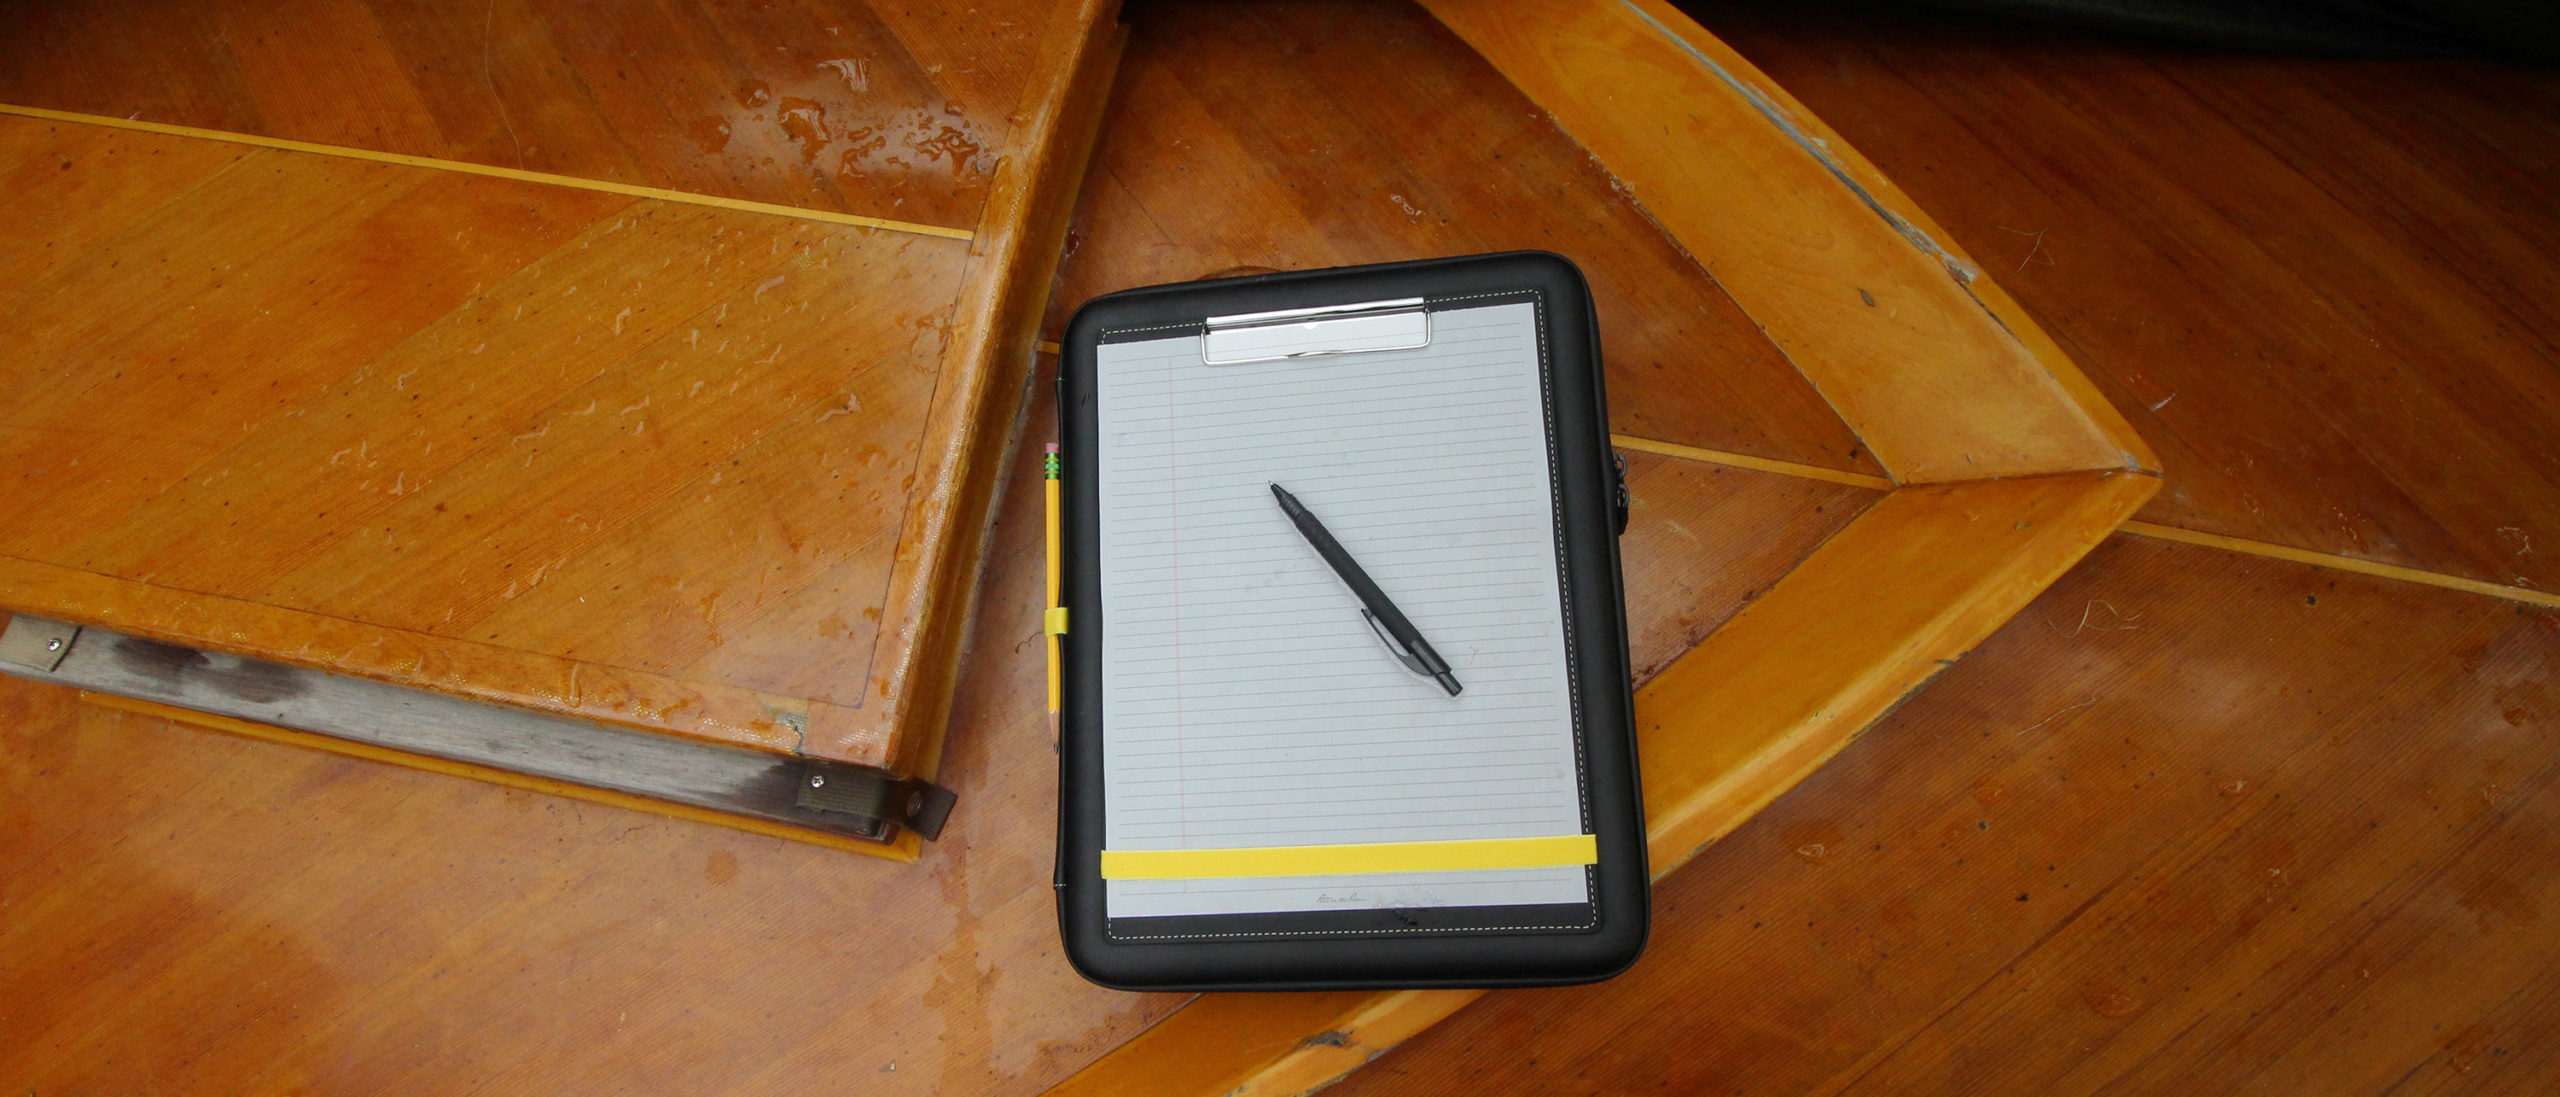
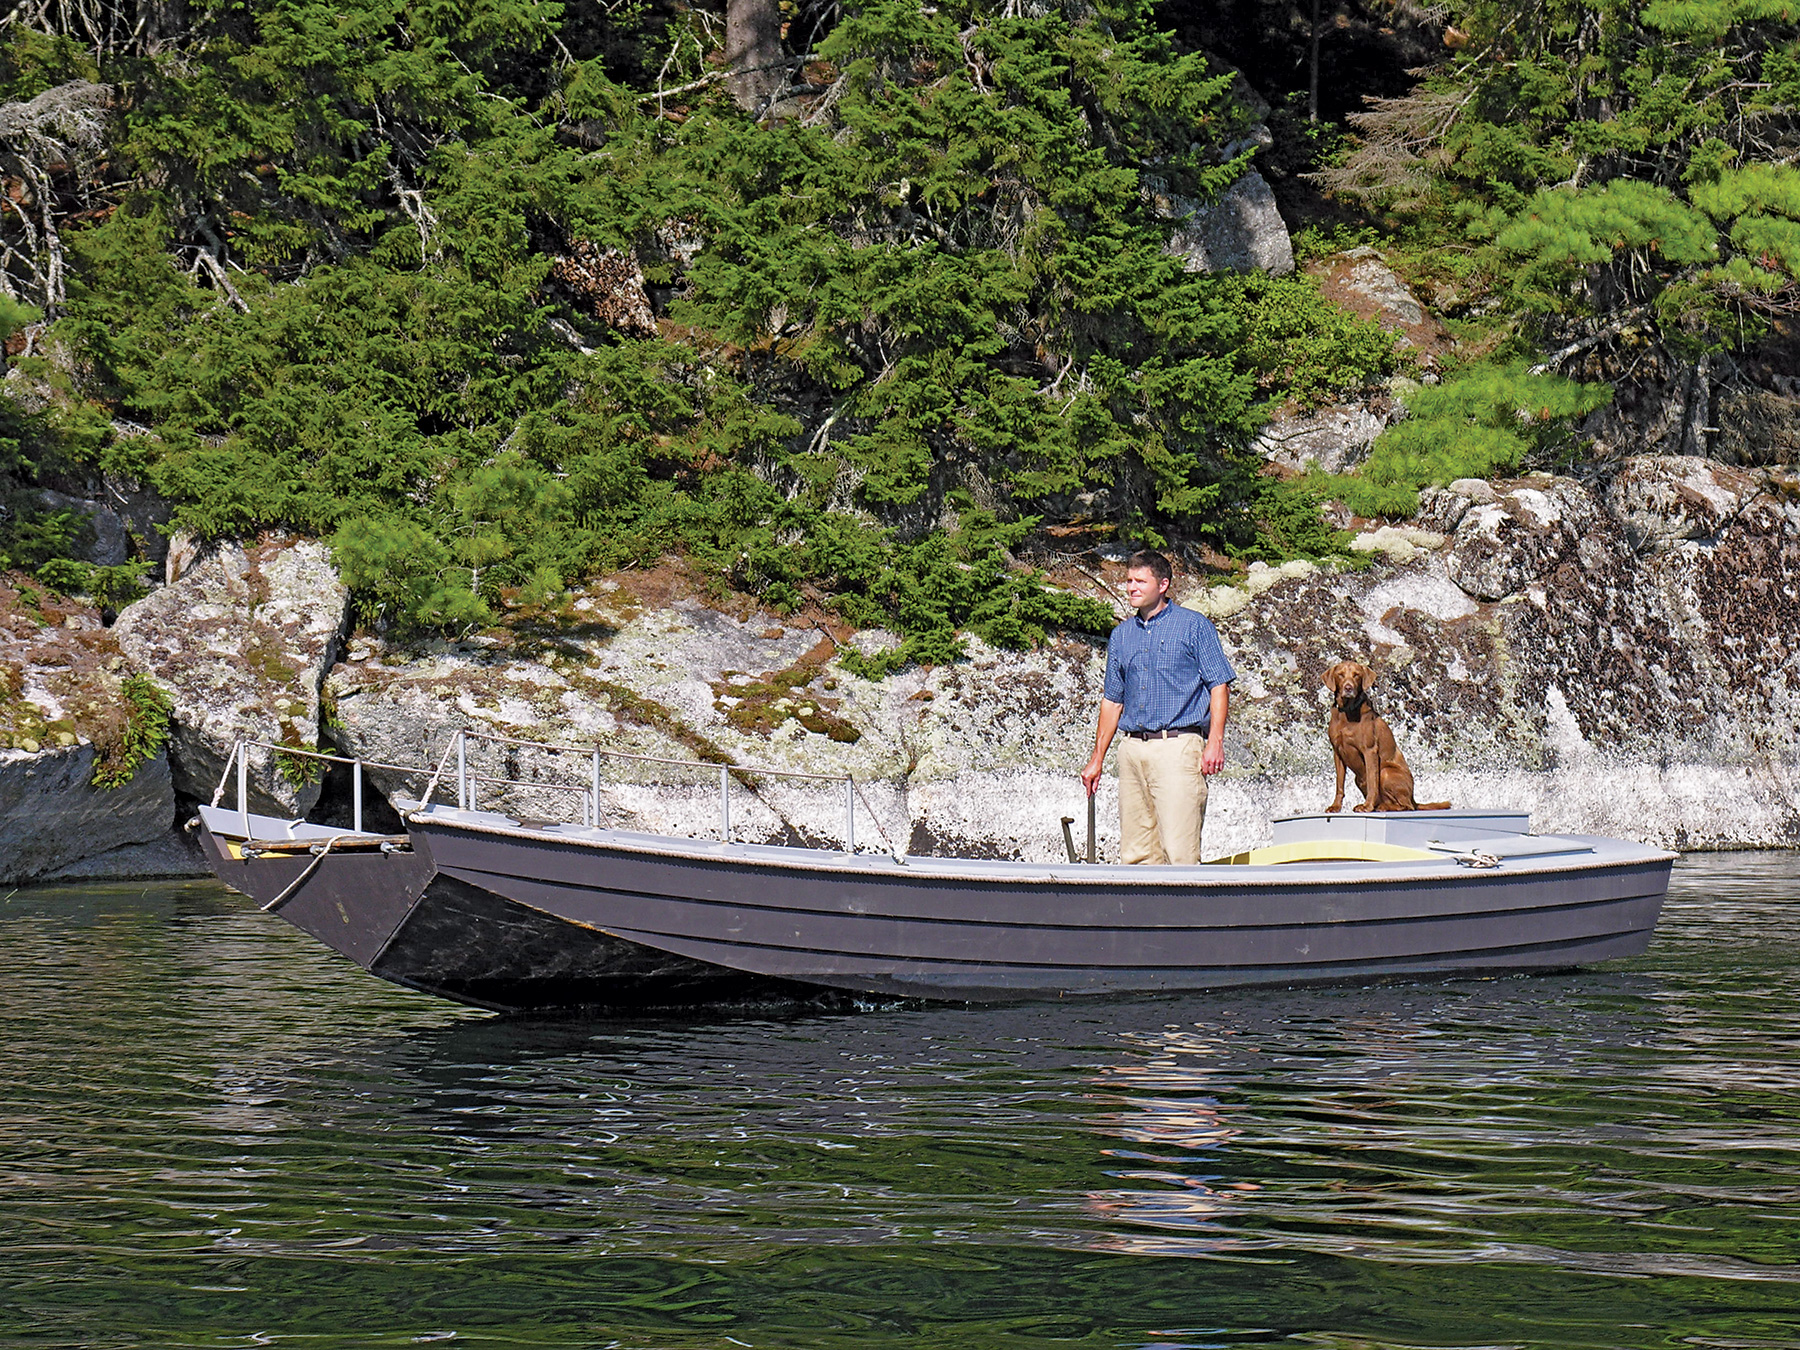
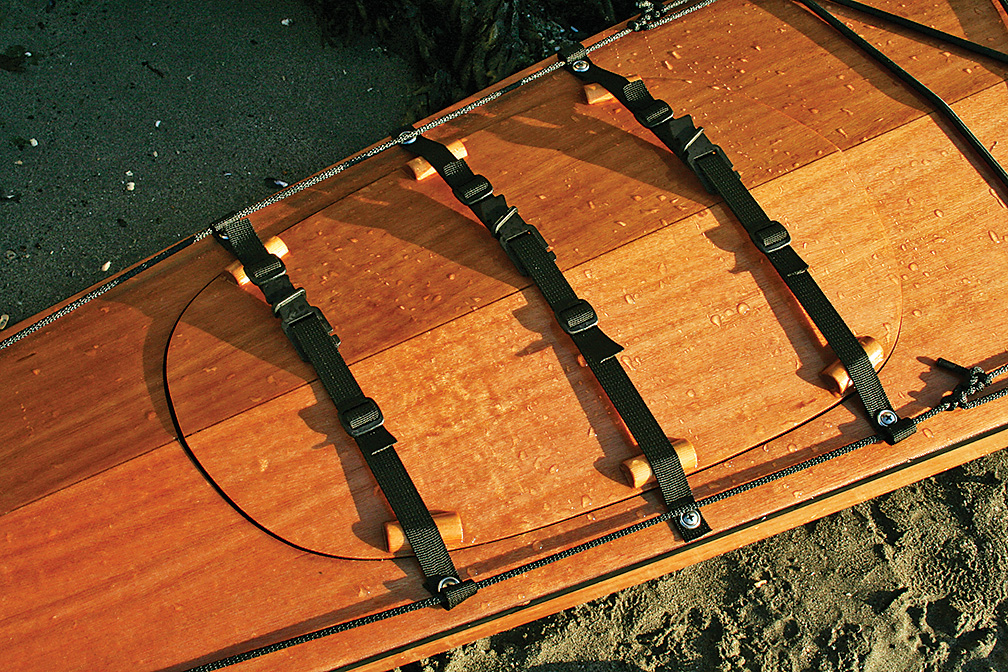
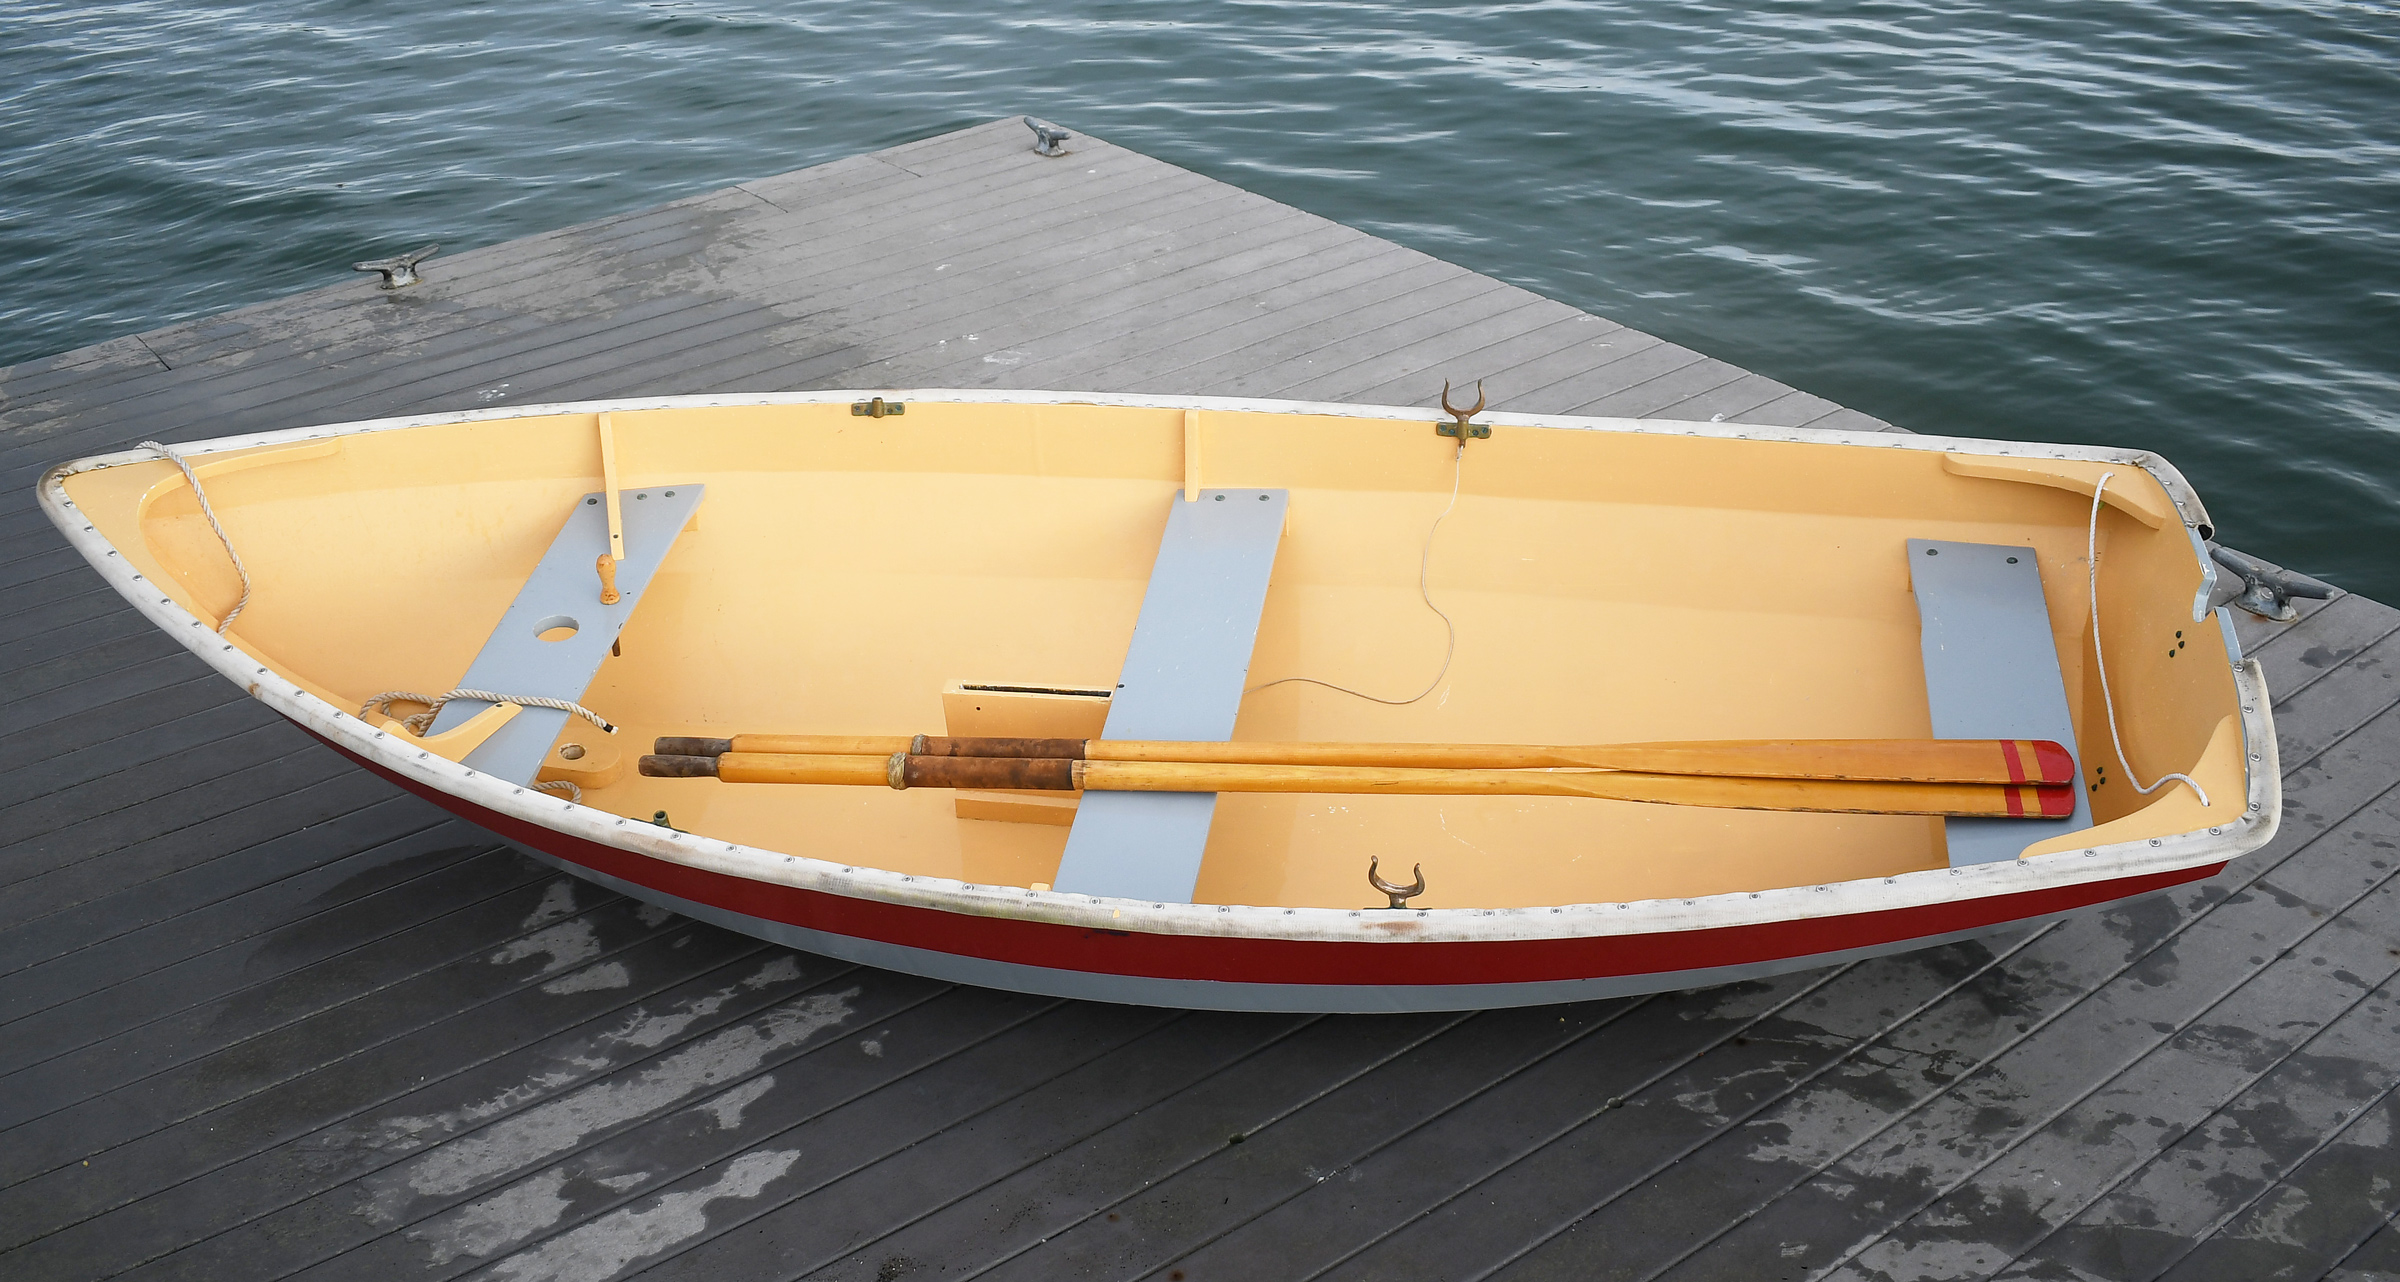
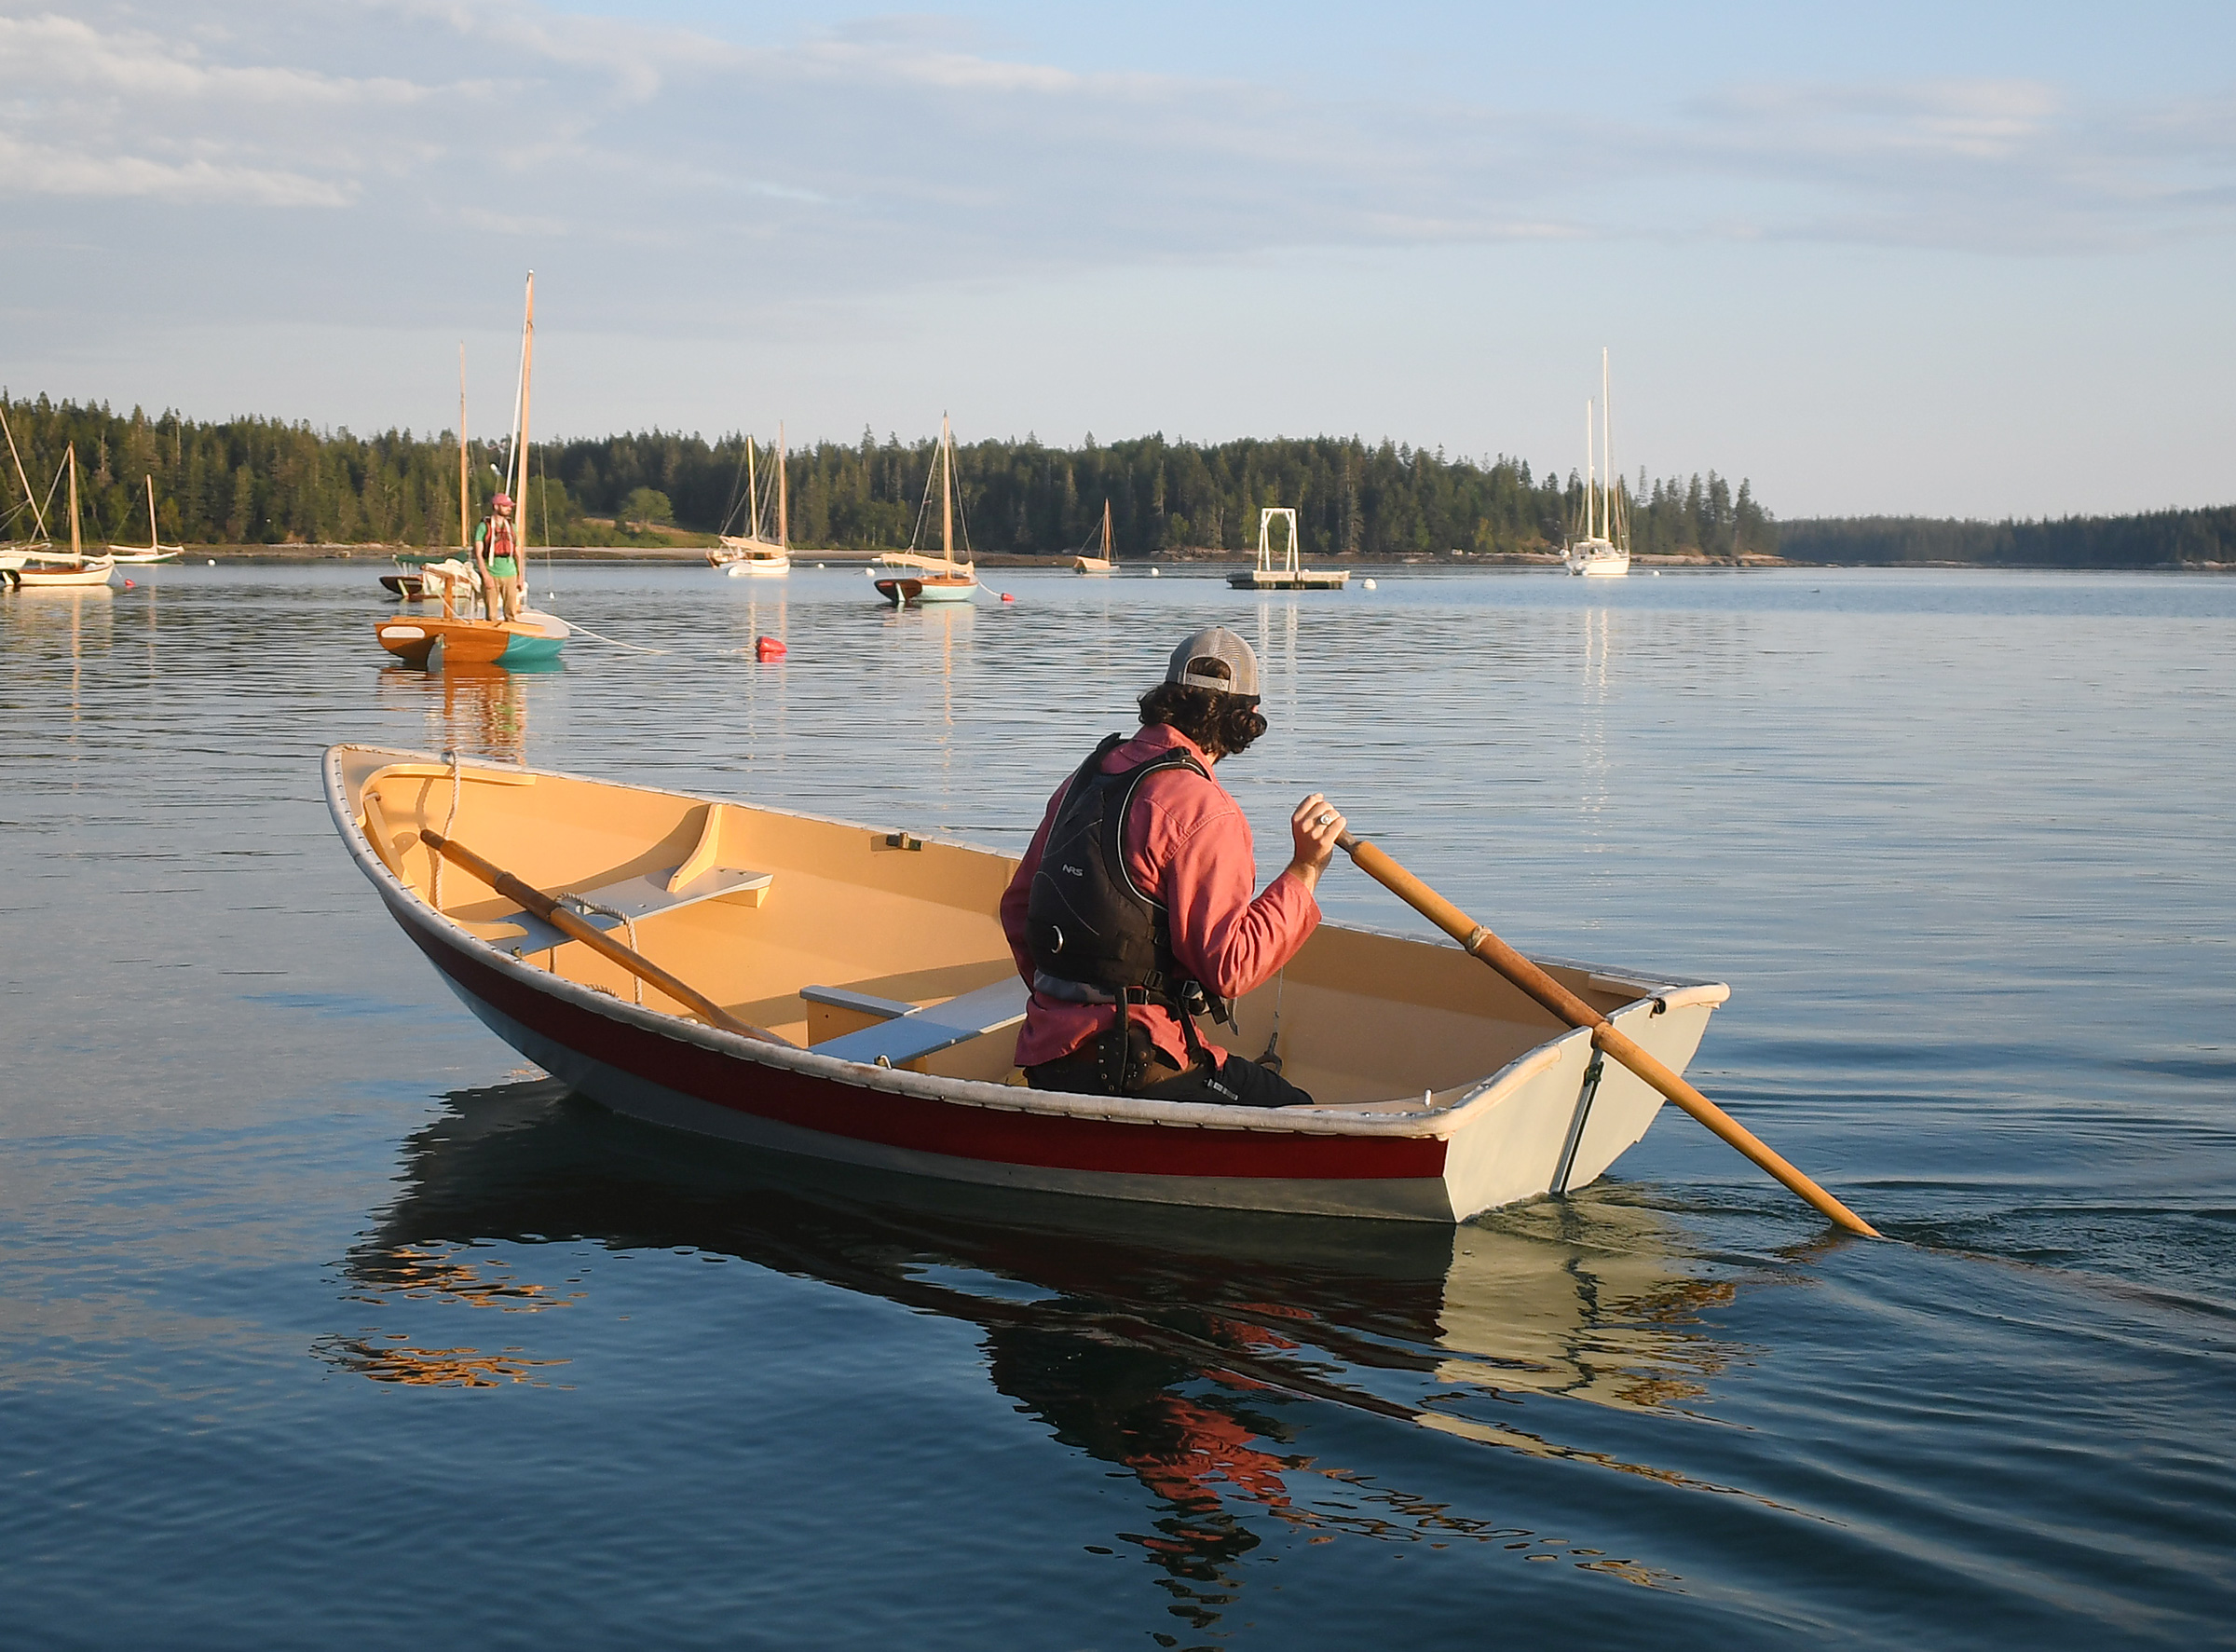
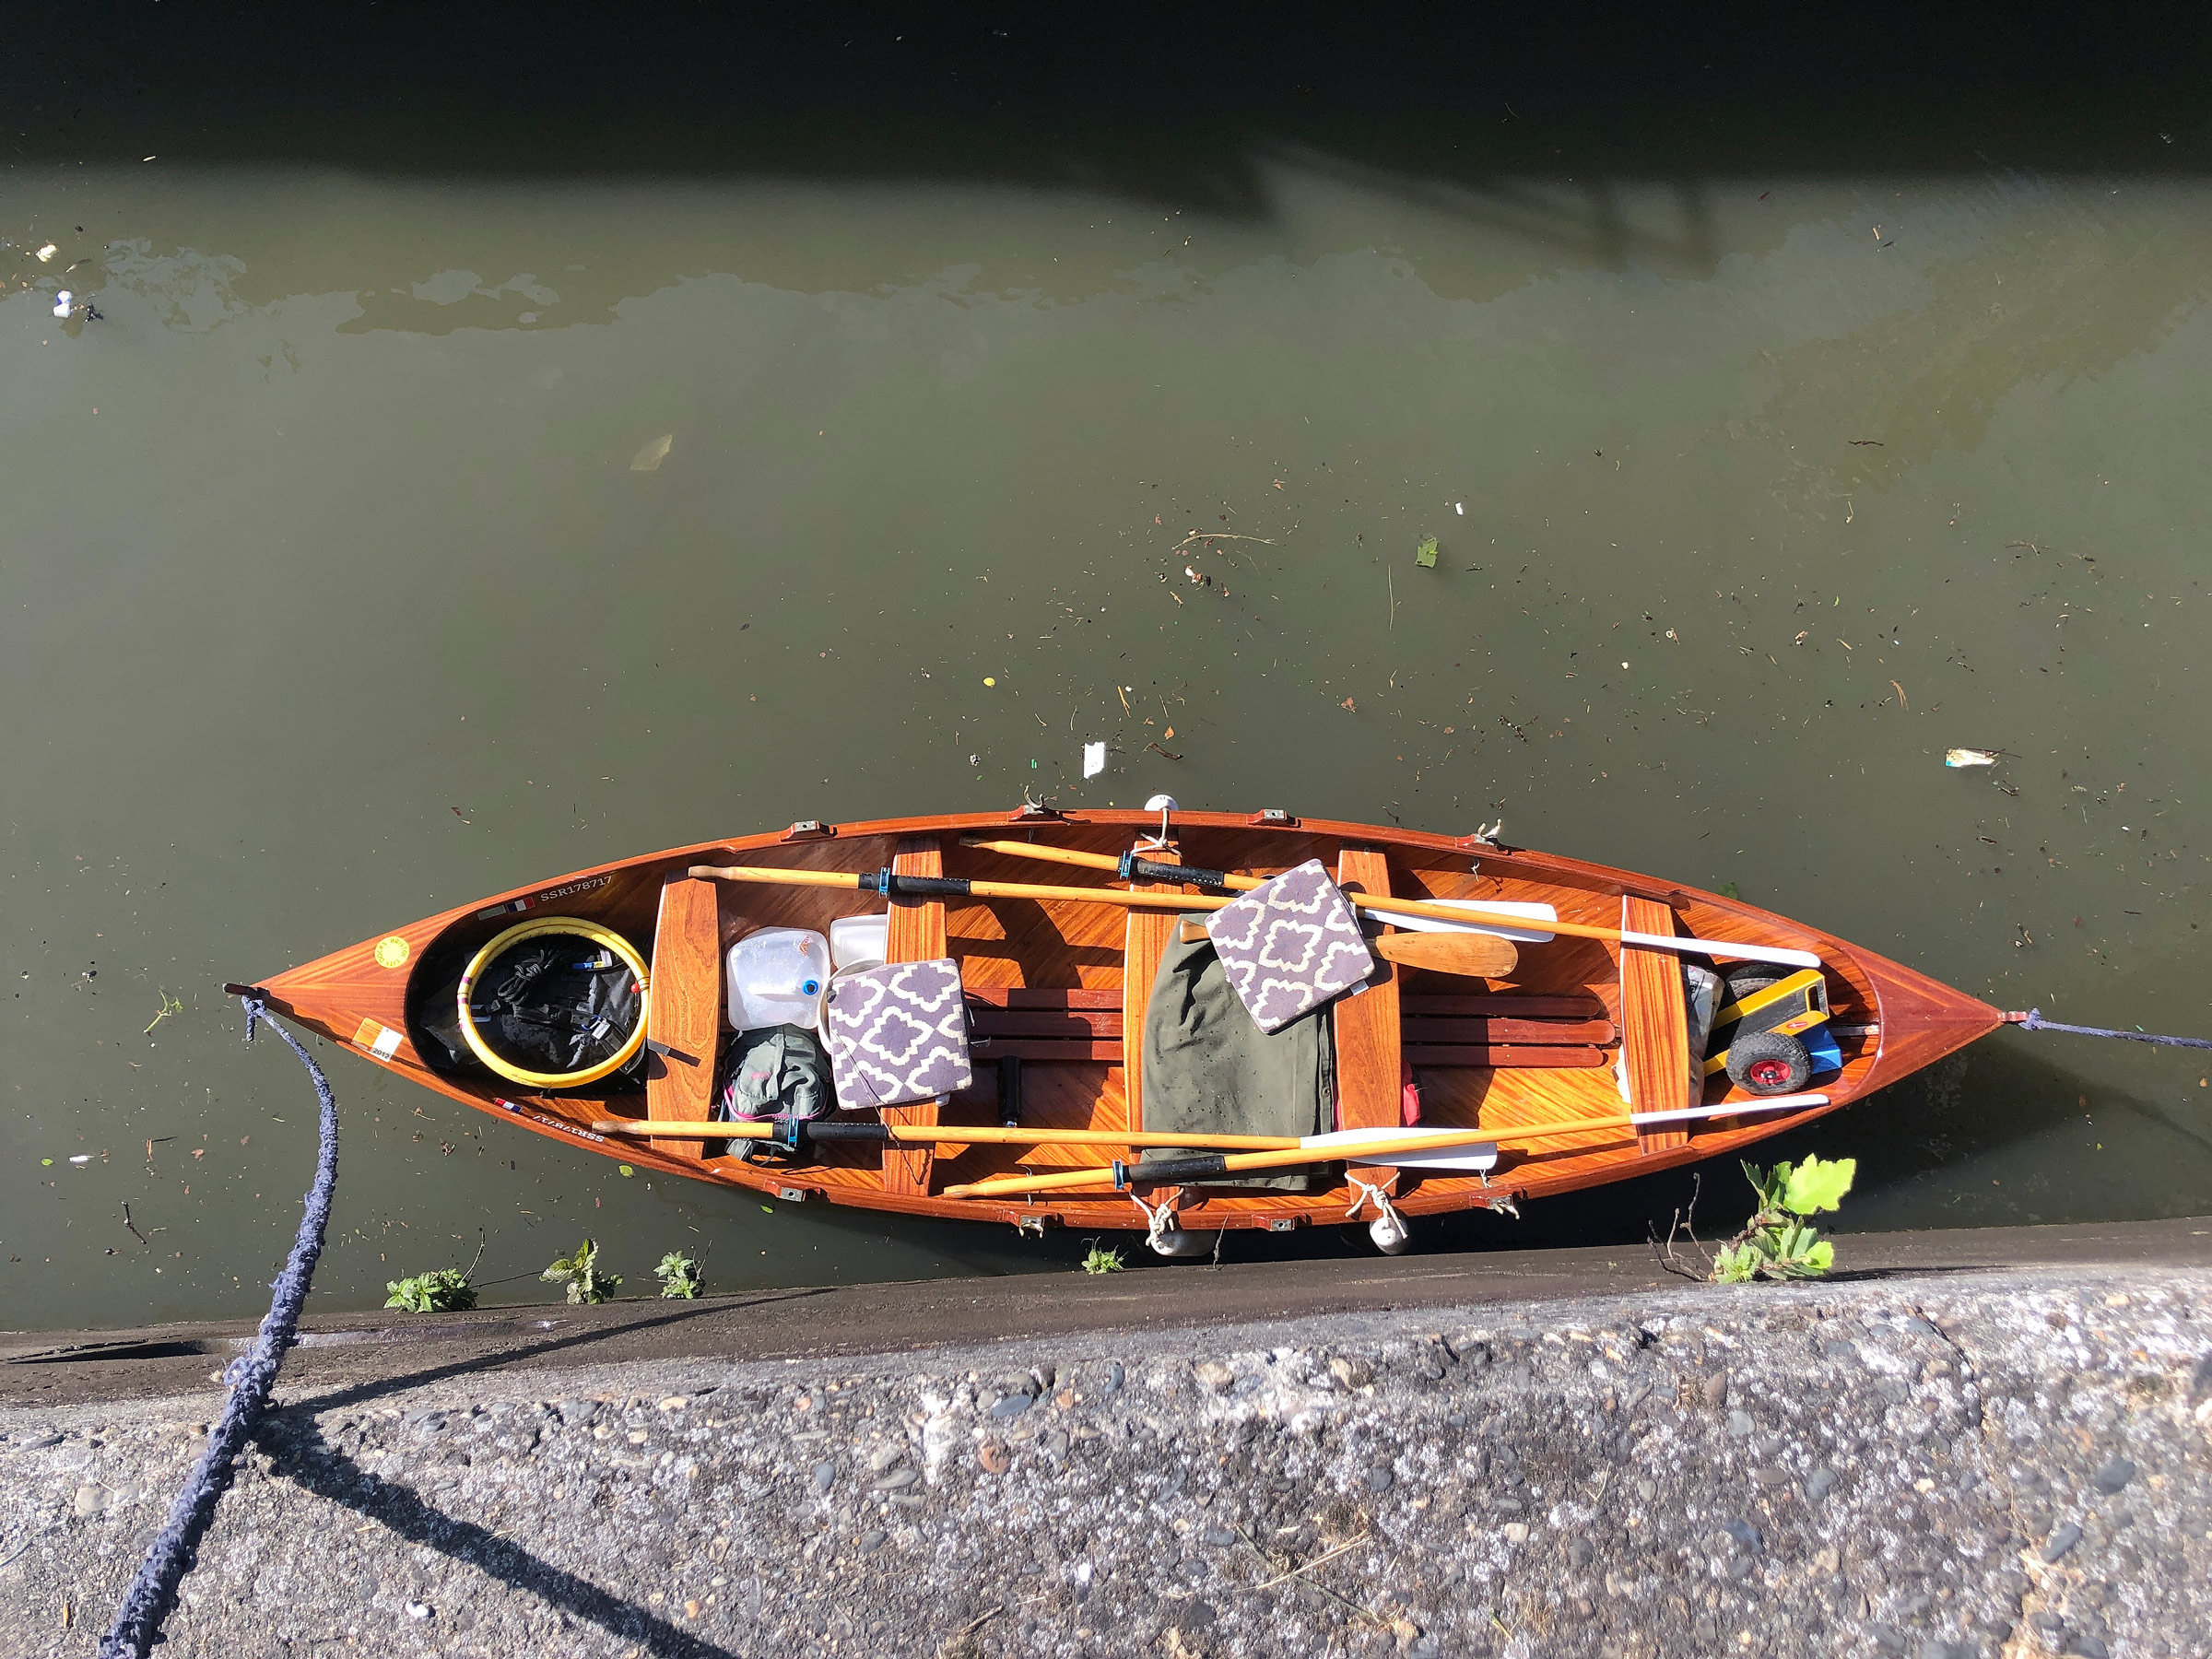
Before putting the boat in the water, we squeezed dry bags and duffels, a cart, and a four-gallon water container under and in between the thwarts. With cushions set on the thwarts, I settled aboard as Ben cast us off from the slip and jumped in. The first 600 yards we rowed was not enough for us to find a rhythm but it wouldn’t take long to synchronize our strokes effortlessly.
 Photographs by and courtesy of the author
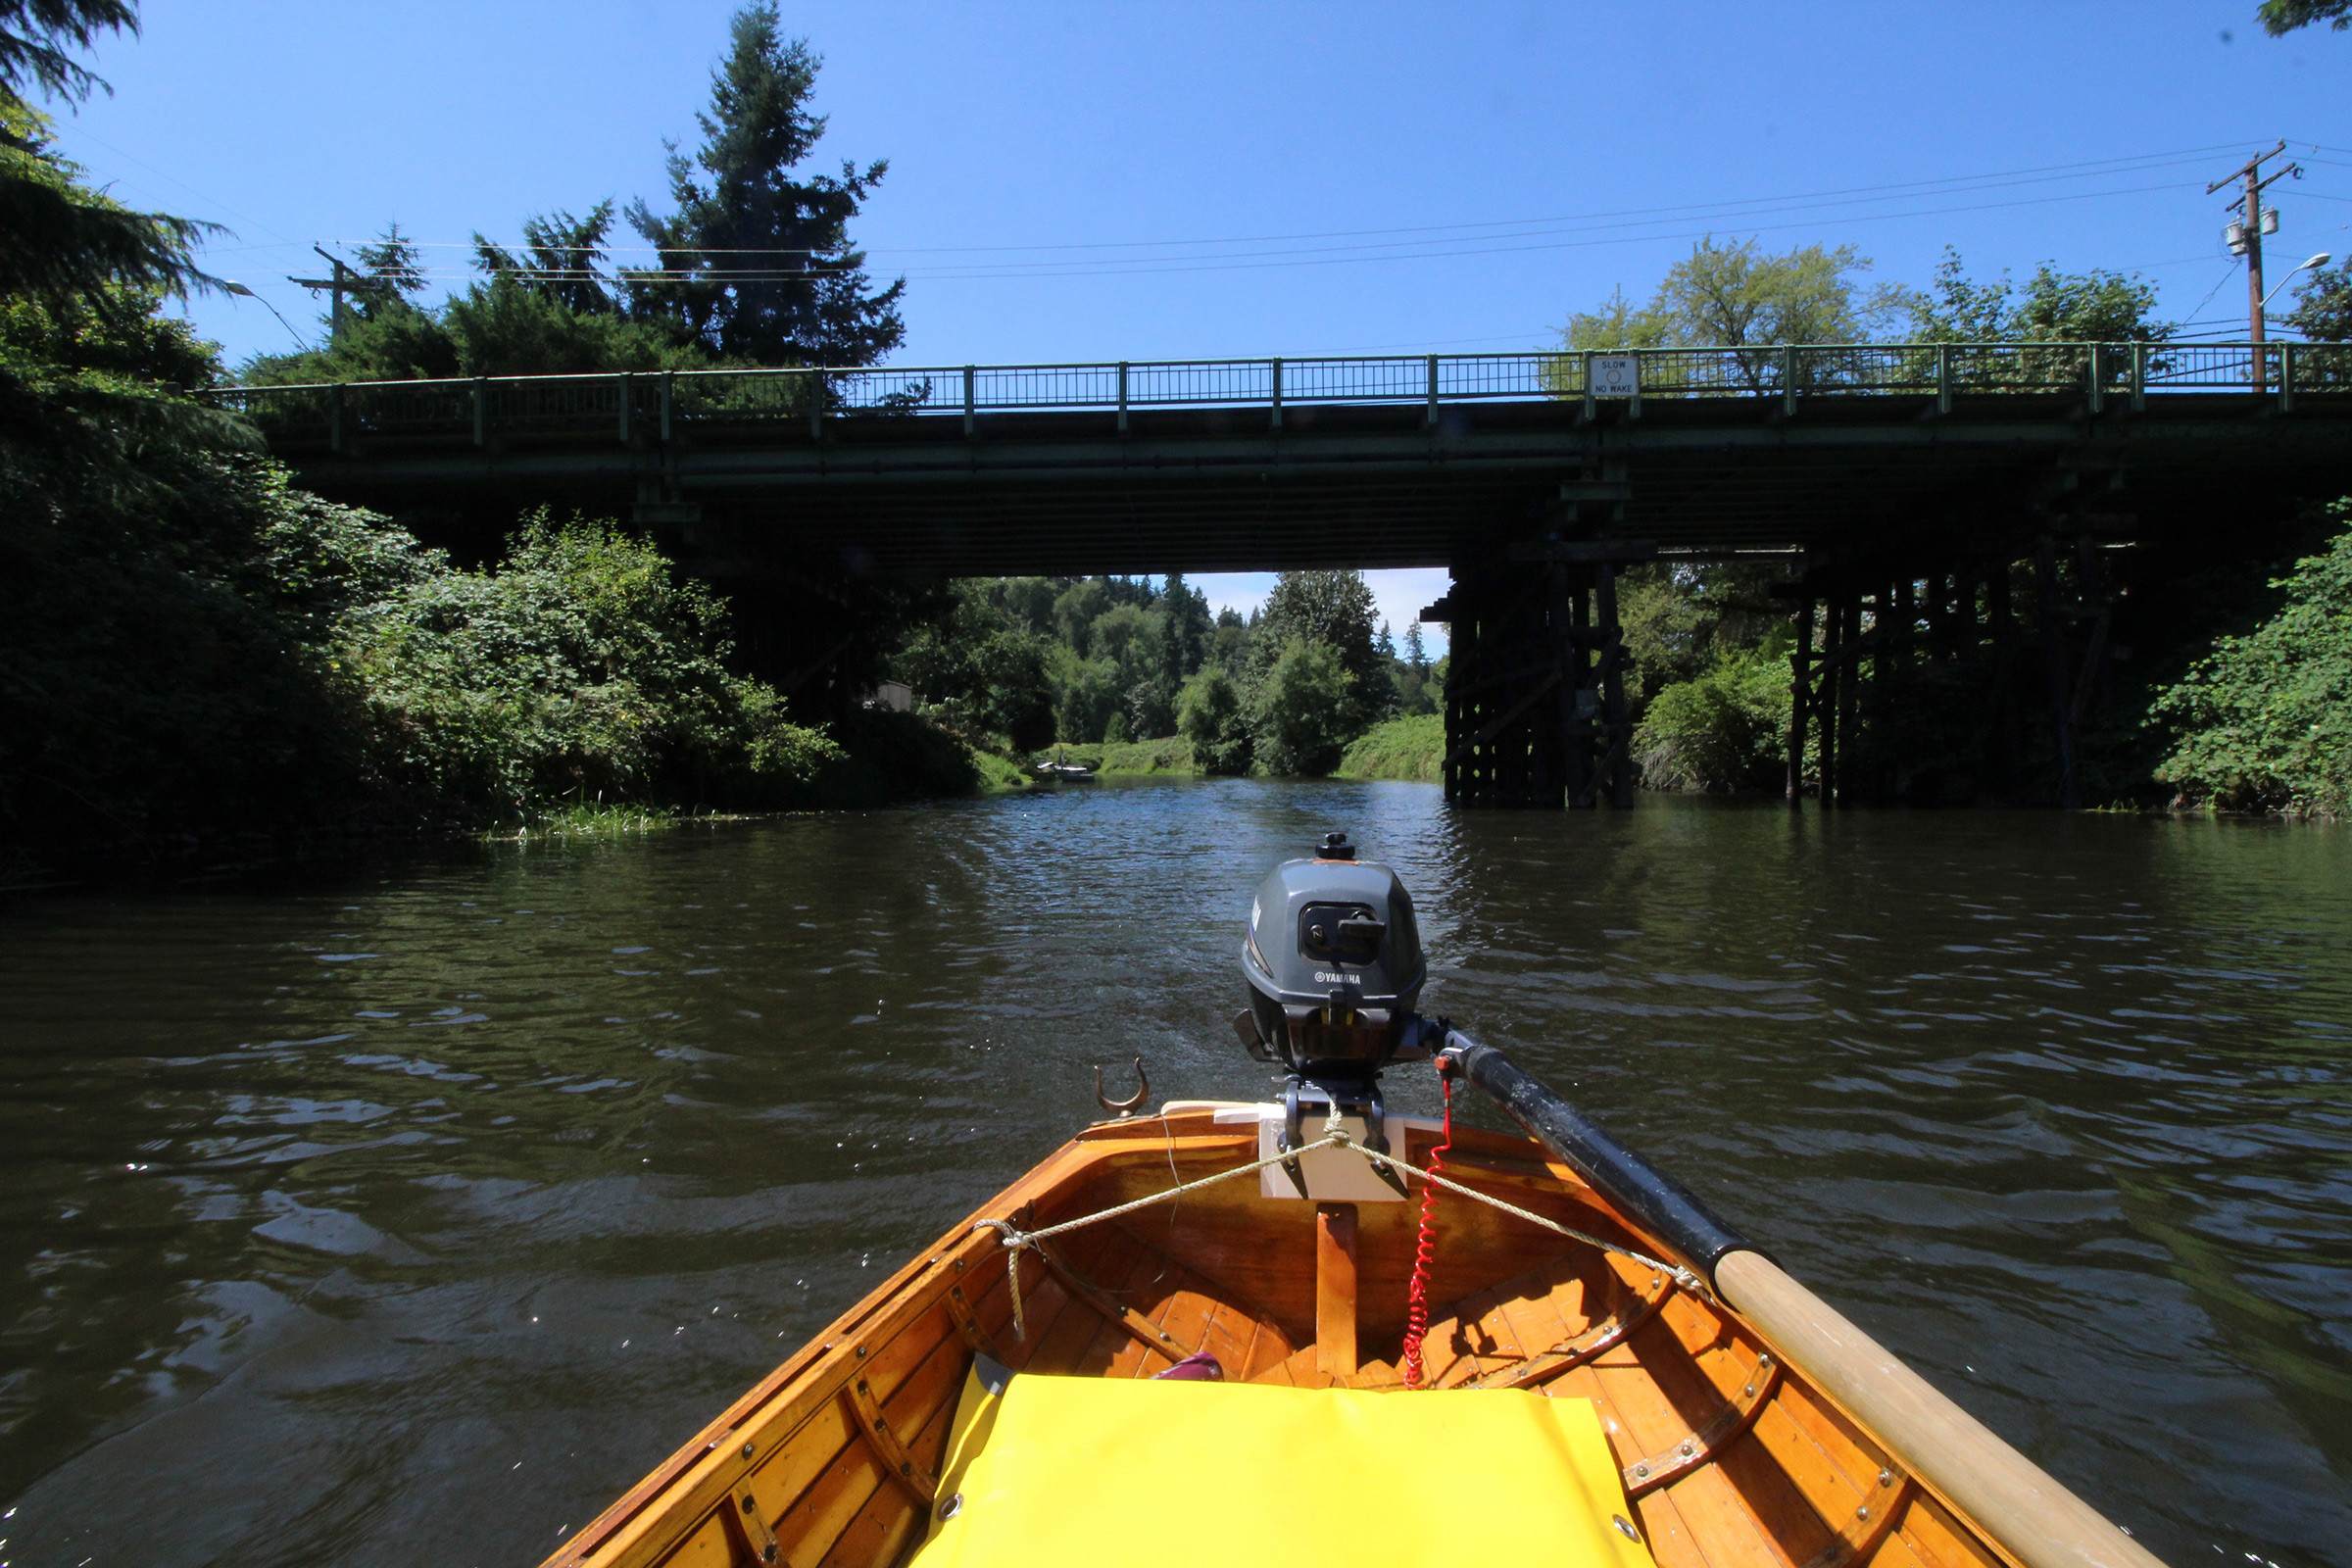
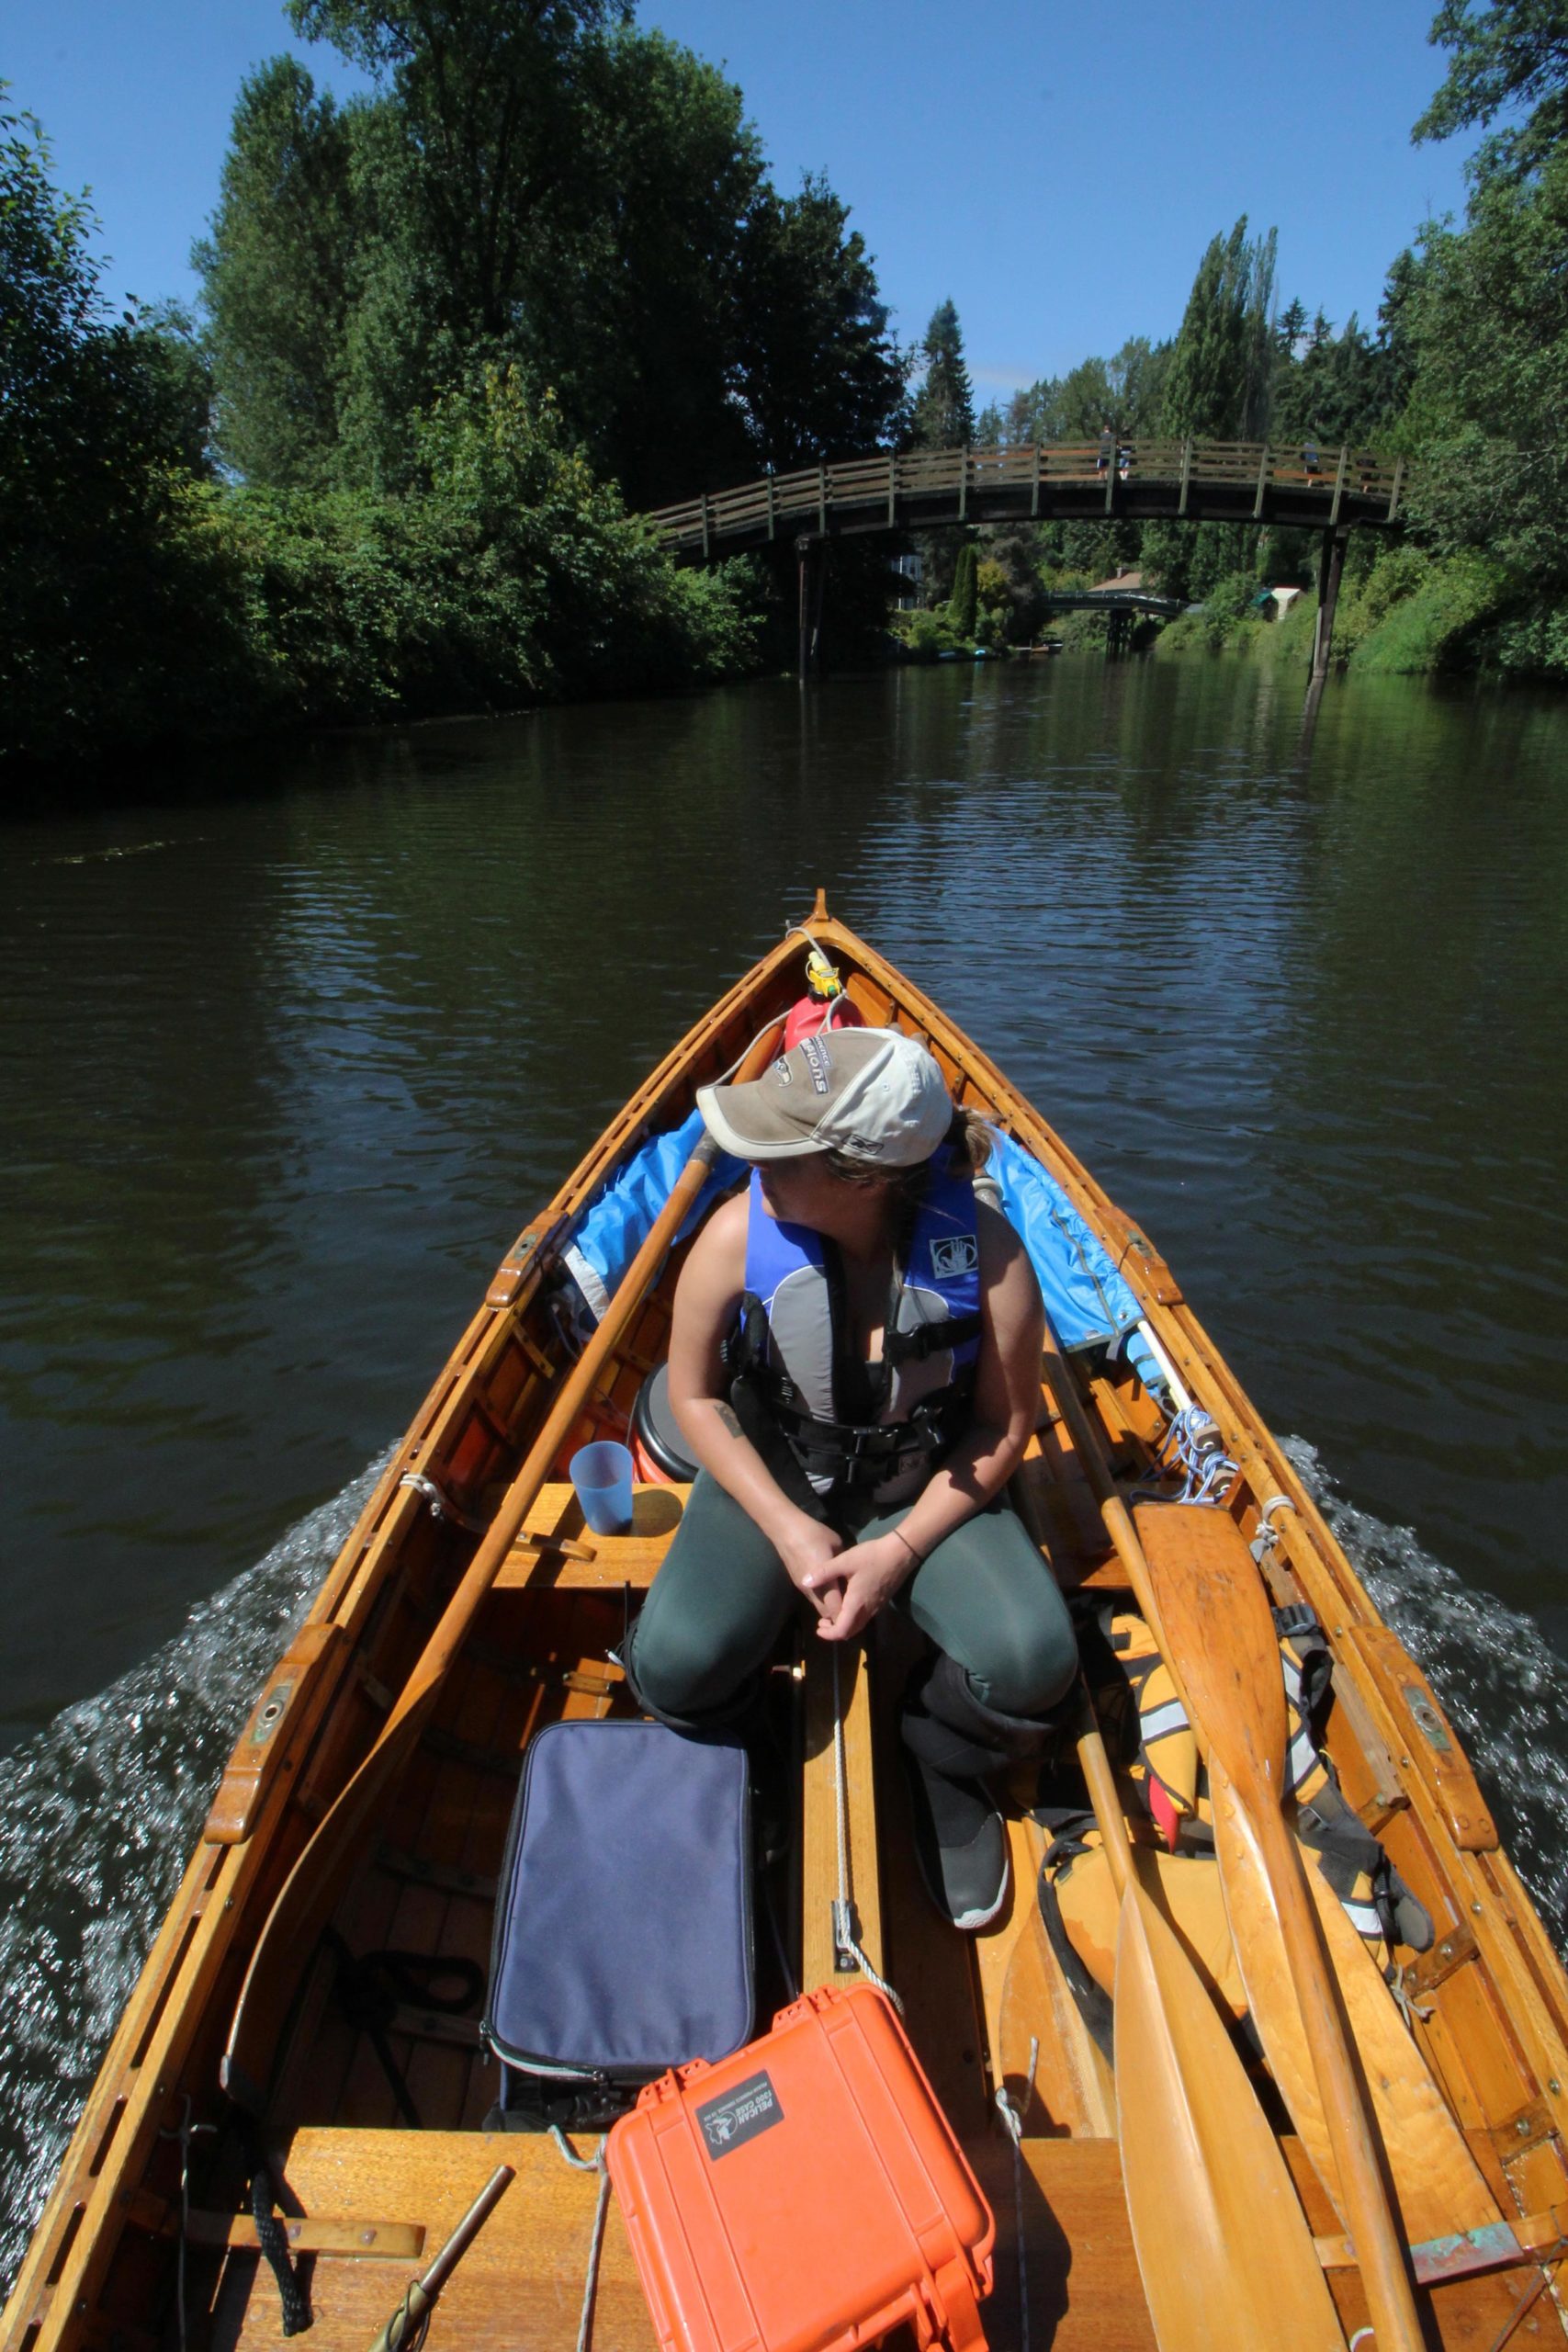
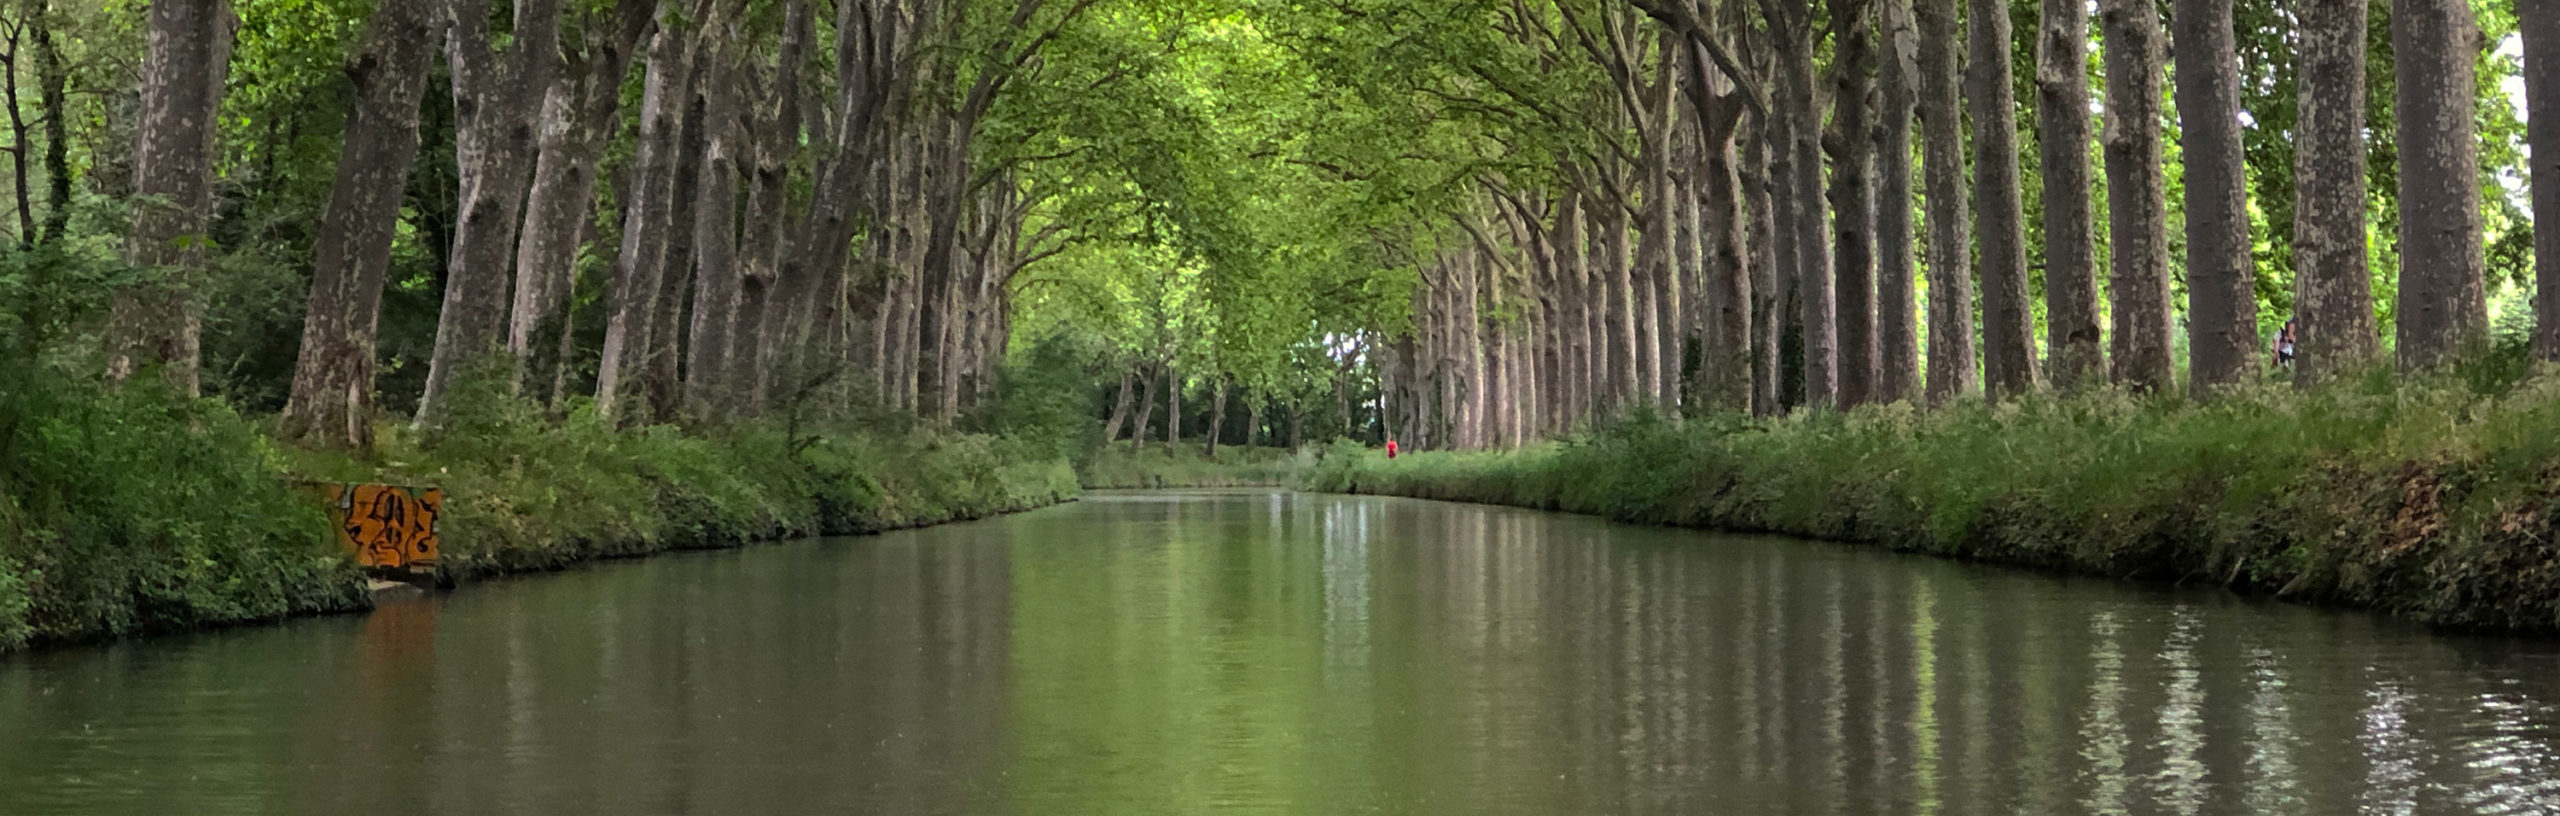
The Canal de Garonne offered abundant shade and peace; in our first week of rowing, we encountered just two or three other boats a day.
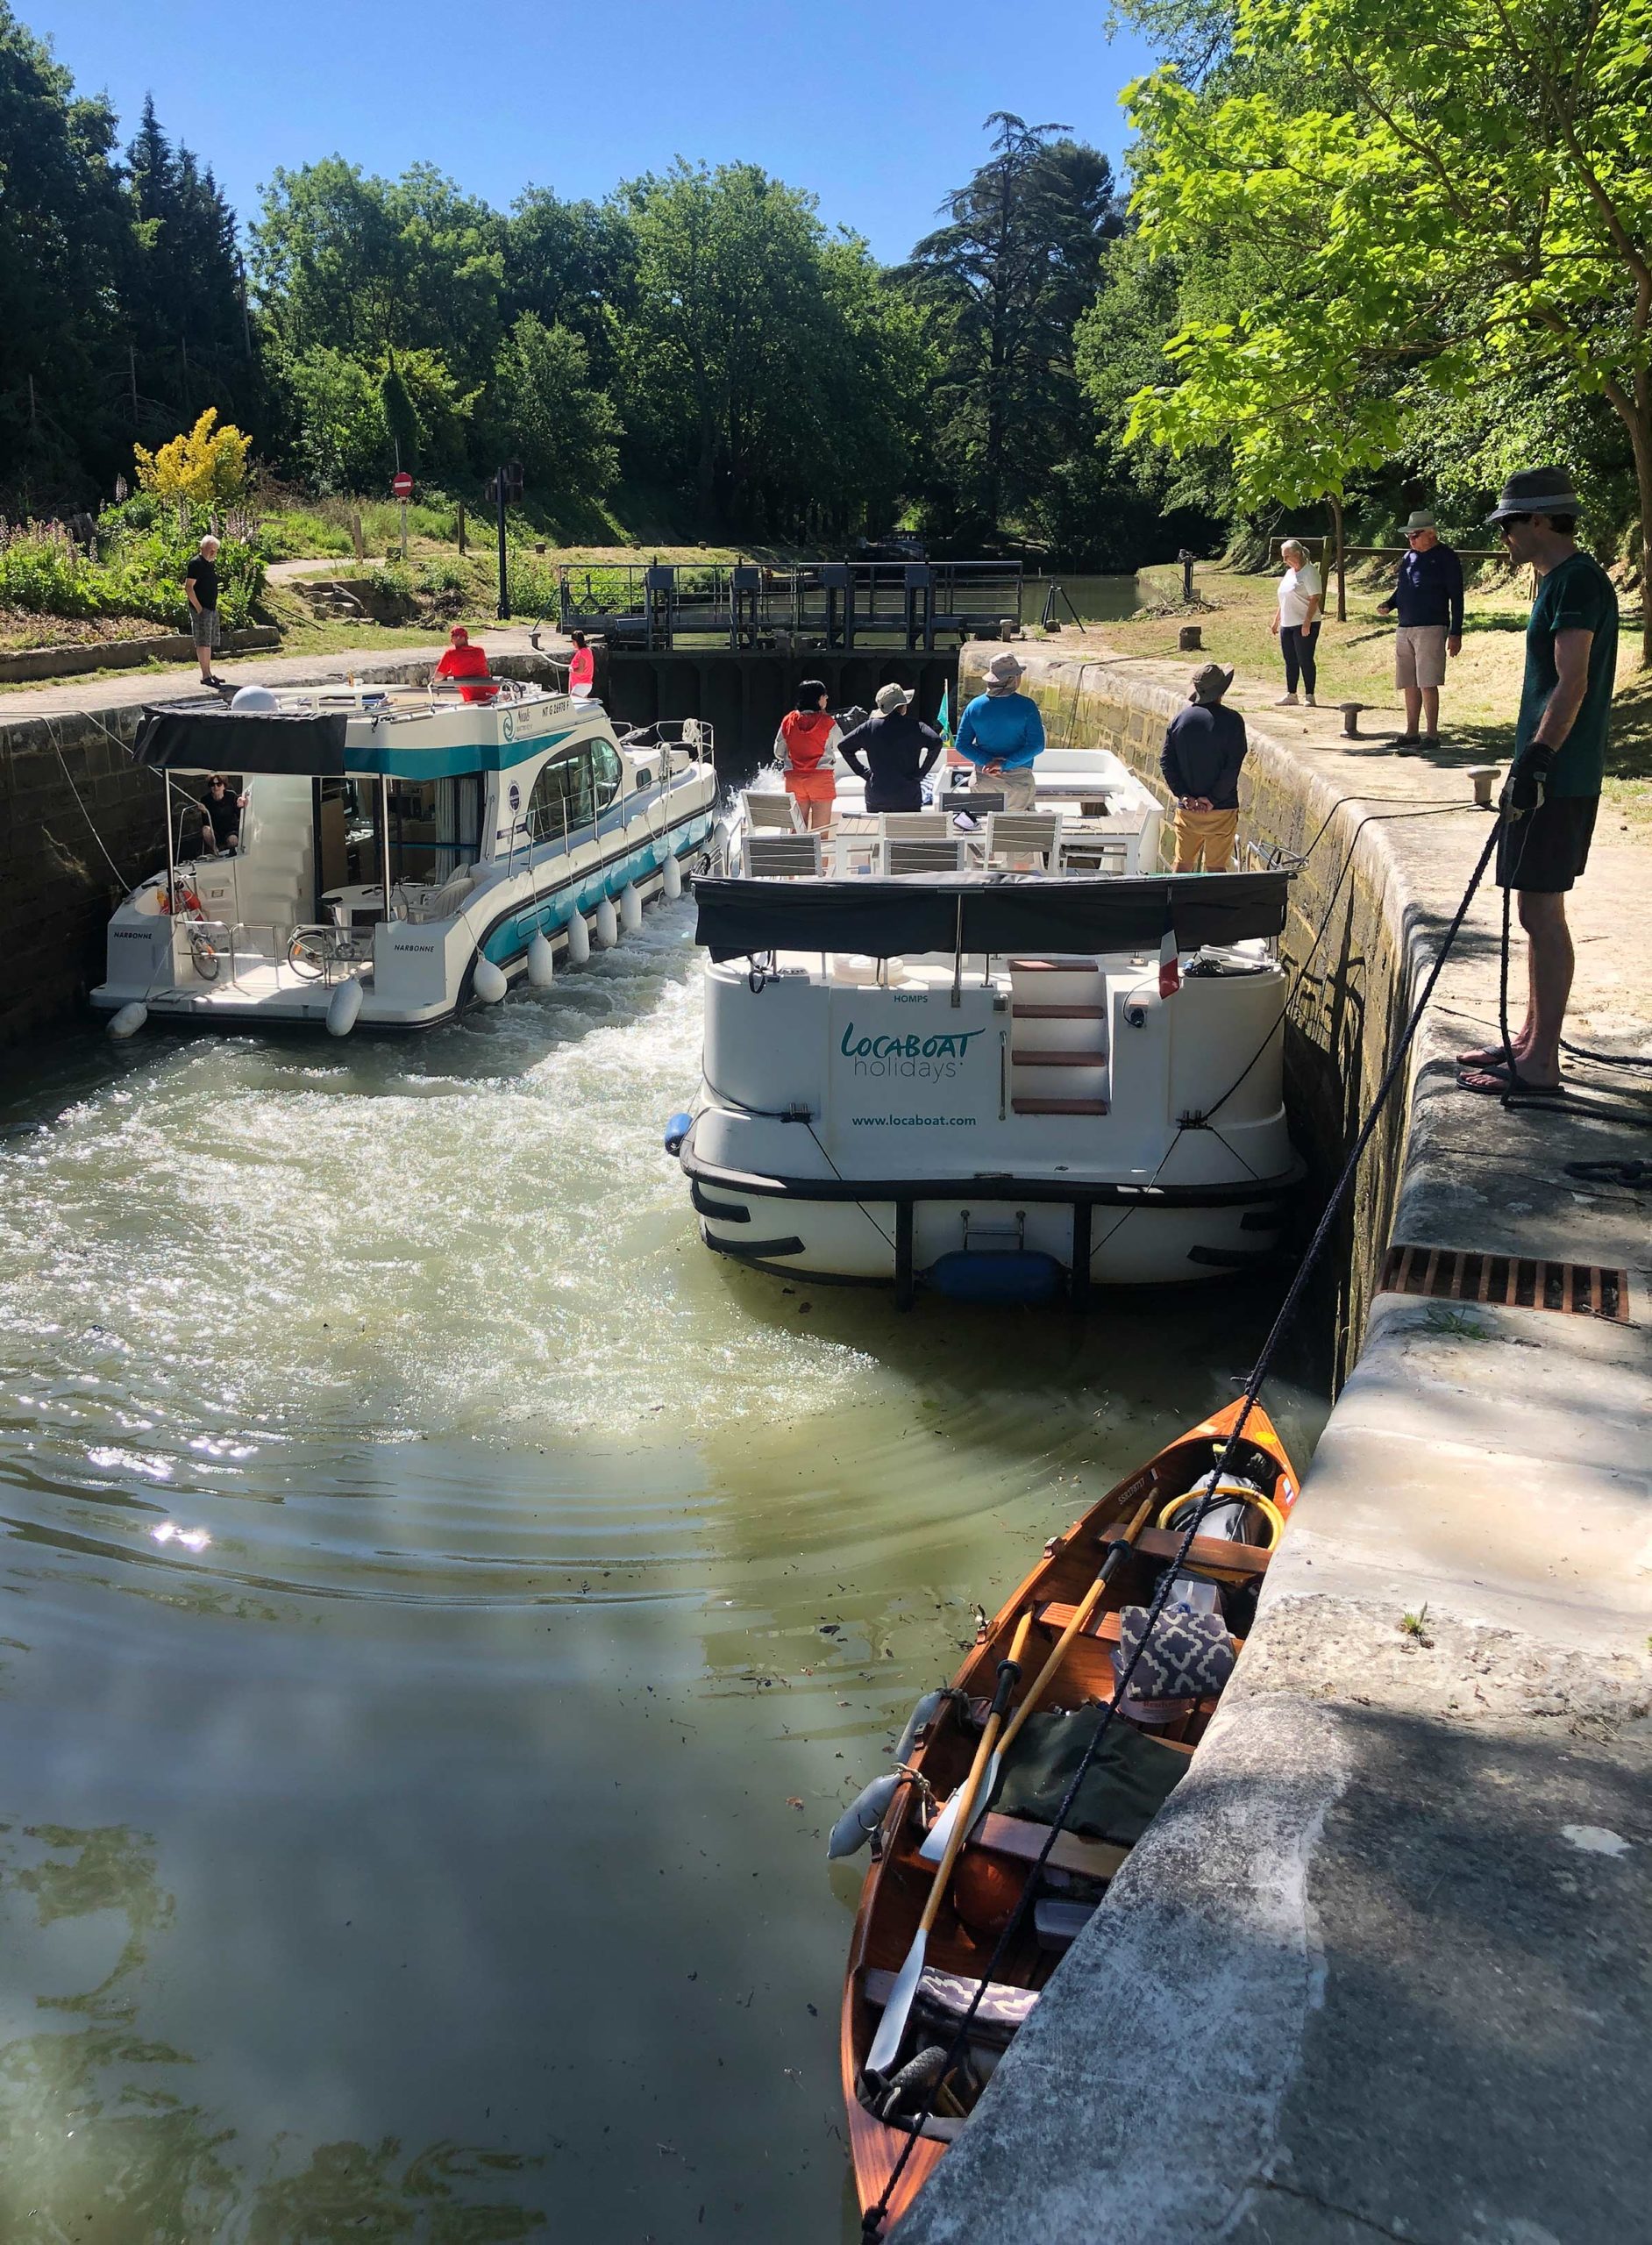
I twisted to peer over the bow and saw the waterway blocked about 100 yards ahead by two solid metal lock gates, flanked either side by steep slopes of dark stone 10′ from the water, the red light of a triangular set of traffic lights just above the right-hand slope. I stowed my oars, stood up, and turned to face forward. Balancing in the moving boat I stretched my arm up fully to reach the rubbery pole dangling from a wire 15′ above the water and yanked it hard to signal the automated lock system of our arrival. The pole bounced up, down and around, but nothing else happened. I sat down to Google “hanging stick French locks” as Ben backed TRAMP. I tried again and twisted the pole one half turn. It clicked and the green light illuminated as the lock prepared itself for us. Moments later, a beeping alarm sounded as the lock gates opened inward. Once they’d each clunked into position alongside the edges of the chamber, the red light went out, the green one stayed on, and we could enter.
The locks were not wide enough to comfortably accommodate the span of our oars, so Ben maneuvered us with the paddle through the entrance to the lock. I looked for one of the light sensors, which detect boats as they pass by and indicate to the automated lock system that a boat has entered or exited the lock. The sensor was set in a cobwebbed circular recess in the stone about 3′ above water level, too high to register TRAMP slipping by beneath it. I held a folded map over the sensor to get it to notice us and activate the system. We stopped TRAMP so I could get out and climb the concrete stairs before Ben paddled past the lock gates and into the chamber.
At the side of lock, the amply windowed olive-drab keeper’s booth was unoccupied. On the wall facing the lock, next to an orange life ring was a white switch box with two push buttons, one green and the other red. After Ben climbed from TRAMP onto the ladder up the lock side holding the bow and stern painters, I pushed the green button. A low humming resonated in the lock chamber followed by beeping as the lock gates we’d just entered jolted from their recesses in the lock walls and 20 seconds later slammed closed with a boom. The humming continued as the sound of trickling water grew louder. Water gushed into the lock, a torrent of white froth curling at the front gates. The water calmed as it flowed farther into the lock, where Ben held the rocking TRAMP 20 yards back, closer to the rear lock gates, coiling the painters in his hand as the boat rose.
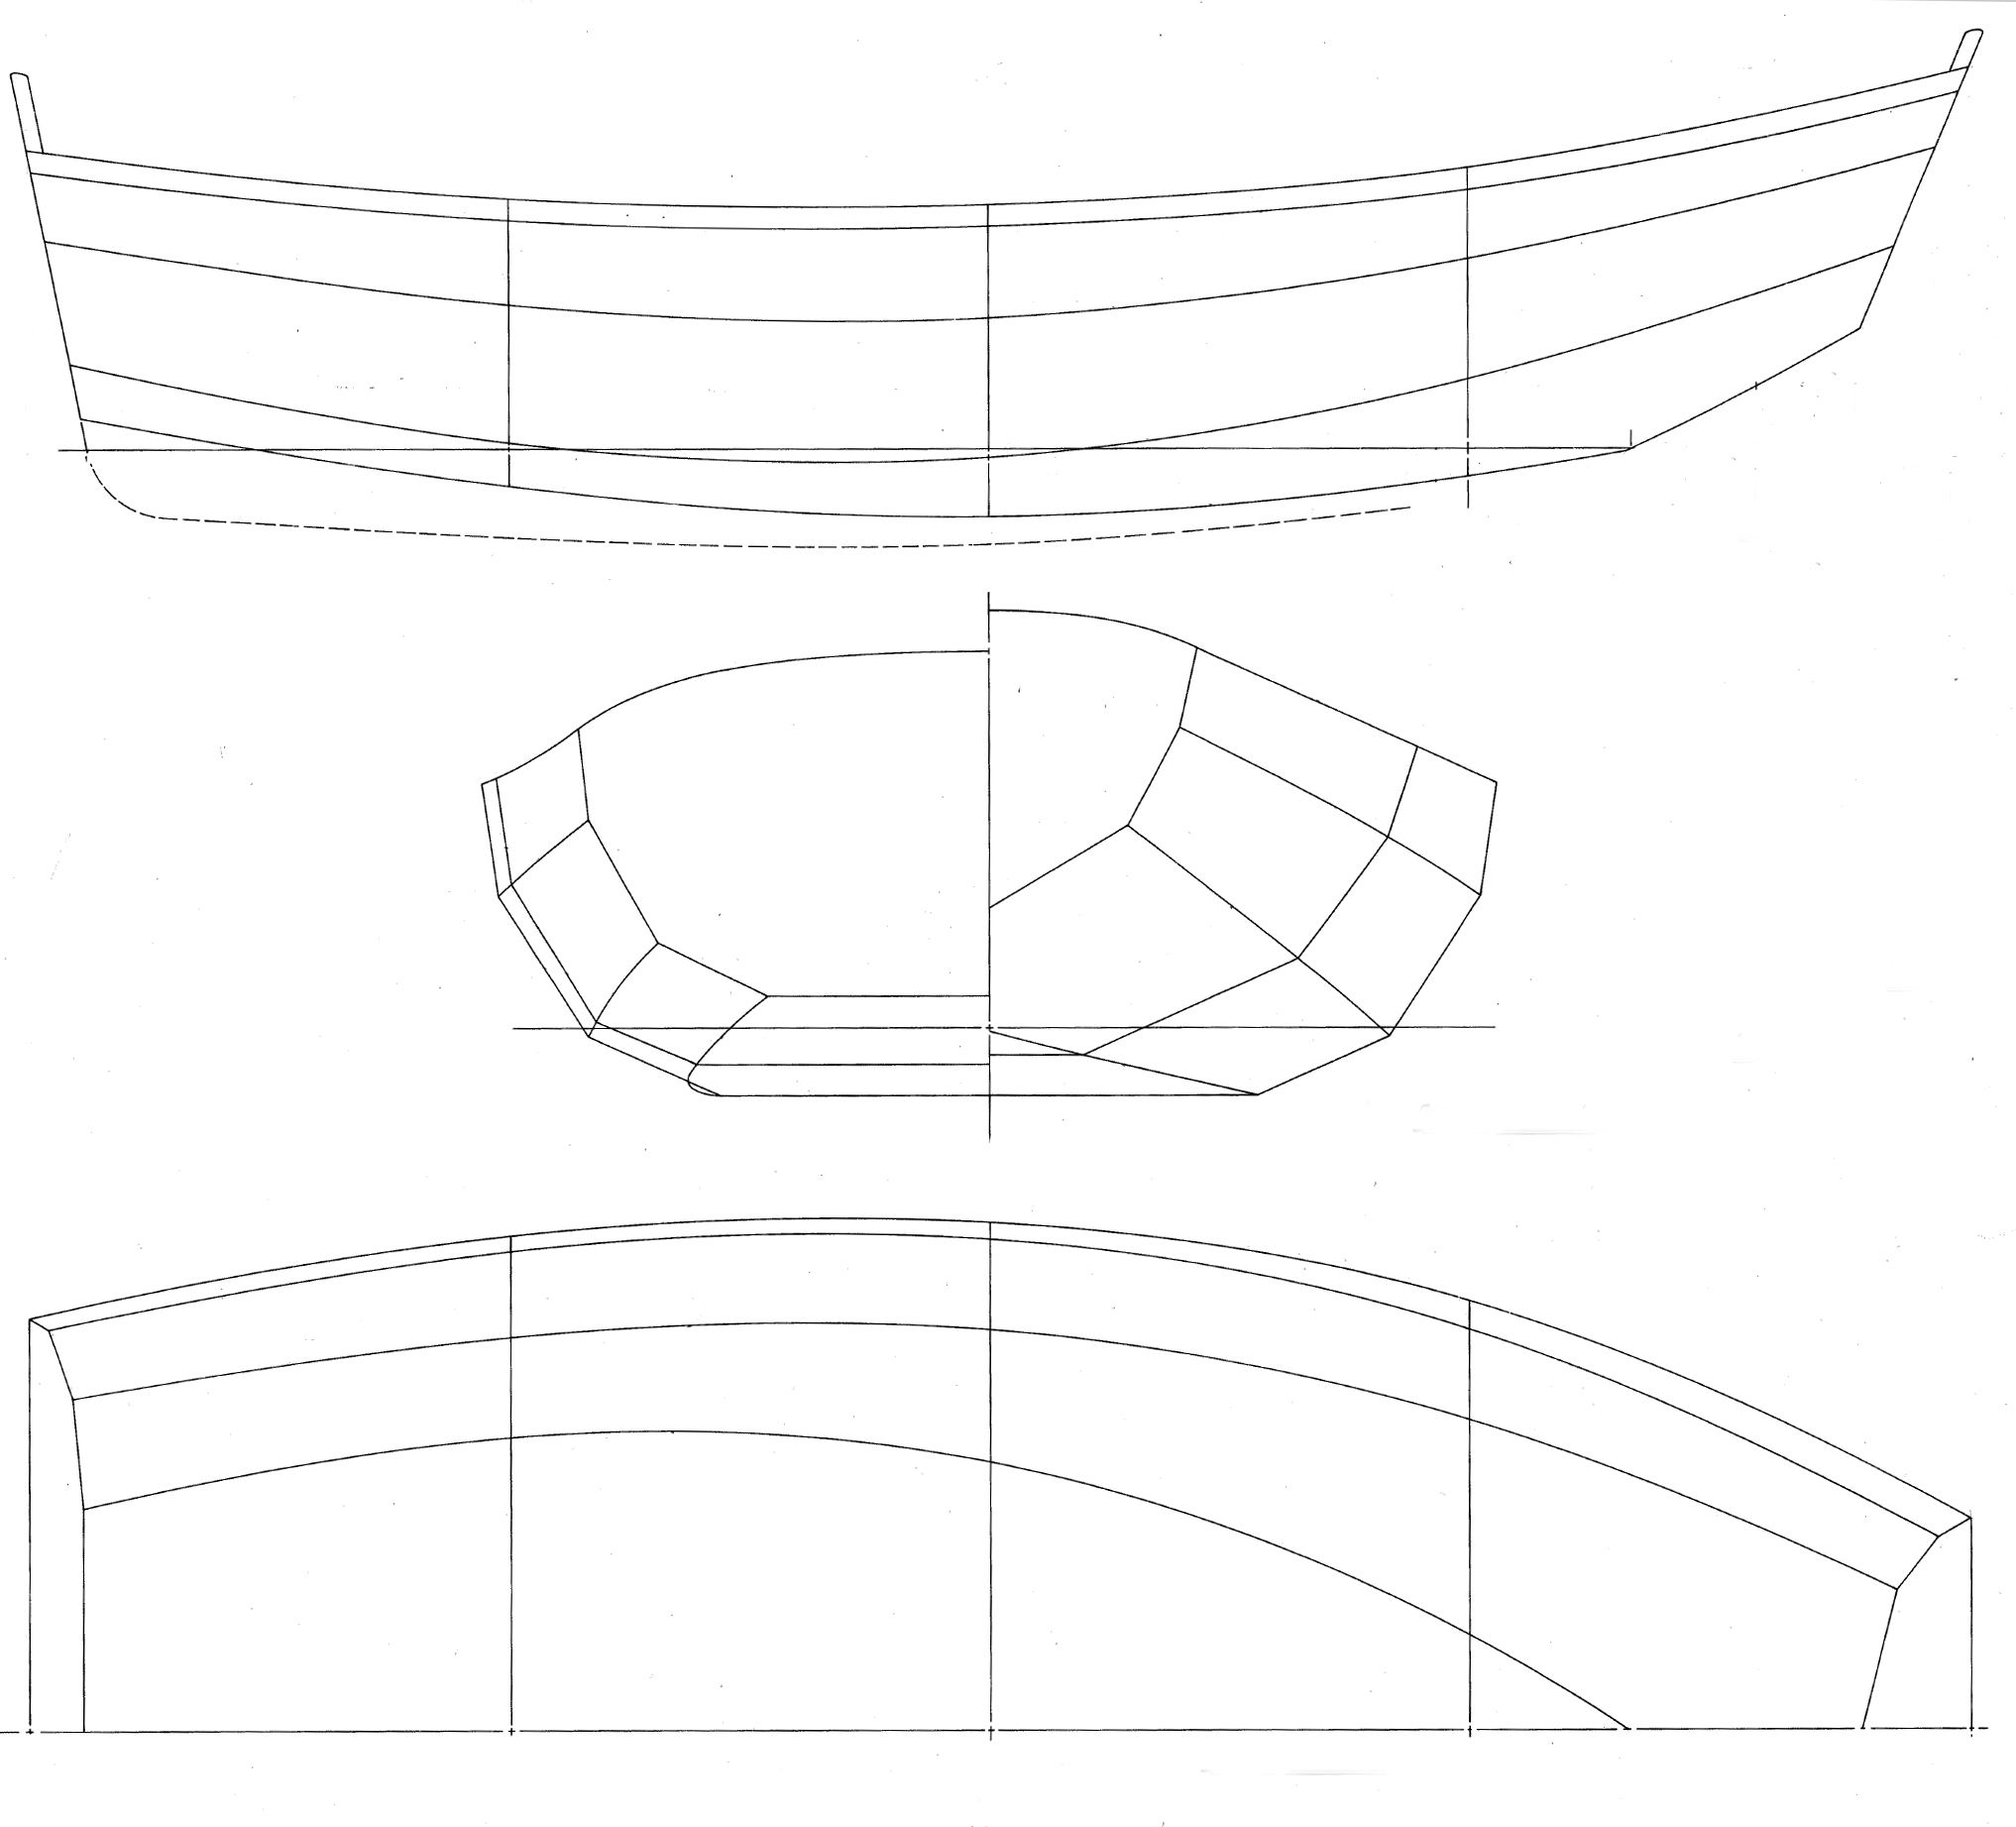
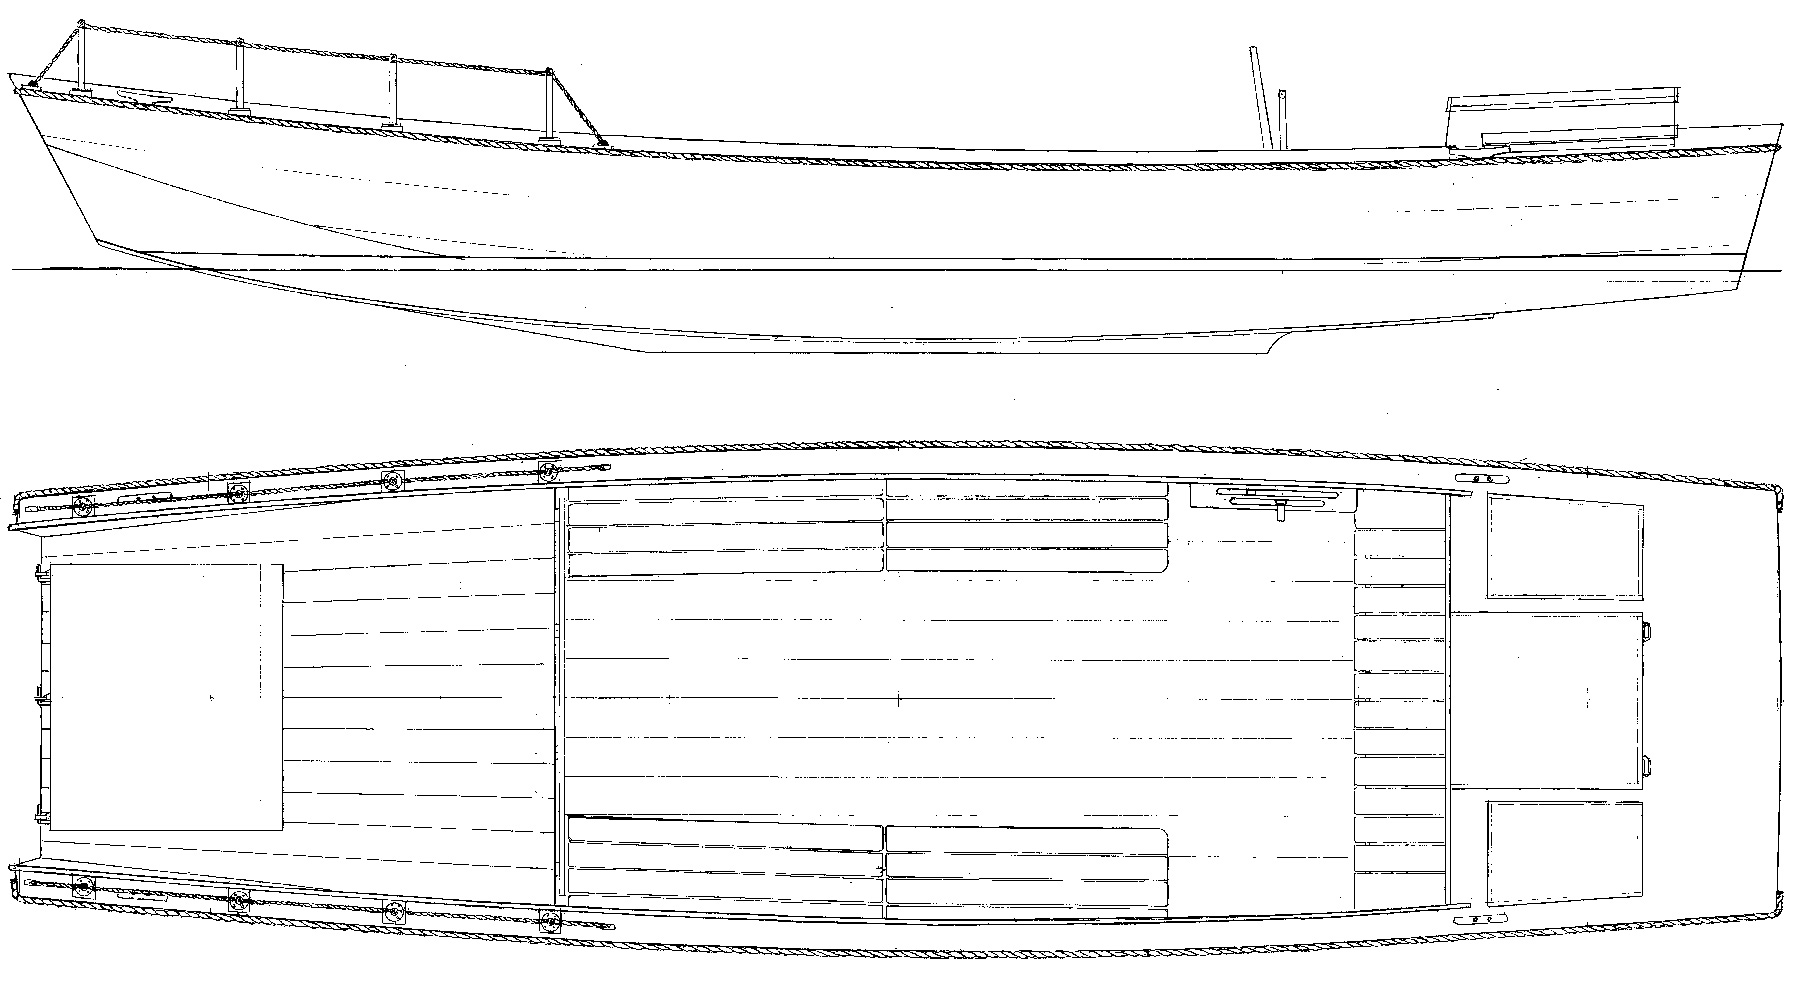
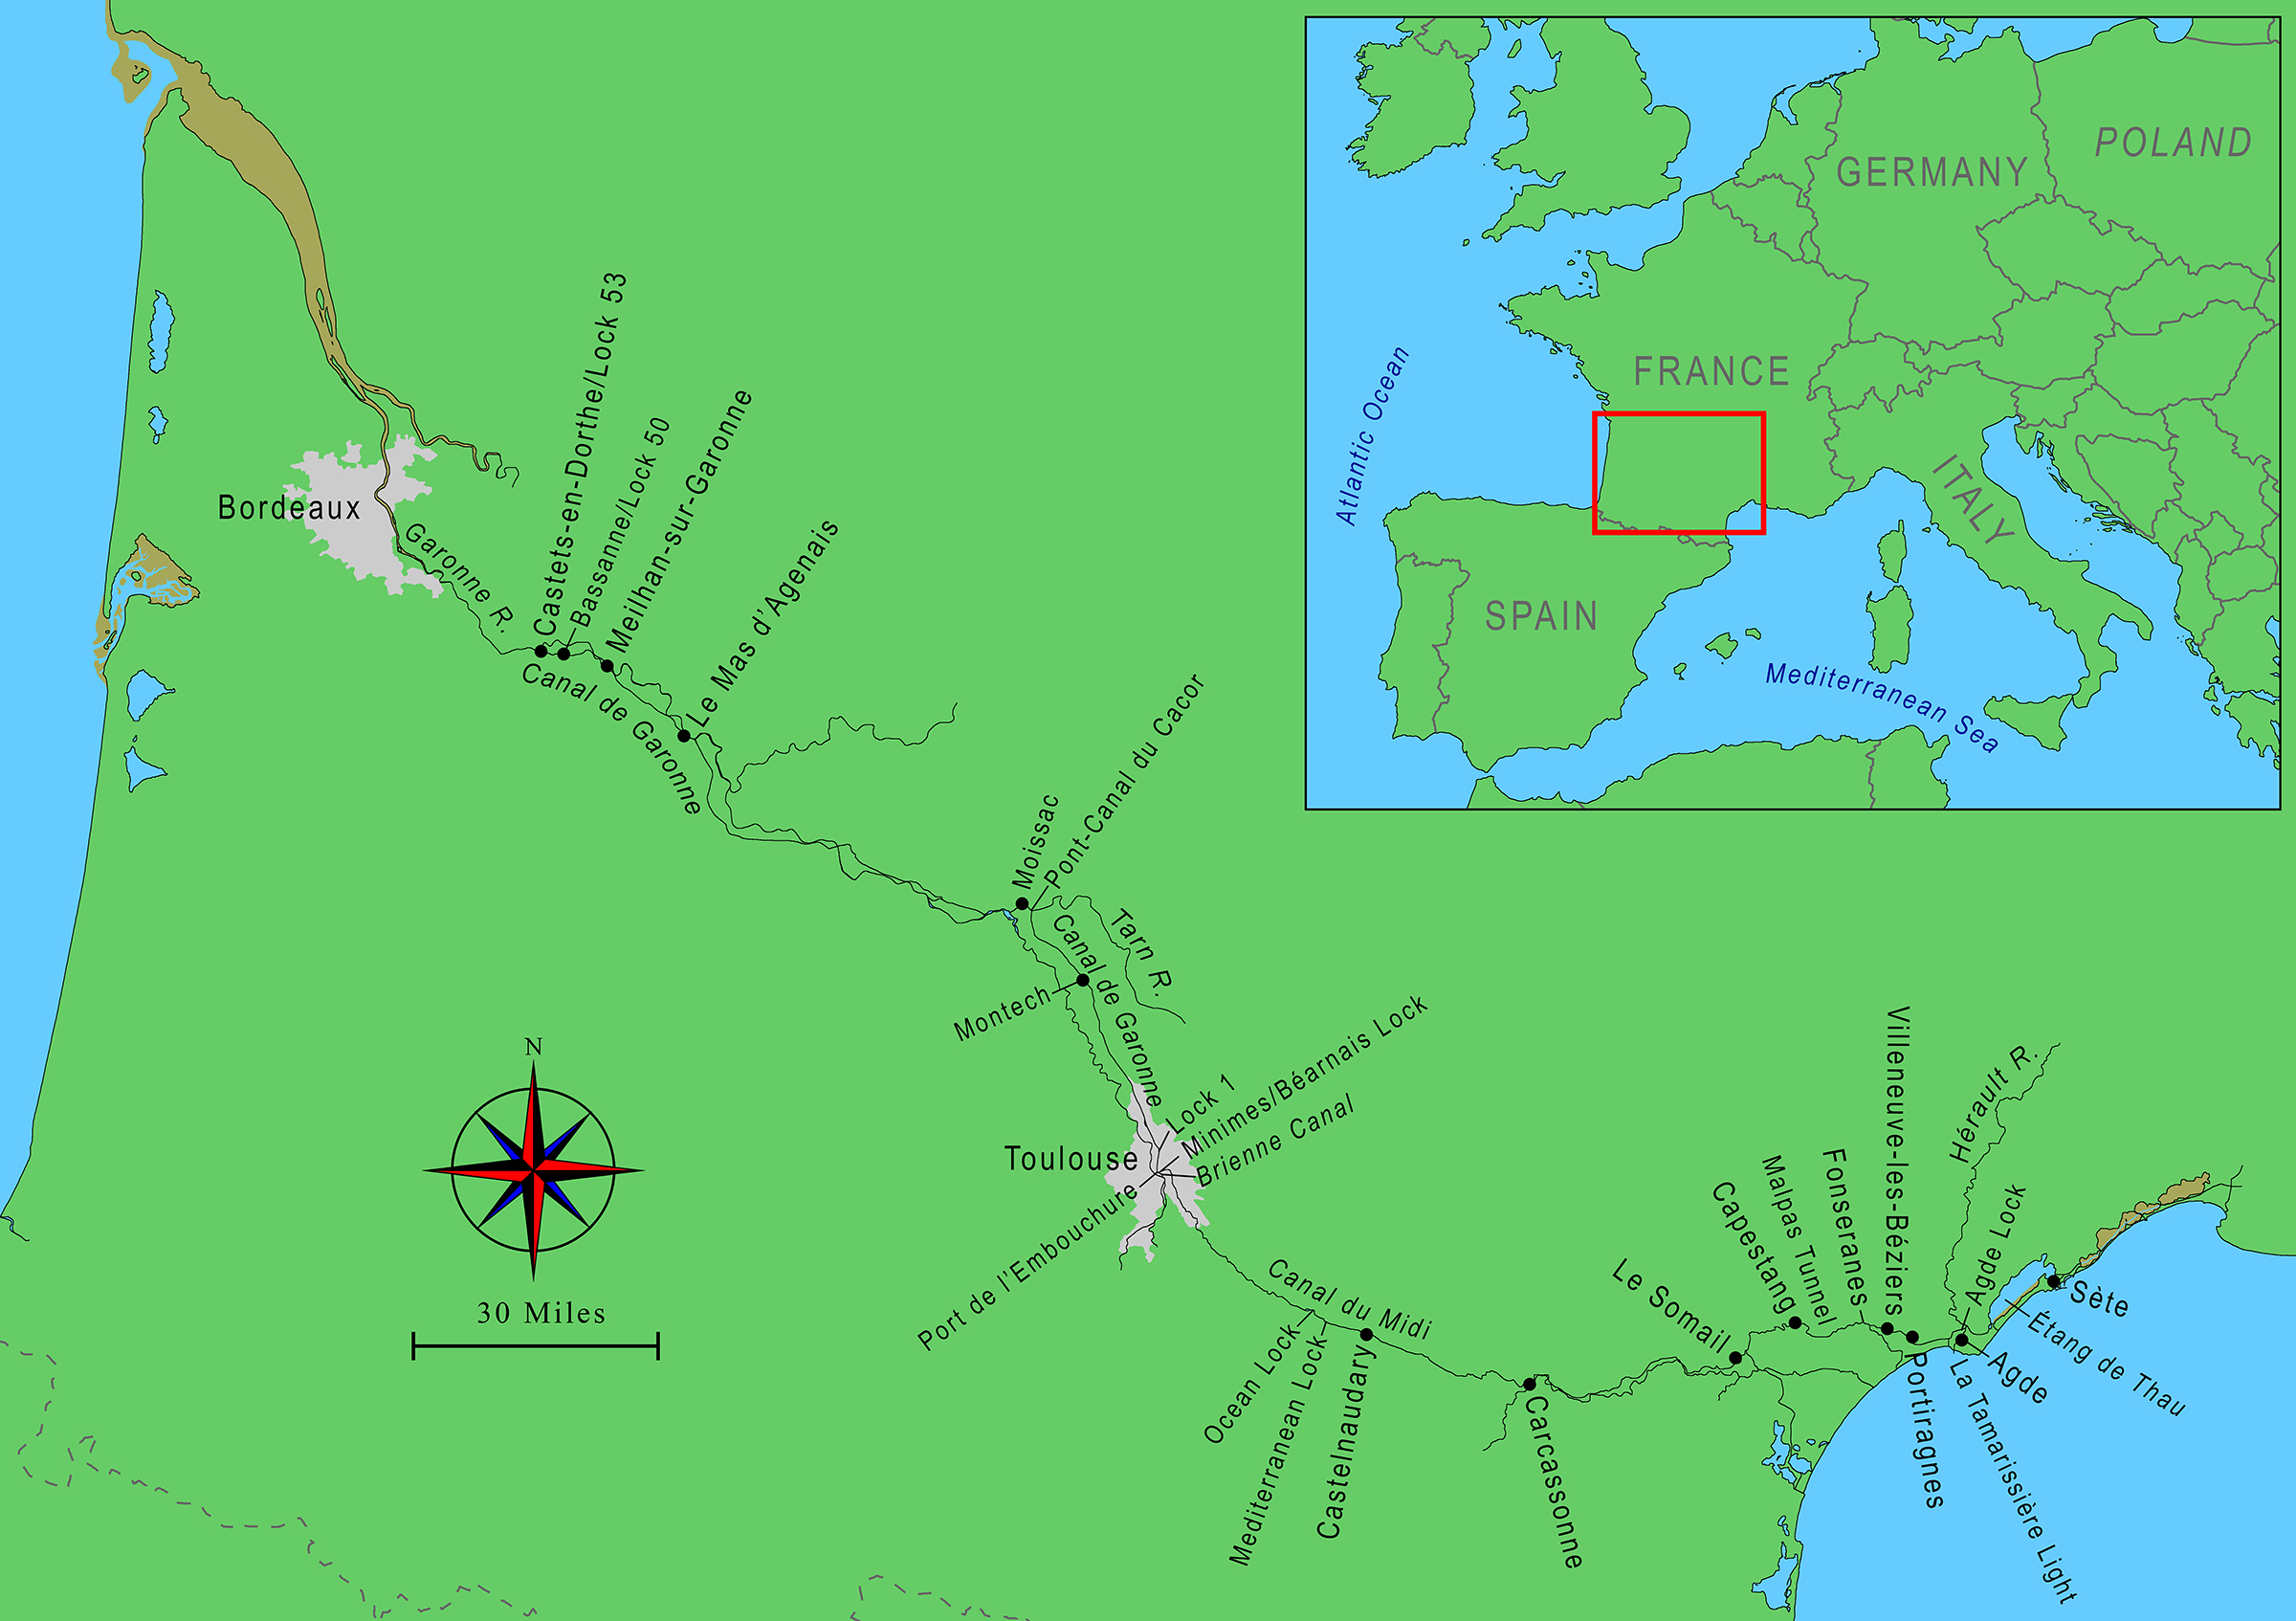 Roger Siebert
.
I wandered up a path to look closer at the light-yellow lockkeeper’s house, a plain two-story building with a terracotta tile roof. A faded blue sign above the front door told us we were at Lock 51, Ecluse de Mazerac. An arrow pointing right said it was 692 meters to the lock we’d just come from and an arrow pointing left said 4,449 meters to Lock 50, Bassanne. We would be counting down the locks from here to Lock 1 at Toulouse.
We rowed 11 miles to the hilltop village of Meilhan-sur-Garonne and pulled into a space between cruising boats, where wooden pontoons ran parallel to the bank along the canal. We cooled down and celebrated our successful first day with a sparkling Perrier water for pregnant me and a beer for Ben. We made a few trips back and forth carrying gear from TRAMP to the campground that was to be home for the night. Our orange pup tent was the only tent on site among campervans and caravans from France, Britain, and the Netherlands.
We got a late start the next day and that afternoon we rowed a stretch of over 6 miles with no locks. Rows of 200-year-old plane trees rose like green vaults of an endless cathedral and protected the canal from winds, its banks from erosion, and us from the sun. The trunks of these trees were surely the inspiration to the French artists during the First World War who developed military camouflage: a patchy collage of swamp green, tea brown, and sandy beige. A steady rhythm formed as our four blades plopped into the water together, followed by the collars clicking against the brass rowlocks, twisting them with a grumble before we lifted the oars out and drips trickled off leaving an arc of overlapping rings on the water. A golden oriole sang soprano in a chorus of the twittering birds around us.
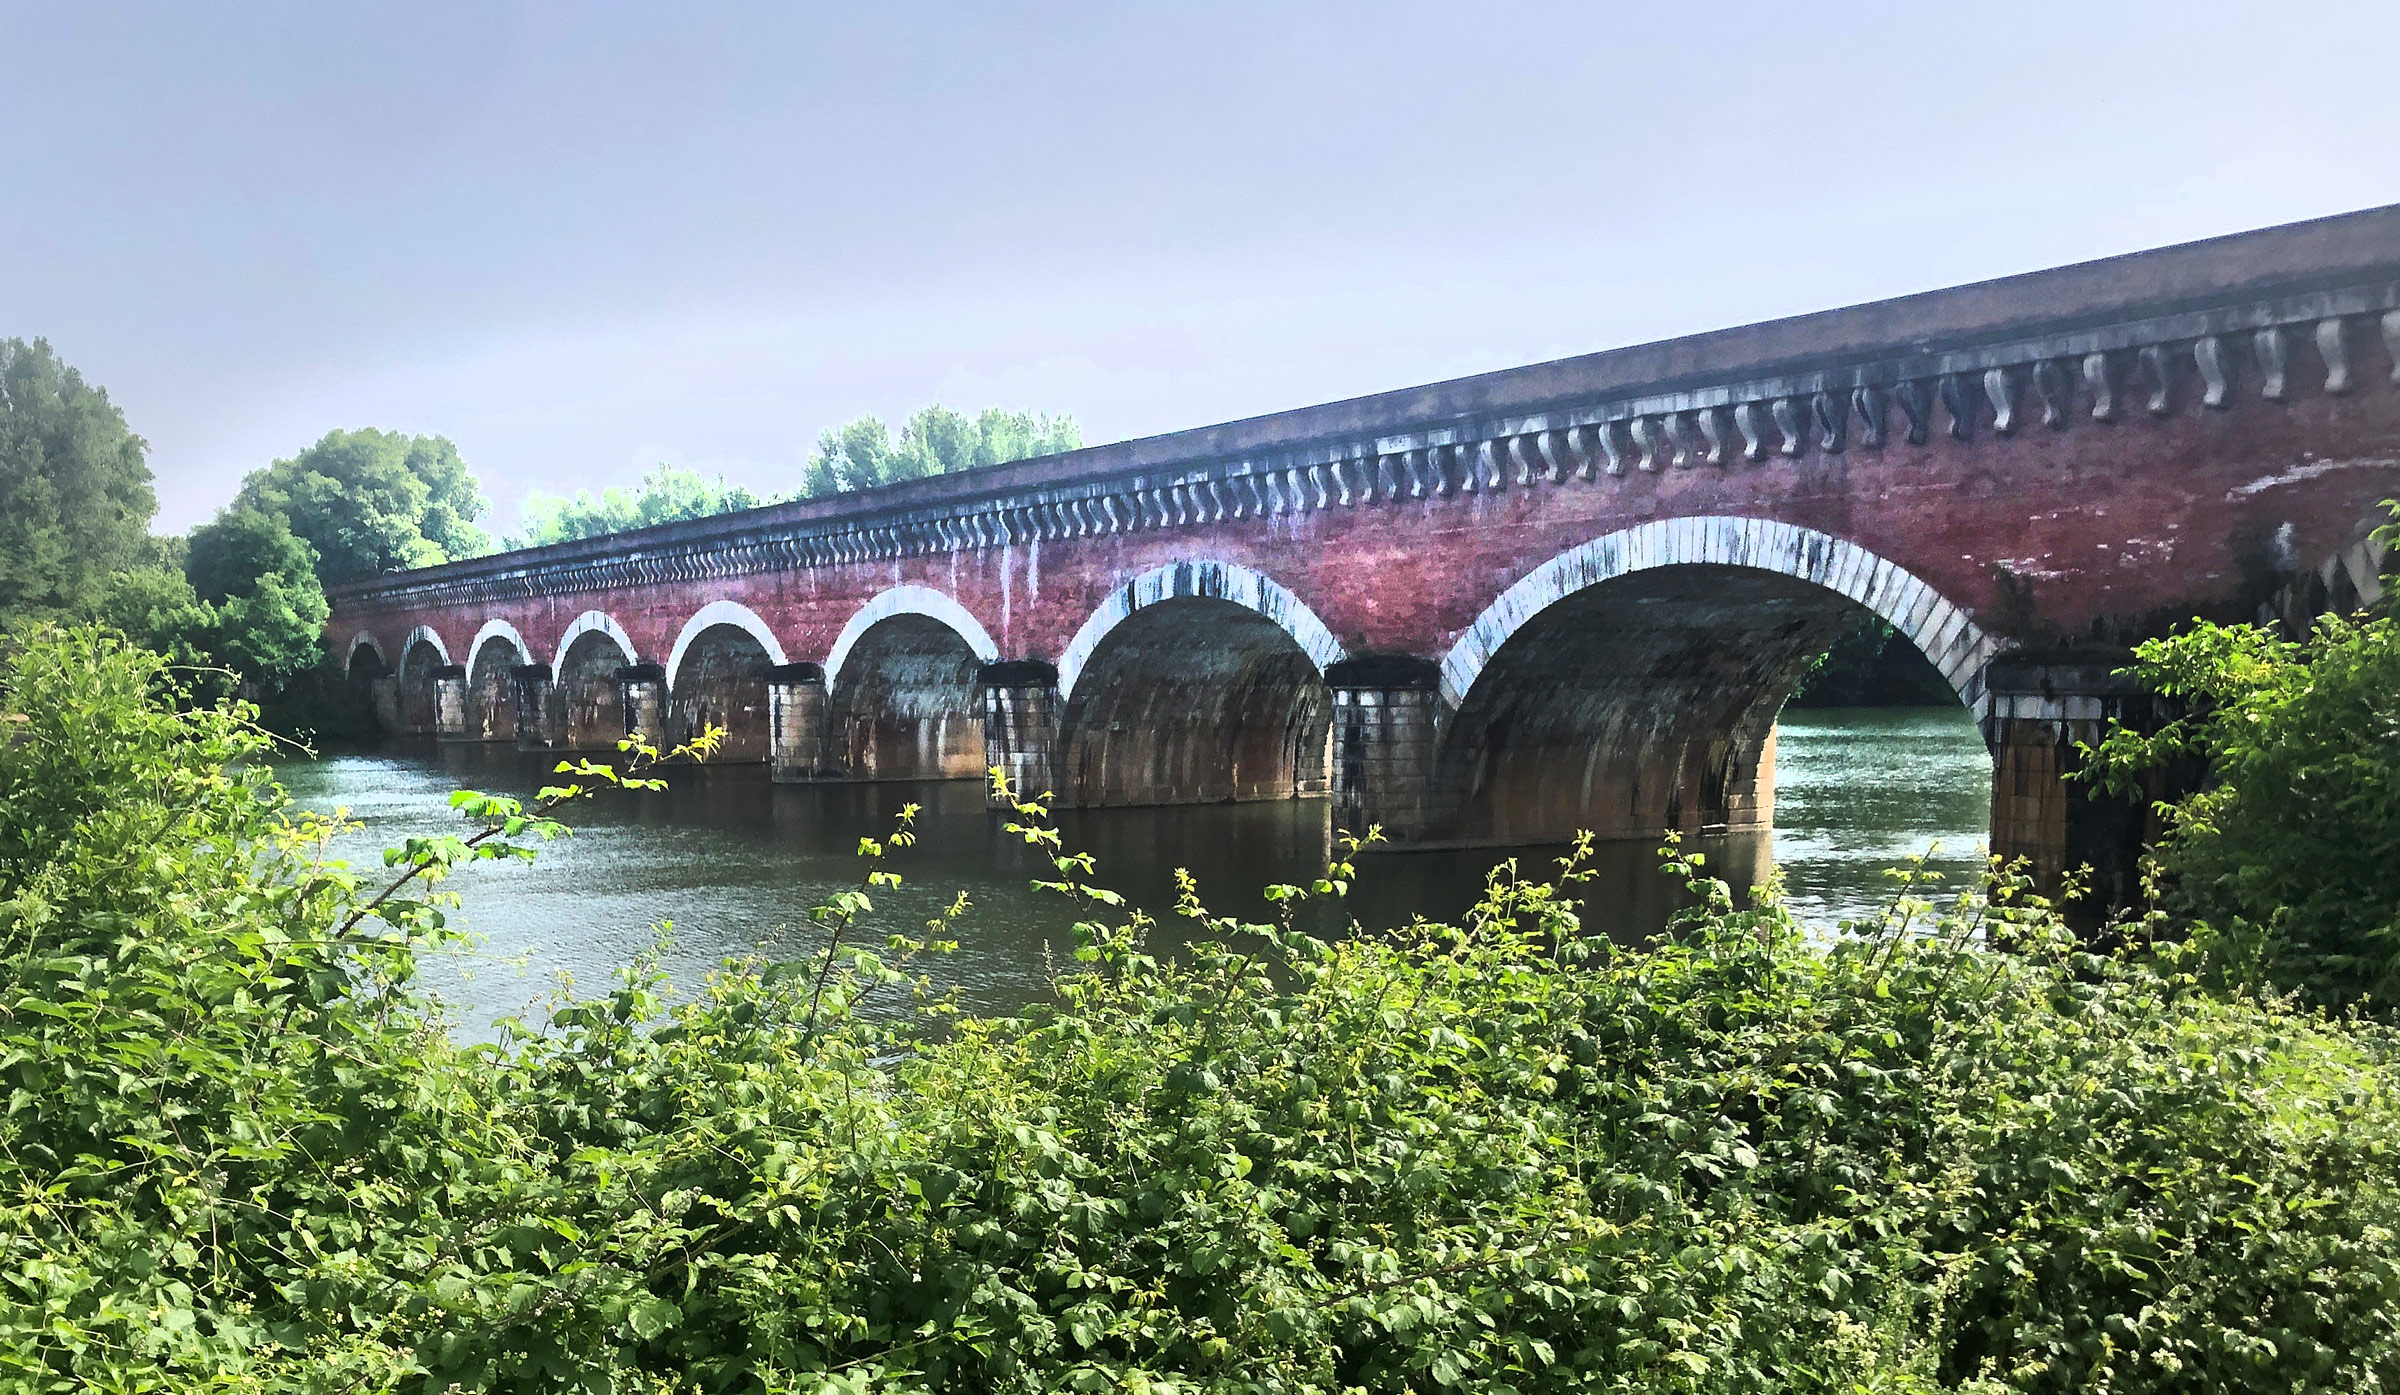
We stopped for a rest day at Moissac and took a walk to look at the Pont-Canal du Cacor, a nearly 1/4-mile-long navigable aqueduct. Built in 1844 of the same pink bricks common in Toulouse, it carries the Canal de Garonne across the river Tarn; the following day we’d row TRAMP along this canal-bridge. Christian pilgrims on the route to Santiago de Compostela in Spain stop by the town of Moissac, which is situated near the confluence of the Tarn and Garonne rivers and famous for its abbey.
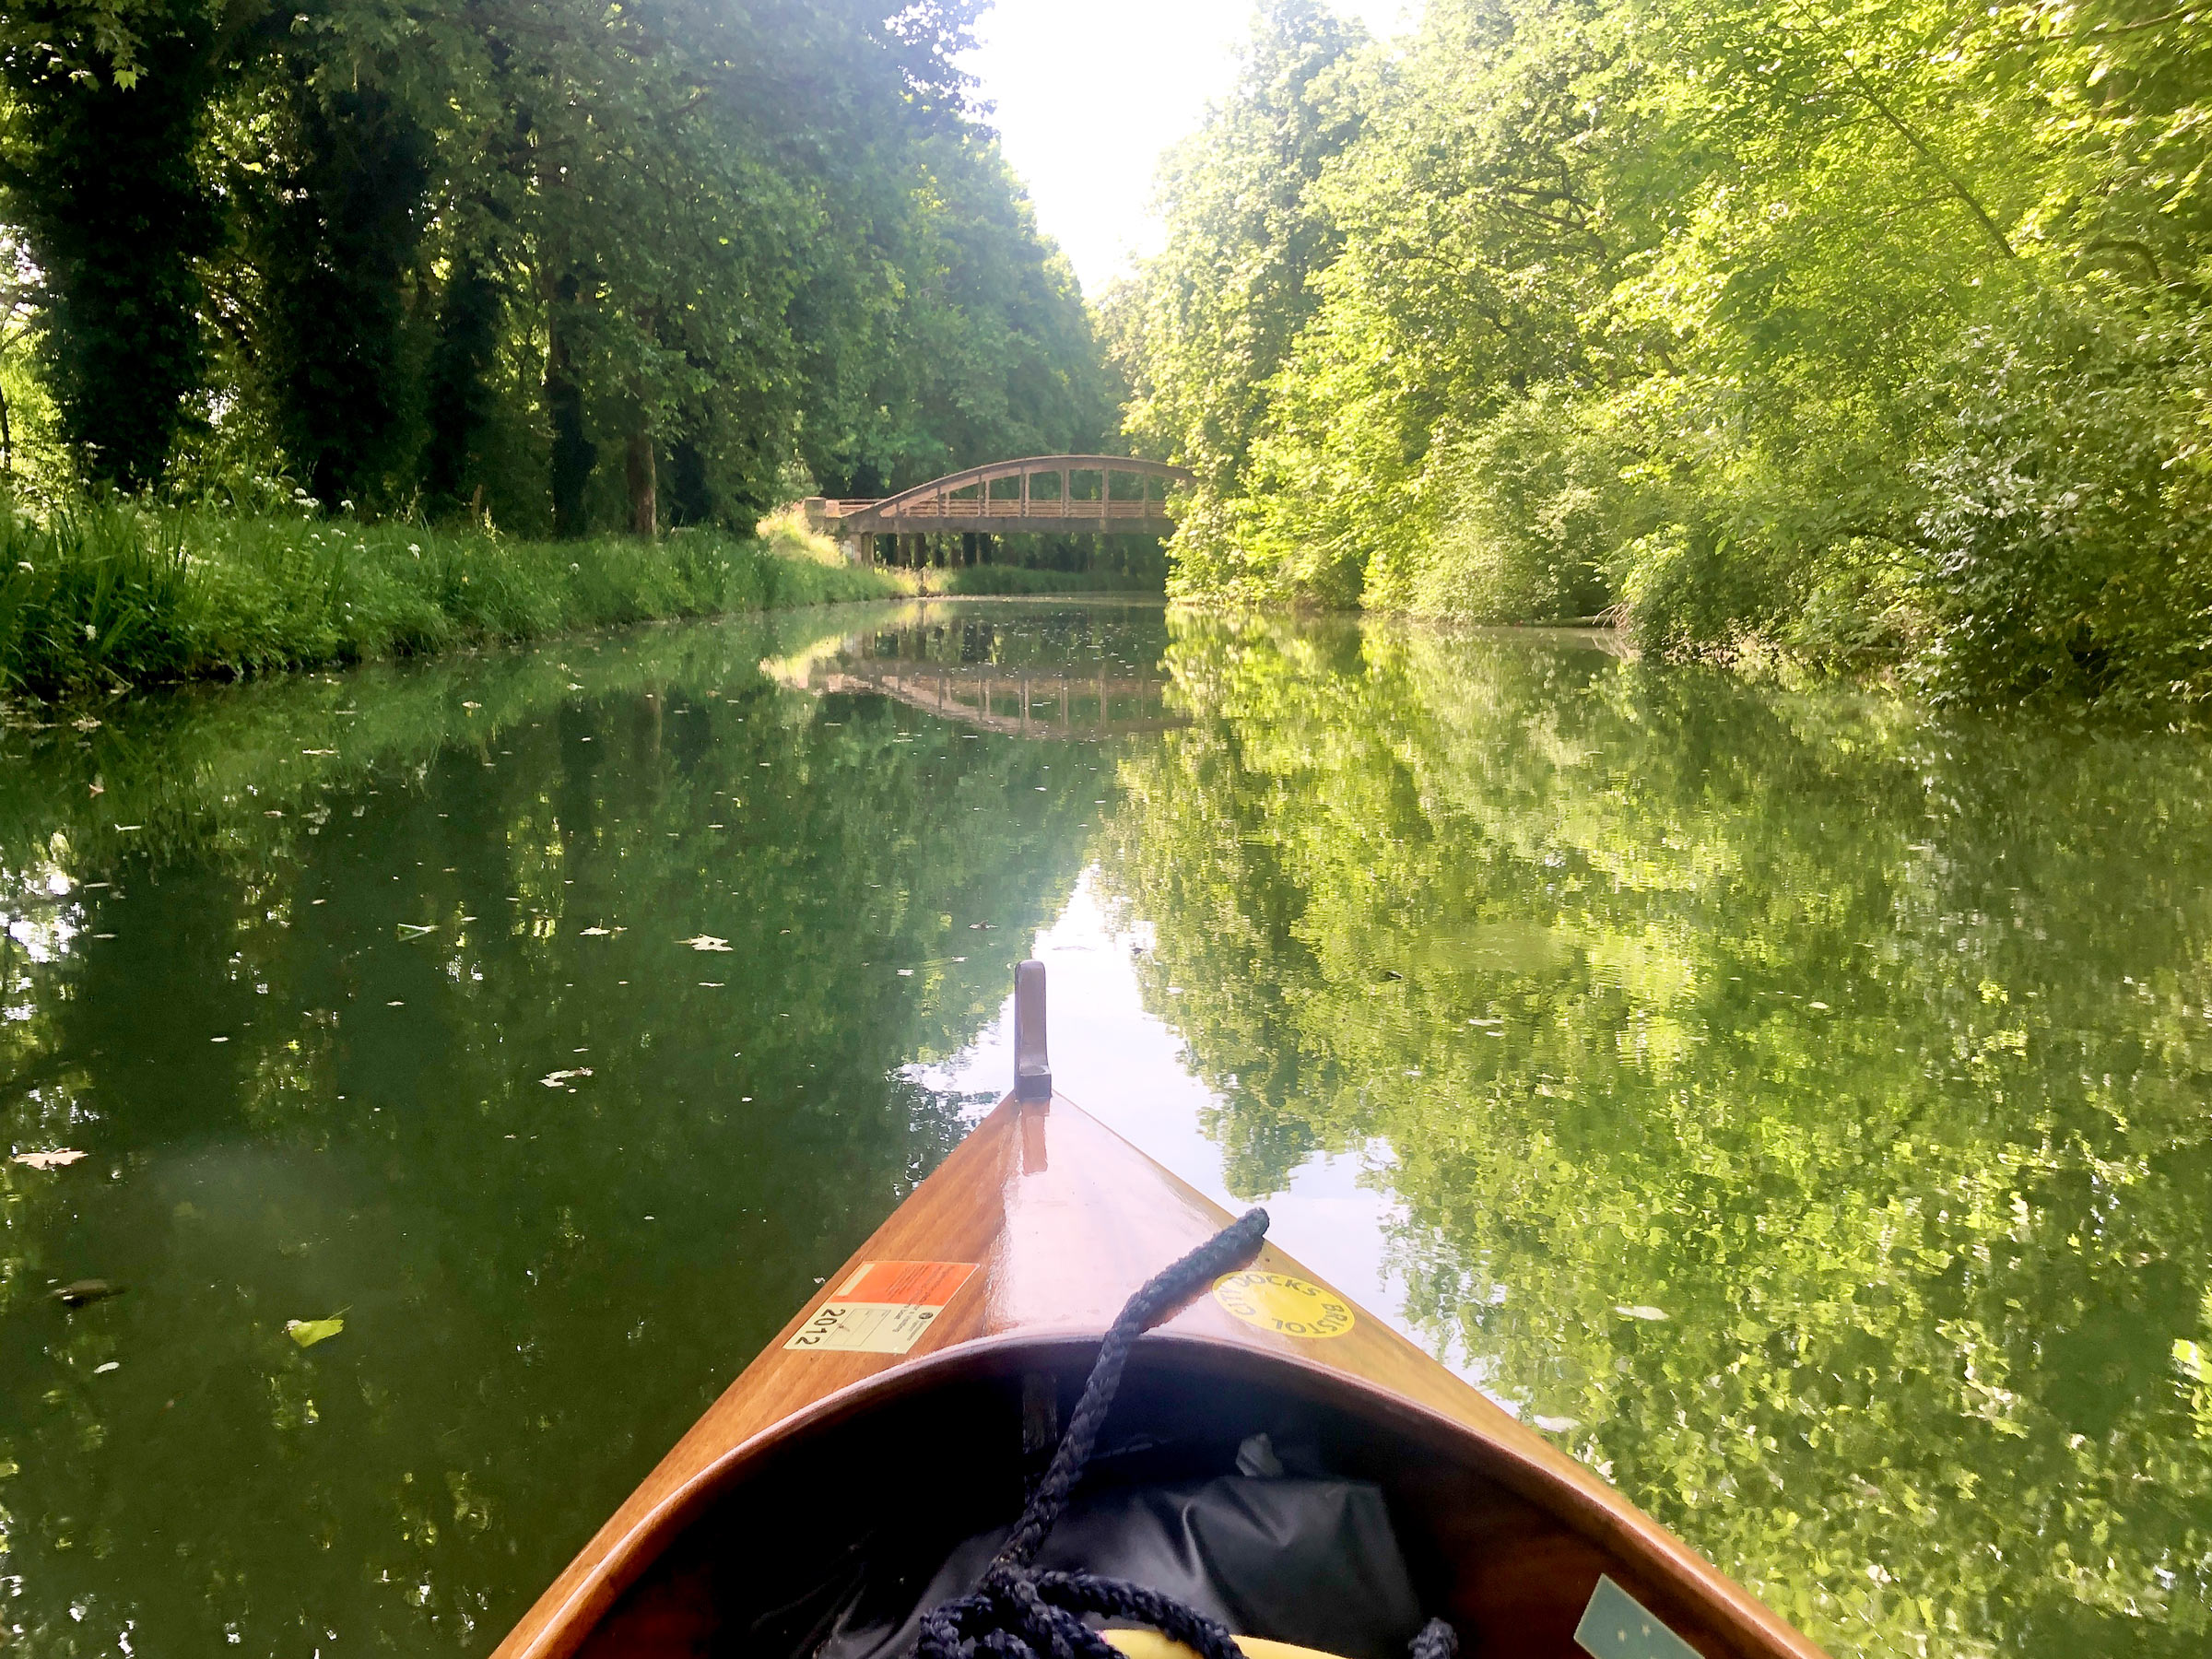
Rowing out of the shade of the plane trees, we saw a triangle of canal traffic lights on the right of the stone arch bridge where hire boats would have to lower their canopies to squeeze under. Beyond the nearly 20 gelcoat-white rental cabin cruisers with their bows pointing into the canal, we found a space just long enough to moor TRAMP. Ben and I stepped ashore to look for the campsite I’d read about online. Two-story houses in different widths and heights all built one against the other rose beyond the grassy bank, their red tiled roofs forming a staircase upward to the village of Le Mas d’Agenais. Quickly sweaty and out of breath, we trudged up between red-brick and flaking-stucco buildings to find a wall-less timber-framed building with a barn’s gambrel roof. Knocks from centuries of market vendors marked its thick mottled hand-hewn oak beams, each planted on a knee-high stone plinth. Neatly brick-paved streets led past a white and gray stone Romanesque church to the campground, where a handwritten cardboard sign dangling on a rope across the entrance read, “Fermé.” We would have to find somewhere else to stay the night.
We returned to TRAMP and within an hour we rowed to the next canal-side campsite, 2 miles farther on. We found an empty car park with a vacant building, a trash-bin enclosure with no bins, and a bone-dry sink with spiderwebs full of dead flies in its corners. A signpost poking out of a waist-height hedge read, “Reserved for Campervans.” By now the canal’s locks were closed for the night, so we dragged ourselves over the canal bridge and along the road to the only other place marked on Google Maps, a bed-and-breakfast less than a half mile away. It had no website or phone number. Beyond a field of knee-high cornstalks with dark green arching leaves, we cautiously wandered through the pillared entrance between 6′ walls into a dusty courtyard. Five doors painted the color of claret were evenly spaced along the front of a one-story building, the windows between them almost hidden behind thick, lush layers of ivy. Perpendicular to it was a sandstone building with cracks that could accommodate small birds reaching up to the beveled clay-tile roof. A wooden beam, almost black with age, spanned the top of a metal garage door.
“Bonsoir?” I called. A man stepped out from the back of a van, wisps of gray hair flowing from the sides of a faded flat cap that shielded his crinkled face from the last of the day’s sun. “The minimum stay is three nights,” he said, “but back at the crossroads, the first house on your left, is someone who sometimes helps travelers like you.” We walked to the house and, finding no way in, gently tinkled a bell hanging on a chain outside. A gentleman appeared and opened his metal back gates. Smiling, he introduced himself as Jérôme and invited us to follow him. We wound through his tangle of rooms, each crammed full with paintings—a still life of three apples next to a stack of crumpled papers under a violin, ladies languishing with half-fallen white robes, an intricately embellished gilt frame wider than the faded square portrait it surrounded, a wooden framed pen-and-ink illustration of a battle sitting on the floor behind the end of a wrought-iron bed frame sculpted with the silhouette of an oak tree. He led us to a bedroom, flung the shutters open, looked under the bed linen to check it was clean, and exclaimed, “Perfect, the room is ready.” We returned to TRAMP to cook up a camp-stove dinner of couscous, tomatoes, and lentils with dried onions, olives, and artichoke hearts. Taking only the wash kit, we headed to Jérôme’s for a dip in the pool before bed. After two consecutive days of rowing at least 12 miles each day, we rested deeply.
Jérôme sat us at a breakfast table where tapestries hung on the wall and an intricate ammonite fossil 12″ in diameter on a metal stand vied for space with six busts on a glass-top table with intricate legs decorated with golden metal leaves. Ben cut a slice of dark crusty bread for me and spread it with a thick layer of butter. I sank my teeth in and was surprised by how sweet it was; it was actually an unfrosted chocolate loaf cake. Jérôme filled the table with a sliced baguette in a woven basket, a jar with a handwritten label abricot, a jug of strong coffee, and a bowl of strawberries from his garden.
Excited to learn that we’d arrived in a wooden boat Ben had built, Jérôme, a metalworker, shared his passion for working with his hands. Around the garden there were large sheets of metal he had sculpted in sensuous forms; his open workshop was adorned with mirror frames decorated with gold-leaf finish, one going to Versailles, one to Italy. Part of his bonsai collection was growing in rocks, with others in pots next to a yew tree he had been pruning into the shape of a flying bird. Neat garden rows stretched out with zucchini, strawberries, tomatoes, peppers, and artichokes. He accompanied us back to TRAMP to admire Ben’s work where I learnt the French word for mahogany, acajou. Before parting ways, Jérôme wished us that all would go well with our growing baby and that only wonderful things would happen in our journey and lives.
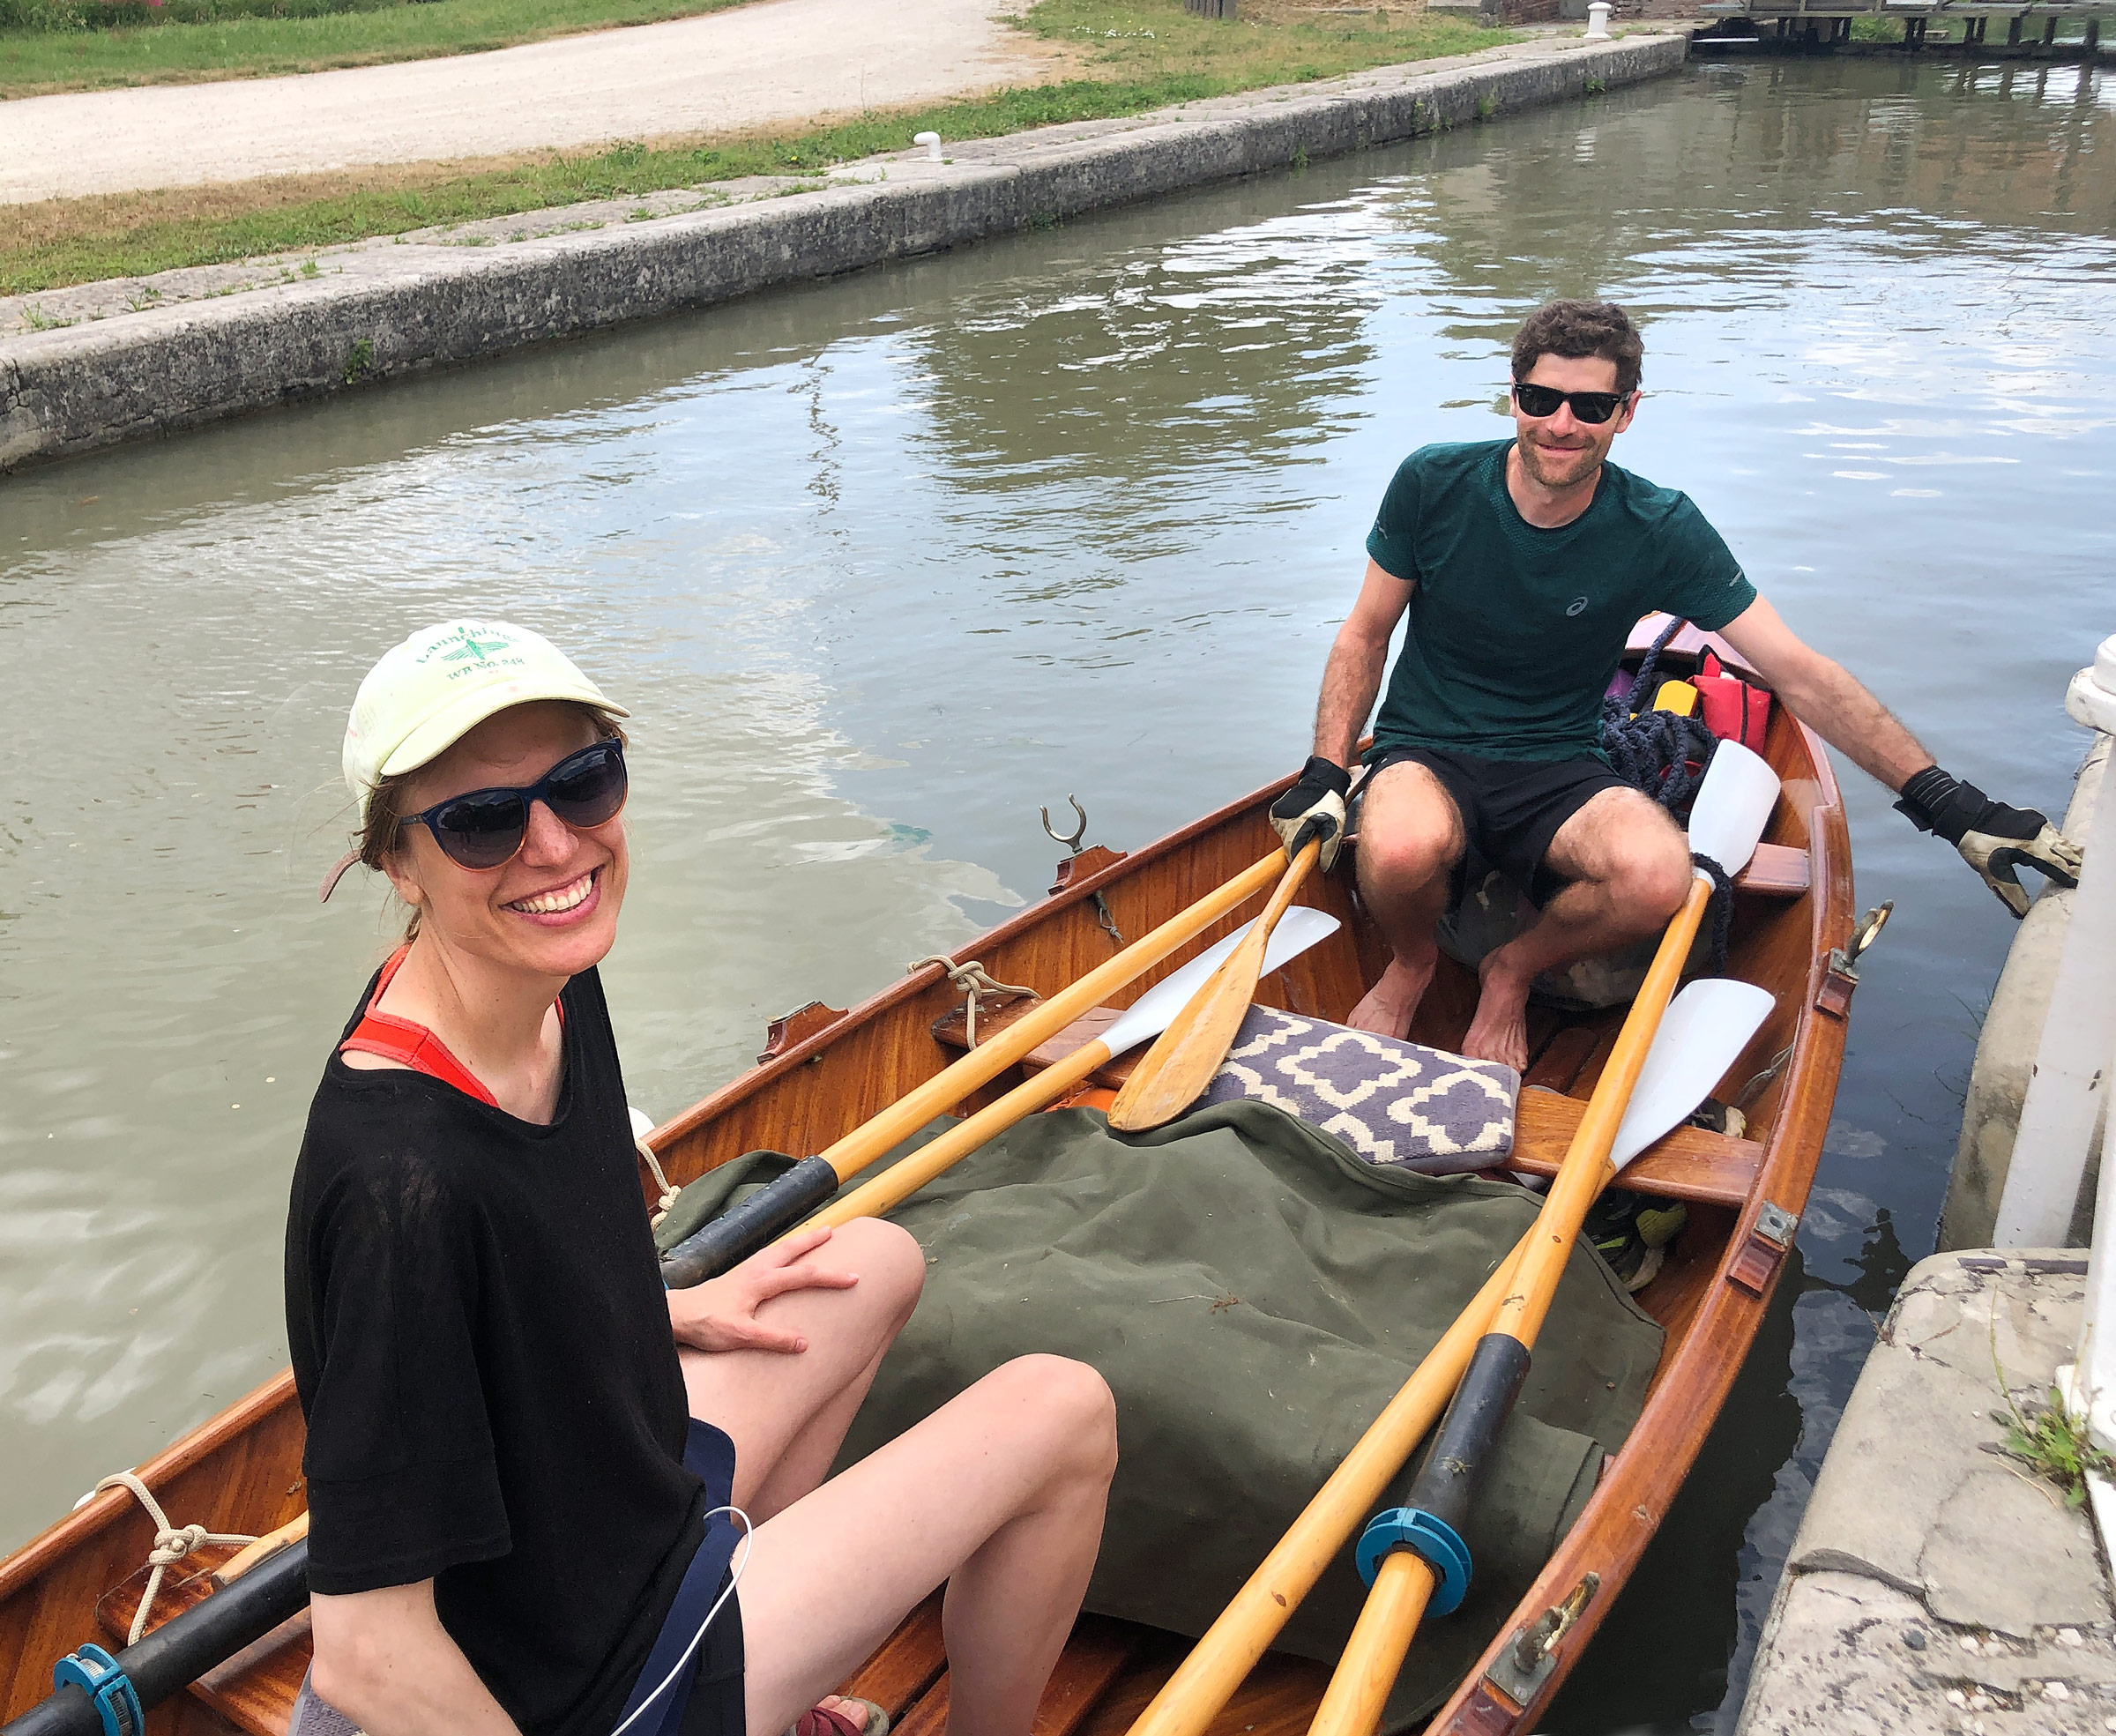
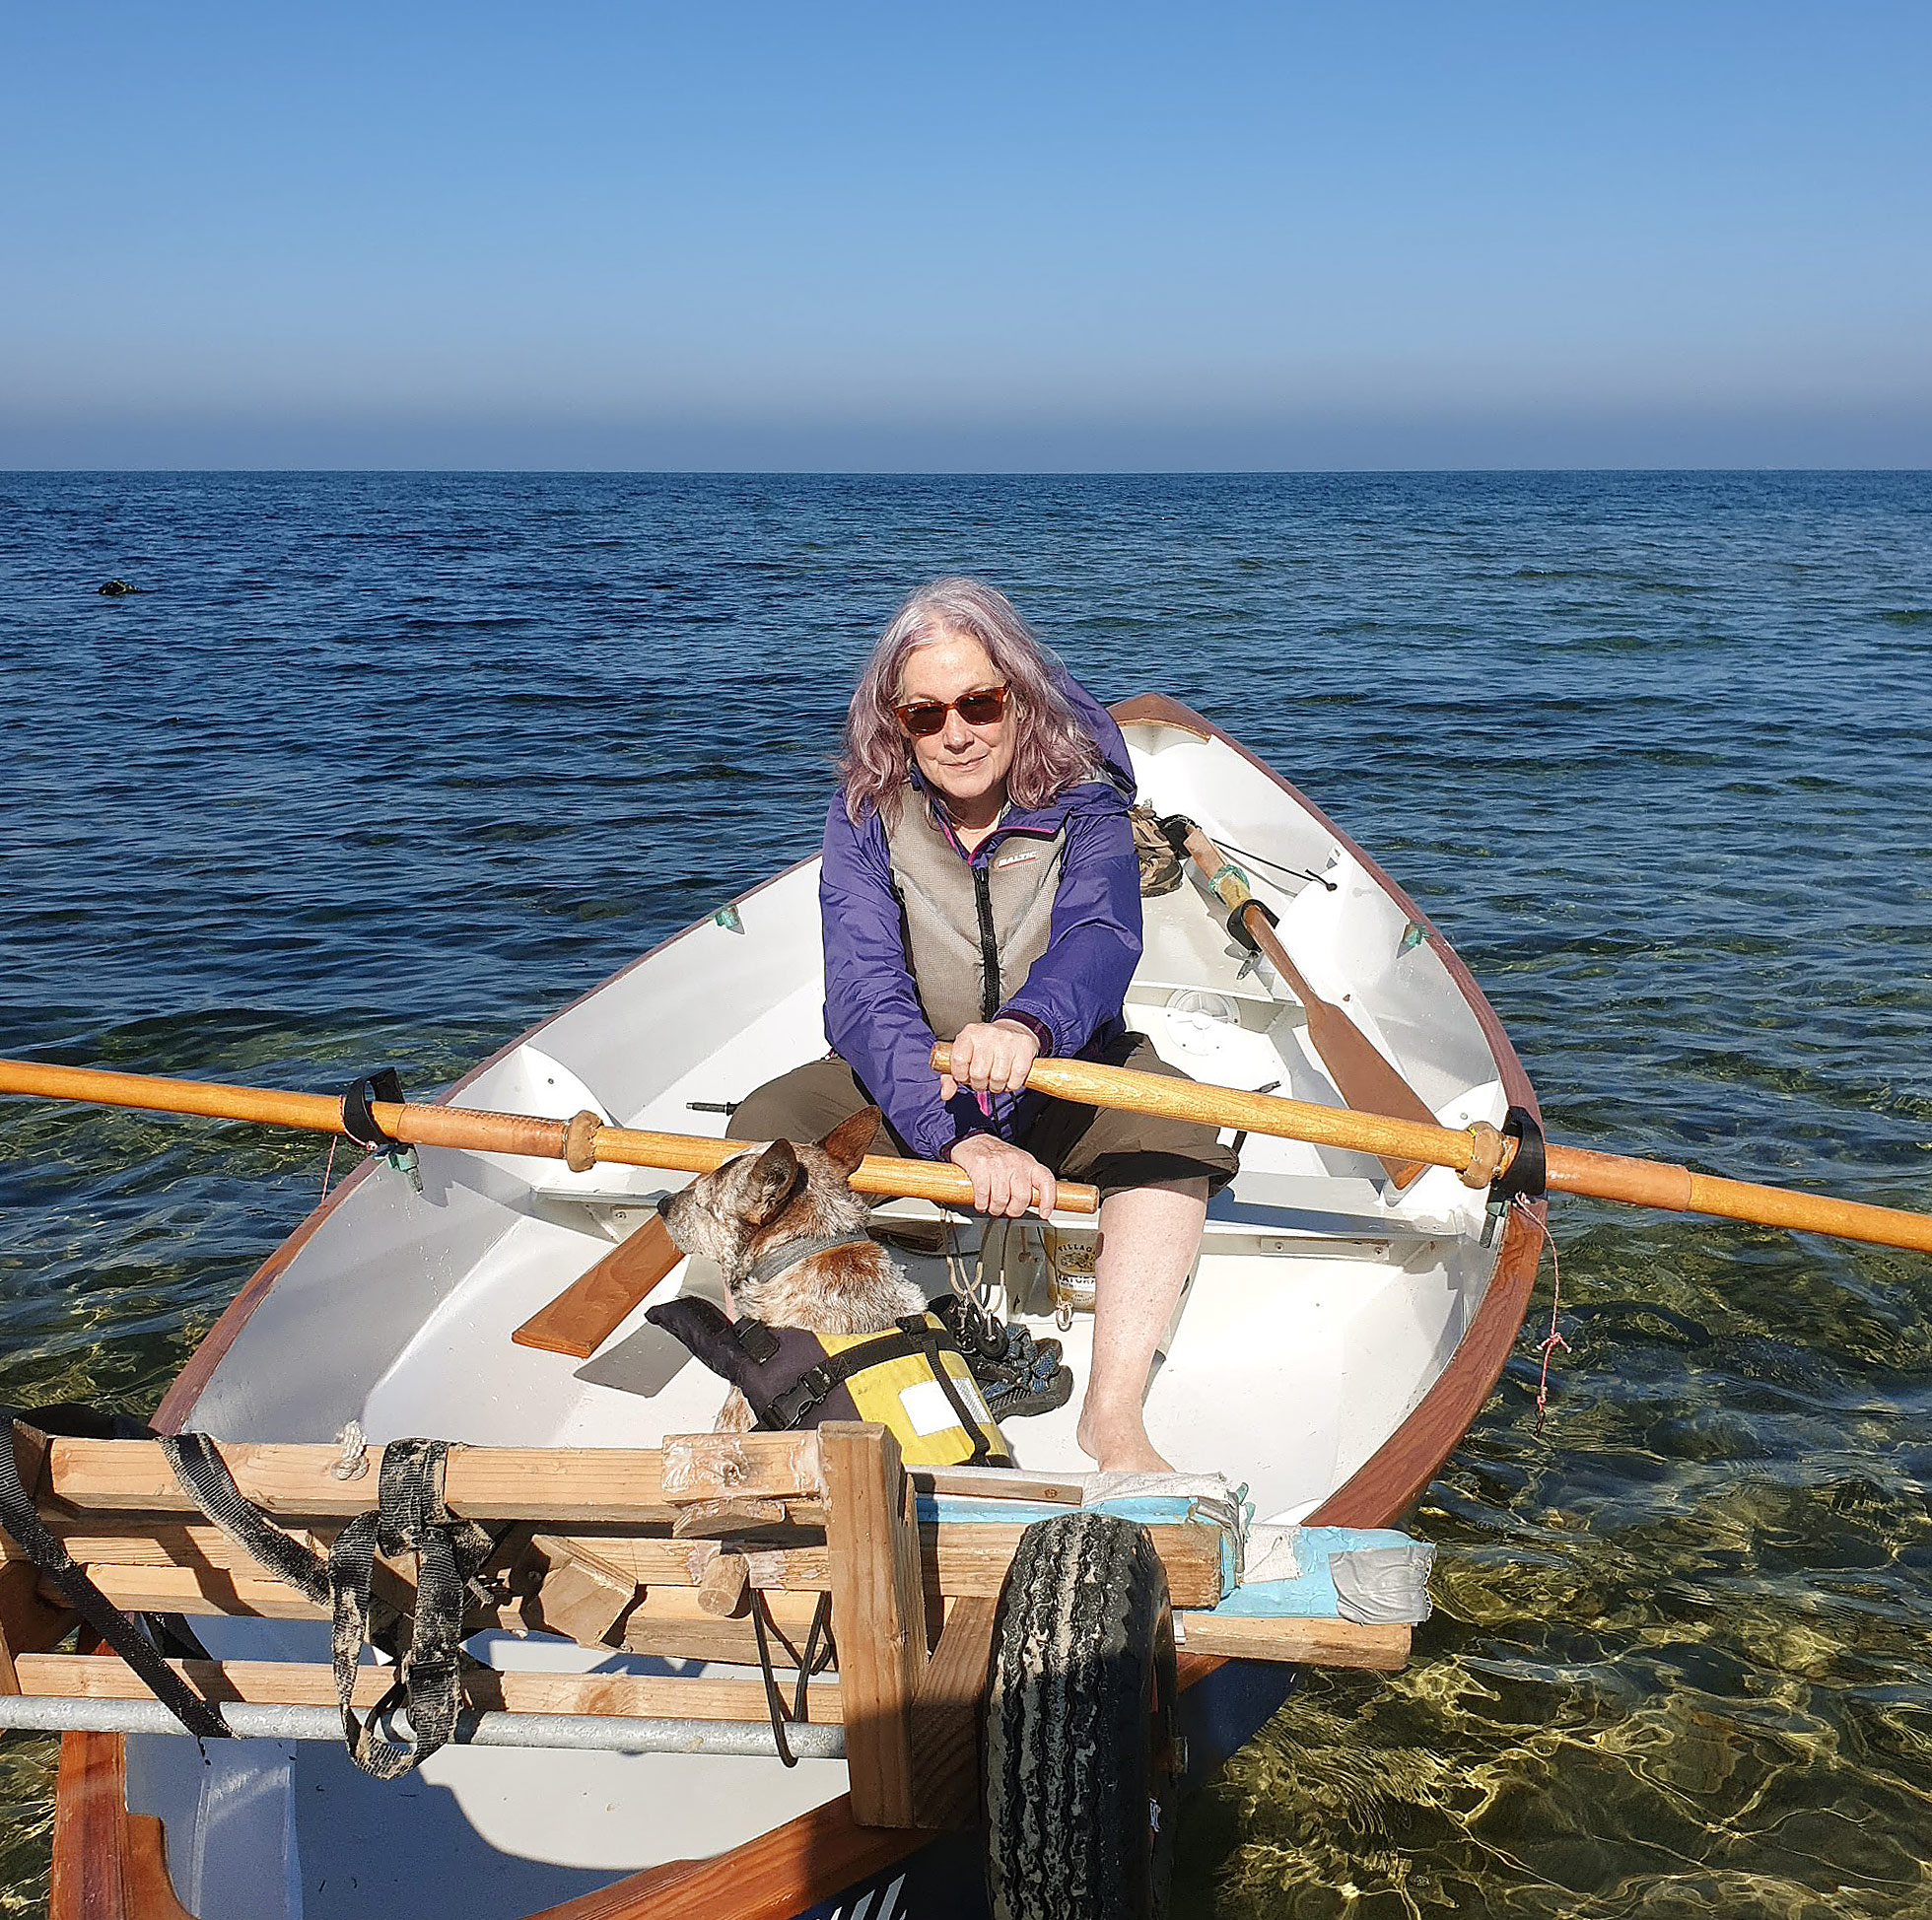
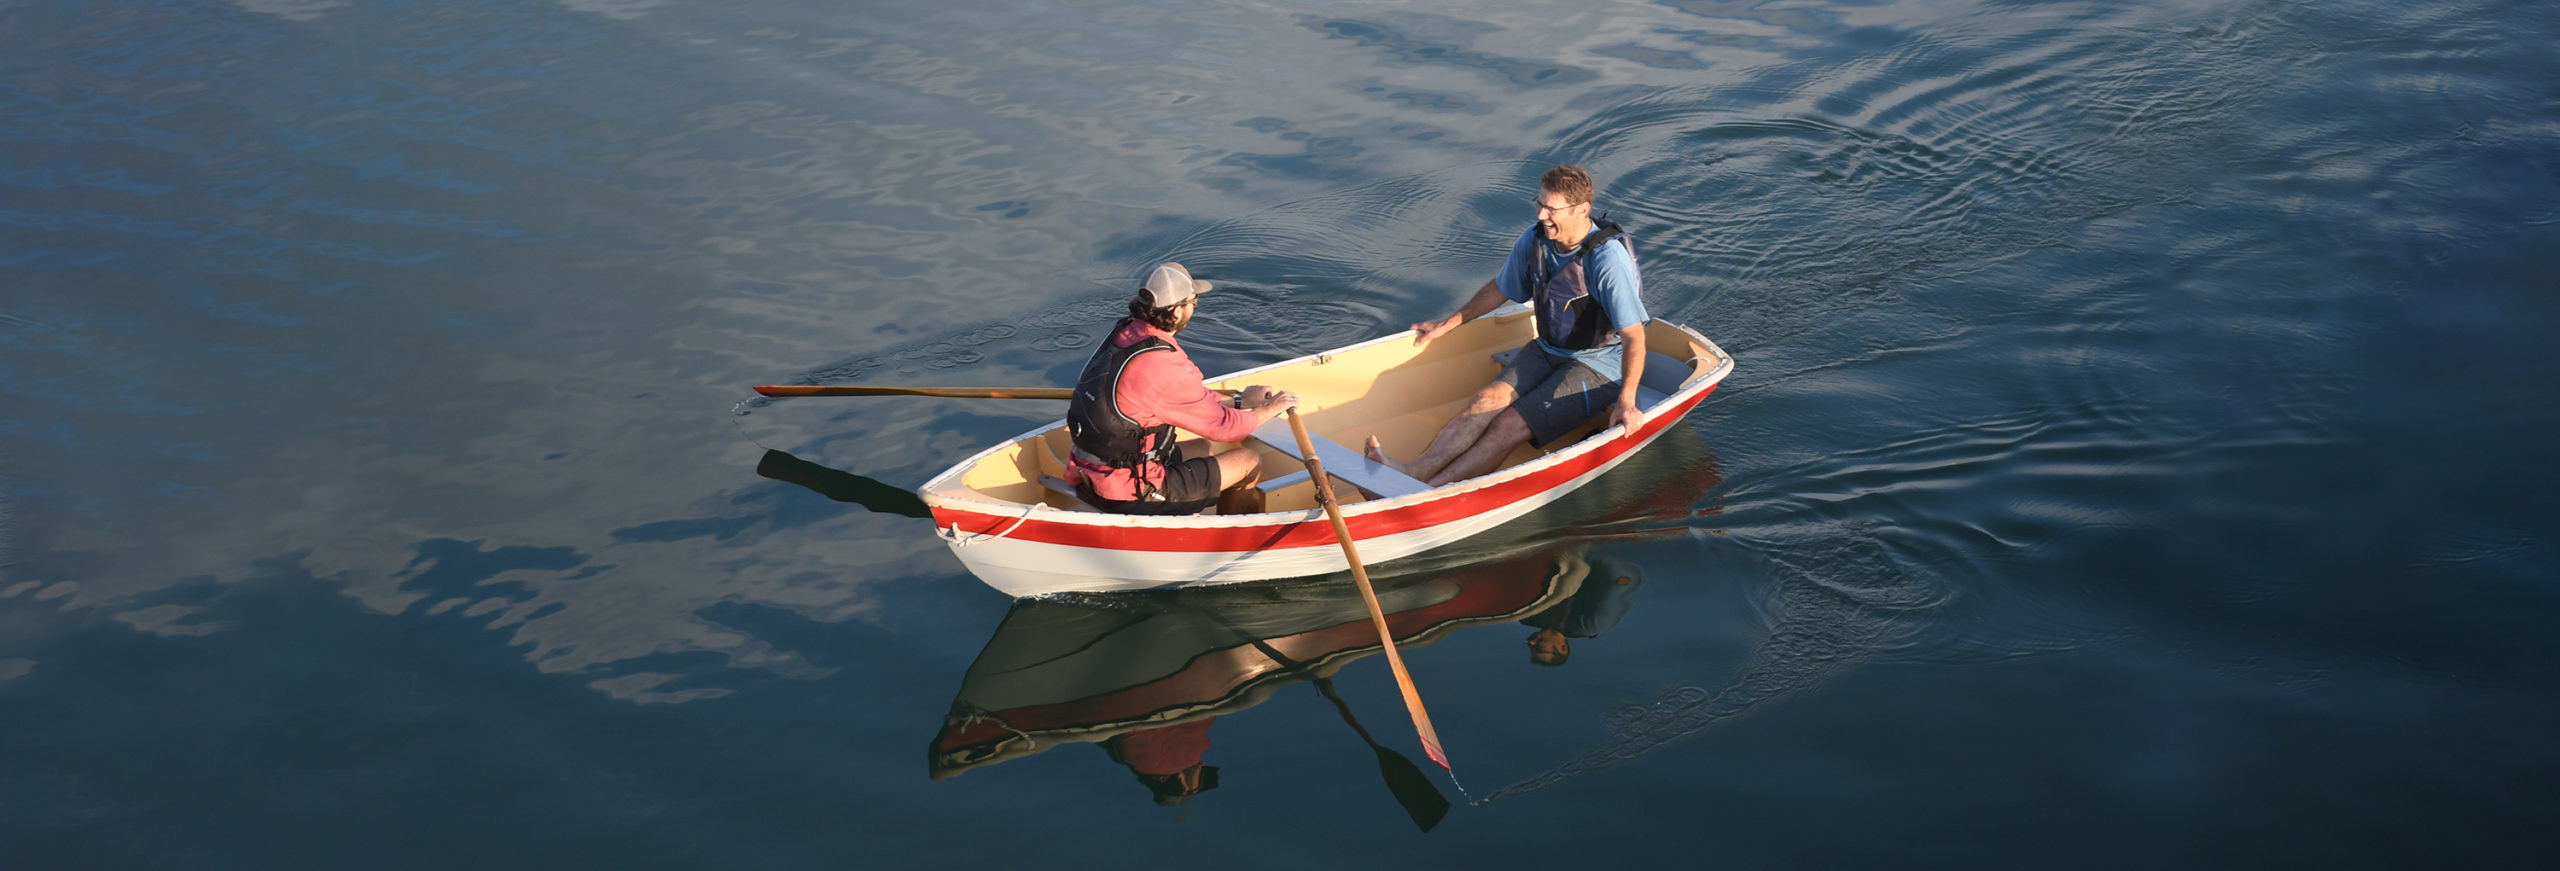
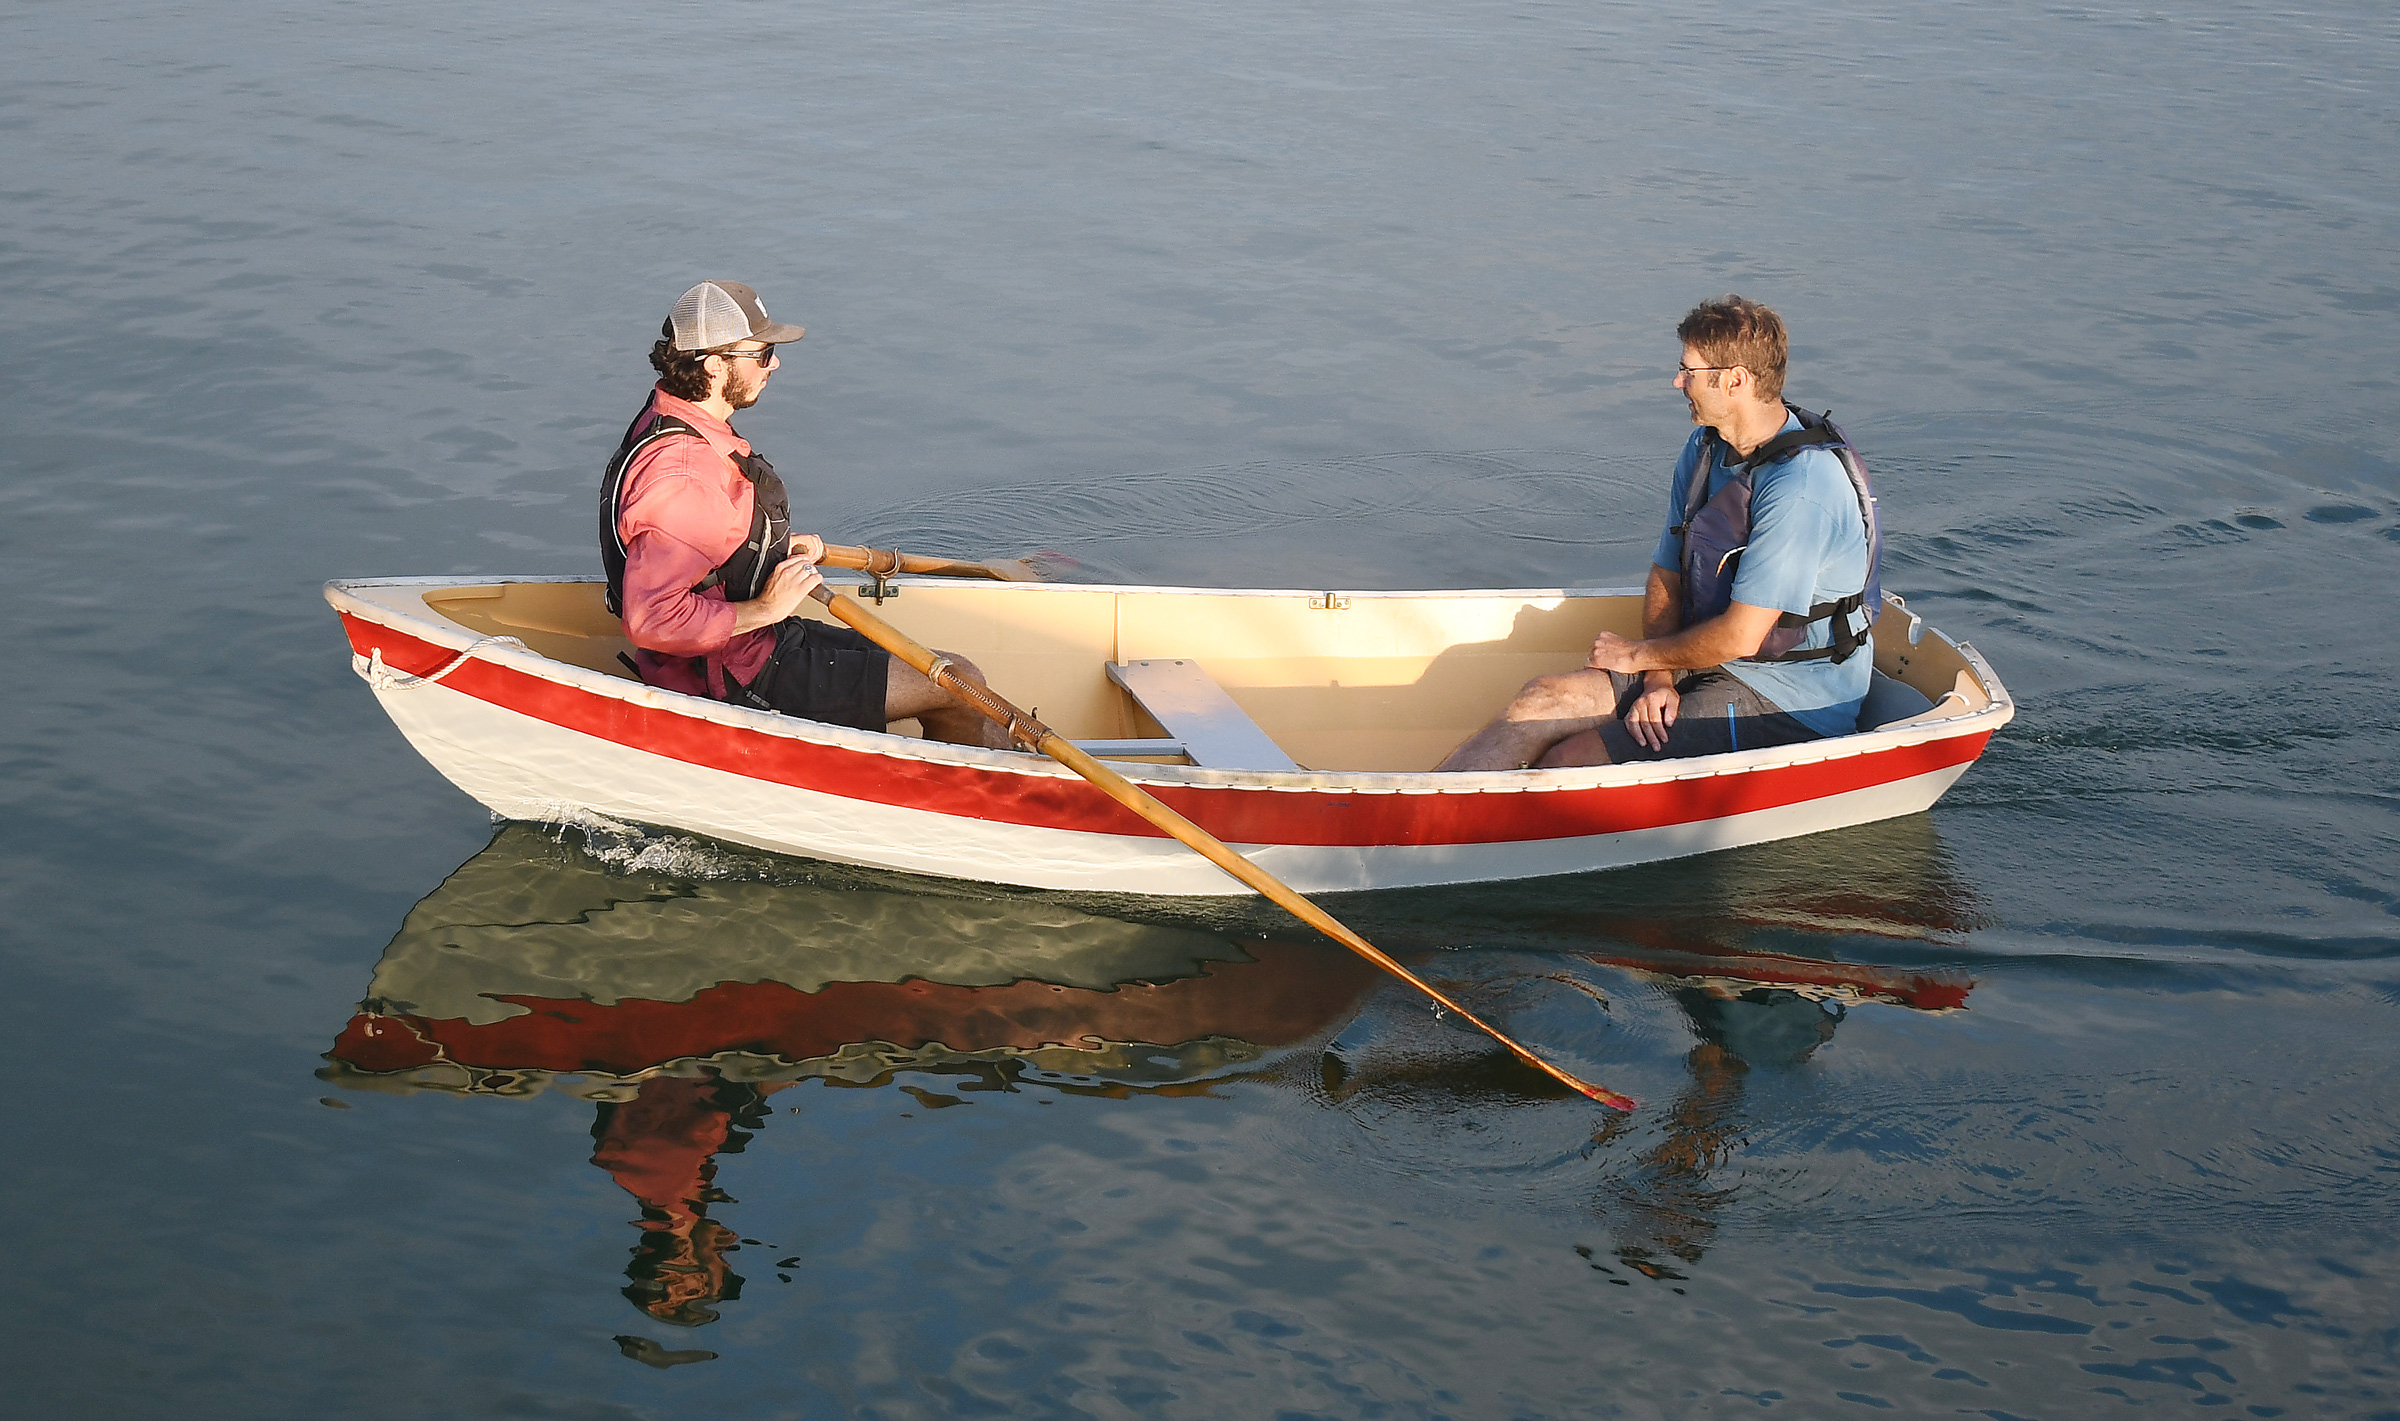
Numerous cyclists enjoy the towpaths between Toulouse and Bordeaux. Curious to see the locks in action with a wooden rowing boat, some stopped to chat and kindly took a rare photo of Ben and me aboard TRAMP.
We settled into days of counting down each Canal de Garonne lock we passed through, long straight rowing stretches, and locating bakeries, campsites, or B&Bs to stay each night less than a 20-minute walk from the canal. On our tenth day, we passed Lock 3 after lunch and Lock 2 less than a mile after. We barely noticed another mile and a half before gliding into Lock 1 at the northern edge of Toulouse. Inside the lock, Ben and I stood holding the bow and stern lines as the two metal gates boomed together, closing the chamber behind us. A man in the now-familiar VNF blue T-shirt stopped trimming the grass on the far side of the lock, walked over the closed lock gates to us, and asked gently, “How far are you going?”
“Toulouse today and Sète after,” I responded. He phoned his colleague at the locks ahead to let her know we were coming and as I heard him use the word aviron, I tensed. Aviron is associated more with oars for racing shells, whereas rame would have been a better word for our oars. The water in the lock slowly rose as the lockkeeper talked with his colleague. The lock was half full when he made another call, three-quarters full when he made the third. I’d lost count which call he was on when the second set of lock gates opened out on the last stretch of the canal.
“I’m sorry,” he said, “you cannot pass Toulouse.” Our second leg, the Canal du Midi, was supposed to begin in the city center with three locks managed by one central lockkeeper using closed-circuit TV. The Toulouse lockkeeper said she couldn’t take responsibility for a boat without a motor going through. “You’ll have to take the boat out.” After another phone call, he said his team leader would come shortly. A cloud of dust billowed from the stony path as the boss pulled up in a white VNF van and came to an abrupt stop. Out strode a large-bellied man with furry furrowed eyebrows who took one look at TRAMP and barked, “Non! Not possible! You do not have authorization.” He stood squarely with his arms crossed, his face slowly getting redder, continuing without taking a breath, “You need documents to pass, it’s a public holiday tomorrow and the managers will take Friday off, too, so you can’t speak to anyone until Monday. You cannot pass the locks.” He returned to his van and roared off.
Dejectedly, we rowed the last 2-1/2 miles of the Canal de Garonne and moored TRAMP at the Port de l’Embouchure, a basin for the three-way junction of the Garonne, Brienne, and Midi canals. Later that warm evening, we strolled through the streets of Toulouse, La Ville Rose—the Pink City—where many buildings have for centuries been built with distinctively pink bricks. We passed duck foie gras specialist shops, Lebanese restaurants, bars, brasseries, and patisseries. About 1-1/2 miles from the Port, we arrived at Toulouse’s Pont Neuf—“New Bridge” (in spite of it having opened in 1612). It spanned the Garonne River on seven stone arches of varied sizes. People filled the streets lining the riverbank, drinking wine from plastic cups and snacking on baguettes and saucisson while a police van parked nearby waited for the hordes of revelers expected before Ascension Day, a national public holiday.
Muscles all over my body ached and my mind, tired of speaking French, raced through “what next?” scenarios. Could we haul TRAMP and all our gear on her two-wheel trolley through the traffic-filled streets and find a place to relaunch after the locks? Might we slip into the locks unnoticed behind a bigger boat? Was our adventure already over?
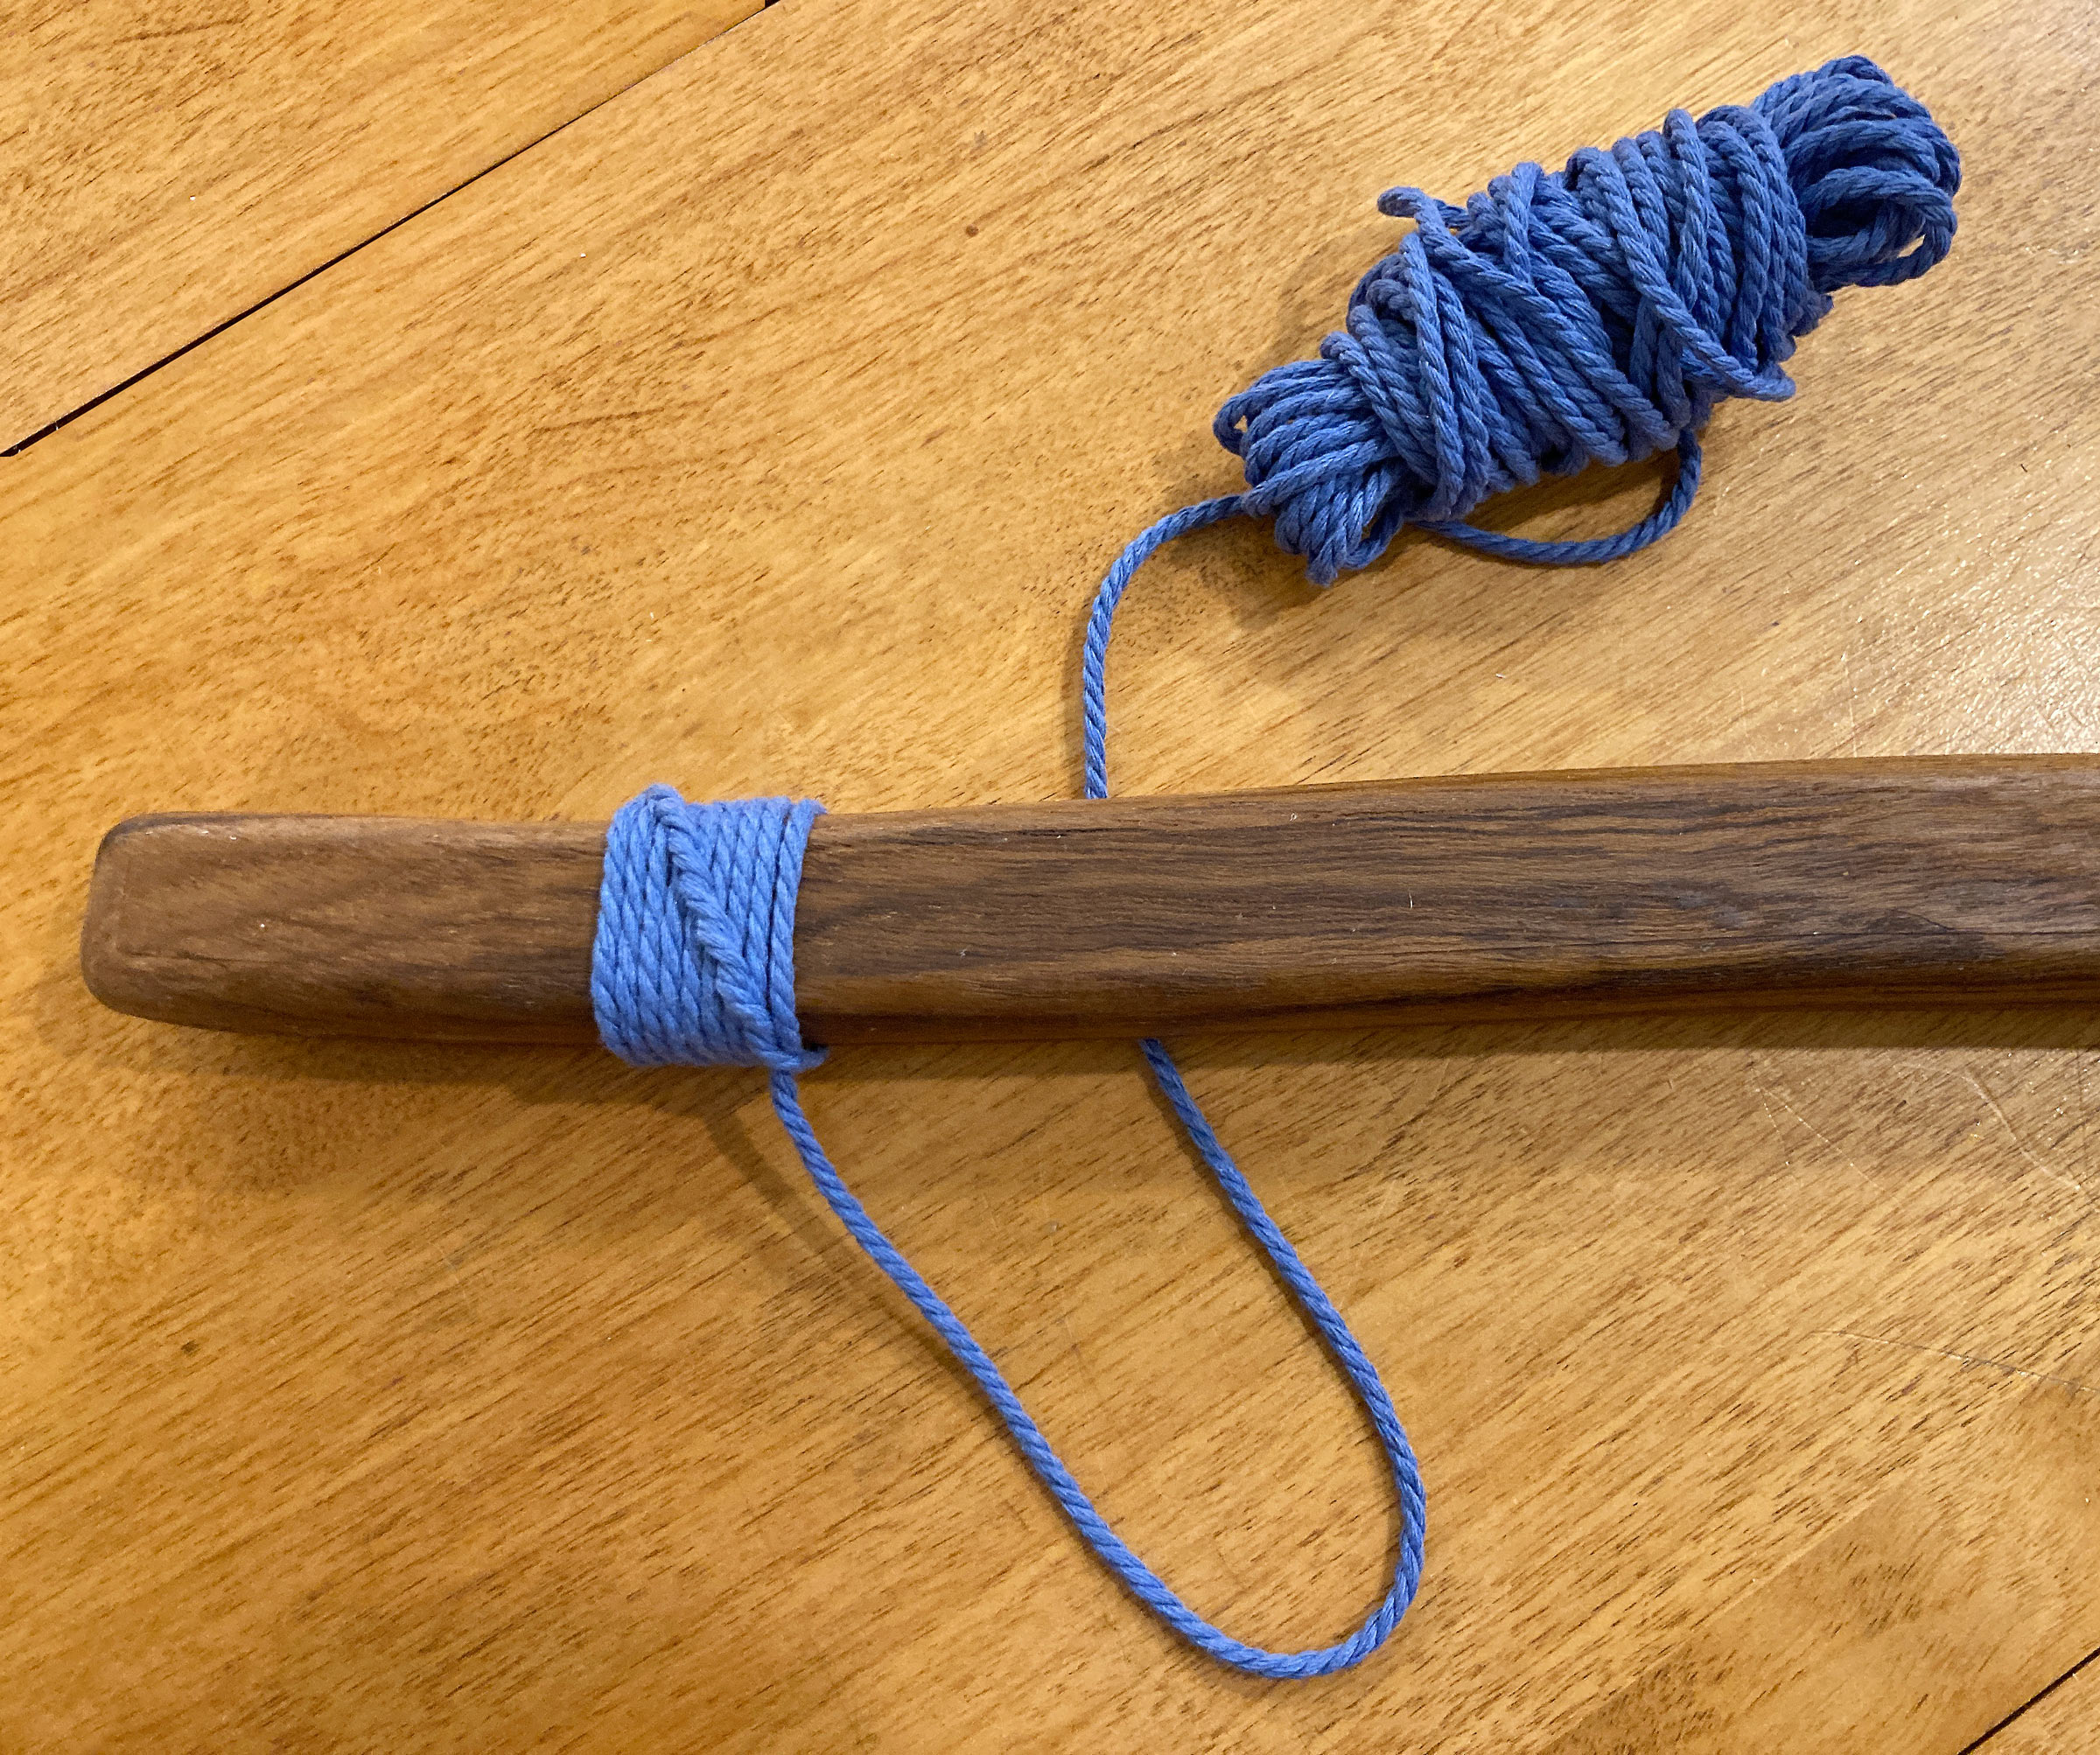
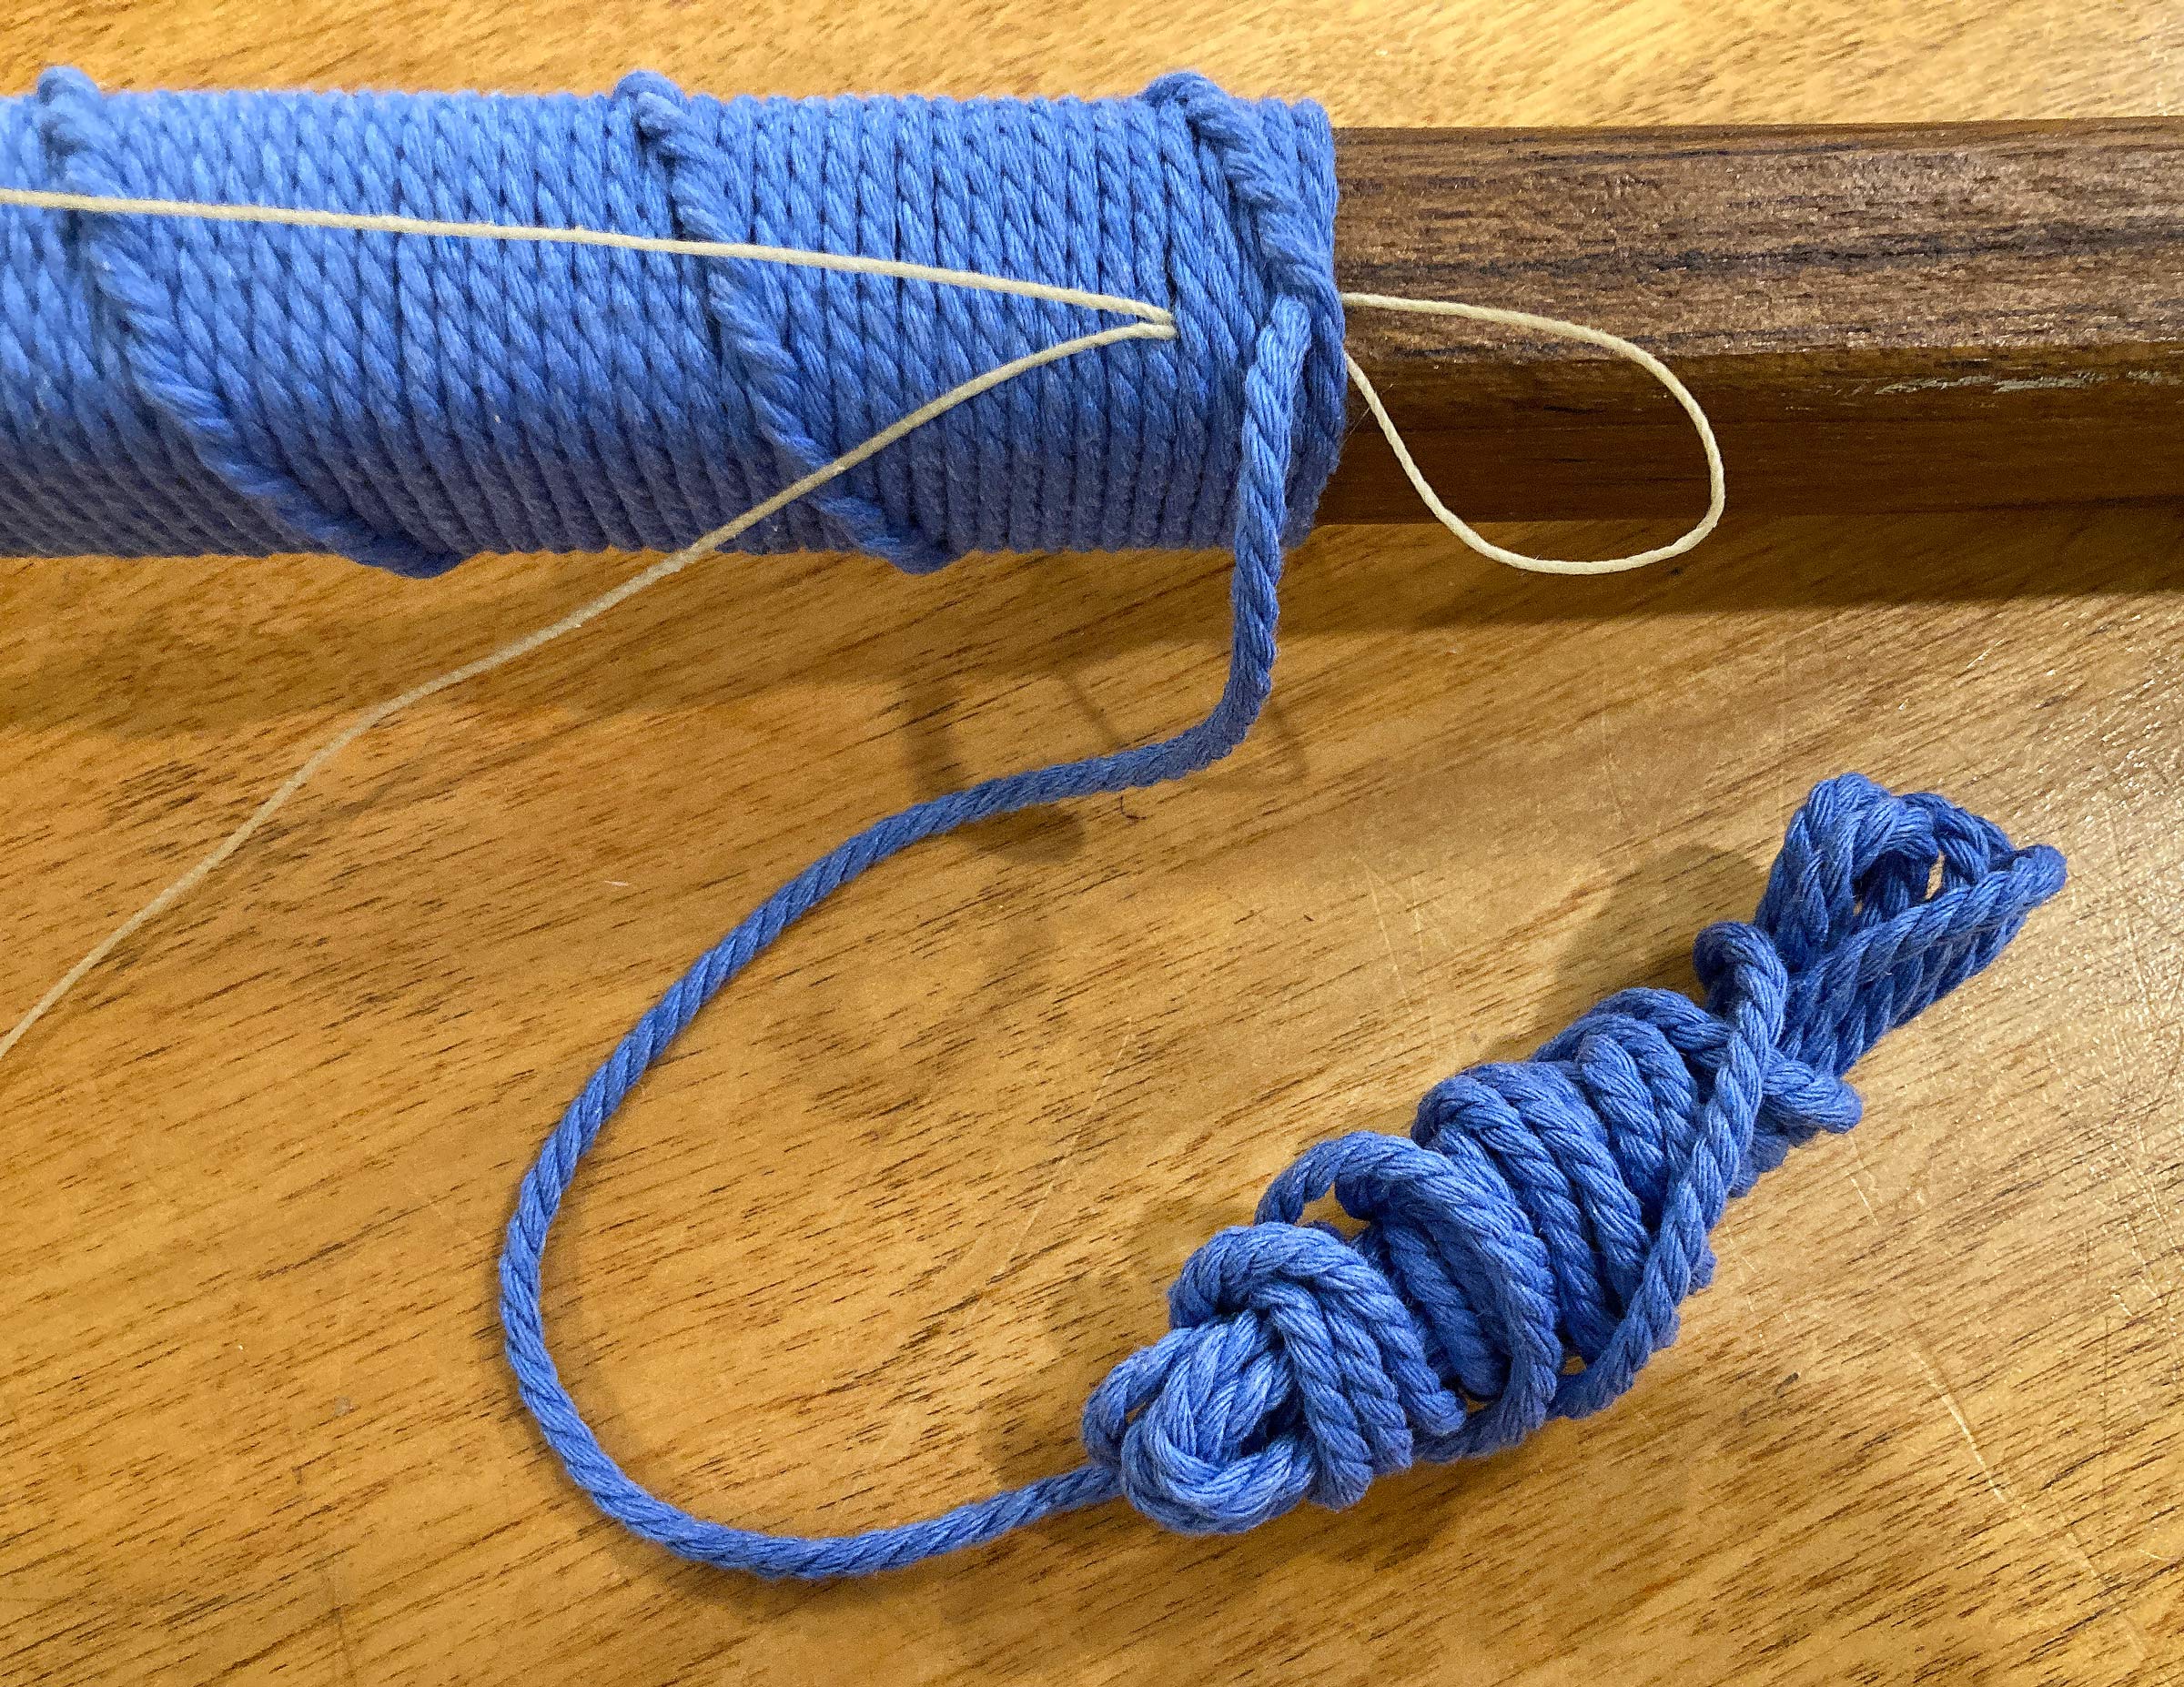
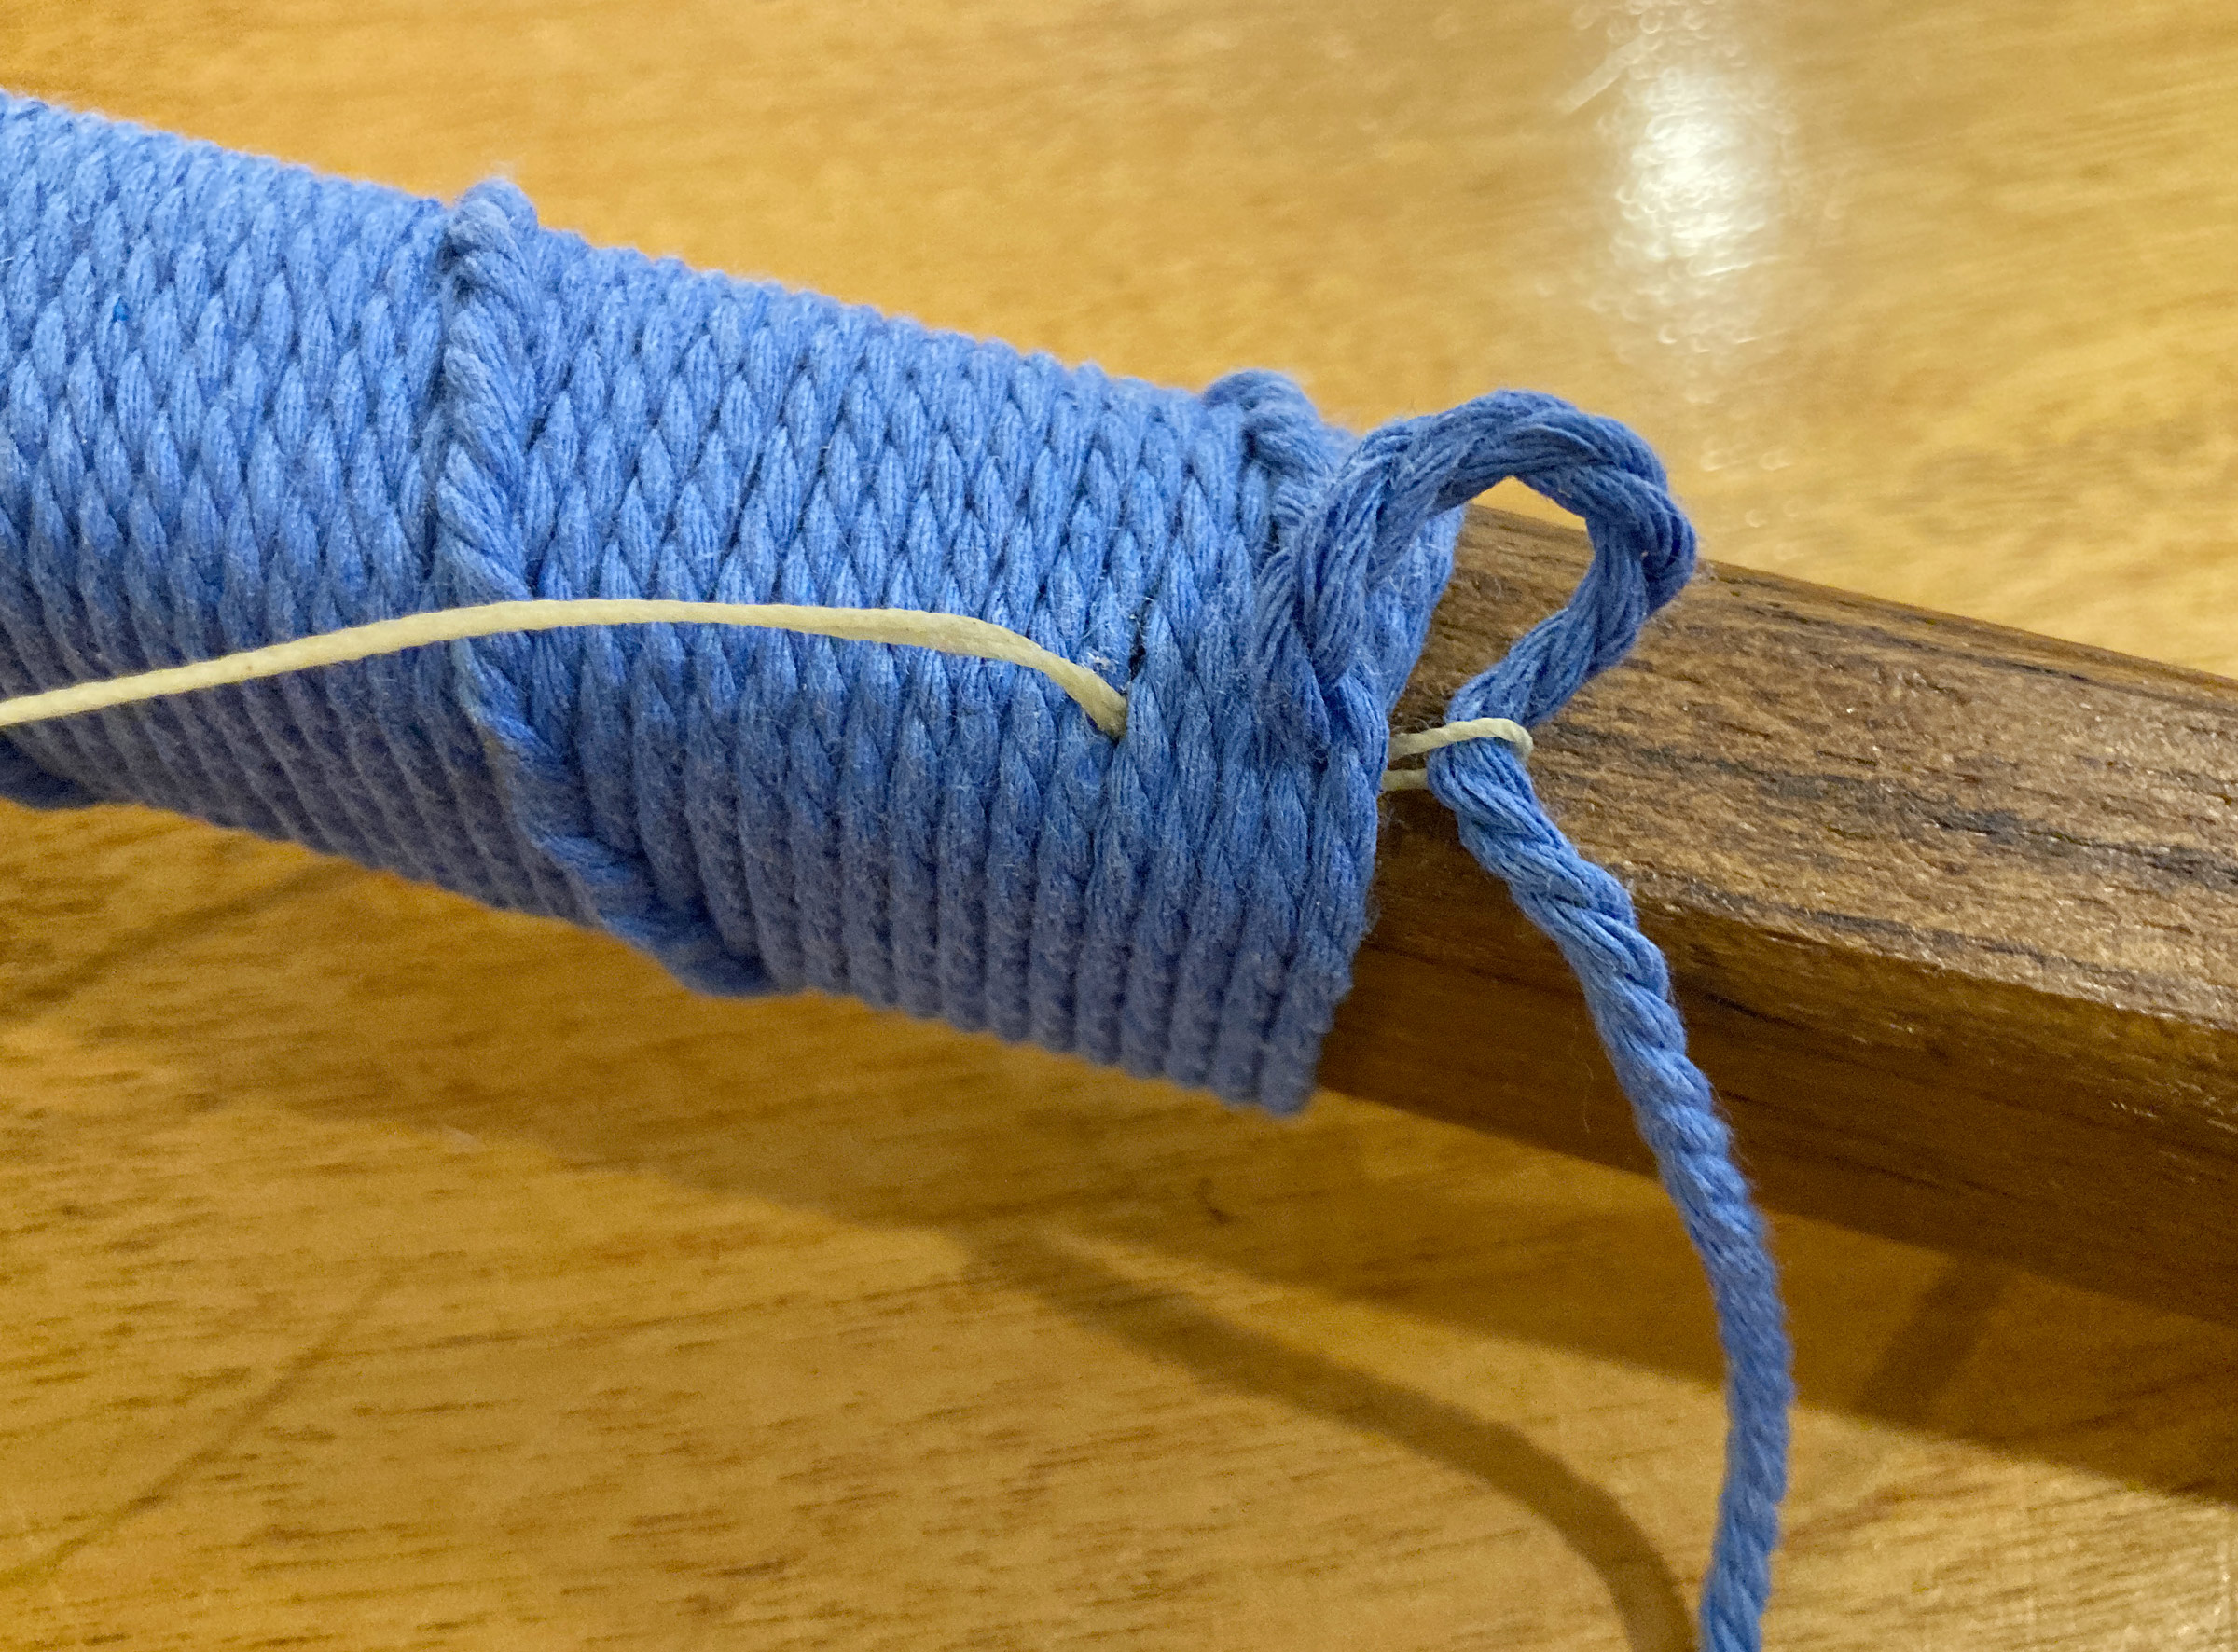
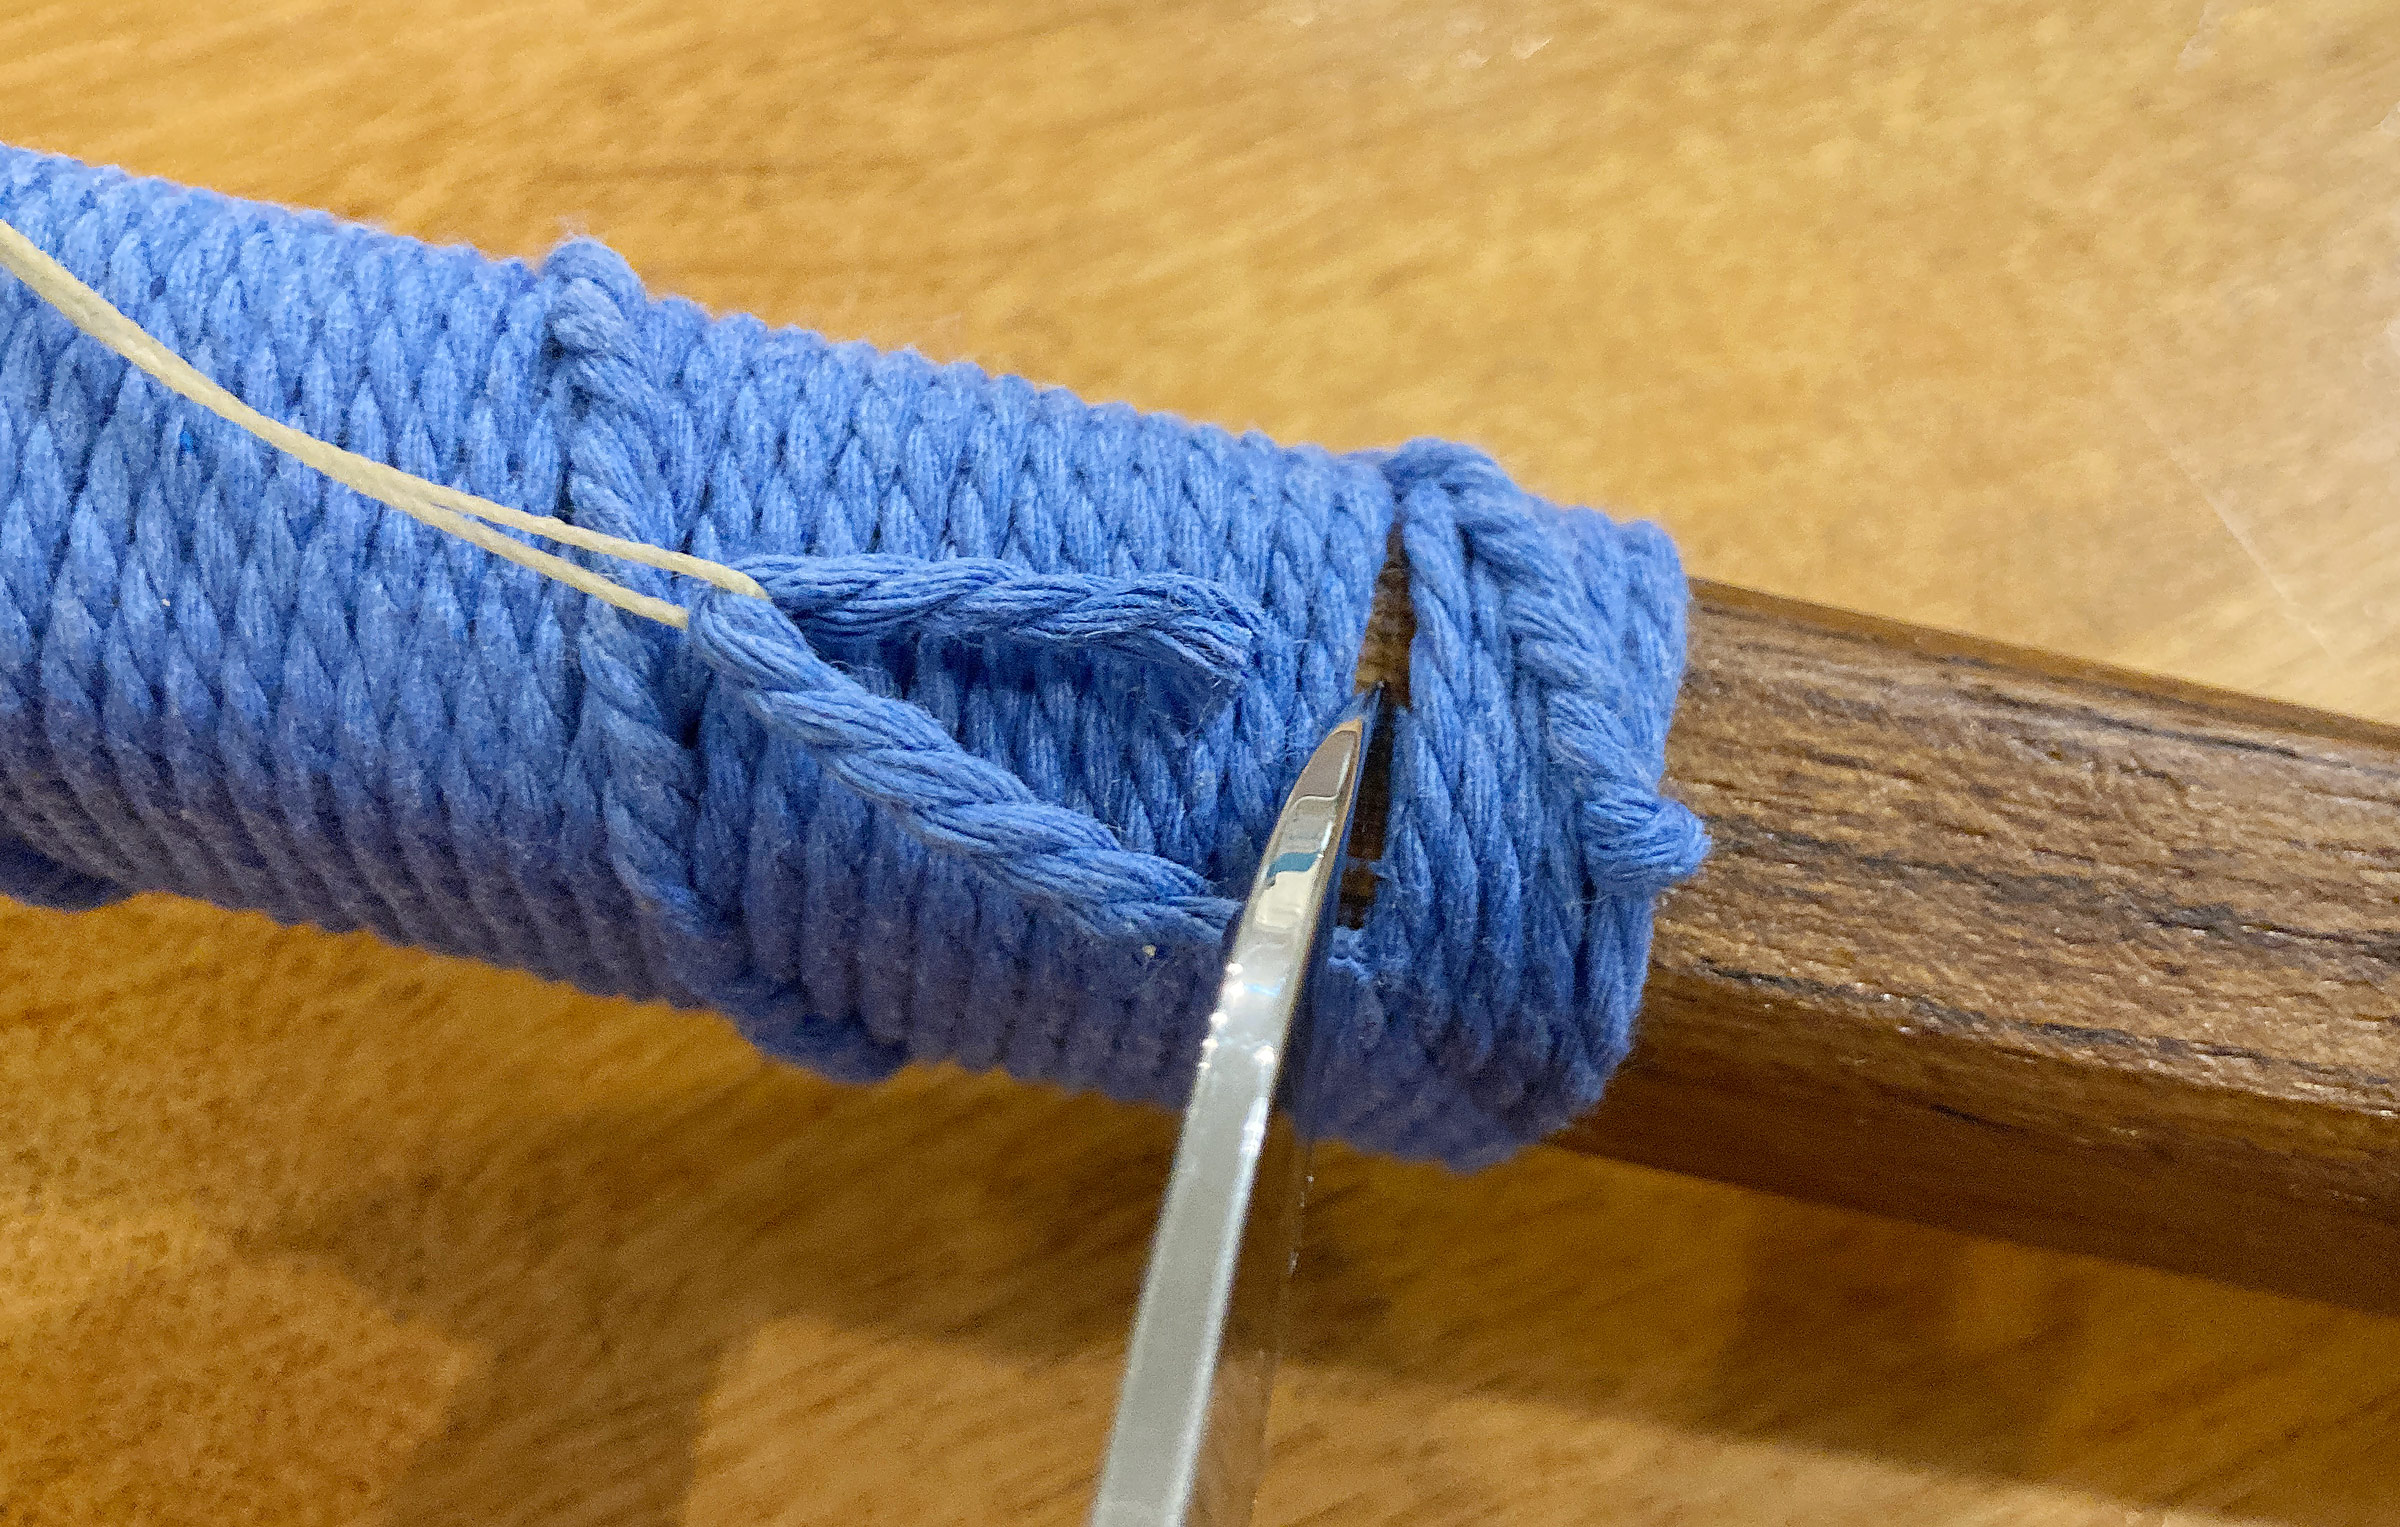
After a restless night in a €75 apartment-hotel, we went to check that TRAMP was still safe. Stuck to the stern thwart with brown parcel tape was a neatly handwritten note in a plastic pouch, “I have more information on your request, please call this number.” I phoned and five minutes later, a man approached in tan slacks and a pale blue jacket. Without the cobalt blue VNF T-shirt I didn’t recognize him immediately, but it was Franc, the lockkeeper who’d made numerous phone calls at the last lock the day before. He’d spoken to the VNF directors, and they would give us authorization to continue—on two conditions: that at least one of our docklines measured no less than 10 meters and that neither of us stayed in the boat while the lock was in operation. Ben unwound the rope from the mooring, and I lined it up on the brick while Franc pushed out meters of his yellow metal tape measure: 12m60. We repeated the process with the bow line, identical in length. We told him we’d like to leave the next day at 9 a.m., and he said the lockkeeper would be waiting for us—we had permission from the VNF territorial management to row all the way to Sète on the Mediterranean coast.
With a verbal go-ahead from the regional management of VNF, we were relieved and excited to be let through the three locks at Toulouse and on to the second leg of our adventure.
In the morning, after stopping at a bakery we set off through the middle of the three arched bridges at the Port de l’Embouchure to the constant noise of traffic and honking car and moped horns. As we rowed, we passed dog-walkers and joggers, some on the towpath a few feet above water level, others a bit higher on the pavement beyond, with shop fronts and apartment blocks lining the half-mile stretch to Béarnais lock, the first of 64 on the Canal du Midi. As we approached a wooden waiting pontoon about double the length of TRAMP, the lock’s bottom traffic light turned to green. We stopped to let me climb out and I walked up the bank side onto the road and used the pedestrian crossing over four lanes of traffic as Ben paddled us underneath and into the lock. Not finding a gate in the metal barrier separating the sidewalk from the concrete area surrounding the lock, I hopped over it and entered an office where a lady sat surrounded by screens showing different angles of the city’s locks, milliseconds ticking by in green numbers in the top right corner of each. I presented her with a croissant and pain au chocolat I’d just bought, so fresh the paper bag they were in did not yet have any translucent butter marks showing. She thanked me and apologized for the difficulties we’d initially faced, assuring us that our safety was their main concern and that she’d slow the water speed flowing into the lock to avoid a torrent disturbing our small boat.
I returned to Ben, who had climbed the lock-side ladder and was holding TRAMP’s lines on the opposite side. We peered around to spot the CCTV cameras, sitting atop posts at either end of the lock, to which we gave a thumbs-up. We grinned to each other as the 50′-long brick-lined lock chamber slowly filled. With many merci beaucoups and smiles, I waved goodbye to the lockmaster as Ben paddled us out of the lock and we resumed our rowing positions for less than five minutes before repeating the whole process at Lock Minimes.
The loud whoosh of cars speeding by next to us bounced off the gray concrete bridge as we rowed under its shade for about the length of a bowling alley, the width ample for our outstretched oars with no need for careful steering. We continued undisturbed along a 1-mile stretch of serenity in the shade of the evenly spaced plane trees, the only constant on the canals since the start of our adventure. Pedestrian and road bridges traversed the canal about every 500 yards with occasional concrete steps leading from the towpath up to at least two lanes of traffic either side. As the CCTV lockkeeper had advised, we stopped a good 100 yards or more clear of Lock Bayard, which borders the Matabiau train station, and waited more than five minutes as the red and green traffic lights shone and the lock chamber emptied itself through the sluices.
Few people noticed us below them as they hurried to and from Toulouse station. Once the red light went out, Ben paddled us into the darkness of 80 yards of concrete-capped canal under the spacious pedestrian plaza area. The smooth concrete sides of the lock rising yards above us were green with grime to the maximum height of the waterline, where the concrete became a clean pale gray about a foot below the lock edge. Like some specialized high-diving facility, a swimming-pool ladder came out of the canal before the lock gates, leading to concrete steps up and beyond our line of sight. Above the cold-black lock gates at the lock’s far end gleamed the bright green leaves of a tree in the sunshine beyond. We both got out of TRAMP using the ladder, then each released more and more slack so we could hoick our ropes over the various handrails lining the steps and lock gates as we climbed up to the lock-side.
At street level we re-entered city civilization in front of the train station, a building adorned with colorful coats of arms between the 26 double windows stretching between the north and south concourse, each topped with a flat-topped dome-shaped black slate roof. The clock in the middle at the top of the building showed 10:30. The sill at the top end of the lock was more than 3′ above the water, trickles spouting continuously over the closed gates above it before we gave our thumbs-up to the CCTV and the sluices opened to let the water rush in. Ben and I stood at the vertiginous lock edge occasionally tugging a line to keep TRAMP steady. Our sharp-edged shadows fell against the opposite side of the lock. Behind us, a toddler stood with his face peering through the orange metal fencing separating the lock from pedestrians as TRAMP’s gunwale finally came into view by our feet. Between us and the Mediterranean lay 150 more miles of canal.
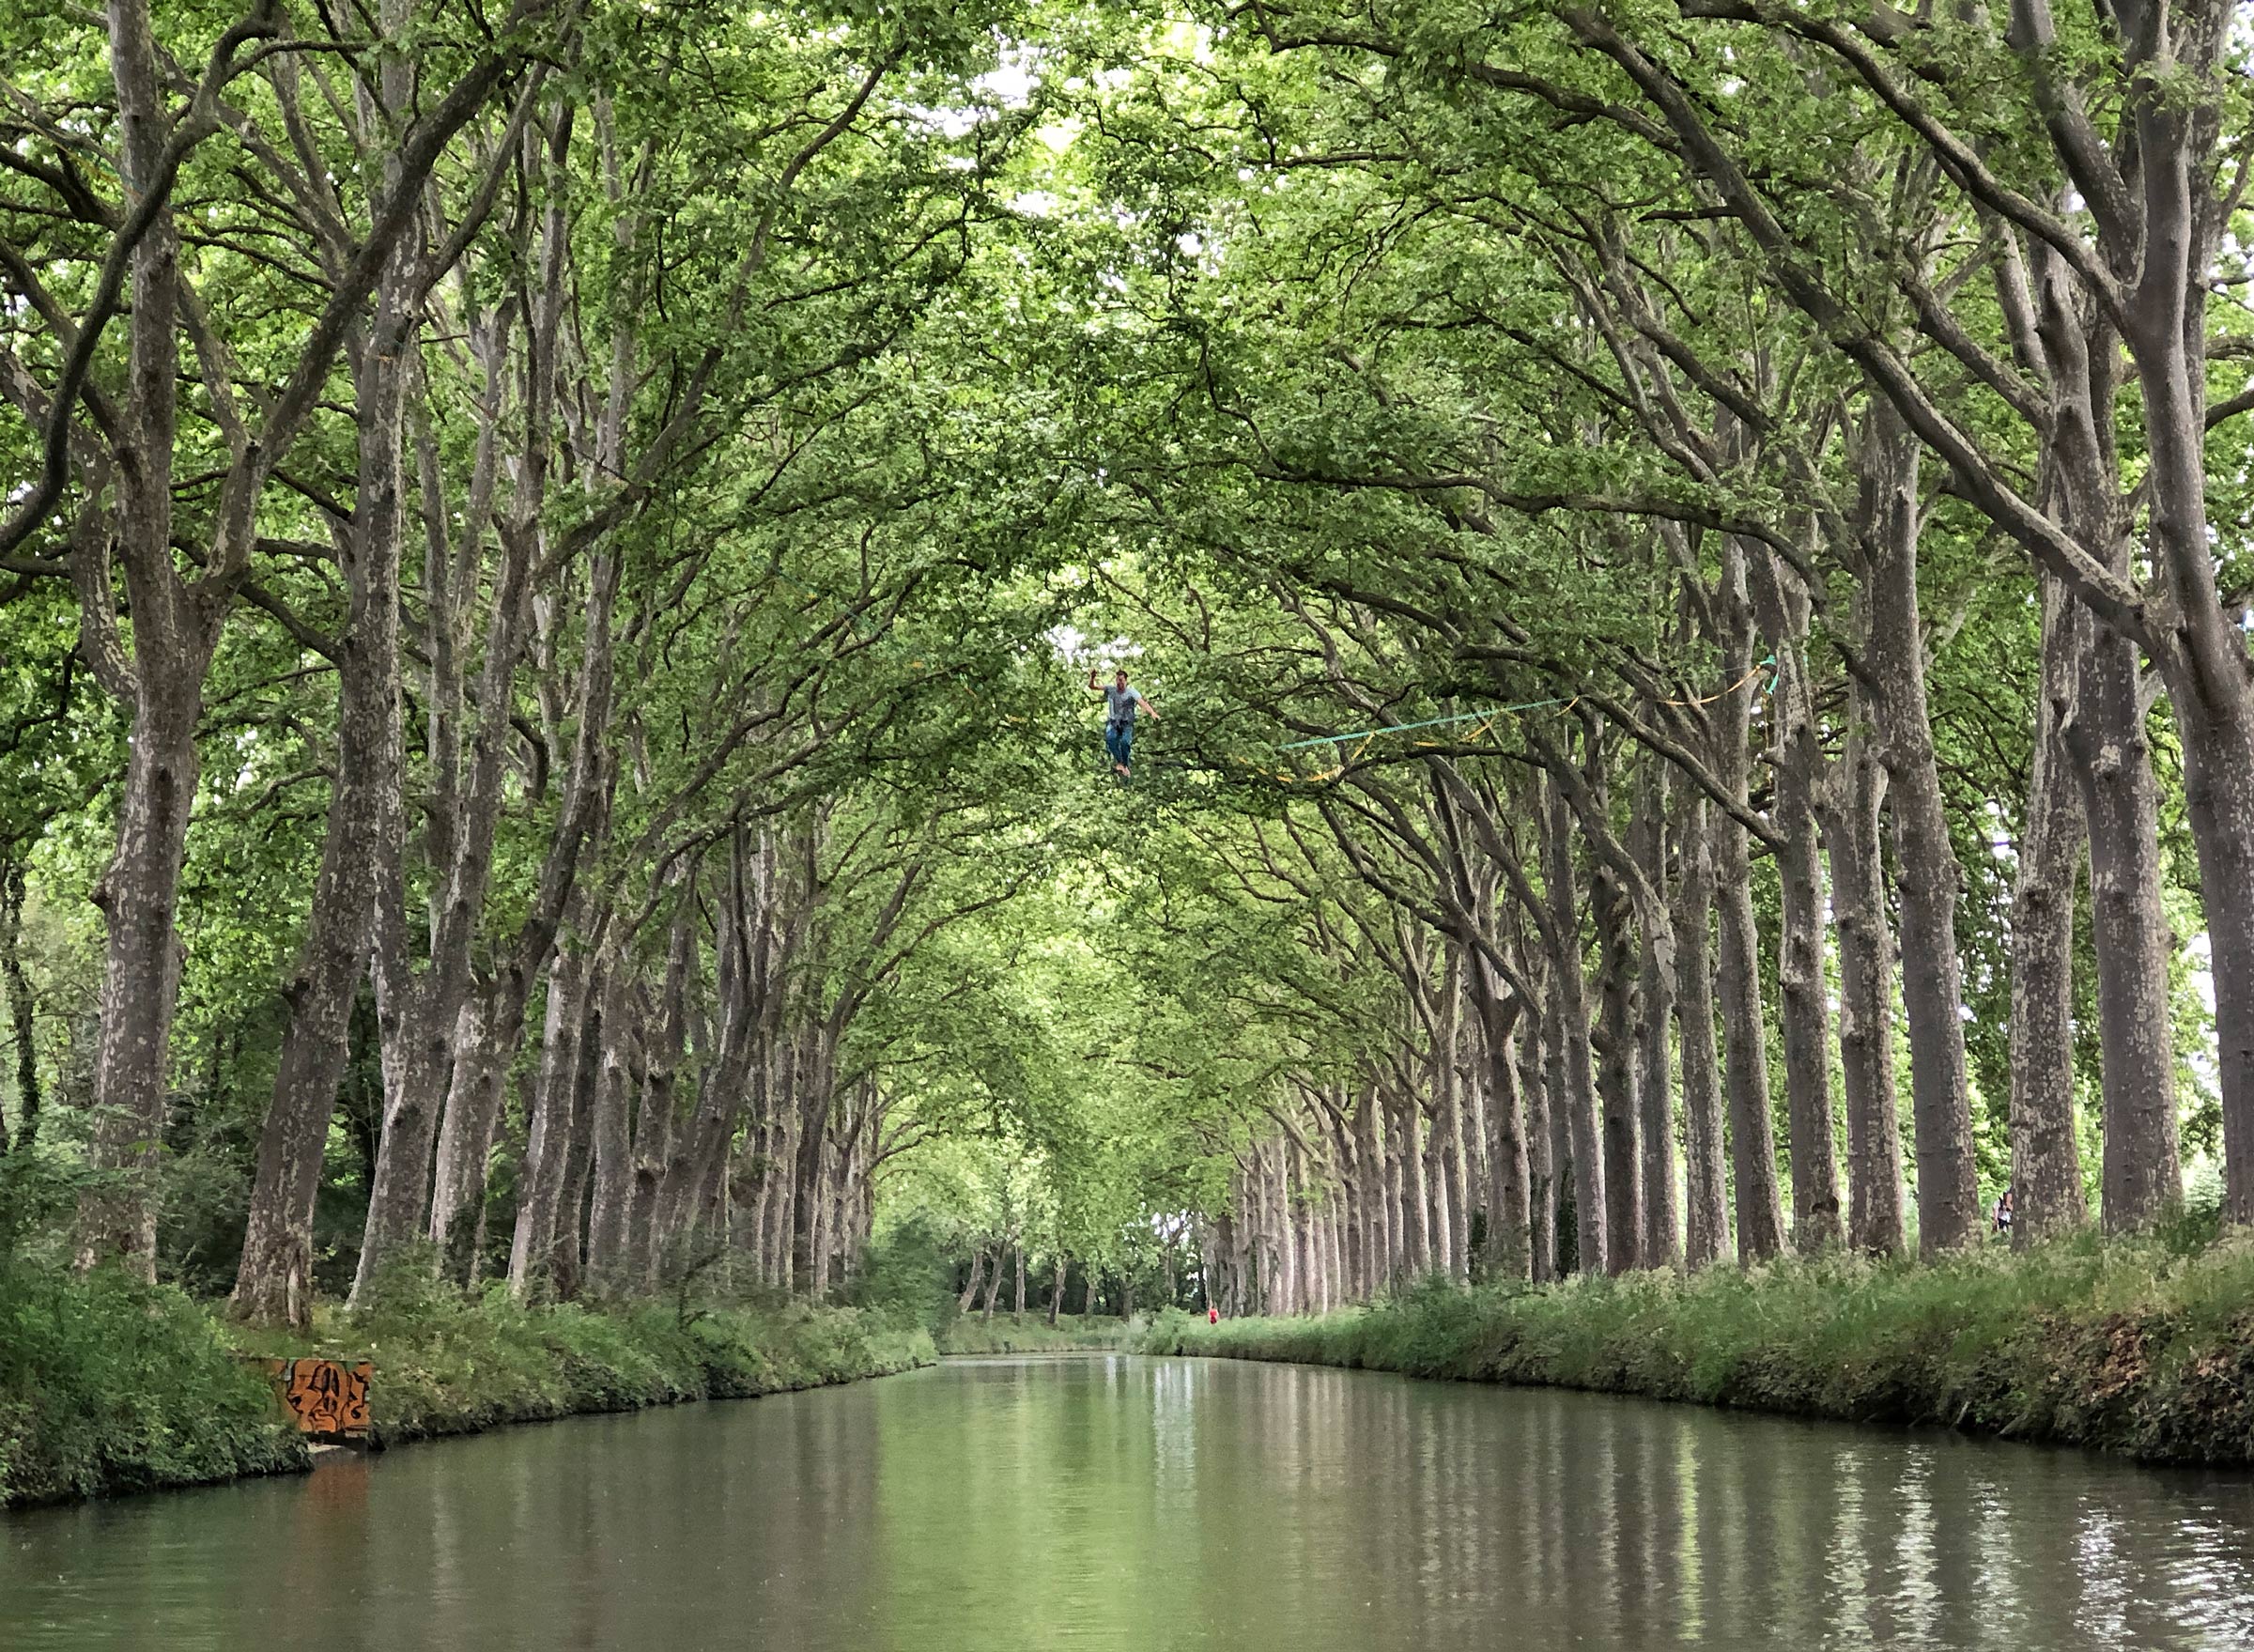
After clearing the drama and hubbub of Toulouse, we were glad to return to the shade of the plane trees where a slackliner, visible here surrounded by the tree canopy, practiced above us.
Two days, 33 meandering miles, and 12 locks later we were 633′ above sea level at Lock Ocean, the canal-system’s aptly named summit. Its oval shape was characteristic of the locks on the Canal du Midi and could accommodate the increasing number of hire-boats and hotel barges we now shared the water with. After another 3 miles of rowing, we were at Lock Mediterranean where, for the first time, the V-shape of the front and rear lock-gates now pointed toward us as we entered. The lock was full of water when we entered so we could easily step out of TRAMP onto the lock-side. The water emptied from the lock without turbulence and we each gradually paid out the painters as TRAMP descended in the chamber. Once the downstream gates opened, Ben climbed down the lock-side ladder and paddled out to the waiting pontoon to meet me.

After we’d finally mastered the light sensor system on the locks of the Canal de Garonne, we discovered that the oval locks of the Canal du Midi use a different system—radar—to monitor boats as they enter and leave.
Six miles and a series of singles, double, and treble locks later, we found ourselves at a closed lock. Like most people in France, lockkeepers took a lunch break at noon and by 1 p.m., a line of for-hire boats had formed on either side of the lock, waiting to pass through. The entire waiting pontoon was occupied by other boats, so we rowed to the opposite bank, held reeds to stay in place there, and watched green and blue finger-length dragonflies dancing together. When the lock-gate ahead opened, three hire boats maneuvered into the lock. We moved into the space on the back left side of the lock to prepare to lock down, but we heard a beeping sound and saw the lock-gates start closing behind us as the boat in front started drifting back toward us. “Red button! Red button!” I shouted in English, trying to tell what I thought was the Belgian crew standing near the control booth to press the emergency stop button. Moments later the lock-gates stopped moving and a flustered lockkeeper appeared on the far side of lock; she had a shoebox-sized box with buttons to control the lock’s operation hanging in front of her from a strap around her neck. “You gave me the fright of my life,” she said in French. “I thought someone had fallen in. This will be your last lock.” Once the boat ahead of us was safely secured, we moored behind it and climbed out. Ben held TRAMP’s lines as I went to speak with the lockkeeper and recount the story of our journey including permission from Toulouse management. As we talked, she kept her eyes on the water level, occasionally pressing a button on the box to operate the double lock. She slowly began to chat more freely. We cleared the two locks and by the time we said goodbye, she was smiling and wished us well on our voyage.
Lock Ocean is at the summit of the Canal du Midi. It was the last of the locks to take us upstream; the downstream locks beyond Lock Ocean would lower us without the turbulence created for upstream traffic. We nearly got crushed three times in one day and were constantly vigilant for the inattentiveness of hire-boat crew with whom we were sharing locks.
While the locks on the Canal de Garonne were self-operated using the dangling pole and the automated system of light sensors, almost all locks on the Canal du Midi were staffed, perhaps because of much higher traffic traveling between tourist hotspots like Castelnaudary, the self-proclaimed world capital of cassoulet, and the fortified hilltop medieval citadel of Carcassonne. On one day we passed through 15 locks, a new record for us, and met lockkeepers of all shapes, sizes, ages, and countenances. One smiling lockkeeper gestured us through without question; when his services weren’t needed, he carved out time to set up a shop selling sun hats, gloves, cold drinks, and cherries picked from a nearby tree and still warm from sunlight. Another lockkeeper sat in the shade of the lockkeeper’s house with the control box on his lap while his sheepdog herded the hire boats through. Yet another lock had colorful ramshackle sculptures for sale: an elephant; a face with moving eyes; male figures with crude markings; a cartoonish big-bosomed, short-skirted lady with flowers growing as her hair. Some lockkeepers phoned their colleagues ahead to let them know a small wooden rowing boat was on its way.
As we neared the Mediterranean, there were more and more boats and fewer and fewer trees. Where the bank drew almost level with the water in the canal, I stood up in TRAMP and in the distance to the south saw the snow-capped table-top mountains of the Pyrenees. A few miles farther along the Canal du Midi, pink rock lined the left side of the canal.

Camping along the canal outside of the established campgrounds is not permitted, but when we reached the locks here on the Canal du Midi after 7 p.m. they were closed, and we were miles from the nearest campsite or village. Most of that afternoon we’d shared locks with the barge LA BELLE VIE, and the couple who lived on it presented Ben with an ice-cold beer and let pregnant me use their bathroom.
We weren’t expecting to see waves on the canals, but for three days after Carcassonne, their rhythm had been constantly battling against ours in the rocking boat. The resistance I felt pulling the oars through the water now doubled as I felt the blades flutter when I pushed them through the air blowing up to 12 miles per hour against them. Both of us taking a break would mean getting pushed backward, but Ben reminded me to take one whenever I wanted. I stowed my oars and laid my head down onto the forward thwart to rest my lower back and gaze up at the cloudless sky. A clubtail dragonfly landed on my starboard oar. A yellow stripe ran from the tip of its 2″-long tail to its bulging head and between the shining domes of its pastel-blue eyes.
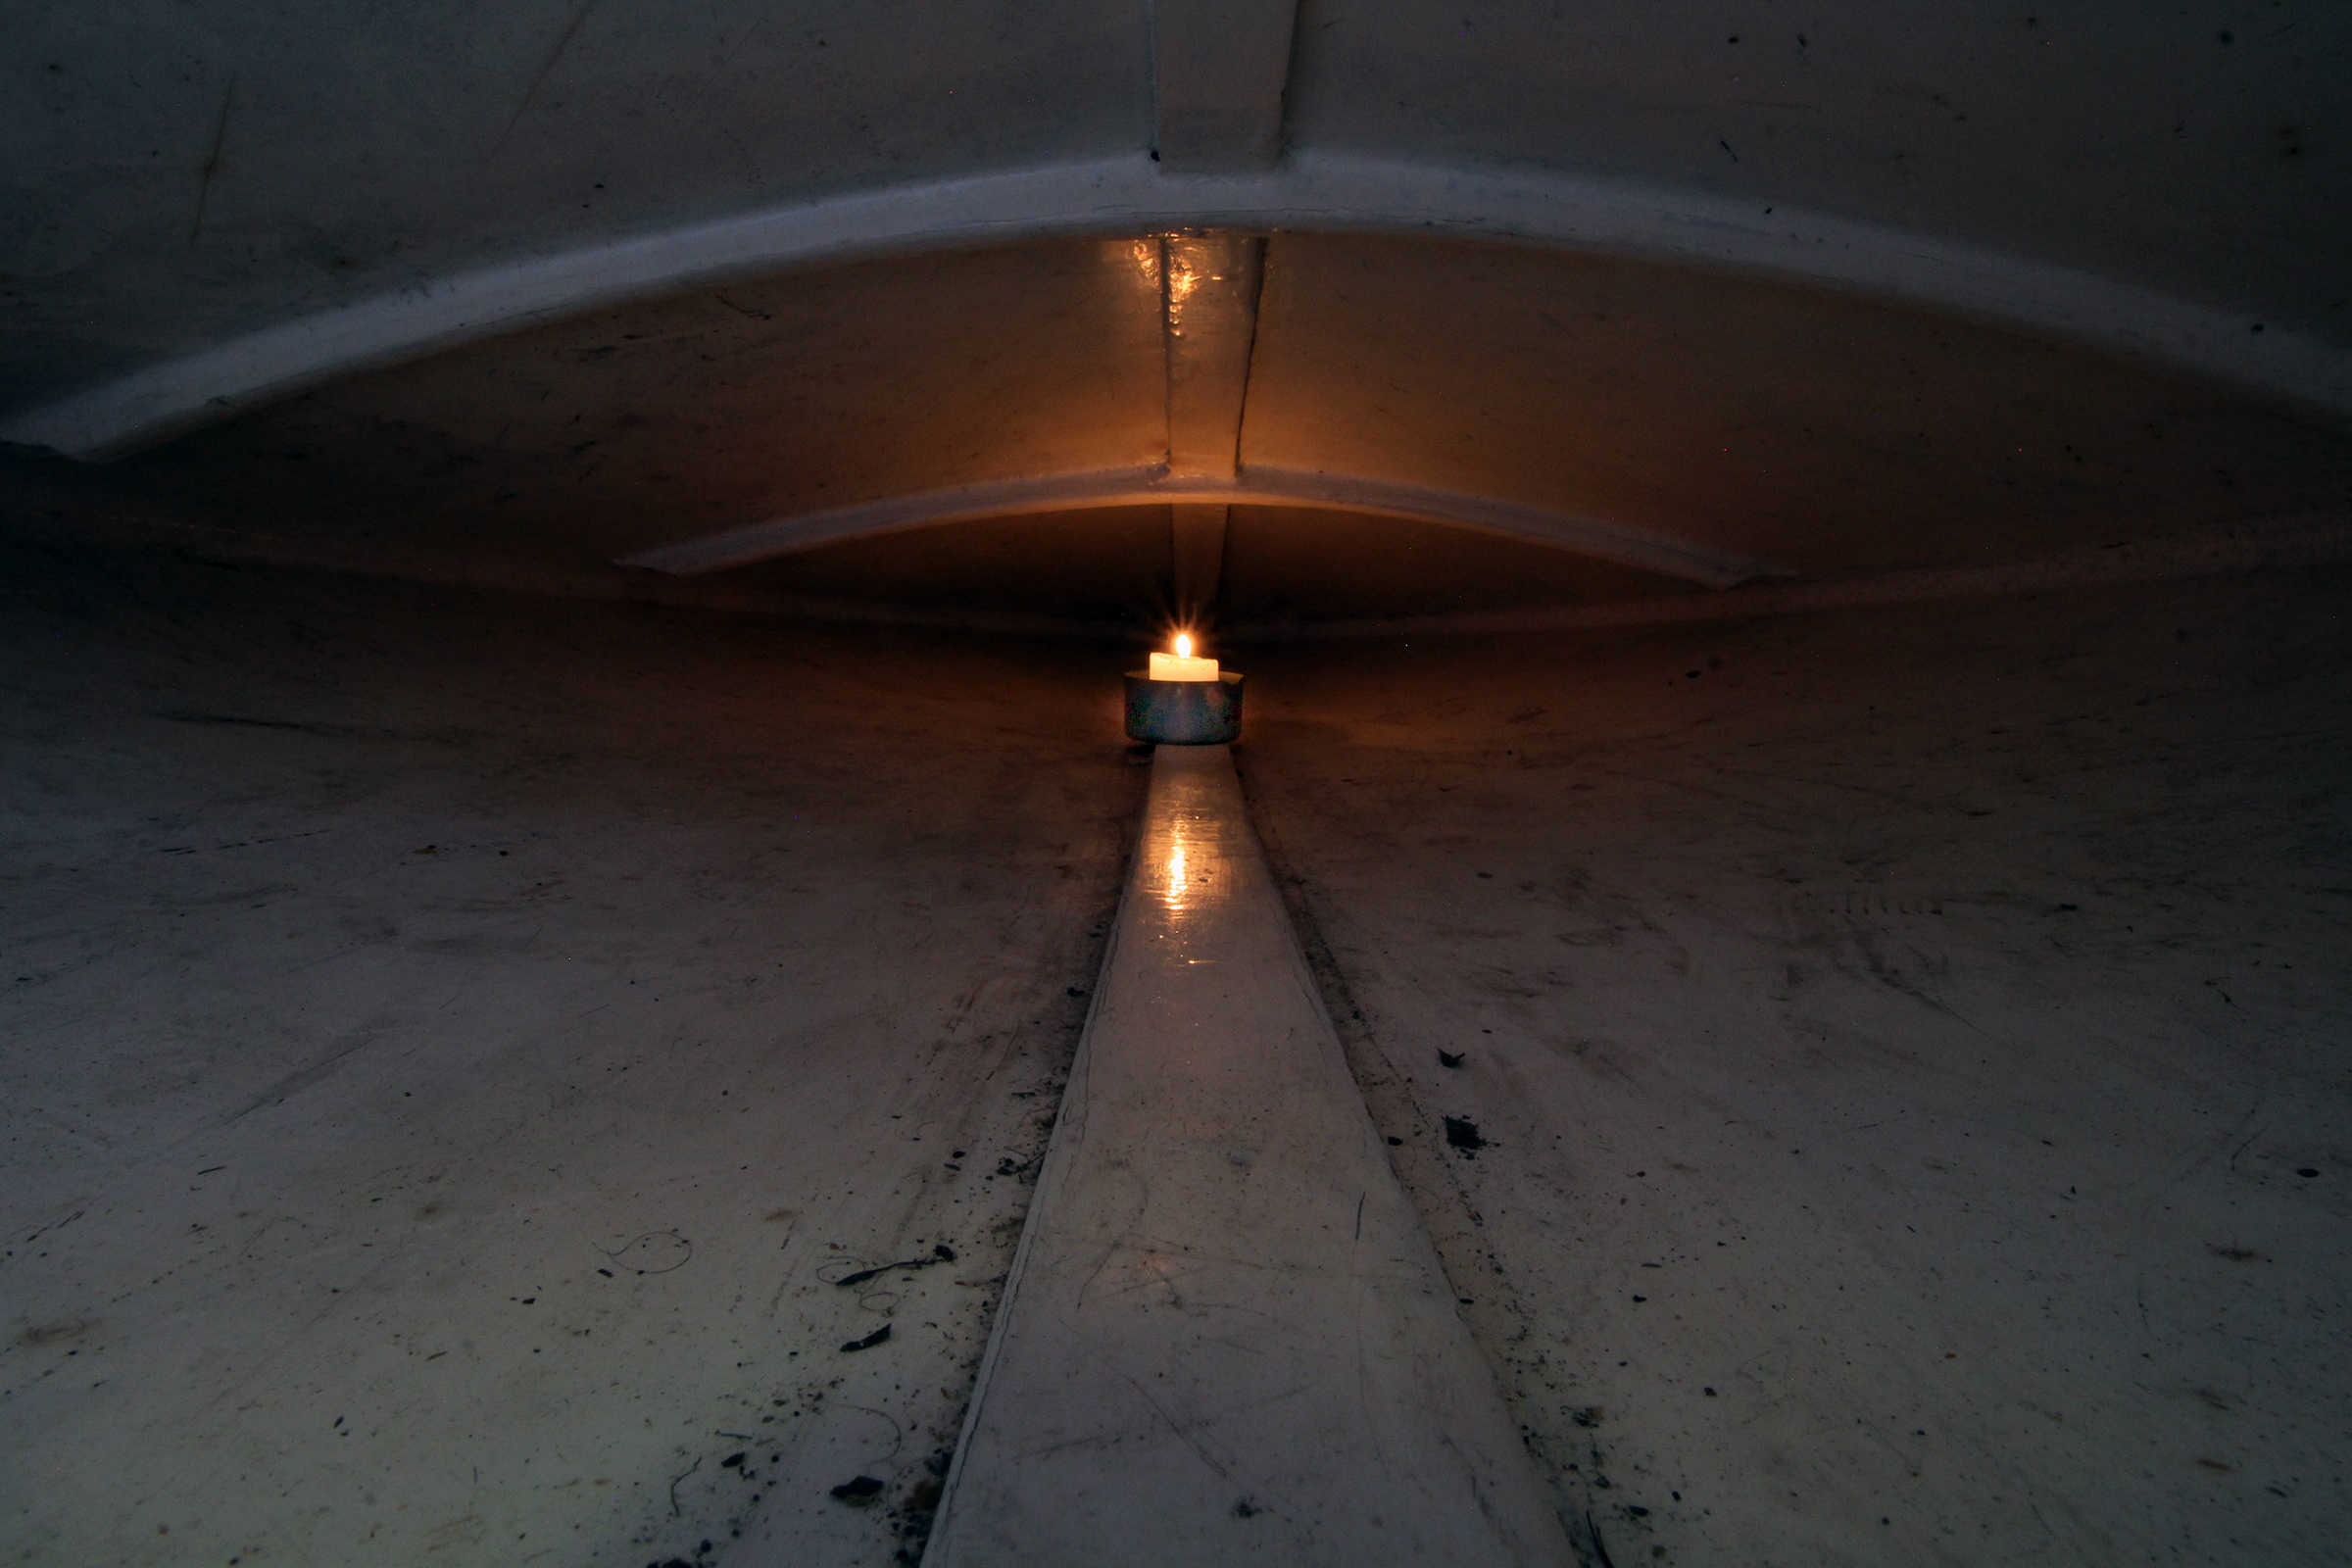
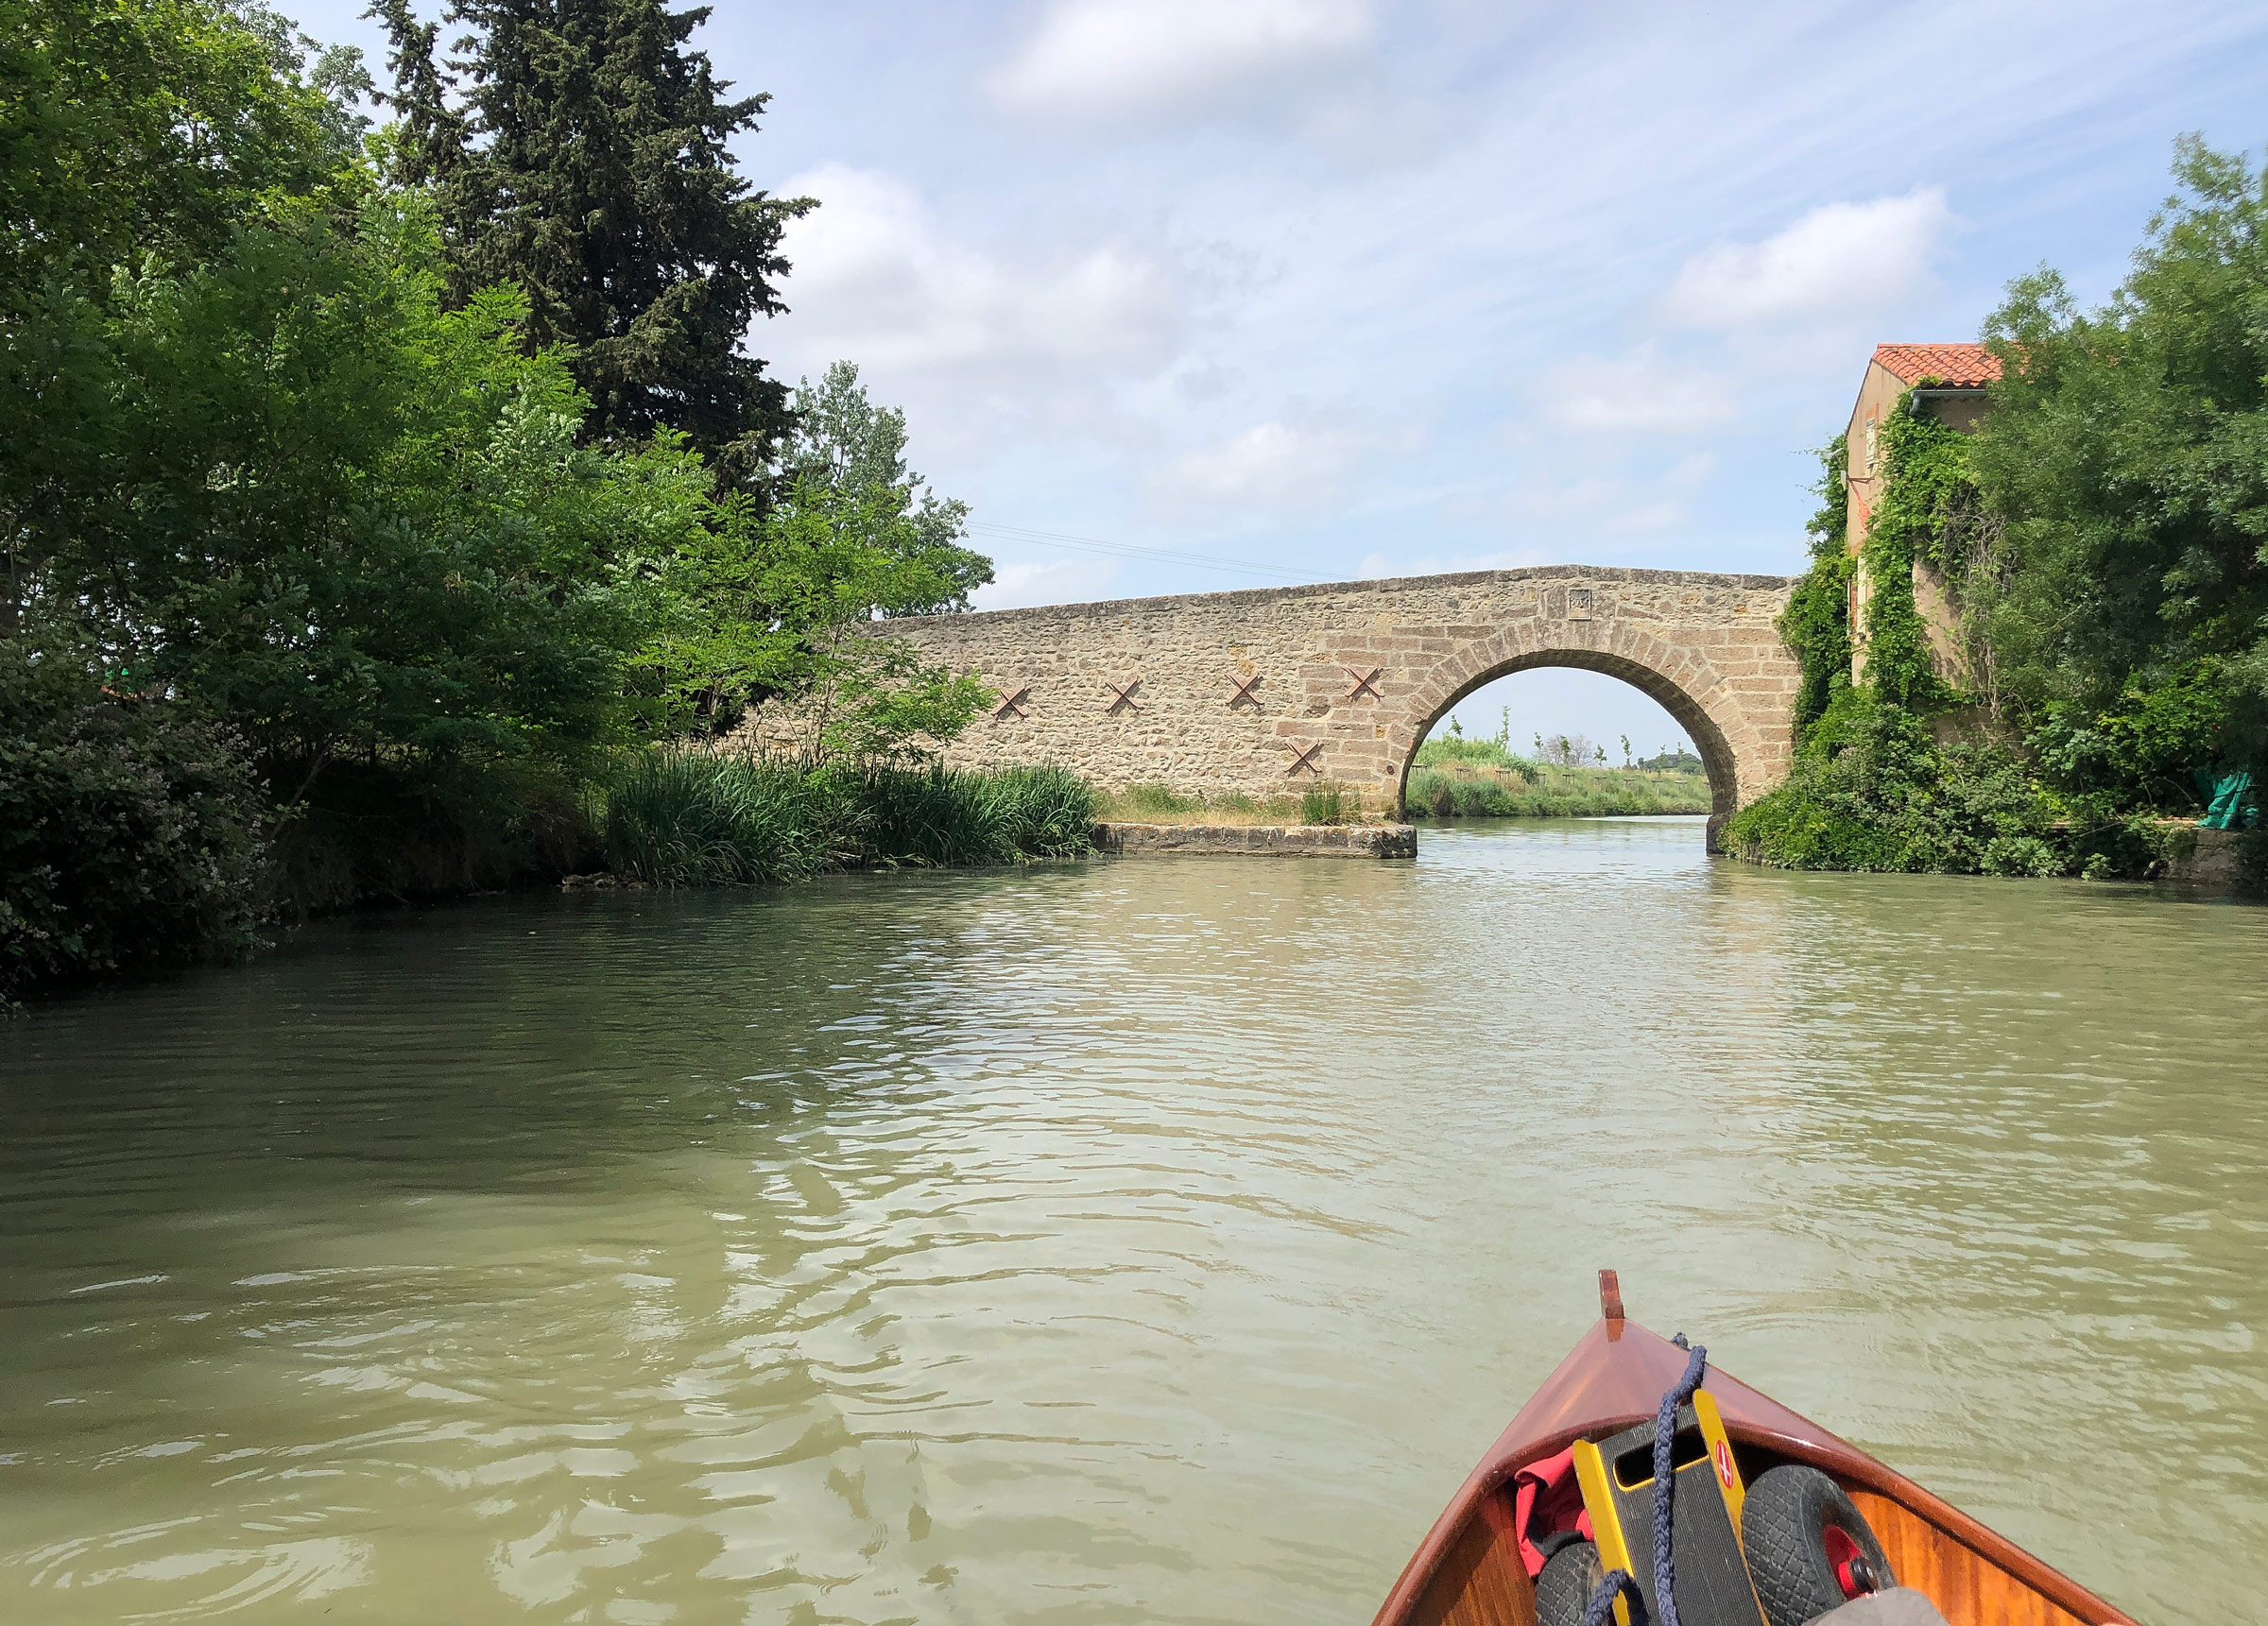
The next day seemed never-ending, rowing 15 miles of lock-free meanders between Le Somail and the bridge at Capestang, an arch of mortared irregular stones over a passage only 16′ wide and 7′ 9″ high at each side. After resting at a guesthouse on the banks of the canal, I ate three boiled eggs, half a baguette, a bowl of fruit salad, and a pot of yogurt for breakfast. Finally, the winds blew in our direction. A blue and white barge with tourists squeezed on its upper and lower decks emerged from the black Malpas tunnel ahead of us. I switched on the navigation light and held it upon my head with both hands, elbows jutting out, hoping to cut a noticeable figure for any boats about to enter from the other end. As I stood facing forward, Ben paddled us gently into the approaching darkness. Once under the Ensérune hill, we could see daylight glaring 165 yards ahead, highlighting a towpath and railings to our left and the lumps, bumps, and voids in the tufa rock tunnel walls from 300 years of humidity and erosion. I sang out at the top of my voice. The tunnel remained clear, and Ben rowed until we popped out of the cool shade through the tidy brickwork at the tunnel exit into the glare of the day.
From the tunnel we rowed 4-1/2 miles along more meandering canal to a seven-lock flight at Fonseranes, which would lower us 71′ over the next 980′. We could only see the first of the 100′-long locks; beyond its downstream gate, the flight dropped out of sight and down to the next step. Three bulky white hire boats had crews of varying attentiveness managing the ropes from the walks above the wall. Fortunately, the limited lock space prevented the boats from drifting backward or letting their sterns shift sideways. We kept TRAMP tucked as far back in the lock as possible without reaching the sill, with Ben holding the stern line up the stairs, and me with the bowline on the lower lock-side ahead of him. After the lock gates closed behind us, water drained away through the front gates into the next chamber for nearly 10 minutes. I turned away from the sun to shade my burning red feet with my legs and drank frequently from the now-warm water in my flask. Once each lock emptied, we waited for the three boats to bumble into the next lock before walking TRAMP along. With only one fender positioned amidships, a rowlock occasionally scraped the stone lock edge, until we reached the flight exit at the end of the seventh chamber.
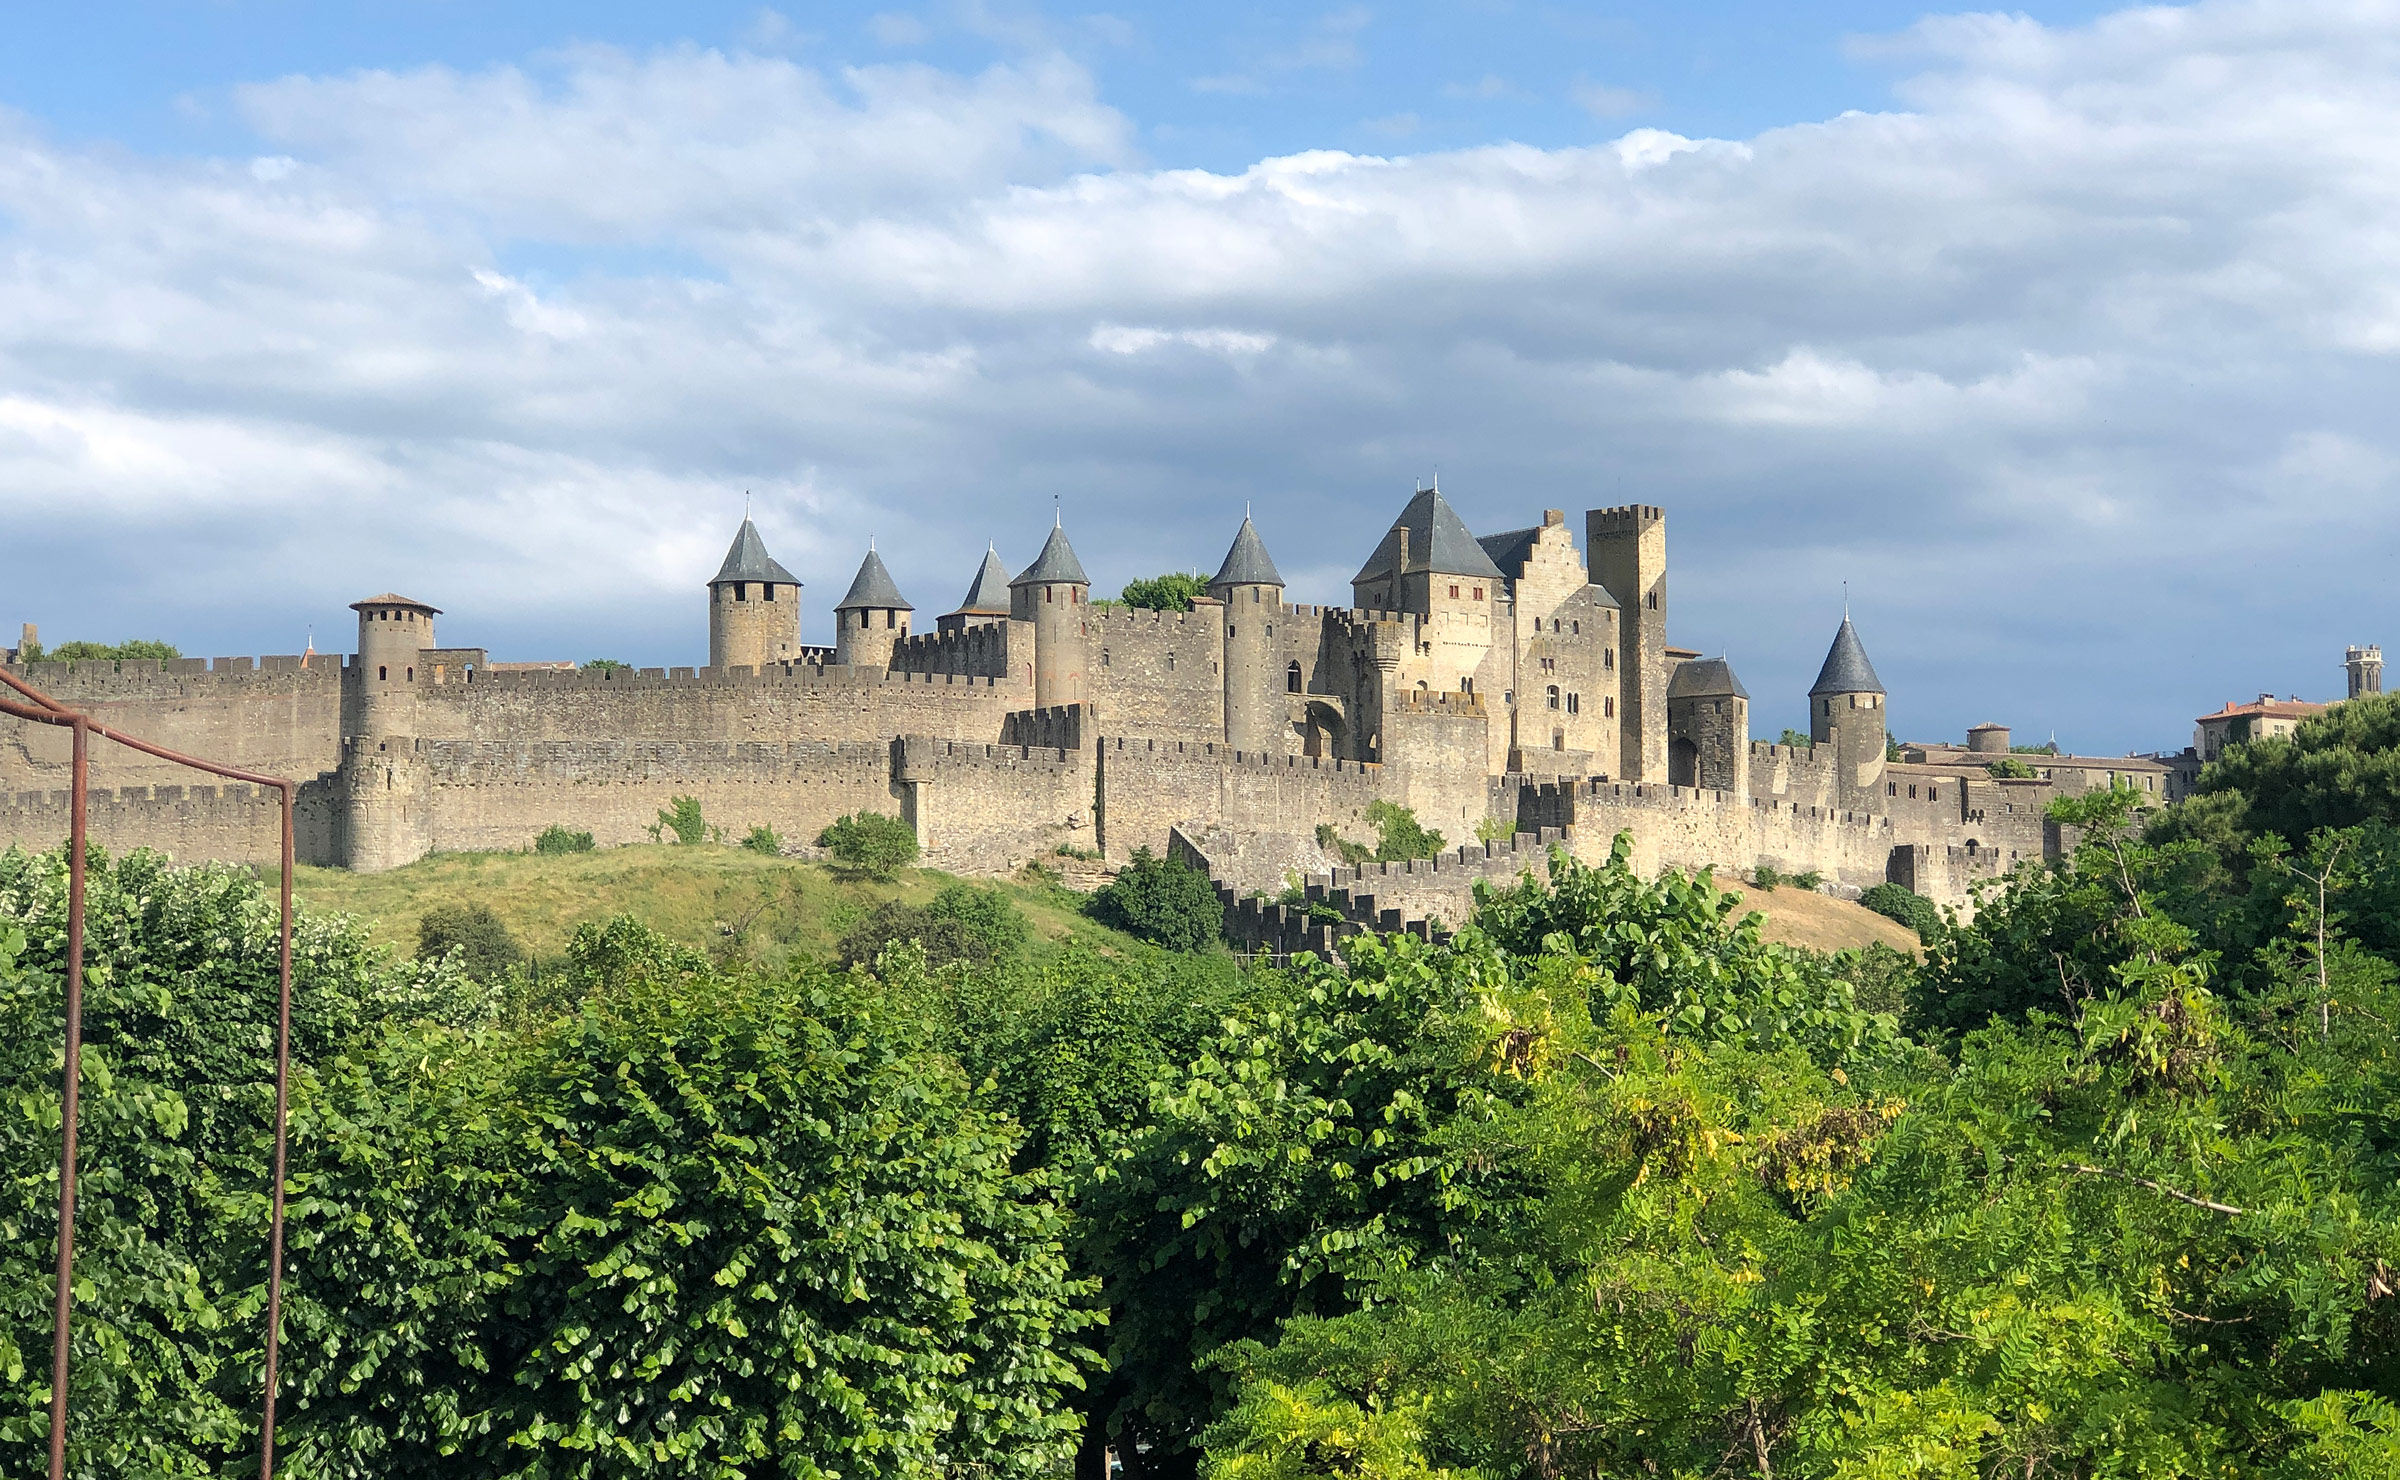
Carcassonne is a medieval city that surrounds a Gallo-Roman citadel dating back to the 4th century. A good way to explore most French towns is to look for a vegetarian restaurant without the help of Google and without paying attention to their opening hours before you get there. You are likely to walk for miles, not find anything, not spend a cent, and see most of the town you are visiting.
After spending a night at a canal-side campground in Villeneuve-les-Béziers, it was already 80°F by 9 a.m. the next morning. Ben and I each set a now faded, flattened, and folded cushion on a thwart to start our 22nd day of rowing. Three miles later, I clambered out of TRAMP onto the grass and walked along a gravelly cycle path to speak with the lockkeeper. I found him resting his elbows on the railing of the single-lane road bridge overlooking lock Portiragnes. “Are you expecting to use the lock in that?” he quizzed me. I barely had enough time to answer before he declared, “Non.” Asking if I could explain, he interrupted, “Let me explain, boats without motors cannot use the locks. I can show you the rulebook that says canoes can’t go through,” nodding with his head toward the lockkeeper’s house where the document we’d been hearing about for weeks was apparently kept. “We’re not a canoe. We’ve rowed over 260 miles on two canals and been through over 100 locks,” I pleaded, “and we’ve only one more lock to go after this.” “I don’t care,” he puffed. “Pull the boat out.”
I looked back at Ben sitting in TRAMP alongside the waiting pontoon wondering what I could do or say next. A 90′ barge was cruising toward the lock, its clean black hull reflecting the sun’s rays off the water, the prow impeccably painted burgundy red. Rows of potted plants and flowers neatly lined the perimeter of the barge that surrounded the four guests being served drinks around a wooden table. The young captain stood at the stern behind a wooden steering wheel twice his width, wearing a navy-blue baseball cap and sunglasses, his white polo shirt tucked into navy-blue shorts. Another man in matching uniform stood looking ahead from the bow, where just below him ALOUETTE was painted in white next to a hefty white anchor. “How did you get through the flight of locks at Fonseranes yesterday?” the lockkeeper suddenly asked me. “We held TRAMP from the lock-side and walked her through with our ropes when possible. Ben used the ladder to get back aboard and paddle through to the next lock when the bridge was in the way.”
“If I let you through,” he said, “you will be walking through, not in the boat.” He told me he would phone his colleagues at Fonseranes and left me standing on the road-way bridge as he headed toward the lockkeeper’s house.
I walked back to TRAMP hoping that we might be able to share the lock behind ALOUETTE. The lock gates opened and ALOUETTE glided in. Ben and I waited, Ben in TRAMP, me standing at the canal side. Finally, the lockkeeper re-emerged from the house and with a wave, he signaled Ben to paddle forward into the rear portside of the lock. As the lock gates closed, the lockkeeper took a closer look at TRAMP. From the opposite side, I walked ahead, past the lock and over the bridge to join him and Ben. After not getting a response speaking French to Ben, the lockkeeper turned to me. “You’re not the first kind of this boat to come through the lock,” he said. “All the others manage to pull their boats out.” He used the plural masculine pronoun ils to refer to ‘the others’ so I switched to feminine elles and asked him, “Were they pregnant, too?” Shocked, he looked down at my belly. “Well, it doesn’t show,” he said, “maybe a little bit.”
Once the lock had emptied, the gates opened and ALOUETTE motored forward. I thanked the lockkeeper as Ben and I walked TRAMP along and out onto what could be our last 8-mile stretch of the Canal du Midi.

Le Somail would be just another sleepy hamlet along the Canal du Midi but for its bookshop, Le Trouve Tout De Livre (Find It All by Book), located near the circular tower at left. The store is a labyrinth of more than 50,000 books, comics, tomes, and antique invoices, and has developed into a popular tourist stop complete with canal cruises and restaurants (including the only vegetarian menu in the region). The bridge here, with the semicircular vault that spans the canal, dates to the 17th century.
The lock at Agde connects the Canal du Midi from the east and west with a junction south to the river Hérault, each lock-gate with different water levels beyond. Our reference book said that the Hérault had suffered from silting in recent years, so we were unsure whether that could be a possible route for us out onto the Mediterranean. To turn boats that are not taking the straight east–west passage, the chamber is shaped like two joined semicircles, the southern one half the diameter of the northern.
We arrived from the west followed by a hire boat; I helped loop its lines around the mooring so they didn’t need to get off the boat. A young smiling lockkeeper said we’d be fine on the river Hérault, though we’d have to wait our turn. Using the control box hanging on a strap around his neck, he first filled the lock to its maximum level, an unusual canal ascent on the otherwise downward route. He opened the east gates, and the hire boat left toward the final lock of the Canal du Midi and the Étang de Thau, a lagoon stretching 13 miles to the northeast roughly parallel the Mediterranean coastline to Sète. Another hire boat with a couple onboard cruised in and a teenage boy appeared on the lock-side as their crew. They took some time to decide on the best place to moor their 35′ boat against the lock’s curved walls, finally choosing the starboard side of the west lock-gate, diagonally opposite us. The lockkeeper released water to the level it was when we’d entered, allowing that boat to continue west.
After the lock-gates had closed behind them it was our turn. Though the water only descended another 3′, it took nearly 10 minutes to drain the voluminous round lock. A darker waterline was revealed on the lock-side suggesting how rarely the south lock-gate was being used. As the lockkeeper opened the gates of our final lock, he seemed to read my mind, “No one will bother you now. When you get to the sea, the nicest beach is on the right.” Ben climbed down a ladder and stepped aboard TRAMP and used a paddle to cross and exit the lock. I rejoined him from a waiting pontoon to row the slender 1/3-mile-long canal to the Hérault.
Exhausted after weeks of rowing and days of headwinds, at least we could enjoy slipping under narrow low bridges without the concerns that bigger boats face. We had a cart in case we needed to portage TRAMP, but fortunately we needed to use it only once to avoid a long wait for a broken lock to be fixed.
After three weeks of rowing canals that were mostly well-protected from the wind, we suddenly faced a salty onshore breeze blowing against us on the 100-yard-wide river. The experience of our regular rowing trips back home in England’s Suffolk county on the tidal River Orwell served us well, and we put our backs into the strokes. Scattered along the riverbanks for about a mile were two-story houses and three-story apartment blocks painted either white, dusky pink, or crème brûlée, but all had terracotta-tile roofs. We rowed past palm trees, fishing vessels bristling with cranes and winches, and moored in front of the corrugated iron warehouse of the Grau d’Agde fish auction. Fishing rods of sport anglers poked up and out in all directions from a pair of parallel basalt stone breakwaters that flanked the Hérault for 1/5 mile beyond the shore into the Mediterranean. Each was capped with a concrete promenade and ended in a squat, white light tower with the top of the one on the west breakwater painted red and, 130 yards to the east across the river mouth, the top of the other painted green.

The light tower of La Tamarissière marked our arrival at the Mediterranean Sea. We stopped in the shallows and Ben gave TRAMP a sponge bath to get the worst of the green canal grime off the hull.
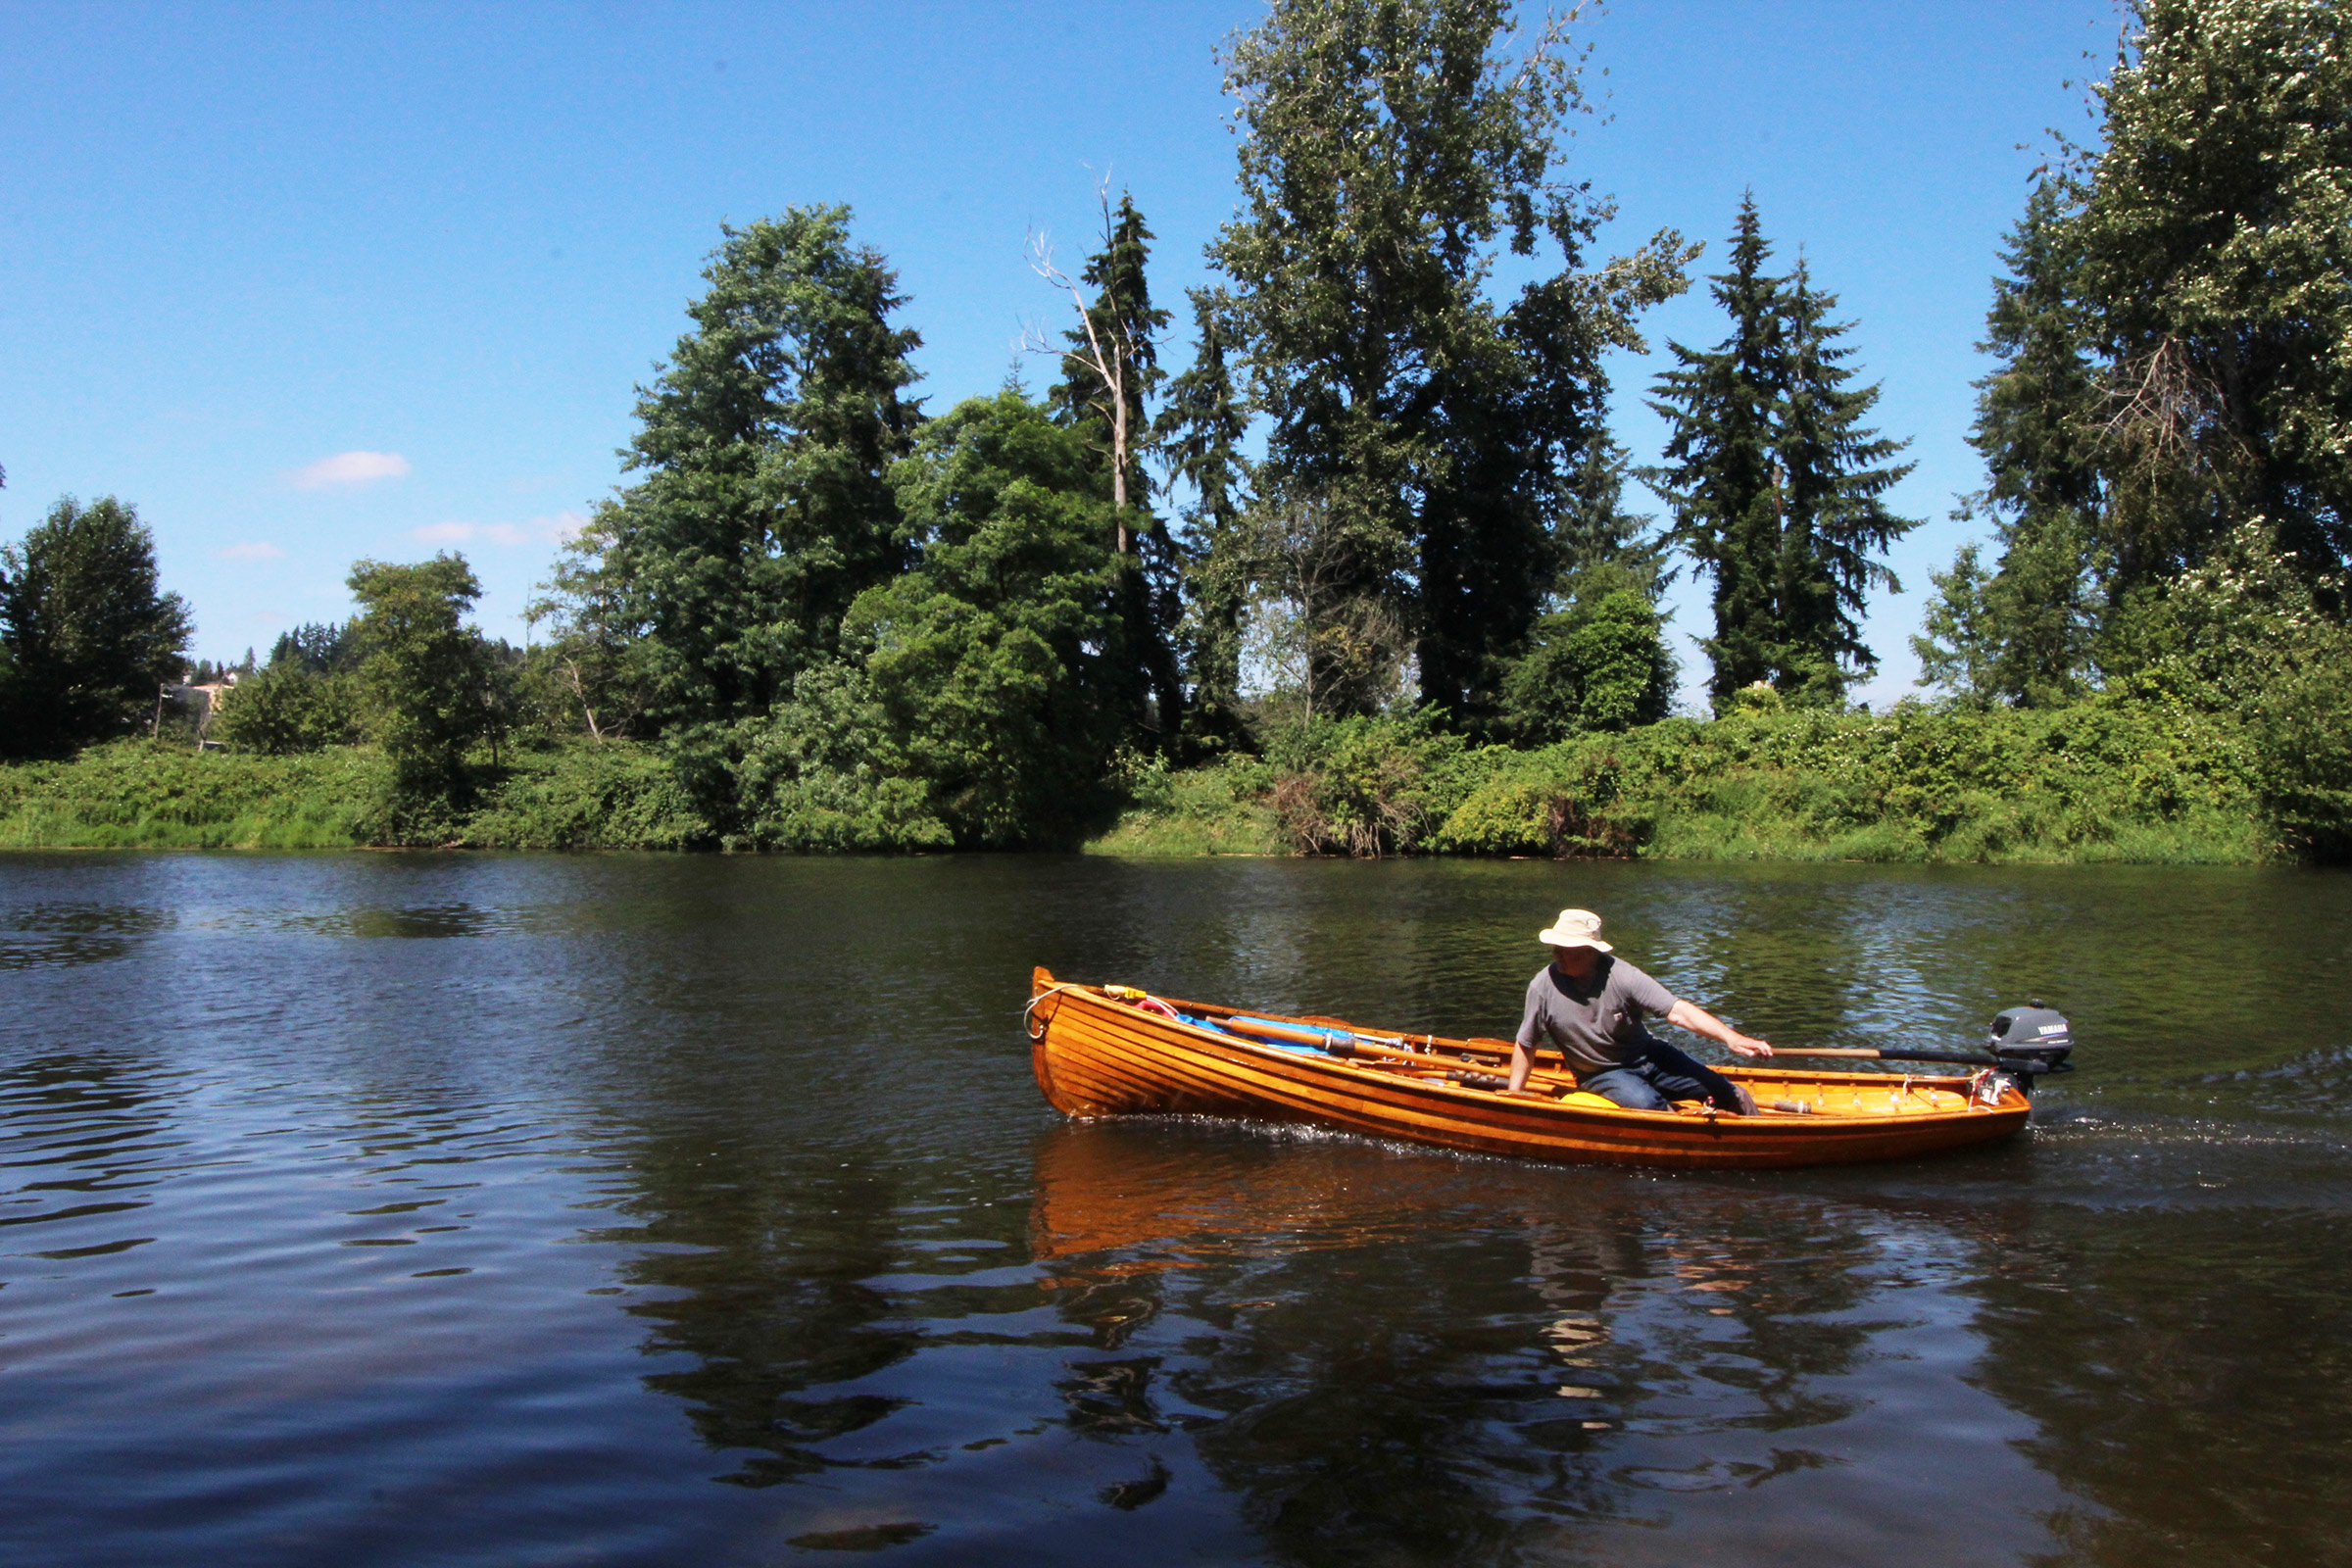
TRAMP lurched up and down quickly as the flow of the Hérault pushed into the azure Mediterranean Sea, which stretched out to meet the cloudless sky. I struggled to get the oars in and out of the water, let alone in time with Ben’s, as we cleared the light tower with the red top and turned west toward a sandy beach dotted with people and parasols of every color. Moments later Ben climbed over the side and dropped into waist-high shallows. I jumped in and ducked underwater, re-surfacing quickly to catch my breath from the shock of the chilly seawater. A few deep breaths later, I lay back in the sea, weightless, and felt the sun’s warmth on my face. With the Canal of Two Seas behind us, I wondered which country’s canals we will be crossing next, where our adventures as new parents will take us, and where in TRAMP the baby will go.
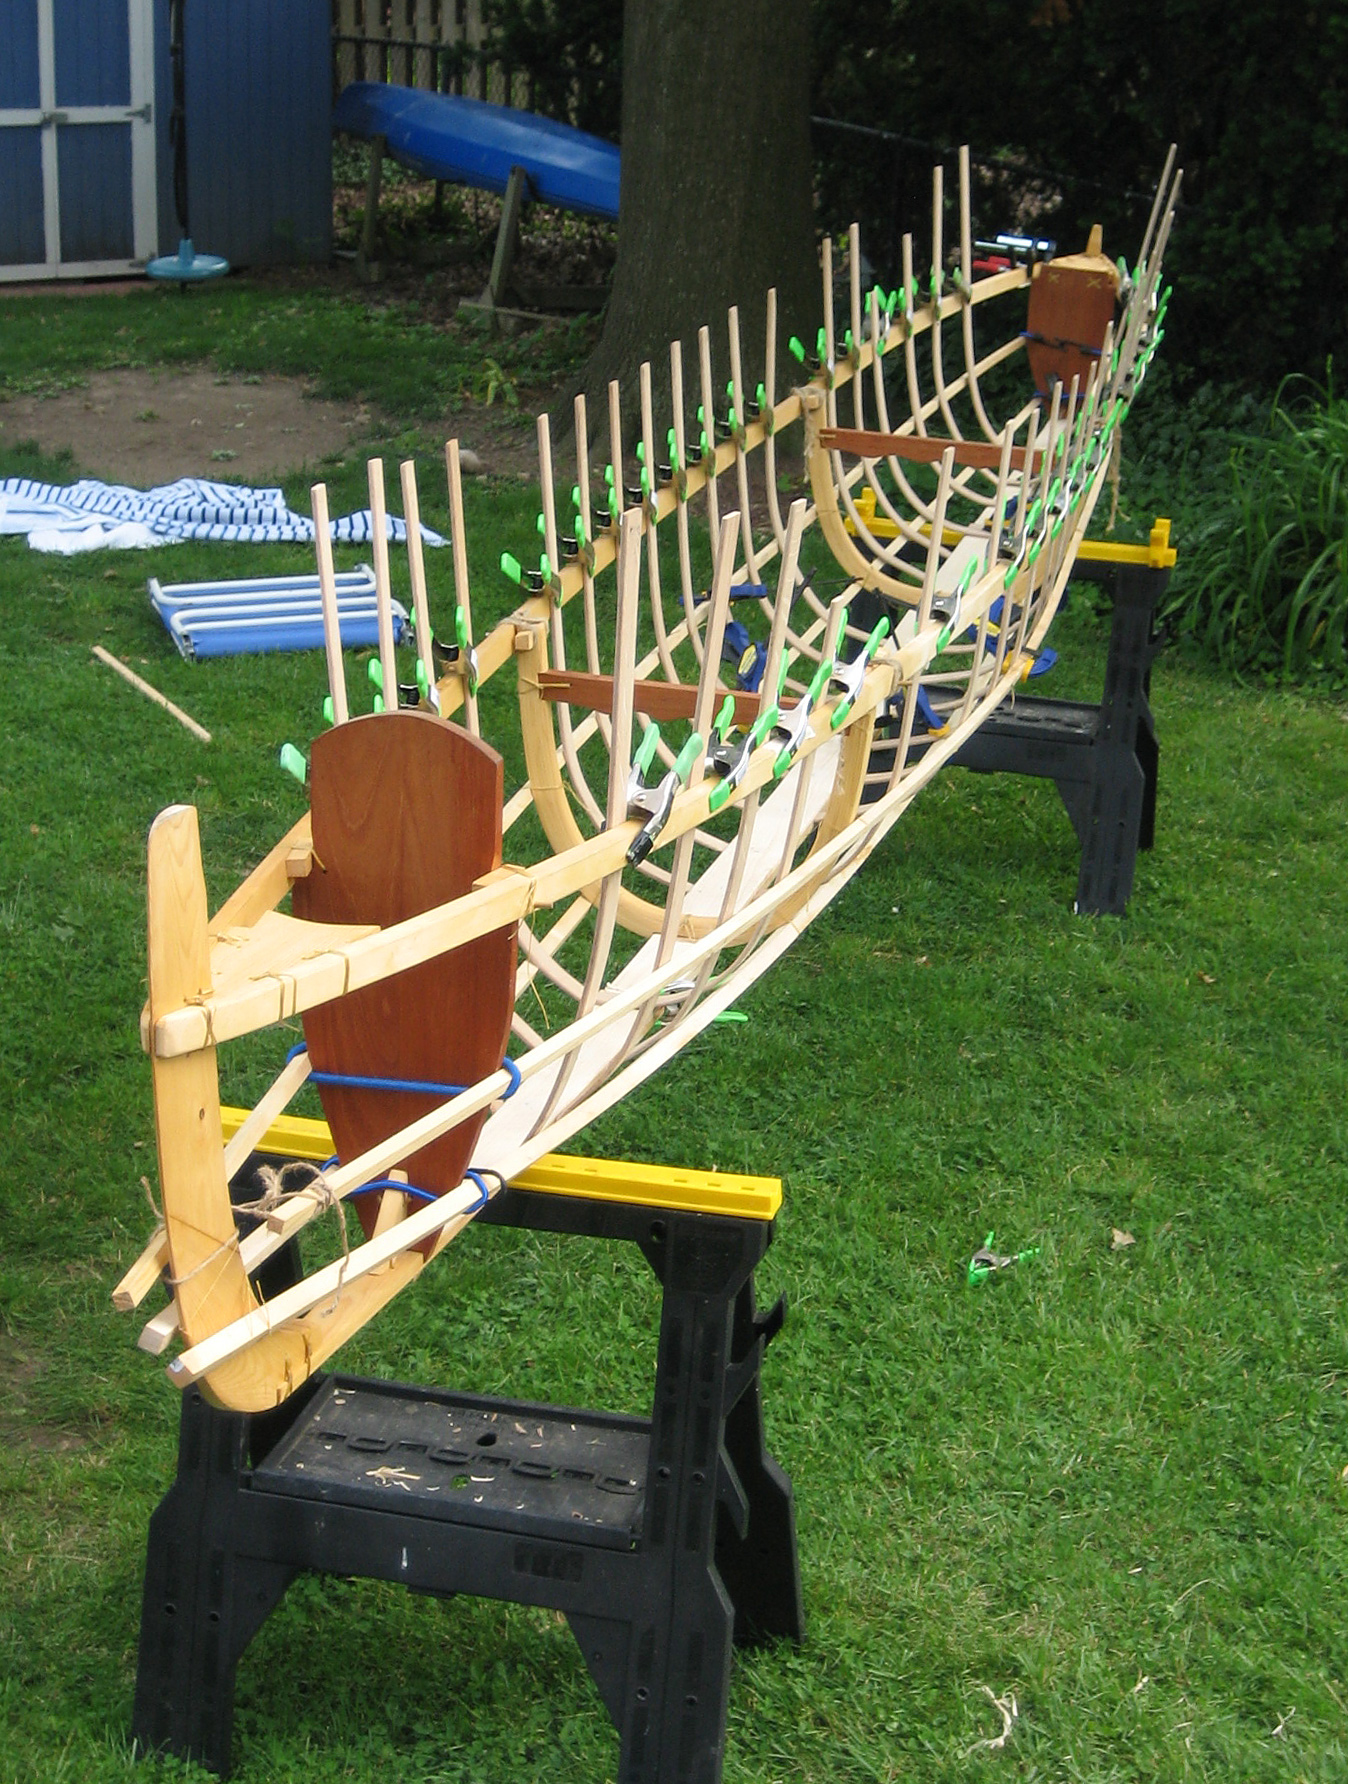
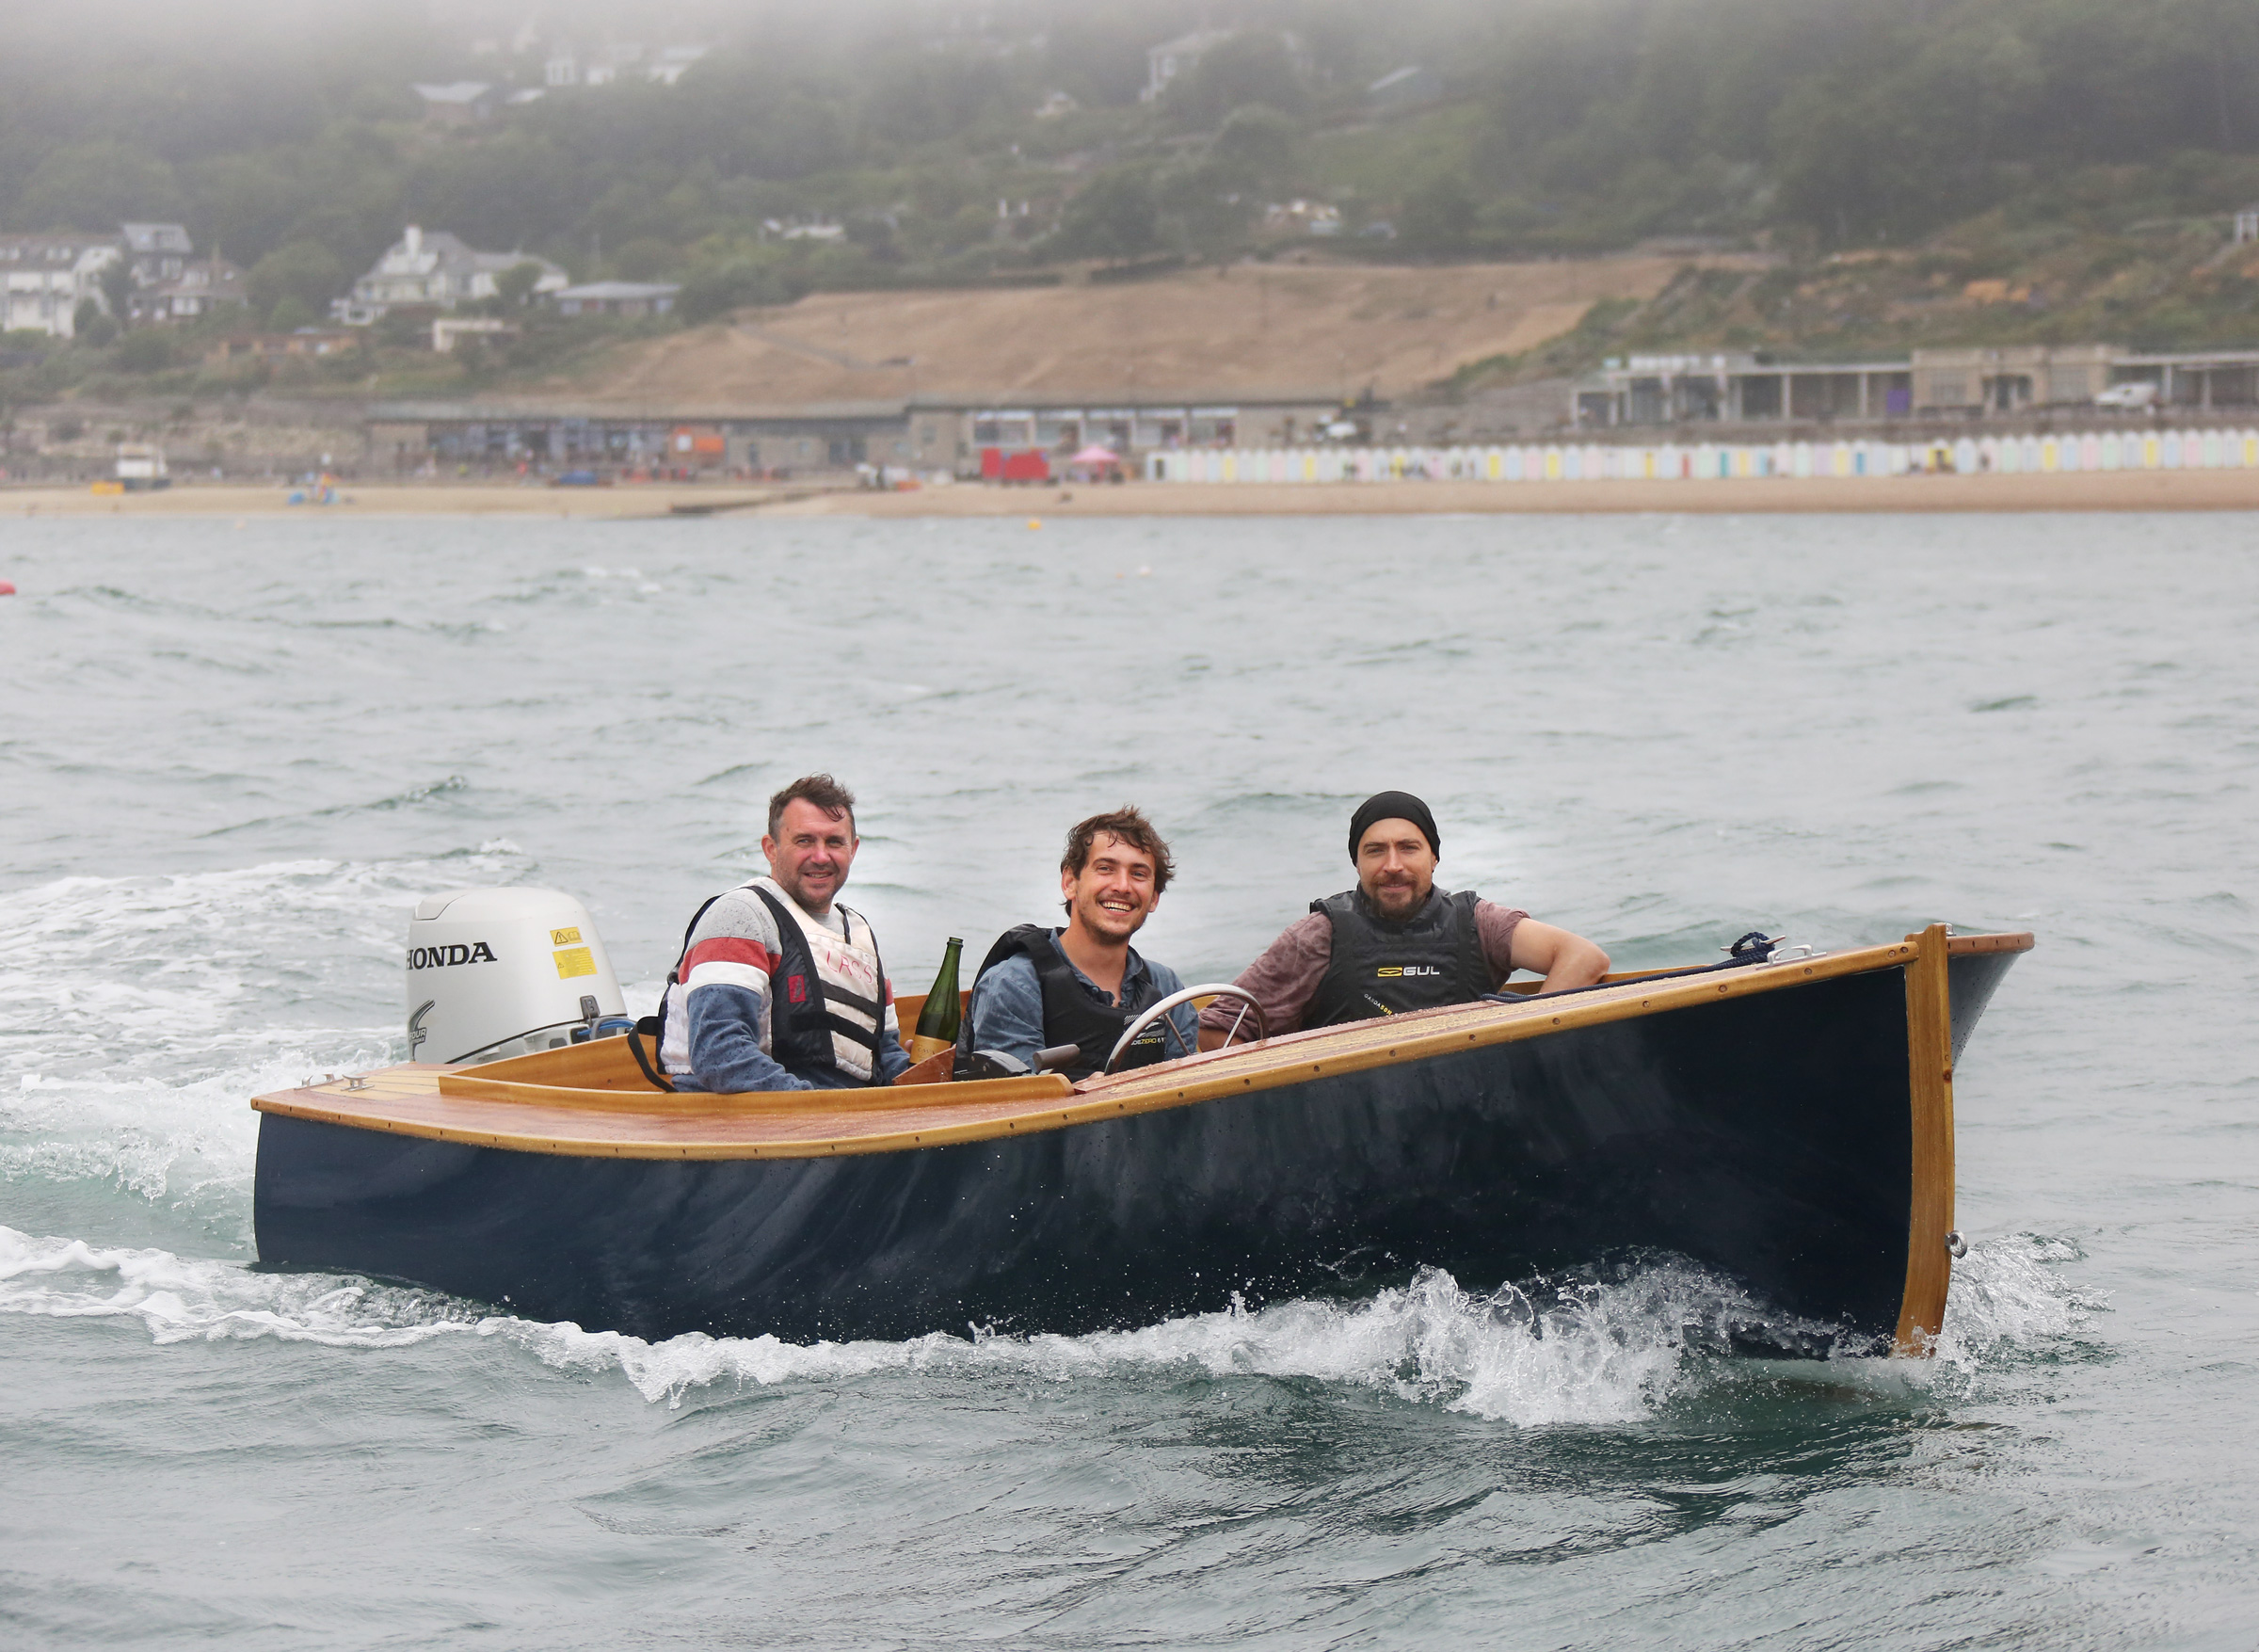
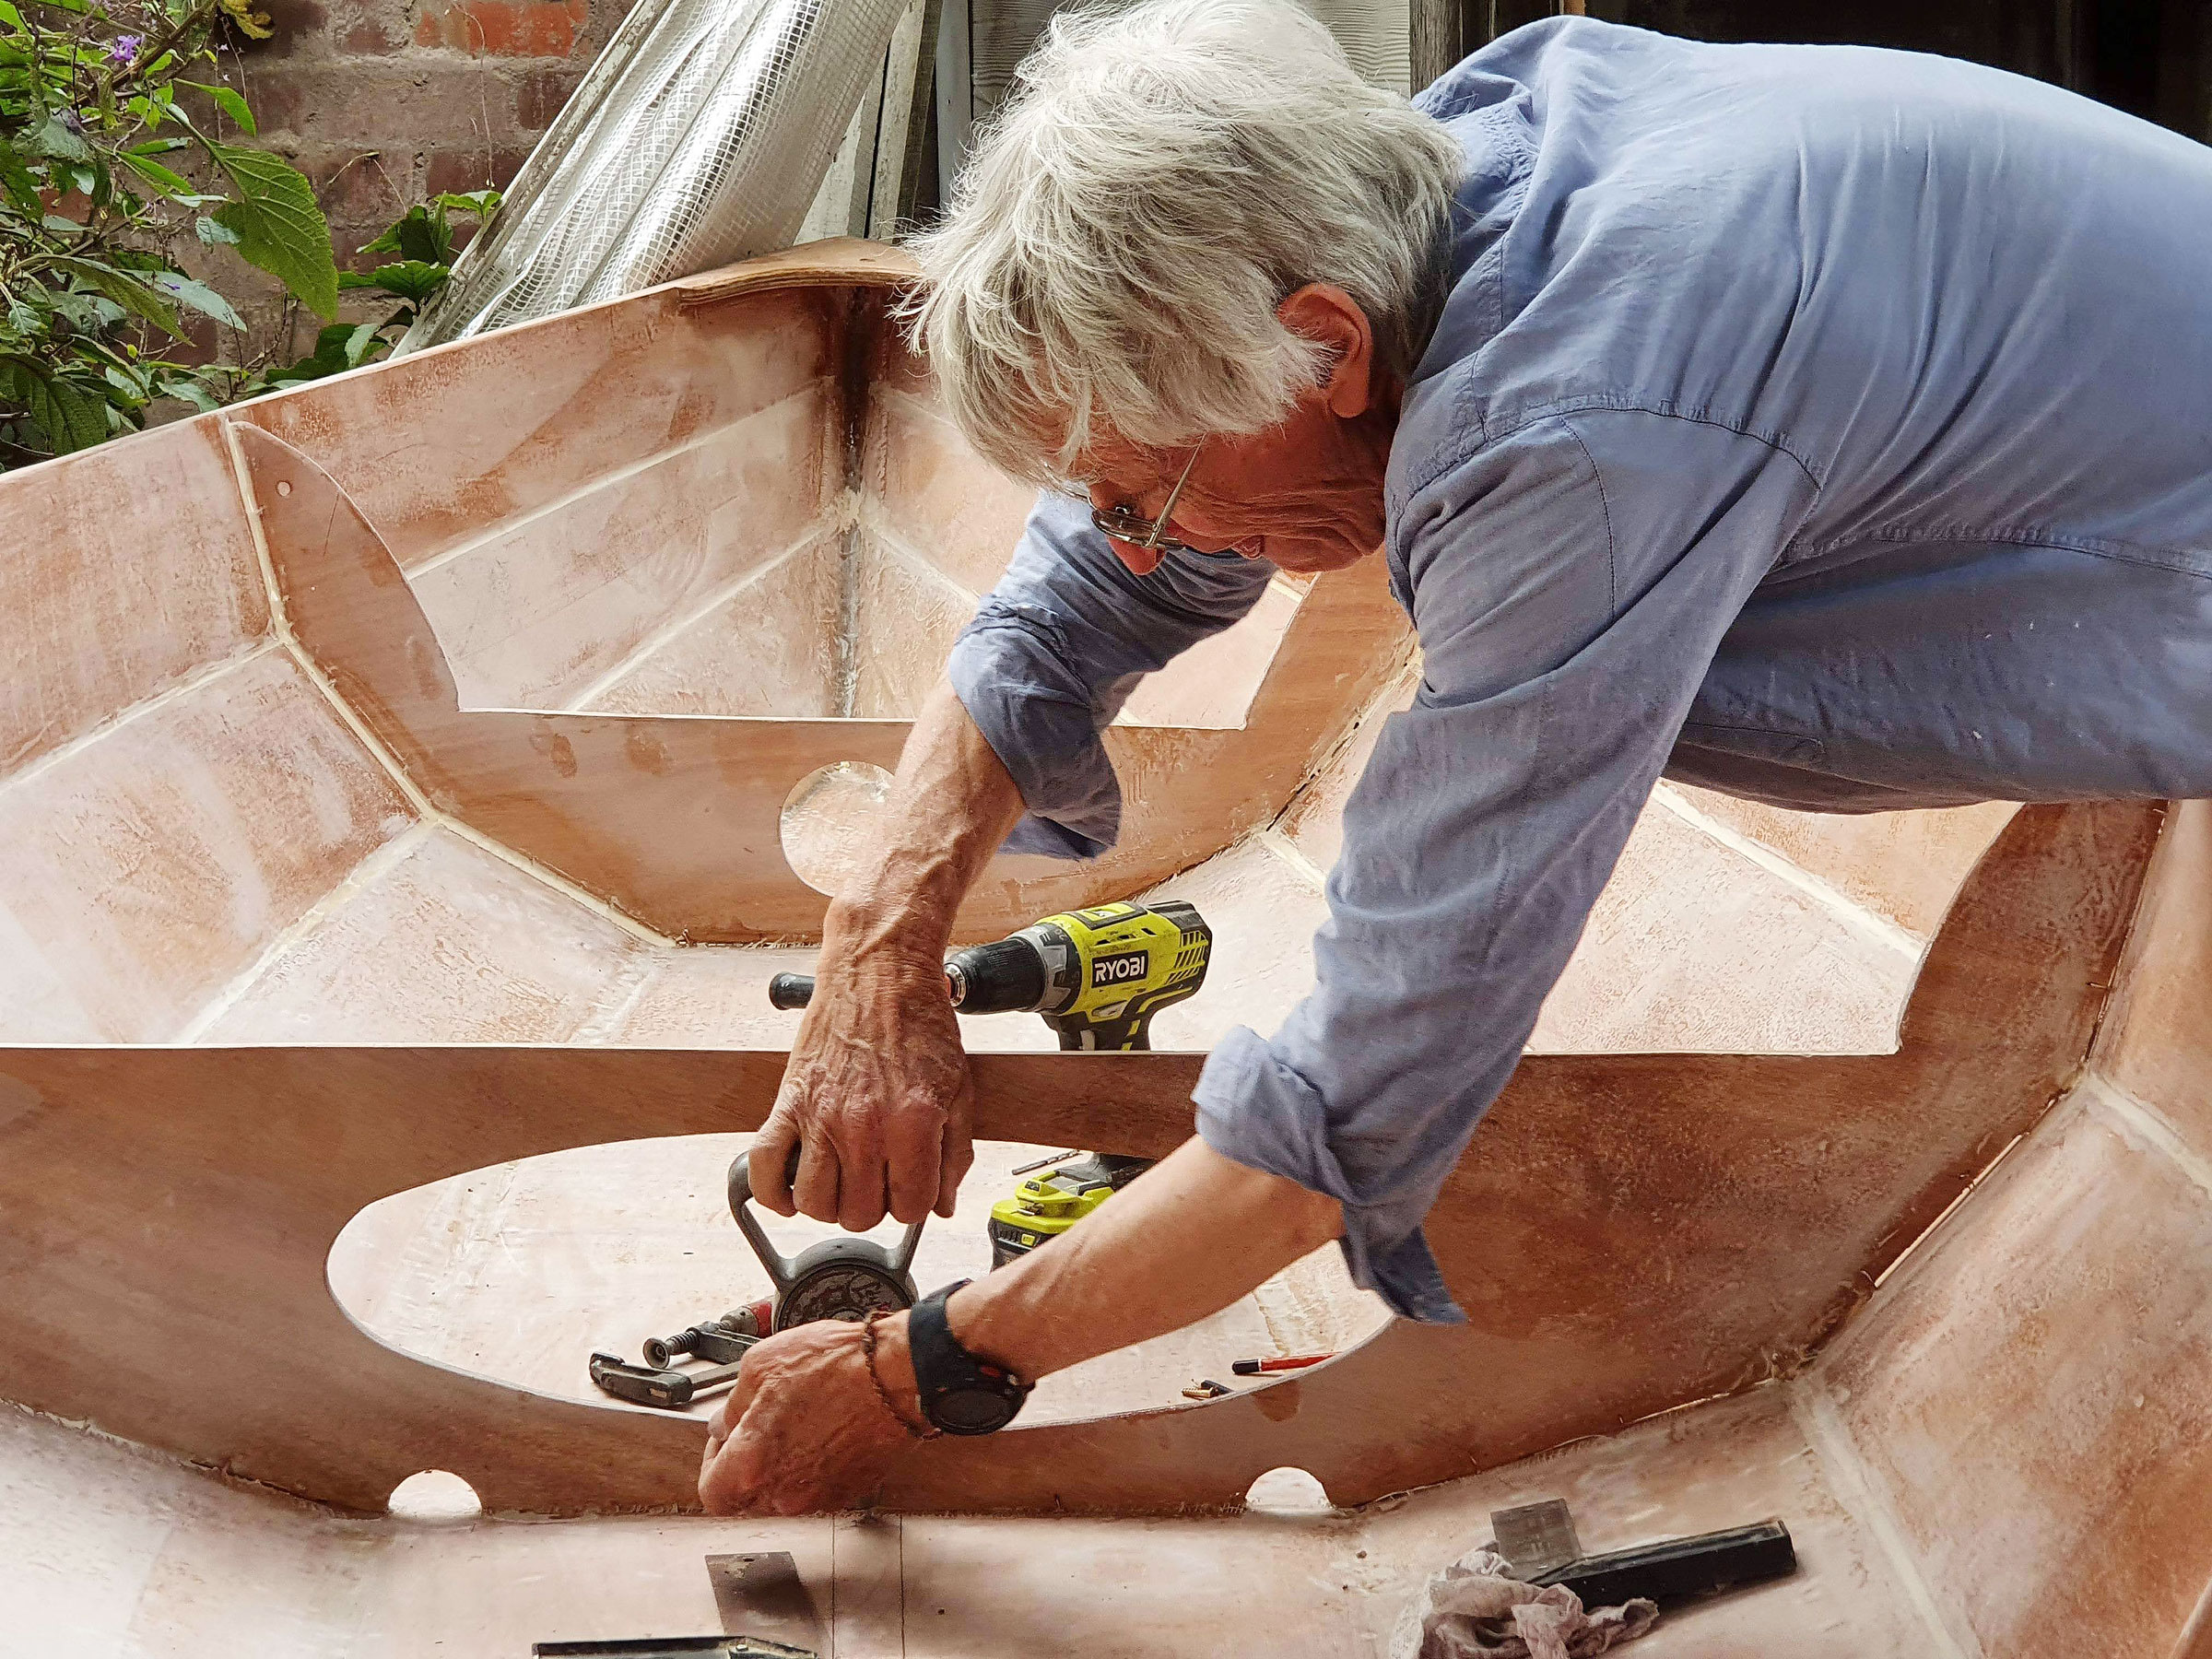
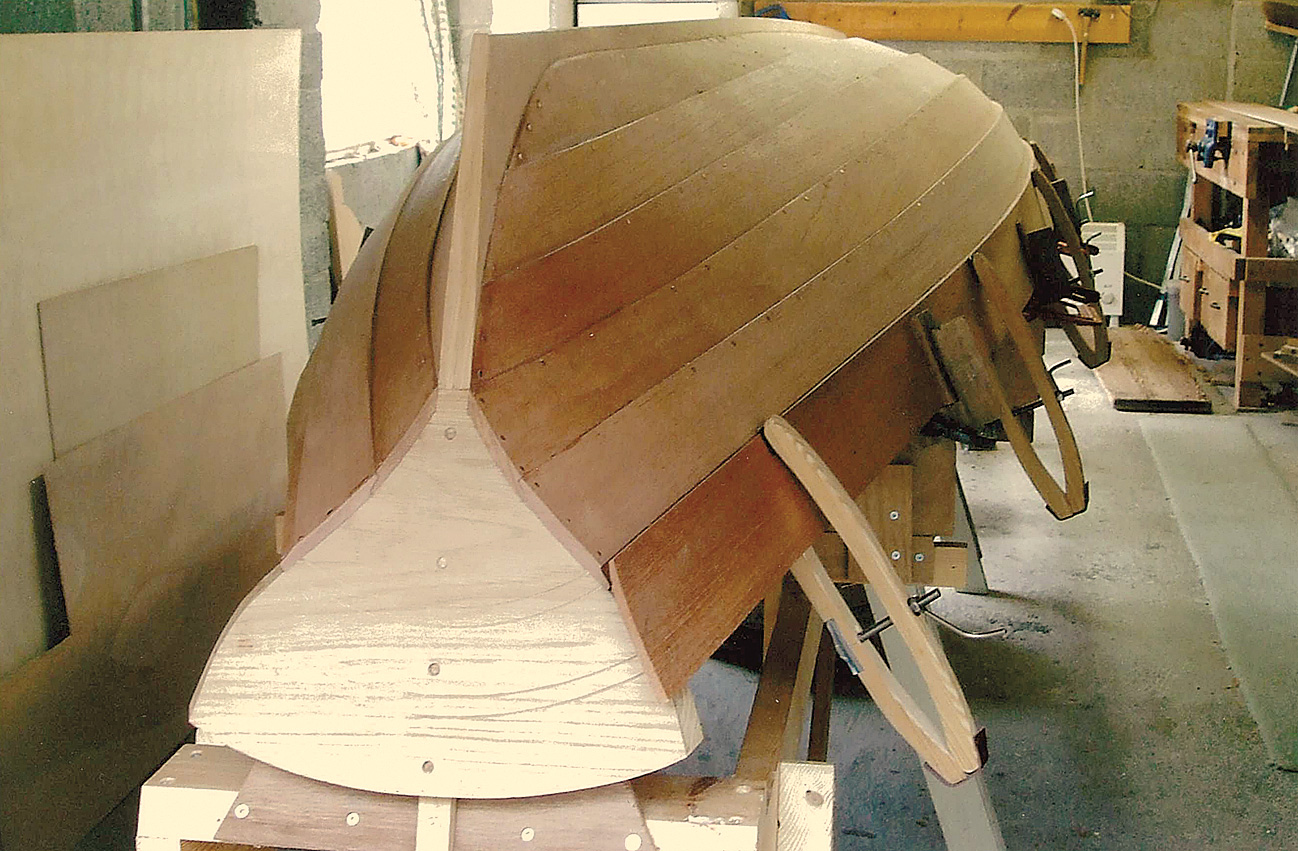
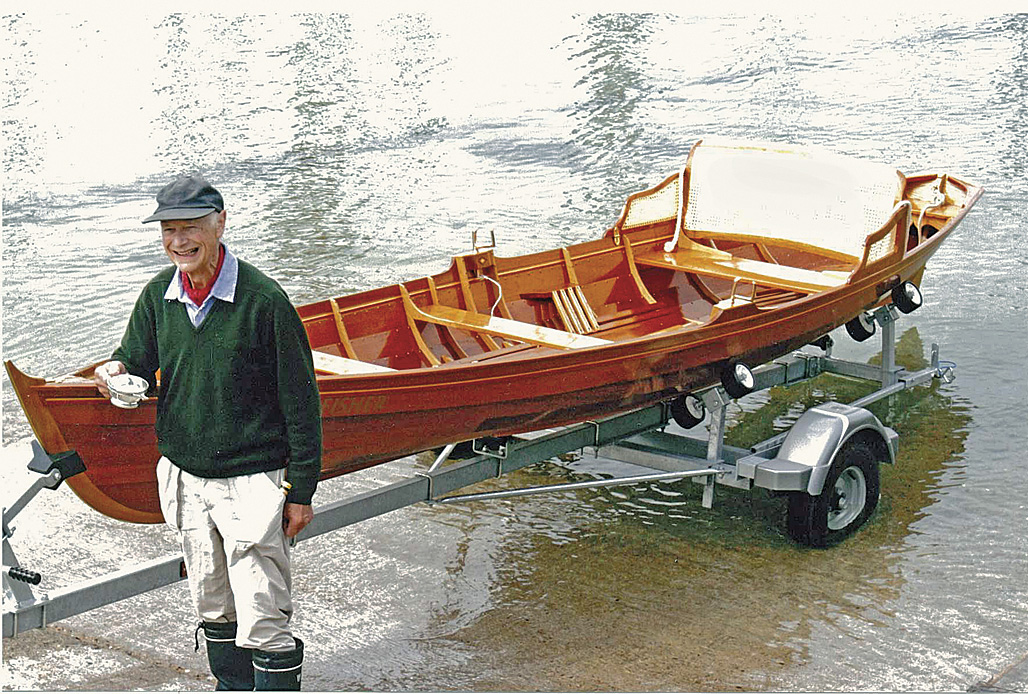
Caroline Kocel and Ben Jackson are based in Suffolk, on the east coast of England. Ben, a classic wooden boat enthusiast, worked at Spirit Yachts for eight years before setting up his own workshop as Jackson Yachts. He met Caroline during the 2020 lockdown after her return from life in Micronesia, and together they have rowed across Scotland, England, and France. They spend as much time as possible on the River Orwell estuary and have their sights set upon sailing a 30′ classic to the Caroline Islands in the Pacific.
If you have an interesting story to tell about your adventures with a small boat, please email us a brief outline and a few photos.