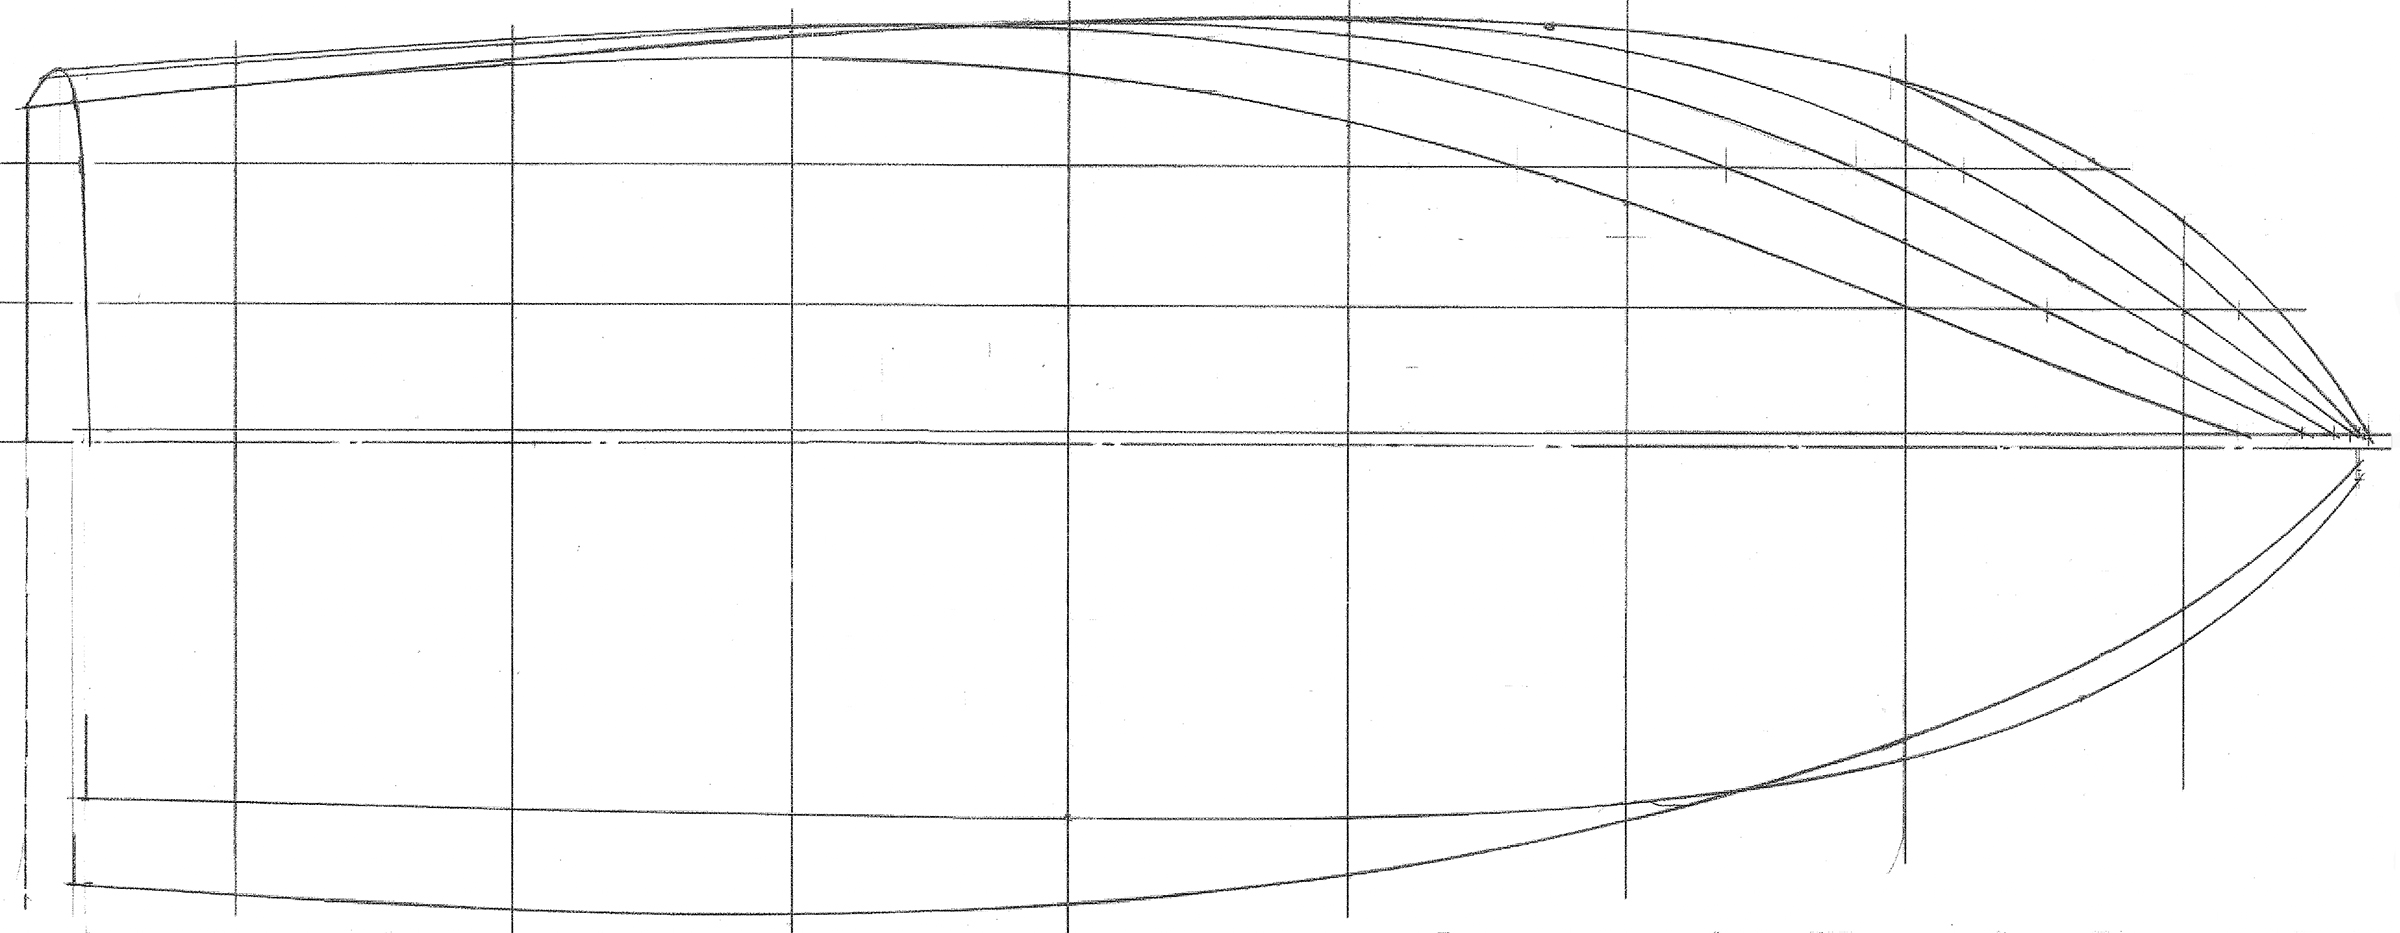
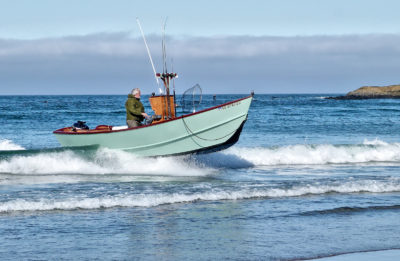
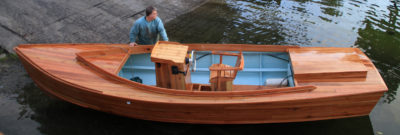
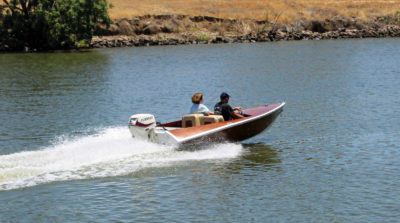
Paul Gartside’s design #221 for a 17′ outboard runabout came about in 2016 when he had an inquiry from a resident of Victoria, British Columbia. The brief was for a 1950s/1960s-style boat with a pair of seats behind a protective windscreen, with room for gear or extra passengers aft, and to use in the Gulf Islands, an archipelago in the inland sea between Vancouver Island and the British Columbia mainland. Paul says that this style of boat “has been standard since the first boom in outboard power in the 1920s, perhaps even earlier, and it’s still hard to beat. It’s fun, comfortable, and sociable—a lot like driving a car.” Knowing that the Gulf Islands area has “some of the most benign boating conditions salt water has to offer” but with “strong tides and wind chops from time to time,” Paul gave the boat’s planing surface a few degrees of deadrise to counter pounding. “In a small boat with the crew’s center of gravity at times high, we can’t give it much, but every little bit helps at speed,” he said. The original brief was for glued-plywood clinker (lapstrake) construction, but Paul also advocates clenched clinker, cold-molding or strip-planking, the latter being, he thinks, “probably the most practical option for most home builders.”
When Tim Odling enrolled in the 40-week Boat Building, Maintenance and Support course at the Boat Building Academy at Lyme Regis, UK, in October 2021, he would have liked to have built a sailing boat with a fixed keel, but the academy’s workshop was unable to accommodate such a boat. So, he decided to build Paul Gartside’s #221 with strip-planked construction, not least because clenched clinker, plywood/cold-molding, and glued-carvel construction were being used for the other three boats the students were building, and it is BBA policy to expose the students to a variety of methods.
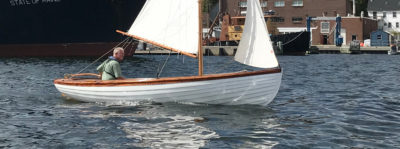
 All photos by Nigel Sharp
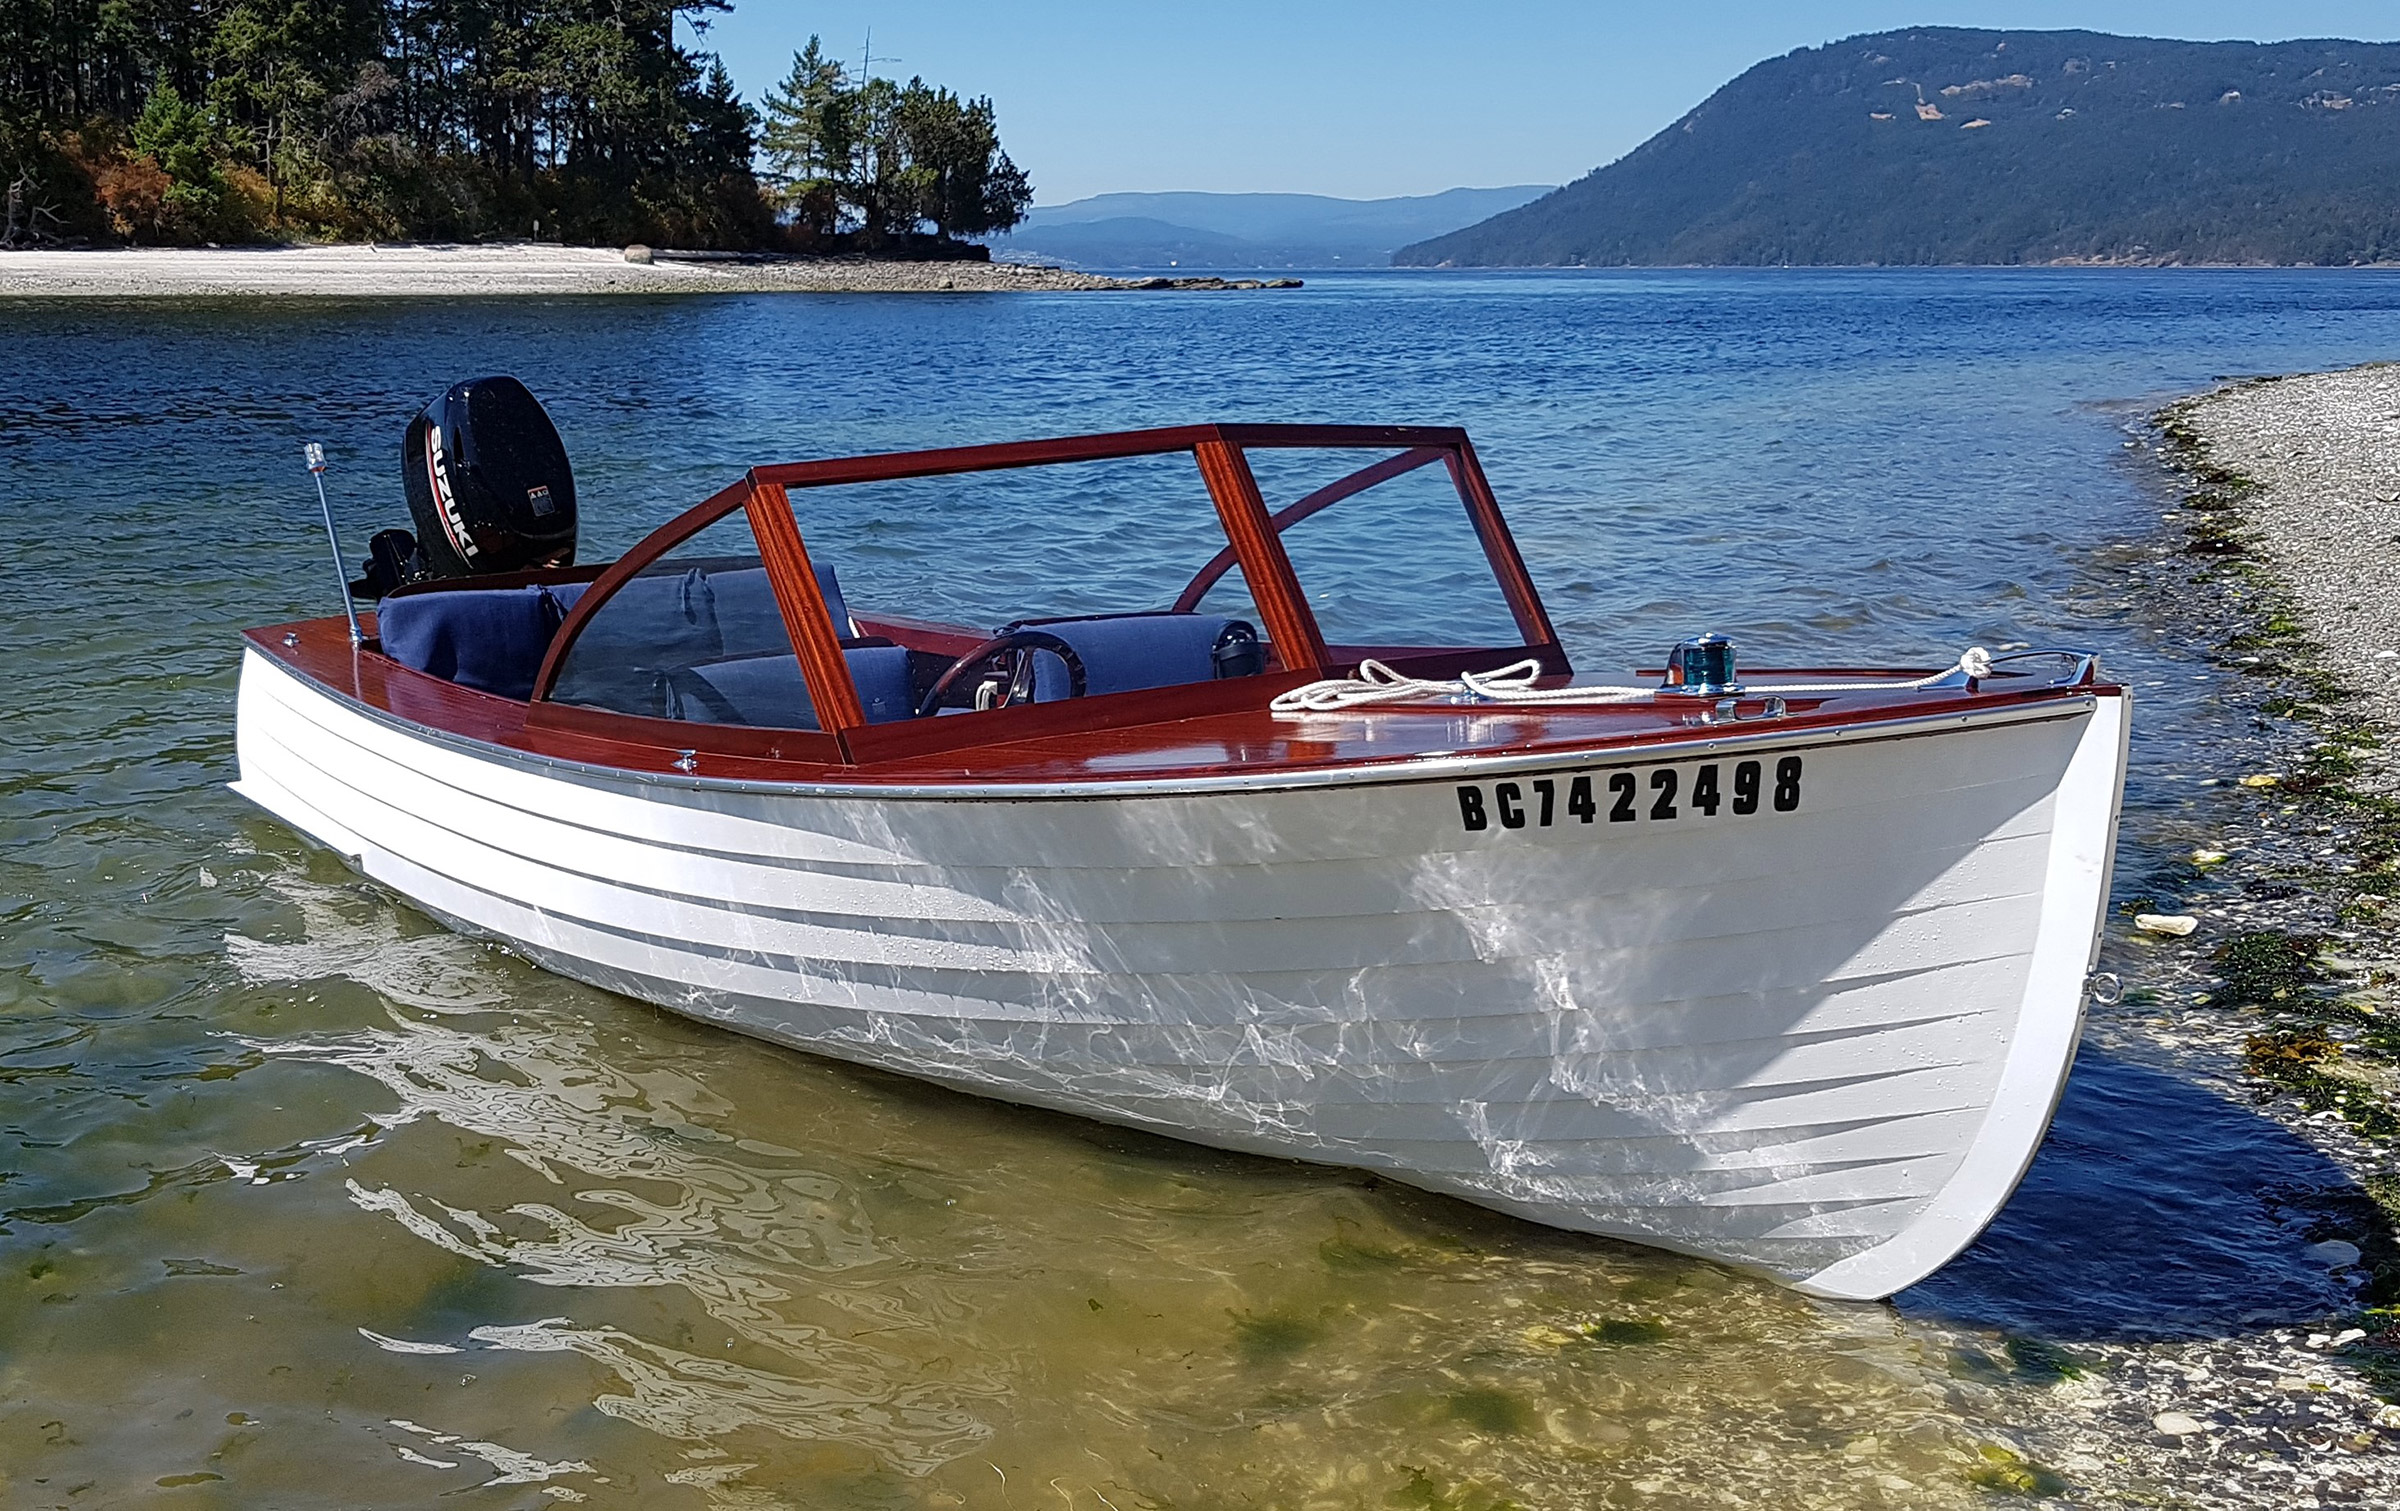
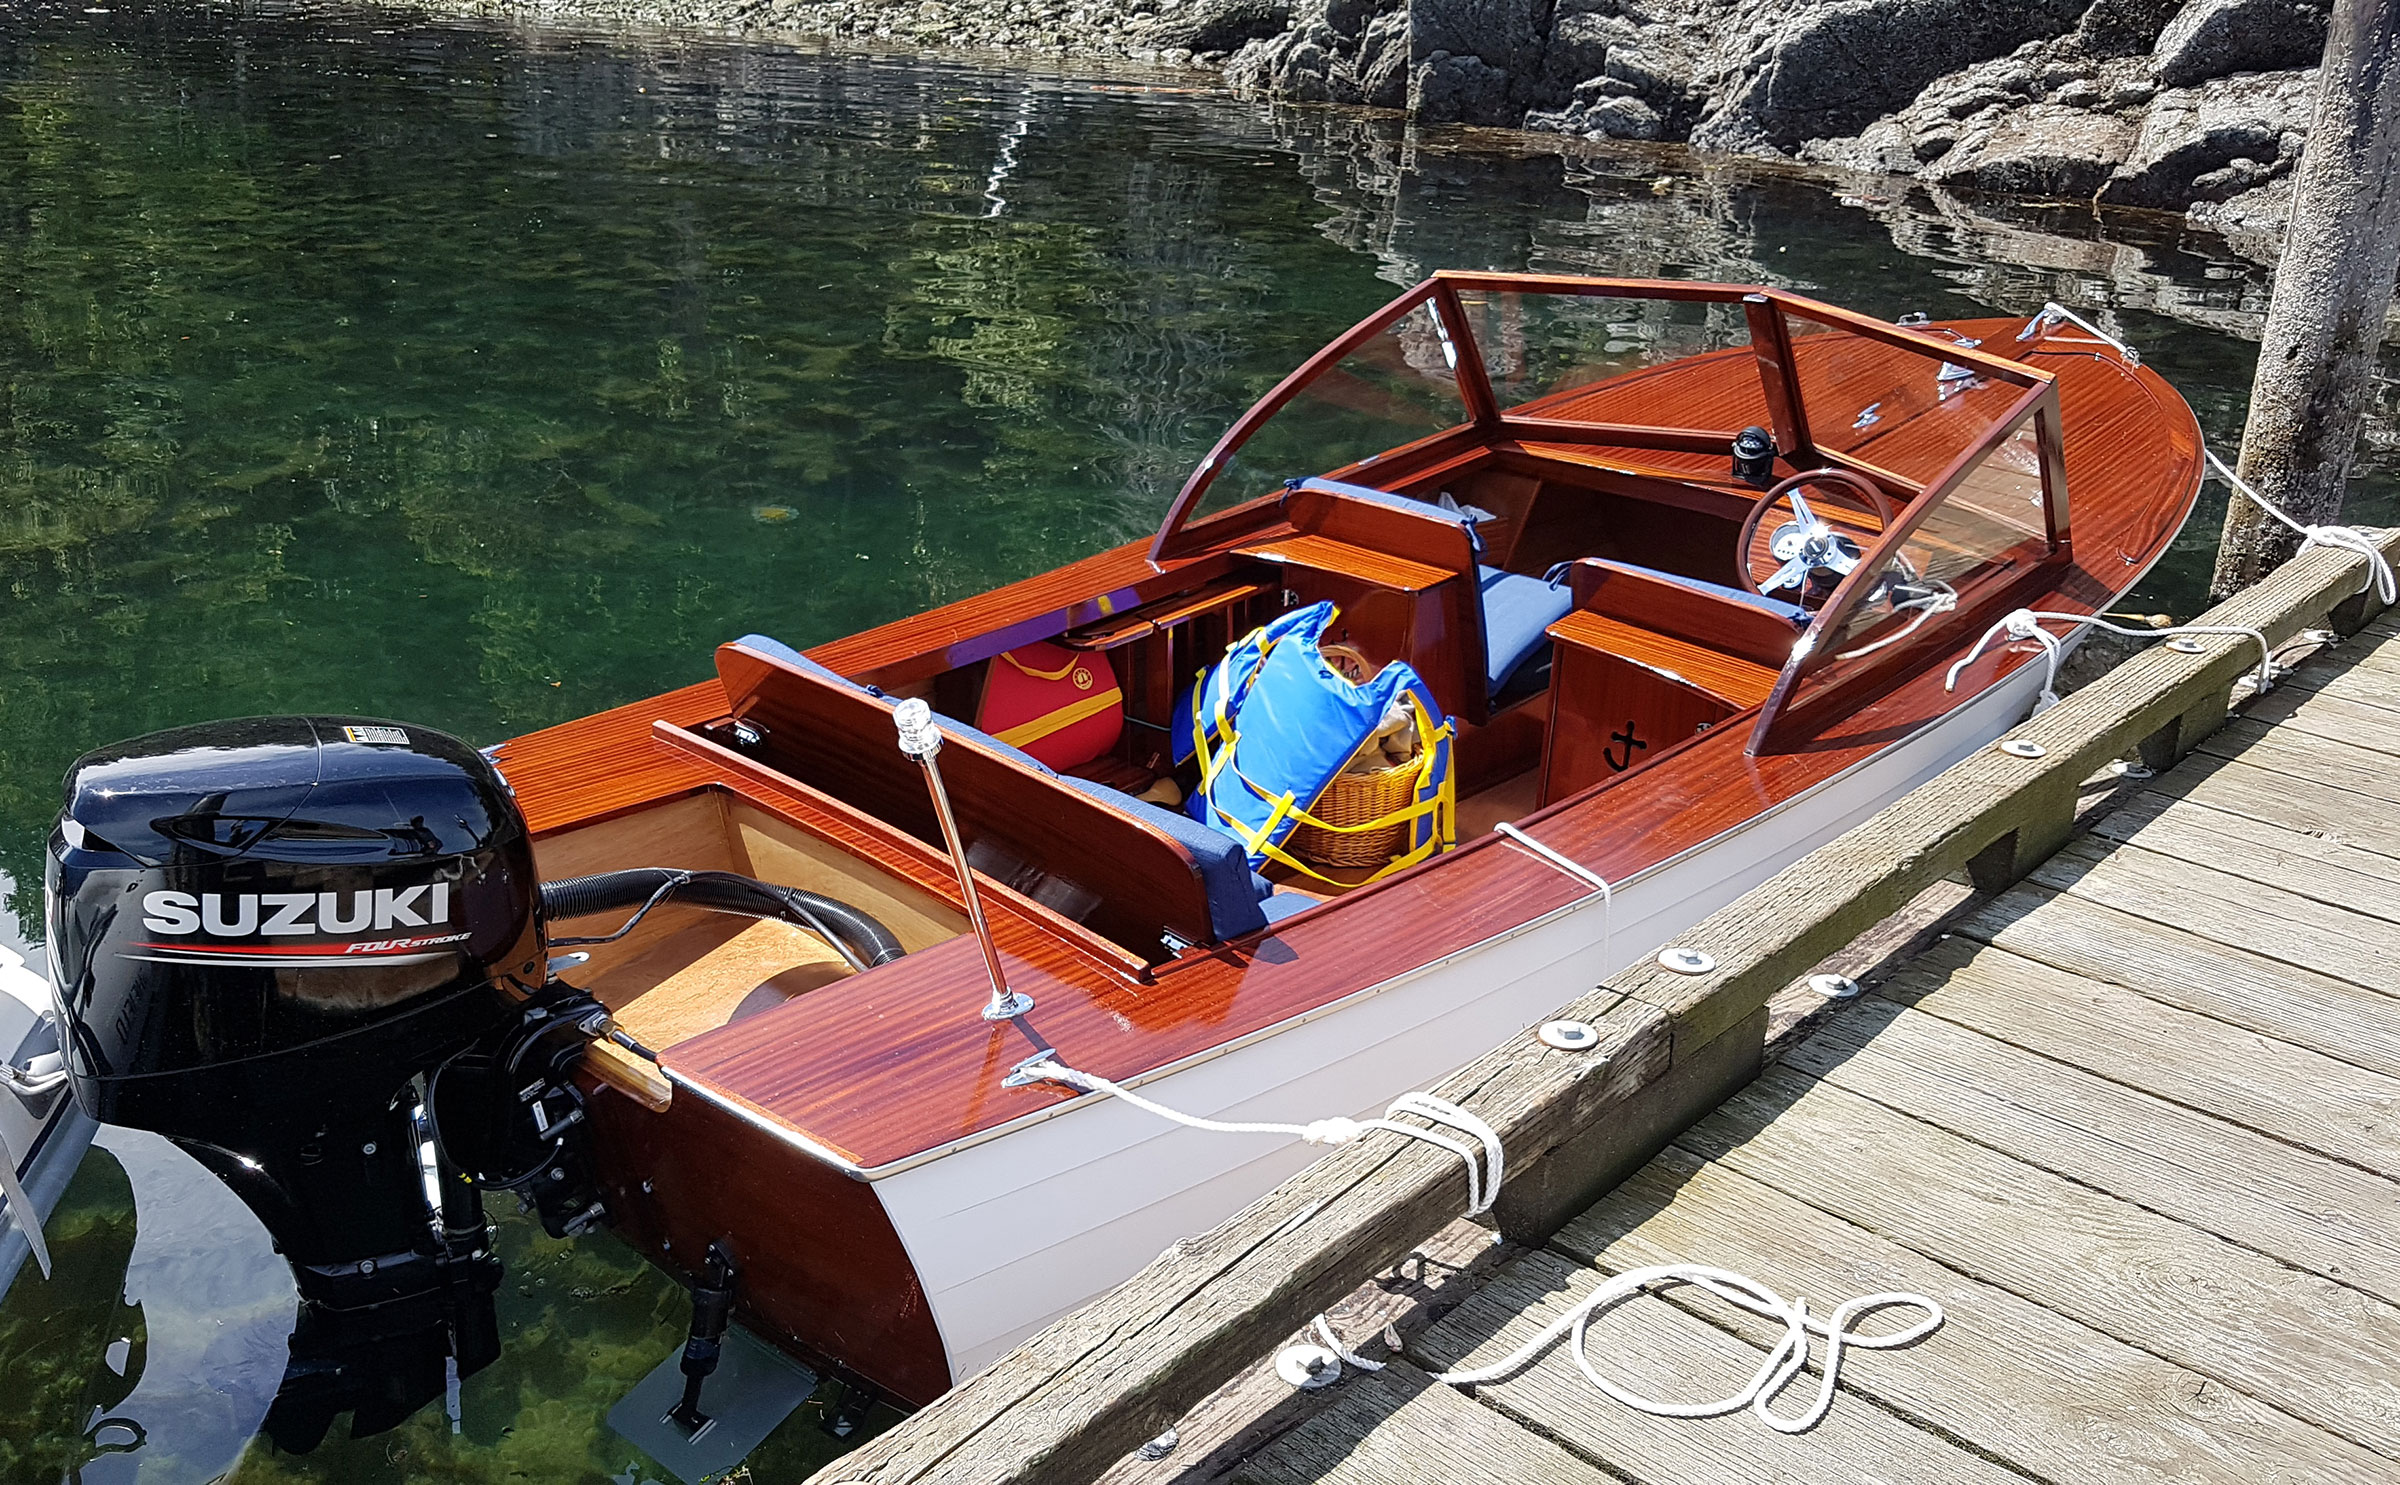
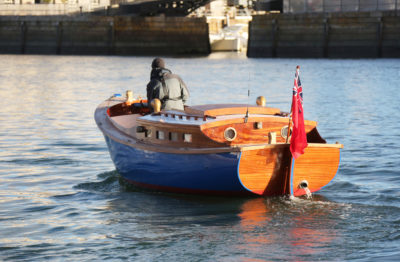
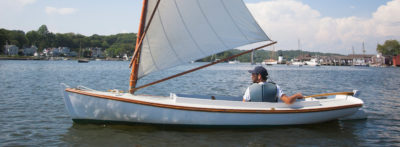
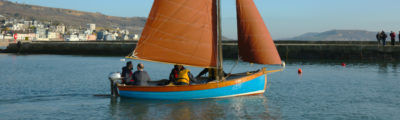
 The windshield included in the drawings hadn’t been built in time for the launching. The drawings also show a folding dodger that offers occupants of the two forward seats additional protection from spray and rain.
After the lines were lofted, the eight temporary molds were set upside down on a base frame. The iroko keelson (“hog” here in the U.K.) and inner stem (or apron) were both then let into recesses in the molds. The keelson was in one piece—4-1/2″ wide × 3/4″ maximum thickness—and the inner stem was laminated from 22 pieces of 3/32″-thick veneer with a maximum width of 2-1/2″. Also let into recesses in the molds were the iroko deck shelves around the sheer, each of them 3″ × 3/4″ and set up at the correct angle to establish the deck camber. The transom frame, laminated from three layers of 1/4″ plywood, was then set up with the apron and deck shelves notched into it.
The plans call for the transom frame to just go round the transom perimeter, but it was decided to include additional components on the centerline and across the top for extra strength. The radiused transom was laminated from three layers of 3/8″ plywood. Although it wasn’t specified by Paul, it was decided to vacuum-bag these laminations to maximize gluing pressure. The transom was then fixed to the transom frame after the apron and deck shelves had been trimmed to length, so their ends were sealed by the transom itself. A 1-1/4″ iroko knee was fitted between the transom and keelson.

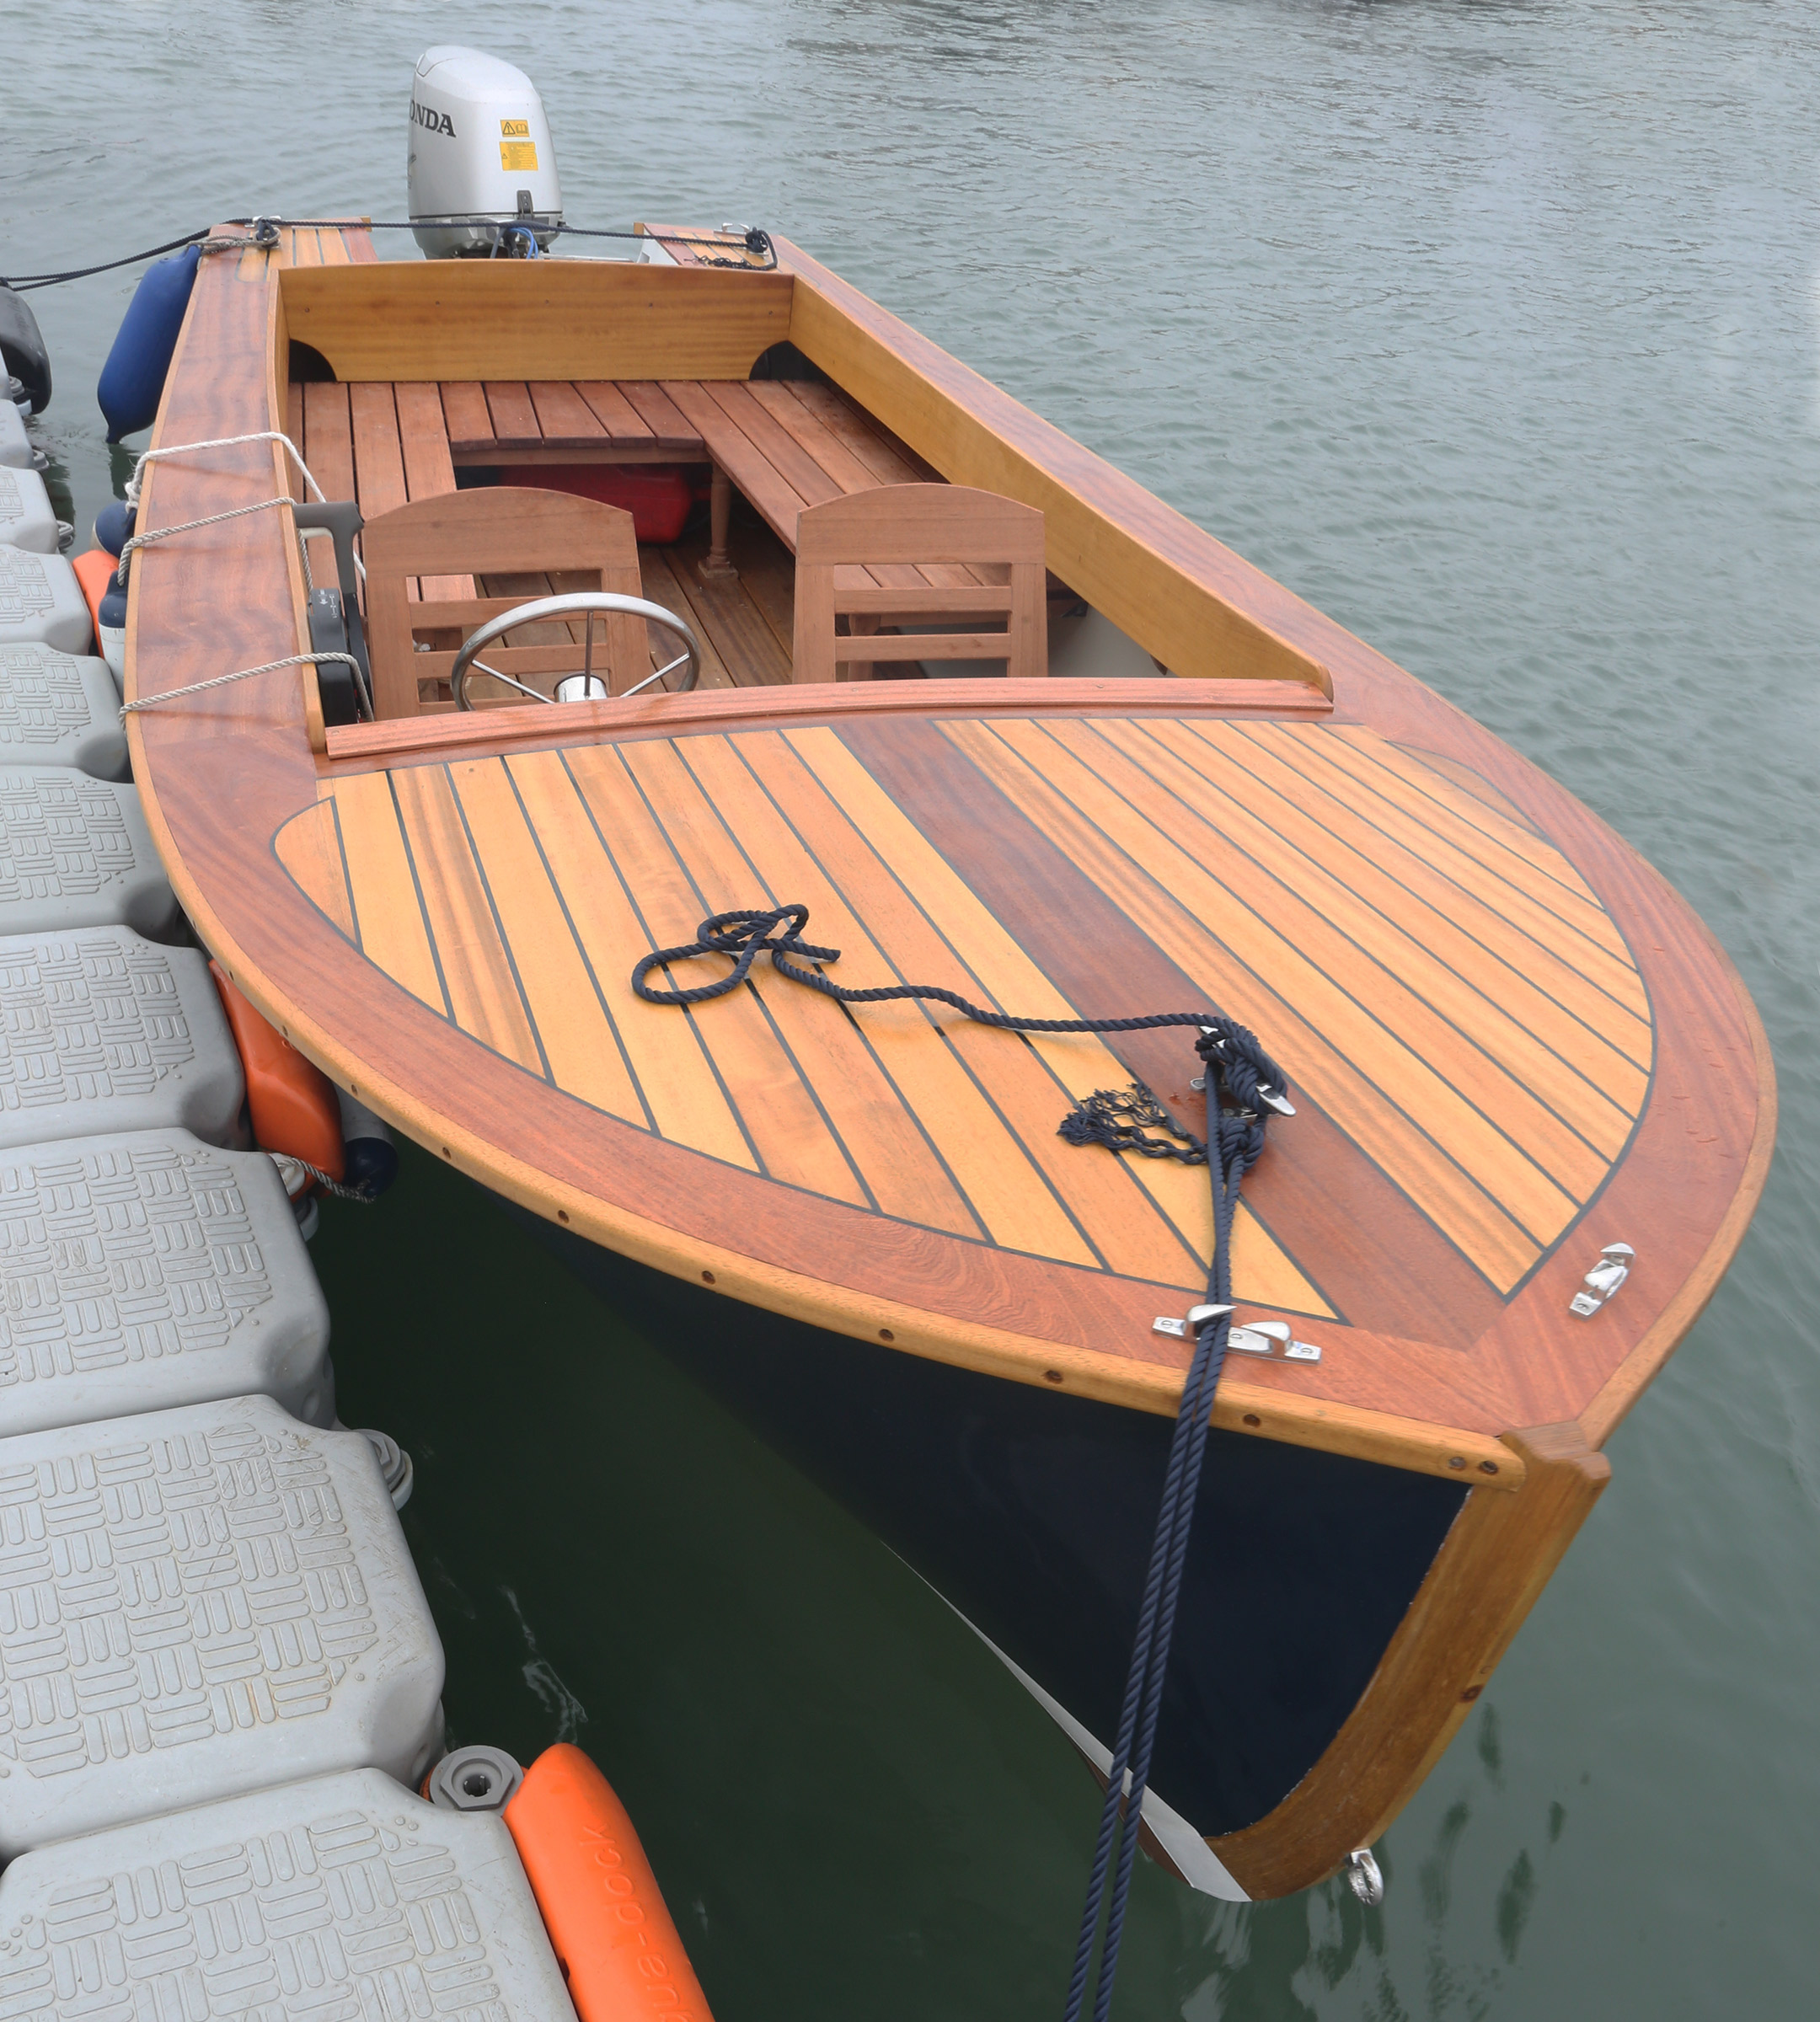
The outboard well has drains to keep water that might wash aboard from accumulating. The aft end of the deck hints at the curved transom beneath it.
The planking selected for the hull was 5/8″-thick × 1-7/16″ yellow cedar with convex and concave edge profiles. The students followed Paul’s recommended starting point for the first plank, from about halfway up the topsides at the transom to then intersect the sheer at the forward-most mold. However, as they continued the planking process—edge-gluing the planks with polyurethane glue and temporarily screwing each one to each mold—they found that they had to shape the forward 3′ or so of about half a dozen planks to avoid excessive edge-bending. None of the planks had to be steamed. The temporary screws were then removed, their holes filled with epoxy filler, and the outside of the hull was faired.
The smooth hull of this runabout was achieved with strip-built construction. The drawings also show an option for a glued-plywood lapstrake hull.
The plans call for 6-oz ’glass cloth on the inside and outside of the hull, but this was doubled up on the outside for extra robustness, in conjunction with Gurit Ampreg epoxy. After the hull was faired with Nautix Blue epoxy filler, the keel, made up of six laminations of 1″ iroko and then tapered and profile-shaped according to the plans, and the outer stem, 22 layers of 3/32″ thick iroko, were then glued and screwed to the centerline. The topsides were painted with Nautix HPE high-build primer, Hempel’s light primer, and then Epifanes two-part Polyurethane Steel Blue topcoat. Coppercoat was applied to the bottom.
The hull was then turned the right way up while removing and partly dismantling the molds at the same time. The interior of the hull was sheathed with 6-oz ’glass and epoxy.
With the runabout at full speed, its turning radius is about three boat lengths.
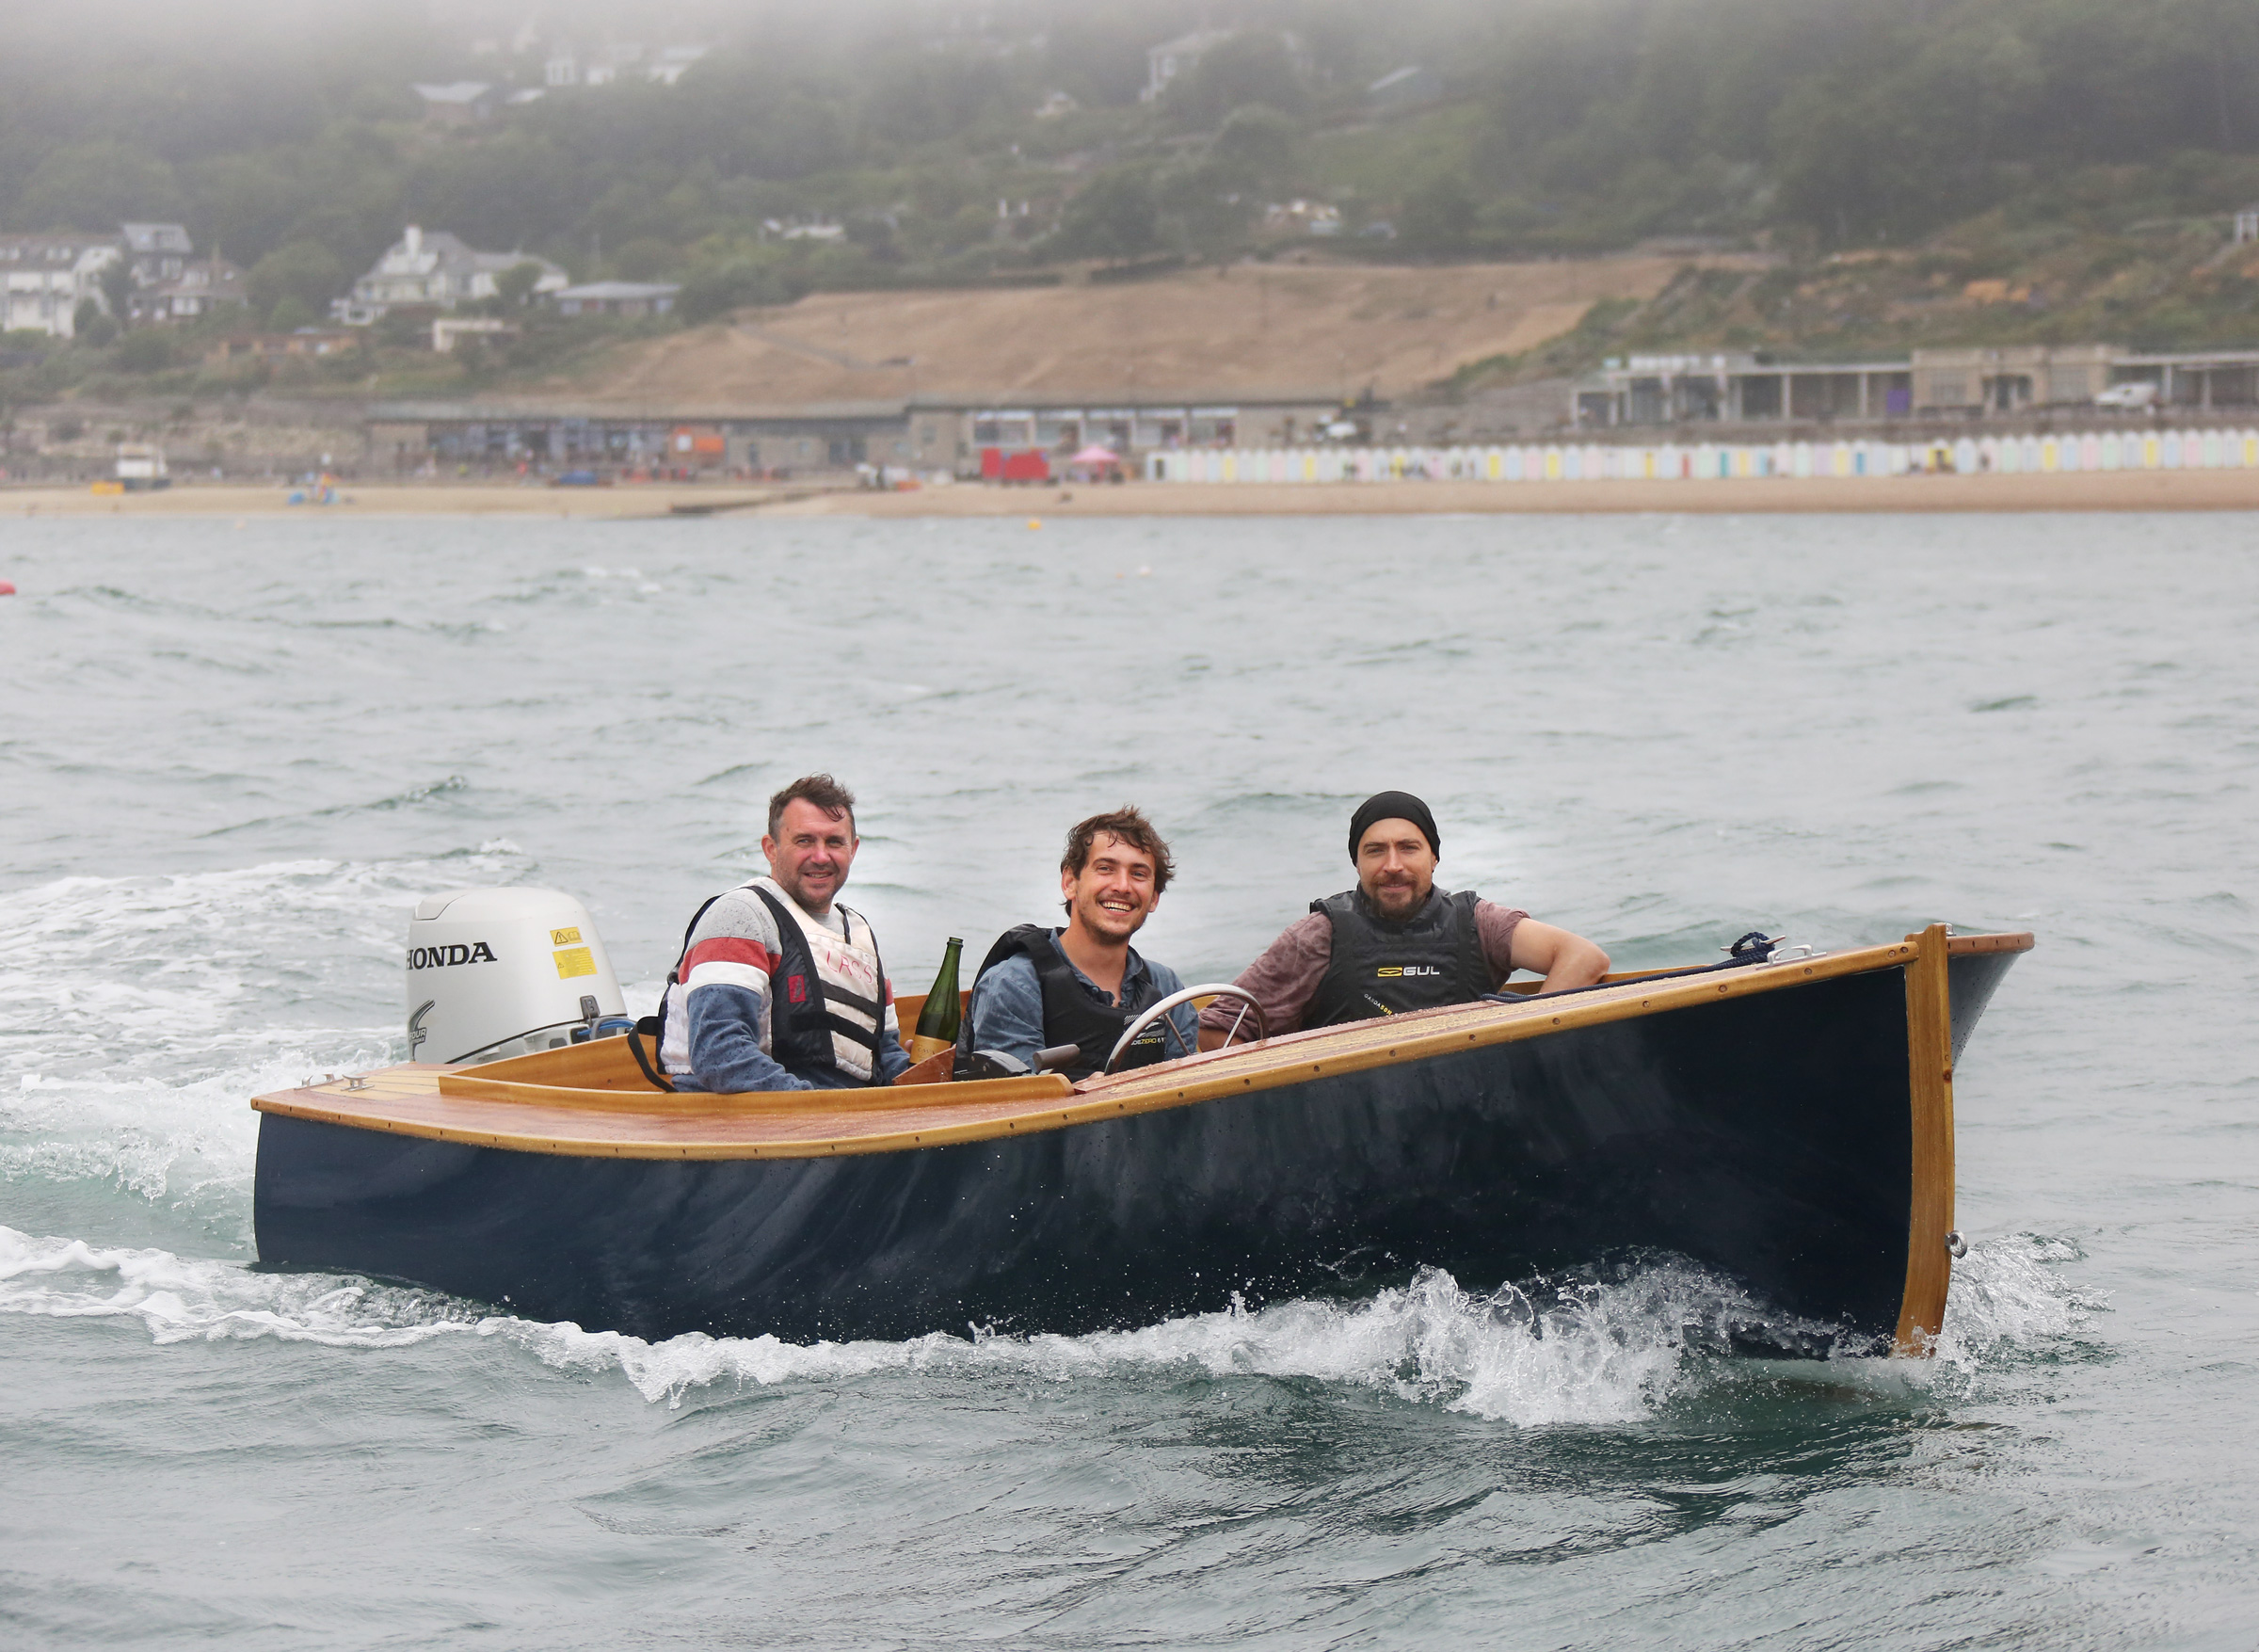
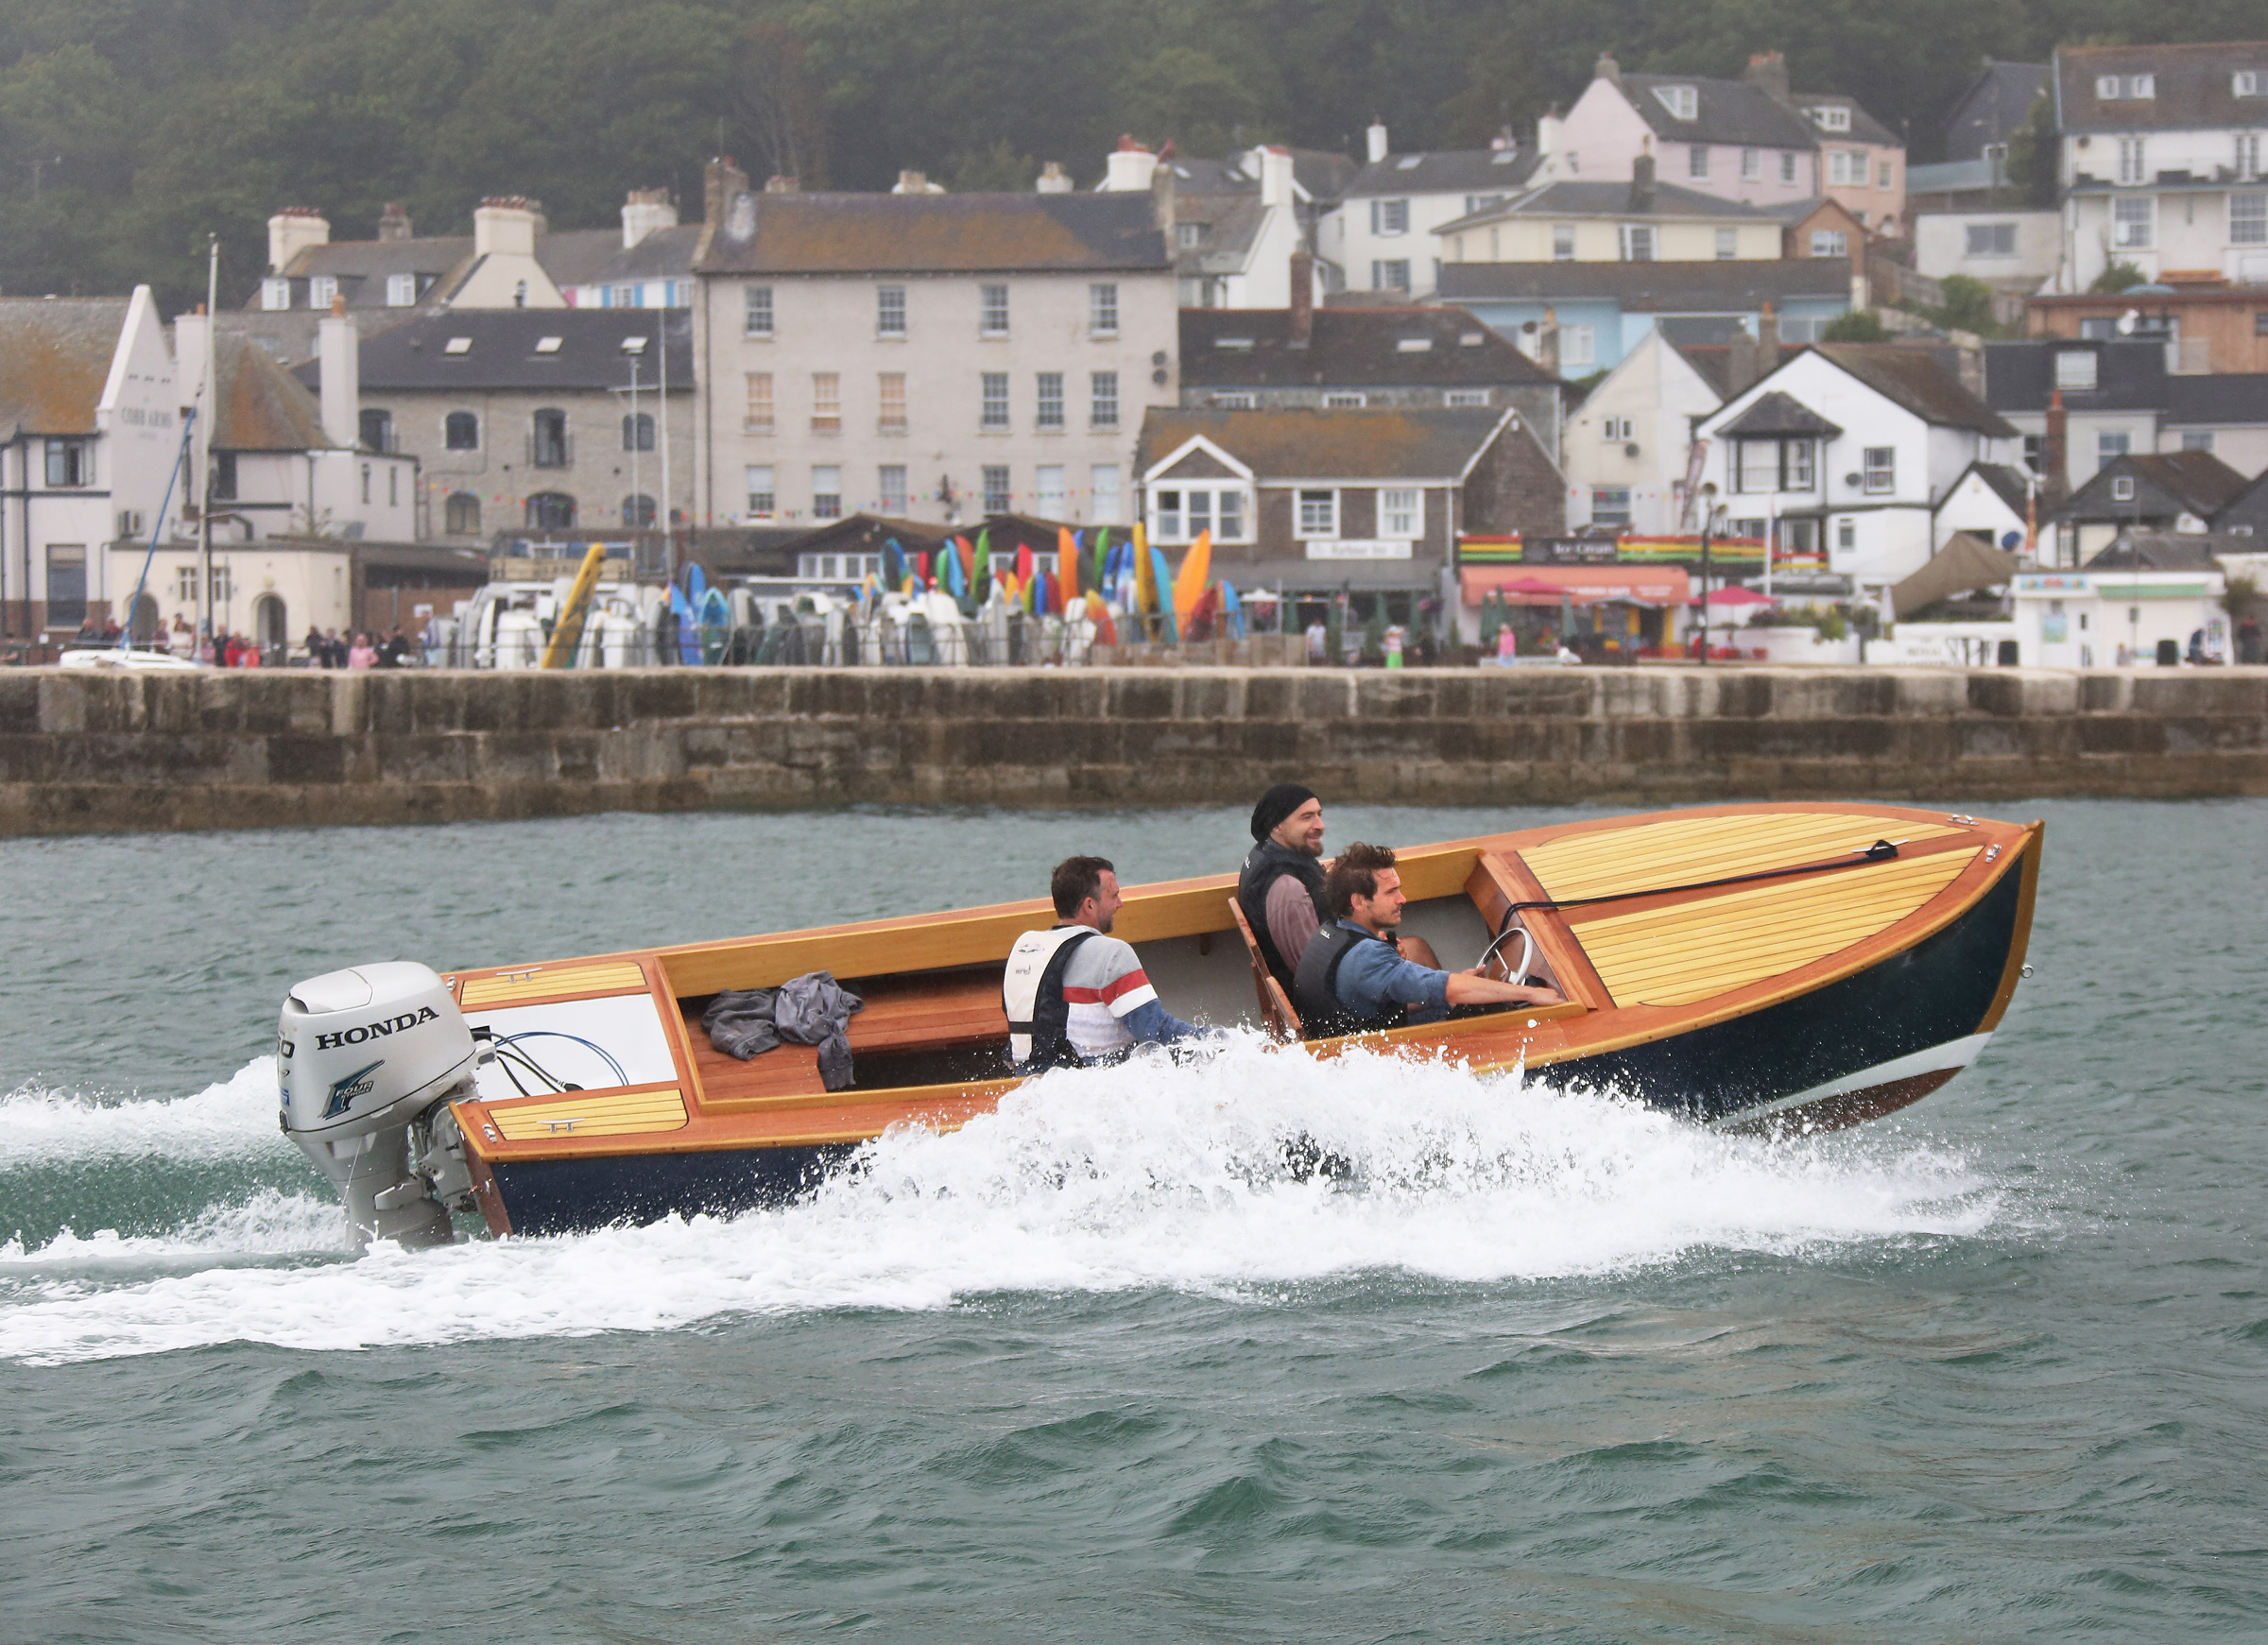
The original design of this boat called for a 20- to 30-hp outboard motor. Tim ordered a 30-hp Tohatsu in plenty of time, or so he thought, but partway through the construction process he discovered that his engine had been held up and was going to be delivered too late for the launching of the boat. Some urgent research revealed that local company Rob Perry Marine had a Honda 50-hp four-stroke engine in stock. Tim got in touch with Paul Gartside for advice, and Paul said that it would be acceptable to use this bigger engine provided the forward end of the cockpit and the two forward seats were moved forward so that the weight of the driver (and another crew member, when there was one aboard) would counteract the additional weight of the engine. Tim moved these elements forward 8″. Paul also suggested that the transom should be made up of three layers of ply rather than the two specified on the plans.
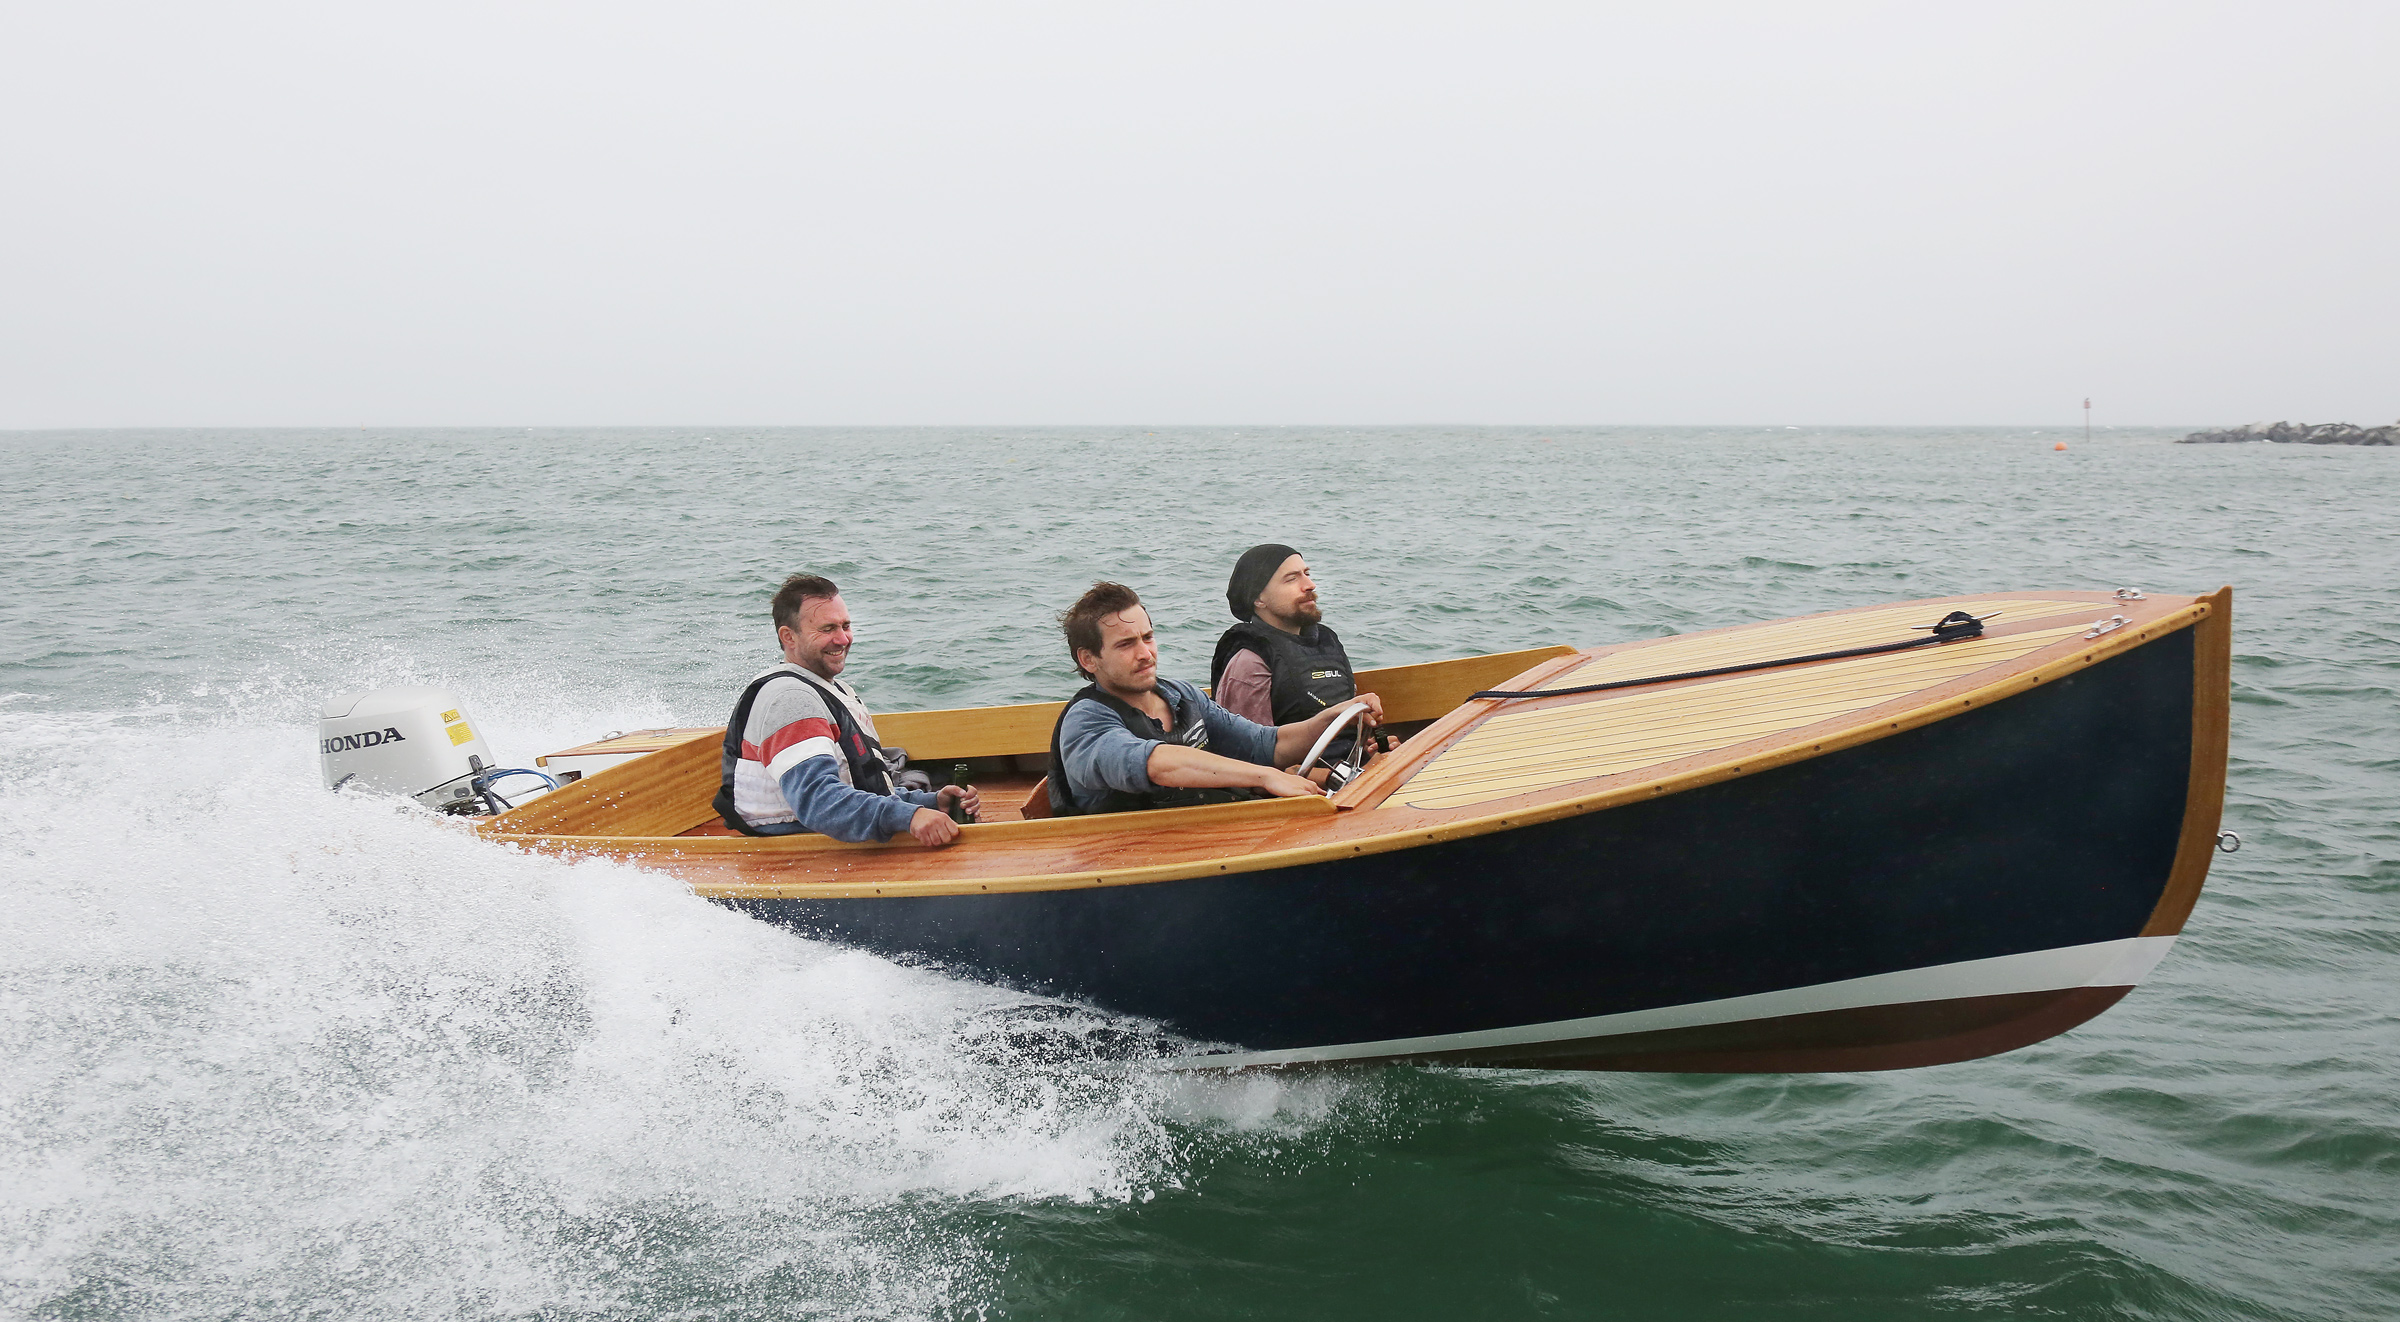
The runabout was designed to be powered by a 25- to 30-hp outboard, but this version of it accommodated a larger and heavier 50-hp outboard by moving the two seats farther forward to help achieve proper trim.
The shift to accommodate the larger engine involved a slight modification to the floors. Eight of these, set throughout the cockpit area, are made from 1-1/2″-thick solid timber. The plans specify fir; Tim used iroko. These eight floors serve as bearers for the 3/4″ iroko cockpit sole boards. Under the foredeck there are three more floors; the aft two are laminated and the forward one is solid with a half-lapped joint. The aft laminated floor was moved forward from the designed position to maintain the required legroom for the driver and passenger. It has a fillet of timber on its aft face to support the ends of the sole’s three middle boards.
In the foredeck area, the thickness of the deck shelf was doubled up on the underside to allow notching-in of the six 1-3/4″ × 3/4″ full-width deckbeams. Tim again used iroko in lieu of the fir specified. Around the side decks, the deck shelf was extended inboard and was supported by two knees each side. A layer of 1/4″ plywood was then laid over the deck shelf and deckbeams, and on top of that were laid sapele for the covering boards and kingplank and 1/4″ iroko for fore-and-aft iroko deck planks.
A 1-1/4″ × 3/4″ iroko rubrail was fitted around the sheer and a 6″ × 3/4″ iroko cockpit coaming was set to rise slightly higher above the deck forward than aft. The helm console fascia was made from sapele, as were the two forward seats and the seating around the aft part of the cockpit.
There was a bit of a swell running in Lyme Bay on the Boat Building Academy Launch Day. Despite that, the boat managed 21 knots with three of us on board. While accelerating, the trim is a little too bow-up, reducing visibility from the helm, but at full speed the runabout almost leveled up. Tim is contemplating fitting a fuel tank under the foredeck to help to address this issue. There was a bit of spray at slow speeds but at 10 knots or more this was hardly noticeable despite the absence of the windscreen, which was to be fitted later. The turning circle was about three boat-lengths at full speed, while at 5 knots the boat turned in its own length. At tick-over rpm in the calmness of Lyme Harbour, it did about 2 knots.
Even though Tim wanted to build a sailing boat, he is looking forward to using his runabout “with the convenience of just being able to turn the engine on and without the hassle of all the rigging.” He plans to use the boat for fishing, swimming, “and just lying at anchor with friends on a bright sunny day. It is a fun boat that I can use for more than just going full throttle because I would get bored of that. I want to be able to do different things.”
And he is delighted with the result of his and his fellow students’ labors. “Before we built it, I don’t think we really realized how beautiful it would be,” he said. “But now I can see it has beautiful lines—the way the bow really flares up and the tumblehome at the stern. It just has this wonderful shape. I fell in love with this boat as soon as we built the hull.” ![]()
Nigel Sharp is a lifelong sailor and a freelance marine writer and photographer. He spent 35 years working in the UK boat building and repair industry and has logged thousands of miles in boats big and small, from dinghies to schooners.
17′ Runabout, Design #221 Particulars
- Length: 17′
- Beam: 6′ 3″
- Hull depth amidships: 2′ 2″
- Power: 25- to 30-hp outboard

Plans for the 17’ Outboard Runabout, Design #221 are available in both print ($250) and digital ($200) format from Paul Gartside.
Editor’s Note:
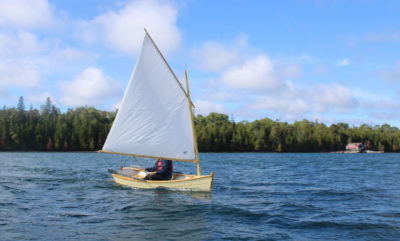
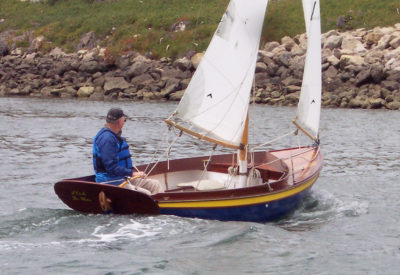
Mike Webb, the Victoria, B.C., resident for whom Paul Gartside drew Design #221, sent photographs of his lapstrake version of the runabout, HAVEN. He made the windshield a bit higher to improve visibility forward, the better to avoid the logs that drift in his cruising grounds.
 Mike Webb photographs
.
Is there a boat you’d like to know more about? Have you built one that you think other Small Boats Magazine readers would enjoy? Please email us!


Why do so many powerboaters think that there are only two speeds, stopped and knuckles-to-the-firewall? With what we know of climate change and the effects of burning fossil fuels, those who don’t want to row or sail need to come up with a new ethic.
Stills of motor boats on a plane tend to look more speedy than they actually are. Those shots were probably less than 20 mph. As for climate change, a Tohatsu 30 on a 17′ boat is hardly unethical in the grand spectrum of oil consumption. Given the alternative to the wood-boat aficionados are many recreational boats with twin 250’s or more. I think the constituents of this magazine are, in all forms, low consumption.
Well said, John.
Another piece of functional sculpture from the talented Mr. Gartside. Beautiful! He may get me to build another boat after all.
I’m the person in Victoria, BC, who asked Paul for the design, and launched my glued-lapstrake plywood version in November 2020. It was fun to build from the excellent plans and is a wonderful boat for its intended purpose. This strip-plank version looks lovely.
Mine also rode bow-high, which I addressed by adding small trim tabs that can be adjusted manually for different loads. The 40hp motor I selected gets her up on plane but I may upgrade to 50hp (same weight as the 40hp) to enable cruising at lower rpm.
Thank you for chiming in with your experience and posting those beautiful pictures of your boat. As a Victoria native myself I’ll keep an eye out for it on the water.
This boat is similar in size to one I built several years ago, and I encountered the same design concerns. I extended the hull at the stern to recess the outboard into the boat. That does three things: it supports the motor better, it almost eliminates bow rise during acceleration to plane, and it visually hides that big motor hanging off the back. Here in Colorado, all our boating is done at 6,000′ to 10,000′ altitude (after the ice melts); so, I use a 75hp engine, but it is not developing its full power.
I also placed the fuel tank under the front seat for better weight distribution. I kept windshield height low. At speed, you are looking over the windshield for maximum view, but the airstream is still deflected over your head, not in your face. The lower windshield also allows a lower height for the rig when towing on the highway.
The feature I wish I had incorporated is the small keel Paul Gartside included. At speed, everything is fine, but when maneuvering at low speed around the launch ramp, any wind can push the hull off course.
beautiful runabout !!! … Would like to see a 20-23 foot version for cruising more folks !!!