I grew up spending my summers in Falmouth, Massachusetts, on Cape Cod. My family has a Joel White–designed Bridges Point 24 sloop; my dad loves to sail and passed his passion down to me. I have been taking sailing lessons since I was eight and I’m now working my fifth summer as a sailing instructor. So, when it came to doing a required “capstone” project for my senior year of high school, sailing was at the forefront of my thinking. I spent months trying to create a project weaving my love for the water with the school assignment. Most students do research and write up a report or try to learn a new skill for their project, but I wanted to do something big.
When I talked to my dad about building a boat, he got super-excited and immediately went to a bookshelf, pulling out Eric Dow’s How to Build the Shellback Dinghy. From that point on, I was determined to build a boat and have it on the water by the end of my senior year.
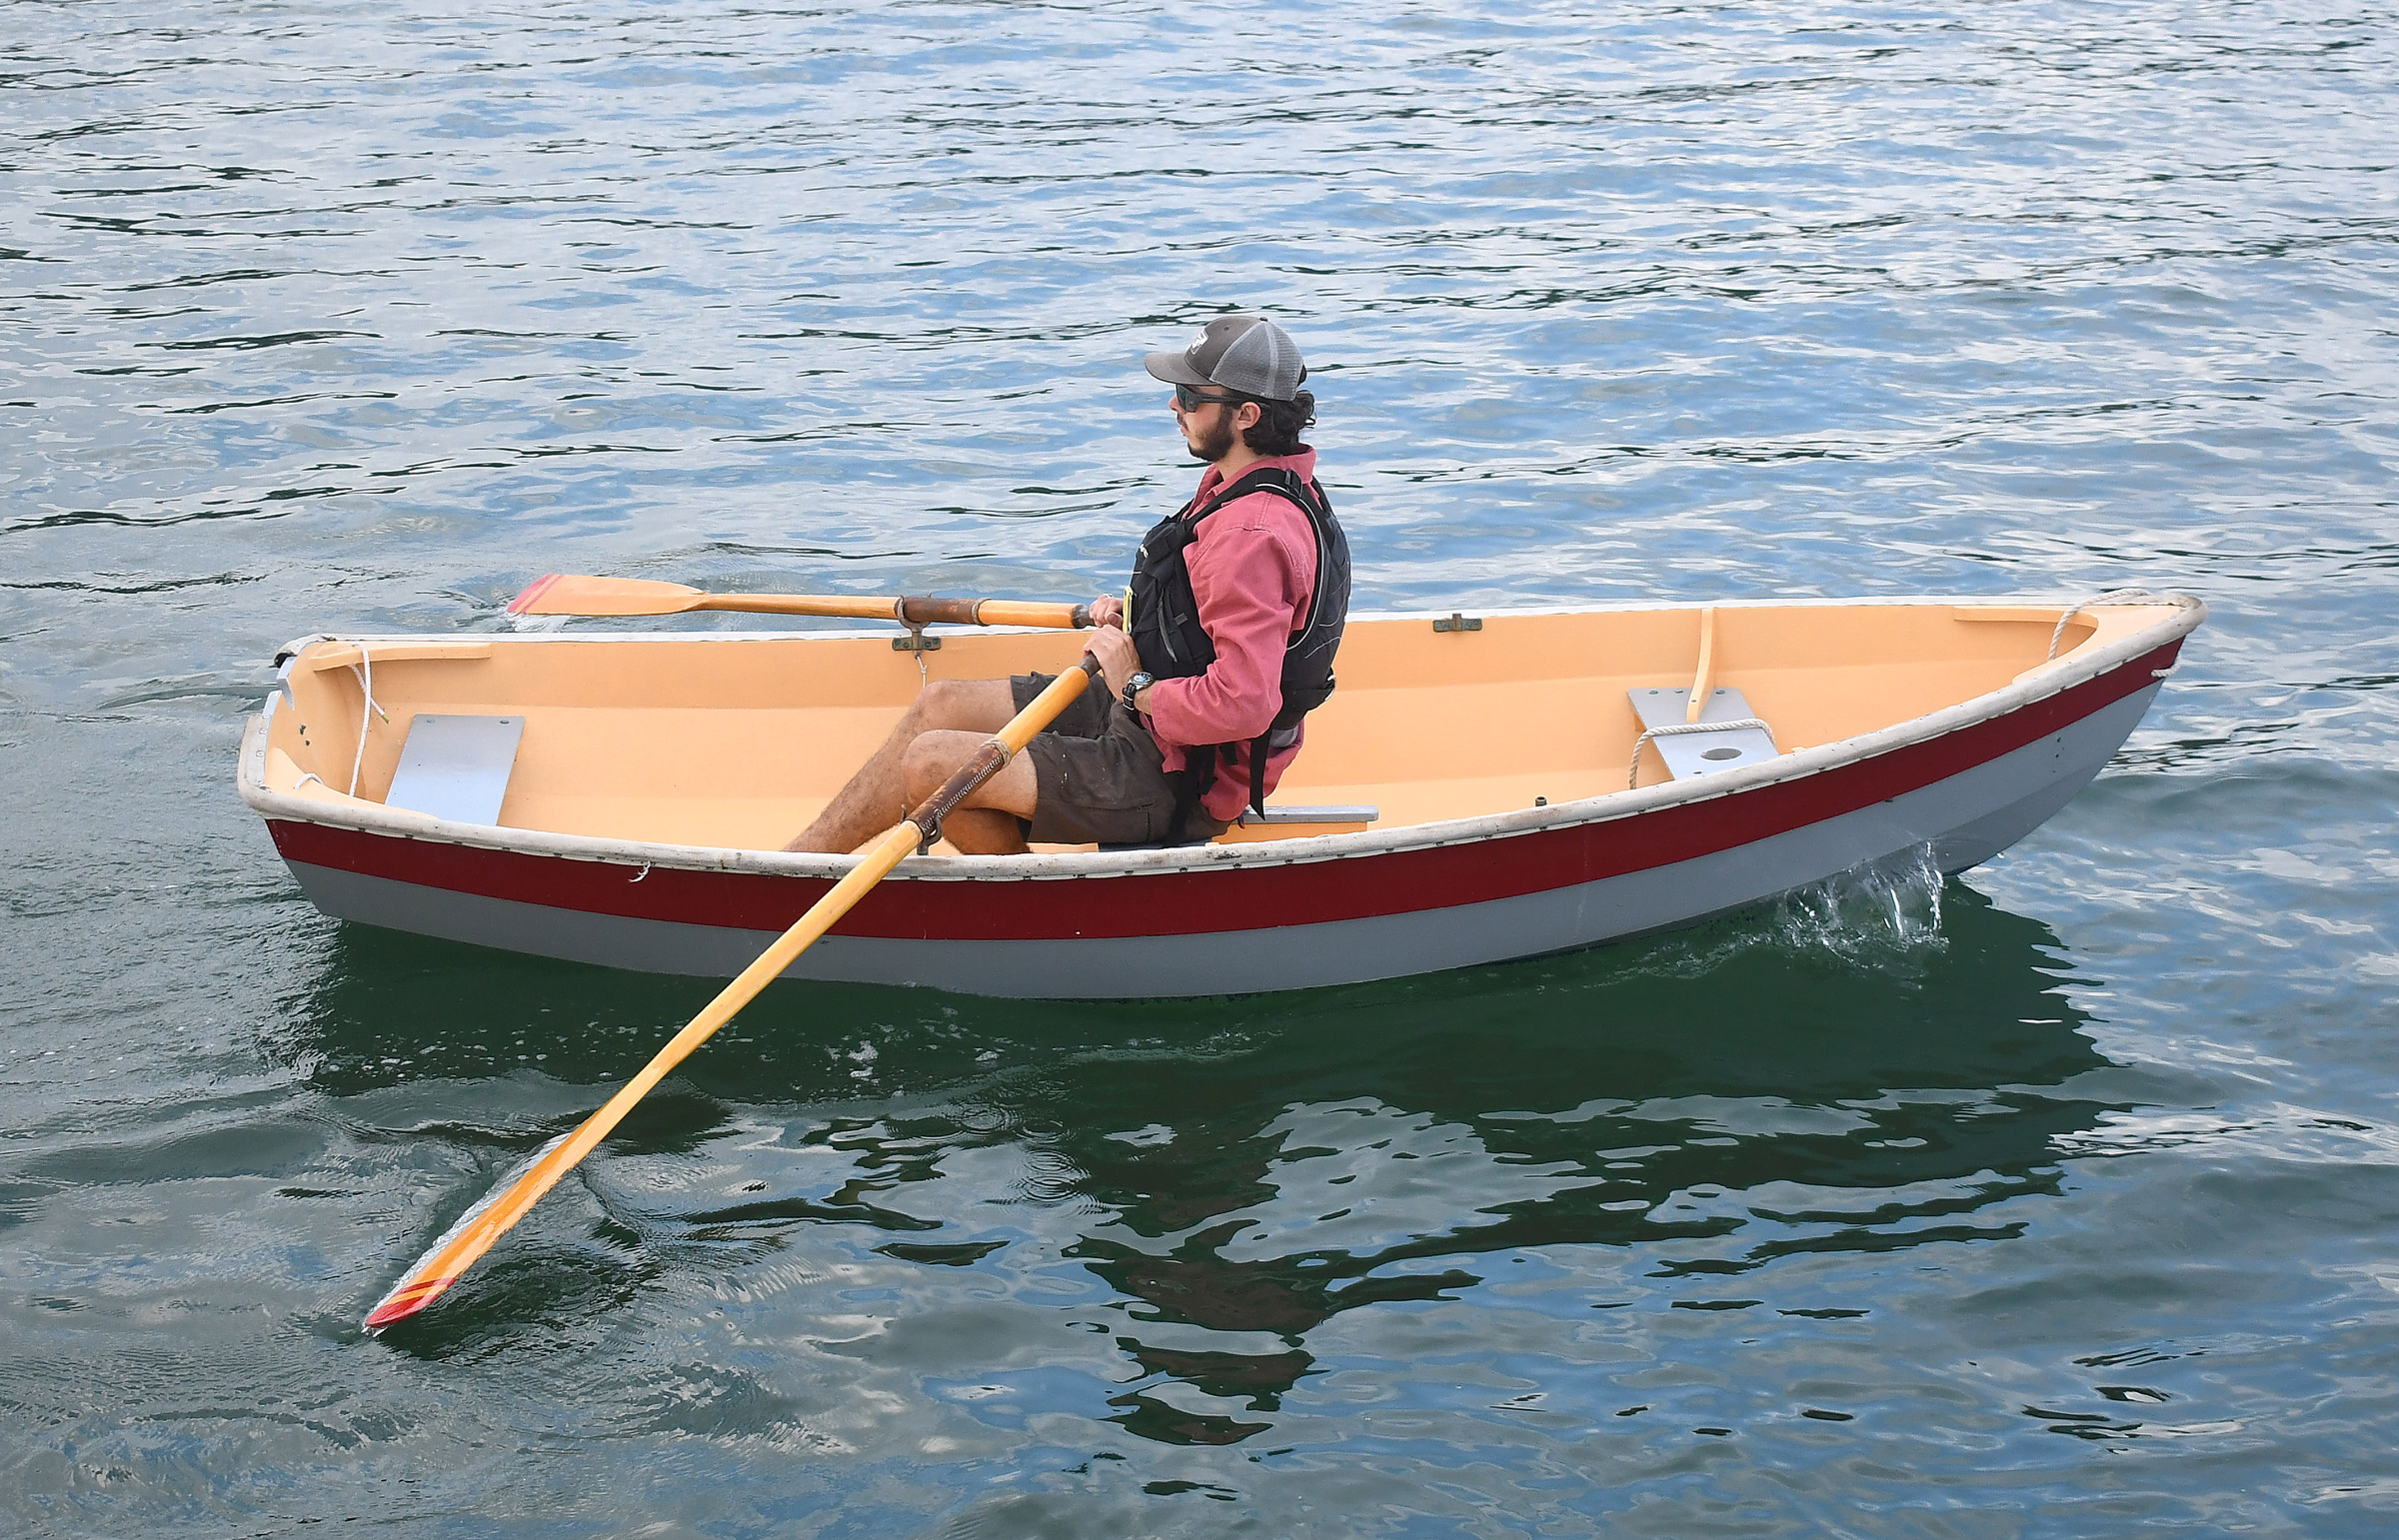 All photos by Delaney Brown
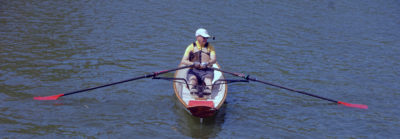
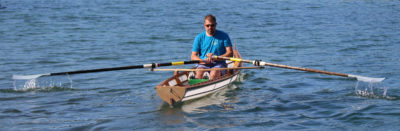
 The Shellback is well behaved under oars. Neither the plans nor the book Building the Shellback Dinghy indicate a brace for the rower’s feet at the ’midship rowing station, but the addition of one would allow for a more powerful pull.
The Shellback is a 11′2″ sailing and rowing dinghy designed by Joel White. The kit I purchased from The WoodenBoat Store came with six sheets of plans, the lumber and precut plywood required to build the boat, all the hardware it would need, the ’midship frame, and the strongback. The plans include lines and offsets and full-sized templates for the three molds, laminated ’midship frame, inner stem, and transom. For a builder working from plans, measured drawings are provided for the 1/4″ plywood planks and the 1/2″ plywood bottom; lofting and spiling aren’t required. Going into this project I had very little woodworking experience and no boatbuilding experience, but I was lucky to have the guidance in Dow’s book as well as the advice of several people in town who had built Shellbacks.
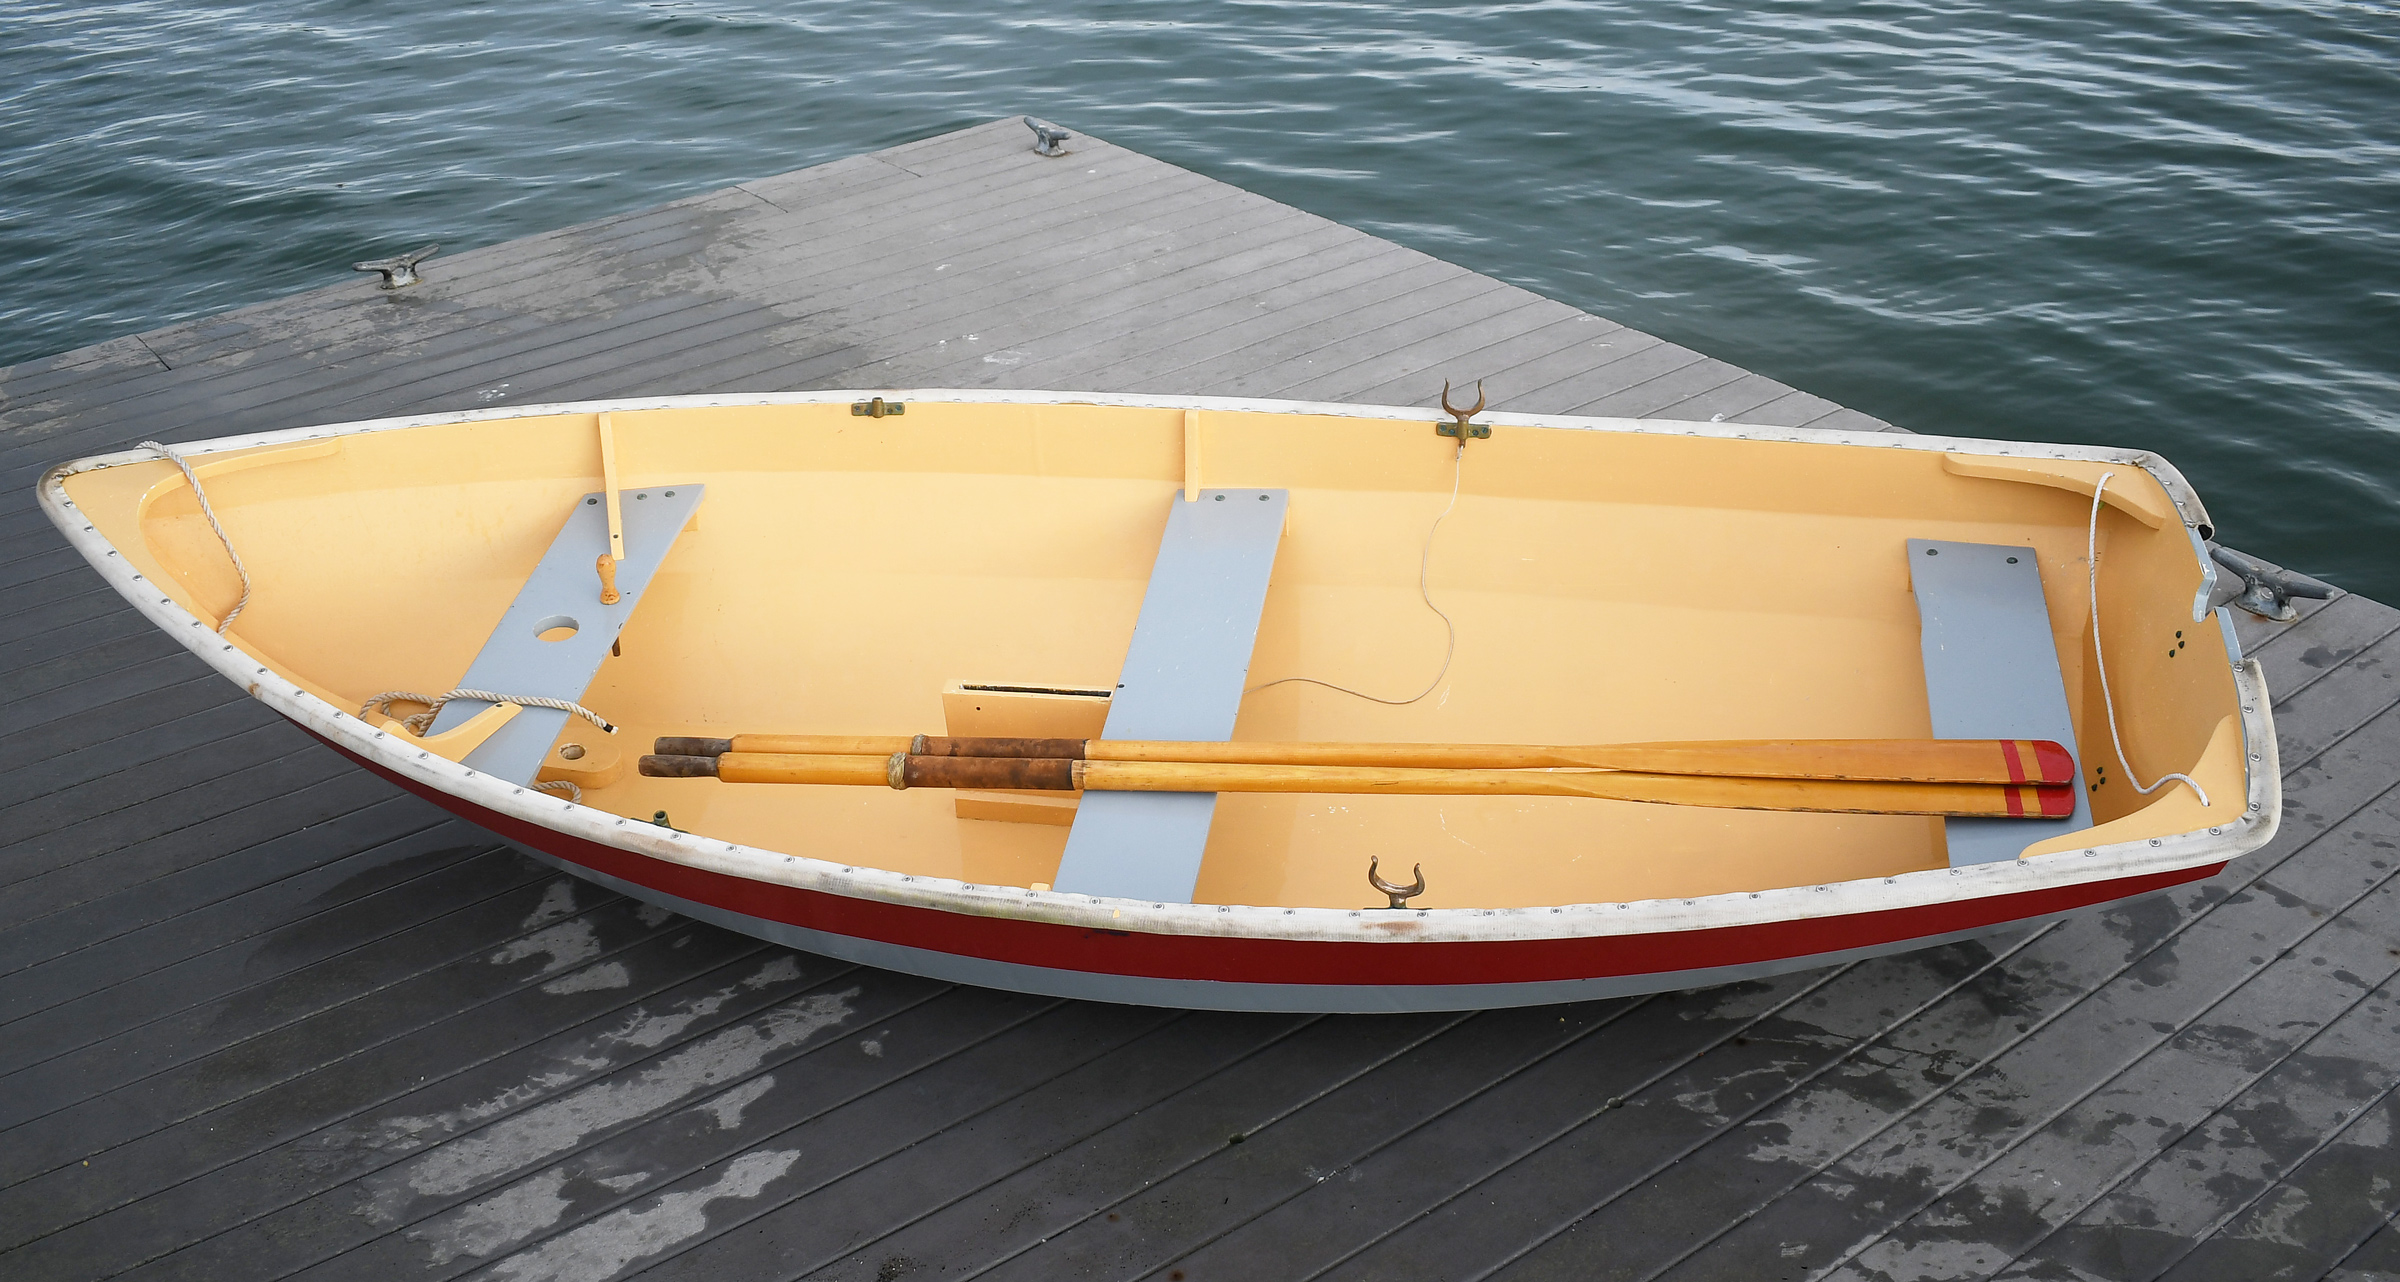
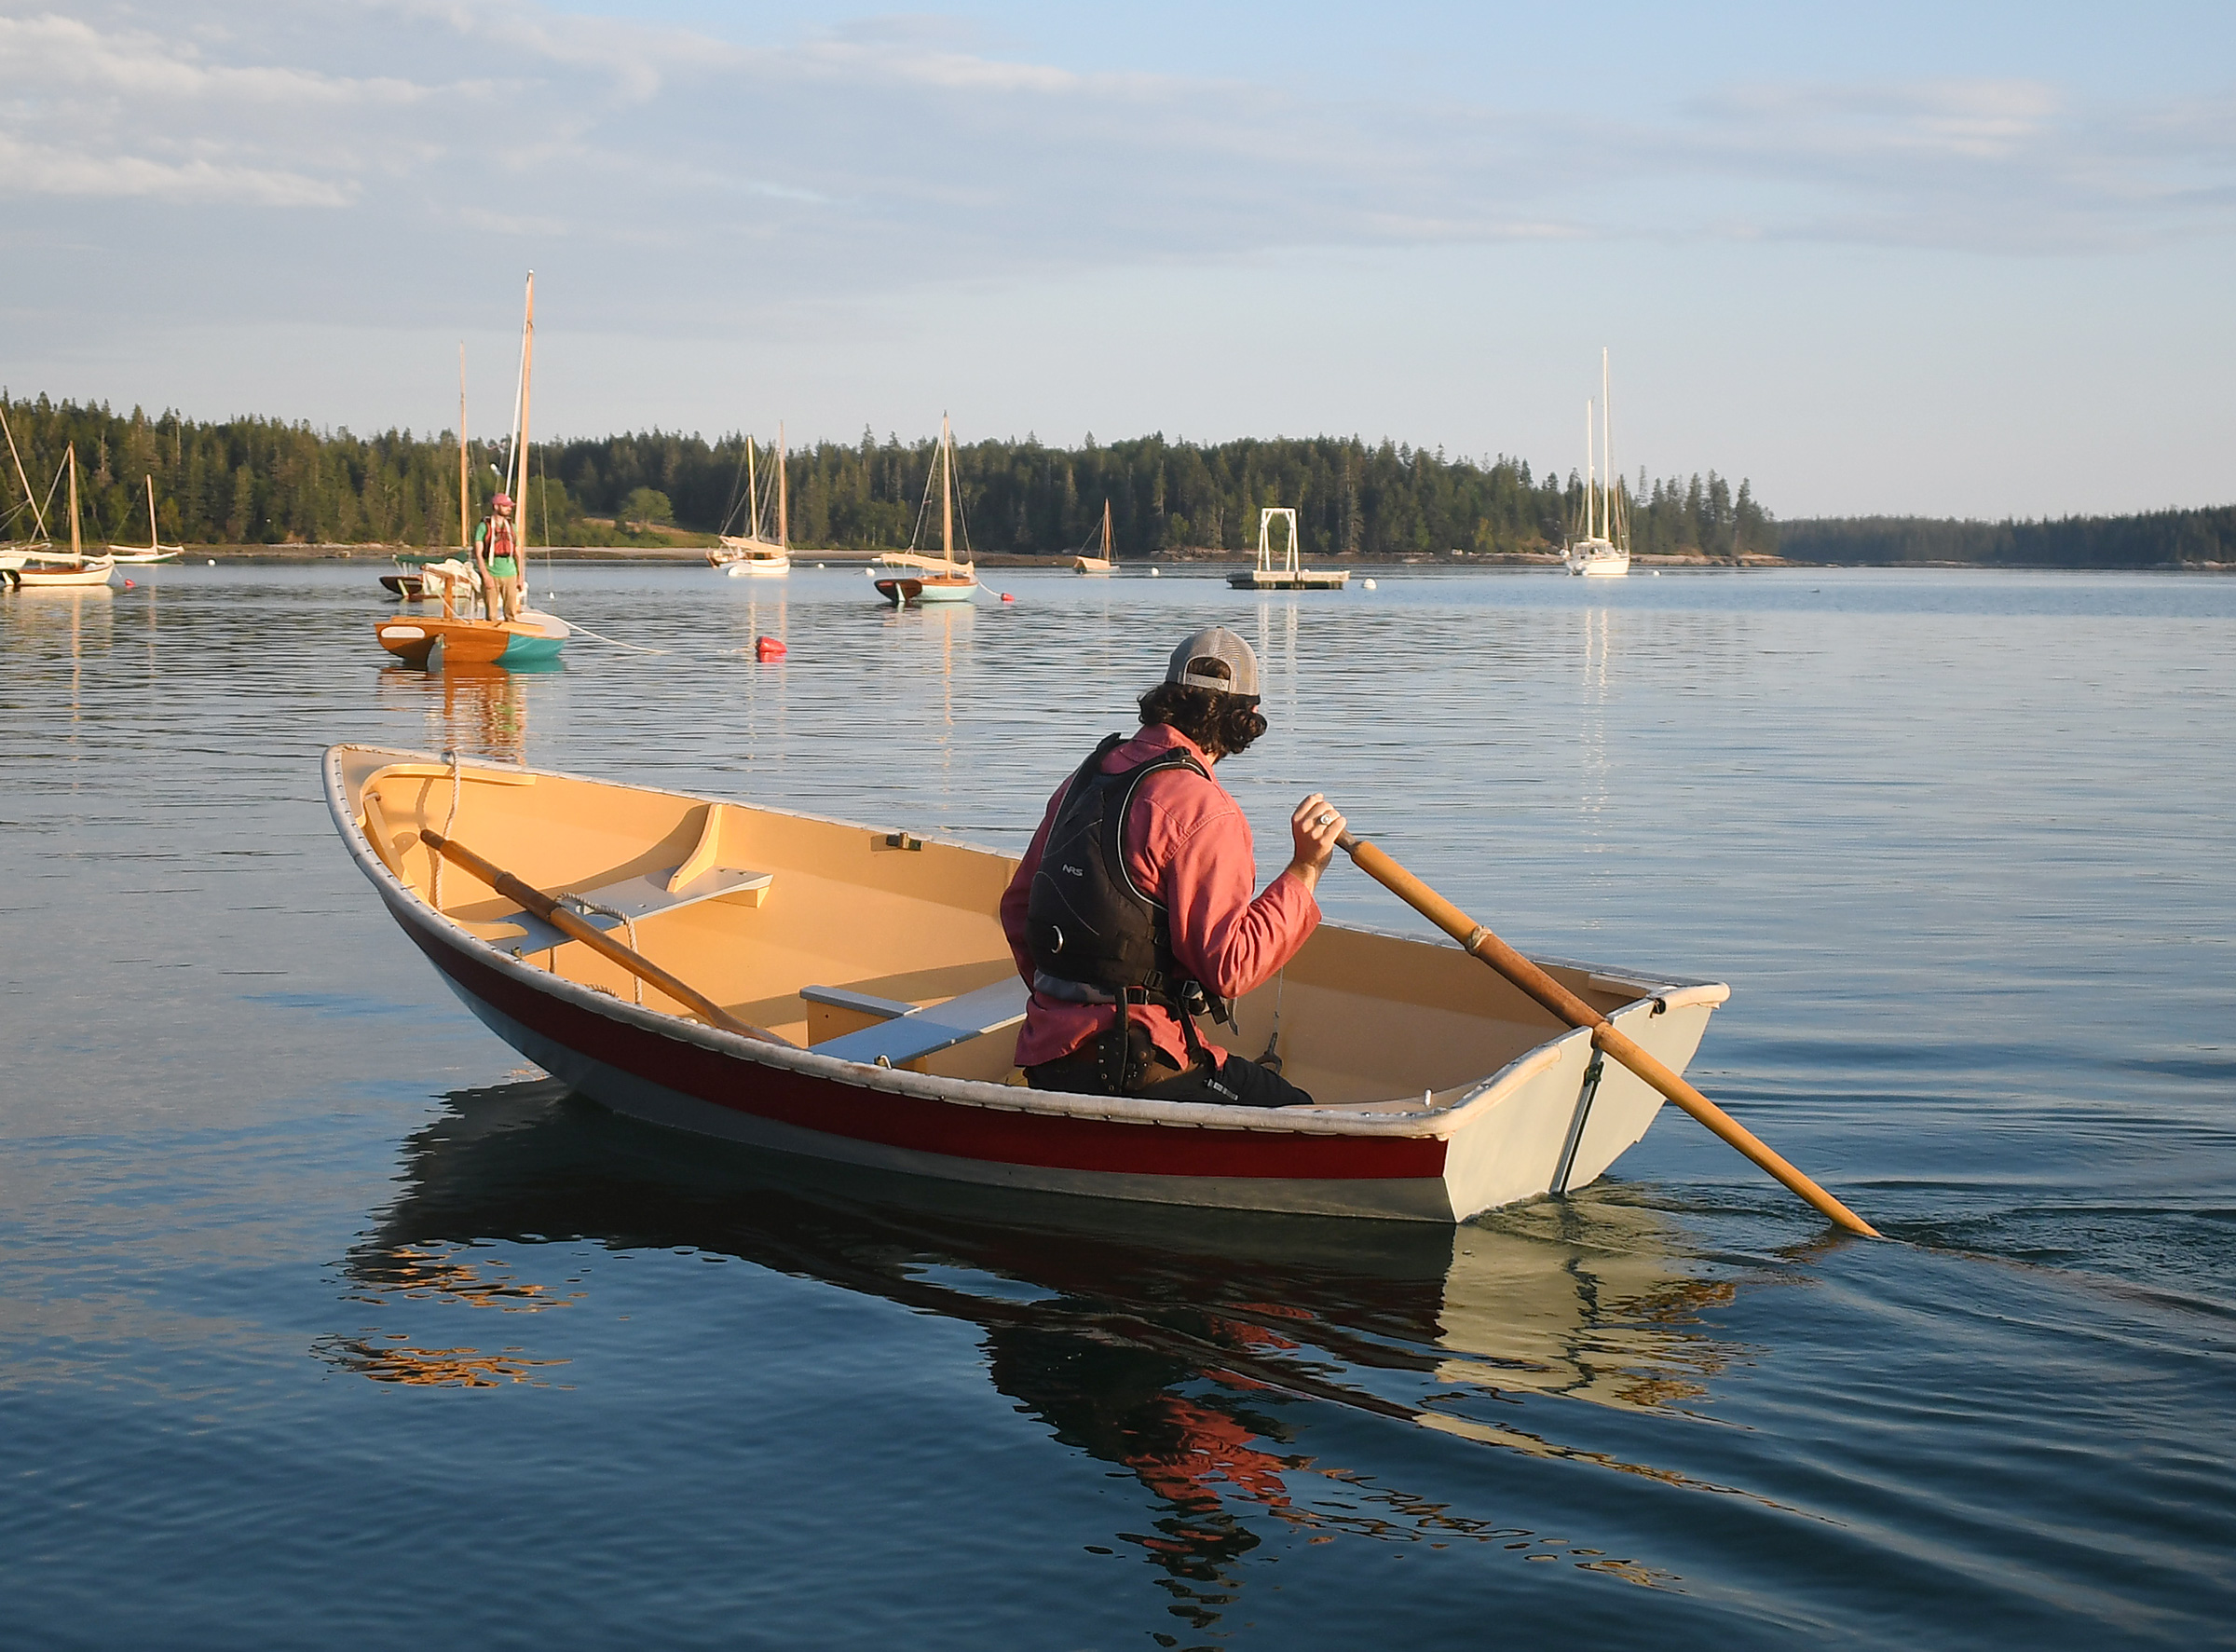
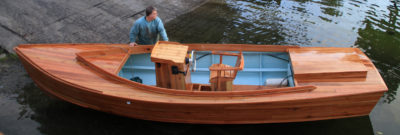
The bottom is obstructed only by the mast step, the daggerboard trunk, and a single laminated frame, leaving the rest of the area clear for the boat’s occupants.
Included in the kit for the sailing Shellback are the blanks for the daggerboard, rudder, and spars. The wooden CNC-cut strongback was easy to assemble and fit together precisely; I made some wooden sawhorses to set it on. Building from the kit went quite smoothly though some steps, while beveling the planks took me a lot of time. Dow’s book was an invaluable resource when I needed additional information on some of the more complex elements of the construction, like cutting the gains at the ends of the planks with a rabbet plane. The actual shaping of the rudder and daggerboard plus making a spar gauge and shaping of the spars are left up to the builder.
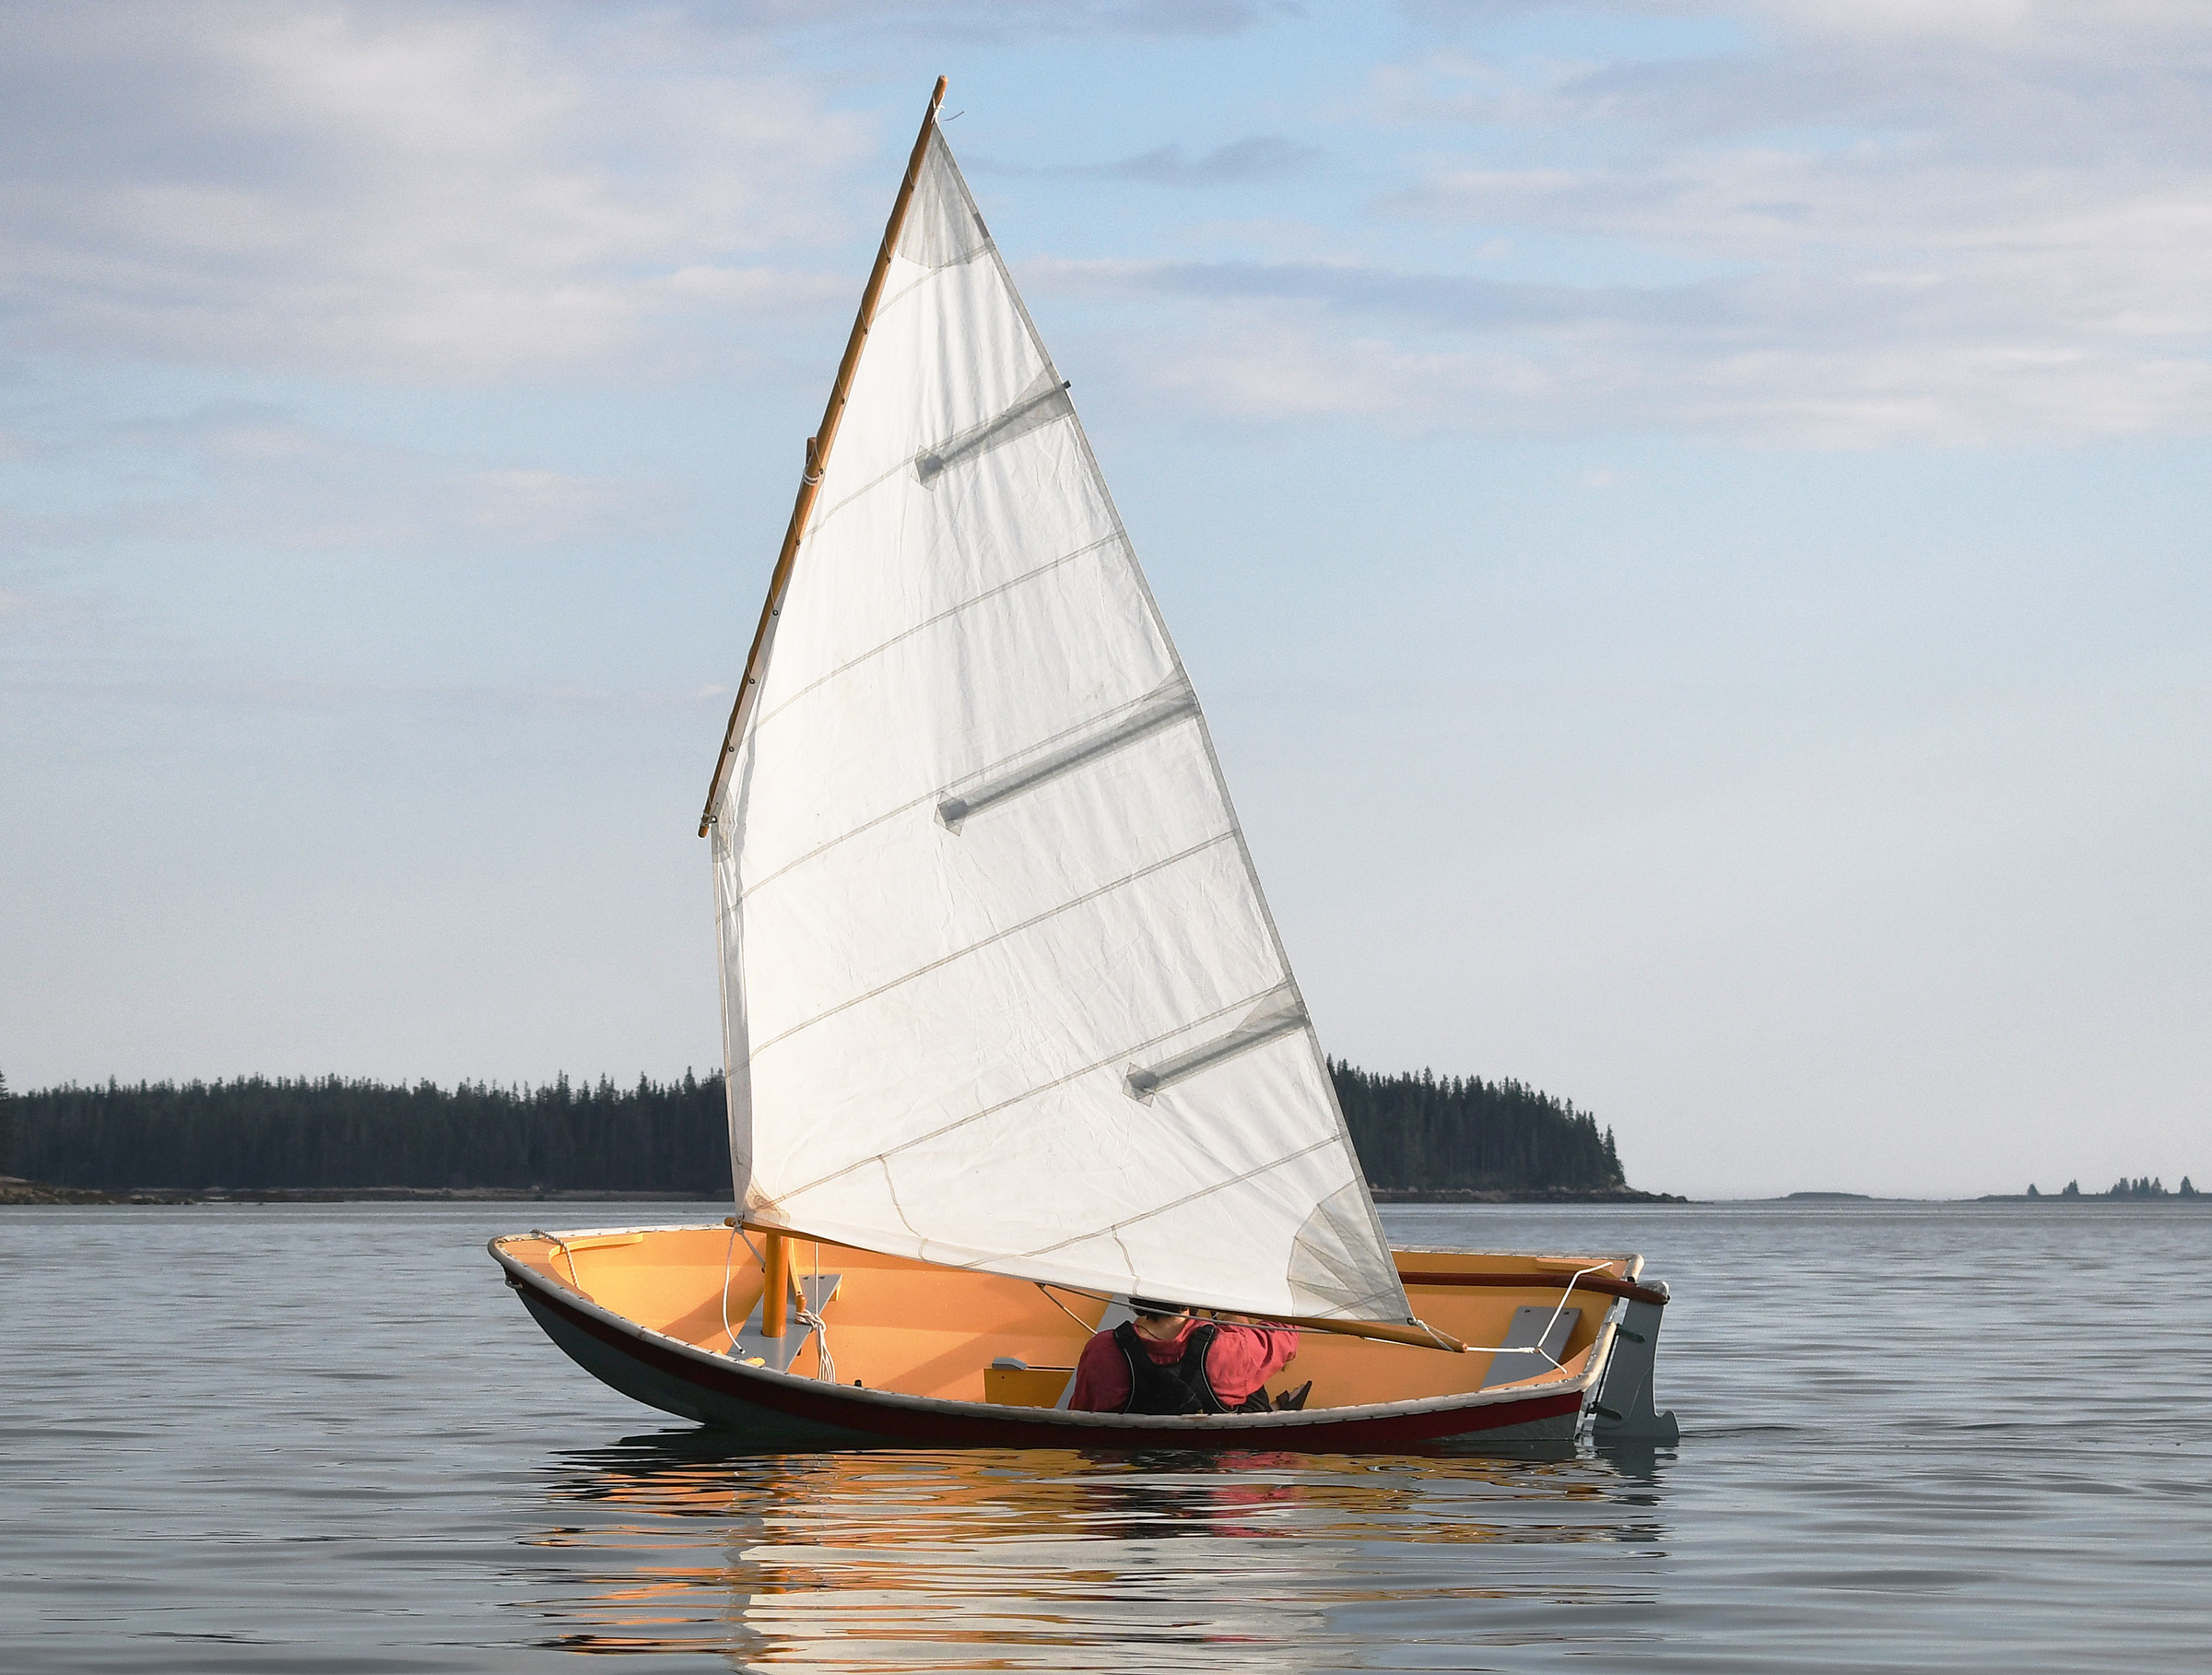
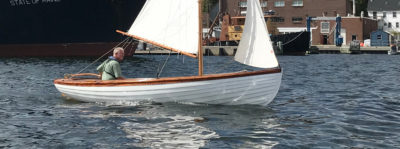
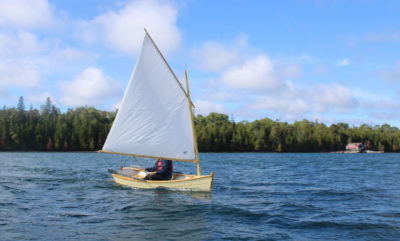
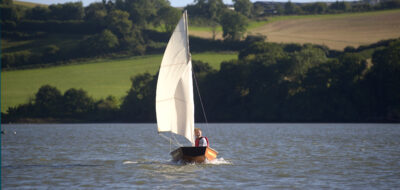
The plans call for a straight leech on the 56-sq-ft lugsail. The battens on this Shellback’s sail allow for some roach in the leech and a little more sail area.
I built the dinghy in my family’s two-car garage. Dow’s book includes a list of tools needed for the job—all are common hand tools plus an electric drill. There is a list of “optional tools that will make the job go more quickly.” While the bandsaw and power planer would indeed speed the work, I preferred using hand tools for tasks such as shaping the spars because they are much more forgiving and gave me more control.
The precut sections of the bottom and planks need to have scarfs cut before being joined with epoxy. Set on the strongback and temporarily held with drywall screws, the edges of the bottom get beveled to meet the garboard, then epoxied, using drywall screws at the laps; the middle planks and sheer planks follow in the same manner. I followed the plans carefully when lining up the planks. The molds came with indexing points on them to help with the process.
When the hull was finished, I coated it with epoxy. I knew that I would be launching this boat from the beach, so I ’glassed the bottom to protect it from all the wear of beaching. These steps are not indicated in the plans or the kit, but I wanted the added layers of protection.
The kit comes with long strips of wood for the outwales, inwales, and blocking for the inwales. Assembling the gunwale parts was just one step where it was extremely helpful to have the book How to Build the Shellback Dinghy, as its illustrations, tips, and tricks made the process a lot easier. The outwales go on first to give the hull some rigidity. This step was easier with two people and about 15 clamps to hold each outwale to the hull. They bend easily enough and do not need to be steamed. Silicon-bronze screws and epoxy hold everything in place.
The thwarts were surprisingly hard to get right and the step I had the most trouble with. I used a compass and a bevel to try and get them to sit flush with the hull. I went through about three sets of seats before I had made ones that fit right. I recommend cutting and fitting some scrap wood to get a flush result before using the wood that comes in the kit. The rest of the inside of the hull is fairly easy to assemble. The daggerboard and rudder foils need to be shaped a little bit, and the daggerboard trunk is simple to build by paying close attention to the plans. Make sure to measure a lot when lining everything up. Dry-fit everything where it should go before permanently attaching anything.
I started the Shellback the summer after my junior year, worked most weekends, school breaks, and many evenings, and finished at the end of my senior year. The build process can be wonderful even for a novice woodworker like me. It’s not a simple process, but it is extremely rewarding.
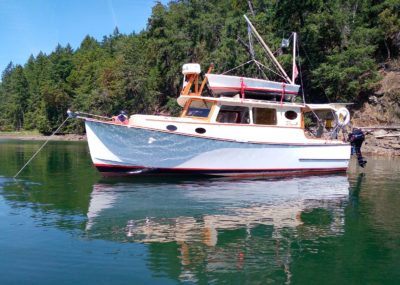
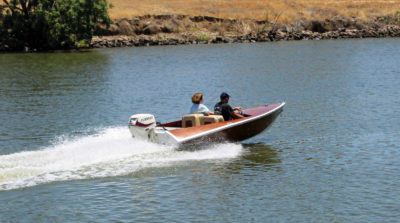
One of the best features of the Shellback is how straightforward it is to transport and launch. My family has a full-sized pickup truck with a 6′ bed, so I don’t need a trailer. Since the dinghy weighs only around 100 lbs, two people can lift it into the truck bed before it is secured with straps for the drive down to the beach. The rig can be easily set up on the beach. I launch from a small beach where the wind is usually blowing straight onshore, so I row out into open water before raising the sail. If the wind were to come from a better angle, I would sail off the beach.
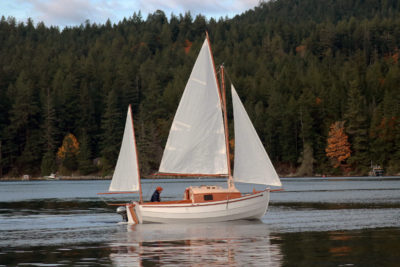
The Shellback is a joy to sail. I can settle down quite nicely just aft of the middle thwart with my feet braced against the leeward side. Sitting on the bottom of the boat, I have good visibility all around, even under the boom. Because the Shellback is so light, it takes almost no wind to get it moving. I feel like I’m gliding along the top of the water, and when the boat really gets going, I hear the sounds of the water rushing past the bottom of the hull—fantastic! The dinghy tracks very well and is responsive to any tiller movement. Sailing is best in about 12 to 15 knots of wind, although the boat can handle more than 15 and still feel under control. The sail has reefpoints, and shortening sail is as simple as re-tying the downhaul and outhaul to set up your reef. The Shellback is also surprisingly stable—you get a nice little heel, but because the boat is so light it’s easy to counterbalance without the need to hike out, especially when you have two people sailing.

Kneeling on the bottom provides good mobility for sailing.
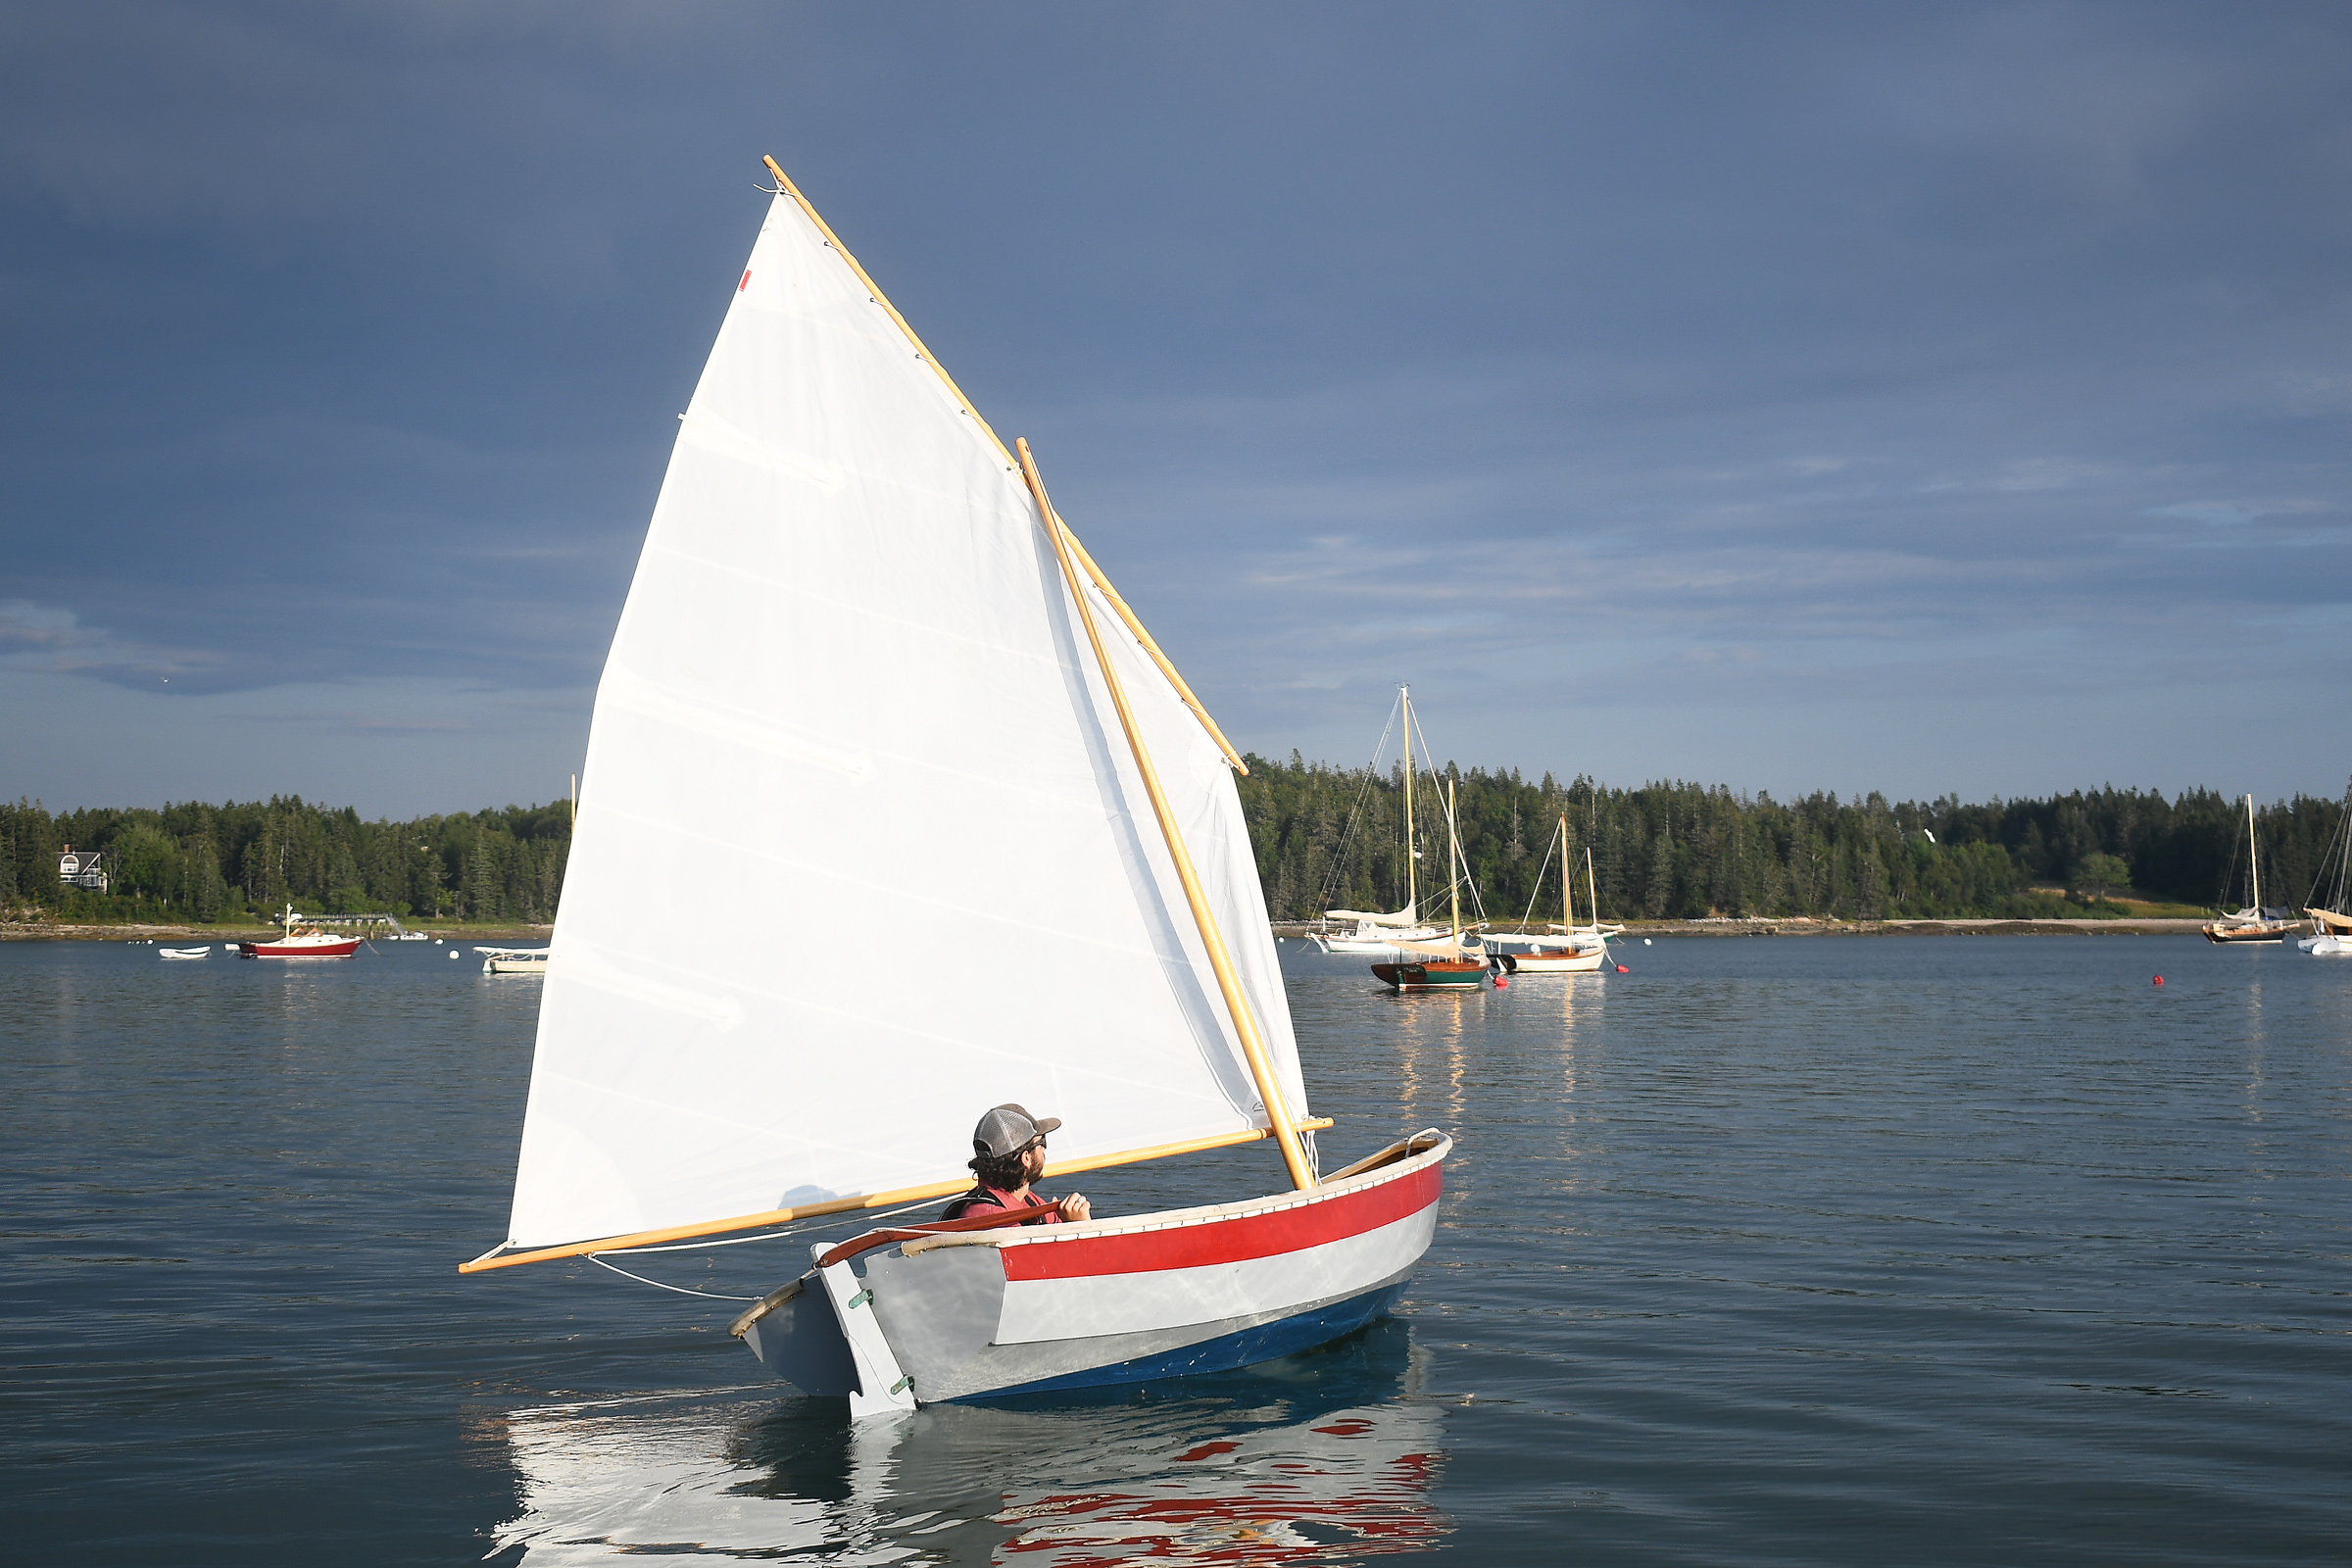
The hull has reassuring stability so the sailor can confidently shift to leeward to heel the boat and let gravity give the sail a useful shape in light air
That lightness and speed do come with a slight cost—the boat does not carry a lot of momentum. That’s wonderful when you’re going back to a dock or beach because it’s easier to come to a stop, but it loses a lot of speed when tacking. The boat gains that speed back super-fast, but it’s something to take note of. I am 5′6″ so I find ducking under her boom when tacking or jibing quite easy. For me, even though the Shellback slows down on a tack, the light weight is worth it for the easy launching and super-fast acceleration.
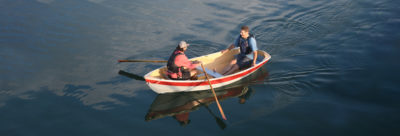
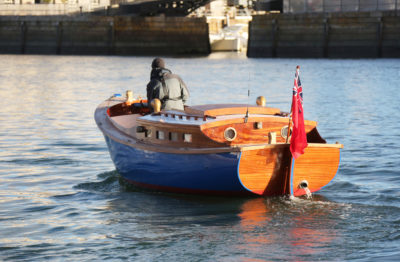
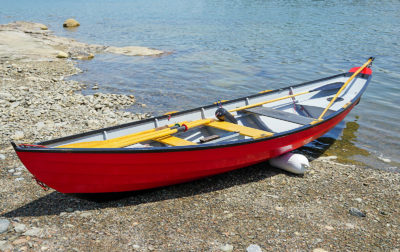
The Shellback rows like a dream. It carries its way in a straight line and moves gracefully through the water. It can easily be rowed solo or with a passenger. Although the plans detail a sculling notch in the transom, I decided not to make one.
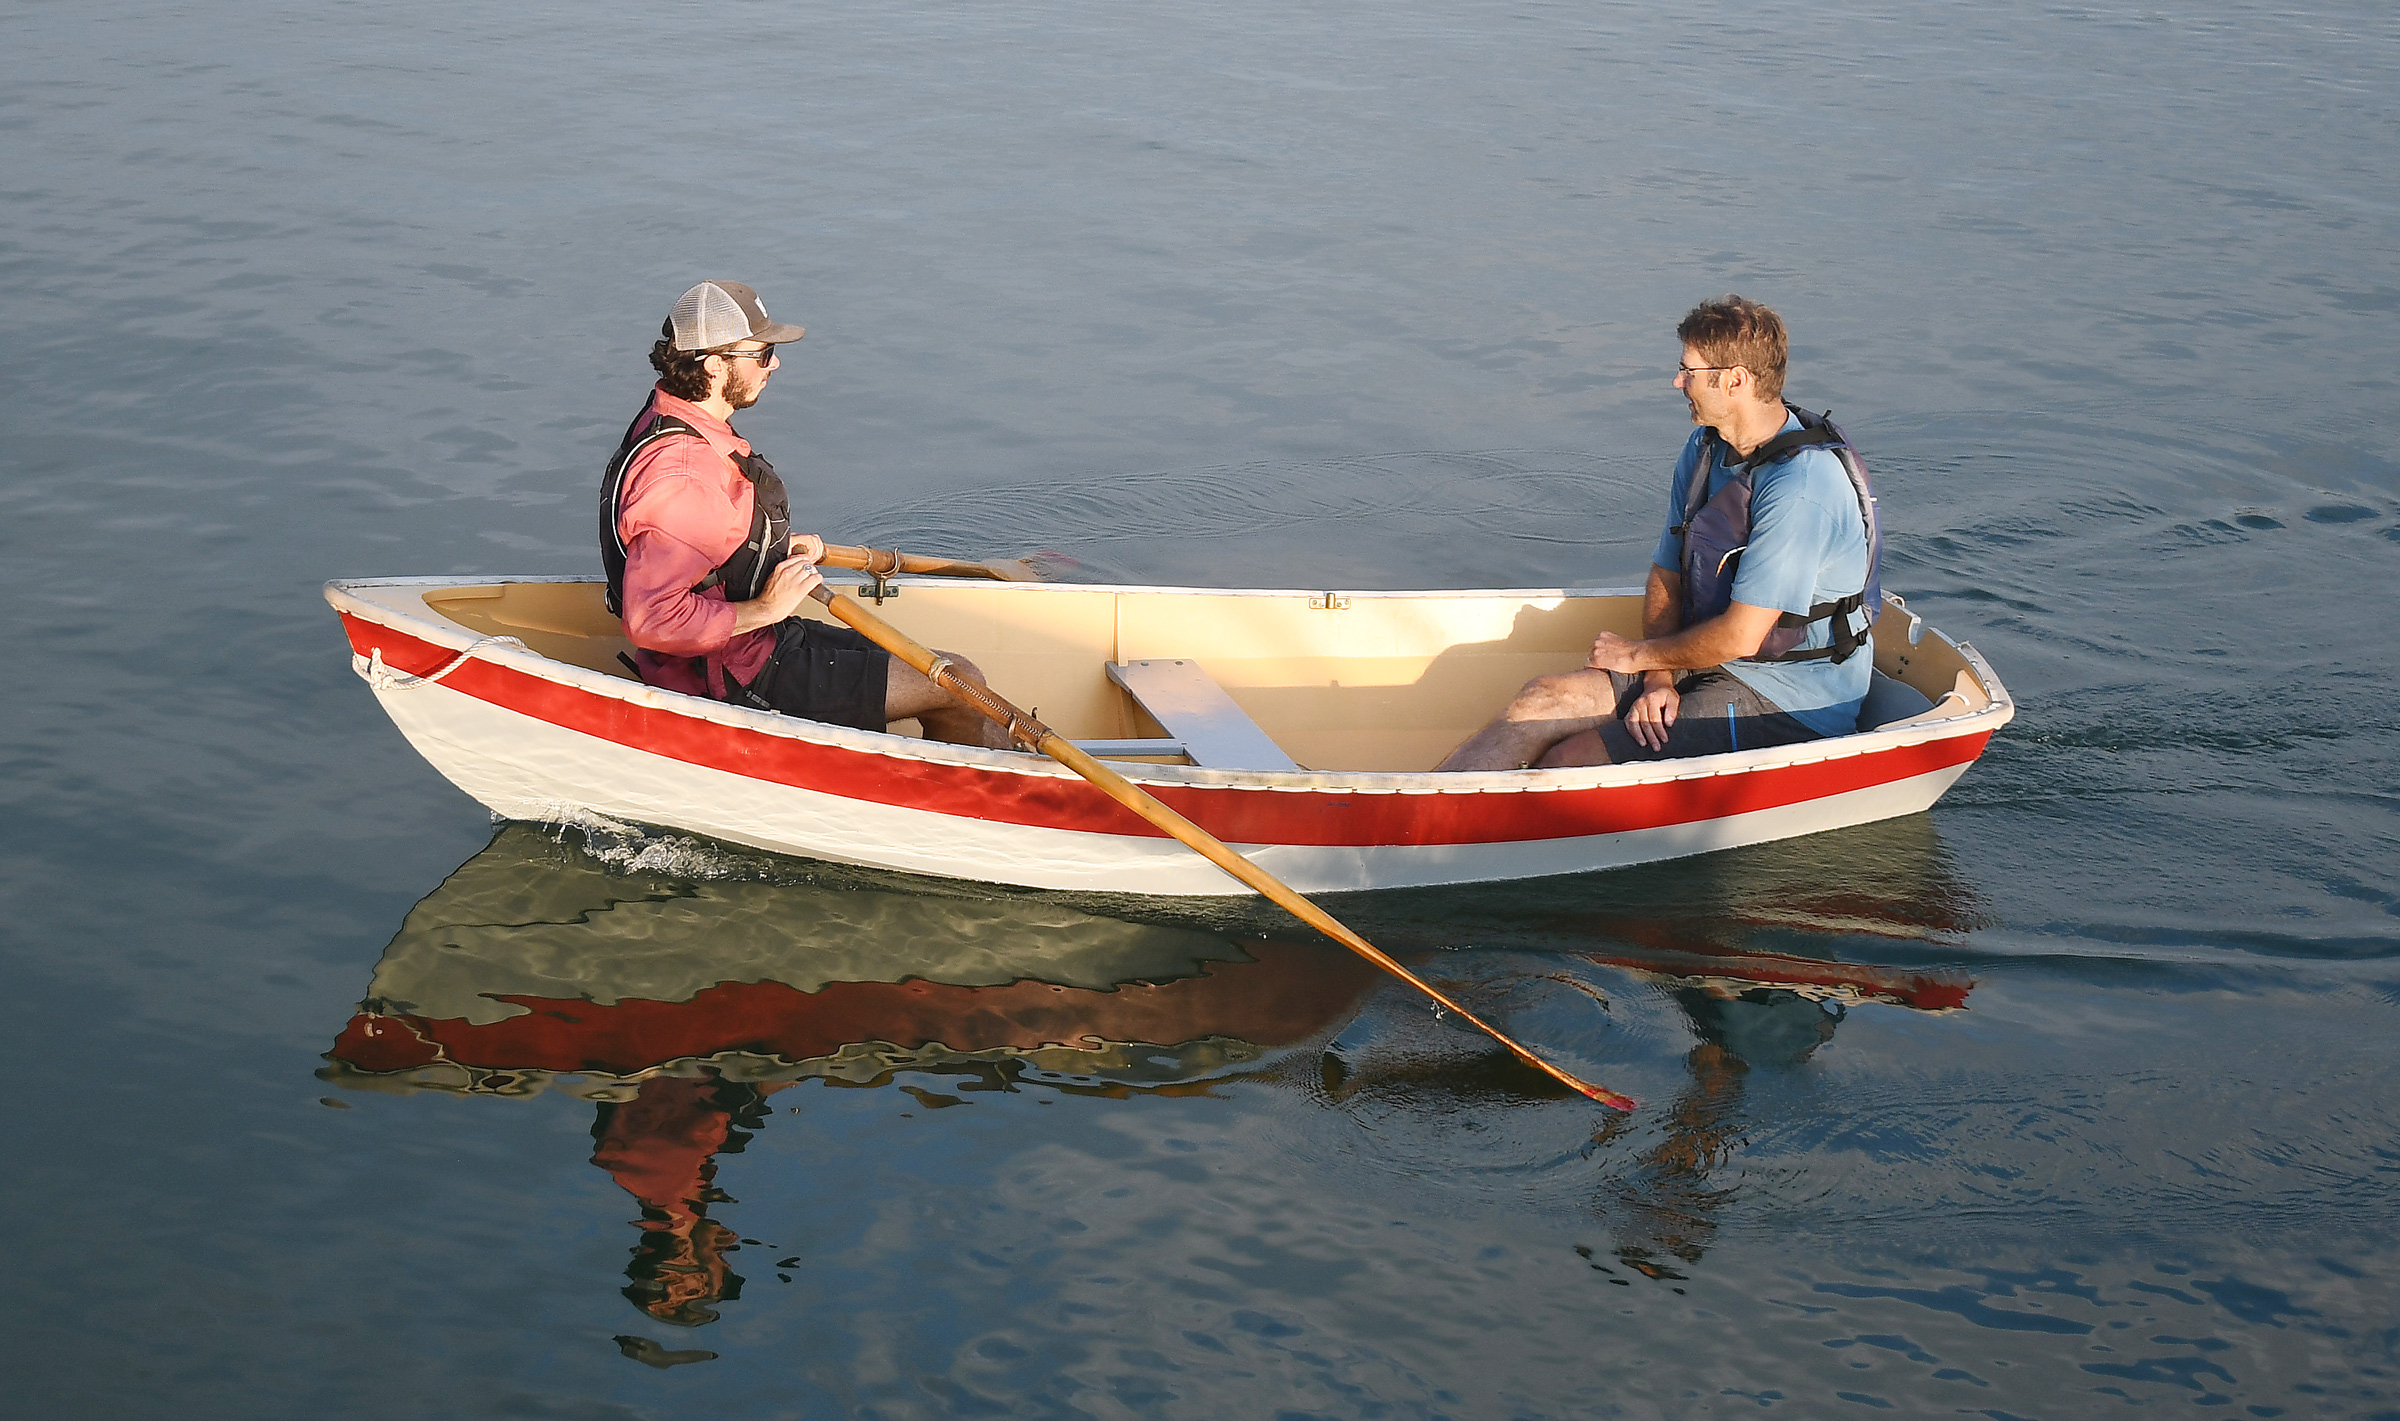
The Shellback sits in near proper trim even with a light rower in the bow and a bigger passenger sitting in the stern.
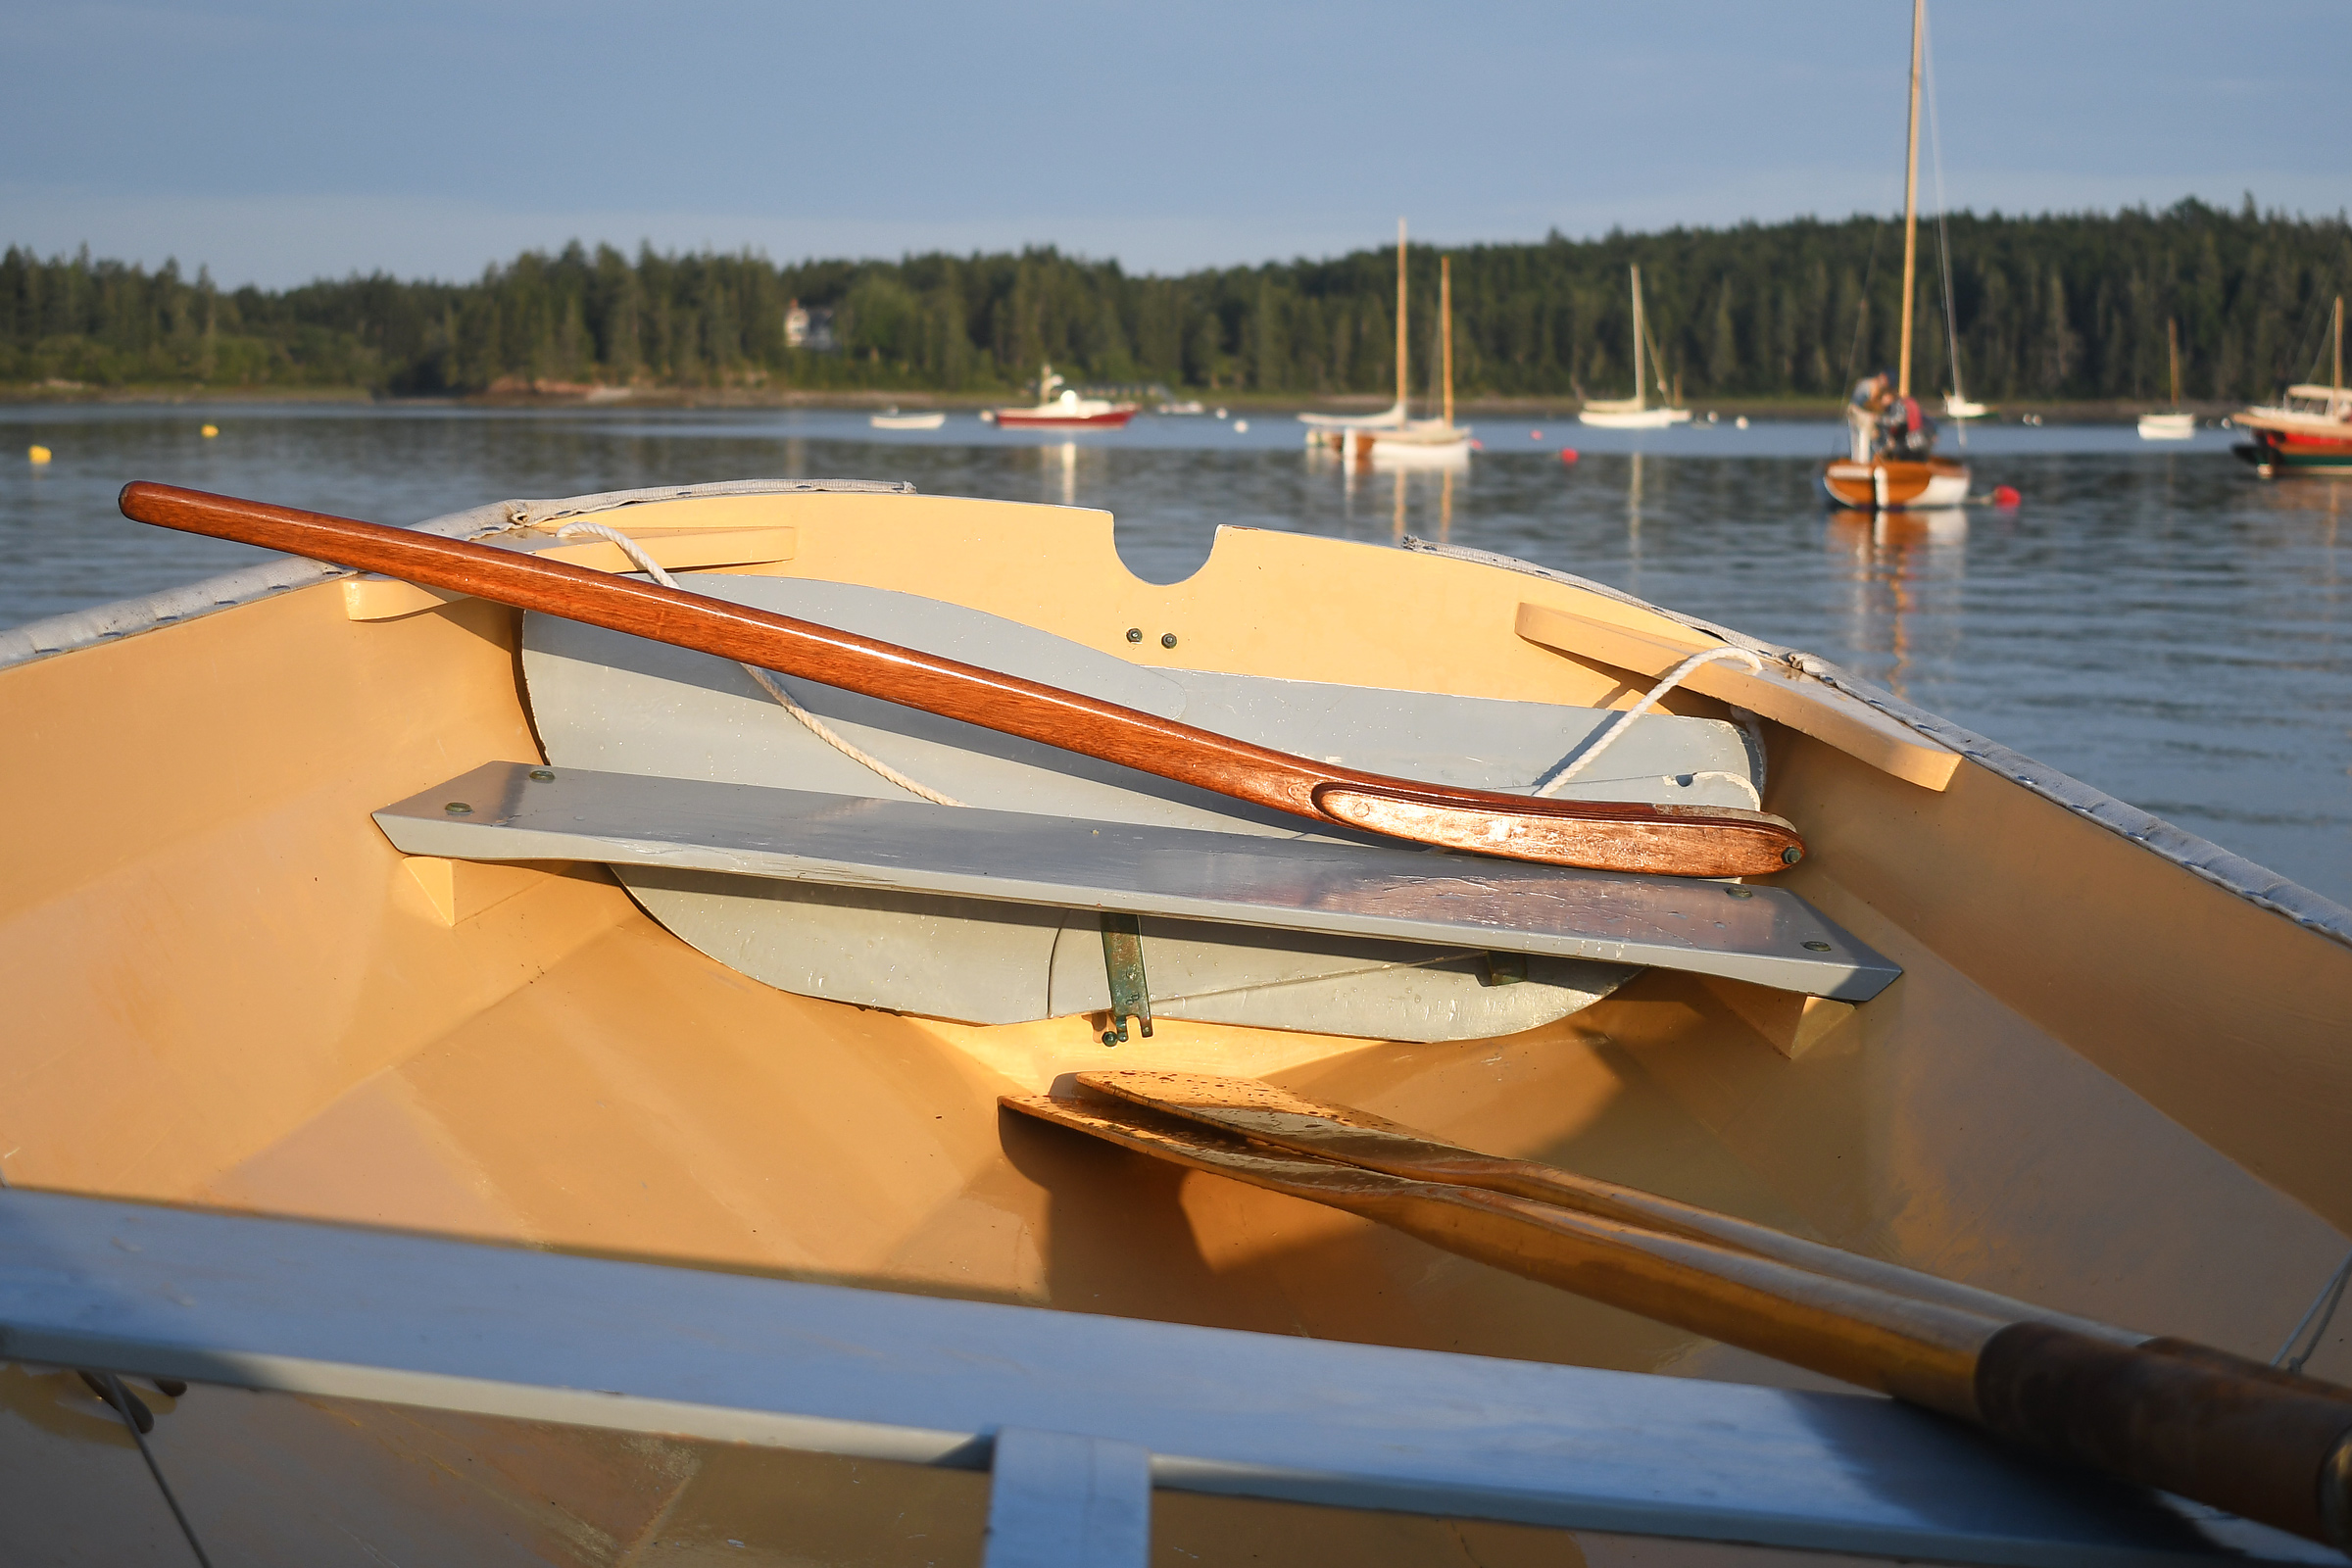
The rudder and daggerboard are designed to stow out of the way when the boat is being rowed. They sit side-by-side in the space created for them between the aft thwart and the transom.
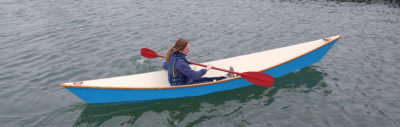
The sculling notch in this Shellback’s transom comes in handy for tootling in confined waterways.
The Shellback is a wonderful design and a fantastic boat for a first-time builder. The plans are not overly complicated, and the kit comes with everything needed. For sailing, you need to be agile to maneuver around in a smaller boat, especially when sitting on the bottom. The Shellback dinghy is easy to build and transport, satisfying to row, and safe and lovely to sail—a fine example of a small sailing dinghy. ![]()
Ben Laster is a first-year student at Worcester Polytechnic Institute studying Robotics. He is an avid boatbuilder, sailing instructor, and fisherman on Cape Cod, Massachusetts.

Shellback Particulars
[table]
Length/11′2″
Beam/4′5″
Draft, board up/6.5″
Draft, board down/2′3″
Weight/about 100 lbs
Sail area/54 sq ft
[/table]
The WoodenBoat Store offers the Shellback Dinghy as plans ($75), full-sized precut kits (rowing $2,500, sailing $3,100), and a model kit ($74.95). Eric Dow’s book Building the Shellback Dinghy is also available ($15).
Is there a boat you’d like to know more about? Have you built one that you think other Small Boats Magazine readers would enjoy? Please email us!


I just purchased a shellback to restore. Waiting on a new mast. Does any one know how far down the mast to drill the halyard hole? We welcome any advice on the restoration.
Thanks,
Rick and Lisa
Northeast Ohio
I purchased one three years ago and am having a lot of fun camp cruising. When sailing two up a tad crowded. She is fast and fun. I use box-store white fenders to add buoyancy. It is the only sailboat I have ever eased over a beaver dam while exploring in the Adirondacks. Floats in a puddle and can be moved along standing with an oar in quiet water.
Wow , I’ve never seen a Shellback with a battened main with a roach. Was this a personal decision? The plans and every Shellback I’ve seen (including my own) has a very traditional looking lugsail. I’m not against roaches and battens, my Gartside 130 has them, but I’ve never seen them on a Shellback dinghy. I agree with your assessment, great, capable little boat. I added a small sprit to mine and flew a jib and took it camping several times. Though I would take my girlfriend out, I always thought of it as a 1.5-person boat.
To carry momentum well through tacking, you need to augment the displacement, for which you might try removable water ballast. This can be in soft sided carriers or jugs. The 2 liter Platypus bottles would work well, and so would dromedary bags as sold by REI. Another advantage of this type of ballast is that it is easily shifted as needed to achieve ideal trim. And should you swamp or capsize, water ballast provides neutral buoyancy and won’t sink your boat as denser ballast might.