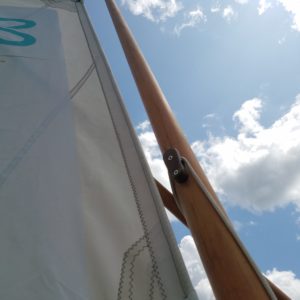
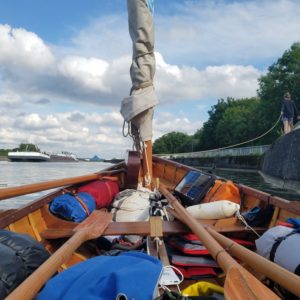
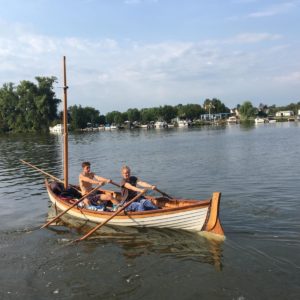
Averaging about 17 miles a day, Finn and Tereza work their way up the Main River and reached Würzberg. They still have many more miles of the Main ahead of them before they reach the first canal along the route to Russia. Watch this video and see how our young travelers are getting into their groove.
Archives: Articles
IssueM Articles
To the Black Sea – Episode 4
Their destination, Sochi, Russia, was 1,500 miles away as the jet airliner flies, but Finn and Tereza are in no hurry and determined to travel in a manner that’s kind to the environment. They have been underway for a week now. Watch this video to see the beauty and adversity they discover in the first week of their journey, which lands them in the Bavarian city of Aschaffenburg, about 50 miles from their start at Mainz.
Watch Episode 4
To the Black Sea – Episode 3
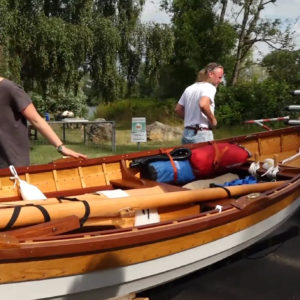
With no car, Finn and Tereza have to figure out how to get their boat to Mainz, Germany. With all their supplies (and a guitar) aboard JILL, their 16’ Matinicus double ender, their goal was to get her in the water and spend their first night under the open sky. Watch this video to see how they fared!
Watch Episode 3
To the Black Sea – Episode 2
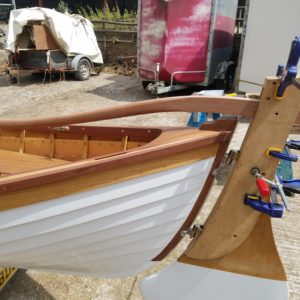
JILL, the boat Finn and Tereza have been building for their journey across Europe to Russia, is still not finished. Watch this video to see the challenges finishing JILL and the final stages of the pre-trip preparations.
Watch Episode 2
To the Black Sea – Episode 1
Students at Brockwood Park School in Hampshire, UK, Finn Cameron-Turner and Tereza Deminova, both 17, built a 16’ Matinicus double-ender. They had some help from a mentor and other students during the construction at the international school located in England’s Hampshire countryside, but it will be up to the two of them to row and sail the boat over 1,500 miles from Mainz, Germany, to Sochi, Russia, Tereza’s home town.
They’ll cross Europe on inland waterways, the last of which, the Danube, will deliver them to the Black Sea for the final leg along an exposed coast. For Finn and Tereza, the voyage is more than a summer vacation. They’ll continue their education by learning about navigation, sailing, and different languages and cultures. The state of the global environment is of great concern to them and they hope to demonstrate that travel, even for Tereza to get from school to her home in Sochi, can be done with a minimum of ecological impact. We’ll follow along on the adventure with regular installments of videos from Finn and Tereza. Watch this video to get to know the two adventurers.
Watch Episode 1
Hooper Bay
I recently parted with my Hooper Bay kayak, the only remaining relic of my first efforts as a boatbuilder 40 years ago. It was my second kayak, the first being one I designed after poring over my father’s copy of Adney and Chapelle’s The Bark Canoes and Skin Boats of North America. That kayak was an awkward platypus of elements I’d seen in the book and turned out to be a bland dilution of whatever qualities the original kayaks might have possessed.
That kayak got me afloat, but I gained a new appreciation for the traditional forms I’d appropriated for it when I met David Zimmerly in 1978 at Port Townsend’s Wooden Boat Festival. He gave a talk there on the Hooper Bay kayak, which I recognized as the same style as the Nunivak Island kayak included in Skin Boats.
Nunivak is about 75 miles due south of Hooper Bay, and both are inhabited by the Yupik people of Alaska’s west coast. I was taken in by David’s detailed description of the Hooper Bay and the work of Yupik master kayak builder Dick Bunyan. David kindled my interest by giving me a photocopy of his draft of his then yet-to-be-published book, Hooper Bay Kayak Construction.
The Hooper Bay design was thoroughly and beautifully documented in David Zimmerly’s book, “Hooper Bay Kayak Construction.” The book is out of print now, but there are some old copies available from online used-book outlets.
It included detailed drawings of every piece, photographs of every step of the process from collecting driftwood to paddling the finished kayak. All that fall after the festival, I gathered driftwood, something I’d been doing since I was a youngster, helping my dad collect red cedar for fencing our yard. The beaches near home also had a bit of Alaska yellow cedar—straight stock for steam-bent frames and the coaming hoops; crooks for deckbeams the curved lower stempiece.
I learned a lot building the Hooper Bay: cutting straight and hooked scarf joints, half-lap joints, and mortises and tenons on compound bevels; working with crooks, carving stempieces, and steam-bending frames and coamings. Aside from the practical experience, I gained a better understanding of the sophistication of traditional designs and the centuries of experience and knowledge that went into them.
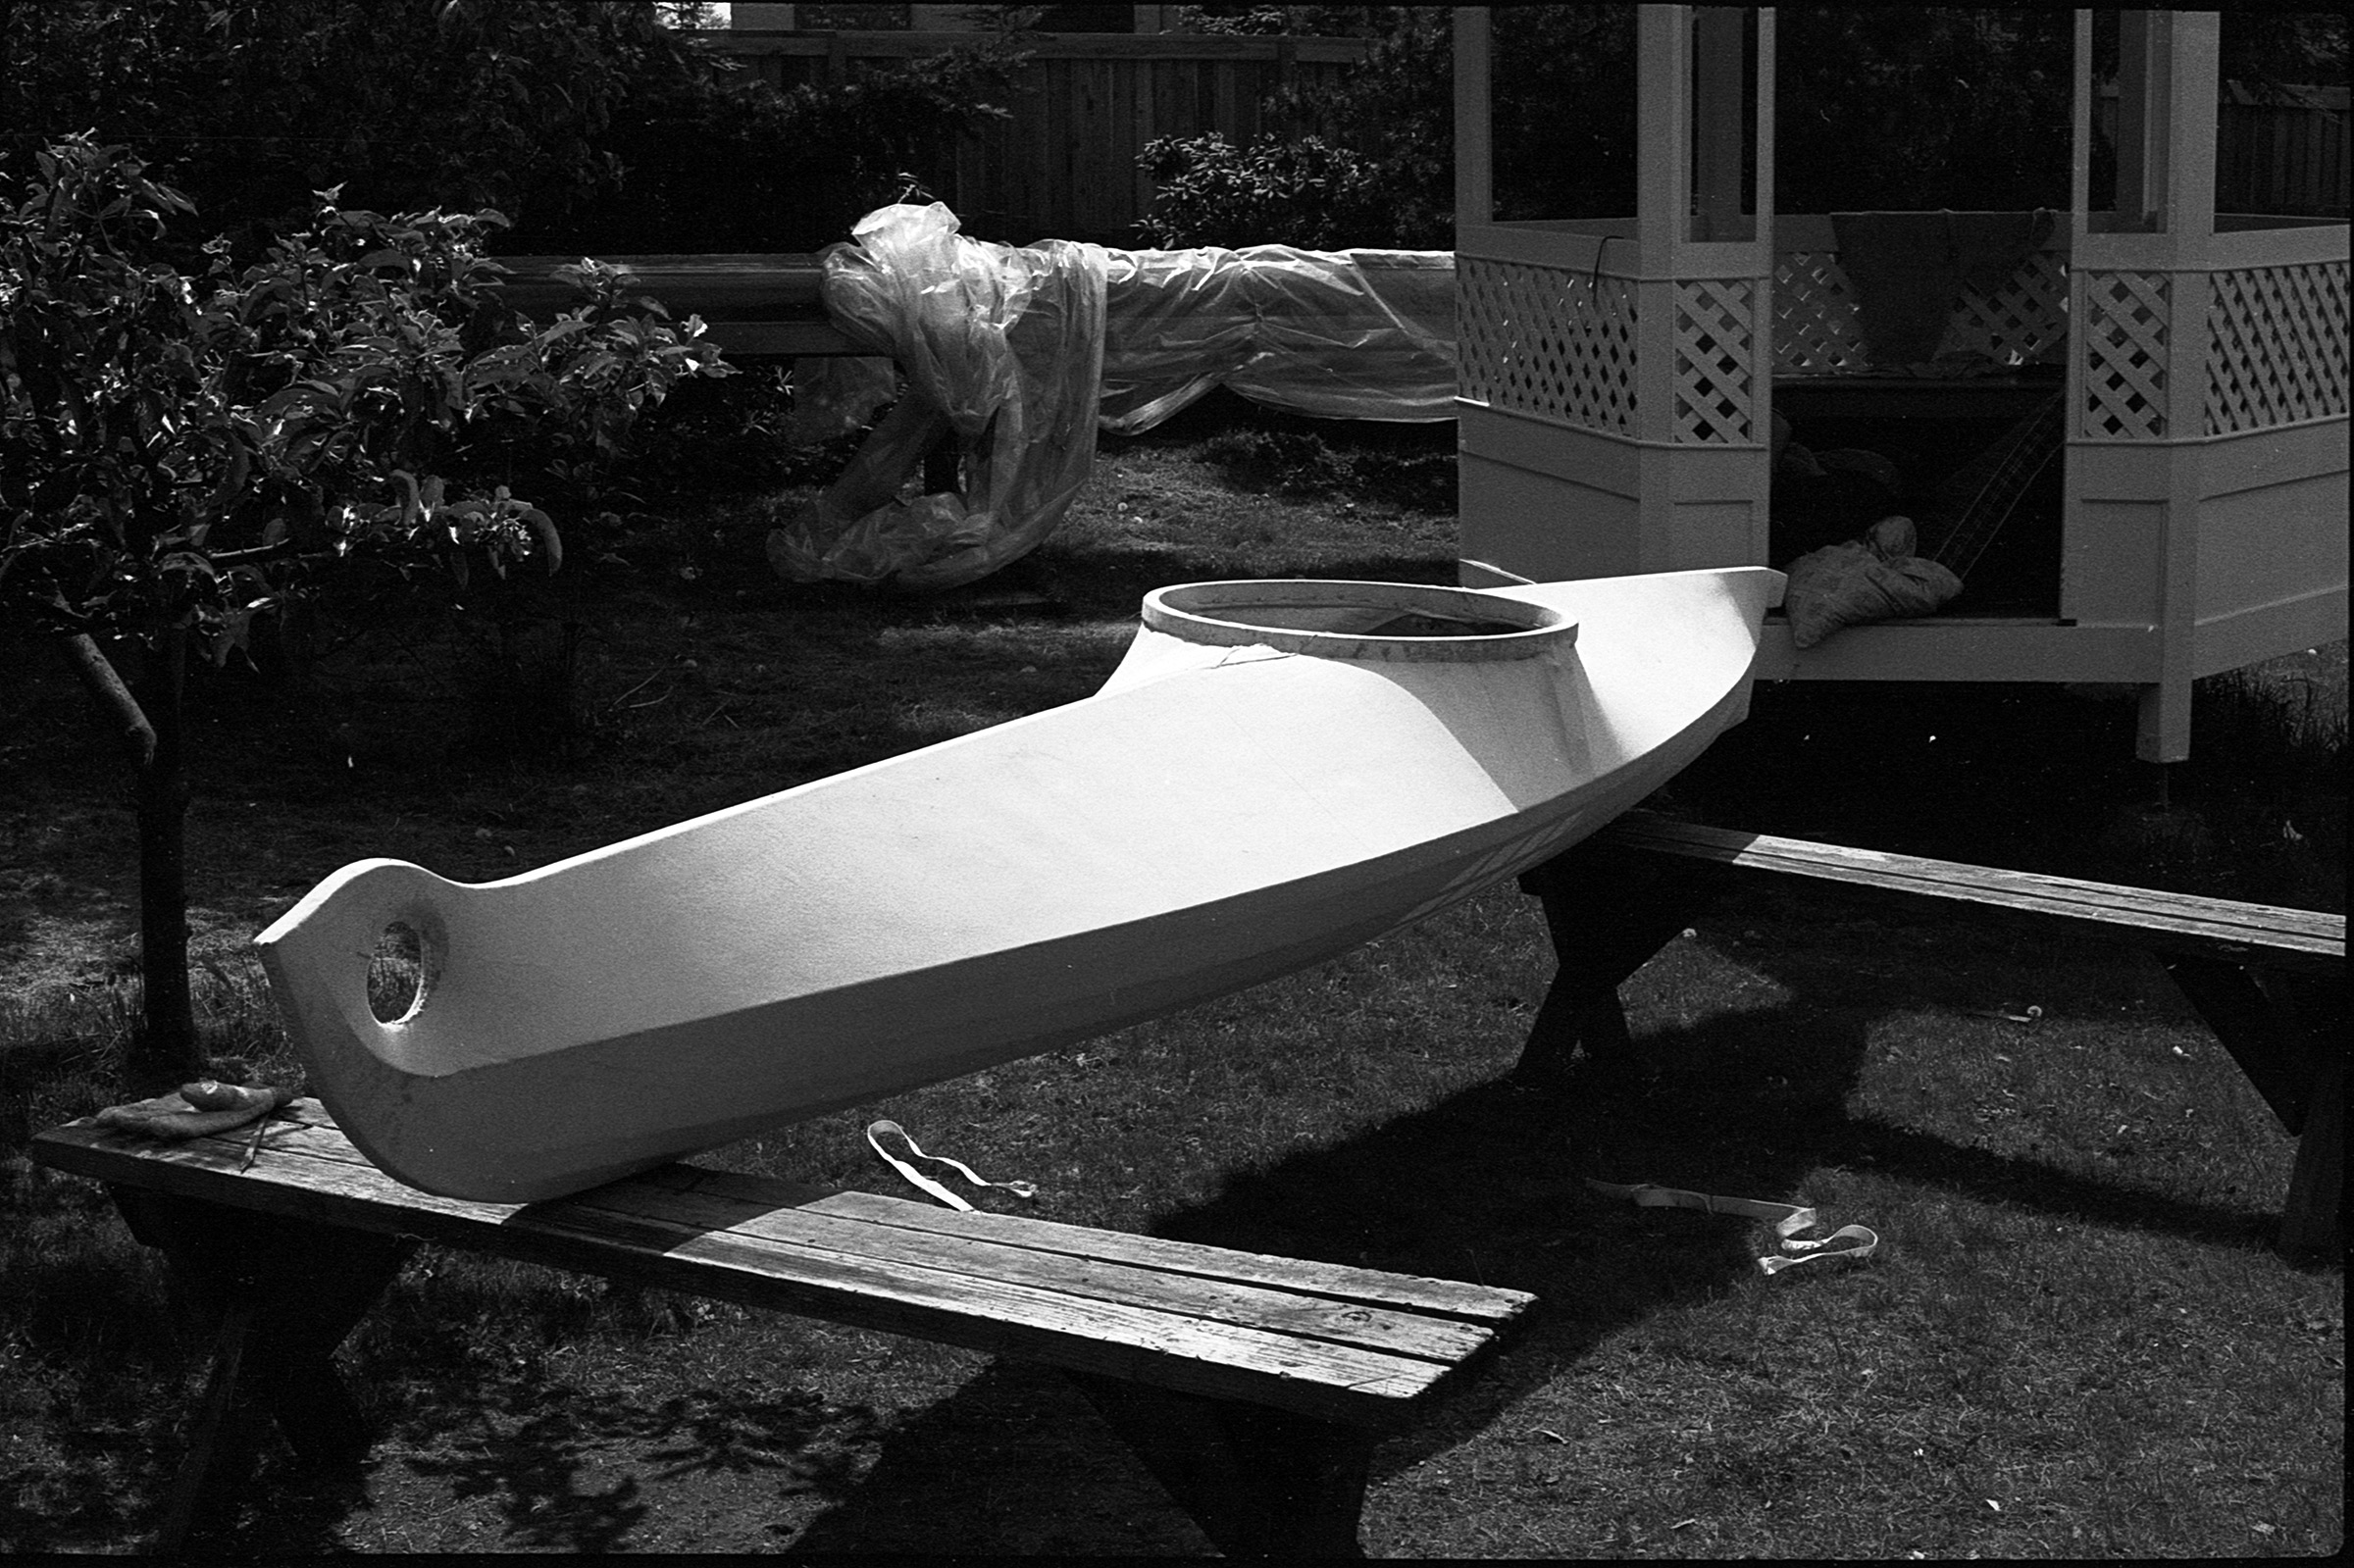
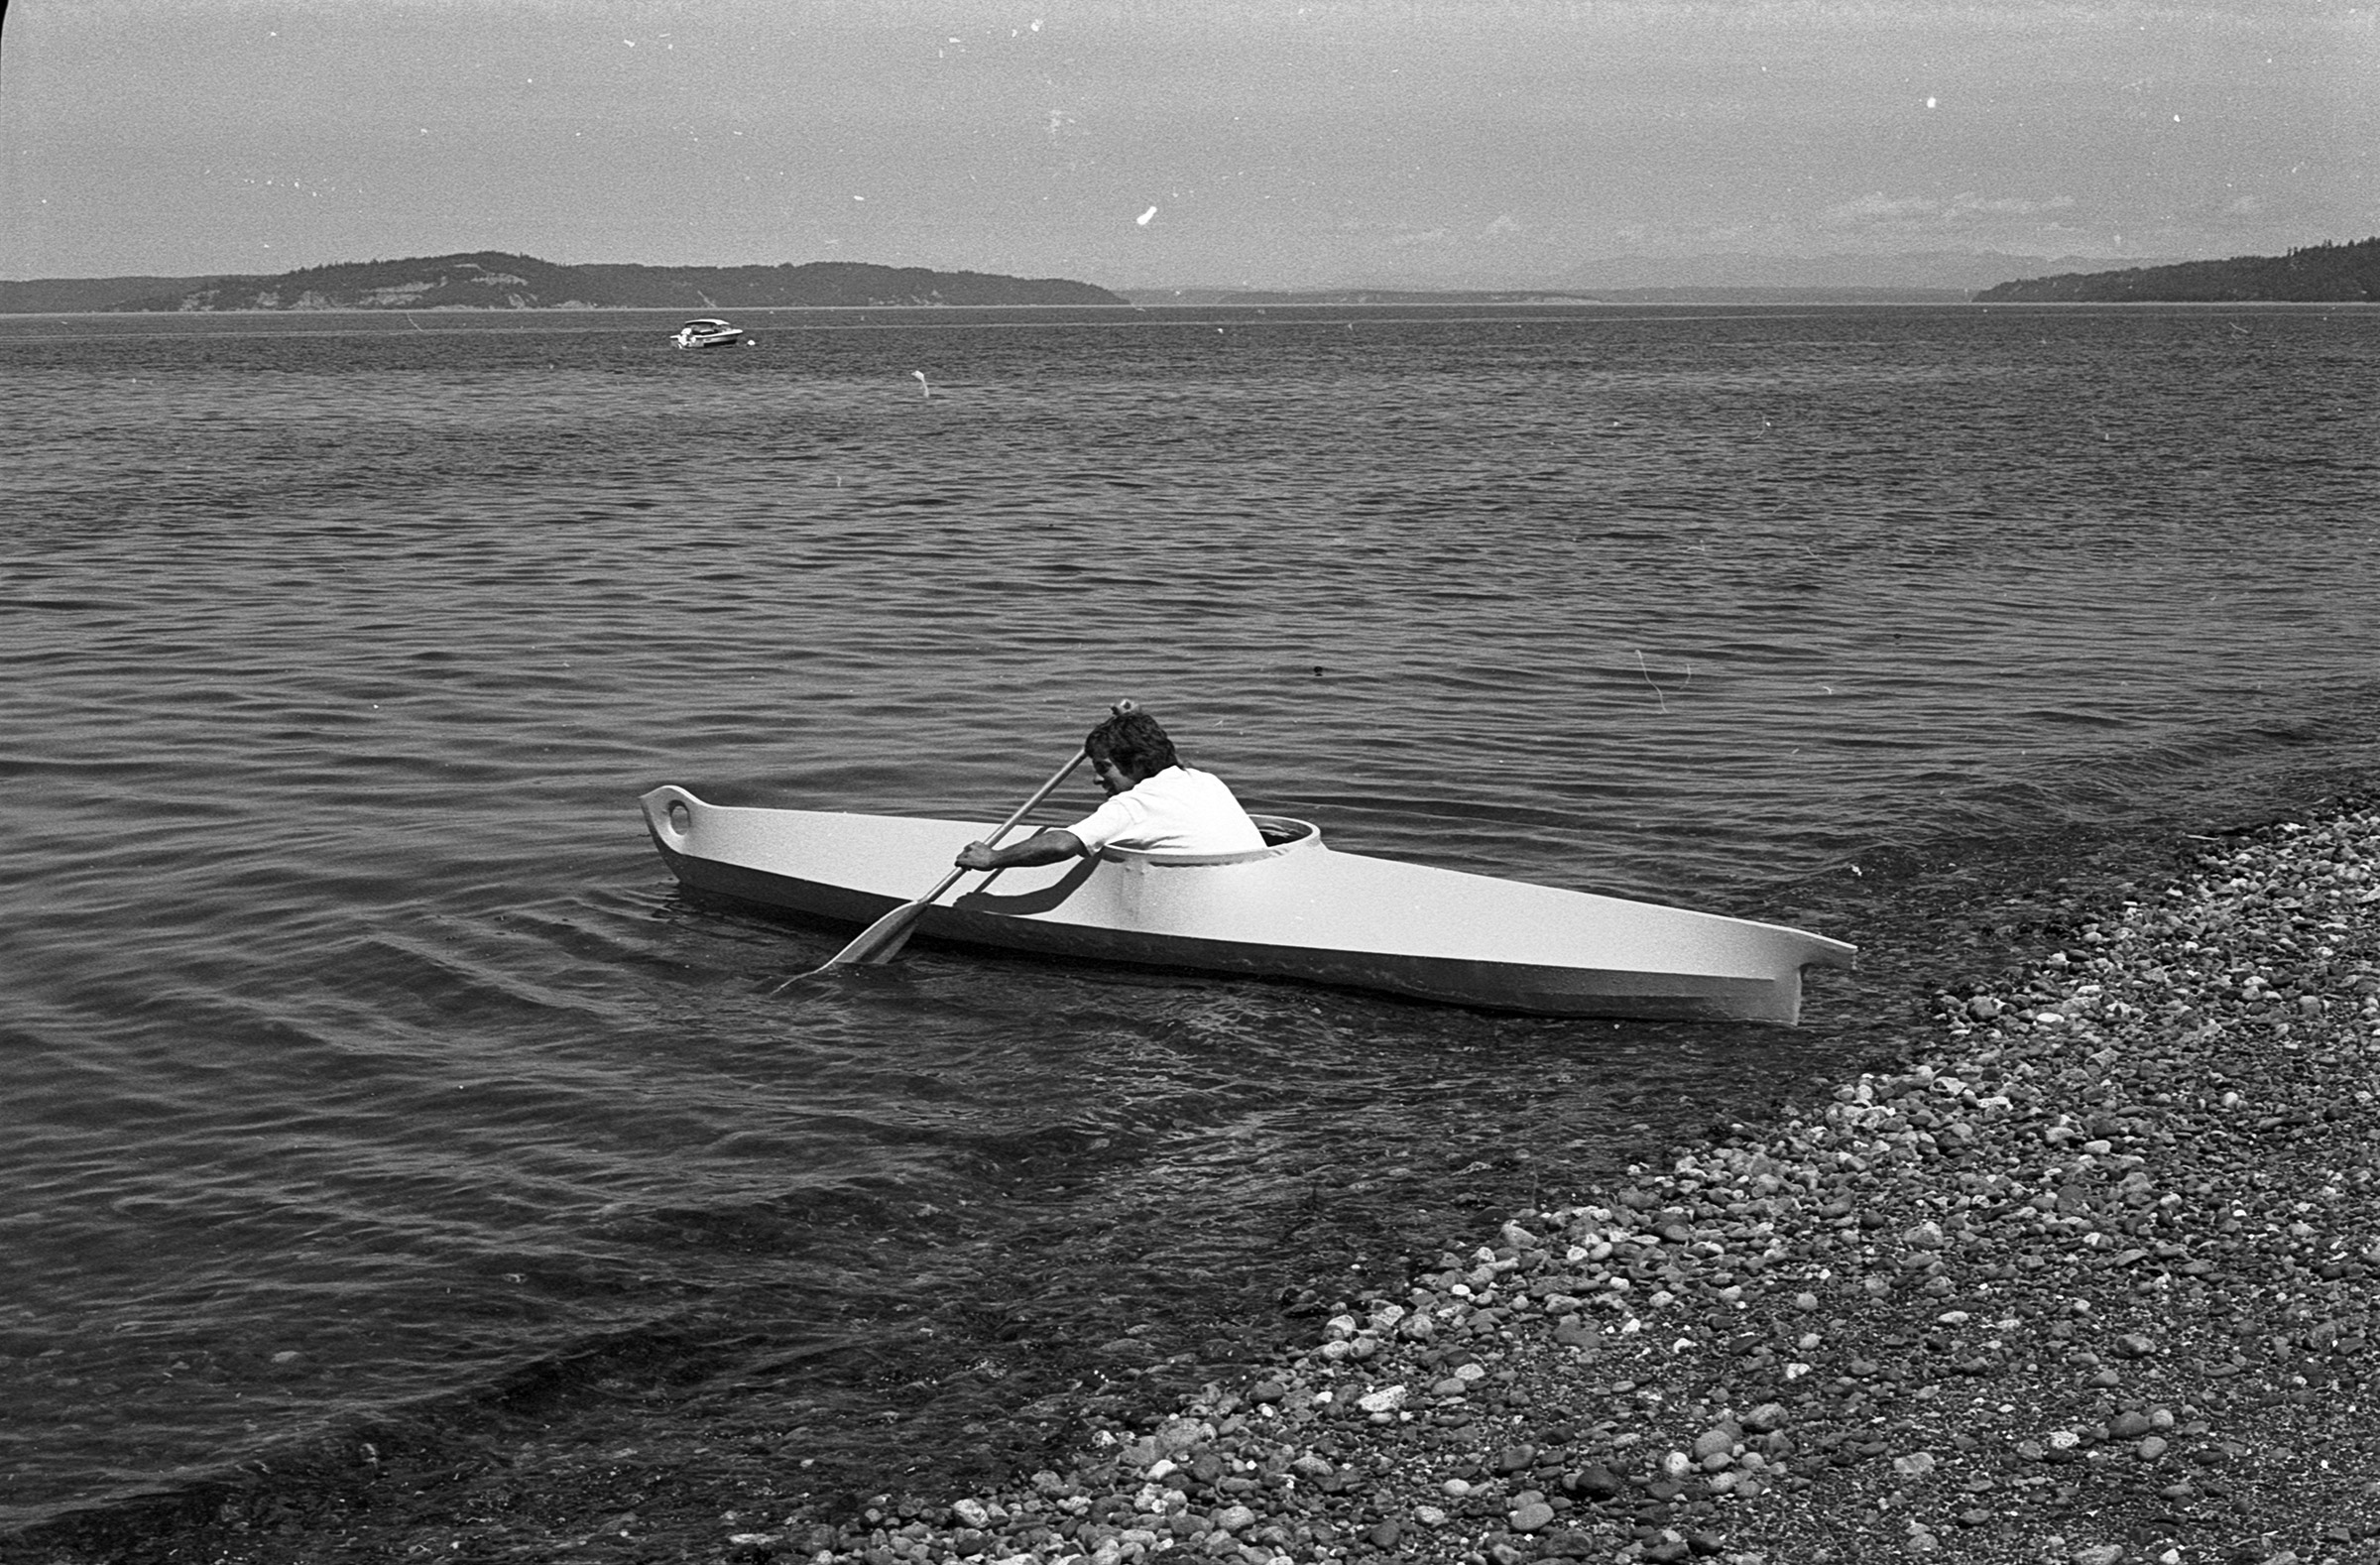
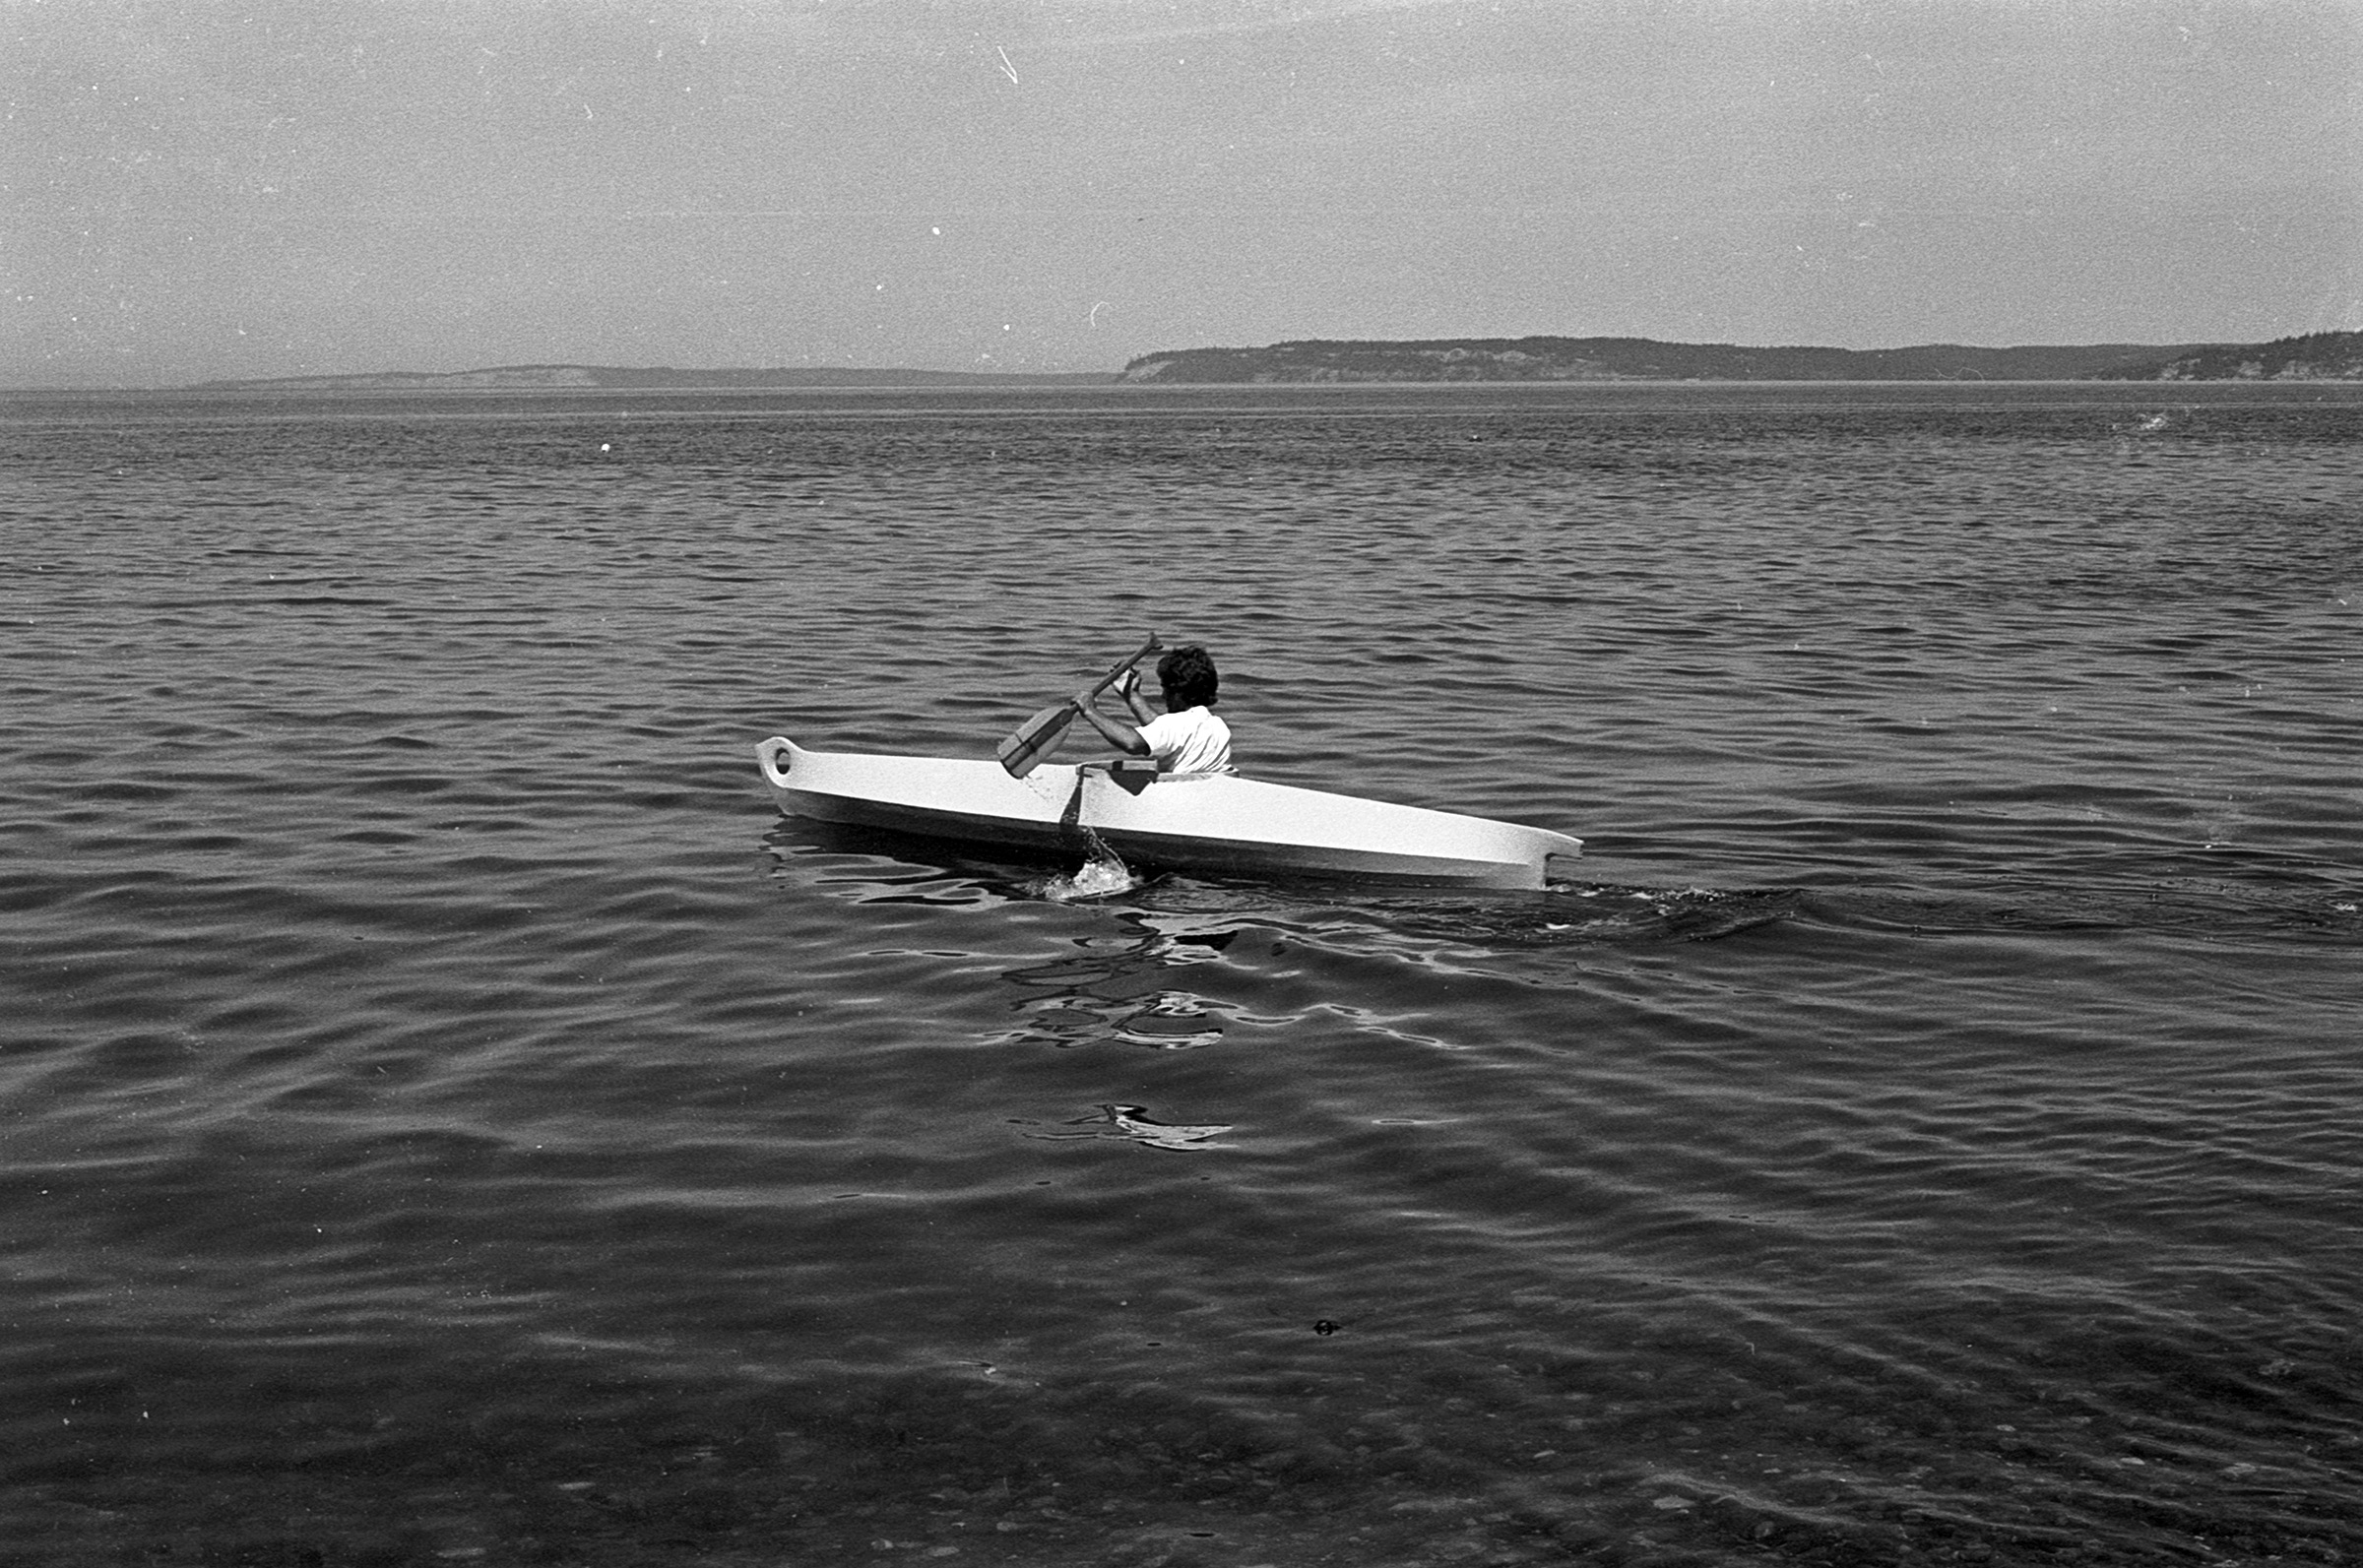
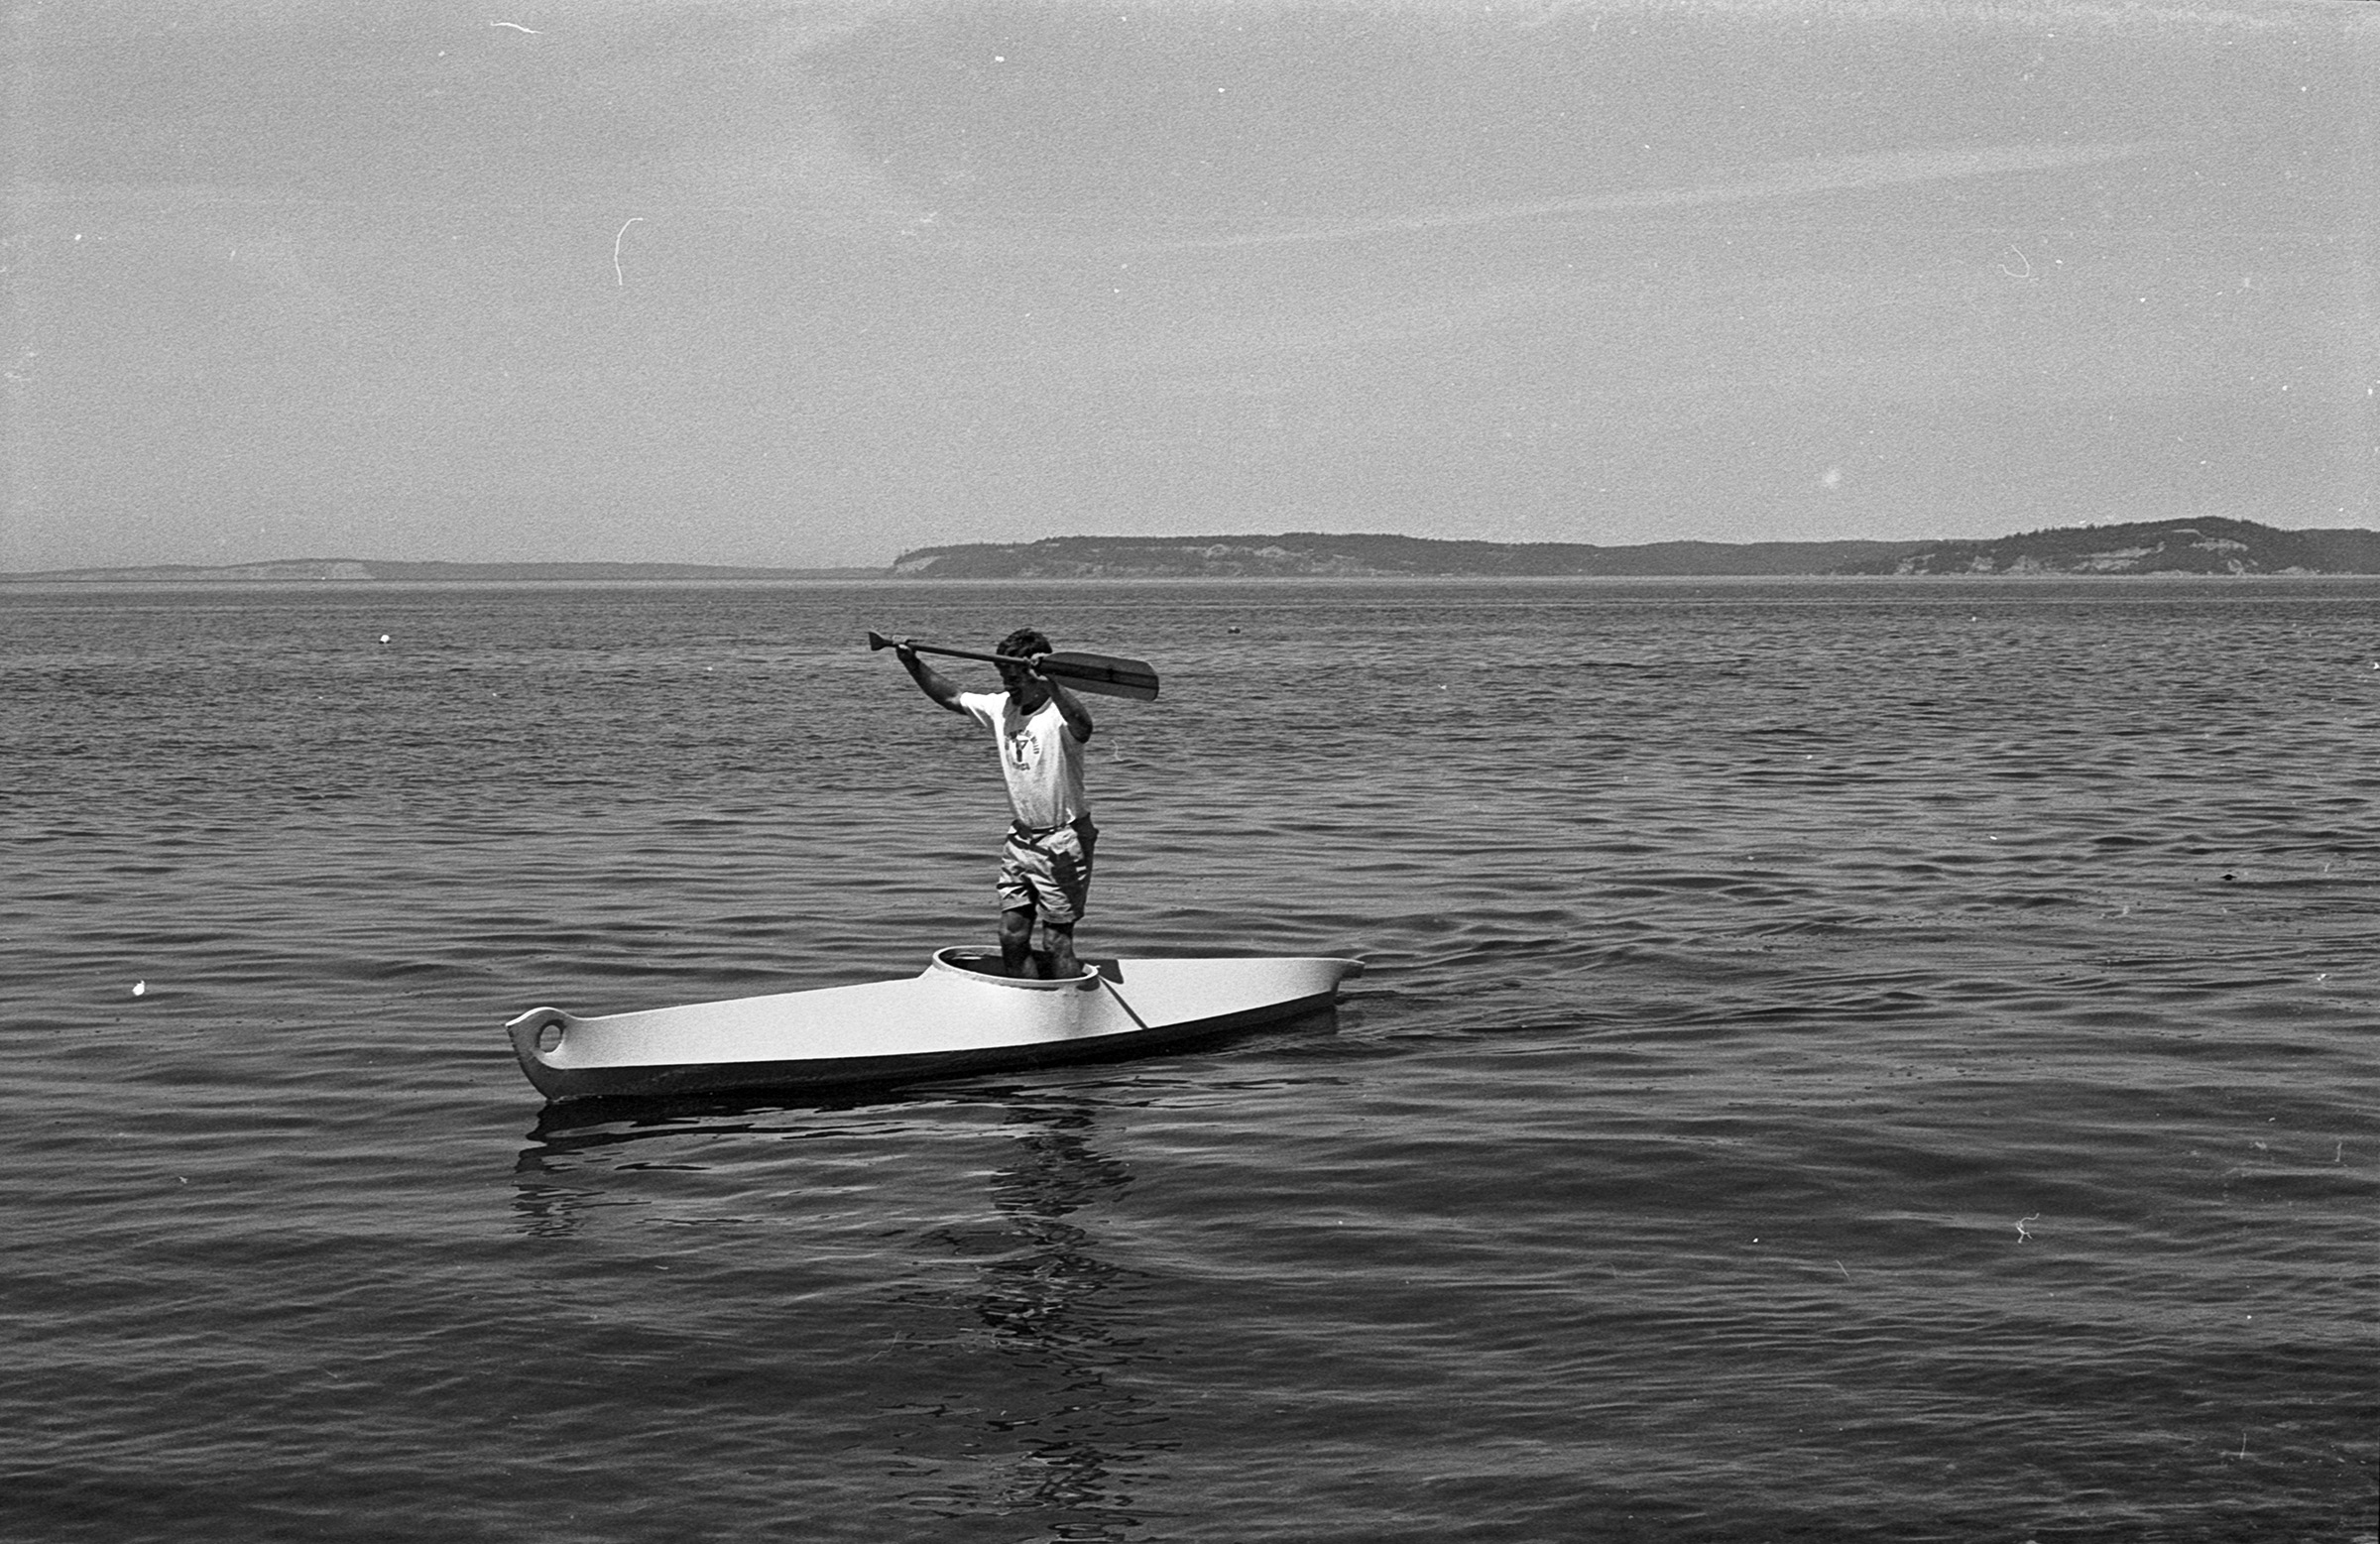
The Hooper Bay was meant for hunting seals in the Arctic and occasionally for ferrying people short distances across protected water, with as many as six aboard: two back-to-back in the cockpit, one on each deck, and one inside each end. It was only 15’ long, quite short compared to a modern touring kayak, but with a beam of 30”, a depth of 18” and weighing over 70 lbs, it was a big vessel. As deep as it was, the coaming came up to my armpits. I made a single-blade paddle of the type used for the Hooper Bay and paddled it like a canoe, alternating sides. It made for a slow, meandering course, so I never traveled far.
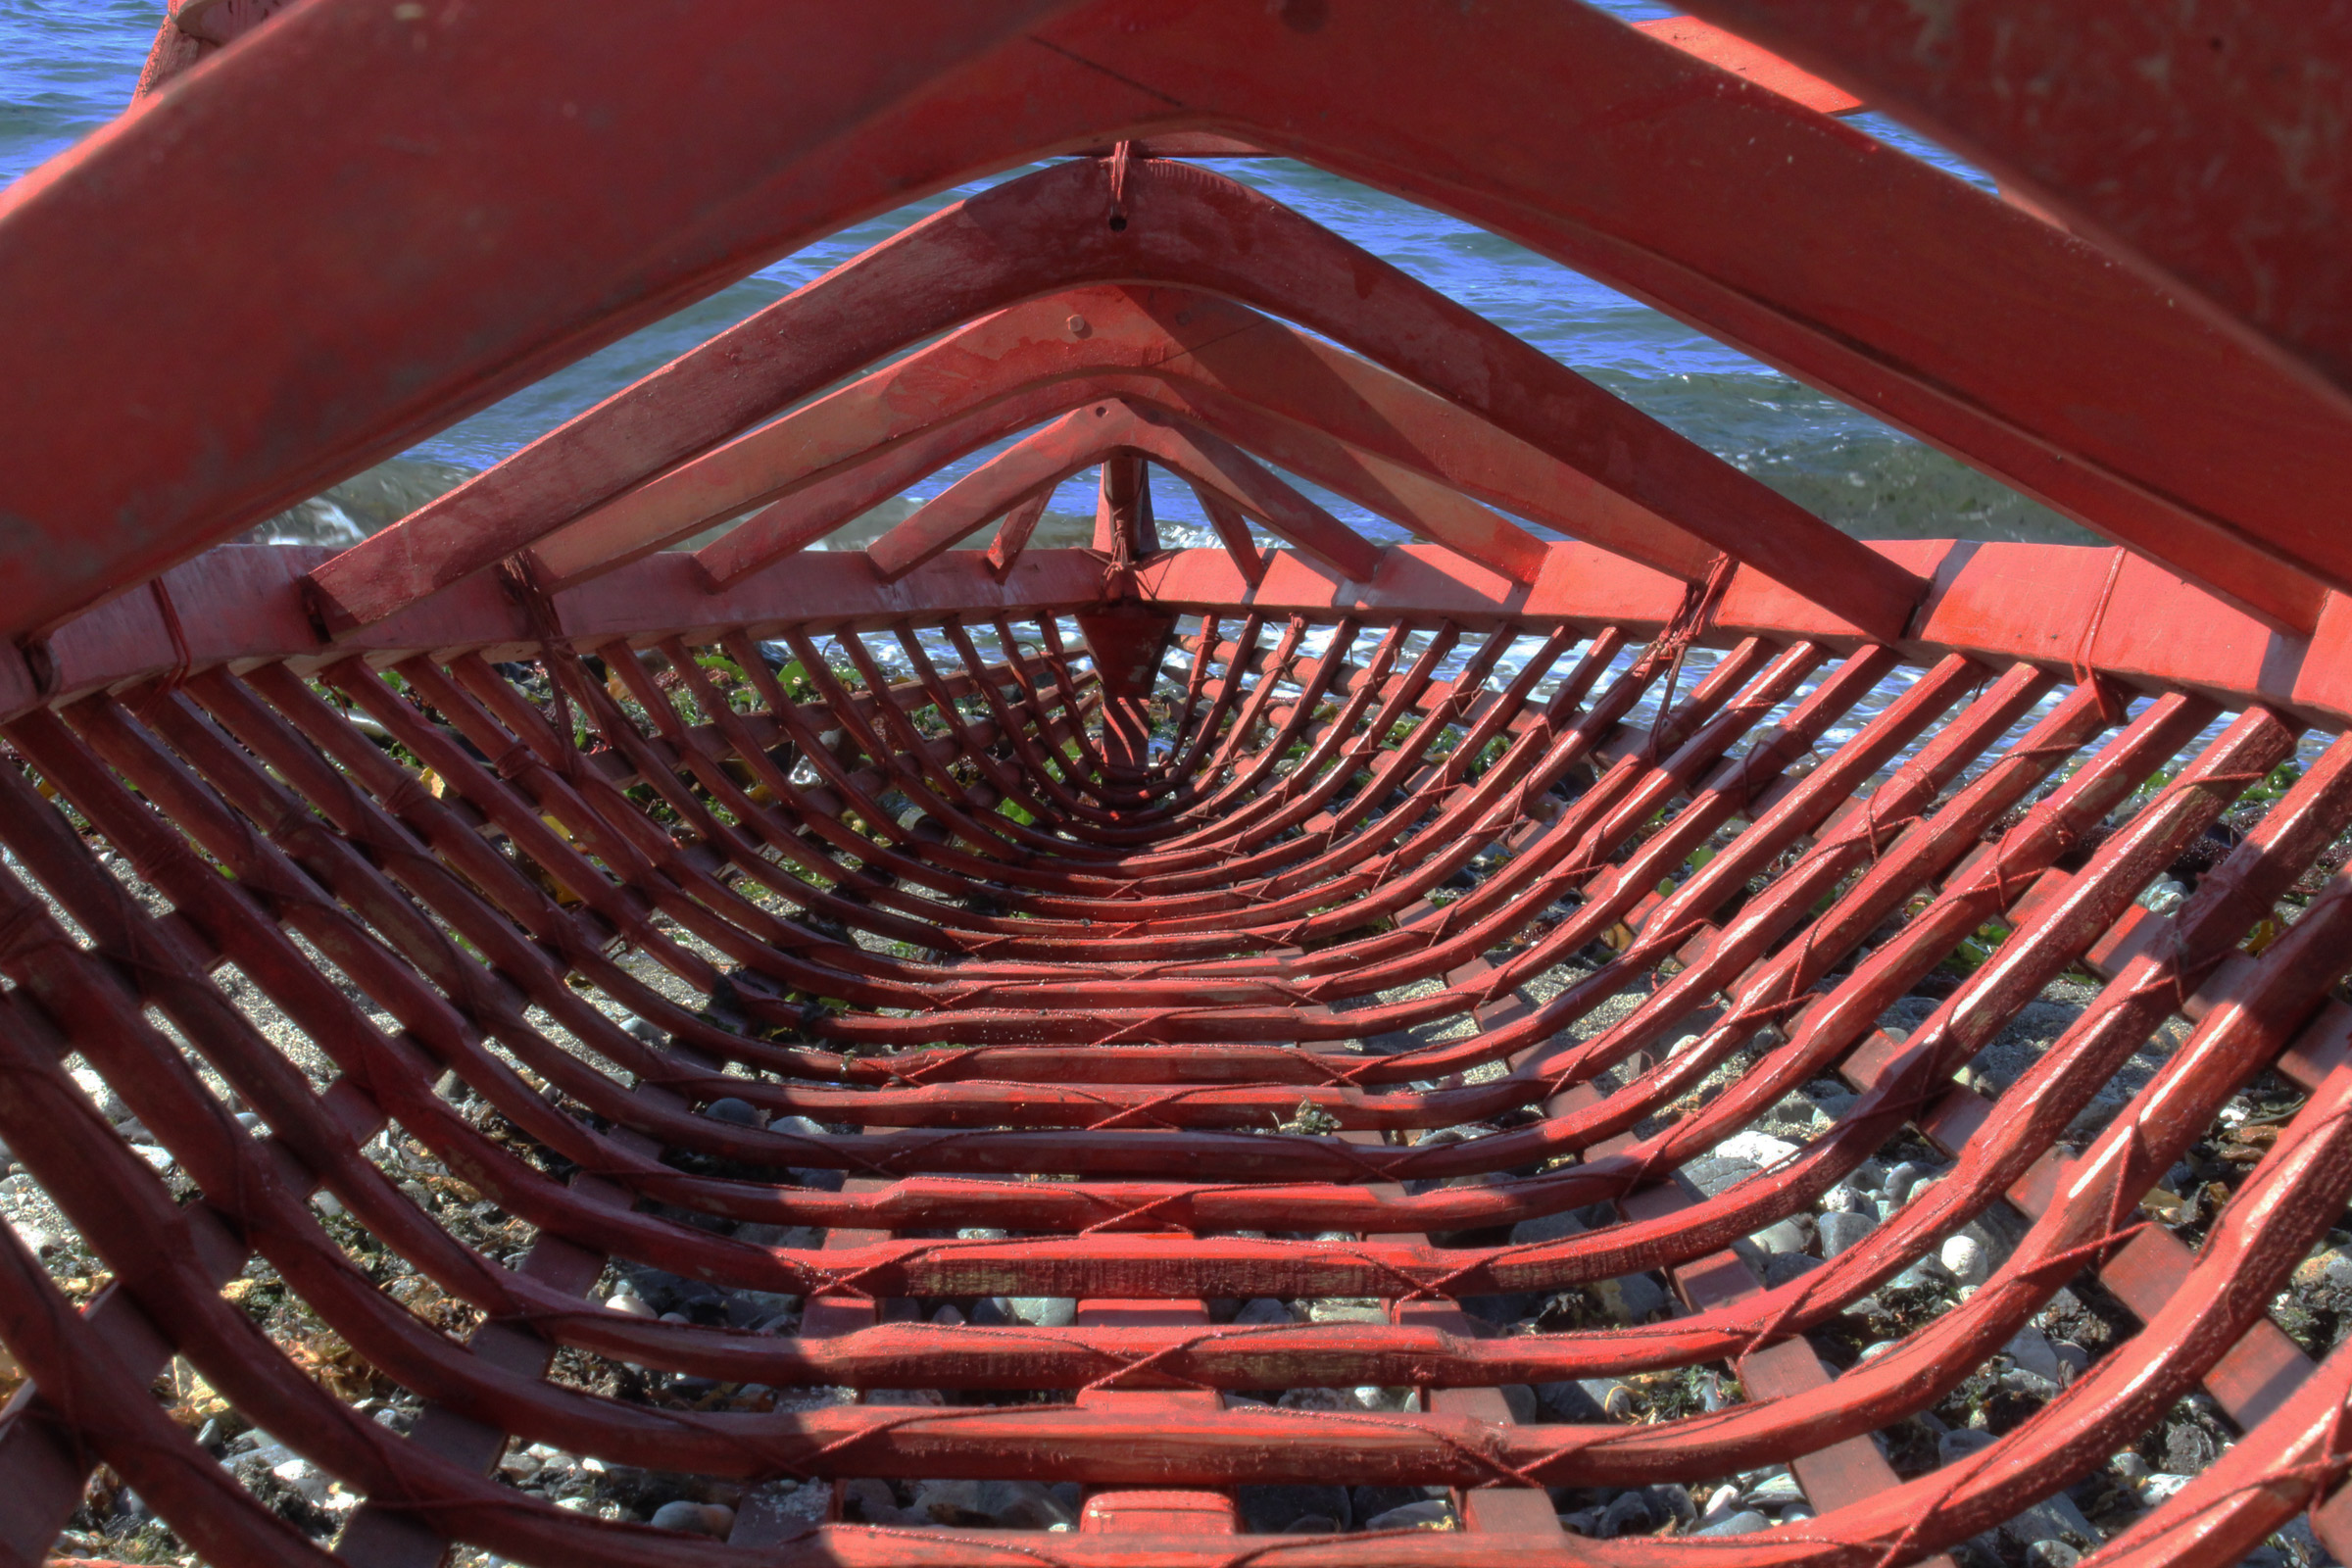
When it still had its canvas skin and was seaworthy, the Hooper Bay was a restful place to lie in with its decks for a cathedral ceiling and its cockpit opening for a skylight.
On summer days I would paddle a mile offshore, stow the paddle inside, and slide into the kayak and let the afternoon’s land breeze carry me back to the beach. Sometimes I’d take a book and read. Twice I took a cassette recorder and made spoken letters for my great aunt in Boston. She was in her 90s and nearly blind, and the sound of the water gurgling against the canvas hull took her back to her childhood, canoeing at summer camp. Most of the time I’d lie on my back looking up through the cockpit at the circle of sky rimmed by the coaming, listening to that same sound. When a cool northwesterly was blowing, the air inside the Hooper Bay was still and warm, and redolent with cedar and linseed oil. The rocking of the hull would hold me cradled between wakefulness and sleep.
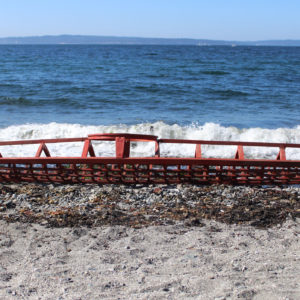
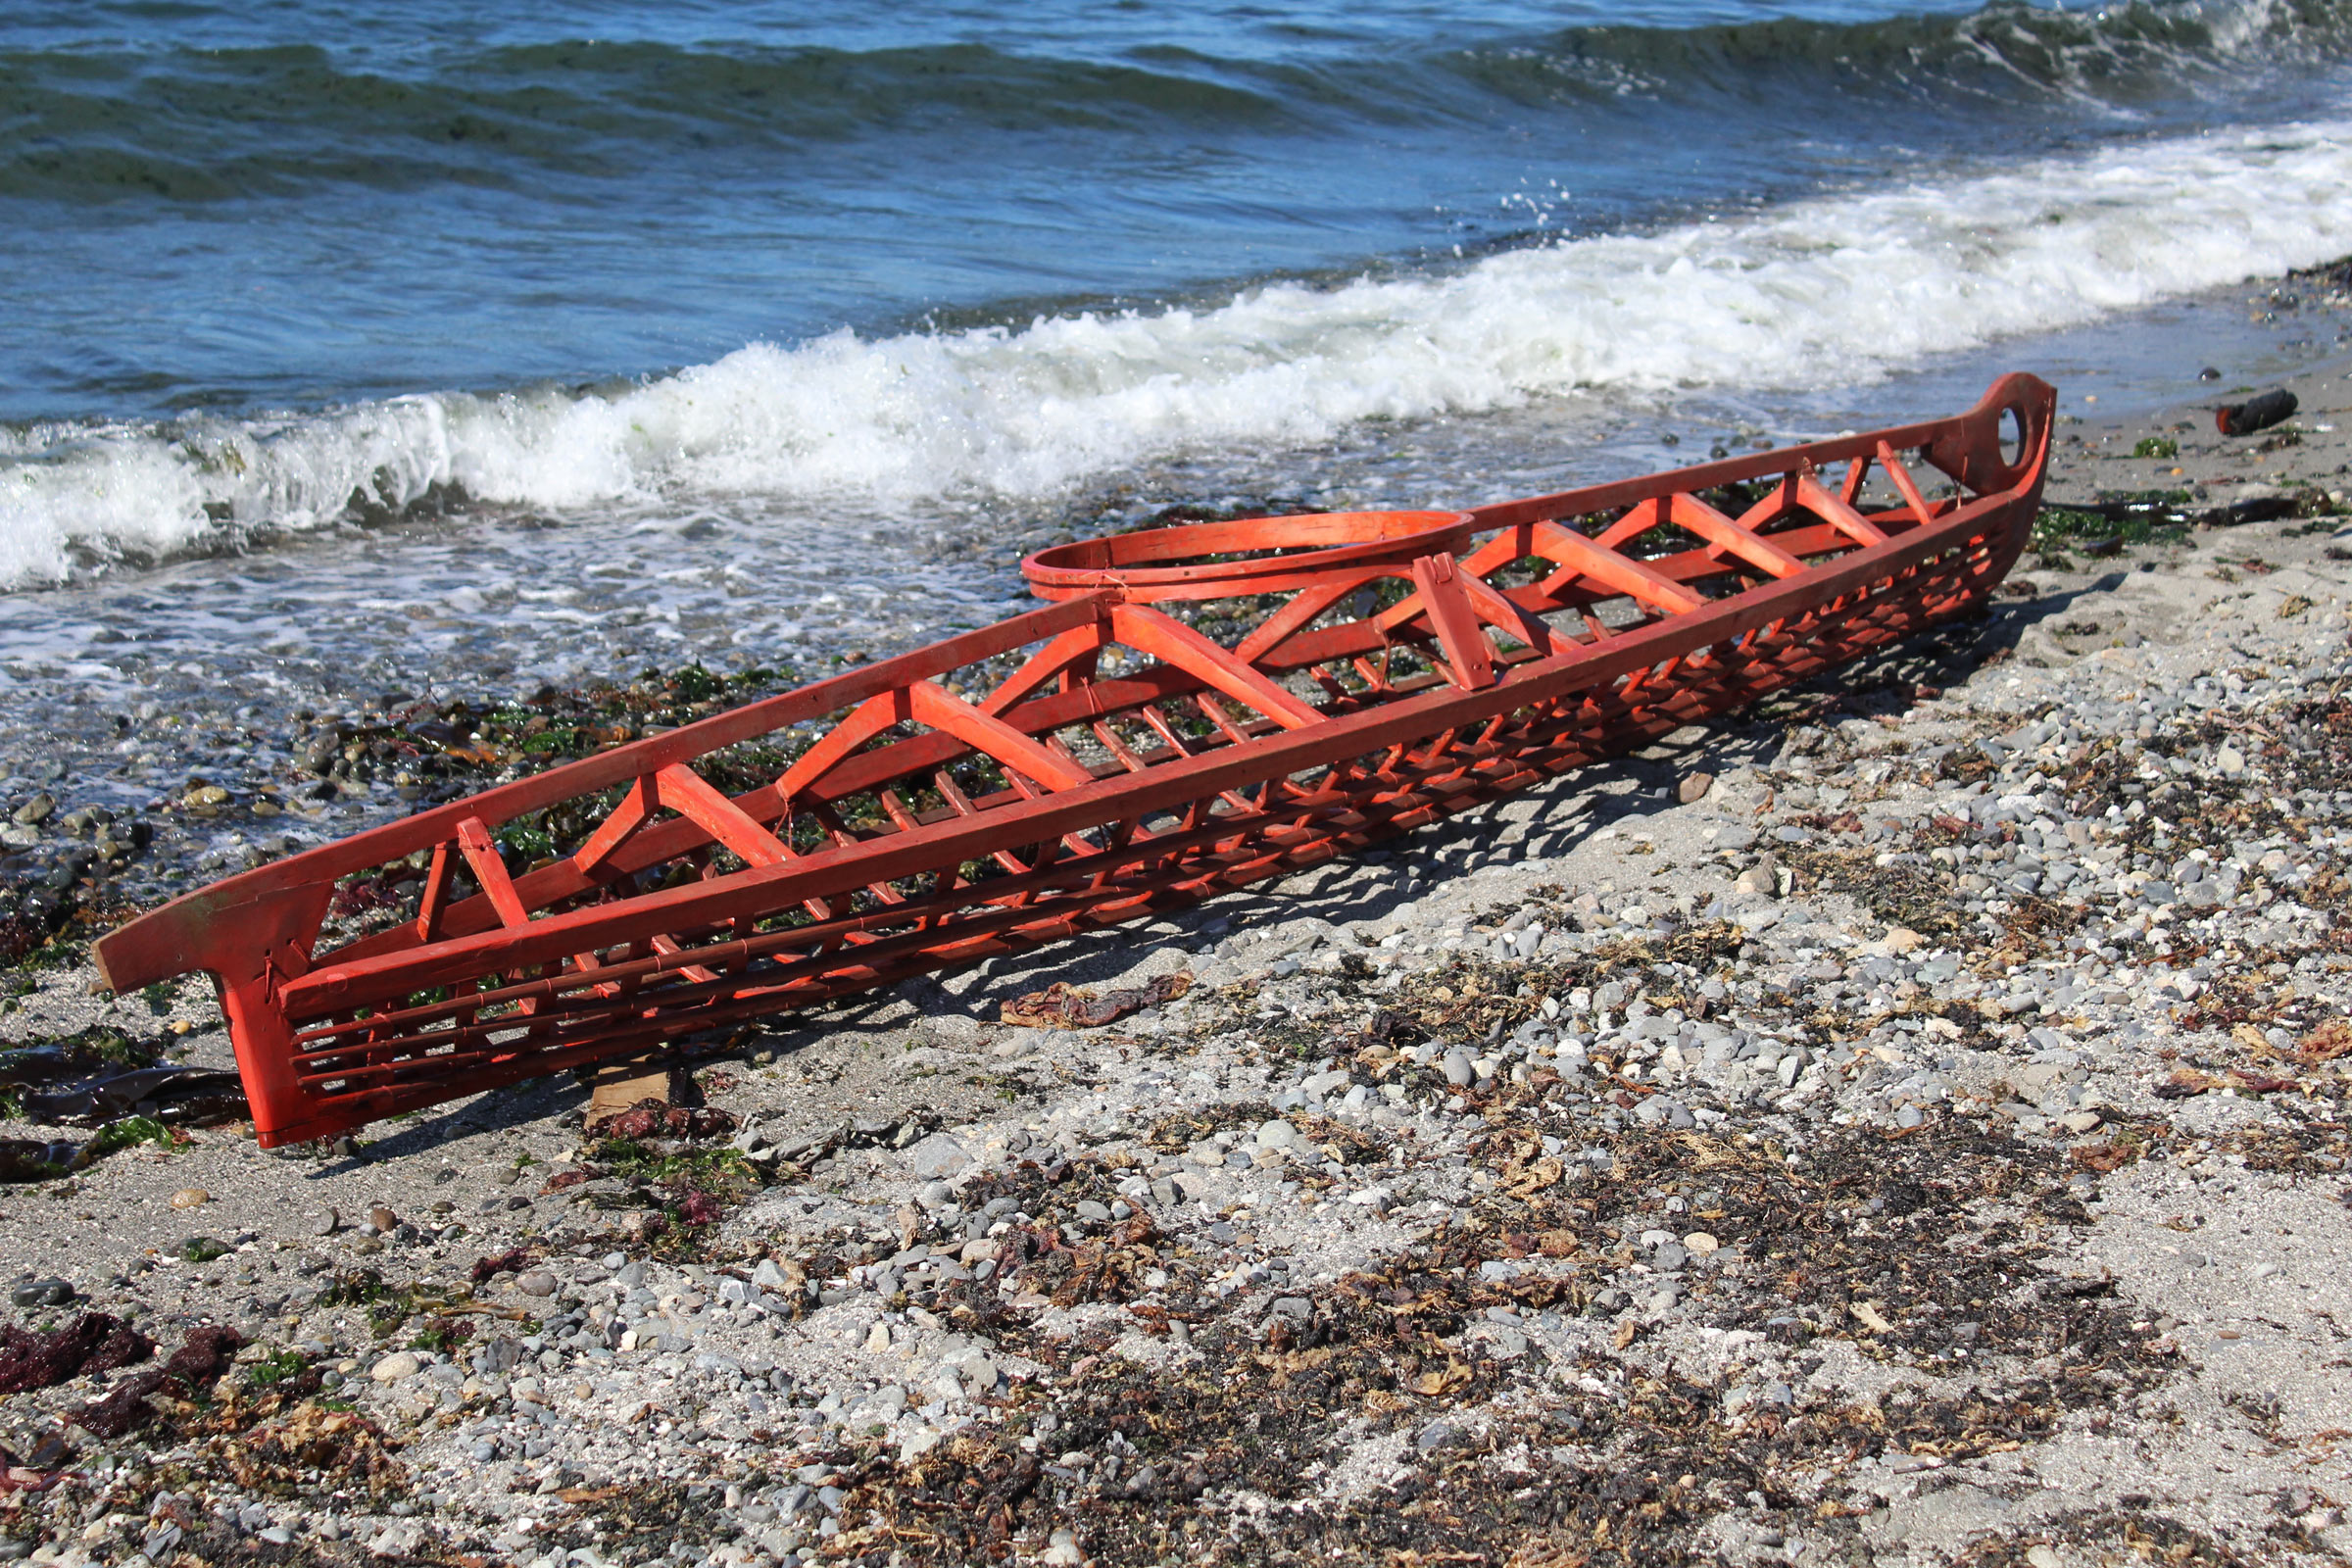
Over the following decades, I continued to build reproductions of Arctic kayaks. I was drawn to the sleeker and faster Greenland types, learned how to roll them a dozen different ways, and enjoyed paddling them in storms with water washing thick across the decks the deafening roar of the wind in my ears. The Hooper Bay sat under the eaves of my parents’ house for years, dusted green with the pollen of the cedar trees. When I had a house of my own, I kept the Hooper Bay alongside the garage. The canvas covering grew speckled with mildew, and the paint cracked. Eventually I removed the skin, leaving the lashed latticework frame bare.
An artist friend liked the frame and offered to keep it in her studio. The cedar had weathered and turned gray, so before taking it to her I brushed it with linseed oil mixed with vermilion pigment.
The frame stayed suspended above a belt sander and an electric kiln for quite a long time—through a dark decade of divorce, from a time when I kissed my young children goodnight to times when they were grown and I’d go to bed in an empty house; through the death of my mother and chill sea of long-forgotten deadlines and appointments.
I brought the Hooper Bay home when my friend moved out of town, and it lay hidden alongside the house under a black tarp. With the coming of each spring, bracken ferns pierced between its ribs and morning glory spiraled around its chines. I often thought about giving the Hooper Bay a new skin, to paddle away from shore, lie down in the cocoon of wood and canvas, and let the waves rock me into that peaceful half sleep of 40 years ago.
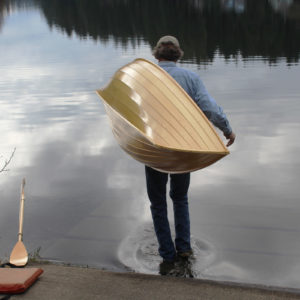
Two summers ago, I took some pictures of the frame set in front of an ivy-covered fence—the vermilion was vibrant against the dark green shingled leaves. I had planned to post the photos with a for-sale ad on Craigslist, but I let month after month slip by. I let the kayak’s color fade. I posted the ad a couple of weeks ago and I got just one response. A few days later the Craigslist buyer arrived and we strapped the Hooper Bay on his roof rack. The frame is gone now, but the best of that kayak remains with me.![]()

Afterword:
Photographs from launch day, summer 1980
Campion’s Apple 16
It all started during the summer of 2015 when I decided that it was time to part ways with MAGIC, my 1962 Alberg 35′ glass sloop. I had spent four years and countless hours restoring MAGIC to her former glory, but two years after re-launching I needed a change. While she was not a big boat by today’s standards, the amount of time and money spent just keeping the boat in the water and in good condition was exhausting. The fact that I lived in central New Hampshire and kept the boat 150 miles away in southeastern Massachusetts only made things worse.
I found myself spending more and more time on a beat-up old O’Day Daysailer that had been following me around since college. My family and I romped around the local lakes and estuaries, sailing hard and often. The only money I spent on her was gas for the car and beer for the cooler. At some point that summer, I realized that I was having as much fun on the O’Day as I was on MAGIC, but with none of the stress. Sure, MAGIC was a comfortable boat that could take somebody sailing for weeks at a time, but I was mostly going out for day sails with an occasional overnighter. I could be doing the same thing on a much smaller boat.
At about the same time, I heard about the Small Reach Regatta, organized by the Downeast Chapter of the Traditional Small Craft Association in Maine. It’s not a race, but a gathering of small, traditional sailing and rowing craft. I have always been drawn to the look of classic boats and when I saw the boat lineup on the Small Reach Regatta website, I knew I had to check it out.
I showed up on the first morning of the event and was able to sail on Mike Duncan’s FRISKY LADY (a Chamberlin 15′ 6″ gaff sloop) and on Geoff Kerr’s NED LUDD, an Oughtred 19′ 6″ Caledonia yawl. I fell in love with the Caledonia but it was a bigger boat than I needed. However, the seed had been planted, and I spent the rest of the summer researching the perfect small boat in the range of 15′ to 18′.
The boat had to be pretty and, while I prefer the look of lapstrake, there is a lot of additional setup and framing required that takes a fair amount of time, so I was looking for a stitch-and-glue design that didn’t require a strongback and associated framing. I also like the classic look of a balanced lug-rigged yawl; and with unstayed spars, balanced lug rigs are really easy to set up for launching. The mizzen makes for easy handling. In spite of the appeal of classic boats, I wanted a fast boat, and a planing hull makes this possible.
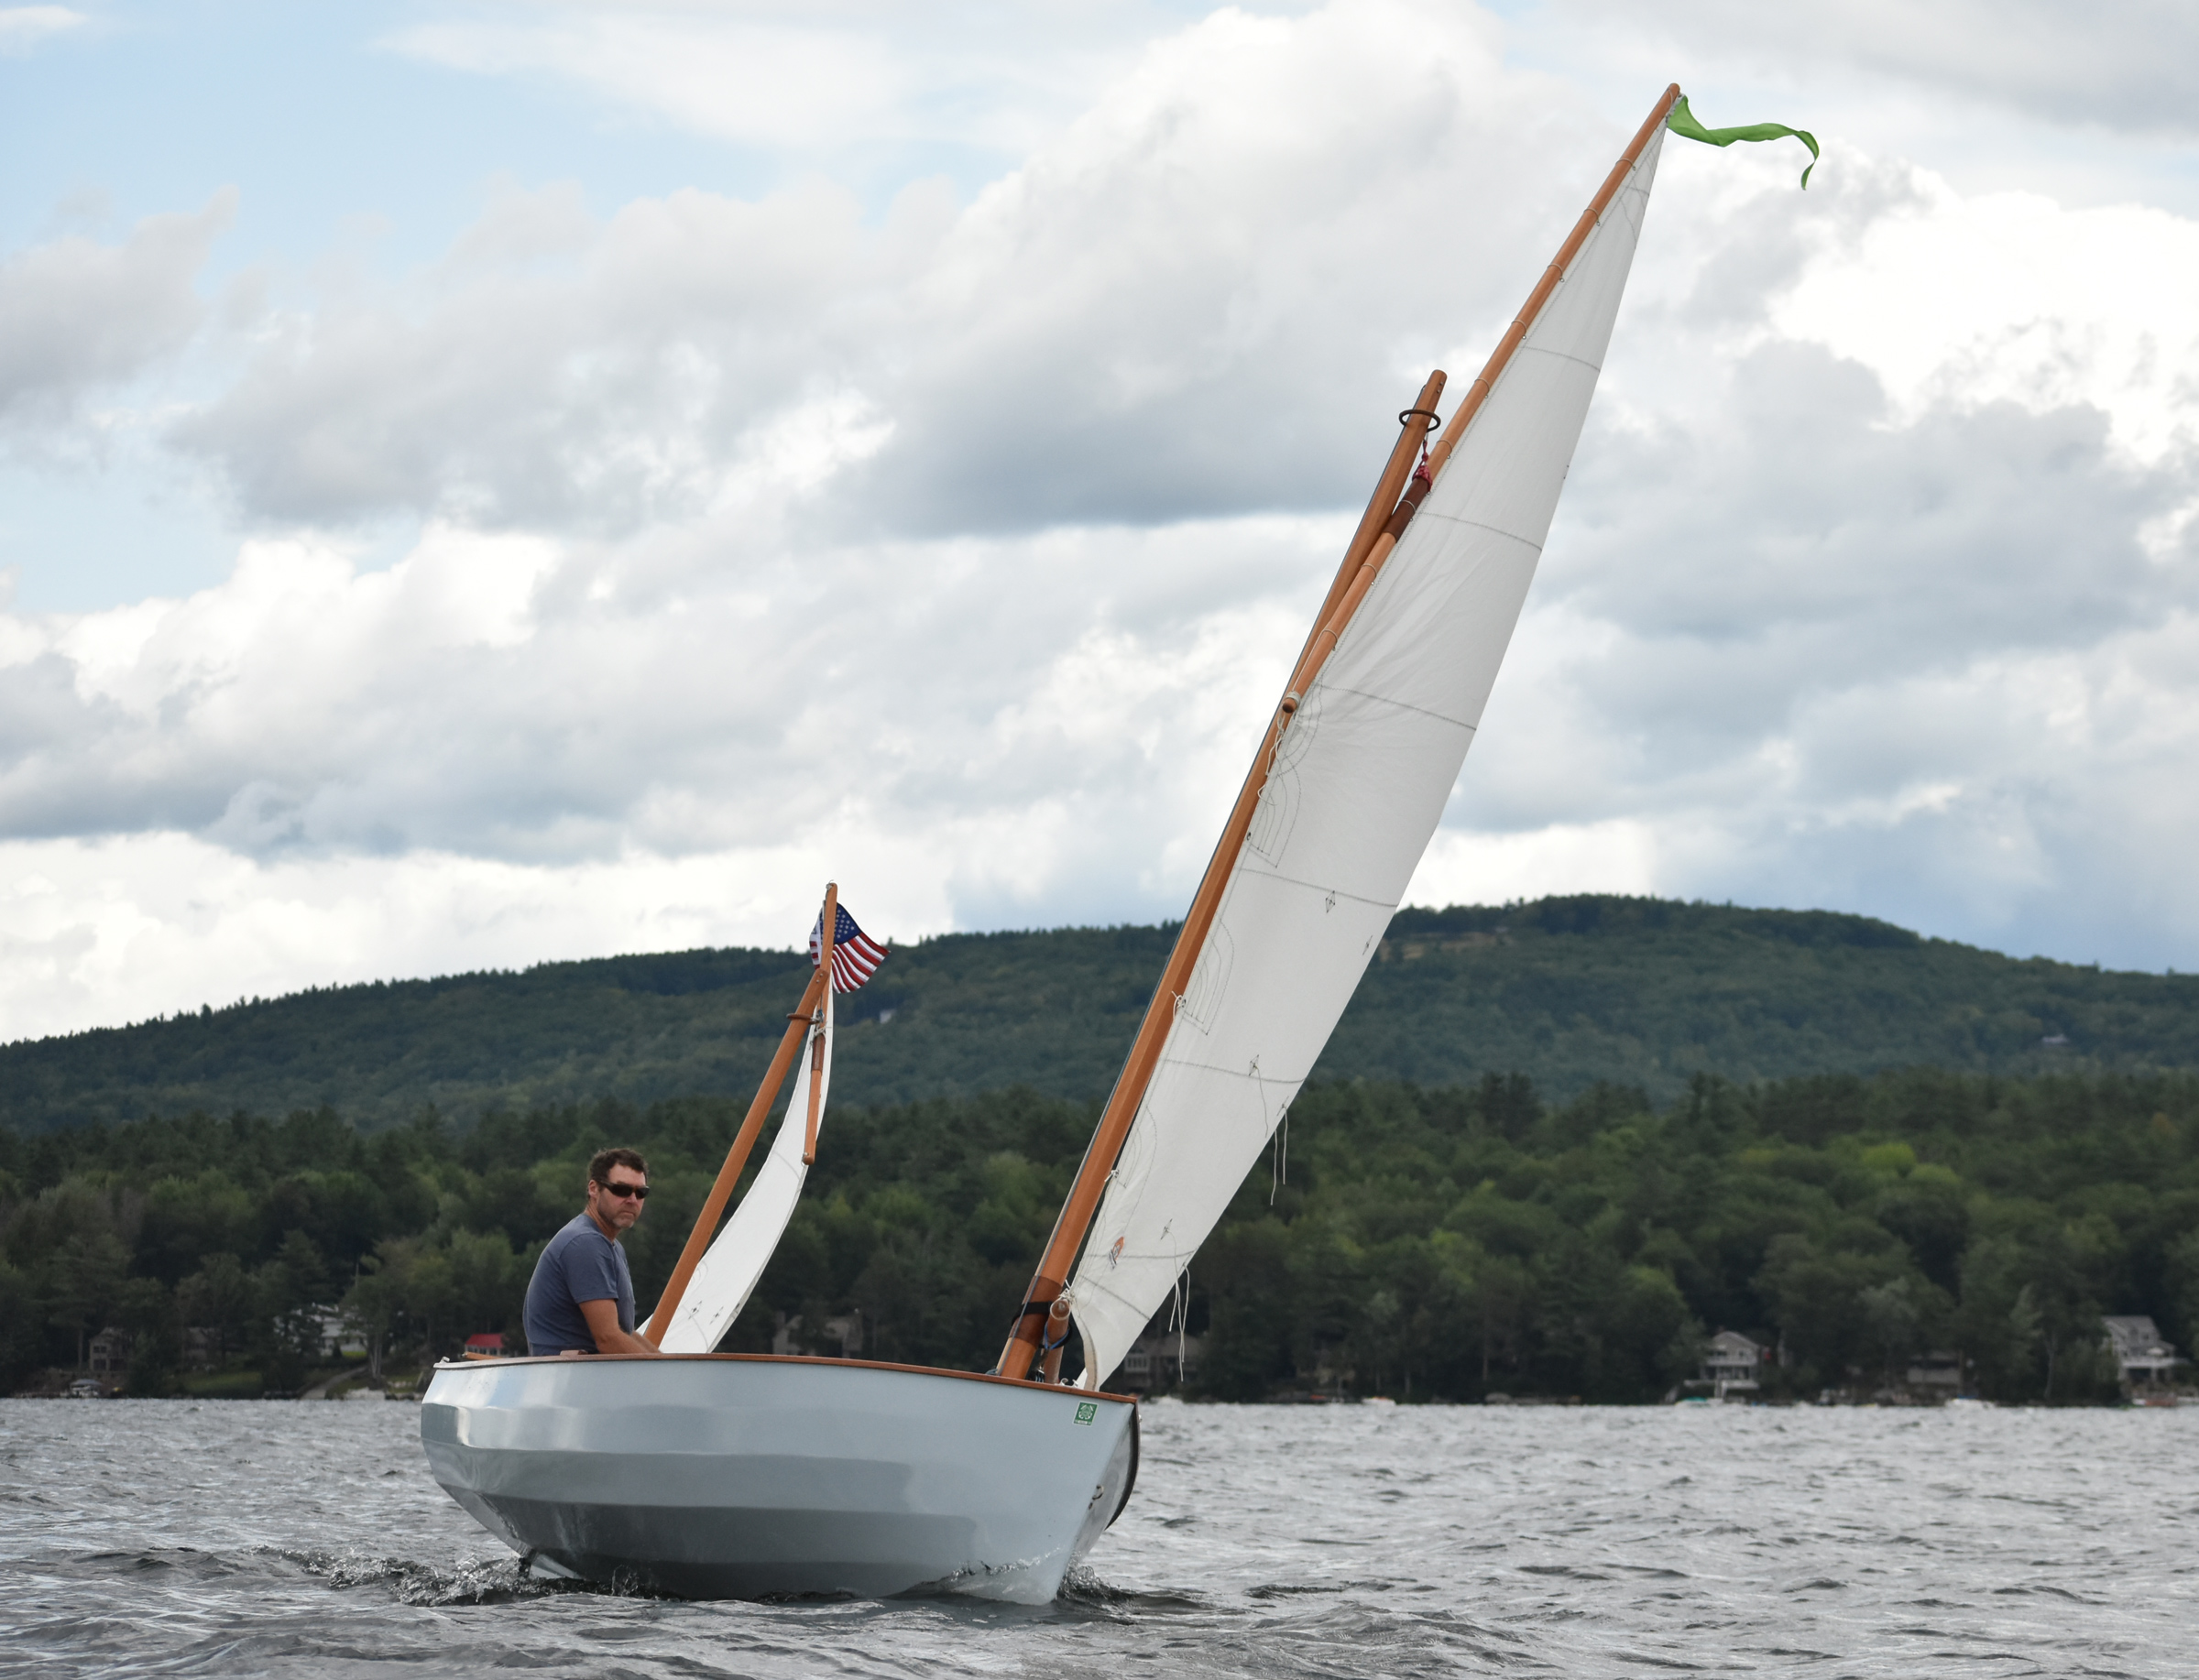
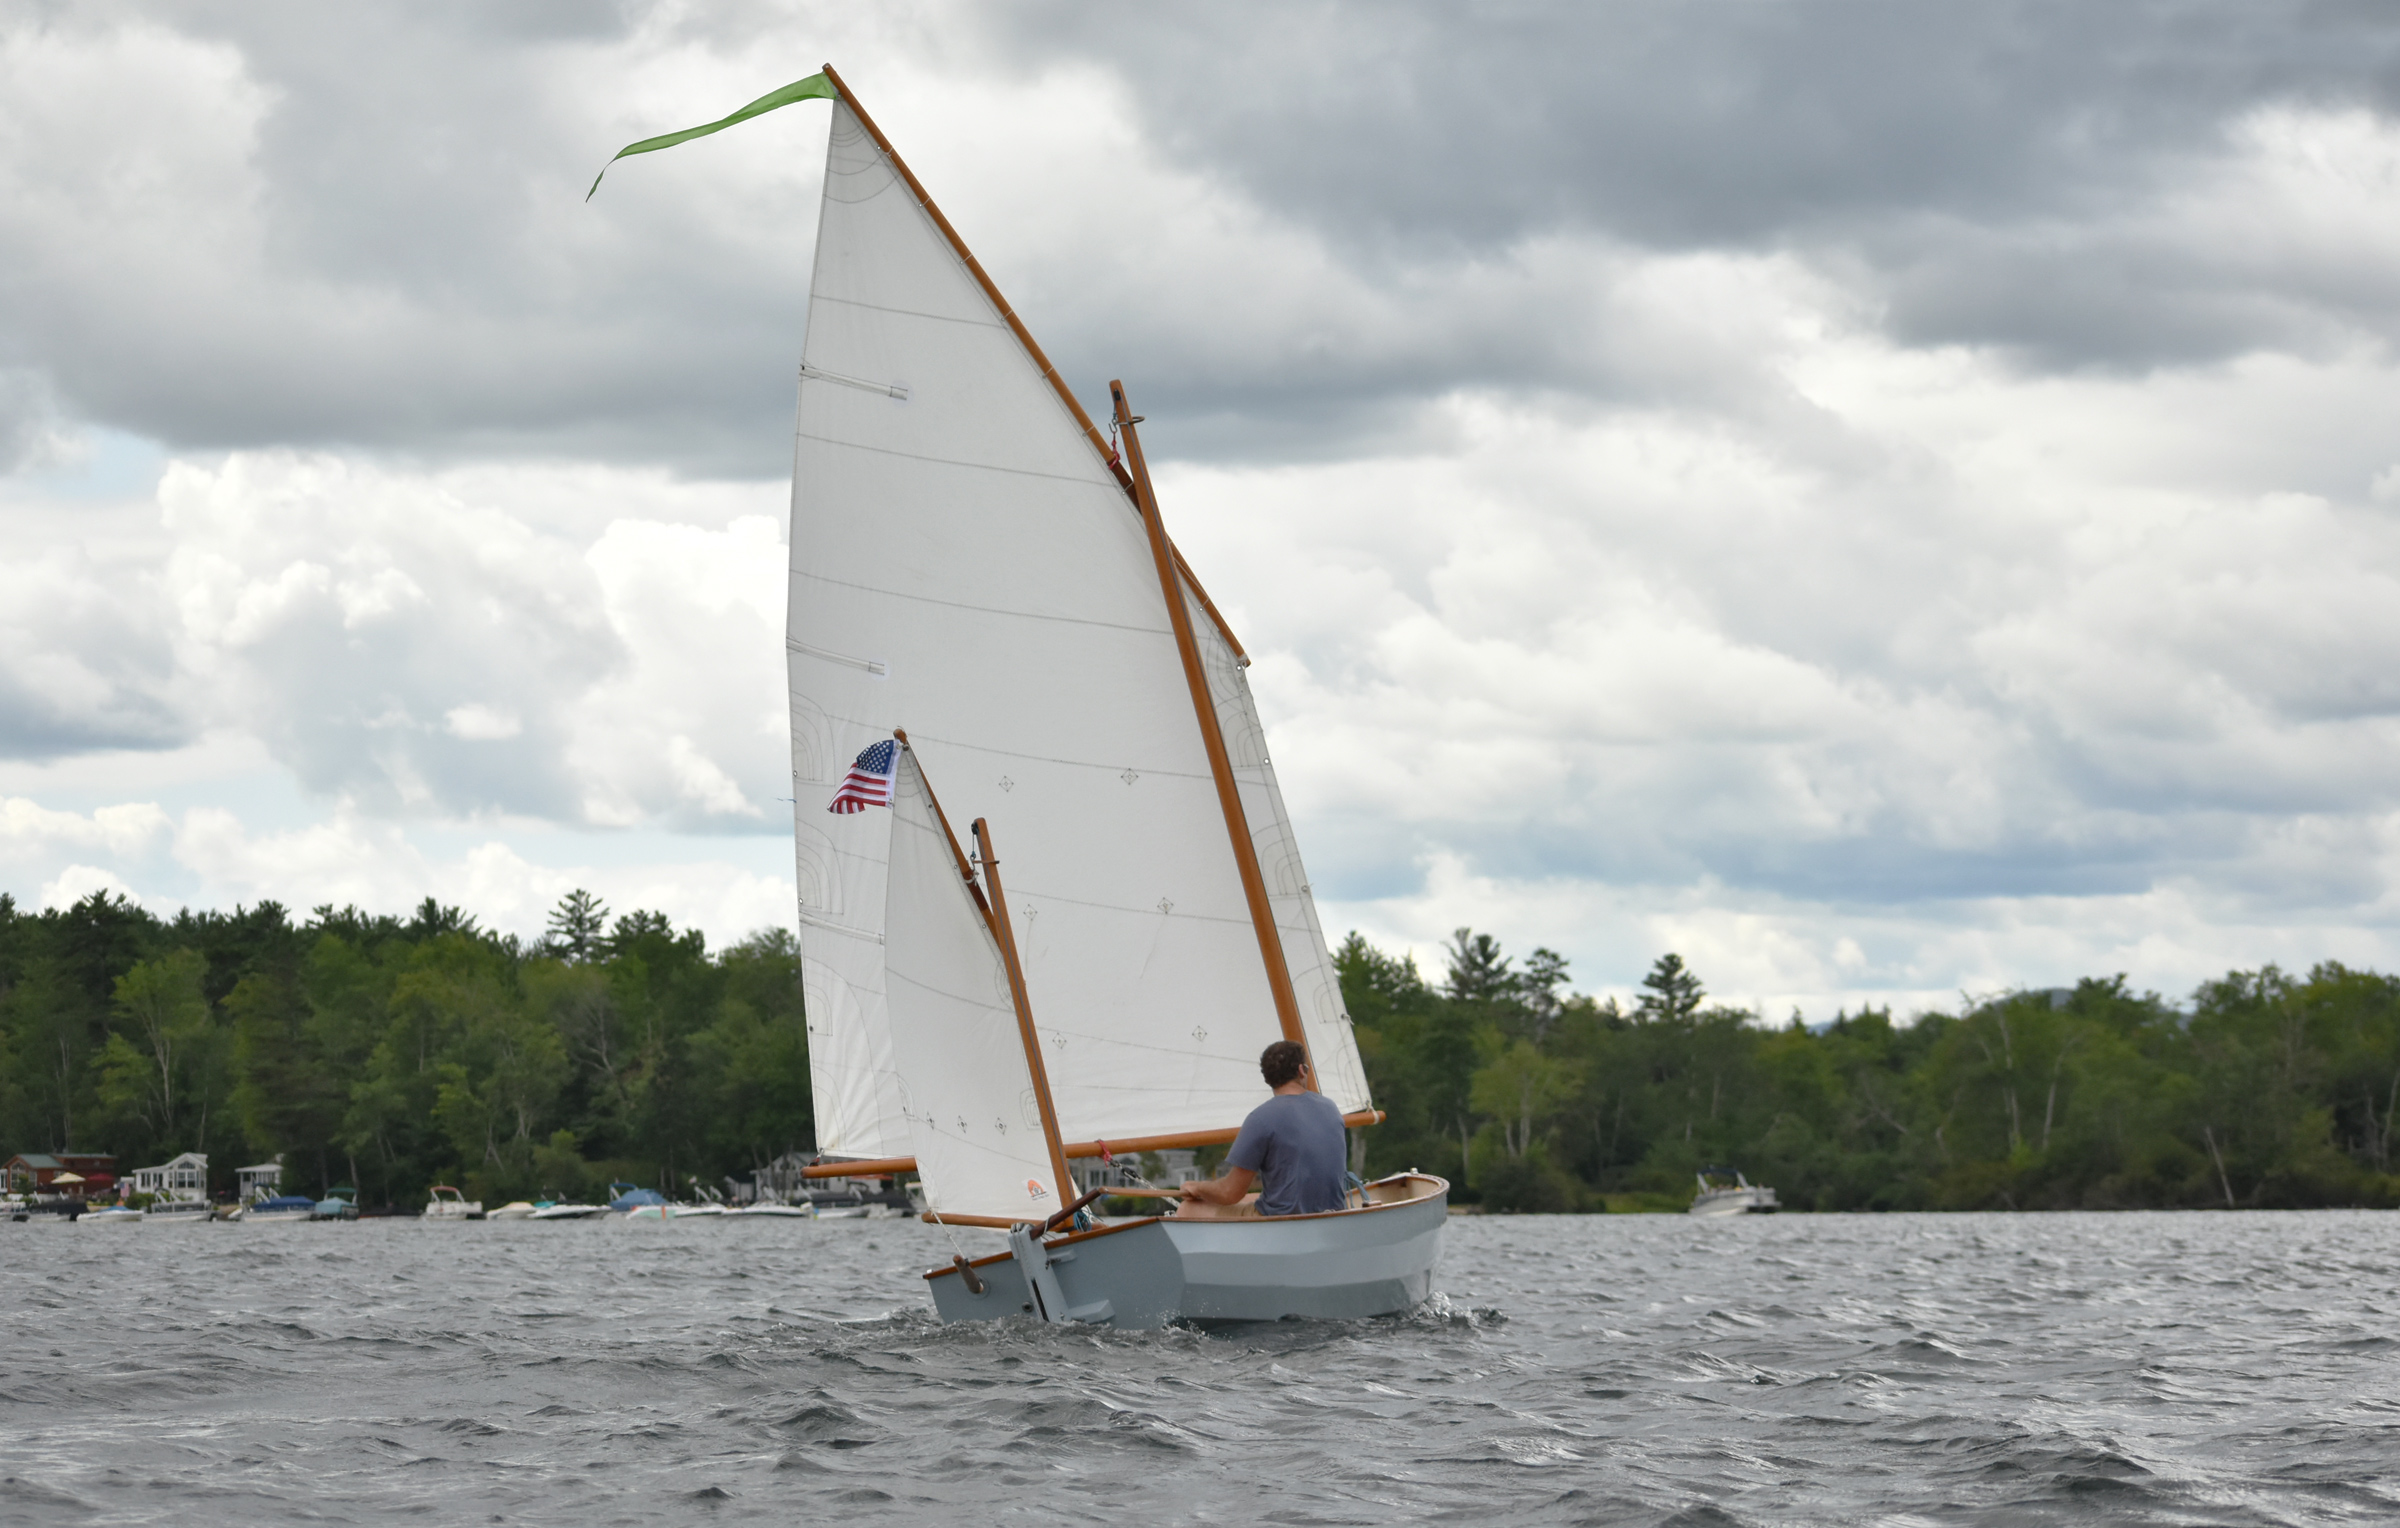
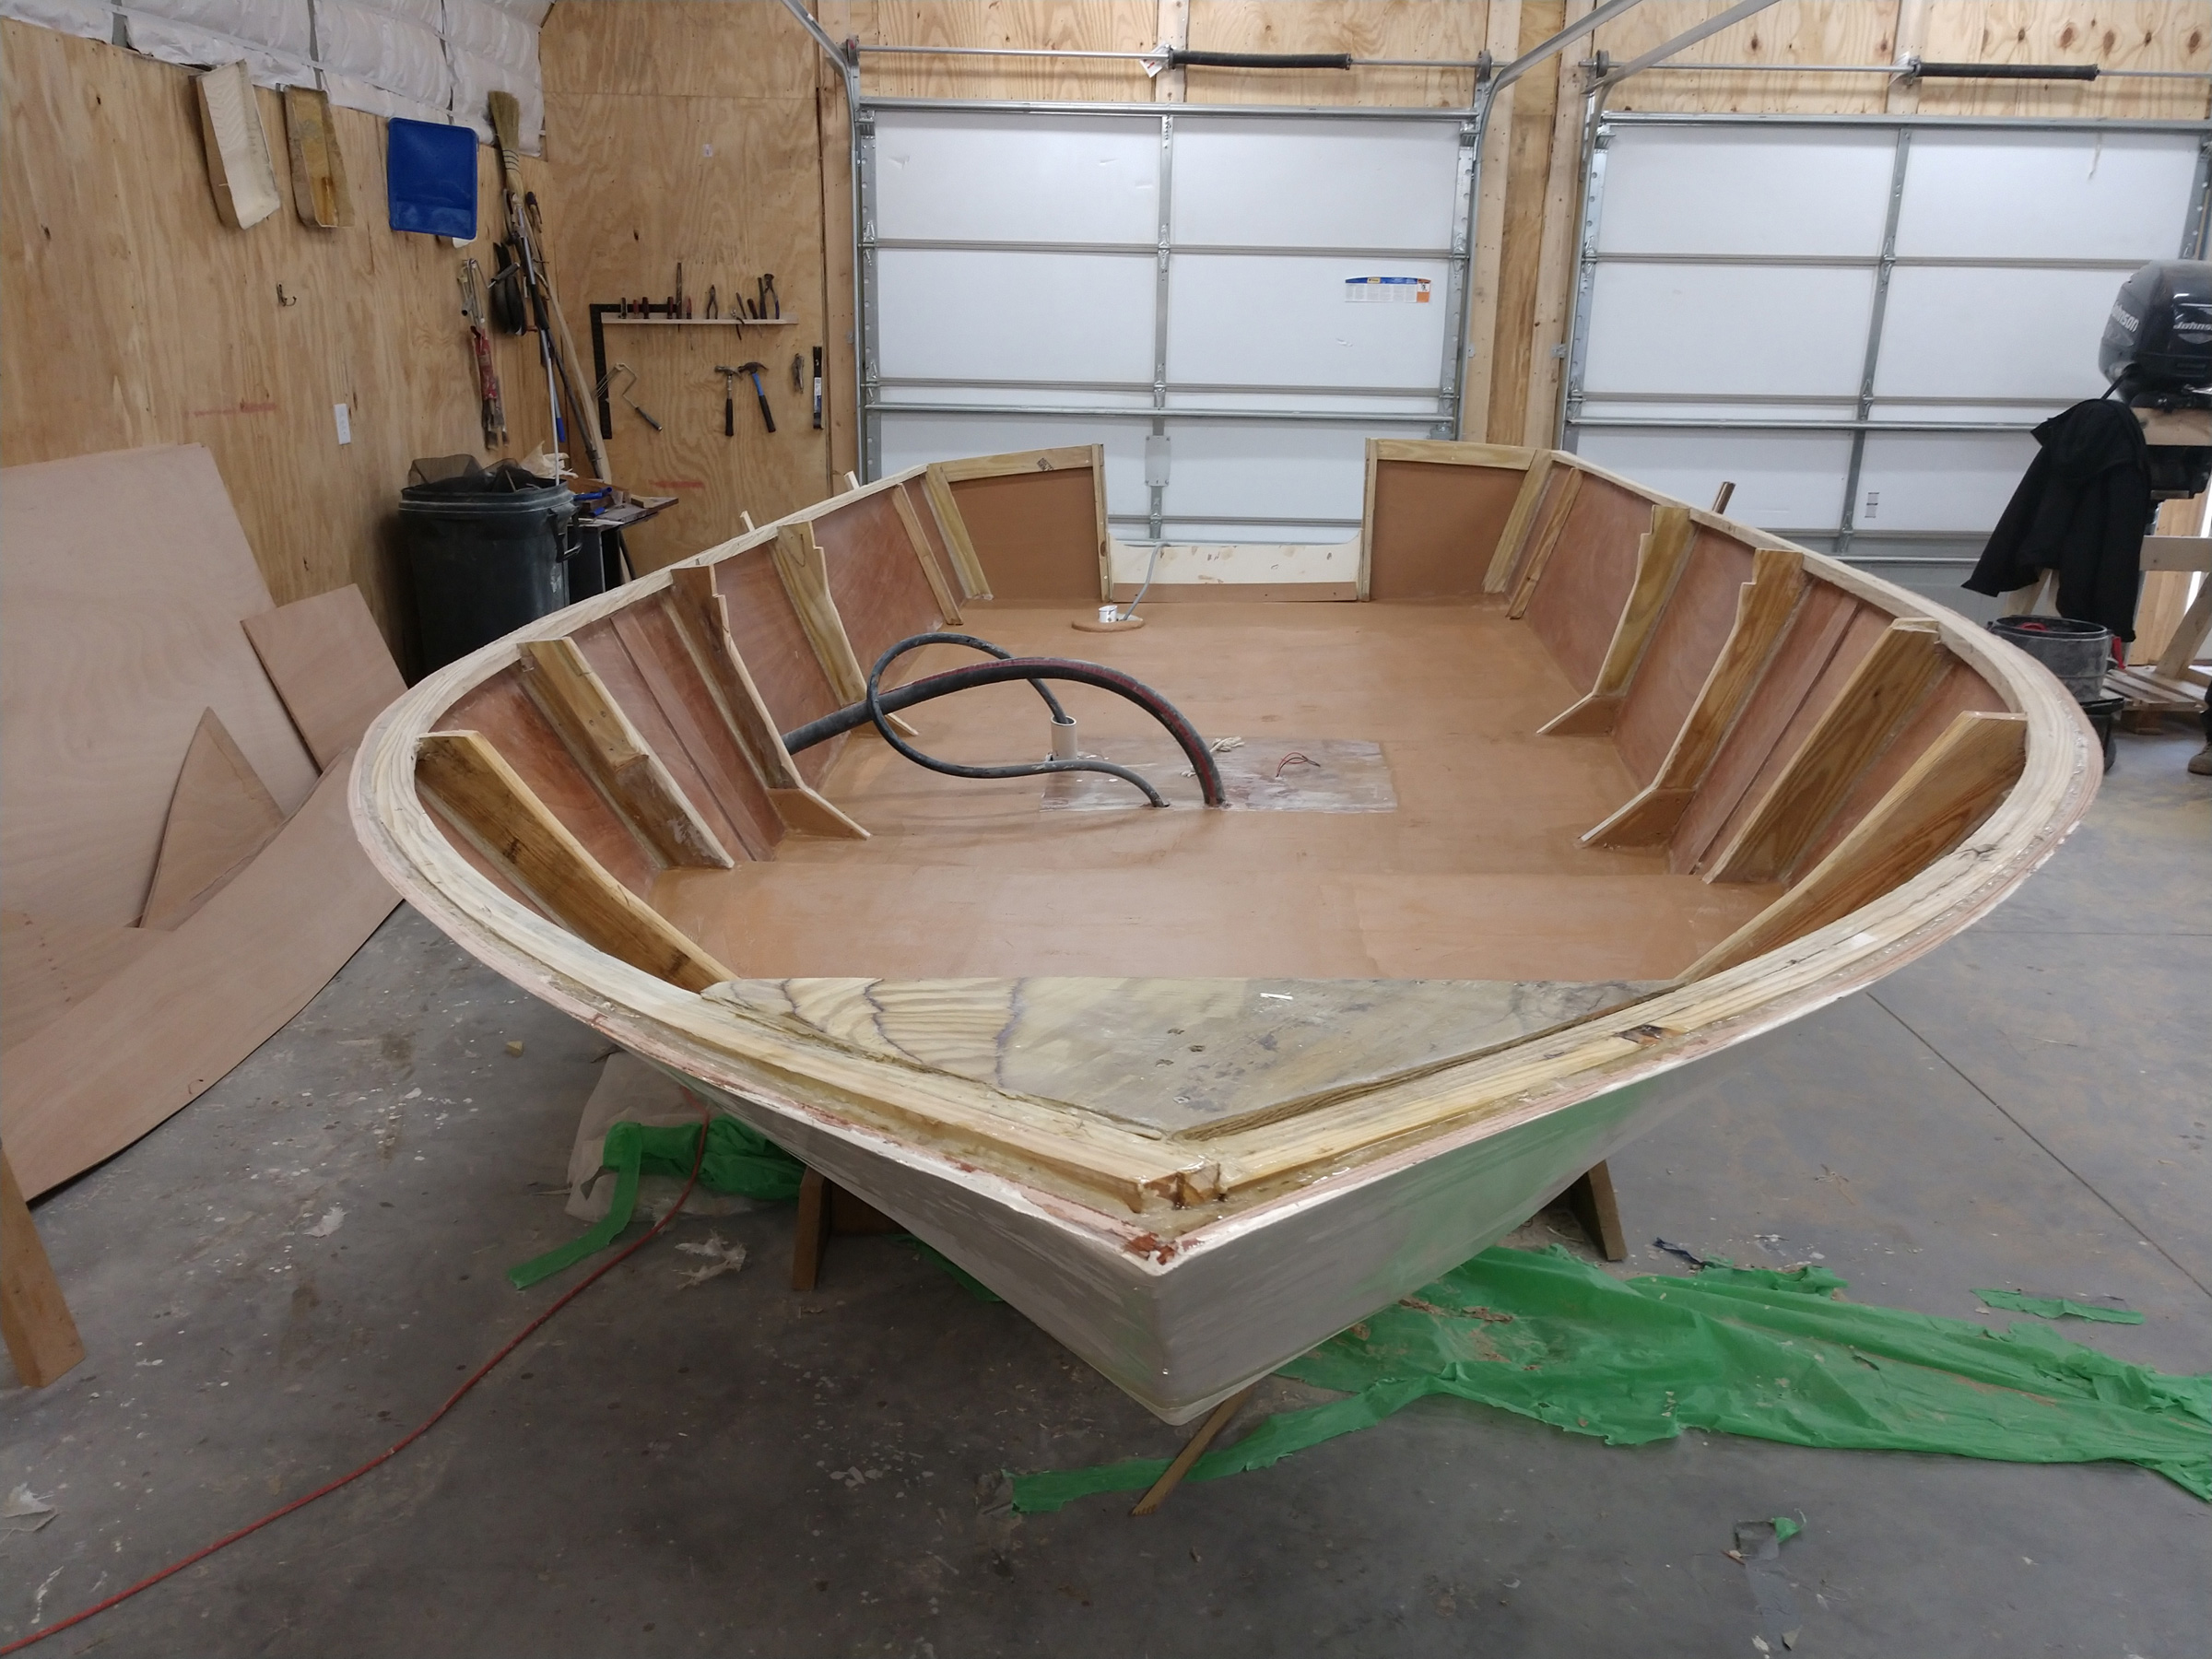
The Apple 16, a five-strake stitch-and-glue balanced lug yawl designed by Thomas Dunderdale of Campion Sail and Design, came closest to being everything I wanted. The classic lines and balanced lug yawl were just what I was looking for and the somewhat flat aft section of the hull allows the boat to get up on a plane. I’m a sucker for a plumb bow, so as soon as I saw pictures of the Apple 16, I knew it was for me.
 Photographs by Jacob Bowser
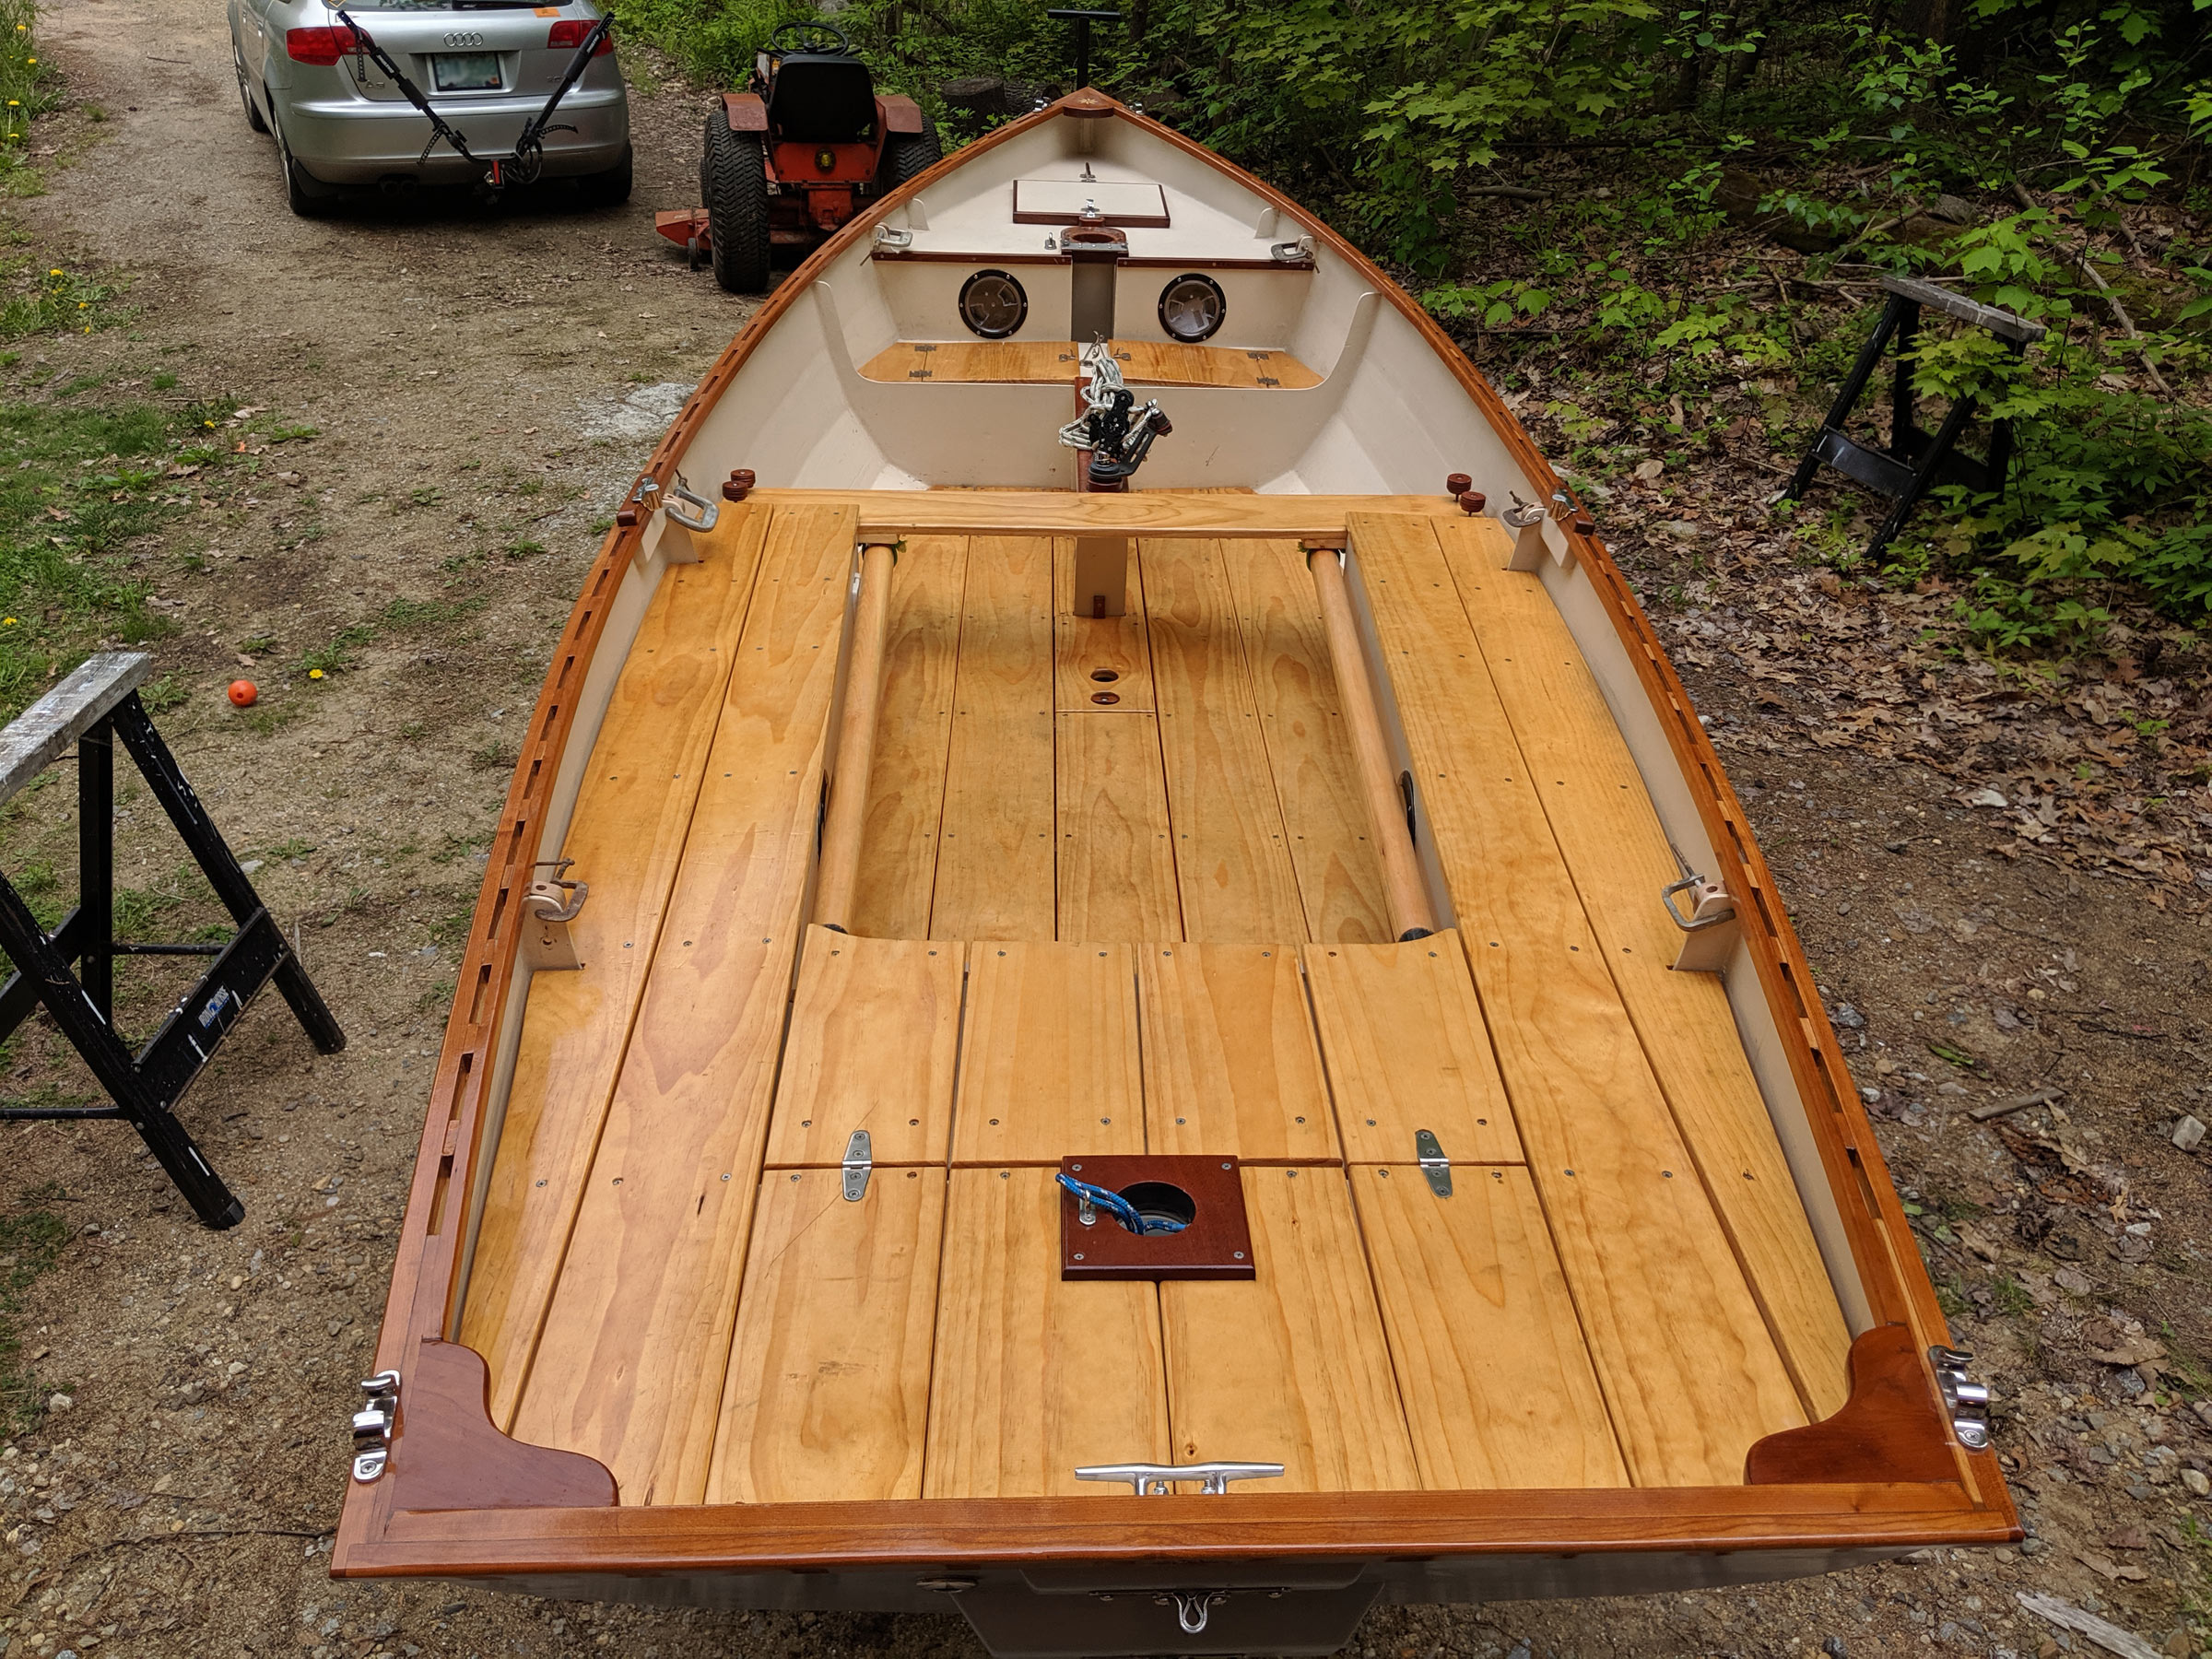
The plans detail several interior layouts, and provide the option for decked ends . The author designed his own interior with flotation tanks and a removable center thwart.
After several conversations with the designer, I purchased plans and began the build. Thomas was very helpful, answering all of my questions via email or phone.
I didn’t want to wait for a shipment of full-sized printed plans mailed from England; I opted for digital files and took them to a local copy shop and had them enlarged for about $30. I was really happy with the amount of thought and detail that went into the plans; they came with a general construction narrative, a detailed 30-page keyed construction index and at least a dozen schematics for the boat, parts, and interior layout options. For a first-time boat builder, everything provided should be easy to follow.
The included materials list calls for four sheets of 6mm marine plywood scarfed lengthwise for the hull, two sheets of 6mm for bulkheads and interior framing, and one sheet of 9mm for the rudder and additional components.

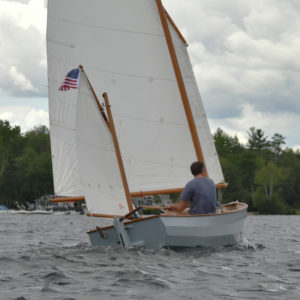
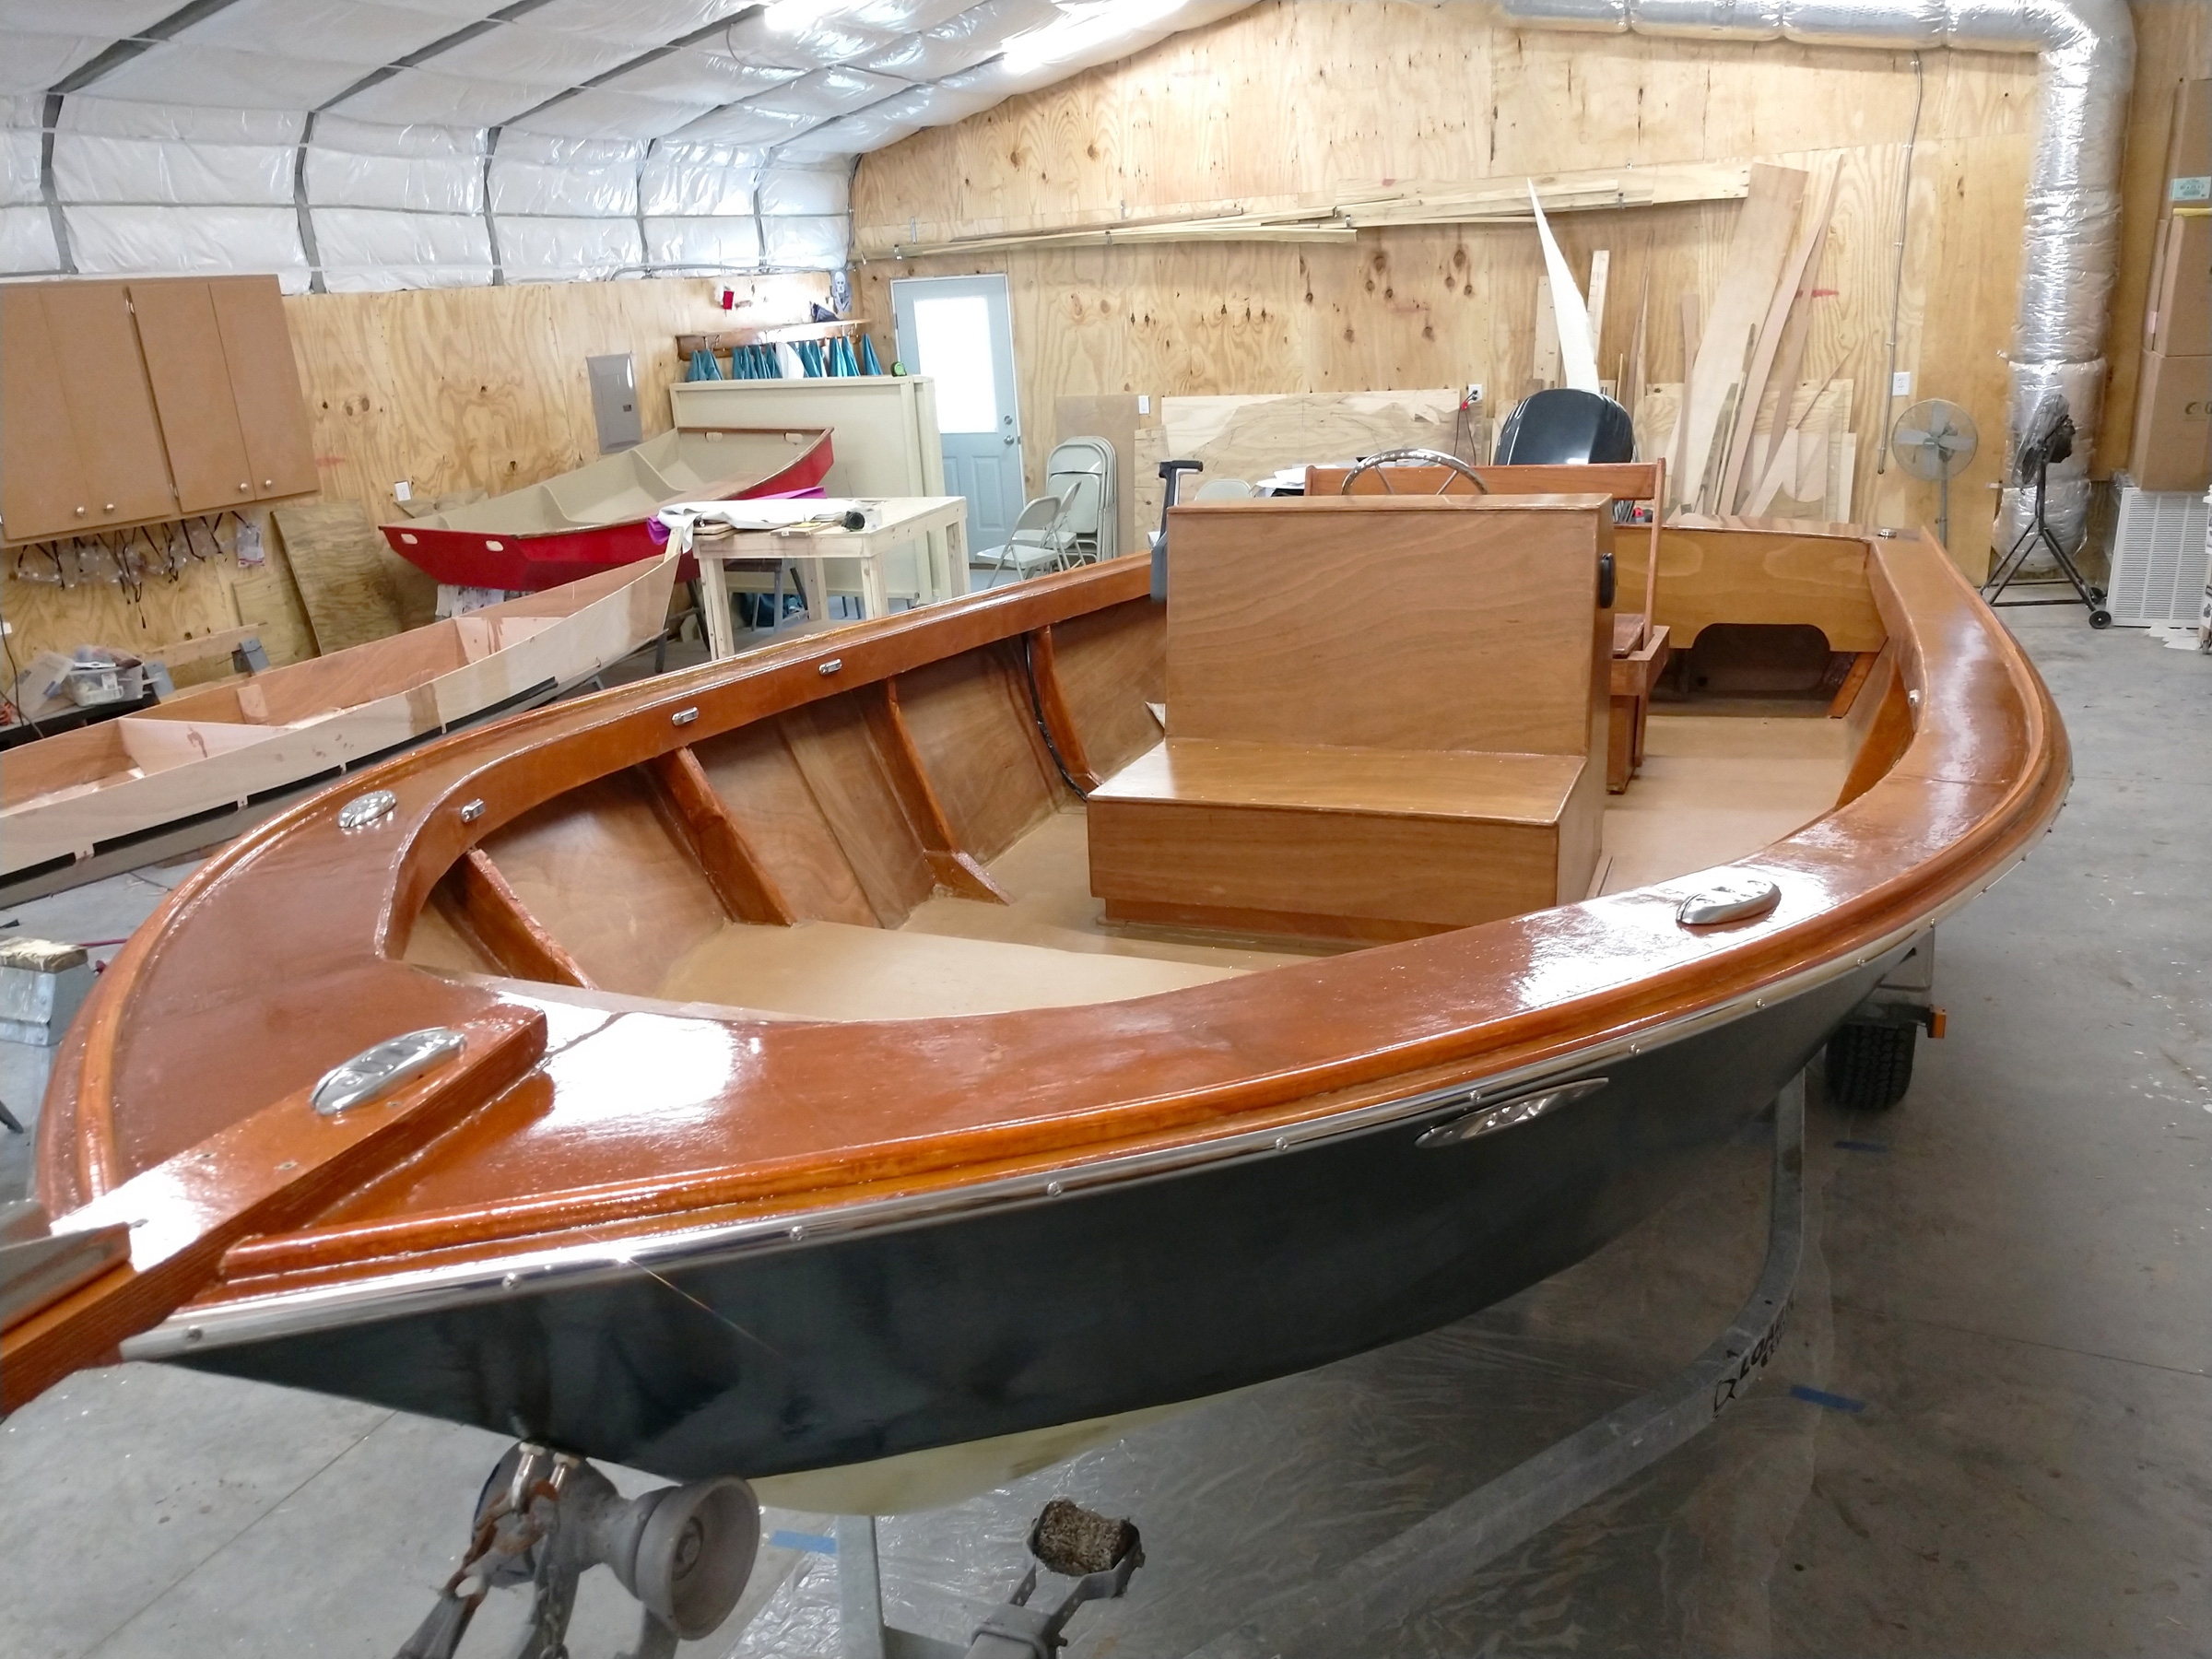
With a solo skipper aboard, the Apple 16 can, in spite of its traditional appearance and rig, get on plane in a moderate breeze.
While Campion does not currently offer files for a CNC mill, someone savvy with a CAD system should be able to digitize the planking measurements and send them off for cutting to save time. I don’t have easy access to a CNC mill, so I opted to plot the strakes on the scarfed panels and cut them out myself. The plans package provides both a table of offsets and a visual diagram for plank measurements that is very intuitive.
Probably the best thing about building a stitch-and-glue boat is how fast you can make visible progress. Once you cut the strakes from the scarfed plywood panels, assembling the hull is a simple matter of drilling out holes for wire or zip ties (I opted for zip ties) and stitching the panels together. In a single, albeit long, afternoon you can go from a pile of flat plywood pieces to a structure that resembles a boat.
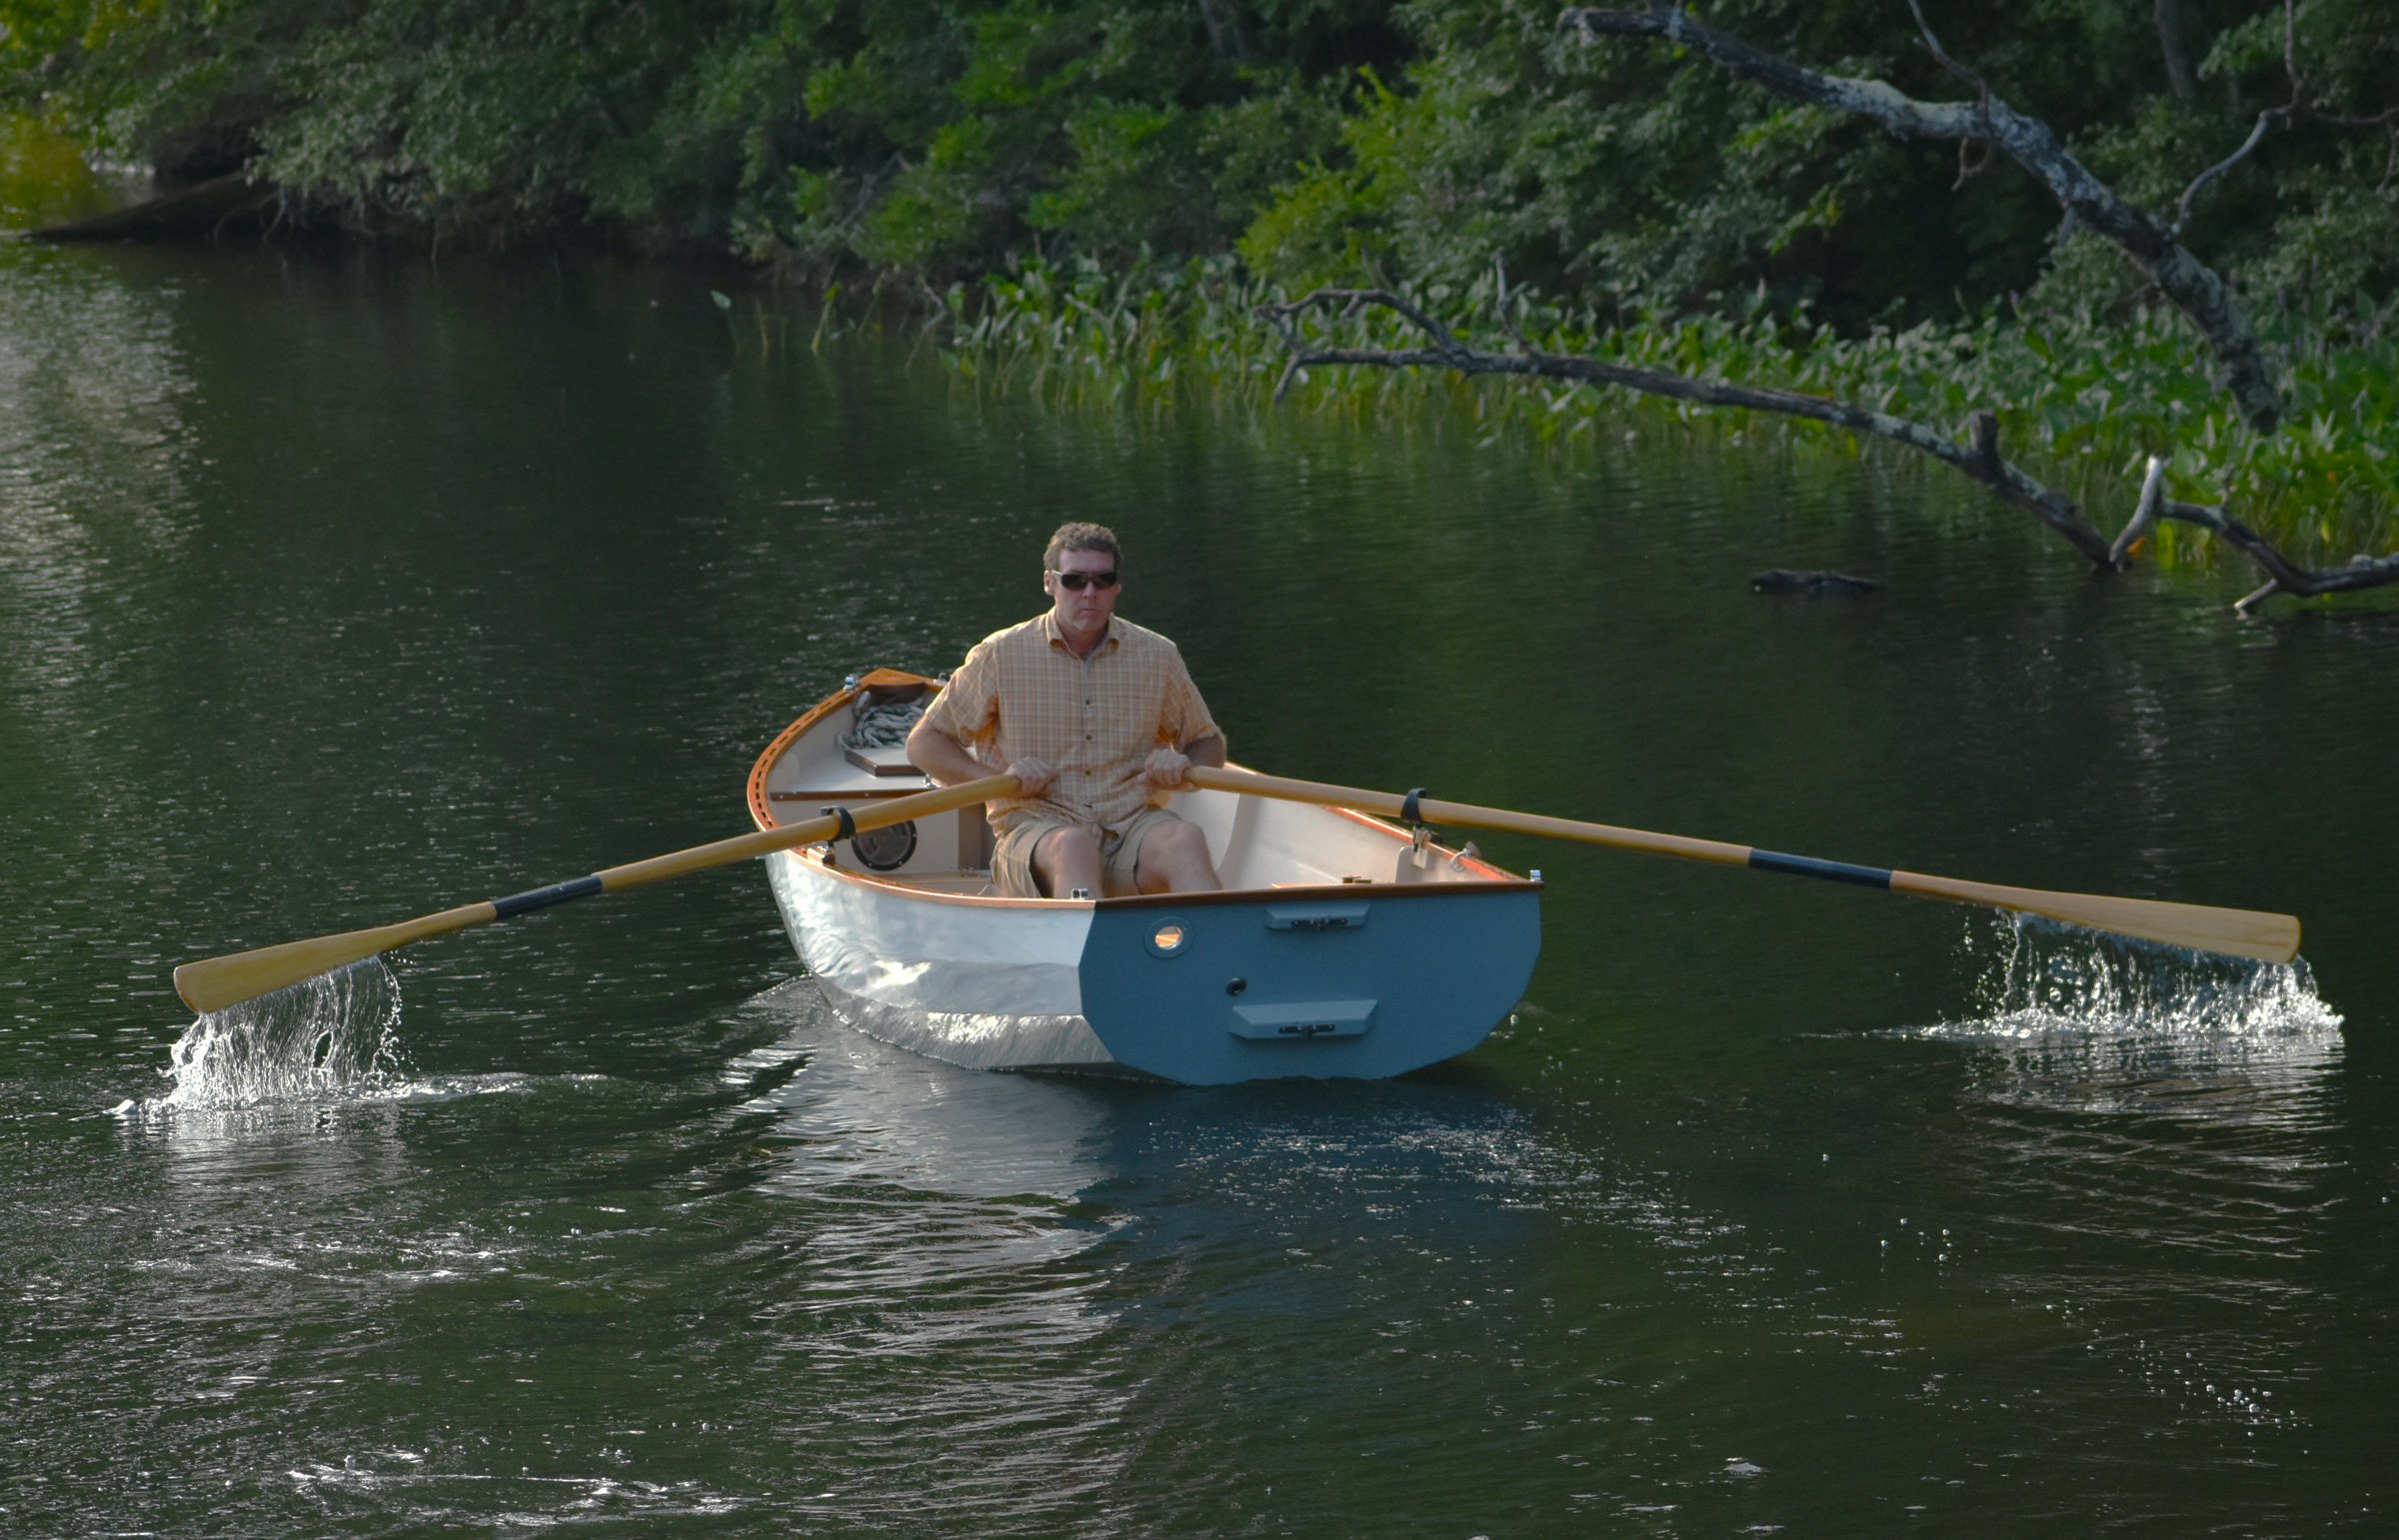
The author could comfortably row the Apple 16 at around 3 knots. His sectional oars, with carbon-fiber ferrules, stow neatly out of the way while sailing.
Of course, it’s not all a piece of cake. Until you get the bulkheads tied in, the entire structure is a bit of a wobbly mess. I cut cradles to steady and align it while I tied everything together. This helps immensely when one is working alone.
The job of taping the inside and outside seams, followed by a layer of 6-oz ’glass on the outside of the hull is rather monotonous. If you’re careful, cleanup should be a relatively minor job and once complete, you can move on to fitting out the interior.
The plans provide layouts for several interiors ranging from a spartan setup of three thwarts, with two doing double duty as mast partners, to a more extravagant layout with decks fore and aft. I deviated from the plans and designed my own interior with built-in flotation compartments and a center thwart that’s removable for camp-cruising.
The boat is quite light, and a solo sailor could add some ballast to stiffen the hull against the press of the sails. The designer recommends adding between 110 to 275 lbs if ballast is needed.
The plans call for a long, open daggerboard trunk to accommodate multiple mizzen sail plans (the larger plan changes the center of effort and requires the daggerboard to be located further aft). Since I was only building the version with the smaller sail plan, I shortened the daggerboard trunk after consulting with Campion.
I also increased the thickness of the daggerboard from 25mm to 33mm so I could build a NACA 0012 foil. I’ve had several opportunities to test performance against other similar designs with balanced lugs and I believe that the foil helps with upwind performance.
All told, the build took me about eight months of working 10–15 hours per week, and I couldn’t be happier with the way it turned out. A single rower with 9.5’ oars can propel the boat at 3 knots when rowing at a comfortable pace, and her sailing ability has exceeded my expectations. Trailering with my four-cylinder Rav 4 is easy.
I’ve had the boat out for dozens of times in a variety of wind conditions, and the boat is really amazing to sail. Having no prior experience with balanced lug rigs, I spent a lot of time researching balanced lug sail tuning and after a bit of trial and error, I opted to go with 6:1 downhaul and 4:1 mainsheet tackle. I used Dyneema line for the downhaul and main halyard to maximize luff tensioning ability.
The Norwegian tiller may take a bit of getting used to if you haven’t used one before, but it is the simplest arrangement for getting around a mizzen mast and has a number of advantages over a conventional tiller.
With the rigging configuration sorted out and making sure the downhaul tension is drum tight, I found that the pointing ability was quite good. Combined with the foil daggerboard, which should theoretically increase lift, the Apple 16 is not far off the pointing angles that a similarly sized Bermuda-rigged boat can achieve. When soloing, I regularly get up on a plane on a reach and hit 8.5 to 9 knots in less than 15 knots wind. Over 15 knots and I put in a single reef, and have sailed in conditions up to 23 knots without being terrified.
We have had four adults out for a sail, and while it is manageable, two of the crew need to sit in the well on either side of the daggerboard trunk forward of the thwart. The 250-lb boat is really best suited for one or two, and each additional crew member reduces the boat’s ability to plane. I have yet to be able to get the boat on a plane with more than two crew on board; I suspect that it would have to be pretty windy to do so. With that said, the boat sails well even with four on board.
The boat is as well-mannered as a light boat can be and is reasonably dry in most conditions. Beating close-hauled into chop over 2’, predictably, tends to be the wettest point of sail. The yawl rig contributes to a very balanced helm on all points with just enough weather helm on the Norwegian push-pull tiller to take any of the play out of the system and allow you to make subtle course corrections.
The Campion Apple is a well-thought-out small boat that is lively to sail and will turn heads in any harbor. It’s a good choice for a first-time boatbuilder with woodworking skills who doesn’t want to spend years building a boat that looks and sails great.![]()
Matt Bowser, a software engineer living in Canterbury, New Hampshire, can’t remember a time when he wasn’t obsessed with boats. He grew up sailing the coast of New England from Rhode Island to Maine and is enamored with the simplicity, ease, and low maintenance of small boats. When he isn’t sailing, building, or fiddling with various boat bits, he’s mountain biking in the forests of New Hampshire and Vermont or trying to get his teenage children to hang out with him.
Apple 16 Particulars
[table]
Length/15′ 10″
Waterline length/14′ 4-1/2″
Beam/5′ 3″
Draft, board down/3′ 9″
Sail Area/123 sq ft
Ballast, if used/110 lbs to 275 lbs
[/table]

Plans for the Apple 16 are available from Campion Sail and Design, based in the UK. Prices are in Pounds Sterling: £65 (approx. $79 USD) for PDF, and £120 (approx. $146 USD).
Is there a boat you’d like to know more about? Have you built one that you think other Small Boats Magazine readers would enjoy? Please email us!
Oughtred’s Auk
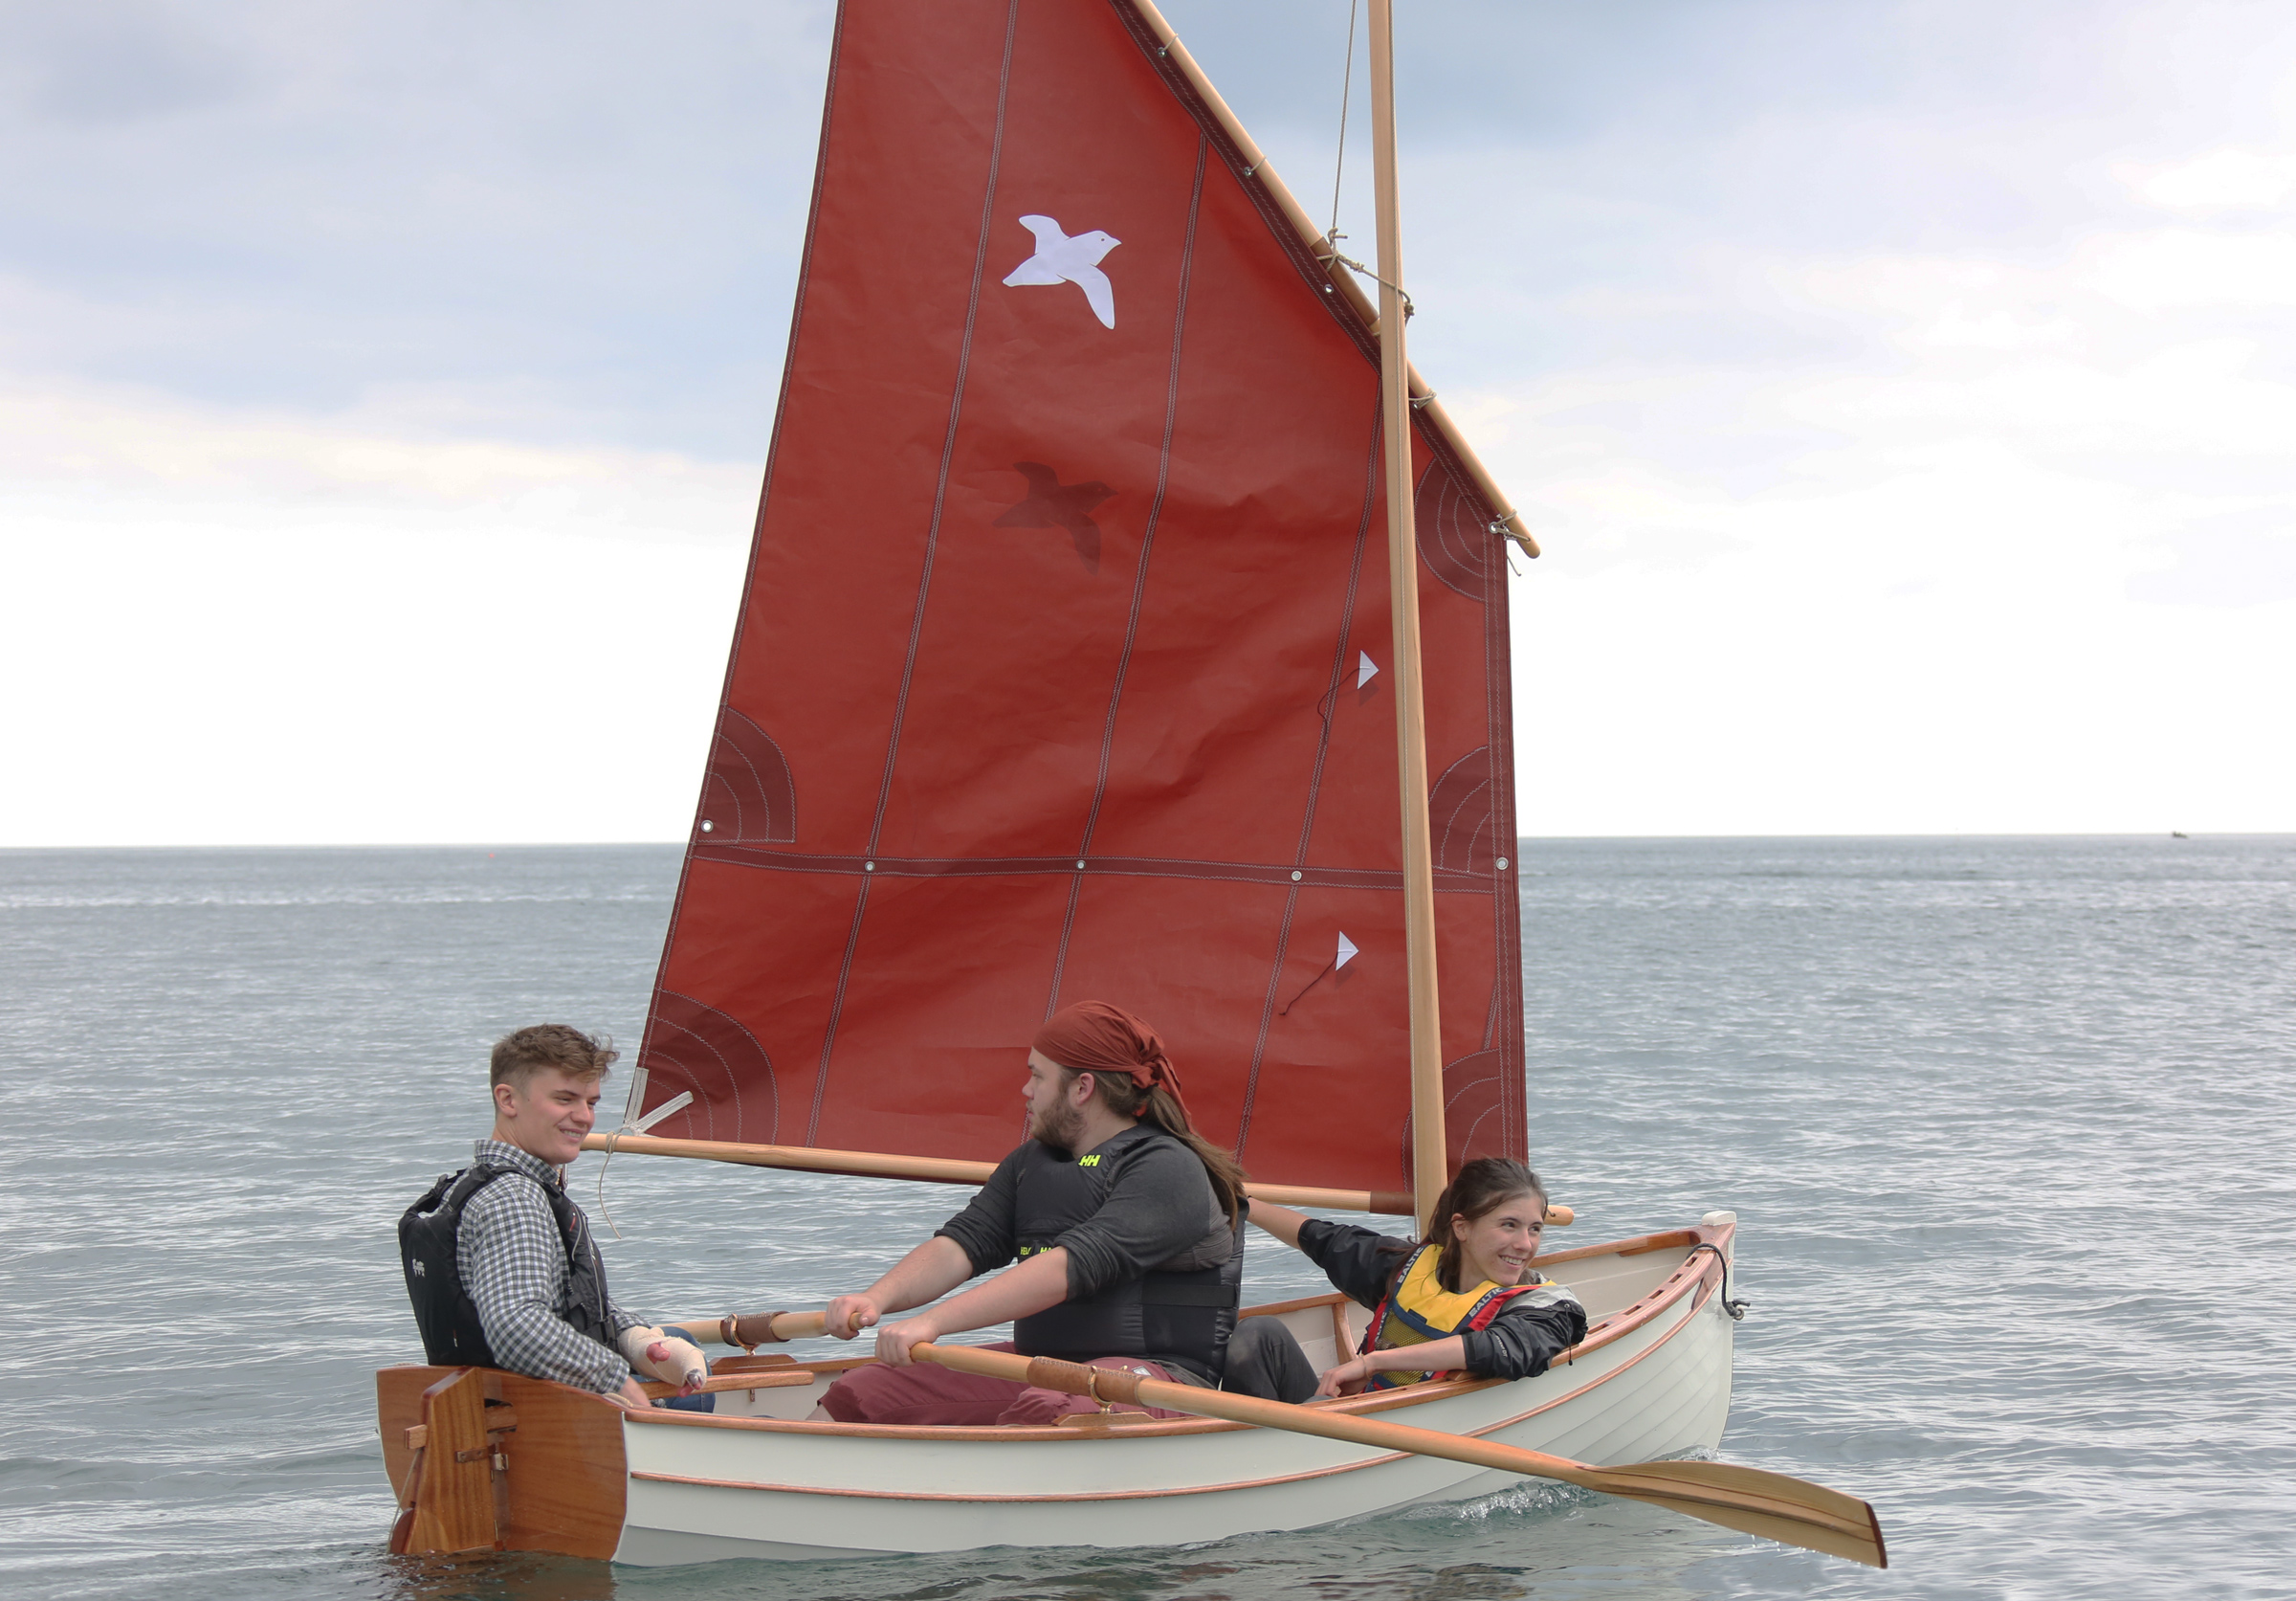
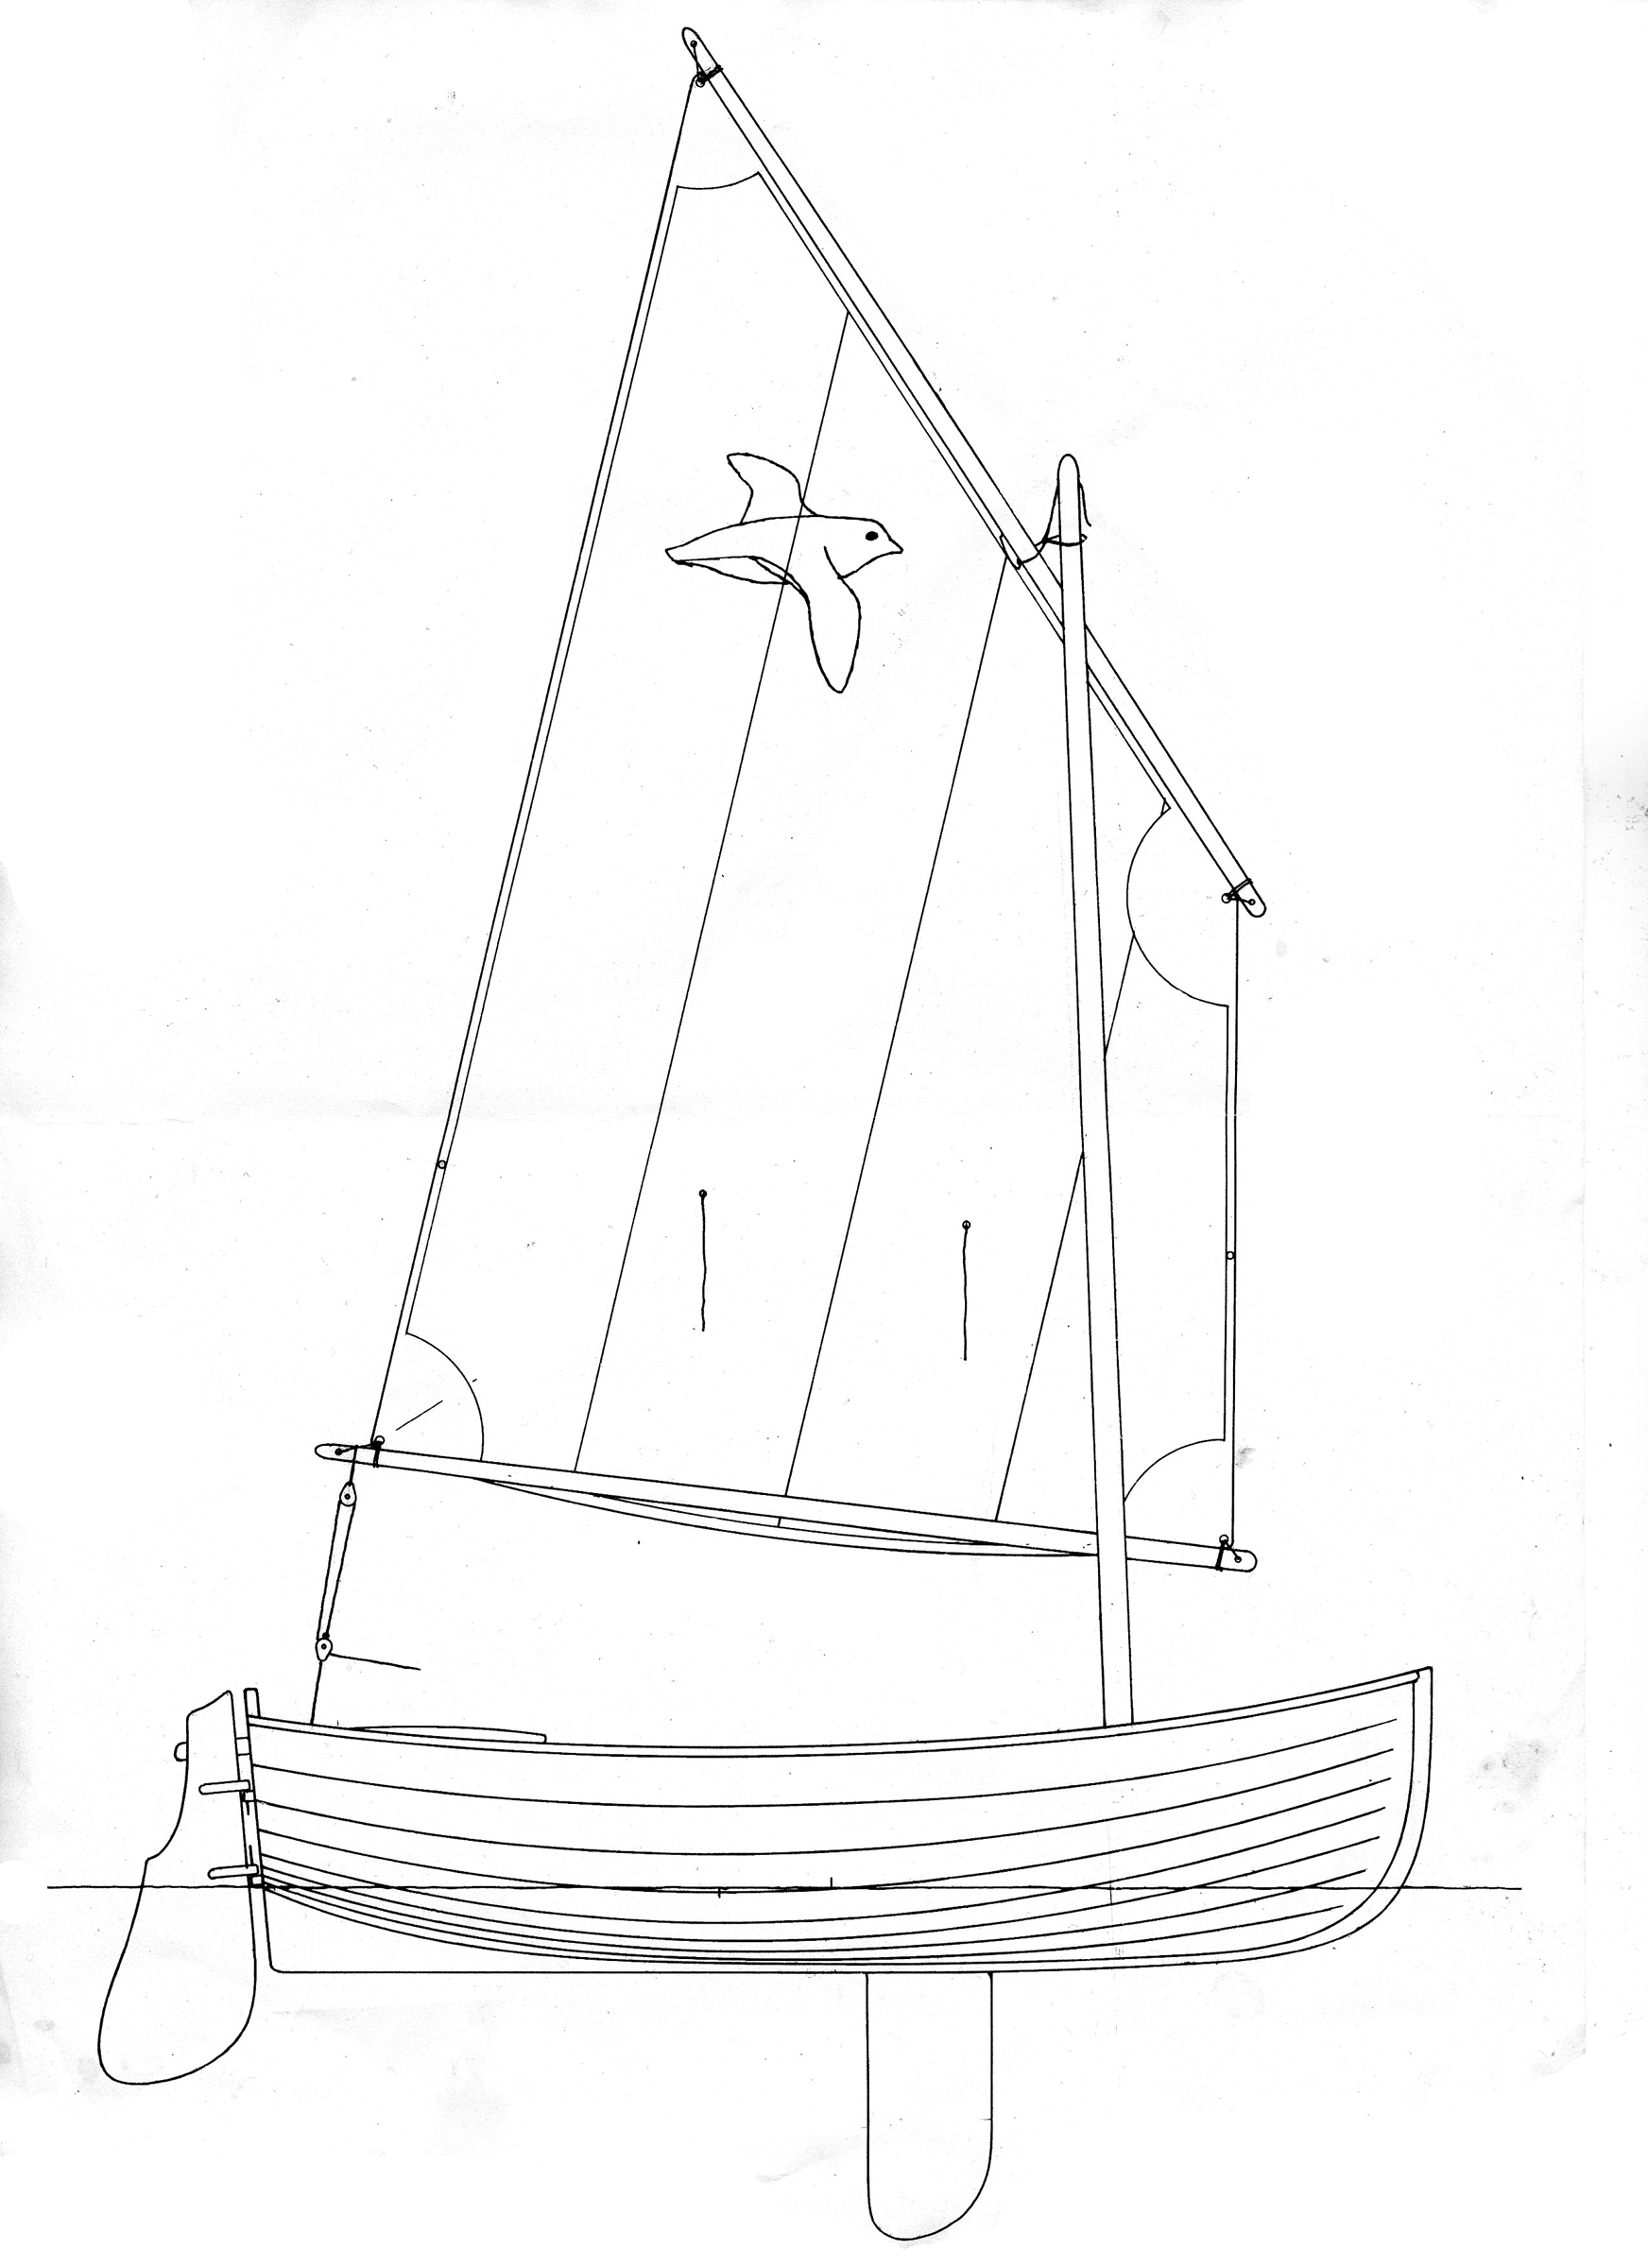
The Auk is an Iain Oughtred design that dates back to 1984. He was “just looking at traditional boats and trying to produce an ideal version of an 8′ tender.” It was a smaller version of the Puffin, a 10′ tender he had previously designed; he gave the Auk a generous beam for its length and a particularly pronounced sheer. “I tend to agree with Uffa Fox that you should have a good strong sheer because it is stylish and it helps keep the water out,” he said. After selling about 250 sets of Auk plans, he redesigned it about 10 years ago to be “a refined version of the same thing with a couple of inches more beam,” and has sold a further 116 sets of plans since then. It is designed primarily as a tender with carrying capacity of three or four people “in sensible conditions,” but he gave it a balanced lug rig for sailing.
When Sam Manners enrolled at the Boat Building Academy in Lyme Regis, England, he decided he would like to build an Auk, but was keen for his to be a bit longer. Iain offers two lengths for the Auk with a little stretching by spacing the five molds, transom, and stem 2″ farther apart to increase the length of the Auk from 7′11″ to 8′11″, but Sam wanted to go a bit longer. He decided to space them 2-1/2″ farther apart than designed, which would give him an overall length of 9′2″.
 Sam Manners
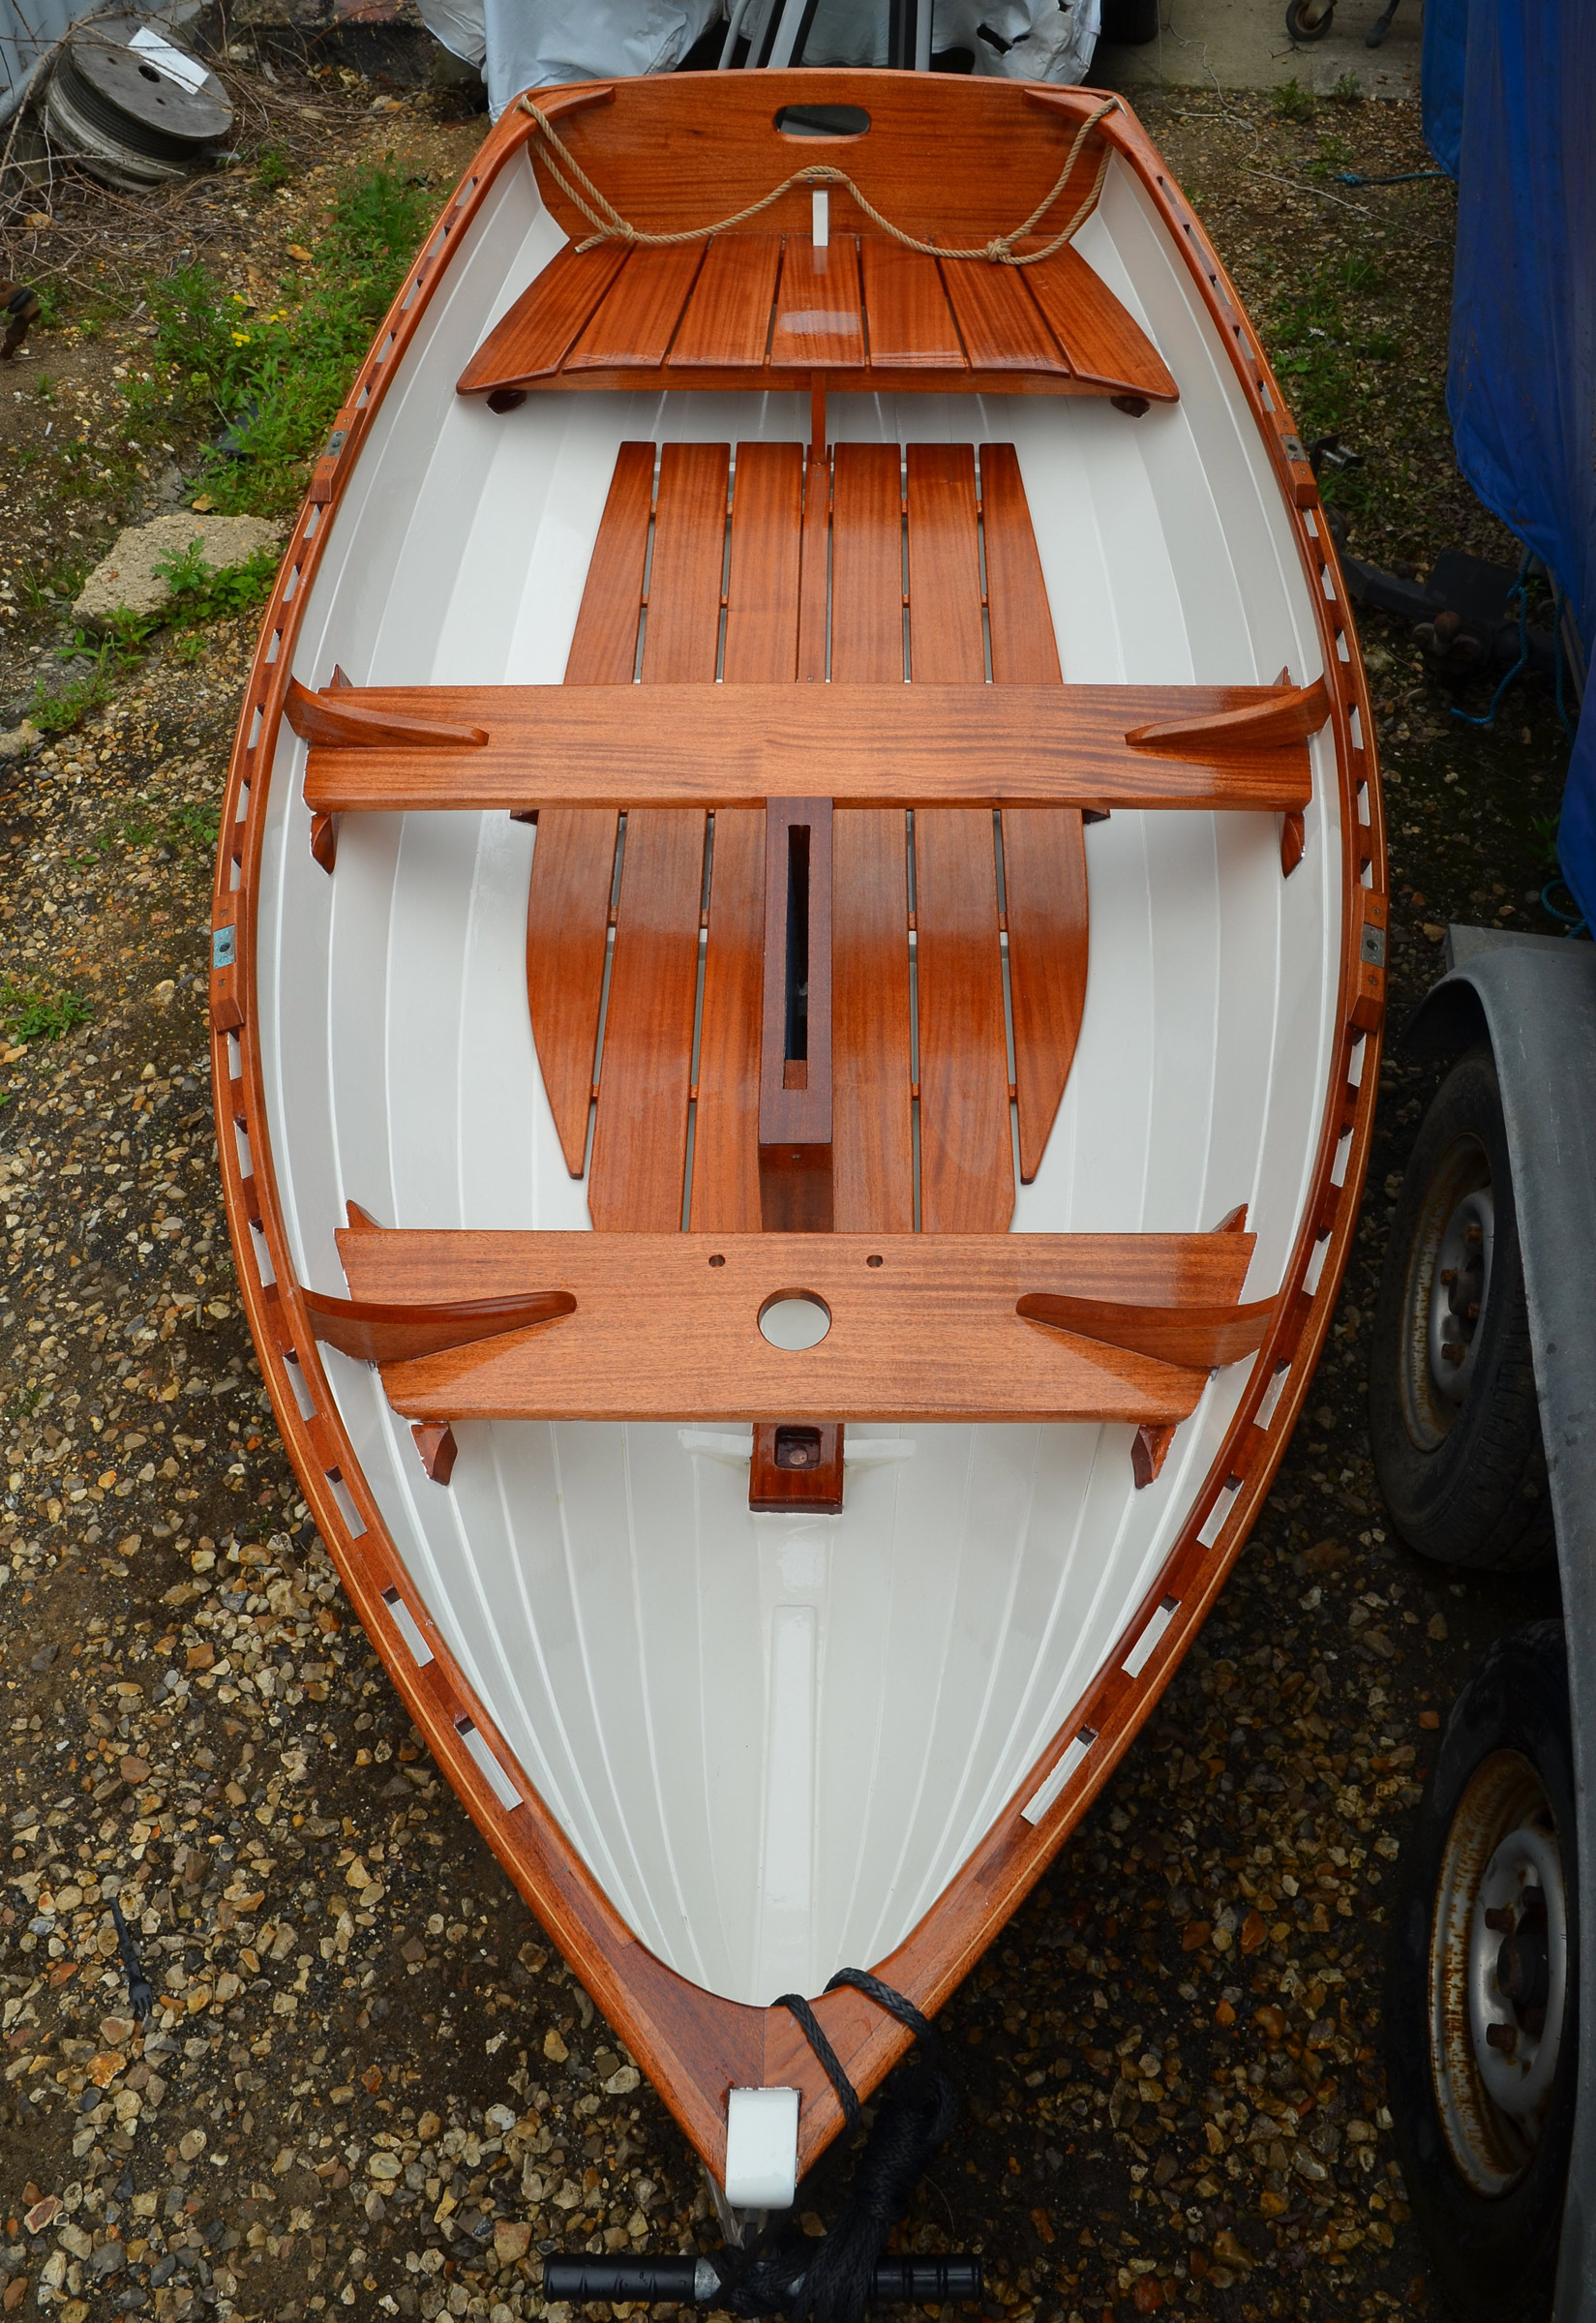
The interior is functional, uncluttered, and easy to clean and maintain.
Printed plans include 12 pages consisting of an introduction, four pages giving basic knowledge regarding traditional and glued clinker construction, the table of offsets, and templates for the full-scale half molds. The plans are not available digitally.
“However good the plans and templates are, we always advocate lofting,” said course tutor Mike Broome, “as it allows any errors on the designer’s part to become apparent. Also, if you are stretching the boat, it’s the only way to get it all faired up. It also means you can lift patterns and templates for any elements of the fit-out, etc.”
After lofting the lines full-size, he and fellow students set to work by setting up five 1/2″ plywood temporary molds and the 7/8″-thick khaya transom upside down on a low workbench to give a comfortable working height. The centerline structure was then added. This consisted of the sapele hog 3/4″ thick and 3-1/4″ wide to allow for the daggerboard slot, although for the rowing-only version noted in the plans it would only be 2-3/4″ wide. The aft end of the hog had to be steamed to cope with the rocker. The curved inner stem (or apron) was laminated from nine layers of 1/8″-thick sapele.
The planks are 1/4″ BS1088 sapele plywood. The garboards were laid over the hog, meeting each other in the middle and glued with epoxy. The rest of the planking was epoxied along the 3/4″-wide laps using shop-made planking clamps known as “gripes,” and temporary screws at the hood ends to hold everything in place while the glue set.
 Nigel Sharp
The standard arrangement for sailing is a balanced lug sail with a daggerboard. The plans offer another option: a standing lug with a leeboard.
The plans called for eight strakes, and that is what Sam and his fellow students fitted, but they had trouble fitting the planks around the turn of the bilge. There were two planks on each side that had get around nearly 90 degrees. “It took many attempts, and we probably got through a full sheet of plywood just trying to get that curve,” Sam said, “but we managed to get it eventually with the aid of double the number of gripes. If I built another one I think I would fit three planks round that curve.”
Once the planking was completed, a 1″-thick sapele skeg and keel were fitted as well as a pair of 2′ x 3/4″-square bilge runners, followed by the outer stem (made up from three pieces of sapele scarfed together) which sealed the end grain of the plywood planks at the bow. The daggerboard slot was cut through the centerline. An epoxy sealant followed by epoxy primer were then applied to the outside of the hull.
When the hull was flipped upright and the temporary molds were removed, it “wobbled like jelly,” but before any stiffening structure was fitted, the excess epoxy was scraped away and the inside of the hull was sanded. Once that somewhat laborious process was completed, four 3/4″-thick sapele floors were fitted.
The daggerboard case is made of ¼” plywood stiffened by a 2″ x ¾″ khaya framework and braced with the 7/8″-thick khaya center thwart. Rather than having continuous risers, the forward and central thwarts bear on short supports, while the stern seat—made up of seven fore-and-aft boards laid out in an attractive fantail pattern—are supported by a 1-1/2″ x 3/4″ athwartships bearer and a pair of cleats on the transom.
The boat’s outwale is made up of three pieces: first a rabbeted section of khaya that covered the end-grain of the top edge of the top plank, then a 1/8″ piece of yellow cedar for aesthetics, and finally another piece of generously rounded khaya, giving a total gunwale thickness of 1″.
 Nigel Sharp
The volume created by the broad transom helps support a passenger seated in the stern.
Fitted along the bottom edge of the sheer plank, as much for style as for a guard, was another piece of 1/2″ x 3/8″ khaya tapered at the ends.
After khaya spacers to support the inwales for the open gunwale were then fitted, the interior received the same base coats as had already been applied to the exterior, and then three coats of polyurethane paint. The khaya got five coats of varnish. The inwales were installed, and the hull was then turned over for paint and brass keel bands on the centerline, alongside the daggerboard case, and on the bilge runners.
Various ancillary parts were made up: the 1/2″-thick khaya sole boards which bear on the floors, the rudder and daggerboard in 7/8″ khaya, and spars and oars of Sitka spruce. “The instructions and plans were nicely detailed and if ever there was any small confusion, we were able to figure it out,” said Sam. “We didn’t need to refer to Oughtred’s Clinker Plywood Boatbuilding Manual.”
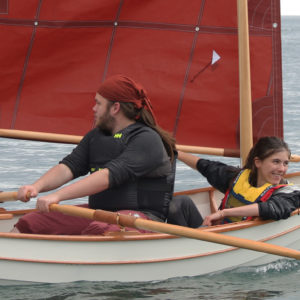
The boat was launched on a gray, at first windless, day in June. Sam and the two students who had most helped him with the build, Sam Ferguson and Amaya Hernández, climbed aboard and rowed out of the Lyme Regis harbor; the tanbark lug sail that Sam had made hung limply. After a while I replaced Sam Ferguson and a gentle breeze soon came off the land. We then enjoyed a brief sail as the boat slipped along nicely in the flat water.
It didn’t seem too crowded with three of us on board until we tacked. That would have been much easier with two, but maybe with a little practice three people could negotiate a better procedure. Starboard tack was the favored one for the balanced lug rig, but any loss in performance on port tack when the sail was pressed against the mast was imperceptible.
 Nigel Sharp
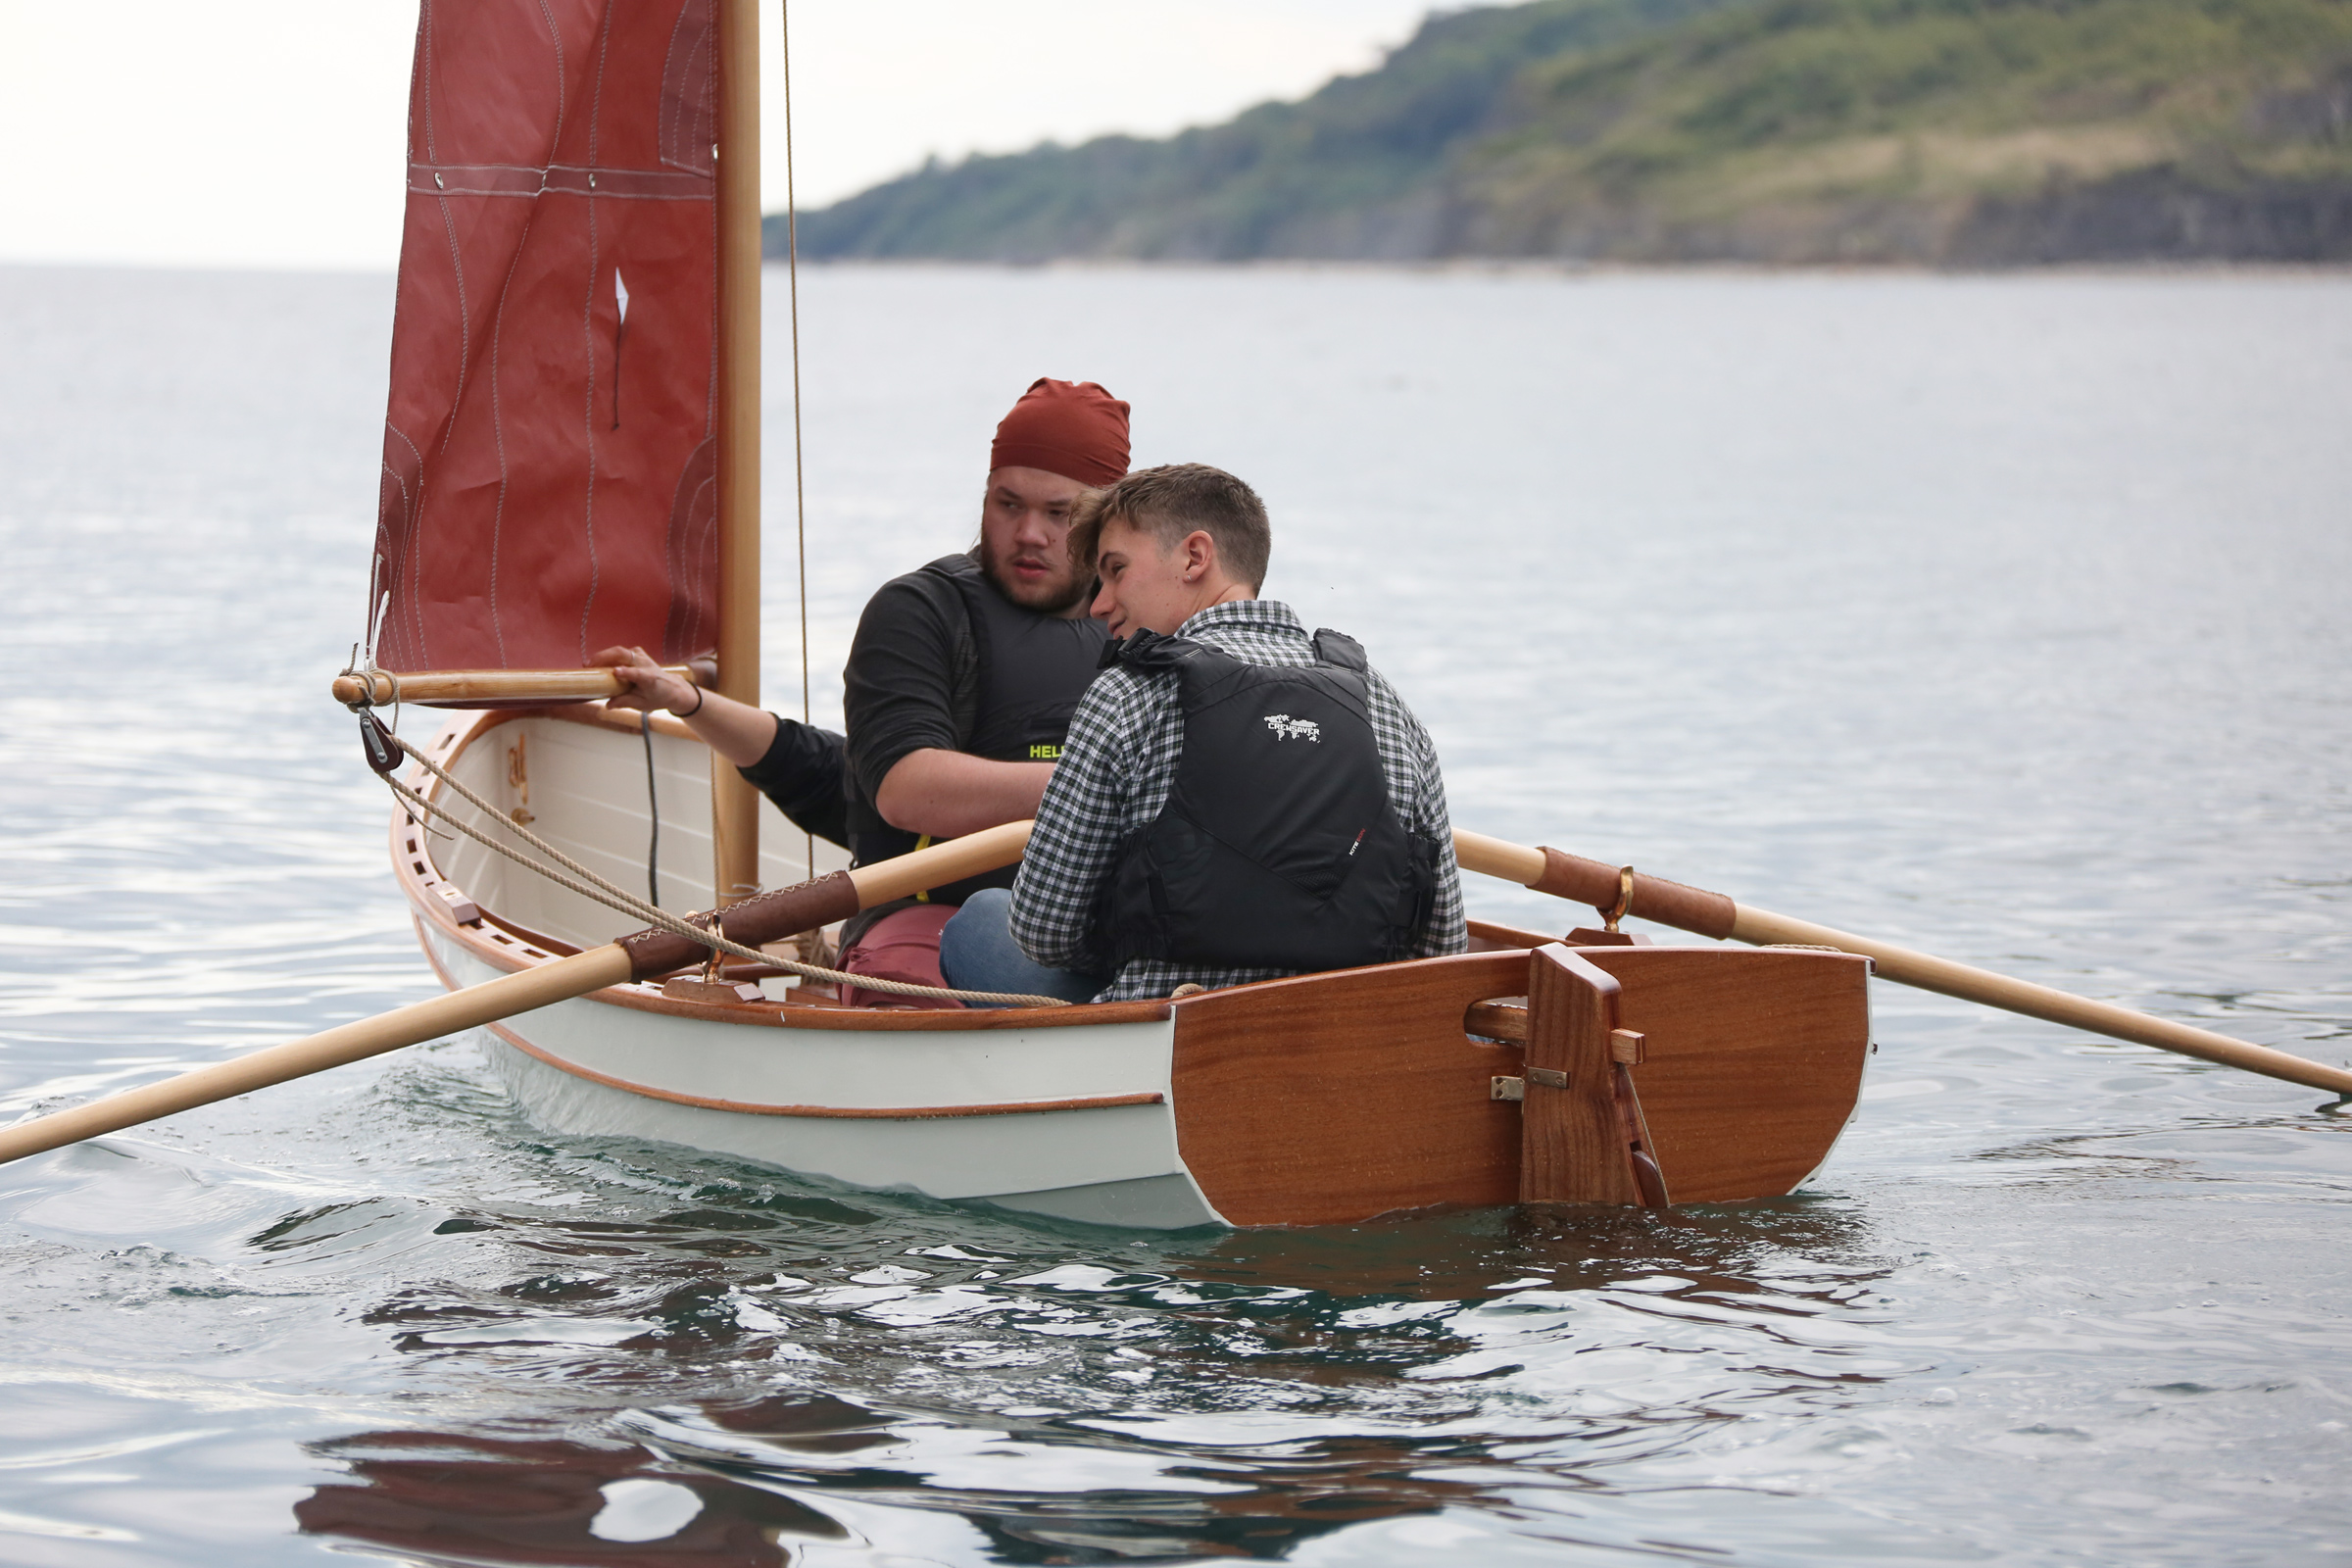
The Auk’s full bilges make a burdensome hull with good capacity. The stretched version here has room and freeboard enough for three; the 7’10” unstretched version will carry two comfortably.
At one point, a speedboat came close by at about 20 knots, and Sam and I watched the approaching wash with some trepidation. When it arrived, however, we were boat pleasantly surprised with how easily the Auk coped with it, giving us no cause for alarm. The boat was much more stable than we expected.
We needed to get back into the harbor before the tide went out, so we dropped the sail and I rowed us back in. The three of us we were able to keep the boat on an even keel with Sam one side of the tiller in the stern and Amaya on the opposite side in the bow. At first, I was worried that there might not be room for my fairly long legs, but I soon found I could use the stern seat as a stretcher. Although the 8′ oars felt too long for me, and the leathers were too thick and prevented feathering, I could tell that the Auk will be a nice, easy boat to row. Sam’s Auk will be used mainly as a tender for his parents’ 32′ sloop. He plans to fit a rope fender around the Auk, using some old heavy-duty hemp, while her sailing rig will stow in a bag strapped to the front of the mothership’s mast. She will certainly be suitable for her role as a tender, and the option of also using her for exploring rivers, bays, and coves under oar or sail will be a welcome addition.![]()
Nigel Sharp is a lifelong sailor and a freelance marine writer and photographer. He spent 35 years in managerial roles in the boat building and repair industry, and has logged thousands of miles in boats big and small, from dinghies to schooners.
Auk Particulars
[table]
Length/7′10″ or stretched to 8′10″ (as built here, 9′2″)
Beam/4′
Depth/19″
Weight/60 lbs
[/table]
Plans for the Auk are available from Oughtred Boats. Listed prices are in Australian dollars: $134.66 AUD (approx. $90.58 USD) for plans, $1235 AUD ($830.75 USD) for kits.
Is there a boat you’d like to know more about? Have you built one that you think other Small Boats Magazine readers would enjoy? Please email us!
Running on Sunshine
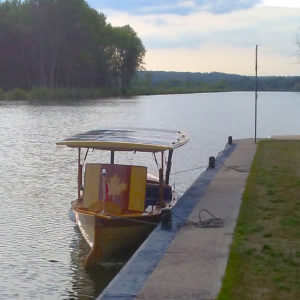
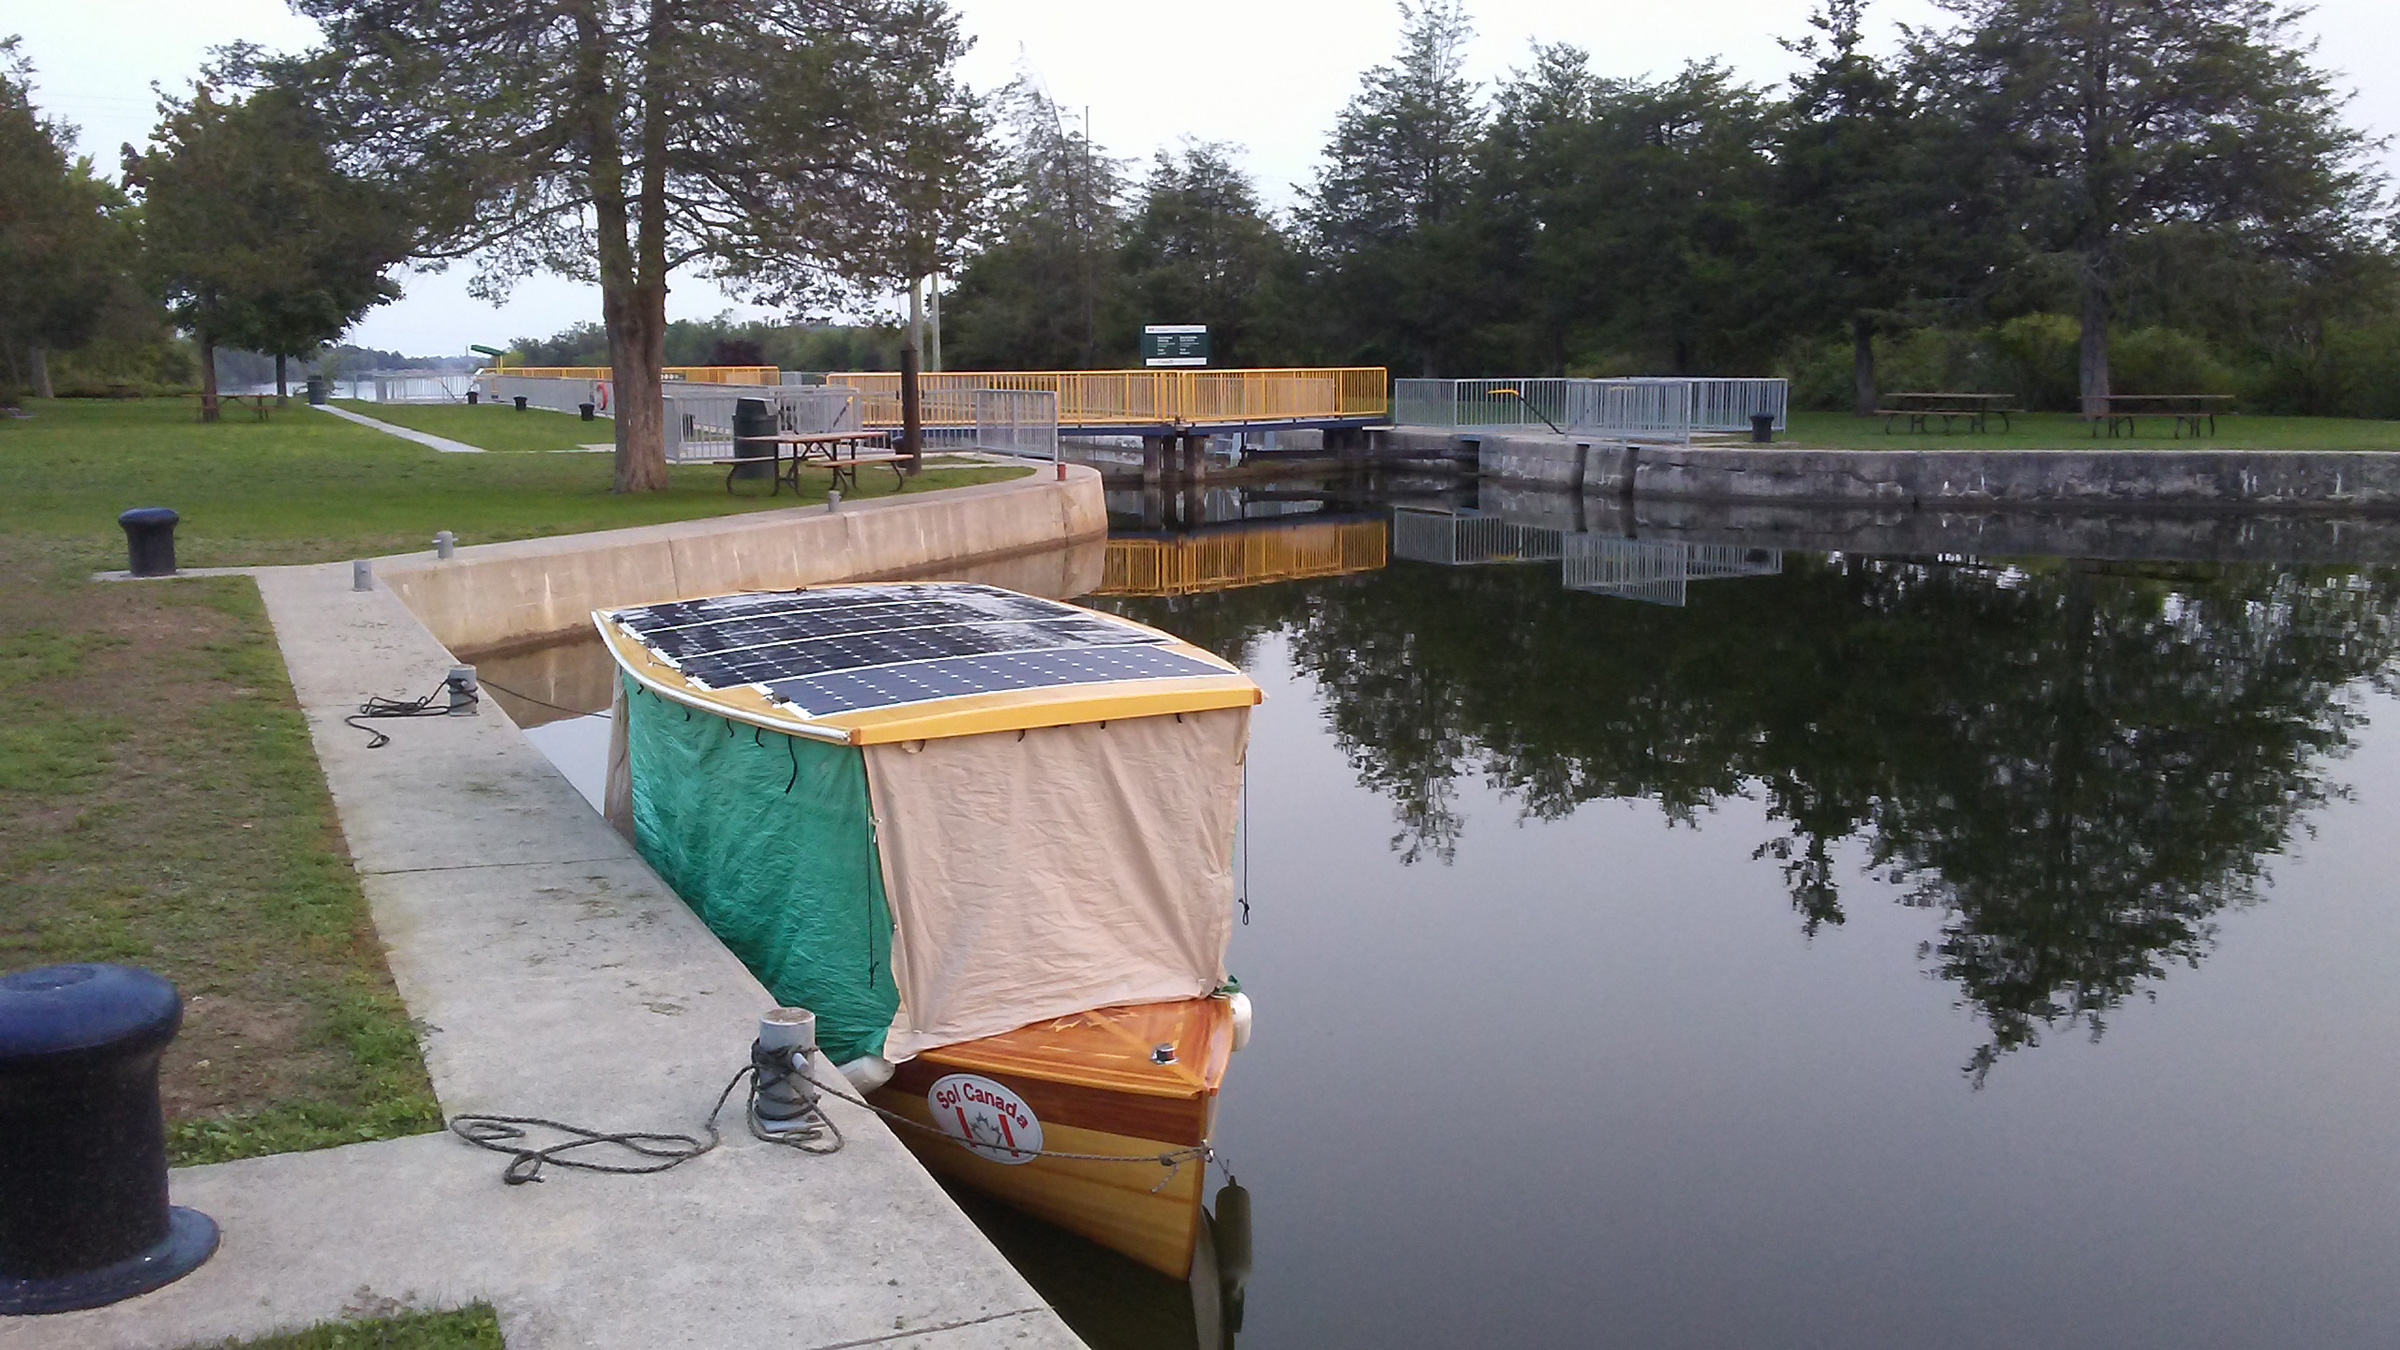
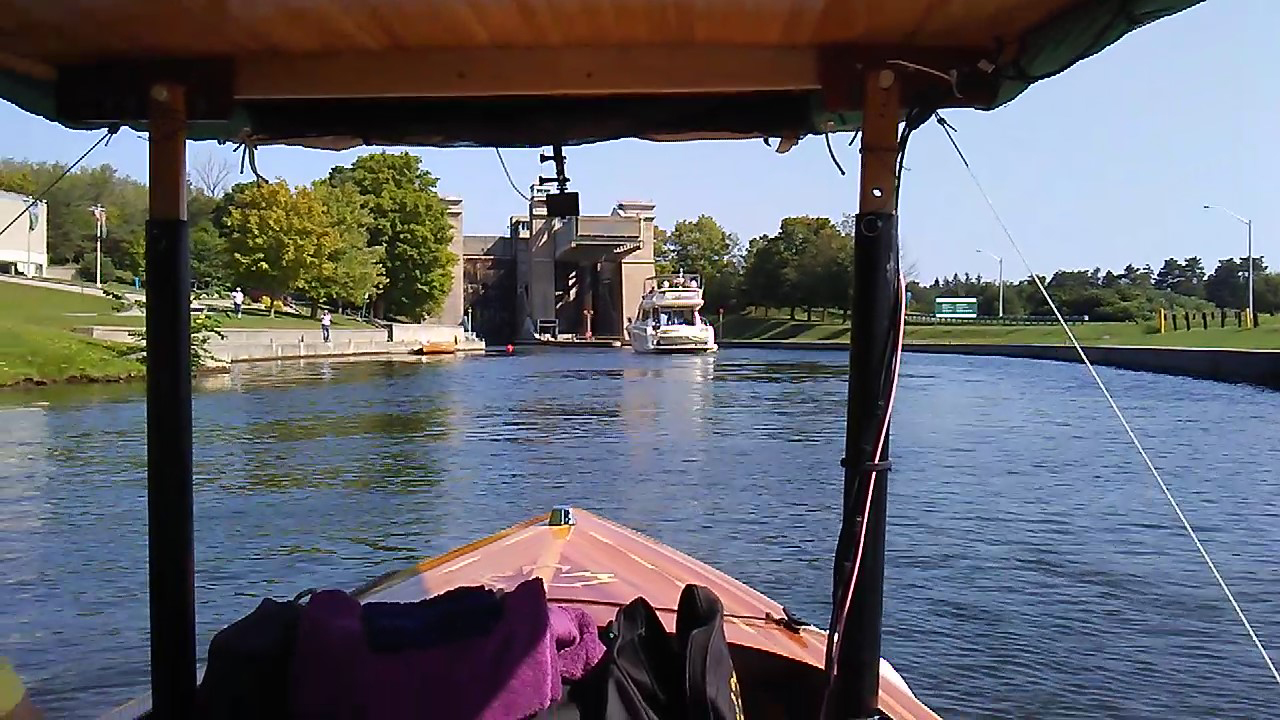
In 2018, I left my home dock on the Napanee River in southeast Ontario and headed for the Trent-Severn Waterway, a 240-mile chain of rivers, lakes, locks, and canals leading all the way to Lake Huron’s Georgian Bay. My challenge would be to do this trip solo in SOL CANADA, a small wooden boat I’d built to be 100 percent solar-electric powered.
I knew of only one solar-electric boat that had traveled the full distance from Lock 1 in Trenton to Lock 45 in Port Severn, so they were the first. I’d be the first Canadian using only the sun to charge my batteries.
 Photographs by the author
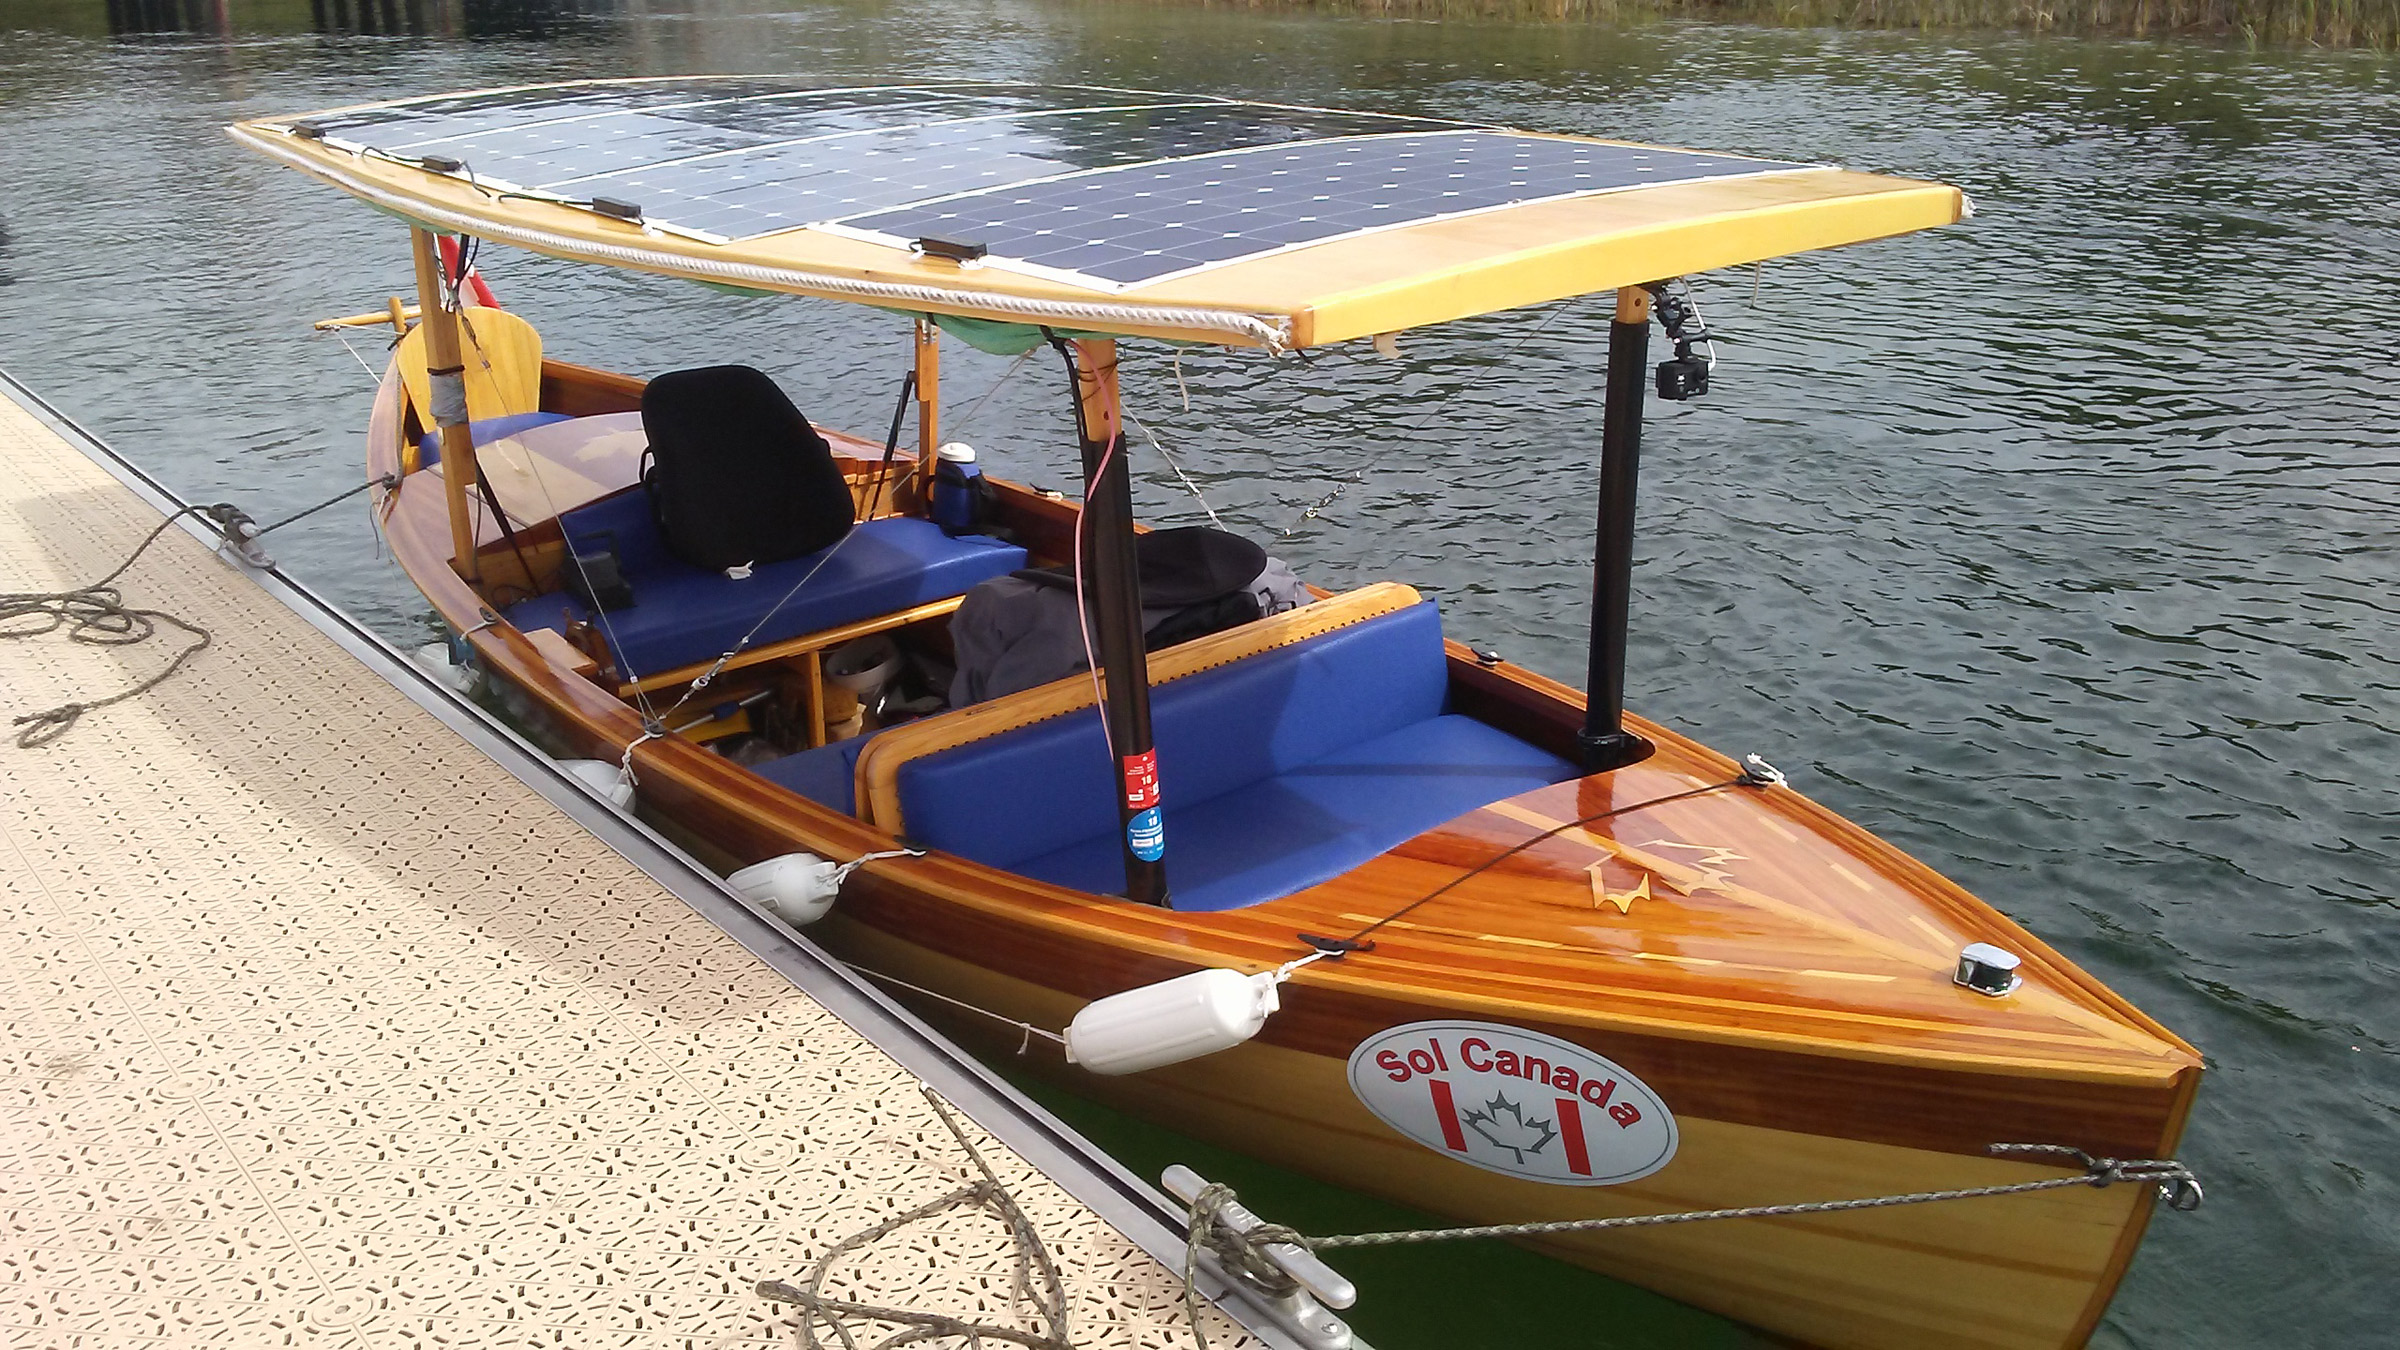
SOL CANADA’s canopy would not only keep me out of the sun and rain (mostly), but the four solar panels it carries would also generate all of the power I’d need for the trip.
SOL CANADA’s hull was based on the Greavette Dispro, manufactured by the Disappearing Propeller Boat Company from 1915 to 1958. An enclosed motorwell holds a Torqeedo Cruise 2.0 electric outboard, and in a compartment under the seats are four 6-volt batteries wired in series to provide 24 volts with a capacity of 221 amp-hours. I expected the boat to be capable of an average speed of 5.4 mph. The batteries are charged by four flexible solar panels on the canopy. They have a rated output of 860 watts.
At 7:30 a.m. on the morning of August 19, I motored away on what was supposed to be a sunny day with a light following breeze from the east. I headed down the 6-mile stretch to the mouth of the river, then along the Bay of Quinte to the city of Trenton—a distance of 31 miles.
There was a haze in the sky that cut the solar production by half, but on the bay, the easterly breeze was now a 12-mph tailwind and SOL, doing a bit of surfing, made good headway to the mouth of the Trent-Severn waterway at Trenton.
Two miles north upriver, the only boat heading upstream, I arrived at Lock 1 and went through immediately. The lockkeeper notified the next lock, just 3/4 miles away, that I was coming and its gate opened for me as I approached. There are three more locks in the first 6 miles of the Trent Canal, and all of them were expecting me with the gates open.
By the end of the first day of my trip, I had traveled 42 miles and had made it all the way to the top of Lock 5. With my home-made fabric walls rolled down into camping mode, SOL CANADA was ready for peaceful night’s sleep.
At 6 p.m. I motored out of Lock 5, well ahead of schedule. My total distance that day was 42 miles and my battery bank was at a 77 percent charge, good enough to carry me the next day if the conditions were poor. I was the only boat stopping for the night in a still-water cove above the lock. The lock master gave me a key to the staff washroom, kitchen, and the shower. Back at SOL, I prepared for the night by folding the seats down to make my bed and rolling down poly-tarp from the perimeter of the canopy. My enclosed sleeping quarters would get some peculiar looks, but they proved to be very comfortable.
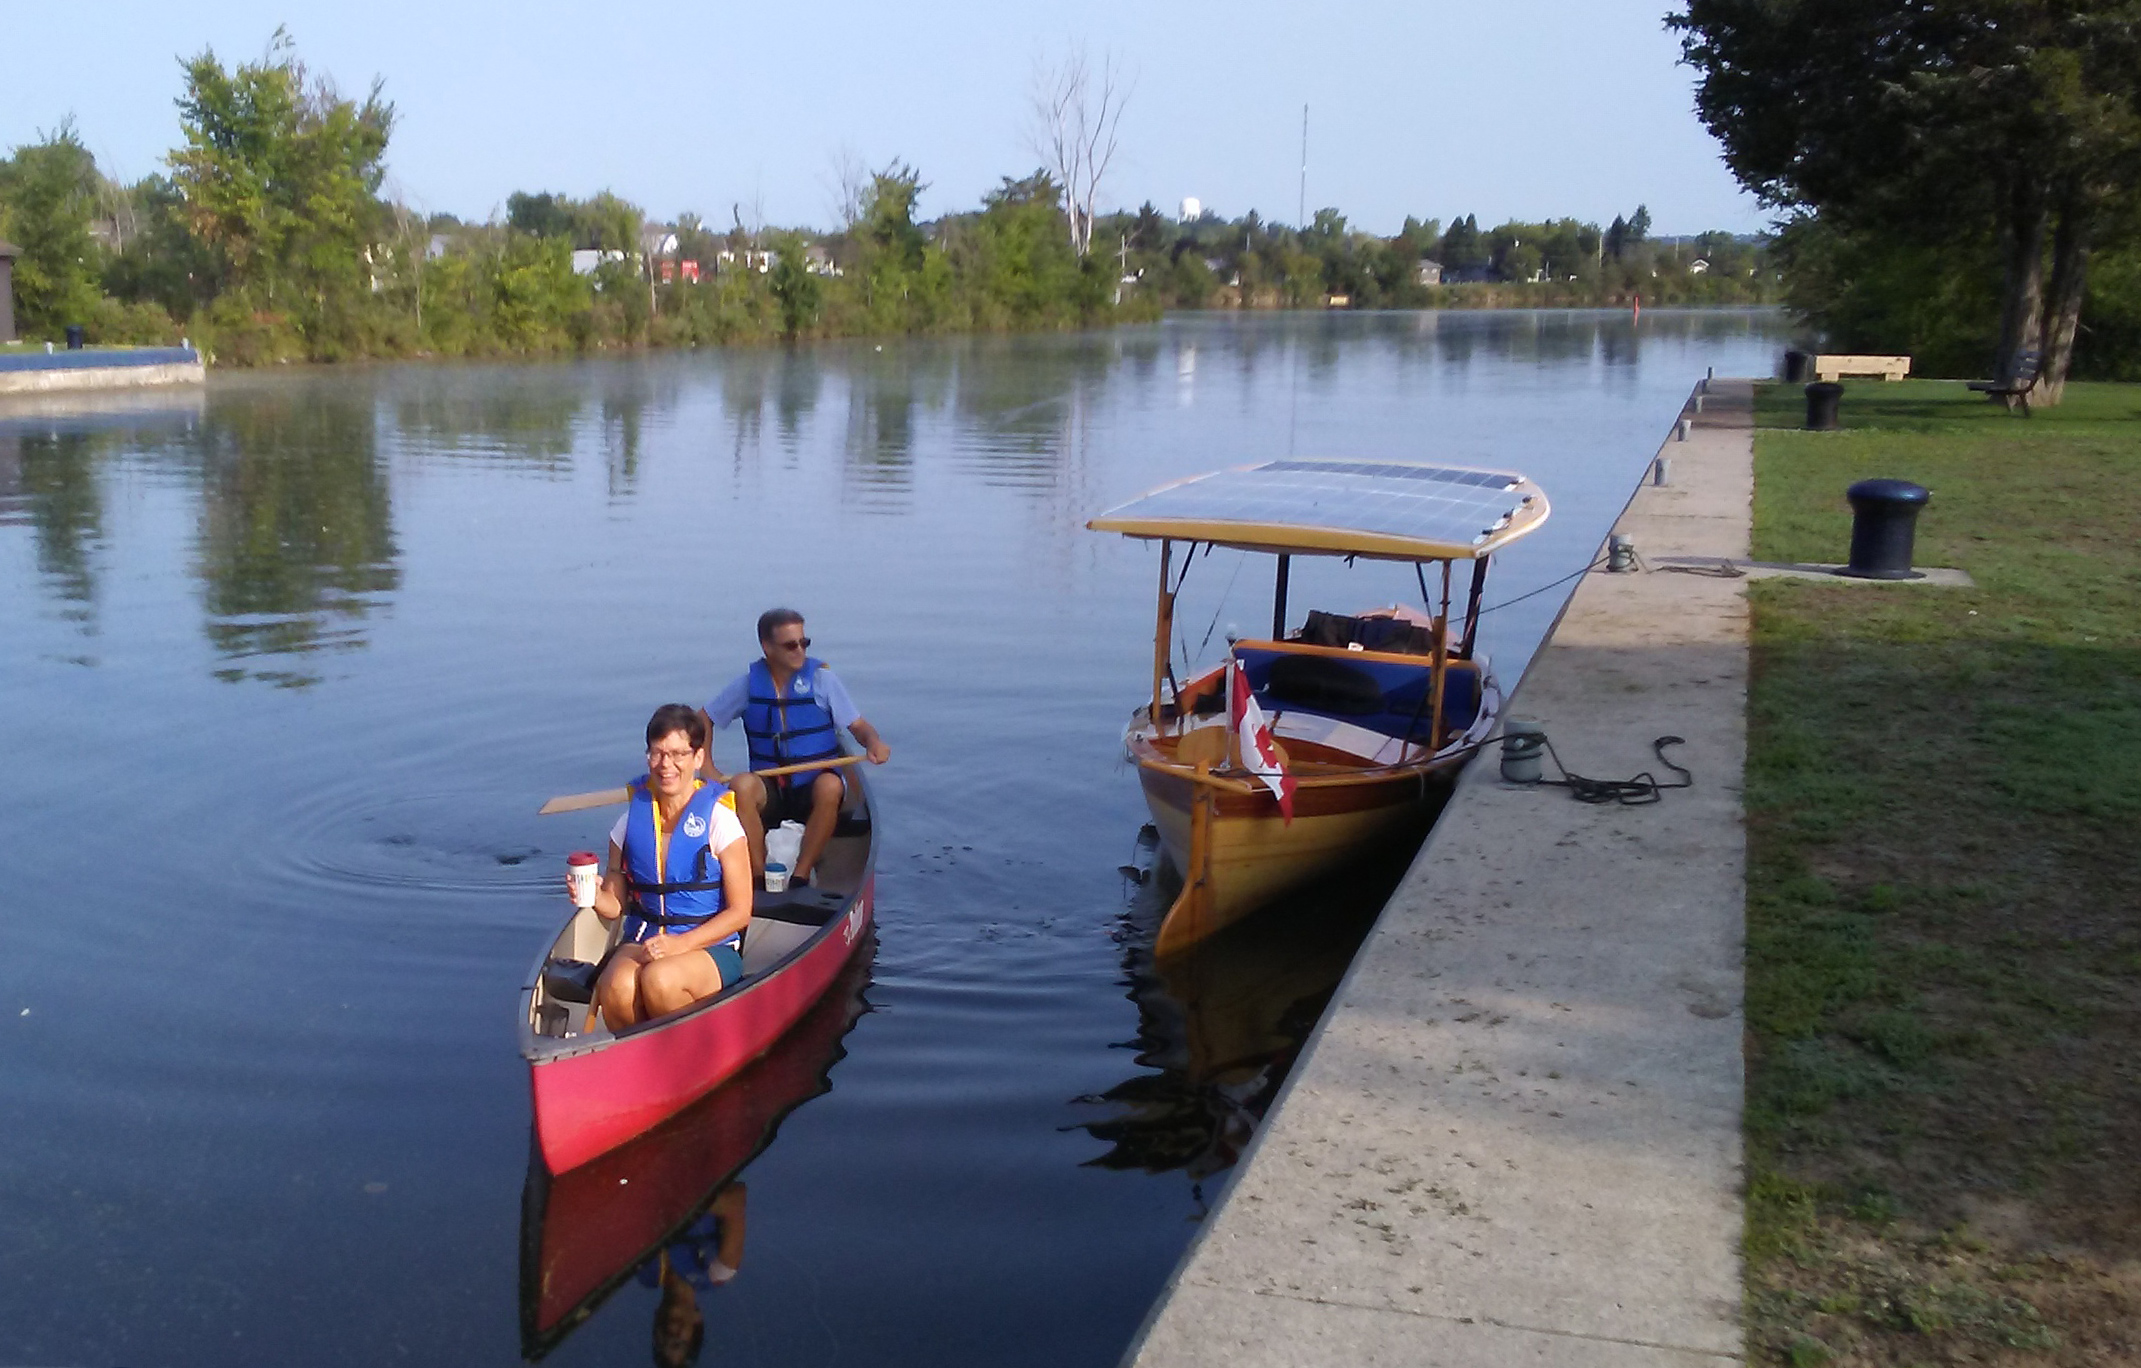
On the morning of the second day, just north of Trenton at Lock 5, my good friends Ed and Sandy arrived by canoe to bring me a hot coffee and a homemade muffin. They just live 1/4 mile up river and frequently paddle this stretch of the Trent River.
The morning sky was clear, and the sun quickly warmed SOL’s enclosure. Ed and Sandy, old friends who live close by the lock, arrived by canoe bringing coffee and a muffin. After saying goodbye and packing my things, I rolled the curtains up and SOL was ready to go. It was such a sunny day, I figured I could maintain a good pace without drawing the batteries down. I got to Lock 6 at Frankford before the morning got busy with boat traffic.
All along the river, weeds choked the shallows, and islands of free-floating weeds ripped up by boats clumped together on the surface. I can see the power gauge jump when weeds get pulled in between the prop and the housing. Although I’d made a prop guard, weeds were still a problem, but I could throw the motor into reverse and almost always shed them. Sometimes I’d have to stop and tear them out.
When I emerged from Lock 6 at Frankford under a bright clear sky, the lock opened on water foul with weeds. Just 1/2 mile ahead they’d bring me to a stop.
Just past the Frankford lock, in a narrow quiet channel with cedar trees hanging over the bank, I felt the motor vibrate with weeds tangled in the prop. Shifting into reverse did not get rid of them, so I put the controller into neutral. As I removed the weeds, I did not notice that the breeze had pushed me close to shore. When I realized what was happening, I quickly twisted myself back into my seat to take control, and in my haste my elbow hit the throttle. The boat lurched forward into overhanging branches, and the 100-lb canopy came crashing down beside me. My shouts echoed across the channel. I should have pulled the magnetic kill switch before working on the prop.
I thought the trip was over. I made my way back to Lock 6 where two lockkeepers and a boater lifted the canopy up while I reinserted the front posts and drove screws back into the holes they’d been torn out of. One solar cable at the back had been pulled apart, and I had to splice it back together. After two-and-a-half hours, the boat was a bit battered but operational. I could keep going forward.
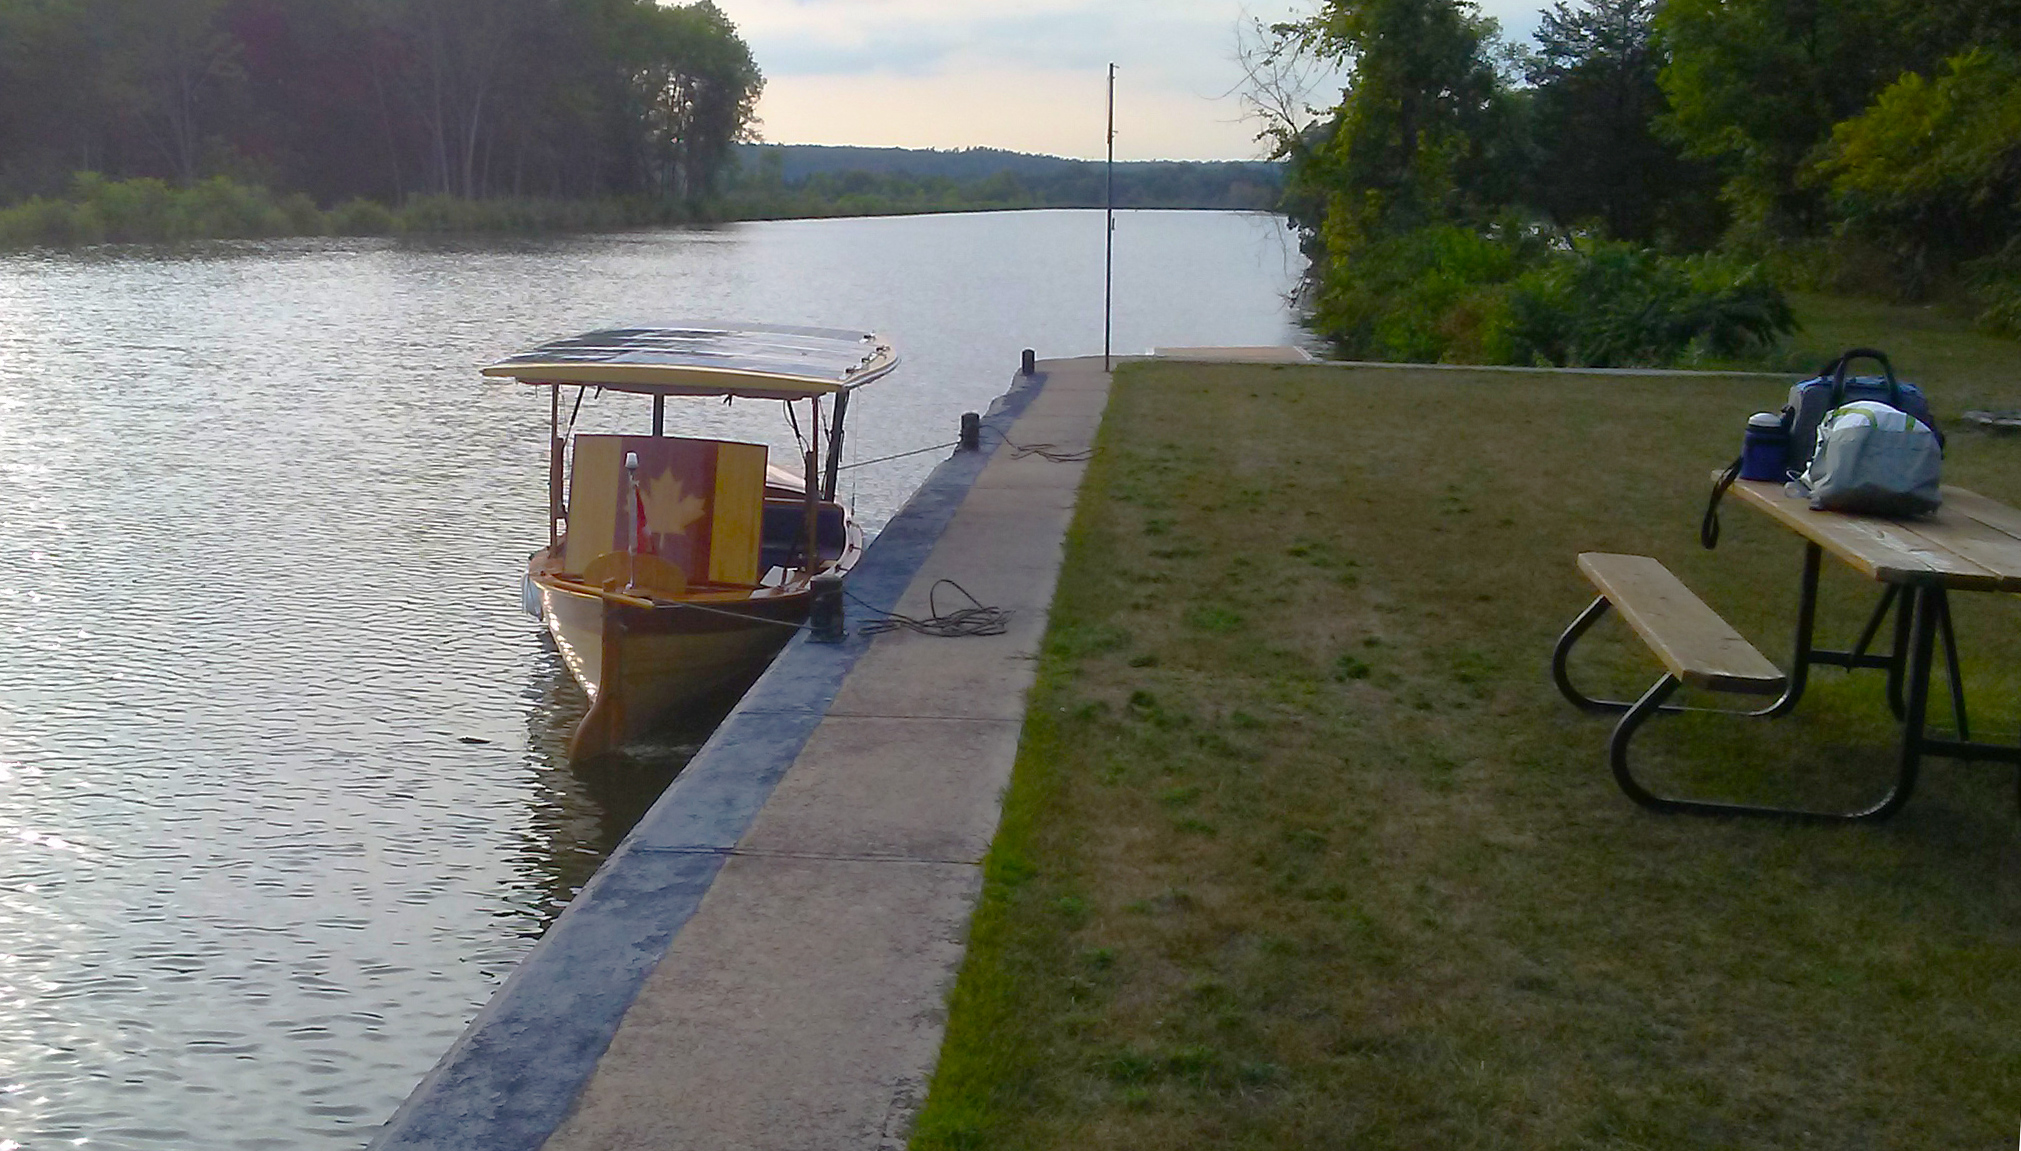
My packs containing my supper provisions and gas stove were on the picnic table as my boat was moored for the night at the top side of Lock 8, Percy Reach. After eating, I finished the repairs to the canopy supports.
I finished the day at Lock 8, a quiet site with campsites. I removed the screws that had been torn out, added glue to the holes, and reinserted the screws. I cooked up some spaghetti on my camp stove and was in bed by 9 p.m.
Morning came with heavily overcast skies; the forecast called for rain later in the day. So much for getting ahead of schedule.
I reached Lock 9 before its keepers arrived at 9 a.m. While I waited, I walked around the grounds. Set between farmlands to the east and a wooded island to the west, it would have been a very peaceful place to spend a night. Like many of the locks on the lower part of the Trent, this one was isolated from towns, their bridges, and their traffic. When the staff arrived, I spoke with the lock master; he mentioned he had a friend named Peter who was an editor and interested in stories for an online newspaper. I provided my phone number in case he wanted to do a story on my boat.
Just 1-1/2 miles upstream from Lock 9, I passed through Lock 10. Locks 11 and 12 were piggybacked one on top of the other for a combined lift of 48’. After about two hours on the water, with the rain pouring down and driving in from the starboard side, I got a call from the editor, Peter Fisher, and arranged to meet him the following morning. After seven locks and 12 miles in the rain, I arrived at the top of the two-lock flight of Locks 16 and 17. Lock 17 was not the nicest place to stay. The washroom was on the grubby side and the weather put me in a bad mood.
In the morning ,I had time to kill before meeting with Peter at 11 a.m. When he arrived, I invited him aboard for a ride on the boat as he interviewed me. I was back on my way at about 1 p.m., headed for Lock 18, 15 miles upstream.
 Roger Siebert
.
The sky was overcast and the solar panels would not be generating much power. I’d have enough charge to get to Lock 18, in the town of Hastings, more than 14 miles upstream; but the following day, to cover 37 miles to Lock 19 at the outskirts of the city of Peterborough, I’d need to start out with fully charged batteries and have sun along the way.
As I was approaching Lock 18, a motoryacht, NEPENTHE, passed by and entered the lock ahead of me. After exiting, we both docked at the concrete wall on the north side of the river. NEPENTHE’s owners, Paul and Jill, and their passenger Tom, are “Loopers,” traveling the 6,000-mile-long Great Loop, a chain of waterways passing through the U.S. and Canada via the Mississippi River and the Intracoastal Waterway. Dale and Ann aboard UTOPIA, another yacht stopped for the night, were also Loopers. For dinner, the six of us walked to a nearby eatery . The yachters asked if I had seen a kayaker named Steve who was paddling the Great Loop. I hadn’t, but said I’d keep my eyes peeled for him.
When morning broke, the day promised to be mostly sunny, just what I needed to get to the Peterborough lock. I left just past 8:30 and headed 5 miles west to Rice Lake, a 20-mile-long shallow lake that can be very rough when a stiff westerly blows, exactly what I faced that morning. SOL crashed over the waves, and the wind howled and made the canopy sway. The quiet electric motor made noise of the elements seem so much louder.
After 17 miles on the lake, I turned north into the Otonabee River where I found shelter from the wind, even though I was traveling against a strong current of about 2 mph. At the Bensfort Bridge, 7 miles upstream, I met with another reporter, Jason Bain, of the Peterborough Examiner. The riverbank where he was standing was rocky, so I anchored 30′ from shore for the interview. We talked for a while, and as I was getting ready to leave, I tried to pull the anchor up, but it wouldn’t budge. I had to cut the rode. Jason felt bad that I had to lose the anchor and promised to replace it.
It took me about 4 hours to make my way to Lock 19 into Peterborough and the lockkeeper there presented me with a new anchor and rode left for me, courtesy of the Peterborough Examiner. Jason called; I thanked him and told him the story of the anchor. In 1964, my father was working on a hydroelectric plant at Niagara Falls. A coffer dam constructed above the falls exposed the riverbed, and among the artifacts lodged in the rocks were two anchors. My dad brought them home and the one I’d lost was one of them. Jason felt even worse that the anchor was a family heirloom, but month later, when I was back at home, Jason called again. Two SCUBA divers had heard about the missing anchor, found it snagged, and sent it to me.
Just 3/4 miles up from Lock 19, I stopped for the night at Lock 20 in the middle of Peterborough. My cousins Carl and Melba took me out to dinner.
With my cousin Carl aboard, we motored into the Peterborough lift lock, Lock 21. This is the largest of its type in the world, and lifts boats 65′ in a just a couple of minutes. At the top there is a panoramic view of the city of Peterborough.
In the morning, Carl joined me to ride up 65′ at Lock 21, the Peterborough Lift Lock, the largest hydraulic lift lock in the world. The locks are a side-by-side pair of 140′ by 33′ tubs called caissons, each sitting on top of a cylindrical ram, 7-1/2′ in diameter. When a caisson reaches the top, it stops a few inches below the water level of the upper canal and takes on water when the gates are opened. The additional water makes it the heavier of the two, and as it descends, water in its ram flows to the other ram to drive the lower caisson upward.
After the lift, I left Carl at the docking wall and chased after the other boats leaving the lock to join them in the 4-1/2-mile-long succession of five locks. If I fell behind I’d have to wait for the next opening, so I zipped along at 5 1/2 mph, figuring I could spare the extra batteries power.
About 14 miles from Peterborough, Lock 27 was the end of the Otonabee River and the entry to the Kawartha Lakes, a chain of a dozen lakes traversed by the waterway. The lock is in a park-like setting with a 200-yard-long island separating it from the rapids and dam where the Otonabee River rushes by.
After another good night I arose to yet another overcast day. I set out northbound on Clear Lake turned west at Stony Lake and passed through two of Lower Buckhorn Lake’s locks, finishing up at Lock 31.
By now, the interview with Jason had been published and I was hailed by boaters and people on shore. People in cars honked and waved at me.
At the west end of Lower Buckthorn, I arrived at the downstream side of Lock 31 and secured the last spot on the wall. It was a Saturday and there was a festival around the lock with live music. I made the rounds until the rain started and I retreated to SOL for the night.
On Sunday morning I headed south along Buckhorn Lake, a 1/2-mile-wide wooded corridor dotted with summer homes and bristling with finger piers. The water is utterly clear but looks black where it is deep. The land around the lake is blanketed with tall pine trees and dotted with granite outcroppings. The waterway turned west through a cluster of undeveloped islands and then north along Pigeon Lake. By midafternoon I reached Lock 32 at Bobcaygeon, a little town in the middle of cottage country. I’d only traveled 17-1/2 miles, but the next lock was another 18 miles away, more than I wanted to take on.
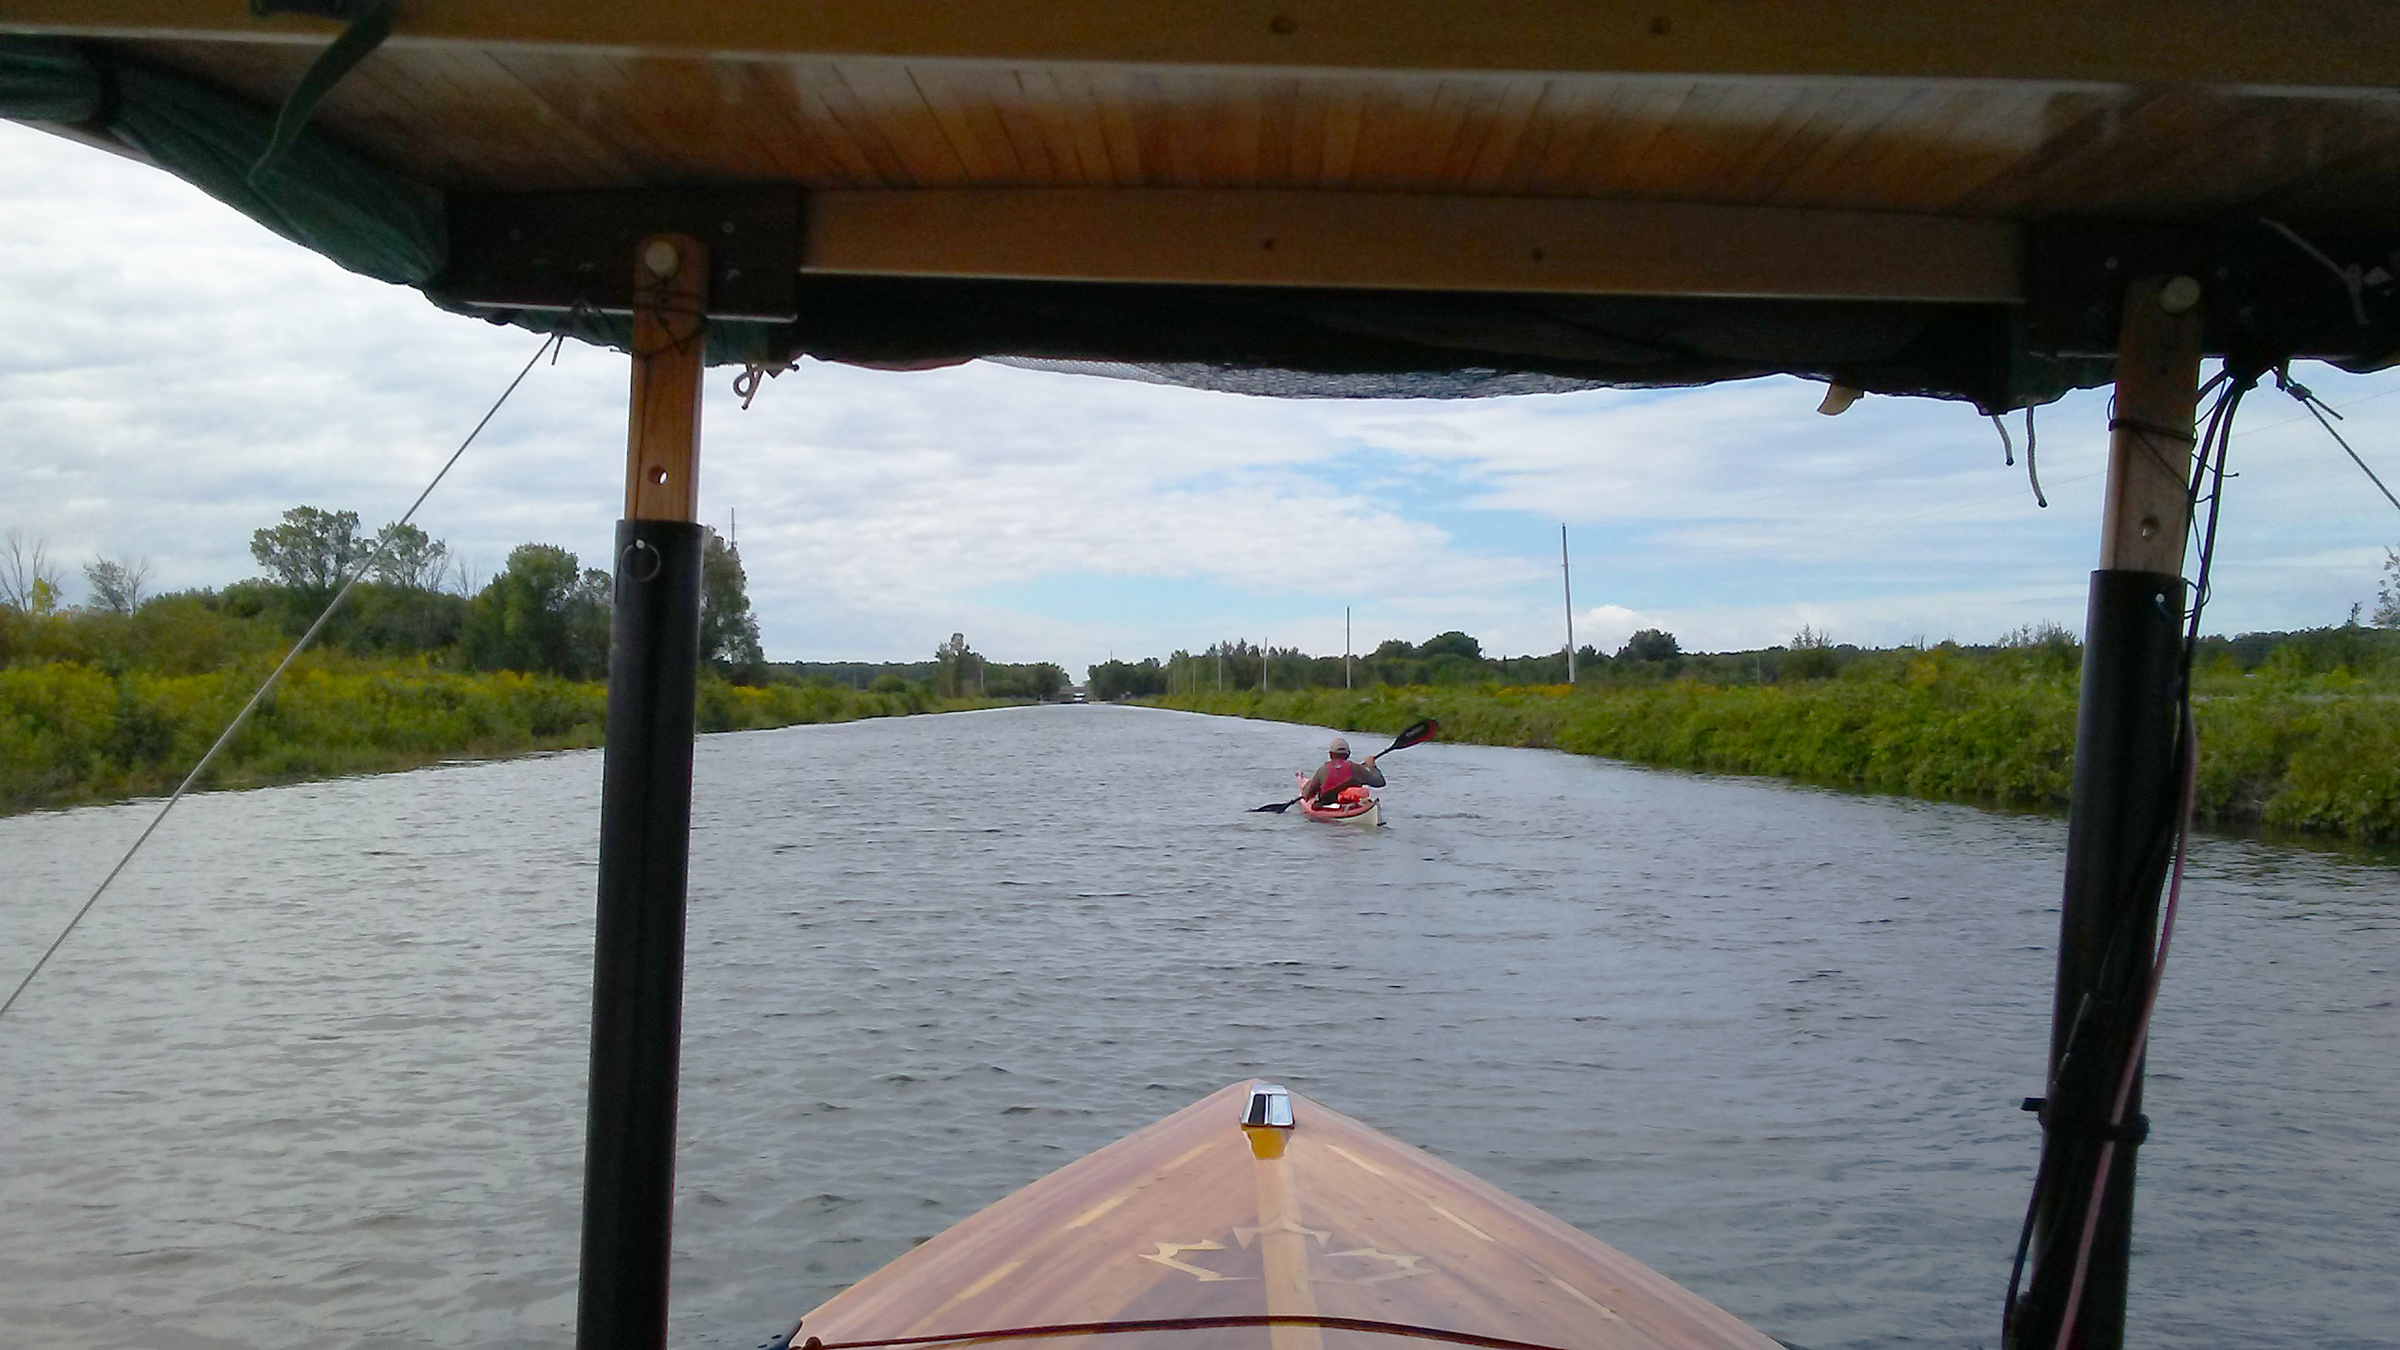
Bobcaygeon was a beautiful spot to stop for the night. There were lots of people around while I tied up the boat, many of whom had read about my adventure in the paper and asked about SOL. I took a walk around town and when I returned I saw a lone kayaker in the lock, his decks loaded with gear. I yelled down, “Are you Steve?”
“Yes,” he answered. I had found the kayaker paddling the Great Loop. After he left the lock, I gave him a hand unloading his gear and helped him set up camp. Steve Chard, 60 at the time, is from England, and had served in the ’70s on British nuclear submarines. We went out for supper and he told me about spending the Cold War years aboard a sub.
On Monday morning, Steve got a 30-minute head start on me, and it took me a couple of hours to catch up and pass him. We were both planning to go to Lock 35, in the rural community of Rosedale, for the night. I arrived at the lock well before he did and as I waited for the green light to enter, I heard the lockkeeper on the loudspeaker call out, “Come ahead, Phil.” Word of my journey had spread and I was now getting personal service.
I set up for the evening above the lock, which is far from any town and hemmed in by old trees, but not necessarily primitive: it had showers and free wi-fi. Steve arrived, set up camp, and we cooked supper together—a spicy Uncle Ben’s rice dish beefed up with a package of partly dehydrated steak chunks. Our meal was interrupted by our cell phones sounding a weather alert: there would be a tornado watch for the next few hours. When the rain started coming down, Steve and I took shelter. We soon had plenty of company. The all-clear notice came at midnight; Steve headed back to his tent and I got aboard SOL.
In the morning, I headed out onto Balsam Lake for a 5-mile crossing. The wind was blowing from the southwest at about 18 mph. The marked channel was exposed , so I veered north to take shelter in the lee of Grand Island, a mile-long, sparsely inhabited island in the middle of the lake. That was fine for half of the crossing, but west of the island, beyond the lee, whitecaps splashed over the bow. I slowed down to limit the spray. At the end of the crossing, with only 1/4″ of water in the bottom of the boat, I entered a quiet, 30-yard-wide canal.

After crossing the very rough water of Balsam Lake on my 10th day underway, I entered into a very long stretch of hand-dug canal where some of the original tailings still remain piled high on the banks. I was relieved to be out of the strong west wind that plagued me on the lake and have this peaceful canal all to myself.
Two long stretches of canal here—separated by the 1-1/2-mile crossing of Mitchell Lake—were dug by hand, straight as an arrow, just wide enough for two boats to pass. Mounds of stone piled by laborers along the banks well over a century ago are still there. I savored the solitude and silence. The only sound SOL makes is the murmur of her bow waves.
Lock 36 is the Kirkfield Lift Lock, slightly smaller than the one in Peterborough, and SOL, the only boat locking through, was dwarfed by the 140′-long caisson. After the gate closed, we dropped 49′, the first descent after gaining about 600’ in elevation since leaving Trenton. The rest of my journey would be downstream.

After I exited the Kirkfield lift lock, the caisson on the left took on two boats and had its gate closed behind them, ready to be raised.
UTOPIA was moored for the night at the downside wall, so I pulled in astern. Dale and Ann invited me aboard, and while we were swapping stories, Steve emerged from the lock and paddled over to join us for barbecued bratwurst.
Steve was in the lead as we approached the Gamebridge Lock 41, the last lock before heading out onto the sometimes treacherous Lake Simcoe.
Steve and I set out from Kirkfield and descended five locks over 11 miles of canal, stopping at Lock 41, which lies just 1-1/2 miles from Lake Simcoe. A sign at the lock warns boaters to be wary and check weather conditions prior setting out on the 14-mile crossing of the lake. Its shallow depth and broad fetch can make it extremely hazardous, with waves that can reach 6′. Steve and I planned to be on the lake by 7 a.m., before any wind came up. I’d follow the channel right out to the center of the lake; Steve would paddle along the shore, which would take considerably more time.
I entered the lake under a dark, overcast sky with a northeast wind already starting to blow. With SOL running at 4-1/3 knots it would take 3-1/2 hours to reach shelter in the waterway through the city of Orillia. As I made my way farther into the lake, the waves grew, probably only about 2′ high, but they pitched SOL back and forth. The canopy was swaying, and to stabilize it I braced with my legs and held on to it with my left hand, like a guy driving down the highway, holding a mattress on the roof of his car. I slowed down to about 3-3/4 mph to keep breakers from crashing over the foredeck. By the time I got to Orillia, my legs were like rubber, but SOL hadn’t taken on too much water.
Beyond Orillia, I navigated a narrow gap into Lake Couchiching, a 10-mile passage, but in that narrow lake the water was merely choppy. In just over two hours I was across and headed up 1-3/4 miles of canal to Lock 42, nestled in a dense forest of white pine, beautiful and quiet. The wind blowing through the trees rustled of the needles and imparted a fragrance to the air. Steve sent me a text saying his trip around Lake Simcoe had been slow and he would spend the night in Orillia.
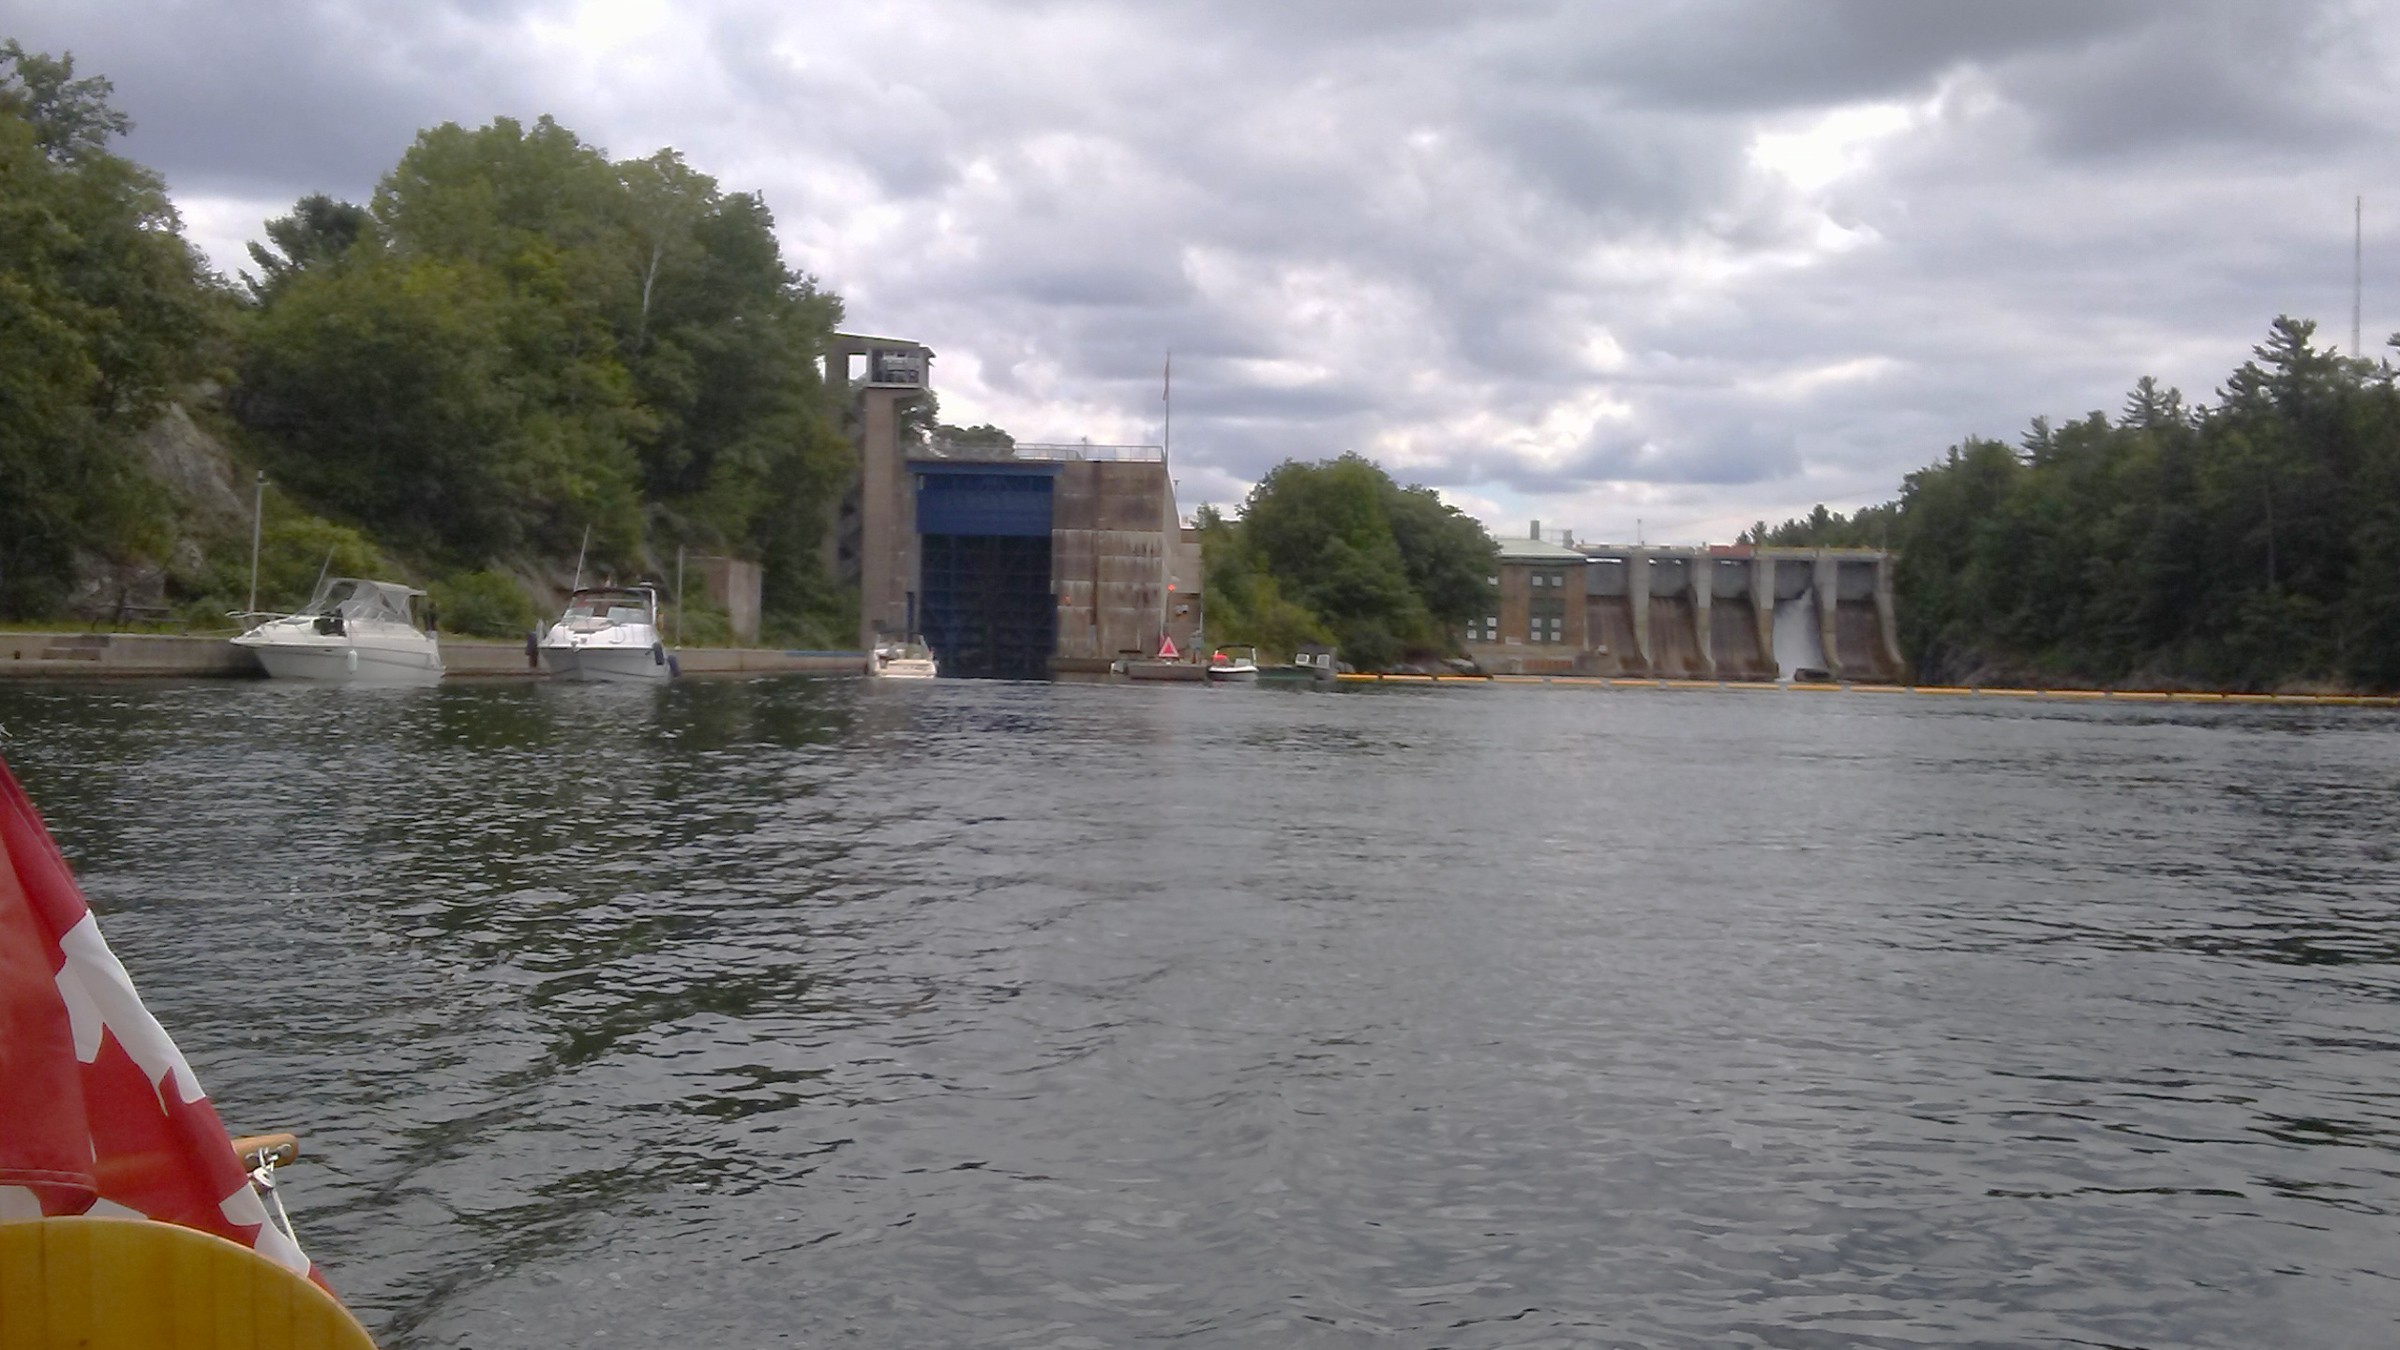
After I passed through Lock 43 at Swift Rapids, I could see the magnificent structure of the lock and the hydroelectric dam adjacent to it.
Just 32 miles separated me from Lock 45 at Port Severn, the gateway to Georgian Bay. Going downstream now, SOL was at times making 6-1/4 mph. Only two locks remained. The towering Lock 43 at Swift Rapids lowered me 46′, and Lock 44 at Big Chute is not really a lock but a marine railroad. A huge flatbed car on train tracks rolled down a slope into the water, and I drove SOL over it, stopping over a pair of slings that cradled the hull. The car carried SOL and a handful of other boats 185 yards over a rocky hill to the other side and back into the water. The ride was a bit bumpy and not as fast as a lock.

The so-called Lock 44 at Big Chute is actually an overland marine railroad, the only one on the Trent-Severn waterway. The adjustable straps can securely hold almost any hull shape, but even so it is a bit of a bumpy ride. (This picture is from is my second visit, on the return part of the trip.)
I cruised the final 8 miles through a chain of irregular lakes to Port Severn, where I tied up for the night at one of the docks near the entry to the lock.
On a beautiful Saturday morning I lined up for the lock before 9 a.m., bound for Honey Harbor. After passing through, I entered the channel, threading between countless islets and rocky shoals on the fringe of Georgian Bay. A dozen miles north, I arrived at Honey Harbor, and after a stop for a lunch of a burger and fries, headed back to Port Severn. There I tied up near a harborfront restaurant for the evening. Thunderstorms were predicted, and while I was in the restaurant the storm hit. Forked lighting struck all around, one flash and thunderclap after another.
I waited until the storm passed before returning to SOL for the night.
My plan for the next day was to start my journey back home along the way I’d come. I was now about three days behind schedule, with unstable weather predicted for the next four days.
I headed out in the morning under an overcast sky and a destination of getting to Lock 43, Swift Rapids. The sky cleared and by the time I got there it was a sunny, hot day. I moored at the top side of the lock and set up camp. The weather forecast for the coming days was not encouraging, and I’d surely have trouble on Lake Simcoe on my return crossing. I decided I would go only as far as Washago at the north end of Lake Couchiching and have my son-in-law pick me up there at the Washago town dock.
SOL had navigated 337 miles in 16 days, and I had reached my goal of traveling solo up the entire Trent Severn Waterway from Lock 1 to Lock 45 using 100 percent solar energy—a first as a Canadian and a first for a solo skipper. I’m happily satisfied with that.![]()
Phil Boyer retired in 2017 after working 38 years in R&D in the telecommunications industry. He now keeps busy teaching karate at two local clubs and building boats. He has been around boats his whole life, starting with paddling as a kid. At age 11 he built a sailing pram with a bit of help from his father. In 2006 he began building solo canoes and now has four of them, featured in the August 2019 issue. Phil’s interest turned to building SOL CANADA, his solar-electric boat, in 2015. His next build will be a solar-electric version of the Power Cat he read about in the March 2016 issue of Small Boats Magazine.
If you have an interesting story to tell about your adventures with a small boat, please email us a brief outline and a few photos.
Four Practical Tips
A Mobile Thickness Planer
 Photographs and videos by the author
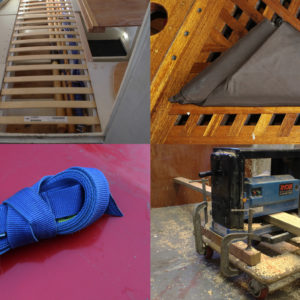
My planer’s first set of wheels was a set of chair casters inserted in holes in the 2x2s attached to the base. Here one of the 2x2s is clamped to a dolly. The 2×4 being planed is pushing against the door at the back of the shop as the feed rollers drive the planer forward.
When I built my 19′ decked lapstrake canoe, my shop was in a cellar not quite 30′ long, so working with 20′ lumber for the keel and gunwales was a bit awkward. I could rip planks on my table saw by making a partial cut, stopping the saw, and flipping the plank around to finish the cut from the opposite end. A thickness planer can’t easily accommodate stopping, removing the lumber, and starting again, so I put mine on wheels. I’d start it up on the far end of the basement, feed the lumber in, and when the stock hit the wall, the planer would propel itself across the shop floor. It left a trail of chips behind it, but that was before I had a dust collection system so I had to sweep up anyway.
Coiling Tie-Down Straps
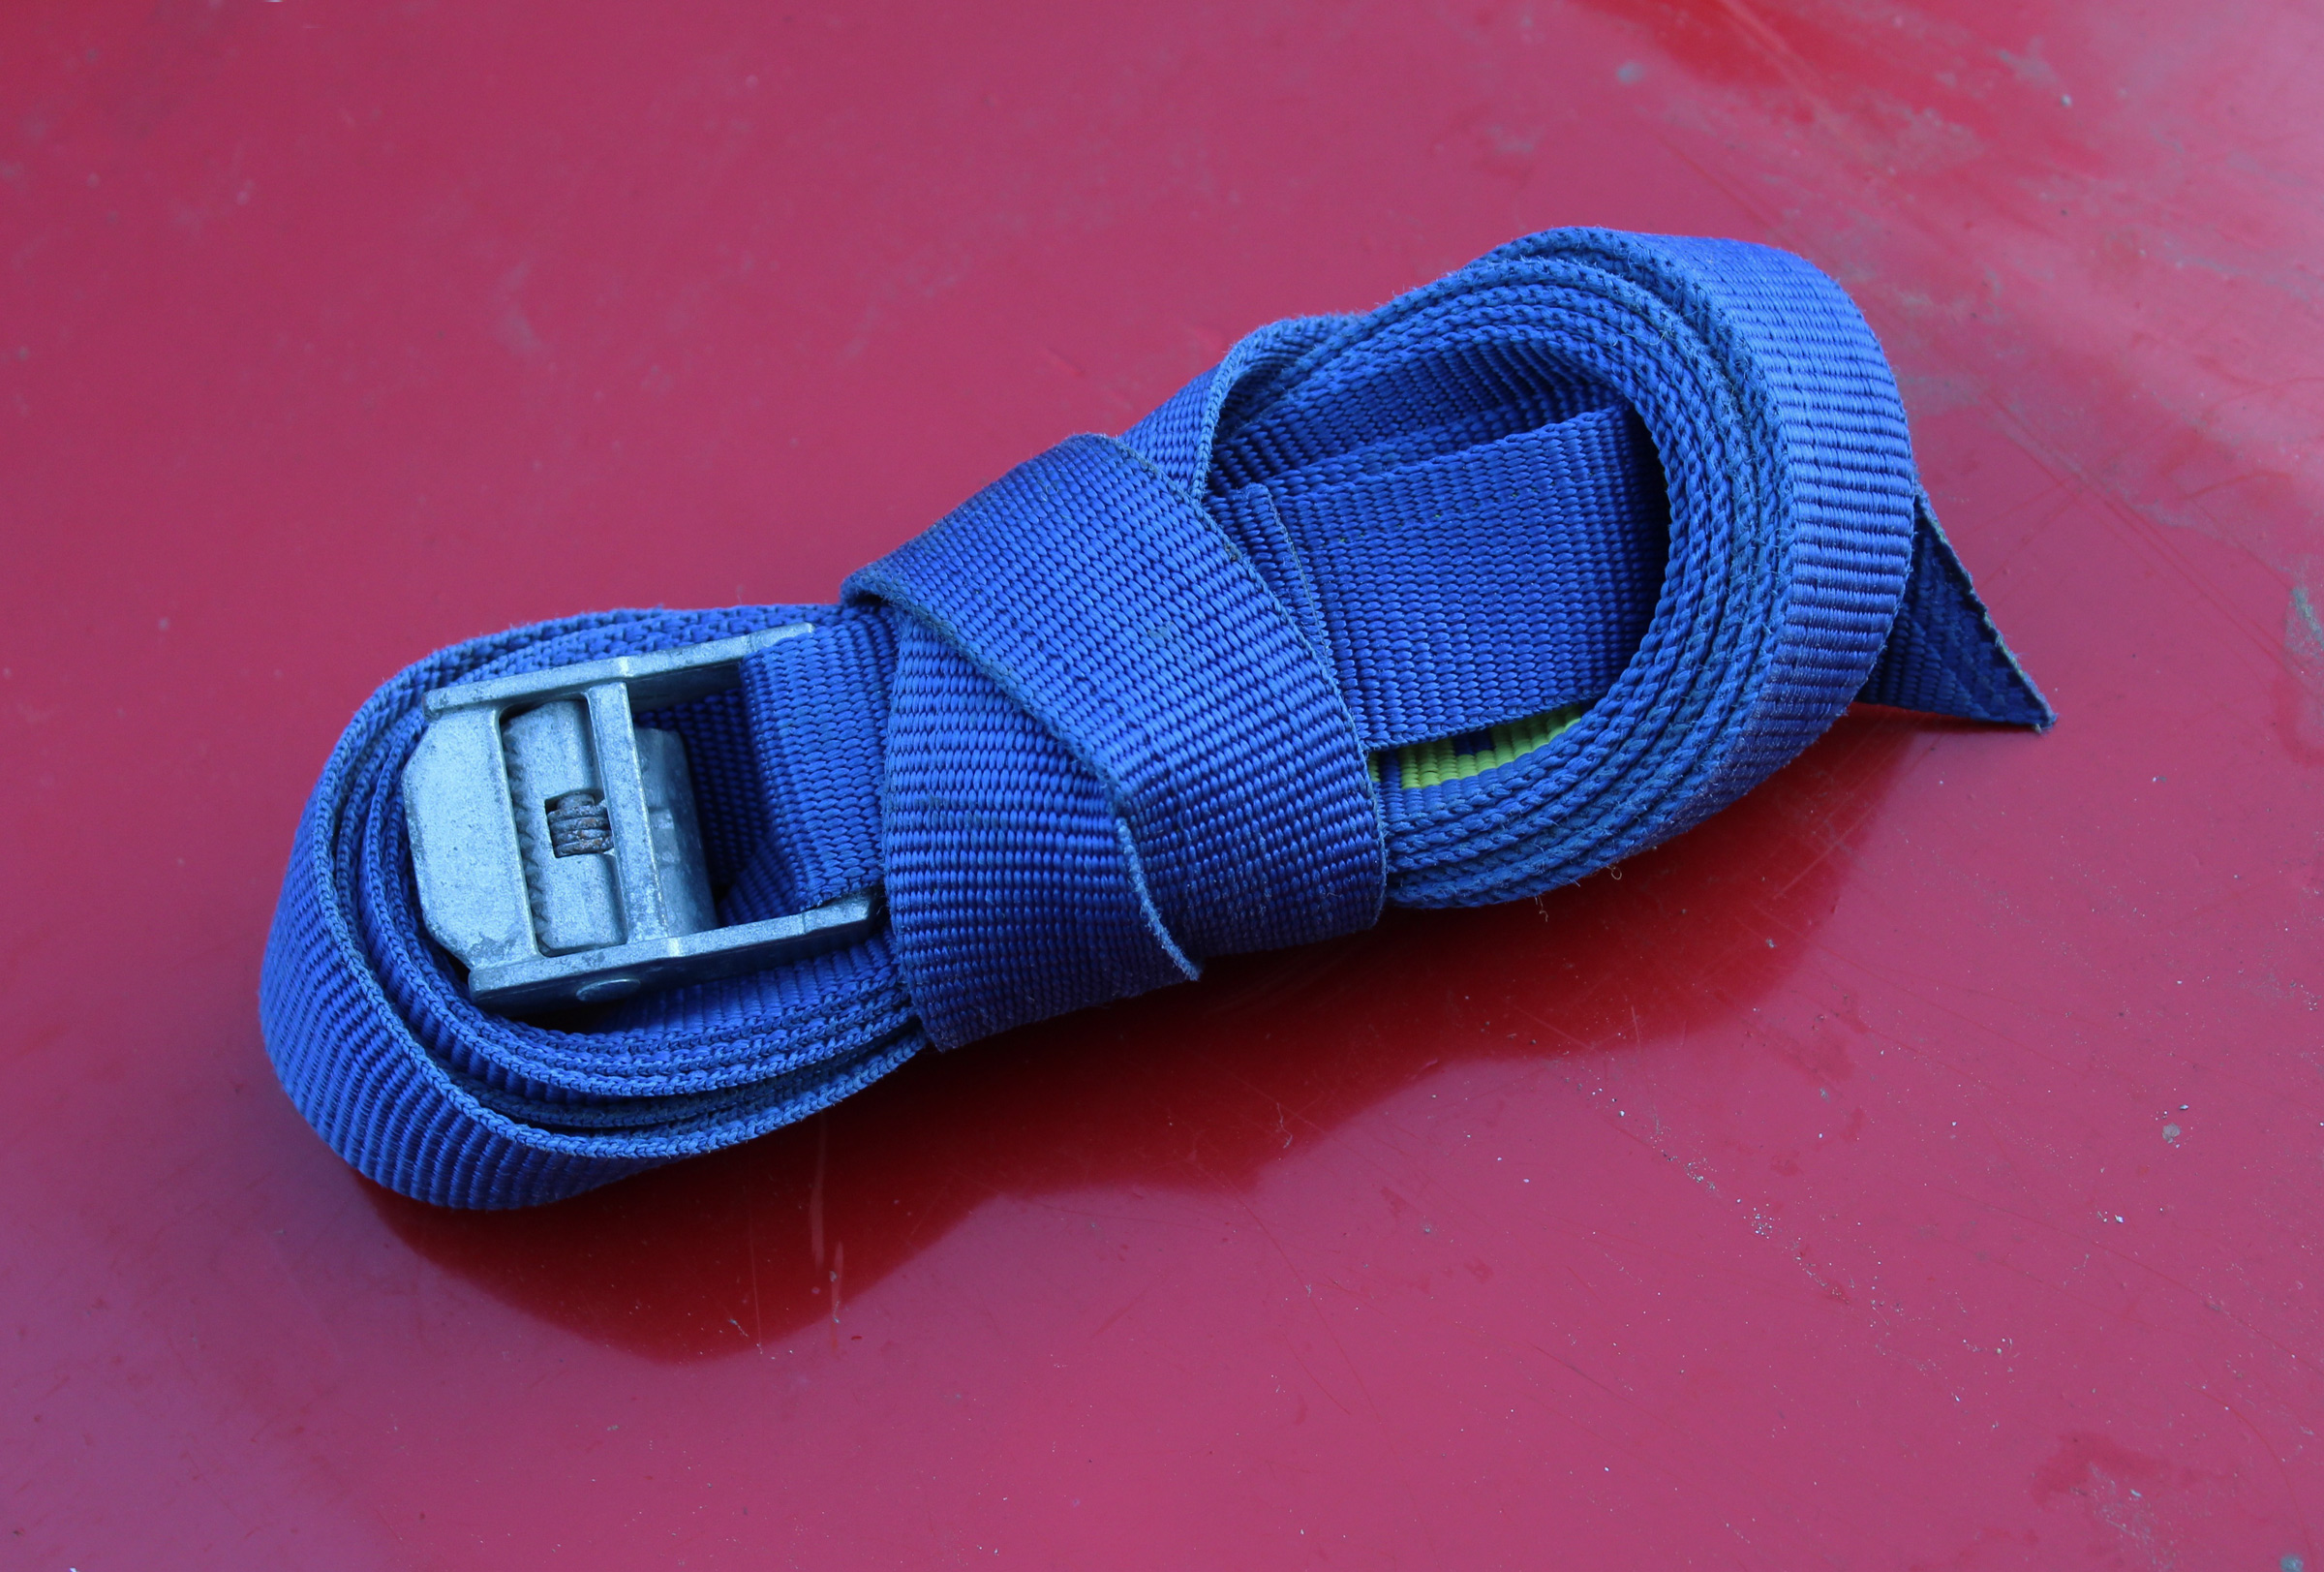
A figure-8 coil keeps tie-down straps in a compact, twist-free package.
Tie-down straps with cam buckles are very tidy devices for holding kayaks and canoes securely on roof racks, as well as a host of other applications, but they’re not so tidy when they’re piled in the back of the car waiting to be used. The 1″ webbing common to most straps doesn’t take as well to a loose coil as rope does, and winding them in a tight coil around the buckle requires something to keep them from coming undone. A better way to coil straps comes from the days when computers stored data on punched paper tape. Russ, a former Army intelligence officer turned kayaker, coiled tie-down straps the same way he had coiled paper tape by wrapping it in figure-8 turns around his extended thumb and pinky finger. The figure-8s have the advantage of alternating twists, so when the coil is undone, the webbing isn’t tangled up on itself.
Start by letting the buckle hang down about 3” from the inside of the pinky of your left hand. Feed the strap with your right hand and let the left hand do most of the work. Rotate your left hand, pulling the webbing around the outside of the pinky then keep rotating until you can dip your thumb under the webbing. Reverse the rotation, pulling webbing from your right hand until you can dip your left pinky under the webbing. That’s one figure-8. Repeat until you have all but about 18″ of webbing remaining. Remove the coil from your thumb and pinky and press the buckle into the hollow where your thumb was. Pinch the center of the figure-8s in the middle, fold the tail end at a right angle and take two or three tight wraps around the coil. Tuck the tail end under the last wrap and cinch it tight. That’s it.
Here’s a step-by-step look:
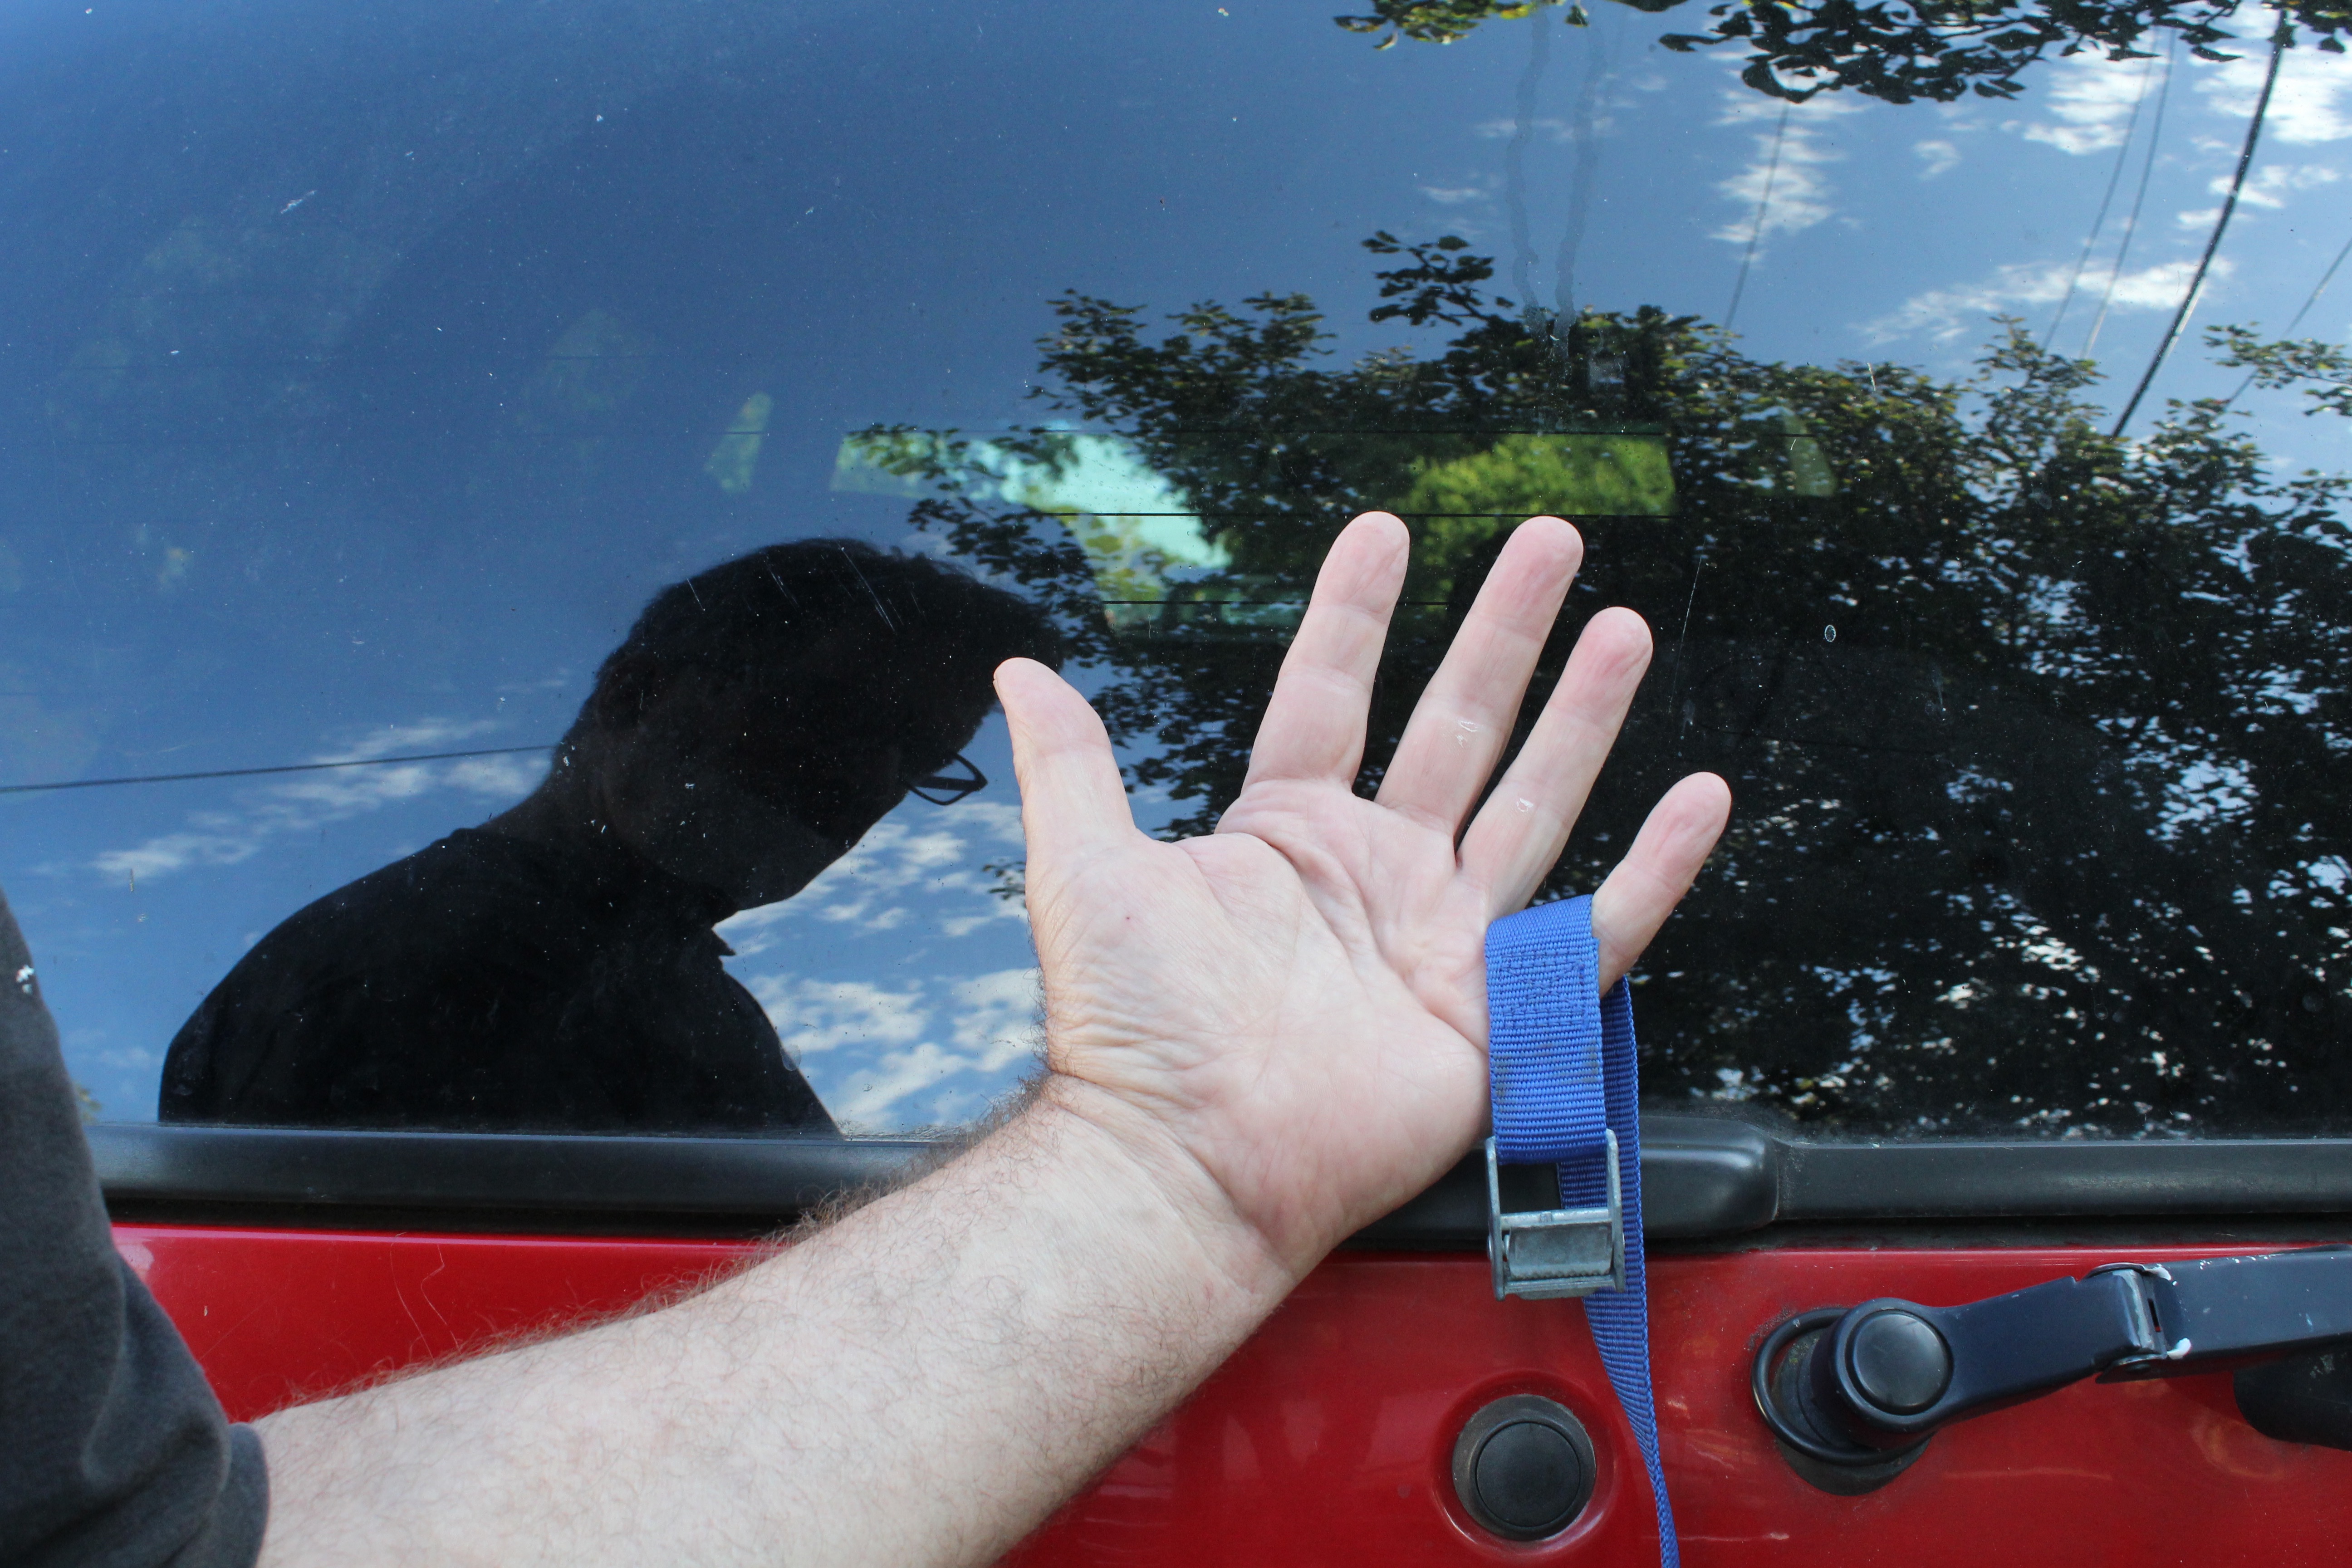
Hang the buckle from your pinky.
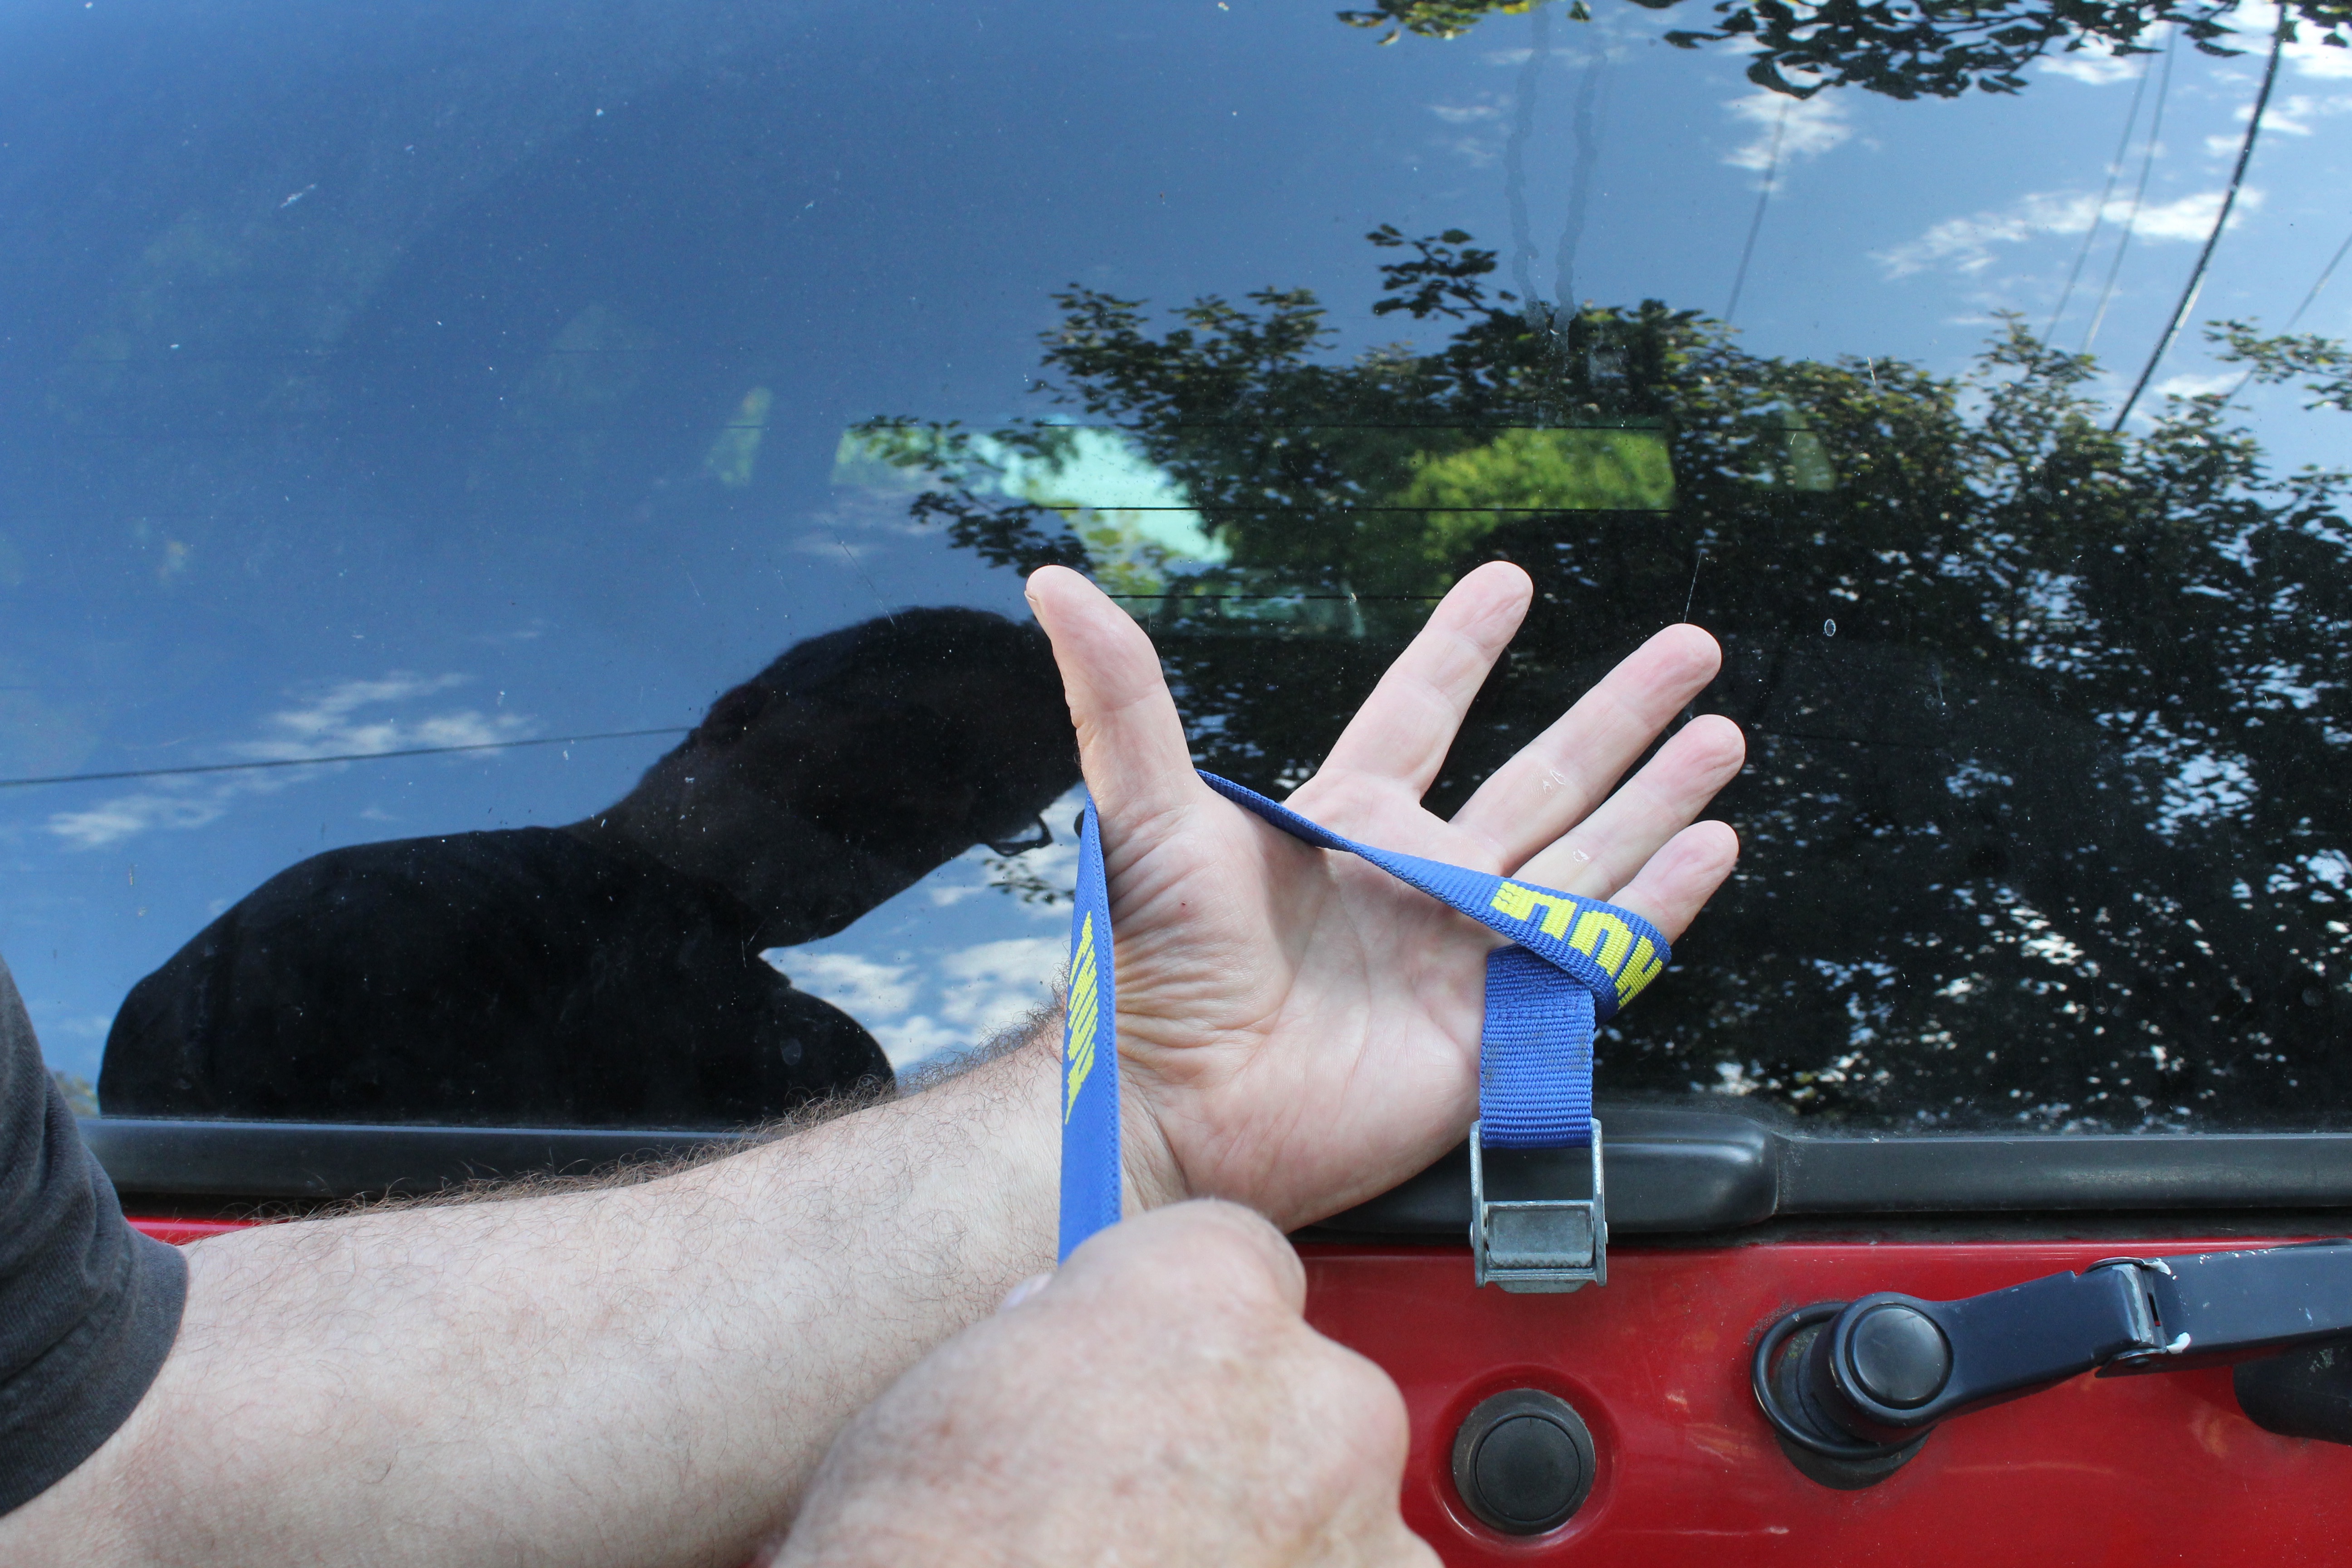
Pull the webbing around your pinky and lead it over your thumb.
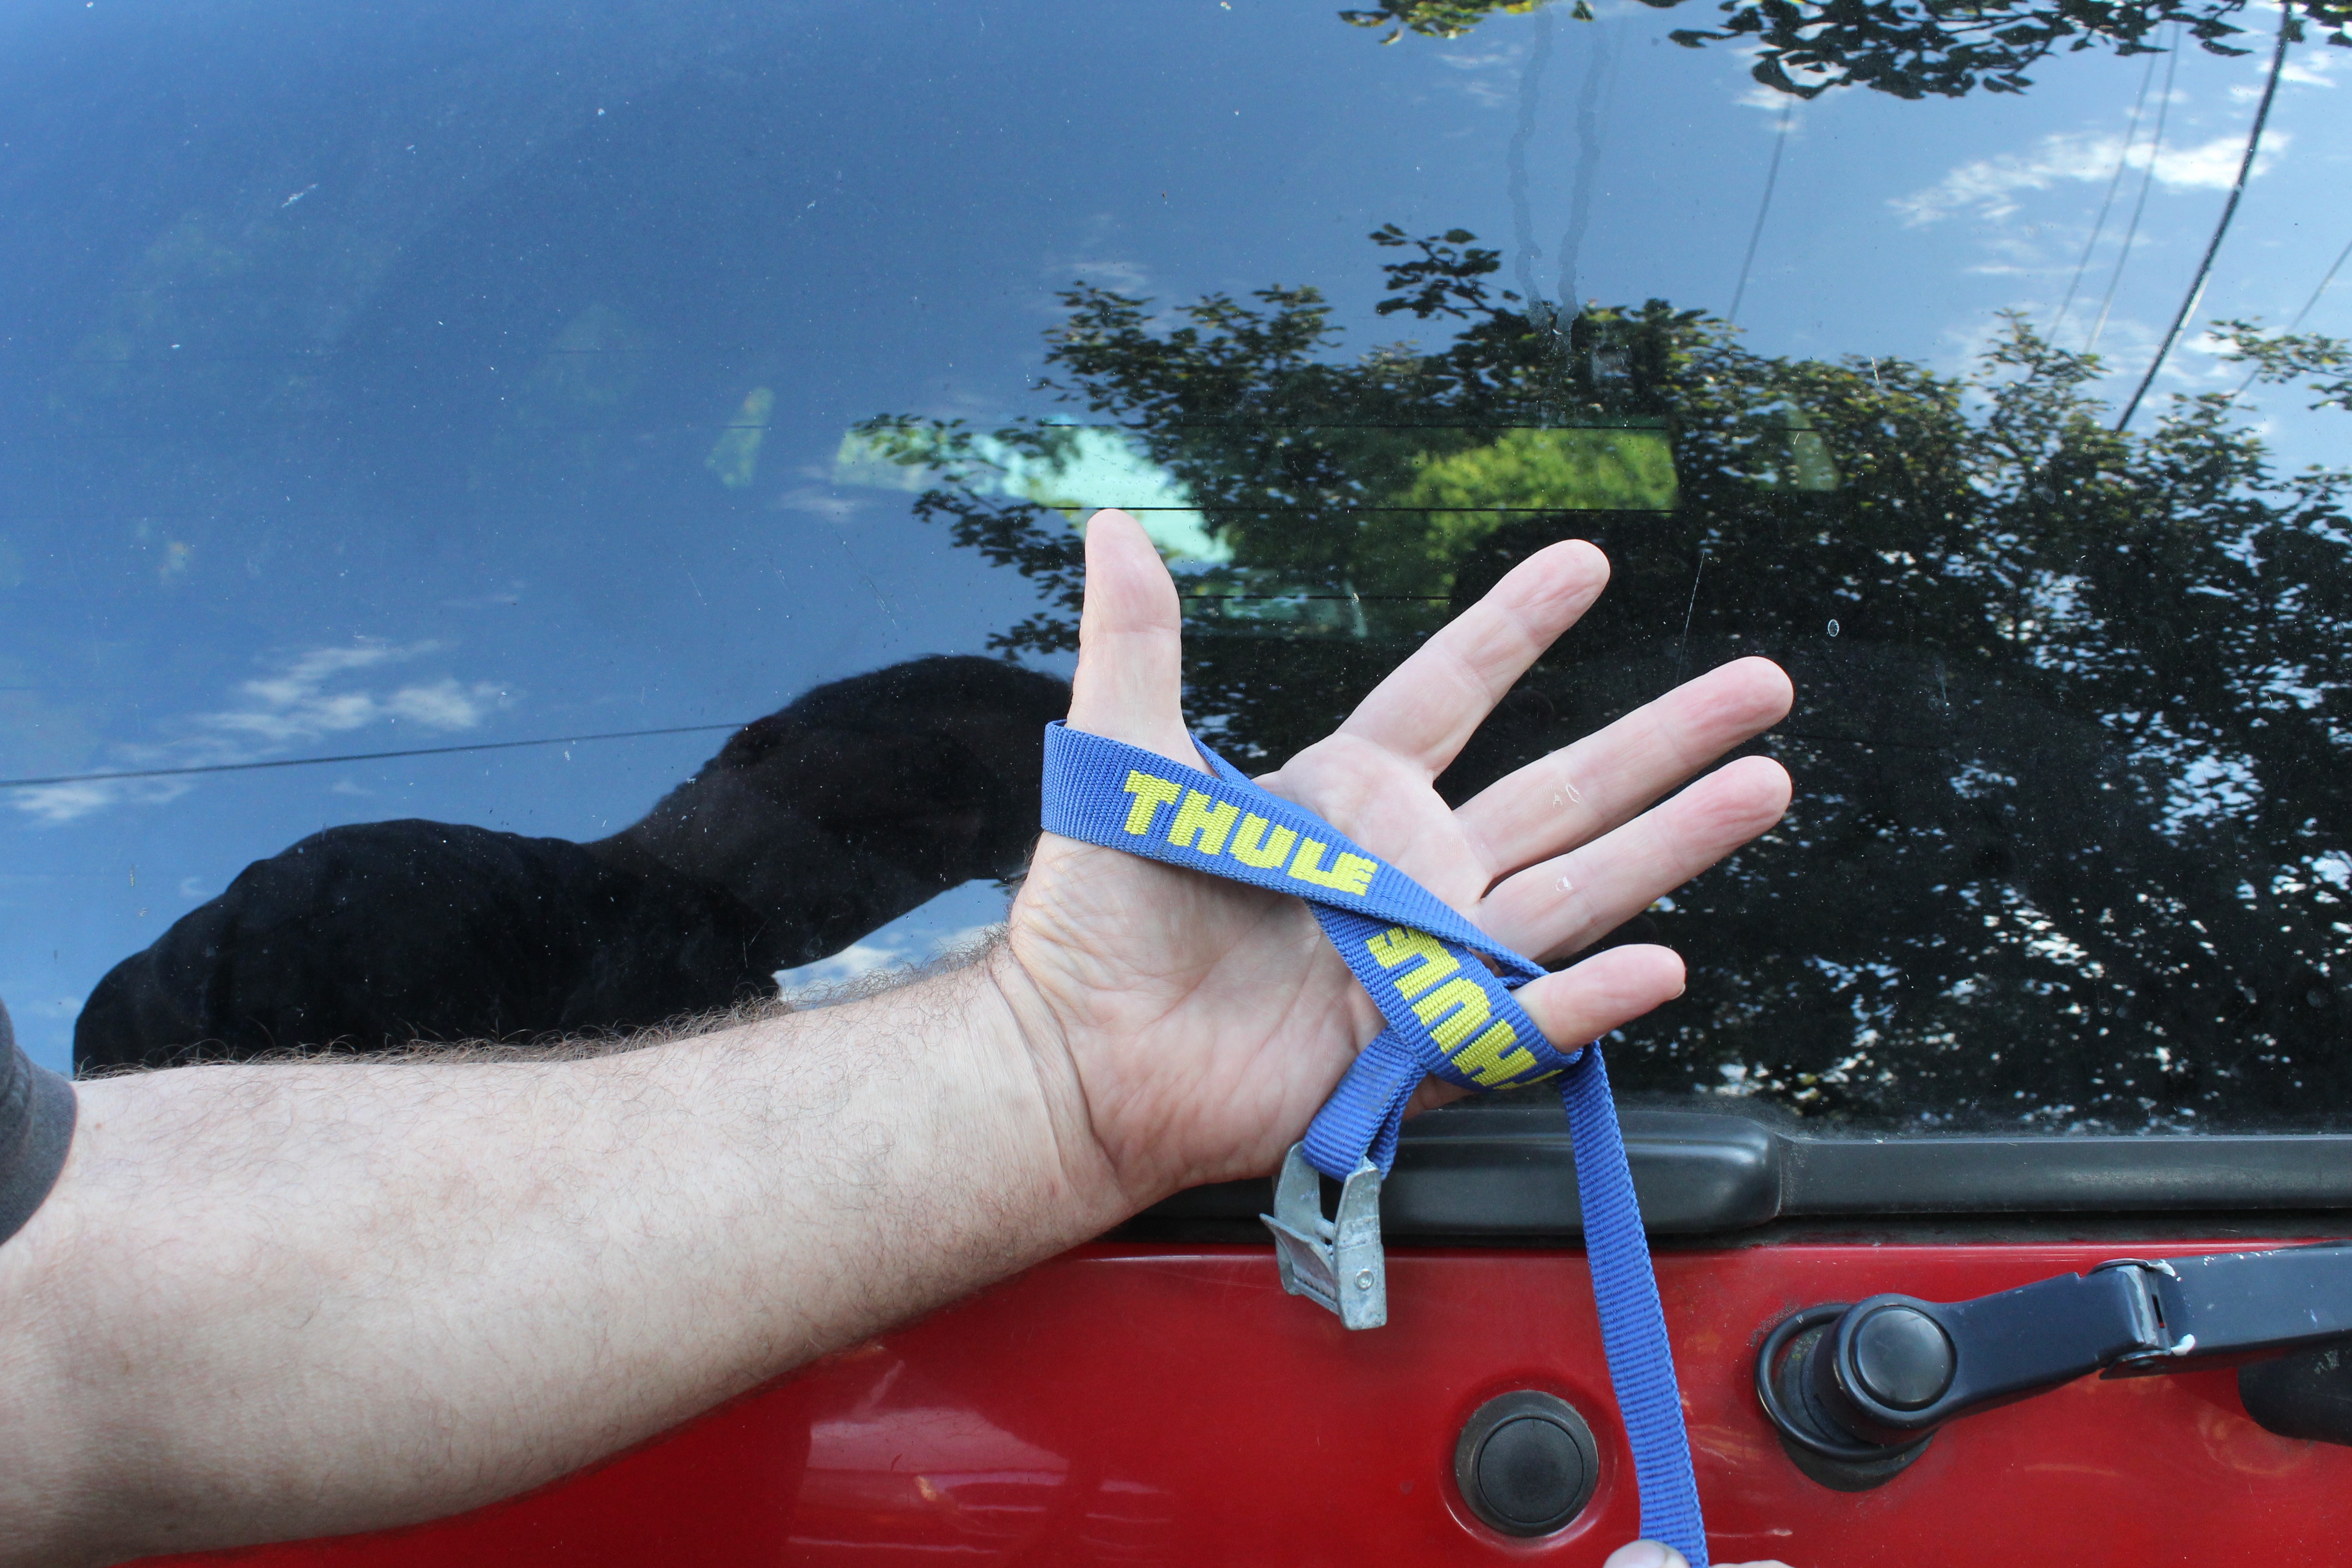
Bring the webbing over the pinky, finishing the first figure-8.

Continue making figure-8s, always keeping the webbing flat and without twists.

Pull your thumb out and press the buckle into the recess.

Wrap the remainder of the webbing around the middle of the figure-8s.

Tuck the tail under the last wrap.

Cinch tight.
When you need to use the strap, pull the tail end free, undo the wraps, hold the buckle, and drop the figure-8s. The strap is ready to use.
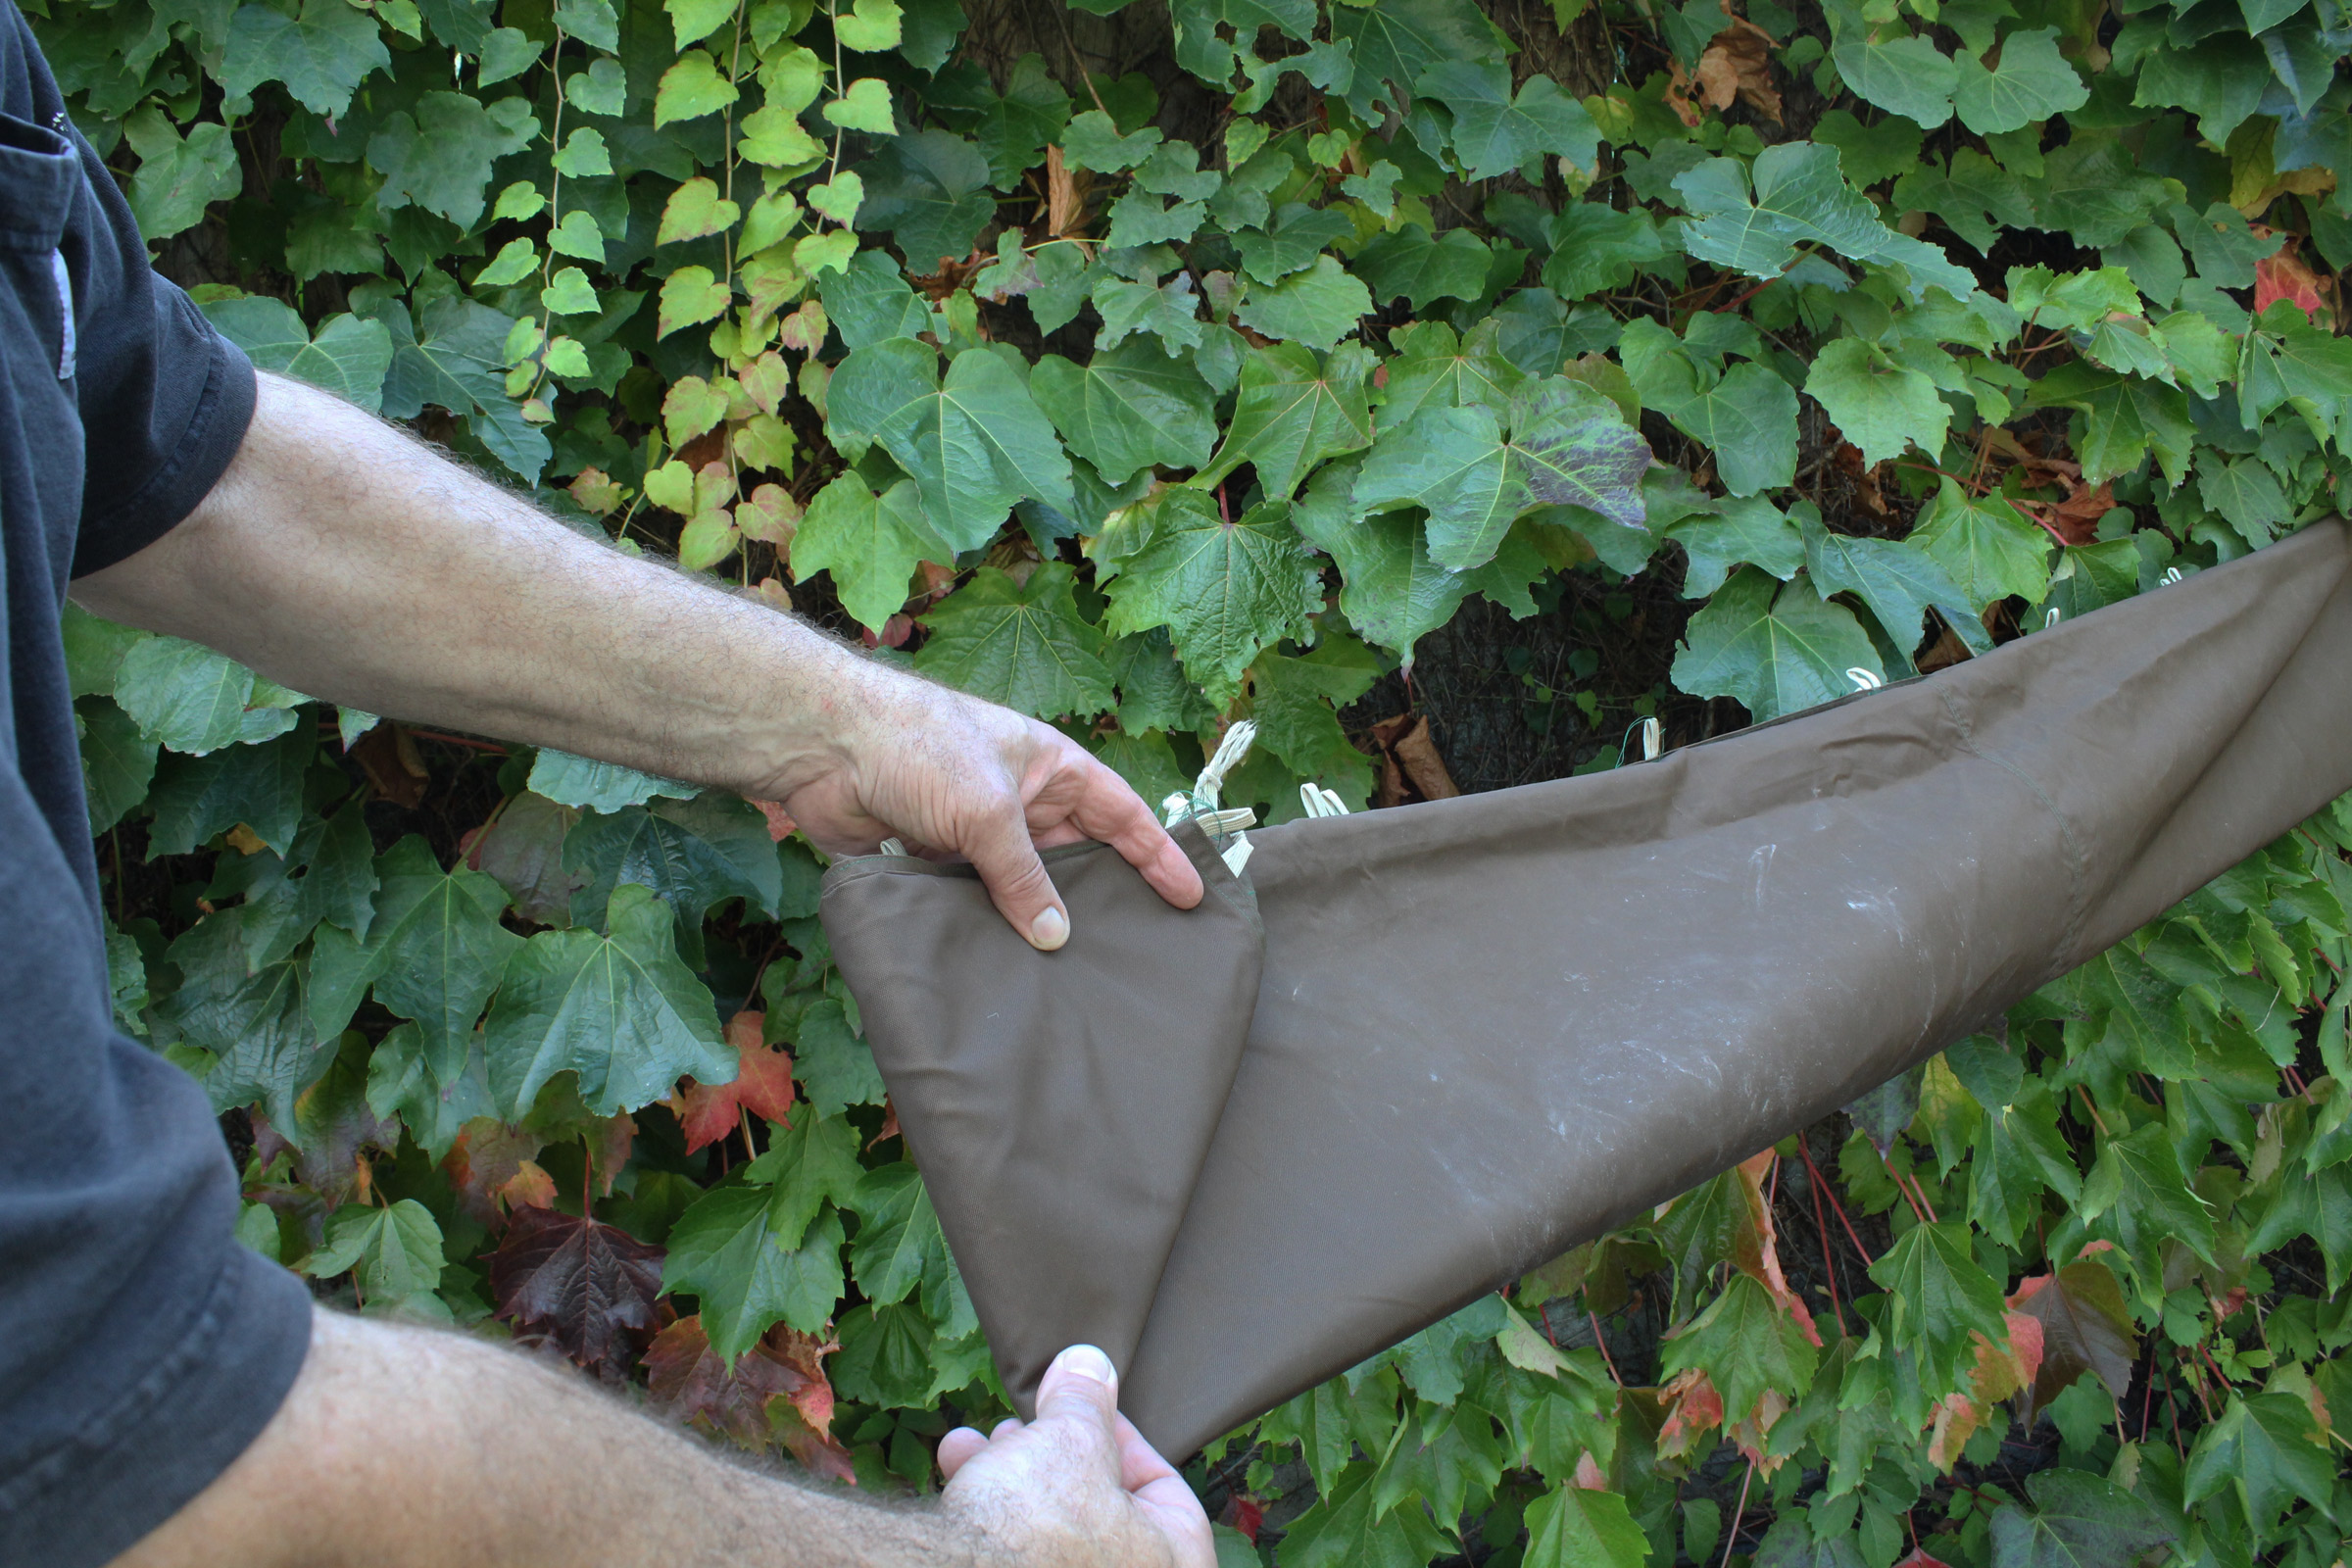
Flag-Folding Tarps
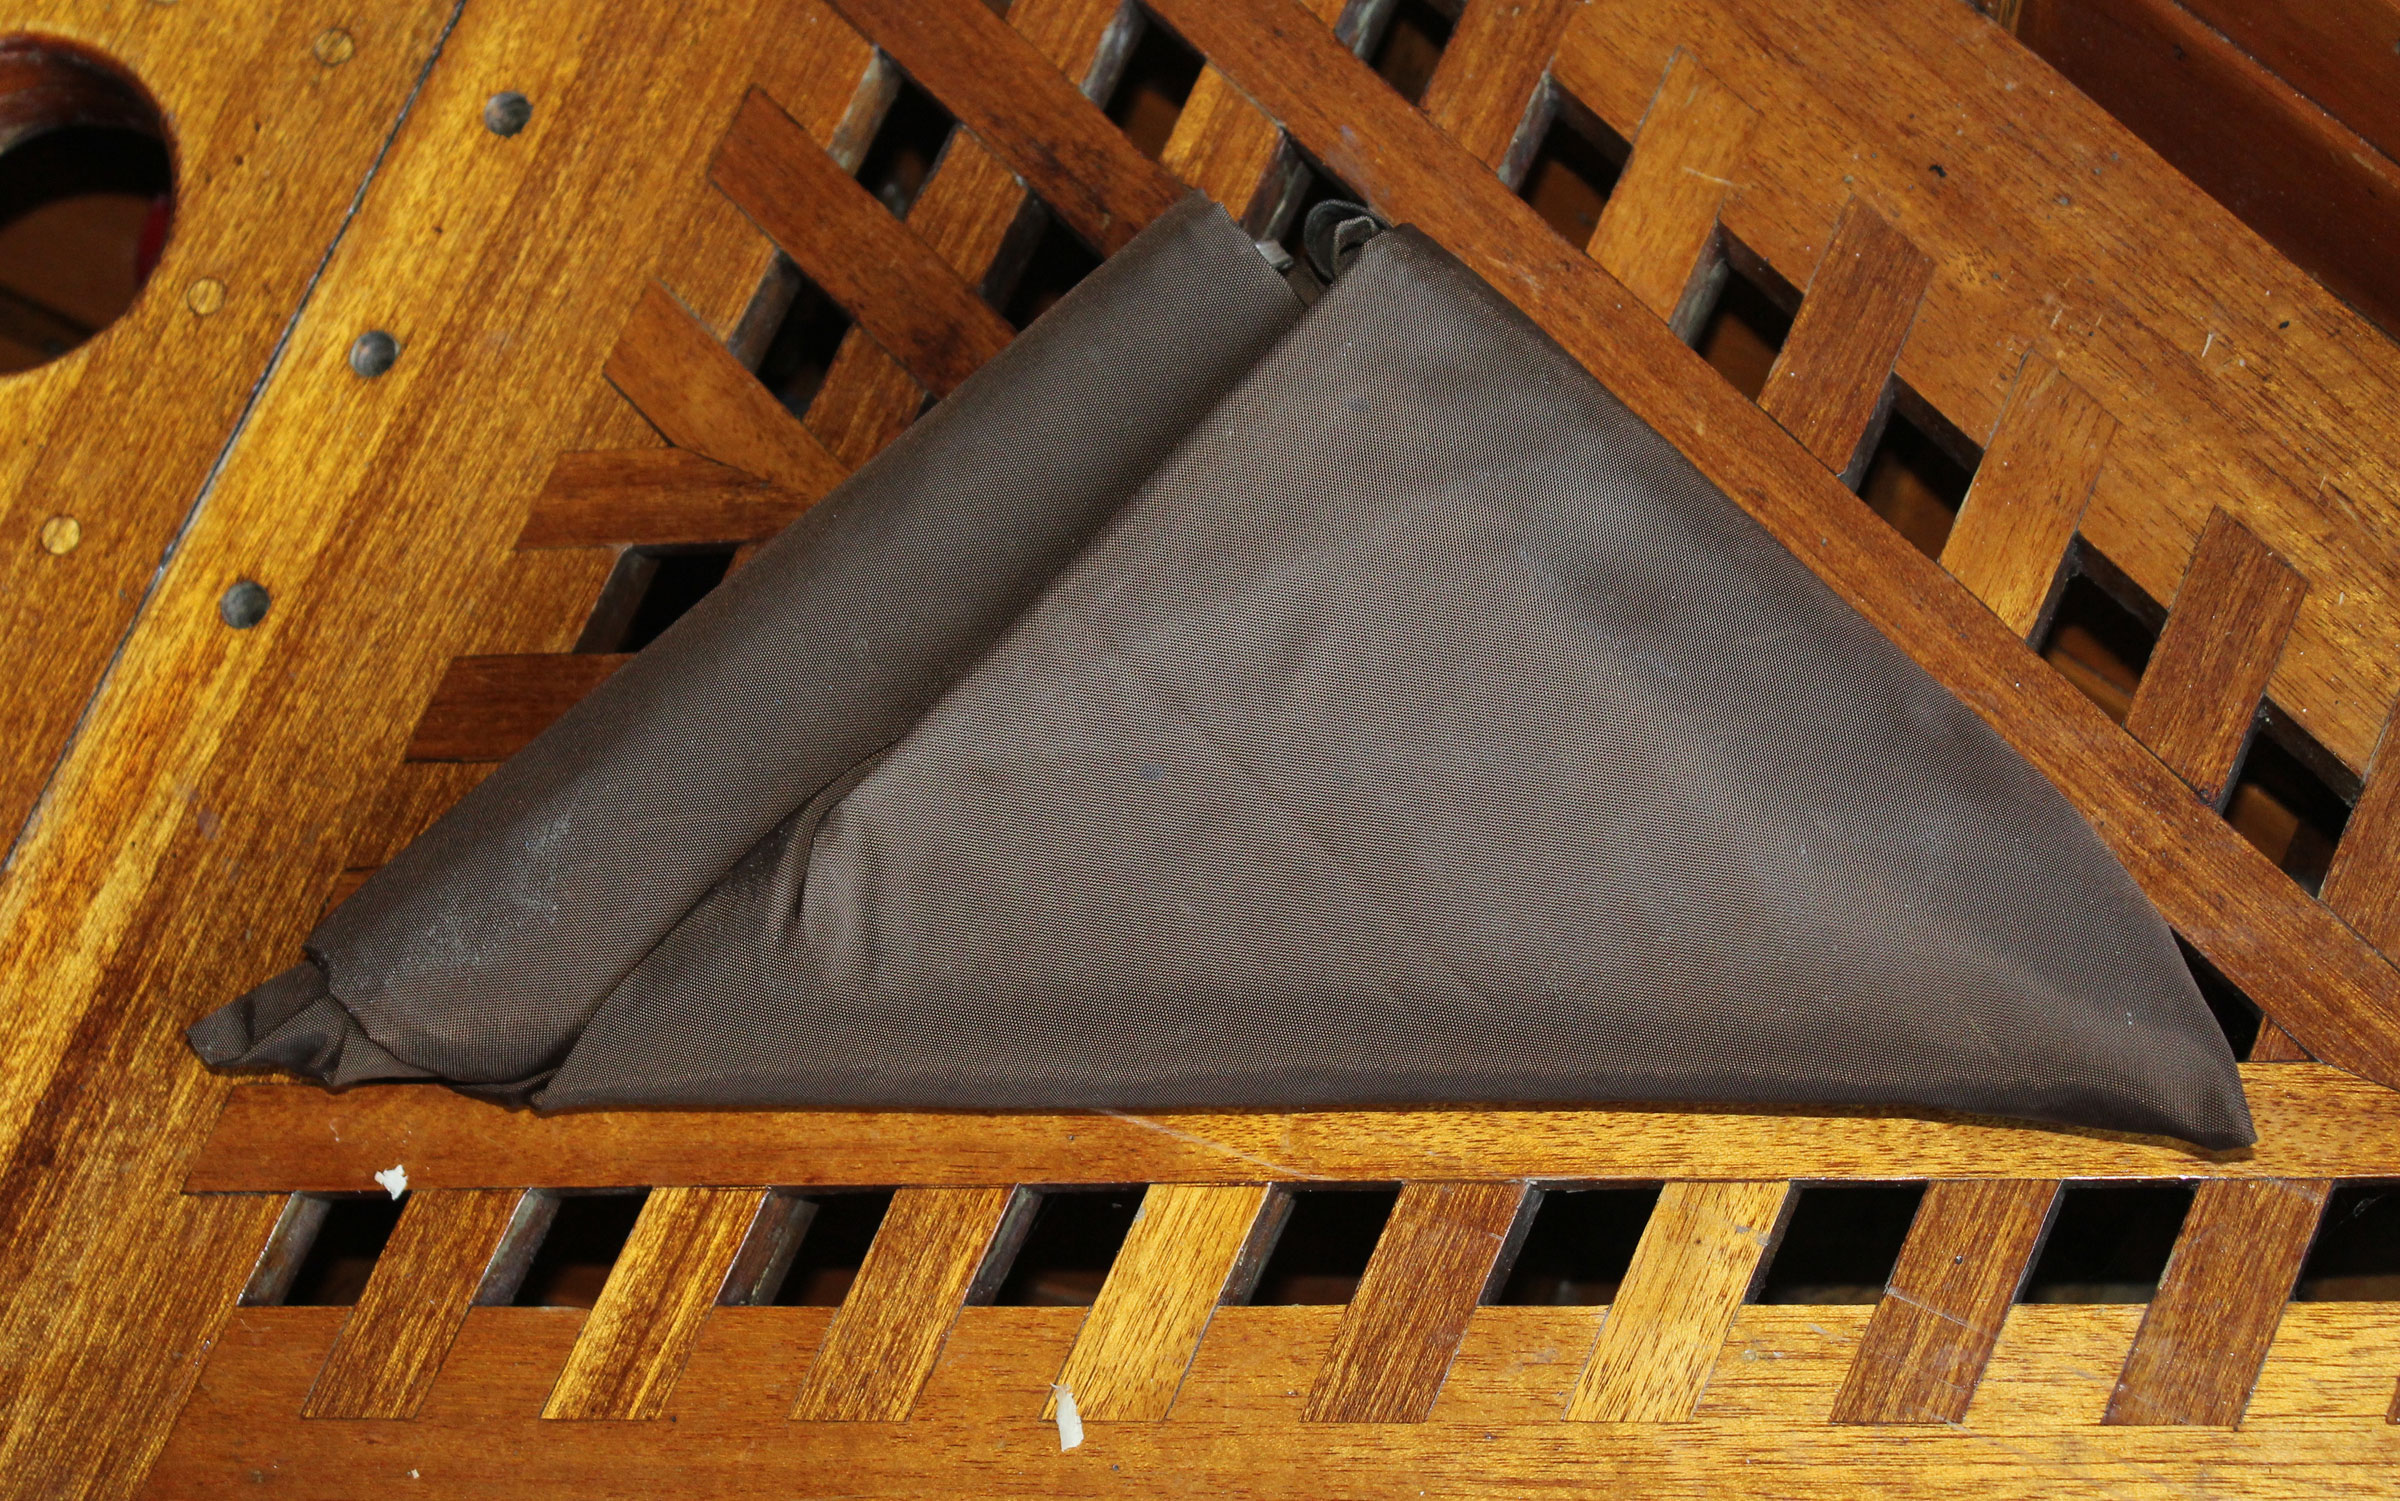
The flag-folded tarp stays wrapped tight by tucking its end into a pocket in the folded triangle.
The method for folding a national flag into a triangle works quite well for camping and workshop tarps and ground-cloths too. The last step tucks the tail end away and the package will hold itself together. Two people can make quick work of folding a tarp, but if there’s no one else around, a spring clamp comes in quite handy. Fold one of the short sides of the tarp in half and clamp the corners to a fixed object. Move to the other end, pull the tarp tight and make the same fold, and then fold it in half again. Return to the clamped end and put a second and a third fold in, making the tarp 1/8th of its full width. Walk the unclamped end out, to tension the tarp again and put the third fold in that end.
Fold one corner in to form a triangle and then “roll” the triangle along the quartered tarp, drawing the fabric tight around the triangle. Stop when you have a leg of triangle (not the hypotenuse) crossing the fabric with at least a leg’s length of fabric remaining. If you have less, back up; if you then have more, fold the remainder to make it about as long as a leg of the triangle. Fold the remainder diagonally to make a mirror-image triangle and then tuck that triangle tight into the pocket formed by the wraps.
Here’s how that looks:
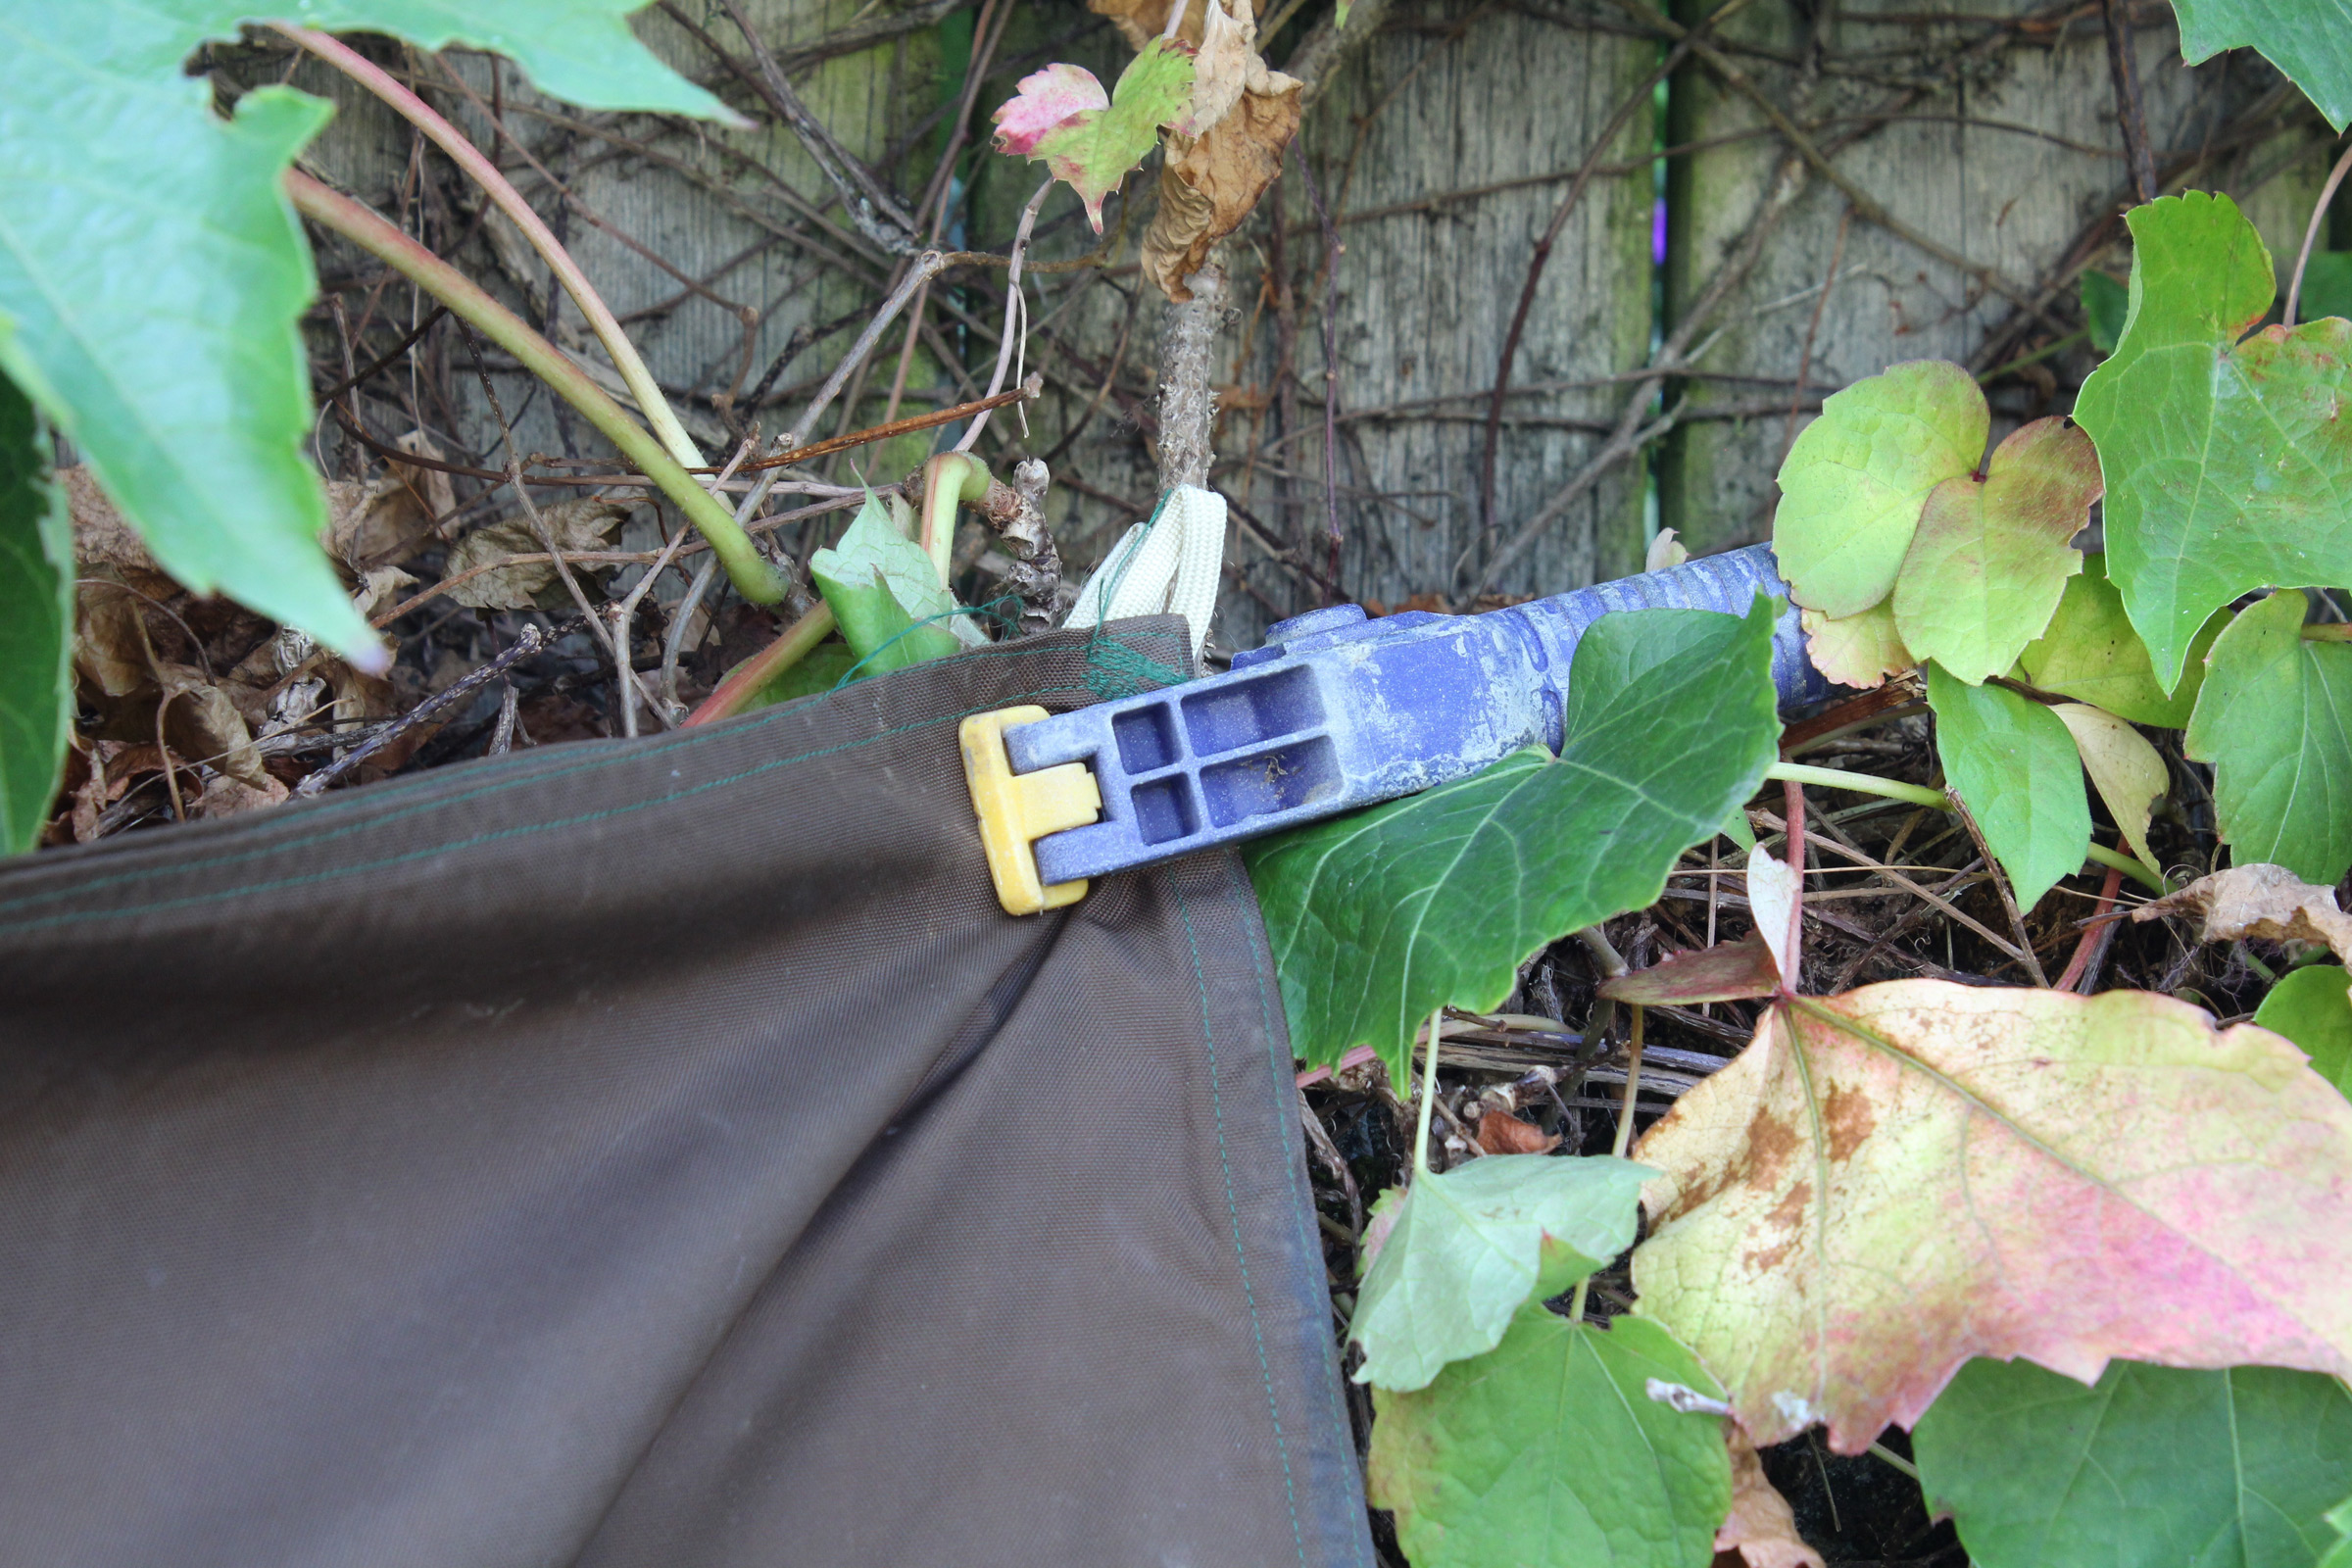
If you’re folding a tarp on your own, have a spring clamp lend a hand.
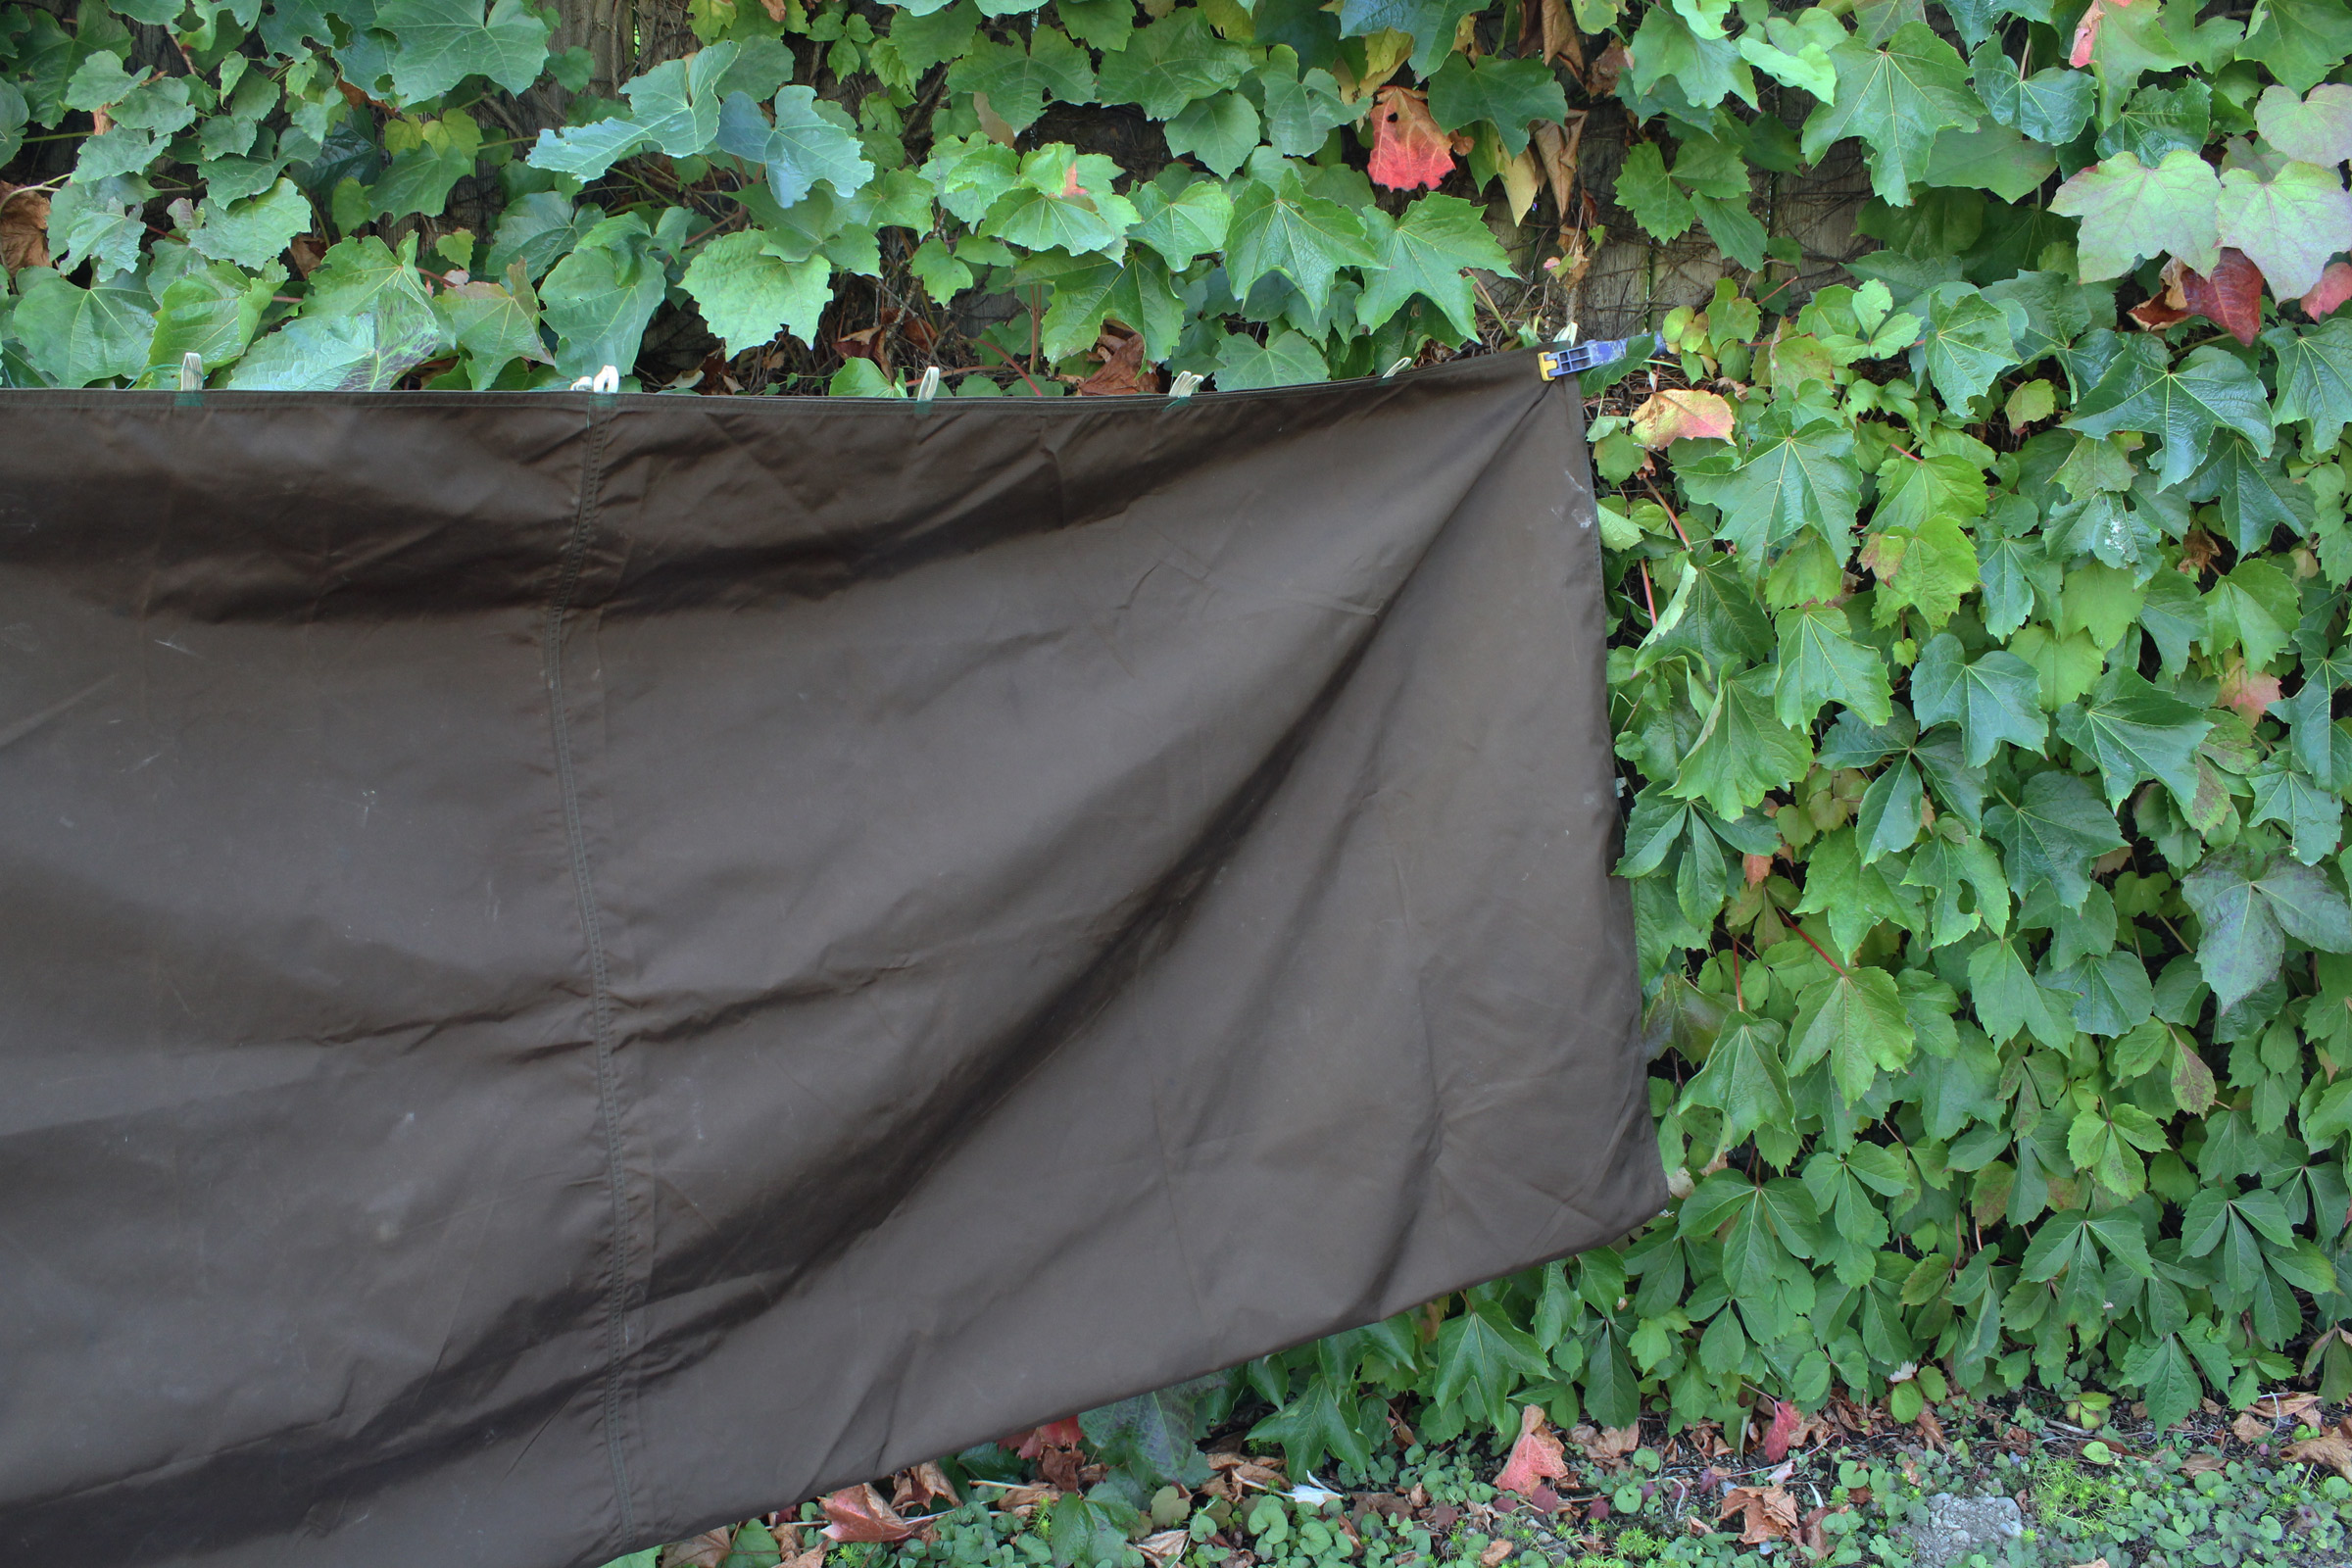
Start with the tarp folded in half and have the clamp hold the two corners, then fold the other end to halve the tarp.

A second fold quarters the tarp’s width.
The third fold decreases the width eightfold.

Fold one corner on a diagonal to form a triangle.
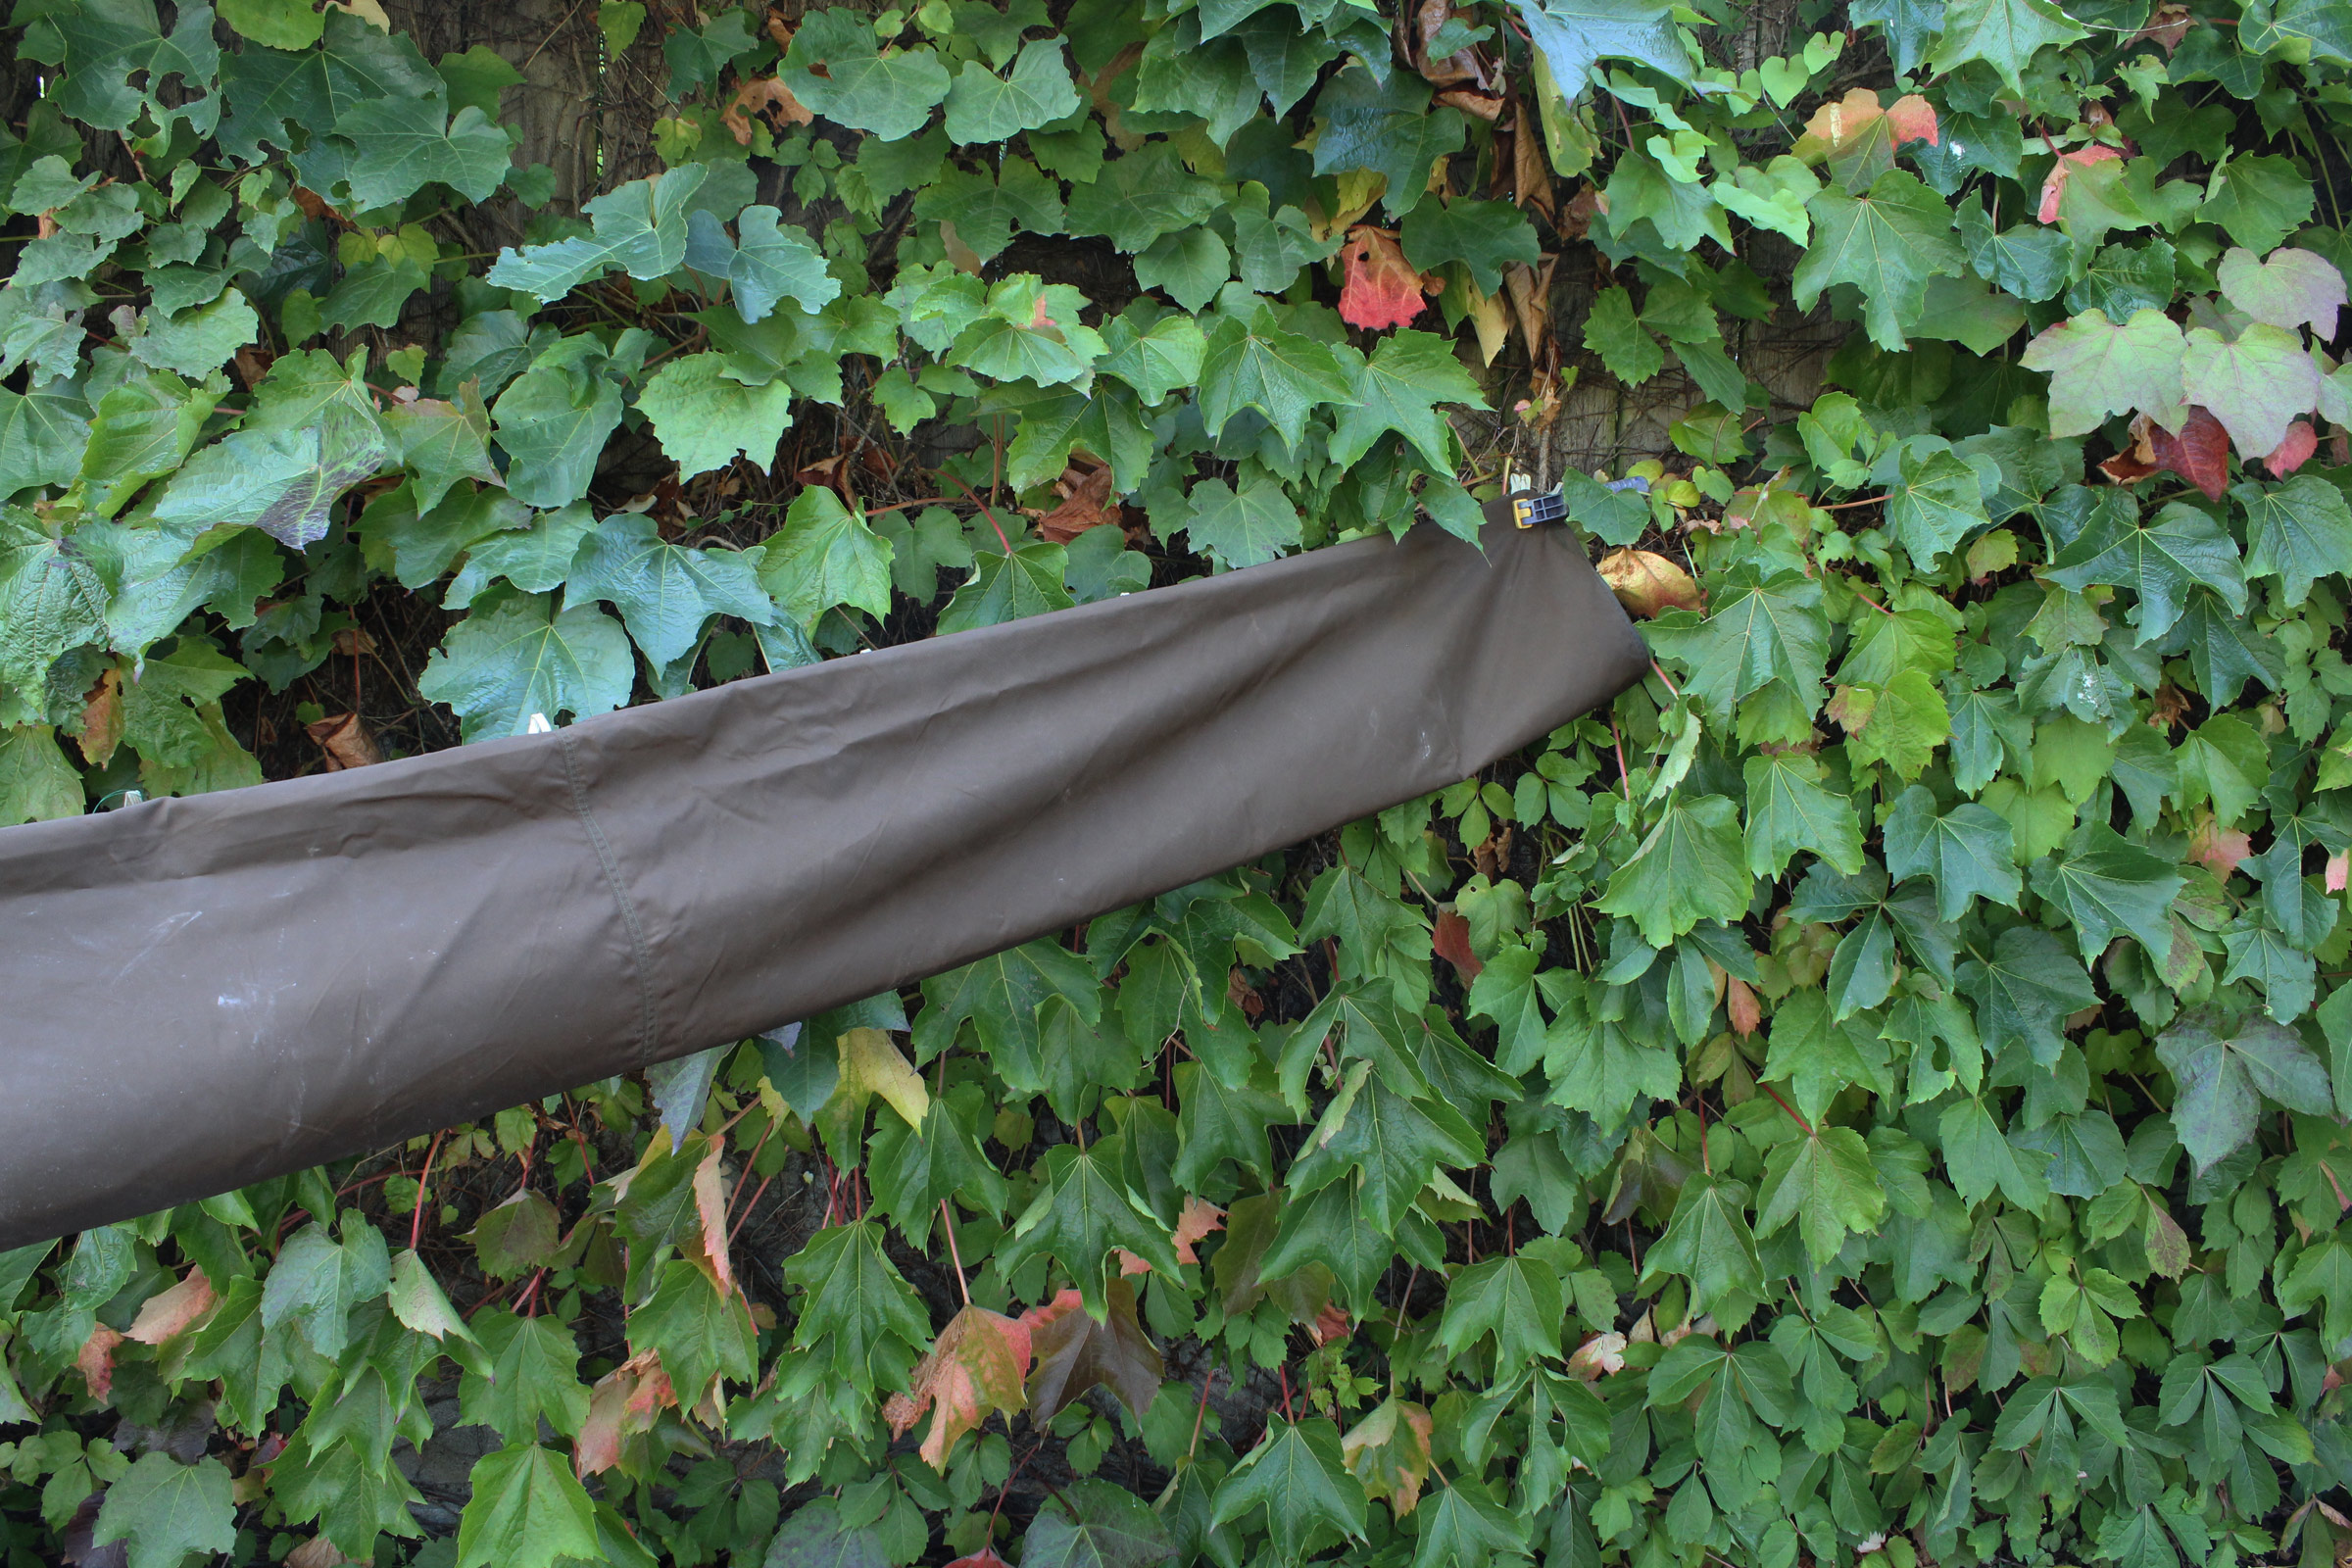
Flip the triangle along the length of the tarp.
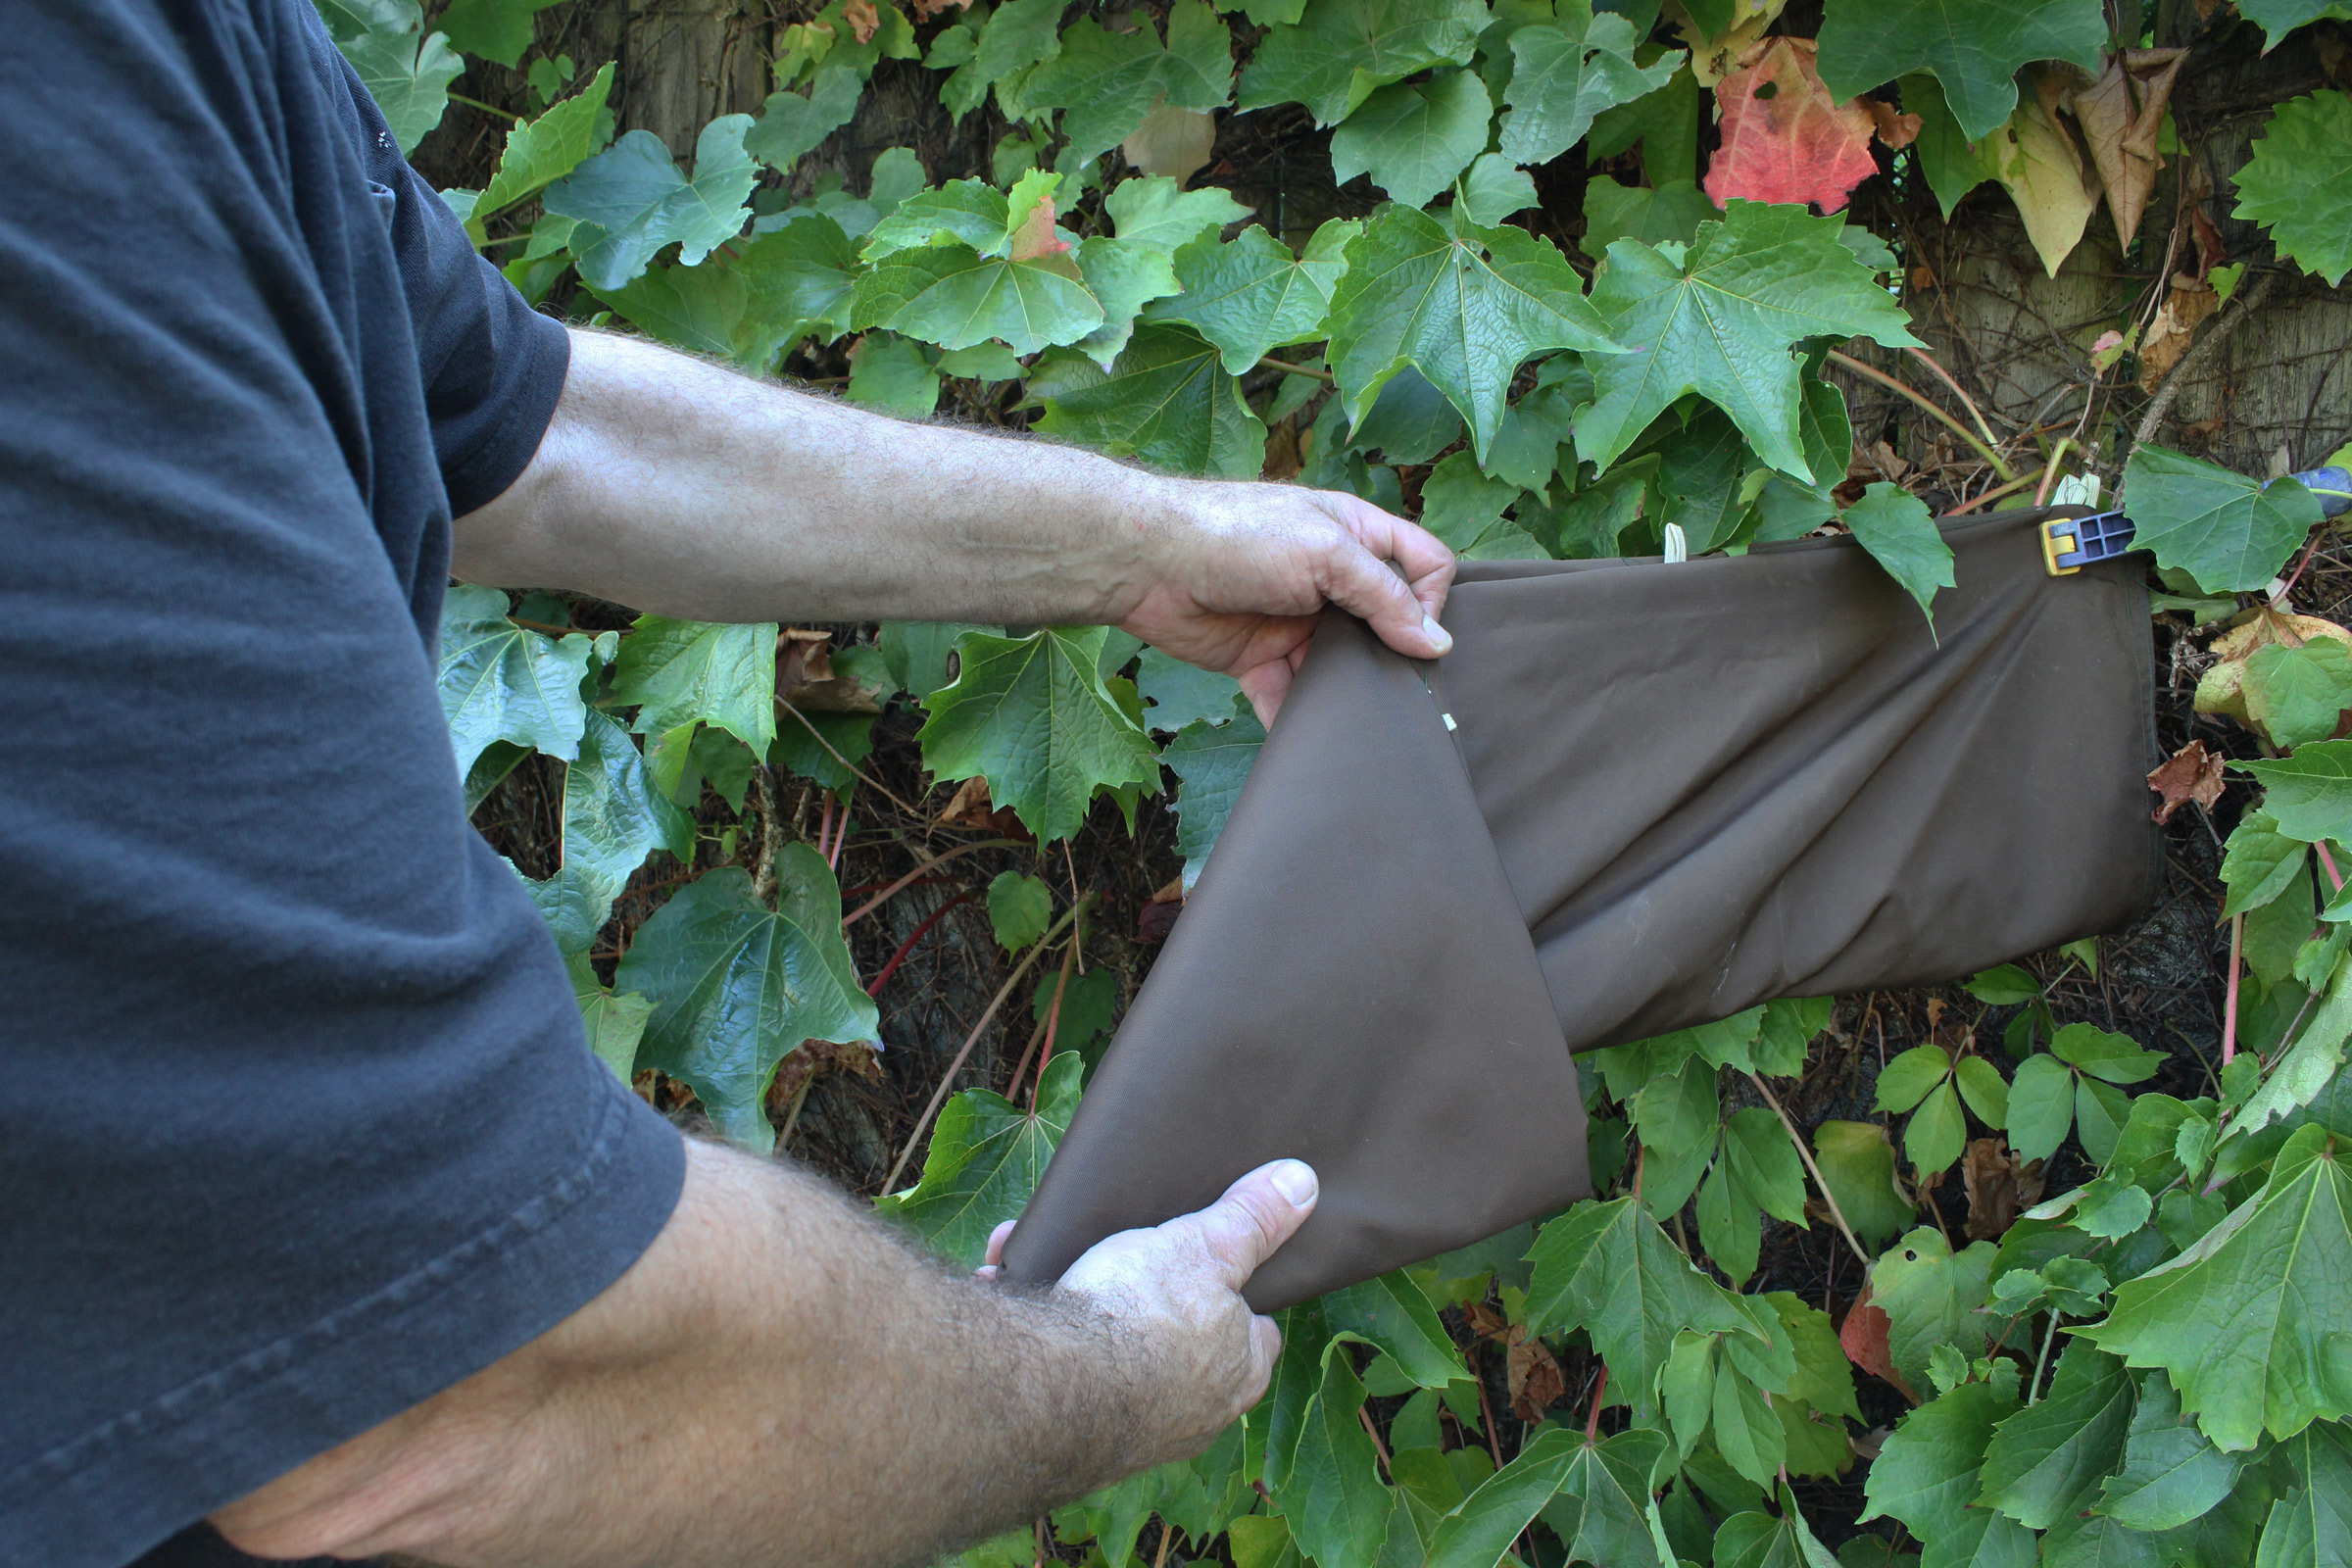
Keep rolling the triangle until you’re close to the end and you have the triangle’s edge square to the tarp. Here there’s not enough tarp left to get to the next squared edge, so the remaining tarp will be folded toward the triangle.
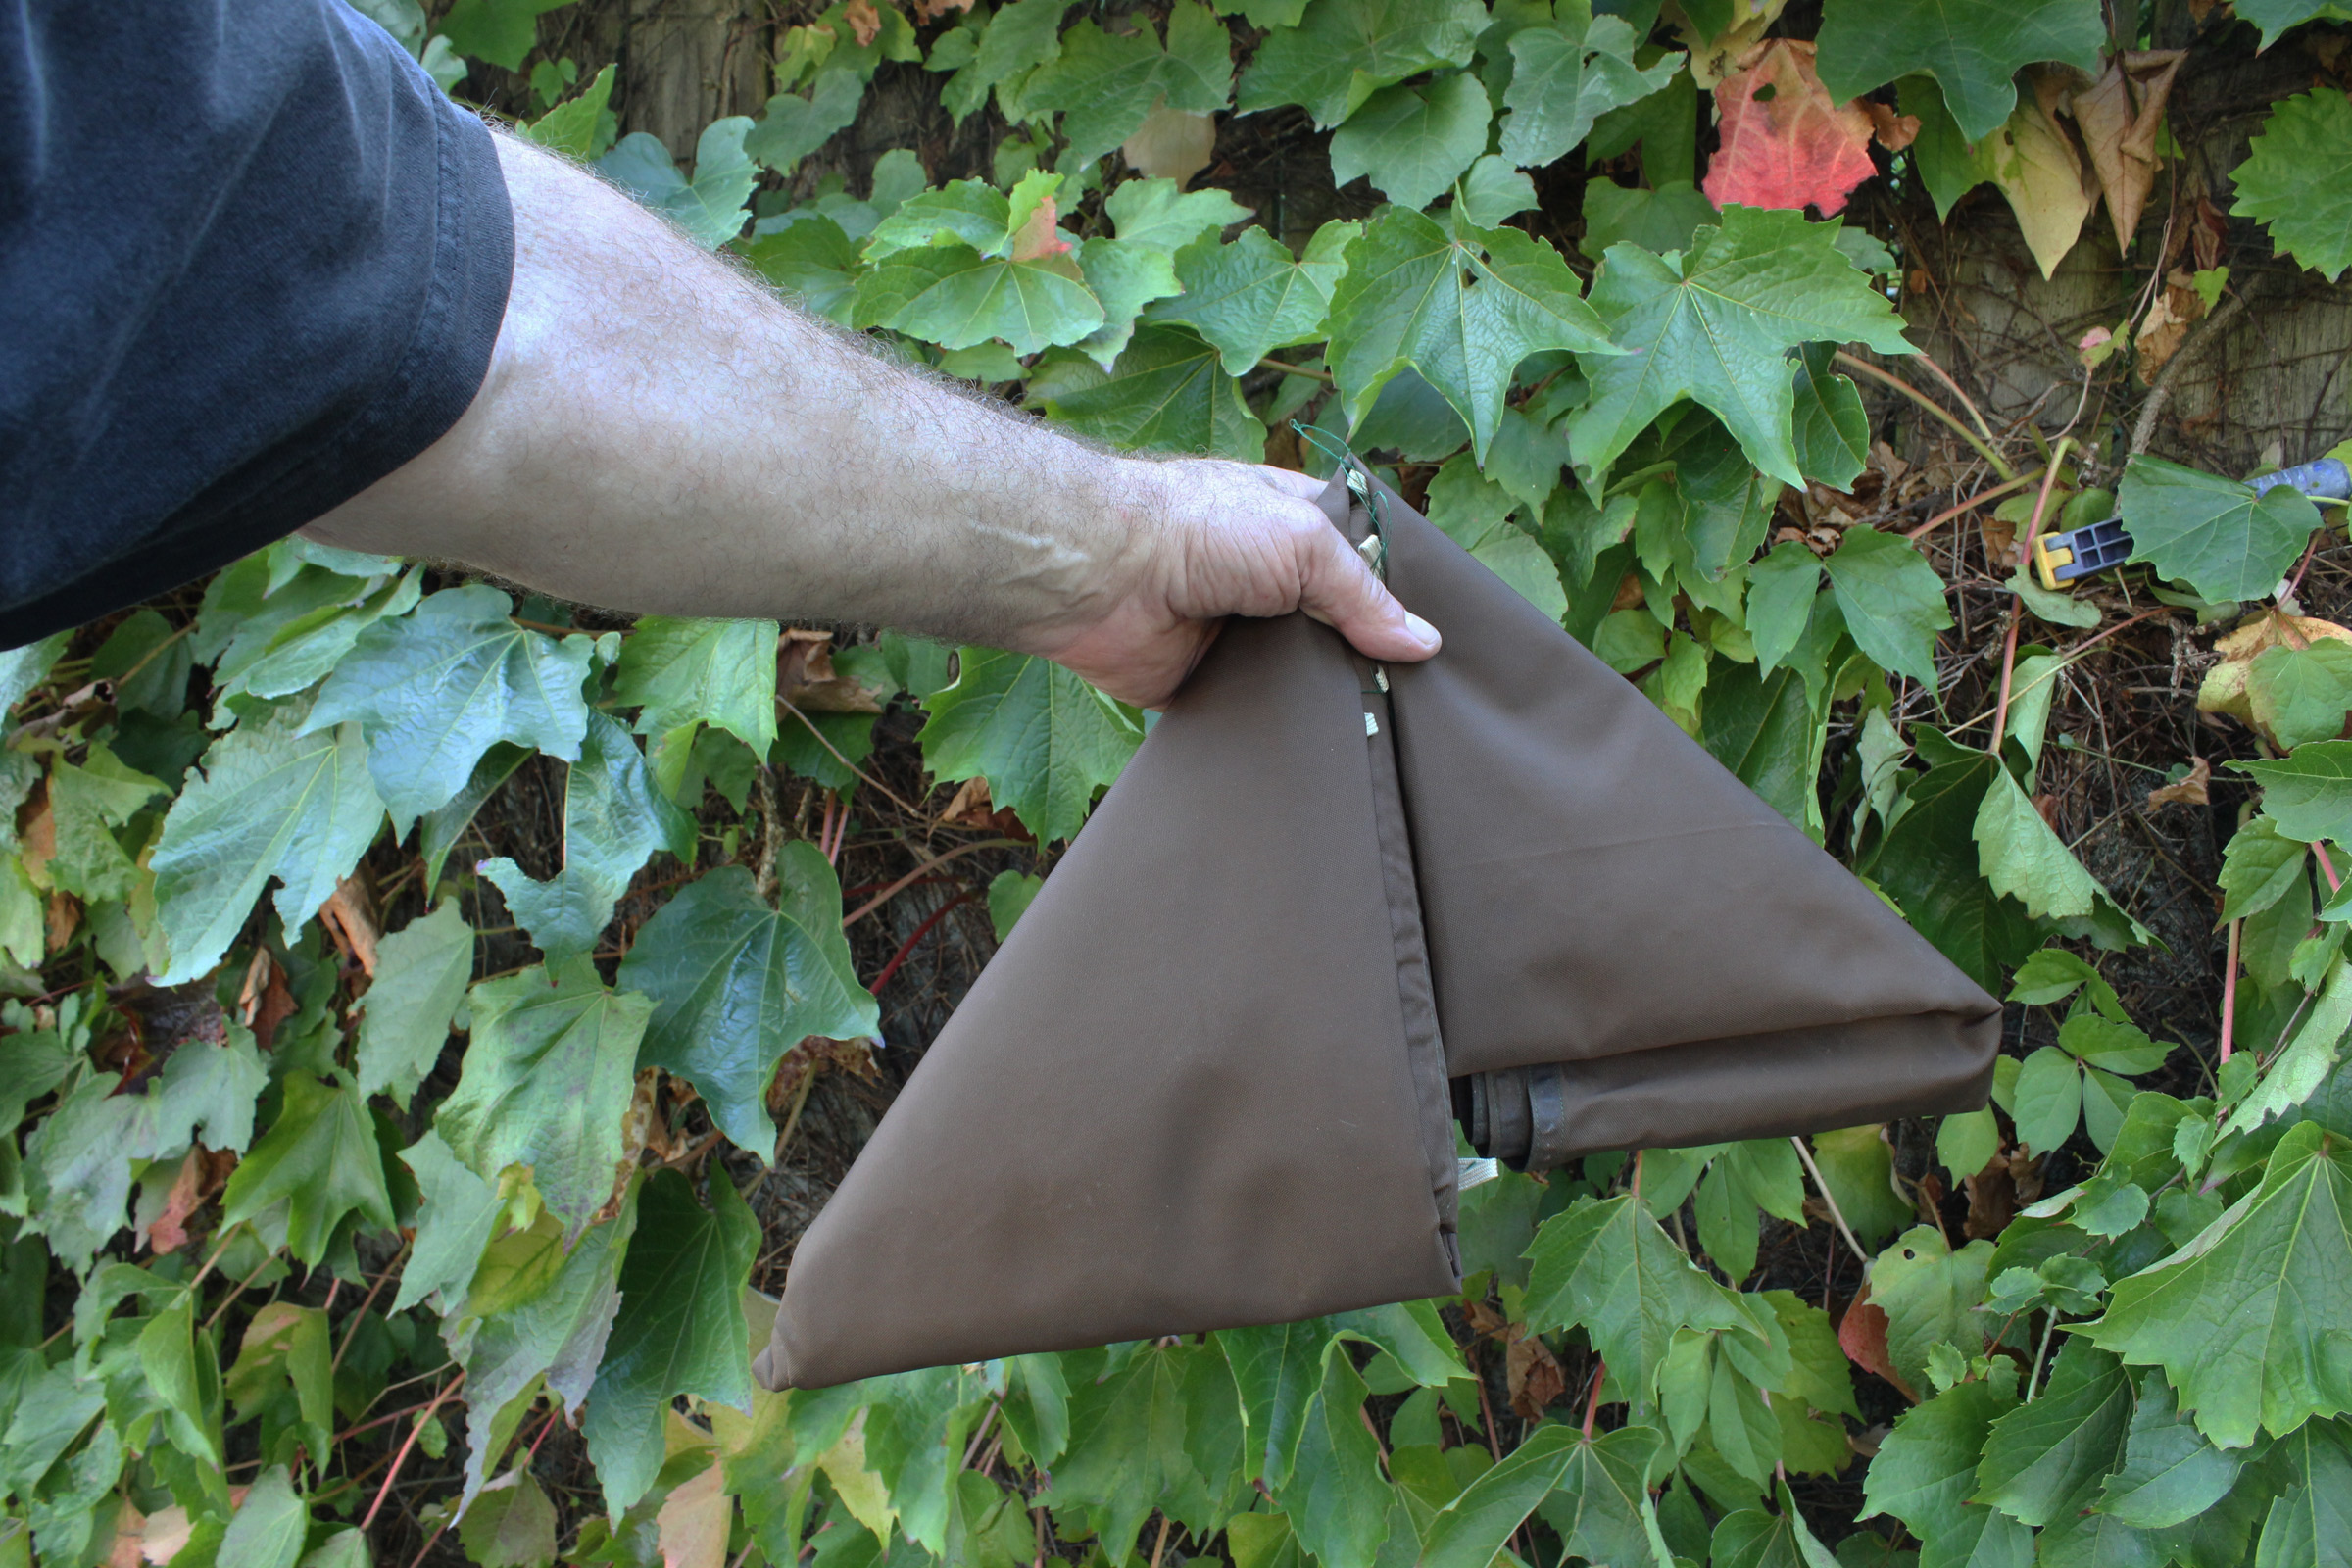
Fold the tail end to make a mirror-image triangle.

Tuck the tail end into the pocket of the triangle.
Throw the flag-folded tarp in the boat if you like—it won’t come undone.
IKEA Slats for a Sleeping Platform
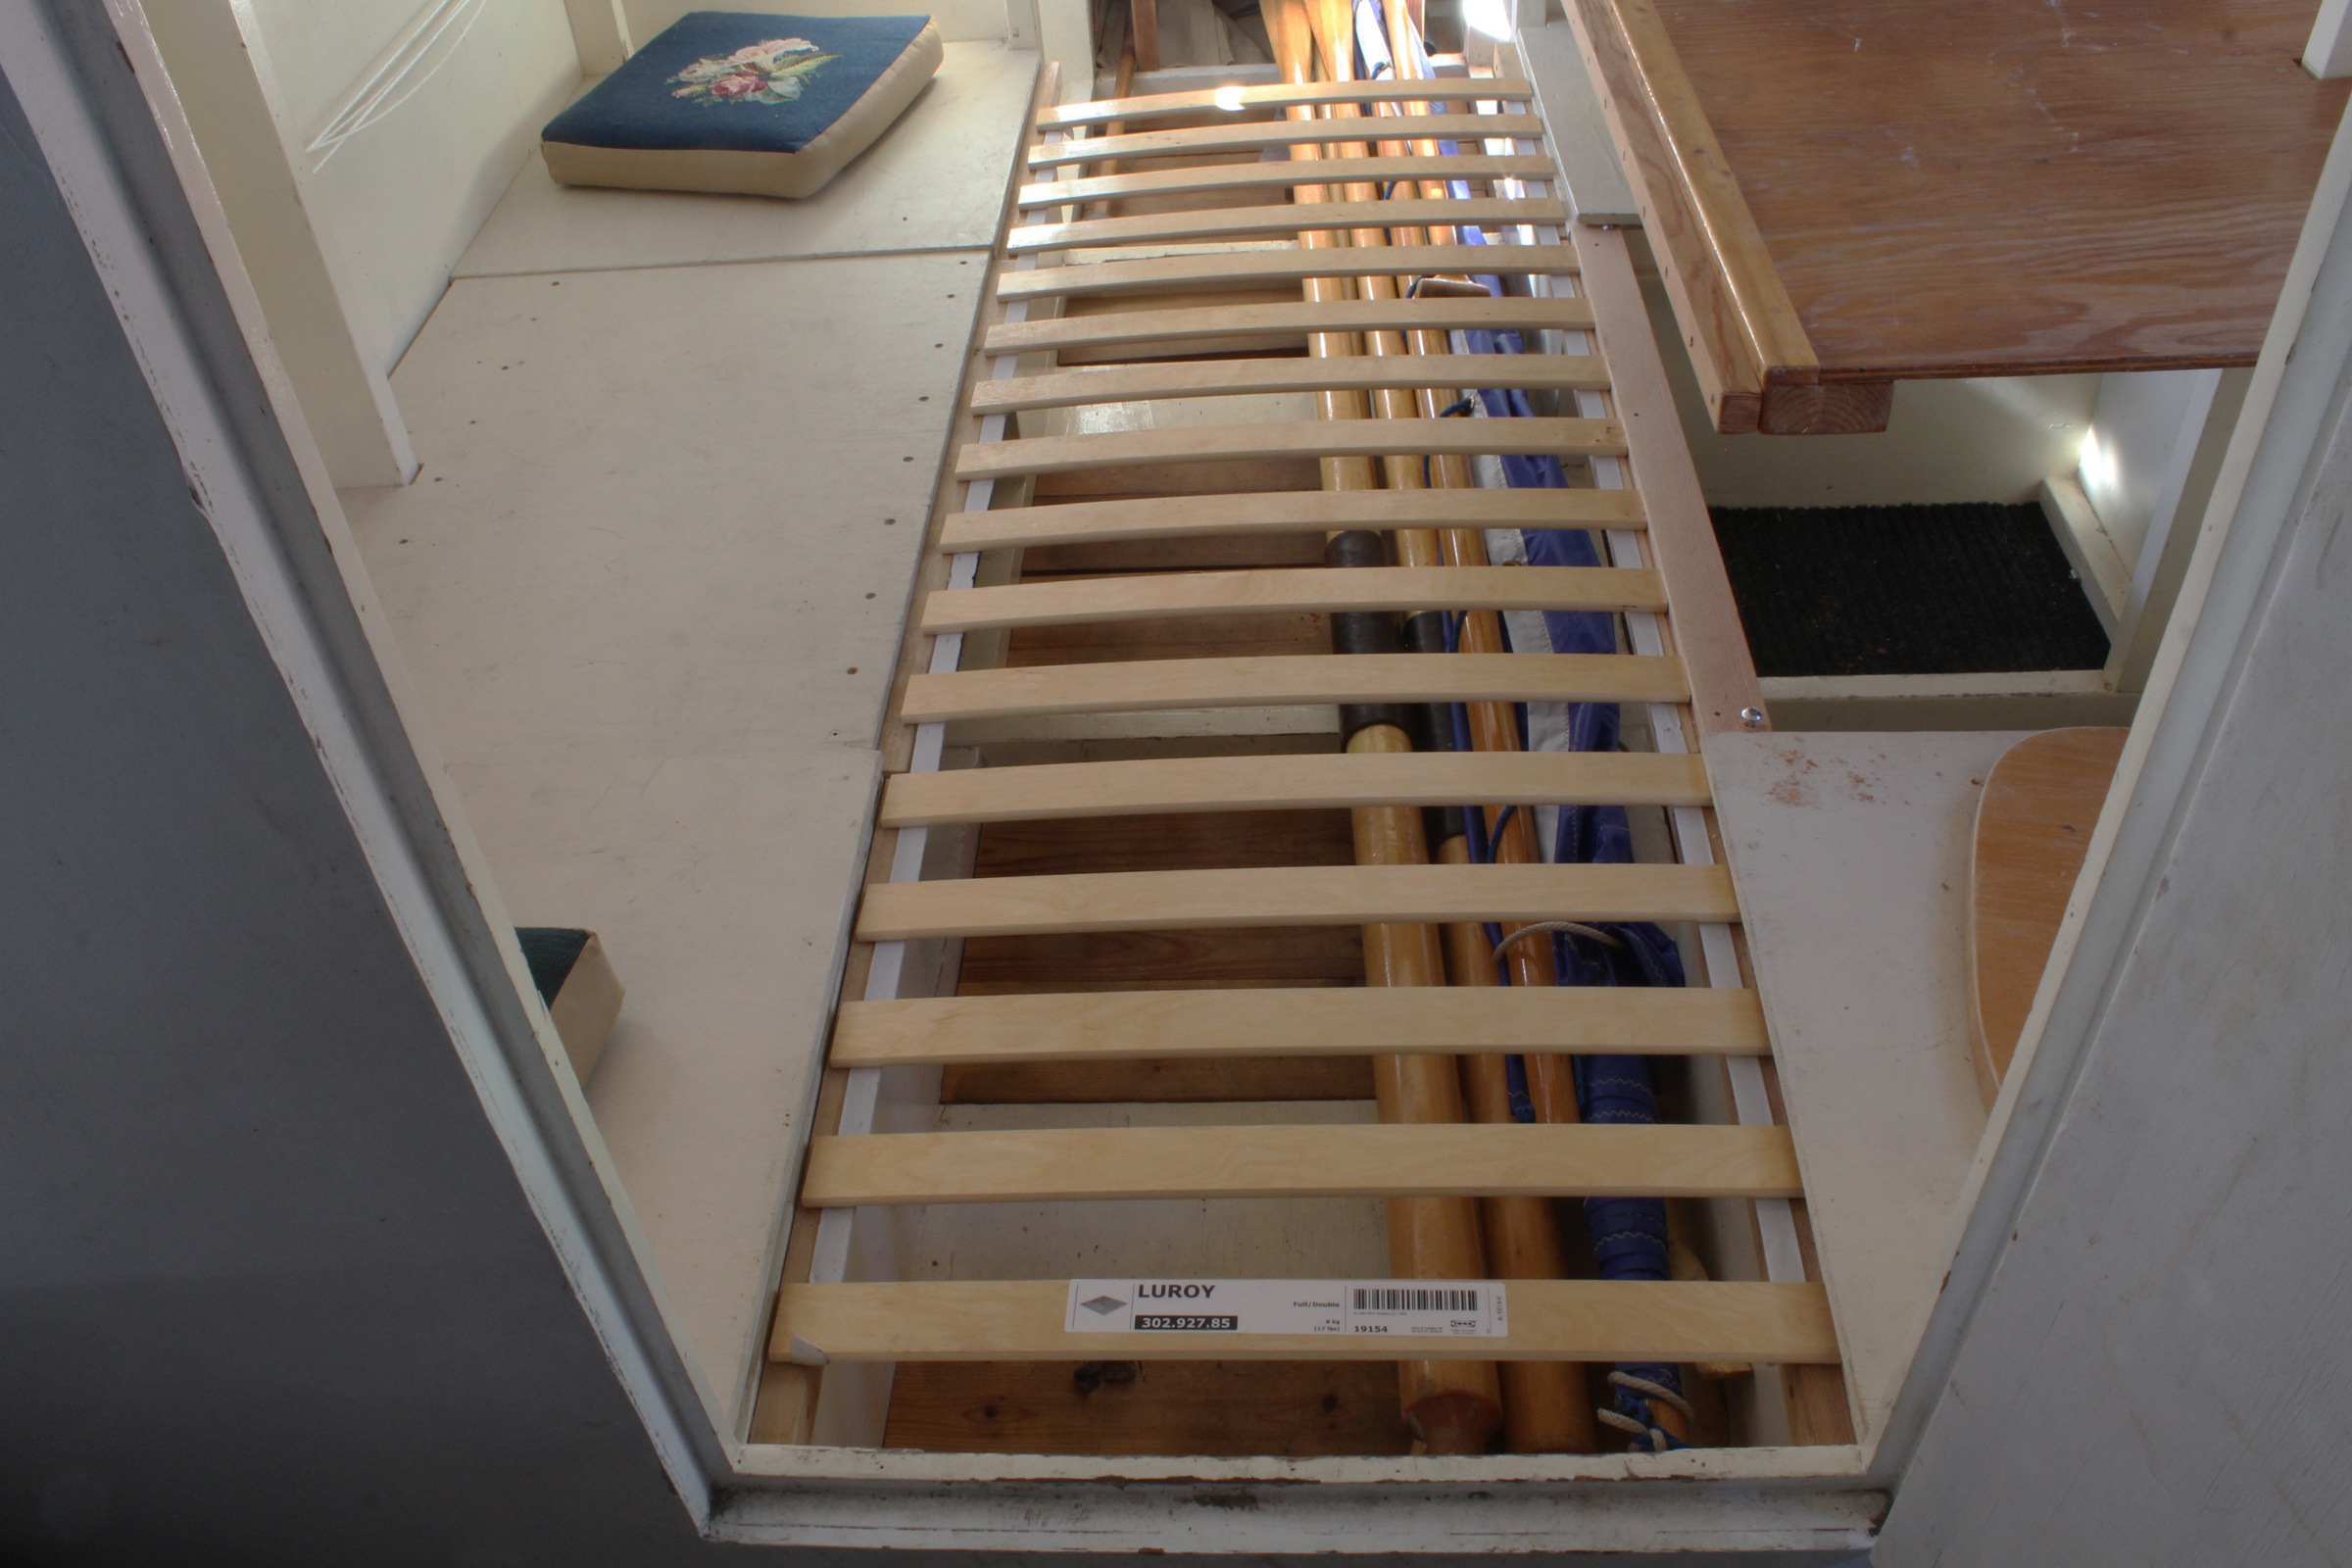
Resting on ledges on either side of the cabin passageway, the slats form a platform for a mattress. White polyester straps fastened to the bottom of the slats keep them together and evenly spaced.
One of our readers, Mike B., asked if I’d ever used IKEA bed slats to create a sleeping platform for overnight cruises. I hadn’t, but just happened to have a spare roll of 27-1/2″ (70 cm) slats for a double bed (Luröy), picked up free off a want ad, and a little canal boat that needed an upgrade for the bulky 3/4″ plywood panels we’d been using to create a sleeping platform in the cabin. The slats are slightly arched and made of 17 layers of hardwood veneer. The space for the slats is 24″ wide, so I had to trim them to fit. They’re joined by a pair of polyester ribbons, so I clamped the slats together and used a chop saw to take a bit off each end.
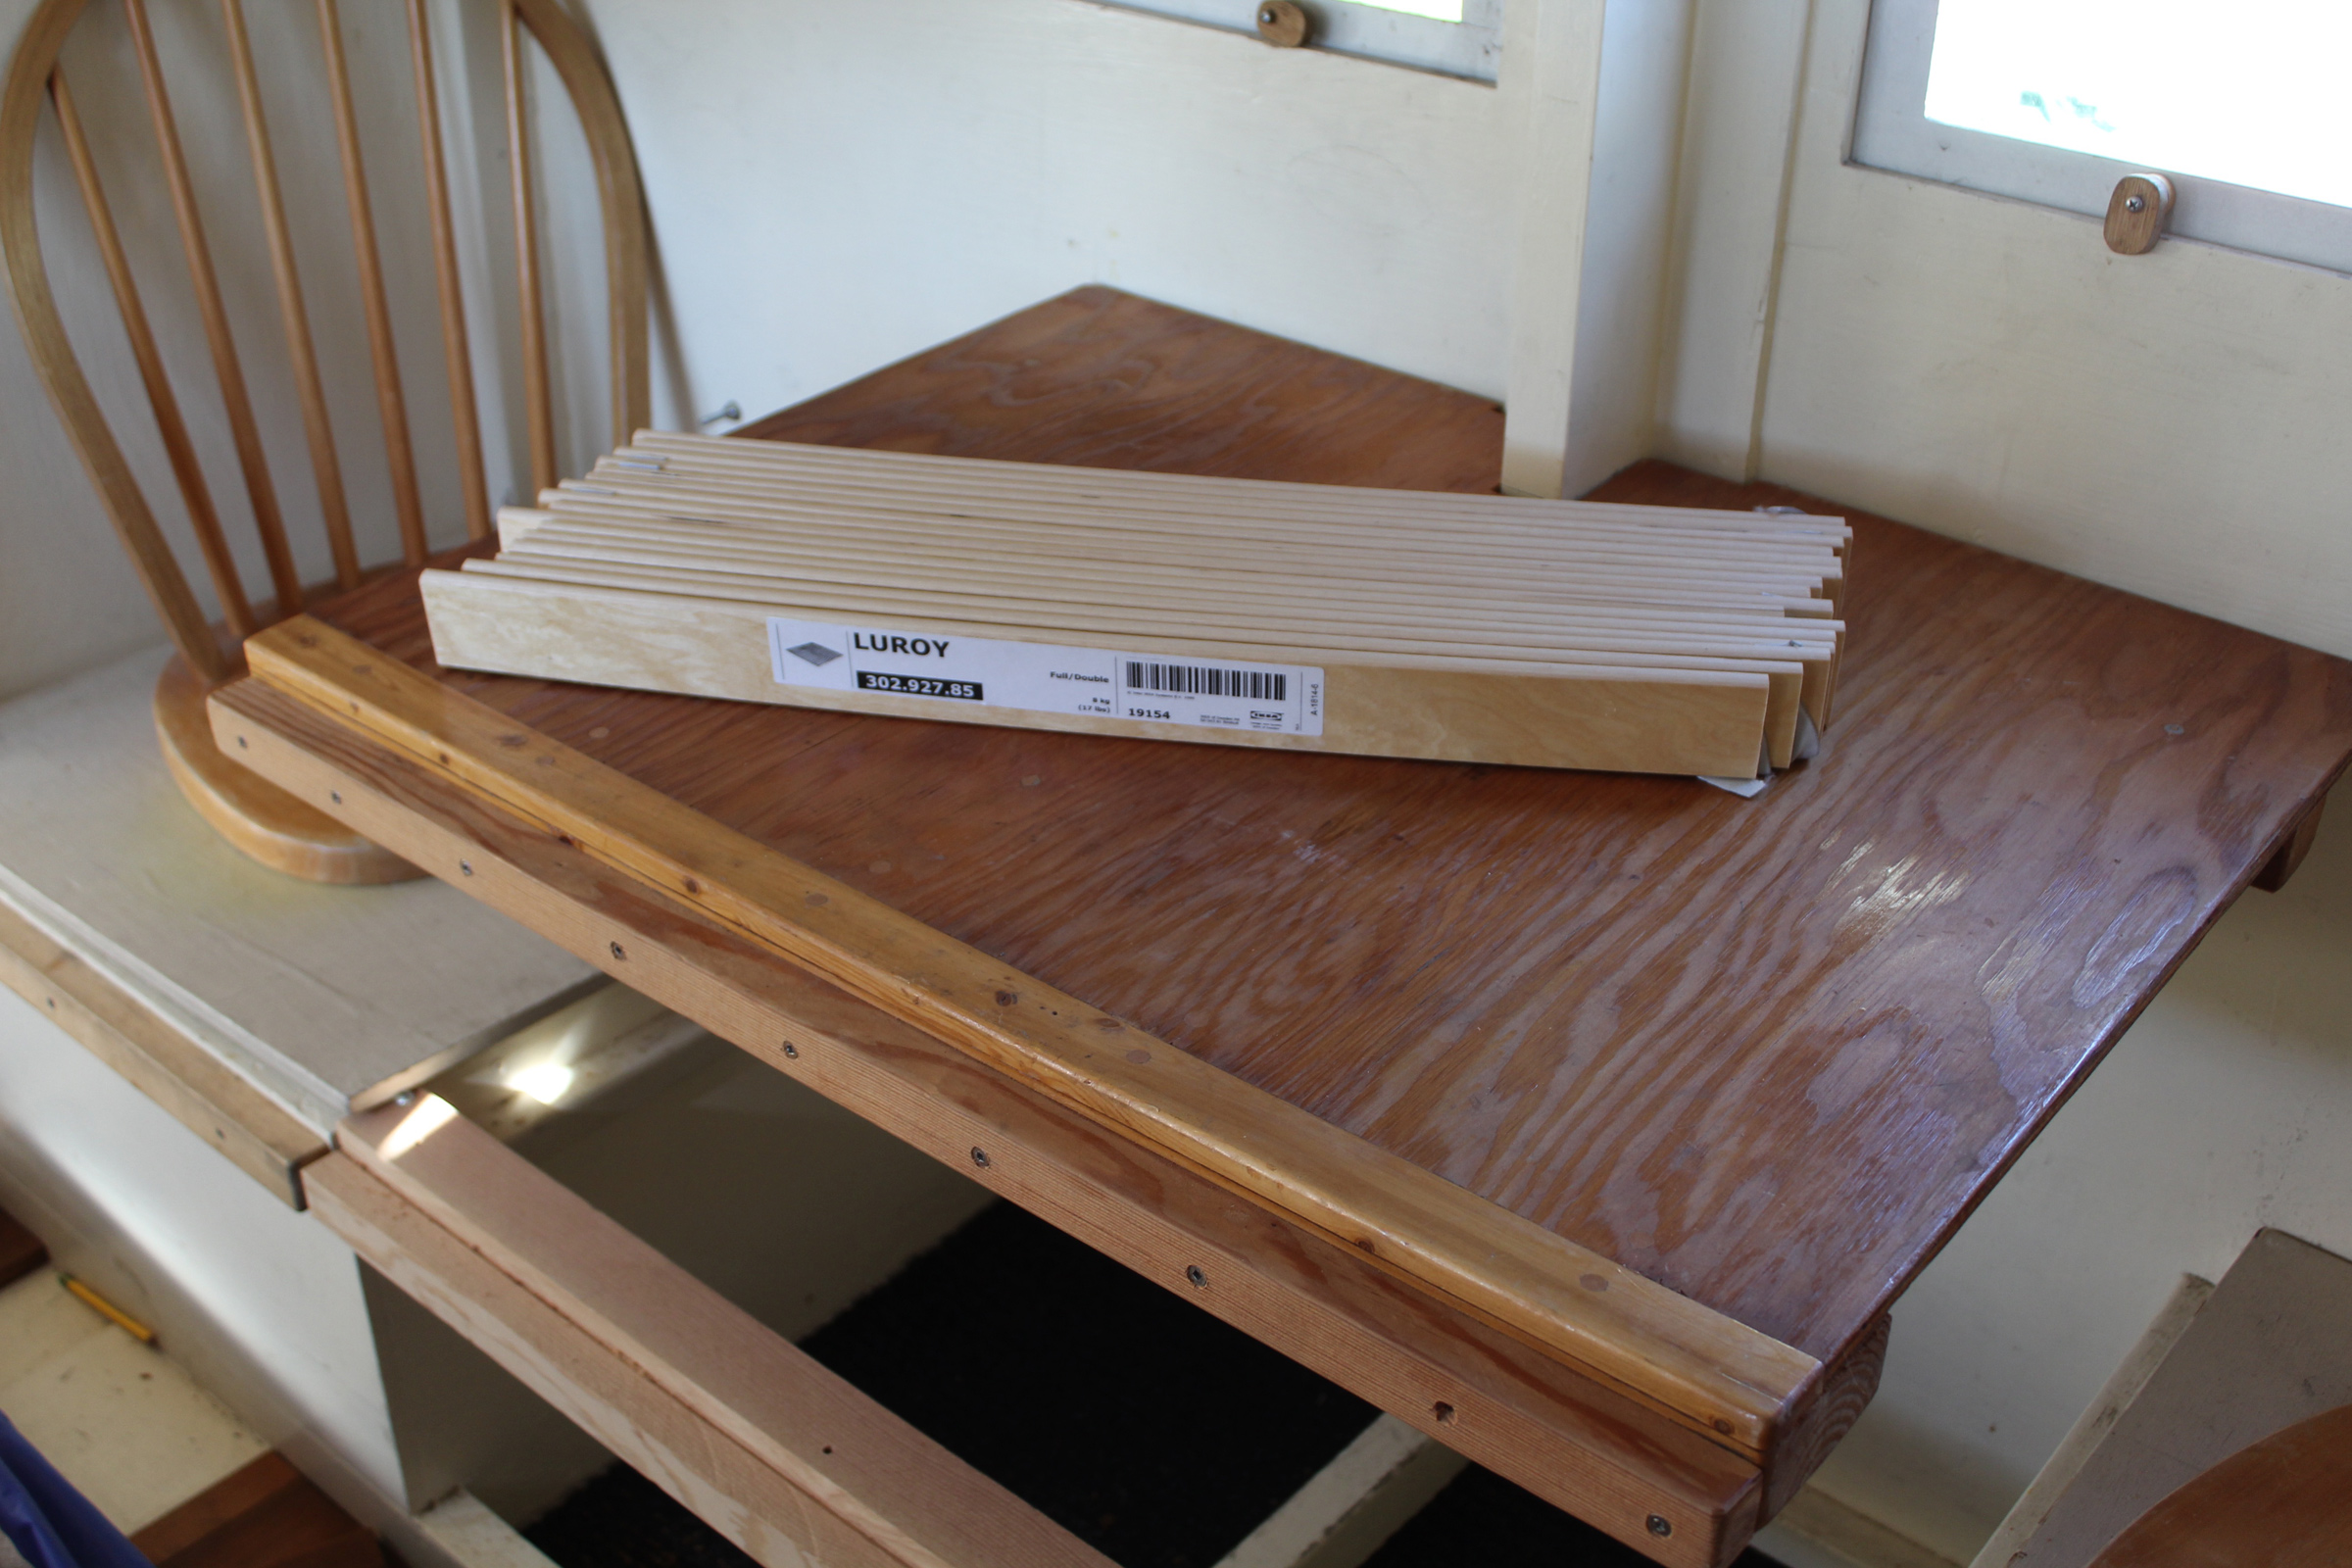
Stacked together, the slats take up very little room. The ledges for the slats are evident on the seats, on a beam spanning the gap under the table, and on the table itself when it’s lowered to create a queen-sized sleeping platform.
At night, the slats rest on ledges to either side of the passageway between the cabin’s side benches. Stops hold the slat at each end so the whole set is kept in place, just as they are on an IKEA bed, when a mattress is laid on top.
The slats are springy for comfort and are able to support a mattress and a sleeping crew member, just as they would in a bed frame. They’re easily stacked for storage, and take up much less space and weigh a lot less than plywood panels.![]()
Christopher Cunningham is editor of Small Boats Magazine.
You can share your tips and tricks of the trade with other Small Boats Magazine readers by sending us an email.
Rolling Relief for Boat Trailers
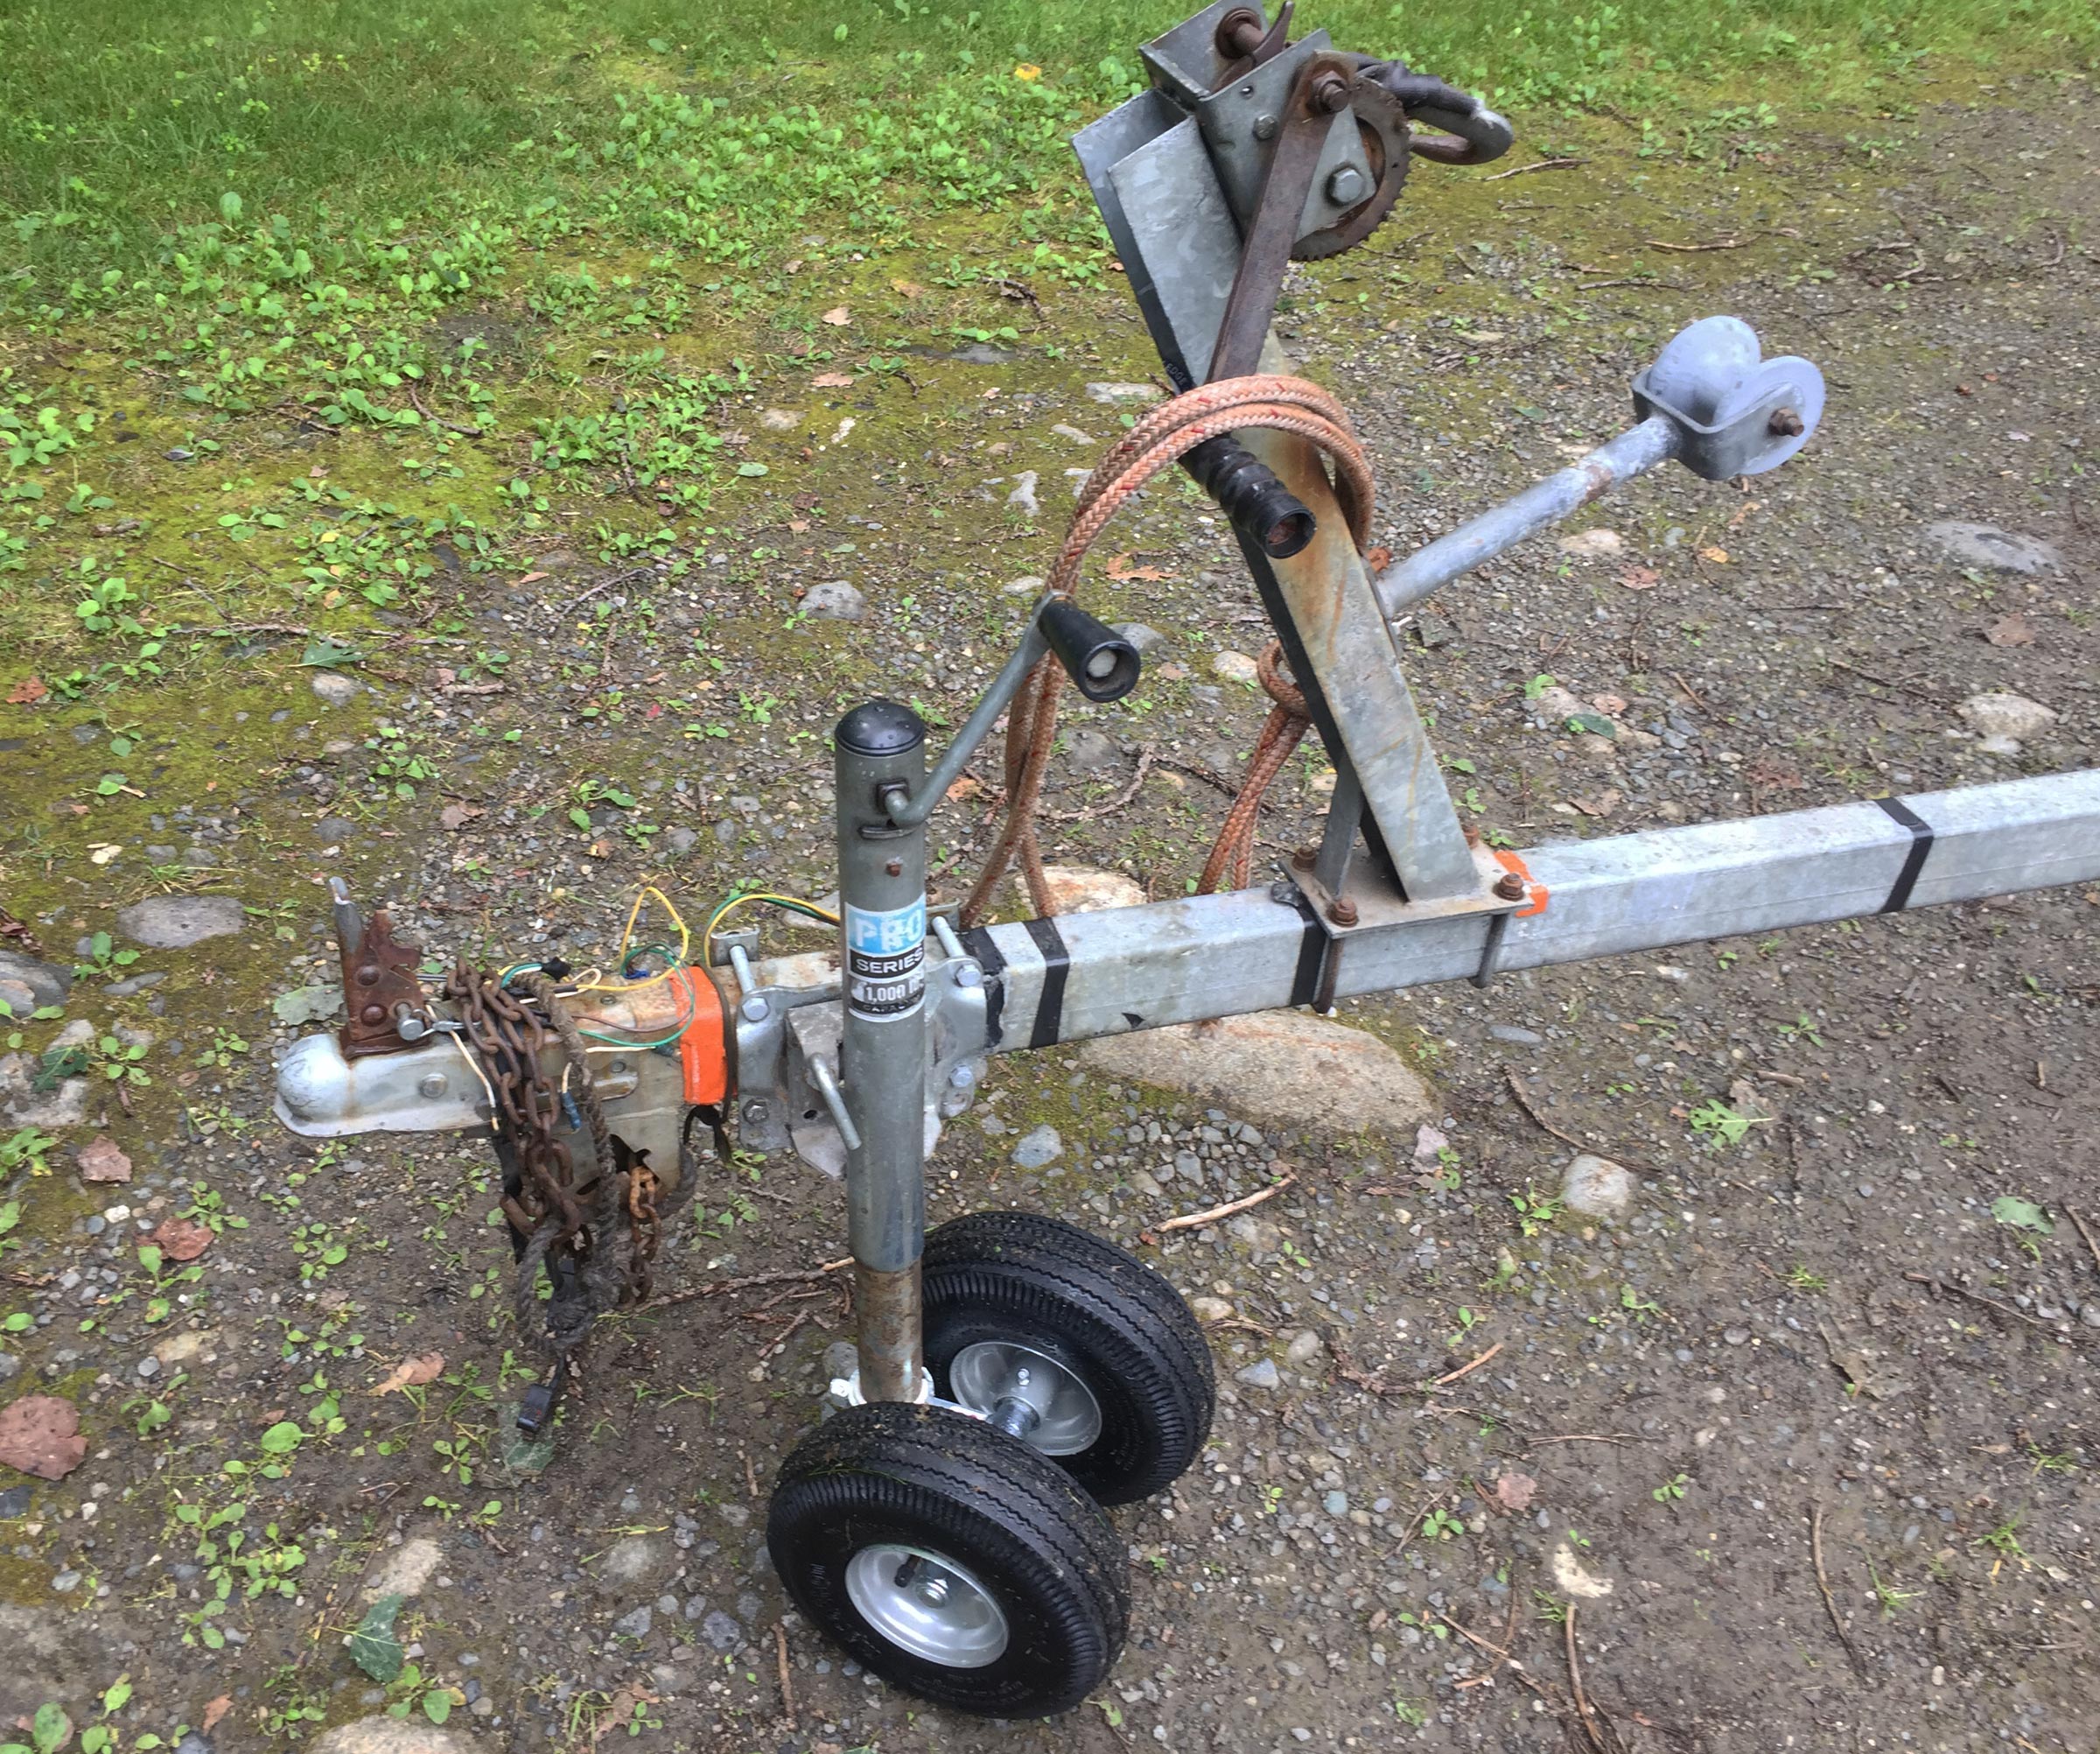
For years, decades really, I’ve struggled moving boat trailers around by hand. They always seem to be on grass or dirt; somehow I’ve never had the luxury of paving. My jack wheels can create a lot of serious drag in grass, and they’ll dig holes in dirt when I straighten them out.
A thread on the WoodenBoat Forum, an immensely valuable resource for me, addressed this problem. “Thorne,” the forum member who started the thread, discovered Croft Trailer Supply in Kansas City, Missouri, not a place I’d think of for boating gear. Croft makes a pneumatic-wheel kit with dual 10″ wheels. The plated-steel hubs have grease fittings to lubricate the axle and bushings. Between the wheels is a plated-steel caster plate with a 2″ socket.
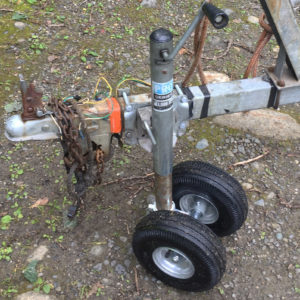
 Photographs by the author
The two 10″ pneumatic tires provide lots of support on soft ground. The rope coiled around the winch post is what the author uses to pull the trailer; the jack-stand wheels follow on their own. The grease fitting for the far wheel is visible on the inside of the hub.
Several forum users bought the Croft wheel kit. One was especially interested in using the wheels with a light aluminum trailer that he pushes by hand across sand. At $90, the kit seemed pricey, but the other option I’d considered, a two-wheeled hand dolly, costs about the same. I often need to move the trailer when I’m away from home, and a hand dolly isn’t easy to carry along. So, I went ahead and got the kit.
To fit it to my existing jack stand, I had to cut off the welded-on caster wheel. It could have been done with a hacksaw, but it was much faster to use a grinder with a cut-off wheel, while wearing, of course, gloves, a full face shield, and ear protectors against the sparks and noise.
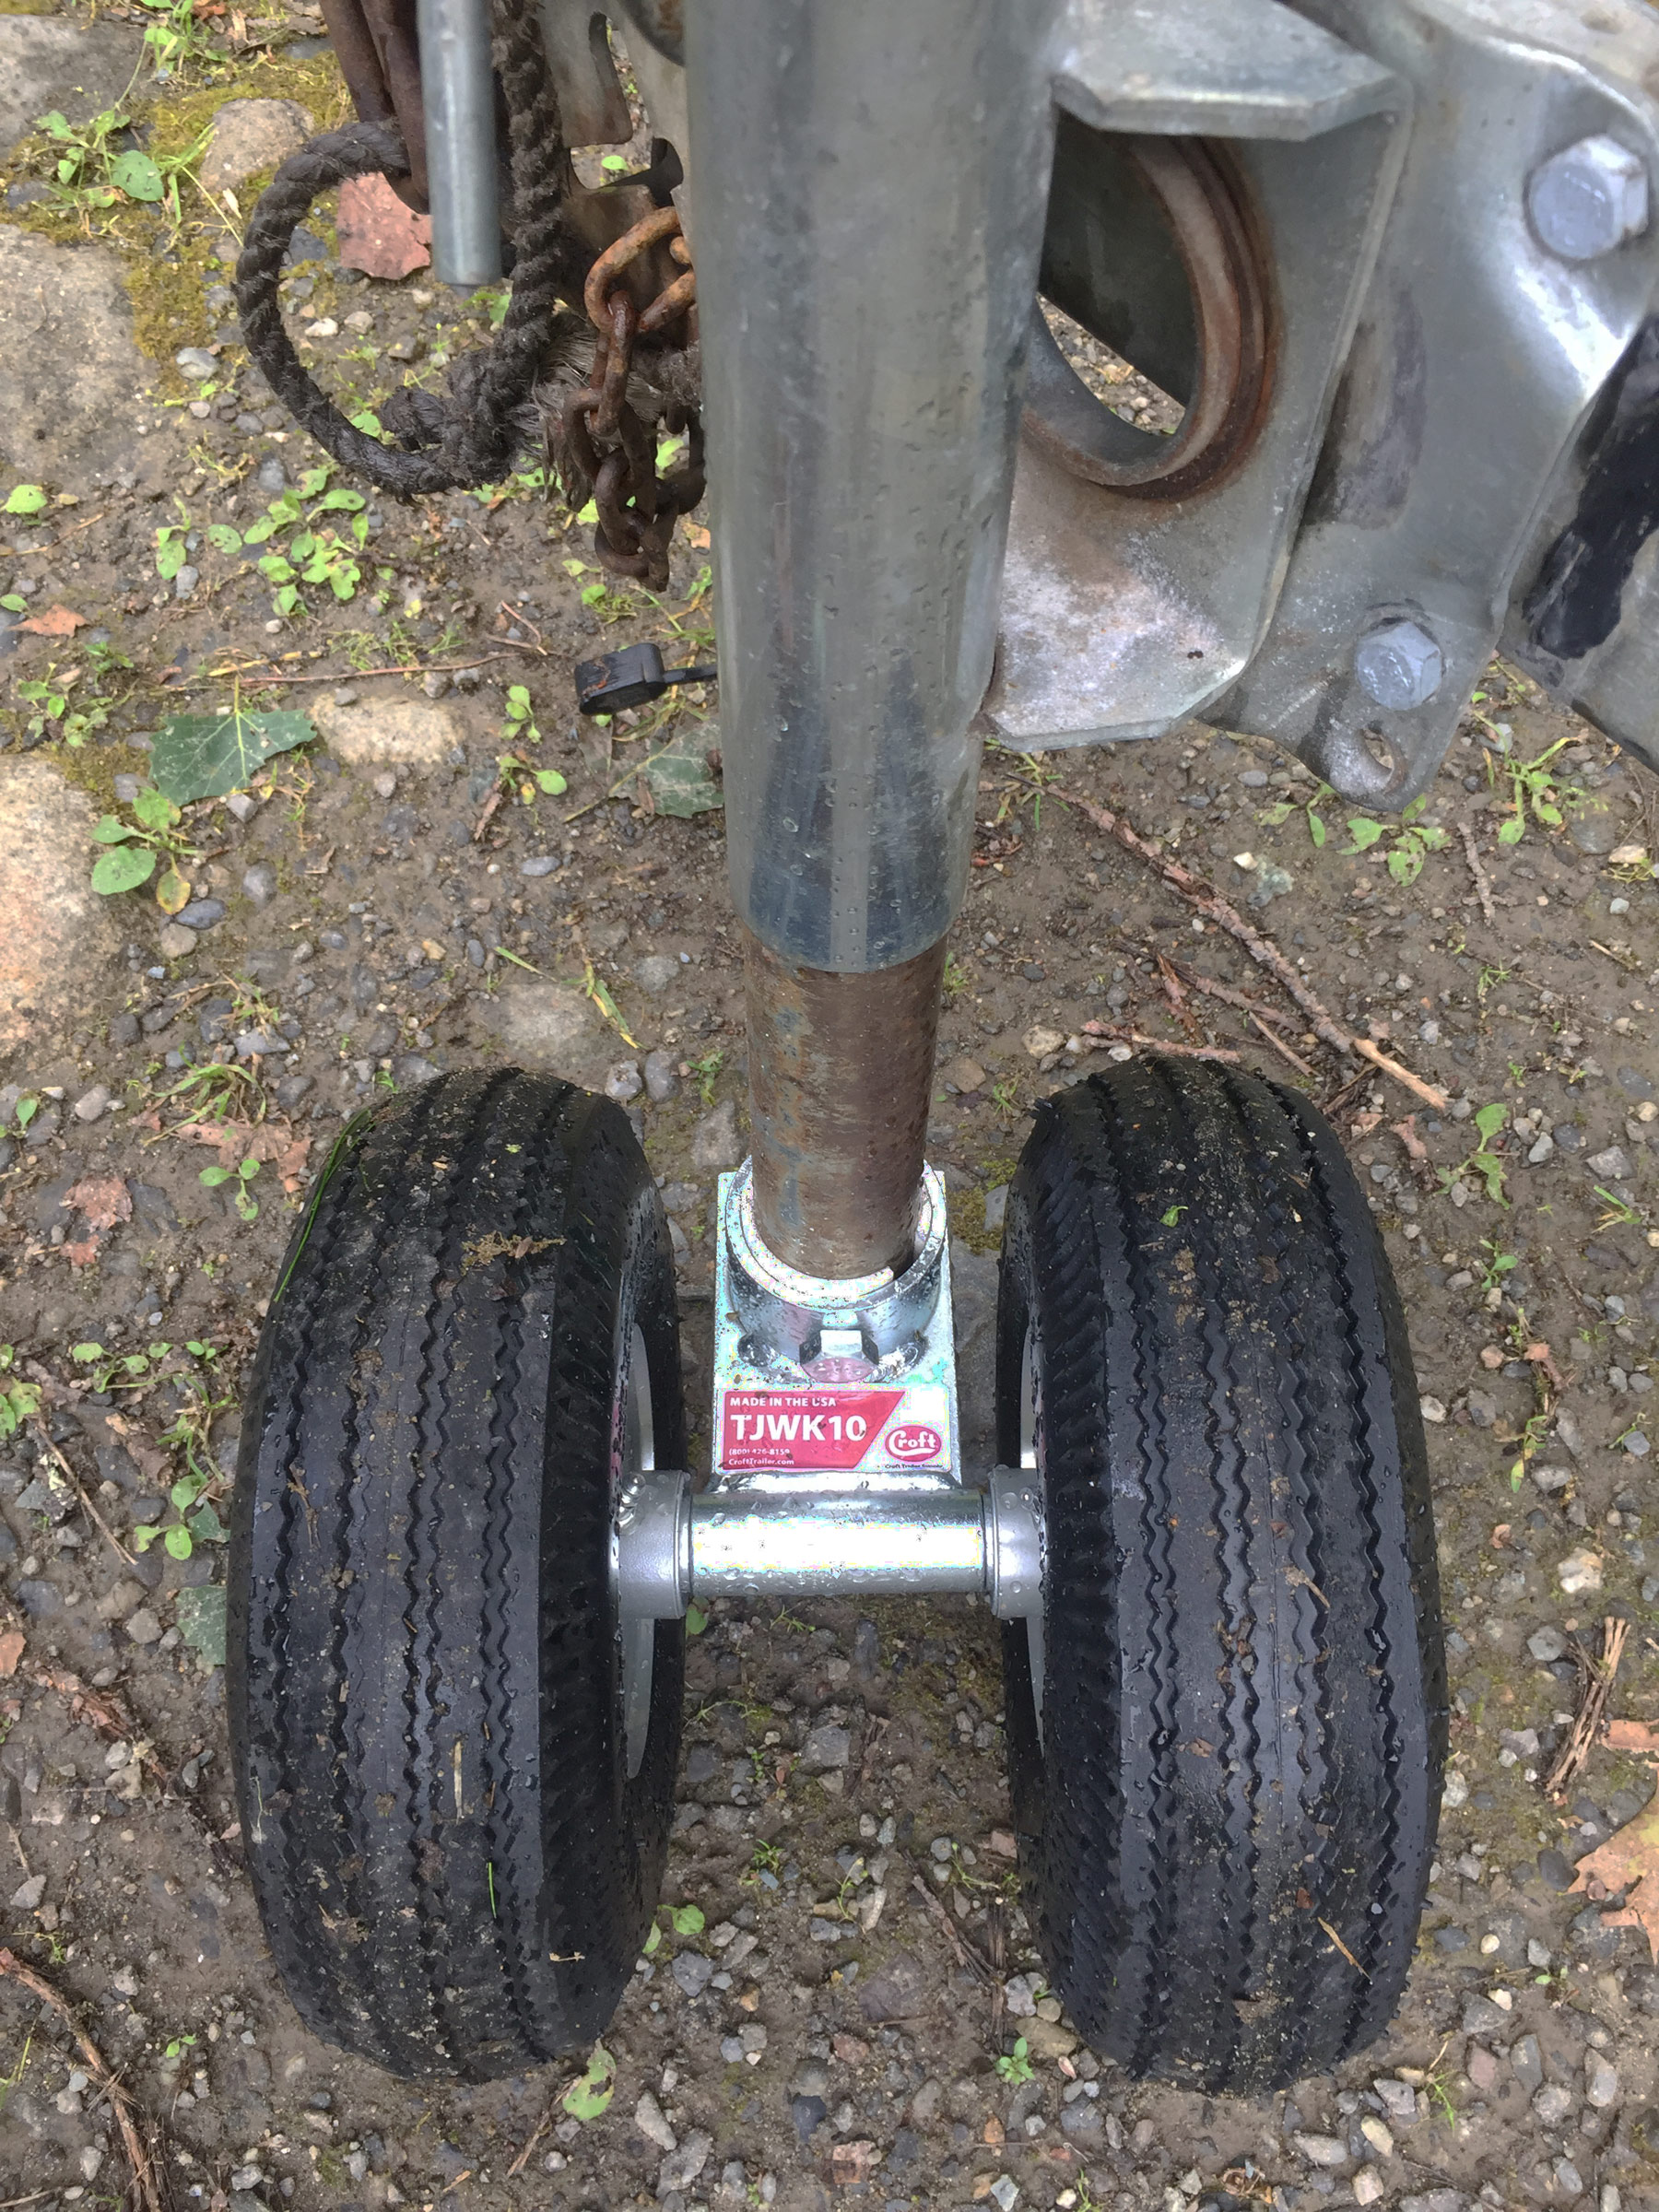
The caster plate is bolted to the jack-stand’s extending tube, which must be able to rotate for the wheels to pivot. The author’s plastic-pipe adapter, with a small gap where it it split, is visible here.
The Croft caster plate is built to fit a rotating 2″ jack tube. Mine was only 1-1/2″ in diameter, so it needed a bushing to fit snugly. One of the forum users found a bronze pipe of the right size, and there is mild steel tubing with a 2″ outer diameter and a 1-1/2″ inner diameter, but I happened to have a piece of 1-1/2″ PVC pipe. I cut a short length of it, then sawed a slot in it so I could open it up to fit around the tube. The pipe was a bit too thick, so I used my angle grinder with an 80-grit disc to thin it down for a snug fit in the caster-plate socket.
The caster plate’s socket is fitted with a 1/2″ bolt, so I needed to drill a matching hole through the tube and PVC. My 1/2″ drill bit was not up to the task, so I invested in a hardened metal bit at about twice the cost. Chucked into my 20-volt battery-powered drill, it did the job just fine. You need to be careful when drilling through metal: When the bit breaks through the back side, the tip of the bit can catch and set a piece of metal spinning or, if the metal is well anchored, wrench the drill out of your hand.
Even with the two oversize wheels, the jack will still fold away. With the wheels down, I can now push and pull the trailer easily over grass and dirt. Gone is the struggle. I like my new “four-wheel trailer” so much that if I were to get another trailer, I’d move my upgraded jack to it.![]()
Ben Fuller, curator of the Penobscot Marine Museum in Searsport, Maine, has been messing about in small boats for a very long time. He is owned by a dozen or more boats ranging from an International canoe to a faering.
The pneumatic wheel kit is available from Croft for $182.95 plus shipping. Price current as of June 2024.
Is there a product that might be useful for boatbuilding, cruising, or shore-side camping that you’d like us to review? Please email your suggestions.
Dust Deputy Cyclone Separator
We do a lot of sanding for our small-boat restorations and builds, and have relied upon a shop vacuum to collect dust. It does the job but leaves us with bags to empty and filters to clean or replace, which is messy and costly. That changed when we bought an Oneida Dust Deputy cyclone separator to collect the dust on its way to the Shop-Vac. The device uses the centrifugal force of a cyclonic airflow to separate dust and heavier particles, drops the debris into a collection bucket, and sends cleaned air to the vacuum. The collection bucket is easy to empty, and we can use the Shop-Vac without the HEPA bags and even without them, the filter rarely needs to be cleaned.
 Photograph by the authors
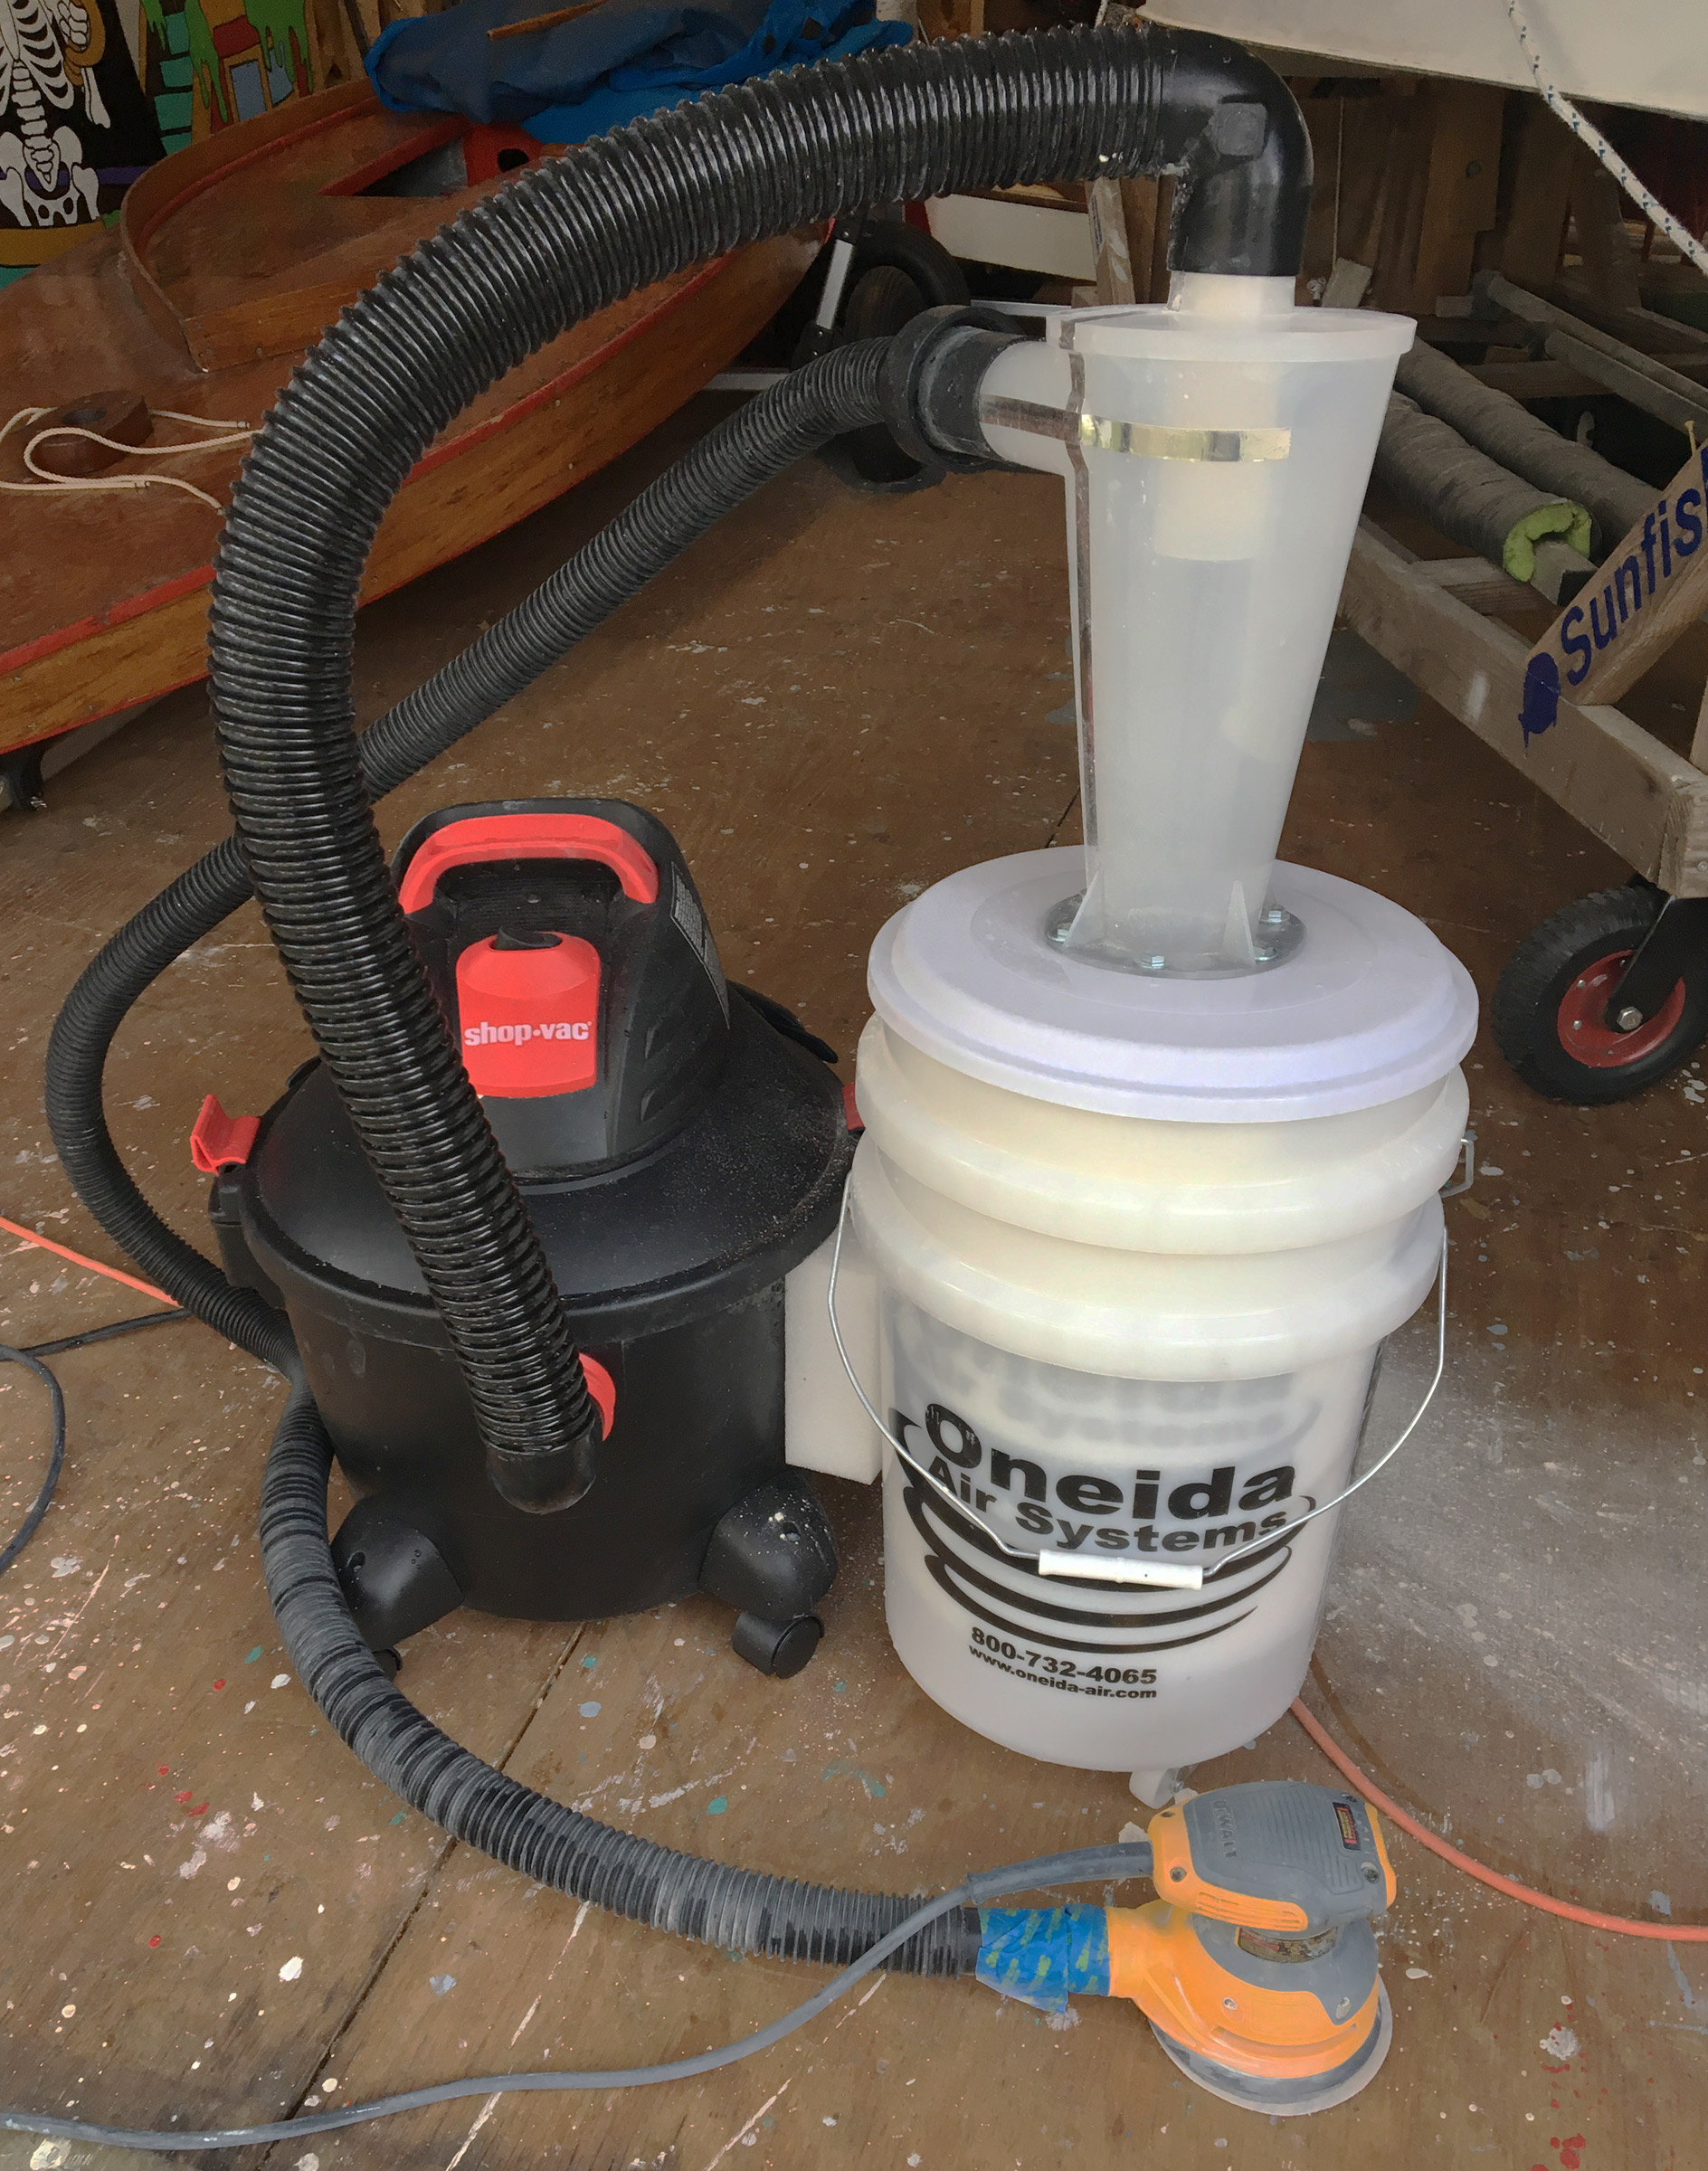
The kit for the Dust Deputy includes a pair of 5-gallon buckets: one to gather dust or even water, and another nested below it that has casters and an attachment to the Shop Vac so the whole system can move as one unit.
We bought an Oneida “deluxe kit” that includes the cyclonic separator, a 3′ hose with two elbow adapters, and two 5-gallon buckets, one to collect dust, the other, equipped with casters, to be connected to the Shop-Vac as a “sidecar” to carry the other bucket. The cyclonic separator can also be purchased separately for attachment to different collection buckets and or to fit to larger collection bins. After attaching the sidecar with the hardware provided, we used our ShopVac hose to connect the Dust Deputy to our various sanders, thickness planer, crevice tool, bristle brush, and floor brush.
The Dust Deputy easily handled sanding two coats of epoxy paint off a Sunfish, and when we were finished we had filled about one-quarter of the 5-gallon bucket with dust and had very little material inside the Shop-Vac. For another job, we ran some cypress through a thickness planer, and without the Dust Deputy, the Shop-Vac would have filled a disposable bag almost immediately; with the Dust Deputy we easily collected and emptied the 5-gallon bucket of shavings.
We continue to use the HEPA filter in our Shop-Vac without the HEPA bags to keep the air as clean as possible and have noticed a visible reduction in dust around our shop. Since the filter doesn’t get caked with dust, the vacuum always pulls with full power. We get excellent performance cleaning up the sawdust, wood chips, and other debris that collects on the floor. Any debris that can pass through the 2″ hose, things like pine needles and small leaves and the occasional wood screw, can get through the cyclone. There are no moving parts to reduce airflow or to damage, and the parts are easy to rinse off.
The small Dust Deputy kit, attached to the Shop-Vac, is mobile, and we move it all around our shop and outdoors. It took a few minutes to get used to the extra bucket following the Shop-Vac around, but the superior air quality and cleaner work environment are well worth it. Many folks build a cart and stack the Dust Deputy over their vacuum for a smaller footprint, and to keep all the attachments together.
The Shop-Vac bags are no longer needed, the filter will very rarely have to be replaced, and the Dust Deputy will pay for itself with the savings. We are having fun using it and appreciate the better dust removal, freedom from cleaning the filter, and higher-capacity debris collection.![]()
Kent and Audrey Lewis mess about in small boats on the Emerald Coast of Florida. Their blog can be found at smallboatrestoration.blogspot.com.
The Dust Deputy Deluxe Cyclone Separator Kit is available from Oneida Air Systems for $99.95. The kist is also sold by online andOneida’s selected international retailers.
Is there a product that might be useful for boatbuilding, cruising, or shore-side camping that you’d like us to review? Please email your suggestions.
The Kingfisher Elective
Glenn Joyner, after 43 years as an educator, decided to retire and delivered his notice of retirement to the administrators of John Paul II Catholic High School (known as JPII) in Greenville, North Carolina. Glenn had served as the school’s first principal when it opened in 2010, and a few years later he took on a position as an English teacher. The school community was reluctant to let him go, and at the annual spring banquet one of the school’s benefactors asked Glenn what it would take to get him to stay. Glenn said, half joking, “Build me a boatshop on campus and let me teach boatbuilding instead of English.” The school took the deal, built a campus boatshop, and Glenn stayed on.
 Photographs by or courtesy of Glenn Joyner
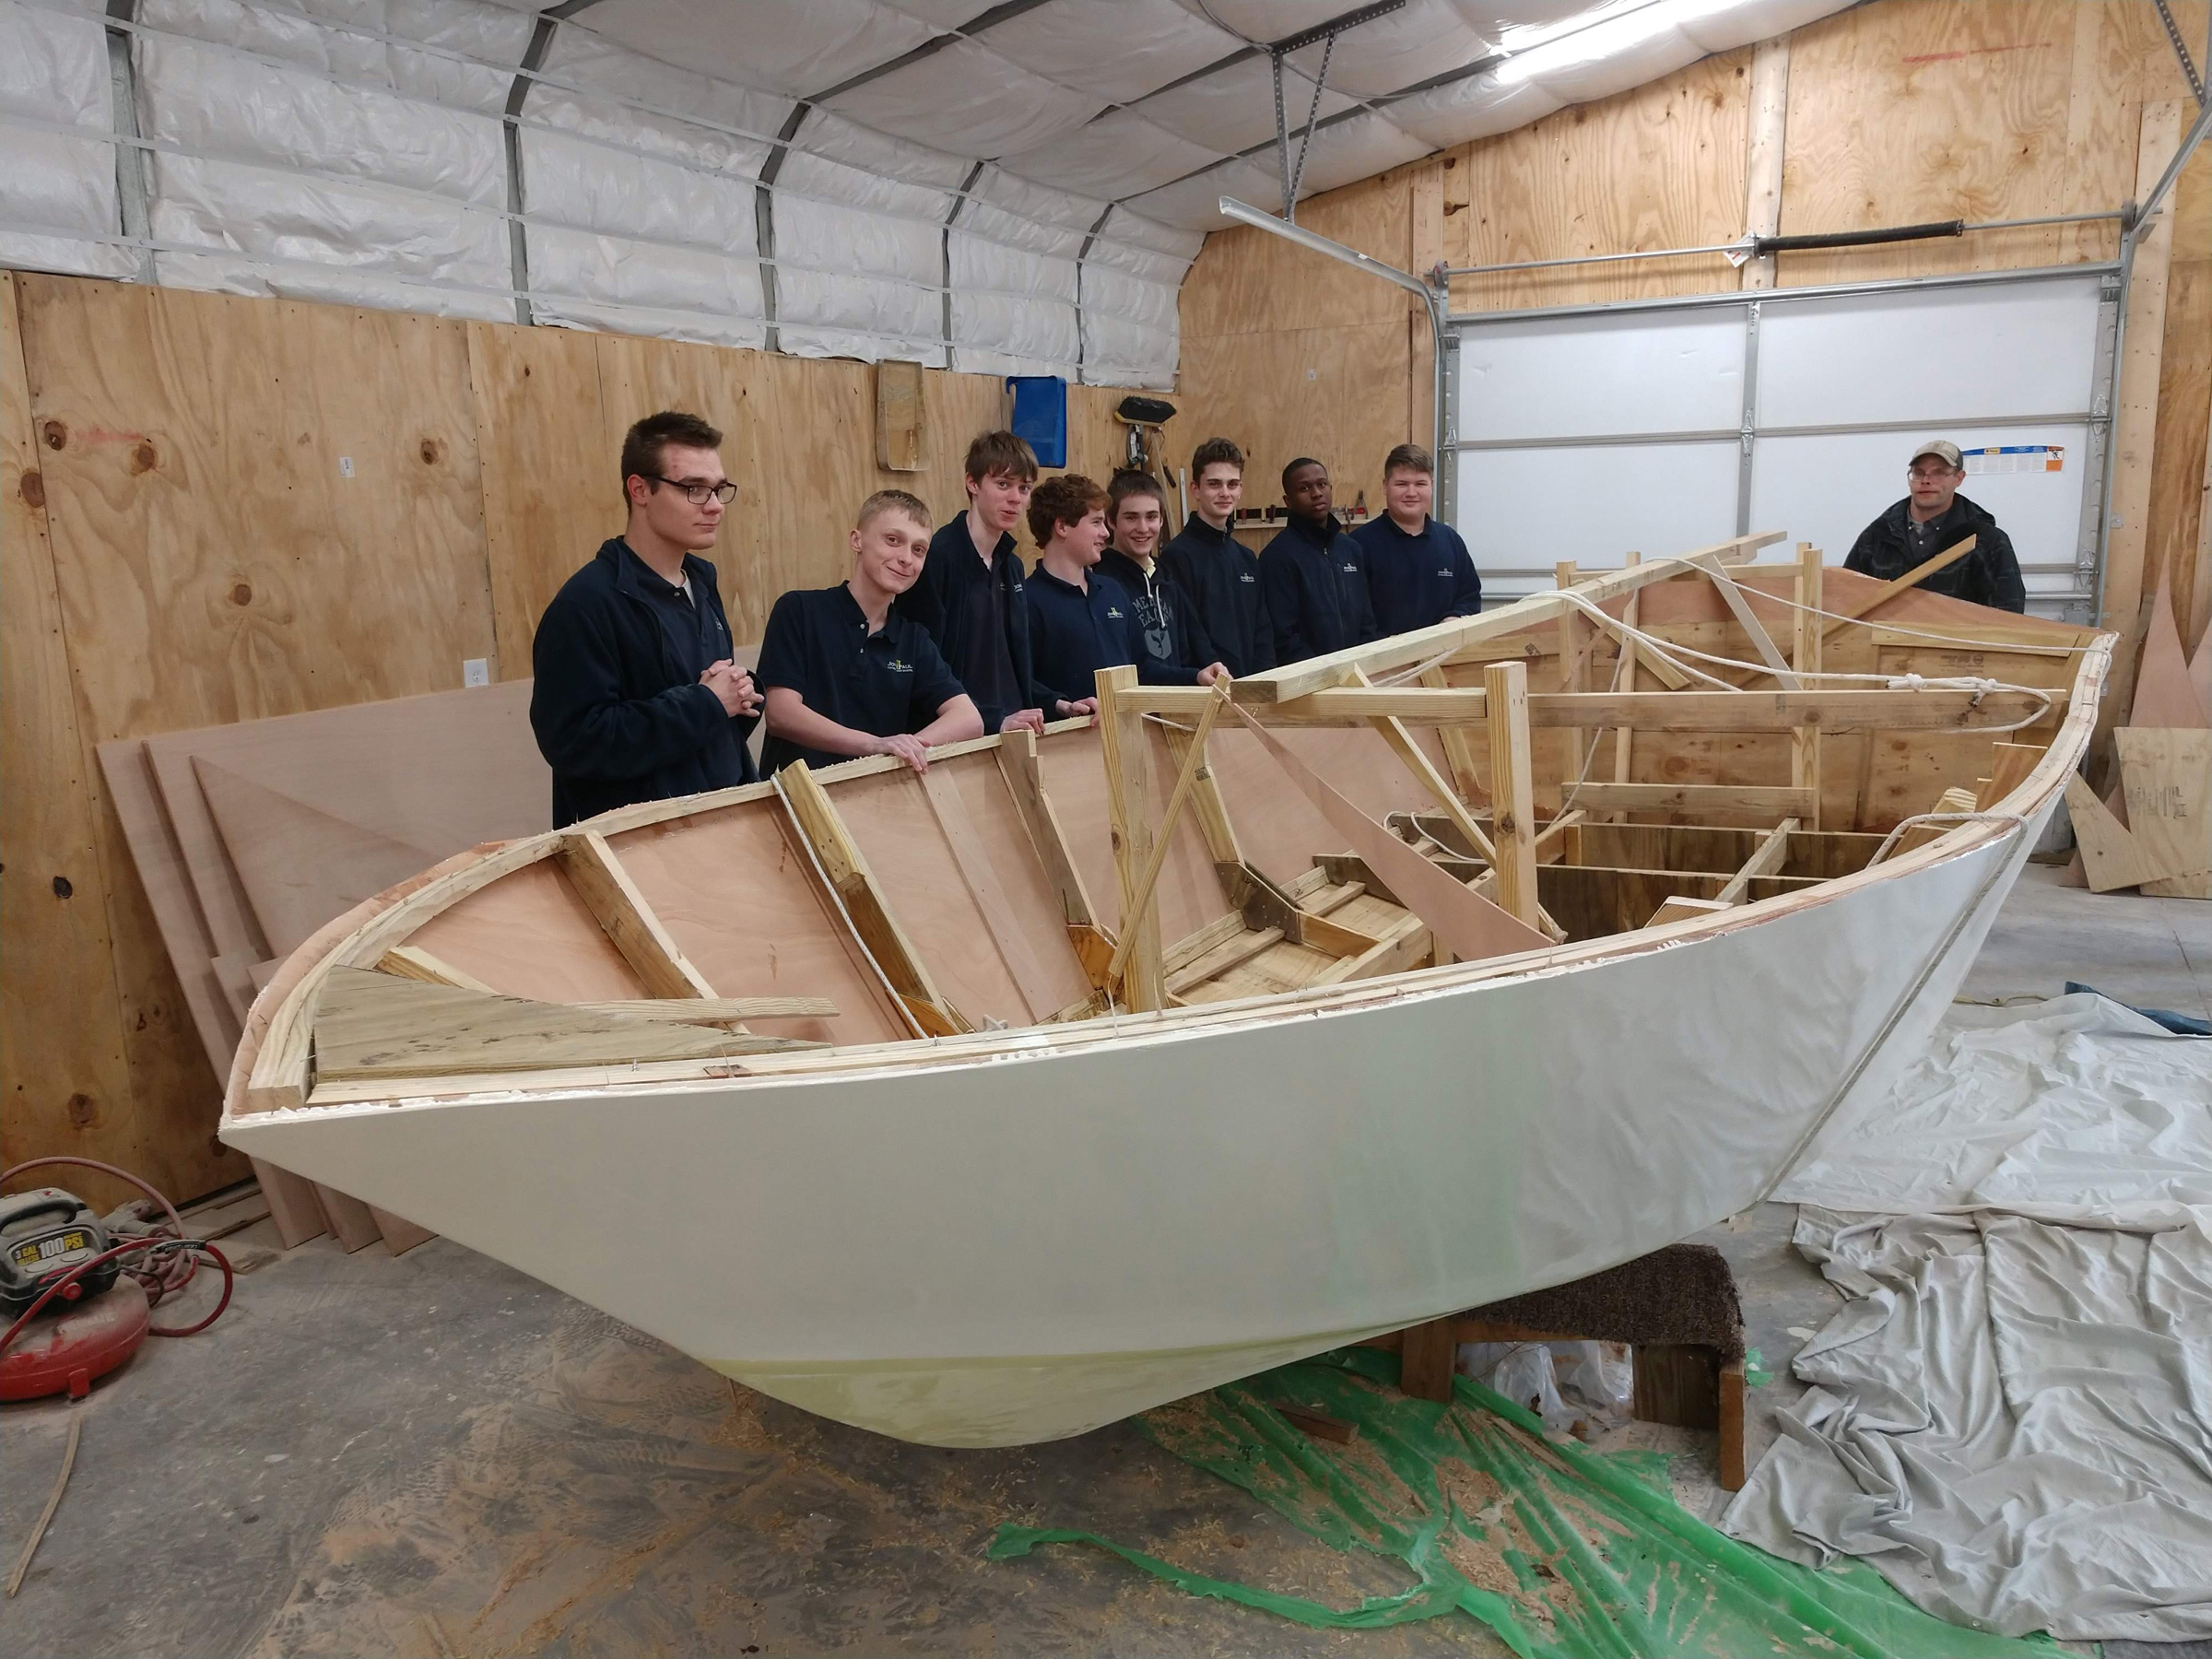
Rolling the hull upright was an occasion that merited a class photo.
His idea wasn’t completely out of the blue. For the previous four years, he had conducted boatbuilding night classes for JPII students in his backyard boatshop. Each year, between January and May, the students who gathered in Glenn’s barn built and launched a new outboard skiff, starting with a the 15′ Diablo designed by Phil Bolger and Harold “Dynamite” Payson, the 14′6″ Little Moby by Charles Wittholz, the 16′ Shoestring by Karl Stambaugh, and finally the 16′ San Juan Dory by David Roberts. The students were enthusiastic and undaunted when they finished a boat only to discover it was too wide to get it out of the shop. They just took the door off its hinges and cut out a bit of the wall.
The school’s new shop has the luxury of two garage doors, each big enough to move boats in and out without cutting into the walls. The 7’6″-wide Kingfisher has a few inches of clearance on either side.
Glenn’s class at JPII is now among the most popular electives, and he has twice as many students as he had at home. That’s 10 students, a healthy percentage of the school’s 120-student population. They come from a broad spectrum of backgrounds; some have never used power tools or been aboard a boat and very few have even seen a wooden boat.
Trailered up, the Kingfisher is ready for the water. Along the wall are two other student-built boats: a Rubens Nymph and a Payson’s Pirogue.
As the boatshop got up and running, students built a Rubens Nymph, a 7′9″ pram designed by Bolger and a 13′ Payson’s Pirogue designed by “Dynamite” Payson. The Kingfisher 18, built to plans from Glen-L, is the first big boat to emerge from the shop. To power the deep-V plywood hull the school acquired a rebuilt 90-hp Johnson outboard. The fuel tank went out of the way under the floorboards to add to the boat’s stability.

With the project nearing completion, the student builders gather for the finishing touches.
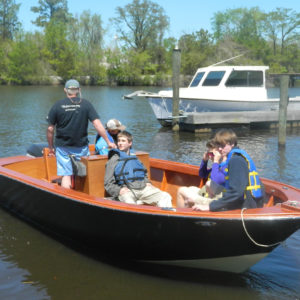
Launch day for each new boat is a big day at JPII, and with the Kingfisher’s 7′6″ beam it helped that the new boatshop has two garage doors. There was no delay getting the boat out and on its way to the water. Once it was afloat, the boat moseyed from the launch out to open water where the throttle could be opened wide. It took off with exhilarating speed, and the V bottom provided a smooth ride. None of the students who were along for the ride had ever gone so fast in a boat.

Teacher Glenn Joyner backs the Kingfisher away from the ramp as class boatbuilders enjoy the fruits of their labor.
Soon after the boat was launched, it was purchased by the parents of two JPII students, but there will be more boats and more students, and it may be a long time before Glenn submits another notice of resignation.![]()
Do you have a boat with an interesting story? Please email us. We’d like to hear about it and share it with other Small Boats Magazine readers.
Explore Your Passion
For a limited time only, save big with this $10 coupon towards a one-year subscription to Small Boats Magazine.
Save $10. Use coupon code:
19THANKS10
We share your passion for boats and we’d like you to be a part of our community. As a member, you’ll be notified of our new content each month, have access to the entire archive of searchable articles (since our launch in 2014), our popular classifieds, and some great new features we’ll be rolling out later this year. Plus, you can cancel at any time.
I Look forward to seeing you on the boat.
Editor: Chris Cunningham

Join the Small Boats community and recieve:
- Unlimited access to our full, searchable archive (since 2014)
- Critical reviews of great small boats
- In-depth tests of gear and techniques
- Small-boat adventure stories
- Post unlimited classifieds
- Converse with passionate readers and our editor through article comments
Subscription Options
Small Boats Magazine is a monthly web-based magazine dedicated to owners and users of boats that can be stored and maintained by the boat enthusiast.
From boats propelled by a oars (like the one pictured above) to boats designed to be powered by paddle, sail, or motor, Small Boats Magazine has monthly content to help you explore your passion for boating.

Explore Your Passion
For a limited time only, save big with this $10 coupon towards a one-year subscription to Small Boats Magazine.
Save $10. Use coupon code:
10SEPTEMBER19
We share your passion for boats and we’d like you to be a part of our community. As a member, you’ll be notified of our new content each month, have access to the entire archive of searchable articles (since our launch in 2014), our popular classifieds, and some great new features we’ll be rolling out later this year. Plus, you can cancel at any time.
I Look forward to seeing you on the boat.
Editor: Chris Cunningham
Join the Small Boats community and you’ll receive:
- Unlimited access to our searchable archive (since 2014)
- Critical reviews of great small boats
- In-depth tests of gear and techniques
- Small-boat adventure stories
- Post unlimited classifieds
- Converse with passionate readers and our editor through article comments
Subscription Options
Small Boats Magazine is a monthly web-based magazine dedicated to owners and users of boats that can be stored and maintained by the boat enthusiast.
From boats propelled by a paddle (like the one pictured above) to boats designed to be powered by oar, sail, or motor, Small Boats Magazine has monthly content to help you explore your passion for boating.
Explore Your Passion
For a limited time only, save big with this $10 coupon towards a one-year subscription to Small Boats Magazine.
Save $10. Use coupon code:
WELCOME10
We share your passion for boats and we’d like you to be a part of our community. As a member, you’ll be notified of our new content each month, have access to the entire archive of searchable articles (since our launch in 2014), our popular classifieds, and some great new features we’ll be rolling out later this year. Plus, you can cancel at any time.
I Look forward to seeing you on the boat.
Editor: Chris Cunningham
Join the Small Boats community and you’ll receive:
- Unlimited access to full archive backlog (since 2014)
- Critical reviews of great small boats
- In-depth tests of gear and techniques
- Small-boat adventure stories
- Post unlimited classifieds
- Converse with passionate readers and our editor through article comments
Subscription Options
Small Boats Magazine is a monthly web-based magazine dedicated to owners and users of boats that can be stored and maintained by the boat enthusiast.
From sail boats (like the one pictured above) to boats designed to be powered by oar, paddle, or motor, Small Boats Magazine has monthly content to help you explore your passion for boating.
Explore Your Passion
For a limited time only, save big with this $10 coupon towards a one-year subscription to Small Boats Magazine.
Save $10. Use coupon code:
10SEPTEMBER19
We share your passion for boats and we’d like you to be a part of our community. As a member, you’ll be notified of our new content each month, have access to the entire archive of searchable articles (since our launch in 2014), our popular classifieds, and some great new features we’ll be rolling out later this year. Plus, you can cancel at any time.
I Look forward to seeing you on the boat.
Editor: Chris Cunningham
Join the Small Boats community and you’ll receive:
- Unlimited access to full archive backlog (since 2014)
- Critical reviews of great small boats
- In-depth tests of gear and techniques
- Small-boat adventure stories
- Post unlimited classifieds
- Converse with passionate readers and our editor through article comments
Subscription Options
Small Boats Magazine is a monthly web-based magazine dedicated to owners and users of boats that can be stored and maintained by the boat enthusiast.
From power boats (like the one pictured above) to boats designed to be powered by oar, paddle, or sail, Small Boats Magazine has monthly content to help you explore your passion for boating.
Subscribe & Save
We share your passion for boats and we’d like you to be a part of our community. As a member, you’ll be notified of our new content each month, have access to the entire archive of searchable articles (since our launch in 2014), our popular classifieds, and some great new features we’ll be rolling out later this year. Plus, you can cancel at any time.
I Look forward to seeing you on the boat.
Editor: Chris Cunningham
Join the Small Boats community and you’ll receive:
- Unlimited access to full archive backlog (since 2014)
- Critical reviews of great small boats
- In-depth tests of gear and techniques
- Small-boat adventure stories
- Post unlimited classifieds
- Converse with passionate readers and our editor through article comments
Subscription Options
Small Boats Magazine is a monthly web-based magazine dedicated to owners and users of boats that can be stored and maintained by the boat enthusiast.
Anchored in Jeopardy
The key to a safe anchorage is the same as the key to prime real estate: location, location, location. When I anchor a boat for the night, I’m almost always sleeping aboard, so it’s not enough for the boat to stay afloat and stay put. The anchorage needs to be quiet and still if I’m going to get a good sleep. Even if a day comes to a quiet close, an anchorage that isn’t well protected from wind, waves, and currents will make me anxious and I’ll wake up frequently to check on the conditions.
I’ve had only four anchorages go wrong (so far). In the middle of a night aboard my dory skiff, I had to sit up in my sleeping bag and row across a cove to get back into the lee after a wind shift; that morning I woke up stranded by a low tide. During an overnight outing in our Escargot canal boat, anchored in the upper reaches of a tidal river, the four of us aboard spent a noisy, sleepless night when the river current accelerated with the falling tide. On my solo in that same boat on the Everett sloughs, I slept well enough but lost my best anchor to a submerged snag.
While those anchorages were annoying, my worst anchorage could have turned deadly. It was in DeHorsey Passage, 17 rowing miles shy of Prince Rupert, British Columbia, on my second cruise up the Inside Passage in 1987. Cindy and I had been underway for a month, rowing and sailing from Puget Sound aboard ROWENA, the Gokstad faering I’d built for the trip. In the days before that anchorage, we had been traveling north along Grenville Channel. We napped during the day when the flood tide was flowing against us and rowed at night when we could take advantage of the slack and ebb tides. At Baker Inlet, 11 miles from the end of Grenville, the water had turned chalky green with the glacial silt flowing out of the Skeena River.
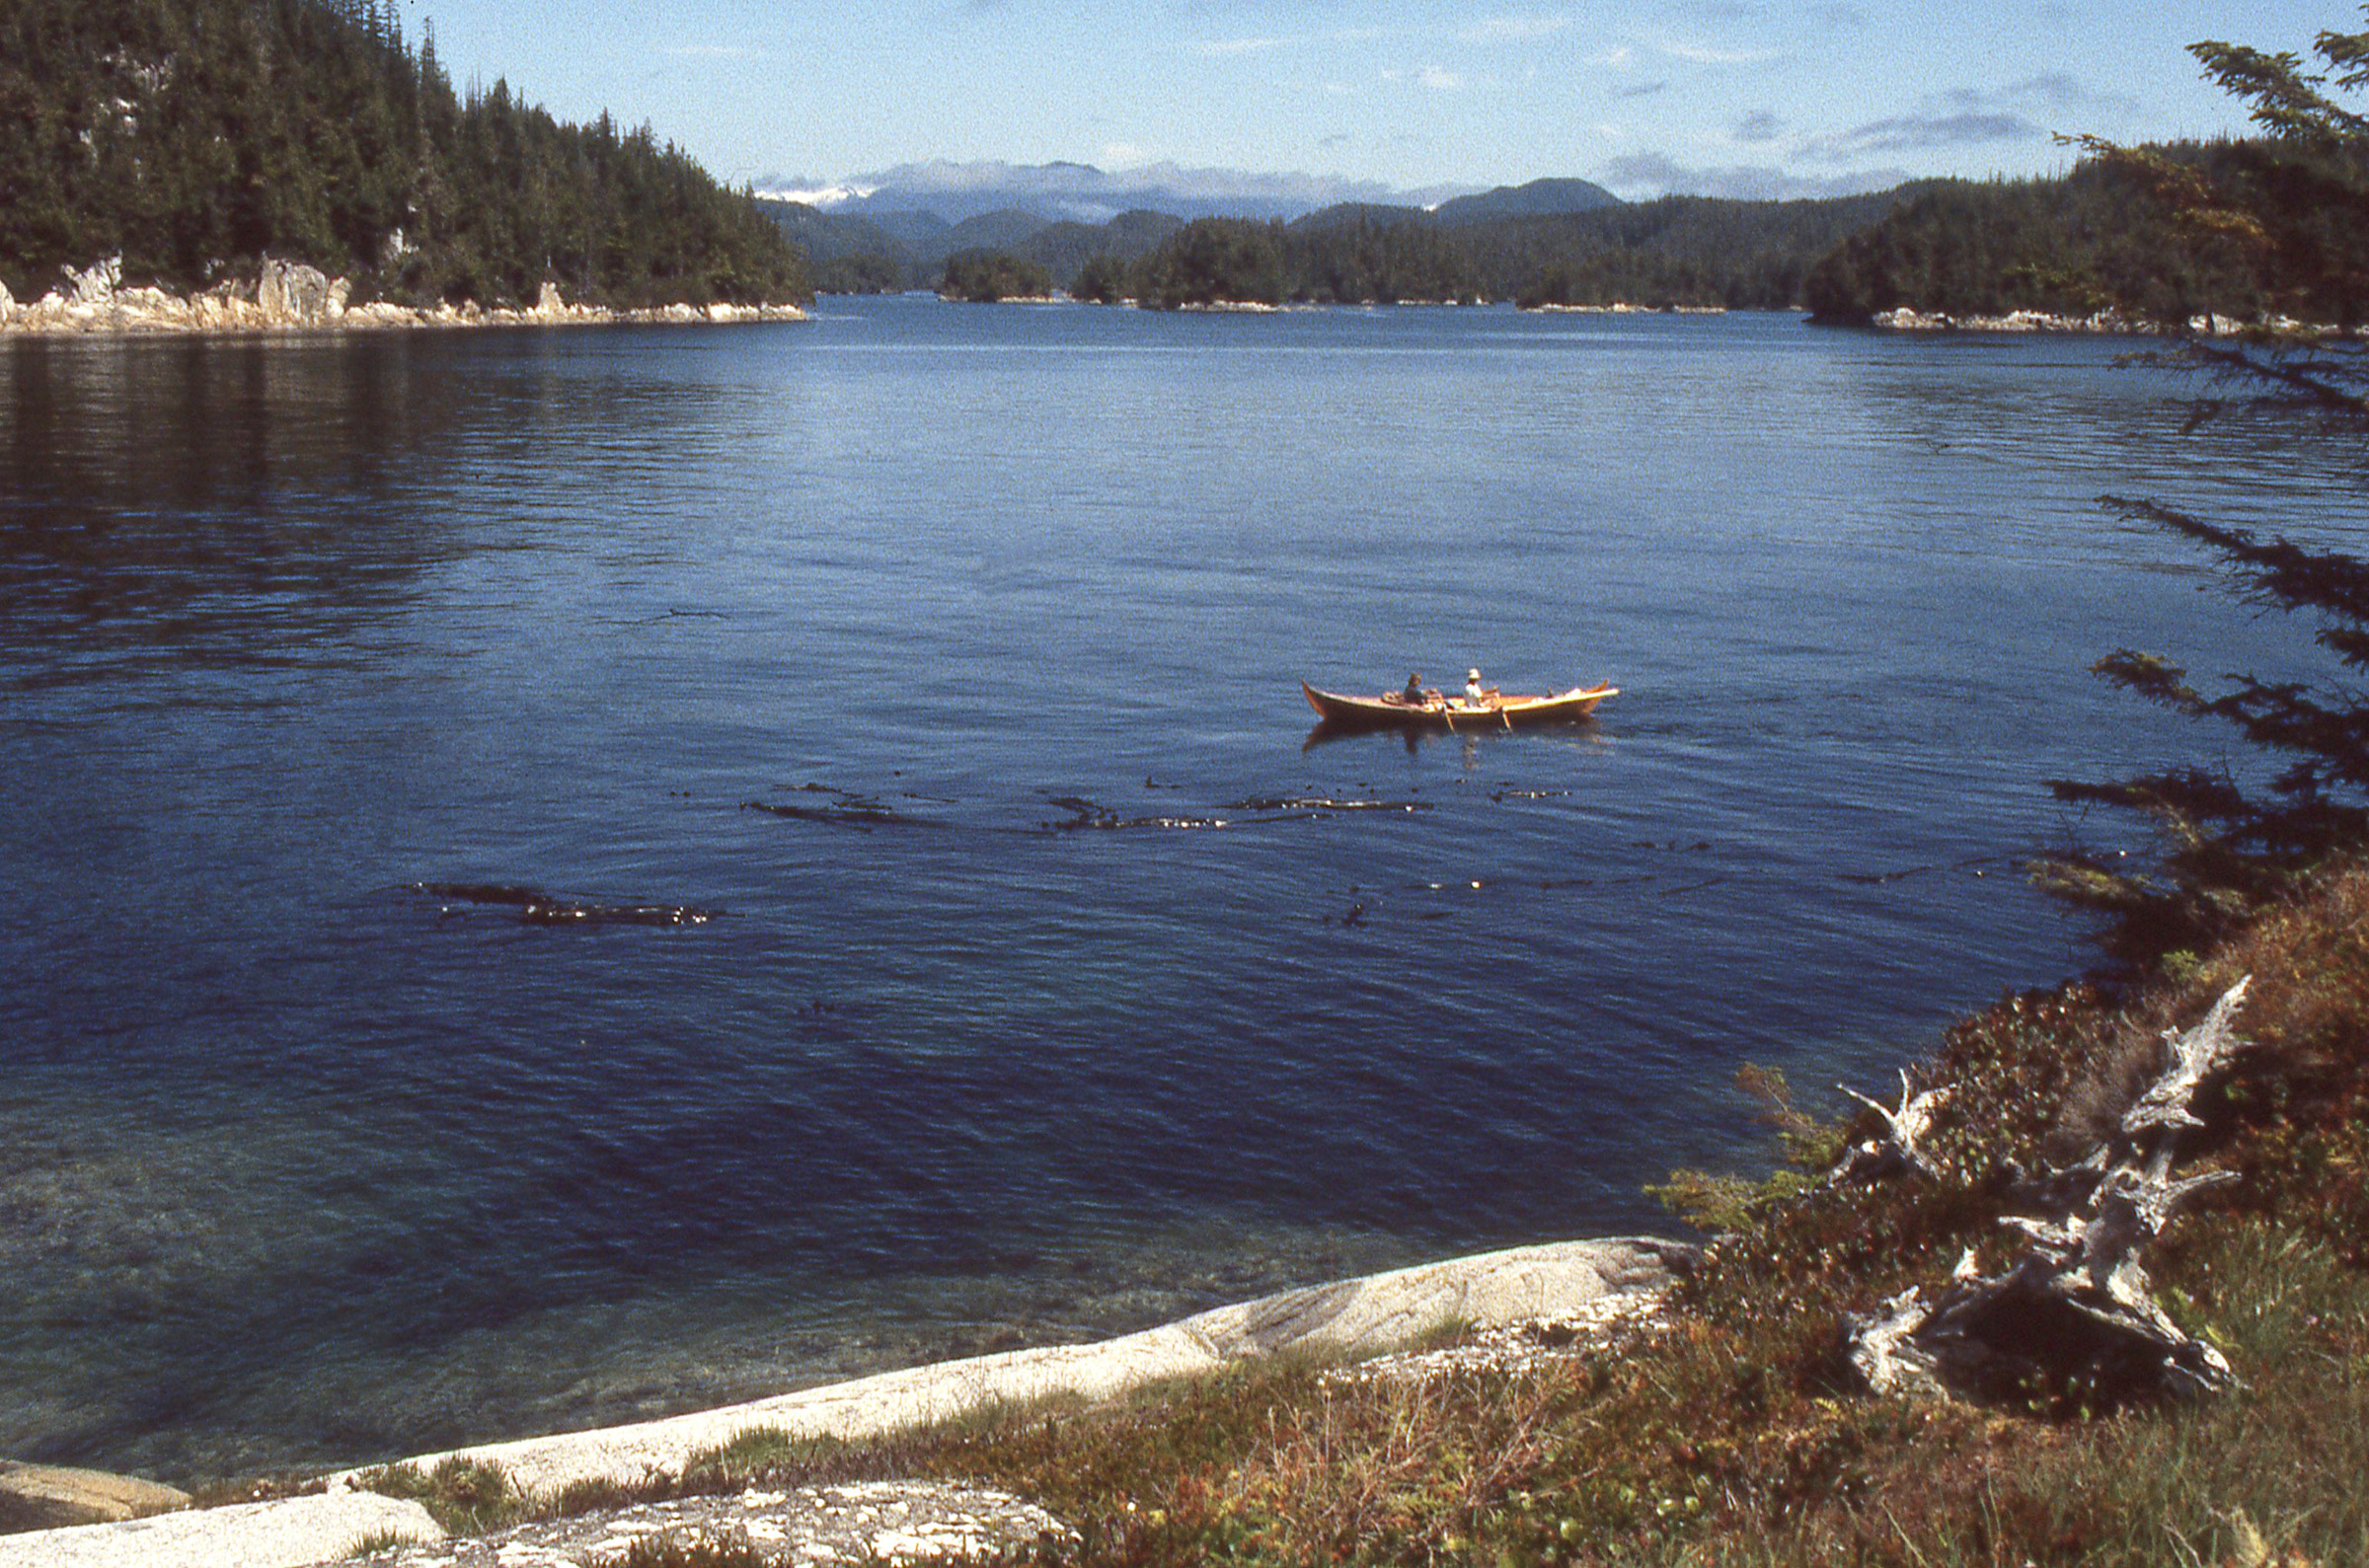
We stopped for the night in a narrow passage like this one, but in the dark near the mouth of a river and dropped anchor in the very brief slack before the tide began to plummet 22′.
We left the channel and stayed close to the mainland shore. Here’s how I described in my journal the events of the night of July 10:
We headed up the mouth of the river. In one south-facing bay we pulled in for a rest stop and in the next bay, facing west, we dropped anchor to wait out the ebb. Cooked up popcorn and dinner and napped on the floorboards with the canopy cloth just pulled up like a blanket.
We woke just before slack and headed north along the edge of the Skeena, tucking into small bays to get out of the wind-versus-ebb chop and the current tumbling over a shoal. As it grew dark, we got ready to cross to DeHorsey Island. We put on foulweather gear and life vests, got the flashlights and new batteries, and took off for a 3-1/2-mile crossing. The moon rose, making it easier to look for the debris carried downriver, but mostly it was a sprint. The navigation-aid lights came on very late. We crossed a noisy chop over a shoal and then hit a tide shear where the current wrapped around Kennedy Island.
We had been keeping track of our progress by watching the dim profiles of mountains at the mouth of the Skeena, and, when it was too dark for that, the position of stars over the ridges.
I called “way enough” and as we drifted through the shear, the bow moved to starboard. We’d have to work to make the top of DeHorsey. We put on the speed and got to the island’s shore and found the current still very strong there. We got just a ways upstream and decided it might not be worth it. We drifted backward as I deliberated. I figured the small pass between DeHorsey and Smith island to the west would be the best place for us to anchor if conditions went wrong overnight. We regained the lost ground and the tide was still against us as we continued north along the east side of DeHorsey, but I figured it would split in about a mile. We kept on and picked up speed and finally got to the split. With the tide in our favor now, we ate an orange and peeled off clothing since we were both drenched with sweat. We were getting quite tired. The fight against the tide had worn us out.
In the channel between DeHorsey and Smith islands, it was hard to see in the shadows of the moonlight. Several points of DeHorsey went by and we finally spotted a bottleneck where there were cabins on Smith and a small islet in midchannel. I dropped the anchor without the chain to get the depth—less that 12′, not enough for us to spend the night. We moved to the other side of the island—20′. I connected the chain and set the hook and then we raised the canopy over the cockpit.
Just as soon as we bedded down, I heard a staccato noise like a beaver gnawing on the bow. Was the anchor dragging? Fifteen minutes later it happened again and I heard the gurgling of the current against the hull. I looked out and the channel was like a river. We got up and packed up.
The anchor rode was tied directly to the painter. I had been eager to get to bed, so I hadn’t tied the retrieval line to the painter so I could pull it in while seated in the cockpit and get my hands on the painter and rode without having to crawl over the bow. I had a fender tied to the end of the rode as a buoy. I told Cindy to row upstream to bring it alongside. The fender was flicking around underwater, submerged by the current. I untied the rode from the painter as Cindy shipped the oars and we drifted back downstream. The tension came on when I had the rode amidships. I was holding the rode’s bitter end in one hand.
At this point, the boat was broadside to the current and the upstream rail dipped close to the surface of the water. I fought to push myself away from the rail to keep from being pulled overboard and prevent the boat from taking on water.
I yelled to Cindy, “Don’t do anything!” I moved aft and waited for the boat to swing around. When it trailed parallel to the current, the stern facing upstream, I pulled the rode in. There was lots of tension in the line and when the anchor broke free it skipped along the bottom, each jerk shaking me hard. I got the anchor aboard and we both set to rowing hard. We worked the bow around upstream. In the reflections of lights on shore we could see the streams of the ebb’s current. We kept an eye out for logs. There was a lot of driftwood picked up by the high spring tide. We hit a line of whirlpools and I called out “Pressure left! Right! Left!” We pulled hardest on our right to keep off the rocks. In the dim light of the cloud-masked moon, Cindy was a dark shape moving wildly.
We finally made it into Inverness Passage and the current whisked us along as the glow of the not-yet-risen sun broke over the mountains to the east.
Our anchorage in DeHorsey Passage was chosen at night, in an unfamiliar place, and while we were sleep deprived and physically exhausted. The location was bad and our timing made the worst of it. July 10 was the night of the full moon and the early morning hours were the spring tide, a drop of nearly 22′. Among the islands at the mouth of the Skeena River, the currents caused by the powerful ebb have the river outflow pushing them even faster. When the tide turned at around 2:00 a.m., about the time we turned in for the night, it took only minutes for the current to build. When I had Cindy row up to the anchor buoy, the current was already at around 3 knots. Within an hour, as we were rowing north against the current to get around the corner of Smith Island into Inverness Passage, the current was likely approaching 5 knots, the limit of our speed aboard the faering. With each stroke, rowing flat out, we were making less than 1′ of headway.
Because I had never anchored in water with any current running, I wasn’t prepared for what happened when I tried to haul the anchor aboard that night. Larger boats are equipped to bring the anchor up at the bow, so even when a current is running, the boat faces it. When I brought the rode aft, the faering veered away from the flow. When the rode was amidships, the faering was square to the current. The pressure on the keel pushed it downstream but, fortunately, the faering has very slack bilges and firmed up before the rail was driven under and the boat capsized. I’d like to think that I would have let the rode go before that happened. We had just the one anchor with us and I was reluctant to lose it, though if I’d had time to think, I would have realized I could buy a replacement in Prince Rupert the next day. I’d had a fender attached to the rode, but I’d removed it before hauling the anchor aboard. If I had left the fender attached I could have let go and recovered the anchor later.
We were lucky to have rowed away from that anchorage intact. That night was over 30 years ago, but I remain grateful we survived my inexperience.![]()

Oxford Wherry
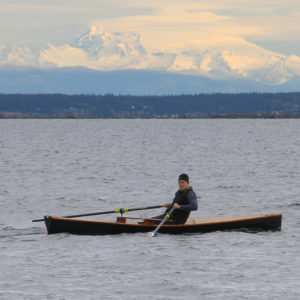
[M]y “gateway drug” into boatbuilding was that innocuous fitness device, the rowing machine. Whenever our CrossFit coach incorporated rowing in our workout of the day, most people groaned. I celebrated. My love of stationary rowing led me to sign up with a crew program on the Willamette River in Portland, Oregon. I’d forgotten how I loved spending time on the water, and rowing on the river is sublime. I wanted a boat of my own, but sliding-seat shells are expensive and of limited use. A friend mentioned the ease of stitch-and-glue boat building, which triggered my optimism, and in no time, without any fine-woodworking experience, I began scouring the Internet for boat plans.
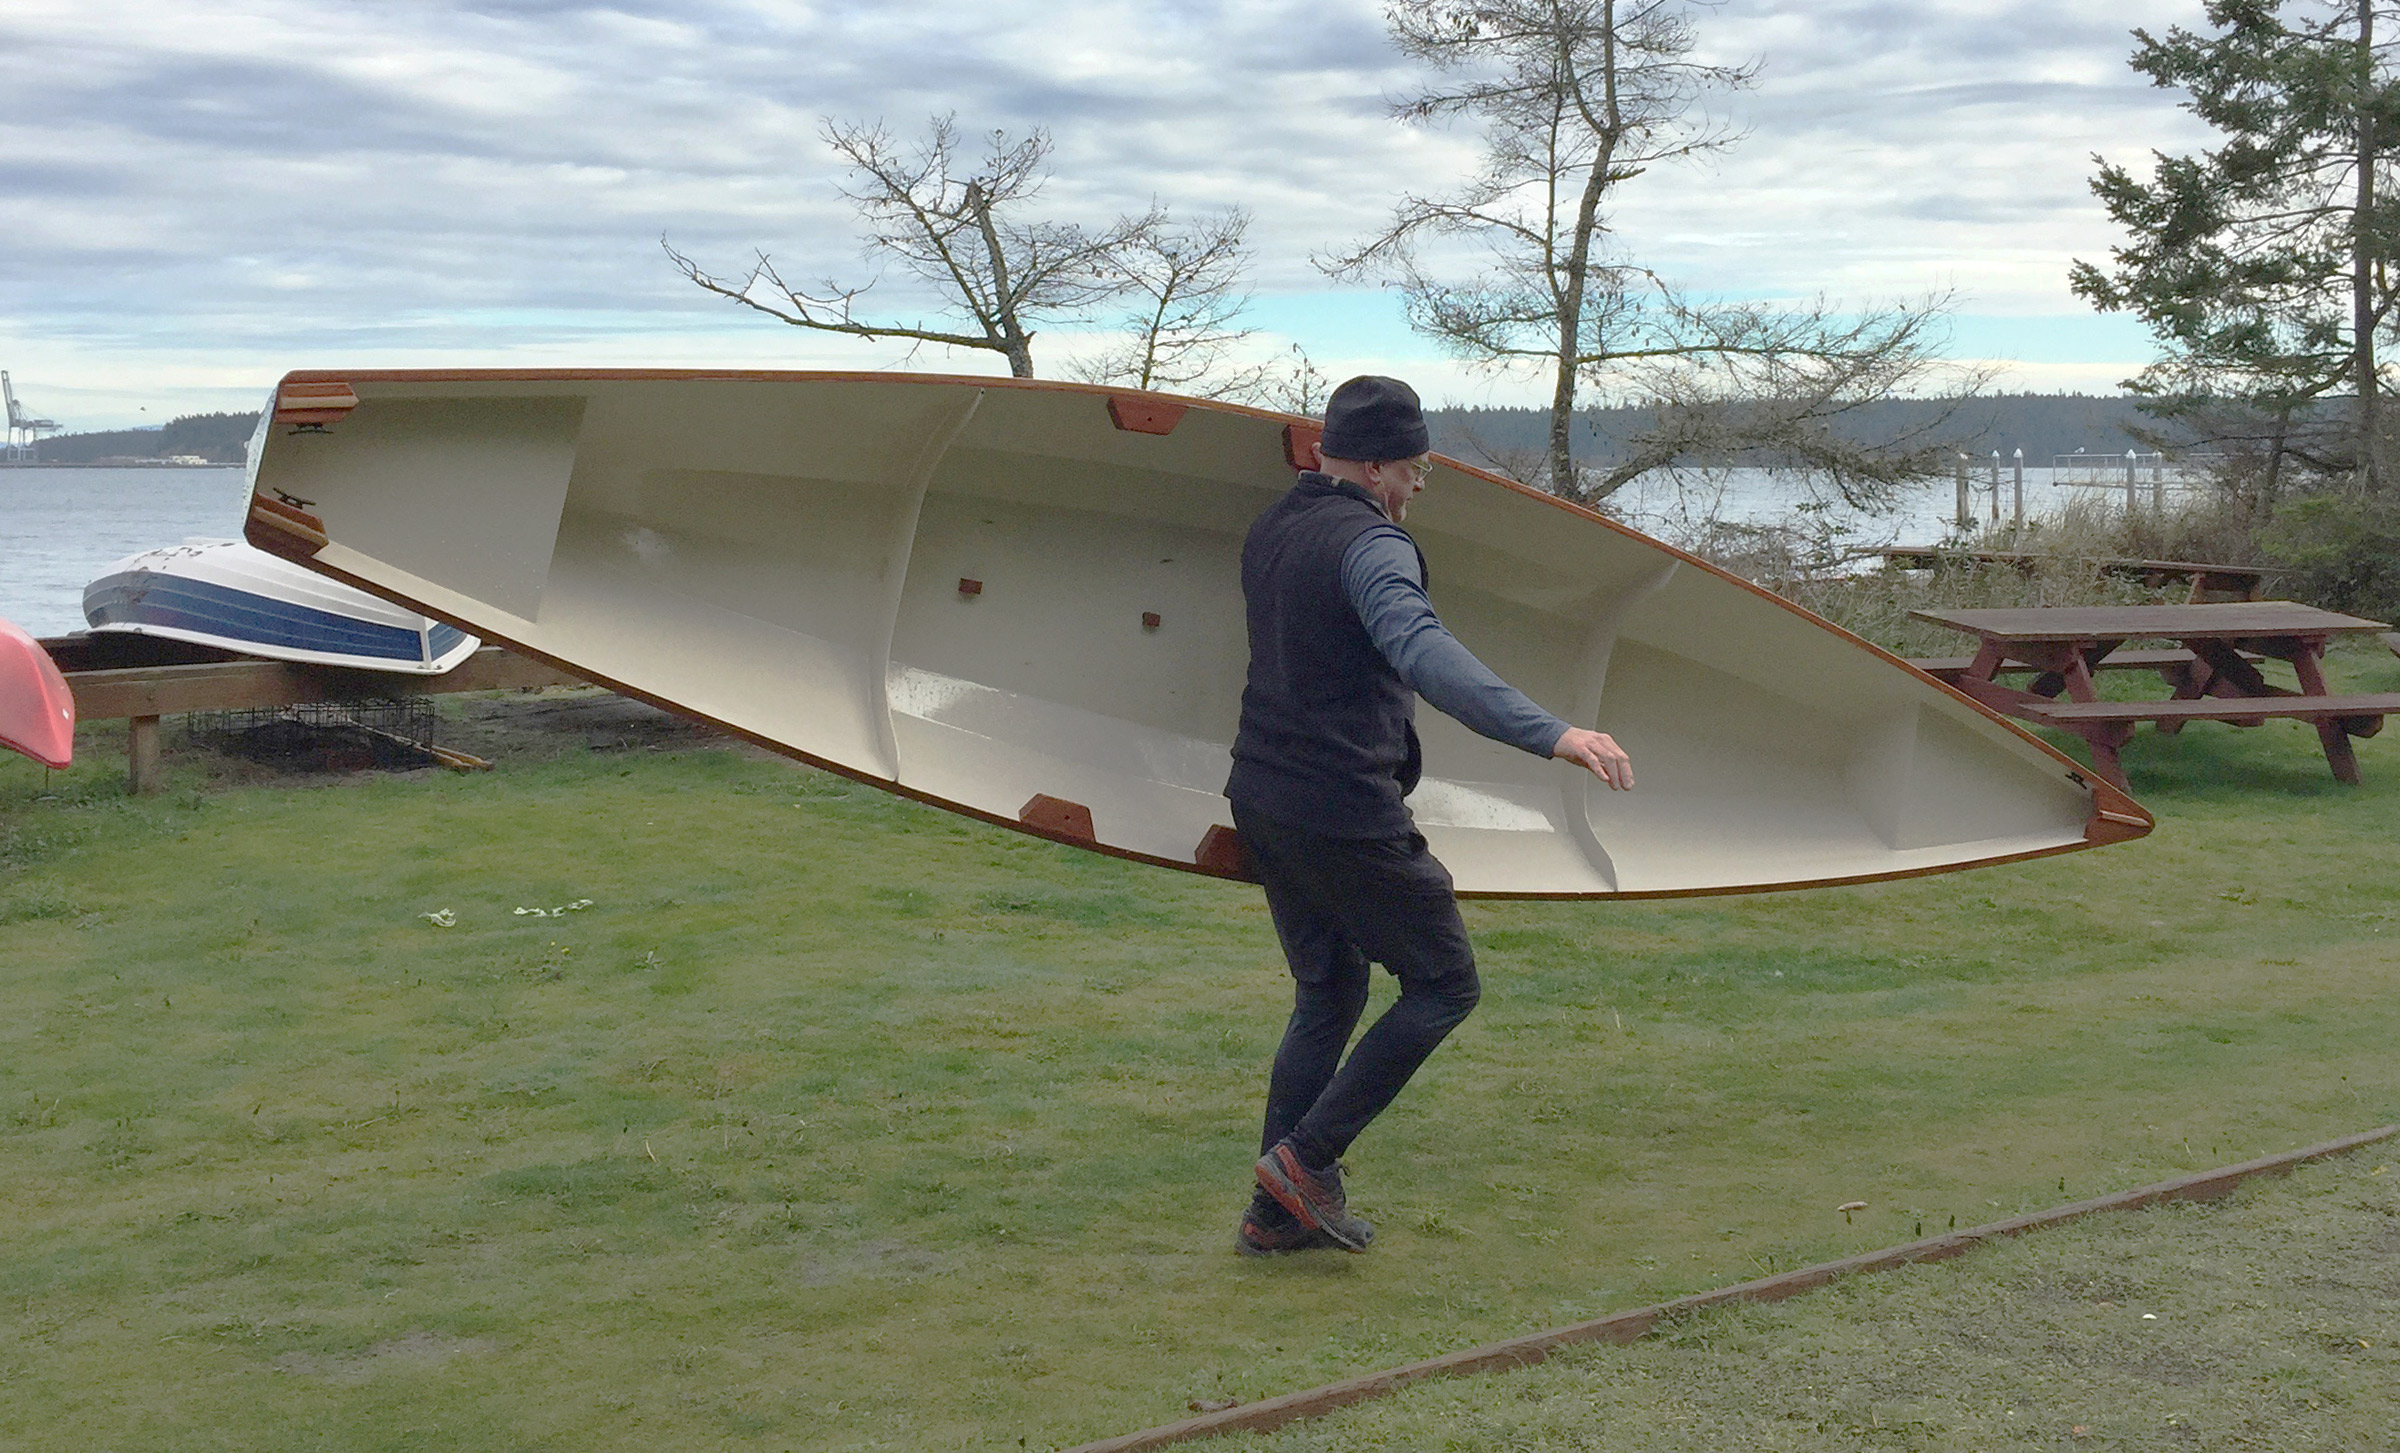 Photographs by Suzanne Eggleston
Weighing just over 50 lbs, the bare hull can be carried solo. The blocks that anchor the outrigger provide handholds.
Angus Rowboats of Vancouver, British Columbia, has a nice selection of performance boats with options ranging from plans to kits to completed boats. I thought the Oxford Wherry would give me the workouts I wanted with the option to bring my wife, Suzanne, along. Angus offers the boat as a kit or as digital plans with CNC router files. I gambled that I could hire a CNC router, and ordered just the plans.
I bought the marine plywood I needed and found a guy who makes his living with a CNC router. I delivered the plywood and digital files to him, and he charged me just $90 to cut the pieces. When I glued up the finger joints, some were a little loose which, judging by the reviews, would not have been a problem if I had ordered an Angus Rowboats kit.
Stitching the panels together was one of the best parts of the building process, as a boat rose from the pile of plywood in just a day. Of course, as an enthusiastic rookie, I didn’t pay strict attention to the instructions and tightened the copper wires too tight. I had to loosen them and adjust the boat as I stitched the frames and transom in. More carefully following the very thorough and readable instructions of the 49-page manual, I injected epoxy into the seams, tacking the planks together and then to the three frames and two flotation-compartment bulkheads.
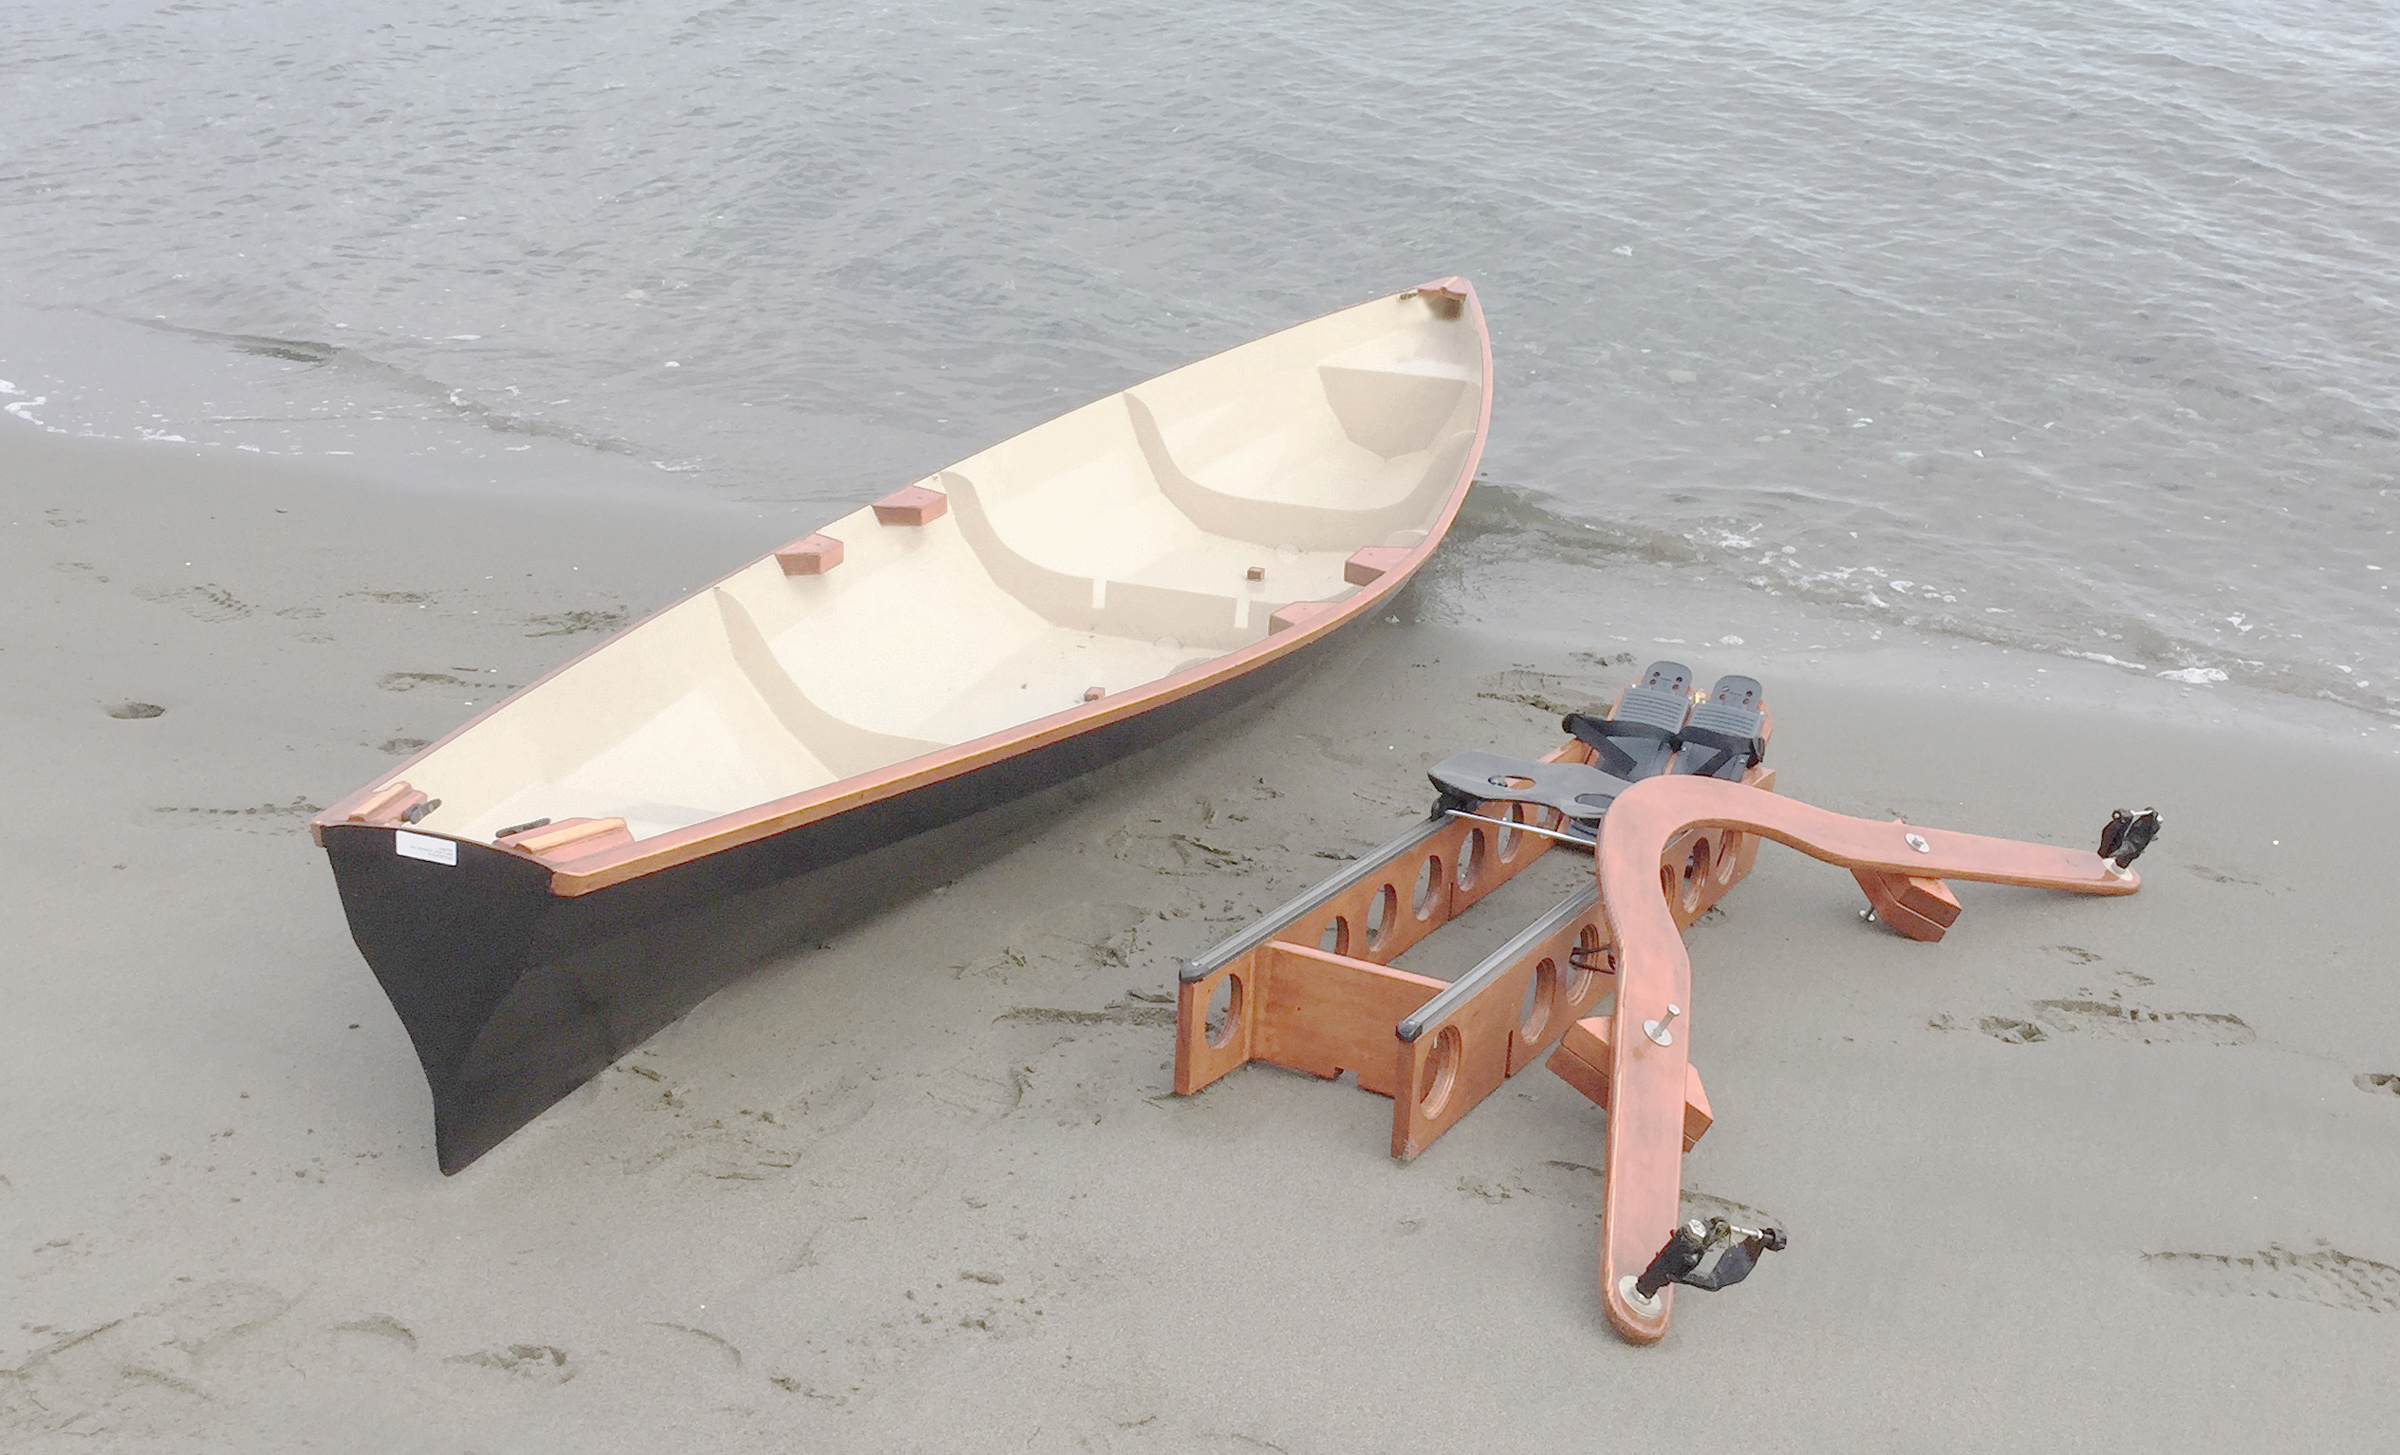
The drop-in sliding seat rig, available as a hardware kit and plans from Angus Rowboats, is an alternative to the fixed thwarts provided with the wherry kit.
After the epoxy cured, I pulled all of the copper wires, leaving tiny holes in the hull. While fiberglassing the interior, I used too much epoxy and it dripped out on the floor and the tops of my boots. The instructions don’t say to fill those holes with thickened epoxy, so I think I just used too much epoxy.
After the hull was ’glassed it was time to move on to the flotation compartment covers, quarter knees, breasthook, and gunwales. Kit builders would have the advantage with the knees and breasthook, as precut mahogany pieces are included and require only a little trimming to fit; each gunwale is made of three pieces with the scarfs already cut and ready for gluing. I don’t have a tablesaw, so I bought 1×1 red oak to piece together the breasthook, knees, and gunwales.
Despite my budding workmanship and a few errors, I finished the project and had a beautiful, shapely hull sitting in my garage. The build process was very satisfying because the design was simple yet elegant and the instructions were thorough and not overly complicated.
The instructions next called for seat installation. The kit comes with three precut cedar thwarts, but I had decided to equip the hull with a sliding seat. A commercial drop-in rig, like the Piantedosi RowWing, would fit the Oxford wherry, but I purchased the Angus sliding seat/rigger hardware kit with a carbon-fiber seat. I used clear vertical-grain Sitka spruce, as recommended by the instructions, for both the rigger and seat rails. The rigger has a span of 64” and is made of two pieces of spruce. A 1-1/2″ -wide lap joint brings the two 33-1/2″ lengths together and fiberglass is then used to reinforce it. This piece is the most beautiful length of wood I’ve ever fashioned.
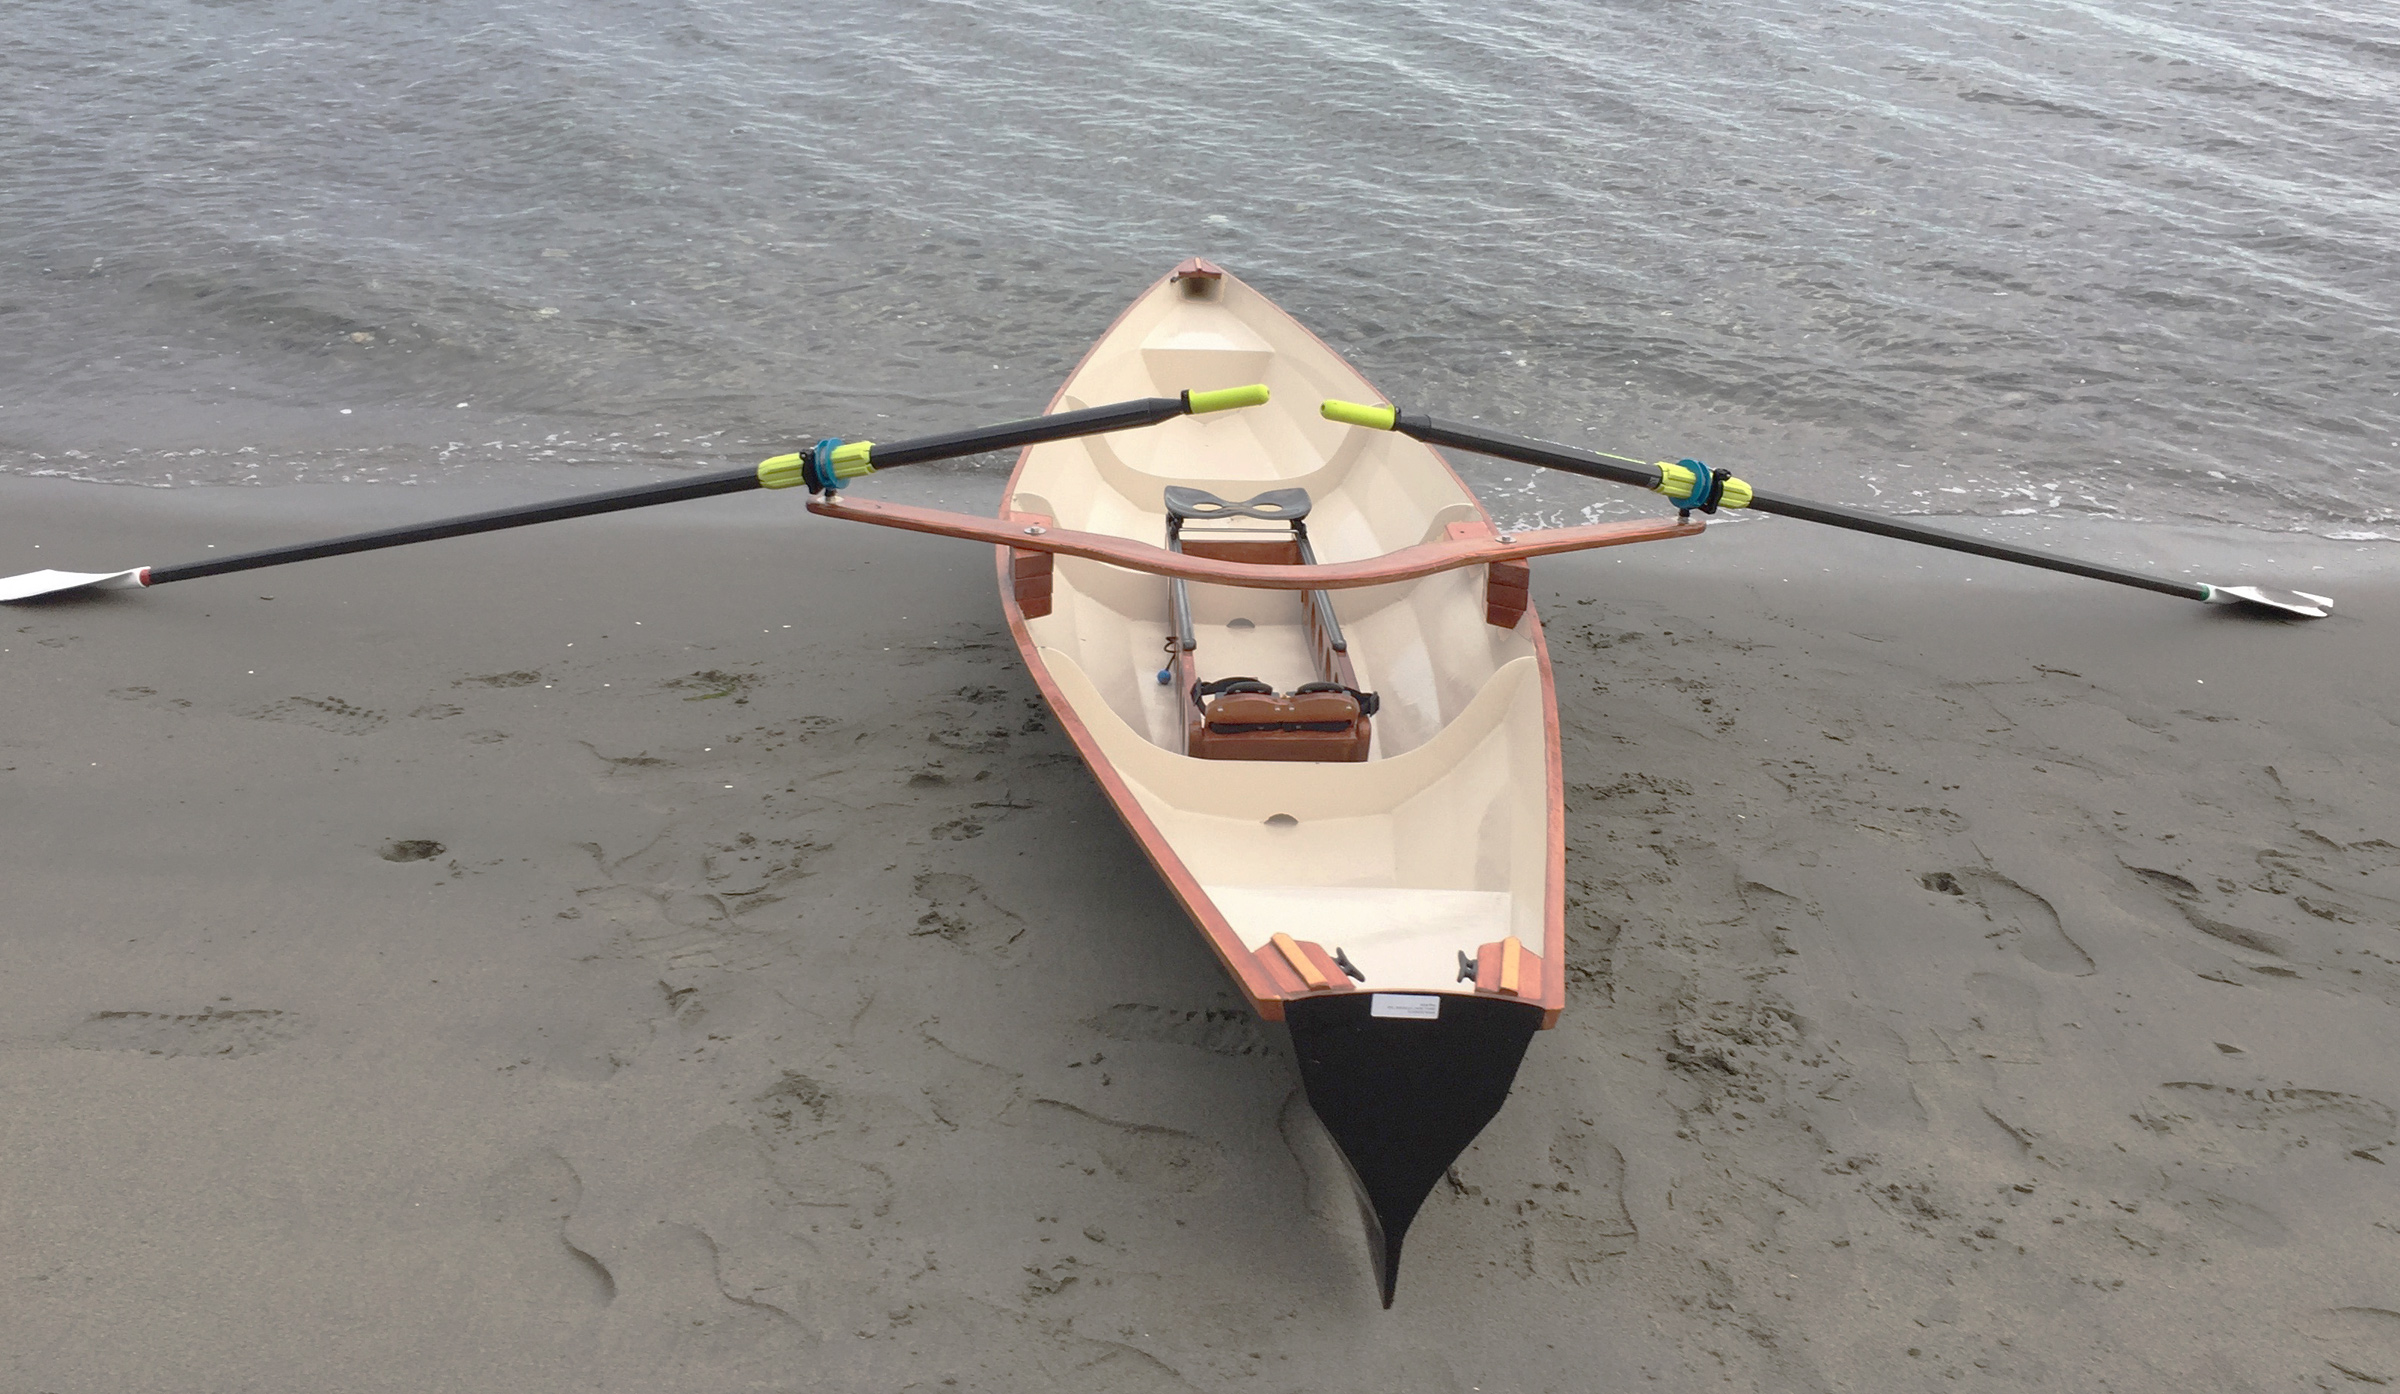
An alternative to the sliding seat rig is the installation of fixed thwarts at each of the three frames and a pair of short wooden outriggers.
I had ordered Angus’s plans for hollow-loom oars, but the contractor’s tablesaw I borrowed from a friend didn’t seem capable of safely cutting the narrow strips I needed to cut, so I ordered up a pair of Concept2 carbon-fiber oars. When the oars arrived, Suzanne and I loaded the boat on the car and headed for Lacamas Lake in Washington State. The water was smooth, the late-September weather gorgeous, and with the rowing rig set in the forward position and Suzanne sitting in folding camp chair just aft of the outrigger and facing forward—a good arrangement for conversation—I managed to row the lake without crabbing an oar.
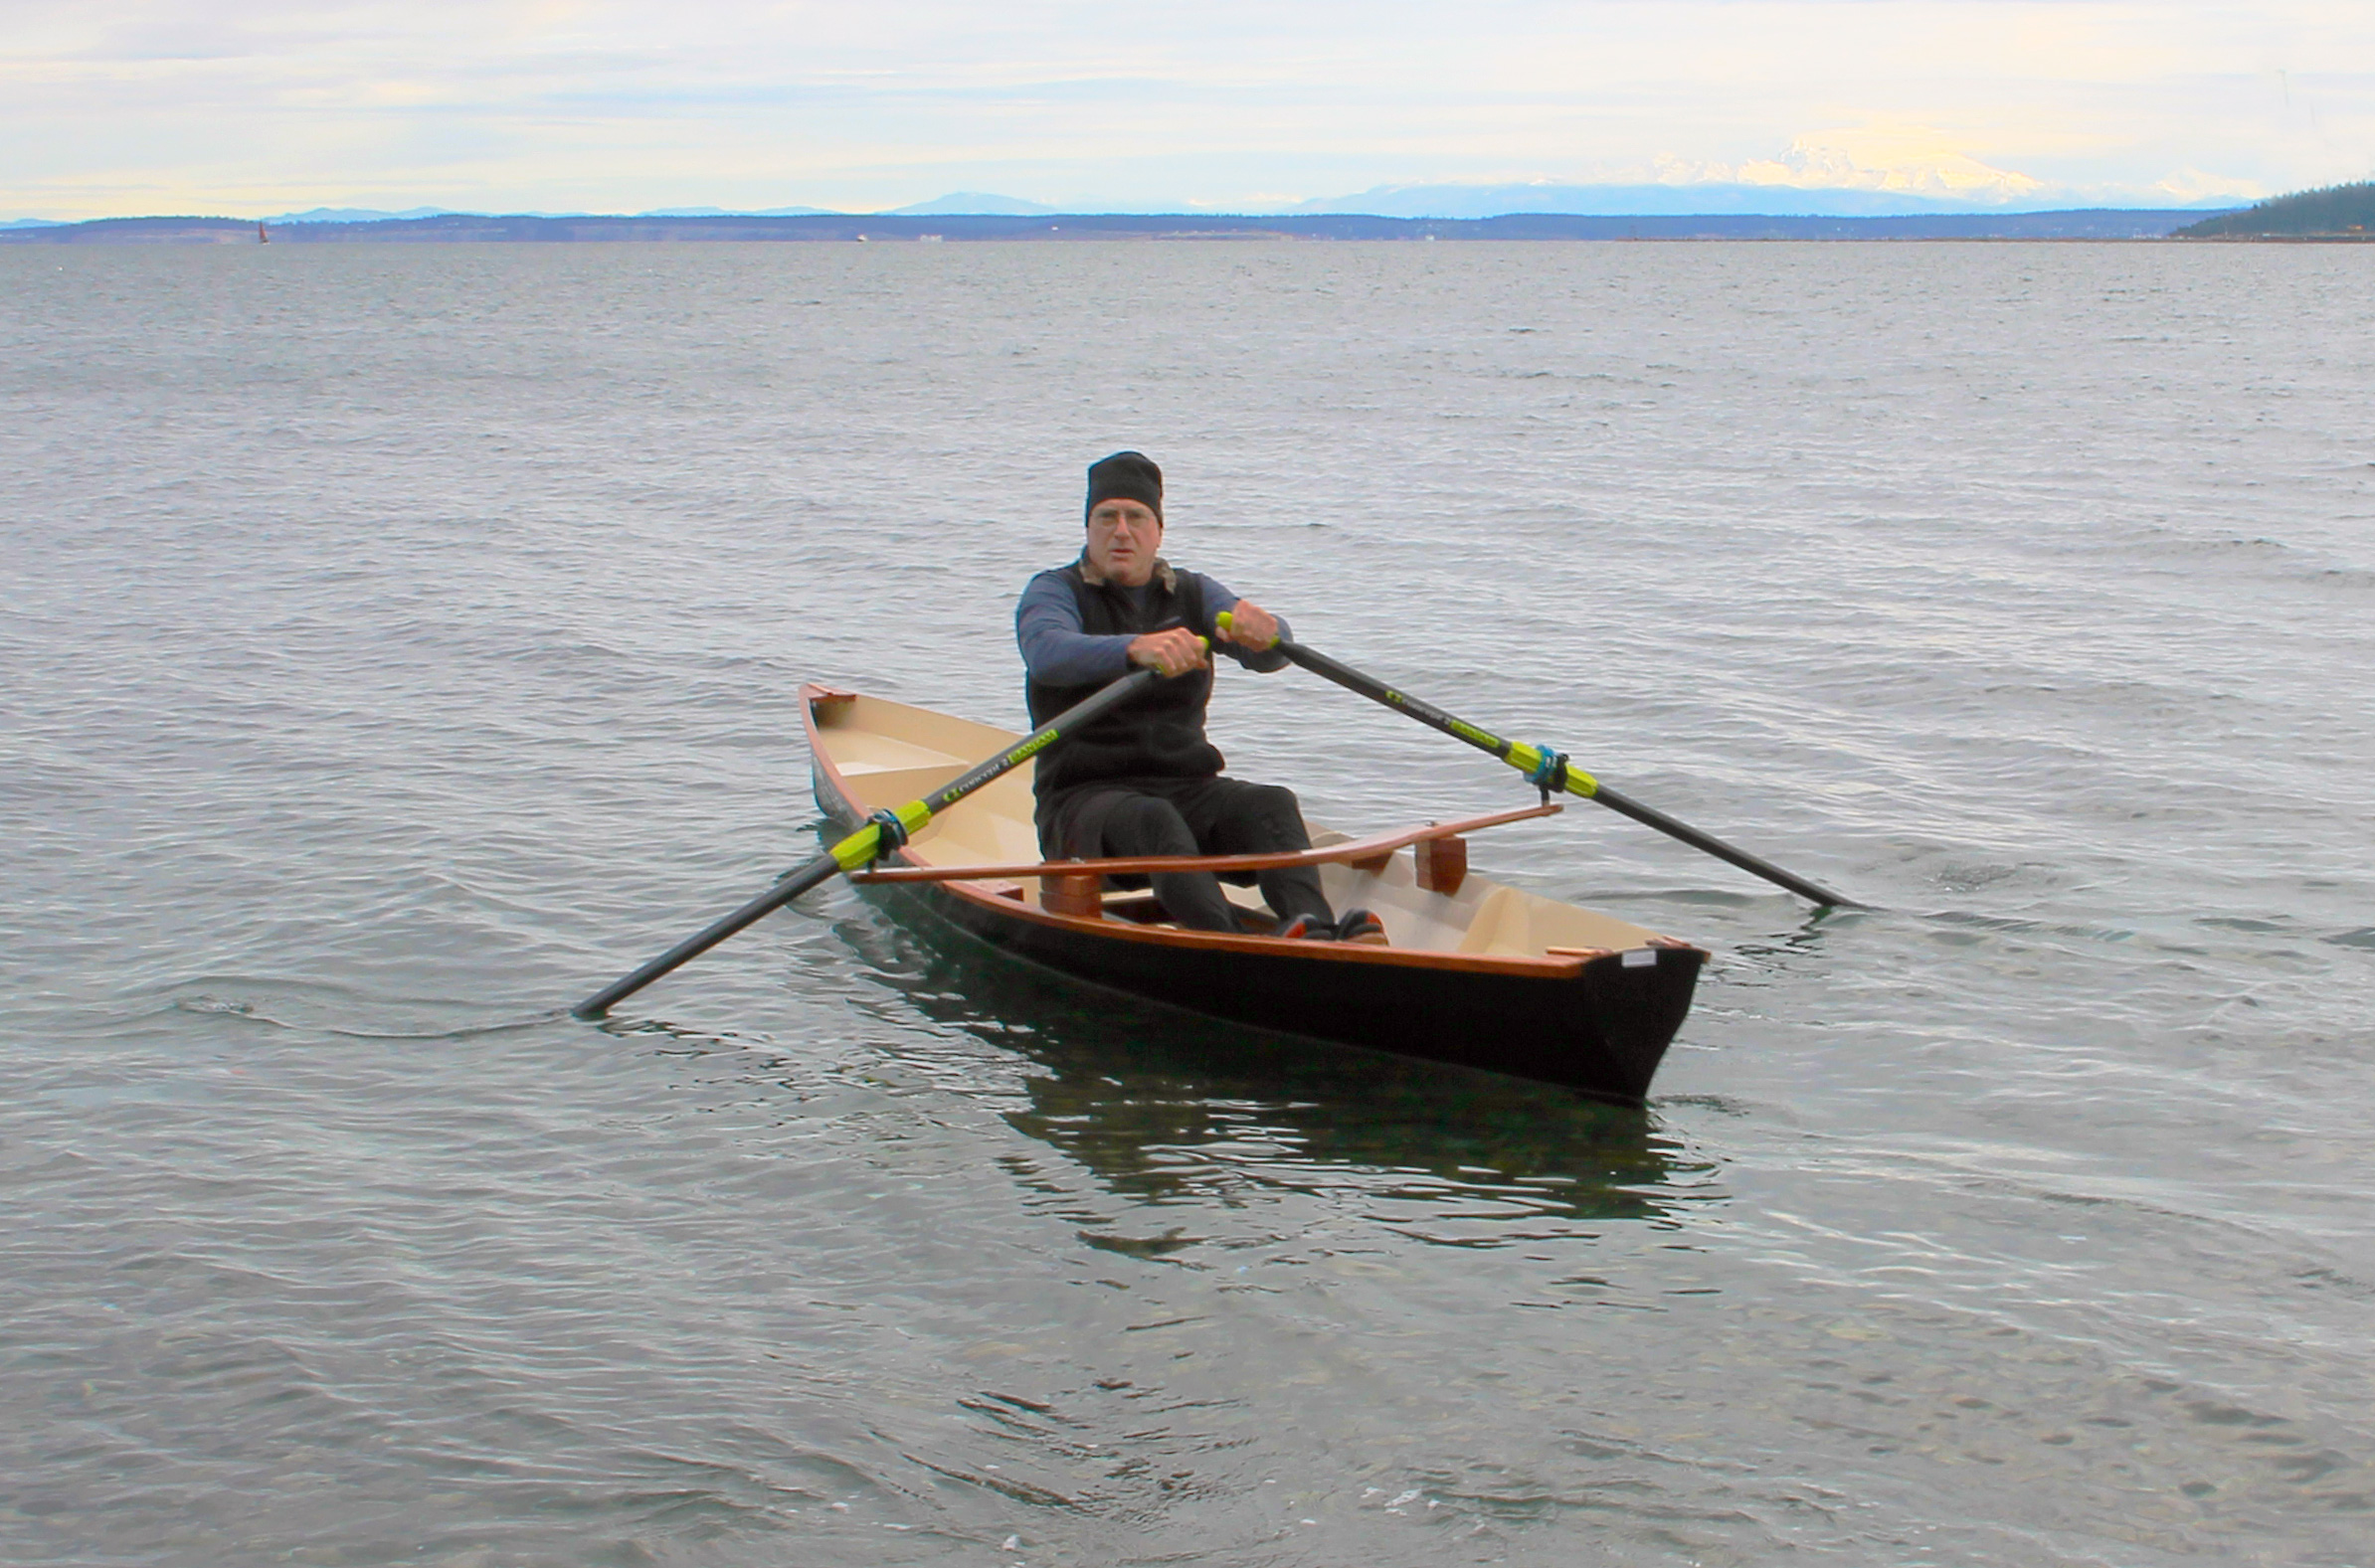
The designer sets the Oxford Wherry’s cruising speed at 3 to 4 knots and the top speed at 6-1/2 knots.
Our next outing was on Vancouver Lake, a venue for rowing competitions. We rowed across the lake and then tested our navigation abilities rowing the 16′ span between the blades down the narrow, serpentine Lake River. Once accustomed to rowing, we found the boat tracked beautifully. Course corrections are as easy as pressing harder with one foot, which translates into about a 5-degree change of direction with each stroke.
The stability added by the long sculls made it easy to get in and out of the wherry. I generally row early in the day on smooth water, and in calm conditions, the boat tracks well and glides quickly. At 235 lbs, I’m a large person, and rowing solo I have enough freeboard. Rowing with a passenger is very smooth and comfortable with minimal loss of speed and maneuverability. When I venture out alone on windy days I feel safe and rarely have water splashing aboard. With Suzanne and some gear along, the load is likely over 400 lbs and I pay more attention to chop and wakes. A bit of water may splash over the gunwale and make some bailing necessary. As with any rowing boat, it is more work to control the boat in chop, especially if taking the chop or wind on the side or the port or starboard bow. When taking waves head-on or running with a following sea, the boat handles well.
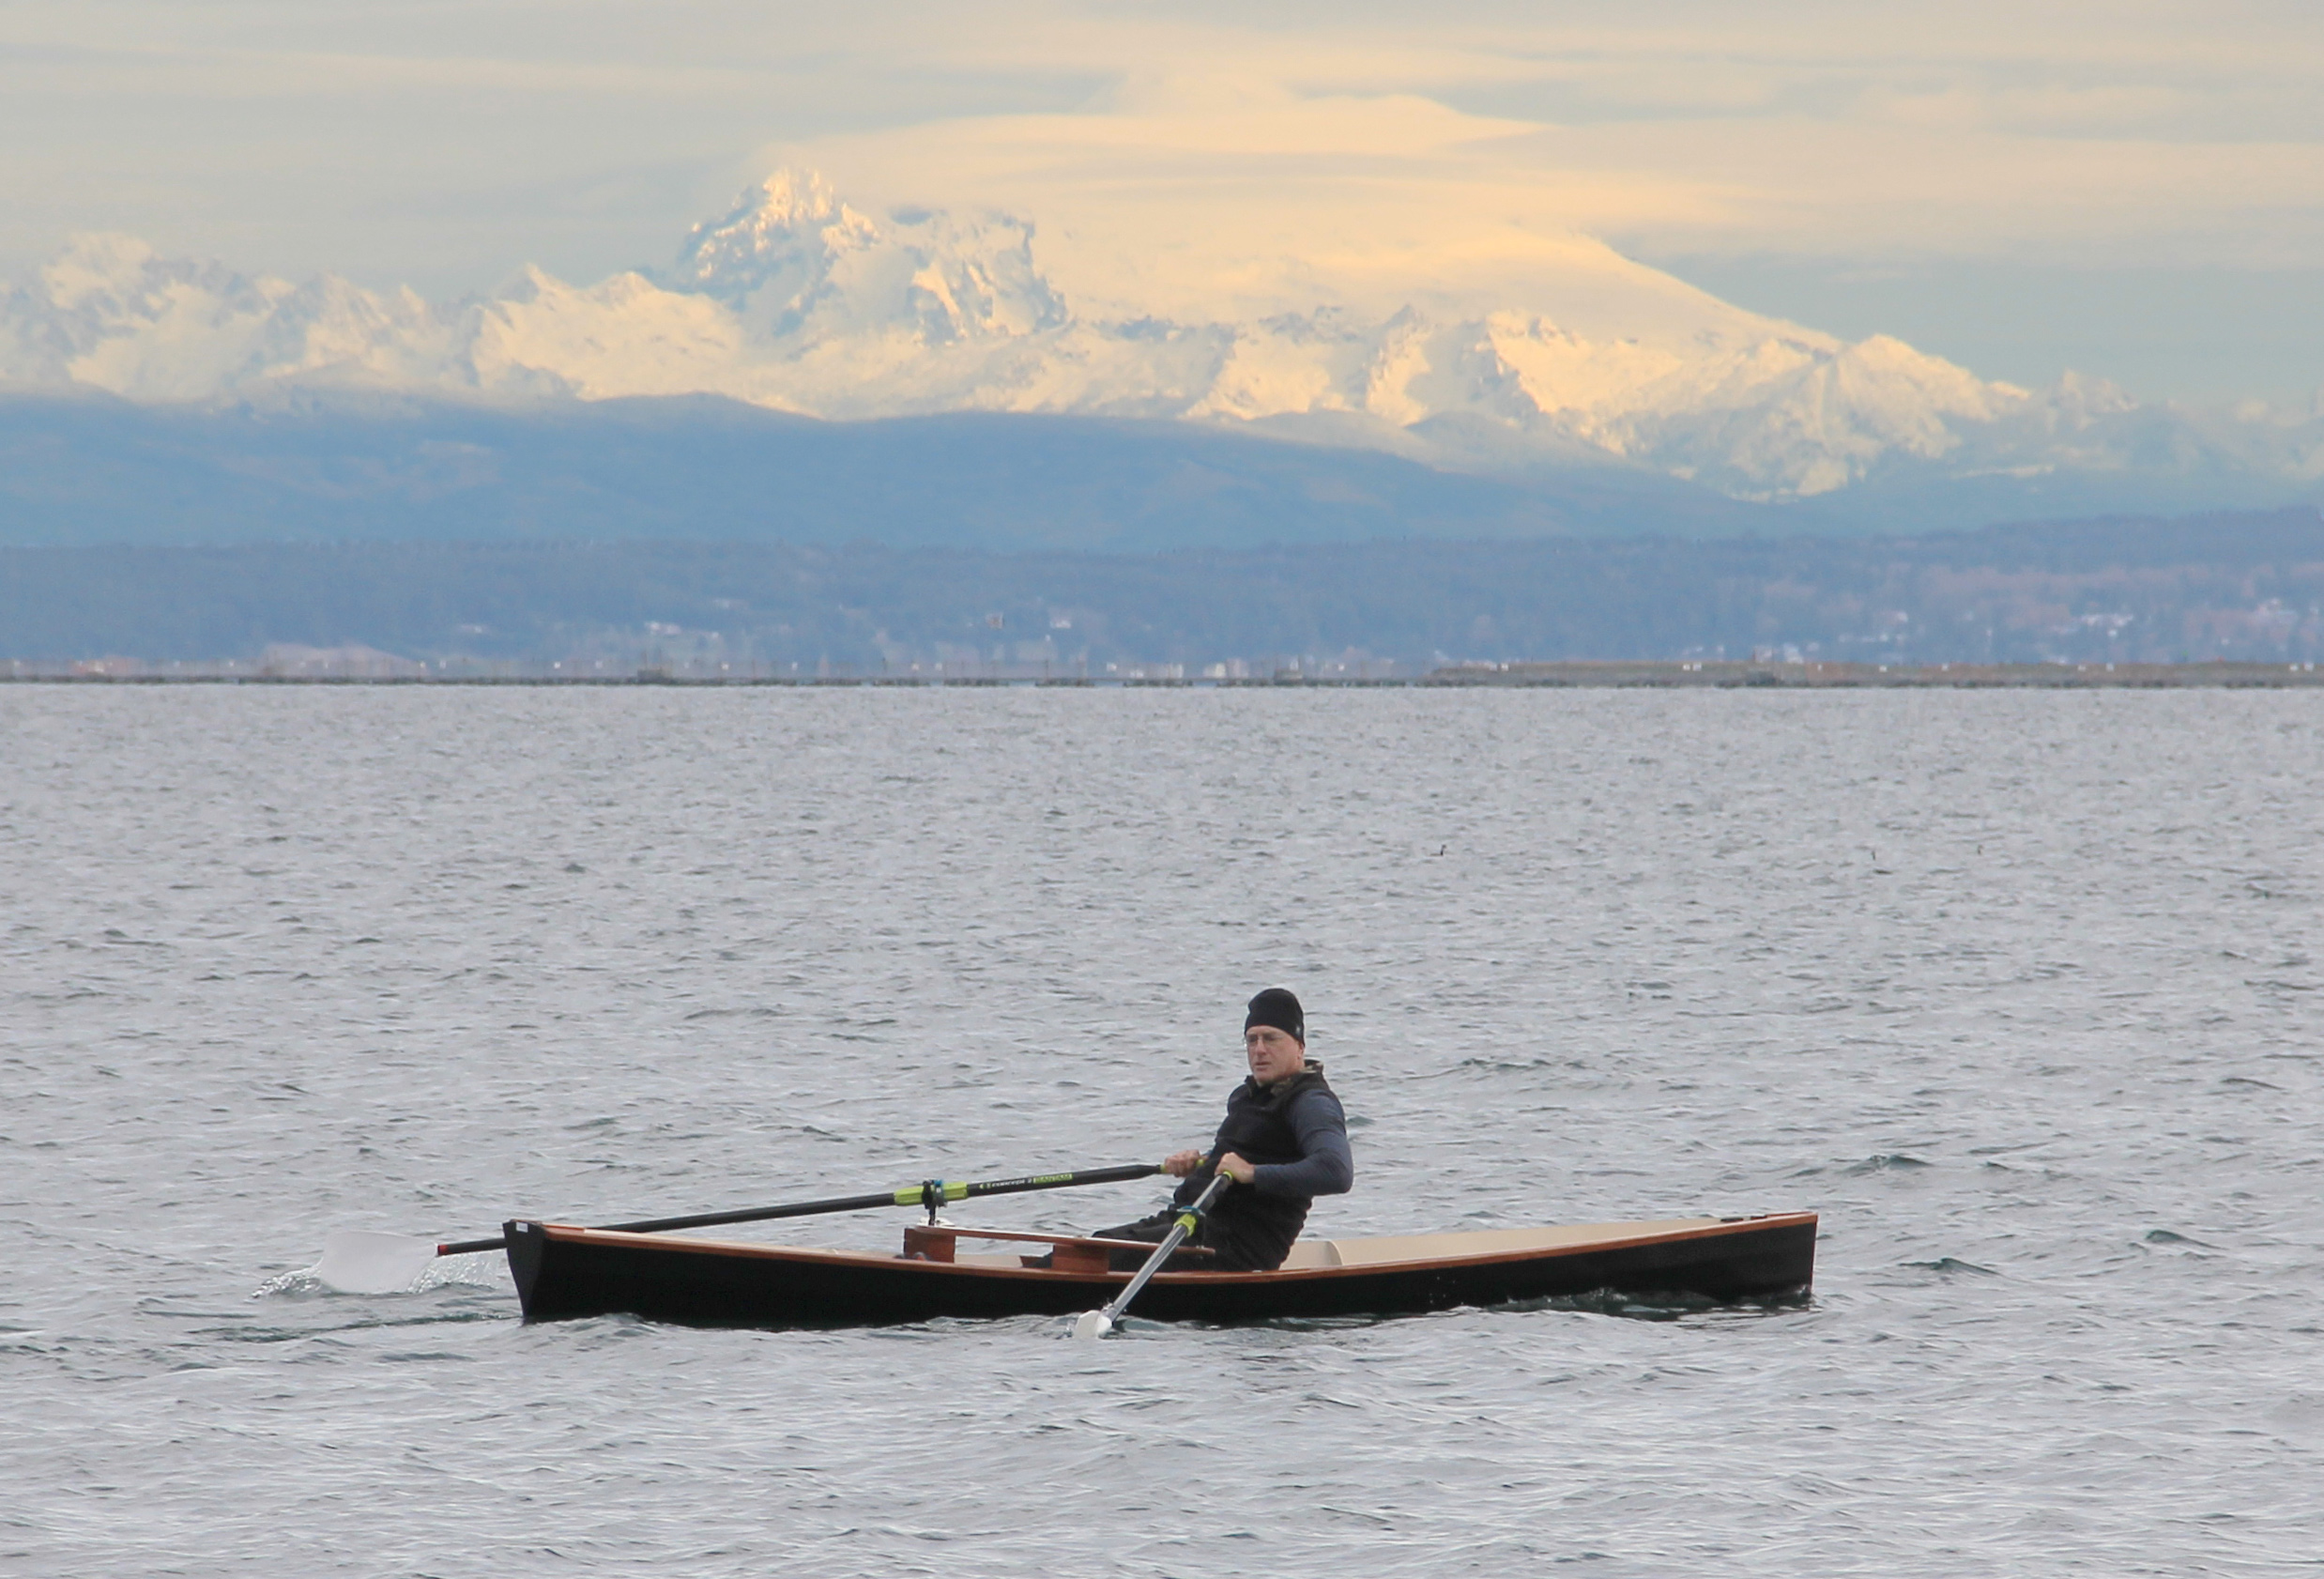
The designer compares the seaworthiness of the Oxford Wherry to that of a canoe. Equipping it with outriggers and sculls provides another measure of stability.
When I retired, I decided to do the things that I regretted not doing when I was younger. I’d been drawn to crew in college, but had been unable to participate while working full time and going to classes. It wasn’t until I was pushing 60 that I finally signed up for rowing lessons. Building the Oxford Wherry had a few of the frustrations common to a budding boatbuilder, but it was a grand adventure and rowing it has been a joyful experience.![]()
Bob Eggleston graduated from college with a degree in psychology and a passionate belief that the only meaningful job would be helping people. He found employment in secure psychiatric facilities working with pre-teens, teens, adults, and finally the elderly, but the sadness of the work took its toll. Bob moved to a more technical career with a large Oregon power company and worked his way into grid operations, partnering with brainy engineers and former Navy nuclear submariners. After a decade there, he took an early retirement to live a more interesting life and do the things he wished he had dreamed about. He moved to Port Townsend,Washington, and enrolled in the nearby Northwest School of Wooden Boatbuilding, to answer this question: “Can a 58-year-old former cube dweller become a productive craftsman?” Bob contently works on answering this question every day.
Oxford Wherry Particulars
[table]
Length overall/15′ 10″
Waterline length/15′ 7″
Beam/38″
Weight/53 lbs
Depth/11″
Freeboard at 250 lbs displacement/7.5″
Freeboard at 600 lbs displacement/5 ″
Cruise speed/3-4 knots
Sprint speed/6.5 knots
Maximum recommended touring load/500 lbs
Maximum recommended short-distance load/600 lbs
[/table]
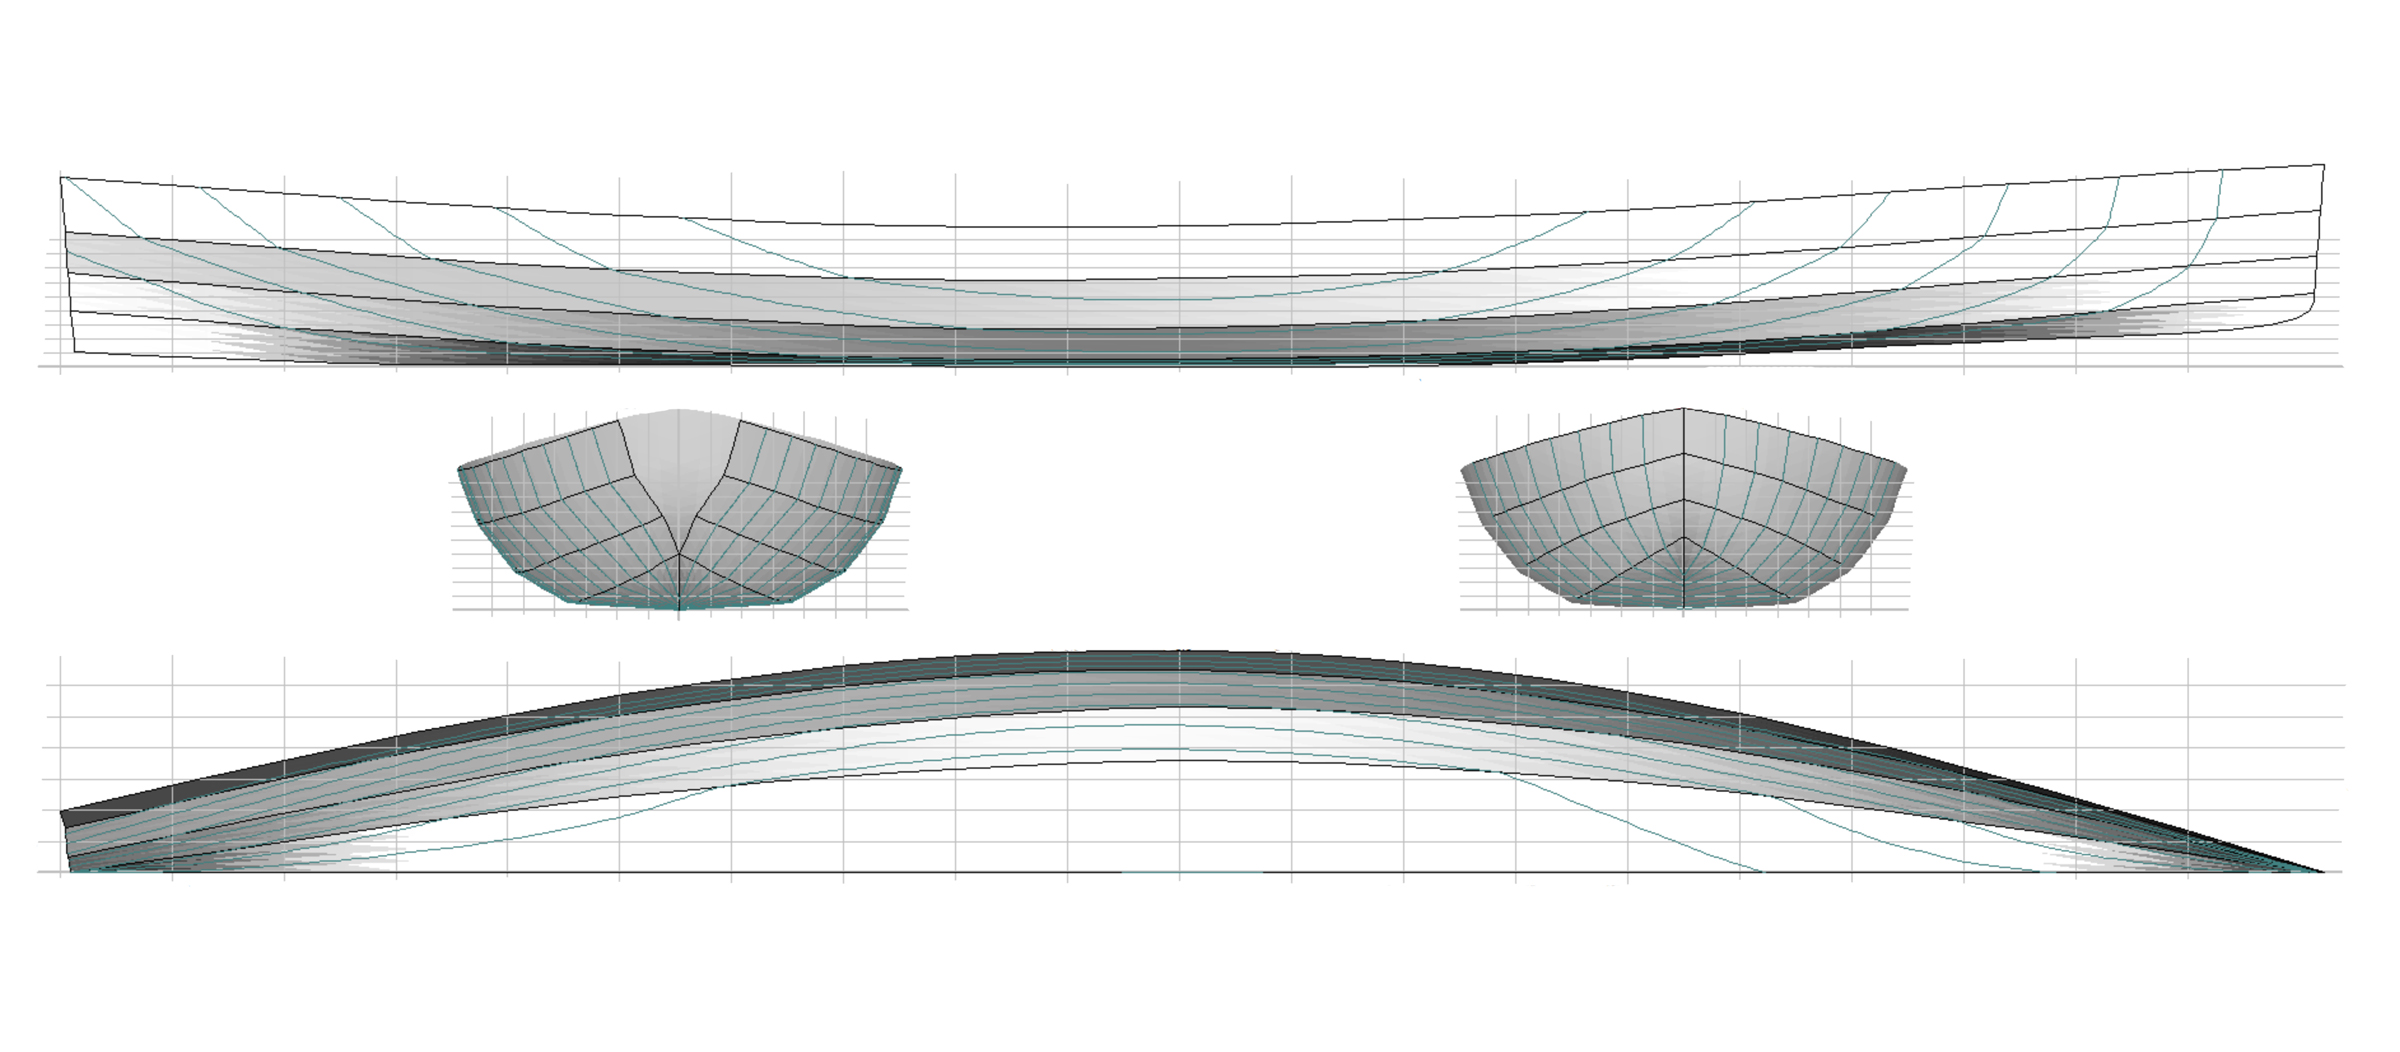
Angus Rowboats offers the Oxford Wherry as digital plans with CNC router files for $129 and a complete kit for $1,399.
Is there a boat you’d like to know more about? Have you built one that you think other Small Boats Magazine readers would enjoy? Please email us!
Super Sailfish
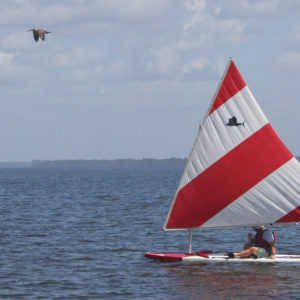
Seventy years ago, LIFE put the Alcort company on the map when the magazine featured the Sailfish sailboat in an article titled “World’s Wettest, Sportiest Boat,” published in the August 15, 1949 issue. Two years earlier, Alcort had expanded their market from iceboats to the little Sailfish, a lateen-rigged wooden hull that measured just under 12′. The boat was easy to handle, affordable, and offered a sporty, splashy ride to America’s post-war market of recreational sailors.
In 1946, Alex Bryan and Cortlandt Heyniger had combined bits of their first names to create Alcort, Inc., and the first sailboat that they designed, in 1947, was the 11′ 7″ Sailfish, built in Waterbury, Connecticut. The Sailfish had a beam of 31-1/2″, a crew capacity of 300 lbs, and weighed 82 lbs. The volume of air enclosed by the hull and deck made the boat virtually unsinkable. A 65-square-foot lateen sail provided ample power.
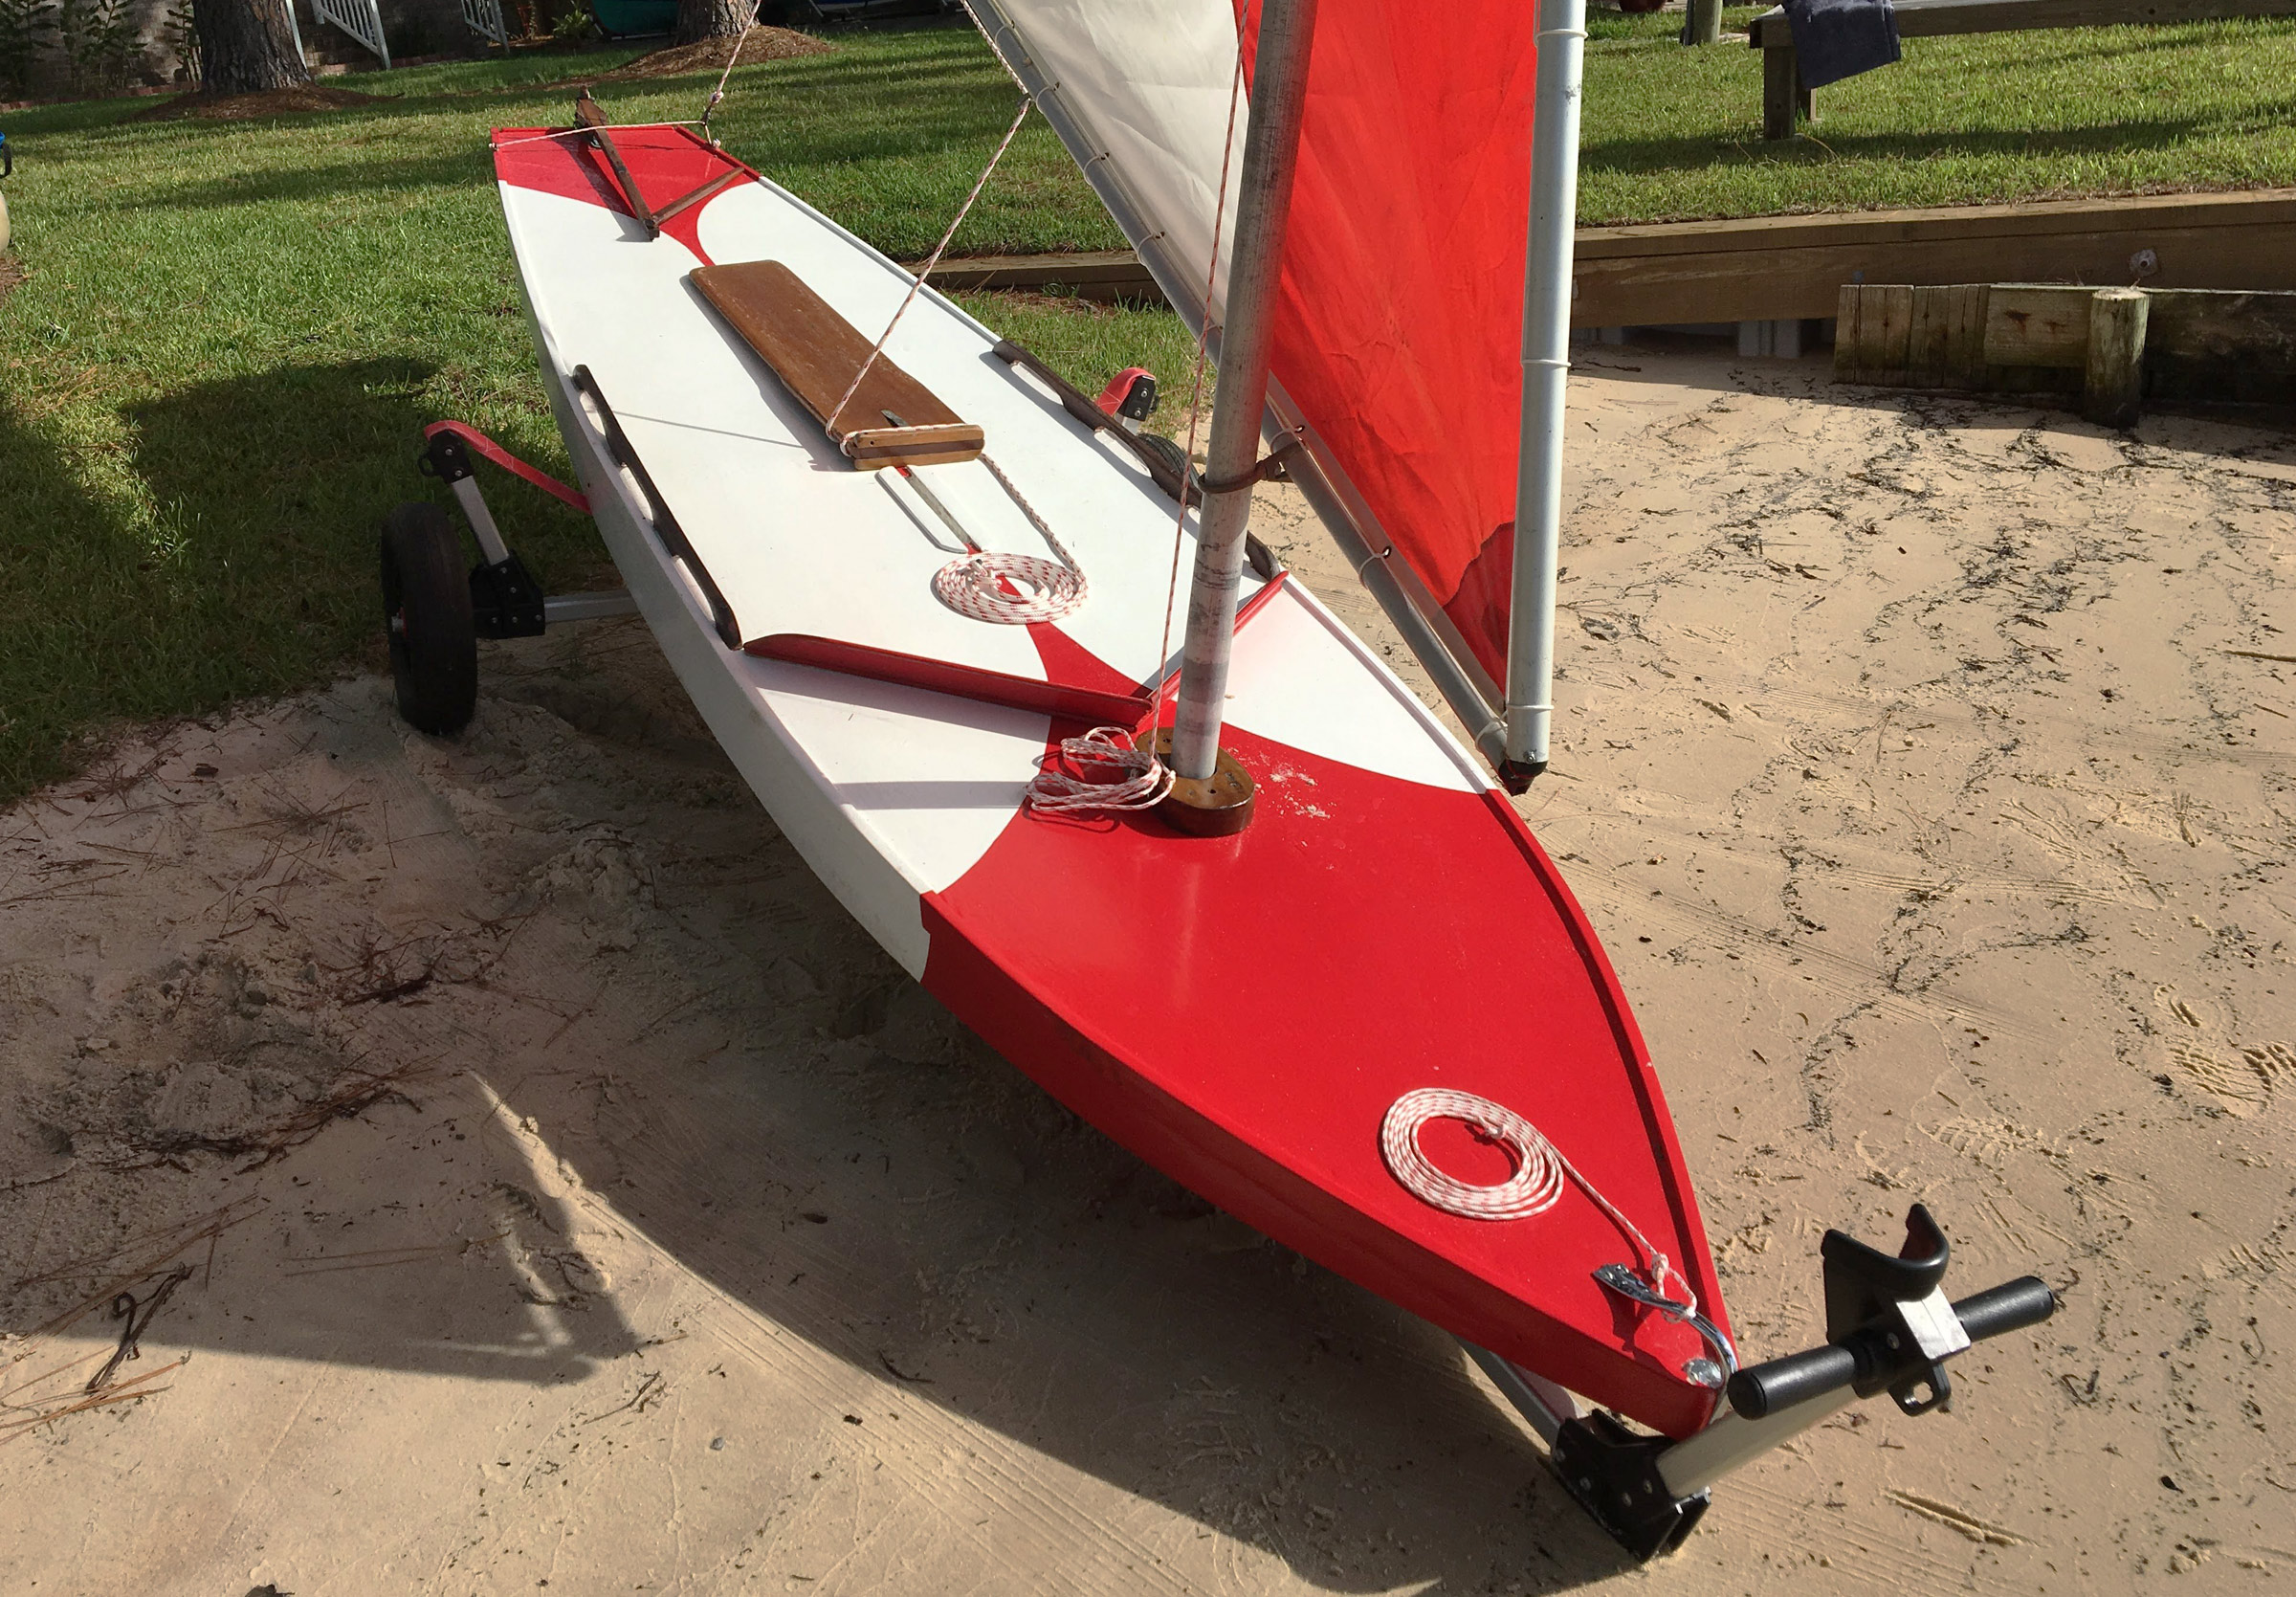 Photographs by the authors
The authors’ Super Sailfish, ZSA ZSA, is their restoration of a wooden boat built in the 1950s. Here, the varnished daggerboard rests just aft of its slot.
The boat gained immediate popularity after the LIFE article, and within a few years the original design was lengthened to 13′ 7″ and widened a bit to 35-1/2″. The larger Sailfish flew a 75-square-foot sail, weighed 102 lbs, and had a crew capacity of 400 lbs. The original Sailfish was then labeled the Standard Sailfish and the big sister named the Super Sailfish. Production of the two models of Sailfish was brisk, and in 1960 Alcort added a fiberglass version, the Super Sailfish MK II. The MK II hull was the same size as the Super Sailfish, had the same capacity of 400 lbs, and used the same rig, but weighed 98 lbs. Alcort was also producing the wooden Sunfish, which used the same sail rig, daggerboard, and rudder as the Super Sailfish line, and a fiberglass Sunfish with a longer daggerboard and taller transom.
The Alcort literature promised the Sailfish would deliver “thrilling speed, brilliant performance, perfect portability, and swamp-proof safety.” The hull, deck, and frames were made of marine plywood, with mahogany sides, transom, rudder, tiller, and daggerboard. Wilcox and Crittenden in nearby Middletown manufactured the bronze and brass fittings for all of the Alcort boats. The spars on the original Sailfish were cut from Sitka spruce, mid-generation masts were a hybrid aluminum base with wooden top, and spars from the late 1950s on were aluminum.
Alcort offered the Standard Sailfish, Super Sailfish, and Super Sailfish MK II as factory-built boats, and they sold precision-cut knockdown kits for a wooden Sailfish through the late ’50s through the mid-’60s. The Standard Sailfish was phased out in the mid-’60s and the Super Sailfish kit was last seen in the late ’60s. Along the way, a two-page set of plans was produced by Alcort with measurements and a materials list for the frames, hull, rudder, daggerboard, spars, and sail. Armed with the plans, an intrepid home builder could build the boat with locally sourced lumber and hardware. We had occasion recently to replace the bottom panels on a factory-built Super Sailfish, and while we had the panels off we validated the measurements in the plans, and all were within a 1/32″ with only one exception. The factory boat’s bow was swept up just under 1″, a design improvement that helped reduce submarining.
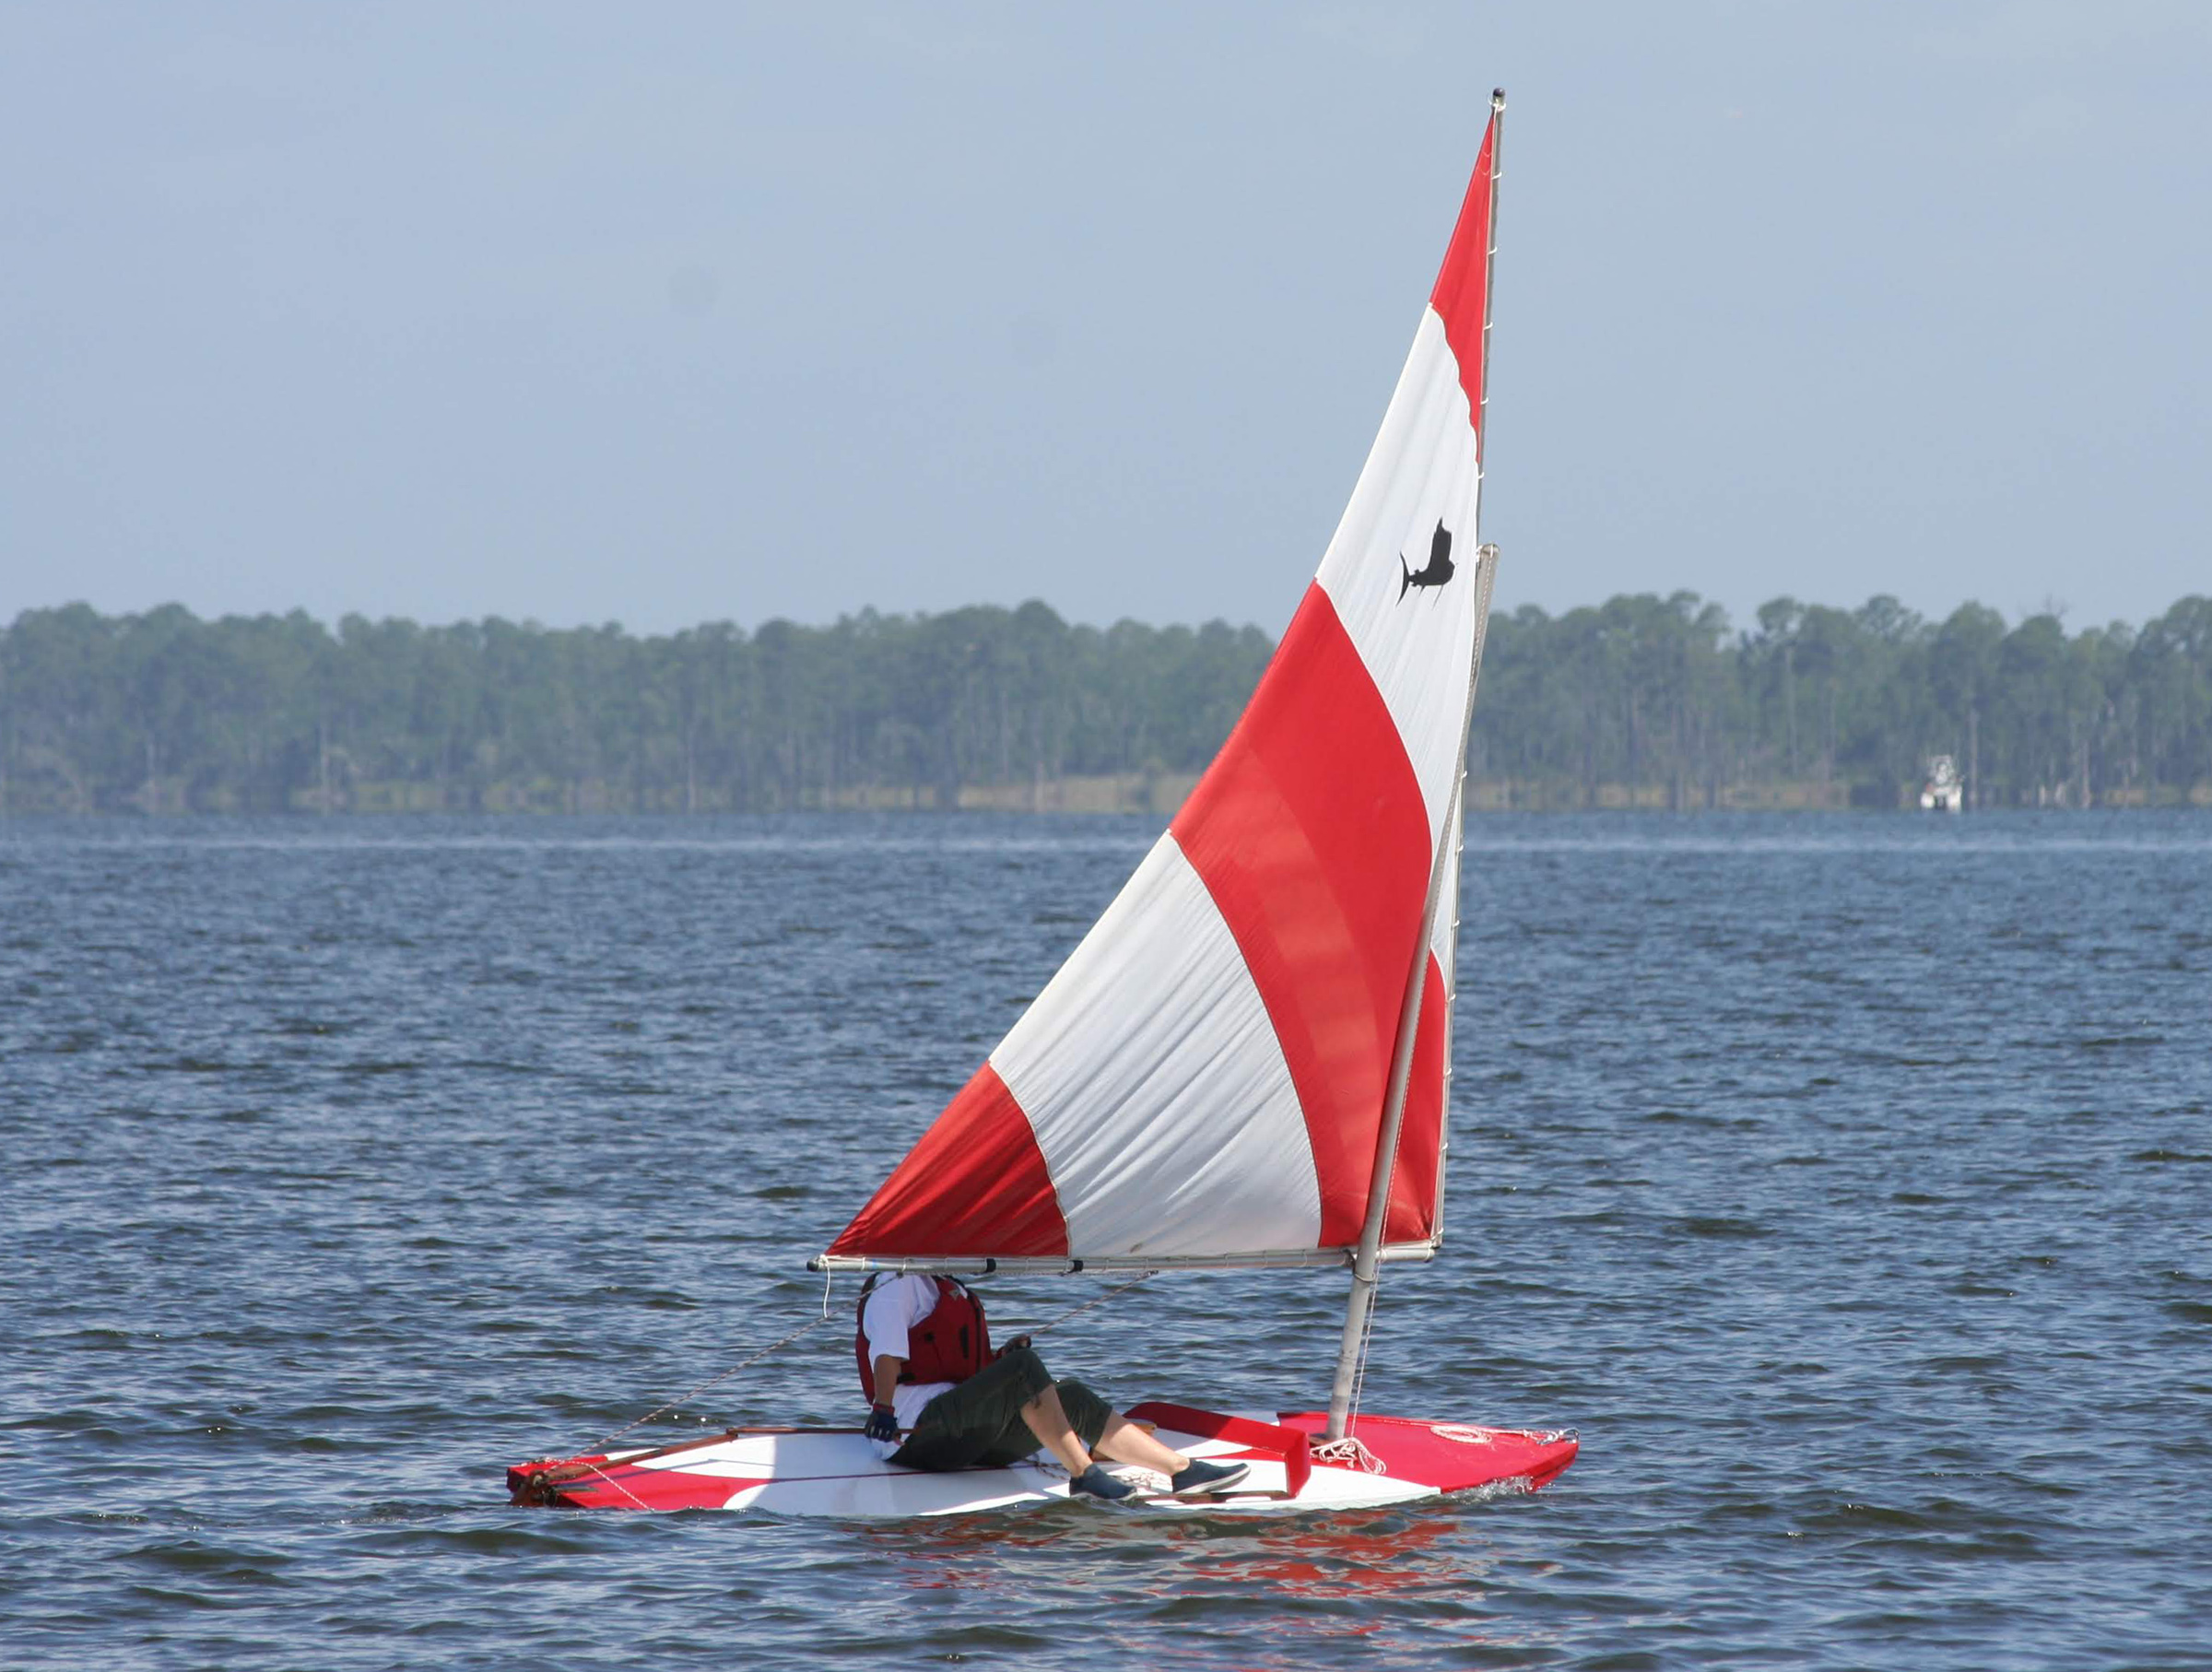
The handrails amidships have an important role as foot bracing to keep the sailor from sliding off the deck when the boat heels.
The Sailfish kits came with all of the wood, hardware, sails, and line needed. Finishing kits with primer, putty, paint, and varnish could be purchased as well. Alcort provided eight pages of well-written instructions with 16 photos. The first two pages of the instructions contained a list of parts included in the kit with numbered photos. The hull was assembled upside down using the shipping crate as a strongback. The first step was to attach the 13′ 3-3/4″ deck longeron to the stem, the seven frames, maststep, daggerboard trunk, and transom. The parts were coated with a sealer, and then screwed together, and the deck was then temporarily attached to the skeleton frame and the solid-wood sides were screwed on, attached first to the stem and pulled into place on the transom with a rope windlass. The inner keel longeron was attached to the frames, and it and the sides were beveled to accept the plywood bottom panels. They were attached with glue and bronze ring-shank nails.
The assembly process was easy. Alcort advertised that it could be done over a weekend with a hammer, rasp, plane, screwdriver, handsaw, square, brace, drill, and bits. A jigsaw would be helpful for building a hull from plans.
The Sailfish delivers on Alcort’s promise of fun. We have sailed all of the models and have only capsized once when a sail caught a puff and the sheet pulled Skipper off the deck. The sheet had no fairlead or cleat, so it was either let go of the sheet or go for a short swim. One sailor joked that “the Sailfish was the boat that you learned to swim on.” The shallow-V hulls of the Super Sailfish and especially the Standard Sailfish with its 31-1/2″ beam, require more balance than the Sunfish. When sailing Sailfish, we tend to sit more amidships and hike out by laying backward at an angle, rather than perpendicular to the centerline. Handrails on the deck serve as foot braces to help maintain control of the boat while hands are busy with the sheet and tiller. Some of the models had a small toerail, which is also helpful for maintaining a grip on the flat, cockpitless deck. The sheet also works as a tether to help keep skippers aboard. Some of the Sailfish had nonskid on the deck, but it quickly wore out pants bottoms. One trick that we’ve come up for tacking is to lean backward instead of forward—while you’re wearing a PFD it is harder to bend forward on a Sailfish than on a Sunfish, which has a cockpit to tuck your legs and feet into.
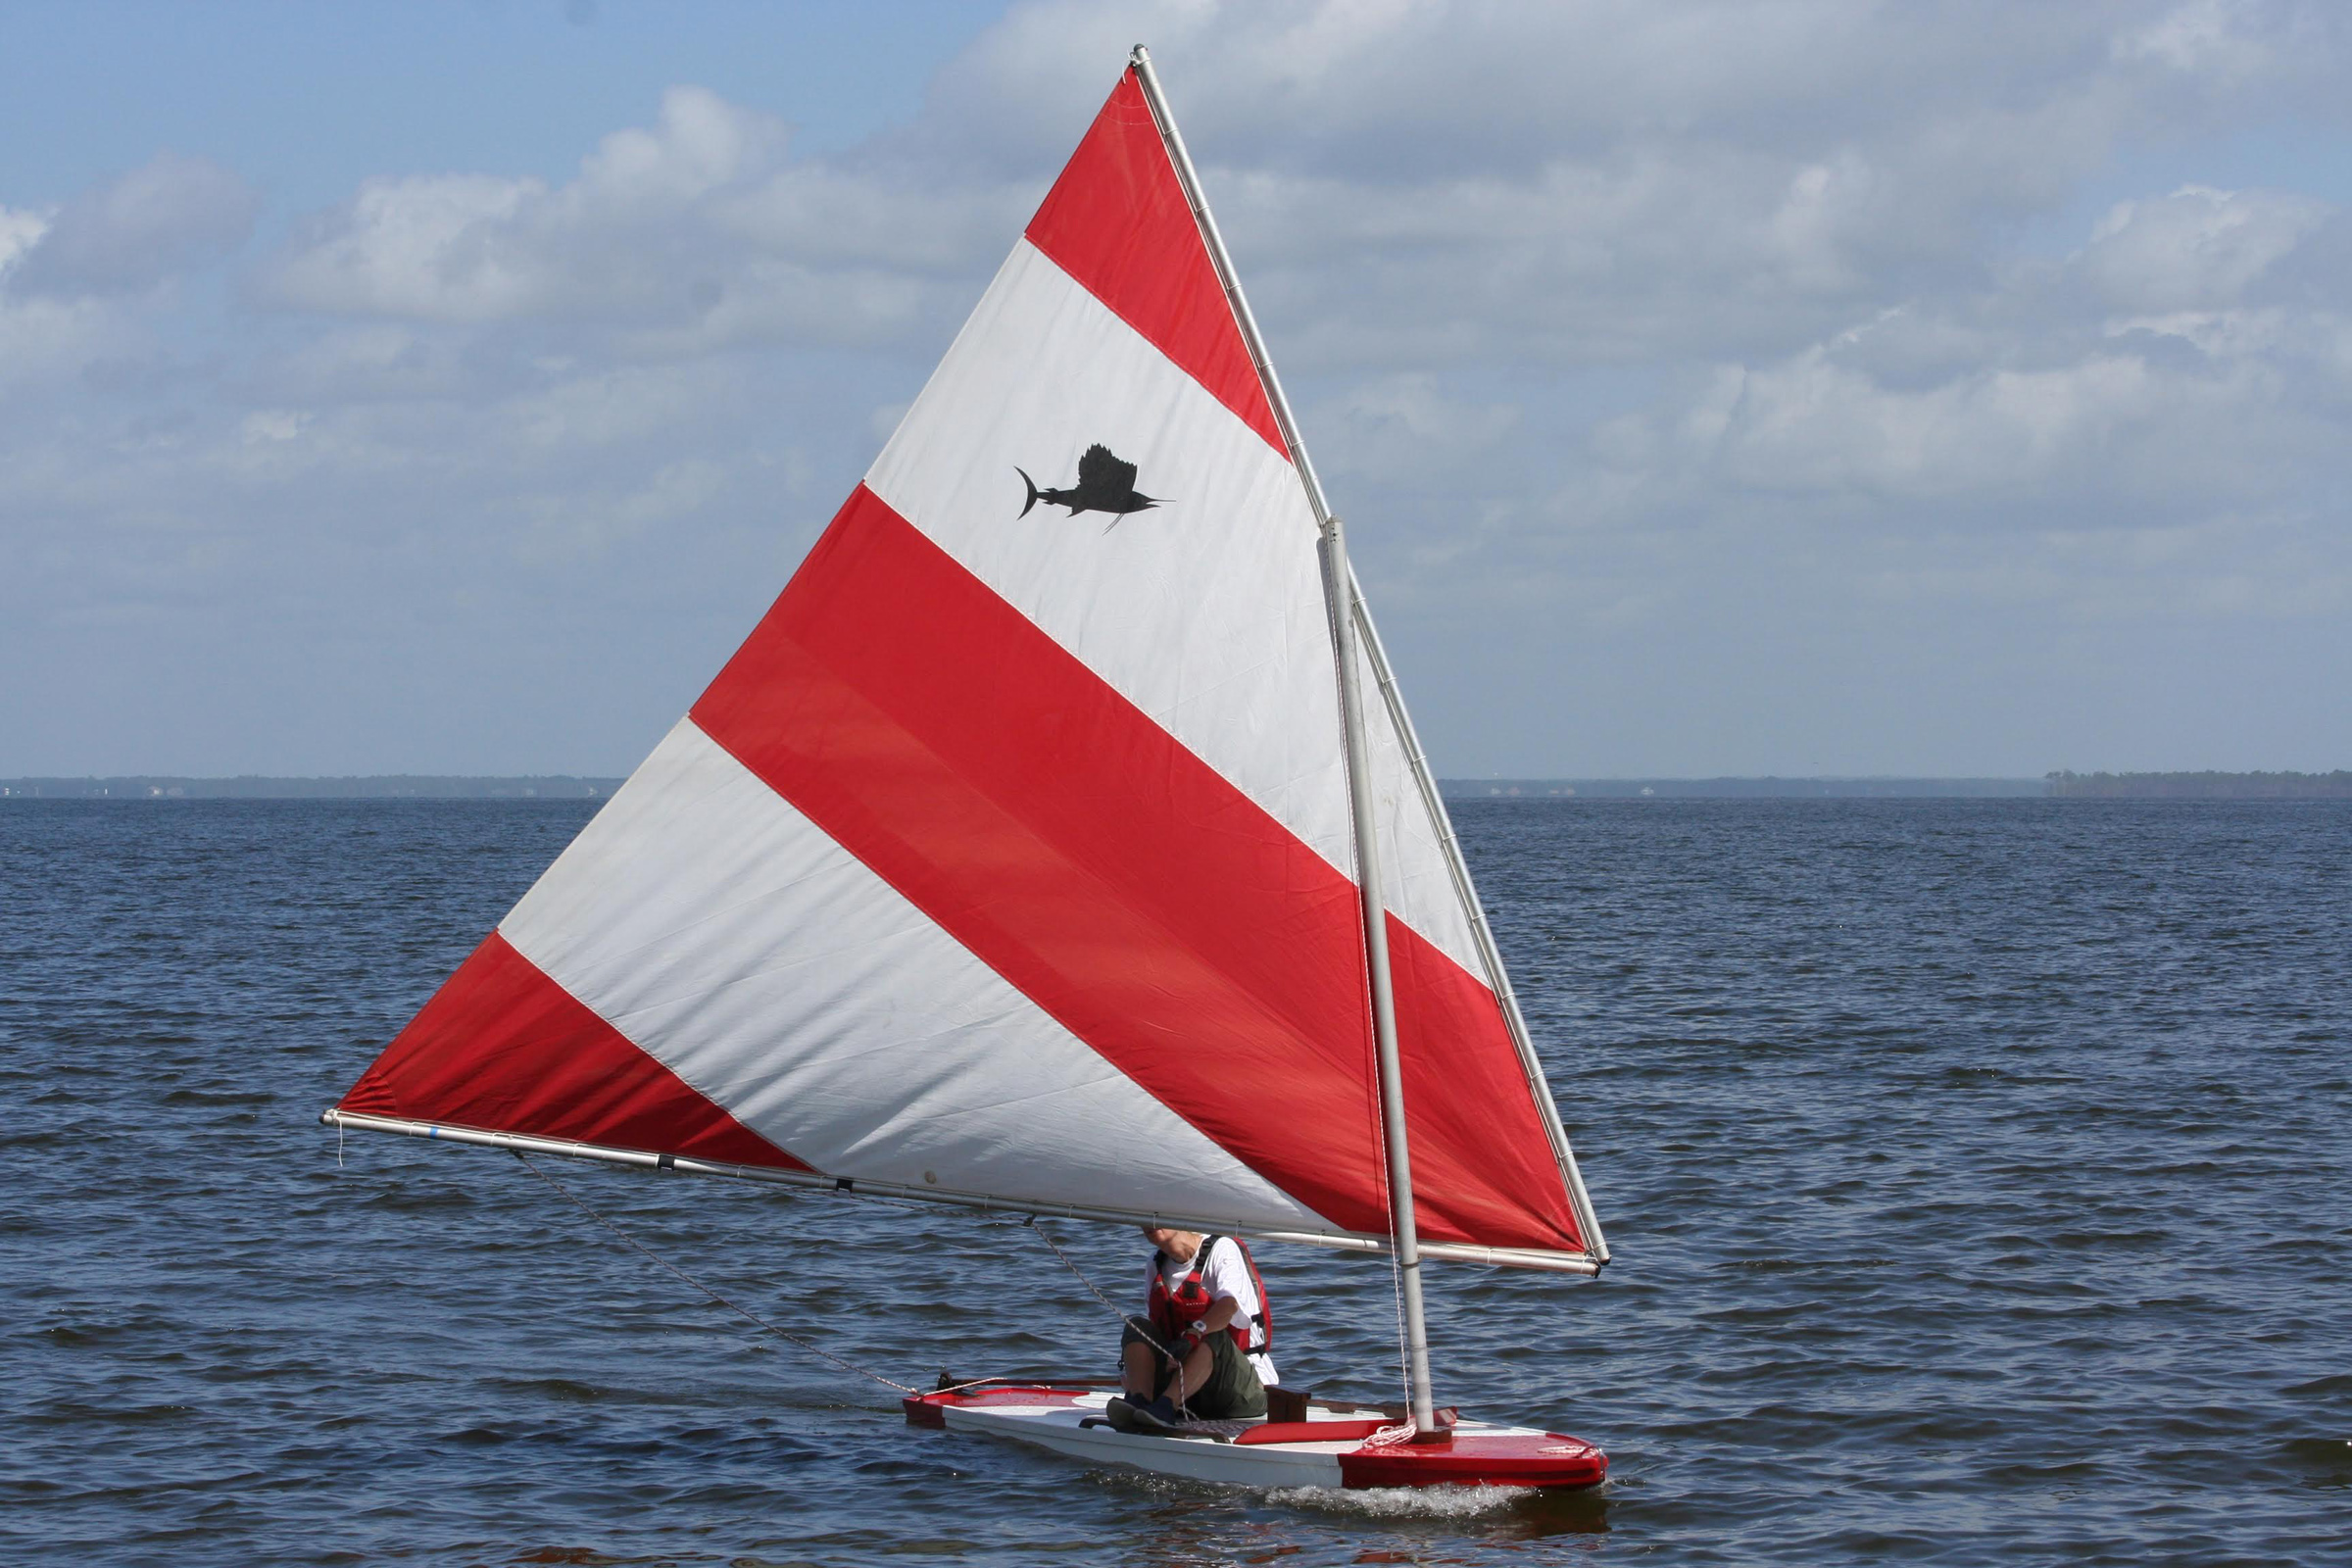
The most recent versions of the spars and mast for the Sailfish were all aluminum.
The Sailfish 65-square-foot sail for the Standard and 75 for the Super are appropriately sized, neither too small to provide fun, even exciting sailing, nor so large as to be overpowering and leading to frequent capsizes. All of the models power up quickly. We’ve found that tacking is improved with a longer daggerboard, similar to the one found on the 1960s fiberglass Sunfish. The mast is easy to step and even kids as young as eight can raise the sail. Our Sailfish moves well even in the lightest of breeze; we enjoy the fingertip control on the tiller and setting coffee cups set on deck, without them sliding over the side. Once the breeze picks up to 5–8 knots, a little more activity is needed to balance the boat and get through tacks smoothly. At 10–12 knots we are moving quickly to stay on course and work the puffs, and above 12 knots we have sailed the Super Sailfish with two on board, one at the tiller and the other serving as movable ballast.
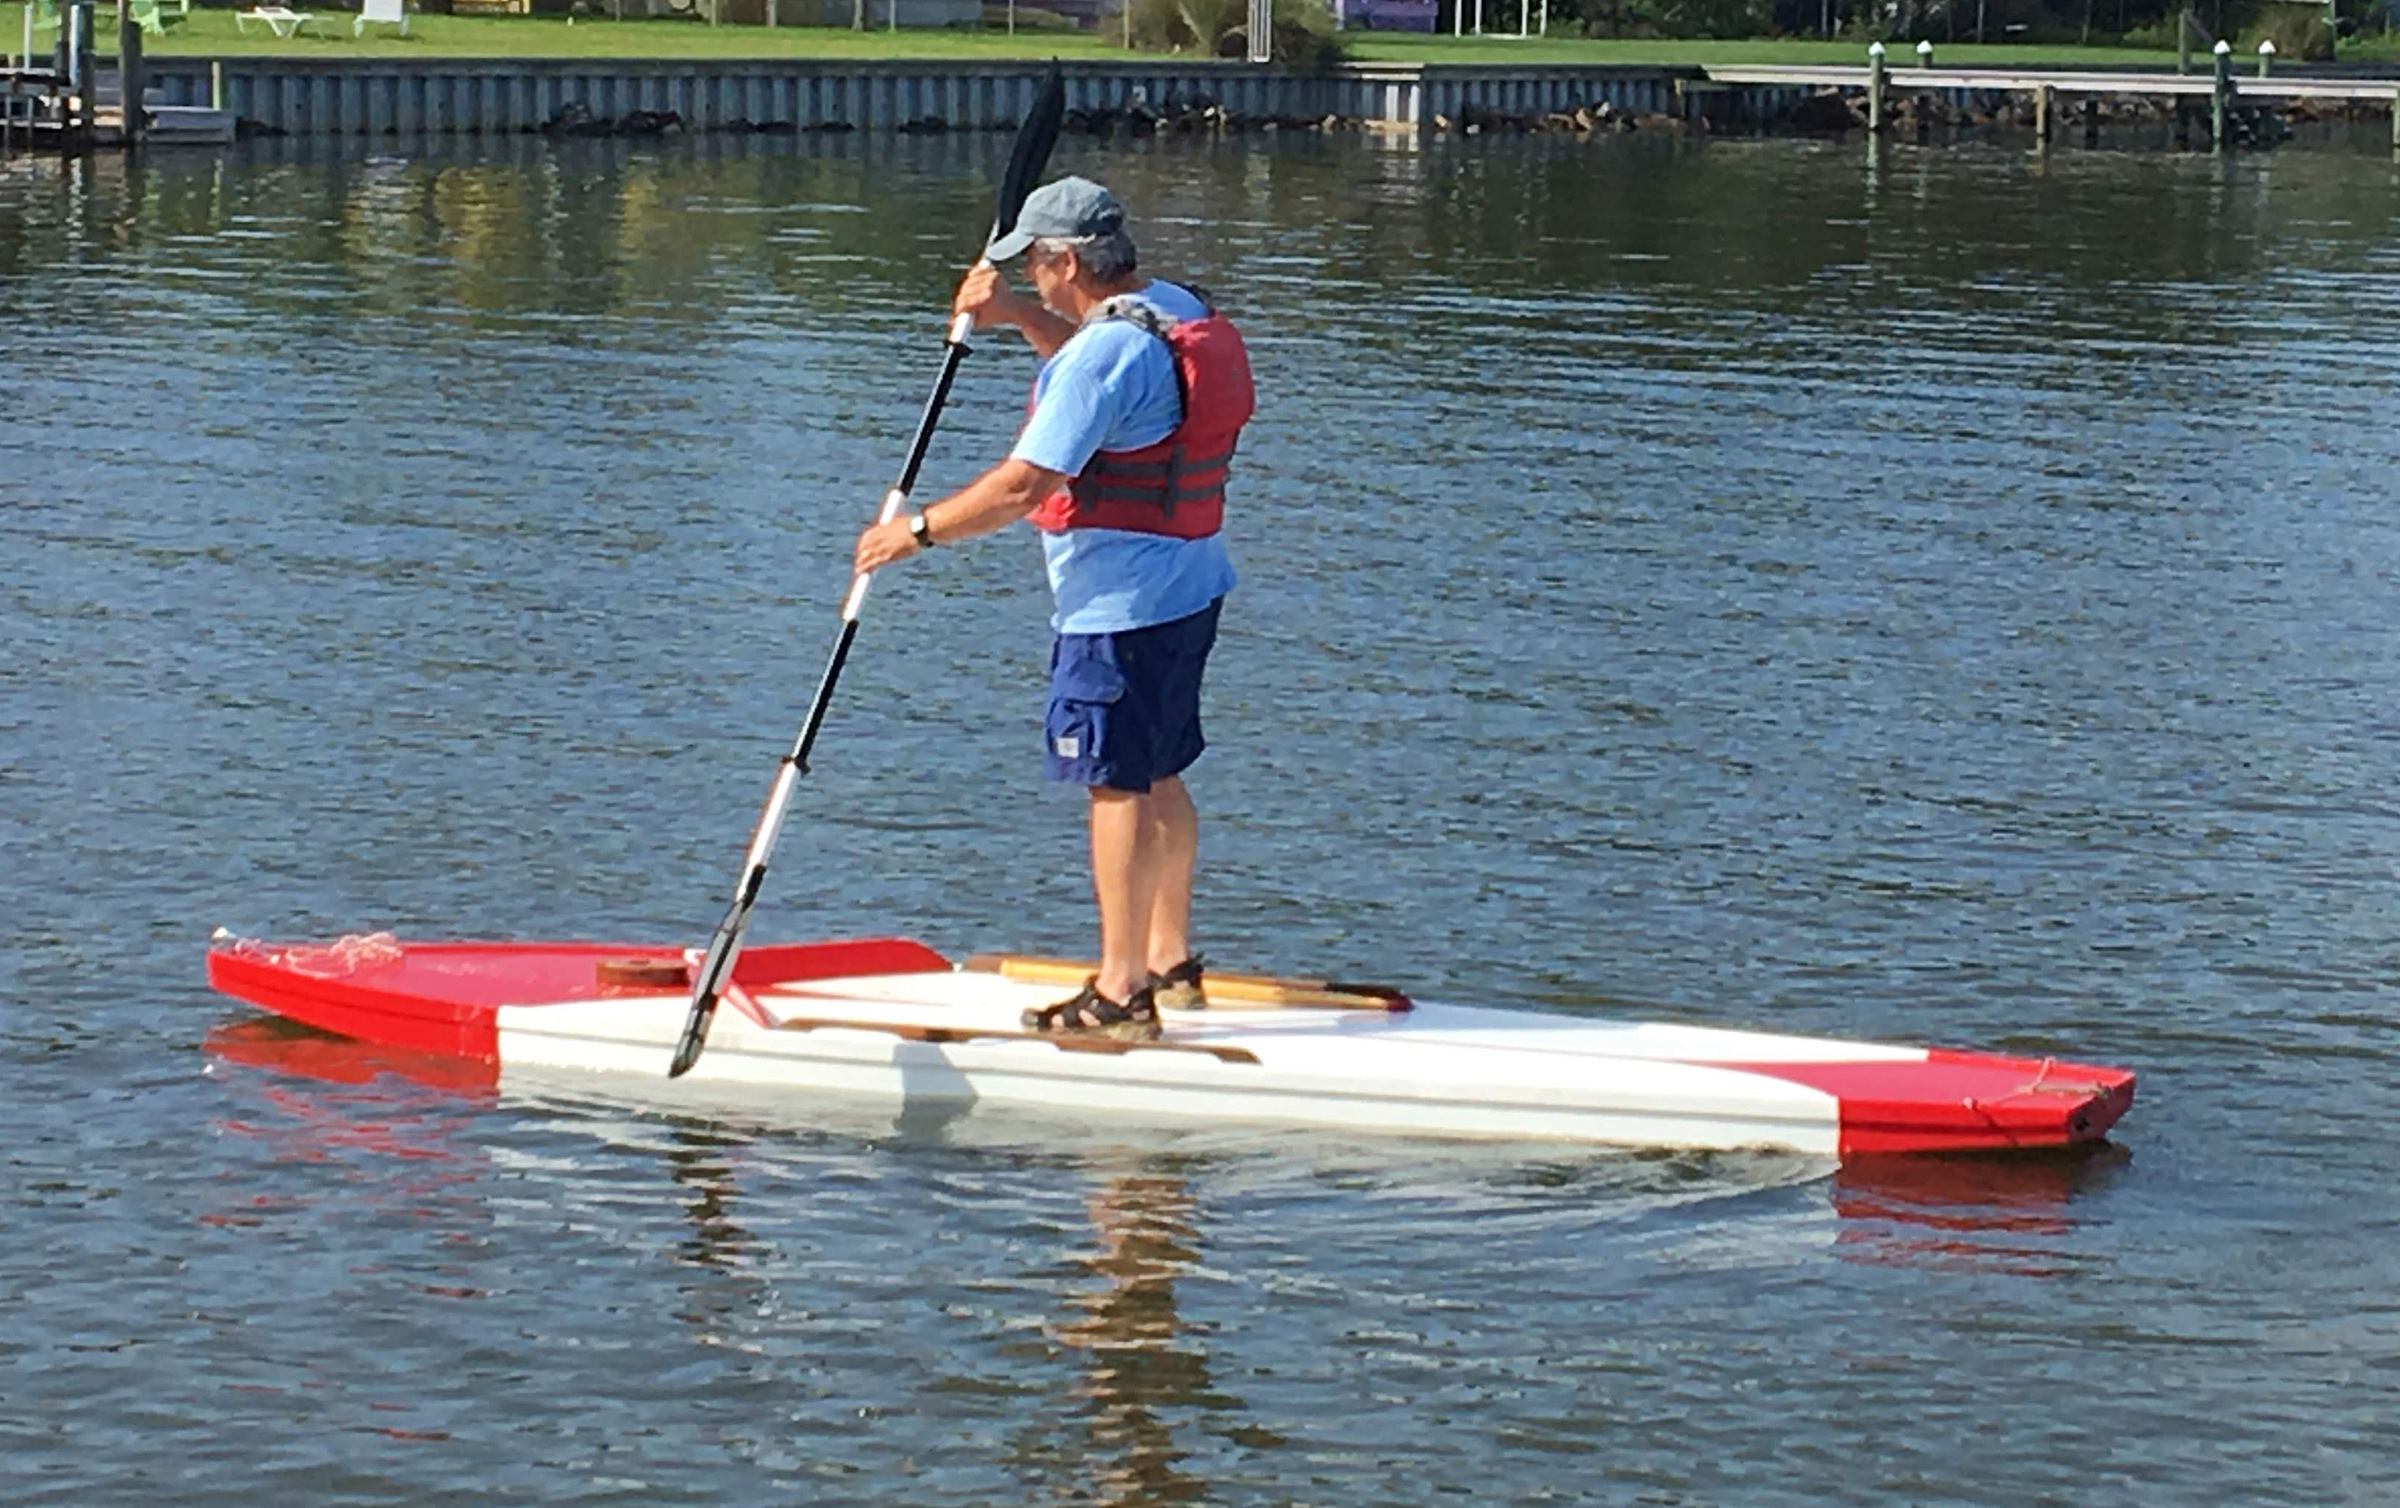
With the sailing rig left ashore, or even stowed on deck, the Super Sunfish serves nicely as a stand-up paddle board.
Alcort made a lot of promises with the Sailfish and delivered on all of them. We’ve even come up with a few more uses for the boats. The Sailfish, with its deck unbroken by a cockpit, makes a respectable stand-up paddleboard, and with a 400-lb capacity, it is well suited for larger paddlers or for an adult taking little crew members out paddling. The deeper hull design has a greater capacity than a normal paddleboard and makes for a very stable platform. The small keel strip helps the boat track straight under paddle power. We can paddle our MK II out in flat calm, and set sail if the wind picks up. I took the hull out once with a low-slung beach chair lashed to the handrails, and it made a fine sit-on-top kayak, a very useful fishing platform or picnic boat. We have also seen folks add outriggers and take their pets out for a ride with plenty of room for the whole pack.
The Sailfish is a proven design. Alcort made thousands of them, and there are still many good boats out there. As the big sisters to the still-available Sunfish, they share most of the same parts, including the sail rig and daggerboard, so building a hull would be an easy way to get into small-boat sailing. The ease of portability and small storage footprint make the Sailfish a fun boat. It’s a nice swim platform for kids, and a wet, wild ride for adults. The up-front investment is minimal and there are no slip fees necessary—just add water!![]()
Kent and Audrey Lewis blog about and maintain a fleet of vintage Alcorts that include a Standard Sailfish, Super Sailfish, Catfish and a wooden Sunfish, along with several fiberglass Sunfish. They also maintain the Yahoo group Sunfish Sailor and publish The Sunfish Owners Manual.
Sailfish Particulars
[table]
Length/11′ 7″
Beam/31.5″
Weight/82 lbs
Capacity/300 lbs
Sail Area/65 sq. ft.
[/table]
Super Sailfish Particulars
[table]
Length/ 13′ 7″
Beam/35.5″
Weight/102 lbs
Capacity/400 lbs
Sail Area/75 sq. ft.
[/table]
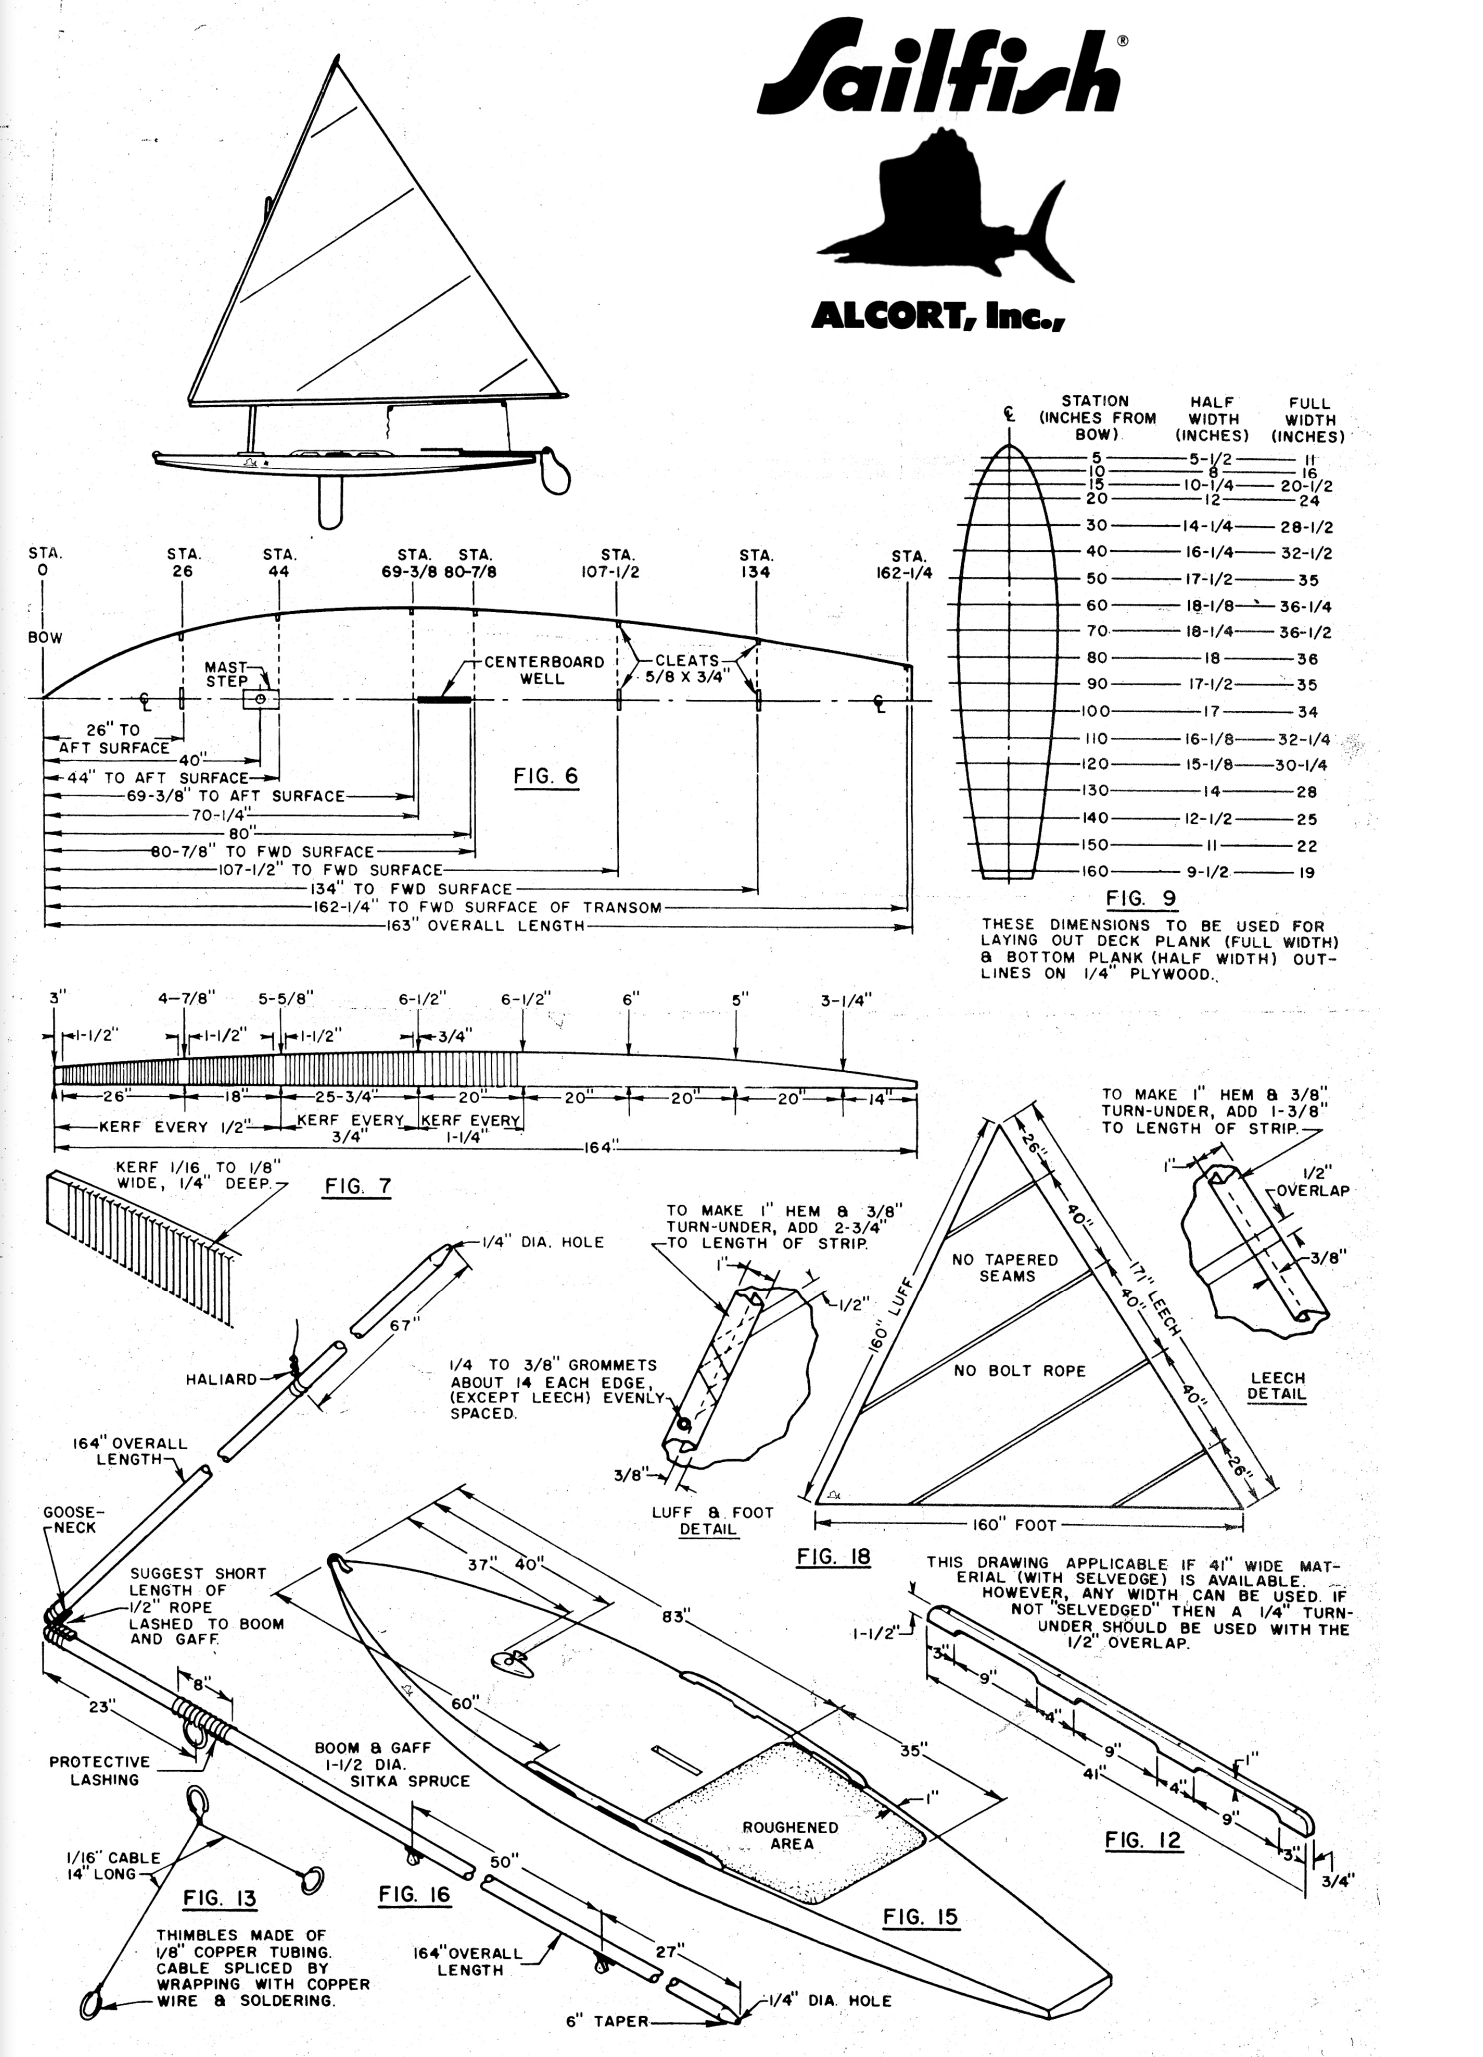 Laser Performance
Super Sailfish with offsets
 Laser Performance
Super Sailfish parts
The kit assembly instructions can be found in the Files section of the Sunfish Sailor Yahoo group (after joining the group) and are very helpful when repairing wooden Sailfish, or for building a new Sailfish from the plans, found in the same Files. Sunfish sails and spars to fit the Super Sailfish can be ordered from Sunfish Direct. The Sunfish is manufactured in fiberglass by Laser Performance.
Is there a boat you’d like to know more about? Have you built one that you think other Small Boats Magazine readers would enjoy? Please email us!
An Uphill Battle
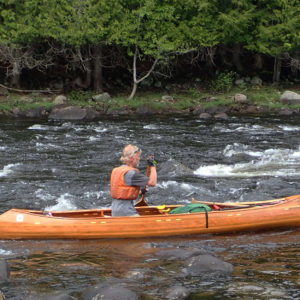
North Hero Island dipped out of sight as I looked up at two converging waves. Both were cresting, the southerly wind blowing spindrift over my head. My hands, already seized from a vice-like grip on the paddle to defy the wind, gripped even more tightly as I nosed the bow of my canoe into the slot between the waves. I began to wonder how long I could muster the strength to continue into this wind.
I had started several hours earlier in Swanton, Vermont. My wife, Viveka, had informed me that the weather was forecast to be the roughest so far: heavy rain and very strong southerly wind, the worst possible for paddling south on Lake Champlain. Her advice was to sit out the storm in the motel, but sitting still is not my style. Nor is getting behind schedule.
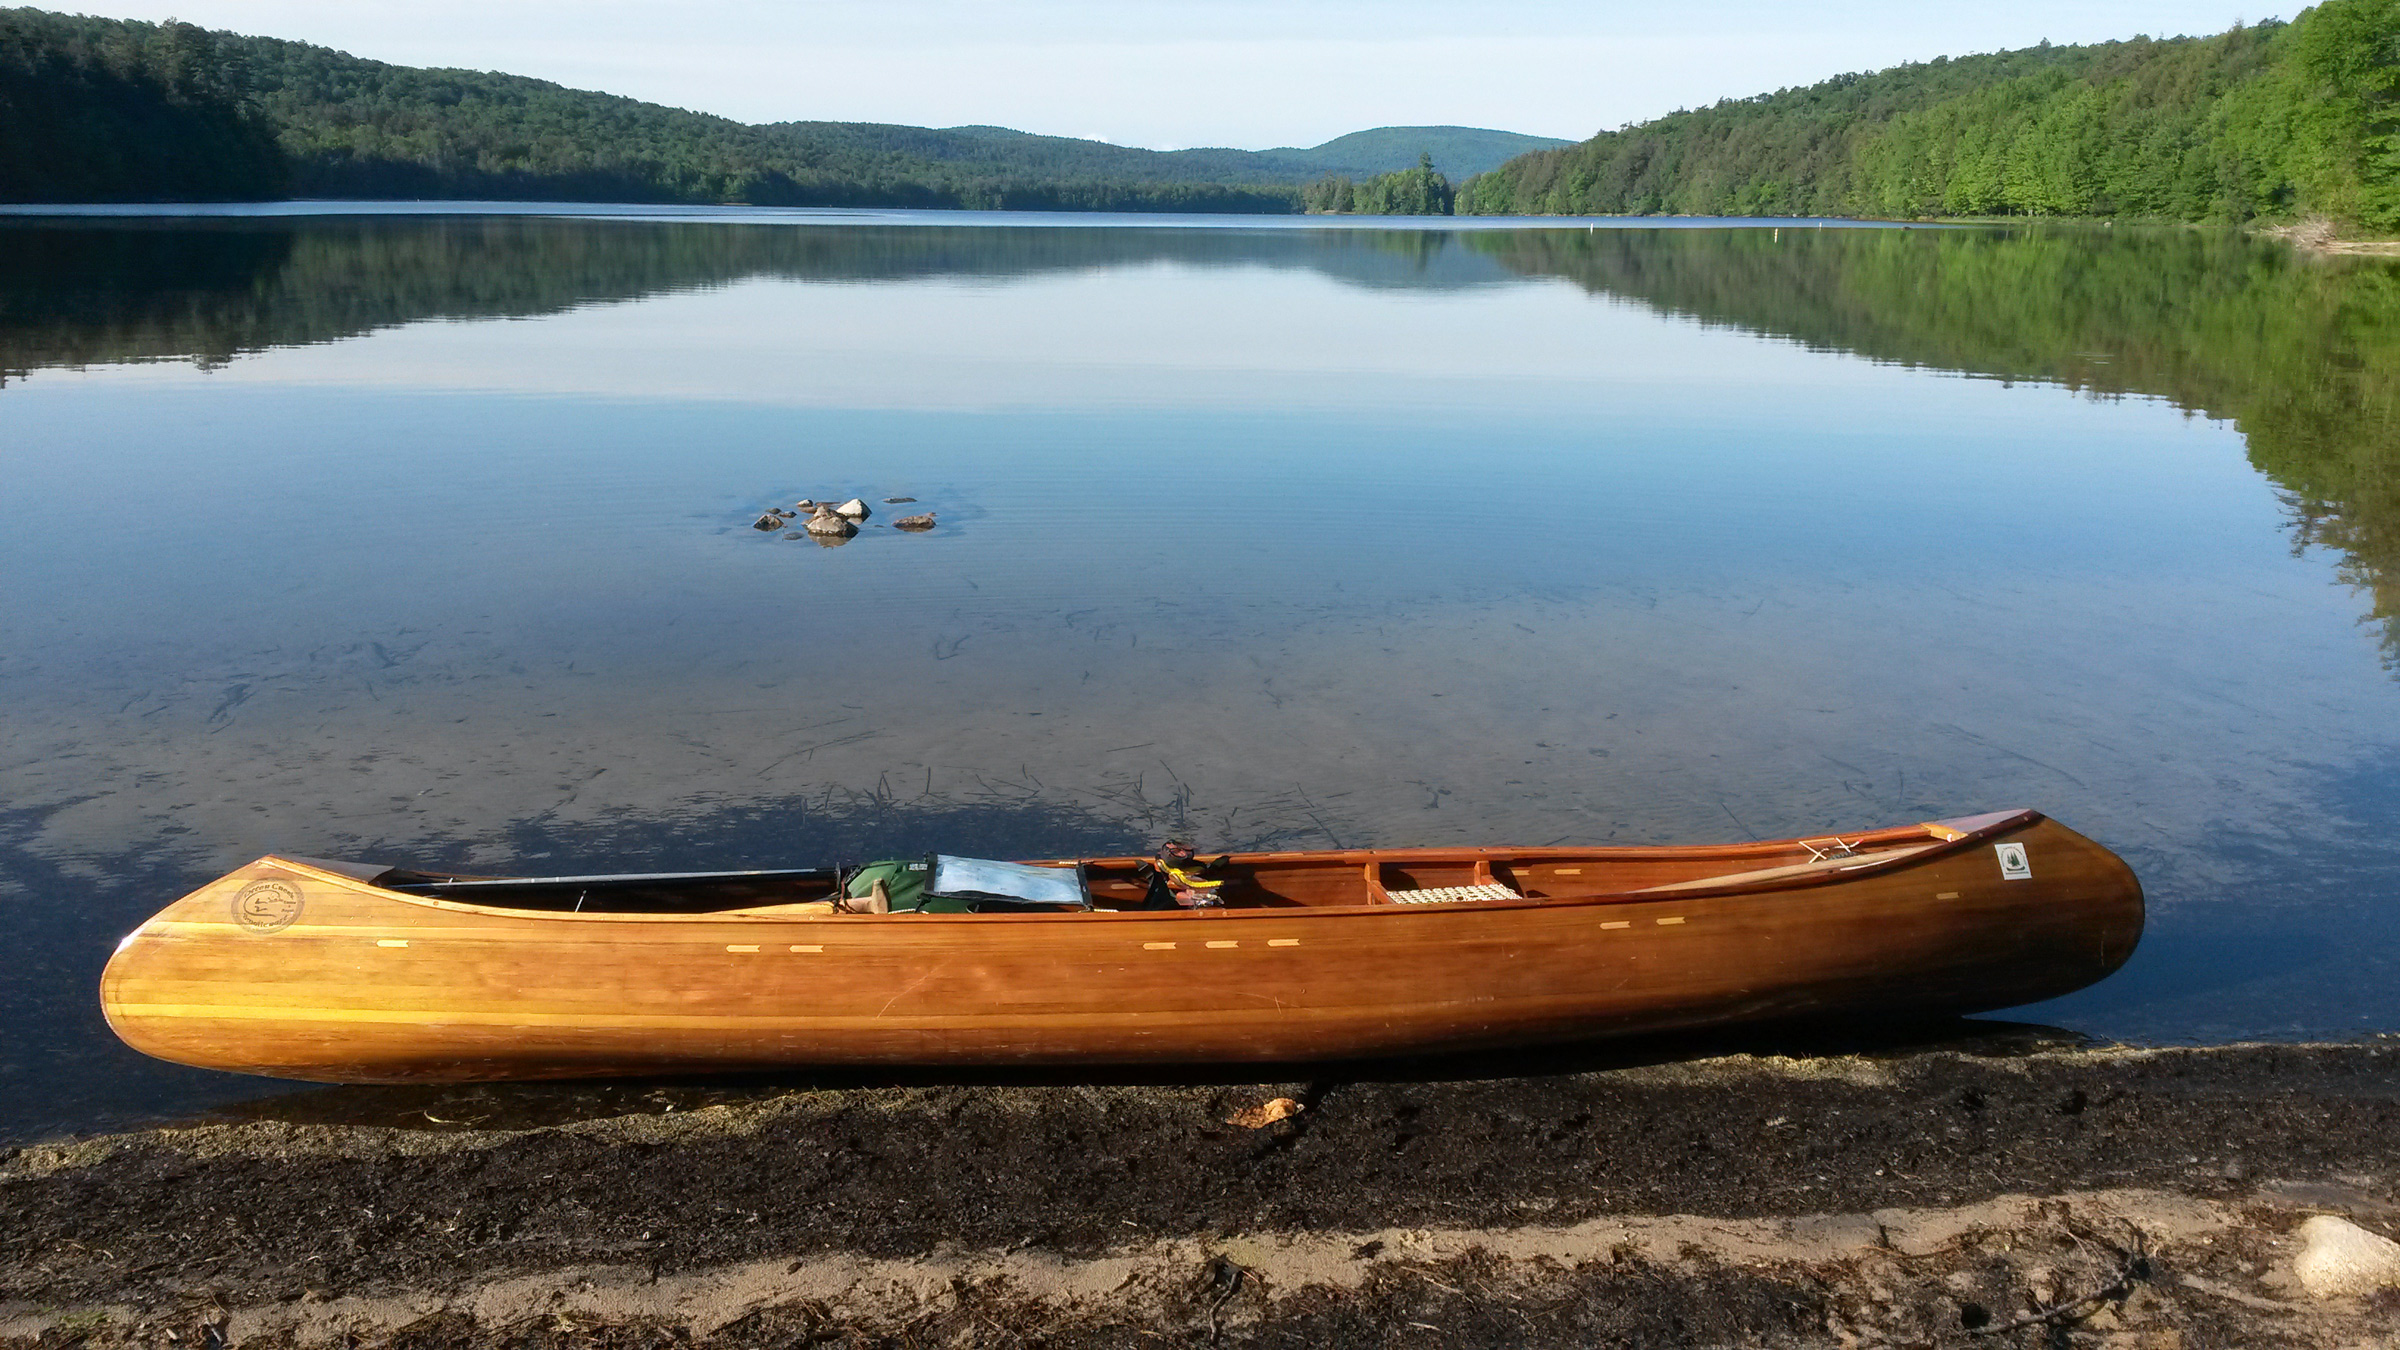 Peter Macfarlane
My canoe is one I designed for fast solo travel and built light for easy portaging. For the Northern Forest Canoe Trail, I added some extra fiberglass on the bottom to better survive the inevitable collisions with rocks. Even with the reinforcements, the canoe weighs just 37 lbs.
This was three weeks into my 2018 through-paddle of the Northern Forest Canoe Trail (NFCT). I had first paddled the trail five years previously, a solo trek of over 750 miles in 28 days, in a 14′ cedar-strip canoe that I designed and built. I was now paddling from east to west, from Fort Kent, Maine, to Old Forge, New York. If successful, this would be the first recorded backwards through-paddle. Of the trail’s 13 major rivers, the conventional direction–west to east–involves paddling nine downstream and four upstream. Nobody in their right mind would go “uphill” from east to west. Part of my motivation was to be the first. The challenge would involve many miles of paddling against the current, rapids, and prevailing headwinds.
On the eve of traveling to the launch at Fort Kent I spent the night in Shelburne, New Hampshire, with friends Ray and Hildy. When I woke and opened my eyes, the first thing I saw was the spine of one of the books on the shelf next to the bed: The Darwin Awards.
The long drive to Fort Kent that day, May 13, was not without trepidation. Just two weeks earlier, the St. John and Allagash rivers, the initial upstream run of over 90 miles, had been in spate with meltwater, and the Allagash had burst its banks. I had watched online as flow rates fell frustratingly slowly, while webcams showed an unusually slow retreat of ice on the lakes. When we reached the levee in Fort Kent, we climbed to the top for the moment of truth. Would we see the St. John at a navigable level? Or would we turn around and take the long road home? Although the river was still above the seasonal norm, it was no longer a raging torrent. The next morning, I launched under a cloudless blue sky, bade farewell to my support crew, and paddled west, ascending the St. John River.
 Ray and Hildy Danforth
Leaving Fort Kent to begin my ascent of the St. John River, I was immediately focused on the first challenge: crossing the outflow of the Fish River, less than 100 yards upstream from the launch ramp. The black spike-like steeple rising above the far bank marks a church in the town of Clair, New Brunswick. For 16 miles upstream, the river separates the US from Canada.
The start, up the St. John and the Allagash to Churchill Dam, was against the flow, including several rapids. Where depth allowed, I used my long-bladed ash paddle. In shallower water, I turned to a shorter paddle with a wider blade. And where rapids started, I turned to my poles, a pair of ski poles. Kneeling to double-pole, I pushed off the rocky riverbed and propelled the canoe forward this way for several miles. On the first day, I ascended nearly 24 miles of the St. John. and on the next day I pushed upstream on the Allagash and made the first carry of the trip at Allagash Falls. The NFCT includes over 50 miles of portages around obstacles and over watershed divides. I continued on the Allagash Wilderness Waterway. At the end of the third day, I stopped not far from the foot of the Chase Rapids, the largest and most powerful on the Allagash. I had worked hard, putting in 12-hour days to reach here, in order to tackle the nearly 5 miles of rapids while I was fresh in the morning.
There had already been several hard frosts, and overnight the cold had turned my drinking water to ice and frozen my toothpaste and neoprene-lined boots. I had to boil extra water to thaw the boots; together with a pair of dry-pants, they were excellent for wading where the current was too strong for poling. I had slept well in spite of the cold. The hammock under-quilt I’d made from an old sleeping bag was highly effective.
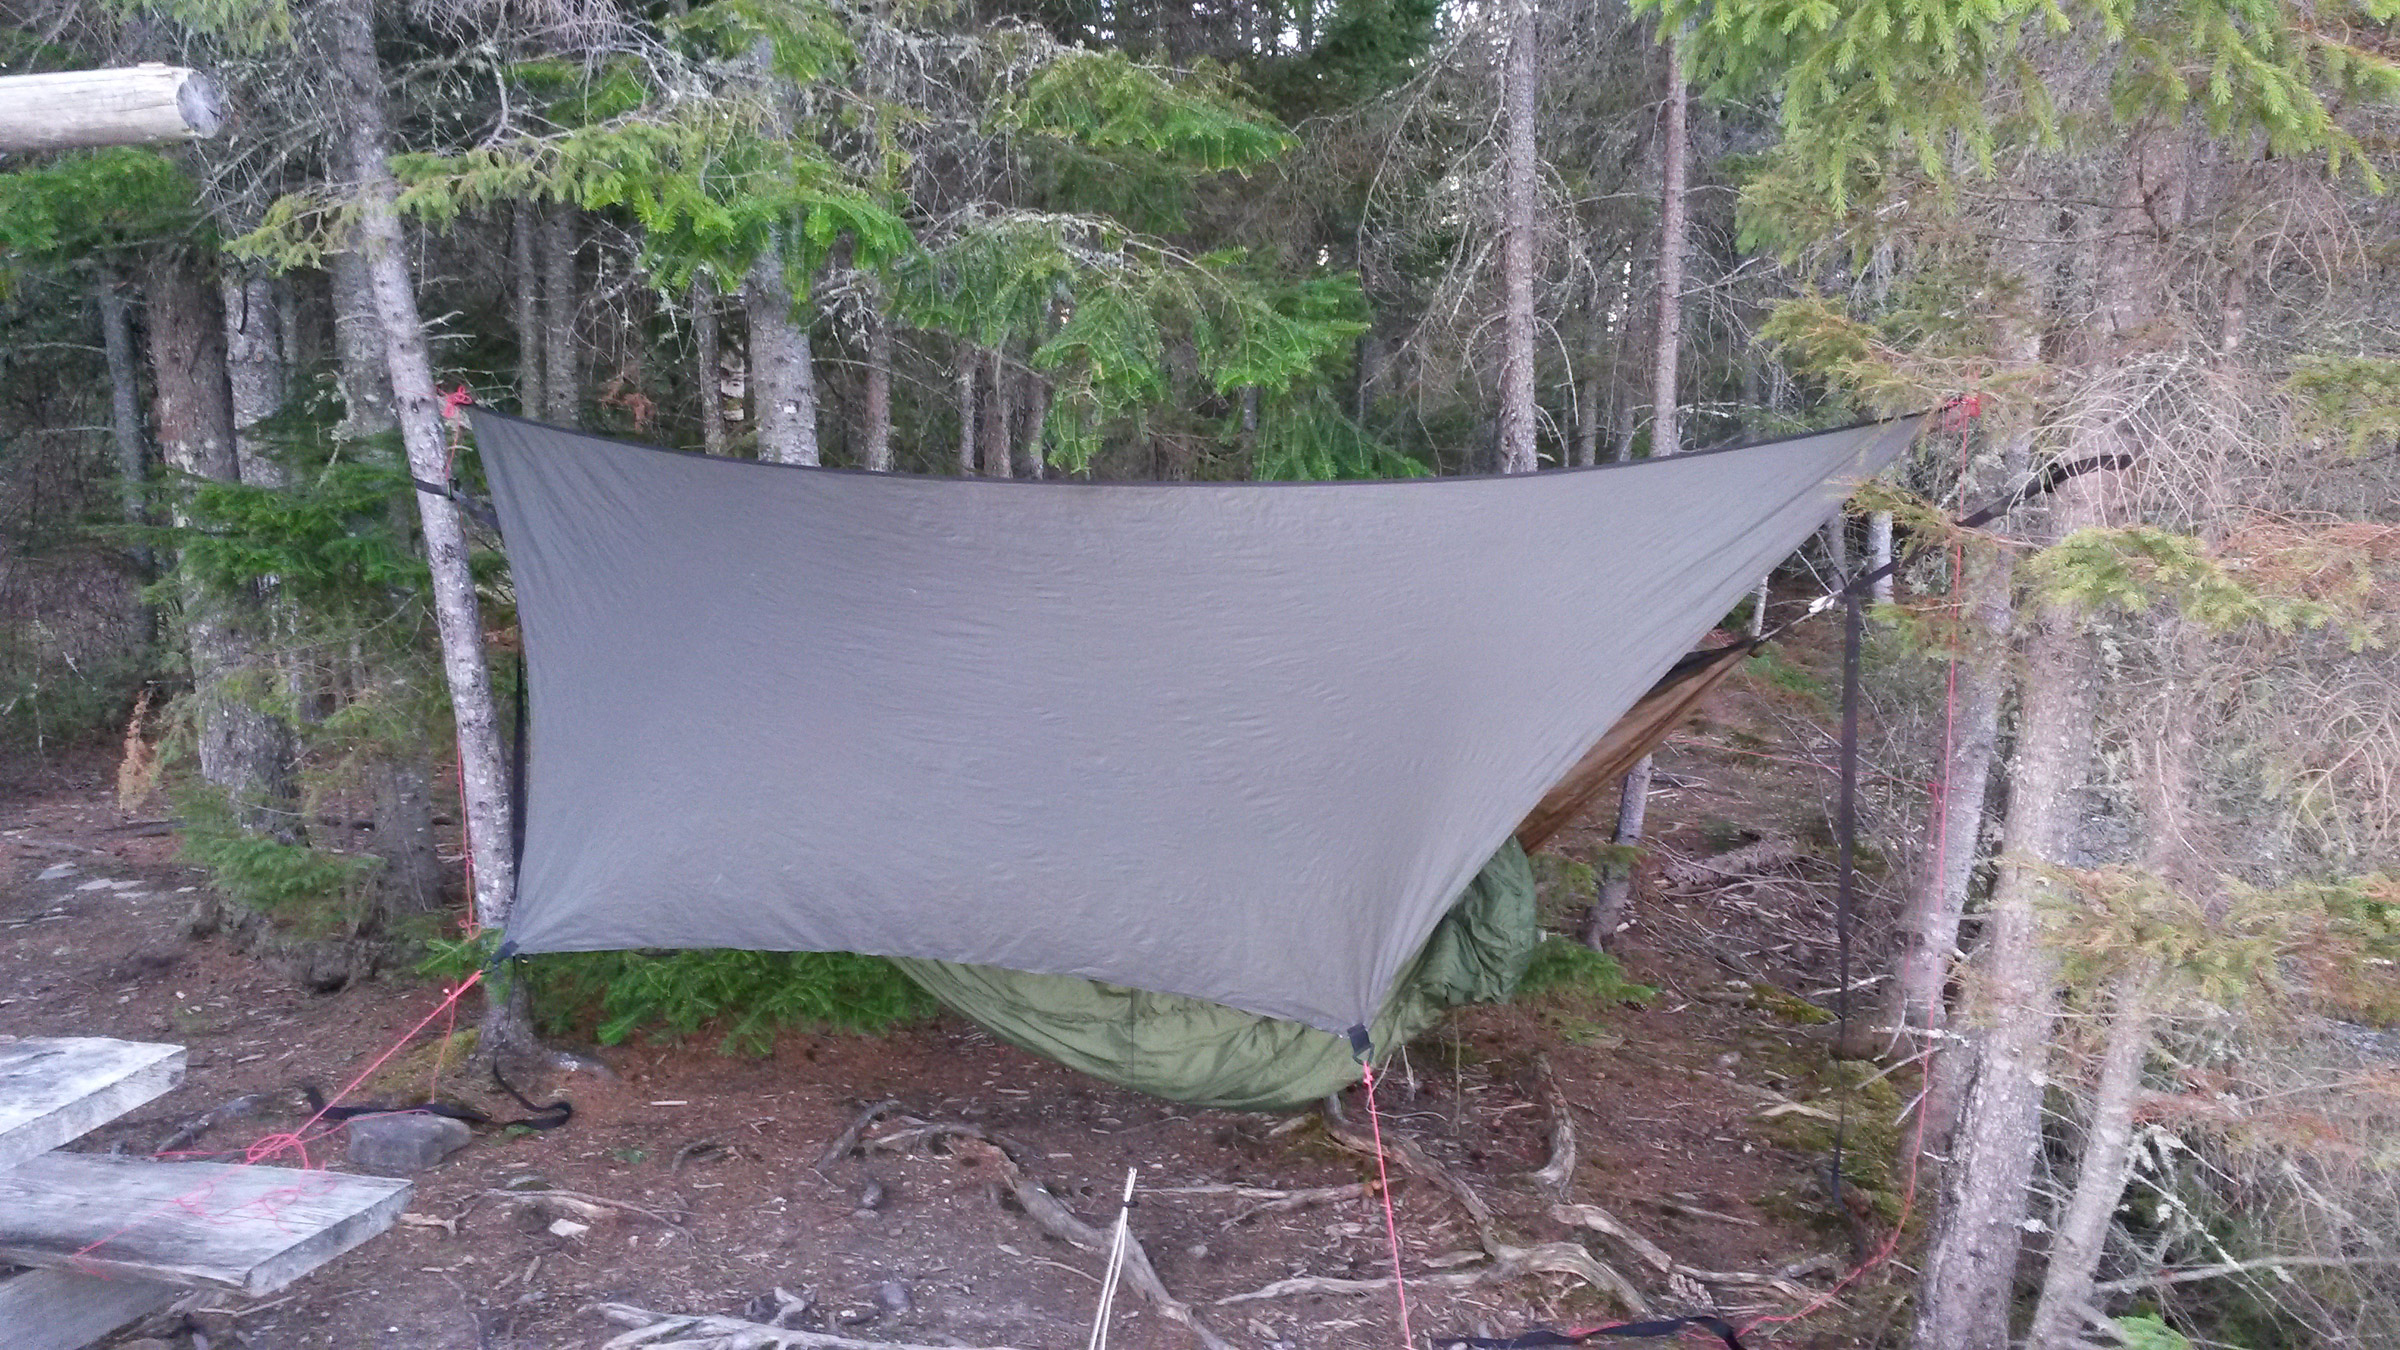 Peter Macfarlane
By camping with a hammock I avoided the need to find even ground, and its absence of rigid parts made it easy to pack. My camp here on the bank of the West Branch of the Penobscot River, near the mouth of Pine Stream, was quite remote but furnished with a picnic table.
I was now down to one ski pole. I had lost the other while wading up the rapids downstream from Round Pond. It must have been flicked out by springy vegetation on the bank, and I could not face returning downstream on a likely wild goose chase. While my solitary pole was useless for propulsion, it kept me upright when wading on algae-coated rocks.
I launched into Chase Rapids and the initial eddy-hopping was a thing of great beauty, accelerating up one eddy behind a rock and crossing the flow to another eddy. Where the current was too powerful I waded, and where there were falls I heaved the loaded canoe up over them. I had been making astounding progress but about 1/2 mile from the top end of the rapids, I slipped on slimy rocks yet again and decided to take the portage trail rather than risk injuring myself.
I arrived at Churchill Dam at the top of the rapids ahead of schedule, having ascended two major rivers in under four days. As I then gained a few miles, the Allagash headwater lakes, rimmed with green conifers, glistened under bright sun.
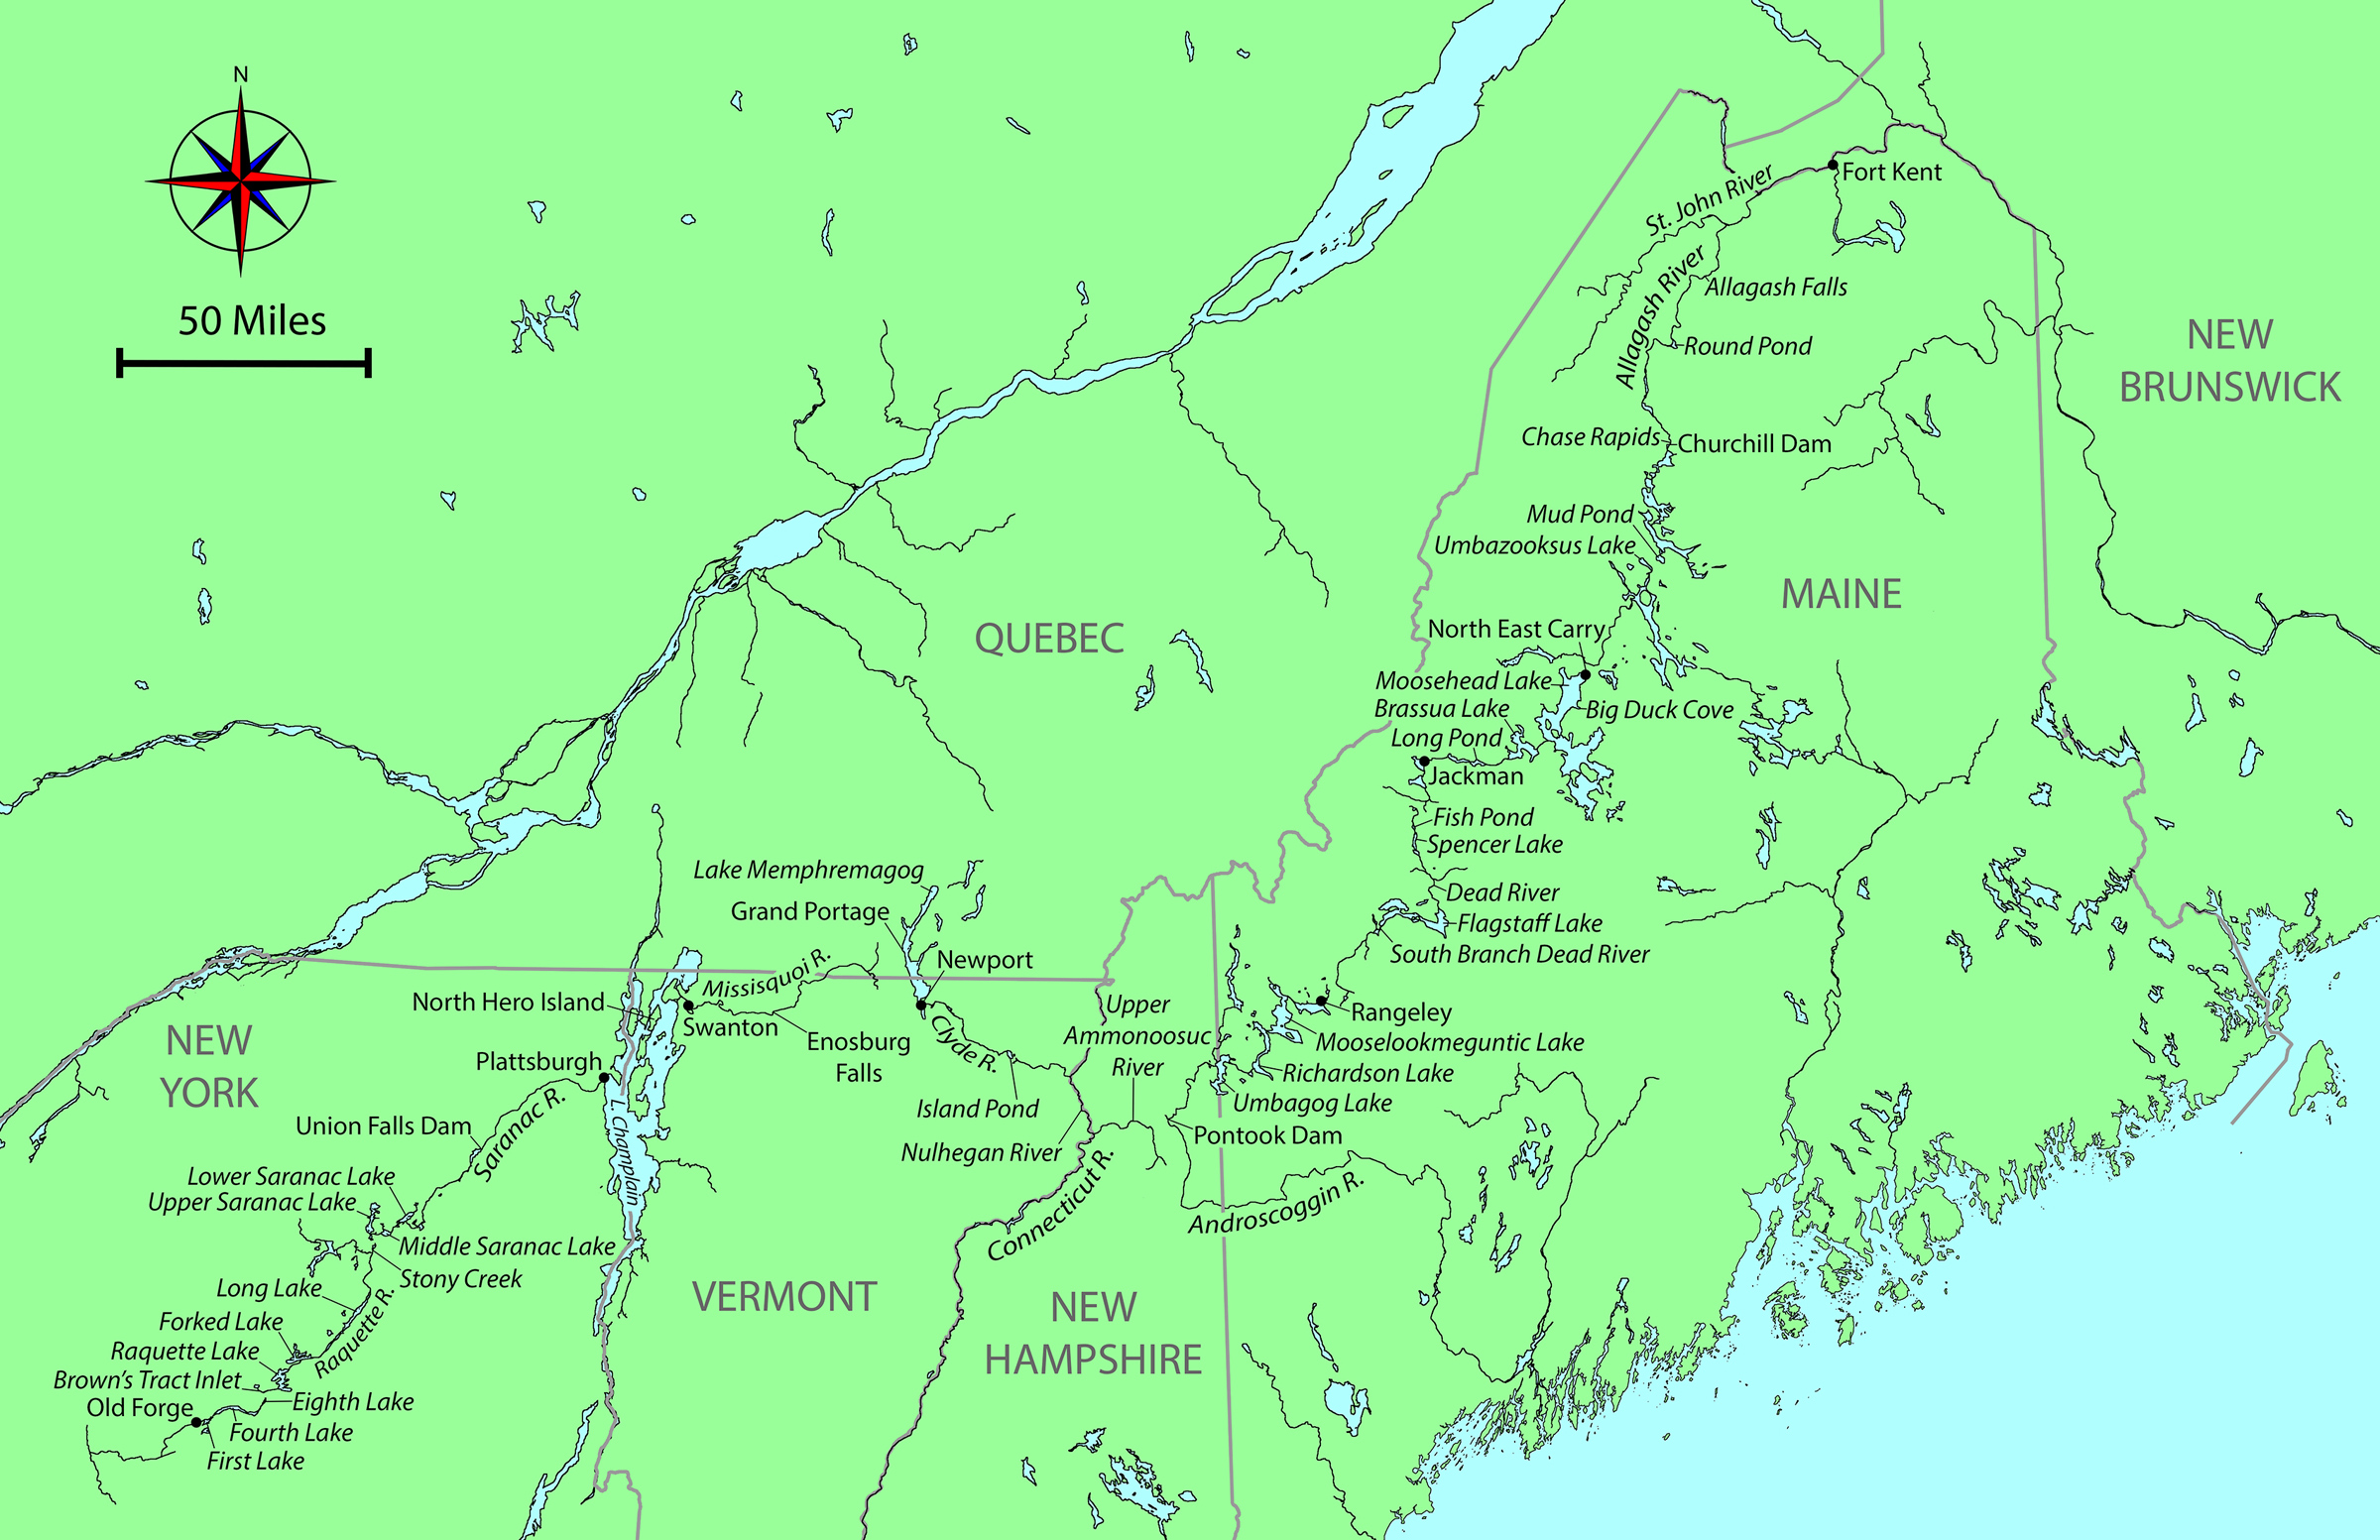 Roger Siebert
.
The Mud Pond Carry, the next day’s challenge, is an historic portage between Umbazooksus Lake and Mud Pond, something of a rite of passage. Five years ago, I had avoided this 1.7-mile trudge through deep mud by taking an alternative route, and now was my chance to earn my stripes. I paddled on a compass bearing across Mud Pond to find a small inlet where I expected to find the portage. I’d been singling the carries, taking everything at once, so I loaded the pack on my back, lifted the canoe overhead, and set out on a floating bog that sank beneath my feet at each step. Soon I was on dry ground, thankful for the lack of spring rain, but the easy going didn’t last long. I arrived at a very deep bog and had to detour around it. The path I found soon became overgrown with young trees. I pushed the canoe into spaces that resisted my efforts to squeeze the canoe through, so I backed out. After a few such shunts, it was clear that I was not on the trail, and retracing my steps soon became impossible; pressing forward on a compass bearing was my best hope.
Finally, the saplings closed in so tight that the canoe would not fit through them. I was stuck and lost deep in the Maine woods. To make matters worse, my water bottle was nearly empty and it was the hottest part of the day. A wave of panic surged through me. I knew there were roads to the west and south, so I could rescue myself, but I’d have to abandon the canoe. That option was almost unthinkable and so I had nothing to lose by forging ahead.
I used brute force to ram the canoe mercilessly between saplings, splaying them apart. I kept at it, making a few feet with every effort, and suddenly emerged into a region of felled trees. In sheer relief I danced from trunk to trunk, before stopping to take stock of my situation. I discovered that my camera, which I’d strapped to my pack belt, had been torn away somewhere in the brush. Lost with it was the record of the trip up to that point. After filtering a little water from a post hole, I searched for the camera, but only briefly: losing track of the canoe and pack would have made a bad situation worse. I dejectedly resumed the trek, following the line of felled trees to a road, which led to the foot of Umbazooksus Lake.
I had singled the Mud Pond Carry, but at a great cost and not by the traditional route. The rite of passage I had hoped for had remained unfulfilled. I paddled with sadness down Umbazooksus Stream, the first short downstream for which I had worked so hard. Partway down this stream, I remembered that my phone could take photos, and if the sun kept shining, my solar charger would recharge it.
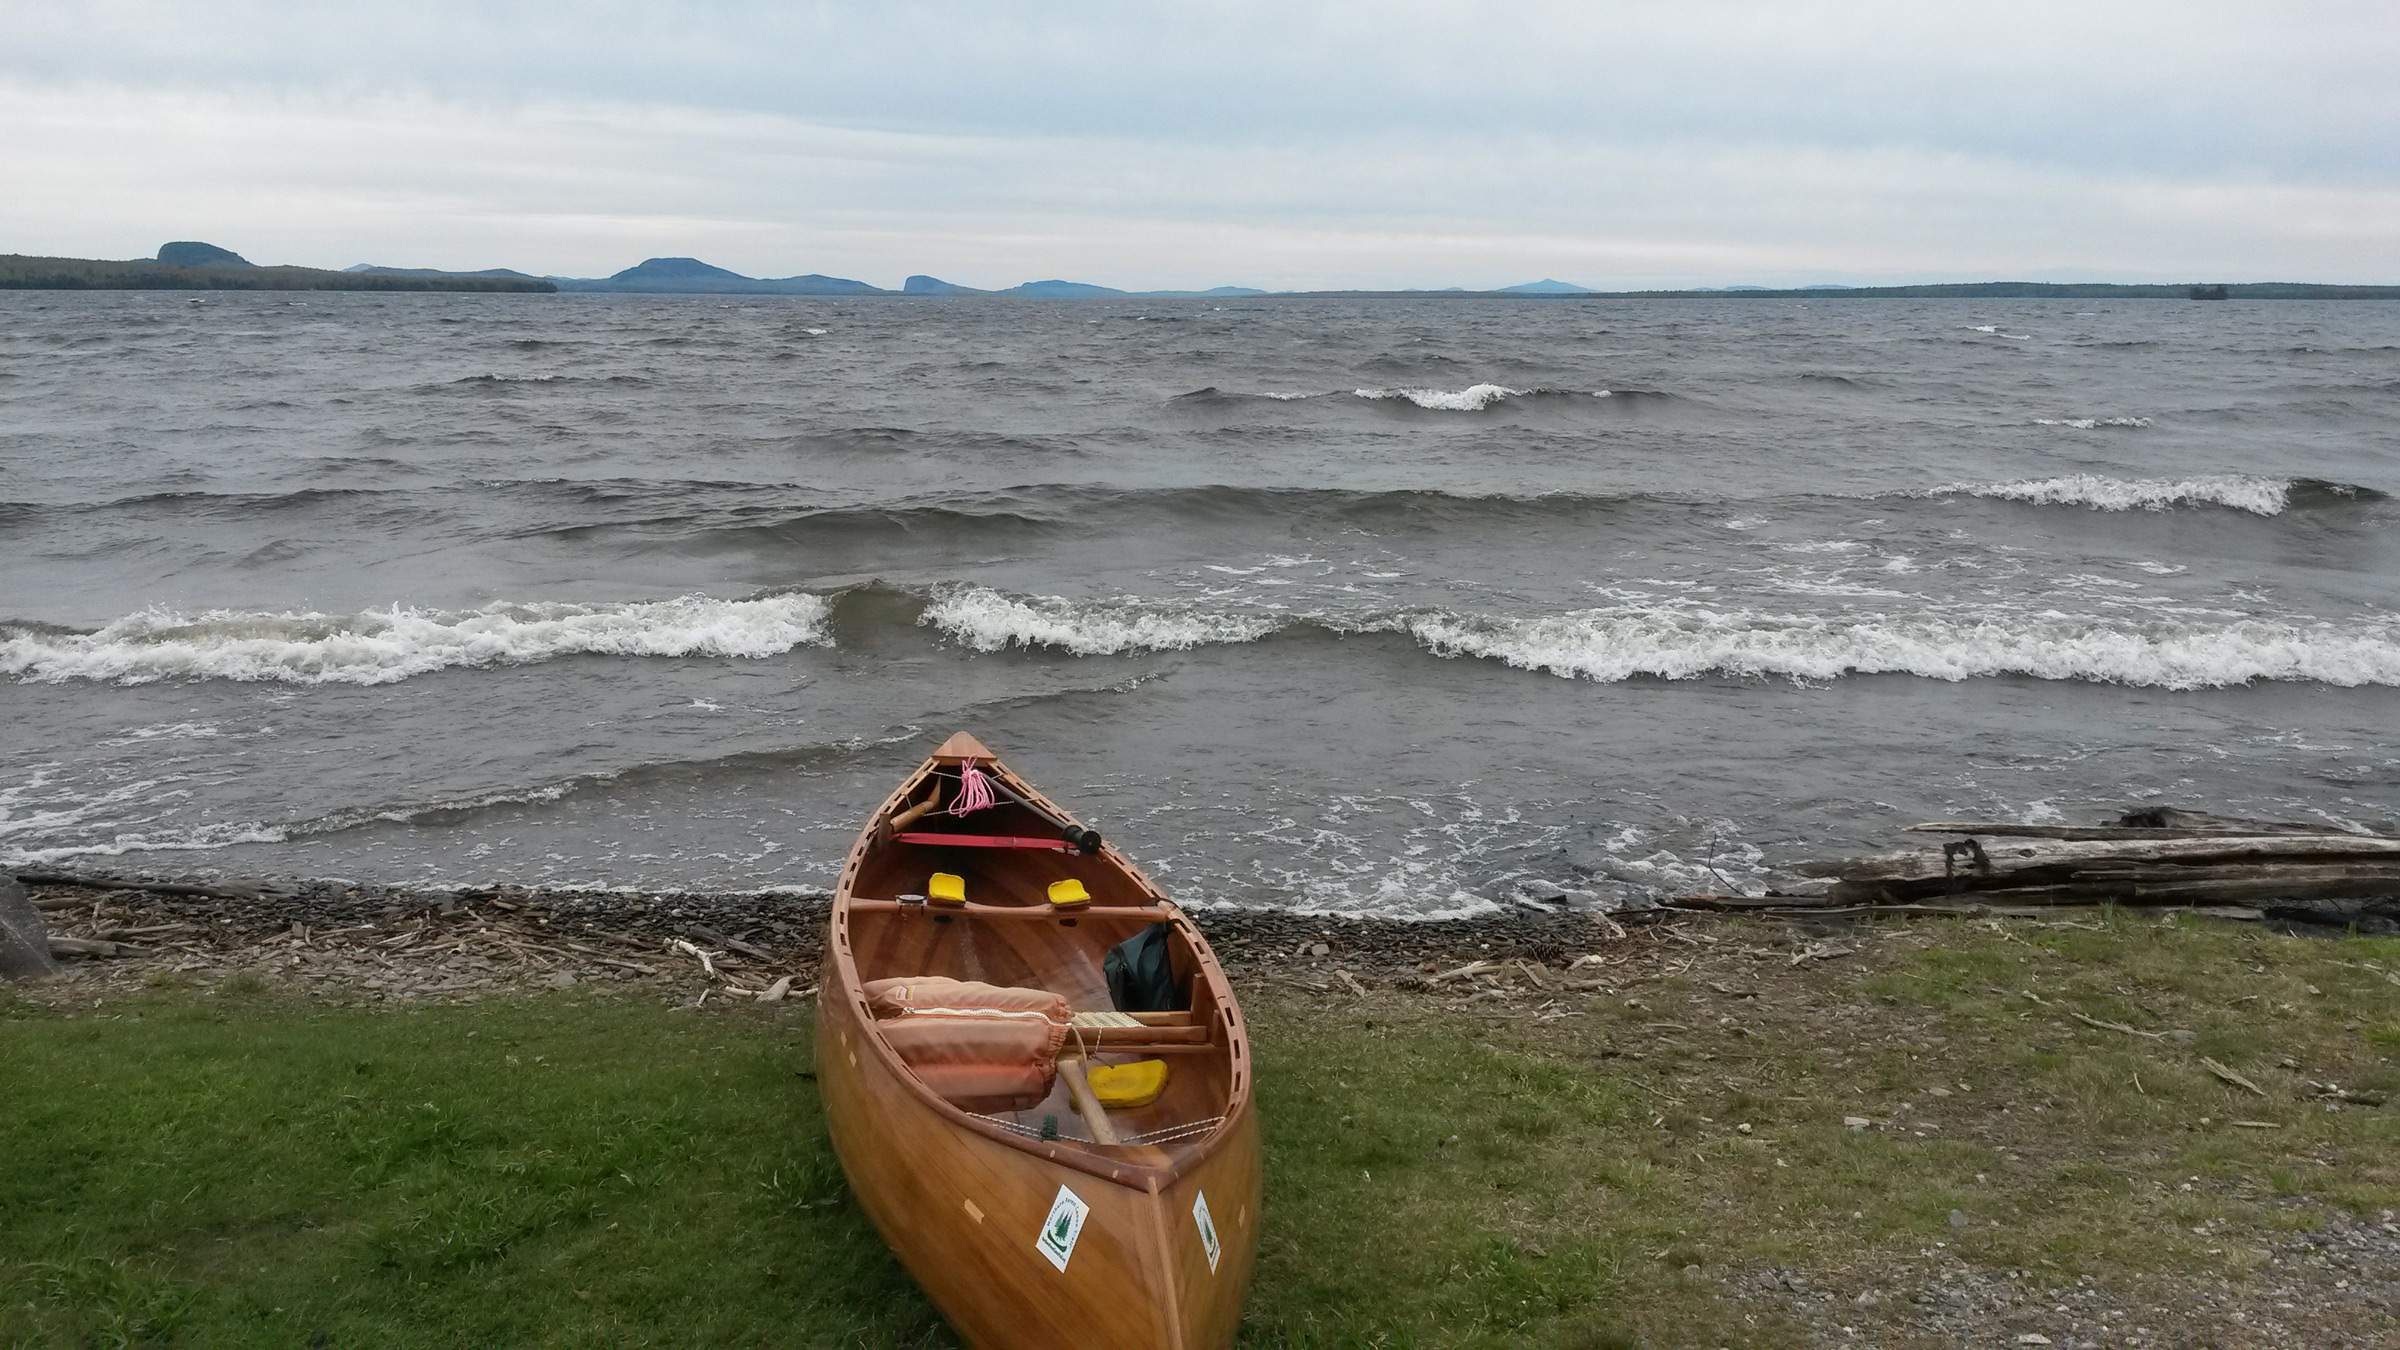 Peter Macfarlane
Launching through the breaking waves at the North East Carry into Moosehead Lake was the first challenge here; paddling against the wind was the next.
Headwinds had plagued me since the start at Fort Kent and, as I was ascending the West Branch of the Penobscot River, a strong southerly sprang up. After traversing the North East Carry, a 2-mile portage from the Penobscot, I arrived at the northern end of Moosehead Lake. At 33 miles long, it is the largest lake in Maine. The southerly wind was now blowing at 20 to 25 mph. I abandoned plans to aim for the exposed Seboomook Point, 3 miles to the west, in favor of a more sheltered campsite farther south on the eastern shore. Either site would require launching into substantial surf.
I enjoy the glide of the canoe and the rhythm of paddling, but there was none of that in this headwind. Every stroke required great effort and accelerated the canoe from a standstill. I inched south along the eastern shoreline just outside of the breaking waves. Blocks of broken ice at the water’s edge reminded me that ice-out here had only recently occurred.
At the end of another 12-hour day I pulled into a campsite in Big Duck Cove, exhausted, having covered 29 miles upstream and into the wind. It had been hard work to keep from going nowhere or even getting pushed backward.
Strong headwinds continued to haunt me. The next day, I headed west from Moosehead Lake up 3 miles of the Moose River to Brassua Dam. Emerging on Brassua Lake a strong northwesterly made paddling a struggle, and I ended the day on Long Pond beating into a 25-mph westerly.
Later a strong southerly would slow me on Fish Pond and Spencer Lake, and I would travel much of the 18 miles of Flagstaff Lake into another headwind just as strong.
When I reached Jackman, Maine, I took a half day of rest in the motel where I had mailed a food package, the first resupply of three. I took a shower, my first since launching eight days before—the frigid lake water temperature did not invite taking a dip to rinse the sweat and grime away. The skin on my hands had developed painful splits, especially on the exposed fingertips, despite wearing fingerless gloves for protection; furthermore, the extreme effort of paddling so many miles upstream and upwind was affecting my shoulders. At night, shooting pains radiated along my arms. And having to grip the paddle extremely hard for long days, merely to keep hold of it in the strong wind, my fingers were now seizing up overnight and required much coaxing to flex again. I needed a rest.
 Peter Macfarlane
Most of the South Branch of the Dead River had too little water for paddling. The upper reaches had just enough water, but were obstructed by fallen trees.
From Jackman, my route took me farther up the Moose River before a carry to Little Spencer Stream, which, with its impoundments of the mile-long Fish Pond and the adjoining 4-1/2-mile-long Spencer Lake, led me down to Spencer Stream and the Dead River. More upstream work on the Dead River brought me to Flagstaff Lake, above which the South Branch of the Dead River is often bypassed due to low water. I ascended the first 3 miles of it, but there was not enough water to sink a paddle. The river was so low that I faced wading almost the entire length on slippery rocks; carrying along the Stratton–Rangeley road that paralleled the river was the better option.
I escaped to the road at the first bridge, and that day carried a total of over 17 miles, putting into the river only for the final 3 miles above Fansanger Falls. The last 4 miles of carry over the watershed divide to the town of Rangeley were to reward myself with a night in a B&B.
The struggle against headwinds continued as I traversed Rangeley, Mooselookmeguntic, and Richardson lakes. On Mooselookmeguntic, the wind made my ears vibrate with the ripping noise of a flag in strong wind.
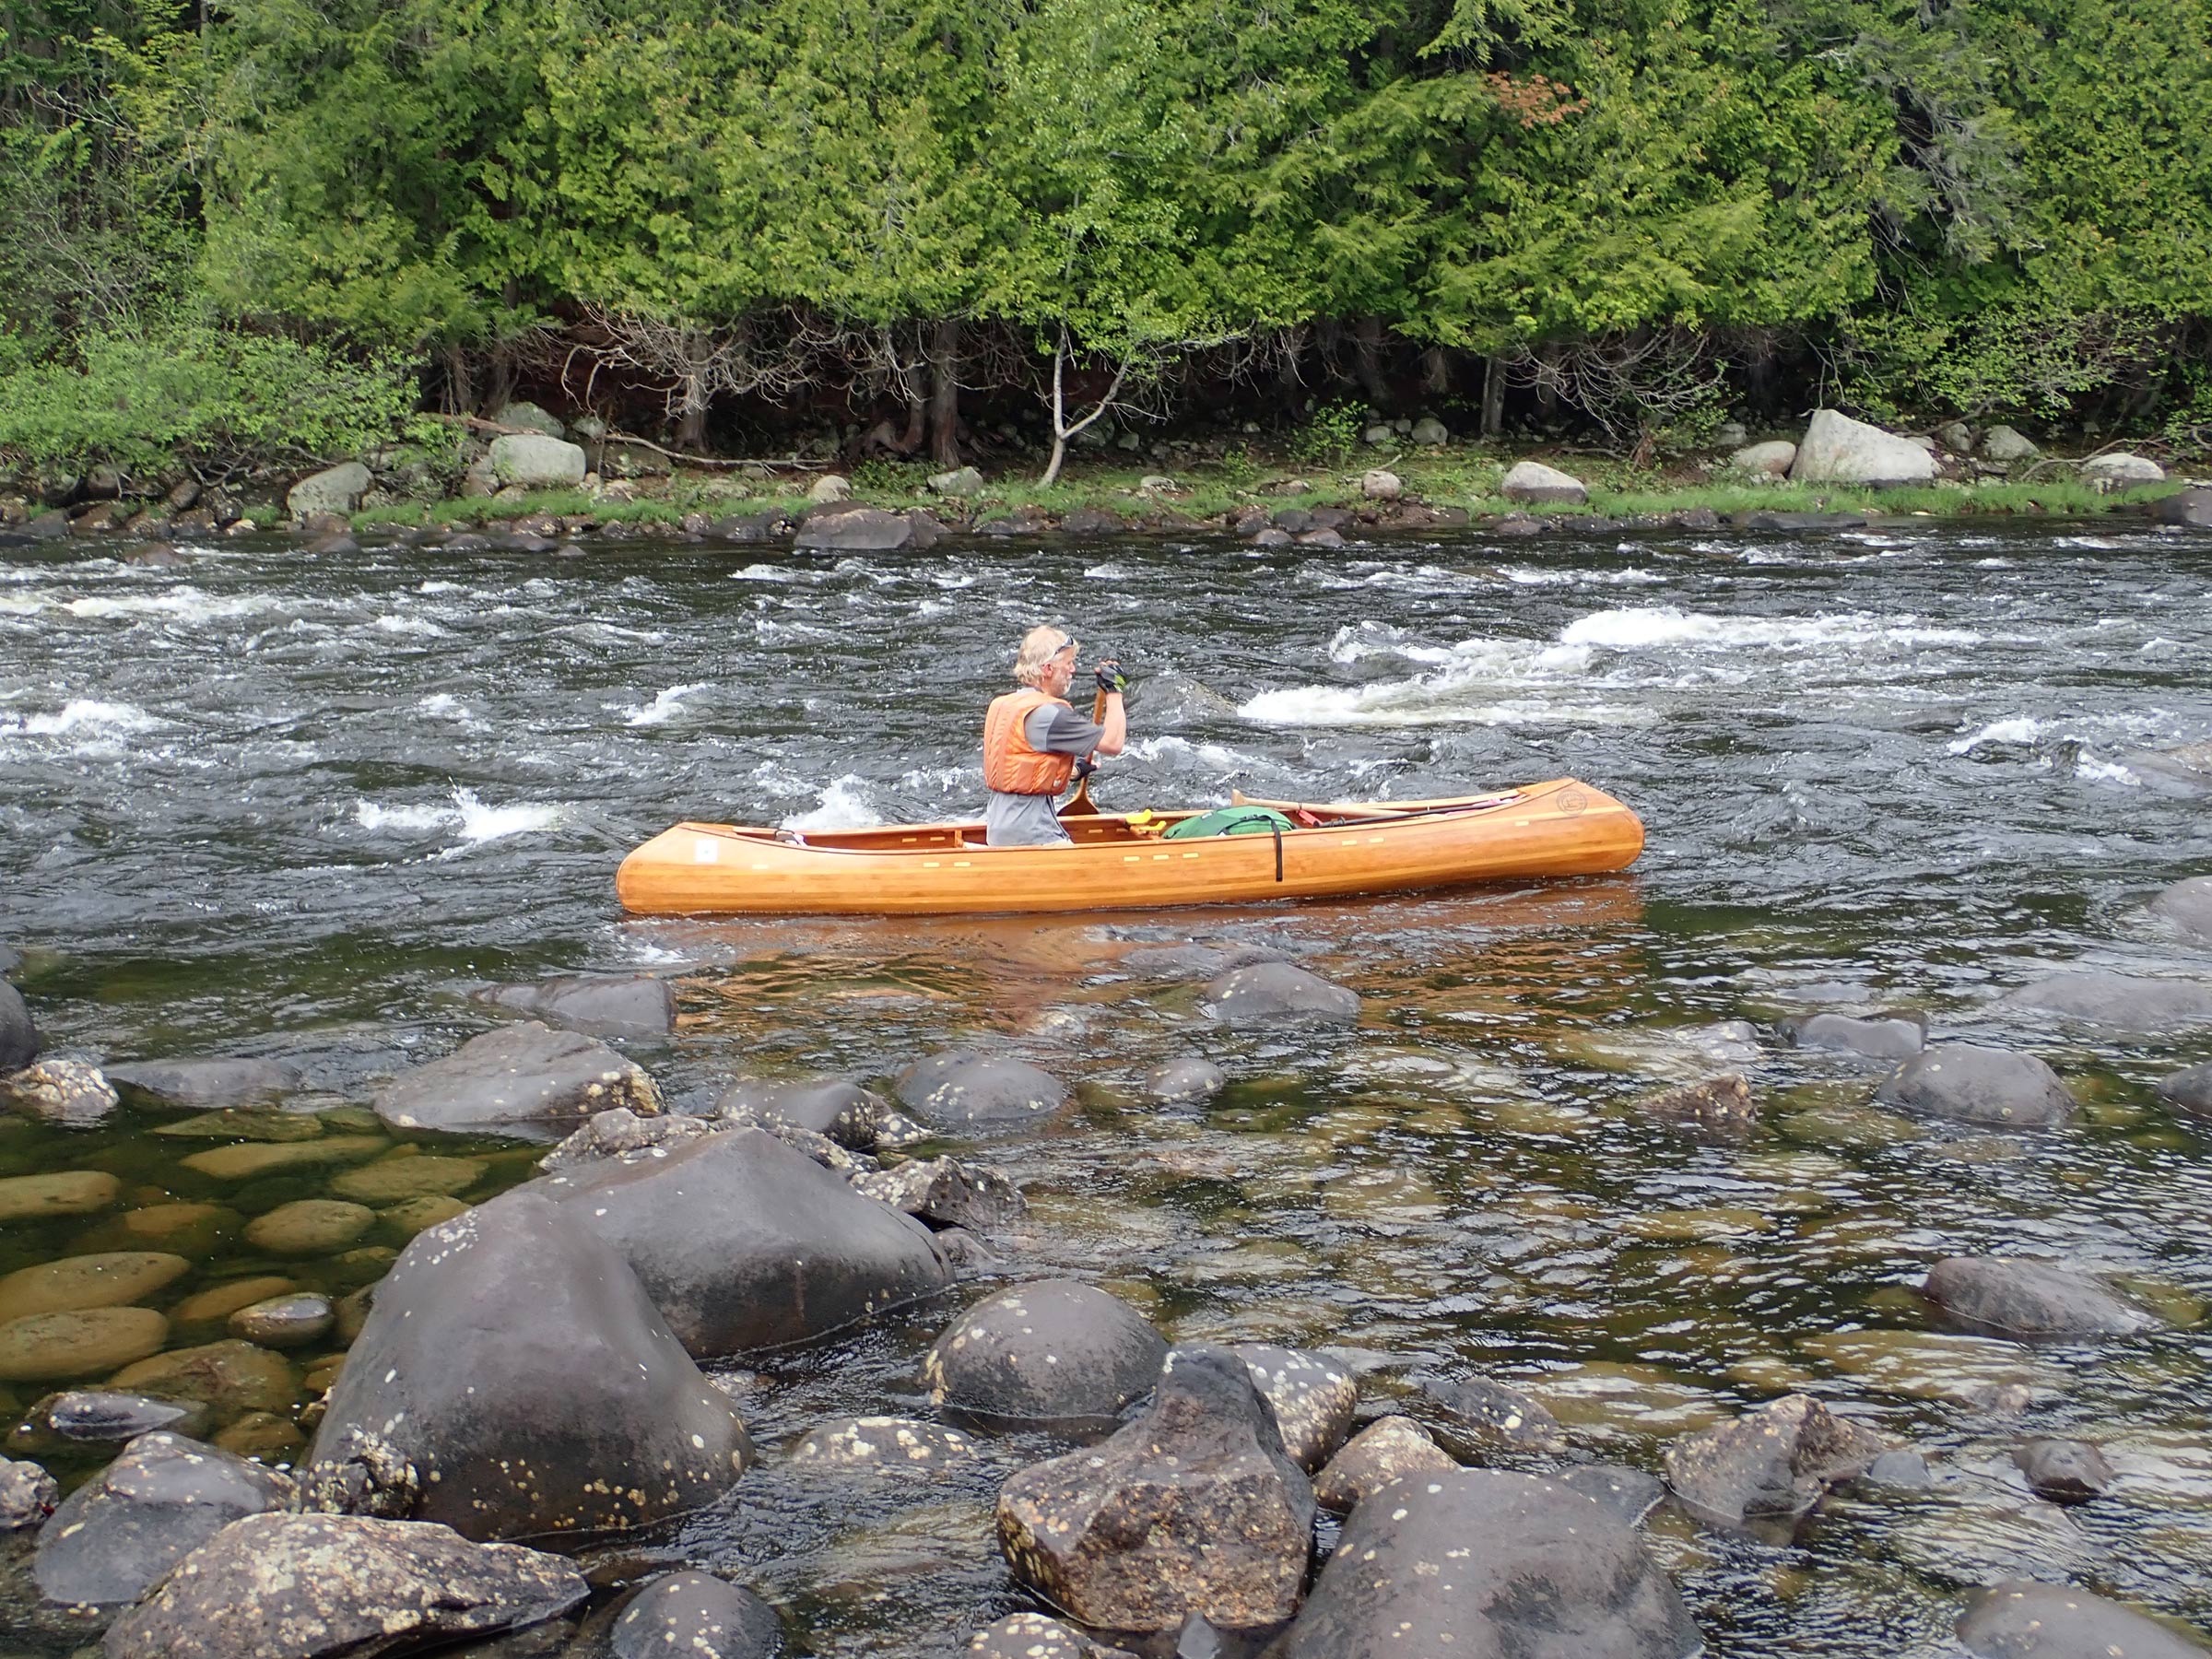 Ray and Hildy Danforth
Tackling the Pontook Rapids on the Androscoggin River saved carrying for 1-1/2 miles along the riverside road, but colliding with a rock resulted in a minor split in the hull of the canoe. I sealed the crack with tape, a repair that lasted for the rest of the journey.
On my 13th day, I paddled into Umbagog Lake, which spans 10 miles of the New Hampshire border. I had almost reached the NFCT’s halfway point. Umbagog drains to the west into the Androscoggin River, my first major downstream run. It was raining, but the river was everything that I wished for: plenty of flow and wonderful rapids with clear channels. The quick run lasted less than a day, but I relished the power of deep, fast water pressing against my paddle. My hard work had earned this. Below Pontook Dam, Ray and Hildy collected me for pizza and ice cream—a welcome change from dried food—a spare pole to replace the one I’d lost, and a comfortable night at their home. I slept again with The Darwin Awards smirking by the bed.
 Peter Macfarlane
The upper Nulhegan River offered some fine paddling through a flood plain, as well as some upstream navigation challenges where streams converge. Tight meanders ensured that this section took longer to paddle than a quick look at the map might suggest.
Ray drove me back to the Androscoggin where I had left off so that I could carry 4 miles to the Upper Ammonoosuc River where another day of downstream across northern New Hampshire brought me westward to the Connecticut River between New Hampshire and Vermont and the Nulhegan River in Vermont. For me, they were two more upstream runs, and a tough section of the Nulhegan has some challenging, rocky rapids. Rather than carry around them, I chose to tackle these rapids upstream, balancing on slippery rocks while hauling the laden canoe up the falls, all while trying to remain calm amid an onslaught of blackflies. As the river opened out into flat meander, I looked back on the very short but tough ascent with immense satisfaction.
From Island Pond, the high point of the trail in Vermont, I paddled downstream on the Clyde River, pushing between alders, negotiating deadfalls, crossing ponds, tackling shallow, rocky rapids, and carrying around dams, all under bright sun with a tailwind. The Clyde deposited me at Newport, a town on Lake Memphremagog, just 5 miles from the Canadian border. The wind remained at my back on the lake straddling the international border, and I checked in with Canadian Customs by phone. A half dozen miles farther north, I hauled out for the Grand Portage, another half dozen miles, this time by road west to the Missisquoi Valley. Here I declined a ride offered by the person who lived nearest the far end of the carry. I doubt he understands even now my desire to be self-propelled.
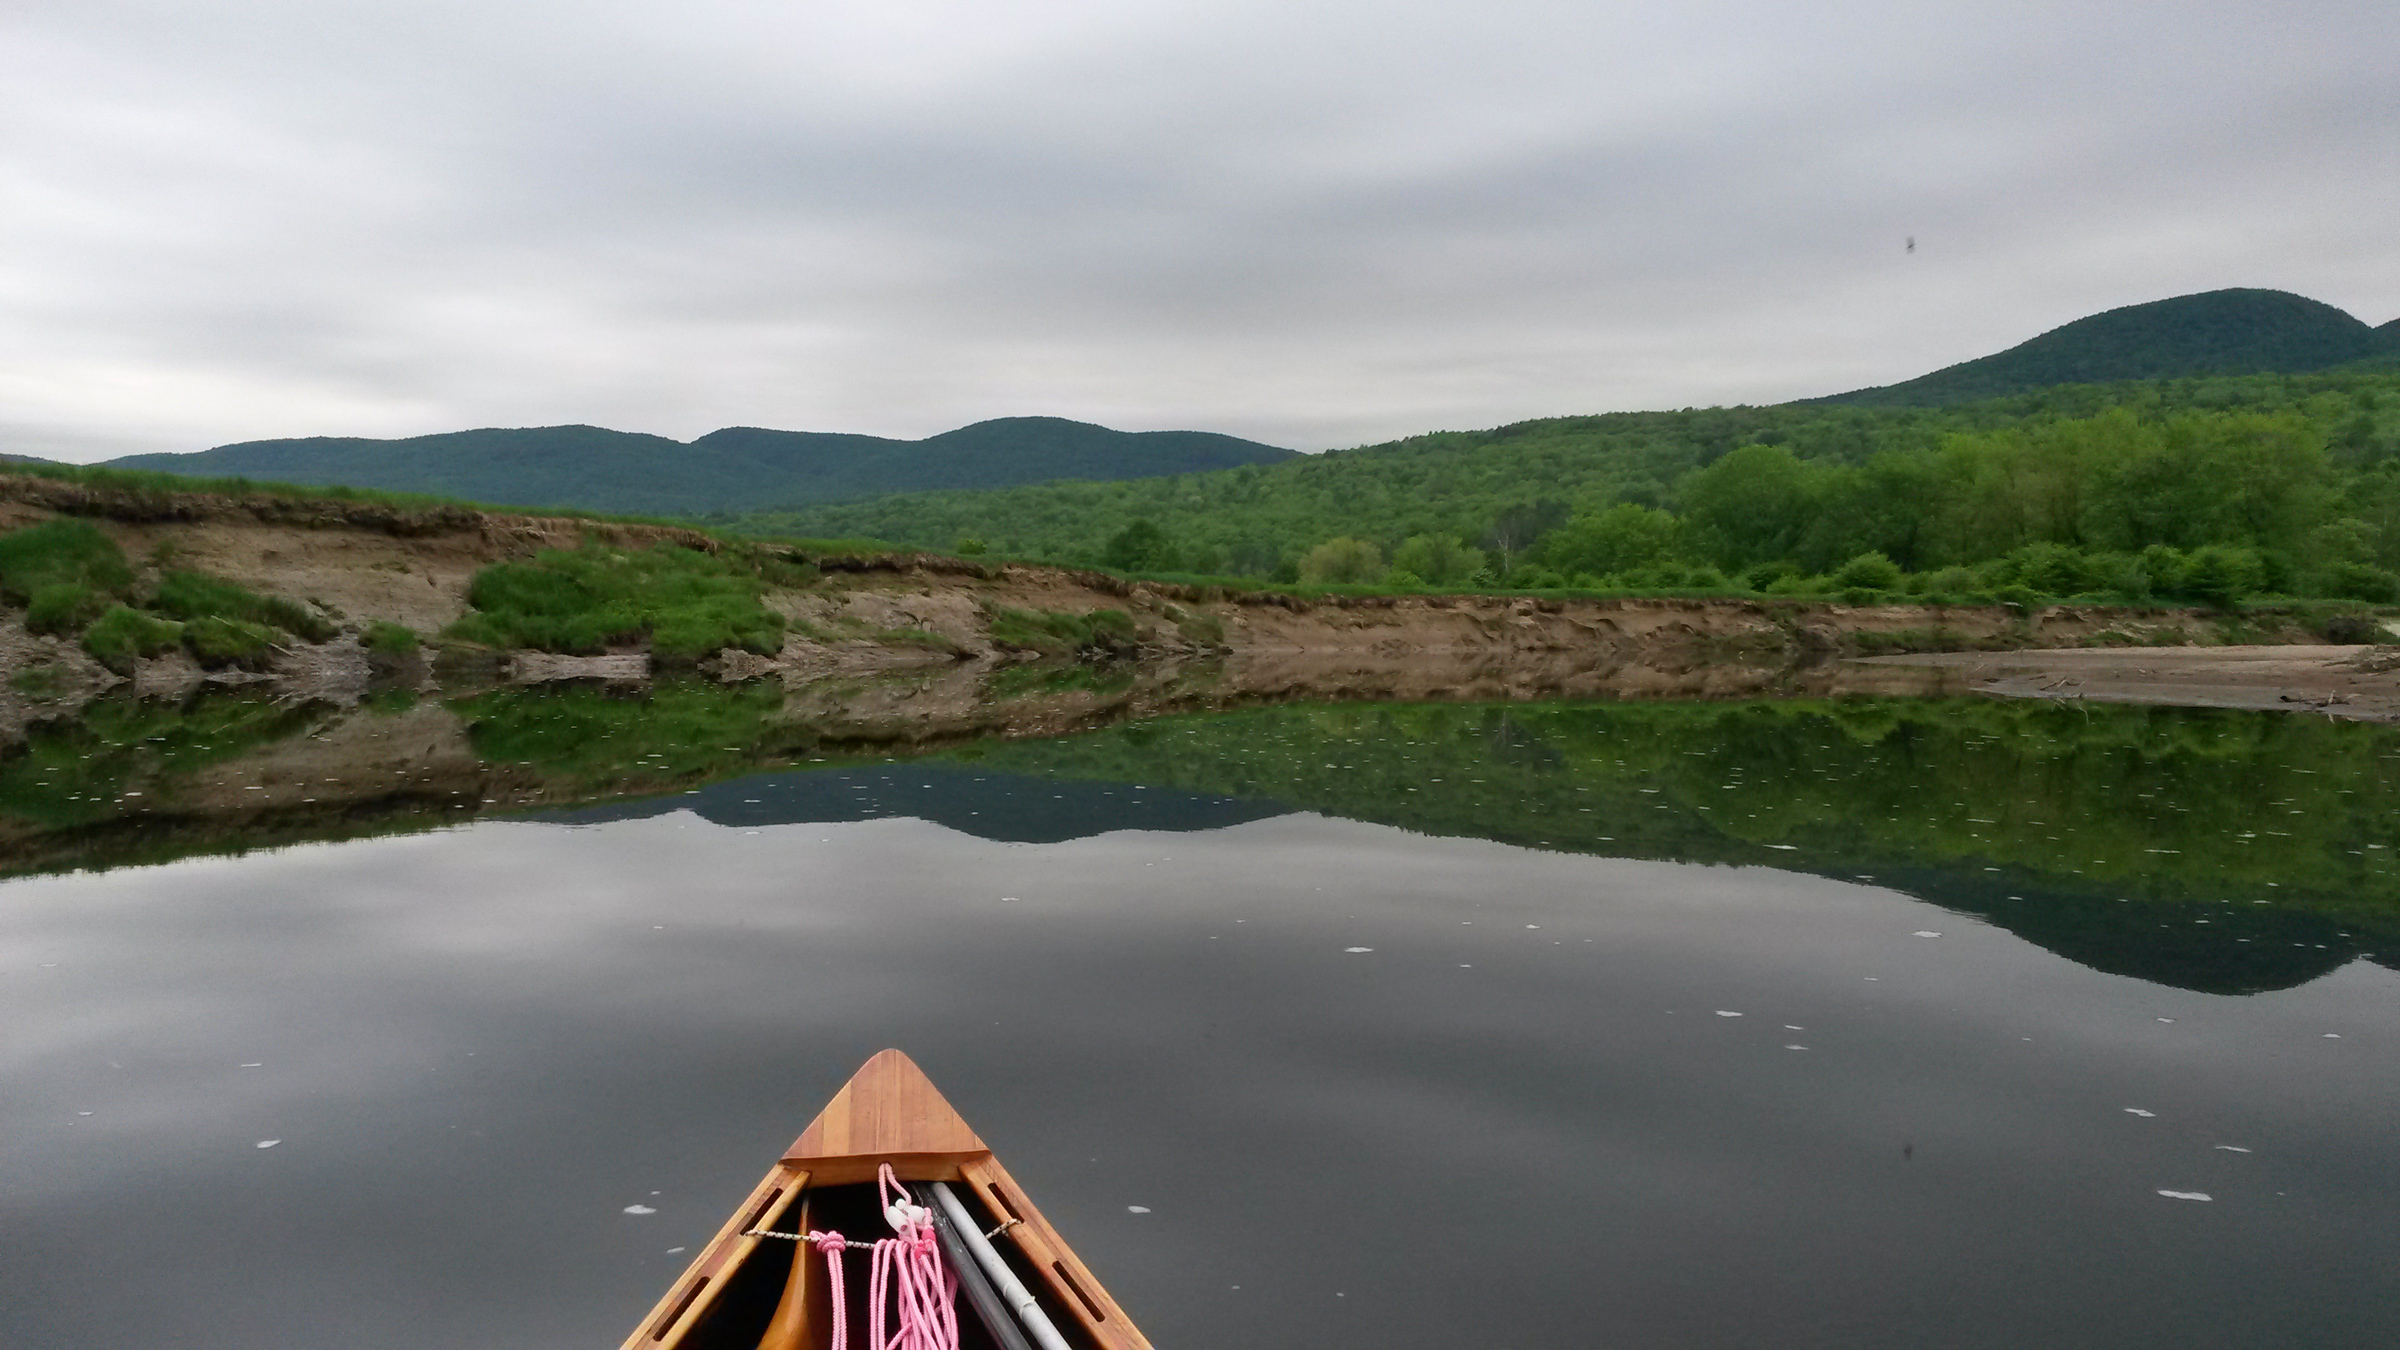 Peter Macfarlane
When I ascended the Missisquoi River five years previously, the water had been lapping at the tops of the banks. During my long descent on this journey, I scraped over many shoals.
On my two-and-a-half-plus-day descent of the meandering Missisquoi across Québec and northern Vermont I was paddling at low water between tall, steep banks, looking up at trees that I had fought through on my west-to-east journey when the same river was in flood and about 7’ higher. Farther down the Missisquoi I re-entered the U.S. and met Viveka at Enosburg Falls for a full day of rest.
At the end of the third week I was back on the Missisquoi, finishing this long downstream run. When I arrived at Swanton, 7 miles from the mouth of the river, I was ready to take on Lake Champlain, despite the weather forecast and advice to sit tight. I set out on the crossing, a mile-plus passage from mainland Vermont to North Hero Island, in a white-streaked sea of tumultuous waves. A southerly gale blowing almost 30 mph and gusting higher was tearing up both sides of North Hero, and drove waves that converged around the north end of the island to rise even higher.
The cresting waves slapped water into my canoe from both sides. It swirled around my knees as the little canoe pitched and rolled yet remained reassuringly stable; the challenge was to make progress into a 30-mph wind. I dropped my head and put maximum effort in every stroke, ferry-gliding alternately to east and west to vary the muscles in use. In this sawtooth fashion, I finally pulled exhausted into the lee of North Hero and uncurled my body, having made the hardest crossing I ever wish to make.
To have stayed there would have put me behind schedule, so, after some recovery, I continued south on the more sheltered west side of North Hero. The only overnight options were on the east, so at the Carrying Place, a mid-island neck of land only wide enough to support a two-lane road, I pushed through a 90′-long steel culvert and emerged into the full blast of the wind. Camping on Knight Island, a state park 1-1/2 miles to the southeast across open water, was now unthinkable, so I set my sights on North Hero Village, a mile alongshore to the south.
The headwind now brought me to a complete standstill. Paddling as hard as I could, I achieved nothing. Defeated, my only hope was to carry along the road. For the first 1/2 mile, a line of trees sheltered me from the wind, but beyond it the carry turned into a nightmare. I leaned the canoe strongly into the crosswind and frequently had to plant a leg wide just to remain standing. After an exhausting carry I finally arrived at an inn, booked a room, and collapsed on the bed.
The next day, feeling utterly beaten I completed the crossing of Lake Champlain in mercifully calmer conditions, coming ashore at Plattsburgh, New York. I received a text from Viveka about a body being found in this area of the lake. I replied, reassuring her by saying, “Still kicking!”
From downtown Plattsburgh I began the ascent of the Saranac River. It was flowing well but shallow and with almost continuous riffles. Paddling, wading, and poling, I completed a stretch of upstream work that I was proud of, but on my 24th day, I still had to carry around a section of tough rapids, part of another day with 17 miles of portage. This brought me to Union Falls Dam, just beyond the upper reach of the whitewater.
 Peter Macfarlane
The eastern shore of Long Lake in the Adirondacks provided a campsite with a lean-to at the perfect time of day. Amid the hard work of the trip, this was a jewel of serenity.
After camping above Saranac Lake Village, I reached Lower Saranac Lake, where I experienced the most perfect paddling imaginable. With the rising sun at my back and smooth, glassy water ahead, I paddled with a sense of connection from the pressure of water on the blade through me to the flowing movement of the canoe. The experience was all the more exquisite for its rarity on this trip.
After a 2-mile transit of Middle Saranac Lake and another 2 miles across the south end of Upper Saranac Lake, I portaged to the ponds at the head of Stony Creek. Descending a looping 1-1/2 miles brought me to the Raquette River for a 12-mile upstream leg to Long Lake, an aptly named broadening of the river 14 miles long and less than a mile wide at its widest point. I ended the day cooking dinner on a sandy beach while the sun sank over the Adirondack Mountains to the west.
From the south end of Long Lake, I finished the ascent of the Raquette River to Forked Lake and Raquette Lake, where I spent the night on Big Island, a few miles ahead of schedule and poised to bring this trek to a close the following day.
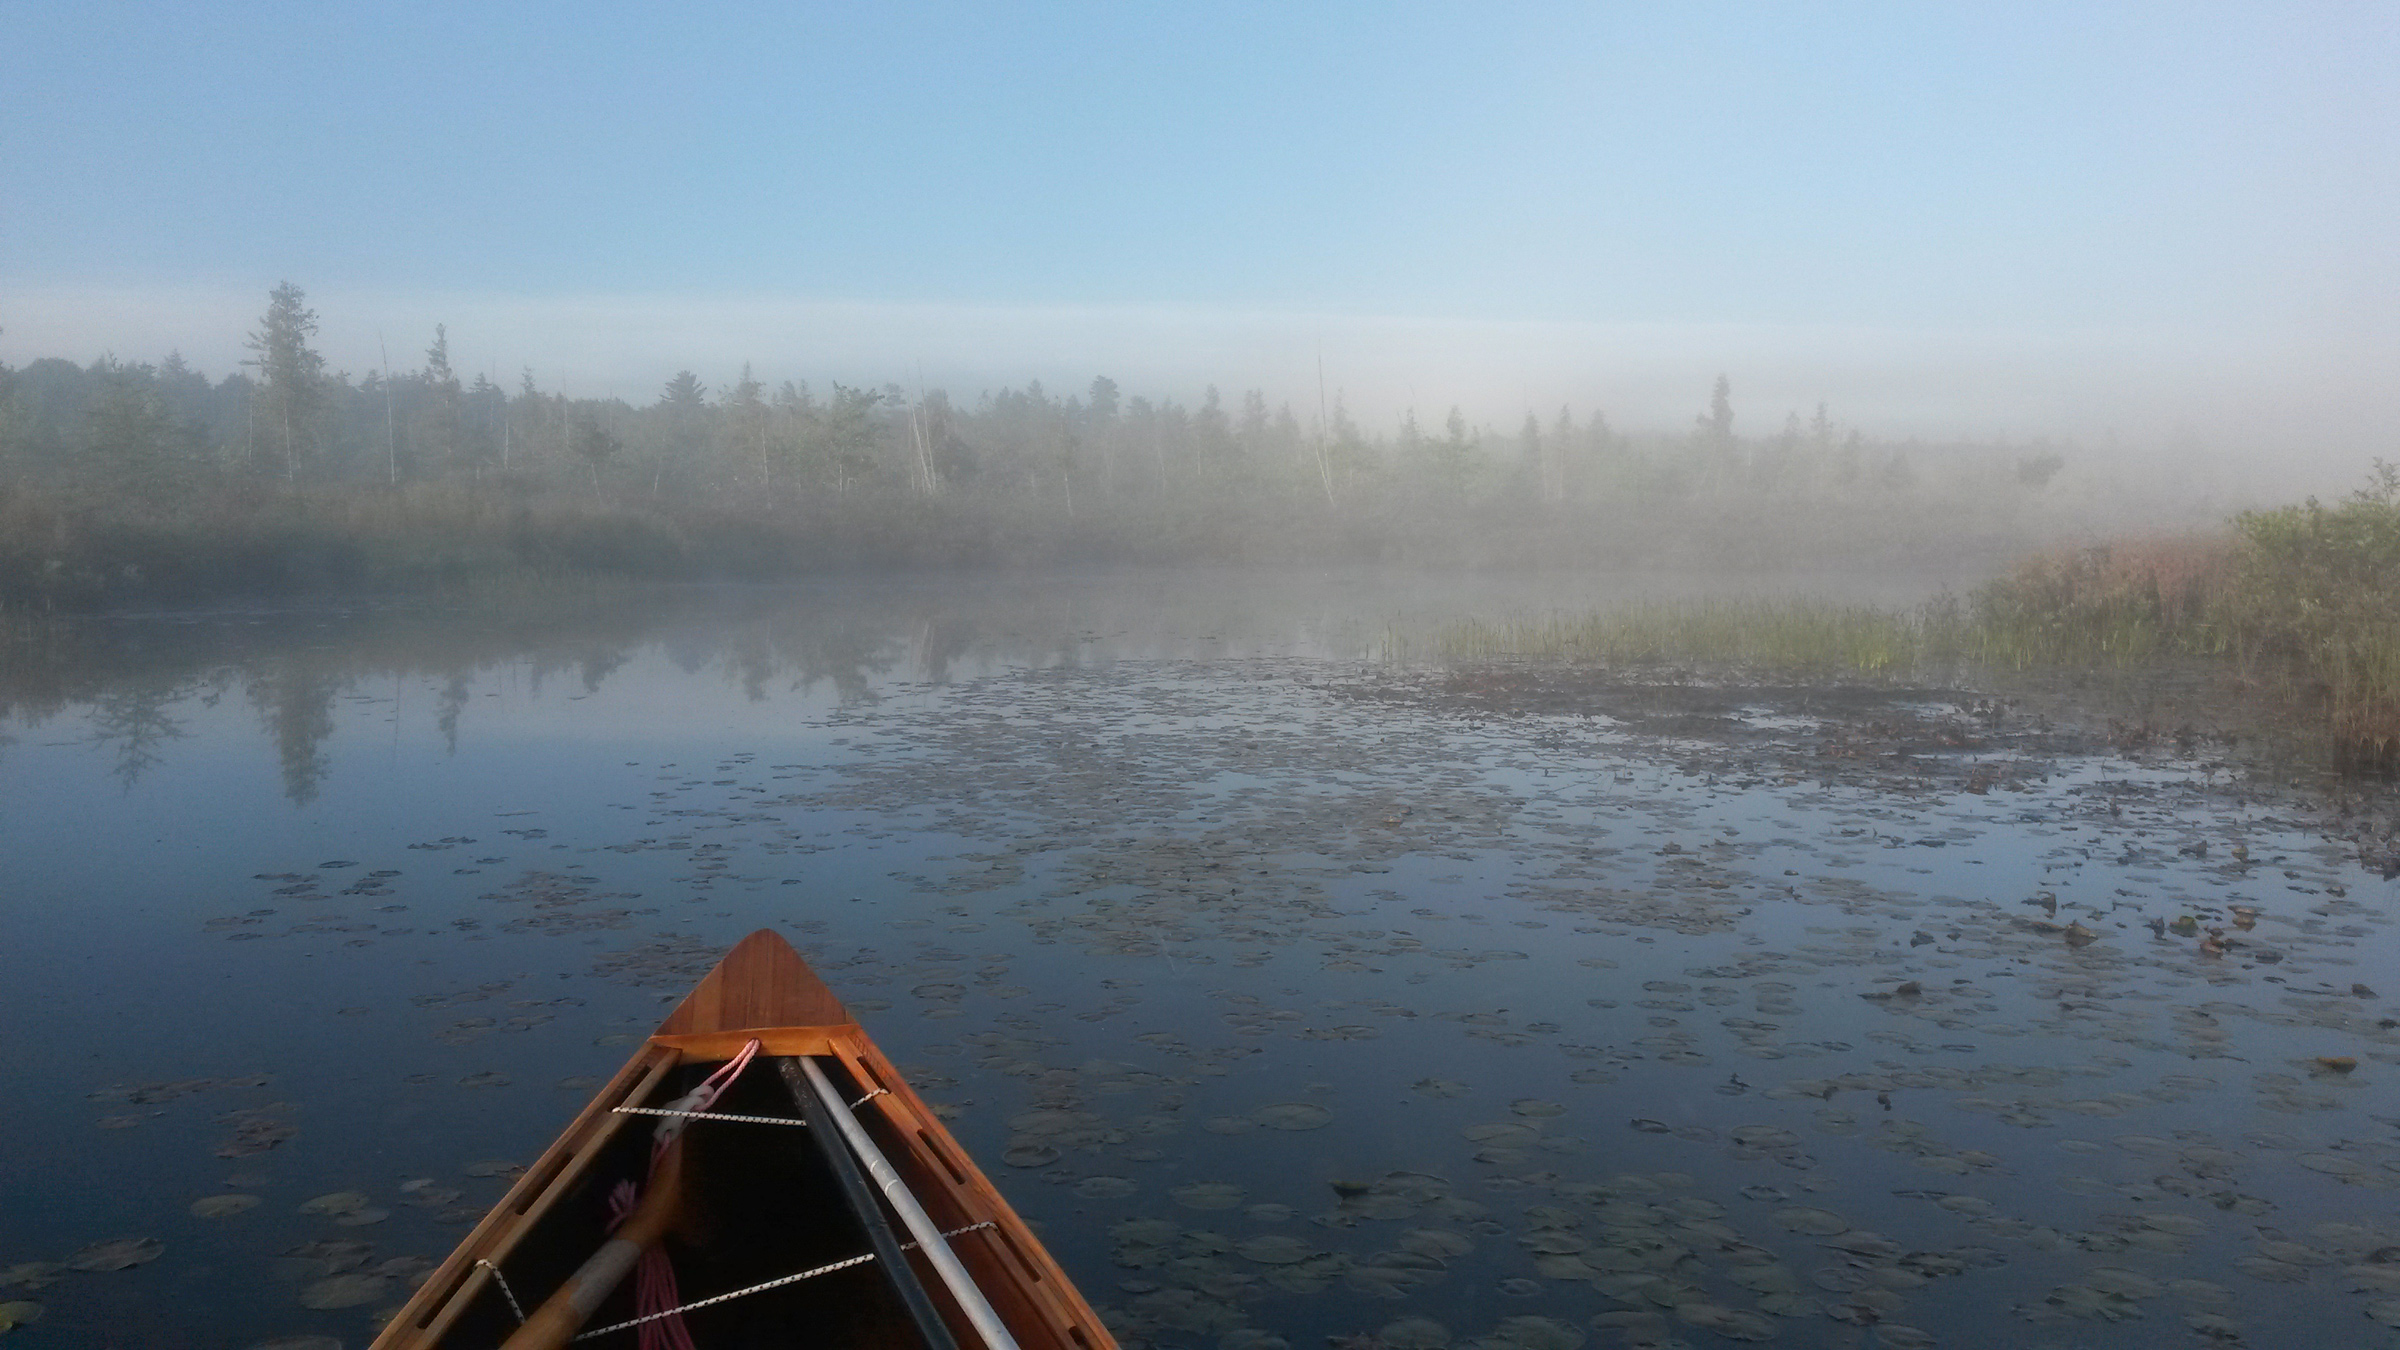 Peter Macfarlane
The final morning of any long journey is a special and bittersweet moment. The mist covering Brown’s Tract Inlet leading from Raquette Lake added an atmospheric touch to this one.
The 28th day dawned misty. I paddled up an ethereal Browns Tract Inlet, a final short, sluggish upstream paddle delayed by beaver dams across the flow. After carrying to Eighth Lake, the uppermost of the Fulton Chain, I was on the home stretch, a countdown of lakes from Eighth to First Lake, under bright sun and blue sky.
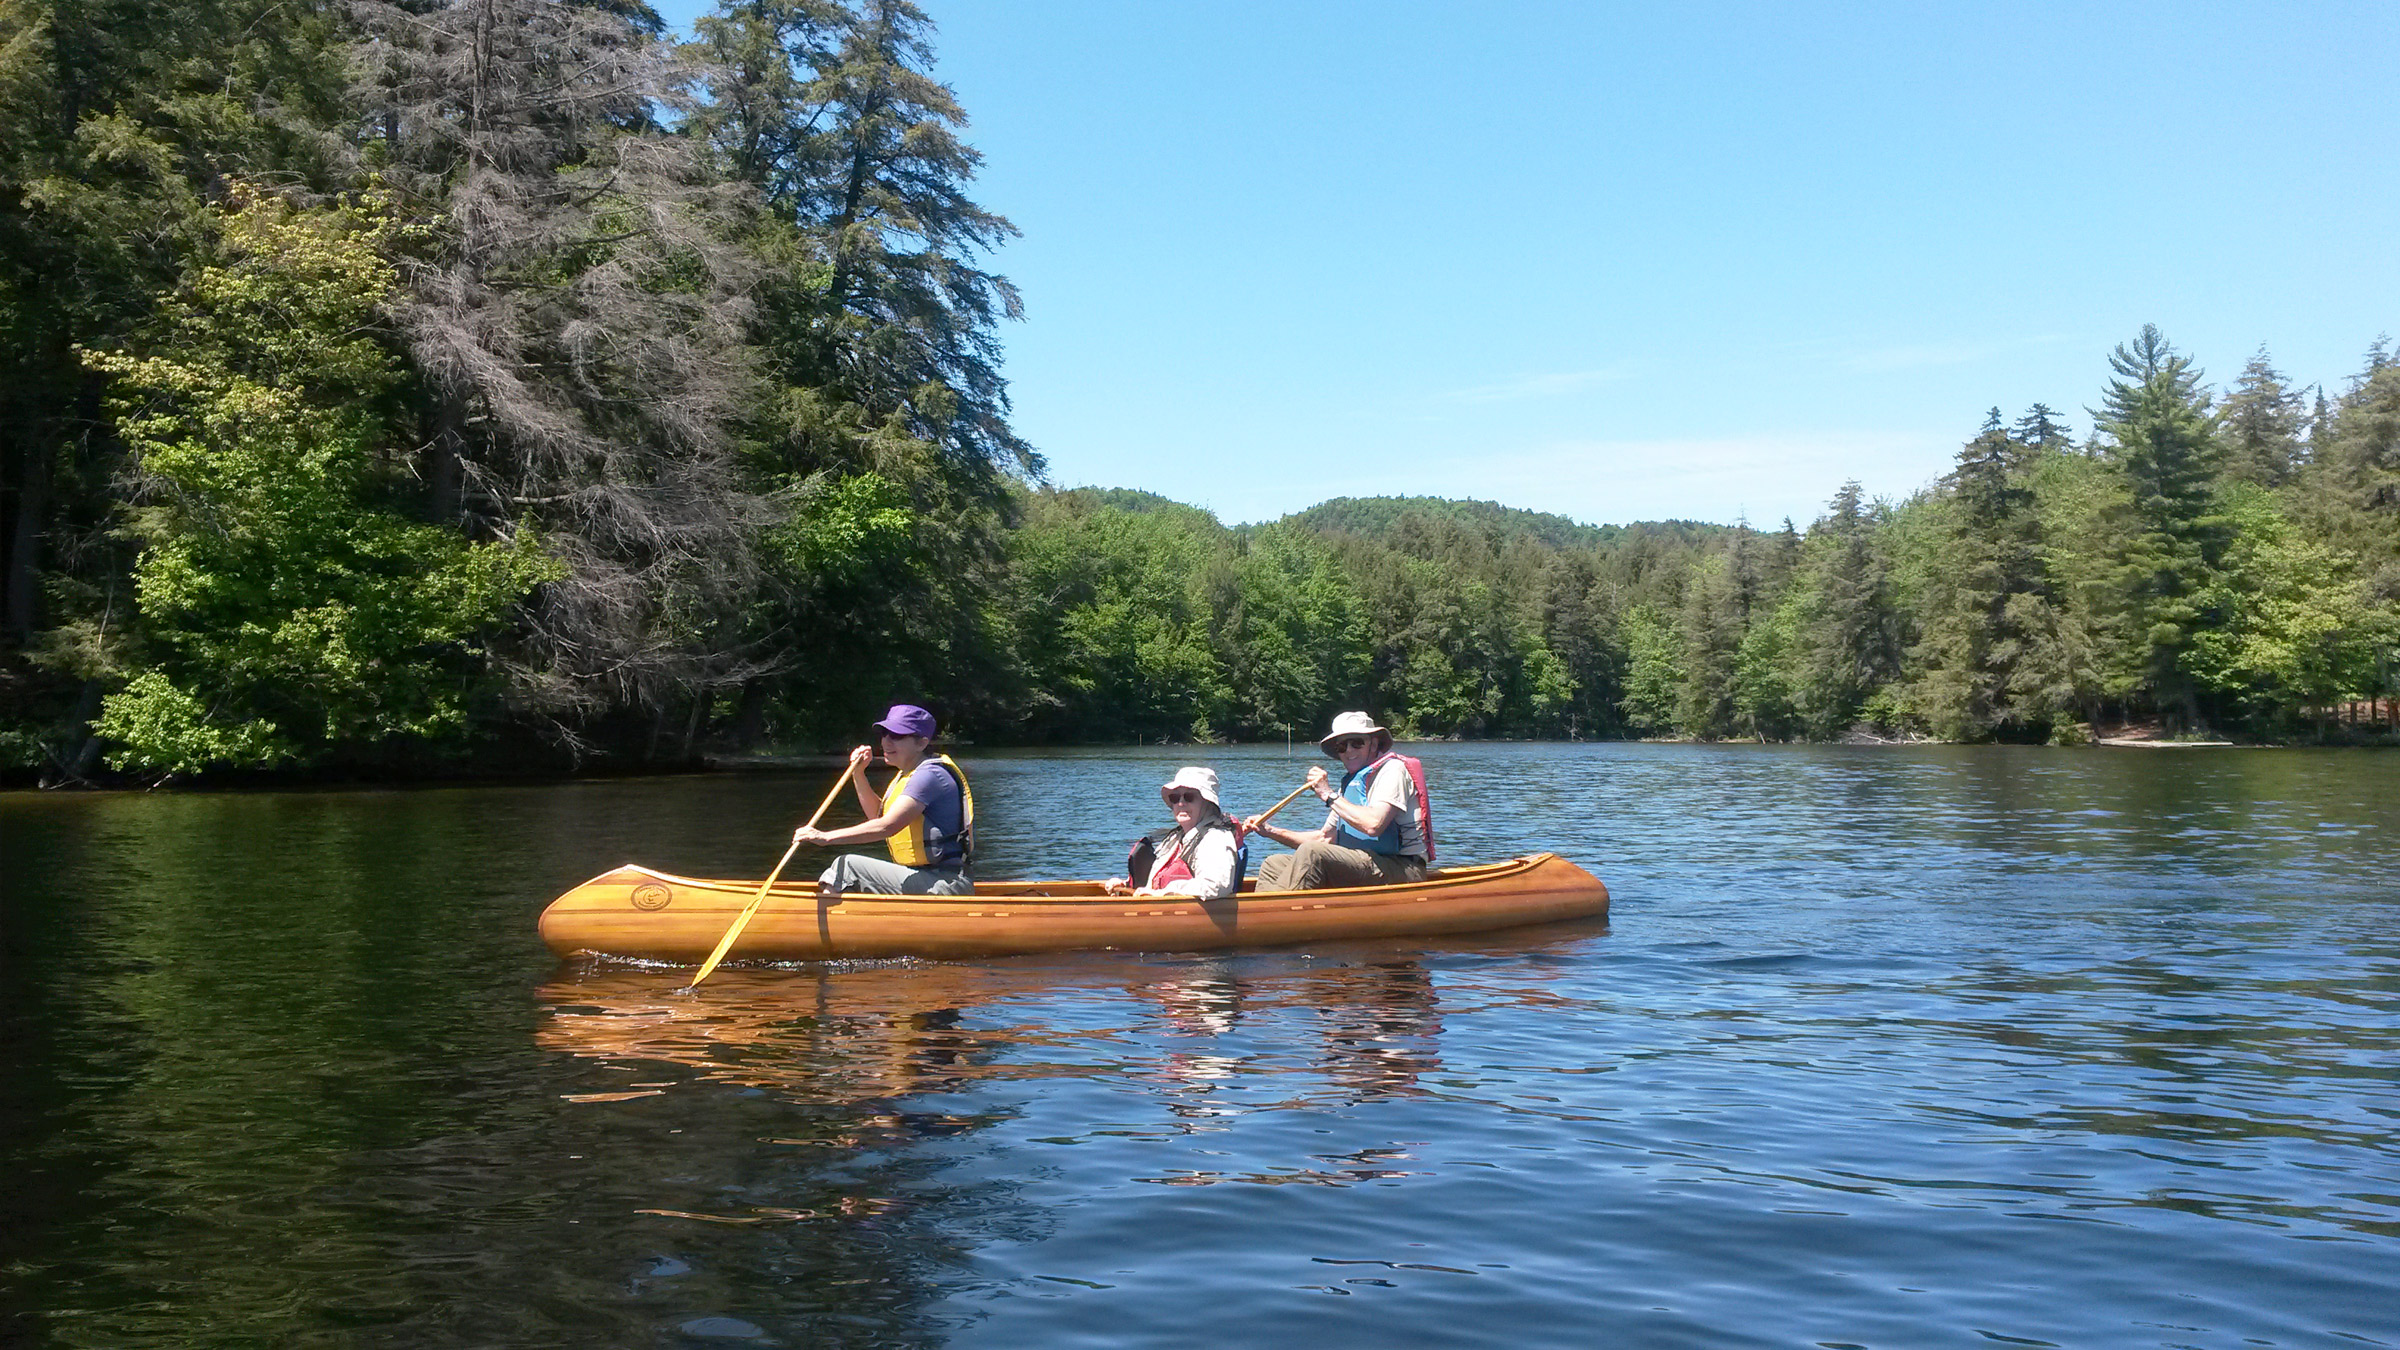 Peter Macfarlane
For the last few miles on the Fulton Chain to Old Forge, Viveka, Ray, and Hildy, escorted me, paddling one of my canoes.
My support crew—Ray, Hildy, and Viveka—paddled out to meet me on Fourth Lake, served me a sumptuous lunch, and then escorted me to the finish at Old Forge. On the final approach, while my friends paddled to shore, I held back and reflected.
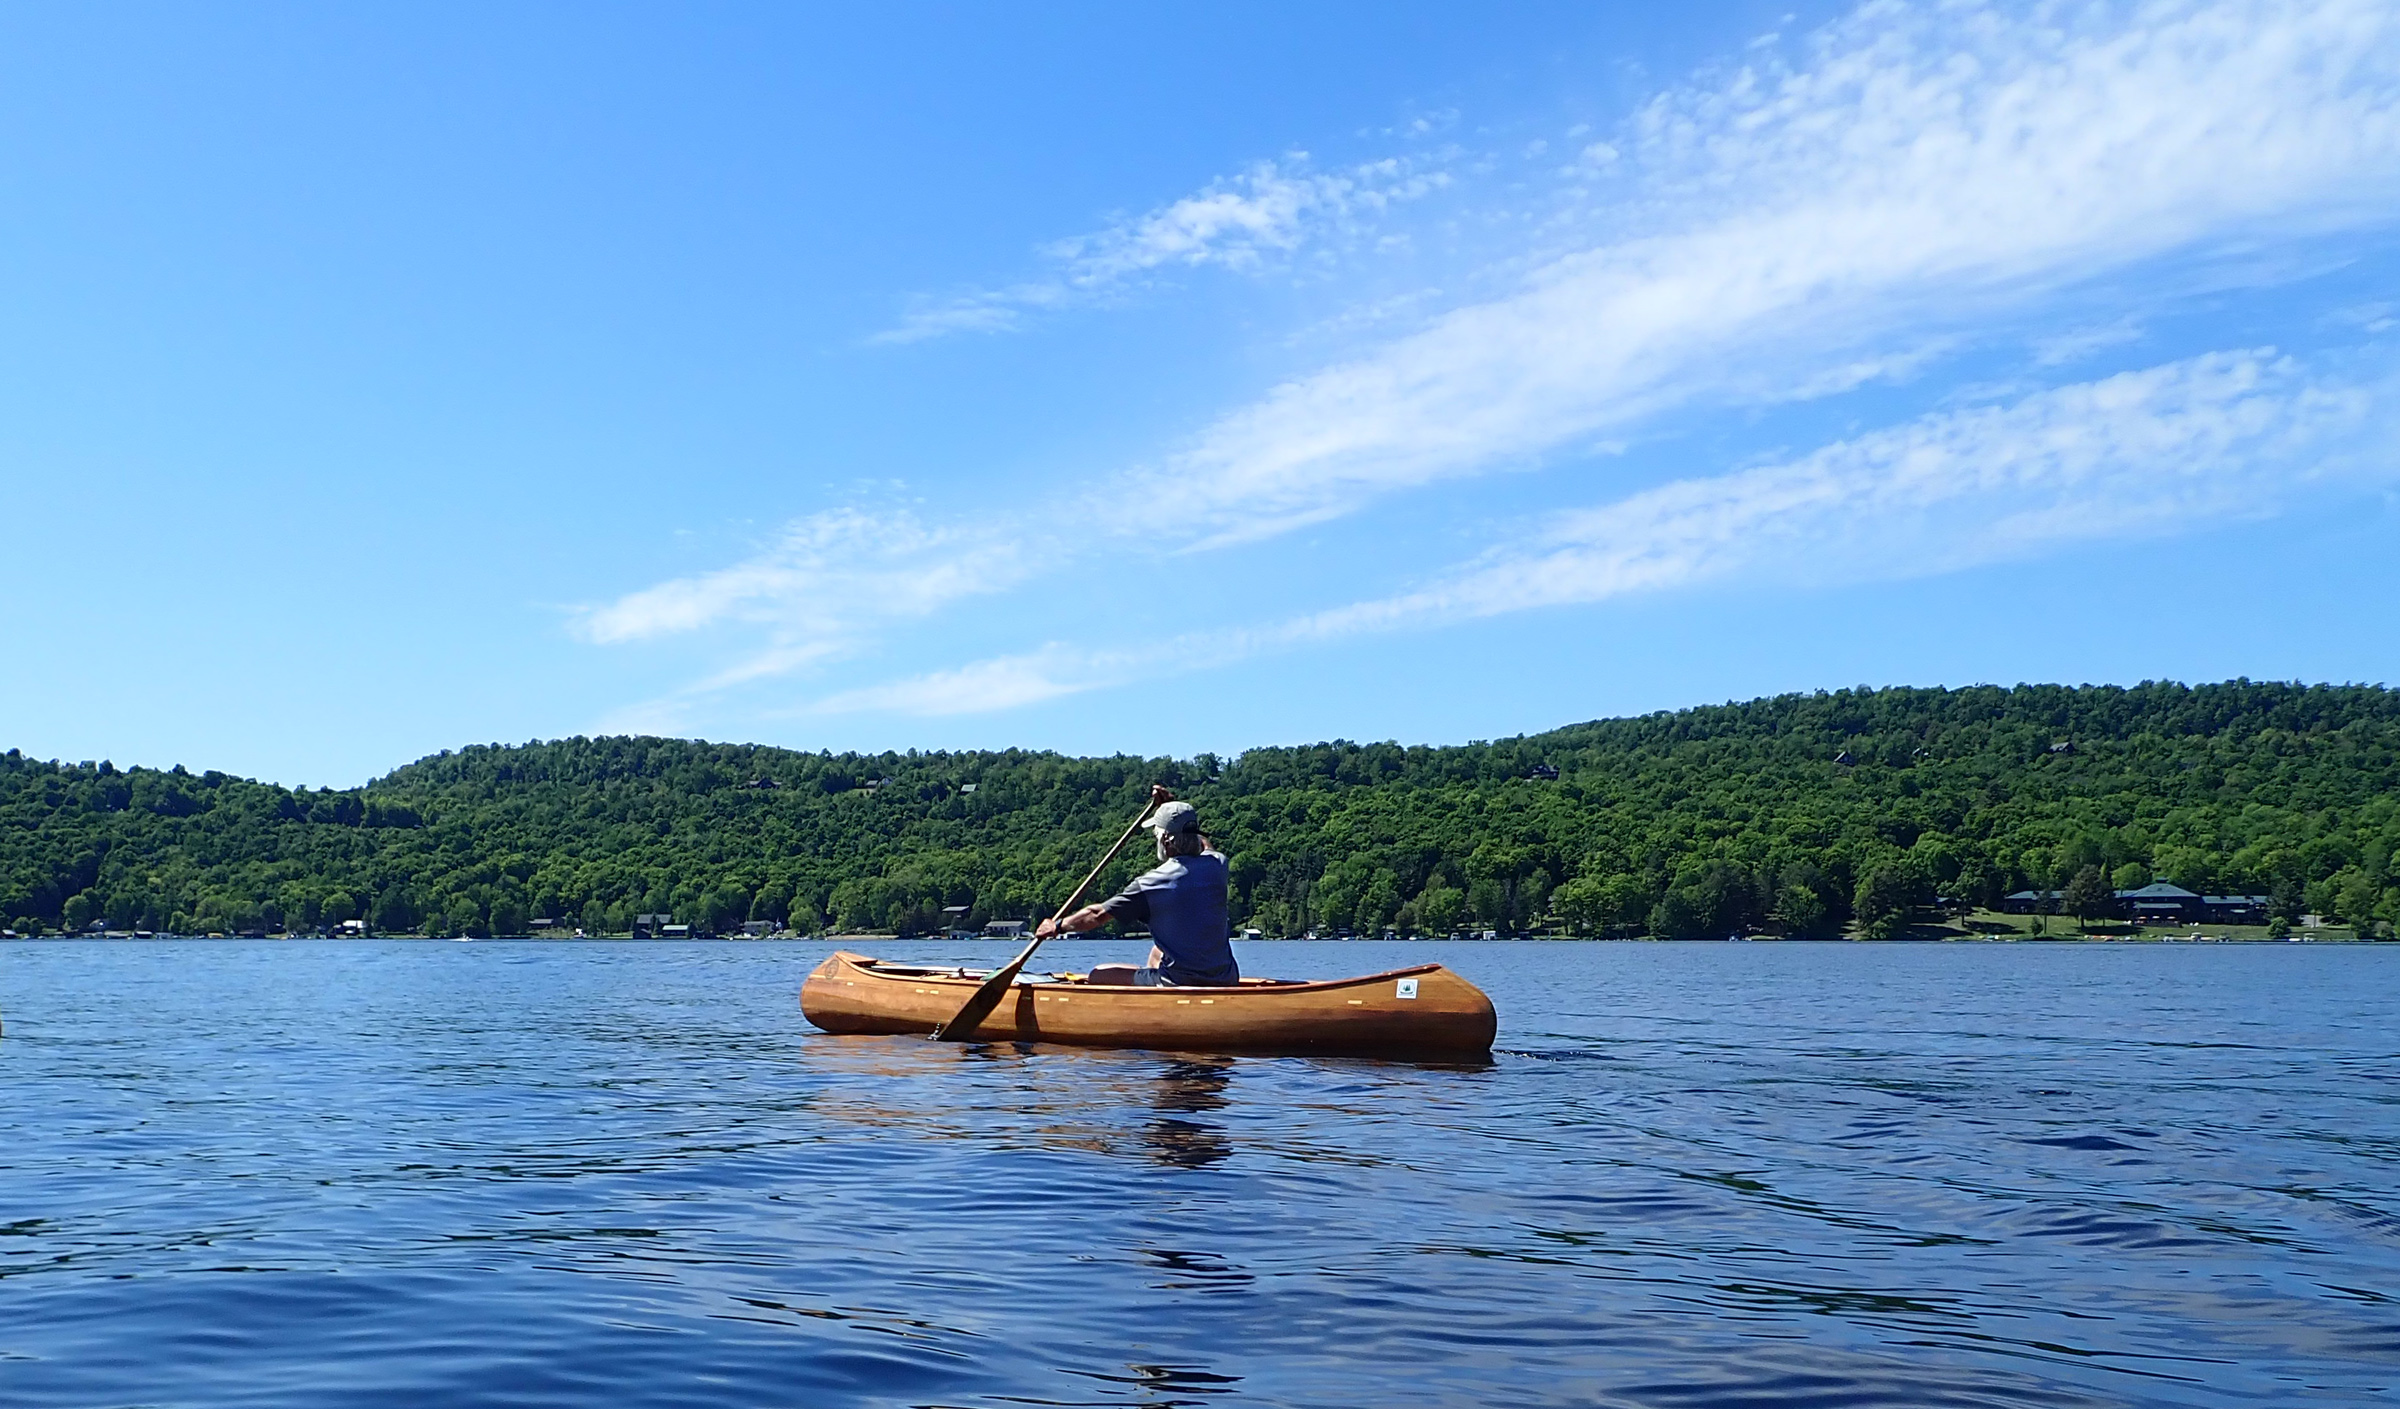
With the end drawing near, my canoe’s wake stretches over 700 miles astern.
It had been one thing to set up this challenge; quite another to see it through to successful completion. The hard work of this trip was beyond what I’d anticipated. I expected upstream to be tough, even relished the challenge, but the headwinds had taken the difficulty to another level. Through all the trials though, my trusted little canoe had once more been my faithful companion.![]()
Following a career of teaching high school science in the U.K., Peter Macfarlane immigrated to Vermont to take up life as a musician. Playing and teaching the fiddle professionally has afforded him the time to indulge his passion for cedar-strip canoes, not only paddling them but also designing and building them as Otter Creek Smallcraft. The canoe pictured here is a Sylva, a solo touring canoe he designed, built, and paddled the full length of the Northern Forest Canoe Trail in 2013 and 2018.
If you have an interesting story to tell about your adventures with a small boat, please email us a brief outline and a few photos.
Anchors Astray
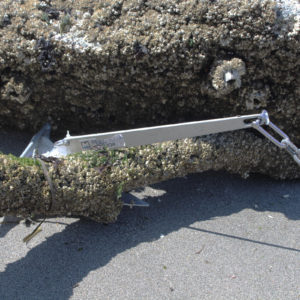
I should have known better. The slough where I dropped anchor for the night was among the many tidal backwaters of the Snohomish River near Everett, Washington. The sloughs were littered with waterlogged driftwood, some of it exposed at low tide, the rest permanently submerged. I dropped my expensive stainless-steel anchor for the night and in the morning it was truly stuck. I spent over two hours trying to free it, using brute force and every trick I knew, and ultimately had to cut it free. It was the only time I’d lost an anchor and I wanted to make sure I’d never lose another.
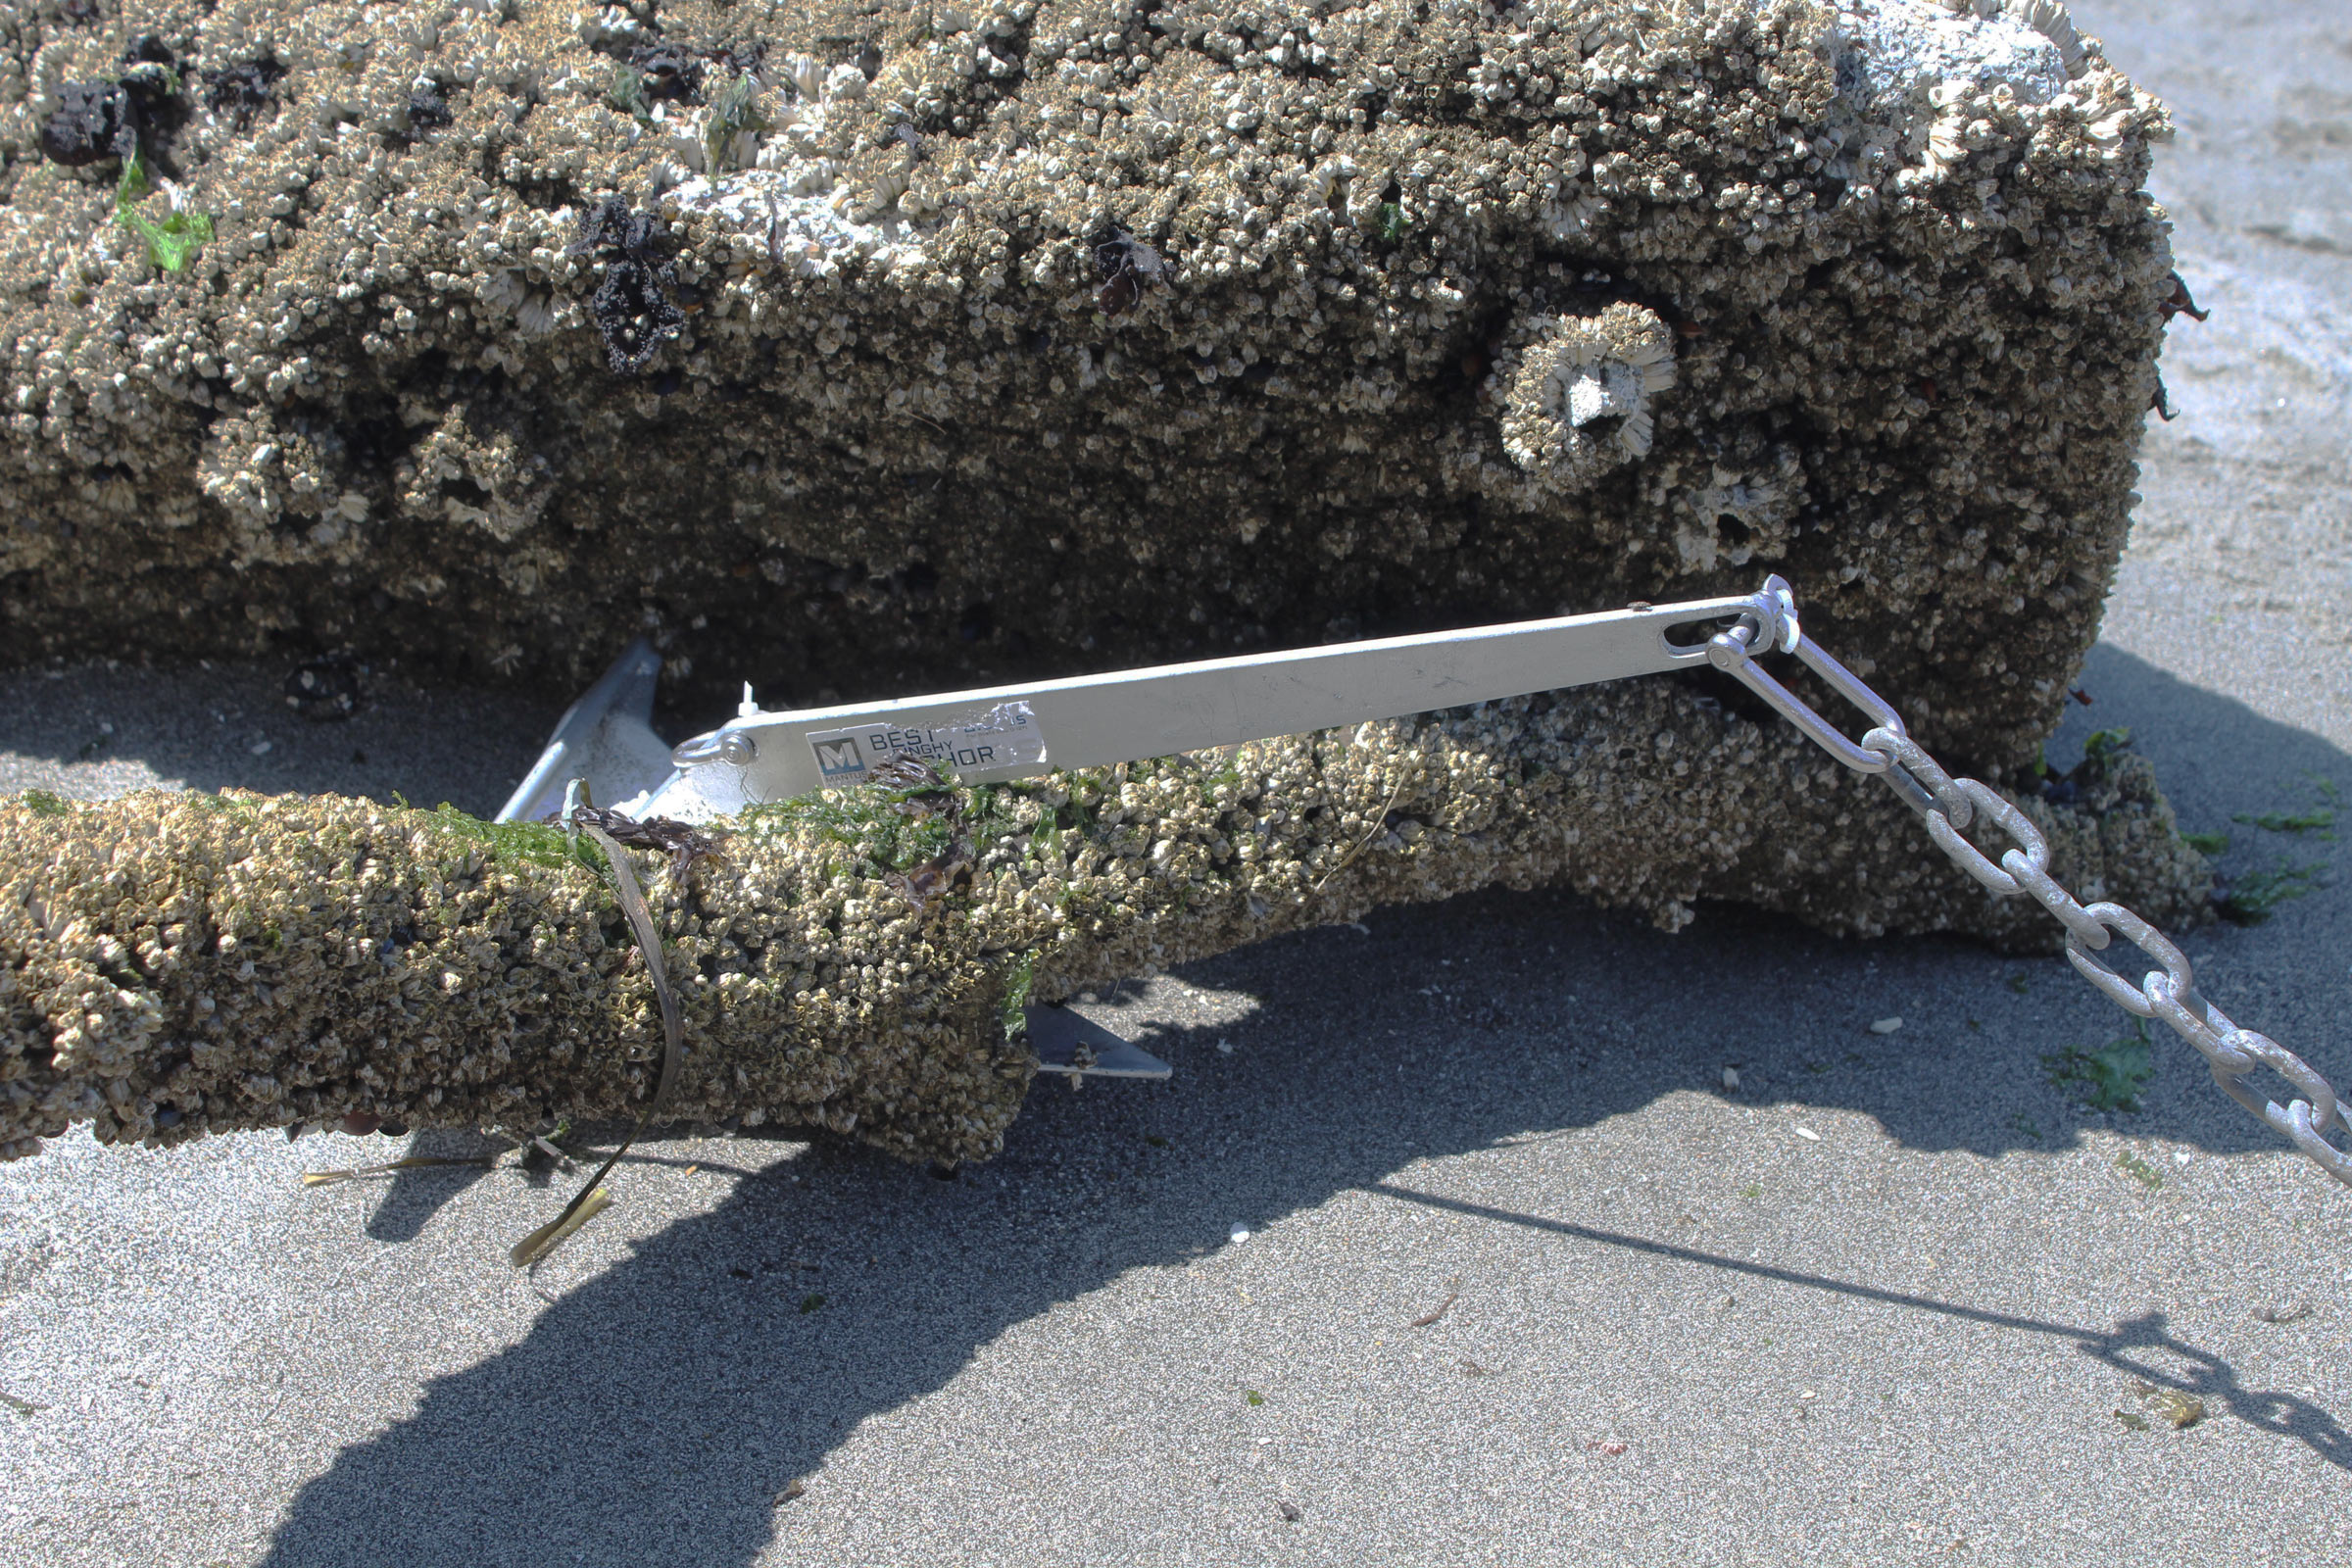 Photographs by the author
This combination of driftwood and a boulder, seen here exposed by the low tide, are the sort of underwater hazard that will snag an anchor.
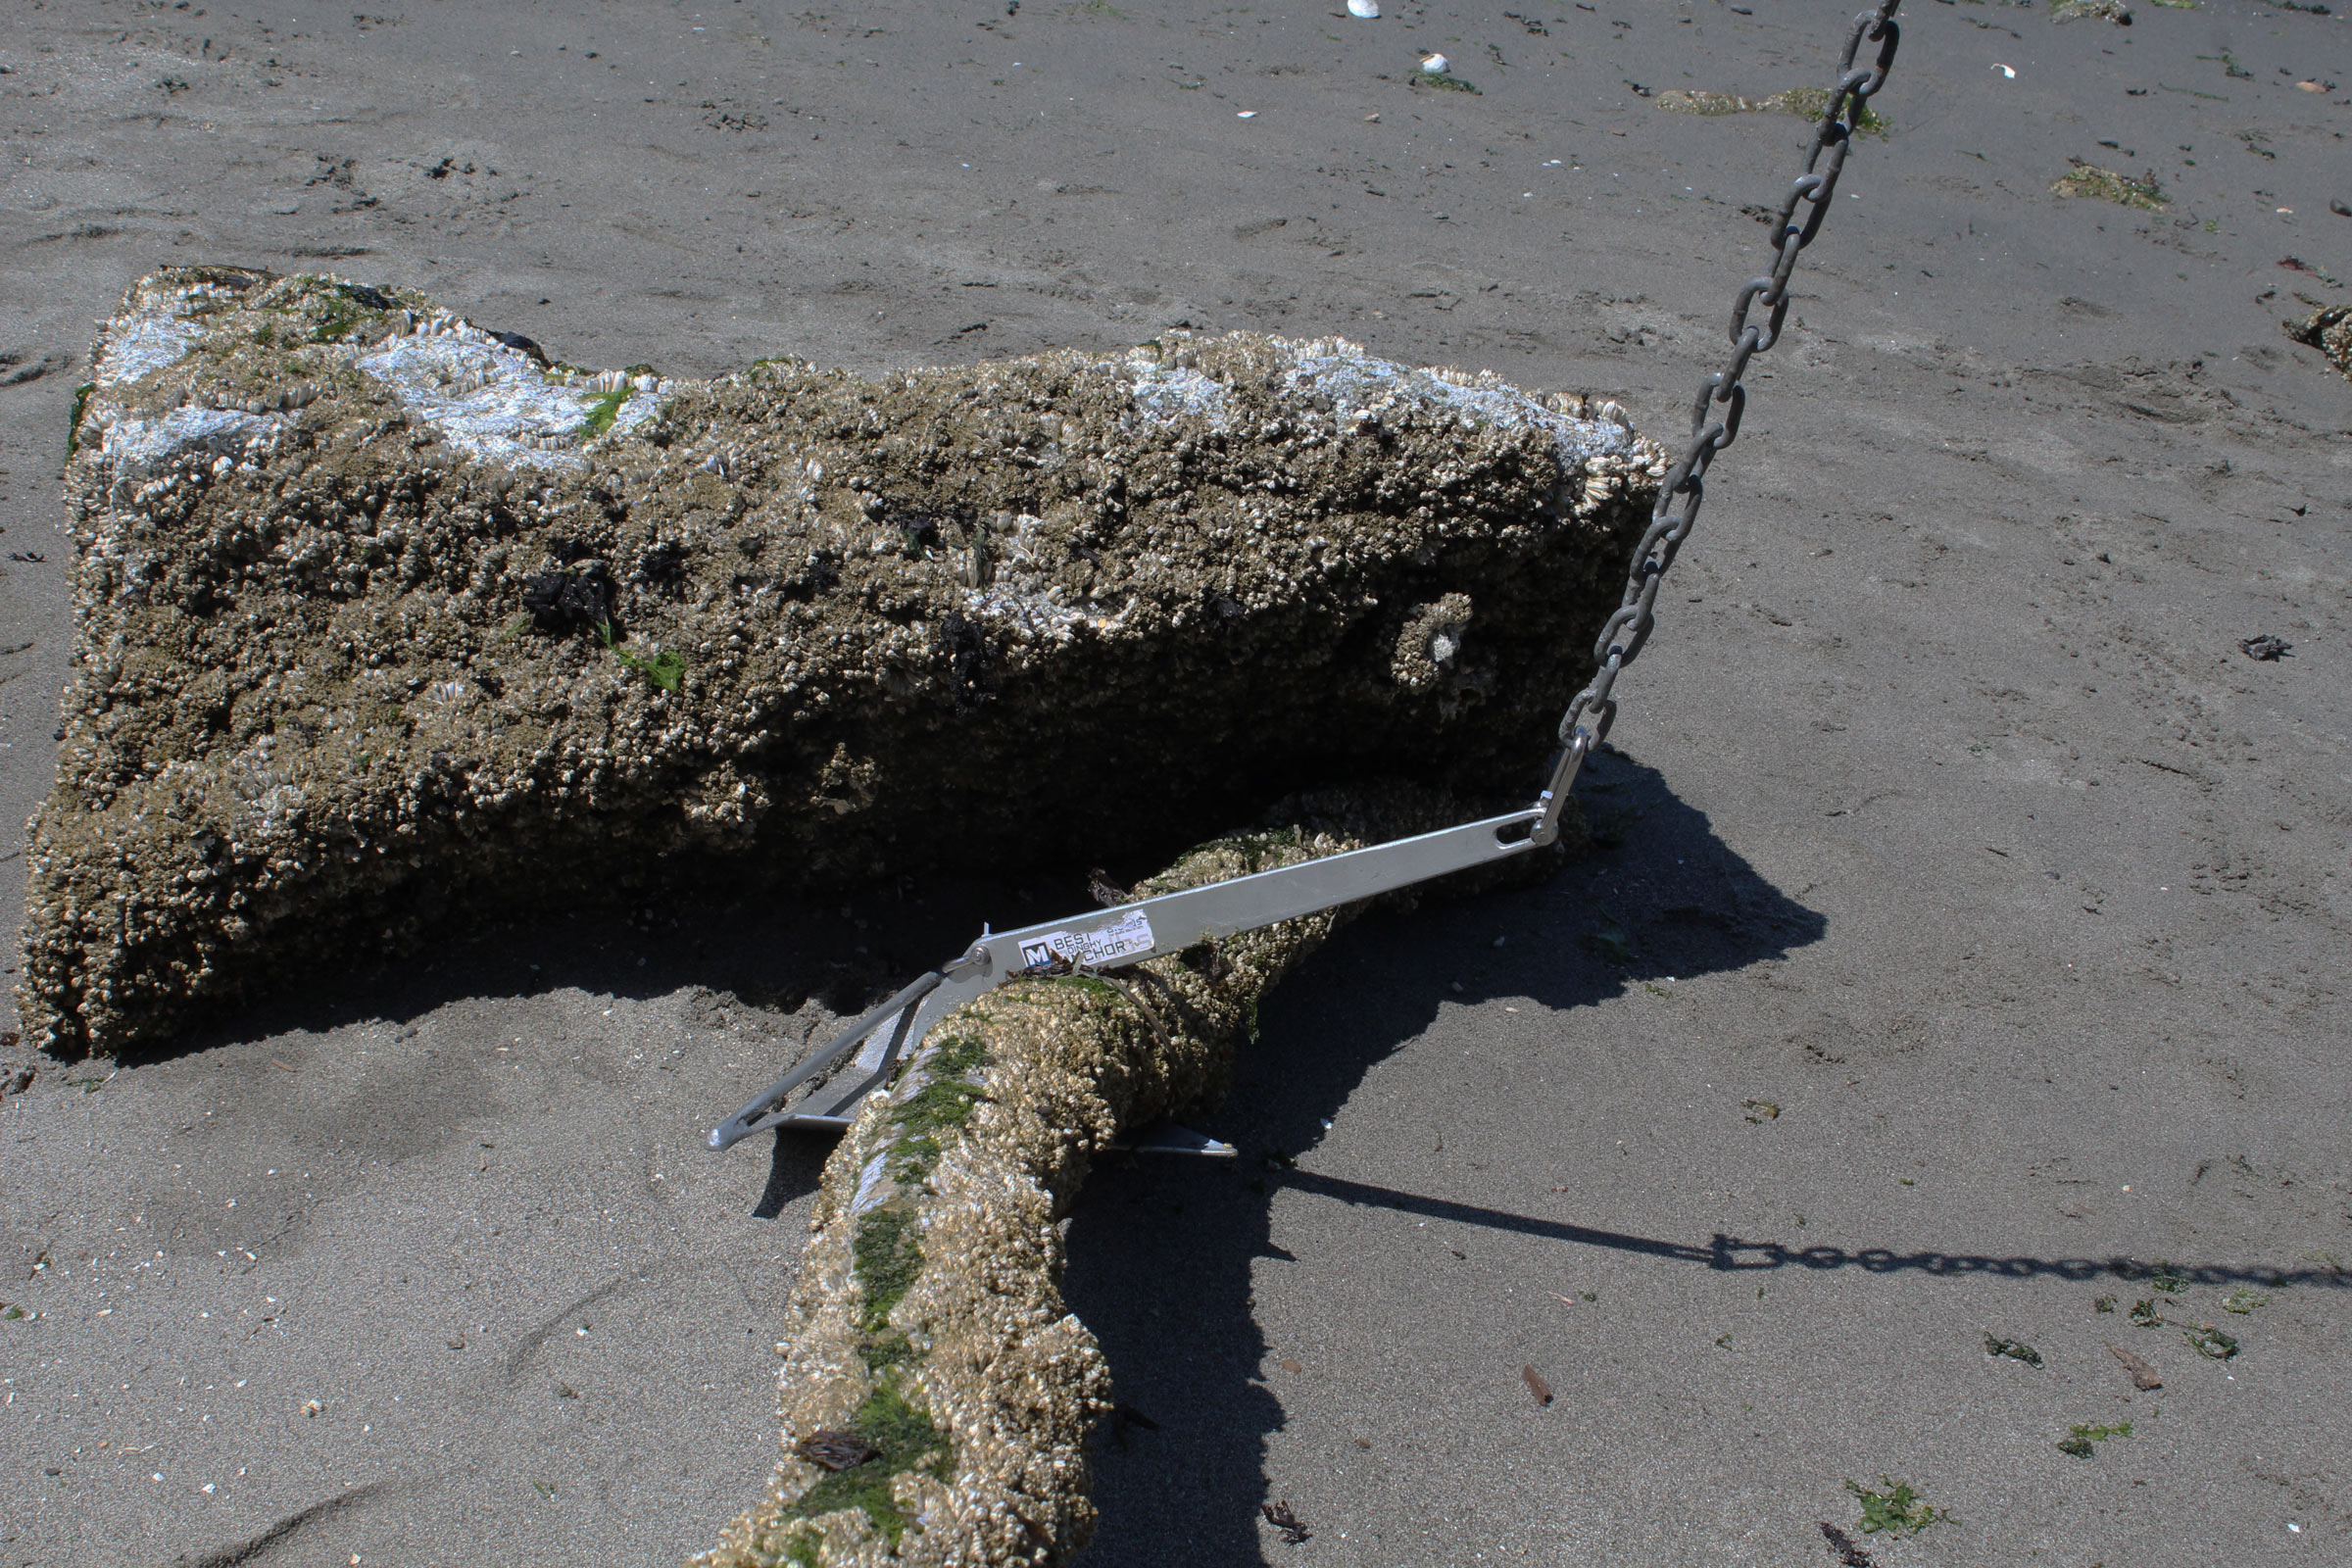
Pulling up on the anchor won’t break its hold on the driftwood and pulling the stock backward will only pivot the anchor, not release it.
The method that I’ve occasionally used to make suer I don’t lose an anchor is to tie a retrieval line to the anchor’s crown and the other end of the line to a small buoy, before I drop the anchor. If the anchor gets hung up and won’t follow the rode up, the buoyed line will pull it backward out of the jam.

My tried-and-true system has the ordinary arrangement of a chain and rode on the eye of the anchor, accompanied by a floating retrieval line with a fishing-net float on one end and a strong stainless-steel carabiner on the other.
Using a retrieval line isn’t as convenient as using a single rode and its chain, so I looked on the Web for other ways to pull an anchor out of a jam. What I found were variations on a theme: connecting the end of the chain to the crown of the anchor and applying a breakable connection between the eye of the anchor and the chain that parallels the shank and passes by the eye.

I tried the cable-tie breakaway system on three anchors (from left): Danforth, Mantus, and a claw.
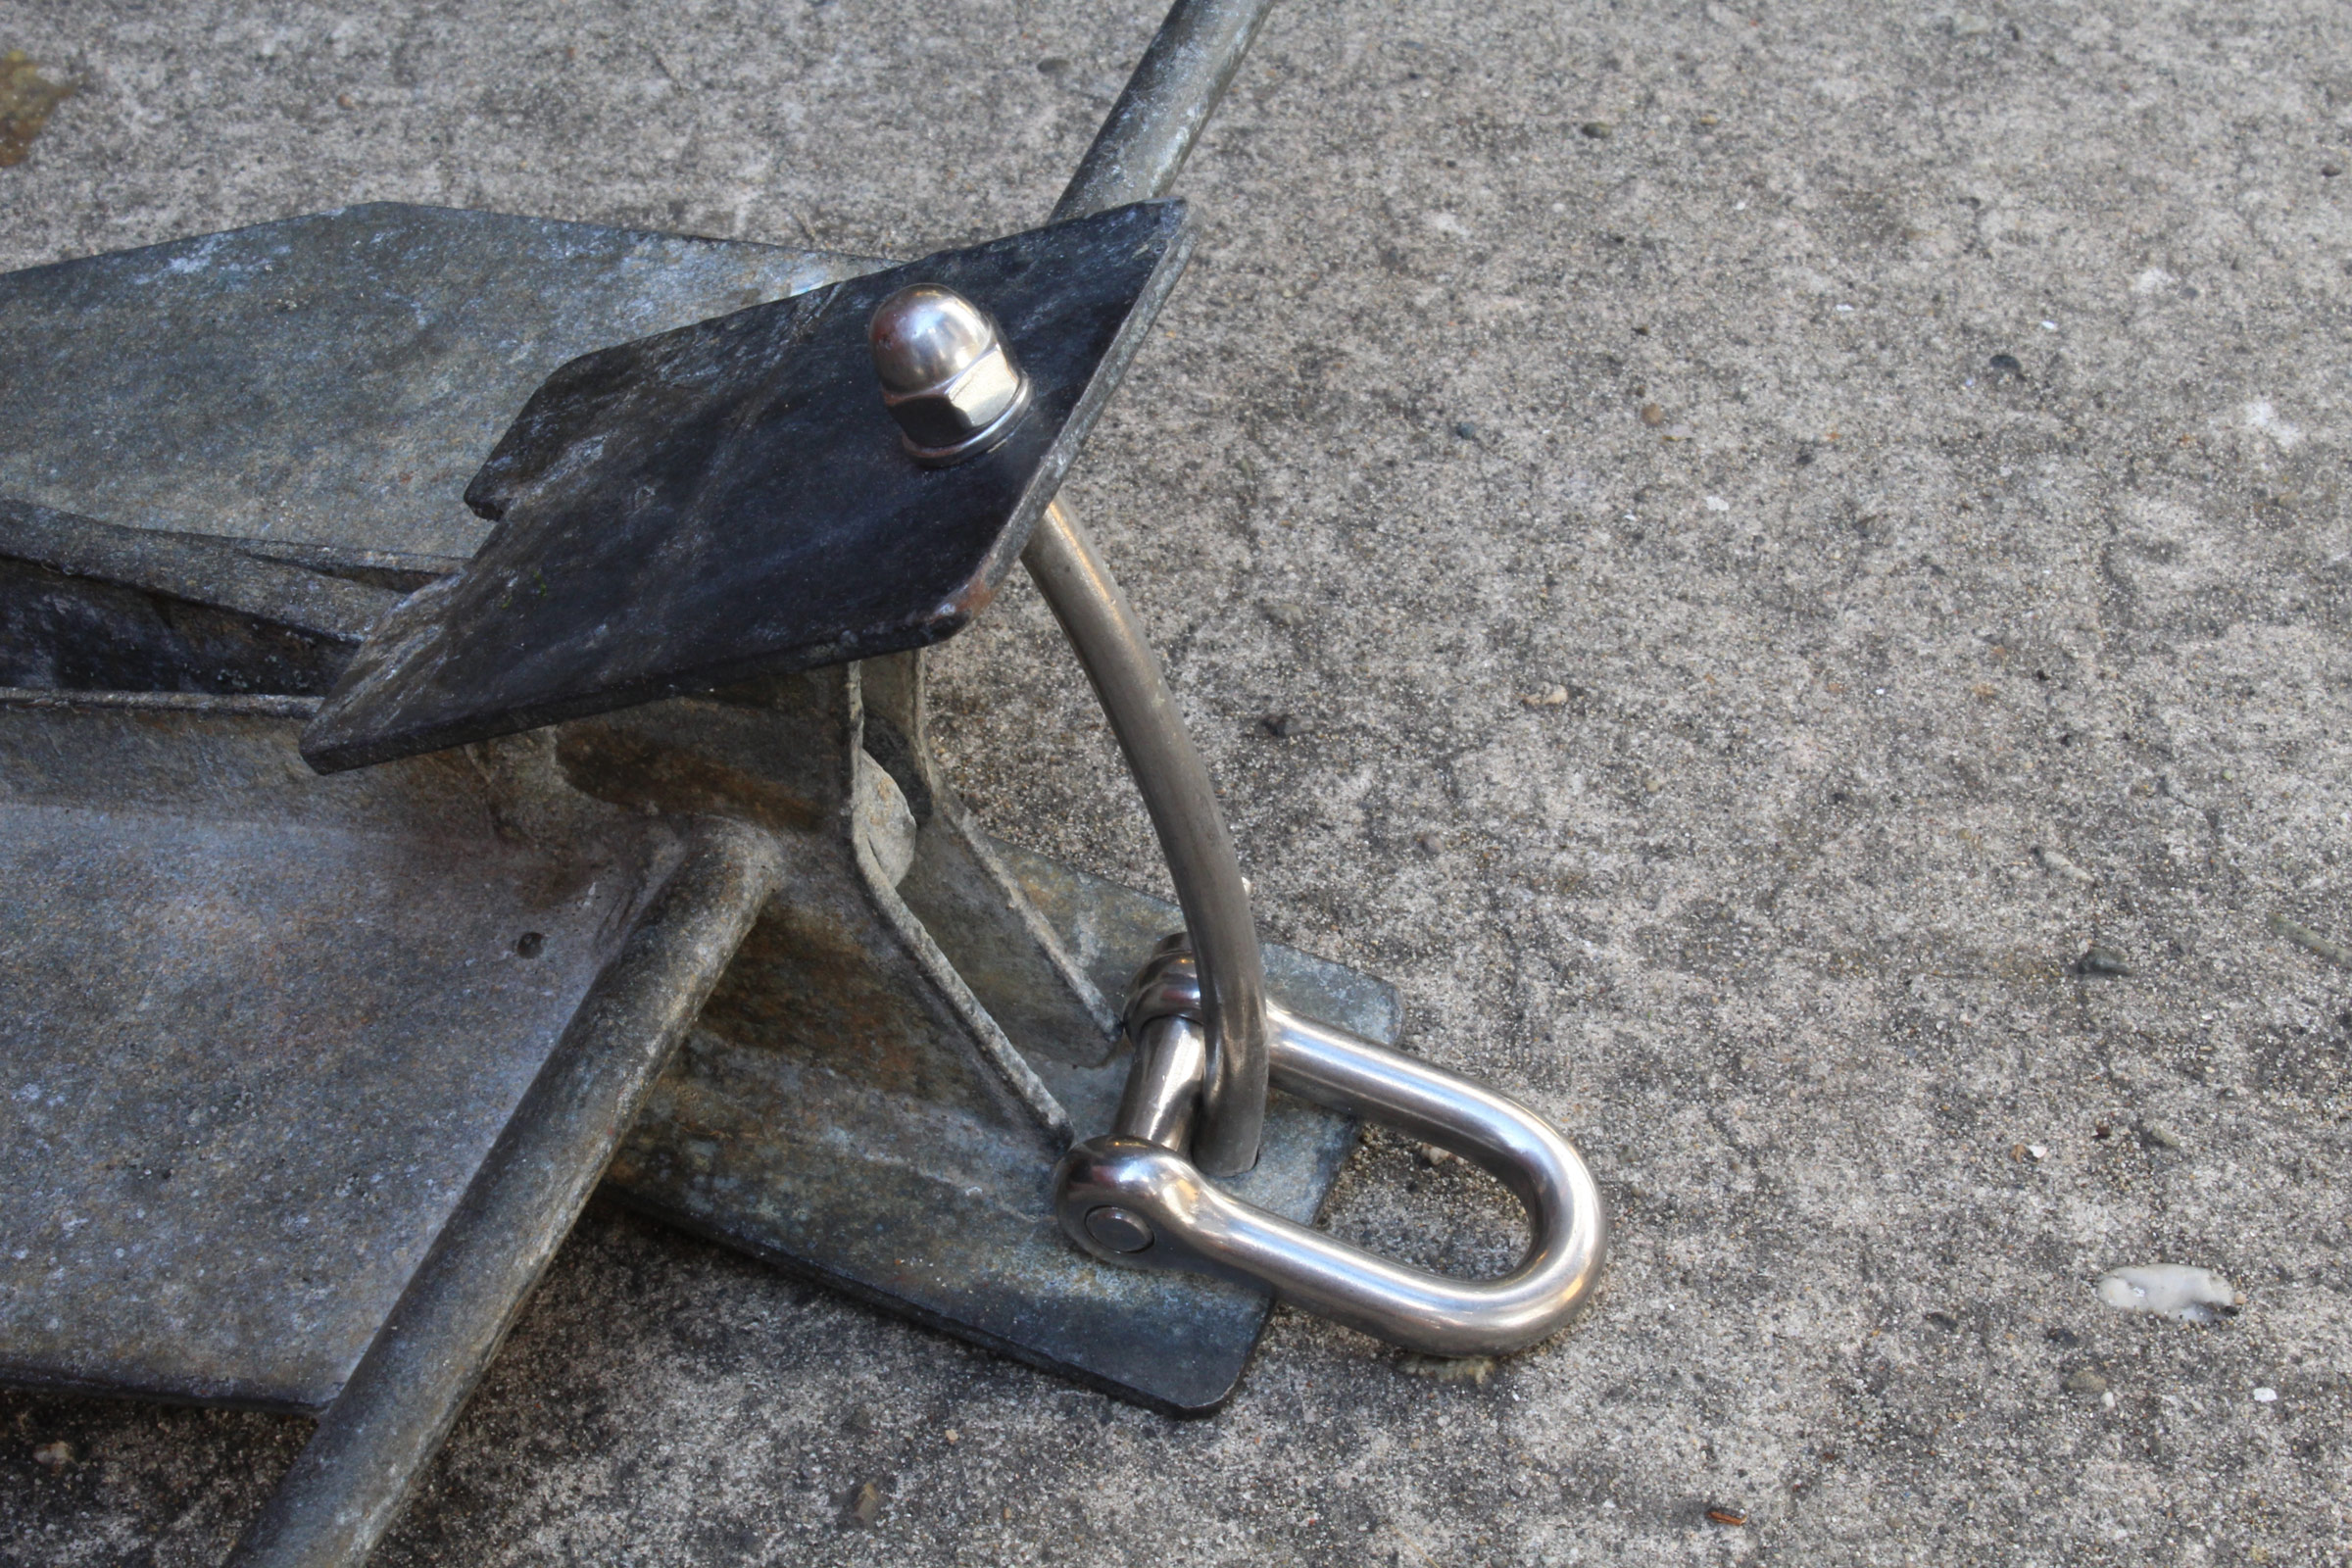
I added a tripping bar to a Danforth by drilling holes in the anchor’s plates and inserting a stainless-steel bolt, bent to be square to each plate.
Many anchors have a hole at the crown for a line to pull the anchor backward, but neither of my two Danforth anchors do. A search on the Web turned up only a few photographs of Danforths with holes in the rectangular plates at the crown and one drawing showing a “tripping ring” secured between those plates. I drilled 1/4″ holes in the plates of one of my Danforths and inserted a bent stainless-steel bolt as a tripping bar.
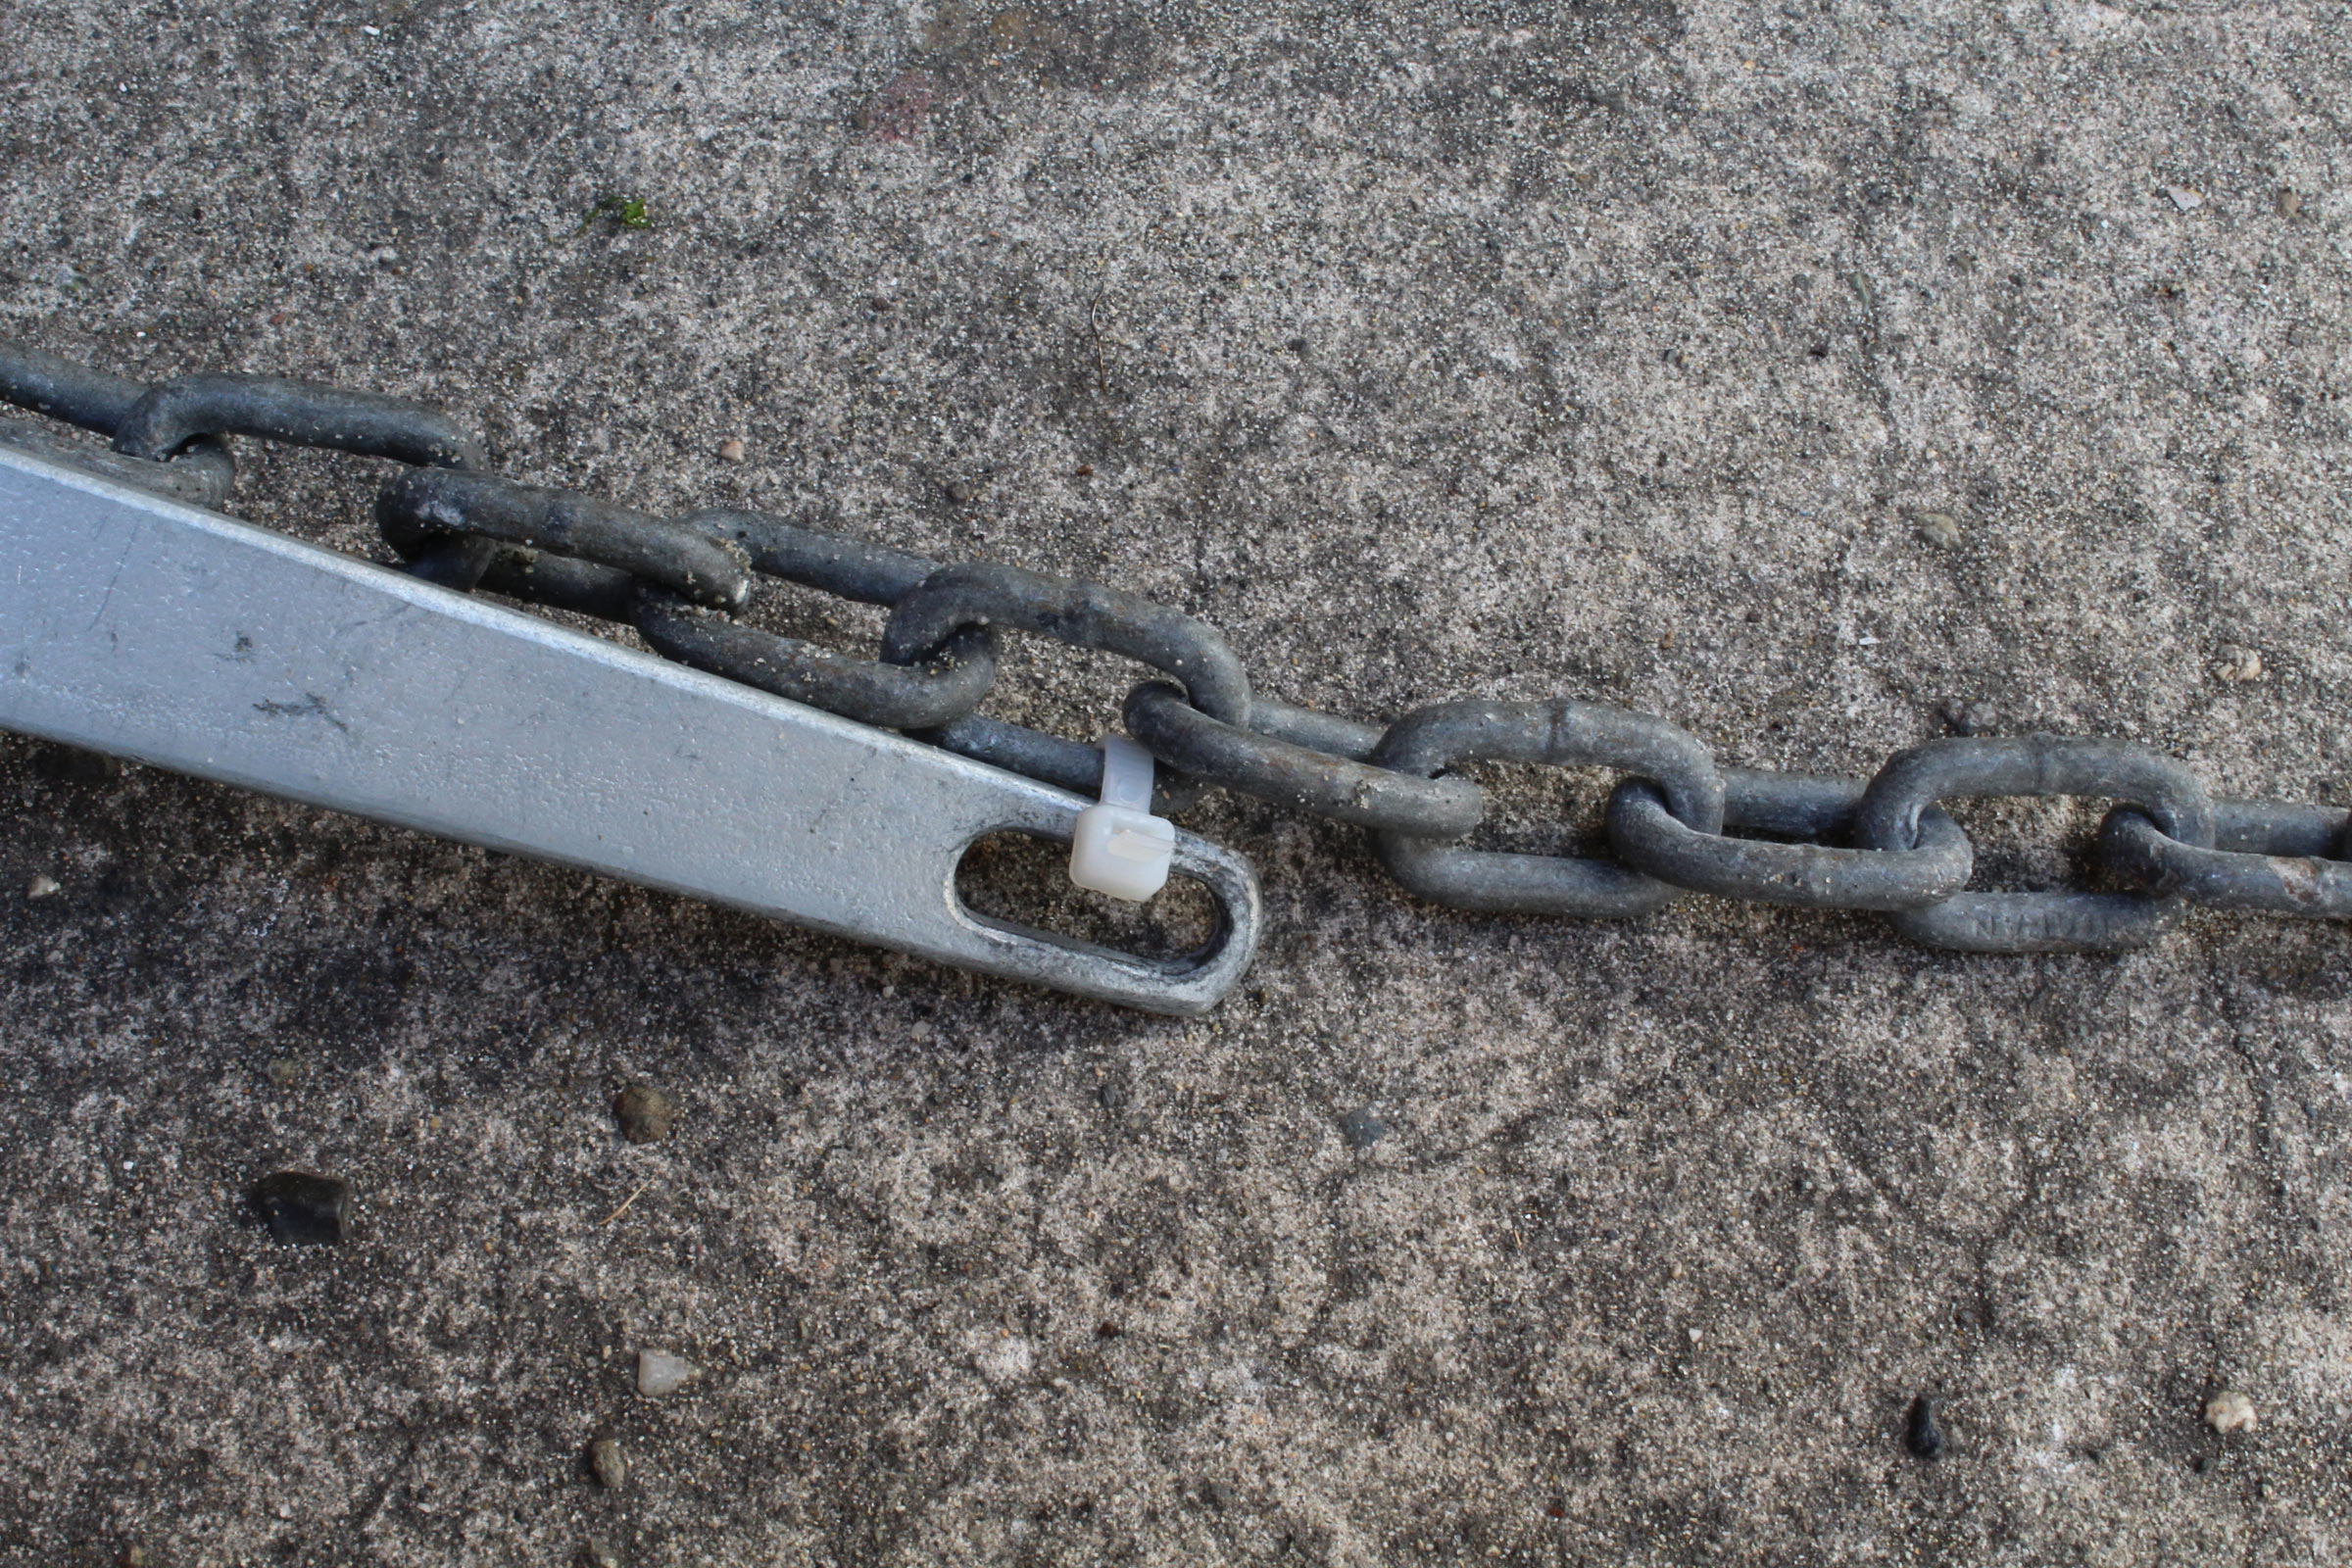
While the chain is tensioned along the shank, a cable tie is applied, placed to allow the attached link to move along the axis of the anchor’s shank. In a normal anchoring, the tie will not be subject to a breaking strain.
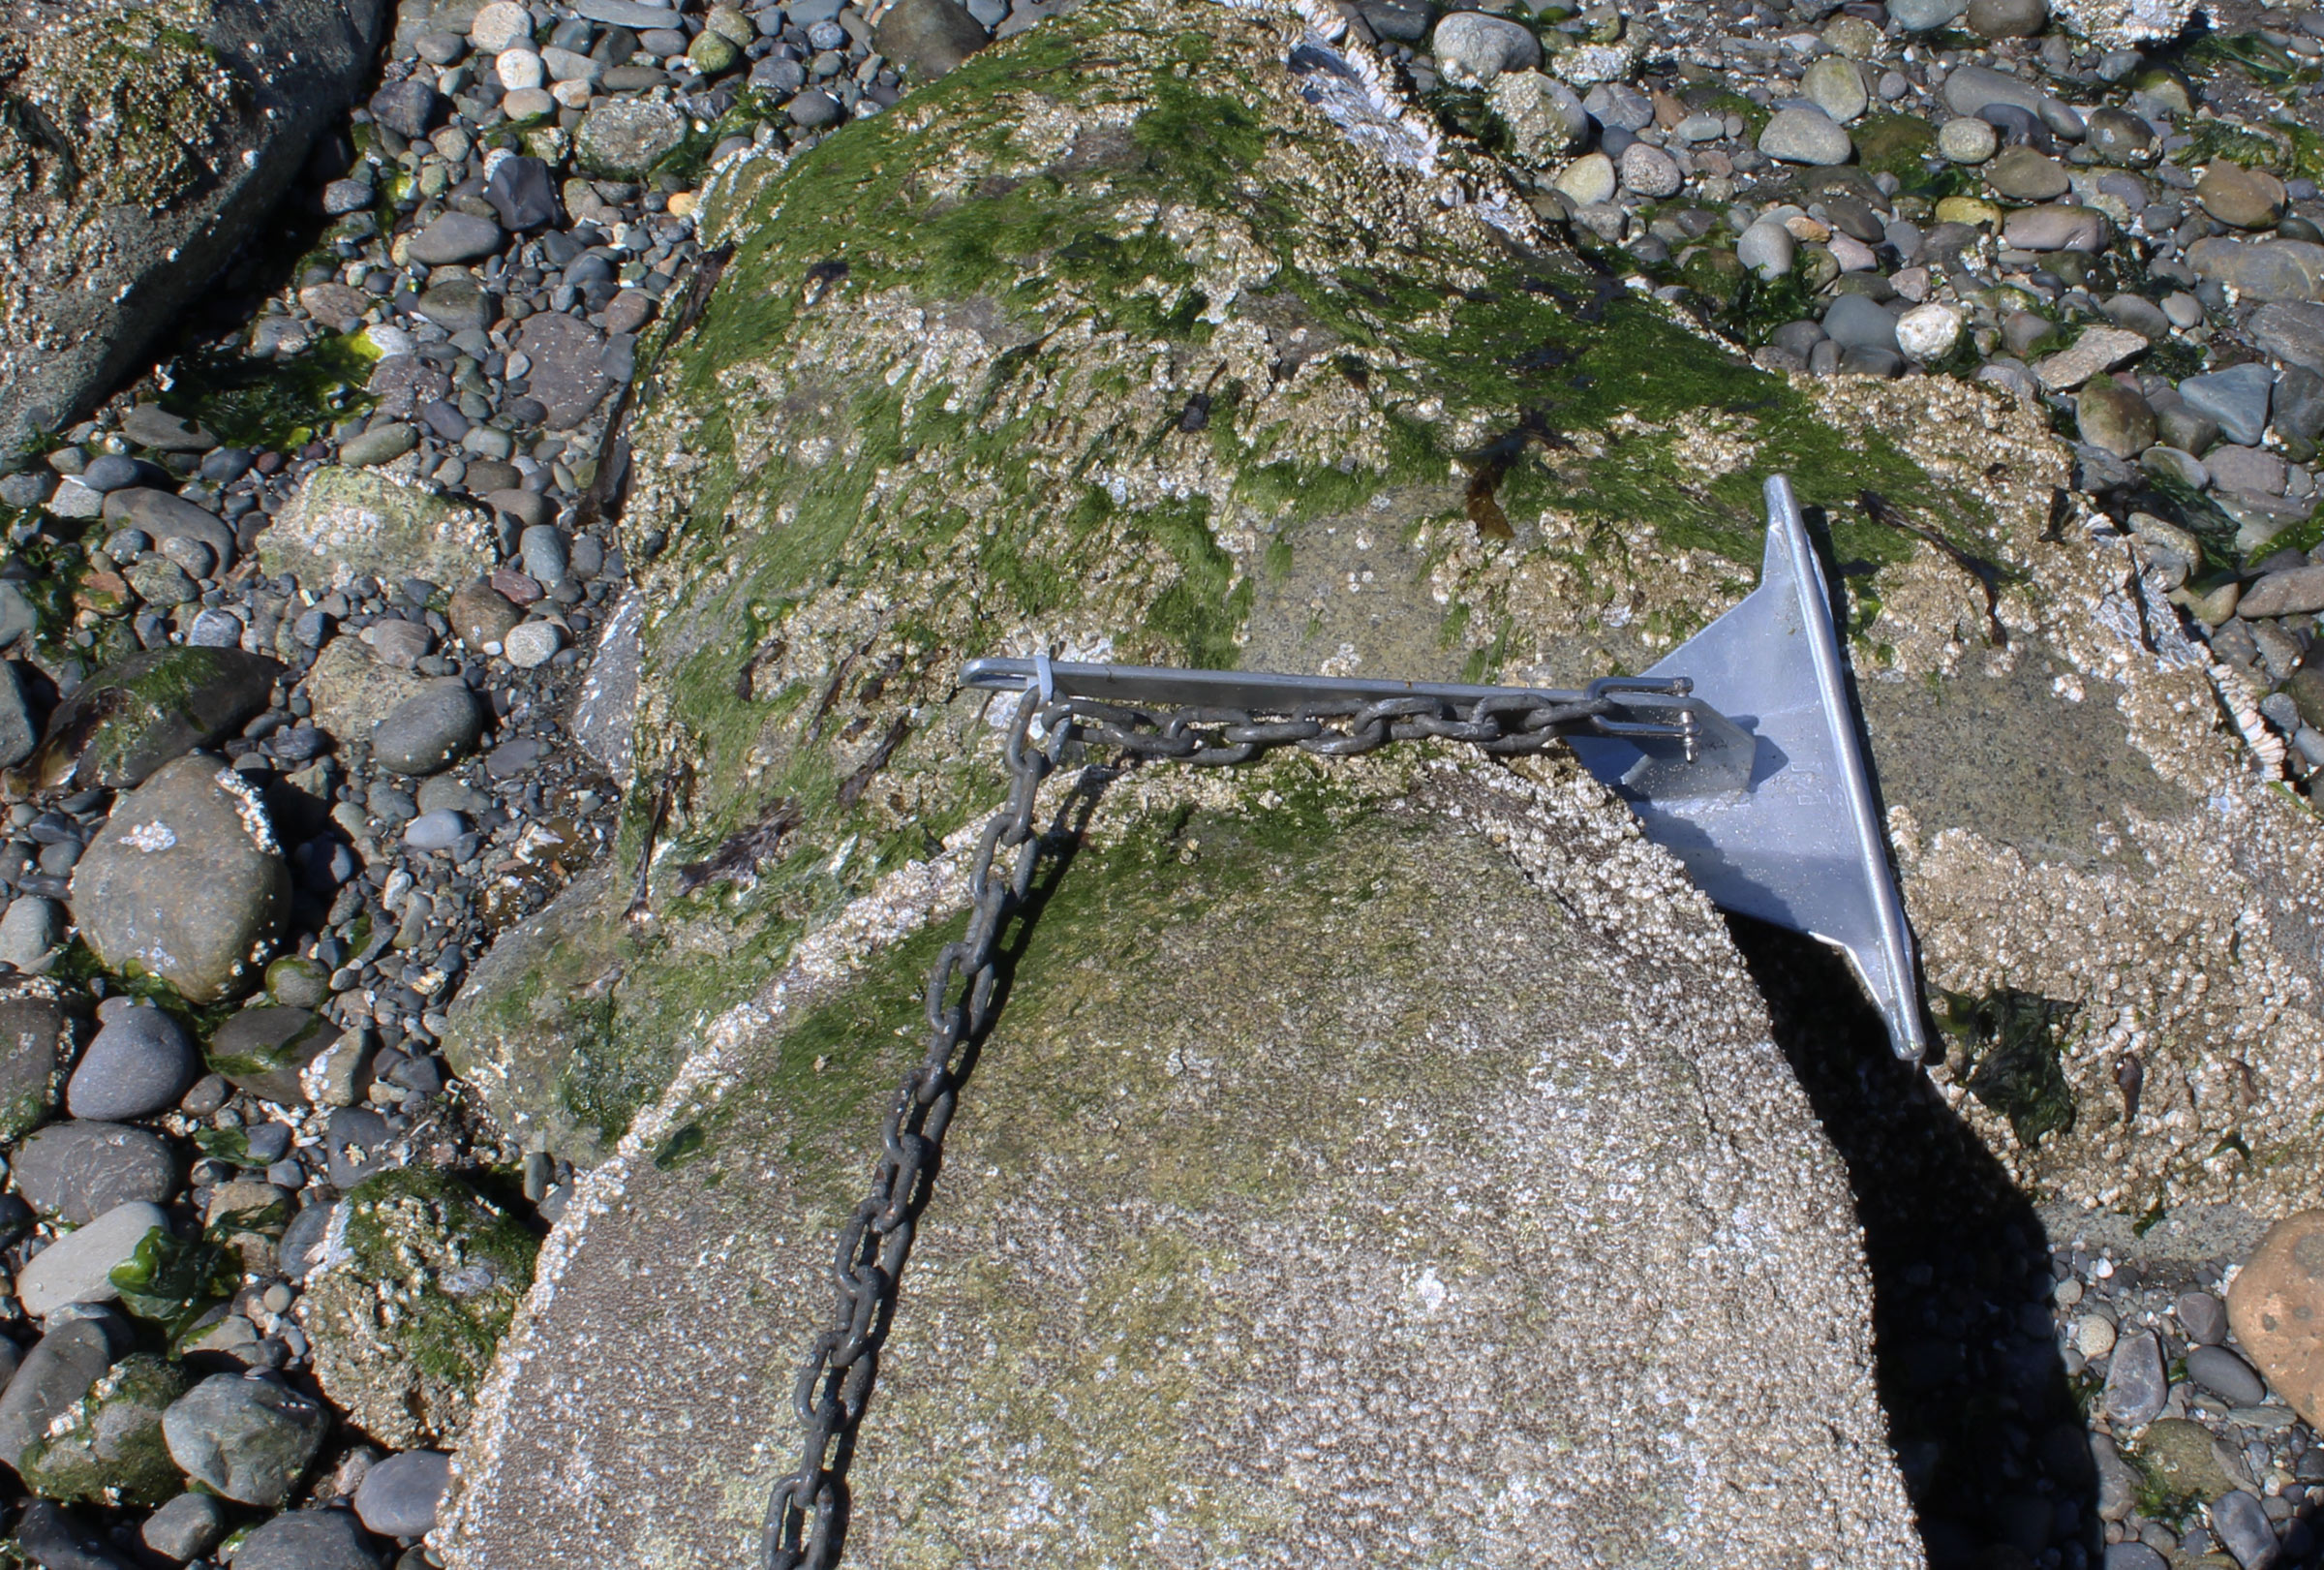
Changing the direction of pull on a stuck anchor will put the tension on the cable tie. When the system works as it should, the tie will break and the chain will pull the anchor from the opposite end of the shank and free it. I found that breaking a cable tie is not always a sure thing.
The most common breakable connections I found in my research were plastic cable ties. One YouTuber suggested twine, but wasn’t clear how thin or how thick it should be. Cable ties come labeled with their breaking strength, so it’s possible to find an appropriate size that can hold the anchor head securely yet be consistently within your abilities to break and free a stuck anchor.

The Anchor Trip Link here is in the open position, ready for installation. The instructions indicate that the slider can be hooked over the opposite are and adjusted while squeezing the link by hand or with pliers. I had to resort to pliers. (The shackle the link is attached to should have the same diameter as the Anchor rip Link. The shackle used for these photos is slightly oversize.)
I also found my way to the Anchor Trip Link from the U.K. It’s a 5″-long chain link, split at one end and equipped with a slider that adjusts to hold the split ends together or separate them. After the end of the anchor chain is secured to the crown of the anchor, the Trip Link is inserted into the anchor chain and the split ends are closed over a shackle in the anchor’s eye. The Trip Link holds a bit of slack in the chain paralleling the shank so the strain on the chain goes directly through the link to the anchor. The slider determines how much force is required to pull the shackle through the split.
My tests at home were quite promising. I could pull hard on the rode, and with the chain parallel with the anchor shank, there was little strain on the cable tie. And yet I could step on the anchor flukes, snap the chain, and break the tie. The Anchor Trip Link performed well too with the same tests.
When I went to the beach for some low-tide trials, the Mantus, my deepest-digging anchor, got off to a good start. It did well with the cable-tie method, and I could set the anchor and change the direction of pull without breaking the tie. The Danforth did the same thing in the sand, but on one trial over rocks, the tips of the flukes got hung up and didn’t penetrate the ground. That made the crown rise, and created enough of an angle in the chain to put a strain on the tie and break it. On another trial, the chain was beneath the Danforth’s shank and prevented the flukes from pivoting into the sand; the anchor just skidded. The claw anchor, which I never use because it seems unable to get a good purchase on sand, surprisingly released the tie when I changed the direction of pull. That surprised me because the claw offered so little resistance. I don’t know if the tie broke or if its ratchet failed; either way, it wasn’t a point in the favor of cable ties.
To simulate a scenario where the anchor was stuck, I slipped the Danforth in between some driftwood logs and pulled the rode at an angle that put the strain on the tie. The chain had to curve a bit over one log, and while that seemed to reduce the pull on the tie only slightly, I couldn’t break the tie. I also tested the tie at the end of 75′ of 7/16″ nylon anchor rode. There was so much stretch in the rode, about 6′, that the tie never got a sudden, sharp jerk. I couldn’t break the tie that way, but when I removed the anchor from the logs and stepped on the flukes, one sharp pull on the chain snapped the tie.
I tried the same log-snag test with the Anchor Trip Link. On two trials, the link got fouled on the anchor shank in such a way that the split couldn’t be put under strain and release the shackle.
I was at the beach conducting trials for less than two hours and yet in that short time I experienced several different and unexpected fails. I suppose with practice I could make the release systems work better, but I didn’t have faith it would be enough to overcome Murphy’s Law. And anchoring late in the day, tired and in the fading evening light, is not the time for using a finicky system.
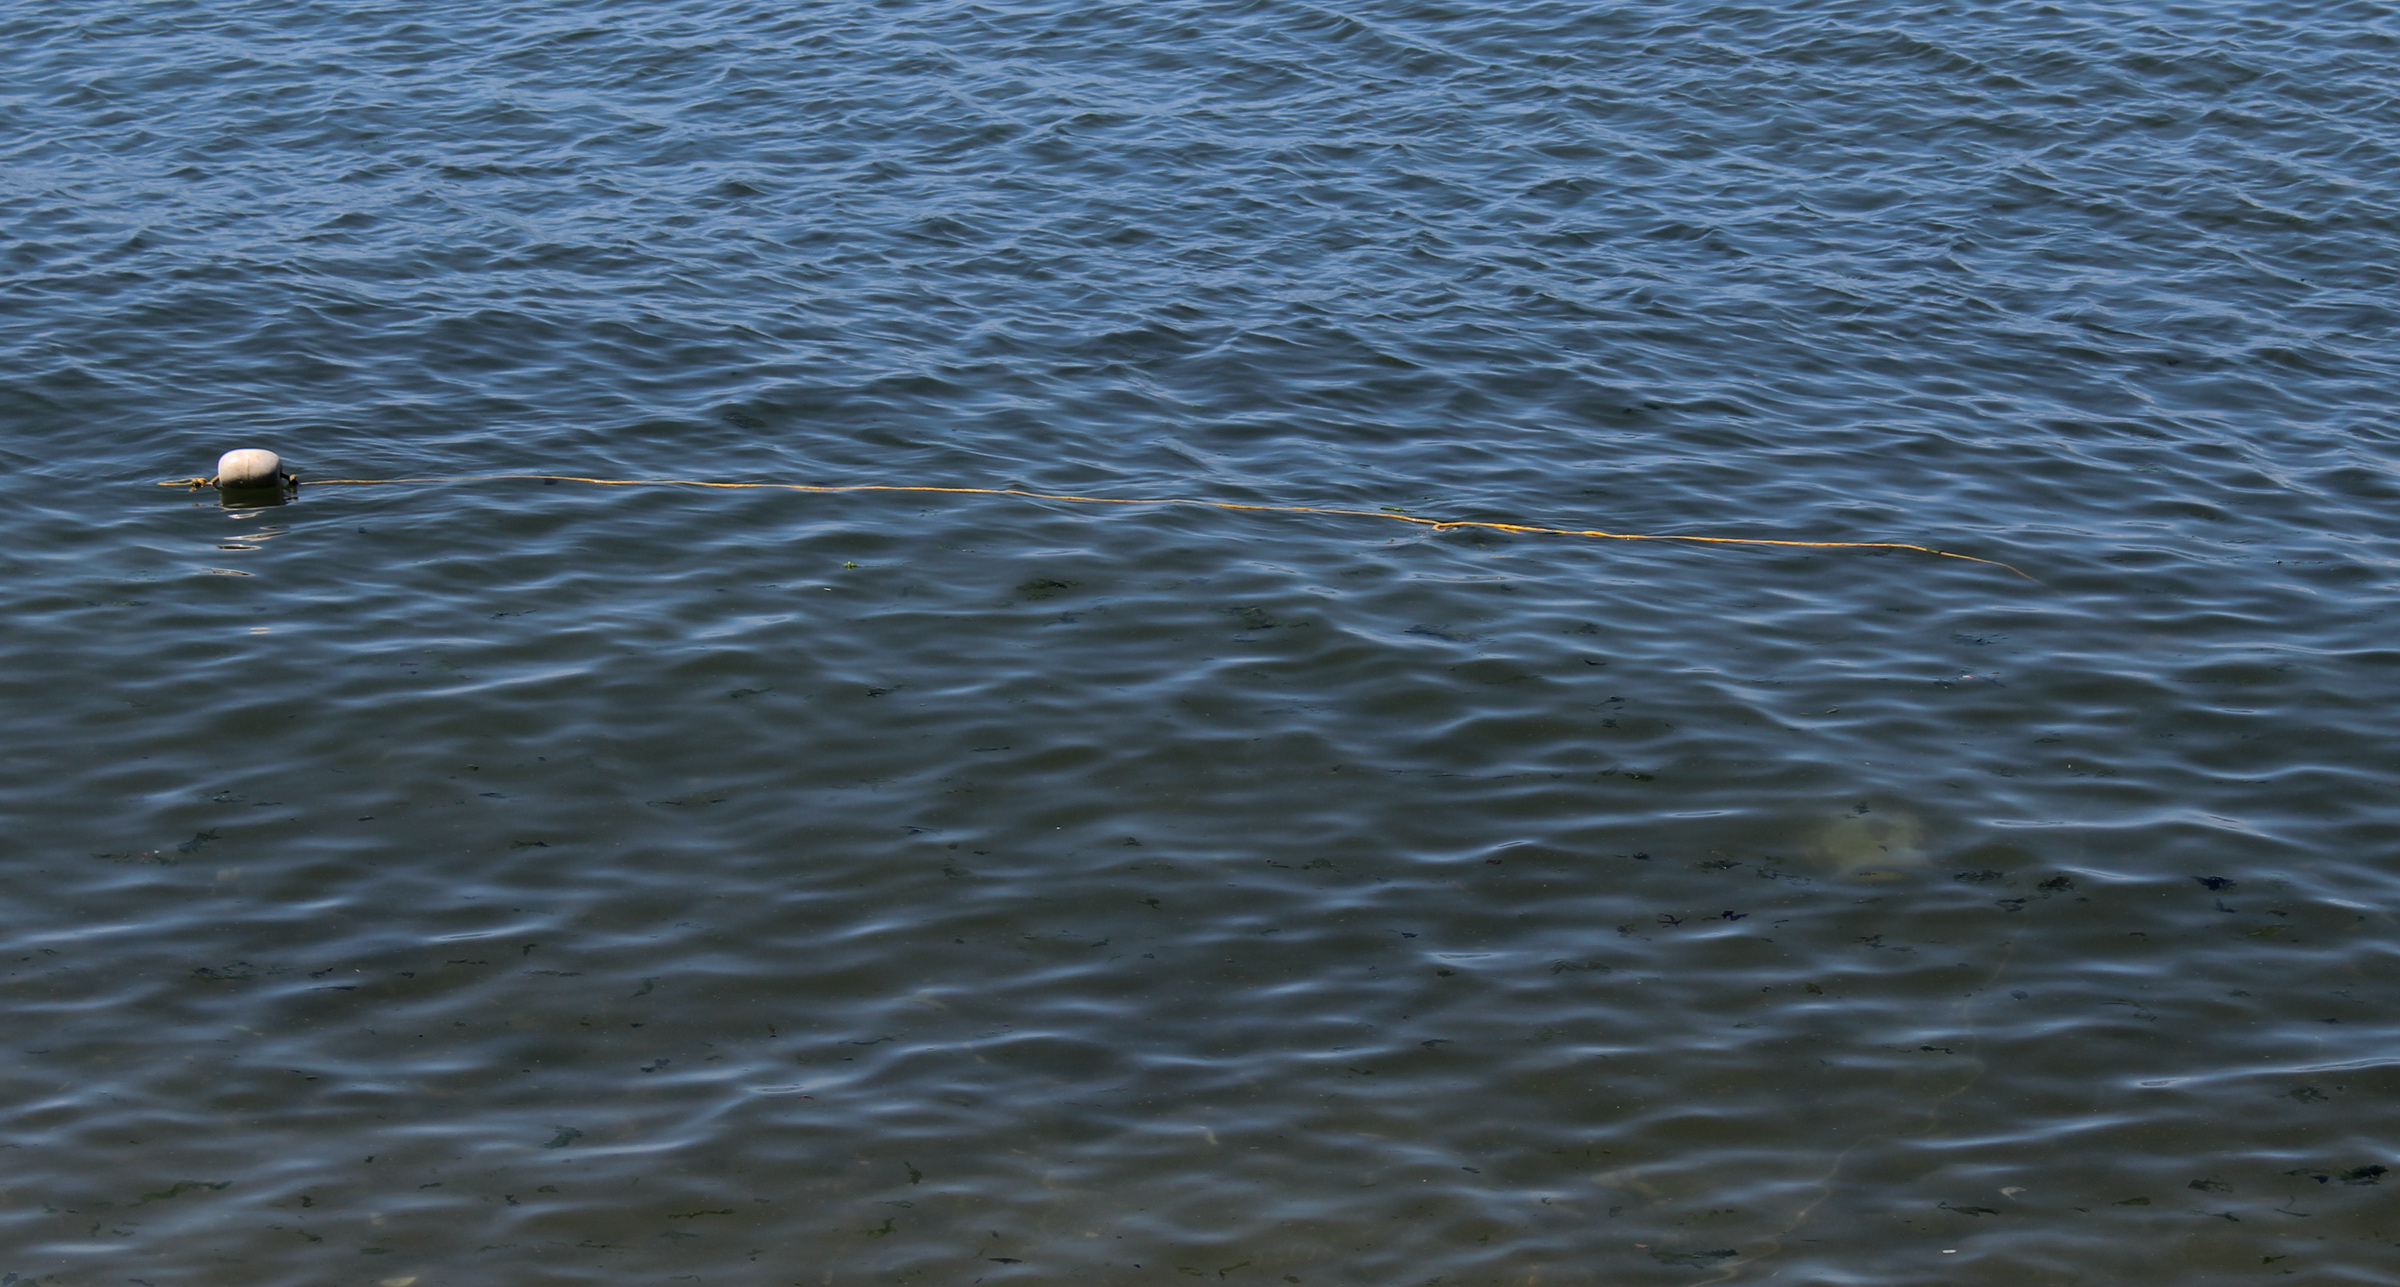
A floating retrieval line keeps the slack on the surface where it won’t get fouled by underwater snags.
I’ll continue using the separate anchor retrieval line. With enough scope, it’ll keep a buoy from pulling up on an anchor in a rising tide. A floating polypropylene braided line, the kind used for rescue throw ropes and dinghy painters keeps the line from getting tangled on any snags on the bottom.
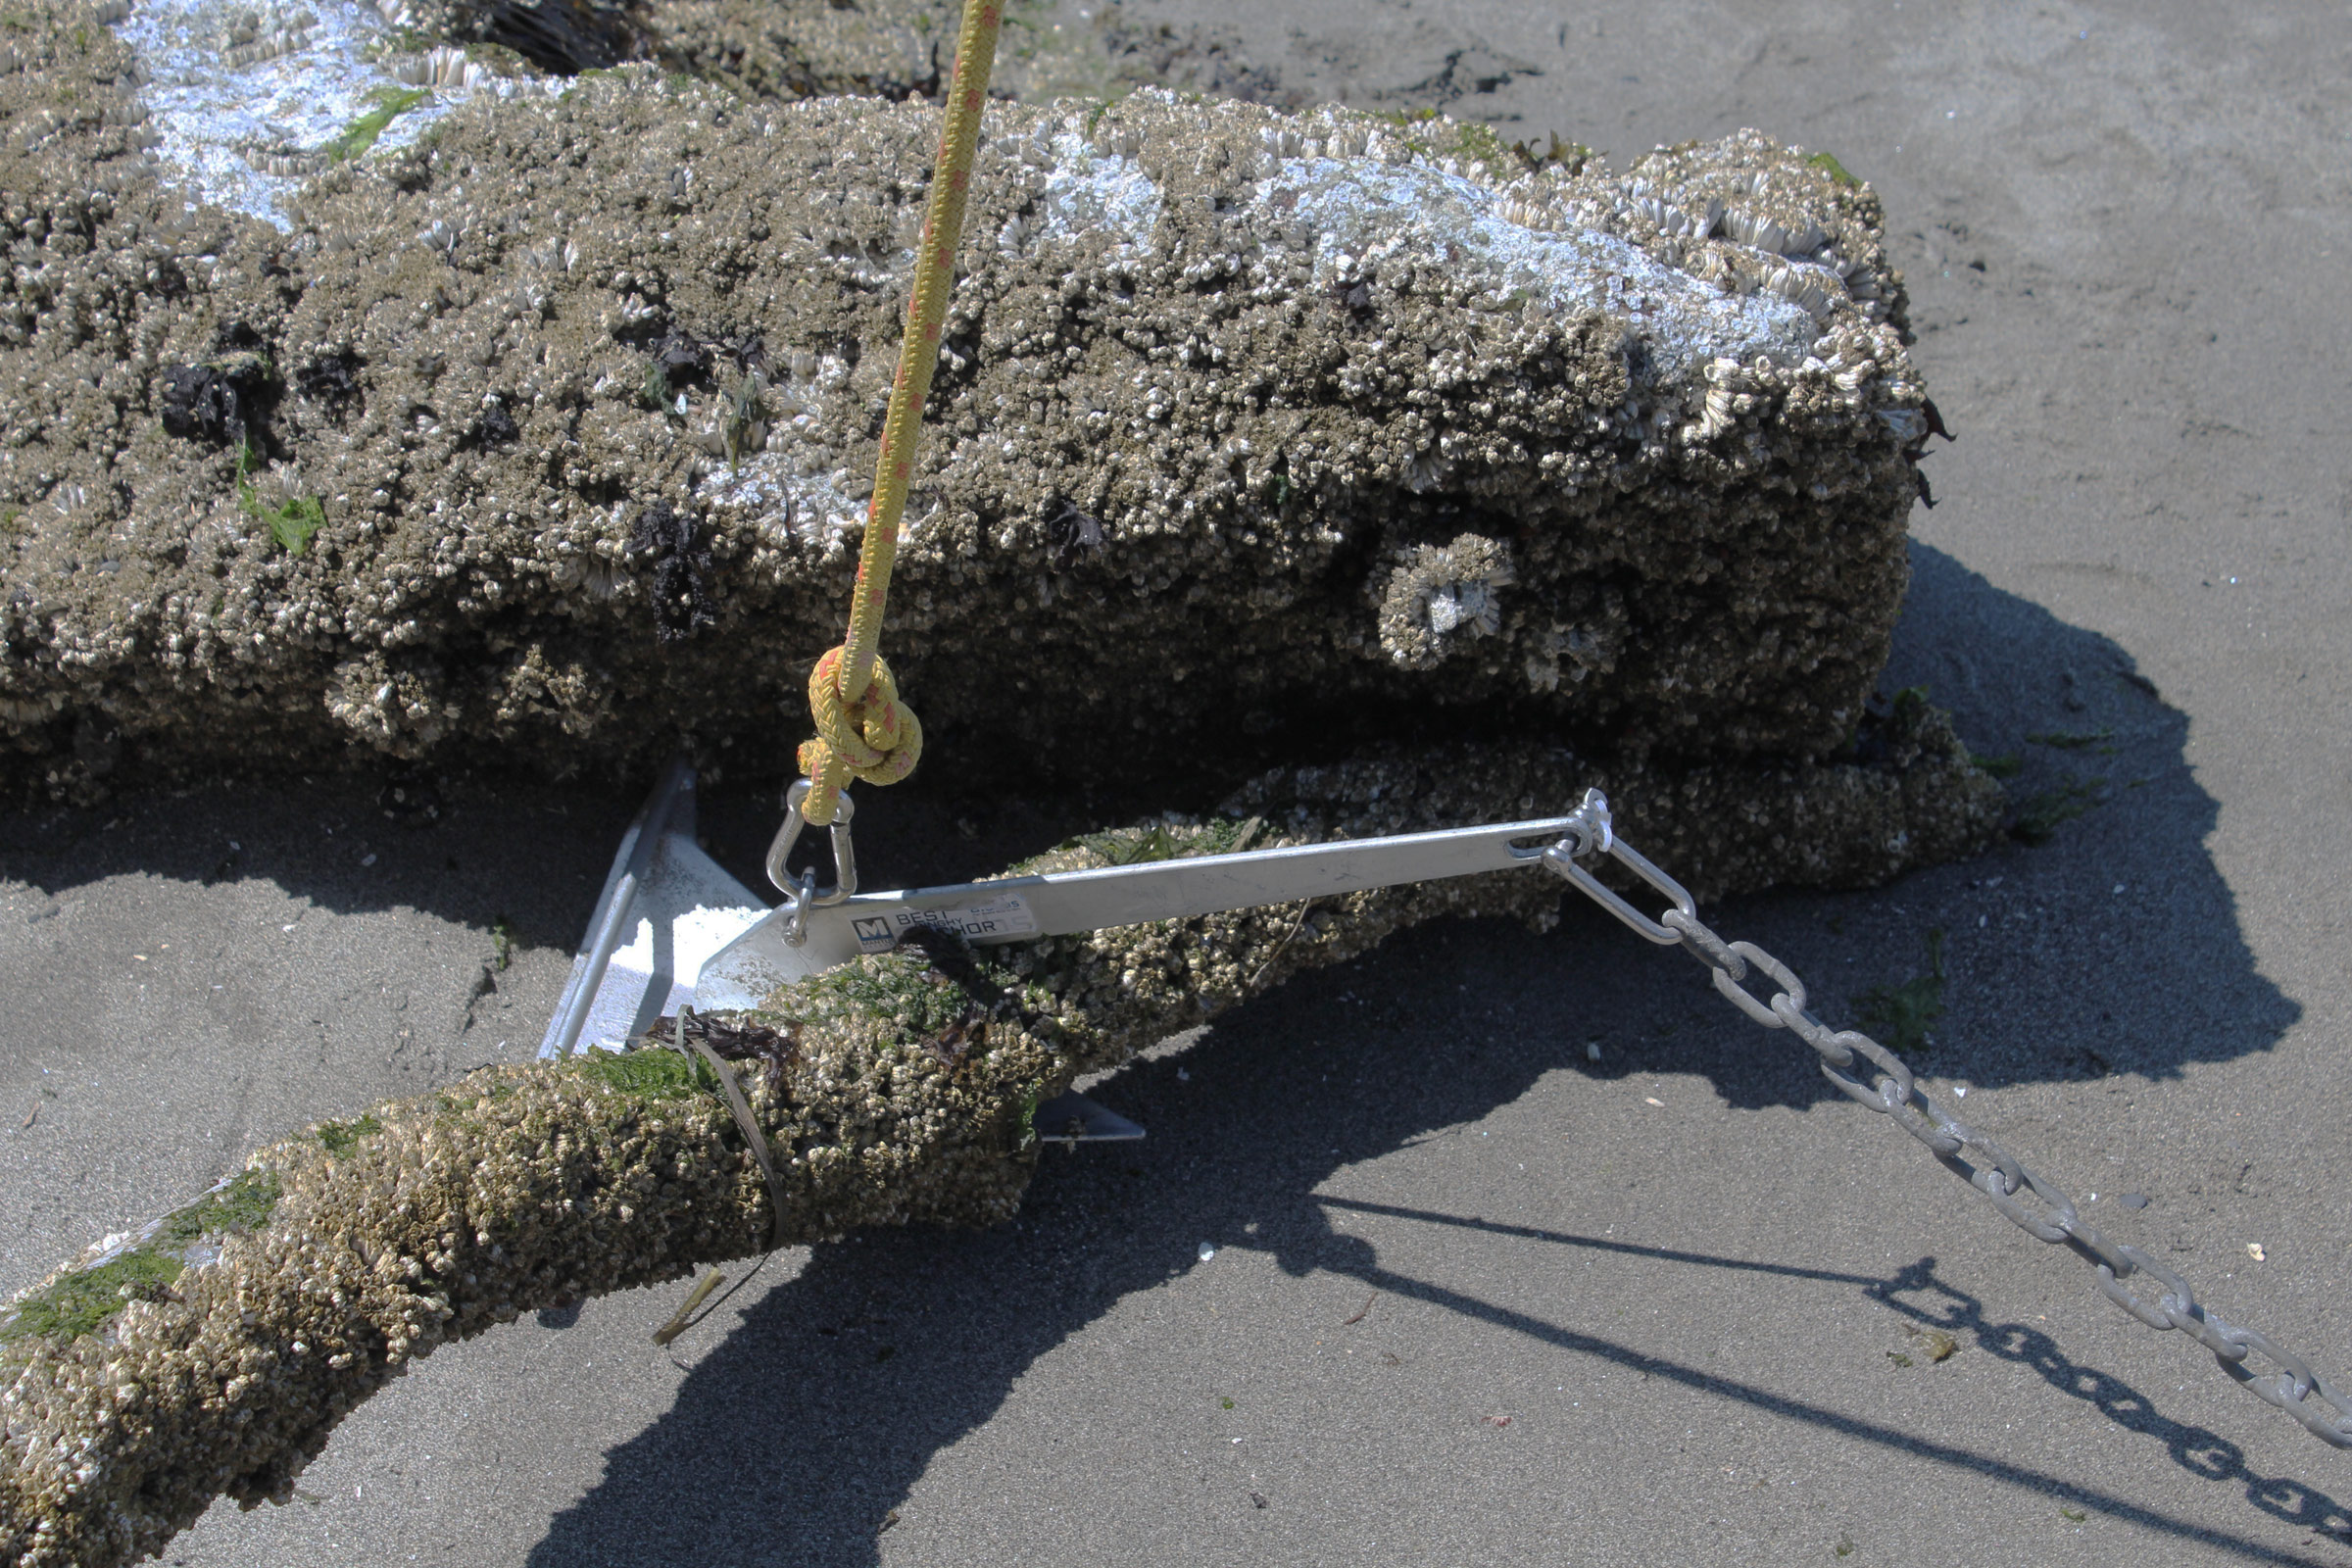
If the anchor has a floating trip line attached, that line is much less likely to get snagged and have its direction of pull changed in a way that won’t free the anchor.

Letting the anchor rode go slack, then pulling up on the retrieval line, will back the anchor out.
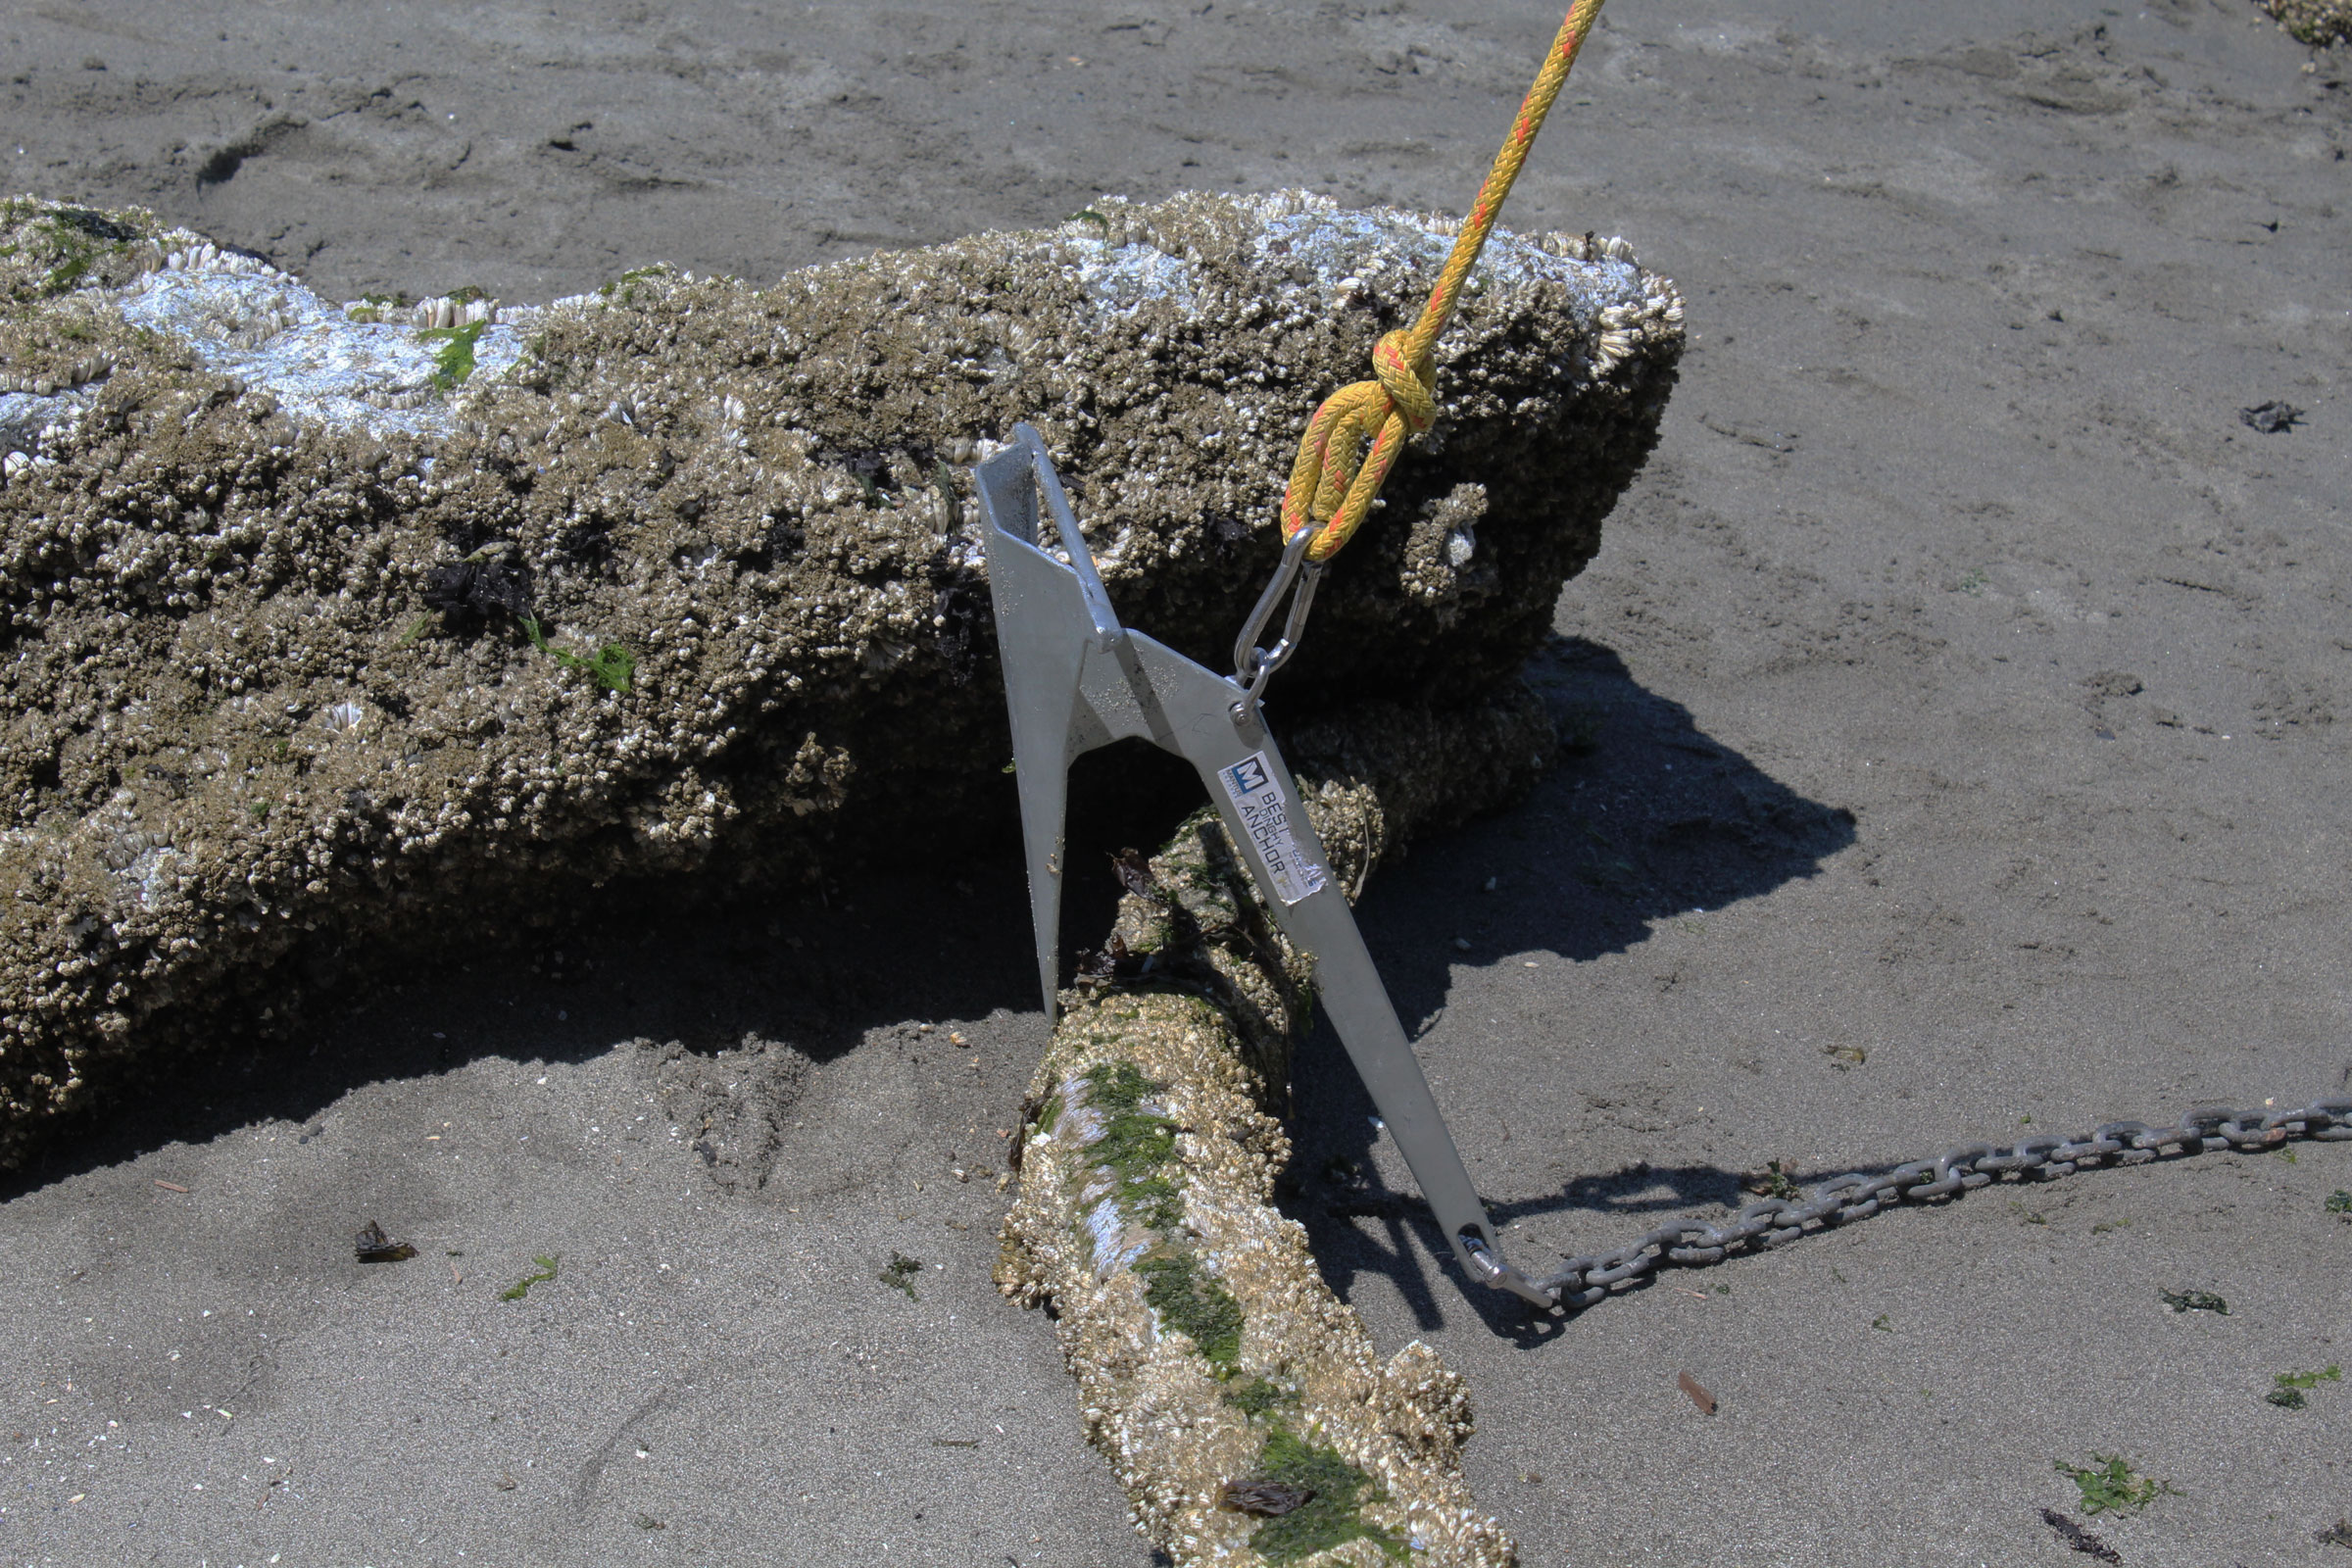
A few tugs were all it took to free the anchor.
A buoyed retrieval line may be an extra line to fuss with, but it is simple and there is not much that can go wrong with it.![]()
Christopher Cunningham is the editor of Small Boats Magazine.
You can share your tips and tricks of the trade with other Small Boats Magazine readers by sending us an email.
Pedal and Paddle Switches
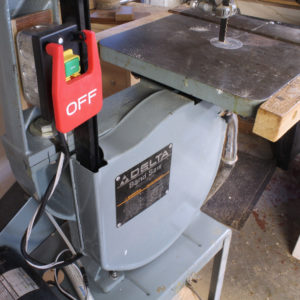
I often have an awkward and anxious moment when I’ve finished a cut on my tablesaw or bandsaw and have to reach down to turn the machine off while still hanging onto the workpiece. While I’m groping for the little toggle switch beneath the table, I have to keep my eye on the racing blade, the workpiece, and my fingers. Aside from my safety, some cuts can bind and stop bandsaw and tablesaw blades, and I need to shut the motor off as quickly as I can before something gets damaged. To add an element of safety, I bought some switches that are easily and quickly operated.
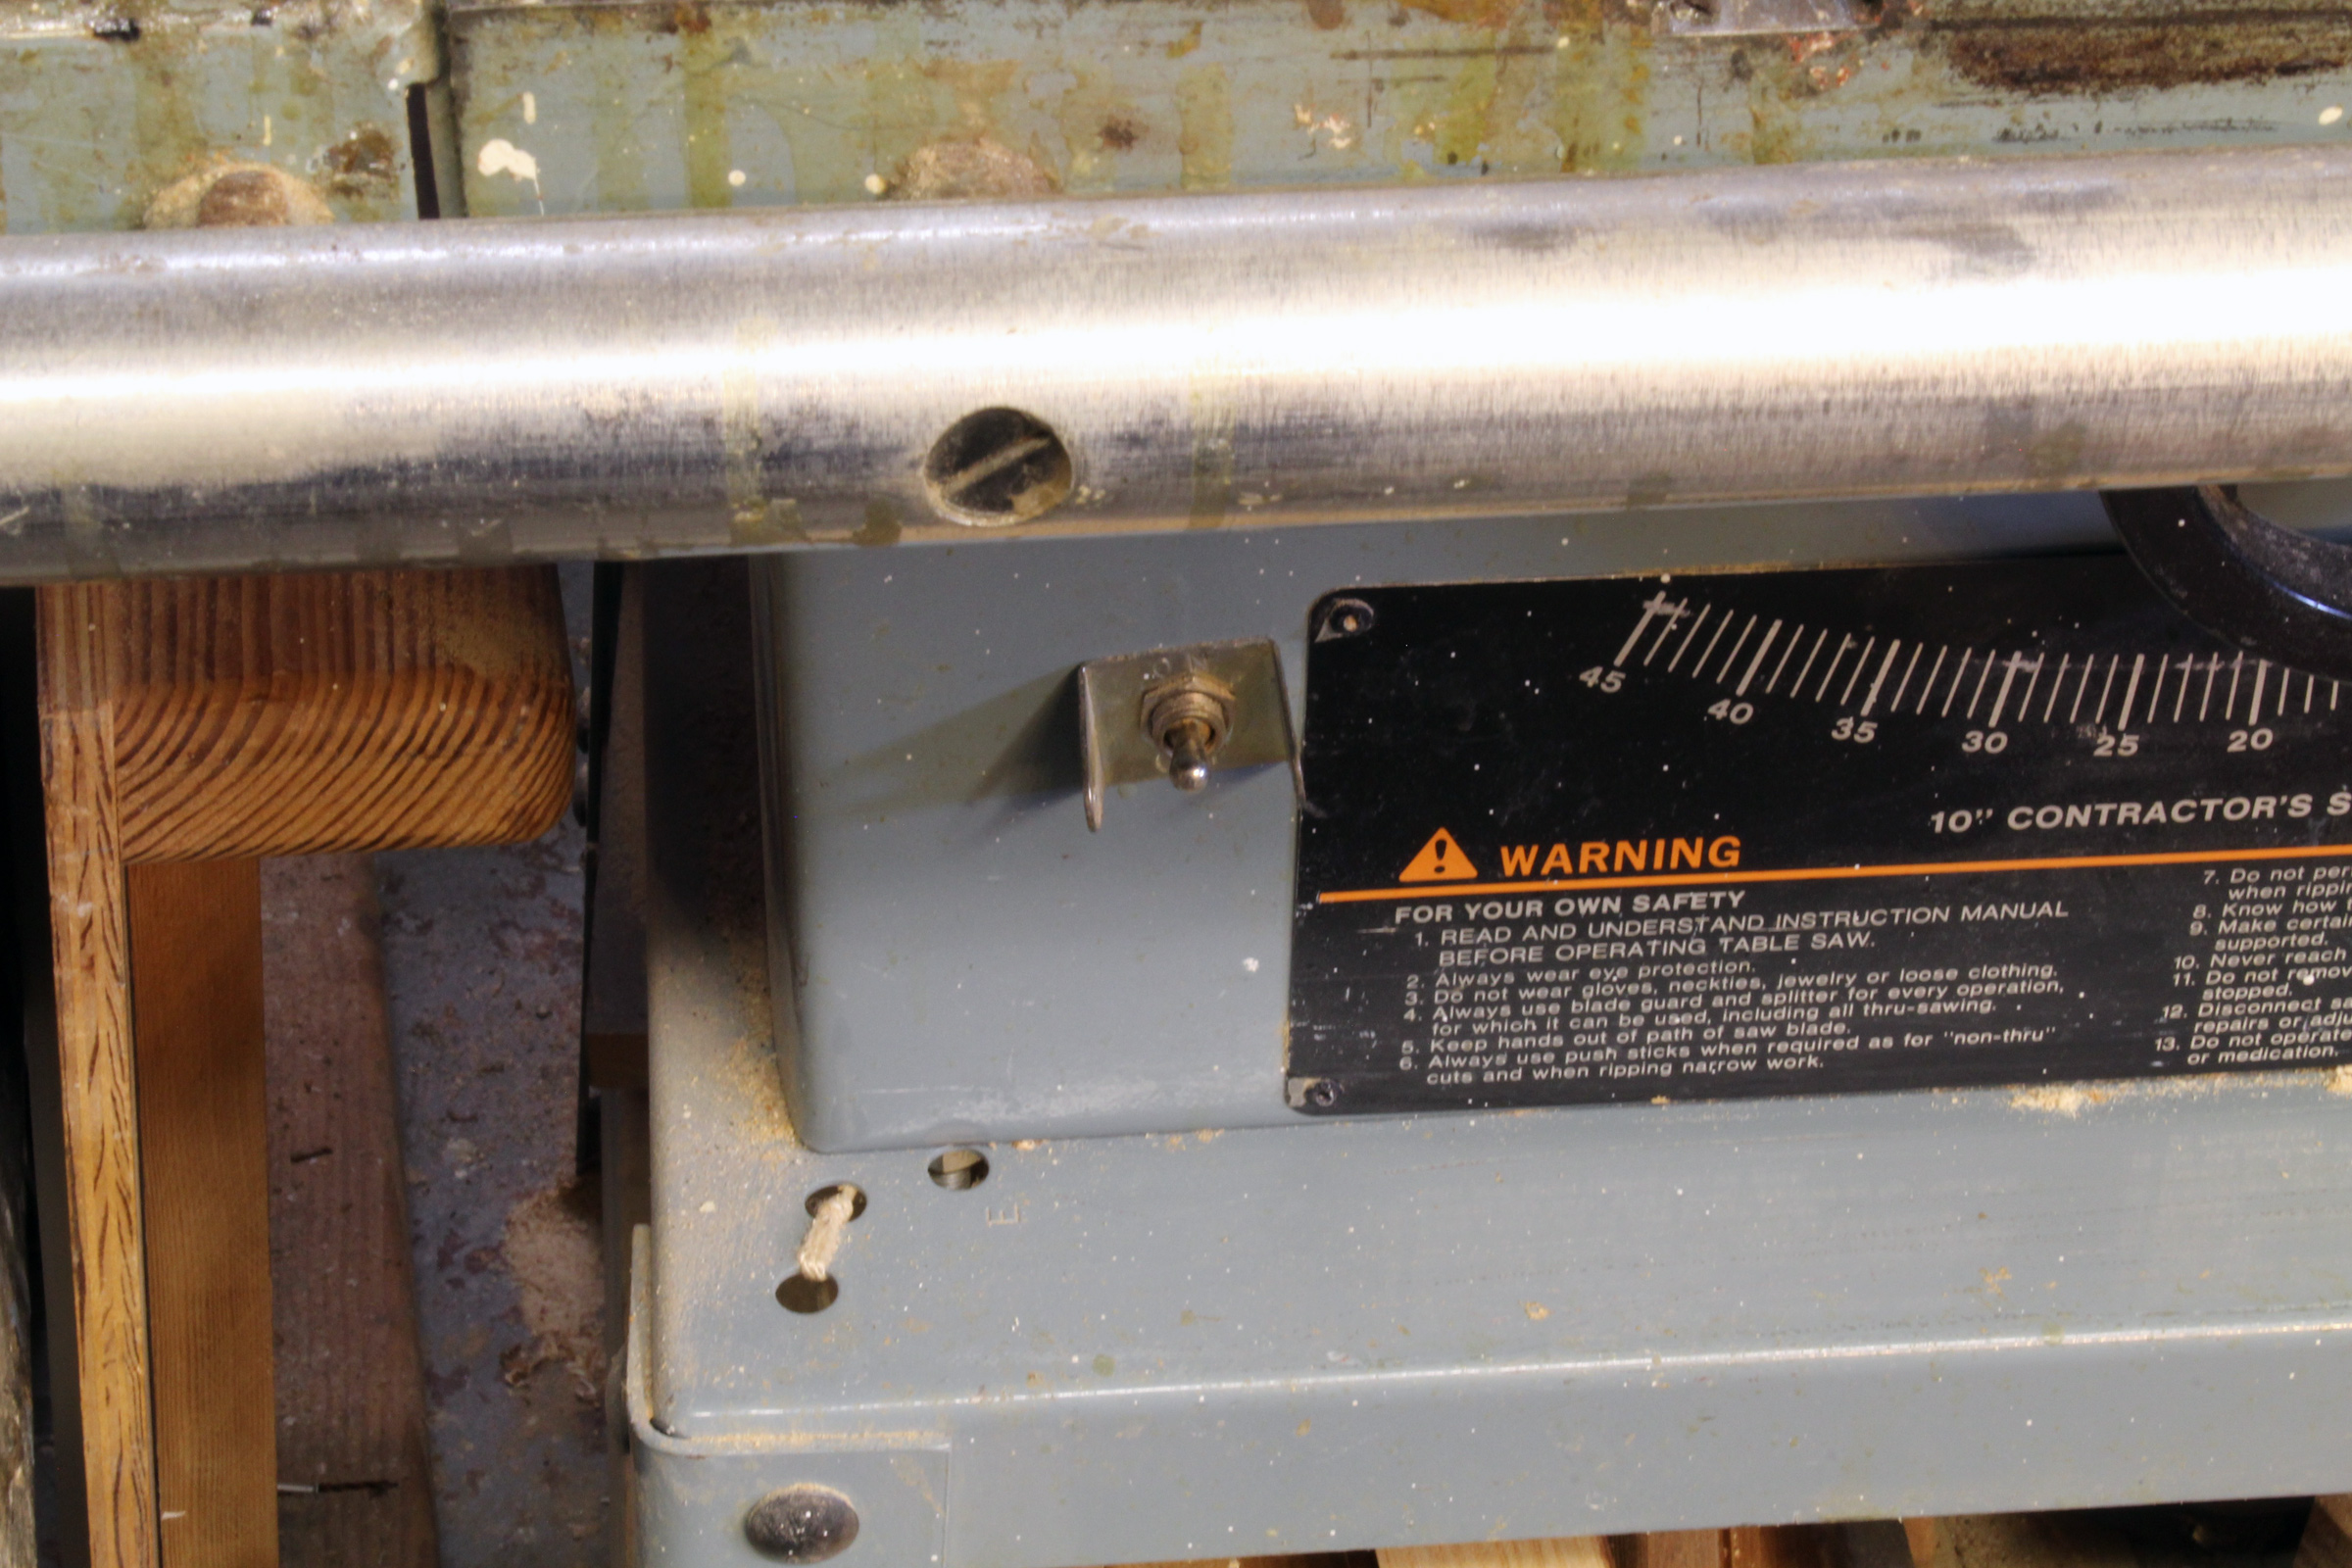 Photographs by the author
The small toggle switch that came with the tablesaw is small and tucked under the table. It’s not set up for quick operation.
I bought two different foot switches, both “power-maintained”—push once for on, push again for off. (There are “momentary” foot switches that cut the power when you lift your foot.)
The foot switch I chose to use for my tablesaw is the prosaically named S420-1501 by SSC Controls. It has a sturdy steel housing with textured rubber pads top and bottom for a non-slip surface. The 8′ cord has a “piggyback” plug with prongs on one side to plug into the power outlet and a socket on the other side to receive the tool’s cord. The single cord is an improvement over the Two-Step’s two: one out the back and another out the side. The switch built into the S420 has a steel arm with a roller. Pressed down it connects the circuit, released it breaks it, so it is actually a momentary switch. It’s the housing that makes the S420 power maintained. The base has a spring and bullet catch. The pedal has a hole in the back to engage the catch. When the back of the pedal is pushed down, the switch closes the circuit and the catch holds the pedal. Pushing the front of the pedal frees the catch and then the spring holds the pedal up with the switch in the off position. SSC manufactures a similar foot switch, the S400-1501, in a momentary configuration and likely identical to the S420 but without the bullet catch.

The S420-1501 has a steel body and operates as a treadle: Press the high end for “on,” and the low end for”off.”
The S420 doesn’t have screw holes for anchoring it to the floor. Aside from having a concrete floor, I find it useful to move the switch. For feeding long pieces into the tablesaw, I can slide the switch out from the saw, set the workpiece up, and turn the saw on. As I feed the wood through the blade and onto the outfeed rollers, I can nudge the switch ahead of me and turn the saw off at the end of the cut.
With its piggyback plug, the S240 is easy to move to other tools—whether bench tools like a drill press or hand tools like a Dremel—where hands-free operation might be an advantage.
The Two-Step Foot Switch from Harbor Freight I use for my dust collector has a plastic body that is 1/8″ to 5/32″ thick, and seems sturdy; we’ll see how long it lasts on a concrete floor among a lot of heavy things. The switch has a 7-1/2′ cord and a grounded outlet, which the tool’s cord gets plugged into. Inside the housing is a spring and a plunger switch; one tap on the pedal turns the power on, a second tap turns it off. The base has flanges on either side and tabs front and back, all with screw holes for mounting.
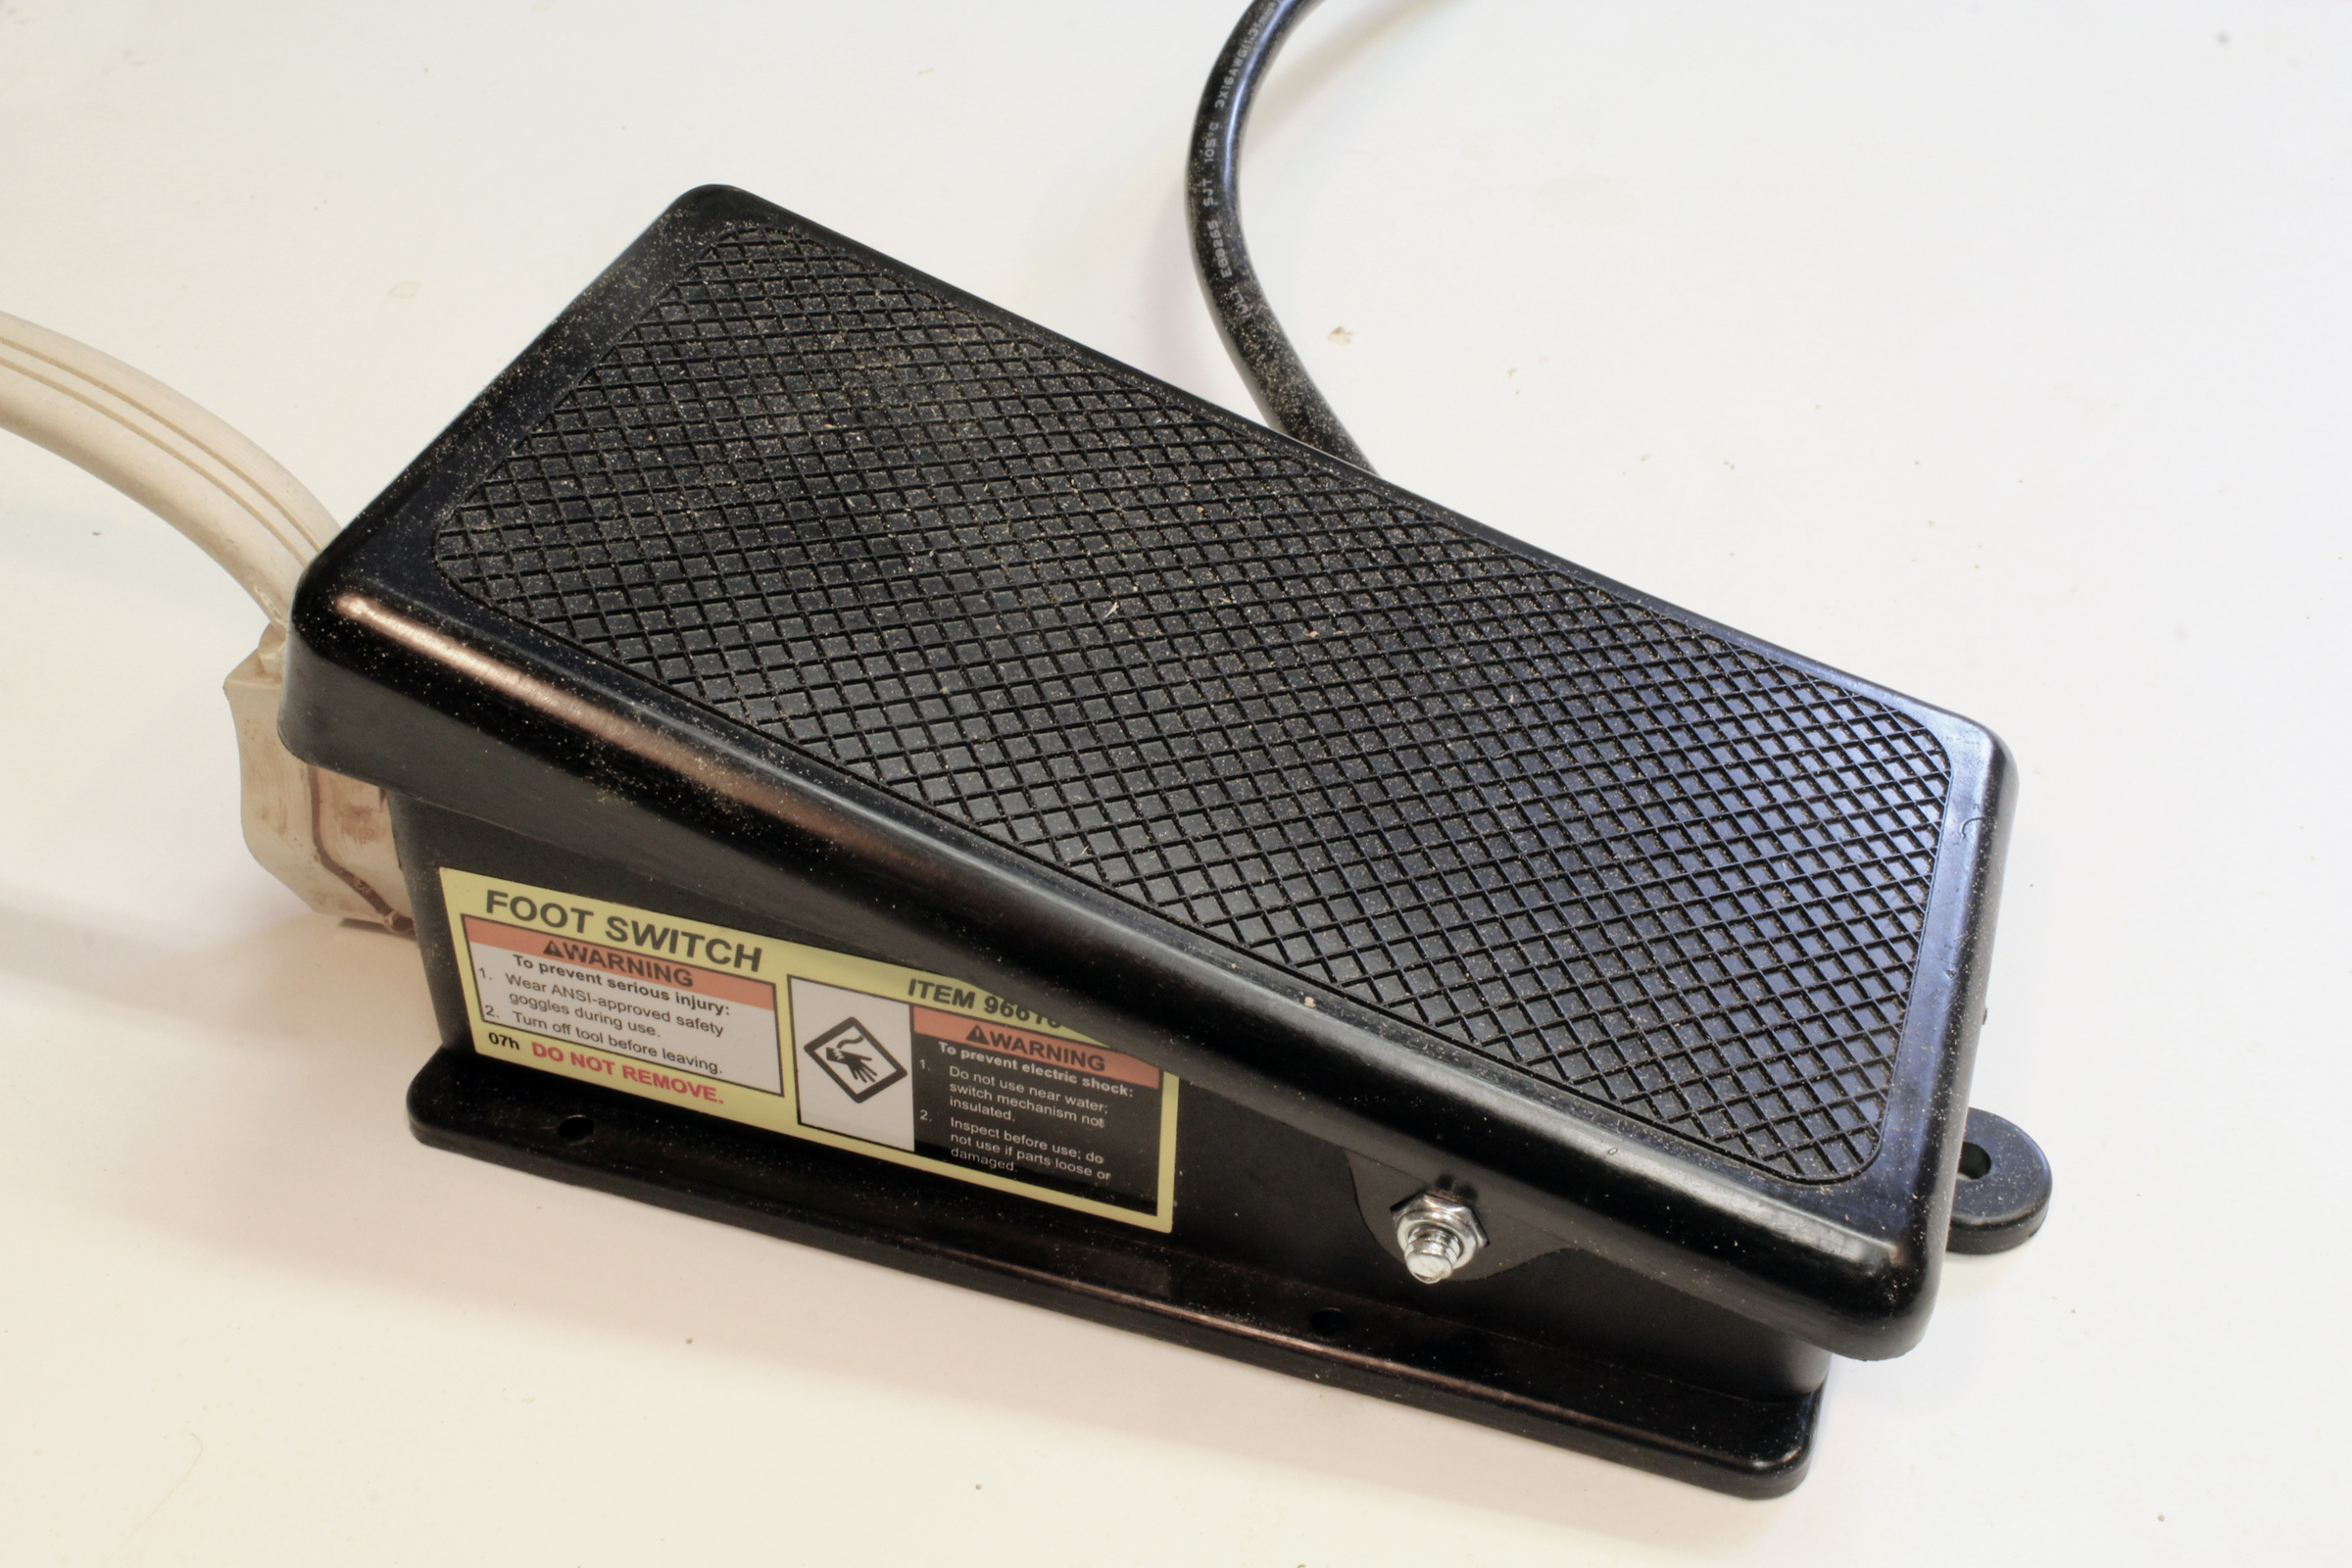
The Two-Step is operated by pressing the high end, once for “on” and a second time for “off.”
The Two-Step switch for my dust collector sits next to the tablesaw foot switch for more convenient operation than moving to the collector. Both switches remain operational when those tools are no longer being used and susceptible to being tripped unintentionally, so at the end of a stint in the shop, I turn the machines’ original switches off.
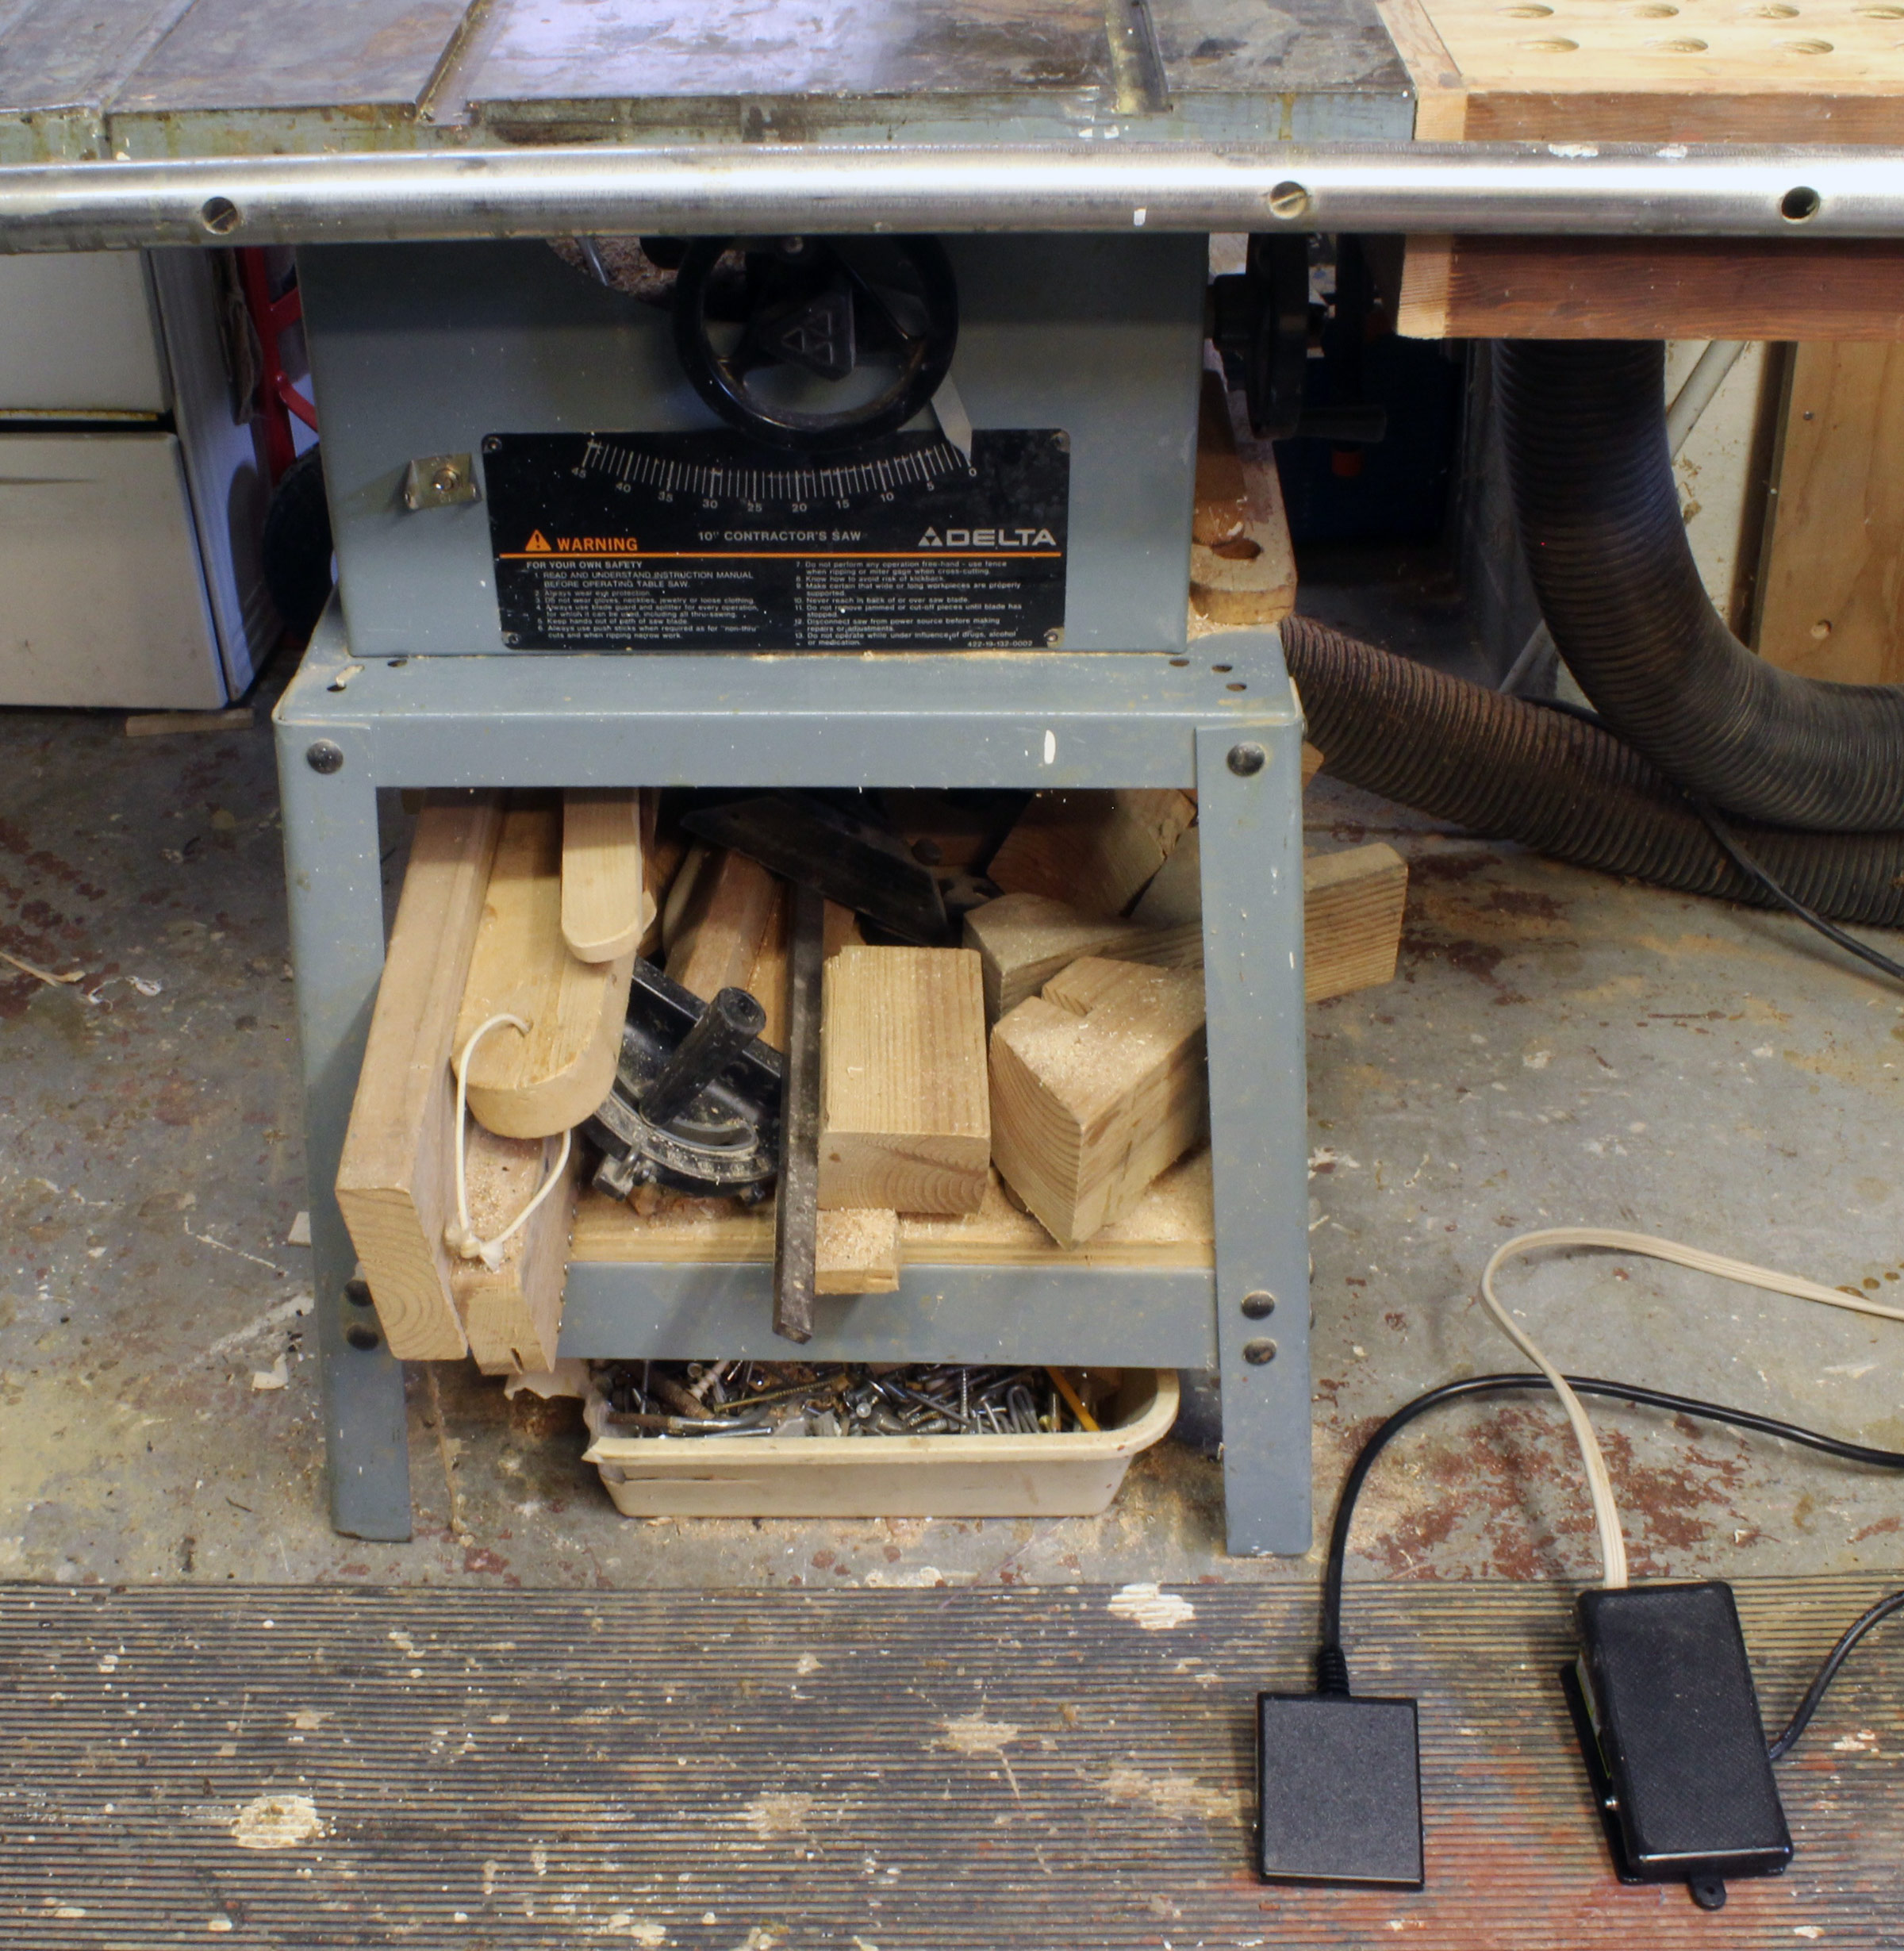
I have the two pedals side by side. One on the left for the tablesaw and the other on the right for the dust collector.
My 1989 Delta 14″ bandsaw, like the tablesaw, has a small toggle switch located on the base. More recent bandsaws have magnetic switches with large on/off buttons mounted on the column, above and to the left of the table. The location is good; I wanted my new switch to be more prominent and easily operated by a quick slap of the hand or the press of an elbow. A paddle switch adds a large pivoting lever over the off button and framing the on button; hitting it anywhere cuts the power.
The large and easily operated paddle switch, bolted to the bandsaw column, replaced the small toggle switch on the tool’s stand.
I bought the Woodstock D4160 Paddle Switch. As a fixed installation, a paddle switch requires some rewiring. The toggle switch breaks the circuit at hot lead alone; the paddle switch breaks the neutral lead as well, so it needs some additional wires to function. I added two wires to the original cord cut from the toggle switch. I set the switch in a steel junction box bolted to an existing hole in my bandsaw’s column, a location that is close at hand and easy to operate, even with my elbow.
These simple switch upgrades were inexpensive and were good investments in convenience and safety.![]()
Christopher Cunningham is the editor of Small Boats Magazine.
The Two-Step Foot Switch from Harbor Freight costs $13.99. The S420-1501 by SSC Controls costs $25.25 and is available from SSC and online retailers. The Woodstock D4160 Paddle Switch is available from selected retailers and through Amazon for $11.70.
Is there a product that might be useful for boatbuilding, cruising, or shore-side camping that you’d like us to review? Please email your suggestions.
Image-Stabilized Binoculars
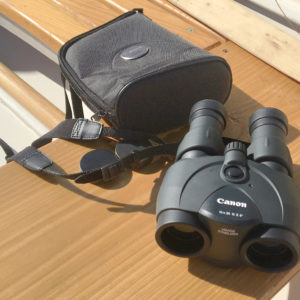
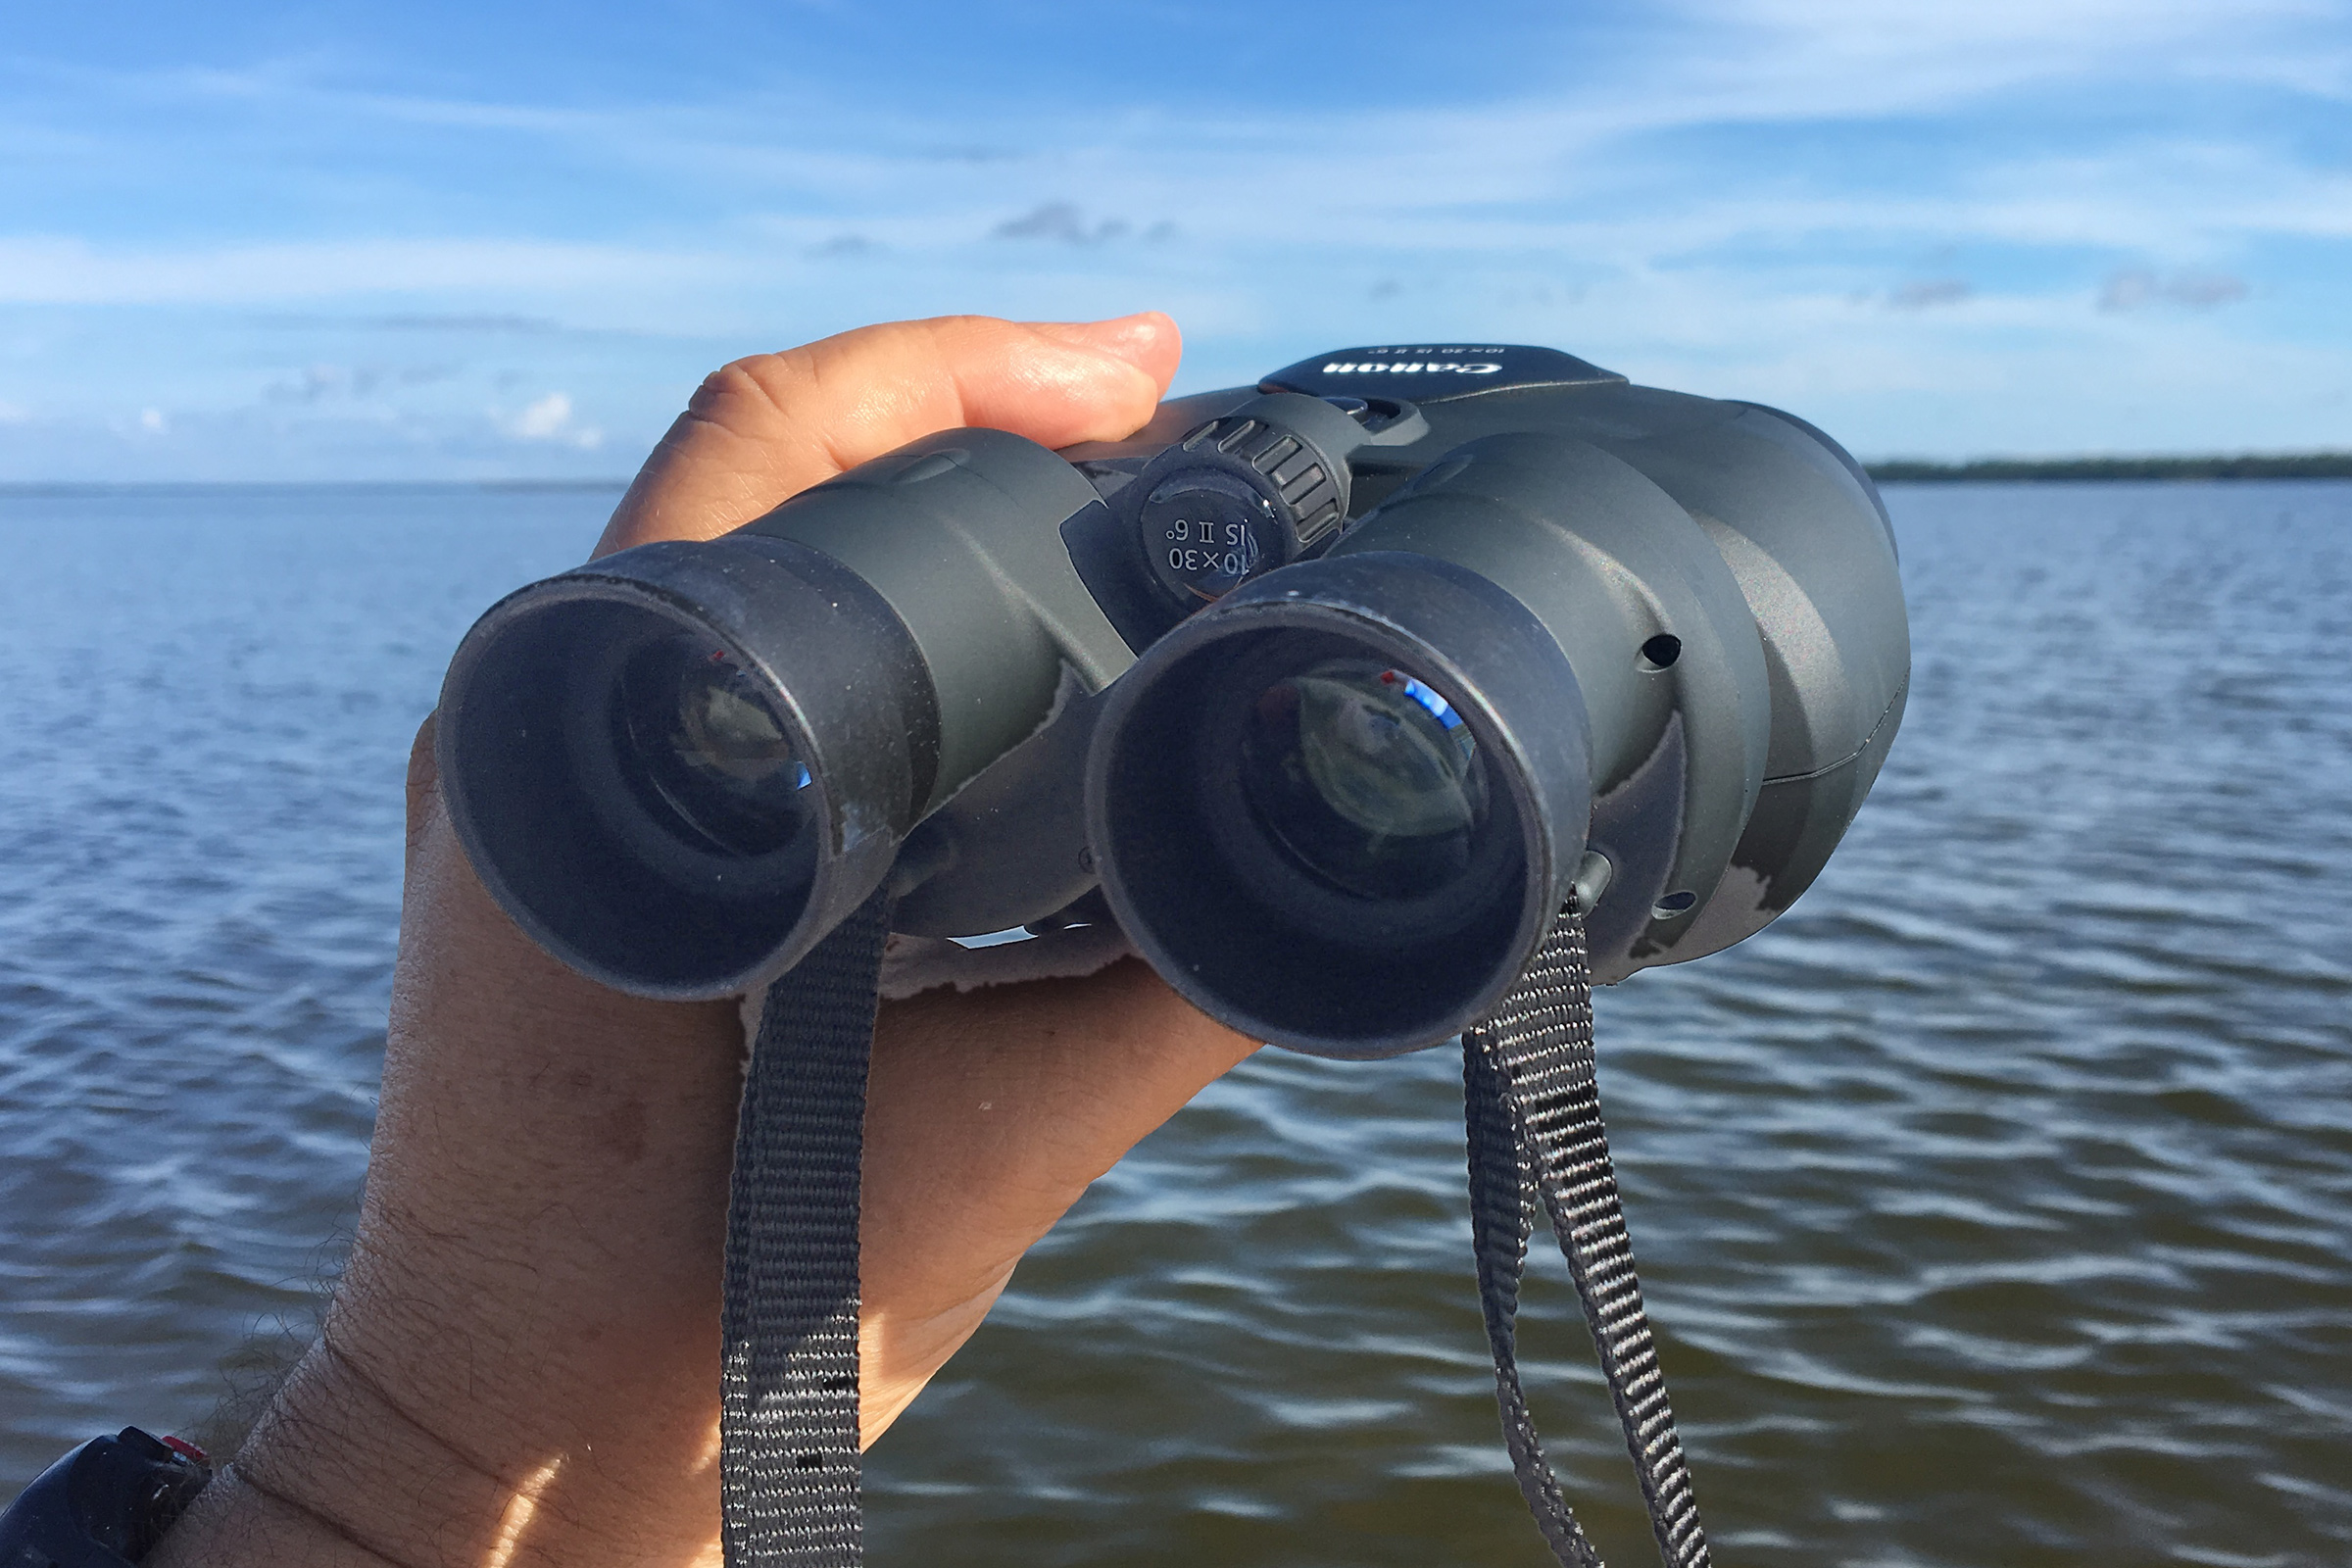 Photographs by the authors
The matte black finish on the Canon 10×30 IS II binoculars eliminates reflections that would spook wildlife.
Audrey and I like to watch wildlife and marine traffic from our boats, and usually carry a pair of binoculars with us. Unfortunately, our more compact pair does not have a sharp image or a satisfactory magnification; our other pair has good optics but is bulky and very heavy. A few years back, our son visited and brought his new Canon 10×30 Image Stabilization II binoculars, and we agreed that they were impressive, so we bought a pair.
The Canon binoculars are compact and lightweight. They measure 5.9″ x 5″ x 2.8″ and weigh 1.33 lbs. Two AA batteries power the image-stabilization function, and last for up to 9 hours at 77°F. Battery life decreases as temperatures drop; the manufacture’s literature lists an hour of operating at 14°F, but I doubt we’ll ever test that in Florida.
Adjusting the binoculars is easy. One eyepiece has a range of +/– 3 diopters to correct for any difference between the user’s eyes. The focus is then set by turning a central knob. The rubber eyepiece rims are comfortable and can be folded back for viewers who like to wear their glasses. The binoculars are not waterproof, so we are careful to not get them wet—with their small size they are easy to stow in a protected location.
The Canon’s optics are excellent. They are coated to reduce glare, and doublet field-flattener lenses correct for curvature distortion around the edges, resulting in sharp focus to the very perimeter. The Porro II prisms between the 30mm objective lenses and the eyepieces flip the inverted image without loss of brightness or color. The prism arrangement also gives the light path a dogleg, which allows the objective lenses to be farther apart than the eyepieces, resulting in better depth perception than binoculars with roof prisms which keep the light path straight.
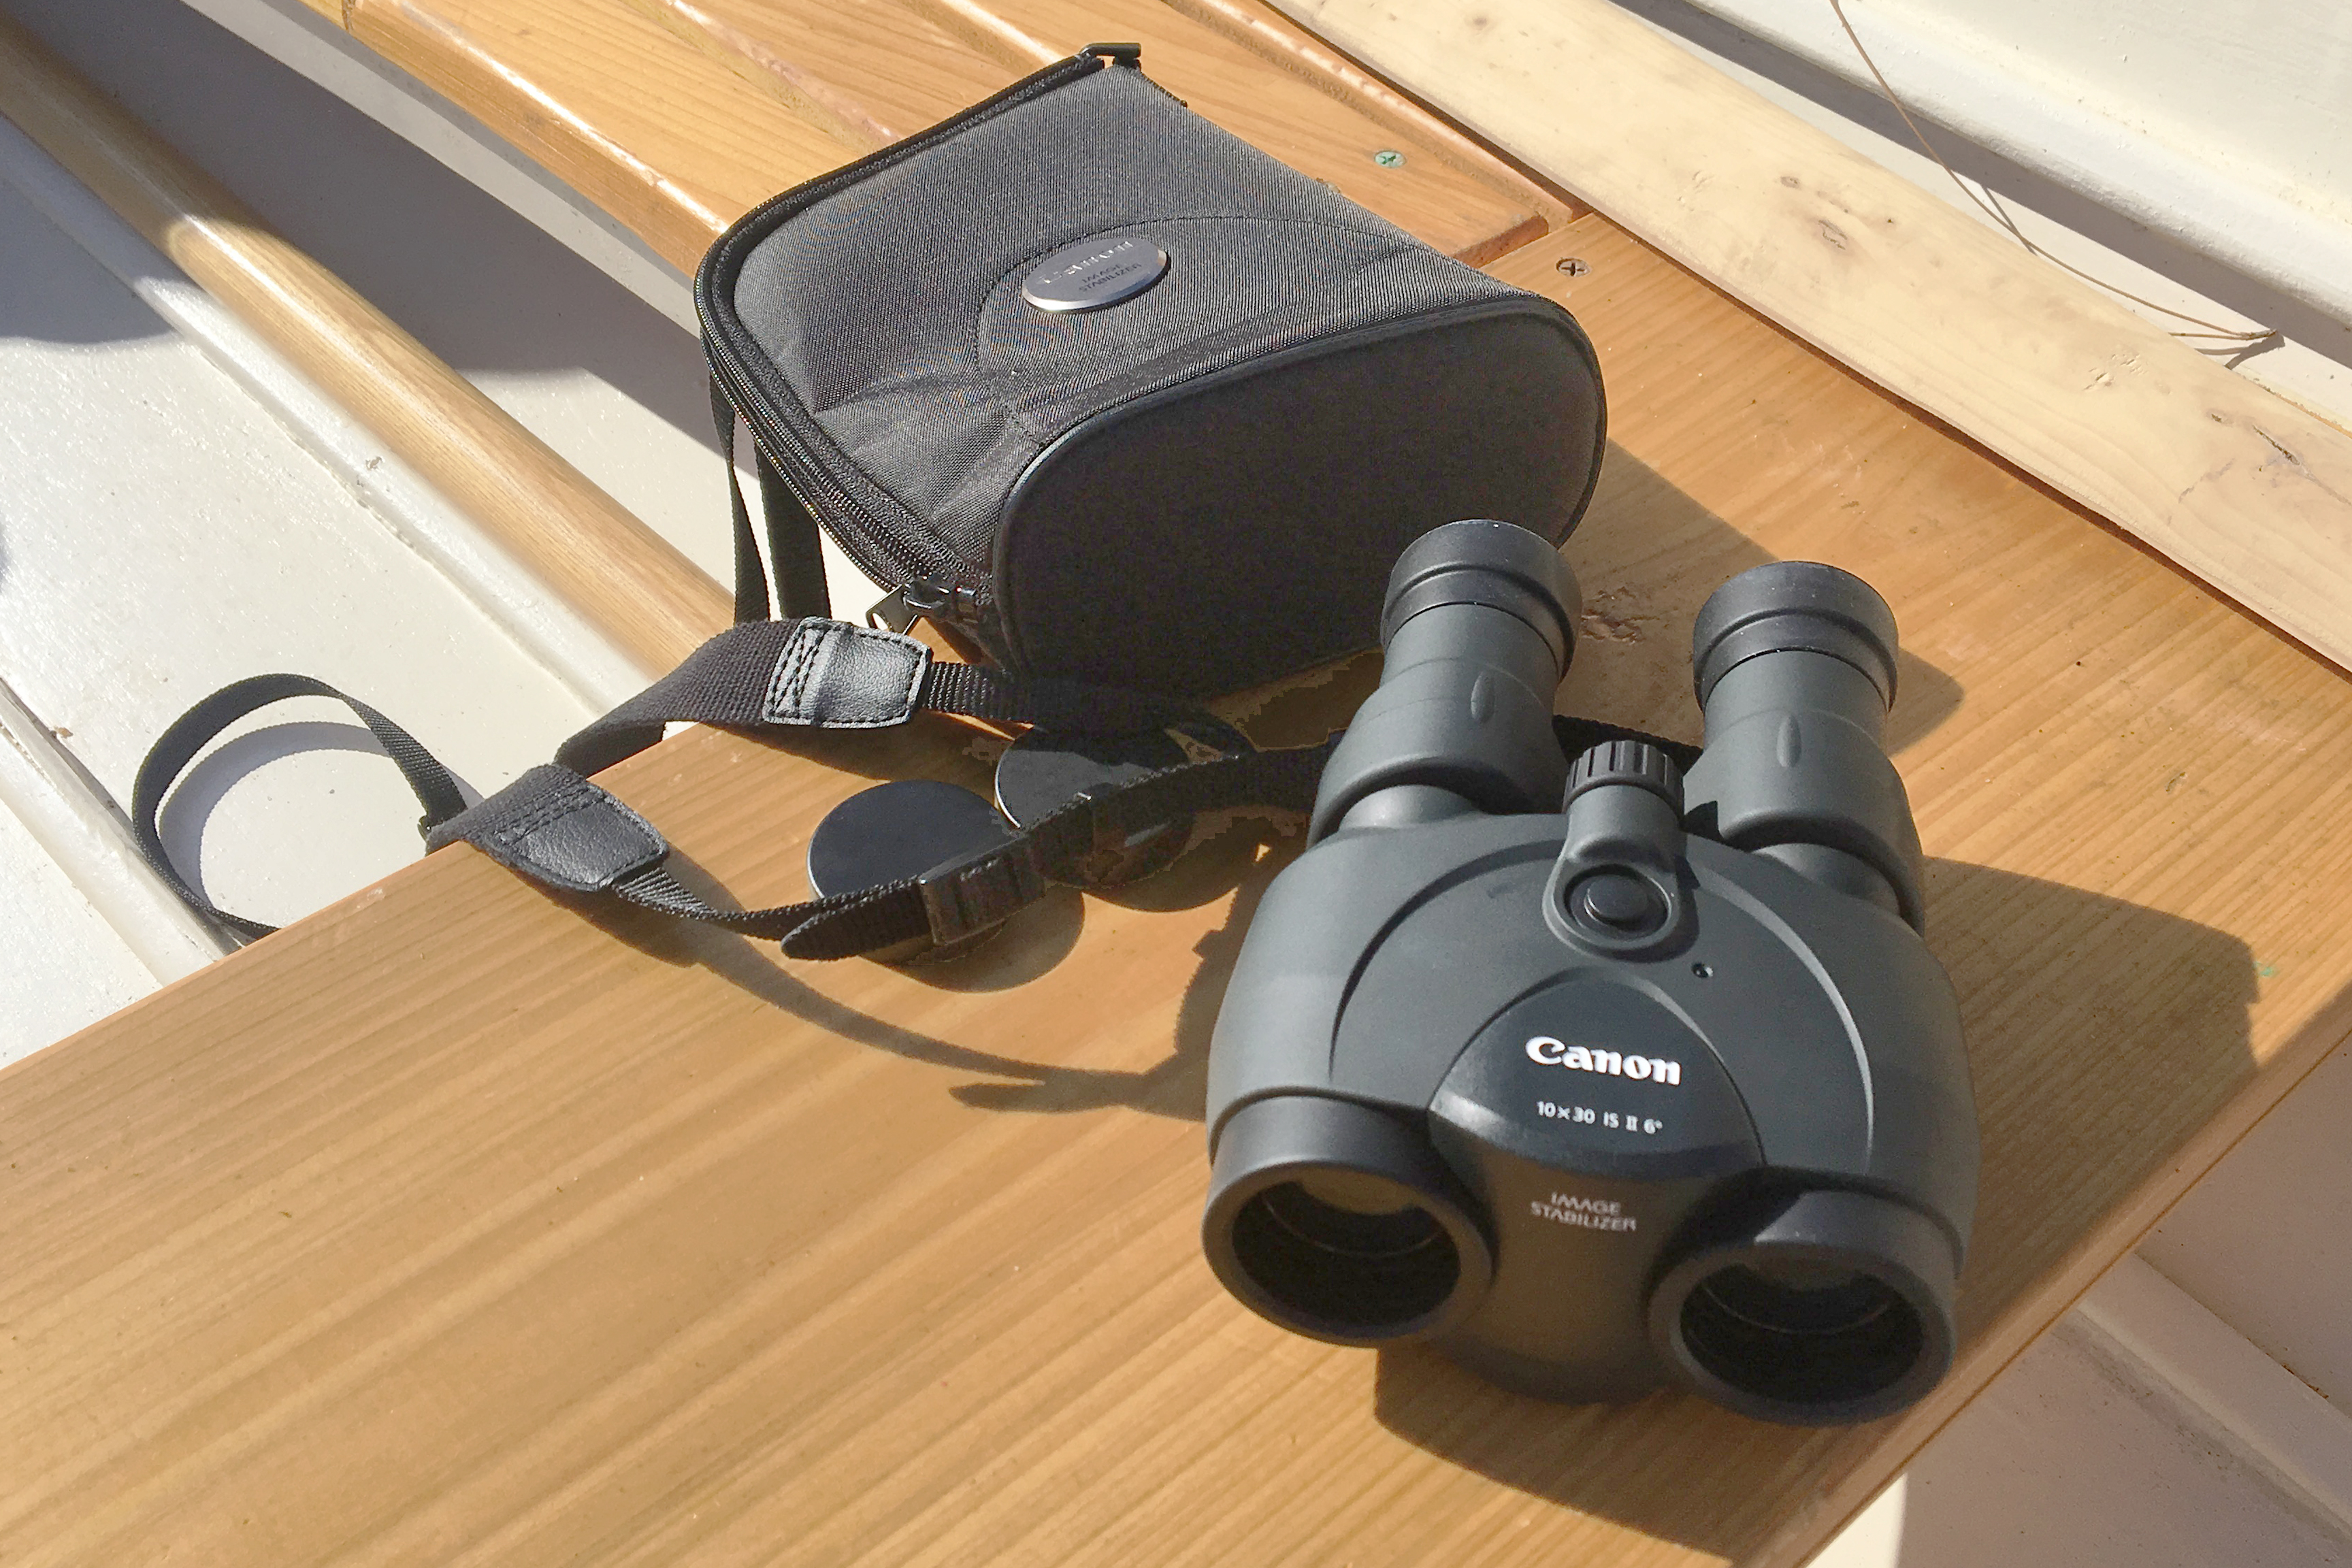
The binoculars came with a case that has an adjustable strap and eyepiece covers.
The image stabilization function is impressive, especially for such a small package. Gyro sensors detect movement and a microprocessor sends signals to the prisms to compensate for image shake. The binoculars have a button to press and hold on the top when image stabilization is desired. The button is well placed, and keeping it pressed down does not interfere with holding the binoculars. They can also be used without the stabilization function.
While IS binoculars cannot compensate for large up-and-down motions of a boat in waves, they do compensate of the image shake caused by the user’s movement and wind. In the past, 7x was about the magnification limit for binoculars practical for use aboard boats. Image stabilization has increased that to 10x, bringing the world significantly closer. Canon’s 10×30 IS II binoculars are not too big, not too small, just right for messing about in boats. We enjoy using them and highly recommend them.![]()
Kent and Audrey Lewis mess about in a fleet of small boats in the Florida Panhandle and are currently building a 16’ catboat.
The 10×30 IS II binoculars by Canon (currently out of stock from the manufacturer) are listed at $549.99 and at discounted prices from online retailers.
Is there a product that might be useful for boatbuilding, cruising, or shore-side camping that you’d like us to review? Please email your suggestions.