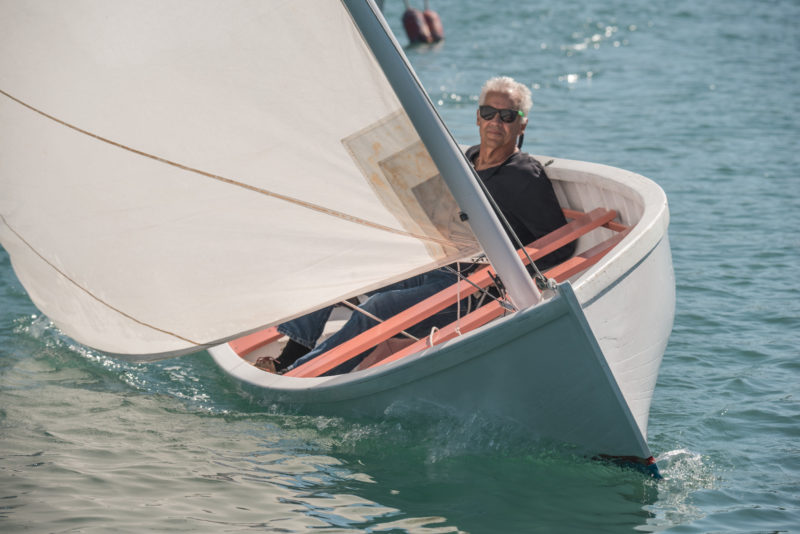
Rollin Thurlow has been building and restoring wood-and-canvas canoes for 38 years. This spring, Rollin took a short break from his shop, the Northwoods Canoe Company in Atkinson, Maine, to paddle the Allagash Wilderness Waterway in celebration of its 50th anniversary. As always, he ventured out in his beloved Atkinson Traveler, the same canoe he’s been paddling for 25 years. “I wouldn’t paddle anything else,” he says. He designed the boat in 1982, as one of a series of plans to be included in The Wood & Canvas Canoe, a revered building guide that he wrote with Jerry Stelmok of Island Falls Canoe, also located in Atkinson.
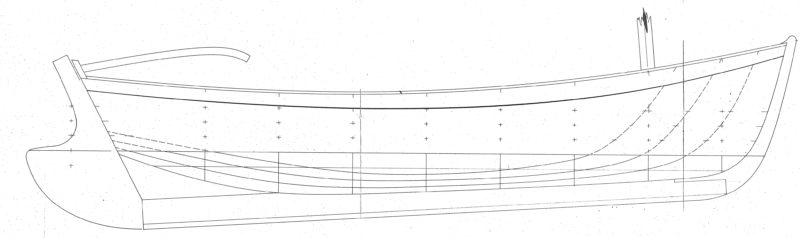
Back when he designed the Atkinson Traveler, Rollin began with what he most respected, the working boats that E.M. White built in central Maine beginning in the late 1880s; White’s designs were the mainstay of the guides, foresters, and wardens of the era. Rollin believes that White’s 18′6″ and 20′ Guide models, built to handle Maine’s often shallow and rock-strewn rivers, neared perfection for a regional craft.
all photographs by the author
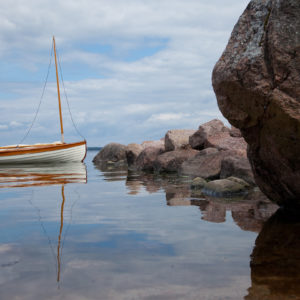
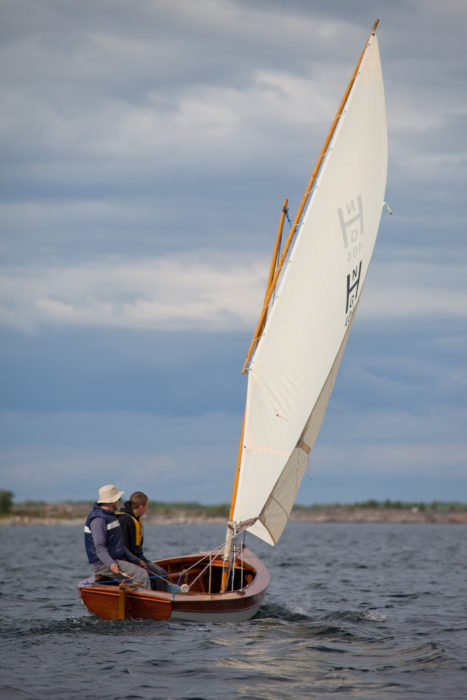
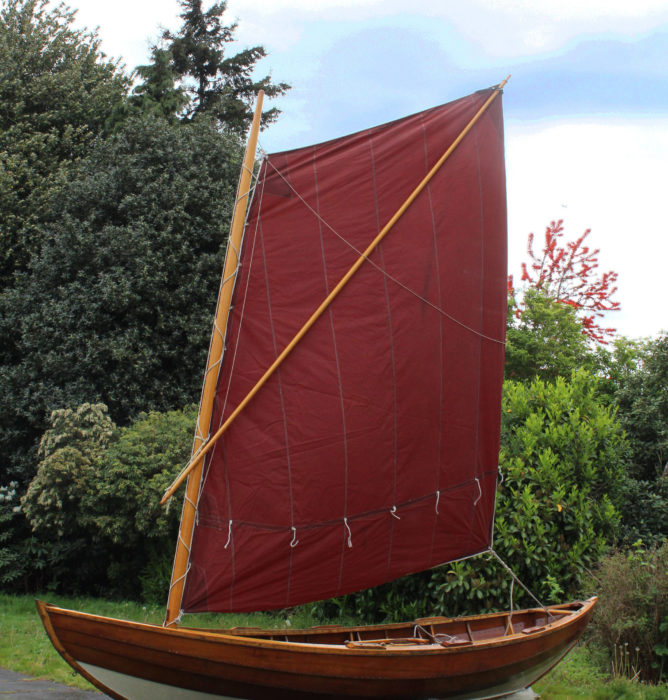
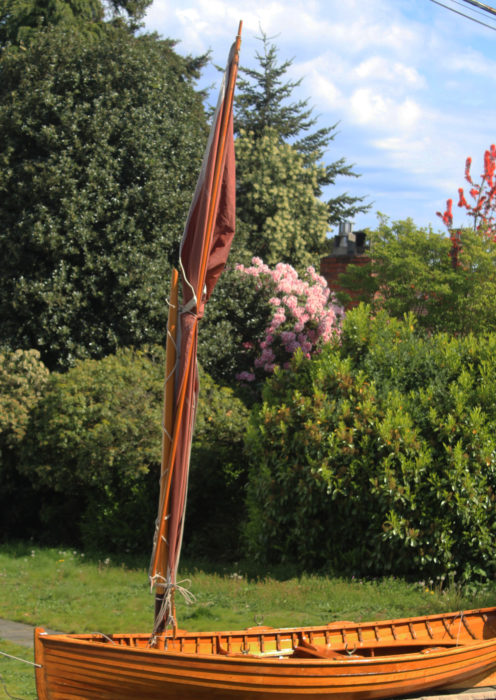
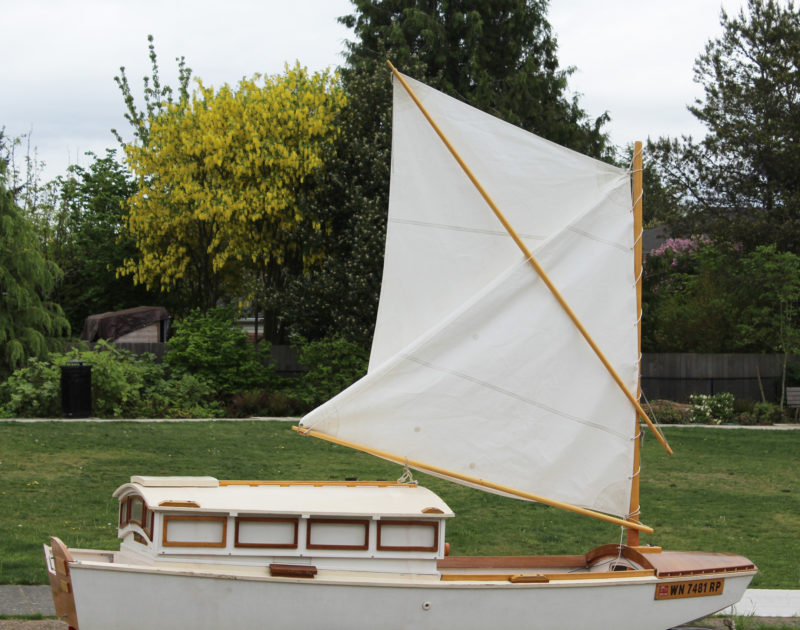
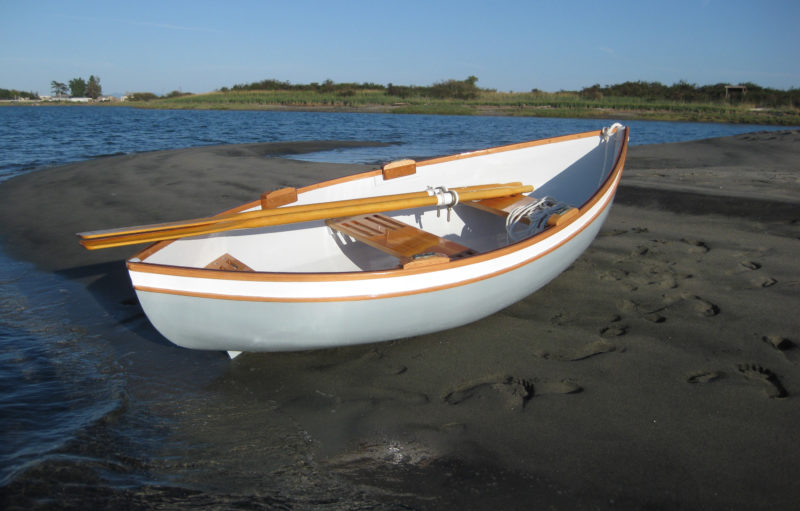
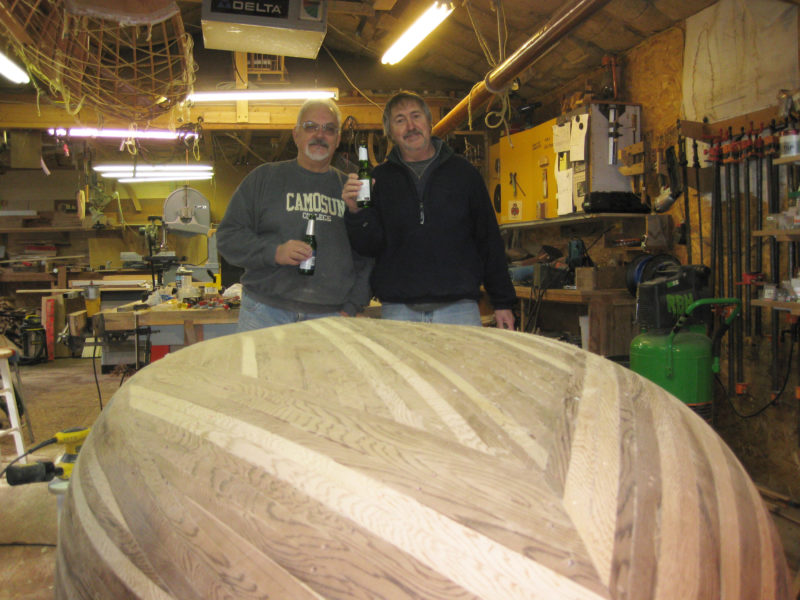
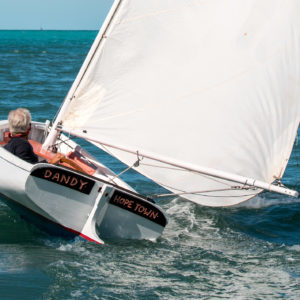
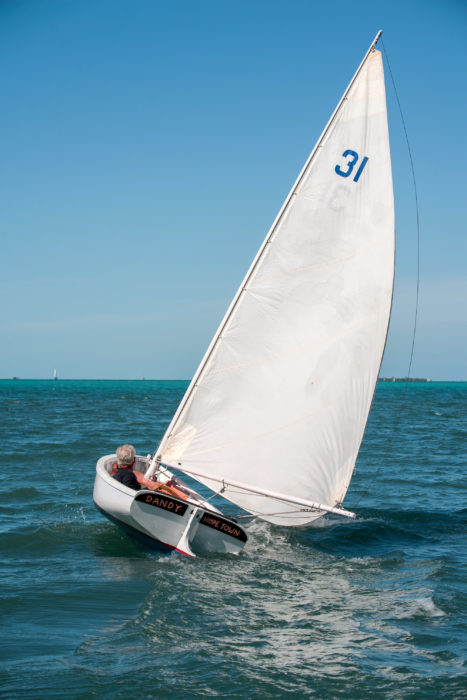
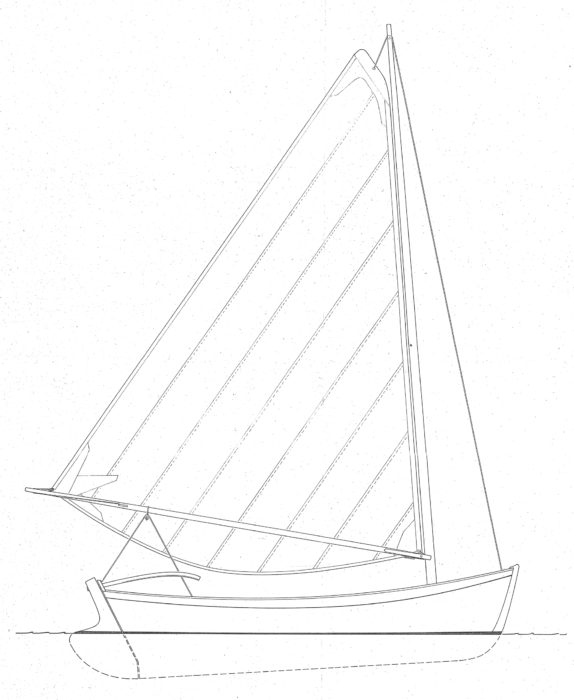
This special commemorative Atkinson Traveler was built to celebrate the 50th anniversary of the Allagash Wilderness Waterway. The cedar ribs and planking come from the AWW, the rails were made from Baxter State Park spruce and the figured maple is from northern Maine’s Piscataquis County.
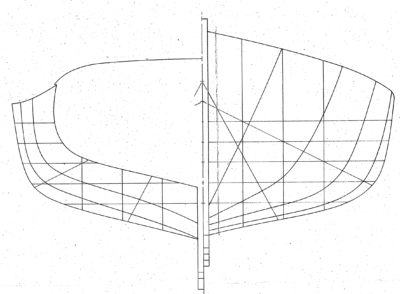
As Rollin turned to his own design, he realized that a shorter vessel that maintained the versatility of the Whites would provide a novel addition to the field of wood-and-canvas wilderness tripping hulls. He opted for an overall length of 17′ 6″; at 75 lbs it weighs in about 5 lbs under the White 18′6″. The most notable change that Rollin made was to alter the White’s fine entry, which made the designs very fast, but that sharpness at the bow led them to dig their nose into larger waves; Rollin gave the Traveler a more balanced entry, making the bow a bit fuller, giving his design more buoyancy in uneven water. He added about ½″ of rocker to the Traveler, bringing it up to 1-1/2″. The 35-5/8″ beam is very similar to the 18′ 6″ White and increases the Traveler’s stability and carrying capacity. The Traveler’s 5 degrees of tumblehome, gently curved sheer, and overall profile remain nearly identical to the White, which gives both boats a minimalist’s elegance at first glance and links them to the White’s ancestor—the Penobscot bark canoe.
While Rollin’s design is foremost a river boat, the Traveler’s shallow arch bottom, another trait inherited from the White, does slightly reduce initial stability (compared to a flat-bottom) for river use, but not enough to compromise the boat’s proficiency at poling, which requires standing and is an all-important skill for canoe tripping in Maine. The shallow arch also reduces wetted surface—and the drag associated with it—making the canoe faster. The Traveler draws about 6″ when loaded with a week’s worth of gear. The design is well rounded enough that it converts many first-time users with its virtues, and it’s not uncommon for paddlers to proclaim it “the ideal canoe.”
Garrett Conover, a veteran North Woods guide, has paddled tens of thousands of miles, and much of it at the helm of an Atkinson Traveler. According to Garrett, the trick in designing a wilderness hull is to find just the right balance of opposing design parameters. A high functioning design must excel at all aspects of wilderness travel, including flatwater, whitewater, downstream and upstream. Garrett explains that the game changer for a tripping hull is its ability to mesh high load capacity with superb handling, and notes that such a balance is very difficult to achieve; Rollin does so by the placement of compound curves in and around the quarters whereby the hull masterfully combines the speed attributes of a sharp entry with a sudden flare to accommodate load capacity as well as add buoyancy that keeps rough water on windswept lakes and whitewater on fast moving rivers from filling the boat.
Upstream travel was an essential skill when traveling in Northern Maine until the mid-20th Century when roads became more prevalent. The region’s shallow and rocky rivers were best ascended in a long canoe with shallow draft. Nothing poled as well as the Whites and the Atkinson Traveler carries on this tradition.
“The Traveler is nimble in whitewater,” he says. “It poles well, it paddles well, and it’s small enough so it’s not quite as heavy as some. It portages well in any country.” Garrett’s personal preference is the Deep Traveler, which carries 15″ of depth amidships compared to the conventional Traveler’s 13″. The Deep Traveler is the design of choice for those, like Conover, who routinely head out on self-supported trips for weeks on end. “To me,” says Garrett, “it’s the pinnacle of wilderness canoes thus far.”
Elisa Schine worked as an instructor at a wilderness canoe camp before landing at Northwoods Canoe Company. She recently took her boyfriend on his first canoe trip and chose to borrow one of Rollin’s Atkinson Travelers, instead of using the round-bottomed Prospector she owns, because of the Traveler’s stability and ease of handling: “I didn’t want to tip him into the river the first time he got aboard a canoe.”
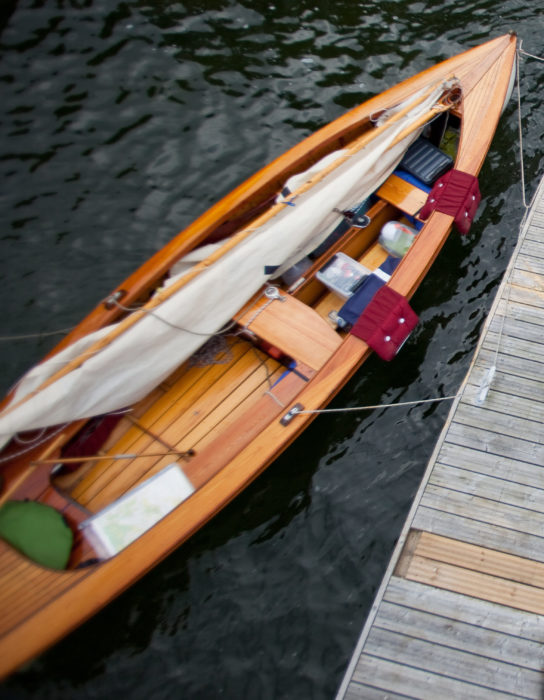
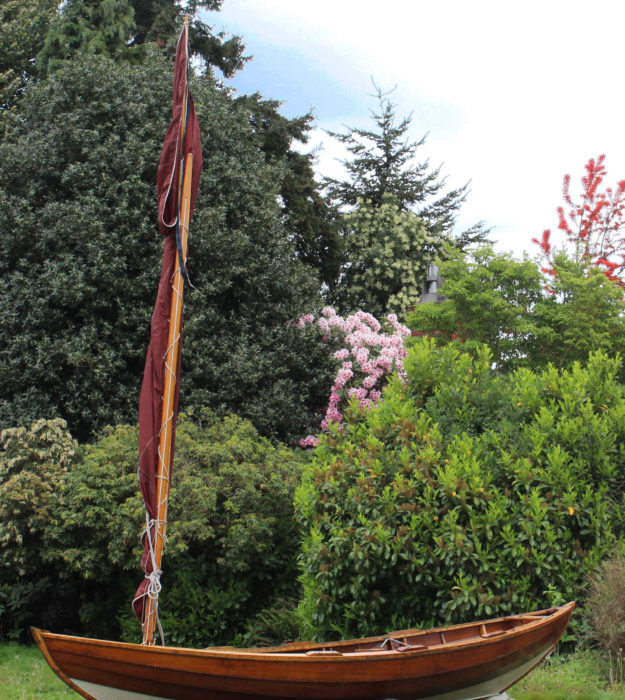
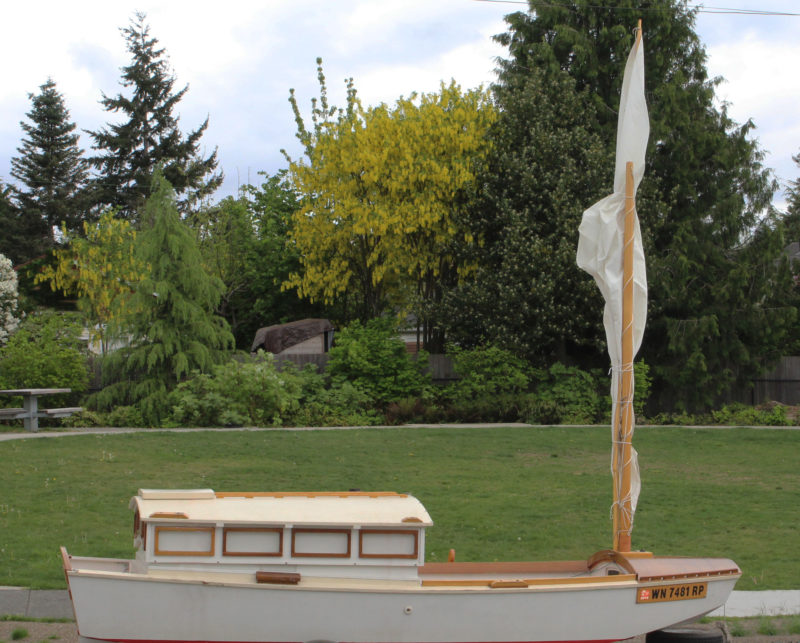
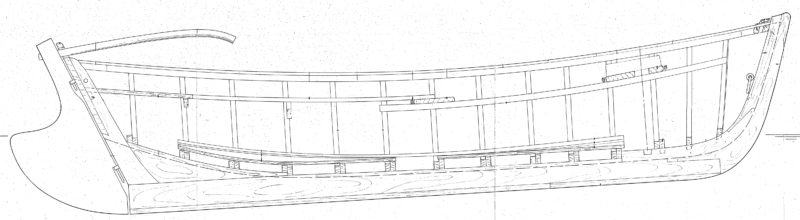
On a bright spring day, I traveled to Atkinson to paddle in the town’s namesake Traveler. Rollin, who celebrated the thousandth canoe to pass through his shop in 2014, had recently finished a special commemorative Atkinson Traveler. The stripes of its tiger-maple thwarts morphed from light to dark and undulated as I move around the boat. The bird’s-eye maple decks’ swirling made them look like old contour maps. The rails were made from Baxter State Park spruce. The gunwales of the standard-issue Atkinson Traveler are also spruce, though many choose a mahogany, cherry, or walnut outwales. If a hardwood is chosen for the outwales, it is also used for the thwarts, decks, and hand-woven caned seat frames—otherwise ash is the standard wood used. The weave of #10 mildew- treated canvas is filled with an oil-based sealer and usually painted in its entirety; many opt for the traditional finish of shellac below the waterline, which slides over rocks and is easier to maintain than paint. Brass stem bands protect the white-oak stems at the bow and stern.
The heart-shaped decks and hand thwarts date back to the earliest wood-and-canvas canoes, as does the hollowing out beneath the deck. Rollin first observed these features while restoring E.H. Gerrish boats and was drawn to their aesthetics. He likes to include hand thwarts to give paddlers a ready handhold for carrying that dissuades them from using the deck to lift the canoe.
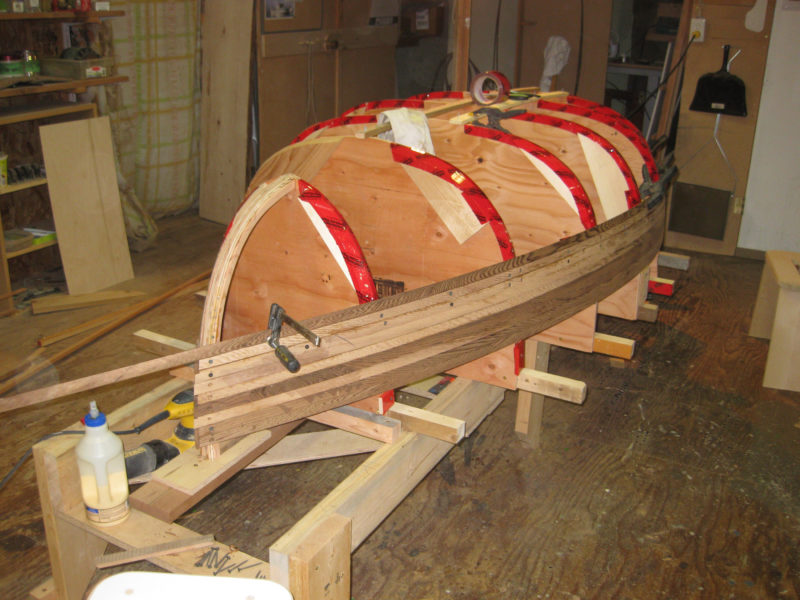
Rollin has sold about 400 sets of plans for the Traveler and highly recommends that homebuilders take the time to build the requisite mold—a sturdy hull form akin to a very heavy strip canoe. Steel bands are attached crosswise over the mold and used to clench the tacks that fasten the planks to the ribs. The hand tools required, include a clinching iron, canvas pliers, a tack puller and a small carpenter’s hammer with a 7-oz head. Builders will need to be set up for steaming ribs, and a jig is necessary to bend the stems. The average homebuilder takes years to complete a wood-and-canvas canoe.
On the water, my paddling partner is Elisa Schine who has worked in Rollin’s shop since 2013. I’m immediately struck by the boat’s speed and a lightness that slices the water and gives it lasting glide. The varnished cedar ribs and planking radiate warmth in the morning sun. The hull is stable when it needs to be as well as agile within the confines of the small pond.
After planting my knees against the sides of the canoe around where the half ribs end, I warned Elisa that I was going to wobble the boat. I rocked it gently, then more aggressively. The initial stability is not as solid as secondary, but the boat is such a comfort to paddle that I scarcely thought of stability for the remainder of the outing. We leaned in and practiced gradual arcing turns and spun it around with hard draws; the Traveler does it all with élan. When I poled the Traveler solo it held a line, even with the bow unweighted and thus a tad high.
Elisa says of the Traveler: “It’s a pleasure to build. With a lot of the models we build, it’s challenging to put planking on ribs, but with the Atkinson Traveler the planking lays across the ribs with no problem.” She believes that Rollin’s expertise unites aesthetics with function. “What looks good to Rollin is going to be the best design as well.”
Rollin has a long history of sharing his designs and hires young builders so he can pass along his knowledge. He has licensed his Atkinson Traveler design to a handful of builders, among them Jeanne Bourquin in Ely, Minnesota. She has been building the Atkinson Traveler since the 1990s and believes the Traveler is “as close to perfect as possible.”
Rollin mentioned that Becky Mason has paddled a Traveler. Becky, the daughter of legendary paddler and filmmaker Bill Mason, is a highly accomplished paddler and filmmaker in her own right, and has introduced thousands to canoeing through her teaching. Like Conover, she holds the Traveler’s capacity in high regard: “You just load those babies up and they take any weight possible. You get elegance—it’s so superbly designed. You get speed—it’s like a dart through the water. And you get maneuverability—it spins on a dime. You can do a beautiful canoe dance or swerve and miss a rock or back it up if you don’t like what you see. When it’s empty it handles like a little acorn on the water.”
“They’re works of art,” says Becky. “There’s an unexplainable quality. You can recognize a Rollin Thurlow canoe, just as you can a Leonardo da Vinci or a Van Gogh.” The subtle attention to detail—the beautiful hollowing along the underside of the deck, the tapering of ribs as they reach the gunwales, the sweep of the bow and the hand-painted waterlines—marks Rollin’s work as that of a true craftsman.
Many see Mason as the custodian to one of Canada’s most hallowed tripping hulls, the Chestnut Prospector, a design her father praised. She paid Rollin’s design the ultimate tribute: “I really think the Atkinson Traveler is an American version of a Prospector,” she says and adds with a laugh, “That’s a bit blasphemous, but I think the Traveler is just amazing.”
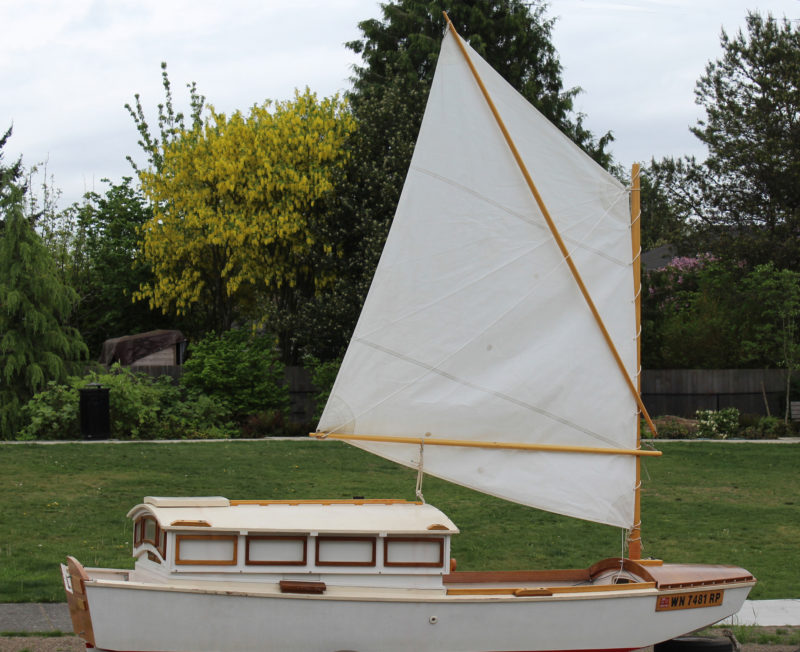
I wanted to learn how to sail, and was looking for a boat I could easily manage singlehanded and that had enough room for a few friends to join in the fun. I had no previous boatbuilding experience, and while I liked the looks of lapstrake, I thought it might be little overwhelming for a first build.
After many hours of research I settled on the Glen-L 15, a sloop-rigged daysailer. I liked the looks of it, its plywood construction appealed to me, and with a length of 15′1″ and a 6′ beam it was just the right size for me for both building and sailing.
Greg Johnson
In light air, a solo sailor can sit on the side benches, but as the wind approaches 10 knots, it’s time to take a seat on the side deck.
The plans for the Glen-L 15 come with a detailed instruction booklet and full-sized patterns for the frames, transom, stem, and breasthook assembly. There’s no need for lofting; this helps a first-time boatbuilder get started with confidence. I chose vertical-grain white oak for the frames, sheer, and chine logs. Spruce and mahogany are also recommended in the plans. All the wood that I would finish bright was sapele. The hull is constructed of 1/4″ marine-grade mahogany plywood fastened with epoxy and silicon-bronze screws. It goes together quickly, even for a first-time builder, and is easy on the budget.
After fairing and applying fiberglass and three coats of epoxy, the hull was ready for its finish. Paint is the most common finish and recommended in the plans, but I wanted a more durable finish that would require less maintenance. After doing a lot of research, I decided to give gelcoat a try. I ended up with a beautiful finish, and after two years there are no chips, no cracks, and no signs of failing.
Casey Johnson
The ample seating and uncluttered cockpit of the Glen-L 15 is well suited for introducing family and guests to sailing.
After the hull has been painted, it gets turned right-side up for the remainder of the construction. The two arched beams that support the foredeck need only minimal fairing to prepare them for the marine-grade mahogany plywood decking. The coaming is made of three pieces mahogany milled into 5/16″ x 7″ boards. The finished coaming is about 3-1/4″ high, but you need to start with wide boards to accommodate the crown of the deck. The coaming is steam-bent, then temporarily fastened into place with clamps and screws. After I scribed the designed shape, I removed the pieces, cut them to size, and reinstalled with epoxy and screws for final trimming and sanding.
The seats, floorboards, and rubrails are mostly left up to the builder. I designed the seats and floorboards to be removable to make any future cleaning and refinishing easier. For the seats, the most common method of construction for them that I saw on Glen-L’s forum was to use 1″ x 1″ pieces of hardwood and bend them to follow the curve of the hull’s sides. Instead of screwing the pieces from the top and into the frames, I through-bolted transverse pieces on either side of each frame and epoxied and screwed the 1″ x 1″ slats to them, creating single-piece removable seat. I built the floorboards in a similar fashion to make them in sections easily removed for cleaning and refinishing.
I milled my mahogany trim for the sheer and coaming. There were no instructions on the plans for a rubrail and trim to cover the screws holding the deck at its perimeter, so I made a cap and half-round to cover the sheer. For mounting an outboard motor, I fastened pieces of mahogany to the transom to take the wear and tear of the motor mount. The boat is rated to take an outboard up 7.5 hp.
Greg Johnson
The pronounced flare in the forward sections lifts the bow over waves and throws the spray to the sides, keeping it out of the cockpit.
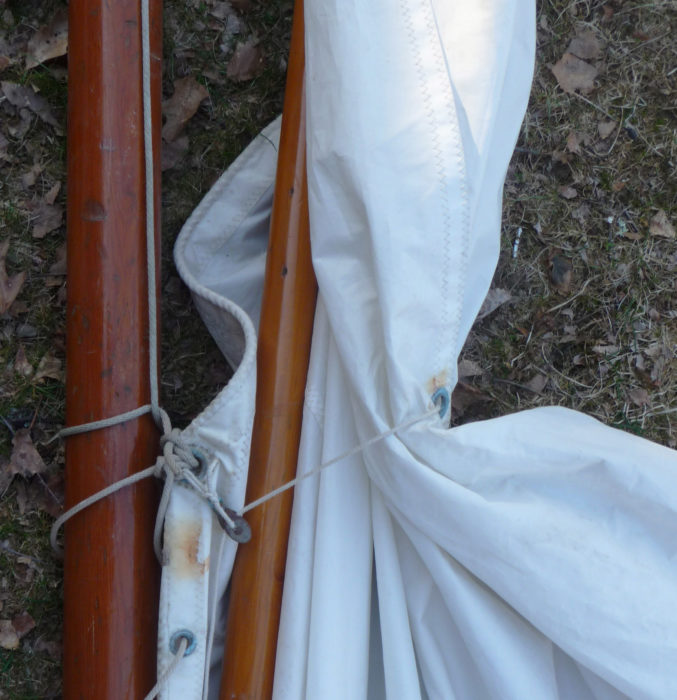
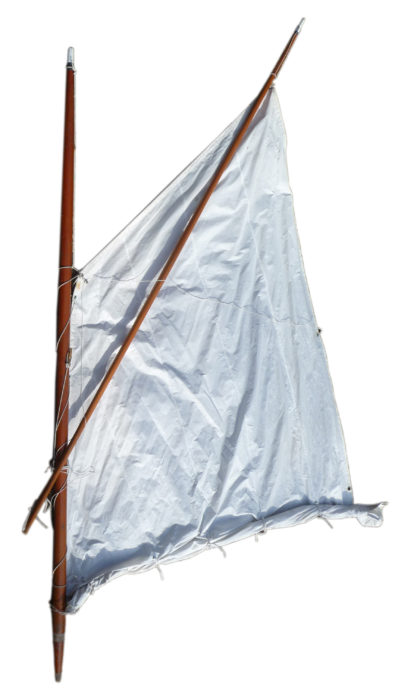
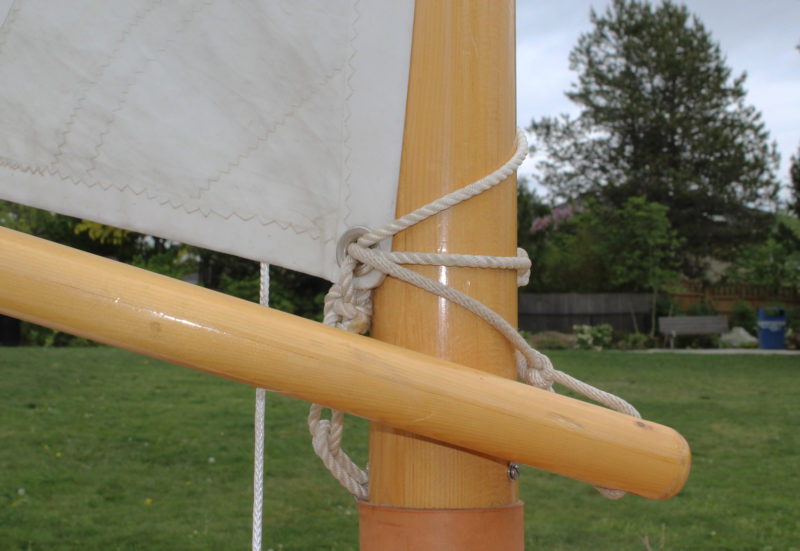
After painting the cockpit and putting nine coats of varnish on all of the brightwork, it was time to think about spars. The plans offered a few options for making the mast. Instead of the hollow plywood mast, I chose to build the solid mast with the sail groove routered into the aft face. I used vertical-grain Douglas-fir 2x4s scarfed and laminated. The mast has the classic teardrop cross-section and is then square below the gooseneck. The boom is rectangular in shape, and there is just one method for building it detailed in the plans. Using the measurements and templates provided, the spar-building wasn’t as difficult as I had expected, and I was very pleased with the results. I ordered the rigging from Glen-L; it was all very high quality and each piece came with diagrams and descriptions to facilitate assembly.
Throughout the build I called Glen-L for guidance, and their staff was patient and knowledgeable and answered any questions I had. The sails were made in British Columbia by Leitch and McBride, sailmakers.
I had spent a year and a half of weekends and some evenings building the boat, and as the time to get ready for launching approached, I had a friend who’s a welder build a trailer using Glen-L’s plans and adding a few custom details. I practiced rigging the boat a few times, and I could get the mast up and the sails ready to raise in about a half hour. The mast is pinned through at the maststep, allowing the mast to pivot up and down. I found it quite manageable to get the mast up solo. The forestay holds it up, and then the two side stays brace it for sailing. A lighter aluminum mast would be easier to handle, but in my opinion the beauty of the wood mast is worth the little extra effort.
At the launch ramp for the first time, the boat slid off the trailer with ease. My father and I used a pair of 4′ paddles to make our way out of the shallows before raising the sails. There wasn’t much wind that morning on Shawnigan Lake, but it didn’t take much to get the boat moving. I was pleased by how effortlessly she glided through the water. Later the wind picked up, and we had a wonderful first sailing experience.
Greg Johnson
When tacking, the bow swings smartly through the eye of the wind and is unlikely to get caught in irons.
I learned a lot that first summer, sailing every chance I got. The Glen-L 15’s 114 sq ft of sail area provides spirited sailing. The centerboard is weighted and raised and lowered with a pulley system. When running downwind I found with pulling the centerboard up I could get more speed and still feel stable and in control. When turning from running downwind into a beam reach, I just need to remember to lower the centerboard well before I turn or the lateral pressure will not allow the board drop freely, especially in strong wind. On a broad reach I’ll usually pull the centerboard up about halfway.
I can control the jibsheet, mainsheet, centerboard, and tiller all from a seating position at the stern, so I haven’t found the need for a tiller extension. The arrangement is great for solo sailing and when taking guests out who just want to enjoy the ride rather than tend sheets. The boom sits high, so there’s good visibility forward and no need to duck when coming about. This makes navigating and taking care of passengers easy. I’ve sailed with four adults in light to moderate winds, and the boat performs well. The boat points high when working to windward. There’s plenty of room for three on one side bench when I need to counter heeling in strong winds. If I trim the sails properly, the Glen L-15 holds a course very well on all points of sail and has a near neutral helm—I never have to fight the tiller. When setting the mast rake I was careful to stick to the plans and get it right. I believe this was an important factor to creating a balanced helm.
The winds on my home waters—Shawnigan Lake—can change direction quickly, and large wakeboard-boat wakes makes for a challenging yet fun experience. The boat maneuvers extremely well; it’s very stable without compromising handling or speed. There’s plenty of room for four adults while sailing with ample storage under the foredeck for life jackets, picnic supplies, an anchor or whatever you might need for a daysailing adventure. I bought an electric trolling outboard for those lazy summer evenings on the lake; all the kids take turns playing captain. When the winds are down, the Glen-L 15 can easily be used as a runabout or for fishing
Greg Johnson
The boom and the foot of the jib are both set high, providing a clear view forward and eliminating the need to tell passengers to duck when coming about.
The Glen-L 15 has lived up to my expectations and has been a great boat for learning to sail in a variety of conditions. It usually draws a crowd and a lot of compliments and questions wherever I go. The experienced sailors who have seen the boat say I’d have no problem exploring the protected coastal waters of the British Columbia coast. My next project is to design sleeping arrangements for two on either side of the centerboard trunk for camp cruising. The Glen-L 15’s versatility would make it a boat almost everyone can enjoy.
Kelsey Johnson was born and raised in Victoria, British Columbia, and grew up waterskiing, surfing, and snow skiing on Vancouver island. A journeyman carpenter by trade, he and his brother own a construction company and build custom homes in Victoria and surrounding areas.
We had arrived at Port Townsend, Washington, a few days before the start of the 2015 Race to Alaska (R2AK) so we would have a chance to make any repairs after our sail there from Gabriola Island in British Columbia, and to watch the fleet arriving. Our 100-mile pre-race trip from Gabriola had been a success, and we felt good about our chances of winning the race—until the other boats started showing up.
Quill Goldman
Although we launched on the scheduled day of April 12, many rig details remained unfinished. The 6-week pre-race trial we intended to do was reduced to about 6 day trips. This little beach on the northwest corner of Valdes was part of one of them.
Early in the morning of June 4 we made our final preparations in the pre-dawn light, and then backed out of our slip. We were nearly cut in half by a racing shell tearing out of the darkness. Having narrowly avoided being skewered before even leaving the harbor, we hoisted our jib and sailed out past the hundreds of people lining the shores. We’d just cleared the jetty when again we were nearly broadsided, but this time by a guy on a paddleboard giving out hot oatmeal.
The one-minute gun went off, and we had to put our oatmeals down, raise the main, and sail back up to the line. We crossed right at the gun, ahead of the fleet of nearly 60 boats charging down on top of us. We were at the head of the pack—for a few seconds, at least, until the multihulls blew past us as if we were standing still. Catamarans, trimarans, and proas left clouds of blowing spray where their boats used to be.
The fleet was soon drawn out into two groups: the fast sailers, and the rest of us. It was blowing 15 knots out of the west, and we were happily sailing upwind at 6 knots, well behind the leaders, but upwind of many of the others.
Tad Roberts
We rowed into Victoria harbor at the finish of the first leg, somewhere near the middle of the fleet. Throughout the trip, weather conditions never remained constant for very long, and switching between rowing and sailing we often found ourselves struggling into and out of our dry suits.
We noticed a small red speck growing larger on the horizon behind us. By the time we were halfway across the Strait of Juan de Fuca, Roger Mann, in a 17′ outriggered kayak, caught us, and then stayed ahead of us the whole way to the entrance to the inner harbor of Victoria, British Columbia. Just as we passed the “No Sail” marker and dropped our sails to row in, a canoe full of what appeared to be women dressed for Sunday tea came blasting around the corner behind us. By the time we figured out what we were looking at, Team Soggy Beavers, in drag, had beat us to dock.
We covered 40 miles in just over 6 hours, pretty good considering 18 teams had already dropped out.
After a three-day layover, the race to Ketchikan, Alaska, began. The morning was sunny and windless, and when the starting horn blew, we made good time getting away and steadily rowed past other boats; by the time we cleared the harbor, there were only two ahead of us. We rowed up the inside of Discovery Island, and the catamaran FELIX tacked in toward Oak Bay. PURE AND WILD, a trimaran under main and spinnaker, soon overhauled us. We kept rowing until we saw the rest of the fleet come round the point under sail.
We raised our main, but a keelboat and a catamaran were bearing down on us under spinnakers. We shipped the oars and pulled up our big orange kite. The breeze was slowly building from 5 knots, but the big boats sailed past us as we entered Haro Strait. The Soggy Beavers, six guys in a 30′ outrigger canoe, were way ahead, making a blistering 6 knots in the calms to everyone else’s 4. Team SeaRunner, a catamaran with a crab-claw rig and pedal-powered propellers, had taken an early lead and were making for the San Juan Island side of the channel.
The breeze held and we were making about 5 knots, broad-reaching north in the bright June sunshine toward North Pender Island and closing on Team Grin in their Etchels keelboat. The chase was on until we were just drawing abeam of them, when they bore away for Active Pass, no doubt looking for wind. It was forecast to blow up overnight, and we chose to stay in the more protected waters of Trincomali Channel. With no competitors in sight, the boat sailing nicely, and the golden sun nearing the mountains of Vancouver Island, I went down for a nap.
I woke to the sound of the oars sliding through their locks; I’d been out for three or four hours. The night sky was full of stars, and the wind had gone. Dylan and I rowed between the puffs through the middle of the night while Mitch slept. Even with the light of a nearly full moon, we still managed to row into a tree with a rootball, and later had to fend off a beach with an oar when the shadows tricked our depth perception.
After gaining no ground on two tacks off Wallace Island, we took to the oars again. Mitch and Dylan traded places, and as the sky in the east glowed pink, we rowed along Galliano Island. The tracker showed that our labors of the night had gained us little. Team Boatyard Boys had spent the night in a small bay and were now only 2 hours behind us, making 3.5 knots to our 2.5.
We doubled our efforts, and soon we were at Polier Pass. The wind, forecast to blow up overnight, had never materialized, so we decided to go through the pass to look for a breeze in the open Strait of Georgia. As the flooding tide sucked us through, we struggled in the light wind to avoid a long row of short, steep, standing waves that extended out toward the mainland. A mile out the breeze filled in, but it was from the northwest and counter a northward-flowing current of the strait. Seeing a patch of flatter water about a mile wide along the shore of Valdes, we decided to short-tack up the coast. I took this opportunity to try to sleep.
About an hour later I was awakened by water coming over the gunwale. I was quickly out of bed and on the weather rail. The flatter water we’d been in had disappeared. The GPS told us there was a small channel inside the reef in front of us, so we tried to take advantage of what little protection it offered. Short-tacking close to a lee shore, we aimed the boat at the foaming pile of angry waves where the channel was supposed to be. Squeaking through with large brown rocks visible just below the surface, inches from either side, we were then able to tack away from that horrible sight.
Nearing our Gabriola Island homeport of Silva Bay, we struggled to sail up around Breakwater Island, the southernmost of the Flat Top group that would offer us protection. Pinching as hard as we could to get round the point, we were just about clear, when team Uncruise Adventures came blasting over top of us, stealing our wind. Once again we found ourselves clawing off an uncomfortably close lee shore. We aimed for the nearest sandy beach on Gabriola, and within minutes were high and dry. We were hardly ashore more than 5 minutes, when we were surrounded by a group of our hometown friends. A half dozen had been watching our track on their computers, and raced to us by water and land to see what was wrong. We told them our story, then made our way into Silva Bay to gather our wits, make some essential adjustments to our reefing system, and wait for the wind to ease. It never did.
Our check of the tracker showed that most of the other teams were also holing up. A few were just going back and forth out in the strait, moving fast but making no headway. We stayed the night, constantly checking the tracker and the weather report. The teams that had stayed out were battling 40-knot winds. The wind rattled the treetops around us, and we hoped everyone would make it through the night.
We were up early, checking everyone’s progress. The three or four boats in the front had extended their lead, while most of the boats near us had stayed put. Those who had stayed out in the strait had been punished. Team Turn Point Designs and team Pure and Wild, retired from the race and were heading back south. Team Sea Wolf, sailing in a 17′, roto-molded hydrofoil, were unable to tack into the giant waves, and unable to bear away for fear of pitchpoling. With their boat nearly awash, they were slowly being driven down on to the Fraser River delta. Shortly before dawn they radioed the Coast Guard and abandoned their vessel for the safety of the rescue cutter.
Team Boatyard Boys and team Super Friends had also come into Silva Bay. We spent the day chewing our nails, checking the marine weather, checking the tracker, driving to the windward end of the island to confirm the conditions, and hiding from people we knew in the grocery store. “What are you guys doing here? Aren’t you supposed to be doing that race?”
Late in the afternoon on the third day, the wind was still blowing 30–35 knots where we were, but all the weather stations in the area were reporting moderate winds of 20–25 knots.
The lead boat, ELSIE PIDDOCK, a 25′ trimaran, was making unimaginable progress, and their lead seemed unassailable. In a momentary lull we cast off and sailed for Sechelt. It was rough, but manageable, and we had an exciting sail across the Georgia Strait. When the last of the light disappeared from the sky, we still had a couple hours of sailing ahead to reach the nearest bay. The white wave crests were all we could see, and when we sailed into Seargent Bay at 2 a.m., we were too exhausted to anchor and instead tied up to the dock of a large, empty-looking house. Spreading our mats out on the dock, we would get up at first light to continue.
Well, we all overslept, and we were surprised to see a man and woman coming down the ramp from the house. Fearing we’d be beaten with sticks for trespassing, we were quick to answer their questions. They had heard of this race, and instead of giving us a thrashing, they invited us up for breakfast. Fortified for our journey, we set sail once again.
The wind was much lighter and we enjoyed the day, sailing across to Sabine Channel where we tacked in the sunset glow between Lasqueti and Texada islands. We pulled into a nice bay at the top of Lasqueti, unloaded our gear on shore, anchored the boat, made a fire and dinner, and turned in.
Quill Goodman
We expected to be sailing in snow and icebergs, but over 90% of our race was in sunshine and puffy little clouds. After the three days of high winds that had kept us pinned down in Silva Bay, the 10-15 knots of breeze that took us west across the Strait of Georgia from Sergeant Bay to Lasqueti was a welcome respite.
We were up at first light and ready to go, but the ocean was about 500′ from where our boat was sitting in the mud. We tried moving the boat to the water, but the beach was so flat that even if we moved it halfway, it would only get us floating an hour or so sooner. It wasn’t worth the effort, so we resigned ourselves to watching the tide come in.
The wind was back up again, and in no time the north end of Texada was off our starboard beam. The forecast was for 25–30 knots of wind to continue through the night, so we sailed for Comox. The waves were big, but long, and we were getting used to this kind of sailing. Even still, with four reefs tied in the main and the setting sun shining through mountains of green water, we were relieved to round Goose Spit an hour or two after dark and sail into the Comox marina under the orange glow of sodium lamps. We dropped our main just inside the breakwater and soon had our beds unrolled under some trees in the park.
The wind had increased overnight, and in the morning a seafood festival was setting up not far from us in the park, and their tables and decorations were rolling across the field like a bunch of tumbleweeds.
A check of the tracker on the iPad showed us that our dreams of winning this race were over. Barely five days from the start, ELSIE PIDDOCK had pulled into Ketchikan. We were barely a hundred miles into the race, with 650 left to go. It was too windy to go sailing, so we spent the day loitering. A friend took us to his house for the night where we had dinner and slept in his yard. The next morning we were up at first light, determined to carry on. There were still a few fast boats nearby that would be fun to race against, and after all, this was a race to Alaska, dammit, and we were going all the way!
The wind was moderate, and Seymore Narrows was less than a day’s sail away. During the run along the Vancouver Island coast from Comox to Campbell River, I took a nap up in the bow, and noticed when I awoke the spare rudder was being used. One of the blades had drifted off, and no one had noticed it go.
We had missed our window to get through the Narrows on this tide, so we stopped in Campbell River. An hour later and we were back in the boat, headed for a bay close to the Narrows to wait for the next ebb to carry us through.
We found a fish farm, and thinking their floats looked more inviting than a night on the hook, we tied up to one, at the bottom of the ramp that led ashore. We went up to the little house at the top of the ramp, and knocked on the door. The guy who answered was very interested in what we were doing, let us tie up for the night, and invited us to sleep in the three spare bunkbeds. We tucked ourselves in early so we could get a predawn start to catch the ebb through the narrows.
We cast off in darkness. As we sailed off the dock, we could see team Excellent Adventure beating along about a half mile ahead. We chased them through the Narrows and up Discovery Passage into the freshening 15-knot breeze. As we rounded Chatham Point into the notorious Johnstone Strait, the scattered clouds had disappeared, the sun was out, the breeze had settled into a steady 10 knots, and by the time we passed Blind Channel at the bottom of Thurlow Island, we were certain that we were gaining on Excellent Adventure, but they suddenly veered hard to starboard, toward Knox Bay. So we sailed on, working the eddies along the shore, and doing well against the current.
Quill Goldman
Although funds were tight for this project, we made getting excellent dry suits a priority. I wouldn’t contemplate doing the trip without them. They served as “personal watercraft” while swimming from our anchored boat to the shore and kept us warm and dry while underway.
Mitch had gone down for a nap, and Dylan was settling in on the trapeze as we passed Kelsey Bay, when we spotted a white line on the horizon. It was approaching rapidly, so we called Mitch on deck and tied in a reef.
It hit us like a wall. The wind doubled instantly, and the lazy current became a churning frenzy. We tied in the second reef, but it was still building, and within minutes we were skipping the third reef and tying in the fourth. Still overpowered, we pinched as close as we could and let the current sweep us along past the top of Hardwicke Island. The waves were rising and falling beneath us and on top of us.
Desperate to get out of this maelstrom, we steered for the channel between two small islands, Clarence and Yorke. We had to get into the lee of Yorke’s east side, but couldn’t safely bear away, even under four reefs. Dropping the main completely, we turned and ran. There wasn’t much of a bay on the east side of Yorke, but the white beaches of Hardwicke Point looked like heaven. They faced west, into the wind, but were in Yorke’s lee. A sandy beach on a falling tide sounded like just the respite we needed.
The beach on Hardwicke was not sand, but rocks, between fist and head size. The moment we reached shore, Mitch ran up the beach and while Dylan and I struggled to hold the boat in waist-deep water, Mitch was frantically trying to peel his off dry suit to relieve a bout of explosive diarrhea. By the time he staggered out of the bushes, we were trying to haul the boat ashore. We tried stuffing logs under it to slide on, but the waves would wash them away before we could drag the boat onto them. Dylan found a large cooler on the beach. He tied the bow line to it, filled it with rocks until it was just floating, dragged it out into neck-deep water, and sank it with a final armload of rocks. This would be enough to keep the boat out of the breaking surf. After tying a pair of stern lines to logs above the high-tide mark, we were ready to light a fire and dry ourselves off.
Mitch had chosen the only flat, open spot around to do his business, so we had to make camp down the beach, underneath a low-hanging cedar. The boat would start to dry out around 6 a.m., so we went to bed early, so we could help guide it safely on the rocks in the morning as the tide went out. We lay down in the deep moss and listened to the wind rip through the big cedar branches above.
I woke up at 4 a.m. to check on the boat, and it was already high and dry. There was nothing to be done about it, so I crawled back into my bag and slept in till late. Once the sun was high in the sky, we went down to the boat to find it high-centered on a large rock. The Kevlar-sheathed bottom had held up, and a little paint would put it right again, but we had to spend the day waiting for the tide to float the boat.
Quill Goldman
The farther north we went, the less hospitable the beaches were. Finding protected anchorages was not often a problem, but places big enough for three people and all their gear wasn’t always so easy. A beach line off the bow, and a haul back to an anchor off the stern was our most common form of mooring.
Our third, and last, handheld waterproof VHF radio had stopped working, so we were unable to listen to the marine broadcast. The wind had held steady since the previous day, at what we later learned was around 40 knots. When our boat was afloat we didn’t even bother putting up the sail, but rowed the 300′ or so from Hardwicke Island, to a small nook on the east side of Yorke. As we came in, we dropped the anchor over the stern, and paid out the rode until we could unload our gear on the beach. Once everything was ashore, I hauled the boat back out to the end of its bow line, tied off the stern, zipped up my dry suit, and swam ashore. We lit a fire, made dinner, and laid our sleeping bags down among the scrub pine along the shore.
Quill Goldman
Although we were again shorebound by high winds for a few days on Yorke Island, the decommissioned World War II military outpost there was very interesting, and the view of windswept Johnstone Strait couldn’t be beat.
The wind had eased some overnight and we were eager to go, but continuing on without a VHF was a risk we weren’t willing to take. While I was washing the breakfast dishes, a sailboat motored close by; I flagged it down and a man got aboard a dinghy and came to help us. I asked if he had a spare handheld VHF he’d sell. He didn’t, but he gave us the phone number of a guy, who had the number of another guy, who referred us to a store that sells VHFs to fish farmers. I had a cell phone and coverage, but none of us had a credit card, so Mitch had to call his sister in New Brunswick to get her credit-card numbers. We made the purchase; a boat working the fish farms would deliver the radio on their usual rounds.
Now all we had to do was wait. That was made easier by the fact that a weather station less than a mile away was still reporting winds of 30–40 knots. The next morning though, the wind had eased to a reasonable 10 to 15 knots, the tide was favorable, and we could see on the tracker that the other teams near us had been on the move since first light.
The call we’d been waiting for came on my phone: The boat with our new VHF was on its way. So we set off in the direction we were told we’d find the nearest fish farm. We hadn’t gone too far in the wrong direction down Sunderland Channel before the delivery-boat skipper found us. He’d been zigzagging up the channel, checking every sailboat on the way. Apparently the farm we had been directed to had been moved a couple years ago.
With this critical piece of equipment delivered, we set our sights for Port Neville, about 10 miles to the north. The old store and post office had been closed for years, but we tied up to the dock and went up to the house to see who was home. The friendly gray-haired people who lived there had company in the kitchen, but were happy to let us fill up our water jugs from their garden hose. The sun was out, but a strong flood would be against us for the next couple hours. When the current eased, we cast off once again. It was well after noon by the time we were underway in earnest, but we covered 18 miles and pulled into Boat Bay not long after dark.
Scrambling around on the bluffs with our headlamps, searching for a secure place to tie up, we came across a handful of tent platforms and a small cabin. Owned by the parks, this station on West Cracroft Island overlooked Robson Bight and monitored whales traveling the Inside Passage. The door was open, and reasoning this was park property, we let ourselves in and unrolled our mats on the bunks.
Quill Goldman
I had big plans of documenting our trip with photos and videos, providing plenty of updates for fans and sponsors, but in reality we had a hard time keeping our batteries charged. When conditions were good enough that we could take time for the camera, there wasn’t enough action to bother filming. When things did get exiting, we were too busy sailing the boat to mess around with dead batteries and tiny digital storage chips. Fortunately I managed to capture a little of the fun we had on our way from Alert Bay to Sointula. Left to right: Quill Goldman, Mitch Burns, Dylan Davenport.
We pulled our anchor early the next morning, but the wind had died, and we spent most of the day rowing 15 miles to Alert Bay in a light drizzle. The boiling current pushed us around as we rowed through Pearse Passage, and by the time we drew close to Cormorant Island, we were pulling hard upstream in the pouring rain.
Two people riding bicycles near the shore waved at us, gesturing us to follow them along the road that paralleled the beach. Pulling for all we were worth, we inched past the moss-covered pilings that held up the remains of former fish-processing plants. Our welcoming party showed us which dock to tie to and gave us two jars of canned salmon. They were fans of the race and had followed us on the race tracker.
There was a restaurant a couple of blocks away, so we got some burgers for lunch. Our constitutions restored, we put our dry suits back on and prepared to head back out into the pouring rain. Coming out the door after us, the cook brought us a freshly baked loaf of bread.
The rain eased, a light breeze sprang up from the south, and for the first time since the start of the race, 11 days ago, we hoisted our spinnaker. For about 30 minutes. Then the breeze, about 5 knots’ worth, swung around on the nose, bringing a torrential downpour.
It was only 5 miles to Sointula on Malcolm Island, but we were relieved when we finally began rowing past all the derelict marine railways that lined the bay. Our friend Nate lived on the island, and when we tied up to the government dock he was there in his truck to meet us. He took us home, let us spread our wet gear to dry by the woodstove, cooked us a big spaghetti dinner, put up his couches for us to sleep on, and took us back down to the dock in the morning.
It turned out to be another day of light, variable headwinds, with periods of rain. Our GPS showed it was 22 miles across Queen Charlotte Strait to Blunden Harbor. Tucked behind Robinson Island, it looked to be protected from any winds.
We dropped our sails as we came to the entrance to the harbor, and rowing in, the prospects for camping ashore didn’t look good. The cedar trees and salal grew thick at the water’s edge, and the only open areas were foul with sharp, pointy rocks. The light was getting dim, and the overcast sky was heavy with the rain that would soon be falling hard and fast.
As we came around the corner of the Augustine Islands, we saw a new galvanized steel-grate dock on plastic floats. A little cabin not far down the beach was just visible through the trees. A sign at the top of the dock proclaimed the land is a native reserve of the Nak’waxda’xw. The trail to the cabin followed the shore and some recent clearing of brush along the edge of the forest revealed the remains of an old settlement.
The cabin was a 16′ by 16′ plywood box, bare inside but for a woodstove and three sleeping platforms. A plastic pipe carried water from a well on the hillside to a laundry sink on the porch; firewood was stacked under the house. The door was open. We lit a fire in the stove and made dinner, and went to sleep listening to the rain thunder down on the roof.
The next morning we packed up our stuff and tidied the cabin. We were just casting off our lines when an aluminum boat roared into the bay and coasted up to the dock. There were 10 or so people on board, half of them Nak’waxda’xw natives, half of them anthropologists. We told them what we were doing and hoped they didn’t mind that we had stayed in their cabin. They were glad it had kept us warm and dry. They were here to survey the area of the old settlement we had seen traces of in the forest and along the shoreline.
It had been a village for centuries, with plank houses and boardwalks on pilings until 1964 when the department of Indian affairs made it necessary for everyone to move to a reservation in Port Hardy. Many preferred the old life, however, and some moved back to their traditional village. The department of Indian affairs responded by throwing everybody’s stuff onto the beach, and burning the entire village to the ground.
Now, 40 years later, people still want to move back; elders want to return to the village they had grown up in. This new dock and the survey were the first steps in that direction. The man standing in front of us said his mother’s body was laid to rest in the tallest tree that grew on one of the tiny islands in the bay. We thanked them and sailed out into a sunny day and we once again set a course straight into the wind.
The race had been won for over a week, and all we knew of our closest competitors was that they had last been seen days ago. We were on an expedited cruise at this point, and the farther we sailed from Port Hardy, the farther we sailed from our last chance to quit this race. We had been sailing straight upwind under quadruple- reefed main for nearly two weeks in an open boat; many other boats had long since thrown in the towel. We could have gone home, and been pleased with having come this far. But we didn’t. The boat had held up beautifully, we knew what to expect from it, and with the pressure of competition more or less removed, we had an opportunity to take the time to explore this beautiful coast.
After beating past the Richard Islands in Millar Passage, we ducked into Shelter Bay and found a nice hole to anchor in behind some islands just off Westcott Point. Once we pulled in, we could see that the beach was sandy, and the tide falling, so we decided to let the boat go aground for the night. After a short walk through the old-growth forest to watch the sun disappear into the Pacific Ocean, we lit a driftwood fire to help keep away the mosquitoes, laid our bedrolls in the sand, and went to sleep under the bright starry sky.
The boat was floating when we woke at sunrise the next morning, so we quickly packed and pushed off. The wind was too light for sailing and a thick-but-bright fog had settled in, so we rowed for a couple hours with the open ocean swell gently lifting us on its glassy surface. Somewhere around the Storm Islands the breeze began filling in, so we held our tack toward Japan, ghosting out to sea in a circle of visibility 100 yards across.
Preceded by a deep rumble, a southbound tug with a barge-load of logs appeared out of the mist in front of us. We tacked back toward the land, when all of a sudden, 50 yards ahead, there was a white line of ocean swells breaking against the bluffs of Cape Caution. We quickly came about, looking for sea room. Eventually the fog lifted and we set a course for Table Island at the mouth of Smith Sound.
Quill Goldman
It wasn’t absolutely necessary that we stop at the old cannery in Namu, just south of Bella Bella, but it was a point of interest, and had played a major role in the history of this part of the coast. Considered by many an environmental disaster that was abandoned by those responsible for it, the reclamation by the surrounding forest has a certain undeniable beauty to it.
We’d come about 25 miles since morning. Sailing into the channel between Table and Anne islands, we found another sandy beach on a falling tide on Anne Island, and ran ashore. Our boat was moored on the east side of the island, where the undergrowth was a little thinner under the ancient canopy overhead. We collected an armload of giant mussels and gooseneck barnacles from the west side, where the waves sucked out between the cracks in the rocks. It was the longest day of the year; we cooked our seafood feast over the campfire before settling in to watch the last of the light fade from the summer sky.
After our breakfast of cream of wheat with hippie grains and dried fruit, we set sail and headed north with fair winds and a clear sky. We took the route inside Calvert Island, and then spent most of the day close reaching up Fitzhugh Sound in 10 knots of wind. As we approached Hecate Island, it picked up to 15 knots, before dying away as we crossed Hakai Pass. We wallowed in a wicked slop with waves too big to row in yet not enough wind to sail. The chop washed in through our open transom, and washed back out again. The wind came back suddenly, shifted 90 degrees, and blew about 20 knots.
Quill Goldman
The only bear we got close enough to hear on this trip was in Namu, so we built a protective barricade to isolate us out on this pier.
We tied in our fourth reef and beat all the way to Namu, once the largest cannery on the B.C. coast. The crumbling remains of the fish plant were falling into the sea, the rows of houses swallowed up by the forest. In an old gymnasium, the maple basketball court heaved and curled, acoustic tiles sagged from the ceiling. The old roads were grown in so thick with trees that they were barely even trails. Bugs, which had slowly been growing more abundant the farther north we went, were ferocious and swarming. No amount of bug spray would keep them away, and only by burying our heads in our sleeping bags could we find any relief from their pestilential attack. So we suffocated instead.
The heat of the morning sun chased away enough of the bugs that we were able to emerge from our cocoons. We spread our sail out on the mossy planks of the pier to repair the reefing system. It had become tangled through constant frantic use. We finished up our rigging and loaded all our stuff back in the boat. We raised sail, but there wasn’t any wind, so we rowed for a few hours up Fisher Channel, until a following breeze sprang up and we were able to hoist our big orange spinnaker. We carried it all the way along Lama Pass on the approach to Bella Bella, the second of two race checkpoints.
The wind turned the corner of Denny Island with us and took us right to the Shearwater dock. We had picked up cell-phone coverage in Lama Pass, so I had called ahead to the pub and ordered a pizza and burgers; our meals would be waiting for us when we pulled in.
Colin Mason
We had very few opportunities to put up our spinnaker. Our friend Colin Mason came out to meet us in a friends boat as we pulled through the final checkpoint at Bella Bella.
After eating we unrolled our beds under the cedar trees on the front lawn of the fishing resort. It was good we were under the trees that night, because a heavy mist settled in, and by morning had turned into a proper drizzle. I was awakened by a dog sniffing in my ear.
We plugged our electronic devices in to charge at the laundromat while we went for bacon and eggs at the local restaurant. A few extra provisions from the grocery store, and we were ready to go. We sailed around Cypress Island, into Gunboat Pass, then west into Seaforth Channel. We were aiming to go up Laredo Sound, but first we had to cross Millbank Sound. There was a big swell running in, and the forecast was to blow up for the next couple days, so we took a more protected route to Laredo Sound between Watch and Ivory islands.
Boat Inlet, at the end of long and narrow Reid Passage, looked like the perfect place to spend the night. We had become used to sleeping ashore, but a quick survey of this shore showed us that this wasn’t going to work. The sky threatened rain, but we only had one tarp. There wasn’t a place big enough for the three of us to lie down under it, and some fresh bear scat convinced us we wouldn’t want to even if there was.
We spread the tarp out over the boom as the first heavy drops began to fall; as we settled in to make our dinner, the drops became a deluge and thinned the cloud of mosquitoes and blackflies that had grown around us. Mitch tucked himself under the foredeck for the night, but judging by his cussing, he wasn’t any better off up there. Dylan and I had the tarp over our heads, but it didn’t do much for the water that fell on the rest of the boat. It flowed down around our mats. I carefully folded my drysuit on top of my pad, then carefully laid my sleeping bag out on top of the drysuit, pulling all the loose edges of the sleeping bag underneath me to keep moisture up from wicking up from the pool my bed was floating in. I then pulled the sleeping bag over my head in an attempt to hide from the bugs, which were under our tarp, hiding from the rain.
The next morning I awoke to find I had somehow, miraculously, stayed mostly dry. Mitch, however, was soaked. It was a gray, misty morning, as we rowed out and set sail in Mathieson Channel. There was a 9’ swell running when we got to Millbank Sound, but the wind was just 10 knots, and there was a kind of queasy excitement riding those big swells under that leaden sky. The wind picked up quickly from astern, but was far too much to fly our big kite. We tied in the third and fourth reefs, then dropped the main completely, and were surfing at 9 knots under the jib alone.
When we came around the first corner of Higgins Pass, the wind eased a bit in the lee and we were able to put the smallest piece of our mainsail back up. At the first narrows, we tacked in vain against a powerful ebb current. It was a couple hours before the tide turned, so we ran back and anchored in the lee of a small island by the entrance to Higgins Lagoon. We went ashore and lit a driftwood fire to warm up to. Exhausted after the wild downwind run, we were soon asleep on the rocks by the fire.
Quill Goldman
Most of our camps were characterized by an explosion of dry bags and gear. The surrounding barbed wire made this one a little different, but we assumed it was the remains of an old homestead’s cattle fence. Instead it was meant to keep out hordes of Japanese invaders that never existed.
We woke as the tide was beginning to flood. The pass wasn’t navigable at low tide, and when we got to Lohbrunner Island we chose the shorter, but narrower, southern route around. With our boards up, just a little piece of rudder in the water, and our oars ready to fend off, we ghosted through with an inch or two to spare underneath and to either side.
When we came out from behind the cluster of islands that cover the western end of the pass that runs between Price and Swindle Islands and into Laredo Sound, there was still some swell, but the wind was a fraction of what it had been in Millbank Sound.
As the light grew dimmer and we neared the southern end of Aristazabal Island, it died away, and we had to row to a little bay around the corner of Tildesley Point. The GPS screen flashed, “This accessory is not supported” and winked out forever. We still had Navionics on the iPad, but it used too much power, and we could only afford to turn it on briefly. The GPS had kept track of every tack and jibe, and although we were only half way into the 750-mile race, it had recorded that we had traveled 1,500 miles over the ground. Losing the GPS wasn’t quite as crippling as the VHF, but was felt even harder, as we used it constantly.
Aristazabal offered us a sandy beach on a falling tide. By the light of our headlamps, we rolled out our beds above the tideline between logs half buried in the sand, and went to sleep to the gentle pitter-patter of sand fleas jumping on our sleeping bags.
The boat was floating again by 9:00, so we set out under full sail and a sunny sky. The wind was light, and on the nose and we tacked up Laredo Sound. At dusk we were near a lagoon halfway up the west side of Princess Royal Island. On a rising tide we pushed our way with the oars through one of its narrow entrances, and found ourselves surrounded by jagged rocks that seemed to rise up out of the water in unpredictable places.
We found a section of shore where the sharp, pointy rocks were small enough that we could lay our beds down on them, and scavenged around for wood to build a fire. What we could find was too wet, and no amount of tinder or carving away the wet outer layers seemed to work. We blew on it until we were too exhausted to blow anymore, then, just as we were falling asleep, it caught.
We got under way shortly after daylight the next morning. The water was glassy calm, and there were humpback whales blowing and jumping all around us in the golden morning light. We drifted along, rowing only when the wind failed completely. The whales drifted off, but a couple of curious sea lions followed us.
Dylan Davenport
The beaches of Campania were among our favorites of the many beautiful places we stopped. Our stay on one of its long white beaches was brief, with a quick snack and a refreshing dip while we waited for the current to ease and the breeze to build.
We rowed across Squally Channel, and up the west side of Campania Island. The sun was hot, the current running against us. We rowed through kelp and over a sandy white bottom where hundreds of flatfish shot off in all directions. We beached the boat and stretched our legs in the pristine white sand. There were wolf prints all over the beach. We found a small stream and I took off my clothes and washed the salt off them and myself.
The wind filled in, so we cut our stay short, and headed out into Nepean Sound. There was only about 7 knots of breeze, but it was a little more west than north, so we made good progress and sailed another 20 miles before we stopped in a small bay on the southwest corner of Pitt Island. We collected firewood in the failing light and camped where the edges of the forest met the scrub bush that grows along the shore. The moss was so thick we needed mats to keep from sinking into it.
At the first light of day we ate a breakfast of blueberries from the bushes surrounding our camp and filled one of our jugs from a stream nearby. As the pink morning glow crept down the mountains of Banks Island to the west, we sailed into Nepeah Sound. The wind was steady but light, and at midday, as we reached Principe Channel, the current took us backward faster than then wind could pull us forward.
We were debating whether to pull out the oars or land to wait out the tide when a couple of aluminum speedboats approached and several native fishermen pulled alongside. When we told them who we were and what we were doing, they looked at the boat, then looked doubtfully at us. They asked us if we wanted any salmon. We said sure, how much? “Oh, no charge,” they said, “we just caught 200 sockeye. How many do you want?” We didn’t think we could deal with more than two, but they gave us three anyway and wished us luck. We hit the beach to dress the fish. Giant cruise ships motored past on their way to Alaska, and we speculated on the contrast between their trip and ours.
The wind picked up enough that we could outsail the current, and before long we passed Anger Island. The sun disappeared as we crossed Petrel Channel, and behind the Cliff Islands we found a nice little rock to spend the night on. We built a fire and put the fillets of two salmon on wet cedar driftwood as close to the fire as we could without the cedar bursting into flames. While they were cooking, we ate the third salmon raw with soy sauce. The sky was especially big and starry that night, and the rock we slept on radiated the day’s heat.
We set a course down Principe Channel. The breeze was a steady 12–15 knots and we made good speed through the water, but the current was against us, so we didn’t cover much ground. A pod of humpbacks went by, making much better progress. As we sailed into Browning Entrance, our 15 knots of wind suddenly became 25 and a big swell from Hecate Strait, combining with a strong current ebbing out of Ogden Channel, made for some very tense sailing. With four reefs in, it was all we could do to sail into the lee of a small island for shelter, but when we got there, a strong current threatened to suck us into the rocks. We quickly took to the oars to move away, then had to stow them just as quickly as the current swept us back into the maelstrom. We tacked into the lee of another small rock and put ashore to catch our breath, collect our wits, and have some lunch.
There was nothing to do but go straight back out and get as much sea room as possible. We put up the main with four reefs and braced ourselves for the ride. The wind blowing in from the Hecate Strait was behind us, and when we got into Beaver Passage the confused seas turned into a steady, long, following swell. This was definitely our best speed of the trip, but we didn’t have our GPS to tell us how fast, and we were too busy hanging on to risk fishing the iPad out.
As we turned around Spicer Island, the wind veered, whistling down the mountains and out of the inlets, and we beat our way past the village of Kitkatla, the first sign of human habitation we had seen in five days. There was still an hour or so of daylight left, so we carried on to Porcher Island.
There wasn’t a good place to camp, so Mitch fought his way back into the salal until he found a spot big enough to lie down underneath it. Dylan and I made our nests on the beach. The only spots reasonable to lie down on were between big old logs at the high tide line. The spaces between them were filled with driftwood and bits of plastic flotsam, so we rearranged little sticks until only a few were poking up. We wrapped ourselves in our hot, suffocating sleeping bags against the bugs, and went to sleep with the ocean gently lapping, inches away.
At dawn our boat was hanging at the end of its beach line, bow up at a 45-degree angle in a pile of boulders. There didn’t seem to be any damage, but the boat was in too precarious a position to move, so we had to wait for the tide. It was already on its way in and eventually lifted the boat as gently from the rocks as it had set it on them.
We rowed out into a calm Ogden Channel and the breeze began to fill. By the time we got to Arthur Passage at the south end of Kennedy Island, it was raining and we were beating our way upwind in 15 knots. When we got to the top of the island, the sun came out, and the wind seemed to ease. The tide was flooding, so we decided to risk running over a sandspit the Skeena River had deposited on the top of Kennedy Island. With boards and rudders up, we charged through the breaking waves, with unknown inches of brown, muddy water beneath us and into the calmer water beyond.
We decided to take advantage of the respite to cook some spaghetti for lunch. By the time Mitch got all the stuff out, and the onions chopped, I had noticed a white line on the horizon, moving in our direction. I suggested to Mitch that he start putting everything away. He tucked some stuff away, but continued cooking. The current in Marcus Passage quickly carried us closer to the white line, and it soon showed itself to be a wall of towering waves with foaming crests. They just stood there, unmoving, while we were inexorably swept into them, as though carried down a river. We punched into the wall; green water poured over the bow, flooding the boat instantly. With 6″ of water sloshing around in the cockpit and bits of food floating everywhere, I yelled at Mitch to put the goddamn lunch away. The hatches were now underwater, so he shoved what he could up into the bow.
The current was pushing us more than our sails were, so we had little steerage and struggled to keep from being smashed into the rocks of Smith Island that were speeding by close to starboard. What waves we didn’t go through, we went over, falling off their tops, slamming into the narrow troughs beyond. We had never been so appreciative of our open transom, as most of the hundreds of gallons of green water that poured in over the bow, carried right on out the stern.
The pounding diminished as we neared open water past the Lawyer Islands, but then the river flow coming out of Inverness Passage hammered into us. We continued our fight to stay upright, until we were near the coal ports of Ridley Island, where the water flattened out, and the waning breeze turned to follow us into Prince Rupert Harbour.
As we came abeam of the big cranes at the shipping terminal, a speedboat came out to meet us. It was our friend Colin once again. We called a cab for the ride into town from the dock where we were tied up. Unfortunately the kitchen was closed at the pub, so we had a few Caesars—Canada’s much better version of the Bloody Mary. On our way back to the boat, we stopped at a 7-Eleven to buy a bunch of junk food. Back at the boat we ate our greasy “food” before unrolling our beds on the dock.
We woke up early and set sail for Venn Passage, a narrow channel between Digby Island and the Tsimpsean peninsula. Working the eddies alongshore, we crept through the kelp beds. It was sunny with about 12 knots of breeze, and soon we were reaching up Chatham Sound. The wind went light at Dundas Island, and a strong current was heading east through notorious Dixon Entrance. We played the eddies behind Holliday Island, to get well north and west before we sailed into the current. The sky was pink, and a big oily swell lifted us as we sailed across the line that marked our entry to Alaska. It was dusk as we neared Cape Fox on the mainland and completely dark 4 miles later when we passed the Tree Point lighthouse.
Mitch and Dylan wanted to go ashore for the night, but the southerly that had been forecast still hadn’t come, and I wanted to be on the water when it did. We were nearly at our goal and close to the cutoff day for completing the course: We had to reach Ketchikan before the official sweep boat could pass us and put us among the boats officially listed as “Did Not Finish.” We were in a race against the clock and the grim sweeper.
Barely ghosting along upwind, Dylan lay down to try to get some sleep. Not long after, Mitch did the same. Our solar panel wasn’t charging our iPad—we turned it on only when absolutely necessary—so I steered by the stars and the silhouettes of mountains until the clouds and the rain moved in, and then I steered by the wind coming down Revillagigedo Channel, and kept the bow pinched into the wind. Up ahead I saw a flashing light and checked the iPad to see what it was. The only light it could have been should have been astern. I realized that the wind had turned and was coming from the south, and I was now going the wrong way. I turned to sail with the wind at my back and the bow to the north.
A vessel overtook us, rumbling into the night, so I followed it, steering by its stern light until it was swallowed up by the low, wet clouds. By about 3 in the morning, traces of light were showing over the mountains to the east.
We had come about 10 miles in the dark, and were in the middle of Revillagigedo Channel off Foggy Bay as the southerly began to fill in with the coming dawn. Mitch and I hoisted the big orange kite. We set a course for Mary Island, and broad-reached through narrow, rocky Danger Pass into Felice Strait.
We made great time under spinnaker with humpback whales blowing and splashing all around us. When we rounded Ham Island, back into Revillagigedo Channel, we fell into a lee, where we wallowed for a bit, until about Bold Island, where it picked up again, but on the nose. We made our final approach with Mitch on the helm, until he had to answer the call of nature and nearly capsized the boat while trying to steer with his knee and look over his shoulder to hold his course.
Nick Reid
Our bid for the cash prize may have been cut short early on, but we spent more time on the course and saw more of the coast than most of the other teams. Of the six boats built specifically for the first edition of the R2AK, two never made the starting line, and three never made the finish. While 28 boats set out from Victoria, only 15 made it to Ketchikan. It may sound like something your mom would tell you after a challenging day, but I think we really were the “Final Winners.”
A boat with some race staff came to see what was taking us so long, and make sure we knew where we were going. We did, but we weren’t sure how much room was in the harbor, so we dropped our mainsail before entering the basin. We pulled up to the dock at 2 pm on July 2, 25 days from Victoria. The race organizers came through on their promise of a cold beer and a warm bed. We were the 15th and final boat to finish. We had been beaten by a 60-year-old guy in a kayak, and yet we hardly tasted the irony of our title, “The Final Winners.” We had made it in one piece. All the way to Ketchikan.
Quill Goldman grew up on British Colombia’s Discovery Islands, and spent most of his early years in boats, traveling from one island to another. He was interested in boats, their maintenance and construction, and enrolled in the Silva Bay Shipyard School on Gabriola Island. His boating adventures range from maxi-yacht racing in the Baltic and Mediterranean, to shipping concrete ballast from the bilges of steel ships. Quill is the owner of Barefoot Wooden Boats and has participated in all of the shipyard raids that were once popular on the North American west coast during the early years of this millennium. He is eager to see interest in these types of adventures once again take hold. You can reach him at Barefoot Wooden Boats.
The Barefoot 5.8
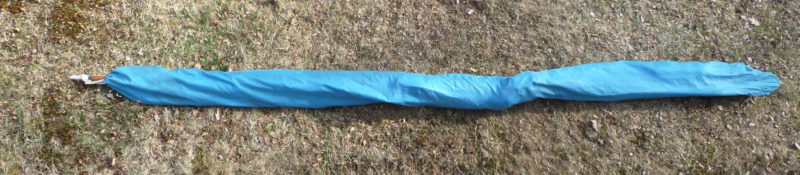
The Barefoot 5.8 was designed by Tad Roberts for Barefoot Wooden Boats to compete in the 2015 Race to Alaska, a 750-mile, unsupported, engineless race from Port Townsend, Washington, along the entire coastline of western Canada to Ketchikan, Alaska. She was drawn as a yawl but launched as a sloop because we ran out of time before we had to head to Port Townsend for the start. The 210-sq-ft main, 110-sq-ft jib, and 365-sq-ft asymmetric masthead spinnaker fly from a 30′ carbon-fiber mast. The main and jib are PX15 Mylar, by Evolution Sails. The nylon spinnaker was made by Storch Sails. All standing and running rigging is Dyneema, and was supplied by New England ropes. Blocks and hardware are from Harken. The hull has a fine entry, low deadrise, and a flat run aft. The waterline is narrower than a sailor might wish, but we expected to cover many miles under oars, so we made a compromise.
In keeping with a Barefoot/Roberts theme of classic style and modern performance, the construction is a hybrid: all lumber was salvaged from either windfall or off the beach, and above the waterline the red cedar plank laps are fastened to each other with trunnels, and bronze ring nails to sawn yellow-cedar frames; below the waterline 1/4″ stitch-and-glue plywood is shaped over a torsion-box frame and sheathed and bonded in Ecopoxy and Kevlar. Eight watertight hatches provide access to four separate compartments beneath cockpit sole. The sole, set 4″ above the waterline, and an open transom allows any water shipped aboard to flow freely out the stern.
The twin rudders and twin, asymmetric bilge boards are red-cedar, strip-planked and sheathed in Vectorply 12-oz quadraxial carbon fiber. The bilge boards are angled in about 12 degrees, and the rudders kick up and lift vertically. An 8′ carbon-fiber bowsprit is held in a bronze stem fitting fabricated by Bob Wyche. Side decks are 1/4″ marine ply, glassed, and covered in full-length, 1/4″ sprung yellow cedar. All ply is painted with Aquagard water-based marine enamel. The oars are 11′ Sitka spruce and are pulled from two modified, extruded aluminum, home rowing-machine seats and tracks, lashed to the cockpit sole. Stainless-steel T nuts are bedded in the sole on top of every frame to accept eye bolts where needed.
Construction began in the middle of December 2014, and the launch was on April 12, 2015. We christened the boat DICK SMILEY, after our late friend and founding partner of Barefoot Wooden Boats, Richard Lyons. During the construction period, I was a single dad on alternate weeks, and for the weeks in between I worked on the boat some 70 to 80 hours. We devoted four weeks to rigging and tuning before we set sail from Gabriola Island bound for Port Townsend for the race start. The DS could have been built lighter, but I wanted a boat that would last for years and wouldn’t break open like a piñata halfway to Alaska.
Of the six boats that were built specifically for the 2015 R2AK, two never made the starting line, and three dropped out. It weighed in 25 lbs over her designed weight of 500 lbs; fully loaded it should displace 1250 lbs, but we probably left Gabriola closer to 1400. –QG
Barefoot 5.8 Particulars
[table]
LOA/19′0″
LWL/19′0″
Beam/6′5″
Draft,hull/6″
[/table]
If you have an interesting story to tell about your adventures with a small wooden boat, please email us a brief outline and a few photos.
The first time I rowed up the Inside Passage—from Washington’s Puget Sound to Prince Rupert, British Columbia—I used a long loop of line to pull the boat to and from the anchor during my stops on land. But it required an awful lot of line and wasn’t worth the trouble unless I was going to spend the night camped on shore. It wasn’t until I ended my trip that I was shown a better way. A native fisherman from Metlakatla, a Tsimshian village a few miles to the northwest of Prince Rupert taught me how the locals anchor their boats when they stop ashore.
all photographs by the author
In 1987 I used the Tsimshian system frequently with my Gokstad faering on a second cruise up the Inside Passage. The anchor is ready to drop over the side with the retrieval line secured to the stock and the chain, rode, and painter joined to the shank.
The technique has been called Siwash anchoring. The Dictionary of the Chinook Jargon, published in 1909, defines siwash simply as “Indian.” More recent sources list the French sauvage, meaning savage, as the origin of the word. Siwash is now regarded as a derogatory term, so if it is time to retire it, we can use Tsimshian instead.
Ashore for the night on one of British Columbia’s Gulf Islands, I gave the faering a hard shove to send it out to deeper water.
The fisherman who showed me the technique tied one end of a long line into the stock of his anchor and tied the other end on shore above the high-tide mark. He set the anchor on the edge of the foredeck and flaked the chain, rode, and the long retrieval line on the deck. The rode was flaked first with the chain on top, and the retrieval line flaked with the shoreside on top so both would pay out without tangling. The fisherman gave the boat a hard push away from shore, and when the last of the retrieval line had gone over the side, it pulled the anchor overboard, and the chain and rode followed. Because the boat was still moving the chain didn’t pile up on top of the anchor and foul it.
After all of the anchor-retrieval line had slipped over the side, the anchor dropped overboard.
When I rowed up the Inside Passage a second time, I used the Tsimshian anchoring technique frequently. The replica of the Gokstad faering I’d built for the trip was finished bright all around, even on the bottom, so I preferred to have it afloat even for short stops ashore. A canvas foredeck was an ideal platform for staging the anchor, chain, and line, and protected the varnish.
The next morning, the tide was out but there was still enough water under the boat to slide it farther out to get it fully afloat.
For overnight stays in areas where the tide would run 10′ to 12′, I needed to get the boat quite far from shore when setting the hook on a high tide. With a double ender like the faering I could arrange the anchor on the bow and shove it out stern first. If your boat will coast farther and straighter going out bow first, you can still set the ground tackle on the bow while it is nosed up on the beach and then turn the boat around for the big shove. I always checked all of the connections between the anchor and the shore side of the retrieval line several times before pushing the boat out. You can give the retrieval line a tug any time you want to drop the anchor.
When it’s time to get the boat back, pulling the retrieval line frees the anchor from of the bottom, and its flukes trail as you bring it in. The boat follows like a dog on a leash.
Christopher Cunningham is the editor of Small Boats Monthly.
You can share your tricks of the trade with other Small Boats Monthly readers by sending us an email.
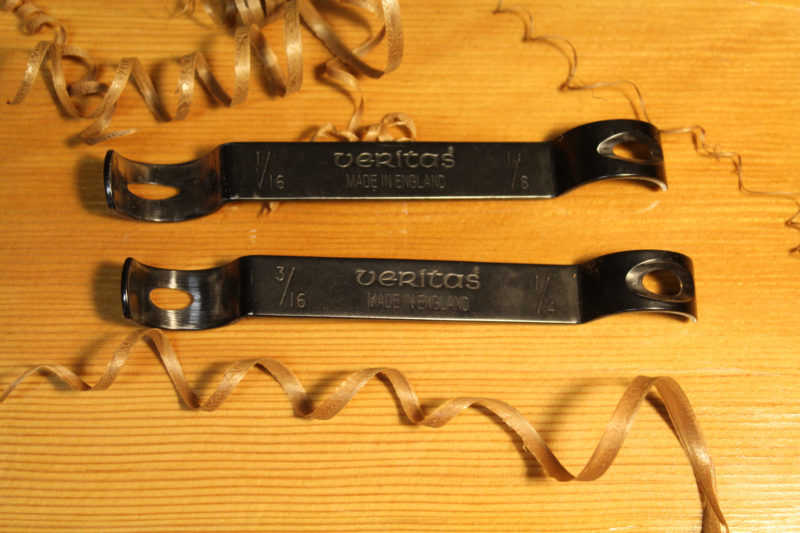
The water-cooled stone makes quick work of sharpening tools without affecting their temper.
When I started building boats in 1978, I used a blade guide, a large diamond hone and three Japanese water stones to sharpen my tools. I was proud of the mirror-shiny finish I could put on the blades, but after I had an opportunity to use the Makita Blade Sharpener when I was teaching at WoodenBoat School, sharpening tools by hand suddenly seemed quite tedious. I didn’t waste time getting a Makita for my shop at home. That was 21 years ago, and it is still working and spinning the same waterstone wheel.
The motor enclosed in the base turns the wheel at 560 rpm and makes an easily tolerated whirring sound. A reservoir at the back drips water onto the stone, keeping the blade cool and preventing the pores of the stone from filling with metal. A circular wheel cover, raised slightly above the surface of the stone, collects the water and slurry and sends it out through a tube to be collected. A rail supported by two posts at the front of the machine can be adjusted to support blades and edge tools at whatever angle you choose. For sharpening jointer and planer knives (up to 15-3/4″ long) there’s a blade holder included that slides back and forth on the rail to move the knives across the stone. The wheel guard has to be lowered to allow the knives to reach the stone so it no longer collects the water; it spins out in all directions and has left a stripe on my shop wall and apron. With the guard down you can touch up the flat side and remove the burr on chisels and hand-plane blades, but you have to be very careful: the stone can grab the blade and pull it out of your hands. I’m happy to report that I’ve never lost my grip on a blade nor seen what damage it could do spinning around. It’s safer to use a regular water stone to dress the blade backs. I have a cotton buffing wheel that I use to remove the burr.
The 7-7/8″ wheel included with the sharpener is a 1,000-grit stone. Stones of 60 and 6,000 grit can be purchased separately, but the 1,000 grit is all I’ve ever needed. It removes metal at a pace fast enough to take out small nicks in blades and yet is fine enough to leave a mirror-like surface on the steel it sharpens.
I’ve sharpened my planer and jointer knives, saving the expense and down time of sending them out. Working the long blades over the stone also trues its surface, assuring that plane blades get a straight cutting edge. I also sharpen knife blades on the Makita when the guard is down. For safety’s sake I’ll hold a knife with its cutting edge facing away from me first on the right of the machine to hone one side of the blade, then on the left to hone the other.
The sharpener sells for around $350, and that may seem rather steep unless you consider the time you can save over sharpening tools by hand and by working wood with sharp edges. With the Makita, sharpening doesn’t interrupt your work, it speeds it up.
Christopher Cunningham is the editor of Small Boats Monthly.
As an expedition rower, I need to be safe, dry, well fed, and well rested on a rowing trip; it’s the well rested aspect that is the source of my greatest consternation. I’m like the princess and the pea when it comes to my sleep kit. I’ve broken three vertebrae over the past 30 years, and for a sleeping pad to pass muster with me it has to provide good support for my injured and aging back. Beyond that, I don’t like waking up because I’ve slipped off the pad or because the pad is crinkling, crackling, squeaking, squawking, or whooshing air from one chamber to another. I’d rather not have to resort to earplugs to get a good sleep—there are sounds that I need to hear to stay safe in a marine wilderness.
SBM
The Megamat needs to self inflate for about 30 minutes before getting topped off in about a minute with the included mini hand pump.
I was keen to see if Exped’s Swiss technology could make a sleeping mat that would suit my needs. The Megamat 12 is the biggest sleeping pad in a stuff sack I’ve ever seen. Nicely designed with horizontal baffles and padding that create a flat surface, it is quiet, warm, and without sharp fabric and plastic edges. In about a half hour it self-inflates to a full 4″ thick, and then you top it off with the included mini pump. After you get aboard you use the deflation valve to adjust firmness. You can get a soft contour-accommodating fit without bottoming out. The mat’s internal polyurethane foam is an effective barrier to ground chill—the mat has an R-9.5 rating and is recommended for use in temperatures down to –54 degrees F.
Deflating and rolling it up small enough for the stuff sack was a bit of a chore for this 130-pounder. I’d consider getting a larger sack for it. Exped recommends the Megamat as a base-camp or camper-van mat, but if you have a large tent, cockpit, or cabin and room to stow the rolled-up mat, it will please even the fussiest princess. Even I had a good night’s sleep on it. It easily passed muster.
SBM
The Synmat Mega is inflated by means of a bag called a Schnozzel Pumpbag that comes with the mat. It takes about 90 seconds and three fillings of the Schnozzel to bring the Synmat Mega up to a firm pressure
The Synmat 12 is a more compact mat. Packed in its stuff sack, it has the circumference and length of a football. The bag has a clever sewn-in flap on one end that I can grab for pulling it off the fold-and-roll mat. I took the Synmat 12 with me for a solstice row and made camp at 5:30 a.m. Inside my tent, I inflated the Synmat with Exped’s Schnozzle, a roll-top, ripstop-fabric dry bag that captures up to 3 cubic feet of air that you can squeeze into their sleeping mats. It spares you a lot of dizzying huffing and puffing, and avoids filling the mat with moist, mold-prone air from your lungs. In my sleeping bag I can adjust firmness of the mat with the deflation valve at my head to meet my body’s needs at the end of a long rowing day.
The mat’s fabric is quiet, and it has raised side baffles to keep you from sliding off it. The five central air chambers inflate to 4-3/4″; the two outer chambers go to 6″. Its microfiber insulation has an R-5.3 rating, good for temperatures down to -4 degrees F. You can feel the warmth reflecting back at you moments after lying down on it. I woke from my two-hour morning nap well rested, wanting to stay in the comfort of a bed that fit my body like a glove.
Excellent quality and smart design can be a challenge for my wallet, but if they lower the risk factors arising from lousy sleep, the expense is worth it. At $200+, Exped’s Synmat 12 is a no-brainer, and I can easily stow it for rowing. If you have a bigger boat with room for the Megamat, it too is a wise investment.
Dale McKinnon began rowing in 2002 at the age of 57 and in 2004 rowed solo from Ketchikan, Alaska, to her home town, Bellingham, Washington. In 2005 she rowed from Ketchikan to Juneau.
I had an opportunity to try the repair kit on a very small pinhole in the side of a Synmat. The textile glue in the repair kit included with each mat was all that was required to seal the hole. While a single application of the glue, followed by a self-adhesive patch, is recommended as a quick fix, I had time to do the long-term repair of three applications of glue, which doesn’t require the patch. When the glue dried the repair was complete; it took just 15 minutes.
I tested a second Synmat by inflating it, setting a stiff panel on top of it and adding 100 pounds to that. The mat showed no signs of losing air during the week it had the weight on it.
To get both mats rolled up tightly, it makes a big difference to roll the mat up once, squeezing out most of the air, then unroll the mat and roll it up again. The second rolling gets the last bit of air out and the mat will then fit easily into its stuff sack. I’ve been doing the second rolling with self-inflating mats since I bought my first one back in the ’70s.
Is there a product that might be useful for boatbuilding, cruising or shore-side camping that you’d like us to review? Please email your suggestions.
The Candlefish has comfortable seating for the whole family and plenty of freeboard.
Scott Rowley, his wife Amy, and their daughters Elli and Livvy live on Steamboat Peninsula, near Olympia, Washington, at the south end of Puget Sound. The aluminum boat that they’d been using was getting on in years and needed to be retired; with the waters of Eld Inlet just beyond their back yard, going without a boat was out of the question. When Scott saw our Boat Profile of Devlin Designing Boatbuilders’ Candlefish 13 in our April 2015 issue, he decided he’d build one as the family’s next boat. He had done some woodworking, but had never built a boat before, and he looked forward to the project as a pleasant diversion from the pressures of his work as a pediatric dentist and the stress of having a new office under construction.
Thomas Rowley
When you’ve used truck-bed liner for paint, you don’t have to worry about dragging the boat up on the rocks.
He called Sam Devlin, who happens to live just 4 miles away as the crow flies, and ordered a Candlefish 13 kit. The package arrived with all the pieces for the stitch-and-glue construction of the 13′ 4″ skiff. He set up shop in the garage after agreeing with Amy that her car would still have its spot in their two-car garage and Scott would park his car outside. Scott was at first daunted by the challenge of turning a stack of flat plywood panels into a three-dimensional curved structure, but as he proceeded with stitching, the transom and the bottom and side panels came together easily and the hull took shape more easily than he had anticipated.
Thomas Rowley
What was designed as a hunting skiff serves as the family’s water taxi, getting to shoreside destinations quicker than they could drive to them in their car .
Construction took bit longer than he had expected, which is to be expected, but the work was enjoyable and his daughters enjoyed seeing the boat take shape. When the hull was ready for finishing, Scott visited Sam for his advice. Sam encouraged him to use a tough-as-nails truck-bed liner. It would protect the hull when the boat was hauled up on the cobbles, and also the cockpit when the kids would get aboard with sandy shoes, or their dachshund, Tina, would be set in the cockpit with sandy paws.
Thomas Rowley
The Rowley’s home waters provide impressive views of Mt. Rainier, Washington’s tallest mountain.
After LADY LOUISE was launched on the New Year’s Eve last year, she’s been kept busy. Taking her out is a pleasure in itself, but she gets the family many places in less time than they could drive. Ice-cream and Sunday brunches at the Boston Harbor marina are just five minutes away by boat, almost straight across Eld and Budd inlets, while it takes 45 minutes to drive around the inlets to get there. Olympia is 7 miles away by boat, 17 miles by car, so in good weather the skiff is a reasonable way to get to a downtown restaurant, and a much more enjoyable ride. A rope swing on Harstine Island and the state park on Hope Island are other popular destinations for the Rowleys. They also do a bit of crabbing with the boat and use LADY LOUISE as a tender on overnight excursions aboard their sailboat.
Sam may have had three hunters and a moose in mind when he designed the Candlefish 13, but LADY LOUISE does very well with a family of four and a dachshund.
Have you recently launched a boat? Please email us. We’d like to hear about it and share your story with other Small Boats Monthly readers.
I needed to pull the centerboard out of my Whitehall and make it a bit thinner so it would operate more smoothly. I wasn’t looking forward to dragging the boat off the trailer, setting it on the lawn, and rolling it on its side to get at the centerboard. That job really needs one person handling the boat and another managing the trailer. If I could just lift the boat up while it was still on the trailer, it would be a whole lot easier and I could do the job alone. It occurred to me that I could use my inflatable beach rollers as air jacks, like those used by rescue workers to lift wrecked cars. If I could slip the deflated rollers under my boat and then pump them up, they might lift the boat.
I didn’t know if the pump could handle the air pressure required to lift the boat, but it became evident that the weight, say 200 pounds, would be divided by the contact area, say 25 square inches at the full lift, to bring the pressure down to a manageable 8 psi.
It worked better than I had imagined. The boat will roll—I figured that out when I got some air in the second roller and the Whitehall started to move—so it has to be restrained fore and aft. The pump I used was for rubber rafts and designed for volume, not high pressure, but it was good enough to get the Whitehall raised 7″ or 8″. That wasn’t high enough to drop the board straight down out of the trunk, but the unexpected benefit of using the rollers for the lift was that they cradled the boat while I rolled it to one side to provide enough room to pull the board. All the while the hull was safely supported on the soft, conforming surfaces of the rollers.
The flatbed trailer provided a good base for the rollers, even when one of them had to conform to the bunk boards.
All it took to lower the boat was pressing the rollers’ valves to bleed off the air. The boat pinned one roller to the deck of the trailer and I couldn’t lift the boat and pull the roller out at the same time. I tied a bungee cord to the roller and stretched it out; when I raised the end of the boat, the roller slipped out.
There may be more heavy lifting ahead for these rollers.
Afterword
My chance to do some more heavy lifting with the rollers came soon enough. I use the same trailer for my Caledonia yawl as I do for my Whitehall, and after I got the Whitehall’s centerboard reinstalled and took it for a few outings, I was ready to take it off of the trailer and put the Caledonia on. After I used the rollers, inflated, to scoot the Whitehall off the trailer, it was time to move the much larger Caledonia. It’s too heavy to slide on the lawn, so I wouldn’t have been able to set a roller at the bow and push the boat up on it, but the bottom has enough rocker that I could slip a deflated roller under the bow. After I had pumped that roller up I had clearance under the middle of the boat to get the second roll, flattened, slipped in. The second roller not only raised the whole boat— lifting close to 400 pounds—it leveled it side to side and kept it stable. It took very little effort then to roll the boat to the trailer and winch it home. When it’s time for the Caledonia to come off the trailer, the rollers will ease it back to the lawn and keep it elevated while I get some blocking under it to keep it off the grass.
The first roller slipped under the bow
First roller inflated, making room for the second roller to be slipped under closer to amidships
Both rollers inflated, the boat raised, leveled, and ready to roll to the trailer
In 1982, when Eric Hvalsoe was fresh out of a two-year boatbuilding program at Bates Technical college in Tacoma, Washington, he launched the first Hvalsoe 13 (then named the Valso 13), a lapstrake skiff he designed and built for a client who wanted a boat that would perform equally well under sail and oars. The boat exceeded expectations and was followed by the Hvalsoe 15 and Hvalsoe 16. Eric most recently designed a larger version of the boat for Seattle small-boat aficionado Tim Yeadon to cruise the inland waters of Washington and British Columbia, and the first Hvalsoe 18, built by Tim in the garage of his Seattle home, was launched in 2015 and christened HAVERCHUCK.
The Hvalsoe 18 measures 18′6″ by 5′4″, and while it is easily recognized as one of the Hvalsoe series of boats, it is not, writes Eric, “just a blown-up HV 16.” His goal for the design was “to create a boat that was comfortable to inhabit—in the oar-and-sail sense of inhabit—for long days on the water.” Among the differences in the new design is some extra fullness in the ends to keep them riding high in rough water and to provide extra stability for stepping and unstepping the masts while afloat. The midsection is fuller and flatter than the previous models. And while the HV 18’s stem has the same look above the waterline as his previous designs , instead of meeting the keel at an angle as with the previous models, it curves into it below the waterline, the better to endure the wear of beaching the boat.
all photographs by the author
The HV 18’s midsection is fuller and flatter than the previous models. The midsections of the Hvalsoe 13 and 16 look almost semicircular in comparison.
Eric favors traditional methods and draws his designs by hand, pencil on paper, and makes area calculations with a planimeter. He also prefers traditional lapstrake construction, and the HV 18 could be built in that fashion. Tim had taken one of Eric’s classes in lapstrake boatbuilding and had built a Matinicus peapod with cedar on oak, but built his HV 18 in glued-lap plywood—largely for the option to incorporate buoyancy chambers for safety’s sake—and Eric followed suit with the HV 18 he’s building in his Shoreline, Washington, shop.
Hull #2 is under construction in Eric Hvasloe’s shop. The planking is laid over an inner keel and stem assembly, then bevelled to receive the external elements.
Eric drew the lines for the HV 18 with smooth curves for sections, leaving it up to the builder to line the hull for lapstrake planking and determine the number of strakes required. There are no patterns for the 18, and between the lofting required to make the molds and the lining and spiling required to shape the planks, this project is best suited for builders with a fair bit of boatbuilding experience or the patience and tenacity to learn the skills on the job. Tim and Eric settled on 11 strakes, the minimum number required to take the designed shape without having to cut facets into the curved edges of the molds. While I might balk at planing so many running feet of bevels and gains, the results are worth the effort. The narrow strakes create a beautiful pattern, and the shadows of the laps emphasize the hull’s curves rather than its planes and angles. The hull brings to mind the ventral pleats under the chin of a blue whale.
What Eric calls his “beach skeg” is shaped from a timber wide enough at the forward end to cover the keel. The extra width gives it a very solid attachment to the keel and helps the boat “ski” over cobble without digging in. A 1/2″ thick shoe will cover the skeg and keel.
The hull is built around seven molds, and in the finished boat the 9mm okoume plywood planking is supported by the 12mm-plywood bulkheads for the flotation compartments and two laminated frames in the cockpit. A narrow plank keel supports a sturdy skeg that covers the keel’s full width and tapers with it to the transom. The skeg, along with the rocker and drag in the keel profile, are designed to strike a balance between tracking under oars and easy tacking under sail. The skeg’s tail end is cut to a generous radius and covered with a strip of high-molecular-weight polyethylene to better absorb the punishment of coming ashore stern-first on a rocky beach. There are 90 lbs of ballast under the cockpit sole: six 15-lb cast lead bars secured to bolts anchored to the inside of the hull on either side of the centerboard trunk.
The HV 18 was designed with a simple cockpit and good stability even with your weight in the ends so “you can walk upright from one end to the other,” notes Eric, “rather than crouching from one thwart to the next.”
After Tim completed the hull, he built the sailing rig to take a Sooty Tern mainsail and a Ness Yawl mizzen, both sewn up from Sailrite kits for those Iain Oughtred designs; Eric’s drawings for the lug yawl rig reflect that arrangement. The masts are built bird’s-mouth fashion. There’s not much weight to be saved by making a spar as small as the boomkin hollow, but it’s well worth the effort: the mizzen sheet is run through the boomkin, which not only serves as the fairlead to bring the sheet into the cockpit, it also allows the sheet to emerge from the tip of the boomkin, making it impossible for it to get fouled when coming about. A Norwegian tiller steers clear of the mizzenmast, and the rudder blade clears the water when retracted for rowing.
The cockpit sole provides good footing for moving about in the cockpit.
Tim later modified the thwart, outfitting a section of it with sturdy hinges, to open up a space for sleeping aboard.
The interior arrangements were inspired by Oughtred’s Arctic Tern. A thwart amidships braces the centerboard trunk and provides seating for a lone rowing station. Tim recently cut a section from the thwart’s starboard side and reinstalled it with sturdy hinges so it could be pivoted up out of the way for sleeping on the cockpit sole. When it is returned to its normal position, two stout bolts secure its outboard end and the thwart resumes its role of bracing the hull and centerboard.
You don’t have to hold the mainmast fully upright to get it stepped. The elongated box guides the heel in; then you can push the mast upright and lock it into place.
Just forward of the centerboard trunk there is a removable trapezoidal box to keep the anchor, chain, and rode neatly stowed and their weight low to contribute to the boat’s stability. The deck of the aft compartment makes a comfortable perch for sailing, and the curved side benches and long tiller allow the helmsman to slide forward to get some more weight closer to amidships on the windward side. The rest of the aft deck makes a convenient place to set things to keep the clutter out of the cockpit and have the sheerstrake, rail, and transom prevent them from rolling overboard. The bulkheads that seal the flotation compartments have oval hatches, though Tim has those sealed and semi permanently installed; they’ll be opened only for maintenance work. The 10″ composite deck plates offer easier access to gear and a quick watertight seal. The masts are stepped in boxes that guide their heels in and keep the flotation compartments watertight. Water that accumulates in them drains into the cockpit through copper tubes. The boxes are elongated to allow the rake of the masts to be adjusted.
Designed as a solo cruiser, the HV 18 has a single rowing station. Kicked up, the rudder blade is clear of the water and doesn’t interfere with rowing.
The first thing I noticed when boarding the HV 18 is its stability. The fairly flat bottom and full bilges contribute to the solid feeling underfoot, and the 90 lbs of lead hidden under the floorboards help drive the point home. The ballast’s inertia slows the boat’s roll, so it feels like stepping aboard a much larger boat. Eric weighed Tim’s HAVERCHUCK at a truck scale, and the hull, with ballast, came in at 520 lbs. Sailing rig and ground tackle added 125 lbs. The 9′11″ oars Tim had for the boat were a good choice for the weight of the boat and the 62-1/2″ span between locks. The oars’ flat blades were well suited for rowing with the dory stroke, a technique that eases the strain on the rower while moving a heavy boat. I could do a GPS-measured 2-1/2 to 3 knots at a moderate, sustainable effort—a respectable cruising speed when there’s not enough wind to fill the sails—and I could get the HV 18 up to 3-1/2 to 3-3/4 knots if I hustled along. A short sprint peaked at 4-1/4 knots. The HV 18 tracks very well under oars and yet spins around like a much smaller boat with one oar pulled and other backed.
The transom is raked at close to 30 degrees and not meant to take a small outboard, and the aft sections are kept fine at the waterline for rowing, and won’t take the weight of a motor and operator sitting in the stern. If a motor is required, Eric suggests installing a well, an option well suited to glued-lap plywood construction.
Having the mizzen sheet emerging from the end of a hollow boomkin prevents it from fouling when coming about.
During my first outing in the HV 18 the wind was light, and the sailing sedate, but the 120 sq ft of the lug main and a leg-o’-mutton mizzen provided enough boat speed to make sailing a better option than rowing. The boat coasted through tacks, never getting caught in irons; it will come about with the rudder left untended—sheeting the mizzen in to bring the bow into the wind and backing the main a few degrees to push it across, then easing the mizzen sheet.
For my second outing, Tim and I went out on a whitecapped Puget Sound with a brisk wind. My anemometer clocked sustained puffs of 22 knots at the launch site, and the weather station a mile upwind of us recorded the wind at 16 knots for the hours were sailing. Not long after we’d set sail, a gust snatched my baseball cap and dropped it in our wake a couple of boat-lengths back. Tim had tucked in two reefs in the main when he’d rigged the boat, and that turned out to be on the verge of being too much for the boat with two of us aboard. The helm was sensitive to the unreefed mizzen, and I often eased the sheet to lighten the weather helm. We took a lot of spray over the bow when working to weather, but we were both wearing dry suits and enjoying the ride. The HV 18 did 5 knots on all points of sail; I saw 6.2 knots on the GPS on a broad reach; the maximum speed recorded was 6.7 knots, and that was in waves only 1-1/2′ high, not really big enough for surfing to account for the impressive peak.
On one tack, the bow had just gone through the eye of the wind when a wave crest lifted it over a trough. The wind pushed the bow downwind, I got caught with the main sheet locked in the cam cleats, and the HV 18 was suddenly beam-to the wind. The leeward rail went under and Tim climbed to the high side as water poured in. I freed the mainsheet from the cam cleat, let it run out, and the boat popped right up. I noticed later that I hadn’t cleated the line that holds the rudder blade down, so while the partially deployed blade was covered enough to provide good steering, it wasn’t as deep as it should have been and may have lost its grip in a trough. That may have been another factor in allowing the bow to fall away so quickly. Still, I was pleased with the boat’s stability in that near knockdown. The rail could be “sailed” underwater and the point of capsize still lay beyond that extreme angle of heel. Tim went to work with the large diaphragm pump he has installed on the side of the centerboard trunk and all was well.
When Tim conducted capsize drills with HAVERCHUCK, the rig kept the boat from a full capsize and stabilized it lying on its side. The flotation compartments kept the centerline above the water, and Tim could slip under the mainmast without having to duck his head underwater to get past it. He pulled the boat upright with centerboard and, with the boat riding low in the water, easily crawled aboard over the rail. He said that taking up a position just forward of the centerboard trunk and keeping his weight low helped keep the boat upright while he bailed.
Tim’s plan for the boat is to cruise north from Puget Sound along the Inside Passage. He has several weeks off from work and will see how far he gets. I think the boat carry him safely and in comfort for as many miles as he chooses to travel.
Christopher Cunningham is the editor of Small Boats Monthly.
Particulars
[table]
Length/18′ 6″
Beam/5′ 4″
Weight/430 lbs
Ballast/90 lbs
Design displacement/750 lbs
Sail area/ 120 sq ft
[/table]
Finished boats or plans for the Hvalsoe 18 are available from Hvalsoe Boats in Shoreline, Washington.
Is there a boat you’d like to know more about? Have you built one that you think other Small Boats Monthly readers would enjoy? Please email us!
During a weekend in northern Michigan during the summer of 2009, I got a chance to take a spin in a couple of wooden boats that my daughter’s boyfriend had built with his dad and his brother. The thrill of coming up on plane and hitting a few waves in an 11′ boat with a 15-hp outboard put a smile on my face that persisted well beyond setting foot on land again. I had not operated a powerboat in many years, and way back then it was an aluminum fishing boat and 9.9-hp tiller-controlled outboard—not as exciting as operating a boat with a steering wheel and a remote throttle handle.
Lisa Lirones
The plans call for fiberglassing the deck, but adding mahogany covering boards and thin decking for appearance’s sake, gives the Squirt the look of a classic. The 11′ version of the Squirt has a longer deck between the cockpit and the motor well. Two 3-gallon gas tanks sit in the compartment under the hatch that Art designed and installed. To start the motor, he stands in the open hatch.
I came back home from that weekend with the plans for the boats they had built, and decided I would build a small boat to utilize that 9.9-hp outboard I had inherited. I talked with my co-worker Ted Gauthier about my plan, and he was on board too for building a boat too. His research took us to the Glen-L website and the wealth of plans they have available. Ted decided to build a runabout, the 14′ Zip. I wanted a smaller boat that I could build in my basement and get out without removing the living room floor. The Squirt model fit that requirement, and by using the plans’ option to stretch the length from 10′ to 11′, it fit my needs perfectly. I loved the look of the design with the pronounced tumblehome at the transom giving the sheerline a beautiful curve. The boat had a seat, steering wheel, and good lines, and Glen-L has a good builder-support system, so it was the choice for me.
Lisa Lirones
In his early trials, Art discovered the he was losing power to prop ventilation. He trimmed some height from the center of the transom to put the prop lower in the water and that solved the problem.
If you’d like to get off to a running start, you can buy a frame kit and have the parts for the transom, the two frames, gussets, stem, breasthook, and knees. I started from scratch with just the plans and full-sized patterns. I made a strongback elevated off the floor to provide a comfortable working height and on it mounted the transom, frames, and stem. The stretch variation was fairly straightforward—the spaces between the ends and frames all get increased by 10 percent—and once they were aligned they were connected by the keelson, chines, and sheer clamps. The hull and deck are constructed with 1/4″ marine plywood. The stretched version seemed to be a good investment because it provided more hull displacement and used material that might have just become scrap with the standard 10′ version.
The completed hull and deck get sheathed with fiberglass cloth and epoxy. This was recommended for the abrasion resistance that it provides and, having hit tree stumps and other water hazards on occasion, I think it is good insurance against getting a hard scrape that might gouge into the plywood bottom. I painted the hull before turning the boat upright and created a pattern that covered screw-head filler along the chines. The 1/4″ marine plywood planking is not thick enough for bungs to cover the screw heads, and the fillers I used were not always a good match for the color of the wood.
Lisa Lirones
Just picking up speed here, the Squirt, with 20 hp behind it, gets up on plane in 3 or 4 seconds.
As I was building the boat, I came to the conclusion that the 9.9-hp outboard I had on hand would not be of sufficient horsepower to provide the oomph I wanted. And my search for remote control hook-up for it was not successful. I liked the look of the 1950s Johnson and Mercury outboards, and my research showed their power-to-weight ratio would suit my boat well. After joining the Antique Outboard Motor Club (AMOCI), I got some advice that the 1956 Mercury Mark 25 was a good motor and was compatible with today’s fuel-system connecters. I followed a lead on one and took the plunge. A little tune-up and checking-over with a fellow antique-outboard enthusiast, and I was on my way. I still had a lot to learn about setting up and maintaining an older outboard, but I had the support of several people in the Great Lakes Chapter of the AOMCI when I had questions and when I needed encouragement.
Instead of ’glassing the 1/4″ marine plywood deck as called for in the plans, I added African mahogany planking on top for stiffness and looks. The resawn wood ended up at about 5/16″ thick and added a bit of weight, but the look can’t be beat and I have no indication that the weight compromised performance. The paint on the hull that hid the filler over screw heads also concealed some fiberglass reinforcement tape at joint lines that came out more translucent than transparent. The paint scheme evolved further to hide some sins along the sheerline, butt joints on the side panels, and joints between the transom and sides. While I covered some unblemished plywood in order for the paint scheme to make the boat look fast even when it was standing still, I was still able to preserve much of the natural okoume plywood along the sides for being finished bright. My daughter, taking her cue from the paint scheme, designed the seat cushions and gave them a retro look to go along with the 1956 Mercury outboard. I still picture a 1956 Chevy Bel Air in blue and white when I look at my boat.
Art Atkinson
Extra boards added between the structural battens in the cockpit create the appearance of floorboards.
The cockpit, with the exception of the seat cushions, is minimalist by choice. Adjacent to the seat there was a space between the cushion and hull that was the perfect place for a couple of large holes in the seat framing for holding drinks. I added floor battens in the area ahead of the seat where we step aboard; they fill in the gaps between the structural battens and create the appearance of floorboards. The result looks clean, and intentional rather than incidental.
The performance of the Squirt has exceeded my expectations. The Mercury, rated at 20 hp, gets the Squirt up on plane in 3 to 4 seconds with just me aboard, and my GPS-measured top speed is about 28 mph. I experimented with different propellers, and a three-bladed prop gave the best overall performance with getting on plane faster with a passenger and little change in top speed. I’ve had passengers weighing up to about 250 lbs aboard, and while it may take 25 seconds to get on plane, the top speed may only come down to about 24 mph. The Squirt never ceases to provide a thrilling ride. The extra weight of a passenger doesn’t significantly affect performance, so the stretch version was the right decision for me.
The boat’s handling is superb. I followed the plans for the center skeg, and it provides the turning ability that will allow the boat to corner at full speed as tightly as you are comfortable with. I think the best comment I received was from a friend who came back from his ride with a huge smile on his face. When asked about why he was smiling, he said something to the effect of “I knew your boat looked good, but I had no idea that it could perform like that—it’s amazing.”
Lisa Lirones
With a second person aboard, the 11′ Squirt loses only a few miles per hour.
I often ask passengers if they mind getting a little spray in their faces. If they’re game, I’ll make a fast circle across the wake and the spray will come up over the bow. I take screams as a good indication that they are getting a thrilling ride. The Squirt can handle 6″ to 8″ chop, but rougher water often requires coming off plane and slowing down the pace.
The boat trailers with ease. It is light enough that if I see that the boat has come out of the water crooked on the trailer, I can pick up the stern and slide the boat over. My trailer is set up so the boat’s bow eye snugs under the winch roller and two ratchet straps hook to eye-bolts cinch it down to the trailer. I had a custom cover made to protect the boat and motor when trailering. When I’m on the road, I hardly notice the boat and trailer from the driver’s seat, and I occasionally look back to reassure myself that they’re still there.
As with many wooden boats, a good deal of the pleasure of owning them is in the reaction people have to it. My Squirt starts many a conversation about wood boats, older outboards, and fun on the water, and may have inspired others to get on with their dreams of building a boat. The handling of the boat is fantastic, the performance is a thrill, and the runabout design keeps you from putting more people aboard than the boat can handle. The Squirt is designed for the beginning boat builder and with economical use of material in mind. On the water it is best with people of average height and weight and taking kids for rides. It could also be perfect for a younger power boater learning to handle a boat.
Art Atkinson retired from Ford Motor Company after 31 years as an engineering supervisor at Body Engineering. He is currently the manager for Bloomfield Village Association in Michigan. Woodworking has been his hobby since high school and prior to building boats he made musical instruments, furniture, and kitchen cabinets.
In November 2013 I received a phone call from Tommy Hudson, good friend as well as one of my employees. After we chatted for a bit, he said he loved his job but there was something he really wanted to do: row across the North Atlantic. I was instantly inspired; I told Tommy he could go and I was going with him. He laughed and agreed.
Pete Fletcher
On arriving in Australia, MACPAC CHALLENGER took up residence in my garden shed. We started on what was to be just a new paint job, but we found lots of rot and removed most of the cockpit interior structure and even some of the hull.
We spent the next 15 months raising sponsorship and rebuilding an old, wooden, ocean-rowing boat that we hoped would survive the North Atlantic. Things started slowly, but then, thanks to the generous support of Macpac, an outdoor clothing company, and World Challenge, the organization where Tommy and I both worked, we began to make good progress, and our boat became MACPAC CHALLENGER, or MC for short. While the name conjured up an intrepid image, that was certainly unmatched by the reality. As we stripped MC bare with the help of Melbourne boatbuilder Dave Parker, we found more and more unsavory parts. She’d been left to sit out in the elements for two years after her third transatlantic crossing and the neglect showed. There was rot in the bulkheads and in the hull, and at one point Tommy put his hand right through the plywood with no effort at all.
David Briggs
When we shipped MACPAC CHALLENGER to New York, we had finished the main structure, rowing setup, and basic safety components, but still had to obtain and install the electrics and autopilot. The cabin pump, its hose visible on the left side of the cabin, could bail the cabin out in the event that it flooded while the boat was capsized. David Briggs made the decals in our absence and must have had a good laugh, sticking “Row, row, row your boat” decals all around the cockpit. After just two days at sea we vigorously scratched off most of the words, but it was too late and the song was indelibly etched in our heads.
The refurbishment was more extensive than we’d imagined, but it gave us the opportunity to redesign aspects of the layout for what would be a longer, more arduous crossing than the boat had ever undertaken. We repositioned the watermaker—our most vital piece of gear—inside the cabin for protection from the elements, replaced the deck with thicker plywood, and reinforced the main cabin framing.
David Briggs
MACPAC CHALLENGER was trailered to the Melbourne airport for her cargo-plane flight to New York. The scuppers visible in the side would drain most of the water that might wash into the cockpit, leaving only the footwell to pump out.
Our project ran long and over budget, but MC was eventually shipped from Melbourne to New York in February 2015 and we felt confident she’d be ready in time for a May departure.
The night before I flew to New York, Willow, my eldest daughter, just five years old, asked me why we were going. My answer—“To see what it makes of us”—was for both me and Tommy, even though he had told me only two days earlier, at our going-away party, that he had problems in his relationship with his fiancée, he’d been diagnosed with depression, and he didn’t know if he’d come on the row. Tommy was one of the only people with whom I’d embark on this kind of journey, but he had a difficult decision to make: If he came he risked losing his fiancée, and if he stayed behind he might never learn to live happily. I left Melbourne 24 hours before Tommy did, with the nagging question: If it came to it, would I go alone? It was a major relief the following night when I pulled up at the Newark airport and saw a smiling Tommy, standing in the chilly, springtime, New Jersey air.
With the help of ocean-rowing record holder, Simon Chalk, we got down to work. Our confidence in the preparedness of our boat was seriously misplaced. We still had to install the electrics and the autopilot, and we had no choice but to join the boat-shop queue with every other boat owner on the East Coast. The whole project had been a race against the calendar and we missed two good weather windows while we were in Brooklyn working on the boat.
Our autopilot was not meant for ocean-crossing rowing boats and there was no easy way to mount it and protect it from breaking seas. We finally installed it on the gunwale, but when we turned it on it didn’t work. Our fortunes began to change when Wayne, a talented marine electrician, replaced the motor and announced, at 7 p.m. on the 20th of May, that the autopilot worked. We were exhausted, our funds were depleted, and the sun was literally setting on our time in Brooklyn: With the wind from the northwest and the high tide at 10 p.m. that same evening, this was our chance to go.
We rowed west from the marina, staying north along the shore to keep out of a strong northwest wind, and then turned south for Rockaway Point. Wayne had warned us about breakers near the channel there and said, “Get ready to row like hell.” Our adrenaline must have been pumping, because at one point we radioed what we thought was a boat in our path only to find out, after the third unanswered call, that it was an oversized channel marker. The fast-flowing ebb shot us out toward the Atlantic; we set a course to the southeast to get offshore as quickly as possible.
In the morning we were disappointed that we could still see New York looming large behind us. Tommy noticed the compass wasn’t working, so we searched for a small screwdriver to remove and recalibrate it, but the smallest screwdriver we had didn’t fit! Although we eventually managed to remove the compass, I had the ominous feeling that we may have left other important equipment behind, and indeed the screwdriver would turn out to be just the tip of the iceberg.
On day four, the autopilot ram pulled out of the gunwale. We got it stuck back in place but eventually the motor blew. We were still within easy sight of the Empire State Building, and had no way to manage the rudder while we were rowing.
Pete Fletcher
Tommy cobbled together our foot-steering system and got it to move the rudder effectively. The failed autopilot ram is visible at lower left. The foot steering was an early success but an ominous sign of other trials to come, as Tommy later had to fix many of our other key components, including the compass, rear hatch, solar panel, and GPS.
I did my best to keep the bow straight in the waves while Tommy built a foot-operated steering system with odds and ends we had aboard. It looked makeshift but we could finally move the rudder with a twist of a foot. This old-fashioned steering would add days to our crossing, but our fortunes would no longer be tied to the hapless autopilot and the constant din of its motor. A calm came over the boat and for the first time in nearly two years there was nothing else to do. We were rowing; we were free.
That evening Tommy called me out of the cabin, telling me to bring the camera. I came on deck and was mesmerized by a huge shark swimming right next to us. It was majestic and over half as long as our boat. Tommy told me to put the camera in the water, and though I seriously considered throwing it to him, we were just four days out and I still felt I had something to prove. I knelt down and got my arm far into the water and came almost face to face with the shark. It let me keep my arm, and after a few moments moved slowly on its way.
Pete Fletcher
We painted our carbon-fiber oars pink in support of a breast-cancer support organization. We started with eight oars onboard, but dispatched two along with other marginally useful gear to lighten our load. Tommy and I wrote our contact information on the oars in case they showed up on some distant shore. Here, early in the trip Tom’s beard is meager and he is still looking robust in his black T-shirt–the first of three, each worn daily for one month.
With a northwesterly wind in the forecast, we made the decision to forgo the more direct, northerly route in favor of using the wind to reach the Gulf Stream to the south, where we knew we’d make better progress. We rowed hard, but hadn’t anticipated an unfavorable current that trumped both our tailwind and our puny efforts at the oars. After five agonizing days we finally started moving eastward in spite of a 15-knot easterly wind. We’d made it to the Gulf Stream! Frustrated by my arm-rowing technique, Tommy decided it was time to teach me how to row properly by driving from the glutes and quads, and with my improved stroke, a current in our favor, and the wind strengthening from the southwest, we flew along, hitting a new top speed almost every hour. As 15′ following seas began to break, we hurtled down from the crests. I feared MC would nosedive in the trough, but each time she lifted her bow just in time.
We covered over 250 nautical miles in three days and recorded a top speed of 17 knots, later learning that MC’s longest day, 116 miles, had broken the Ocean Rowing World Record for the greatest distance ever covered in 24 hours. We’d had incredible conditions, but MC, a wooden boat in her twilight years, deserved the accolade.
Tommy Hudson
The first time I deployed the sea anchor it was without the trip line, a mistake that could have cost us the anchor. Confucius came to mind: “I hear and I forget. I see and I remember. I do and I understand.” I never again forgot the sea anchor’s second line. Deploying the sea anchor helped cut our losses in unfavorable winds, but resorting to it was often followed by a consolatory cup of tea as we watched our hard-won miles disappear.
Our first storm came a month into the crossing. The wind blew 40-plus knots from the south all day, creating 20′ seas. We were exhausted and at dusk debated whether we should stay on deck to keep the boat from going beam-on to the waves and potentially rolling, or hunker down in the cabin for the night. We decided to retreat and put a small drogue out to keep MC’s stern to the waves while we slept.
Tommy Hudson
It was rare for both of us to be in the cabin and usually that meant tough times, sitting it out on the sea anchor, with regular trips outside to look at the sea state determine the wind direction and strength. The quarters were cramped but with our photos and messages from loved ones, the cabin was our sanctuary.
Breaking waves crashed over the cabin with a mighty force but we were so tired that sleep came easily. It didn’t last, and we woke suddenly in the pitch black at around 2 a.m. as MC pitched violently to port. A moment later we were lying on the roof of the cabin surrounded by water. Our seat belts, which we used to strap ourselves to the cabin sole, had broken and with all the water around us it seemed as if the cabin had fractured. There was little we could do but trust that the ballast would bring us back up. MC rose and fell with several waves but remained inverted, so Tommy and I clawed up one side of the cabin and after few more waves, MC righted herself. I got my foulweather gear and harness on, got out on deck and closed the hatch as quickly as possible. In the dark it was hard to judge the extent of the damage, but it was clear that we’d lost the drogue, the stern bridle, and the main bilge pump.
When dawn emerged, we could fully assess the boat’s condition. The battery monitor indicated we were almost out of power and the GPS was completely shorted. We could have limped on without navigation and communications equipment, but we needed power to run the watermaker, so we simply had to maintain the electrics. We found water seeping through the hull into one of the battery compartments. To keep the water from destroying the battery, Tommy drilled holes down low in the battery compartment partition so water could drain into the footwell where we could easily pump it out.
Pete Fletcher
Low-pressure systems bringing wind and rain were a common occurrence and waves would often grow too large to negotiate with the foot-steering system. Here Tommy is holding the hand steering lines to keep the stern into the waves.
At our going-away party we’d had a sweepstakes to predict how long the crossing would take. Guesses ranged from 60 days to over 100, and Tommy and I guessed 75 days. With winds so rarely in our favor, it was 31 days before we notched 1,000 nautical miles out of over 3,000. Tommy and I were joined that day by hundreds of dolphins, and agreed that a swim with them was the perfect way to celebrate the milestone, even as late as we were getting to it, and give ourselves a much-needed bath. We must have underestimated our stench, because as soon as we took the plunge the dolphins vanished.
We discovered that roughly 40 percent of our food supply had spoiled, and our slow progress compounded the problem of not having enough to eat for the rest of the crossing. We couldn’t help but reflect on one of the comments my wife Beth and Tom’s fiancée Jodie had made during an interview before we left: “They’ll be fine as long as they have enough to eat.” Tom and I had previously discussed rationing, and though we desperately wanted to avoid it, we now had no choice. We worked out how much longer the crossing should take and divided our supplies by the number of days.
It was late in the crossing to establish the kind of routine that would give us the best chance of making it to England, but after we discovered the spoiled food we decided it was time we got organized. We stopped rowing together and settled on round-the clock 2.5-hour, solo rowing shifts. We also focused on our boat “culture.” We’d leave a hot flask on deck for the next person, and, when it was wet, do longer shifts to save us from both being miserable and reduce the amount of water in the cabin. We couldn’t expect to be on top of the world all the time, but with just two people onboard, managing emotions was crucial. We talked a lot, and one of our favorite pastimes was “Top Tens.” At first this was the usual stuff— influential movies, books, funniest moments—and then it turned to more philosophical topics—passions, people we look up to, and plans for the future.
provided by Israel Cannan via an onboard Go Pro
Rowing in tough conditions was risky as a lapse in concentration could easily result in catching a crab and taking an oar in the ribs or worse. The wind here was not yet blowing 30 to 35 knots, the point at which we’d generally clip in our safety tethers.
About a week after the first storm, we experienced another, and this time it was a direct hit. The wind blew 40-plus knots from the south for 12 hours, then at midnight it came in at about 60 knots from the north. The sudden change in direction played havoc with the waves, which rose to 30′ and marched in the dark from every direction. Tommy had been on deck at the change in wind direction, and when I relieved him in the early hours of the morning it was clear that he was physically exhausted and mentally rattled. He wanted out and I wouldn’t have been far behind him, but knowing we couldn’t actually get off the boat, we agreed to get some rest and then, like all members of the British Empire who find themselves in a crisis, we put the kettle on!
Anniversaries and birthdays passed by back home without us, and Tommy was desperate to get back to begin rebuilding his relationship; I sorely missed my three girls. But with the currents and particularly bad weather of 2015, the more we focused on the disappointing distance we had covered, the more psychologically harrowing the full length of the crossing became. Our journey was less a test of speed and more a test of endurance. This required a different mindset.
We talked about the few things that would put an end to the crossing, things like a man overboard, major injury, flooding the cabin, and running out of fresh water, which now had become a major concern. The decline in water quality from the watermaker was so gradual that at first we didn’t notice the increased salinity. Eventually I got stomach cramps and kidney pain, and inevitably crashed; Tommy did three rowing shifts back-to-back to cover for me. Our watermaker badly needed a service, and although we had the service kit, we’d lent its Allen key to a boat owner in Brooklyn and hadn’t got it back.
Tommy Hudson
Pete takes a shift at the oars on the home stretch. After some long delays the sea anchor (in its red bag to port) was finally packed away and with roughly 600 miles to go, rowing never felt so good. With its high windage, MC leaned away from a crosswind, so leaving some gear on deck on the windward side kept the boat on an even keel. By this time our signs of hunger were becoming ever more visible.
Tommy nobly had me drink from the 120 liters of bottled fresh-water ballast while he persevered with the poorly desalinated water. It was a selfless act that I now suspect impacted Tommy far more than I appreciated at the time. With both food and water now heavily rationed, our crossing became even more a race against time.
Around 600 nautical miles from England we found ourselves on the wrong side of two high-pressure systems that produced easterly winds for 8 out of 10 days, and with food so low we had to change our approach to meals. Instead of continuing with our structured rationing system, we divided up all remaining food and resolved to eat no more than what we needed to get through the day. To make the food go further I only ate before a shift and would immediately clean my teeth to mark the end of each paltry meal; Tommy made a powder out of his remaining dark chocolate and he’d dip his finger in it to savor the taste. With dried beef in the greatest supply, we created unusual hot drinks including “Green Tea Beef” and Tommy’s favorite “Boffee.”
While the easterlies blew, with nothing to do but hang on the sea anchor we nicknamed this time “The Waiting Place” in recollection of Oh the Places You’ll Go, by Dr. Seuss. I created a verse of our own:
Waiting for the wind to change
To go around to a better range
Waiting for the rain to pass
Hoping that the tins will last
Buying time for bums to heal
Hands to thaw and feet to feel
Sitting around fighting cold
Praying that the anchor holds
With so little food and so far to go, we couldn’t risk losing the sea anchor. Without it we’d have no other way to combat adverse winds and could lose 50 miles in a day. For the first few days the wind blew at a constant 15 knots, but then it gradually increased to 25 and 30 knots, the strongest in which we’d used the sea anchor. With 6′ to 10′ waves coming over the bow and so much tension on the system, we made the decision to pull in the sea anchor and allow Mother Nature to send us backward at 2 or 3 knots. While this was one of the toughest decisions to make, it was the closest we ever came to letting go of our plans and ambitions and accepting whatever came our way with equanimity. We were now in the hands of fate flying along in the wrong direction, thinking we’d probably be 100 days at sea before reaching shore.
We got a text message over the satellite phone from Glenn McGrath, whose late wife Jane founded the cancer charity we were supporting, urging us to keep going. The easterlies eventually abated and we got a great run toward home. To go into the record books as an unassisted crossing we had to reach 5 degrees west, the Ocean Rowing Society’s official finish line, after which we could accept a delivery of supplies. Our colleague Simon Drayton set about trying to organize the delivery. A Cornish fisherman, Jimmy, and his crew agreed to make a detour to us on their way to their fishing grounds. My wife Beth and three girls, who had moved to Cornwall for the summer, dropped food canisters to Jimmy, but the effort was in vain. A storm kept them in port.
Tommy Hudson
For two hungry men, cleaning a fish is a serious job. The throw cushion in front of the cabin door made it easy on our knees getting in and out of the cabin and also served as our kitchen countertop. A couple of cook pots melted circles in the covering.
On the evening of day 95 we received word of Jimmy’s delay and we were bitterly disappointed. On the dawn rowing shift after receiving the message—the morning of day 96, the day on which we would finally cross 5 degrees west—I went to the bow to retrieve one of the last bottles of drinking water, and came across the most wonderful sight. In the footwell of the rowing station was a 6″ fish delivered by the storm waves of the previous night. I was over the moon, and I immediately called Tommy out of the cabin to see what we’d inadvertently caught. Referring to divine intervention, Tommy said that at least He has a sense of humor! I cleaned the fish, cut it into six parts, quickly boiled it, and we enjoyed the most succulent meal of our lives.
Just before dusk, Tommy saw something on the AIS (Automatic Identification System) screen that we hadn’t seen in all our days at sea, a battleship. It was heading straight for us at 20 knots. He immediately radioed the ship and confirmed they were on their way to drop us a care package that would help get us home. Although we were absolutely thrilled at the prospect of having a proper meal, we were still a mile from reaching 5 degrees west, so we called Simon Chalk and confirmed that we could take the package without compromising the unassisted crossing as long as we crossed the line before opening the package.
The frigate HMS PORTLAND appearing out of the gray was a sight to behold. After being at sea for 96 days, I was so used to the two of us bearing the responsibility for anything that had to be done that I was working on a plan for the delivery. I asked Tommy how we’d coordinate it. He laughed harder than he had in days, and responded that in all likelihood Her Majesty’s Ship would coordinate us! The 436′ frigate left MC to starboard at a safe distance before deploying a rigid inflatable boat (RIB) with four personnel who were next to us in seconds. They gave us three large bags of food, two flasks of hot soup, and HMS PORTLAND caps, which we donned with pride. We thanked them profusely, and once the RIB was back on the battleship, its captain called on the VHF to say “Well done” and wish us a safe passage to Falmouth. We were impressed with the courtesy and generosity of the British Navy.
We packed the food down in the cabin before Tommy took to the oars in a very wet 35- to 40-knot southwesterly. Although it was uncomfortable on deck for him, with little energy between us left to row, it was the push we needed on the penultimate night at sea. After receiving the fresh supplies we knew we should ease back into food slowly, but this was easier said than done. Tommy was ravenous and ate seven meals in close succession before falling into a deep sleep.
Pete Fletcher
For the entire voyage, Tom had lamented having to survive without licorice and when the boat arrived to tow us from Lizard Point to Falmouth Bay, it brought a bag of his favorite candy. He was happy, and I was in peace!
Alone on deck at around 4 p.m., I looked over my shoulder and saw land for the first time in 97 days. At first I couldn’t remove my gaze for fear that it was an illusion, but then when I knew the sight was real, I was overwhelmed with joy and laughed aloud as tears rolled down my cheeks. With a full moon, clear sky, and 15-knot tailwind, the final night in the English Channel couldn’t have been better. The many boats and the flashes from the Longships and Lizard lighthouses were sure signs that civilization was only hours away.
In the morning we were very grateful to have a lift from the Deputy Harbormaster who towed us from Lizard Point up to Falmouth Bay, before releasing us to row MC to a waiting crowd at 10 a.m. on August 27. As we reached the dock, I heard Willow asking which one is her daddy and in the next moment my family was in my arms.
Nine months have passed since we stepped ashore, and perhaps Tommy and I did see what the crossing would make of us. Tommy feels like he was stripped bare by the ocean and all that’s left is potential that he can shape in any way he sees fit. He’s a new man and knows he can be anything he chooses. If there’s something that I learned, it has to be: Never set foot on an ocean-rowing boat again!
Peter Fletcher is the Managing Director of World Challenge, a youth-development organization that enables high-school students to develop life and leadership skills through challenging student-led expeditions overseas. Although originally from the UK, Peter now calls Australia home and when not working overseas, he lives on Victoria’s Mornington Peninsula with his wife, three daughters, puppy, and the family chickens.
If you have an interesting story to tell about your adventures with a small wooden boat, please email us a brief outline and a few photos.
Stout ski poles offer a way to move upstream in the shallows while kneeling rather than standing in a canoe.
Poling is the age-old technique for propelling a canoe against rapids or up shallow streams where paddling is ineffective. Standing in the canoe, the paddler uses a straight pole, often 12′ long, to push against the streambed; a skillful poler can make this look graceful and effortless.
Preparing for a 2013 through-paddle of the Northern Forest Canoe Trail (NFCT) in a 14′ solo canoe, I was in the midst of making a two-piece pole when I accepted that standing in a small, narrow canoe in rapids was probably a recipe for disaster. I adopted instead to adopt a technique suggested by my wife the previous summer. Progressing up an Adirondack stream too shallow to plant a paddle blade in and with no long poles on hand, she suggested using a pair of sticks in double-poling fashion like cross-country skiers do. It worked astonishingly well, and immediately entered my repertoire of skills.
The poles I now carry are aluminum downhill ski poles. It is critical that the poles be stiff and strong. Wide flanges on the grips ease the need to clench hands so tightly. Removing the baskets makes them less susceptible to snagging rocks, albeit offering less resistance against a riverbed of soft silt, and removing the wrist straps allows quick release if they become wedged between rocks and when it’s time to resume paddling.
Double-poling can require considerable upper-body strength, and much of the propulsion comes from bending the torso rather than relying on arms alone. Kneeling in the canoe with the knees set especially wide offers better control of heeling and steering. It is worth trimming the canoe to be bow light so that, on entering the current, there is less risk of it being swept around.
For effective forward propulsion, the poles have to be angled well backward, tips planted roughly even with the hips. Steering is achieved by planting a pole forward of the hip and pointing away from the canoe while the other pole, planted well back, prevents downstream drift or, strength permitting, maintains forward momentum. I have yet to try tandem double-poling, but it promises to be highly effective, especially with the stern poler providing propulsion, while the bow poler steers by guiding the bow as necessary.
Double-poling has some advantages: the poles are lighter and easier to stow, and the kneeling position gives you a lower center of gravity and greater stability. It also has some disadvantages: less leverage and less propulsion than a long pole, and a smaller range of water depths in which it is feasible.
Poles sometimes wedge between rocks, so I recommend practicing this technique before relying on it for real. On the NFCT, double-poling propelled me in a fully laden canoe up Class I and lower Class II rapids on New Hampshire’s Upper Ammonoosuc and Androscoggin rivers and Maine’s Spencer, Little Spencer, and Caucomgomoc streams.
Following a career of teaching high school science in the U.K., Peter Macfarlane immigrated to Vermont to take up life as a musician. Playing and teaching the fiddle professionally has afforded him the time to indulge his passion for cedar-strip canoes, not only paddling them but also designing and building them as Otter Creek Smallcraft. The canoe pictured here is a Sylva, a solo touring canoe he designed, built, and paddled the 740-mile length of the Northern Forest Canoe Trail through northern New York, Vermont, Quebec, New Hampshire, and Maine.
You can share your tricks of the trade with other Small Boats Monthly readers by sending us an email.
When you’re pulling up an anchor or a crab pot, you’ll get a better purchase on the line if you get up next to the rail, but putting your weight so far off center in a small boat might bring the gunwale uncomfortably close to the water. The alternative is to sit in the middle of the boat to keep it on an even keel, drag the line over the gunwale, and wear through the paint or varnish.
both photos by the author
The Pocket Puller holds line clear of the gunwale, preserving the finish. The fairlead and jam cleat allow for one-handed operation.
The Pocket Puller is a device for pulling anchors and pots back aboard small boats. It’s made of cast aluminum and fits in a standard 1/2″ rowlock. I’ve only used the Pocket Puller in the rowlocks that I have for rowing, but you could install another socket specifically for the Pocket Puller anywhere on the boat. A nylon sheave on a stainless-steel axle brings the line turn the corner outboard so it’s not scarring the rail or bringing lot of water aboard. Inboard the Pocket Puller has a fairlead and jam cleat that takes line from 1/4″ to 1/2″. A diagonal slot in the side lets you slip a line into the fairlead and keeps it captured there when it’s under tension.
The Pocket Puller is especially handy if you’re repeatedly changing where you’re setting your anchor, whether scouting for good fishing holes or finding good holding ground in an anchorage. You can pull the anchor up and let the jam cleat hold it over the side while you row to a new spot. You don’t have to leave the rowing thwart to tend to the anchor each time.
Although not designed to handle chain, the Pocket Puller works with links no wider than 13/16″.
While the Pocket Puller is meant for cordage, I found it also worked for my anchor chain. It’s 3/16″ chain, with links 13/16″ wide. The outside edges of the wings that guide line and chain into the sheave often caught on the links, so I filed the corners off and now the chain rattles through without a snag; it even holds in the jam cleat and slips through the slot in the side of the Pocket Puller.
The Pocket Puller will bring the line up about 2-1/2″ from the rowlock socket; if you need more clearance, there is an extension arm that provides 8″ of reach, which will help keep pots and anchors from running into the hull as they reach the surface.
Christopher Cunningham is the editor of Small Boats Monthly
During the author’s four-hour row in hot weather, the NewGrip pads prevented the hot spots that would have caused blisters.
Blisters are a rower’s nemesis, and any way to prevent them or reduce their severity and frequency would be welcomed. Lots of rowers try gloves, but seams and creases in the material, and sweat and heat generally make blisters worse. Tape is another option, but it takes time to apply and lasts only for the day.
SBM
The Pro Model is equipped with wrist straps that attach to Velcro patches sewn on the neoprene pads.
Most competitive, open-water, and expedition rowers row with bare hands and work through a phase of blisters to get calluses. But calluses will fade if you stop rowing over the winter, and you may then have to toughen your hands again. I’ve tried many remedies in the past 20 years and settled on Row-Wik tape, a thinly padded tape wrapped around oar grips. The tape has eliminated blisters on my fingers and palms, but has some disadvantages: I sometimes still get blisters on my thumbs when out for weeklong trips, and I can’t move the tape to another set of oars.
SBM
The Pro Model is recommended by NewGrip for rowing: the wrist strap is made of cotton webbing for better comfort against the skin and is said to relieve the strain that causes sore wrists and carpal tunnel syndrome.
After a recent 10-mile row in 85° heat using the Pro Model, I think the NewGrip concept is going in the right direction. NewGrips protect hands with 3/16″ neoprene pads attached across the back of the fingers by elastic straps and around the wrist by detachable, adjustable Velcro straps. On one outing with the NewGrips I started rowing on the morning of a day that would warm up to the 80s. My fingers stayed cool, but I wasn’t used to the Velcro wrist straps. I ‘d put the straps on snug so they wouldn’t rub; they got too hot under the direct sun, and I wasn’t comfortable with the pressure and movement on the top of my wrist from feathering the oars at the end of each pull. I removed the wrist straps and rowed with just the elastics holding the pad to my fingers. (NewGrips come in a version without the wrist straps.)
To see what how the NewGrips worked when wet, I dunked them, expecting I’d have to squeeze water from them when I put them back on, but the neoprene didn’t absorb any water. I shook the water off and could still row with a secure grip.
I hadn’t done a long row in the previous month, and my hands were very soft and callus-free, but with NewGrips, after an hour of rowing when I’d normally feel some hot spots, my hands were in good shape. With temperatures rising to 84°, the black elastic straps across the backs of my fingers heated up, so I pulled my fingers free from the elastic and instead slid only a middle finger under each elastic while all other fingers were on top. This worked, and my palms and fingers were cooler.
At the end of a 10 ½-mile, 4-hour row, my hands were in good shape. It was odd to come in from a long row and not have to inspect my hands for damage. NewGrips may look a little clumsy, but they are functionally elegant and eliminate the threat of blisters. They made me wonder: Why didn’t someone think of this sooner?
NewGrips—without strap, $14.99; with strap $27.99—are available from direct from the manufacturer.
Dale McKinnon began rowing in 2002 at the age of 57 and in 2004 rowed solo from Ketchikan, Alaska, to her home town, Bellingham, Washington. In 2005 she rowed from Ketchikan to Juneau.
Editor’s note:
I also rowed with NewGrips, both the PowerPads without the straps and the Pro Model with them. As simple as they appear, I was skeptical about how well they’d work, but soon took a liking to them. The benefit they provide was made most clear when I rowed hard for a few miles with a PowerPad on one hand and the other hand bare. The difference was more than just having a bit of firm paddling. On the bare hand I could feel the shear my skin was subjected to as the bones in my fingers pulled toward the bow and the oar handle resisted that motion. The skin in between would get stretched in some places, pinched in others and develop hot spots. With the PowerPad, I couldn’t detect any shear—I could feel the neoprene staying with my skin and keeping it from getting distorted. Like Dale, I didn’t develop any hot spots.
SBM
The finger straps on the Power Pads are sufficient to hold them in place over your palms.
SBM
For pulling, the pad is moved toward the fingertips; for pushing it is placed closer to the wrist.
SBM
You can slip all of your fingers or just some under the strap, whichever is more comfortable.
During the recovery part of the stroke, I keep my wrists straight and my fingers cocked back, pushing the handle sternward with the perimeter of my palm. It’s a very relaxed and loose grip, but the PowerPad didn’t diminish the control I had on the oar. Even when the pads and my hands were wet, the neoprene didn’t absorb water or get slippery. The wrist straps on the Pro Model felt a bit strange, though not uncomfortable, but reminded me not to drop my wrists too much at the release.
Is there a product that might be useful for boatbuilding, cruising or shore-side camping that you’d like us to review? Please email your suggestions.
The double-ended waterlines will allow ELLANDELL to coast along easily while being rowed.
After his kids were grown and out of the house, Elliot Arons found himself with lots of free time on his hands. As liberating as that might be, he often found himself “wallowing in front of the TV.” His daughter Emily prodded him to do something more productive and suggested he build another boat. When she was much younger she’d seen him build a Platt Monfort Dacron-skinned canoe, a project that he seemed to enjoy. But the building had turned out to be more engaging than the paddling. He used the canoe a few times on the annual summer trips to Friendship, Maine, but after that it gathered dust in the basement of the family home in the Bronx. What he really wanted was a sailboat.
Elliot Arons
The kit arrived neatly packaged, including custom-fit blocks to keep pieces from shifting during shipping.
Elliot liked the idea of building another boat, and his search for plans led him to Arch Davis, a New Zealand–born boat builder and designer now living in Belfast, just an hour’s drive up the Maine coast from Friendship. Arch’s Penobscot series of Whitehall-like sail-and-oar skiffs caught Elliot’s eye. He ordered one of Arch’s boatbuilding DVDs to see what the project would entail, and soon after watching it he ordered a Penobscot 17 kit.
Elliot Arons
After the side benches are installed there will be seating from stem to stern. Slabs of foam tucked under the side benches will provide flotation.
Arch strives to assure that beginning boatbuilders get off to a good start, and he certainly succeeded with Elliot, who noted: “Arch arranged it all: the delivery of his precut parts, the marine plywood from Florida, the epoxy kit that lasted for the whole construction, the video instructions, and the manual. The way Arch put the box together with the bulkhead pieces, and keel pieces affixed to the box so that nothing would rattle or shift, made me realize this was a very carefully thought-out and executed system.”
Elliot Arons
A Penobscot 17 will tip the scales somewhere between 260 and 300 pounds, making for easy towing on a light trailer.
Elliot went straight to work and turned his garage into his boatshop. The project required plenty of time and effort and occasionally kept him up at night worrying that he might have made some mistakes, but “from the start I was in sheer bliss. I lost weight because I ran up and down the stairs so often, getting tools and getting set up.”
Ellen Blye
The gunter sloop rig sports 132 sq ft of sail. The alternate ketch and schooner rigs carry 118 and 139 sq ft, respectively.
The boat’s glued-lap plywood planking is laid over stringers set in notches in the bulkheads that support the seating and for foam flotation. Elliot chose the gunter sloop rig rather than the balanced-lug schooner and ketch rig options included in the plans. To move the project along he enlisted Arch’s help and hired him to build the spars. In 10 months Elliot had his Penobscot ready for the water, and although his home is less than a half mile from the Hudson River, he trailered the boat to Maine to launch it at Friendship. Christened ELLANDELL, the boat is named after Elliot and his wife Ellen.
Ellen Blye
The gunter sloop rig is the fastest to weather of the three rigs offered in the plans. Shrouds anchored in the forward rowlocks make it possible to keep the jib’s luff taut.
He sails the waters of Maine’s Muscongus Bay, often solo, sometimes with family. He has been getting the boat ready for the summer sailing season and writes: “I needed a hobby and building the boat kept me busy; now I have the upkeep and I’m happy.”
Have you recently launched a boat? Please email us. We’d like to hear about it and share your story with other Small Boats Monthly readers.
When I made the spars for my Caledonia yawl in 2005, I decided to lighten the largest of them by making them hollow and give the bird’s-mouth method a try. It was a lot of work milling eight staves for the two masts and the yard and the boom for the lug main spar, but I was pleased with the results. They were quite light, most notably the mainmast, which I had to lift high to slip though the foredeck—it was a cinch to step.
It didn’t take me long to notice something unusual about the mainmast when I was sailing. Its halyard wasn’t always where it should be, snug against the mast. It tended to move away, as much as 3″. This puzzled me because it seemed that the halyard was moving, even though I knew it was quite taut. I eventually realized that the halyard was staying as straight as a bowstring, and the mast was bending away from it. At 19′ the mast was the tallest I’d ever made, so I accepted that some flex was meant to be. Still, there were times when I nervously watched the gap between halyard and mast pulse and widen.
I was sailing across Puget Sound with Sharon, a new girlfriend at the time, and we had made a brisk crossing on a broad reach from east to west and had turned around to head back. On the new course I had to haul the sheets in and point higher. We were making very good speed, but the gap between the mast and halyard was wavering between 3″ and 4″. A fast-moving tugboat crossed a few hundred yards ahead of us. Its wake had smoothed a bit by the time it reached us, and the bow climbed over the first wave easily, but after the bow rose to meet the second wave, it fell heavily into the trough. The mast exploded with the report of a shotgun blast and broke in two, about 5′ above the deck. The sail fell overboard and we came to an abrupt stop. Sharon looked at me with her eyes wide. I shrugged and said, “It looks like I have a woodworking project for next weekend.” With the sail aboard and the spiky stump of the mast unstepped, I got out the oars and rowed us home, a distance of about 3 miles.
I did some more reading on bird’s-mouth spars and found one bit of information that I’d missed: When a spar is made hollow, its diameter needs to be increased to give it the same strength as a solid spar. I wasn’t going to make the hole in my foredeck any larger for a new mast, so I made the replacement solid. It’s a lot heavier and a chore to raise and lower, but having a mast that stays where it belongs, snug against the halyard, is a comfort when the big lugsail is drawing hard.
I’d put too much work into the bird’s-mouth mainmast to be happy scrapping the whole thing. I sawed off a 4 -1/2′ section of the upper half, cut away the plugged top, and used it as didgeridoo, a rather poor one; and with a portion of the bottom half of the mast I made a stout, unwavering music stand.
I live in Fort Myers Beach, a small town on Estero Island on the southwest coast of Florida. Estero is a barrier island with a long, shallow-sloping white sand beach facing the Gulf of Mexico on one side and the protected waters of Estero Bay on the other. My wife Courtney and I have a house within a few hundred yards of the beach, and after a major surgery I spent a good deal of time walking there to recuperate. I got to thinking about owning a small boat that I could hand-trolley from home and launch at the beach. Rowing would be good recreation too—like most men my age with a desk job, I need exercise.
I wanted a small rowing boat light enough for me to manage by myself, large enough for the two of us, and wooden—something beautiful and interesting. Courtney, a master of online shopping, found the website for Cottrell Boatbuilding in Searsport, Maine, and there it was, the Chaisson dory.
The Chaisson dory was designed as a tender and originally built in the early 1900s by George L. Chaisson of Swampscott, Massachusetts. It is quite sturdy and has a high load capacity. The 10′ dory has a rounded lapstrake hull with a small flat area on the bottom that’s perfect for beaching. Chaisson made no provisions for sailing; the boat is strictly for rowing.
A little research and a few phone calls to Lynn and Dale Cottrell confirmed that their version of the Chaisson dory met all of my criteria. I placed the order, and six months later the finished boat was shipped to a marina a few blocks from our house.
Doug Eckmann
To keep this boat light for walking it to the beach, the floorboards were made of cedar. Cross cleats for heel bracing were added after a few launches through breaking waves.
As I unpacked the boat from its shipping crate, I told myself not to be disappointed if the quality of work was not perfect, but there was nothing to worry about. The boat was not just perfect; it was a work of art. The workmanship is flawless, including the beautifully painted hull with a navy-blue accented sheerstrake and eight coats of varnish on the mahogany seating, trim, and transom, which bore the name ELIZABETH II. A friend had told me: “Whatever you name the boat, make it a ‘II’ so people will think it’s the tender to your yacht.” As sort of a joke I’d sent an email to Lynn asking if I could have a name painted on the transom, something like Elizabeth II (Courtney’s middle name is Elizabeth). The next day I received an email with a picture of the name painted on the transom.
John Walther
With two aboard, the Chaisson dory is in good trim and has plenty of freeboard. The span between the locks at the forward rowing station is less than that at the amidships station and calls for a second shorter pair of oars.
The Cottrells’ Chaisson dory has a length of 10′2″ and a beam of 4′2″. It has three seating positions: spacious mahogany sternsheets, and thwarts at the center and the bow. Both thwarts are accompanied by oarlocks. The forward rowing position allows better balance when carrying a passenger on the sternsheets. The boat came with one pair of Shaw and Tenney oars the ideal length for the center station. I ordered a second set of oars 6″ shorter to use in the narrower forward rowing position.
The boat has glued lapstrake plywood construction with laminated Douglas-fir stems and a gorgeous mahogany transom. The sturdy thwarts and gunwales are also mahogany. The woodwork is also available in teak or white oak. Dale offers floorboards in mahogany, teak, or oak, but made mine of cedar to keep the boat light. The hull is without frames but stiffened by the thwarts and the sturdy open gunwale. The boat weighs about 90 lbs. I find this is manageable; it’s easy for me to walk it to and from the beach with a lightweight adjustable aluminum launching dolly. The boat’s fastenings and hardware are silicon bronze. We requested bronze handles on the transom to aid handling and beach launching.
Doug Eckmann
The waters on the Gulf coast are not always calm, but the dory can easily manage a bit of surf. Here Courtney holds the boat, waiting for Doug.
On the maiden voyage I started learning some of the extra details that would make the boat easier to handle in the medium surf we often have on Fort Myers Beach. First, I added teak cleats on the floorboards to brace my heels for rowing. When I launched into the waves, the bow would rise to meet the wave crests and I tended to slide off the seat unless I had a way to brace my feet. Second, waves slapping the oars tend to lift them out of the oarlocks, so I replaced the horn oarlocks with round closed oarlocks. Even these tended to jump out of the rowlocks, so I screwed small bronze cleats to the pad support blocks to secure the line tied to the oarlock shaft. The cleats make it easy to secure and to dismount the oars quickly. Launching in the surf, I have to get underway quickly to avoid being broached and rolled by incoming waves. Finally, I found machined aluminum split-shaft collars that I installed to back up the leather oar collars, which were not quite sturdy enough for the surf.
After I had ironed out a few details and mastered my launching technique, rowing off of the beach was really fun. With a mostly rounded bottom, the dory is a bit tender, so getting in and out takes a bit of care, as with a canoe. With the crew seated and weight centered, the boat feels very stable underway, even in moderate waves; I don’t think it would easily capsize. It rides waves like a cork. When I head in, I can catch a wave, surf right up on the beach, and land upright on the flat part of the bottom. The large transom can take on a following sea or breaking surf with little danger of swamping, although I must maintain course by alternately dragging oars to keep the bow pointed straight down the wave face. A small skeg aids tracking/keeping the boat on course.
We don’t use the dory as a tender, so I ordered the boat without the standard canvas rubrails, and had the mahogany gunwales finished bright. I can’t say from experience how it would behave under tow, but with its tucked-up stern, cutaway forefoot, and a bow eye set low, it appears that the dory would tow well.
Courtney Eckmann
John Gardner writes of the Chaisson dory tenders: “In spite of their narrow, flat bottoms, which, incidentally are great for landing on the beach, they are essentially round-hull boats and behave as such, being in their performance on a par with classic yacht tenders by Lawley and Herreshoff, although they are only half as difficult to build.”
The dory is very maneuverable and turns quickly and easily. I estimate solo rowing speed to be about 4 knots with moderate exertion. The boat is light, so it doesn’t carry a lot of momentum between stokes. In calm water, I make about 2 knots with Courtney and our two small dogs on board. I have not had three people on board, but my impression is that it would be a bit overloaded except for short distances in smooth water. With my “crew” aboard, rowing is about as strenuous as walking briskly. I am pleased that rowing turned out to be the good exercise I’d hoped for. After an outing of several hours I can report that rowing pretty much exercises every muscle I could feel—calves, thighs, seat, stomach, chest, shoulders, arms, and especially legs—but without discomfort or lower-back issues.
In shallow Estero Bay on the backshore of Estero Island, this little dory has allowed us to see seabirds roosting on small mangrove islands and bottlenose dolphins. Once we came upon a gathering of West Indian manatees and were charged by a bull manatee Moby-Dick style. He dove under the boat, his massive back just inches below the boat. On another occasion I rowed right into a school of thousands of mullet, leaping in all directions as larger predator fish swooped into the school to attack them. Our Chaisson dory is less intrusive than larger boats, and we get to see things up close. The boat’s small size, easy launching, ready availability, and low maintenance invite using it at the drop of the hat, so we get out on the water frequently. My friends with powerboats don’t seem to get out that often.
The custom-built Chaisson dory was expensive for a 10′ rowing boat, but not pricey for a masterpiece of woodworking that has impressed everyone who has seen it on the beach.
Doug Eckmann grew up in Racine and learned to sail on Wisconsin lakes. He joined a university sailing team in 1969 and later did more sailing on Texas lakes when he moved to Austin. He is a civil-environmental engineer in Fort Myers, Florida.
Particulars
[table]
LOA/10′ 2″
Beam/4′ 2″
Weight/85 lbs
[/table]
Cottrell Boatbuilding offers the Chaisson dory for $5,450 to $6,475 depending on woods used. Floorboards are optional. Lines and offsets for the boat are published in The Dory Book by John Gardner.
If you have an interesting story to tell about your adventures with a small wooden boat, please email us a brief outline and a few photos.
Iain Oughtred’s double-ended beach boats are descendants of Shetland Island yoals, workboats used extensively for fishing. While the Shetland Islands have long been politically linked to Scotland, older cultural ties to the Norse led to the development of boats with a reputation for seaworthiness, thanks to their Viking-derived shape and lapstrake construction. While some yoals were equipped with dipping lug sails, the majority were simply rowed. (Marc Chivers, a research student at the Center for Nordic Studies in the Orkney Islands, explores the history of these boats in a blog, The Shetland Boat: History, Folklore and Construction.)
The 18′2″ Arctic Tern is one of a series of Oughtred’s family of double-ended designs for oar and sail. These range from the capacious 19′6″ Caledonia yawl to the compact 15′1″ Whilly Tern. His designs differ from the traditional yoals in that they are intended to sail as much as row and designed for glued-lap plywood construction. The use of modern materials gives the boats several advantages: They are lighter than their traditional counterparts, allowing for easier rowing and transport; without ribs or other structural members, the cockpits feel more open; and the epoxy-and-plywood construction eliminates the problem of leaking caused by the shrinking of wood as it dries, an issue in traditionally built boats.
all photos by or from the collection of the author
The boomkin on this Arctic Tern is not according to Oughtred’s plans, but it is a common feature on his other double-enders with mizzens.
The Arctic Tern is a construction project for a builder with intermediate skills or better. The six strakes make for planks that are narrow enough to go on the molds without too much fuss at the ends. While the plans fall on the well-detailed end of the spectrum and include almost all the information a person would need to construct the boat, Oughtred’s book, Clinker Plywood Boatbuilding Manual, is a useful accompaniment to his plans.
The Arctic Tern is designed to be a camp-cruising vessel capable of being rowed or sailed long distances. It easily has enough space in the open cockpit to accommodate two people, and enclosed flotation compartments in the ends hold gear for a weeklong adventure. For a day sail, the boat will comfortably carry two adults and two children and is easily singlehanded, even under rough conditions.
I can rig and launch the boat by myself in less than 20 minutes. The unstayed masts on the yawl version of the Arctic Tern speed rigging; they’re simply dropped into the maststeps. The top forward corner of the centerboard protrudes at the top of the trunk; the unweighted board is easily lowered and raised. A shock cord attached to the board has a snap-shackle that gets clipped to a stainless-steel pad-eye at the aft end of the centerboard case to keep the board down and allow the board to retract if it hits an obstruction. With the board up, the Arctic Tern floats in about a foot of water. Nosed onto a beach on a falling tide, the boat leans slightly but comes to rest relatively flat, and you can attend to any chores that need to be done. If you wanted to stay aboard while aground, tucking a small fender under each bilge would allow you to sit or sleep in level comfort.
The circular access port was added to ease access to the forward compartment.
The Tern has a surprising number of seating locations for a boat of its size: the aft flotation compartment, the side benches, the amidships thwart, and even the floorboards. This variety makes a long journey much more comfortable and makes it easy to fine-tune trim. Each location provides some back support, as well as legroom and easy access to the sheets and the main’s downhaul. With my homemade cockpit tent, I find it reasonably comfortable to sleep on the floorboards by sliding my legs under the thwart and resting my head aft. This extends the range of places I’ve been able to cruise solo, especially on a multi-day trip where camping on shore is prohibited or not possible, but the boat is too small for additional crew to be comfortable overnight.
The buoyancy compartments under the end decks keep the Arctic Tern floating high, and the masts keep it from turning turtle. Additional flotation secured under the side benches would add stability to the swamped boat when it is righted.
Flotation compartments in the bow and stern are a great safety feature and double as dry storage. In my capsize drills the masts prevent the boat from turning turtle. When the boat is righted, the built-in flotation keeps the open slot at the top of the trunk above water level so the boat can be bailed. I can right the Tern by myself by standing on the centerboard and scrambling into the boat as it rolls back over. Sloshing water in the boat can destabilize it, so you have to crawl aboard and be ready to steady the boat. There’s a lot of bailing that follows rerighting, so a good high-capacity pump or bucket at the ready is required for a quick and effective recovery. (For a video of a capsize trial, click here.)
The flotation compartments have ample storage space for gear, but the oval hatches in the bulkheads, measuring approximately 15″ x 25″, are awkward to use and too small for larger items like sleeping bags or larger dry bags. I’ve installed a round deck plate on top of the forward compartment and plan to install larger rectangular watertight hatches on top of both compartments for even easier access.
The cockpit offers a lot of open, flexible space, and when we’re cruising we travel with a lot of gear kept in numerous small dry bags that we lash along the port side, below the benches and thwart, leaving room on the starboard side of the boat to access sails or set an anchor.
The Arctic Tern is drawn up with one rowing station; with some modifications to the interior layout the boat could be arranged for tandem rowing.
With a beam of 5′4 1/2″, the Tern is comfortable to row at approximately 2 knots, but is also about the largest boat that a man of my size—6′1″, 175 lbs—can row for long distances. The Tern tracks well, providing the gear in the boat is trimmed well and the rudder and centerboard are retracted. I have rowed the Tern with a variety of flat-bladed oars, in lengths from 9′ to 11′, but 10′ seems to be the ideal balance between the ability to make long strokes in flat water and the quick strokes needed to row in rough conditions. Finding a location to store the oars when the boat is under sail can be a challenge on many sail-and-oar boats, including this one. The oars are too long to stow on the cockpit sole or comfortably in the locks and secured to the gunwales. Stowing them leaning partially on the forward flotation compartment while tucked under the thwart on the starboard side keeps them reasonably secure, but also accessible in a pinch. A motor well is indicated in the plans, but I don’t have a need for an outboard and prefer not sacrificing valuable storage space and flotation to accommodate one.
Although the Tern has rowing boats as its forebears, it sails very well. While a stayed gunter sloop rig is one option Oughtred offers in his plans, many builders choose a balanced-lug main with a leg-o’-mutton mizzen. The mizzenmast calls for a split tiller or a push-pull Norwegian-style tiller. The latter can feel unfamiliar if you’re used to the more common sweep tiller, but after a few hours of sailing you’ll get the hang of it.
The 120-sq-ft sloop rig with a high-peaked gaff main and a jib may be the fastest and highest-pointing of the rigs shown in the plans, but I opted for the lug yawl rig with a 94-sq-ft main and a 17-sq-ft mizzen. The yawl rig keeps the center of effort low and reduces the heeling while under sail. The mizzen also serves an important safety role. With the mainsheet released and the mizzen sheeted in tightly, I can easily heave-to. The boat will weathercock and bring the bow pointing into the wind and waves. If the tiller is lashed with the rudder angled out to the side, it acts as a brake, slowing the downwind drift of the boat. I have sat comfortably hove-to for up to a half hour in 20-knot winds; this gives me ample time to consider options, have a snack, or drink, and make good, unhurried decisions. While hove-to it’s also easy to reef or lower the mainsail from the safety of the middle of the cockpit.
The mainsail is shaped by a highly tensioned downhaul near the base of the mast, and with the luff pulled taut, the standing-lugsail points reasonably well, but not as high as the gunter rig might. And although the shape of the sail is better when on the downwind side of the mast than creased over the mast on the upwind side, the boat seems to perform about the same on either tack. The Tern is steady and responsive under most wind conditions, and in a big gust, as long as the main isn’t sheeted too tightly, the boat tends to round up rather than get knocked down. With three rows of reefpoints, the mainsail can be sized to sail comfortably in a wide variety of conditions from light winds to about 20 knots. By the time the third reef is needed, the ability to point and steer well goes down and it’s time for me to head for a safe haven.
I have the mizzen sheet reeved through a stand-up spring block on the rudderhead, as called for in the plans, but the builder of my boat’s sistership deviated, adding a boomkin, a feature incorporated in several other Oughtred designs, for sheeting his mizzen. In light winds both arrangements perform equally well, but when the wind gets over 15 knots, control of both the rudder and mizzen is easier with the boomkin. The Tern rides dry whether under sail or oar; even under bumpy conditions, not much more than a few splashes tend to come aboard.
The author’s Arctic Tern, ROW BIRD (left), and SIGMUND, both built by Andy McConkey, sail out of Portland, Oregon, and cruise the inland waters of the Pacific Northwest.
The Arctic Tern fulfills its role as a daysailer and camp-cruiser with flair. The boat quickly goes from driveway to launch, making a day sail an enjoyable outing with little time spent at the ramp. It also makes the transformation from a capable sailboat into a respectable rowing boat or the reverse, with practice, in about a minute and a half. It has impressive stability and maneuverability in open water, and sails especially well with a heavy load aboard. The ability to pull the Arctic Tern ashore for the night or sleep aboard at anchor enables it to go places other boats can’t follow. If you are in the market for the nautical equivalent of hiking and backpacking, this boat is certainly capable of taking you on adventures near and far.
Bruce Bateau sails and rows traditional boats with a modern twist in Portland, Oregon. His stories and adventures can be found at his web site, Terrapin Tales.
Particulars
[table]
LOA/18′ 2″
Beam/5′ 2″
Weight/240 lbs
[attr style=”font-weight:bold;”]Sail area
Single lug/102 sq ft
Lug yawl/111 sq ft
Gaff sloop/120 sq ft
[/table]
Plans ($306AUS) and kits ($3,970AUS) for the Arctic Tern are available from Oughtred Boats in Australia. Hewes & Company in Blue Hill, Maine, produces many CNC-cut kits, including one for the Arctic Tern. Jordan Boats in the UK also makes kits for Oughtred-designed boats.
Is there a boat you’d like to know more about? Have you built one that you think other Small Boats Monthly readers would enjoy? Please email us!
In the middle of July last summer I found myself with no responsibilities. I had five days with no plans and no kids to attend to. I packed AANAR, my modified Herreshoff Coquina, with camping gear and drove from my home in the small town Porvoo to my favorite place to launch, the southern point of Emäsalo Island on the Gulf of Finland. Being by the open sea, the wind there is steady and unobstructed, making sailing faster and more pleasant than in the 10-mile-long inlets that flank Emäsalo. I launched AANAR and rigged her for sailing. The original Coquina was a cat-ketch and with rope steering; mine is rigged with single lugsail and tiller steering. The Wizard of Bristol gave her delicate and fast lines, and she is rewarding to sail.
all photographs by the author
AANAR’s cockpit has plenty of room for a solo sailor and cruising gear. The burgundy cushions hanging over the side decks are an innovation I tried, hoping to make seat cushions do double duty as fenders. They were, frankly, more comfortable to sit on before the modification.
After setting sail, it took just a few minutes to get out of the bay and around the sheltering Fagerudden cape. Once I had passed the rugged red granite cliffs and boulder-strewn shoreline of Haxalö Island, I had a broad view to south into the vast Gulf. After the hassles of getting groceries and packing charts, clothes, and camping gear, I was finally by the open sea and AANAR’s cream-colored sail was pulling steadily beneath a patchwork of brilliant white clouds and blue sky. While the forecast did not promise sunshine, it did offer light winds, smooth seas, and good sailing. I am comfortable in AANAR with full sail up to 14 knots wind, and when reefed down have done some crossings in sheltered waters safely with 17 to 20 knots.
This narrow channel leads into the bay by Pirttisaari, a village that has been inhabited from the beginning of 16th century. While fishing is the main occupation for islanders. the island has two artillery stations that are part of Finnish defenses.
The 5-mile crossing east from the southernmost tip of Emäsalo to the Pellinki archipelago is wide open, but with the wind being gentle and on a broad reach, the sailing was easy and peaceful with little waves only gently rocking AANAR. In the tranquil atmosphere I could step away from the rush to get launched and give myself over to the tranquility of the island-fringed waters. The wind simmered down after my crossing, and I continued slowly eastward through more sheltered waters. Scattered clouds blocked the sun and cast patchwork shadows on the sea and surrounding islands. With the 3-mile-wide Pellinki island slipping by to port, I headed for the island of Sandön, its forest a dark green line on the eastern horizon.
There are no noticeable tides in the Gulf of Finland, and the fluctuations in the sea level that come with wind and changes in barometric pressure are gradual and rarely more than 15″. In a sheltered bay AANAR can rest safely while pulled up on the rocks with just a pad under her bow.
When I approached the shallow west beach of one of Sandön’s coves, AANAR was headed for a scattering of rocks breaking the calm surface of the sea, so I dropped the sail and paddled slowly closer. I found a spot where the grass came almost right down to the water, steered the bow into it, and pulled AANAR upon on a gently sloping sandy beach. I found a flat patch of grass the size of my pop-up tent. Angling under cast-iron gray clouds, rays of sun lit a sea surrounded by the dark silhouettes of nearby islands.
After landing on Sandön, I set up camp with a pop-up tent, a kitchen in a box, boat cushions as a divan with a view, and a bottle of wine.
June and early July had been exceptionally cold, and there were only a few other boats in this popular northwest-facing cove lined with old, crooked pine trees growing a few paces up from the water’s edge. A family of barnacle geese with black necks and white masks swam by, occasionally dipping their heads underwater looking for food. The only sound was the lapping of ripples on the stony shore.
I walked along the esker that formed the island’s spine, following a narrow path that zigzagged through the heathland under tall pines. The island is narrow, and I caught glimpses of both shorelines through the colonnade of trees. Most of the islands of the archipelago are of solid granite, but Sandön (Sand Island) is a long, cusped crescent fringed with sand and stretching three-quarters of a mile from north to south. I continued my barefoot stroll along the eastern shoreline on the smooth sandy beach. The clouds made way for the sun, and a warm shaft of light gave the pine trees and cliffs a coppery glow.
While I was camped at the northern tip Sandön, the skies cleared and I had one of the few sunny moments of my trip. In the distance to the south lies the open water of the Gulf of Finland and to the west, just out of view, lies one of the most beautiful sand beaches you can find in all of Finland.
The next day I woke to raindrops drumming gently and steadily on the tent. I was in no hurry to get up and waited for a while as the rain waned to a drizzle. When I shoved off, I paddled standing forward in the boat with one oar to get out of the shallow water and glided over a coffee-brown, rocky bottom. I lowered the centerboard, attached the rudder, and with a few pulls raised the lugsail. AANAR immediately picked up speed, sliding silently away from the shore and leaving nothing but ripples in the calm surface of the water. A man and a woman were walking on the beach near a small catamaran they’d pulled ashore. They waved to me and I waved back. I had noticed them yesterday evening camping a few hundred meters down the shoreline, but hadn’t approached them. This is typical of Finnish nature. We appreciate our country’s vast wild spaces, the thousands of lakes and islands, and respect the privacy they afford us.
Taking a rest and steering with my toes, I sailed away from the small islands at the edge of the Gulf of Finland. On the horizon on the right is Klovharu, the small and remote islet where Tove Jansson and her companion spent their summers.
Some of my clothes were already wet from the rain, and the cold, damp air had gotten into my bones, so instead of sailing farther east I headed back west to a small island owned by the yachting club I belong to. The sauna there would warm me up. I sailed past a three-mile-long broken chain of islets and granite outcroppings at the edge of the Gulf of Finland. One of the islets is Klovharu, nothing more than a knoll of bare rock rising from the open sea. On this remote island artist, cartoonist, and creator of Moomins, Tove Jansson and her companion Tuulikki Pietilä spent summers for nearly 30 years. (Moomins are hippopotamus-like children’s-book characters whose popularity spread from Finland to all of Scandinavia, and the UK, Japan, and even the former USSR.) There are no trees on the island, only bare granite, rocks, and a small one-room cabin with a chimney in one corner. Tove and Tuulikki had a wooden rowboat with a small outboard, and fished for food whenever the wind allowed. When it was blowing hard they could not get off the island, but Klovharu was their refuge and their inspiration. They fell in love with the open sea, the abundant sunlight, and the storms that swept past their island from time to time.
As AANAR was gliding slowly in the calm reflecting sea, I was tempted to head for some of the small outer islands near Klovharu, but being surrounded by the open sea, there is always some swell, making landing tricky, especially when I’m on my own. I sailed instead to Äggskär, which has a harbor sheltered by two surrounding islands.
There is plenty of space in the boat for one man and camping gear. The dark grey box is for food and the transparent one is the kitchen containing a camp stove. Clothes are packed in watertight bags; sleeping bag and mat fit under the small foredeck.
Äggskär is a pine-forested island the size of few football fields; it sits at the center of a tight archipelago of five other islands. The bay between Äggskär and Långholmen to the east is littered with boulders; low slabs of rusty-colored granite bedrock rise from Äggskär’s eastern shoreline. After landing at the pier I grabbed my kitchen box and some food and walked to a firepit near the rocky shore. I cooked hotdogs over an open fire and brewed a strong latte with a moka pot. I usually take a refreshing dip in the sea whenever there is an opportunity, but I passed this time, still feeling chilled from sitting in the boat during the cool morning.
From Äggskär to Furuskär, the island owned by my yacht club, it was going to be 8 miles tacking upwind, so soon after lunch I left and raised sail. The wind was very light but gradually increased as I passed by the southernmost tip of Emäsalo Island. The sun was getting low, and I still had some tacking to do before I would reach Furuskär. When I arrived I was ready for the sauna. A private island with a sauna might sound like something fancy, but the sauna, typical of those in the area, is a very modest log building measuring only 9’ by 7’ with a tiny dressing room on other side. Inside the sauna there is a wood-burning stove and benches on one wall. The steel stove, streaked with rust, has a water tank attached to it, supplying hot water for washing. There are hundreds of thousands of these summer-cottage saunas along the coastline around the many numerous lakes of Finland. It is estimated that in all of Finland there are two million saunas.
I got the fire going and heated the sauna up to 175 degrees (80°C), and relaxed on the upper bench. I slowly soaked up the heat and gradually started throwing more and more water over the hot hissing stones, and a cloud of hot vapor gently curled down from the ceiling, making the humid air feel a whole lot hotter. The sauna was close by the shoreline, just a short walk down to sea for a refreshing swim. The combination of hot sauna and cooling effect of the water gave my body a rush and an instant feeling of deep relaxation and comfort. It was not so effective as it is during the winter, but good enough.
Warmed up and with dry clothes, I launched the next day and sailed farther west in a steady wind of 10 knots. I was going upwind and hiked out to keep AANAR going fast with a moderate heel. It is in conditions like these that I enjoy sailing the Coquina most. With my one hand on the helm and the other on the hard-pulling sheet, AANAR was briskly climbing up and down the gently sloping waves with water splashing hard against the lapstrake hull. The lugsail had a perfect full form and was driving us powerfully, and I had just enough weight on the rail to keep her from heeling too much.
Kaunissaari means “Beautiful Island,” but much of its shoreline can be quite menacing where waves break on bare rocks and cliffs.
My destination for the night was Kaunissaari, a mile-long island some 5 or 6 miles to the west. With this moderate wind it would only take an hour and a half to get there, so I took a tack to the southeast and into the sheltered village bay of Pirttisaari, a former fishing village. The bay is protected from all directions, and has small piers, boathouses, and wooden villas with red, white, and yellow façades all around its shoreline. I strolled along a narrow path through the well-maintained gardens with rose bushes, colorful flower benches, and neatly mowed lawns stretching all the way to the shoreline. After passing a half a dozen villas, I continued deeper into the island; the narrow path turned into a wider sandy trail, where the alder and pine trees were taller and shading the narrow winding road.
I returned to AANAR, cast off from the dock, and raised sail again. The wind had died, so I found myself doing little more than drifting as I tried to get out of the bay and through the narrow channel. With a few painfully slow tacks I managed to struggle out of the channel. There was still a swell running from the wind earlier in the day, and AANAR was rolling in the waves with little speed, the sail and spars sagging and swinging from side to side. I could have taken the sail down and pulled out oars, but I decided to wait. In half an hour the wind picked up again, and I reached Kaunissaari after a couple of hours. I sailed in between the harbor’s twin curved breakwaters of mounded boulders. The 200-yard-long natural bay behind the breakwaters was crowded with boats and surrounded by alder trees hanging over the water. I made a smooth landing in one of the free spots on the dock with sail still up.
While all of the other boaters visiting Kaunissaari were stuck in the shadowed harbor, I had the best view all to myself just a short walk away.
A young couple with kids in a boat tied up next to me had come for the night in a classic Danish Coronet, a fiberglass day-cruiser motorboat with a small cabin. The kids were wondering where I sleep. I showed them my tent and then packed the camping gear into a bag and walked a few hundred yards along the south shore. I found a meadow of hay and flowers just 20 yards from the sea with more than enough room for my tent and an unobstructed view into the light blue vast Gulf of Finland. As the fading sun bathed the rocks and cliffs with amber light, I had a swim in the cool and clear water. I toweled dry and relished a cup of port wine sitting on the still-warm bare stone. I soon turned in for the night and fell asleep listening to the swell breaking into the rocky shore.
Rays of sun warming up the tent woke me up, so I packed my gear, and had breakfast and coffee on the pier. I took a 2-mile walk along the path going around the island. On the northern, more sheltered side of the island the dense spruce forest pushed up tight against the shore. The path was in deep shade and the only sunlight I could see was shining on the islands across the water to the north. I rounded the western part of the island and turned south, where serene meadows were surrounded with crooked alder trees and rugged cliffs that had been worn smooth by the last ice age. I saw a few tents and campsites, but they were well hidden behind the rocky knolls, bushes, and trees, so this part of the island, while popular, did not feel crowded.
This was the first clear day of the week, and as I set sail my eyes were overwhelmed by the brilliant light and the bright blue sky. The wind was nothing more than a gentle puff, the sea calm and reflecting, so I was able to take the outer route back to the southern tip of Emäsalo. AANAR was slipping gently eastward in a broad reach, making 3 knots. I tucked the tiller extension into a slot between the bench and the hull and left it locked there. Sitting in the middle of the boat facing the stern, I could steer by shifting my weigh slightly from one hip to the other. I sailed literally by the seat of my pants for half an hour.
On my last day out I stopped for a lunch in the quiet lee of Onas island. A small natural harbor there is protected by a row of boulders.
Halfway home I turned north along the east shore of Onas Island and landed behind a natural breakwater of rocks. I was less than 3 miles from Emäsalo, and, in no hurry to end this trip, I would have a leisurely lunch before heading home. Twenty meters up a gentle slope from the beach there was a fire pit surrounded with rough-hewn wooden benches. Instead of fire I used my camp stove, and while waiting for a potful of potatoes to cook, I admired the bright mahogany sheerstrake and shining white curving hull of AANAR resting peacefully, tethered to the breakwater. To my right were white and yellow flowers rising between the rocks of a rugged shore and small alder trees with branches curving over the distant blue line of the horizon. My mind was clear and my spirit lifted by the serene views and the sight of a small boat so full of character. I was already planning a next venture, and would bring my kids to share in all this coast and this boat have to offer.
Mats Vuorenjuuri is the father of three and an entrepreneur, making a living in graphic design, photography, and freelance writing. He has sailed his whole life and has restored wooden sailboats and motorboats. He currently owns a small open plywood motorboat, a traditional Finnish lapstrake racing rowing boat with sliding seats, and the Coquina.
Herreshoff’s Coquina
In the winter of 1889 N.G. Herreshoff designed Coquina for himself. He had been sailing small boats all his life and was at the prime of his creativity, so surely this was going to be an exceptional boat. The original Coquina had cat-ketch rig and rope steering. Our Coquina, AANAR, was built in Finland in 2000 for a farm owner who was a passionate sailor. In 2010 he turned 70 and was ready to pass it on, and by that time had forgotten the name of the builder. AANAR was built of locally harvested pine with lapstrake construction and was rigged with a single standing lugsail and equipped with tiller steering. The lugsail is very fast to set up, and simple to control. The mast and yards fit into the boat while trailering. AANAR sails well to windward, but being light and relatively narrow she is lively and requires hiking out in anything but light winds. Herreshoff carried some ballast in his Coquina, but he also had two rigs, the larger being 183 sq ft, which he thought was too much for ordinary sailing.
Our Coquina’s hull is as Herreshoff designed it, but the rig is a single lugsail. Without the usual mizzen in the way, we can use a tiller rather than the rope steering system that Herreshoff used. The Coquina is lively and fast and for the first two years we owned her we used her mainly for daysailing and taking part in RAID Finland. It was only later that we found AANAR well suited for camp-cruising.
Off the wind the Coquina is remarkably fast for her size. She has a fine entry, the distinctive Herreshoff reverse curve on her forward waterline, and a subtle form that lets her slide effortlessly through water. While the boat is not designed to plane, AANAR does occasionally exceed her hull speed, with the help of waves, and reach 6 to 7 knots. Sailing straight to downwind can be a bit challenging, the big single sail pulling on one side and waves rolling the boat. The addition of a boom vang made sailing downwind and on a broad reach much more comfortable and efficient.
With her narrow hull, curving sheerline, and low freeboard in the aft section, she looks more like a racehorse than a working one. She is surprisingly seaworthy, though, and we have made some crossings safely with winds around 20 knots. We have one reef in the sail, but when reefed down her performance upwind is decreased significantly.
She has ample space for gear and two people, but is a bit crowded with three people on board. I find AANAR is sensitive to weight, performing best when lightly loaded. Once you get her moving, the Coquina rows well, keeping a steady track, but she is a bit heavy for rowing longer distances.
For safety, I have installed four 15-gallon (55-liter) flotation bags underneath the aft deck, side benches, and forward bench. For navigation we have a fixed compass on the centerboard case, and charts in watertight shield bag. Camping gear, tent, sleeping pads, and bags fit under the decks. Clothes packed in dry bags get lashed in the middle of the boat for additional flotation. Food and kitchen utensils are stored in plastic boxes that are easy to hoist ashore when camping.
—MV
[table]
LOA/16′8″
Beam/61″
Weight with rig/450 lbs
Sail area/120 sq ft
[attr style=”font-weight:bold;”]Draft
Board up/8″
board down/36″
[/table]
If you have an interesting story to tell about your adventures with a small wooden boat, please email us a brief outline and a few photos.
I have been using sprit rigs for decades and currently have one for my Good Little Skiff and two of them for my Delaware ducker. Of late, sprit rigs seem to have become less popular for small boats than the lug, which is more easily reefed. But there is a lot to be said for a sprit rig, whether boomed or boomless. If set up the way fishermen and hunters once had them, they are ideal for trailerable boats. The sail is laced to the mast and can be dropped into the step, a sheet reeved, and off you go. My sprit rigs live in long, loose, and slippery bags of light fabric. To unpack a bag, I untie it, flick the rig vertical, and pull the bag down; I’m ready to step the mast with everything attached to it. To put the rig away, I lift up the foot and pull the bag on over it, then work it along the bundled sail and spars.
Ben Fuller
For transport, a bag sewn of light, slippery cloth keeps the bundled sprit rig compact and not prone to getting snagged.
The key to working with a sail, sprit, and mast—and boom if you have one—is to have it all in a bundle. To create this you need a brail line. As Pete Culler showed us in his book Skiffs and Schooners, a light, slippery line is fixed to the throat grommet, then run to a small brass thimble sewn to the leech and run back to another thimble on the opposite side of the throat, and then down the mast. I use a clove hitch to tie the brail in, a grommet punched to the leech, and a small block or ring at throat. The distance from the peak to the grommet is the same as that from the peak to the throat. If you have a boom, you need a little block of wood on the bottom with a bee hole in it, set at a distance from the boom jaws that’s equal to the length of the sail luff. For a boomed spritsail the brail is run through the bee hole on the boom, not a grommet on the leech, and gathers up both boom and sprit.
Ben Fuller
A small block tied to the throat sends the brail down along the mast. The sail here is reefed and brailed. Note the throat pennant takes a hitch around the mast before it heads up to be tied to the masthead.
I tie the tail end of the brail to the tack grommet, leaving enough slack in it to let the sail set properly. To furl the rig, haul on the part of the brail that lies alongside the mast, leaving its end tied to the tack. When it has bundled the rig, I clove-hitch the brail onto the tack thumb cleat, which has a thumb just long enough to drop the hitch onto it. I then have enough slack brail to run up the mast and to make a lashing around the bundled sail and spars to keep everything together.
The other key to managing the sprit rig I learned from Joe Liener, and was done by the Delaware ducker and sneakbox sailors: using a peak pennant. This is a light line tied on to the grommet at the peak of the sail and run down the sprit to a rolling hitch or to a small wooden cleat. It keeps the grommet in place on the sprit even when there is no tension on the snotter or indeed if the sprit is out of the snotter completely when doing a nice, tight roll of the sail around the sprit. When you next raise the sail, the peak is ready to go. The peak pennant is long enough so that if you have to scandalize the sail (remove the sprit and fold the sail from throat to clew), you can pop the sprit out of the snotter and pull the sprit down far enough to grab the pennant and not have the peak slip off the sprit and flap out of reach.
The major objection that many have to the sprit rig is that it is hard to reef and that when it is reefed, it doesn’t set right. This can be fixed. Some people use multiple thumb cleats or relatively sticky line to lower the snotter on the mast so that the sprit can continue to bisect the peak, as it must for the sail to set right, when the sail is lowered. Sliding the snotter down the mast probably worked well in the days of manila, but today’s synthetic lines are slipperier. Since I don’t want to have an extra thumb cleat on my mast, I use a snotter pennant, a light line that has a loop to slip over the snotter’s lone thumb cleat, and a tail end that is tied to the snotter’s wrap around the mast.
Ben Fuller
A pennant for the throat takes the place of a halyard and requires the rig to be lowered to reef the sail.
Lowering the sprit can create a problem on some boats if the butt of the sprit hits the deck or gunwales. This is easily solved by using the peak pennant. The grommet normally rests on the shoulders of the sprit, but if the grommet is large enough, it can be turned to a right angle to the sprit and can be slid past the shoulder. The peak grommet needs to be big enough so it can be slid a foot or two down the sprit. Then you can run the sprit up past the peak far enough so that its butt doesn’t hit the deck. The peak pennant runs up to the sprit shoulder and is clove-hitched there. If the grommet is too small to slip past the sprit’s shoulder, you can loop the pennant around the sprit, thread it through the peak grommet, and then tie it off on the sprit’s shoulder.
I only reef the spritsail on my skiff about 10% of the time or less, so to keep the rig simple, I don’t use a halyard. A throat pennant ties the sail to the masthead. It’s another bit of light line, this one somewhat longer than the depth of the reef.
If I need to reef, I’ll brail the sail, unstep the mast, and drop the whole rig in the boat. This has lots of advantages. Instead of standing up and bouncing around, I am nice and stable, just lying a-hull; I may even have a cup of coffee from my Thermos. I untie the throat pennant, pull slack in the luff, and tie the luff tack cringle to the sail’s tack. To reduce the number of lines, my tack lashing is an extension of my luff lace line that is clove-hitched to the throat, then spiraled down the mast through the luff grommets. It is clove-hitched to the tack, then looped around the mast under the tack thumb cleat, then clove-hitched again to the tack. The tail end has enough extra so I can use it to lash the throat reef cringle to the throat so I don’t need an extra line. I then pull on the throat pennant to tension the luff and clove-hitch it to the masthead.
Having dealt with the luff, I shift the snotter down but don’t hook the sprit back in yet. I hook the snotter pennant over the snotter thumb cleat and half-hitch it to the snotter loop on the mast. If you frequently reef, the snotter pennant can be permanently lashed to the snotter, measured to the correct length, and a loop tied in to hook over the thumb cleat. (If you leave this in place, you have an extra line where you need it when you lash the bundle together for transport.) Then, after you’ve lowered the snotter, if needed, slide the peak grommet down the sprit and tie the peak pennant to the sprit shoulder. Hook the sprit’s bottom on to the snotter and set the snotter just tight enough so the sprit doesn’t come loose. Tie in the reefpoints. Restep the mast. I set up my rig so that I just relead the sheet into the reefing clew, leaving a bit of slack at the end of the gathered foot of the sail which hangs down a little, but you can use a clew line or pennant to lash the reefing clew to the sail’s clew so you don’t need to shift the sheet. Tighten the snotter, cast off the brail, and go sailing.
Ben Fuller
Pennants for the peak, throat and snotter allow the spritsail to be reefed and hold a good shape.
My skiff’s sprit sail is about 75 sq ft, as is one of my ducker rigs. I don’t race these boats, so I don’t need lots of parts to the mainsheet; I can give the boat a bit of luff if I can’t pull hard enough to haul the sheet in. For the skiff, I make the mainsheet off on one quarter knee, then just run it through the clew grommet, and back to a turning block on the other quarter knee. I have a half pin protruding down from a hole in the sternsheets set up so I can take a turn around it and use a slippery hitch to make it fast (something I learned as the doryman’s hitch). Having the sheet run through a grommet rather than a clew block creates a bit of friction that makes it easier to hold. For the ducker, there is a block lashed to the boom with a sheet that comes up from a becket block (I use a modern ratchet block) that is snap-shackled to a pad-eye fastened to the plank keel.
Boats that I have rigged with lugs are easier to reef, but there are more pieces to the rig package and masts are relatively longer. The sprit’s simplicity is compelling for boats that are frequently launched and recovered, and rarely reefed. And walking down to your boat, boots on, oars and rig on one shoulder, bag with lunch and foulweather gear in the other hand takes you back a century or so to a simpler time.
Ben Fuller, curator of the Penobscot Marine Museum in Searsport, Maine, has been messing about in small boats for a very long time. He is owned by a dozen or more boats ranging from an International Canoe to a faering.
Brailing Spritsails
Sidebar photos, SBM
A boomless spritsail is brailed with a grommet or ring on the leech.
With the spritsail brailed, the sheet is half-hitched around the lower end of the bundle to keep it snug against the mast.
For a spritsail with a boom, the brail is threaded under the boom.
A plastic fairlead keeps the brail in place.
The brail gathers up the boom, sprit, and sail without having to adjust either the sprit or boom.
A sprit boom is self-vanging so it can’t be pulled up by a brail unless the forward end is lowered and secured near the tack.
A line though the tack and around the mast with a loop tied in it holds the boom in position for brailing.
The brail for the sprit boom runs through a wooden block with a beehole.
With the boom brought down even with the foot of the sail, it is ready for brailing. The sprit’s snotter has been eased to lower the peak to make the sail easier to brail.
After the boom and sprit are repositioned they can be brought up tight against the mast.
Harbor Furl
A harbor furl makes a bundle tighter and neater than that of a brailed sail. Slip the sprit from the snotter and hold it parallel to the mast keeping the peak held high. Fold the clew over the sprit and roll the sail up until it is snug against the mast. You can use the snotter to tie it there.
—Ed.
You can share your tricks of the trade with other Small Boats Monthly readers by sending us an email.
While sanding is easily the most pedestrian task in building a boat, rounding edges is probably next in line. It’s a job that has to be done to give paint and varnish a fighting chance to protect the wood they’re applied to and to give the boat a benign, skin-friendly touch. Sanding edges will do the job, but raises a lot of dust and doesn’t automatically produce uniform results. A router equipped with a corner-rounding bit will work too, but routers are noisy and because they cut in just one direction they often work against the grain.
My Stanley No. 28 is still working but looking a little the worse after 37 years in workshops both indoors and outdoors.
Many years ago I bought a Stanley No. 28, a bar of steel with question-mark ends and elliptical holes that round corners to a 1/16″ and a 1/8″ radius. There was also a No. 29 that cut 1/4″ and 3/8″ edges. These tools are no longer made by Stanley, but you can find them for sale on the Web as vintage or antique tools, which, at my age, stings a bit because I bought mine new.
The new incarnations of the Stanley tools by Veritas do excellent work and are a pleasure to use.
Veritas Tools of Canada has made very similar versions of the tools. They’re the same length (5 3/4″) and cut the same radii as the Stanley 28 and 29. The openings are larger than those of the Stanley tools, making a wider throat that requires a bit more care and attention to avoid raising a sliver. The tools are simple to use and can cut either pushed or pulled to suit the run of the grain, though I prefer to switch the work around so I can pull the tool. You can see the wood as it meets the cutting edge, and you’ll be able to tell if the grain has turned against you and stop before you raise a big sliver. You can further minimize that risk by starting with the next smaller size cutter. Veritas includes a sharpening system: a special sanding block set up with the four radii for the different cutting grooves and the large curve on the other side. Silicon carbide 600-grit waterproof sandpaper wrapped round the block hones the metal.
The Veritas sharpening block has all five radii for honing the cutting surfaces. The tools’ black finish gets removed by the 600-grit sandpaper wrapped around the block, leaving polished steel.
These tools stop cutting when the corner is cut to the designated radius, so you get uniform results, and they have a very short contact area so they will work curved edges. They will also cut across grain, though you’ll want to start with the 1/16″ cutter and work your way up to the radius you need, pulling into the workpiece to keep from splitting its corners off, and do a little fine sanding to smooth the surface. They’re a pleasure to use and easy to keep handy in a pocket.
The Radi-Plane is limited to a single radius and working straight edges.
The Radi-Plane, originally made by the L.A. Mathers Company and now reproduced by Rockler and Shopsmith, is a more complex tool. It has a hardwood body, a brass right-angled sole, and two 1/4″-thick carbide-tipped cutting blades. The front blade is set slightly shallower to make a first cut and leave the finishing work to the back blade. Set-screws accessed through the top of the plane adjust the blade depth, and a pair of set-screws on either side of each blade lock it in position. While the blades hold a good edge and should, in theory, cut oak as well as they do mahogany, the Radi-Plane feels like it’s skating on the harder wood. It cuts a radius bit over 1/16″, which can be a good match for working the edges of risers, inwales, and outwales. You have to do the work before such pieces are installed: The 7″-long sole of the Radi-Plane doesn’t do well with even gentle curves. The cut is so shallow that it doesn’t take much to put the work out of the blade’s reach. The Radi-Plane is of more use for furniture making than for boatbuilding.
The blades for the Lee Valley beading tool can be easily filed to a corner-rounding profile. The tool produces coarse dust instead of shavings.
Following my article on a homemade profile scraper, one reader noted a commercially made tool by Lee Valley that also cuts beads. The tool will also round a corner to a 1/16″ or 1/8″ radius with the blades available. You can work other radii by filing a plain blade end or a blank blade. The tool cuts by scraping, rather than by cutting, and can be an advantage on wavy grain. But the tool is small, just 5″ long, and designed to be held with the fingertips, and the blades are only about 1/32″ thick, so its calling is light work.
A bit of steel pipe can be made into a corner rounder that works like the Stanley and Veritas tools.
If you’d like to make your own corner rounder, a piece of steel tubing can do the trick. I used some chrome-plated tubing that was kicking around in my metal scrap bin. It has a diameter of 1″—about the same as the curve at the end of the Veritas tool—and a wall thickness of a thin 1/16″—a bit shy of the Veritas. I started cutting the groove across the pipe with a bench grinder and then refined it with a rat-tail file. The sides of the groove need to be flared out to form a 90° angle when the groove is viewed from the end, otherwise they’ll gouge the work, and its ends need to be beveled to create the cutting edges. If you just file straight across, the tool won’t cut. Veritas uses a cutting angle of 15°. Hone the edges inside and out with 600-grit sandpaper wrapped around dowels to match the diameter of the groove and the inside of the pipe.
Christopher Cunningham is the editor of Small Boats Monthly.
When Sean’s friend Robert saw the lines for the little double ender, he said: “We have to build that!” And together they did.
Sean Russell of Comox, British Columbia, has been writing books—the Charles Hayden historical naval fiction novels—and designing boats, lots of them, for years. He started drawing lines by hand and then worked with CAD programs—first Hulls, then Prolines, and finally Delftship. He set out to do his own design of every type of rowing and small sailing boat, and to date he has amassed a catalog of several hundred designs.
Sean’s drawings for SWEET PEA
Sean liked the look of the Beach Pea—a 13′ peapod designed by Doug Hylan for glued-lapstrake plywood construction—and decided to draw up a peapod of his own. Inspired too by Baby Boat, a 6′11″ double-ender made from a single sheet of plywood, Sean designed his peapod to be a diminutive 8′ 1-1/2″ by 45″, sized for kids to row. He drew the waterplane as large as possible to give the boat good carrying capacity, and made the bottom rather flat to keep the initial stability high, an important consideration for a boat without a transom to help steady it.
The molds were cut from computer-generated patterns; once they were set up on the strongback the strips went on perfectly fair.
Sean showed his drawings to his friend Robert Hale, an avid builder and restorer of wooden boats. Robert’s reaction was enthusiastic: “We have to build that!” The two were soon in Robert’s shop building SWEET PEA, the first of Sean’s designs to come to life, his first work of non-fiction you might say. SWEET PEA would be strip-built, but neither of them had any experience with the method, so the learning curve was steep. They sawed strips from red cedar planks and milled them with bead-and-cove edges. The strips set parallel to the sheer got them off to an easy start, but as they progressed along the stems and toward the turn of the bilge, the boat’s short length and wide beam proved a difficult form to work with.
Long shop-made sanding boards like the one resting on the hull played an important role in getting the strip-planking faired before sheathing it with fiberglass.
Applying strips in a chevron pattern at the stern got them around most challenging curves, and a large diamond of strips parallel to the keel finished the planking. “I would not recommend this as a first-time project,” Sean warned, “It was quite a challenge.”
Robert (left) and the author take a break after finishing the planking. The bends on such a short, chubby boat were fairly extreme, especially around the stern, which was blunter than the bow. Laying the strips at a chevron-like angle was the only way to get them to take the curve.
The hull was sheathed inside and out with 6-oz fiberglass cloth set in epoxy. Douglas-fir was used for the inwales, outwales, sheer guards, and seats, and oak for oarlock pads with blocks of cherry as bases. The seats, glued up with strips of fir, are admittedly “quite elaborate” and strong, but the three of them weigh 15 lbs, a quarter of the boat’s 60-lb overall weight.
Tucked in van, SWEET PEA is ready to launch. The keel and skeg give the hull good tracking ability while under way.
Sean has carried and launched the boat solo, and while the weight is manageable, the size is a bit awkward for one; with two people, carrying is a breeze. While SWEET PEA could easily be transported on a roof rack, Sean just loads her in the back of his van.
The only things SWEET PEA has in common with a peapod are the two pointy ends. Her name is a reference to a character in the old Popeye cartoons.
With a pair of 7′ straight-bladed oars SWEET PEA “rows beautifully, doesn’t hobbyhorse, tracks perfectly, and takes no effort to make her go.” The boat carries two adults with ease and fares well in waves up to 2′ and big powerboat wakes. When Sean and his wife go sailing in their bigger boat, SWEET PEA rides on the mother ship’s deck, and gets launched and retrieved with the aid of a halyard.
While Sean designed SWEET PEA as a boat for kids, it turned out the boat was quite capable of serving grown-up requirements, and he hasn’t yet given any kids a shot at sea trials. They’ll have to wait their turn.
Have you recently launched a boat? Please email us. We’d like to hear about it and share your story with other Small Boats Monthly readers.
I trust Joshua Slocum’s Sailing Alone Around the World needs no introduction here. I have three copies of it: the paperback volume I read in seventh grade, my father’s 1950 hardback, and a 1905 edition I received as a gift from my friend Paul Thomas. Every time I pick up that oldest book, I think of the hands that opened the cover over a century ago to sign it.
A 1905 edition
Slocum signed this book 9 years after completing his circumnavigation. Ill at ease at his home on Martha’s Vineyard, he spent much of his time sailing the East Coast aboard the aging SPRAY and occasionally selling copies of his book. At the time he signed this book in May of 1907, he was in Washington, D.C., and had a meeting with President Theodore Roosevelt at the White House.
Yours very truly
Joshua Slocum
Onboard the Spray
Washington D.C.
May 19th 1907
Susan Slocum Dyer is a writer and teacher living in Metlakatla, Alaska.
Last month Slocum’s great-great-granddaughter, Susan Slocum Dyer, spoke at Seattle’s Center for Wooden Boats and brought with her stories about the world’s first solo circumnavigator and some keepsakes that had been passed down to her. Susan’s mother was born a Slocum, the granddaughter of Benjamin Aymar Slocum, the second son of Joshua and his first wife, Virginia Albertina Walker. When Susan was eight years old, great-grandfather Benjamin told her that she was the great-great-granddaughter of “the greatest sailor who ever lived.” Young Susan asked what had become of him, and Benjamin told her he was lost at sea and probably drowned. “He was the greatest sailor who ever lived,” she replied, “and he drowned?! I’m never going near the water.”
Before making his circumnavigation of the globe from 1895 to 1898, Joshua and Virginia—“the love of his life,” Benjamin often said—spent much of their life aboard ships under his command. Susan had with her a handwritten page listing children born to them. On one side of the page were the children that are recorded in the historical record—Victor, Benjamin, Jessie, and James—but on the other were the names of three more children: twins Frederic and Edith, and Helena. None of them survived infancy. They died at sea and, but for the piece of paper Susan had, would have been forgotten. I found an extensive genealogy of the Slocum family online, and those three names are indeed missing from that record. Susan noted that when Helena died, Virginia couldn’t stand to bury another child at sea, so Joshua embalmed her in brandy so she could be put to rest ashore. That story had survived in a letter Virginia wrote to her mother in 1879, but the infant’s name wasn’t mentioned. Susan brought Helena’s name to light.
NORTHERN LIGHT was one of the ships under Joshua’s command. Susan brought with her the ceremonial flag flown by the vessel, an enormous flag of dark blue with white stars. Susan had studied it carefully and found repairs done in many different patterns of stitching, an indication of how many people had cared for the flag. One of the people attending the talk asked if there was any significance to the stars and to their arrangement. Susan suggested that there was a connection between the stars and the man Joshua was accused of murdering. While sailing AQUIDNECK, a ship he commanded prior to NORTHERN LIGHT, Slocum had to repel an attack by pirates. He shot and killed one of them. He was tried and acquitted. Susan was coy about the connection between the shooting and the stars, and knew more about the case than she was going to reveal to us, saying only, “Believe me, I have evidence.”
This is the flag that was flown from NORTHERN LIGHT while it was under Slocum’s command. (The light blue area is created by a projector aimed at the screen behind the flag.)
She also brought a small oilcan that Joshua had used aboard the SPRAY. Her mother had given it to her as a gift at a time in Susan’s life that she had evidently been stuck and in need of a little help to get running smoothly again. To see things that belonged to Joshua Slocum, and to hear stories about him that were known only to his family, was quite moving.
If you haven’t read Sailing Alone Around the World, do yourself a favor and get a copy. It belongs in your bookshelf.
I had to take the Forward-Facing Rowing System apart to make a change before I fit it to my Whitehall, and in the process of removing the 8 stainless-steel nuts and bolts, I found that seven of the nuts wouldn’t budge, and the only way to remove them was to twist until the bolts sheared. I may have twisted an odd bolt or two off in the past and chalked it up to corrosion, but to have seven out of eight new bolts go was odd. (In defense of the Forward-Facing Rowing System, the change I made was unique—the bolts don’t normally need to be removed.) I thought the ends of the bolts might have been damaged, but some of the bolts that sheared had several threads extending out of the nut and they looked like they were in good condition. I didn’t try a shot of WD-40—there wasn’t any sign of corrosion.
Eight stainless-steel 1/4 x 20 bolts, seven nuts seized up by galling
I took a look on the web and discovered the phenomenon is called “galling”—“thread galling” when it happens with nuts and bolts. Galling is also called “cold welding” and occurs when susceptible metals undergo a lot of pressure and friction. Nuts and bolts can literally be welded together. Galling can be prevented by giving the threads should get some lubrication before nuts and bolts are joined. I had a very old tube of anti-seize goo in my shop—I had’t used any in years—and to my surprise the label said “anti-galling.”
I bought a new set of bolts and nuts and gave them a smear of anti-galling goo before I installed them on the rig. In the future I’ll used the goo more regularly to save a few bucks on ruined fastenings.
After I’d bought the replacement nuts and bolts, I was on my way out of the hardware store with a handful of stainless steel just as another customer who was about to leave came up behind me. I waited a moment and held the door open for him. He went through without saying thank you or even putting a hand on the door. He passed by me less than a foot away but didn’t even look at me. Now that’s what I call galling.
"Sweet lines” is often the first thing out of the mouth of classic-boat aficionados having a first look at an Abaco dinghy. It’s no wonder legend has it that this traditional Bahamian workboat had a role in inspiring Capt. Nat Herreshoff’s famous 12 1/2 daysailer. Dinghy owners call them little jewels and will lavish hundreds of hours and many thousands of dollars on full restorations.
During the mid-20th century, yachtsmen began gravitating to the Sea of Abaco in the Bahamas. Lying between the Abaco Cays—Green Turtle, Great Guana, Scotland, Man-O-War, and Elbow—to the east and Great Abaco Island to the west, the Sea makes a sheltered cruising ground. Visitors found friendly islanders with accents like Cornish fishermen, clear blue water rife with reef fish, and good breezes. They also found a vibrant wooden boat building industry on Man-O-War Cay and in Hope Town on Elbow Cay. The yachtsmen and expats proved a ready market for local workboats to be used as daysailers and racers.
Nobody knows for sure when the first Abaco dinghy was built, or who built it, but the type has been around as a small fishing boat since the late 1800s. Dinghies are traditionally either 12′ or 14′ overall, with a 5′ beam and a 2′ draft. During the middle decades of the 20th century Abaco boatbuilders like Maurice Albury on Man-O-War Cay and Winer Malone at Hope Town launched hundreds of dinghies for fishing, daysailing, and racing. Some builders had government contracts to turn out dinghies to supply the Bahamian fishing fleet.
An Abaco dinghy carries a catboat rig on an unstayed mast. The large three-sided sail (about 200 sq ft) has a nearly straight leech and a long, loose foot with a deep roach. The sail’s large headboard, known locally has a “banana board,” can be adjusted to tension the leech for different wind conditions. Sails were traditionally cotton, but today they are Dacron or Oceanus sailcloth. Hope Town–built boats are fully open; many Man-O-War boats have the bow decked over to just aft of the mast partners. The dinghies usually have a notch in the transom for a sculling oar.
With their carvel plank-on-frame construction, full keels, and wineglass transoms, Abaco dinghies are more like little ships or scaled-down versions of the bigger Abaco fishing smacks than actual dinghies for harbor transport or towing behind yachts. Like bigger Bahamian smacks and sloops, Abaco dinghies are built without plans from the keel up by what local builders often refer to as “mother’s wit.” Boatwrights work from a traditional formula. The beam is half the keel length. The transom measures three-fourths of the beam. Mast height is twice the length of the keel. Abaco dinghies have subtly curved stems; they’re raked on Man-O-War boats and nearly plumb on Hope Town boats. Abaco dinghies have a graceful sheer, low freeboard, and keels with moderate drag. The greatest beam is slightly forward of amidships.
To begin construction, builders lay a keel and attach a stem, a sternpost, and a transom. Then they construct a mold or use one handed down over generations for the center rising-frame. Many builders add a forward frame and a stern frame, too. These three frames are connected by ribbands to the stem and transom. Once the ribbands outline the shape of the new hull, the rest of the frames can be hand-cut to fit before the hull is planked.
photographs by Jay Fleming, jayflemingphotography.com
DANDY’s owner Dave Pahl hefts a bit of the locally grown corkwood that provides crooked timbers for sawn frames.
Planks are 3/8″ to 7/16″ thick. Builders use natural crooks shaped with hand tools for frames. These frames are 1″ wide with varying depth and are set on 12″ to 15″ centers. Traditionally, builders used local mahogany they called madeira or madera (Portuguese and Spanish for timber) for framing crooks, but in more recent years they have used corkwood. Planking, gunwales, and decking are either cypress or Caribbean pine. To season the lumber, boatwrights soak it in the harbor for six months. In the past, builders used iron boat nails and brass screws. Restorations use bronze. Getting the planks to make the sharp twist running aft into the wineglass stern is not for the novice builder. Similarly, shaping the garboards and the planks at the sharp turn of the bilge requires advanced boatbuilding skills.
A few decades ago the demand for dinghies fell sharply. Abaco fishermen had turned to speedy fiberglass runabouts, and easily available wood began to disappear. Few orders came to the builders and aging boats began disappearing, but fortunately, Hope Town cherishes its strong maritime and sailing tradition and booms as a mecca for cruising yachts. Here, with the support of the active Hope Town Sailing Club, local lovers of traditional Bahamian small craft have been reviving the fleet of dinghies. In the U.S., boatbuilding programs like The Apprenticeshop in Maine began teaching a new generation of boatwrights how to build and sail the Abaco dinghy.
These days, people go to great lengths to get an Abaco dinghy. After searching for years for a dinghy of their own, Dave and Carol Pahl, “snowbirds” with a winter home in Hope Town, rescued one from a Hobie Cat dealer in New York. Following a couple of years of stripping and refastening it in the U.S., the Pahls shipped their boat to Hope Town at considerable expense. They finished the restoration and launched the 14′ DANDY this winter.
Sculling is common in the Bahamas and the Abaco skiffs often have sculling notches in the transom instead of oarlocks or tholes on the gunwales. The notches are set to port and the sculling is done left handed, freeing the right hand for other tasks.
I had a chance to sail DANDY one blustery February morning in Hope Town Harbour when Dave said, “Go have fun.” With the wind veering through 50 degrees and ranging from flat calm to 18-knot puffs, I had great conditions for getting to know DANDY. Leaving the dock in virtually no breeze, I sat on the floorboards and waited to see if this vessel would move. To my delight her big, deep-bellied sail filled with wind I could barely feel, and we slipped out into the harbor on a dead run.
Howard Chapelle notes “The Bahama sail is always made long on the foot and not excessively lofty. This, with the heavy roach at the foot, brings the center of effort low by modern standards for a triangular sail.”
As soon as we found clear air, the wind suddenly blew 12–15 knots. DANDY charged forward with noticeable acceleration. We took a gust as I was putting her on a close reach and the boat heeled over abruptly. With DANDY’s long boom, there’s a lot of sheet to manage, and I was slow at trimming. The end of the boom and the clew of the sail dragged in the water before I could trim in or adjust my weight to windward. As I got things under control, I reminded myself that DANDY’s round bilges and relatively narrow beam made her tender. In these blustery conditions, having a second person in the boat as ballast and a sheet tender would definitely have been an asset.
How she screamed along on a reach! With small adjustments to the tiller, I let DANDY run a swift and easy slalom between the yachts in the mooring field. Hardening up onto a beat, I found that DANDY pointed like a typical 100-year-old workboat design. She didn’t like to go closer than 45 degrees to the wind. But even with dramatic shifts in the direction and intensity of the breeze, she held a pretty consistent 25 degrees of heel as long as I was quick to trim the sheet with the puffs and lulls. If I was the least bit slow to ease the sheet, DANDY could dip her lee rail and ship water. In these conditions with just one person aboard, she had a notable weather helm.
“Unstayed masts were sometimes looked upon as a safety factor, for it was thought that the bending of lofty masts spilled the wind out of the sails to some extent in a knockdown. In the Bahamas, the unstayed masts are thought to permit carrying sail longer, before reduction becomes necessary….” Howard Chapelle
I was exhilarated but busy . More than a few cruisers came topside on their boats to watch. Crews on motoryachts and runabouts stopped to look and take pictures as this sailing anachronism worked her magic. But I was too busy in the blustery conditions to bask in the glory. Her boom was only about a foot above the gunwale. The sail blocked my vision to leeward unless I lay with my shoulders against the windward rail so I could peep under the sail. Once again I wished that I had a shipmate, this time to act as a lookout.
I had heard that Abaco dinghies are hard to tack, but in the calm water of Hope Town Harbour, DANDY had no problem. With her full keel, she just required a firm shove on the tiller to bring her around. She did not come around fast, though. The sheet, hanging beneath the boom, tended to catch on the back of my head. With the big sail and unstayed rig, jibing has to be carefully controlled to be safe.
Growing bolder, I sailed out into the Sea of Abaco to see how DANDY would do in a hearty wind and choppy waves. She loved beating into the froth and was remarkably dry. In a beam sea she had an easy roll as long as I sheeted the boom in far enough to keep it from tripping in the waves. Clearly, DANDY’s type had been built to fish and travel in these conditions—but tacking her into this chop was no easy matter. Unless I fell off on a screaming reach and roll-tacked her like a modern racing dinghy, DANDY wanted to stall.
Ghosting back to the dock, I was still throbbing with adrenalin. While she would be an easy daysailer for a couple in winds less than 8 knots, in blustery conditions she was a thrill ride, and to sail her safely I needed to be on top of my game.
Abaco dinghies have long had a reputation for being good sailers in the strong tradewinds of the Bahamas.
With DANDY added to the fleet, Hope Town now has 14 Abaco dinghies sailing and racing. More restorations and new boats are in the offing. During my visit, I found a trio of folks under a harbor-side tent stripping paint from an old dinghy in preparation for a full restoration. Internet threads highlight a resurgence of interest in the type, too, among both modelers and amateur builders.
Local builders don’t use plans but lines drawings, offsets, and construction details are available from The Apprenticeshop. Construction is challenging, so if you want one of the Abaco boatwrights or the Apprenticeshop to make you a new dinghy, keep this in mind: Sweetness comes at a price.
Randy Peffer is a frequent contributor to WoodenBoat, the captain of the research schooner SARAH ABBOT and a relentless racer and gunkholer in all manner of small craft from canoes to catboats.
Particulars
[table]
Length/12′ 3.25″
Beam/4′ 9.5″
Draft/1′ 4″
Sail area/93.5 sq ft
[/table]
(Dimensions above and the lines drawings below are from the plans offered by The Apprenticeshop. They represent an Abaco dinghy built by Maurice Albury on Man-O-War Cay in 1952, and measured by D.W. Dillion in 1985.)
For a new Bahamian-built dinghy (likely to be somewhere north of $20,000) contact:
The Apprenticeshop in Rockland, Maine offers plans for $35 and can build an Abaco dinghy for around $10,000 to $25,000, depending on material selection and size—anywhere from 12′ to 20′. Address inquiries to Kevin Carney, Lead Instructor.
Howard Chapelle includes a description and drawings of what he calls a Bahama dinghy in American Small Sailing Craft. The 14′ 5 1/2″ boat was built at Hope Town in 1898.
Is there a boat you’d like to know more about? Have you built one that you think other Small Boats Monthly readers would enjoy? Please email us!
Subscribe For Full Access
Flipbooks are available to paid subscribers only. Subscribe now or log in for access.
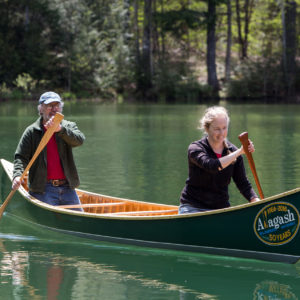
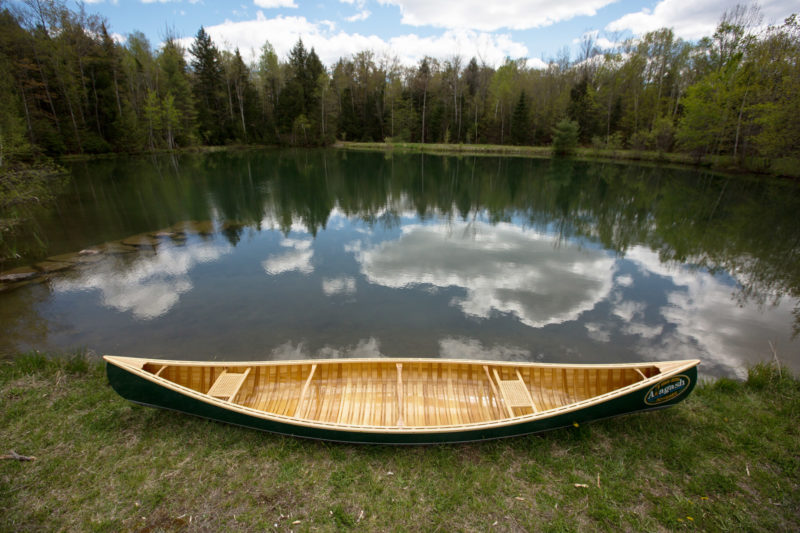 all photographs by the author
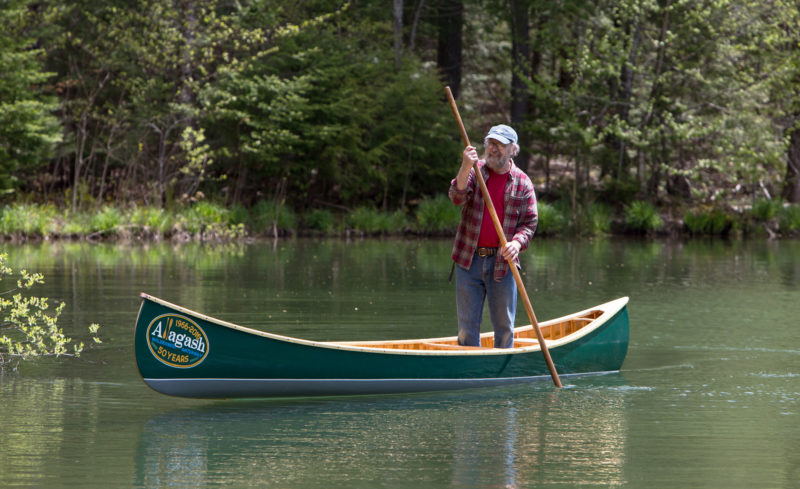
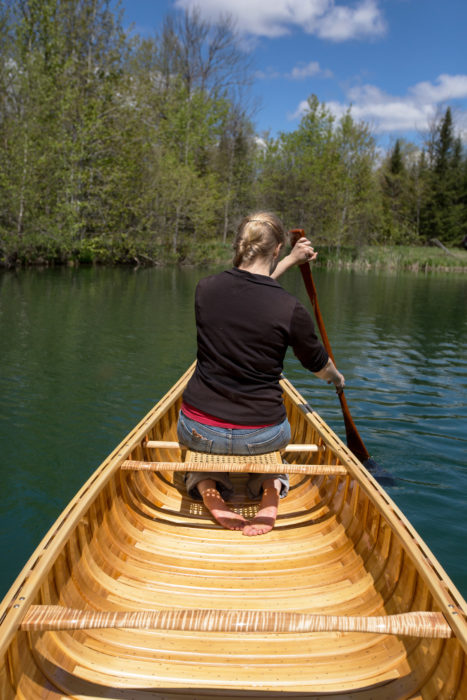
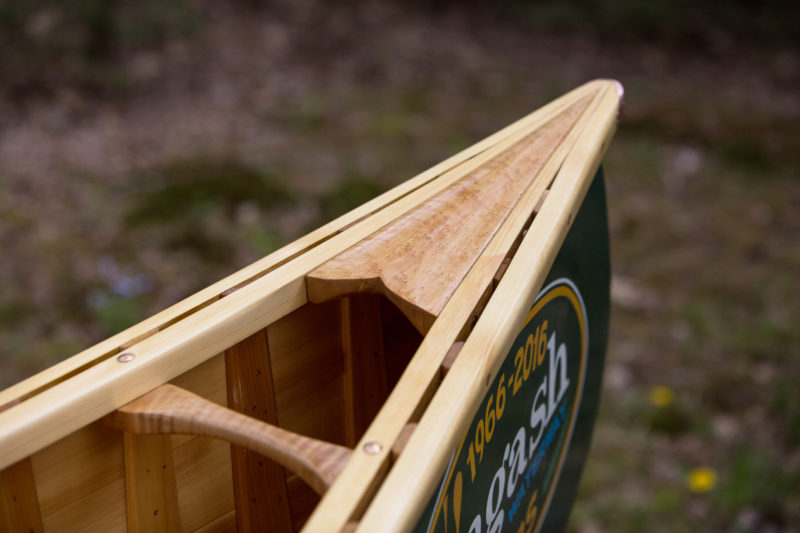
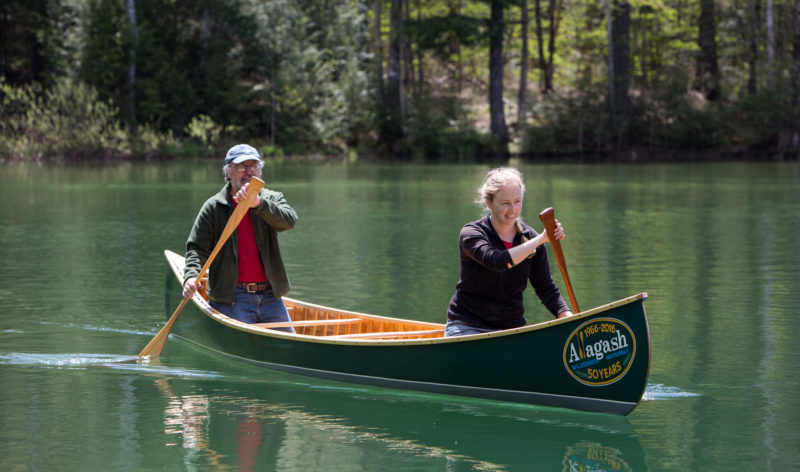
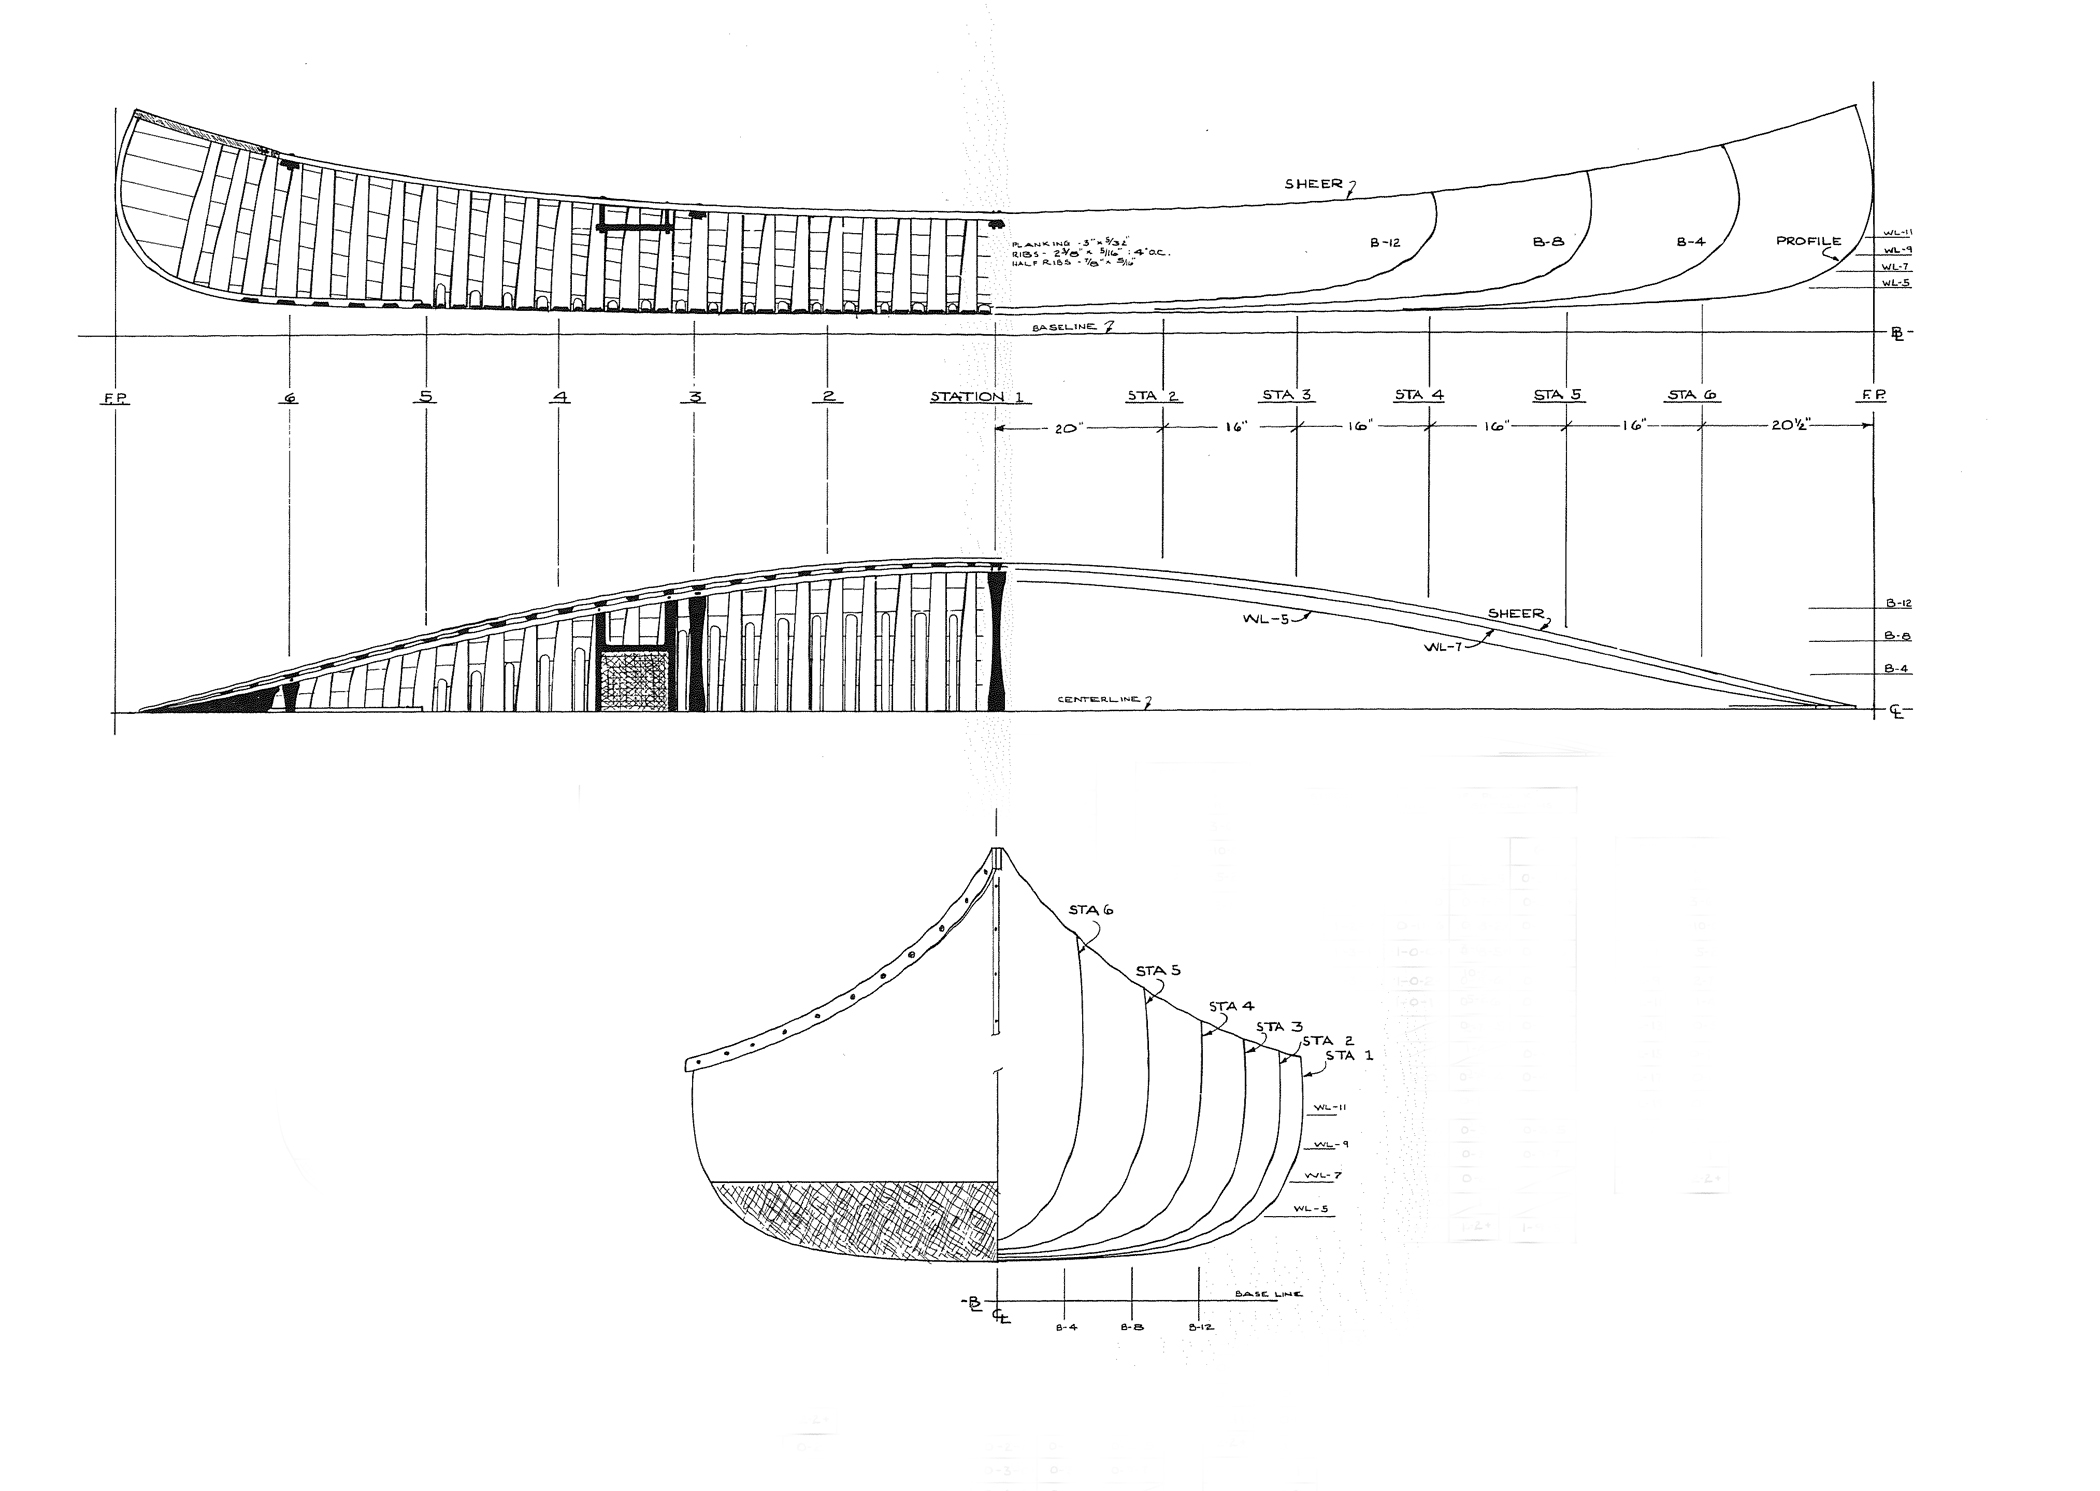
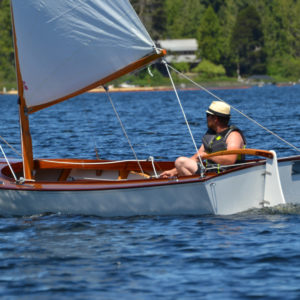
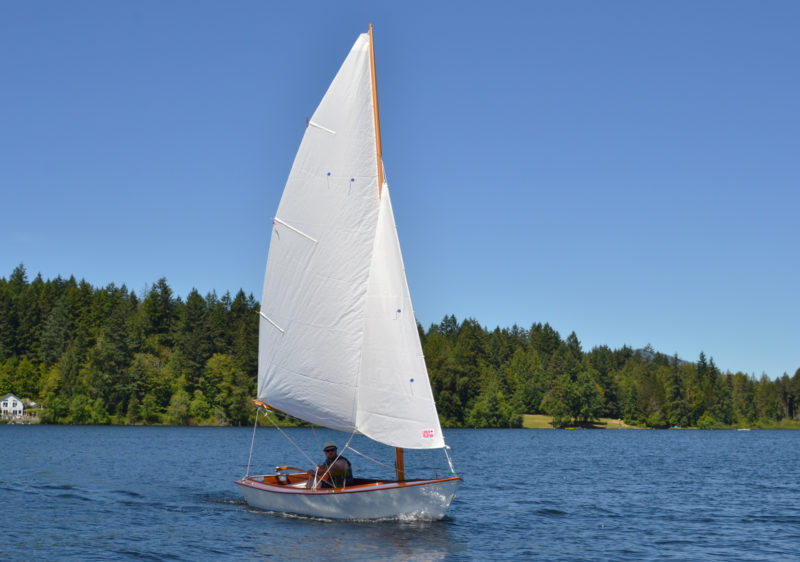
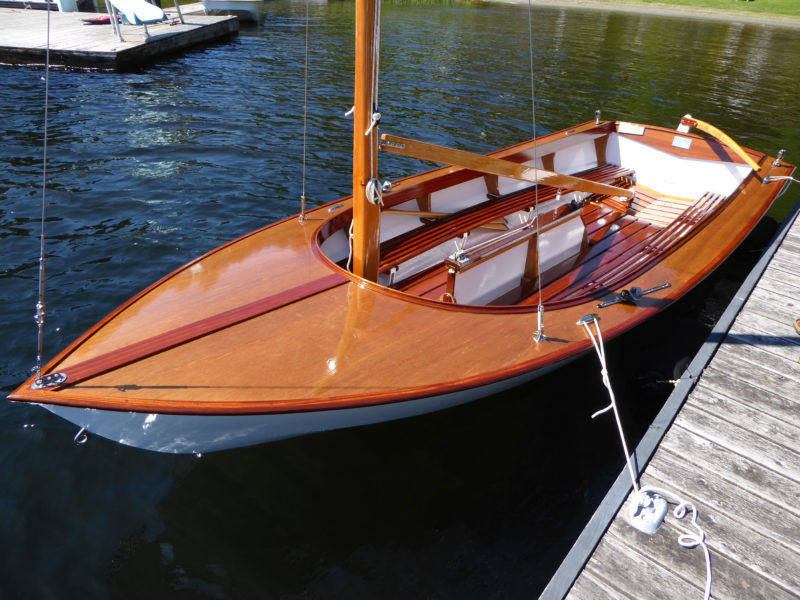
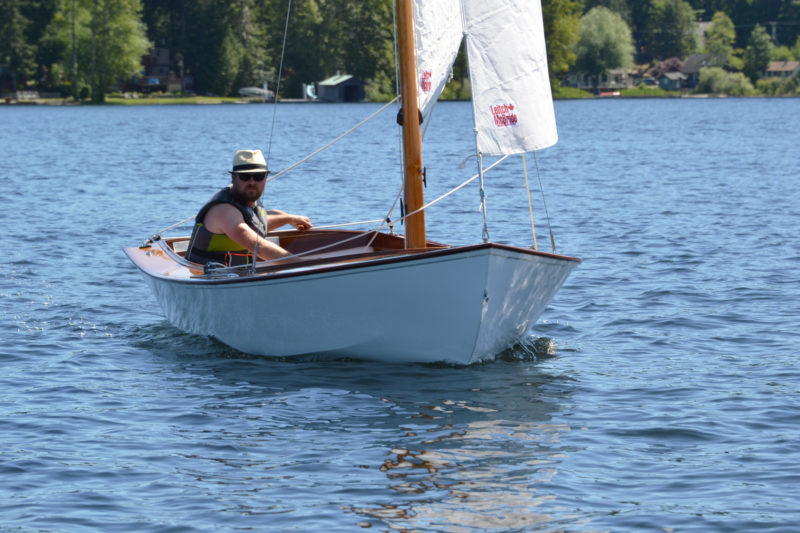
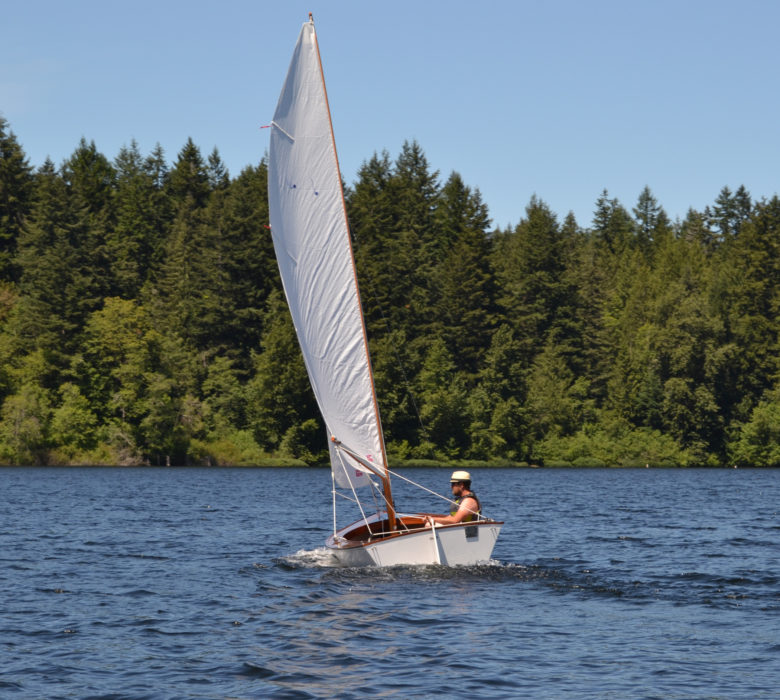
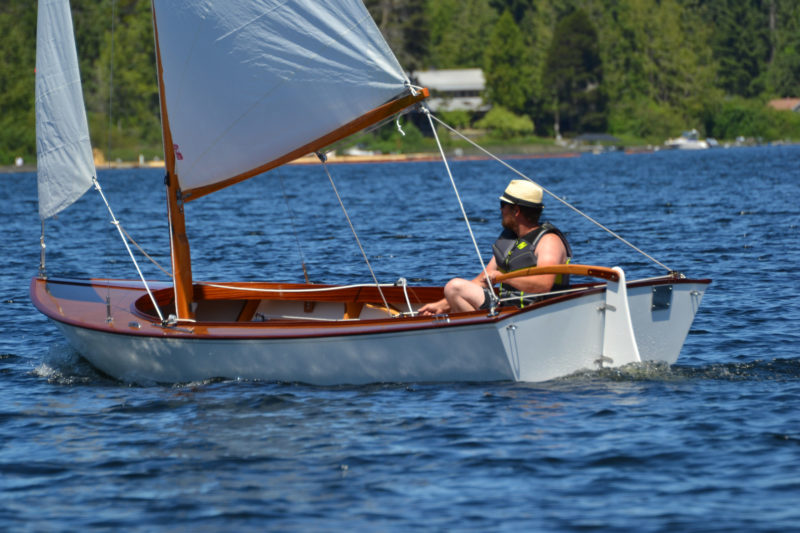
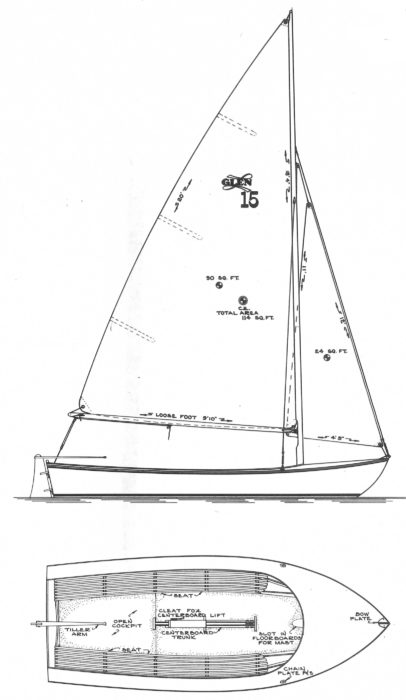
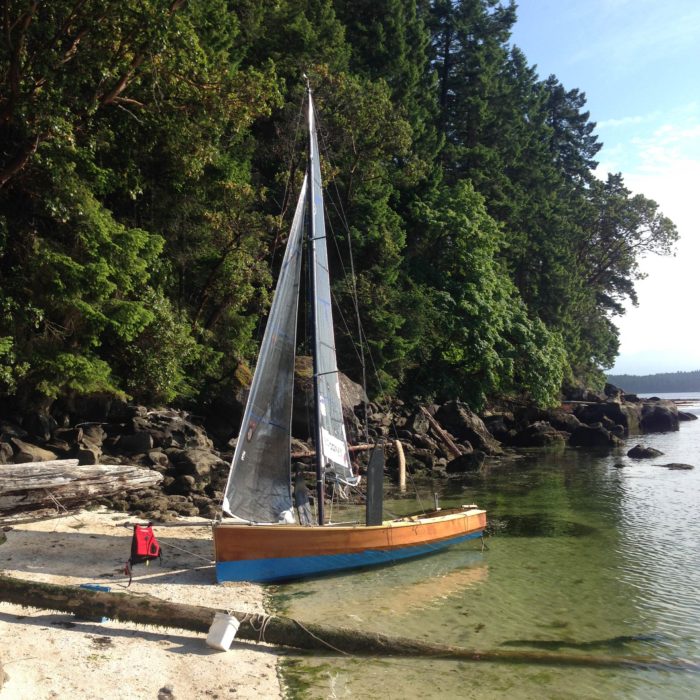
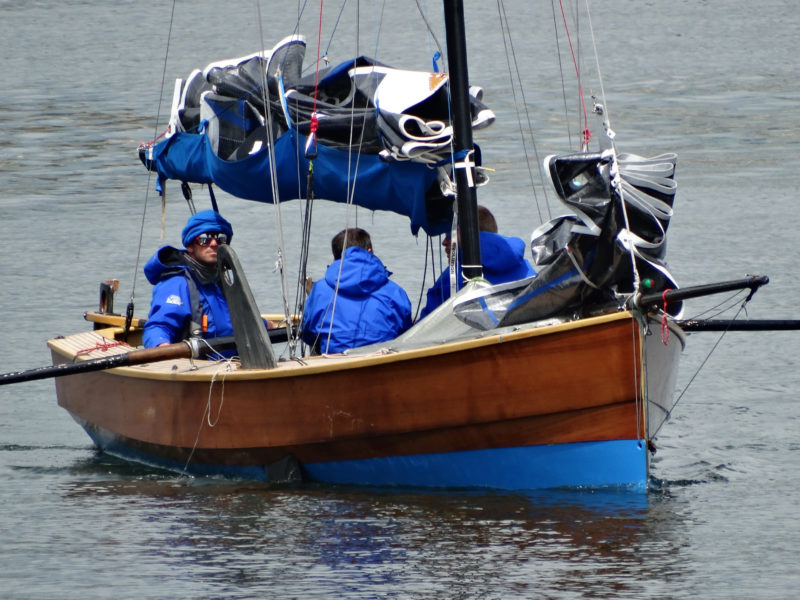
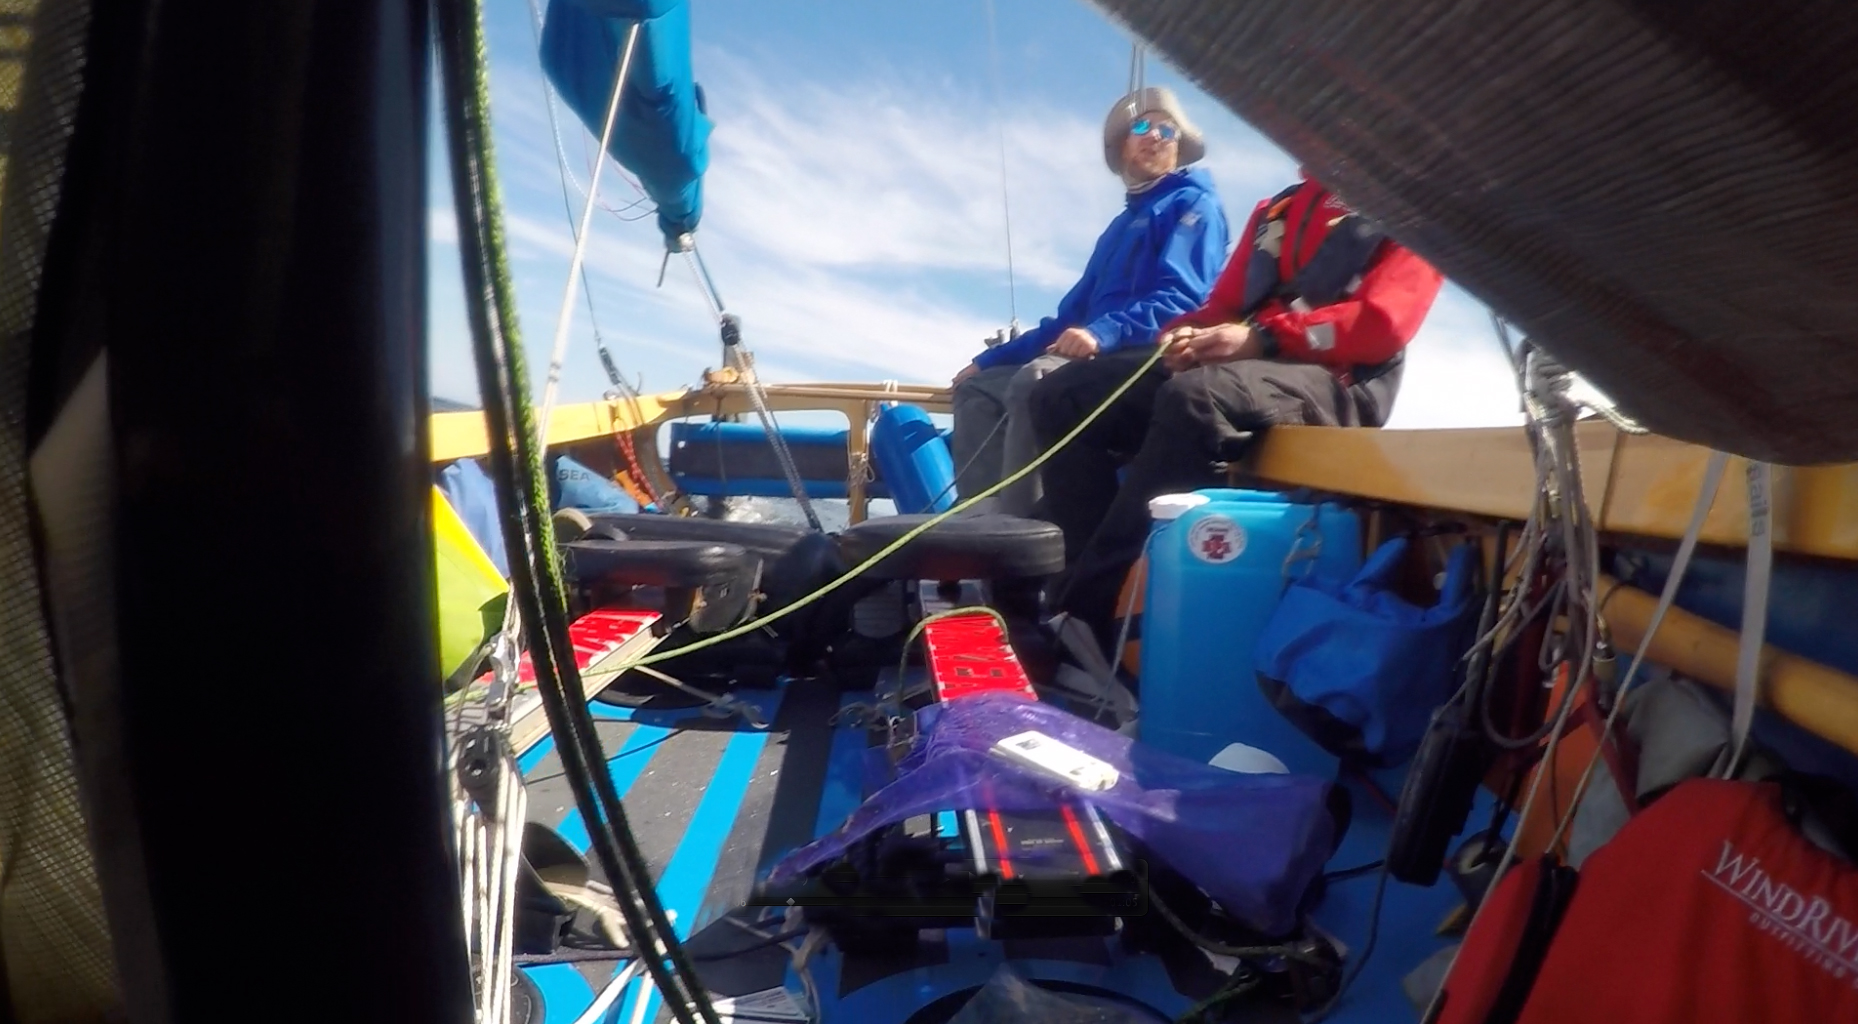
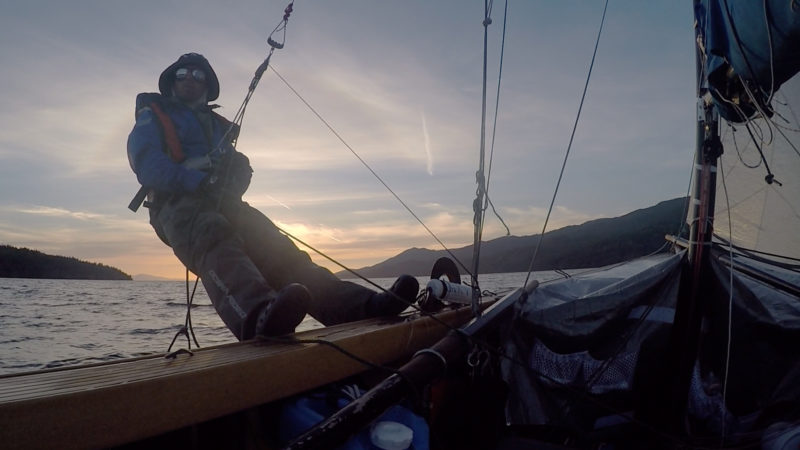
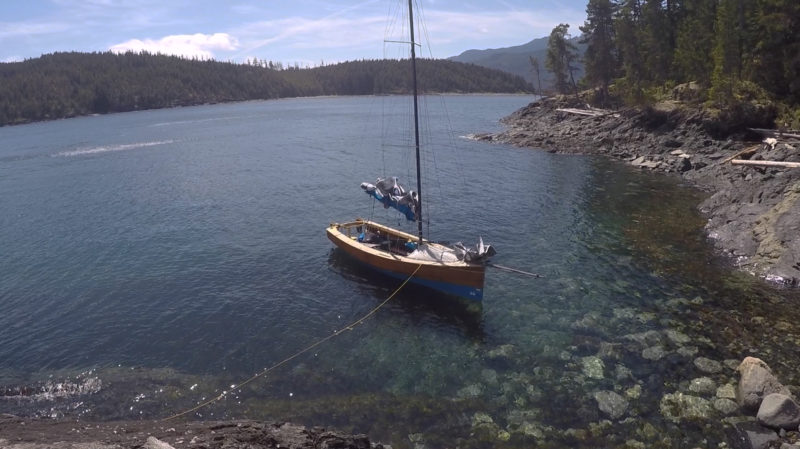
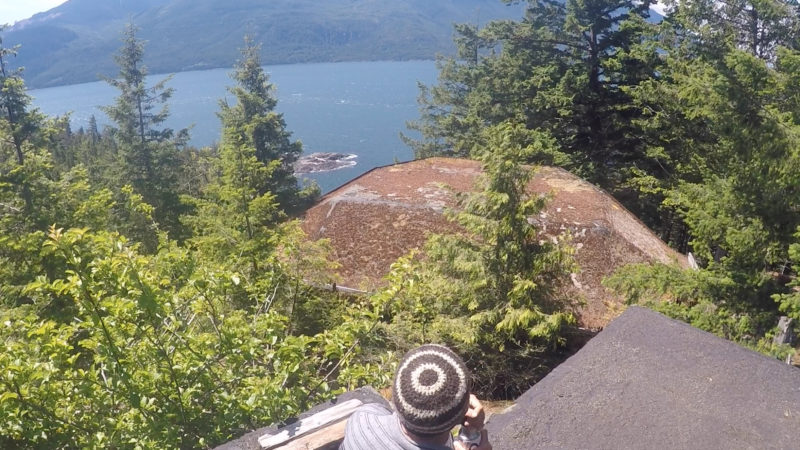
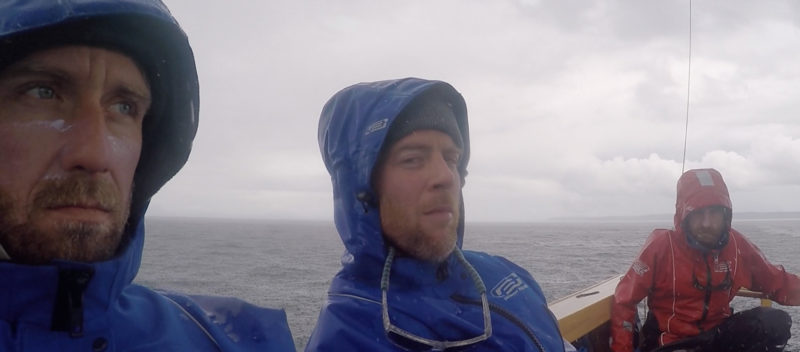
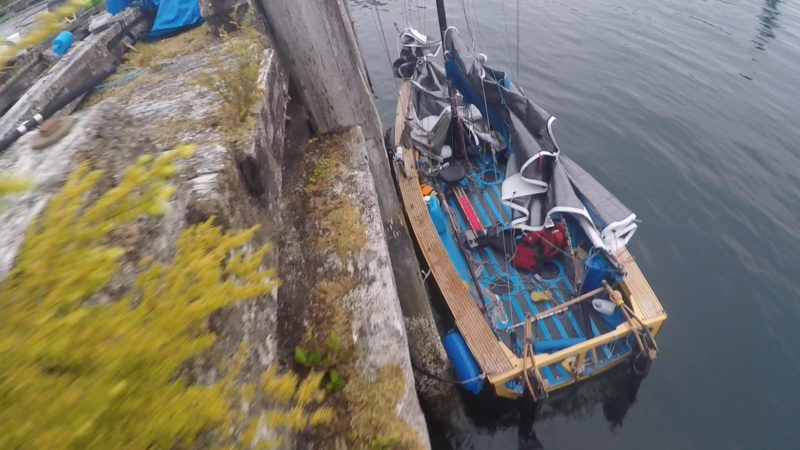
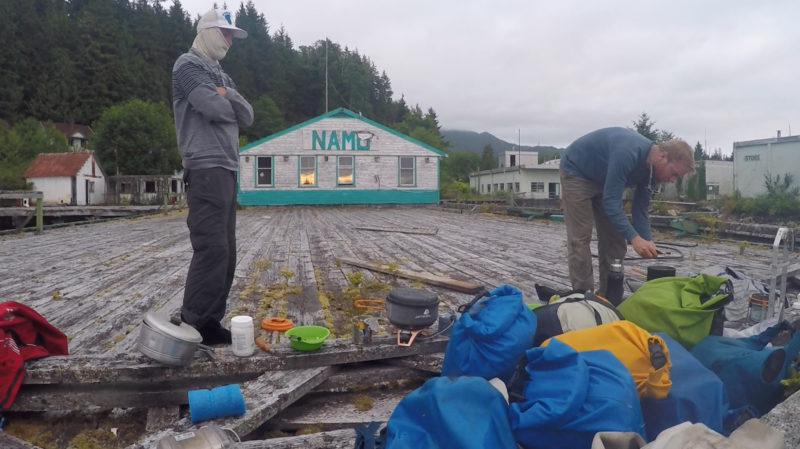
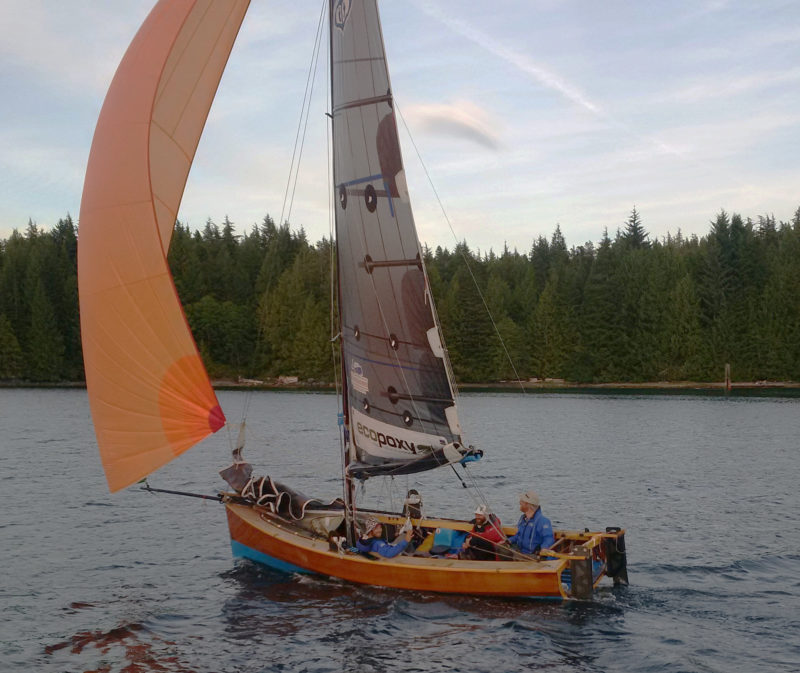
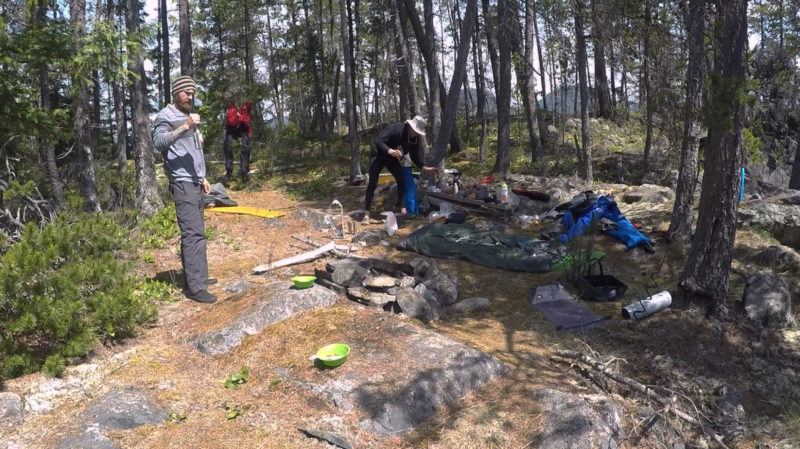
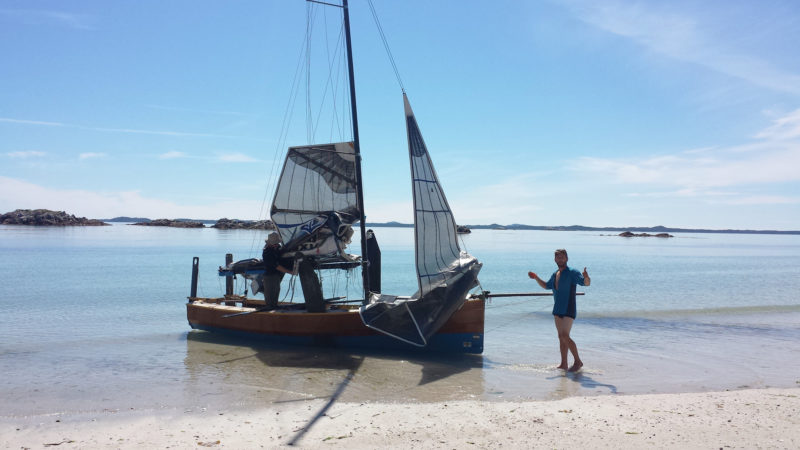
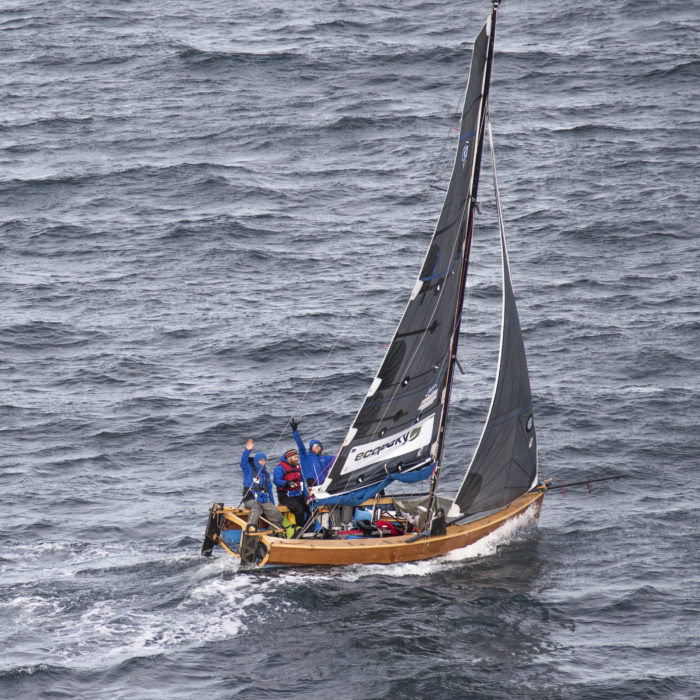
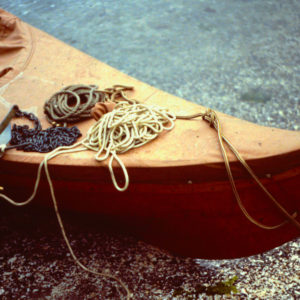
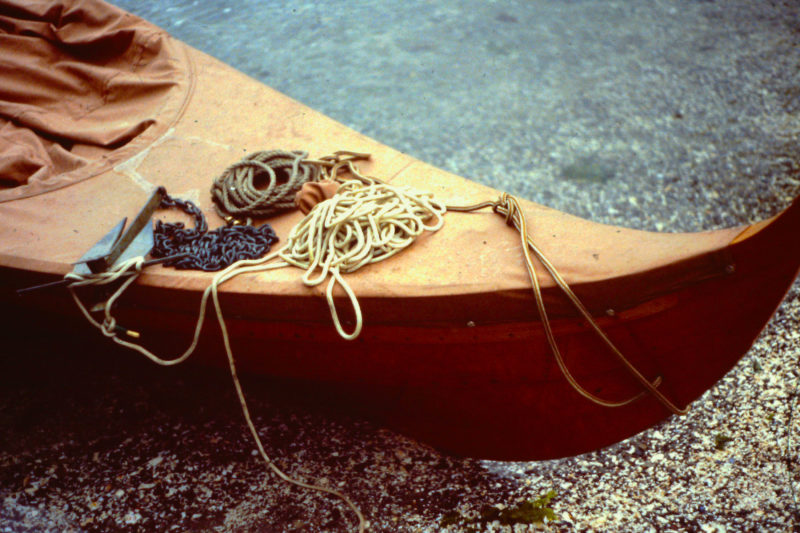
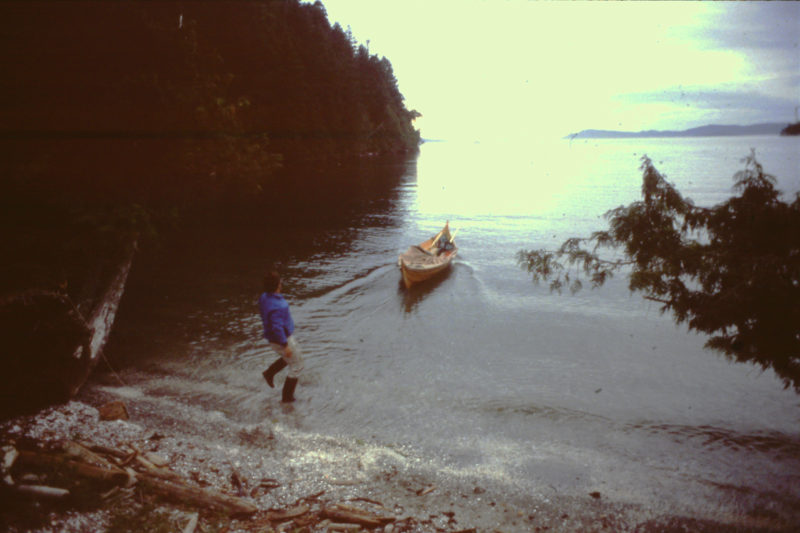
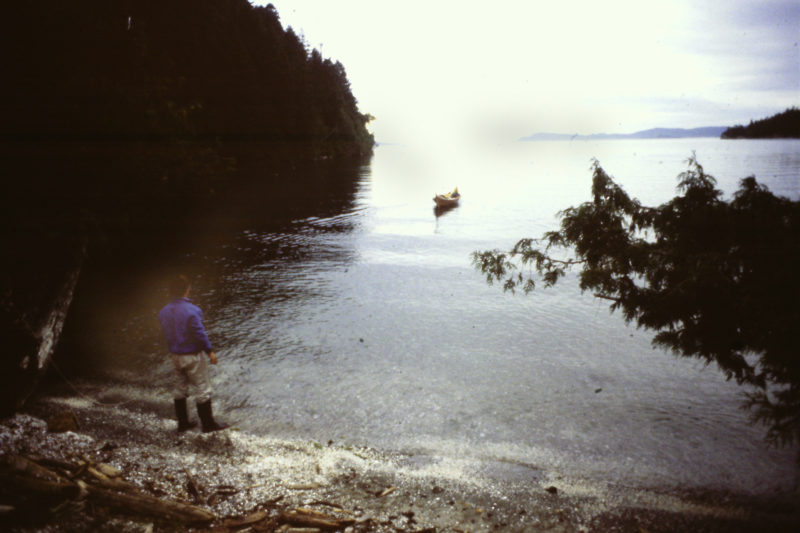
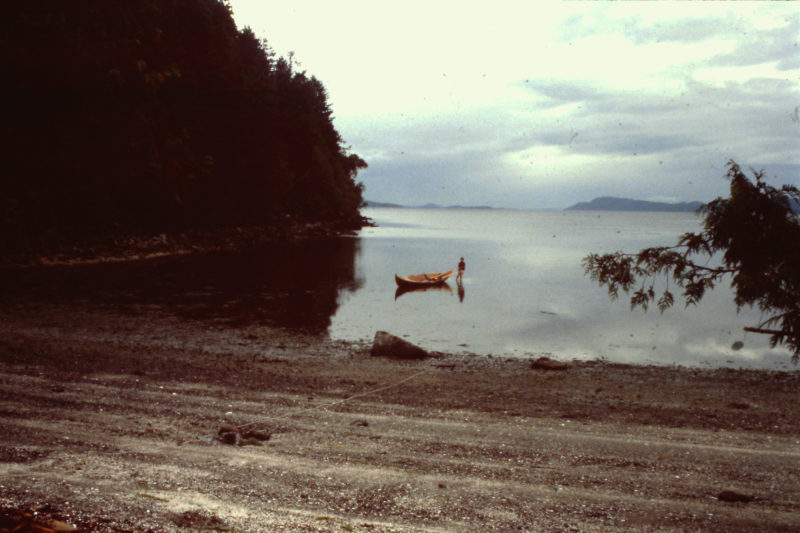
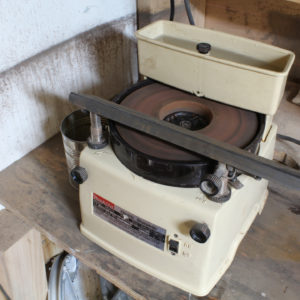
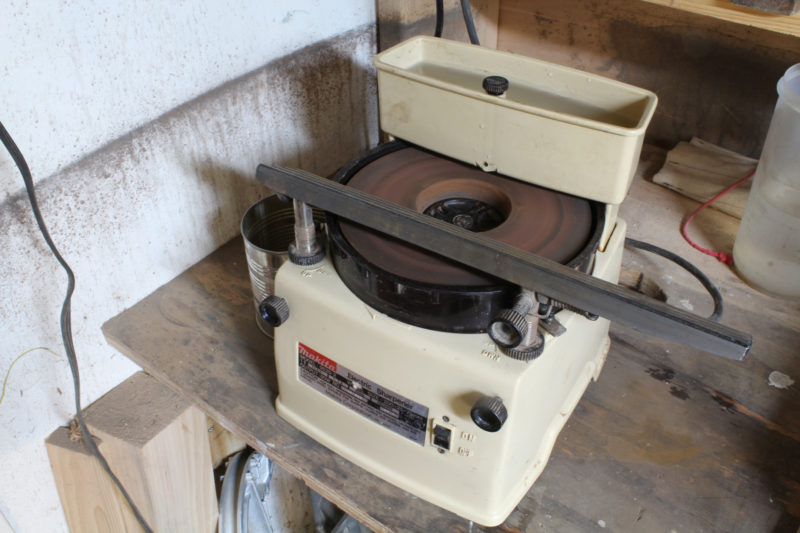

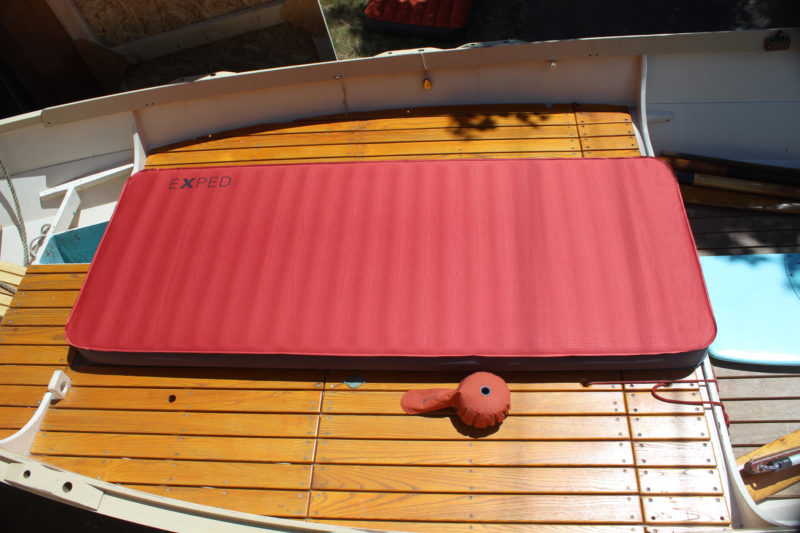
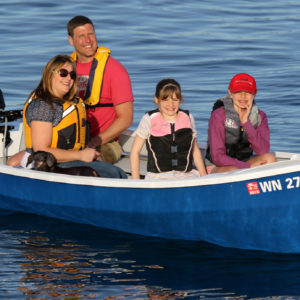
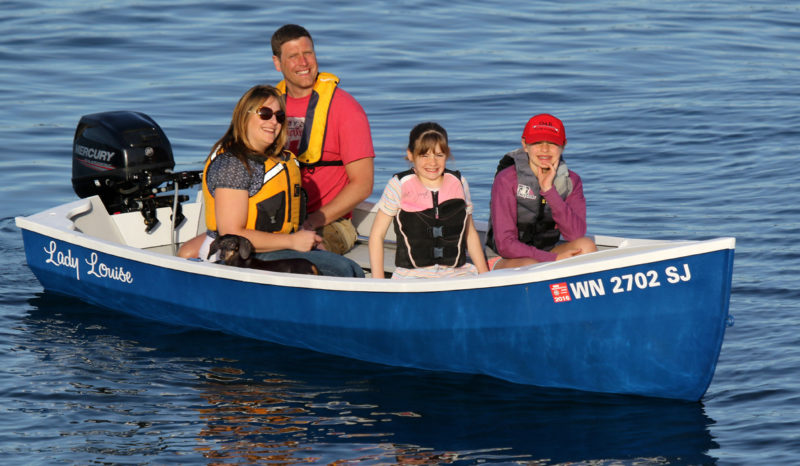
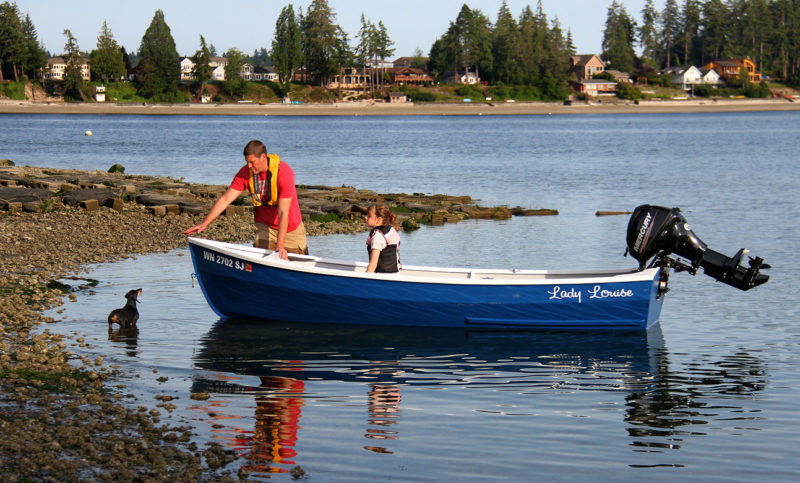
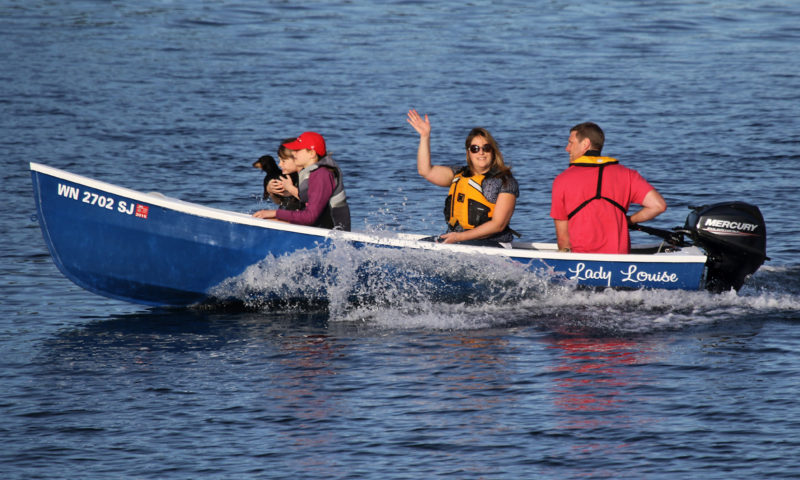
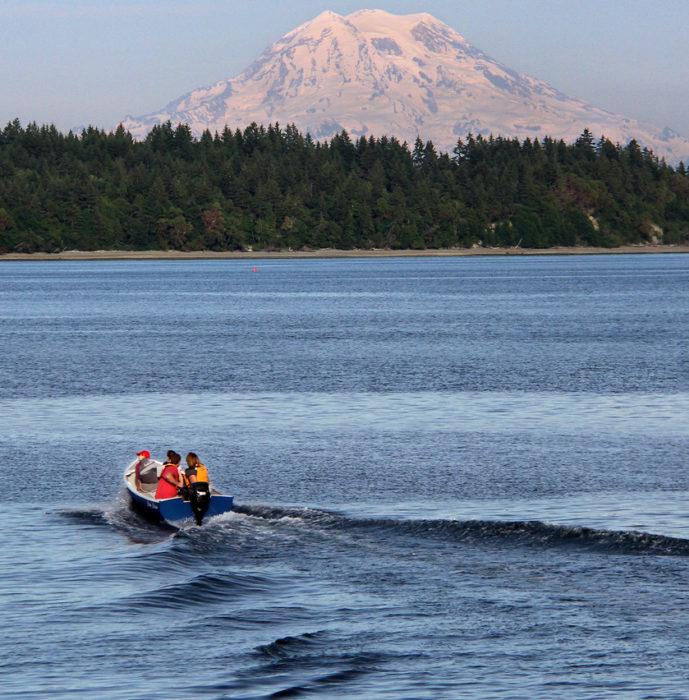
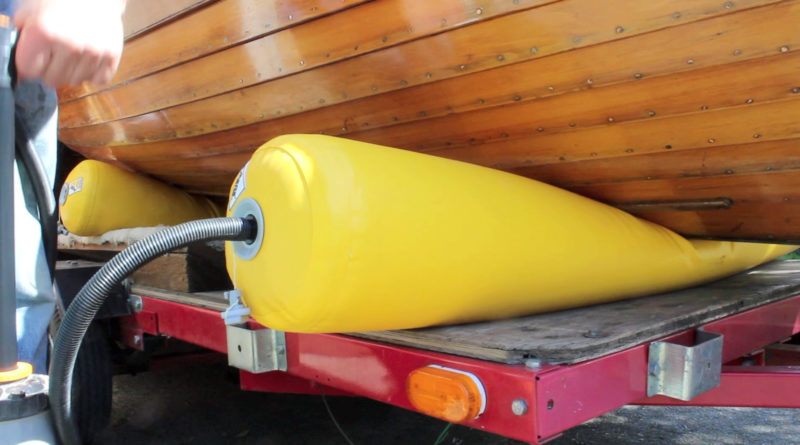
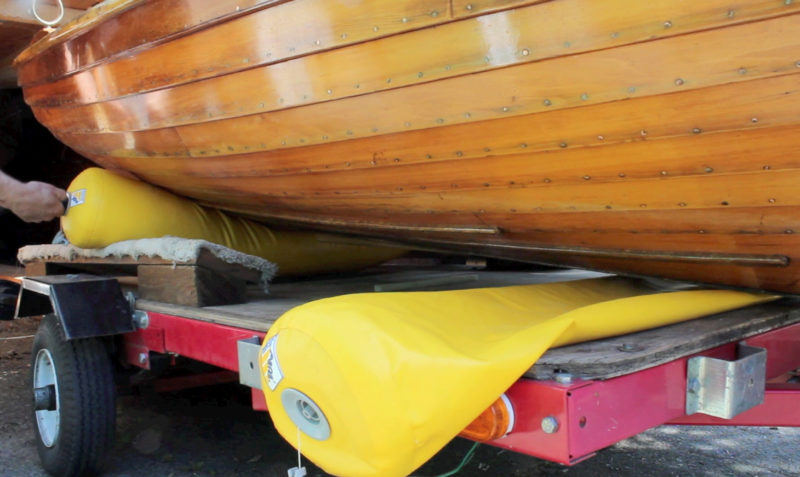
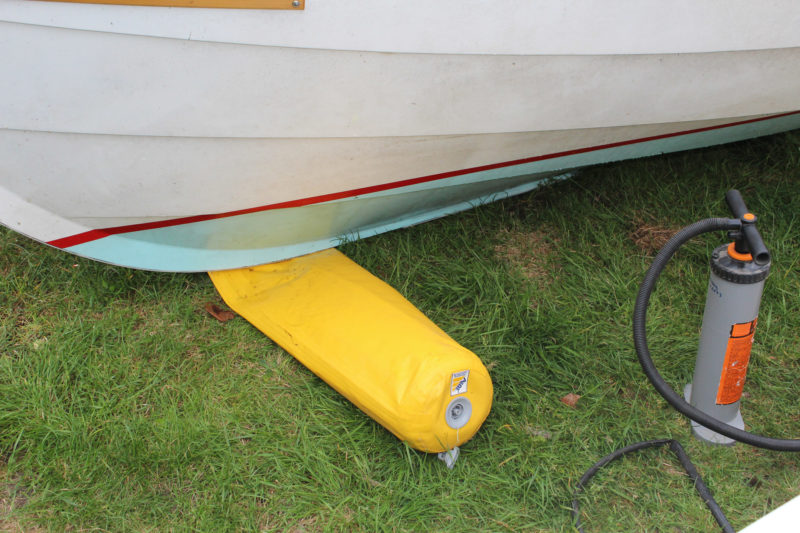
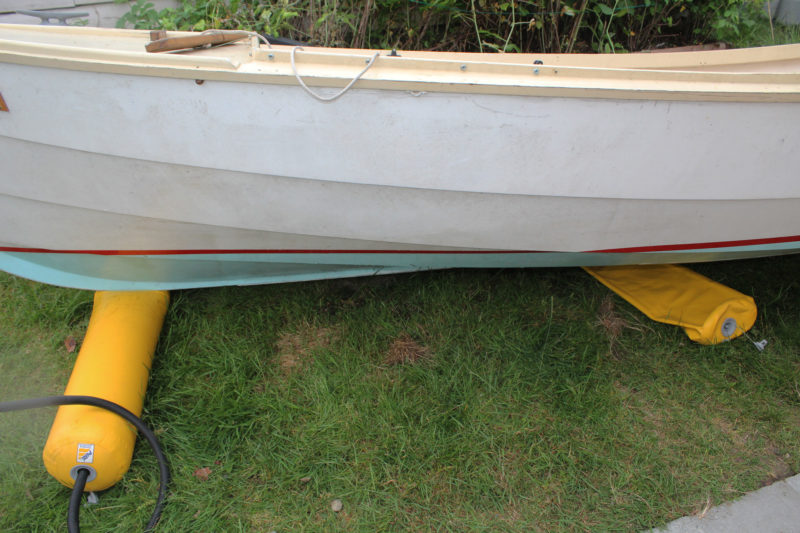
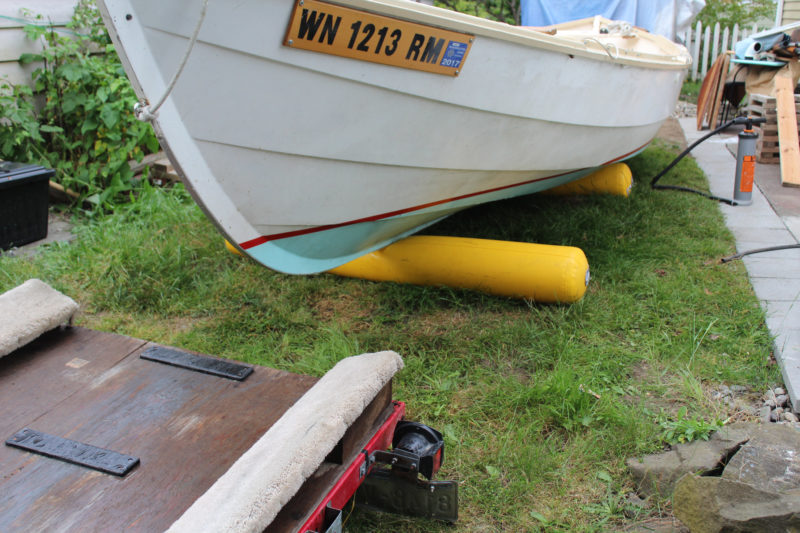
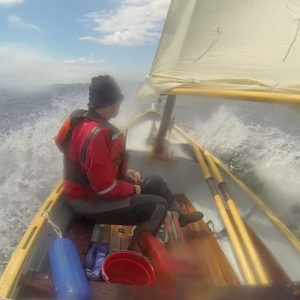
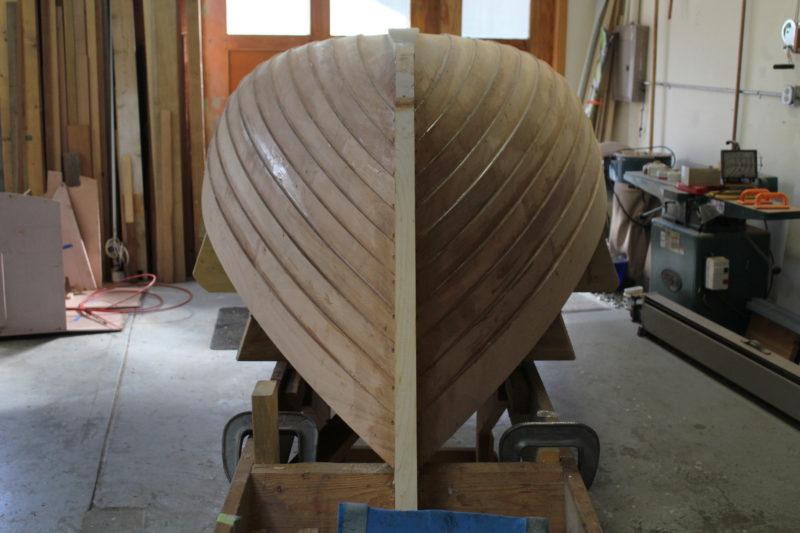

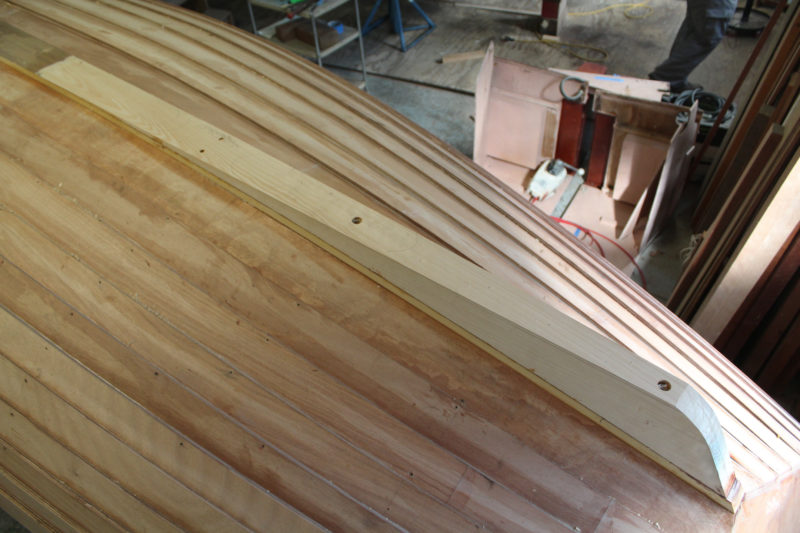
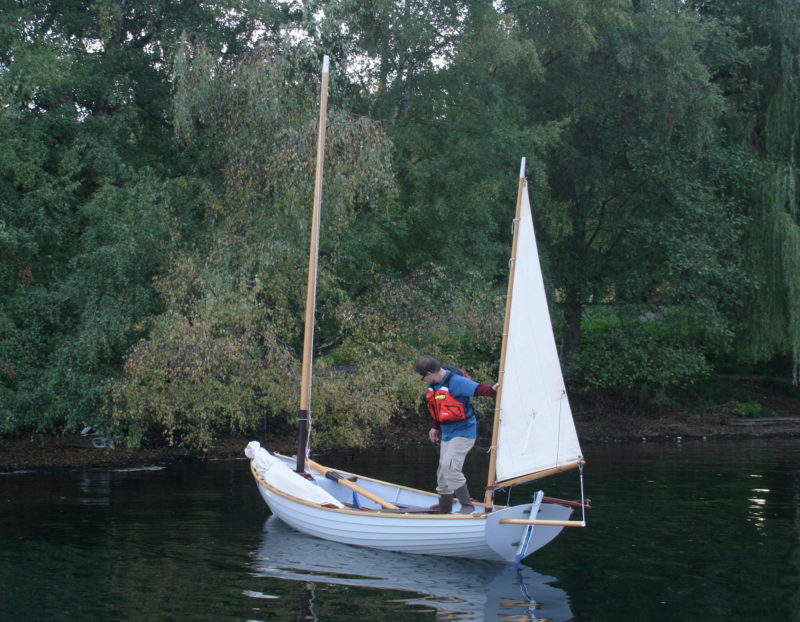
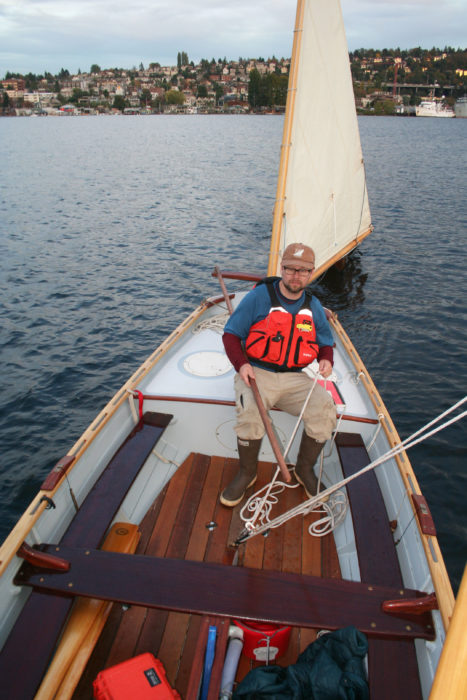
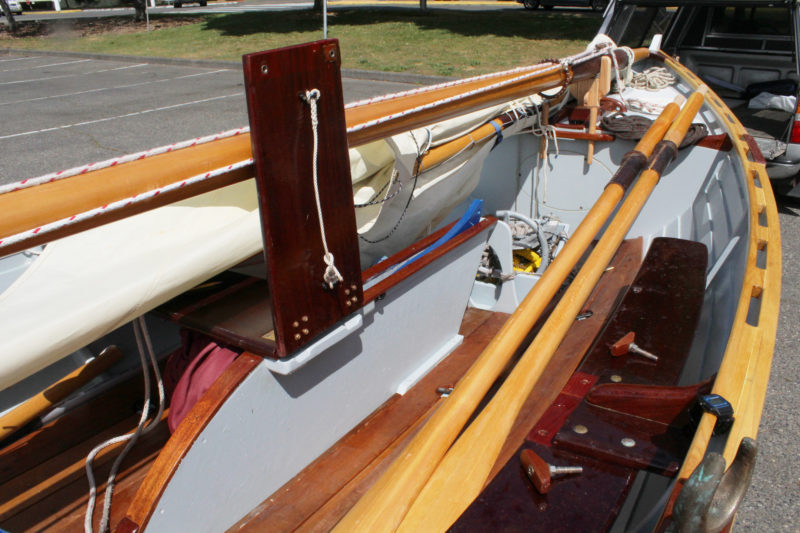
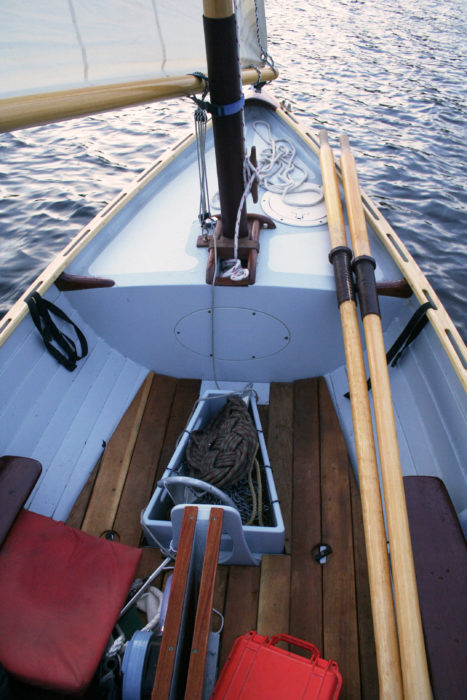
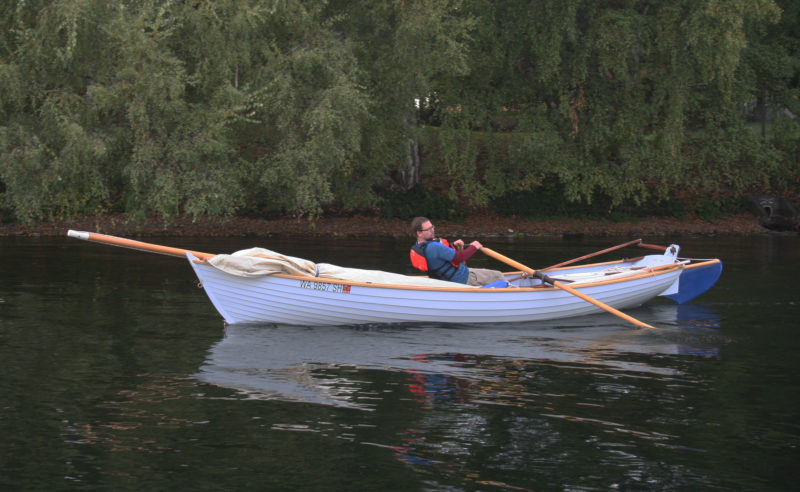
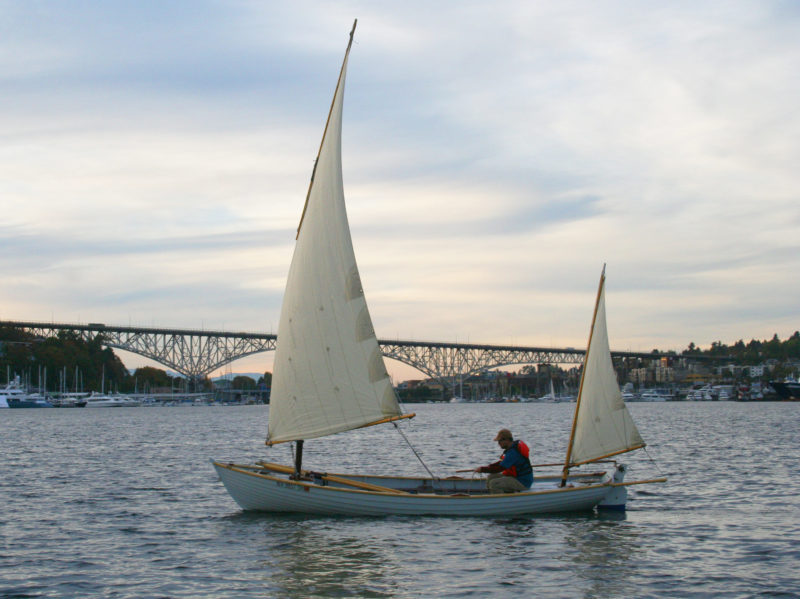
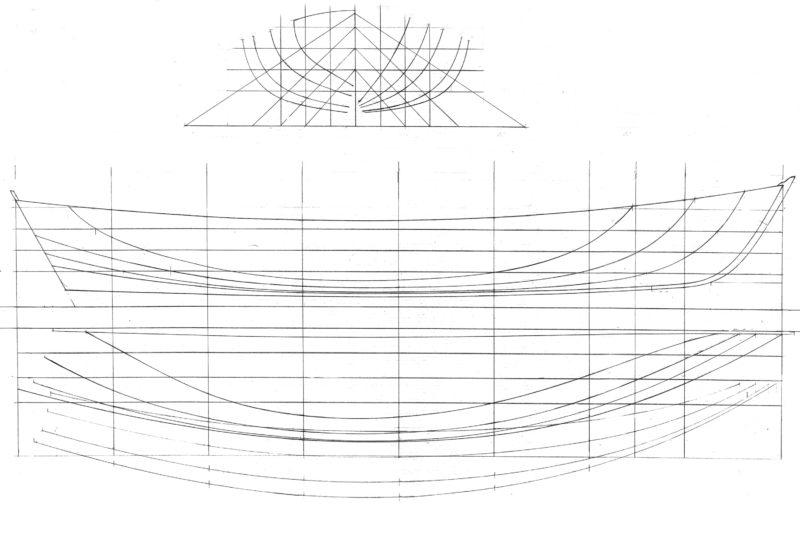
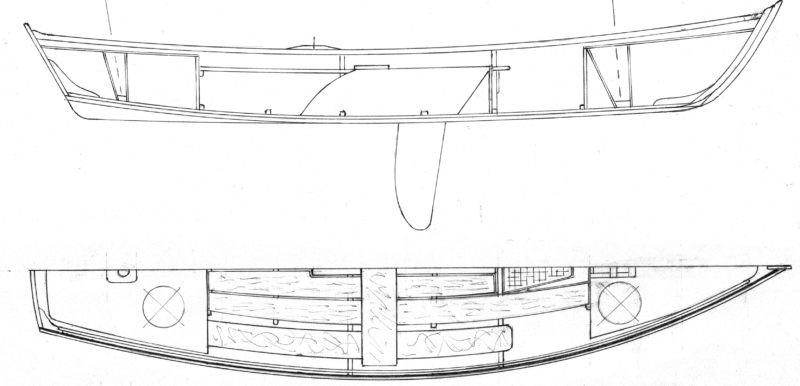
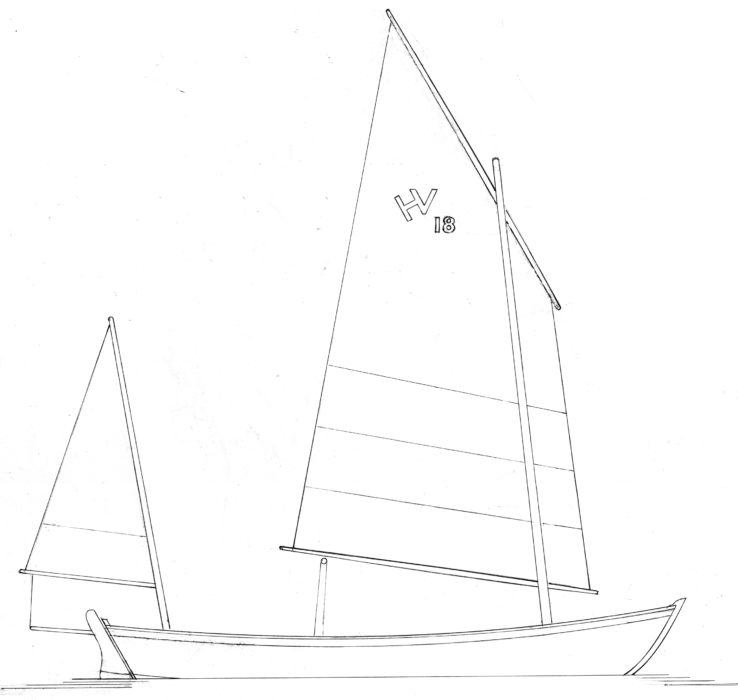
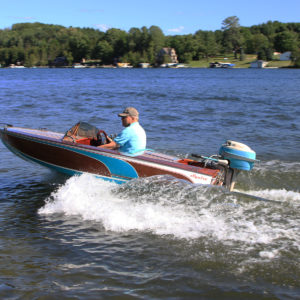
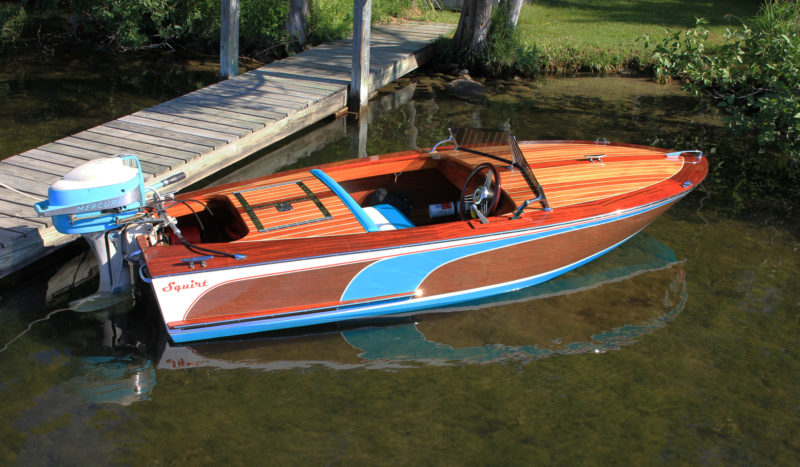
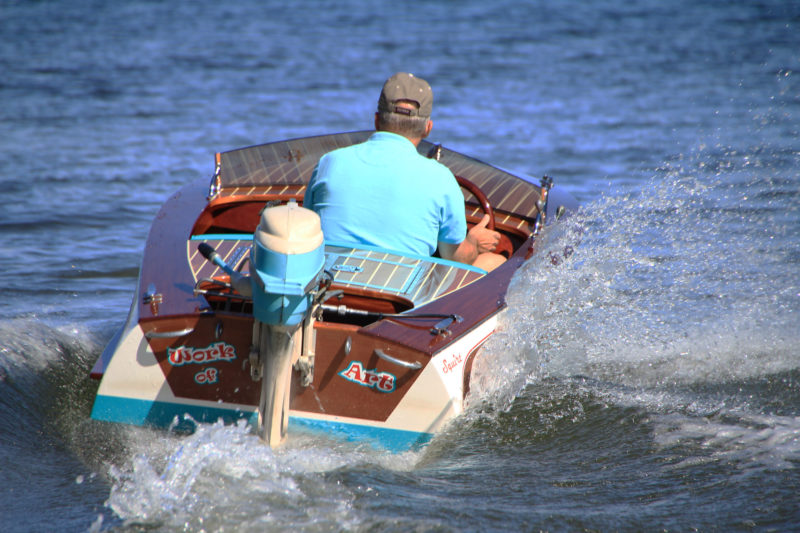
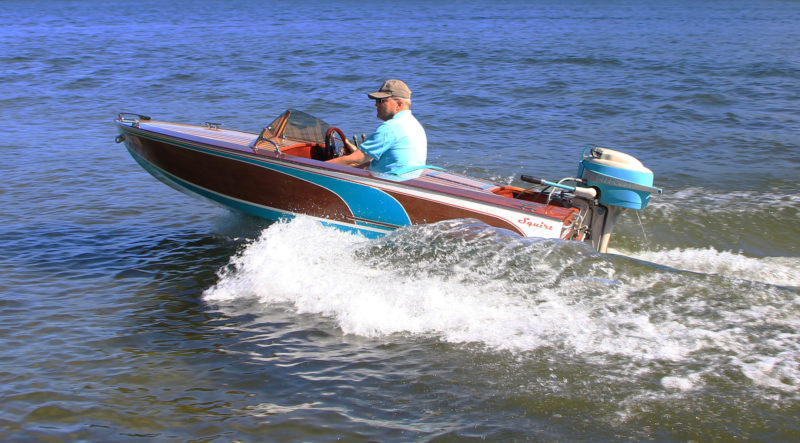
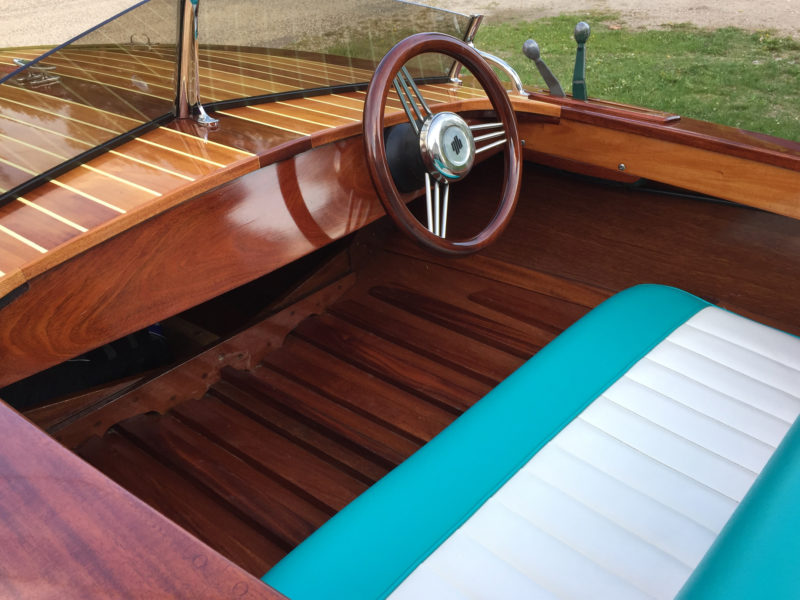
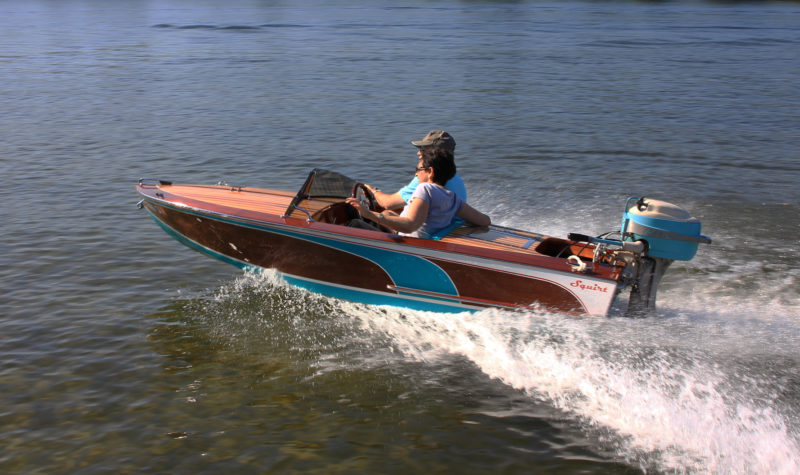
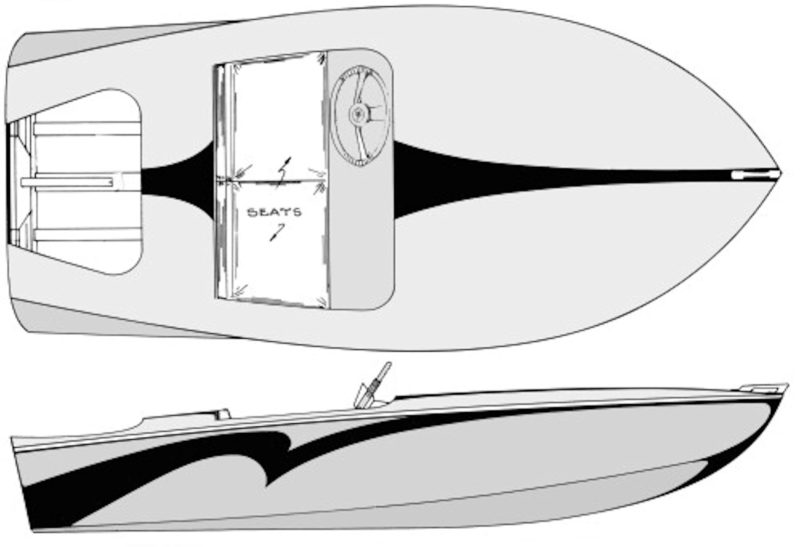
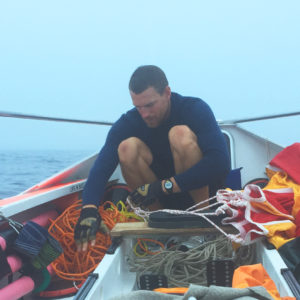
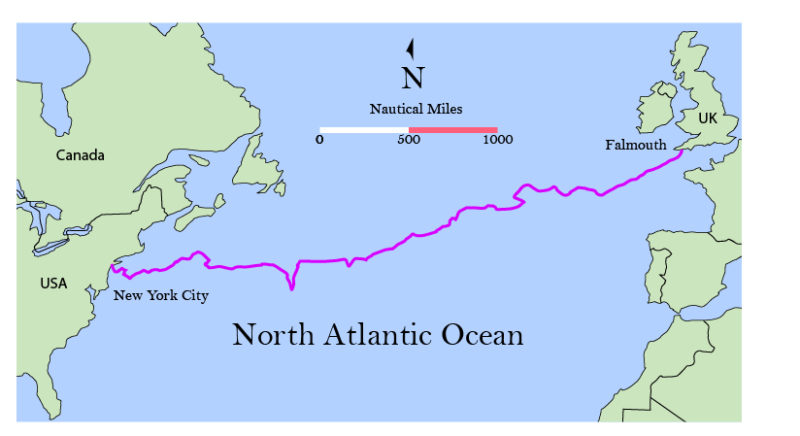
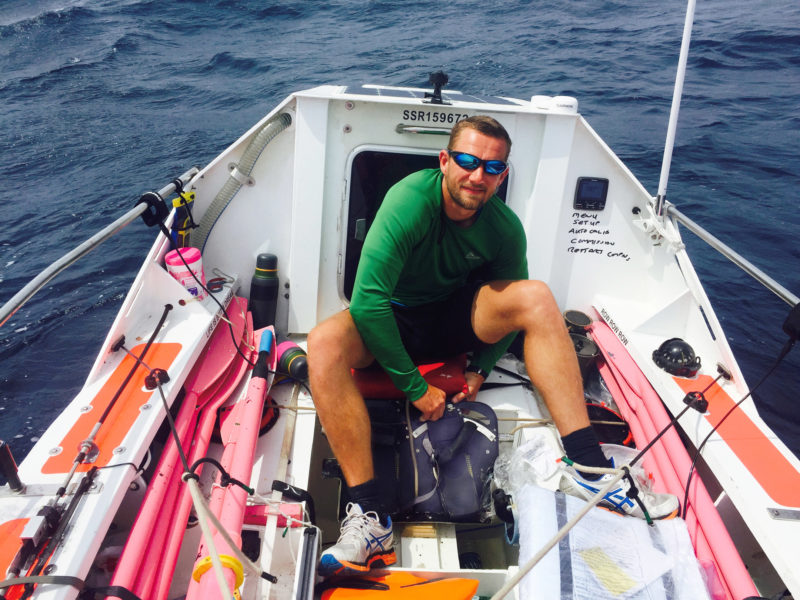
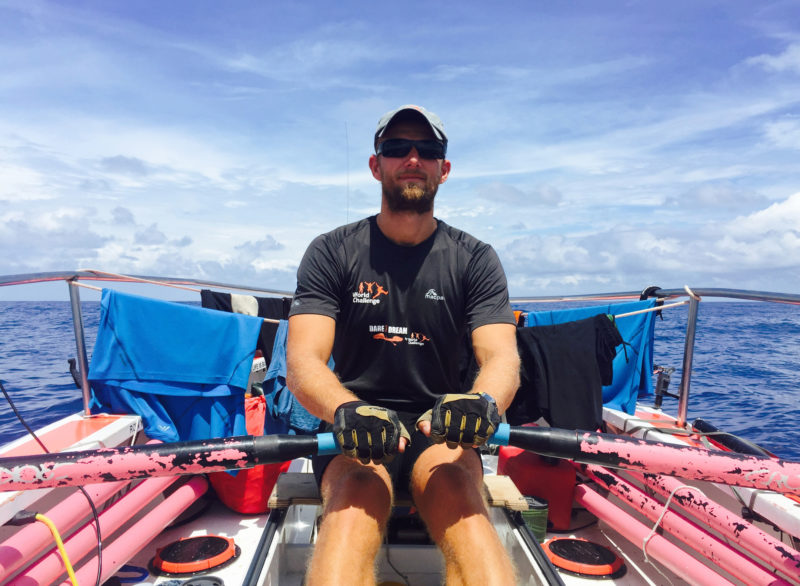
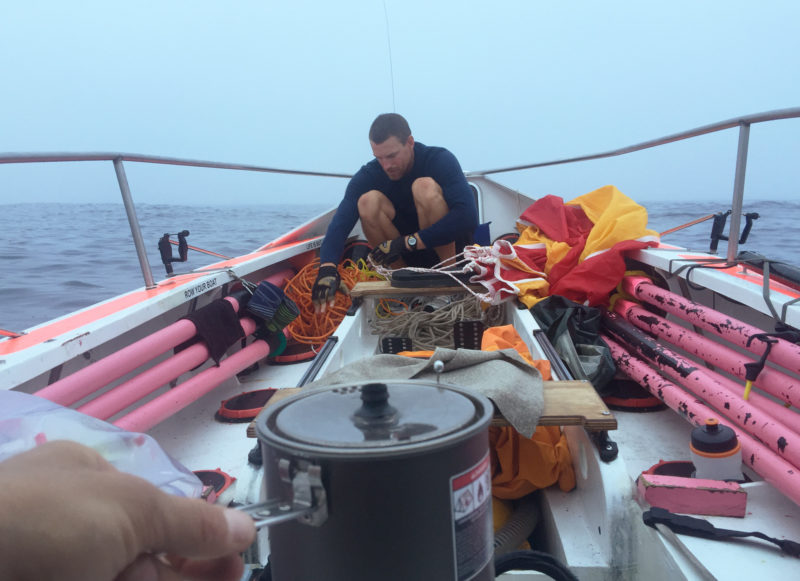
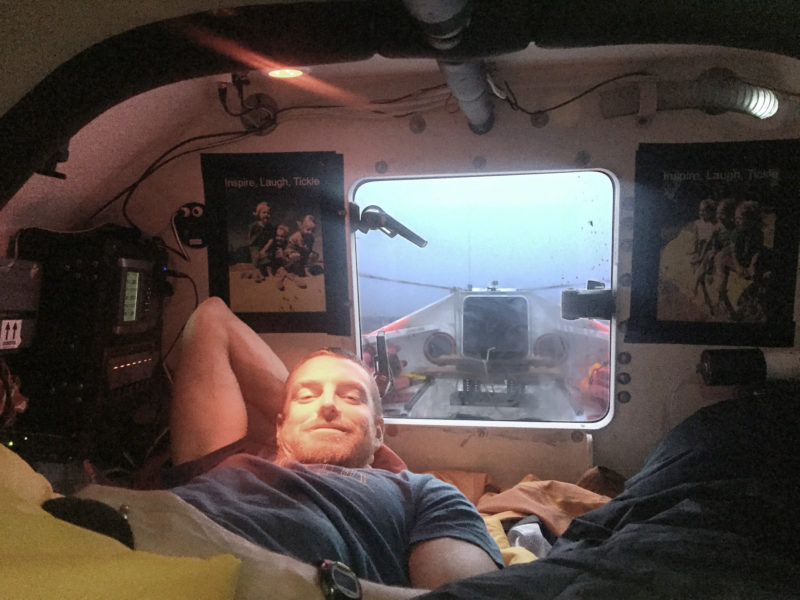
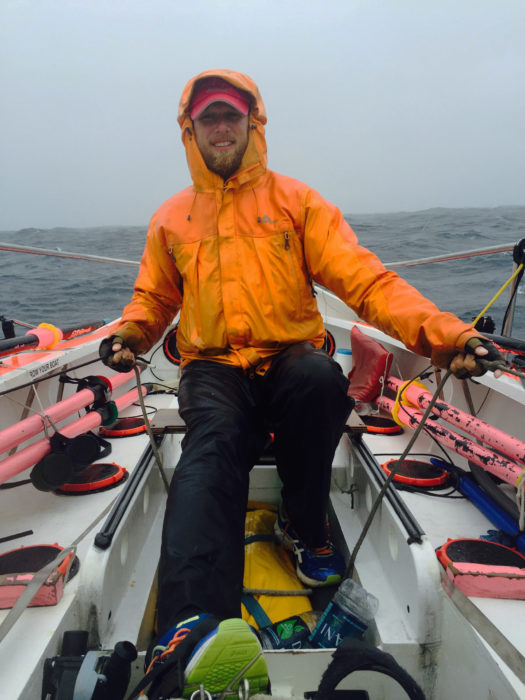
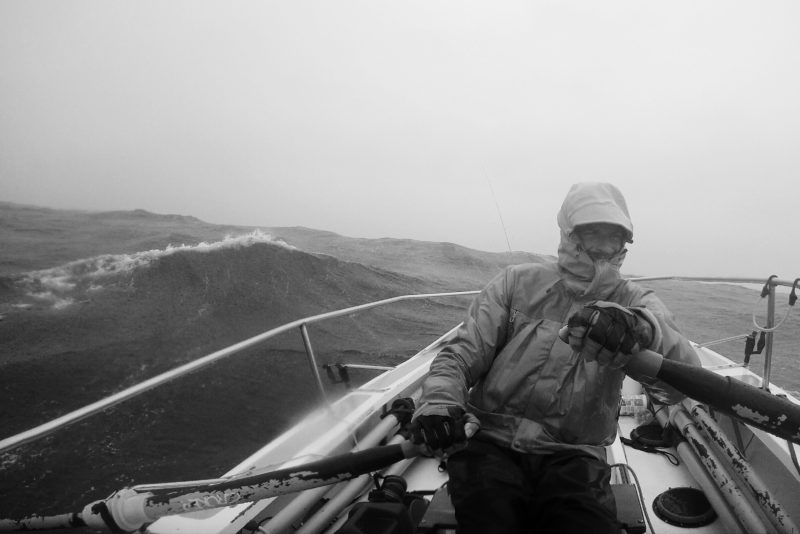
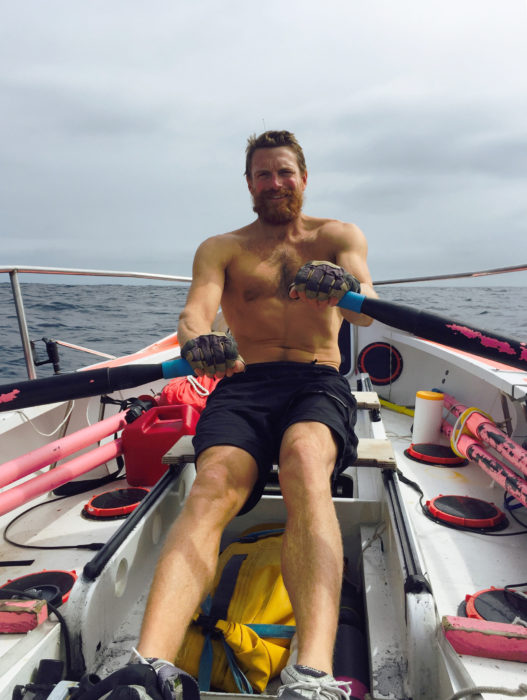
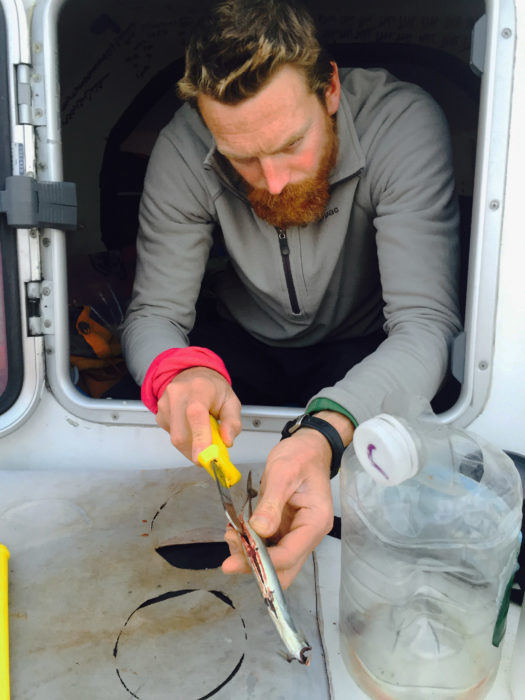

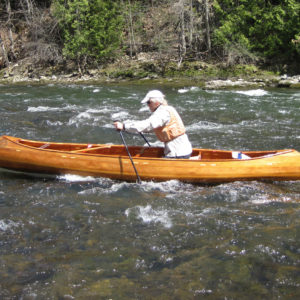
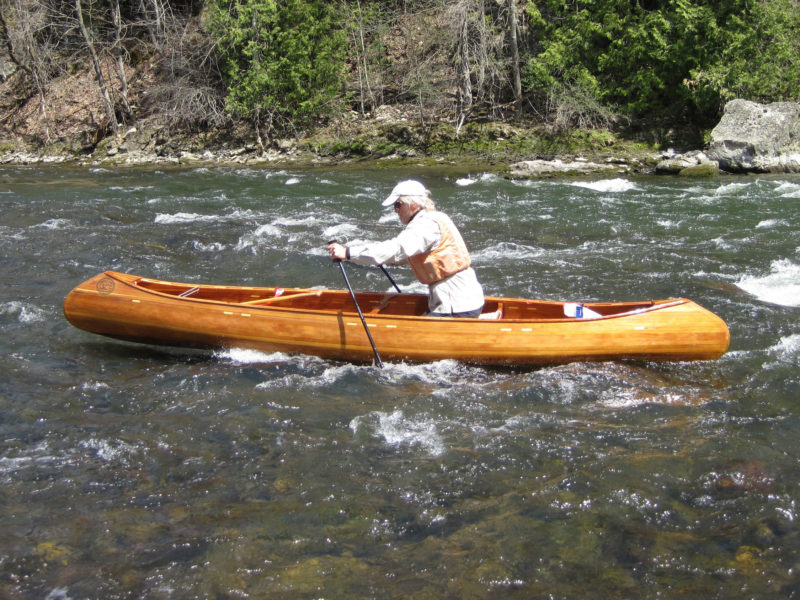
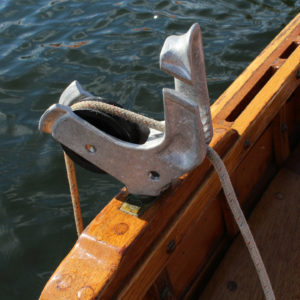
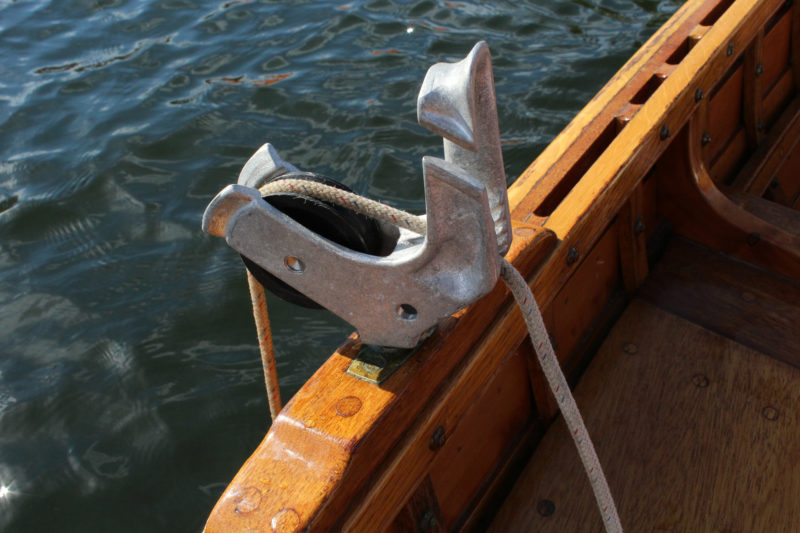
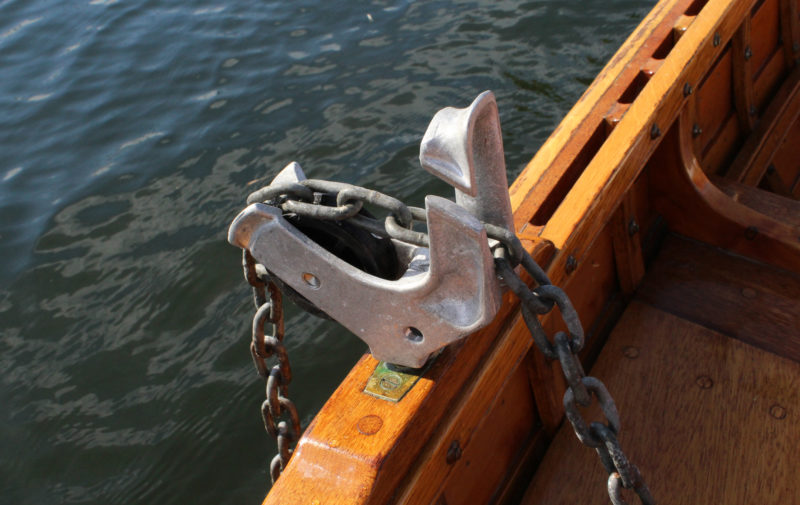
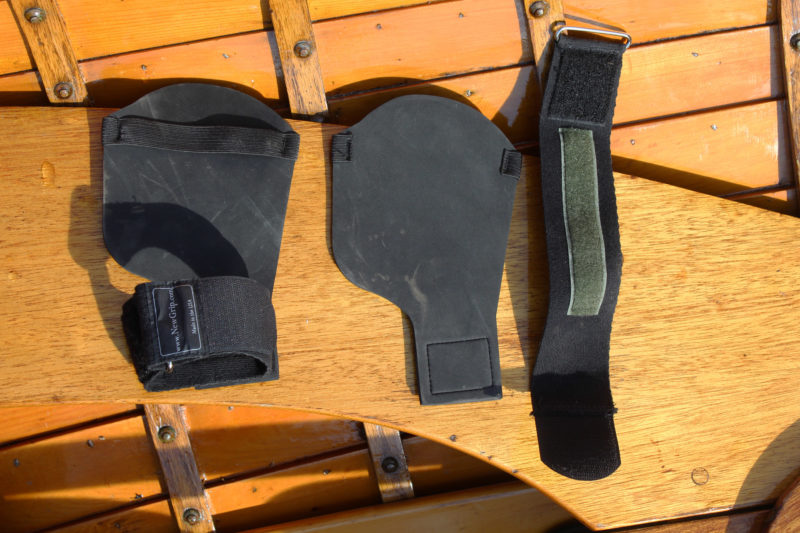
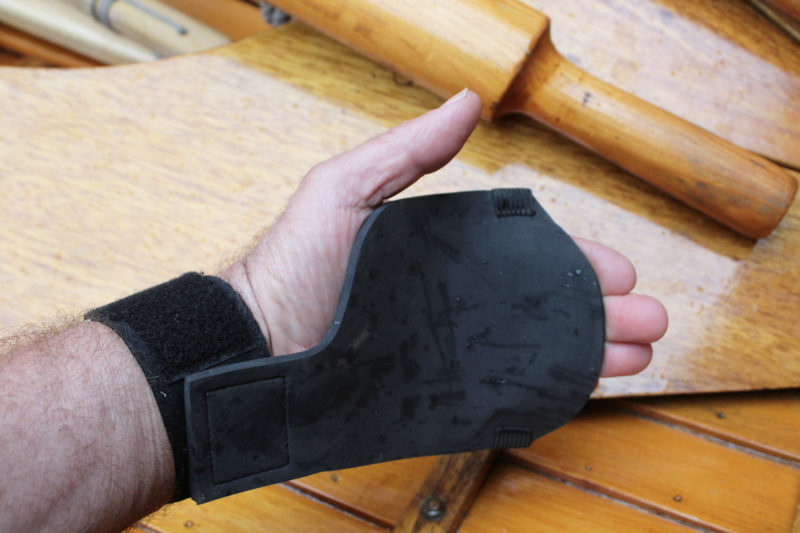

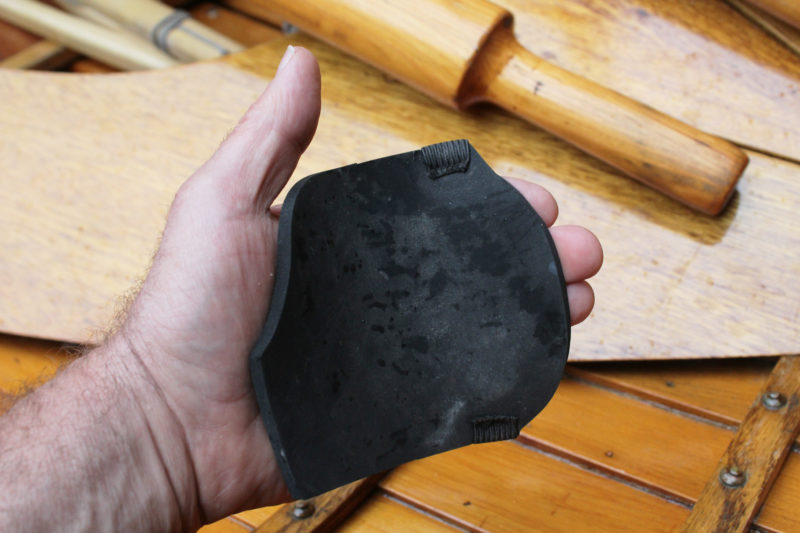
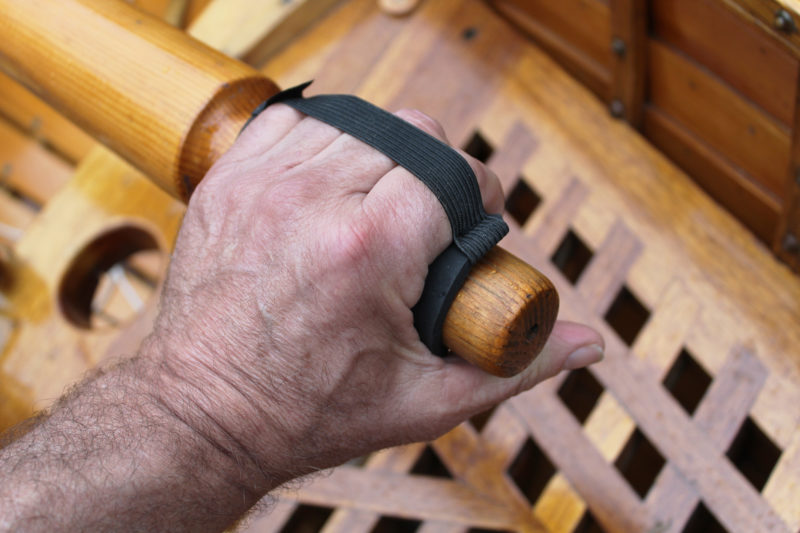
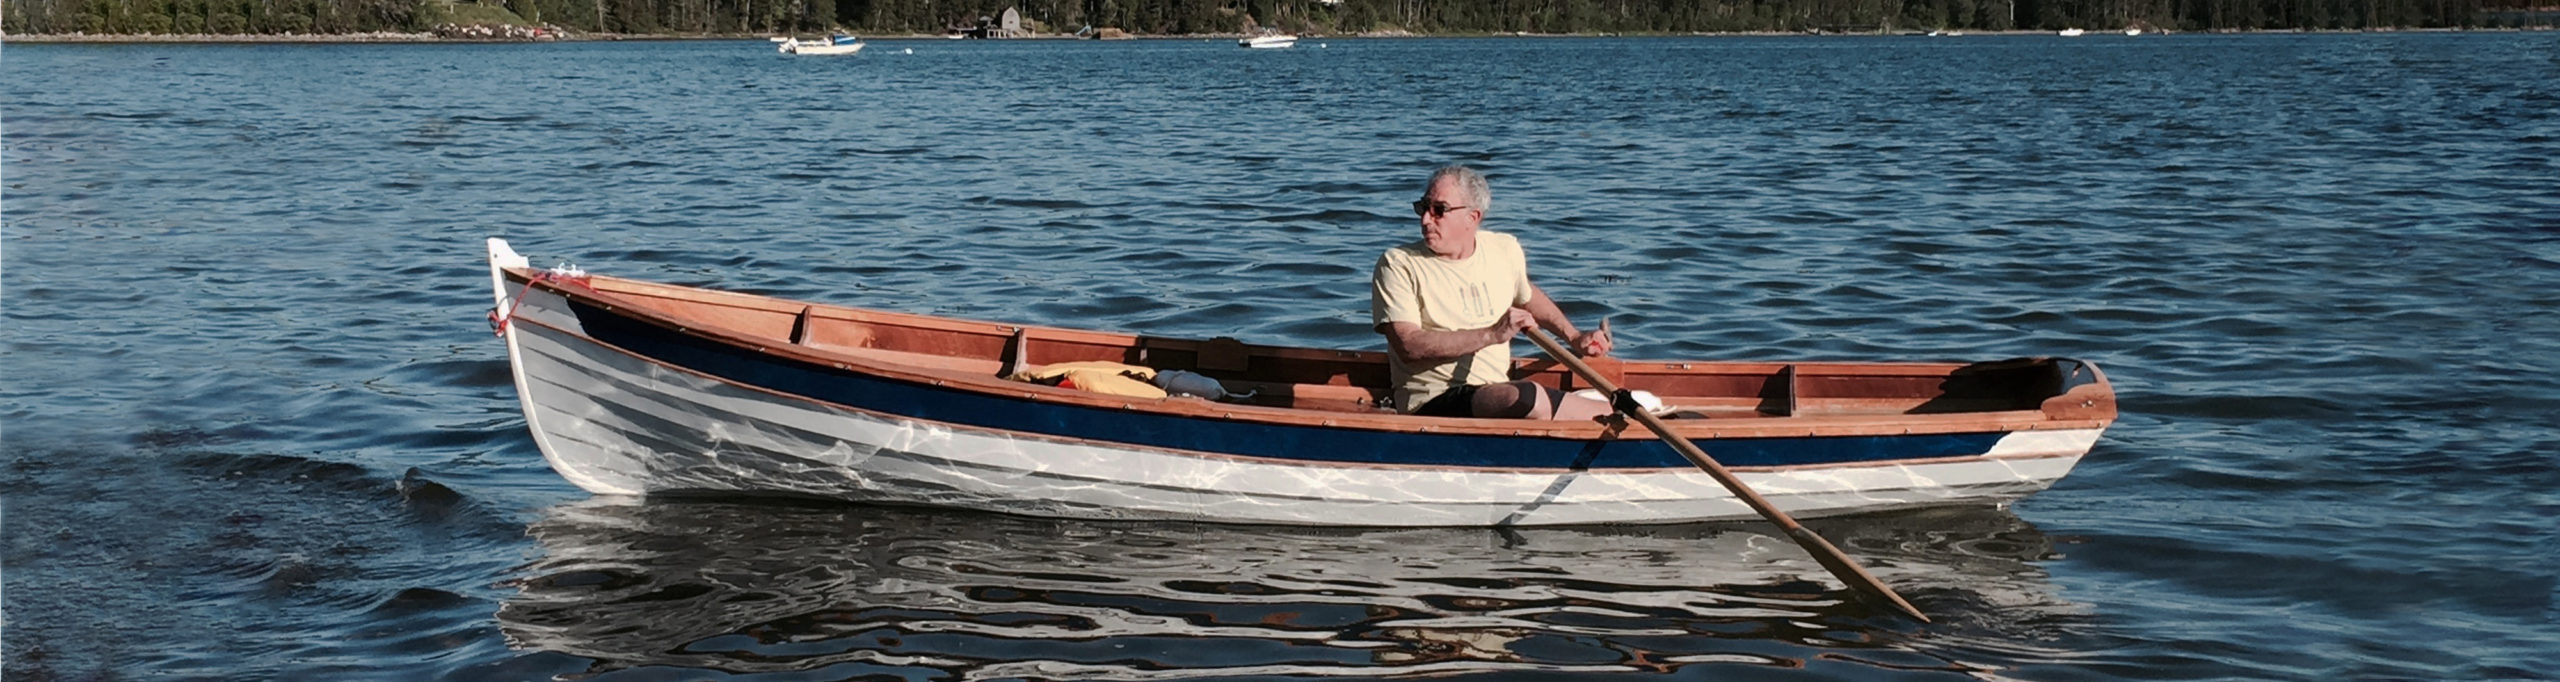
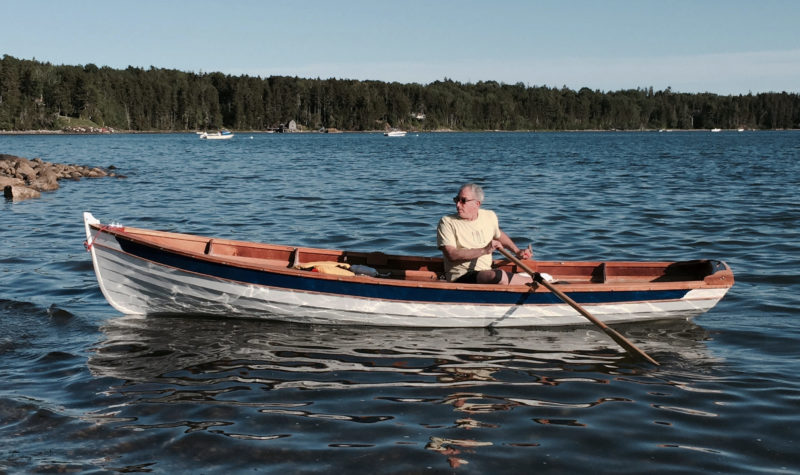
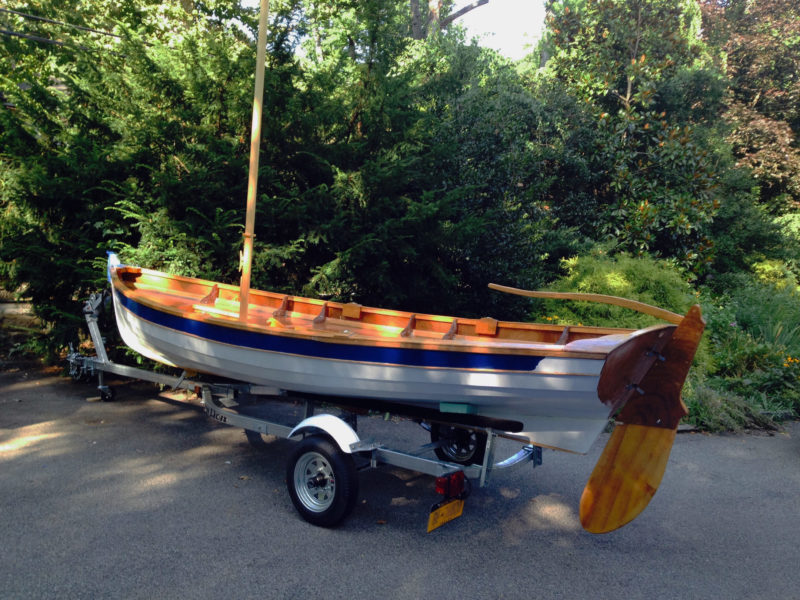
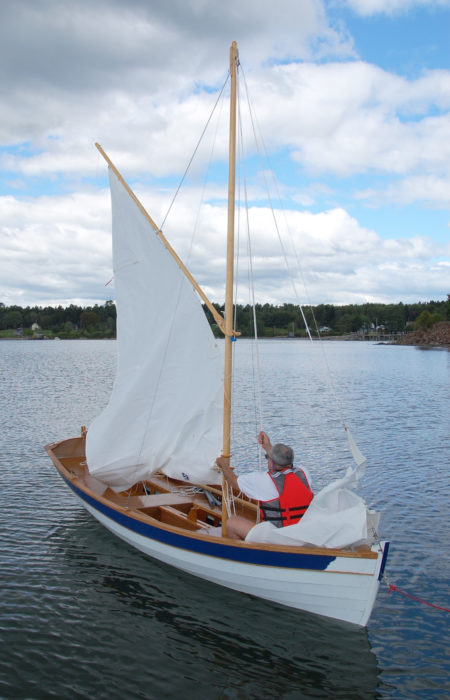
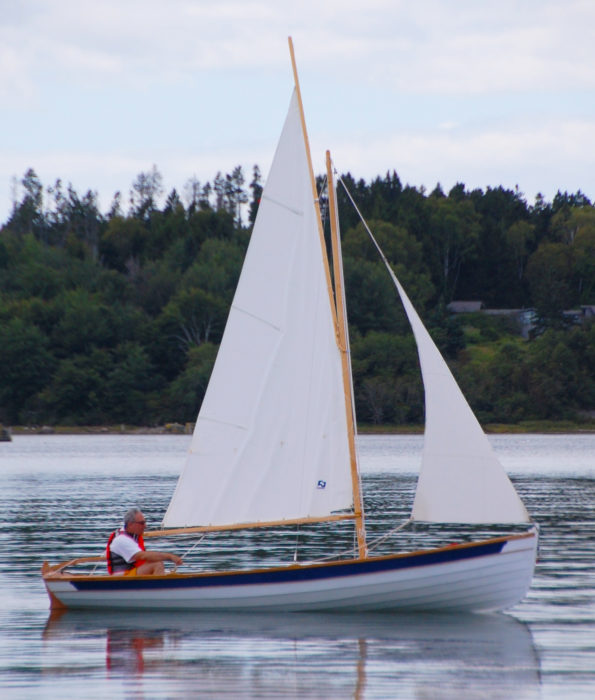
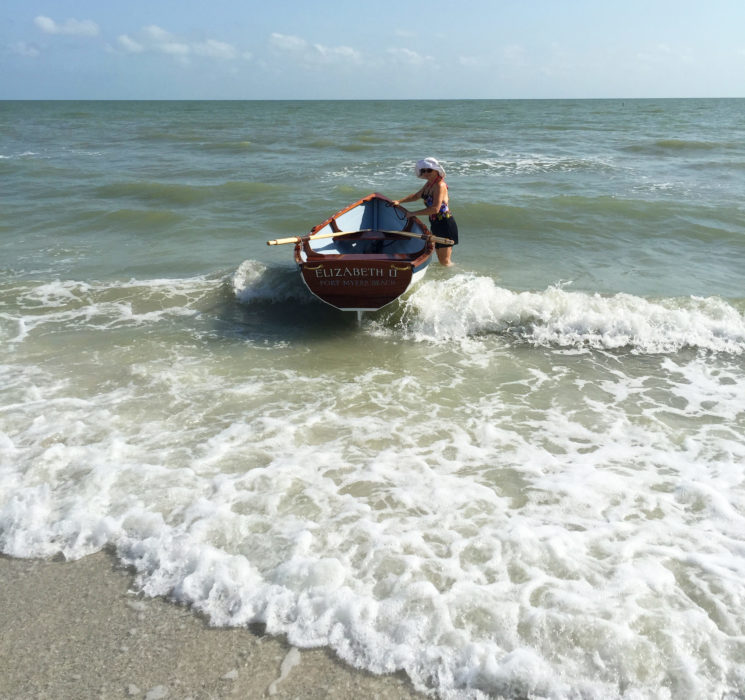
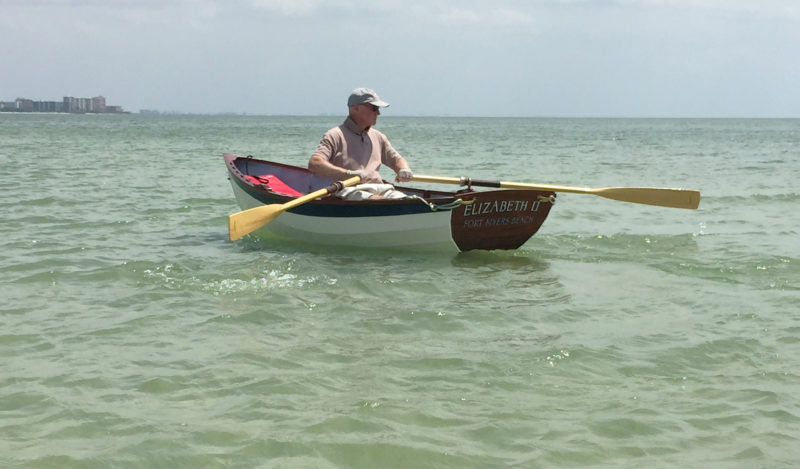
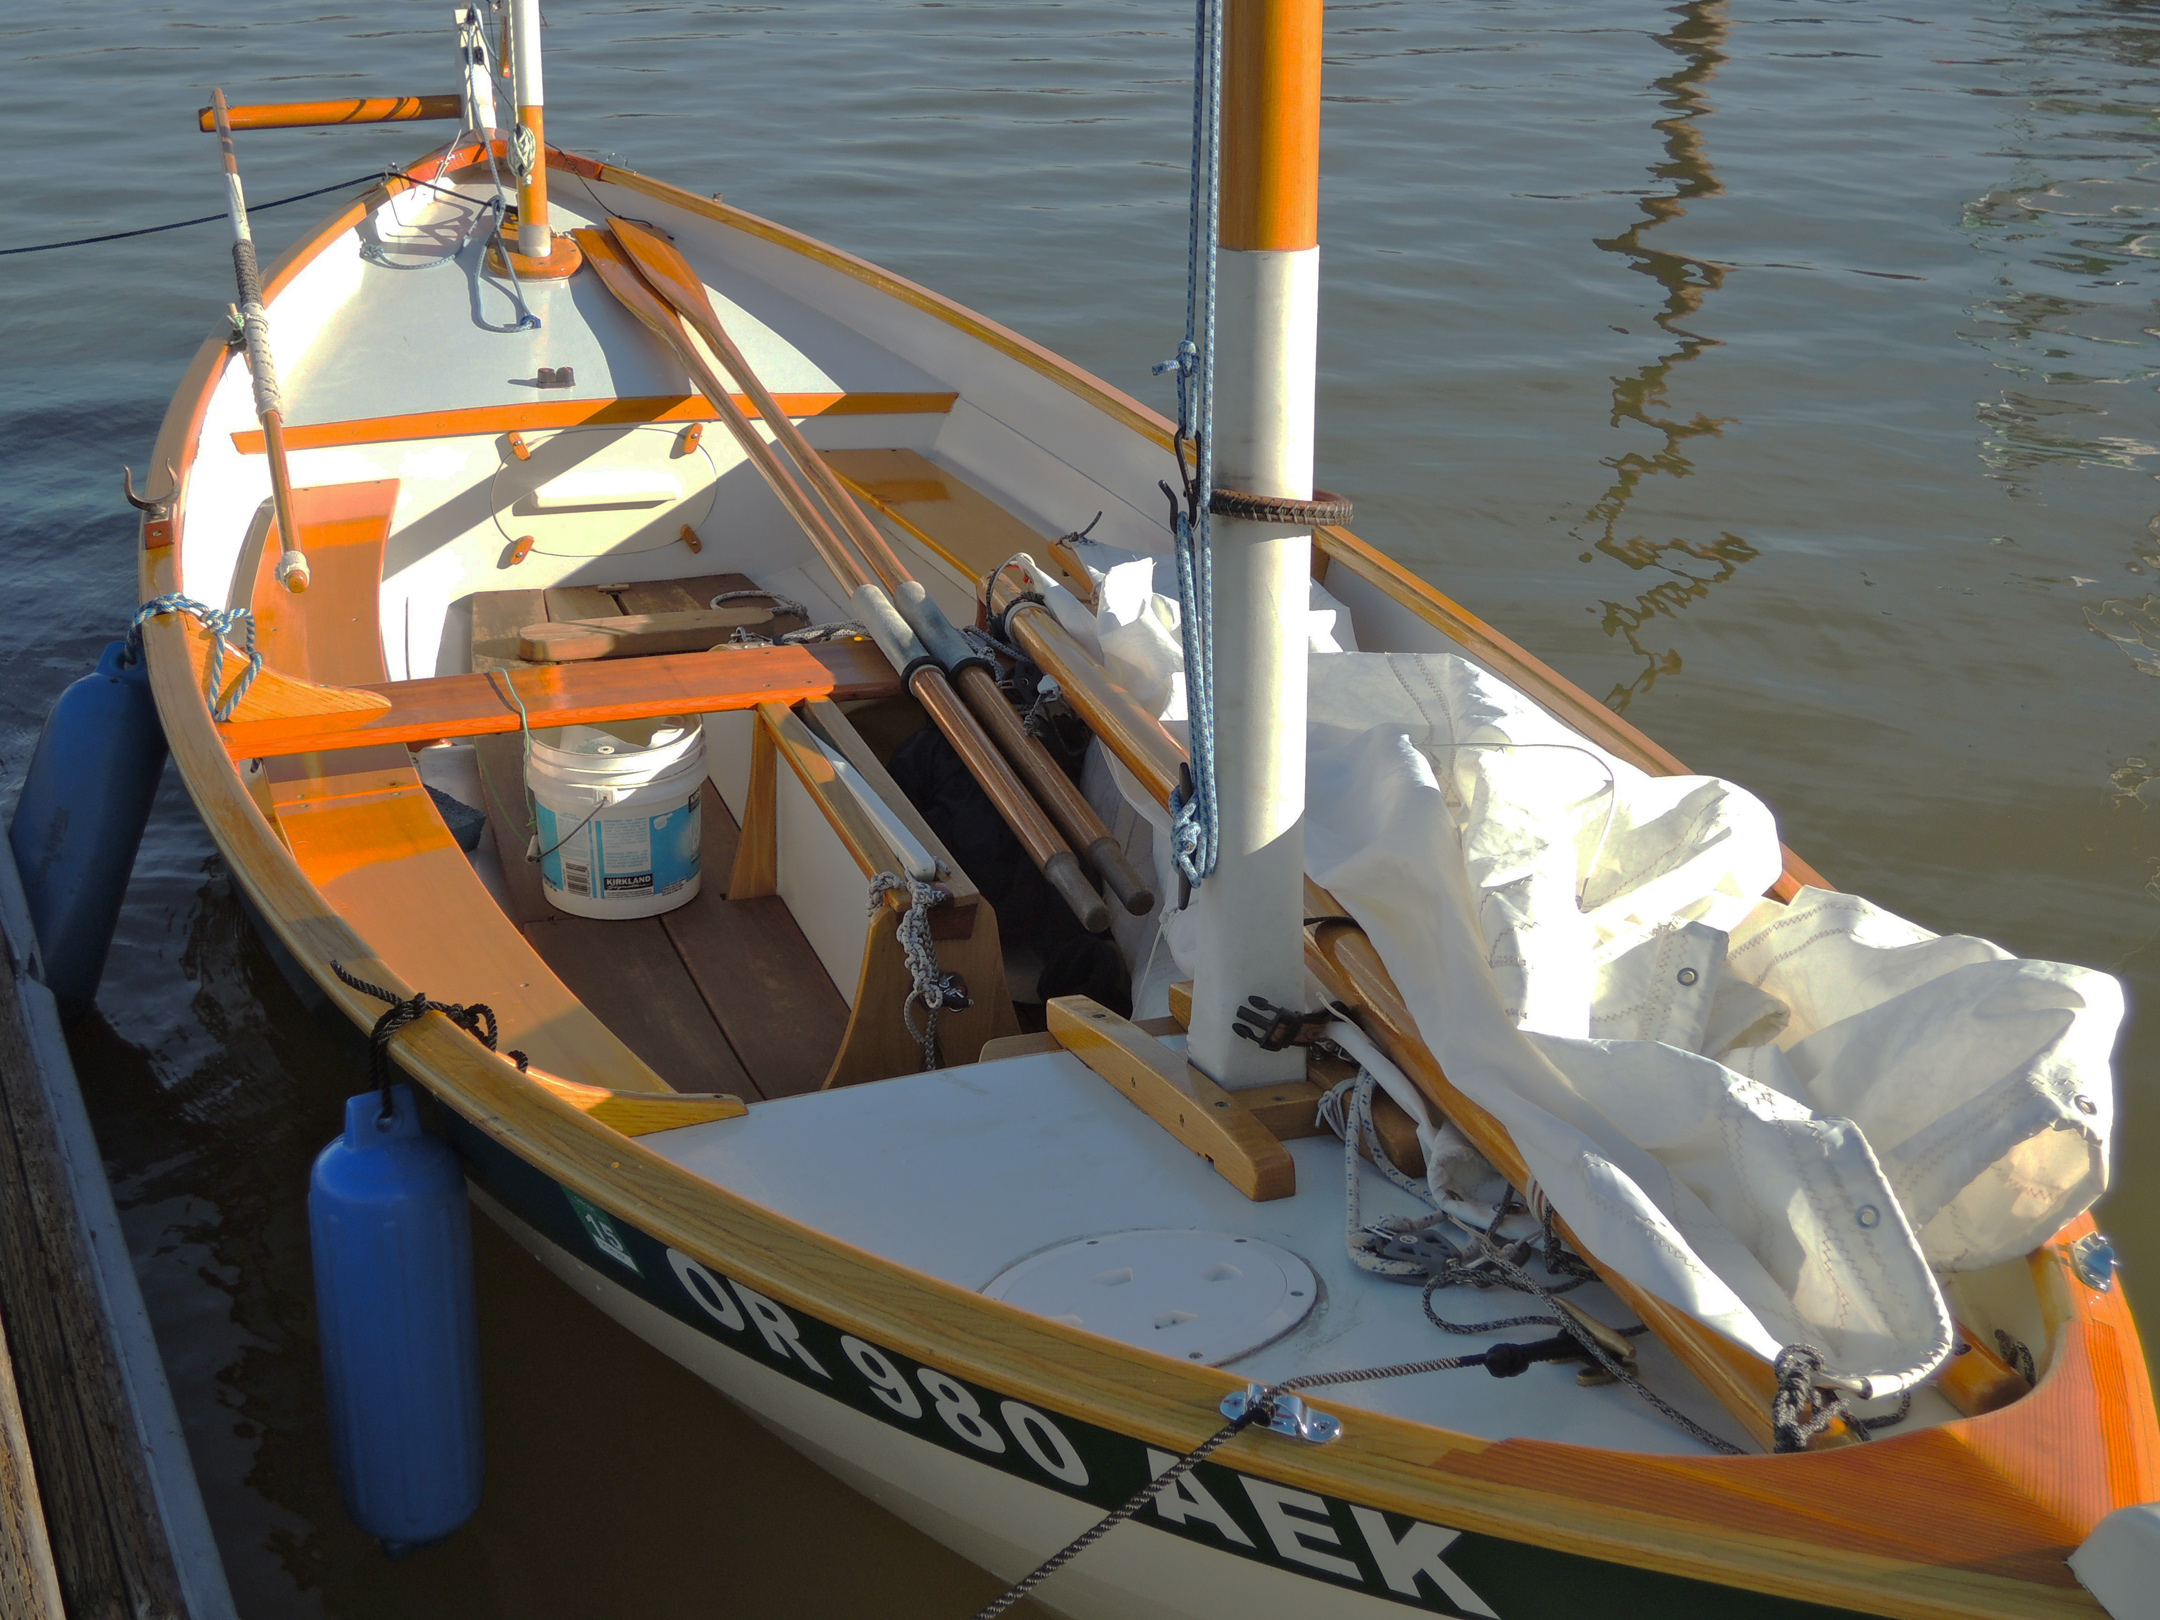


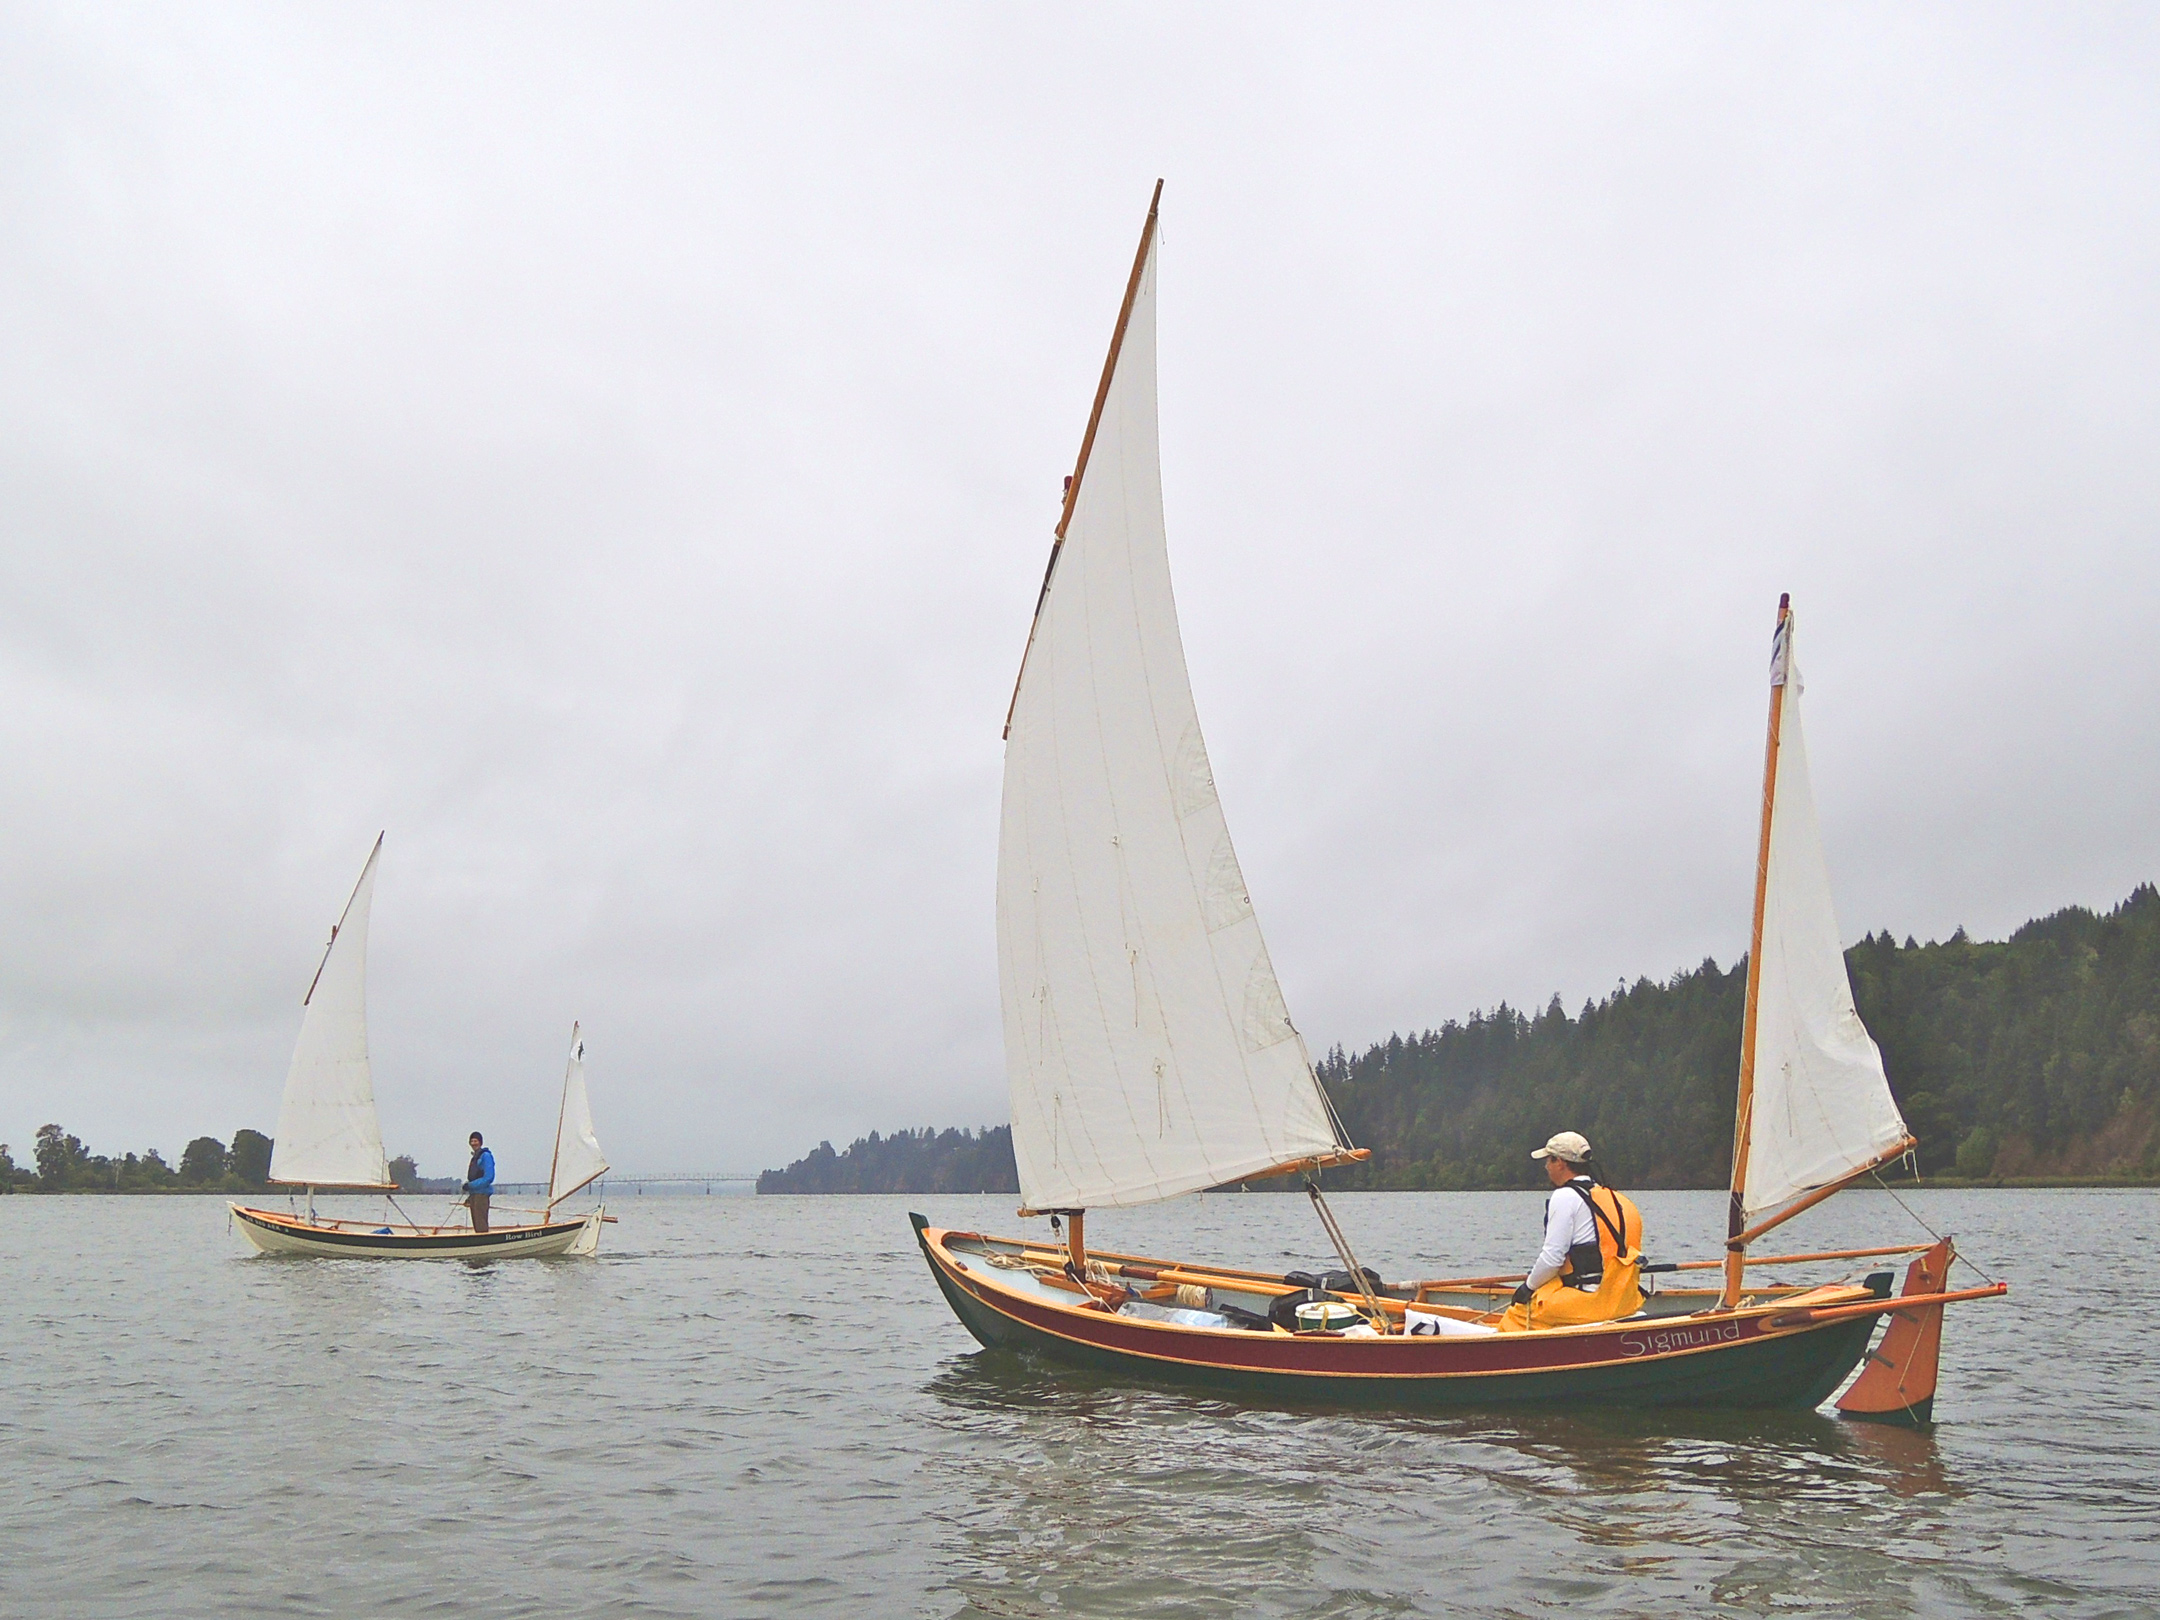
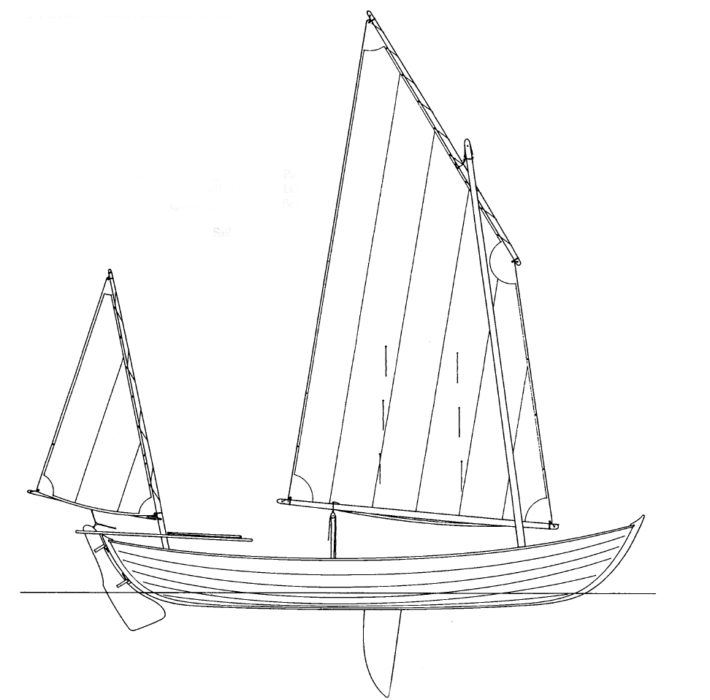

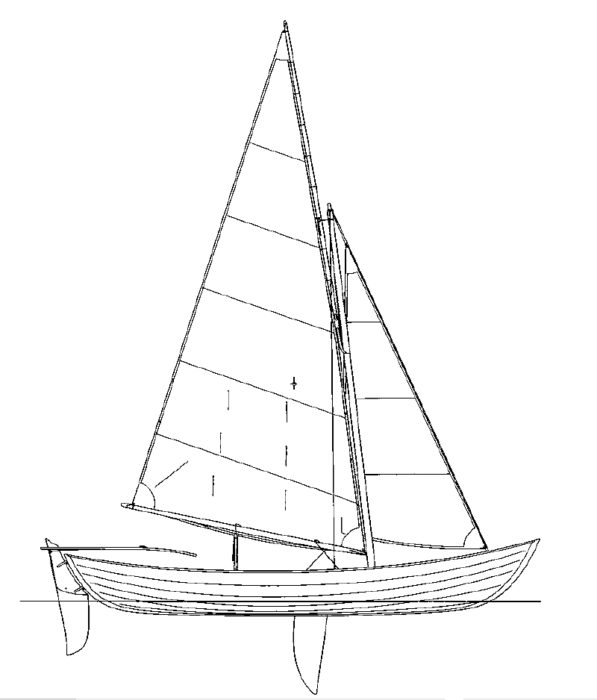

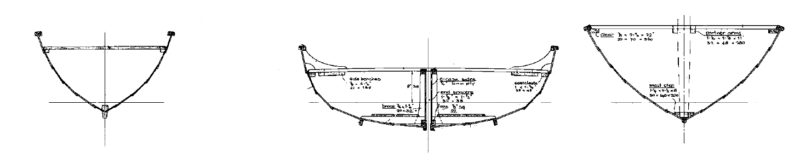 Plans ($306AUS) and kits ($3,970AUS) for the