The Duckling 17 is a robust, elegant, and fast pulling boat. Its predecessor, the Duckling 14, was designed and built in 2007 by Sam Devlin to meet a client’s need for yacht tender that he could use for sliding-seat rowing for exercise, and fixed-thwart rowing with a passenger seated aft. Years later Sam created the Duckling 17 with an overall length of 17′ 3-5/8″ and a beam of 3′ 5-3/4″. One might think that stretching a boat from a previous, shorter version is a relatively simple, straightforward process, but without attention to the altered proportions of the hull and aesthetic tweaking to create a visually pleasing and performance-driven boat, you might wind up with a longer, awkward-looking, if not ugly duckling.
Dale McKinnon
For a durable and non-slip finish Devlin often uses spray-on truck-bed liner on the interior and sometimes exterior. The drop-in rowing rig is by Piantedosi; the oars by Dreher.
While it is obvious there is a connection between the two boats, Sam doesn’t remember how direct the lineage is. He kept referring back to his nearly 40 years of experience with his Oarling design to inform the refinement of this new hull design. It’s somewhat of a cross between a wherry and dory: The bottom is wherry-like, but above the waterline the Duckling 17 has the characteristic widening of a multichine dory. Unlike the Oarling, the new Duckling “didn’t need to be such a cargo carrier as the Oarling, so I kept the freeboard down and I widened the beam a little bit,” Sam said. He wanted to create a boat “that carries weight a little bit more efficiently between strokes than the Oarling, and with a longer waterline it would.” The new design keeps the boat in the recreational singles category for races, and sets a course toward a fast tandem pulling boat. He thinks this design would be an excellent double at 21′, and I’d have to agree.
When he’s designing a fast pulling boat, Sam balances the needs of a beginner with those of rowers with intermediate or advanced skills. It can be a difficult balancing act to create a boat that works for a broad range of abilities. Sam thinks he has pushed Duckling 17’s skill requirement to the intermediate level, but I think its stability would diminish beginners’ initial apprehensions and they’d do well in it. The Duckling 17’s stability was, in fact, the first thing I noticed about it. When I moved from dock to boat and transferred my weight with one foot close to the gunwale rather than centerline, the Duckling 17 yielded and tipped slightly, unlike the Oarling which would have had a startling tilt. The Duckling 17 is very stable; this would be especially welcomed when getting in or out of it from a fishing boat or yacht, particularly if the Duckling 17 is equipped with riggers extending well beyond the gunwales.
The high stability suggested to me that the boat might be sluggish in a hard, driving start on flat water. Generally, faster boats sacrifice stability for speed, but in six hard pulls I had reached a GPS-measured 5.7 knots. With a waterline length of 15′ 7-1/8″, the Duckling 17’s theoretical hull speed is 5.3 knots. I settled down to a little over 5 knots at about 22 strokes per minute. The oar puddles were noticeably farther apart than those the blades make when I’m rowing my Oarling.
Dale McKinnon
Sam likes to come ashore stern first because it’s easier to walk out of the boat over the transom. Although he shifts his weight forward to lift the stern on to the beach as he makes his approach, the landing can still put a lot of strain on the skeg. Extending the skeg around the transom gives it additional strength.
The Duckling 17 tracks well, making it easy to stay on course even in the 10-knot breeze I had during my trials. Leaving a straight wake behind means you can get to a destination sooner with less of an expenditure of energy. When I’m rowing with the wind on the beam, I’ve been in the habit of frequently checking a mark over the transom to maintain my heading, but the Duckling has very little tendency to weathercock and didn’t require me to keep a close watch. There was very little curdled water flowing at an angle off the stern, a good sign that the Duckling 17 was maintaining a true course without making much leeway.
Although sliding-seat rowing can generally drive a long boat faster through relatively calm water or a 12″ chop, it presents challenges in rough seas. Rowing the Duckling 17 on a fixed thwart, while I didn’t have the opportunity to do so, would be less of a challenge simply because the thwart is lower in the boat than the sliding seat. This allows more clearance for the oars over your legs at the recovery and offers a lower center of gravity, making the boat more stable.
Sam Devlin
The author, at 5′ 6″ and 130 lbs, has plenty of clearance between the oars and her legs to make the recovery of the stroke being crowded.
Dale McKinnon
Sam, around 6′ and 200 lbs, doesn’t have as much freeboard or as much clearance for the oar handles. Elevating the locks would provide an easier recovery.
Devlin is the master of stitch-and-glue boat design and construction. The Duckling 17 hull is built from six long panels of 9mm marine-grade plywood, each scarfed together in three pieces. The panels are wired together side by side and to five temporary molds and the 3/4″ plywood transom. Epoxy fillets and fiberglass tape on the seams create strong joints and straightforward construction for the beginning boatbuilder. The hull is reinforced by the flotation/seat compartment amidships, mahogany gunwales, transom knees, and breasthook. The compartment under the seat is filled with expanding foam, making the Duckling 17 unsinkable even in the event of a swamping.
I’m 5′6″ and 130 lbs, so I choose not to struggle with cartopping any of my boats—I use a trailer—but the Duckling 17, at 95 lbs, could be cartopped by someone with a bit more height and strength, or with help from a friend. Launching from a small trailer is a breeze.
Dale McKinnon
The uncluttered interior and well-filleted joints make the interior easy to clean.
On the Duckling 17 that I rowed, the interior surfaces and gunwales are finished with a spray-on truck-bed liner. For my purposes—long cruises, muddy boots, beach sand and gravel—this is a perfect durable nonskid finish, but marine-grade one-part polyurethane will also make an adequately durable finish for the home builder.
Although Devlin envisioned the Duckling 17 as a performance rowing craft, not as a load-carrying boat, I’d consider adding battens on the sides during construction to provide a place to attach plastic or metal pad-eyes. With bungee cords and dry bags you’d have secure load-carrying capacity for fast touring coastal waters like the Salish Sea or Penobscot Bay. The Duckling 17 has a designed working displacement of up to 346 lbs, so there is plenty of capacity for weekend camping gear. I’d add a Venturi auto-bailer to take care of any water that might get shipped in rough seas.
Sam Devlin
The long waterline, full-length keel strip, and skeg give the Duckling strong tracking; little effort is required to maintain course.
After 15 years of putting my trust in Devlin’s dories, I am seriously considering building the Duckling 17 for my own travels. The thought of arriving comfortably at a destination 20 miles away half an hour sooner is quite appealing. I have no hesitation in recommending the Duckling 17 as a boat for fast and light touring, as well as recreational and open-water rowing. The challenge of pushing up to hull speed and beyond will hold the attention of intermediate open-water rowers and advanced racers as a training craft. And for the rowing aesthetes out there, a cushion in the stern for a passenger will evoke the refinement and grace of Whitehalls on the Charles River a century ago.
While there is little I’d change about the Duckling 17, I would give the design a different name. This graceful boat is not a duckling but a cygnet.
Dale McKinnon began rowing in 2002 at the age of 57 and in 2004 rowed solo from Ketchikan, Alaska, to her home town, Bellingham, Washington. In 2005 she rowed from Ketchikan to Juneau.
Several years ago I stood high on a scouting rock next to the Rogue River looking over the rapid that would, from that day forward, run through my daydreams and nightmares. The Rogue flowed gently around the corner after the constricted and chaotic Mule Creek Canyon and fanned out at this deceivingly beautiful point where autumn’s splashes of red and burnt orange were dabbed among dark green trees lining the steep banks. The water pooled above the rapid was peaceful and serene until it dropped over the entry point and tumbled hard and fast through a complicated maze of boulders the size of trucks, jagged rocks that rip open rubber rafts, and narrow chutes that break boats. It was Blossom Bar, a Class-IV rapid just beyond the halfway point on the 36-mile Wild and Scenic section of the Rogue in southwestern Oregon. It has been flipping rafts, smashing drift boats, sinking kayaks, and terrorizing boaters for decades. Blossom Bar was once so strewn with boulders that boats had to be portaged across it, but Glenn Wooldridge, an early river runner on the Rogue, dynamited a passage in the 1950s (see video: Blossom Bar Blasting). While Blossom can now be run, it has claimed several lives in recent years.
When I stood on that rock for the first time, I was surrounded by a crew of experienced river runners, watching as the group right before us struggled to hoist an 18′ rubber raft off the Picket Fence, a line of jagged rocks it had hit when it missed the first turn to the right. While they hauled on an elaborate rigging of ropes and pulleys, one crew member sat off to the side, alone, with his head in his hands, and his arm in a makeshift splint—a casualty of a river mishap that had occurred just prior to our arrival. My freshly varnished hand-built mahogany-plywood drift boat barely had a scratch on it, and I was as worried about what the rapid might do to it as much as what it might do to me. I’d been told so many times that rapid and the whole lower Rogue is no place for a boat made of wood that I’d started to believe it.
I made it through the rapid that first time without a scratch, but that was a thousand river miles and several thousand rapids ago. I’ve been on many of the rivers in Oregon, chasing fish, and running rapids in my wooden drift boat, and each river has a distinct personality. Some are fussy, some are sophisticated; others are fickle, elegant, classy, and even sacred. But the Rogue is a breed apart. It’s the river where Zane Grey did his best writing, where John Wayne and Katherine Hepburn, Merrill Streep and Kevin Bacon made movies; it’s a river where famous athletes and dignitaries have fished. And it’s a river that doesn’t suffer fools lightly. The Rogue is rowdy. Rough and rugged, it represents the American West when it was wild. The Rogue brings out the best in me as a river runner, a fisherman, and an outdoorsman. I’ve run the lower Rogue in every season of the year, in a wide variety of weather conditions, always with the same wood boat and mostly with the same river crew.
Greg Hatten
The calm of Kelsey Canyon creates a nice opportunity to get lost in the steep mossy walls, the deep green of the towering trees, and the emerging colors of fall on the hills looming over the river.
Last fall was different. Almost everything I knew about the river changed in 2015 because of an historic low water level. River levels all over the West were at all-time lows because of the lack of rain and snow. None of us had ever seen the Rogue so low. All summer we had watched the levels continue to drop, and as our early October permit date approached, we debated whether we should run it at all.
A few days before our scheduled put-in, I spent a couple of days and cold nights high in the Cascade Mountain range exploring Crater Lake National Park, very close to where the Rogue River gets its start. I was amazed at how the deep dark blue of the lake could upstage such a beautiful cloudless October Oregon sky. Just a few miles from the rim of Crater Lake, on the north flank of Mount Mazama at Boundary Spring, life begins for the Rogue River. Unlike many Northwest rivers that start out as a quiet trickle from glacier melt, the Rogue bursts out of the ground with all the power and drama it’s known for downriver. It surges from the ground almost as if someone turned on a fire hydrant and left it gushing. The cold, clear water races down the western side of the divide, carving a path through a series of chutes and sharp drops as it runs under and over moss-covered trees that have fallen all around the narrow passages of the river.
There was no evidence at the river’s source that the drought in the West had any effect on the personality or the pulse of the rough and tumble Rogue. But as I drove down from the heights of the mountains and along the river, it was clear from the waterlines on the shore and the exposed rocks in the river that this year’s flow was well below average. Some of the tributaries that normally feed into the Rogue were practically dry and the snowmelt was long gone, leaving the river much rockier and rougher than usual.
While I was in Crater Lake Park and disconnected from cell phones and emails, word went out that a drift boat was jammed in the middle of the narrow slot canyon known as Mule Creek Canyon and the Wild and Scenic Rogue was closed by the Bureau of Land Management until the boat could be removed. Our trip was off. My heart sank when I read the notice and saw the pictures my friends had circulated of the boat wedged tight in the canyon channel unable to fit through the narrow passage. The bow was caught on one side of the canyon wall and the transom on the other, while the water kept the boat pinned on its edge. No one had been seriously injured, but the boat was a mess. Moments after I read the notice word came through that the current had broken the boat, folded it, and flushed it downriver. Our trip was back on.
We headed to the rustic riverside Galice Lodge with our rigs, boats, and supplies ready for a week of river running. I was coming from Crater Lake and was the first to arrive in the early afternoon. I headed to a great little riffle just downriver from the Lodge; three fish later, I trudged back up the steep bluff to connect with the river friends I hadn’t seen since this same time last year.
All of us, including Scott, our trip leader and one of the best oarsmen on the planet, were anxious about the low water level. Even Debbie, the owner of the lodge and “Goddess Divine of the Rogue,” advised against going. She has been on the river all her life and had never seen it so low. She stopped renting her river rafts several weeks prior because her gear was getting torn up by inexperienced boaters in low water and sharp rocks. We talked about it and decided to launch anyway.
We pulled out early the next morning for the short drive to the Graves Creek put-in at the upstream end of the 36-mile Wild and Scenic section. We shoved off from the boat launch into a pool of calm water, and in a mere 200 yards we reached the chaos at the top of the Class-III Graves Creek Rapid. The low water was immediately evident as the bottom of my boat bumped boulders in the middle of the rapid where I had never before touched a rock. Running the river at this level would be a huge challenge requiring vigilance and skill, particularly in the back-to-back Class IVs: Mule Creek Canyon and Blossom Bar. They were two days away, but already on my mind.
Just a couple miles from the put-in at Graves, there is a waterfall with a drop so vertical and violent you can hear the deep thunder of crashing water on rocks for a quarter mile upriver before you can see the cloud of mist that hangs above it. It’s Rainie Falls, classified as an “unrunnable” Class VI, the highest designation for degree of difficulty on North American rivers. On river right there is a narrow rocky lining chute that makes it possible to avoid the falls if you are willing to wrangle your boat through a more gradual elevation change in the form of something that resembles a ragged stone staircase for King Kong with water running down it.
Greg Hatten
To get around the unrunnable Rainie Falls, we lined our boats in the skinny side channel known by many names, the only printable one being Fish Ladder. It required all hands and a couple of hours to get ten boats through the narrow rocky chute.
We pushed and pulled and squeezed and coaxed the rafts down that rocky narrow flight of stairs one by one and only lost control of one raft. It happened on the last narrow section at the bottom; the raft got stuck and with water starting to pour over the sides, we released the rope and let it go rather than let it sink. Two rowers quickly jumped in an empty boat, chased the runaway down river and pulled it to shore.
When it was time for my wood boat to run the gauntlet, I tied my 100′ rope to the transom, gave it a little nudge, paid out some line, and watched the river current take it 20 yards down to the lip of the first stair step where it got hung up by low water. It teetered for a few moments with the bow hanging precariously over the 5′ drop until the water built up behind it and sent it over the edge in a nosedive. I held my breath hoping there was enough water to break the fall. There was water, powerful water, and it grabbed my boat and shot it forward. I did my best to hold onto the rope but it screamed through my gloved hands and left me with painful rope burns. My boat bumped the bottom several times and slowed down before it reached the next stair step and I repeated the process four or five times until the last narrow pinch. The pinch was too narrow for the rafts and I knew it by looking at it that it would be too narrow for my boat.
The water surged as it forced its way through the slot and it grabbed my boat and almost pulled me off my feet. I let out line and as the boat did it’s best to fit through the opening, I heard the awful sound of wood scraping the canyon wall as the rocks on the right side carved a scratch down the entire length of my boat. Since I’d built the boat and would have to repair the damage, it was like hearing the scratching of fingernails along an eight foot chalkboard: excruciating. Lining a group of boats around Rainie Falls in normal flow usually takes us 30 to 45 minutes. Low water conditions turned it into a two-hour struggle.
Greg Hatten
The view of the sunset up river from our camp below Tyee Rapid was stunning as the shadows crept up the mountains and dusk overtook the day.
We camped at the bottom of a Class-IV rapid called Tyee. It has a spacious area of gravel, sand, and brown grass, with plenty of room for the boats and a huge level area for our campsite. The weather was unseasonably warm, and we took advantage of it that night. Not one of the 10 of us set up a tent. We all preferred sleeping in the open air with the stars overhead. I threw down my cot and bedroll next to my boat and soon fell asleep
Scott Vollstedt
The narrow opening on the right side of Slim Pickens left no margin for error as it was just a little wider than the boat. To run it in a wood boat at low water levels required plenty of nerve.
Our second day on the Wild and Scenic section was filled with tricky Class II rapids, starting first thing in the morning with Wildcat, and then Slim Pickens, Black Bar, Dulog, and Quiz Show. They were all sharper and more technically demanding than usual and we were constantly scanning the water for ragged rocks just below the surface. Everything was harder. The low water had turned the Class IIs into Class IIIs, and the Class IIIs into Class IVs.
Scott Vollstedt
Black Bar Rapid is a Class III and normally, only the top of this rock in the middle is exposed. At low water, it becomes a big obstacle that must be missed.
After an exhausting day of rowing we pulled into Battle Bar Camp, the site of a bloody skirmish between the U.S. Army and the Rogue River tribes over 150 years ago. The campsite is one of our favorites with plenty of room for tents and cots. I hauled my gear 100′ up a narrow winding trail to a small flat area on the edge of the bluff with a commanding view of the valley downriver, the steep tree-covered hills of the opposite shore, and our row of colorful boats pulled up in a neat line at the river’s edge.
Greg Hatten
One of the best sights on any river trip are the colorful boats pulled into camp each night after a hard day of rowing. Our campsite at Battle on the second night of the trip provided a bird’s-eye view of the boats and camp from the bluff above the river.
These boats mean the world to the men who row them. Each of us has found a craft that suits the way we row and the way we travel on the river, and while no boat or setup is the same, the connection we have with them is very much the same. We all have stories of close calls and near misses, and it’s always the boat that pulled us out, avoiding scrapes and averting disaster. Time after time, the boats deliver us from tight spots. We love our boats. Mine is a McKenzie-style drift boat. Nothing on the river is quite as pretty to my eye, and nothing I have ever rowed is quite as responsive. I built the boat and have shaped, sanded, and varnished every square inch of wood on it. I’ve rowed it for thousands of hours and hundreds of miles and know what it is capable of. I’ve repaired holes, replaced frames, resanded, revarnished, and refurbished most every part of it. My connection with it runs deep. When I am rowing the boat in sync with the river, everything feels effortless, time stands still, and I am part of the river. The boat moves nimbly with just a flick of my oars and the paths through the rapids come easy.
Scott Halpert
One of the best parts about running the Rogue in autumn is the vibrant color along the hills lining the river. In between rapids, stretches of calm water like this one just above the Battle Bar camp site provided good opportunities for fishing.
After a campfire dinner down by the river, we talked about our running order, the meeting time above the rapid, and the effect the low water level might have. I took my river book out of my boat to review my river notes from previous years. The first page I turned to had a note from a few years back when the water was low, and in big bold red permanent marker I had written, “NEVER run this river below 1,100 CFS.” When we launched at Graves the level had been 950 cubic feet per second.
In the morning I sat up on my cot, still wrapped in the warmth of the bedroll and blankets, and admired the vivid colors on the hill across the river. The yellows and reds of fall were even brighter with the morning dew. I was eager to take on the day’s challenges but anxious about the risk the rapids ahead posed to everyone on the team. When we gathered on the beach for coffee, Scott reviewed the running order and ideal time to run Mule Creek and Blossom Bar.
After breakfast we broke camp, stowed gear, and pushed off one at a time. In just a few miles of rowing and fishing we reached our staging point at Rogue River Ranch. We pulled up on the long sandy beach for final equipment checks and to make sure our boats were “rigged to flip,” river-talk for having rods and loose gear stowed, dry bags tied down, and spare oars made accessible. We launched and then rowed the slow approach to the slot canyon.
The river current starts moving quicker as the elevation drops, and finally we saw the two boulders that mark the entrance. We call them Jaws. They stand like sentinels, three stories high. Once we passed them we really started to fly. Low water made the descent into the canyon steeper and faster than I’ve ever seen it. The walls felt tight, too close for comfort. I shot through the first section, and in several places the tips of my oars touched both sides of the canyon.
The line through Mule Creek is constantly shifting as the current rushes through the chute and bounces off the walls. To avoid crashing into the wall, you have to read the current and the waves bouncing off the boulders to anticipate what effect they will have on the boat. It’s critical to keep the nose of the boat pointing at the wall or boulder you expect to smash into so you can pull back away from it. Midway through the run, at one of the fastest points on the whole river, I misread the current and got thrown against the right wall. The rocks could have sideswiped the entire length of the hull, but just before impact I extended my right oar to protect the boat. The oar took the brunt of the damage and the loud scraping sound of wood on rock echoed off both walls.
I was fast approaching the narrow point in the canyon where all that raging water gets squeezed through an opening only little wider than our boats. It was where the metal drift boat had been wedged a week earlier. I took a deep breath. There was no margin for error or hesitation; I read the current, lined up the bow, had just enough room to give one hard forward row with both oars before tucking them in, and shot right through the skinny opening clearing both sides with just inches to spare.
Coffee Pot is the last of the nasty obstacles in the canyon. It’s a boiling, angry ogre of an eddy that lurks in the canyon. It’s about the size of a living room with a narrow opening and a narrower exit. Once your boat enters the eddy, the strong current sweeps everything counterclockwise and you can only exit when a rotation takes the boat close enough to the exit for a quick stroke of the oars to break through the current and slip though the opening. I’ve taken as many as five rotations before getting out of that eddy.
As I approached it, I was still moving fast in tight quarters, and I lined up the boat as best I could with my bow pointing slightly left of center. I gave a quick thrust on the oars to stick my bow inside the swirl. The current grabbed hold and pulled the rest of my boat onto the dance floor, and just as the stern had cleared the entrance and the whole boat was in the eddy, I gave the left oar a hard pull and spun the boat so the transom was lined up with the exit then gave both oars a deep pull and shot backward through the exit in the cleanest and quickest exit I’ve ever made in the Coffee Pot. I was through and I was pleased. My heart raced.
We all made it safely through Mule Creek, but there was no time to celebrate. Blossom was right around the corner. We pulled in at the steep rocks above the rapid, tied our boats off, and scrambled up the scout rock for the view of Blossom Bar to make sure there were no obstructions that might block our path or alter our line. It was one of first times in years there wasn’t an overturned raft, a metal frame, a busted-up drift boat, or a half-submerged kayak to maneuver around. After crawling back down the slippery rocks to the boats, we arranged ourselves in the same running order as in Mule Creek and floated single file to the top of the rapid in what seemed like slow motion.
As I pulled into the soft water of Purgatory Eddy just a few yards before the first pour-over of Blossom, I did one final visual check of the boat and then eased back into the current. Just before dropping over the entry point, I saw a sharp rock right in the middle of the pour-over that I had never seen before. I gave a quick corrective pull on the oars and missed it by inches. The strong current tried to pull me down to the four sharp, pointed boulders that rise up out of the water and form the barrier known as the Picket Fence, but I broke through the lateral wave and swung my boat across the current to the right so I could hook the boat around a rock we call the Horn and slip down the chute known as the Beaver Slide. At this point we are moving our boats laterally through an opening that always feels like it’s a size too small for our boats. To do it right, the bow must come very close to the pour-over that tumbles into the Picket Fence; this move requires steady nerves and a few strong pulls on the oars.
Scott Vollstedt
This holding eddy just below the Picket Fence on Blossom Bar is where we position ourselves as the first line of safety in case of emergency for rowers that come after us. This photograph, taken in 2013, shows the river at normal water levels. In 2015, the water was several feet lower and the passage through Blossom all the more dangerous.
At normal water flows, I’d be so close to the left rock when entering the Beaver Slide that I’d have to raise my oar up out of the water and drop it on the other side of the rock to make the quick pivot. But with the water so low, the move I’d made 100 times before didn’t work. The rock was too tall for me to get my oar up and over, and there was a moment of panic as I had to improvise my entry and pivot down the slide with my right the oar, the only one I could use. As soon as I passed by the boulder and I could use both oars, I made the pivot and dug the oars deep in the water to break left out of the current. I made a series of zigzag moves through a dramatic rock garden filled with large and small rocks with names like Volkswagen and Clam Shell. I felt like a pinball going through the gauntlet of moss-covered rocks, swirling eddies, and boulders.
Greg Hatten
The Class-III Devils Staircase was one of the few rapids we found a little easier in low water; it was a slip-and-slide run of moderate waves. I pulled into the peaceful eddy on river left to watch the rafts come through after me.
When we were all safely through the Class IVs, we had a traditional toast in the calm pool at the bottom of the rapid we call Whiskey Eddie and then we ran Devil’s Staircase, the last of the Class IIIs. From this point in the adventure, we normally turn our focus to fishing, but the low water wouldn’t let us get too comfortable. In a tricky Class II called Tacoma, one of my friends wedged an oar between two submerged rocks and had to let it go. The mishap almost sank his raft, and he was lucky to only lose some fishing gear and the oar. It could have been much worse.
Greg Hatten
Our last night on the river was a rocky camp site but a good one. My folding cot kept me elevated just enough so I hovered just above the rocks and slept comfortably in my old-school wool blankets and cowboy bedroll.
At our last camp we dined on fresh steelhead cooked over an open flame, cold wine, warm whiskey, and recalled the heroics of the boats, the nerves of the oarsmen, and the skills of the fishermen. Our release from the stress of rowing so many difficult rapids in such low water turned the evening into a celebration, and there were times we laughed so hard we cried. Night came to the Rogue, and we slept under a covering of stars.
Greg Hatten is an outdoor writer, a consultant for active-consumer products, and a licensed Oregon Outfitter and Guide who hosts outdoor river adventures in a hand-crafted wooden drift boat pursuing steelhead on the fly.
If you have an interesting story to tell about your adventures with a small wooden boat, please email us a brief outline and a few photos.
An old plastic cutting board and a stainless-steel screw make a quick, easily removed, and adjustable collar.
A few years ago I wanted to add collars to a pair of oars but didn’t want to remove the existing leathers to sew on strips of latigo. The leathers had been soaking up tallow for several years; I didn’t think I’d have much luck gluing anything to them. I also wanted collars that I could easily reposition or remove. High-density polyethylene (HDPE) seemed like a good material for the job. It’s easily worked and durable, and I happened to have a big piece of it in the kitchen: a 1/2″-thick cutting board.
Careful drilling of the pilot hole is required to recess the screw head. The gap in the collar assures that it can be drawn up tight.
The oars had a diameter of 2″ at the leathers; a 2″ holesaw cut through the 1/2″ HDPE. I didn’t have a 3″ holesaw to create a 1/2″ wide ring, so I used a bandsaw to cut around the hole. Before I split the ring, I drilled a pilot hole and countersink for a 1-1/4″ stainless-steel square-drive flathead wood screw. To get the countersink deep enough to bury the screw head, I aimed the pilot drill to follow a tangent that came about 1/8″ from the inside hole. I then cut through the ring at a point where the unthreaded screw shank would be on the countersink side, the threads on the other. I had to saw about 1/4″ from the threaded side for the screw to squeeze the collar tight on the leathers. My quick and cheap collars wound up working beautifully and have lasted for years.
I recently decided to add collars to another set of oars, and while the HDPE collars are easy to make, there wasn’t much left of the cutting board, so I thought about doing something in wood. A ring wouldn’t work because of wood’s tendency to split along short grain. Reasoning that the oar doesn’t require a full collar to keep it from sliding out through the lock, I thought I’d try adding something smaller to the leathers.
I did the lashing the same way I’d do a simple whipping on the end of a line: making an elongated loop over the thumb button, making tight turns around button and oar, and using the protruding end of the loop to pull the tail end under the tight band of turns. I put a flame to the trimmed ends and smeared the melted nylon flat.
I cut pieces of hardwood—locust—1-3/4″ long and 1-1/4″ wide, and gave them an inside curve to fit the oar leather and an outside curve to create a crescent-shaped cross section. A quick test showed that the end that makes contact with the rowlock needs to be rounded. Lashings recessed in a wide groove hold them to the oars.
I roughed out the inside and outside curve on the bandsaw and cleaned up the inside curve with a 2″ sanding drum, the outside on a disk sander. A small rasp cut the recess for the lashings.
The thumb buttons, as I call them, worked just as well as collars. Because they can be rotated to the top of the oar and then passed between the horns of the lock, I added second button, to create a different gearing. With a little practice I was able to change gearing in between strokes without a break in the rhythm. Changing gears on the fly worked so well I added a third button, resulting in a range of gearing similar to what I have with the long collarless leathers I use for rowing on tholepins.
I lined the thumb buttons up with the bottom/trailing edge of the oar blade so spoon-bladed oars can lie directly next to one another, loom to loom, when the blades are cupped one inside the other. Without the splay created by a full collar, a pair of oars makes a more compact bundle for carrying and stowing.
Christopher Cunningham is the editor of Small Boats Monthly.
You can share your tricks of the trade with other Small Boats Monthly readers by sending us an email.
The carbon-fiber ferrule weighs just 9 3/4 ounces.
Most of my boats are outfitted for rowing, and while I always have a pair of oars aboard, they’re often in the way when I’m sailing, motoring, or at anchor. Duckworks offers a solution: carbon-fiber ferrules to make sectional oars, which are much easier to stow when they’re not being used.
The ferrules are cylindrical and work best on oars with cylindrical or minimally tapered looms. All of the oars that I’ve made have tapered looms and carry an oval cross-section through much of their length, so they were not good candidates for the ferrules, but I was given an old pair of commercially made 10′ oars that were. They’re Sitka spruce, made by the Lister Brothers in Vancouver, British Columbia. With a bit of trepidation—I’d seen a pair of Lister Brothers oars for sale on an antiques website, priced at $1,500—I put those oars in my chop saw.
If you want the sections to be equal in length and both fit in the smallest possible space, don’t cut your oars in half—you’ll wind up with one section 3-1/2″ longer than the other. To make the sections of equal length, find the midpoint of the oars, and make the cut 1-3/4″ to the handle side of that mark. Then put the longer male side of the ferrule on the handle section and the female side on the blade section. (That puts the mating surfaces of the ferrule farther away from the oarlock where they’re subject to less strain.)
The 14″-long ferrules will add 7″ to the overall length of the sectioned oar. The additional length made my 10′ oars a better fit for the boats I’d be using them for, but if you want your oars to remain the same length, cut the oars as noted above and then trim 3 1/2″ from each end.
If your oars have a diameter less than 45 mm, you’ll have to add some thickness. The Duckworks website has a note from one customer who used wraps of fiberglass and epoxy to fill the gap. The looms of my oars have a diameter a bit larger than the 49mm outside diameter of the ferrule and needed to be trimmed to fit inside diameter of 45 mm, or 1 25/32″. I needed to reduce the diameter of the looms to take the ferrules. To do that I made a cradle to the hold the oar sections on my tablesaw: With the blade of my tablesaw at 45° I cut a groove along the face of a 2 x 4. I then set the fence of my tablesaw 3 1/2″ from the far edge of the blade (the length that gets inserted into the ferrule halves). With the blade lowered, I clamped the 2×4 across the table and, with the saw running, cranked the blade up through the bottom of the 2×4 until it cut into the groove.
Repeatedly sliding the loom across the tablesaw blade trimmed it down to size. I got less tearout at the shoulder by making the first cut with the end butted up against the fence and making a full rotation of the loom.
With an oar section resting in the groove, I raised the blade in small increments, cutting just the end of the loom until I got a tight fit in the ferrule. With the blade set to cut just enough wood away, I butted the loom against the fence, rotated the loom to cut the shoulder, then slid the loom back and forth across the blade rotating a few degrees at a time.
Testing the fit in the ferrules and a light touch with a fine-toothed rasp finished the trimming.
You should do a dry fit before gluing the ferrules in place. If the button for the ferrule’s latch doesn’t pop up through the hole, you might need to trim a bit off the loom that fits the female half of the ferrule. Don’t take a rattail file to the button’s hole to enlarge it; you don’t want to give that a loose fit.
When you’re ready to assemble the pieces, paint epoxy on the ferrules and the sawn ends and newly trimmed surfaces the oars. Be stingy with the epoxy when coating the female side of the ferrule: A thin film on the inside surface of the ferrule is all that’s required; any excess will just get pushed ahead of the end of the loom and need to be completely removed. Clean up any epoxy that will cause problems joining the oar sections later. Set the oar sections with the ferrules up while the epoxy is curing to avoid any drips fouling the joint. After the epoxy cures, you’ll be ready to row. An easy way to assemble the sectional oar it to rest each half on the gunwale—to take the weight—and slide the ferrule ends together in the middle of the boat.
I’ll be able to stow the oars tucked along the sheerstrake or against the uprights supporting the side benches. Note that the oar sections are of equal length, but the connections with the ferrules (and the hidden cut ends of the loom) are staggered.
The sectional oars performed just as well as they did before being sawn in two. The ferrule is tight and takes the strain without any movement or complaining. With the halves of the oars each at 5′ 3-1/2″, I had lots of places to stow them on the boats they are meant for.
A word of caution: The earliest sectional paddles I used, both in fiberglass and in carbon fiber, had the same type of ferrule and over the course of several years of use and wear they tended to loosen up. Newer kayak-paddle ferrules solved the problem with joints that used compression to hold the two paddle halves together and take up any slack that might develop over time. The Duckworks oar ferrules are substantially larger and have a much broader area of contact between the two halves, so I suspect they’ll be very slow to wear and loosen. I’ll use one-piece oars when I intend to do a lot of rowing, but I’d still carry the sectionals for backups. Saved for use when a one-piece oar breaks or goes missing, the motor conks out, or the wind won’t fill the sails, the sectional oars will have a good tight fit for many, many years. Best of all, while they’re waiting to save the day, they can be tucked somewhere out of the way.
Christopher Cunningham is the editor of Small Boats Monthly.
The plant-based ingredients make up over 50% of EcoPoxy content, far higher, according to the manufacturer, than other epoxies moving away from petroleum-based materials.
I’ve been building cedar-strip rowboats and canoes in British Columbia for more than 15 years. They are light, strong, and made of local woods: red and yellow cedar, fir, and maple. Until I discovered EcoPoxy about four years ago, the least appealing aspect of my work was the toxicity and odor of the petrochemical epoxy I’d been using.
EcoPoxy has replaced some of the normal petroleum-based compounds with plant-derived ingredients and is priced to compete with premium boatbuilding petro-epoxies. It is less toxic than other epoxies I’ve used in the past; it is 100 percent solids, has low VOCs (volatile organic compounds), and has very little odor. I use EcoPoxy Clear. Its hardener is listed as a long-term irritant, so I still take the normal epoxy handling precautions and use safety glasses, gloves, and long sleeves. I can order it online in up to 30-liter kits, and it gets mailed to my door, normally in four days. When I ordered epoxies from other manufacturers, it would have to be categorized as toxic and shipping was more costly.
What I first noticed about EcoPoxy is the almost complete absence of odor. The hardener has the slightest whiff of ammonia, and the resin is virtually odorless. The resin and hardener are mixed in a 2:1 ratio and are, according to the manufacturer, safe to use without a respirator as long as there is some airflow in the shop. Both the resin and hardener are water-clear and stay that way when mixed together. EcoPoxy has low viscosity, so fiberglass cloth wets out easily and completely. I use EcoPoxy thickened with fine sawdust (to keep it from flowing out of joints) as an adhesive for all the gunwales, decks and fittings, and, when thickened further, to make structural fillets. Finally, I use EcoPoxy as a sealer on any raw wood and under both waterborne linear polyurethane and polyurethane varnishes.
My first project with EcoPoxy was a Fine, a sleek, 18′ sliding-seat rowboat. When applying the fiberglass sheathing, I mixed the EcoPoxy in 3-oz batches and had plenty of time to squeegee the product through the cloth. The whole boat stayed workable until the sheathing task was done. Even though it was February, and the shop was cool, the EcoPoxy in the ’glass cured to the point where I could start attaching the skeg and keel the next day. I saw no sign of blush and the fill coats went on smoothly. While the EcoPoxy Clear I use doesn’t form blush, the manufacturer cautions that blush may form when using their fast or medium hardener and must be sponged off with warm water before any coats of epoxy or other finishes are applied.
The Fine has riggers to allow the use of long oars. I constructed the riggers from maple and EcoPoxy and even used EcoPoxy to glue the stainless-steel oarlocks posts in place. Normally held to metal outriggers with a nut tightened on threaded bottom end, the Fine’s posts are set in holes in the wood and held entirely by epoxy, without a nut. All of this has held up for over four years, with no delamination or failures—even on the highly loaded riggers.
To build this Cosine wherry, the author used EcoPoxy as an adhesive, a sealant, and to wet out fiberglass cloth.
I’ve used EcoPoxy to build about over a dozen of the rowboats and canoes I’ve sold. I have used EcoPoxy in three boatbuilding classes, where the ease of use, lower toxicity, and lower odor are important benefits for my students. I keep the resin and hardener warm in the winter, and EcoPoxy works for me in 50-degree shop temperatures. In the summer when it’s 80 degrees in the shop, the pot life is never too short and the cure time is never too fast.
I have a lot of confidence in EcoPoxy. Next to the wood, it is the most important component of my boats, and I like the fact that it incorporates plant-based ingredients that come from renewable sources, a lot like the cedar, fir, and maple I use to build my boats.
Update: Ecopoxy is no longer producing the clear product that I used for my boats, and the substitute they offered (Biopoxy 36) didn’t cure clear or was too viscous or had extremely long cure times. I have had to change to an Entropy Resins bio-based product, which has been great. RC, September 2022
Rick Crook and Pat Beninger live in Pender Harbour on the Sunshine Coast of Canada’s British Columbia. Rick has been building cedar-strip canoes and rowboats for 15 years and doing business as Oyster Bay Boats. He offers Wee Lassie canoes, Cosine wherries, Handliner rowboats, and the Fine, a sliding-seat rowboat. His boats are built with locally sourced red and yellow cedar, fir, and maple, and they have found their way to customers from Vancouver Island to Ontario.
EcoPoxy Clear is manufactured by Ecopoxy in Morris, Manitoba, Canada, and available direct from the manufacturer or from retailers. The two-part kit is priced at $37.50 for 750ml, $57.75 for 1.5L, $84.85 for 3L, and $150.75 for 6L (US dollars, ordered from Aircraft Spruce).
Is there a product that might be useful for boatbuilding, cruising or shore-side camping that you’d like us to review? Please email your suggestions.
“That boat is so damned beautiful, it’s making the rest of us look bad.”
Mark Ramsby of Portland, Oregon, wanted a bigger boat. He had built a cedar-strip canoe and had used it for several years, but at 66 he was finding it more difficult to sit in its confines of long stretches of time. After he had retired he thought about building a boat with enough room and stability for him to move about and to take on less-sheltered waters: the lower Columbia River, Puget Sound, Hood Canal, and the San Juan Islands to the north in Washington State.
CNC-cut tabs, slots and notches assured a fair and symmetrical hull.
Mark looked at a wide variety of designs for powerboats and sailboats. While he was interested in boats up to 30′, his home workshop in his two-car garage set the limit at 20′. He opted for a powerboat to travel without the limitations often posed by sail, and briefly considered a boat with sleeping arrangements for overnight trips with his wife, Meg. To keep the boat simple, affordable, and versatile, he decided that shore-side accommodations—camping on the beach or renting a room—were the better option.
Harry Bryan’s 18′ Handy Billy caught his eye, and he went so far as to buy the plans and loft the lines. The 5′ beam began to look too small, the projected 900-lb weight too heavy, and the potential for leaks in the batten-seam construction too great. He abandoned the project and went back to his search.
After Mark finished building the boat, he got it prepped for a professional painter to apply the finish.
Mark had seen PT Watercraft’s 18′5″ PT Skiff in Port Townsend, Washington. With a weight of 385 lbs (without motor), this center-console runabout was much lighter than the Handy Billy, wider at 6′2″, and, with its plywood and fiberglass construction, wasn’t going to leak after drying out while sitting on a trailer in his garage. Mark wanted the experience of building from plans, but the PT skiff was available only as a kit. After considering the building time—2,000 hours for the Handy Billy versus 400 hours for the PT skiff—the kit became the obvious choice. “That was the difference between building it over a couple of years and building over the winter. Since I was 66 at the time and wanted to use this boat, I wrote the check and placed my order.”
Anticipating he’d varnish the outwales, Mark glued them using small square pads of plywood to minimize the damage the temporary screws would do.
The CAD-designed kit parts are CNC-cut from BS 1088 okoume plywood with tabs and slots, puzzle joints, scribed markings, and alignment notches to assure everything gets assembled with great precision. Mark made a number of modifications to his PT Skiff—swapping out plywood parts meant to be painted with solid wood that he could varnish, for example—to produce a boat that he “wanted to look at for a long time.”
Mark replaced the kit’s plywood seat tops with solid sapele, cut them slightly oversize for a visually appealing overhang and wrapped the tops and bottoms with 4-oz ‘glass. The middle seat also has reinforcing gussets port and starboard where passengers are likely to step aboard.
On September 2 last year Mark and a friend launched in MOJO on the Willamette River. Less than 4 miles downriver Mark crossed the stern of a tug pushing a barge into a dock. MOJO, running light without her ballast tanks filled, got tossed around in the prop wash. Mark filled the tanks in mid-river, adding 320 lbs of ballast beneath the cockpit sole, and crossed the prop-wash again, this time with confidence-inspiring stability.
The forward bulkhead extends up behind the coaming, providing a comfortable backrest.
Meg joined Mark the following day for a 20-mile trip on the Willamette, and the following week the couple began the exploration that he’d been daydreaming about. They trailered north into Washington and toured Washington’s Hood Canal, and then launched again at Port Townsend to show the boat off at the Wooden Boat Festival.
The instrumentation mark added to his PT Skiff includes tachometer, voltmeter and depth sounder with through-hull transducer. In the open space beneath the console he has an onboard 120-volt charger for charging the 55A/H AGM battery under middle seat.
Mark and MOJO made the most of the remaining mild autumn weather and explored more of the Willamette River both upriver and down, and ventured farther north to Multnomah Channel and the Columbia River. He reports that for MOJO running at 10–15 knots is “a lovely speed, not too much twitchiness, just a calm and mannered cruise.” On one of his outings he and a friend stopped at a riverside café. When they returned to MOJO, someone from the café asked if they were heading out soon, adding: “That boat is so damned beautiful, it’s making the rest of us look bad.”
Have you recently launched a boat? Please email us. We’d like to hear about it and share your story with other Small Boats Monthly readers.
Harris Bucklin, a Small Boats Monthly subscriber, sent me this note after he had read our review of the iBall back-up camera in the January 2016 issue: “You gave me a great idea for using my GoPro with my cell phone.” If you have one of those little waterproof action cameras and a wireless connection to connect it to a smartphone, using it as a back-up camera is indeed a great idea.
Christopher Cunningham
A wide-angle mirror and a jointed suction-cup mount worked on the tailgate of my truck and the rear window of my SUV.
Prior to using the iBall I had cobbled together a wide-angle rearview mirror from an auto-parts store and an articulated, suction-cup camera mount. It worked pretty well and didn’t cost much to make.
Christopher Cunningham
With the same mount I used for my mirror I could put my GoPro over the trailer ball.
Following Harris’s lead, I removed the mirror from the cup mount and put the GoPro on in it instead. (That’s what it was originally intended for.) My smartphone has the GoPro app installed and its display screen serves as the camera’s wireless remote monitor.
Christopher Cunningham
My smartphone with its Bluetooth connection to the GoPro serves as the monitor.
The GoPro has a very wide-angle lens and with the camera mounted over the trailer ball I can see the trailer tongue approaching from about 15′ out and guide the ball back until it is directly under the trailer hitch. There are a few things about the GoPro that took some getting used to. The images can’t be flipped left for right, so having the phone on my dashboard doesn’t give me the image I’m used to seeing in the rearview mirror. Holding the phone behind me and looking over my shoulder keeps me from working at cross-purposes. The wide-angle view seems to make the trailer tongue speed up as it gets closer, so a slow approach over the last foot or two is best. There’s also a delay in the image that appears on the phone’s screen, so to keep the tongue from denting my license plate (yet again) I stop every inch or so and let the image catch up.
If you already have a GoPro, the phone app, and a mount, you can set yourself up with a trailer-hitch camera in a couple of minutes and then head out and use the camera to record your boating activities. If you don’t have the GoPro rig, a mirror system like the one I came up with or the iBall are less pricy ways to get hitched quickly without help.
Zach, my sailing buddy/guru, had been shopping online for a sailboat for a co-worker when out of the blue, he sent me this instant messaging note: “Matt, I really think you should own this boat.” When I clicked the Craigslist link he sent, I saw a small red boat that was for sale near Boston. It was like nothing I’d ever seen before. It was a pram with a few long wooden ribs and some kind of fabric hull, and could be folded in a matter of moments for storage and portability. It had been used as a tender with a Johnson 1.5-hp Seahorse outboard, but when Zach explained that the boat, called a Fliptail 7, could be rigged as a sailboat, I realized immediately he was right, it was perfect for me. I wrote back, “Must have! Damn you.” The last thing I needed was another sailboat. I already had a 14′ one-design sailboat, and I was building a 15 ½′ sailing dinghy in my tiny East Village basement in Manhattan. But the lure of having a folding sailboat was inescapable.
Matthew McGregor-Mento
The folded Fliptail, together with its sailing rig make a compact bundle that’s not too much trouble to store. A small set of wheels eases walking the boat to the launch site.
I have always had a love for things that fold. I have three folding kayaks and two folding bikes. I designed and built two folding surfboards: a folding long board and a soft short board that fits in an airline carry-on bag. My dining room table is actually a portable picnic table that folds down into a neat little rectangle I can store in a clothes closet. My affinity for folding things comes from living in a cramped Manhattan apartment and my fascination for the engineering that goes into an elegant folding design. I did some research on the Fliptail at the Wooden Widget website, and was really impressed by the videos of it sailing and the ease and speed of folding it. After I watched the video of a Fliptail being quickly folded and driven away by a folding bike that had stowed aboard the boat moments before, I knew I had to have one.
If you live in a big city like me, you probably have no car and no room to store a sailboat. In Manhattan, yacht clubs are, of course, expensive, and marinas charge an arm and a leg to store a boat ashore, even more to rent a slip, and the handful of moorings that are available have a wait list that can be years long. I can store the Fliptail in my basement (it would even fit in a closet), wheel it to the riverside on a kayak dolly, and assemble the boat, completely ready to sail, in about 10 minutes. It means that I can go sailing on a whim if I have a couple hours free. I don’t have to make special plans with my wife and block out a half day to go sailing.
Benjy Benjamin
The chines and gunwales meet the stem at an angle and require small triangles of wood to accommodate the hinges.
The first thing you notice when you meet a Fliptail face to face is that it folds smaller (7′2″ x 24″ x 10″) and faster than you would imagine. If you’ve ever folded a portable baby crib, it has that same kind of magic-trick feel. The boat’s laminated keel, chines, and gunwales are all hinged together and fan out to support a PVC-reinforced polyester fabric skin. To unfold the boat you release a small Velcro strap and spread the sides out; the hinged floorboards flop down into place.
Benjy Benjamin
Sliding bolts keeps the uprights lined up over the cross beams and small notches in the chines keep the crossbeams where they belong.
Once extended, the sides are locked into place with four supports between the gunwales and the chines. There’s nothing complex about the supports, and it takes just a few seconds to secure each of them. Another four beams pivot out from the keel to the chines. Once they are square to the keel, you just position the vertical supports to meet them and secure each with a barrel bolt. To fold the frame back up you unlock the barrel bolts and release the supports. The floorboards fold up, and when you lift them by their handles the whole boat just folds up neatly, ready to be carried away.
Benjy Benjamin
The narrow transom stern is built solidly and has enough width at the top to take on a small outboard motor.
Robin “Benjy” Benjamin, the Wooden Widget designer, made the Fliptail to be a very pleasantly stable boat under sail. It has a lively feel in a breeze, and while you might heel a little, its broad beam, carried almost from end to end, assures that it’s unlikely you’ll capsize unless you really screw something up. I’ve added a jib just for fun, and even with the extra sail area, the Fliptail shows no signs of getting close to turning turtle. The boat sails as you’d expect of a short, beamy pram, but despite its unusual construction, it points to windward fairly well. Because the boat is so light, it rides right over the chop and boat wakes. It has handled everything I’ve encountered sailing the busy wake-ruffled Manhattan waterways.
Matthew McGregor-Mento
In an urban environment that’s not conducive to having a small boat on a trailer to go with it a compact folder offers access to the water.
I have also been pleasantly surprised by how well the Fliptail rows, though I have to confess I’ve had no experience rowing beyond the rowboats on The Lake in Central Park. I once sailed into the mouth of New York’s infamous Hell Gate, a narrow tidal strait in the middle of the East River, and had to take to the oars to fight the current. With a fair amount of effort, I skirted the shore, working upstream, until I rounded a bend and broke into quieter waters. I’ve also rowed the boat pleasantly for long stretches on the upper Harlem River.
Matthew McGregor-Mento
The single leeboard stays on the same side of the hull for both port and starboard tacks. When the board is on the upwind side, a lacing hook fastened horizontally to the chine engages a pad eye on the centerboard to keep the board from getting pried away from the hell.
On the Wooden Widget site it says, “You can’t buy cool. You have to build it.” I was lucky enough to buy one of their boats, but that’s pretty rare. If you want your own Fliptail, it’s available as a set of plans. And although I didn’t build my Fliptail, I did retrofit it for sailing. Benjy graciously sent me the boat plans, which included the step-by-step instructions and many helpful photos for adding the sailing rig. The instructions were easy to follow (as were the instructions for the build), and I was able to adapt readily available Optimist sailing dinghy parts for the rig.
Benjy specs a sail for the Fliptail that can be built from a kit ordered from Sailrite or by cutting down an Optimist sail. He advised the kit sail performs better than the modified sail. I ordered my kit from Sailrite and had it sewn up by UK Sailmakers on City Island in the Bronx. Despite the sail’s small size, I asked for reefpoints, thinking I might someday cruise with the boat and safely sail in slightly stronger breezes.
Matthew McGregor-Mento
As short as the Fliptail 7 may be, it has room for two, even two adults.
I did make a few modifications to the sail rig. The plans call for a mast made by lengthening an Optimist mast by 9.5cm, but I added a 40cm extender tube, available from an Optimist parts supplier, so I can tack without having to duck low under the boom. The taller rig sacrifices some stability, but the Fliptail is beamy and I’ve been pleased with how well it resists heeling. Instead of using a tiller, I rigged rope steering to gain a bit more room in the cockpit. This really isn’t necessary, but I discovered an unintended perk: I can make the boat self-steering using clam cleats I’ve fastened to each gunwale. Despite Benjy’s prudent recommendation to the contrary, I rigged the mainsheet with a blocks and a cam cleat. The mainsheet is meant to be a single line, held by hand for safety’s sake, but I like being able to set the sail to take care of itself and free up a hand. In a very light breeze it’s fun to make the boat sail itself completely hands-free and just sit back and enjoy the ride. I fastened the block to the keel with a quick-release pin (Zach’s brilliant idea) that allows it to be quickly set up when launching and removed to allow the boat to fold properly.
The Fliptail makes it possible for me to use public transportation for my sailing trips and launch from places farther than I can walk. I can launch near one bus stop or rail terminal and land near another; I’m not limited to out-and-back voyages. For a recent trip I departed from the 20th Street launch—really just a pile of sand and rocks around an old dilapidated wooden drain that’s completely underwater at a spring high tide—and after sailing, rowing, and mostly ghosting along on the current for 12.5 miles, I landed at 215th Street, packed up the Fliptail, and took the subway home.
I’d highly recommend a Fliptail to any sailor who wants a very compact tender or who lives in a house or an apartment with no room to keep a boat. The boat’s ease of storage and portability make having a boat a new possibility for many, and its quick assembly time offers little impediment to getting afloat. My Fliptail 7 is 7′2″ long. There are two other versions: the even smaller Fliptail 6 at 6′2″, and the comparatively roomy Fliptail 9 at 9′ even. At 33, 39, and 50 lbs, respectively, they’re all light enough to put on a regular roof rack—that’s if you happen to lack the good fortune to live on Manhattan and are forced to own a car.
Matthew McGregor-Mento lives in Manhattan with his wife Emma, his 18-month-old daughter Kirra, and 3 cats. He leads a creative technology group at a worldwide advertising agency. He bought his first small boat, a Snark Sea Skimmer, in the 80s for $50 at a garage sale and, sadly, sailed it only once. He didn’t sail again until 2013 when he rescued and rehabilitated a derelict Force 5 sailing dinghy that he found among discarded construction materials at a recycling warehouse. He’s currently designing a backpackable sailboat and has a Mirror Dinghy waiting for him in a shed in Australia where he’ll be living in 2020 if all goes to plan.
Particulars
[table]
Length/ 7’2″ (218cm)
Beam/40″ (102cm)
Height/17″ (44cm)
Weight/39 lbs (18 kilos)
Capacity/Approx 440 lbs (200 kilos)
Power/3.3 hp (max)
Sail area/25 sq ft (2.5 sq meters)
[/table]
Plans for the Fliptail 7 (£30 or about $42 USD) and other folding and lightweight boats are available from Wooden Widget.
Is there a boat you’d like to know more about? Have you built one that you think other Small Boats Monthly readers would enjoy? Please email us!
Was it time for another boat? In the 1980s, it was a 16′ sailing dinghy that awakened my wife Barbara and me to the beach-cruising pleasures of the San Juan Islands in Washington’s Puget Sound. In the ’90s, it was a 19′ lug-rigged double-ender for oar, sail, and outboard that extended cruising to Desolation Sound. Then came a 20′ catamaran, sporting a wing mast with square-topped mainsail, that got us inside a comfortable cabin while offering exciting sailing in moderate conditions. But as years went by, sitting out in the weather and hauling sheets took its toll. Sailing was exciting when the wind was up, but boring in light summer winds. Why bother with sailing if we could motor at 10 knots? Was it time for a gasser?
And so it was, and we decided upon the Eco 5 Power Cat by Bernd Kohler in France. Its narrow hulls, wave-piercing bows, space-age profile, and three-tone color scheme really made it a looker. At 5.5 meters, it was about the same size and accommodation as our 6-meter sailing cat, and still trailerable behind our compact SUV. The twin 5-hp outboards specified in the plans were to drive the EcoCat at an economical 10 knots and spin it around in circles. Having them mounted on the transoms should eliminate weed pickup, as well as the between-hull wave buildup working against a centrally mounted outboard. I ordered plans, and the digital files came quickly via email.
The plywood-on-frame EcoCat is simply built, using chines sprung around widely spaced bulkheads. I opened the DXF files on an older Mac Cube still running Drawing Board CAD from Ashlar Vellum. With CAD, I made some design changes for a bit more cabin headroom, bigger windows, storage lockers forward, and extended cockpit sides complementing the cabin profile.
Ron Mueller
The Eco Cat rests comfortably on the cobbles between tides. There’s room aboard for an inflatable kayak when a dinghy is required if the Cat’s at anchor.
Once I had the design tuned to suit our needs, I nested parts for economical use of plywood sheets, created a tool path for the ShopBot CNC router I’d used for our rowing-shell kit business, and quickly cut out the parts from 6mm plywood. It sounds complicated, but it’s actually similar to laying out parts by hand—but with parts cut far more accurately, with beautiful, fair, and smooth curves everywhere. I milled clear Sitka spruce to dimension, scarfed it to full lengths, rounded edges, and precoated everything with epoxy. This self-made “kit” made for very fast building.
The building jig had only one temporary form; all other forms were bulkheads that remained with the hulls. The hulls were built upside down, planked, and even finish-coated with graphite-infused epoxy—later I’d paint above the waterline. The 6mm planking was patterned on the hull, as the actual faired shape may be a bit different from a CAD plate expansion, then glued in place and trimmed. The hull and side-panel sections were joined with butt blocks that added stiffness in way of the temporary bulkhead. After I flipped the hulls upright and aligned them, I fit the deck—scarfed 12mm plywood. The cabin sides and top were built up with two layers of 4mm ply. It took just four months for me to complete the construction of the hulls and cabin.
The partially finished boat looked great, and I decided to spend the big money for a two-part paint sprayed on by a professional, thinking it would be done quickly. Wrong. It was another six weeks before the boat was back for outfitting. The plans showed a windscreen here, a galley there, a steering wheel, and twin outboards—but no details. It was just another challenge to work through.
Ron Mueller
The two small outboards were a good fit for the twin hulls, but didn’t provide adequate power.
Remote steering and motor controls for twin outboards is very routine for a monohull, but not for tiny twin 5-hp outboards on a catamaran! Time to improvise. A tiller bar, supported on nylon bushings, was hidden in the cross beam with a mechanical steering cable connected to the dash-mounted steering wheel. What a challenge it was just to have twin motors on a little catamaran.
Another professional I hired designed an excellent canvas dodger, back panel, and semi-rigid windscreen that really complemented the design. Barbara and I could now cruise, completely protected from wind and rain, sitting in comfortable captain’s chairs. The 6′ x 8′ cockpit is our living room at anchor, doubling the EcoCat’s enclosed space. A Yeti cooler, good for five days, stays in the cockpit as a table or extra seat. An Origo two-burner alcohol stove eliminated complicated propane systems. We use a lightweight 32-amp-hour starting battery, not for the pull-cord-start outboards, but for powering LED lighting and an iPad for music and charts with the Navionics app. We only need the instruments powered up while we’re under way, so the outboards’ 6-amp charging outlets supply power directly to the instruments and charge the battery at the same time. No shore power is needed. Simple systems for a simple boat—its name, JUST ENUF, serves the cat well!
Ron Mueller
The Cat’s shallow draft and twin hulls open up options for anchoring in shallow coves. If the bottom is even and not too rocky, grounding out during a midnight low tide isn’t a problem.
During the boat’s first season we took a two-week cruise to British Columbia’s Broughton Islands. The cruise covered hundreds of miles, and we alternated between being the only boat in a secluded cove and being surrounded by the warm hospitality of wilderness float marinas. A comfortable 80-mile range and top speed of 10 knots allowed us to do plenty of exploring without concern for time or fuel. The EcoCat is comfortable in sea conditions of 2′ short, steep chop and can confidently deal with far rougher conditions.
Ron Mueller
Having the lines of the Eco Cat in CAD files simplifies making alterations like raising the cabin roof to provide standing headroom.
This 8′-wide catamaran offers the stability and seakeeping of a far larger boat. There’s never a problem grabbing for a hot pan when another boat, zipping by to look at JUST ENUF, leaves its wake for us. There is plenty of room with a hanging locker and two cuddies for each person. Sleeping bags with integrated mattresses make a very comfortable double. When bags are folded over during the day, the large padded bridge deck area is very comfortable for sitting, cooking, and just hanging out. The starboard hull has a cushioned canoe seat atop the porta-potti. Just forward is hull storage for an inflatable kayak or two folding bikes and other bulky gear. The port hull has standing headroom at the sink and sit-down room for meal preparation with a flip-down table for dining.
Ron Mueller
A single 20-hp outboard can outperform twin 5-hp outboards. Just behind the motor’s shaft you can see one of the extensions added to the hulls to improve the trim with the greater motor weight. The custom-made canopy doubles the Cat’s sheltered space.
The twin 5-hp outboards proved to be not enough power. They had no top-speed potential, pull-cord starting, and were noisy, especially with the steering linkage rattling between them. Worse, the tiny props had so little bite that docking maneuvers were a constant challenge. A repower with a single Yamaha 20-hp outboard yielded a 10-knot cruising speed, 15-knot top speed, and the same fuel economy as the twin 5s: 1 gallon per hour at any speed. Electric start, 6-amp charging capability, and a lightweight battery competed the package. A 1′ extension added to the stern of each hull helped offset the additional weight of the larger motor and its under-deck 12-gallon fuel tank. Docking was no longer embarrassing, and we could now talk while running 10 knots. The rougher the water got, the faster and smoother we would go. Life was good.
Christopher Cunningham
A hatch in the foredeck provides access to the bow for anchoring.
But as most of the weight was still aft with either engine arrangement, the EcoCat still squatted underway. One day, Mike Snook—experienced with super-large, high-speed Australian catamarans—suggested transom wedges and end plates as the cure. A 1″ x 4″ wedge was added like a trim tab to the each stern with skeg-like end plates added in line with the sides of the hull to contain the flow. The cat’s tracking was better, even with the previous centerline skegs removed. Trim was now level with clean entry and a very smooth exit. After a prop change, we had the same top speed with cruise speed reduced by 400 rpm for a noticeably quieter boat.
Outboards are designed to mount behind a transom with only the prop exposed below the hull. When centrally mounted on a catamaran, all of the lower unit below the bridge deck is exposed to bow wave convergence with lots of unwanted spray and, perhaps, added drag. We had tried several ideas on previous sailing catamaran but solved the problem on the EcoCat with a hull-mounted streamlined fairing that lets the motor think it’s on a transom.
Christopher Cunningham
The EcoCat is quite at home in the broad reaches of Puget Sound that lie in the shadow of Mount Baker.
The 10-knot cruise speed for our typical three-day, 50-mile round-trips lets us enjoy island life and not lose one day getting somewhere and another getting back. That’s the advantage of a gasser. It’s all about the destination, hanging out, enjoying a nice hike, being in a special place, especially for my wife Barbara and me. My solo trips continue to range farther and wider in all weather conditions.
Could a gasser be my only boat? I still enjoy sailing in other small boats at a rendezvous or big sailboats with friends. I’m on the water most days, year-round, rowing my wherries or open-water shell. The EcoCat takes me comfortably, in safety, to far-off destinations that I would not choose to get to under oars or sail. I’m going to keep my EcoCat!
Ron Mueller continues to design and build small boats and still rows most days in Bellingham, Washington. He started whitewater kayaking in the late ’60s, sailing in mid ’80s, and rowing in the ’90s when he founded Wayland Marine. Ron designed and built the Merry Wherry kits and was the Northwest dealer for Alden Ocean Shells and Echo Rowing until retiring in 2010.
Eco Cat Particulars
[table]
LOA/ 18′ (5.50m)
Beam/8′ 2.4″ (2.50m)
Draft/8.7″ (0.22m)
Weight/606 lbs (275 kg)
Capacity/1350 lbs (620 kg)
Power/15–20 hp
Construction/Approx. 400 hours
[/table]
Plans for the EcoCat, with a digital manual and 16 pages of drawings as BMP or DFX files, come from Bernd Kohler at K-designs. A kit is also available.
Is there a boat you’d like to know more about? Have you built one that you think other Small Boats Monthly readers would enjoy? Please email us!
If there’s one thing I’ve learned about the rowing on the Lower Columbia River, it is to go with the flow. Winters there tend to be gray, windy, cold, and wet, but when I heard that a ridge of high pressure was approaching the Pacific Northwest bringing uncommonly clear skies and mild winds at the end of first week of February, it was an opportunity I didn’t want to let pass. I’d get to row in sunshine and soft winds among the overwintering migratory birds at the Lewis and Clark National Wildlife Refuge.
The refuge consists of 20 small islands strung along 27 miles of the Columbia River and surrounded by marshes that are sometimes inundated by high tides. This reedy landscape is a winter home to 50,000 scaups, thousands more Canadian, cackling, and snow geese, trumpeter swans, pintails, teals, buffleheads, hooded and common mergansers, ruddy ducks, horned grebes, scoters, northern harriers, and peregrine falcons. For eons, countless birds have fed, rested, and nested in the refuge and along the Oregon mainland shores among the ubiquitous bald eagles and ospreys. Here the Corps of Discovery—wrote William Clark on November 26, 1805—found “Great numbers of Swan Geese Brant Ducks and Gulls in this great bend which is Crouded with low Islands covered with weeds grass &c. and overflowed every flood tide….”
For several days the weather forecast consistently called for a three- to four-day window of big sun and slow wind. Intent on catching this rare winter weather window, I put the trip together quickly. I always keep much of my gear packed in ready-to-go dry bags, so I needed only to freeze gallon jugs of water for the cooler and shop for food. I updated my smartphone with tide tables for various locations and links to real-time wind reports from the Megler-Astoria Bridge.
I trailered MAC, my 17′3″ light rowing dory, south on the interstate from my home in Bellingham, Washington, and reached the riverside marina in Cathlamet late Friday afternoon. I wanted to row across the Cathlamet Channel before dark and dock at Island’s End Farm on the downstream point of Puget Island. I’d met the farm’s owners, Carol and George, in 2010 on the last day of my row down the Columbia from Portland, Oregon. In the morning I’d make the crossing to Tenasillahe Island—less than a half a mile, but across the shipping lanes—and decide then whether to veer south into Clifton Channel or head north parallel the shipping channel to Red Slough and Welch Island.
all photographs by the authror
Cathlamet is not on the shipping channel so I didn’t have to be alert for traffic as I crossed to Puget Island. As long as I paid attention to the current I could dawdle, drifting, and take photos of the scaups as they circle and fly upstream.
After getting MAC off the trailer and loaded with my gear, I rowed out of the marina and turned south on Elochoman Slough. A short 300-yard pull brought me to the Columbia River. At the buoy marking the slough’s entrance I realized that I was drifting quickly downstream and that I needed to angle 30° upstream to ferry directly across Cathlamet Channel in the ebb-strengthened current. Three-quarters of the way across the channel I was startled by a sound that seemed to be a sudden, loud waterfall. I turned quickly to see hundreds of scaups rushing into the air. Even though I was 100 yards away, my approach made them take flight. They quickly strung out and flew a wide circle around me 40′ over the water, and the muted rush of their wingbeats grew faint as they headed upstream.
I rowed looking for an opening through the small, muddy marsh islets between Little Island and Ryan Island to find my way into Birnie Slough. The dense reed canary grass and stunted red osier shrubbery blocked my view, but I finally saw a narrow watery opening. In 15 minutes I had rowed to the downstream end of Birnie Slough and there saw George and Carol walking the aluminum ramp to their dock to greet me. After joining them at their home for a Dungeness crab dinner, I headed to bed in their spare bedroom at 8 p.m. and slept soundly in the quietness of the riverside farm.
At 5 a.m. the guttural barking of sea lions in the shipping channel woke me. I knew a big smelt run was in progress, and it meant a feast for them and for the birds. Out the window, I saw a few stars above an opaque blanket of ground fog spread across the farm’s fields. It meant I wouldn’t risk crossing the shipping lanes at sunrise and could get a few more hours of sleep. I groped for my glasses in the dark, turned on my smartphone, and checked the weather forecast and the conditions at the Megler-Astoria Bridge. The wind prediction had changed overnight from just 7–12 mph easterly, to 25 mph easterly, straight down the throat of the Columbia; it was already blowing a steady 15 mph at the bridge. The flood tide working against the river flow and the strong easterly would make for rough rowing. There’d be a lot of whitecaps, and rowing along the Washington side of Tenasillahe Island would be unpleasant. At least the forecast for brilliant sun still held, and temperature would rise to an unseasonably warm 60°F. The morning’s low tide would create bit of a lee among the low-lying islands downriver, but the midafternoon high could eliminate rowing for half the day in the broader fetches among the islands. I was willing to test any fetch, but I’d do it by degrees.
Poised to head out around the sand spit at the downstream end of Puget Island, I started the day’s rowing, as I always do when leaving land, by focusing on my surroundings, boat trim, the plan for the day and the fit of my derriere on the seat.
I ate breakfast and after I’d reorganized my gear in MAC, George came down to see me off. He pointed to a bulk carrier heading upriver toward us around the great bend and suggested I wait until it passed before I went out into the channel. I rowed around the sand spit on the downstream end of Puget Island and waited as the ship’s wake spread toward me. I casually rowed about 50′ farther out into the channel to get a better view of any traffic upstream and saw a tugboat less than a mile away coming around the corner of the Island headed in my direction. I moved back toward shore to await its passage and wake. With the shipping lanes clear, I pulled across the channel to the one-third-mile-long pile dike that guards the southern tip of Tenasillahe Island. Five seals and a sea lion followed about 30′ behind me. The long-whiskered sea lion left the chase halfway across the channel while the seals’ sleek heads would slip under to follow MAC and pop back up, quickly turning looking from side to side before resuming their focus on me.
There are about 20 hunting cabins on floats permanently moored in several of the narrow sloughs between islands of the wildlife refuge. In the channel between Woody and Horseshoe Islands about ten or twelve cabins are strung like a necklace on the downstream end of Woody Island. At high tide these cabins are fully exposed to the wind. Beyond these cabins in the refuge looms Jim Crow Hill on the Washington side of the river.
I had felt cheated by the short notice of the change in the weather, and hesitant about taking a route up Clifton Channel, but I was met there with only a mild chop. As the sun burned away the clouds, I rowed along the Oregon shoreline and watched birds dabbling in the shallows of Tenasillahe a quarter mile off. My original plan was to row the serpentine route from the shipping channel along Steamboat Reach into Red Slough and past Welch Island, then weave downstream through their braided sloughs in what little protection the islands offered. But what I saw beyond Clifton Channel made me realize I’d find little lee among the islands. After the first mile, the downstream shoreline of Tenasillahe and all of Welch Island were just long lines of reeds and marsh grasses with no trees or high ground. I let go of my oars and opened Google Earth on my phone. As I ran the cursor over all the islands, I could see their average elevation was only 7′ above mean sea level. The day’s noontime high tide would be close to 10′. As I approached the downstream end of Tenasillahe it was obvious to me that camping anywhere in the refuge, even if it were allowed, would be difficult because the high tide in the wee hours of the morning would saturate any “dry” land and lift me out of any lee I might have had at low tide and expose me to the wind. I pulled easily downstream in Clifton Channel as the sun rose higher in the blue southern sky; I looked for birds, sometimes swinging MAC to travel stern-first to ease the strain on my neck from looking over my shoulder.
Without fail, every flock of scaups I came near went aloft when MAC was within 50 yards, and I again heard the sound of a waterfall as they lifted, feet furiously slapping against water to get airborne. If I were to row into the refuge I would disturb every diver, dabbler, and honker resting among the reedy islands. Being close to the birds brought me moments of quiet joy, but I couldn’t help but feel apologetic for disturbing them as they circled off to safety and protection. Losing myself in the meditative motion of rowing and listening to the sounds of the birds, the water on hull, and the wind through reeds, I left in my wake a glistening diamond-speckled path leading toward the sun. Being out on the water was my raison d’être and dissolved all of my disappointments.
An hour later, I reached the quiet lee of Aldrich Point, and the sun’s warmth filled the day and water smoothed as the tide reached high slack. The river current combined with beginning ebb and scooted me along; the thick ruby-stemmed red-osier dogwood along waters’ edge slipped quickly by. As I approached the curved channel called Devil’s Elbow, I heard a low, grumbling sound like river gravel grinding on the bottom of a shallow fast-moving stream. It was the sound of bird caucus, maybe 500 or 600 grumbling scaups about a quarter mile away. I let my oars trail and listened, turning my head side to side to gather the sound. Five minutes later I heard the unending conversations and occasional honks of snow geese hidden behind thick reeds and cattails. I held very still; MAC drifted slowly. We passed an area of sparser scrub, and some of the geese saw us through the gaps in the grass. About ten arose in indignation, honking their alarm in flight away from the danger of my little dory.
The mirror attached to the bill of my cap has caused a lot of funny remarks. Many people do not understand how I use it and I’ve even told a few gullible people that it is a GPS display so I know where I’m going. Here in Cathlamet Bay, the Washington shore seen on the horizon is 8 miles away.
Rapt with listening and seeing, I had no particular thoughts. I would occasionally remember to take my bearings and look in the bicycle mirror I had clipped to the brim of my cap. At more than one inattentive moment I had to take a quick, hard pull on an oar to avoid hitting a deadhead or getting swept into a strainer, a large, submerged tree trunk lying parallel to the water’s surface with its limbs skyward.
Much of the forested bank along the shoreline was in shadows, but I had the warmth of sun on my back. On this midwinter day, long shadows angled away from the southwestern sky and the sunlight caught a group of leaf-bare alders leaning over the water, their limbs and trunks stunningly radiant.
I needed to find a suitable camping spot either in my boat or on shore, so I pulled for the little community of Knappa, thinking I’d find a dock or relatively flat piece of land where I could put my tent or bivy sack. Out of curiosity I turned on my GPS to check my speed over ground, and with easy effort at the oars I was flying along at 5 knots. The ebbing tide was still fairly high, so I cut through the grass and reeds of a very narrow gap to Knappa Slough that would soon be impassible. I saw no public dock, and in a few minutes I was past the settlement and again surrounded by estuarine grass, reeds, and scrub that blocked my view except for the ribbon of water ahead and behind. I was quickly around the southeastern elbow of Karlson Island.
The bridge over the slough to Svensen Island doesn’t get much traffic. There are only four homesteads on the 1 ¾-mile-long island and two of them are abandoned. I saw only one person walk over the bridge while I was there.
As I rowed into the 50-yard-wide slough inside of Svensen Island, I saw a small community of floating shacks and houseboats clustered along the mainland on either side of a low concrete bridge spanning the slough. As I drifted into this very small village on the water, mallards flew directly over me in an arc toward the island. A black-and-white Australian shepherd carefully walked the length of a log float supporting a cottage no more than 20′ square with door and screen door propped open on a covered and sagging porch that served as dock. An aged, fiberglass runabout, looking about as tired as the house, was parked there. The dog seemed friendly enough, and I called out “Hello pup!” I could hear the noise of a TV in the house, and as I angled closer saw a man with a beer in hand peering out at me. I began to make out the sounds of a football game and remembered it was Superbowl Sunday. The man called out, “Nice boat!” and I replied, “Thanks! Who’s winning?” He said, “It’s only the first few minutes, and the Broncos are ahead ten-zip.” I said, “That’s a surprise, who wouldda thought?” “Yeah,” he replied, “They’ve got the defense thing down.”
The house on Svensen Slough and the powerboat tied to it had seen better days, but I couldn’t help but envy the man who lived here as I imagined him sitting on the porch here, watching summer sunsets, beer in hand with his dog resting beside him.
I asked if there was a dock or haulout where I could put my tent for the night, and he said, “No, there’s no ramp near here” and turned to go back to the game. I pulled on the oars, but he came quickly back outside, pointed downstream, and yelled, “Hey, the docks at the end of the slough belong to the Petersons. They won’t mind if you tie up there.” I waved, shouted “Thank you,” and turned to see a brand-new dock paralleling the shoreline with a new, as-yet-unoccupied, two-story home on it. I rowed MAC around the dock to tie her in the lee of a smaller houseboat. After securing the dory, I stretched out on the dock to rest my back and checked the wind forecast on my phone. It would blow even more tomorrow, but the wind would continue to come from the east. Here in the slough, there was only a whisper of a breeze; I listened to the geese and ducks on the island and watched a peregrine falcon soaring in a wide circle overhead. This was not the trip I had expected, but it was turning out to be better than I could have imagined.
My little 28-quart cooler is essential for my rowing travels. It’s chilled by two plastic gallon bottles of filtered water that I’ve frozen in the freezer at home. A reflective fabric cover I made to fit over the cooler adds insulation, and helps keep eggs, butter and meats at 40-45°F for four to five days. The cooler serves as a backrest when I want to stretch out while I’m on my rowing seat
I had plenty of room to put up my tent on the square wooden float, and after getting settled for a night’s stay, I bundled up as the air temperature dropped into the 40s. The sun, brilliant throughout the day, settled in the west, softening into a glow of orange, then red; I watched its last reflections on the water and listened to the music of ducks.
The two abandoned houses on Svensen Island are now is home to birds and whatever critters live on the island.
In the morning the dock was wet with heavy dew, and the inside of my tent was dripping with condensation. I tried to start up my stove, and although my Bic lighter sparked, it produced no flame. I tucked it into my armpit, and a few minutes later I had the stove roaring under my mug and in another 10 minutes, a good, oatmeal-sausage breakfast.
I set my wet tent and gear bags on the dock to dry and moved them every 10 minutes to follow a spot of sunlight coming through trees. About 9 a.m., an aluminum skiff with decoys piled on top of a bundle of reeds and camouflage netting slowly maneuvered to the dock just upstream from me. Two Labrador retrievers jumped to the dock, followed by their owner in camo waders and jacket. I spent half an hour talking to Cody Mathers, a pro fishing and hunting guide coming in from a “duck” morning. His wet, happy black Labs bumped against my legs looking for a scratch and rub. When Jody left to put the dogs in his pickup to head to Astoria, I returned to slowly packing and stowing my gear in MAC. At 11 a.m. I was on the water and pulling out of Svensen Slough toward Cathlamet Bay.
MAC immediately swung abeam to the 20-knot easterly wind blowing across the open bay. I needed to make my way downwind around Settler Point to find muted wind in the lee of the point, but it was a bit of a haul, short-stroking through 3’ chop to get to less bumpy water. I was only a couple of miles from the mouth of the John Day River where I’d end my trip. Looking over the stern as I rowed, I could see the tree-covered ridges of Washington across the watery landscape of reeds that was Seal, Green, Russian, and Marsh islands. I decided to let MAC simply drift. The wind would push us sideways to Lois Island, which sits directly across from the entrance to the John Day River. From there it would be a short half-mile pull to the ramp to haul out and head home. I looked out across the reeds and cattails toward Miller Sands, 5 miles away on the far side of the Columbia River. The chart showed there was land between me and Miller Sands—Grassy Island and McGregor Island—but I didn’t see any, only water and reeds. I let go of the oars, laid back on a dry bag, and watched and listened. MAC’s drifting startled more ducks now and then, and after an hour or so rocking side-to-side under the sun, I dozed off.
The reed growing on the western islands in the refuge is purple loosestrife, the tall, darker reed growing with the cattails and reed canary grass. It’s an invasive species that is crowding out native plants and threatening to degrade the habitat for overwintering and resident waterfowl. Efforts to control it are continual, particularly in Cathlamet Bay.
I was rudely awakened by gnats as MAC drew near Lois Island, and I took to the oars. In 20 minutes I reached the launch ramp. While I waited for my friend Jessica to come to drive me back to Cathlamet, I unloaded MAC, stacked my bags, and made a sandwich and tea.
The absence of Grassy Island and McGregor Island stayed with me. The 20 reedy islands in the Lewis and Clark Wildlife Refuge are so transformed by tides that there were some that I wouldn’t see unless I returned to row the meandering sloughs at a different turn of the tide. I’d bring MAC back, keep a keen eye on the weather, and row again with the flow and the fetch.
Dale McKinnon began rowing in 2002 at the age of 57 and in 2004 rowed solo from Ketchikan, Alaska, to Bellingham, Washington. In 2005 she rowed from Ketchikan to Juneau. The Salish Sea of Washington and British Columbia is her playground. She lives in Bellingham near her grandkids, with her partner, Berns, and chocolate Lab, Thea, and builds the light dories like MAC for other rowers.
Dale describes the building and outfitting of her boat, an Oarling designed by Sam Devlin, at the end of her previous article about rowing the Columbia River.
If you have an interesting story to tell about your adventures with a small wooden boat, please email us a brief outline and a few photos.
To row with power you need to have your feet firmly braced against something solid enough to take your full weight. In some traditional boats you can get by with the internal structure. Sawn frames across the bottom usually have enough height to offer a good purchase and sometimes you can get most of your foot on a side frame. Even something smaller can be useful. My cross-planked skiff has a short keelson (just the skeg is fastened to it) that gives me a spot to brace with one heel. It works for short distances; for longer rows I have a short brace for both feet that bears on the keelson and the chines.
Ben Fuller
This flat-bottomed skiff has a footboard fit around the risers and resting against a frame.
A better arrangement is in a friend’s Good Little Skiff. His brace rests on the chines and seat risers and provides full foot support. He often rows all day long on many of his trips. If your boat doesn’t have some interior structure that you can use, it’s well worth installing an arrangement for bracing your feet.
SBM
The heel holes in this Chamberlain gunning dory’s floorboards have an extra cleat to keep the corners of the cutouts from splitting.
A pair of heel holes is a very simple option for boat with floorboards. The holes are best set up to span two boards; holes that are cut through only part of each board can be reinforced by a single cleat underneath the hole. If your boat is rowed by people with different leg lengths, you can have several pairs of holes. If you feel the need for a broader surface to push against, you can add heel-brace blocks. They’re small pieces of wood fastened on top of the floorboards. Their sides and aft ends are rounded down to minimize intrusion, and shaped like oval or Gothic arches they can be quite elegant.
SBM
Heel blocks, contoured to minimize snags and trips, can give a heel hole a broader area of contact.
Delaware watermen liked to keep their weight low in the boat, so the cleats that joined the floorboards were on top, and the floor flats, as they called them, rested on the slender steam-bent frames. One of the cleats served as a heel brace. The boxes they used for seats could be moved to adjust for leg length. A similar cleat secured to floorboards (or directly to the bottom if there are no floorboards) is a common and easily installed brace.
A stretcher is a bar running across the boat and supporting the feet higher up. Crossbars that make a narrow contact with just the instep or ball of the foot, like heel braces, work well for rowing a few miles around a harbor or a modest poke up a creek, but your feet will be grateful for a full foot brace if you race or want to cover serious miles. (Early Thames gig rowers did row all day with a plain stretcher but wore their footplates—sturdy boots.) Thames wherries have cross-boat foot plates that span the whole foot vertically, and the width of the boat horizontally. With them you can move your feet to the center or out to the sides to change position.
Ben Fuller
QUEEN BEE, a pulling boat built around 1900 and now in the Mystic Seaport Museum collection, has square stretchers that drop into notched cleats screwed to the floorboards
SBM
Stern sheets can provide an easy way to add a stretcher. Simple L-shaped blocks hold an easily removable hardwood bar.
If others row your boat, adjustable stretchers are useful. Most traditional boats had no more than three options and two may be all you need. Thames skiffs had stringers running between frames and cleats fastened to them at different positions. More common is a couple of notched pieces secured nearer the boat bottom to support a low crossbar for your heels or instep. The bar is removable, but the pieces supporting it are not and can get in the way.
SBM
This full footboard is in a late 19th-century wherry built in Shrewsbury, England. Four slats offer three positions to adjust for leg length.
For modern glued-lap plywood boats, notched supports can be glued to the sides. These work especially well on boats with side buoyancy compartments. Their vertical surfaces are well suited for mounting the plates. A round cross bar can support a foot-sized plate with its bottom edge is resting on the floorboards. The plate is cut to a length to provide a comfortable angle; it pivots to the different angle at each position. The supports work best if there is not much taper to the sides of the boat where they’re attached, or if there is not much fore-and-aft range to the adjustment required. A support an inch or so thick can accommodate the stretcher bar over a short fore-and-aft span without being too intrusive.
SBM
The side benches in this plywood boat have parallel sides so the supports for the stretcher can be long and serve two closely-spaced rowing stations. The holes in the port-side support are notched for removing the dowel.
Another type of adjustable brace is anchored to the floorboards. It usually has a flat base and a foot plate set at a comfortable angle. These work best where bolts can go through gaps between floorboards. With the bolts set in a crosspiece beneath the floorboards, the brace gets clamped down with wing nuts. I made a set of these for my dory. They give my feet full support and are easily removed.
Ben Fuller
The footbrace in the author’s dory is adjustable and removable by means of bolts that slip between floorboards to a sliding crosspiece.
On RANTAN, my oar-and-sail boat, I have adjustable foot braces attached to tracks used for the stretchers in modern sliding-seat racing boats. I cut slots in the floorboards and fastened little plates under them so the tracks would lie flush with the top surface.
Ben Fuller
The heel brace in the author’s Dias Harrier, RANTAN, is fixed to a single racing-shell stretcher track set in the floorboards. The fine adjustment it offers may not be needed by most rowers.
What could be called a trapeze brace doesn’t require making any modifications to the boat. It is a length of line with its ends tied to the rowing thwart. The lines could also come back to clam cleats under the rowing thwart. You can brace your feet directly against the loop or tie a fender into the line as a more comfortable footrest. Another version of the trapeze brace is made of webbing or other low stretch line threaded through slots or holes in a wooden bar. Buckles or knots can provide adjustability and make it readily removable.
SBM
Two straps and a simple footboard with four slots for the webbing make a trapeze stretcher.
There are lots of options from heel supports for occasional rowing to full foot braces for racing or full days of rowing. They all make a significant difference over going without.
Ben Fuller, curator of the Penobscot Marine Museum in Searsport, Maine, has been messing about in small boats for a very long time. He is owned by a dozen or more boats ranging from an International Canoe to a faering.
You can share your tricks of the trade with other Small Boats Monthly readers by sending us an email.
The original mechanism that inspired Gig Harbor’s Forward-Facing Rowing System and the design for this New York Whitehall both date back to the late 1800s.
Forward-facing rowing systems are nothing new. You’ll find many old patents for devices that use gears or pivots and connecting rods to get rowers to see where they’re going. The Forward-Facing Rowing system from Gig Harbor Boat Works (GHBW) was inspired by a mechanism from the late 1800s and was redesigned to be manufactured in welded stainless steel. Each unit weighs just under 7 lbs, including the base that is bolted to the gunwale. The upper part of the mechanism pivots on the base to allow the vertical motion of the oar blade in and out of the water. The spoon-bladed spruce oar is in two pieces—a 30″ handle and a 72″ blade section—each bolted to a cradle that pivots on a 1/2″ bronze pin. A connecting rod joins the cradles and transfers the swing of the handle to the blade.
The pivots under each oar cradle have self-lubricating silicon bronze pins and HDPE washers for smooth, corrosion-free action.
I mounted the system on my 14′ New York Whitehall. It took less than two hours to figure out the placement (it just fit in between the oarlock pads of the middle and aft stations), make curved oak pads, and attach the bases and pads to the gunwales. The articulated oars can be removed by pulling the hairclip cotter pins and the 3/8″-diameter pivot rods, but the rig can stay fixed to the boat for trailering. The blades can swing aft and into the boat.
It doesn’t take any time at all to get used to rowing straight with the forward-facing oars. Everything else—turning, stopping, and backing—is a different matter. My rowing instincts have been ingrained for over a half century and are the opposite of what’s required. While doing the opposite is an easy concept to grasp, it’s surprisingly difficult to put into action. Almost every time I’d make a guess about the stroke I needed to do for turning or backing, I’d be wrong. You can’t feather the oars with the rig, so that element of the stroke doesn’t add to the confusion. It helped to think how I’d make the stroke in the water with just my hand, but getting to the point where I could make the right stroke without thinking would just take time, just as it did when I was getting used to a Norwegian push-pull tiller. I should mention that the initial awkwardness wasn’t frustrating; it was actually entertaining, like a brainteaser. And while I thought I’d feel hampered by non-feathering oars, it didn’t bother me at all.
At the catch, pulling the handles through the first 10° of the stroke will move the blades through twice that angle.
At the end of the stroke the blades move though an arc nearly equal to that of the handles. A long stroke finishes with the blades pulling in toward the boat; a shorter stroke won’t give up much forward propulsion.
Forward-facing rowing has quite a different feeling. With standard rowing, you move your upper body weight toward the bow as you’re pulling, and if we take the oars out of the equation, there’s an equal and opposite reaction pushing the boat back. During the recovery, you swing aft, pulling the boat forward. The shifting of your weight takes some of the forward momentum provided by oars during the drive and puts that energy into the boat during the recovery. In racing shells, where the crew weight far exceeds that of the boat, the speed peaks during the recovery when the oars are out of the water—the crew may seem to be sliding aft, but they are actually pulling the boat forward. In heavier rowing boats, the swings in your weight tend to even out the speed of the boat.
In forward-facing rowing, you lean aft during the drive phase of the stroke, pushing the boat forward in tandem with the oars. During the recovery, the boat gets pulled back as you reach toward the catch. The shifts in your weight increase the fluctuations in the boat’s speed.
During the drive I felt like the boat was slipping out from under me. The catch—coming when the boat’s momentum has been bled off by drag and by my weight shifting toward the bow—feels quite heavy. Each stroke feels like the first few strokes of regular rowing taken from a standing start. I could make the catch feel lighter when I rowed keeping my torso upright.
When the blades are aligned with each other the handles are not quite at their farthest reach.
The geometry of the device may also play a role in how the catch feels. The handle of the oar and the blade do not mirror each other. When the blades are perpendicular to the boat’s centerline, the handles are forward at 50° to the centerline; when the handles are square to the boat, the blades are at 135°. In a full stroke, the handles move through 70° (25° to 95°) and the blades move through 100° (40° to 140°). The GHBW web site notes: “Oar blade speed is increased because the oar cradles are asymmetric; the blade travels 15% faster than a traditional oar with the same handle speed.” That “gearing” isn’t uniform throughout the stroke. When I moved the handle through its range 10° increments from catch to release, the blade moved 23°, 19°, 25°, 23°, 12°, 10°, and 8°. The geometry of the pivots and connecting rod put a longer sweep and thus a higher load on the first half of the stroke.
When the handles are aligned with each other, the blades are near their farthest reach aft.
To focus on the physics and the geometry is to miss the point of forward-facing rowing: the view over the bow. Seeing things as they approach is much more interesting than seeing things as they grow distant. I enjoyed poking around the marinas and shipyards that line the waterways near home. The rowing rig worked smoothly and quietly, and I gradually stop thinking about it and just enjoy the scenery.
Using the Forward-Facing Rowing System in tandem with someone rowing with regular oars was unexpectedly fun and effective.
The most fun I had with the rig came as a surprise. My son, Nate, took up the forward-facing oars and I rowed in the Whitehall’s forward station. Rowing face-to-face we could converse easily, and by mirroring each other we could synchronize or stroke. Our shifts in weight cancelled each other and the boat stayed in trim. We made great speed and had eyes looking forward and back. I’ve done some long crossings rowing in tandem with normal oars, and after a while conversation gets abandoned because it’s hard to hear one another and you can’t see the person you’re with. Nate and I chattered the whole time we were rowing facing each other.
While I’ve always been devoted to the art and craft of conventional of rowing and will remain so, the forward-facing rowing rig opened up some very appealing possibilities.
Christopher Cunningham is the editor of Small Boats Monthly.
The older I get, the more safety conscious I become. Every year I add to the emergency kit I bring on my small-boat adventures, but as yet I’ve never carried pyrotechnic emergency flares. My reluctance stems from wariness: I’m averse to the explosions that launch aerial flares and the slag that drips from handheld flares. I don’t want to chance burning a hole in dry bags or sails, further endangering me in an emergency, or risk swamping or capsize by holding a flare far over the gunwale. Flares are also bad news from financial and environmental perspectives. A basic set costs about $30 and expires in around three years, providing the flares don’t get damp or damaged, a likely occurrence on a small boat. Once their expiration date has passed, flares no longer meet Coast Guard requirements and have to be replaced and eventually disposed as a hazardous material. All that aside, do they work? According to many reports, including an article from the safety-oriented BoatUS, flares, lasting from a few seconds to a few minutes, aren’t actually very visible.
So what’s a small-boat sailor to do? The new battery-powered SOS Distress Light from Weems & Plath may be worth considering as an addition your kit. Introduced to the market in January of this year, the light is currently the only one of its type to meet Coast Guard requirements. There are many emergency strobe lights with simple on/off flashing, but they don’t qualify as substitutes for flares.
The SOS Distress Light is modest in size, with solid construction. Measuring approximately 8″ tall and 4 1/4″ at its widest point, it can stow easily in a small boat. Made of orange plastic, it has anchors for two shock-cord straps that I find useful for securing the light to a spar or an oar handle. A dense foam ring protects the unit and allows it to float upright should it be dropped in the water. A clear plastic lens projects light upward in a focused beam and outward horizontally through 360 degrees. The device is powered by three C-cell batteries (not included). You rotate the lens clockwise to turn the light on, counterclockwise to turn it off. Continuing to turn the lens counterclockwise removes it to provide access to the batteries. Two O-rings make a watertight seal between the lens and the battery housing.
The light is produced by a single LED dome about 1/16″ in diameter, and the circuitry connected to it produces an SOS pattern—three short flashes, three long flashes, three short flashes—timed to meet Coast Guard specifications. The light quality is crisp and clear, but not blinding. The packaging claims the light “runs 6 hours at peak intensity, total illumination 60 hours.” I left the unit on for 24 hours straight, and it did not dim noticeably. Even after 50 hours straight, the unit still provided enough light to be useful.
The SOS Distress Light comes with an internationally recognized day distress signal flag.
I initially thought the light seemed too small to have much effect at a distance, but when I took it outside at night, it was surprisingly visible. According to the manufacturer, the light can be seen for up to 10 nautical miles. It’s easiest to spot any signal light in near total darkness and when there are no other lights in its vicinity. I found the SOS Distress Light to be clearly visible at a half mile, the longest range I could find where I wouldn’t create a false alarm. While the device is intended for nighttime or low-visibility conditions, it is somewhat visible by day.
While the light is designed to float upright with its lens above the water, it can be obscured by waves at short distances, and by the curvature of the Earth at long distances. Raising it attached to the handle of an oar can extend visibility, but because the light is projected in a horizontal plane, the light should be kept as close as possible to perpendicular to be most effective.
Even though we small-boat sailors are not often far offshore, a small craft can be hard to see, especially in rough water. In an emergency during daylight hours, the SOS Distress Light, in conjunction with a VHF radio or an EPIRB, could be very useful in guiding rescue crews once they’ve arrived at the general location. The light projected from the top of the lens can then be aimed at potential rescuers. Having a nighttime distress signal that can flash a universally recognized distress signal for hours can have a distinct advantage over relying on the brief lives of incendiary flares.
As you start to review your emergency supplies for the season ahead, consider adding or replacing those flares with an SOS Distress Light. It’s a good long-term investment in your safety, meets Coast Guard requirements, and is easy on the pocketbook and the environment.
Bruce Bateau sails and rows traditional boats with a modern twist in Portland, Oregon. His stories and adventures can be found at his web site, Terrapin Tales.
The SOS Distress Light comes with a plastic 34″ x 36″ daytime distress signal flag (a black ball and square on an orange background) and retails for $99.95. It is manufactured in the USA by Weems & Plath and available from the manufacturer, The WoodenBoat Store, and many marine chandleries.
UPDATE: 12/16/2020 Weems & Plath no longer lists the SOS Distress Light on its website and the WoodenBoat Store no longer has stock and doesn’t know if they’ll be resupplied. There is a nearly identical device under the Sirius Signal brand for $89.95. For a newer and more compact SOS distress light from ACR, see our review in the December 2020 issue.
If you have an interesting story to tell about your adventures with a small wooden boat, please emailus a brief outline and a few photos.
With trucker’s horn on the foredeck and the “Don’t Tread On Me” Navy jack flying at the stern, ERGED ON may be compensating for the absence of the intimidating noise that a gas outboard would produce.
Ned Farinholt of Winchester, Virginia, had a career as an electronics engineer, so it’s no surprise that he took an interest in electric boats. They had fallen out of favor since their beginnings in the middle of the 1800s but have been making a resurgence with the development of new technology in batteries and motors and a growing concern for the environment. In 1992, a group of enthusiasts formed the Electric Boat Association of America, dedicated to “the enjoyment and promotion of clean, quiet electric boating.”
Ed Farinholt
With just Ned aboard, ERGED ON II hits a top speed of 17 mph with the motors drawing a total of 10 kilowatts.
To encourage advancements in electric boats, the association created the Wye Island Challenge, a 24-mile-long electric-boat marathon that starts and finishes in St. Michaels, Maryland, and loops around Wye Island. The island is surrounded by estuaries and rather protected waters, but to get to the island racers have to cross 5 miles of open water and may encounter up to 2′ Chesapeake Bay chop.
Ned’s first entry in the race was in 2011 in a 15′ aluminum utility skiff. Ned had been keeping tabs on the development of lithium batteries for electric cars and chose lithium as his power source. All the other boats in that year’s race, whether using ready-made electric trolling motors, outboards and inboards, even gas outboards converted to electric power, were using lead-acid batteries, so his boat—ERGED ON—had a distinct weight advantage. He was the first racer to exceed the limits of hull speed and begin to plane.
“There was,” says Ned, “considerable teasing about my hot-rod approach at a gentlemen’s game. I resolved that next year that I would come back with a pretty boat.” His only boatbuilding experience had been making a plywood kit kayak with one of his grandchildren. He searched for plans for a boat he could build in plywood. To do well again in the race he needed a boat that could exceed hull speed. Other racers, working with the same idea, produced multihulls, long slender shells, and even hydrofoils. Ned decided upon a planing hull, the best option for his boatbuilding skills and the space he had in his shop. He found Charles Mower’s WHIZ, a skiff the well-known naval architect designed in 1926 for the Johnson Motor Company to complement their new 6-hp outboard.
Ned Farinholt
ERGED ON II is equipped with a handheld VHF radio, an electric bilge pump, dual motor controls and a depth finder.
Ned stretched the 16′ hull to 18′ 10″. He built the boat over molds, in the traditional manner, but used plywood and stitch-and-glue construction. There was too much twist in the bottom at the bow, so he had to use three strakes instead of a single panel to take the shape.
Ned Farinholt
The boat that Charles Mower designed in 1926 was intended for a single 6-hp gas outboard. St A standard Torqeedo 4 motors are rated as 4 kW and the equivalent of an 8-hp gas outboard. Ned upgraded his motors to 6 kW.
Before decking the boat, he did sea trials, using used a Torqeedo 4 electric outboard. Consuming 4.5 kW of power, the motor brought the boat up to 12 mph. That more than met his expectations, and Ned later entered the finished ERGED ON II in the 2012 Wye Island Challenge. He won but didn’t do as well as he had expected. The motor began to overheat and automatically cut back to 3.5 kW to protect the electrical system. Ned solved the problem by adding a second Torqeedo 4 and another bank of batteries. That stood him in good stead in the 2013 race until he cut a corner in the Miles River, clipped an oyster reef, and knocked out an engine. With the remaining engine he was able to finish in second place. The following year he gave the shoals a wide berth and won the race, in spite of having the extra weight of a passenger aboard.
Pegg Bliss
With Ned and Marilyn aboard, ERGED ON II tops out at 15 miles per hour.
In 2015 conditions on the race course were roughened up by a 15-knot wind, and only 6 of the 11 boats that started finished the race. Ned, with his wife Marilyn aboard, broke the two-hour barrier, but he wasn’t alone. John Todd, in MISS WYE, his slender 20′ racing hull, also broke the two-hour barrier, finishing 11 minutes ahead of ERGED ON II. Ned may be back this year, pushing for more quiet speed.
Have you recently launched a boat? Please email us. We’d like to hear about it and share your story with other Small Boats Monthly readers.
Ron Frenette of Canadian Canoes emailed me after he’d seen the Dragonfly rowing shell featured as the Reader Built Boat in our January issue. He elaborated on the reasons the Dragonfly wasn’t developed more for home builders: “At one time we thought this would be a great project for many, but I suspected the amount of space required would be a deterrent.”
That led to swapping stories about boatbuilders with a will finding a way when space is an issue. Rann Haight, as you may recall reading in the December 2015 issue, designed an oversized garage for his home to allow him to build a 26′ dory. My friend Eugene Arima, a well known authority on Arctic kayaks, didn’t have enough room to build a kayak in his walk-up flat in Ottowa, so he built it in the longest space he had: the stairwell. It’s the only boat I know that was constructed on the diagonal.
Sometimes the “way” comes unintentionally, late in the game. Ron mentioned that one of his customers “built a 17′ Redbird canoe and it would not come out of the basement where it was built. Several thousand dollars later, he had a whole new basement entrance with a sliding door and one very unhappy wife!”
I had a similar experience building a lapstrake decked canoe in the basement of a rental home in Silver Spring, Maryland, when I was working for the Smithsonian Institution in Washington, D.C. I had carefully measured the window that I’d intended to use to get the canoe out of the basement and the beam and depth listed in the plans would result in a boat just small enough to slip through. When I finished the canoe I tried to move it out of the basement and soon realized that the outwales were not included in the measurement for the beam. The window had a steel frame so I took a hacksaw to it and cut two notches for the outwales.
Before moving out of the house I filled the notches with aluminum and Bondo and painted the repair to blend in. That was in 1989 and when I was in the DC area a few years ago, I drove by and checked the window. The patches were still intact.
I built the boat in the family room in the basement assuming it would fit through the door to the garage workshop on its way out of the house. I’d forgotten to allow the thickness of the outwales, which required 1-1/2″ more clearance than the door provided.
You’d think that was a lesson I’d have learned, but when I built my garvey cruiser HESPERIA on top of the pool table in the family room on the ground floor of my Seattle home, I had a similar problem. The hull should have fit through the door to the garage/shop and then out to the driveway, but it got hung up in the doorway.
Something had to give and it wasn’t going to be the boat. The top of the doorframe and the sheetrock had to go.
I had to tear out the top of the doorframe to make room. That was only the first obstacle. The overhead furnace ductwork was at the same height as the doorframe and I had to remove the sheetrock covering it. The hatchet I need for the job was in a cabinet on the far side of the hull. The bottom of the boat was up against a corner that projected into the garage, so to get the hatchet I had to crawl through the small triangular space between the floor and the hull’s flared side. It was a tight fit and I could only advance if I emptied my lungs to shrink my chest. I’d exhale and squirm, then get stuck when I inhaled. It took a few minutes to get through and after I got the hatchet I had to inch back through the gap to get out. I hacked the sheetrock away and squeezed the hull through.
The hull left a path of destruction through the shop.
While I was building the boat several of my daughter’s friends bet I’d never get the boat out. Alison wasn’t doubtful, telling the skeptics: “You don’t know my Dad. He’ll tear the house apart if he has to.”
Initially designed for millionaires, the Passagemaker skiff is also ideally suited to thousand-aires like me. In addition to being a manageable “investment” at $1,349, the Passagemaker proved to be less onerous to build than I originally imagined. On completion, this skiff lived up to its touted versatility and its ability to carry loads and loads of all kinds of boating stuff.
The Passagemaker was created by John Harris, chief designer and president of the Annapolis, Maryland, based Chesapeake Light Craft (CLC) at the behest of PassageMaker, a magazine catering to anyone interested in big, expensive, power cruisers. “The editor was very specific in what he wanted the boat to do,” Harris recalls. The design had to be small and light enough to be easily hoisted, probably in davits, onto the stern of a trawler-style cruiser. Its length was to be 11′7″ and include the option of breaking the down into two parts, each with its own watertight integrity, and easily reassembled. It had to be robust enough to carry three people and all their gear comfortably and safely in protected waters where the mother vessel was likely to be anchored, moored, or docked. It had to be propelled easily with an outboard motor, oars, or a sailing rig, and, finally, it had to be good-looking.
Undaunted by such a tall order, Harris self-imposed a 100-lb limit to the skiff’s dry weight, a goal he more than met by bringing the Passagemaker in at just under 90 lbs. This was achieved by drawing on the handsome form of traditional Norwegian prams and using modern materials and boatbuilding methods. The lapstrake design of the original prams lends itself to CLC’s LapStitch method for stitch-and-glue plywood. The overlapping joints are self-aligning and offer plenty of gluing surface area and an attractive appearance. Using mostly 1/4″ (6 mm) stock for the four strakes, bottom, and other pieces helped keep the weight down, while fiberglass cloth and epoxy added stiffness and durability. By the time the design was ready for the CNC cutter, Harris was well on his way not just to meeting all of the PassageMaker magazine specifications but also to creating a boat that would have a broad appeal. He introduced his Passagemaker in 2005, and since then CLC has sold more 500 of the kits.
all photographs by Joe Devenney Photography, photos.joedevenney.com
All of the CNC-cut pieces are shipped boxed and ready for assembly. Longer pieces are in the unopened box standing against the wall.
When my Passagemaker kit arrived via UPS, I anticipated few problems. The space needed to put the Passagemaker together turned out to be considerable, but I had the luxury of working in a big, open barn; a single bay in the standard two-car garage would be a pretty tight fit, making some construction processes more onerous than they might otherwise be. The MAS epoxy CLC recommends and sells exceeded my expectations. With several decades of experience working with other brands, I was impressed with how well MAS epoxy flowed and laid flat and even. It had essentially no odor and stayed perfectly clear on the surfaces I coated with it for protection. MAS epoxy is non-blushing and does not create a waxy film on its surface as it cures. That eliminates problems blush can pose when applying subsequent coats of epoxy, varnish, or paint.
All of the planks for the Passagemaker arrive in two parts and have to be made full-length before they can be assembled into bottom and sides. My Passagemaker kit was an early version, and plank pieces had to be scarfed together. Slathered with epoxy and clamped, the slanted surfaces slid against one another when pressure was applied by weights or clamps. CLC solved this problem by changing the scarf joints to puzzle joints that assure much greater precision, and eliminate the messy task of trying to keep scarf joints from moving about.
Pre-drilled holes for the CLC’s plywood panels are also a big improvement over earlier iterations of the Passagemaker kit. The locations of the holes are determined by computer and each pair is matched up directly across the lap, so wire ties ensure greater precision. I had drilled the holes myself on an earlier project, and ran the risk of having the assembled strakes ending up out of whack with each other at the ends. Pre-drilled holes also save a tremendous amount of time.
The construction of the Passagemaker is pretty straightforward, even if you’re a beginning do-it-yourselfer. The free customer support via telephone was excellent. I called only once with a question about an obscure aspect of the construction process. The CLC representative didn’t have the answer when I called, but he called me back in about 20 minutes with the information I needed. Two other CLC kit builders I know reported excellent customer support on many aspects of the construction process.
CLC has a list of tools and supplies you’ll need for the project. None of the tools needed to complete the Passagemaker are particularly expensive, and they’re all worthy additions to the shop of a beginner do-it-yourselfer. You can’t have too many clamps. A half-dozen C-clamps are particularly useful, and spring clamps, bar clamps, and deep-throat clamps come handy, especially if you are working alone. Having a wide variety of clamps can keep the work moving along if an extra pair of hands is unavailable. I clamp pieces together for a dry run before I mix epoxy. I know from experience that when parts don’t go together quite as expected after epoxy is applied, things can get very messy. The puzzle joints are virtually foolproof, but it’s always wise to work any bugs out before the epoxy gets stirred.
Chesapeake Light Craft estimates the Passagemaker will take 100 hours to build. The daggerboard trunk is standard outfitting, even for the basic rowing hull, making it easy to upgrade to sailing.
CLC’s website offers weeklong classes in which many of their boats can be built in a week and taken home for outfitting and applying a finish. Without the benefit of CLC’s shop, tools, and expertise, even an accomplished do-it-yourselfer cannot assemble a Passagemaker in one week and enjoy the process. It took me 125 hours to complete a Passagemaker, and that included painting, varnish, and setting up the sloop rig. With the new puzzle joints and the pre-drilled holes for the copper-wire stitching, the time commitment could be under 100 hours.
The bottom has enough rocker to keep the transom from dragging in the water, even with a much heavier load aboard.
On my first few rowing and sailing outings with the Passagemaker, I was alone and without any load aboard. The high volume of the hull makes the boat sit high in the water, and the generous rocker sets the ends high; the skeg is only partially immersed, and the overhanging bow can catch the wind. In a 12-knot breeze, having some sand-filled bags in the bilge settled the boat deeper in the water, and I was better off both rowing and sailing. Leeward drift in my sloop-rigged Passagemaker was significantly reduced by putting some weight in the bottom. To be fair, the boat was designed to be filled with up to 650 lbs of cargo—passengers, groceries, dogs, or whatever—and the more you fill it up, the better it performs.
With a solo helmsman sitting in the stern sheets, the Passaagemaker will settle down by the stern. Sitting on the bottom farther forward or carrying ballast in the bow will restore proper trim.
The boat worked best with lighter people and goods well forward or aft, and the larger, heavier portion of cargo amidships. Keeping the ends light makes the boat quicker to respond to waves and lift over them. At first, when I sailed alone, I sat well aft, handy to the tiller and rudder, but this set the bow higher than it needed to be. Sitting amidships put the Passagemaker in better trim and might have led me to make a tiller extension and new leads for the jibsheets. Before making any modifications, I tried loading my sand bags at the base of the forward seat. I found I could sit comfortably aft, and the boat performed very well. And only 100 lbs of sand was needed for good sailing results on my solo outings.
This Passagemaker carries the gunter sloop rig. The mast, gunter, and boom all fit within the hull for easy transport.
Designer Harris reports the single-sail lug rig is more popular than the two-sail sloop rig I built. I’d agree that the lug rig would make sailing simpler, but either sailing rig is well worth the investment: Sailing is the best way to enjoy the Passagemaker. The Passagemaker can carry an outboard from 2 to 4 hp. With my 3-hp motor I found it performed best when loaded, with the weight properly distributed fore and aft.
The latest version of Passagemaker is a take-apart model, one that breaks into two sections, and after the stern seat is removed and placed in the bow, the forward section nests in the stern section for very compact storage and transport.
Harris notes most Passagemakers are built for their own sake, not as a tender for a big trawler. “It’s an enormously versatile boat, and most people seem to build them for the self-esteem that a project like this brings,” he reports. I’d agree that the Passagemaker has much more to offer than mere utilitarian service as a tender.
Ken Textor has been writing about, working on, restoring, building, and living on boats since 1977. He lives in Arrowsic, Maine.
Particulars
[table]
Length/11′7″
Beam/56″
Weight/90 lbs
Maximum payload/650 lbs
Draft/6″
Draft with daggerboard/30″
Sail area/78 sq ft
[/table]
Chesapeake Light Craft’s library of videos includes Passagemaker construction, rowing, and sailing. Plans, an instruction manual, and a variety of kit options, including a gunter sloop or a lug rig, are available from Chesapeake Light Craft.
Is there a boat you’d like to know more about? Have you built one that you think other Small Boats Monthly readers would enjoy? Please email us!
Several years ago, I was standing on the banks of the River Thames watching a boat sailing by at the annual Beale Park Boat Show. It was a small, double-ended dinghy obviously inspired by Scottish workboats but built of modern materials. As a longtime enthusiast of Iain Oughtred’s double-enders, I was mesmerized by this little boat that seemed to encapsulate the essence of a salty workboat, pared down and reduced to its bare elements. The Storm 15, first offered as a wooden kit and then reproduced in several sizes in fiberglass by Swallow Boats in Wales, was almost brutal in its simplicity and showed how traditional designs can be successfully reinterpreted in a modern style.
Ten years later, standing on the deck of a camera boat on the south coast of Devon, I was similarly struck by the latest offering from Swallow Yachts, as they’re now called. There was that strong sheer, plumb stem, and dramatically raked sternpost, combined this time with a fully battened, square-headed Bermudan mainsail. Tacking off the timeless, craggy coast of Devon, the Storm 23 looked decidedly unconventional, even kooky, and yet there was something about her that inspired confidence: a purposeful air, a look of intent, almost of defiance. And, while there was no one else on the water that late autumn day, there’s no doubt that in any fleet of boats, the Storm 23 would stand out by a mile. She’s nothing if not striking.
all photographs by the author
With the ballast tanks empty, the hull rides higher for less wetted surface and better performance in light winds.
It came as no surprise that Christian Fortmann, the owner of the first Storm 23, has sailed a Storm 17 for the past 10 years. His main use for the boat is sailing on the lakes close to his home in Munich, Germany, but once a year he takes it on the family holiday to the village of Newton Ferrers, Devon, in the southwest corner of the U.K. Idyllically positioned at the mouth of the River Yealm, the harbor at Newton Ferrers opens straight onto a rocky and unforgiving stretch of coast. It’s a great cruising ground, with Salcombe and other pretty villages to the east and the River Tamar and the whole of Cornwall to the west, but get it wrong and you can soon be in serious trouble—as many an unfortunate ship has discovered in the past. With his family growing up and his sailing ambitions growing too, Christian asked Swallow Yachts to built him another boat. His brief was simple: “Like the Storm 17, but bigger.”
There were other criteria that dictated the eventual shape of the design. The boat had to be trailerable, so it could be easily transported to the lakes and to the U.K., which immediately raised the issue of ballasting. And Christian wanted to be able to sail with his whole family, necessitating a fair-sized cockpit, or on his own, meaning the rig had to be reasonably easy to handle. These were just some of the issues the boat’s designer and builder, Matt Newland, had to juggle with in creating a boat “like the Storm 17, but bigger.”
Matt applied a modern solution to the problem of ballasting: water ballast. The Storm 23 is fitted with ballast tanks capable of taking 500kg of water, thereby doubling its displacement. Combined with 215 sq ft (20m2) 0f sail, this gives her, according to Matt, a sail area to displacement ratio of 16.9 with her tanks full, similar to a medium-displacement cruiser, and 23.3 with her tanks empty, closer to a racing boat. It’s a neat solution which should make the boat easy to trail and exceptionally fast in light winds, but which has certain ergonomic consequences, as we shall see later.
In keeping with all their made-to-order wooden boat designs, Swallow built the Storm 23 in epoxied plywood, using mostly 9mm ply. The trim is made of utile, a West African hardwood with an interesting interlocking grain.
Stepping on board the Storm 23, the first impression is of a thoroughly modern, well-thought-through design. The deck, cockpit, and cuddy are all made of clean white panels, and could just as well have been made of fiberglass as plywood (and no doubt this is done with an eye to eventual production in ’glass). What brightwork there is, is mainly decorative trim, with the exception of the tiller.
The cuddy roof is low to keep windage to a minimum. There’s 6 1/2′ of covered space under it, room enough to sleep if bad weather keeps you overnight.
With the bilges filled by ballast and buoyancy tanks, the cockpit floor of the Storm 23 is set quite high—so much so that the centerboard case is almost entirely buried under it, with only the topmost edge protruding above. It takes a bit of getting used to, but the overall effect is to increase cockpit space and maximize legroom. It also allows unhindered access to the small cuddy forward. The cuddy itself is 6 1/2′ (2m long), but with minimal headroom, it provides only a very basic sleeping area. Most of the time, it’s likely to be used as a large and very convenient storage area.
A retractable swim ladder is built into the starboard side of the hull at the aft end of the cockpit.
There are some neat tricks, such as the telescoping swim ladder concealed behind a hatch in the topsides. It can be accessed in seconds. Under the aft deck, there’s just enough space for an outboard well—in this case housing a Torqeedo electric outboard. The rudder is set on a long pintle so it can be raised with minimal effort in shallow water or for launching and recovery on the trailer.
The rig itself is unabashedly modern, with carbon-fiber spars and matching black hardware for the running rigging. There are nods to the boat’s traditional heritage, such as the leathering around the mast and a wooden locking bar where the mast passes through the foredeck, but these are the exceptions. It’s all very clean and uncluttered, with even the roller-reefing mechanism tucked out of sight under the foredeck. Matt has done away with crosstrees on the mast to reduce windage and simplify the rigging process, while the square-headed mainsail makes for a shorter mast, which means less overhang on the trailer.
With the wind picking up, the Storm 23, still sailing without ballast, shows her keel. With 1100 pounds of water brought aboard the ballast tanks, she’d ride deeper and more upright.
It was late afternoon by the time we made it out of the harbor entrance, and the last of a 10-knot breeze was pushing up a chop which bounced uncomfortably off the cliffs. The boat’s ballast tanks were empty for the photos, and she seemed slightly tender to start with. With her hard-chined bottom, she has a tendency to slam when sailing empty, but this was quickly rectified by adding some ballast. And it was easily done. Christian simply opened a watertight hatch on the cockpit floor, reached inside, and opened a forward facing, gateless self-bailer to let the water in. Once the tank was full, he reached inside again and closed the bailer. To someone hard-wired to keep the water out of a boat at all times, it was quite disconcerting to watch the sea flooding in, but Christian assured me there was so much buoyancy, the tank would stop filling long before the boat sank. The tank is also equipped with standard rear-facing bailer for emptying, although a hefty bilge pump takes the ballast water out faster when the boat speed is low and you want to lighten up because the wind has died down.
With the boat’s displacement effectively doubled, the boat settled into a groove and gave a much more comfortable ride. The Storm 23 has a relatively small rudder, but her double-ended shape means the water flows steadily past it, giving excellent steerage at any angle of heel. Even with her long, straight keel line, she’s easy to maneuver and doesn’t get stuck in her stays. And she’s certainly nimble. We didn’t have a log on board when I sailed her, so I couldn’t measure her exact speed, but she accelerated well out of every tack and skimmed across the chop with gusto, thanks to her slender, easily driven hull.
With her efficient rig, lightweight construction and 5′ 4″ (1.6m) deep centerboard, the Storm 23 performs more like a modern dinghy than the Scottish workboats she was originally inspired by. According to the sales literature, this combination “gives her blistering upwind performance and if well set up she will point as high as anything else afloat.” There were no other boats on the water that day to test that claim, but certainly the boat pointed well enough to take us quickly off a worrying lee shore and safely into deep water.
The jib’s tack is anchored aft of the stemhead and it’s roller furler is set in the foredeck. The main’s fat head allows the carbon fiber mast to be kept short for less overhang when lowered for trailering.
As the sun lowered, the cliffs and hillsides were bathed in a golden light that looked as if it had come straight out of a tourist brochure. The Great Mew Stone, a distinctive double-wedge shaped island, was silhouetted on the horizon with Rame Head in the distance. I could see why Christian wanted a bigger boat to explore this enticing but dangerous coast, with its idyllic hidden beaches protected by lines of jagged rocks. He could pull the Storm 23 up on a beach—it draws only 9.8″ (0.25m) with the board up—and enjoy a picnic with the kids, and then push off and sail home in comfort and safety when the prevailing southwesterly starts to build.
With the Storm 23, Swallow Yachts have achieved that and created a stylish and distinctive little boat that will provide a lot of fun for Christian and his family and other families just like them.
Nic Compton is a freelance writer/photographer who grew up sailing dinghies in Greece. He has written about boats and the sea for more than 20 years and has published 12 nautical books, including a biography of the designer Iain Oughtred. He currently lives on the River Dart in Devon, U.K., and sails two boats designed by Nigel Irens.
"Is that really necessary?,” I teased Andy, pointing to the tripod strapped to his pack. Andy, a veteran Outward Bound instructor, was the first of several paddling partners to accompany me on the journey I was about to begin, the first through-paddle of the Northern Forest Canoe Trail (NFCT), on May 1, 2000. In the original incarnation of this adventure I had imagined Andy and I would travel the entire 740-mile trail together, but his ties to his wife and work precluded him from making the full trip. I’d rendezvous with other paddling partners along the way and paddle solo in between.
TINTIN, my 16′ wood-and-canvas canoe, floated at the dock in Old Forge, New York, and with each armload of gear we loaded I watched the freeboard dwindle. I’d built the E.M. White canoe for this trip under the guidance of Maine builder Jerry Stelmok. My goal: cross the Northeast in a single season, under human power alone, following the Northern Forest Canoe Trail. The then-nascent water trail links a series of shorter routes used by Wabanaki natives and early European settlers to travel the region between New York’s Adirondacks and northernmost Maine. The trail is now well established and supported by a non-profit organization (see sidebar below).
“Like you’re going to use that axe,” Andy replied. I’d found the axe head rusted and abandoned the previous summer and refurbished it for this trip. While an axe was an odd accompaniment to my Leave-No-Trace ethic, it was the traditional tool for wilderness canoe travel—so I packed it. Though I’d been trained as a low-impact camper, I was fascinated by the era when the canoe was king, and Voyageurs were masters of woodcraft and living close to the land. I had imagined that my trip would have some of that raw quality, but I was hoping to do without the common Voyageur maladies of compacted spines and hernias.
At 28, I was still living with my mother when I wasn’t working for Outward Bound. My friends found this odd, but my Italian grandfather assured me that when he was a boy the practice of living with a parent at my age was standard fare. On the dock, I felt in my gut what I saw in my mother’s watering eyes, but in my last-minute frenzy culminating six months of planning, I pushed my sadness aside. I had taken plenty of backcountry trips, but never one as long as what lay ahead of me.
NFCT/SBM
.
I dipped my fingers into the water and shivered. The lake was free of ice but surprisingly cold. Andy and I took our first strokes and glided away from the dock, passing rows of boarded-up summer cabins that lined the narrow lake. The still-bare branches arching over the shore looked brittle; the dull brown water barely rippled at our passing. TINTIN was the only boat on the lake. I turned several times to wave to my mother. She remained on the dock until we were out of sight.
Andy and I rode a wave of euphoria through the serene and sparsely populated Adirondack woodlands where lean-tos outnumbered cabins. But our spirits began to sink shortly after we portaged through the small urban center of Saranac Lake and launched in the Saranac River. The river’s rushing water brushed TINTIN’s hull with a line of scum; to replenish our supply of drinking water, we’d have to detour into the adjoining untainted wetlands. I was determined to treat my trip as a wilderness expedition by living off the supplies we carried and the water nature provided, so I refused to climb the riverbank and request tap water from the homes we passed. Grocery shopping was also out, even though the route occasionally intersected towns with markets.
Donnie Mullen
Fulton Chain, Adirondacks. This lean-to is typical of the camp shelters scattered throughout the Adirondacks. I had been keeping my red food sacks in a canvas Duluth pack, but one night, while the Duluth rested inches from my head, mice sneaked into the Duluth and chewed straight through a stuff sack full of GORP and granola. We tried hanging the stuff sacks but that didn’t entirely eliminate the problem; we just wound up with critter piñatas.
The lower Saranac brought a succession of portages around dams and Plattsburgh’s urban clutter of bridges, noisy riverside roads, and industrial buildings before dropping us into Lake Champlain at dusk. Under cloudy skies we paddled south, hugging the shore as the lake unfolded to the east. After eight days without a rest my body ached, but I forced myself to maintain our tempo. Just before dark we reached Valcour Island, hauled our gear up to an exposed ledge, and erected the tent on a spongy, pungent bed of pine needles. South Hero Island, our next goal, lay 3 miles distant, a pencil line of land on the horizon. We’d need calm conditions for the open-water crossing.
“If the weather’s good tomorrow, we’ll have to go,” I said to Andy, secretly hoping that he’d persuade me otherwise or that rain, lightning, an earthquake—anything—would grant us a day off. Lightning pulled through and confined us to the thickly wooded island the next morning. I slept until noon. When the rain broke, I made chocolate-chip chapati bread while Andy inspected the torn canvas and gouged shellac on what had once been TINTIN’s unblemished hull.
Andy Chakoumakos.
Fulton Chain, Adirondacks. Those first few days are a blur. I was so charged that sleep and food felt more like atmosphere that I passed through then anything that consciously required a stop. I leapt at any chance to practice my burgeoning outdoors skillset. Once I wielded my refurbished axe, whacking wildly at a spindly blown-down, another time I planted my pole and surged through a rivulet that connected to lakes in the Fulton Chain as though I were Benedict Arnold ascending the mighty Kennebec River.
The following day, under a grimy sky, we paddled to South Hero Island, surviving the longest crossing of the trip—a challenge that had worried me since day one—and worked our way north along the east side of the island. The shoreline was a sheer slab with no place to land, but after the crossing I felt much less anxious having solid ground nearby. I was even a bit cocky after our recent success, and it took me a while to notice the growing swells that were piling past us.
Andy dryly noted “a bit of chop, dude,” as TINTIN teetered on the crests of passing waves. As he strained to keep us upright, his blade barely left the water between strokes.
TINTIN’s stern bucked out of the water and I found my blade swinging through air. I pressed my knees into TINTIN’s flanks and leaned down to connect with water. The rough paddling was exhilarating until TINTIN was propped up on the back of a large wave and I found myself looking down at Andy’s head. Snapped sober, I traced the shore for a safe landing. A mile in, there was a break in the South Hero shoreline, and I took aim for the pebble beach there. After we’d hauled everything ashore, we climbed the bank and headed to the nearest home. A grumpy, half-shaven man burst onto his porch. Once we explained ourselves, he was kind enough to offer us a spot on his lawn for the night.
Andy Chakoumakos
Fulton Chain, Adirondacks. All told, I portaged nearly 70 miles. I had long held that portaging offered necessary balance to the lifestyle of the canoe tripper, providing the paddler with a break from long hours of sitting. Admittedly, I became attached to portaging. Ever challenging myself to carry TINTIN yet a little farther without stopping. When the going got rough on the water, carrying was my reprieve.
The next morning we made the 1.3-mile crossing to the Vermont mainland and pushed our way into the mouth of the Lamoille River. Days of rain had flushed a brown sediment-rich cloud into the lake. We inched upriver against a flood of current. High water swirled around tree trunks. We had no place to hide, no eddies to protect us. Poling was impossible. After two hours of hard paddling, my neck was electrified with pain. Near breathless, I grabbed a branch to hold TINTIN in place and give us a break while Andy filled his empty water bottle in the murk. Would the river be this brutal for all of its 75 miles? Andy was scheduled to leave the following day. Barbara would replace him, but she only had five days to paddle. It would be impossible to ascend the Lamoille alone; I pictured myself in a desolate swamp, creeping upriver one tree branch at a time.
After a single frustrating day fighting the current, we reached a small gravel boat launch in East Georgia, where I said goodbye to Andy and welcomed Barbara aboard. She ran the Outward Bound base where Andy and I worked. That first afternoon aboard TINTIN, she looked me straight in the eyes and declared, “Let’s get you off this river!” We charged upstream, and soon reached a 3-mile portage around a series of rapids. Barbara carried the Duluth pack, filled with fresh supplies and as heavy as lead. On our second day we continued to fight a powerful current. I shoveled water madly in the stern and Barbara put her back into every stroke. I couldn’t bear to look directly at the bank—I could see clearly enough in my peripheral vision that our progress upstream would have scarcely outpaced a slug. I tried poling but abandoned the attempt after a mishap sent us careening broadside to the current.
Andy Chakoumakos
Forked Lake, Adirondacks. Long-distance paddling provides endless opportunity for idle chat, proselytizing, and banter. Andy told me about boyhood fishing trips with his uncle. The outings started early and the fishing was OK, but what really made his day was having grinders for lunch. When we paddled past a tiny island chapel I spouted, “I would go to church there!” before trundling off on a “God as nature” tangent. Later, a floating stick felt like undisputable proof of my belief in wood’s superiority for canoe construction. Andy wasn’t convinced.
As we climbed higher into the Lamoille watershed, the banks were dotted with dandelions and the river wound through bright green farmland. The inside bends of the river held precious slack water where we could rest. Beyond the north side of the river, cropland snugged up to wooded ridgelines, a glimpse of the Green Mountains that run the length of Vermont from Massachusetts north to the Canadian border. The floodwaters had begun to recede, but even so the Lamoille never allowed us more than 10 miles a day. When Barbara waved goodbye along a quiet stretch of river, the full height of the land was still ahead of me.
Donnie Mullen
After Barbara and I had to part ways I had to take on a waterfall and three sets of rapids—all within the span of one mile. That portage around the falls was up a sheer wooded bank, but beyond that the river was only knee deep. I just hopped in and hauled. Little was going to stop me from reaching Hardwick Lake and putting the longest, upriver component of my trip behind me.
After a final day of hauling TINTIN upstream, I reached Hardwick Lake, a 1 ½-mile-long finger of water snugly balanced between the abrupt sides of a conifer-draped valley. I raised my arms and hollered with only TINTIN to hear me—Hardwick was my farewell to the Lamoille River and the end of my week of toil.
At the far north end of the lake, I paddled into a stream about the width of a bathtub, ducked under some wire fencing, and soon found myself in a rocky meadow. As the setting sun grazed the treetops, I bumped into a tiny culvert bearing a dirt road that connected the steep valley sides. Beyond the culvert my stream disappeared into a tangle of alders. I was tired, wet, and needed to make camp.
I hopped the fence, and followed the road to a white farmhouse, the only building in sight. A collection of horse tack framed the front door. A dark-haired woman answered my knock, and after I explained my predicament she gave me permission to portage out of her pasture. I mentioned that the only hospitable tenting spot I had noticed was an open bluff about 100′ up the other side of the valley. She replied flatly that the property wasn’t hers and left it at that.
I shuttled everything to the roadside below the bluff and was bent over a pack when I heard tires crunching on the gravel behind me. I spun around as a blue pickup threw a cloud of dust over my gear. I was an odd sight with my packs and canoe: the only water within reach was the unnavigable stream. The passenger’s window rolled down. In the shadowy interior sat two large men and despite the dim light, I couldn’t miss the gleam of the shotgun placed between them. The passenger’s gaze was fixed upon me.
“What ya doing?” he asked casually.
“I was going to camp up there.” I immediately chided myself for stating instead of asking.
“No you’re not.”
My legs began to shake.
“I’m doing this crazy trip,” I blurted. “I’m headed to Maine.”
“Maine?” he said with contempt. “How are you getting from here to Maine?”
“From Lake Elligo, I’ll paddle to the Black River,” I talked fast, suppressing tears. “The Black will take me to Lake Memphremagog, then up the Clyde River and down the Nulhegan to the Connecticut…” His face softened. Still, he told me I couldn’t stay, but offered me a ride a mile and a half up the wooded valley road to an old tote road that would be suitable for camping. I thanked him, but declined the ride, and as they sped off, I readied for another portage, my fifth of the day.
Having walked 4 ½ miles to make the 1 ½-mile portage of canoe and gear, I slapped up my tent in the glow of my headlamp. I slid into my sleeping bag and scrawled in my journal “Will my body function in the morning?” I quickly fell asleep.
Andy Chakoumakos
Raquette River, Adirondacks. Lining, like portaging and upstream hauling, became comfort measures. When paddling simply wasn’t working, I fell back on what would. Progress was slow, but anything that kept me moving was enough to boost my spirits.
The Black River offered several days of welcome downstream travel. I meandered through cow pastures and took a rest day in a tucked-away pine grove. I found a pay phone and called my mother, who shrieked when she heard my voice. She told me that adolescence had been extended until 29. I knew she meant it as a vote of confidence, but all I could verbalize was a mumbled thanks. A day later, Cristina, a fellow Outward Bound instructor, joined me as we turned up the Clyde River and got blasted by what the map indicated as four consecutive contour lines’ worth of elevation gain. I had known that the Clyde would be against the current, but I had never studied the map closely enough to prepare myself for the true onslaught. All day long we were waist-deep in the water, lining TINTIN upriver.
“Was the Lamoille this bad?” Cristina complained.
No, I had to admit. Even the Lamoille let up now and again, but the Clyde remained constant for miles. At one point, we crept beneath the massive buttress of a cement bridge where cars rattled overhead. Cristina stuck it out with me until the river plateaued on a confusing wetland and I again had to part ways with another friend.
I went on alone, and suffered one final parting kick on the Clyde: 12 mind-numbing blowdown-induced portages in the span of two hours. Along the roadway portage to the Nulhegan, a policeman pulled over and for some odd reason, asked me if I owned my canoe. Our whole exchange took place while I had TINTIN weighing on my shoulders.
When I reached the Connecticut River, a wide-open channel warmed by a burst of evening light, it felt like a gift. I followed the Connecticut’s looping meanders south, then headed east on the Upper Ammonoosuc River. I regained my confidence with poling as I ascended its shallow waters into New Hampshire. The canopy overhead nearly blocked out the sky. The click of my pole on the pebble bottom startled a moose into a cross-river trot, water splashing around its knees. The corridor of diffused light brought a memory of a boyhood fishing trip with my grandfather and for the first time since the Adirondacks I felt at peace with the landscape.
Two days later, I was plowing east on a portage through a sea of spindly trees trying to find my way to the Androscoggin River. My tote road had petered out long ago. When I wasn’t tripping over roots, I was being slapped in the face by branches. And there were mosquitoes, lots of them. In a fit of exhaustion I tossed aside one of the two packs I was carrying and pressed on with the other. When I finally broke through to a logging road that would take me to the Androscoggin, I dropped the pack and without a moment’s rest reentered the overgrown jungle in search of the Duluth I’d abandoned. Five hours later, I had trudged just 4 1/2 miles and was back on the edge of boulder-strewn Phillips Brook where my portage began. I still had to get TINTIN across, but it was dusk. My supplies were with the packs and I had little energy. There was an empty yurt nearby, and after eating the last of the hummus in my day bag, the only food I had with me, I spent the night shivering in the yurt. The following morning, my ordeal continued, brightened slightly when a fisherman passing through told me that his grandfather remembered Native Americans using this same portage.
One month from the day I left Old Forge, I made the 2-mile crossing of Umbagog Lake’s remote northern bay, and traversed the watery border into Maine. I put on my only piece of unsoiled clothing, a blue-and-white-flowered Hawaiian shirt, and celebrated entering my home state and reaching the halfway point of the trail.
I clambered up the high bank at the mouth of the Rapid River and prepared for the 3-mile carry around the river’s Class III and IV whitewater. The trail wound through a cedar grove before climbing to drier ground and leaving the river’s tumult behind. A few hours later, I stopped at Forest Lodge, which sits on a hill overlooking the river. I stood by a pair of Adirondack chairs and gazed down a green lawn as it dipped to the trees that cloaked the churning waters. In the 1930s and ’40s, author Louise Dickinson Rich lived at the lodge. I had read her first book, We Took to the Woods, and been charmed by her tales of homesteading in the Maine woods of yesteryear. Louise, looking out from this same viewpoint, had witnessed everything from the whitewater fanatics of her day to one of the last long-log drives in the East.
Andy Chakoumakos
Saranac River, near Clayburg, New York. I had just turned down Andy’s offer for a spell from carrying when a pickup pulled over to offer us a ride. I knew that Andy and I were aligned in our refusal to accept a lift, so I just kept walking and let him talk. Andy mentioned where we’d come from. “You’ve come all the way from Old Forge?” The driver said, dumbstruck. Then his face wrinkled in bewilderment. “Suit yourself,” he snapped and screeched off.
Three days later, I paddled into the lakeside town of Rangeley to begin the 4-mile portage between the Androscoggin and Kennebec watersheds. Feeling strong enough to give double-packing another go, I plodded along the path over grass and then pavement. While passing a municipal tennis court, a red-haired and bearded man motioned to me.
“You’ve got quite a load,” he said.
“I’m doing this trip…”
“The Northern Forest Canoe Trail!” he beamed.
I was shocked to hear the name spoken aloud in connection with my efforts. At the time, the nonprofit organization devoted to the trail was barely months old. The trail wouldn’t officially open until 2006.
His family, a cherubic red-haired daughter and son and his soft-spoken, striking wife, joined us. The man put his arm around his son and grinned, musing that someday the two of them might paddle the trail.
“Did the Lakes have enough signs?” he asked.
I chuckled. Except for a few placards along the Saranac River in New York, the trail was unmarked with the notable exception of western Maine. He told me that he’d helped to post the signs throughout the Rangeley region. I wondered if he might have been responsible for putting up the very sign that had introduced me to the existence of the trail several years before while I was leading a trip for Outward Bound and set me on the course that carried me to that day.
A drizzle set in as I parted ways with the family. The simple kindness and encouragement they extended was a pleasant contrast to my solo travel and reminded me that my journey could resonate with others.
Another week of solitude passed. The rainy spring was over. The South Branch of the Dead River was impossibly strewn with rocks. I threw up my arms as I bounced between the boulders. Even before these new scrapes, TINTIN had stayed about as dry as my leaky boots. I was forced ashore every couple of hours to drain the puddle that lapped at my toes. Even though the Duluth grew lighter by the day as I gobbled a potful of dinner each night, I began to feel the dead weight of my little-used axe.
In the midst of paddling the windblown 21-mile length of Flagstaff Lake, I took a rest on a shrubby island and stumbled over old chunks of pavement, the remnants of a road that led to the village of Flagstaff before the Dead River valley was inundated by the building of a hydroelectric dam in 1950.
Andy Chakoumakos
Lamoille River, Vermont. As we loaded gear back aboard TINTIN in the quiet water above this dam, a man out walking his dog made a passing comment about a wild ride down the river. I was about to correct him, but Andy got to him first: We were traveling up river, not down. The man’s eyes grew wide with disbelief. I felt a rush of pride, not just because the stranger was impressed, but because Andy had taken ownership of the trip. It had become ours.
The next day, I heard the rumble of Grand Falls long before I ground ashore to make the portage. Below the 30′ falls and afloat once more, I poled up wide but shallow Spencer Stream and took the first tributary that I found, expecting it would deliver me to Spencer Lake. After I’d traveled for an hour up the small stream, the dense forest leaned in and threatened to swallow my narrow corridor. I had passed a spot where my map indicated there would be a bridge, yet I’d seen nothing there but woods. I worried that I had turned up a forgotten branch of the stream and would miss the lake and the rendezvous with my next paddling partner. Determined to arrive at the lake by evening and trusting my intuition to continue driving farther upstream, I leaned into the pole and thrust TINTIN up the rivulet, sliding past moss-covered banks. Eventually, the channel widened and I entered a pool where I was reassured by the sight of a fisherman on the far shore.
At dusk I portaged around the cracked timbers of a leaking dam into Spencer Lake. The black flies descended, and I couldn’t get TINTIN back into the water fast enough. I fled to the middle of the lake and only then did I have a moment to take in my surroundings. Ridgelines layered in mist ascending upward cupped the isolated lake. I could see a single lodge built into a nearby hill; the remainder of the tree-lined shore was uninhabited. A sandy spit sprinkled with polished stones arced into the lake. The sounds of TINTIN’s wake and the water dripping off my paddle blade mixed with the hum of distant peepers. On the spot, I promised myself that I would return.
The 5-mile portage to the Moose River was the longest of my entire route; it would take all day, packs first, then TINTIN. Fortunately, I had help. Jodi, the office manager at the base where I worked, had joined me. From the north end of Spencer Lake, we followed a logging road east, then north toward the Moose. Gear aside, the walking was easy. Slash-covered clearings occasionally marred the scraggly roadside forest. I’d been on my own for nearly three weeks. Starved for conversation, I launched into an episodic narrative. I babbled for over an hour before the first wave of embarrassment spread over me, but the urge to speak was uncontrollable. Normally, I was a sensitive conversationalist, but my weeks alone had changed me.
By day’s end, with the portage behind us, we camped above the Moose River. To celebrate, we built a campfire. In my effort to tread lightly on the land, this was only my second fire. My neck was stiff and my legs weak from the 15 miles of hauling.
Jodi Hausen
Spencer Rips, Moose River, Maine. It became pretty obvious that the axe wasn’t necessary, but I couldn’t imagine making the journey without it. My goal wasn’t simply to paddle the trail. I had to do so with an ethic that honored the past, even if it made the trip harder than it had to be. The axe was my link to the era of the Voyageurs.
Thwack!
I drove the axe into a piece of firewood. Previous campers had left several chunks of split wood. I was slimming a couple down to kindling size.
Jodi was stacking birch bark and twigs in the fire ring. I placed another piece on the splitting stump and raised the axe high.
Chink…thunk!! It was the wrong sound. The wood fell away. Then I shivered, as though I’d stepped from a sauna into the sub-zero air of winter. I felt the cool metal blade in my foot, but the sensation floated like it belonged to someone else. I released the axe handle, without looking down. I had been wearing sandals.
Jodi dashed toward me with huge eyes.
I dropped to the stump. My head hung low; I could smell the stench of armpit. Salty sweat trickled across my lips.
Jodi knelt beside me and I could feel her shaking hands against my leg.
“You’re okay. No blood. Damn it…what should I do?!” her voice quaked.
“Get the first-aid kit.”
Jodi dug through my pack. I lifted my foot and pulled the sandal off, investigating with my hands what my eyes would not.
Eventually, I gathered my courage and bandaged the wound. I went to bed determined to continue paddling the following morning, but my throbbing foot gnawed at my resolve. During the night, a lightning storm passed over us and filled the tent with steely-blue flashes of light and cracks of thunder. Rain pelted the fly. I imagined sitting in TINTIN for hours on end with an injured foot. I wanted to be courageous, but what I needed was a hospital. At daylight, Jodi ran back across the portage and retrieved her car.
Jodi Hausen
Jackman Clinic, Maine. As result of the axe mishap, I had to call Tom, another Outward Bound friend who was scheduled to paddle with me, and cancel our rendezvous. He could have stayed where he was, at Maine’s northernmost Outward Bound base in Greenville, but he hopped in his truck and spent hours speeding across the logging roads to help get me and TINTIN home.
By the end of the next day, following a rescue that brought Outward Bounders Tom and Dietter and their trucks to my aid, I was deposited with a stitched foot at my mother’s house, 100-plus miles to the south of the trail. Wilderness, water, and my adventure were gone, replaced with pavement, rows of homes, and the growling of a lawn mower.
My mother asked, “How soon can you get back out?”
I called my friend Tony, “What the hell are you doing home already?” he snapped.
I felt pushed and protested: Who says I have to go back?
Yet the trail had worked its way into me, and my friends and family saw the connection more clearly than I could. Then, after four days on the couch reading Against Straight Lines, Robert Perkins’s book about his canoe travels in Labrador, I couldn’t deny the tug of the trail. I longed for open water and to complete what I had started.
My mother drove me back north to meet up with Joc, my final paddling partner. I returned with a new pair of rubber boots, a hermetically sealed suture removal kit, and a dream that I would be able to keep my wound dry for the remaining 200 miles. The axe stayed home.
My first day back on the trail, Joc, an Outward Bound course director I’d met while working for the school in Florida, and I put in on the Moose River where I had left off the week before. Soon, we were crossing a series of remote ponds and muscling through tireless swells that licked at the gunwales. Twice, Joc’s long arms and stabilizing braces saved us from capsize. He cheered even as spray matted his blond hair, but I remained pensive, thinking about one of the rapids that lay ahead.
The Demo Bridge Rapid is a frothy Class III created by two slabs of bedrock that squeeze the river’s flow down a narrow chute 30’ long. While there are larger rapids along the trail, this was the most difficult I had contemplated paddling. The route through crosses the current far left before slipping between the slab shore and a chair-sized boulder. The rapid is made particularly gnarly by a river-wide ledge that lies just downstream of the chute.
Two years before, a brother-and-sister duo—the only other group to attempt a through-paddle of the NFCT at the time—ended their effort after a ledge on the Moose River swallowed one of their boats. I had only read about their misfortune, and assumed that the Demo Bridge Rapid was the one to derail their expedition. My Outward Bound training told me that paddling such a risky rapid during a long expedition, and in a wood-and-canvas canoe, made no sense. Yet on that day my competitive side won out.
TINTIN wobbled as Joc and I peeled out into the current. Despite having memorized the route, it’s hard for me to think straight once I’m on moving water. Amid the roiling mess, I caught a glimpse of the chair boulder.
“PADDLE!” I shouted.
The current flung us downriver.
“Damn it!” I yelled. We had to get the hell off the midstream conveyor belt. We lashed at the water and TINTIN jumped in response, enough to startle me, but where had our route gone? The slab shore loomed ahead. We were moving way too fast.
I caught sight of the chute and pried for all I was worth. Joc buried his blade into a cross draw, pulling, clawing toward the chute, and suddenly the bow snapped into the narrow opening like a compass needle finding north.
We’d done it!
Bryn Clark
Moose River, Maine. My first day back on the river Joc asked me what stories I’d tell about my experience on the trail. At the time, I didn’t think I’d have any worth telling. I felt then that I had failed because I’d left the trail. All these years later, I feel like I could tell a story about strength of spirit, will, and friendship in a myriad of ways.
We paddled across the northern bay of Moosehead Lake, the largest of Maine’s lakes, on the calmest of days. Legend about Moosehead’s oceanic potential seemed unfounded as the summer sun beat down on us. Then the West Branch of the Penobscot guided us without delay down its pine-lined corridor to the north end of Chesuncook Lake. The tucked-away Umbazooksus Stream was next, then it was on to Mud Pond. To my surprise, the murky depths along the infamous Mud Pond Carry didn’t breach my boot tops. Joc shouldered TINTIN most of the way so I could give my aching foot a break.
Donnie Mullen
Mud Pond Carry, Maine. As infamous as it is old, the 2-mile-long portage had worried me for weeks. Would we get lost or stuck in the mire? Early on the trail took us through open, easygoing terrain, but nearer Mud Pond it lived up to its reputation: overgrown, obstructed by blowdown, and shin-deep in muck.
We crossed shallow Mud Pond and found a beaver dam clogging the outlet that connects the pond to the lakes of the Allagash Wilderness Waterway. We bounced off the stick dam, which held back a small pond that spread through the trees. Below the dam the stream had been reduced to a mere trickle that could hardly float a toy boat, let alone our heavily laden canoe. I quickly resigned myself to another portage, but Joc jumped onto the dam and started pulling out sticks, hurling them wildly through the air.
“What are you doing?” I asked, incredulously.
“I’m not doing another damn portage,” he huffed, bent over.
“You’re crazy. Get in the boat,” I chuckled.
He spent several minutes undeterred and engaged in a Herculean task. Finally, defeated, he slumped back into the canoe, and we retraced our strokes in search of the portage trail. Later I read in David Cook’s Indian Canoe Routes of Maine (republished in 2007 as Above the Gravel Bar:The Native Canoe Routes of Maine) that the practice of disassembling beaver dams for the benefit of canoe travel was more common then I suspected. Settlers made quick work of the dams with dynamite.
We paddled back-to-back 30-mile days on the Allagash River, turning an estimated nine days of travel into just seven.
Joc Clark
St John River, Fort Kent. I spent 20 of my 55 days paddling solo, yet by the time I reached Fort Kent it was clear that my success was thanks in large part to the support of Outward Bound. The school donated food, loaned me gear, and managed my resupplies. I was steeped in the school’s emphasis on tenacity, self-reliance and personal challenge and the paddling partners who saw me through were all Outward Bound colleagues. They organized my rescue and then helped to coax me back out.
When we hit the St. John River, the last of my worries evaporated as I realized that we could float the river while barely lifting a paddle and reach the end of the trail undeterred. A day later, on June 25th, Joc and I glided quietly down the wide and shallow St. John under cloudy skies as Fort Kent, and the end of the trail, took shape on the high southern shore. Green hills poked from the Canadian side.
We were hours ahead of schedule, and still my mother was there to cheer us ashore as we ground TINTIN into the sandy beach. The elation I expected at my finale was absent. I was exhausted. Joc cinched TINTIN to the truck’s roof rack as I piled our gear in the back. My mother slipped behind the wheel to begin her second five-hour drive of the day; I slumped in the back seat. Soon, the sounds of water rippling across rock and the wind whistling through the treetops were replaced by the hum of tires on pavement and the laughter of my mother and my friend. I drifted off to sleep.
Donnie Mullen is a writer and photographer who lives in Camden, Maine, with his wife Erin and their two children. For more information about his E.M. White canoe, see the sidebar in his article “Investing in Memories: Canoe Camping in Northern Maine,” in our September 2015 issue. He reviewed the Original Bug Shirt in our August 2015 issue.
Northern Forest Canoe Trail
In 2000, the Northern Forest Canoe Trail was transformed from an idea into a nonprofit organization. Since then, the NFCT staff has worked tirelessly and the changes they’ve made have been profound. When I paddled the trail, the route was determined by a set of maps drawn by hand by one of the original route researchers. Now, the NFCT boasts a series of 13 full-color detailed maps. In 2010, the NFCT published its official guidebook (I wrote the Maine portion), The Northern Forest Canoe Trail:The Official Guidebook.
In 15 years, the route has become markedly more paddler friendly in terms of access, portages, campsites, outhouses, and signage. In 2000, I found well appointed basic amenities in the Adirondacks at one end of the trail and in Maine at the other end, but nearly everywhere in between I had to rely on my own resources. Now you can travel virtually the entire 740 miles of the trail and have signs, portage trails, and campsites to make your adventure all the easier. The route itself has changed very little. However, when I paddled the trail, it offered the option to paddle through Vermont and Quebec via the Missisquoi River to the north or the Lamoille River I struggled with. The Missisquoi is now the official route. In New Hampshire, the route now bypasses a difficult stretch of water along the Phillips Brook, connecting the Upper Ammonoosuc and Androscoggin Rivers via a 3.8-mile portage along Route 110A.
Over 80 paddlers have through-paddled the trail—15 of them just last year. Prior to my trip, there was some doubt that the entire trail could be paddled in a single season attempt. Now that so many people have done just that it’s easy to brush aside the hardship of the voyage, but it takes a well-rounded paddler and outdoorsperson. As a paddler, you must be proficient in all aspects of water travel: upriver and down, flatwater, whitewater, and open water; portaging, poling, lining, and water rescue. Campcraft skills require backcountry cooking and hygiene, low-impact practices, and wilderness medicine. Outward Bound provided me with valuable training and for over half of my expedition I had the good fortune of traveling with individuals who had expertise that equaled or exceeded my own. That said, will and perseverance, more than strength and skill, allowed me to achieve my goal.
A millennium-old profile pattern cut into the plank edges of Norse boats has a recess for the rivet heads and is flanked by a pair of grooves.
There can be a lot of scrambling around on a small boat, so it’s best to take the curse off the edges of all the bits of wood. The rounded corners will not only keep the your shins and knuckles intact, they will also hold on to varnish and paint longer. You could just take a quarter-round router bit to everything, but the softening of all the edges blurs the sweet, sweeping lines that make a wooden boat such a pleasant study. Putting a bead on an edge rounds the corner and adds a small groove that creates a crisp yet well-protected accent line. Risers, inwales, and outwales all have sweeping curves that carry this decorative element well. A slightly more intricate treatment for plank edges has a long history. Traditional Norse boats have at their planks’ edges a decorative molding that dates back over a 1,000 years. The tool used to cut the molding, a strek høvel (strake plane), is a U-shaped piece of iron with a wood handle spanning its ends. The cutting edge was at the center of the curve and appears to have done its work by scraping rather than shaving.
The curves of this cutter match two Dremel grinding bits. It took only a couple of minutes to repurpose this bit of hacksaw blade.
There are router bits that will machine simple beads and other patterns, but I prefer to do the job with a shop-made tool that lets me determine the shapes and placements of beads and the grooves. I use bits of hacksaw blade for a cutting edge. I cut the blades into shorter pieces with a cold chisel and an anvil. With just a light hammer tap on the chisel, the plain high-carbon blades will shoot pieces off. Bi-metal blades won’t break off quite so dramatically, but the crease the cold chisel makes will make the blade break when it’s bent. I do the contour shaping at a bench grinder at the corner of the wheel or with a Dremel tool and grinding-stone bits . The Dremel bit will create a burr that needs to be removed, either with careful work by the same bit or by working the flats of the blade on a sharpening stone.
My original profile scraper, made in 1979, is a single piece of maple with a kerf to accept a blade. A piece of a worn-out Japanese saw became the blade. A screw set at an acute angle to the kerf locked the blade in place.
A two-piece tool makes changing and adjusting blades much easier. Note that the lower bolt and hole are set away from the notch to provide room for the cutting blades.
I make the scraper bodies from scraps of hardwood: oak, ash, or maple. My latest holder is 4 1/2″ long and cut from a block about 2 3/8″ square. I first cut a 1 1/4″ right-angled notch along the full length of one edge. Then I drill two holes for a pair of 5″ carriage bolts. I use a long undersized bit on my drill press to get two parallel holes in the holder, then cut the holder in half. In one half I drill 1/4″ holes for a snug fit on head side of the bolts, and in the other half a 17/64″ hole for a slip-fit over the bolt threads. Assembled with washers and wing nuts, the holder is ready for the shaped hacksaw blade. Aided by the sides of the hacksaw teeth pressing into the holder, the wingnuts provide enough holding power. (With hex nuts and a wrench, it’s possible to apply enough pressure to split the wood.)
The cutter for a simple corner bead is easy to make and the effect it creates is dramatic. You can see how the outside edge , rounded for safety and durability, makes the visual line indistinct. The groove restores the line with a crisp edge set in high contrast by the shadowed groove.
I start the cutting with firm lateral pressure, holding the holder tight against the edge of the workpiece, and very little downward pressure, pushing the cutter into the work. The single sharp point of a simple bead cutter is easily derailed by the grain of the wood, so a gentle, cautious start is best. The blade will be less apt to wander the deeper it goes.
The simplest edge treatment is a corner bead, formed by a cutter with a half-round hollow and a sharp spur.
More complex profiles are limited only by the shapes you can grind into the edge of a hacksaw blade. I did a simplified version of the molding on the planks of the Gokstad faering I built in 1986, and used my earliest profile scraper to cut a pair of lines at the edge of the plank first; then, with the blade moved, cut another pair above the space the rivet heads would occupy. The shapes you choose to cut will be limited only by what you can grind into a bit of hacksaw blade.
Christopher Cunningham is the editor of Small Boats Monthly.
You can share your tricks of the trade with other Small Boats Monthly readers by sending us an email.
My drill is beginning to take on a patina of glue and paint but is none the worse for wear after a year of hard use.
I hated giving up on my Makita cordless drill after it had served me so well for over 25 years. I bought it in 1989 when I was doing exhibit installations in museums, and it quickly became the most frequently used tool in my home shop. I’ve used other cordless drills but always preferred the Makita because its batteries were housed in the grip, rather than in a clunky box clipped on the end. My trusty Makita was bright blue when I bought it; it’s now brown, covered with epoxy after countless boatbuilding projects. It never stopped working, but the batteries for it eventually became obsolete and too expensive to replace.
I was reluctant to put my trust in a new and different cordless drill, but I switched brands and bought a Milwaukee cordless 3/8″ M12 drill/driver (as a kit, Model 2407-22). The grip is ergonomically designed and as pleasant to hold as the beautifully sculpted handles on my ancient Disston handsaws. It wraps around the web between my thumb and index finger and fills the hollow of my palm. The forward-and-reverse switch is located right between thumb and forefinger and operable without shifting my hand. On the top of the M12 there’s a switch with two settings: 1 for high-torque and 2 for high-speed. The variable-speed trigger is quite sensitive, especially in the high-torque mode, so I can easily line up driver bits with the slots in screw heads; there’s a 20-step clutch that prevents tearing up screw heads and spinning screws in soft wood. The chuck is keyless and provides a tight non-slip grip even on round drill bits.
The only quibble I had with the Milwaukee was the belt clip is too stiff and too tight against the drill body to slip over the edge of a belt.
The Milwaukee’s 12-volt lithium-ion battery is so small that it extends just 1/2″ below my hand when it’s plugged into the grip. You’d hardly know it was there. In spite of its compact size, the battery has enough oomph to deliver 275 inch-pounds of torque, almost three times the 104 inch-pounds of my Makita. The M12 will push a 1 3/8″ Forstner bit through pine or a slightly dull 7/8″ Forstner through locust. It can also drive a 4″ exterior screw all the way into a 4×4 and bury its head without hesitation.
To see what the drill could do to 1/2″ stock on a single charge, I drilled 151 3/8″ holes with the first fully charged battery and with the second drove deck screws in and backed them out 143 times.
The battery is rated at 1.5 amp-hours, whatever that means. To put amp-hours into terms I could understand, I drilled some 3/8″ holes through 1 1/2″ Douglas-fir using the high-speed setting. I did 151 holes, one right after the other, before the fully charged battery pooped out. With the drill switched to high-torque and the drill’s second battery ready to go, I then drove a 1 5/8″ square-drive stainless-steel deck screw through a 2×4 and backed it out 143 times before that battery ran out. The charger included with the kit brought the batteries back up to full charge in less than 35 minutes, much less time than it takes me to deplete one in ordinary use.
The drill has some nice bells and whistles. There’s a built-in LED headlight to illuminate the work. The chuck casts a shadow, but any drill or driver bit longer than 2″ will have illumination at its tip. The light goes on when you pull the trigger partway, stays on while the drill is running, and turns itself off 10 seconds after the trigger is released. There’s an audible tone that sounds after the light goes on and just before the motor begins to turn, not a bad idea if you need to get a bit properly set in a straight-slotted, easily damaged brass screw before driving it. There are four red lights on the left side of the drill that indicate the level of charge remaining in the battery. And the drill is balanced so it will stand up on the flat end of the battery. While it’s not as steady as a cordless drill with its feet cemented into a bulky battery box, I thought it was a good indication that the Milwaukee designers thought of everything. The Milwaukee drill/driver’s light weight and compact size belie its power and endurance, and make it well suited to working in the narrow angles and tight spaces of small boats and to taking on bigger jobs around the house.
Milwaukee tools are widely available at hardware and home-improvement stores. The company web site provides a finder for stores and online vendors.
Christopher Cunningham is the editor of Small Boats Monthly.
Is there a product that might be useful for boatbuilding, cruising or shore-side camping that you’d like us to review? Please email your suggestions.
The Row Pad is sized to fit racing-shell seats and has a non-slip bottom to keep it in place.
One of the things I learned from my long paddling and rowing trips was that the body adapts to the demands put upon it. Muscles get stronger, hands develop callouses, and heart and lungs get more efficient. The one thing that didn’t adapt was my butt. The farther I got into a 4 1/2-month paddle down the East Coast, the more padding I needed. I kept an eye out for new home construction along the Intracoastal Waterway and when I found job sites I went dumpster diving for scraps of foam carpet pad.
Skwoosh is a company dedicated to eliminating pains in the butt, and to that end developed TekPad gel. The gel contains tiny air-filled balloons and is sealed into flexible packs in a wide variety of seat pads including the AGP Row Pad and the Kayak Pad.
Rowing puts intermittent pressure on the tailbone and constant pressure on the ischial tuberosities or sitz bones. The tailbone is easily taken care of: Just cut away the portion of a seat pad that the tailbone touches. Skwoosh uses the packs of TekPad gel to ease the pressure on the sitz bones. The Master AGP Row Pad is 5/8″ thick and has two 4 1/4″ circular gel pads. If you squeeze the foam padding that surrounds the gel pads, it will push pack; squeeze the gel pads and it will yield. It feels a bit like squeezing a tube of toothpaste. While the gel provides some cushioning, it’s the way that it moves that makes the Row Pad effective.
The molded rowing seat is a vast improvement over a bare thwart and the Row Pad adds an equal measure of comfort on top of that.
Using my 14′ Whitehall as a test platform I’ve used the Row Pad on its own and along with a racing shell seat. Anything is better than sitting directly on the thwart. Without any paddling I feel the pressure of my sitz bones bearing against my gluteus maximus muscles and the skin over them. Just sitting on the thwart with my legs relaxed isn’t so bad, but rowing makes the pressure much more acute. At the catch I lean at my hips and, as I tilt my pelvis aft, my knees rise. The angle between my back and legs gets more acute, my glutes stretch and thin over my sitz bones and the pressure increases. Almost any padding helps, but foam tends to push back, so where the pressure is the highest, the foam exerts the most resistance. The gel moves away from the pressure points and, a bit like a waterbed, exerts the same amount of pressure wherever there’s contact. By itself, the Row Pad makes a big difference even though it is on 5/8″ thick. I can feel the gel moving back and forth as my sitzbones rock on it. It even pops, much like synovial fluid does when you crack your knuckles. The RowPad is meant to be used in conjunction with a racing shell seat and that’s a winning combination. I often use a racing shell seat when I’m rowing from a fixed thwart; its notch keeps the tailbone free of contact and its holes take some of the pressure off the sitz bones like a ring of moleskin does for a blister. But the rocking of the pelvis that occurs during the stroke kneads the glutes against the edges of the holes in the racing shell seat, particularly at the catch where the glutes are at their thinnest.
A Row Pad set on top of the racing shell seat gets the benefit of the seat’s sculpted shape. Cushioned by gel and cradled by contours, my butt feels like it’s all one unit, not made up of moving pieces wearing against one another. The combination would be quite well suited to the long haul in either a fixed-thwart or a sliding seat rowing boat.
The Kayak Pad adds warmth and comfort and minimizes friction. It has a loop for a tether to prevent loss in a capsize.
The Kayak Pad is 5/8″ thick and has a non-skid bottom and a slick yellow top. Like the Row Pad, it is meant to be used in conjunction with a contoured seat. I’ve used the Kayak Pad aboard a Struer Freedom, a molded wooden kayak with a racing-style cockpit and seat. The seat has plenty of contour and I’ve never found it uncomfortable. It helps that paddling a kayak doesn’t set the pelvis rocking back and forth. The kayak stroke calls for torso rotation, and in a racing kayak the hips also rotate as the leg muscles are engaged to add their power.
My Struer’s molded wood seat has deep contours and is fairly comfortable by itself but it isn’t slippery enough for effortless hip rotation.
I’ve been doing my paddling with the Kayak Pad in cold weather, and the first thing I’ve noticed is the warmth of the pad. The wetsuit pants that I wear don’t slip on either the varnished wooden seat or on me, so I feel some of the hip rotation happening between my sitz bones, glutes and skin. The pad’s slick fabric lets the neoprene pants slip easily, so there’s no friction to put my knickers in a twist either literally or metaphorically.
Christopher Cunningham is the editor of Small Boats Monthly
The skiff’s concave run is as effective as trim tabs in keeping the bow down at speed.
James Boyce has been a professor of biology at Coastal Carolina Community College in Jacksonville, North Carolina, for the past 42 years, but he grew up fishing and has kept at it his whole life. From the very start, boatbuilding has been intertwined with fishing. He was raised in Gastonia, North Carolina, and when he was in the seventh grade his family moved to a 130-acre farm that had a 6-acre farm pond. He and his father built two plywood 10′ rowboats for fishing. “For the next five years, while going to high school, I would come home in the afternoon and either go hunting, plinking with my .22 rifle, or get out the bamboo fly rods and go fishing for a few hours on the pond. One of the great pleasures was to catch a 3/4-lb bluegill on a light bamboo fly rod. What a fight!” James later built a vinyl-skinned kayak from a Folbot kit.
Married and with a young family of his own, he built a flat-bottomed Carolina skiff, a boat he used for years but never cared much for: “I finally sold it to a fisherman who used it for about another 10 years, and then I lost track of it.” In the past decade James built an Arch Davis Penobscot 14, a Simmons Sea Skiff, a strip kayak, and, along with a friend, a 21′ stitch-and-glue rowing shell.
Bulkheads under the seats enclose storage compartments and serve as framing to reinforce the glued-lap plywood construction.
The Jericho Bay Lobster Skiff is his most recent build. The 15′6″ skiff was originally designed by Joel White and named for a bay within sight of the WoodenBoat offices in Brooklin, Maine. Renowned peapod builder Jimmy Steele built two of the first boats, carvel-planked, cedar on oak. Tom Hill adapted the design for strip-building and detailed the construction in WoodenBoat (September/October and November/ December 2009).
James’s lapstrake version of the skiff made it lighter and easier to maintain than the carvel originals.
James got Tom’s plans and set out to build his own version of the Jericho skiff in lapstrake plywood. The modifications he had to make to the hull shape were minor, and his skiff OSPREY is as true as possible to the original form as he could make it. That includes the slightly concave profile of the bottom aft of amidships. The unusual reverse curve there was drawn by White to serve the same purpose as trim-tabs do: bringing the bow down as the boat gets on a plane and holding it there while at speed. James used yellow pine for the keelson and red oak for the keel, knees, breasthook, seats, and console. He laminated ash for the stem and two layers of 3/4″ marine plywood with a 6mm layer of meranti plywood for the transom.
James made some slight modifications the the console, but kept the location as it was in the original, with the helmsman’s weight close to amidships for optimum trim.
James confesses that he’s not much of a painter, but he did well with the finishwork on OSPREY. He took extra time and care sanding between coats of paint and on the advice from the folks at Interlux, used their 333 Brushing Liquid to keep the surface damp as he applied fresh coats of paint. “It came out looking almost as good as a spray job. I was very pleased.”
OSPREY is powered with an Evinrude E-TEC 30-hp outboard equipped with remote steering and electric trim and tilt. With the throttle wide open, the Evinrude gets OSPREY up to around 30 mph by James’s estimation—keeping the boat simple, he chose not to install a knotmeter. He reports “the ‘hogged’ bottom does a good job in getting the boat up on plane rapidly from the start. At top speed, however, with just me aboard, the boat has tendency to porpoise, so I use about 90 percent power to cruise. With another person in the boat, seated in front of the steering station, there is no porpoising. With a lighter 20-hp motor, that would also cease to be an issue.”
In a hard turn at 25 mph, OSPREY, he reports, “holds the water well and doesn’t side-slip.” The skiff takes on chop with aplomb. Being caught out on open water by a 20-mph northerly would have made for a wet ride in his other boats, but not in a Jericho skiff. “North Carolina rivers,” James notes, “are famous for getting into a hard chop quickly with this much wind.” OSPREY took on several miles of chop very well and stayed virtually dry even when taking a course at an angle to the wind.
A bit of inlay in the breasthook dresses up an otherwise utilitarian skiff.
Whenever James takes OSPREY out, it draws a once-over from almost every other boater who sees it and many ask where he got the boat. James gets the pleasure of replying: “I built it myself.”
Have you recently launched a boat? Please email us. We’d like to hear about it and share your story with other Small Boats Monthly readers.
I met Dick Wagner in 1976. I was fresh out of college, living in Seattle, and boatless; Dick and his wife Colleen ran a boat livery out of their home on Lake Union. Their home is indeed on Lake Union: It’s a white clapboard-sided houseboat afloat on a raft of western red cedar logs. In their watery “back yard” they kept a half dozen or so rowing skiffs, mostly lapstrake White Bear skiffs. I rented one of the skiffs for an hour and took Mary Ann, my girlfriend then, out for a tour of the lake. When we returned, Dick was ready to help us in. I wanted to impress Mary Ann with my rowing skills and started sculling the boat sideways toward the dock where Dick was waiting. I knew how sculling was supposed to work, and had tried it on occasion, but I wasn’t very good at it. I wagged the starboard oar back and forth but that didn’t slide the skiff to port. I’d had my chance, blown it, but kept wagging. Dick rolled his eyes and said: “Hand me an oar.” I extended the port oar to him and he pulled us in. I came away from my first meeting with Dick with some important lessons: pride goeth before a fall; a waterman is businesslike, not frivolous; and if you’re going to show off, you have to be really good.
The center’s main building is anchored on Lake Union surrounded by a fleet of wooden boats. The site for the new education center is marked by a green fence to the right of the boatshop roof in the background.
In the years that followed I practiced my sculling; the Wagners went on to much greater things and created the Center for Wooden Boats at the south end of Lake Union. Since its founding in 1977, the CWB has grown to become a priceless Seattle institution, keeping the history of wooden boats alive and introducing countless people to boating. Last Tuesday, Dick and Colleen broke ground to begin the construction of the Wagner Education Center. It will house a shop much larger than the Center’s current floating boatshop and provide space that can that can be adapted for use as a sail loft, classrooms, and exhibition galleries. If construction goes according to plan, the building will be finished and open this October. It will assure the continuing and growing interest in wooden boats for generations to come.
Dick and Colleen prepare to break ground for the new building that will carry their names.
The education center will be a well-deserved tribute to the Wagners. Over the nearly four decades that have passed since I first met Dick, the Center for Wooden Boats has become an important part of my life. It lies literally in the shadow of the Space Needle, a Seattle landmark that I’ve visited only three times since it opened in 1962 along with the World’s Fair. In contrast, I visit the CWB dozens of times a year and I’ve never grown tired of it.
To celebrate the ground-breaking ceremony, the CWB shop relaunched one of the Center’s eight Blanchard Junior Knockabouts. Lead Boatright Bradley Suedekum (at left in the yellow PFD) directs the action. The new building will have room for a shop twice the size of this one.
The Wagners still live in their houseboat on the north end of the lake and I pass by it every time I’m paddling or rowing to the Center, ever grateful for my friendship with Dick and for what he and Colleen have done for the wooden boat community.
Dick Wagner, now in his mid 80s, remains active at the the center he founded 39 years ago.
We’re pleased to have you aboard Small Boats Monthly as we greet the New Year. This issue is number 17 and we’ve been pleased with the response to this recent addition to the line of WoodenBoat publications. Many of you have been surprised to learn that SBM is bicoastal. The crew at the WoodenBoat offices in Brooklin, Maine, is, of course, the driving force behind SBM; I live and work in Seattle, Washington.
While I was born on the West Coast, my connection with wooden boats has East Coast origins. My grandparents on my father’s side lived in Lowell, Massachusetts, and I spent many summers there and at Marblehead. Some of my earliest memories are of sailing outside of Marblehead Harbor aboard MOLLY MAY, my grandfather’s wooden cutter. Hanging above the mantle at the Lowell house was a painting of NEWSBOY, a brigantine built in 1854 at Owls Head, Maine, for my second great grandfather, Frederic Cunningham and my second great granduncle, Charles Dabney, Jr. Several wooden half-hulls of boats in the family also graced the living-room walls.
The home I was raised in is in Edmonds, Washington, and walking distance to the shores of Puget Sound. My father always had wooden boats and would often say about them: “Every aspect pleases.” He kept a 27′ Tumlaren sloop at the Edmonds marina, and the rest of his fleet—a Herreshoff Amphi-Craft, a skin-on-frame rowing wherry, a wood-framed Folbot, and several Pocock racing shells—was scattered around the yard, hung from rafters in the garage, and stuffed in the crawlspace under the house. I grew up earnestly believing that wooden boats were not only necessities in life but also good for the soul.
In this new column, “From the Editor,” I’ll be making notes about changes to SBM, new developments in the topics we’ve covered, events we’ll be attending, and other items that we hope to be of interest to you. If you’re reading Small Boats Monthly, you likely share an affection for wooden boats and we hope you’ll find food for the soul here.
Sam Devlin’s Cackler wears camo well, but if hunting’s not your thing, it can easily take on a different look and different duties: Its 14′4″ garvey hull and unobstructed cockpit are eminently adaptable. Sam recalls: “I did the original work on the Cackler design years ago—about 1984—and did the design as a combination shop skiff and hunting skiff. The evolution was directly from my other duck-boat designs, with higher freeboard but retaining the decking that gives the reserve buoyancy and seaworthiness. A garvey-type hull allowed easy walking off the front of the boat when beaching, and effectively gives a larger volume to the interior without additional and unusable length. With the first one built I knew, in my humble opinion, that I had a winner.”
The Cackler I spent some time with was built at Devlin Designing Boat Builders for one of Sam’s regular customers, John Heater, a 95-year-old Bainbridge Island, Washington, man who has owned four other Devlin boats ranging from a 9′6″ skiff to a 31′ cabin cruiser. “In his more than 25 years of owning Devlin boats, John’s boating needs have changed over the years,” writes Sam, “and with this latest build he really wanted a small and fast boat that would be seaworthy enough to keep him aboard in all kinds of weather and conditions and would allow him to explore the Puget Sound waters around his island home safely.” Meant to be seen and enjoyed rather than concealed in the marsh, John’s boat looks good in gleaming dress whites.
photographs and video by the author
At rest, the Cackler offers a stable platform for fishing or hauling pots.
The Cackler, named after a species of goose with a distinctive call, has a simple garvey hull—two bottom panels, two side panels, and two transoms. Parts are CNC-cut from 1/2″ and 3/4″ BS1088 marine plywood, joined into full-length panels with interlocking puzzle joints, and assembled in the stitch-and-glue manner that Sam developed for all of the boats he has designed. The hull has a shallow-V bottom from bow transom all the way aft, and a pair of 1 1/2″ x 1 1/2″ bilge keels stiffen and protect it. A pair of wedges added at its trailing edge help keep the bow down when running at full speed.
There are three options for mounting the outboard motor: directly on the transom (the option offering the best speed), on the bulkhead at the forward end of the aft deck, or on a mount installed halfway in between. If there’s any fussing to do with the outboard, having it mounted in one of the forward positions provides a place to work on it without hanging out over the stern; according to Sam, this position also offers a profile less apt to make waterfowl nervous—especially late in the hunting season. The boat shown here was built to have the motor mounted in the middle. The arrangement provides a compartment between the mount and the bulkhead for a battery to power the electric starter.
Two 6-gallon tanks each have their place under the aft decks. The scuppers at the aft end of the cockpit sole drain water into a splashwell.
Under the decks in the aft corners are two compartments designed to take a pair of 6-gallon fuel tanks. Aft of those compartments are enclosed buoyancy chambers accessible through watertight deck plates mounted on the vertical bulkhead at their forward ends; inside each flotation chamber are two or more Type II personal flotation devices (PFDs). They’re strapped up against the deck, keeping them from sitting in any water that might find its way into the compartment. The PFDs provide readily available and inexpensive closed-cell foam to meet a Coast Guard requirement for positive flotation. Sam had tried other types of foam in the compartments—two-part pour-in foam and blocks of solid foam—but neither would survive an accidental exposure to gasoline. There’s a third buoyancy chamber under the foredeck that contains another four PFDs. A storage area aft of that chamber occupies the remaining space under the deck.
The plans call for six 2″ x 3″ hardwood bollards set around the cockpit coaming, a versatile arrangement for a workboat, but John’s Cackler has a full complement of stainless-steel deck hardware, including a single stout bitt bolted through the foredeck and into a broad carlin and a wooden backing plate.
The folding chair is the owner’s concession to comfortable seating. When not in use, it tucks under the foredeck, out of the way.
The 8′-long cockpit sole is unobstructed. Limber holes forward and aft keep the water from accumulating and let it flow aft to a splashwell just forward of the motor mount. The water can be pumped out while the boat is afloat or drained when it is hauled out and the transom stopper pulled. The coaming is a couple of inches wide and can serve as a perch for the helmsman, though John, understandably, likes the comfort of a padded folding chair. In 2015 he asked Sam to rig his Cackler for wheel steering. “He loves the change;” Sam writes, “he doesn’t have to sit sideways to run a tiller and he can more easily keep his eyes on the waters ahead.”
John’s Cackler has a bright white Awlgrip finish that’s so smooth and glossy it would be easy to think the boat was built of fiberglass and gelcoat, popped out of a production mold, and buffed to a high shine. Along with the sparkling hardware, it’s a far cry from the olive-drab and camouflage paint jobs the hunting versions get.
The Cackler banks into turns, keeping its place underneath the crew.
A 25-hp, four-stroke Yamaha provides the power for John’s boat; the Cackler will take up to 35 hp. The recess in the stern limits the turning range for the motor, but probably only a hair more than the 35-degree swing to either side that’s built into the motor. I wouldn’t expect better maneuverability: At low speeds with the tiller hard over, the Cackler did 360s within a boat-length radius. With a quick twist of the throttle to full power, the boat gets up on plane in 3.5 seconds. Push-button trim on the outboard adjusts the attitude of the boat for optimum speed. With just me aboard, I peaked at 22.2 knots. In turns, the boat banks without surprises, and I never felt that the hull was moving out from under me. The wide bottom offers a feeling of stability at speed and at rest.
When I cut the throttle suddenly and coasted to a stop, the wake would catch up and nudge the stern, but none of the slop washed aboard. I found backing a bit tricky. The shallow-V underbody doesn’t offer much resistance to lateral movement and once the bow gains some sideways momentum, it keeps drifting. Putting the tiller hard over to counter that only makes the boat sideslip. With more weight forward, the bow would have more water to reduce the lateral drift, and with more practice I’d learn to steer with a bit more finesse, avoiding the oversteering that’s likely the source of the problem.
Designer Sam Devlin puts the Cackler up on plane on Eld Inlet, his home waters at the south end of Washington’s Puget Sound.
You can order a Cackler with a host of options for hunting: a camo cockpit and engine cover, layout boards to give a hunter a comfortable seating position with a low profile, brackets for a cockpit blind, and a grassing skirt system to conceal the hull behind a fringe made of baling twine. If you opt to build a Cackler from a kit, you’ll get plans, instructions, and a 4′ x 8′ pallet with all of the plywood parts for the boat and for a building frame. Everything is accurately cut with a CNC machine, assuring that the boat goes together in proper alignment. Fiberglass, epoxy, and dimensional lumber can be purchased separately from Devlin Designing Boat Builders or from local sources.
If you’d like a larger version of the design, Cackler has big-sister designs: the 16′ Snow Goose and the 18′ Honker. You can ease into building a Cackler by reading Sam’s book, Devlin’s Boat Building: How to Build Any Boat the Stitch-and-Glue Way, and by ordering a 1/4-scale model kit. It has all of the same plywood parts as the real thing.
If you won’t be going hunting with a cockpit crowded with hunters, dogs, and decoys, you can use a Cackler for lake fishing, salvaging driftwood logs, or even taking the kids water-skiing. You’ll have little trouble adding to the list.
Christopher Cunningham is the editor of Small Boats Monthly.
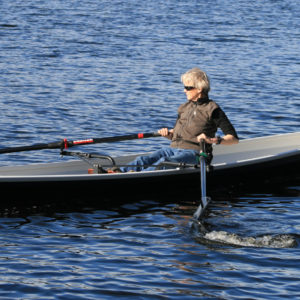
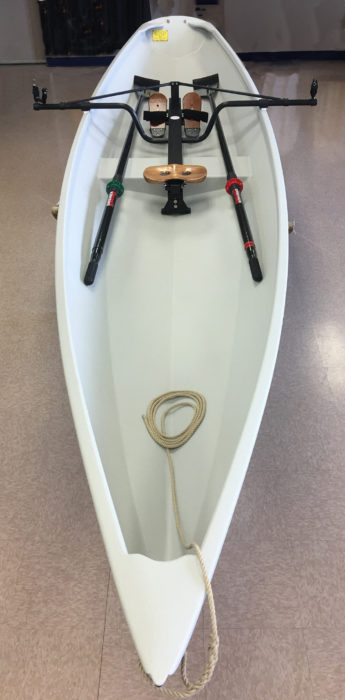 Dale McKinnon
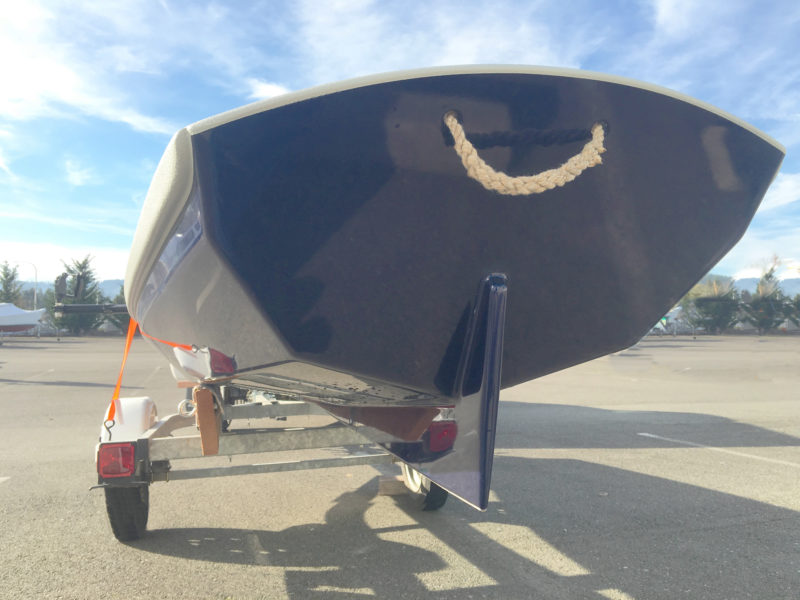 Dale McKinnon
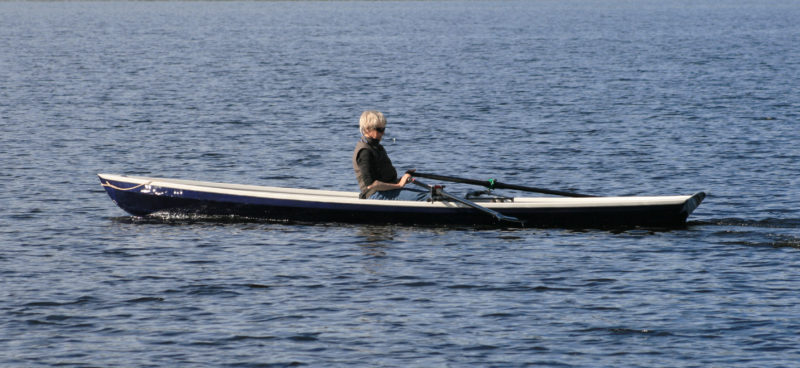 Sam Devlin
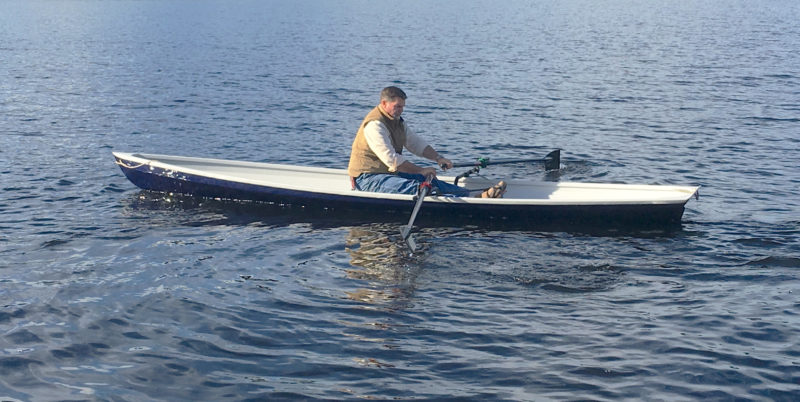 Dale McKinnon
 Dale McKinnon
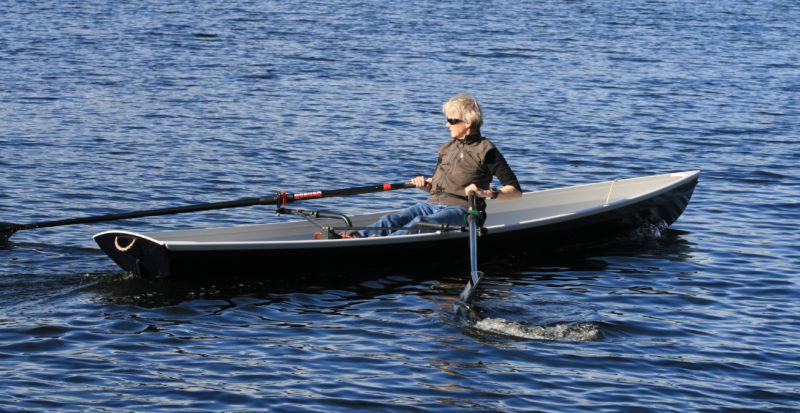 Sam Devlin
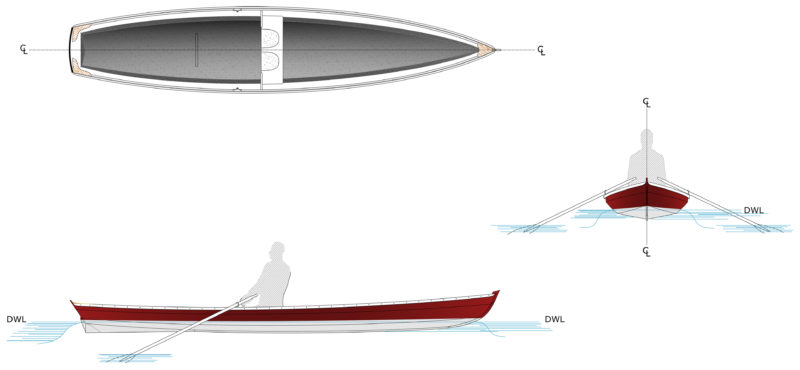
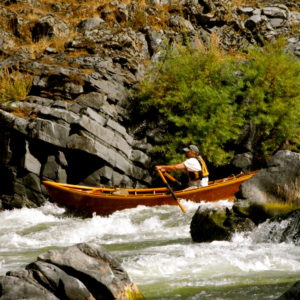
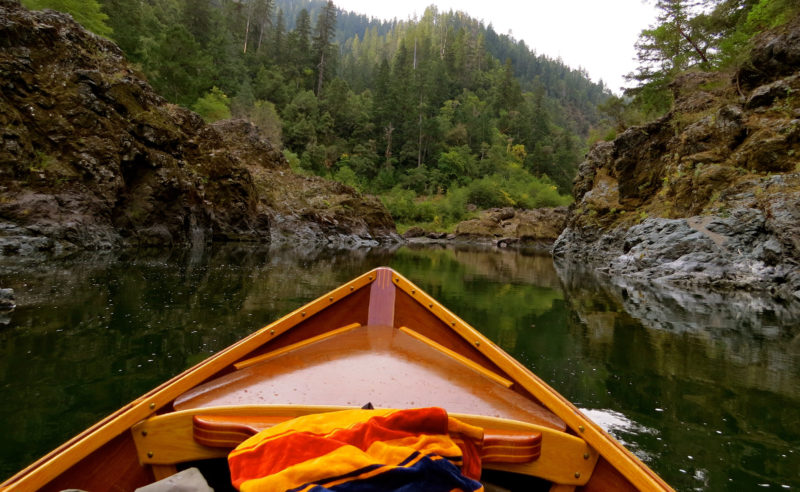
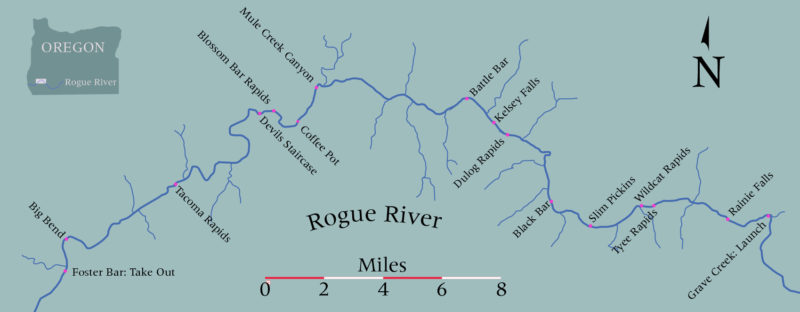
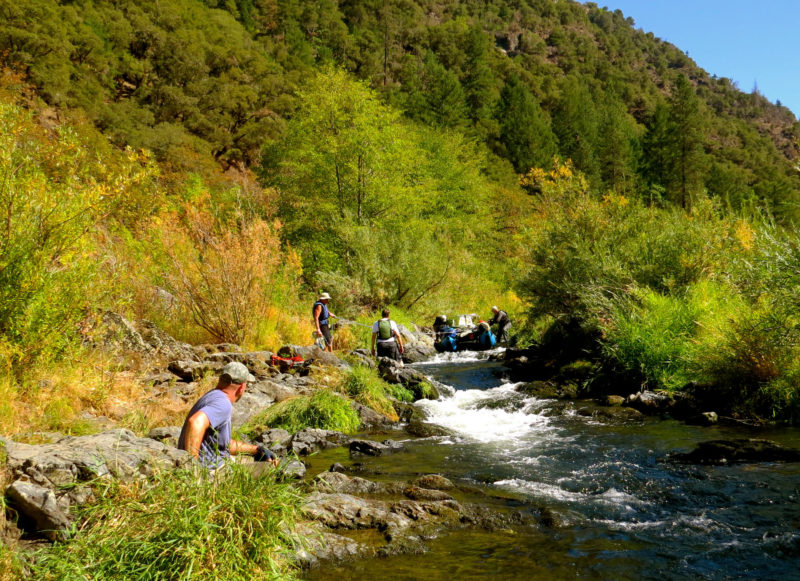
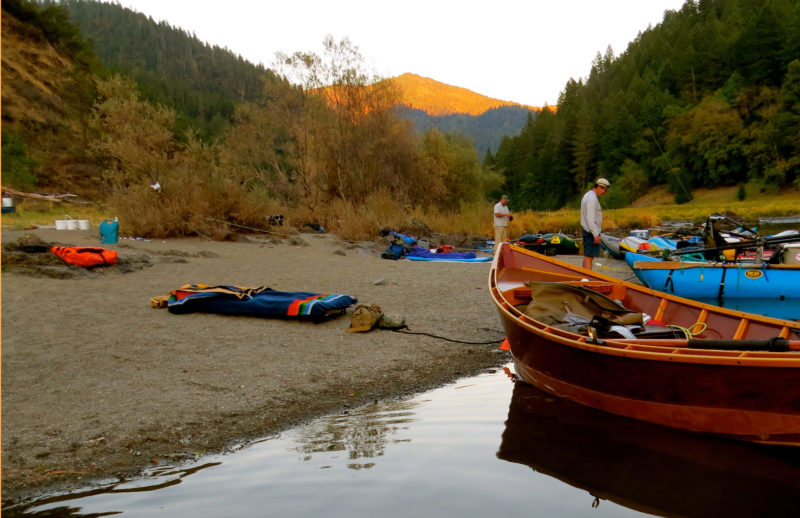

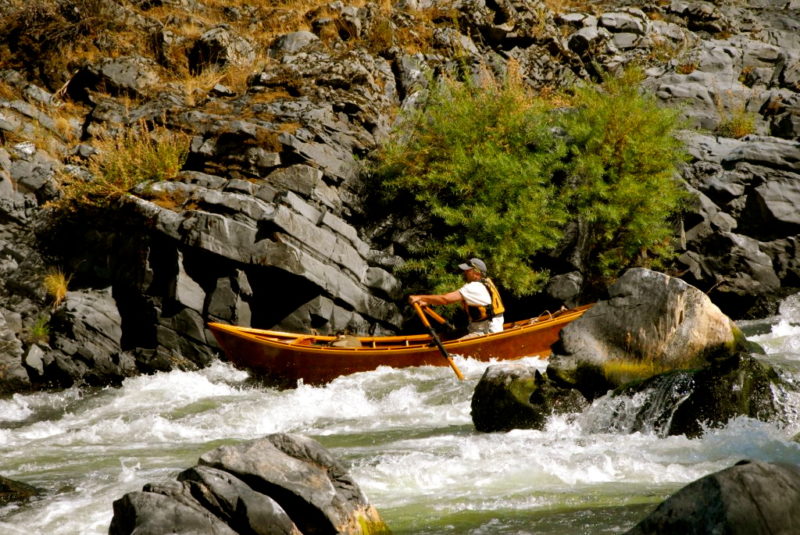
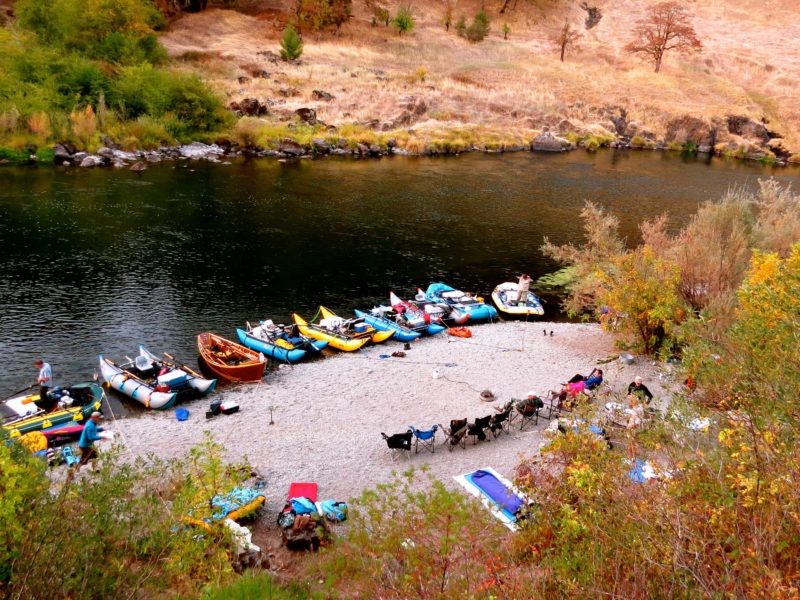

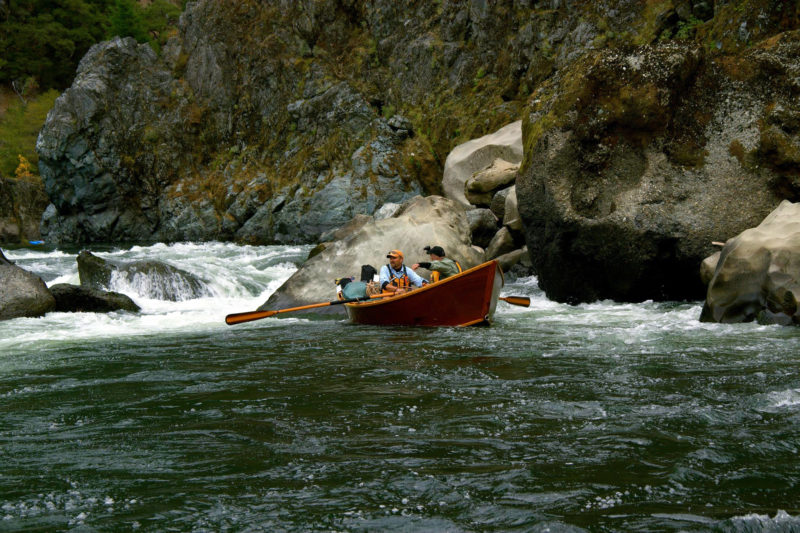
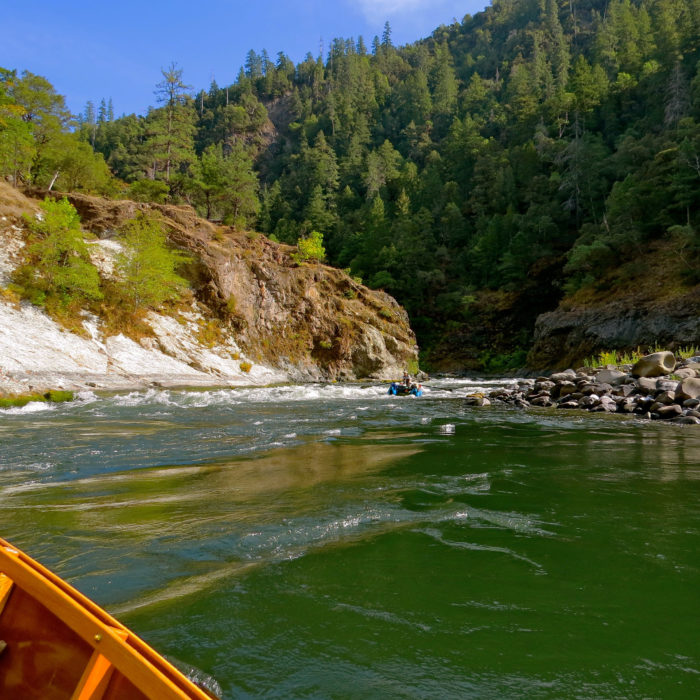
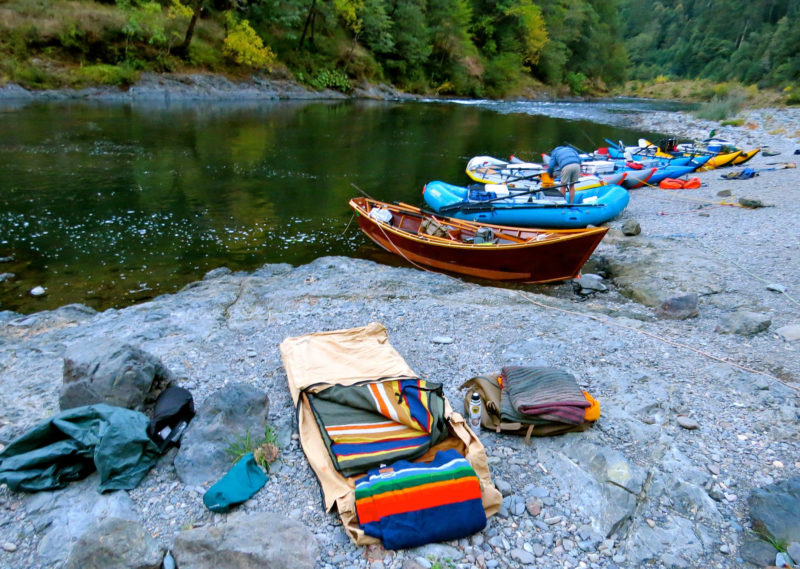
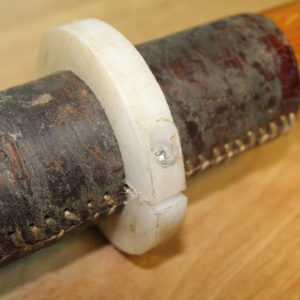
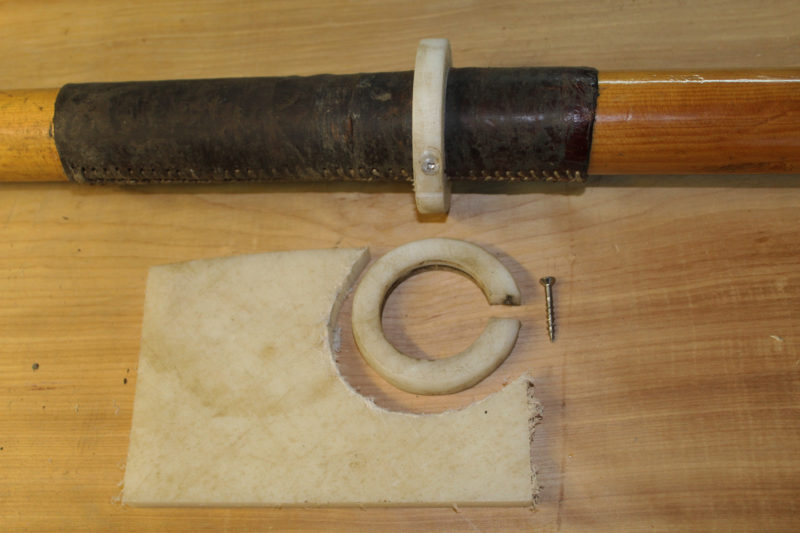
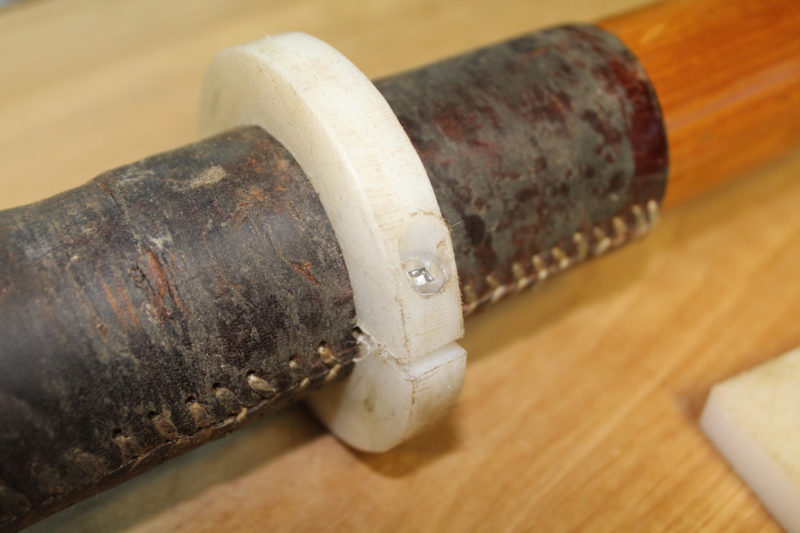
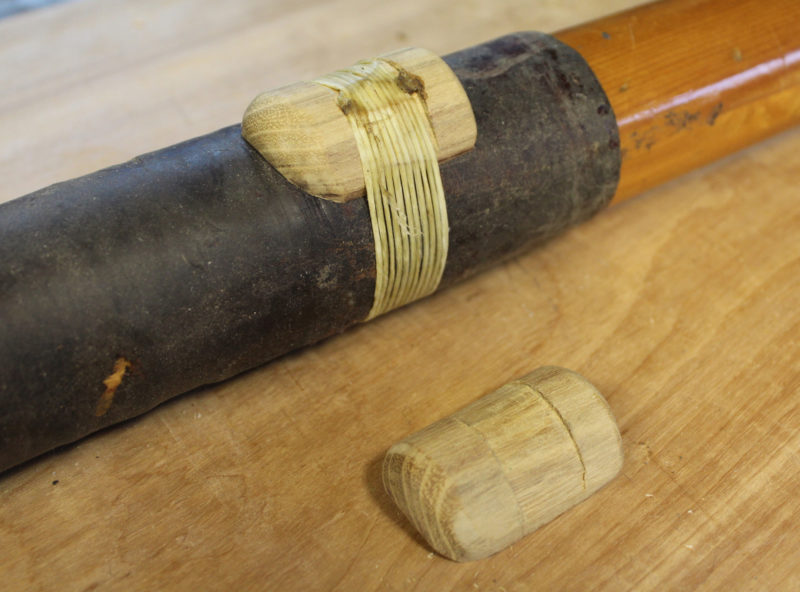

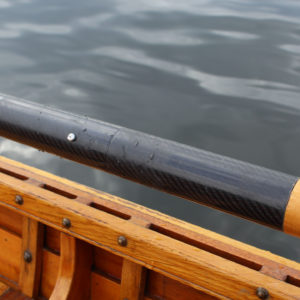
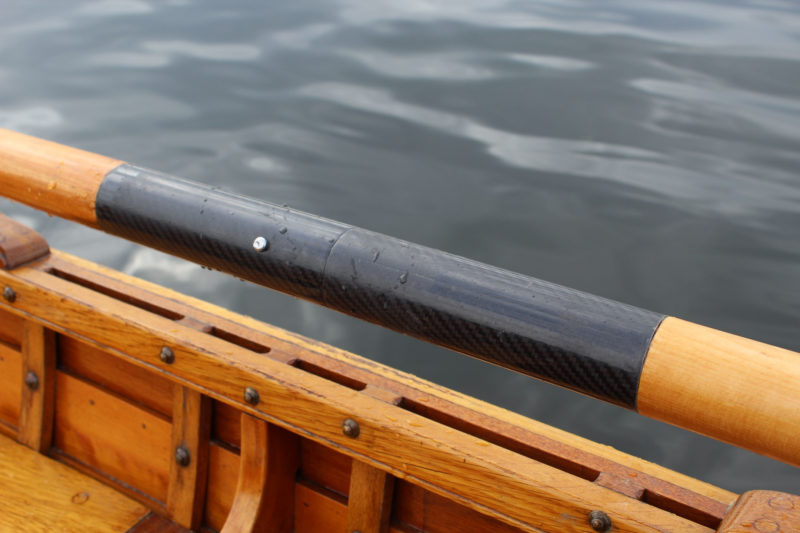
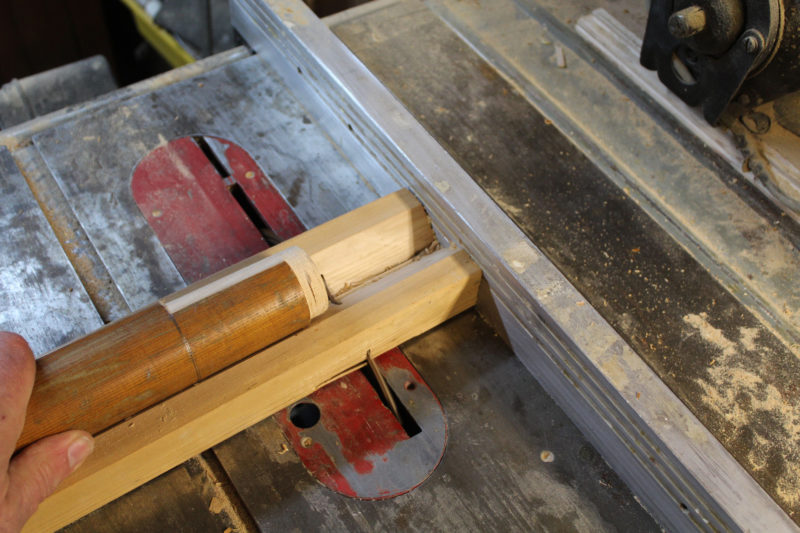
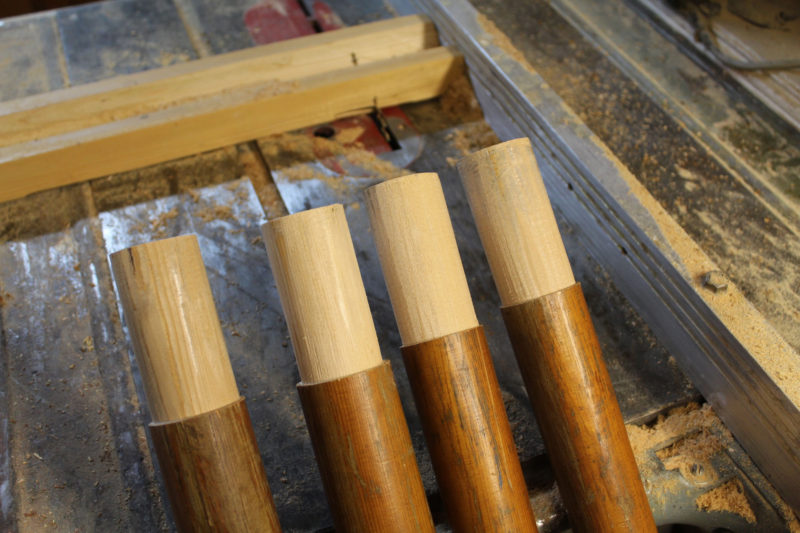
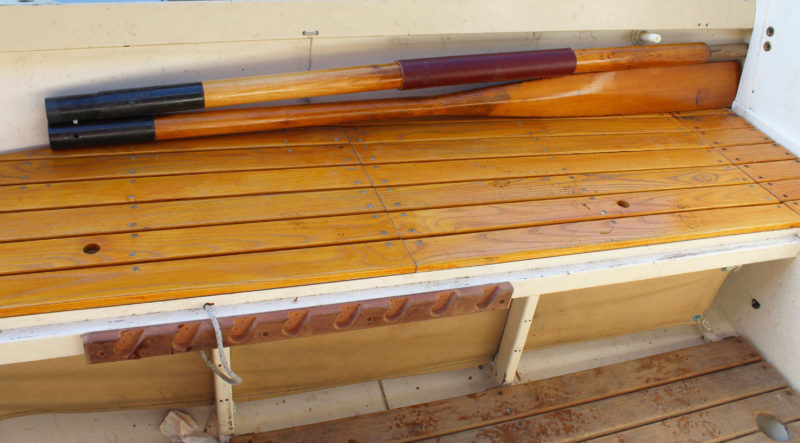
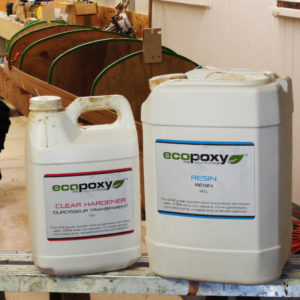
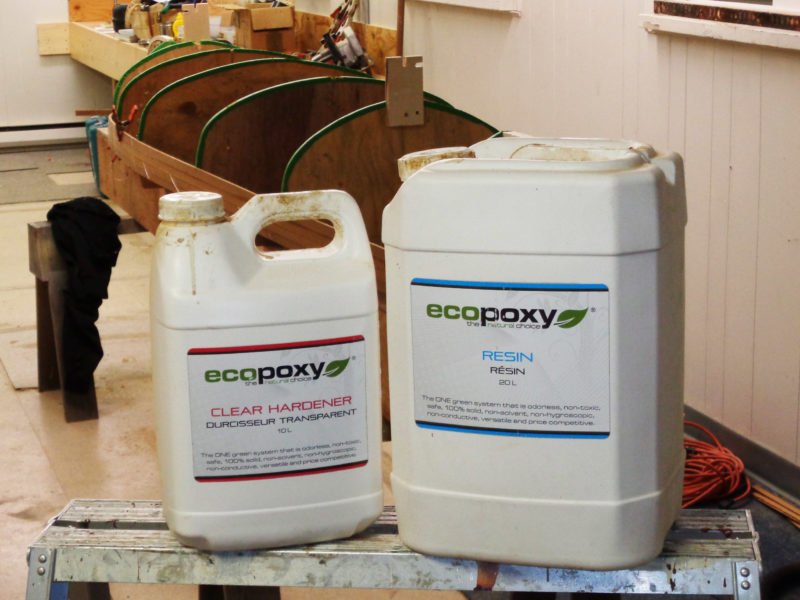
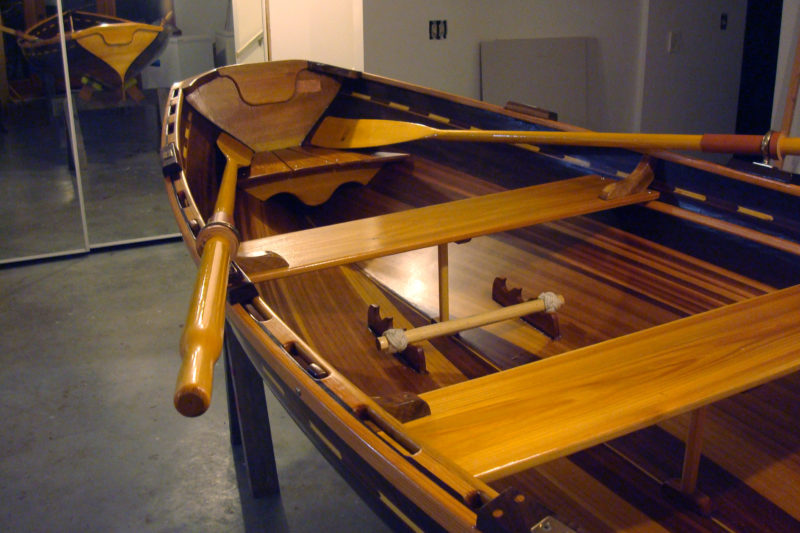
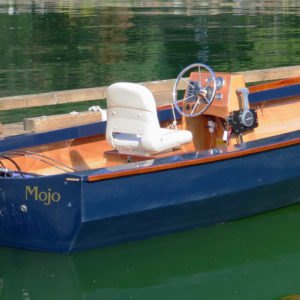
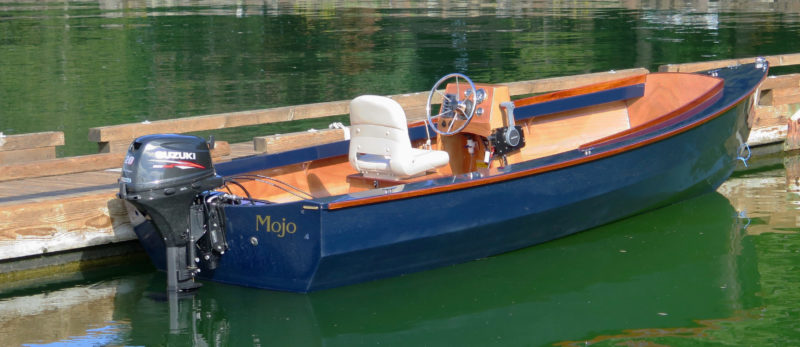
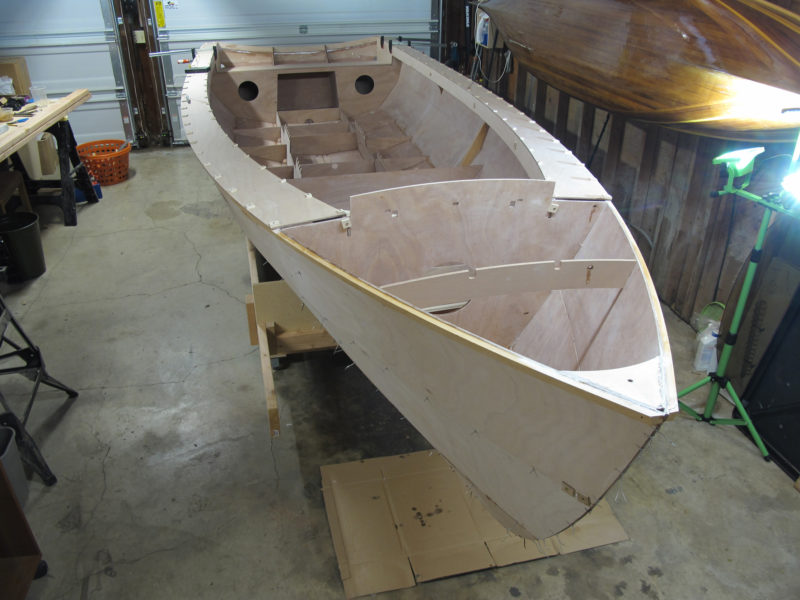
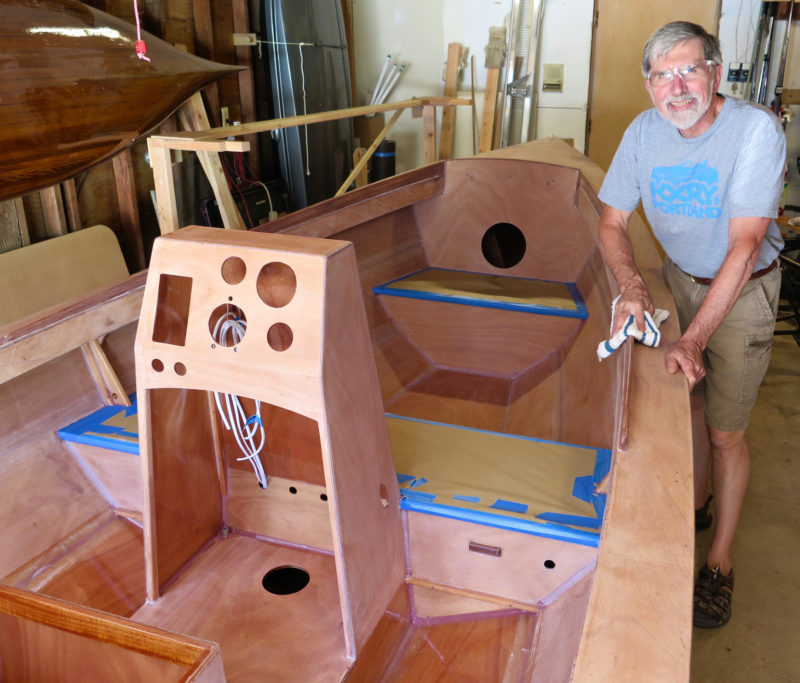
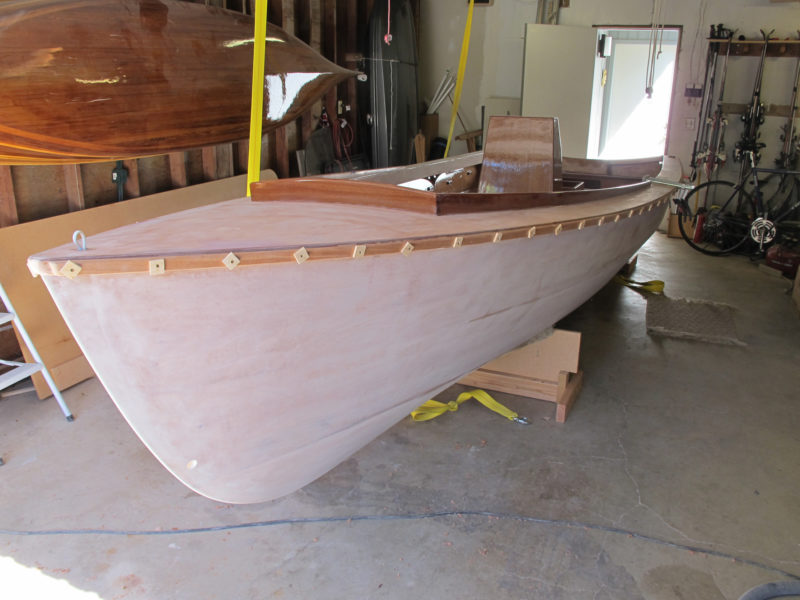
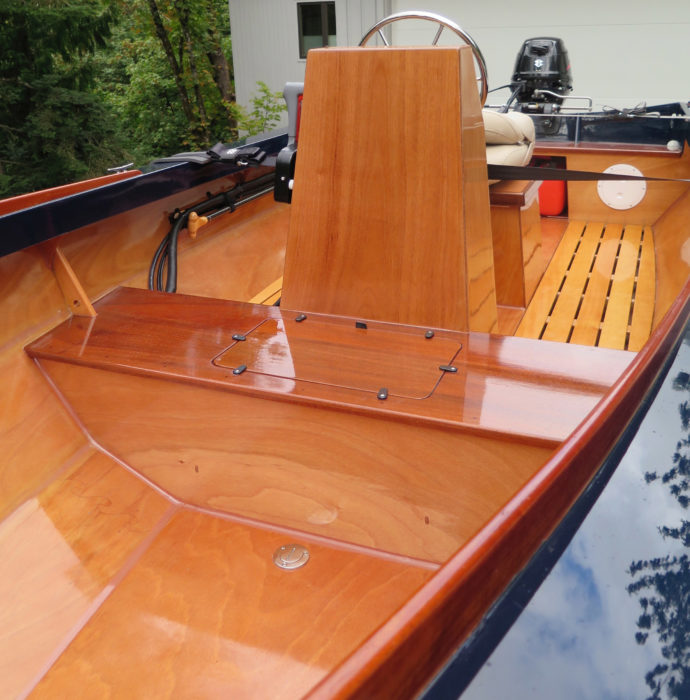
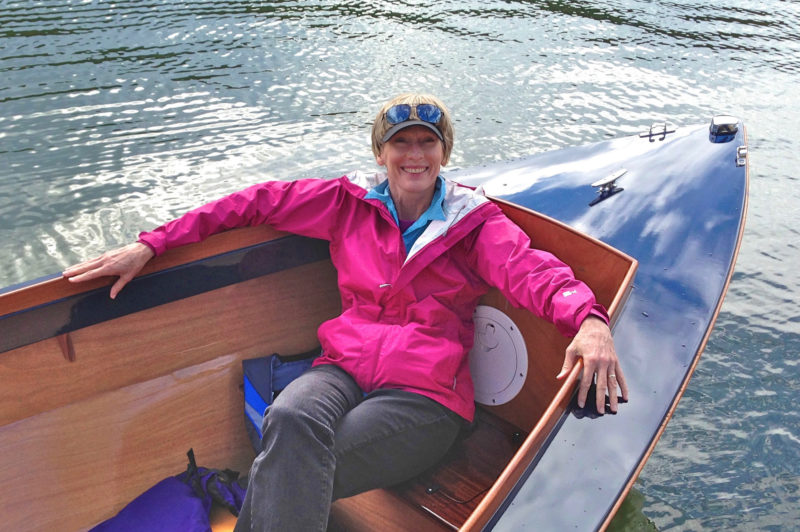
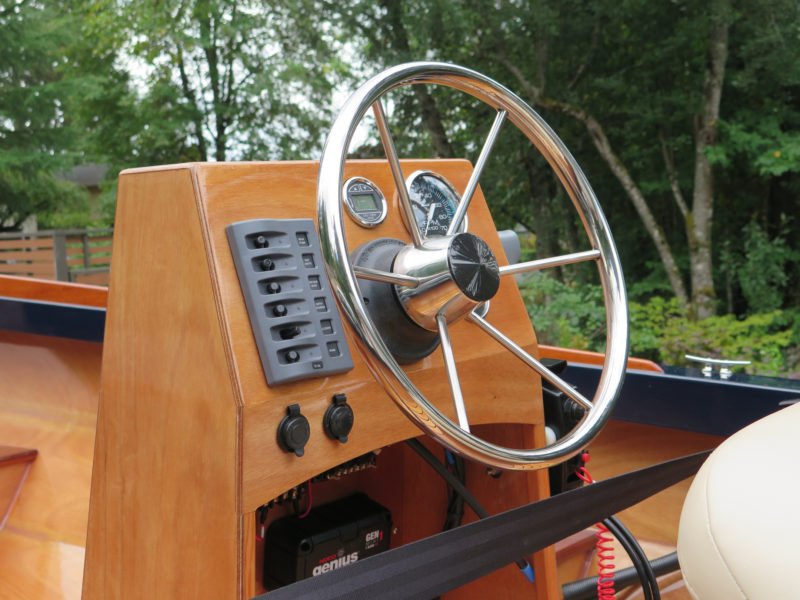
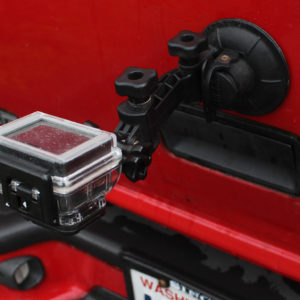
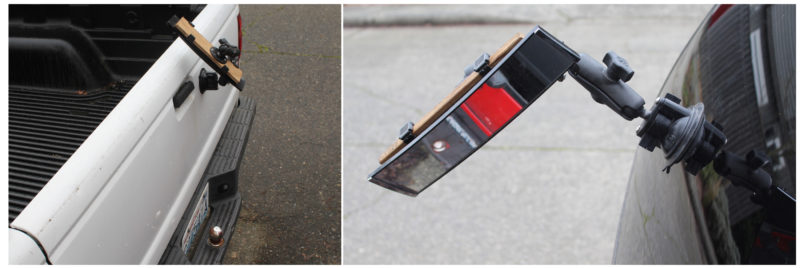
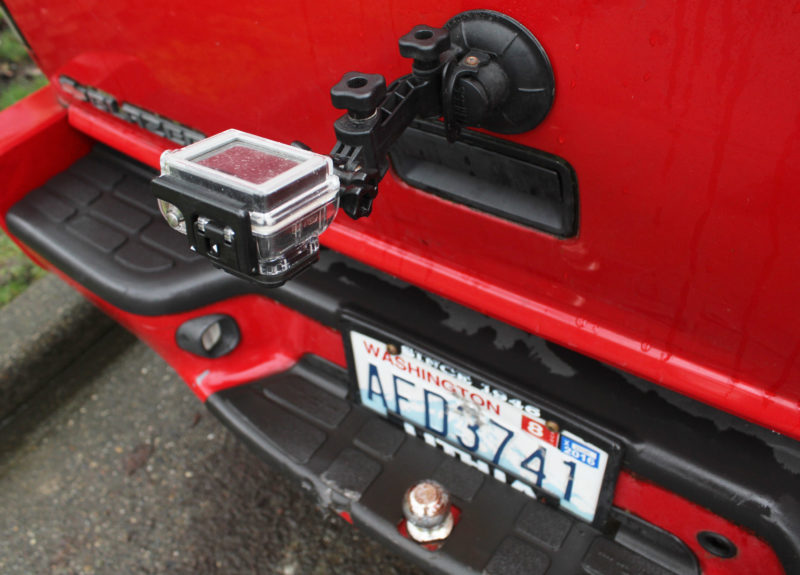
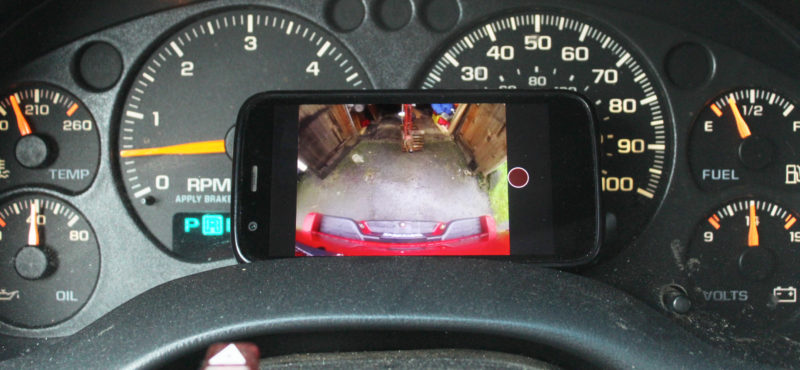
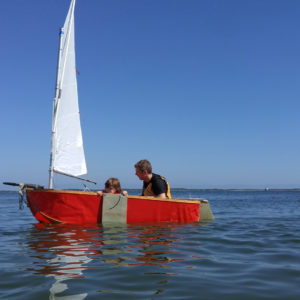
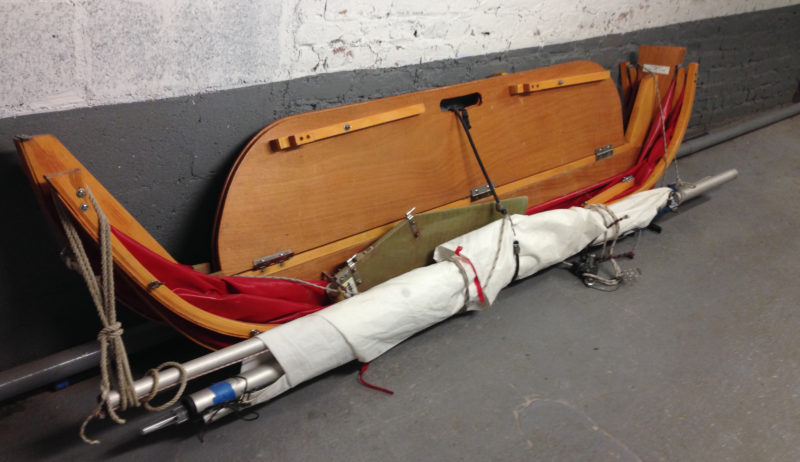
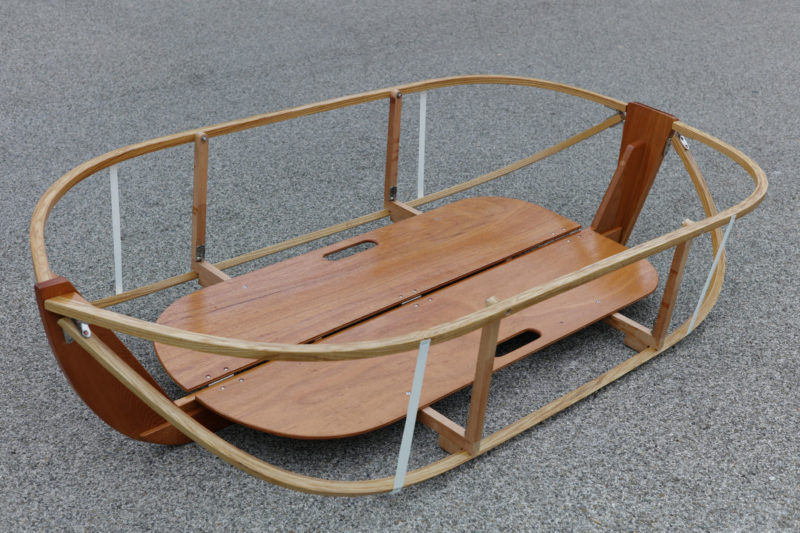
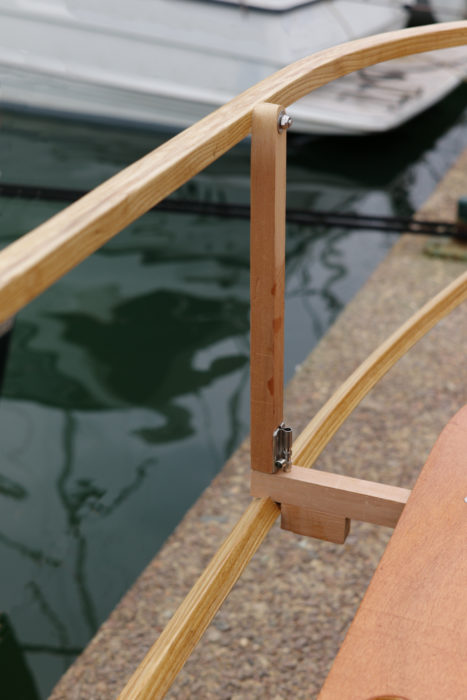
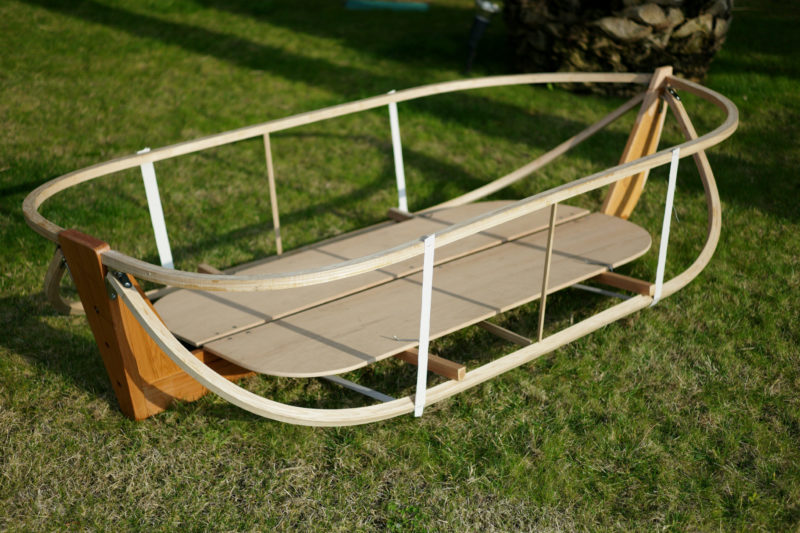
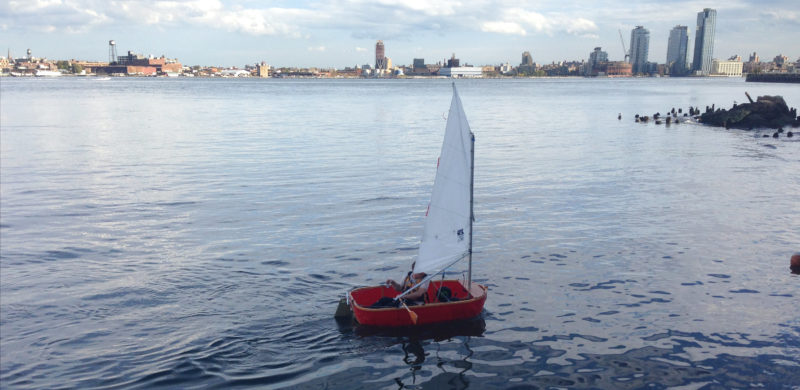
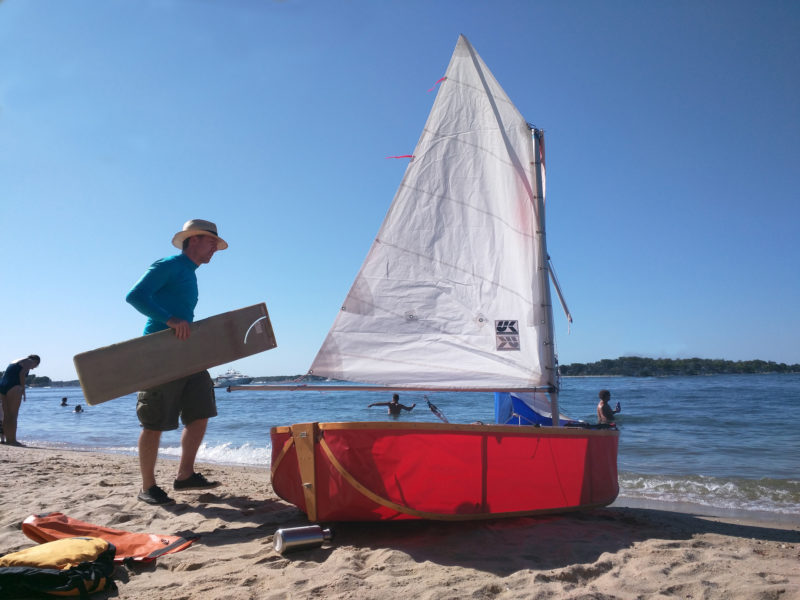
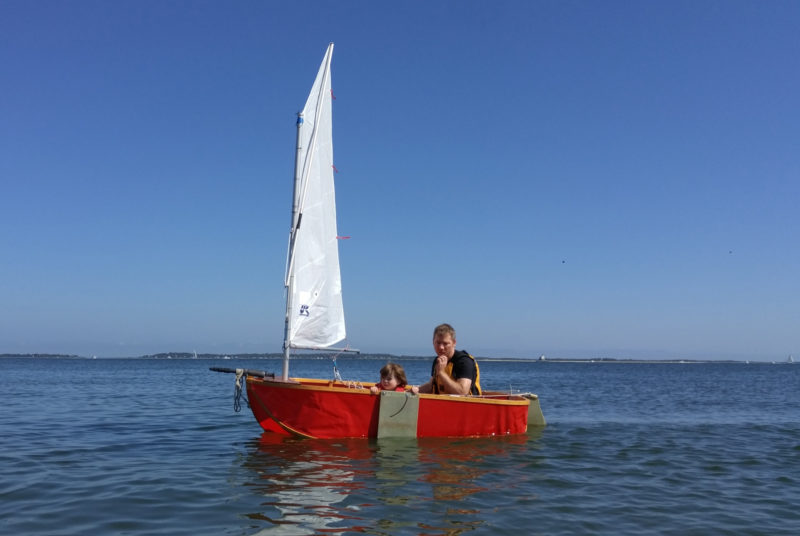
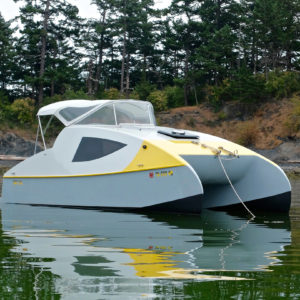
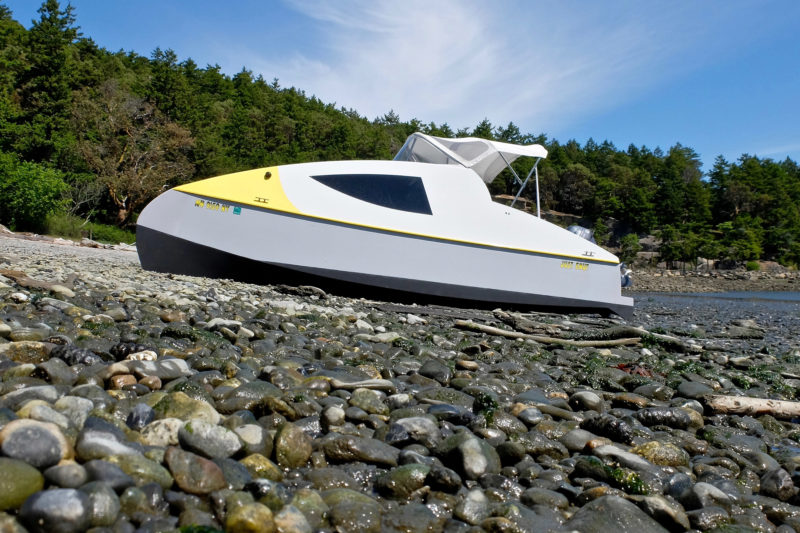

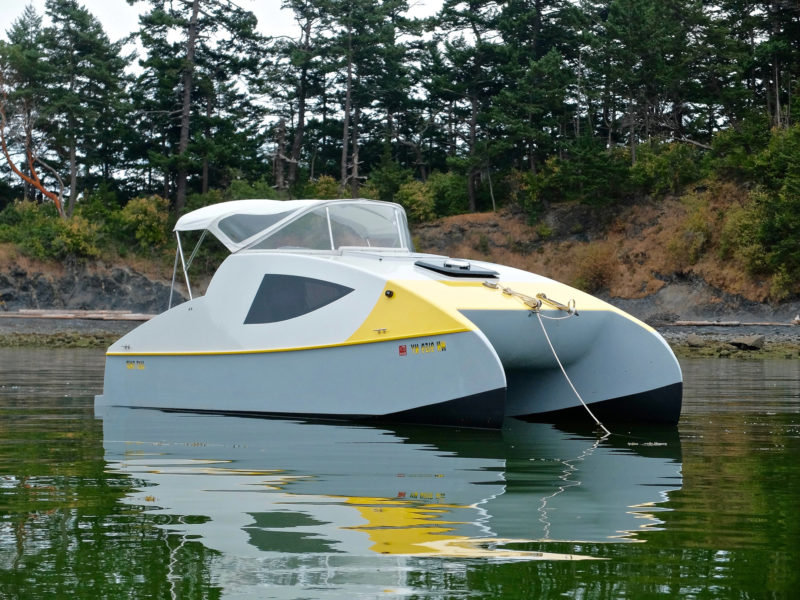
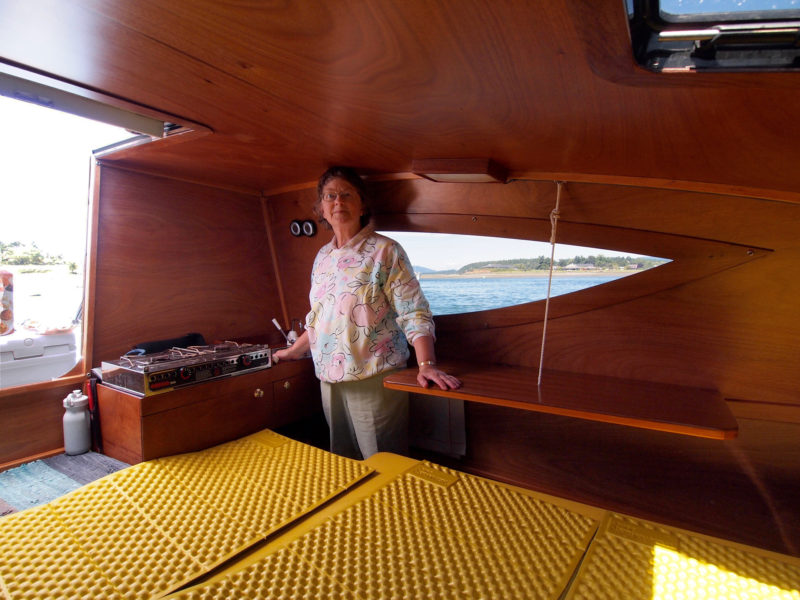
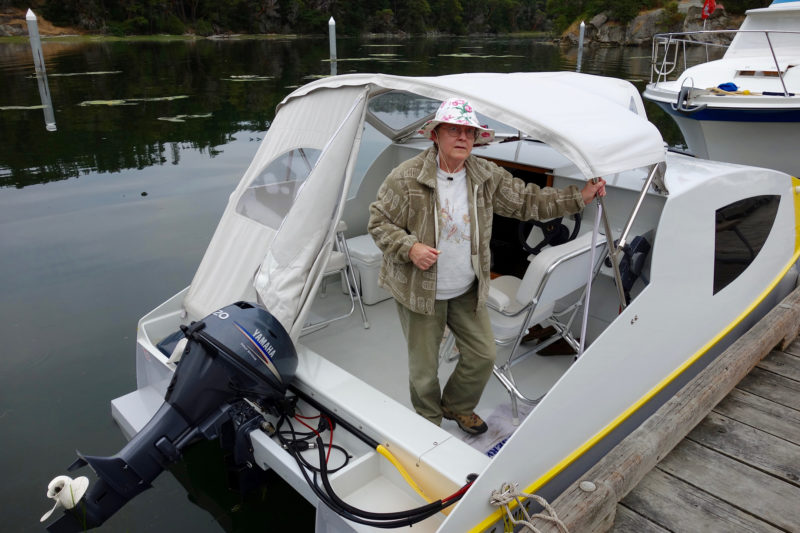
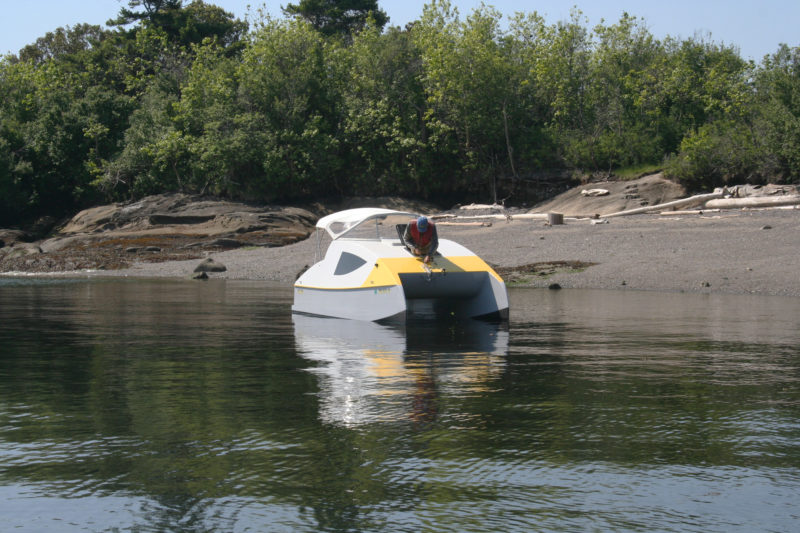
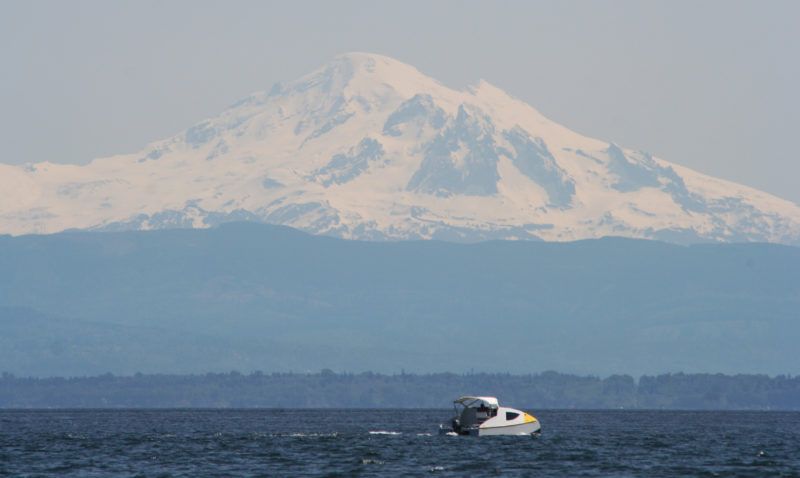

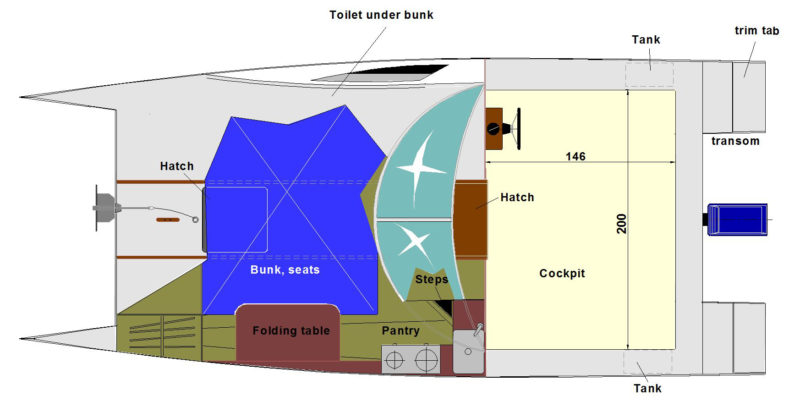
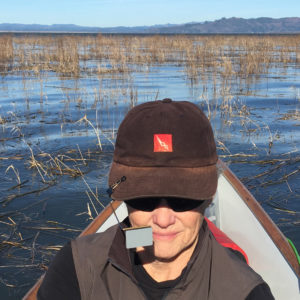
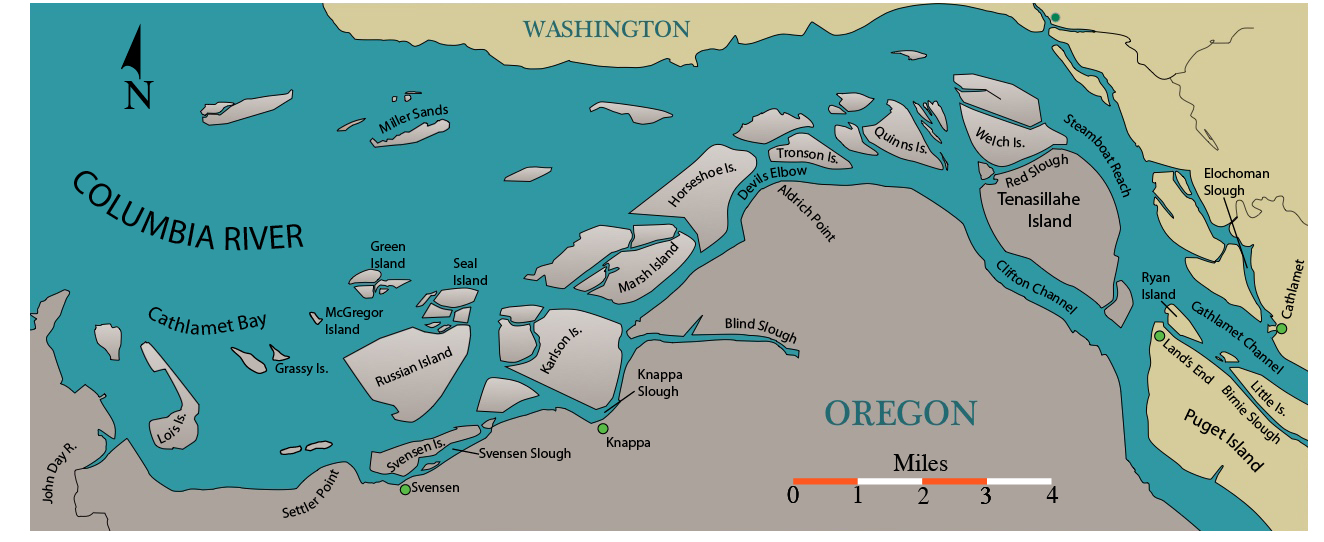

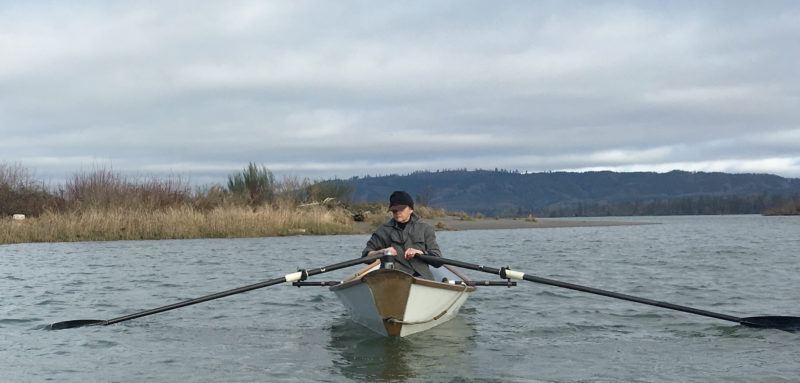

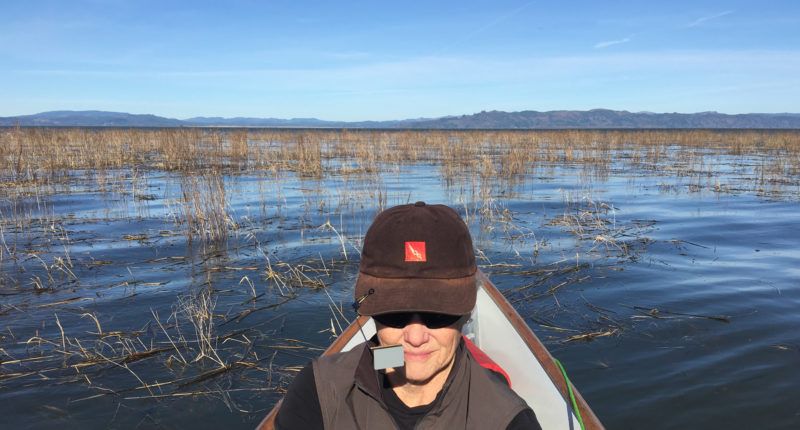
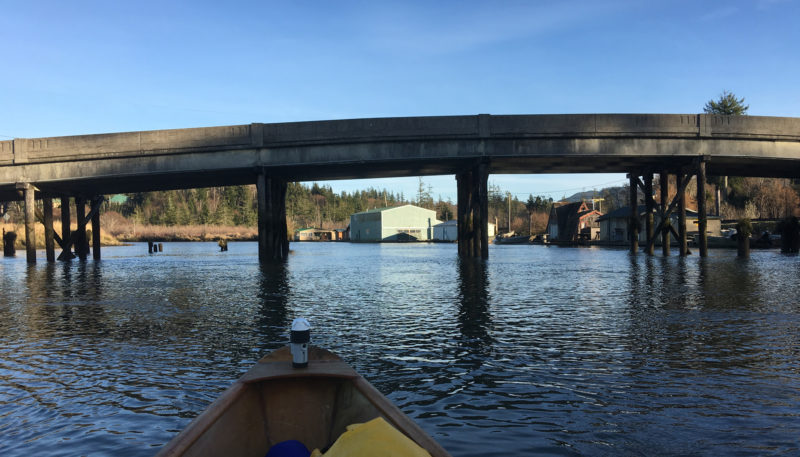
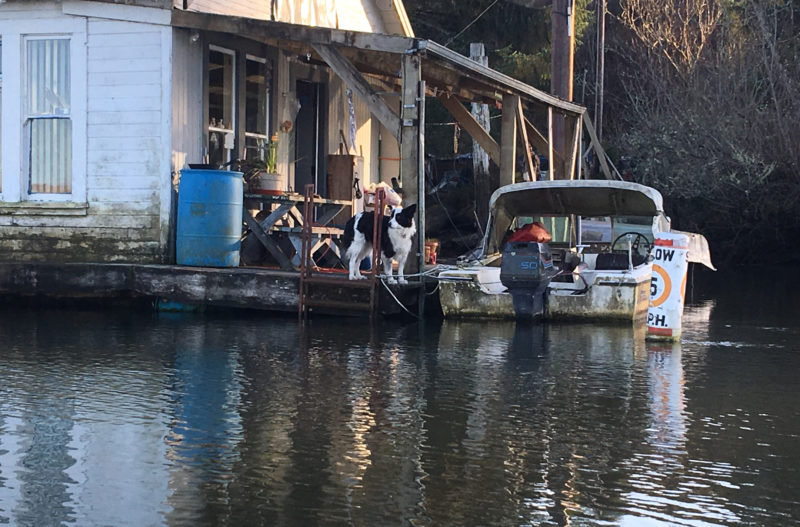
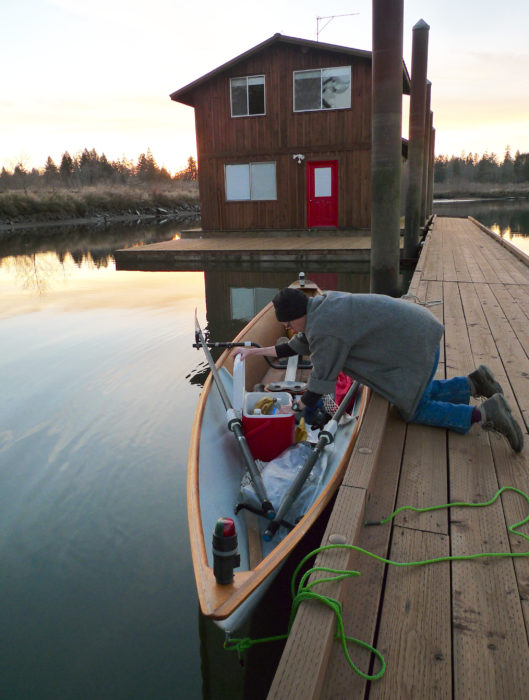
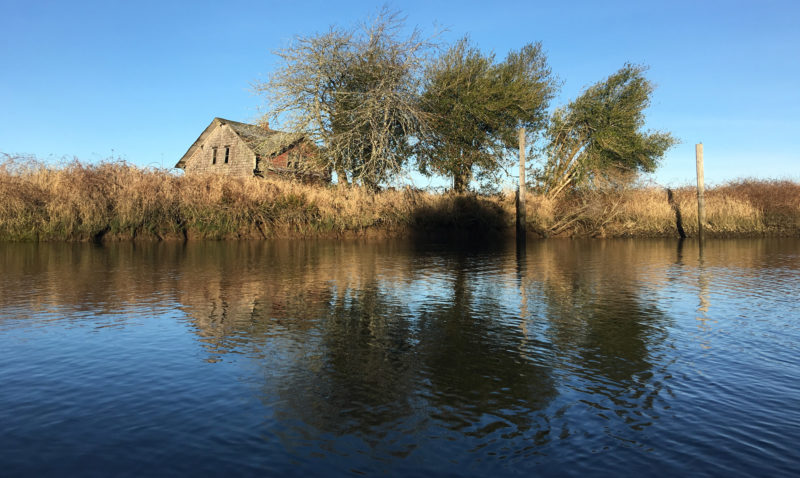
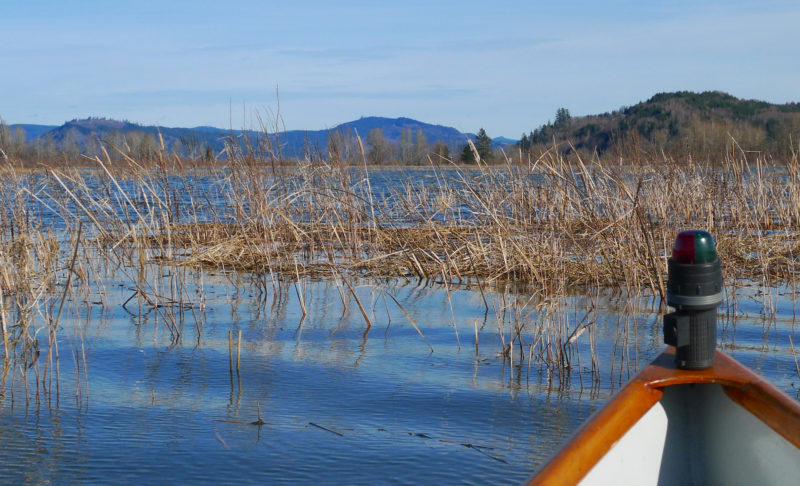
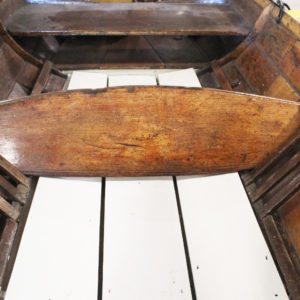
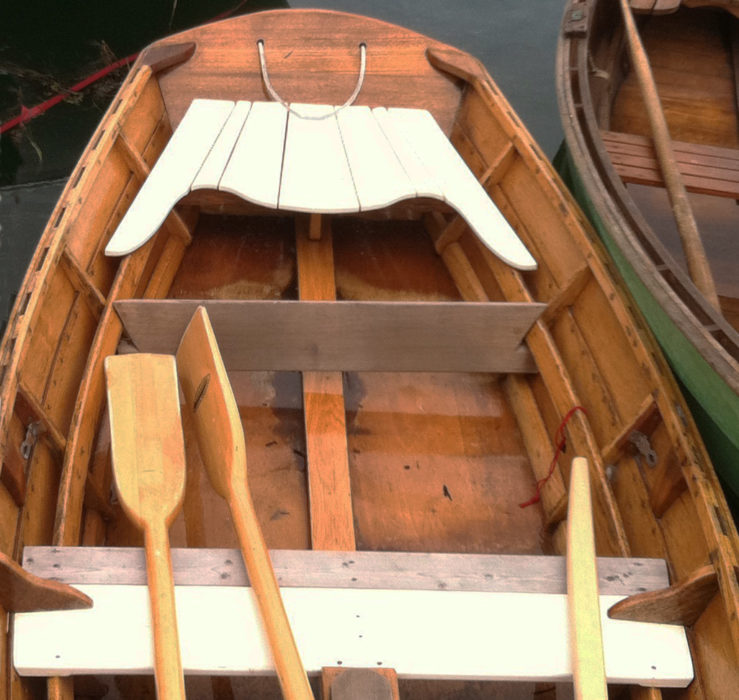
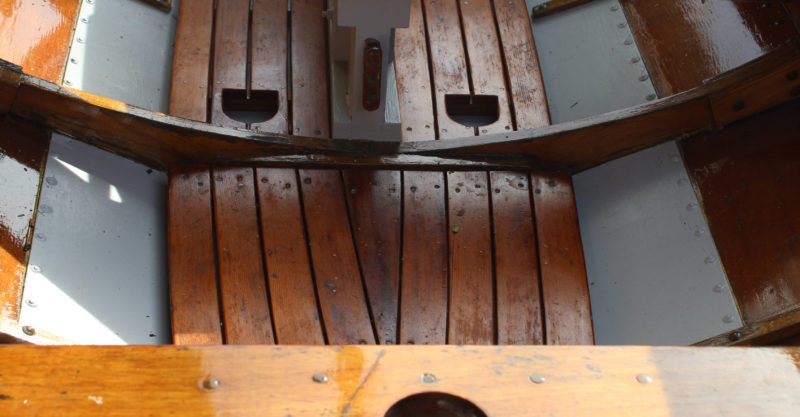
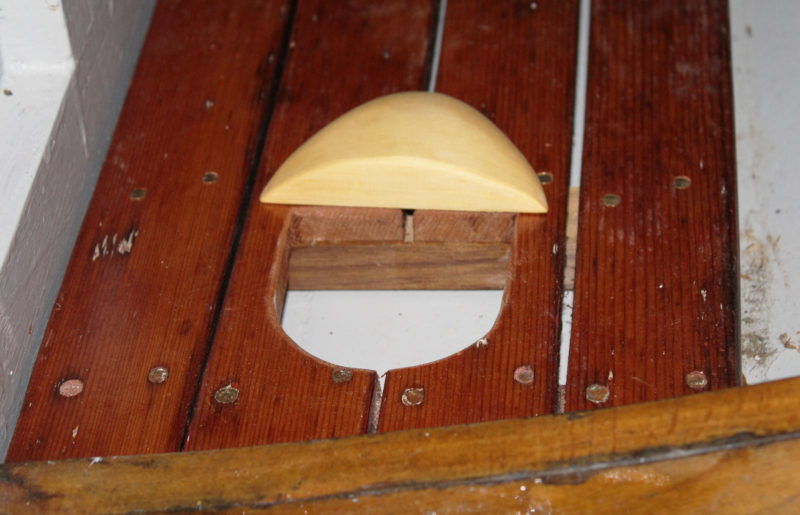
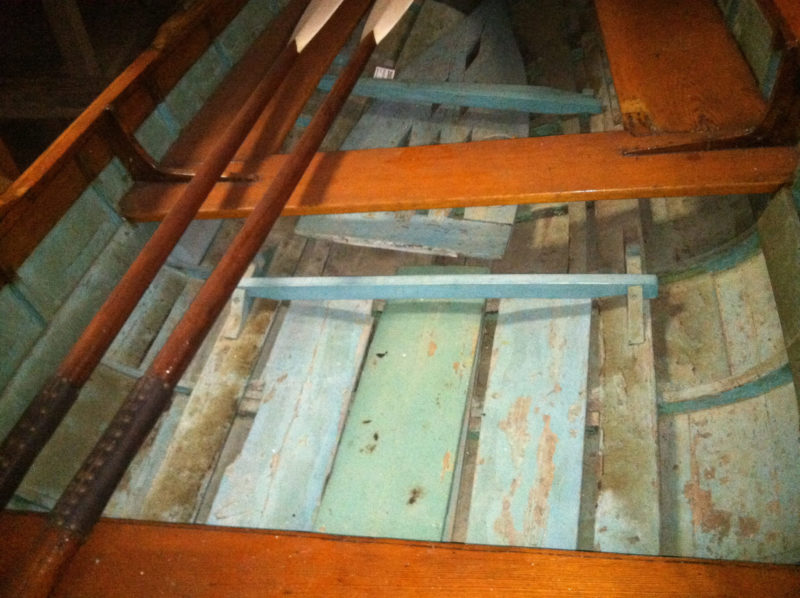
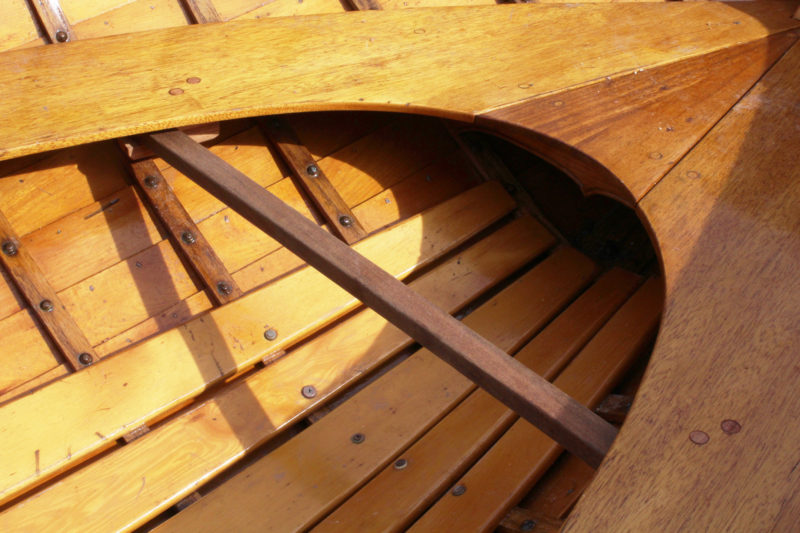
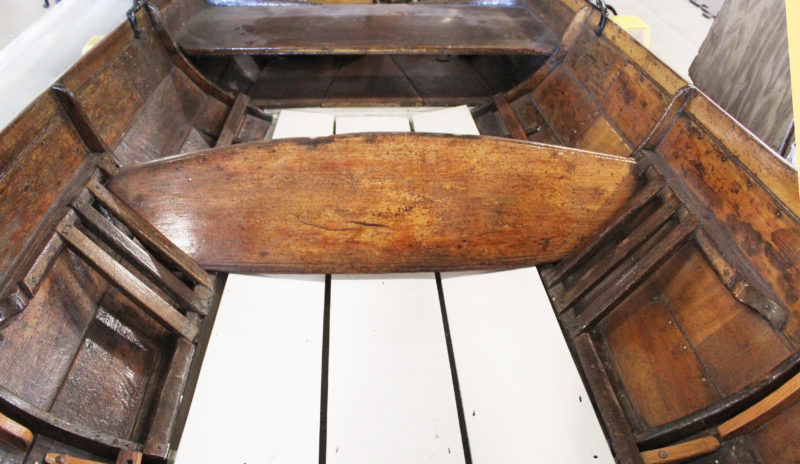
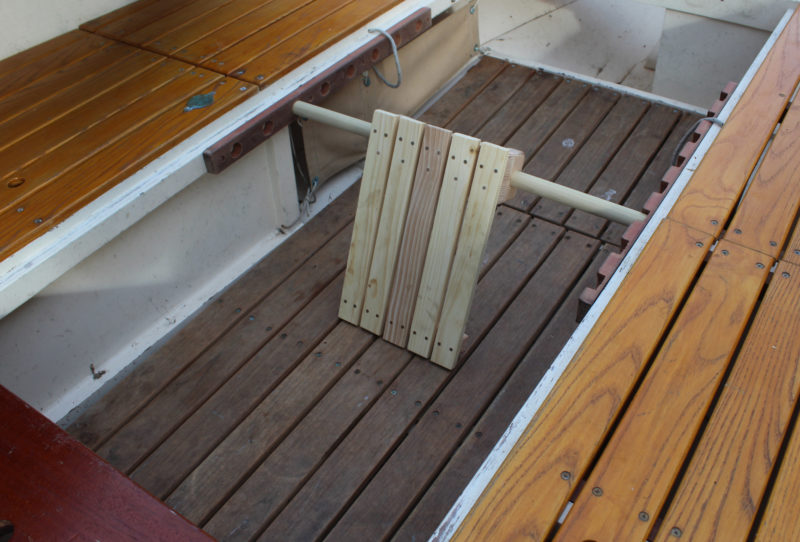
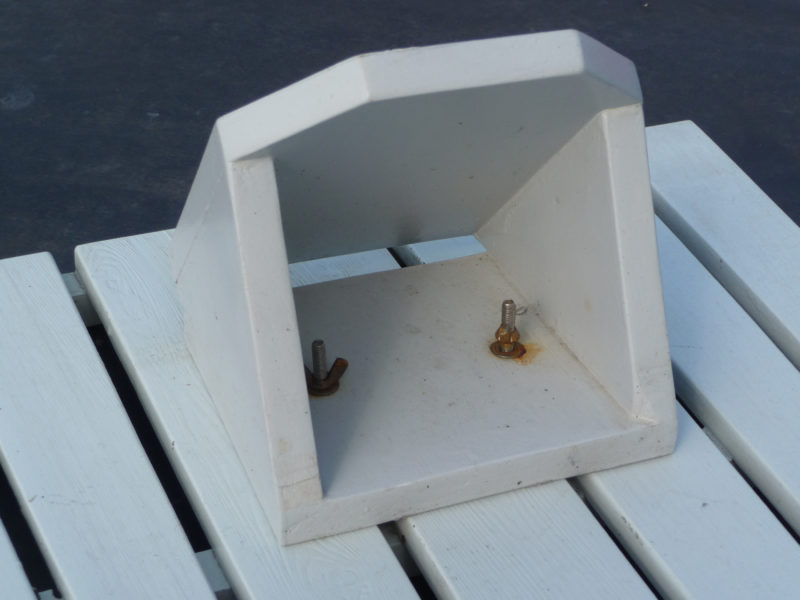
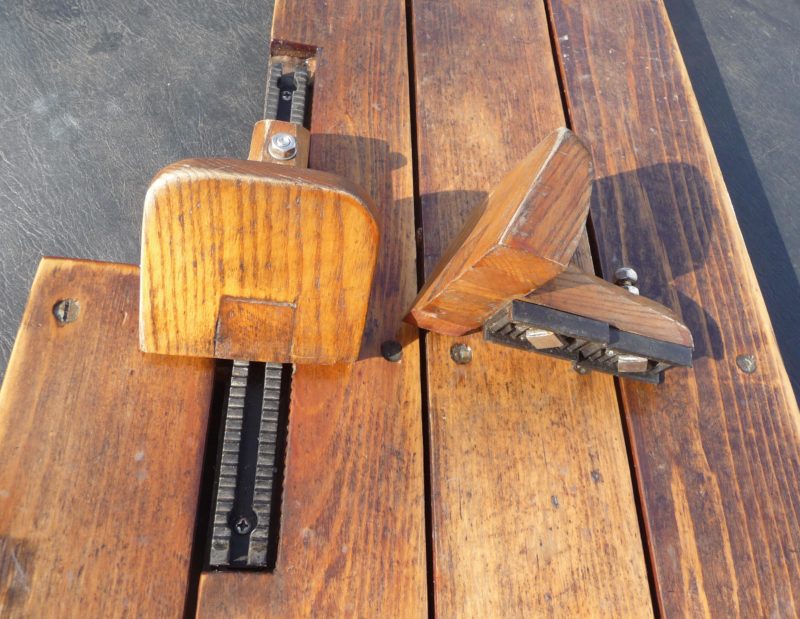
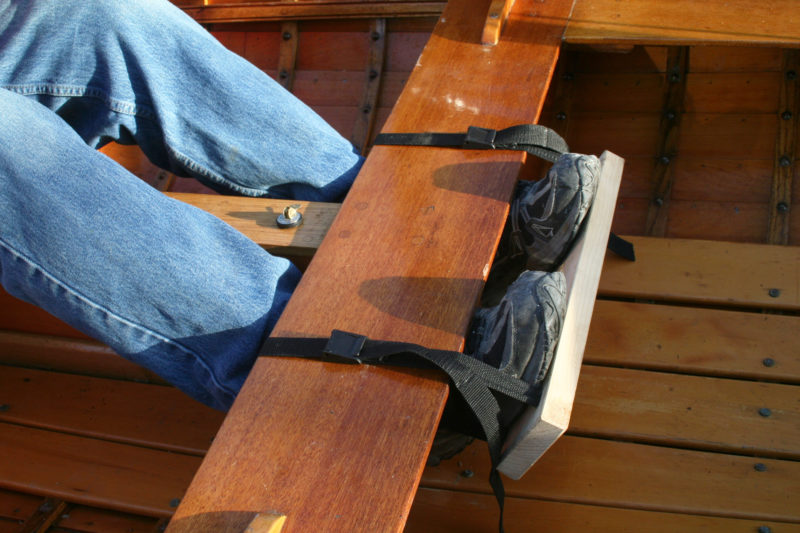
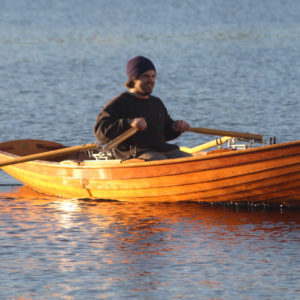
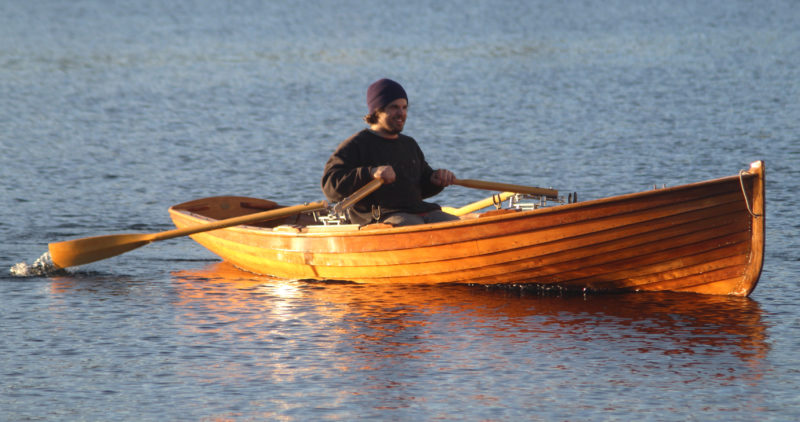
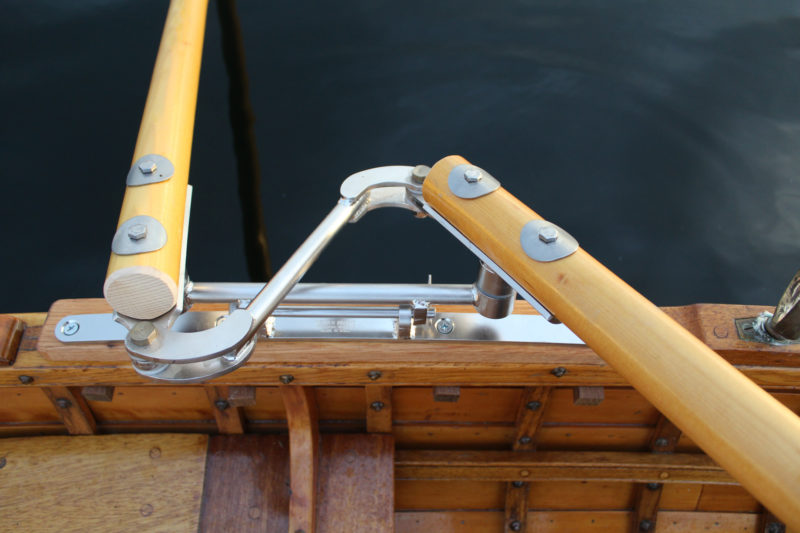
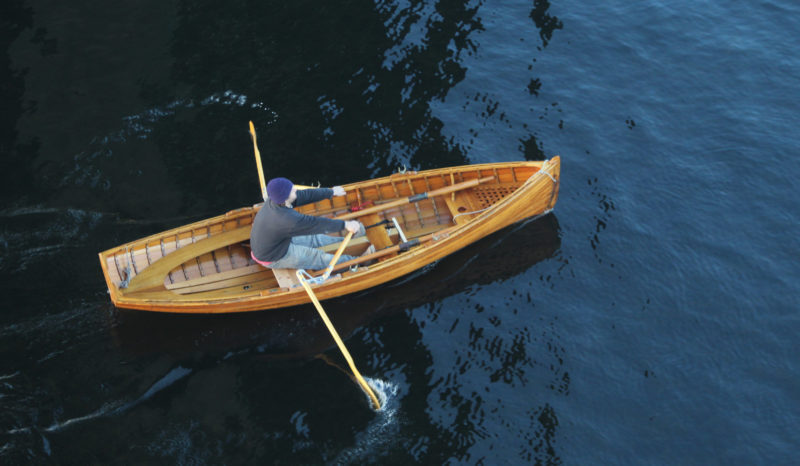
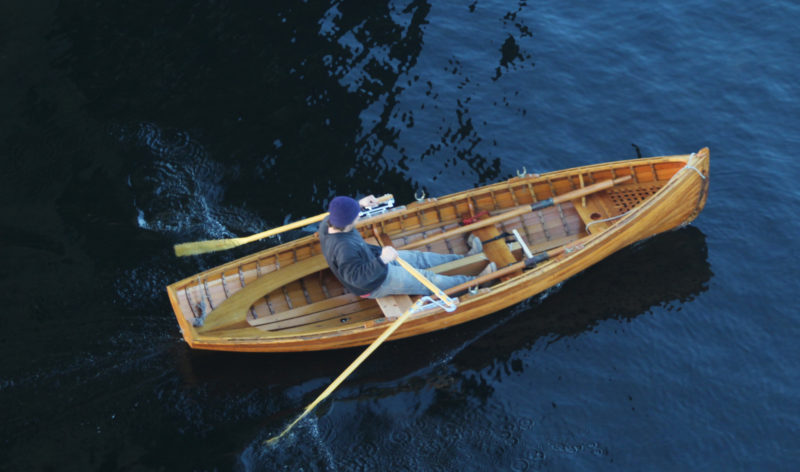
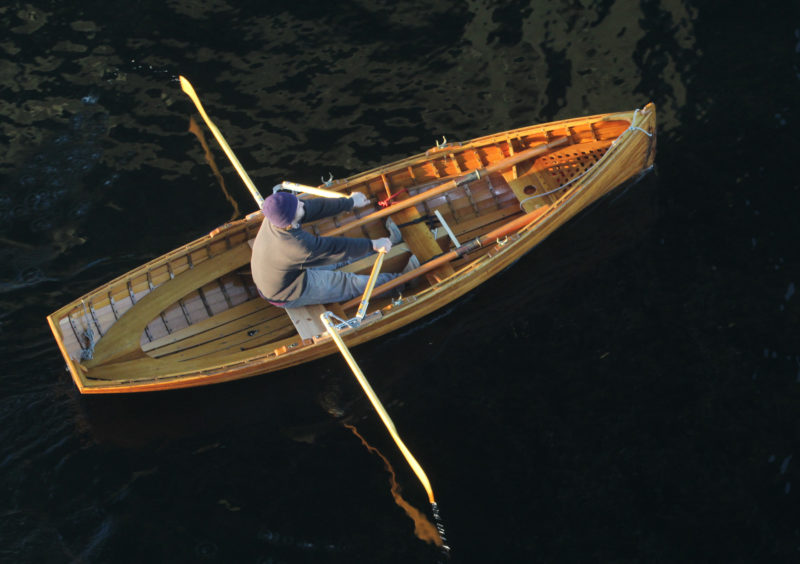


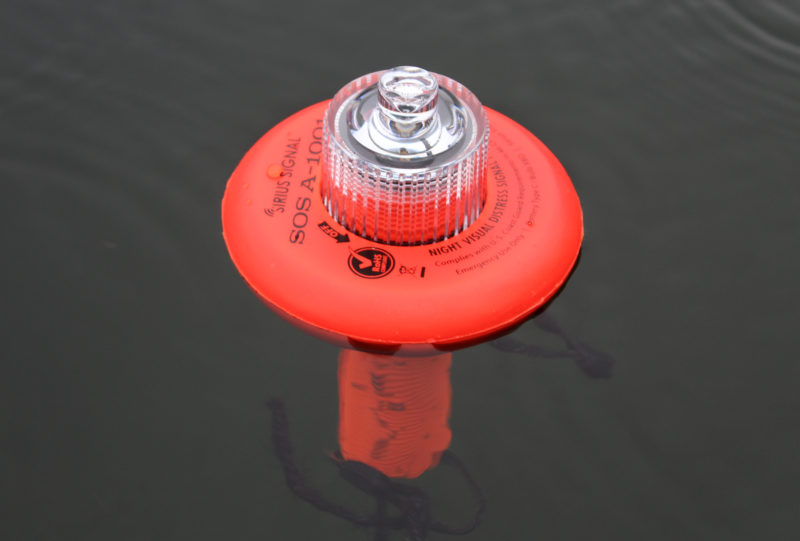
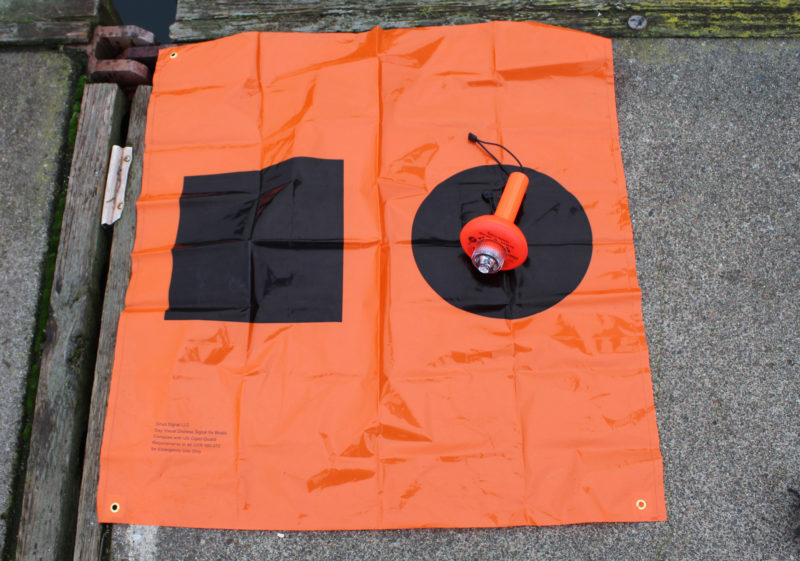
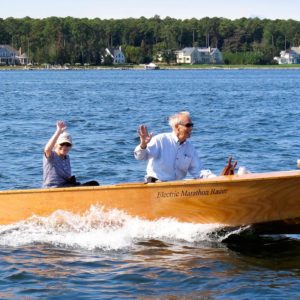
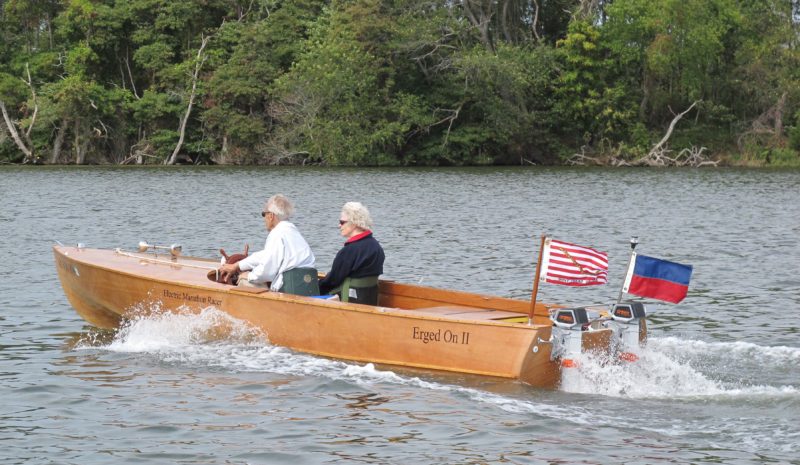
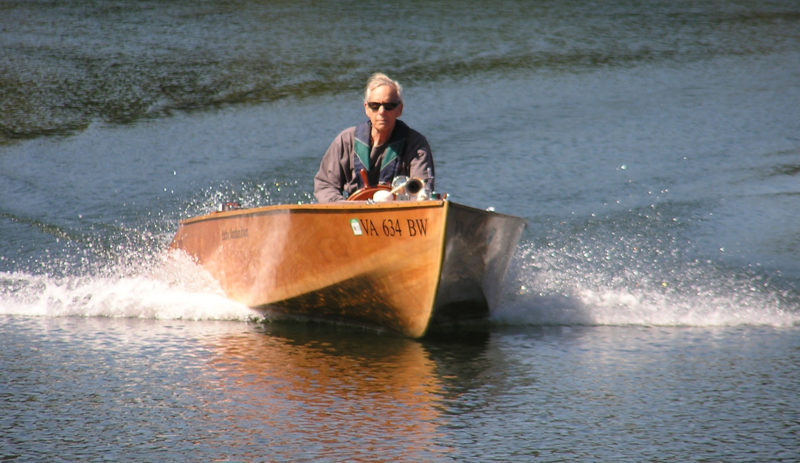
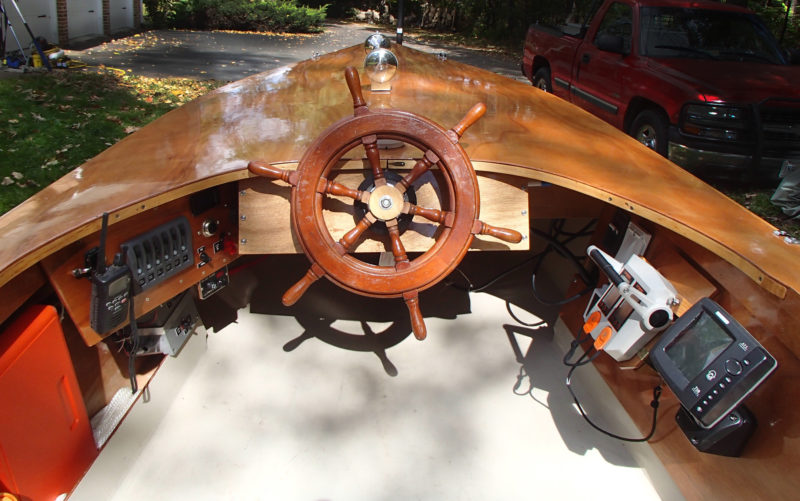
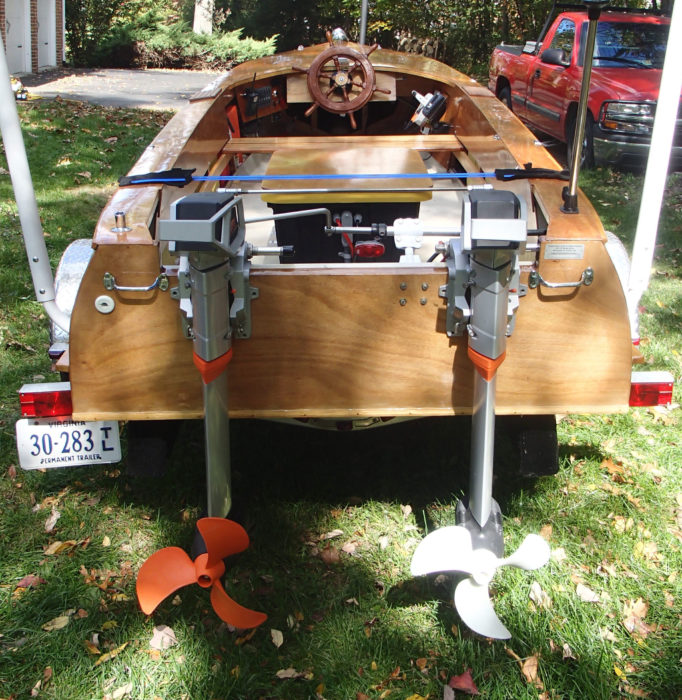
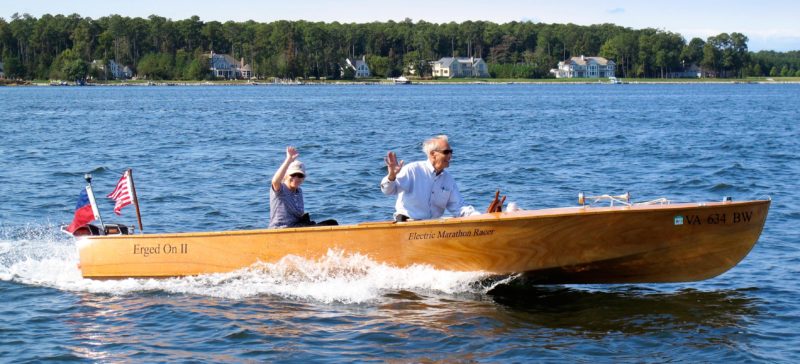
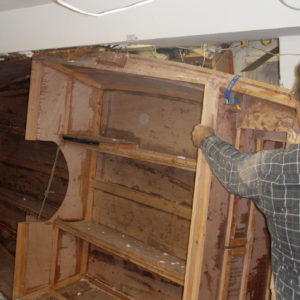
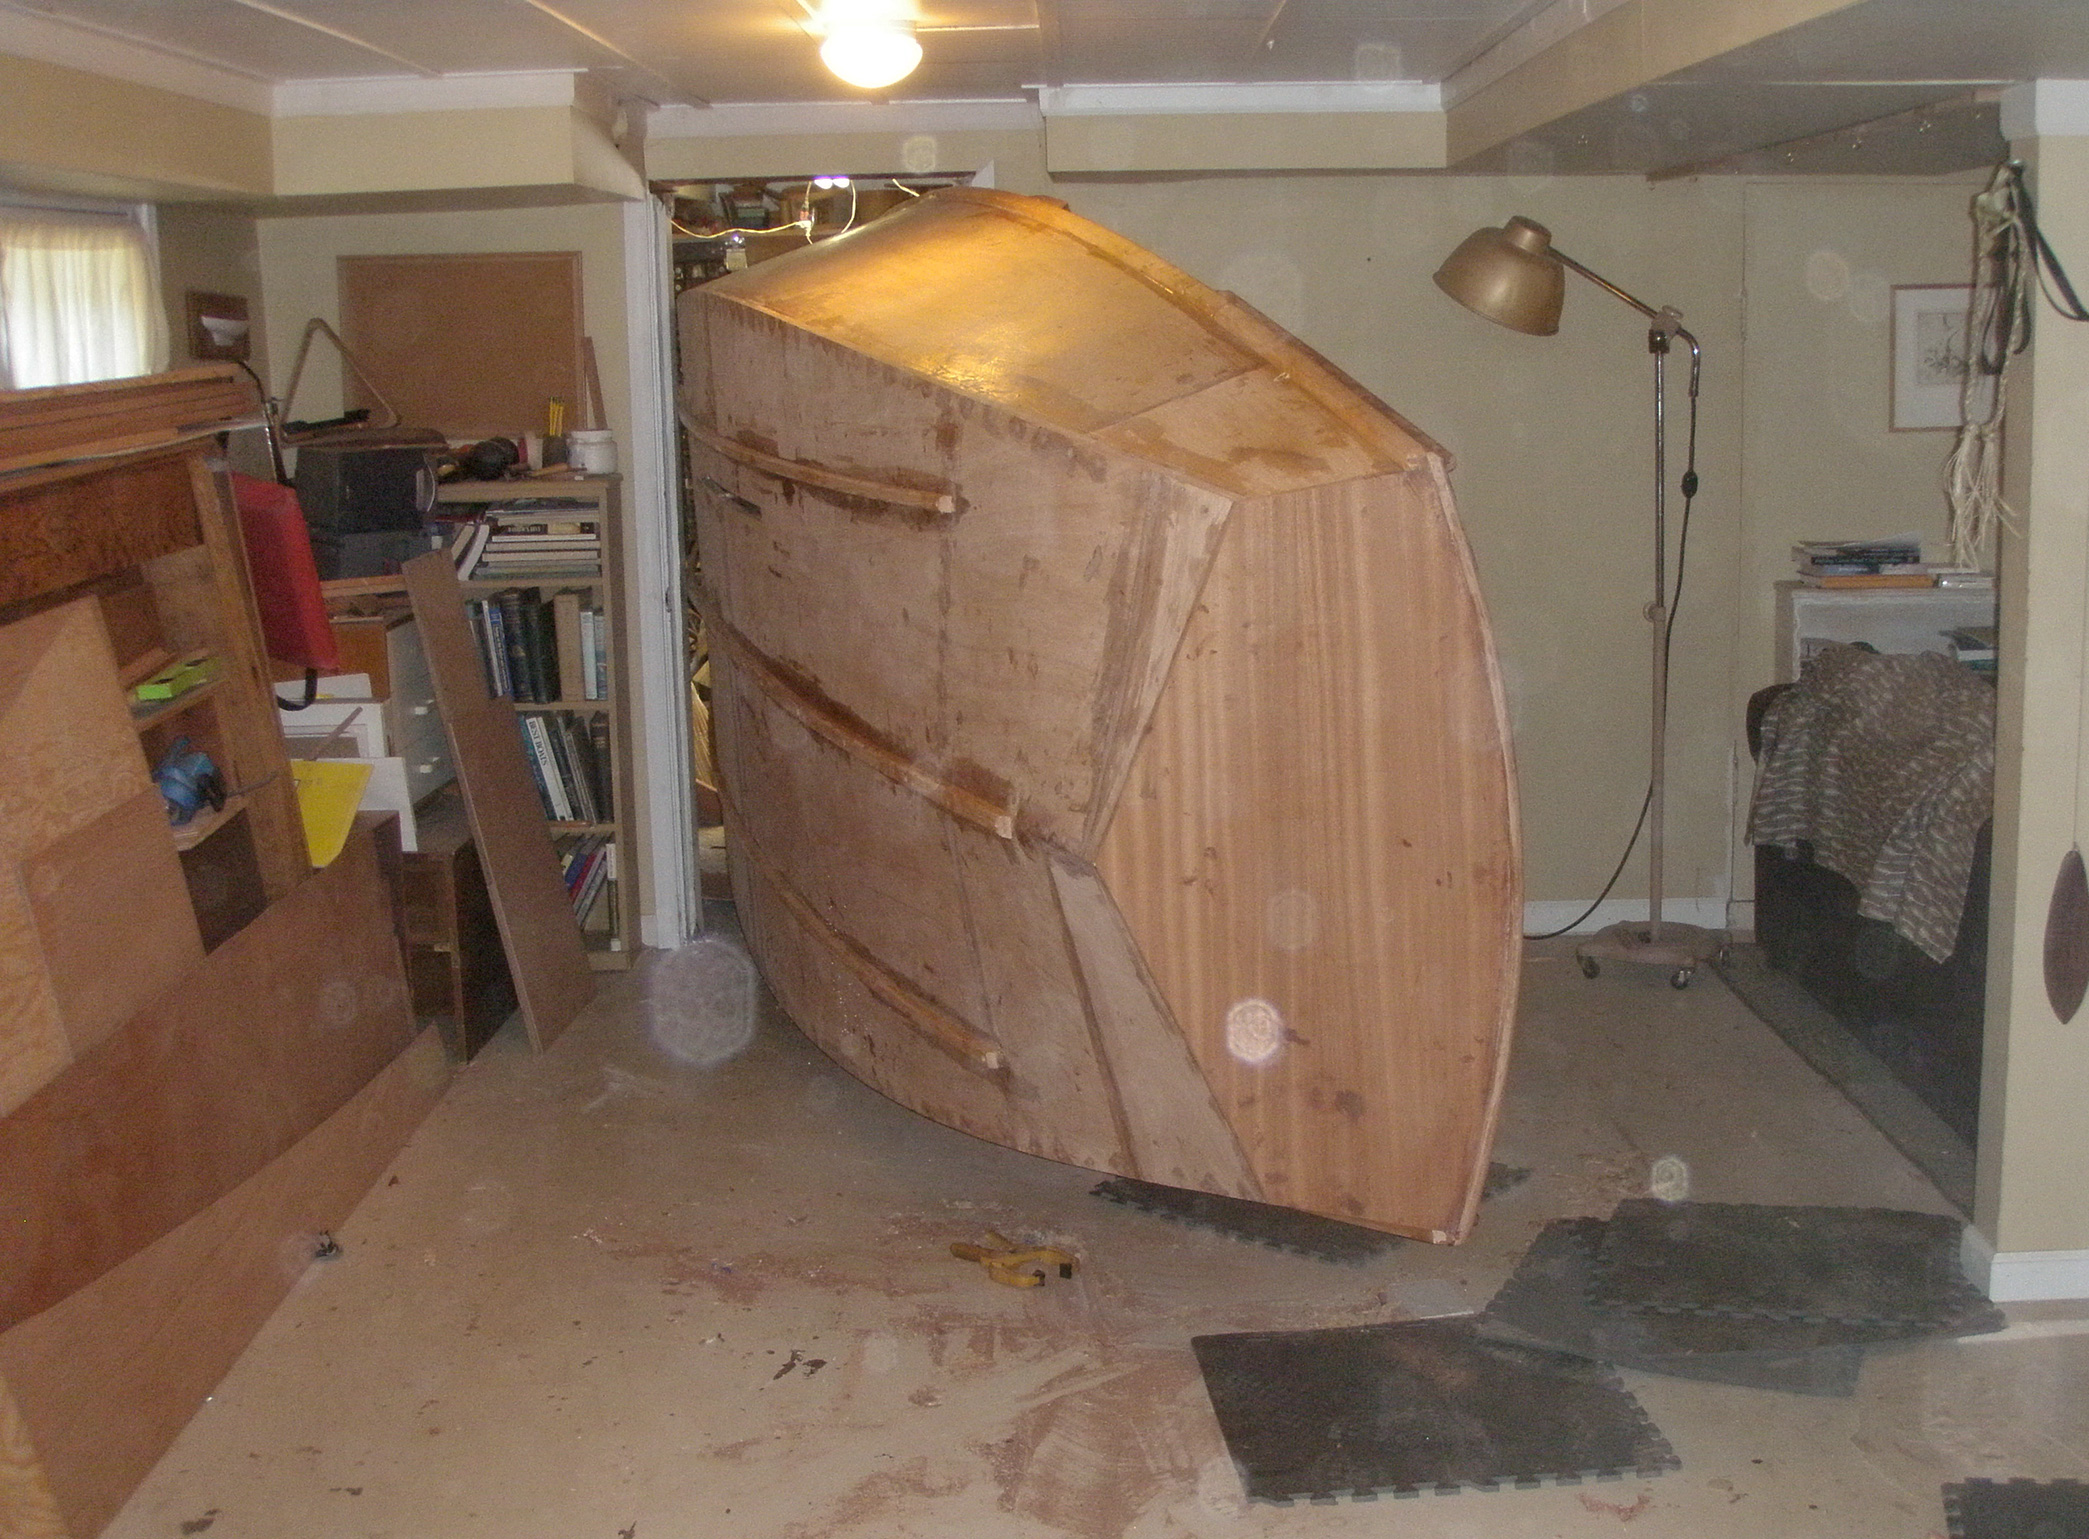

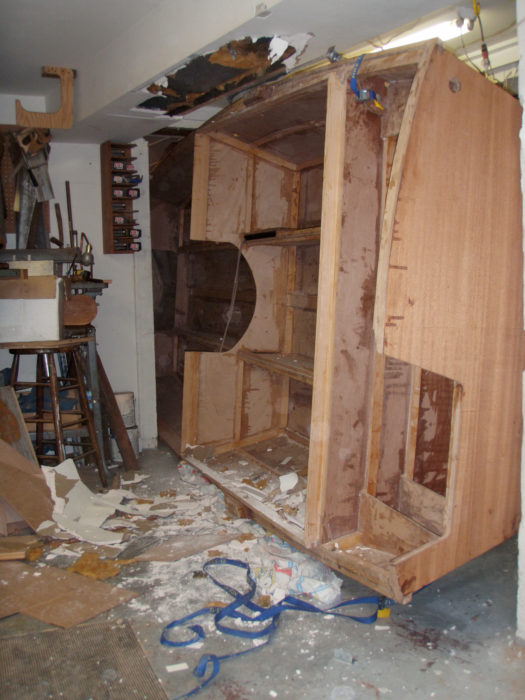
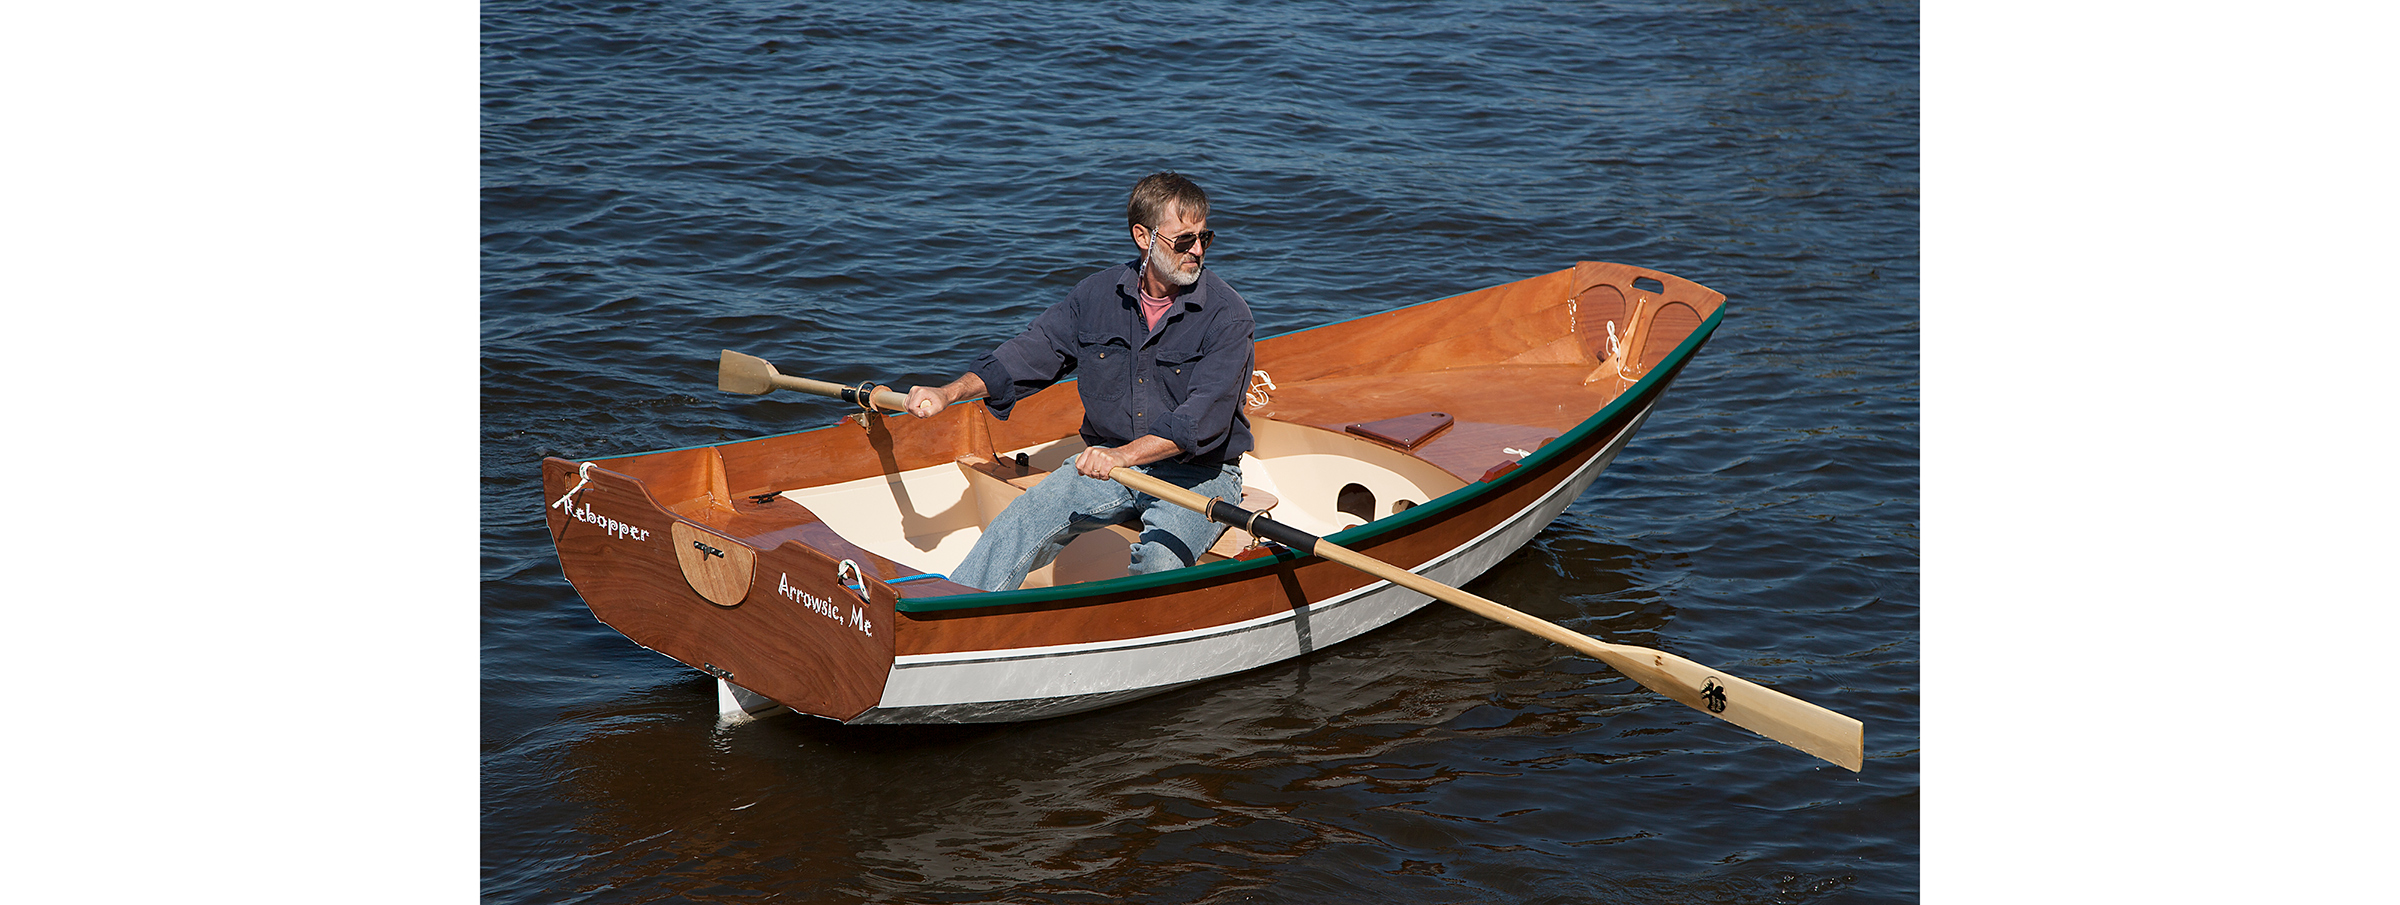

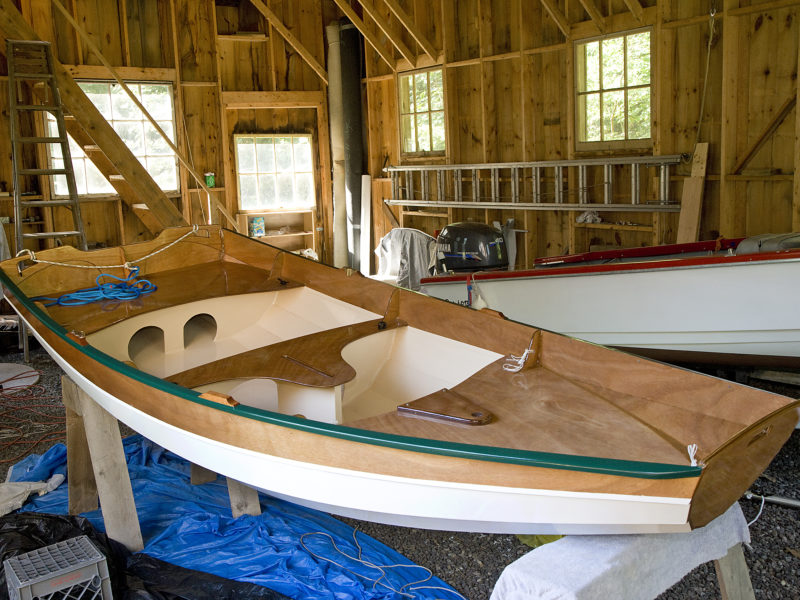
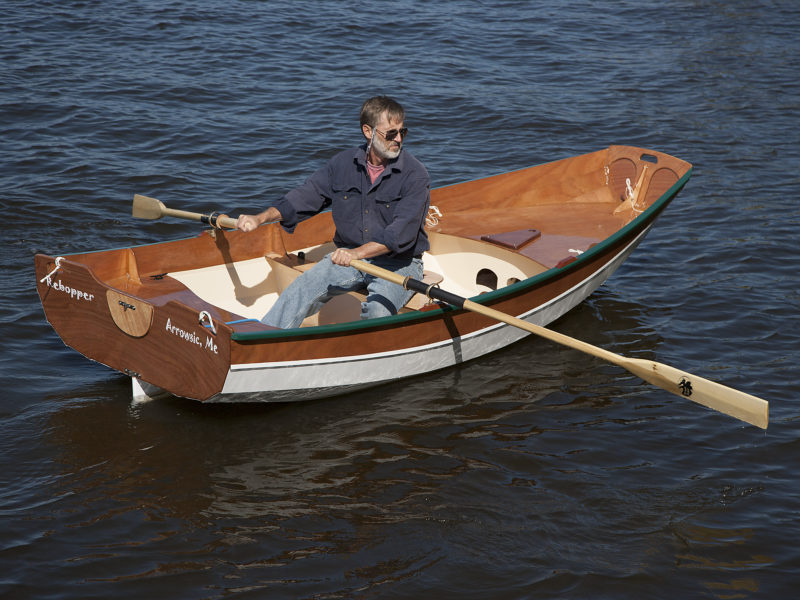
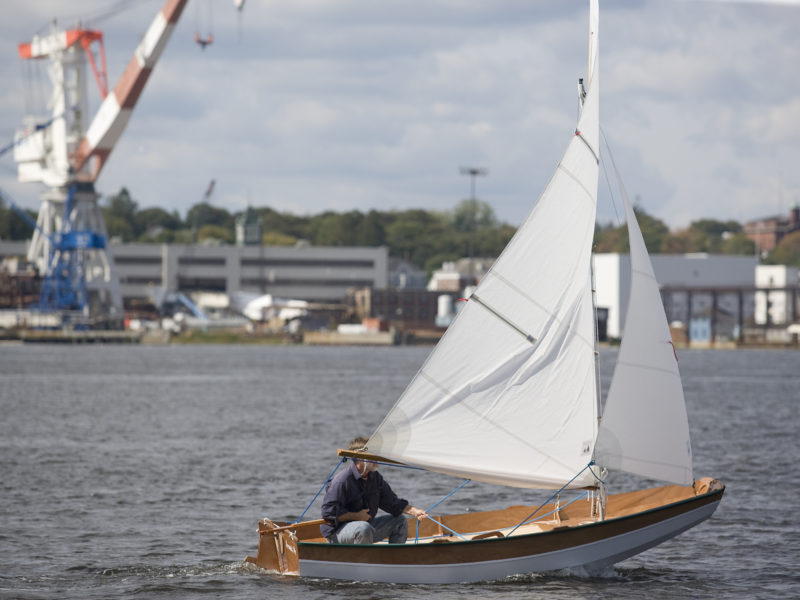
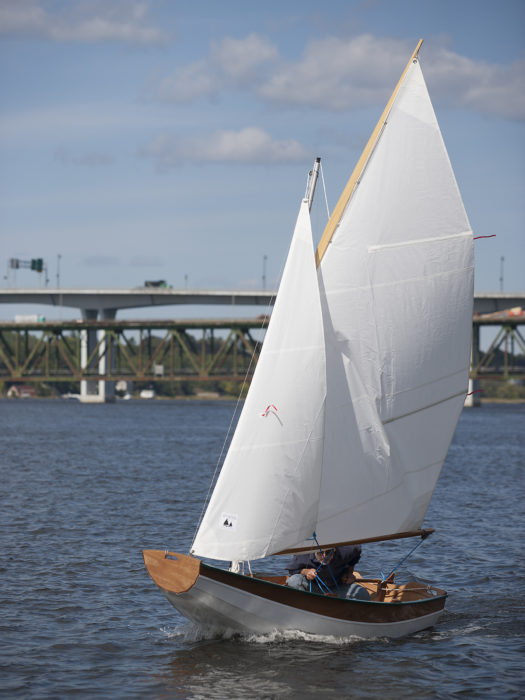
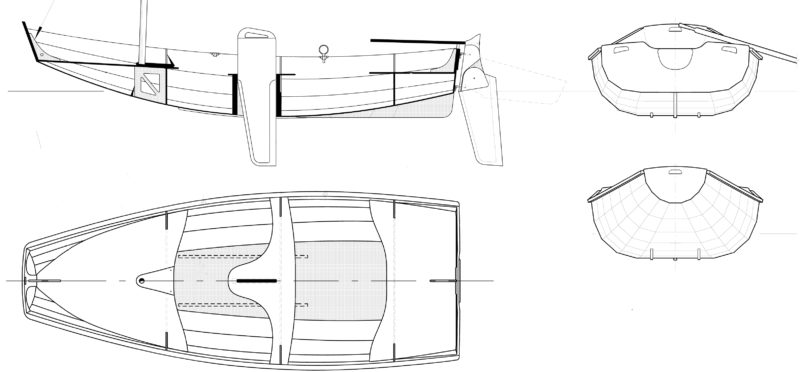
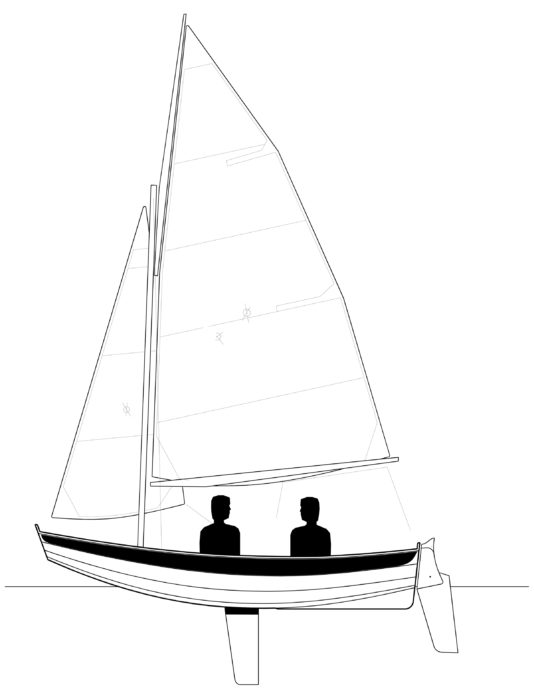
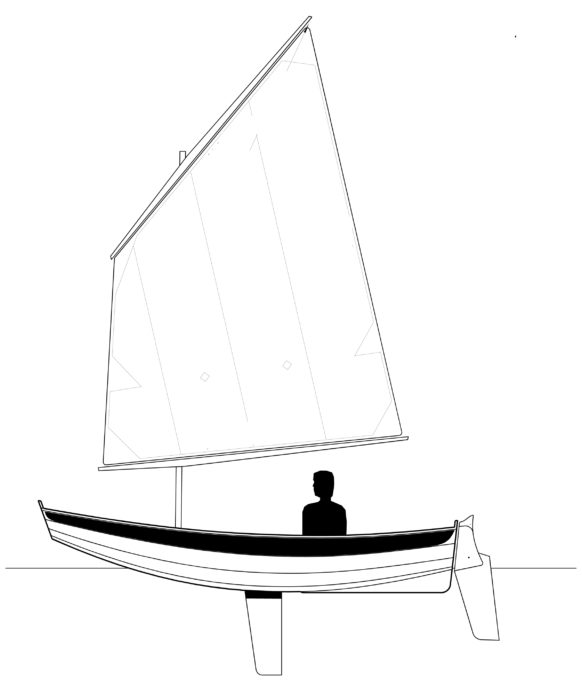
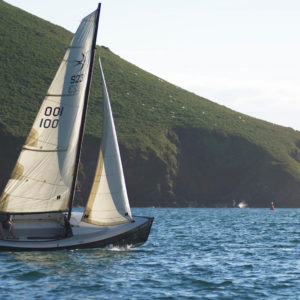
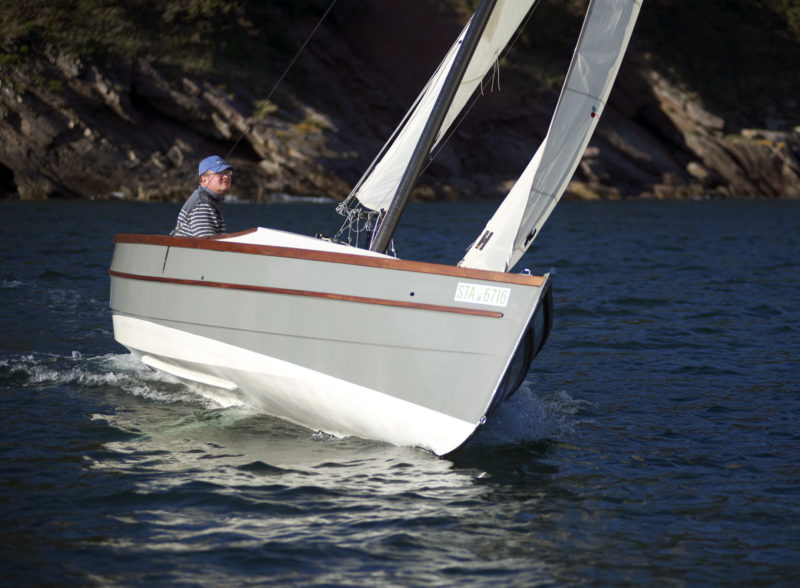
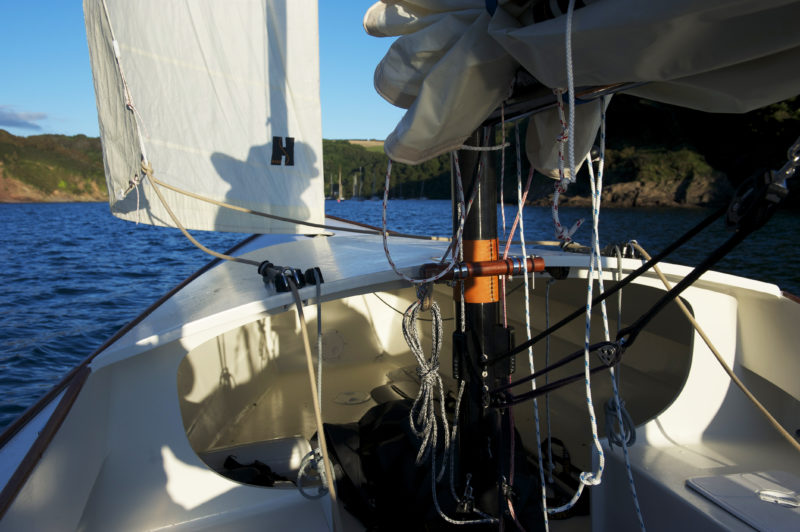
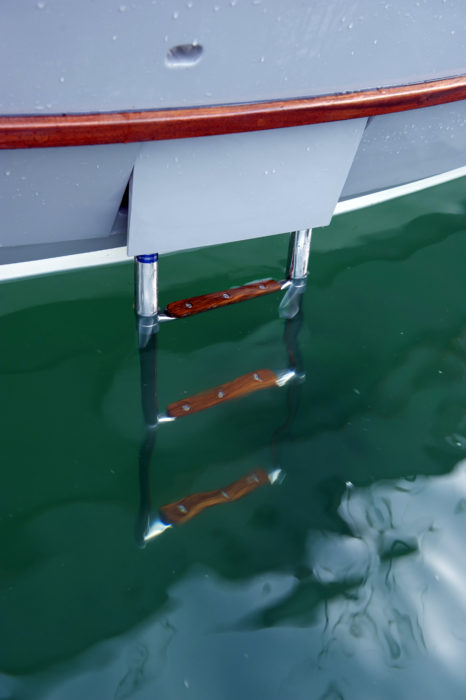
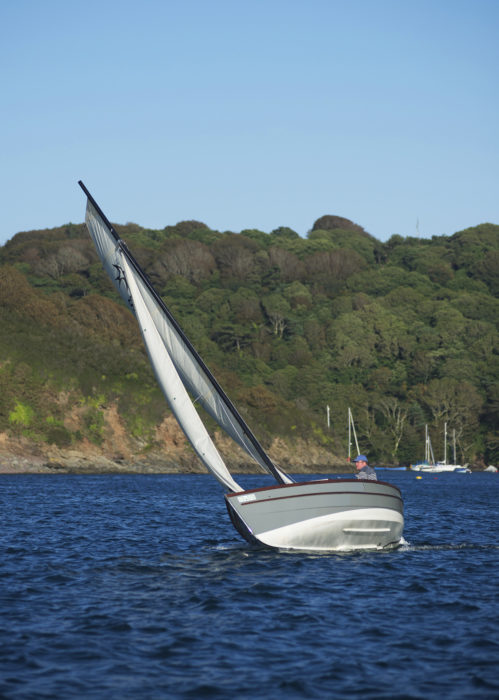
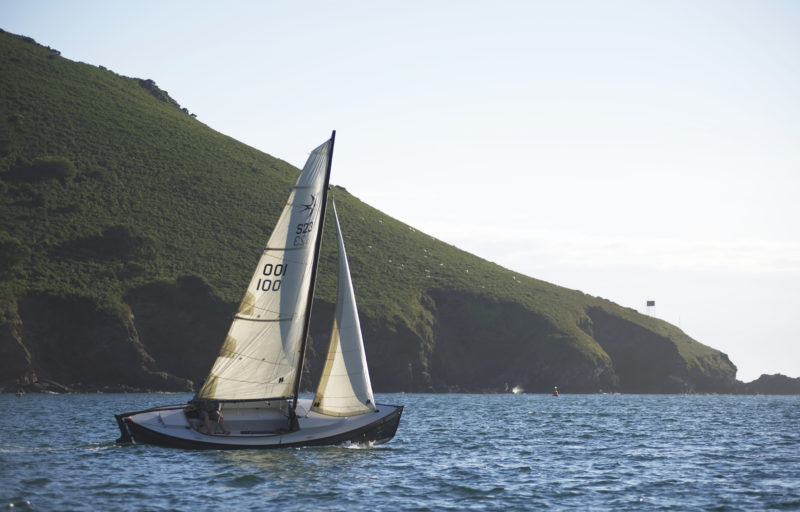
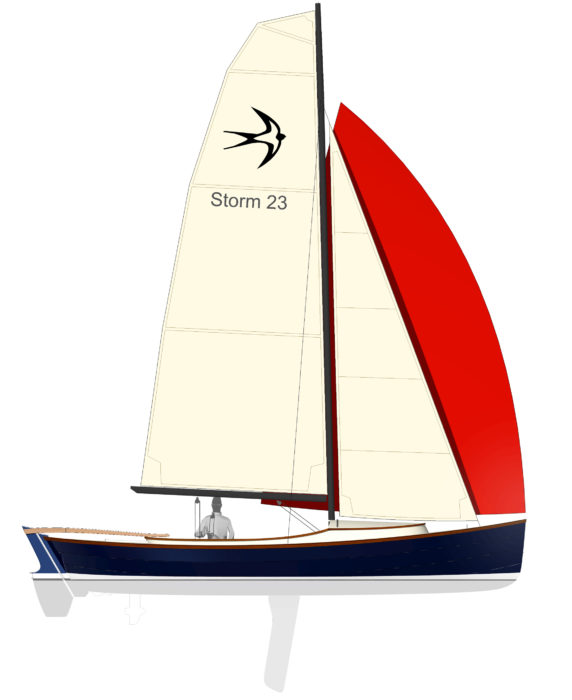
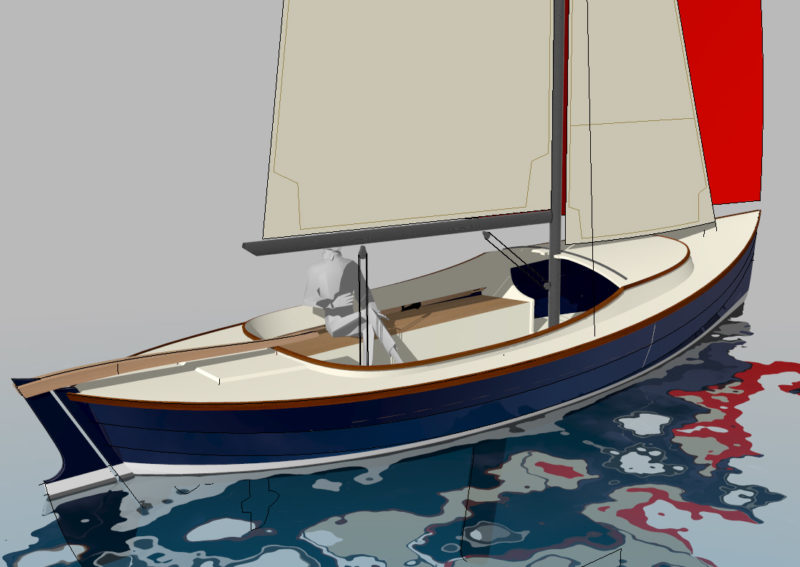
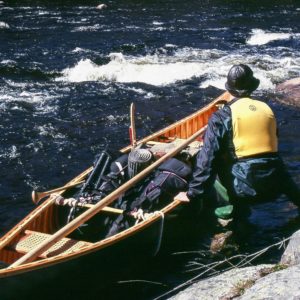
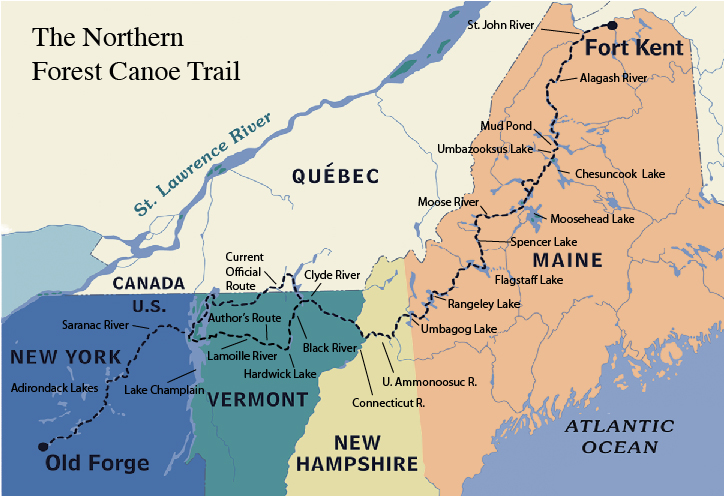
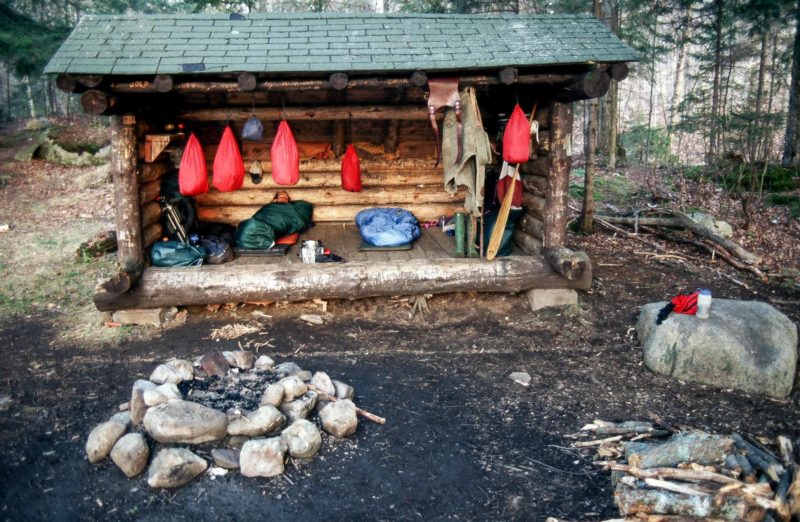
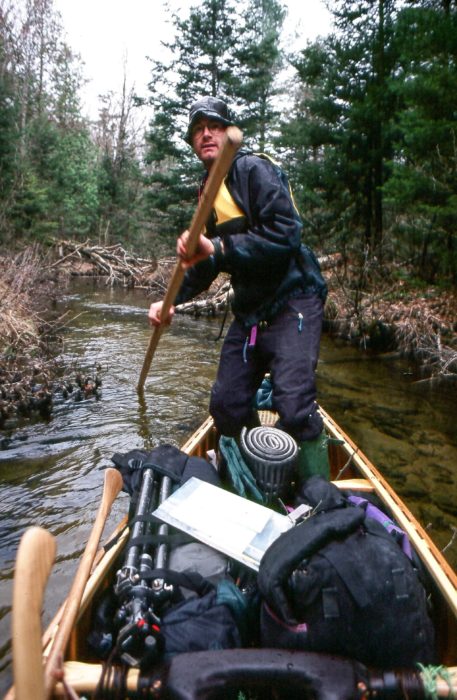
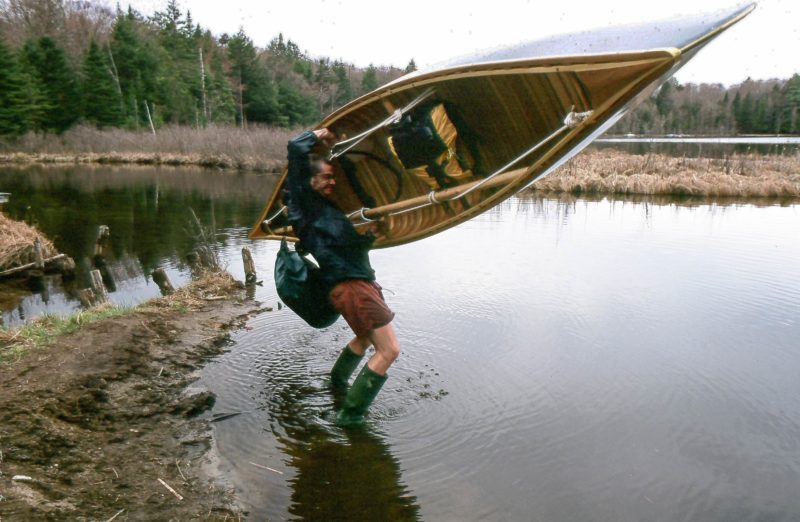
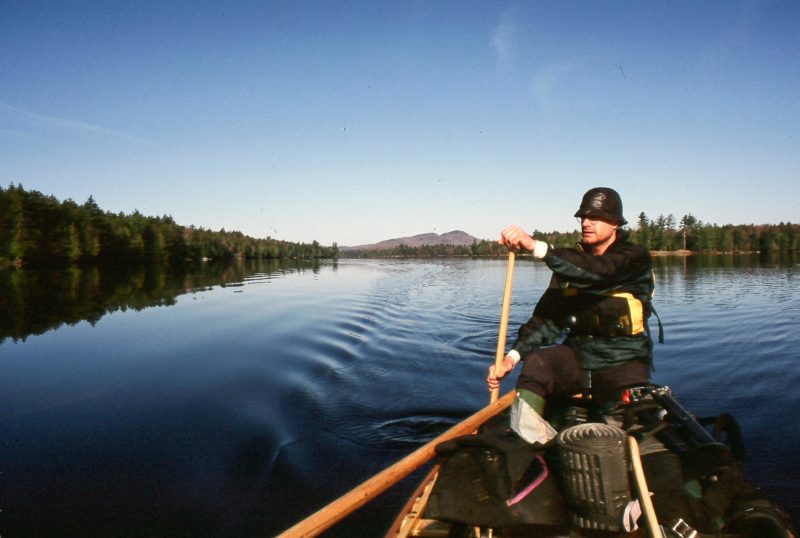
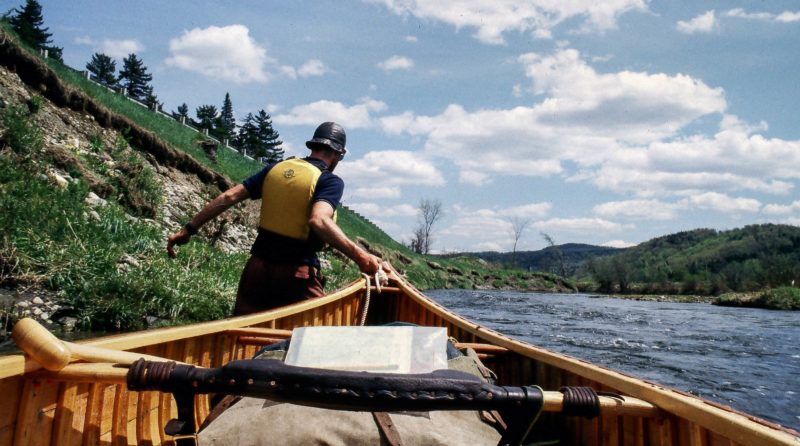
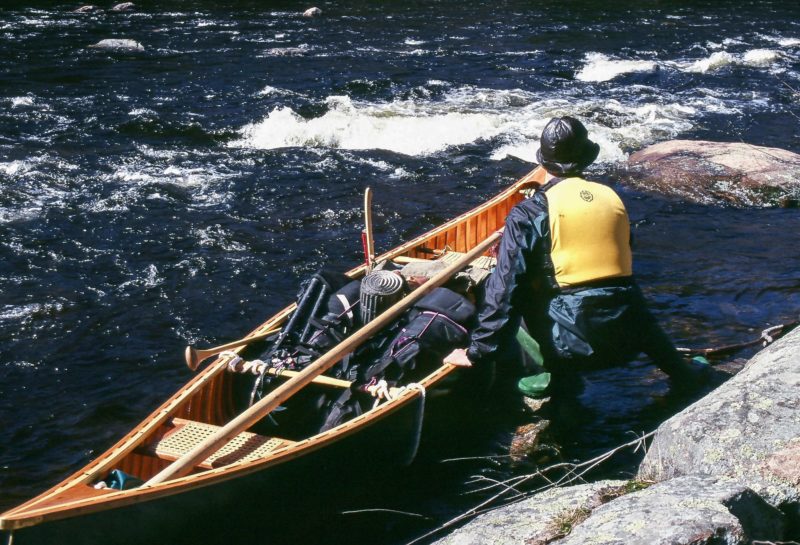


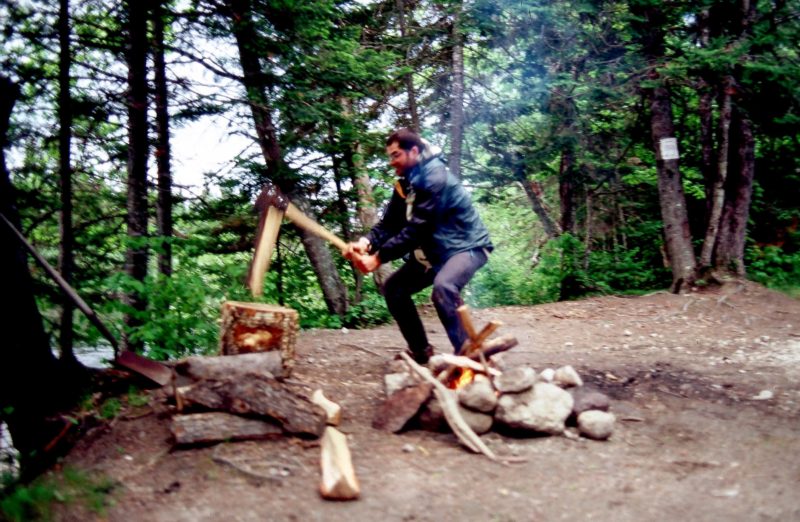

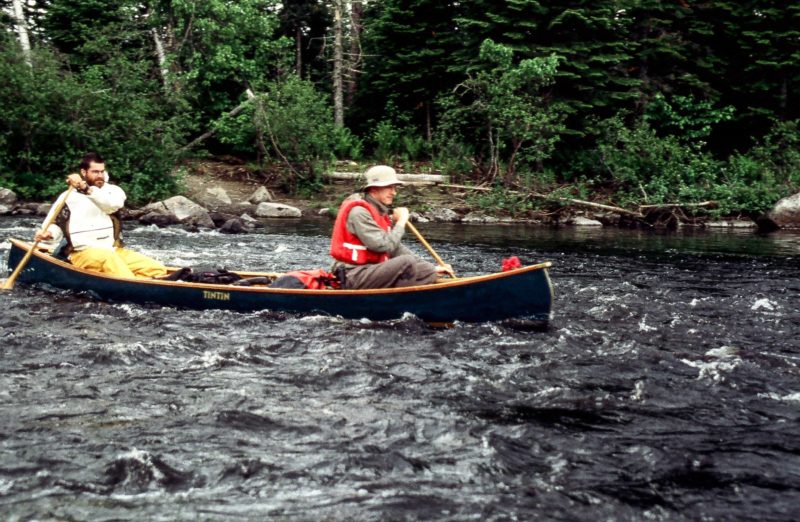

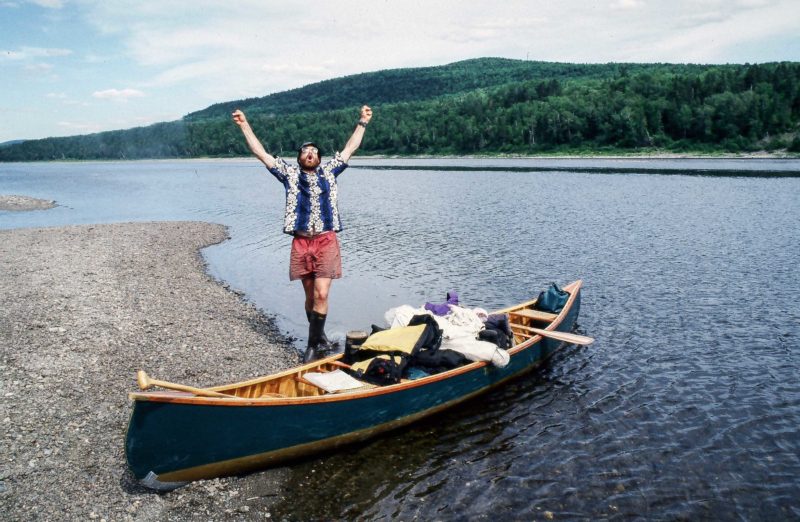
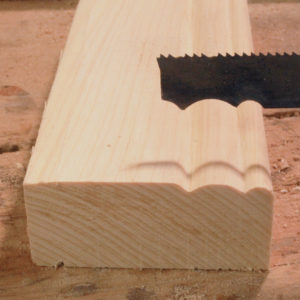
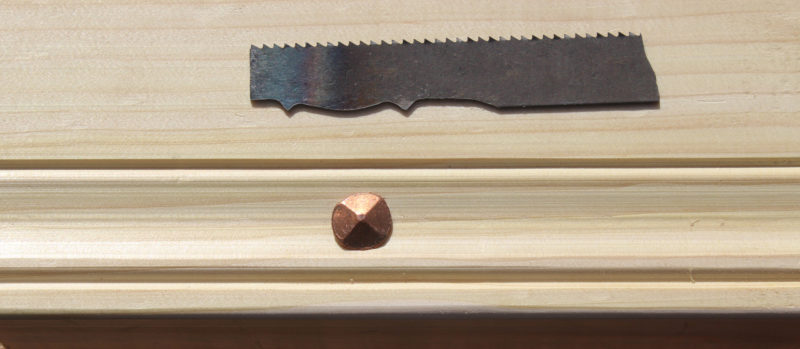
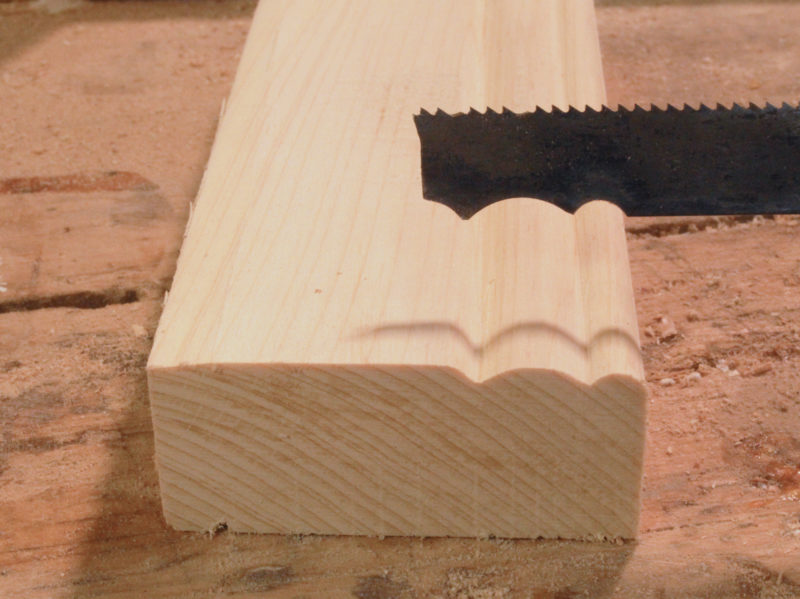
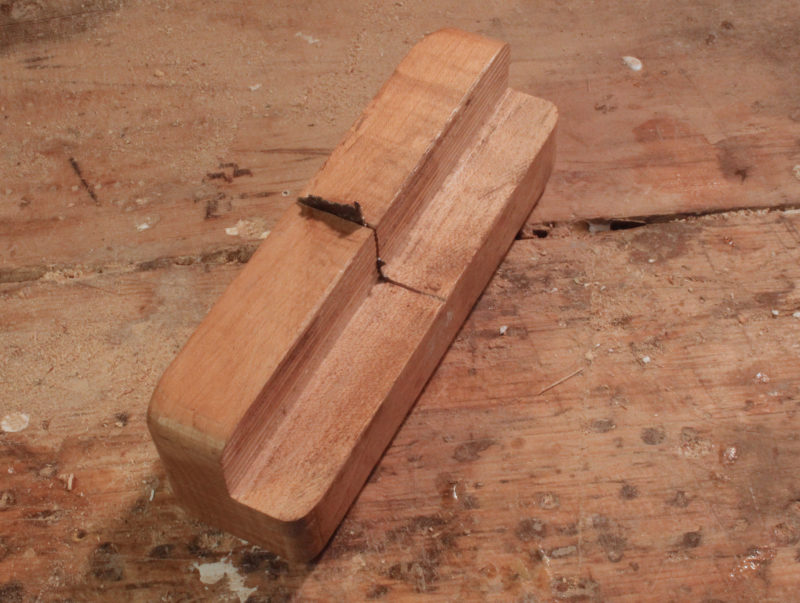
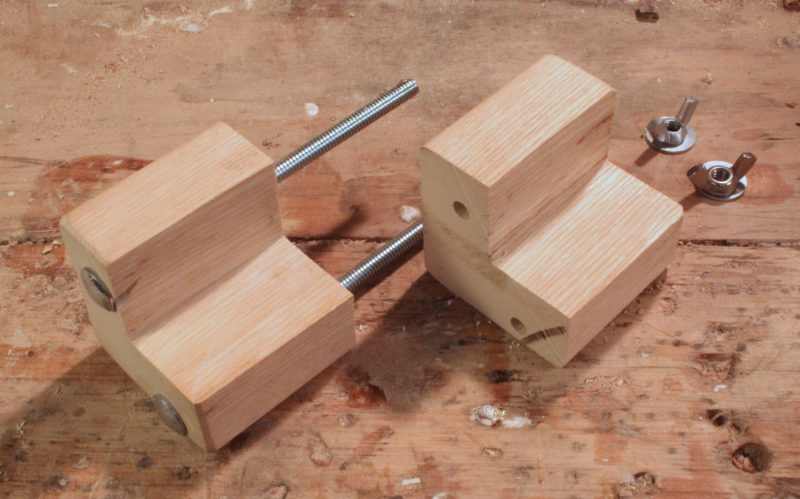
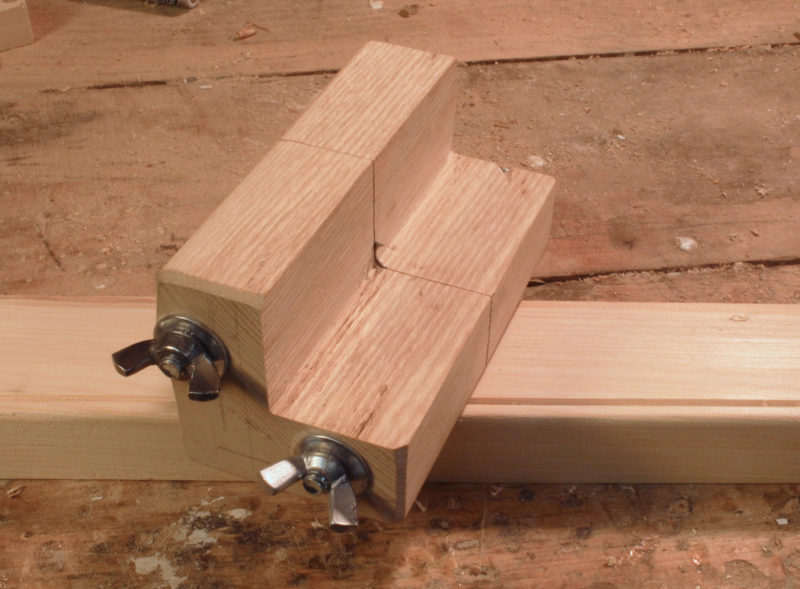
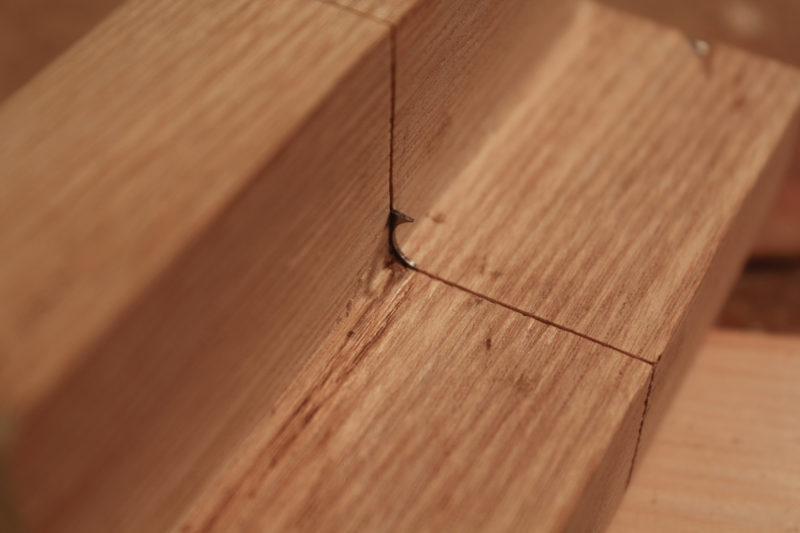


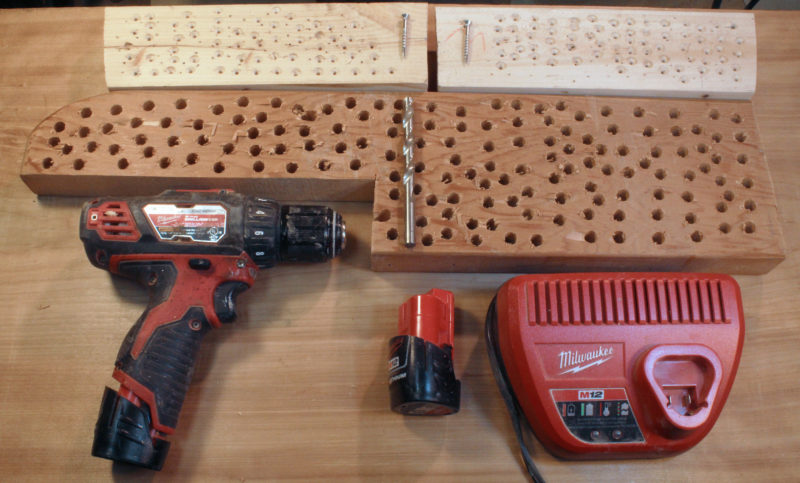
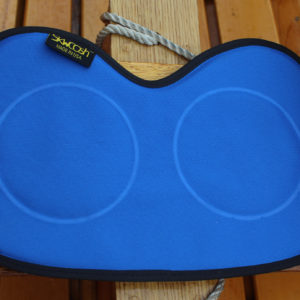
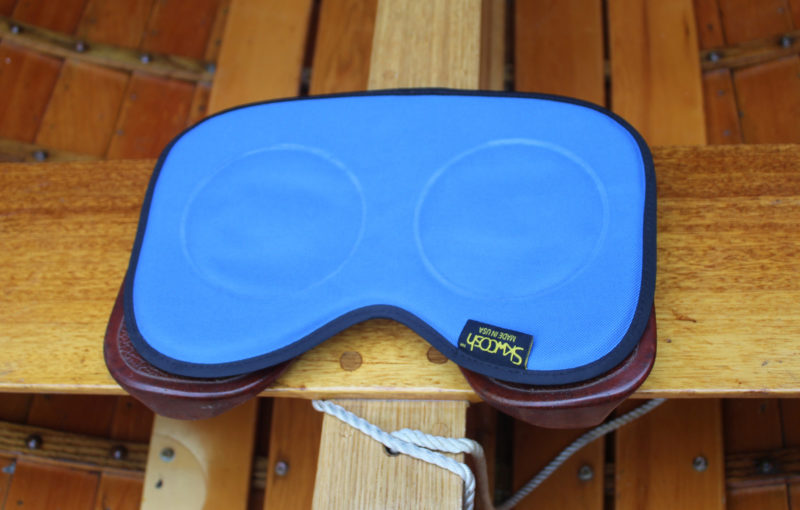
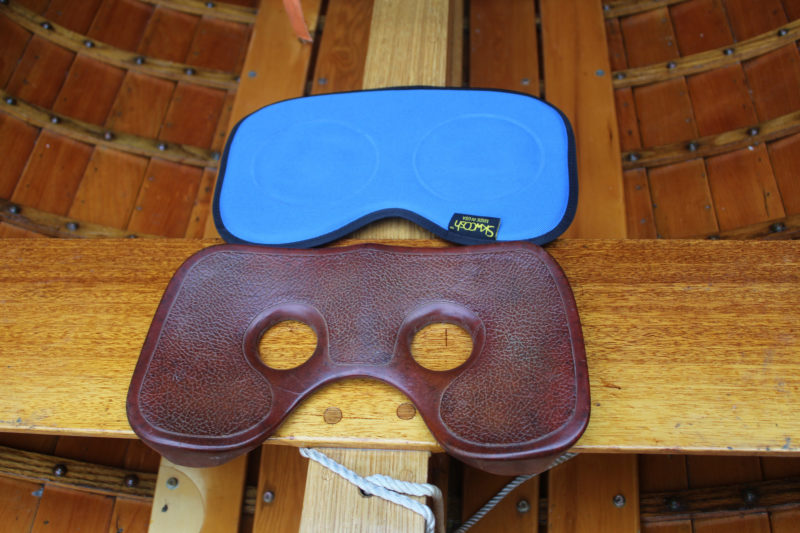
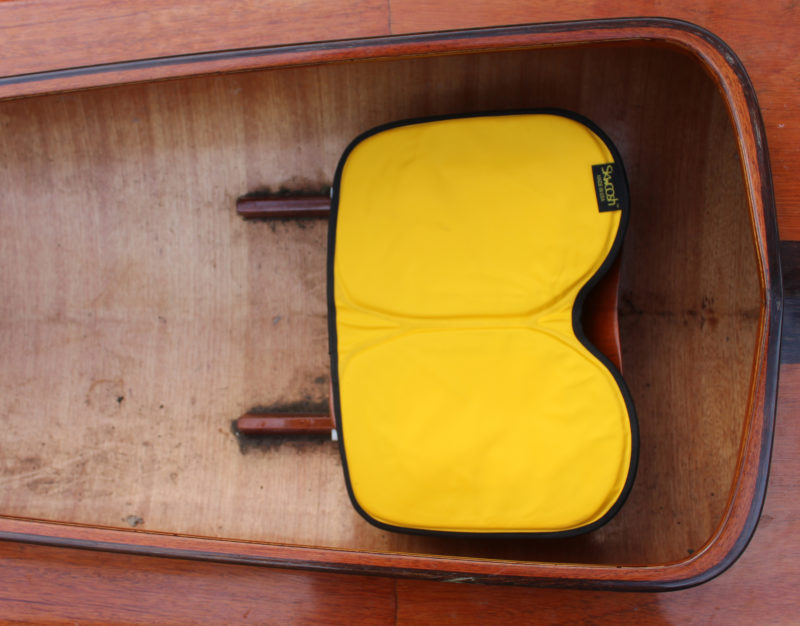
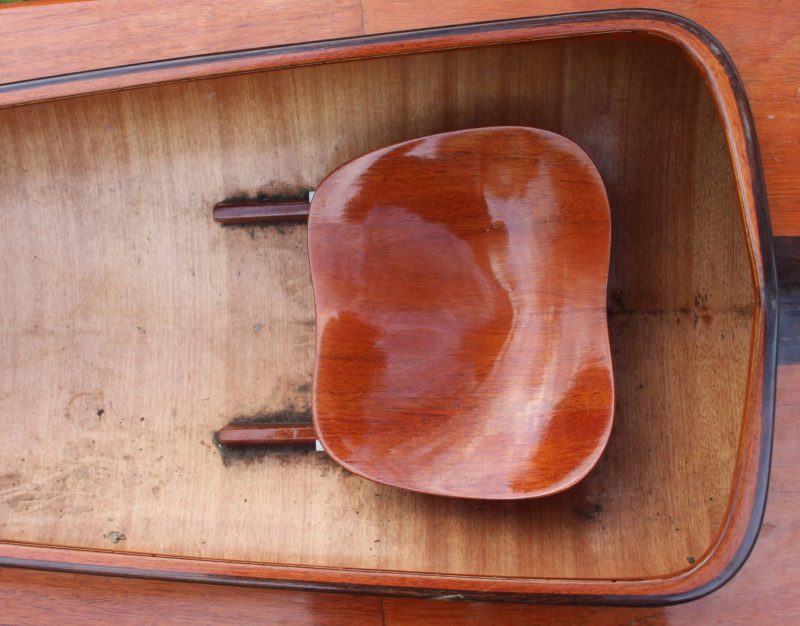
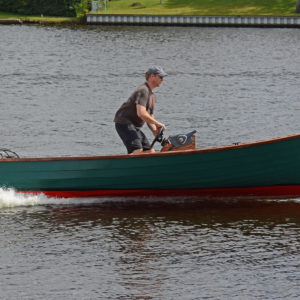
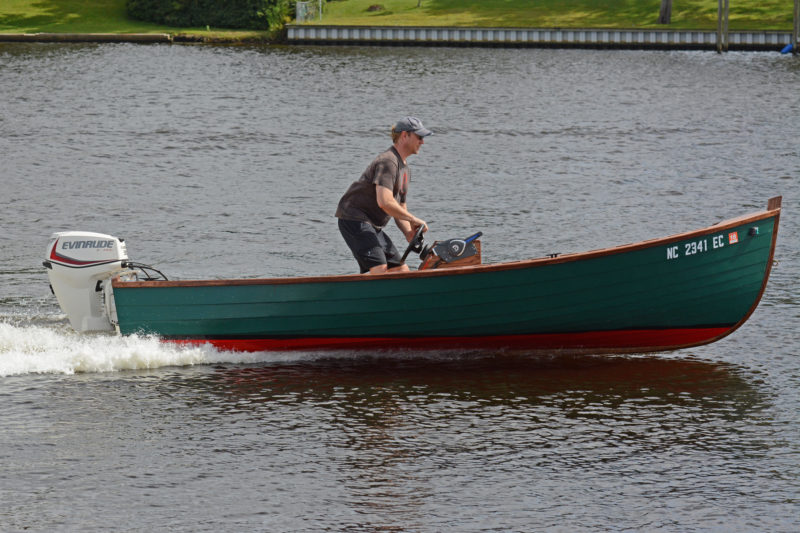
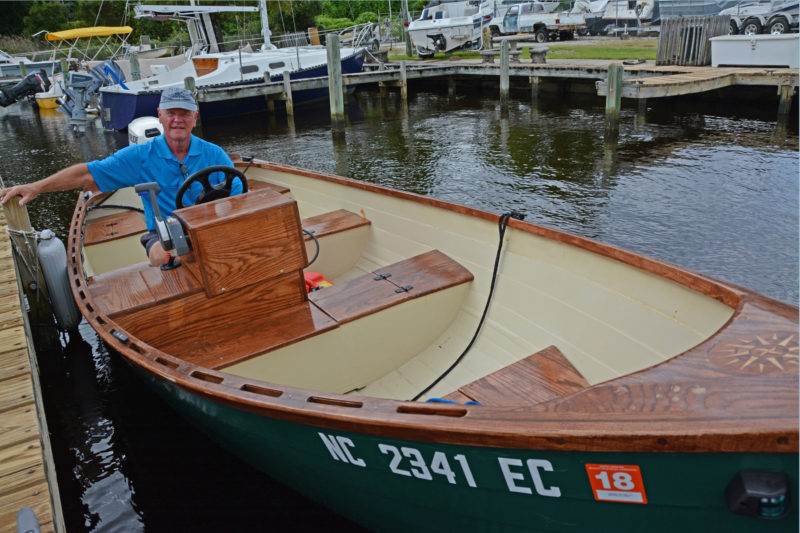
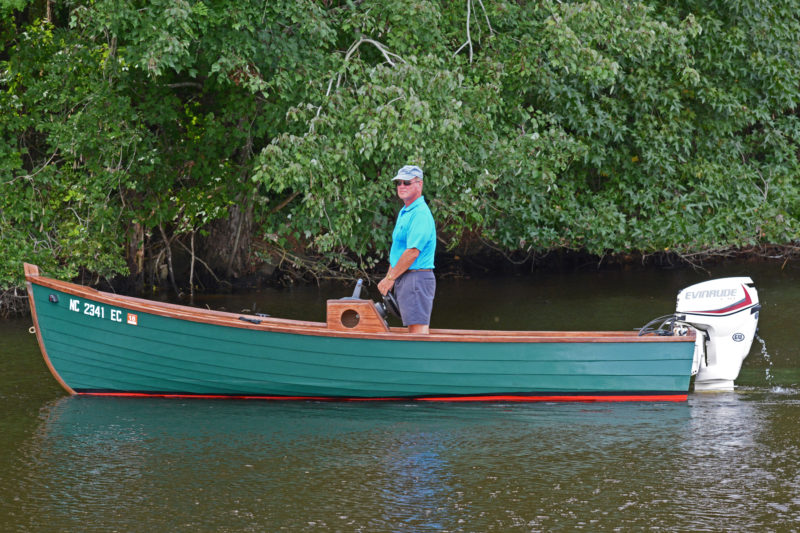
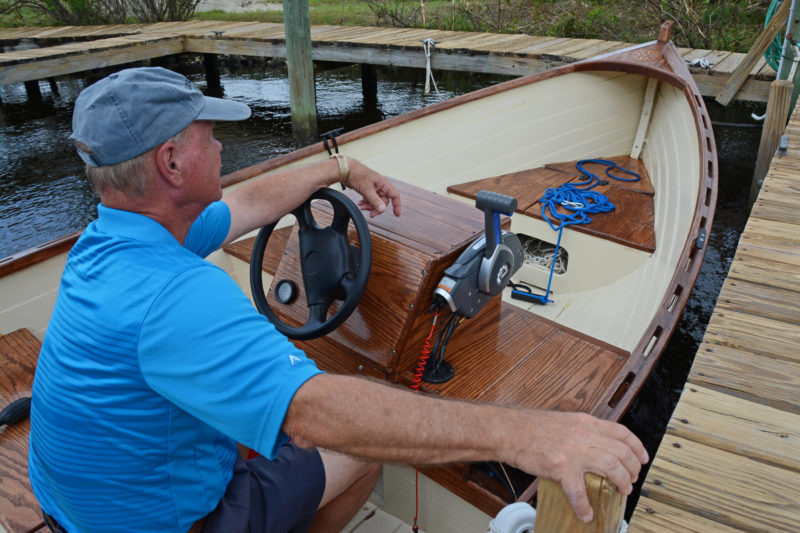

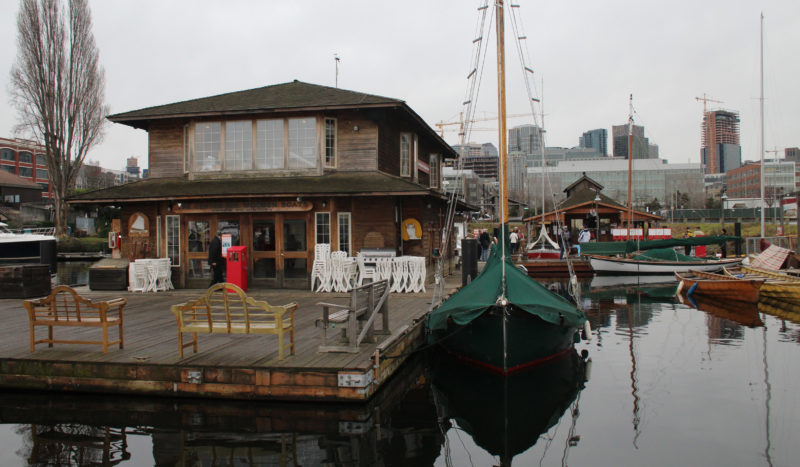
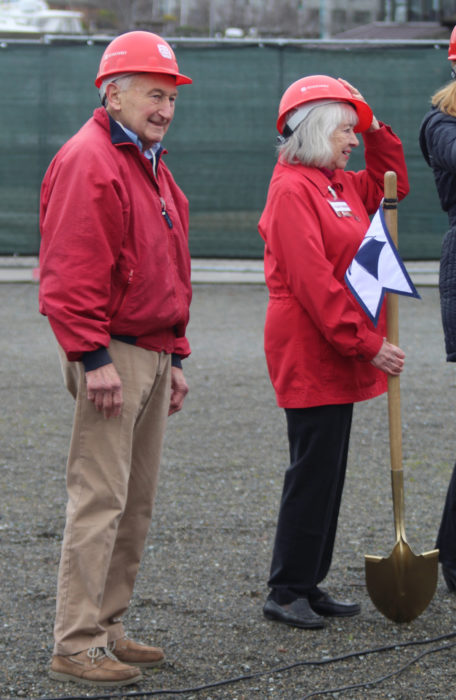
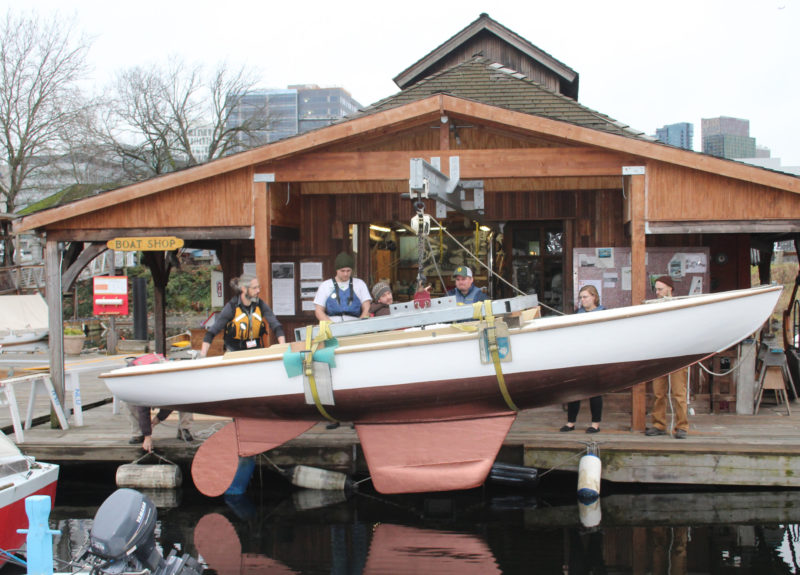

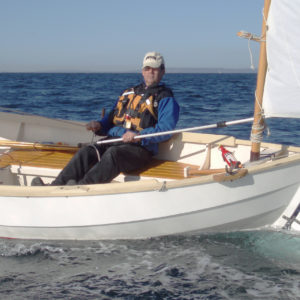
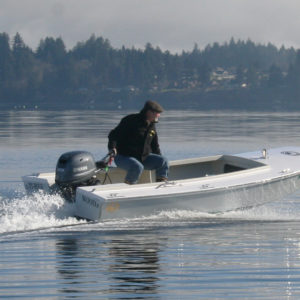


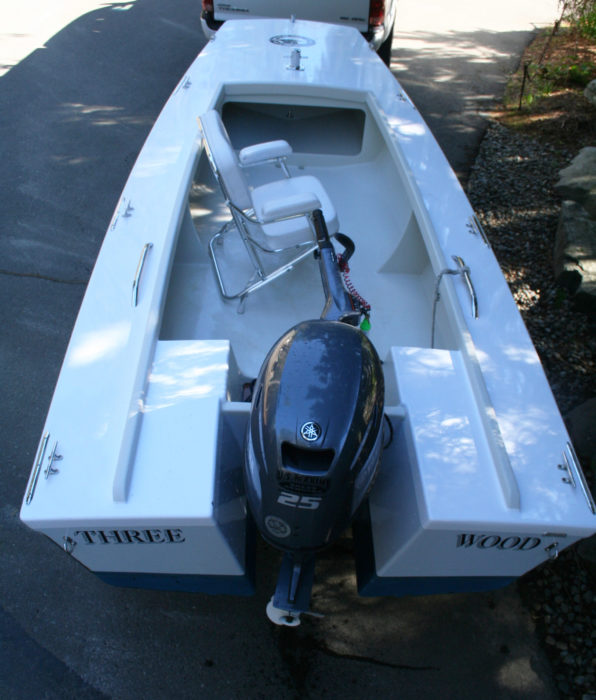
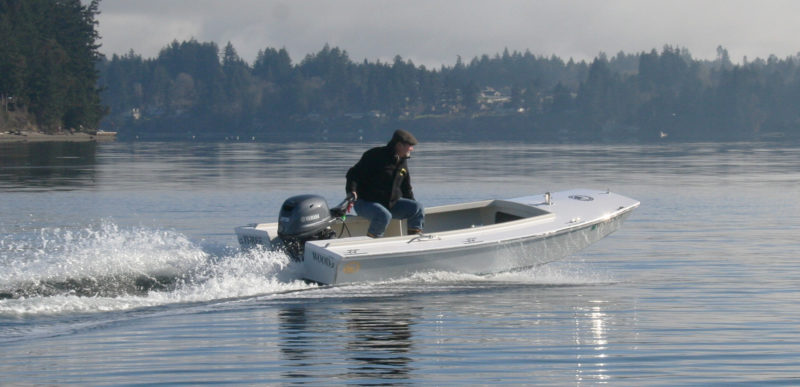
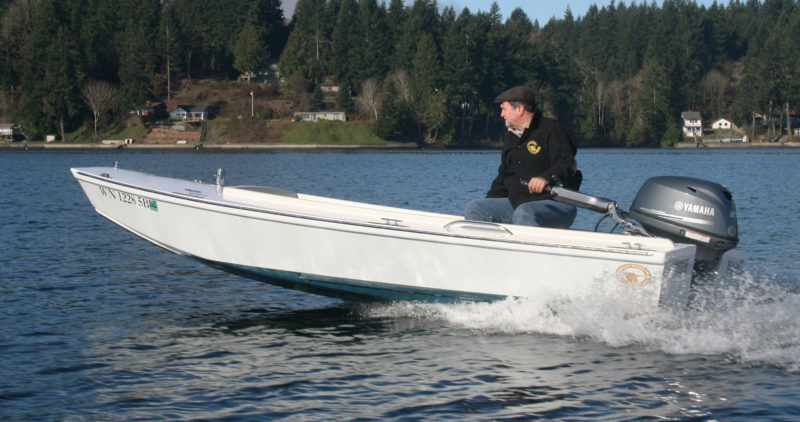
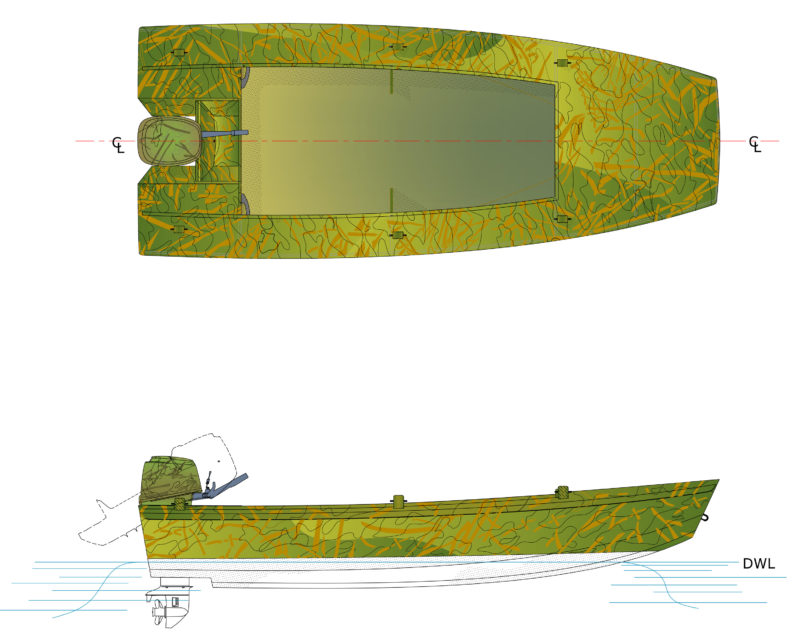
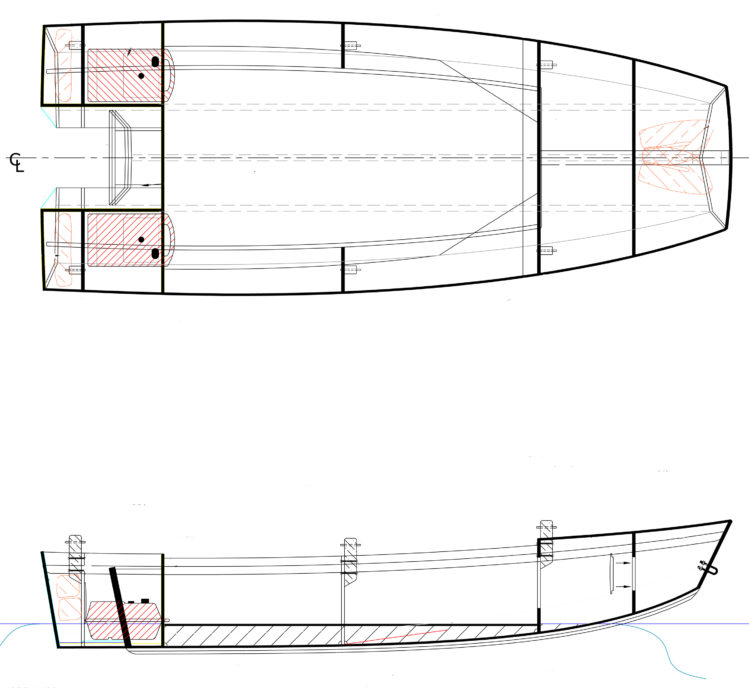