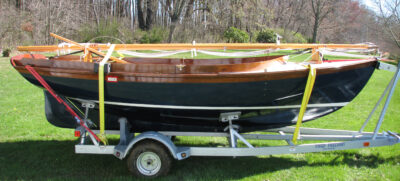
When I was building my Haven 12 1⁄2, one of the big questions that loomed over the much-anticipated launching day was: “How do I carry the spars while I’m trailering the boat to the launch ramp?”
Ballentine’s Boat Shop in Cataumet, Massachusetts, builders of the Doughdish (the fiberglass version of the Herreshoff 12 1⁄2), makes spar carriers for that boat. They gave me permission to share my spar carrier build inspired by their design.
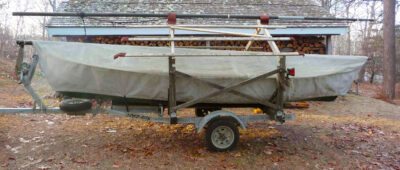
My boat has four spars: mast, boom, gaff, and jib club. The 4′ 8″ jib club can be transported behind the seat of my truck, but the others must go in the boat.
 Photographs by the author
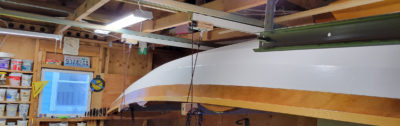
The stern deck stand is considerably larger than the foredeck stand. In part this is because it supports all three of HEY JUDE’s principal spars, but also because the stern deck is several inches lower than the foredeck. Note the carved groove in the foredeck-stand foot, which goes under the deck cleat, and the large-diameter hole in the stern-deck stand, which accommodates the 12 1⁄2’s tiller.
Designing and building a DIY spar carrier
For my custom spar carrier, I built two vertical stands—one for the foredeck, one for the after deck. Each is a piece of 1⁄2″ plywood with semicircular cutouts in the top edge and multiple drilled holes for tying the spars to the stand and the stand to the boat. (For the 12 1⁄2, the after stand also features a hole for the tiller, which passes through it.)
When designing spar carriers, it’s handy if you can use the boat’s existing hardware to support them. On my boat, I determined that the forward stand could slide under and be anchored by the after horn of the deck cleat, while the after stand would line up with my tiller tie-off pad-eyes on either side of the deck.
 All drawings from sketches by the author
To calculate the required height for the stands a string is run stem to stern, clearing all items such as the cockpit coaming and tiller. The string shows the position of the bottom of the largest-diameter spar.
When determining the height of each stand, all the spars must rest above any part of the boat. In my case, the bottom edge of the mast (the longest and largest-diameter of the spars) had to clear the coaming, stem head, and transom. I clamped pieces of scrap wood to the stem and transom and stretched a length of string between them. Measuring from the string down to the decks gave me the desired height-above-deck of the bottom of the mast. To this I added one half of the mast’s diameter (the amount of spar that would rest in the stand) plus 1⁄4″ for additional depth and thus support. This gave me the overall height of each stand. In the 12 1⁄2, the foredeck is higher than the afterdeck, so the forward stand is 9 3⁄8″ tall (plus 1⁄8″ foam glued to the bottom of the base), while the after stand is 14″ tall (plus 1⁄4″ foam—extra to accommodate the greater weight carried).

While the measurements in this, and subsequent, drawings are suitable for the Haven 12 1⁄2, the plan can be adapted for other boats.
To determine the overall width of the stands—including their bases—two factors come into play: the size and number of the spars to be carried, and how each stand will be supported. In my case, the forward stand would support the mast and boom and be held down and stabilized by the deck cleat, thus requiring no additional support other than tie-downs to prevent it sliding aft. The after stand would have no deck cleat to anchor it, and would support all three spars (the forward end of the gaff rests on the cockpit sole) so would require a more substantial base to stabilize it.
The stands would be cut out of 1⁄2″ marine plywood. To find the width of the top edge of each carrier, I established the diameters of the spars’ holding cups and spaced them 1 1⁄2″ to 2″ apart. This gave me 14″ for the after stand, and 11″ for the forward stand.

I started with the foredeck stand, the simpler of the two, which I had determined would be 9 3⁄8″ top to bottom and 11″ wide at the top. To give it a wide, stable stance, I made the base 14″ wide. The bottom of the plywood would slot into a dado cut into a solid piece of 2 x 4 Douglas fir which, to accommodate the slight crown in the deck, would need a shallow arc in the bottom, rising to 1⁄16″ in the middle.
After I cut out the plywood trapezoid, I drew the cups by placing my compass point 1⁄4″ below the top of the plywood, drawing a semicircle below that, and extending each side of the arc straight up to the top. I then cut the spar cups into the top edge using the bandsaw’s 3⁄8″ blade, and drilled out the 1⁄2″-diameter holes for the tie-downs.
Next, I cut a groove into the Douglas fir, which would form the base of the stand. Using a tablesaw, I cut a 3⁄4″-deep groove, making repeated cuts to slowly widen it so that the plywood fit snugly. (Do not assume that plywood advertised as 1⁄2″ is that exact thickness—mine measured 0.570″.)
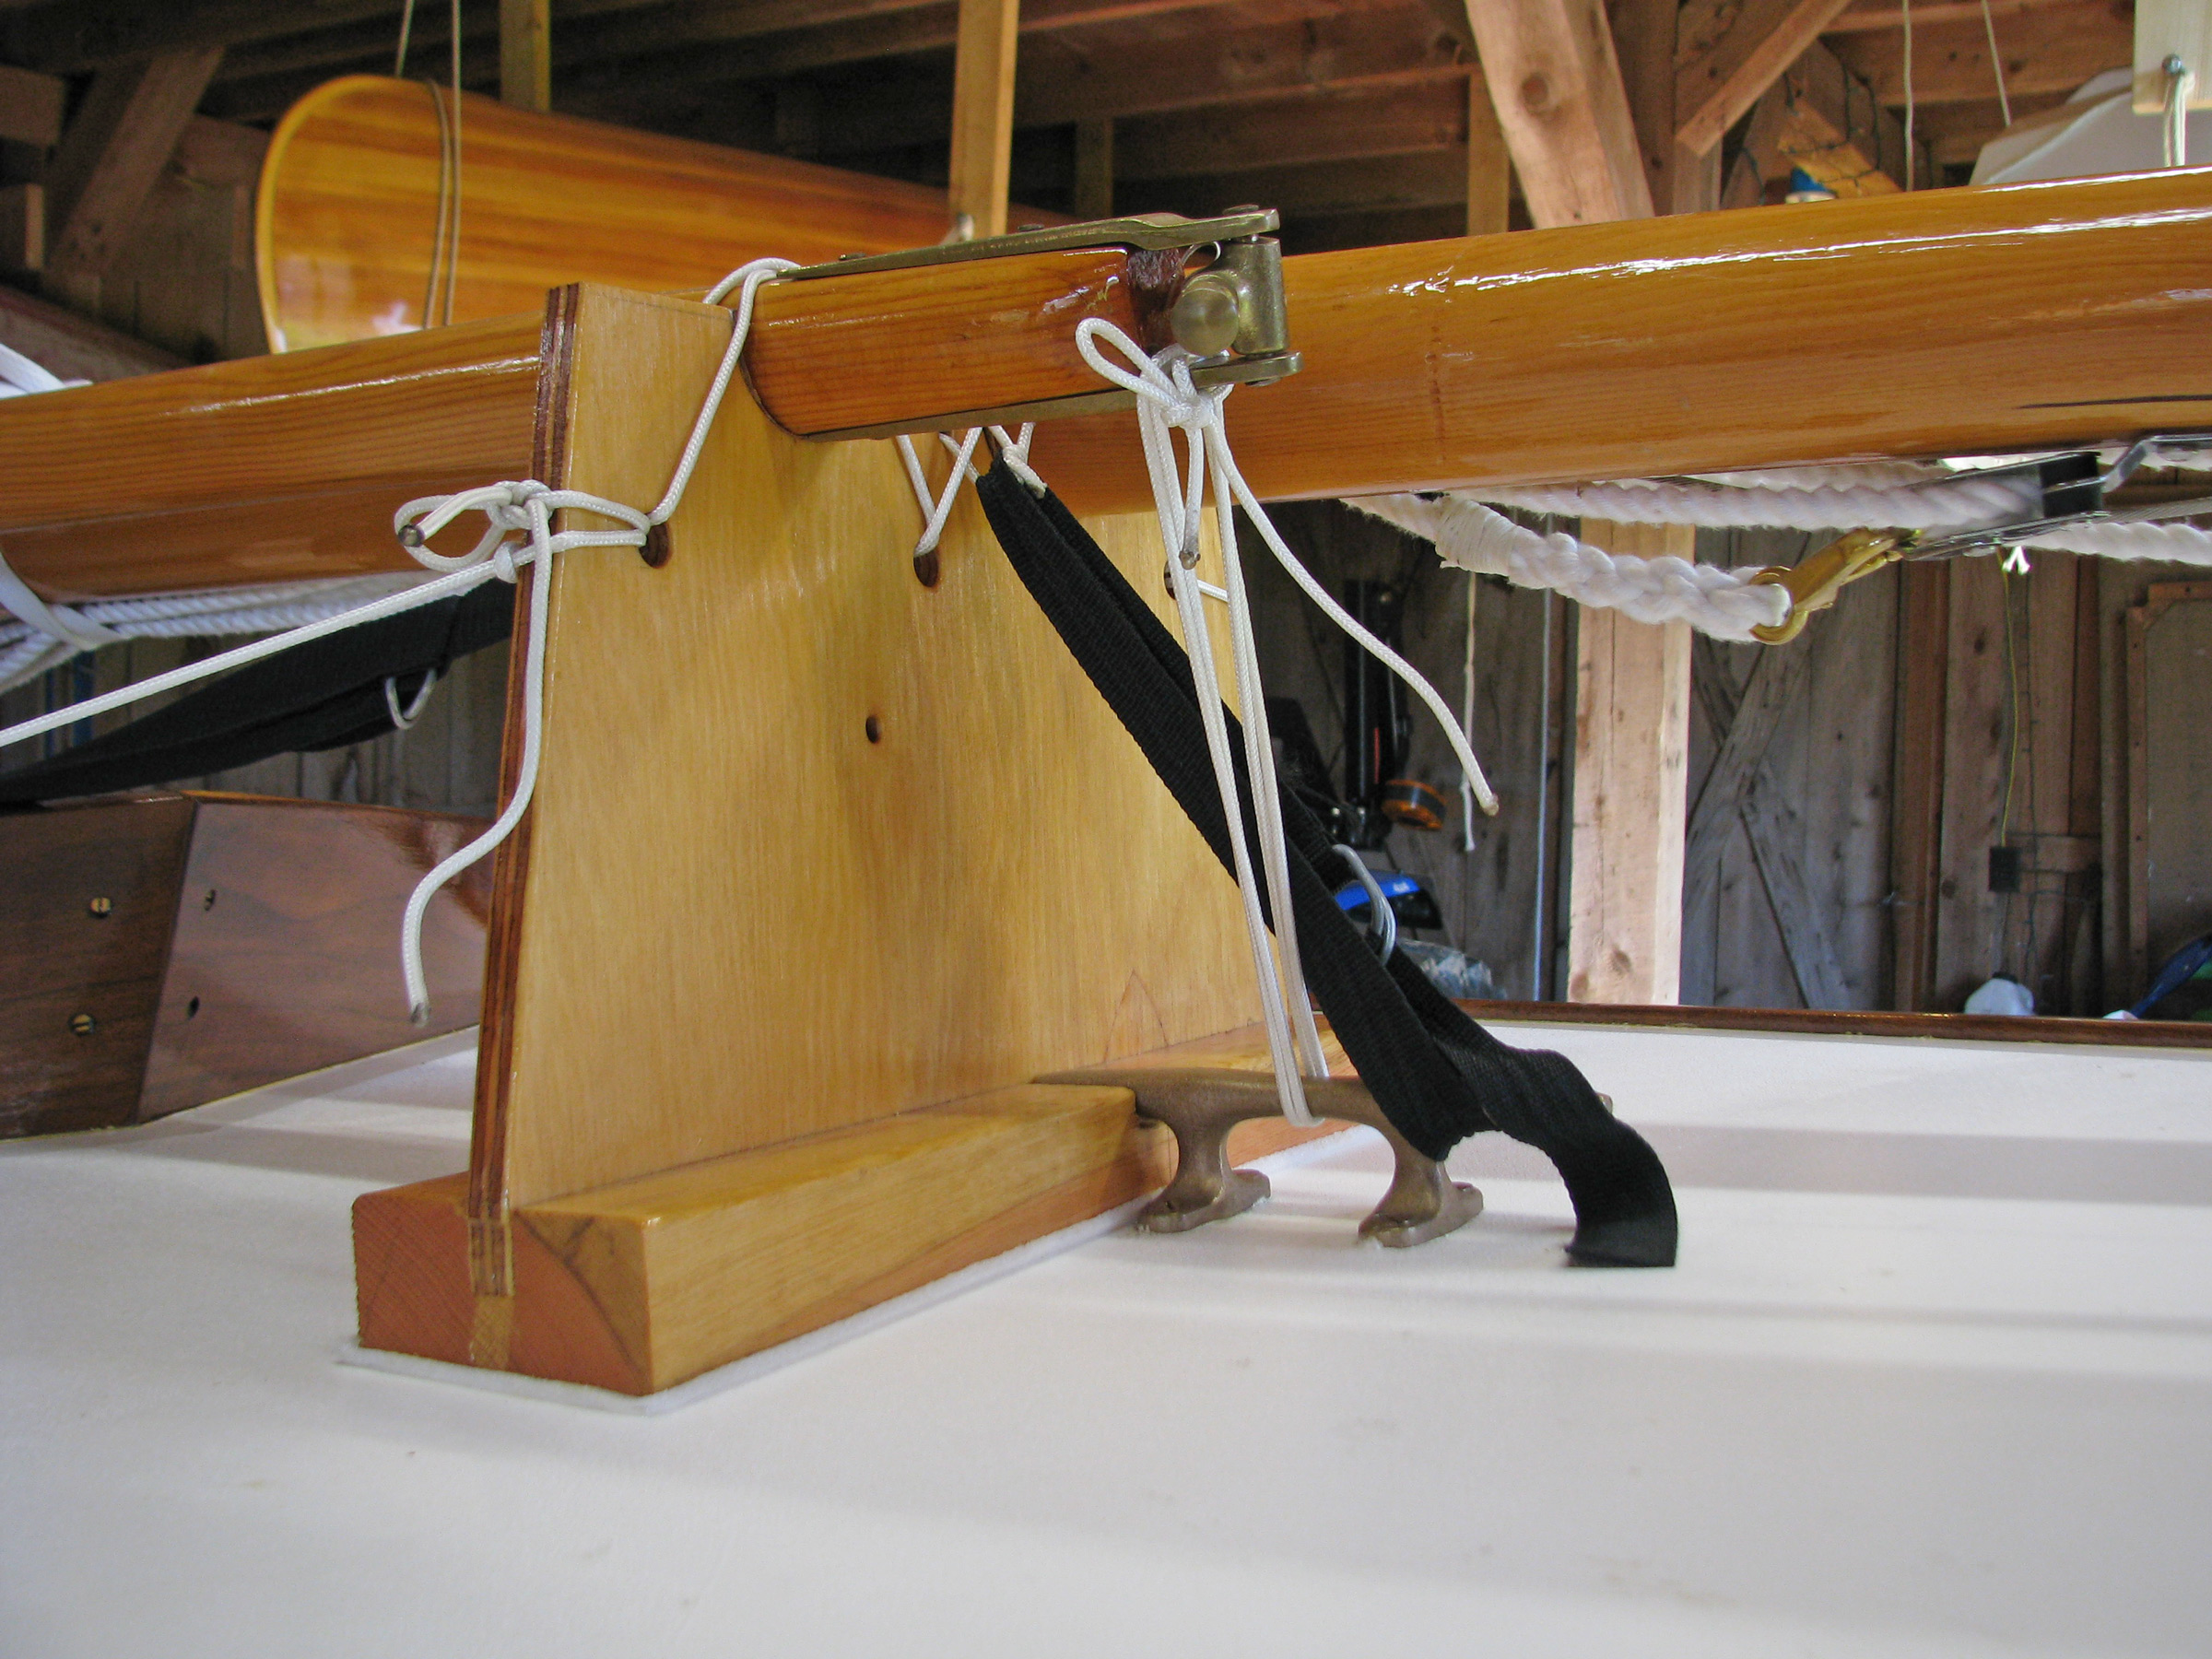
When making a spar carrier it’s useful if you can employ existing hardware on the boat. On my 12 ½ I use the tiller tie-down pad-eyes on the stern deck and here, on the foredeck, I use the deck cleat to tie down both the stand itself and the boom. I also drilled some extra holes in the forward stand for additional tie-downs that I’ll use if a long highway trip is in our future.
Because I was using the deck cleat to locate the stand, I next chiseled out a channel in the top of the fir so that it could slide under the horn of the cleat.
I glued the plywood into the groove of the base with epoxy. I rounded all the edges and sanded everything using a piece of sandpaper wrapped around a scrap of dowel to sand out the inside of the tie-down holes.
I finished everything with epoxy—paying particular attention to soak the plywood edges—and several coats of marine varnish.
Finally, I glued 1⁄8-thick closed-cell-foam padding to the bottom of the base to protect the boat deck, and glued some leather strips into the spar cups.

With the foredeck stand complete, I turned my attention to the after stand. I cut out the 1⁄2″ plywood face to the desired dimensions: 18 1⁄2″ × 14″. I then glued and screwed one of the longer sides between two 1 3⁄8″-square × 18 1⁄2″ pieces of dimensional lumber. When the glue had cured, I glued and screwed the whole assembly into two 1 1⁄2″ × 1 3⁄8″ x 9″-long Douglas-fir feet, into which I had precut 3⁄4″-deep × 3 1⁄4″ recesses.

I cut the spar cups and drilled for the tie-downs as before, marked up and cut the tiller hole, and again coated the assembly with epoxy and several coats of marine varnish. I protected the bottom of the stand with 1⁄4″ closed-cell foam.

Having all of HEY JUDE’s spars supported and stable in their custom carrier has simplified the set-up for trailering.
Each stand needs at least four tie-down locations: side to side and fore and aft. I use 1″ strapping with quickly adjustable Double D rings and snaphooks wherever possible.
The spars are tied into the cups by lacing two strands of 1⁄8″ cord up and over the spars and down through holes in the stand, crossing on the top of the spars as they go. I have drilled extra holes in each stand in case I want to use more or different tie-downs.
Simple to make of inexpensive materials, the spar carrier has worked well through two-plus seasons of semi-local day-sailing.![]()
Bill Jordan teaches the Art of Shaker Box Making at WoodenBoat School. He documented the building of HEY JUDE through three YouTube videos hosted on his channel Boxesnboats. To read HEY JUDE’s story, see “Building the Haven 12 ½.”
You can share your tips and tricks of the trade with other Small Boats readers by sending us an email.


Join The Conversation
We welcome your comments about this article. To include a photo with your remarks, click Choose File below the Comment box.