Bill Griffin’s first boating memory is of paddling a wooden canoe on a New York lake as a young child. The first family-owned boat, he says, was a 17′ aluminum Grumman paddling and sailing canoe. It was followed by Sunfish dinghies, larger daysailers, and still larger cruising sailboats. One after another they inspired in Bill a love of boats and boating that eventually led him into a career in the marine industry, for many years at a marine hardware store in Annapolis and more recently as a rep for a marine paint manufacturer. As Bill puts it, his work life now consists of “calling on boatyards, retailers, and builders, talking boats, and getting paid to do it.”
For all his experience, however, Bill had never built a boat for himself. He had helped his friend and neighbor, Charlie Flanagan, to restore a 1935 Herreshoff 12 1⁄2 and a 1973 Beetle Cat and on both occasions, he brought his professional expertise to the table, advising Charlie on the best paints to use and how to apply them.
 Bill Griffin
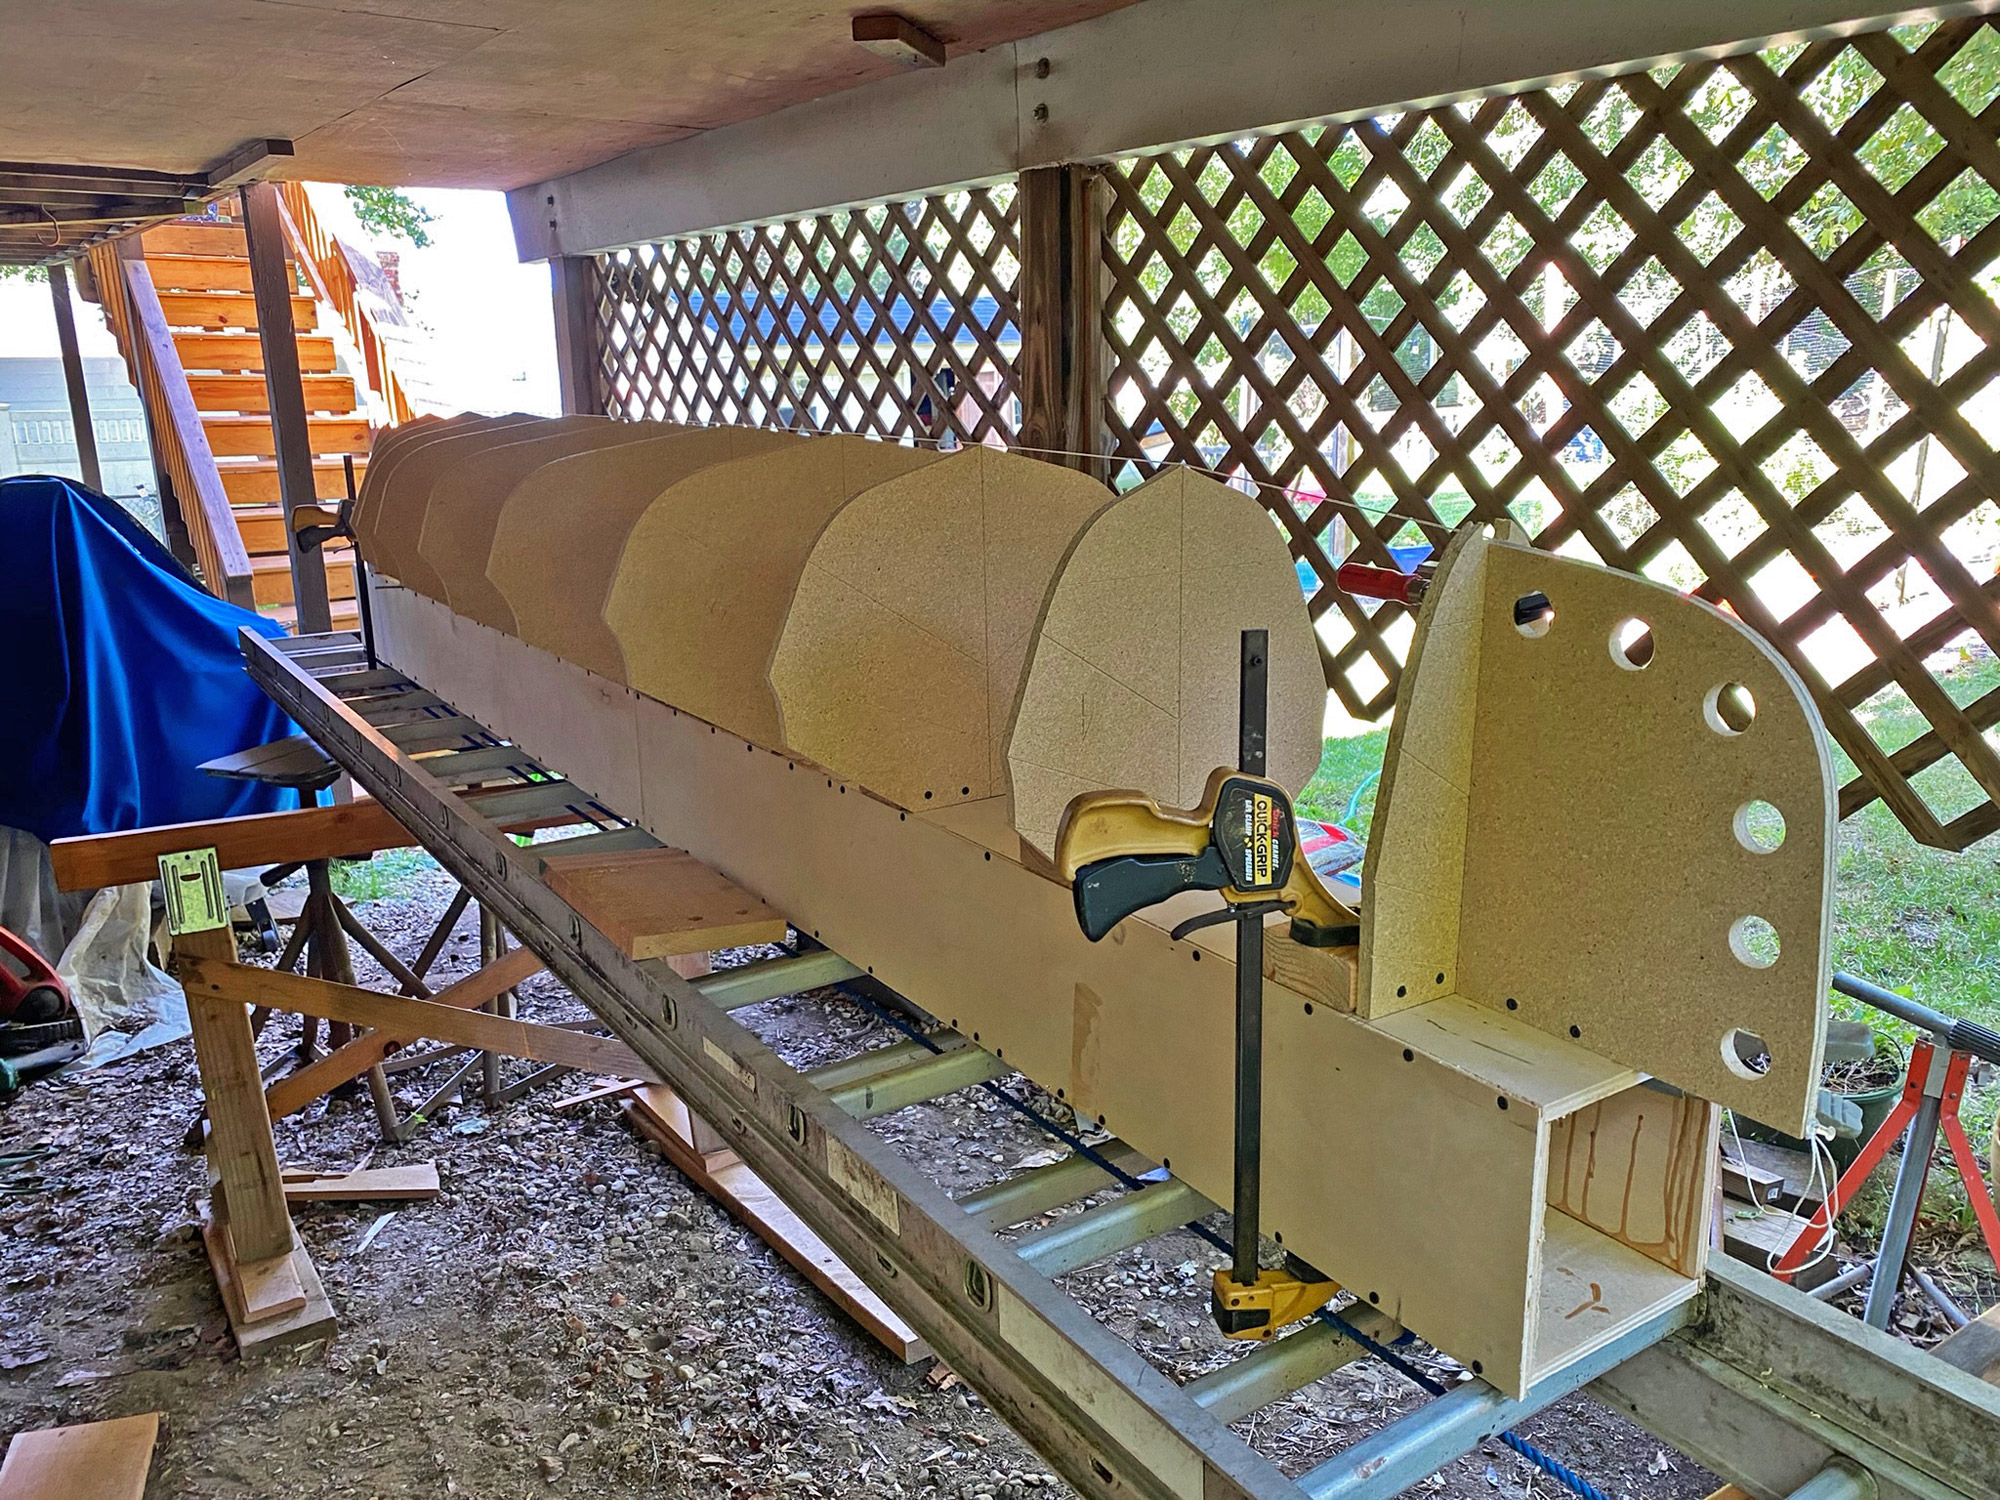
Once Bill and Charlie had built the box beam—laid atop an aluminum ladder on two leveled horses—they set up the building molds over which they would plank up the hull.
He also helped Charlie to build a Chesapeake Light Craft (CLC) Lighthouse Tender, which introduced him to the world of kit building. Then, after Bill saw a Nick Schade–designed kayak at the Chesapeake Bay Maritime Museum and subsequently read Schade’s book, Building Strip-Planked Boats, the seeds were sown—it was time to build. He ordered a CLC kit for Nick Schade’s strip-planked 12′ canoe, Nymph. He chose the Nymph, Bill says, because he wanted a canoe, wanted to build strip-plank, likes to use a double-blade paddle, and was intrigued by the prospect of paddling a canoe that weighs just 25 lbs.
So began what Bill has come to see as a series of lessons learned.
 Bill Griffin
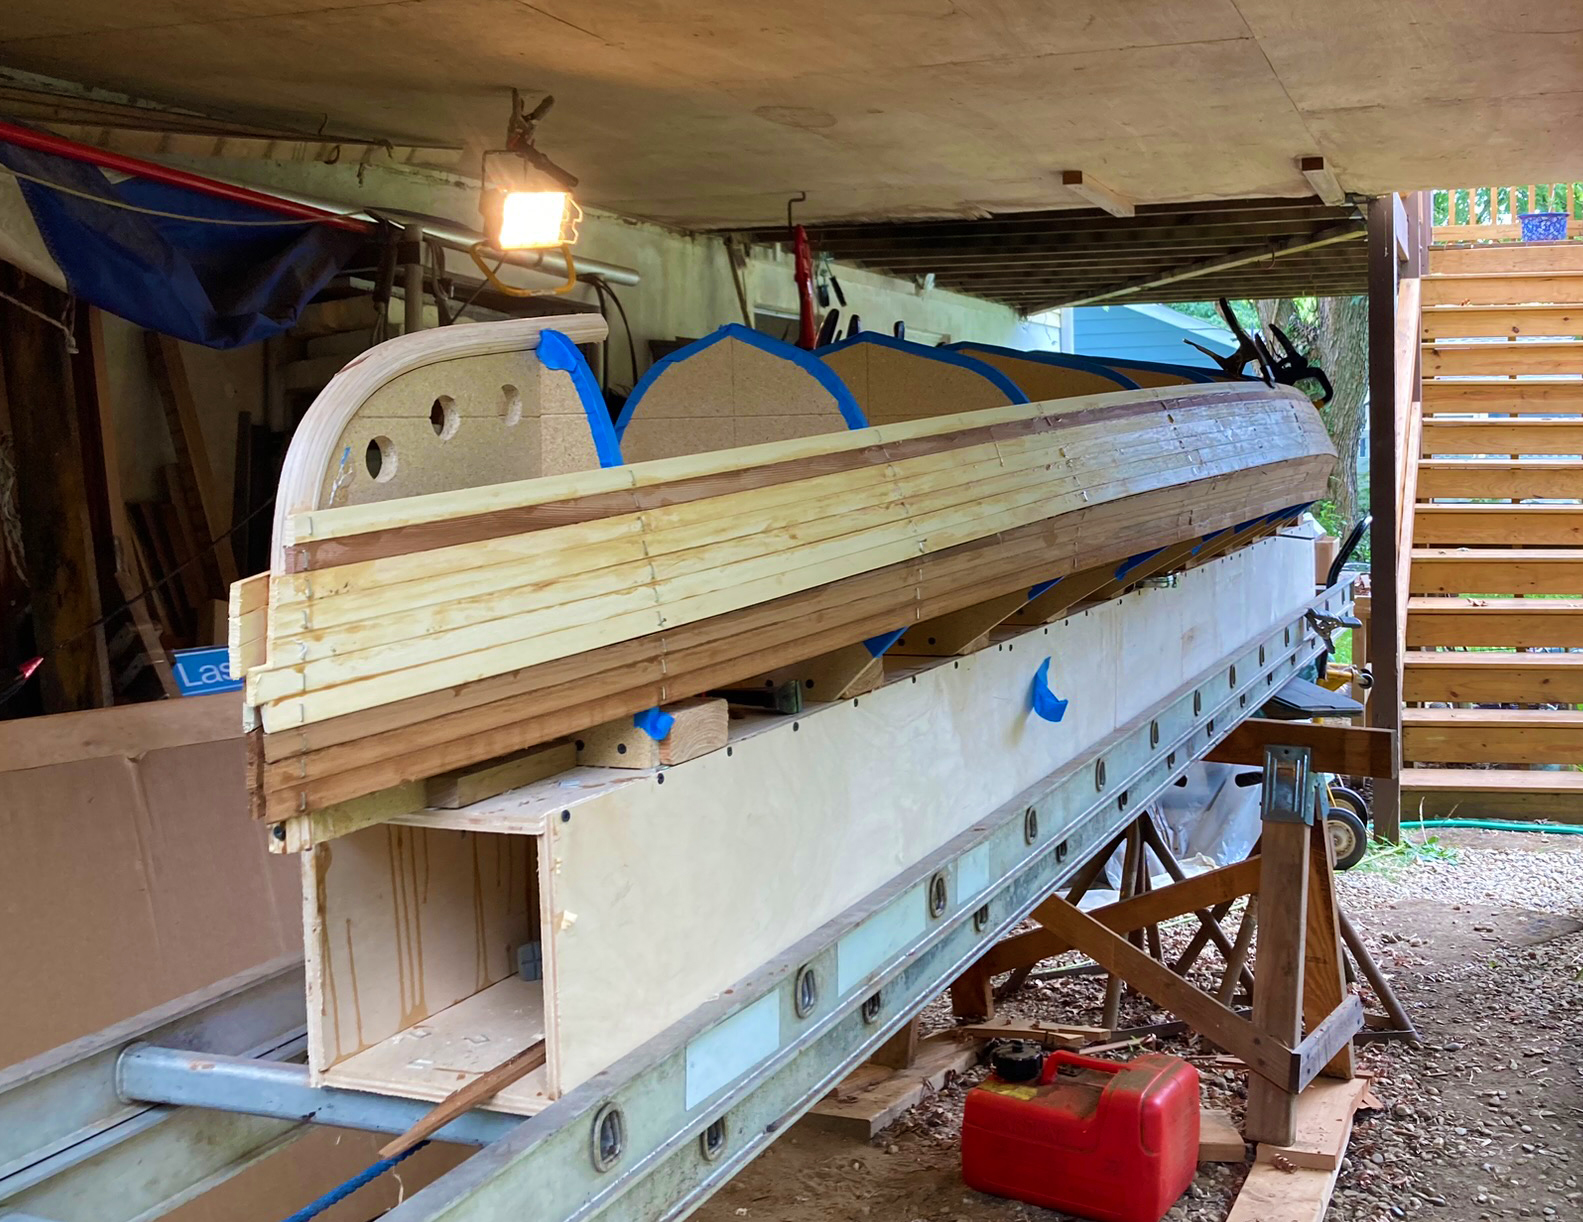
Prior to planking, Bill had carefully mapped out the order in which the strips would be used, so establishing the hull’s ultimate color-and-pattern scheme. He had also laminated the four stems—two inner, set in place before planking began, and two outer. Finally, Bill and Charlie covered the outer edges of the molds with masking tape so the planks wouldn’t be unintentionally stuck to the molds.
Lesson 1: A project of this size should be tackled in small step-by-step increments. “It’s overwhelming if you look down the road at all that is to come,” Bill says. “It’s important to tackle one challenge at a time.”
Lesson 2: Find a good place to work. Building a boat, says Bill, “always seems to take longer than expected, so you need a suitable workspace that won’t be needed for other things; you don’t want to be moving the boat while it’s being built.”
 Bill Griffin
The outer stem would be glued and clamped into place. The gap seen here was reduced to almost nothing and what remained was filled with thickened epoxy.
Bill talked to Charlie, who “has a sheltered dirt-floor workshop where a project can be undisturbed for months. With the space, inevitably, came Charlie, as a willing helper and collaborator. Despite his years of restoring and building boats, Charlie had never done any strip building and was eager to be involved.
In August 2023, when both Bill and Charlie had a week of vacation time, the two friends started work. They reread Nick Schade’s book, went to CLC to pick up the parts for the boat, and built a plywood box beam to serve as a building platform. “It was tricky to get it level on the uneven ground,” says Bill, “so in the end we leveled some horses, laid an aluminum ladder across them, and placed the beam on top of that.”
The kit from CLC included building notes, western red and Alaska yellow cedar bead-and-cove strips (as well as a few in walnut), mahogany for the rails and decks, spruce for the thwarts, and precut molds. Over the course of their week off, as well as setting up the box-beam strongback and molds, Bill and Charlie glued up and placed the inner stems, and laid out the strips to figure out how they looked next to each other and to pick out the places in the hull where they’d look best. “We took our time and sketched out the hull’s color scheme.”
 Bill Griffin
The hull was lifted off the molds and carried out into the yard. The amount of cleaning and sanding that would be needed was daunting, but Bill was excited by the very light weight of the hull.
After the flurry of the first week, the project moved steadily but slowly with Bill and Charlie only able to build during weekends, and not every week. They applied strips carefully, a few at a time, stapling them to the forms, which they had masked with tape so they wouldn’t inadvertently glue the strips to them. As they worked, they figured out how to cut the scarf joints and how best to staple the strips, often supplementing the staples with packing tape.
Soon, Bill says, they came to Lesson 3: Sometimes the next step just doesn’t make sense. “When we got to the sharp turn to the tumblehome in Nymph’s topsides, we were met with a complex bevel, and we spent time figuring out how to fashion the required shape on the bandsaw. Our method—which we applied time and again when things were complicated—was to read the directions a few times, then just try something. If it didn’t work out, we’d start again, and try another method. This project taught me a new level of patience.”
 Charlie Flanagan
Applying the ’glass and epoxy was an exacting task, especially in the hull’s interior where Bill struggled to cut the cloth so that it didn’t pucker in the ends.
The tumblehome bevels mastered, planking the rest of the hull went smoothly. But the next head-scratching step came when it was time to shape the external stems. They deliberated, discussed, tried out some ideas, and sought advice from experienced builders. In the end, Bill says, “I followed my own process and shaped them on a stationary belt sander. The satisfaction I felt from successfully shaping them to fit and look good was one of the best parts of the whole experience.”
Another highlight came when they lifted the glued-up hull off the molds. “It seemed as light as a feather,” recalls Bill, “I knew it would be fun to paddle.”
Lesson 4: Some steps in any boatbuilding project are tedious. The first hint of tedium, Bill says, came when they were closing in the bottom of the canoe. It required a lot of cutting joints and persuading strips to bend and stay put in ways they were not inclined to do. But it was the sanding that truly brought home Lesson 4. “Sanding the inside and the outside of the hull, unavoidably calls for a lot of hand-sanding,” Bill says. “I can’t imagine anyone enjoys a lot of hand-sanding.” As they smoothed, Lesson 5 came to the fore: Be judicious in how much wood glue you use when attaching strips. “Most of the sanding we did,” says Bill somewhat ruefully, “was to remove hardened excess glue.”
 Bill Griffin
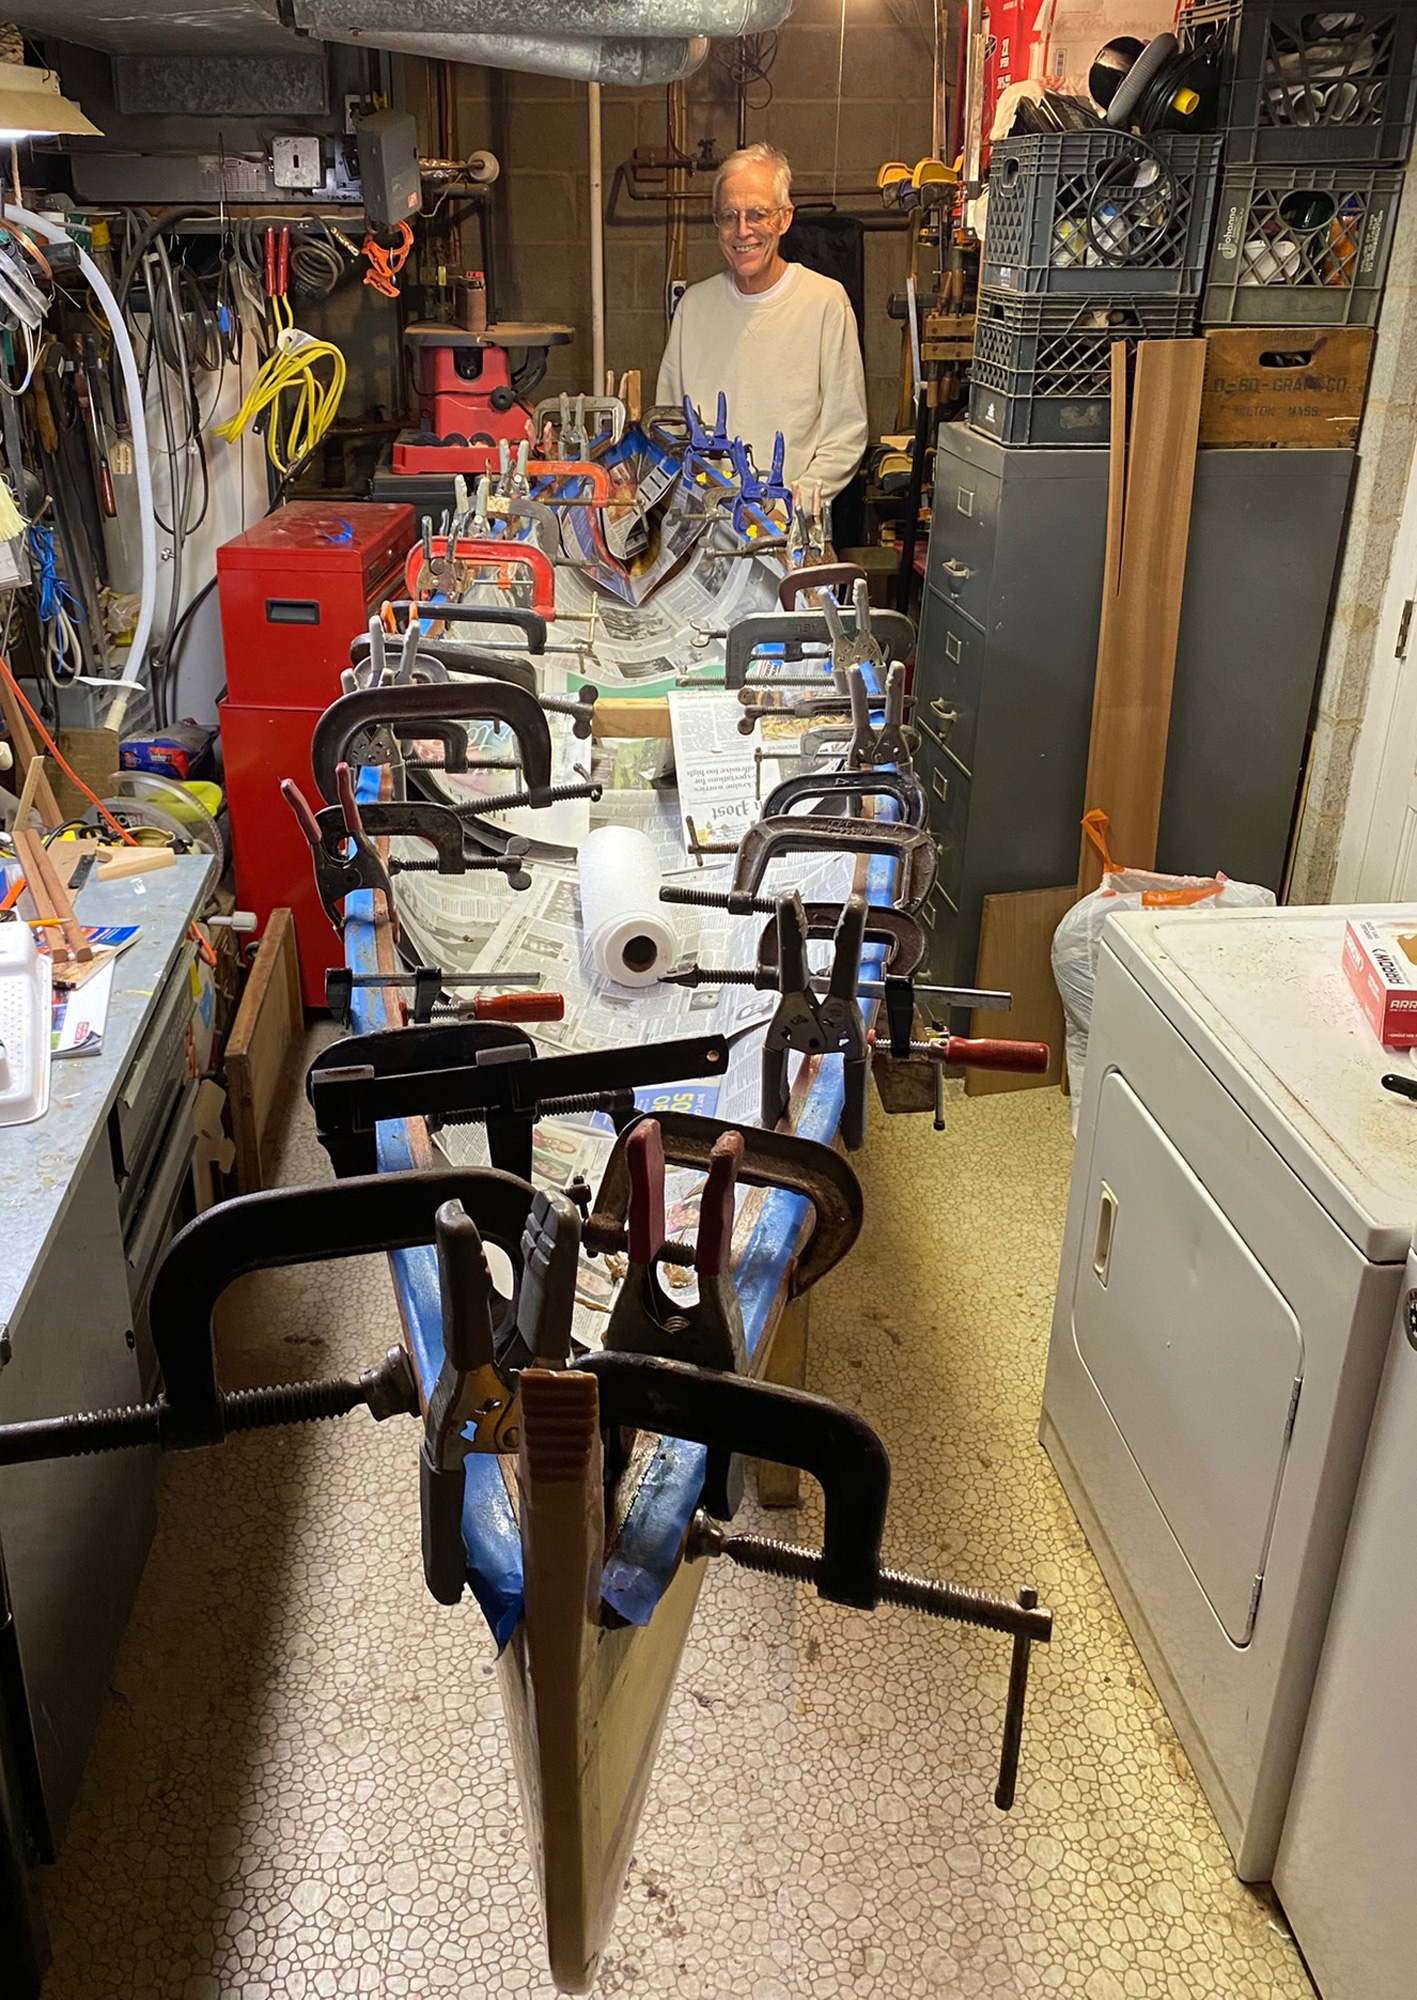
Once the boat was moved inside to the family laundry room (note the dryer at right) space became tight, but there was still much to do to. When fitting the gunwales Bill and Charlie (seen here) used every clamp they could find.
Before ’glassing the boat, they carefully looked over the hull for any gaps between strips. When a gap was found, they masked around it and filled it with thickened epoxy; when it had cured, they reached for the sandpaper again.
The build called for ’glass sheathing both inside and out. Bill says ’glassing the outside was a good deal easier than the inside. On the outside, “the cloth naturally drapes over the hull. Inside is a challenge because you have to figure out how to cut the cloth to fit it into the ends without puckers or wrinkles. We didn’t get them all out; I know where they are…I just hope no one else will notice!”
 Charlie Flanagan
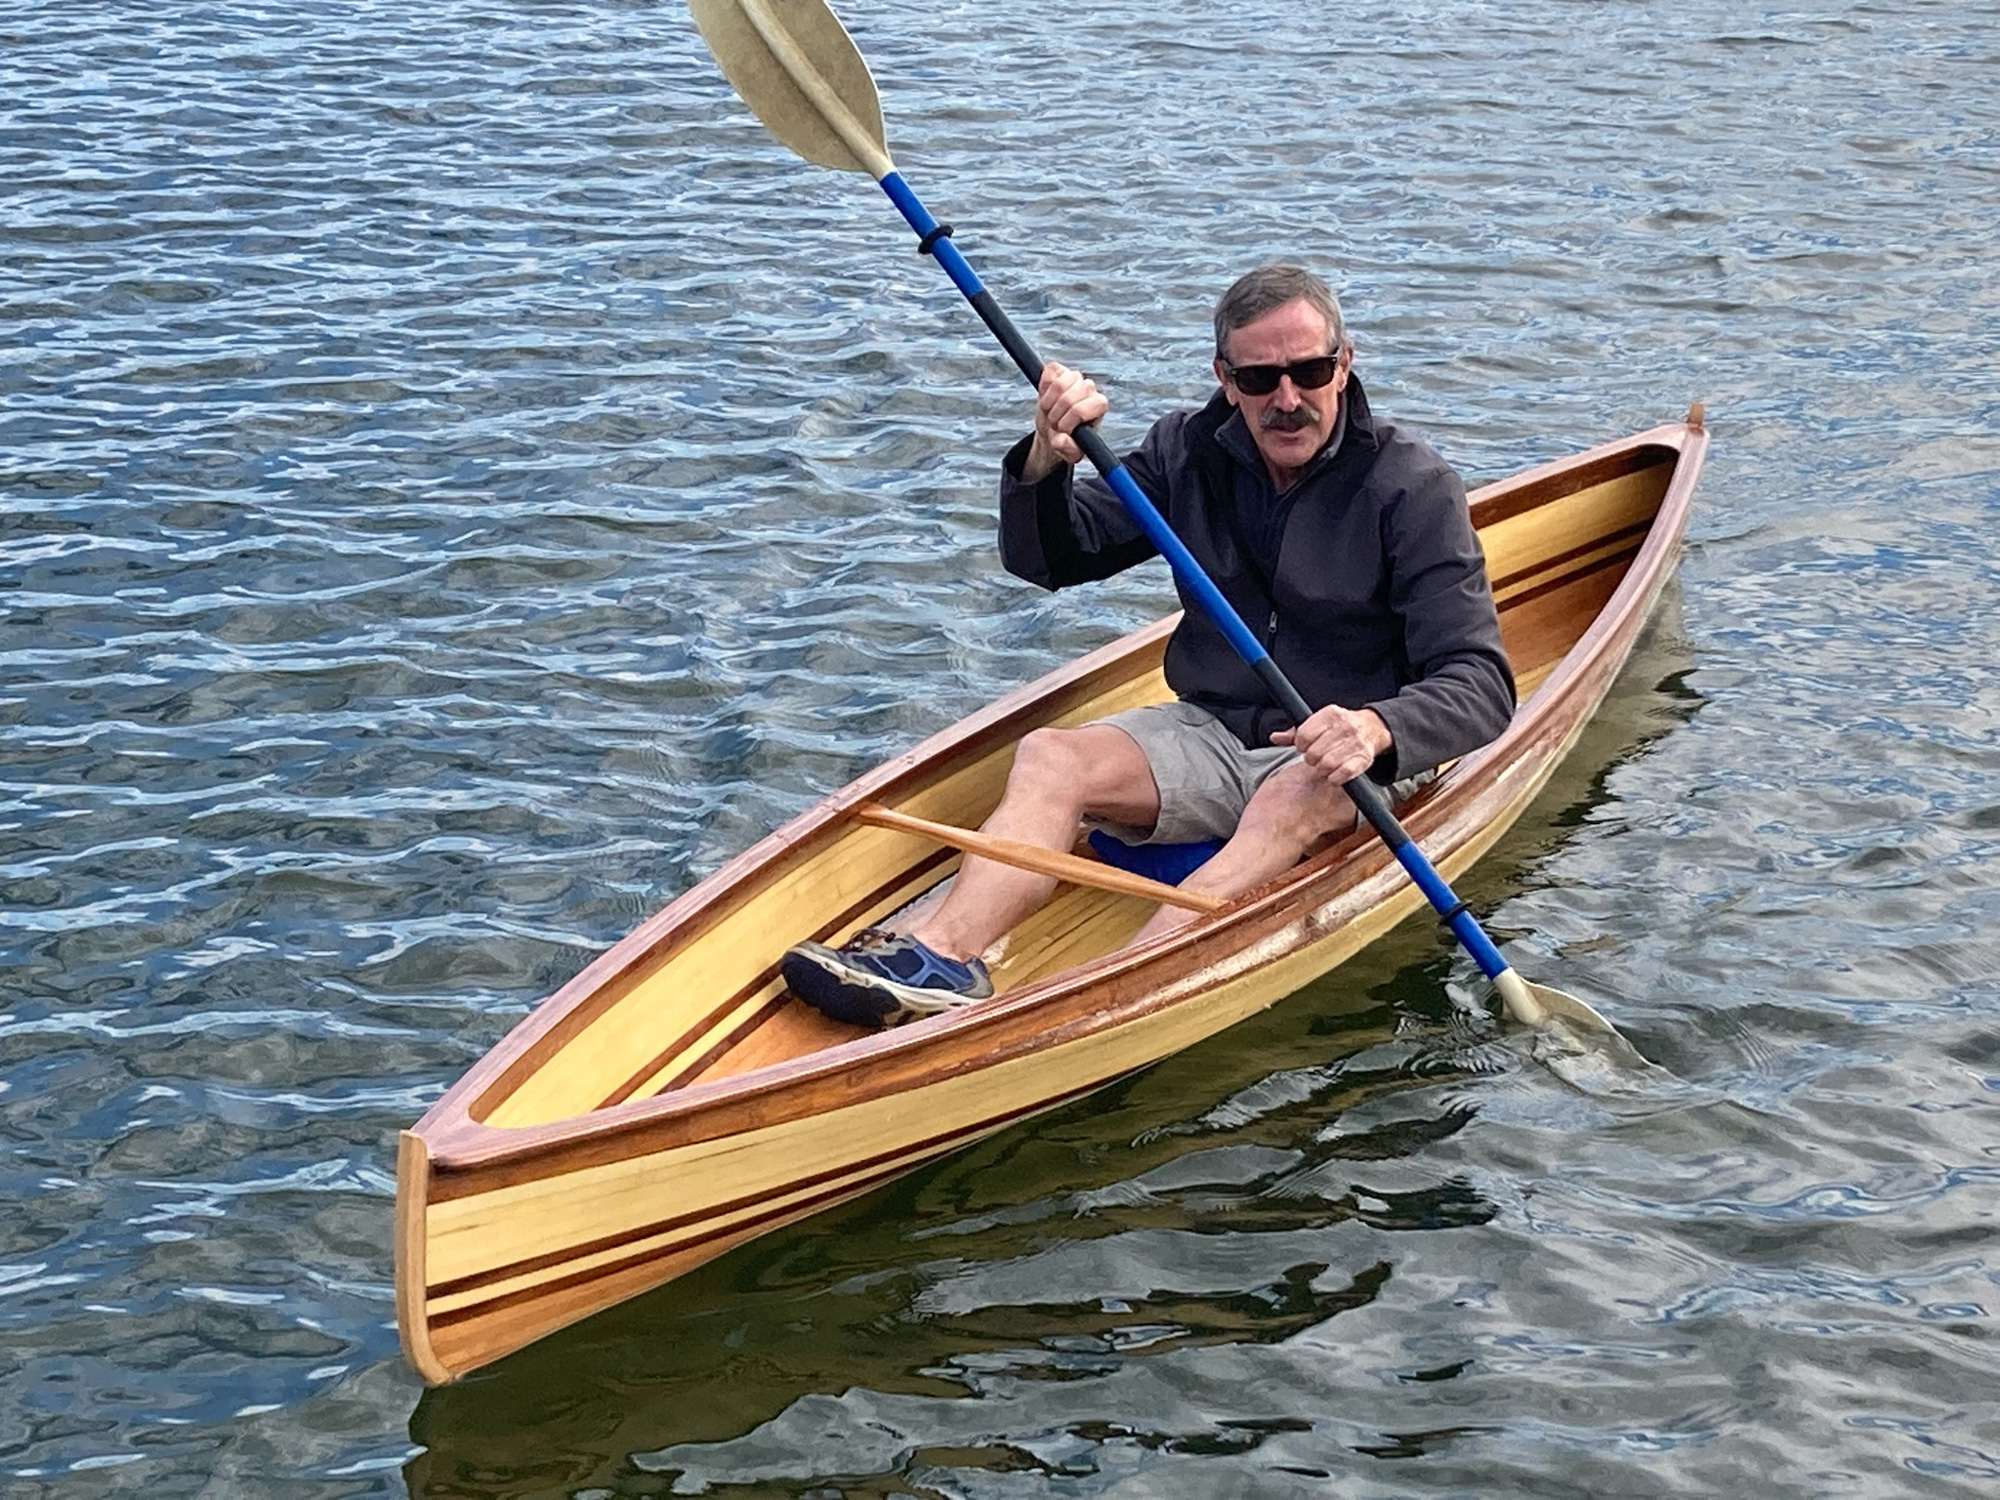
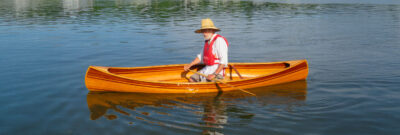
On a mild December day Bill paddled the canoe for the first time. It was a low-key launching, but for Bill, a day long anticipated.
In early November 2023, with the outside temperatures dropping fast, they moved the ’glassed hull into Charlie’s family laundry room where, for several weeks, accessing the washer and dryer meant squeezing by the canoe. By then, says Bill, the canoe looked almost finished, but… Lesson 6: Almost finished isn’t finished. Now came the installation of the gunwales and inwales, the seat, the thwarts, the decks… “These were significant pieces,” says Bill. “They might seem like afterthoughts, but they’re among the first things a viewer sees.” For the rails and decks Bill decided on mahogany, rounding the edges on a table router, and treating them with great care as “though they were parts of a piece of furniture.” It was all tied up in the experience, says Bill. “I really enjoyed taking boxes of wood from CLC and fashioning them into a thing of beauty and function. I didn’t design the boat, but I did have an impact as to how she turned out, looks, and performs.”
 Charlie Flanagan
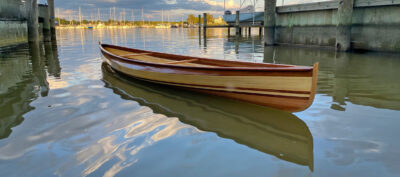
Weighing only 25 lbs and measuring 10′ end to end, the Nymph can be easily lifted and carried by one person.
They finished up in December and, on an unseasonably warm Saturday, they launched the canoe in Duvall Creek on South River, Annapolis. “It looked tiny in the water, but it was stable and seaworthy. I got in and paddled around for a while, savoring the joy of accomplishment.”
Even before the canoe was launched it had been noticed by others. A nearby art space was sponsoring a two-month show of local arts and crafts, and Bill was invited to exhibit the canoe. He did so with pride, and at the show’s January opening he delighted in talking to people about the project. Whether it’s an exhibit in an art show or being used in the water, says Bill, a wooden boat is an “instant conversation starter.” The Nymph would be on display for the next two months.
 Bill Griffin
After a short taste of saltwater, the Nymph would be pulled out, dried off, and taken to a nearby art space to be part of a local arts and crafts exhibit for the next couple of months.
The final lesson Bill learned from building his canoe, he says, is that boat projects are best when you have someone to collaborate with. “Many times, Charlie and I discussed how to proceed and even though we’d have different opinions, we’d come to conclusions, and they usually worked. And for extra help, I’d reach out to the staff at CLC, as well as Nick Schade, and always received good counsel. I now have a boat that moves beautifully through the water, but I ended up with so much more. Building the Nymph yielded a lot of challenges, a lot of satisfaction, and a great social experience of collaboration.”![]()
Jenny Bennett is editor of Small Boats.
Do you have a boat with an interesting story? Please email us. We’d like to hear about it and share it with other Small Boats readers.


Just a few thoughts. First, You really did a nice job. the canoe is a head turner. Some constructive comments. Clear packing tape is a better tape to use on the forms. Much better release. Fiber glassing the inside is always a builder of patience. Instead of trying to cut the cloth to fit, stop the glass a foot short of the ends. Then using the outside of the canoe as a template, cut a piece of cloth that will fit the remaining space. Do this one side at a time. Apply some resin to the inside wood, then slip the cut cloth into position and add more resin. Another tip is to shape the bottom inside stem piece so that it is tapered and rounded so the glass will easily go around it. Thanks for another great article.
Great article, and heartily concur with lesson #7 “…boat projects are best when you have someone to collaborate with.”
Thanks for the inspiration!