On a recent multi-day paddling trip in my Fox canoe, I found myself pondering (and ultimately solving) one of the small issues I’ve always had with open canoes and sailboats and, to some extent, kayaks: the presence and inconvenience of water in the bilge. The process of getting into and paddling small boats inevitably brings water on board. Any gear lying in the bottom of the boat then sits in that water and things that should stay dry get wet. Of course, one way to avoid the problem is to keep everything in dry bags, but most days when I’m only going out for a short time—and often combining my waterborne excursion with some hiking—I prefer to use a daypack.
 Photographs by the author
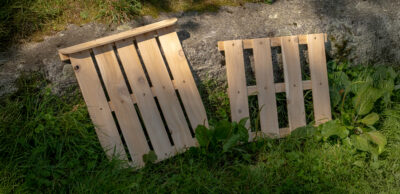
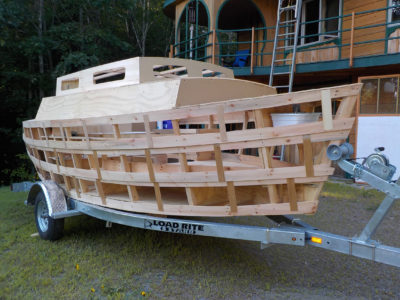
By placing blocks between the slats, you can ensure their regular spacing.
To elevate my gear off the bottom of the boat, I had toyed with the idea of small, lightweight, removable floorboards for the Fox—one behind the seat and one in the forward end of the cockpit—but I’d never thought the need justified the effort of building them. This past summer, however, as I paddled across a lake, feet braced against a dry bag wedged up against the forward bulkhead, I realized that a forward floorboard—if it included an angled upright—would also serve as an excellent foot brace. While I’ve never installed foot braces in my Fox, there is no doubt that bracing feet to help translate the power of paddle strokes into forward momentum provides a definite advantage, especially on longer outings.
Over the next hour or so of paddling, I worked out the details and did a few sketches. Placement and size of the after floorboard was easily determined—it would fill the space between the after bulkhead and the seat. The forward floorboard needed to be long enough to be useful for gear and to serve as a foot brace. I took measurements and noted them on my sketches.
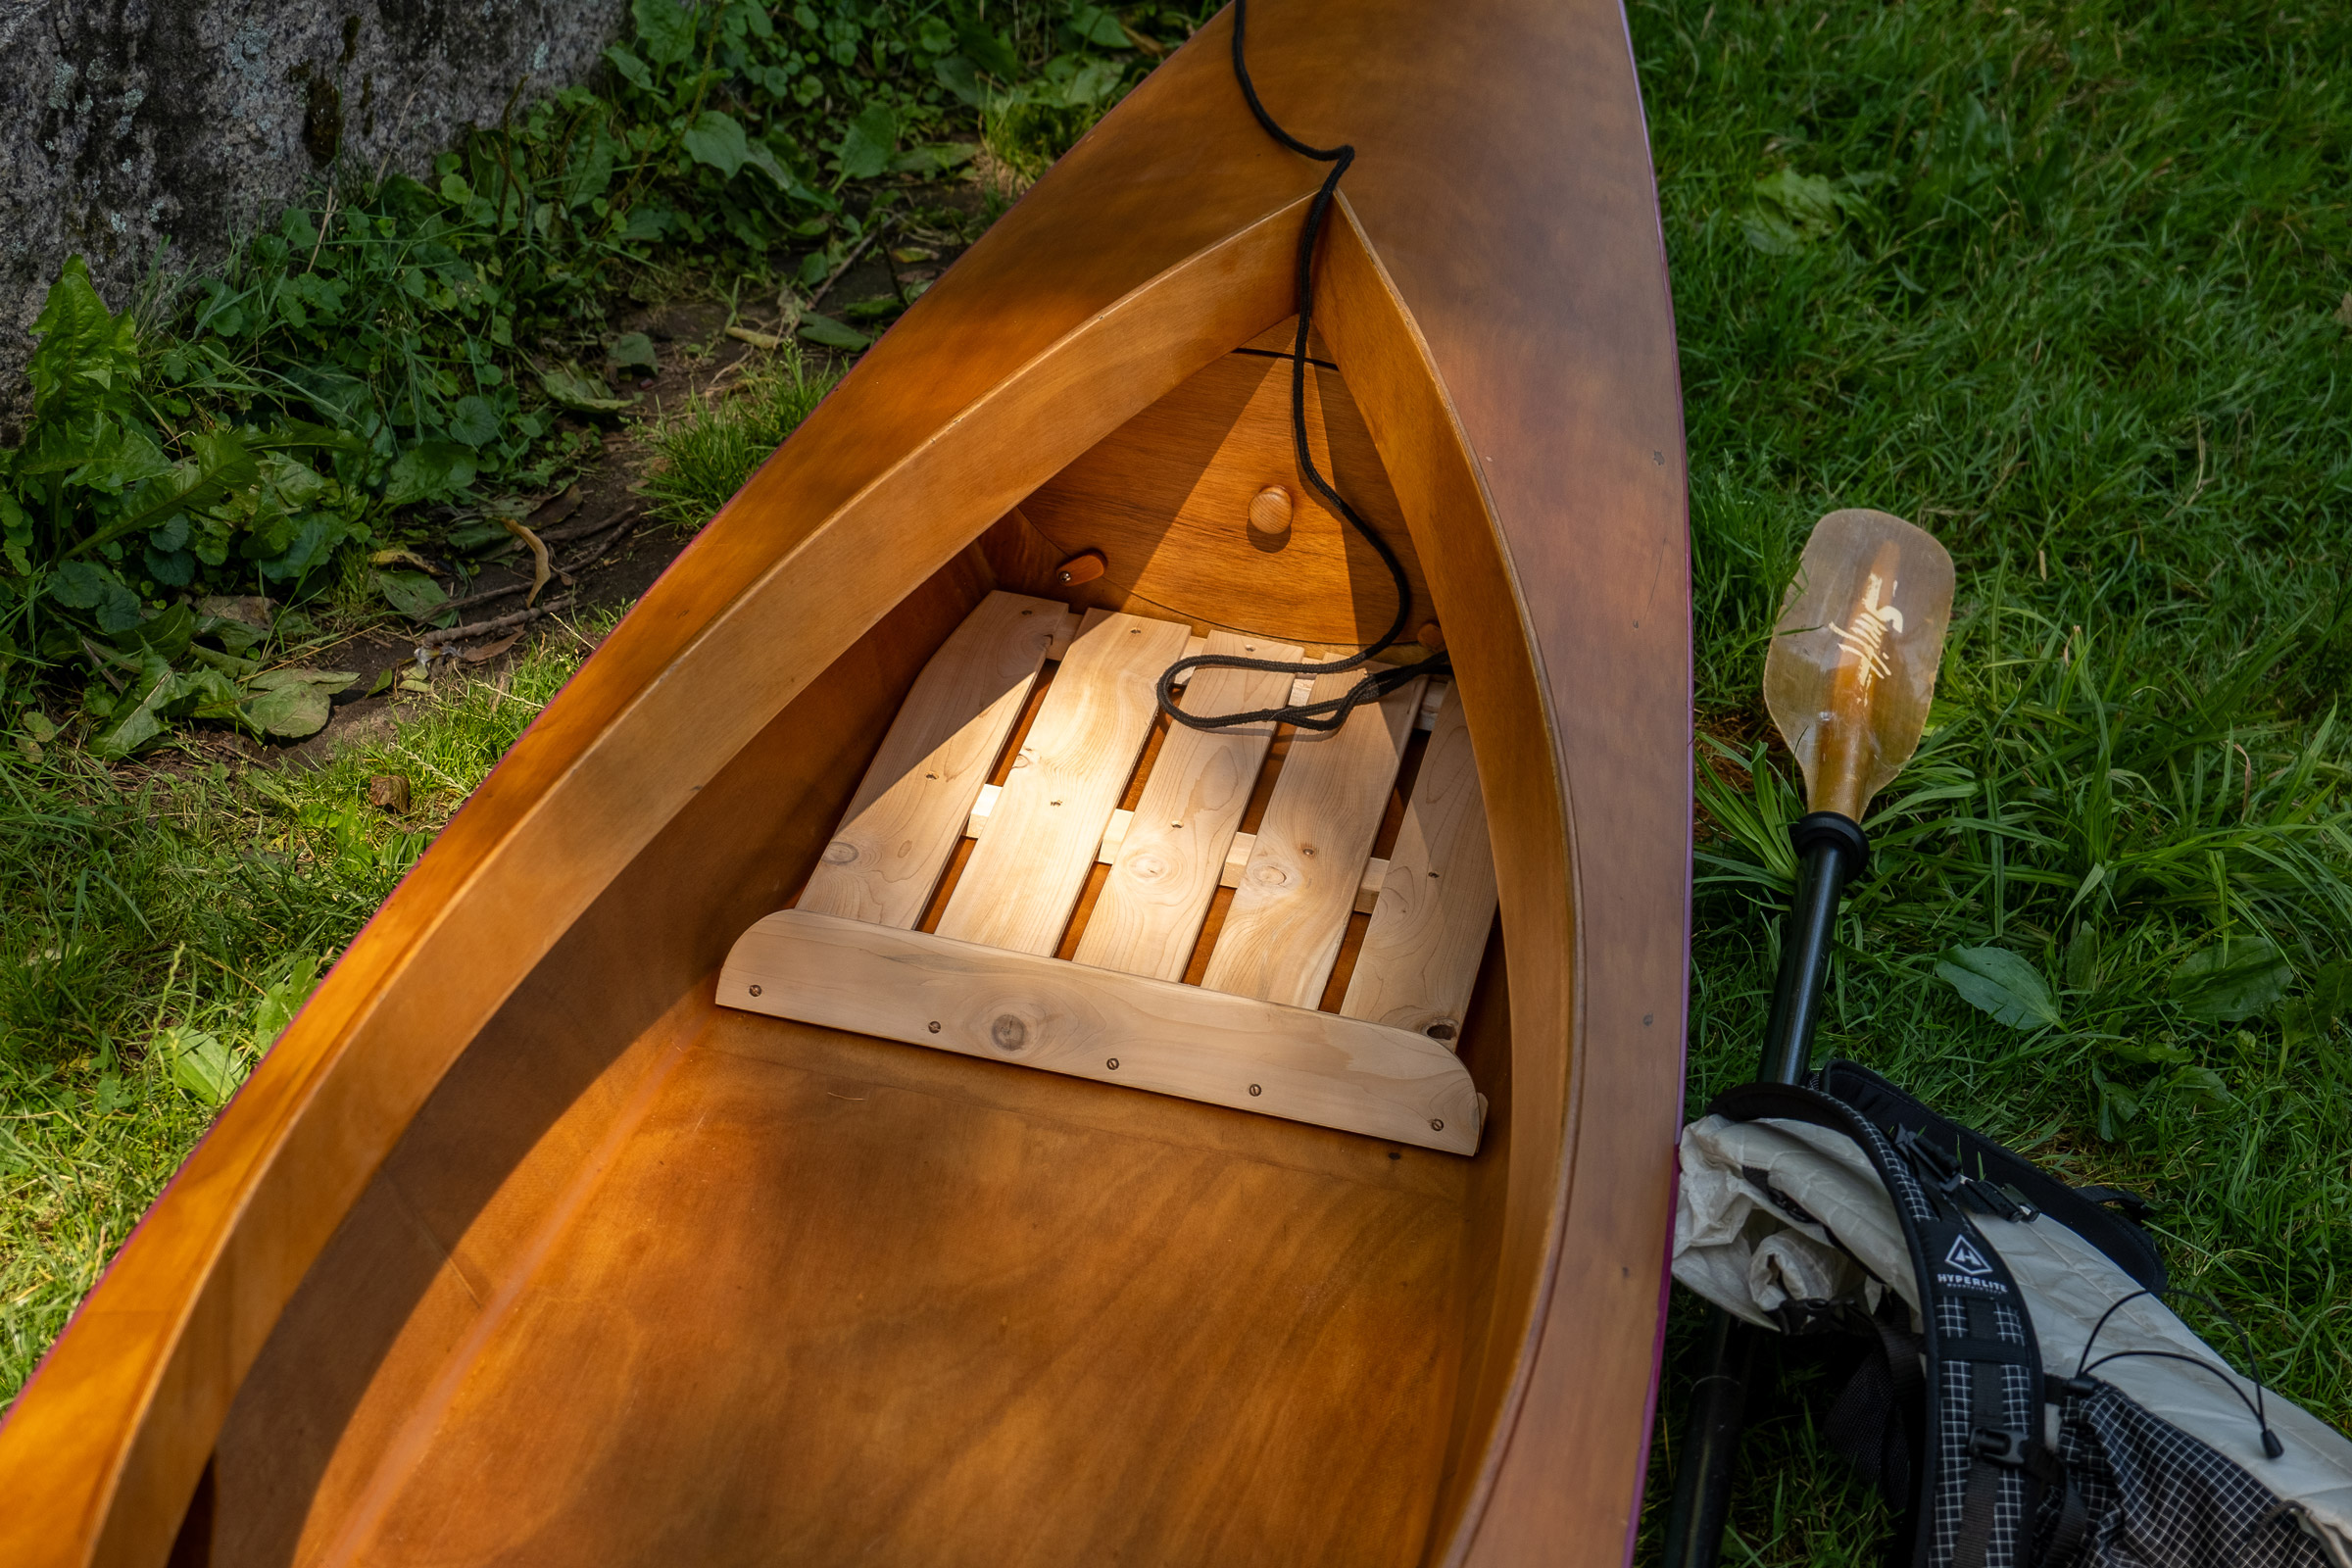
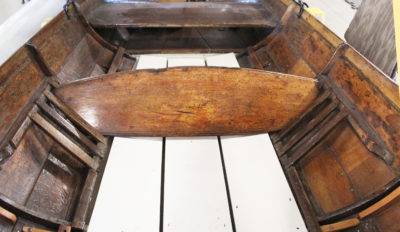
With the after edge of the forward assembly beveled, a precut cedar board can be attached and will rest at an angle that makes it suitable for use as a foot brace. It also serves to keep smaller items in place on the floorboards.
Back in the shop, I milled some salvaged eastern white cedar: 11⁄16″ for the supports that would rest on the boat’s bottom and 5⁄16″ for the slats that would span those supports. Having previously established the placement for my floorboards, I started assembling the forward one. I measured the width of the boat’s bottom in the appropriate location, and cut three supports to the necessary lengths. These I laid, equally spaced, across the flat bottom, temporarily holding them in place with double-sided tape. Next, I took some of the 11⁄16″ slats and cut five to length—the outer two were shaped to follow the contours of the hull. I then laid out the five slats on the supports and, once I was happy with their placement, added a drop of Titebond III glue at each joint, drilled and countersunk holes through the boards and into the supports, and drove in temporary #6 × 3⁄4″ steel wood screws. Then, I removed the assembled panel from the boat and, using a low-angle block plane, beveled its aft-facing end, slats and support. To this I glued and screwed the 3″ × 5⁄16″ cedar slat that would serve as a heel brace.

The number of slats and the gaps between them can be adjusted to fit the space for the floorboard. In the Fox canoe, the after floorboard, with widely spaced slats, sits neatly between the seat’s backrest and the bulkhead.
Once the glue had cured, I removed the steel screws and replaced them with #8 silicon-bronze round-head wood screws. Bronze screws are softer than steel, but the latter are more easily driven in during the assembly process. If you choose smaller #6 screws for the temporary assembly, the larger permanent #8 screws will bind well. Once all the screws were replaced, I sanded and eased the edges. I then assembled the after floorboard in the same manner but with only four slats and no foot-brace bevel. Once everything was finished, I set both boards back into the boat—in the Fox the floorboards fit snugly athwartship and against the cockpit bulkheads, so it is not necessary to secure them to the hull.

The finished floorboards don’t have to be fixed in the boat and so can be easily put in and taken out. Because they are not permanently left onboard, where they would be exposed to water and weather, the cedar boards can be left untreated. They will silver with time, but that will simply give them more character.
This simple floorboard installation would work well in many small boats where bilgewater can be a nuisance—this winter I plan to make some removable floorboards, possibly with foot braces, for our Shellback Dinghy. If the boat is flat-bottomed, like the Fox and the Shellback, the process is easy; for a V- or round-bottomed boat, time would need to be taken to establish the lower profile for each of the supports, but otherwise the process would remain the same.
While I don’t insert the floorboards every time I go out in the Fox, I’m finding I use them more and more, and every time I do, I recognize them for what they are: a simple but effective addition to a small boat.![]()
Bill Thomas has been a custom woodworker, designer, boatbuilder, and teacher for more than 40 years. Despite Bill’s addition of floorboards to keep gear out of the wet, he does still sometimes use dry bags, especially the Project M23 Waterproof Fieldbag, which he reviewed in September 2025, and in which he carries his camera when he’s afloat.
You can share your tips and tricks of the trade with other Small Boats readers by sending us an email.
More articles by Bill Thomas
Kayalite Kayak Light, a practical all-around light for small boats
Jorgensen’s 60-1⁄2 Block Plane, reviewing a new adjustable-mouth low-angle block plane
Redwing, Bill takes us aboard a power skiff for simple cruising

Always good to see more stuff from you, Bill! Hope you are doing well.
Dave