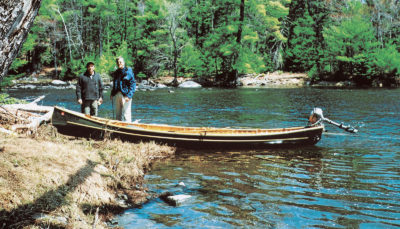
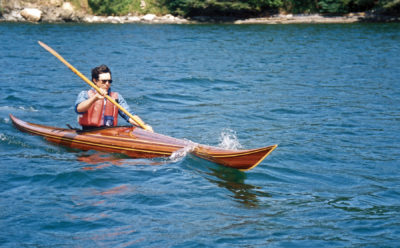
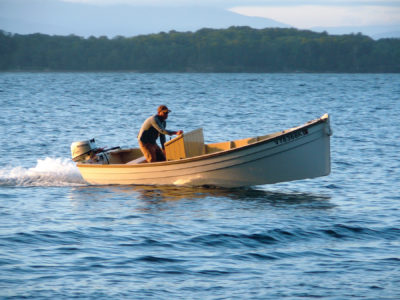
Little boats are…well…little. By my definition, they can be towed by four-cylinder cars and ride on trailers without brakes. They are usually less than 400 lbs and often are powered by only wind, muscle, or both. The smallest ones can be placed on roof racks and carried atop a car. They are the types of boats that don’t force you to get rid of one because you want to get another. Little boats can accumulate.
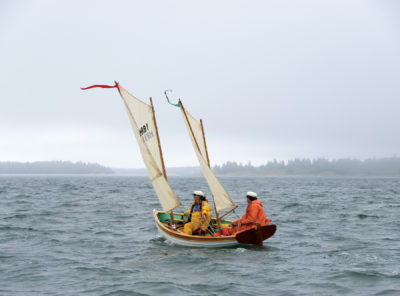
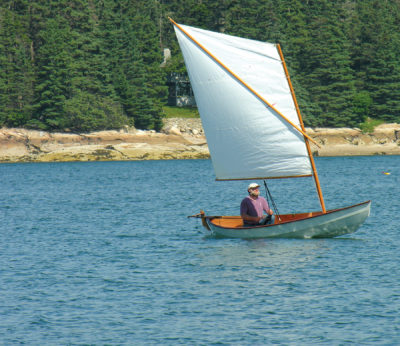
My friend Peter Duff once observed that I had 100′ of skiffs. Two hundred feet is more like it, I suspect. I had 16 boats at last count, and have been fortunate enough to never have to get rid of any. Because they are small, each has its own feel in the water, providing a different kind of boat experience. My boats range from a state-of-the-art high-tech sailing canoe to a pine tar-finished traditional Norwegian double-ender. In addition to forcing me to develop on-the-water skills, my fleet of small craft has made me develop skills in organizing, storing, and transporting boats. The following is some of what I’ve learned from years of living with little boats.
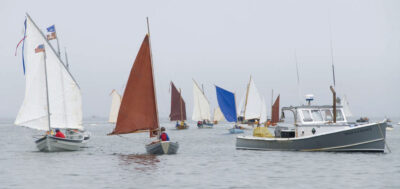
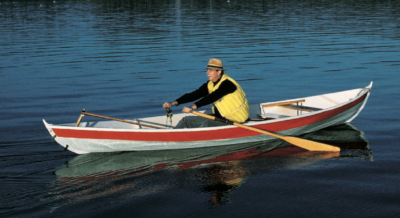
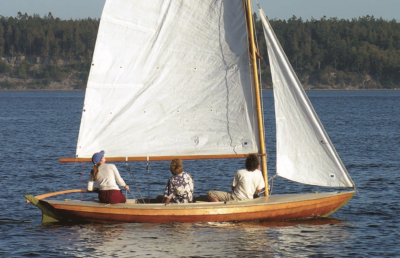
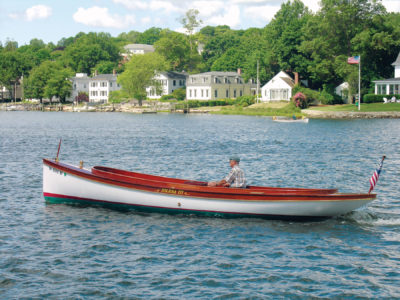
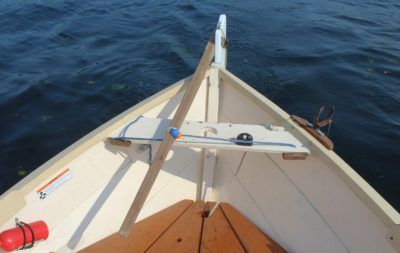
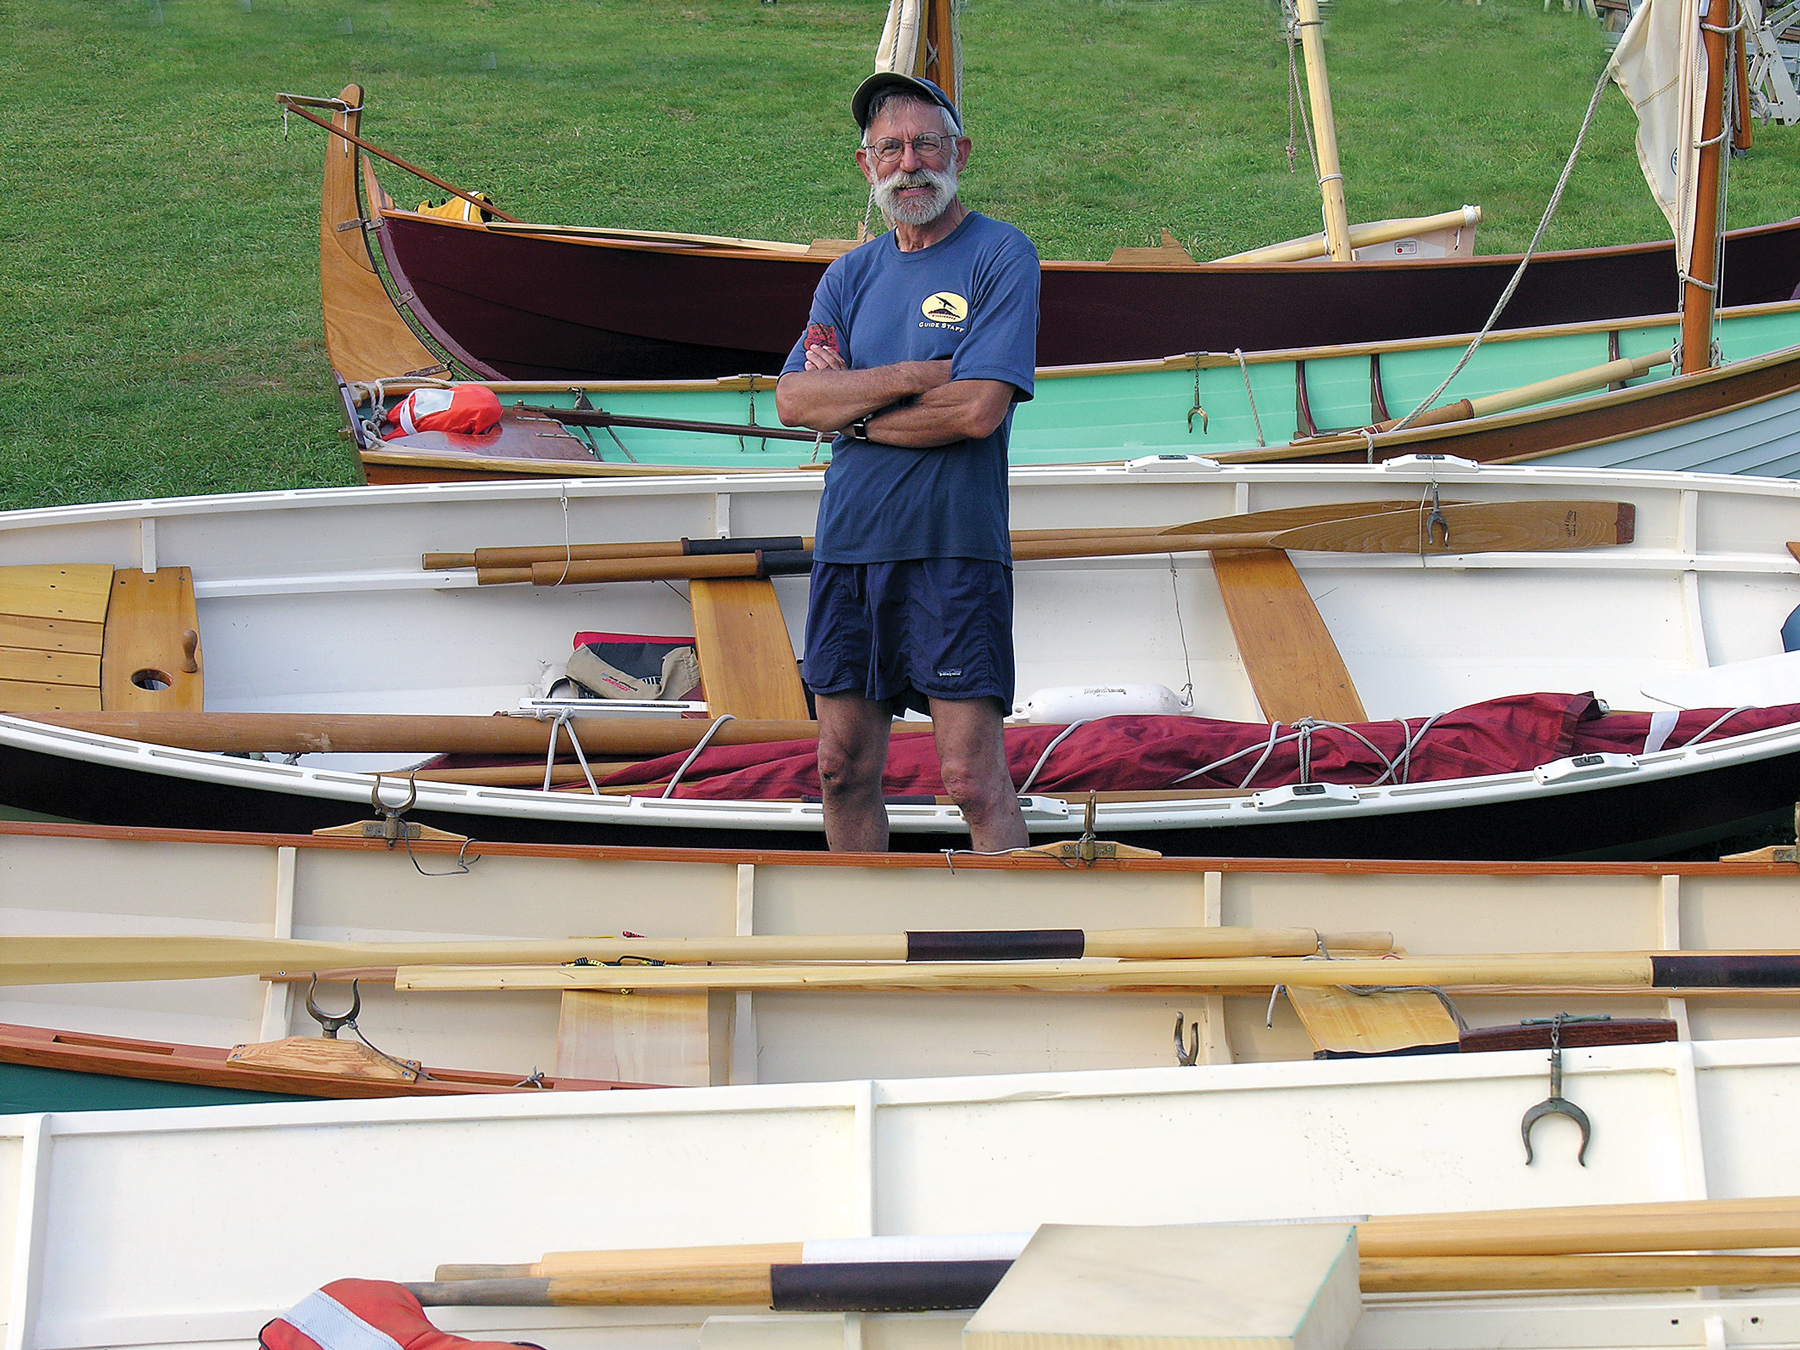 Photo by Matthew P. Murphy
Author Ben Fuller stands with a fraction of the fleet at last summer’s Small Reach Regatta. “With small boats comes stuff,” he says. Knowing how to organize and transport that stuff is the key to living with little boats.
Boat Storage Solutions
When not in use, my boats live mostly on land rather than on moorings or at docks. They get tucked into the tops of garages, onto racks outside, and stored on trailers.
Keeping boats out of the sun, rain, and snow is critical to long life and low maintenance. A shelter can be as simple as a tarp tied over the boat, but a tarp takes time to get on and off. It’s better to store a boat under a solid roof.
1. Joe’s shed
When I first started down the traditional-boat path, I was in the Chesapeake Bay region and met Joe Liener, a retired master builder from the Philadelphia Naval Yard. He had built several small boats, and his boat shed itself was a small wonder. It was a simple pole building just big enough for a couple of skiffs to hang in it about 3′ off the ground. The end of the shed served as a spar and oar locker. The shed also had a winch for hoisting boats aloft.
Joe had run a pipe through the upper portion of the building from end to end, along the centerline. One end of the pipe stuck out the building, and here a crank could be fitted. There was a pair of cables attached to the pipe that ran down and through sheaves in the ends of two 4′, 2″ x 4″ hoisting beams. Each cable ended in a ring. To hoist a boat, the boat was rolled into place on a cart. The 2 x 4 beams went under the boat and the ends hooked onto the rings. Joe then cranked and the boat would rise. When the boat was high enough, slings went under it and were hooked up to the building’s collar ties. The beam was then unhooked and readied for a second boat to be hoisted up into the other side of the building, or just left in place for lowering.
2. Instant Garages
Today there are a number of companies that make instant garages. These structures make great boat shelters. A boat and trailer can be rolled into them. Smaller boats can get tucked on the ground on rollers behind and alongside, and there is room left for garden tools. (A dirt floor is kind to traditional boats but can make rolling a little difficult.) With slings and wooden strongbacks a couple of kayaks or spars can be slung from the roof. I don’t know how long the roofs last. Mine, which is out of the sun, is going 10 years now. While these are “temporary” shelters, they may require building permits. Check with your local authorities.
3. Your Home Garage
Real garages are ideal for small-boat storage, even if they also have to house cars. Most of them have enough height for boats—sometimes surprisingly large boats—to go above the vehicles.
Slings can be used to hold most boats. I have used everything from pot warp to padded webbing, depending on the boat. I like to use a screw-eye on one side and a hook on the other. For a canoe or kayak, the far loop stays fixed and the one toward the door gets unhooked from a low step-stool. To place the boat on a car, one end of the hull is lowered to the roof rack and then slid out of the other loop. If you need to get the boat lower, for maintenance or repair, you can do this procedure with sawhorses rather than roof racks.
Harken is now making a nice set of blocks and jam cleats for hoisting little boats off roof racks (visit www.hoister.com for details).
For heavy loads and general utility, I made a boat hoist from a trailer winch. Its line leads from the winch up to the peak of the garage, and then down to a ring. Two lines attached to this rig each lead to a strongback with a bolt at its center. Attached to this bolt is a turning block; the line leads through this block and then dead-ends, creating a 2:1 purchase. There are two such purchases—one at either end of the boat—so, the entire load is lifted by a 4:1 purchase. The hauling part goes from the garage’s peak to the winch through fairleads on the wall. The winch is mounted to a stud on the garage wall.
The lifting procedure is simple: The boat goes under the strongbacks. Slings (mine are old seat-belt webbing) are slung under the strongbacks and around the boat. Then you crank on the winch, and a couple of hundred pounds of boat head for the ceiling. I have set mine up to handle a couple of boats with carabiners on the hoisting end so I can switch the winch from one boat to the other. Each has its own strongback. Do use safety lines with this after you get the boat up. Cleverly placed, these can help distribute the weight, which is important for a traditional boat. The safety lines can be padded with carpet.
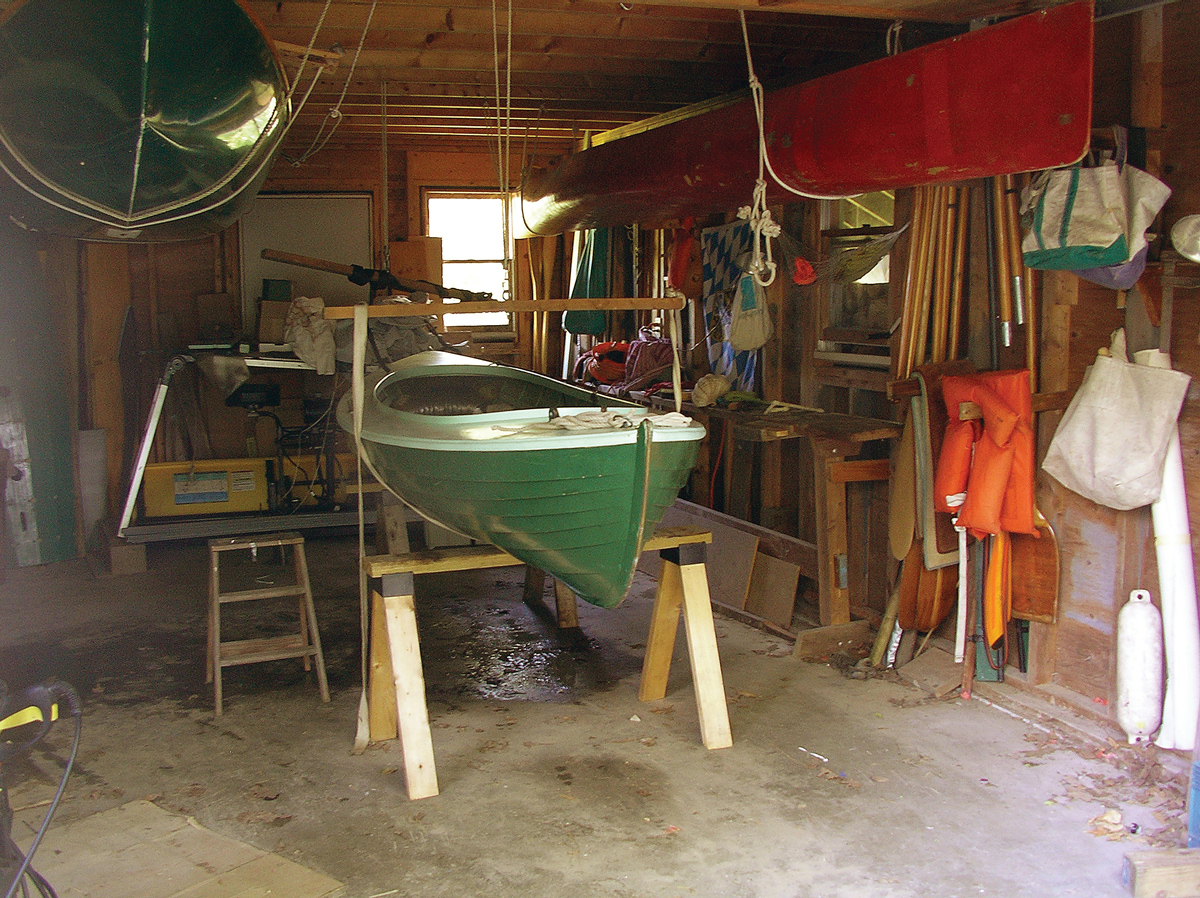 Photo by Ben Fuller
The author’s garage. He owns 16 boats (at last count) and many of these live aloft in this structure. They are hoisted there by means of a trailer winch adapted to the purpose.
Boat Storage Is Where You Find It
Other storage spots can be found, depending on your ingenuity. I have hung boats upside down under decks, which can keep a remarkable amount of sun and rain off them. I have racks built onto deck support posts. I once had no garage but did have a screen porch with a high ceiling where boats were hung. And when I lived in an apartment I built a rack that ran over a couch for a couple of kayaks—the functional equivalent of an upper bunk.
Building Your Own Boat Storage
The thing about renting boat storage is it can be quite expensive from season to season. You might think about think about building your own as a more economic solution. If you have the room on your property, here are three indoor boat storage solutions you might want to consider.
Storing Boat Gear
With boats comes stuff: anchors, electronics, life jackets, oars, paddles, spars, navigation gear, and coolers. Then there is gear needed to move boats on land: tie-down lines, rollers, padding, chafing gear. Depending on one’s neatness quotient, sometimes it is difficult to keep this gear in order and ready for instant use. No matter how many boats you own, an organized system of on-land storage is imperative.
Using not much more than furring strips, you can make racks by nailing pieces to the studs inside an unfinished garage. They can be horizontal or vertical. Horizontal racks can handle oars and spars that are longer than the height in the garage. Mount them high enough so other stuff can go underneath. In my garage it’s easier to go vertically. Oars go handle-down and are leaned up in the bays between the studs in a corner. Rudders often fit right in between studs. My long oars go right at the gable ends where there is space between the garage ceiling and the rafters. For really long stuff, I can find diagonal space at the end of the garage or use horizontal racks or slings.
For paddles you can nail a pair of 1 x 2s (furring strips) to both sides of a stud and use them as a hanging rack. Paddles then hang on the shoulders. To keep them from turning, a third 1×2 is nailed at the level of the lower blade. Softwood 1 x 2s also work very well to hang PFDs, loops of line, and anchor or other gear bags.
Traditional sails tend to stay on spars. They get lashed on and stay on the spars during the season. Some have lots of small lines attached, like reefpoints, sheets, and halyards. For trailering and storage, a long, loose, slippery bag works well so that you don’t have to tie things up in a tight bundle.
Those of us who live in rural areas have to deal with mice. I brought a sail in to the sailmaker once, and all I said was that it had been moused. He laughed and said how big were the holes? Mice are really fond of sails for bedding. The best defense seems to be to hang sails in bags or bundles. Mice seem reluctant to go down thin lines. Squirrels are not, so a second line of defense, a tightly closed bag, seems to also be in order. If sails are too big and heavy to hang, tightly sealed plastic bags with mothballs may help.
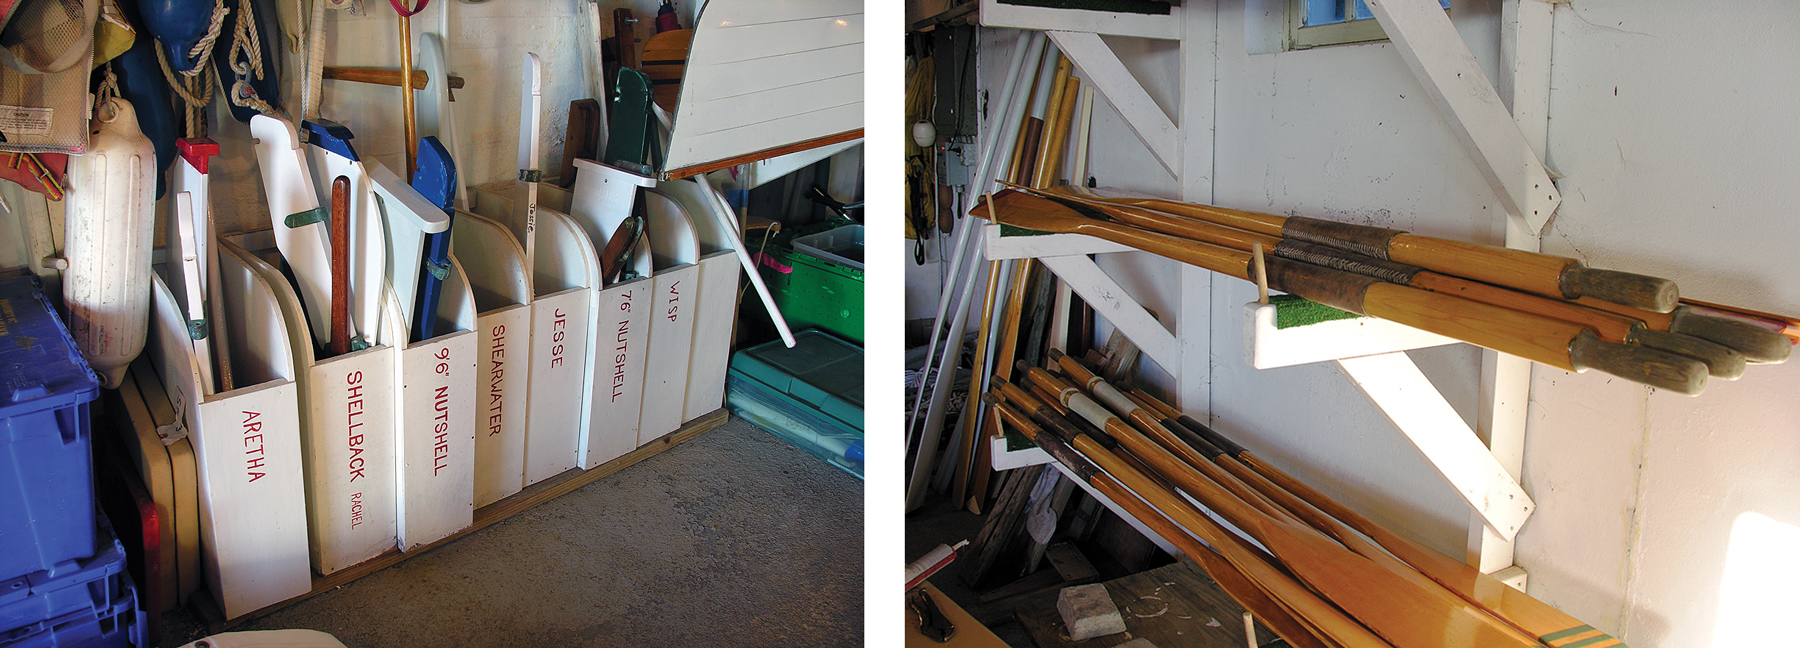 Photos by Matthew P. Murphy
With boats comes stuff. These two photographs show portions of the storage system at WoodenBoat School in Brooklin, Maine. Each small boat has its own gear case, and these are “shelved” library style. Oars live on purpose-built racks, and are color-coded by length. Each pair has its own symbol emblazoned on the blades, for quick matching.
Boat Transport
Trailers and Roof Racks
A glance at any marine supply catalog will tell you that there is a lot of good trailer gear on the market. It is mostly aimed at outboards, boats that typically are shorter for their beam and weight than traditional oar and sail boats. Small non-motorized boats can easily be 17′ long yet weigh a tenth of similar-length outboard-powered craft. Trailer modifications are in order for such boats.
On and Off the Trailer
Big boats live on trailers or in the water. Small boats, however, are often owned by people with more boats than trailers. Trailers must be shared, so boats must be moved. The rules of this are simple: Never lift what you can roll or hoist, and never lift more than about 70 lbs.
Small boats are easily rolled on and off trailers. PVC pipe provides a ready durable, inexpensive source for rollers. Let’s assume your boat is on the ground on rollers and needs to get onto a trailer. Back the trailer up to the boat’s stem, and hook up the winch cable. Lift the trailer tongue or, if you have one of the older-style break-back trailers, lower the rear. Then start cranking in. If the trailer end is under the stem, you’ll find that the trailer rolls itself under the boat. After the boat hits the balance point, the tongue comes down and you crank it in the rest of the way.
To reverse, lay out the pipe rollers behind the trailer, then chock the wheels. Start pulling the boat off onto the pipe rollers. At some point you’ll need to ease the stem down onto the pipes.
 Photo by Matthew P. Murphy
Many hands make light work. Carpeted bunks are generally kinder than rollers to the bottoms of small wooden boats. They distribute the weight more evenly, thus minimizing the risk of hull deformation during transport.
Trailer Selection
Small-boat trailers are usually at the bottom of the weight-capacity range. If you get one that is too big, the springs can be too stiff. But make sure that you get one with a long-enough tongue to take small unpowered boats. A 200–300-lb Whitehall or dory can be 18′ long, much longer than the equivalent small outboard boat.
There is a new family of aluminum trailers that have appeared on the market in the last few years with aluminum bolt-together frames. Trailex is perhaps the best known of these, and it is light enough to be used as beach dolly. A newcomer, catering especially to the canoe/kayak market, is the Rack and Roll which uses common factory roof-rack bars and accessories to support the boats.
A flatbed trailer like those for snowmobiles can carry a couple of small boats side by side, and be used for other jobs when not boat toting.
There are arguments about bunks versus rollers. Rollers make loading and unloading easy and are really good for heavy boats. But most small boats don’t need them and can live happily on carpeted bunks. I like to use the roller hardware down the centerline of most trailers to mount a bunk that provides full keel support; this is especially useful for flat plank keels. I can spring the forward end a little to conform to the boat’s “rocker,” or longitudinal bottom curvature. To make it easier to slide a boat off, toss a bucket of water at the keel before launching. If you use the trailer for multiple boats, you may need to move the winch stanchion. Mark the trailer to make it easy to adjust and keep those bolts, as well as bolts used for adjustable bunks, well lubricated. I leave a roller at the very end of the trailer adjusted at just below bunk height to help the boat on and off.
Shorter masts can go on roof racks, but for longer ones I like to put a V-bracket on an extension that is fitted onto the winch post; a second post is mounted via pintles to the rudder gudgeons. The horizontal mast, lying on these posts, then becomes a ridgepole for a cover.
Of course, any boat that is carried right-side up is fitted with a nice threaded drain plug (and there is a spare plug in your parts kit).
Double-Decking a Trailer
Double-decking creates a two-story trailer. I like to double-deck my trailers for a number of reasons. The main one is to carry more boats, but the cross bars that support the upper deck are also a good place to carry a dolly, oars, and rigs. The stanchions are a great place to mount lights, and there is the added bonus of being able to see the trailer if there is no boat on it. I have also found the stanchions useful in supporting boats that have plank-on-edge keels without using bunks under the bilges.
I make mine by starting with 44s as a base and for stanchions. You can get nice galvanized hardware to make the joints. You will need cross braces and diagonal braces; the cross bars are 2 x 4s on edge and must be through-bolted to the posts after half-lapping the posts. The height should be enough so that the bars don’t need to come off for most of the boats that you are loading. Bars can be removed and replaced as long as they clear the boat amidships. If you don’t want to build an upper deck, you can buy one. Seitech makes multiple-boat aluminum racks that bolt together and fit on your trailer of choice.
The main disadvantage to double-decking is that you are limited in beam to the spread of the posts. Also, the cross-bracing restricts leaning into the boat. I have thought about building gear-carrying boxes for daggerboards and rudders in between the stanchions, but so far have not. I have used the stanchions to mount sides for a temporary box trailer.
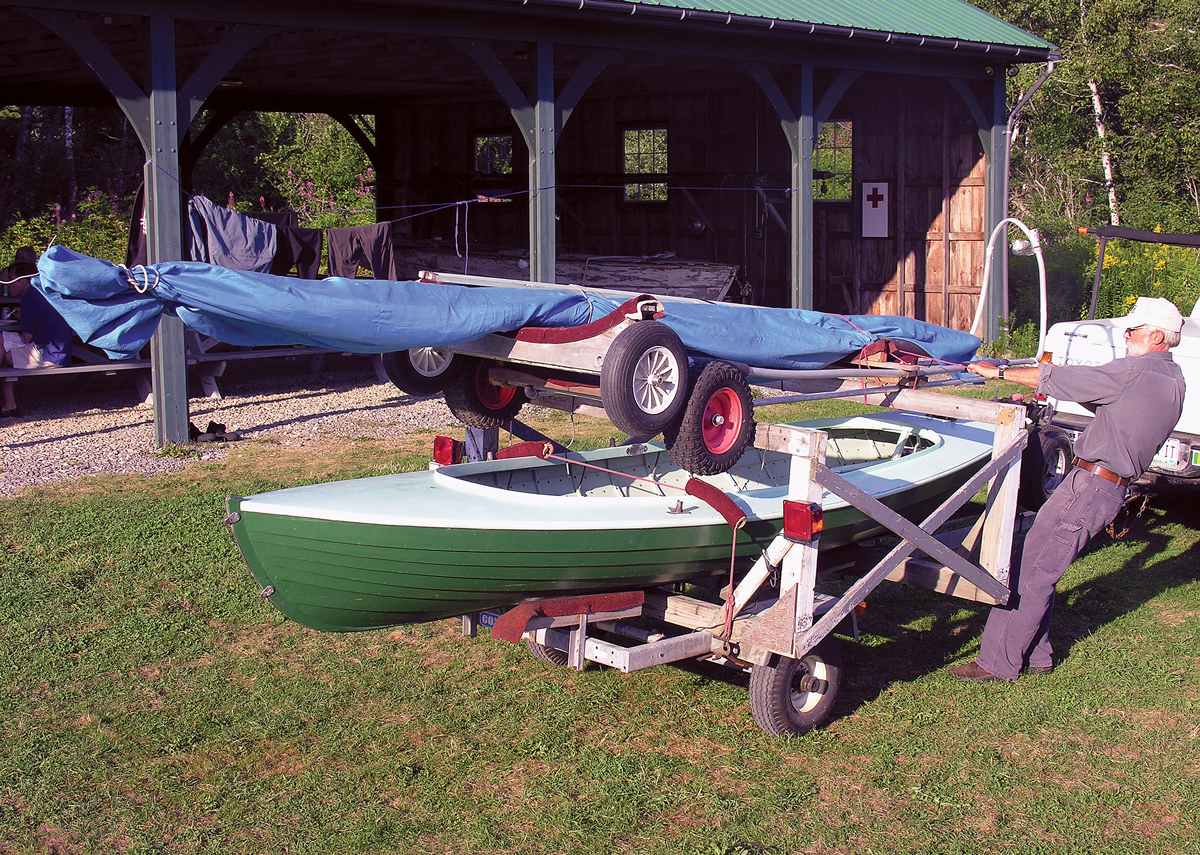 Photo by Matthew P. Murphy
Double-bunking a trailer. Author Fuller secures a Delaware ducker and its associated gear on his modified trailer. The lower bunk carries the boat; the upper bunk is free for another boat or, in this case, two dollies and a rig.
Trailer Balance and Maintenance
No matter the trailer, you need to check tongue weight. If the weight isn’t enough, the trailer can fishtail. If it’s too much, the tow vehicle’s suspension and trailer hitch can be in jeopardy. For little boats, 50–75 lbs seems about right—just about all you want to lift onto a hitch ball. For years I said that I didn’t need a third wheel at the tongue. Life is much better now that I have one, but those wheels only roll well on hard-packed dirt or blacktop. A length of line affixed to the trailer tongue to help lift and tow it by hand saves your back. If the tongue weight is too much, you can move the trailer axle. Most factory trailers are set up on the assumption that there is an engine in the boat’s stern. Small sailing and rowing boats have their centers of gravity amidships.
Trailers need maintenance. Small-boat owners can usually keep their wheel bearings out of the water, which will substantially reduce problems. To do this, sometimes wading is needed; I try not to go deeper than my knee boots. Systems like the spring-loaded grease fittings called “Bearing Buddies” help keep the bearings greased. They are designed to prevent hot bearings from sucking in cool water. But best is not to have the problem. Of course, a grease gun, extra grease, a scissor jack, and a spare tire are part of your kit.
Trailer lights are always a problem. Mounting them high on the posts of a double-deck rig helps keep them working, but even then mice can get to the wiring harness which is usually neatly run inside the trailer tubing. The first time this happened to me, I restrung a new harness. The second time I taped the wiring harness to the outside of the trailer frame and let mice have free run of the trailer tubing. A lighting board hung on the boat transom is another good solution.
Some states have rules that say how long a load can extend aft of a trailer’s lights. You may need a flag or in extreme cases need to make a light bar that goes onto the boat, something required in Europe. The light bar has the added advantage of electrics that never get near the water.
Hand Dollies
A beach dolly makes it easier to get boats on and off trailers and much easier to launch in places where trailers and cars can’t go. These are common among one-design sailboat racers. To load the trailer, you roll the boat up to the trailer, lift the stem onto the rear roller or bunk, hitch up the winch, and crank. Or, if the boat is light, just push it on. In Europe, beach dollies are often integrated into trailers, so that the dolly gets slid onto the trailer with the boat on it. Hand dollies or beach dollies are really useful in shallow water when you have to submerge the dolly to get the boat on and you may be a ways out in the water.
The largest line of boat dollies in the United States is produced by Seitech. They use aluminum extrusions held together with proprietary hardware. They also make a nice line of wheels with durable plastic roller bearings. Seitech’s wheels are removable, making it possible to tie the dolly to a roof rack or turn it upside down and lash it to a boat being trailered.
Lightweight aluminum trailers like those made by Trailex for boats less than 250 lbs can also be used as hand dollies. Canoe and kayak dollies are made by a number of companies. They are commonly of the kind that strap onto the bottom of the boat. Look for those with wide tires for sand and rough trails, and be sure they have non-corroding parts. Plastic wheels and bearings are good, as these will be immersed. Some of these dollies can be broken down so they’ll fit into the hatches of a kayak.
Making Your Own Dolly
Dollies can be home-made. The frame can be galvanized iron or heavy-gauge aluminum conduit, or PVC pipe. Wheels can be made from plywood using worn-out small airplane tires or bought from Seitech—whose hubs have nice, corrosion-free plastic bearings. Making wheels means cutting out plywood discs fitted to the inside diameter of what ever tire you find and then a wider one with a lip to catch the tire. Two sets are needed for each wheel, and these are bolted together. The tires need inner tubes. Drain holes will make it possible to get rid of water that seeps in between the tube and tire.
A dolly’s bunks can be cut to fit a particular shape, have a simple V that catches the boat’s keel, or be a webbing strap. Simplest may be to make the after bunk of two 2x0s or 2x12s sawn to shape, then glued together. Drill holes in the lower corners to take whatever frame stock you want to use. Then glue and screw the two together after cutting a bevel on each piece so you have a nice V-shaped groove for a piece of aluminum tube for an axle. Or if you are using Seitech wheels, you can use their stub axles. These axles get some screws in them to fasten them into the groove. The bunk is then carpeted with indoor-outdoor carpet of the variety used on trailer bunks.
For a forward bunk, I usually fasten a couple of wedge-shaped pieces of wood onto a board and then U-bolt or lash it to the dolly.
I have seen dollies made from recycled baby carriages and bicycle and garden cart wheels. These have the disadvantage that they are subject to rust, but can be had at virtually no cost.
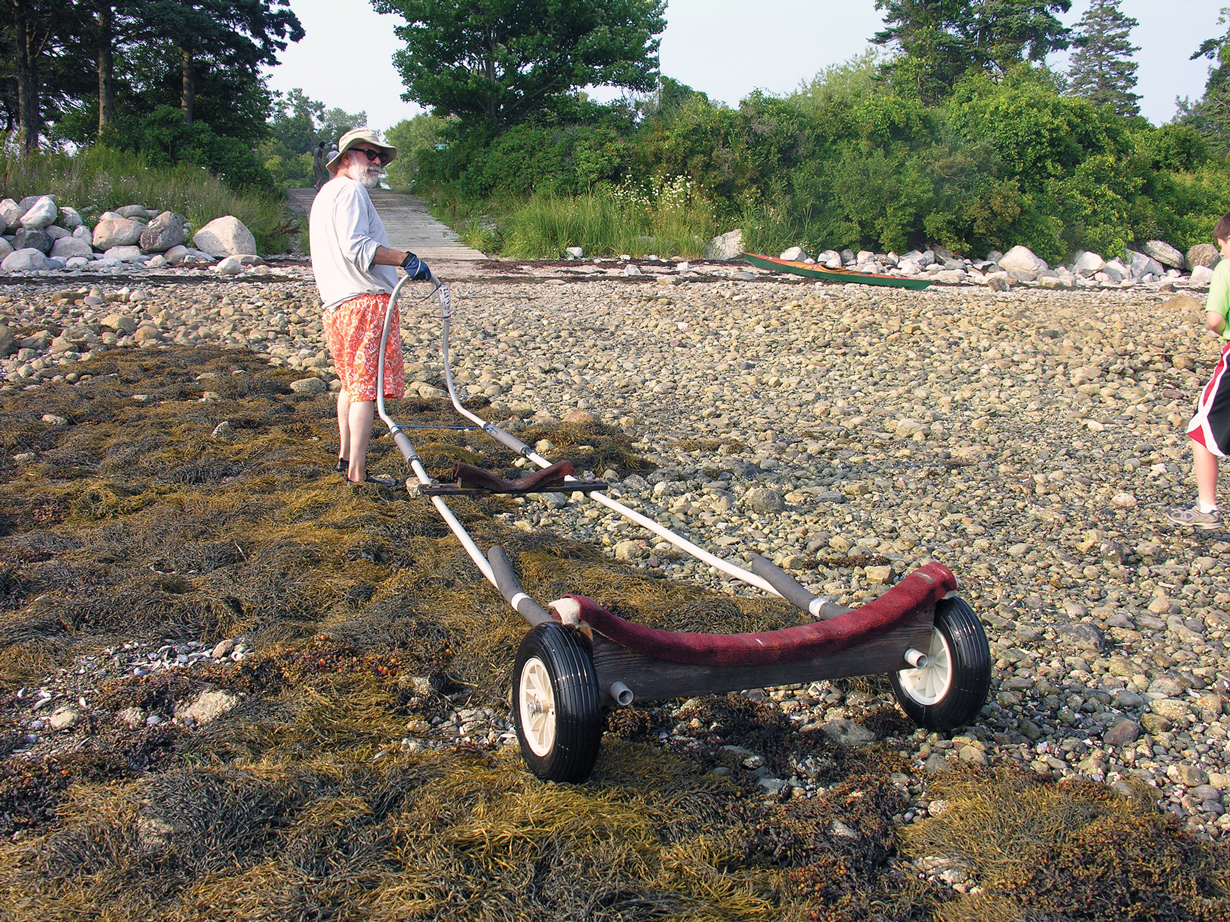 Photo by Matthew P. Murphy
A home-made beach cart. It’s assembled from off-the-shelf
wheels, electrical conduit, and pipe insulation.
Cartopping
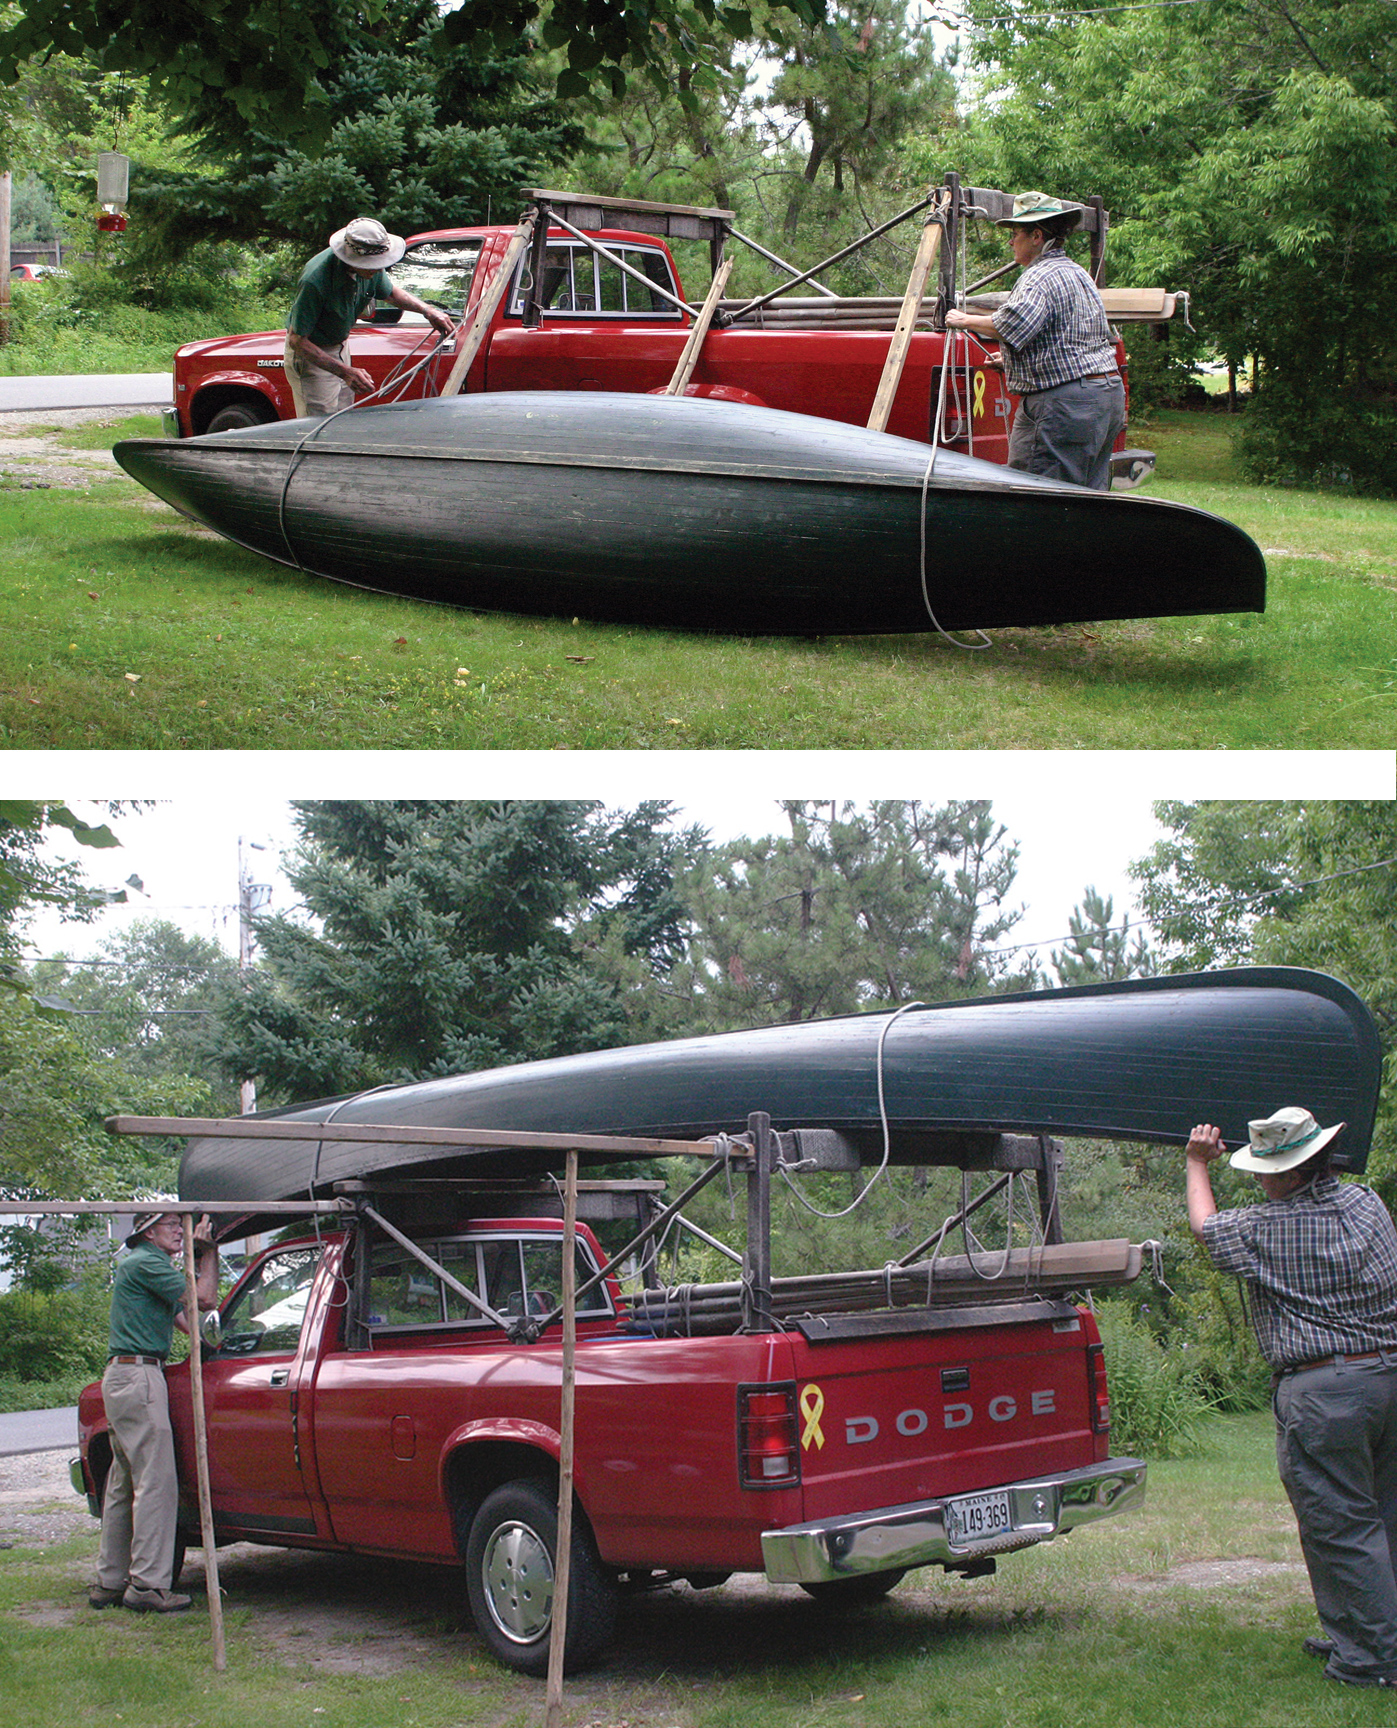
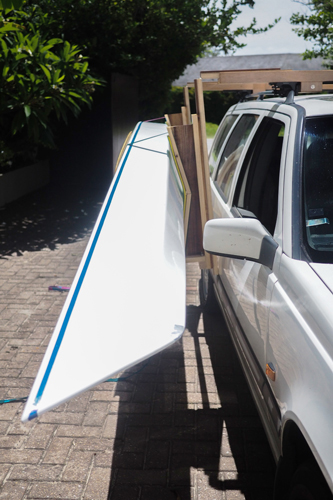
The neatest and most ambitious cartopping rig I ever saw was a setup where a small catamaran was being roof-racked on a van and the owner could get it on and off by himself. This was sometime in the 1980s, and the owner had made “hull carriers” that hung down from the 2 4 rack so that when the boat was up there, hull on each side of the van, the door had just clearance to open. The after one had rollers. To load, he rolled his cat on a pair of dollies close to the rear. He then lifted the bows up and rolled the boat so the bows were resting on the rack rollers. Then he walked to the stern and pushed.
Recently I saw a Mazda Miata rigged out with a rack to carry a kayak. The owner had light U-brackets made that were set up to fasten to the towing eyes on the car’s underbody. A bar joined them, adding rigidity. The kayak went on the cross bars of the U-brackets.
But you don’t have to go to those extents. Manufacturers have plenty of products that purportedly make it easier. Indeed, these are engineered systems based on a set of bars. Specialty items attached to these bars make for easy and safe carrying of kayaks, canoes, and other small boats—either on their bottoms (in the case of kayaks) or upside down (in the case of canoes and small boats).
On and Off the Roof
At the local put-in the other day, I watched a couple struggle to get their canoe loaded on top of their SUV. The SUV was too long and high to let the couple press the boat high enough to get it onto the racks. They had to worry it onto their racks, which is not a nice way to end a pleasant paddle. Recently coming back from a 10-mile race and paddle, getting my 45-lb kayak to my roof racks would have hurt. But I had design help. The bow of my boat went onto the after rack, the stern on the ground. Picking up the stern and shoving was about all I could manage.
The goal of any loading system is to let one or two people easily load boats weighing up to 150 lbs or so—and letting one person load what they can carry but perhaps not lift onto a high rack. Your objective is to only lift one end of the boat at a time and then slide or roll it onto the rack.
Possibly the simplest way, if your rear rack is far enough aft that you can get the boat’s bow on it, is sliding the rack through a piece of PVC pipe before you put it together, to act as a roller. For loading and unloading you put one end of the boat on it, roll it on, then slide it out of the way when the boat is up.
My friends Susan and Sam Manning have thought more about do-it-yourself loading methods than most of us. They have a nice wooden truck rack. Using holes and the right length of line, they’ve lashed a couple of long beams to each bar, creating an inclined plane to the ground. Their canoe rolls up next to it on a converted baby buggy. They can then parbuckle with rope or lift each bar up, working together to raise the canoe and then slide it onto the racks. For unloading, the long beams have legs that can be lowered.
 Photos by Karen Wales
A back-saving truck rack. In the first photo, the canoe rests on diagonal beams; these beams articulate on the secure wooden truck rack. In the middle photo, Sam Manning is about to raise the diagonal beams to horizontal, and prop them in that position with sticks. In the final photo, the canoe, now at altitude, is simply slid into place on the truck rack, and secured.
Car Selection
Modern aerodynamic cars are not roof-rack friendly. Rack makers have worked hard to accommodate them, but there is nothing as easy as the old gutters. The earliest gutter-mounted racks that I used were Quick and Easys that fastened to a 24—not friendly to the wind, but they were easy on and off. These cars had nice steel bumpers around which tie-down lines could go, or you could drill holes and put in eyebolts. Sometime in the early 1990s the gutterless car and truck made these obsolete.
The racks that work with the gutterless cars need precise siting and adjustment, and hence they tend to remain mounted on vehicles—which is not necessarily good for door gaskets. Some of the newer utility-style vehicles have factory-built-in racks. These should be checked carefully for load specifications, as cosmetic racks won’t do at interstate speeds. The best ones I have seen are the fore-and-aft racks which let you then use a relatively easily removable cross bar.
Dedicated roof-rackers look for older cars. The square box pre-aero Volvo wagons let you put a rack right at the after end of the car, letting almost anything be easily slid up from the ground. My early-’90s Saab 900 works the same way. A 17′ boat can rest on the ground with its bow on the roof rack and not contact the rear hatch.
SUVs are difficult. The lift is high, no matter what you do. In my old age I find that getting 60–70 lbs up to SUV height is hard. Hence I prefer vehicles whose racks come to shoulder height.
Roof-rackers also look for pickup trucks. A rack at the rear and one forward on the cargo bed can easily be put into place. They can range from heavy-duty lumber carriers with extensions over the cab to 2 4s bolted together. Here in Maine, we sometimes see wooden racks that are works of art with steam-bent braces. Those with camper backs can set up roof racks with the aft rack close enough to the rear to slide boats up. Mine has a hard tonneau cover, and that proved a problem to find thin plates to go under the tonneau onto which to mount the racks. Some people with camper backs also use these plates. When I found a rack and plates from Oak Orchard Canoe, I got only one rack and slid it forward so that the cover goes up as high as possible, and then I have a bar on the cab. The single rack is positioned so that I can slide a boat up on it after resting the end on the ground. The forward one is set so that a 17′ boat drops on it neatly when it hits the balance points. A rack on the cab used to be a problem for the boats but is less so now that truck frames don’t move much.
Tying Down on Modern Cars
Tying down is another challenge. One can tie to the rack, which works pretty well. Loads should be tied to the vehicle fore and aft as well, something I don’t do for short slow distances but should. The problem is finding an attachment point in a universe of plastic fairings and crumple zones. Thinking about this before buying is good. Look for vehicles that have towing eyes under the bumpers. A trailer hitch can work as a good tie-down point in the rear.
You can also make what rock climbers call chocks. These are knotted pieces of webbing that can go into holes and be captured by rear doors or hoods and trunks. Most vehicles have holes in the sheet metal at the lips of hoods and trunks. A knotted or toggled piece of webbing can go into the hole, leaving a loop hanging out. When the hood or trunk is closed (if the load is short), you could get some paint chafe, so soft webbing is good.
The Rear Cantilever
You can also make a frame that extends the range of your racks to the rear of the vehicle. A roller on the end lets you slide a boat up. Thule has one now for kayaks that is a metal frame onto which pads and bunks are clamped with a roller at the end. Fittings allow you to pull it back, and slide the boat up. Then you can slide the frame forward so that it bridges the roof racks nicely.
Oak Orchard Canoe, , in upstate New York has another solution to sliding boats up from the rear. They have a roller mounted on a metal bracket, and the bracket is thin enough to fit between the top of the cargo door and the roof. You open the door, insert the roller, then close the door. You then have a roller where you need it. They have a number of other hardware items to make loading and carrying easier that work with the racks of the main suppliers.
Thule has also developed a kayak lift system with a rack that extends out and down from your roof rack. You set the boat on it, tie it down to J saddles, and then a couple of hydraulic cylinders help you lift it up and slide it into place. It’s an award-winning design and an ingenious feat of engineering. And it’s expensive.
Or is it? I know at least one person who attributes a chronic back problem to poor body mechanics while lifting and dragging boats. The expense of two surgeries— both in lost work time and the operations themselves—are far greater than carefully engineered trailers and roof racks. If you’re to live well with small boats, it’s good insurance to invest thought and/or money into storage and transportation systems. You’ll save your boats. You’ll save your relationships. And you’ll save your back.


Something not mentioned (among many great ideas) for car-topping is suctioned rollers that attach to back of sedans or hatch backs (on the rear windows of the latter). They make the task of leaning the front of the boat onto something much easier (I can do it with an 8′ boat, from the ground, on a Prius), and then it’s just a matter of lifting the rear of the boat and rolling along until it reaches the back rack. They are meant for kayaks (and are shaped the fit the hull), and may not work too far outside that form factor, but I’ve put two on either side to get a box-shaped boat (parallel gunwales) onto the roof.
I don’t remember where I originally saw this idea, but I did refine it to solve a couple of inherent problems. I have this on my Toyota pickup with a canopy. The canopy top is level with the top of the cab, because I prefer to have my forward bar on the cab rather than on the canopy (because otherwise a long kayak may extend too far over the forward bar if that is located behind the cab roof, especially with an extra-cab design).
For the forward bar, I use a Yakima round bar, because I want to slide a pipe inside it, which would be problematic with a Thule rectangular bar. To use, I slide the pipe out of the round bar, far enough to hold the forward end of the kayak away from the cab—maybe a couple of feet or so. The bow slides onto the extension and rests there. I then lower the stern end of the kayak to the ground, followed by the forward end. Loading the boat is the reverse—forward end onto the pipe extension, then stern up, and then bow slid over onto the forward bar. At which point the pipe is slid back into the forward bar.
I saw one difficulty with this: how to hold the pipe in place in the forward bar. I didn’t take much imagination to picture the pipe shooting out when turning a corner, or jiggling out while traversing a rough road. My solution was to graft a threaded pipe end onto the bar tubing, and fixing a pipe cap to the extension pipe. (the pipe cap has to be large enough to screw onto this grafted pipe end). To lock the pipe in place, I slide the pipe into the tube, and twist the pipe cap onto the threaded end. This was a bit tricky to work out, but is really simple in practice (I have a photo of this, but will have to edit this later when I figure out how to import it).
My other point has to do with attire for launching. Raise your hand if you’ve never stepped in over your boot tops launching from or picking up on a trailer. Since Puget Sound is bitterly cold, even in summer, I have gotten in the habit of wearing a dry suit while paddling my kayak, even on a hot day. Gore Tex allows this, as the material breathes so well, that I stay at a comfortable temperature after the initial 20 minutes of overheating. So I thought, why not wear the dry suit when sailing a small boat? Makes launching or picking up a much drier event. Saves having to do acrobatics on the trailer tongue to reach the bow eye or operate the winch. Just plunge right in and get to work.
We used to do extensions in the old days of 2×4 racks with sliding 2x4s. Had one of these on my Volks bus.
One of the companies now offers a commercial version of your pull out for real dough.
On my truck where the bars are higher than my head, I use the longest bars I can get. They stick out far enough for me to get an end of a kayak on it.
I rigged up a home-made version of Thule’s kayak carrier. Took some head-scratching and is not perfect, but it works. My 25 year-old Volvo 850 station wagon is ideal for the job.
https://smallboatsmonthly.com/wp-content/uploads/2021/01/TravellingPosition500.jpg
However, even with this carrier I find the Chesapeake 16 a little heavy for me these days.
My truck rack now has pads I learned about from iceboating, where you can’t be bothered with fitted chocks in winter cold. Use 1″ pipe insulation over the whole bar and wrap it all with Gorilla tape.
I went one better, slipping a piece of 2″ ID PVC pipe over the after one with a couple of 1″ ID, 2″ OD nylon washers on each end. It too is covered with pipe insulation and tape. In my case, I made it about 16″ long and have one end against one of the vertical bar supports as it is for iceboats and kayaks. Idea is that you put one end of the boat on the roller, push it up, then move it sideways for the next one. I can solo load a 100-pound iceboat up there with the only real work being the initial lift of the boat stem. The stern is fastened to a cart that comes right along with it.
Per David Peebles comments on using a piece of pipe in a round Yakima rack, Thule actually markets a section that slides into their roof rack beams. It has a friction stop to keep it in place, so it won’t fly out rounding a turn.
Thanks, Ben. Solid, practical solutions. I’ve been hanging kayaks (now 4) in the garage/barn. Pulley into the west end, hung on lag bolts. Carabiners to attach to stern handles. Cleats here and there for tying off bow lines. I can, without step stool, hoist and loop-off to a cleat the stern lines. A step stool helps with the bow lines for further looping off to garage door elements and ceiling, joists, or beams. To avoid repeated mild TBIs, I’ve screwed in some snug-up screws to put more tension on the stern lines, elevating the bottoms. In the colder months when we’re feeding cows, the 2 or 3 ton of stored alfalfa bales make for even easier sliding on and off. The 14′ wherry is another matter. Leaning towards a pole structure just north of the barn. Am assembling one of the Ohio Trailex trailers you noted. Parts are fine but the manual needs a glass to see the tiny photo details and the parts kit does not provide a full, searchable description of all the hardware (chasing down one 1/2″ ID plastic bushing for a leaf spring).
If you don’t want to make your own chocks, I have a pair of Sherpak Quick Loops:
They work great for the trunk. The company also makes a set that you can screw into the frame under the hood, which also works well.
And just as a reminder, for canoes nothing fore and aft is as important as a good strong tie-down to the racks. The NRS tie down strap with the padded buckle is the best.
For more on the Sherpak Quick Loops, see our review in the July 2021 issue.
—Ed.
Another concern occurred to me: A friend who had partnered with another to start building kayaks (over 20 years ago) built one of their first boats for his wife. To transport it home, he simply set the kayak on roof pads and tied it down fore and aft to the ends of the car. The partner advised him to add athwartship tie downs as well. But of course he ignored this advice.
Sure enough (you can see this coming, can’t you) the brand new kayak flew off one side of the vehicle and was trashed.
And another point: I’ve followed behind cars that had canoes or kayaks held down with bungees. It’s always alarming to see the leading end of the boat lifting high above the cross bar as the bungee stretches from the strong air pressure. The driver is oblivious, as it’s happening overhead where he or she can’t see it. Even a very heavy-duty bungee will stretch like that. Bad idea, yet a lot of people think that they can get away with it.
I had a mouse problem. They chewed all of my lines and made messes out of my storage bags. I now use mouse repellent (they are little pouches with peppermint and spearmint oil). No more mice and my garage smells good.
I am reaching the point where storage is beginning to be an issue. Two kayaks (soon to be three) a Duck punt, GP14, CLC Eastport pram, and a Montgomery 17 are quickly filling my small yard. The Monty sits in the driveway, the Punt in the backyard in her cover, the larger Kayak and Pram are under the deck, and the pride of my ‘fleet’, the GP14 is in paid storage.
The thought of not lifting too much is a big one. Many years ago, when I was restoring my GP from wreck to polished little gem, I lifted her off the trailer by hand. 300 pounds of boat! Using my legs, I rested the chine on my thighs, grabbed around the gunnel, and used my legs to lift, pivot 180 degrees, and put her down on the ground. While I did not hurt myself, I did not realize the stress I had put my legs under until I sat down later and tried to get up. My legs refused!
While I thankfully came away from that with only a funny memory, I could have really hurt myself, but it does add credence to the “lift with your legs!”
If you have a pick-up, a very easy way to load a small boat is to put a slick plastic strip (usually bolted on) on the back lip of the tailgate. You can safety back the truck down most ramps and the rear-end and bearings will not get hurt by water most times as they are sealed. Many people are strong enough to then lift the front of the boat (if not too heavy) into the back of the pick-up as the plastic strip makes it easy to slide. Here in Alaska, we use the thick plastic used for dog sleds coz it is very slippery and is at least a 1/4″ thick to take recessed bolt holes. I used to do this with loaded canoe and canoe boat types. Reticent types will fret about getting grease from the rear-end/wheel bearing grease into the water. Which especially with newer vehicles is not a concern, kind of like 2-stroke outboards. Believe it or not!