After seeing a strip-built kayak being paddled many years ago, I started dreaming of building one for myself. When the COVID-19 pandemic hit, I found myself working from home with a little extra time on my hands: it was my opportunity to fulfill my dream, and I started looking seriously at companies that offer complete kits. I had little woodworking experience and wanted a basic beginner-friendly kit, as I had no interest in lofting, building from scratch, cutting lumber, milling strips, etc. I had dreamed of this for years, but strictly as daydreaming. The idea of building my own boat was intimidating, and I never thought I would have the time or skills to make the dream into a reality.
After spending many hours on the water over the last 15 years, I consider myself an experienced kayaker and knew I wanted a recreational boat for easy paddles on my local lake. I am a fair-weather paddler who does not look for whitewater adventures—just lazy days on the water with a sandwich and a few cold drinks. After comparing kayak kit packages and manufacturers, I decided on the 12′ 8″ Excursion model from Newfound Woodworks of Bristol, New Hampshire.
I had many questions about the build process, no prior working experience with epoxy and fiberglass, and was interested in building my first boat in a classroom setting, but when the pandemic hit, all in-person classes were canceled. I really wanted some hands-on experience before taking on the build, and the folks at Newfound, Alan Mann and Rose Woodyard, listened to my concerns and scheduled a day of one-on-one instruction with me. They shared techniques and tips as we worked with the materials, which gave me the confidence to tackle the project and was key in my decision-making process.
 Photographs by and courtesy of the author
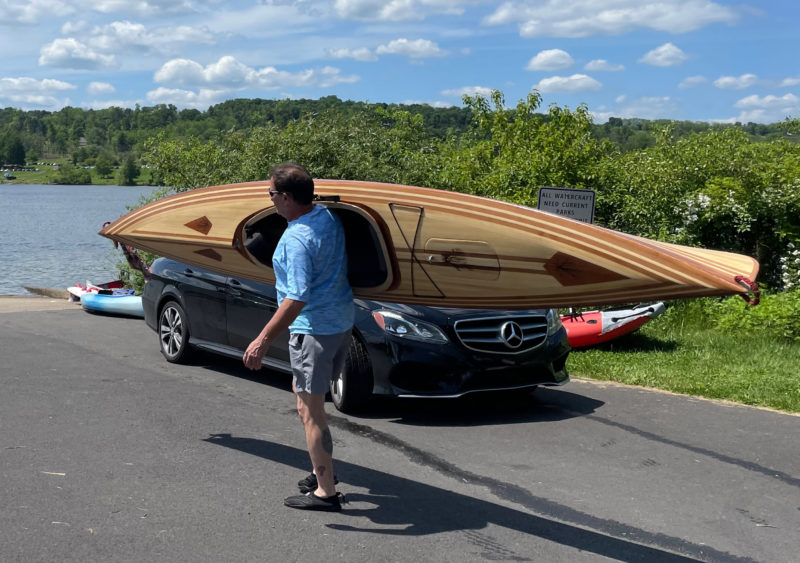
Built according to the instructions, the Excursion can weigh as little as 37 lbs. Extra fiberglass on the author’s kayak brought its weight up to 44, which is still easy for him to carry to the water’s edge and back.
A Newfound “Pre-Kit” arrived first with instructional DVDs that demonstrated and clearly explained the construction methods step by step; the DVDs proved to be invaluable.
The pre-milled cove-and-bead strips arrived in a 14′-long plywood shipping crate designed to be used as the box-beam stand during the build–a great way to save time compared to building one from scratch.
The Newfound Ladder-LOC Strongback system of brackets and forms was easy and straightforward to assemble—just center each form and square up. The forms are precision-cut from MDF (medium-density fiberboard) on a CNC machine and milled with a slot in the perimeter for clamps, so the boat is stripped without using staples. To me, the finished boat looks much nicer without staple holes.
I wanted full-length strips for appearance’s sake—there would be no joints on the finished boat—and to eliminate spending time to scarf-join every strip. I also ordered extra strips to cover anticipated mistakes. I purchased many of the tools and supplies that I needed from Newfound. Rose and Alan have simply been great folks to work with: always available by phone to discuss concerns, answer questions, offer great advice, and happy to share their knowledge and experience. They’re an invaluable resource for a novice builder.
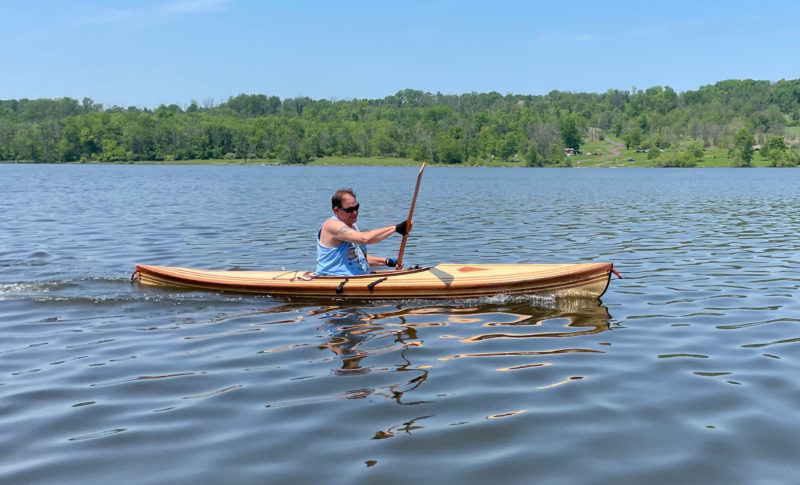
With an overall length of 12′ 8″, the Excursion is not designed for a high top-end speed, but with its light weight it is quick to accelerate and carries satisfying speed.
For the most part, I stayed true to the Excursion design and did not modify the hull. I deepened the recess for the cockpit coaming by a couple of inches for ease of entry and exit. The cockpit is now large enough that I can bring my feet and legs out and recline in my seat with my feet up on the front deck and my head resting on a rolled towel on the rear deck just behind the cockpit. My foredeck is a bit more peaked than designed—an unintended amateur mistake on my part—but it made it a little roomier under the deck for my cooler bag and I can stretch my legs out. I used magnets in the hatch coaming and flush-mounted the hatch cover to minimize deck hardware and keep the deck as clean and open-looking as possible. The rear bulkhead is marine mahogany plywood, supplied with the kit, but I omitted the front bulkhead for extra legroom and open storage under the foredeck. I can add inflatable float bags when needed
The kit package includes a mini-cell seat bottom pad and a back band, which is mounted to the cockpit coaming, but I wanted a one-piece seat and minimal hardware. I researched various seats and back band combinations but did not find anything on the market that I really liked. However, Redfish Kayaks offers custom seats made from a few pieces of minicell foam glued together and shaped to fit. Its molded sides and good backrest eliminate the need for a separate back band and hip braces. I have not added thigh braces under the deck. The seat is comfortable to sit in for hours on the water and is easy to clean and maintain. It easily pops in and out of the kayak when I want to hose off and wipe down the boat after use.
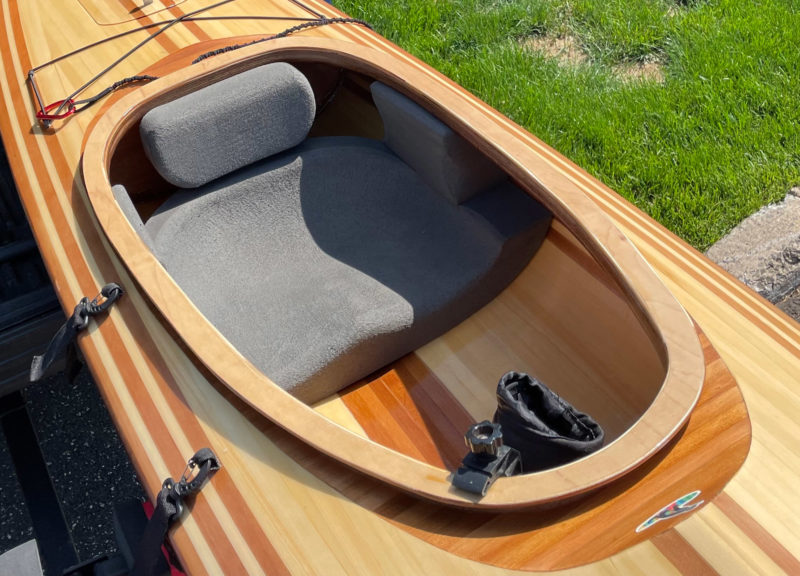
While the standard Excursion kit includes a seat and back band, the author opted for a custom-made foam seat from Redfish Kayaks. The cockpit coaming will hold the optional Newfound Woodworks spray skirt securely in place.
I added several types of wood as accent and trim pieces, including a nice piece of curly maple plywood for the cockpit coaming, teak veneers for the hatch lip coaming, and Spanish cedar pieces for inlays that I decorated with high-voltage electrical-current burn patterns (see LAZY LIGHTNING). The bow stem is western red cedar and the stern stem is red oak.
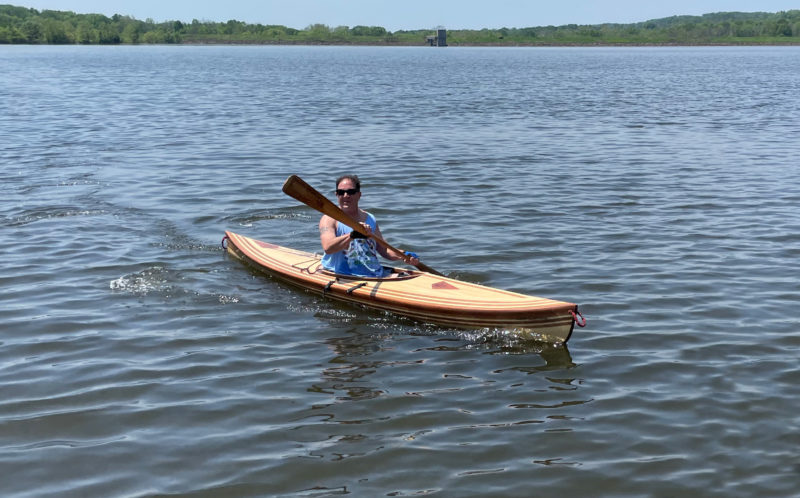
With the Newfound Woodworks construction system, the strips are held to the molds with clamps rather than staples, so the finished kayak isn’t marred by speckled bands of staple holes.
The kit kayak as designed should weigh around 36 lbs, but with extra layers of ’glass on the hull bottom and stems, my finished boat is about 44 lbs.
I use my pickup truck to transport the Excursion and can load and offload it by myself, but it is easier to handle with someone to help. I have never had to portage over distances or obstacles, but the kayak is easy to balance on my shoulder and solo carries over short distances are no problem.
The 36″ × 17″ cockpit opening is large and the Excursion has a 24″ beam, making it easy to get in and out. The kayak is very stable and makes a good platform for fishing, photography, birdwatching…or just daydreaming and floating the afternoon away. The Excursion is fast and glides well; it’s a sports car compared to my 12′ 8″ rotomolded plastic kayak. It tracks nicely and handles a cross breeze well for a shorter boat. Newfound notes that the Excursion is “designed to be used in a recreational setting such as day trips on inland lakes and quiet water.” I would not choose to take it out in rough weather, but it does okay in a stiff breeze on the open water of my local lake (I have been out in swells and a couple of feet of chop, and the kayak rides nice and high).
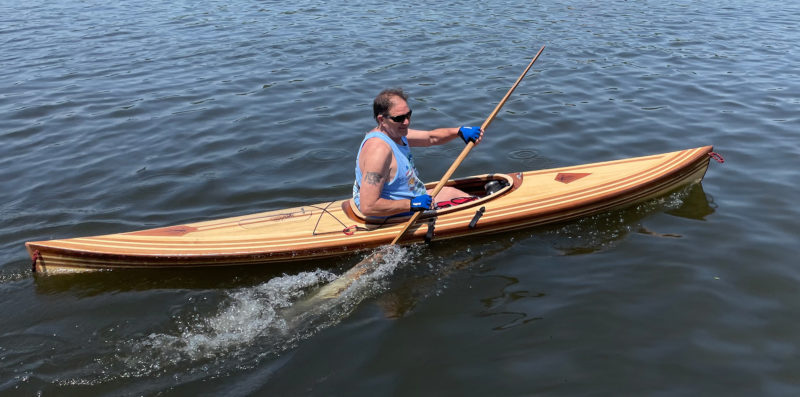
The Excursion has a long cockpit, and paddling without a spray skirt is appropriate for the quiet waters the kayak is designed for. While it has good stability, in the event of a capsize, the large opening makes it easy to exit the cockpit.
I cannot speak to rolling, self-rescue, or wet exit as I have no experience with these maneuvers. As a 60-year-old man, I am strictly a lazy-day-on-the-water paddler and too old for rough water, rapids, or whitewater. More important, I don’t want to bang up my boat, so—no rocky streams.
The whole experience of building the Excursion was interesting, enjoyable, and I couldn’t be happier with how it turned out. The custom kit package enabled me, a complete novice, to build a beautiful recreational kayak that I am proud of and will be happy to paddle for years to come. ![]()
A Philadelphia kid at heart, Dave Feder discovered his love of water while spending childhood summers at the Jersey shore and as a young sailor in the U.S. Navy. He has been a recreational kayaker most of his adult life. An electrical engineer by profession, he also enjoys hiking and trail-walking with his dog and playing with his grandkids. In his spare time, he is an amateur woodworker. Building his own boat was a longtime dream.
Excursion Particulars
[table]
Length/12′ 8″
Waterline Length/12′ 3.4″
Beam/25.25″
Waterline Beam/24.13″
Weight/35 lbs
Displacement/250 lbs
Draft/4.33″
[/table]
Plans ($110), pre-kits ($65), and kits ($2,500) for the Excursion are available from Newfound Woodworks.
Is there a boat you’d like to know more about? Have you built one that you think other Small Boats Magazine readers would enjoy? Please email us!
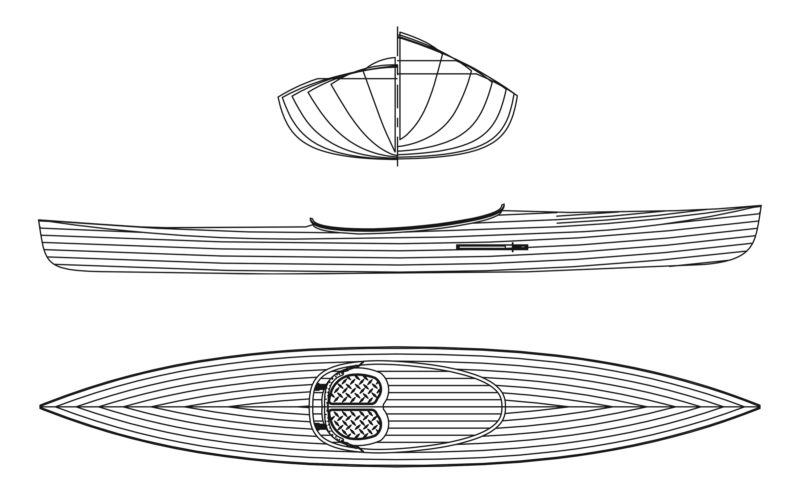





Please wear a PFD (aka “life jacket”–new Coast Guard parlance) when you paddle. I also urge you to use a spray skirt, which implies practicing wet exits.
You say you have paddled in choppy waters. It doesn’t take much for those wave tops to start dumping water into your boat. A story depicting this eventuality is in the book Deep Trouble, compiled and edited by Chris Cunningham (editor of this very publication). The victim got in trouble because he didn’t use a spray skirt, and survived the swamping and loss of his kayak only because he was wearing a dry suit.
I know a few people who take along a PFD, but stuff it behind their seat instead of wearing it. A good experiment to see how well this works is to try putting the PFD on while you are swimming. Essentially, it can’t be done.
I have been paddling since 1984. I have paddled in Puget Sound, Queensland, Australia, Belize, Baja California, Alaska, and many trips on the west coast of Vancouver Island. I always wear a PFD and always a spray skirt (as well as a dry suit, as many of these waters are bitterly cold).
I suggest you have a trustworthy friend spot you when you are practicing wet exits. Helps give you confidence
Lovely boat, by the way. Nice job.
P. S. I should add, the Coasties require you to wear a pfd in all waters within their jurisdictions.
Also, I think the inlays on your deck look very nice. I do have a question about the magnets to hold your rear hatch in place. I have known several people who have done this, and am curious if they have ever had a problem with them. I have in mind the unexpected sweeping of your deck by a green wave, which can create a lot of suction. Other readers are welcome to educate me on this.
When you do your practice wet exits, pay attention to how much loose gear goes adrift. It can be quite surprising.
From the Editor:
The United States Coast Guard only requires having a PFD on board for each person over the age of 13 but the requirements for wearing the PFD are left up to the states. There is a federal requirement for those under the age of 13 to wear a PFD but state requirements for children take precedence. Only New Mexico requires all kayakers to wear PFDs. (Maine requires wearing a PFD only on the lower Saco River between January and June). A list of requirements by state is provided by the Coast Guard’s Boating Safety Division.