Small boats have been a part of my life from a very early age; over the years I’ve owned kayaks, canoes, and several powerboats. I had often thought of building my own small boat but never had the time or confidence to do so. I did not have much experience as a woodworker and no experience at all working with epoxy or fiberglass. In spite of these limitations, I felt a strong urge to build a small powerboat, something between 16′ and 18′, with room for four, and easy to trailer and launch on my own. A lot of our fishing is in shallow water, so I was leaning toward a flat-bottomed hull, one that would lend itself to rowing at times.
I came across Spira International’s website on a random internet search. Intrigued by some of the designs, I was happily surprised that the boats could be built using construction-grade lumber. The Carolinian Carolina Dory seemed to have the qualities I was looking for. Designer Jeff Spira notes: “The design was taken from the Grand Banks Dories after the advent of power. The built-in rocker hull common to a Grand Banks dory was replaced with a flat bottom which would allow the boat to plane under power. These boats, primarily used for fishing in the inland and near shore waters of the Carolinas, did not require a lot of horsepower to move along at a good clip.”
 Bill Smeaton
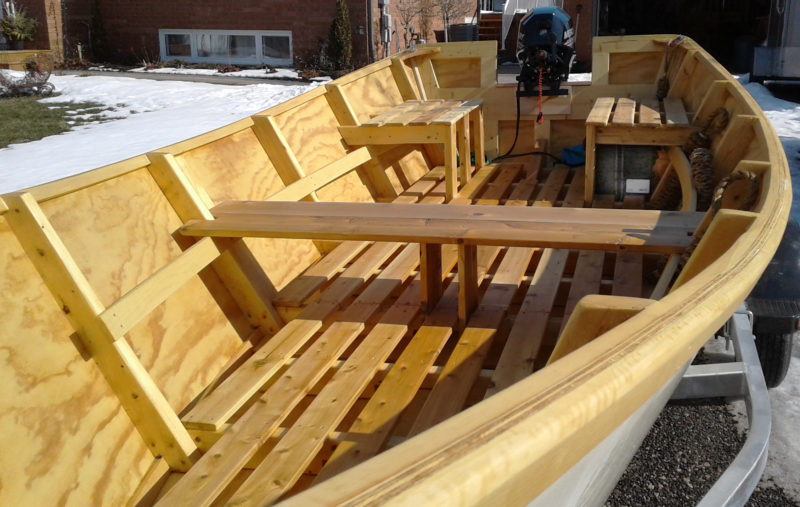
The Carolinian Carolina Dory from the design firm Spira International is based on the shape of the traditional Grand Banks dory—but updated for outboard power and construction with lumberyard materials. With most of the Spira designs, the interior arrangements are left up to the builder. In the author’s boat, he sits on a starboard seat to take the helm while underway. The battery for the motor, kept under the port bench, provides some balancing weight.
I ordered the plans in electronic format. They included six easy-to-follow pages detailing framing measurements, chine-log and sheer-plank assembly, transom assembly, and bow specifications. The plans package included a bill of materials, schedule of fastenings, and an illustrated e-book about the construction of the Carolinian. A second e-book, the Illustrated Guide to Building a Spira International Ply-On-Frame Boat, has instructions covering wood selection, fastenings, scarf joints, epoxy, and fiberglass.
The only power tools I used in the construction were a circular saw and orbital sander. All of the lumber was of construction grade—marked “SPF” for spruce, pine, fir. It’s most often spruce, which keeps the boat light. For the plywood, the plans called for 1/2″ exterior construction plywood. I was considering finishing the interior bright with spar varnish, so I paid a bit extra for plywood with an A-grade face, without the football patches found with B-grade. All joints were glued and screwed as instructed in the plans, using stainless-steel screws to secure all frame joints and the attachment of plywood to the frames. All screws were countersunk and sealed with epoxy. I deviated from the plans and used Gorilla construction adhesive instead of epoxy on all frame joints and the transom frame. It made the construction much simpler because it required no mixing. I also used the adhesive on the chine-log and sheer-plank scarf joints. The Gorilla adhesive held well and none of those joints failed when bending those longitudinals. [Editor’s note: Gorilla Glue is rated as “Waterproof, Passes ANSI/HPVA Type I.” This polyurethane adhesive first came on the market in 1999, and it’s not clear yet how it holds up over time or during prolonged immersion. Marine epoxies have proven reliability for use in boats.]
 Laurie Smeaton
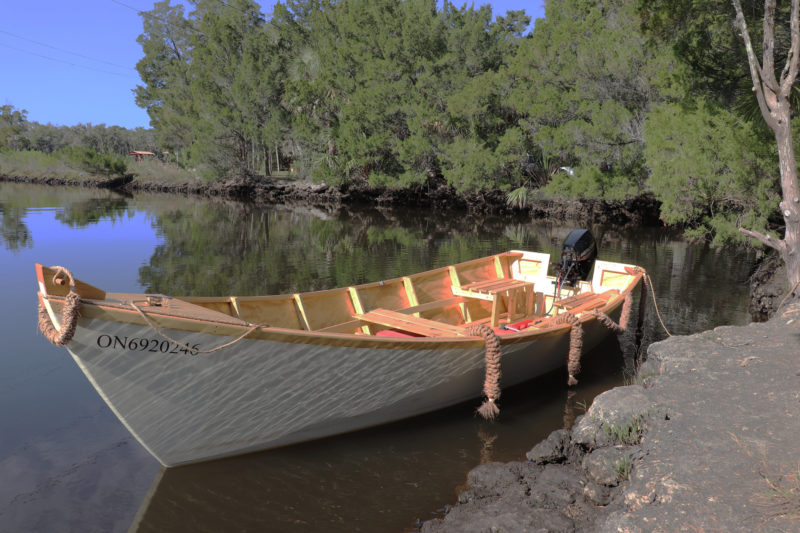
The flat bottom gives the boat a very shallow draft, just under 5″, with two aboard.
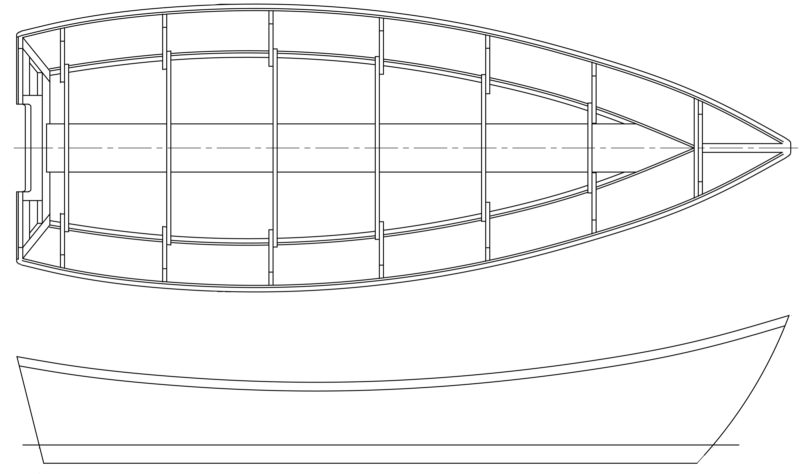
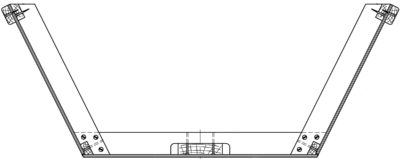
The frames are constructed with 2x4s using a jig set up on a sheet of plywood. The transom is framed with 2x4s with a piece of 2×8 at the motor mount, and its 1/2″ plywood face is glued and screwed in place. A straight strongback supports the seven frames, the transom, and the stem—which is cut from a 2×8. Joined to these pieces are a 2×6 keelson and the 1×2 chines and the sheer clamps. When the framework is finished, 1/2″ plywood is bent around the sides and the shape traced along the sheer clamp and chines. It takes three pieces to cover a side from stem to stern; they’re joined with butt plates that are attached with glue and screws while the side panels are in place on the framework. The 1/2″ plywood bottom goes on last, its shape traced along the side panels. Rubrails of 1×3 strengthen the sheer.
Among the elements I added that were not included in the plans were an oak breasthook installed beneath the plywood foredeck and a 1×3 oak keel running the full length of the bottom. The breasthook provides additional strength to the bow for lying at anchor and loading the boat onto the trailer; the keel improves tracking for motoring at slow speeds and rowing.
The plans called for the entire boat to be sheathed in 6-oz fiberglass cloth set in epoxy with a second layer added to the bottom for boats that may be beached. I chose to use 7.5-oz cloth with layers doubled up at all of the seams.
 Laurie Smeaton
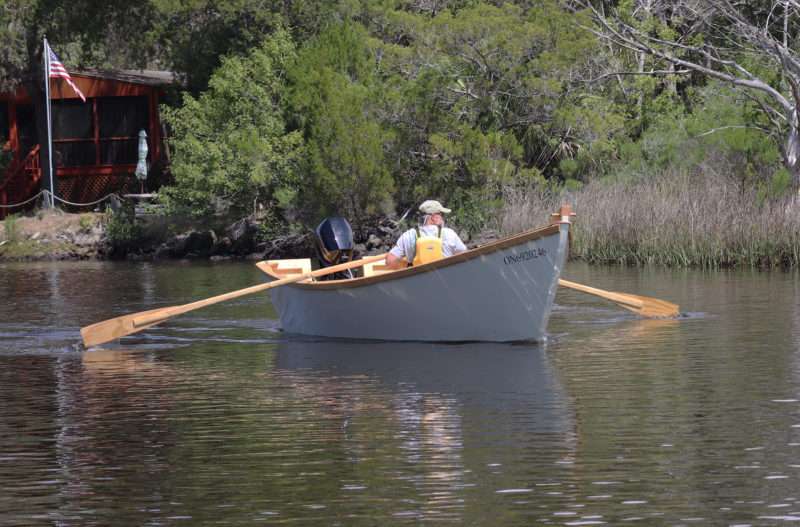
Outfitting the dory for rowing is, like the interior layout, a personal choice.
As with all Spira designs, finishing the interior is a personal choice. I chose a split seat in the stern to allow for operating the boat from a standing position, which is sometimes required when running slowly through the inshore waters of Florida’s Gulf Coast where we spend time in the winter. I installed a rowing bench amidships and left the bow open for a folding deck chair which can be stowed when fishing. I used white cedar for the seats and floorboards and finished it with an oil-based semigloss spar varnish.
My boat will not be in the water for long durations, and with the exception of our time in Florida, will spend all of its time in fresh water. I painted the exterior with commercial-grade oil-based rust-inhibiting paint. Applied with a foam roller, it went on very nicely with five coats on the bottom and three coats on the sides and transom.
I completed the Carolinian project, including making 9 1/2′ oars, in 350 hours. The boat trailers very well; for its maiden voyage we towed it 1,200 miles from Ontario to Florida.
 Laurie Smeaton
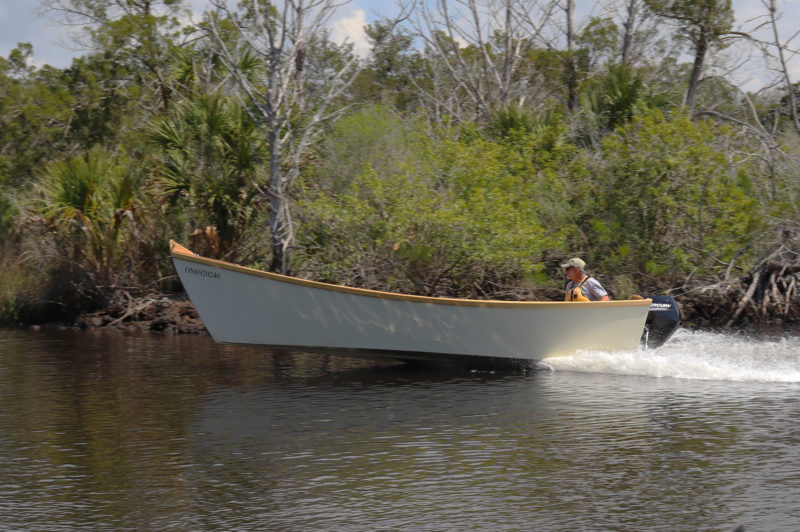
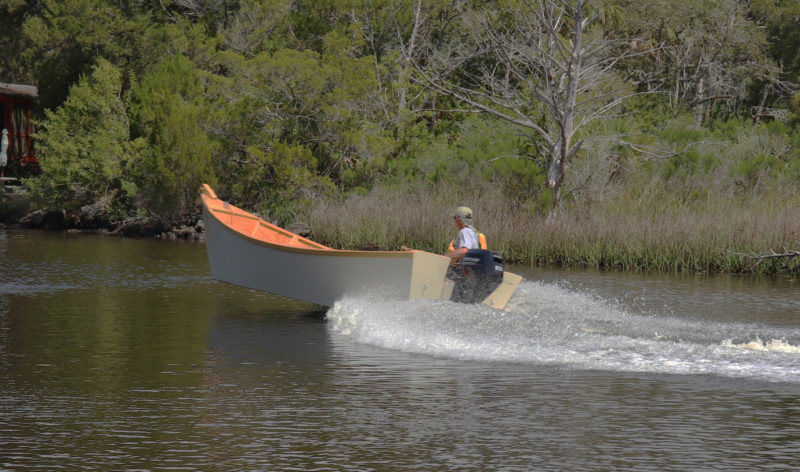
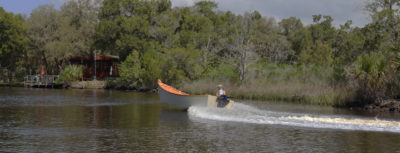
With a 20-hp outboard, this Carolinian dory can hit 28 mph.
The boat has performed extremely well, meeting and even exceeding many of my expectations. Powered by a 20-hp Mercury ELPT (Electric Start, Power Trim) with 20″ shaft, it comes up on plane quickly, has a top speed of 28 mph, and cruises comfortably in choppy water at 15 mph. With two occupants aboard, the boat draws less than 5″, and the power trim diminishes the draft to allow for navigation in very skinny water; the power trim also keeps the bow down when going fast. I have installed the full-sized 40-lb marine battery beneath the port stern seat, and this is balanced quite nicely with the operator on the starboard side. Under full power the hard chine causes the boat to respond very quickly to the tiller; my first time experiencing this caught me a little off guard, but it was easy to adjust to. Trimming up the bow helps to lessen this quick response, which is another benefit of a power-trim motor.
 Laurie Smeaton
An outboard motor equipped with power tilt can adjust the boat’s trim. Raising the bow smooths the dory’s response to turns.
I added oarlocks because I thought they were a must for a dory. The Carolinian tracks well while being rowed, and while I row mostly for the pleasure of it, the boat has a satisfying speed under oars.
The hull is stable. I can stand on the gunwale and not have any sensation that the boat is about to tip. My wife and I have moved to the same side of the boat to land fish without feeling the stability has been compromised.
I especially enjoy the Carolinian at 15 mph, listening to the sounds of waves running along the wooden hull of this beautiful boat. I have named the boat the JACQUES-YVES after my childhood hero, the marine conservationist Jacques Yves Cousteau. It was fitting that on her maiden voyage, two dolphins swam with us for at least a quarter mile. JACQUES-YVES promises to provide many hours of enjoyment to come.![]()
Bill Smeaton is retired and living in the village of Beachville in southwestern Ontario. He started his career as a commercial diver, followed by a 32-year career with a large electrical transmission and distribution utility. He and his wife Laurie have two sons and four grandsons. They are avid fly fishers and enjoy spending many hours on lakes and streams throughout Canada and the United States.
Carolinian Carolina Dory Particulars
LOA/17′ 7.5″
Beam/6′ 6.8″
Draft/5″
Hull weight/650 lbs
Maximum displacement/2,500 lbs
Maximum outboard, 20″, remote/75 hp
Maximum outboard, 15″, tiller/30 hp
Update: Jeff Spira passed away unexpectedly in the spring of 2022. His website is no longer operating and it is presumed that his boat plans are no longer available.
Is there a boat you’d like to know more about? Have you built one that you think other Small Boats Magazine readers would enjoy? Please email us!






Hi Bill
You did a fine job building that Spira Carolina Skiff. It sure looks pretty. I built a Spira Albion in 2016. Like you I was really impressed by how stable the boat is.
Jeff Spira stretched my design out to 20’. There was an article in Small Boats Monthly in September, 2018 on our boat.
Thank you, Al. I enjoyed your article on the Albion very much. Congratulations on your award. Very well deserved.
Hello Bill, nice boat! You wouldn’t know off hand what the build price was, do you?
Ray
Awesome job! I plan on building that design also.
Boat materials cost approximately $2000.00CD
This was be for COVID drove up the cost of lumber!
Excellent article, Bill. Thanks very much!
Thank you very much, Pete. The article was a rewarding learning experience in itself.
Nice clean wake, I was surprised. And great use of locally available materials. Pretty light for an 18 footer.
Thank you, Kent. I have been very impressed by how high and smooth this boat operates at higher speeds. I originally had second guessed my decision to go with a 20hp. I am glad I did. A 25hp would have been too much. The extra weight of a 25 hp may also have had negative impact on performance. Spira’s recommendation was right on.
Glad to see that there are a few continuing to keep this tradition alive. As a former boat builder, my concern is the choice to go the economic route with lumber and fasteners. Unless your intention is a showroom piece that will never see the elements, you have already reduced the life to roughly a third of its life. We see water intrusion damage all the time and unfortunately it starts out so small you would never know it. As it’s encapsulated inside the fiberglass and epoxy it does its damage unseen. You have already started the process with the water-based Gorilla glue. Very bad choice. You never use a water-based product followed by sealing. We see these failures often and when you consider the time factor it doesn’t make sense to go this route.
Thank for the feedback John. The only joints where I substituted epoxy with Gorilla construction adhesive were on the frames, which are also screwed. Hopefully, with the boat being stored on trailer out of elements, it doesn’t present a problem too soon.
One other point. Unlike Gorilla wood glue, the construction adhesive does not contain water.
Why didn’t you build me one?
Very cool, Bill. Congrats from Sue, Harrison, and me.
Nice article! Your boat looks terrific. Enjoy.
Aunt Laura.
Excellent build Bill,
So pure and well picked, the varnish paint combination. I´m in the very first step of my first build. Choosing the right boat plan. I have a single car garage and a 18′ is the max. length I can reach. I was between the Spira´s 17′ Kachemak, the 17′ Fast Skiff and the 17ft Tango Skiff. But I think for a first build maybe a V-bottom will be complicated for me, also I will need more power for the Vs and I can get a 20hp 4 stroke reasonably cheap. The only problem is here in Rio de la Plata sometimes it gets choppy as lake Ontario.
Enjoy your boat, You deserve her!!
Thank you Horacio for the kind words. I have now had the opportunity to spend several days in choppy water (exceeding 3 feet). With weight, i.e. passenger in the bow, the boat handles waves comfortably. However max speed is reduced to less than 15 mph.
Hi Bill
Your boat has been an inspiration to me. It is beautiful. I first saw photos on the Spira International website. I am close to completing my Carolinian. I just put the motor on yesterday (same 20-hp you have on your boat) and it appears that it sits a little too deep on the transom:
1. Did you follow the transom dinensions on the plan or
2. Did you modify the transom / motor interface in any manner?
Hi Steve. No, I didn’t modify the plans at all. I built to the 20″ standard. I
have a 1″ block that the motor sits on. My 20-hp is a long shaft. This puts the center line of the propeller 8″below bottom of boat.
;
Steve, one other point. If you are referring to the power head of motor sitting deep, it does. A 25-hp mercury would not have enough room to turn. I have had no issue operating the 20-hp mercury.
I am currently building a Carolinian in my garage. I too want to set it up for rowing, as well as an outboard. I’d love to hear some thoughts learned in retrospect on oarlock placement, seating, and the oars themselves.
Andrew
I started out with the Shaw & Tenney formula which I found on the Shaw and Tenney web site. This formula called for an oar length of 11 feet . This was slightly longer than I had hoped. I experimented with some lengths of wood and I found that because I was mounting my oar locks directly to the inside sheer plank, which was on an angle, that this would result in the oars entering the water on an angle of 20 degrees. This allowed me to reduced the oar length to 9.5 feet.
My oar locks are installed 82.5 inches from the stern. The center of my rowing bench is positioned 15 inches forward of the oar locks.
My rowing bench seat measures 14.5 inches above boat bottom and 10.5 inches above floor boards.
The boat rows very well in calm to moderate seas. I did have one day this summer where I was rowing/fishing in windy conditions (wind peak over 20mph) and very choppy water. While rowing into the wind I heard a cracking sound come from one oar. There was no visual indication of stress and I suspect I was pushing the limits for the screw mounted oar lock. I am considering an alternative mount method which would include a hard wood block bolted through hull.
I hope this answers some of your questions.
As I noted in my review of the Carolinian Dory was constructed using construction grade lumber, as advised in the plans. One thing I underestimated was the moisture content of the spruce 2x4s used for the frames. This resulted in “screw pops” which are visible through the painted epoxy and glass finish. I also have a very slow leak (not a big issue) which I believe is the result of a screw being pulled slightly through the epoxy as the frames dried, creating a small crack, which is not visible through the paint and does not restrict the use of the boat; but definitely not something I had considered.
With rising demands for construction lumber, I can see this issue possibly getting worse.
I don’t want to deter anyone from the boat design because we are thoroughly enjoying our boat. This is just a note that consideration for extra dry time either prior to build or prior to epoxy would be of value. Any screw pops can then be filled prior to epoxy.
Is there any way to obtain a set of plans for this boat? I’m completely in love with the design.
We have a huge woodworking shop on the south shore of Nova Scotia and I’m sure we could have one in the water by August if I even had just the drawings for the rib stations