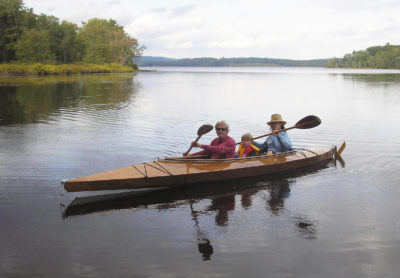
The last two kayaks I built were for casual day paddles: a Nick Schade–designed Petrel Play for my wife, Caroline, and an Eric Schade–designed Shearwater 14 for myself. Our excursions often involve coasting while looking around, and perhaps taking some photos or raising binoculars to identify a bird. The wind is usually light, the water a protected spot in a bay or at the narrow end of a lake. We are decidedly in no hurry and have no need for a high degree of maneuverability, but rather, favor having good directional stability.
However, we found that while both kayaks would hold a course well when we got them moving, when the paddling was paused, they tended to yaw left or right. And this, of course, is annoying when you’re trying to get the camera aimed at that showy hooded merganser or sunbathing painted turtle. Just as you’re getting the shot lined up, the kayak turns you away from the target.
 Photographs by the author
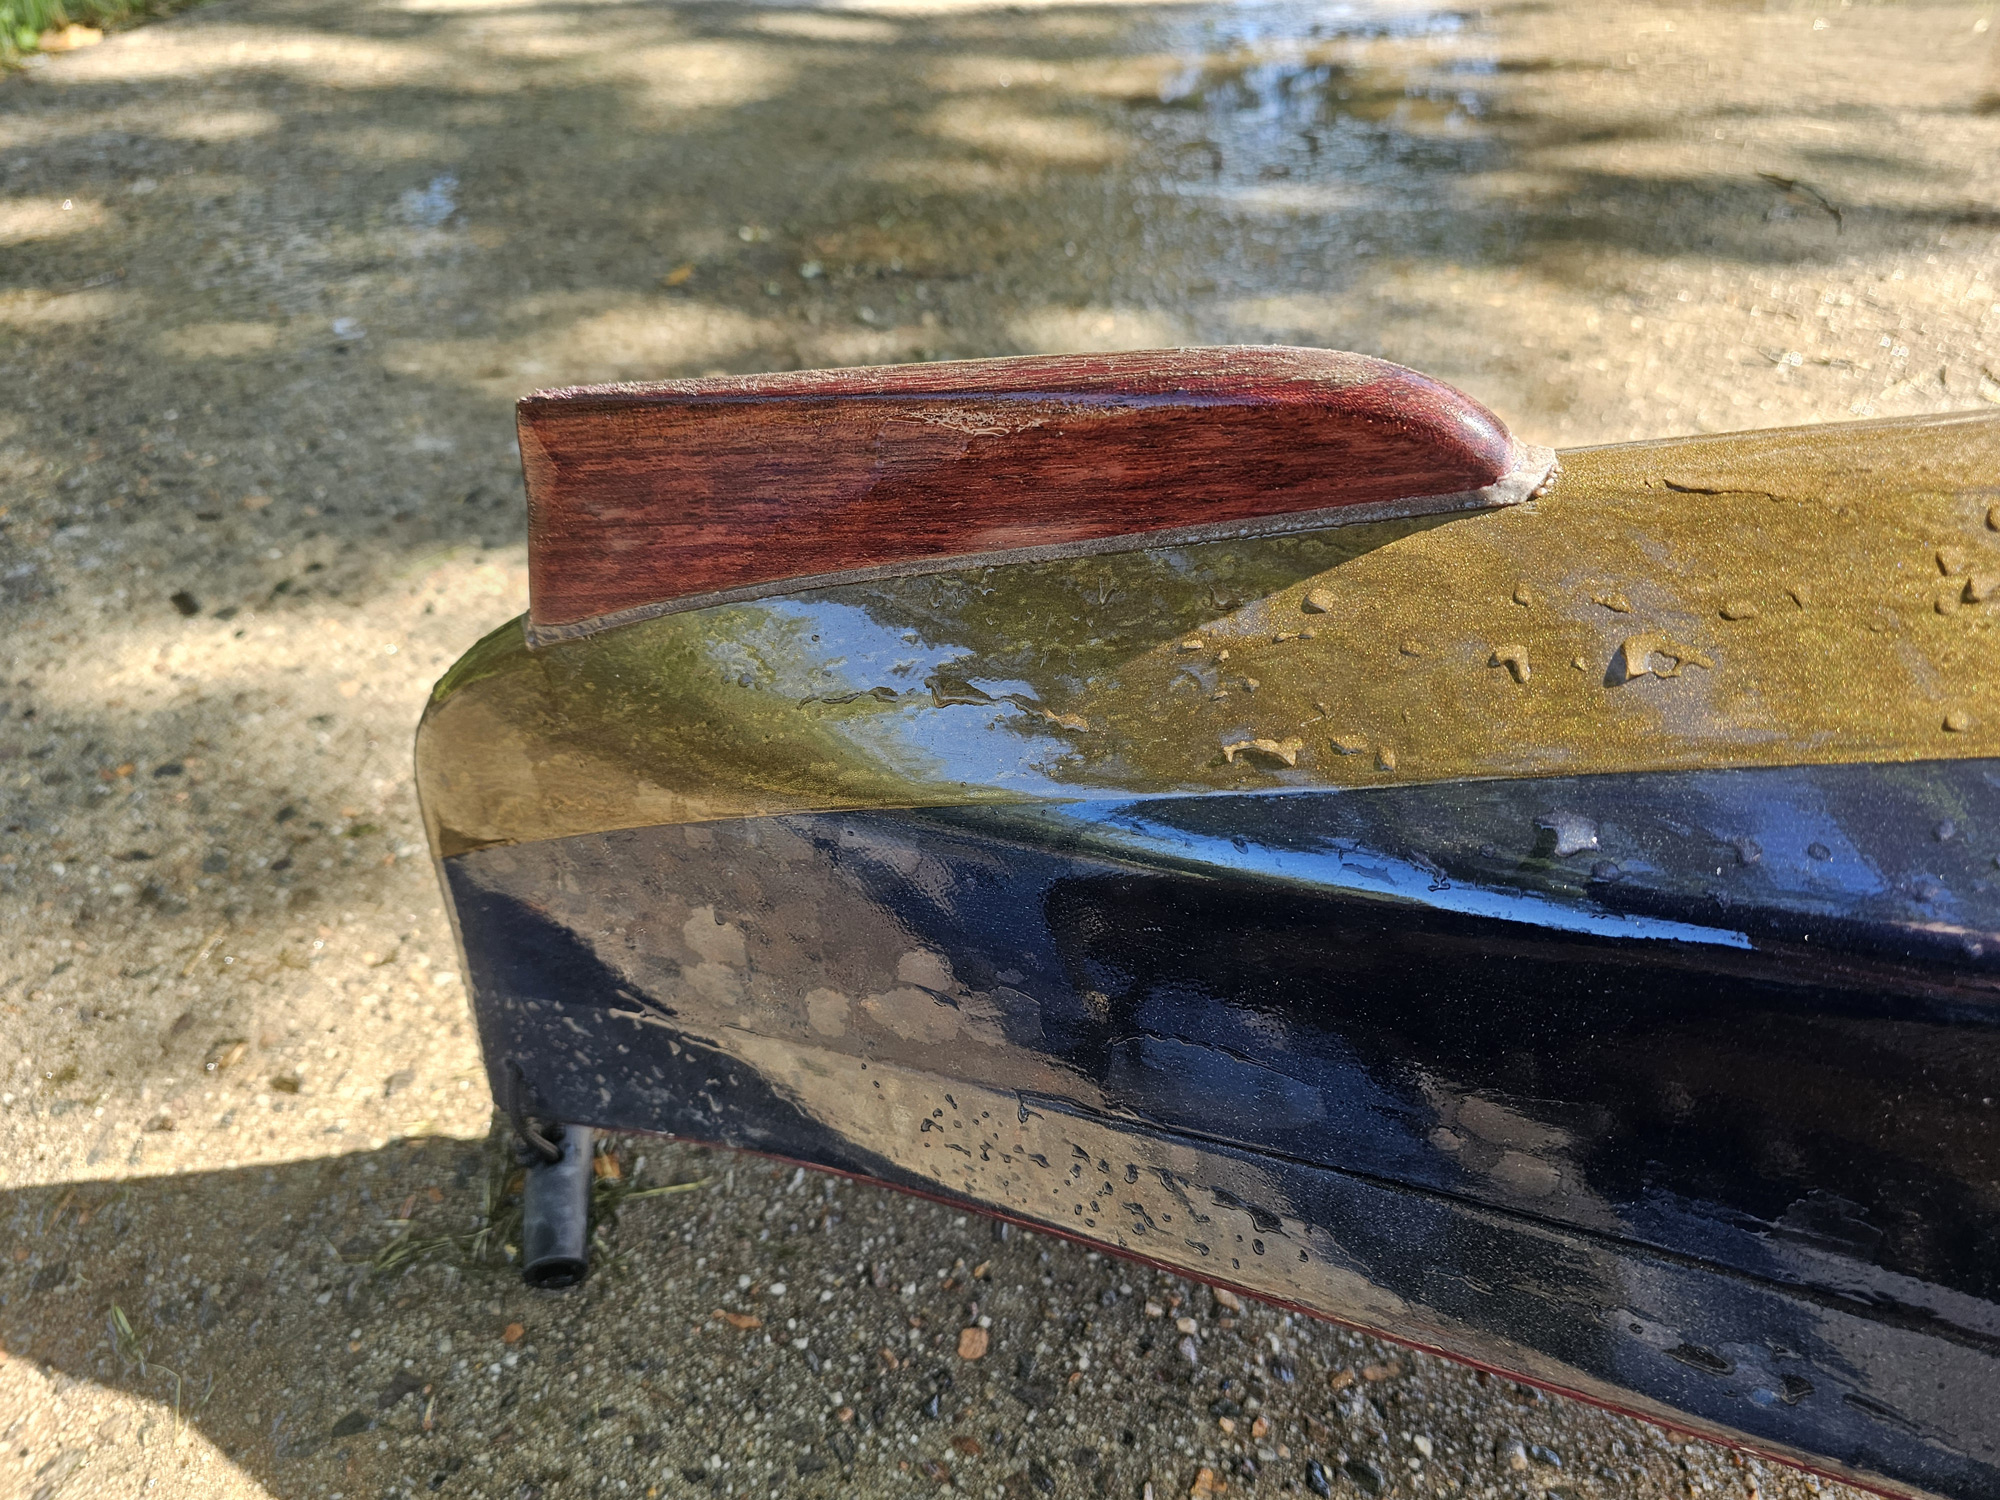
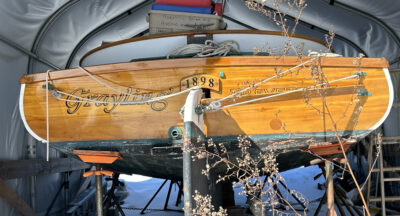
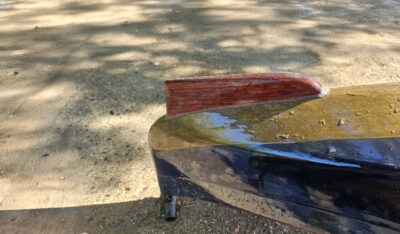
This skeg, on my Shearwater 14, is 3⁄4″ wide at the top and tapers to about 1⁄4″ along the bottom edge. It has held up over two years of regular use and has done a good job protecting the kayak’s finish at the stern, a common wear point.
I could have attached retractable rudders or built pivoting skegs with their boxes. But these are simple kayaks for quick and easy trips. The object was to keep everything as uncomplicated as possible. So, rather than deal with the complexity of either a pivoting skeg or a rudder, my solution was to attach a short, fixed skeg to each kayak. It was a relatively quick and easy add-on, and a surprisingly small skeg can keep a kayak from yawing without seriously affecting its ability to turn. An added benefit is that the skeg can prevent the stern from getting scraped when putting in and taking out.
For both kayaks, I used small blocks of hardwood that I had on hand: a chunk of purpleheart for the Petrel Play and a piece of reclaimed Brazilian cherry—a hardwood more properly called jatoba—for the Shearwater. Both woods are dense and tightly grained; any dense hardwood would be suitable.
Few tools were required. I used a bandsaw, planes, gouges, and a stationary belt sander to shape mine, but a handsaw, some rasps, and some sandpaper would also do the job.
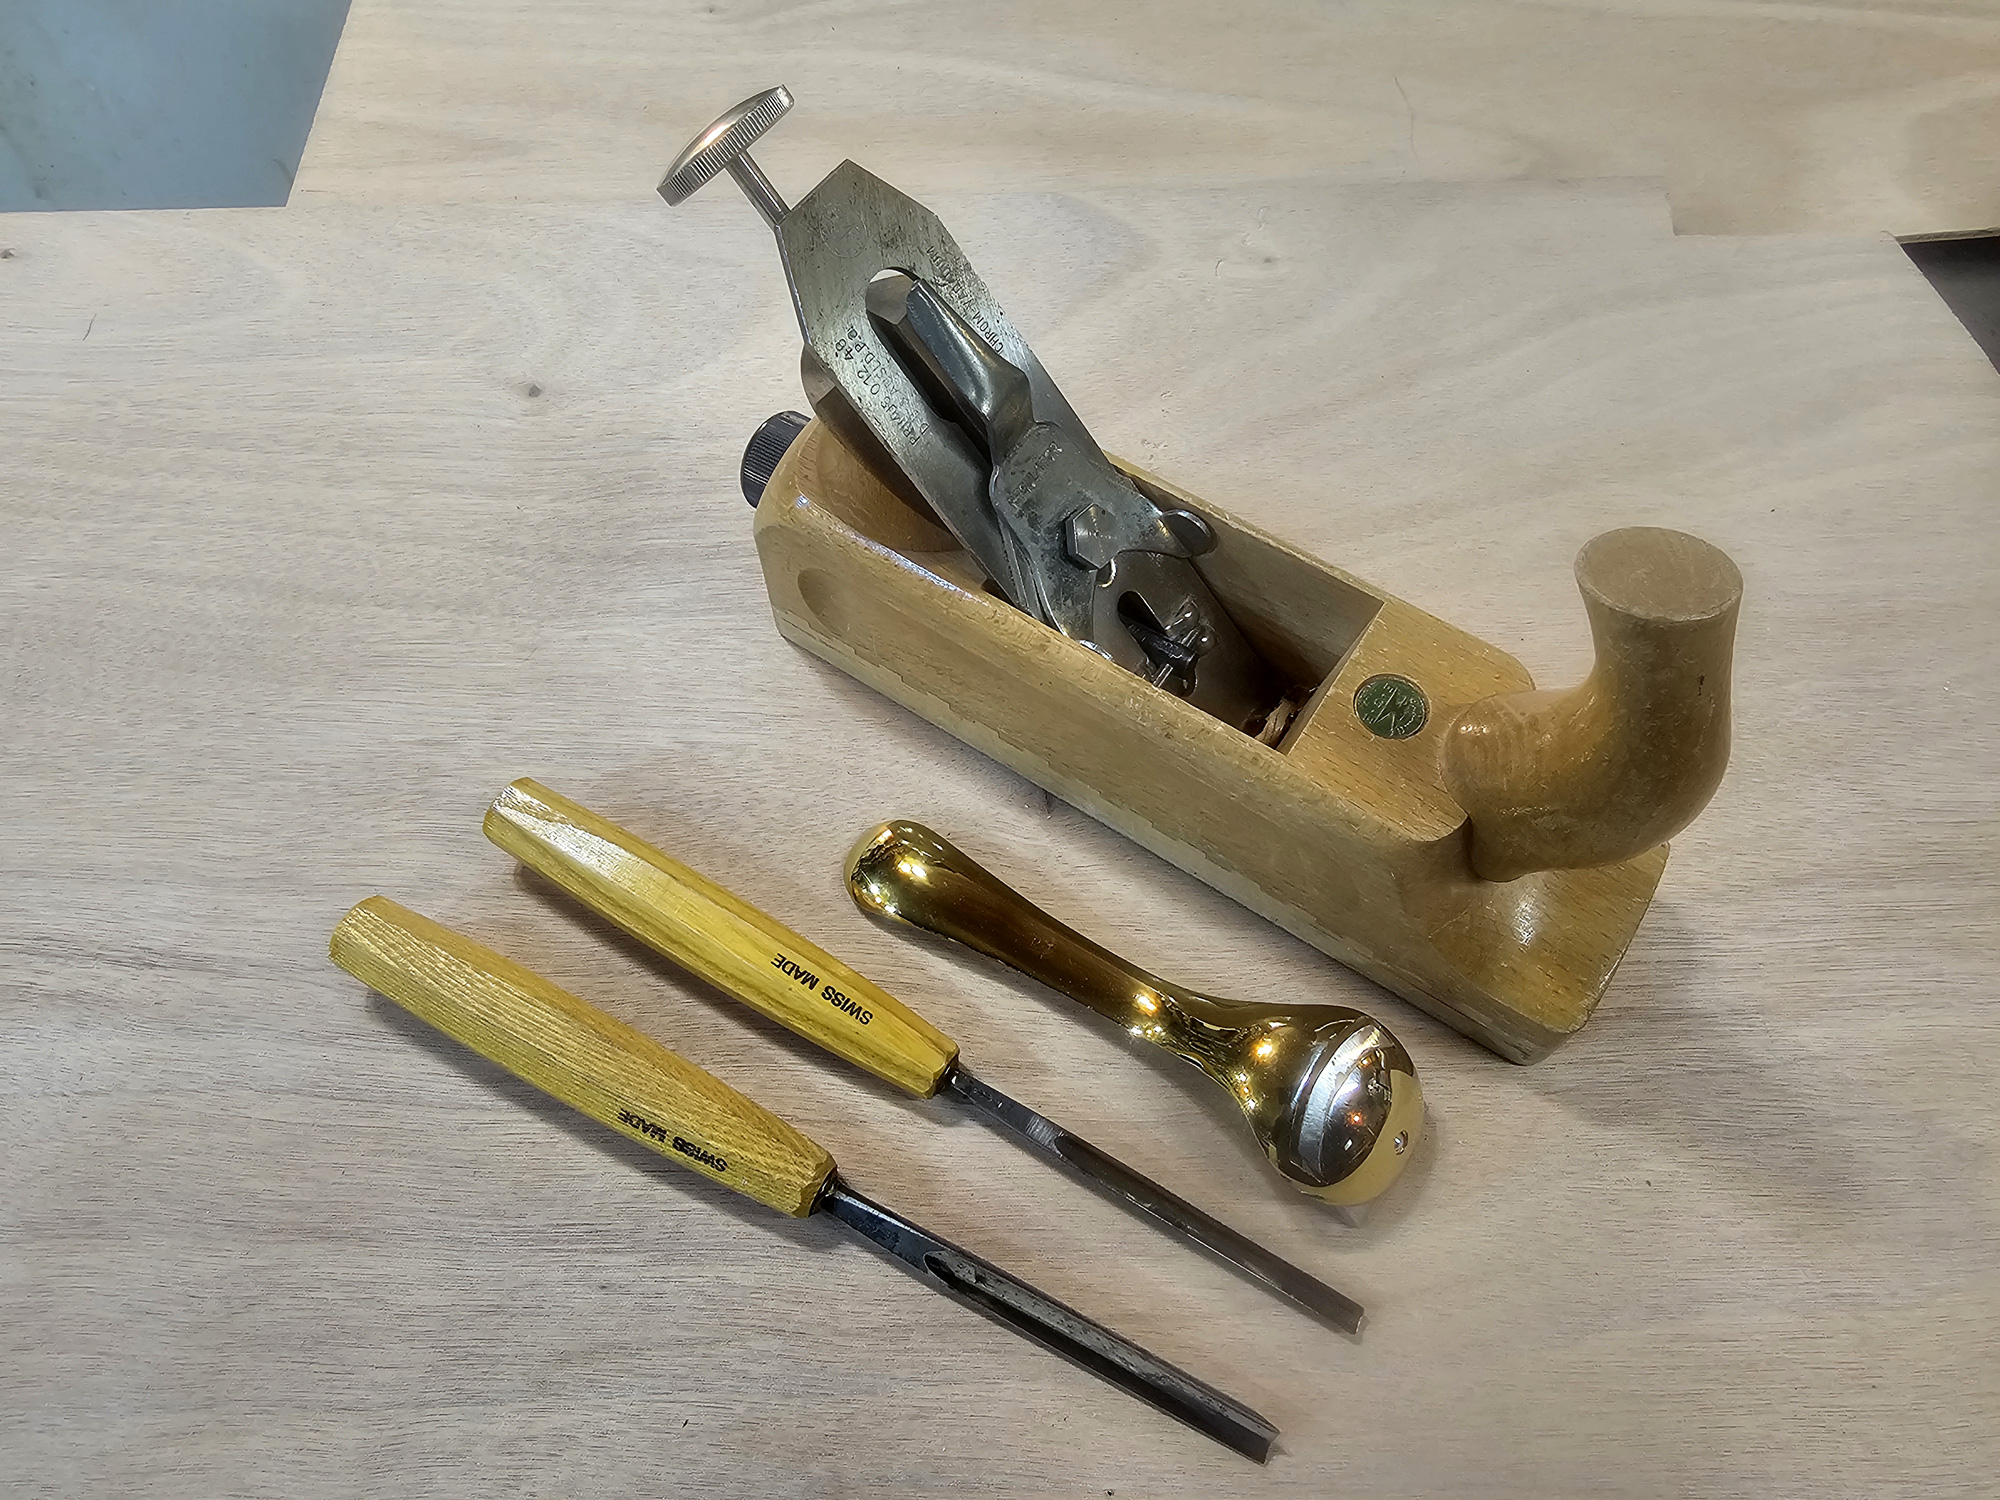
I used a bench plane, spoon plane, and a couple of gouges to shape the skeg before taking it to the roller end of a stationary belt sander.
How to make and fit a fixed skeg to a kayak
Decide how much correction you want to introduce
The Petrel Play has a flatter, broader underbody than average, so I went with a 9″-long skeg. The Shearwater has a more traditional V-bottom and tracks fairly well, so I made a shorter, 7″ skeg for that kayak. Both skegs are 2″ deep—I found this was sufficient for the tracking I was trying to achieve. If I had made them deeper they would have increased the draft, compromising the great advantage kayaks have in shoal waters.
Keep in mind that after the skeg is on the kayak, it can be easily trimmed down with a plane or saw, so if in doubt, a larger skeg is the way to start.
The other decision is where to place the skeg. Attaching it farther back makes it more effective for maintaining direction, but in any kind of chop it will often be out of the water. Bringing it forward keeps it submerged and working more of the time, but now the skeg is deeper in the water and will probably have more impact on the kayak’s draft. Because we use our kayaks in mild conditions, I placed the skegs well aft.
Take two measurements off the kayak
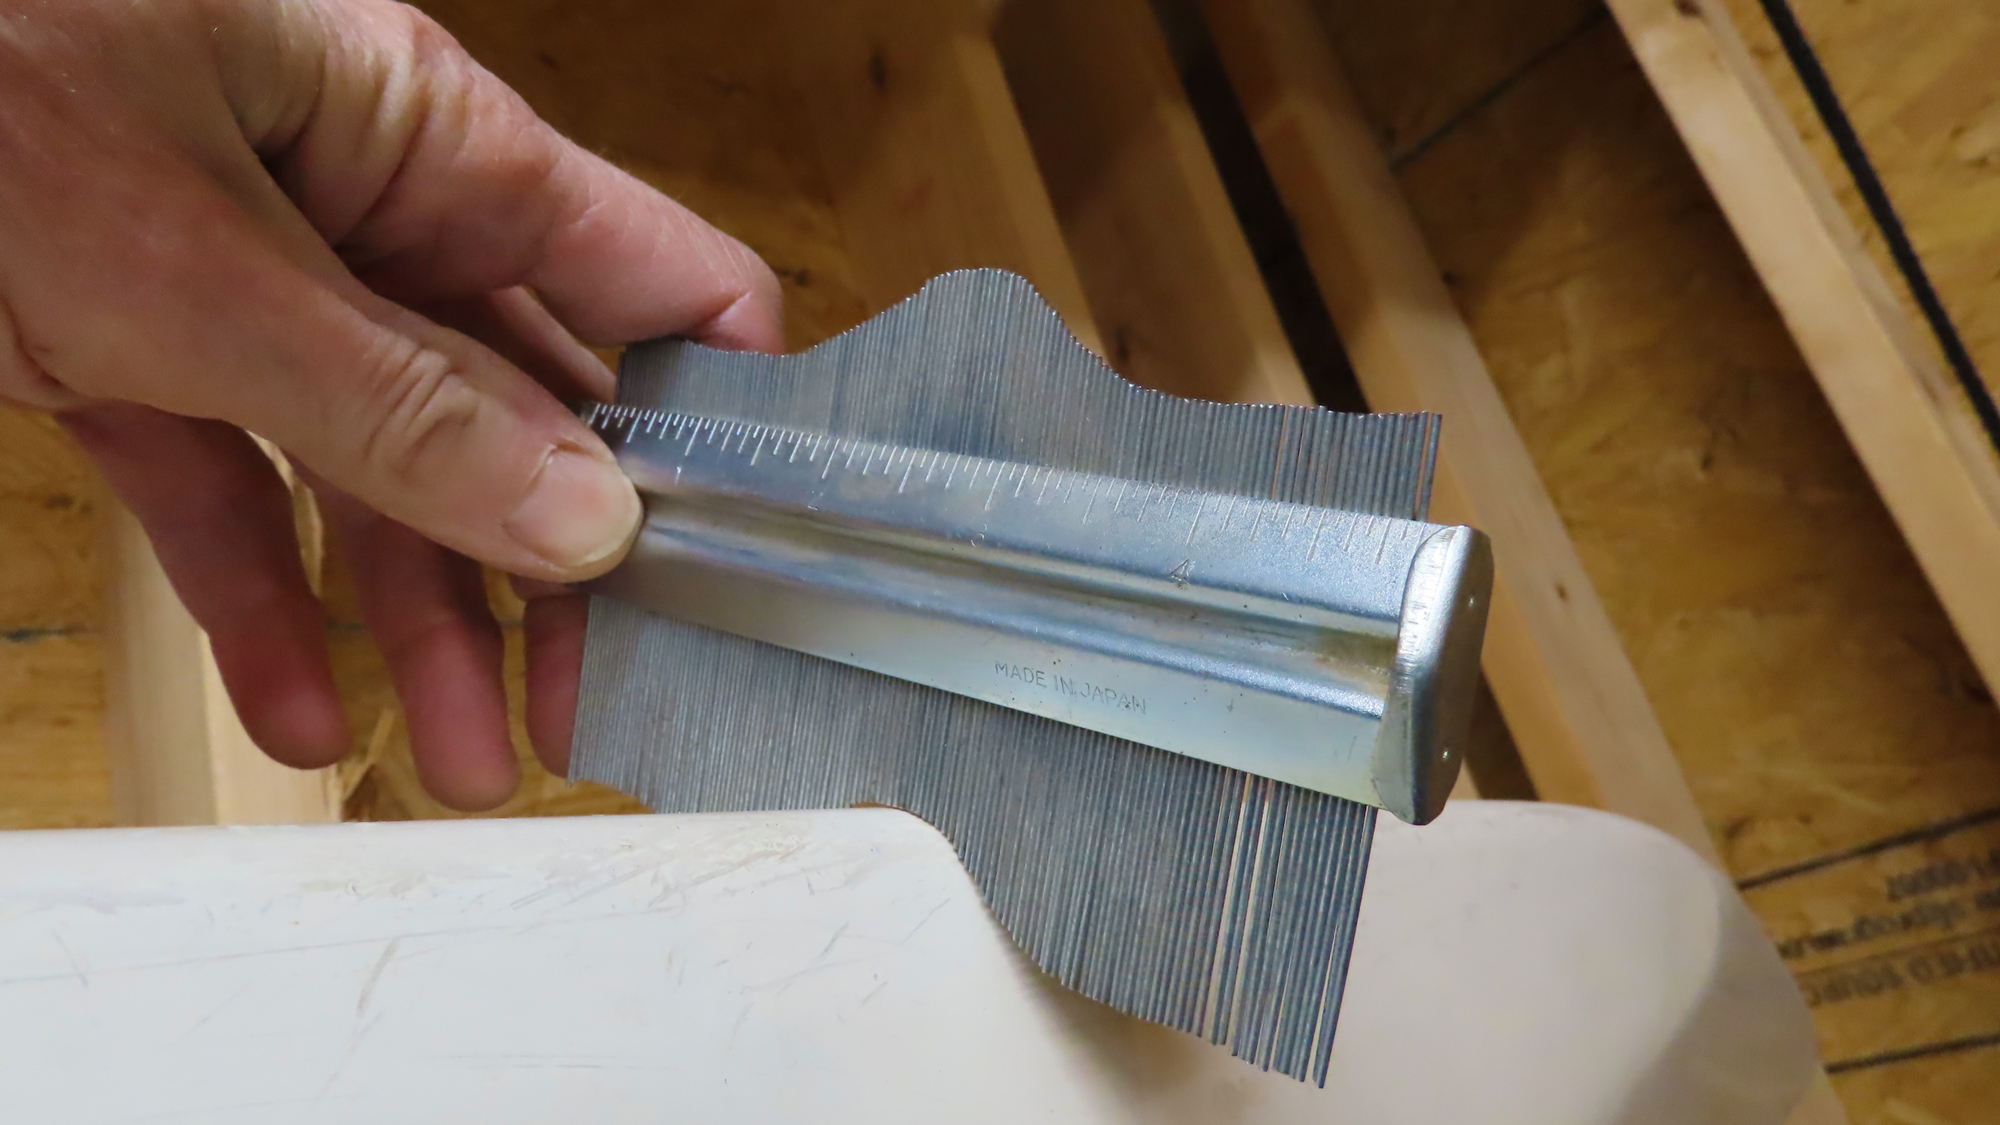
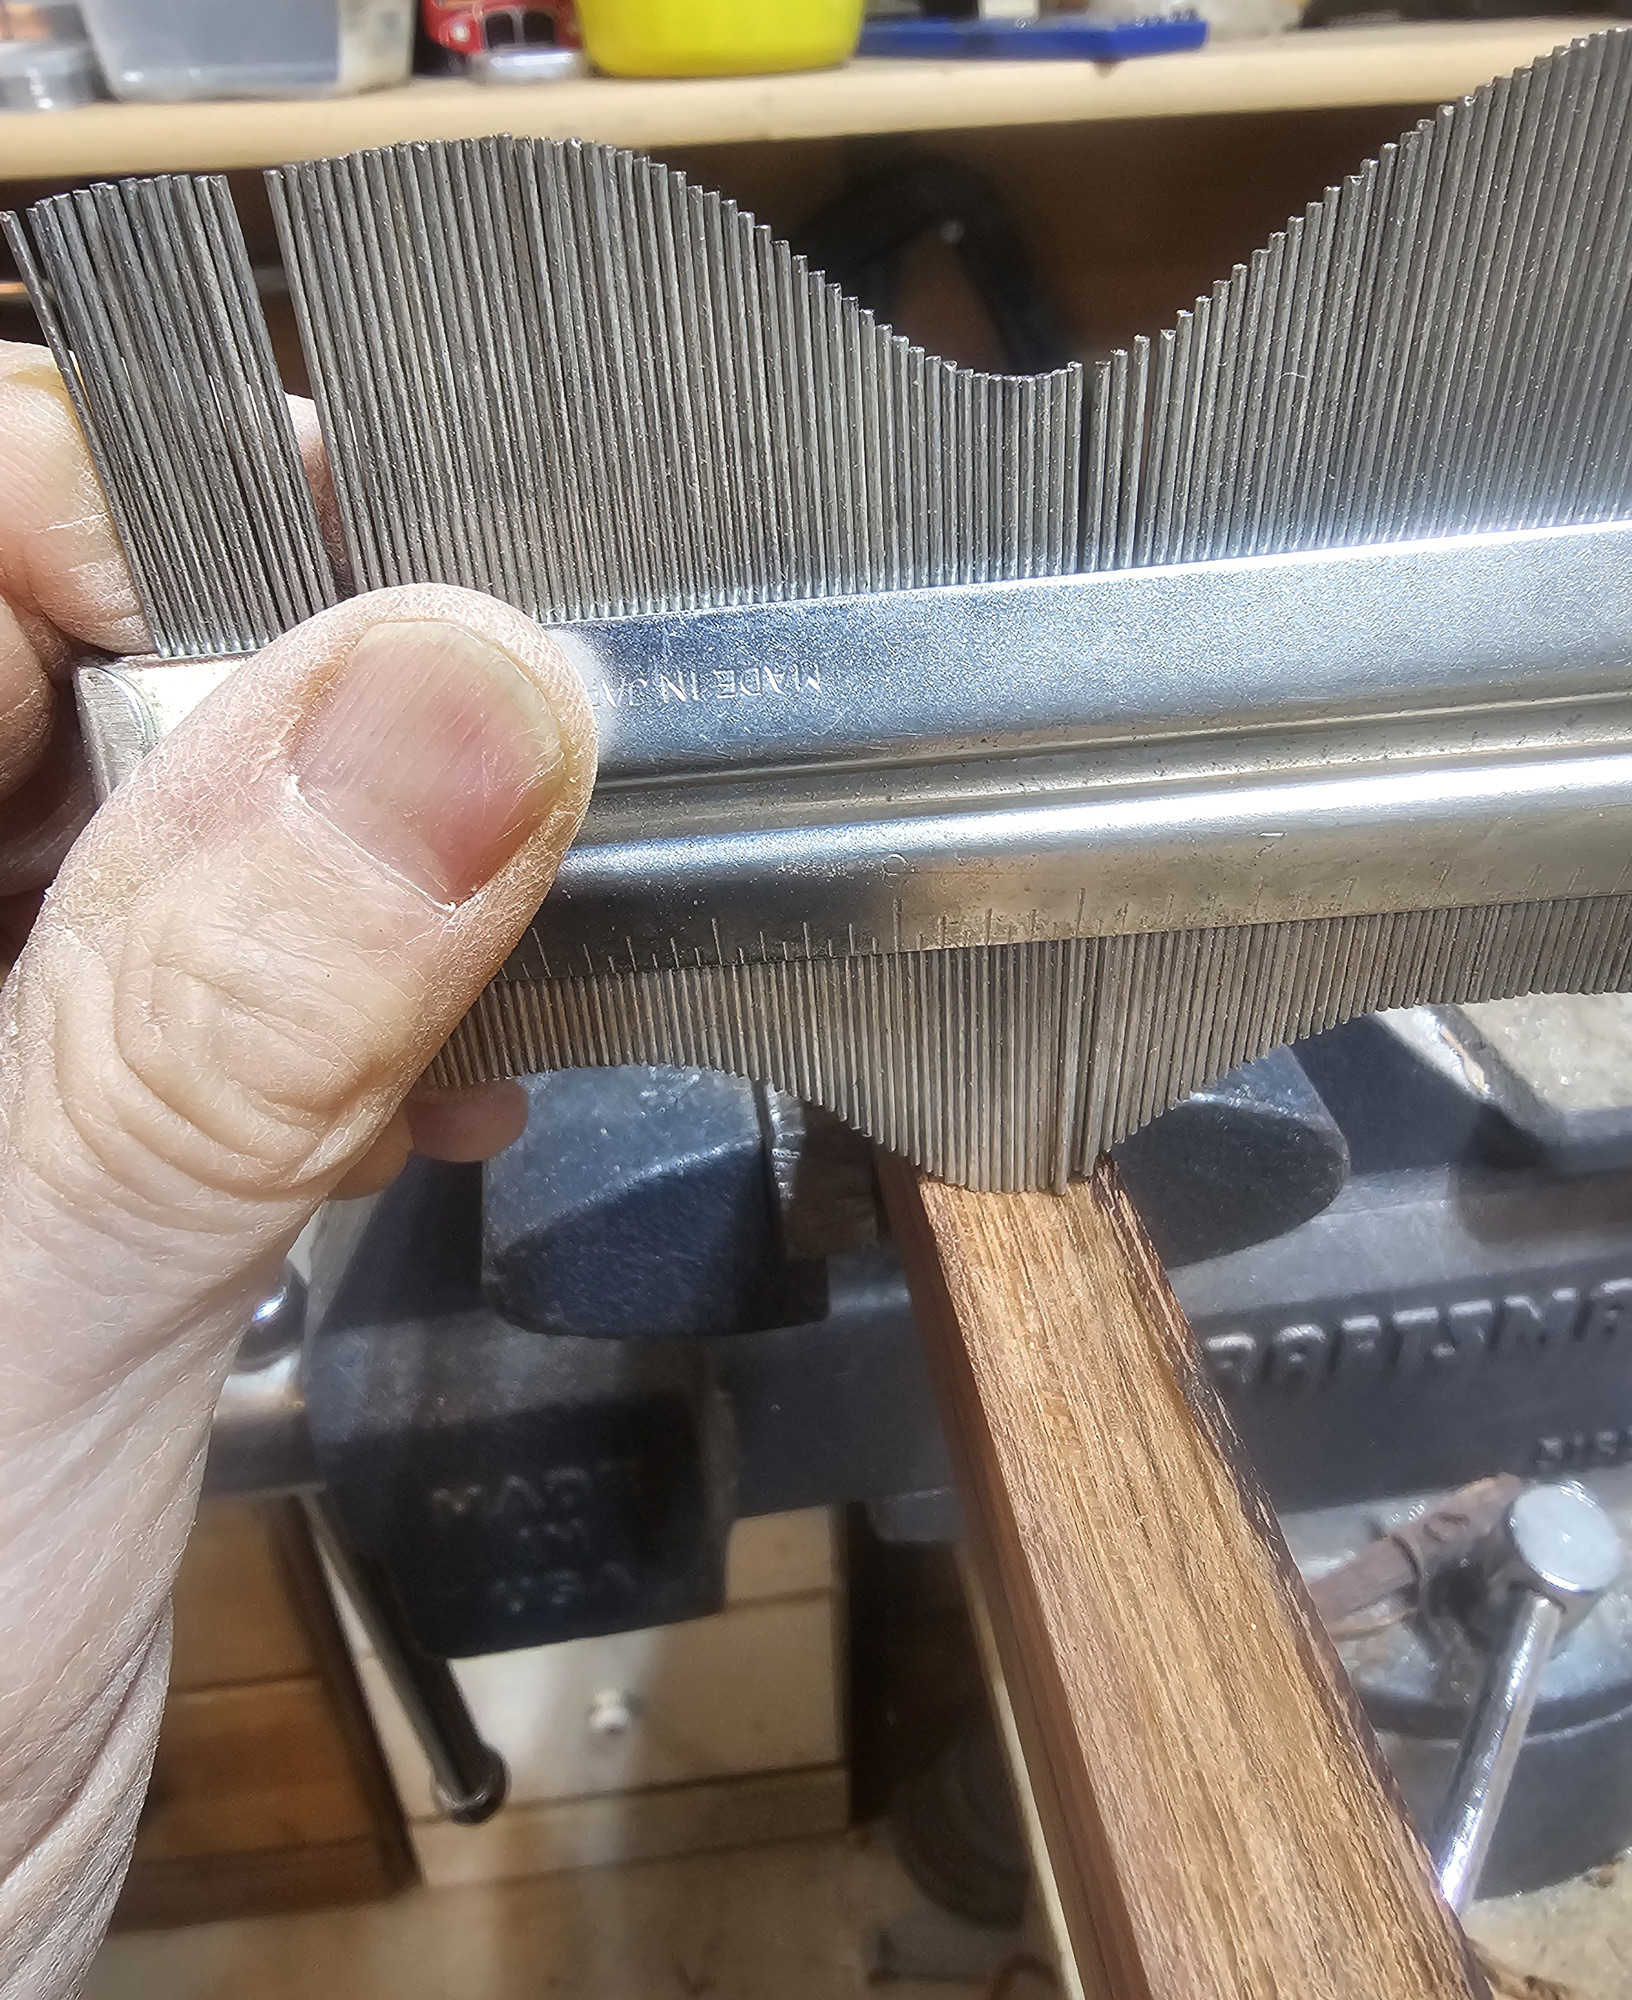
Using a contour gauge to record the profile of the keel.
After deciding where you will place your skeg, place the kayak on the floor and measure the gap between the keel and floor where the skeg will fit. By using a sliding T-bevel or by cutting out a cardboard template, establish the shape and size of the skeg. Most kayaks have enough rocker to make this work. A skeg with a bottom edge that runs parallel with the ground will work well in most cases and will protect the kayak when launching and retrieving. Next, using a contour gauge, record the athwartship curve of the keel in the same location (see below for option if you don’t have a contour gauge).
Draw the keel angle onto the stock
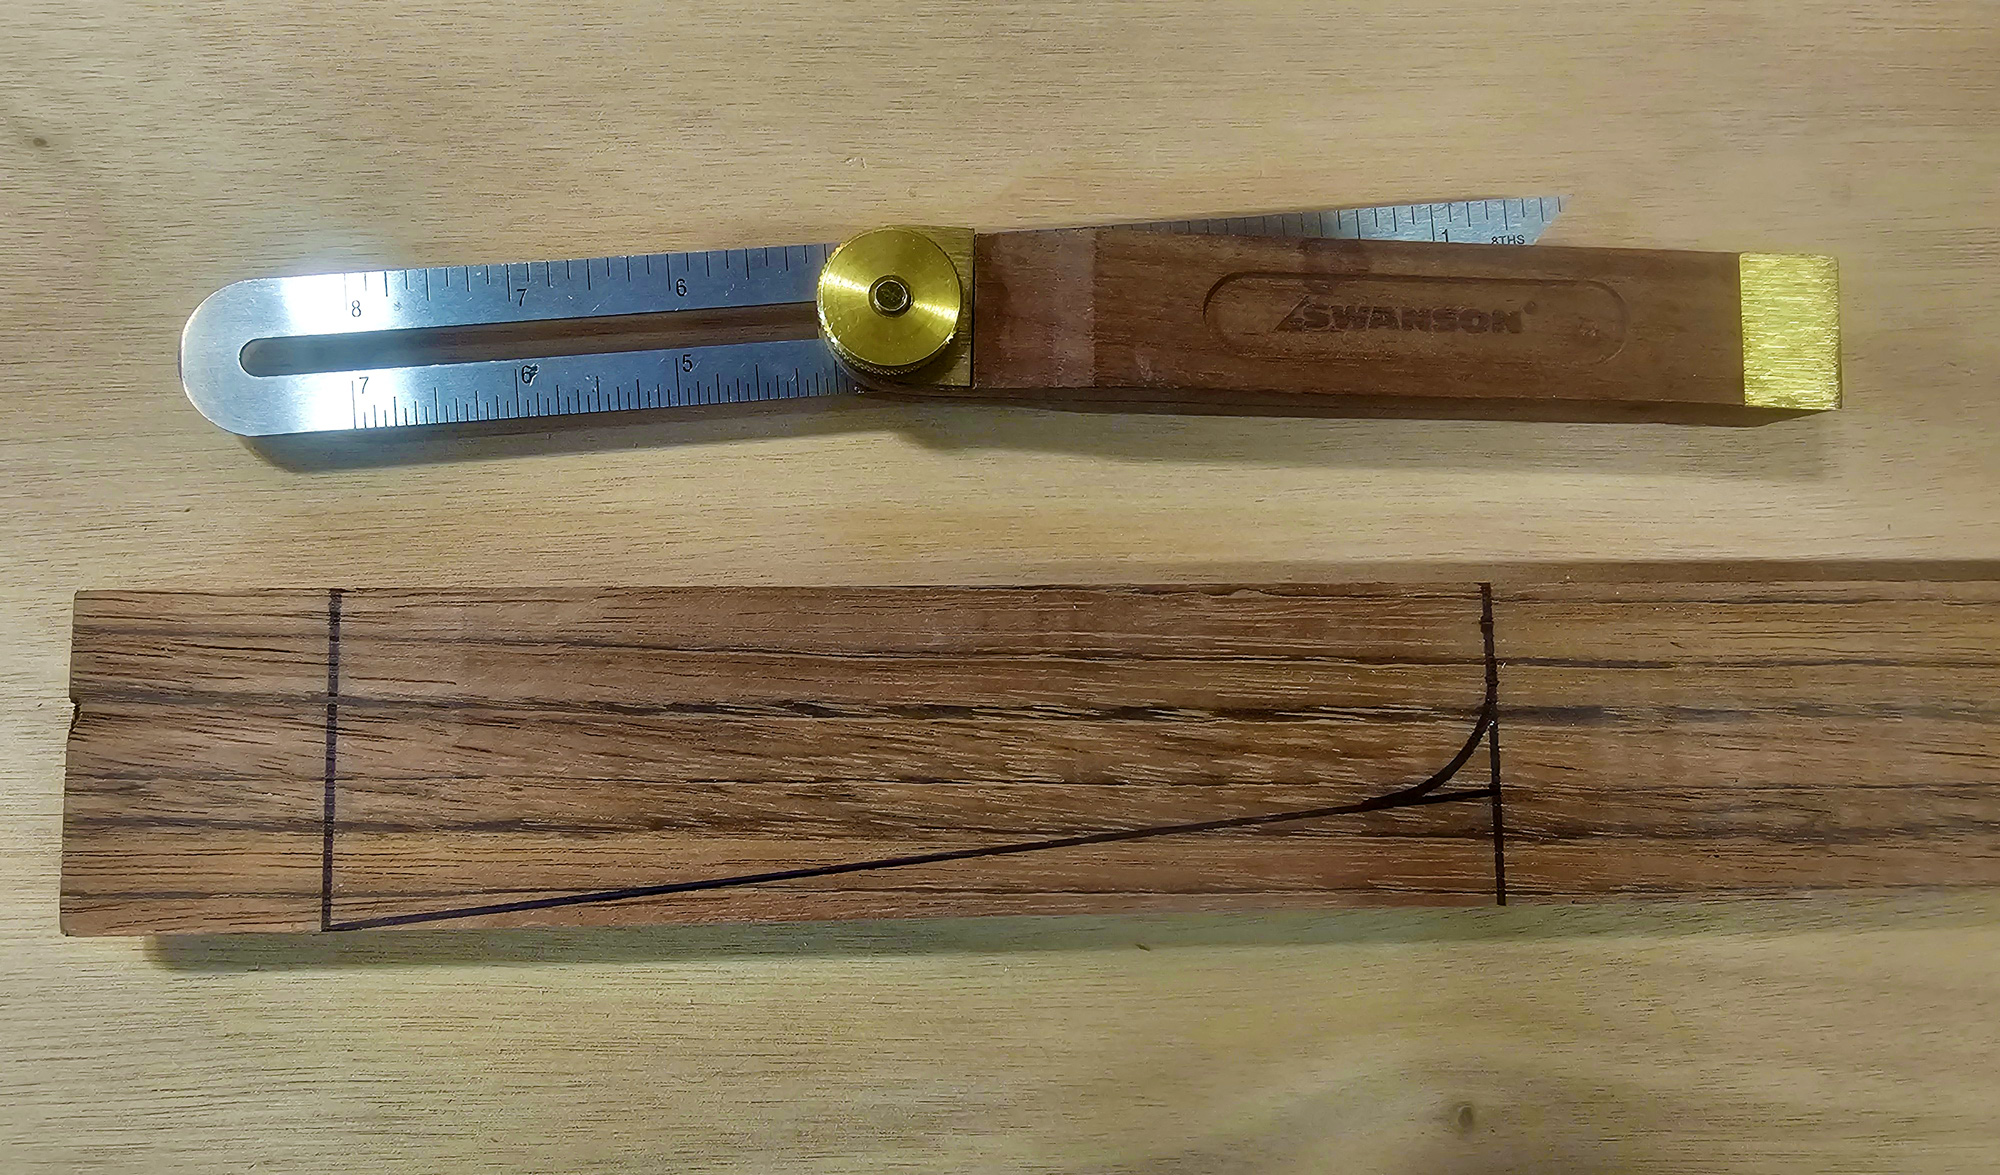
Mark the angle you measured between the rise of the keel above the floor as a baseline on the stock and draw out the shape. Or, if you created a cardboard template, trace it onto the stock. This skeg is 2″ by 7″ on an offcut of 3⁄4″-thick jatoba flooring.
A piece of 3⁄4″-thick hardwood works well. Leave a “handle” on the forward end of the marked shape so you have something to clamp securely into a vise while shaping the skeg.
Shape the skeg
Start by turning the rectangular sectional shape of the stock into a V. Don’t over-thin the bottom edge of the skeg—it will need to take some abuse. And don’t thin the top of the skeg as this will be where it bonds to the boat; you need the full 3⁄4″ width for good adhesion.
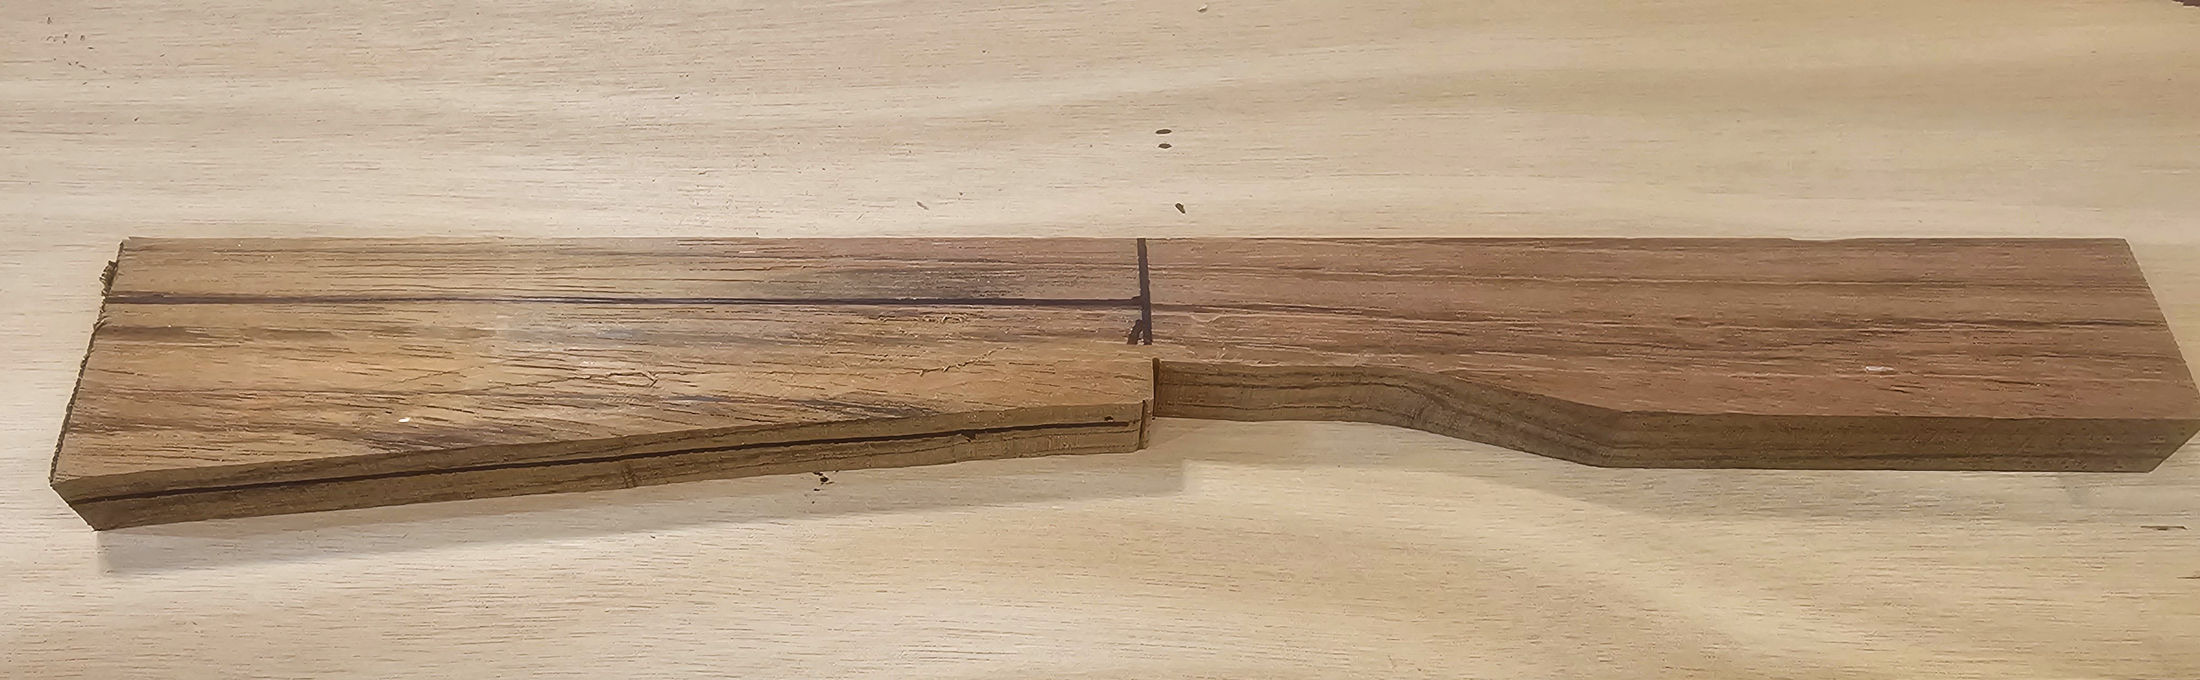
The profile has been cut out, leaving a “handle” on the right, which can be secured in a vise to simplify shaping. The centerline is marked on the bottom edge for reference. The horizontal line at left marks the transition to the taper.
Cut some hollow into the sides of the skeg
I used a brass spoon plane, but a half-round rasp or the idler roller on a stationary belt sander will also work.
Cut a channel into the top edge
Checking the shape of the keel groove with the contour gauge.
Using a gouge, cut a channel into the top edge of the skeg to match the shape recorded with the contour gauge.
Cut the skeg free from the “handle”
Once the skeg is formed, cut it free from the stock’s handle, and finish shaping and sanding until it has the shape of a fin. Remember, don’t make it delicate—leave some thickness on the trailing and bottom edges so that bumps and grinds on rocks won’t damage it. Don’t worry about added drag—I guarantee you won’t feel any increased resistance when paddling your kayak.
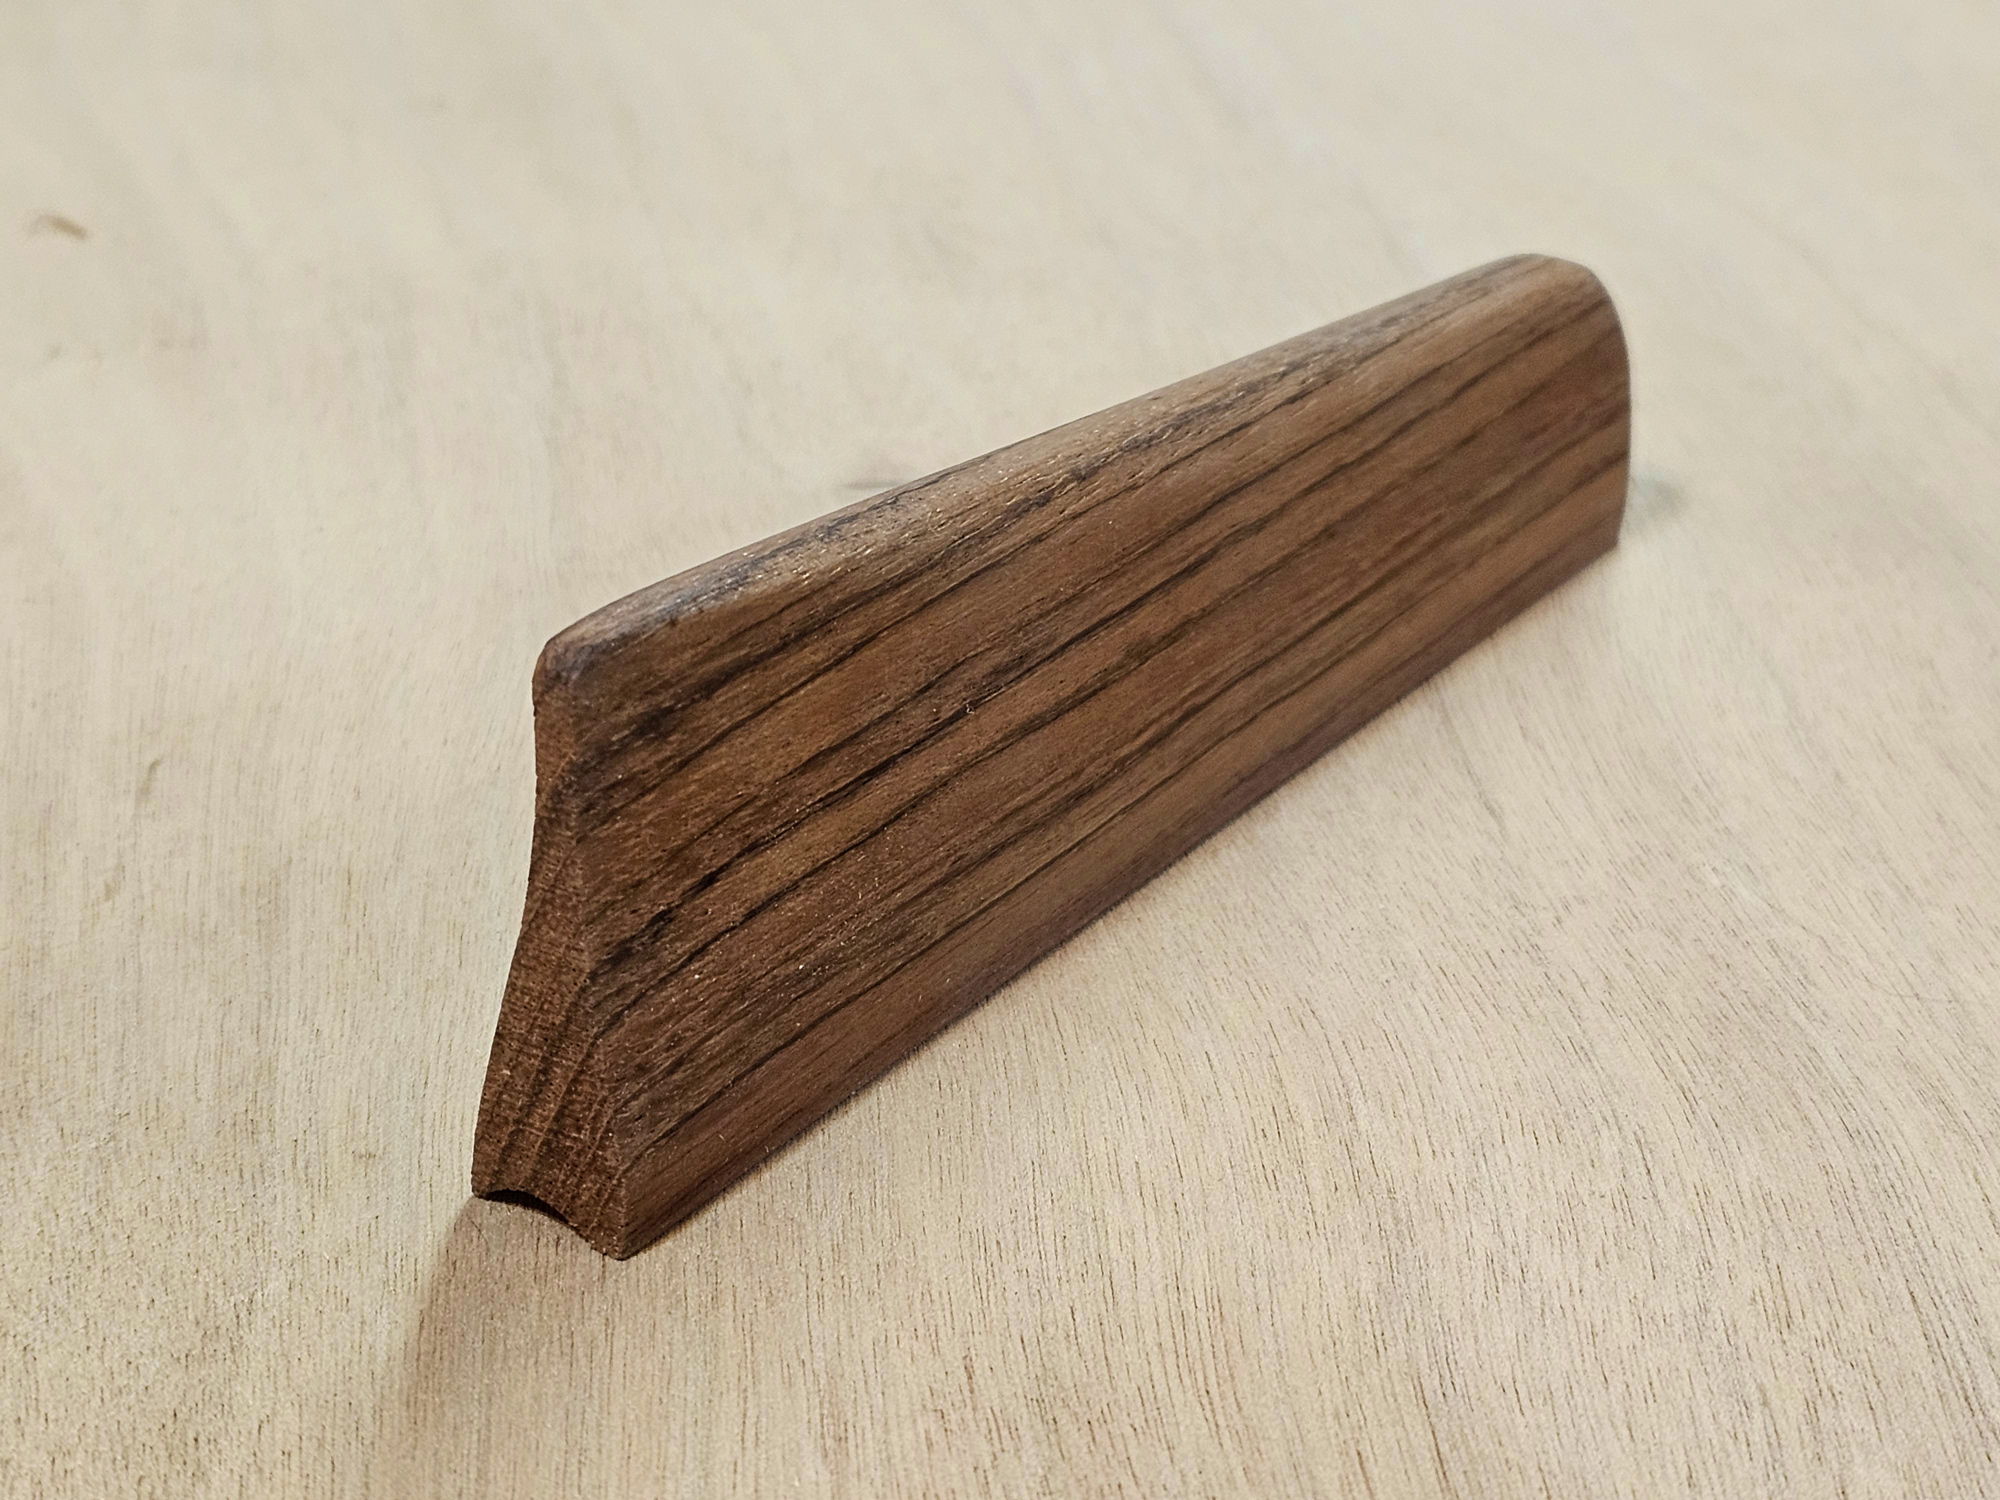
The completed skeg, ready to be mounted.
Finish the skeg however you like
You could saturate your skeg with epoxy and then apply layers of varnish, or just wipe it with some tung oil. Kayaks don’t live in the water full time, so if you’ve used a dense hardwood there should be no need to worry about rot.
This skeg—9″ long and 3⁄4″ wide—has a bullnose leading edge and well-tapered trailing edge, which help to minimize drag while maintaining the skeg’s strength.
Fasten the skeg to the boat
To fasten our skegs I used thickened epoxy, but if you don’t want yours to be a permanent fixture there are other options. Hot-melt glue will hold it in place but allow removal with the sharp whack of a mallet. A marine adhesive sealant such as 3M 5200 will work for a more permanent connection. High-strength, double-sided auto-body tape should work too, although I haven’t tested that yet. If your boat is made of roto-molded polyethylene, getting good adhesion may be more problematic, but West System’s G-Flex epoxy and products like 3M 5200 would be the best options here. ![]()
David Dawson lives in Pennsylvania but stretches his passion for boating up and down the East Coast, paddling and sailing the waters between Maine to Florida. Since retiring in 2012, he has built six kayaks and a sailboat.
Editor’s note
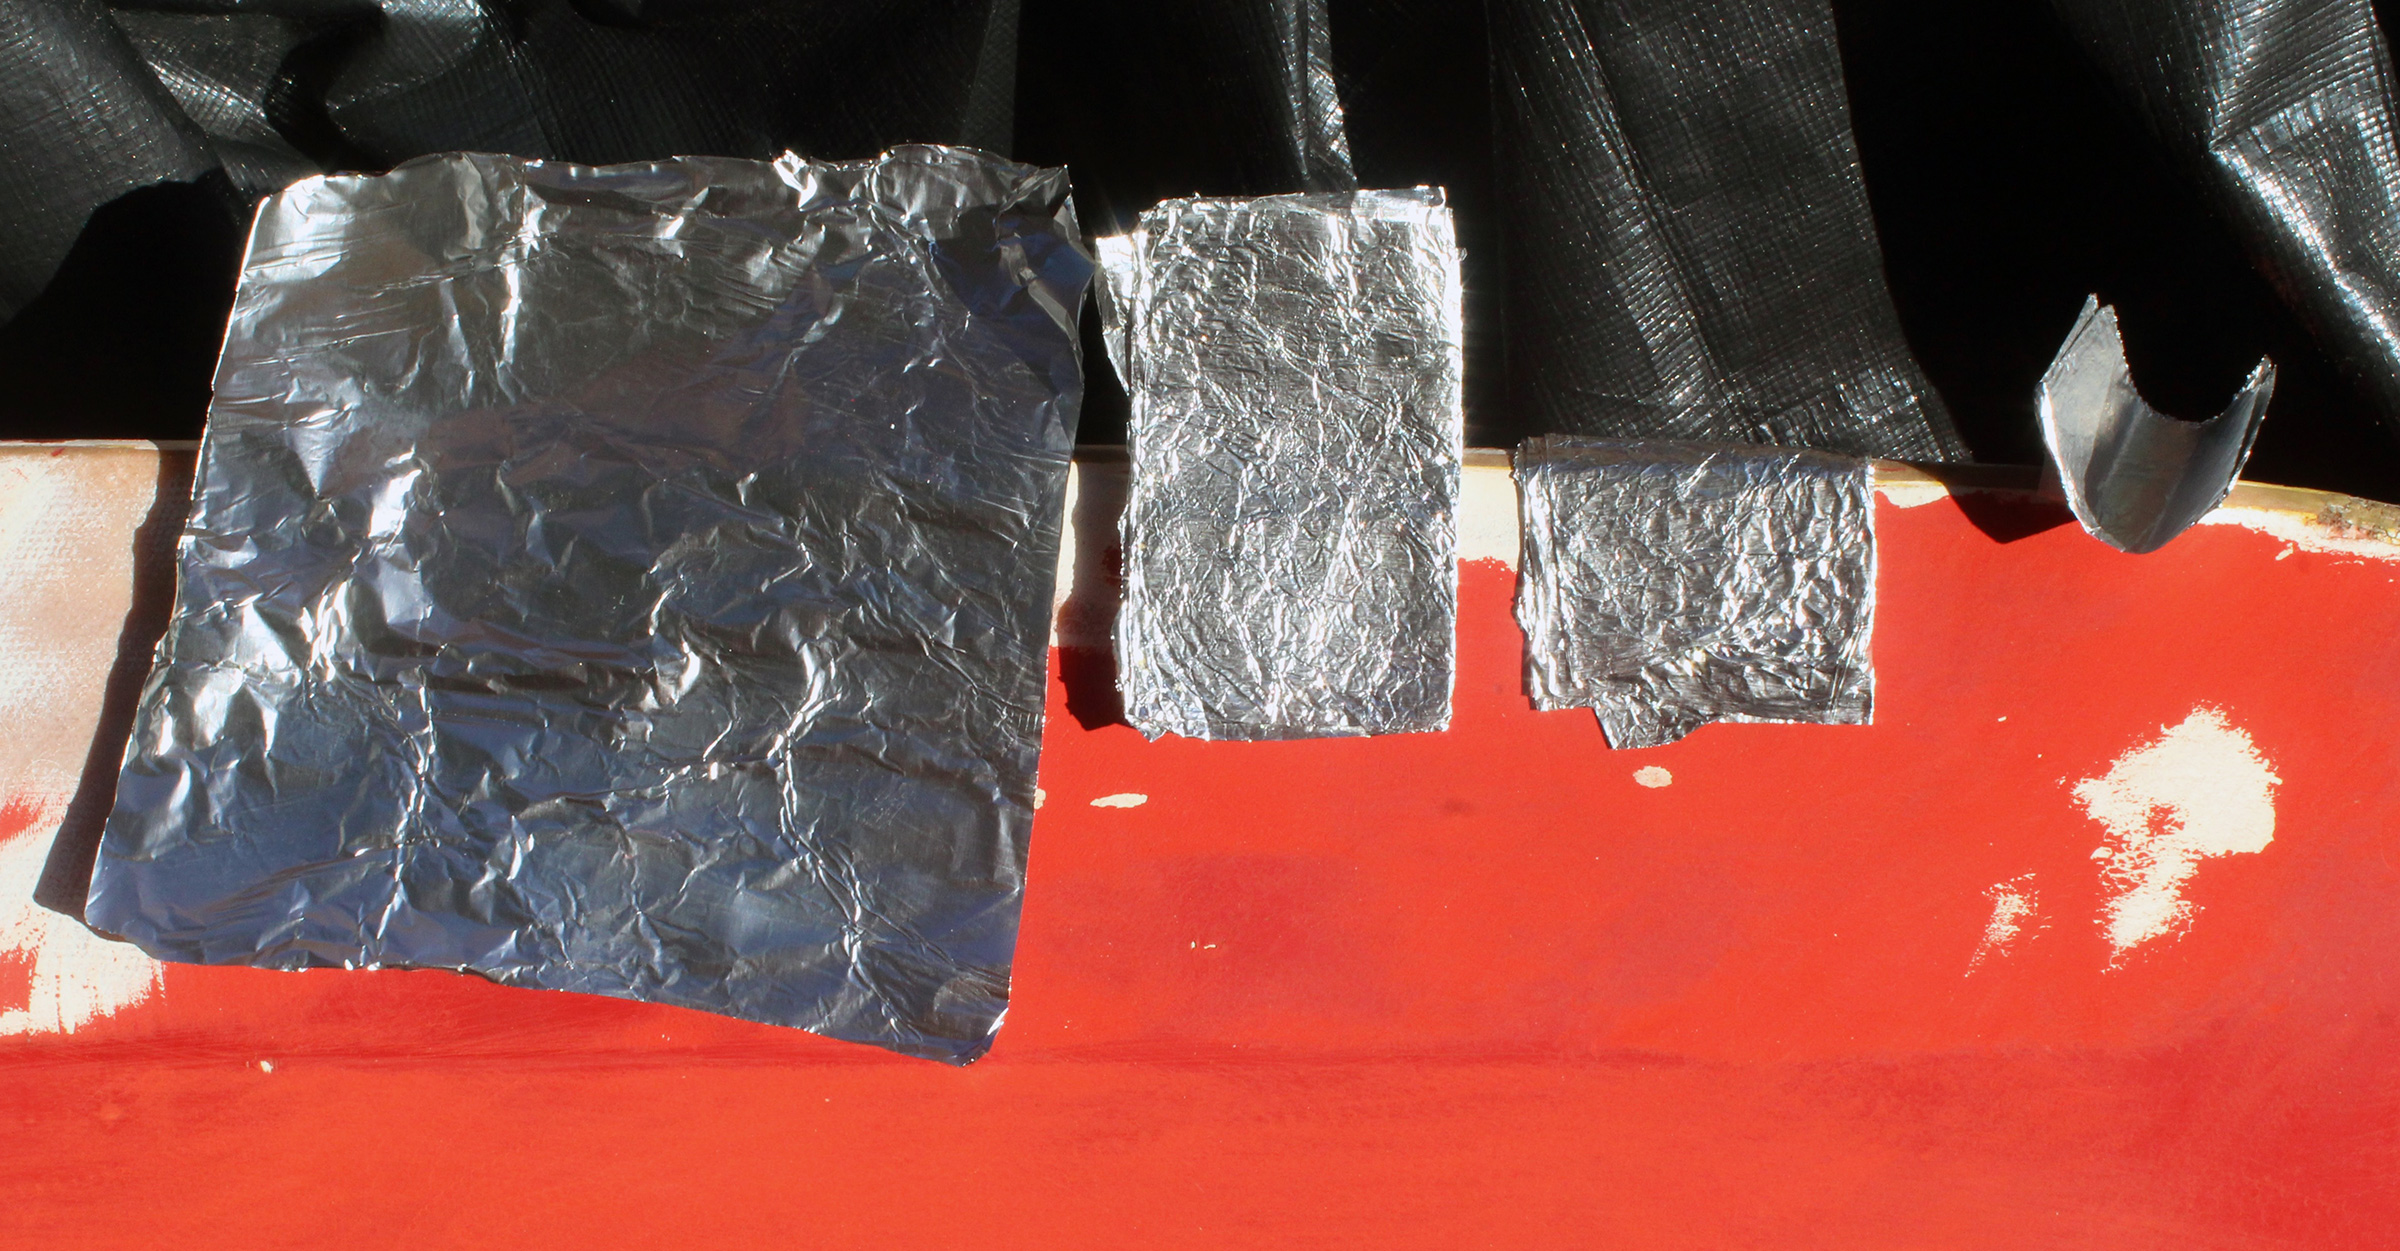
When measuring the athwartship curve of the keel, if you don’t have a contour gauge, fold a 6″ square of aluminum foil in half three times to create eight layers, then press it smooth across the keel. Remove it and handle it gently as you use it to shape the skeg’s groove.
 Christopher Cunningham
To measure the keel without a contour gauge, fold a 6″ square of aluminum foil in half three times and press it down across the kayak keel. Carefully remove the pressed foil to reveal a useable template. Crinkling the foil before flattening and folding it helps the template to hold its shape.
You can share your tips and tricks of the trade with other Small Boats readers by sending us an email.
For more kayak material from David Dawson see…
The Shrike Kayaks, a review of CNC’s modern kayaks steeped in Inuit tradition, available as plans for amateur builders.
Different Ways to Style your Kayak, David’s innovative ways to bring stunning individualism to any plywood or strip-planked kayak


Having once owned a kayak that absolutely required a rudder, I promised myself that I would never again own such a boat. I can with fair confidence tell how a kayak is going to behave by looking at the stern, specifically the shape of the waterlines and the profile of the keel at the stern. If the waterline is full (curves outward), this will probably be a boat that doesn’t want to track. If the water lines at the stern are hollow, it should track well. A rounded or cutaway profile at the stern is another tell. The full waterlines and cut away stern tend to go together.
I have a friend who built himself a strip-planked kayak from a well-known designer. When he first paddled it at Esperanza Inlet, he found that the boat wouldn’t track. As a consequence of fighting the squirreliness he blew out his shoulder, and we had to tow him about 12 miles. He sold the kayak after that trip.
During Bellingham’s “Ski to Sea” race a few years ago, I watched a paddler struggling to make her kayak go straight. As soon as she would get the boat aimed the direction she wanted to go, it would veer off to the left or right (impossible to predict) and she would have to fight again to get it aimed right. I strongly suspect it was a borrowed boat, and I imagine she was muttering to herself, “Why the hell would anyone want to paddle one of these effing things?” Or maybe she was screaming it. It wasn’t at all windy that day. That was the way my original kayak behaved. It was fine with the rudder, until I underwent a day’s training under George Gronseth, who insisted we not use our rudders. As a consequence of this, I capsized and lost a contact lens in Deception Pass. As you can imagine, I never found that contact again. Perhaps a near sighted ling cod is wearing it.
Eventually I used fiberglass to mold an extension (not a skeg, as such) onto the stern, eliminating the cutaway profile while making sure that it had hollow water lines. And that was enough to tame the kayak’s bad manners. Mr. Dawson’s skeg is another solution. I kept the rudder, for its usefulness in windy conditions. I have a rudder on my current Pygmy Coho for the same reason.
Why a rudder at all? Well, during one long crossing from the Brooks Peninsula (Vancouver Island) to the take out at Side Bay, we faced a moderate wind of 8 or 10 knots on the starboard bow, and the boat insisted on weathercocking. I used every trick I knew (edging the boat, extending the paddle to one side, extra strokes on the windward side, paddle ruddering, etc.) and after the 8 nautical mile crossing, decided to invest in a rudder. I have not regretted it since. Most of the time I don’t use it. Glad to have it when I do.
Susan Conrad says in her book, Inside, that there was one crossing on her solo (mostly) paddle from Anacortes, Washington to Juneau, Alaska, where she would have used a rudder if she’d had one.
Thanks for the observations, David. I would argue that the paddler should be able to manage without a skeg or rudder, but it’s also true that in some conditions using one or the other device simply makes life much easier. I don’t think of rudders as devices to turn a kayak. Intead, I see them as adjustable fins to fine tune tracking. Likewise, skegs can be dropped by degrees as needed – it shouldn’t be an all or nothing decision.
In the case of the two boats in the article, both needed nothing major, just tweeking for our purposes, so minimal skegs did the trick.
Wonderfully written and beautifully constructed, David. Thank you for putting this guide together.
Thanks, Brad.
It’s with some hesitation that I wade into the waters on this turbulent rudder/skeg question. Opinions seem to be held with the tenacity of religious convictions, and no design detail more affects the pleasure of a paddle. I’ve paddled a Struer Lancer for forty years. Built as Olympic sprint boats with very fine ends and absolutely no rocker, I was curious what effect the rudder was having, so I took it off one day. The boat was pivot crazy, turning ten degrees with every stroke, and absolutely maddening. Gone were those long arrow-straight glides that are the great pleasure of this boat. I think the culprit was the round bottom which allowed pivoting away from the stroke despite the boats pointy stem and stern. I have found that I prefer steering with my arms rather than my feet, and as a dedicated flatwater paddler I don’t need retractability, so I am putting my faith in skegs. I remain unashamed of needing a little help in keeping my boat running straight and am now very appreciative to you, David for showing me how to build and retrofit a sturdy skeg to any new kayaks I build.