 Photographs by the author
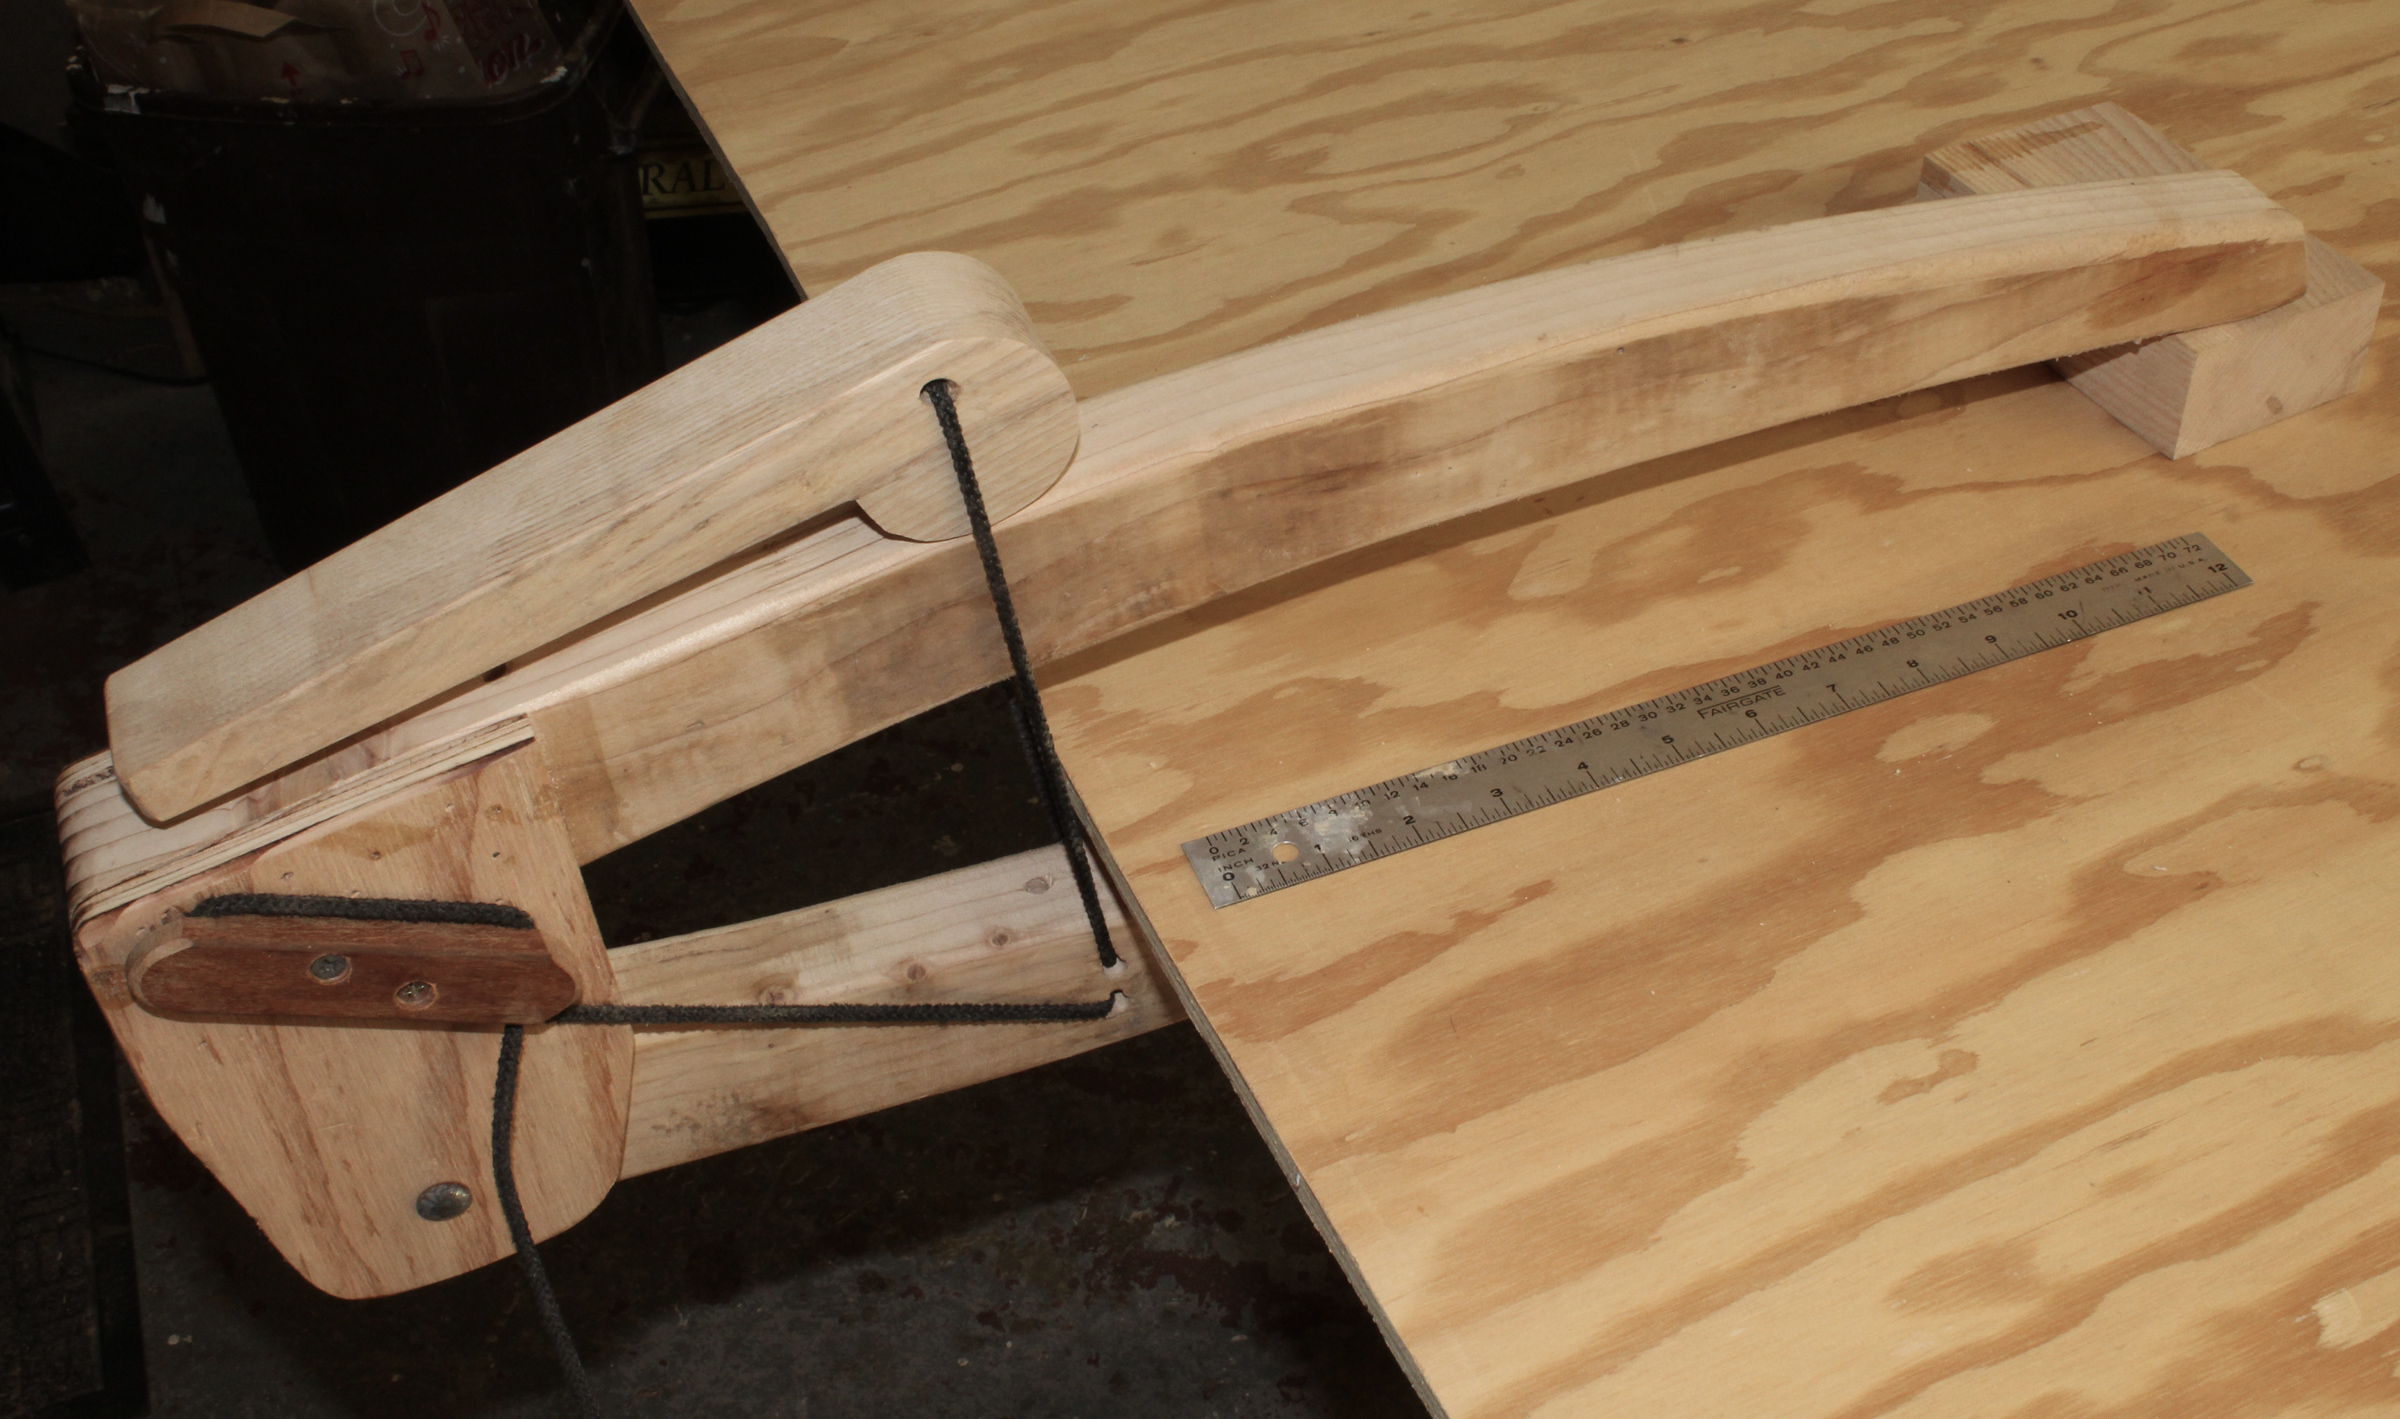
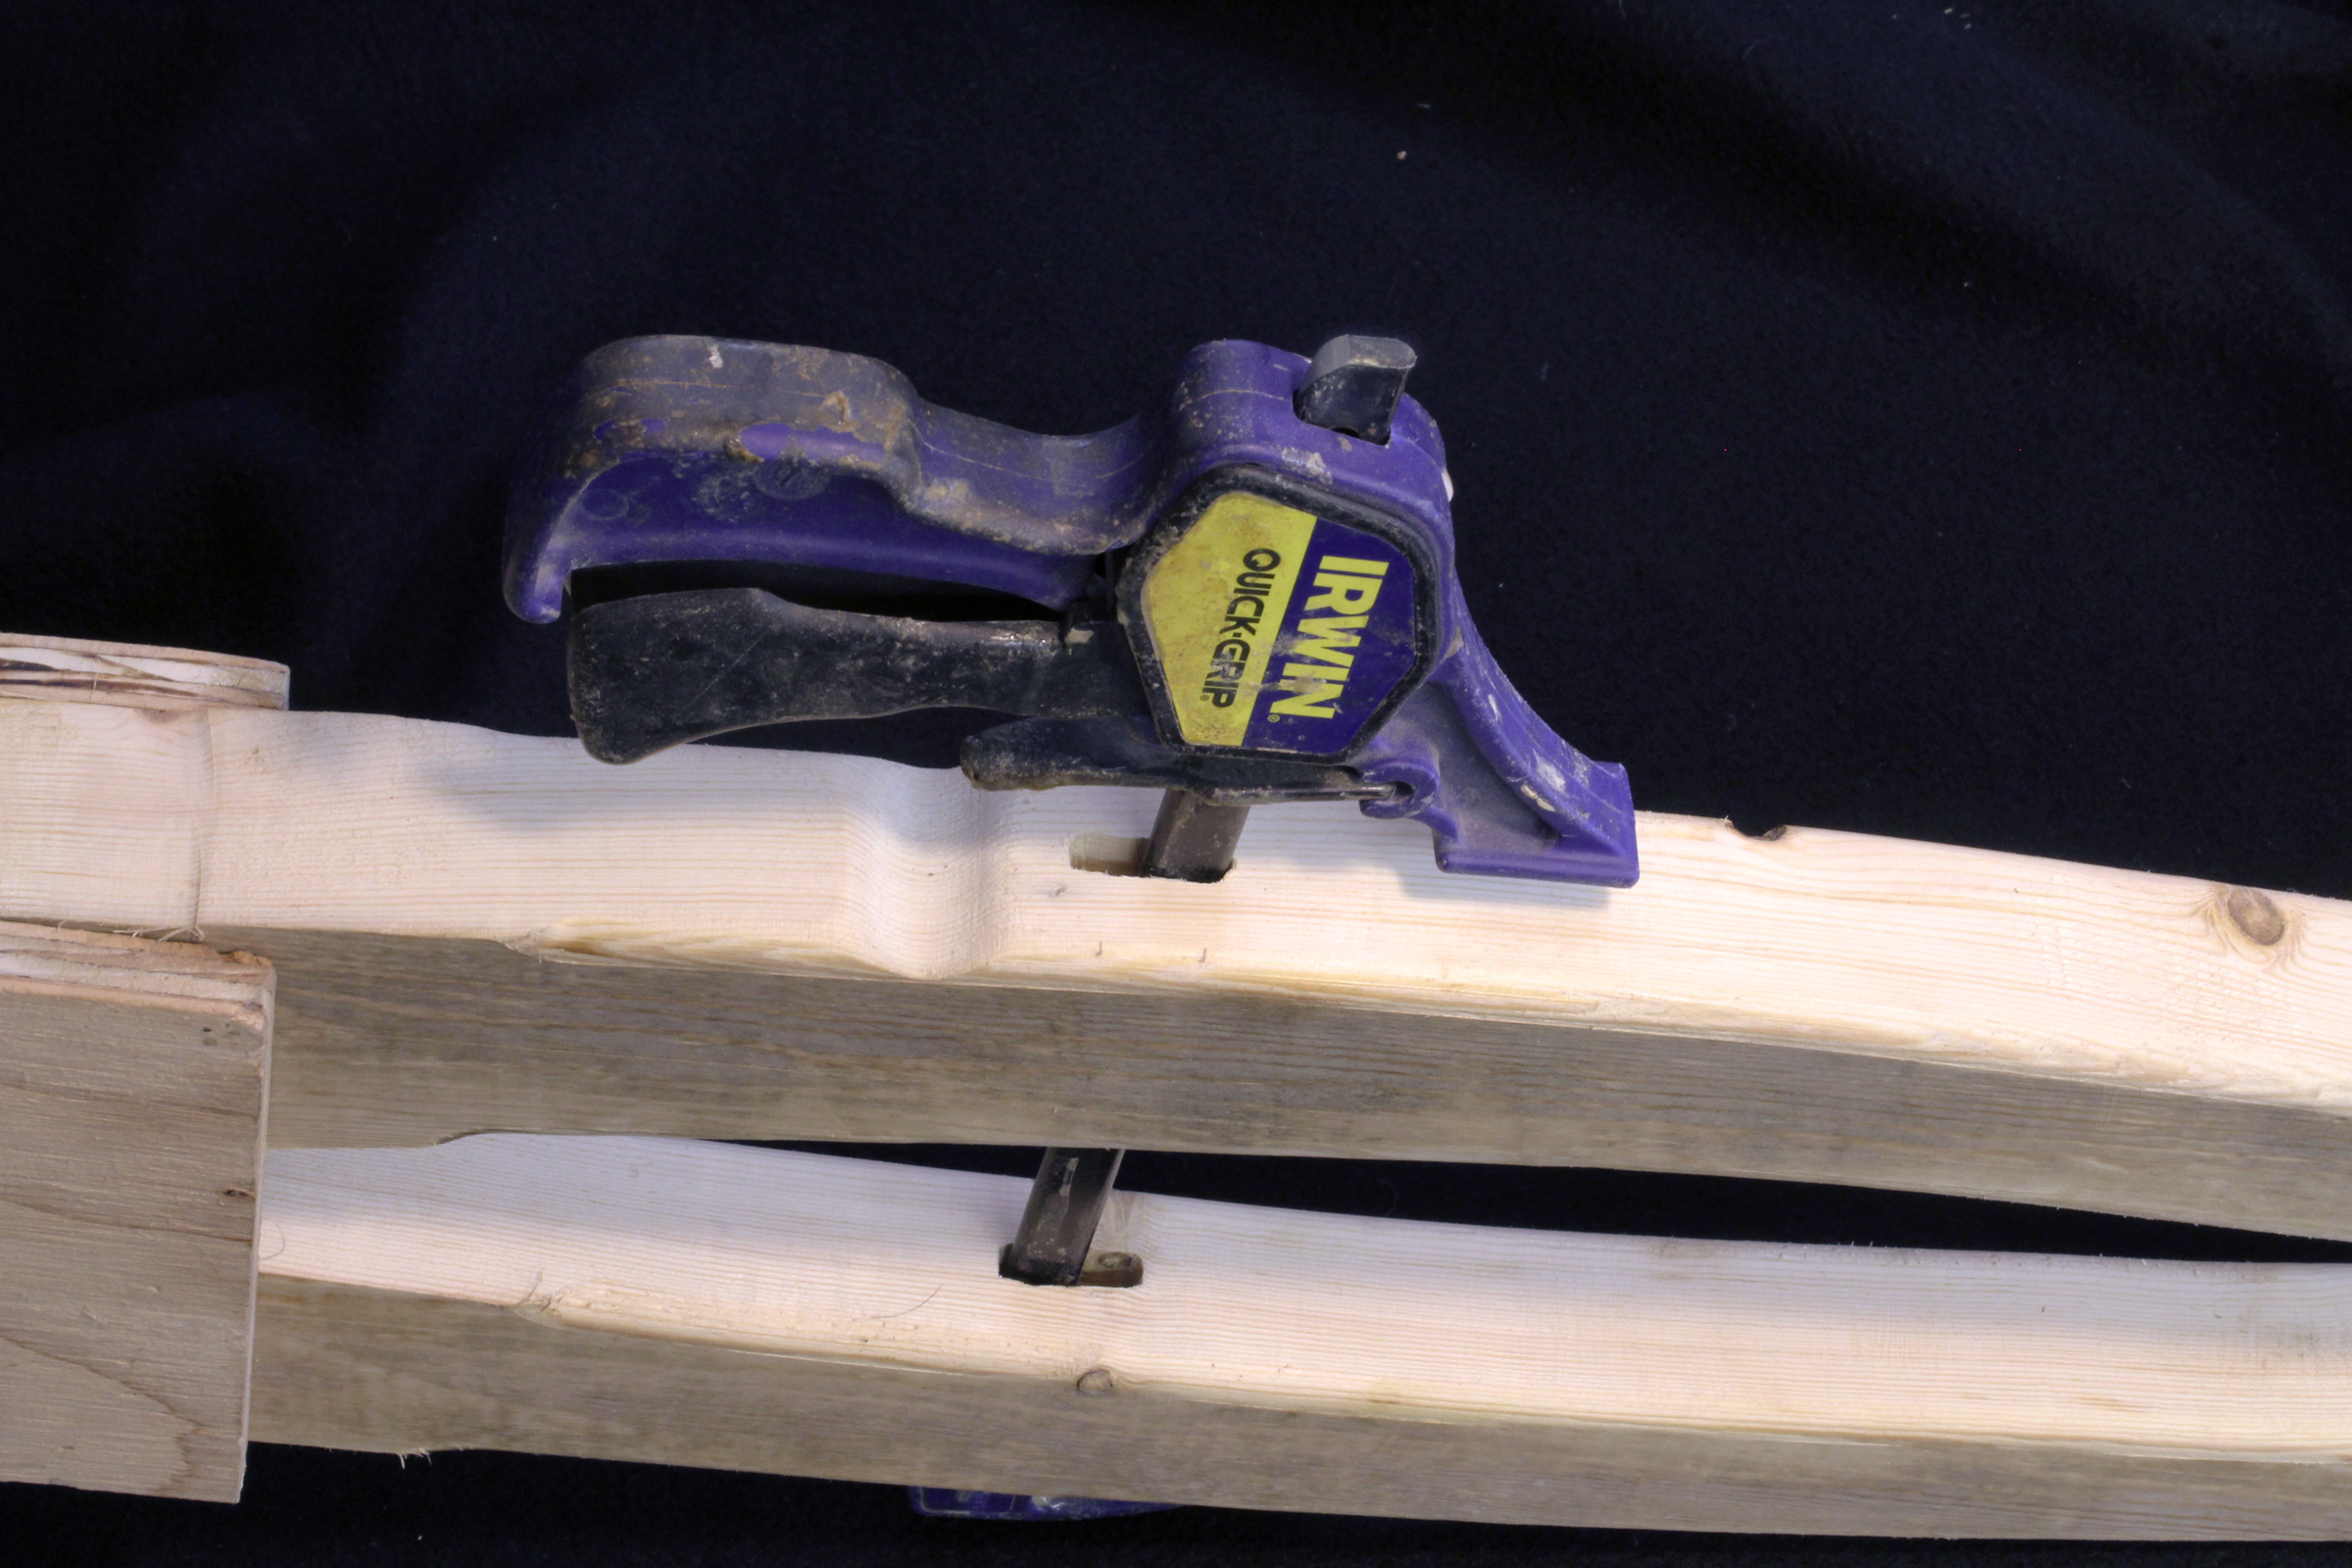
My new set of homemade clamps have a reach of 16″. Here one is applying enough pressure to keep the clamp from pivoting under its own cantilevered weight and resting on the edge of the plywood.
When I built a reproduction of the 9th century Gokstad faering, I encountered a number of challenges I hadn’t faced with any of the other boats I’d built; one was working with very wide planks. The faering has only three strakes, and the planks are 12″ to 14″ wide amidships. I had a collection of Brenne-style cam-lever planking clamps that had a 10″ reach, enough for even the rather wide planks on dories, but they couldn’t span the middle of the faering planks.
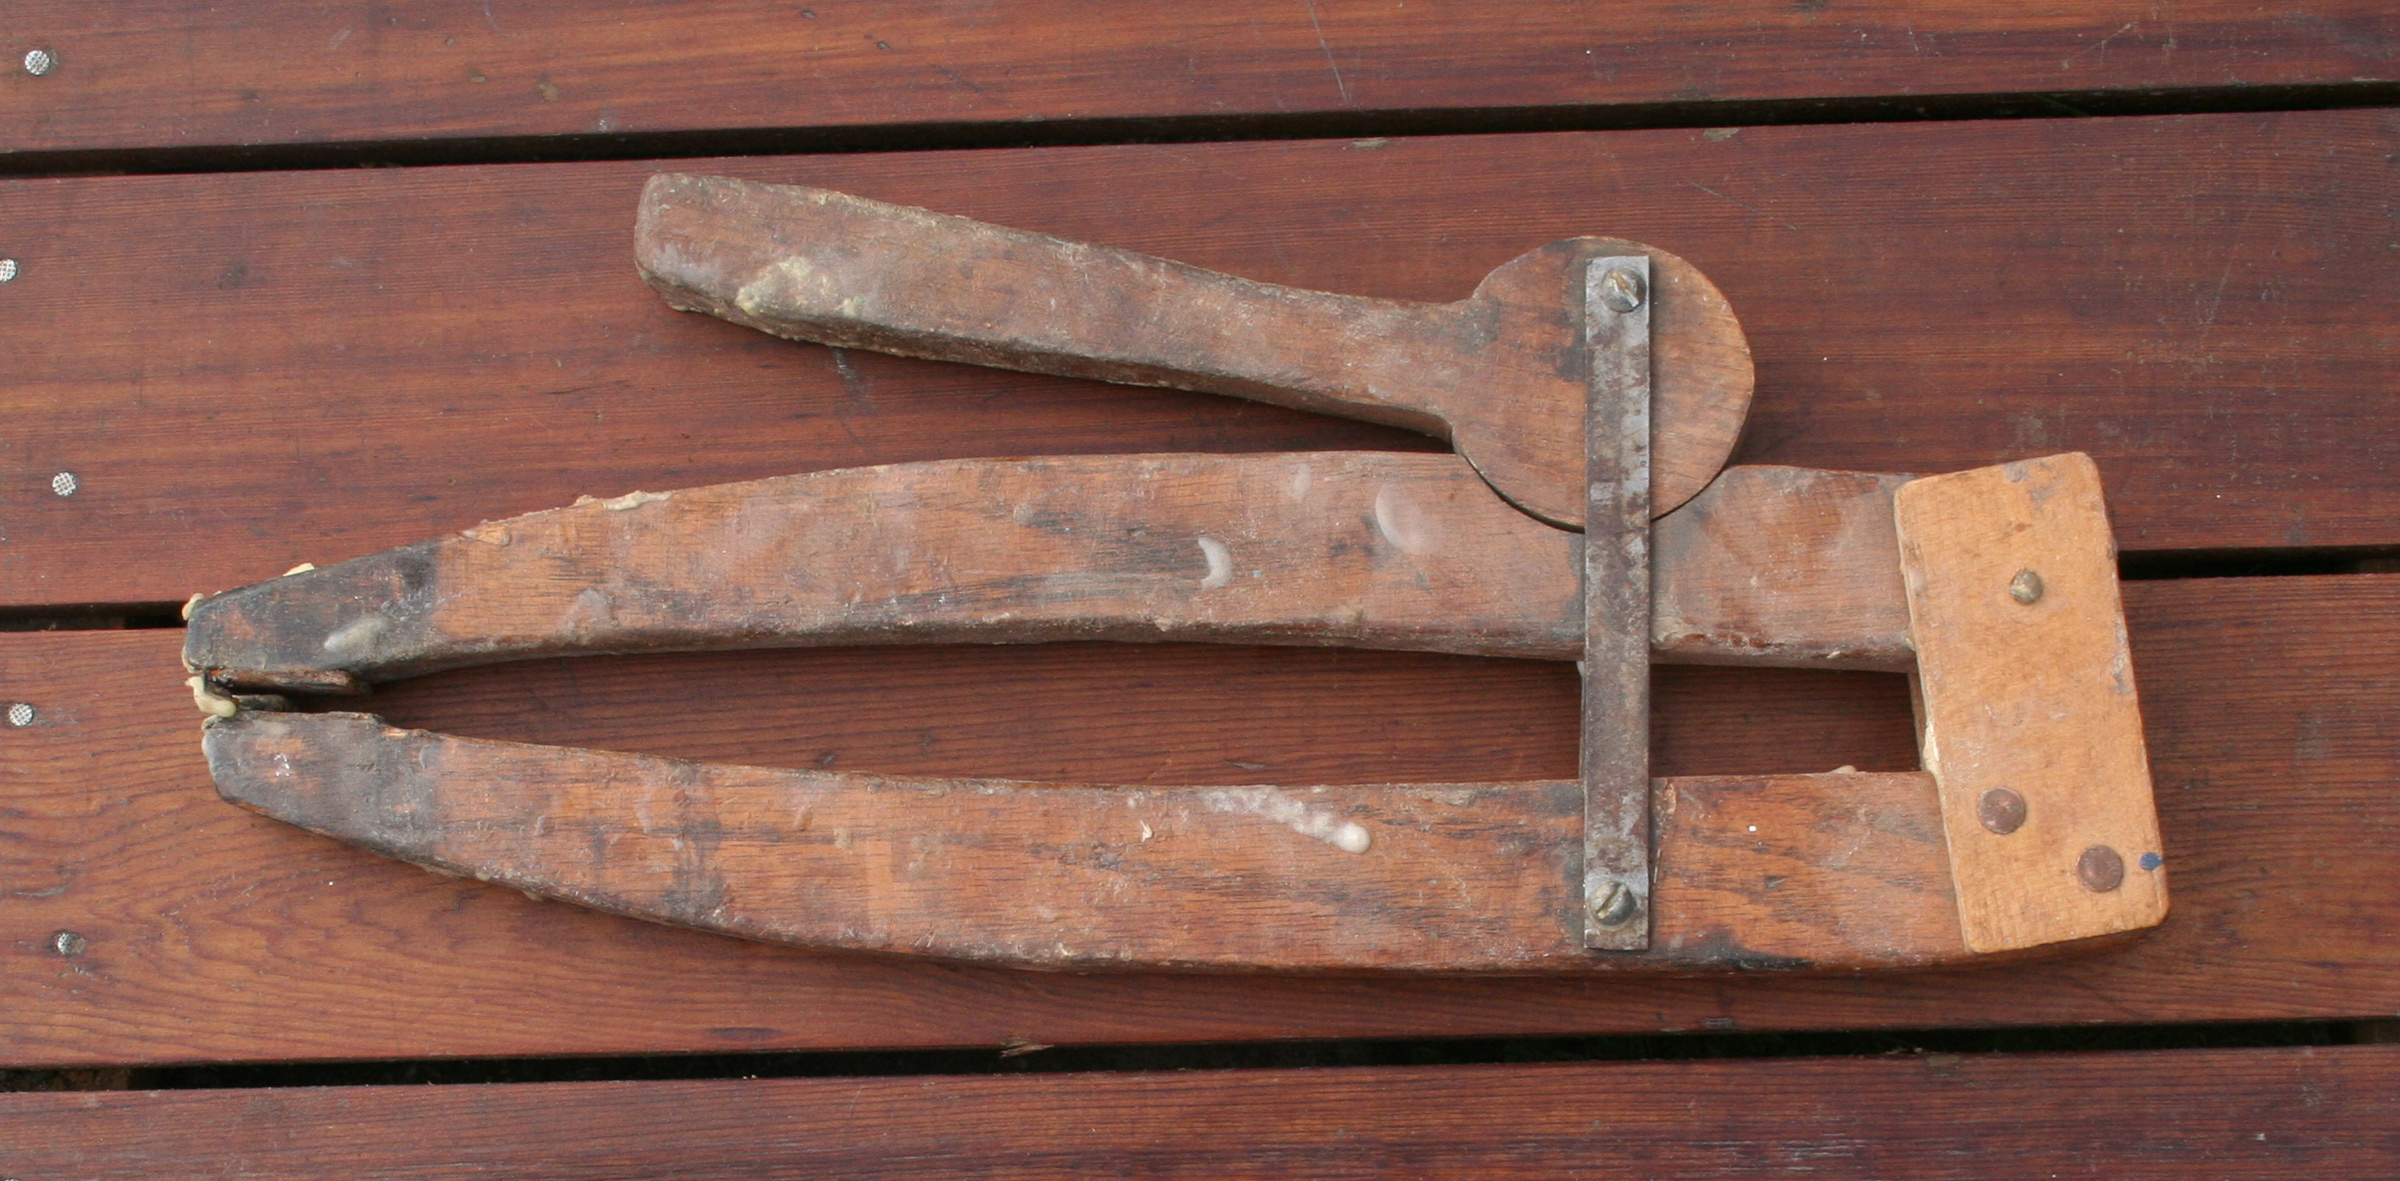
I made my first set of Brenne-style clamps in the late ’70s and they’ve see a lot of action, but there are some jobs that are just beyond their reach.
I made a set of three extra-long clamps for the job; I used my tap-and-die set for wood to make threaded dowels as the means to tighten them. They worked, but were unwieldy and much slower to operate than the cam-lever clamps.
A Brenne clamp, like the fist planking clamps I made, could easily be scaled up to provide more reach, but the cam and the metal straps connecting it to the clamp jaw opposite have a limited operating range. I’d made one of my earliest clamps in that style with longer straps that had additional holes, but adjusting it to fit the work at hand was never something I thought to do until I had a batch of epoxy mixed, and the clock was ticking.
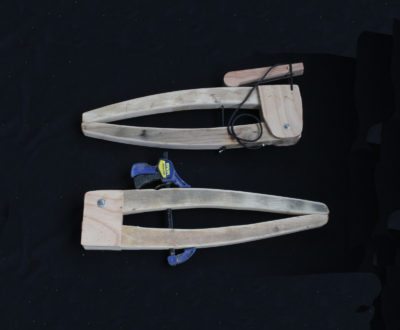
When I made a new set of long-reach clamps, I used the cam idea but did away with the metal straps and used a single length of cord instead. It allows instantly changing the clamp to fit jobs of different thicknesses. I didn’t bother with the semicircular notch for the cam that’s cut into the jaw; it’s the fussiest part of making Brenne clamp and unnecessary here. I went through a few iterations of the new design, with each less complicated than the one that preceded it and, as is often the case, the simplest solution, presented here, was the best solution.
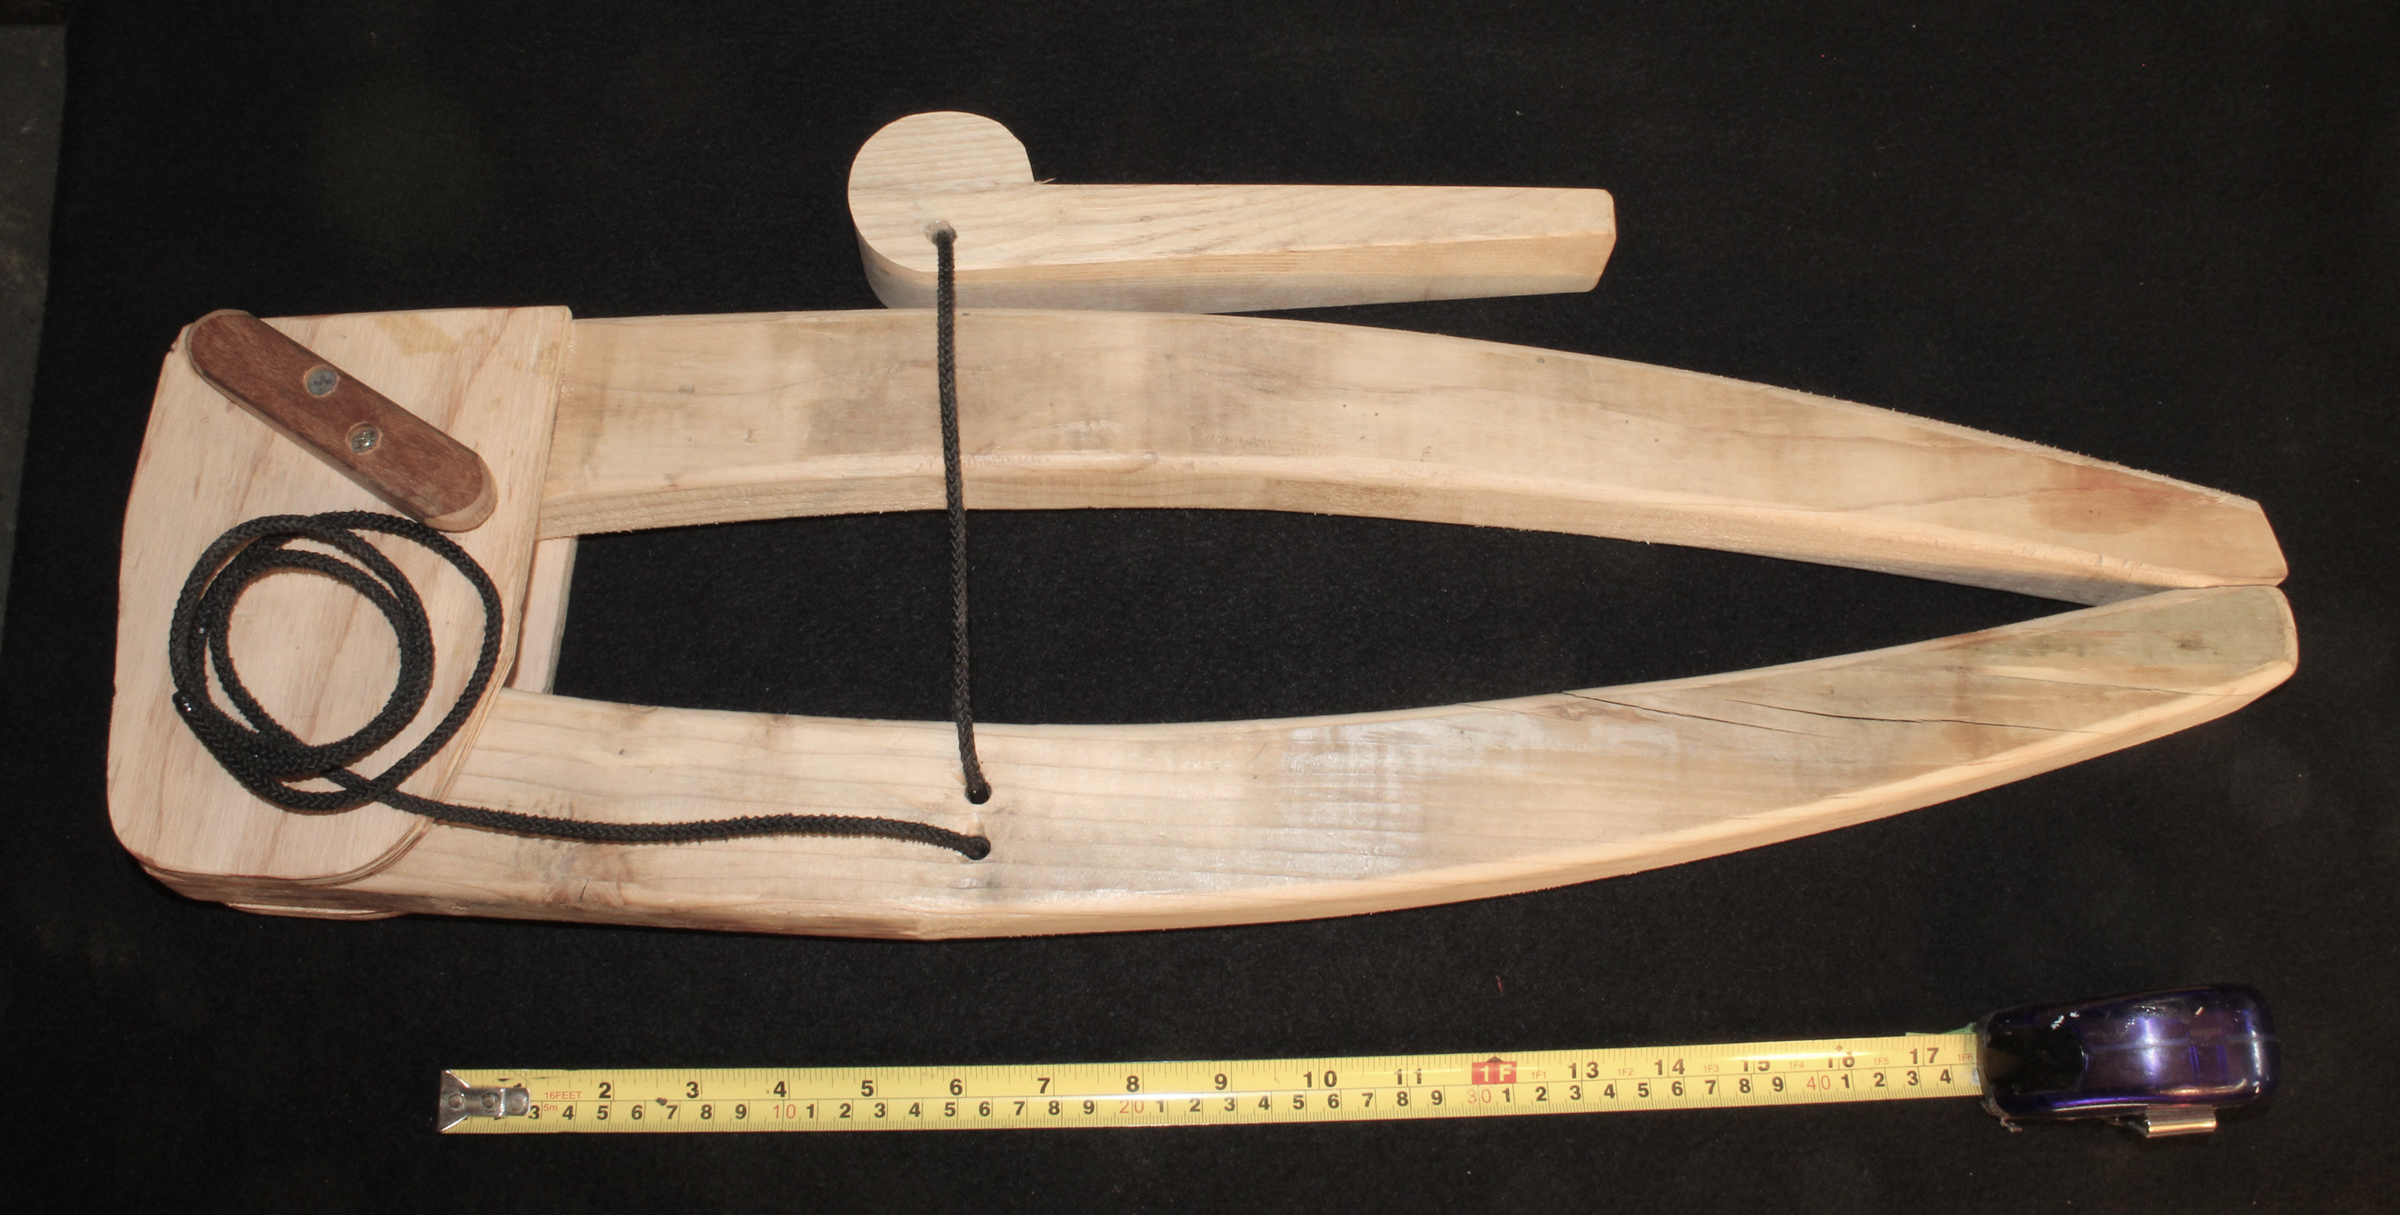
The dimensions aren’t critical so you can build the clamp to suit your needs and available materials. The 2-1/2″ circle seems to be a good size for providing good clamping pressure.
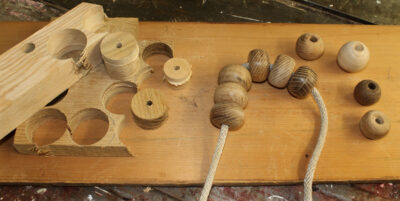
For a clamp with a 16″ reach, I cut two 24″ jaws out of softwood 2x4s. The tips are about 1-1/4″ wide, the tails 3″, and in between, the jaws curve smoothly and taper gradually. I glued and nailed two 1/2″ plywood cheeks to one jaw, then set the other jaw between the cheeks, with a 1″ gap between the tails, and drilled a 5/16″ hole for a 1/4″ carriage bolt.

The jam cleat is just a piece of hardwood with shallow-angled cuts on the bottom. I didn’t sand those cuts smooth; I left them rough for a better grip.
Roughly 16″ in from the tip of the pivoting jaw I drilled two more holes, one above the other. I made a 4″-long hardwood jam cleat and screwed that to the plywood cheek over the fixed jaw. The fixed jaw will be on top during use, and because I’m right-handed, I put the cleat on the right side.

When I checked the clamping pressure on a bathroom scale, the results were around 50 lbs. I can get over 60 lbs if I apply the clamp, then flip the cam lever forward, tighten the cord to pull out the slack, and flip the lever back again. I couldn’t measure the clamping pressure of my Brenne clamps this way because they can’t function on an arrangement this thick.
For the cam lever, I used a piece of hardwood (ash); the lever is subject to a lot of pressure and hardwood is less apt to be crushed. It’s 9-1/2″ long, 1-1/2″ thick, and the circular end has a diameter of 2-1/2″. The hole drilled in it needs to be lined up with the circle’s center. Put a square on the side of the handle that meets the circle at a tangent, draw a line through the circle’s center, and drill the hole on that line.
I tied a stopper knot in a length of rather stiff 3/16″ kernmantle cord and threaded the cord through one hole on the lower jaw’s left side, through the hole in the cam lever, and finally through the other hole in the lower jaw.
In use, the cam lever is set on the top jaw with the handle facing away and the hole and cord set on the bottom. With the clamp’s tips set on the workpieces, the cord is drawn tight and wrapped around the jam cleat. The cam lever is flipped, raising the hole and adding tension to the cord. The cam will roll backward as the lever is brought down on the jaw and the lever will tend to rise and release the tension. Sliding the cam lever forward will change the angle of the cord and cause it to hold the lever down.
This version of the clamp applies the same amount of pressure, about 50 lbs.
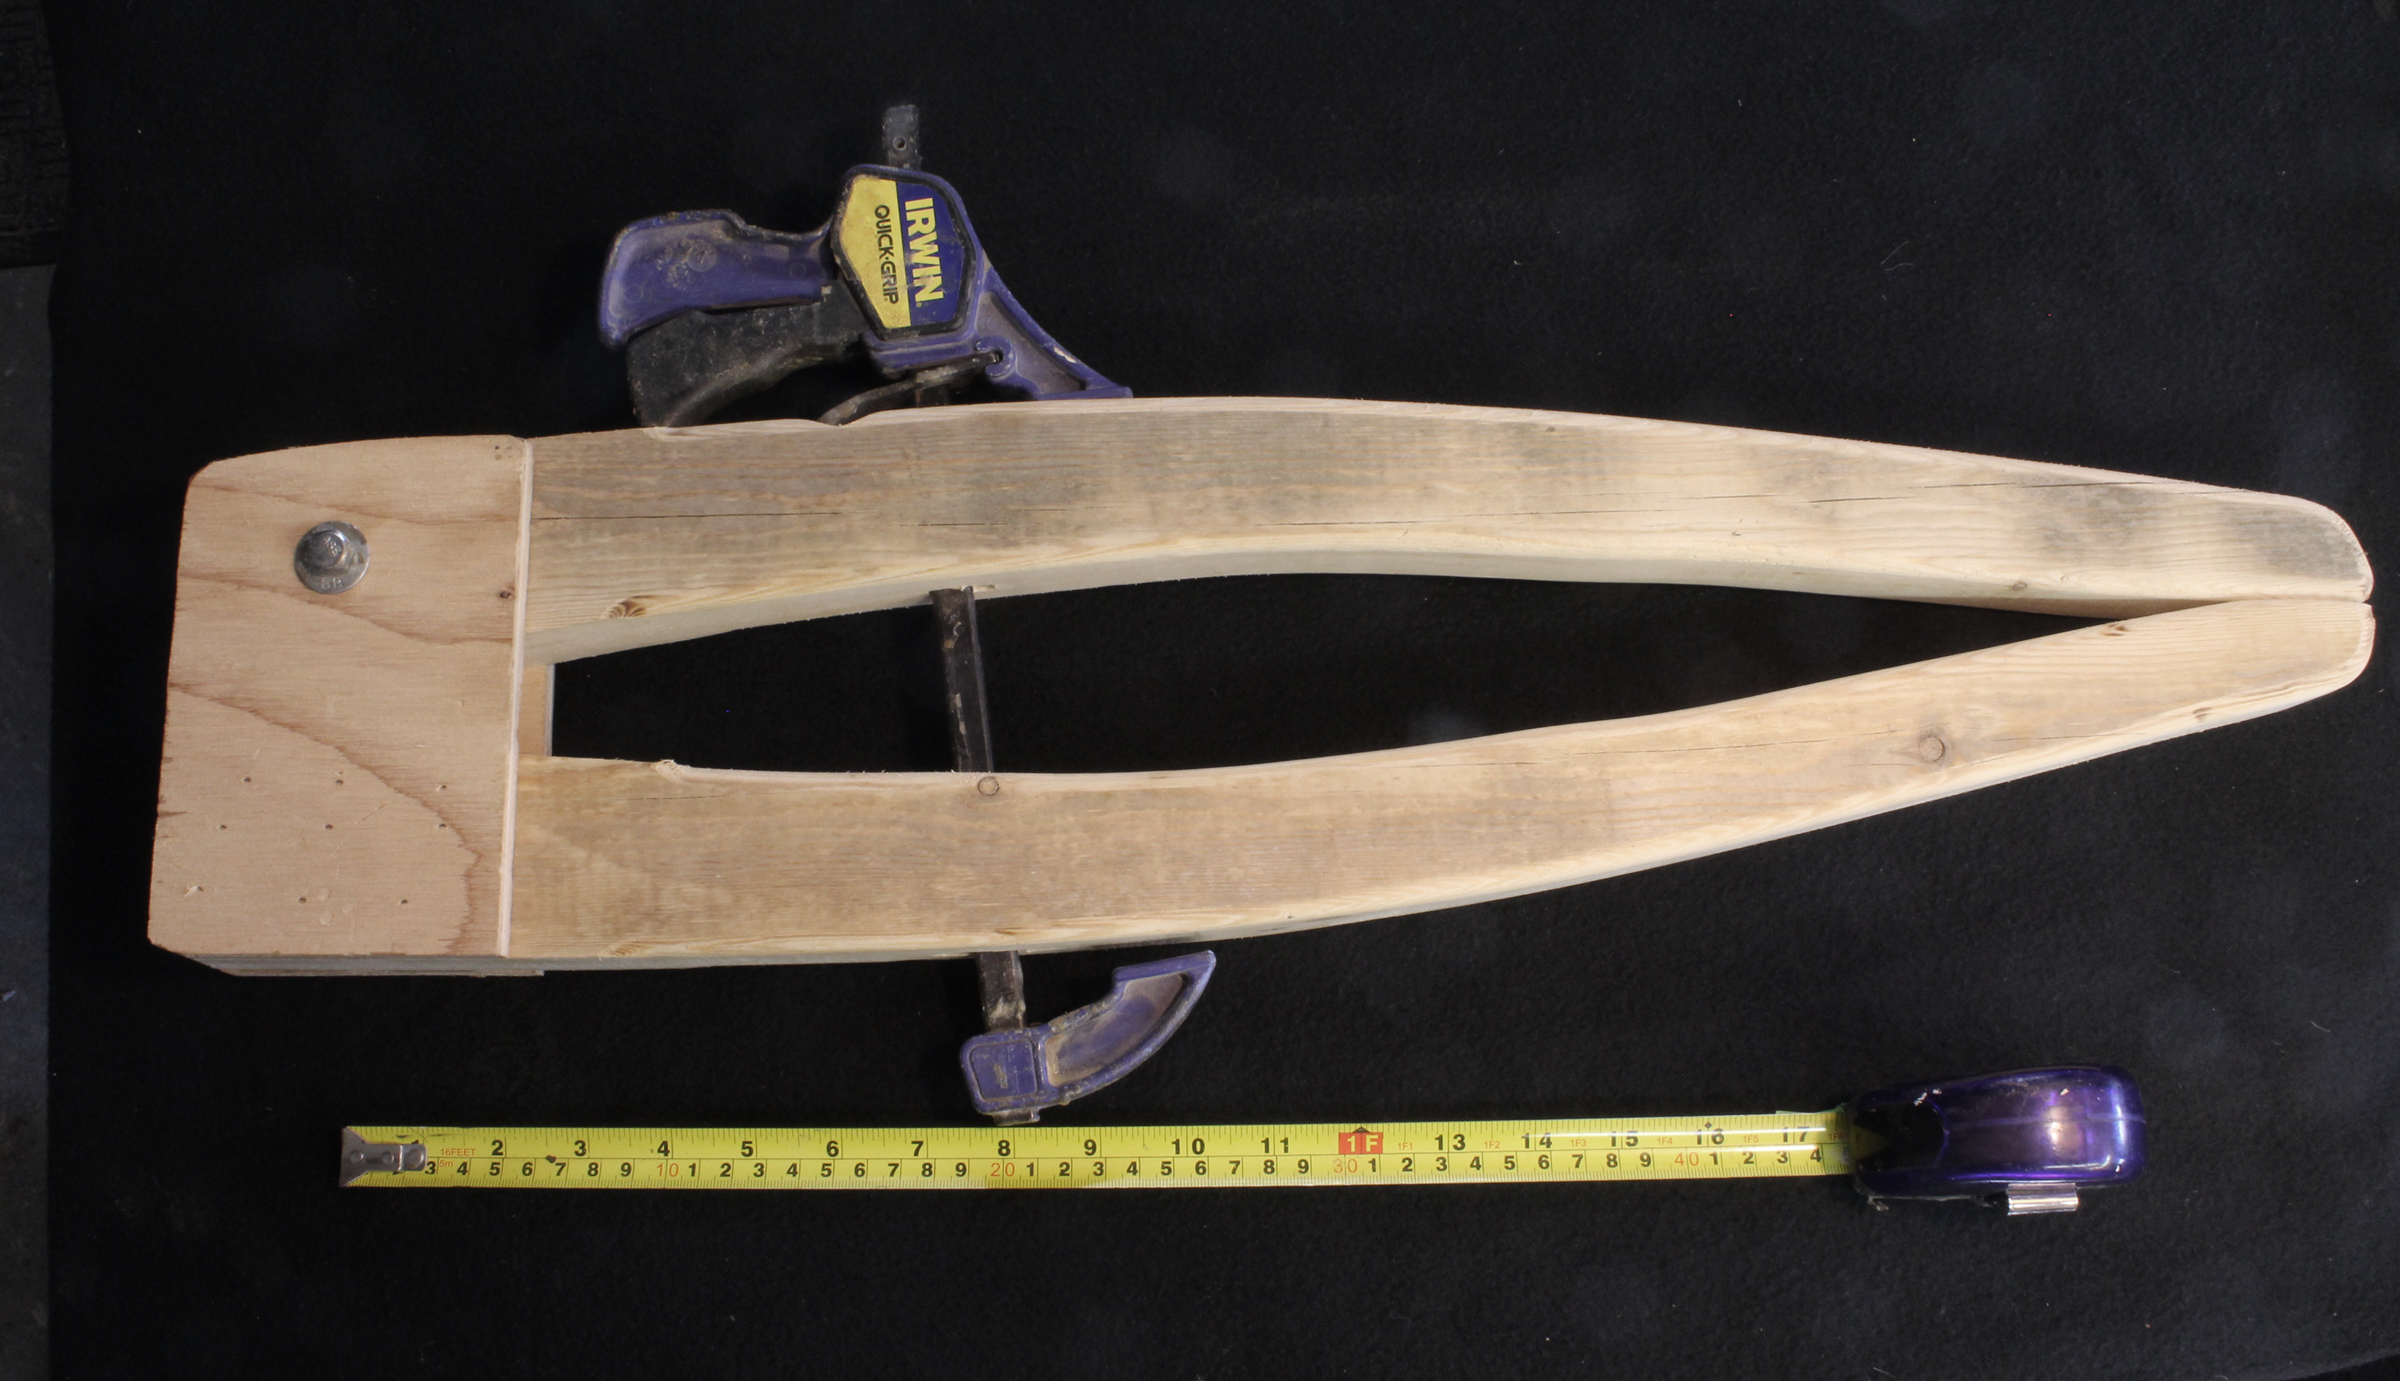
A long-reach clamp can also be built with a ratcheting bar clamp. Cut a slot in each jaw to give the bar a loose fit by drilling a row of holes and remove the wood remaining between them with a knife, chisel, or coarse file. The clamp will probably have a rolled steel pin in the end of the bar. Tap that out with a hammer. Remove the clamp’s sliding jaw, insert the bar through the slots in the jaws and replace the sliding jaw. It may help to grind or file a corner off the end of the bar to ease reinserting it past the inner workings of the ratchet mechanism. If the release trigger is too close to the jaw, cut a groove in the back of the jaw to make room to get a finger under the trigger.
Slots in the wooden jaws accommodate the bar of a ratcheting clamp. Note the shallow groove in the wooden jaw, which provides clearance for the release lever, and the rounded end of the bar, which eases reinserting the bar through the ratchet grip.
You can tap the rolled pin back in or leave it out to make it easier to switch back and forth between the ratchet clamp’s normal use and its place in the long-reach clamp. The clamp I built this way is the size of the cam-lever version above, and has the same reach and applies the same pressure.![]()
Christopher Cunningham is the editor of Small Boats Magazine.
You can share your tips and tricks of the trade with other Small Boats Magazine readers by sending us an email.


Great design! In particular, I love your adaptation to extend the reach of a ratchet clamp. I will certainly be using that idea in my next build.
Sweet! Nice, Chris. Now I just need a reason to use these.
Any plans from you guys??
Hi Jay,
There’s nothing critical about the clamps except for the location of the hole in the cam lever. If you make something that is close to what you see in the photographs, there’s not much that can go wrong.
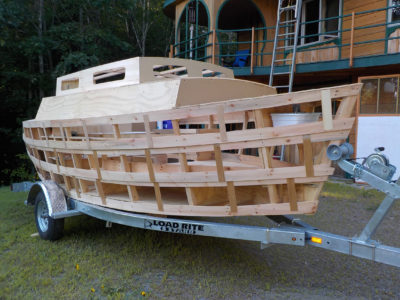
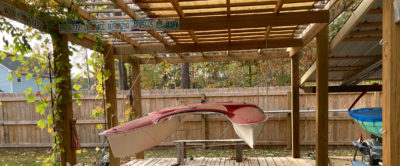
Chris Farmer of Fairfax, Virginia, made nine long-reach clamps for building his 16′ Hammond Swampscott Dory from John Gardner’s The Dory book. “The long-reach clamps,” he writes, “were a revelation. I made nine of them.”
Here he’s using the clamps to hold risers in place, a job that ordinary clamps can’t do.
I made long reach clamps by cannibalizing the pair of opposite-thread screws from a hand screw (the kind the school shop provided when you were a youth). These give you a lot of versatility in exactly how you need the clamps to be configured.