 all photographs by the author
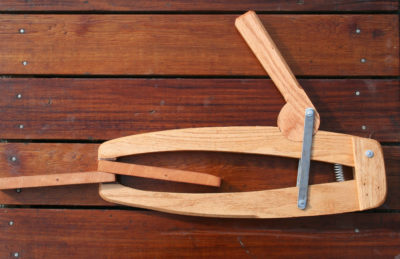
Friction will hold the cam lever in place securely even though the pin isn’t at top dead center.
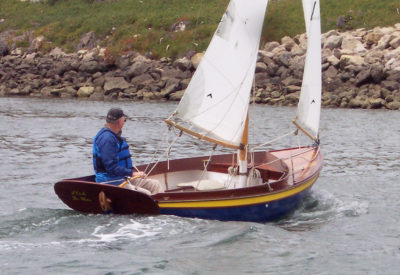
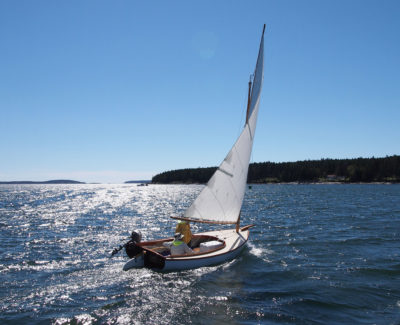
In 1979, when I built my first wooden boat, I had to gather up the tools I needed as I went along. When it came time to lay the planks on, I made a set of planking clamps with the reach to get across the plank to the lap. Now, 36 years later, I don’t recall where I found the pattern for them, but the cam-lever design is still my favorite. The clamps can be applied with one hand, leaving the other hand free to hold and align the plank, and they’re very fast to operate going on and coming off. When I needed planking clamps with a longer reach I later made another set, the more common variety with threaded rods to apply pressure. They do the job but take two hands to operate; by comparison to my first set they’re quite cumbersome. I’ve also made simple plywood clamps that require a wedge slipped under one end for pressure. They’re okay when I just need to add a lot of quick-and-dirty clamps to a plank already secured in place, but they’re quite fussy.
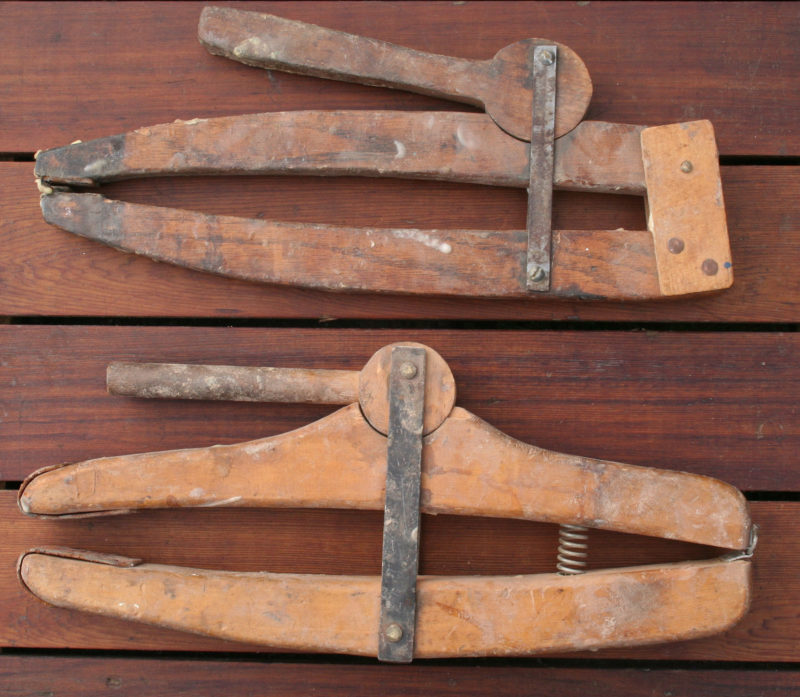
I made my original set of seven clamps (top) 35 years ago with oak from salvaged from a discarded dining-room table. The second set of three (bottom), in Alaska yellow cedar, was thicker, had a shorter reach, and like the first set, tore the hinges apart. I went back to the original design and replaced the hinges with the hardwood cheeks and brass pivot pins.
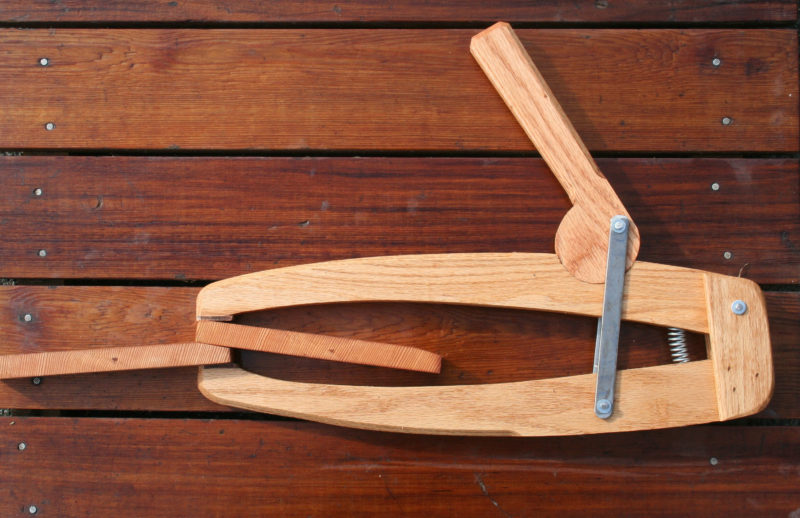
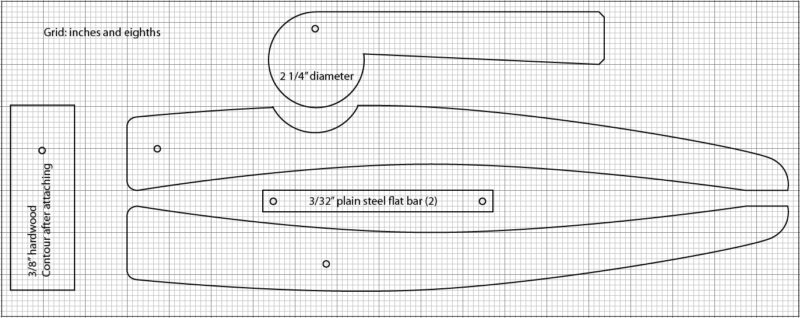
I bandsawed parts for my first set of cam-lever clamps from ¾″ oak. I used Alaska yellow cedar for a second set of three more clamps, opting for 1 ½″ stock to give the softer wood more strength. They’re a bit clumsy, and I’ve gone back to using ¾″ oak. The semicircular notch in the top jaw is easily cut with a hole saw chucked in a drill press. You won’t have the advantage of a pilot bit in the work piece, but if you use gentle pressure to get the teeth started they’ll cut without skating off target. You can also saw the notch out with a narrow bandsaw or sabersaw blade. When shaping the circular part of the cam handle, a perfect fit in the notch is laudable although not required, but err on the side of making the circle slightly oversized–it will have a better grip in the clamp jaw.
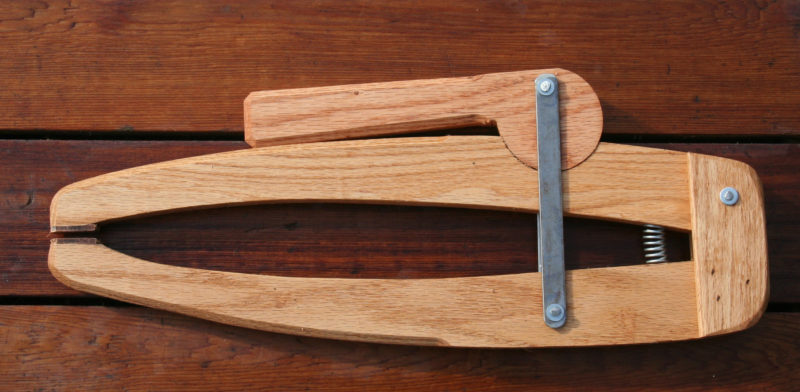
A spring set in holes in the jaws pushes the clamp open, and leather pads glued to the tips provide padding or the planking and prevent damaging misadventures with epoxy.
The straps are 1/16″×3/8″ plain steel flat bar. For the pivot pins I’ve used 1/8″ steel or brass rod. Sixteen-penny nails work well too, and their heads save time peening. For the spring to open the clamp, the parts must move freely, so stop peening the ends just before all the slack gets taken up. If you use a machine screw and nut instead of a rivet to hold the straps to the lower jaw, you can have a second hole to offer a wider setting, but I haven’t found that necessary. The 3/8″ hardwood plates on the end of the clamp are glued in place. The cam levers hold well before their pivot rods hit top dead center, so the clamp has a wide enough range to lock on planks of the various thicknesses generally used for small boats. I’ve used hinges to join the jaws, but those small enough to fit the ¾″ stock are made of thin metal and don’t hold up to the pressure. The hardwood cheeks and pivot rods have proven much more durable. Leather pads on the pinching ends keep the jaws from damaging soft planking and help the clamp release: If a bit epoxy gets on the clamp, it will leave a little leather behind rather take a bit of planking away.
 If you already have a set of planking clamps that use threaded rods or wedges, you could make a set of three of these clamps and use them first to get the plank secured in place and then fill in with the others. They’re almost as good as having a helping hand.
![]()
Christopher Cunningham is the editor of Small Boats Monthly
You can share your tricks of the trade with other Small Boats Monthly readers by sending us an email.


I’m still using steel long-jawed screw-down clamps (6″ & 9″ throat) which do the job, but you’re right, they are a two-handed operation. I have plans for long-jawed wood clamps with a screw but I think when I get time to build them I will use the lever handle. Working alone, I understand the need to have one hand holding the plank and the other working the clamp.
Hi Christopher, it might be that you found the design for your lap clamps either in WoodenBoat #23, pg 80, “A Norwegian Boatbuilding School,” or in WoodenBoat #29, pg. 67 “The Brenne Clamp, Norwegian Finger Clamps II.” One or the other—or both—of these articles is where I got the plans for the same planking clamps, built at much the same time as yours and used with pleasure ever since. Mine were built of some scraps of oak, most of them 1 1/2″ thick (heavy and bomb-proof) or 3/4″ thick (lighter but tending to get out of alignment if you’re not careful when putting pressure on them. The plans show hinges, as you have, but I must not have had money for hinges as I’ve used leather for the hinges. I’m not sure why the hinges would break as the cam lever pulls both ends together. The leather has held up for almost 40 years. I lucked out and found some hefty brass door kick plates that I had cut up for the metal to hold the cam handle, and riveted these, as you did, with 16 d nails, though some may have been fastened with bolts and extra holes to extend the opening. Like you, I’ve never needed to do this. You were smart to put springs in your clamps to help hold them open, as well as adding leather at the pinching ends. I didn’t do either of those things, and so far I’ve never found that the clamps damage the wood–most of my planking is in white spruce–though I do have to do some gymnastics to get them to stay open without the springs. I’d forgotten this feature was in the plans and will look for springs to add. I like your hardwood-and-pin pivot arrangement and imagine that this works well with the 3/4″ clamps to keep them in alignment. Your comment about making the cam circle barely larger than the hole for it to turn in is well taken. I cut mine, I think, with a narrow bandsaw blade and on a few of them I got the hole for the circle to go into too large, and these slip occasionally. I fixed this problem by gluing fine sandpaper into the hole. These clamps may take a little longer to make than ones using bolts, but they have been well worth the effort. Thank you for your well-written articles, both on the clamps as well as on your well-thought-out and beautiful camp cruiser.
Thanks, John, for finding those WoodenBoat articles where the cam-lever clamps appeared. The Brenne clamp, credited to Harald Brenne, a Norwegian boatbuilding instructor, is indeed the pattern I used for my second set of clamps. The clamps that appear in a photograph in WoodenBoat #23, also credited to Brenne, are similar to my first set of clamps, but appear to be significantly longer. Both versions show the cam centered over the length of the clamp’s “fingers.” With the pattern I’ve used, the cam is situated closer to the hinge/pivot end. That position may reduce the pressure exerted by the clamp (though I’ve never found that lacking for the jobs the clamps do) but it results in having the back end of the clamp sticking out not quite so far, and advantage in a shop with tight quarters.
The hinges are in compression when the clamp is applied, so it would seem they’d hold up better than if they were being pulled apart, but as you noticed, the clamp fingers can get out of alignment and that’s what gradually bends the hinges. The hardwood cheeks and pivot pins are cheaper than hinges, maintain alignment, and are quite durable.
The most recent change I made to the design was to set the lever handle off the circle center. In the original design it looked a bit like a lollipop and had two angles to cut between the circle and the handle. Offsetting the handle eliminated one of them, shortening the time it takes to make the piece.