The perfect oarlock socket exists, and you can make it in a modestly equipped home workshop. These sockets are very strong, precisely machined, and will never corrode or need lubrication. I got this design from avid rower Rick Thompson. Installed in 2010, his original pair are still going strong and they have never squeaked!
The secret ingredient is a $6 Oilite bushing. Oilite is sintered oil-impregnated bronze: powdered metal coalesced into a porous solid, permanently holding lubricant in its interstices. In use, oil travels through the pores of the material to lubricate the bearing surface. Commonly used in motors and machines, Oilite bushings are available in a huge range of sizes including the 1⁄2″ and 5⁄8″ inside diameters that perfectly match commercially available oarlocks.
To make these sockets, you will need:
Oilite sleeve bearings about 2″ long with an inside diameter equal to the diameter of your oarlock shafts. I made the sockets in these photos to fit Sawyer Super Strong oarlocks with a 5⁄8″ shaft. It is wise to purchase your oarlocks first to confirm that the shafts have been precisely turned; the sockets and oarlocks form a system and will work best if they match closely.
Plain bronze sleeve bearings. You will press the Oilite bearings into these to create a larger non-porous outer layer. This will stop the oil from leaching out of the bearing into the gunwales. Choose a size with an inside diameter equal to the outside diameter of your Oilite bearings and with a length 1⁄2″ less than the bearings. Brass bar stock 1⁄8″ thick and about 1 1⁄2″ wide; 3″ of length per oarlock socket is about right. Links to the pieces I purchased are listed below.
 Photographs by the author
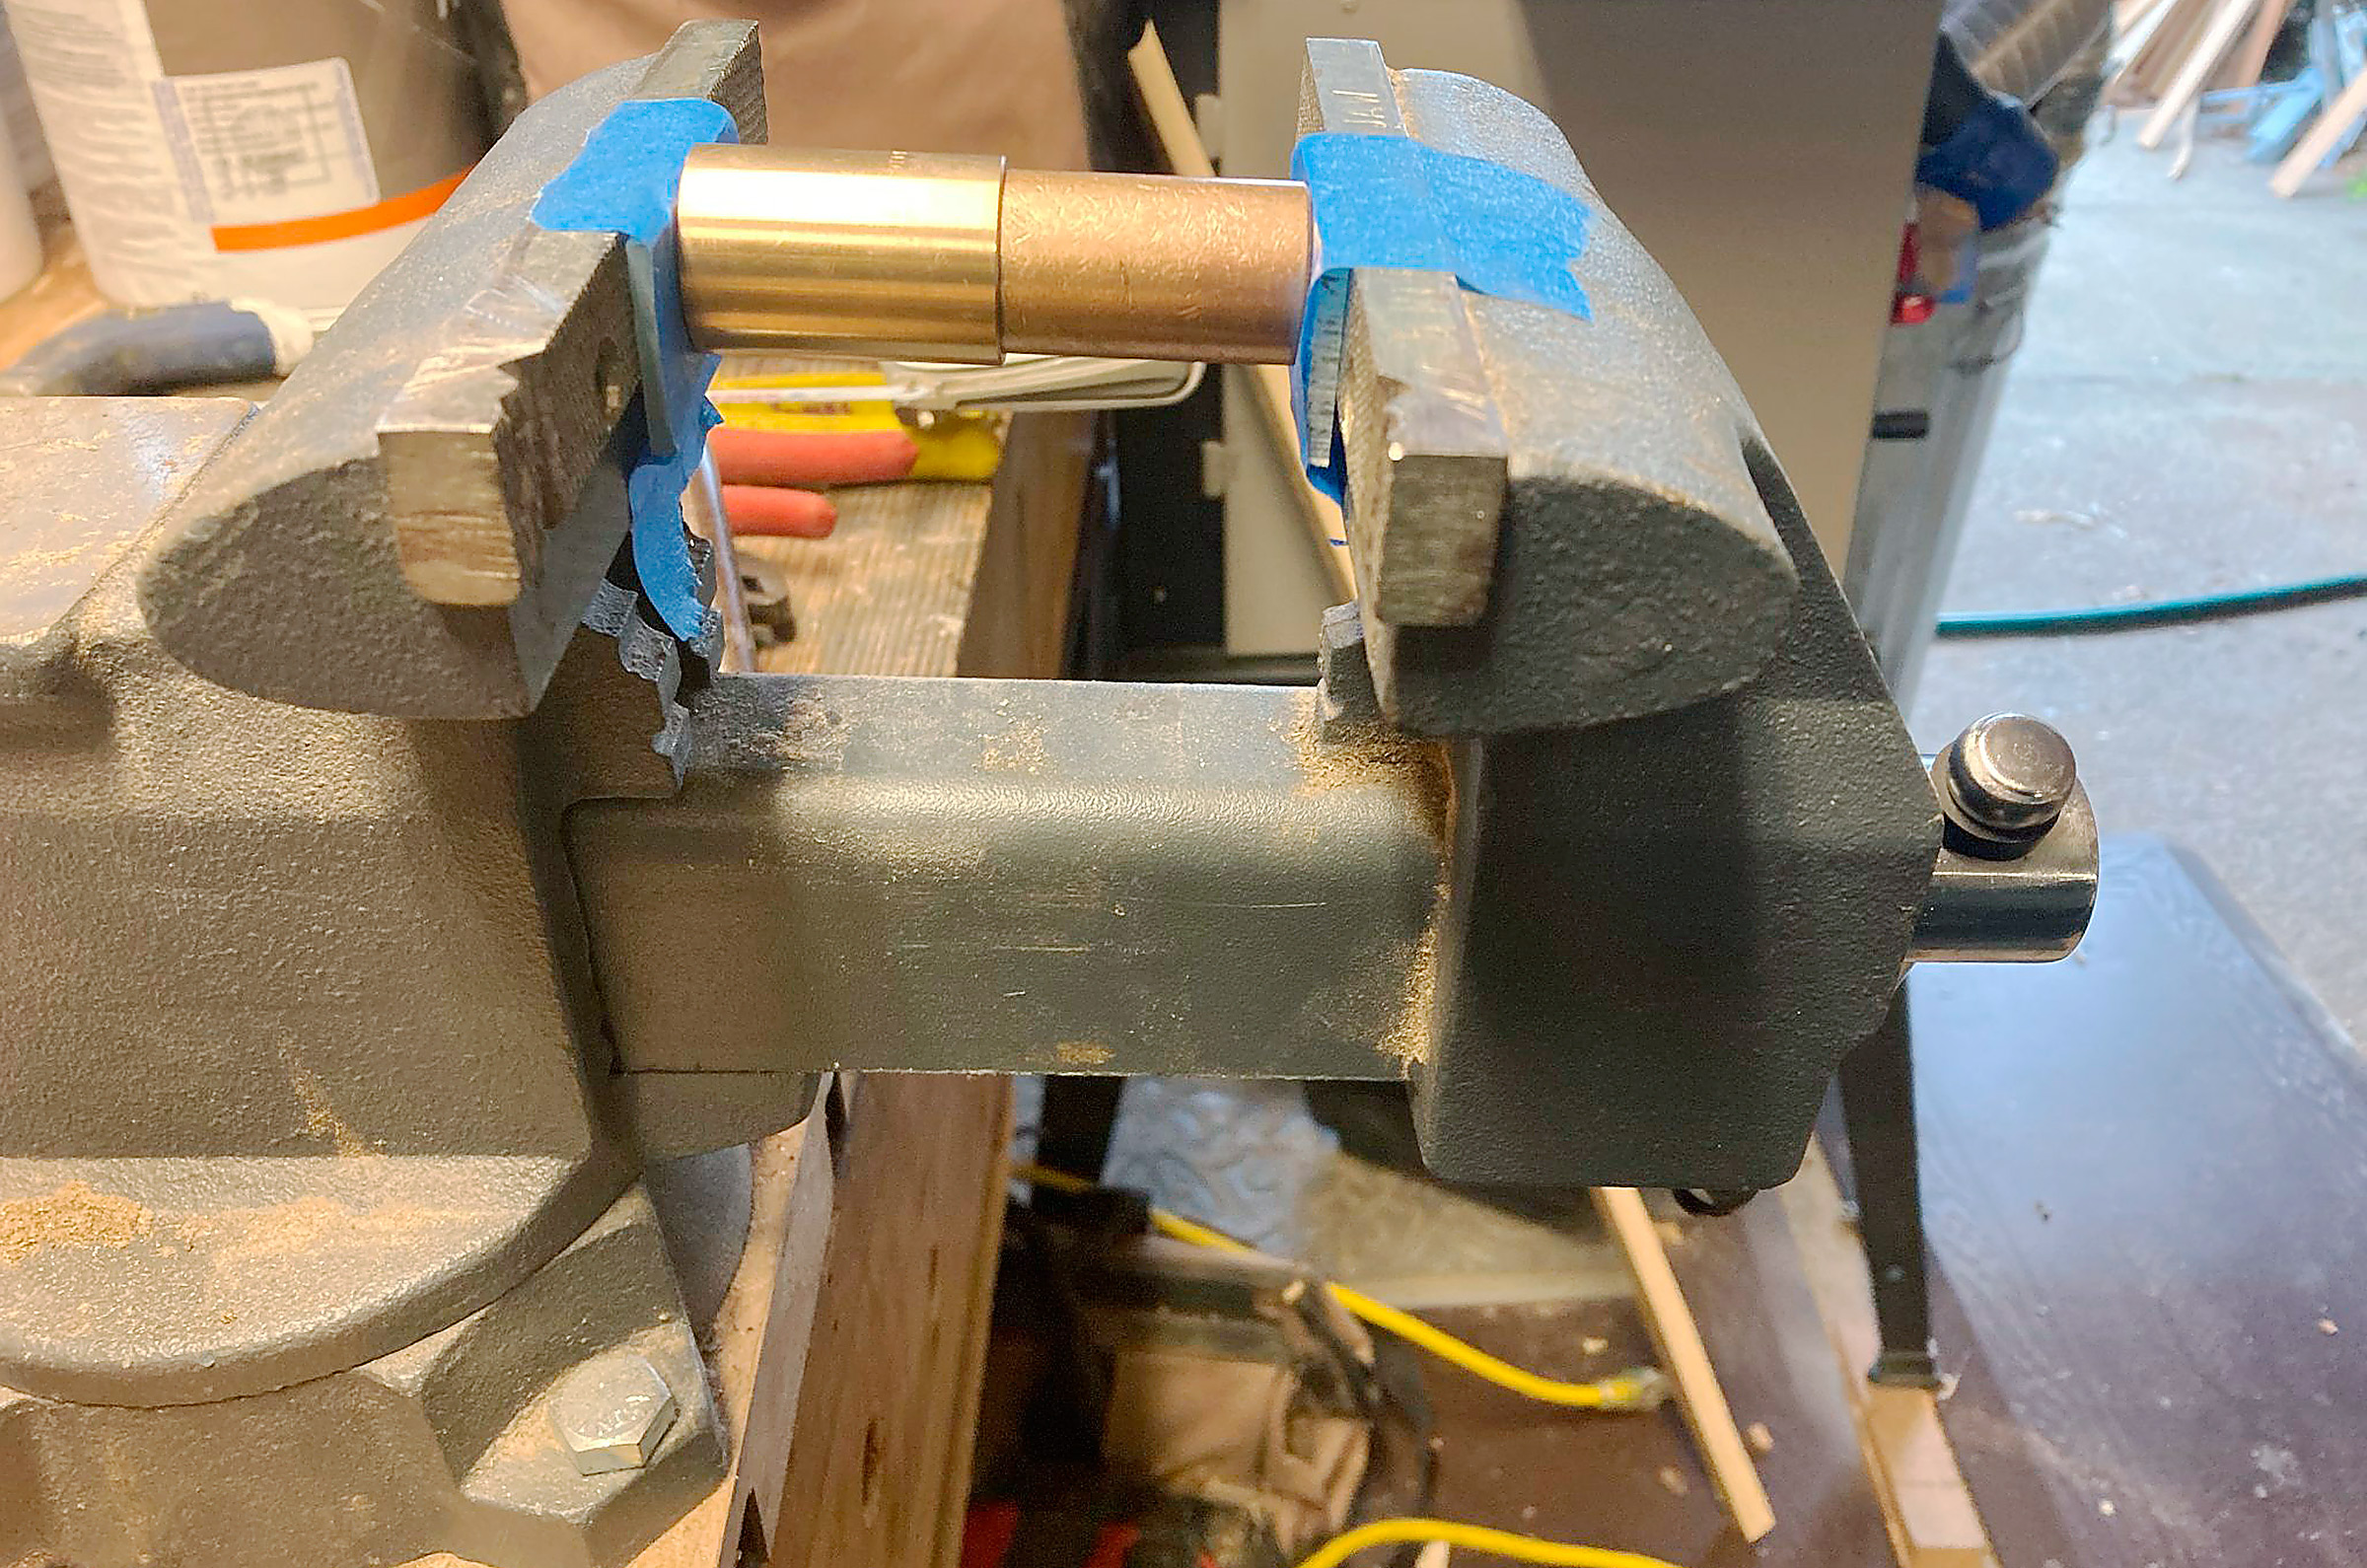
Within the plain bronze bearing there is an Oilite sleeve bearing. It is this extra element that makes the socket a superior product and cuts down on the squeaking so often heard when oarlocks rub within their sockets.
To assemble your sockets, first push each Oilite bearing into a bronze sleeve bearing until it bottoms out. While an arbor press would probably be ideal for this, I had no trouble using a low-quality 5″ bench vise.
Now, make mounting plates from the brass bar. First, make a jig. Route a 1⁄8″ recess the width of the bar and 3″ long into a scrap board. Bore three holes to clear the bits you will later use to drill the brass: a central hole larger than the outside diameter of your plain bronze bearing, and two peripheral holes larger than the holes you will drill for mounting screws. (When you lay out for these holes, extend the layout lines beyond the routed recess to the surrounding surface. You’ll later use these lines to transfer the location of the holes on your brass bar).
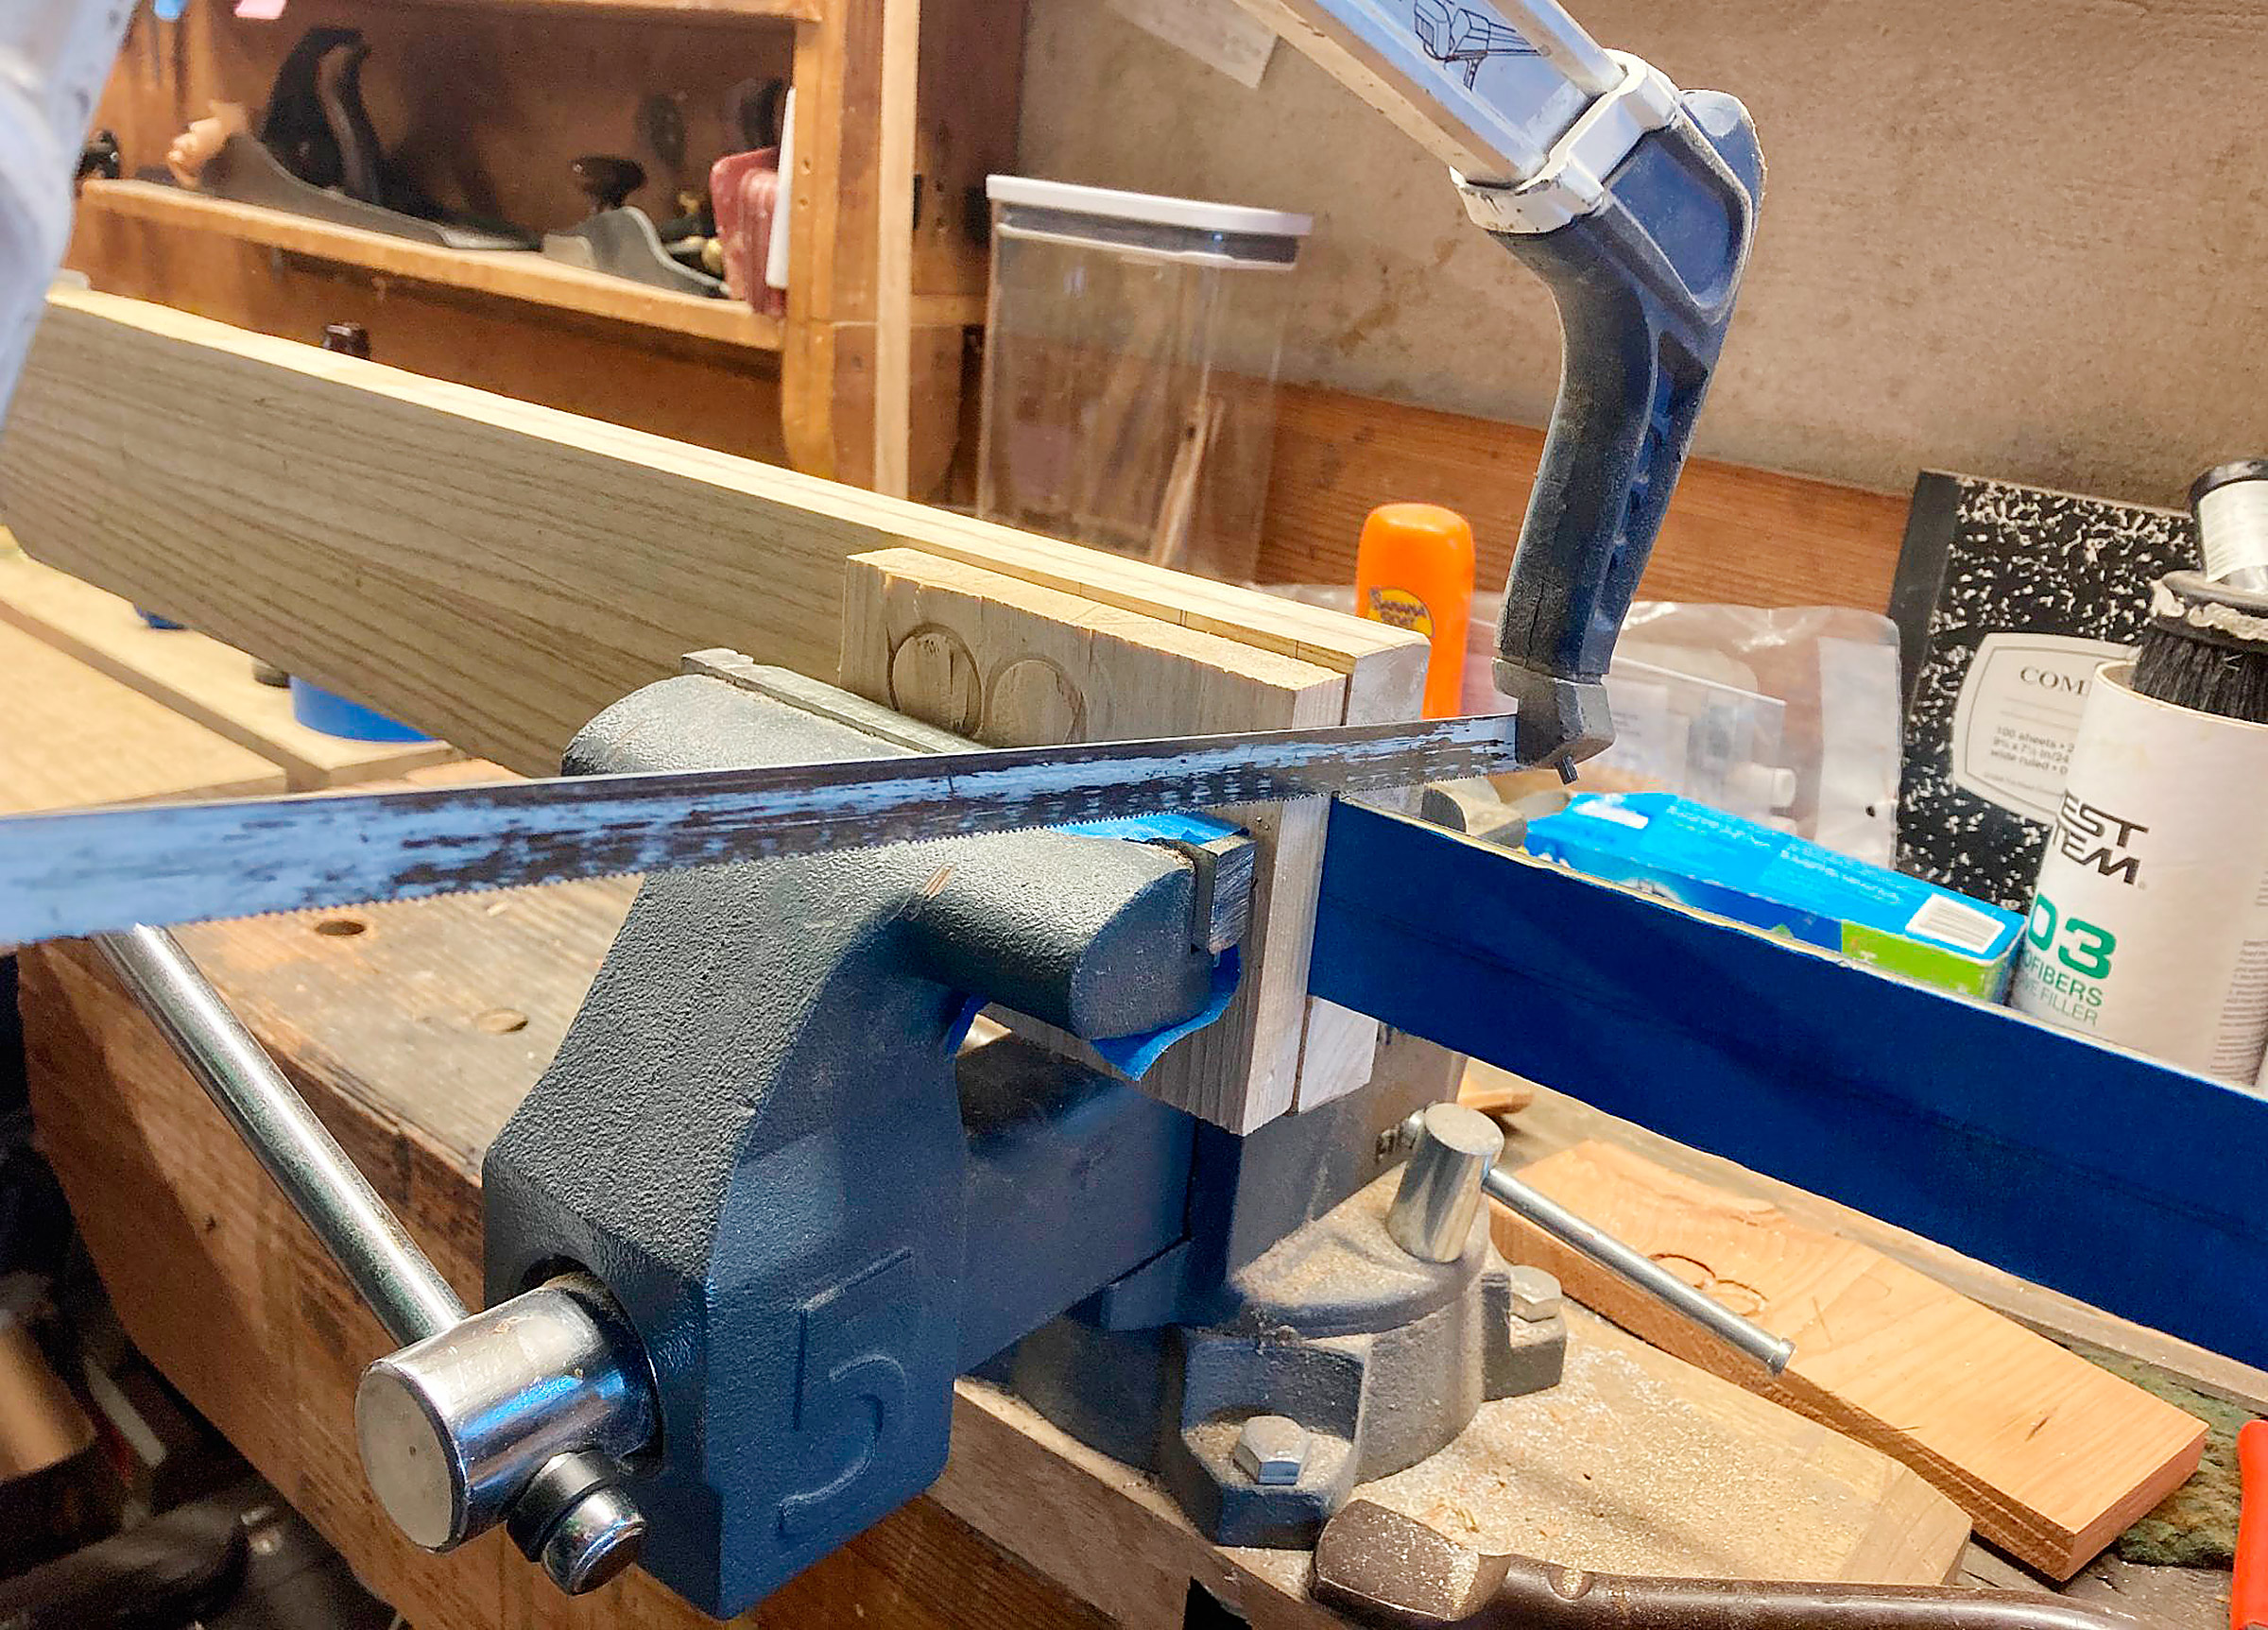
Before cutting the brass plate to size, it is covered in masking tape—to avoid scratching the surface—and held between two pieces of wood within the vice to further protect it and provide a guiding edge for the saw.
Before working the brass bar, protect it with a layer of masking tape. Insert the brass bar into the jig. Cover it with a scrap piece of wood, clamp the resulting sandwich in the vise, and cut along the edge of the jig with a hacksaw. Use a file to clean this cut down to the surface of the jig.
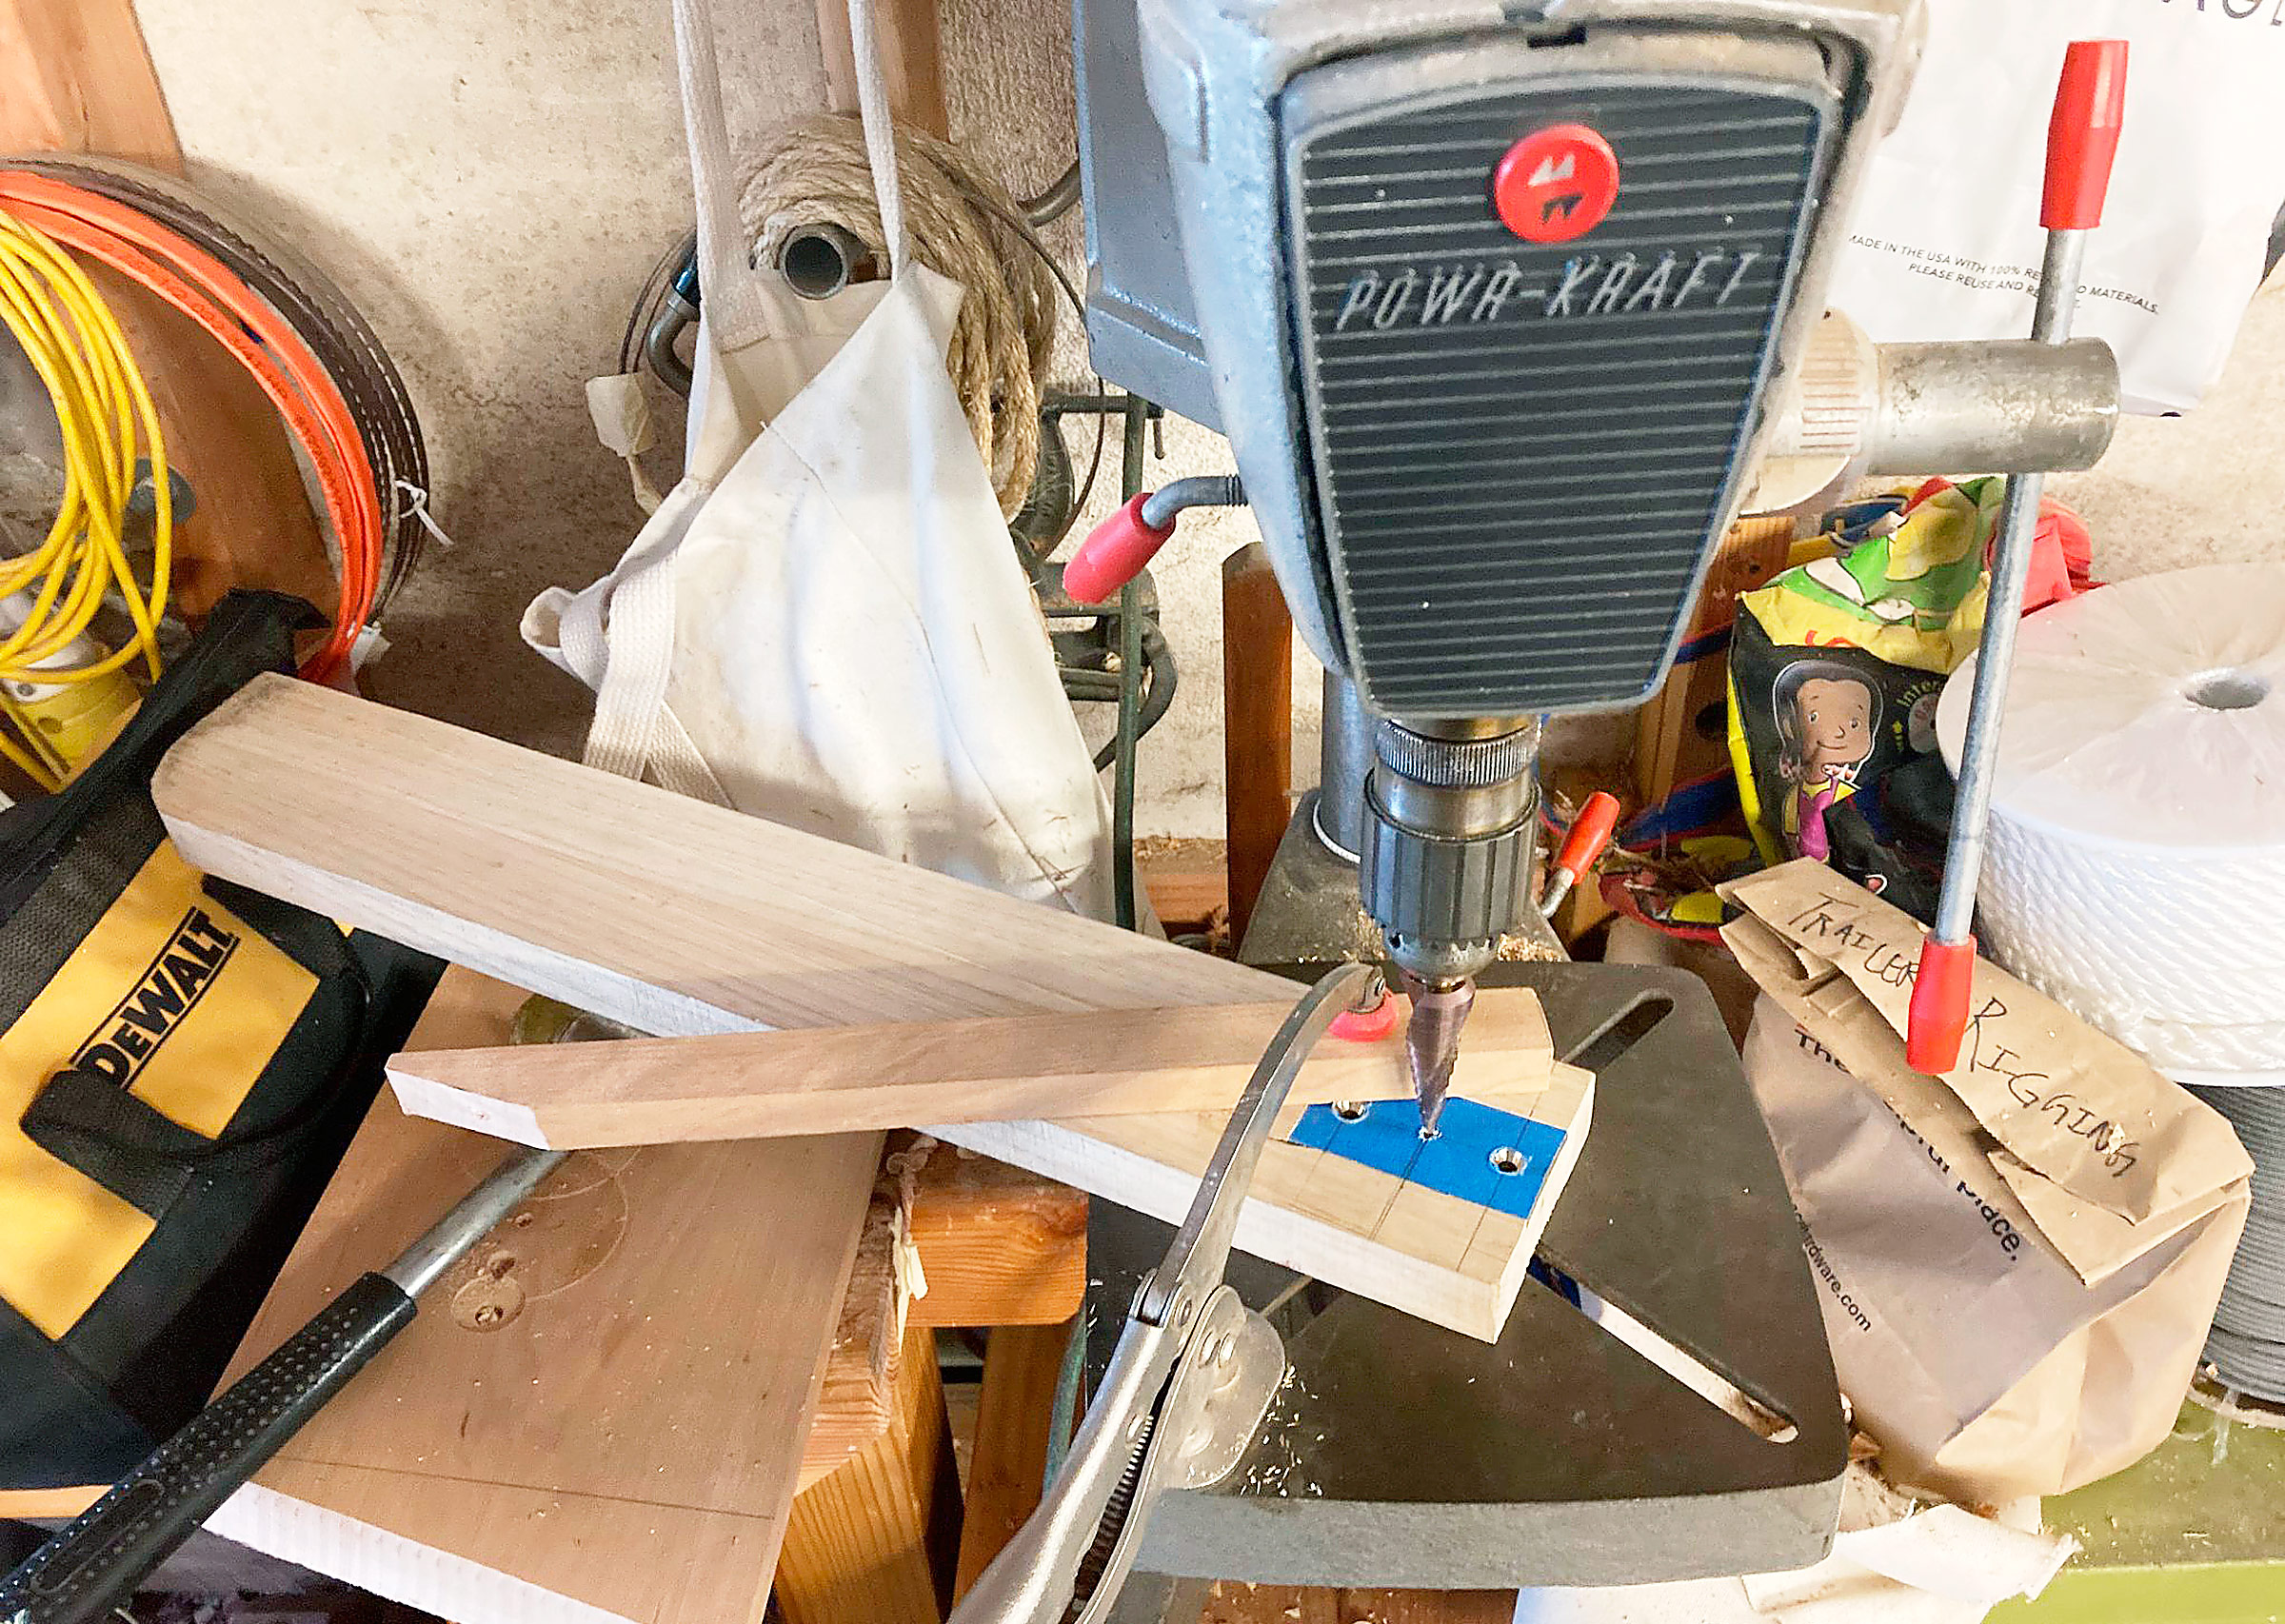
When drilling the holes into the jig it is important to make them just slightly oversized—the central hole is sized just larger than the outside diameter of the bronze bearing, the two side holes just larger than the screw holes in the socket plate.
Keep the bar in the jig for drilling. (The increased holding power provided by the jig makes drilling much safer, particularly as brass stock tends to catch on conventional drill bits and the brass can then spin.) Carry your layout lines onto the bar, then drill and countersink for the fastenings. Standard woodworking countersink bits should work well. Drill the smaller holes for the fastenings after the countersinks. Use a step drill to make a hole the size of your Oilite bushing’s outside diameter. As with the plain bronze sleeve bearing, the precision and standard sizing of these parts will allow for a tight press fit.
Take the sockets and plate to the vise and press the Oilite bushing into the large hole in the center of the plate; a hardwood block with a clearance hole drilled in will allow the bushing to extend past the top of the plate. When the plain bronze sleeve presses against the brass plate, your sockets are complete.
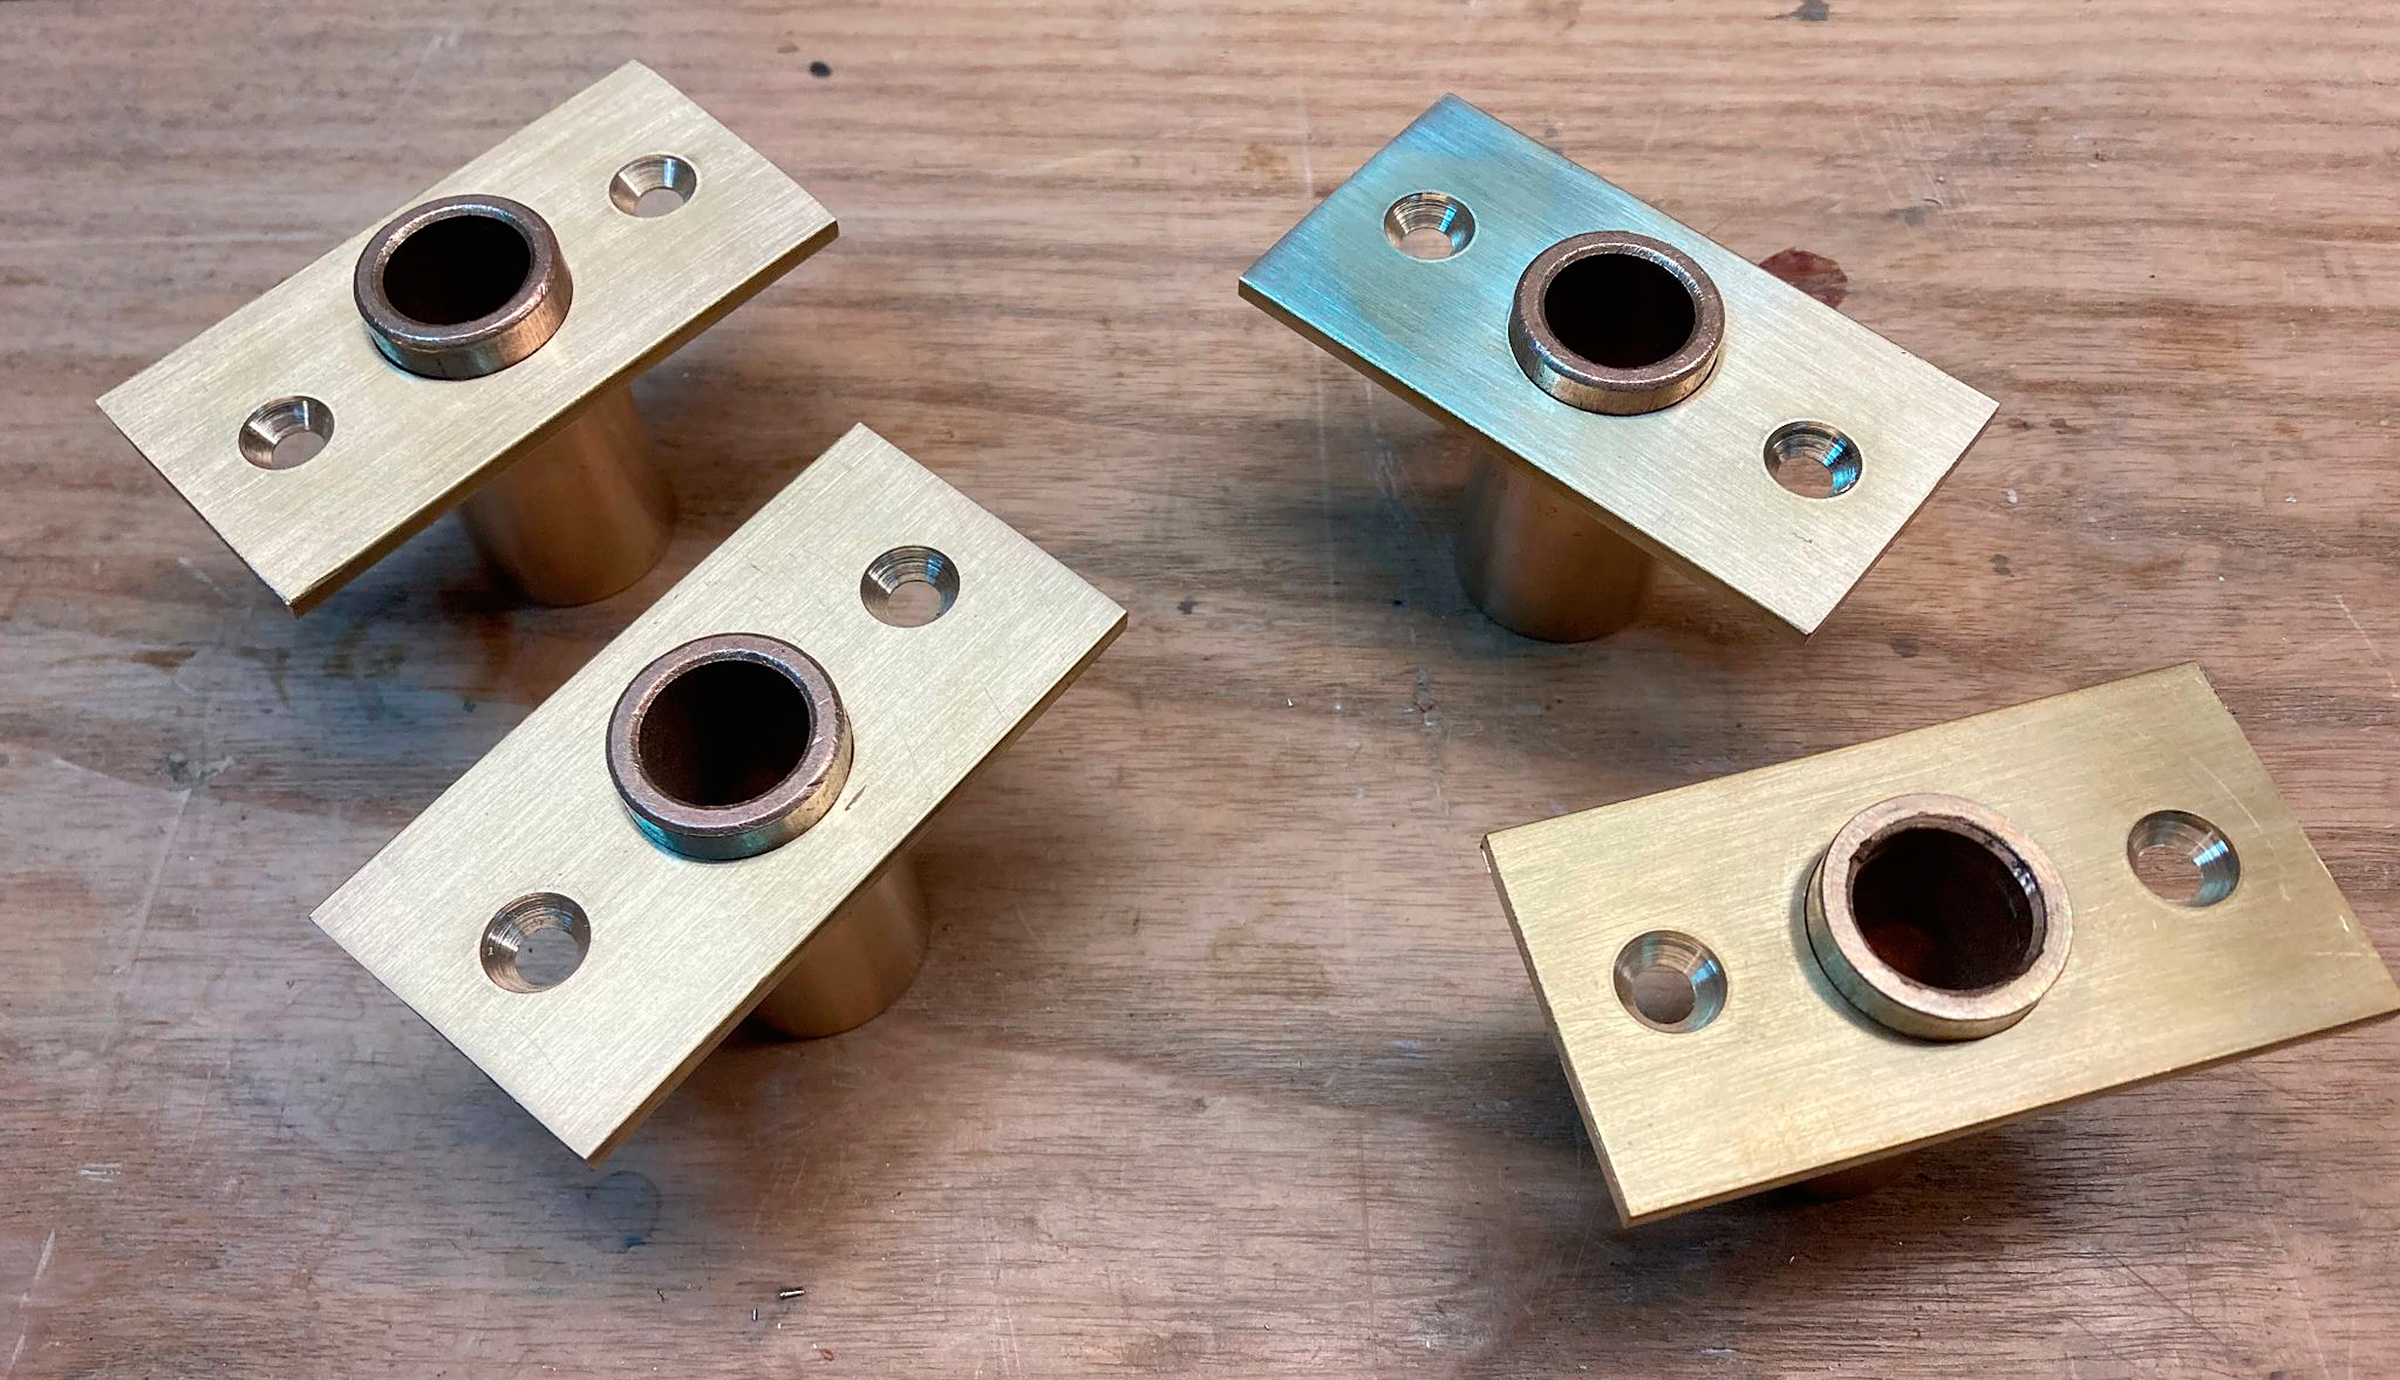
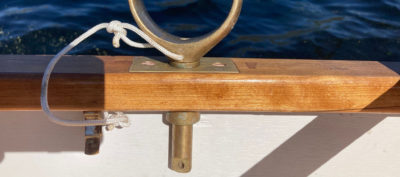
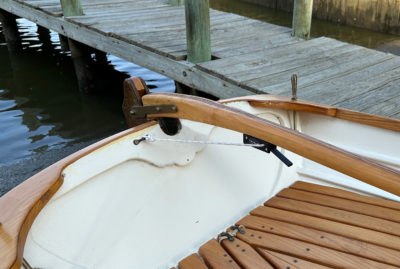
The finished sockets ready to be mounted on the boat. They make look identical, but the alignment of the screwholes is just slightly different on each. The author labeled the undersides so that if he ever needs to remove them he will be able to see easily which goes where.
I installed my 1″ outside diameter oarlock sockets into 1″ holes in the gunwale. Here’s how: first, drill a hole through the gunwale (or oarlock pad and gunwale) for the bearing. After pressing the socket assembly into place and carefully aligning it with the gunwale, temporarily install fastenings (I recommend brass bolts and nuts) then mark along the outside of the plate with a sharp knife. Remove the socket assembly, mortise inside your line to the depth of the plate, and complete the installation by bedding the hardware in compound, paint, or old varnish.
The four sockets I made all appear identical when installed on the boat. However, if you tried to swap them, you’d find that the location of the holes for the fastenings is not perfectly aligned. I was sure to scratch a label on the underside of each socket’s plate so that I can match them with the appropriate mortise on the gunwale in their proper orientation should they ever be removed for varnishing.
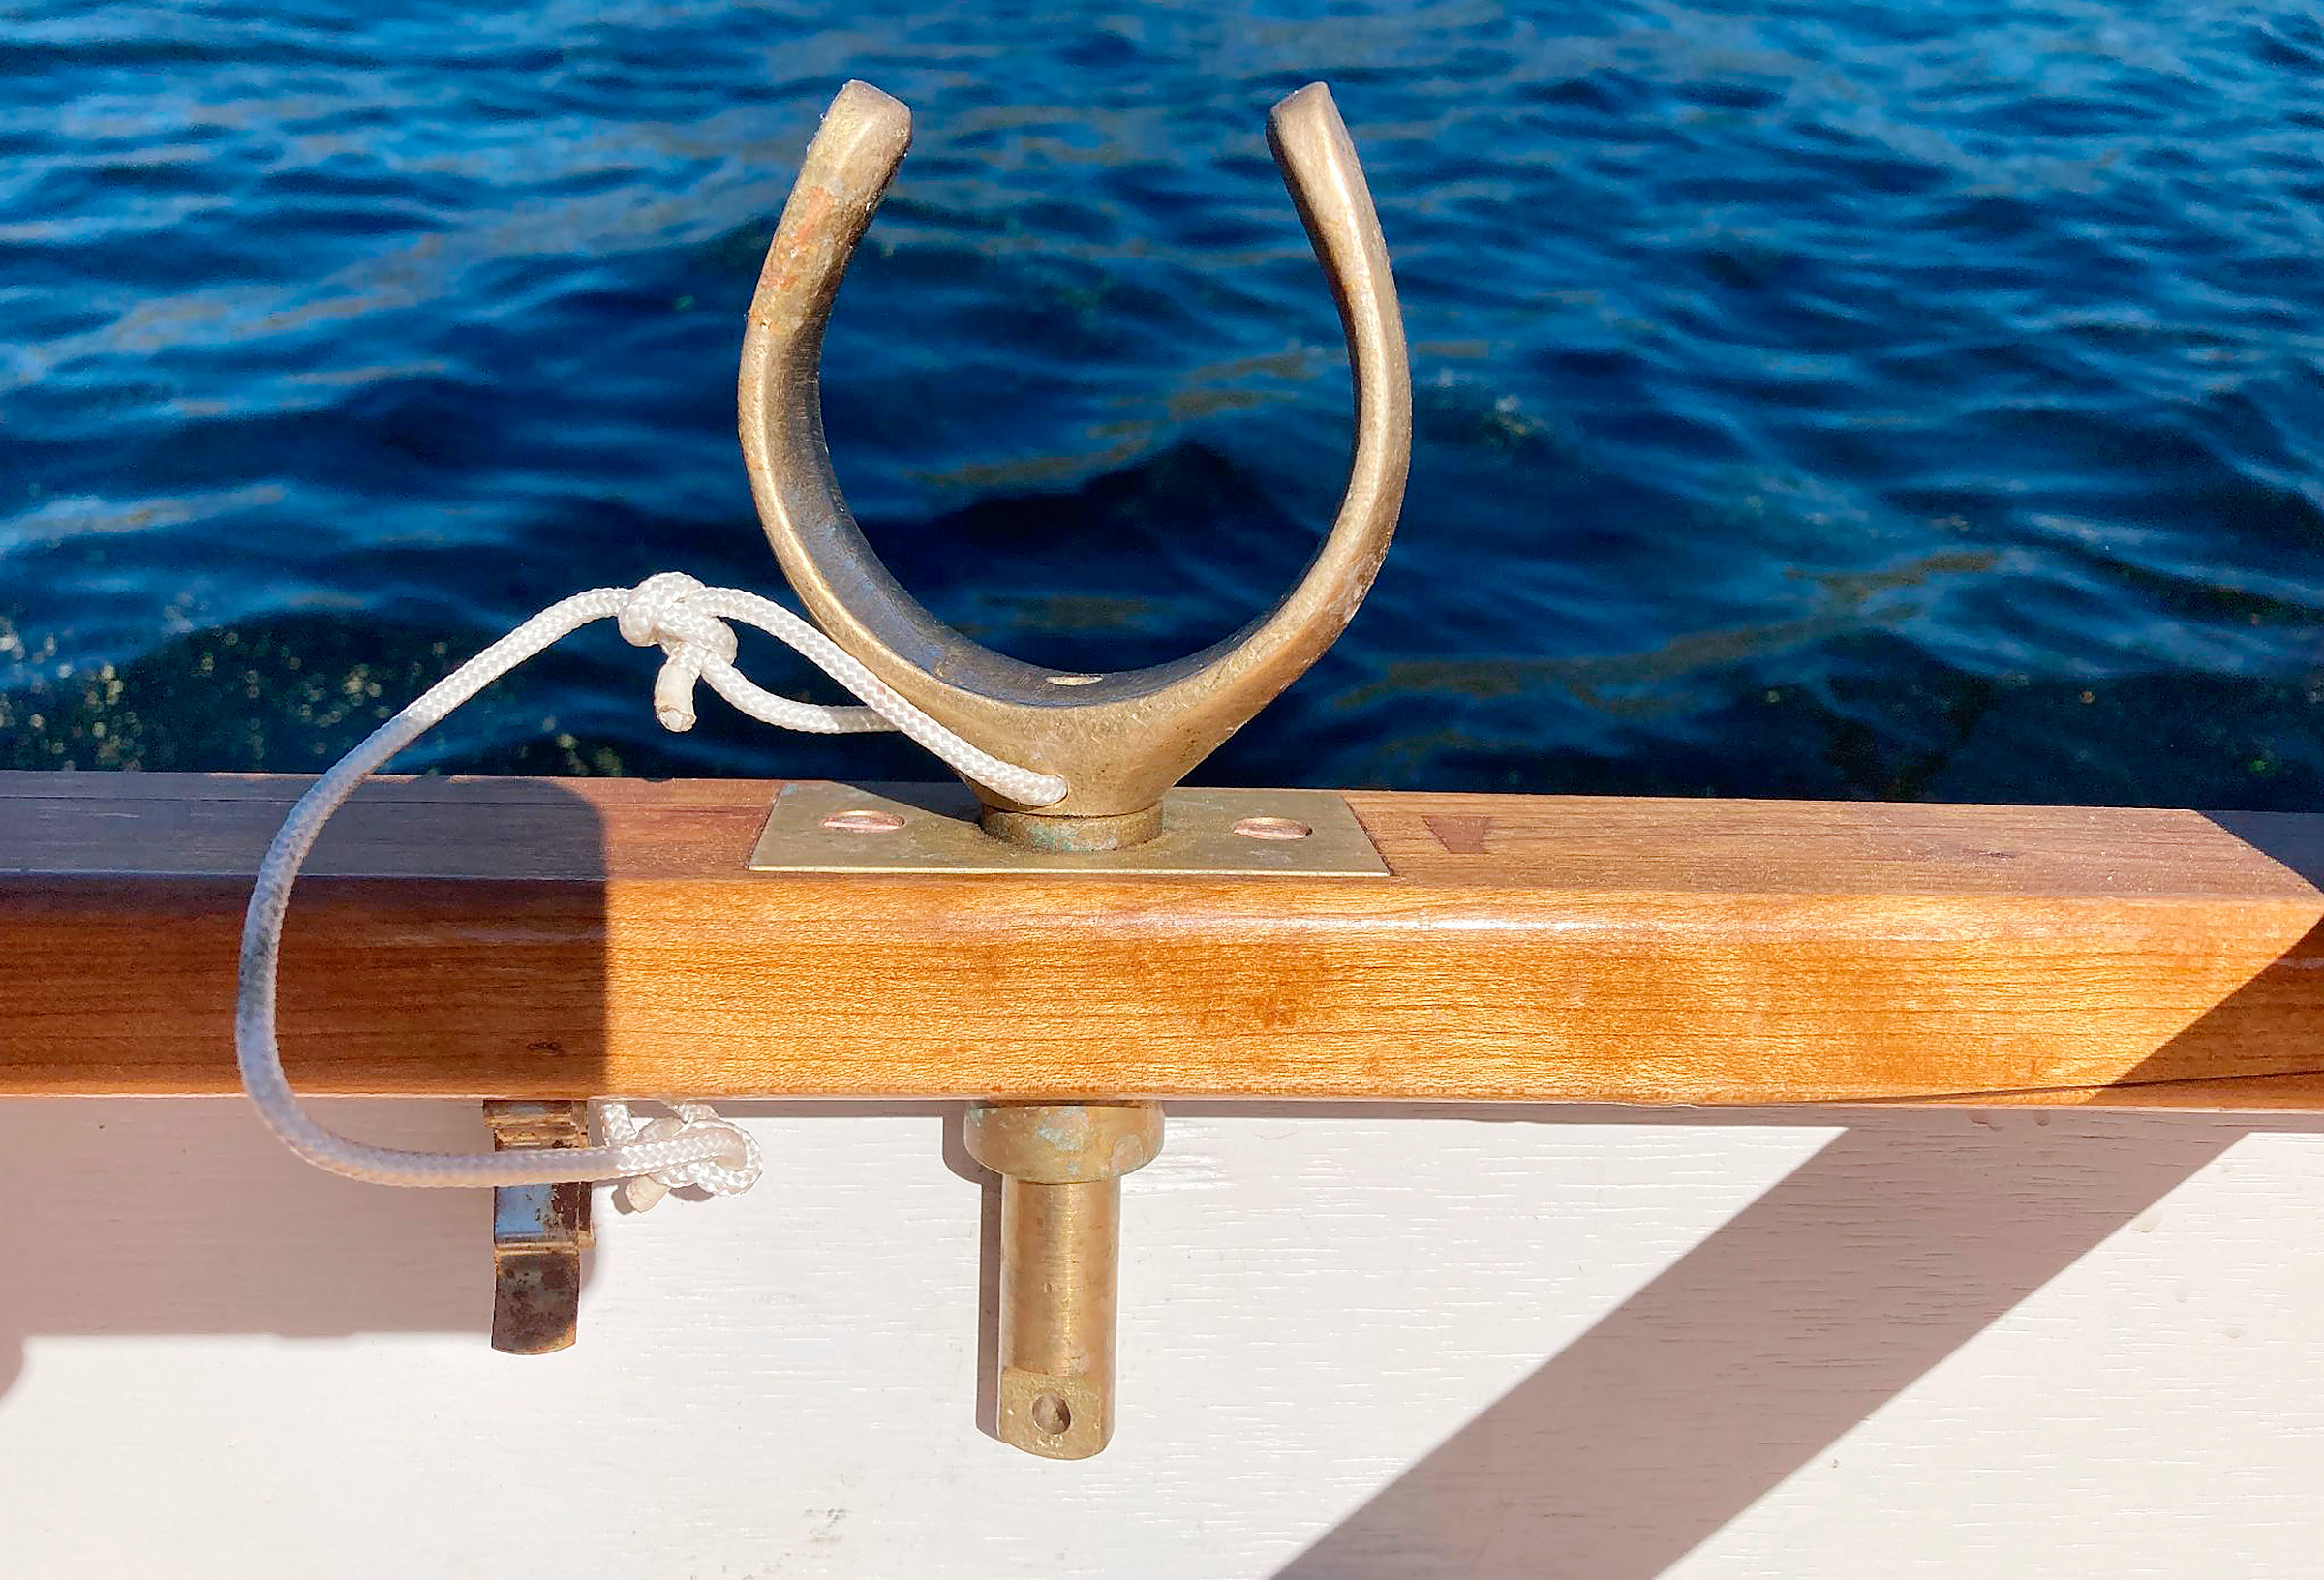
The perfect socket, made to measure for both oarlock and boat.
I have been exceedingly pleased with the quality of these home-brewed sockets and would put them up against anything on the market for quality. Try a set for yourself!![]()
James Kealey lives and teaches in Richmond, California. When he’s not chasing his two young sons, he can usually be found banging away on some project in his garage workshop. In high school, he rowed in racing shells. He still gets away most summers for sail-camping trips on mountain lakes.
The materials James used were sourced from McMaster-Carr.
For the 5⁄8″ sockets (one piece each per socket):
Oil-Embedded Bronze Sleeve Bearing for 5⁄8″ Shaft Diameter and 7⁄8″ Housing ID, 2″ Long
Ultra-Machinable 360 Brass Bar, 1⁄8″ Thick, 1 1⁄2″ Wide, roughly 3″ Long per socket
For the 1⁄2″ sockets:
Oil-Embedded Bronze Sleeve Bearing for 1⁄2″ Shaft Diameter and 3⁄4″ Housing ID, 1 3⁄4″ long
Ultra-Machinable 360 Brass Bar, 1⁄8″ Thick, 1 1⁄2″ Wide, roughly 3″ Long per socket
You can share your tips and tricks of the trade with other Small Boats readers by sending us an email.


It has been cheaper and easier, for me at least, to make my oarlock bushings out of machined LDPE, the plastic from which many chopping boards (and deer butchering slabs) are made. This material has the merit of being naturally pretty quiet, and not needing any lubrication at all.
Regards, Tony, from in N.B. Canada.
LDPE (Or HDPE) bushings make a lot of sense, Tony. Though I’m not convinced they could be much easier to make than these press-fit sockets, I’m not surprised to hear they work well. How durable are they proven in service?
– James
Two years so far. Important to keep the bearing surfaces clean, of course, since sand particles grind only too well. I also use LDPE for sliding surfaces in my home-brew sliding seat. The seat itself rides on soft-surface wheels from a skateboard.
Tony
Hello All,
Just to let you know, McMaster-Carr does not ship to individuals in Canada. They cancelled my order and stated:
“Hi Mike,
Due to the cost and complexity of shipping our products to Canada, we are only able to accept orders from businesses and schools. We’ve canceled your order. If this material is not for personal use, please resubmit your order online using the business or school name.
Kelly”