For more than a half-century I have explored many of the Minnesota waterways from a canoe and although I have enjoyed much of that time fishing from it, the idea of trolling or casting for hours on end is not, to my bewilderment, met with as much enthusiasm by my wife and two kids. Our 17′ canoe is more boat than I needed for what has become an individual activity, and I wanted something much more portable and nimble—a solo canoe. Purchasing a new canoe was never going to be an option due to limited resources, and reasonably priced used solo canoes don’t become available often. So, I decided I’d attempt to build one as a winter project.
My criteria for choosing a design revolved around the following: stable enough for trolling or casting, ease of transport on and off my car roof rack, light enough to portage, uncomplicated construction for a first-time boatbuilder, and affordability.
 Mike Hoyt
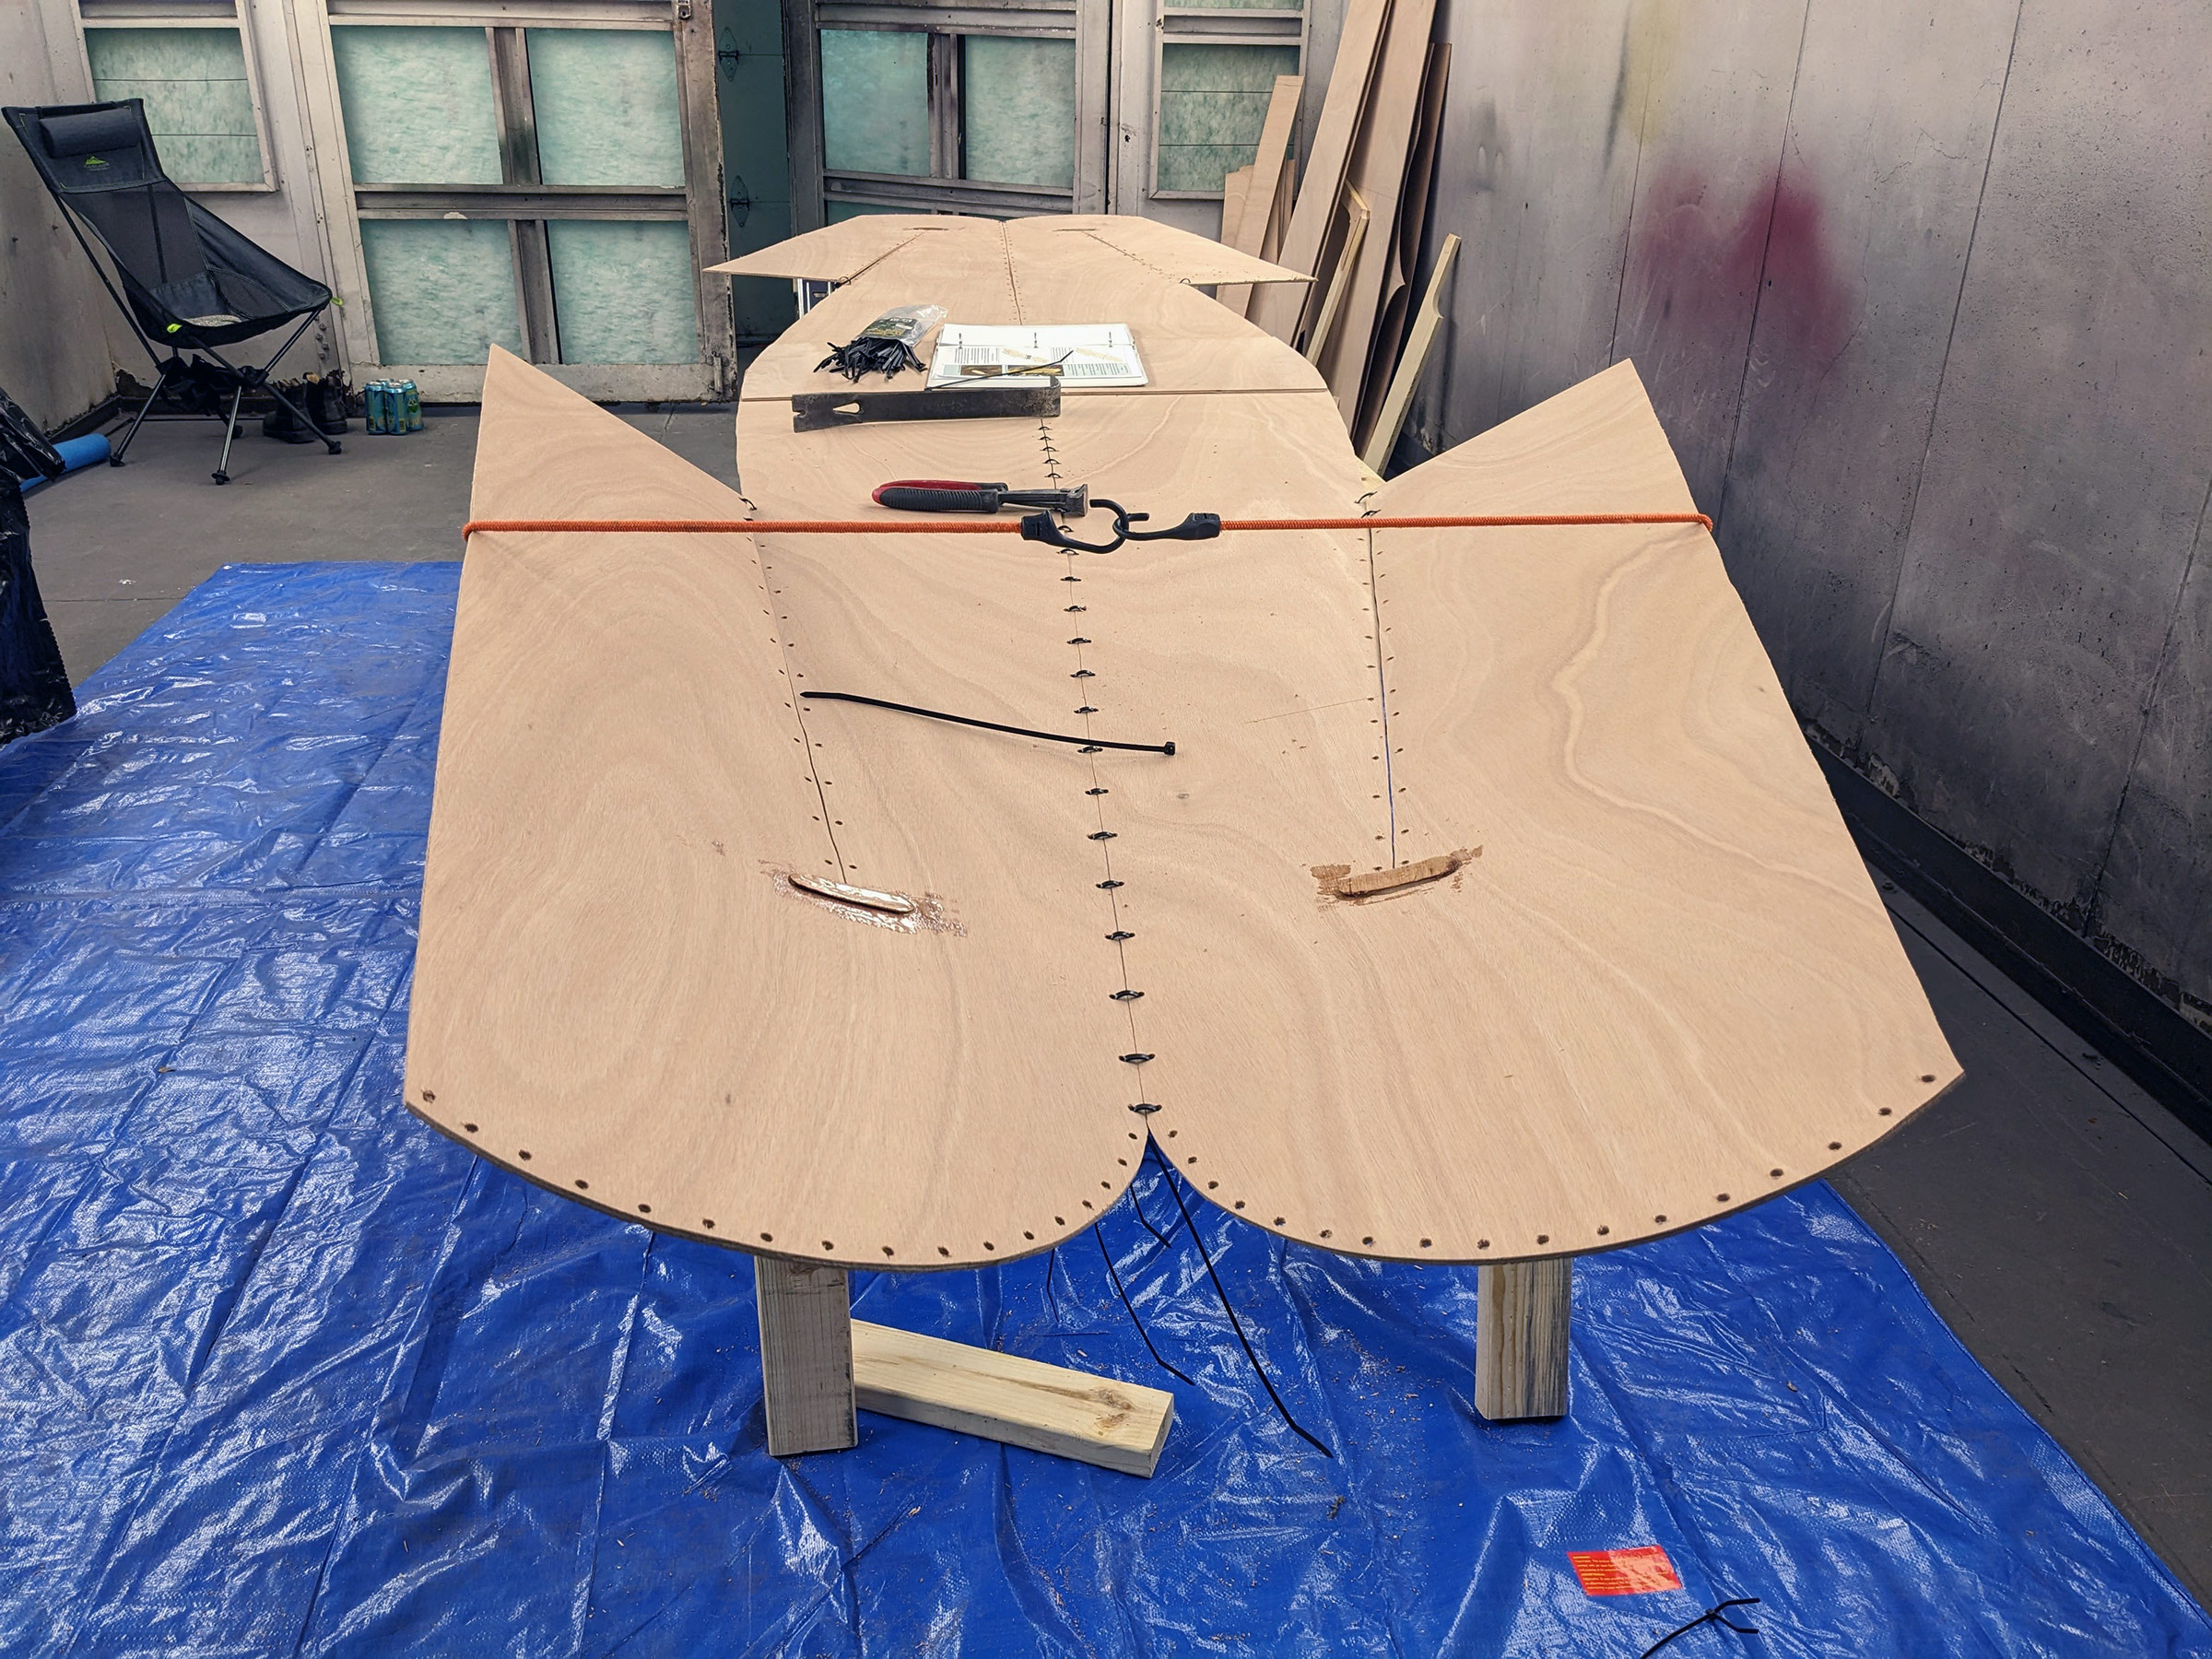
With the two end pieces joined together, the canoe takes shape as the sides are curled up. The seams that will become the chines end short of the stems and are reinforced with small plywood patches, epoxied in place, to ease the transition there from angled chine to curved bow.
I found many resources on the web for one-sheet, lapstrake, and tortured-plywood designs. After finding and browsing Michael Maddox’s site, I settled on his Hiwassee Wanderer design because I felt like it fit well with my key criteria. As Michael wrote, the “canoe is designed to combine classic aesthetics with simplicity of construction. It features a traditional recurved bow and is well within the abilities of a first-time amateur builder.”
I purchased the plan set online and promptly received PDF files for the two sheets of 1:5-scale measured drawings, one with the patterns for the five plywood hull components and the other detailing the single frame and its gussets, the breasthooks, thwarts, and seat supports. The 12 pages of instructions included informative drawings and color photographs detailing every step in the construction process. Michael’s clearly written instructions walked me through each step of construction in a sequence that was easy to follow. The construction doesn’t require any special tools—most people probably own (or are able to borrow) the necessary tools and equipment for the project.
 Mike Hoyt
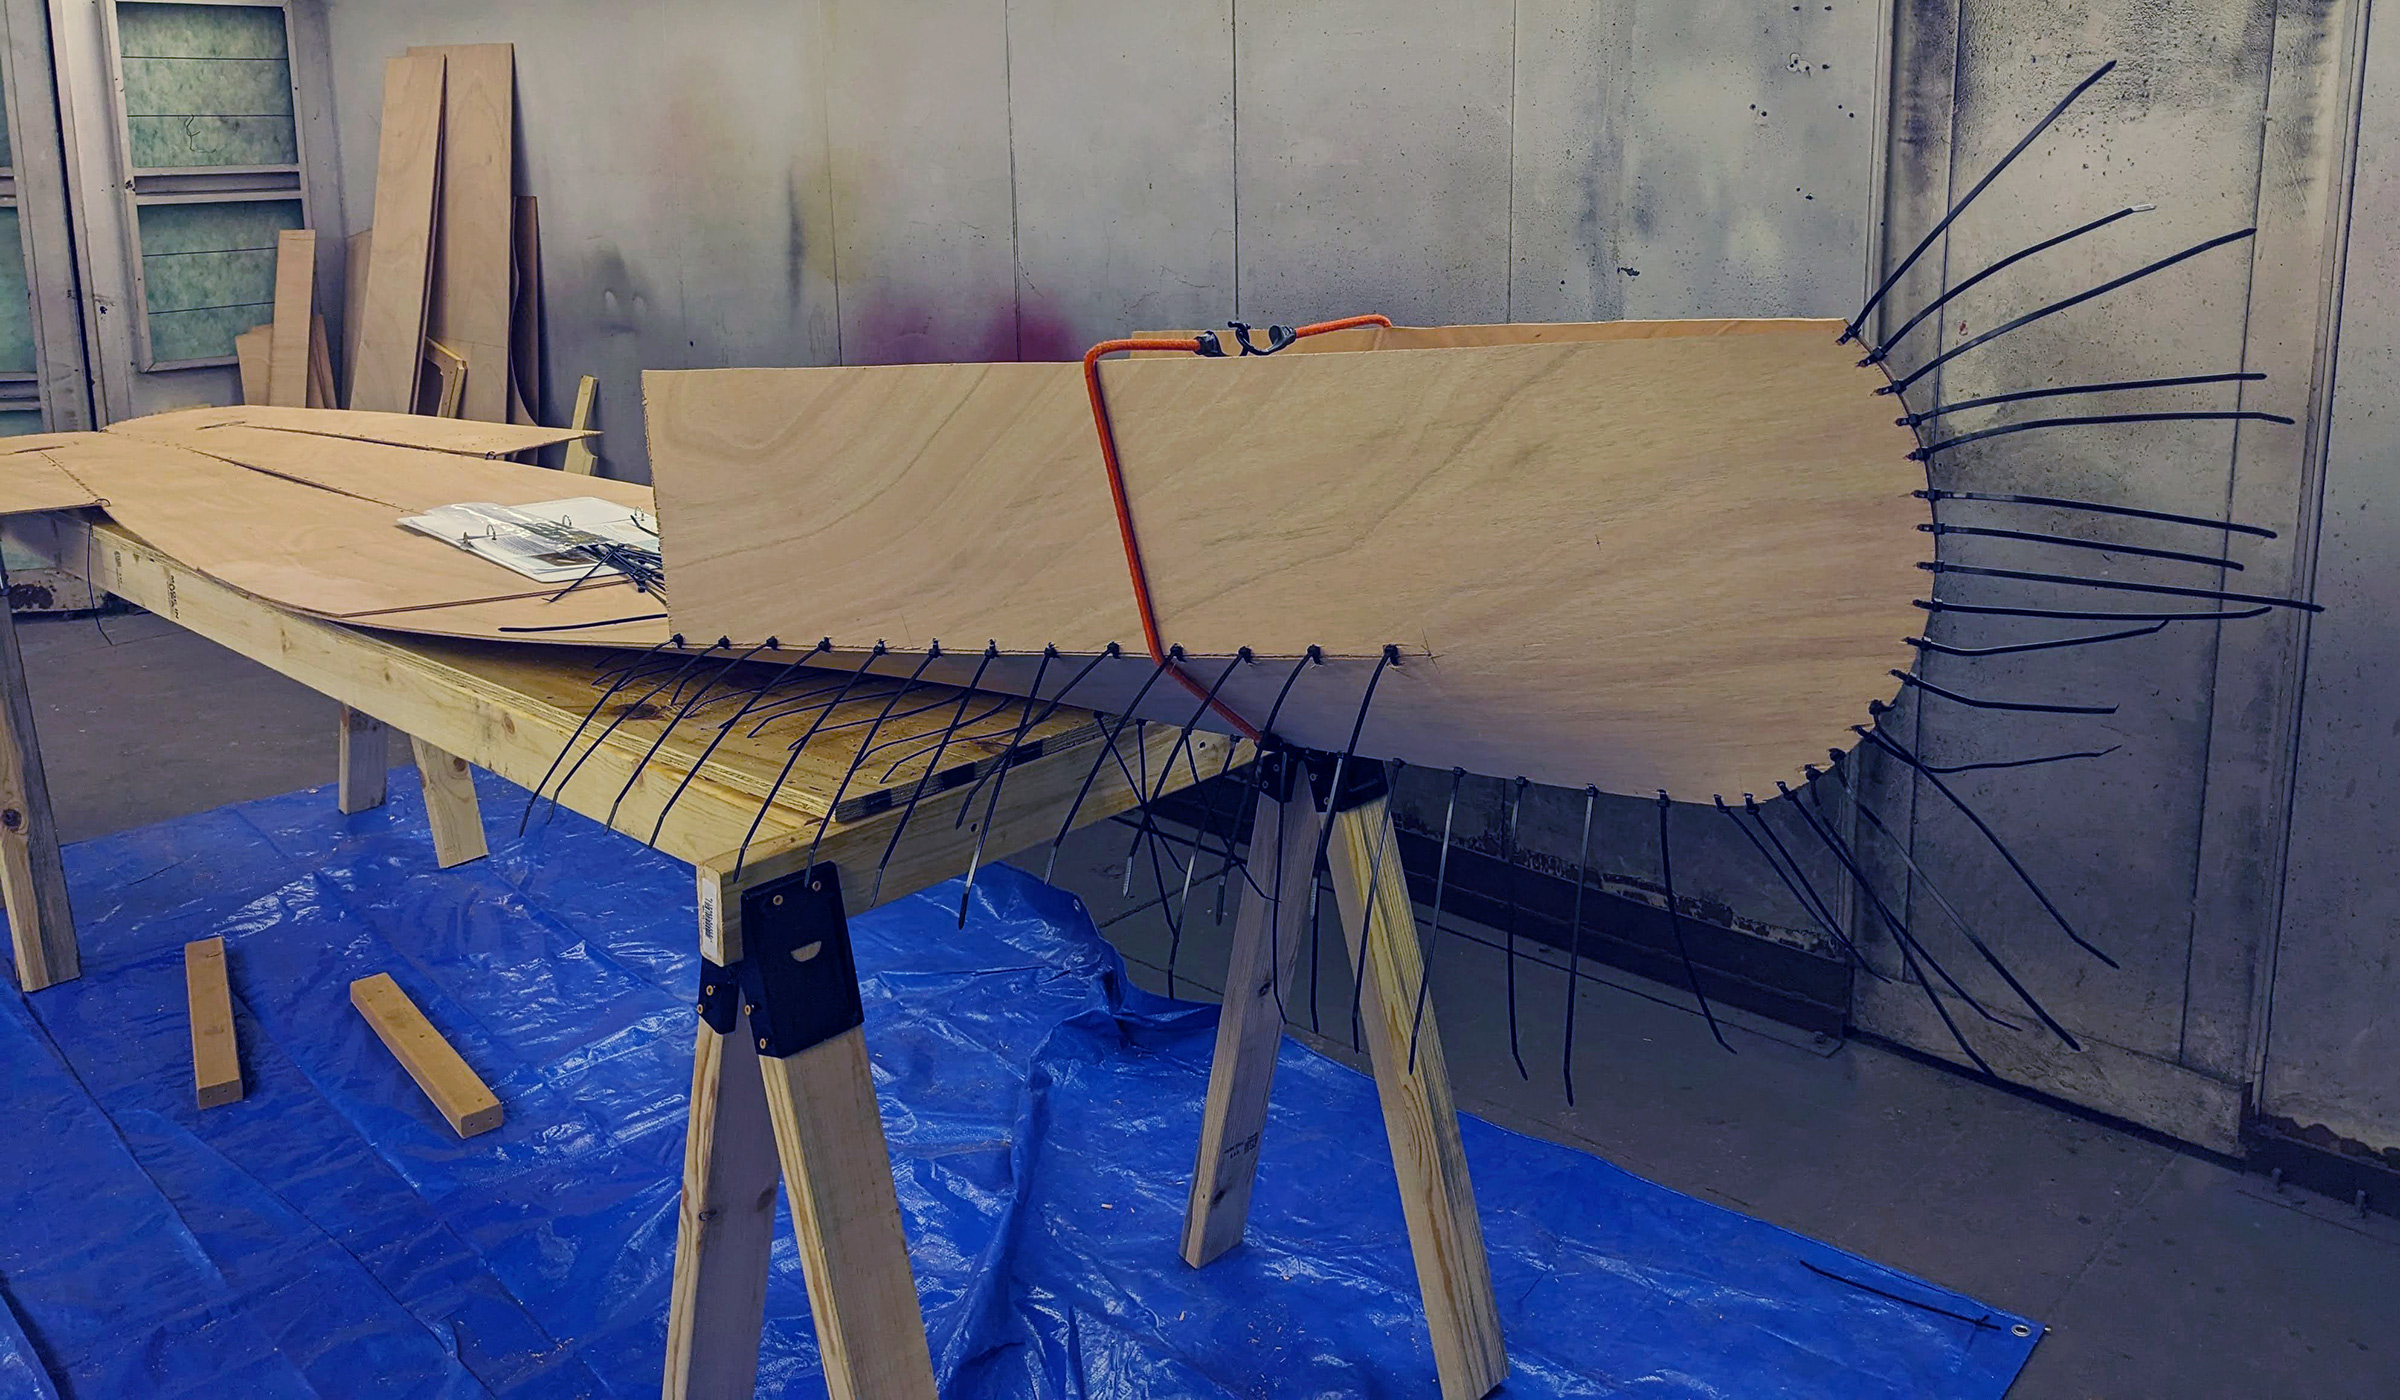
Stitch-and-glue construction often uses wire to close the seams, but zip ties make it easier to align the joined plywood edges.
The hull of the Hiwassee Wanderer requires three sheets of marine-grade 1⁄4″ plywood—fir, judging by the looks of the plywood in the photographs—but I opted to use 4mm okoume instead. I built the rest of the components from scrap materials I had on hand or wood purchased from a big-box lumberyard. When I had all my tools and materials gathered, I was ready to begin the build. I consider myself a competent woodworker but would never claim to be a master carpenter. I was familiar and comfortable with the tools required for this project and found it easy to construct the canoe without assistance.
The plans provide thorough instructions for drawing the hull shapes on the plywood. After the two end pieces are cut out they are butted together and the “floor block” is epoxied in place over the joint.
 Peter H. Thompson, www.phtpht.com
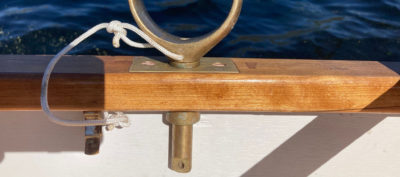
The outwales and the inwales (which are installed here in sections between thwarts and frames) were not indicated in the plans but reinforce the sheer and make the canoe easier to grip from anywhere along its length.
Shaping the hull with the stitch-and-glue process was new to me, and as I slowly ratchet-strapped the flat assembled panels I was surprised at how they curled up to take the shape of the canoe. As the seams between the bottom and sides closed, they formed the hard chines amidships and forced curves into the ends. Working slowly while tightening the zip ties that close the seams helps ensure even alignment of the joined edges. Using zip ties was easy and much more efficient than twisting copper wire. A friend who had built her first dinghy told me that using copper wire to stitch the seams together was the hardest part of the process.
Two slightly curved rectangular plywood panels measuring 63 1⁄2″ × 11″ fill the gaps on the sides of the hull. They’re zip-tied to the bottom panel at the chine and butt-blocked on their ends.
 Peter H. Thompson, www.phtpht.com
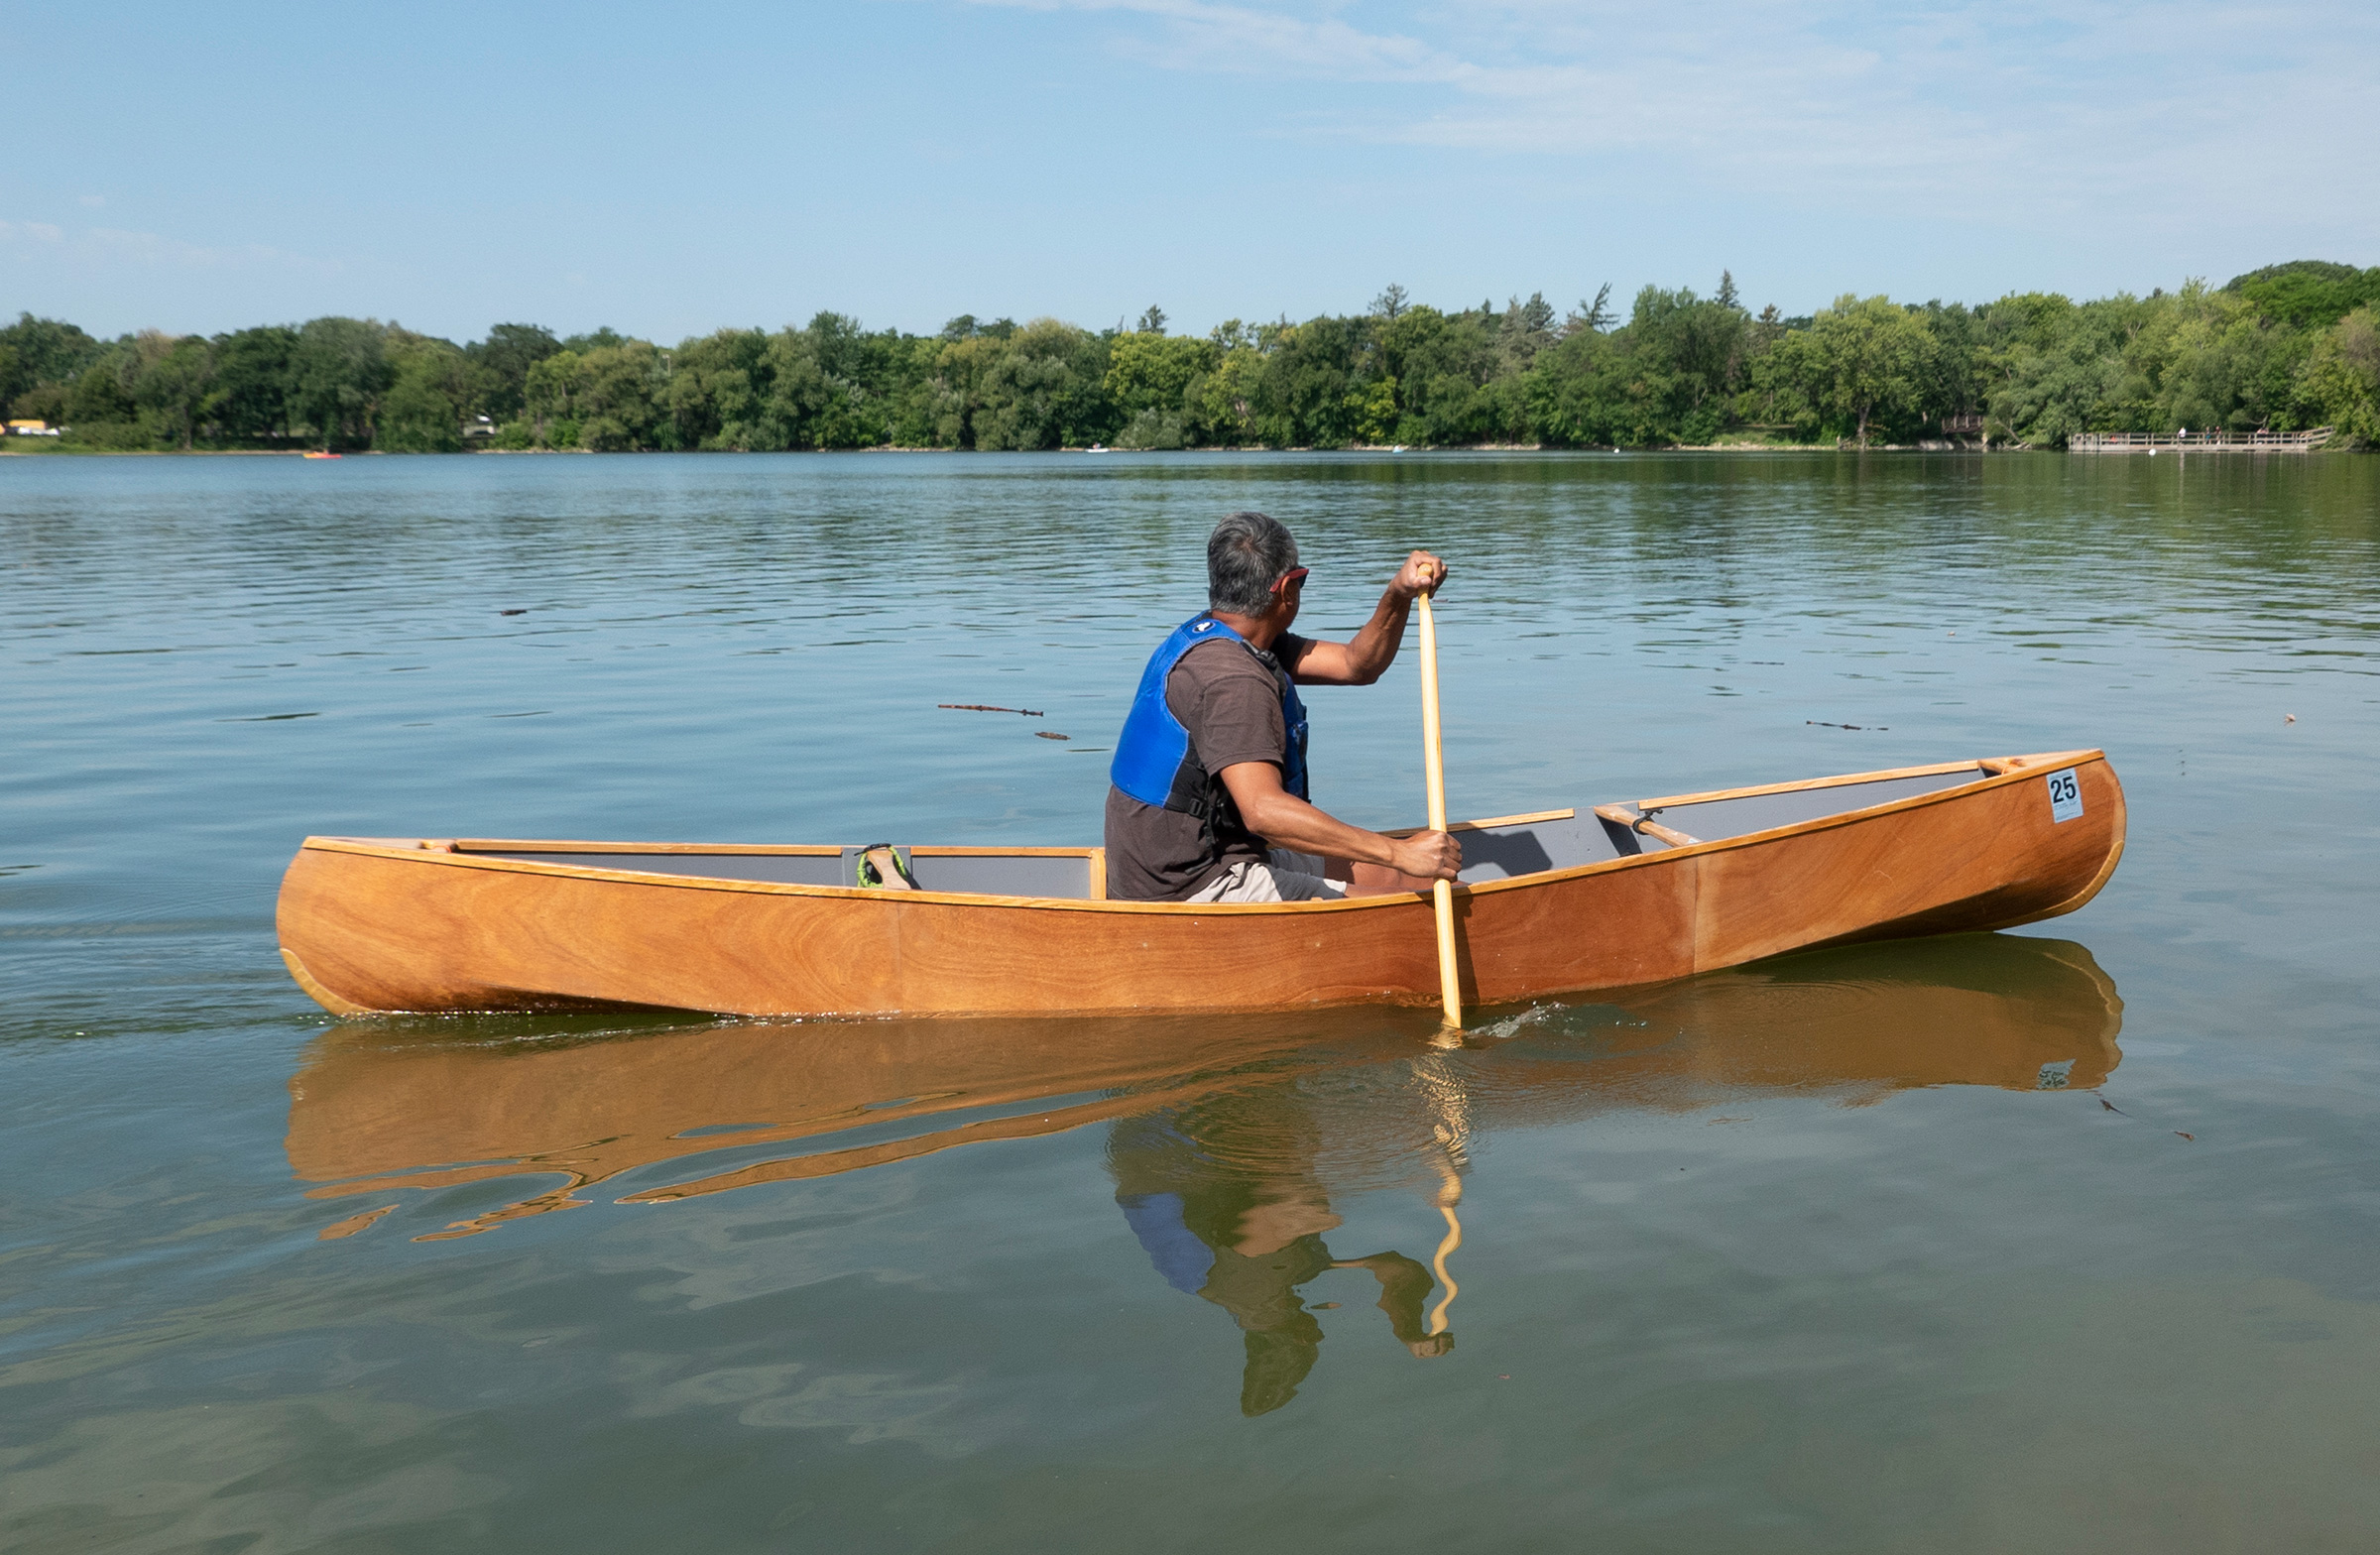
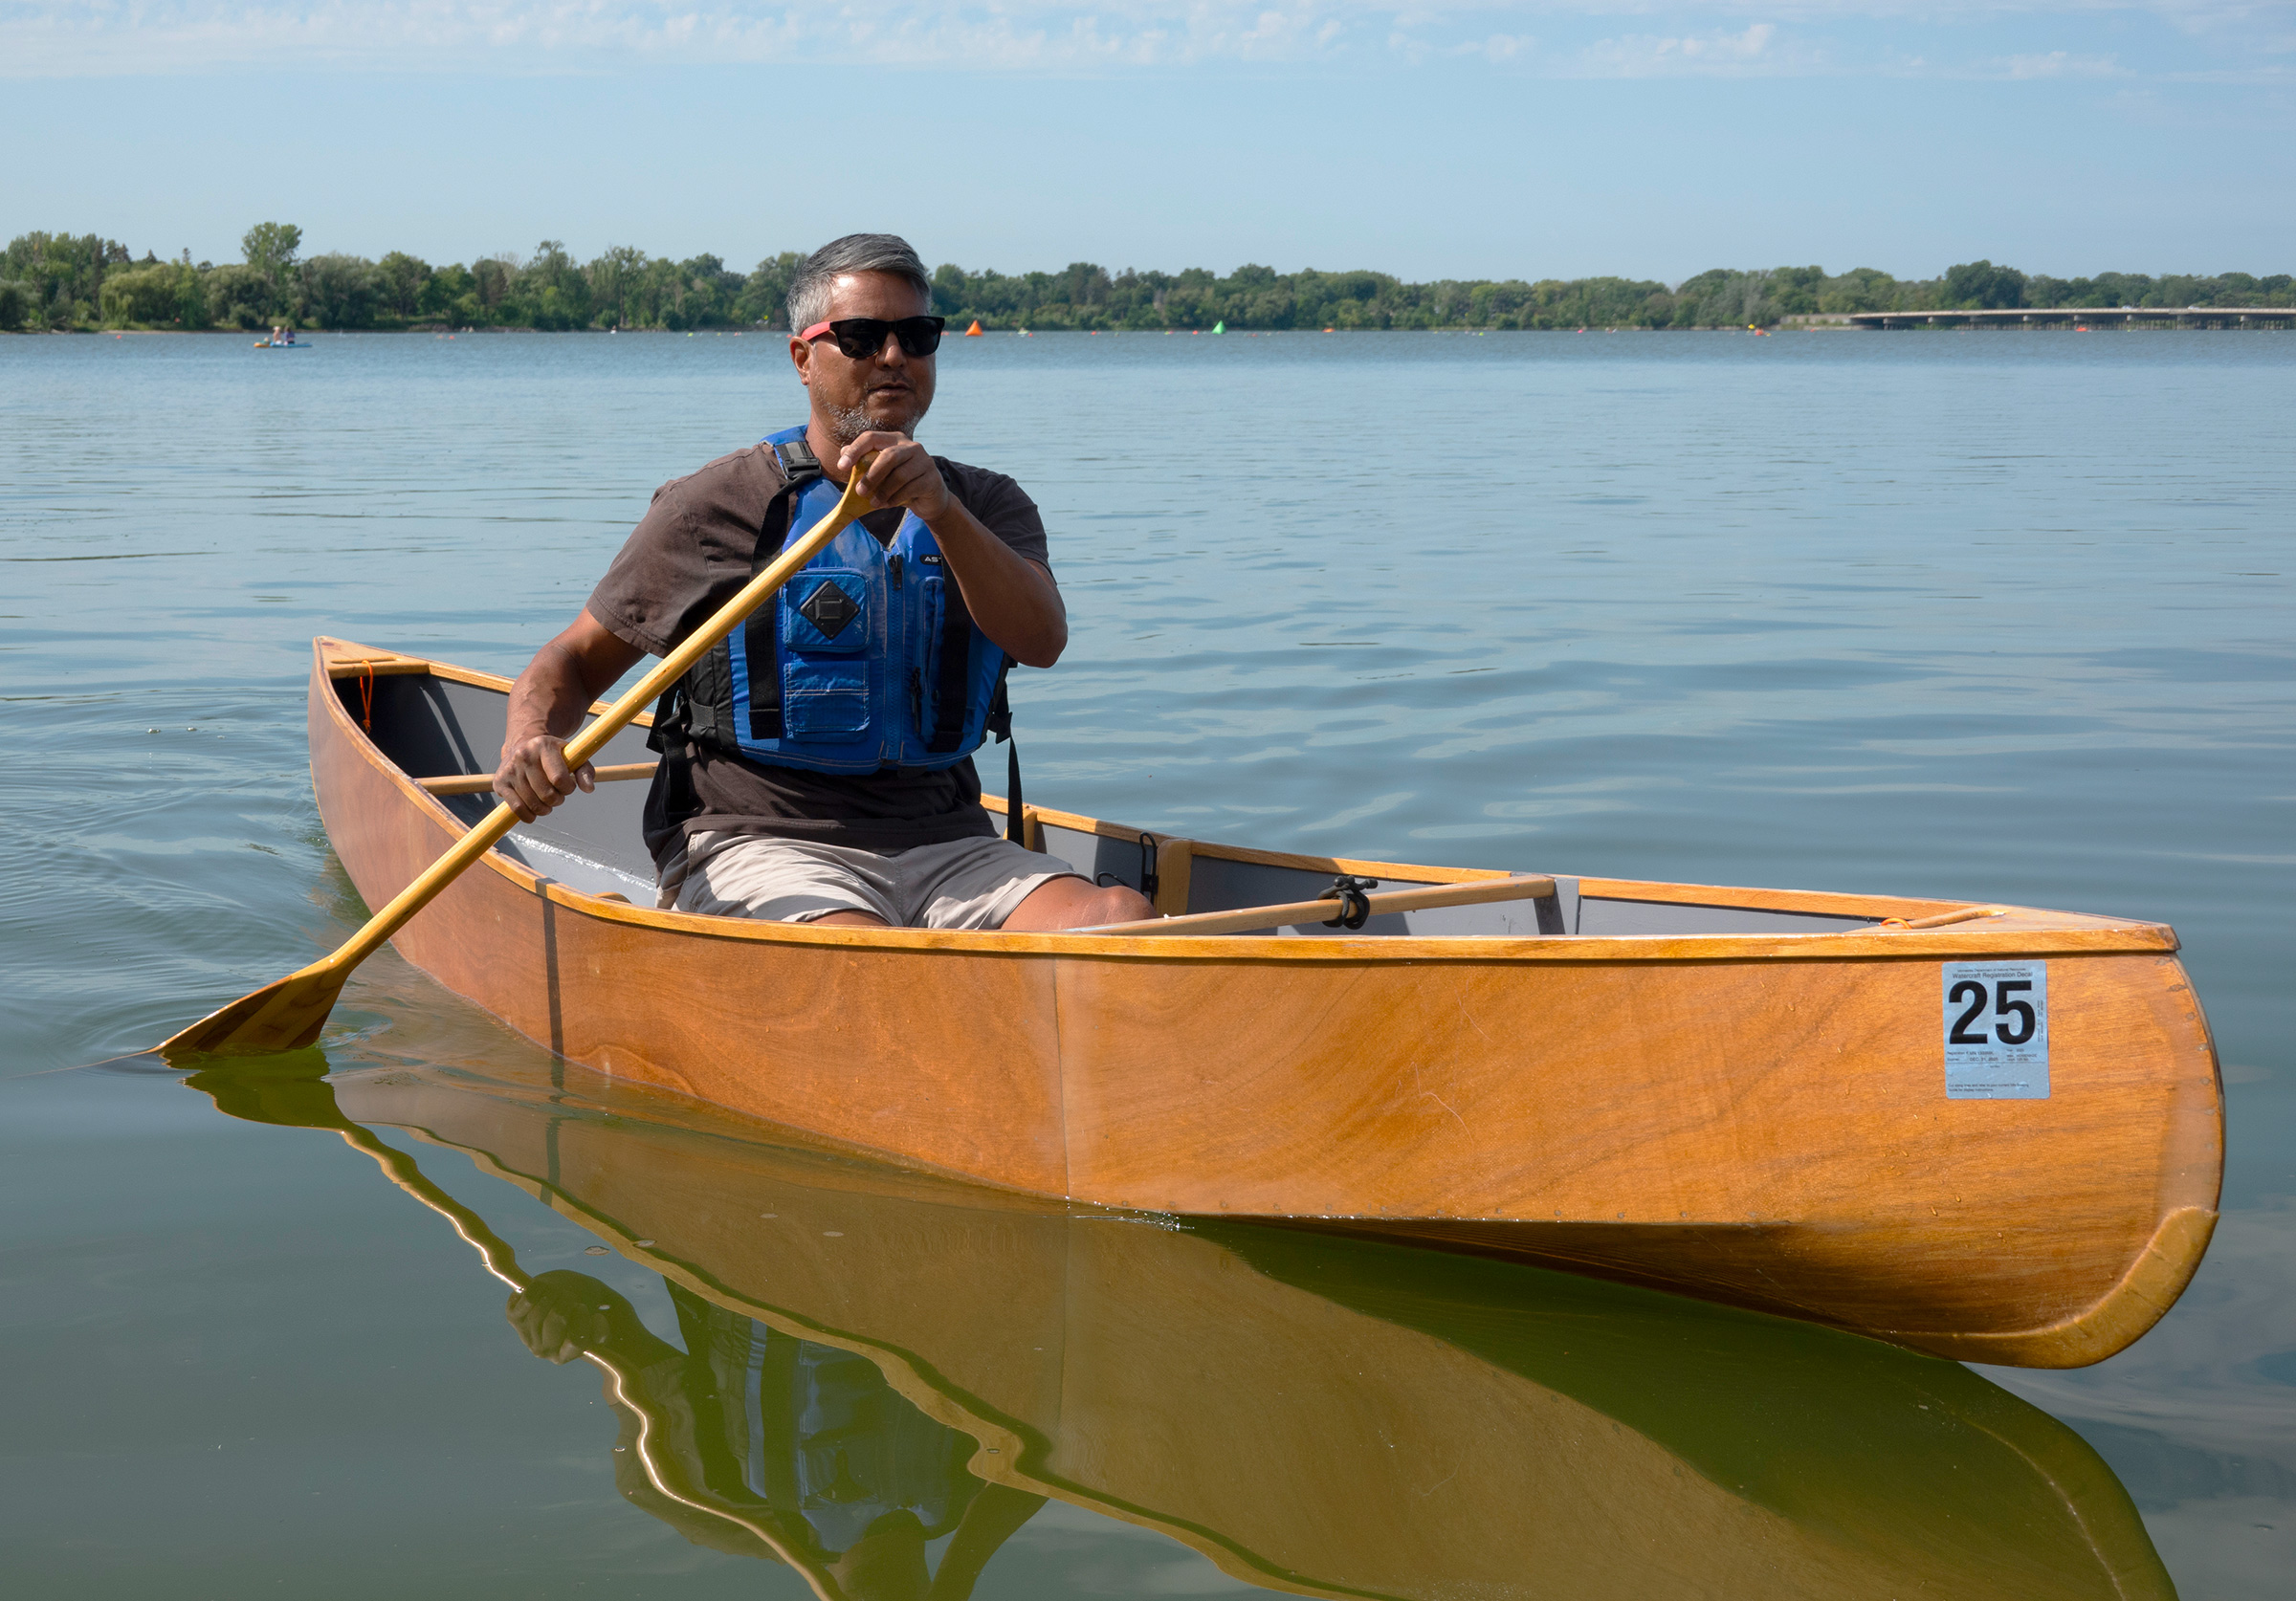
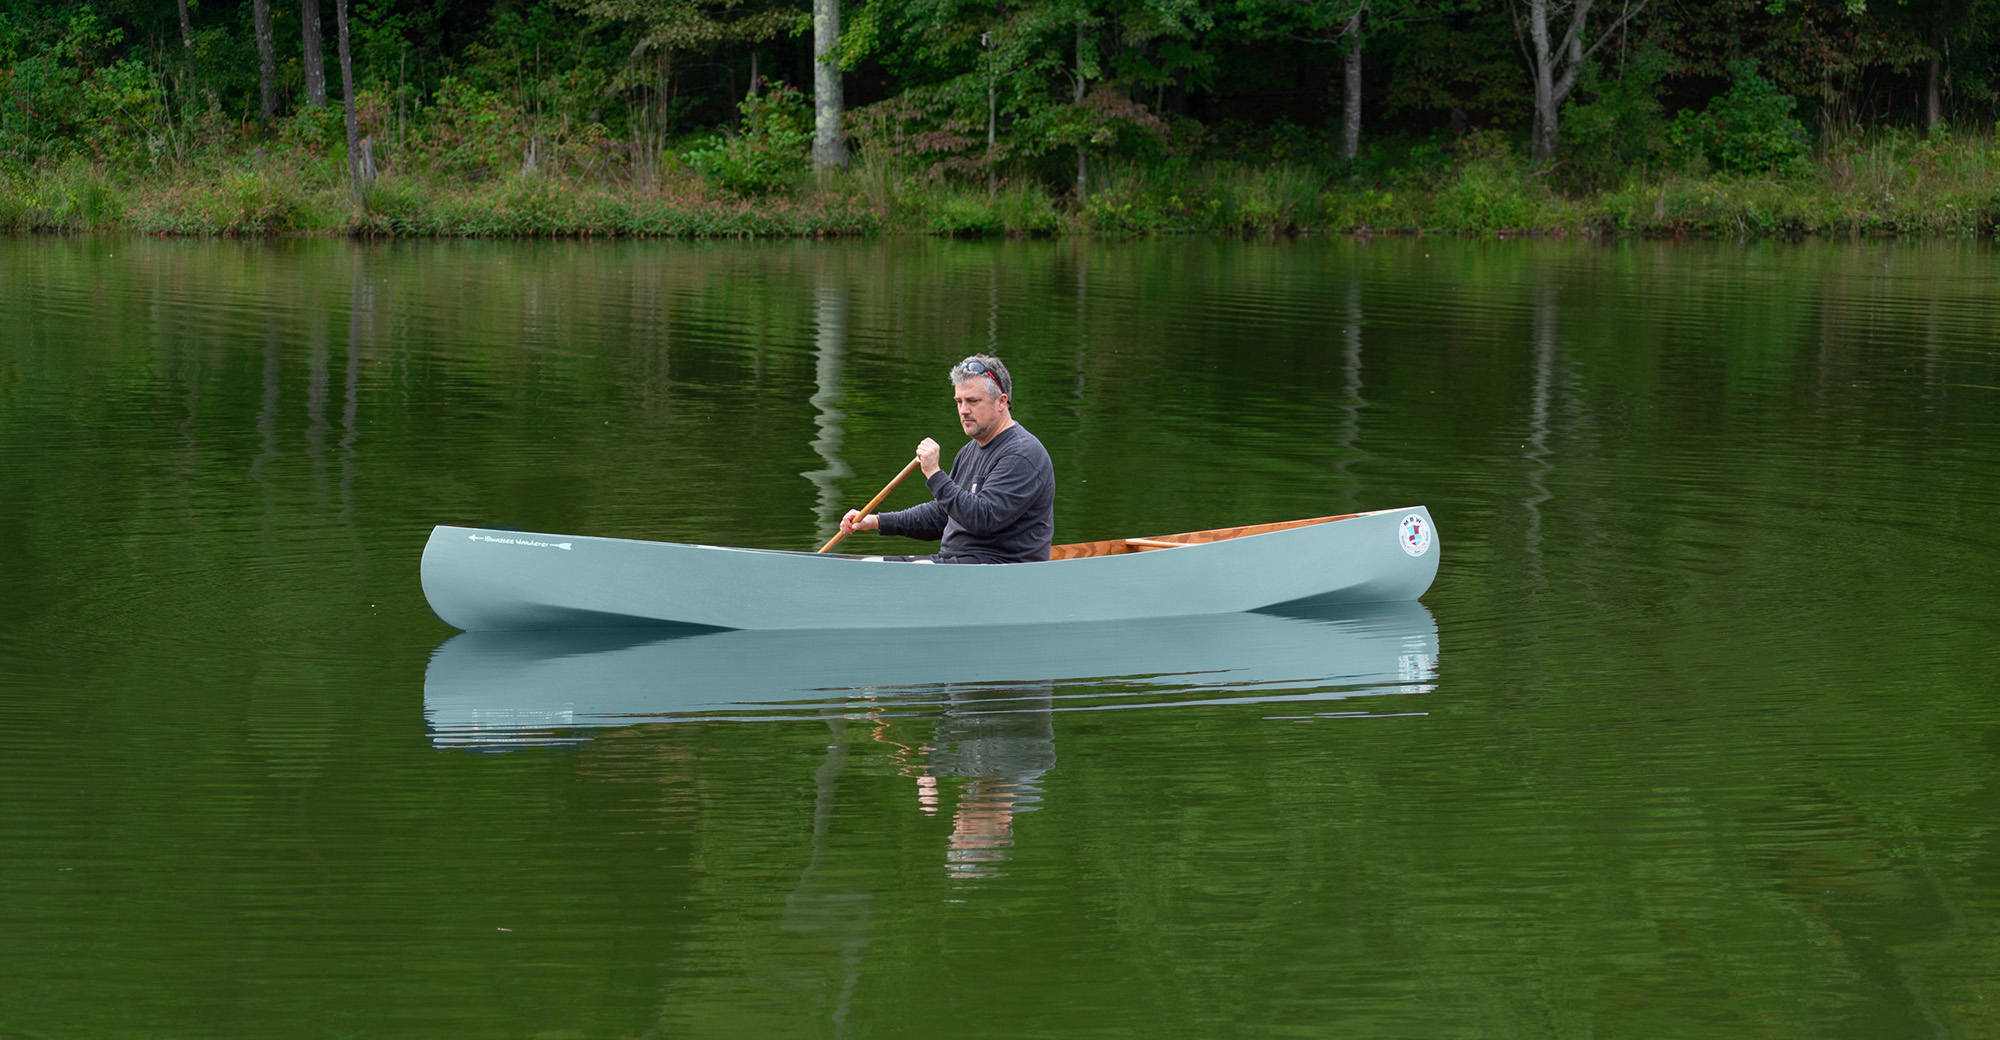
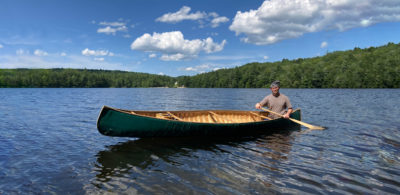
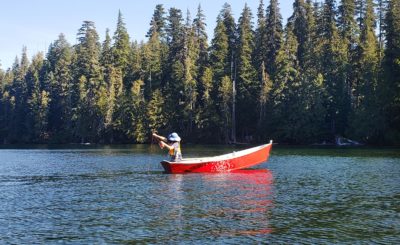
With the author aboard, the Wanderer sits lightly on the water and its wide bottom provides good stability.
After the hull had taken shape and all the zip ties were in place I tacked the seams with epoxy thickened with fumed silica. It took some trial and error to get the ratio to achieve the right viscosity, and my skills improved as the project progressed. After the epoxy had cured, I cut and removed the zip ties, applied fillets of thickened epoxy to the chines inside the hull, and filled the gaps outside. Finally, after sanding them smooth, I applied fiberglass tape to the chines, inside and out.
The instructions suggest “the builder may choose to fiberglass the entire hull and/or encapsulate it in 2 or 3 coats of marine epoxy for increased water resistance and added durability.” I sheathed the exterior with fiberglass and epoxy. I installed the breasthooks, thwarts, frame, and the wood-slat seat (woven webbing is an option) as directed by the instructions but held off on installing the keel to see how the canoe would handle without it.
 Peter H. Thompson, www.phtpht.com
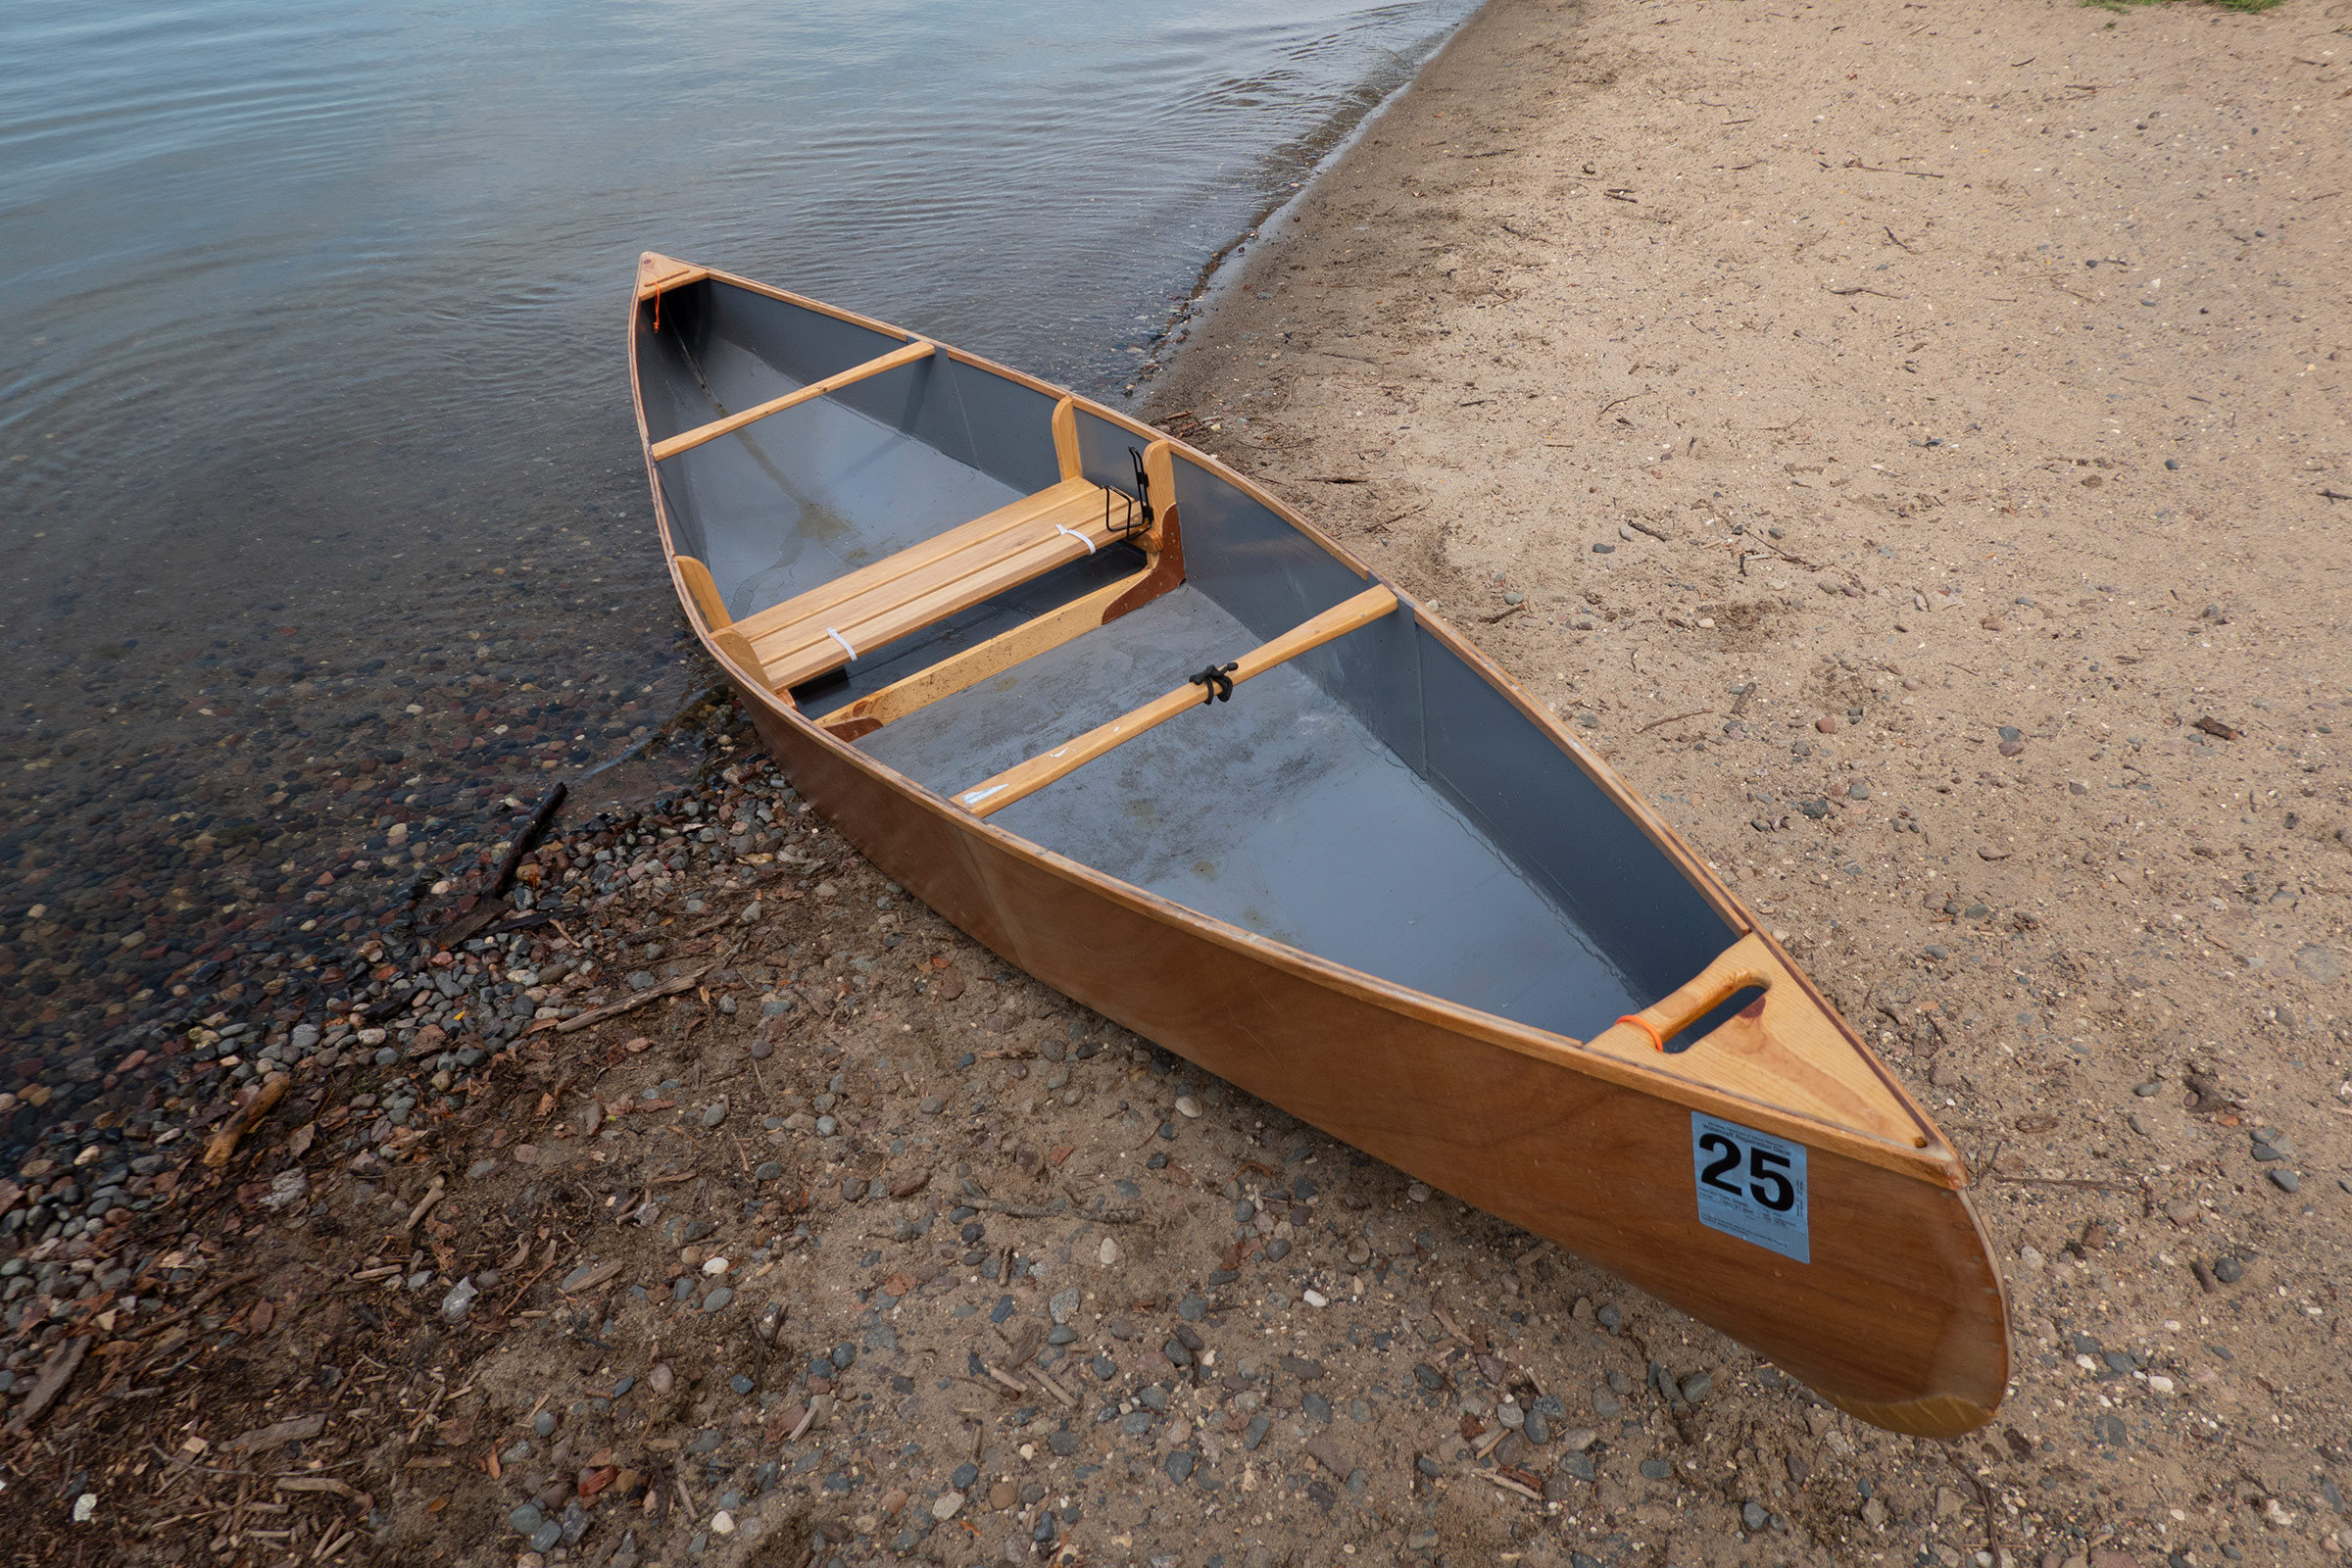
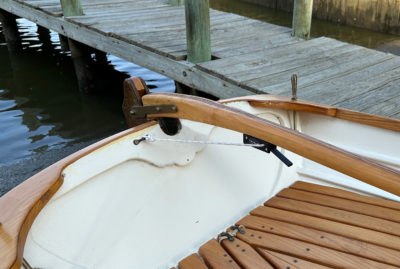
The raised seat makes for a comfortable paddling position and facilitates getting in and out of the canoe.
I finished the canoe in roughly 100 hours over three weeks and I think most builders, even novices, should be able to take on this project without too much difficulty. If you want to varnish the plywood, slow down, as all the imperfections caused by hastily done work will show. You can prolong the enjoyment of the process by reducing the urge to cut corners.
 Mike Hoyt
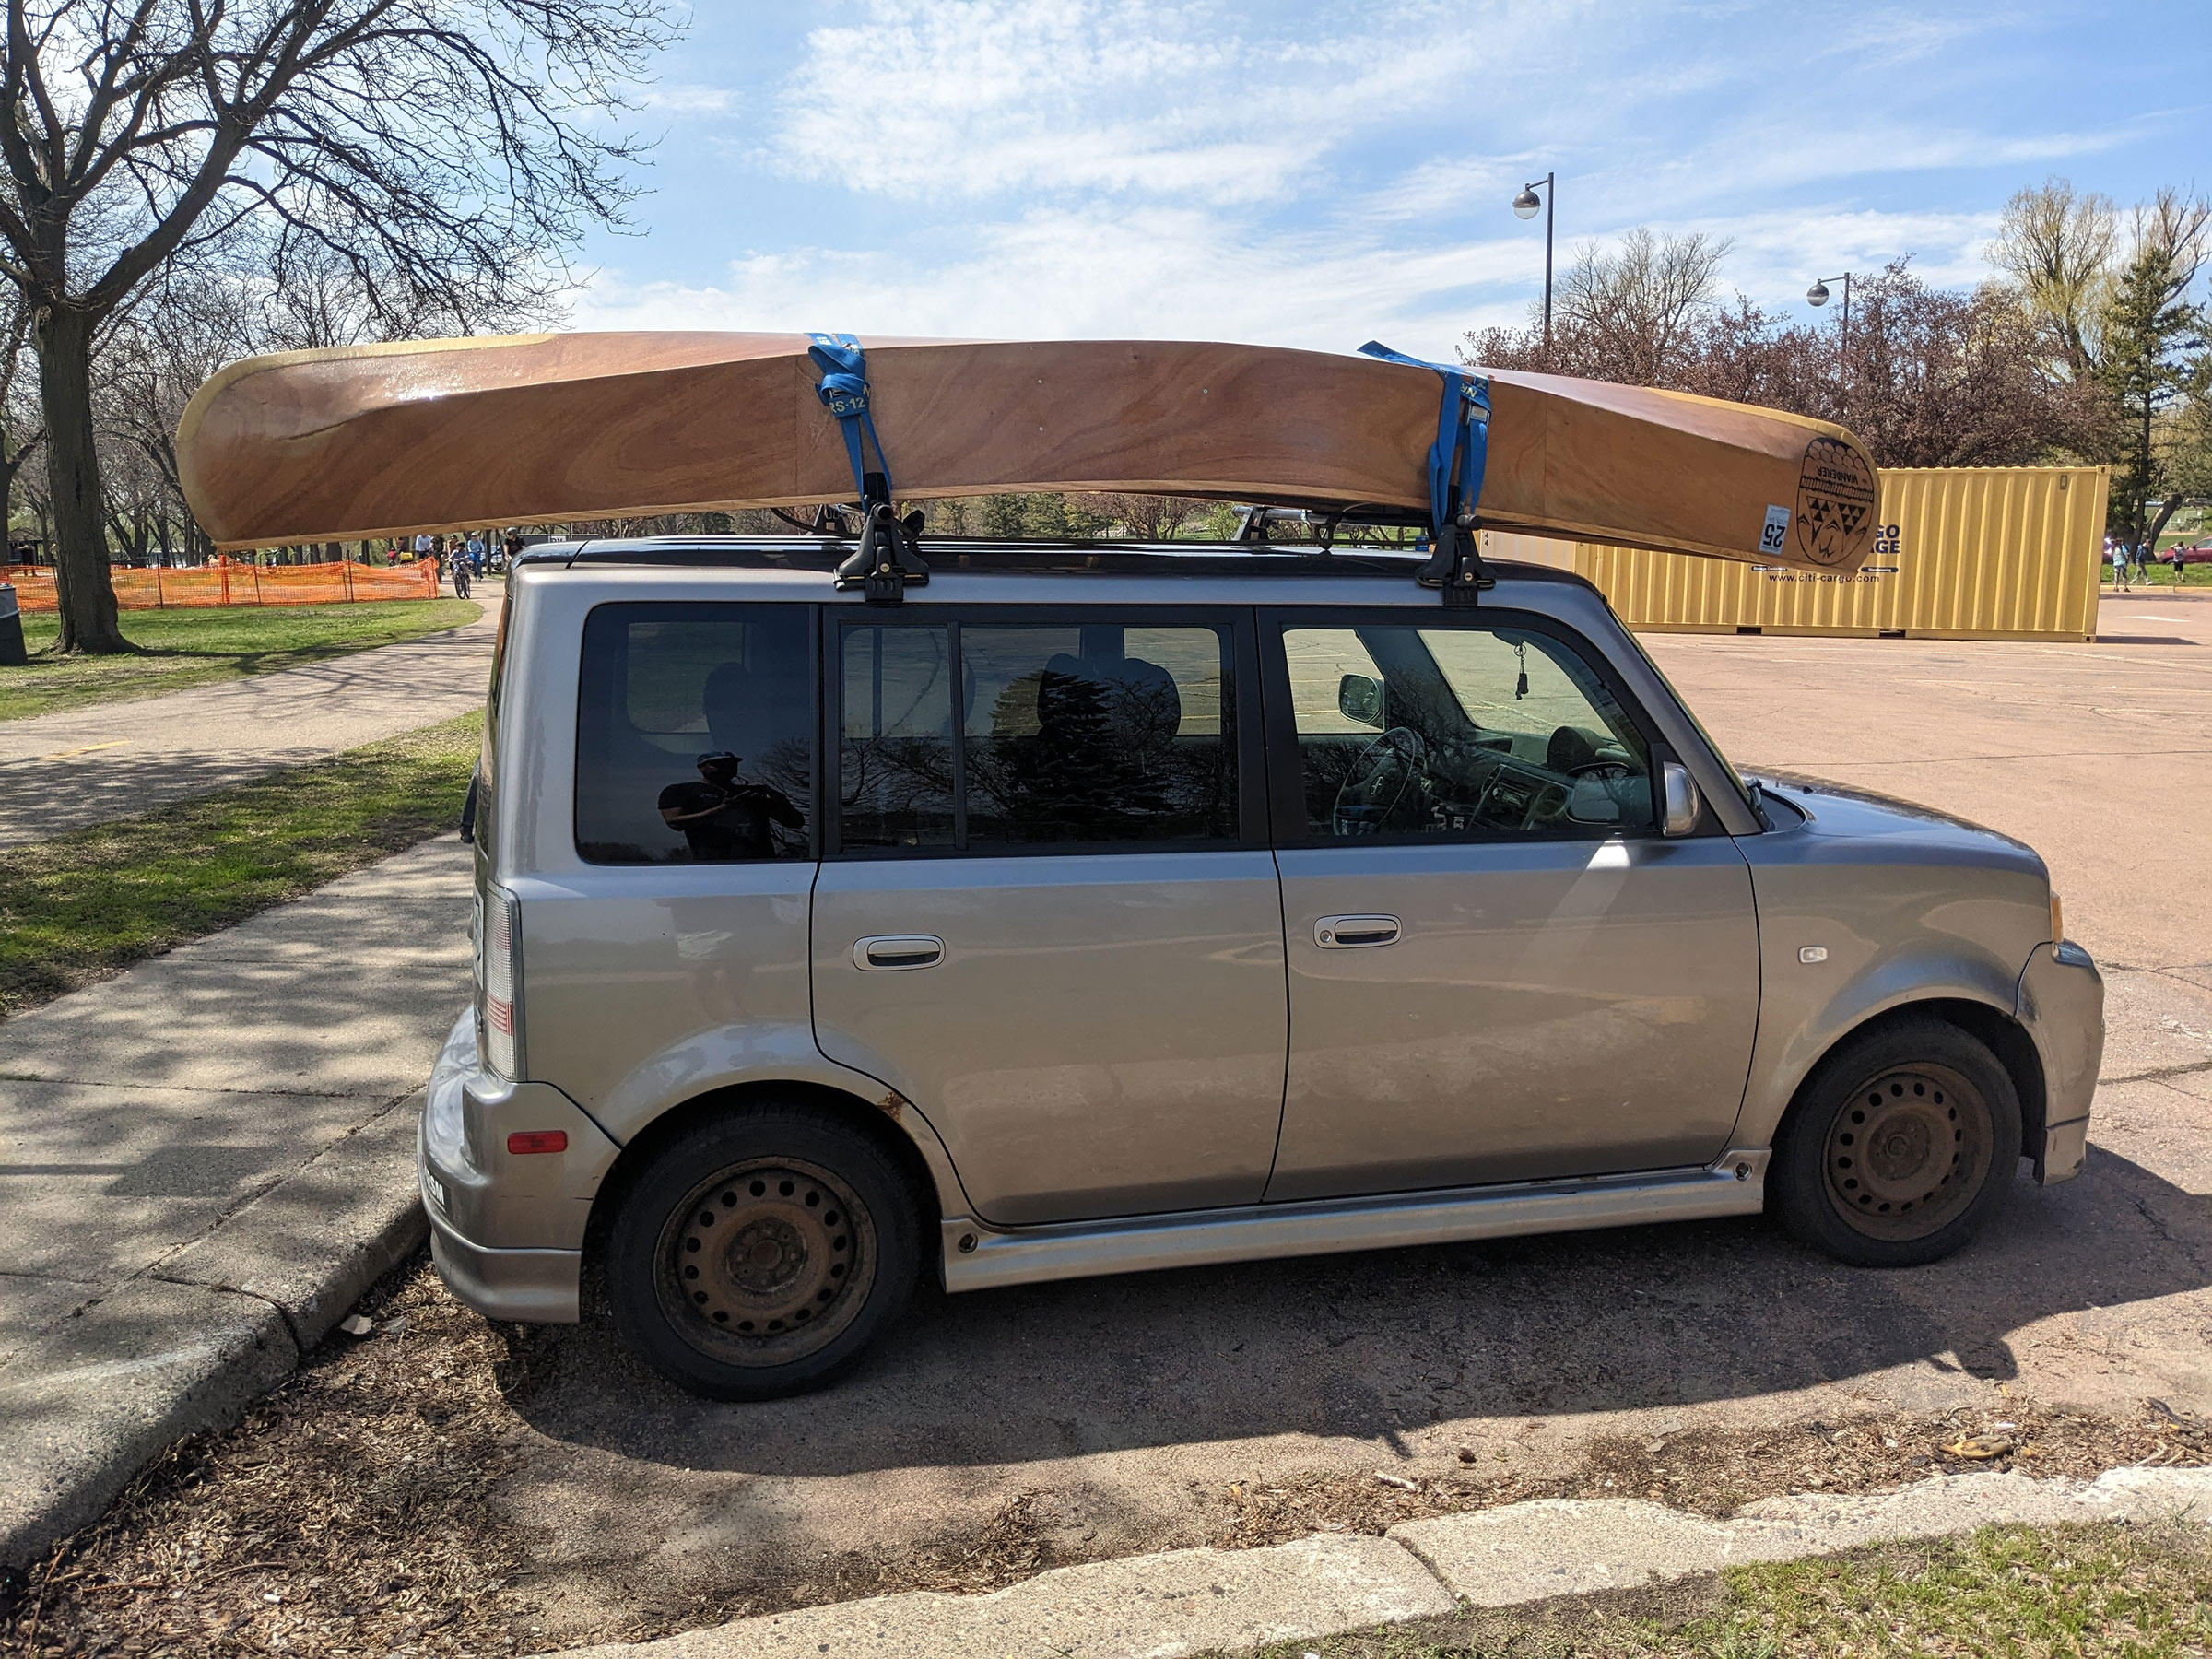
The Wanderer can be easily lifted on and off roof racks. The Kevlar skid plates applied to the ends are not in the plans but offer strength and protection.
I took the canoe out on a local lake for my first test paddle. It was very easy to transport on my car’s roof rack and was light enough to portage, without a yoke, from the parking lot to shore without difficulty. The conditions were mild to moderate winds. Once afloat for the first time, I was impressed with the initial stability, an important characteristic in a solo canoe that I’d use for fishing. With no keel the canoe did not track as well as the tandem canoes with which I was familiar, but I attributed some of this to the canoe’s shorter length and ample rocker.
 Peter H. Thompson, www.phtpht.com
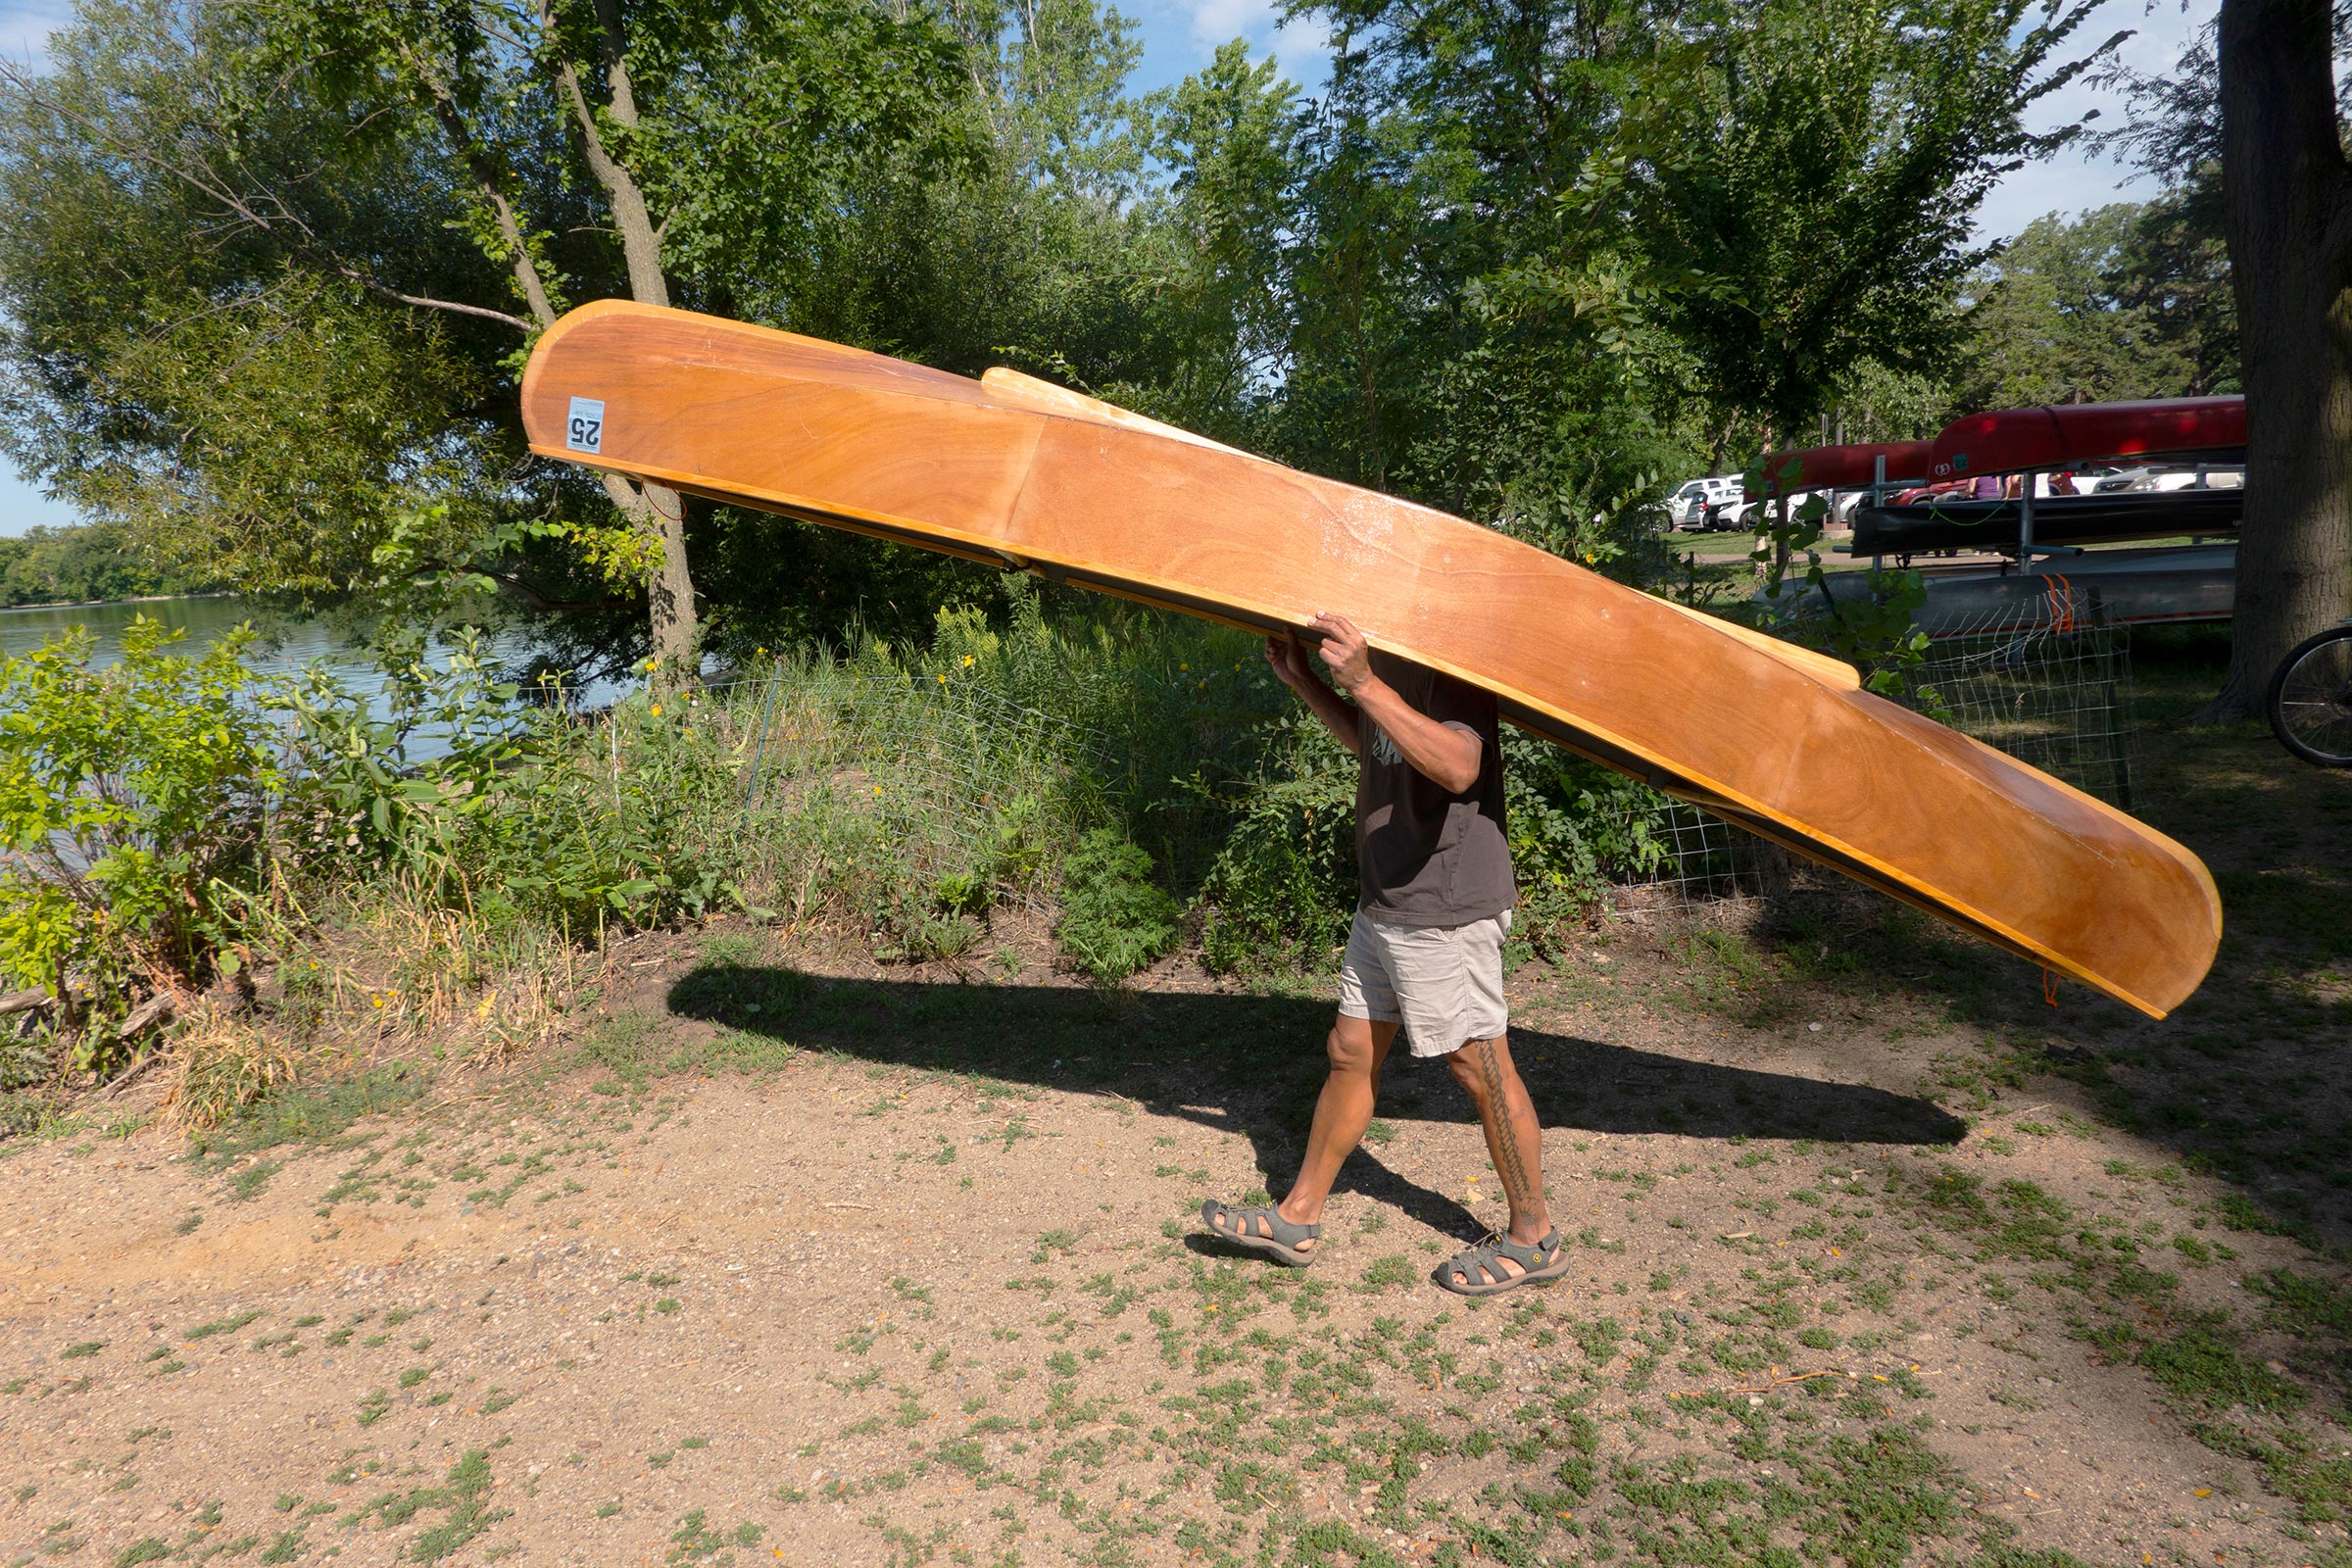
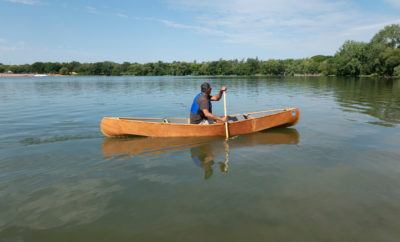
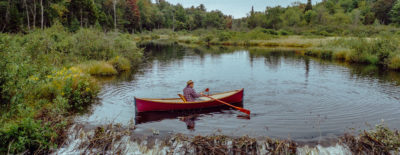
The light weight of the Wanderer makes it an easy carry. Here its partial-length keel is visible.
After about five days on the water and a few email exchanges with Michael about how the canoe was performing, I decided to add the keel. It was, after all, part of his original design and I figured it would help. After installing the keel, I took the canoe on a multi-day fishing trip on a small trout lake in northern Minnesota. For most of the time the conditions were mild, and I explored a body of water new to me at a casual pace. I was out of cellular service and there hadn’t been any bad weather forecast for the area, so I was caught off guard when a storm moved in. As the sky darkened and the winds picked up, I did my best to get off the water, but did not make it before being challenged by horizontal gusts of hail and whitecaps. It was not an ideal position to be in, but it did give me some assurance that the canoe had good stability. I got safely back to shore.
The addition of the keel did improve tracking, but not dramatically given the short waterline. I found that using a slightly longer paddle made my J-stroke more effective for course corrections by giving me more reach over the wide beam. I paddled for a day with a double-bladed kayak paddle, and it was easier to maintain a straight course with that than it was with the canoe paddle. Although I found the kayak paddle too cumbersome for use while fishing and trolling, if fishing is not a priority, I recommend using one with the Wanderer. The canoe maneuvers easily and can be rotated in place and repositioned quickly. When trolling I found it helpful to set the canoe across the wind so that its ample freeboard caught the gusts for a slow sideways drift.
 Michael Maddox
As designed, the sheer is unreinforced by inwales or outwales, keeping weight to a minimum.
The raised seat was among the reasons I chose the Wanderer. At my age, I don’t want to sit or kneel on the bottom of a canoe. The seat height is quite comfortable and affords a good upright paddling position, even after five hours on the water, and it helps with entry and exit at the shore. There is plenty of leg room and enough space between the seat and the forward thwart for my fishing gear.
 DeAnna Oliver Maddox
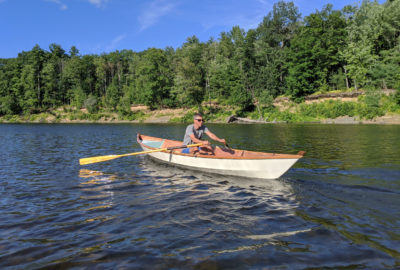
With designer Michael Maddox aboard, the Wanderer sits right on its lines with the stems touching the water.
After logging 30 to 40 hours in the Hiwassee Wanderer, I could happily confirm that it met all my initial criteria. It is extremely stable for solo fishing and provides ample room for gear. Compared to a tandem canoe it is much easier to throw onto the roof of my car for transport, which means I will get on the water more frequently and for more hours at a time. And it is certainly a more cost-effective option than purchasing a new or used solo canoe. Perhaps even more important, building it was a very enjoyable project.![]()
Mike Hoyt is a Kanaka Maoli currently living on Dakota homeland, Bde Ota Othunwe, Mni Sota Makoce, Minneapolis, Minnesota. He is an independent professional artist and the Creative Community Director at the Pillsbury House Theatre.
Hiwassee Wanderer Particulars
[table]
Length/12′ 6″
Beam/33″
Depth/11 1⁄2″
[/table]
The plan set for the Hiwassee Wanderer is available from Duckworks for $45.
Is there a boat you’d like to know more about? Have you built one that you think other Small Boats readers would enjoy? Please email us!

Join The Conversation
We welcome your comments about this article. To include a photo with your remarks, click Choose File below the Comment box.