Skipper and I have been pushed around by boat trailers since we were kids, and between the two of us we have been taking road trips with boats for over a century. Gearing up for this year’s boating, we got together with our friend Eddie, a professional trailer builder, to compare notes on best boat-trailering practices.
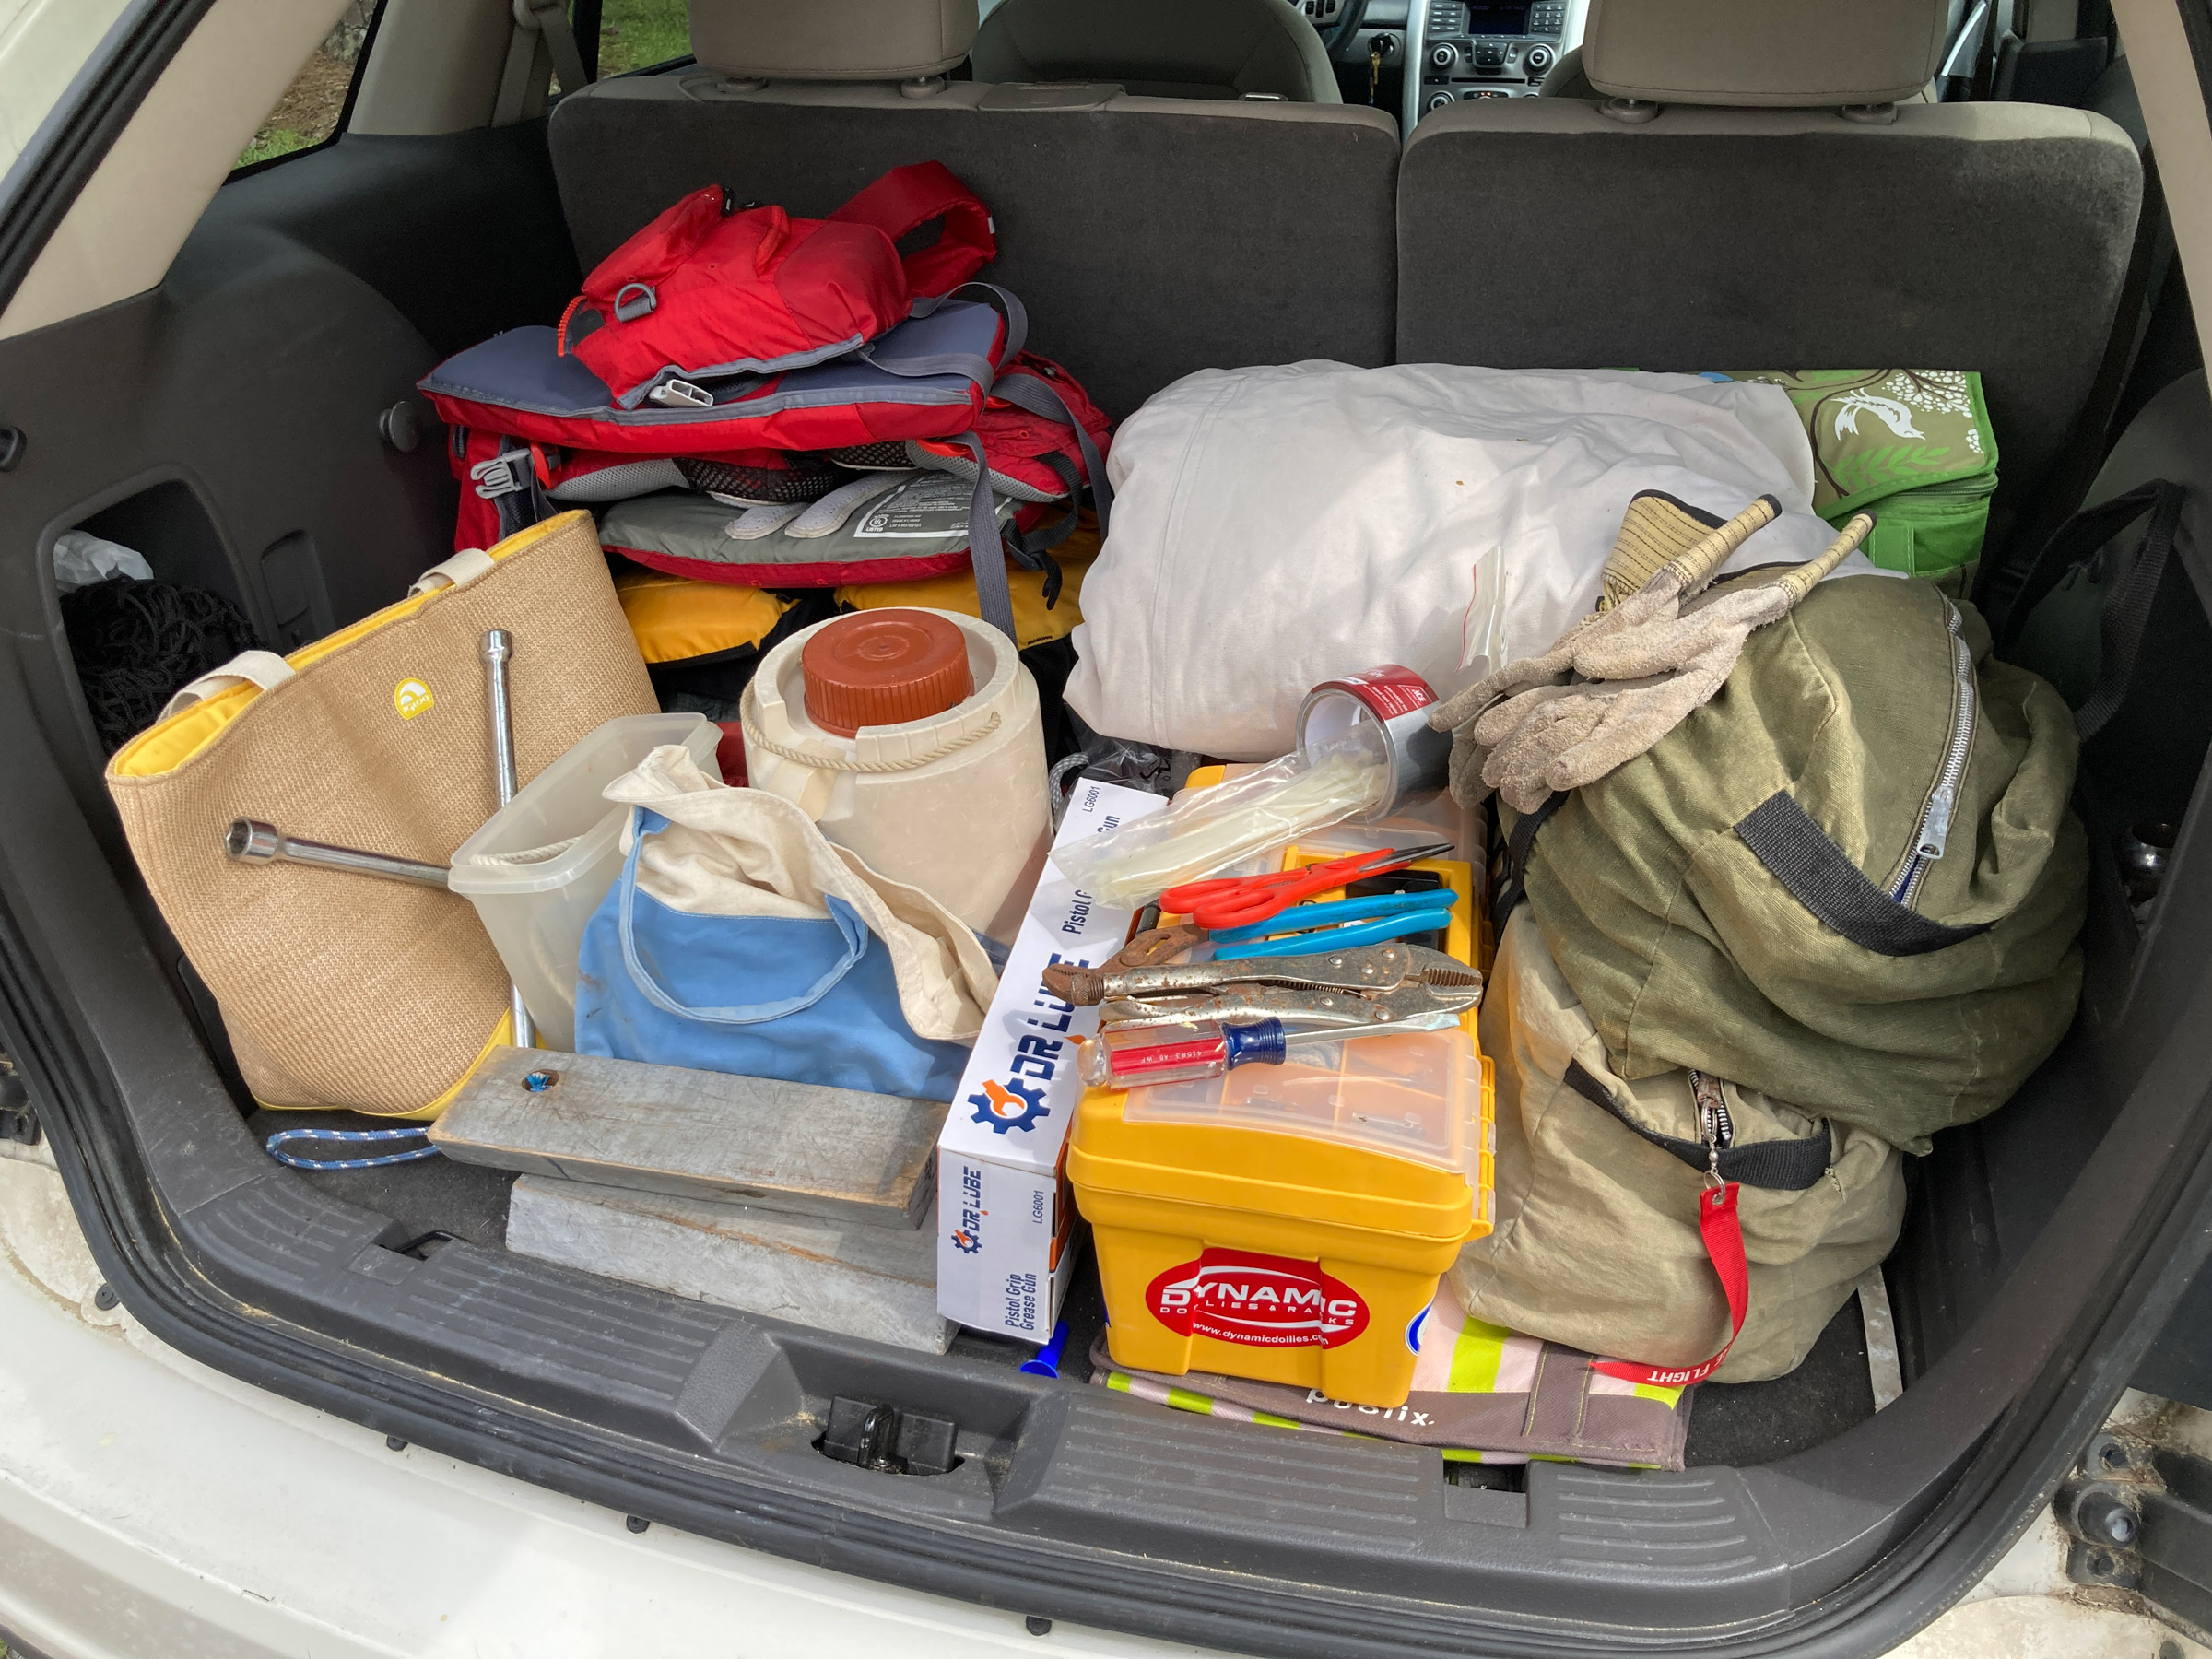
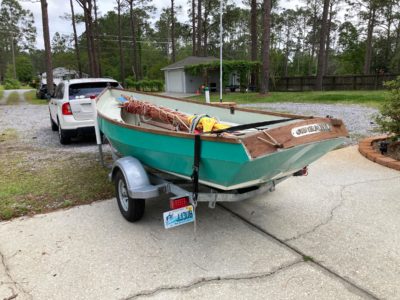
The item at the top of our list is keeping the boat light. While a boat for cruising can carry a lot of gear when it’s in the water, it should not be loaded down with excessive weight while on a trailer. Eddie has seen bent axles as a result of overloaded boats, and Skipper and I, with plenty of experience repairing damaged boats, know that lightly built hulls don’t tolerate the extra load. And, for the sake of the trailer, the combined weight of the boat, the gear it has aboard, and the trailer itself should not exceed the trailer’s total capacity, which is noted on the manufacturer’s tag. We load as much of our cruising gear as possible—especially the heaviest things like fresh water, anchors, and trolling-motor batteries—in the tow vehicle. Shifting the weight will ease the stress on the trailer, improve its performance on the road, and keep the boat and its gear from getting damaged. Trailers for small boats may have springs but not shock absorbers, so the boat and the gear will get a much bouncier ride than you do in the towing vehicle. The impact of the boat on the bunks or rollers and of the gear against the boat can cause damage.
 Photographs by the authors
Moving gear out of the boat and into the towing vehicle makes trailering safer. Along with the cruising gear we carry in the car is a set of tools for any roadside fixes the trailer might need.
The few items, such as rudders and oars, that are transported while on the cockpit sole get cushioned with beach towels. We use throwable cushions and our old PFDs as padding for the spars that ride in the boat and use docklines to tie them down. Sail ties secure the furled sails to keep them from flapping and wearing at freeway speeds. We use a transom-saver on our 15′ runabout’s outboard to keep its weight from straining the transom. When we trailer our 19′ sailboat with the motor in its inboard motorwell, we rig a line from the part of the transom that spans the well to the lower unit to reduce the effect of road bounce and stress on the motor mount. Centerboards should be secured and prevented from dropping in case whatever normally holds it retracted in the trunk fails. We have bunk rollers placed to support the keel at the middle to aft portion of the trunk slot to prevent the board from dropping down and leaving a trail of sawdust on the pavement. Locker and hatch lids should be locked or pinned lest they take flight on the freeway.
Full fuel tanks are heavy but not safe to carry in the passenger compartment of the towing vehicle; even the vapors coming from an empty can are unhealthy. Transporting them securely tied to a roof rack is advisable if the vehicle can accommodate them or consider carrying empty containers in the boat with a plan to fill them when you get close to the put in. Plastic containers will do less damage to the boat than metal gas cans.
Inflate the tires up to the maximum pressure indicated on the sidewalls. Air hoses at gas stations are inconvenient and often charge for the use, hand and foot pumps are impractical, so an electric inflator is a good investment in tire maintenance. Fill tires when they are cold, before you drive—the maximum indicated takes into account the increase in pressure due to hot weather and long highway drives. Check and fill the towing vehicle’s tires while you’re at it. Lug nuts usually stay secure as long as they have been properly torqued after a wheel change, but to be on the safe side, bring a lug-nut wrench along on the first tire check of the season.
Pull on the tops of the tires to check for loose bearings—there should be some play, but no more than 1/8″— and leave the window down for the first few miles of a trip to listen for a squeaky or crunchy bearing. It may need some grease. If it has the play required and grease doesn’t eliminate the noise, the bearing may be bad and unsafe on the road, especially at freeway speed. It’s best to head home and replace both bearings in that hub. (When one bearing fails, it usually heats up the grease, the grease fails, and then the other bearing is compromised.)
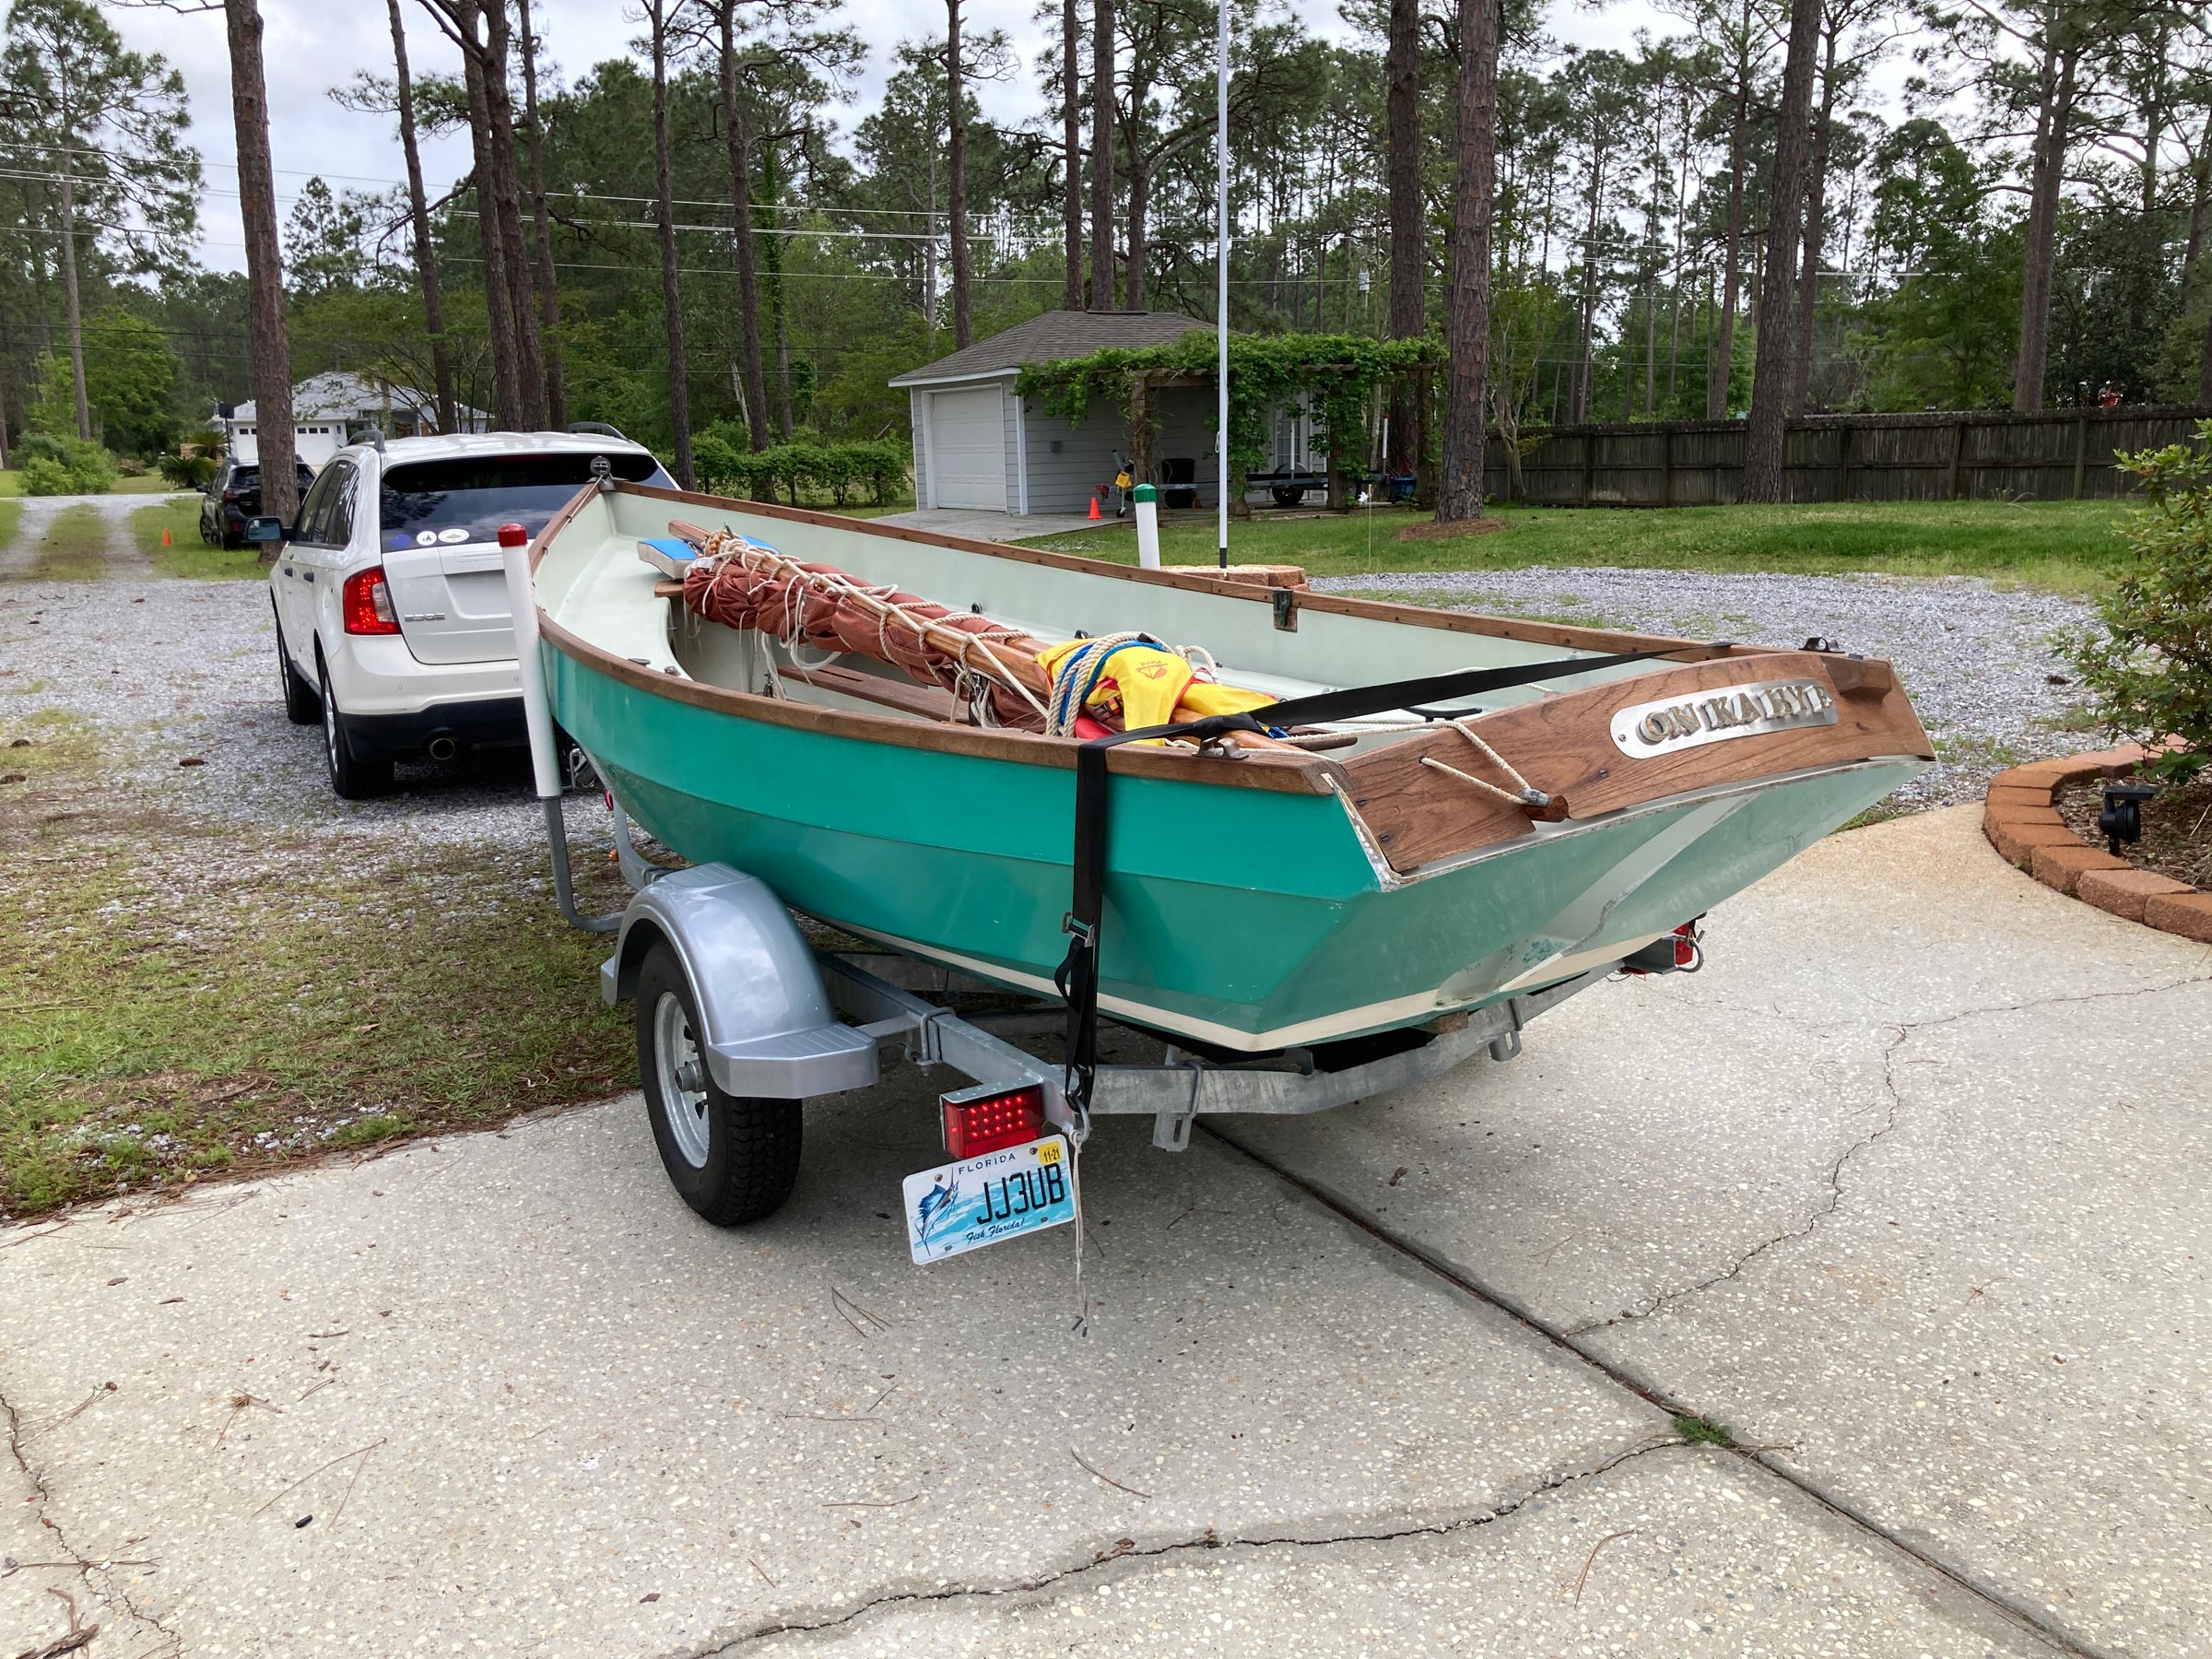
Ratchet-strap mechanisms are very powerful and should be used carefully to avoid damaging the boat.
Surprisingly, not all folks use boat straps aft or transom straps, but we recommend them. We use over-center straps or ratchet straps, because we have not had good experiences with the cam-buckle straps. Ratchet straps can exert more than 2,000 lbs of force; they should be snug but not so tight that they stress and crack the hull. We also tie a second line from the bow eye to the trailer bow stop to supplement the winch hook; some trailers come equipped with a safety chain for the bow eye.
At around 1 mile, 10 miles, and 100 miles, as well as whenever we stop, we check the boat and whatever is stowed aboard and tug all of the straps to see if they’ve loosened. We check the bearings and tire sidewall temperatures with a touch to make sure they’re not getting hot. We also check the lights.
A padlock on an outboard will help keep the mounting screws from vibrating loose on the road and discourage theft in a hotel parking lot; we use locks on trailer couplers as well. If you have a hitch receiver, a locking receiver pin or a cable lock from trailer to tow vehicle provides additional security against theft. A boat cover designed for trailering will prevent an open boat from becoming a swimming pool during a downpour, and provides a bit of security for any gear kept aboard during overnight stops. If you trailer an open boat without a cover, be sure the drain plug is removed, because there needs to be an escape path for water if it rains. Some folks have built and installed drain-plug keepers near the trailer coupler to serve as reminders to remove and install the plugs.
To deal with breakdowns on our long-range trips, we carry a grease gun, rags, either a spare set of grease-packed bearings or a hub with bearings already installed, along with the spare tire, a tire inflator, lug wrench, and jack. Our small toolkit contains boat registration, channel-lock pliers, screwdriver, duct tape, multipurpose tool, and is adorned with a BoatUS sticker with the toll-free number to call for tow assistance. We live large and pay for the BoatUS tow package that includes both water recovery and land towing for not only the boat trailer, but for the tow vehicle as well. AAA and Good Sam also offer boat-trailer towing with RV membership options.
Plan for a slower trip than you’d make without a trailer; it will be easier on the boat and easier on the nerves. Once in transit, Google Maps on your smart phone, your vehicle nav system, or other GPS driving aids will show real-time delays that factor into tactical trip planning. Maneuvering in tight spots requires skill; in rest stops we usually head to the trucks-with-trailers side for the added room and exiting without backing. At stores and gas stations we head for places where there aren’t any other cars. If we do get in a tight spot, instead of backing down or trying to turn the entire rig around, we’ll unhook the trailer, turn vehicle and trailer separately, hook everything back up, and be on our way.
As a former Marine aviator and a current Airline Transport Pilot, I have always had checklists to get me safely from place to place. Having one for trailering assures that Skipper and I arrive at the launch with boat and trailer in good shape.![]()
For more information, see the articles on trailer tires, bearings, guide posts, LED lights, and a tire inflator.
“Clark” Kent and Audrey “Skipper” Lewis mess about with their small armada of 15 boats and four trailers. Their boat-trailer trips have included hauls from the Gulf Coast to the Pacific and back, and up to the Great Lakes. Next stop, the Chesapeake. A sample checklist can be found on their blog, Small Boat Restoration.
Eddie English of Milton, Florida, owns and operates Eddie English Co., Inc. creating custom boat trailers for the past three decades.
Editor’s Note
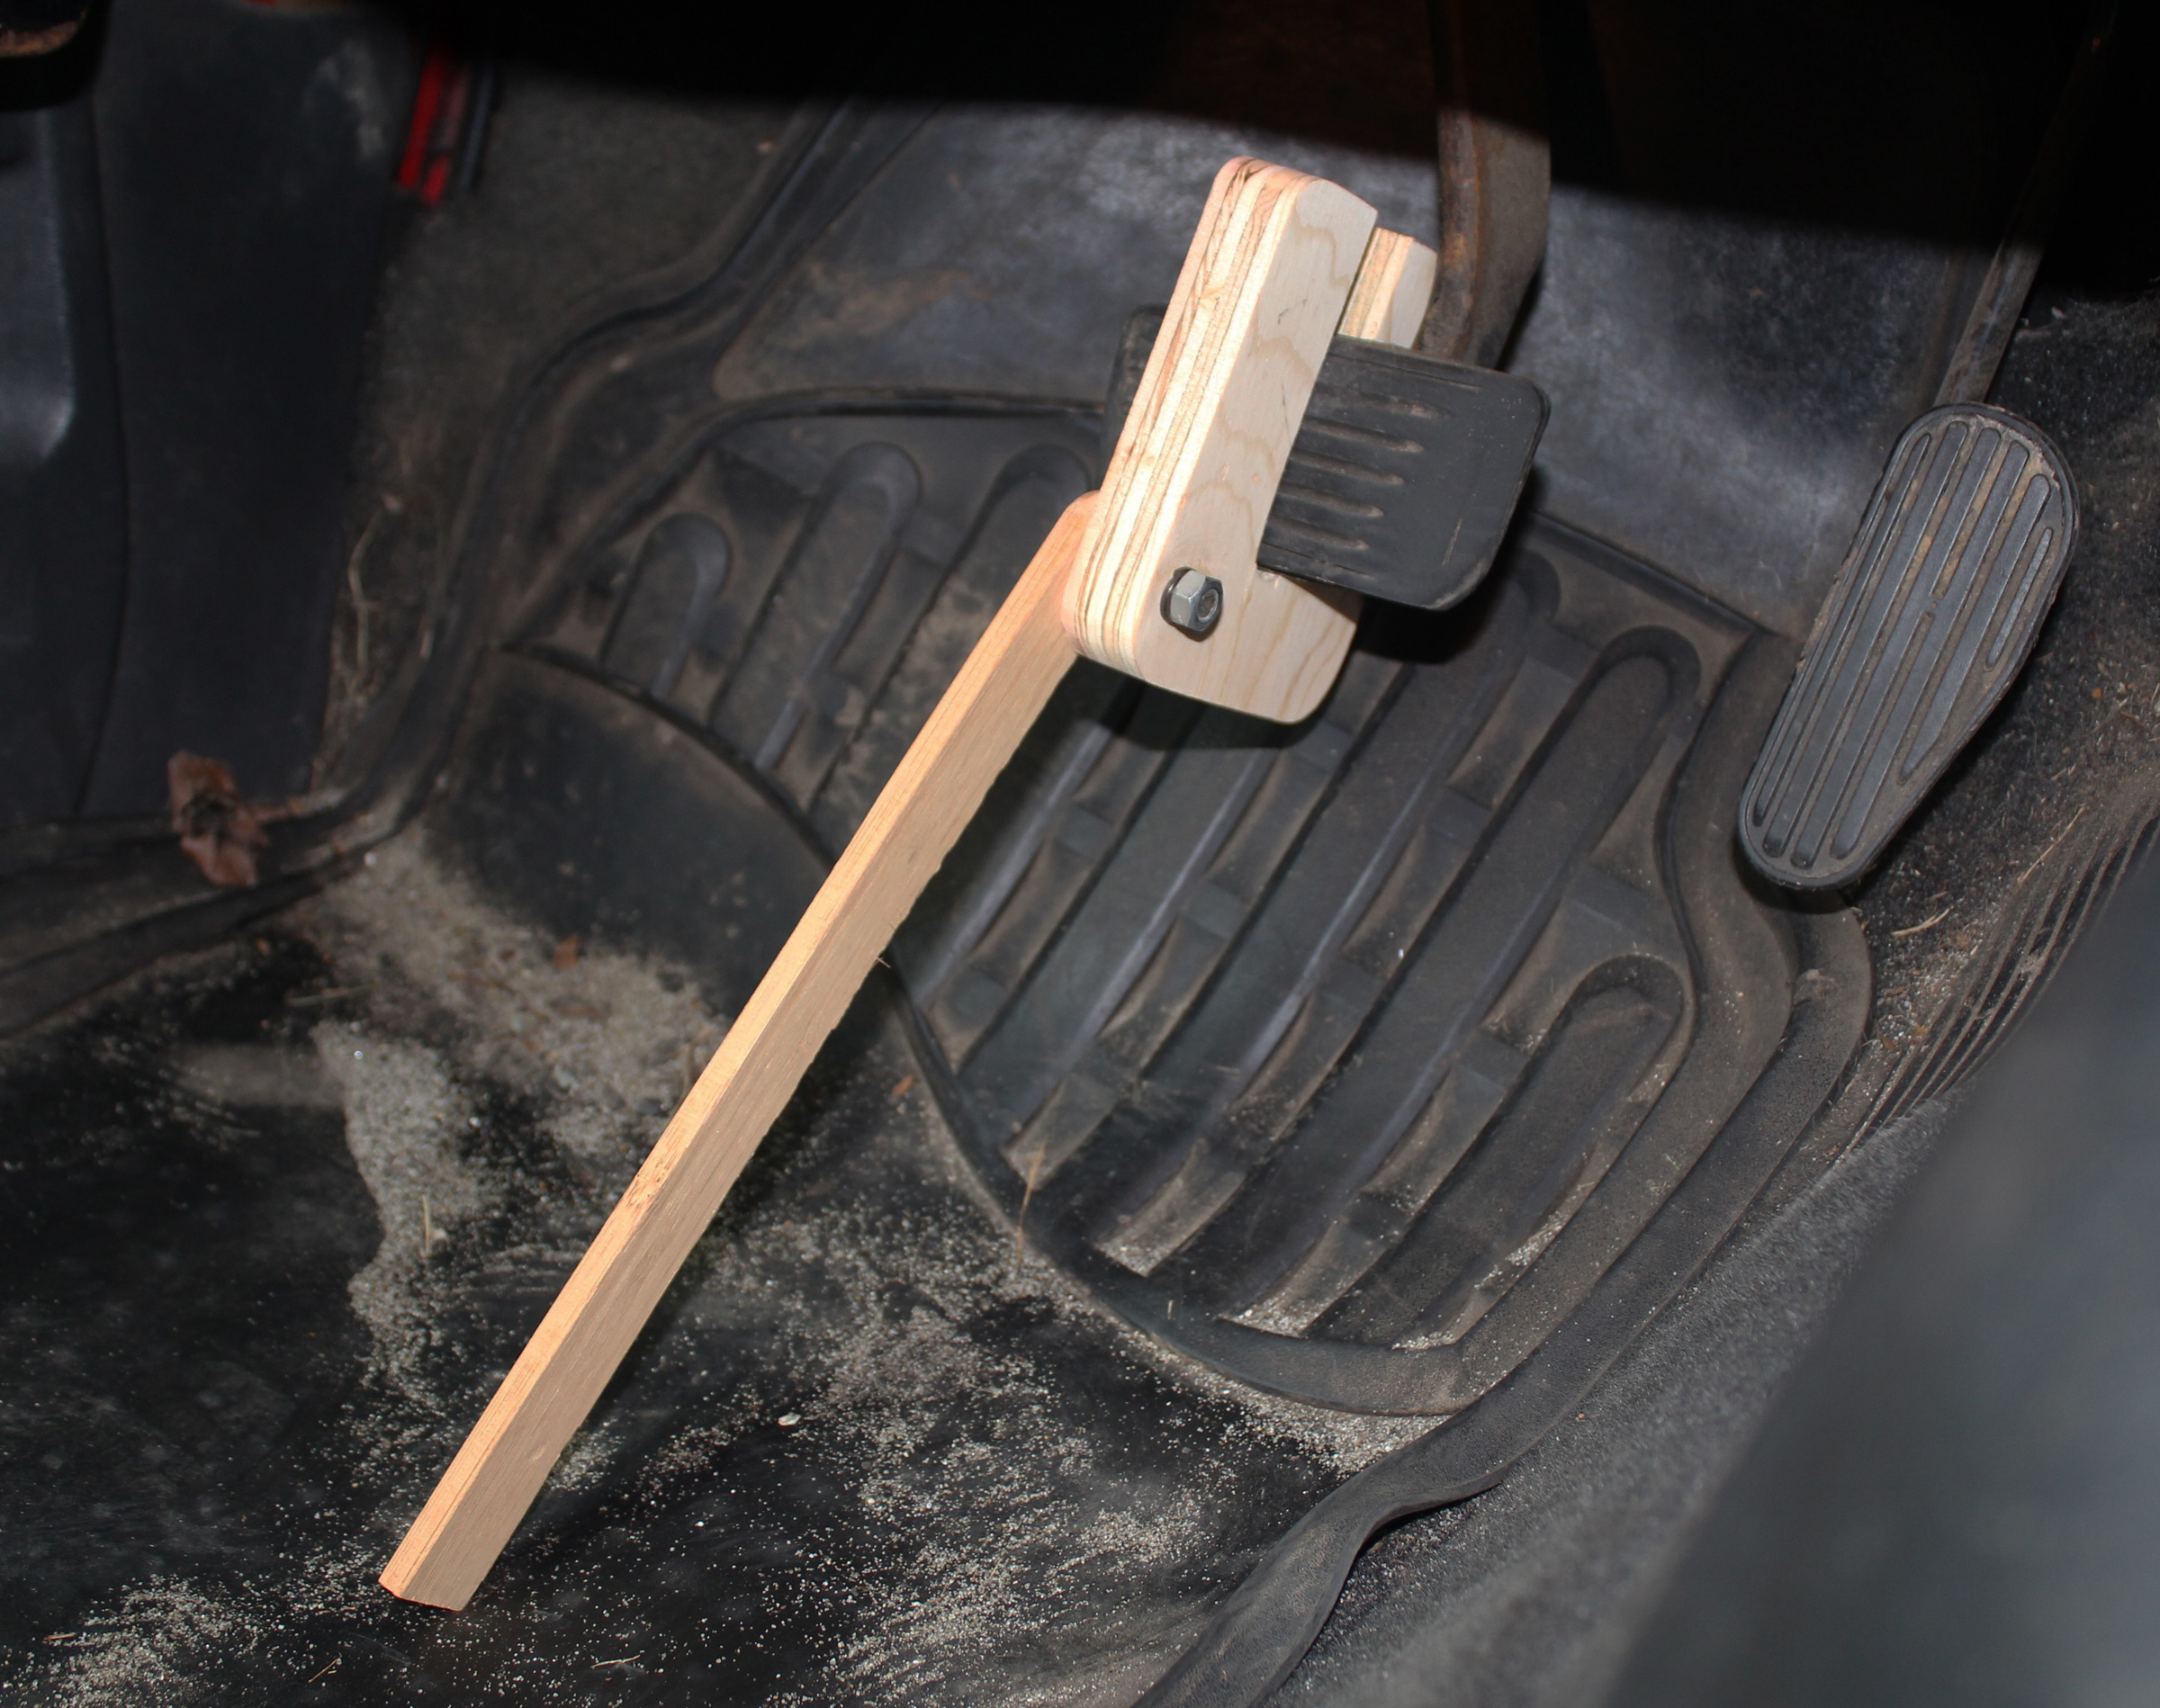
Trailer lights are my most frequent boating problem, so I’ve learned to check them often. When I go boating solo, it takes me a few trips from the car to the back end of the trailer to check the turn signals, tail lights, and brake lights. The first two functions are easy enough—those lights can be turned on—but for the brake lights, I need something to press and hold the brake pedal. I used to lean a brick against the pedal, but I’d always leave it at home—I wouldn’t want it flying around in the car in the event of an accident. I’ve since made four devices to press the pedal, and the two here have worked very well.
 Photographs by Christopher Cunningham
This brake-light tester has a piece of plywood with a 1/2″-wide slot to slip onto the brake pedal. A pivoting stick 10″- to 12″-long works like a kick-down door holder. The sharp square edge at the bottom of the stick helps it grip the floor mat or carpet.

This 32″ length of 3/4″ dowel extends far enough beyond the steering wheel that, when its cord is tightened, it can depress the brake pedal. A skinny V-shaped notch in the dowel’s end holds the cord tight.
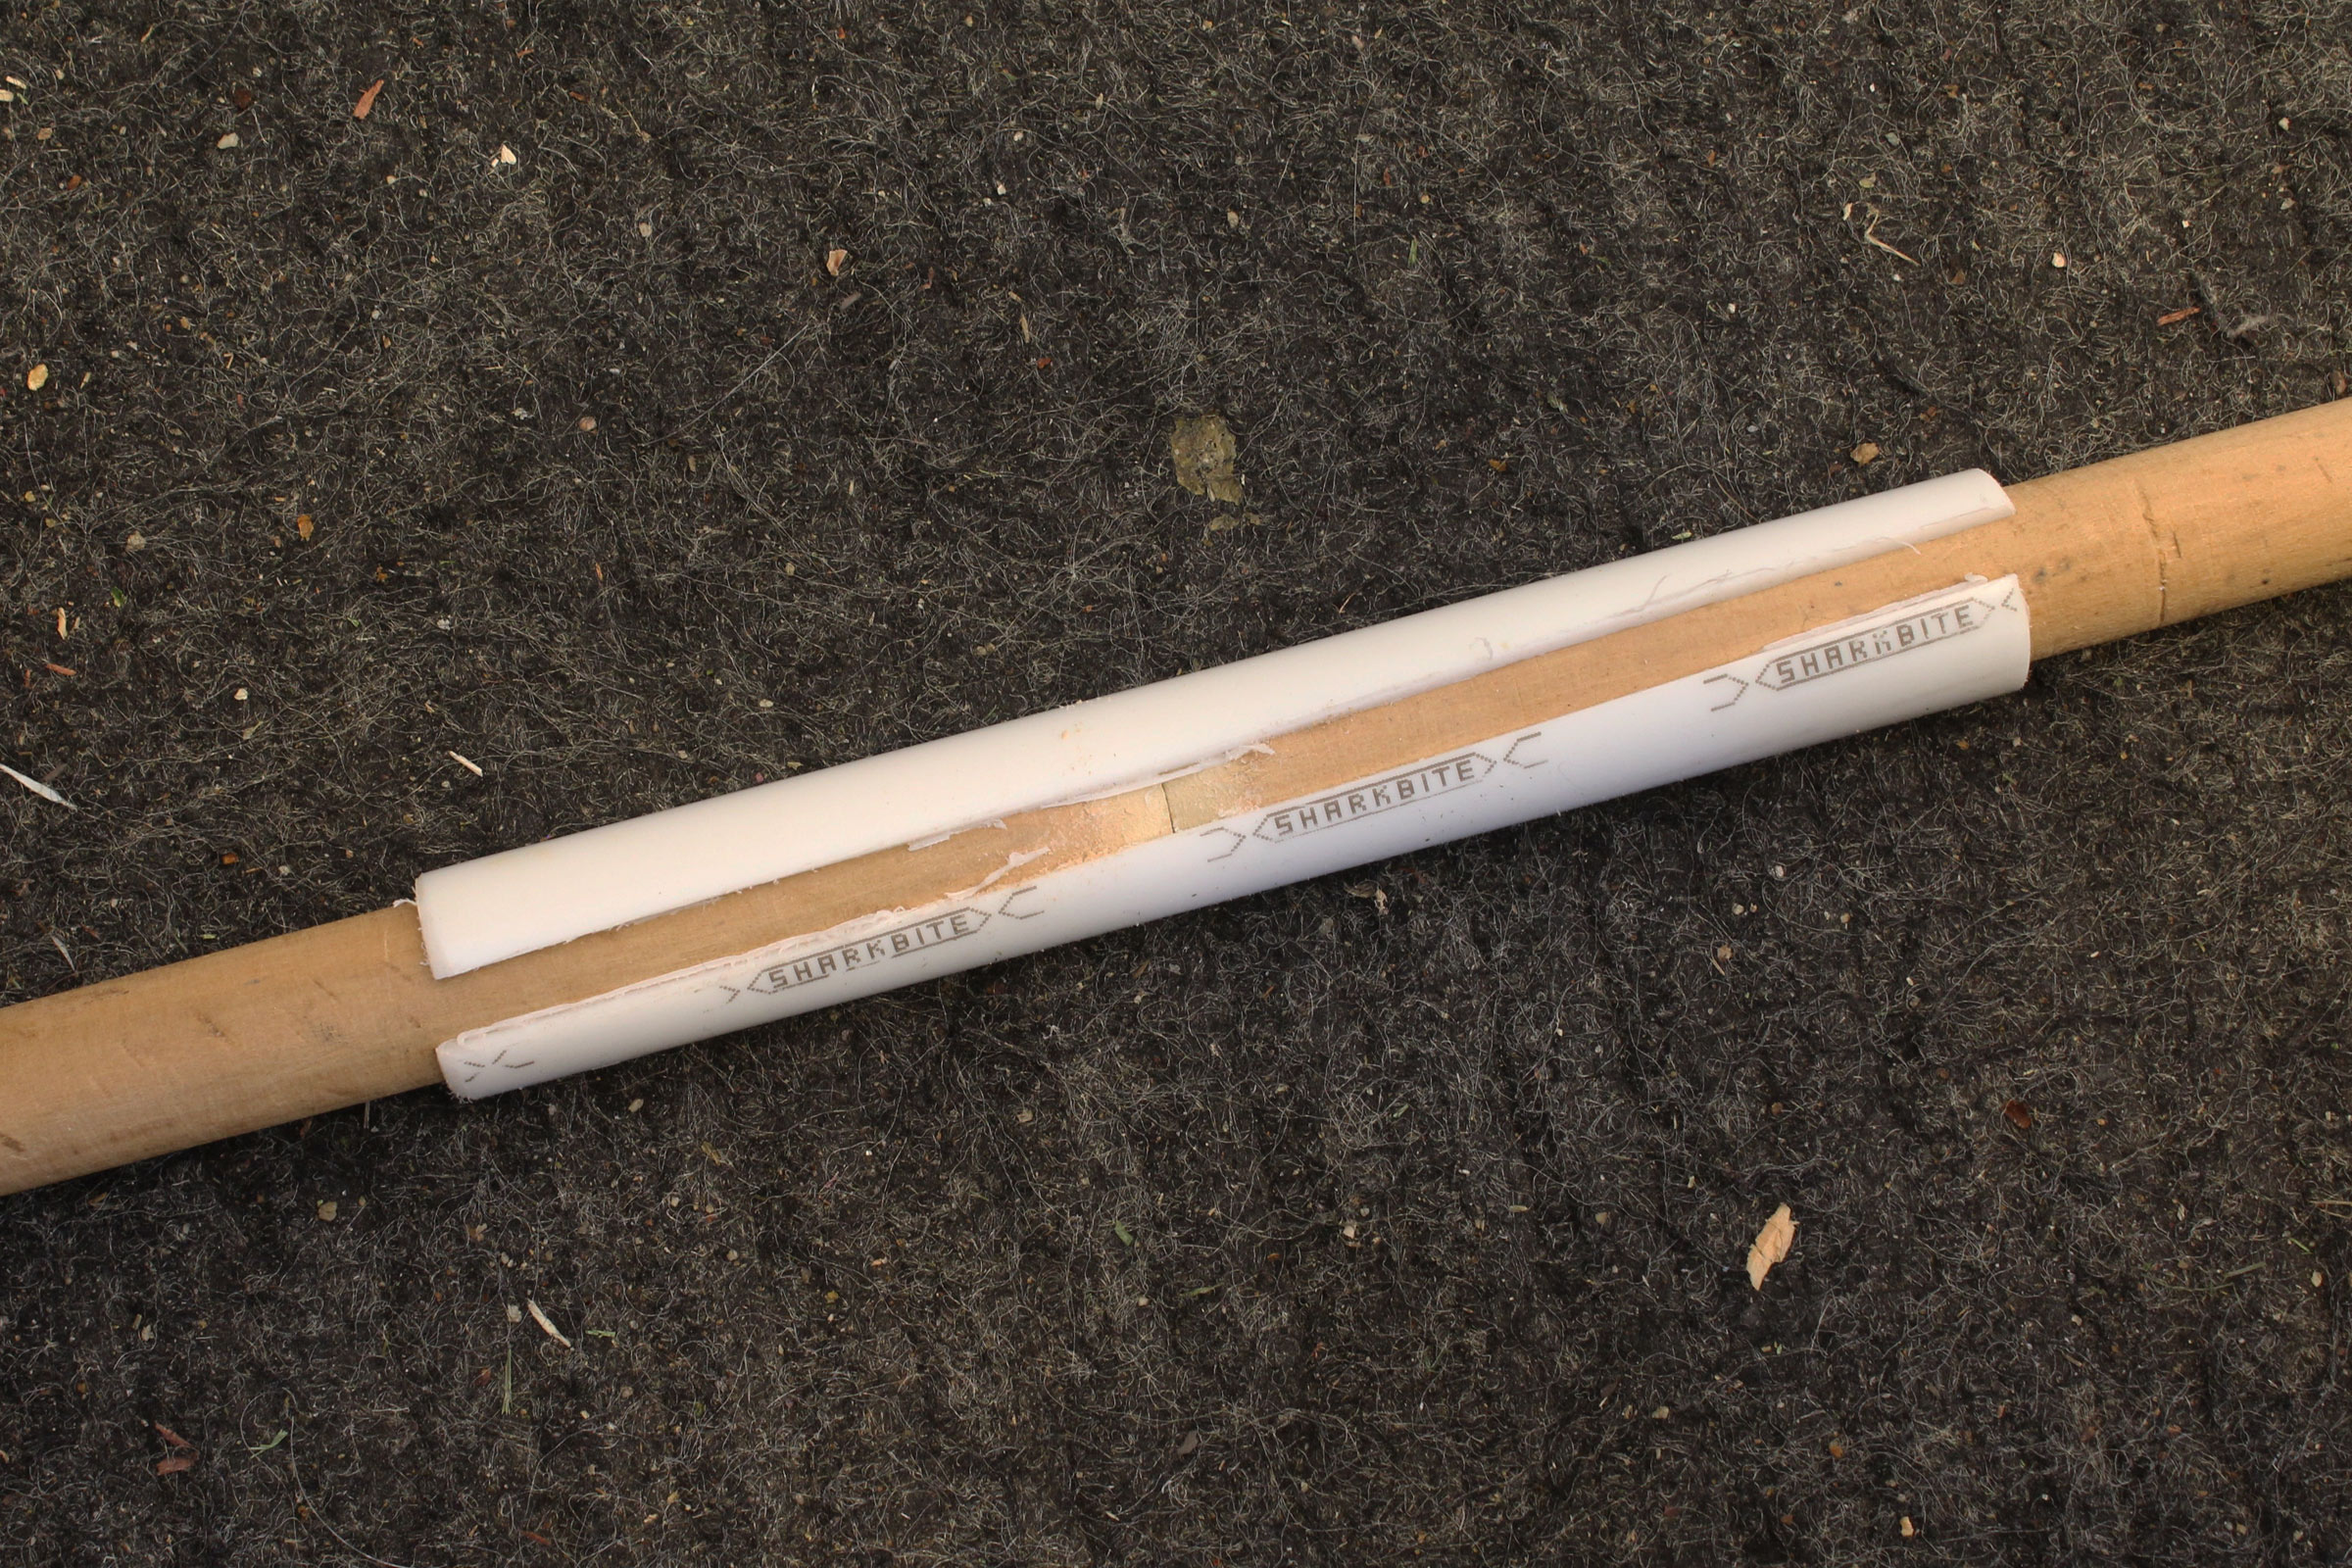
The 32″ dowel was too long to store inconspicuously in the car, so I cut it in half and used a 6″ length of 1/2″ plastic water pipe, sawn down one side to fit the dowel, as a sleeve to join the pieces. The ends of the dowel are tapered slightly to make them easier to insert into the pipe.

When the dowels are bundled with the pipe and wrapped with the cord, the device is easier to store. The notch in the end of the dowel keeps the cord tight.
If the trailer lights don’t pass muster, I have to find where the problem is. After reading the article Kent and Audrey wrote on LED trailer lights, I made the switch from incandescent fixtures, so burned-out bulbs and corroded sockets are no longer an issue.
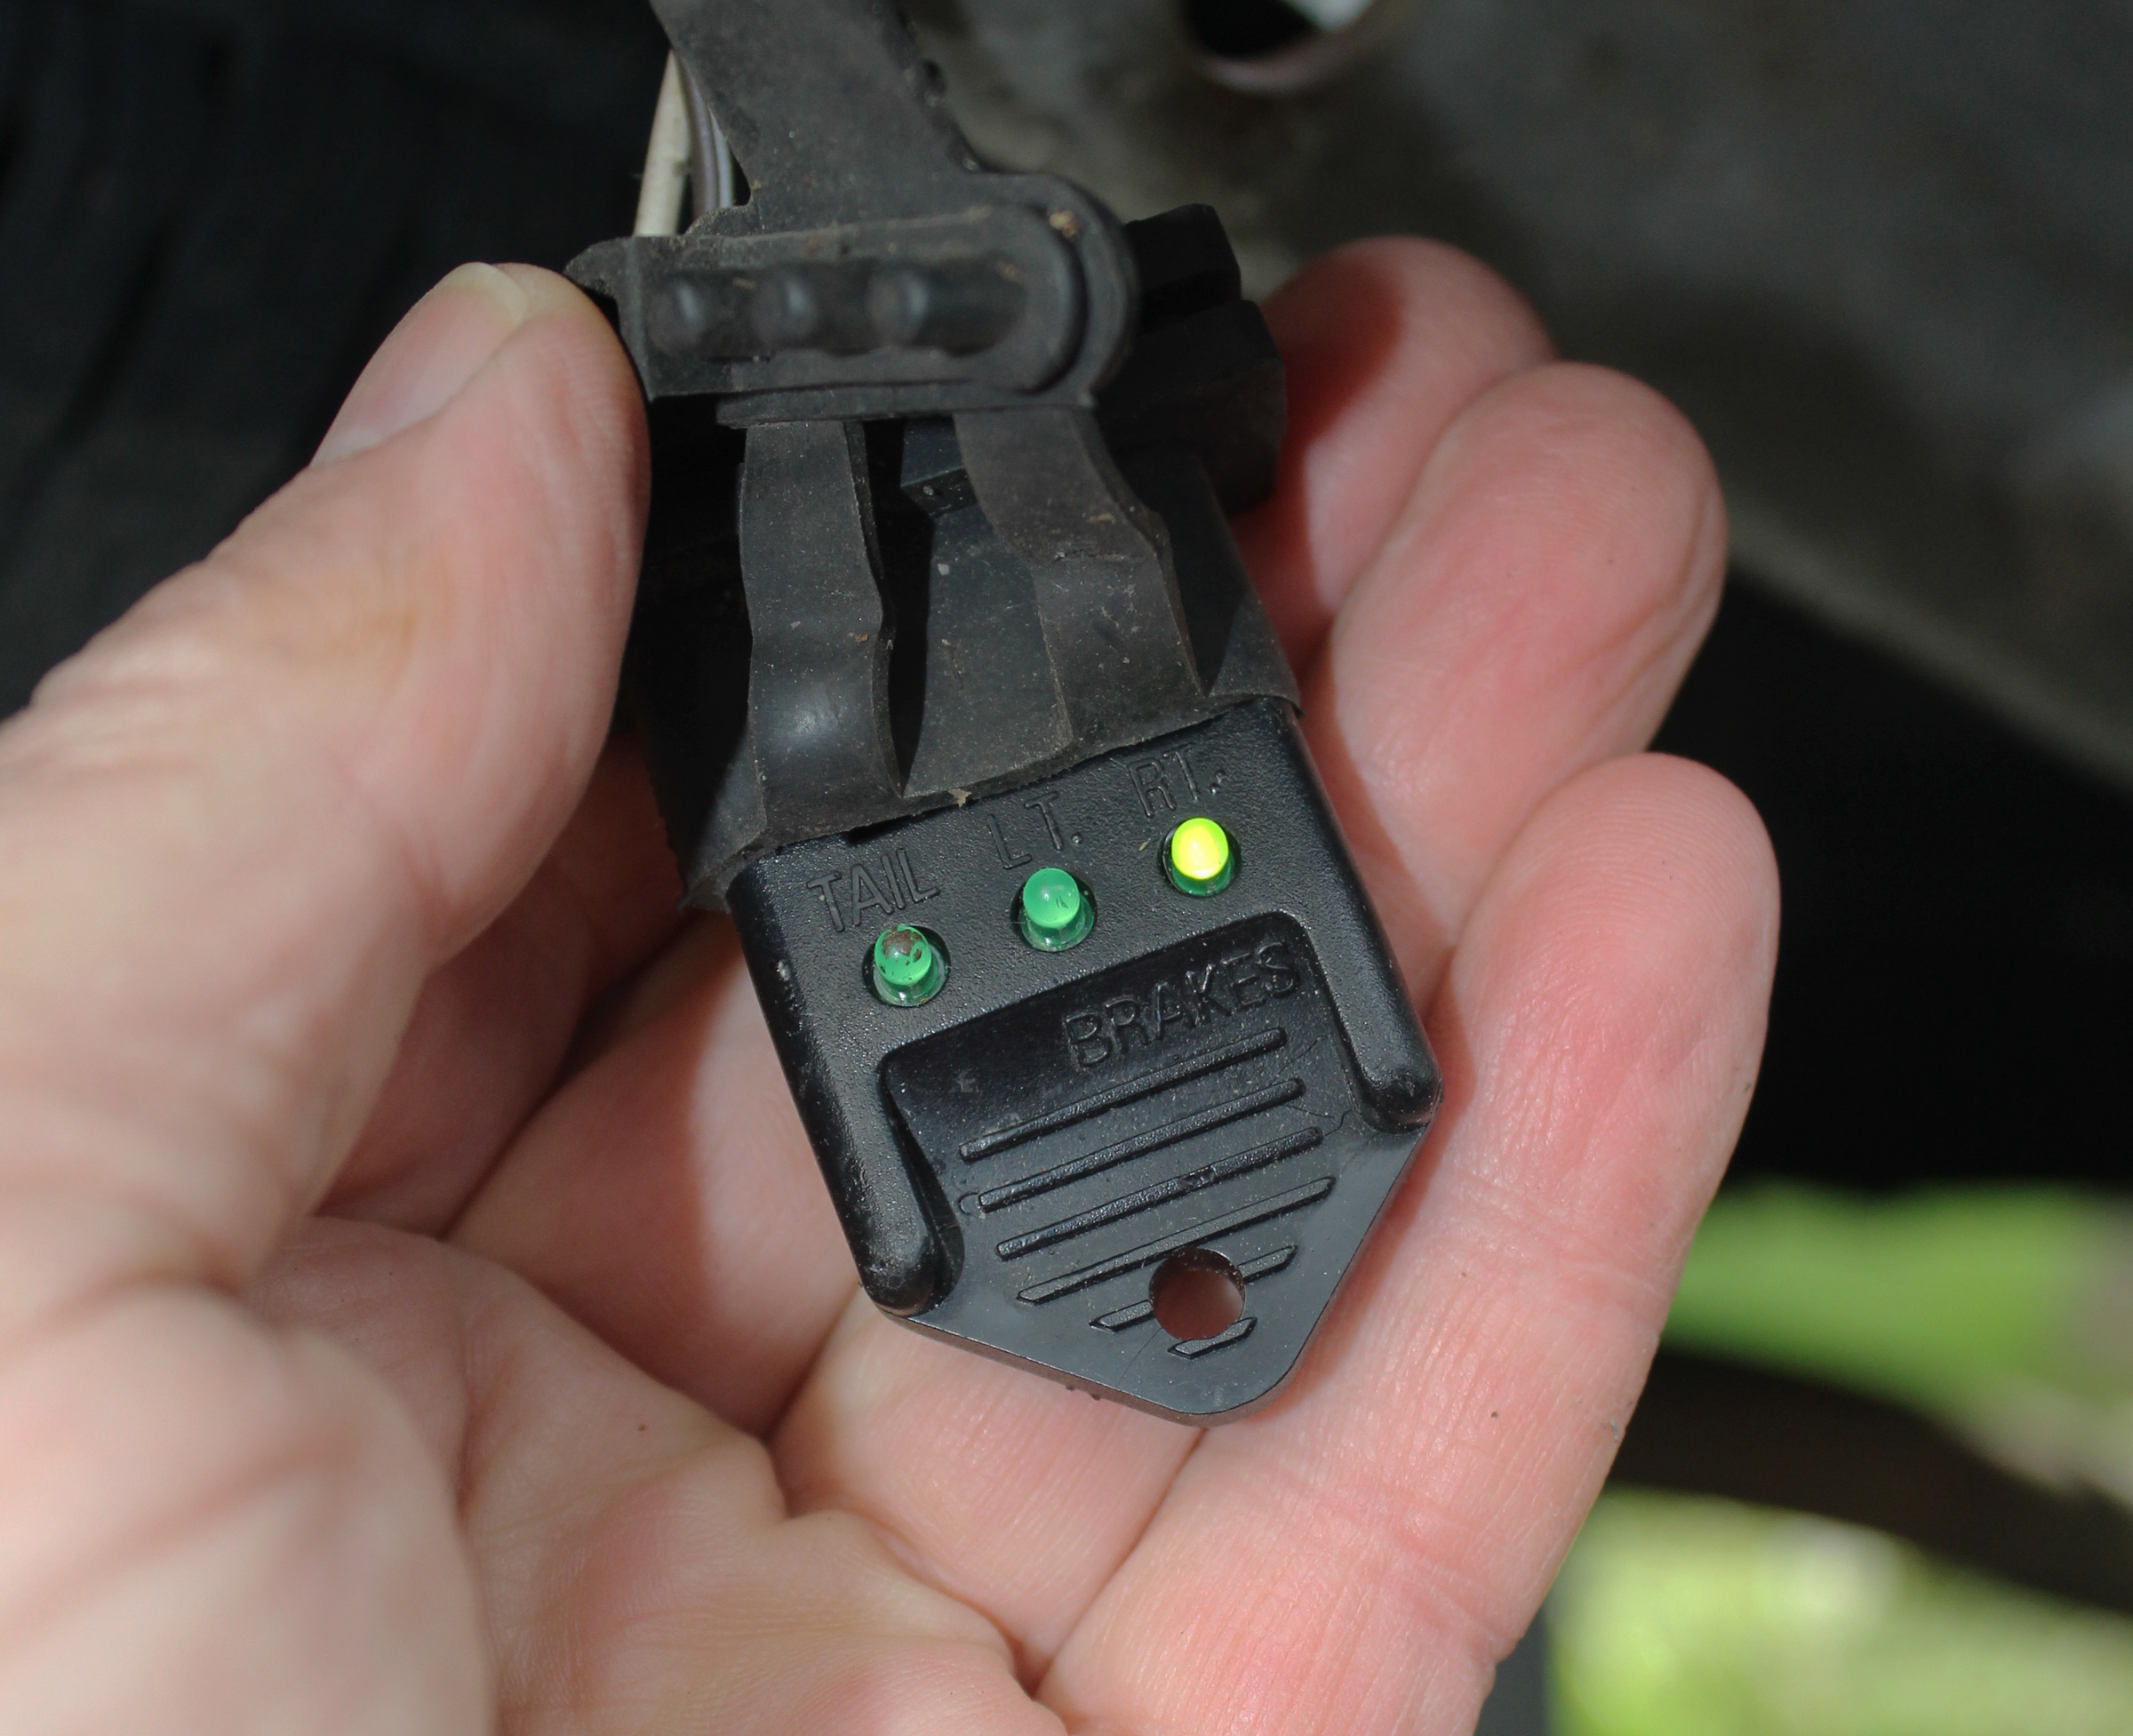
A trailer-light tester can check the wiring connection on the towing vehicle.
I have an inexpensive tester that plugs into the vehicle socket. It will illuminate its LEDs to verify current coming for left and right turn signals, tail lights, and brake lights. If any of the tests fail, checking the fuses is easy enough and doesn’t require groveling at the back bumper. The trailer-light circuit can have its own fuses, so the vehicle’s tail lights aren’t always an indication that power is getting to the trailer plug.
If the fuses are good, the trailer-wire plugs may be the problem. The four-wire flat plugs I have don’t seem to age well and their contacts get corroded. I clean the pins with a brass-wire brush and the sockets with a cotton swab dipped in vinegar. The vinegar, a mild acid, will loosen corrosion and spinning the swab will wipe it off. On occasion, using a pair of pliers to pinch the plug to tighten the sockets is required.
Far too many times, I’ve checked the condition of the trailer just when I’ve hooked it up to hit the road. It’s best to allow time before departure for doing any maintenance and repairs.![]()
You can share your tips and tricks of the trade with other Small Boats Magazine readers by sending us an email.














The dowel with the cord is pure genius and elegant design!
Way too late in life (mid-60’s) I gave up on trailer lights and built a light bar for each trailer that attaches to the boat above any conceivable water level. Since the lights never submerge I’ve never had a failure. Mr. Cunningham could probably improve on some of my light bar attachment scenarios.
My understanding is that putting on the 4-way flashers plus headlights checks all the trailer lights? Am I mistaken?
I keep the 4-pin connectors capped and coated in spark plug dielectric grease. No problems so far, touch wood.
A half twist in the ratchet strap stops the insufferable droning.
My Chevy Blazer and Ford Ranger both have separate fuses for the 4-way/emergency flashers and trailer lights. When I used a 4-pin tester on the Ranger with the lights and flashers on, there was no indication that the brake lights were included in the test. I think it’s best to test all of the functions—lights, left and right turn signals, and brakes—separately.
Dielectric grease and capping the plugs are good ideas.
When I was in the classroom section of the school to get my CDL, the instructor told us of one time he had just used the 4-way flashers to check his trailer lights. When he was one the road, he had numerous truck drivers get pi***ed off at him. It turned out that the wires in the pigtail between the tractor and trailer were crossed. When he thought he was signaling a right hand turn, the left turn signal was activated and vice versa. Just using the 4 way flasher did not show the crossed wiring.
All great advice, just want to note that I do use a manual bike-tire pump for the trailer tires. The high volume, lower pressure type meant for mountain bikes works well – cheap, easy to carry, no plugging in.
A note on checking the trailer lights single-handed. My son, who happens to take no interest in boats, came upon me doing my “pre-flight” ritual involving turning on the right blinker, running behind the trailer to check the light, turning on the left blinker, running behind the trailer to check the light, and finally balancing a cinder block on the brake pedal to check those lights. He said, “Dad, why don’t you just set your cell phone up behind the trailer, make a video of the lights, and check that?”
Hmmm. Glad all that money I spent educating him wasn’t wasted.
This technique greatly simplifies the process and reduces the number of trips running from the driver’s seat to the back of the trailer. As an added bonus, if I ever start a YouTube Channel of my trips, I will have a clip that will serve as “foreshadowing” in a droll sort of way.
Too funny, re the education expenses.
With the Maine Island Trail skiffs, which are launched every day all summer long, we work really hard not to get the bearings in the water, even though they have the latest, greatest bearing protectors. We try to remember to pull disconnect the light line as we’ve found that we have electro-corrosion issues if lights are dunked. Those trailers have articulated rollers for basic support. I added center rollers at the after cross member which engages the bow when pulling up the boats.
My go-to trailer fits everything from a 13′ skiff to a 21′ iceboat. I’ve built a 4×4 frame, posts and walkways on my trailer so I can double-deck gear or a second small boat. These let me put my lights up reasonably high. I have squirrels and mice so I have run my lights on the outside of the trailer frame. Since I do light wooden boats, I do carpeted bunks instead of rollers, including a full-length keel bunk.
I like to jack the trailer in the spring and spin the tires, listening to the bearings.
Two other notes.
A good place for a spare drain plug is the glove compartment of your tow vehicle.
For a rowing boat, leaving oarlocks in place and running your tie down through them will help lock it in place and minimize chafe on your rub rails. I like to sew little outdoor-carpet tubes to run on my tie down line which lock nicely into the locks.
For launching, I fixed two planks with anti-slip next to the centreline of the trailer, to walk with the boat aft when launching and picking her up easier when retrieving. Slipways are often slippery, hence the name slipway?! Walking over your two slip-free planks could make your day start or end better.