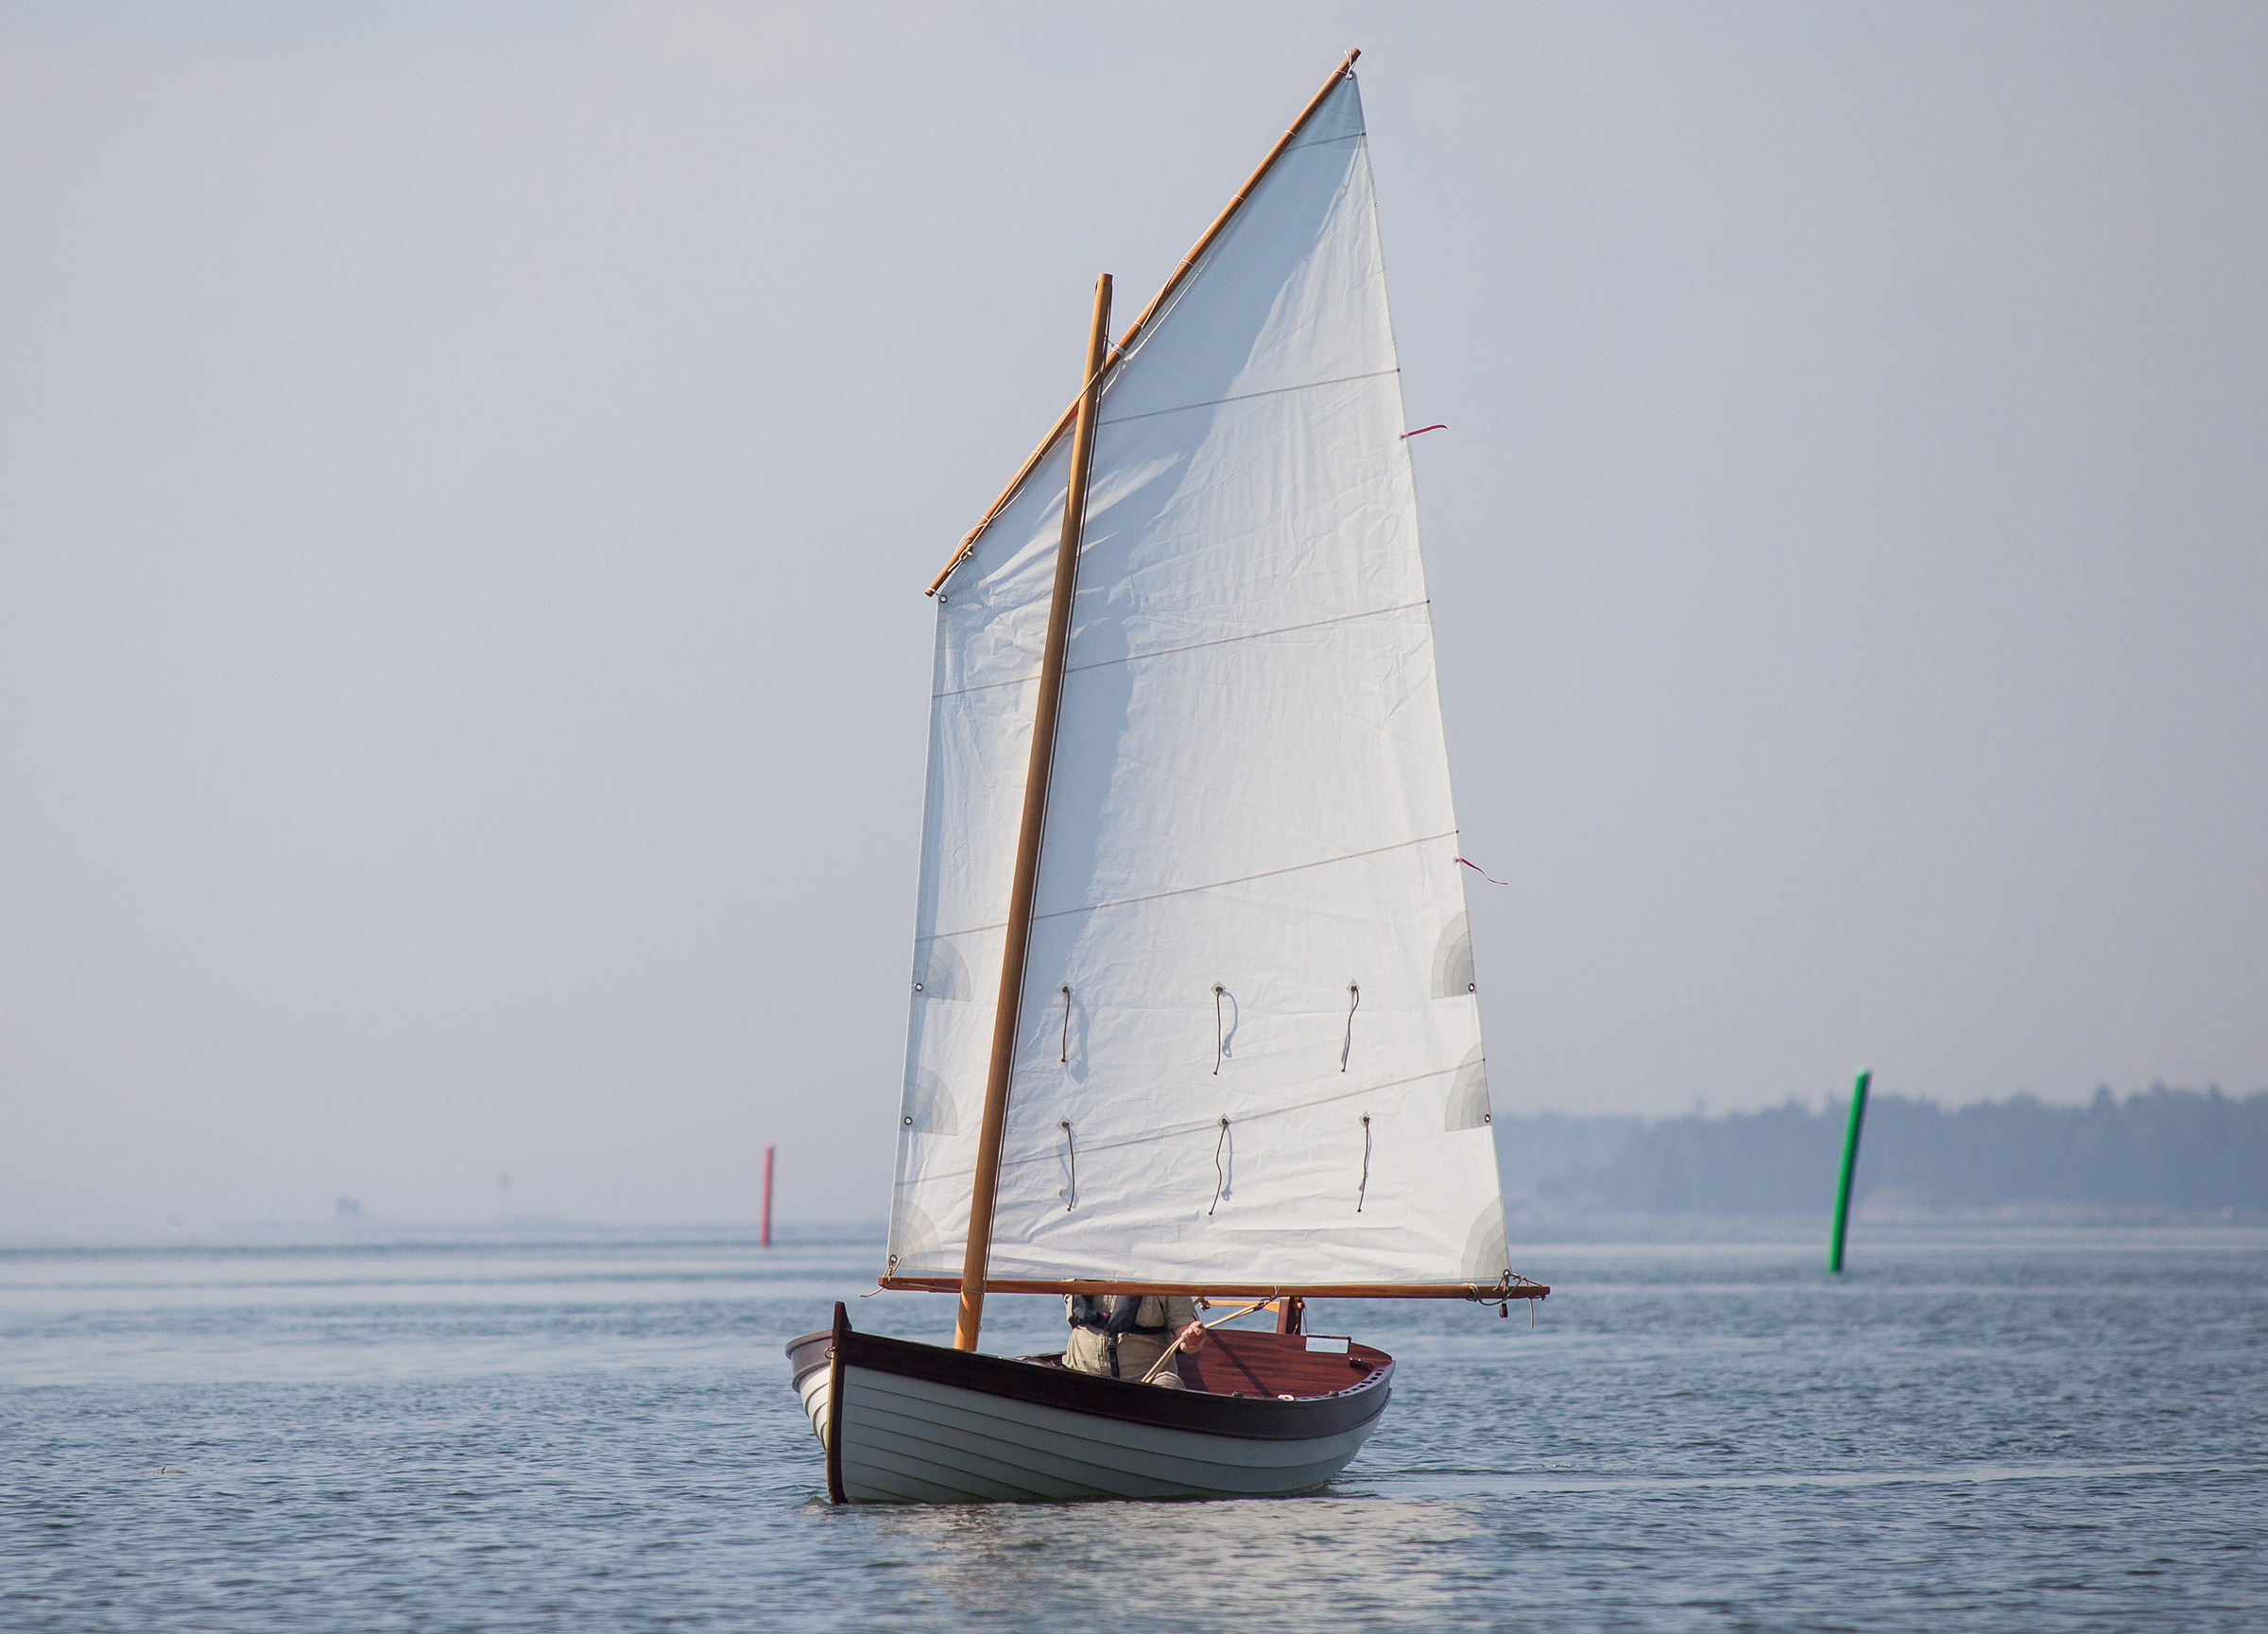
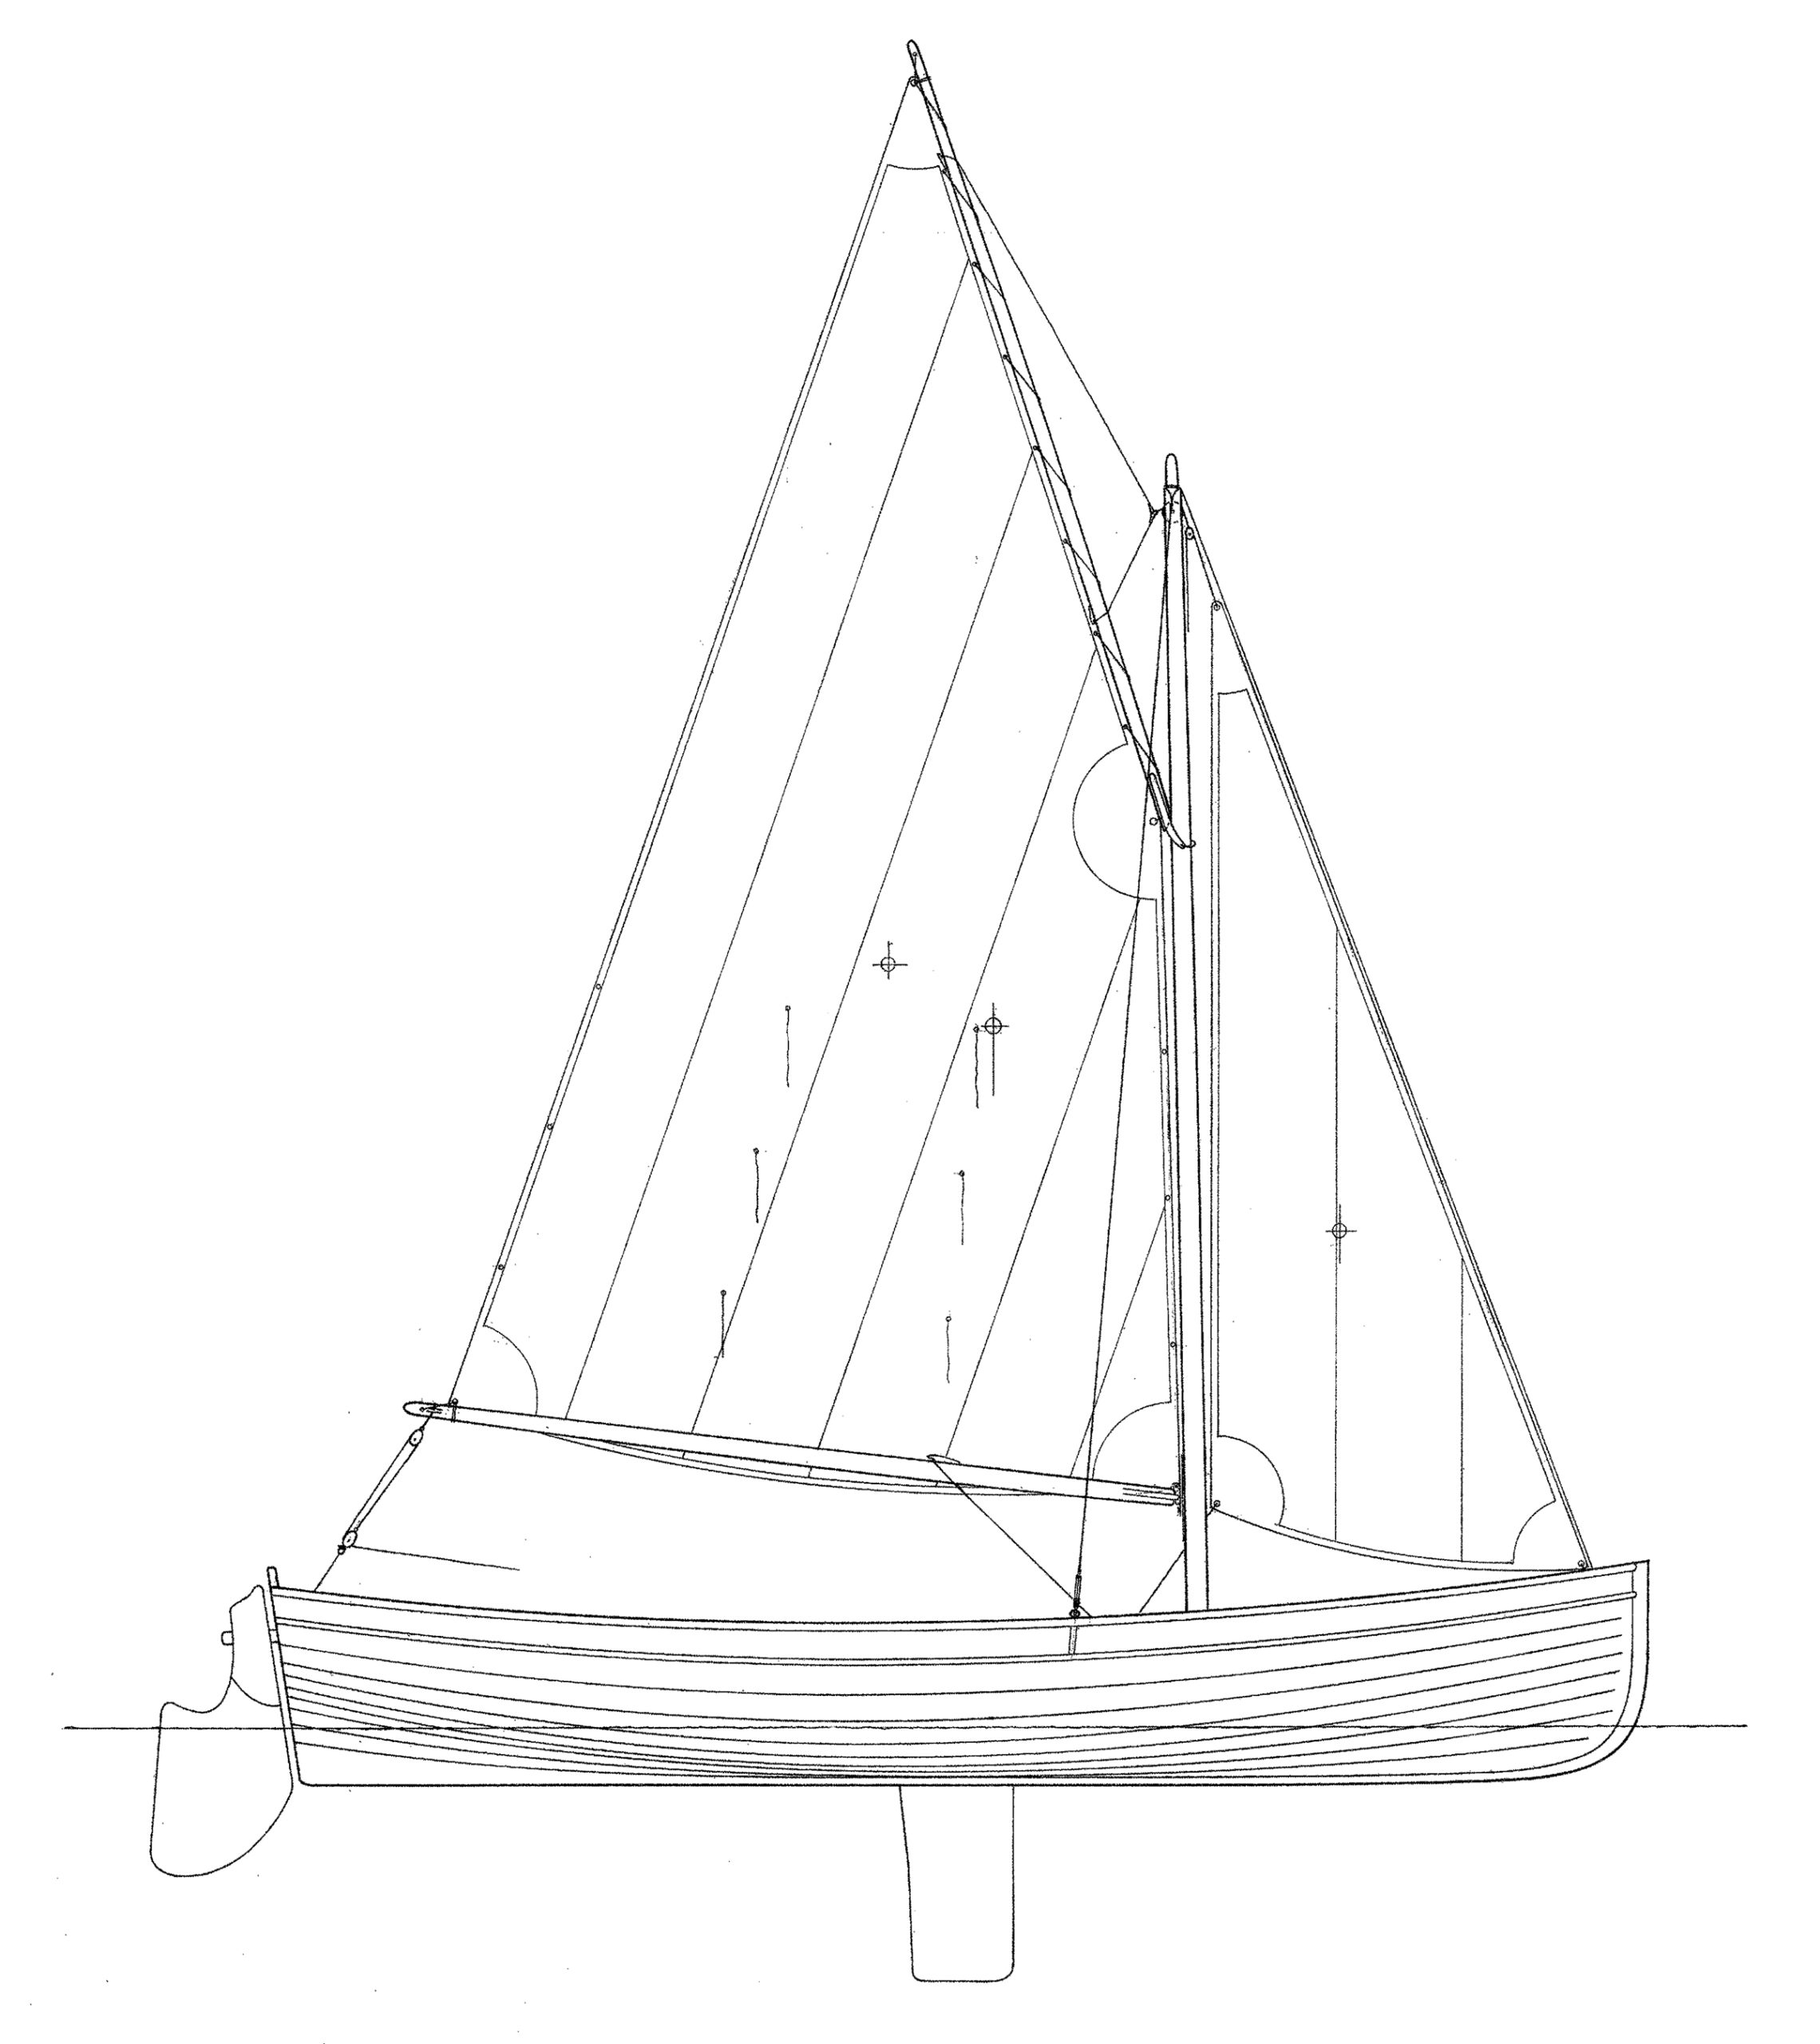
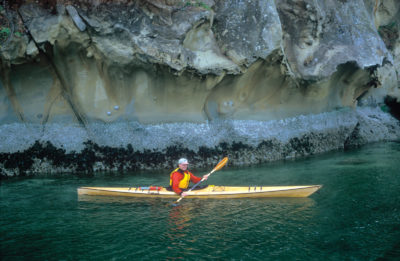
Iain Oughtred’s 15′ 11″ Penny Fee is the latest and largest member in his line of classical rowing-sailing dinghies. All of them have roots in 18th-century ship boats and yacht tenders, which were relatively full in shape for good carrying capacity and had wineglass transoms to avoid adding drag when they were fully loaded.
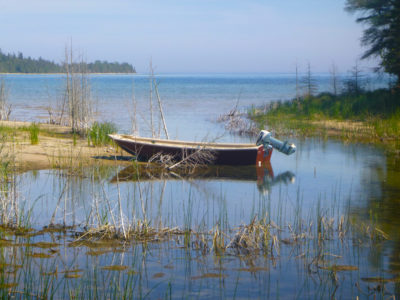
My path to the Penny Fee started at a local boat show in 2020 where I met a couple looking for a sail-and-oar boat and someone to build it. They took me on as their builder, and together we started mapping out suitable candidates that would meet their criteria: modern glued-plywood construction, a relatively light hull, good rowing and sailing properties, and accommodations for occasional fishing. They also had in mind to use a small electric outboard, so a boat with a transom was preferred over a double-ender. The Penny Fee emerged at the top of the list of candidates. It has enough stability for an all-around boat and for fishing. Its longer hull promised more speed under sail and maybe even when rowing.
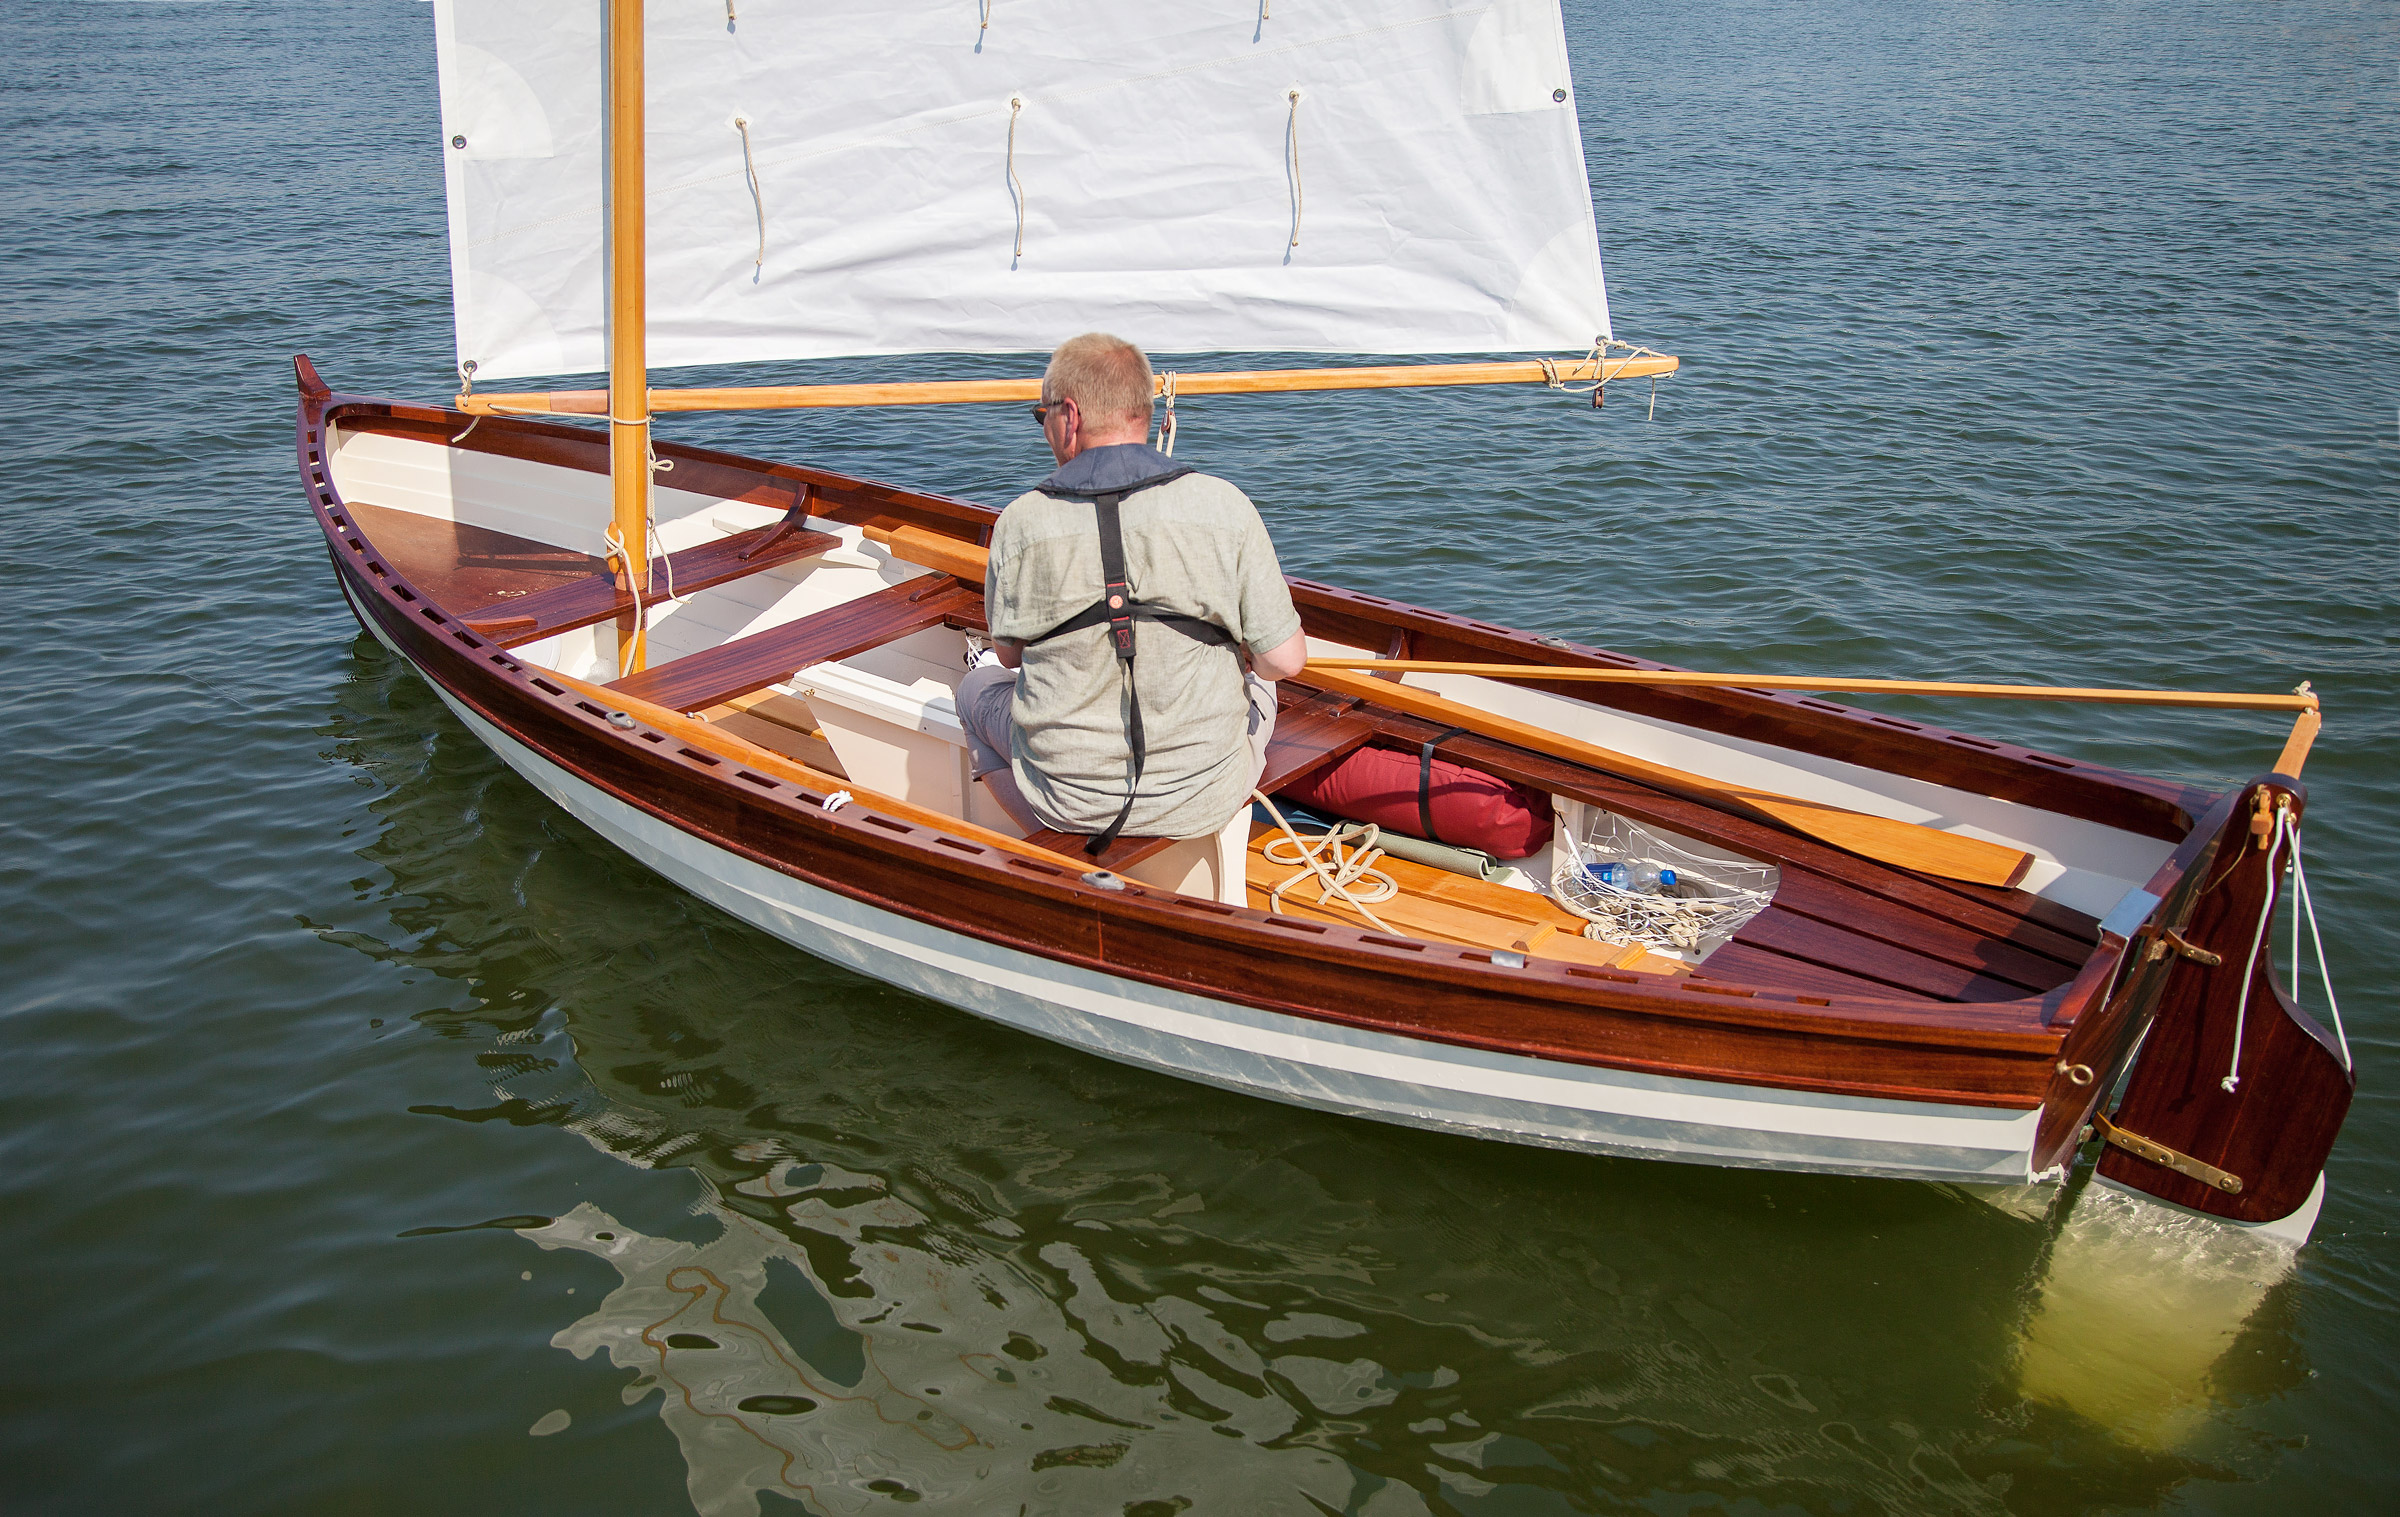
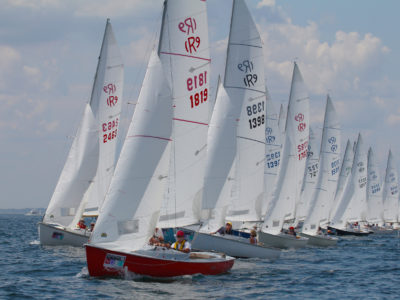
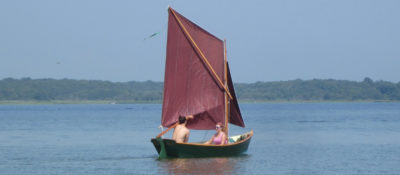
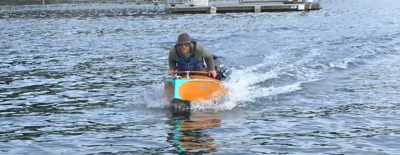
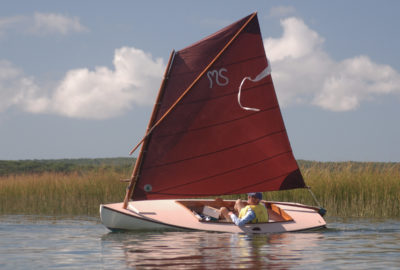
 Mats Vuorenjuuri
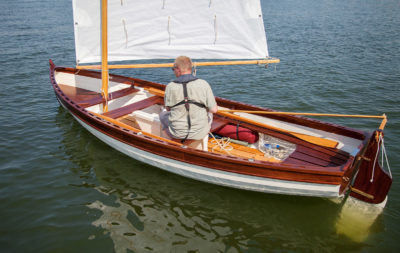
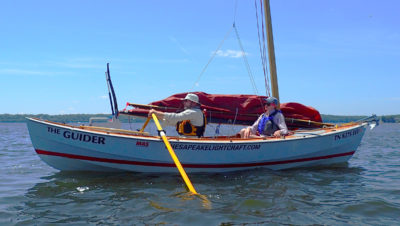
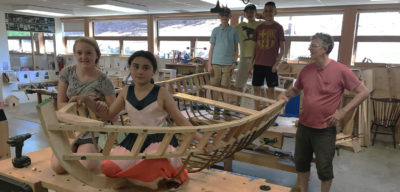
While the Penny Fee is easily sailed singlehanded, there’s room for a complement of four aboard.
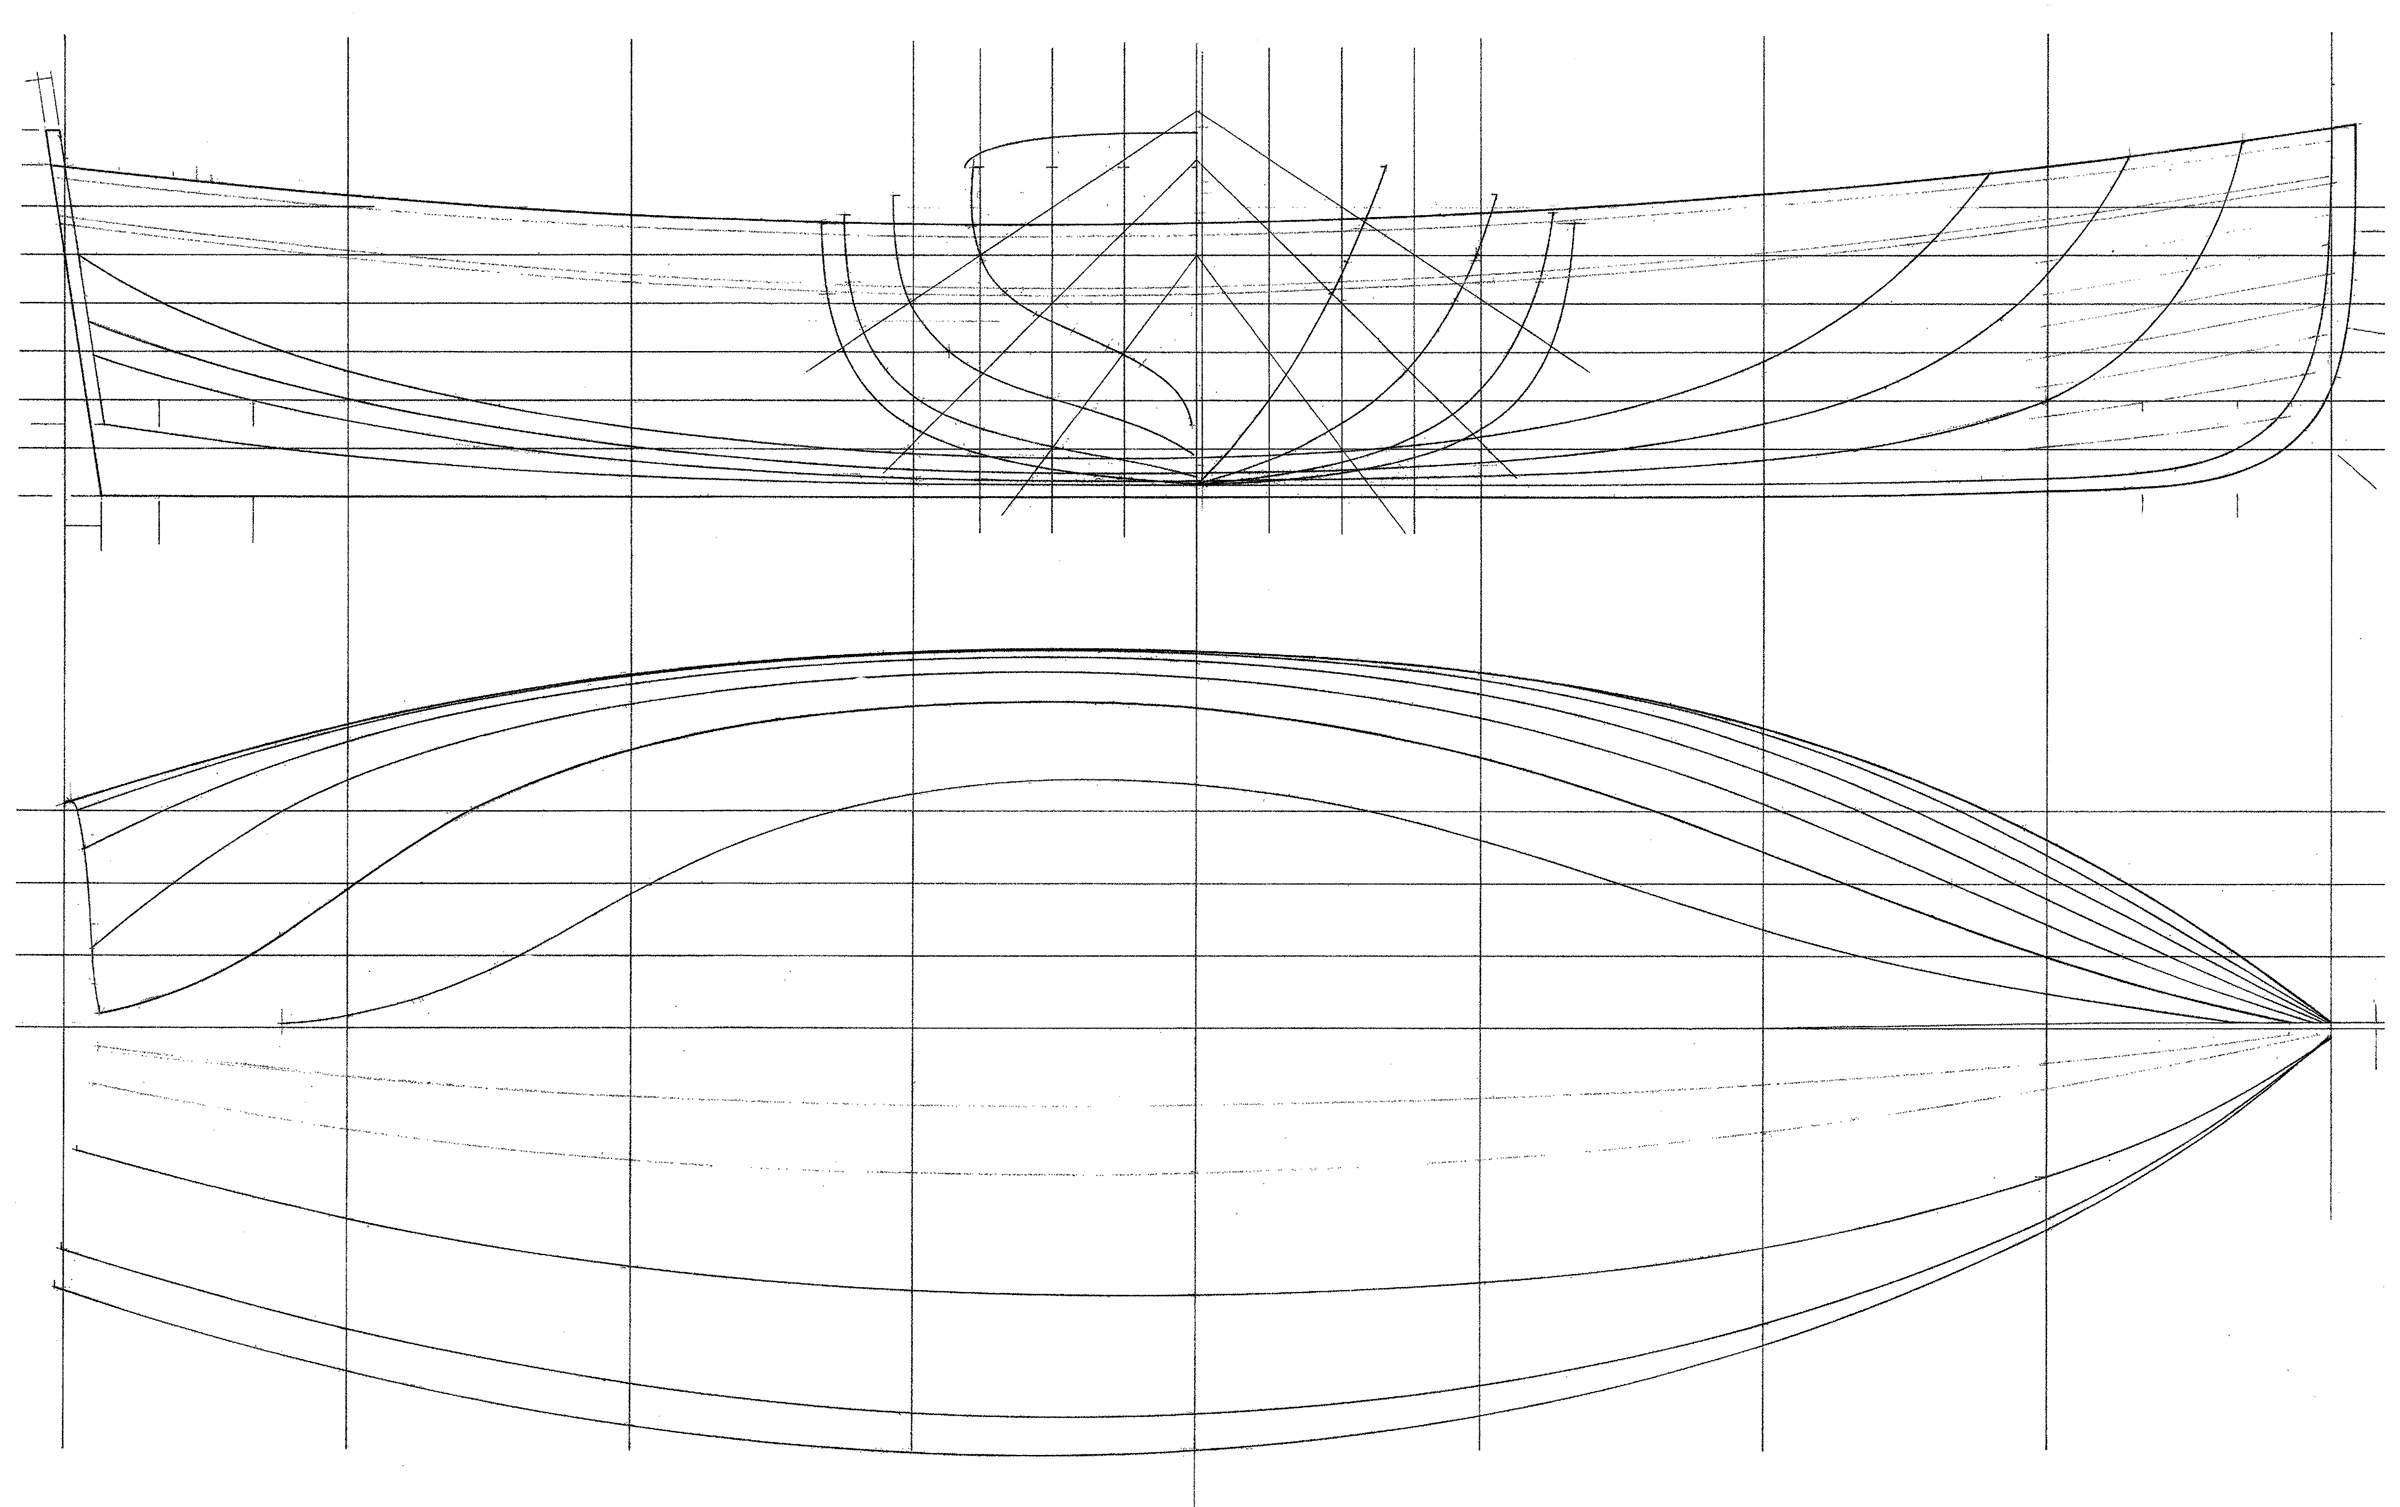
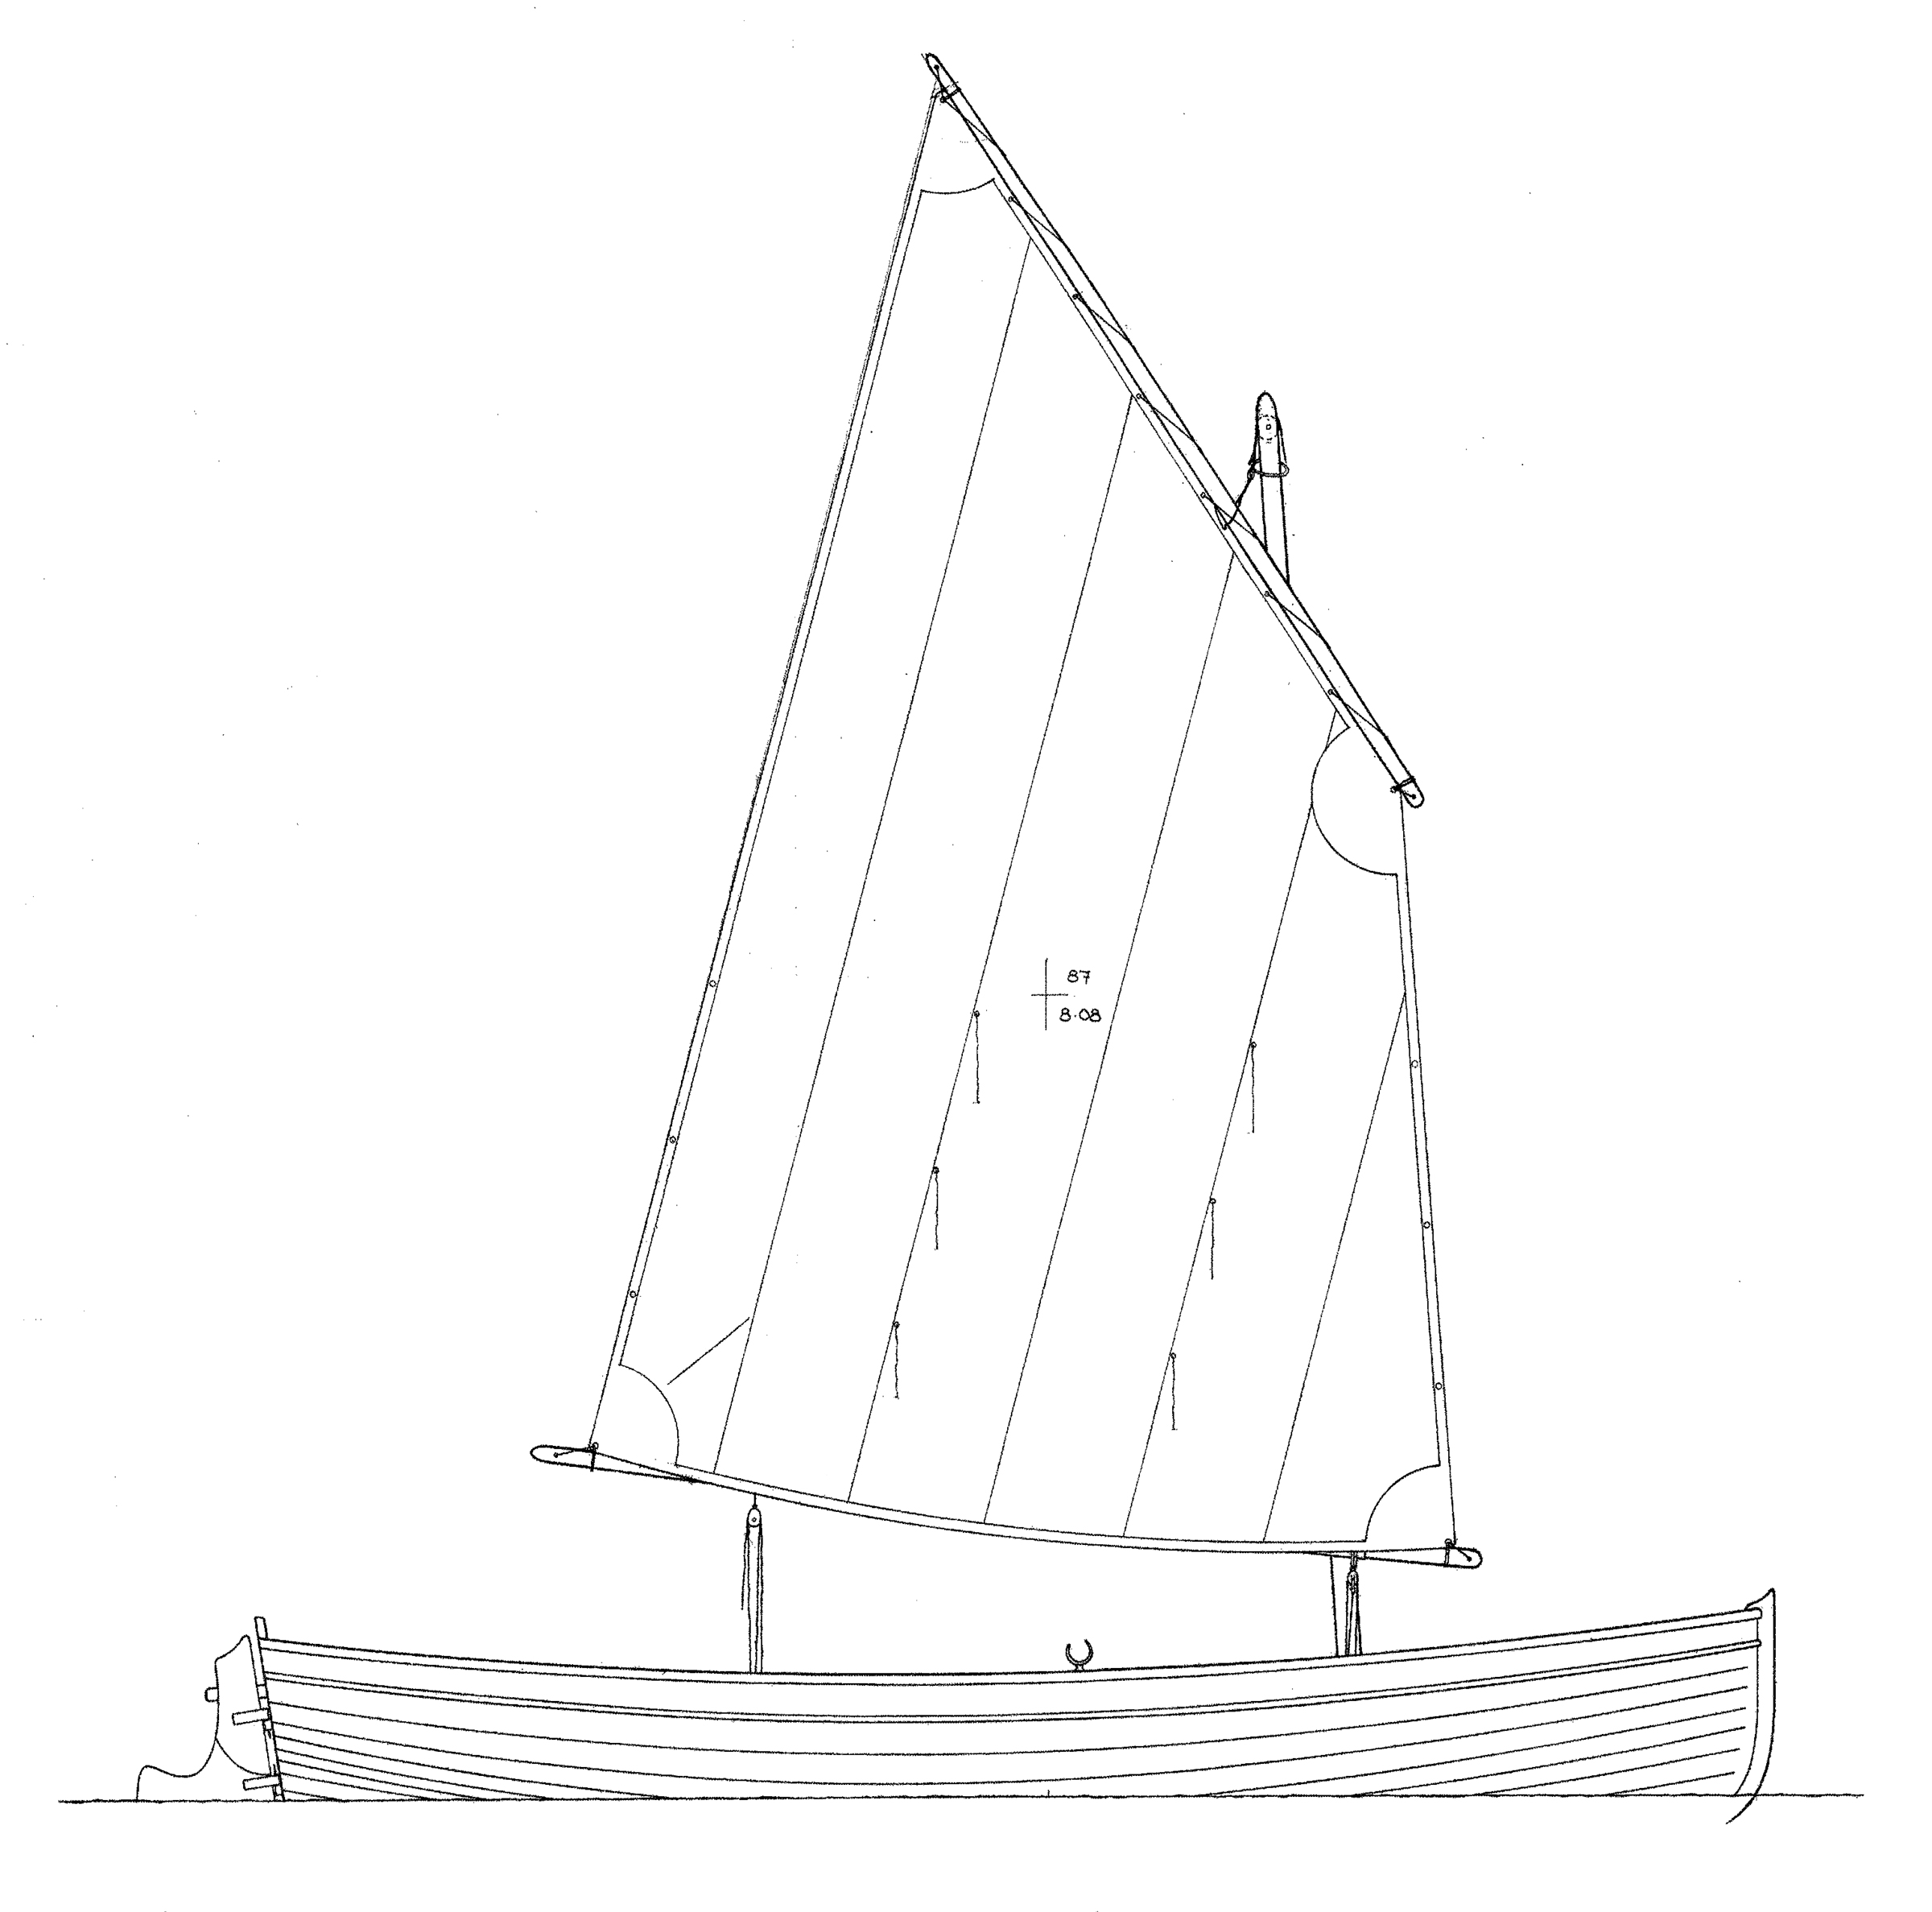
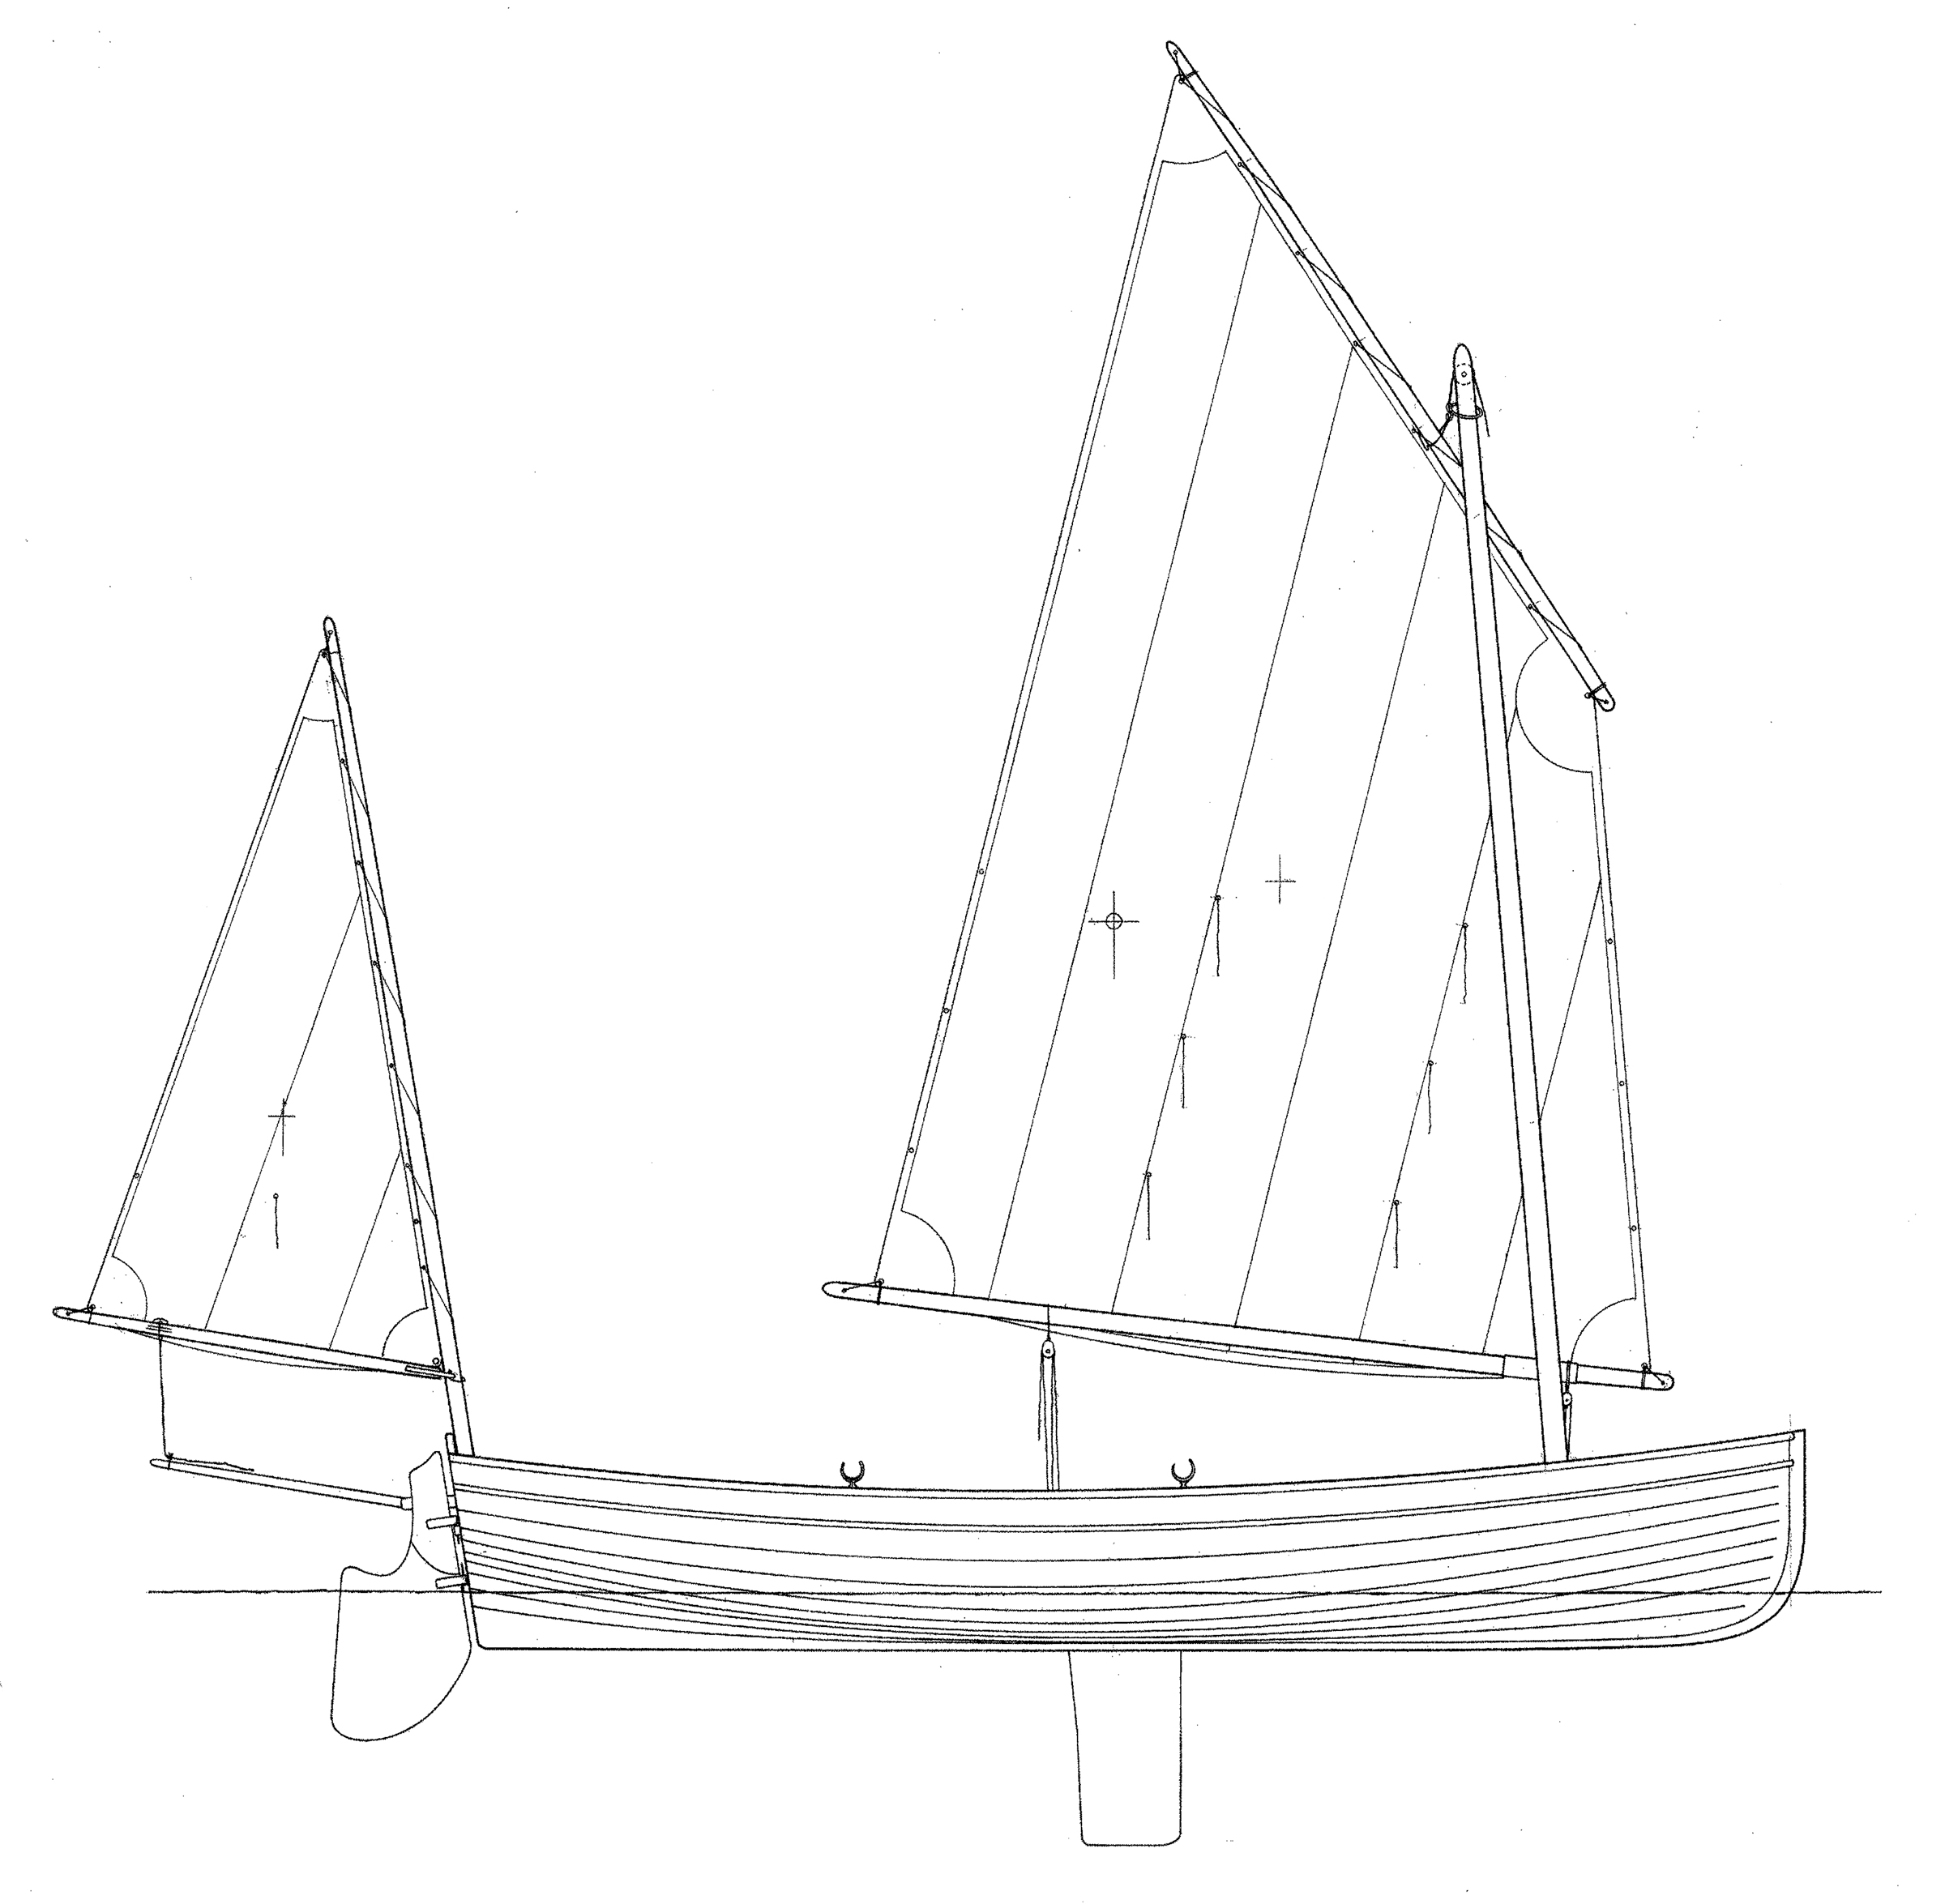
I ordered the plans for the Penny Fee and, as always, Iain’s drawings were a treat for the eye and the soul. The Penny Fee set consists of eight sheets. There are offsets, lines, and a detailed construction plan followed by four options for the sail plan: single lug, lug yawl, gaff sloop, and gaff yawl. A measured drawing defines the centerboard; the shapes for two rudders—fixed and kick-up rudder—are conveyed with superimposed grids. Full-sized patterns are provided for the molds, stem, and transom. The plans do not include drawings for oars, but Iain kindly supplied us with drawings, and recommended an oar length of 9′ 10″.
In order to speed up the start of the building project, we decided to build from a CNC-cut kit supplied by Jordan Boats UK. The kit consists of 9mm plywood okoume planks (each in three pieces) and okoume building molds, and 9mm side panels for the centerboard case. The molds have notches on the outer edges for the planks to fit into, so no measuring and marking of strake locations is needed when fitting the planking to them. For scratch builders, the plank locations are all marked on the patterns for the molds, stem, and transom.
Jordan Boats prefers scarf joints to finger joints for appearance, strength, and simplicity of construction. The scarfs are cut by the builder and the kit provides an ingenious system for aligning the plank sections for gluing them. There are predrilled holes in the scarf joints and in the ends of the planks; a nail is driven through the holes, locking the scarfs in place. A string is drawn tight between the nails driven in the predrilled holes in the ends of the plank; once the string touches the nail located in the center of the plank, its sections are aligned properly. This worked well, but we still checked each strake visually for a fair curve, before letting the glue cure. Scratch builders will spile the planks from the molds.
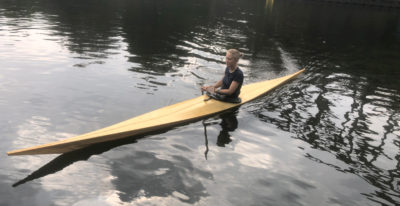
 Mats Vuorenjuuri
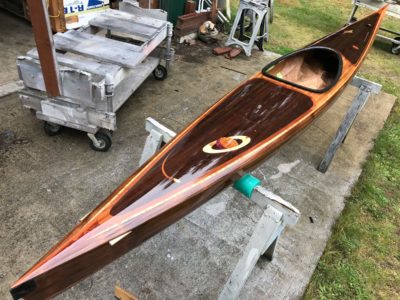
The plans offer drawings for two rudders, one with a fixed blade and the other with a pivoting blade with lines to deploy and retract it.
The 1″-thick transom can be built from solid wood or by gluing up two pieces of plywood. We edge-glued three wide planks of khaya mahogany and cut the transom using the CNC-cut hardboard pattern that Jordan Boats supplied. The stem is cut and glued from three pieces of 2″-thick solid wood; for the stem and keel we used khaya mahogany. For accurate placement of the transom, the kit also included plywood brackets which are attached to the building frame and the eighth mold. Once the stem, keelson, and transom are in place and glued together, planking can begin.
The garboards get a fair amount of twist in the stern. By softening the plywood with rags soaked in hot water, the bend is easier to achieve. As mentioned in the instructions provided with the kit, some minor adjustments might be needed with the molds in order to make the strakes run smoothly. For us, this was the case with the first three strakes. After that, the rest of the strakes fitted the precut notches perfectly. Because the sheerstrake was going to be finished bright, it was cut from solid mahogany and we used the kit’s okoume strakes as patterns. Khaya mahogany was also used for the floors, rubbing strakes, inwales, knees, and the transverse and longitudinal thwarts. The bottom boards were cut from knot-free Oregon pine.
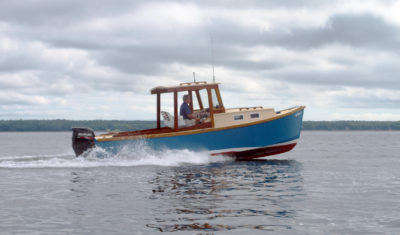
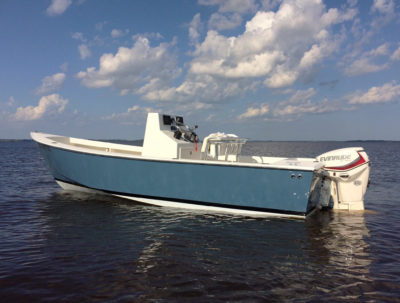
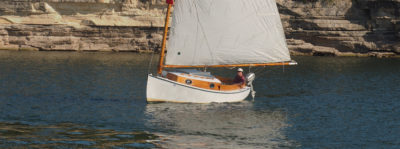
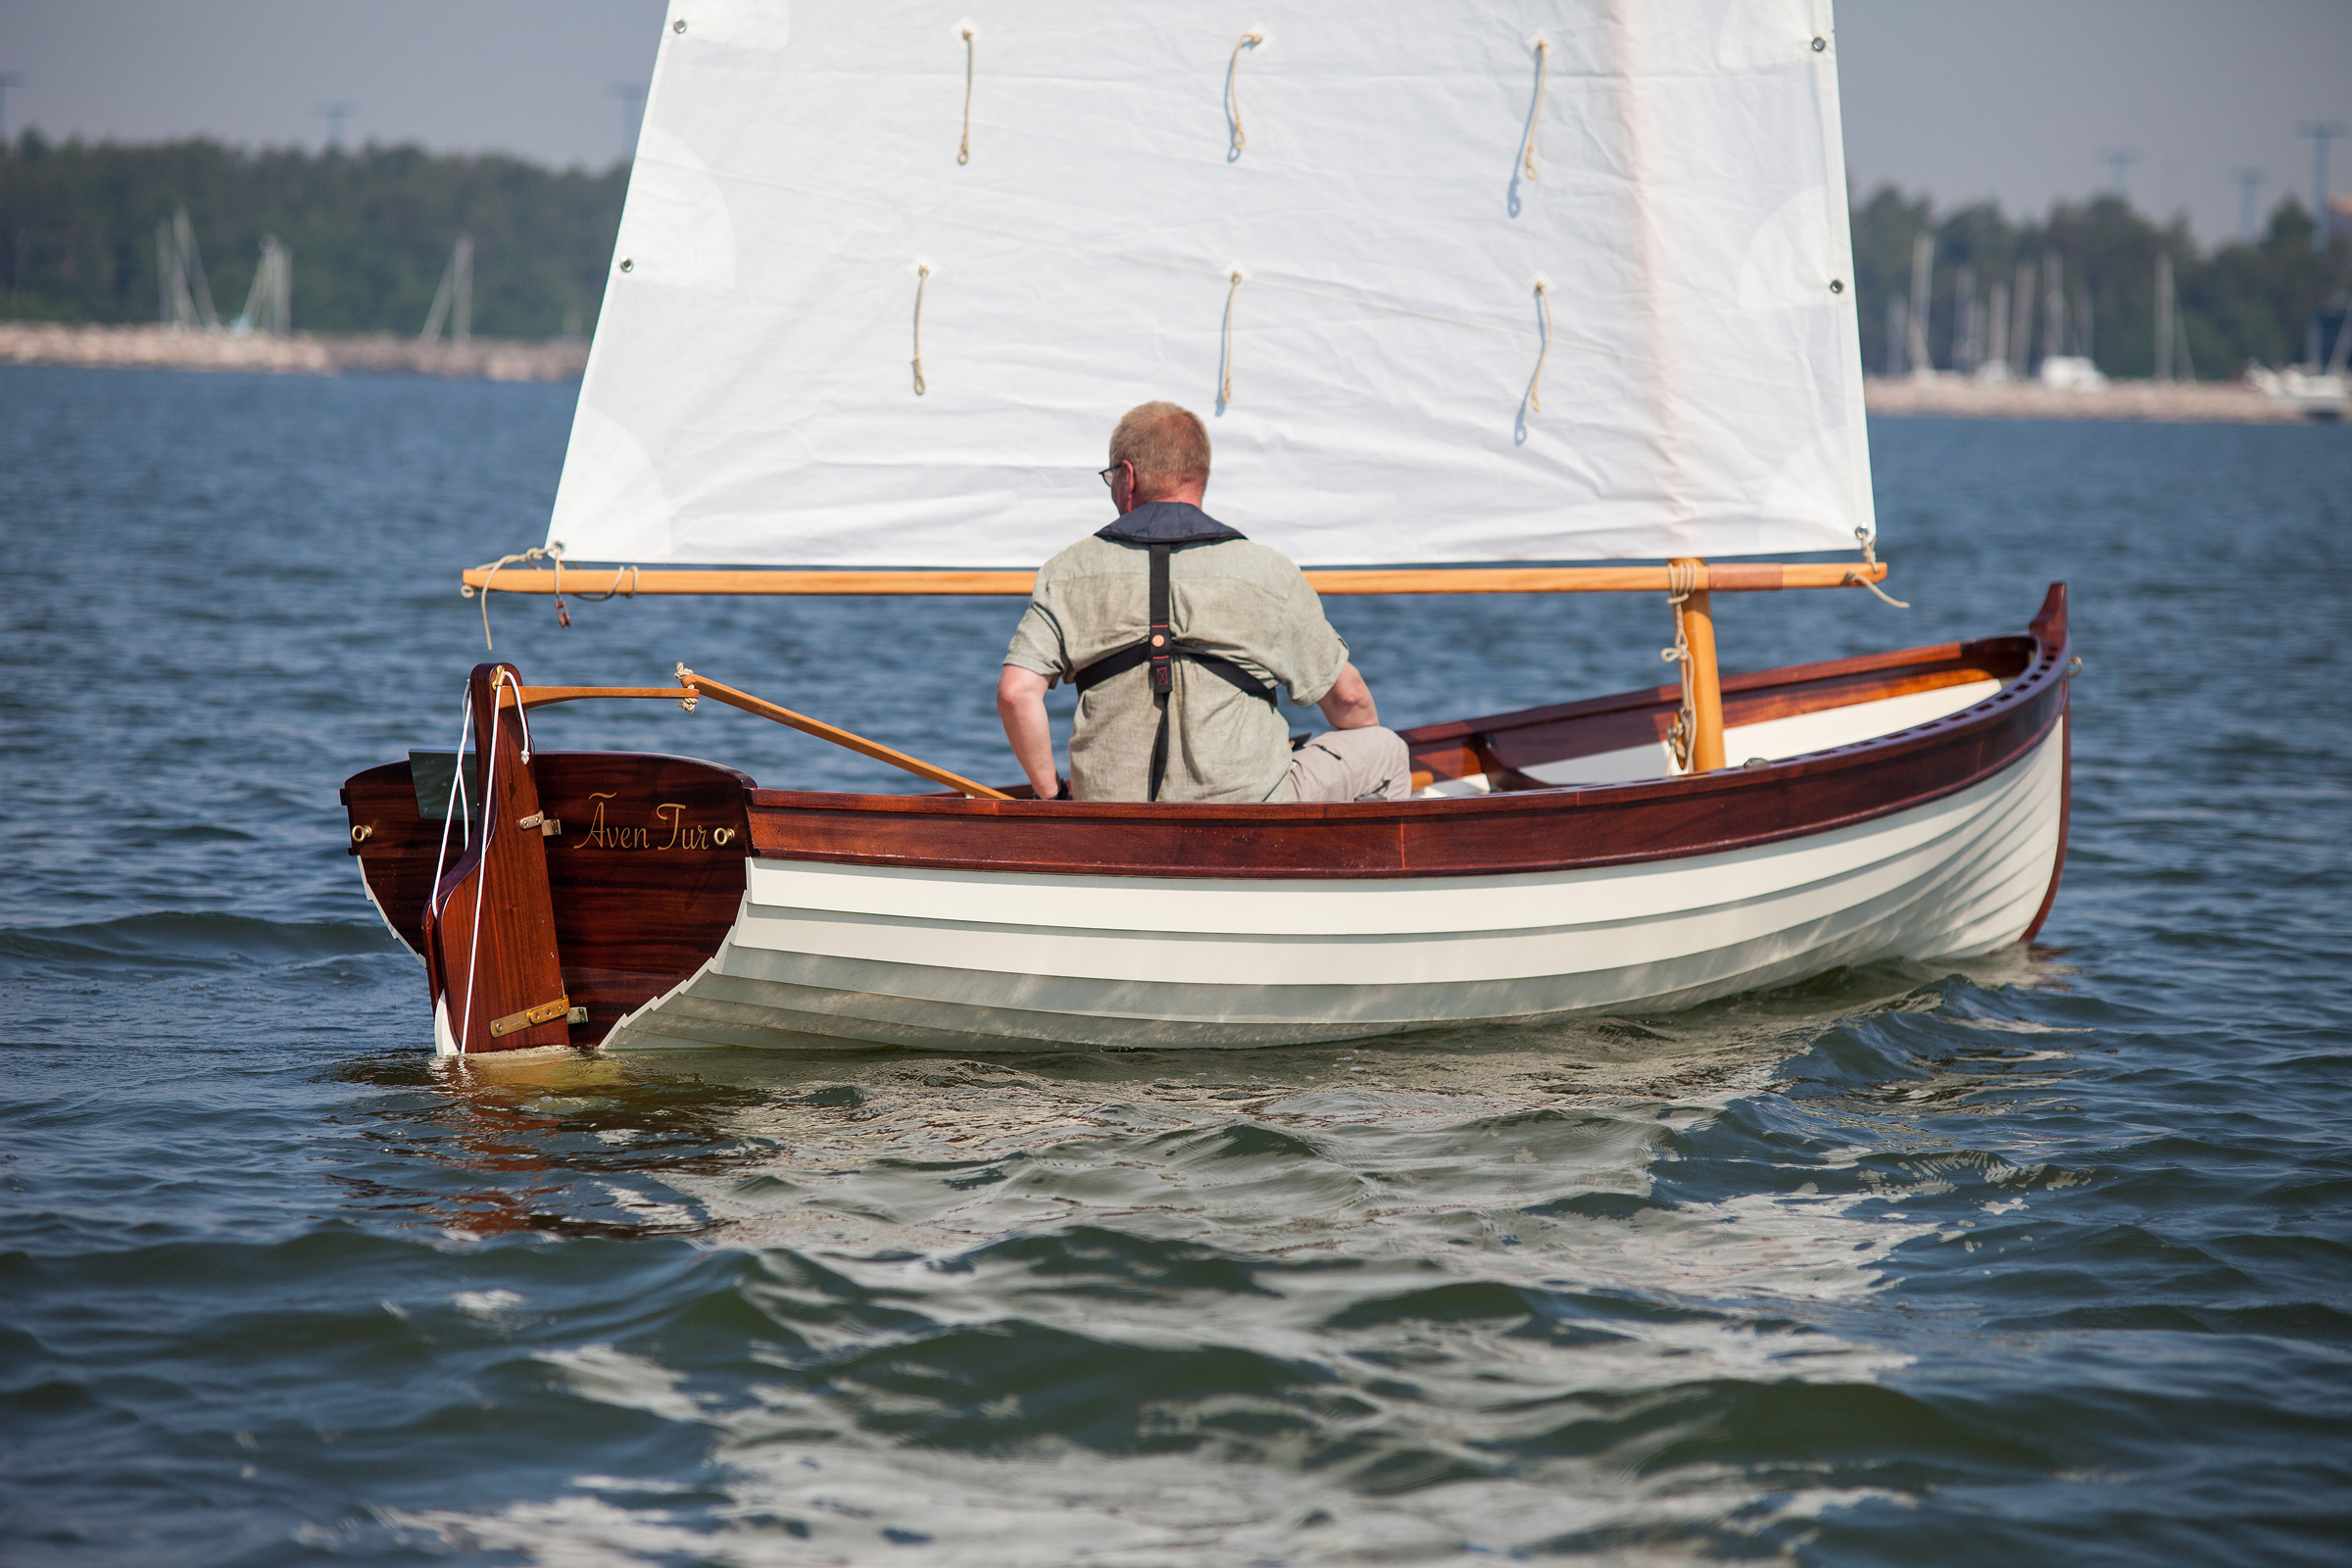 Mats Vuorenjuuri
The Penny Fee is ordinarily equipped with a standard tiller, wich leads from the rudder head through a slot in the transom. The Norwegian tiller here was adopted because it provided clearance for an electric outboard set to port.
As the bottom boards are not connected to each other for support, they need to be substantial, 3⁄4″ thick, in order to retain shape when stepped on. The wooden cleats holding them in place may get kicked open from time to time, but our clients wished the floorboards to be easily removable, and we followed the plans.
The okoume hull was sealed with epoxy, painted with two layers of epoxy primer, and finished with two-part polyurethane enamel. For the sheerstrake, we chose a marine two-part saturating wood oil. The floorboards and thwarts were also sealed with epoxy before being finished bright. The Oregon-pine spars and oars were wiped down with linseed oil.
While the plans don’t include built-in flotation, at the clients’ request we added a sealed compartment in the bow, which doubles as a stepping platform and a forward seat. With two inflatable rollers strapped in the middle of the boat under the side seats and one buoyancy bag under the stern thwart there was more than adequate flotation in case of a swamping.
One distinctive feature of Penny Fee’s design is the high, arched transom, which has a hole cut in the center for the tiller. With an electric outboard installed in the transom most of the time, this Penny Fee was equipped with a Norwegian tiller over the transom. When the outboard is kicked up, it would interfere with the tiller.
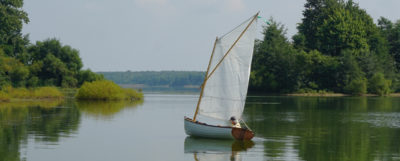
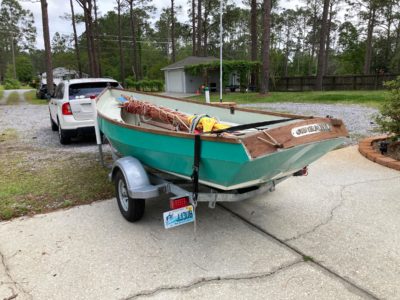
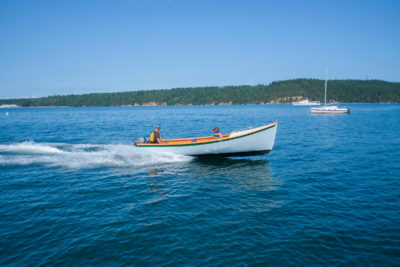
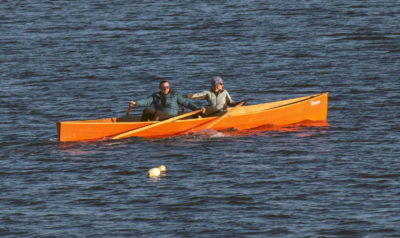
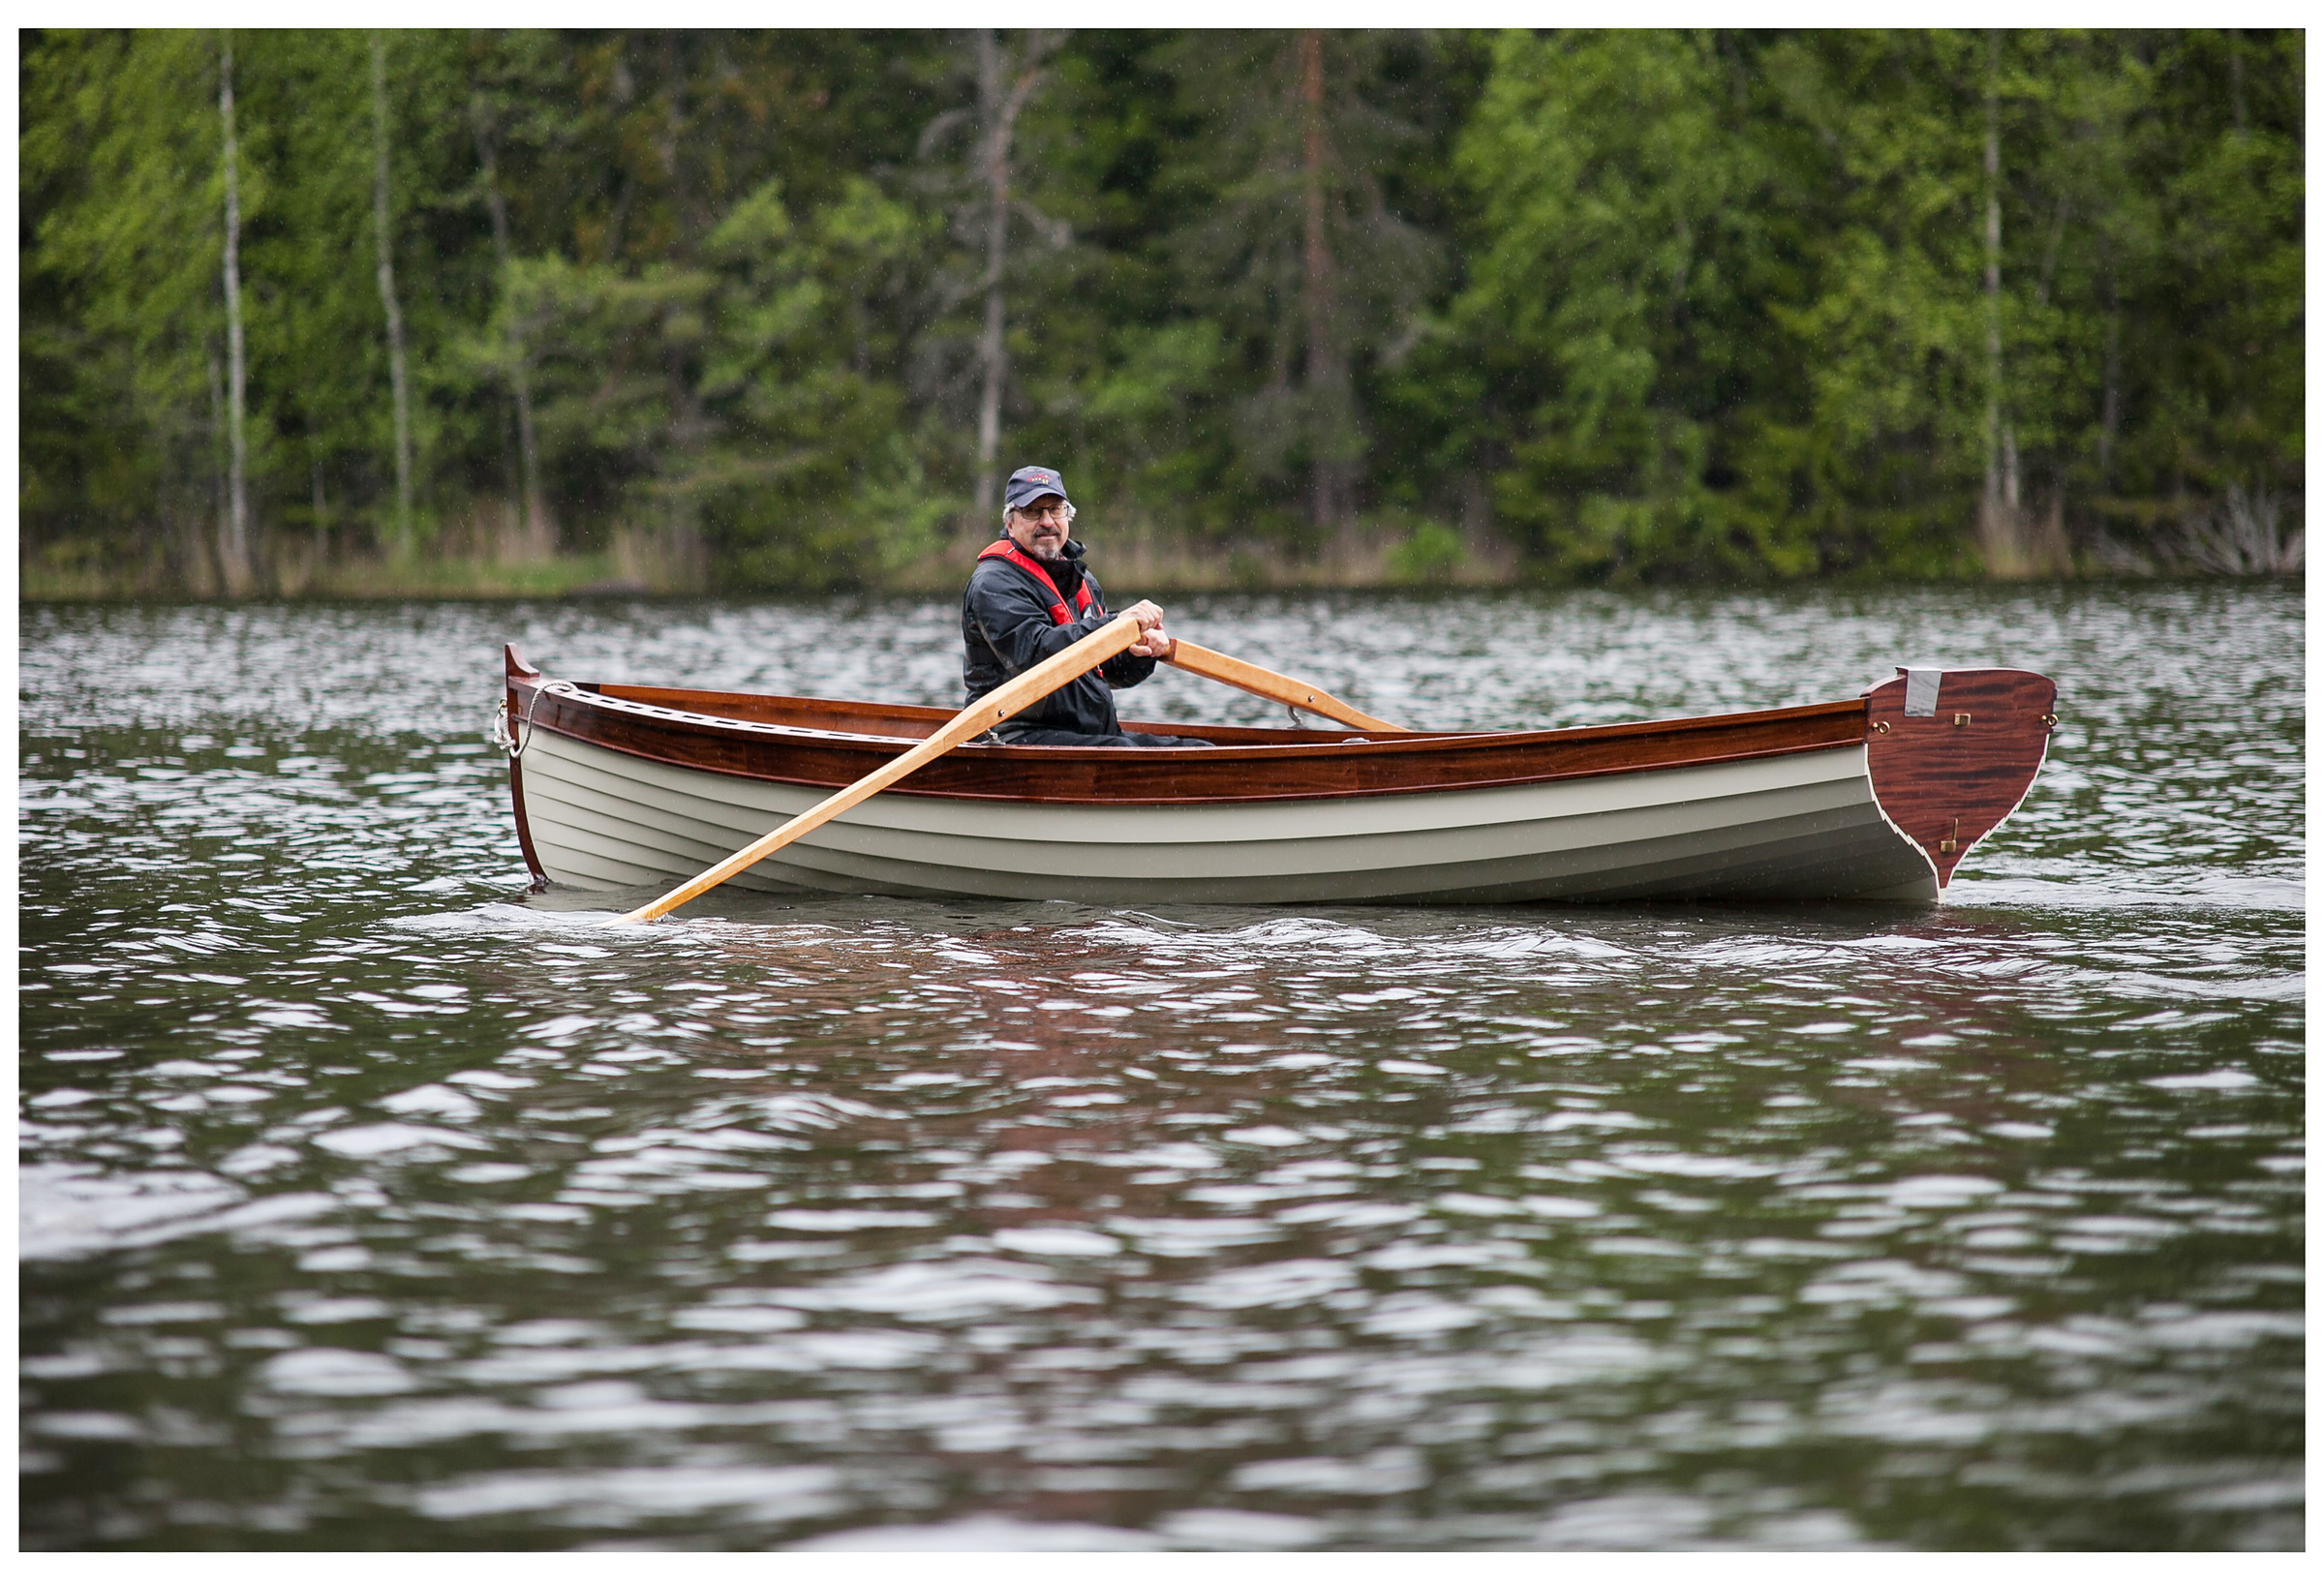 Mats Vuorenjuuri
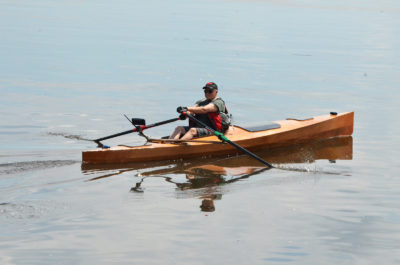
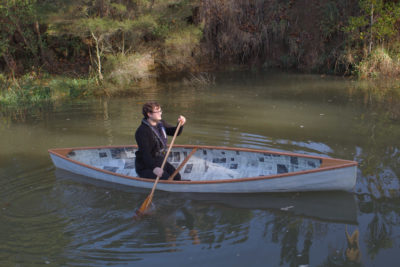
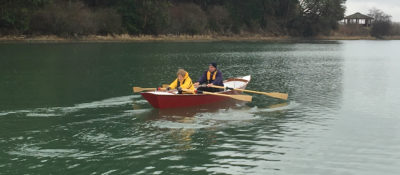
With a beam of 63″, the Penny Fee feels big for a rowboat, but cruises easily at 3 knots.
I have been impressed by the solid feel and stability of Penny Fee. Lightly loaded, the transom is well clear of the water, promising good load-carrying capabilities without added drag. For a rowboat, it is on the larger side, and you can feel the weight and beam, but once you get the hull moving with a good pair of oars, it is easy to maintain 3 knots and, with a little more effort, the GPS can clock a steady 3 1⁄2 knots. Penny Fee has two rowing stations, the middle one being a natural choice if you are rowing on your own. At this station, the beam of the hull is widest, providing a little more leverage. The boat is fairly well balanced longitudinally, whether you use the center or the aft rowing station. As only one pair of oars was made, we did not test rowing with two, but you would certainly get more speed and range with two rowers.
While the lug-yawl rig has the mainmast partner well forward, the plain lug rig option puts the mast partner close to the first thwart, and the forward part of the boat gets a bit busy; when getting aboard, you have to step in carefully. The floorboards do not extend all the way into the bow, and the open area is a good spot for bailing out.
We conducted a capsize test and the Penny Fee, with the flotation installed, floated steadily on her side; righting the boat and getting back on board was a simple matter. Once recovered, the top of the centerboard case was still well clear of the waterline, and the stability was good enough for at least one person to move around in the boat and bail.
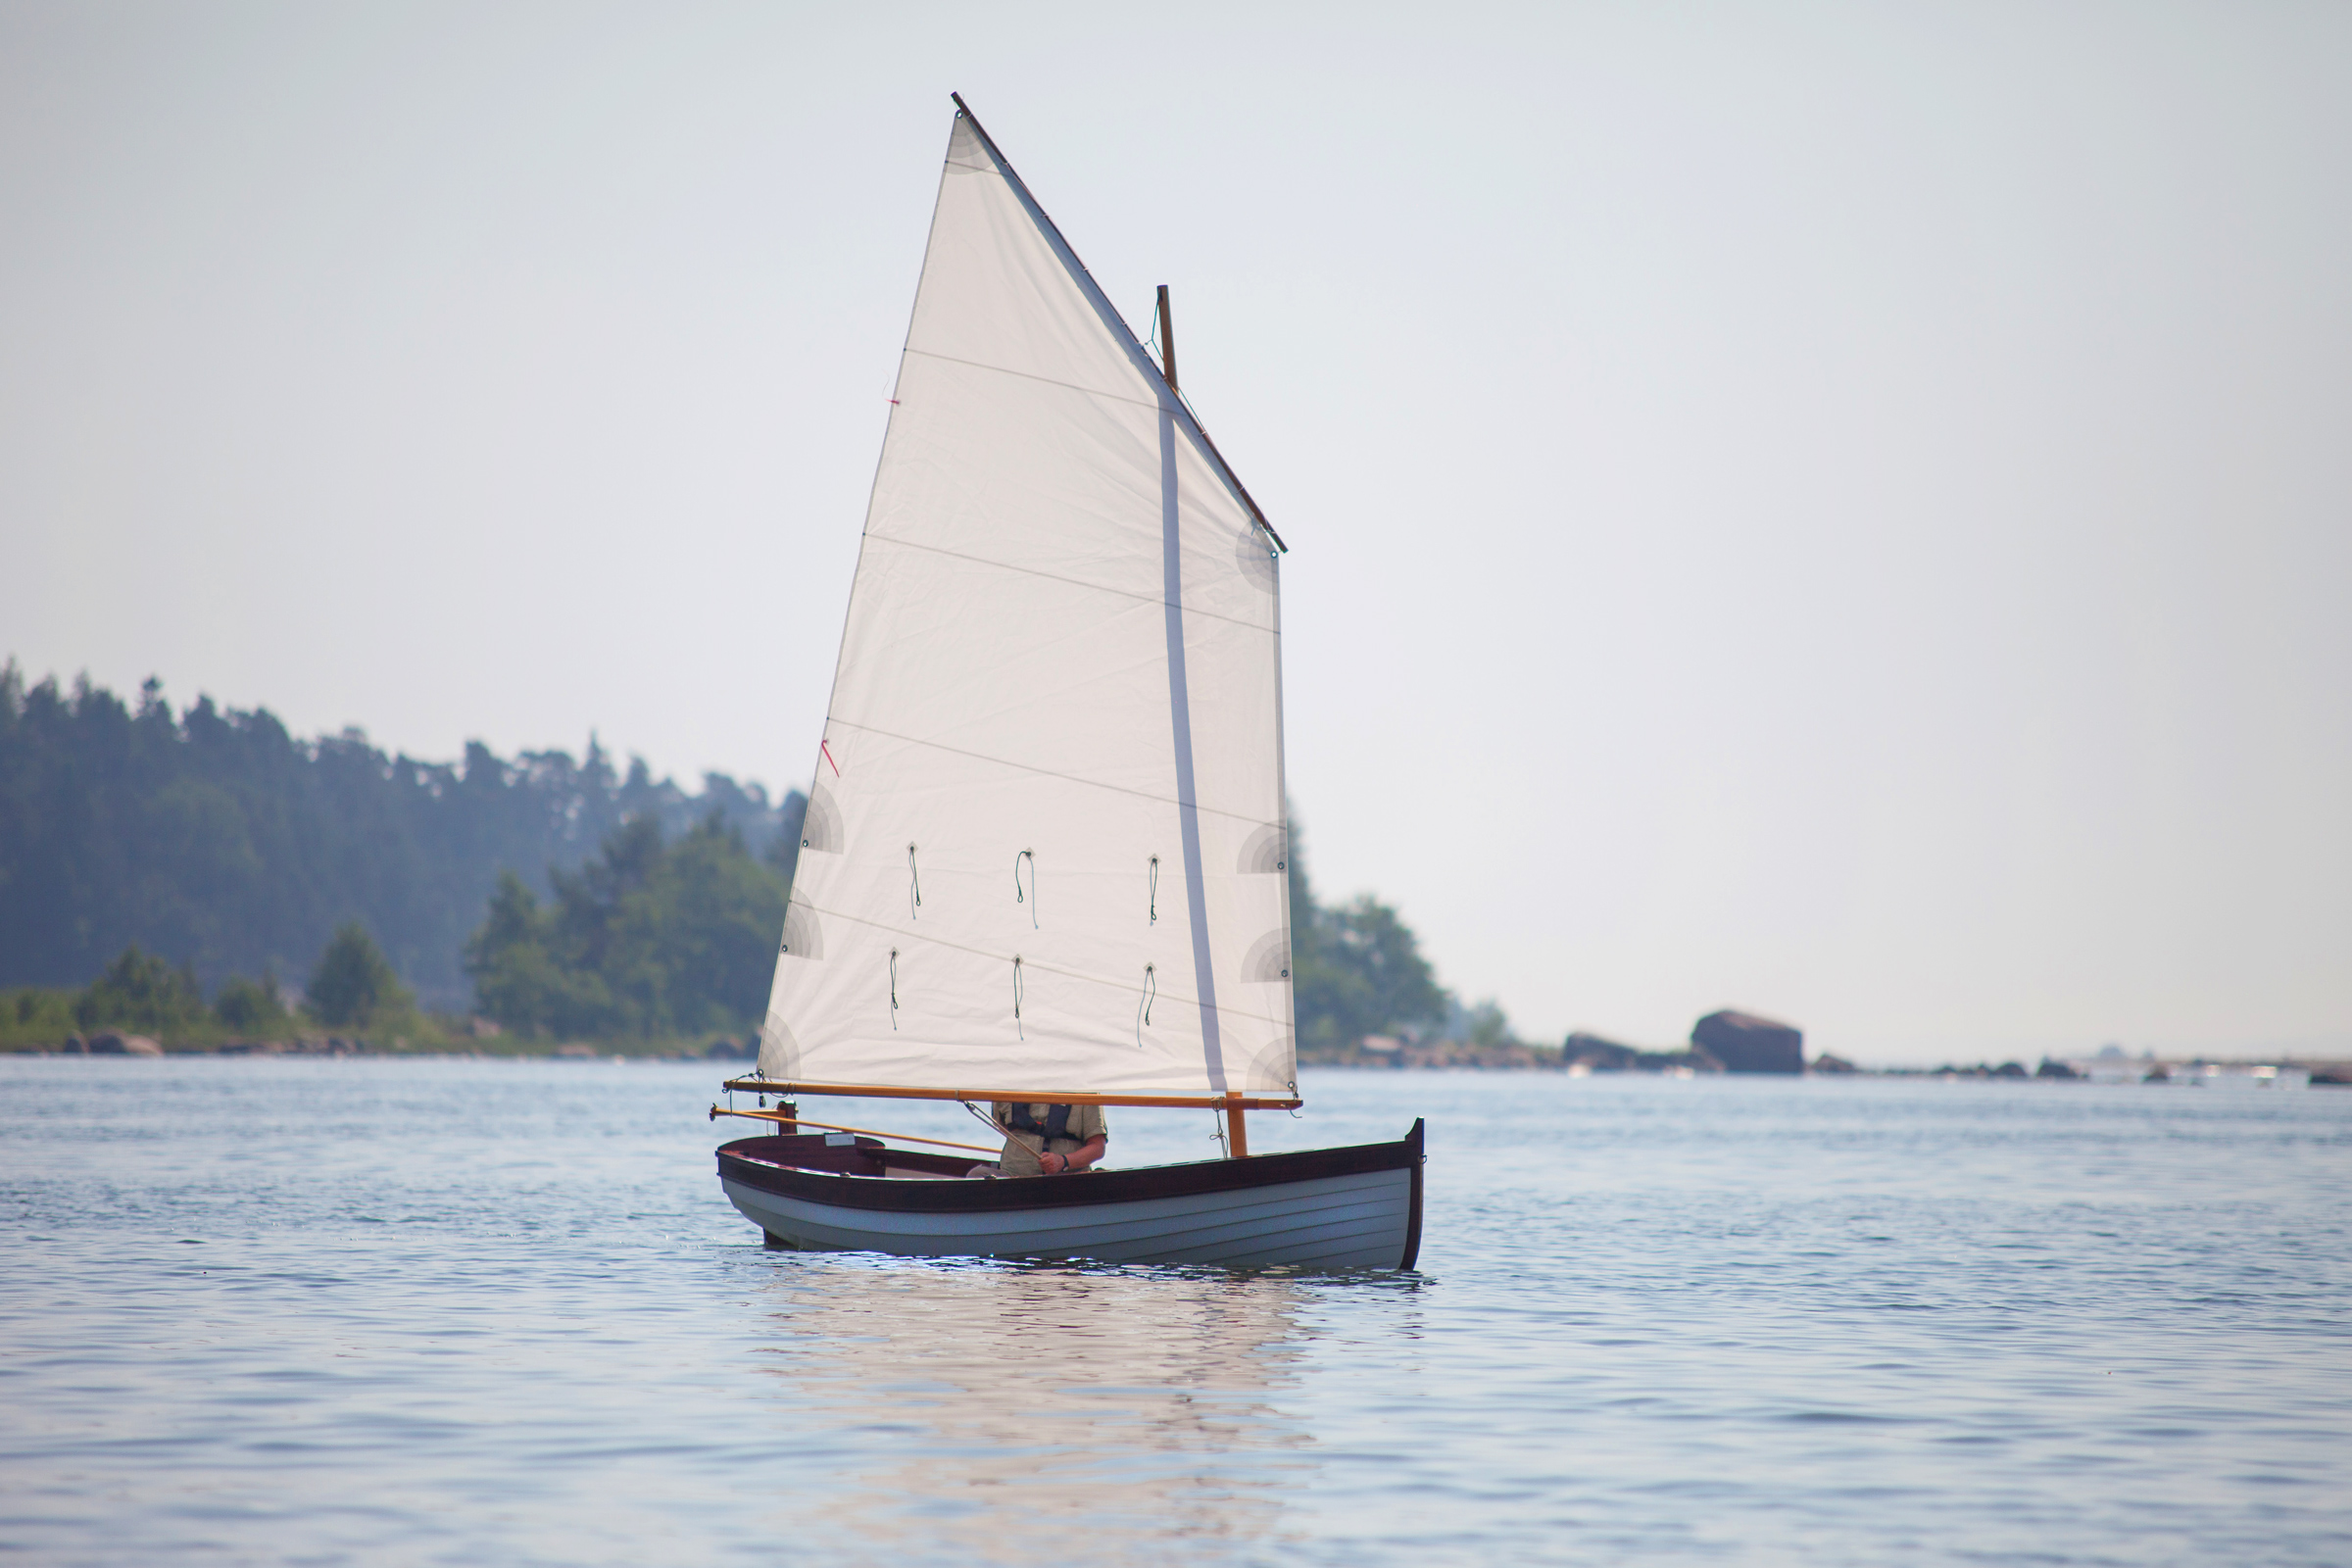
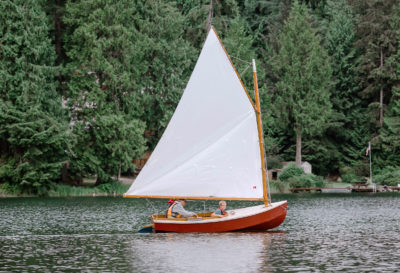
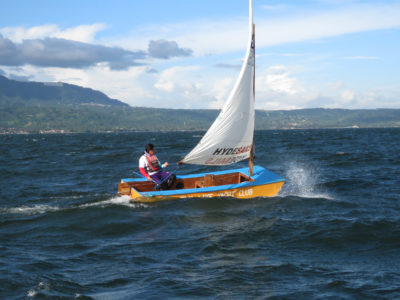
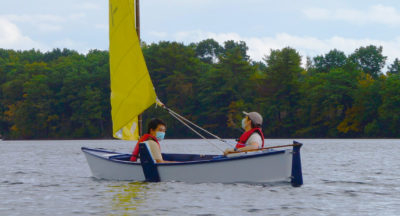
 Mats Vuorenjuuri
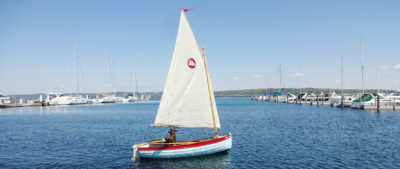
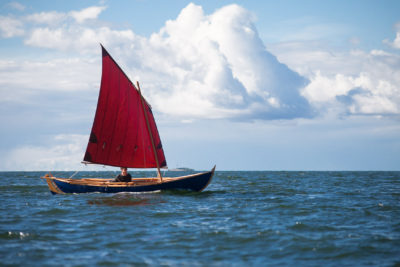
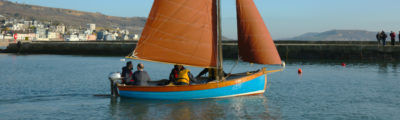
The lug rig is the simplest and the smallest of the rigs
Our first sail was in mild 8- to 10-knot winds, and with three people on board the balance was near perfect, with an almost neutral helm. The sail area seemed to be adequate, giving 3 to 4 1⁄2 knots depending on the point of sail. For more exhilarating sailing, the extra sail area of the gaff sloop or gaff yawl will give you more liveliness and more strings to pull. With the single lugsail, tacking is easy, and the boat turned about quickly enough and didn’t get caught in irons. On a second outing, the wind was even lighter, only 4 to 6 knots, but by trimming carefully and not pointing too high, the Penny Fee glided through the water effortlessly and even had enough speed and momentum for effective tacking. In this wind, if I let go of the tiller the boat had a slight tendency to turn away from the wind. I did not have the opportunity to sail in heavier winds, but the solid stability and modest sail area promise good handling and the ability to carry full sail in moderate breeze with ease.
Penny Fee is more a workhorse than a racehorse, and, for camp-cruising with two, the stability and roominess really come into play. Building a Penny Fee takes some effort, but the result is an able, traditionally stylish, and handsome vessel that will serve many uses well: rowing, sailing, fishing, or cruising.![]()
Mats Vuorenjuuri discovered the simplicity and joy of small boats after sailing various types of craft including sail-training schooners. The father of three, in 2019 Mats started building modern glued clinker plywood boats professionally and offered maintenance services through his business Nordic Craft. His son Akseli, joined him as an apprentice in 2022, and Iain Oughtred’s timeless but modern designs have been the backbone of their business. For more Iain Oughtred reviews by Mats, see “Elf,” “Elfyn,” and for some of Mats’s own adventures see “The Sea of the Sámi People,” and “Sailing the Archipelago Sea.”
Penny Fee Particulars
Length: 15′ 11″
Beam: 5′ 3″
Depth: 22 1⁄2″
Displacement: 300 lbs
Skill level: Intermediate to advanced, no lofting required
Construction: Glued lapstrake plywood, traditional, cold-molded, and strip plank.
Sail area:
Lug: 87 sq ft
Lug yawl: 104 sq ft
Gaff sloop: 104 sq ft
Gaff yawl: 121 sq ft


Plans for the Penny Fee are available from The WoodenBoat Store for $231 and from Oughtred Boats for $256 AUS. Kits are available from Oughtred Boats and Jordan Boats UK.
Is there a boat you’d like to know more about? Have you built one that you think other Small Boats Magazine readers would enjoy? Please email us!
Beautiful boat. I’m looking to buy something similar here in Seattle. Any thoughts on who or where to get one under $7500?
Thanks,
Jeff
Keep an eye on this website as well as the Center for Wooden Boats and Northwest Maritime Center. I found my Penobscot 17 on the NMC website. CWB has had similar boats, in the past, on their site. Or, take a trip to Port Townsend; have a late breakfast at the Blue Moose; check out all the bulletin boards for boats for sale; post boat-wanted ads in all of the above. Happy hunting.
You should also review Ross Lillistone’s Phoenix III – very similar design but with designed flotation. It’s a lapstrake design but Ross has a very similar design—the First Mate—made with flat panels for easier construction. https://smallboatsmonthly.com/article/lake-nipigon/
Hello, I found the boat beautiful. I am from Argentina, more precisely from Misiones. I live near a river and I would like to build my own sailboat. However, I haven’t found any plans to do so. Do you know where I can get them? I would like to be able to build a sailboat similar to yours
Hi Alejandro, plans for the Penny Fee are available from various sources. Here in the U.S. you can purchase them from The WoodenBoat Store for $231, and they are also available from Oughtred Boats in Australia for $271 AUS. Kits are available from Oughtred Boats and Jordan Boats in the UK.