Several years ago, I was watching a TV show that featured a Riva Aquarama, and I remember thinking that the luxury runabout was perhaps the most beautiful boat I had ever seen and wondered if I could buy one. I soon realized that even if I could find one to buy, I certainly couldn’t afford it. But during my Riva research I stumbled upon the Glen-L Marine website and started thinking: maybe I could build something that resembled the Aquarama, but at considerably less cost.
Since 1953, Glen-L Marine has been producing designs for amateur builders, and their creations have been built all over the world; their website features hundreds of successful builds. After sifting through about 300 designs of extraordinary variety, I landed on the page for the Malahini, a classic 16′ runabout designed by Glen L. Witt in the 1950s. It spoke to my runabout imaginings, and I studied the online drawings closely: It was powered by an outboard, which appealed to me as I was somewhat intimidated by the idea of installing an inboard; and its V-bottomed hard-chined hull was developed for plywood construction, which sounded a lot simpler for a beginner than cold-molding or carvel planking. I am an IT guy by trade and have only a few carpentry skills, but I had built a simple johnboat a few years earlier so did have a few tools and a little experience. I ordered the plans.
 Simon Foord
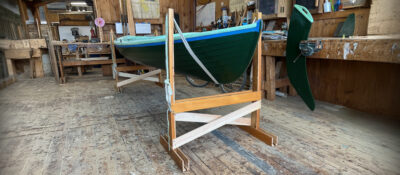
The build of the Malahini begins with the strongback onto which are mounted the stem, transom, and frames. Before fitting the bottom panel, the chine logs and the battens that stiffen and strengthen the bottom of the hull are also fitted. At this stage in the construction, it is easy to see the sharp V-entry and how it contrasts with the flat, beamy sections in the stern.
The delivered package included complete plans with full-sized patterns for the stem, breasthook, transom knee, and chine-blocking, as well as half-section patterns for the frames and transom. There was an eight-page instruction manual, broken down into very detailed sections that cover every aspect of the build including a comprehensive bill of materials and fastening schedule. In addition, there are five illustrated sheets with clear descriptions and dimensions. The build calls for hundreds of screws (I chose silicon-bronze), fiberglass cloth, epoxy (the company does offer both a fiberglass and a fastening kit), oak or mahogany for the boat’s backbone, framing, and transom, and marine plywood for the hull sides and bottom, stem, floorboards, seats, and decks. I was unable to find good marine plywood where I live in Tennessee and instead used good-quality exterior fir plywood. As per the plans, I used 3⁄8″ for the bottom planking and 1⁄4″ for the sides and sub-decks.
Building the Malahini
The build begins with the construction of the strongback onto which are mounted the transom, stem, breasthook, and frames. The plans and instruction manual thoroughly explain how to build each component and the order of operations. I used red oak for the frames, not realizing when I began the project that it is more susceptible to rot than the specified white oak. Rather than replace all the frames, I thoroughly encapsulated them in epoxy resin and later applied plenty of bilge paint below the waterline. Eight years later, the frames are still like new. However, having learned of the superior qualities of white oak, I switched to that for the rest of the build. After the frames were all in place, I installed the keel, bottom battens, sheer clamps, and chine logs.
Once all the structural pieces are complete, the hull’s bottom and topsides panel can be fitted. I scarfed the plywood sheets to get the required lengths, and then the installation of the panels was relatively straightforward using thickened epoxy and a ton of screws. The tighter bends in the bow area did need a little encouragement, but the shaping was achieved by dampening the plywood with towels soaked in boiling water. I stained all the plywood panels a mahogany color before sheathing the exterior with fiberglass cloth and epoxy resin.
 Simon Foord
When the hull structure was complete, but before the deck was fitted, I painted the bilges throughout. The plans call for the cockpit sole to be made of plywood, but I installed 5 1⁄2″ pine floorboards, spaced to let water pass through to the bilge, instead. Limber holes in the floor timbers let water flow aft to be collected in the open area in the stern.
I recruited and bribed friends and neighbors to help flip the boat right-side up onto its trailer. It was an exciting, if nerve-racking, moment, but the operation was successful and went without incident.
Before proceeding with any of the fit-out, I painted the bilge while it was still exposed and accessible. Then I installed the sole boards so that it would be easier to move around within the boat. For the sole, the plans call for plywood sections, but I opted to use 5 1⁄2″ pine boards with 3⁄16″ spaces between them to allow for drainage to the bilge. I encapsulated the boards with epoxy and varnish, and applied strips of clear nonskid tape for safety.
The plans suggest several ways to finish the decks and covering boards. I chose to use 1⁄4″ fir plywood as sub-decks onto which I laid hardwood veneers—first, 1⁄4″-thick mahogany for the covering boards and kingplank, then book-matched strips of 2 1⁄2″-wide by 1⁄4″-thick mahogany alternating with 1⁄4″ × 1⁄4″ maple to simulate classic deck planking with caulked seams. I temporarily screw-fastened the strips while the epoxy cured. After removing the screws, I counterbored the holes and filled them with mahogany plugs for a traditional look. I had seen this method used by other builders, and thought it attractive.
The Malahini cockpit layout
Next, I worked on the cockpit. After selecting good-quality mahogany boards, I installed the coamings and dashboard. The plans leave the layout of the dashboard and the number of gauges and switches to suit the builder. I laid my gauges out in a straight row with the various switches (for lights and bilge pump) beneath. To add a little flare, I inlaid two strips of maple across the dashboard.
 Lisa Foord
The layout of the cockpit is close to the design, but I wanted to get as much weight forward as possible, so while the fuel tank and battery would ordinarily be carried beneath the afterdeck, I moved them forward and installed them beneath the foredeck. In turn this gave me storage space beneath the afterdeck, where I made the bench seat easily removable and attached the backrests with strong magnets. The motorwell is self-draining and large enough to allow the motor to be fully tilted.
The plans offer several options for steering, the position of the remote controls, and how to run the cables. I mounted the throttle control on the starboard coaming and ran the wiring harness with the steering cable beneath the side deck to the transom.
To construct the benches, I followed the plan dimensions but with a few changes. I wanted to get as much weight forward as possible, so I moved the dashboard and steering bench forward 6″ and installed a 19-gallon fuel tank and battery beneath the foredeck (Glen-L positions these beneath the stern deck). This alteration provided me with storage space beneath the afterdeck, so I made the stern bench seat easily removable, and attached its backrests with powerful magnets so they can be folded down or removed for quick access. I also reduced the width of the walkthrough cutout in the forward bench backrest to give a middle passenger better back support. All the seat bases are hinged and have generous storage beneath them. Despite the fuel tank and battery under the foredeck, there is still plenty of foot room for passengers, with places to stow bags and life jackets.
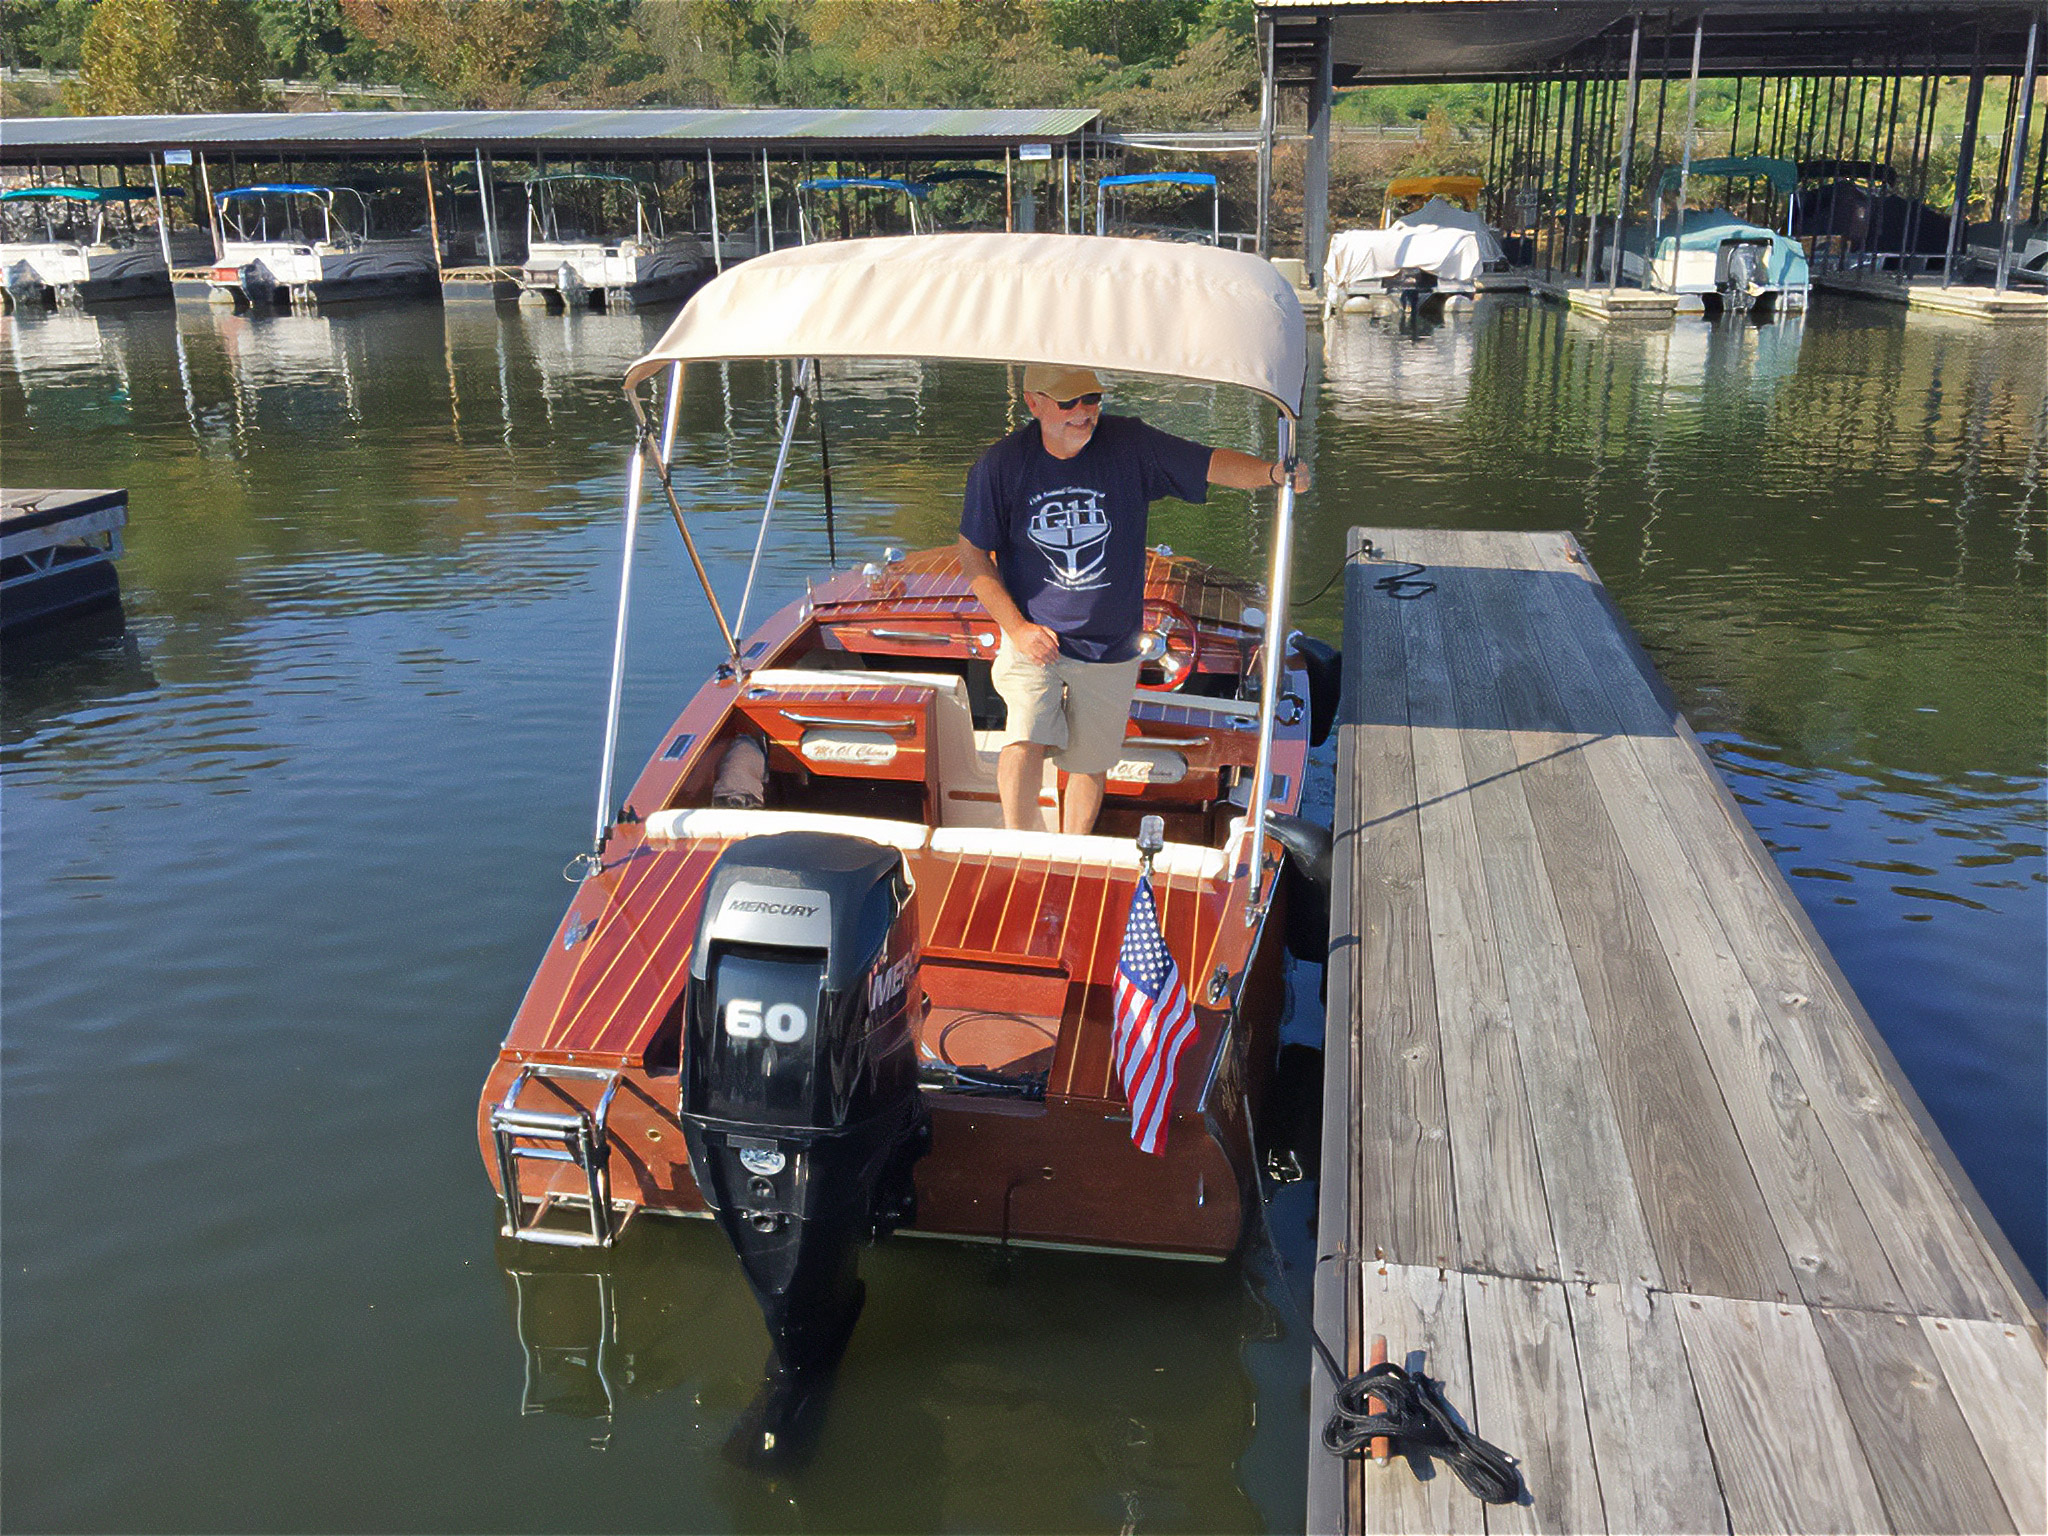
The plans include a schematic of the transom and self-draining motorwell with a table of various dimensions to cover a variety of motors from a 5.5-hp short shaft to an 85-hp long shaft. I made the recommended modifications to suit a new Mercury 60-hp four-stroke long shaft. The well is sized so the motor can be fully tilted up. To satisfy the warranty conditions, the motor was installed by the dealer. It has been reliable, has ample power, and is relatively quiet.
 Michael Maddox
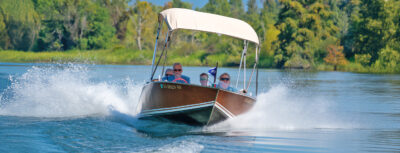
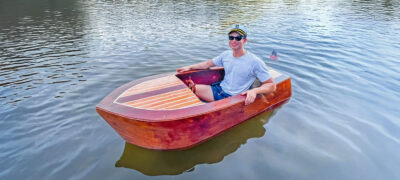
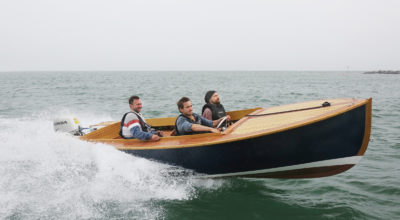
For four adults, the Malahini’s cockpit is spacious. For extra comfort I mounted chrome grab handles in front of each seat. The bimini is not specified by Glen-L, but this production 8′-long, four-hooped version that I found online works well. While the boat is designed to accommodate an 85-hp outboard, the 60-hp motor here provides ample power, though the addition of trim tabs helps the boat to get on plane quicker when there is a full crew on board.
Little information is given regarding the electrical system. I ran all 12-volt wiring back to a convenient flip-down fuse panel beneath the dashboard. Finishing up the electrics, gauges, and controls took several months. The plans do give some brief details on the upholstery, and l considered doing it myself but instead found a professional shop to custom-make everything for me.
After a good deal of fairing and sanding I applied more than 10 coats of varnish to the topsides, interior and decks, and then installed chrome and stainless-steel fittings to complete the classic look. The windshield shown in the plans is a fixed Plexiglass type. I bought cast-aluminum frames from a foundry in Pennsylvania, and cut the windshields from 1⁄4″ clear Plexiglass sheets. Although a bimini is not specified, my wife and I were keen to have one. I found a production 8′ four-hoop bimini online that has worked well.
Working evenings and weekends, and with support from my wife, the build took me two and a half years.
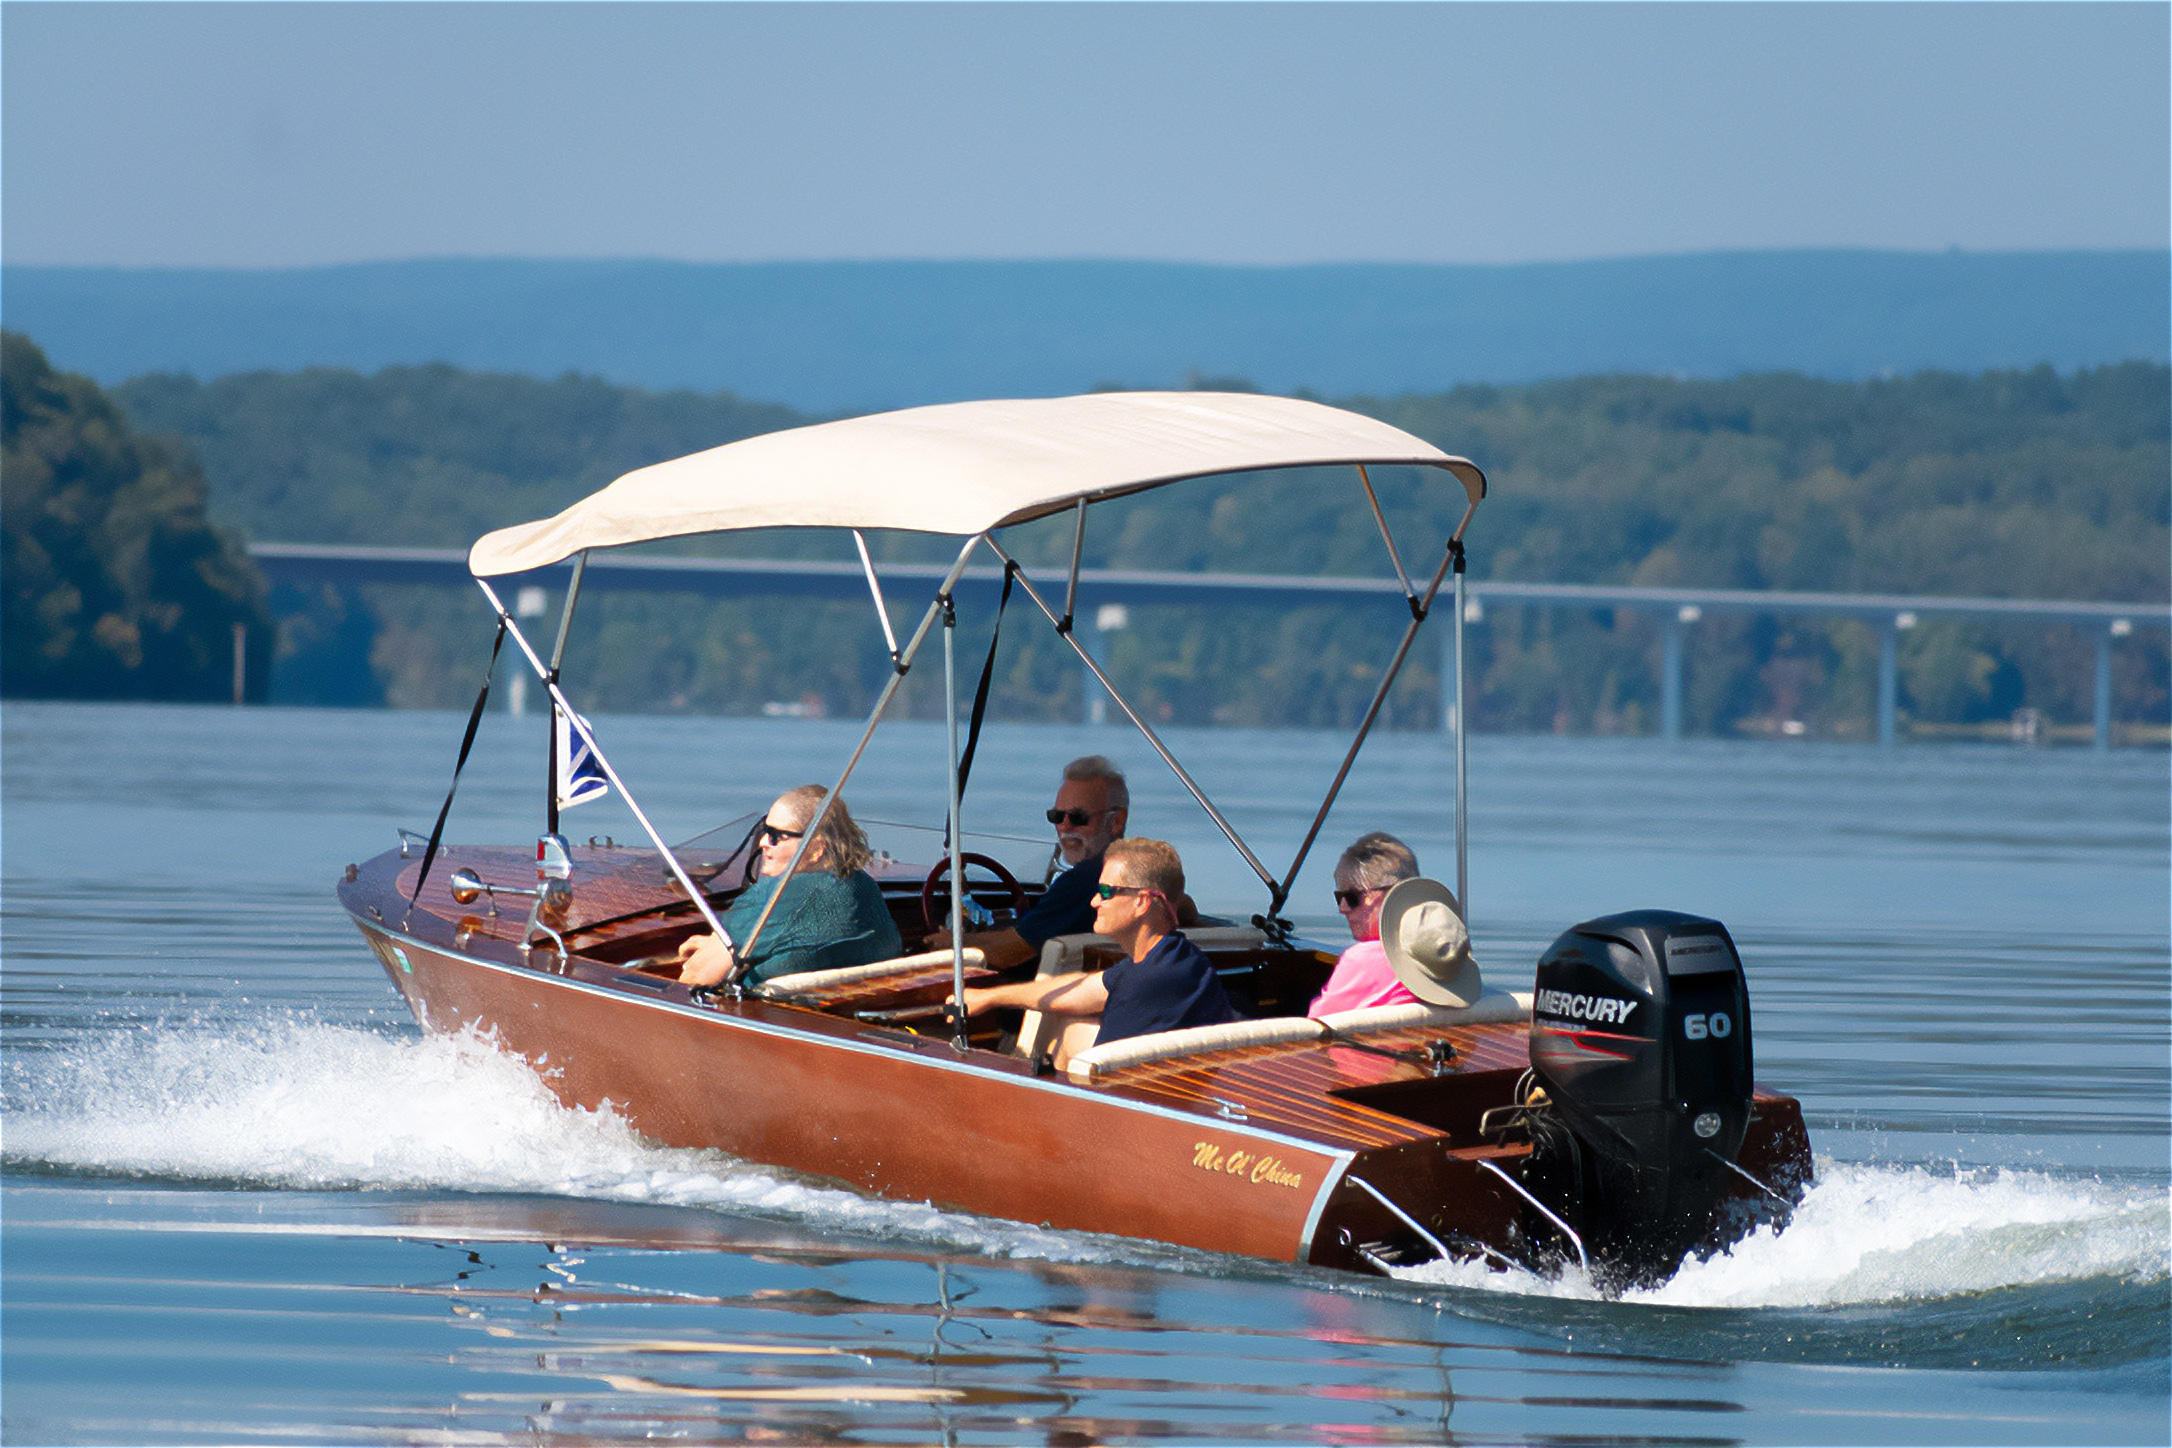
Malahini on the water
At rest the Malahini is very stable, which makes it easy to get aboard and move around, especially with the walk-through forward bench. I added a bracket in each side deck for boarding poles, which some passengers find reassuring. There is comfortable seating for four adults. To achieve optimum trim, I always try to seat lighter passengers on the aft bench. The Malahini drives like a sports car and is exceptionally maneuverable, carves through turns without skidding, tracks straight, and is quick to get on plane. The boat’s top speed is a little over 33 mph, and it will cruise comfortably at 25 mph; with the full-length spray rails, long and slightly radiused foredeck, and windshield it is a fairly dry boat. After using the boat for a while, I added trim tabs to the transom, and these have significantly helped to get on plane when the boat is fully laden. The boat performs best in calm waters, but while it does have a tendency to pound a bit in a chop, I have full confidence in the strength of the hull.
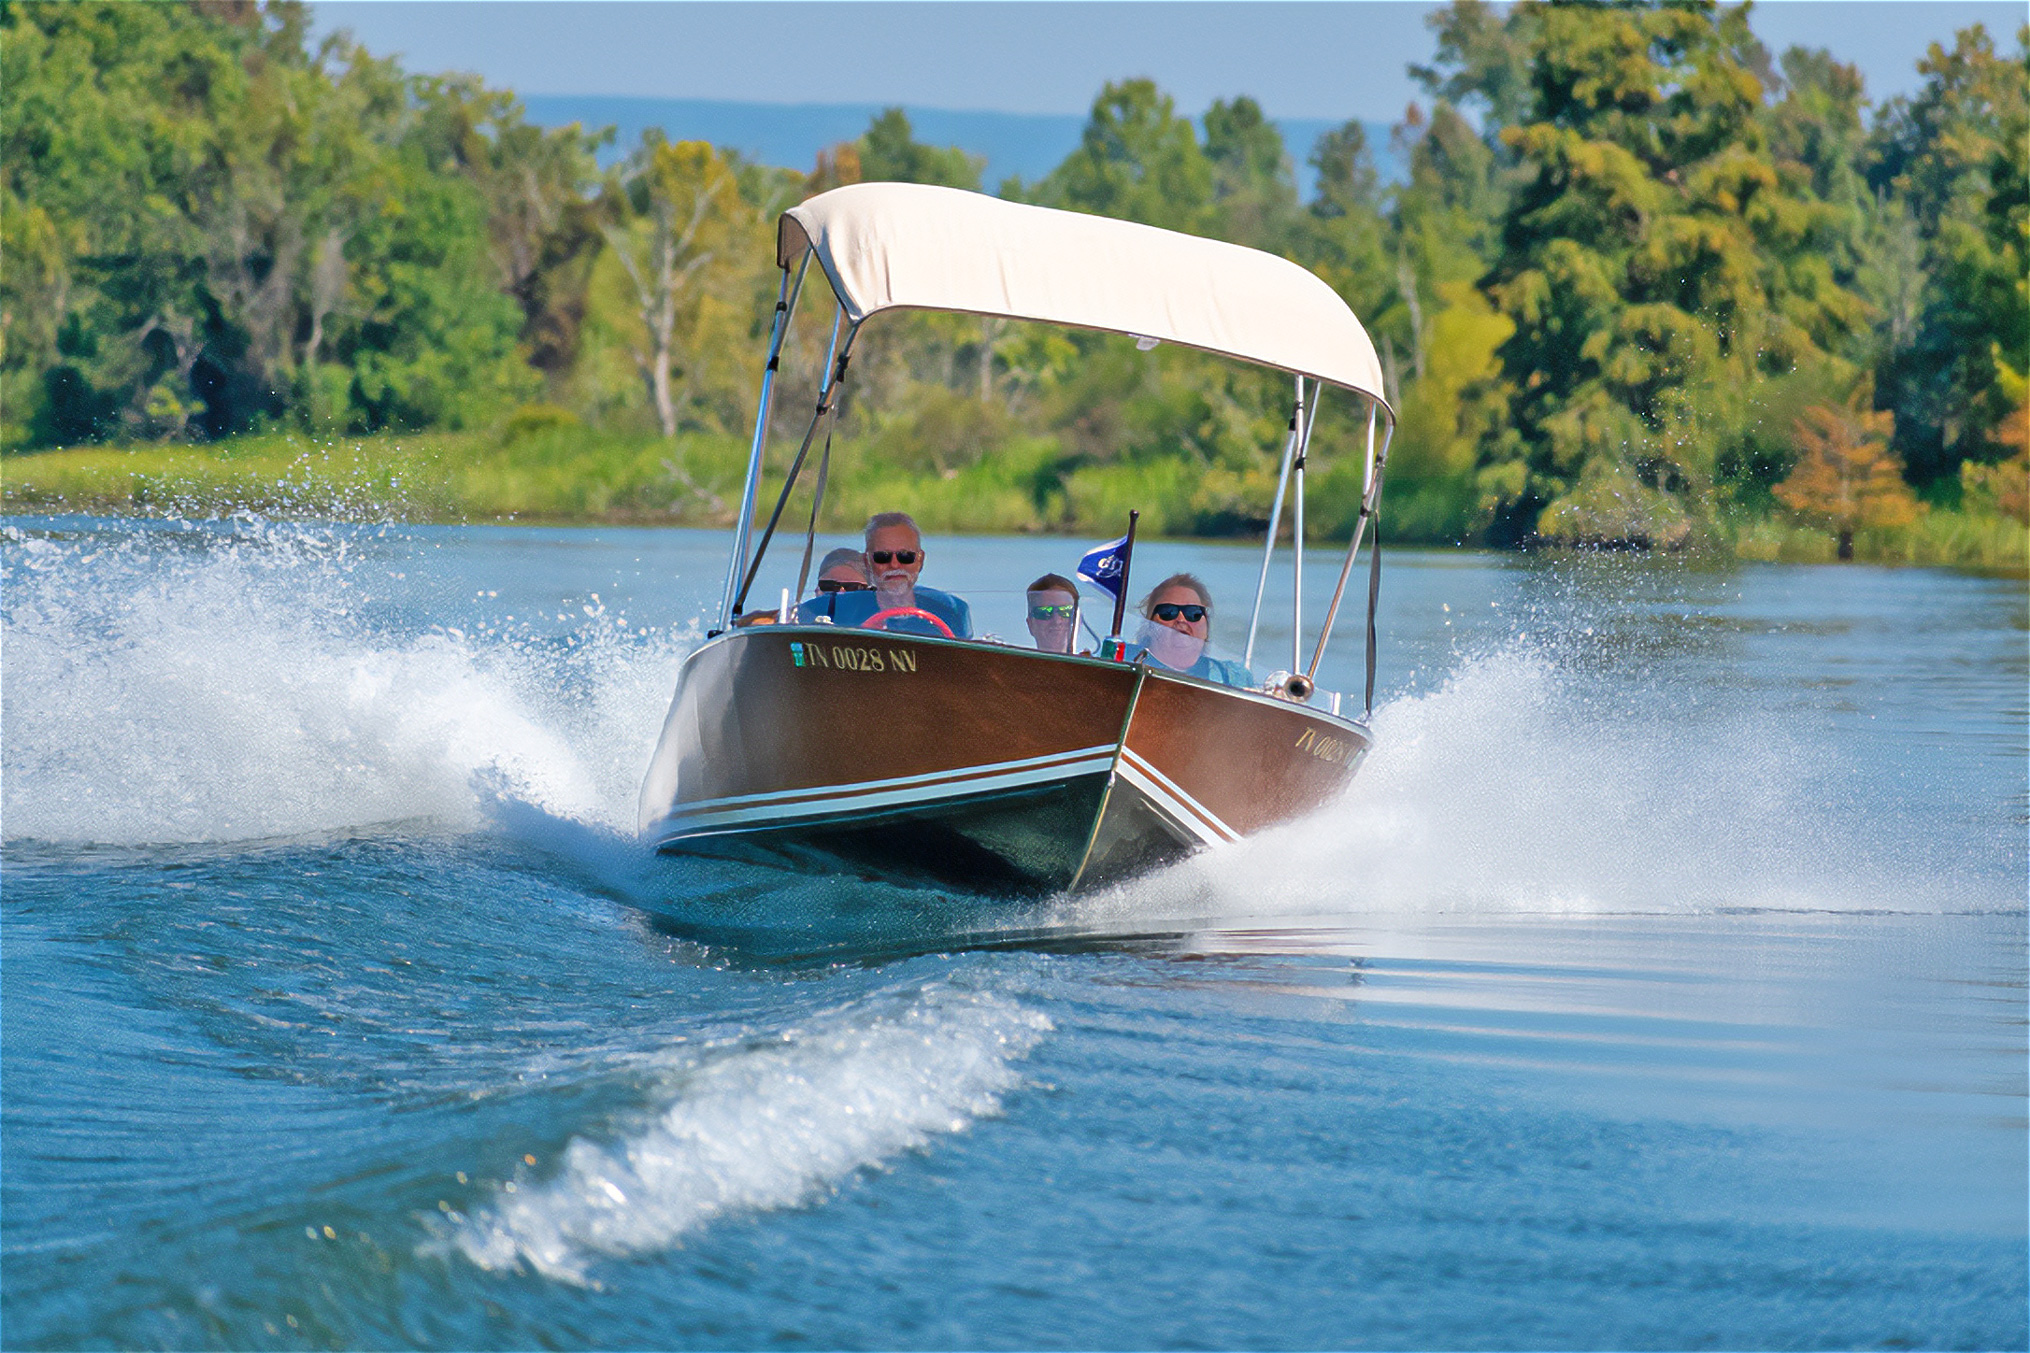 Michael Maddox
Even at speed and crossing the wake of another boat, the Malahini is a dry boat. The spray rails at the chines direct water out and away from the hull.
Above all, the Malahini is an extremely good-looking boat and always attracts plenty of attention and compliments. The construction project is best suited to builders with some experience, but the support from Glen-L’s plans and instructions is excellent, and I also appreciated the wealth of information to be found online in the Glen-L forum and elsewhere. On the occasions that I called Glen-L Marine they happily answered all my questions.![]()
Simon Foord is a retired IT systems engineer, born and raised in England. He moved to California almost 40 years ago and now lives in Tennessee. Simon has owned and built several boats over the years, and has a special passion for wooden boats. He enjoys running about in the Malahini and sailing his Glen-L 19 sloop on Percy Priest Lake near Nashville, Tennessee.
Glen-L Malahini Particulars
LOA: 15′ 11″
Beam: 6′ 7″
Hull depth: 31″
Passengers: 1–4
Hull weight (approx.): 475 lbs

Plans and accessories for the Malahini are available from Glen-L Marine. Prices range from $149 to $690 depending on the options chosen.
Is there a boat you’d like to know more about? Have you built one that you think other Small Boats readers would enjoy? Please email us your suggestions.
More powerboats from Glen-L Marine
Glen-L Zip: A twin-cockpit runabout, reviewed by Ted Gauthier
Glen-L Sea Knight: A 1957-vintage outboard cabin cruiser, reviewed by Chuck Black
The Glen-L Utility: Classic 1950s style in a boat that’s simple to build and a joy to use, reviewed by Michael S. Maddox
My son and I built the Glen-L Bullet (12’ 3” two-seater) in 2008. I wished we had built the Malahini instead. Four seats and more room makes it a more all-around useful boat. Beautiful build!
Thank you! My family appreciates the roomy cockpit.