For 30 years John Diamond has been a hobby woodworker, building furniture for the family: beds and bedside tables for his daughters, a desk, a dresser, an entertainment center, a music stand. But about five years ago, he and his wife, Justine, started watching YouTube videos of people building boats. “First we watched videos of people building wooden sailboats,” says Justine, “then we found cedar-strip canoes.” They were captivated. “We didn’t think we’d be able to use a sailboat or a rowboat, but a canoe was approachable, and we could see ourselves using it.”
 Photographs courtesy of Justine and John Diamond
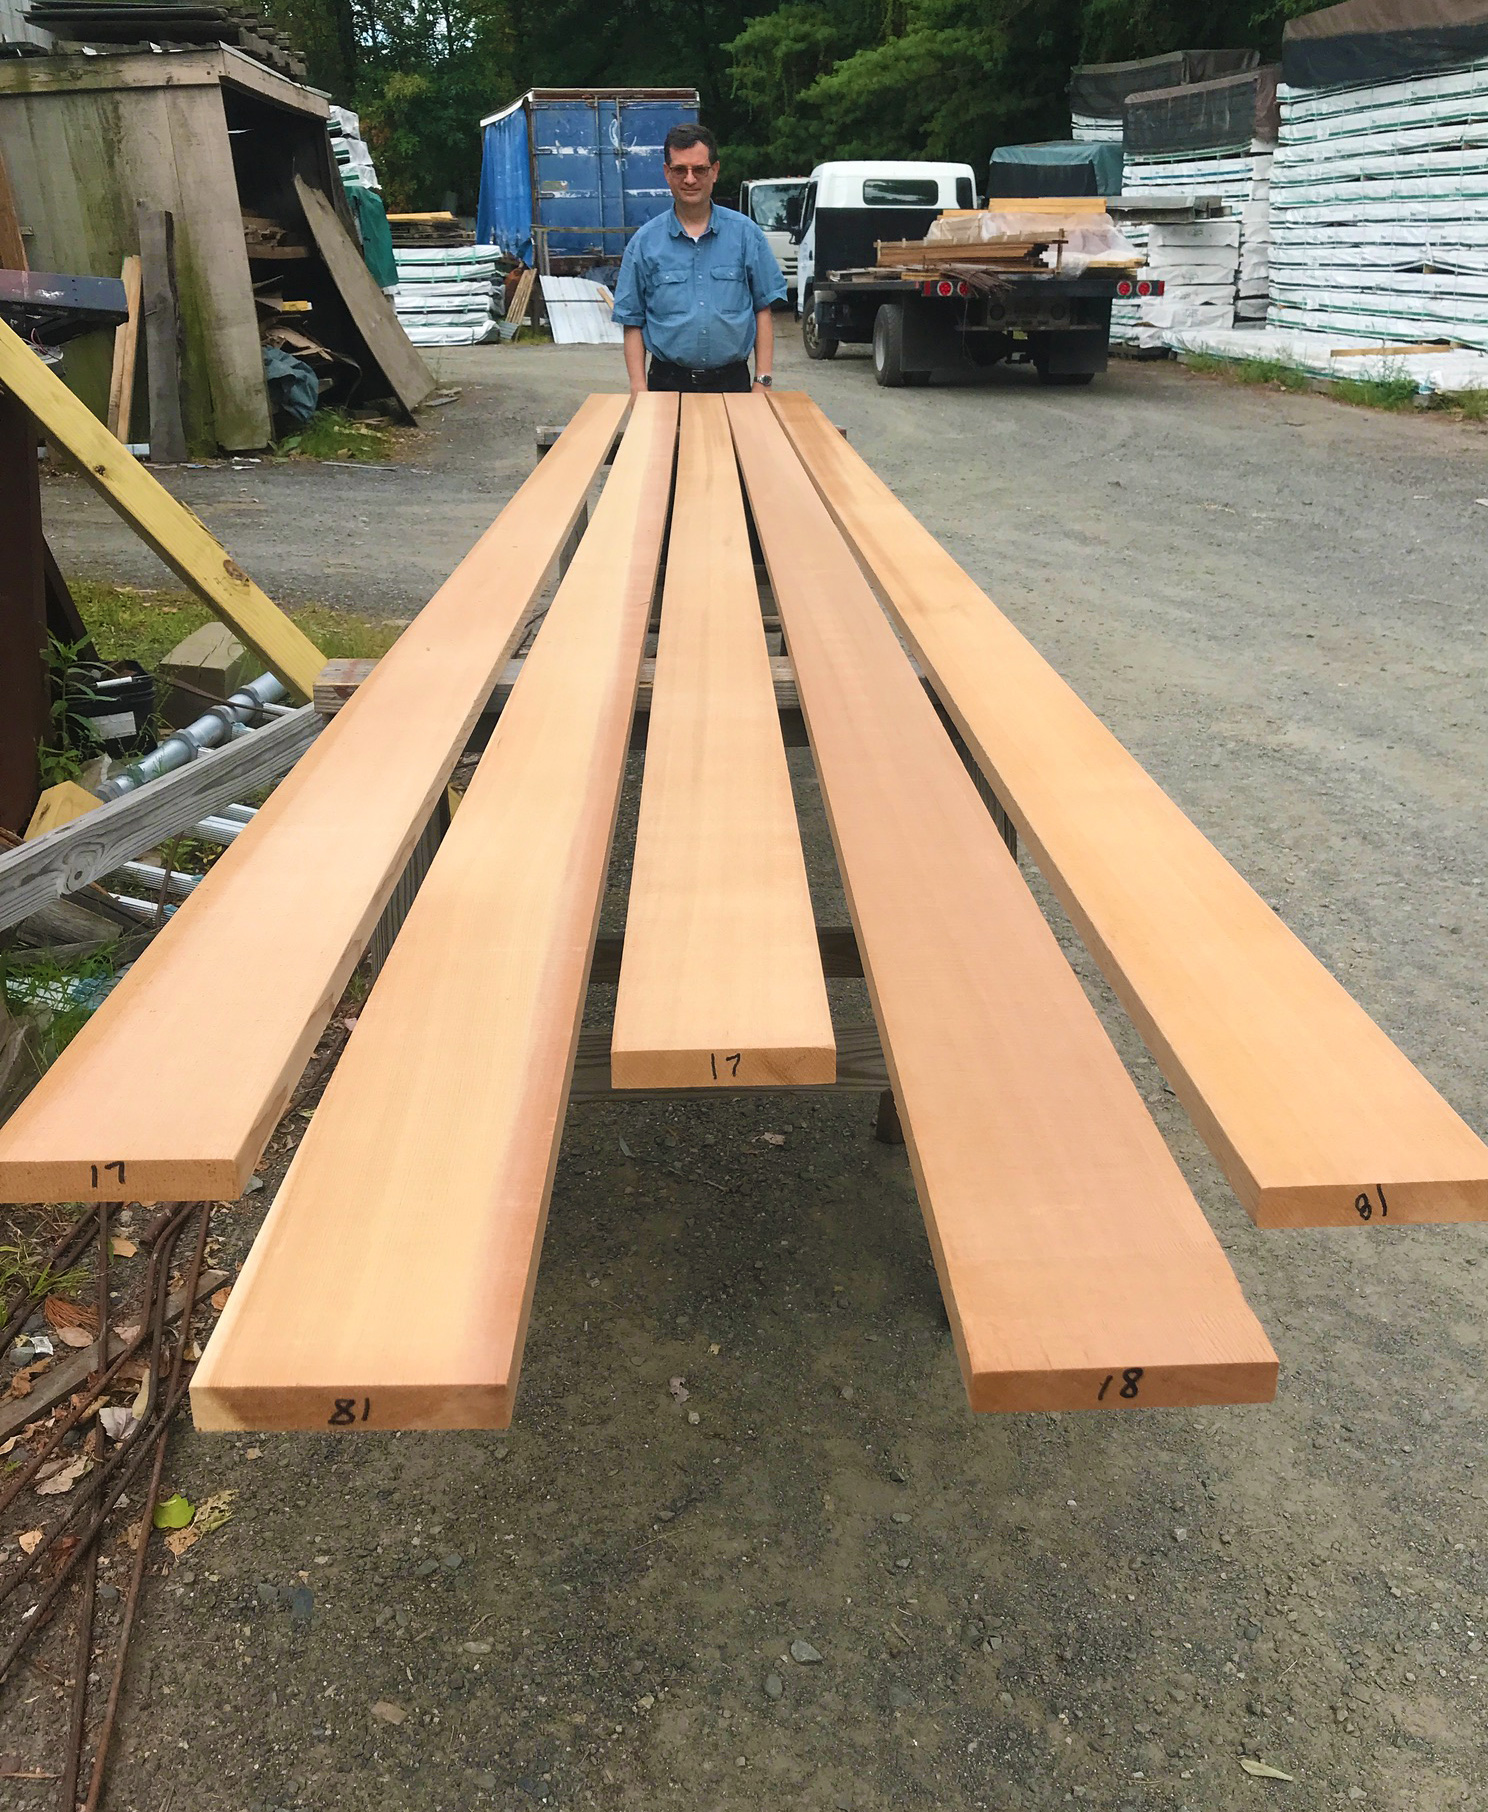
After several hours of searching through the stacks at the lumberyard, John (seen here) and Justine had found five beautiful western red cedar boards, which they were able to mill into 72 strips to build the hull of their Bob’s Special.
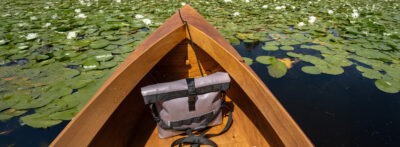
They began searching for a suitable design, something they could build at home, that was short and light enough to be car-toppable, but long enough to accommodate two paddlers. They settled on Bob’s Special, a 15′ canoe developed from the Chestnut Special, a 50-lb canoe advertised in the 1950 catalog of the Chestnut Canoe Company in Fredericton, New Brunswick. In 1993 Ted Moores of Bear Mountain Boats took the lines off an original Chestnut Special, and the following year Steve Killing modified and redrew the lines for the homebuilder. It is one of Bear Mountain Boats’ popular designs. “Of all the canoes we looked at,” says John, “it checked all the boxes, and was recommended as one of the most stable.”
Growing up in Westchester County, New York, Justine had paddled canoes as a youngster during family summer holidays in Nova Scotia, but John was less familiar with them. “He’d been in a canoe once, while on a family holiday in France,” says Justine. “He had no idea if he’d even like it.” But they were determined the canoe would be their next project and before they had even ordered the plans, they visited a nearby lumberyard where they were invited to take their pick from the stack of western red cedar boards. They spent hours pulling out boards, inspecting them for grain, color, and knots until they had five 17′ to 18′ flawless boards that the yard agreed to deliver free of charge.
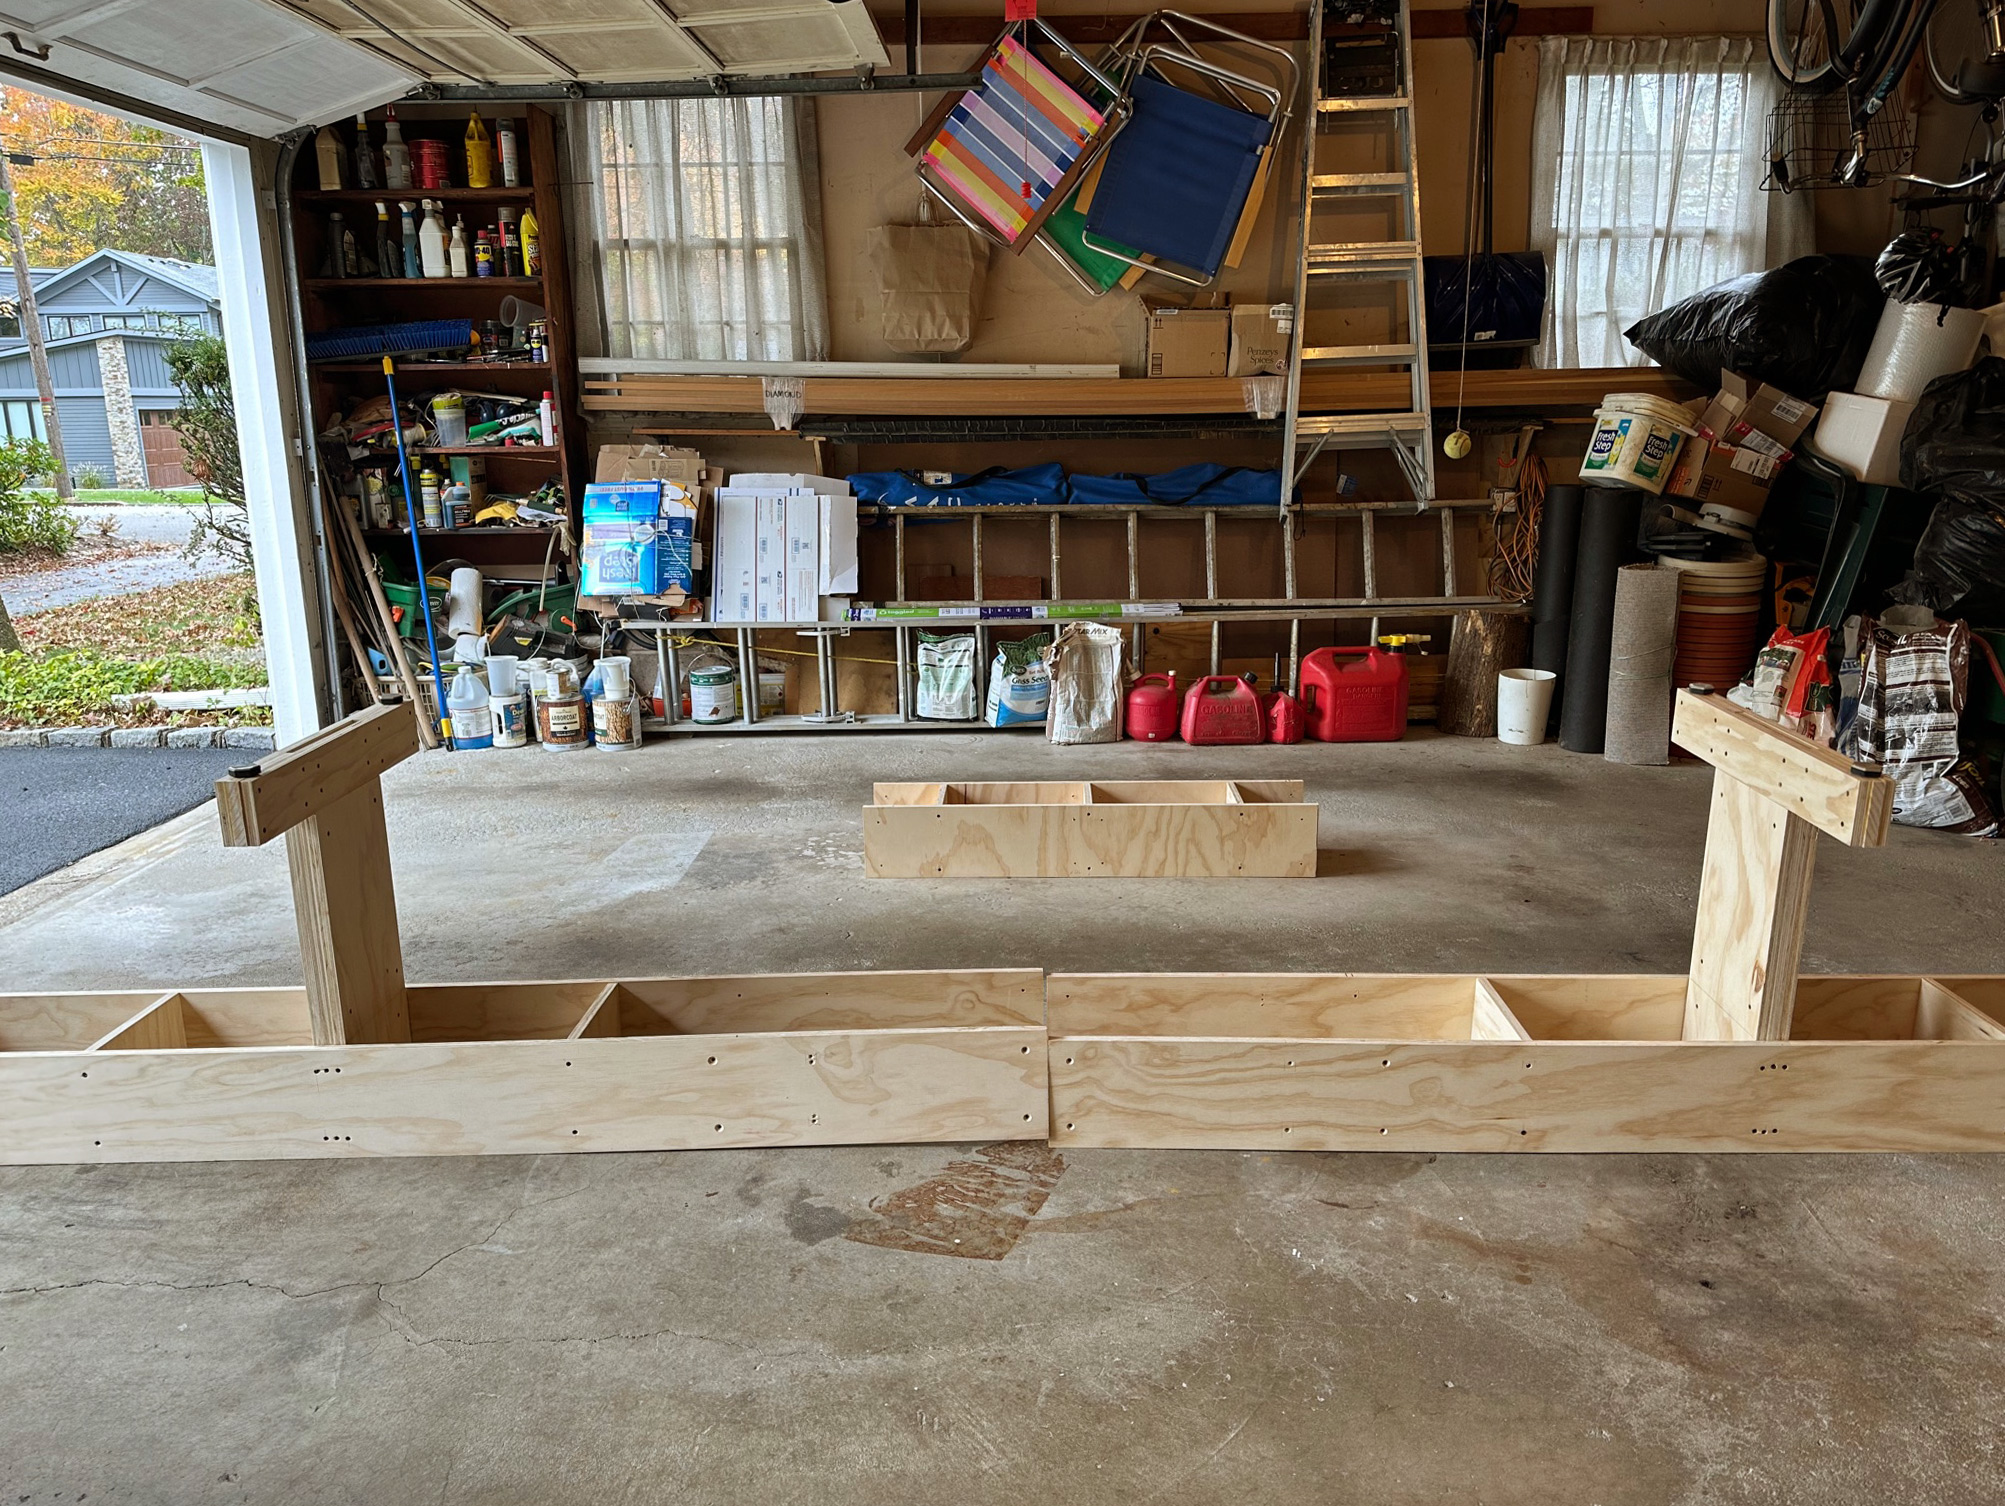
John built the strongback in the basement workshop before he and Justine carried it up the stairs, outside, and around the house to their two-car garage. There they assembled it upside down before turning it over and leveling it.
From the outset, Justine and John had agreed that they would build their boat from scratch—no kit, no pre-milled strips. John had a well-equipped workshop with a table saw, router, and planer and the challenge of doing it all for themselves appealed to them. John had never milled his own lumber and nor had they worked with strip planking before but, John says, “YouTube is a wonderful and instructive resource.”
Building the extras
In August 2022, the cedar was delivered, and so were the plans along with CAD files for the molds. Justine is on the staff at Bergen Makerspace, a community learning center in Hackensack, New Jersey, where they had just taken delivery of a Shopbot CNC router. It had not yet been assembled, indeed was still in its packing case as a set of parts, but the center agreed that the Diamonds’ molds could be the first items to be cut. As they prepared the CNC router, which they built with assistance from another member of staff, John and Justine worked on preparing as many other parts as they could.
The stems (each composed of an inner and an outer stem) were laminated of ash. John steamed the ¼” strips and then, working quickly, bent them around the stem form. After they had cooled and the curve was set, he removed the laminates, applied epoxy to create the inner and outer stems, and reclamped both to the form with a layer of masking tape between them. The hull was strip-planked to the inner stems; the outer stems were fitted after planking was complete.
First came the business of turning the five cedar boards into 72 strips each with a bead and cove molding. Their basement workshop had its constraints. The only access was via an internal staircase or through some small ground-level windows. The room was 33′ long, giving only just enough space to mill boards 16′ long. After the boards came down through a window, they were planed to a thickness of 13⁄16″ and strips were then cut to a thickness of 1⁄4″; each was routered with a cove and bead. As they worked, John and Justine numbered each strip according to the board and the position on that board from which it came. “When we built the boat,” John says, “we book-matched each strip to the next, so the grain of any two neighboring strips was mirrored.” The finished strips went back out through the window and around to the two-car garage where the canoe would be built. John built the plywood strongback in the basement, constructing it in two halves so that he and Justine could carry it up the basement stairs to the garage, where they assembled it on adjustable legs to ensure that it was precisely level.
They also built as many other parts as they could: a pair of paddles with ash shafts and beaver blades and grips laminated of basswood and cedar; a pair of seats with ash frames and synthetic cane; the ash gunwales; and the decorative accent strips for either side of the canoe, which, says John, “took a lot of time, each strip has about 100 pieces.” John tried to get all the ash components out of a single board, but in the end there wasn’t enough wood for both halves of the gunwales, so he fashioned the outwales out of a 9′ board with a long scarf joint.

John and Justine decided not to use staples when planking the hull. Instead, each strip was glued to the one below, clamping blocks were placed inside the upper cove to protect its vulnerable edges, and then a bungee cord—attached to a clip—was wrapped around all the laid strips and tightened to apply pressure to the new plank as the glue cured.
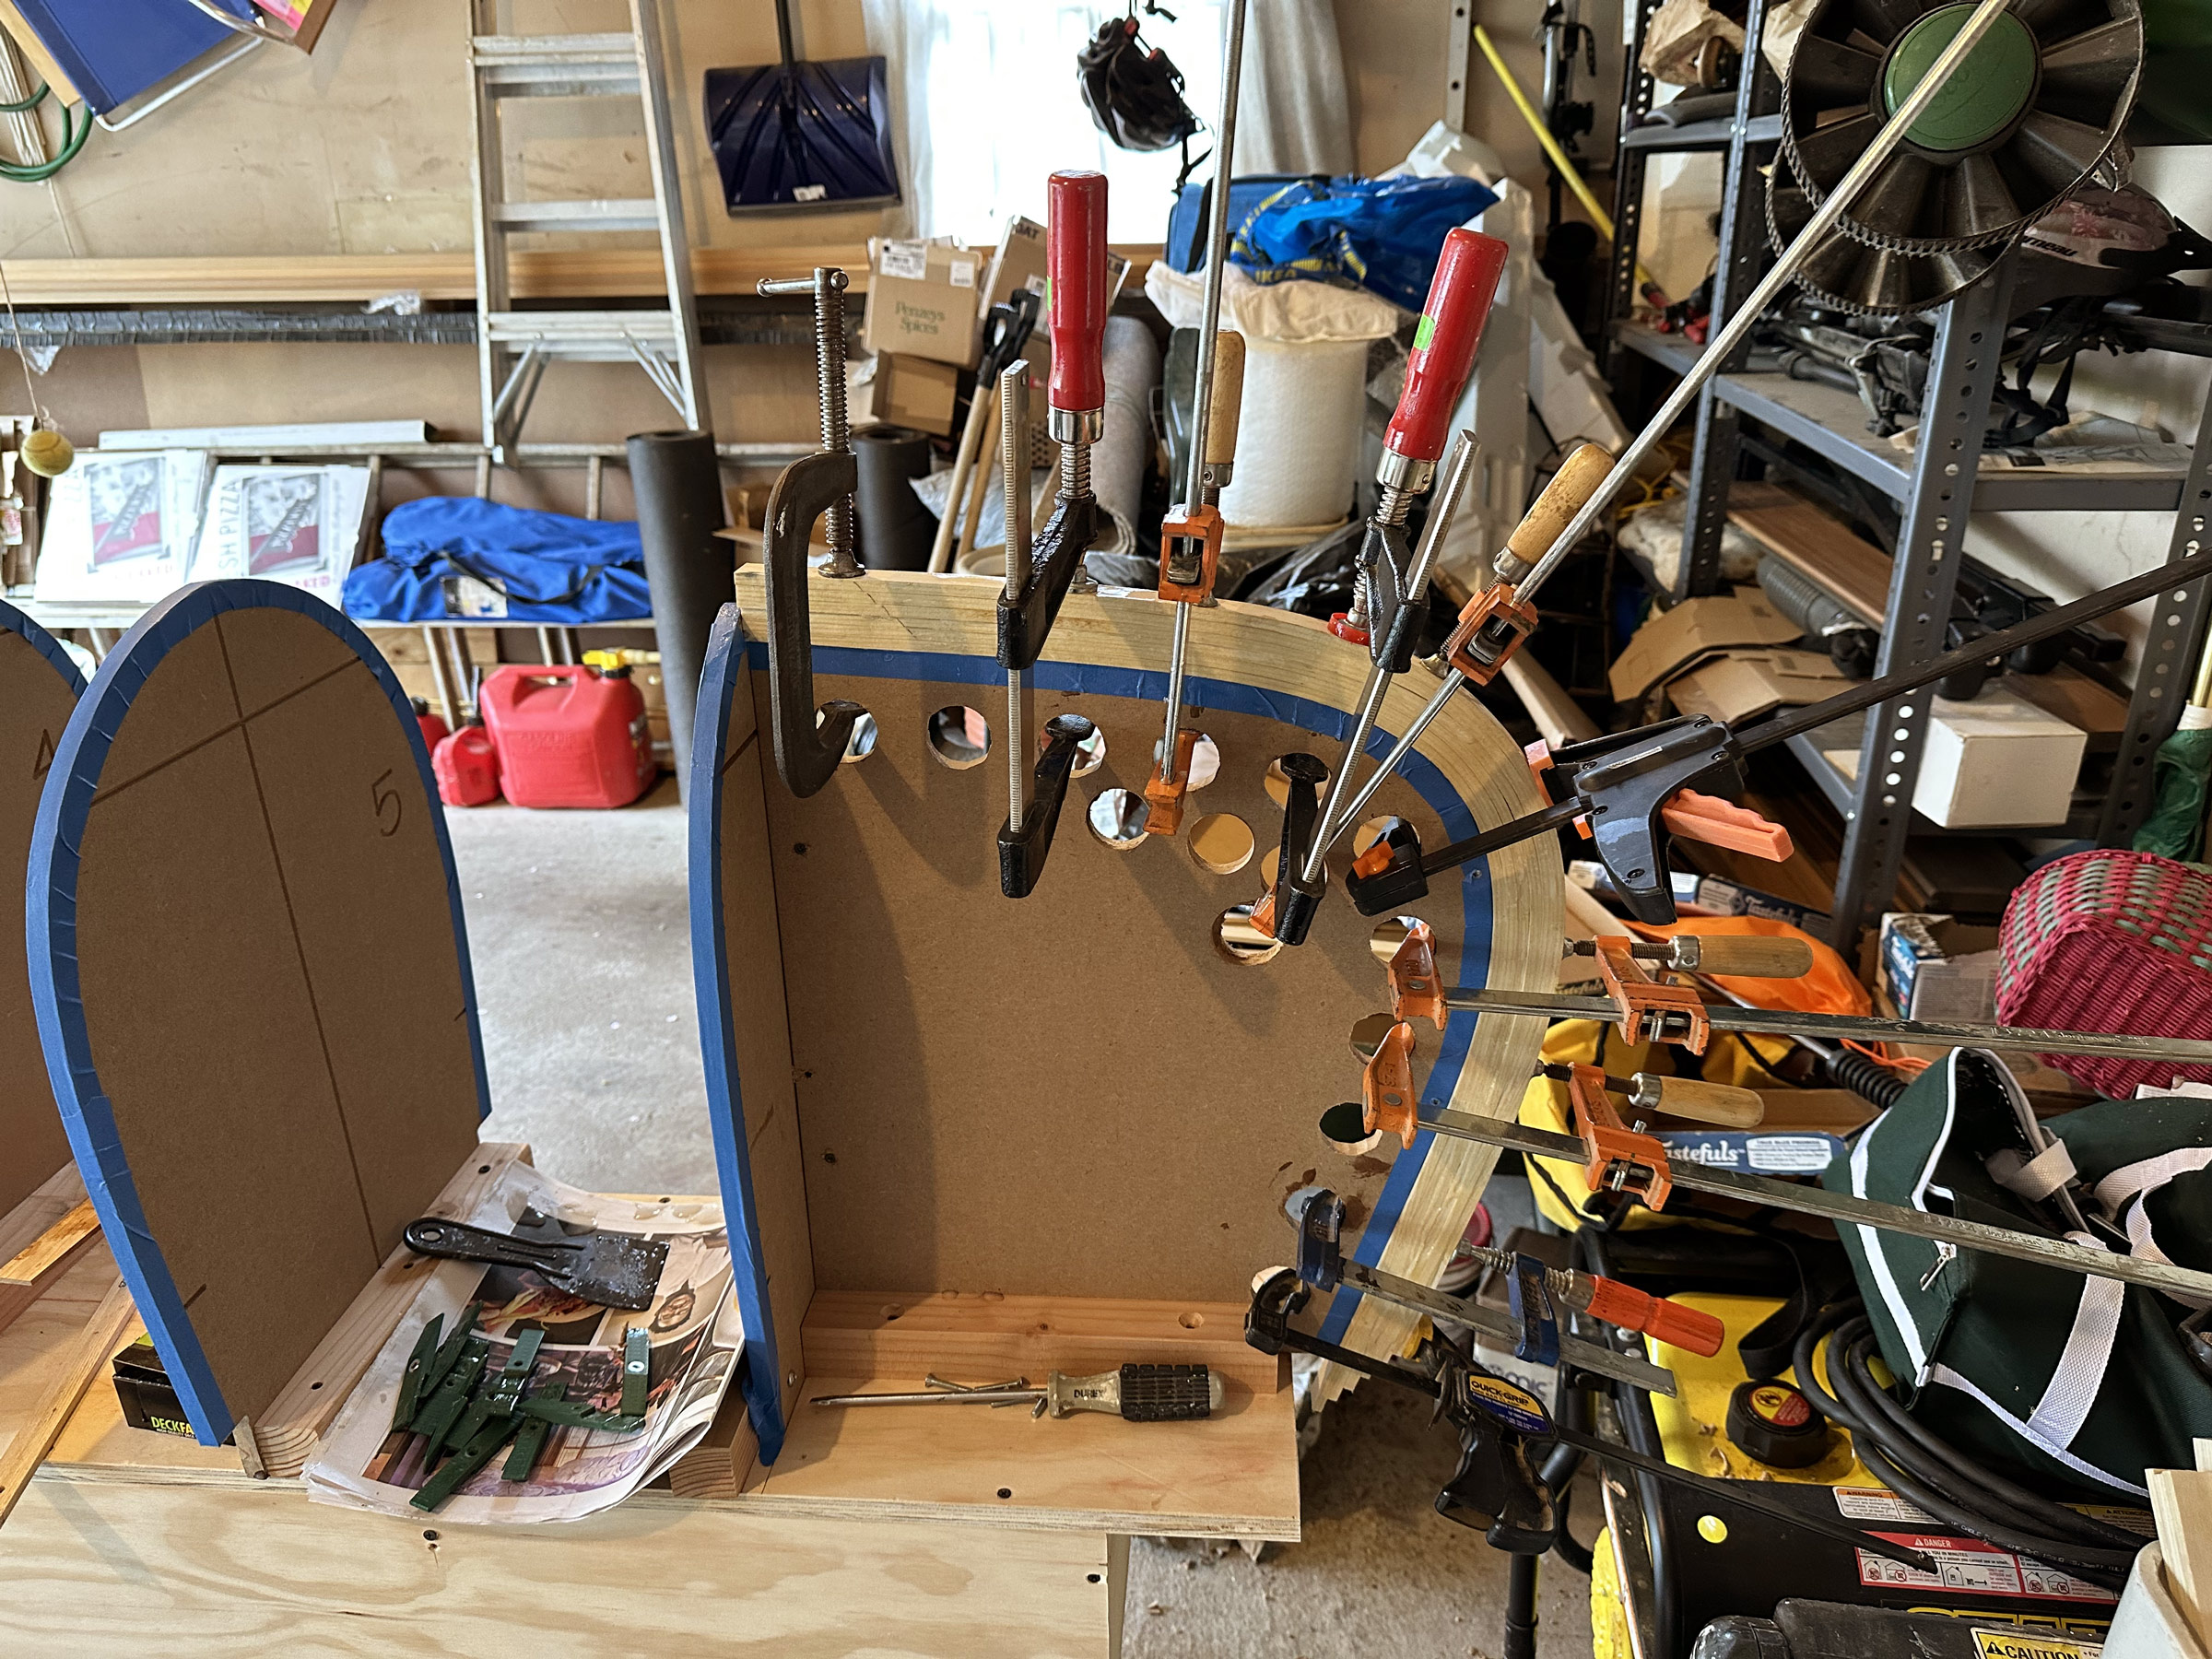
As soon as the CNC router was assembled at the Makerspace, the Diamonds went over with their CAD files and, with the assistance of family friend Alan Zenreich and fellow staff member Dave Beckerx, cut the 13 molds and two stem molds out of MDF. They were ready to build the hull.
Planking the hull
John and Justine had decided to plank the hull without the use of staples. “We wanted to avoid the staple marks, but it did make the build more fiddly,” says John. With a 3-D printer he created some spring clips with hooks, to which he attached thin bungee cord. As each strip was glued to the strip below, it was held in place with the clips, clamping blocks were placed into the cove of the uppermost strip, and the bungee cord was wrapped down around the lowest strip and back up, applying pressure as the glue cured. John says he later learned that instead of the bungee they could have used painter’s tape; “it’s simpler and would have worked just as well.”
They stripped each side of the hull simultaneously, but as they neared the centerline they worked on just one side. Rather than weaving the two sides together herringbone fashion, the Diamonds had decided they would end with a straight line down the middle. The first side was straightforward: they laid all the strips, overlapping the centerline, and then, with an oscillating multitool, cut the straight line down the middle of the bottom. Each of the strips coming in from the second side, however, had to be cut to length and shaped with a block plane before being glued into place. For the final center gap (the whiskey plank), they glued two strips together, shaped it into the required elongated football, and glued it in.
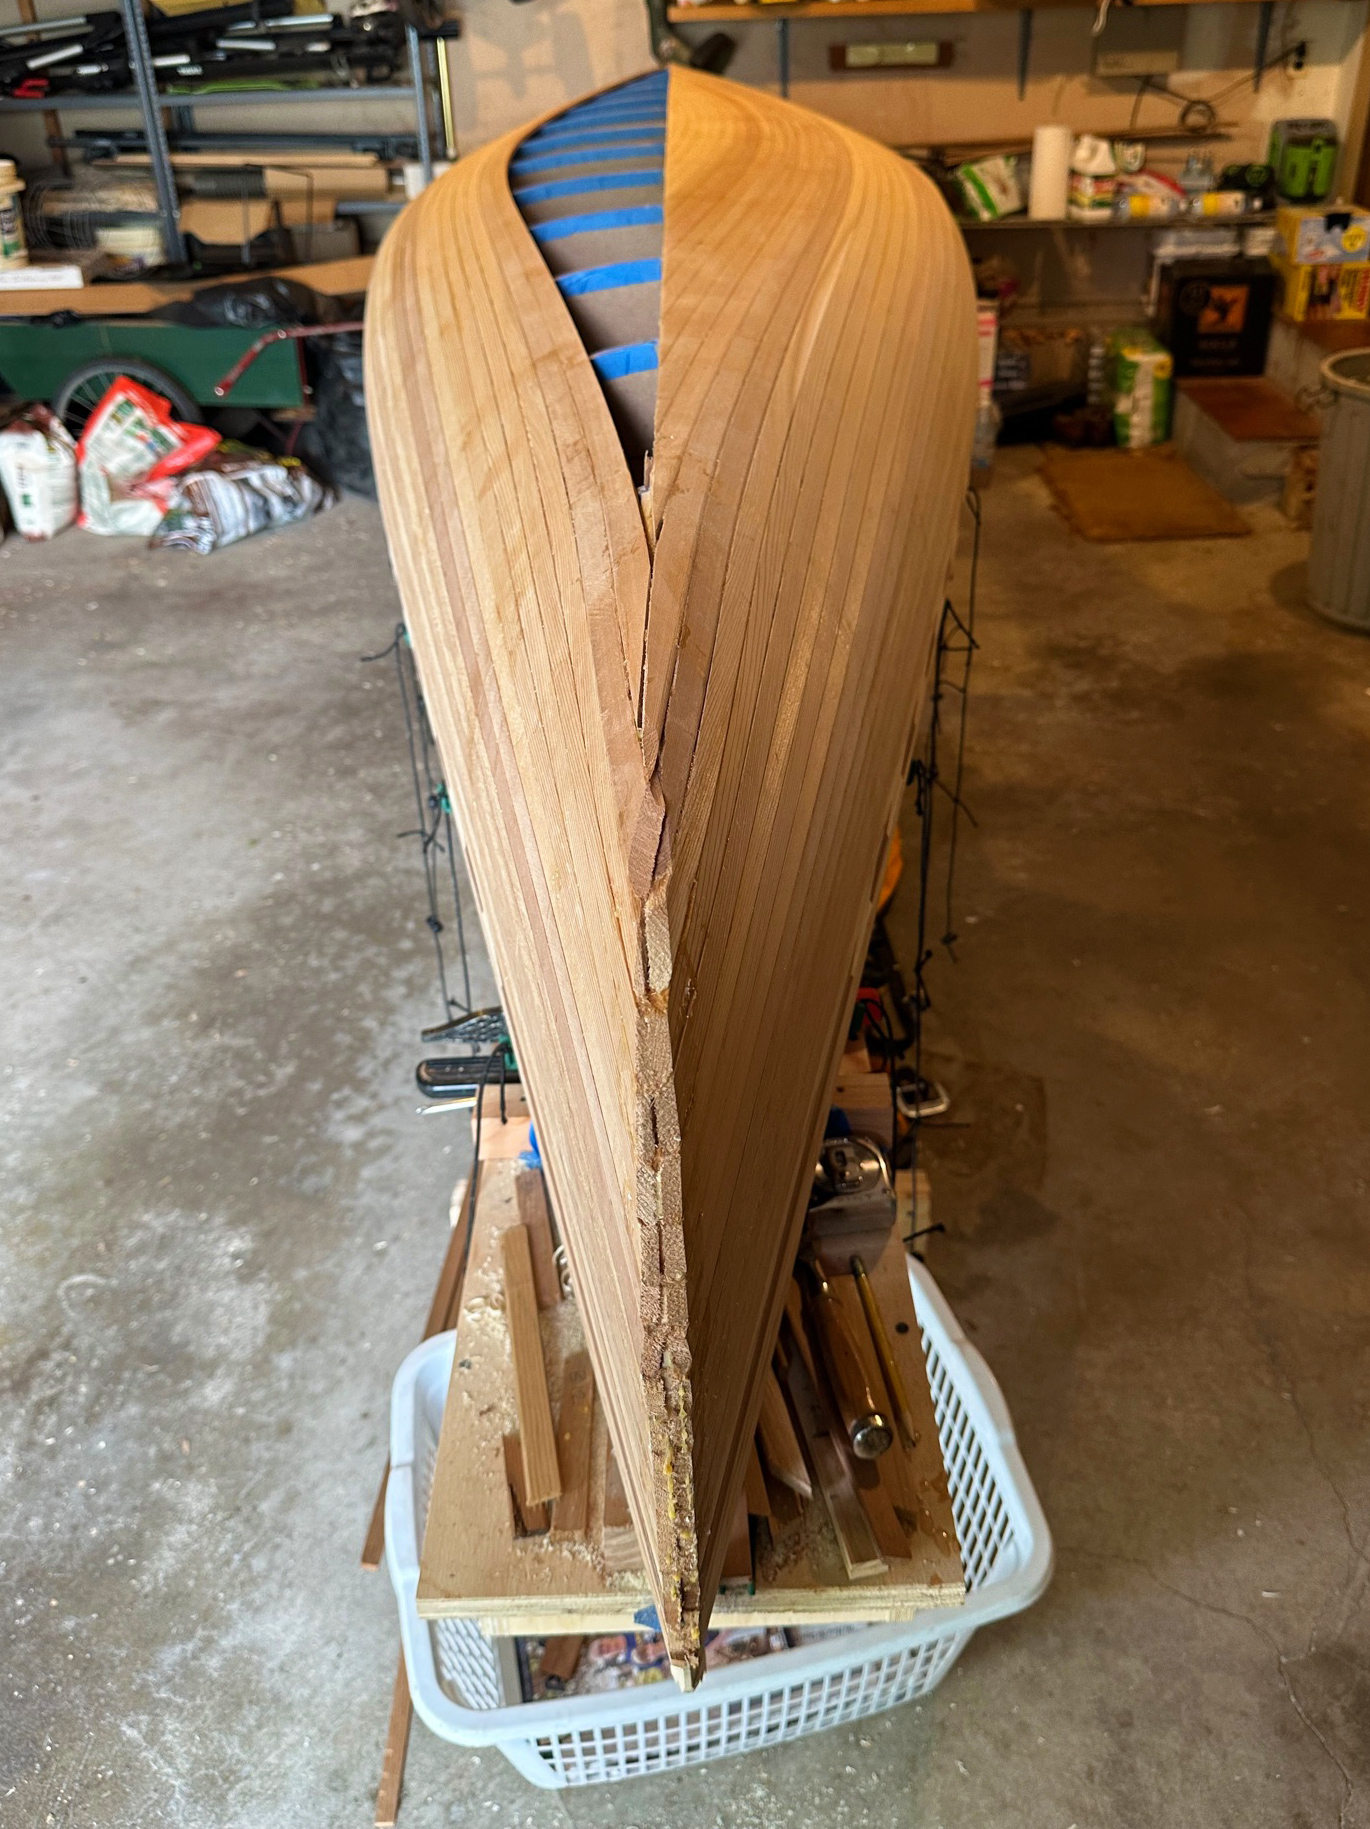
As the strips neared the final layup, John and Justine stopped planking on the port side and instead planked only the starboard side. Then John cut the ends of the starboard planks in a straight line along the centerline of the hull. The port side was then finished until there was only an elongated gap into which John dropped a pre-fashioned two-strip “whiskey plank.”
Next, John and Justine had to cut the strip ends back to the stems. John fashioned a plywood guide with the same profile as the real stem, set it up alongside, and attached a piece of wood to the block plane so that, as he moved the plane down the strips, it followed the guide and correctly shaped the ends of the strips.
At last, they had a fully planked hull. Before turning it over, they sanded the outside using longboards with 80-grit paper and then applied 6-oz ’glass cloth saturated in epoxy. They spread the resin using mohair rollers and squeegees, applying four coats, sanding between each coat.
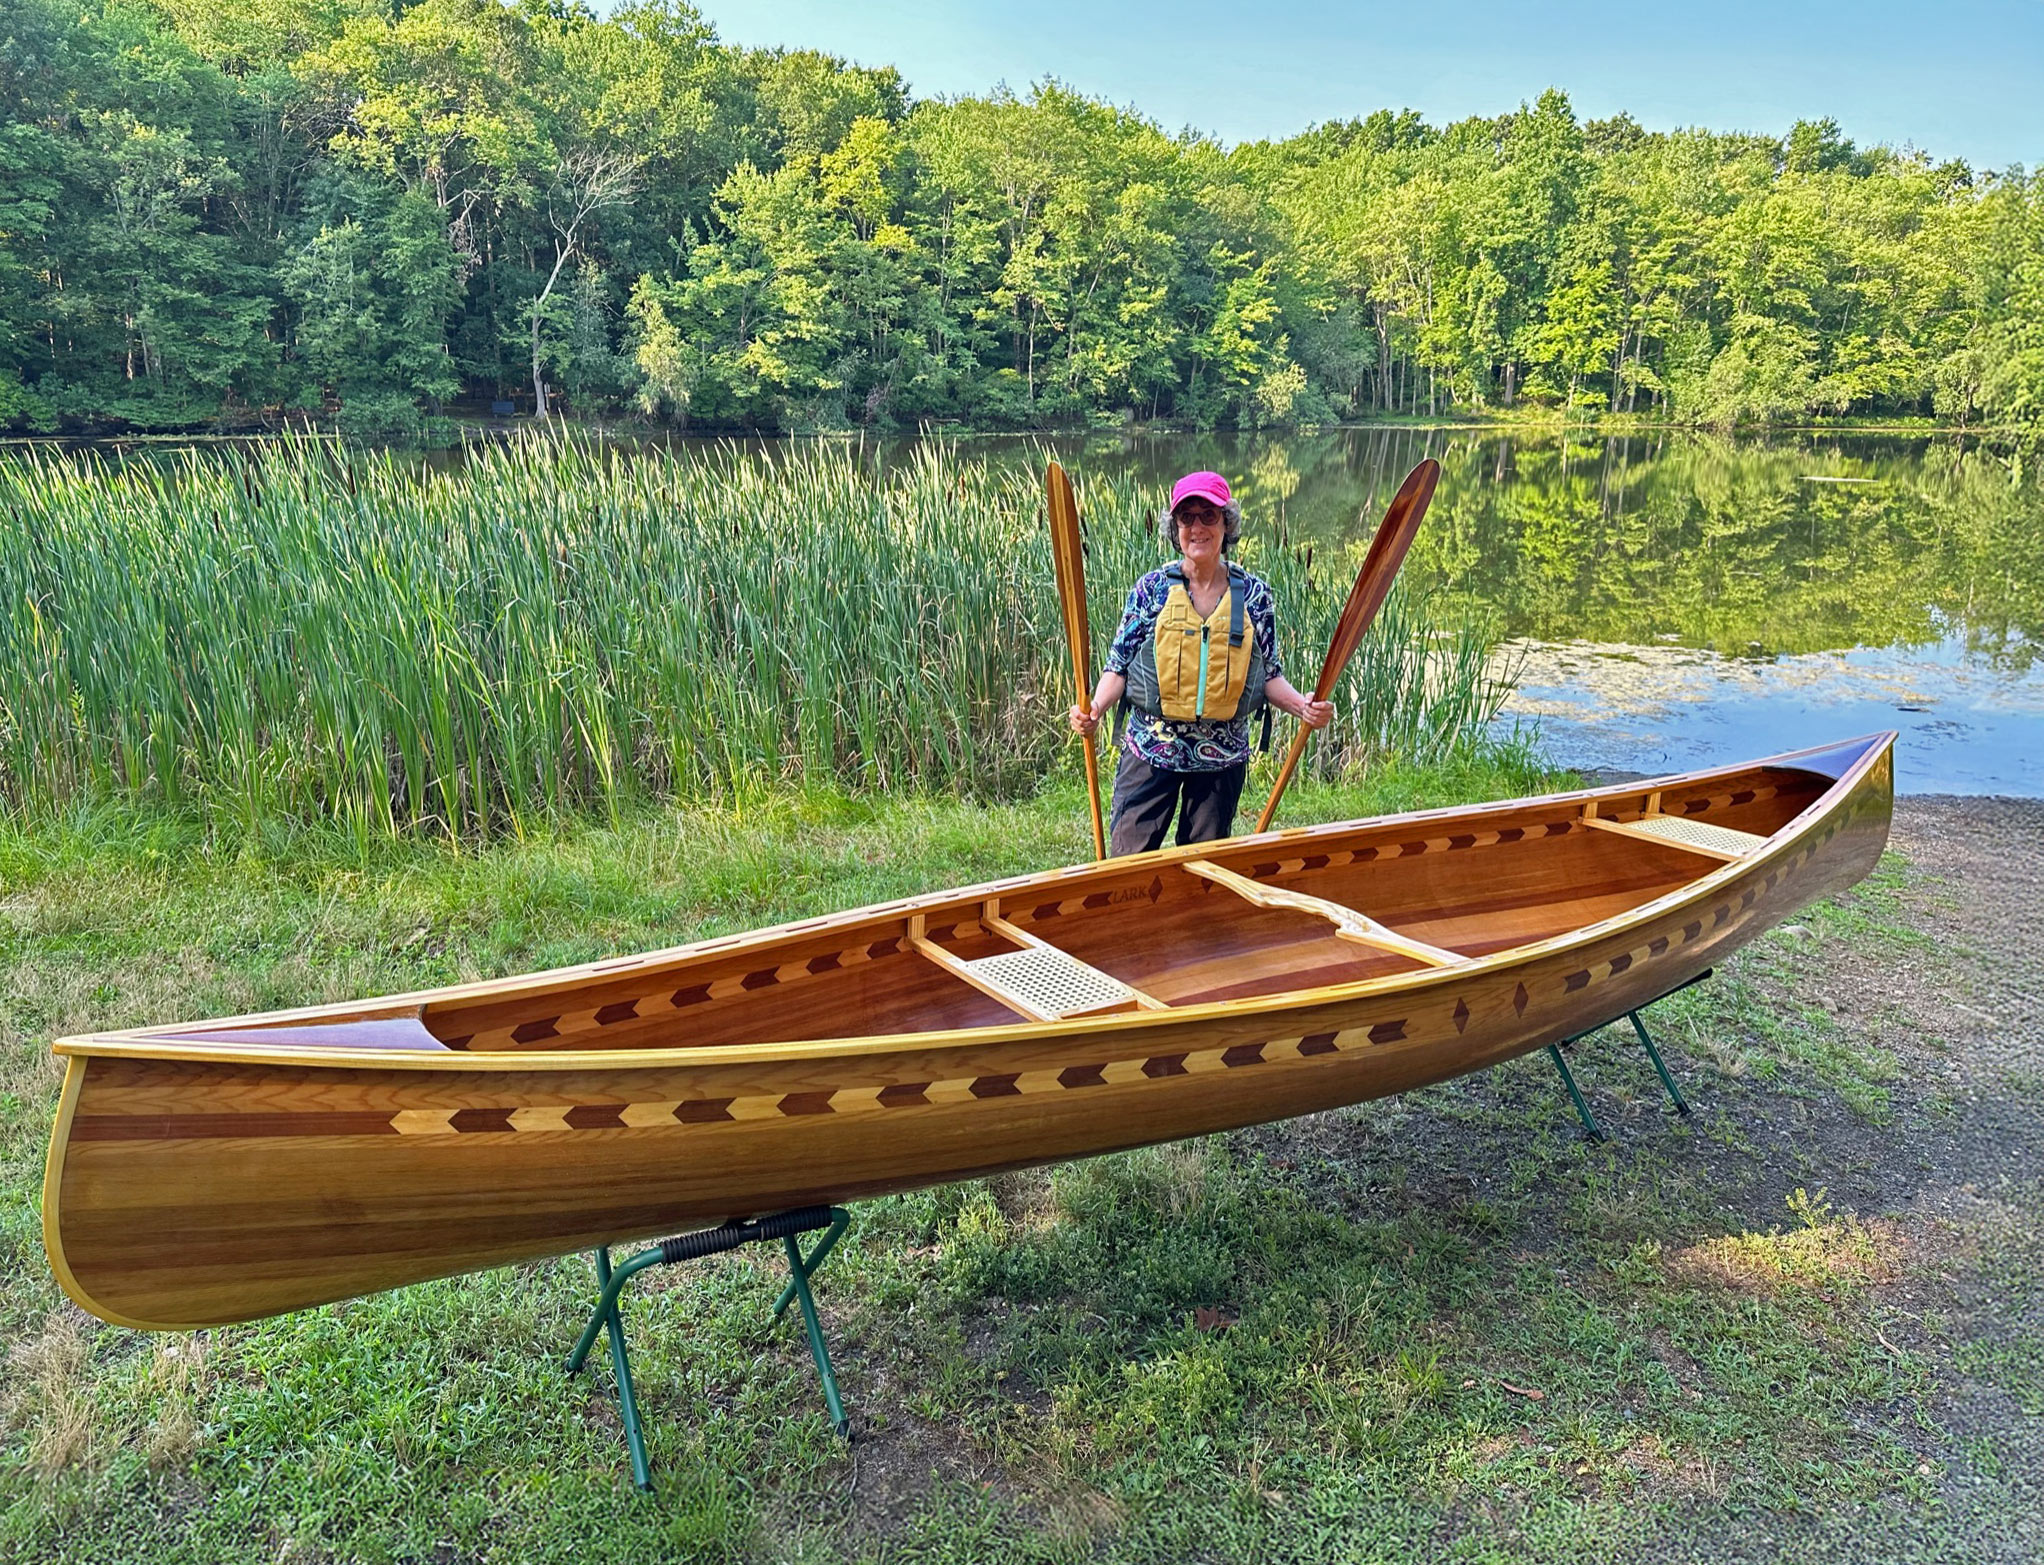
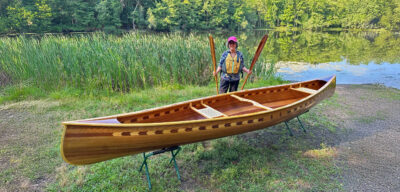
On launching day, Justine stands ready with the beavertail paddles, which John made. The two paddles are identical save in length: Justine’s is roughly an inch shorter to better fit her. The feature strip includes two diamonds, one each for John and Justine Diamond.
About a year after they had bought the cedar boards, the Diamonds turned over their finished hull and laid it in carpeted slings suspended from a pair of stands. There was still much to do, but they had something that looked like a boat. They sanded the interior with a random-orbit sander and laid 6-oz cloth with one coat of resin so that the weave of the cloth could still be felt, providing a slight non-slip surface inside the hull. Then all that remained to be done was fitting the seats, the gunwales, the thwart, and the cherry decks, and of course, sanding and varnishing, varnishing and sanding. By Thanksgiving 2023 the canoe was finished. The weather had turned and rather than launch in the cold, they took the canoe to the Makerspace to give a presentation on the build, and then tucked it away in the garage.
A delayed launching
The following spring, they pulled it out for the big launching. It was the perfect day: the sun shone, and the breeze was minimal. As they launched the canoe into the water for the first time, they spotted a 2″ blister in the epoxy in the middle of the interior. Then they saw another, and another. Their hearts sank. As the warmth of the sunlight hit the canoe, blisters were appearing in a 4′ section through the middle of the boat, gunwale to gunwale. It became evident that in that one area the epoxy resin had failed to cure properly. They took the boat home.
Not to be daunted, the Diamonds did the only thing they could; they fixed it. “We cut the fiberglass cloth at each end of the failed section, peeled it off, scraped off the remaining uncured resin, sanded back to bare wood, laid some new cloth, and applied fresh resin and varnish. It took us about six weeks and if you don’t know to look for it, the repair is barely visible.”

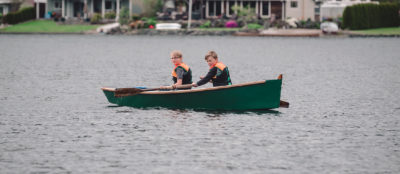
With two people aboard—here John and his daughter Kate—the canoe is well balanced. When a single paddler is on board, the canoe’s direction of travel is reversed, and the forward seat here, which is nearer to the center of the boat, becomes the paddler’s seat.
In June 2024, John and Justine relaunched LARK—“we’d built her on a lark,” says Justine, “so it seemed a good name.” Since then, they’ve had no further maintenance issues. They’ve taken LARK to lakes, reservoirs, rivers, and canals in New Jersey, New York, and Massachusetts, and they exhibited her at The WoodenBoat Show in Mystic Seaport, where they were awarded the honorable mention in the Owner-Built category. They are, Justine says, “continually exploring new water, often on a weekly basis.” And to the evident relief of both of them, John is as enamored of the boat as Justine is. “Paddling,” she says, “has become a passion for us both.”![]()
Jenny Bennett is editor of Small Boats.
In late 2023 John and Justine Diamond gave a presentation at the Bergen Makerspace; it was videotaped and uploaded to YouTube as LARK—Building a Strip Canoe.
Do you have a boat with an interesting story? Please email us. We’d like to hear about it and share it with other Small Boats readers.


A beautiful boat! I especially like the accent strips on the sides.
Having built a strip planked canoe and Adirondack Guide boat, I am well aware of your efforts to produce this fine craft.
A most wonderful looking build. Two really great friends and I have built two canoes and we have 2 more to build. We finished the first one in 2012 and I am most pleased to tell you that it has performed flawlessly. I admire that you two went the “no staples” route. We did the same and it adds a noncompromised look and beauty to the cedar. Congratulations and enjoy your functional art.
After building 4 or 5 strip boats I thought I could save some money on the epoxy by using cheaper ingredients.
Wrong.
I’ve probably made over 1000 epoxy mixes with pumps and on gram scales and sometimes I get a little sloppy and thrown in a little amine (curing agent) from a different manufacturer.
Wrong.
Sometimes I was in a hurry and didn’t mix it long enough and ended up with a patch of bis-a that didn’t mix with the catalyst.
Wrong.
Follow the instructions and the recipe and don’t mix different manufacturer’s “a” part with a different supplier’s “b” part.