Some sawhorses I’ve used were built bull-strong for house construction; others were so feebly put together that they quickly became kindling. The style I like most is based on a James Krenov type used for a mortise-and-tenon exercise 30 years ago at furniture-making school. Those horses were made of 4/4 hard maple with legs like an inverted-T and upper and lower crossbars that are through-tenoned, wedged, and glued. Variations on that style have become the mainstay in my shop.
 Tom DeVries
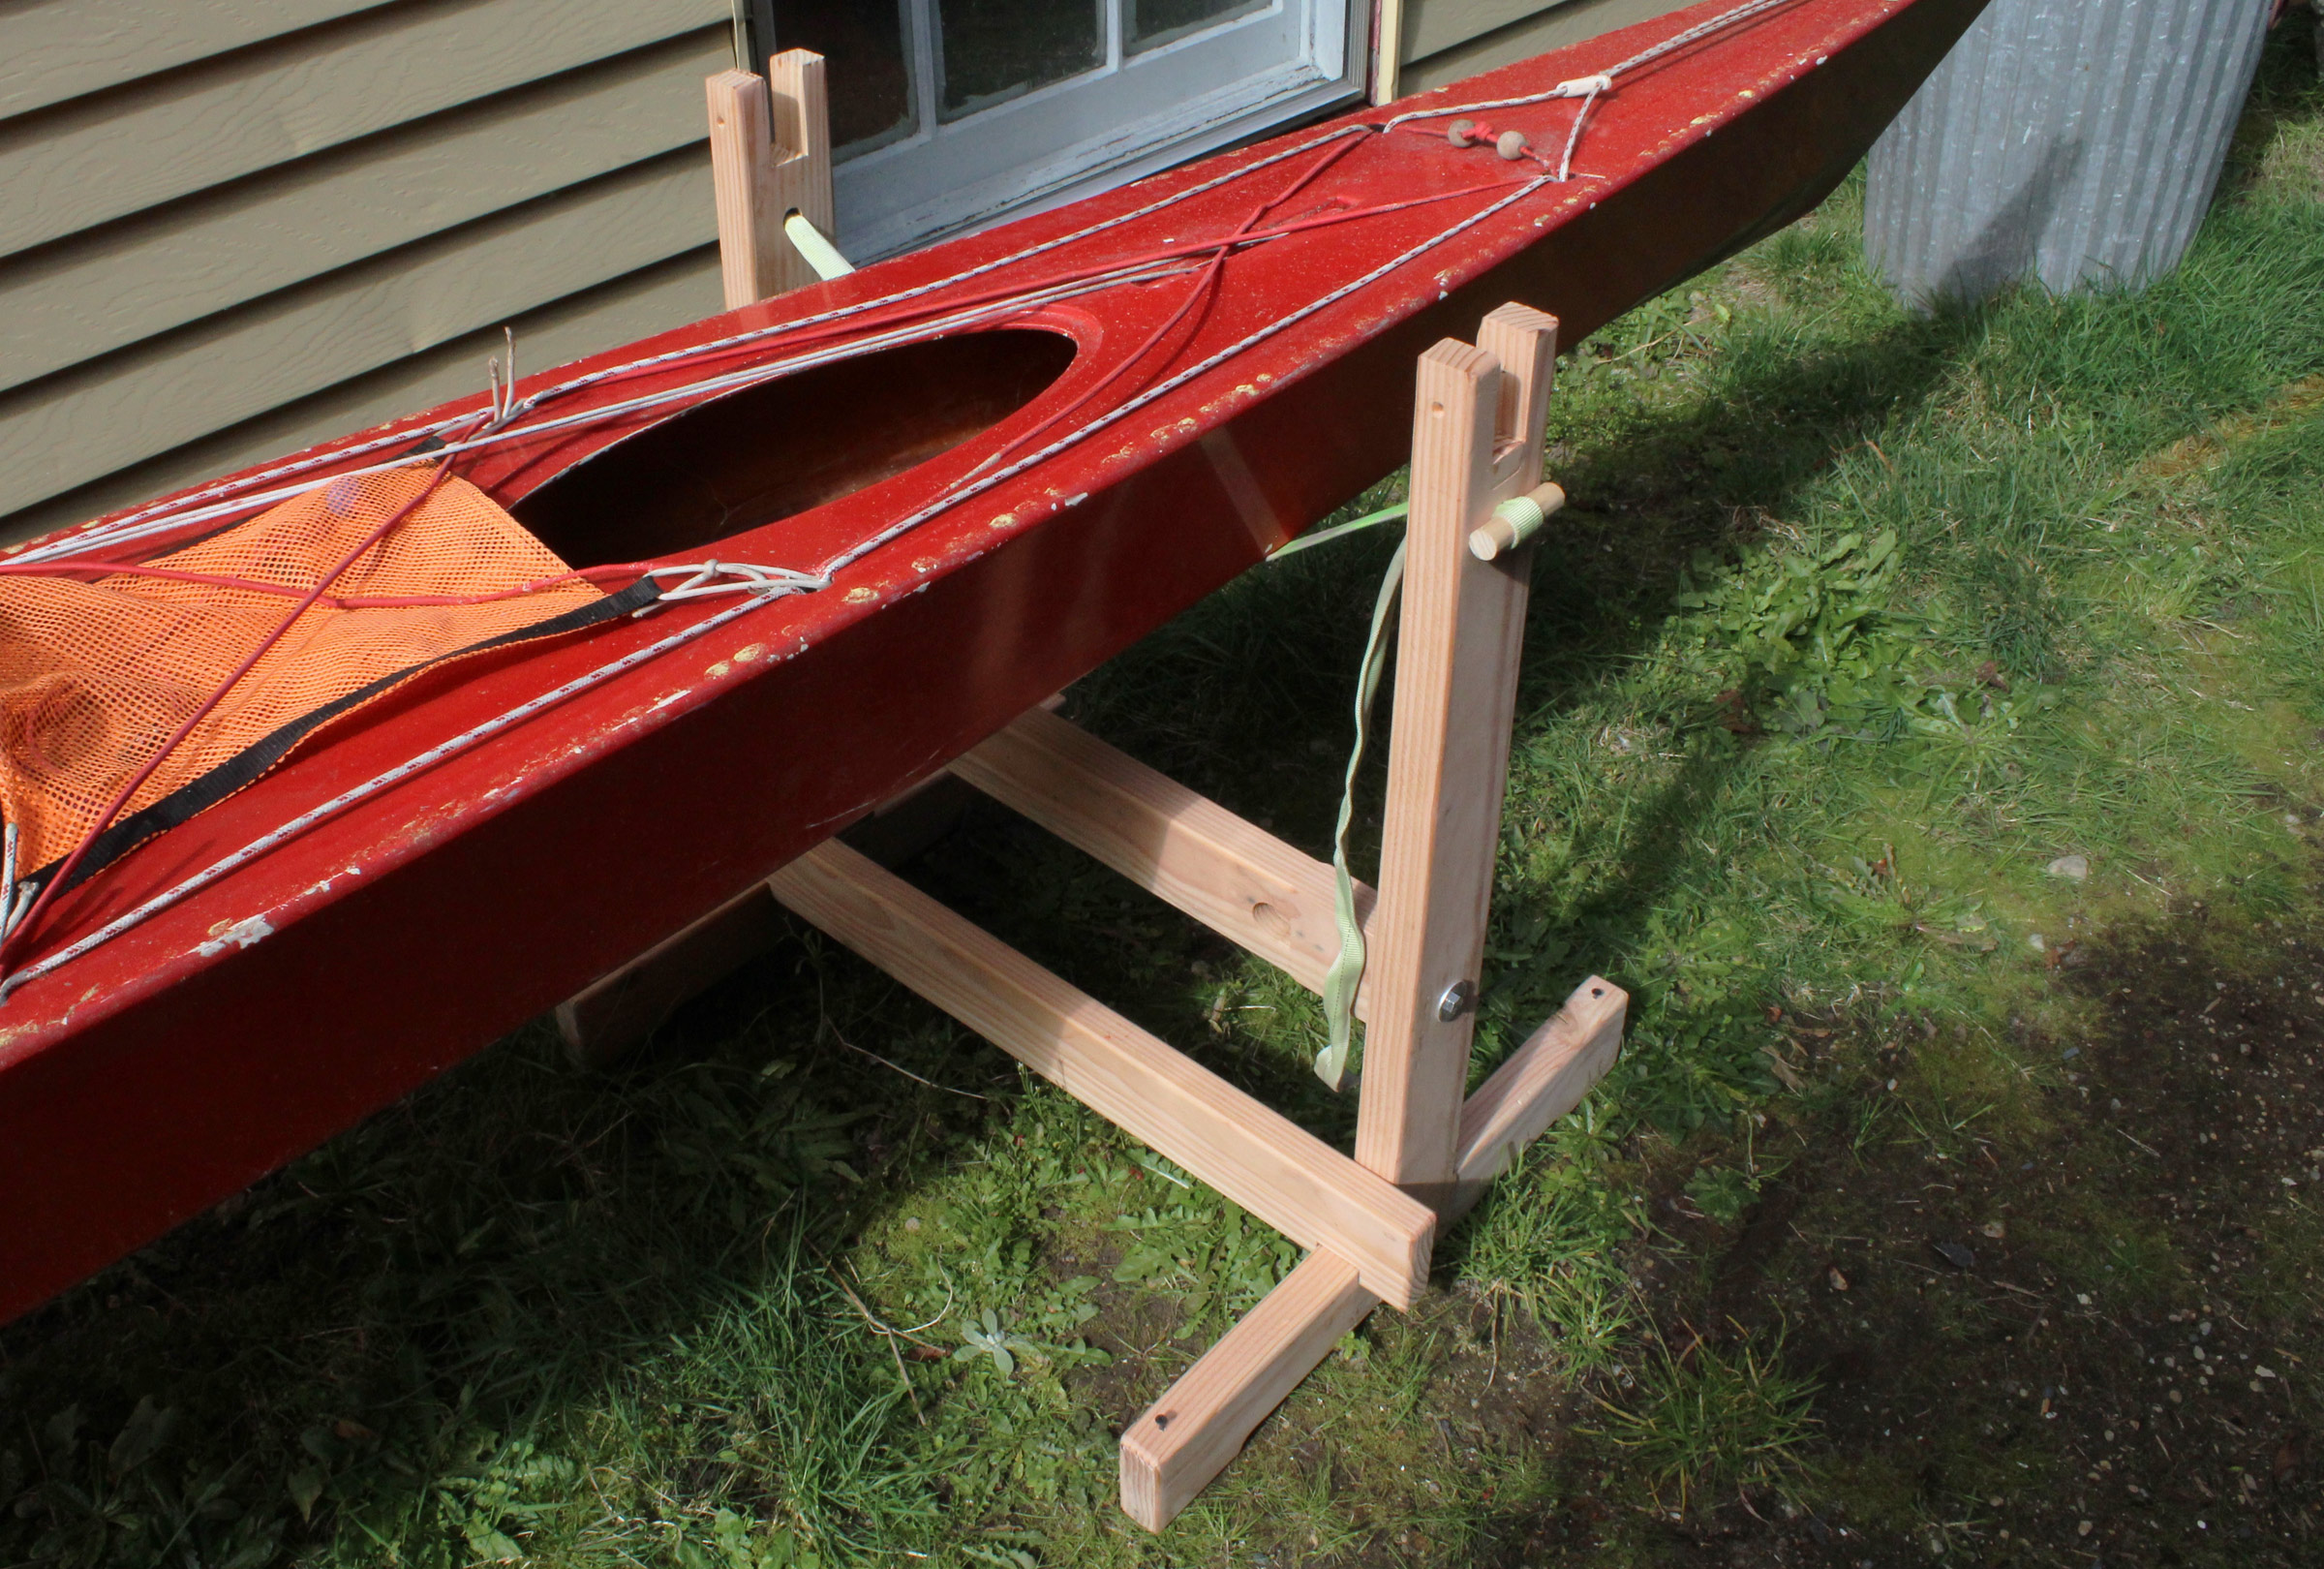
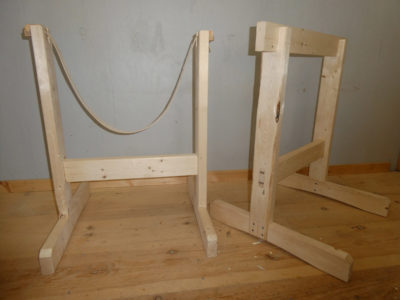
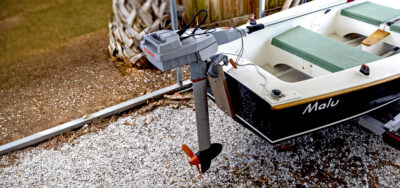
This pair of sawhorses converts from crossbeam (right) to sling (left). The lower beams’ tenons are wedged to lock them permanently in the uprights’ mortises.
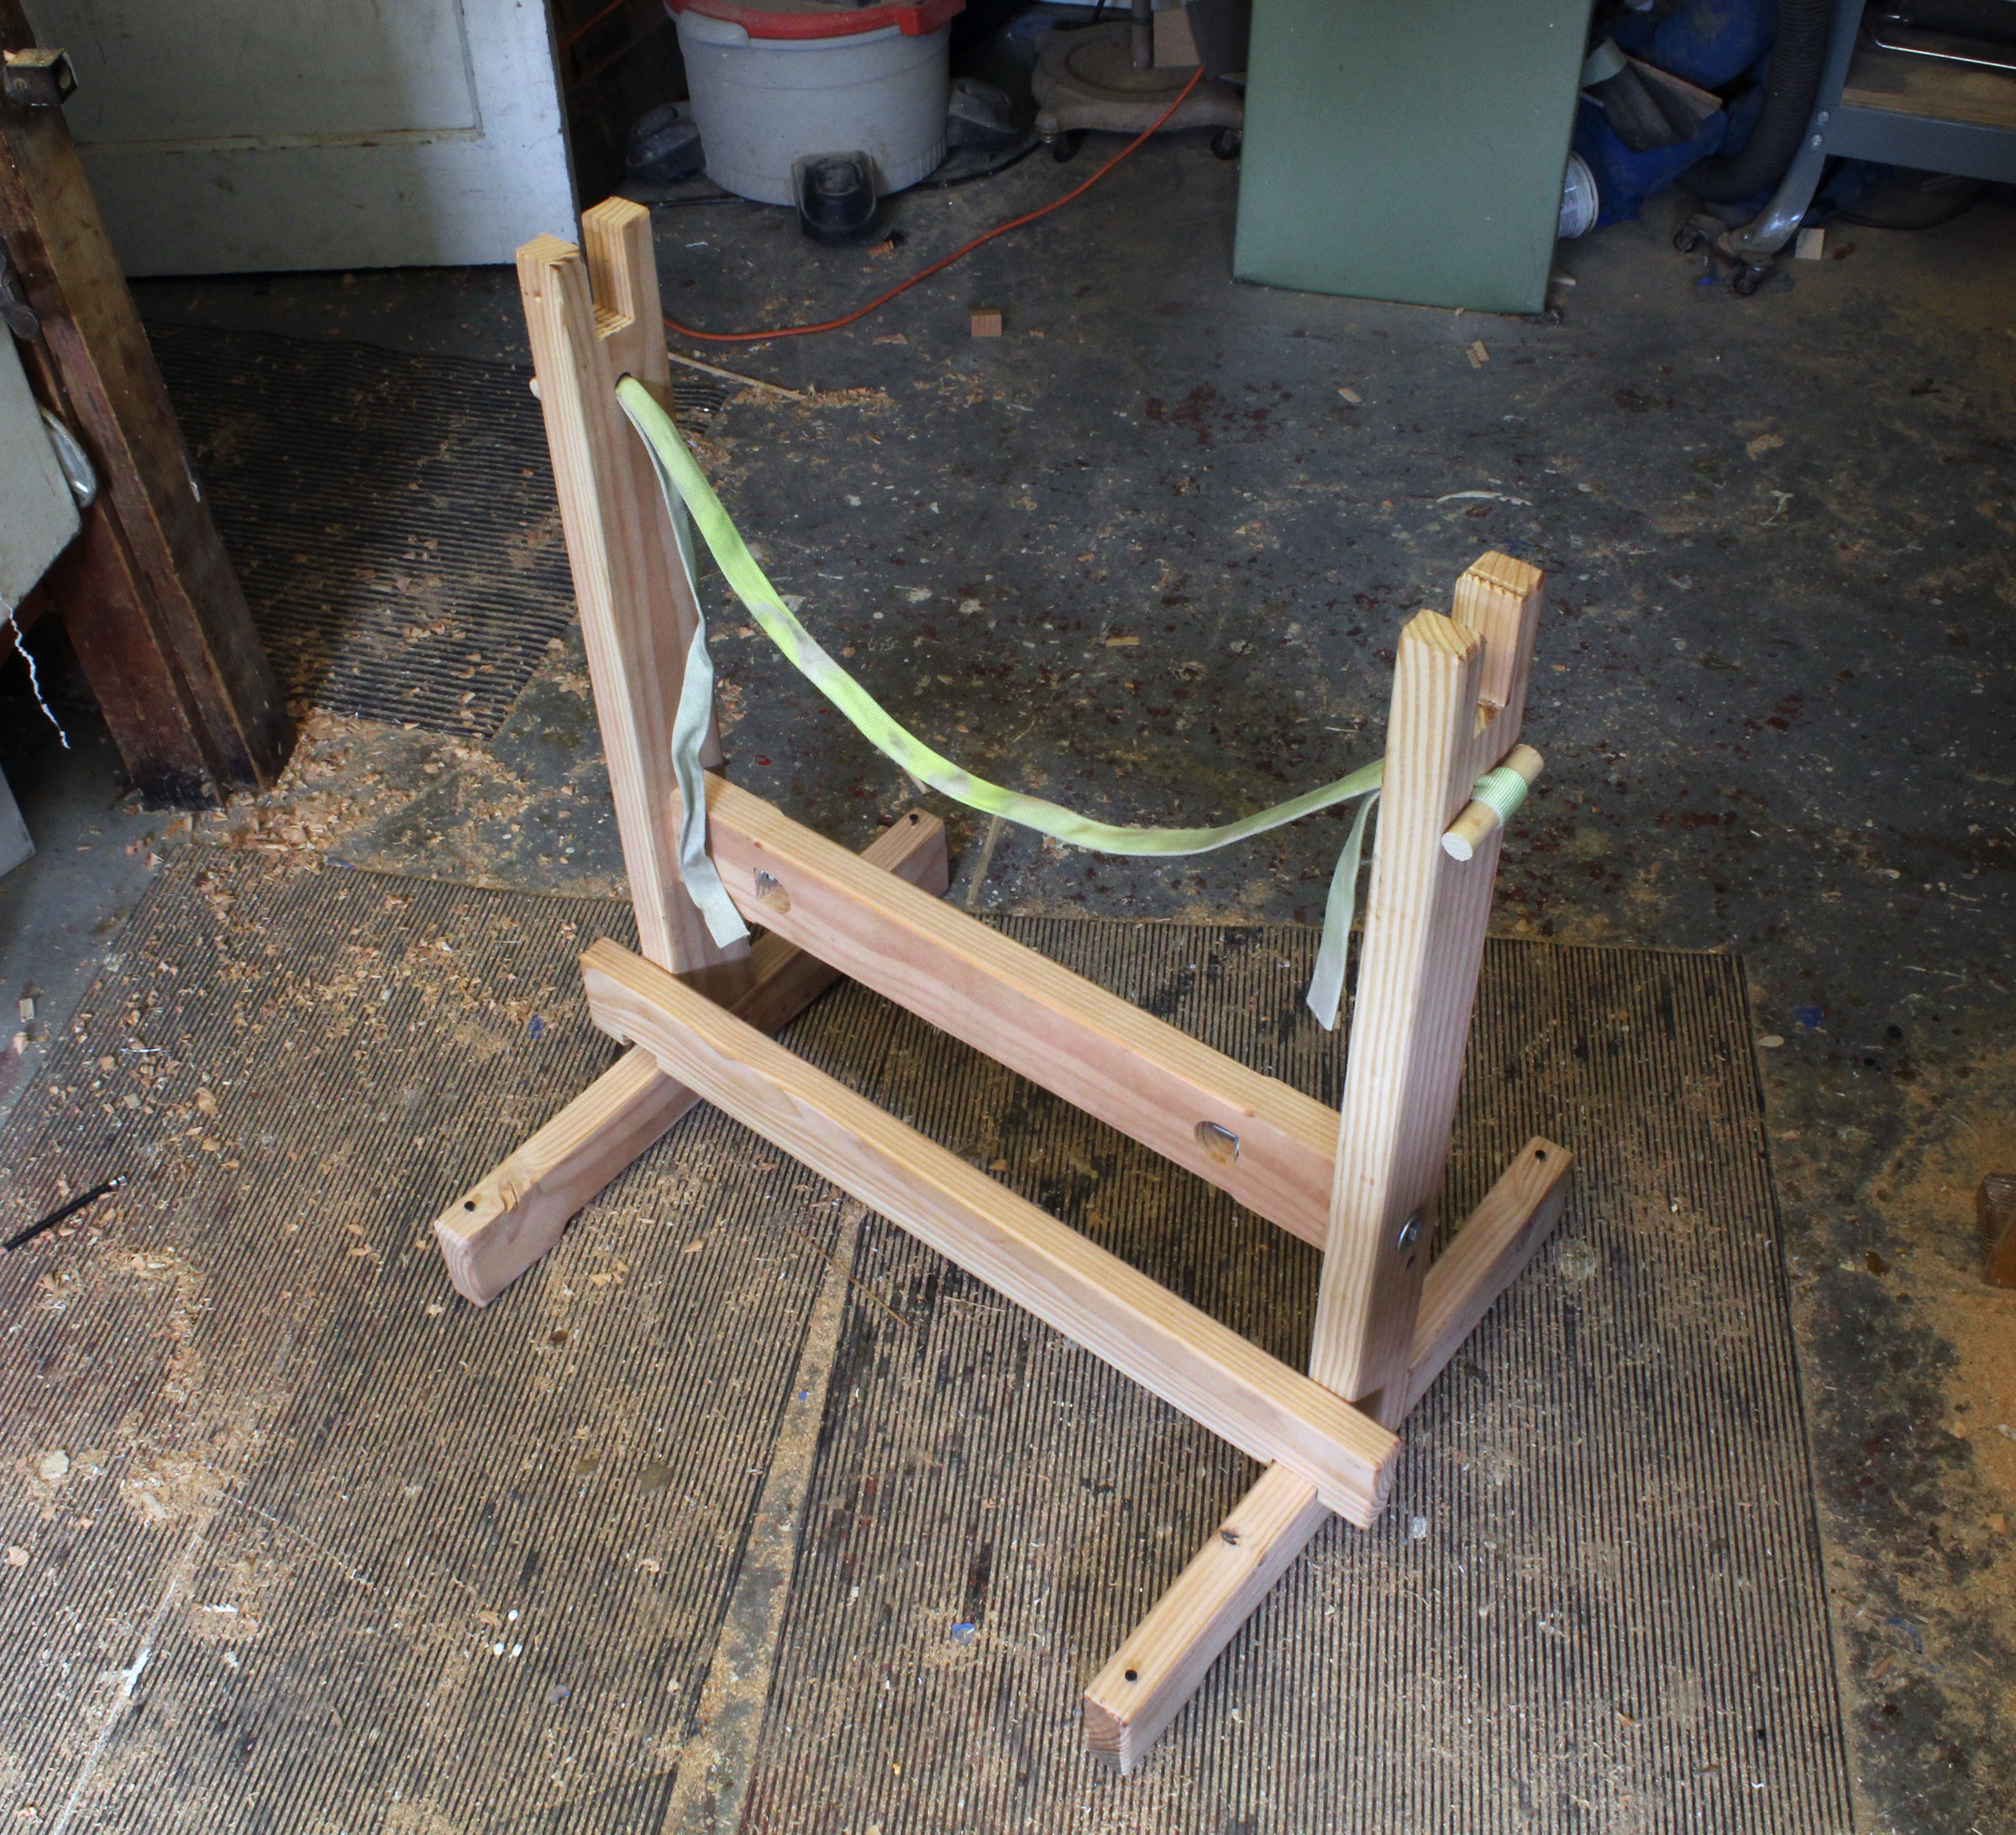
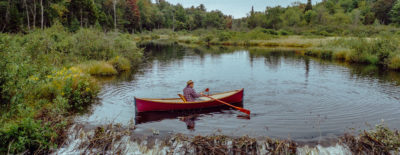
I wanted knock-down sawhorses for travel and storage, so I designed a set with cross bars attached with dowels and carriage bolts. I made these of spruce 2x4s and with upper cross pieces I can remove and replace with carpet-strip slings screwed to the uprights. For displaying a pair of lapstrake canoes, I made two pairs of “show horses.” I worked out a simple, break-down design with loose-wedged tusk-tenons for the lower cross piece and a sling made of soft, polyester three-strand rope attached through holes in the uprights with fancy stopper knots. These stands readily break down to two parts and lie flat for transportation or storage.
 Tom DeVries
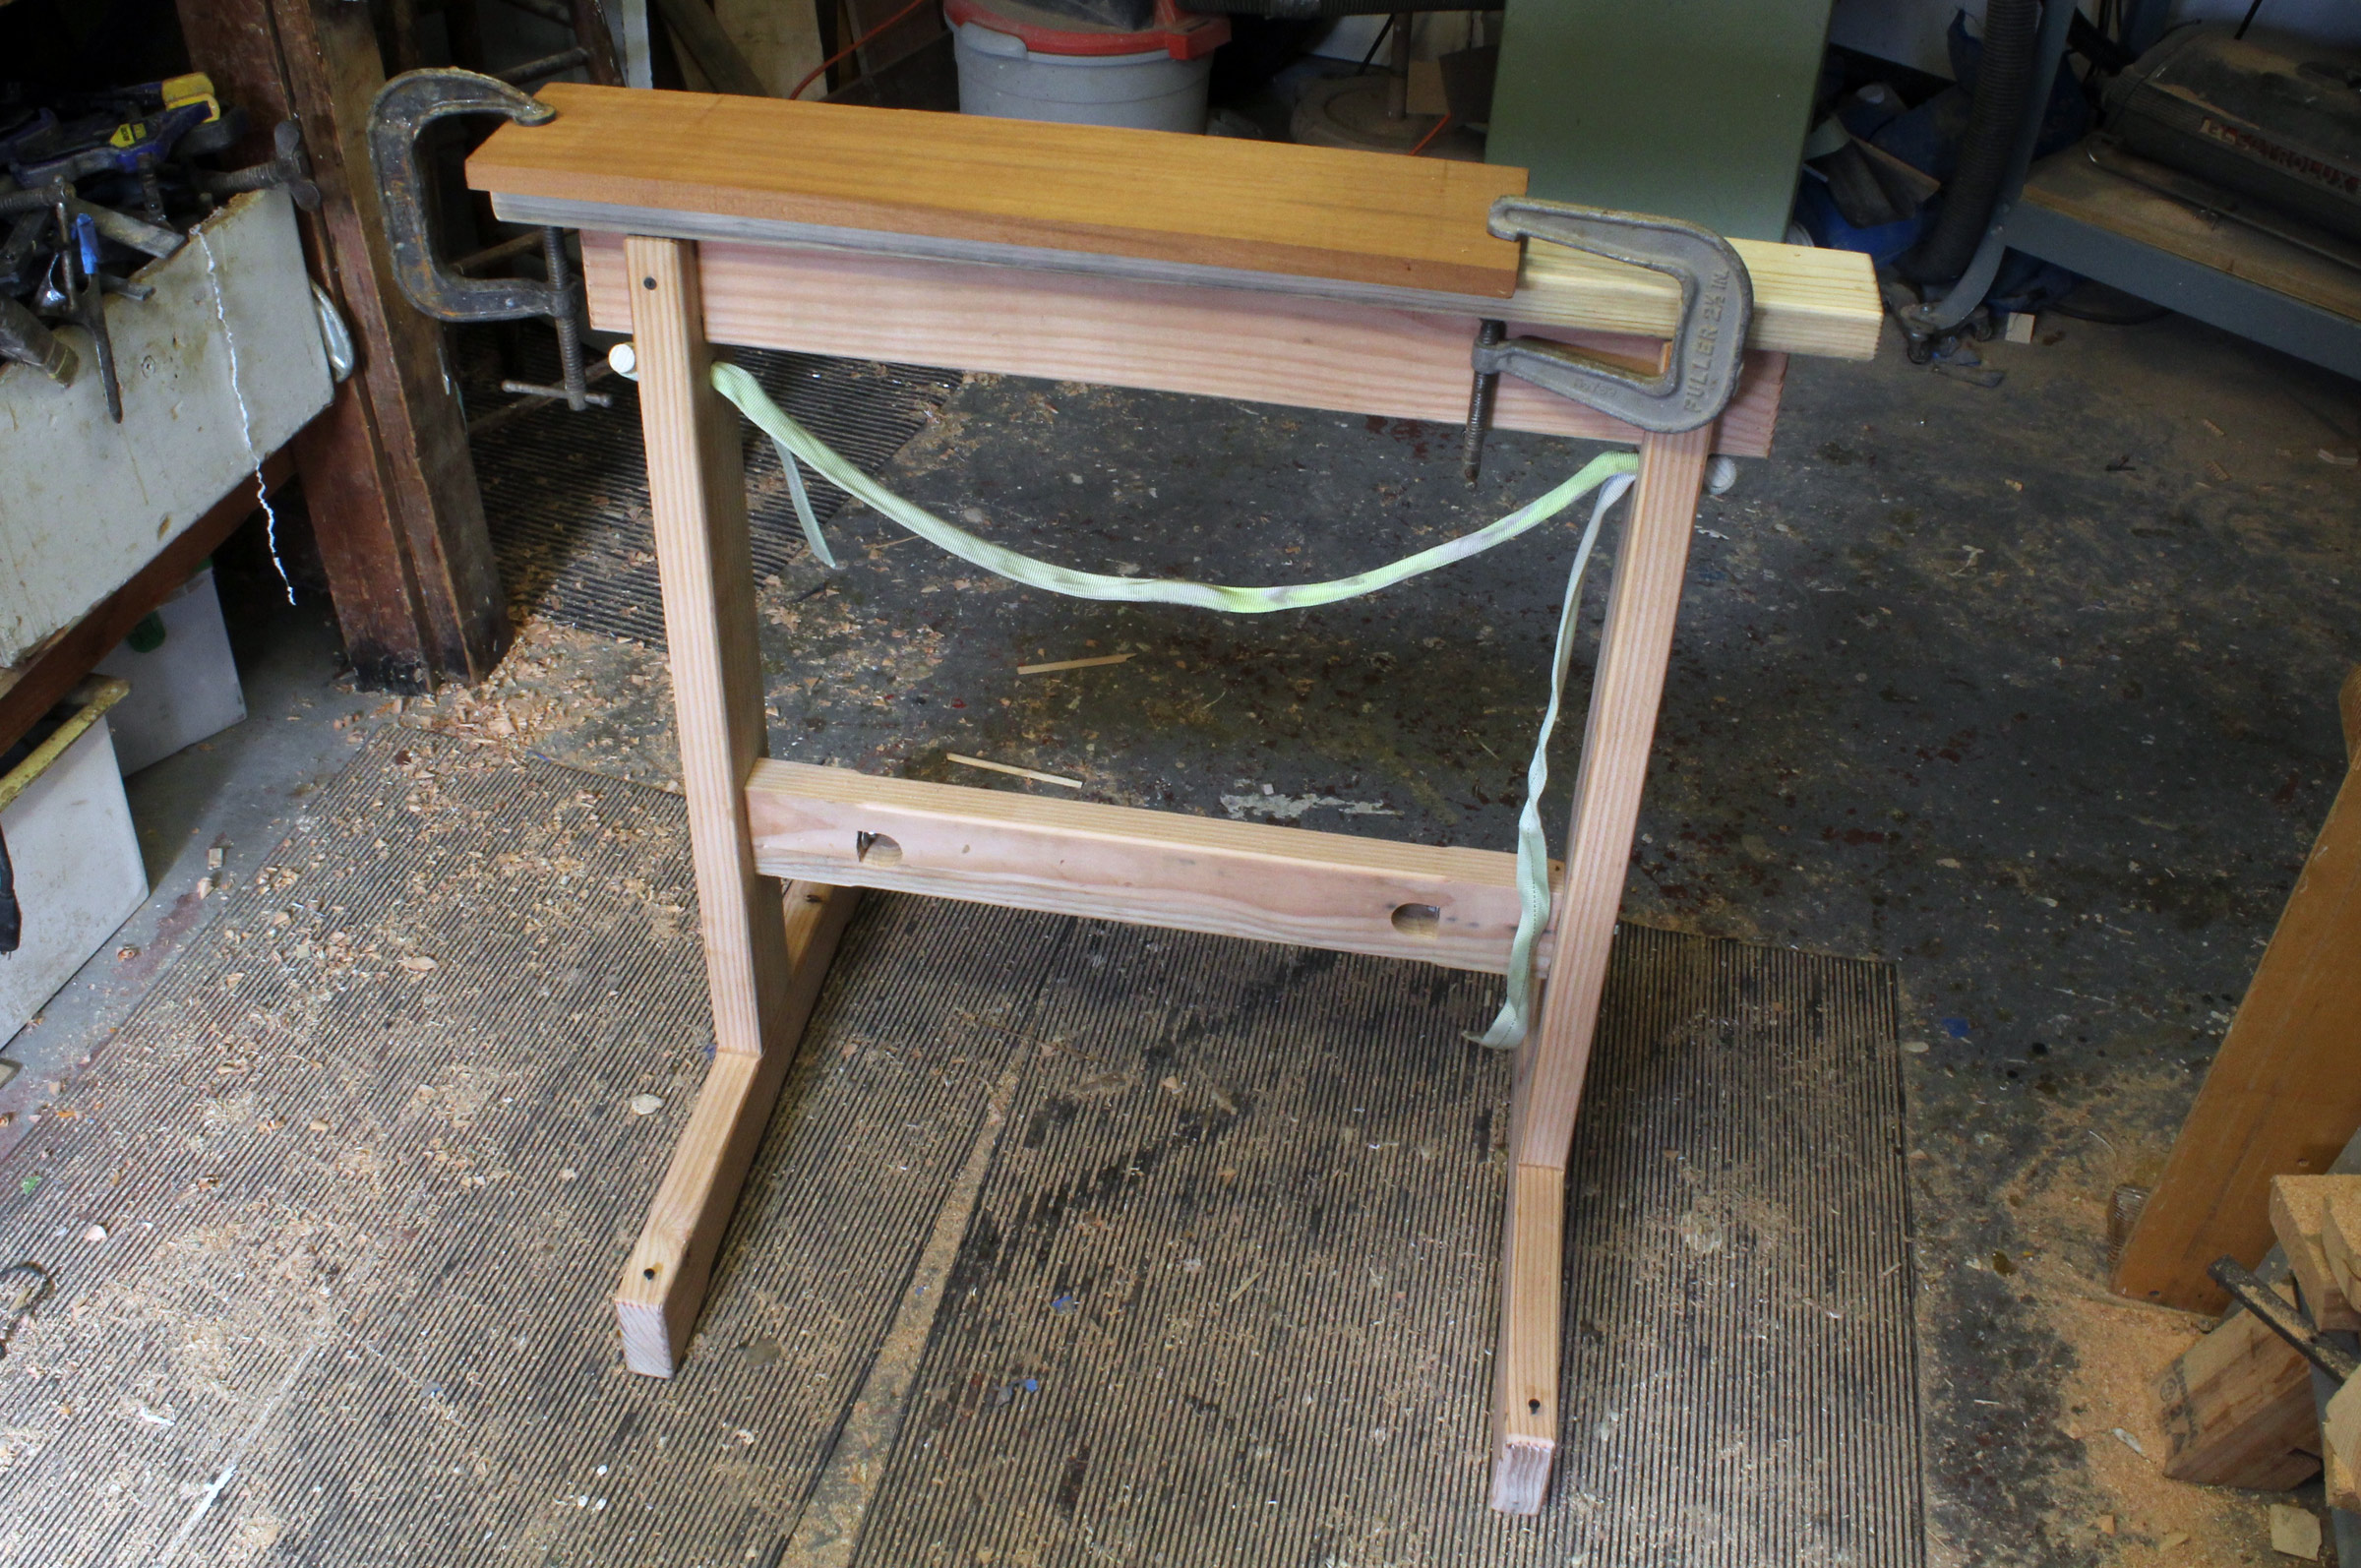
These take-apart sawhorse slings have tenoned crosspieces that are held in their mortises by removable wedges.
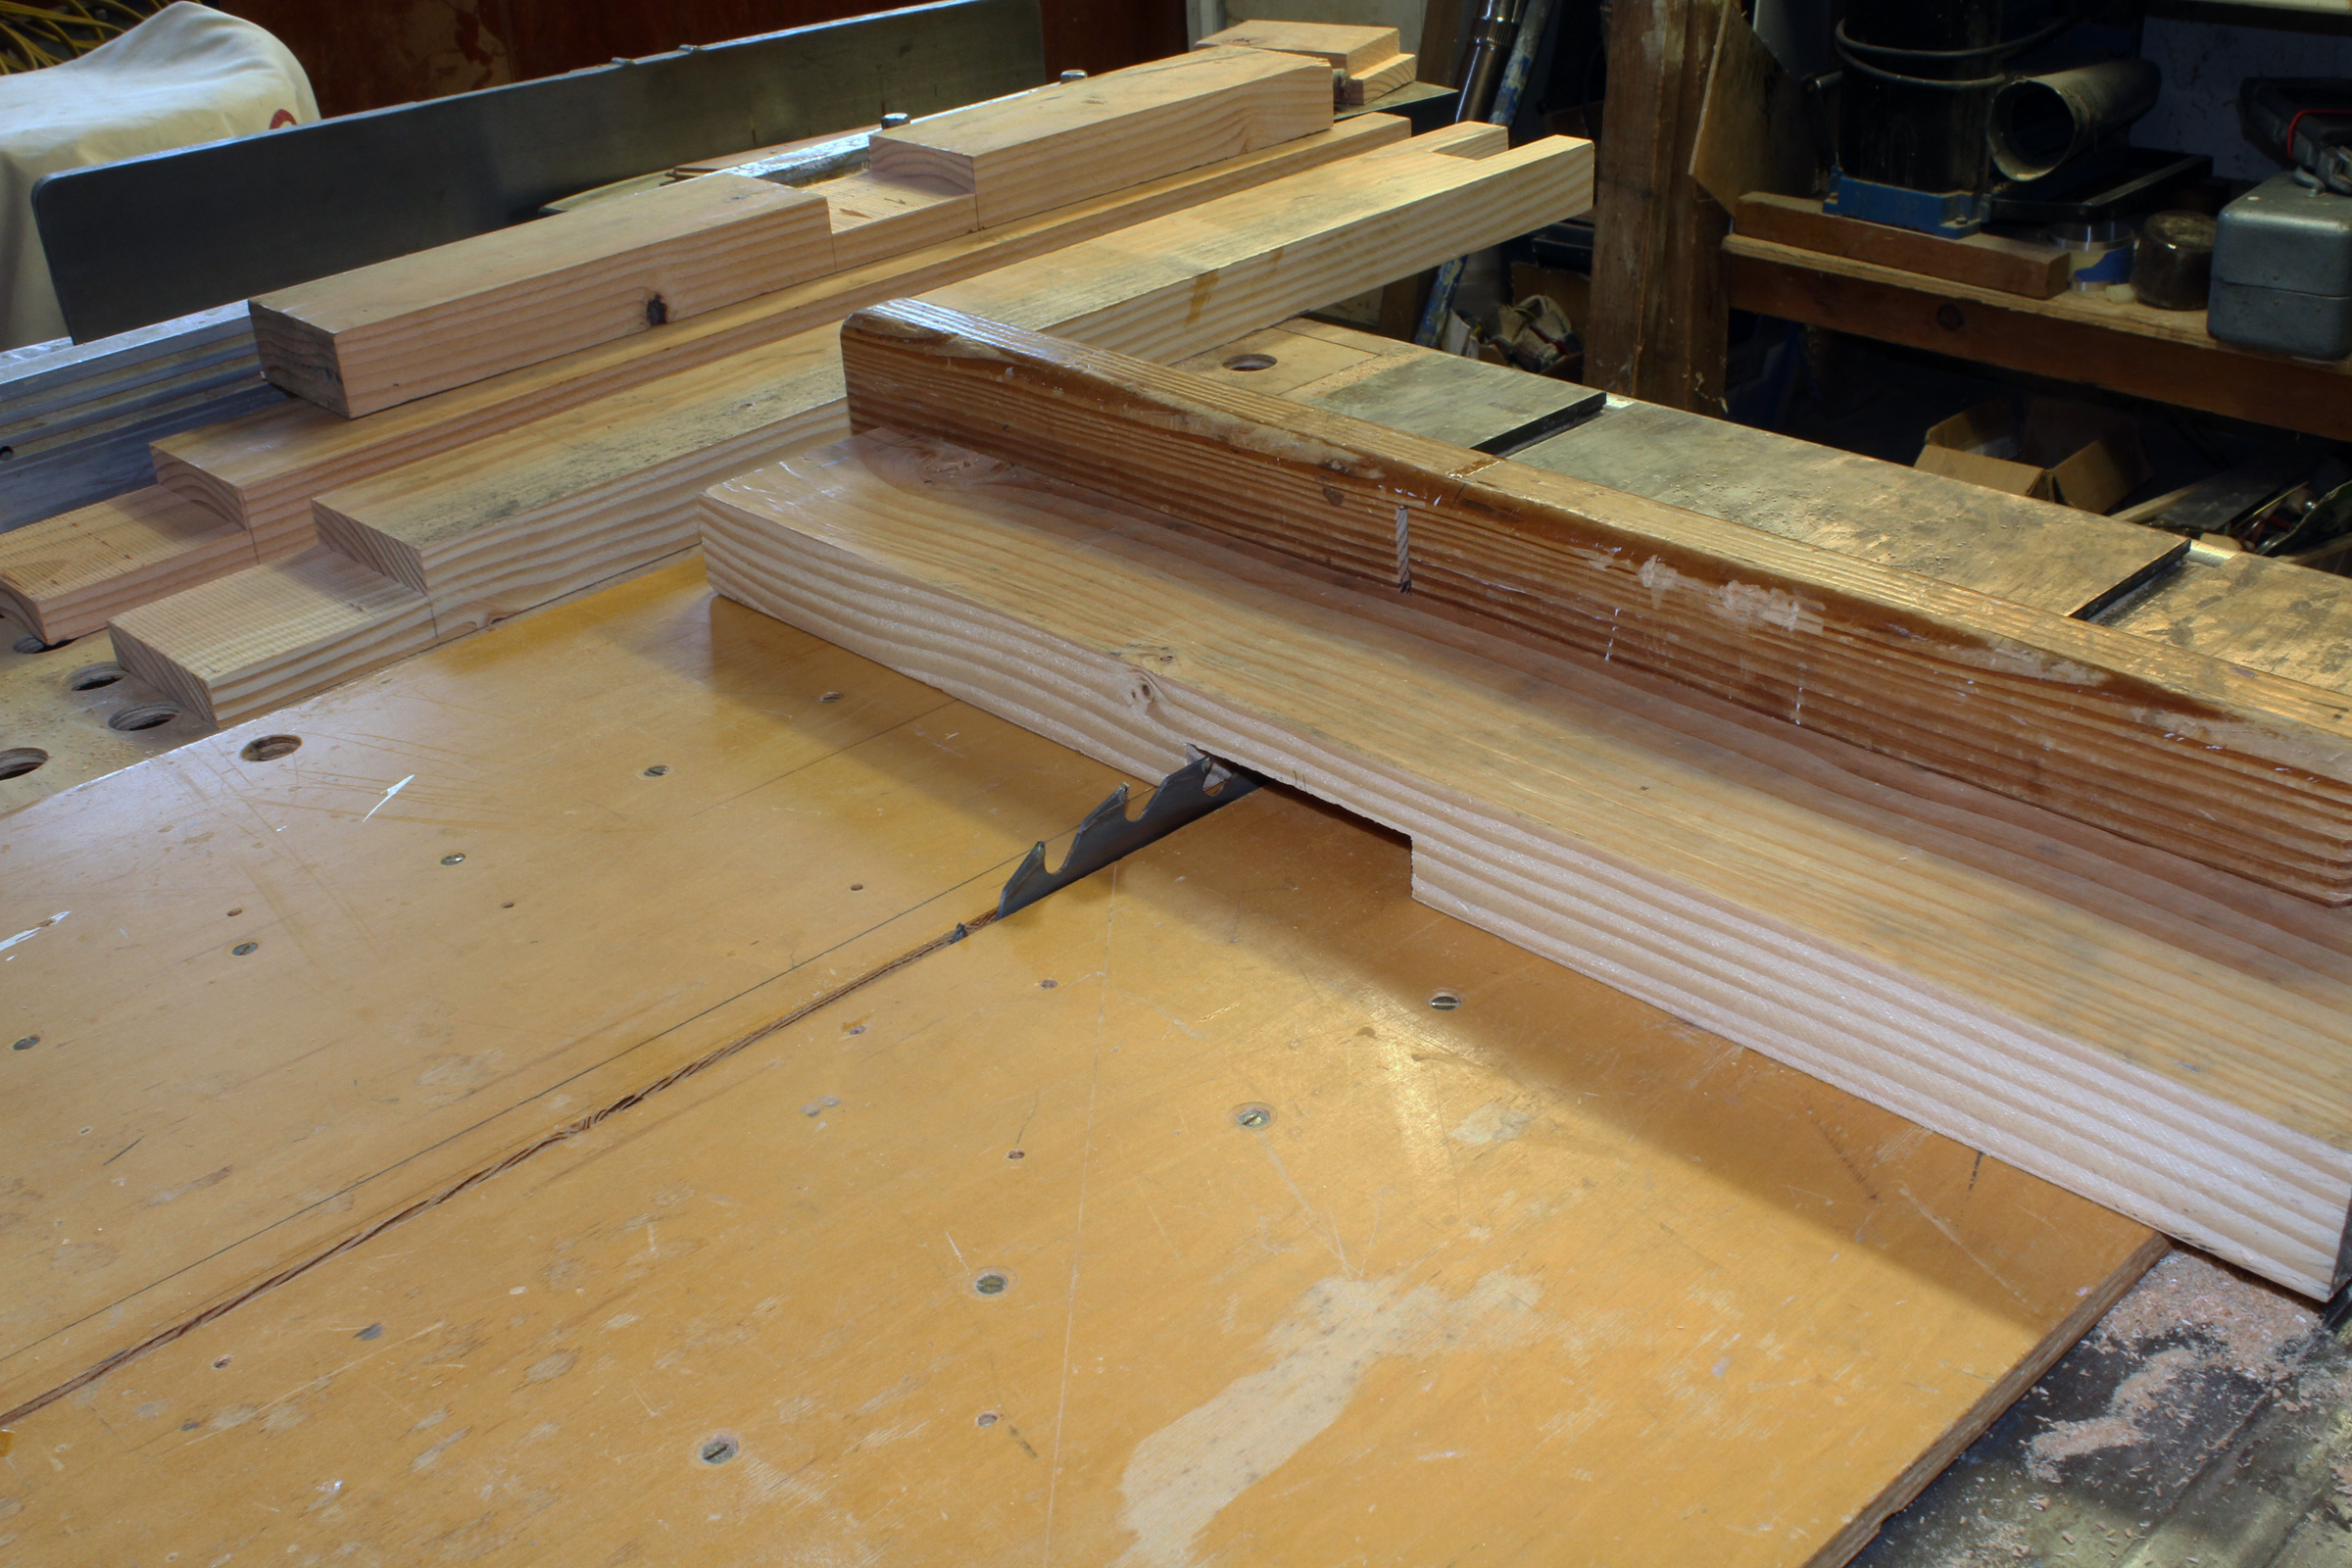
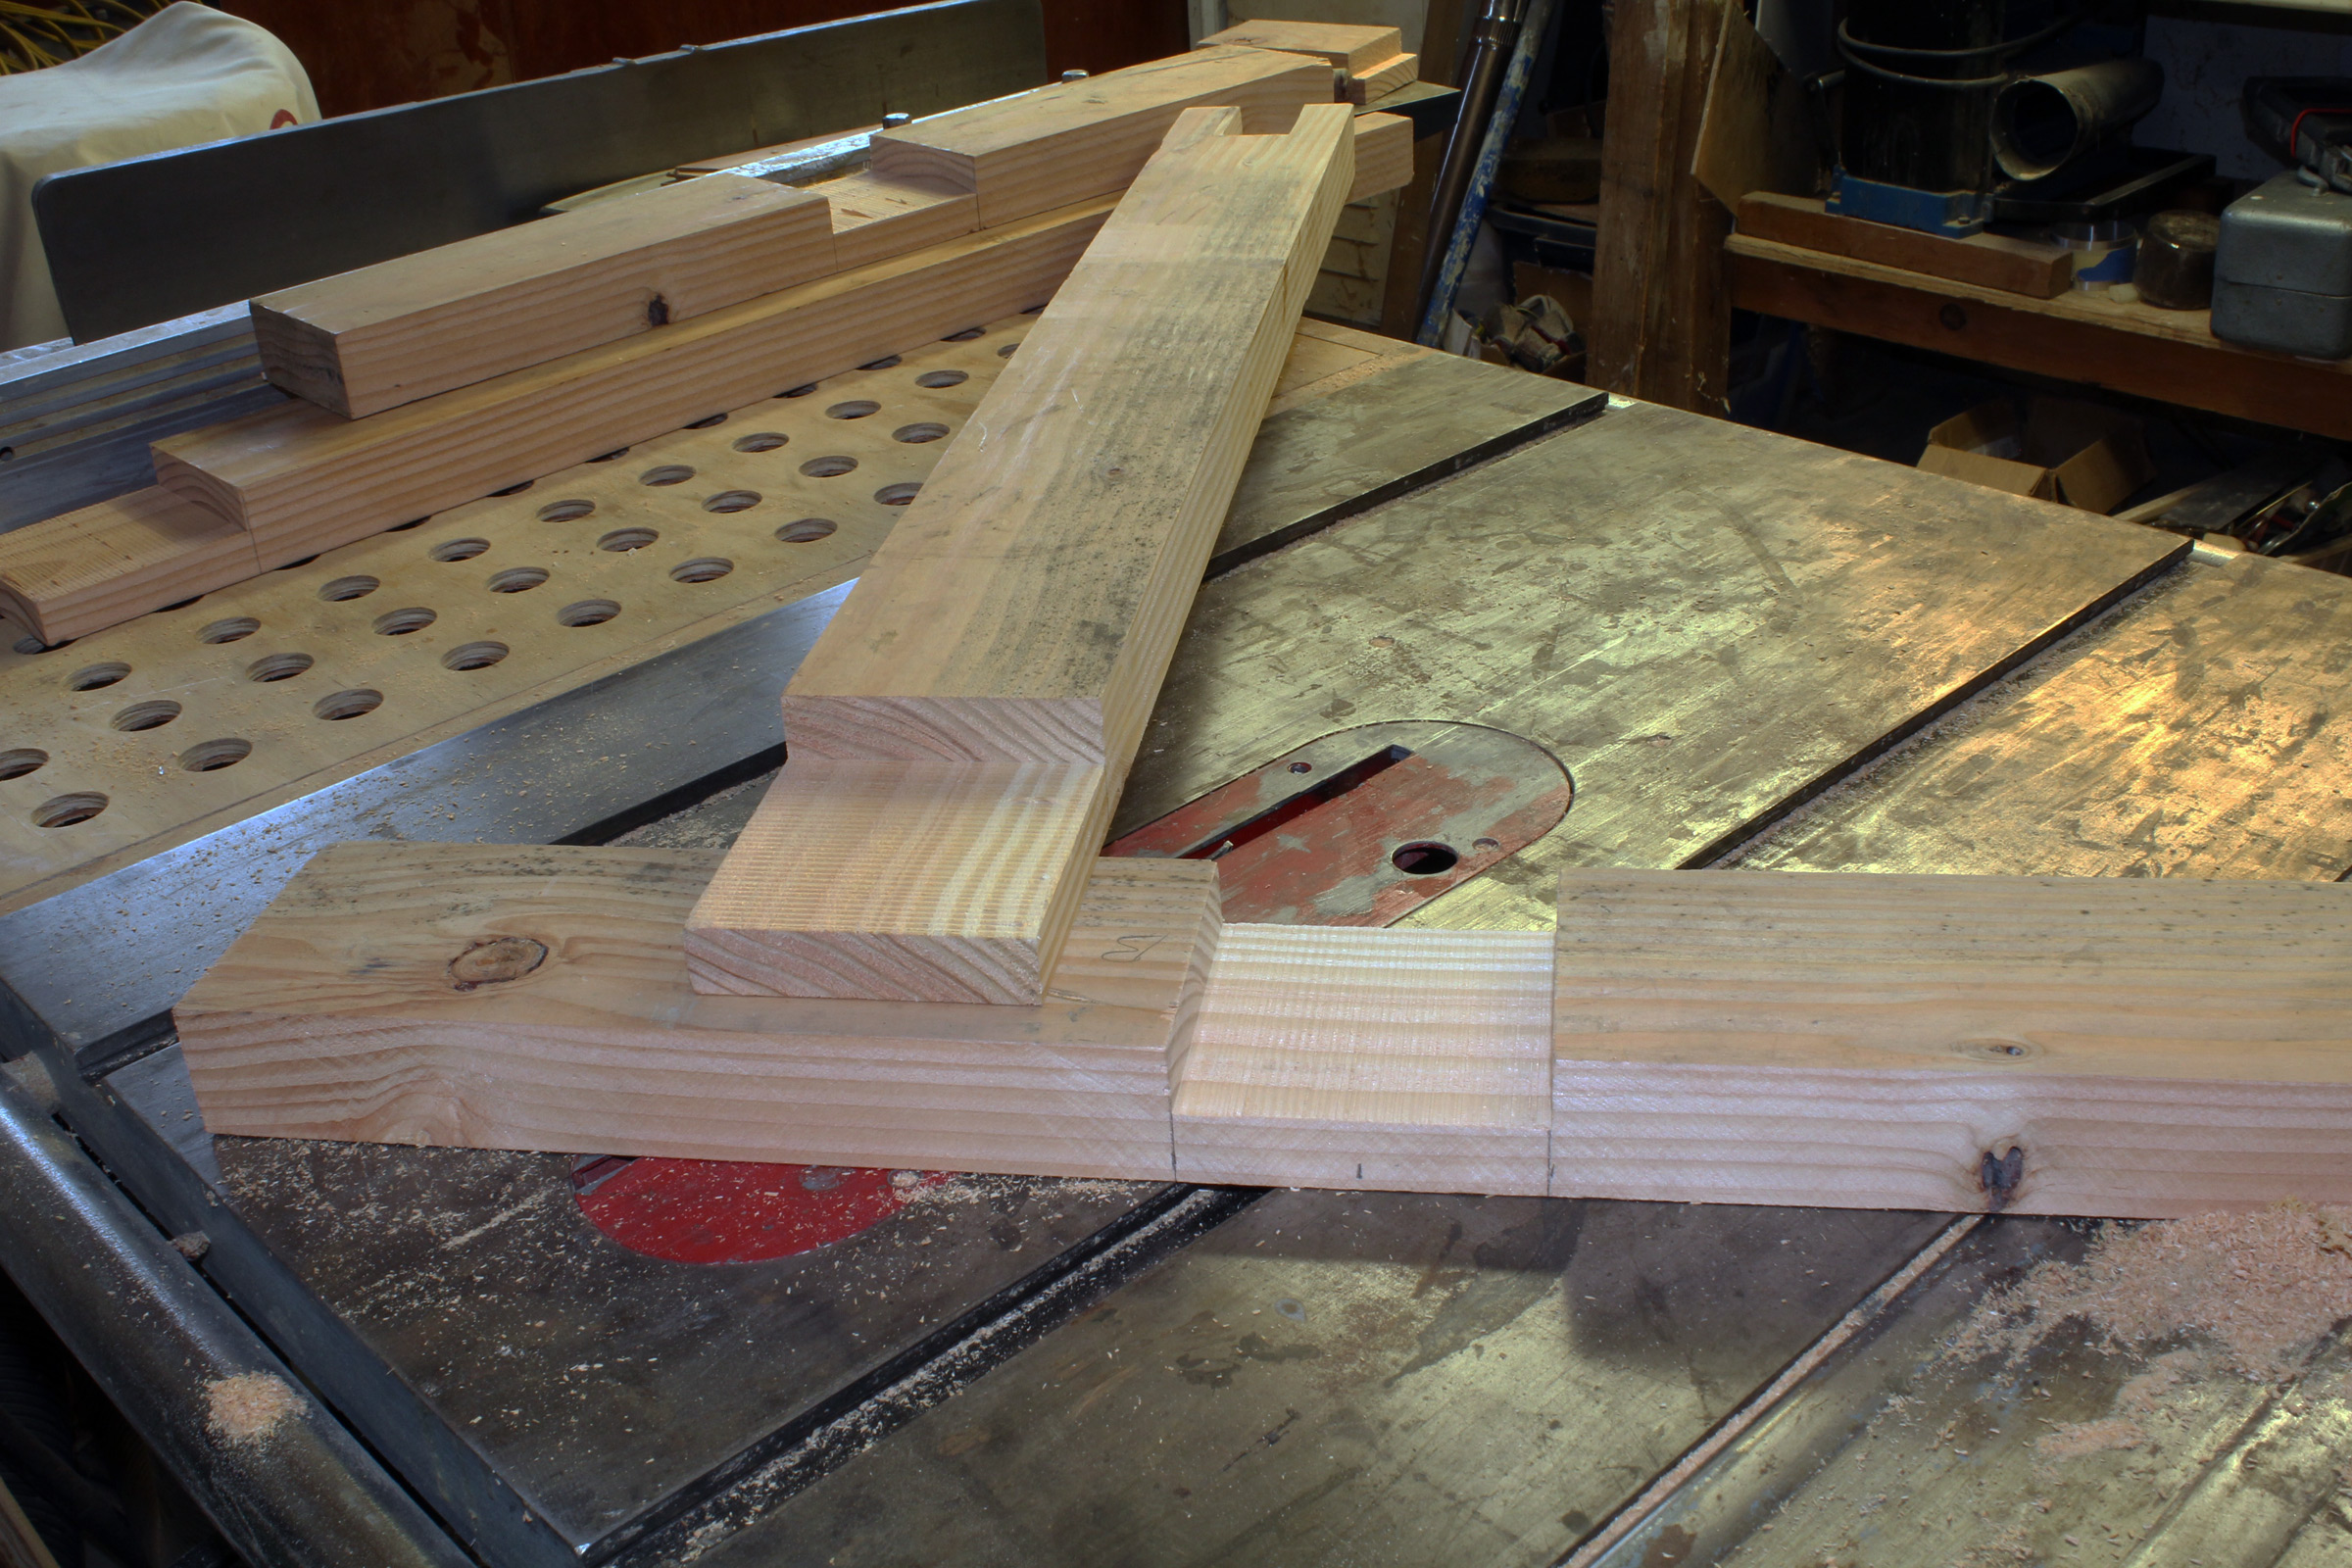
On occasion, I have more than one boat needing attention, so I recently put together a new set of work horses that have both upper cross bars and canvas slings. These were made from four 8′ 2x4s of the SPF variety (my chosen boards were likely fir). With a chop saw I got out four bases 23 3⁄4″ long, two 23 3⁄4″ lower cross pieces, four 31 1⁄2″ uprights, and two 30″ upper cross bars. I picked the heaviest 2×4 for the bases and the lightest for the top cross bars, then thickness-planed the top cross bars to 1 1⁄4″ and left the other parts as is. After cutting mortises in the uprights for the lower cross piece through-tenon and cutting the notches for the top cross bar bridle joints, I mated the bases and uprights with a half lap, glued, and screwed together, with the joint off center. (A great resource for all woodworking joinery is a book titled Woodwork Joints by Charles H. Hayward. In it you will find the half-lap, dowel, tusk-tenon, through-tenon, and bridle joints used in these sawhorses.)
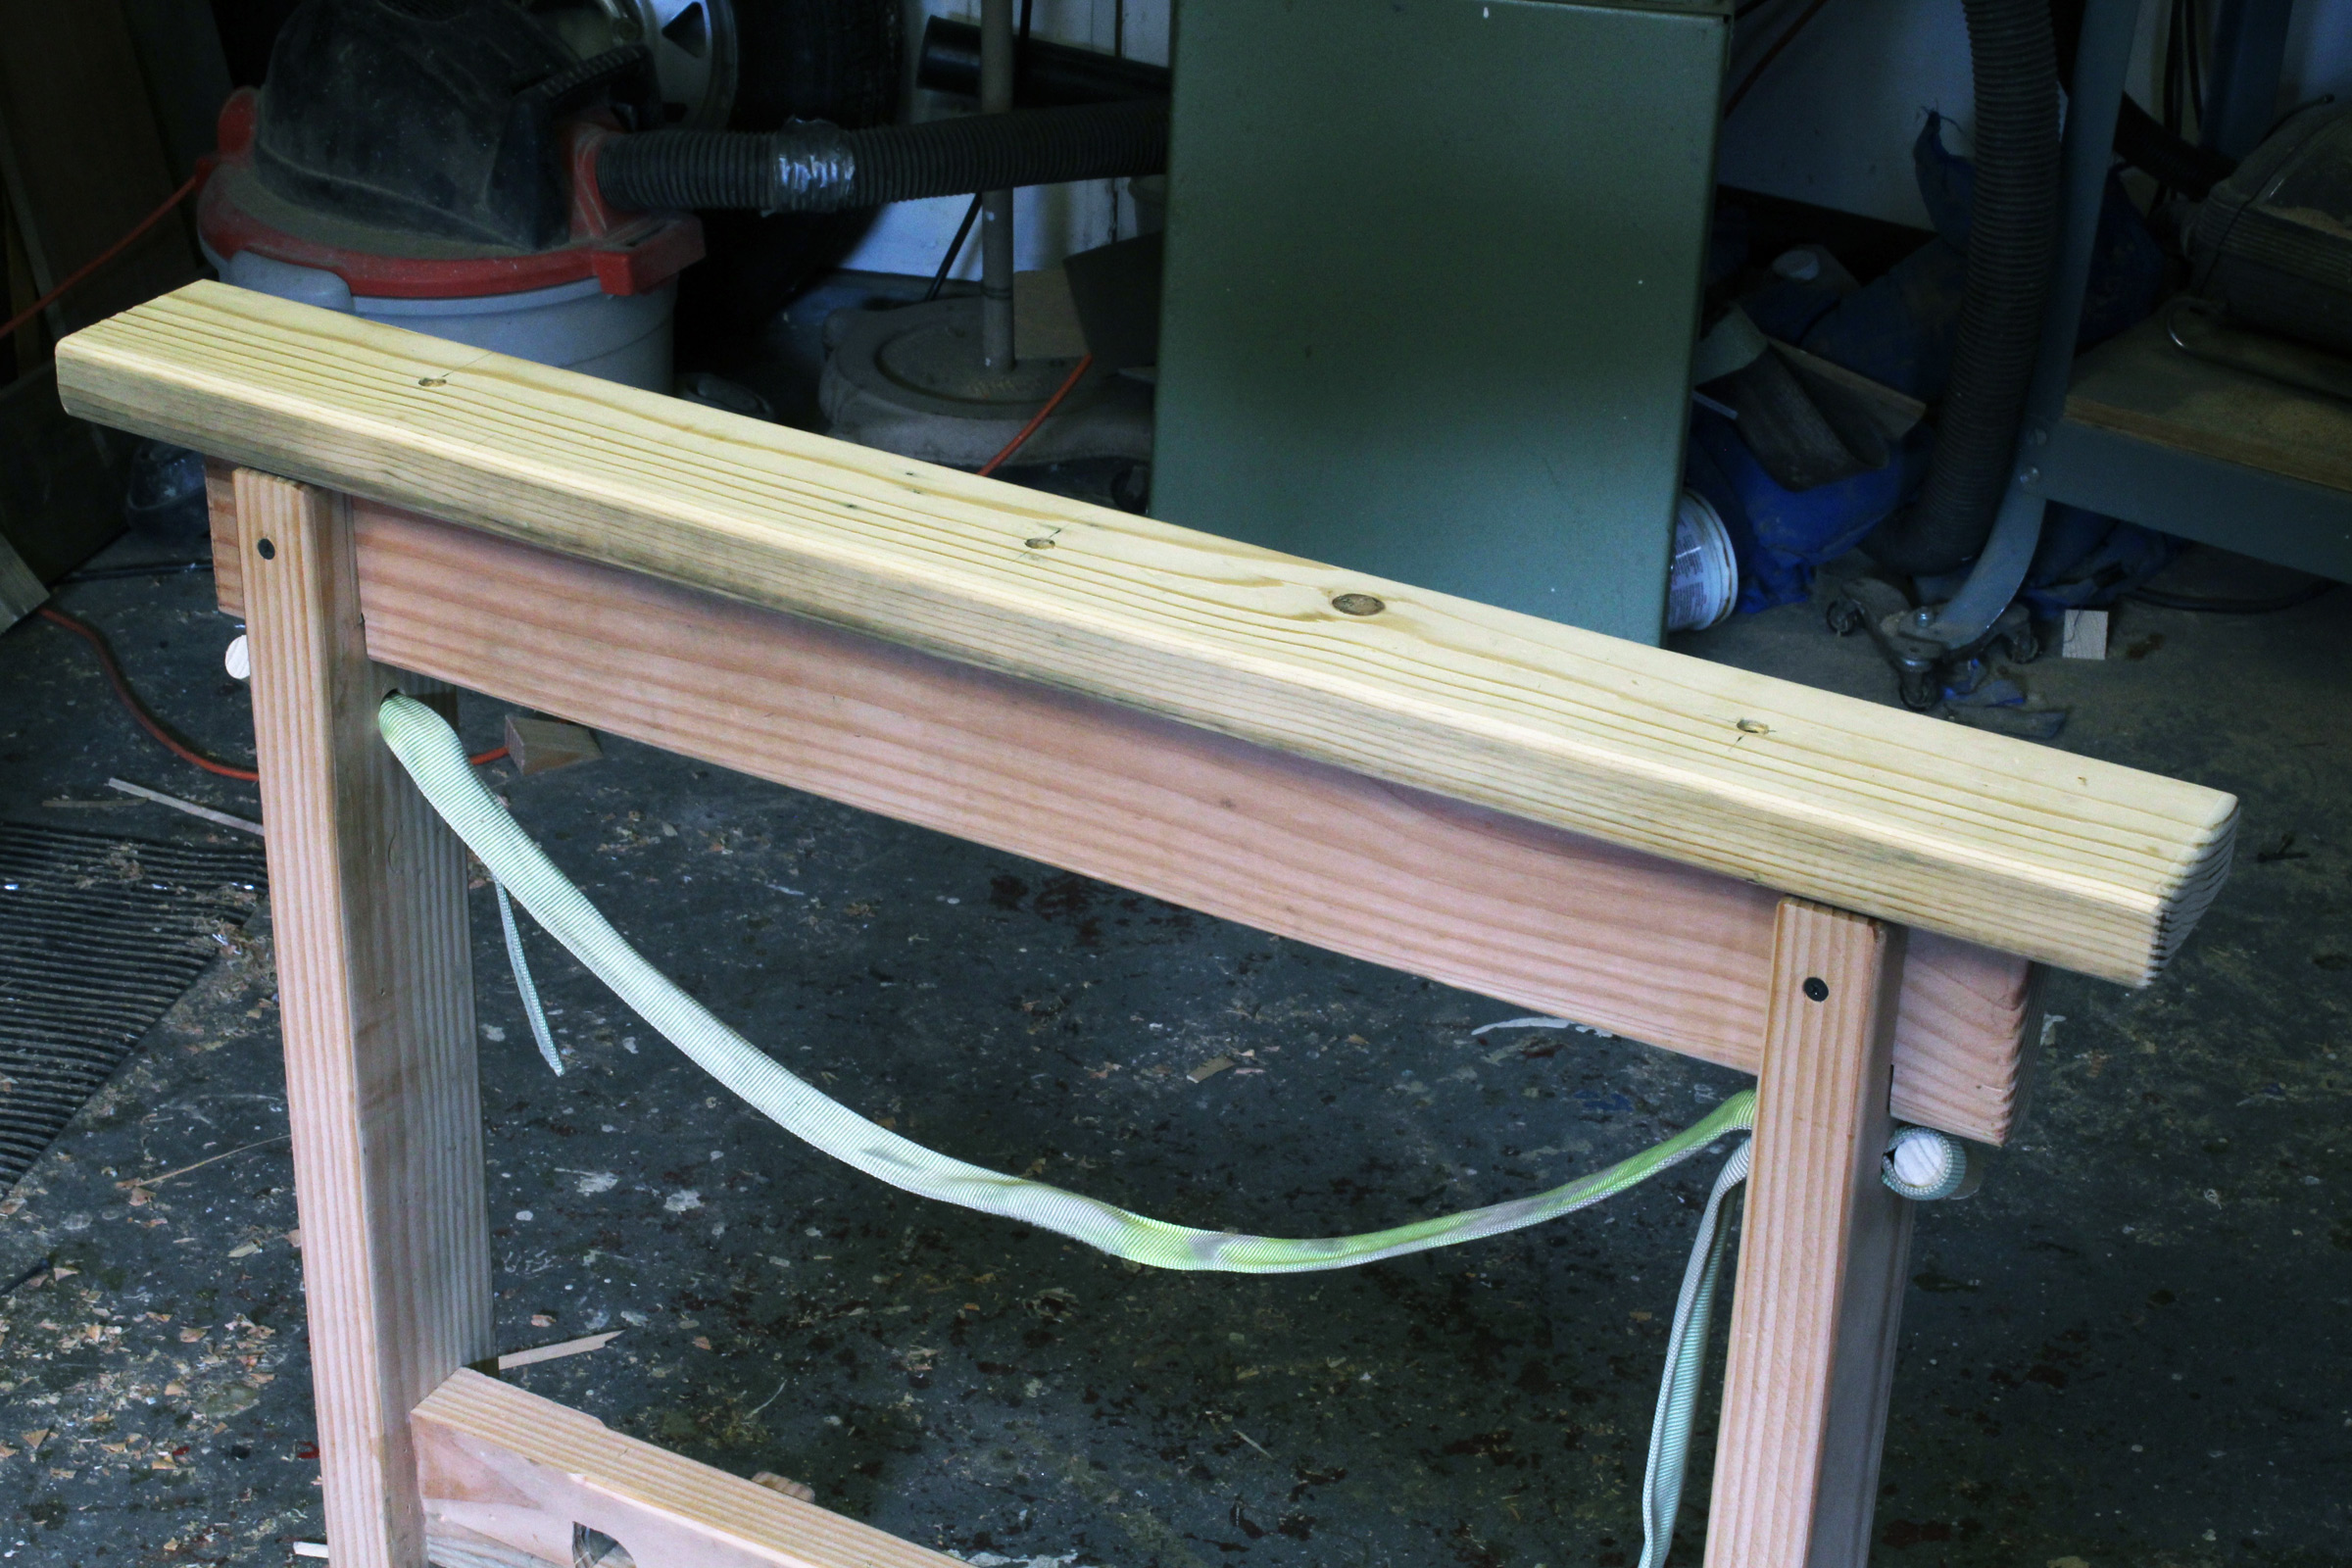
Having longer feet pointing toward each other makes the horses less likely to rock when a boat is slung on them. Offset bases also require a little less floor space when these horses are stored shoved together. A slight arch cut on the bottoms of the bases keeps them from getting high-centered and rocking. The lower cross piece is attached to the uprights with wedged through-tenons. Before the glue-up I dry-fit everything, including the notched top cross bar. I checked for square and avoided racking while clamping for this glue up. The slings are made of a triple layer of No. 10 canvas that I sewed to a width of 1¼″. They are 44″ long and are glued and screwed to wooden blocks that fit the upright notches.
Whether glue-fastened tight or designed for easy disassembly, these show horses and work horses cost only a few dollars and a few hours’ work, and all earn their keep.![]()
Tom DeVries studied fine woodworking with James Krenov in the early 1990s. He and wife Tina live in central Massachusetts surrounded by white-pine and red-oak trees. Tom drives north for his white cedar planking stock and wishes his lumberyard still carried spruce 2x6s.
Editor’s notes
When I first saw Tom’s Krenov-style sawhorses, I was a bit skeptical. All of the sawhorses I’d ever used a flat plank top and four splayed legs; I didn’t think an inverted T shape could be as solid. I built a sawhorse to Tom’s specifications, modeled on a bolt-fastened take-apart he’d made, and as soon as I had it assembled, I was sold on the design. I can take the one here apart in less than a minute and put it back together in about 75 seconds.
Years ago I’d bought some molded brackets that held 2×4 legs to a 2×6 top. They were annoying to assemble and constantly got loose and wobbly. I can get rid of them now and replace them with the Krenov-style.
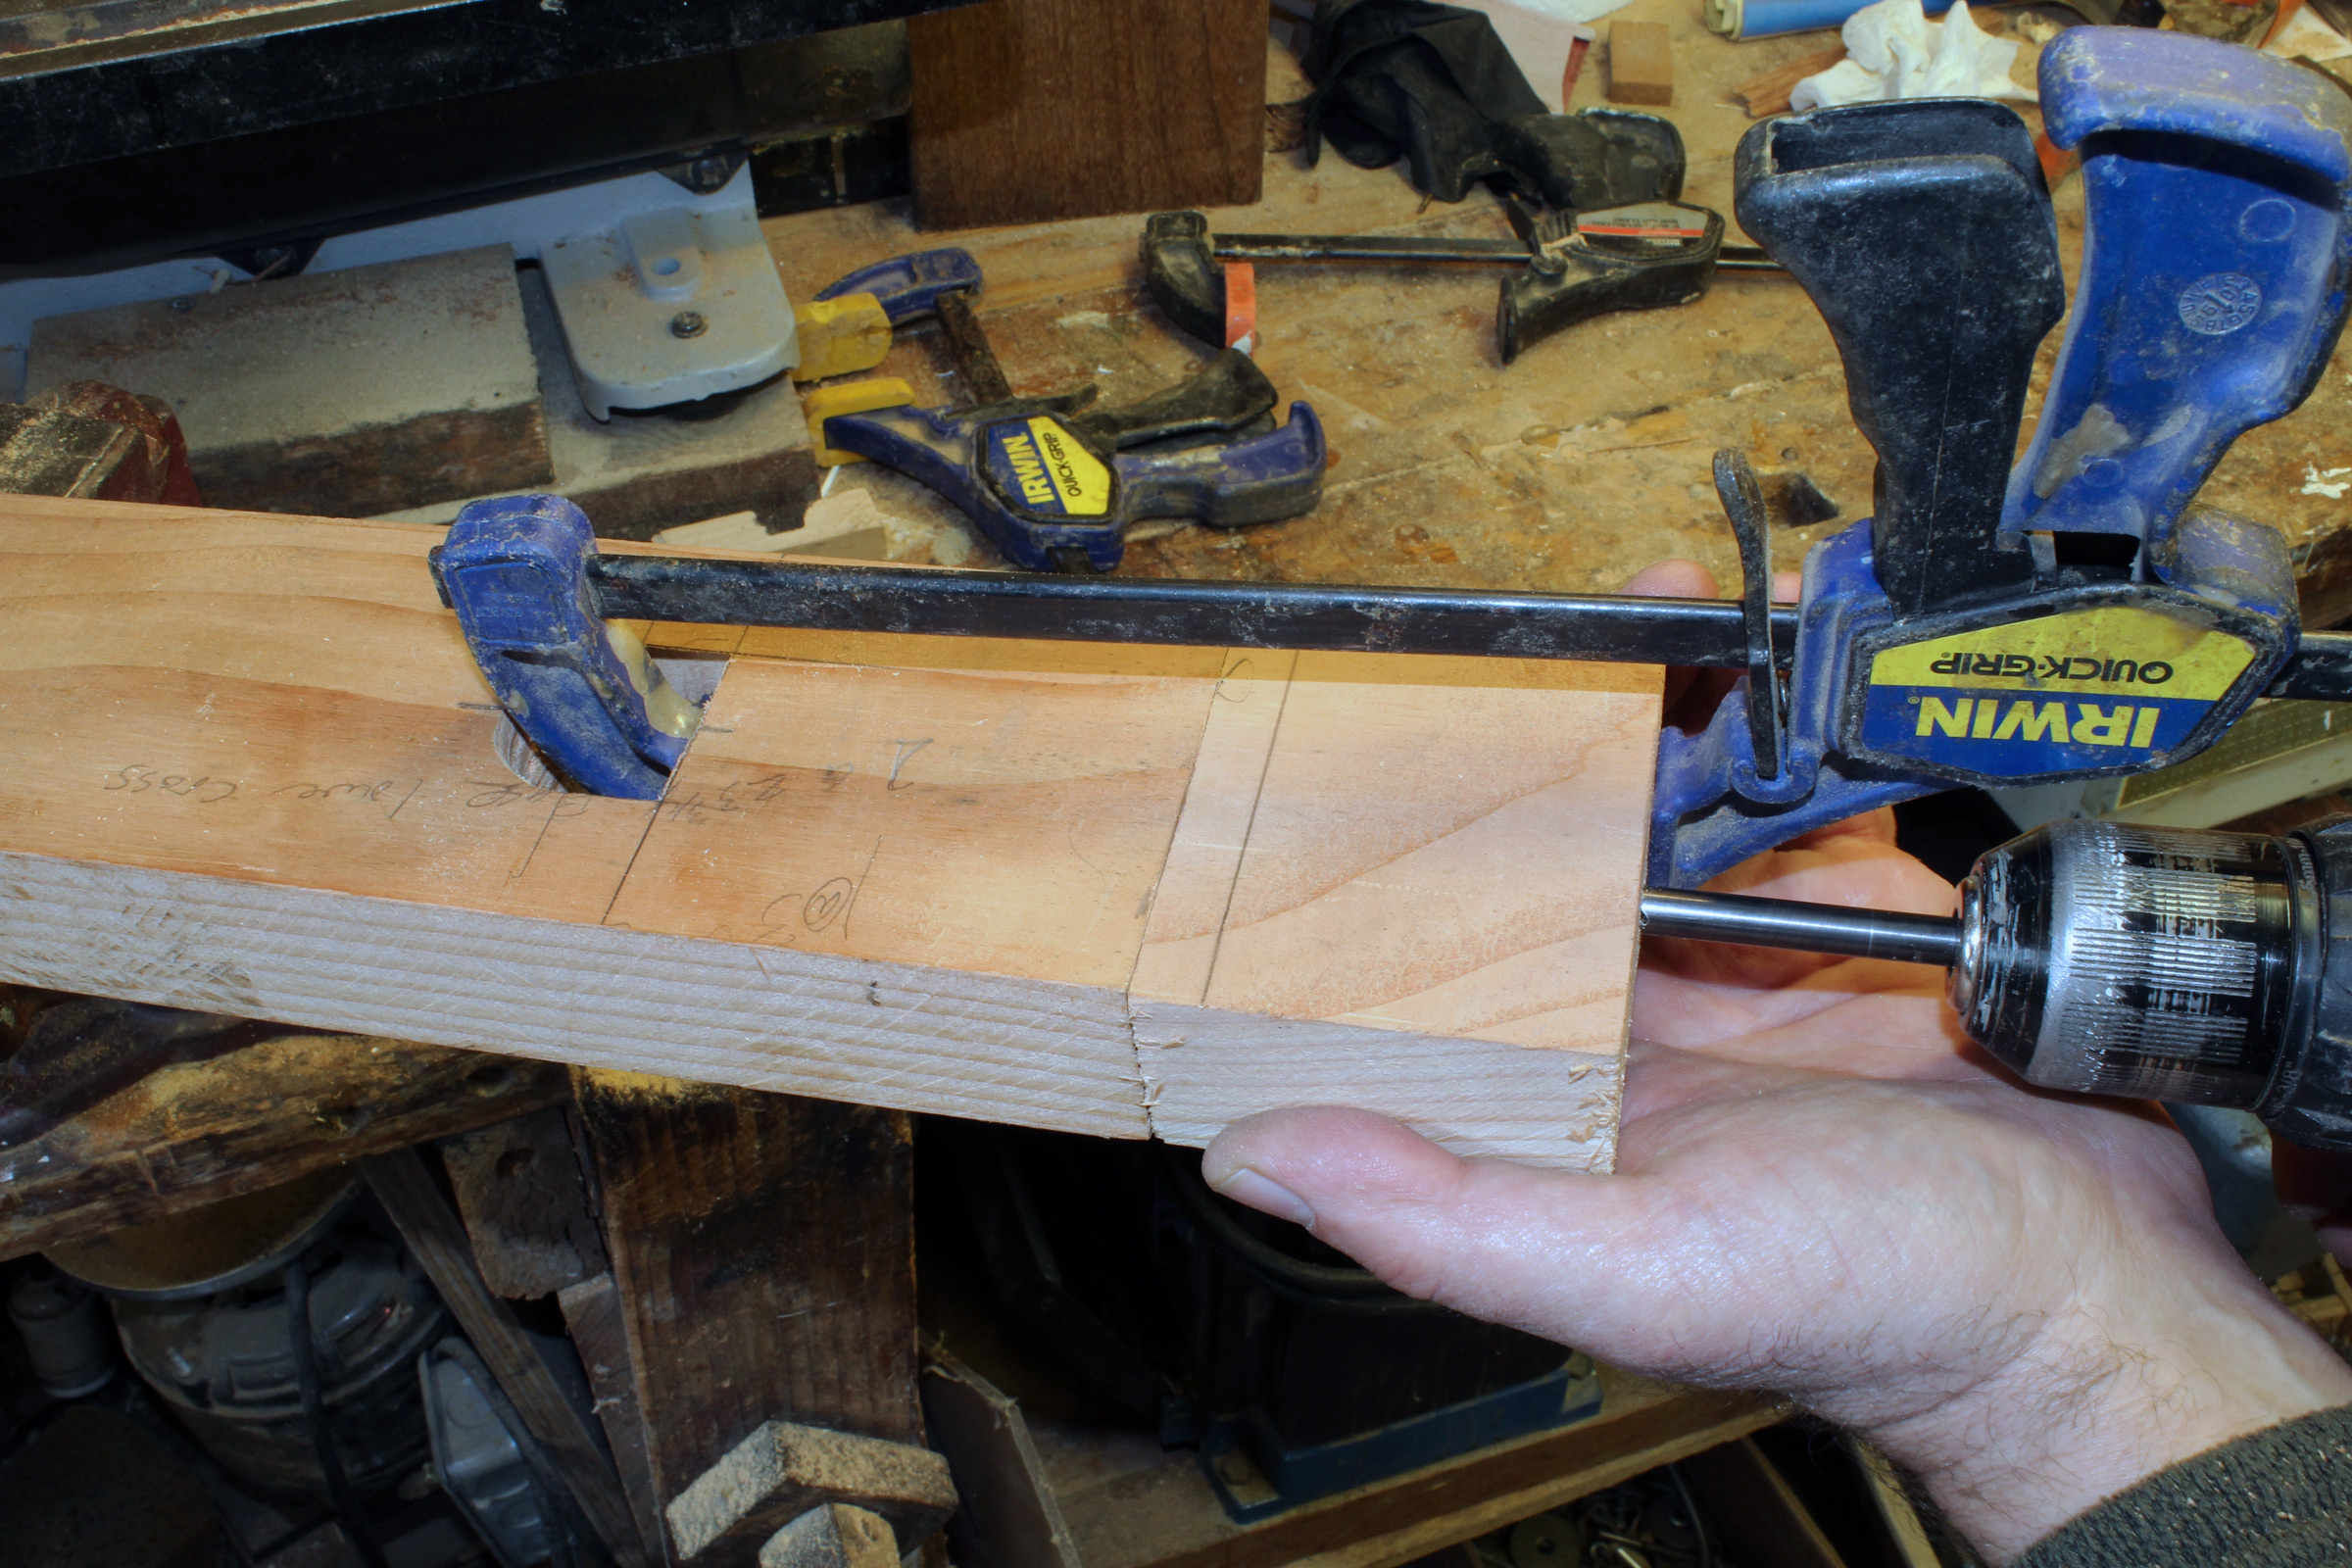
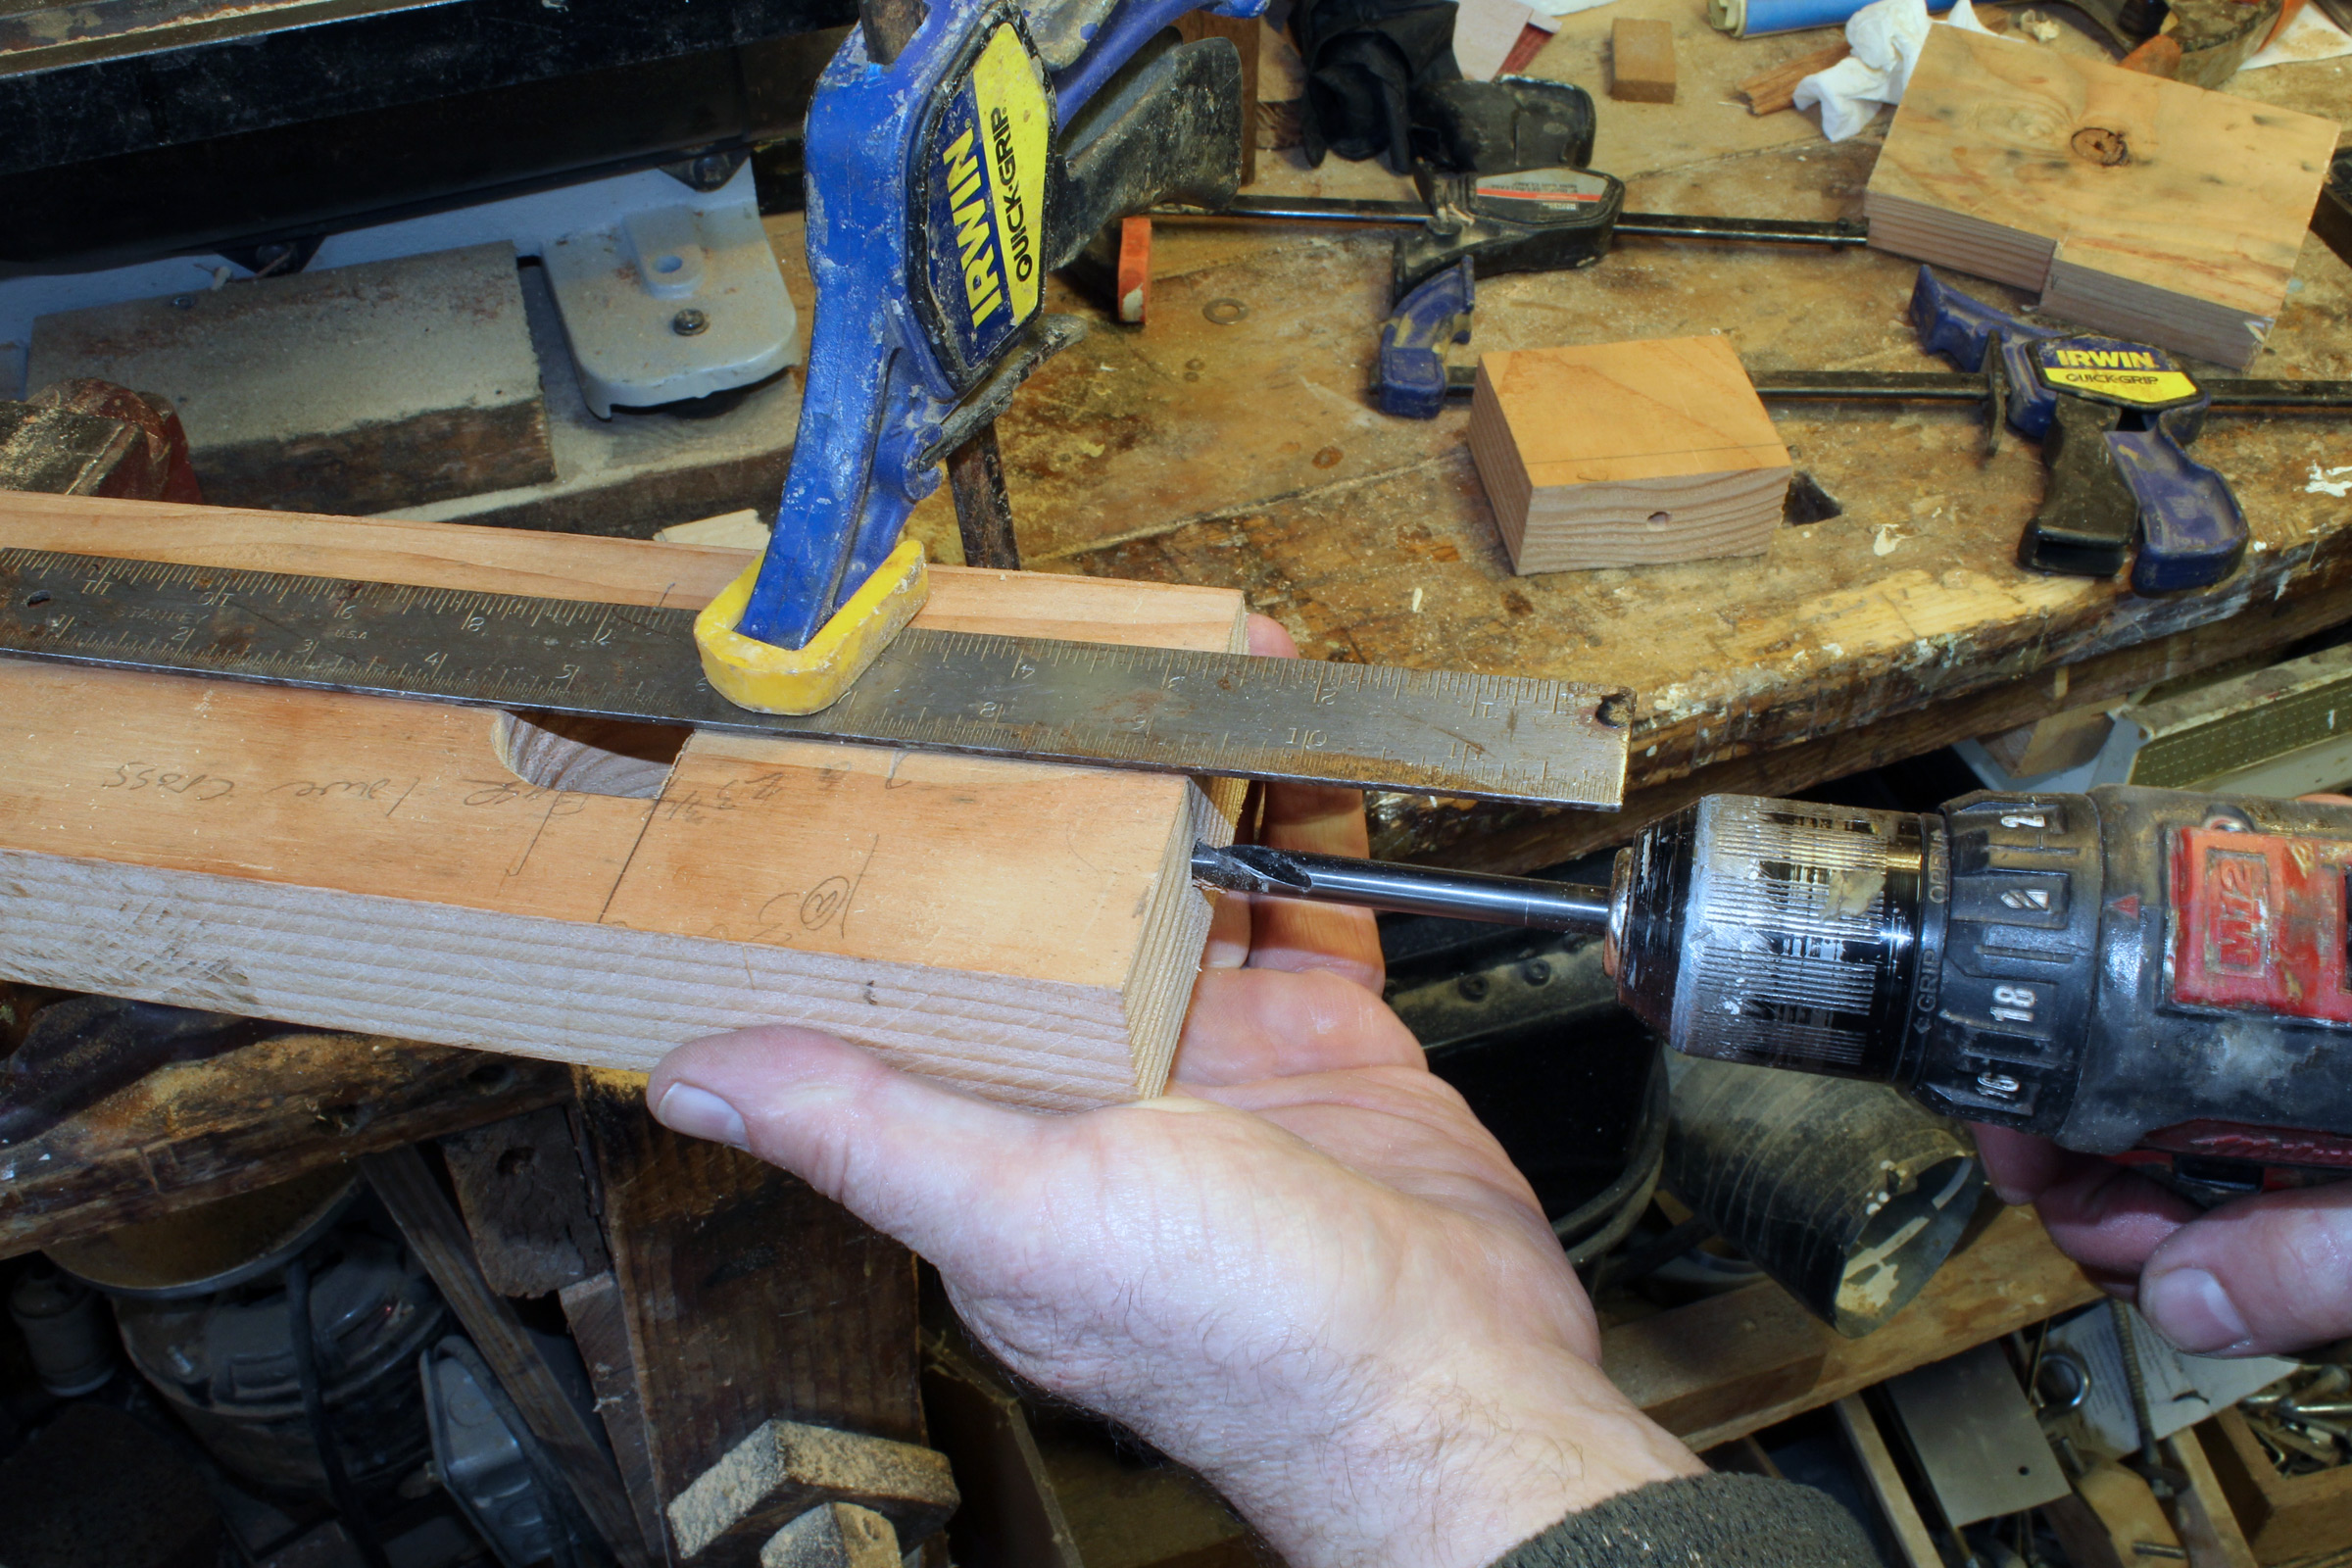
The half lap is easily cut on the table saw. A shop-built sled is safer and more accurate than a miter gauge. If you don’t have a sled, this is a good excuse to make one. To make the sawhorse joints as strong as possible, cut the slots in the bases for a tight fit on the sides of the uprights.
After the upright and base have been cut and dry fit, the joints is assembled with carpenter’s glue and screws.
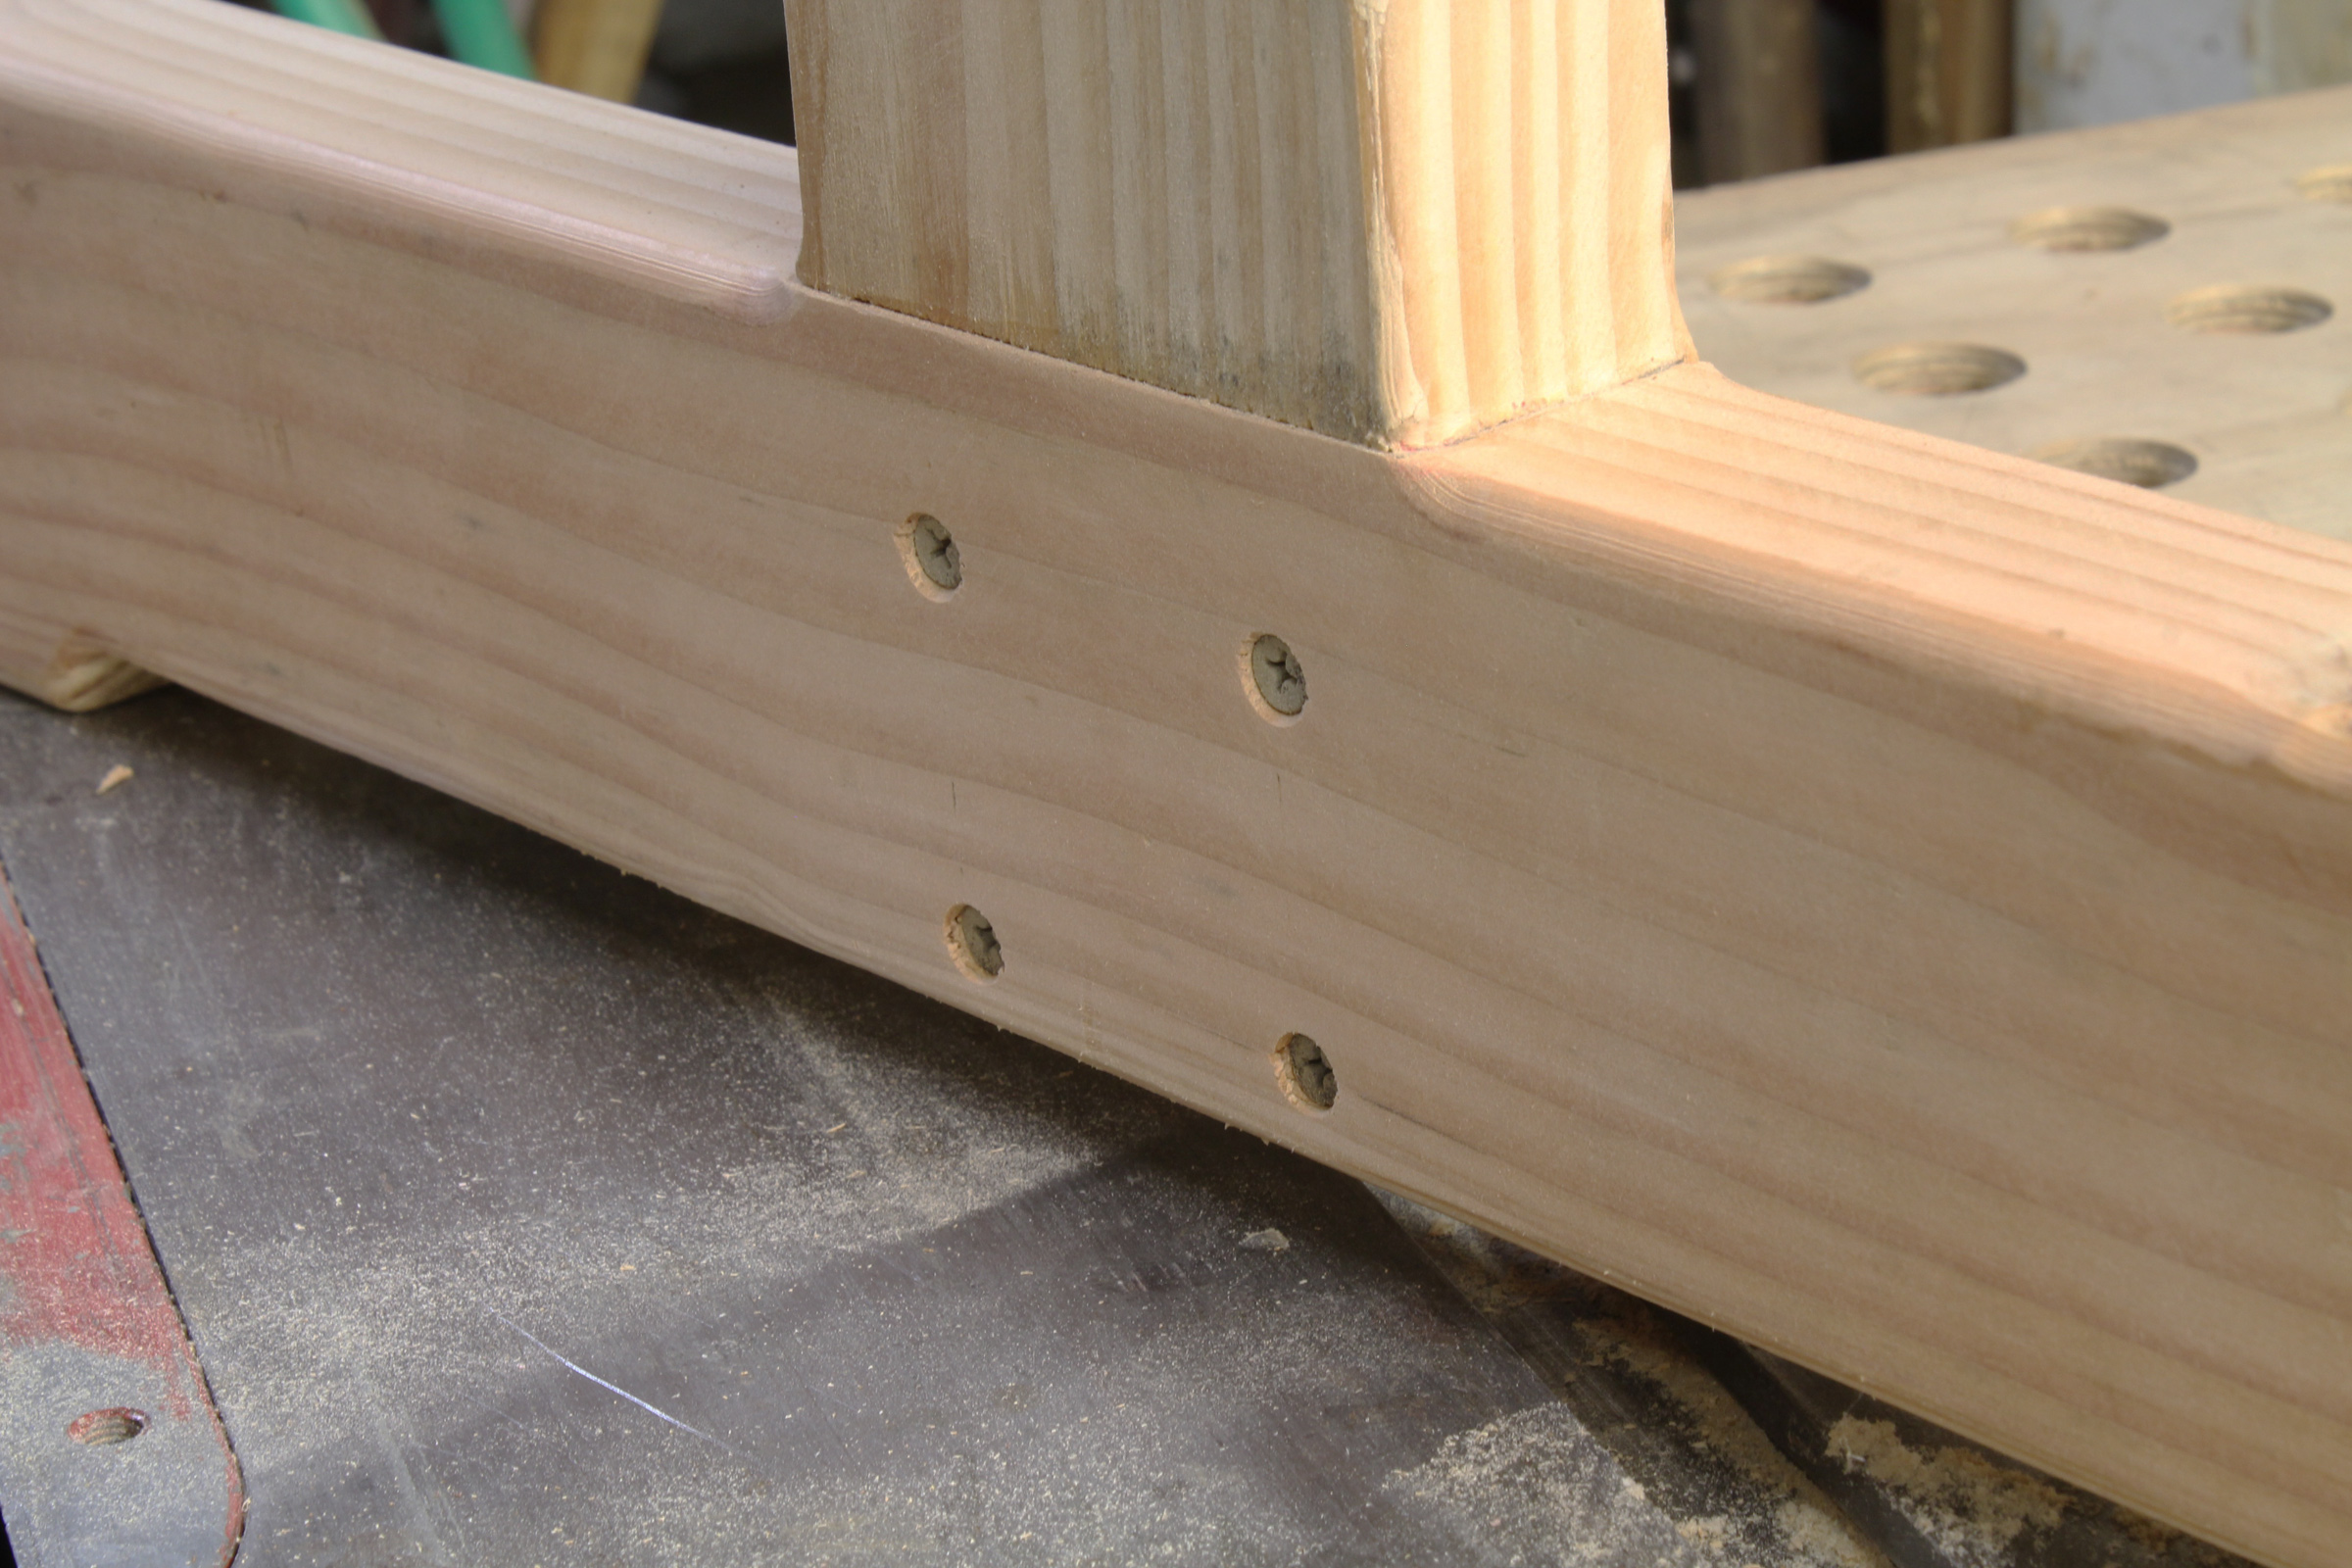
Screws are driven into the joint from the base side because the upright’s side of the joint has an open end that poses a risk of splitting.
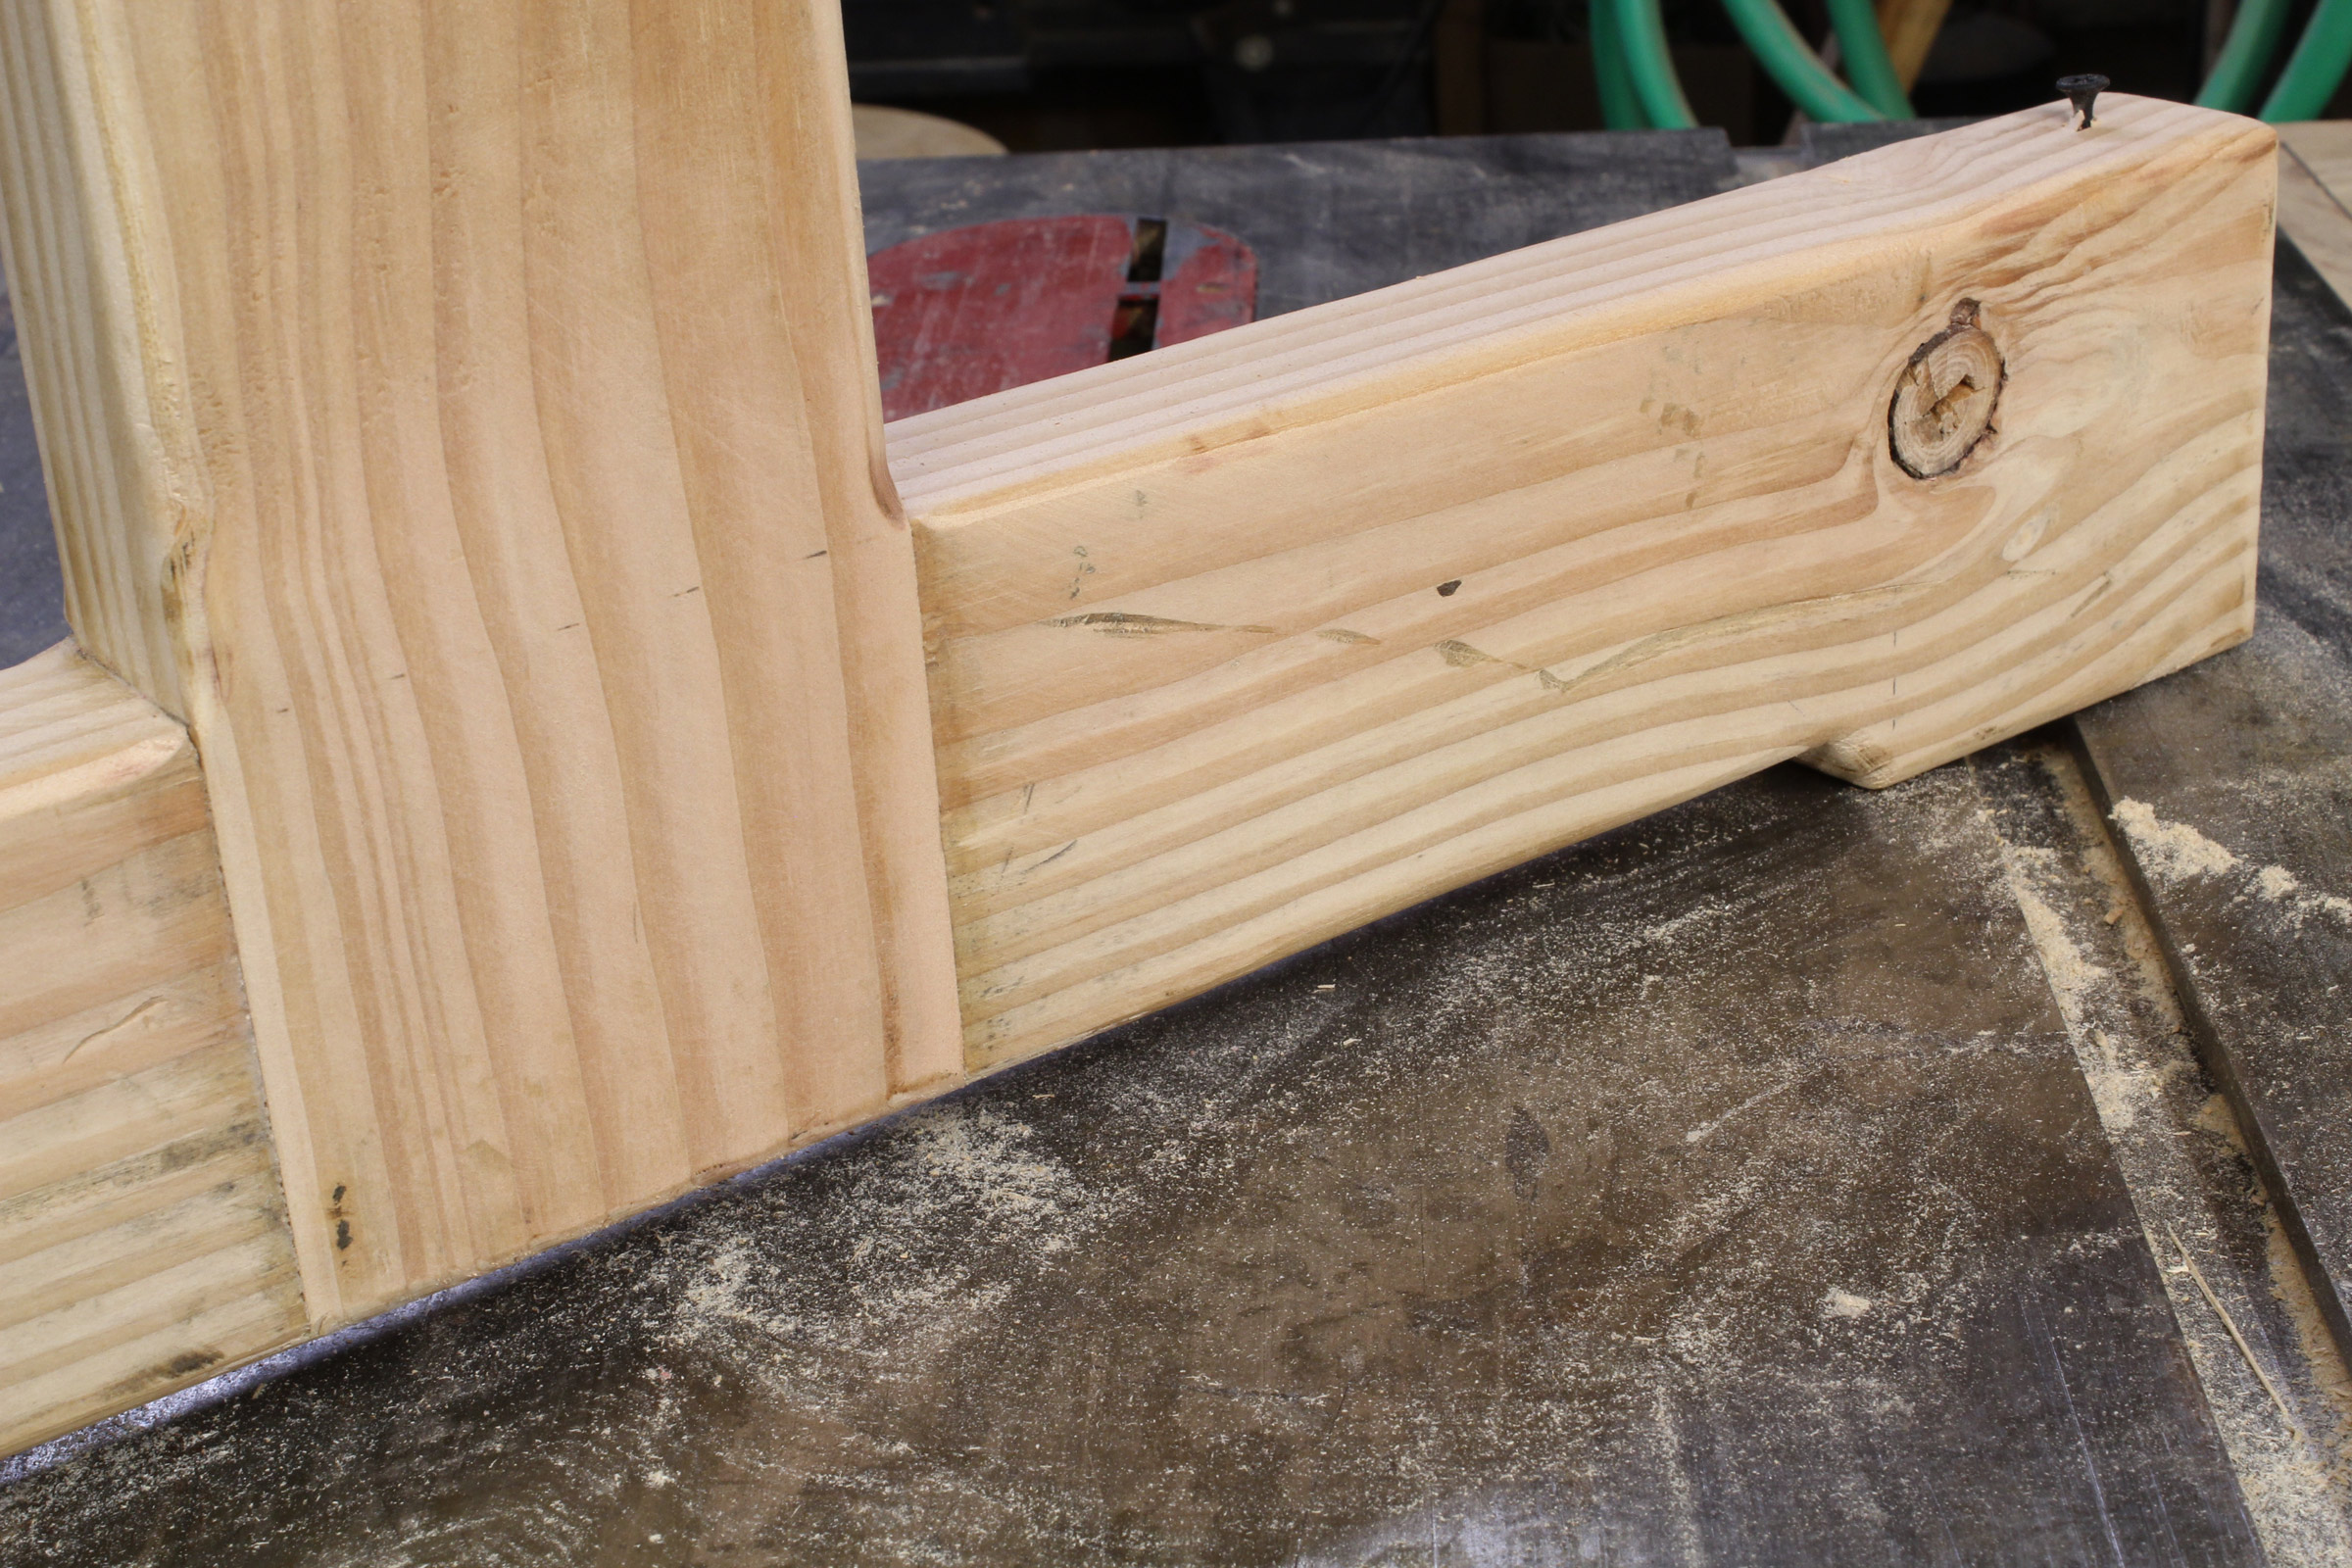
Cutting 1⁄2″ from all but the ends of the base creates feet at the ends that will keep the sawhorse from rocking. An alternative is to glue 1⁄2″-thick blocks on the ends of the bases.

The cutout for the bolt end starts with a 1 1⁄2″ hole; a jigsaw is then used to cut a flat for the washer.
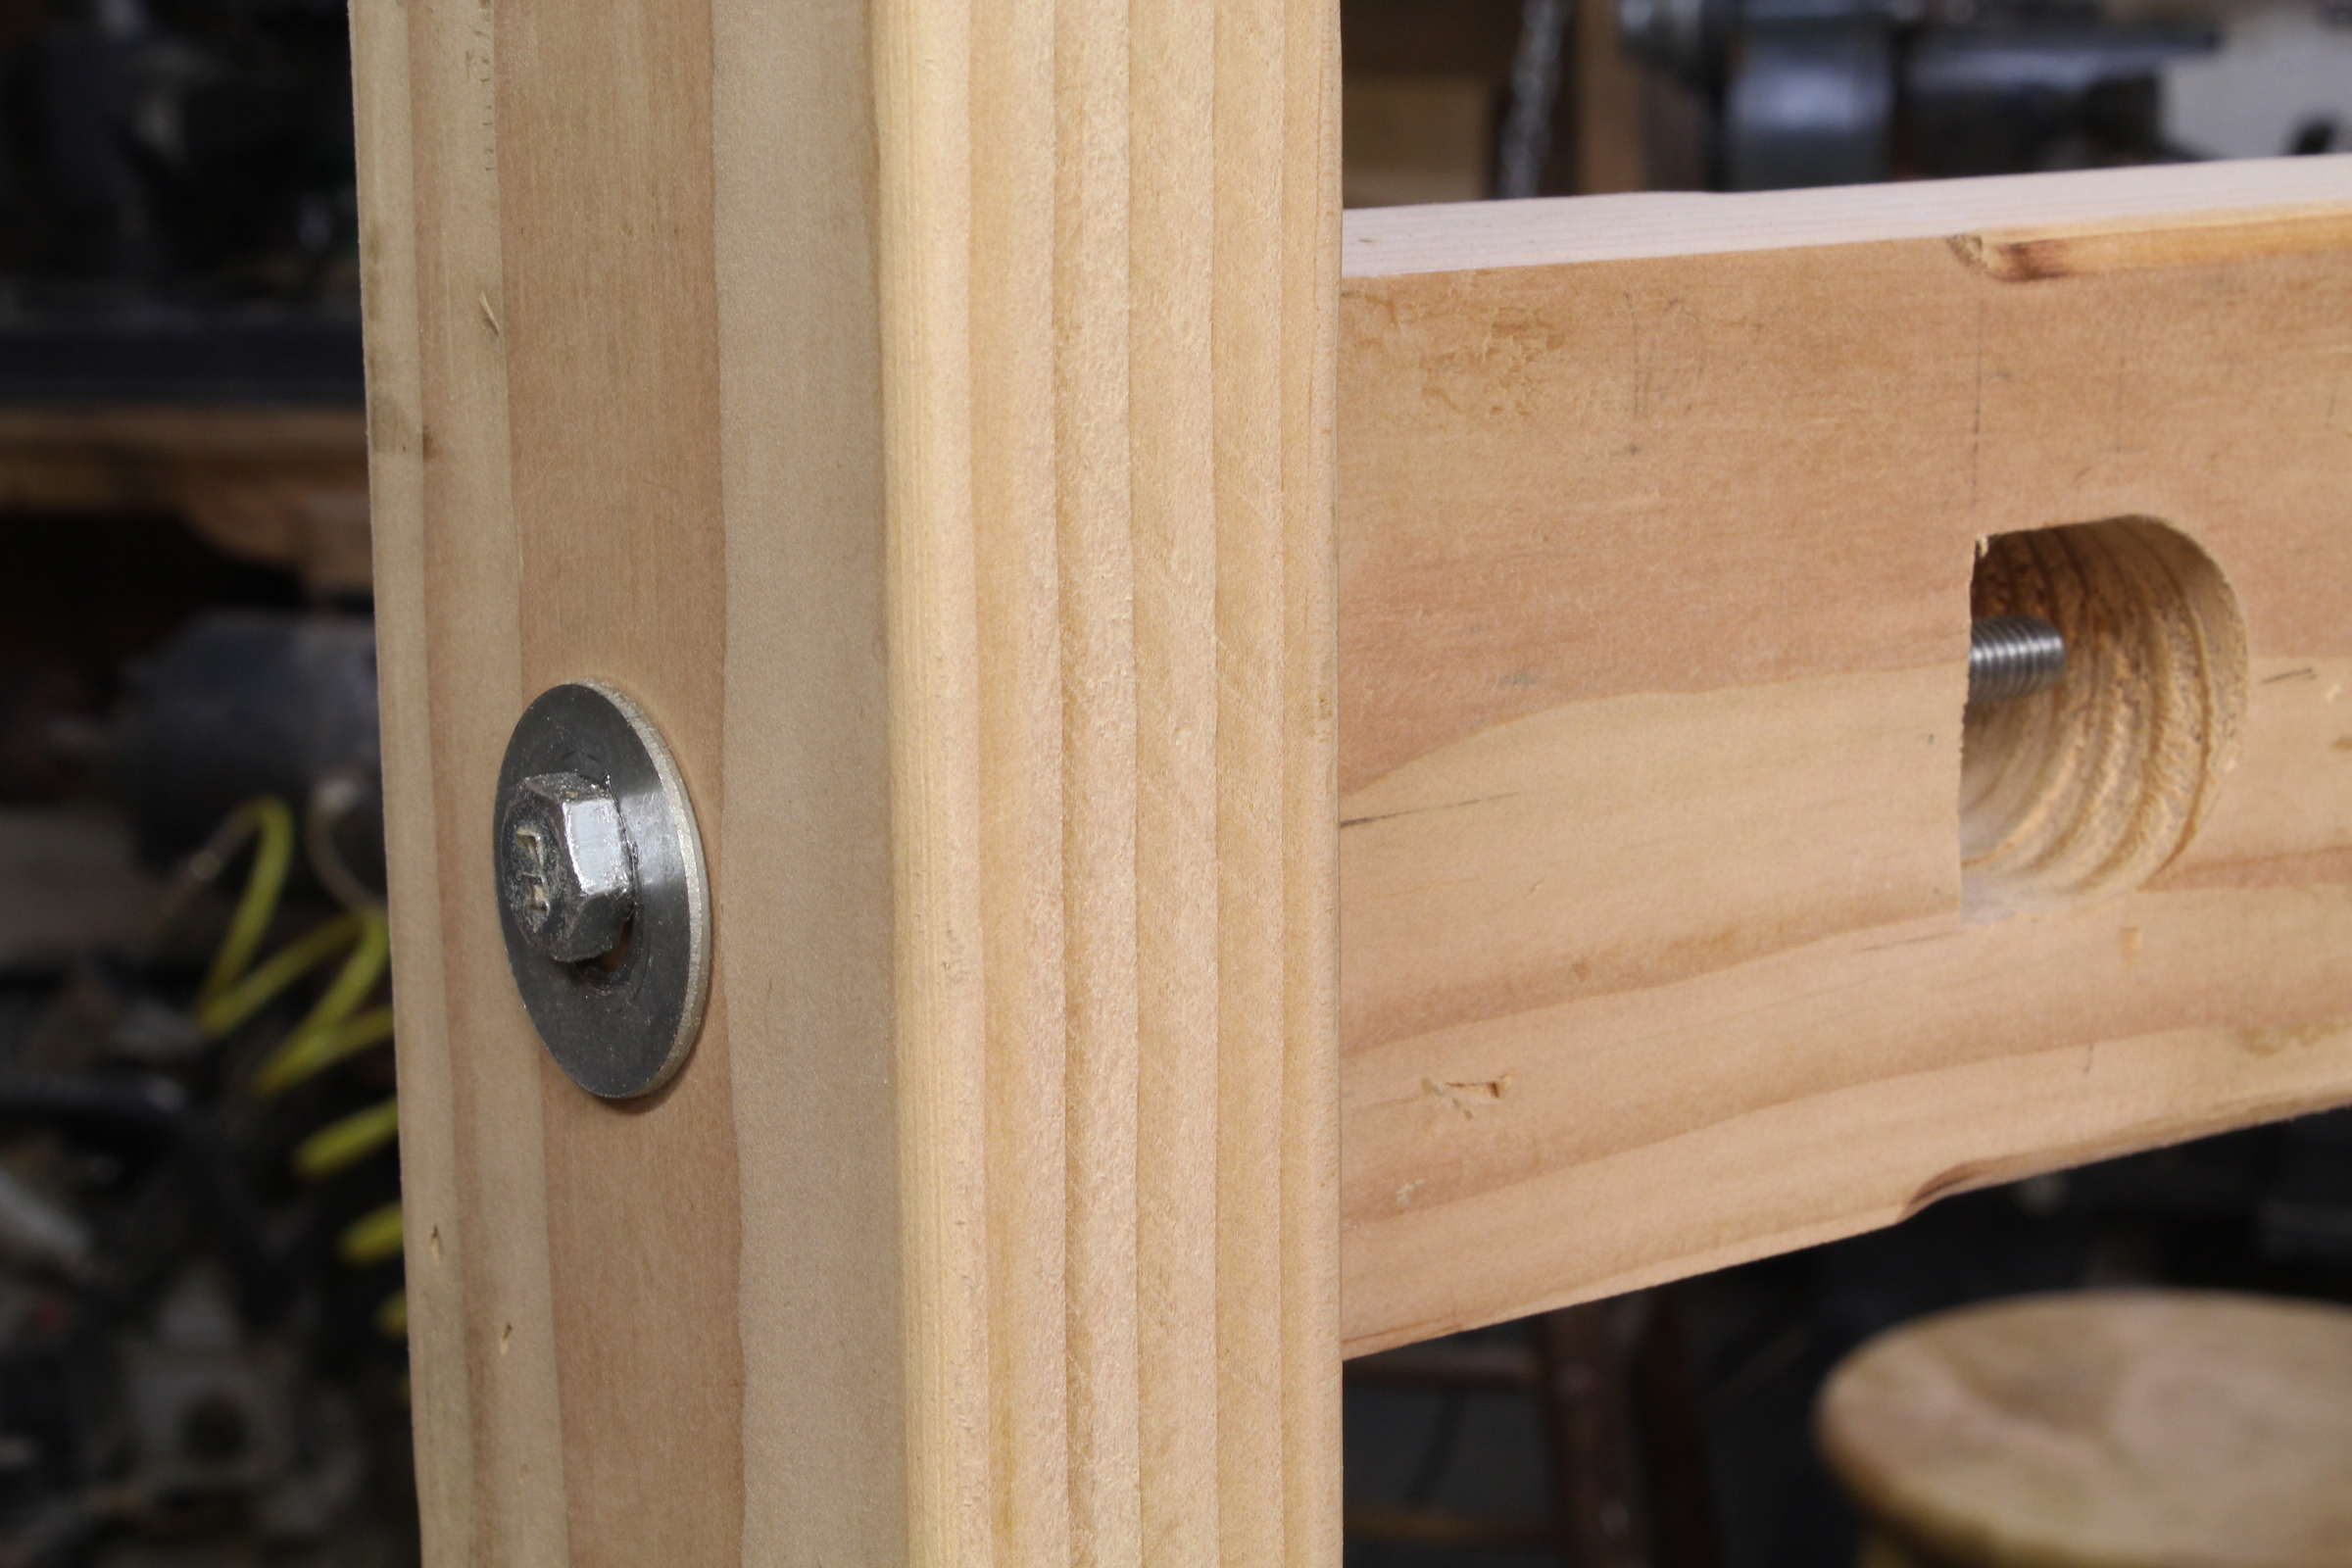
A long hex-head bolt holds the lower crosspiece in place. A bolt with a washer allows putting a lot of pressure on the connection, making it so solid that the tenon used in the classic construction isn’t necessary. The hex head makes for quick assembly and disassembly. A carriage bolt would mean turning the nut in the cutout, a slow and awkward process. And the head of the carriage bolt would eventually crush the wood and make the connection less solid.
To assure that the hole for the bolt hits its mark in the center of the cutout, use a guide block bored on the drill press.
Another aid to a straight hole is a straight edge clamped on the centerline. Eye the drill bit parallel from above and the side.
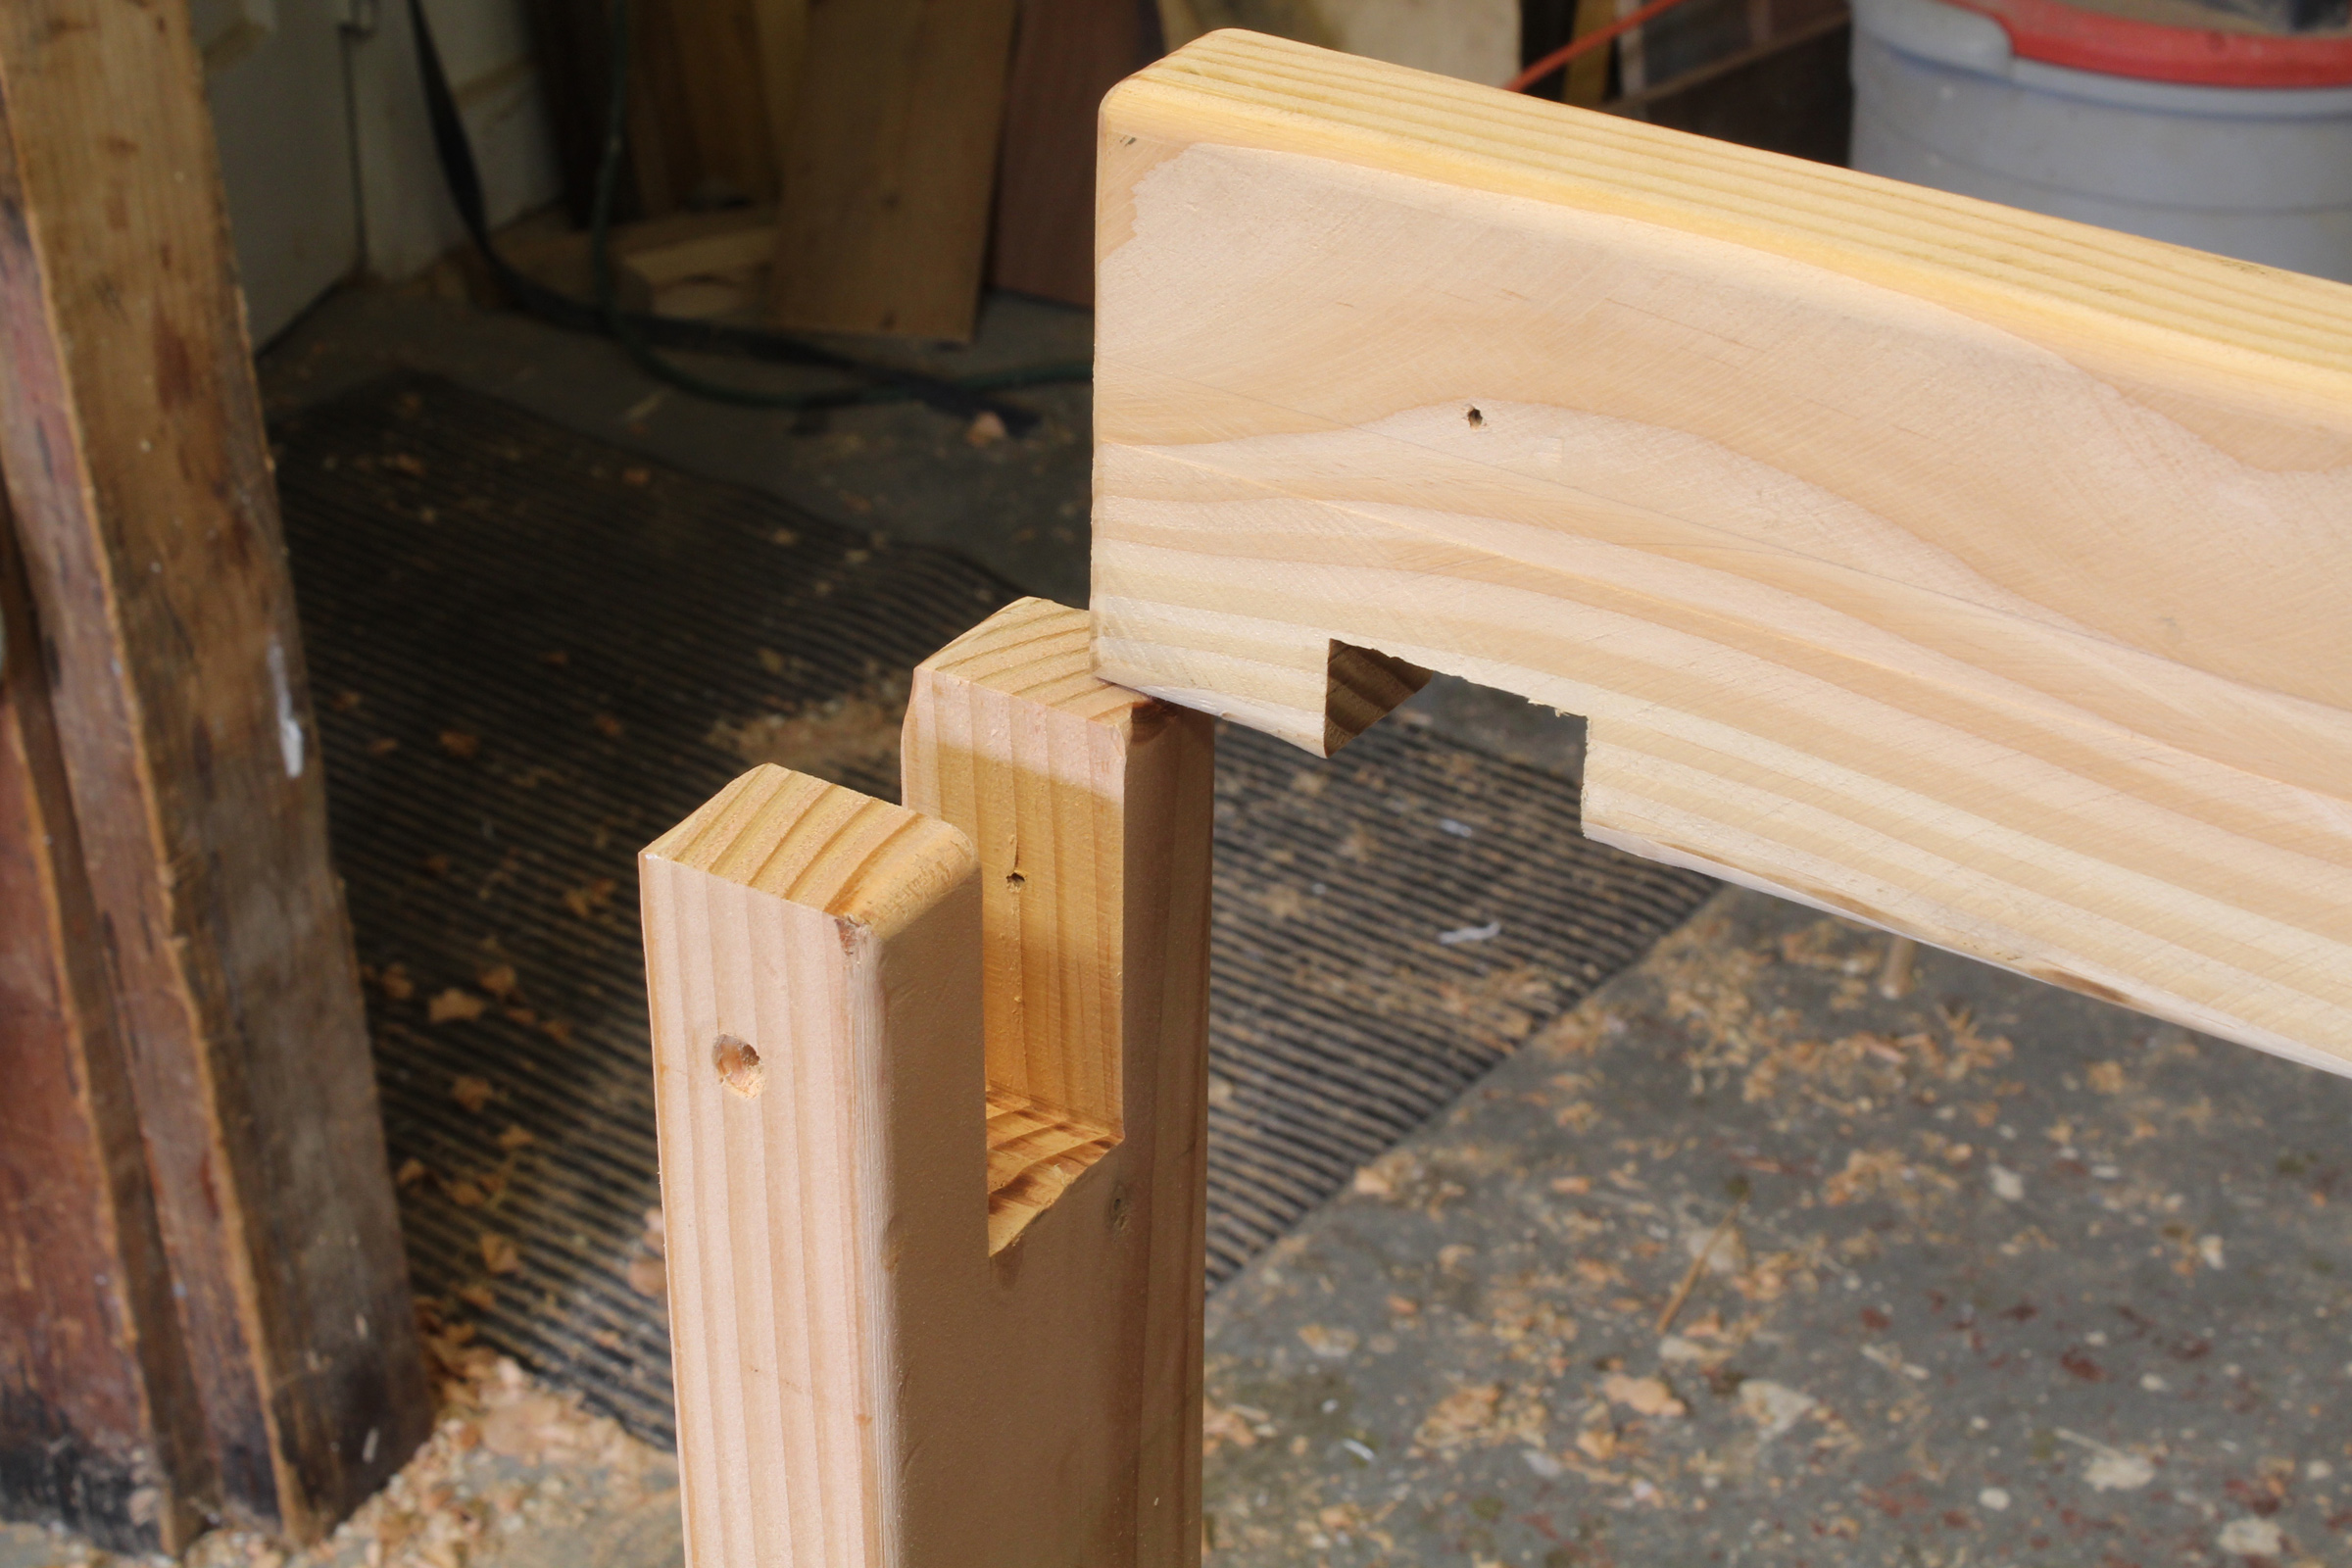
The crossbar is notched to keep the crosspiece from sliding out of the upright’s slot. Cut the slot 2 3⁄4″ deep and the notch 3⁄4″ deep, so the top surfaces of the uprights and crosspiece will be flush. You can plane or rip the crosspiece to a thickness of 1″ to make the sawhorse lighter; if you do, cut the upright slot to match.
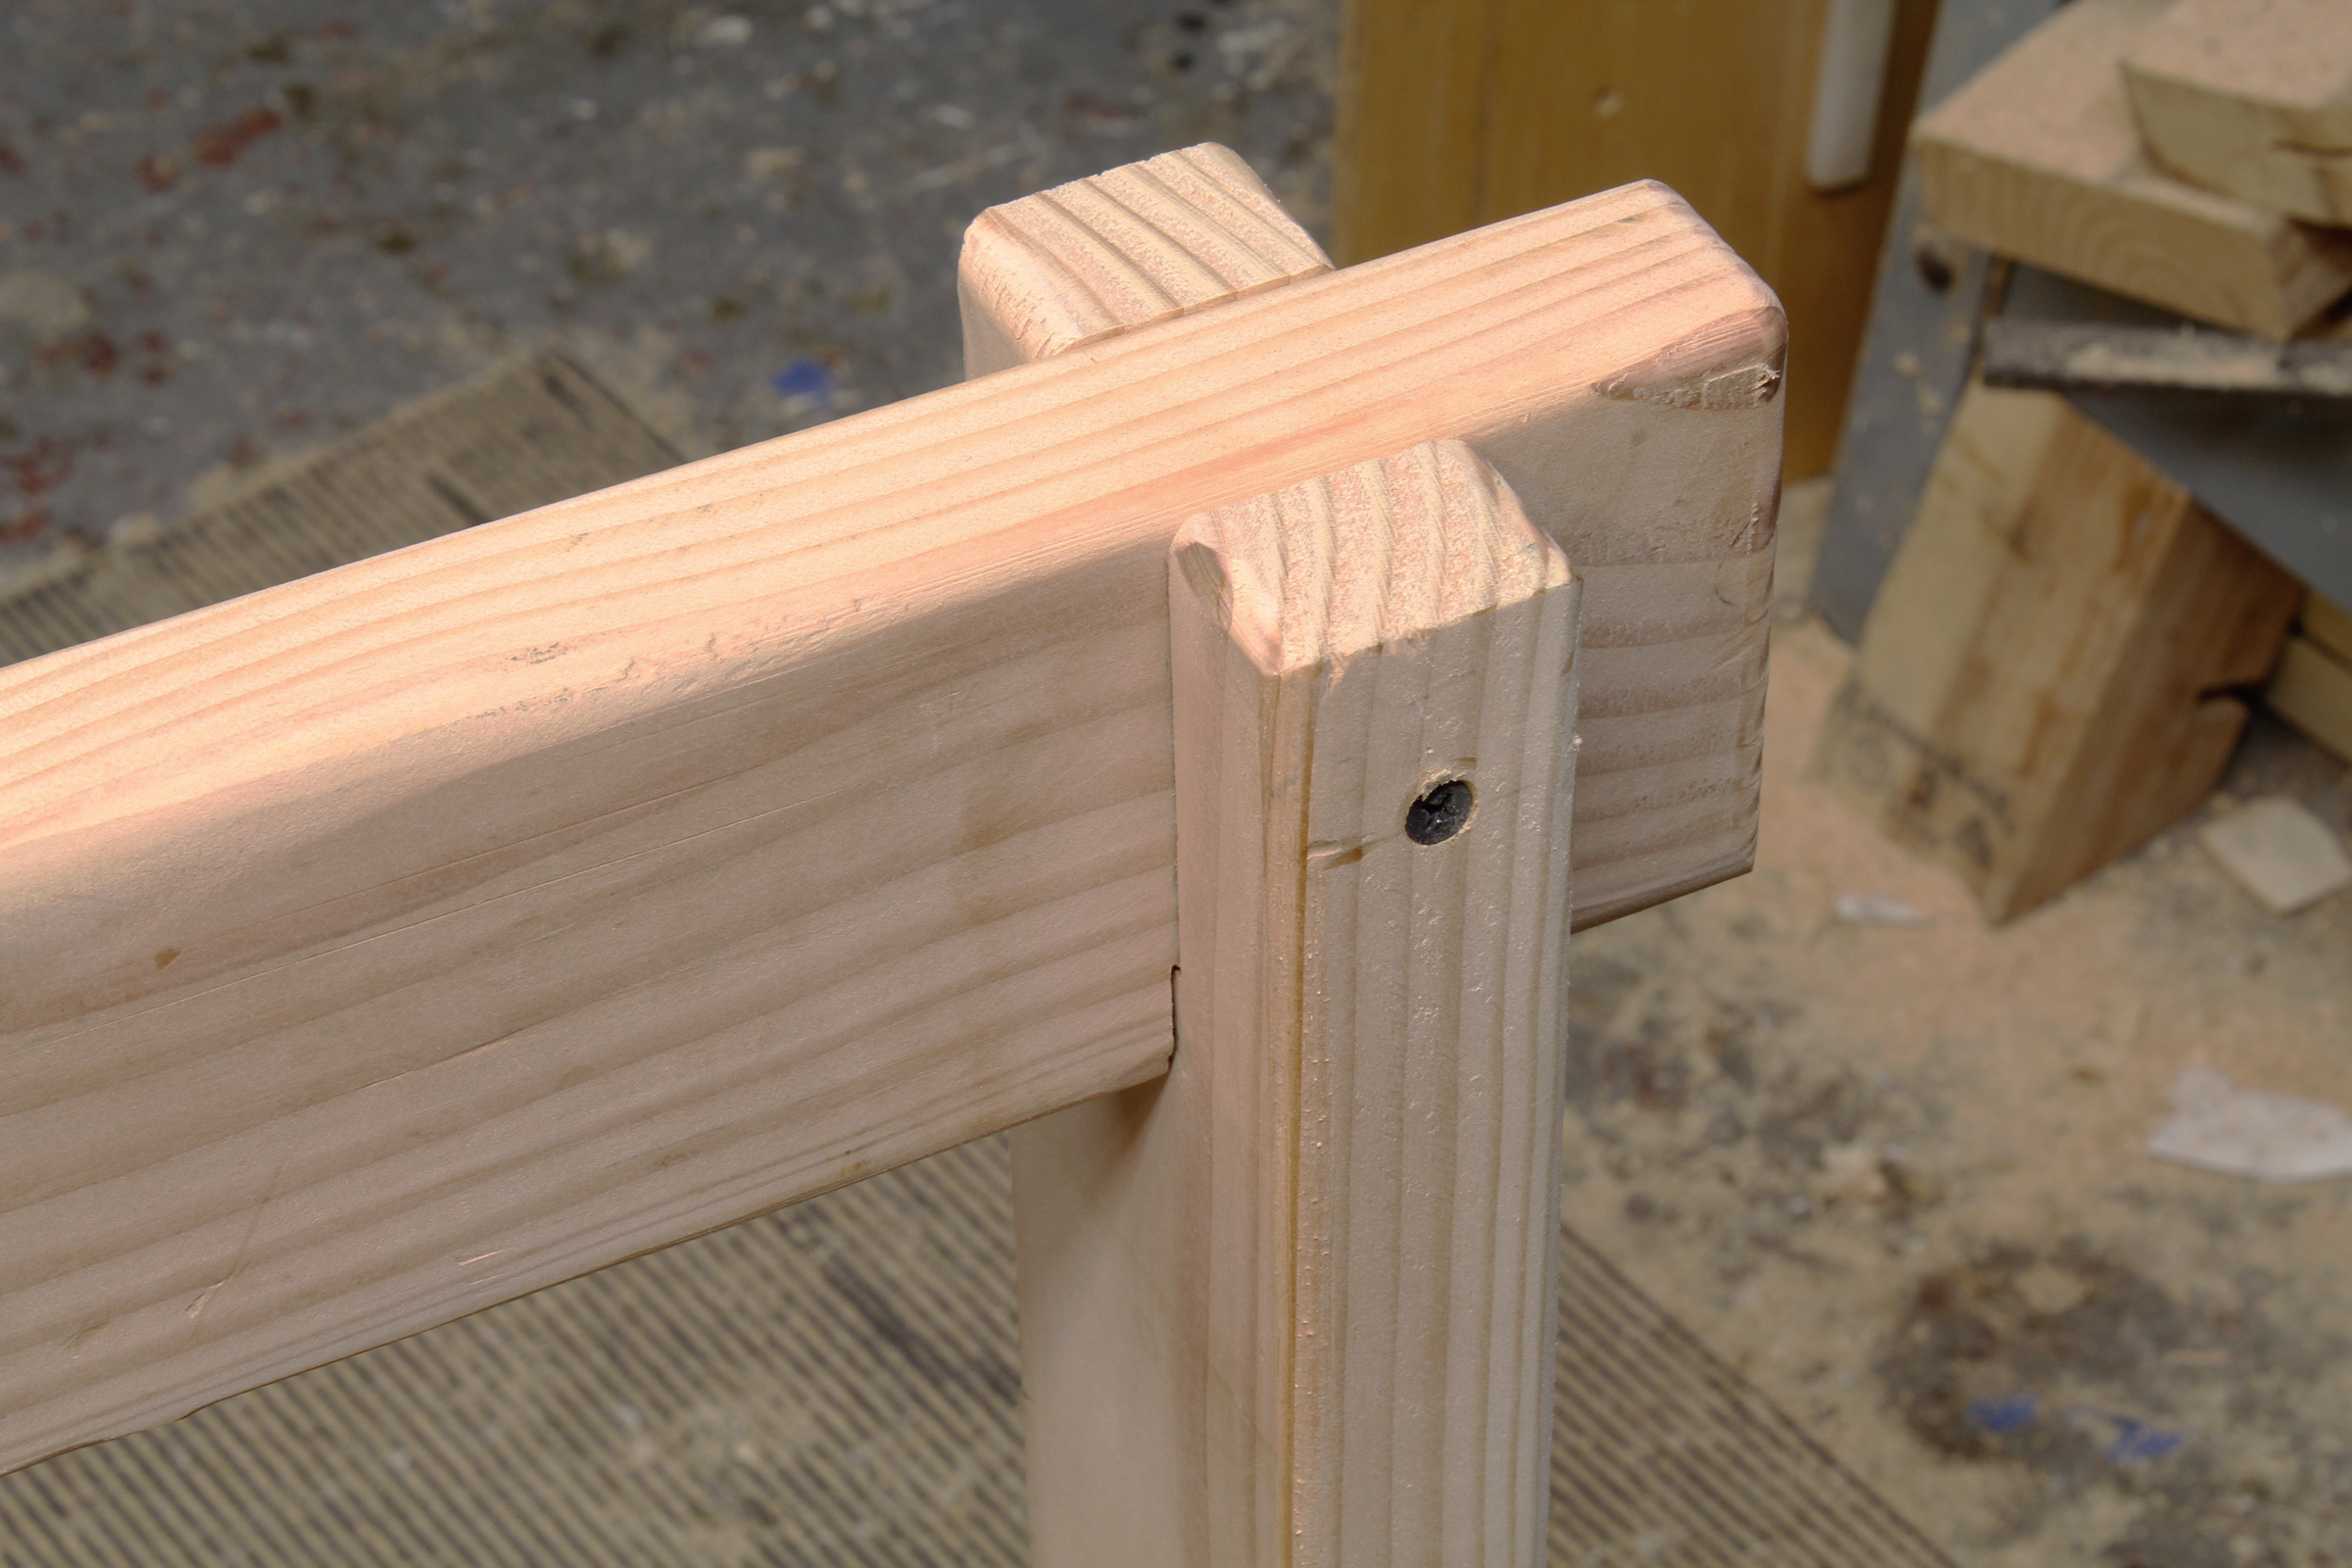
A screw driven through each upright keeps the crosspiece in place when you use it to lift the sawhorse.
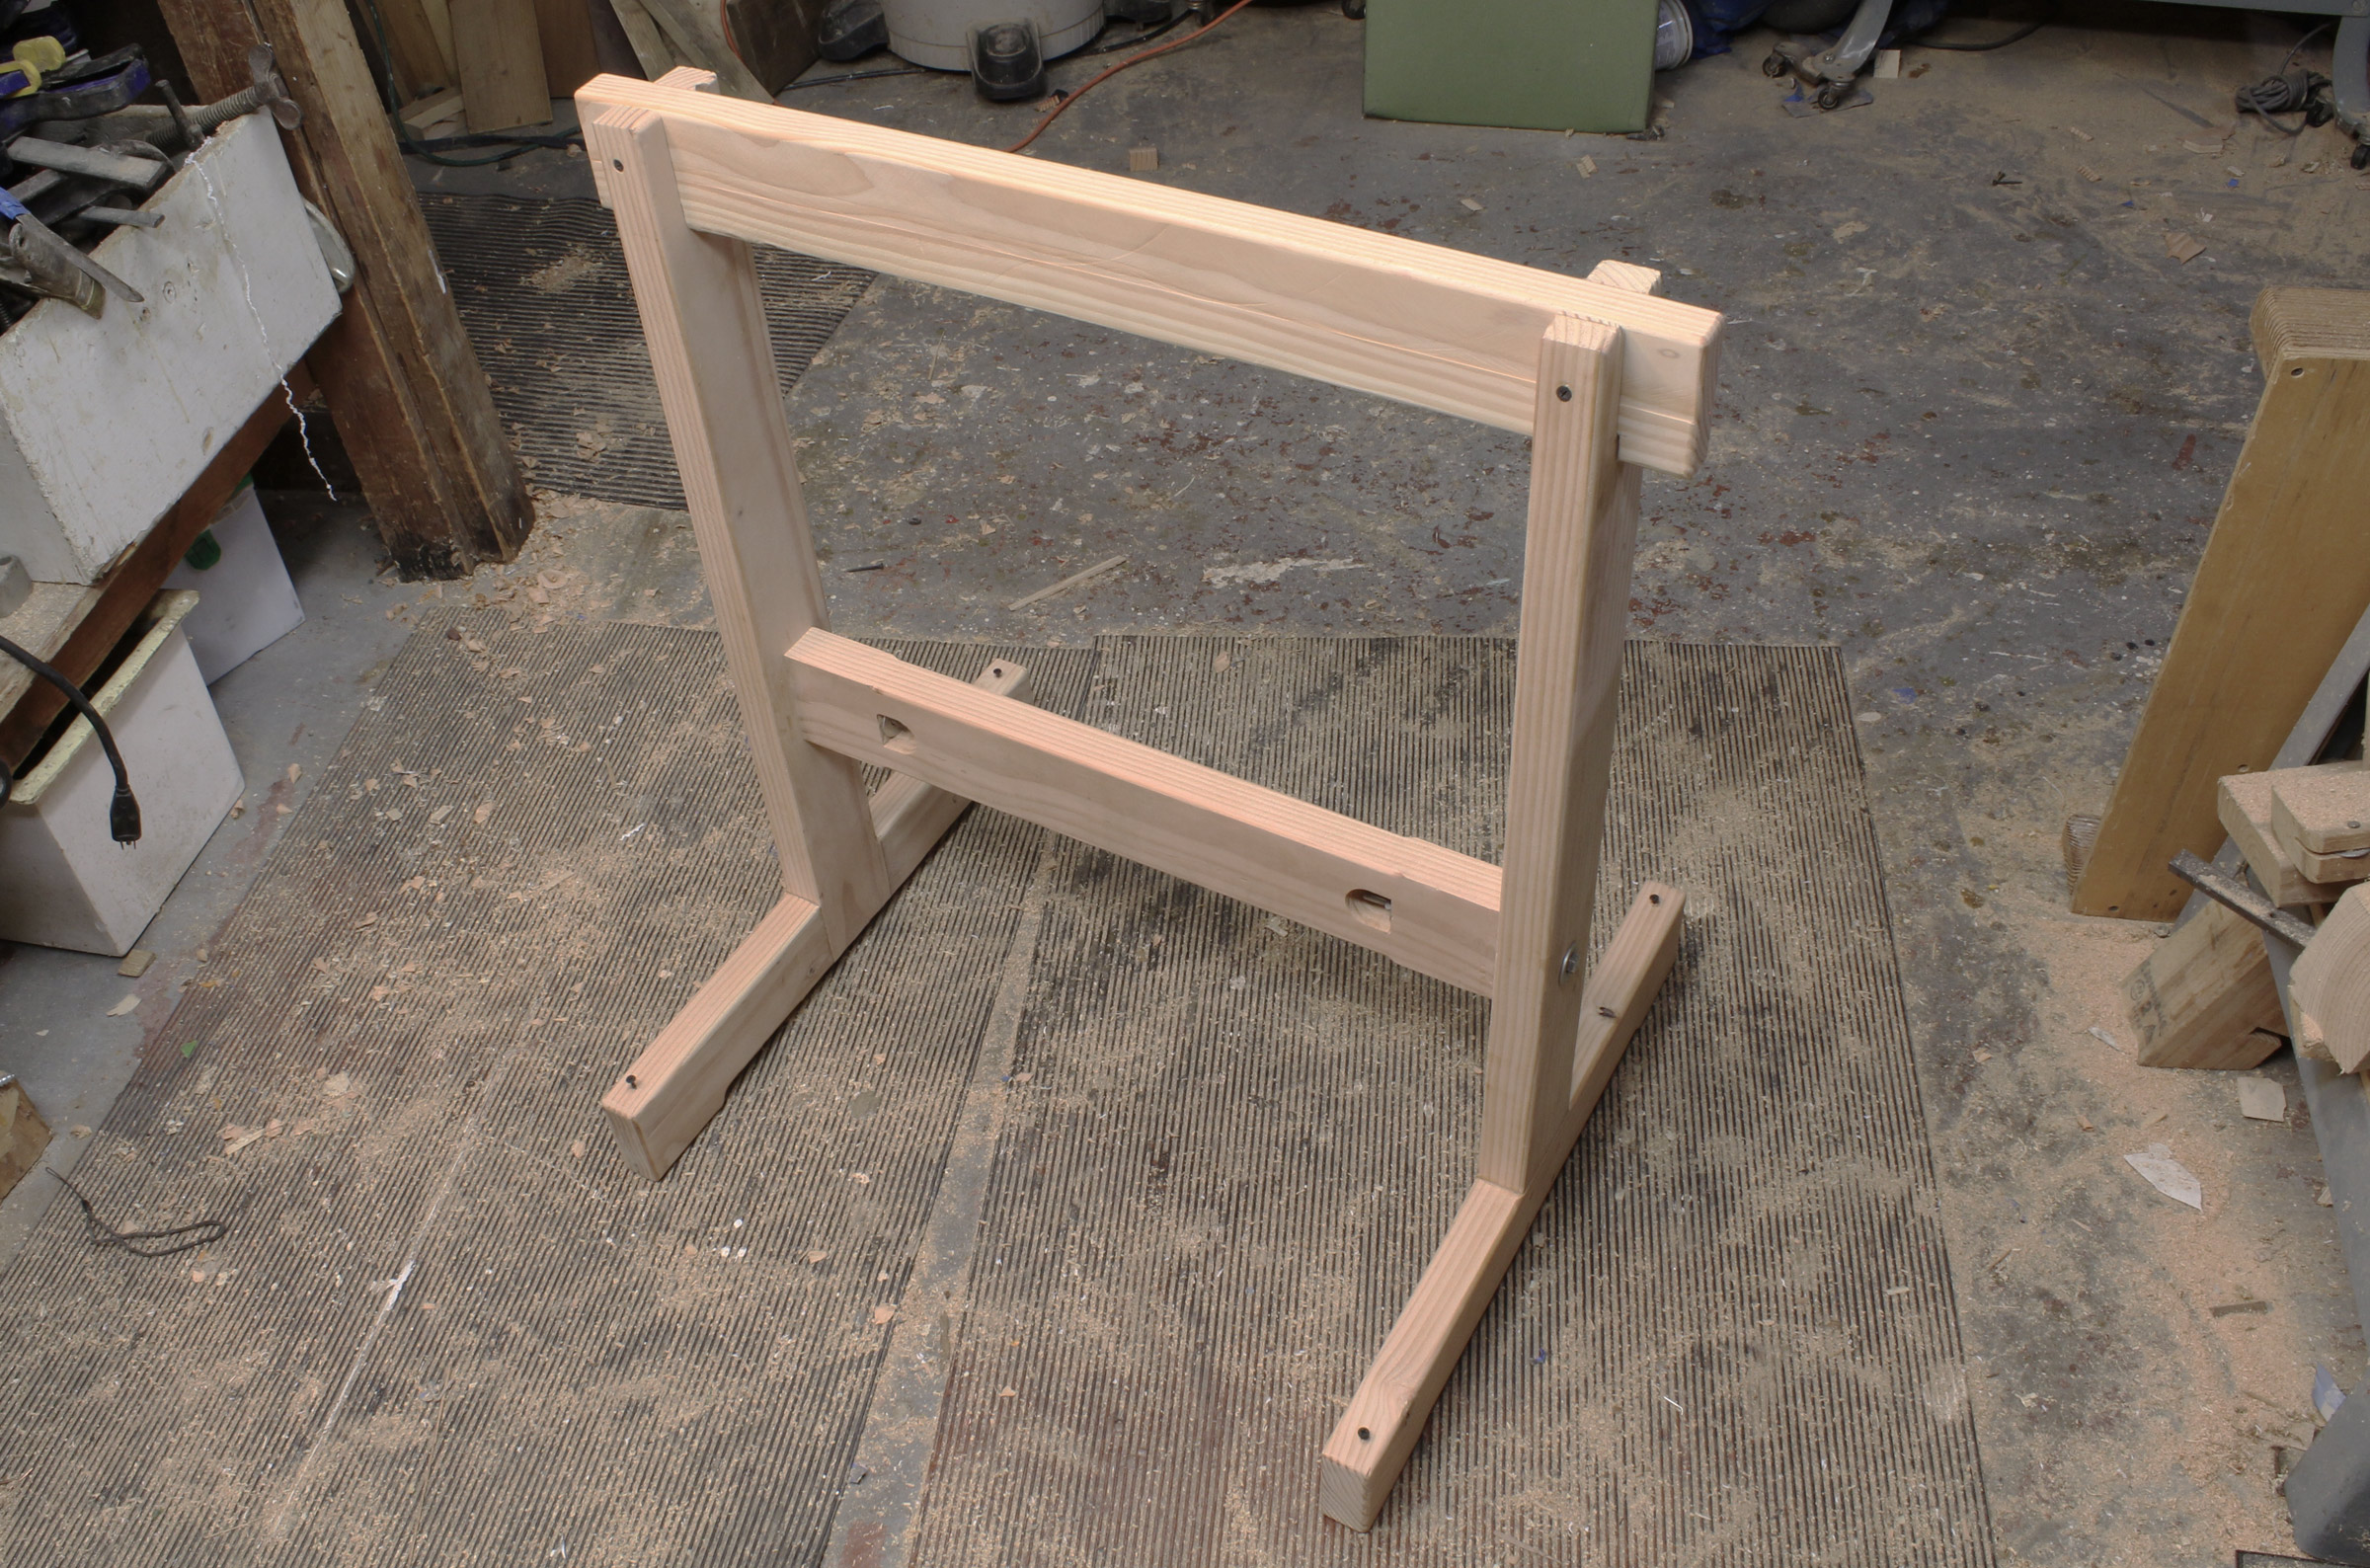
With the bolts turned up tight, the take-apart sawhorse is quite solid.
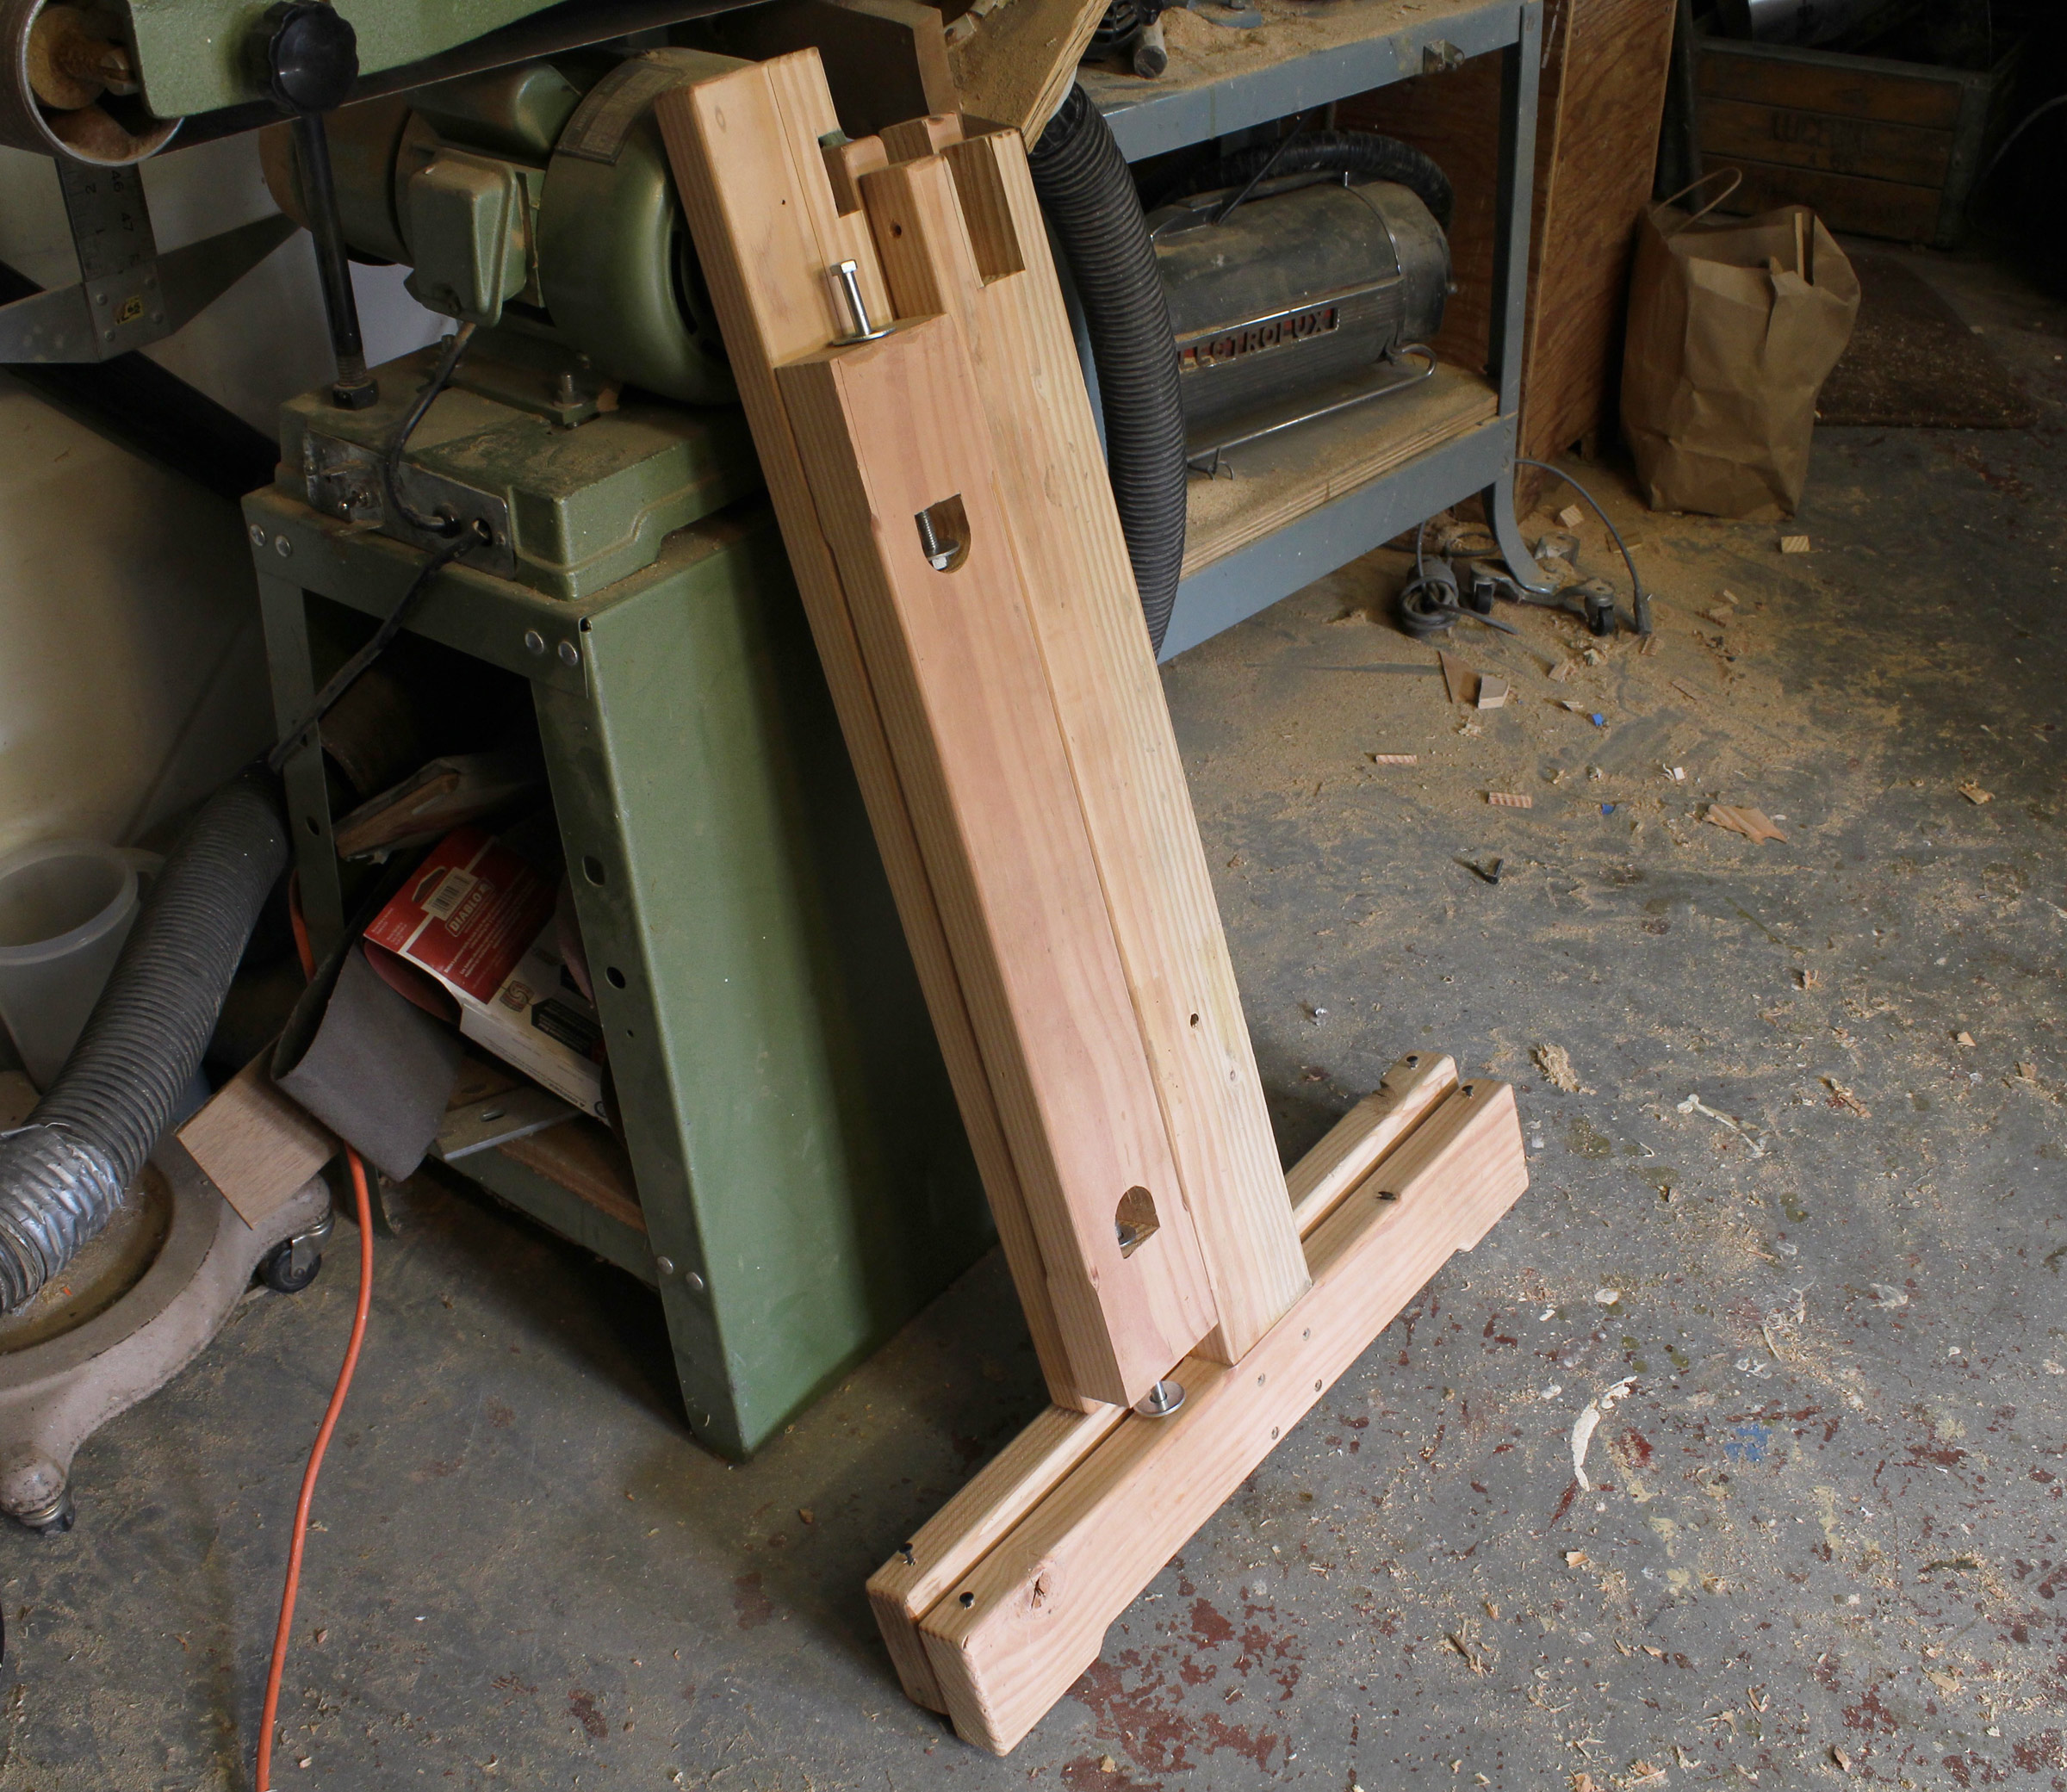
Taken apart, the sawhorse makes a compact bundle.
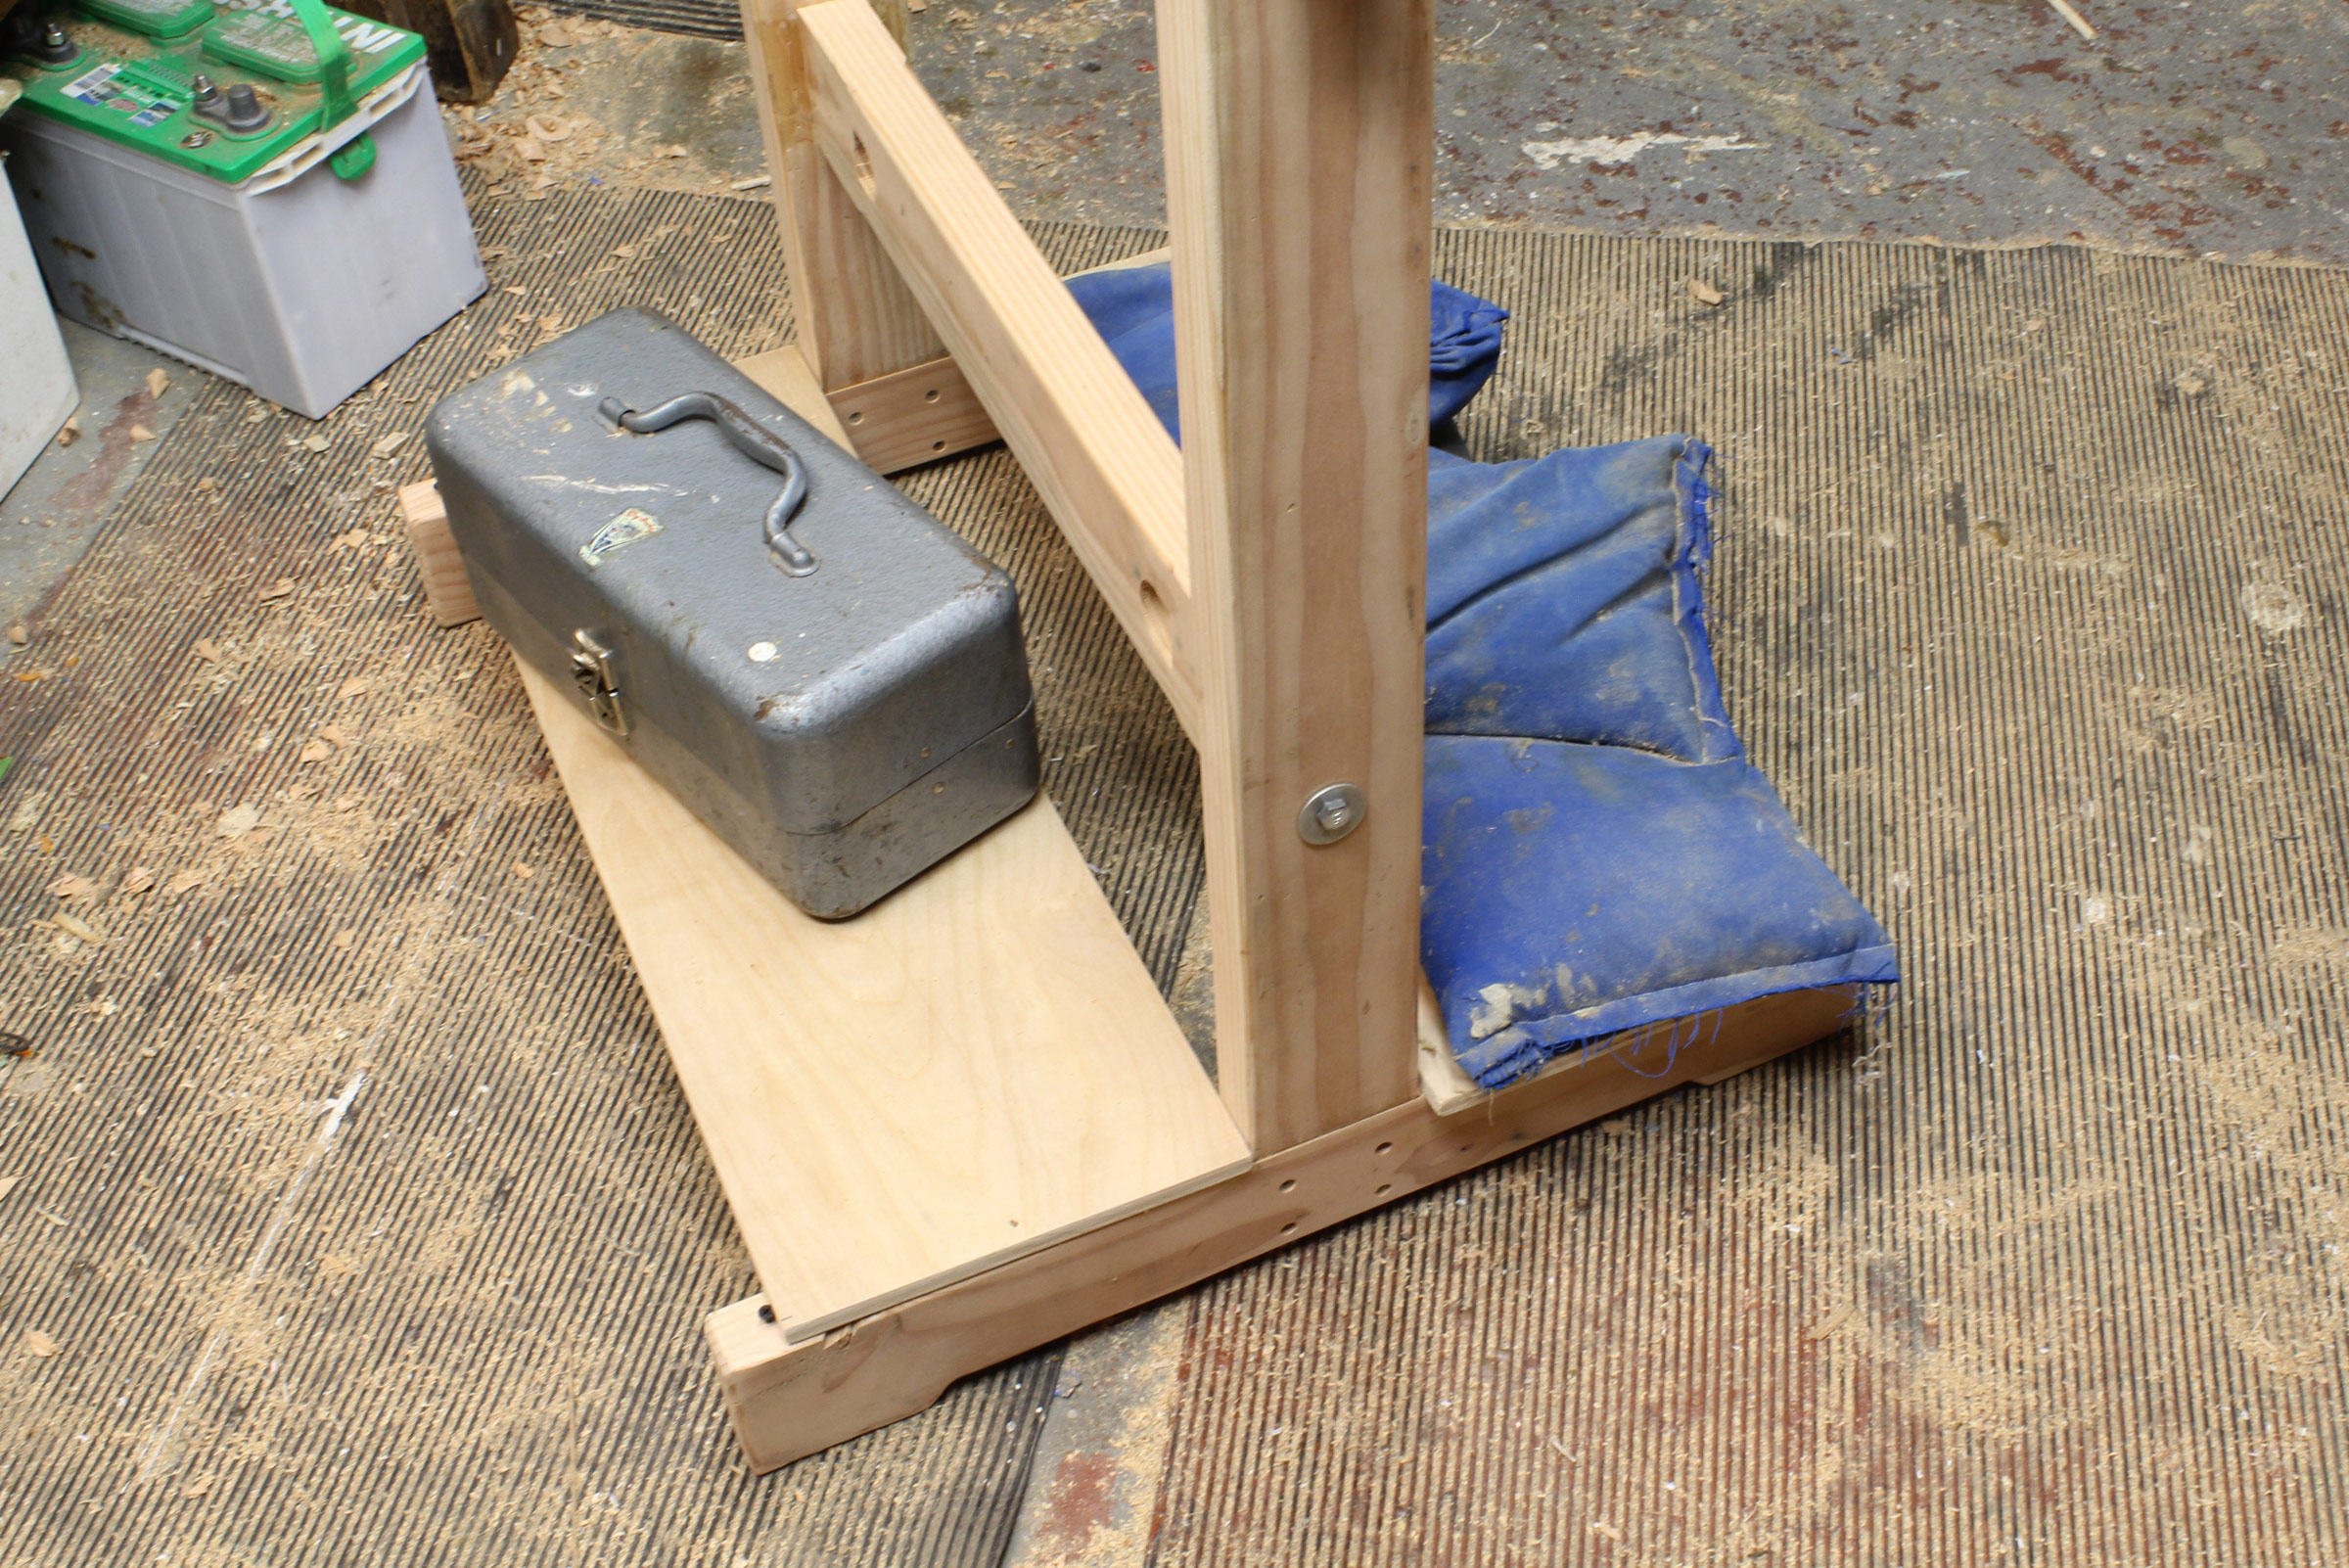
A pair of plywood shelves set on the bases provide a place to hold tools or weight (sandbags here) to steady the sawhorses. To keep the shelves in place, screws driven into the bases are set close to the shelf’s edges and left about 1⁄4″ proud so the screw heads dig into the edge of the plywood when it is pivoted in place, wedged against the uprights.
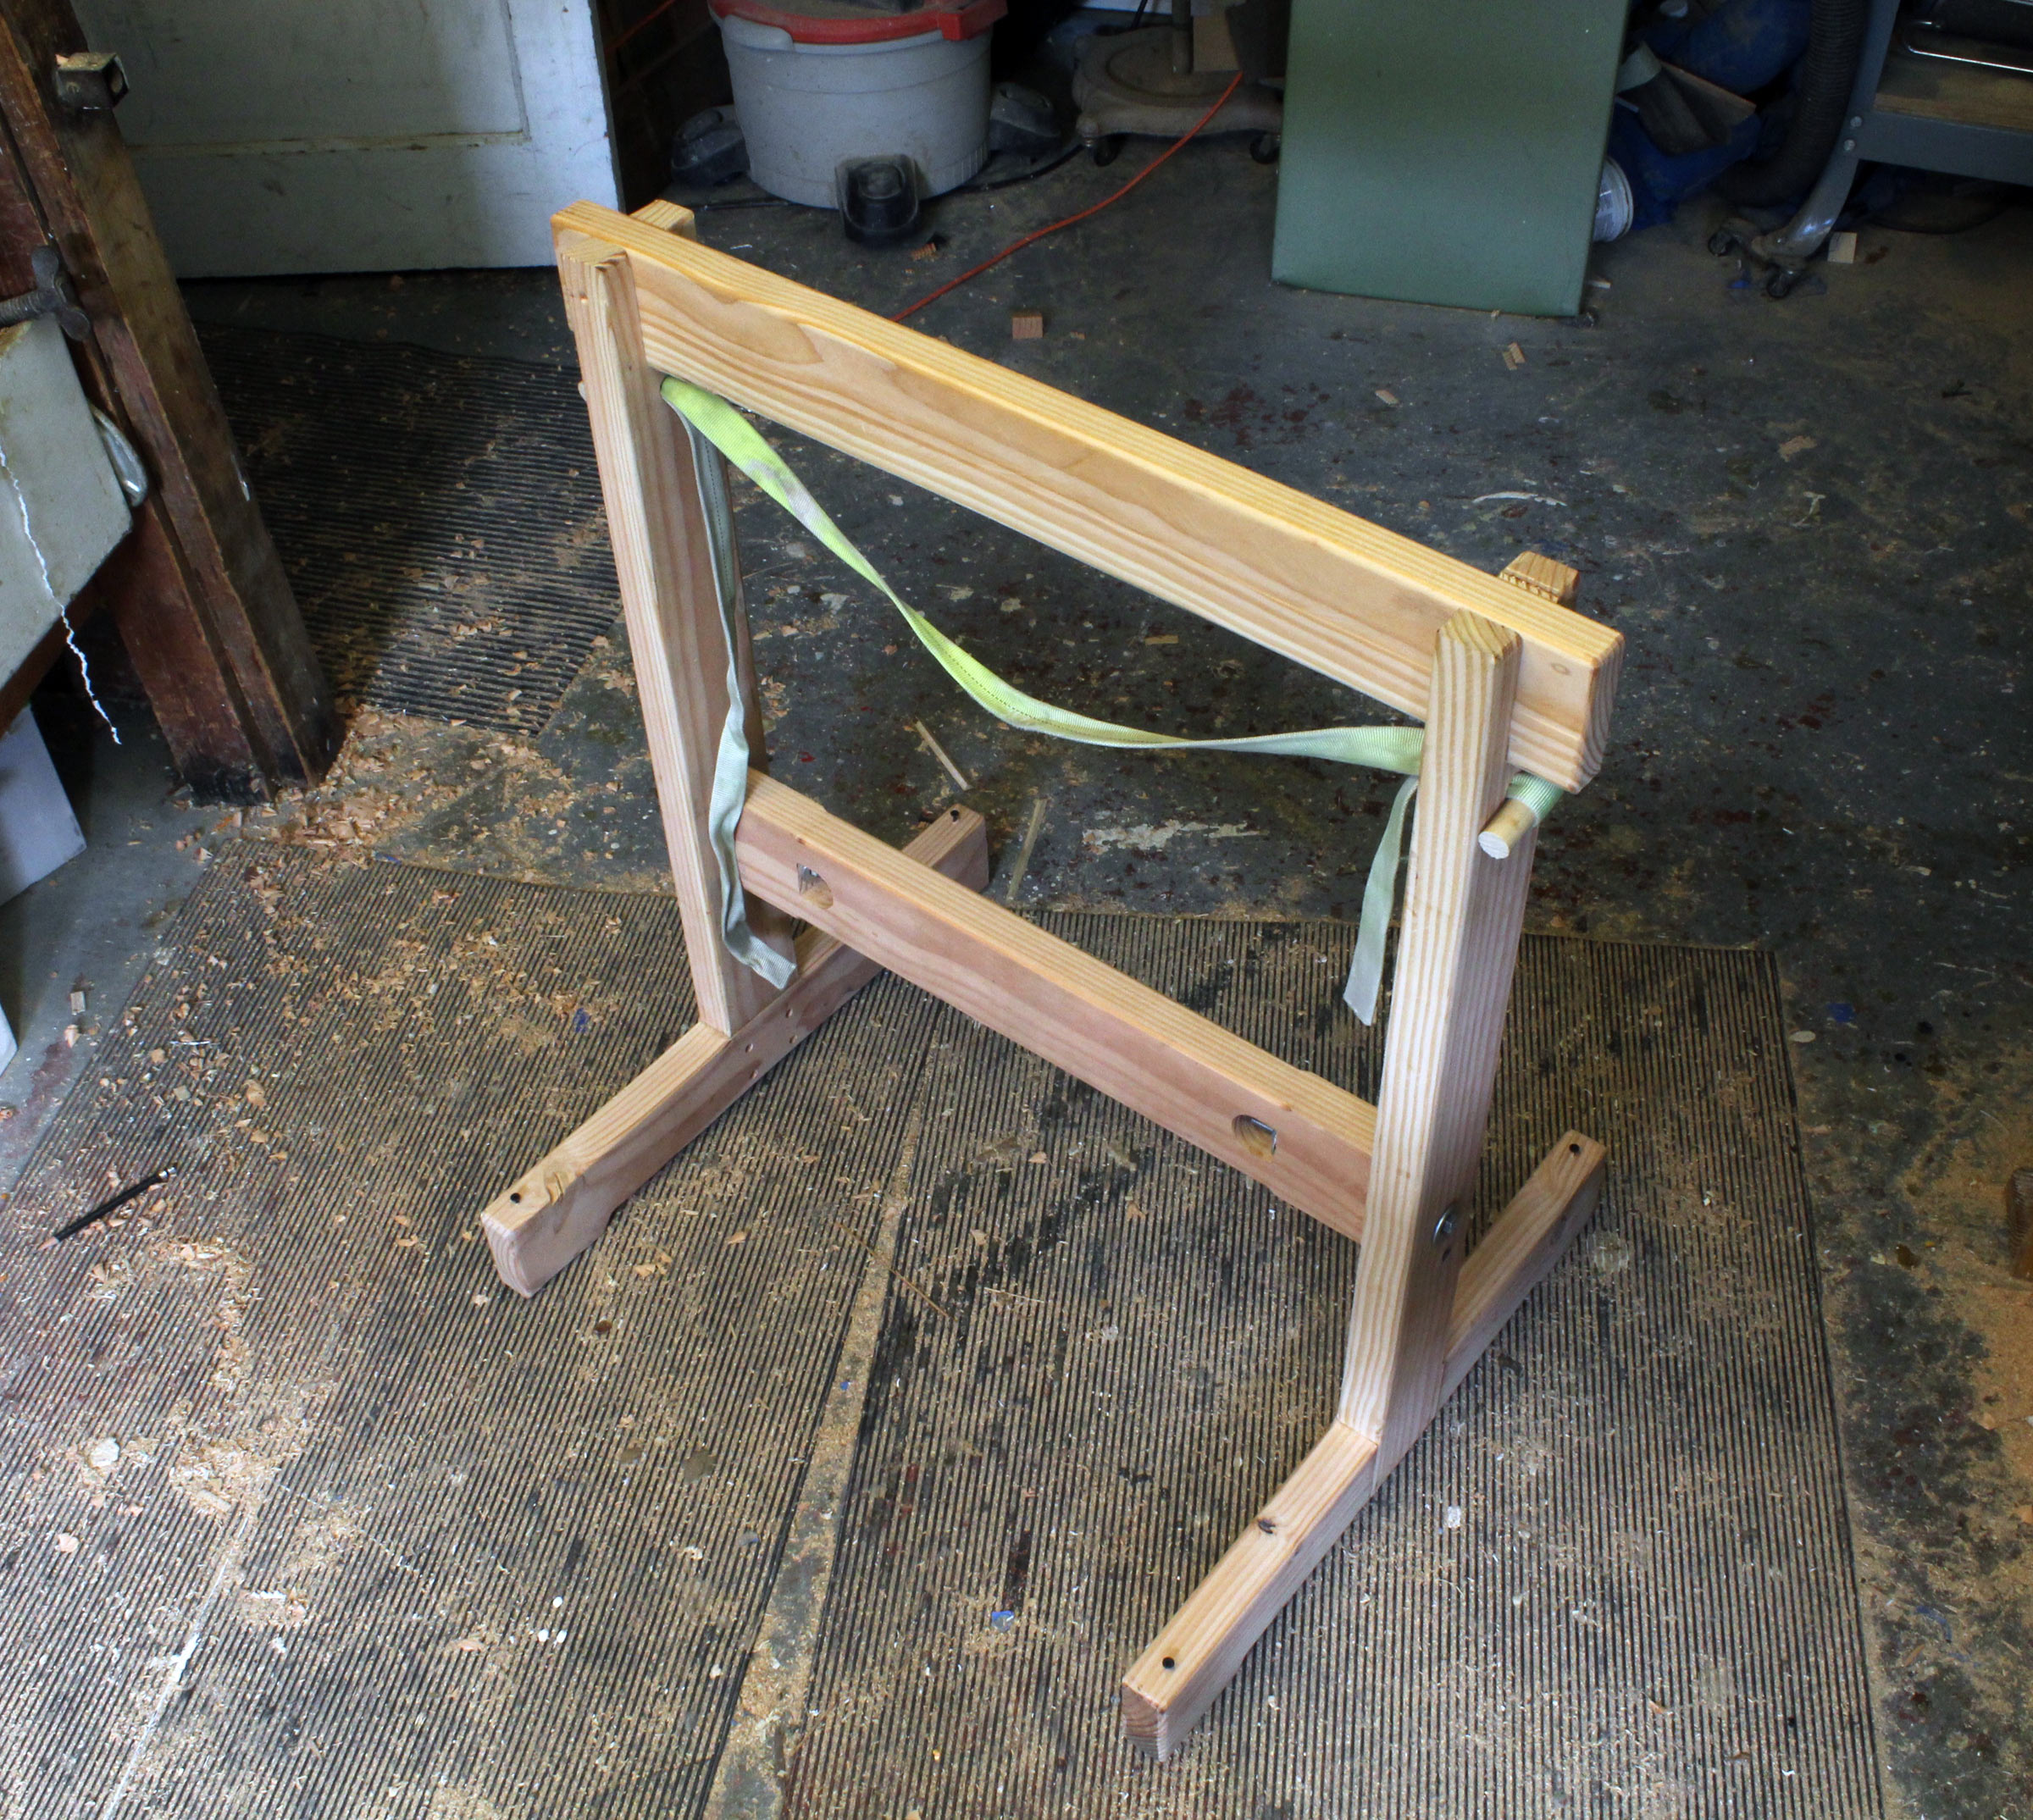
A sling of 1″ tubular or flat webbing can be a permanent part of the sawhorse. I drilled 3⁄4″ holes for some 1″ tubular webbing 1 1⁄2″ below the uprights’ slots.
Simply remove the crosspiece to use the sling. The idle crosspiece can rest on the bases, with its notches engaged to keep it from sliding around.
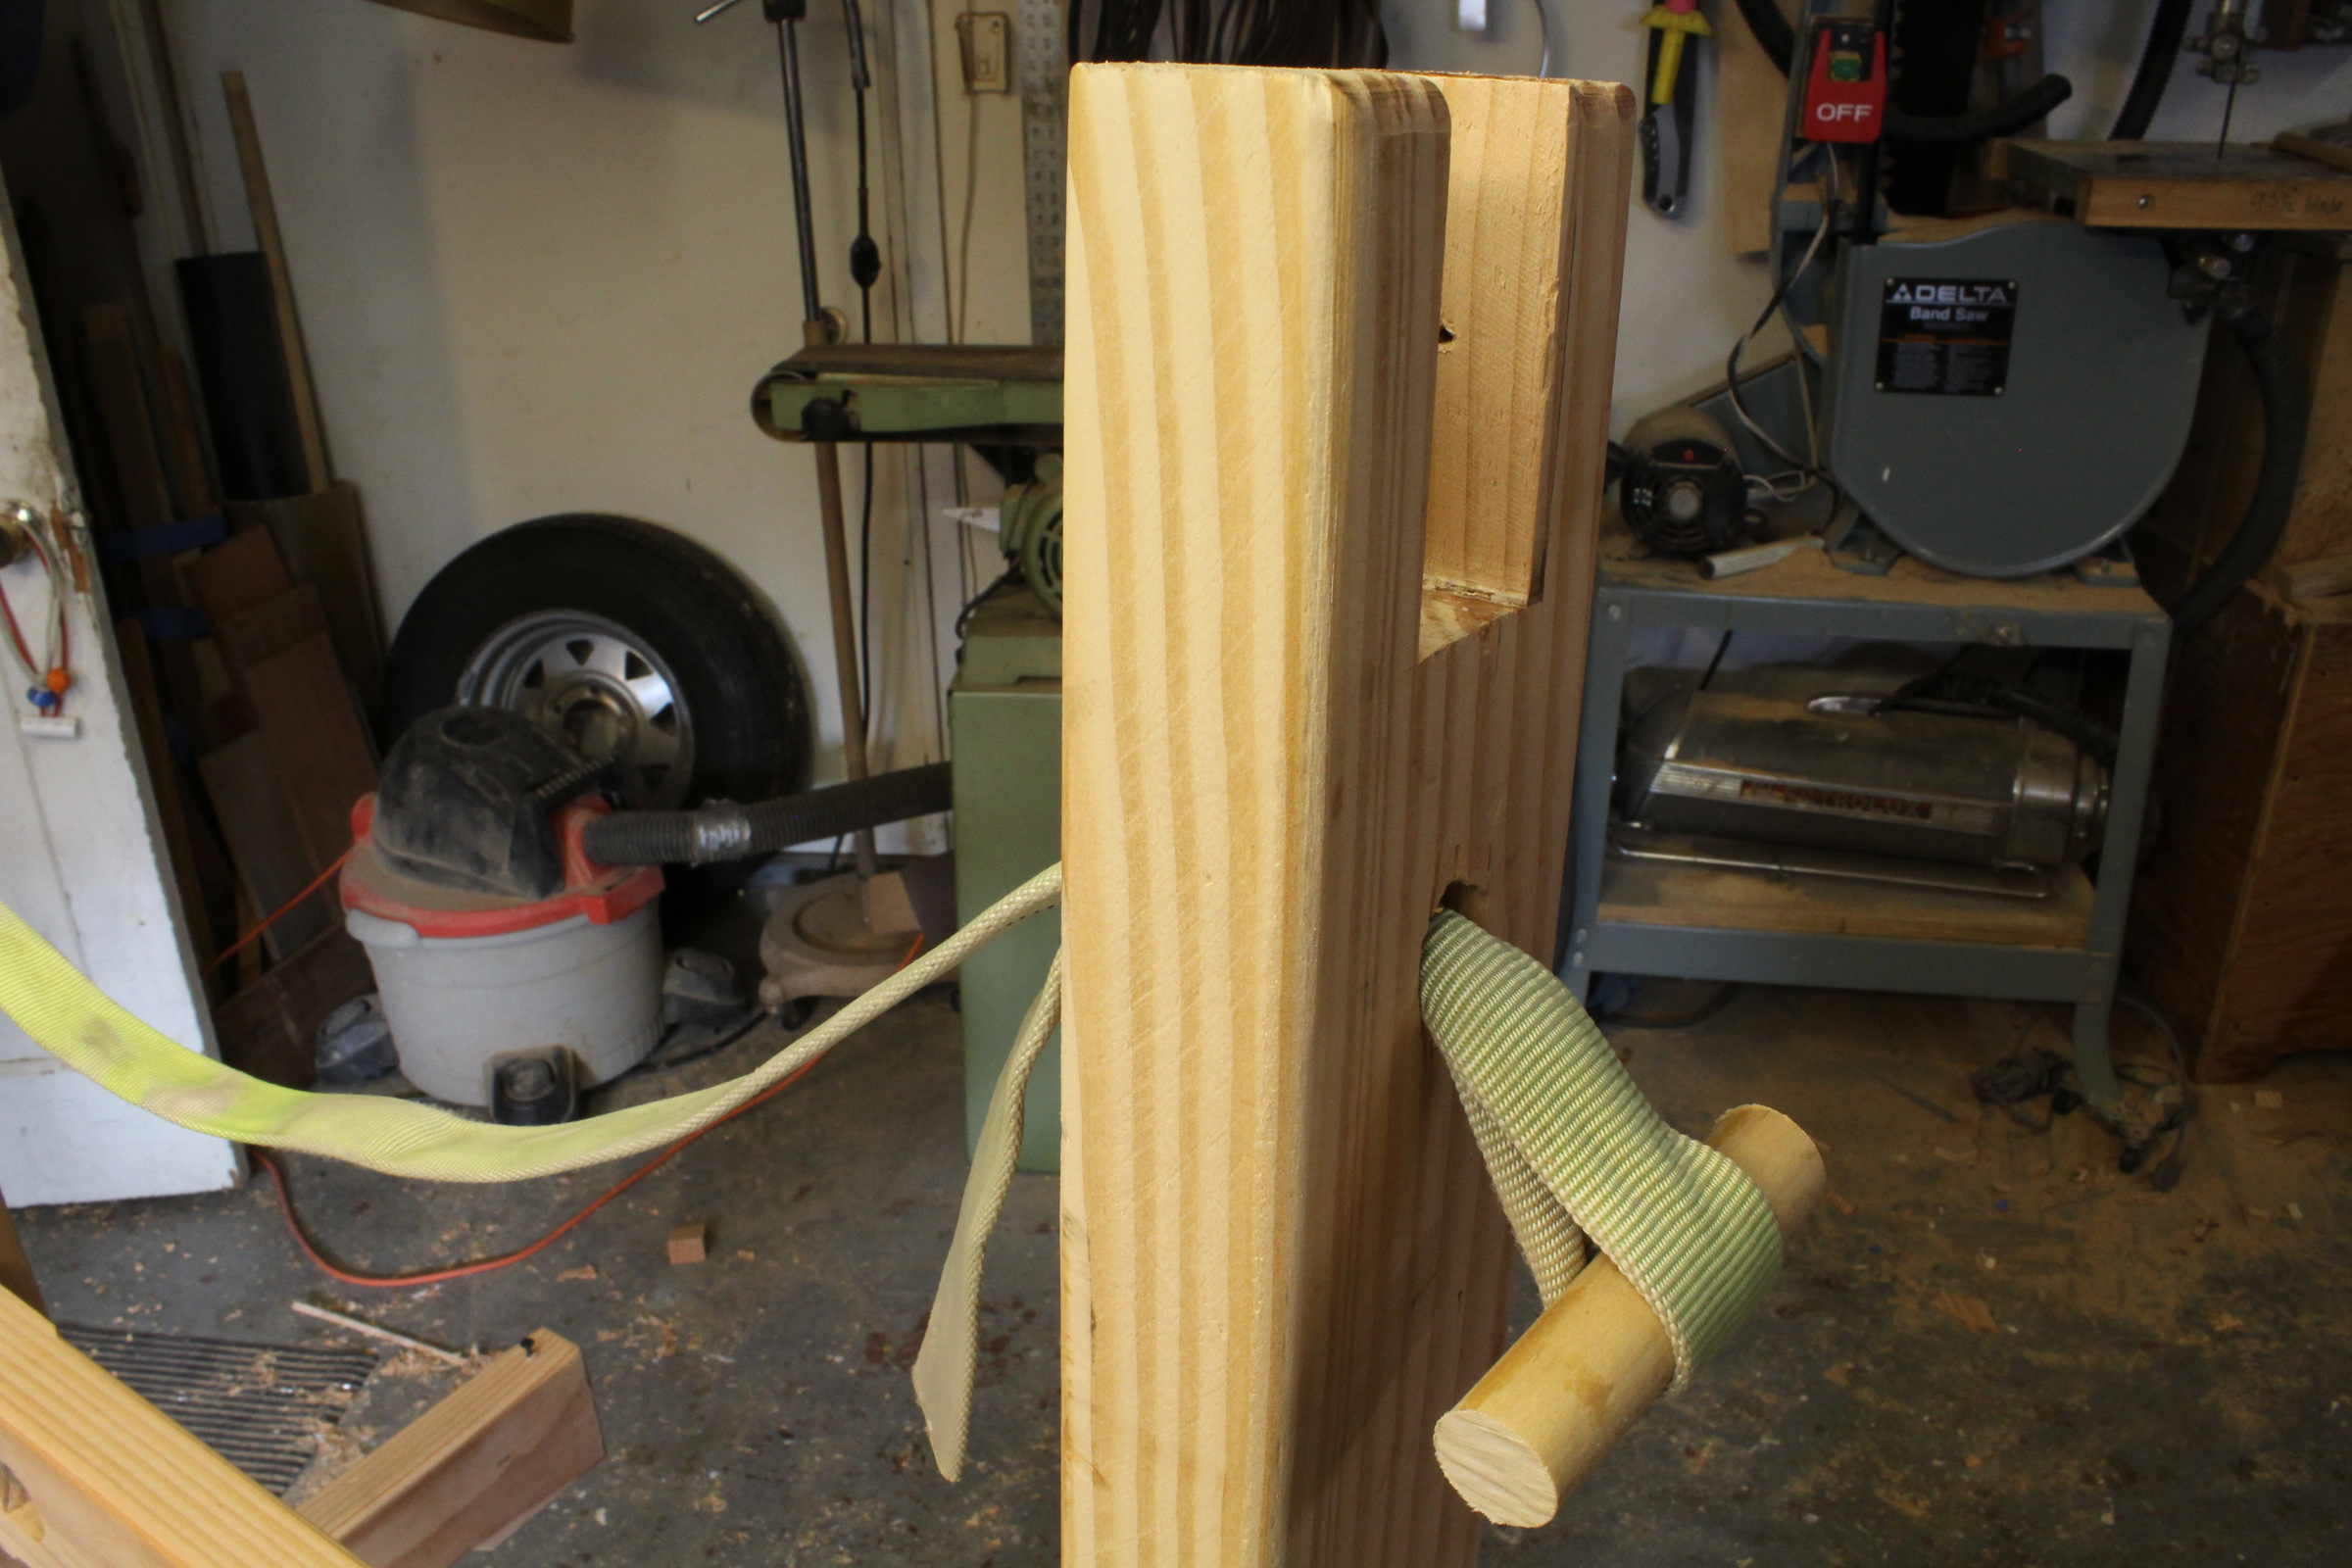
The 1″ webbing for the sling is inserted through the top of a 3⁄4″ hole, looped around a dowel, and passed again through the hole, on the bottom.
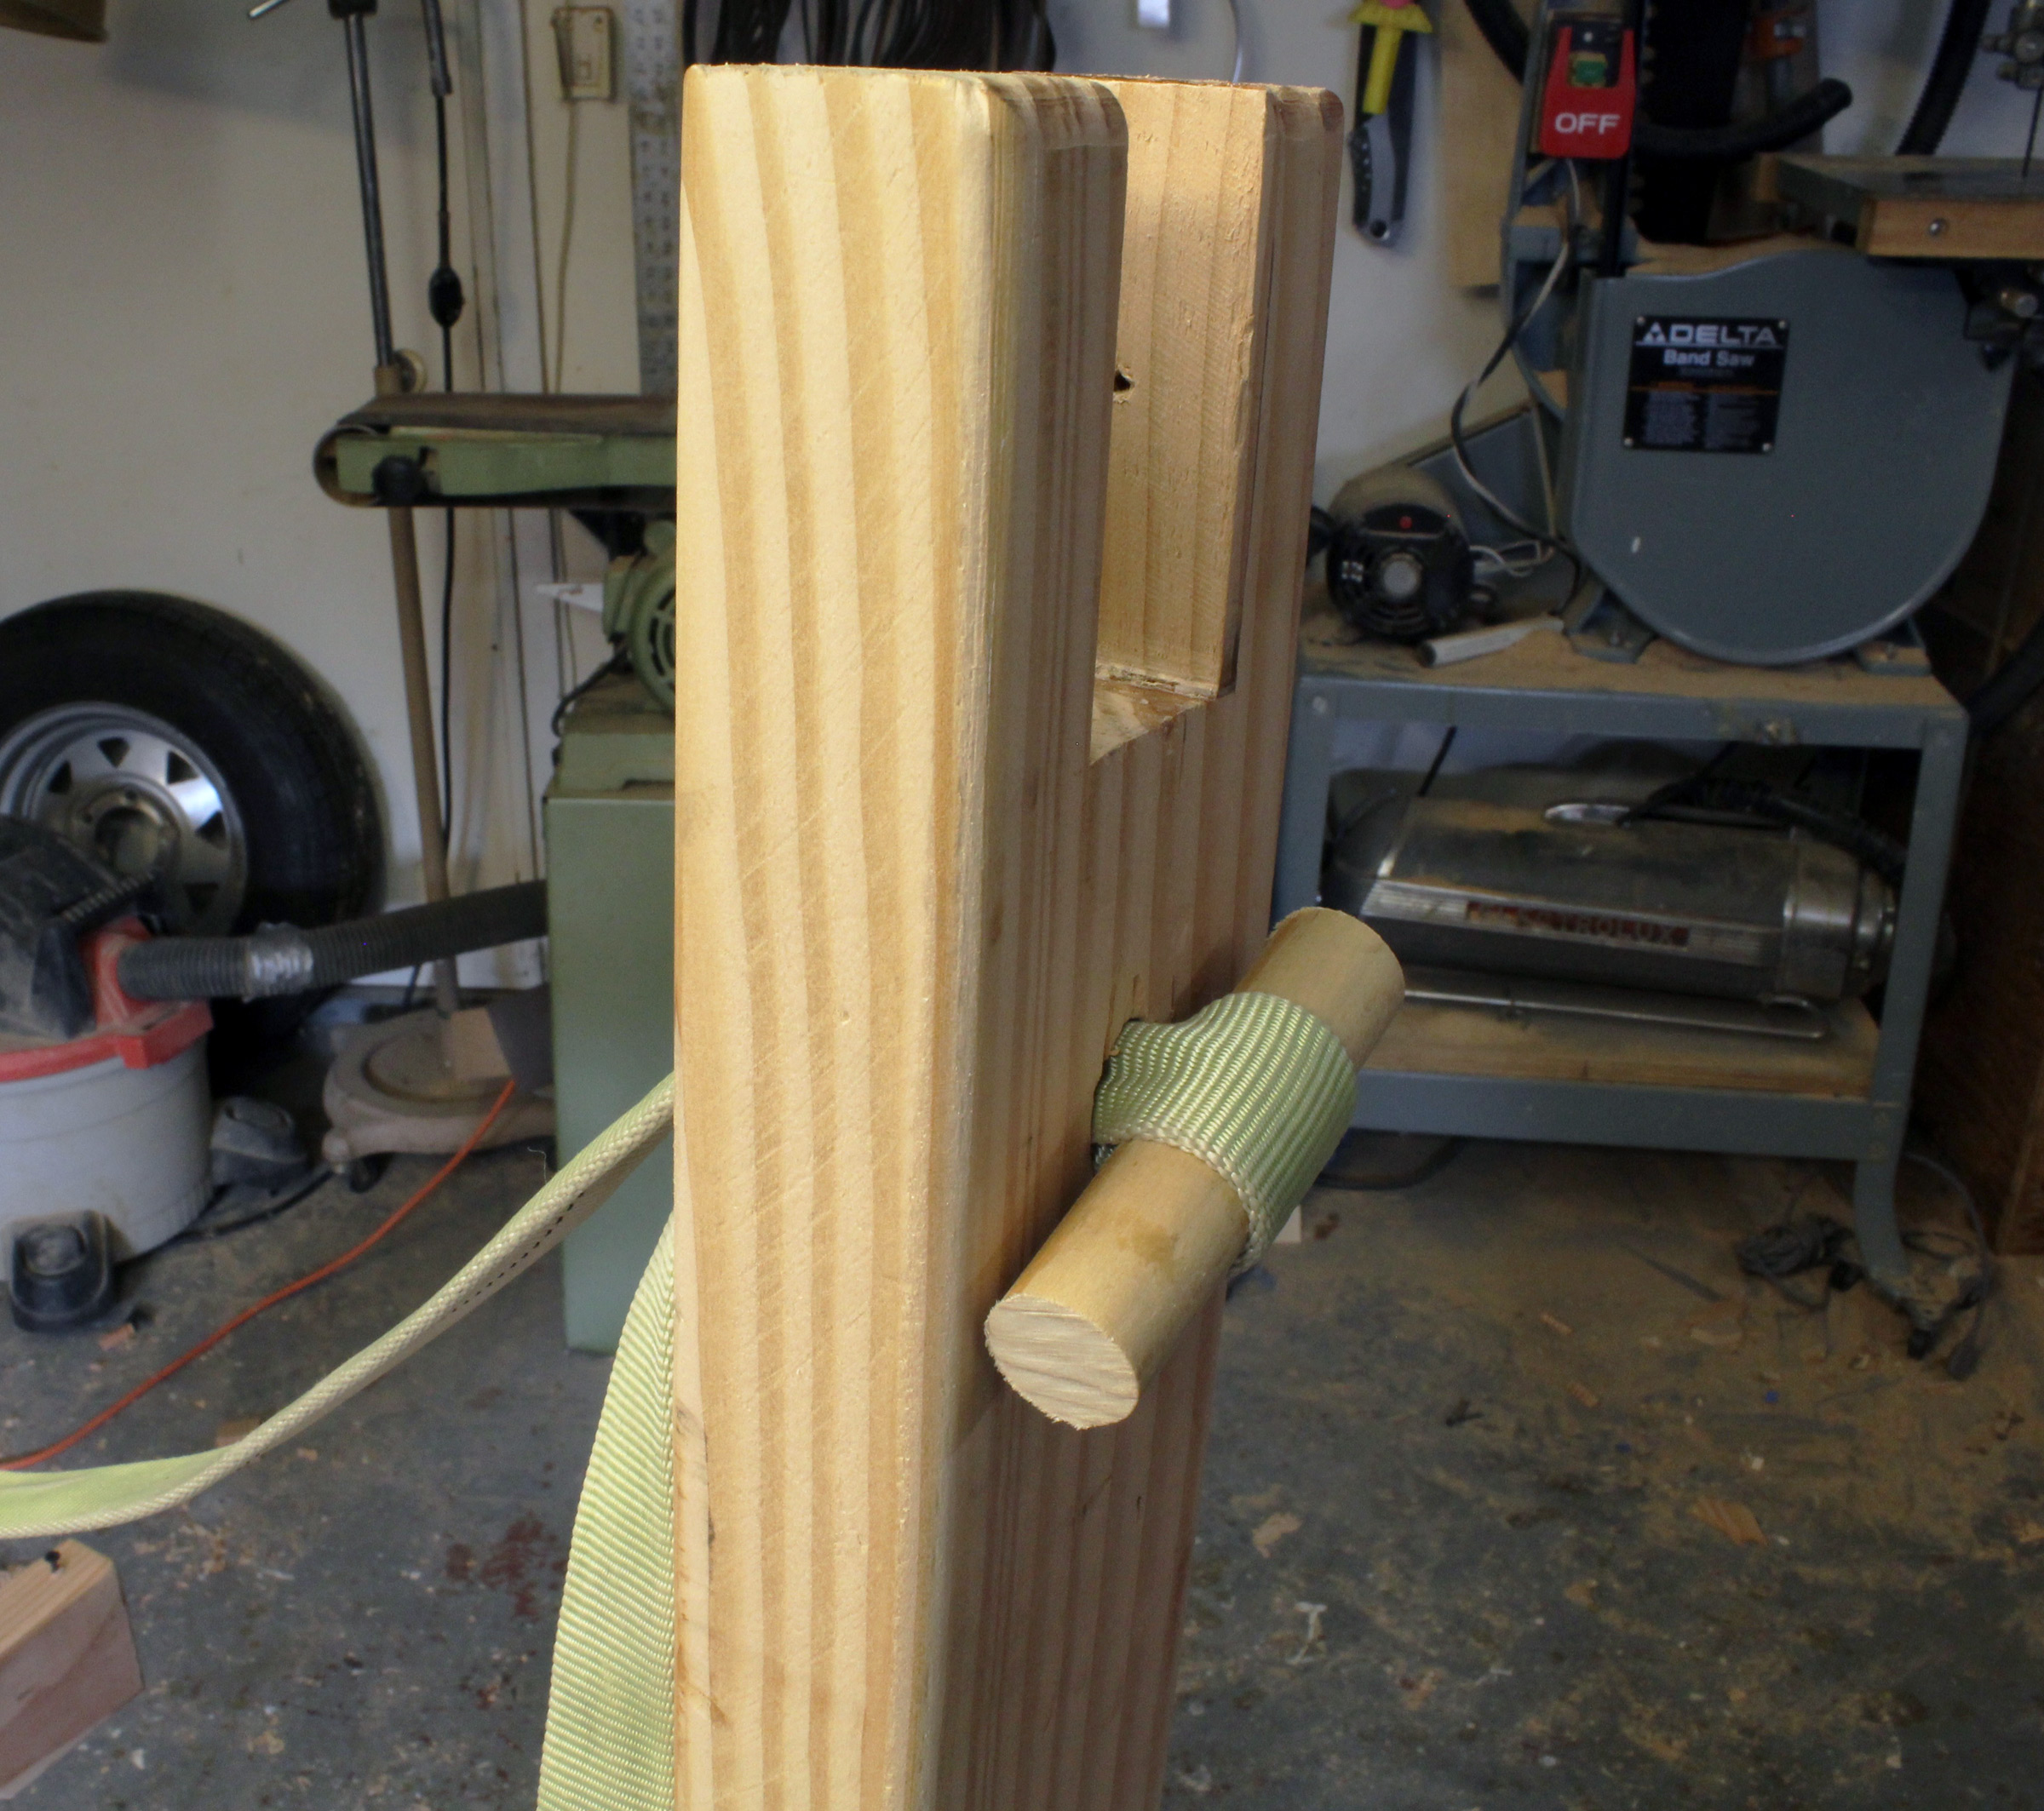
When the webbing is drawn tight, friction and downward pressure on its tail end keeps it from slipping.
The sling will keep round- and V-bottomed boats upright.
A 2×4 or 2×6 fastened on top provides a lip for clamping.
The 2×4 is held in place with a few screws driven into the crosspiece.
You can share your tips and tricks of the trade with other Small Boats Magazine readers by sending us an email.
Do you sell plans or a kit?
One thing to keep in mind is customization. You are an individual with a certain height, and building, maybe, a boat for the cradle of a certain width. Some kayaks hold 3 people, others hold a person who weighs 100 pounds, so depending on your plans, your beam for the horses could vary. I always build custom and for myself, and not to plans.
Hi Richard,
No, I haven’t drawn up plans for sale but that’s not a bad idea. Do you prefer the idea of take-apart horses or permanently fastened? Chesapeake Light Craft shows a couple of canoe/kayak boat stand designs on their web site.
Excellent! Gonna spend a weekend (ain’t they all, right now?) making some of these. Thank you!
Bill, you’ll get an excellent rate of return on your investment! Enjoy your weekend in the shop.
As an alternative to planing the top crosspieces to 1 inch you could substitute 5/4 decking , rip the rounded edges off to whatever you want and make the slots to suit .
Great idea using 5/4 stuff, David. The stock and dimensions in the article are guidelines, and making the most of materials at hand is wise. Chris, SBM’s editor, told me he got his “2x4s” from a 2×10. Often you can find nicer wood with better grain in a bigger stick. I would always use a softwood for the upper cross piece, making it less likely that you would ding the outwales on your inverted boat. Also, as Chris shows in his final photo, it’s easy to simply screw a top board into it. I have an 18′ freight canoe in my shop now and I added a 40″ top board to my 30″-long upper crossbar to accommodate the canoe’s 36″ width at the transom.
Great looking set of horses. I especially like the way you did the web sling. Looks like I have found a use for some 2x’s I have lying around.
I like Chris’s use of dowels and friction for his web slings, too, Daniel. If you happen to have some 1/2″ to 5/8″ rope with a soft hand laying about, you could also make an adjustable sling by simply trying figure eight knots instead of the fancy knots I used in my “show” horses.
Great idea. I have been using a pair of Krenov-designed horses for about five years after coming across plans in a woodworking magazine. I added a removable piece to bring them up to the level of my workbench.
The removal system here is brilliant as is the knockdown idea.
Over time I’ve found that the horses as useful as any tool in the shop.
Thanks for the insights.
If I ever knew what these were called or who I learned about them I’ve lost that knowledge in the mists of time. I’ve kept this basic design in my head for thirty years and every once in a while I whip out another one pair out of three 8′ 2x4s and deck screws. The only fancy joinery I do is to notch the feet into the verticals so they can’t rock around. If a set does get rickety I’ll add some plywood gussets to get another year out of them.
I made a set of proper-looking Krenov horses out of maple, and while I would have used mortice and tenon joints, I had just purchase and early PC biscuit jointer, and used it instead. The plan was to see how long they would last, and when they failed, just replace the b-joints with mortice and tenon. This must have been 35 years ago.
Well, they lasted really well. I made a trimaran where the boat was hung from 4 points, 2 steel drums, and my two Krenovs. There was the weight of the boat, and us walking around inside it for 6 months during the build. Eventually they did break a few years later, but only the crosspiece joints, not the feet. Rather than mortice and tenon them as planned. I cleaned them up and reglued with epoxy. The joints had double biscuits in them.
The big hassle are that they are terrible to store, and easy to trip over, but otherwise invaluable. I was thinking of making a new pair for my lake shop, and maybe using a ratchet strap to hold the crosspiece in place, than the who thing could be knocked down. We will see.
I mentioned a ratchet strap, but your drawbolts achieve the same result and are less oddball. My preference when drawbolts come up are epoxy bonded bolts. They are super easy to install (though the timeline is longer) and a pleasure to use as all you have is a custom stud in the stretched, no fishing for nuts, or unsightly slots and captured nuts. After using captured nuts on my first workbench, I never looked back once I used hardware bonded studs. Thank you Gougeons!