When Kyle and I decided to build our own boat to take on a trip down the Mississippi River, we decided to make, rather than buy, as many of the bits and pieces as possible to save money and make the build and journey on the boat even more meaningful. We needed five blocks for SØLVI’s sailing rig and looked to see what was available on the market. Traditional bronze blocks were beautiful but heavy and expensive. High-tech blocks for dinghy racing, made of stainless steel and fiber-reinforced plastic, were light and smooth-running, but expensive and not in keeping with the classic look we wanted. Our research led us to L. Francis Herreshoff’s Common Sense of Yacht Design, where we found drawings of blocks that we could adapt to meet our requirements.
While Herreshoff called for cast bronze sheaves, we decided to buy Harken’s Delrin ball-bearing sheaves. They are strong, smooth-running, and affordable. We ordered six—one for a prototype and spare—sized for 3/8″ line. The sheaves cost $10.99 apiece (less expensive sheaves, without ball bearings, are available in nylon or bronze from Duckworks). We purchased a 12″ x 12″ sheet of 0.062″ naval brass (C464) for $54 (and needed only half of it; a high silicon-bronze—C655—would also work), 36” of 1/4” bronze rod for $18, and a package of 100 bronze cotter pins for $5.
 Danielle Kreusch
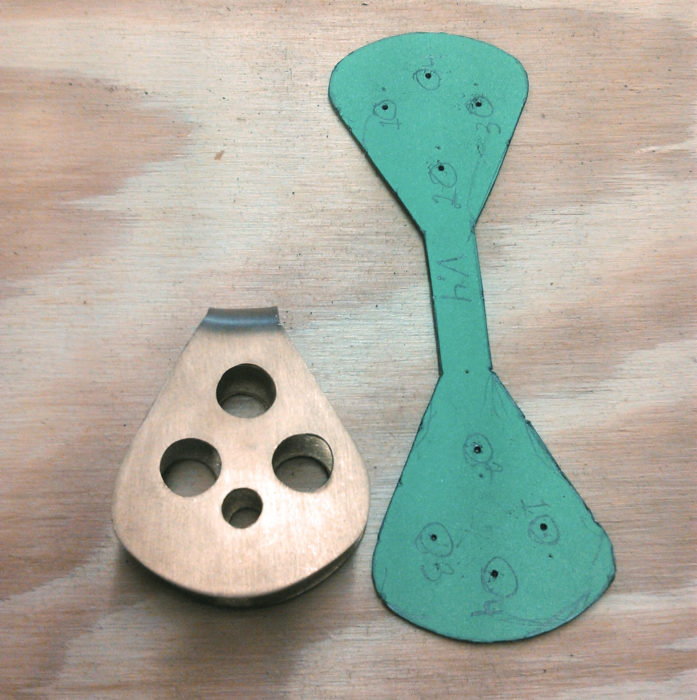
The paper pattern has small holes to locate the position of the holes to be drilled in the cheek plate. The straight portion of the pattern needs to be long enough to assure there will be enough clearance for the line.
Herreshoff made his blocks with two flat cheek plates joined to a third piece of bronze; we’d make both plates in one piece, bent to fit around the sheaves. The bend would have to provide enough clearance for the 3/8″ line to run freely. Rather than use the expensive bronze to get the right dimensions for creating a pattern, we used a piece of 1/16″ aluminum flat-bar to determine the distance needed between bend and the sheave axle. Our bending jig for the flat-bar, as well as for the plates we’d bend later, was a scrap of oak a bit over 1/2″ in thickness to match the sheave and with one end a half-round.
The bronze will spring back after it has been shaped to the jig and must be finished by hand. The fit isn’t critical as it would be with a simple, non-ball-bearing sheave. With the Harken sheave the cheek plates can be squeezed tight against its round inner circle; the outer ring will still spin freely.
After making a pattern on stiff paper, we went to work on the cheek plates, tracing the pattern in fine-point marker and cutting the line carefully. Cutting bronze sheet with a jig saw requires some care to keep the blade from binding in the tight turns and deforming the metal; any damage was easily fixed with a hammer. We then made the four holes in each cheek with a cordless drill; three 3/8″ holes were to make blocks lighter and more aesthetically pleasing, one 1/4″ hole was for the sheave axle. This prototype proved perfectly serviceable, and we went to work on the rest.
 Danielle Kreusch
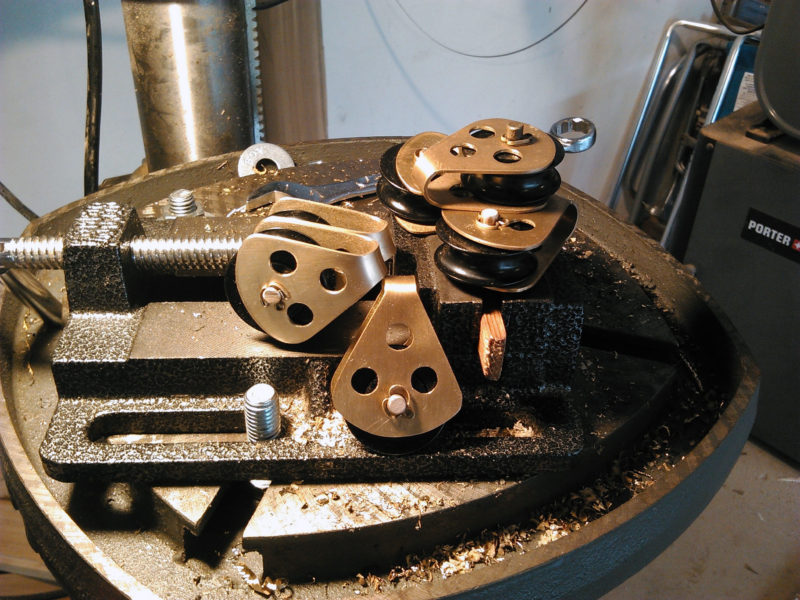
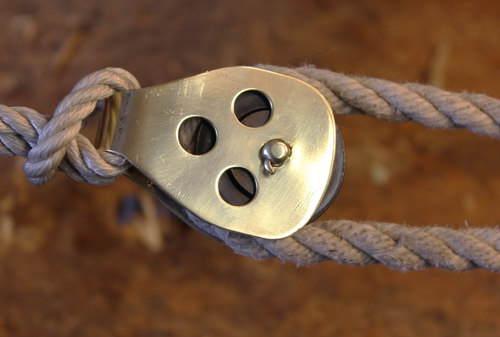
Homemade blocks met our goals for weight, affordability, and a classic look. The two blocks at the left share a single axle, creating a double block.
We decided that spending $14 on a new metal-cutting blade for our bandsaw was a good investment in the project; while not a necessity, it was more efficient than using the jigsaw. We smoothed the edges of the bronze sheet with a disc sander, something that could also be accomplished with files. After bending the cheek plates on the jig, we installed the sheaves with 1/4″ naval bronze rod axles, held in place with cotter pins on the ends.
We had intended to use bronze shackles with the blocks, as Herreshoff did, but decided they would add unnecessary weight and expense. We ended up splicing loops of line to the blocks or lashing them in place.
Our blocks were just half the cost of cast bronze blocks, and were not only lighter but also smoother rolling. After over 1,000 miles of sailing and use, we found the blocks to be durable and attractive. ![]()
Danielle Kreusch grew up in Salt Lake City, Utah and spent a lot of time hiking and camping in the mountains. After moving to Florida to finish her BA in Psychology and Child Development, Danielle met Kyle Hawkins, who took her sailing on their third date. Their Mississippi River trip was their first small-boat excursion, and they have both fallen in love with the idea of continuing to travel in small boats.
You can share your tips and tricks of the trade with other Small Boats Monthly readers by sending us an email.




Great explanation for a project that I previously thought overly complex, but would now be willing to take on. Thanks for the write-up.
I just finished the first of what I expect to be many blocks I’ll make to this pattern. It didn’t take long. I found the sheaves at a marine hardware store and had bits of brass at home. I didn’t have any cotter pins so I used canoe tacks with their ends nipped off. The bending form took just a few minutes to make. For the next block I’ll mark the center of the cheek plate and the center of the jig to make sure the axle holes line up more precisely. The bend was a bit of center on this first attempt and I had to tune the bend with a pair of long-nosed pliers.
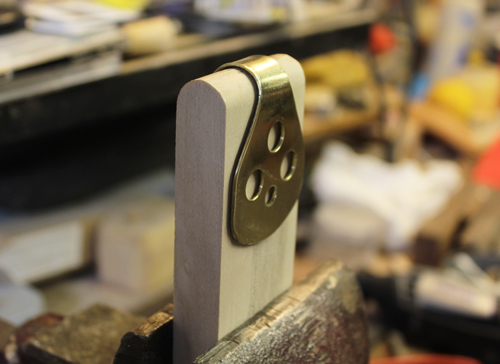
I think I would only drill the 1/4″ hole thru one side before bending. Then after you bend it, insert your drill thru the existing hole to drill thru the other side. I believe it would be easier to get the holes lined up this way.
I found that the cheek-plate material, about 1/16″ thick, was easy enough to adjust. Drilling both axle holes according to the pattern assures that the cheeks will be aligned as mirror images of each other.
Wow, what a great idea. I’m definitely going to be making some of these. Thanks!
Thanks for an alternative to a more expensive route.
Really cool project. I made a bunch of bronze blocks but they were more complex than this. These are a better idea.
Well done!
Rob
Years ago, I bought a 14″ woodcutting bandsaw with the express intent to make it into a metal-cutting saw. To slow the blade down, I mounted a stepped pulley in the base on a jackshaft, and a similar pulley on the main shaft. This slows the fpm down to about 350 or so, which I think is better for cutting metal. The first project I did called for cutting parts out of a bronze water tank and it worked well for this. The slower blade is also good for cutting mild steel, and even for stainless. Cutting stainless with a jig saw is hopeless, as heat builds up within seconds, and ruins the blade. The longer bandsaw blade has time to cool as it exits the work and goes up and over, etc.. The slower fpm blades do cut much slower in wood (also because the variable pitch metal cutting blade has much finer teethI), but I do occasionally cut wood with it.
Drilling stainless is quite challenging also, though cobalt HS bits work well. Lacking cobalt bits, you can get away with ordinary high-speed bits if you can introduce a means of lubricating and cooling the bit. A guy at my local hardware store tipped me off to this about 40+ years ago, and the coolant/lubricant he mentioned was canned milk (the butter fat is the lubricant part). This really does work. Later I decided to try water mixed with miscible oil dormant spray, the kind you use in your orchard. This is an oil that mixes readily with water. The advantages over canned milk is that it isn’t as messy, and won’t spoil and stink.
When you drill stainless this way, the heat quickly boils the water off, and you have to keep adding more until the hole is finished.