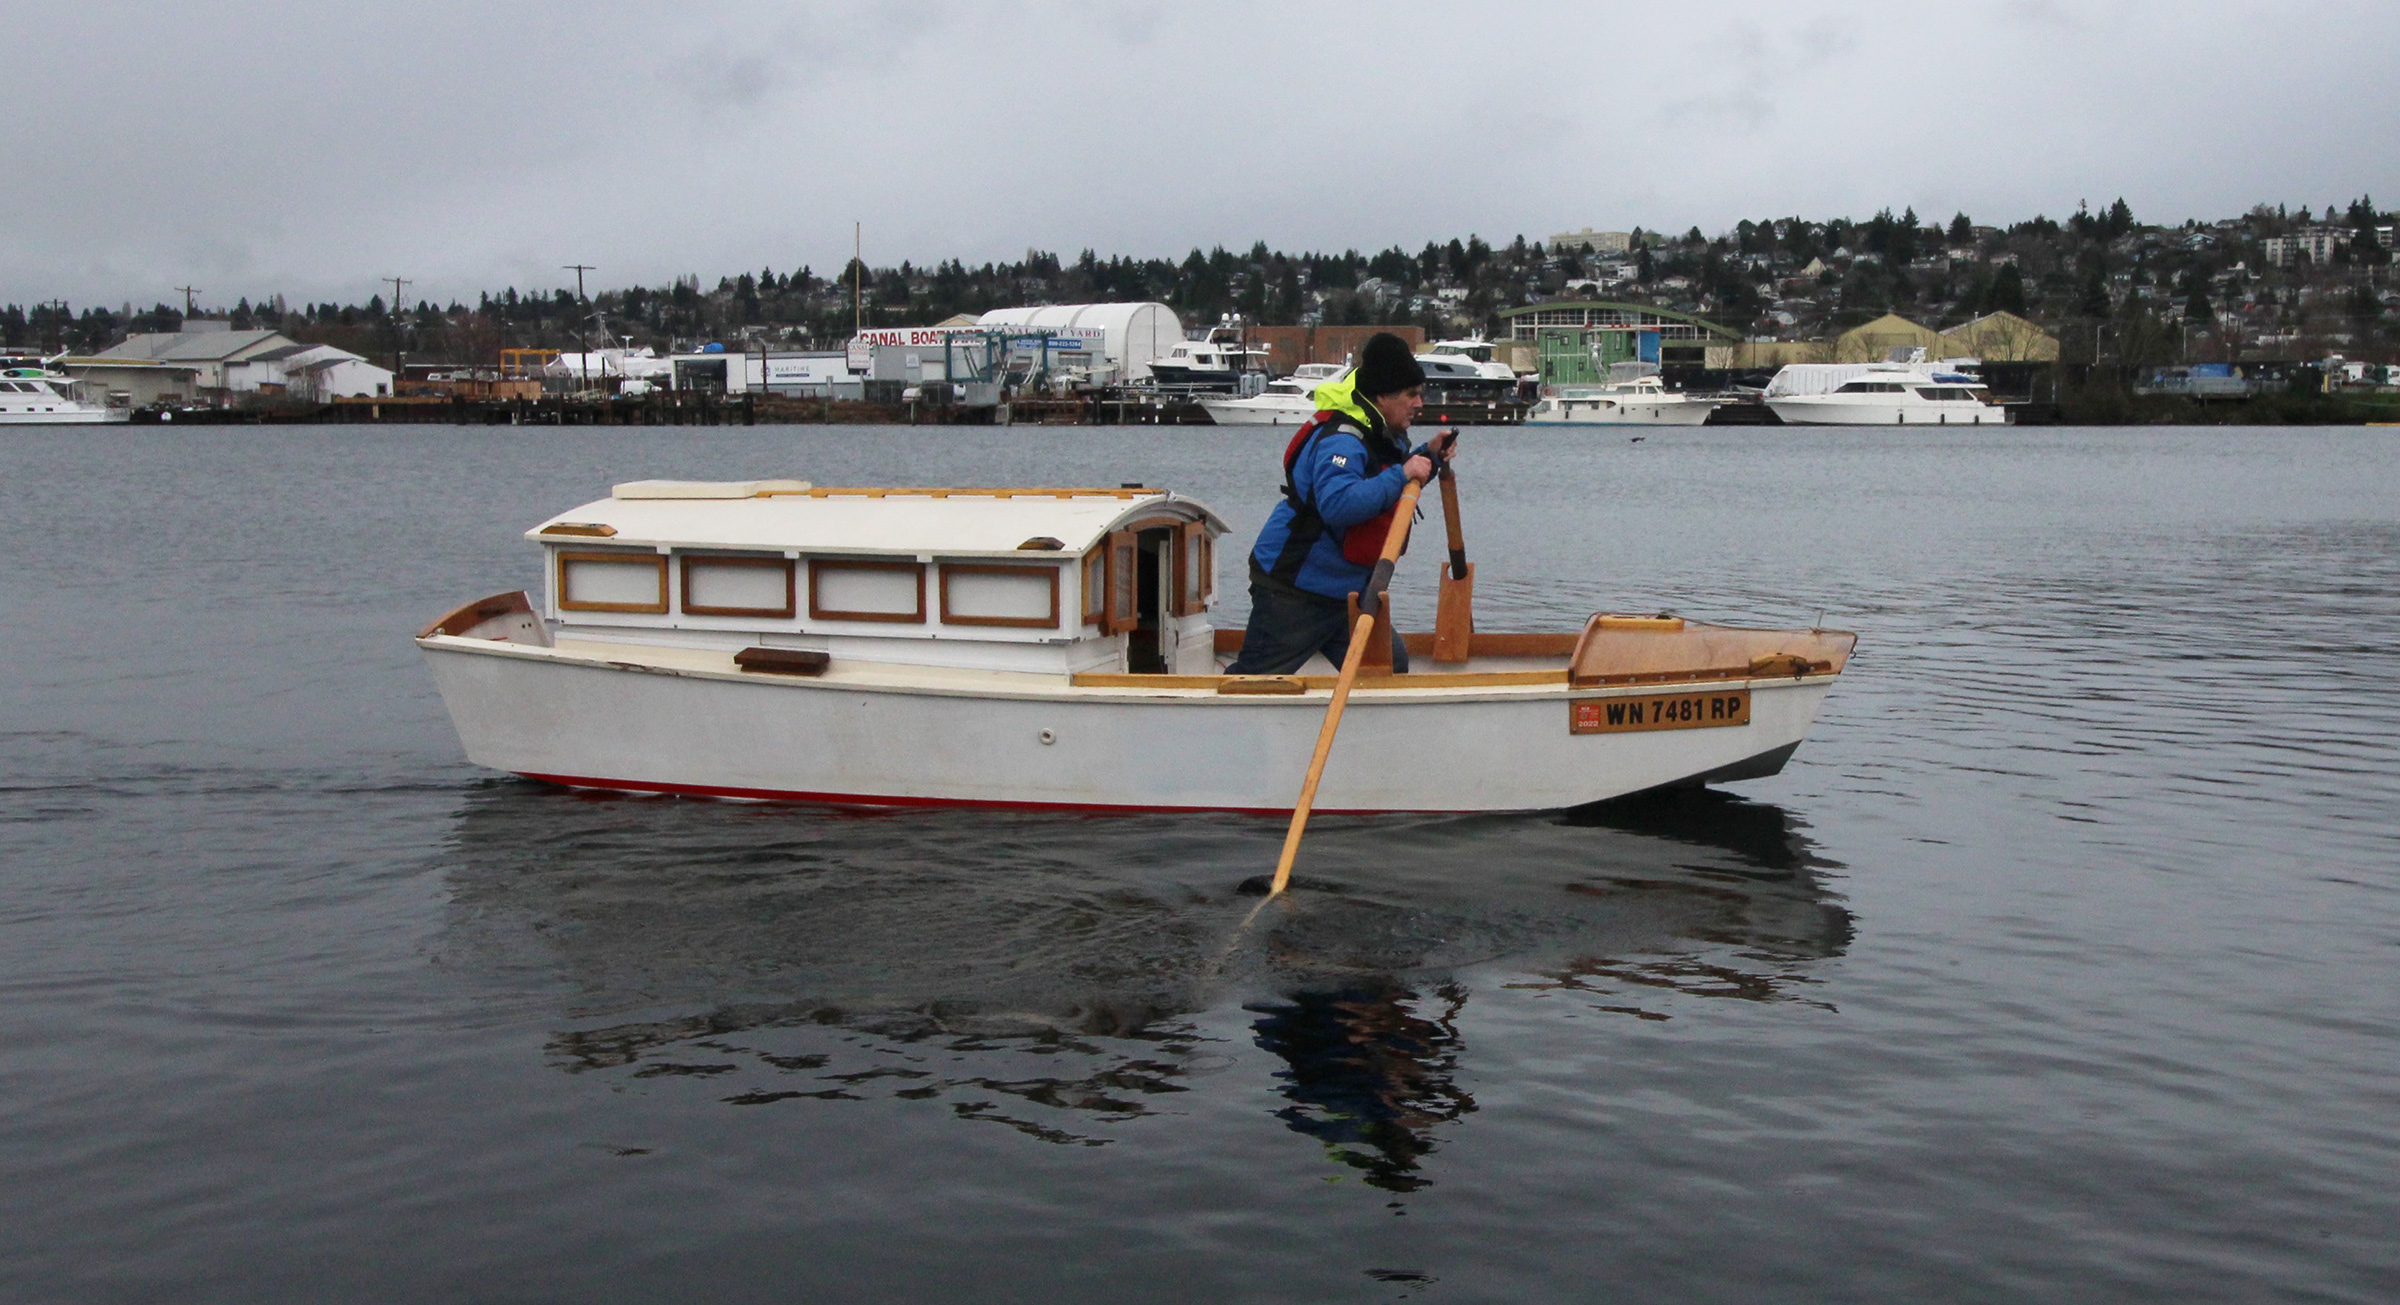
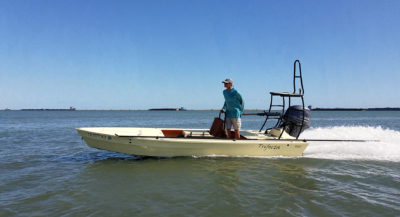
People need to see where they are going; racing-shell rowers and hockey’s defensive players are about the only ones that don’t. For the rest of us rowers, there are times and places where being able to see the path ahead is really certainly useful.
Rowing in tightly constrained water or in the midst of boat traffic is challenging unless there is a cox steering the boat. So, rowers in Venice’s narrow canals and in Louisiana’s winding creeks and bayous stand and row facing forward, while lobstermen in Maine who work around rocks and ledges and in narrow coves and inlets set up their peapods or double-enders to be rowed facing forward.
 David Cockey
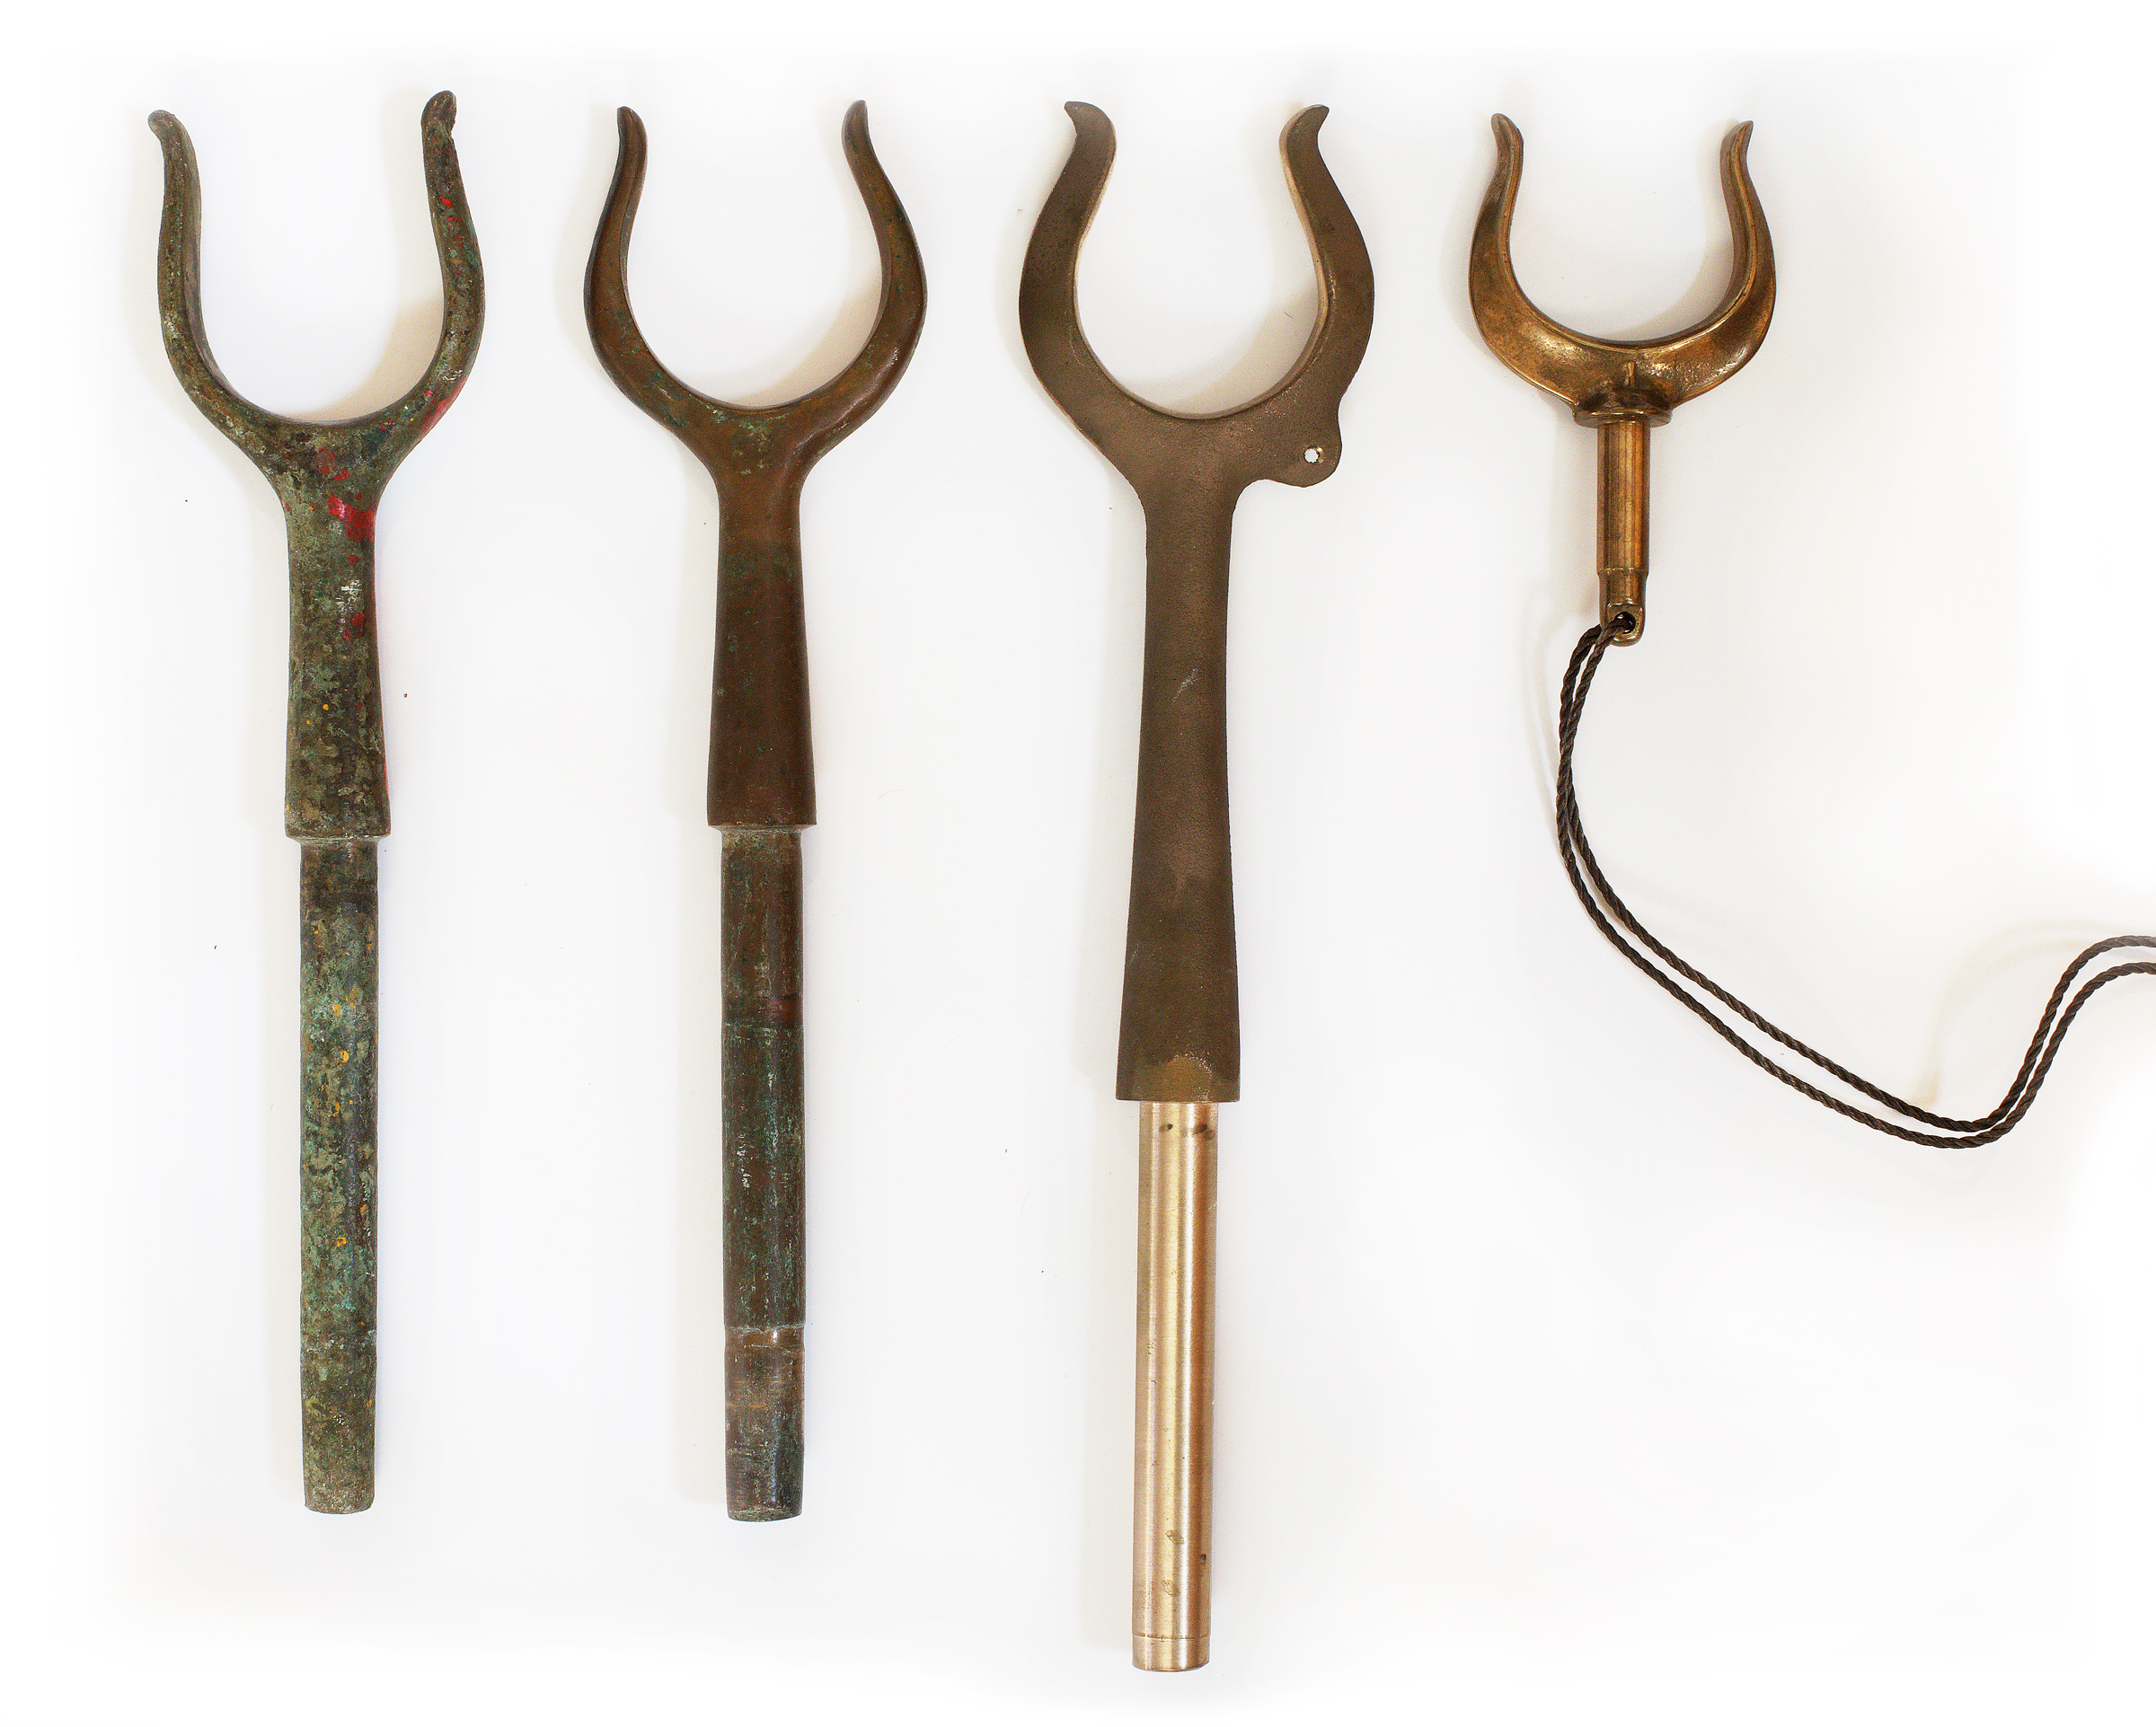
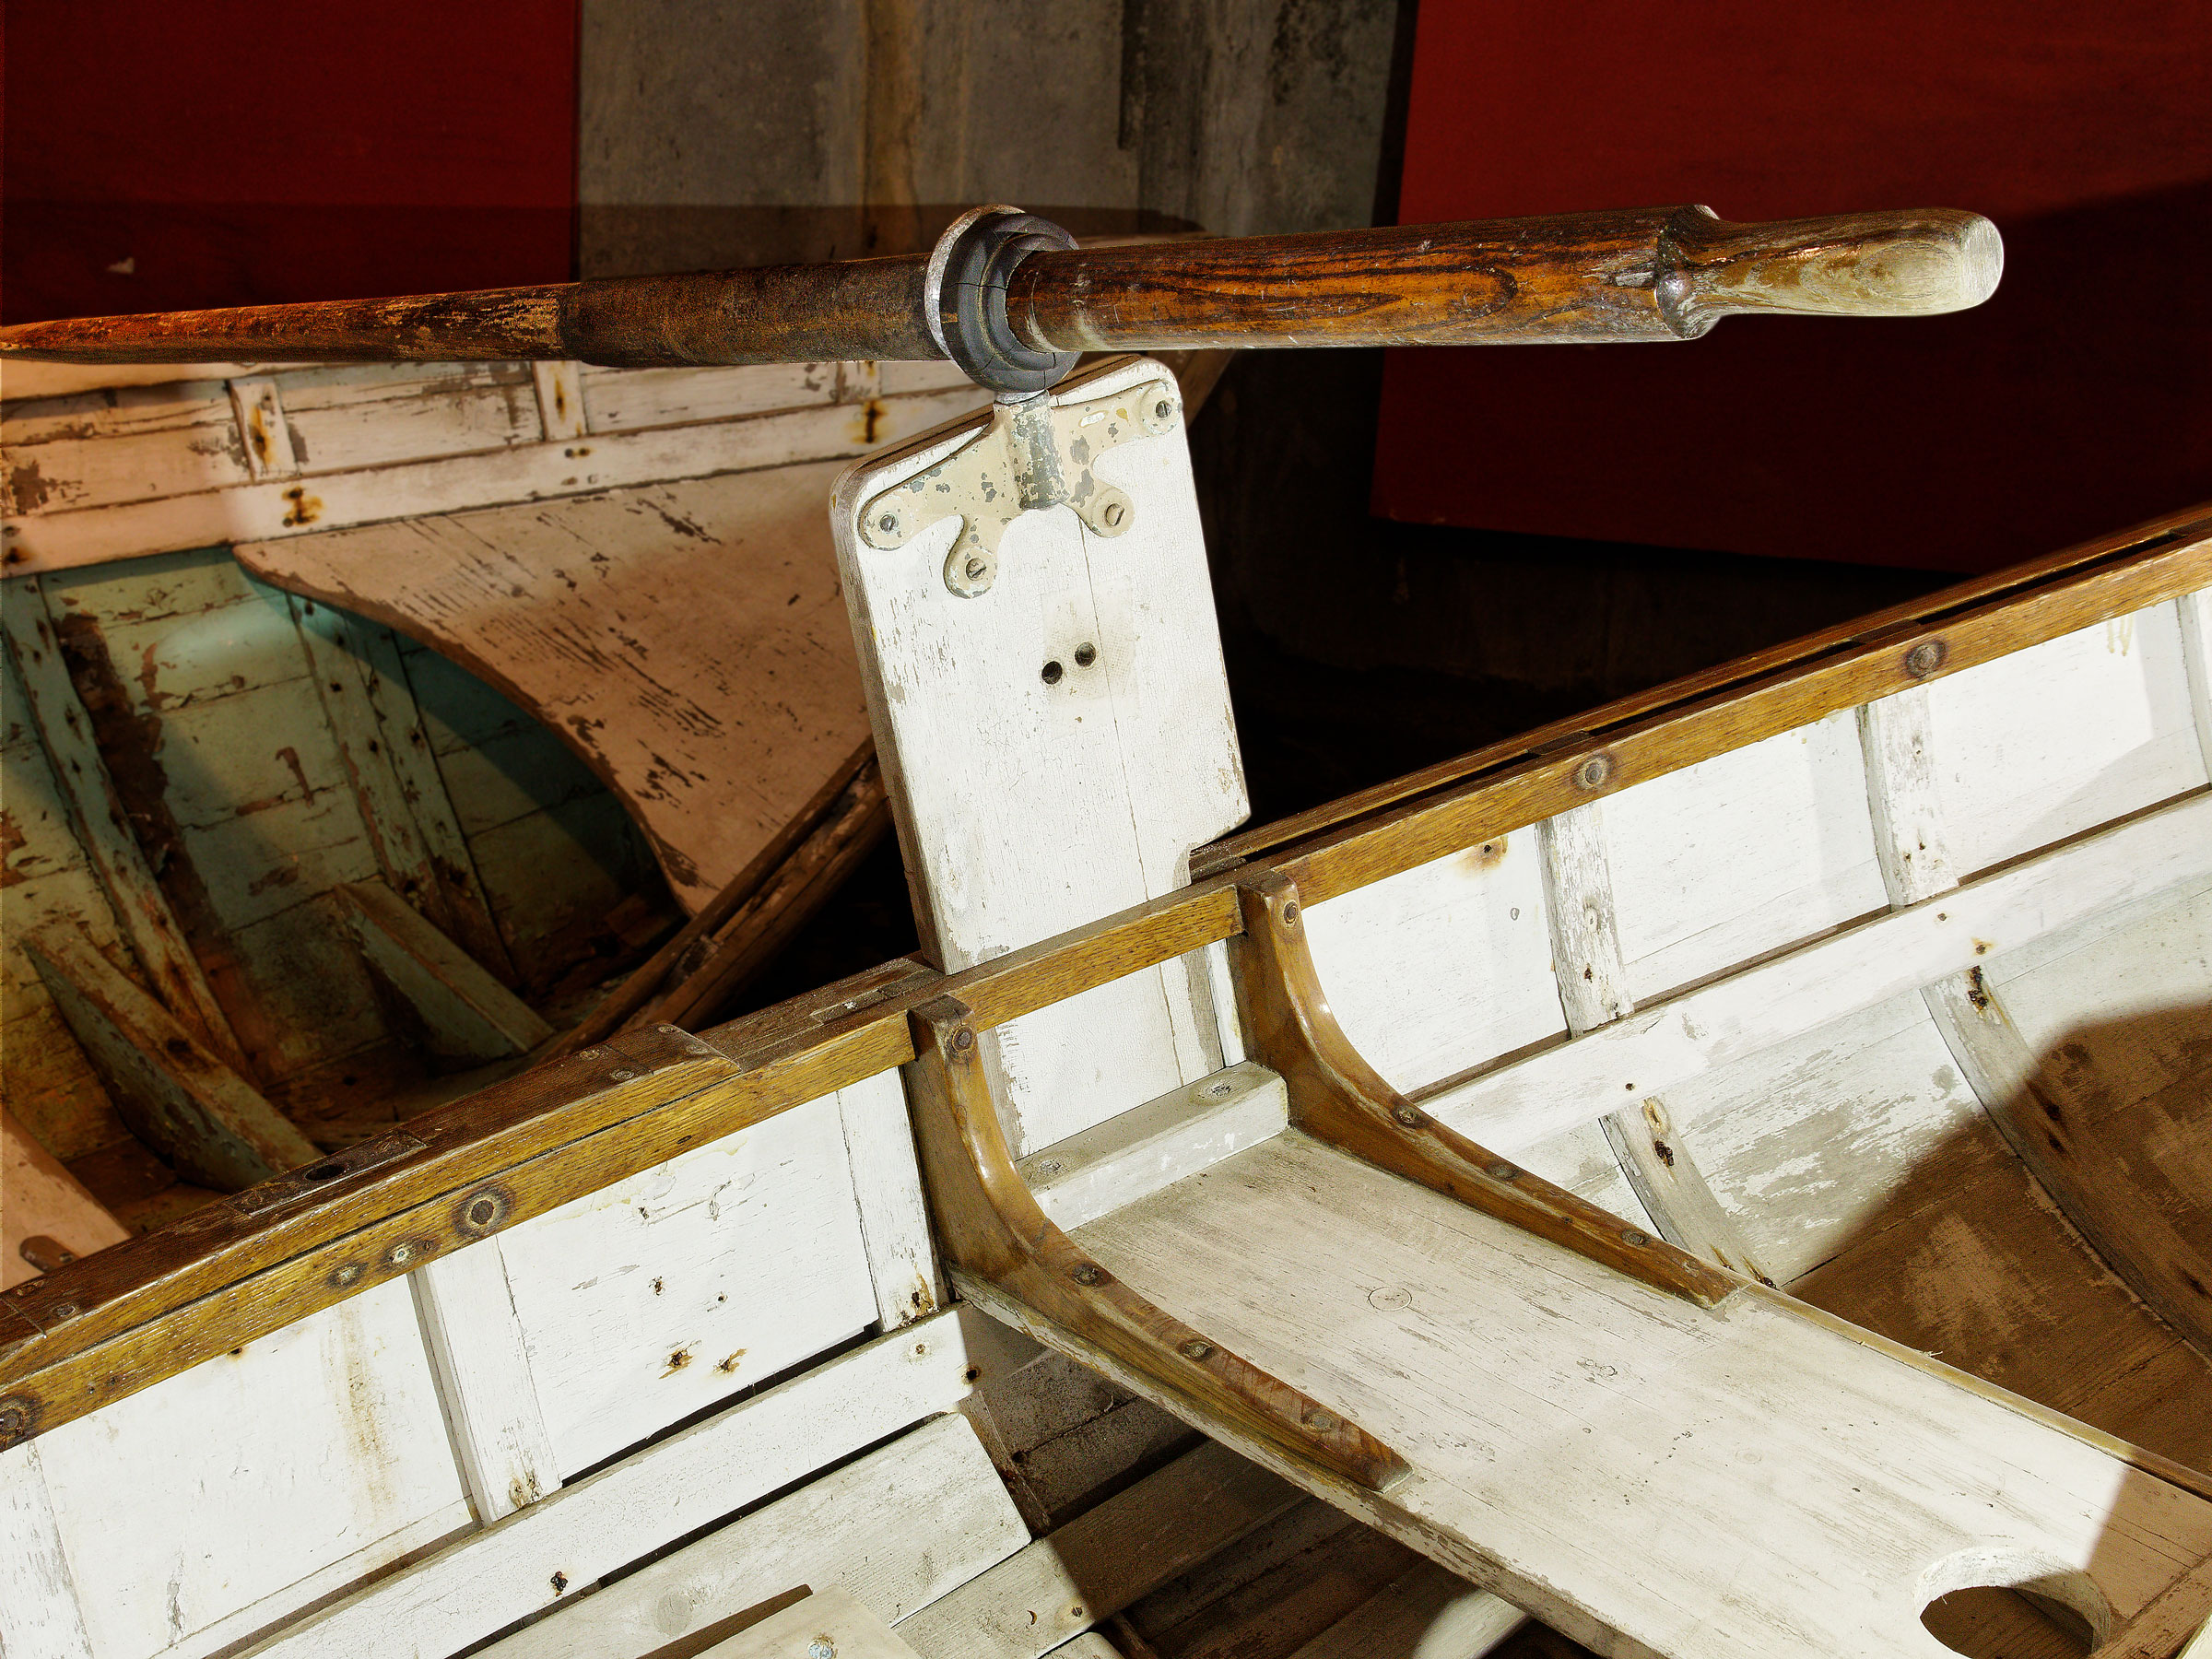
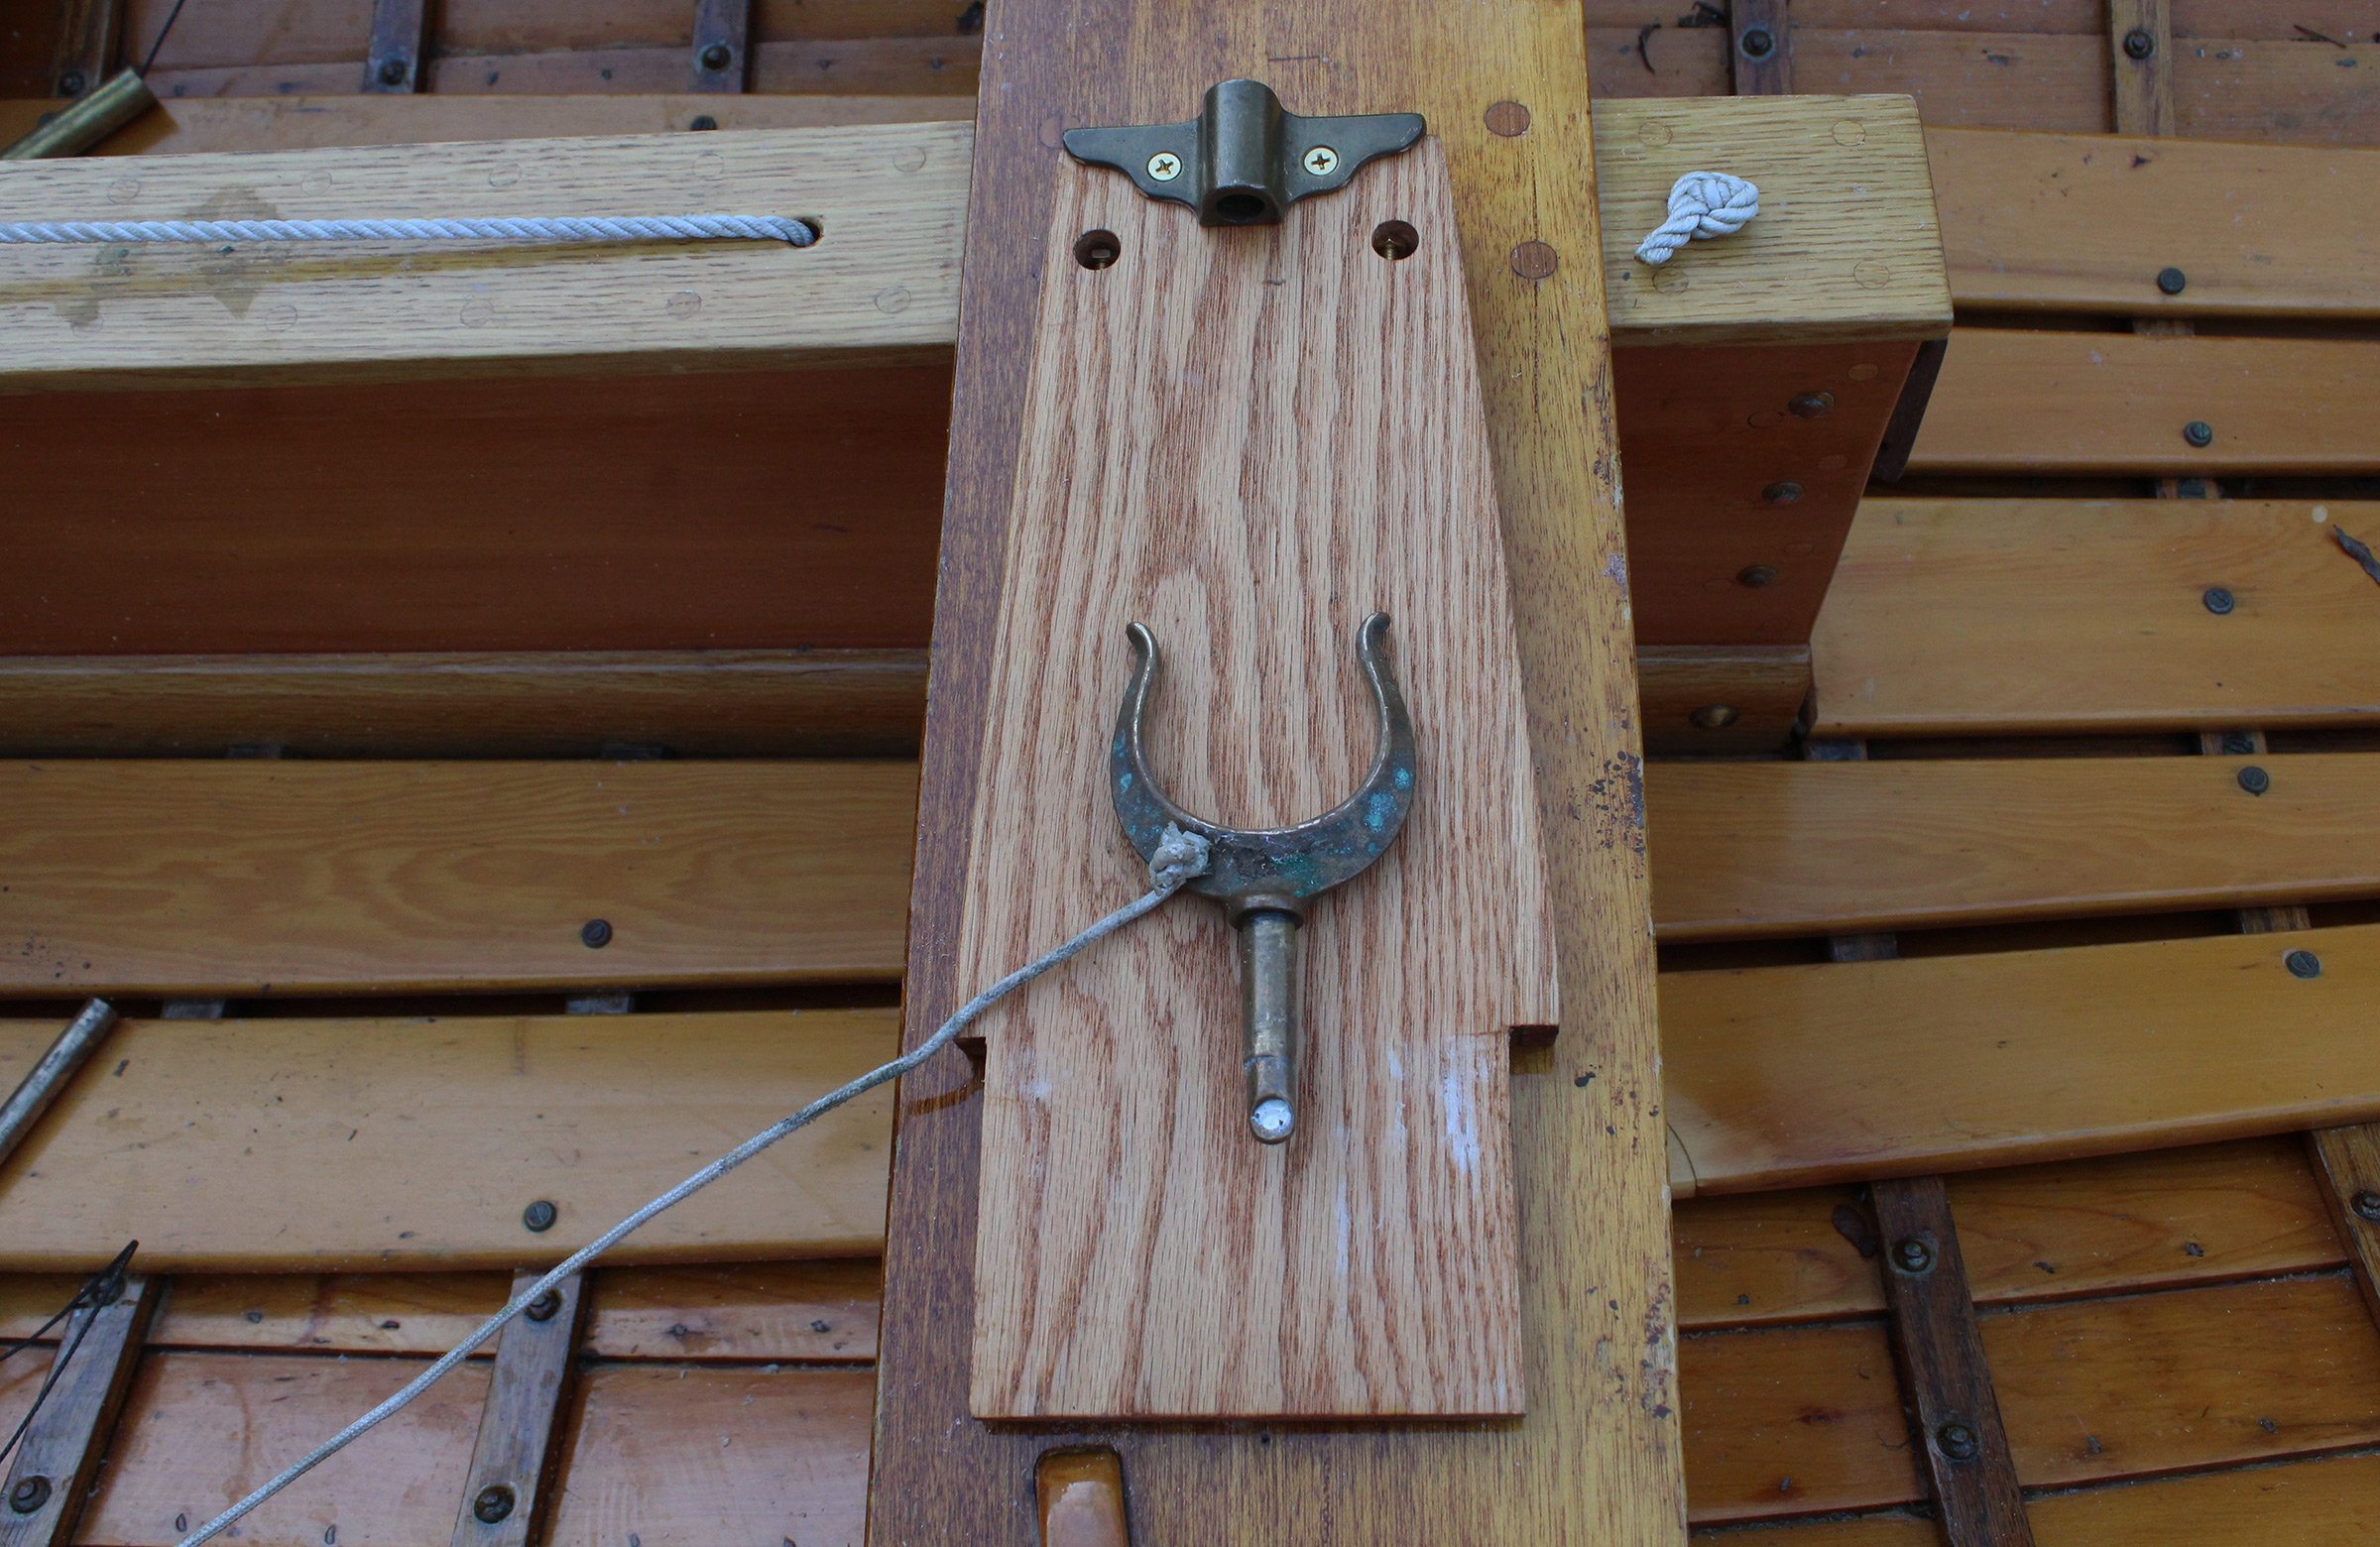
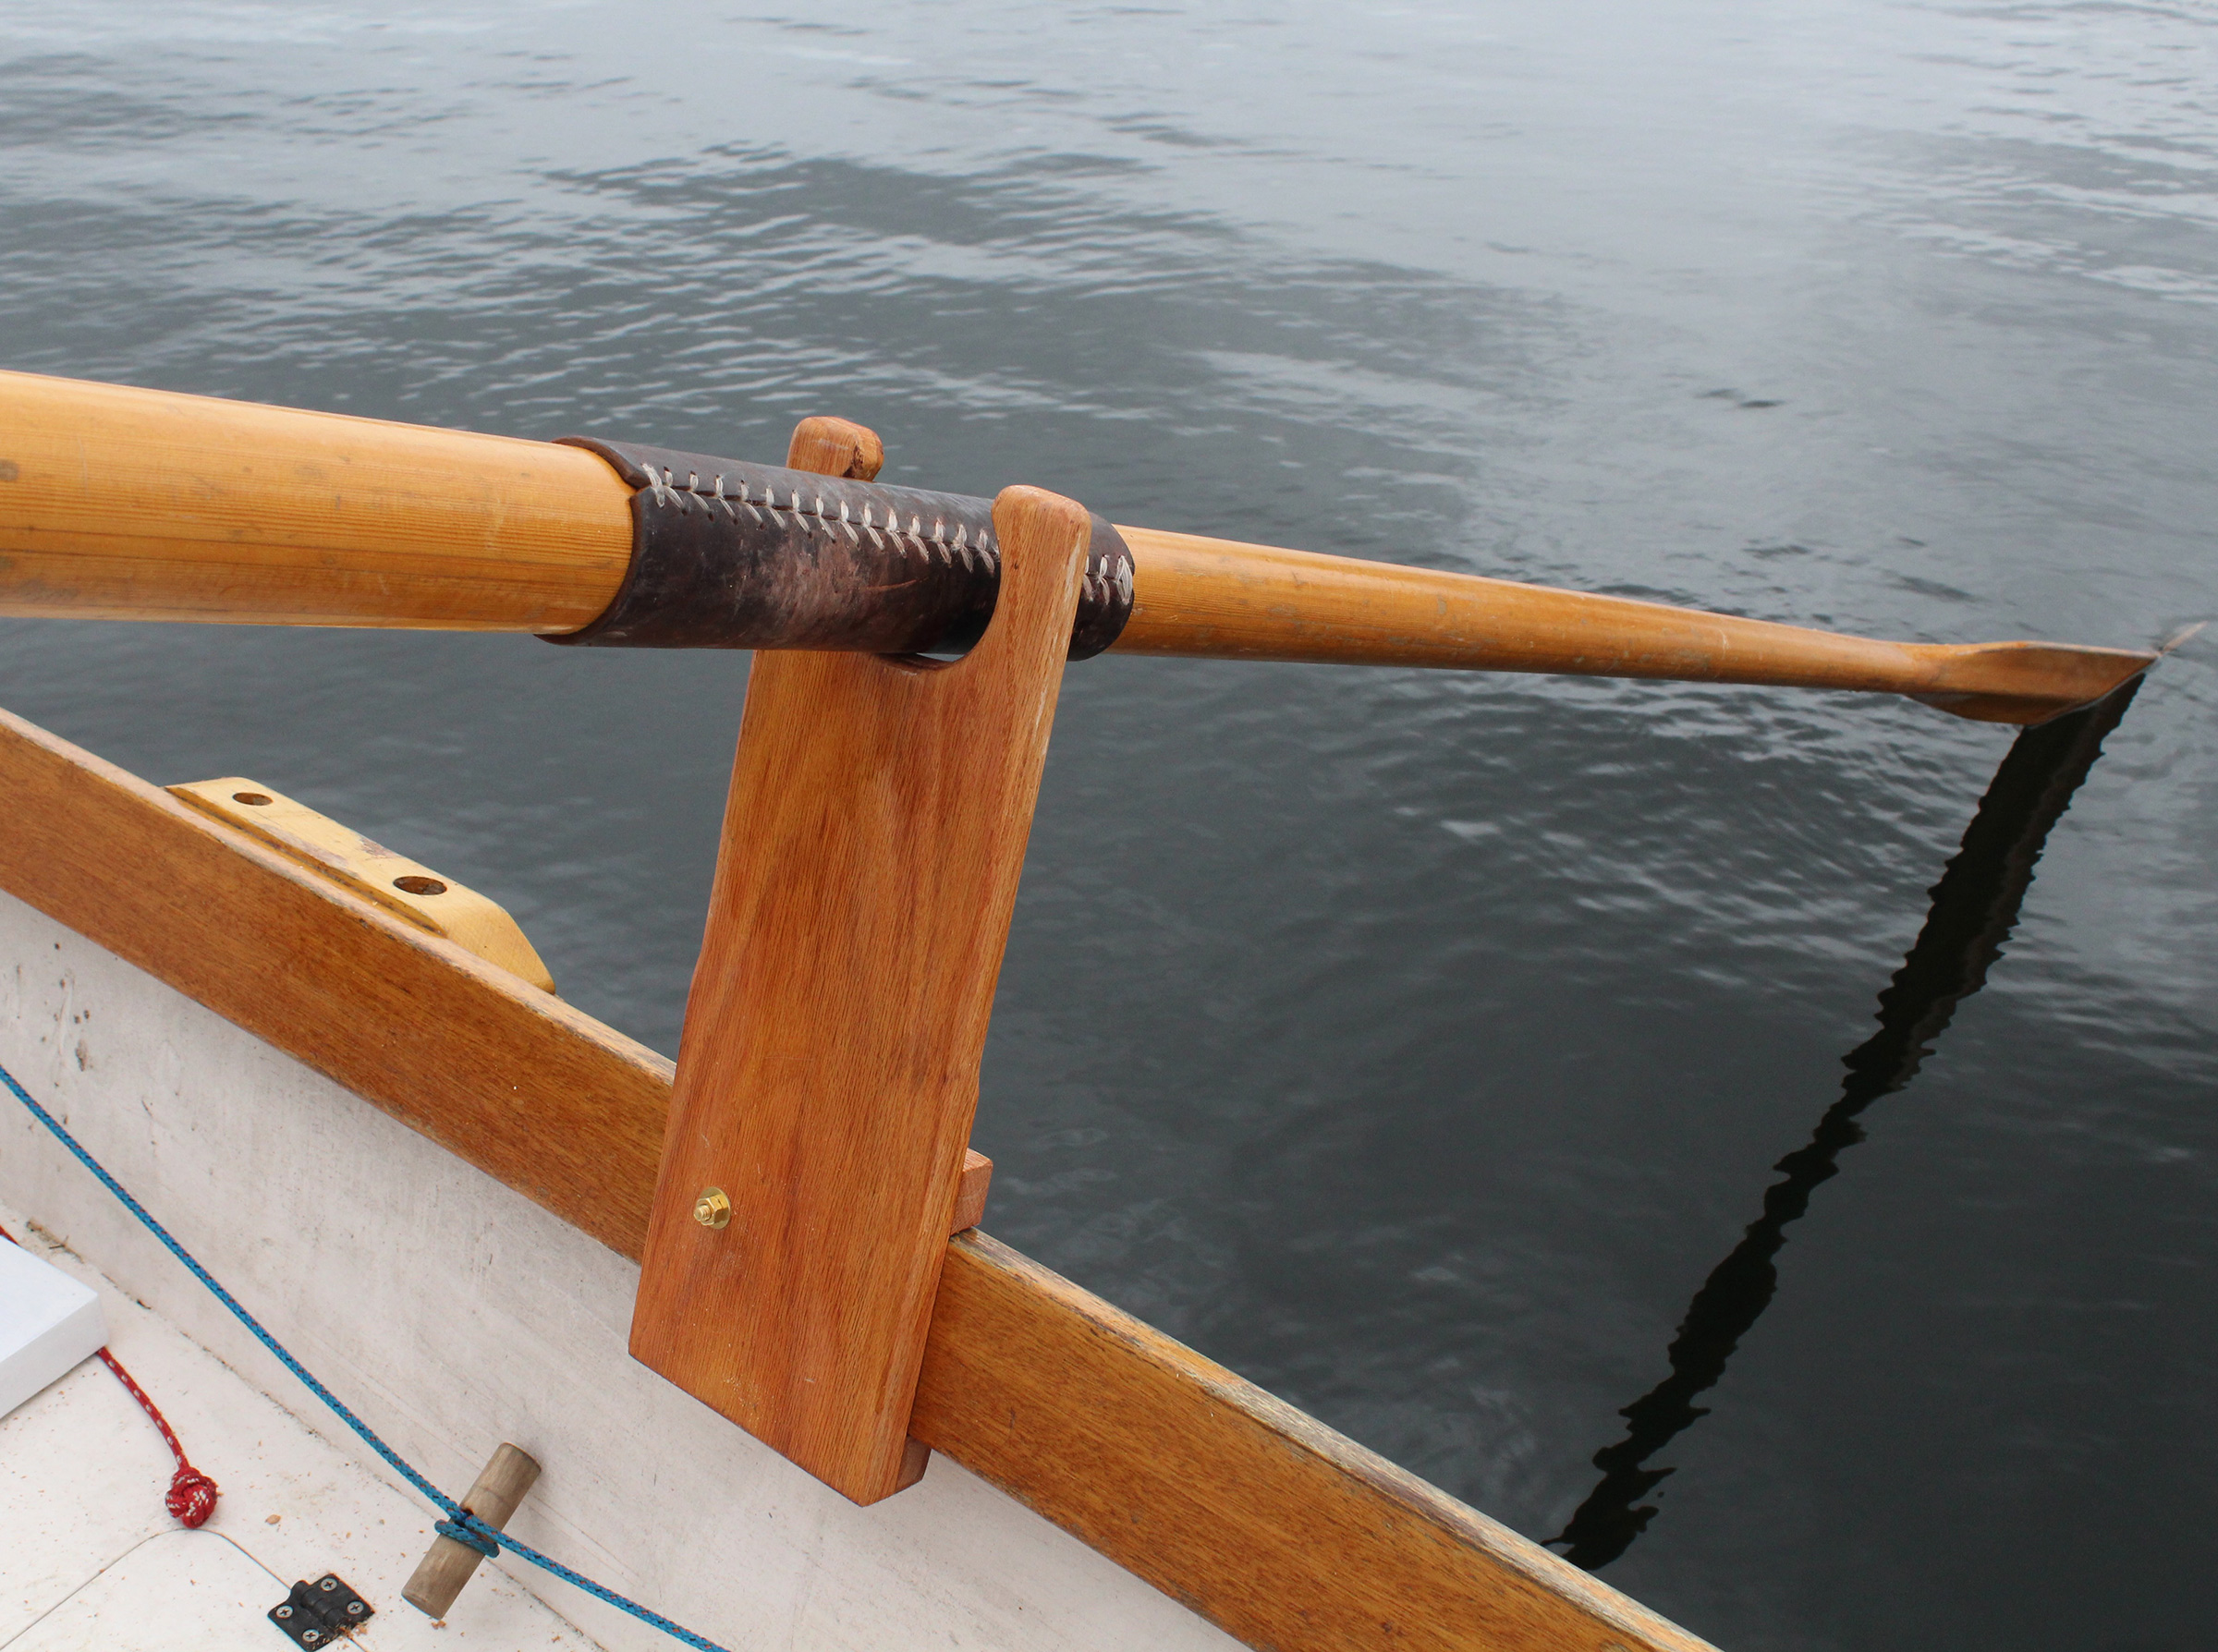
The two extended oarlocks on the left belong to the Ames peapod. The clearly different shapes suggest that they were designed by different companies. The tallest of the group is the Standing Oarlock Horn from Duck Trap Woodworking. It raises the oars 6” and like the Ames locks, it has a 3/4” shank. At right is a standard oarlock with a 1/2” shank.
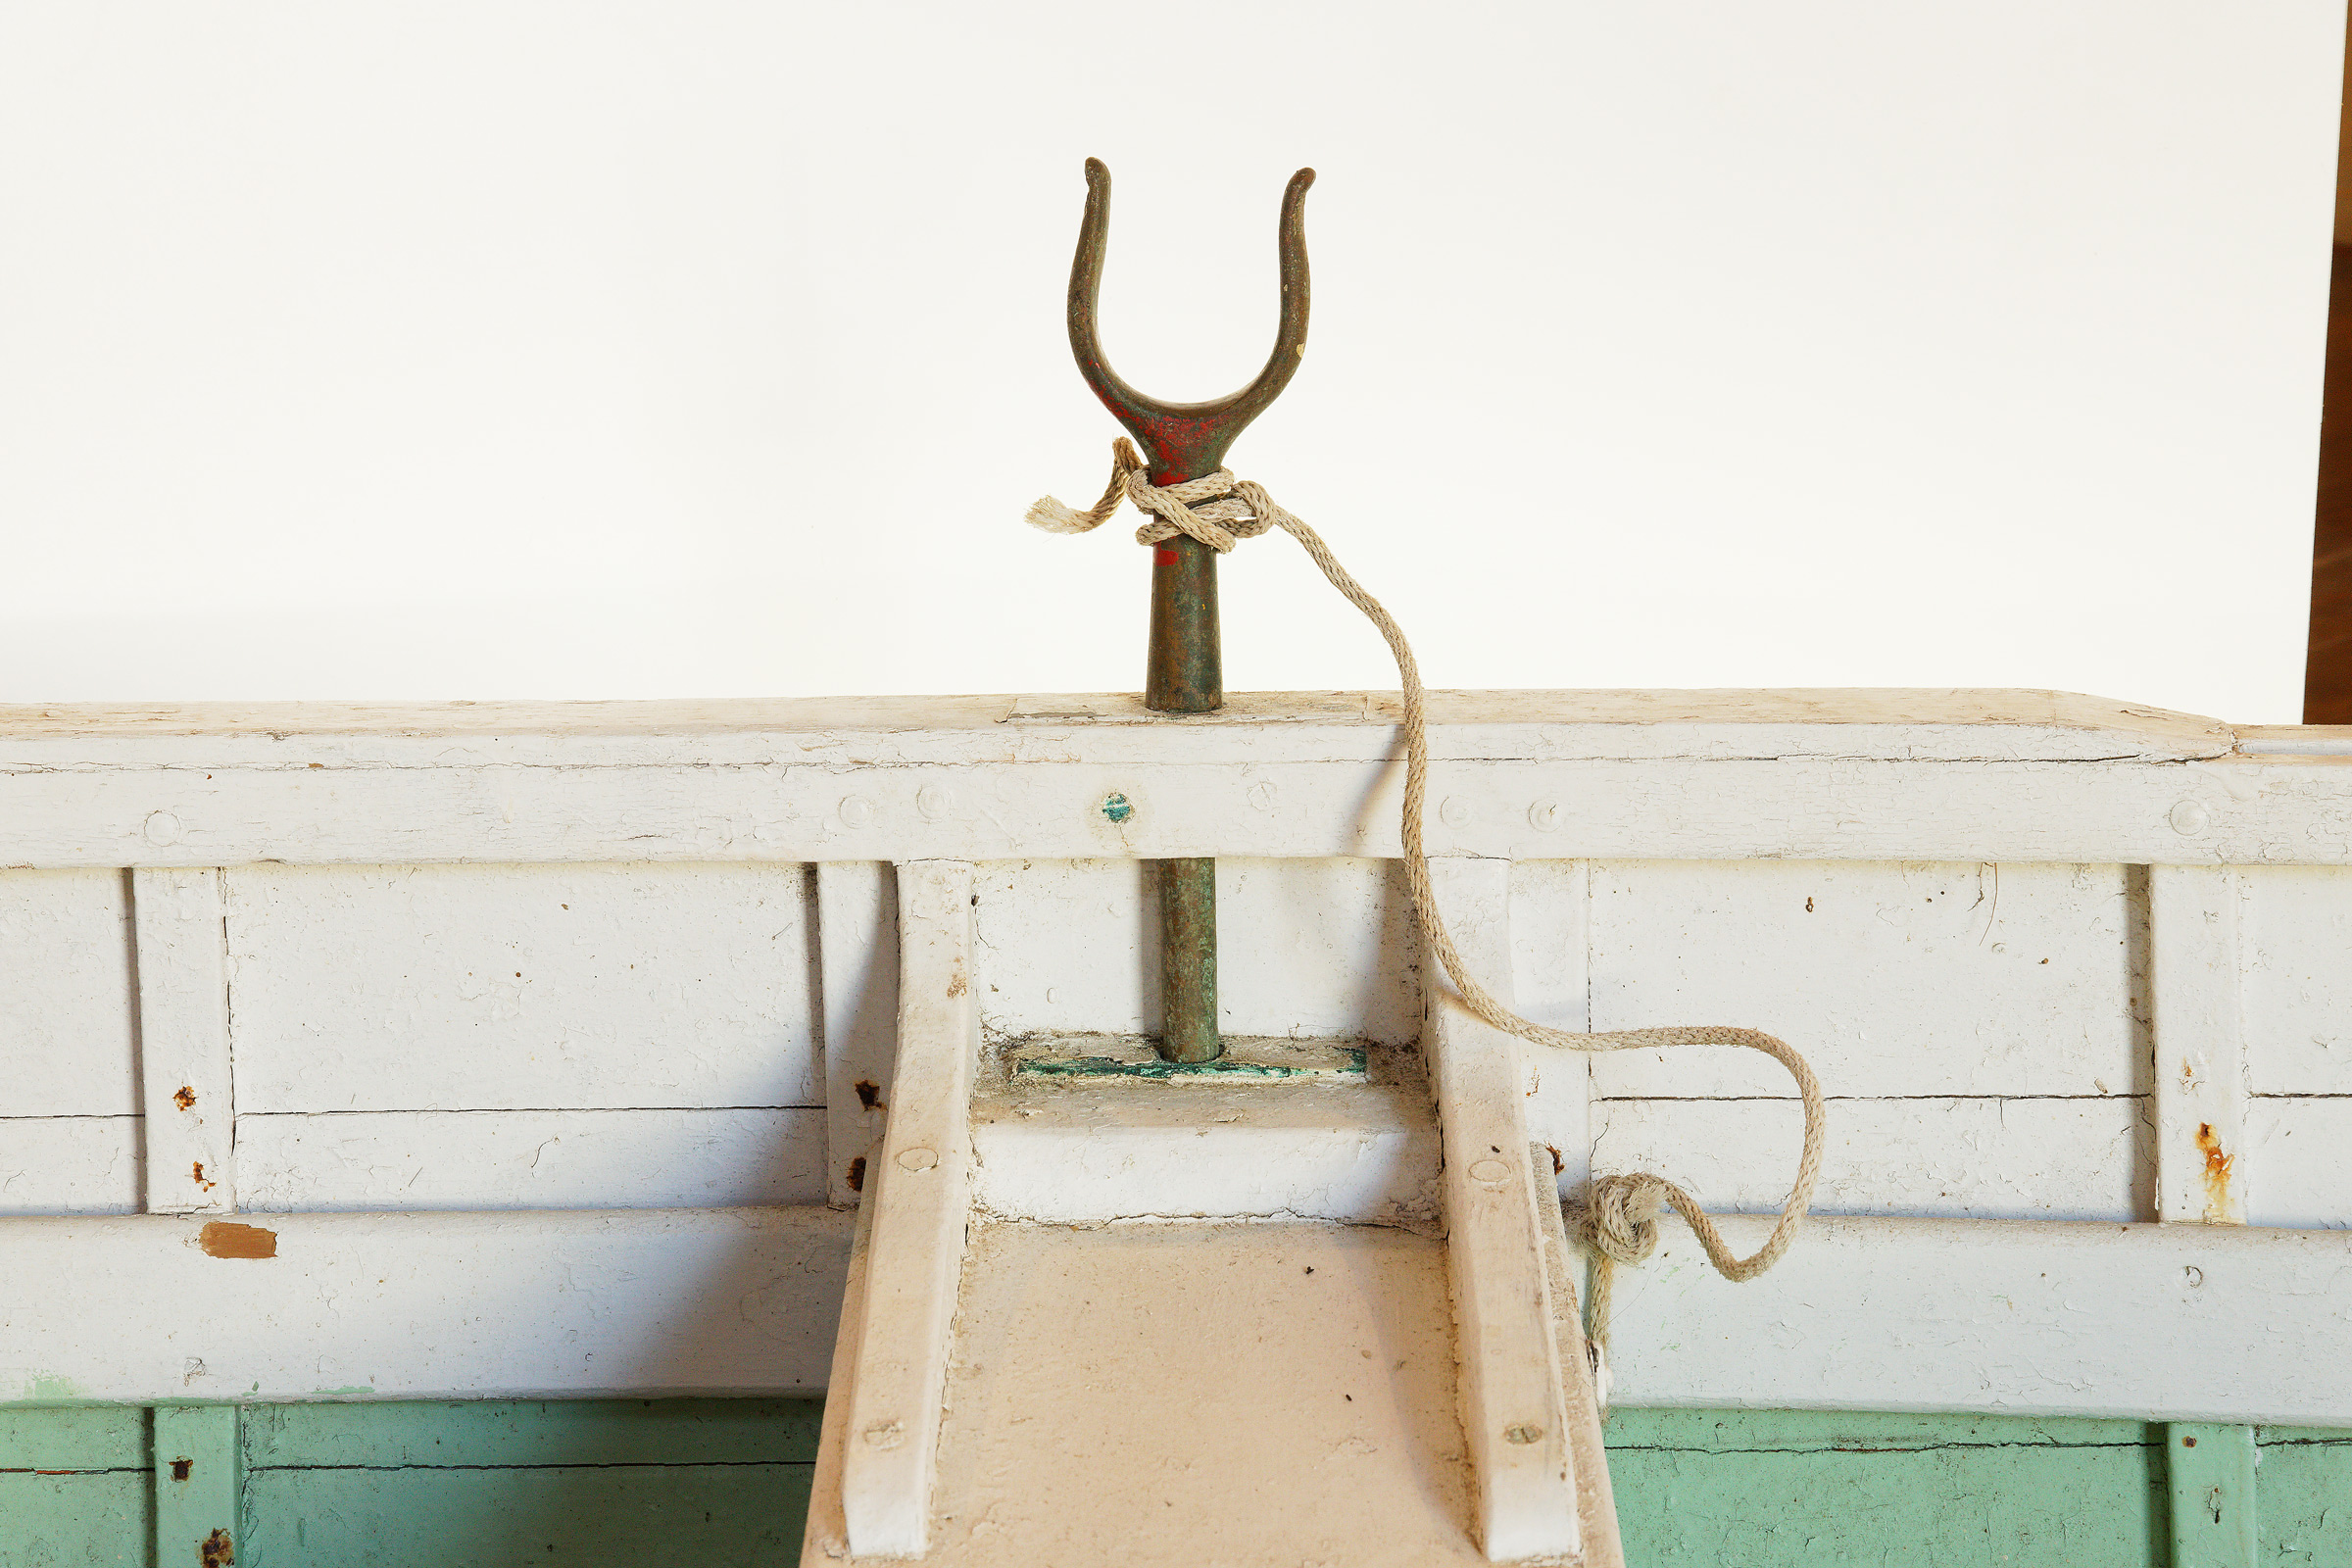
Among the peapods that David Cockey and I studied at Mystic Seaport Museum, Maine Maritime Museum, and Penobscot Marine Museum there were several set up for forward-facing, stand-up rowing. What looks to be the last of a long line of working peapods is at the Penobscot Marine Museum. It was built circa 1950 for Orren Ames of Matinicus Island and uses a type of oarlock with an extended shaft above the shoulder and a long shank below it. The oarlocks with the boat are not a matched pair and are evidently from different makers, suggesting that there must have been enough demand for more than one foundry and machine shop to make them. Ames had specified that the sockets for the oarlocks would be right over the central thwart. This position worked only for rowing while standing and facing forward; the boat can’t be rowed from a seated position while facing backward.The shank on each of Orren’s locks is turned to a ¾″ diameter and is 6″ long from the bottom end to the shoulder. The shank slips through a ¾″ hole in a metal plate on top of the rail, and its end is captured by a “step” made of a block with another metal plate with a ¾″ hole. The locks raise the oars 4” above the shoulder. Elevated oarlocks like these are still available from Walt Simmons of Ducktrap Woodworking in Lincolnville, Maine. They also have a ¾″-diameter, 5 ¼″-long shank and provide a 6” lift above the shoulder.
 David Cockey
The Ames peapod has its only set of oarlocks positioned over the center thwart and could only be rowed standing up. The extended locks raise the oars 4” above the rail.
Simple, do-it-yourself elevated locks can be fabricated from pipe with a 1/2″ inner diameter that can take an oarlock with a ½″ shank. A ½″ rod is inserted into the bottom end of the pipe to serve as the extension’s shank. These pipe-and-rod extensions might not be as sturdy as a one-piece cast lock, but you could use iron pipe for the extension if you keep it painted. All tubes and pipes—whether copper, brass, or iron—available from a hardware store will have an inside diameter bigger than an oarlock, so you’ll need to use something like G/flex thickened epoxy to hold them together (unless you can drill and rivet them, which is what was done on the old ones). These extensions slide through an oarlock socket or through a plate on the gunwale; either way, there should be a “step” to capture the rod’s bottom end. The location of the step can be on a thwart on a boat with nearly vertical sides, otherwise it may be determined by the point at which the rod makes contact with the planking. A bronze bushing set in the wooden base can prevent the base from wearing away.
 Ben Fuller
As a test of this extension, I clamped the 1/2″ bronze bar horizontally in a vice with 3 ½″ jaws then slid a 6″ piece of 1/2″ (nominal) copper tube onto the shaft. I had cut the eye off an oarlock which left me with 1-1/2″ bearing, so I had 4-1/2″ of shaft in the pipe. The vice jaws are 3-1/2″. With 45 pounds of lead hanging on the recurved area of the oarlock horns, I put a straight edge on the tube and could see no deflection. With the bit of slop in the system, I would have seen point loading at the junction of shaft and lock. Potting both shaft and lock in G/flex would take out the point loading. Sitting on my erg with a seat fixed and pulling with one hand, I peak at about 50 lbs with an average of 35 lbs per stroke while pulling as hard as I can, much harder than I would normally pull.
With the extensions in the oarlock sockets, you can do a trial light row to see if you like the fore-and-aft placement. You may decide you want to have a socket a little farther forward, perhaps over the seat like many of the lobstermen have them, to put the boat in better trim. Once you decide, you can add a new set of oarlock sockets.
 David Cockey
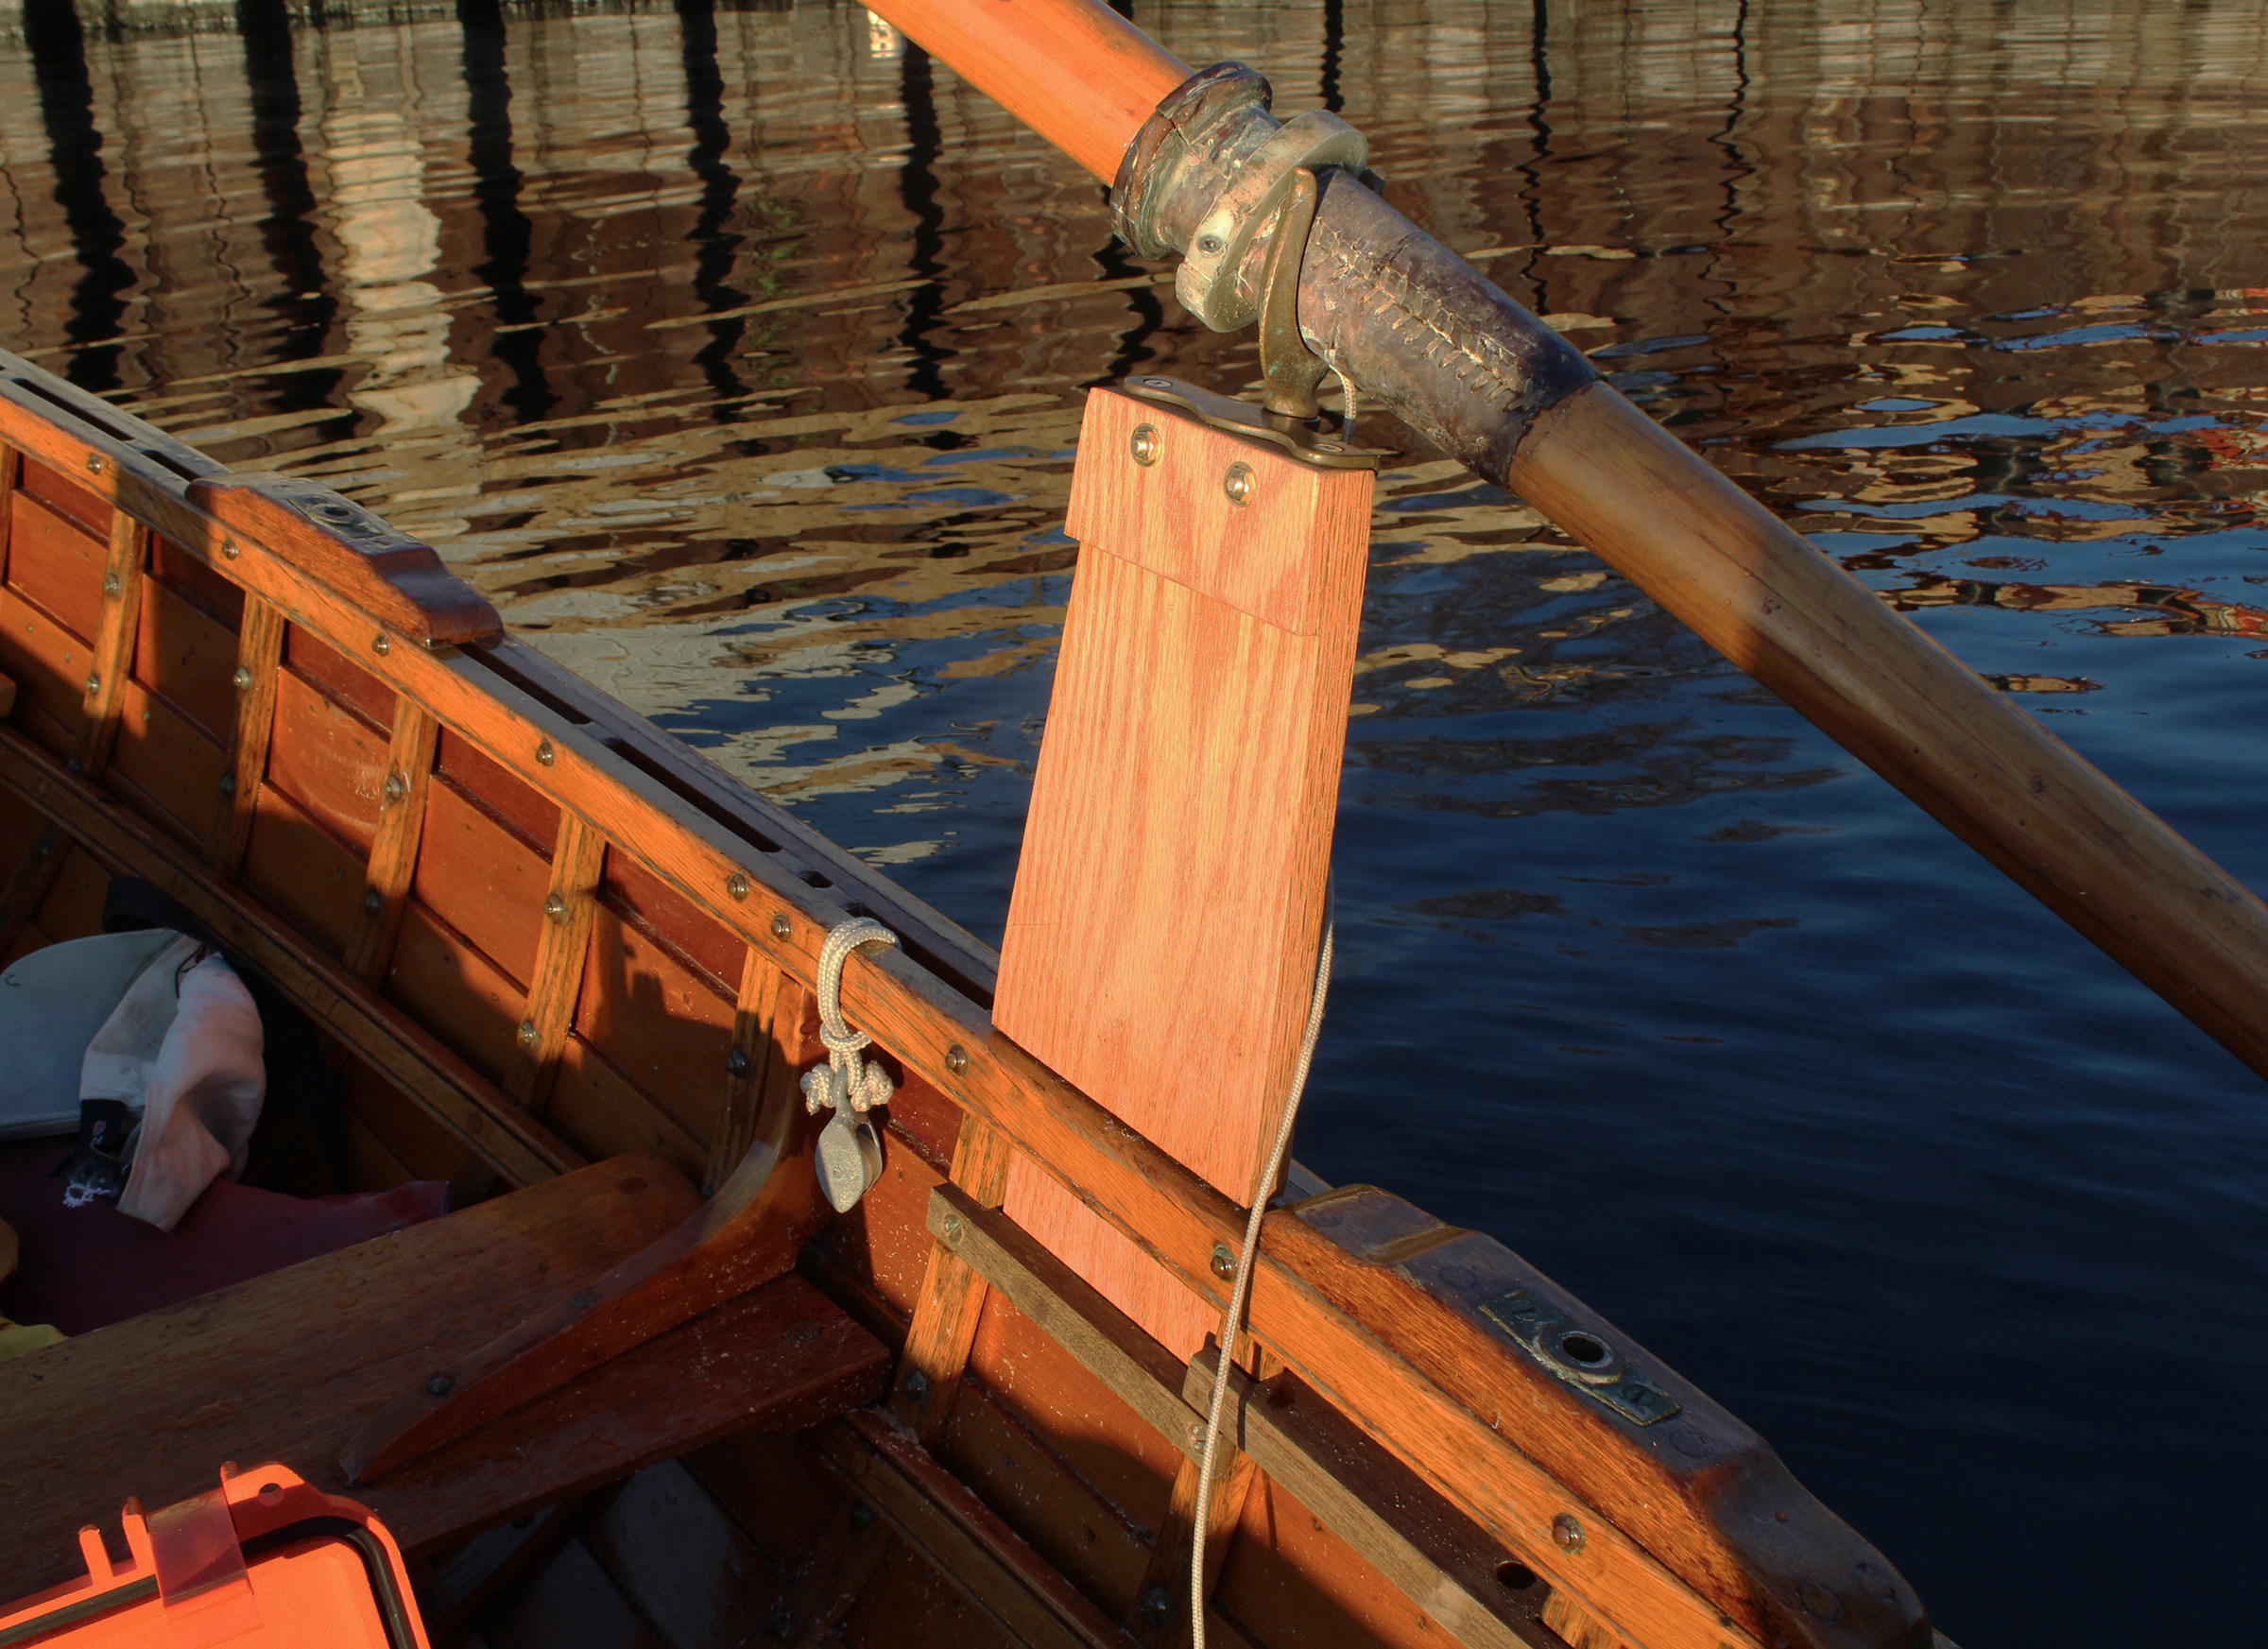
The wooden extension is fitted with a top-mounted socket and a standard oarlock. The “tenon” at its bottom slips between frames and between the inwale and sheer plank. It is curved to follow the sweep of the frames and clear the planking lap. When the tenon is fully inserted it tucks behind the riser and its shoulder rests on the rail.
Wooden extensions are also common. These usually need an inwale separated from the sheerstrake by frames or spacers to create a slot. The extension’s “tenon” is sized to fit in the slot and may be slightly curved to match the angle of the planking. The bottom can rest on a thwart, but some are shouldered so that they rest on frame ends and the inwale.
 David Cockey
The wooden extension here is made for a side-mounted socket. Its tenon is most likely straight and follows the sheer plank as far as the lap with the next plank. A wooden cleat on the thwart keeps the tenon tight to the sheer plank.
The extensions, often made of oak, can be made wide enough at the top to take side-mounted sockets, or narrower to take top-mounted sockets. The height above the rail can vary; 8″ is the tallest we’ve seen in old peapods, but Maynard Bray, WoodenBoat’s technical editor, made a pair that has an extension 12″ above the rail of his peapod. He uses the same 7-1/2′ oars that he uses while sitting, but would prefer they were 1′ longer.
The choice of extensions, their height and mounting, is going to vary depending on your boat. The easiest modification is a fabricated metal tube and rod or cast lock system. A wooden extension could be easy to make for a boat with open gunwales, but a boat without slots between the inwale and sheer planks would need at least a wooden “partner” to hold the extension.
The oars normally used for the boat can also work with extended locks; you may have to pull the handles farther inboard, and that may pull the leathers away from the locks. If you have other oars, a pair 6″ longer may be a better match for stand-up rowing. Many of today’s rowing and sailing boats have high initial stability and are good candidates for stand-up push rowing, especially when the wind is light. You may enjoy the better view you get with your head high and looking in the direction you’re going. ![]()
Ben Fuller, curator of the Penobscot Marine Museum in Searsport, Maine, has been messing about in small boats for a very long time. He is owned by a dozen or more boats ranging from an International Canoe to a faering.
Editor’s Notes
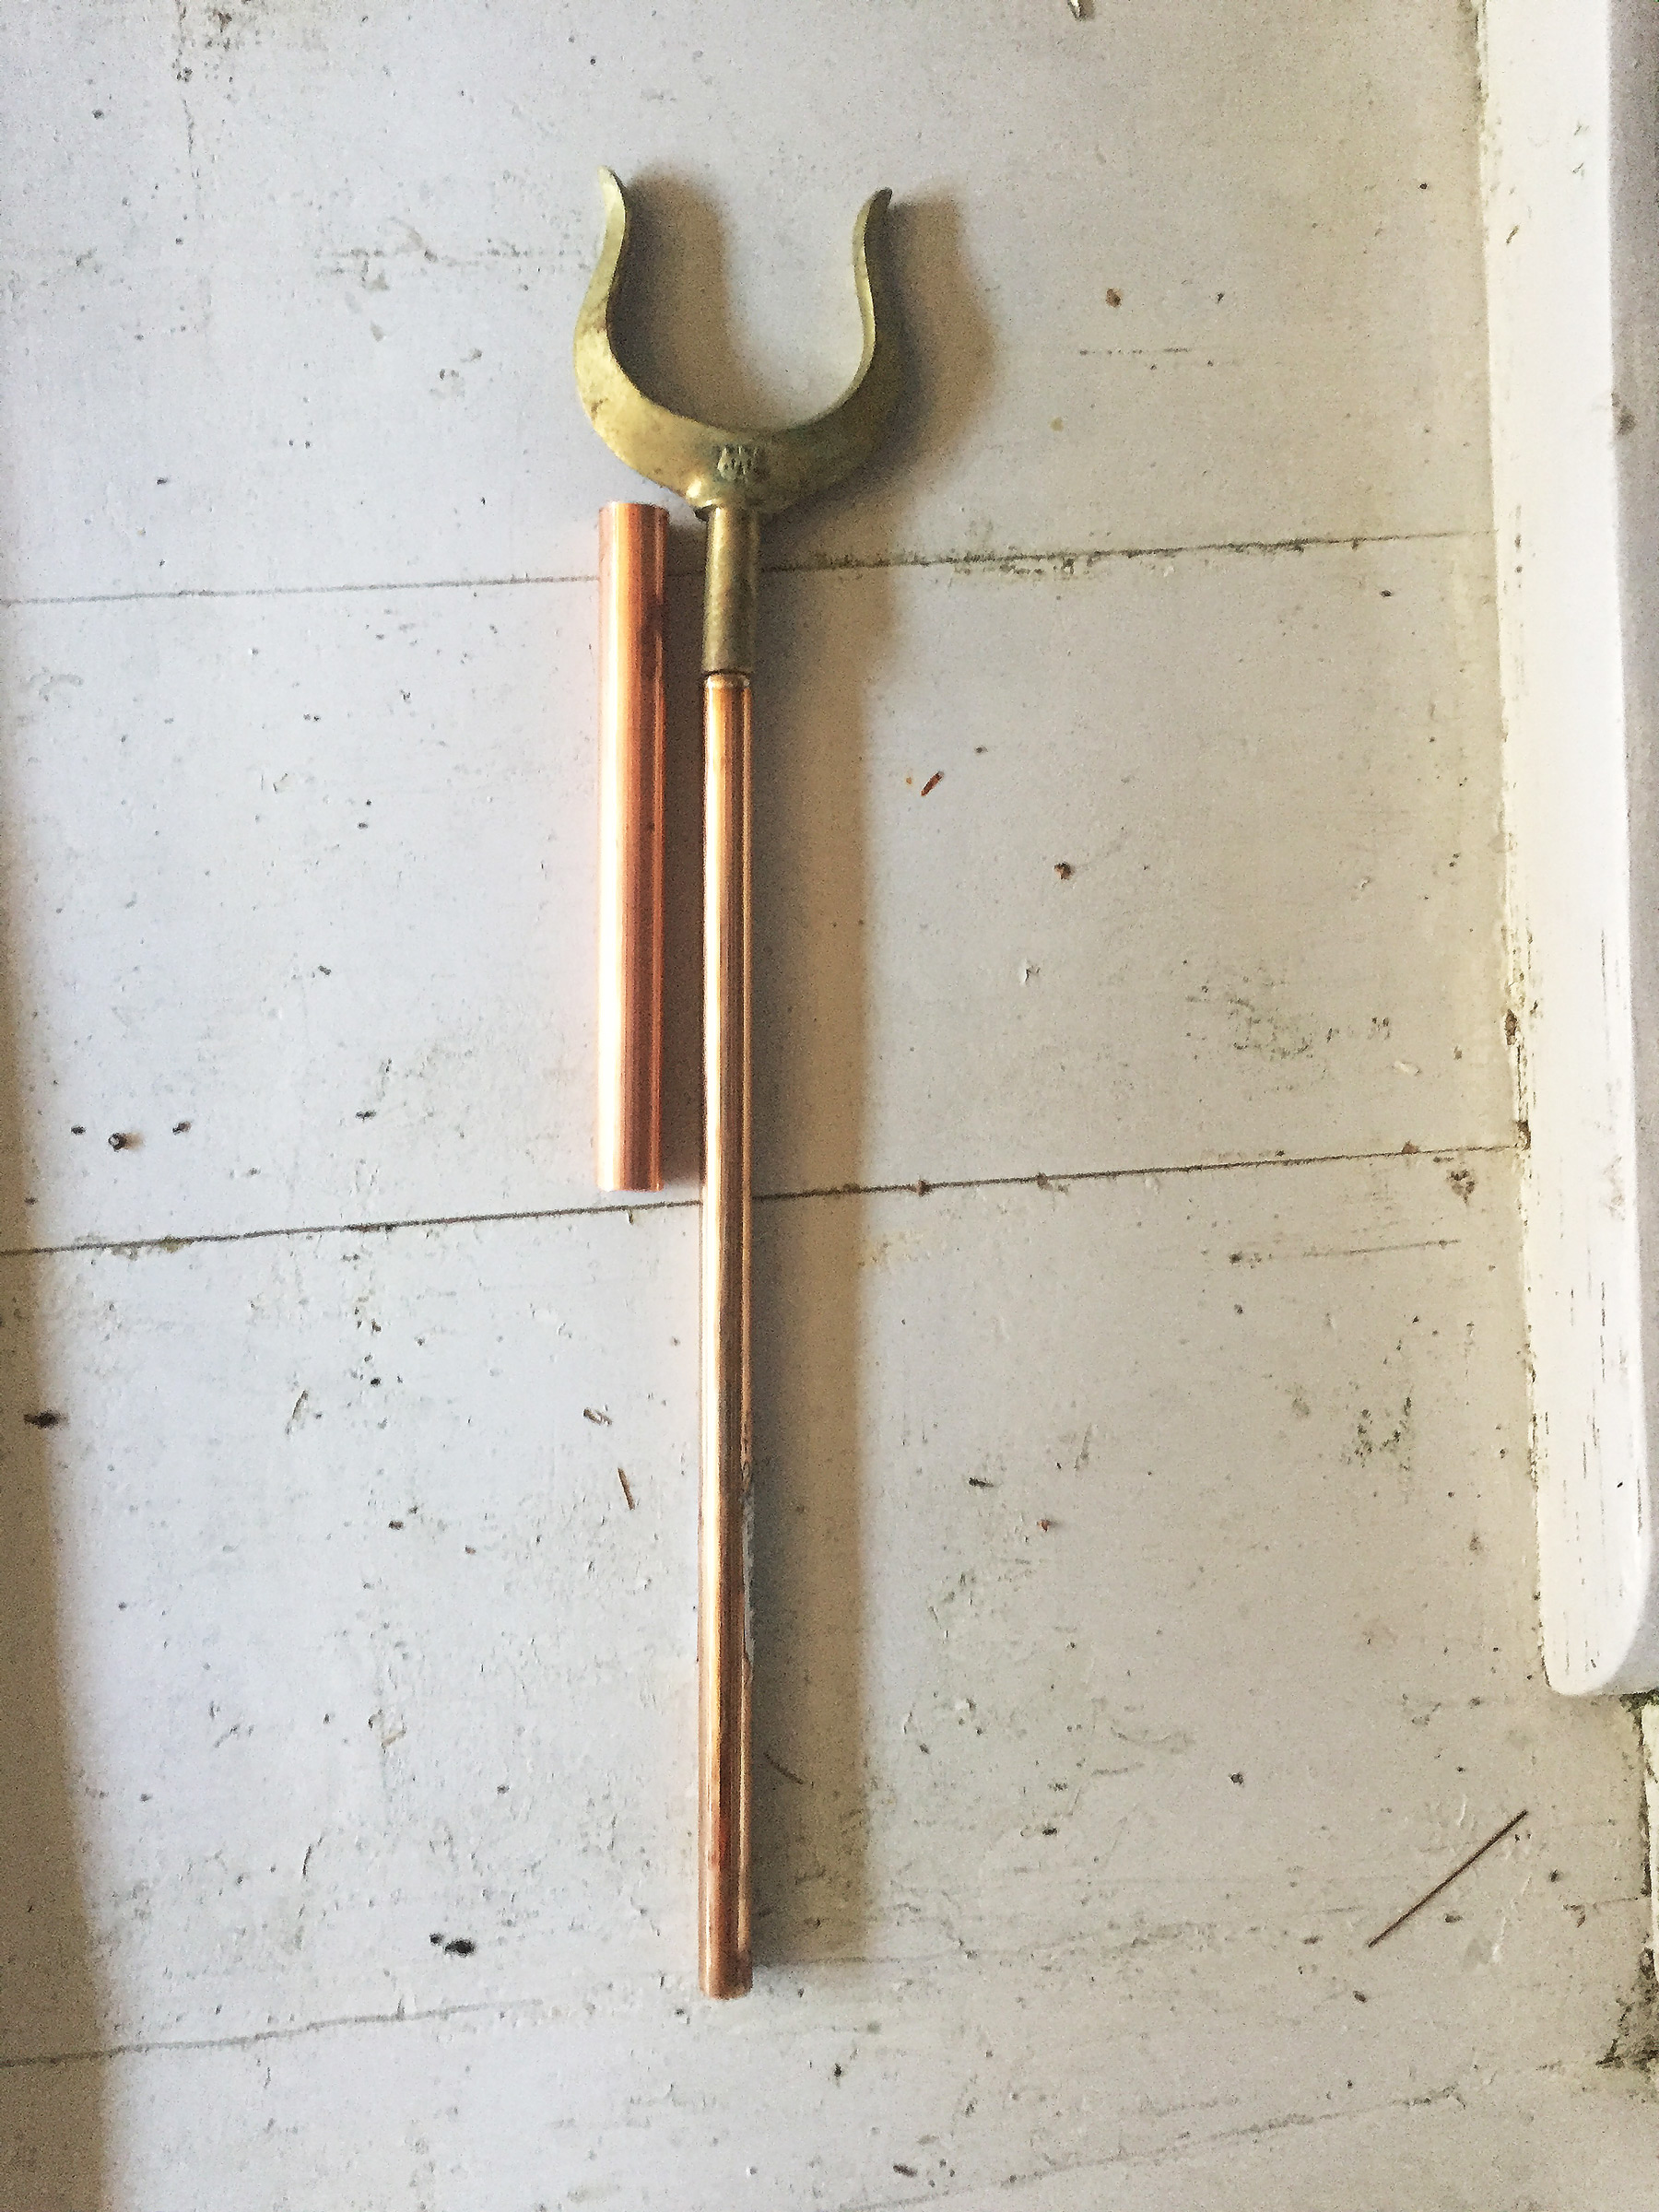
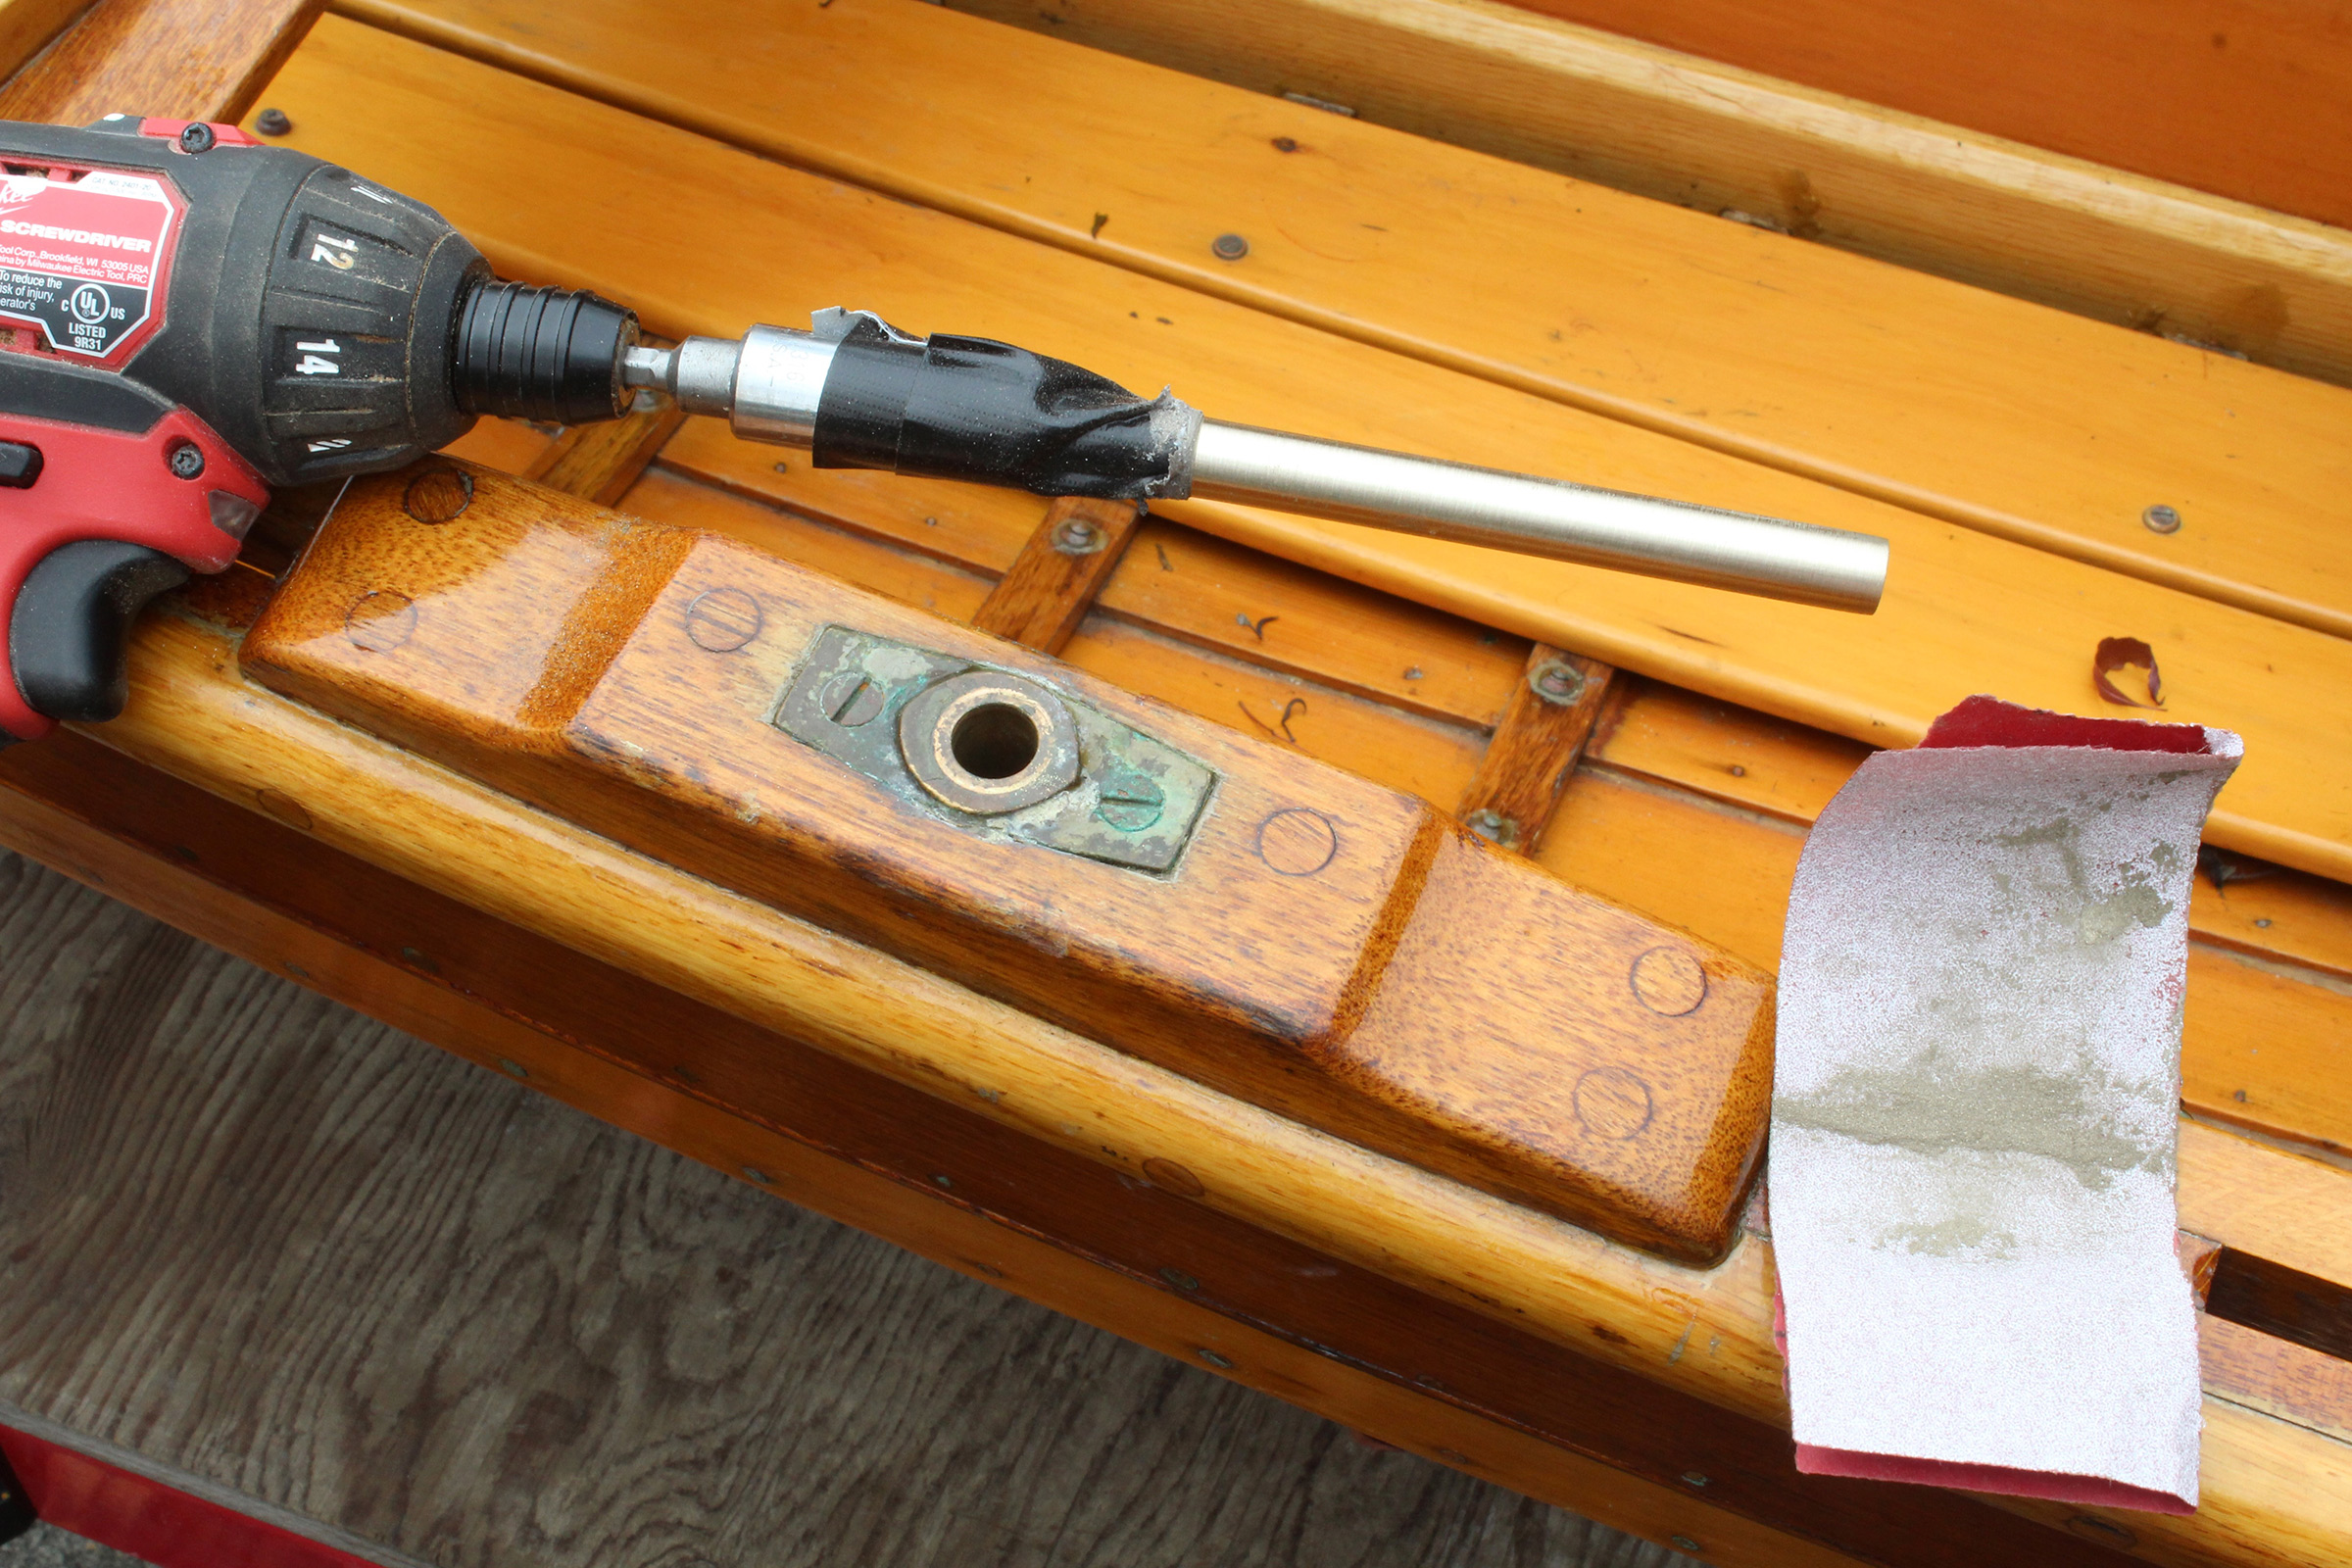
Eager to follow Ben’s lead and do some stand-up rowing, I made three sets of extensions, two for my 14′ New York Whitehall and one for my cruising garvey.
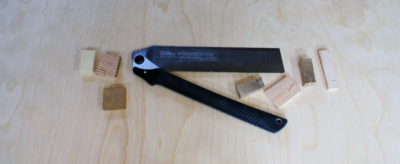
For the metal extensions to fit in the existing oarlocks, I found a good match with a 0.5″ bronze round bar and a brass tube with a 0.51″ inside diameter. I later found a 0.5″ brass round bar that would have cost a little bit less and should have worked, as well. The tube’s inside diameter turned out to be too small for the 1/2″ shanks of my locks, but that was easily remedied by drilling out a couple of inches of one end with a 1/2″ drill bit. The drill bit should have been a slip fit, but it shaved just enough from the inside to provide the right fit for the oarlock shank. The bronze round bar was oversized for the oarlock socket. I didn’t want to drill out the socket and make a sloppy fit for normal rowing, so I needed to trim one end of the rod to fit. A 1/2″ socket fitted to a hex-bit adapter and taped to the rod with Gorilla tape provided a way to spin the rod with a drill. A file was ineffective at removing metal, but a piece of 120-grit aluminum oxide sandpaper squeezed around the spinning rod worked very well. I did the trimming at the boat, and tested the rod frequently in the oarlock socket for fit. I left 2″ of the rod’s end in the socket untouched.
 Photographs by Christopher Cunningham
 To trim the 1⁄2″ bronze rod to fit the socket, I spun the rod with a drill and a 1⁄2″ socket. A folded half sheet of 120-grit aluminum-oxide sandpaper was effective in removing metal; you can see the bronze powder in the sandpaper.
All that was left was to join the rod and the tube. The specified dimensions should have made a slip fit, but the rod was too large for the tube. I put the rod in the freezer for a half hour and then heated the tube in boiling water in a stainless-steel cake pan set on the stove top. The cold shrank the rod while the heat expanded the tube and the changes were just enough to get a tight slip fit. I was ready with a hammer and a block of hardwood to protect the kitchen floor. I acted quickly and pounded the 2″ of untrimmed rod into the undrilled end of the tube. It took just a few seconds for the two pieces to lock together and, once they were both the same temperature, they were as good as welded.
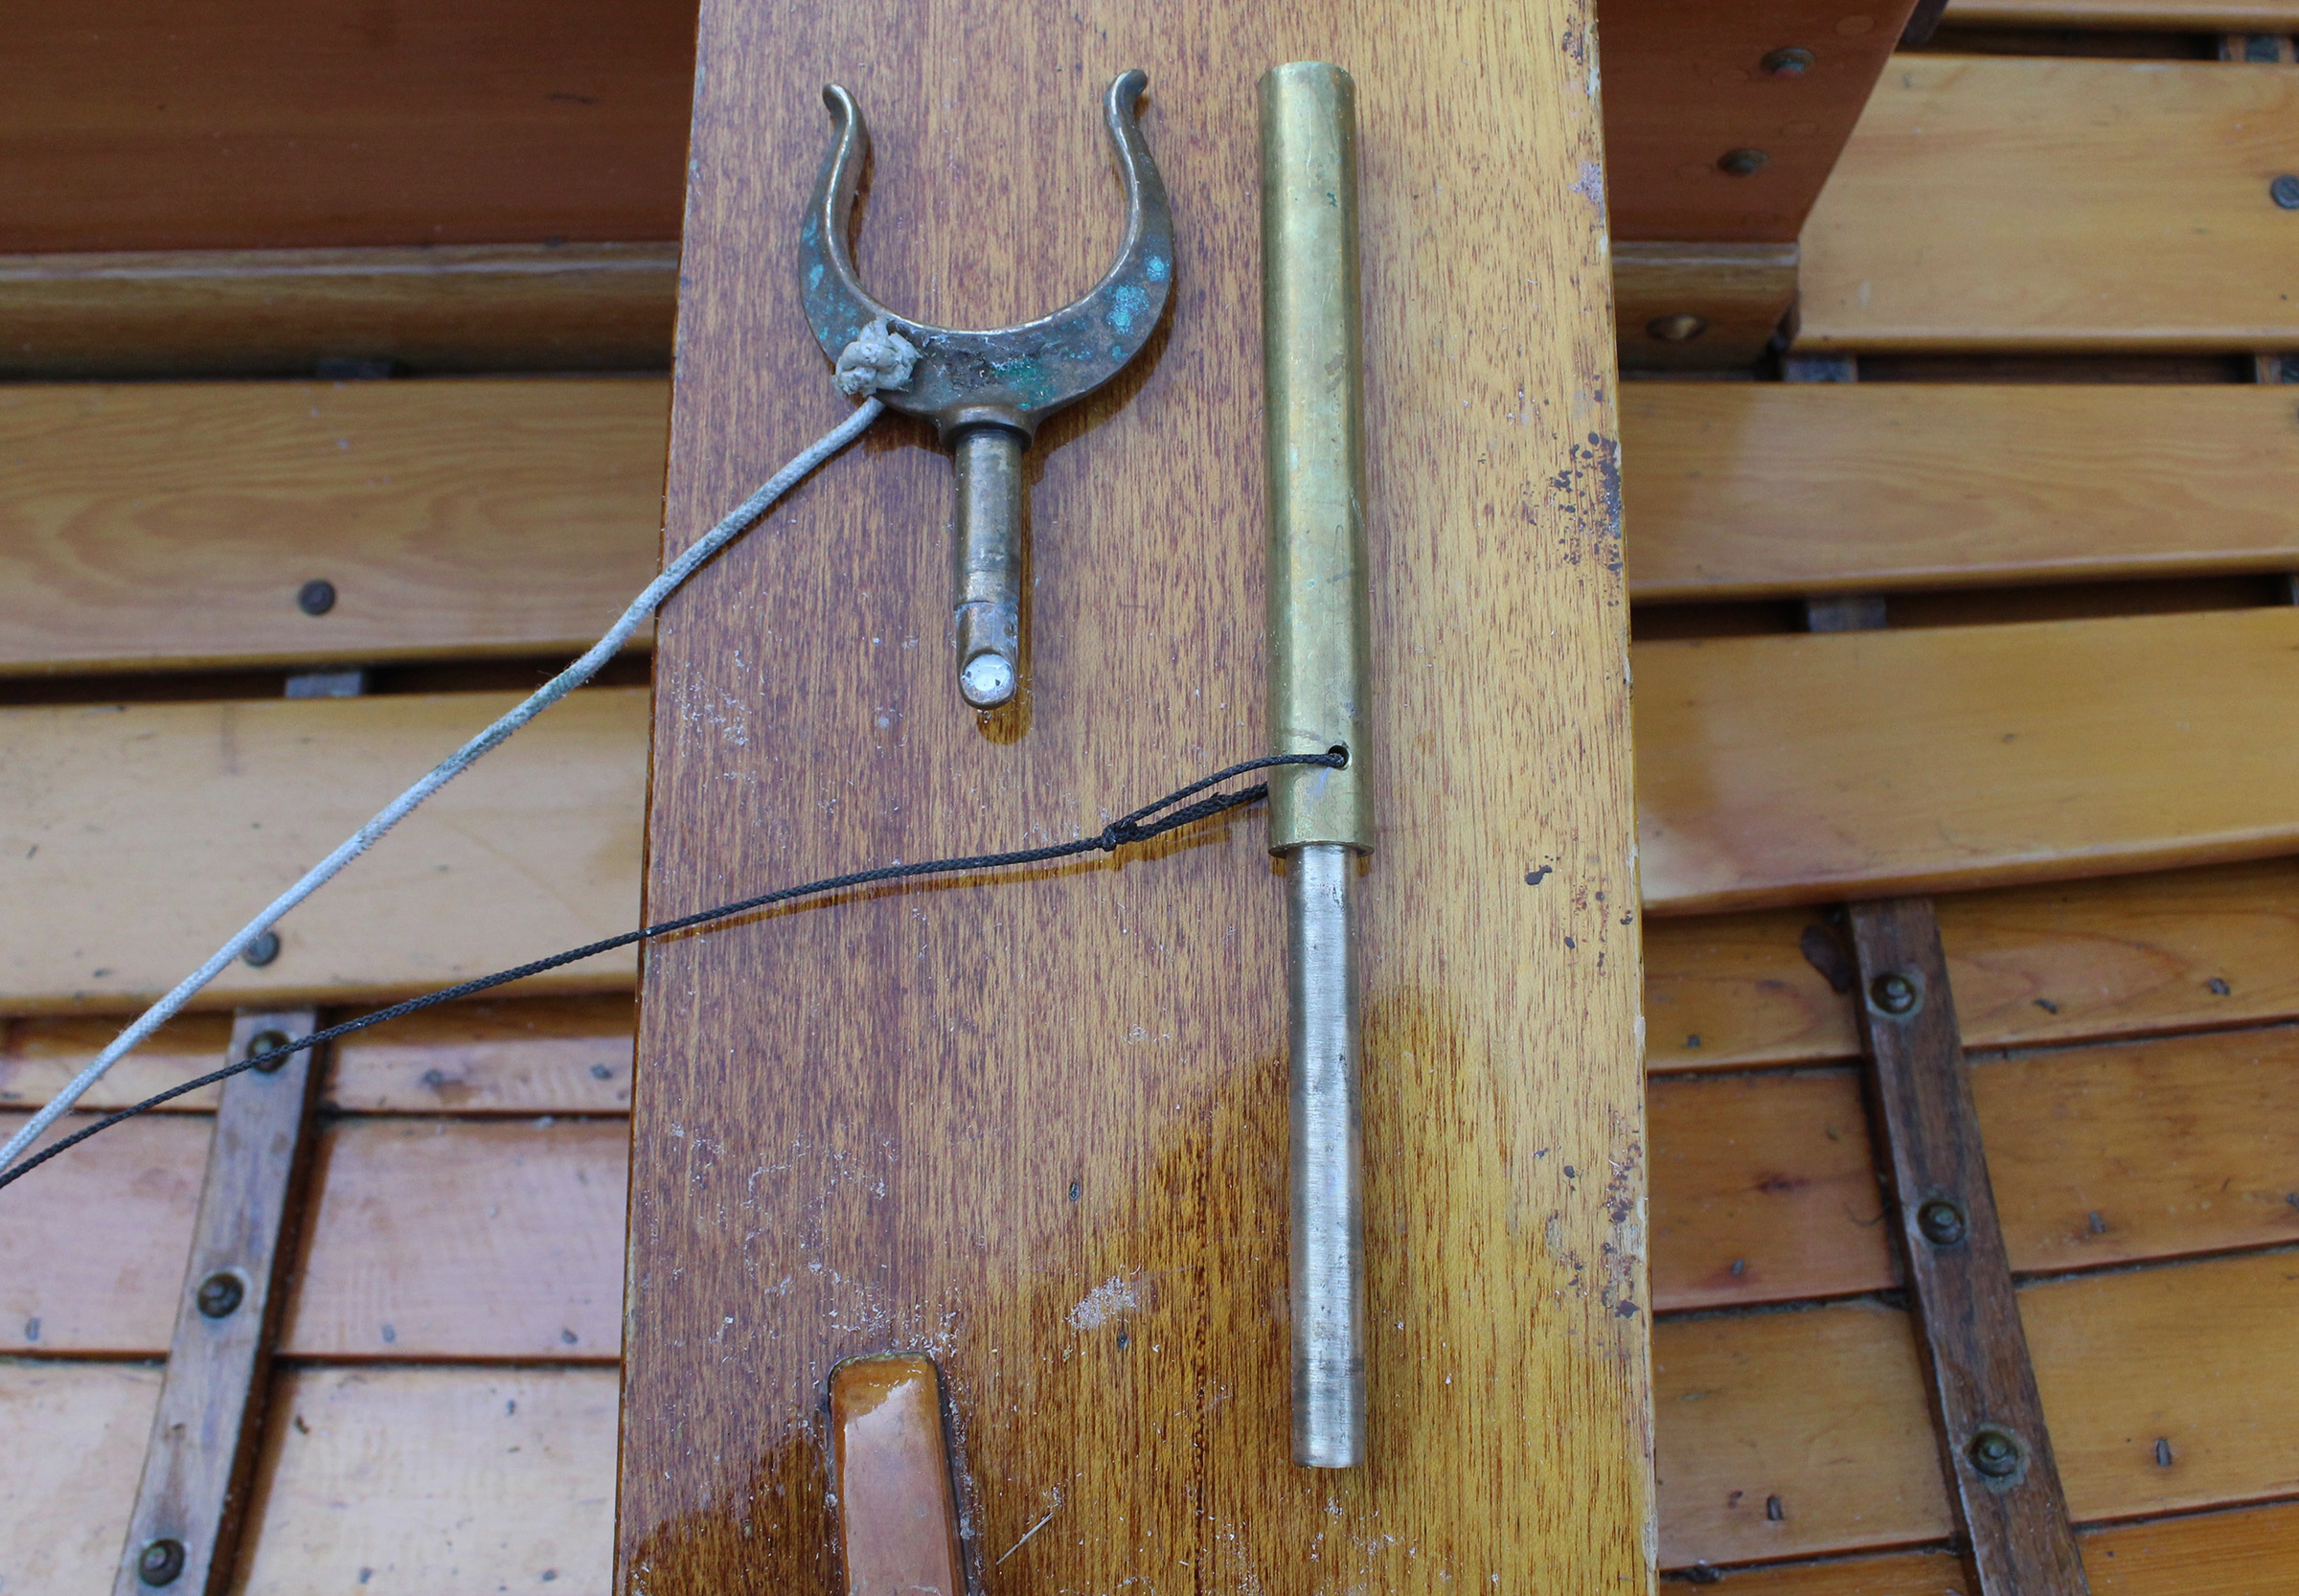
A hole drilled through the extension provides an attachment point for a lanyard.
For lanyards to tether them to the boat, I drilled a hole through the new extensions at the joins. I fixed a piece of ipe to two steam-bent frames below the oarlock socket and drilled a 1″ hole in it to accept the bottom end of the shank.
I drilled a small hole in the oarlock for a lanyard. The cleat at the bottom of the shank is screwed to two frames and is shaped to hold the tenon against the sheer plank.
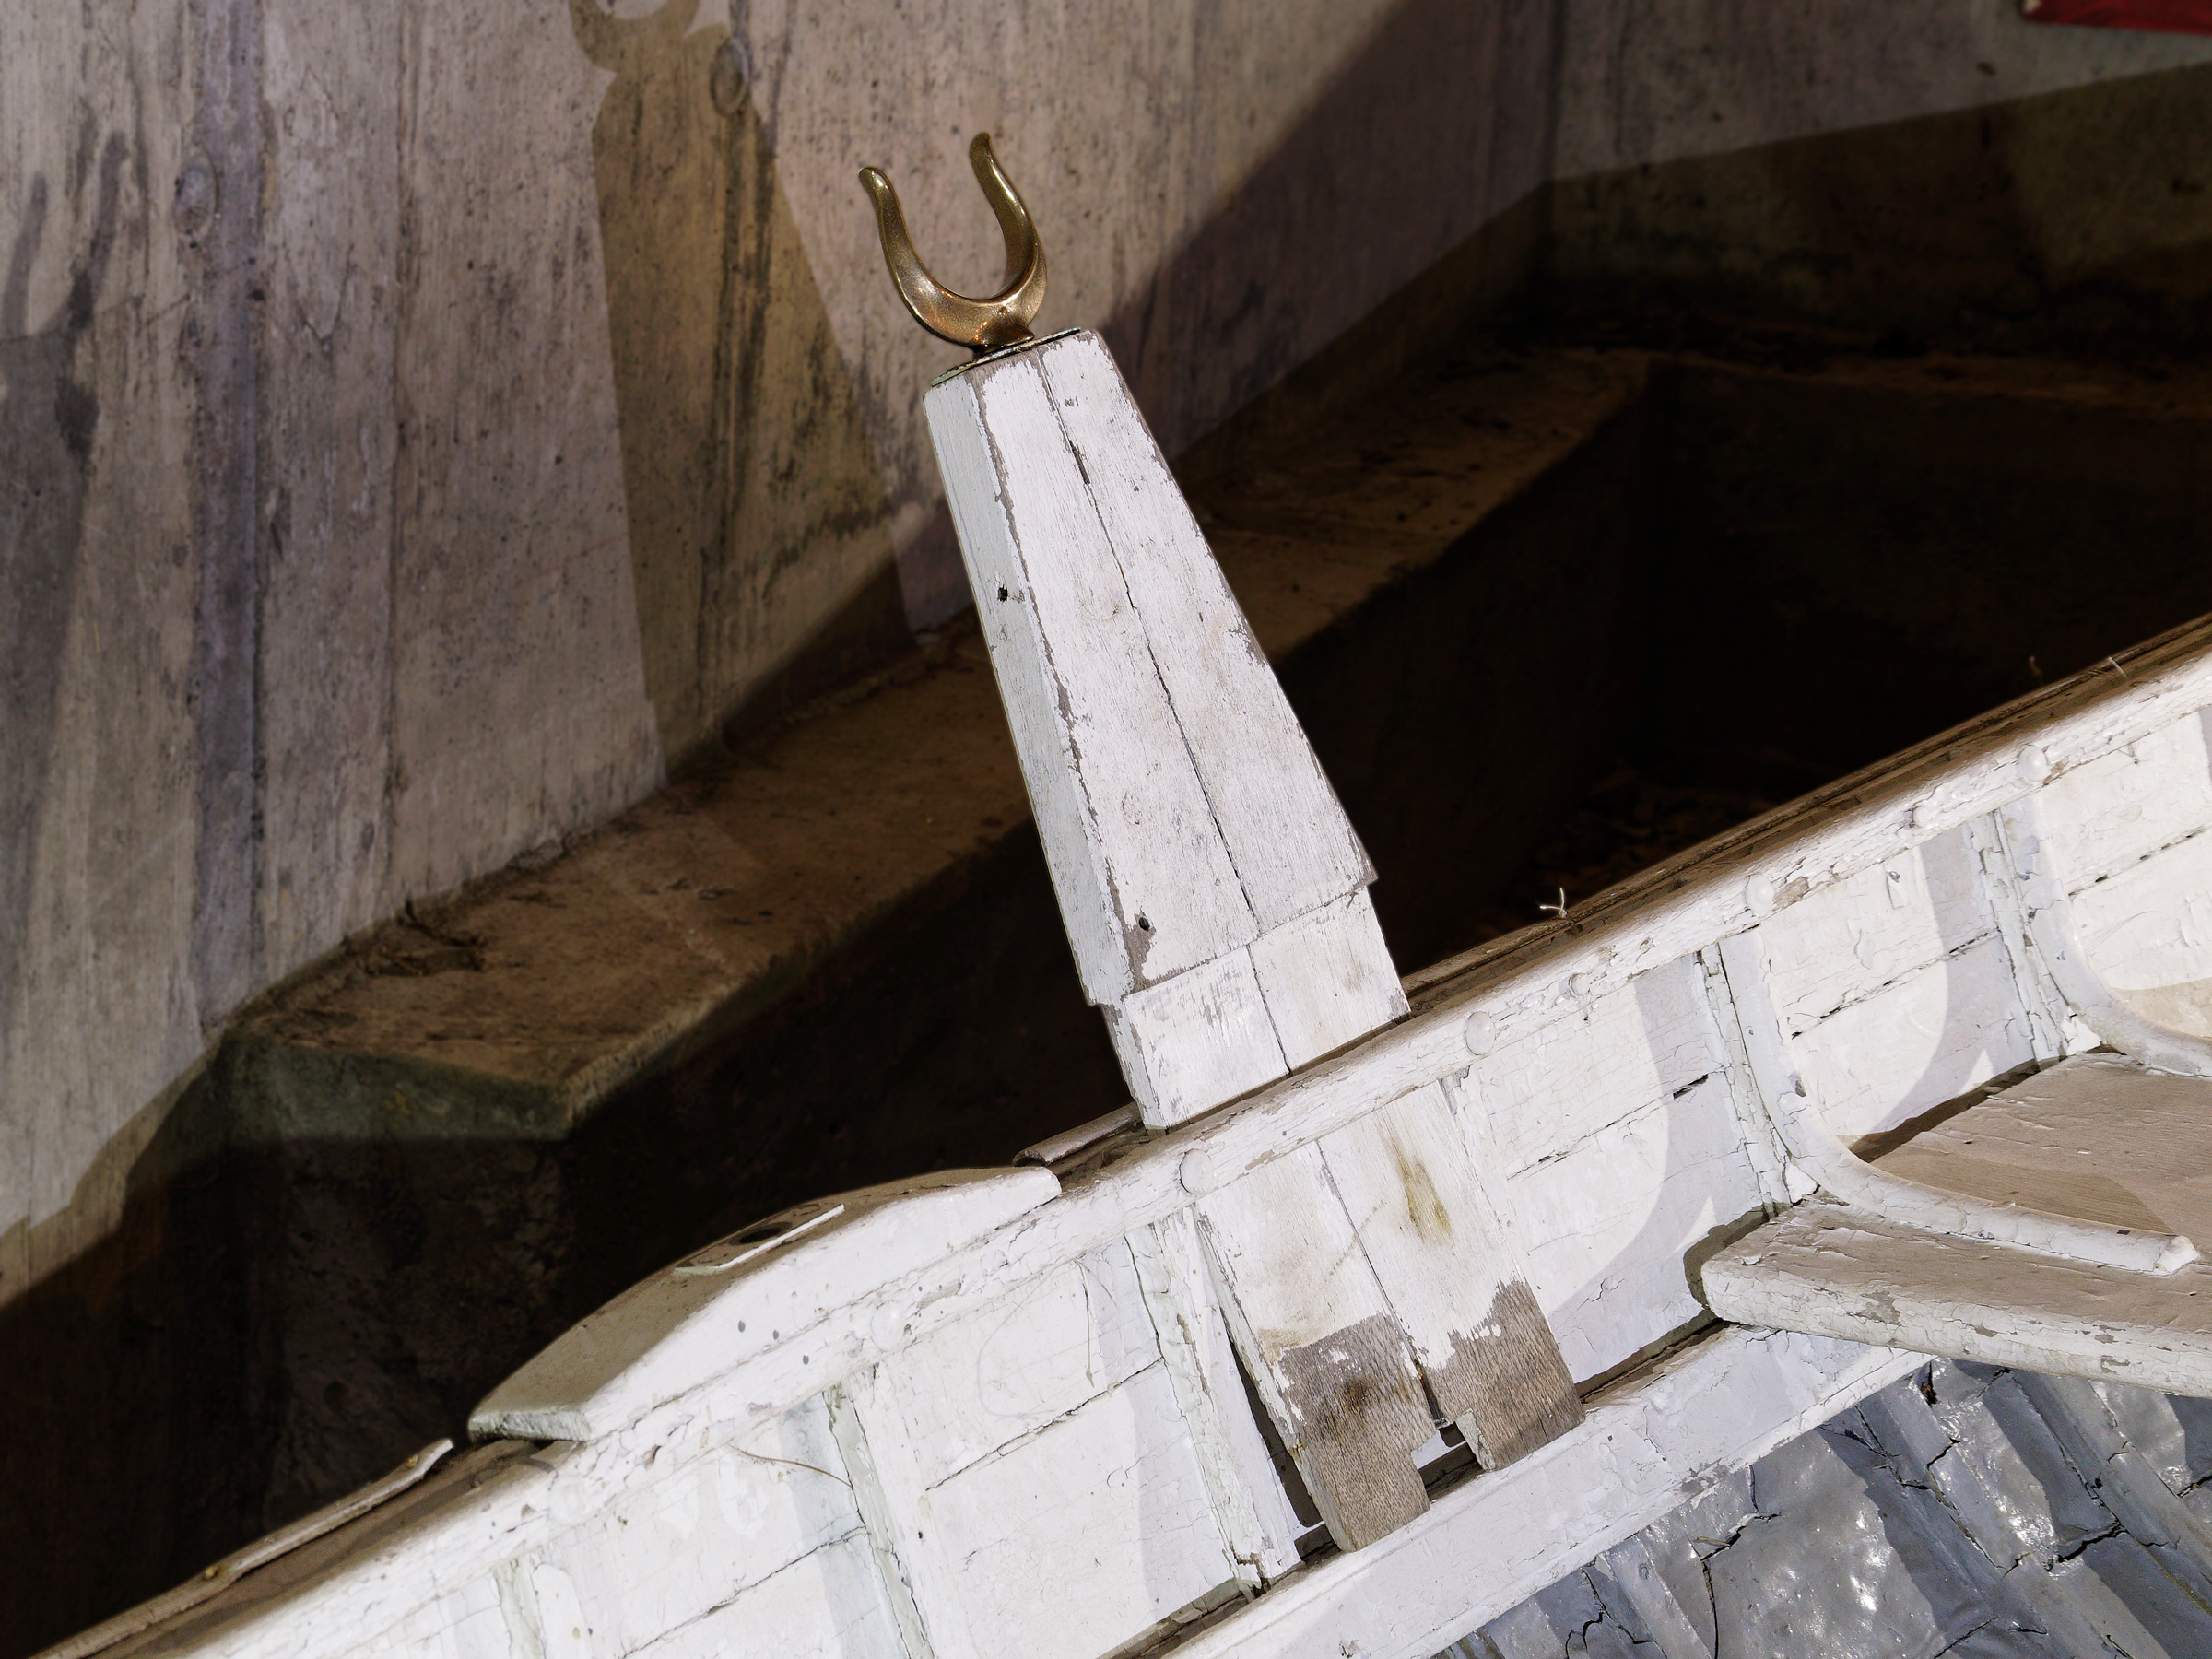
The shanks have a tight fit in the ipe, so the extensions are stationary, and the oarlocks rotate in the tubes. These extensions raise the oarlocks by 6″, the length of the brass tubes.
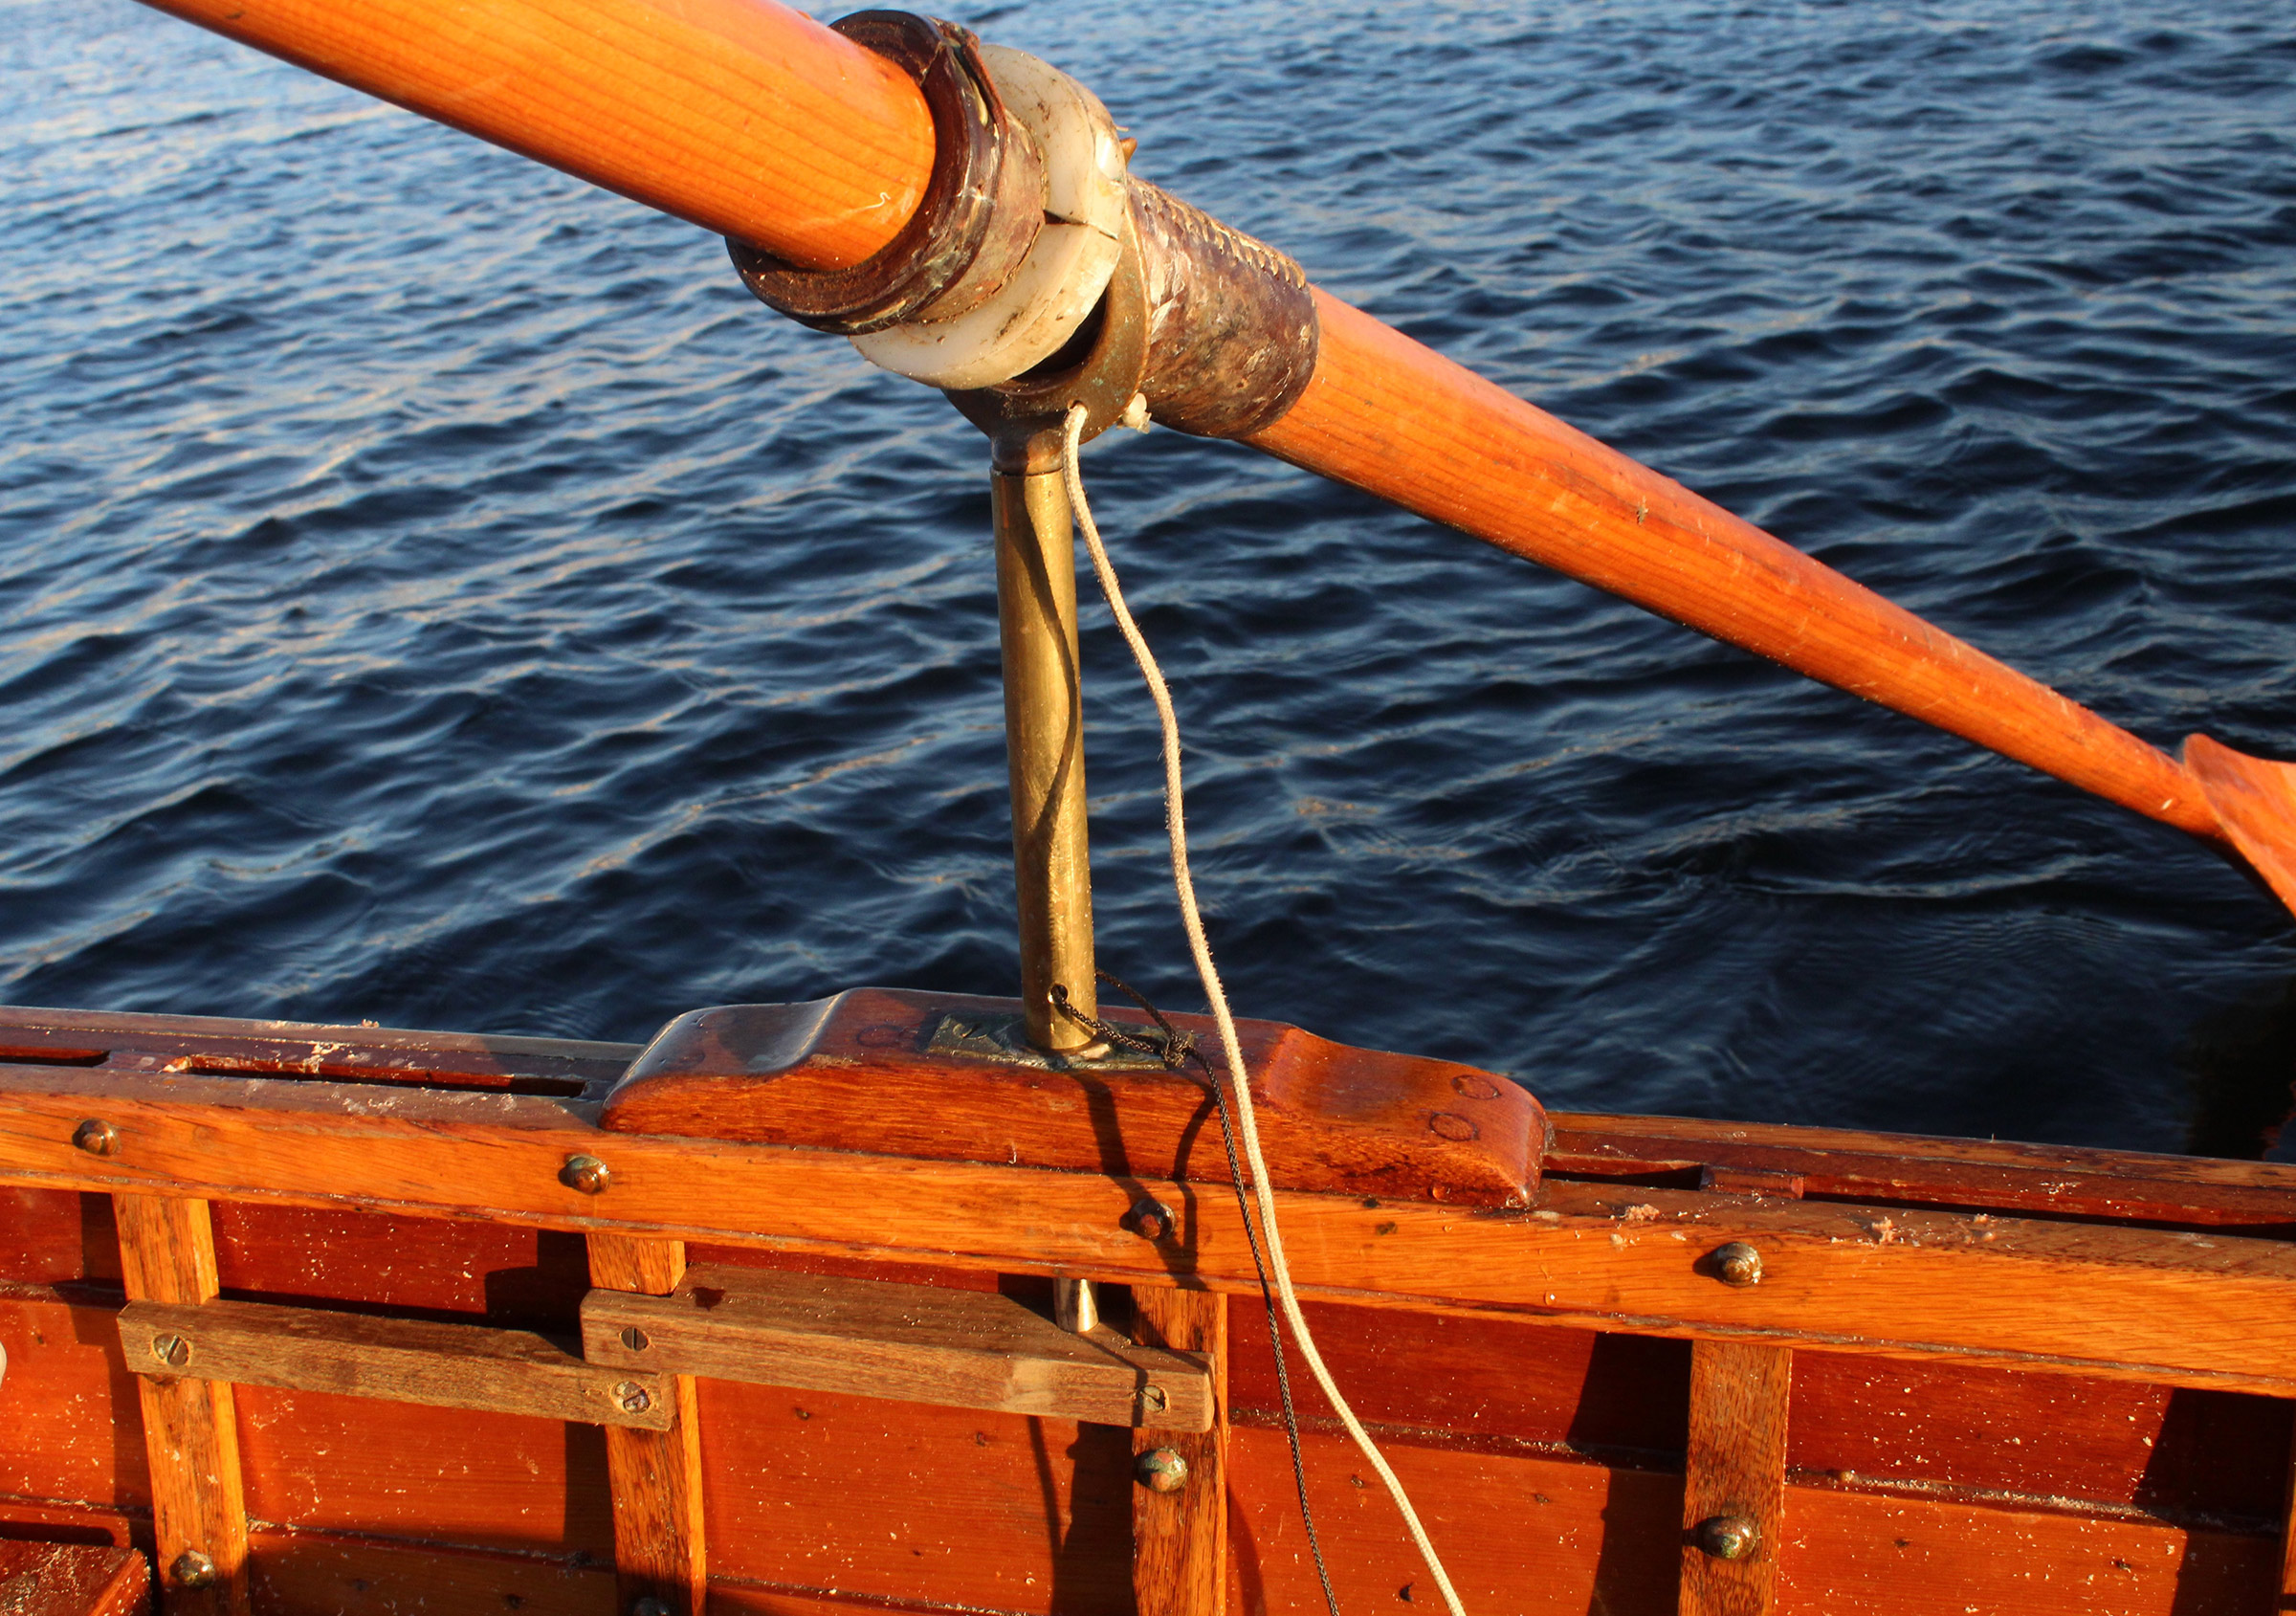
The top of the socket fitting has four holes for fastenings, and while the two holes in the side flange can take screws (visible here), two screws through the socket’s top flange won’t hold well in end-grain. I used machine screws instead wood screws and the nuts for them are captured in the two holes in the side of the extension.
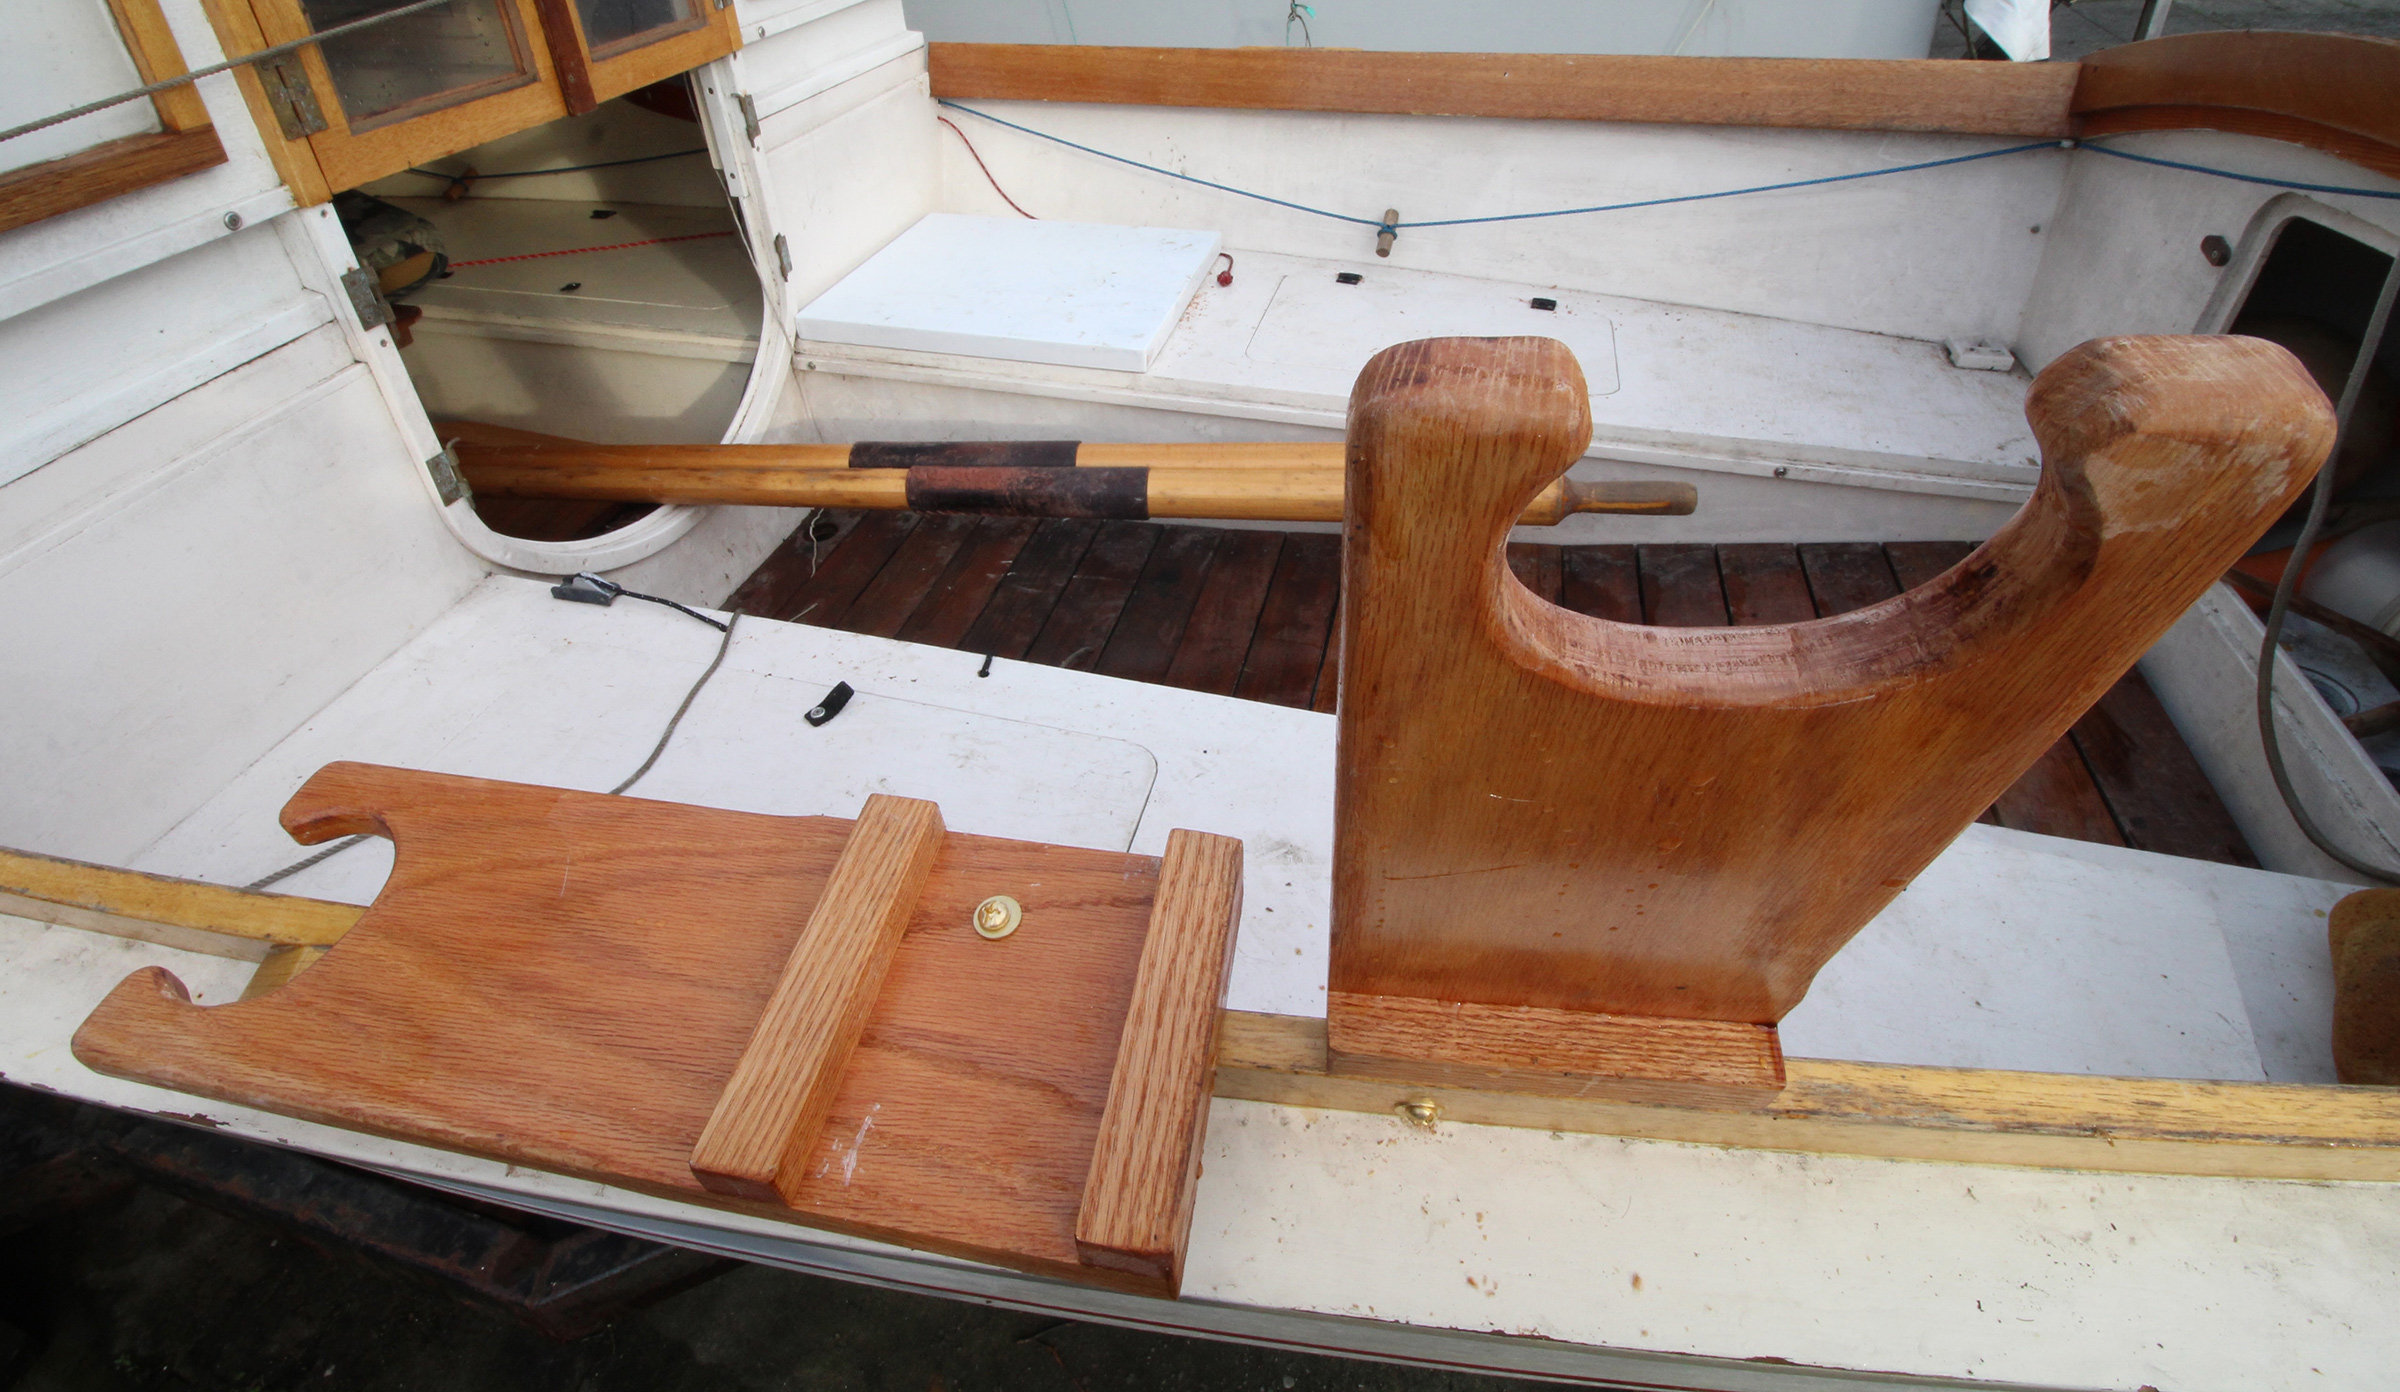
The wooden extensions I made for the Whitehall raise the oarlocks 10″ above the gunwale. The 3⁄4″ oak I had on hand was thinner than the top flange of side-mount oarlocks, so I glued a piece of oak to the tops to make them thicker. I cut straight tenons at the bottom of the extensions; they rest against the sheer plank and butt against the lap with the next plank.
At the top of the extension, I glued on an extra piece of wood to create the thickness required to provide a seat for the entire flange at the top of the socket fixture. The cleat at the bottom, screwed to two frames, is shaped to press the extension’s tenon to the sheer plank.
These tenons require cleats across the adjacent frames to hold the ends of the tenons in position. The alternative, seen in one of the photos in Ben’s article, is to cut the tenons to follow the curve of the frames, which has the advantage of allowing a longer tenon and a more stable extension.
 Penobscot Marine Museum
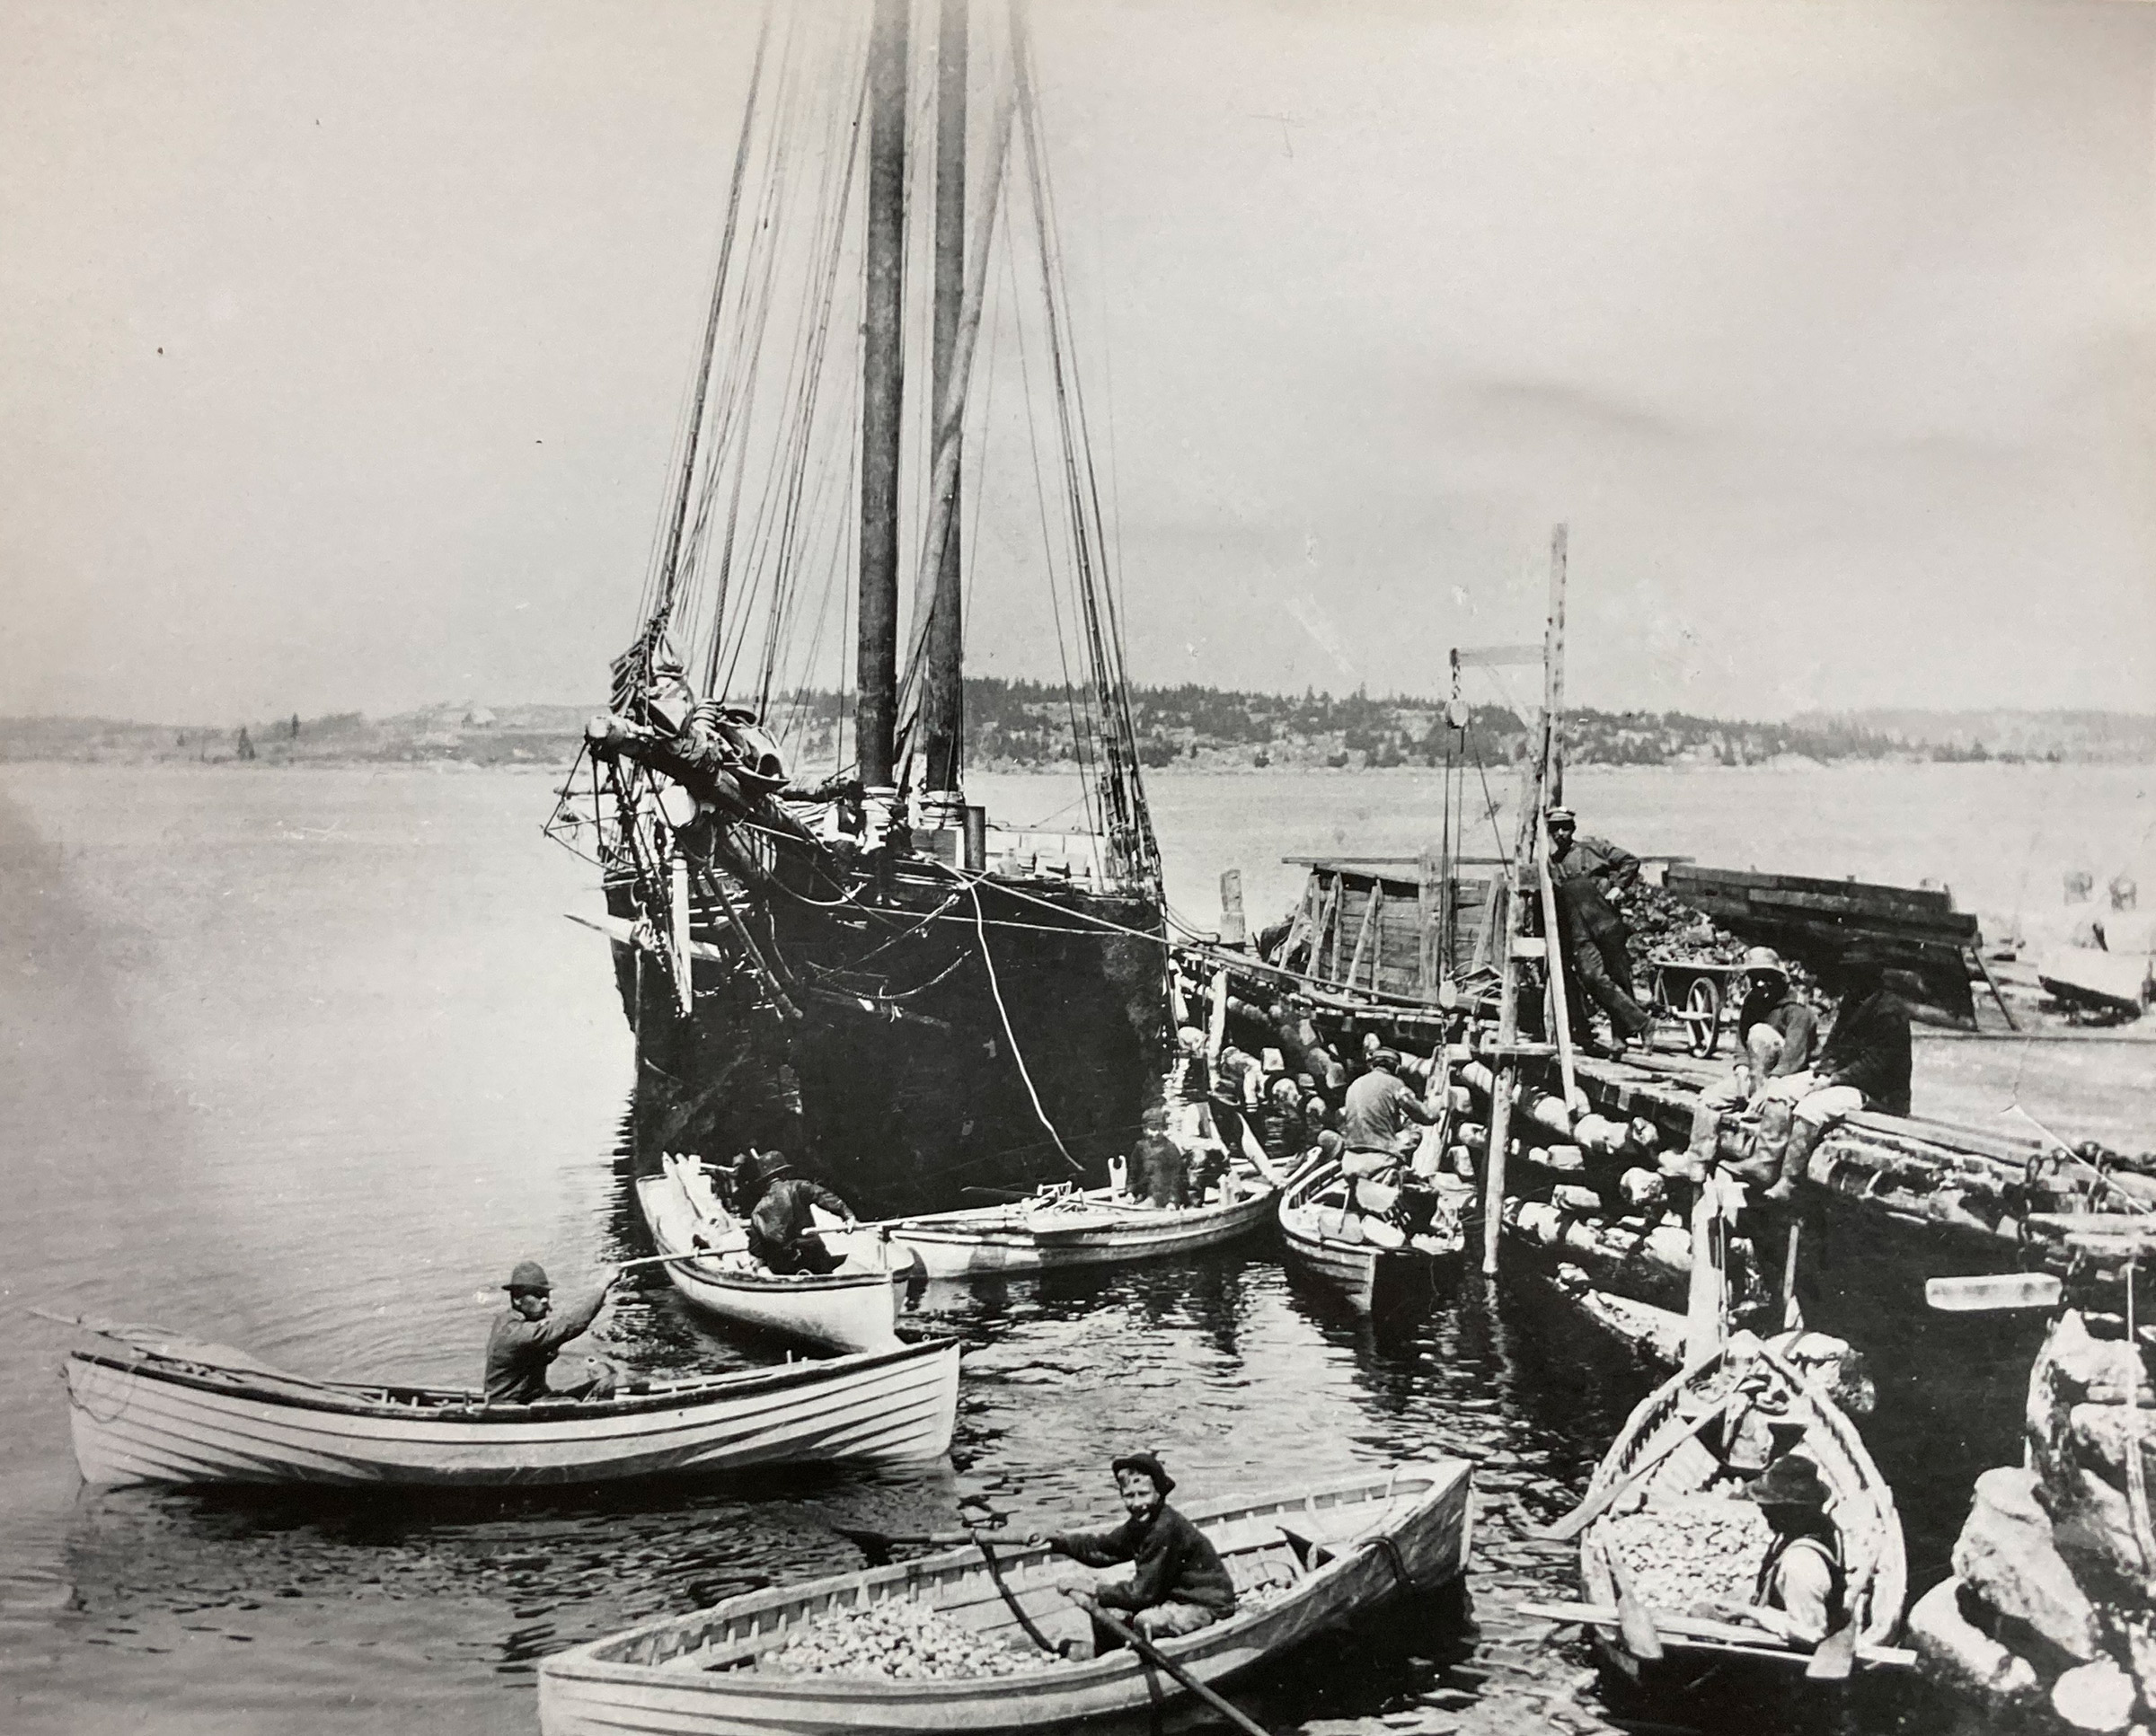
The text attached to this photograph reads: “Clam diggers and Schooner E. A. WHITMORE, at the Oceanville, Maine, clam factory dock. Photo taken in 1902.” In the center, silhouetted by the shadow of the schooner’s port bow, is a crab-claw-like extension, one of a pair on the skiff in the middle.
My third set of extensions was based on an old photo Ben sent to me. It was taken in Oceanville, Maine, in 1902 and shows a half-dozen skiffs clustered around the bow of a schooner. One of the small boats is equipped with extensions, apparently made of wood, with round notches, open at the top, to accommodate the oars. I made a similar set for my cruising garvey, HESPERIA. They are 3⁄4″ oak, 5 1⁄2″ wide and 16″ long. For oars that are 2 1⁄2″ in diameter at the leathers, I made an oval opening 3 3⁄8″ wide. At the bottoms, cleats glued on one side capture the cockpit coaming of the garvey, and 1⁄4″ brass bolts hold the extensions in place. The coaming is part of the gunwale and is structurally quite strong. These extensions raise the oars 8 1⁄2″ above the coaming.
The wooden extensions for my garvey have cleats across the bottom to fit above and below the coaming. Single bolts hold each extension in place.
The oars I use for the Whitehall are spoon blades, and while they worked with boat extensions, they felt a bit awkward. Extensions set the oars at a higher angle, causing the blades to be more vertical in the water. Spoons are designed for a stroke just below the surface of the water and parallel to it; they move a short distance sideways to get in and out of the water. The steeper angle of the oars changes the way the blades move through the water and how deep they’ll go, and the spoon blades seem to create much more drag when used with extensions. The jury is still out: I need larger oarlocks to fit the pair of straight-bladed oars that should work with the Whitehall extensions.
The oval opening provides enough room for the oar to swing.
The oars for my garvey have straight blades like the oars used by the peapods and other workboats equipped with oarlock extensions. Straight blades are often used with a dory stroke, in which the blades move through the water edge first and go well below the surface. That stroke is much better suited to the steeper angle of oars when using extended locks.
The oars I use with the garvey work well with the extensions. The long leathers, which are positioned to make contact with the thole pins while rowing from a seated position, also protect the oars while rowing with the extensions.
My wooden extensions work especially well with the garvey. It’s a stable boat with a beam of 6′, so it’s steady underfoot while I’m standing. The oval openings in the extensions allow the oars to swing through an arc more than adequate for a full stroke. Rounding the edges of the opening with a 1⁄4″ quarter-round router bit added to the range of motion. Getting the blades in and out of the water is as easy as it is when rowing while seated. At the catch and through the drive the handles are at shoulder level, and I just lean on them to provide power. Rowing in reverse is also uncomplicated and effective; I lean back and just hang by my arms from the handles. If the oar were to hit an obstruction, the extension doesn’t pivot like an oarlock does and could be damaged, but since I’m looking over the bow, it’s not likely I’ll run into anything.
The Garvey extensions are a great success.
You can share your tips and tricks of the trade with other readers of Small Boats by sending us an email.


With some help from Ben via the WoodenBoat forum, I put together a pair of oarlock extensions for my row-cruising Walkabout (just noticed that was 7 years ago now!). The ones I made are 1/2″ stainless steel rod with an Oilite bushing, held together with canvas phenolic tubing. I did some trials with adjustable rods, and found 13″ of extension was most comfortable. These are used in the forward (out of 3) rowing positions on my boat, putting my standing weight near center. Support blocks below the oarlocks were needed to take up the increased torque of the long lever, as you note in the article. The 8″ extensions on the oar handles put my hands in the most comfortable and best power position.
Power is less than slide-seat rowing, but standing works well for maneuvering to a dock, puttering along a shore while birdwatching, and just taking a break from sitting.
A photo set of my project is on Flikr.
I’ve made two pair of extensions with heavy-walled naval-brass tube and 1/2″ brass rod. They’re quick and easy to make and they are extremely strong. I haven’t had a failure, but I suspect the oarlock socket is the weak spot.
David,
All of the old working pod rigs have a “step” of some kind below the oarlock socket. I’ve also looked at rigs on hunting boats where they need extensions for pulling. Here again there is a block of some kind to take the bottom of the extension. In the case of the old pipe extensions on the hunting boats, they just got through a plate with an appropriate hole drilled in it, then to a block.
You might find the attached photo montage interesting. The montage depicts DIY oarlock extensions installed on my Drascombe Lugger (Lugger 801). The photos were taken this past summer (2021) during my sail/row/motor downstream the Lower Snake and Lower Columbia (27 boat days, Lewiston, Idaho to Astoria, Oregon). In the montage I’m departing the marina at Cascade Locks, Oregon, just upriver of Bonneville Dam. Throughout the journey the standup/forward facing row position was of particular value each evening (and the following morn) when searching-out a nearshore anchorage (preferable tucked tight into the weeds, out of wind and current, see photo attached of Lugger 801 anchored near Beacon Rock, which is in the photo background).


It appears that the extensions put oarlocks at about waist level while sanding. Am I correct?
Extention at waist level while standing?
Eric – I found putting oar handles at chest height works best. Most of the stroke is just leaning body weight onto the handles, with a straight arm push at the end. Chris’s photo on his garvey looks the same.
I am building an Acorn 12 and will keep all of this stuff in mind as I go. It will also be much easier to read the water depth when standing up.
When sailing in the lagoon of Grado (Northern Adiatic, Italy) with my Harrier, I took some pictures of an old wooden fishing-boat, a Batela, which is always rowed standing up and facing forward.
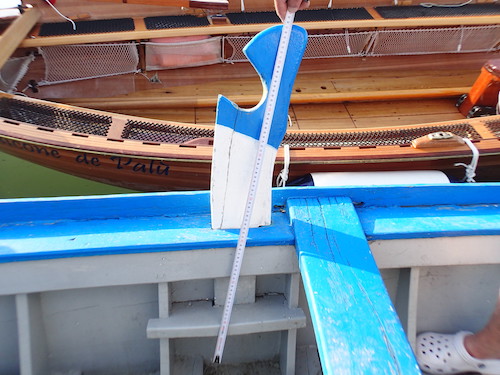
Batelas have a flat bottom, the wooden tholes are called forcole.
Waist level would be low for efficient pushing. As noted above, chest would be better. There are three variables: boat beam, oarlock height and oar length. Not obvious until you draw it for a given boat beam and height, longer oar length if you just get the blades in means a lower push angle. It looks like the Maine fishermen just used their pulling oars for pushing.
My friend Joe Auciello just set up some push locks in his Skerry, using iron pipe for extensions. He experimented on his trailer. Got in the boat, started with high extensions maybe a foot, used his regular oars, and trimmed the extensions down to what worked: a chest push, blades below the waterline. We discussed hand spacing, and figured that pushup spacing would be about right. He also looked at where he needed to stand and was able to site his oarlocks accordingly. The regular sockets were too far aft. Only after he had things to his liking did he make a block to take the foot of the oarlock.