In 2010, a 12-year-old boy was walking home from school when he saw a strange-looking boat in a pile of garbage at the side of the street. The boat was long, double-ended, and surprisingly light for its size. It was covered with some kind of fabric, like the upholstery of an automobile seat. Underneath was a spindly wooden framework. The boy dragged it home, in desperate hopes that somehow an outboard motor could be mounted on it to make it go very fast. The boy’s dad is a cabinetmaker in Fort Pierce, Florida, and was known to perform minor miracles in the realm of things that were important to 12-year-old boys—but he could not invent a way to put an outboard motor on a fabric-covered sea kayak. So, they loaded it into the pickup truck and brought it to me, at Riverside Marina Boatyard.
I instantly knew what it was, as the Folbot name-plaque was still affixed to the cockpit coaming. But what it really was, was a basket case. The fabric covering was worn, torn, and poorly applied. The hull was covered with what looked like gray Naugahyde; the deck with green fabric of the same type. The sheer clamps were riddled with hundreds of tiny bronze ring-shank nails holding the fabric in place. The framework was made of spruce longitudinal stringers over plywood frames with a plywood keel plank. Many of the stringers were broken or missing, and the frames were damaged with rot pockets and what looked like very large rodent bites. The wood around the fastenings was suffering from metal sickness. The bronze nails and screws holding everything together were little more than yellow powder.
The kayak was old. And big. And clearly meant for the garbagemen. It was beyond rescue—and yet I couldn’t quite bring myself to break it up and toss it in the dumpster. Because it was also beautiful—a very far-gone piece of functional art. The model was Folbot’s largest two-person expedition kayak—an early model, from the late 1950s or early ’60s. The fabric covering was certainly not original. I eventually stripped the fabric off the frame, and broke the frame into its two halves, where the Folbot kit pieces were joined. All the stringers and the bottom plank were attached with screws and butt-blocks so that the boat could be reduced to two sections about 8′ long.
I left the halves intact, and they followed me around for 11 years—up to Maine, in and out of storage, and eventually into the pole barn I built in Appleton, out in the farm country where I now spend half of each year. This summer, as I was reorganizing the loft of my barn, I looked with dismay at this pile of garbage that had once been a beautiful kayak, and decided it was time to either burn it or restore it. I happened to have several sheets of Shellman okoume African mahogany plywood on hand, in 3mm and 4mm thicknesses, and that decided the Folbot’s fate. Despite the fact that Folbots are meant to have fabric covering, I always knew that if I ever restored this one, it would be as a plywood-planked boat. I dragged the sad remains out of the loft and under a tent on the slab of the house I should have been building instead of messing around with rotten old boats—and went to work.
 Photographs by the author
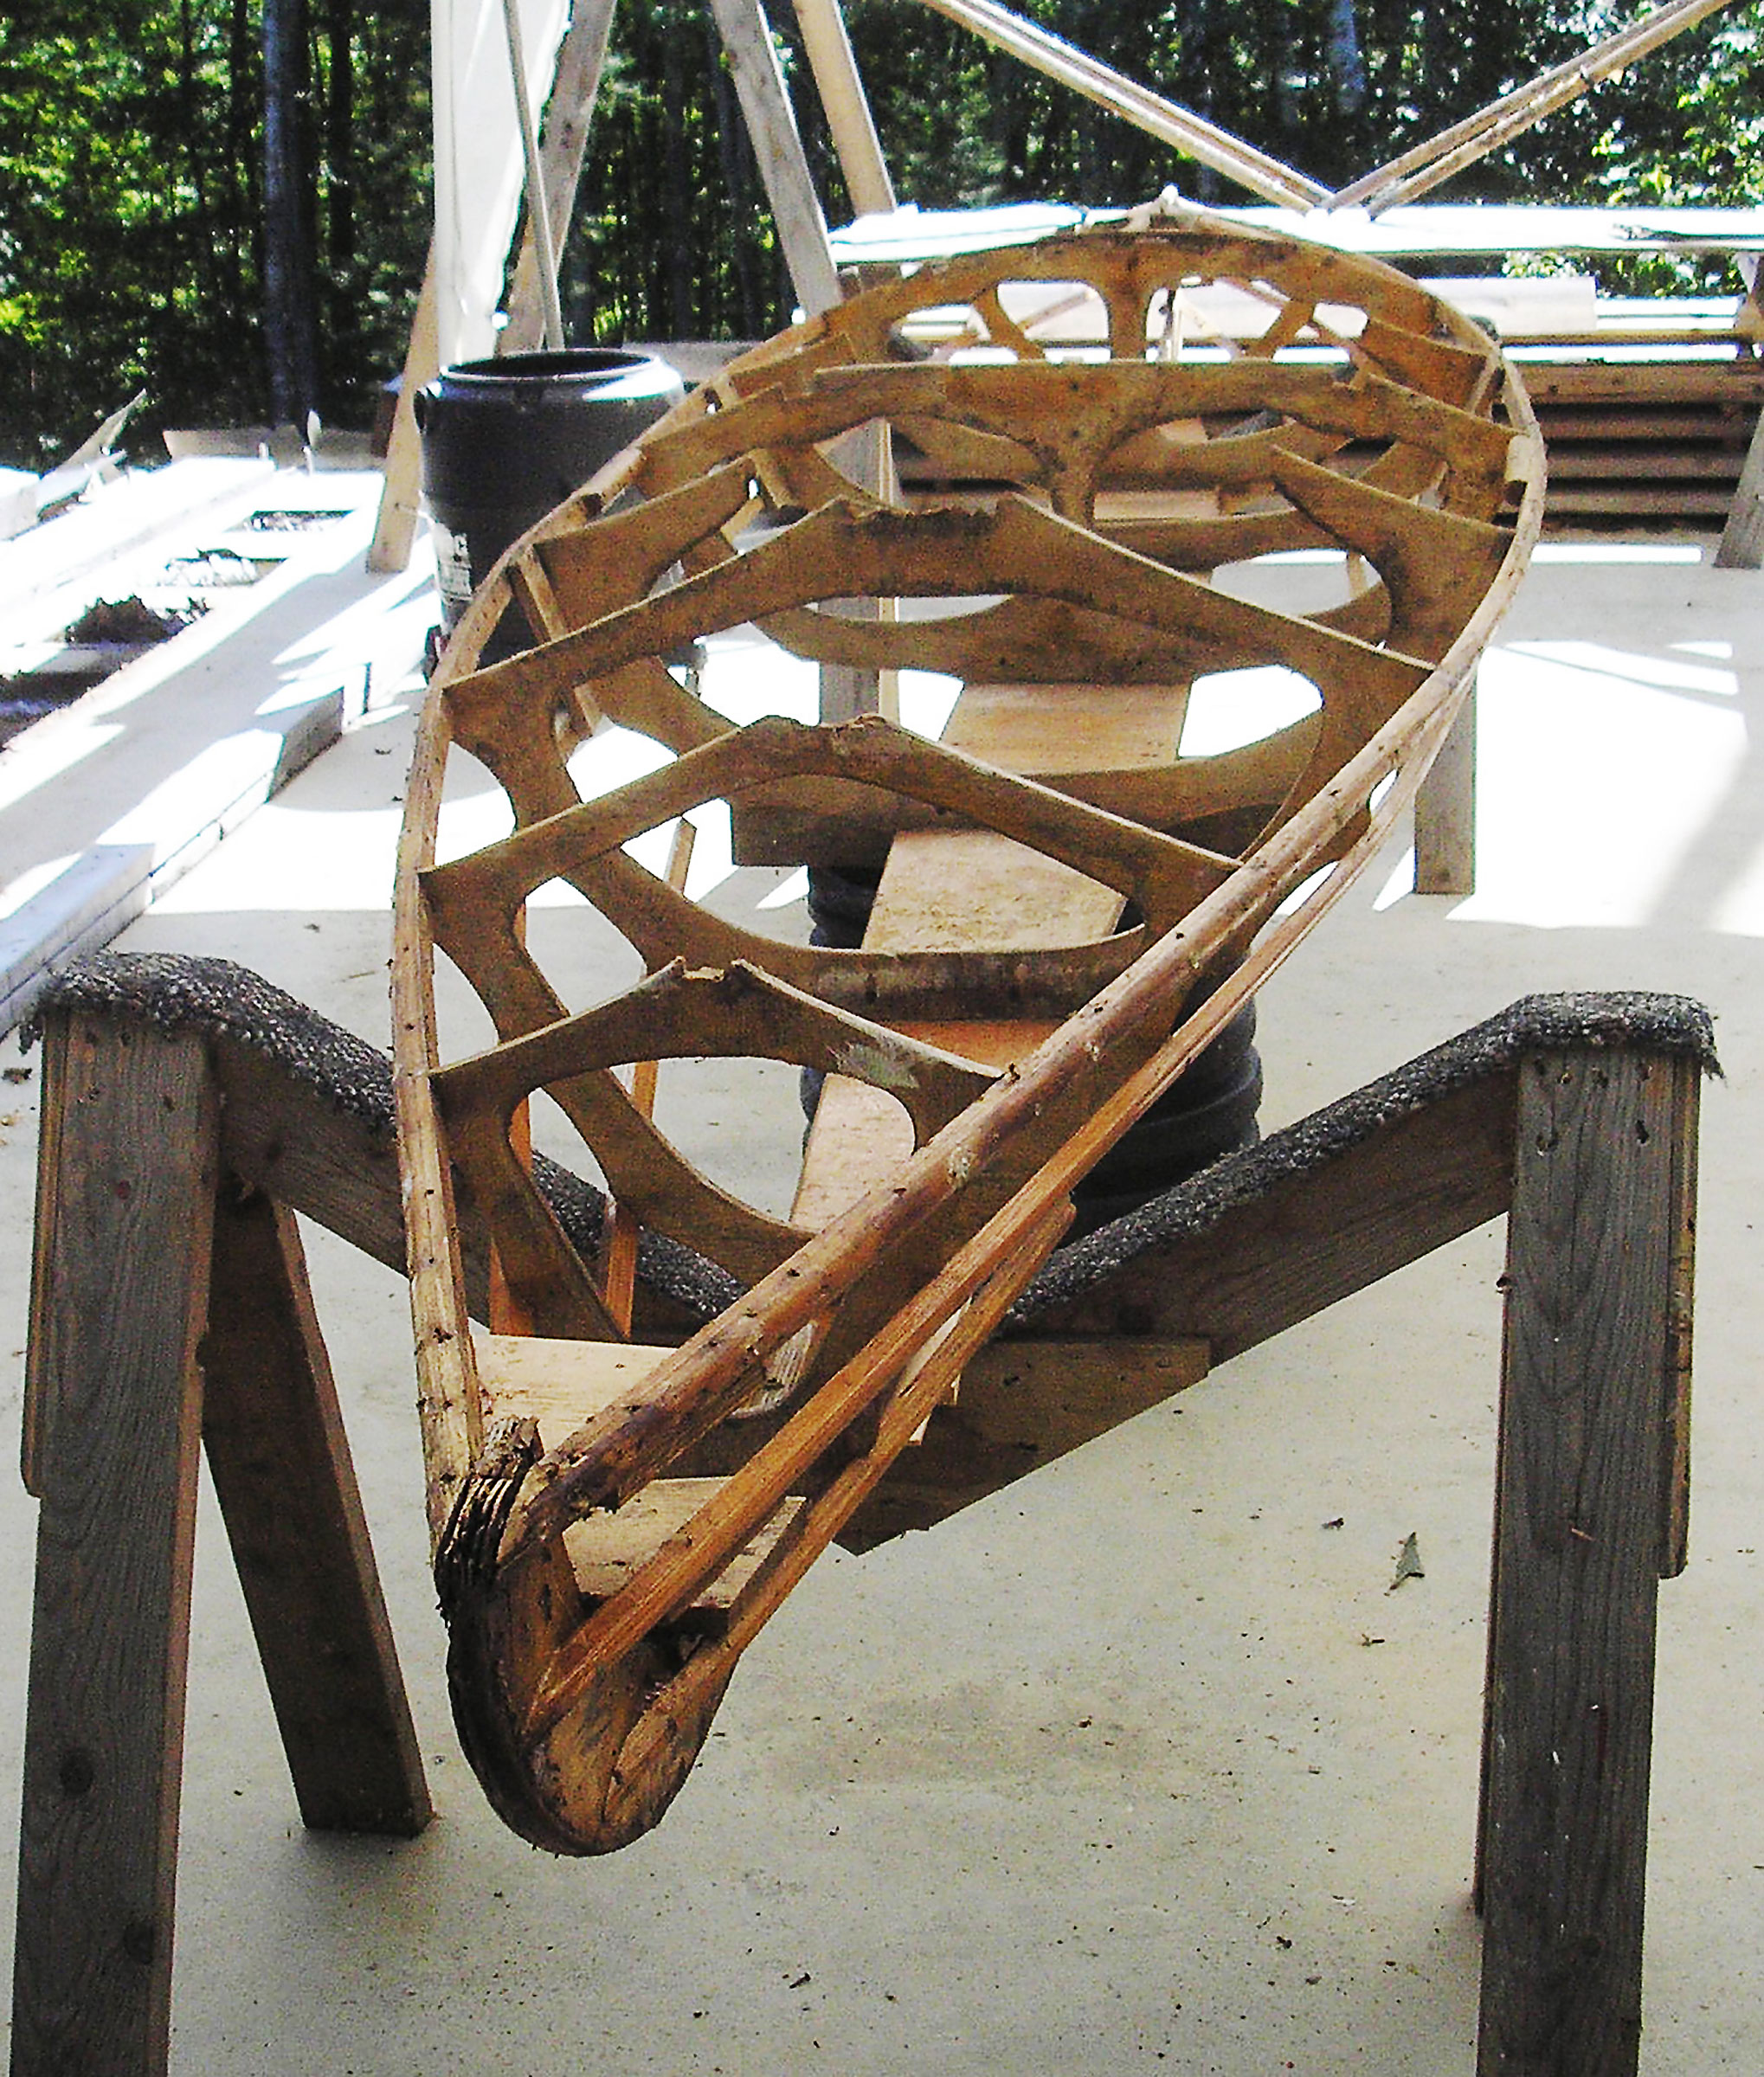
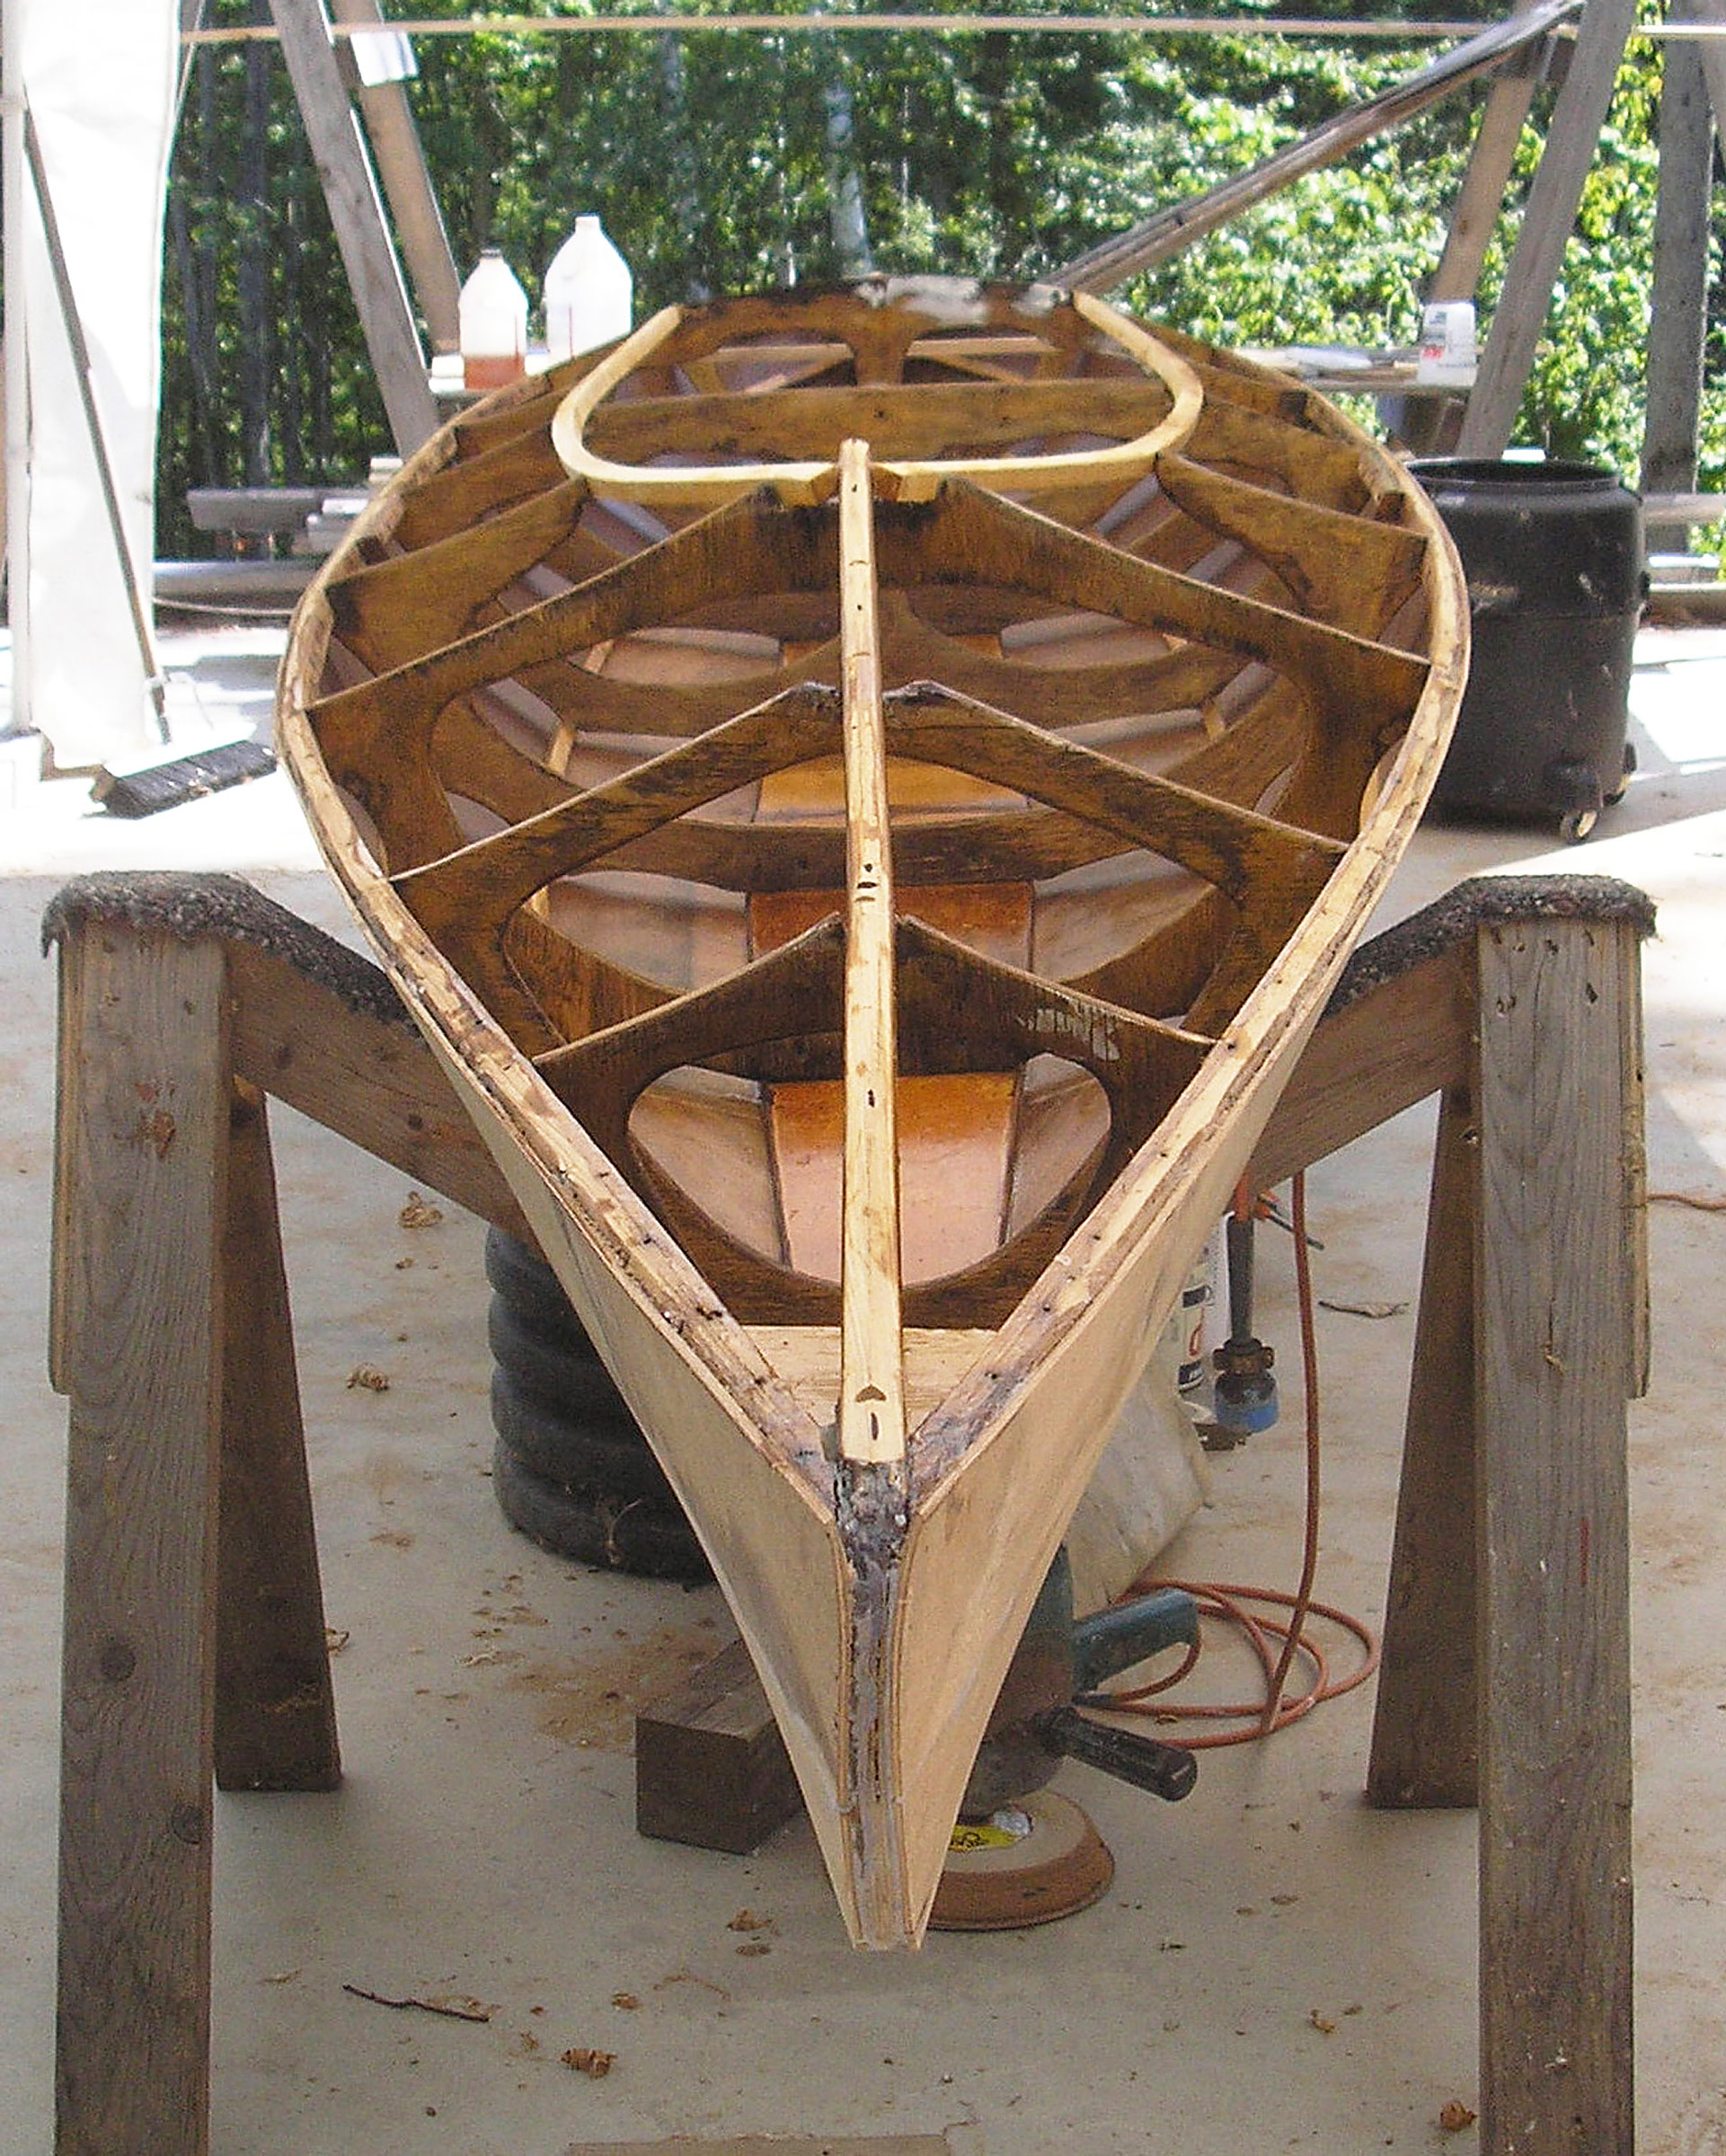
I reattached the two halves of the kayak and reconnected what was left of the original longitudinal stringers, and contemplated what I should do. The rigorous approach would have been to take careful measurements of all remaining components and replace them entirely with new ones. But I decided I wanted the soul of the old boat intact—in so far as possible—and instead I saved everything I could save.

Much of the wood was severely damaged, but still retained its shape. All the stringers were shot except for the sheer clamps, and I should not have tried to save even them, but I did.
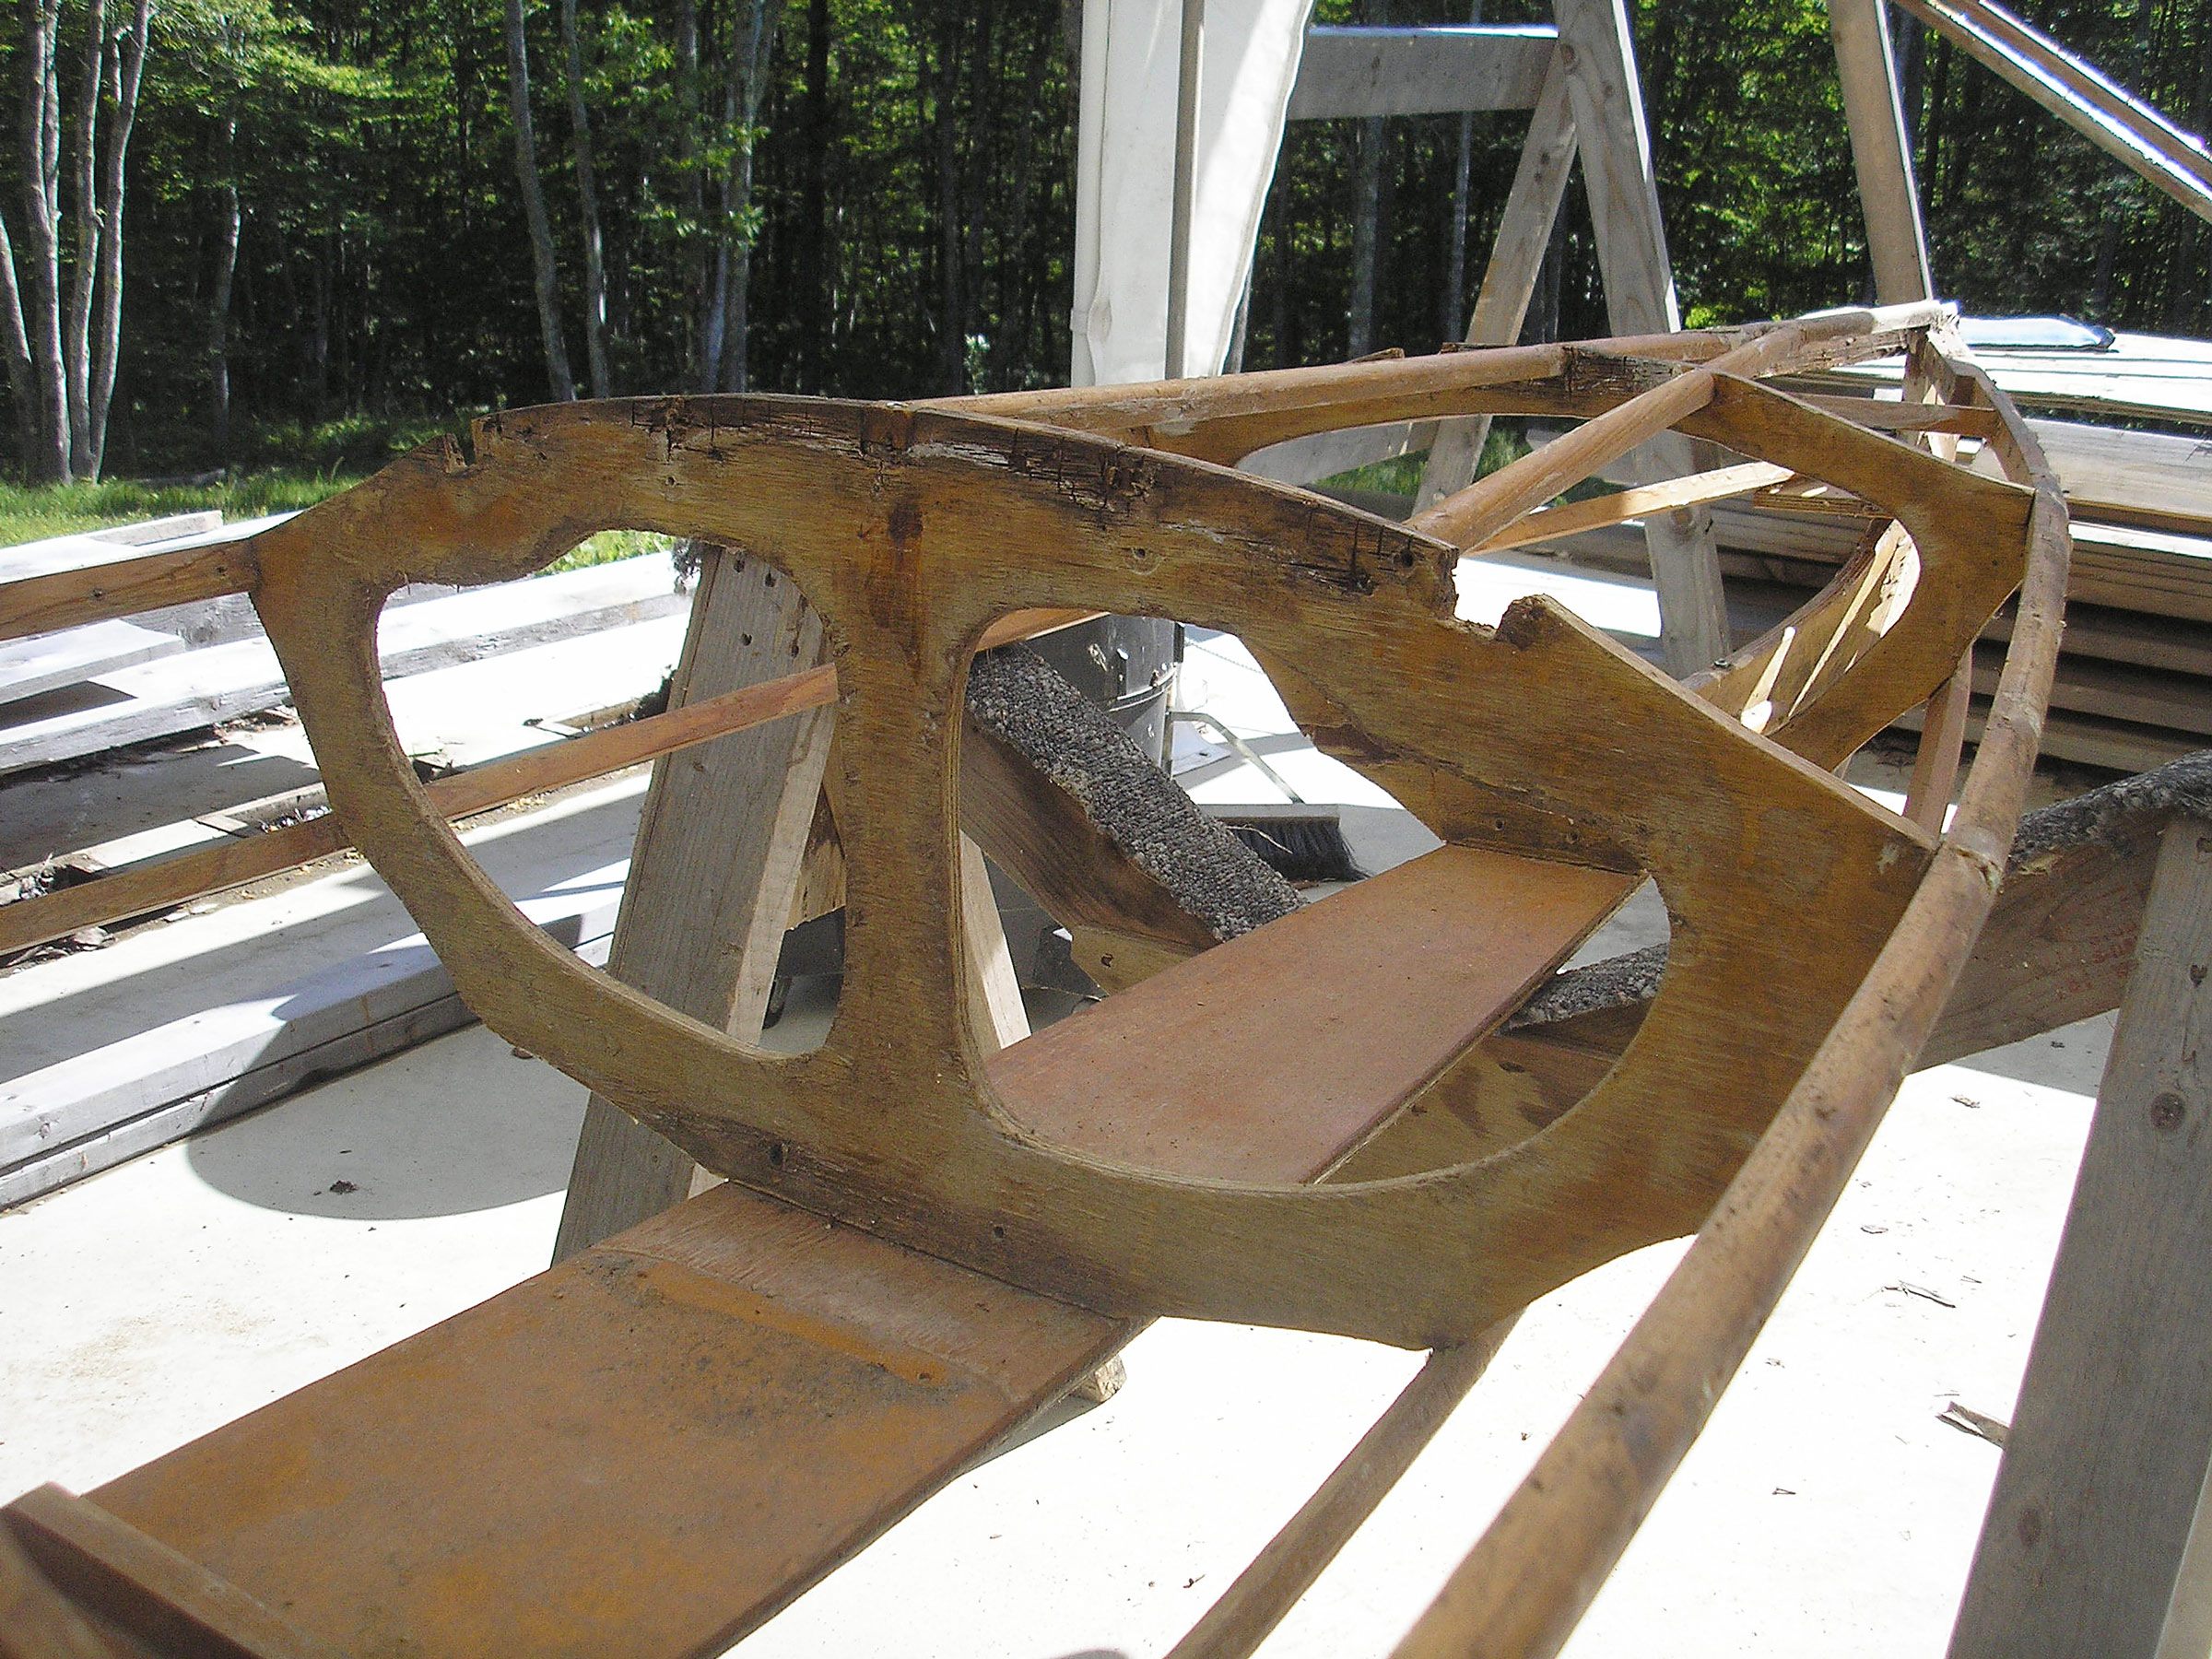
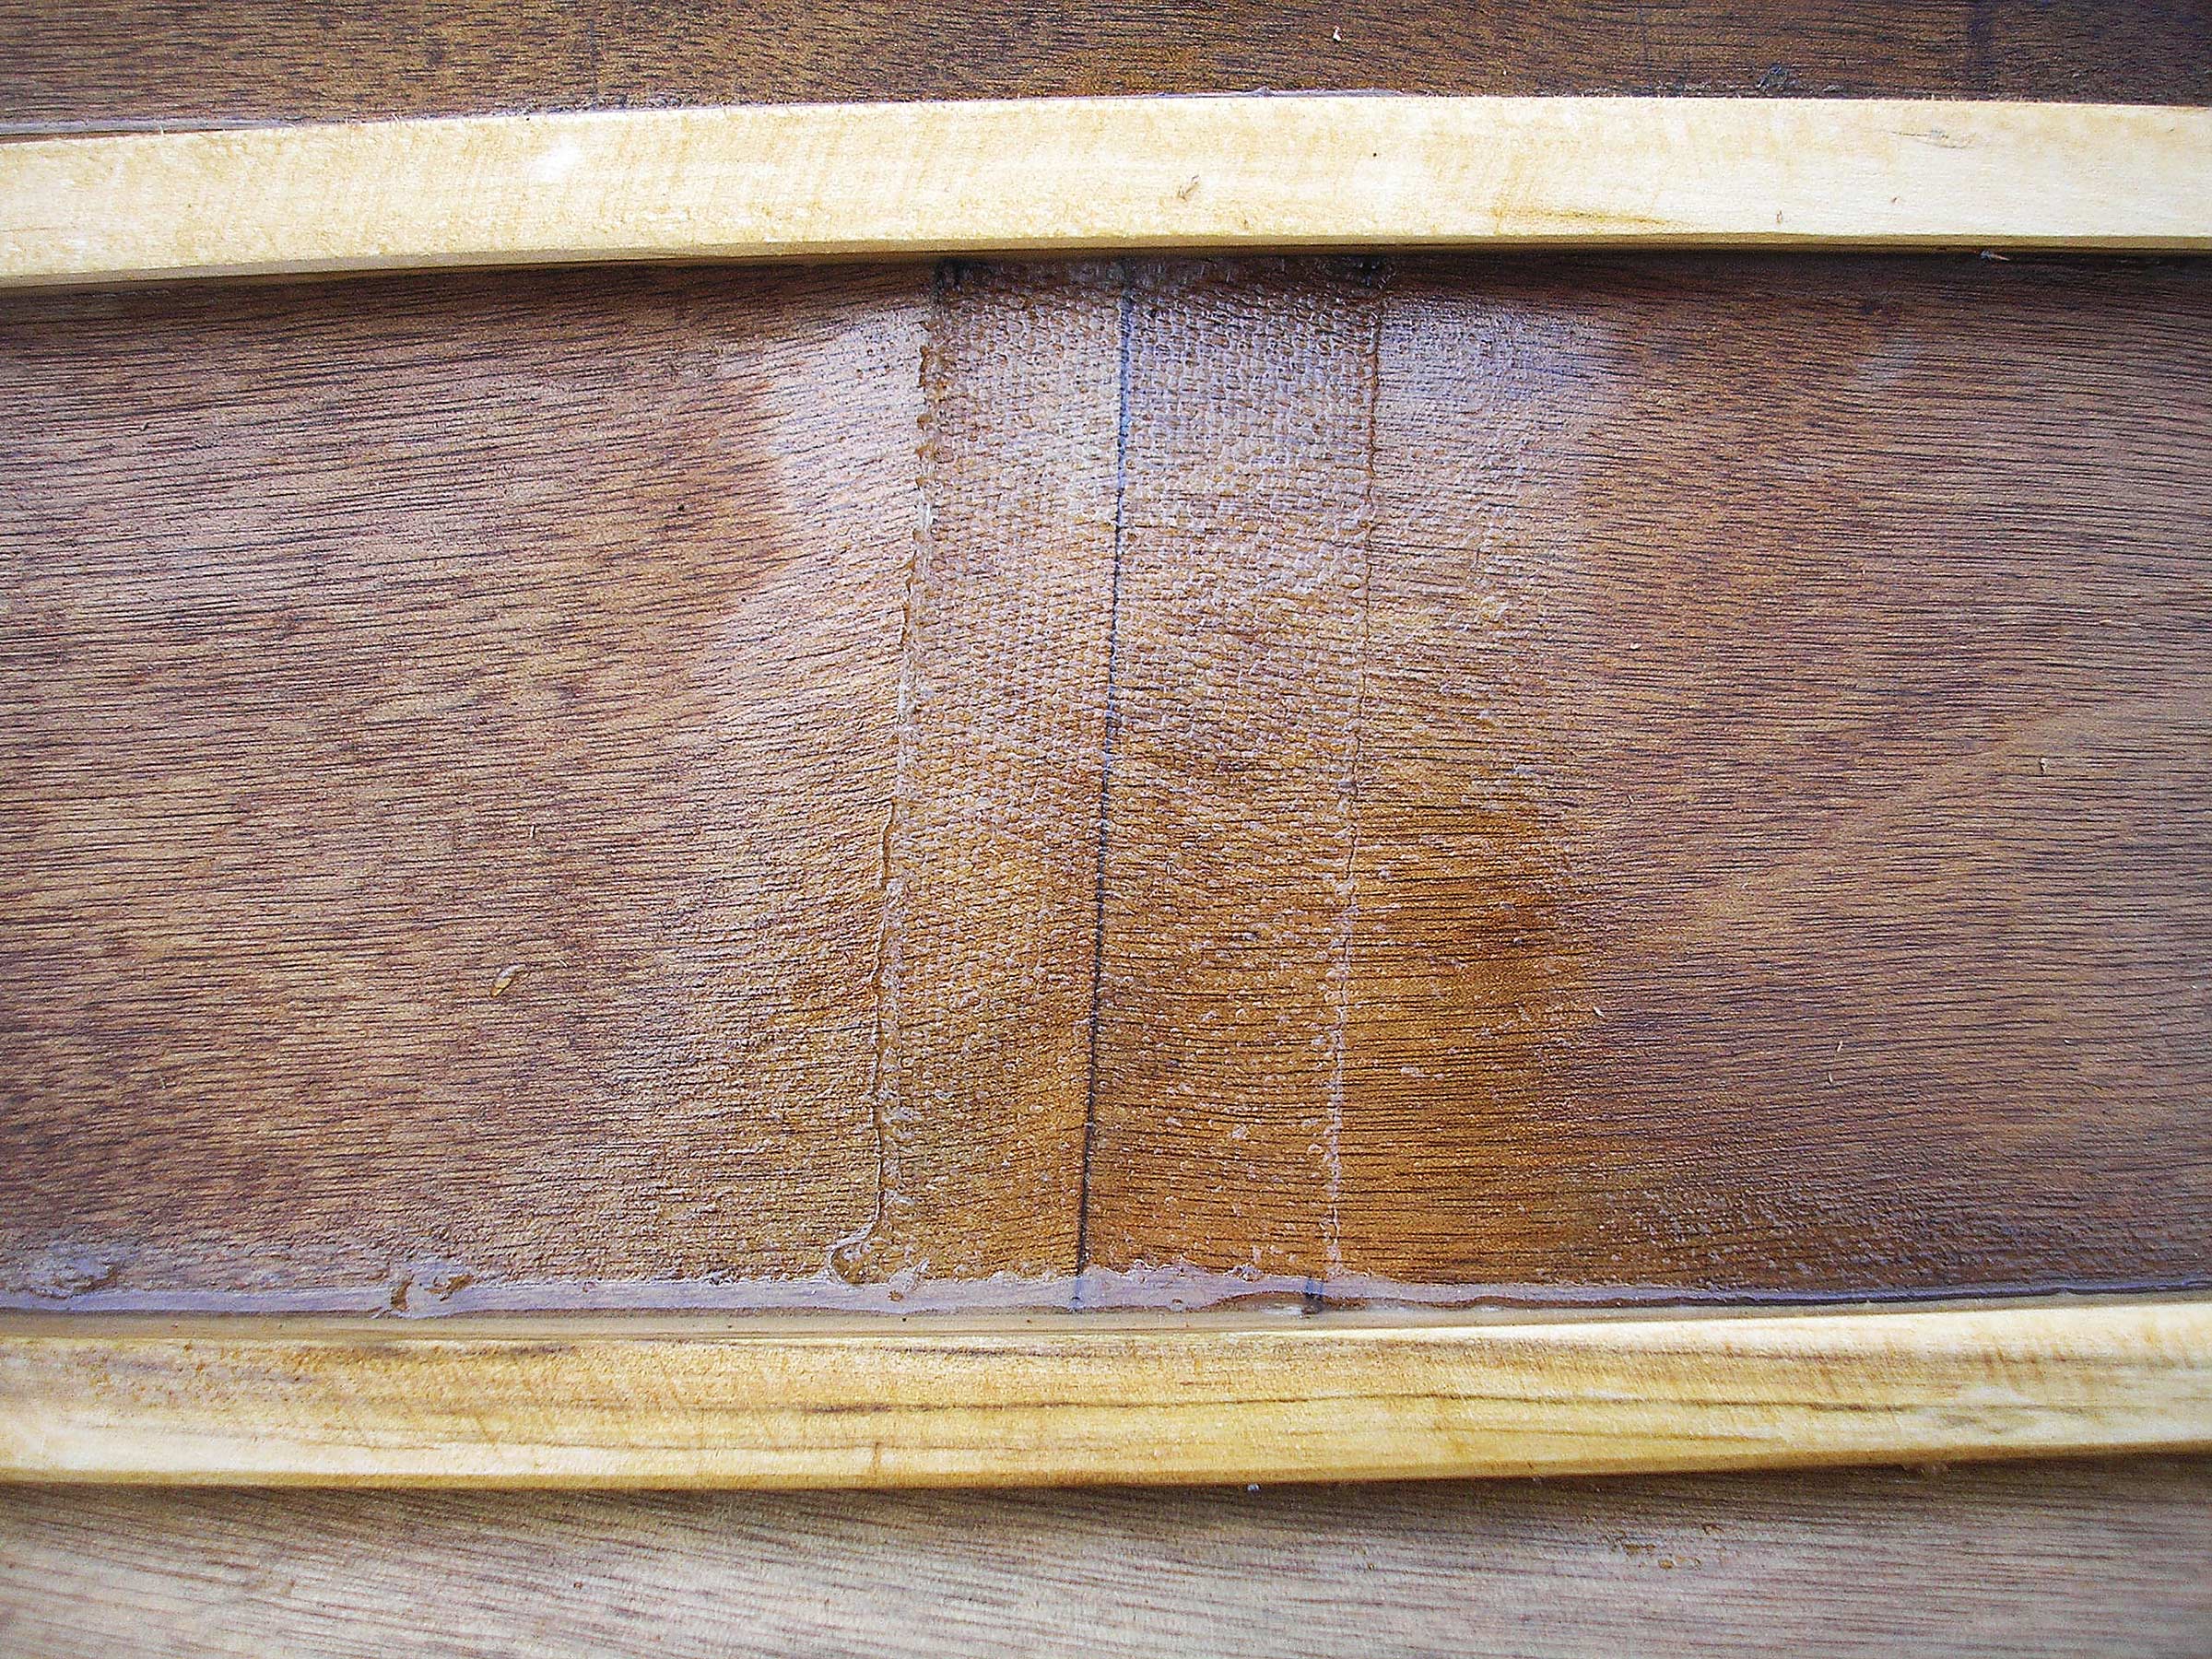
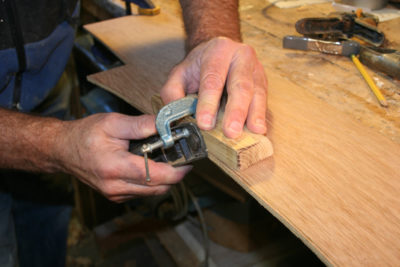
Most of the 1/2″ plywood frames had fairly superficial damage, like the one above. I chiseled out the punky spots and took complete advantage of the gap-filling properties of epoxy putty. I sanded the frames down and routed new edges where necessary, using a 1/4″ quarter-round bit in a trim router. I made new longitudinal stringers from rock maple (the longest material I had on hand) and installed them in place of the originals. In many cases I had to epoxy fill the old screw holes and drill new ones. I used stainless-steel square-drive self-drilling/self-tapping screws. I reassembled the new and old frame components using a pre-thickened epoxy compound.
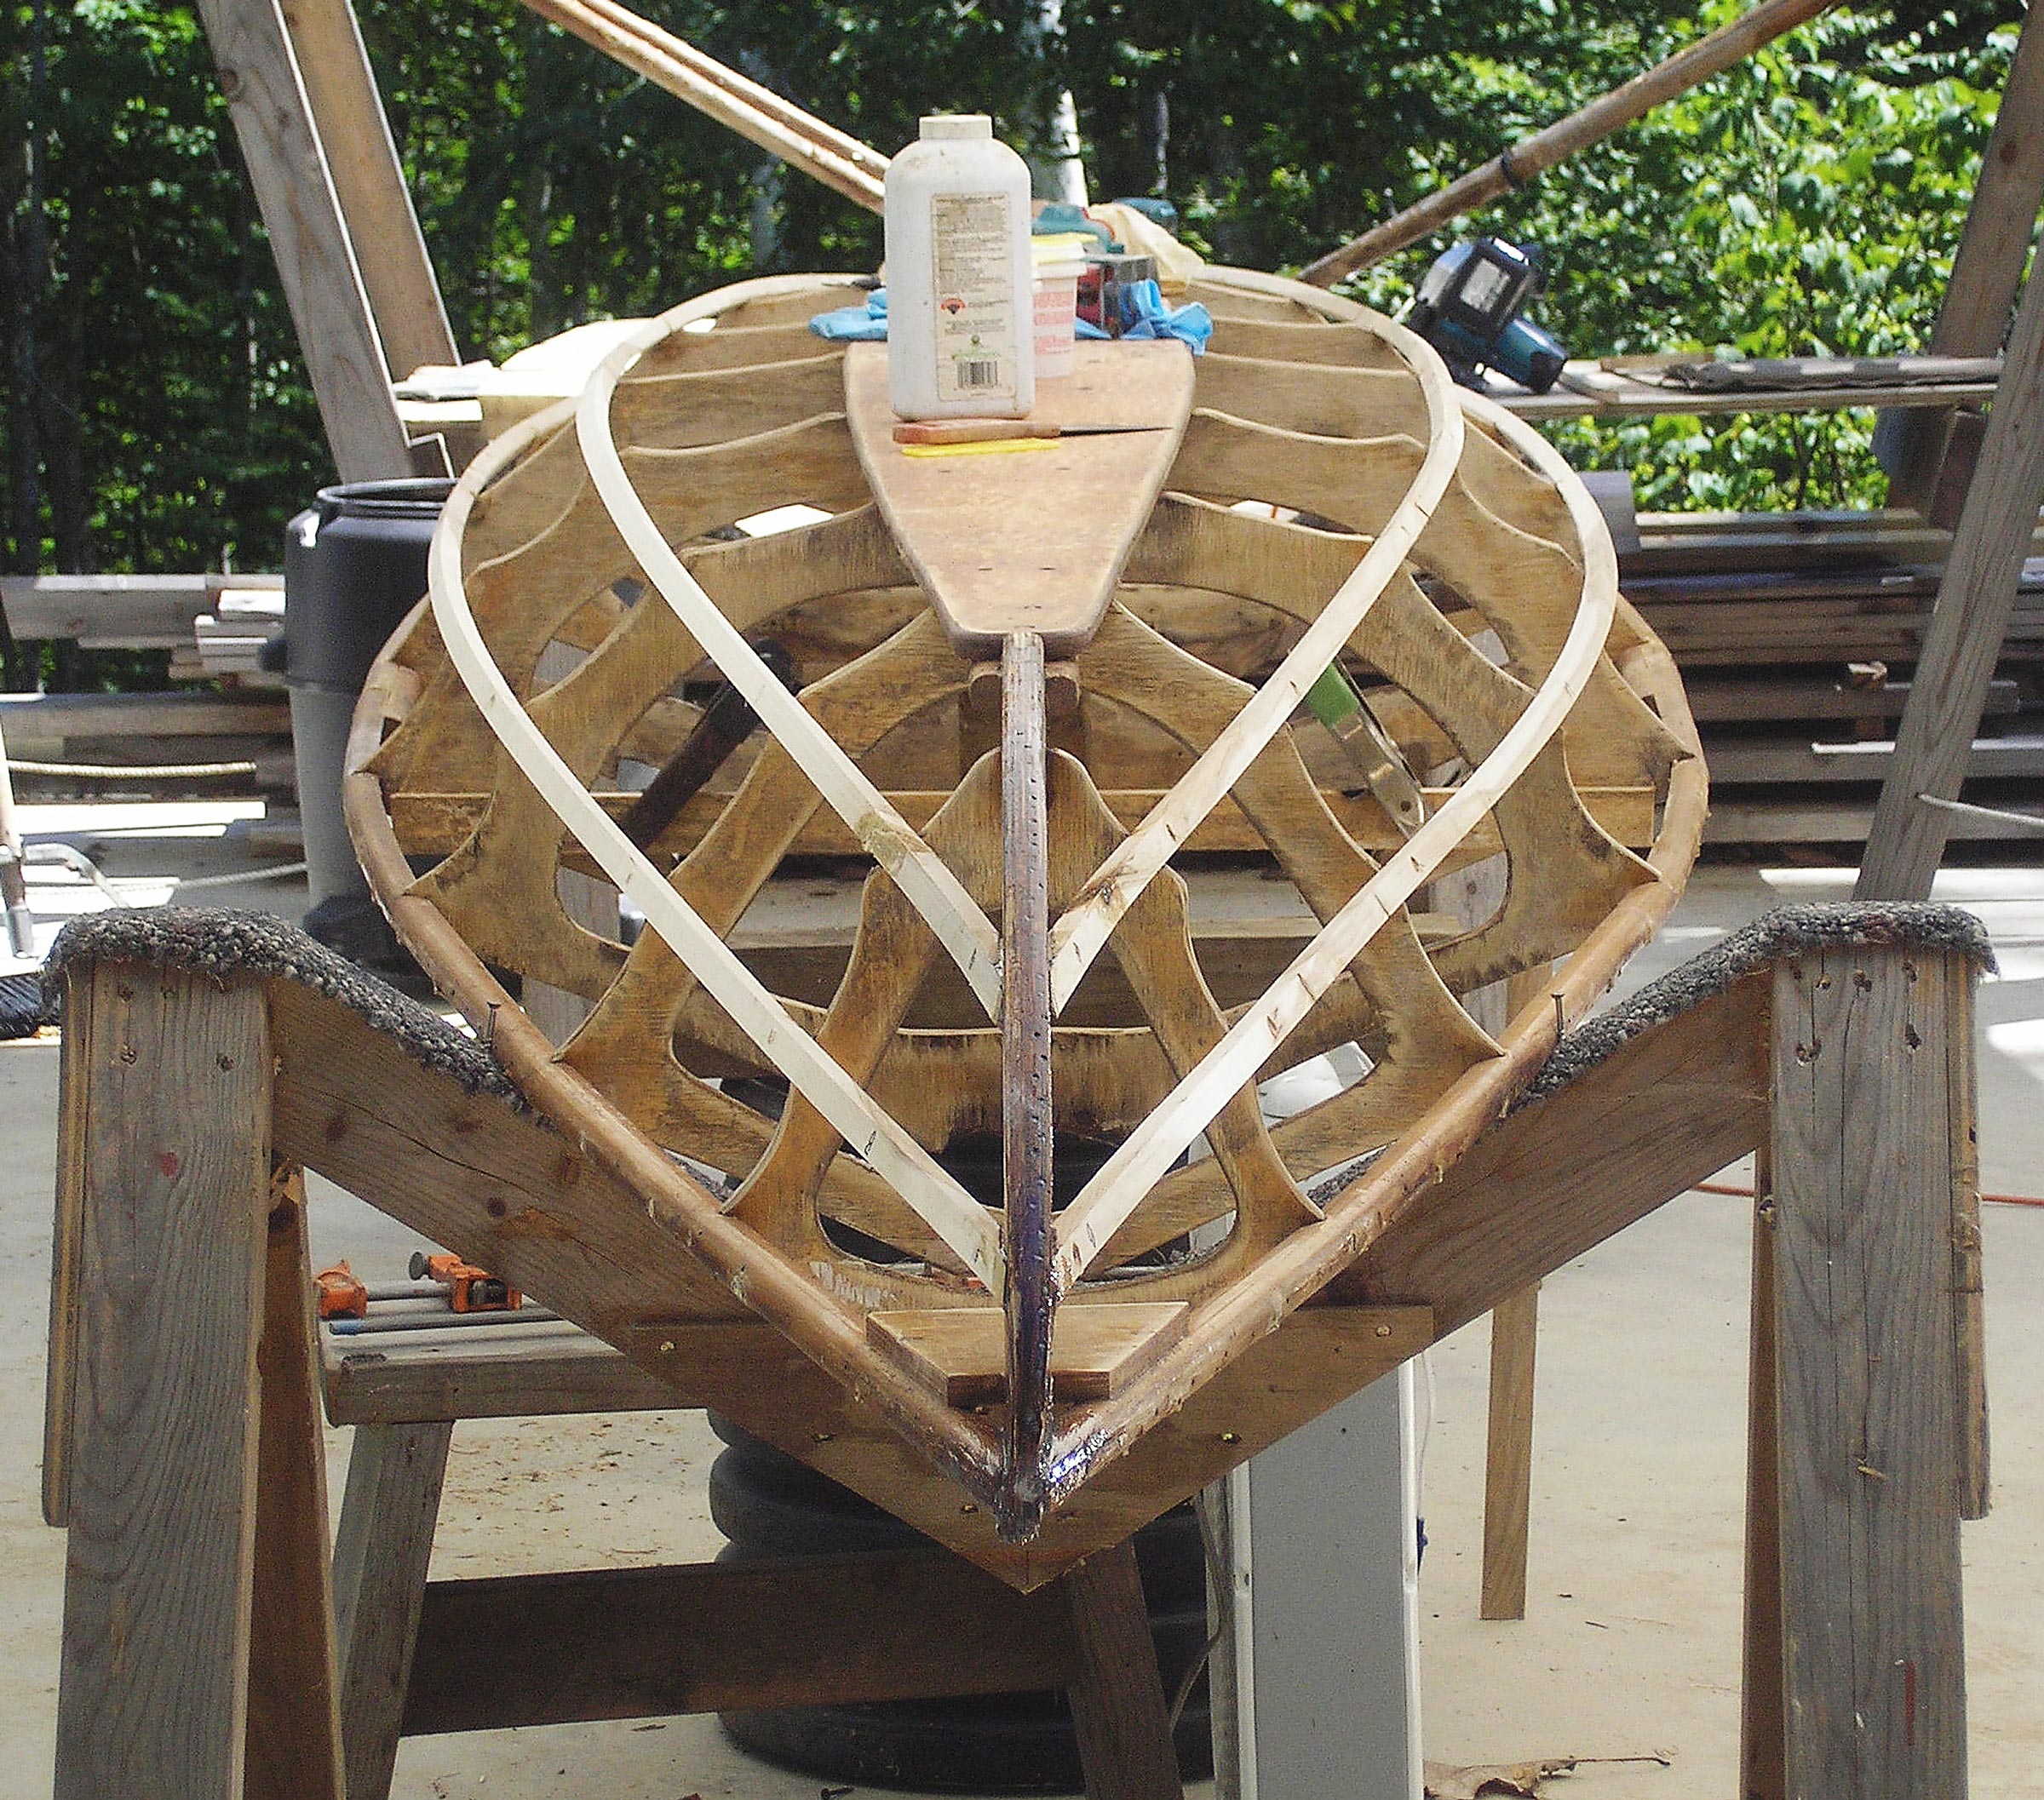
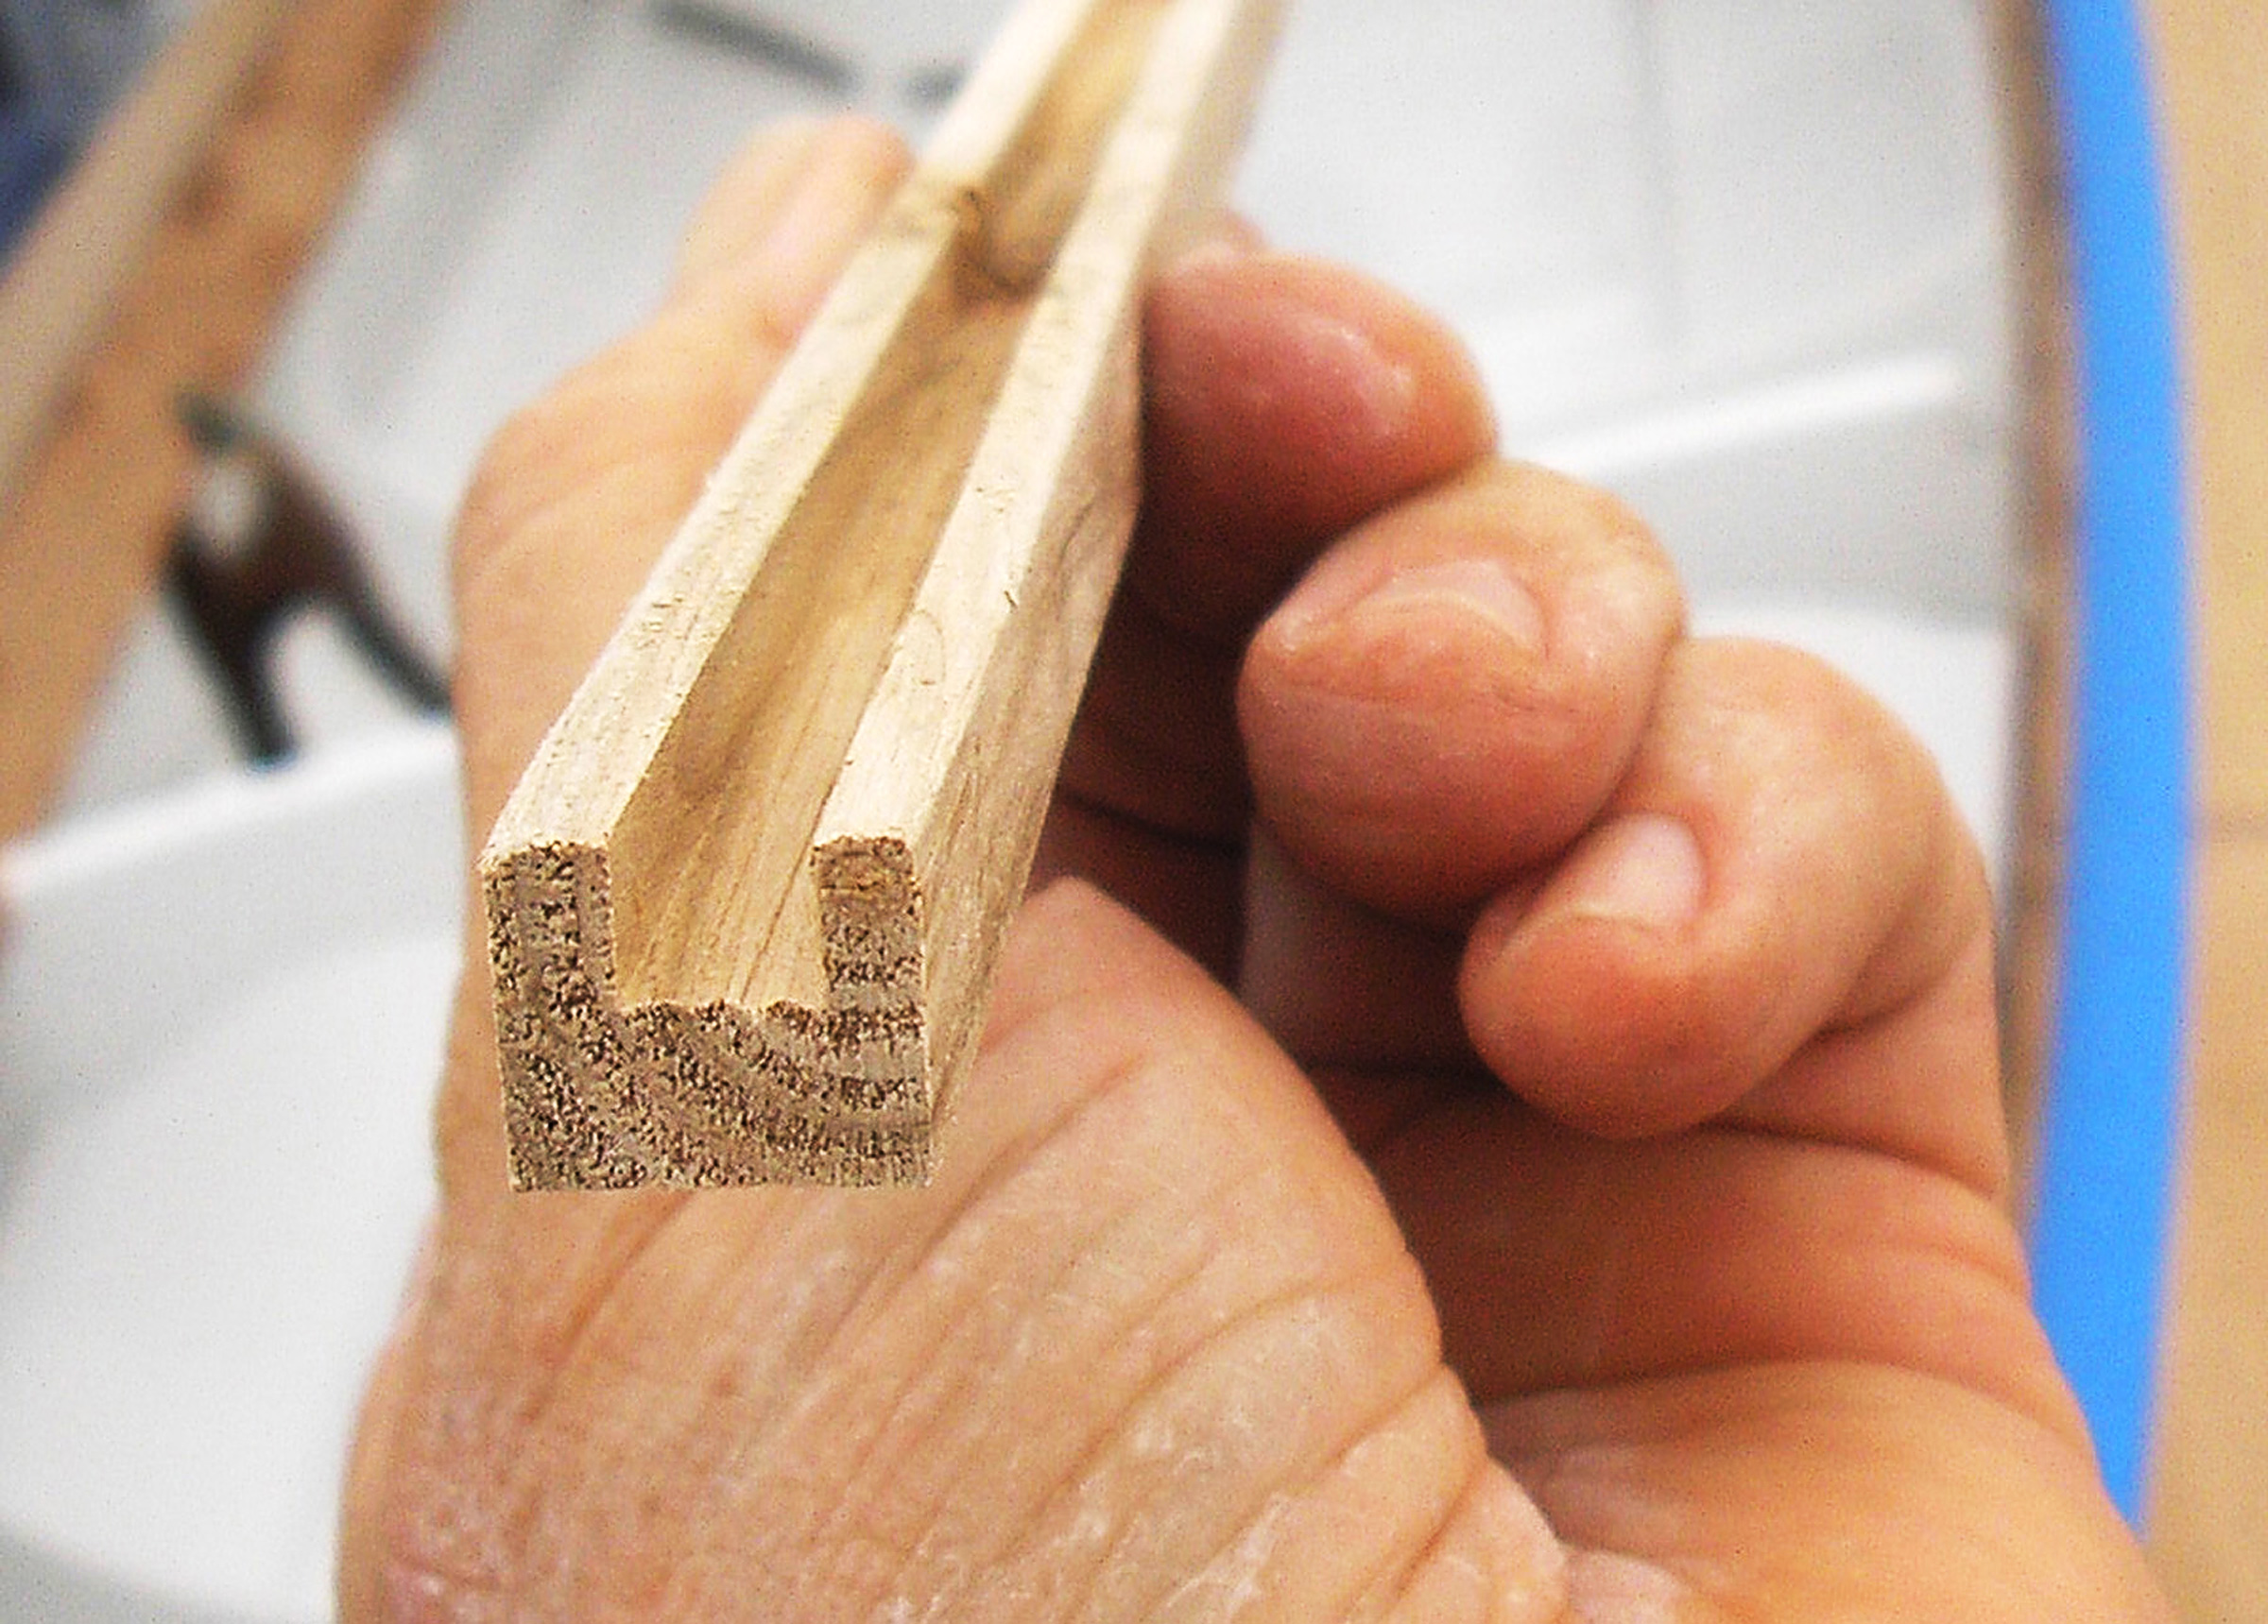
The longitudinals, which have square sections here, would work for a fabric-covered hull, but they’d have to be beveled for plywood planking.
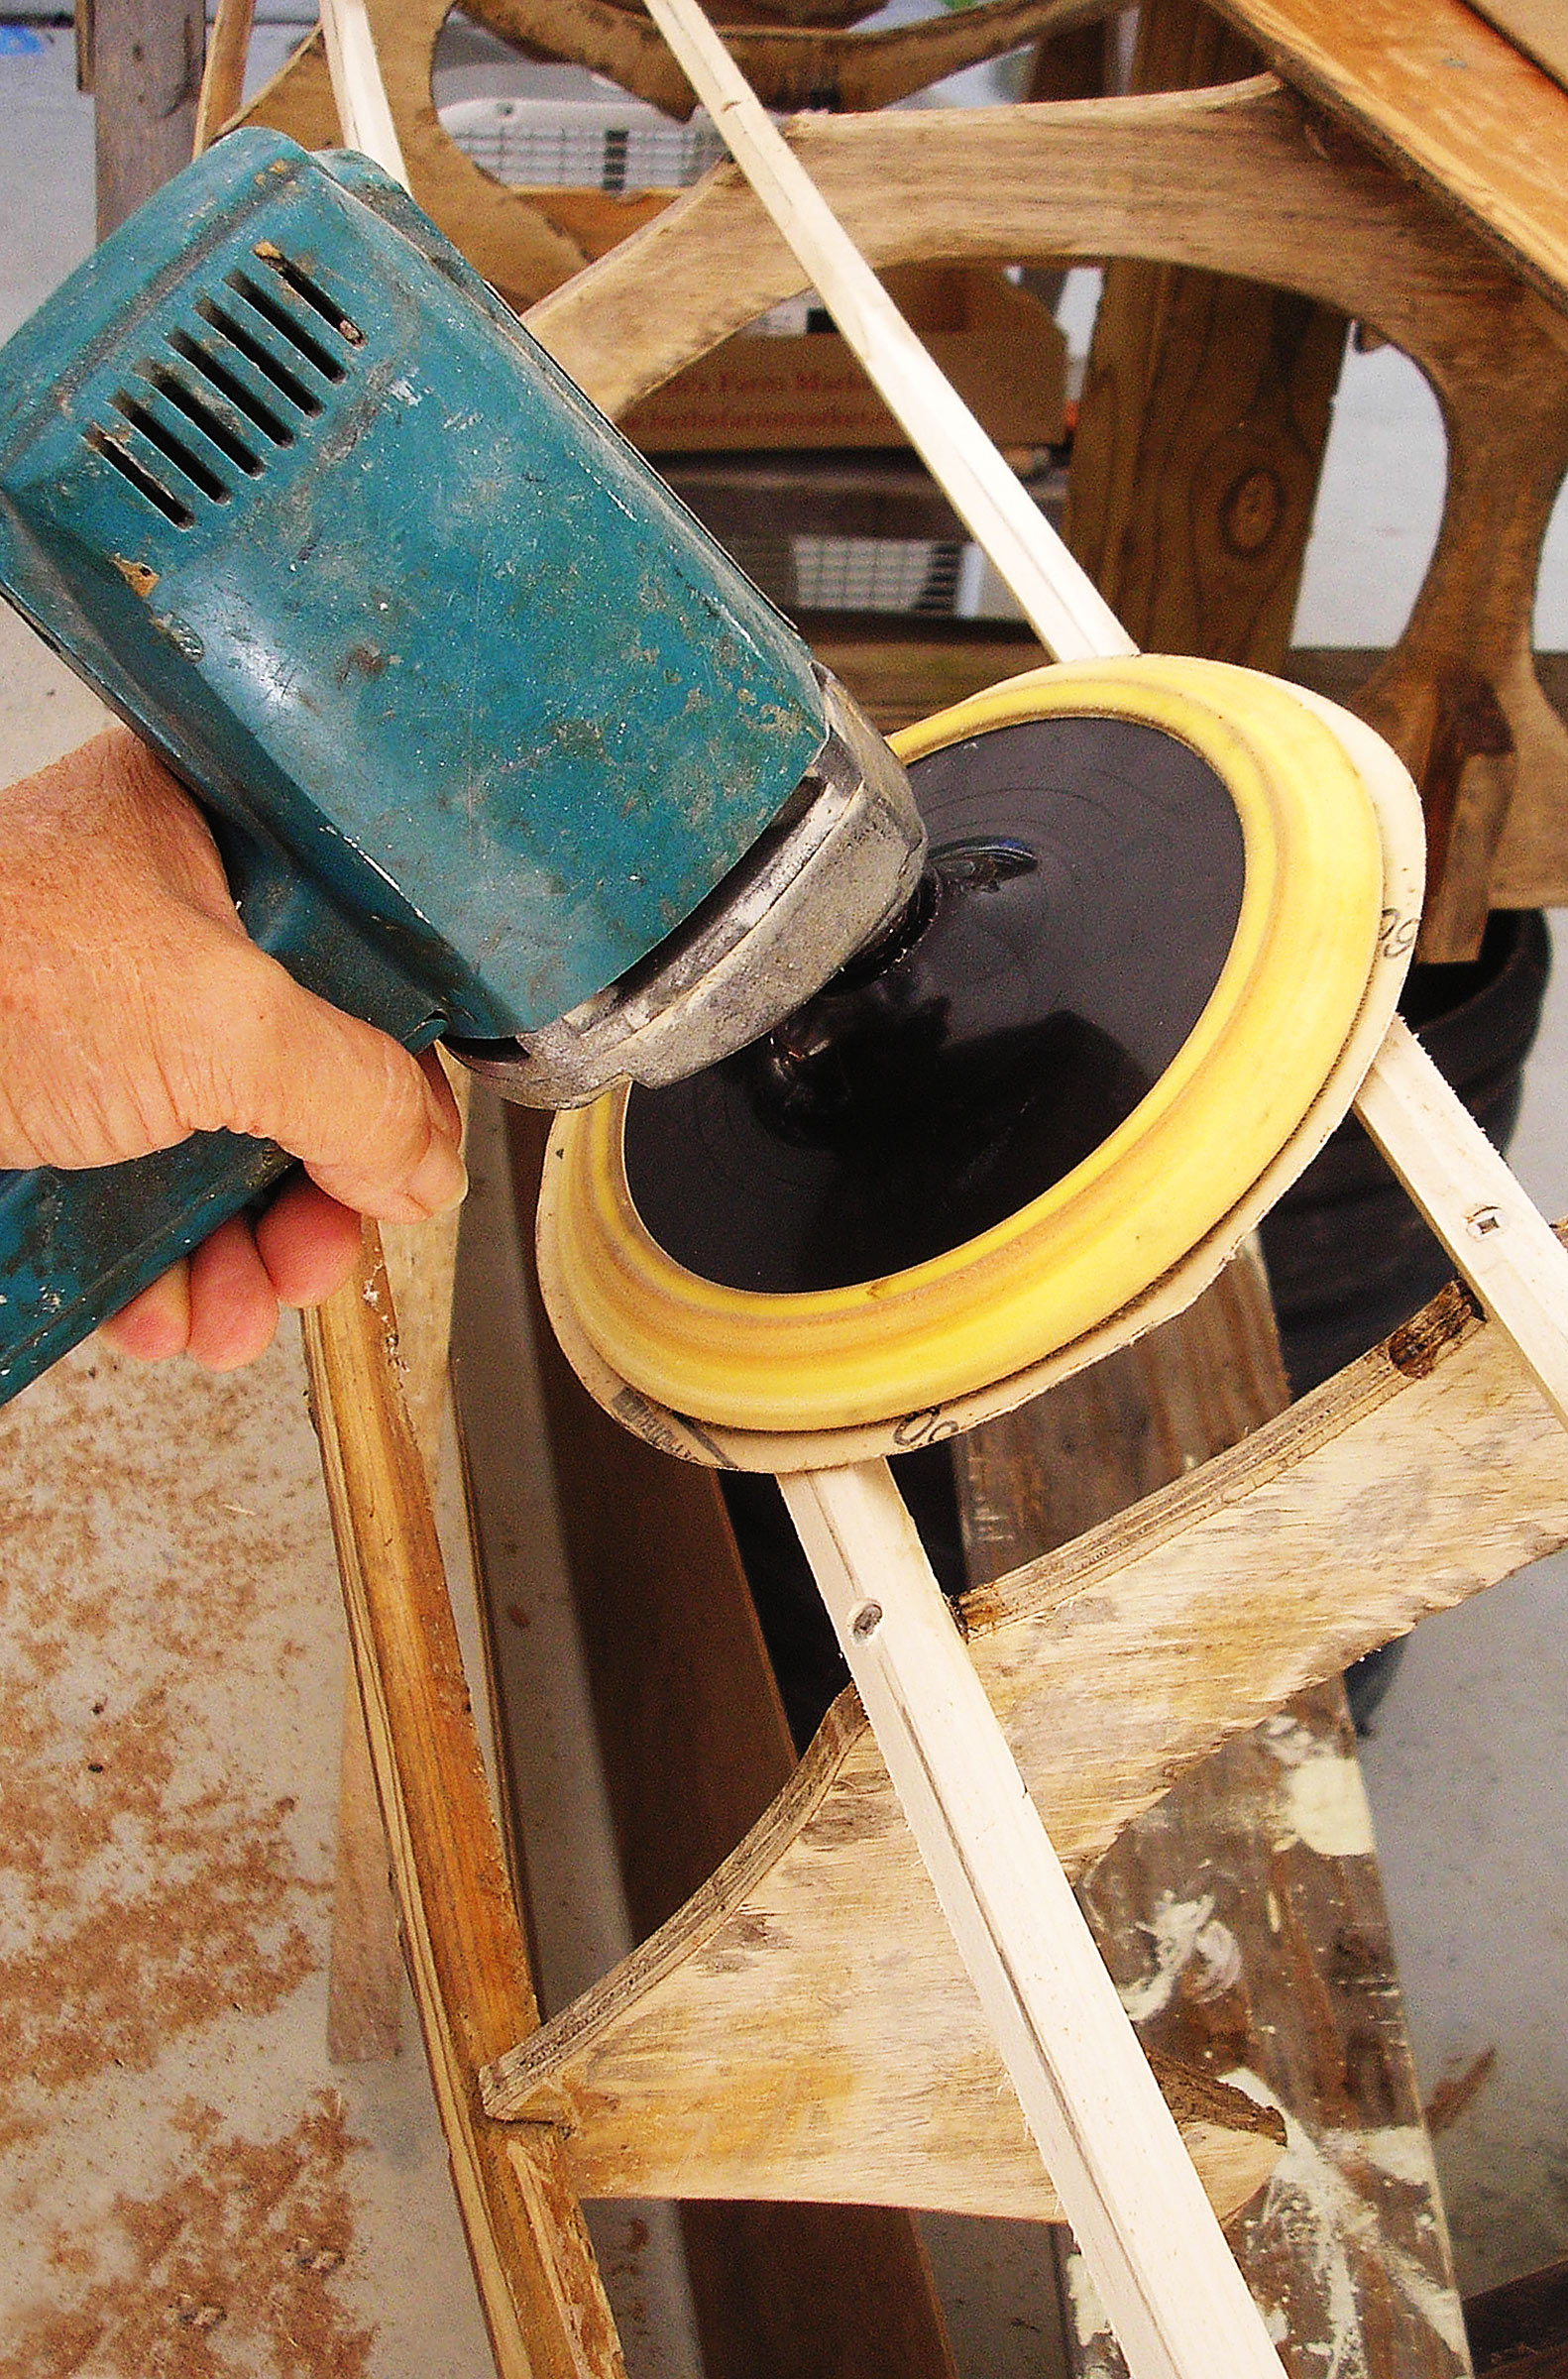
I used a high-speed body grinder with 60-grit paper to bevel flats to the angles required. The large disc bridged the adjacent longitudinals, taking the guesswork out of sanding at the proper angle.
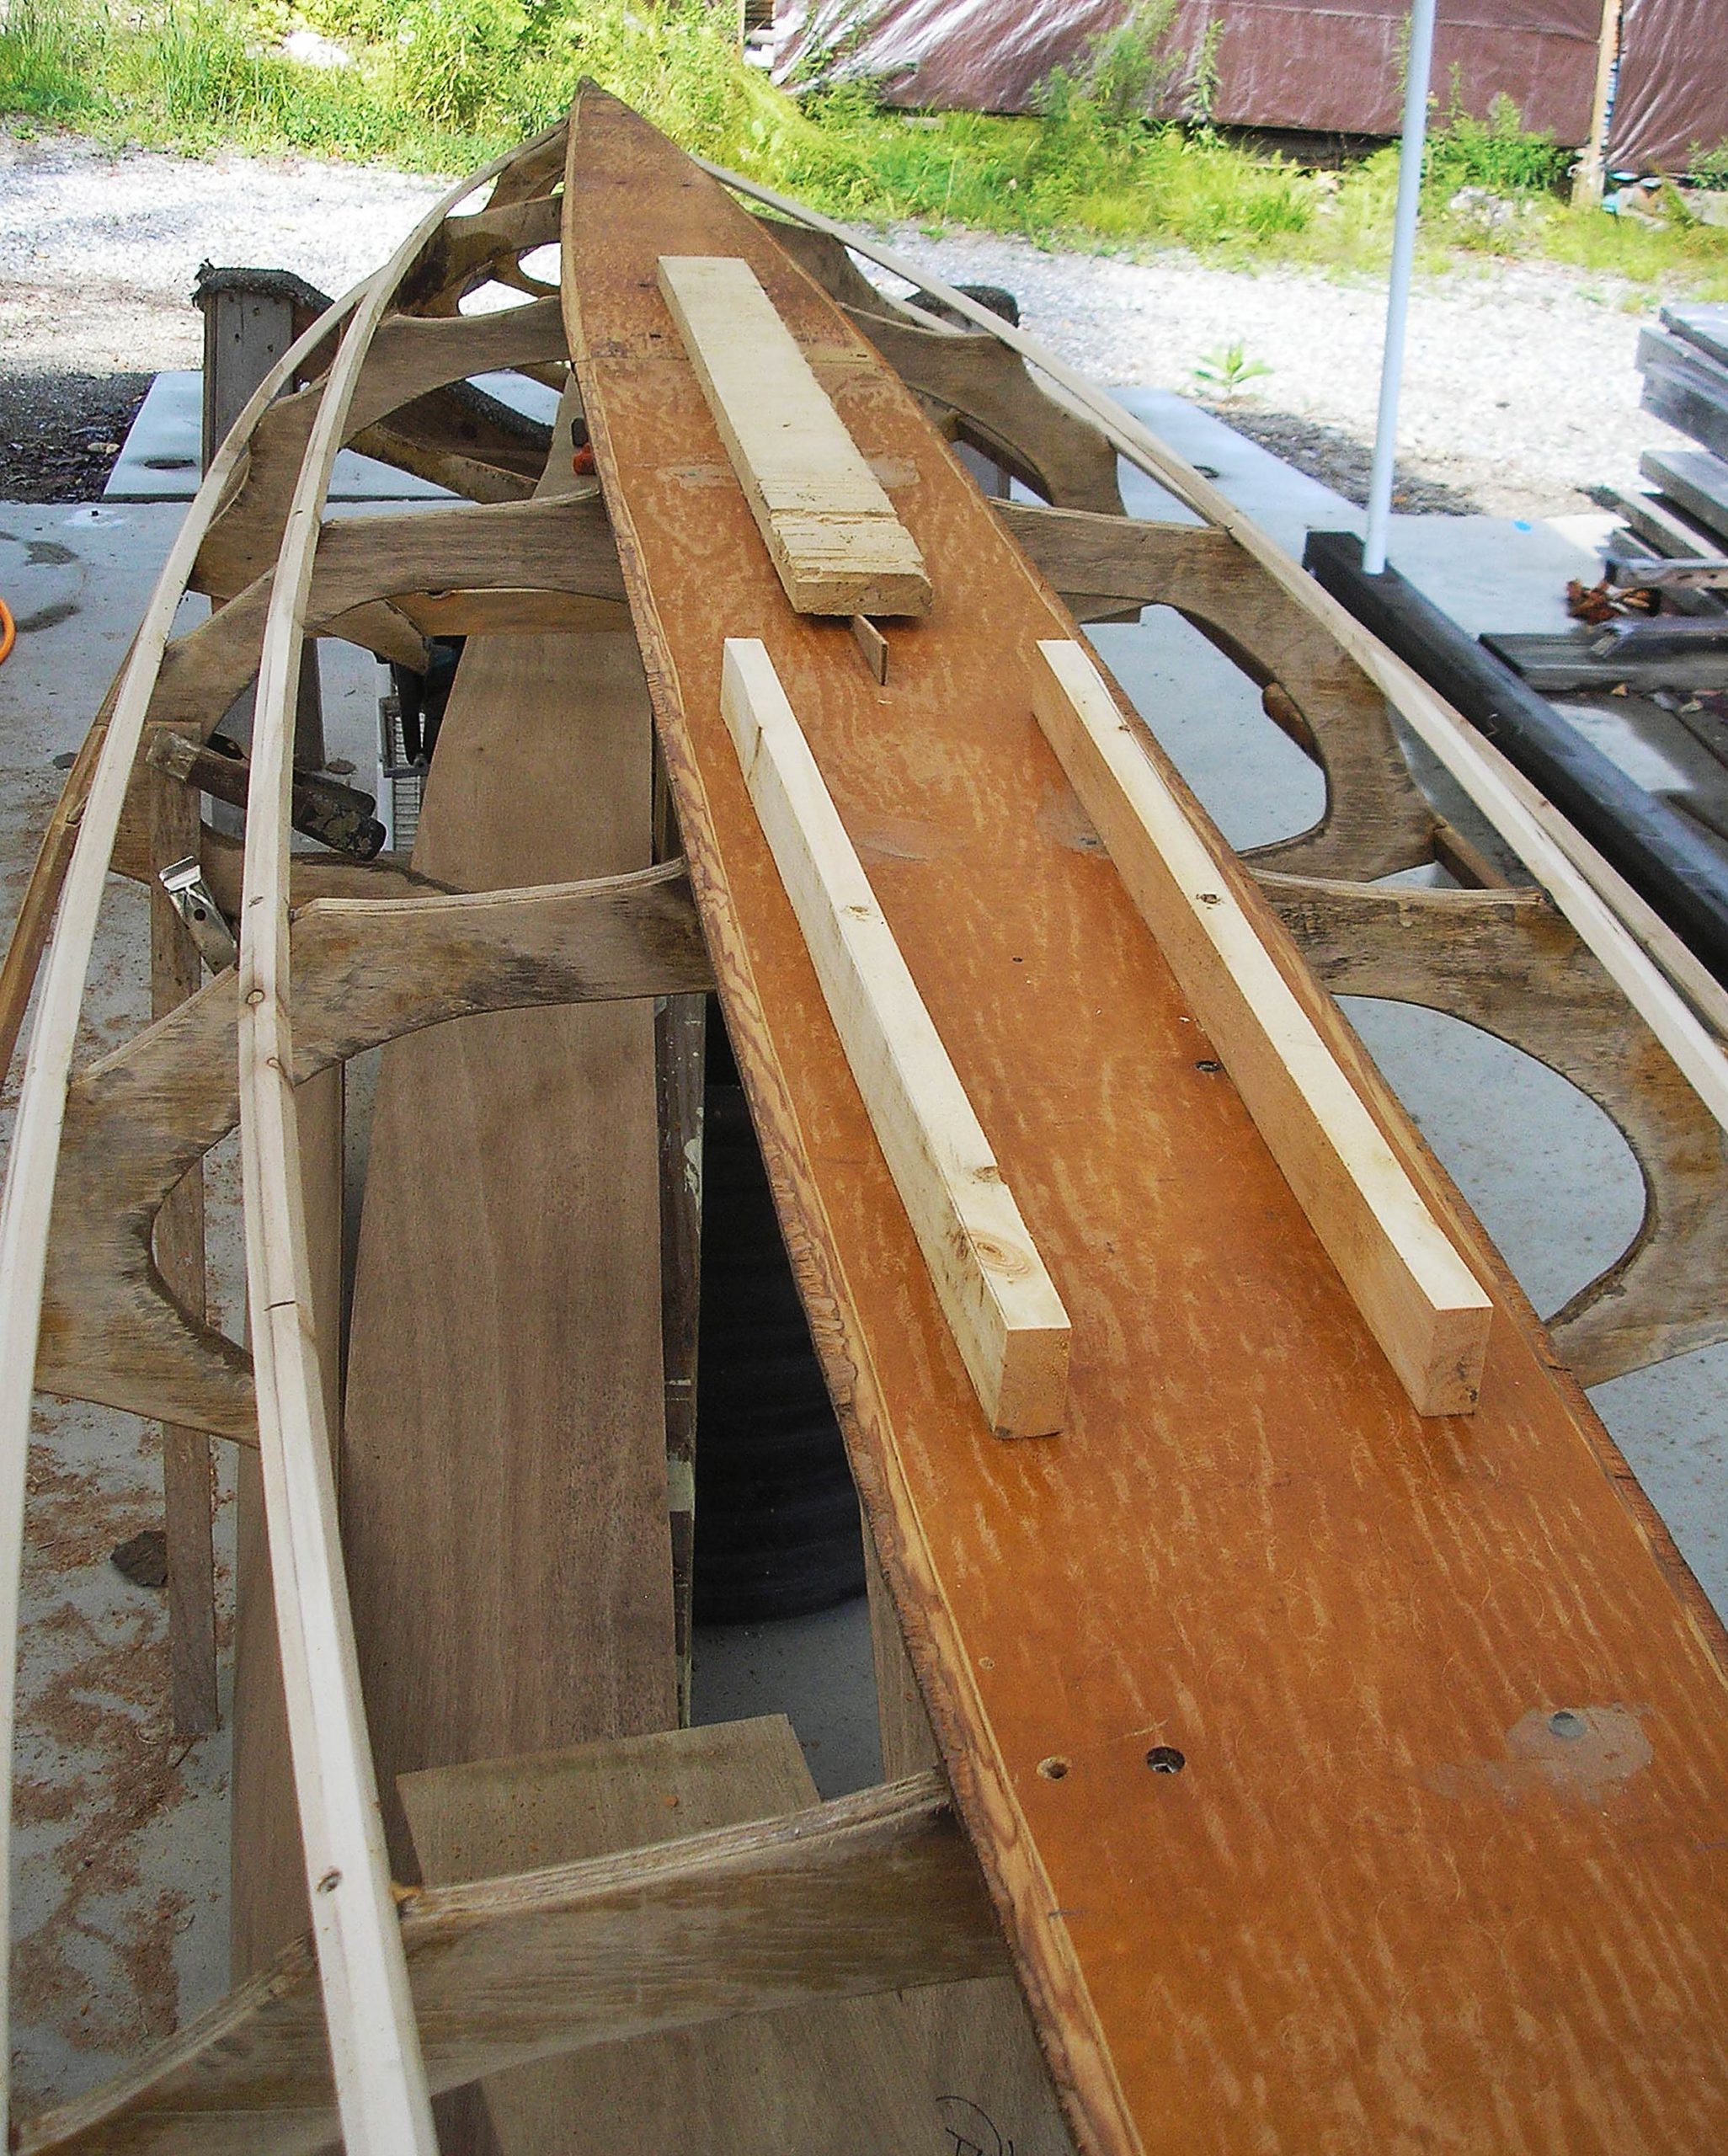
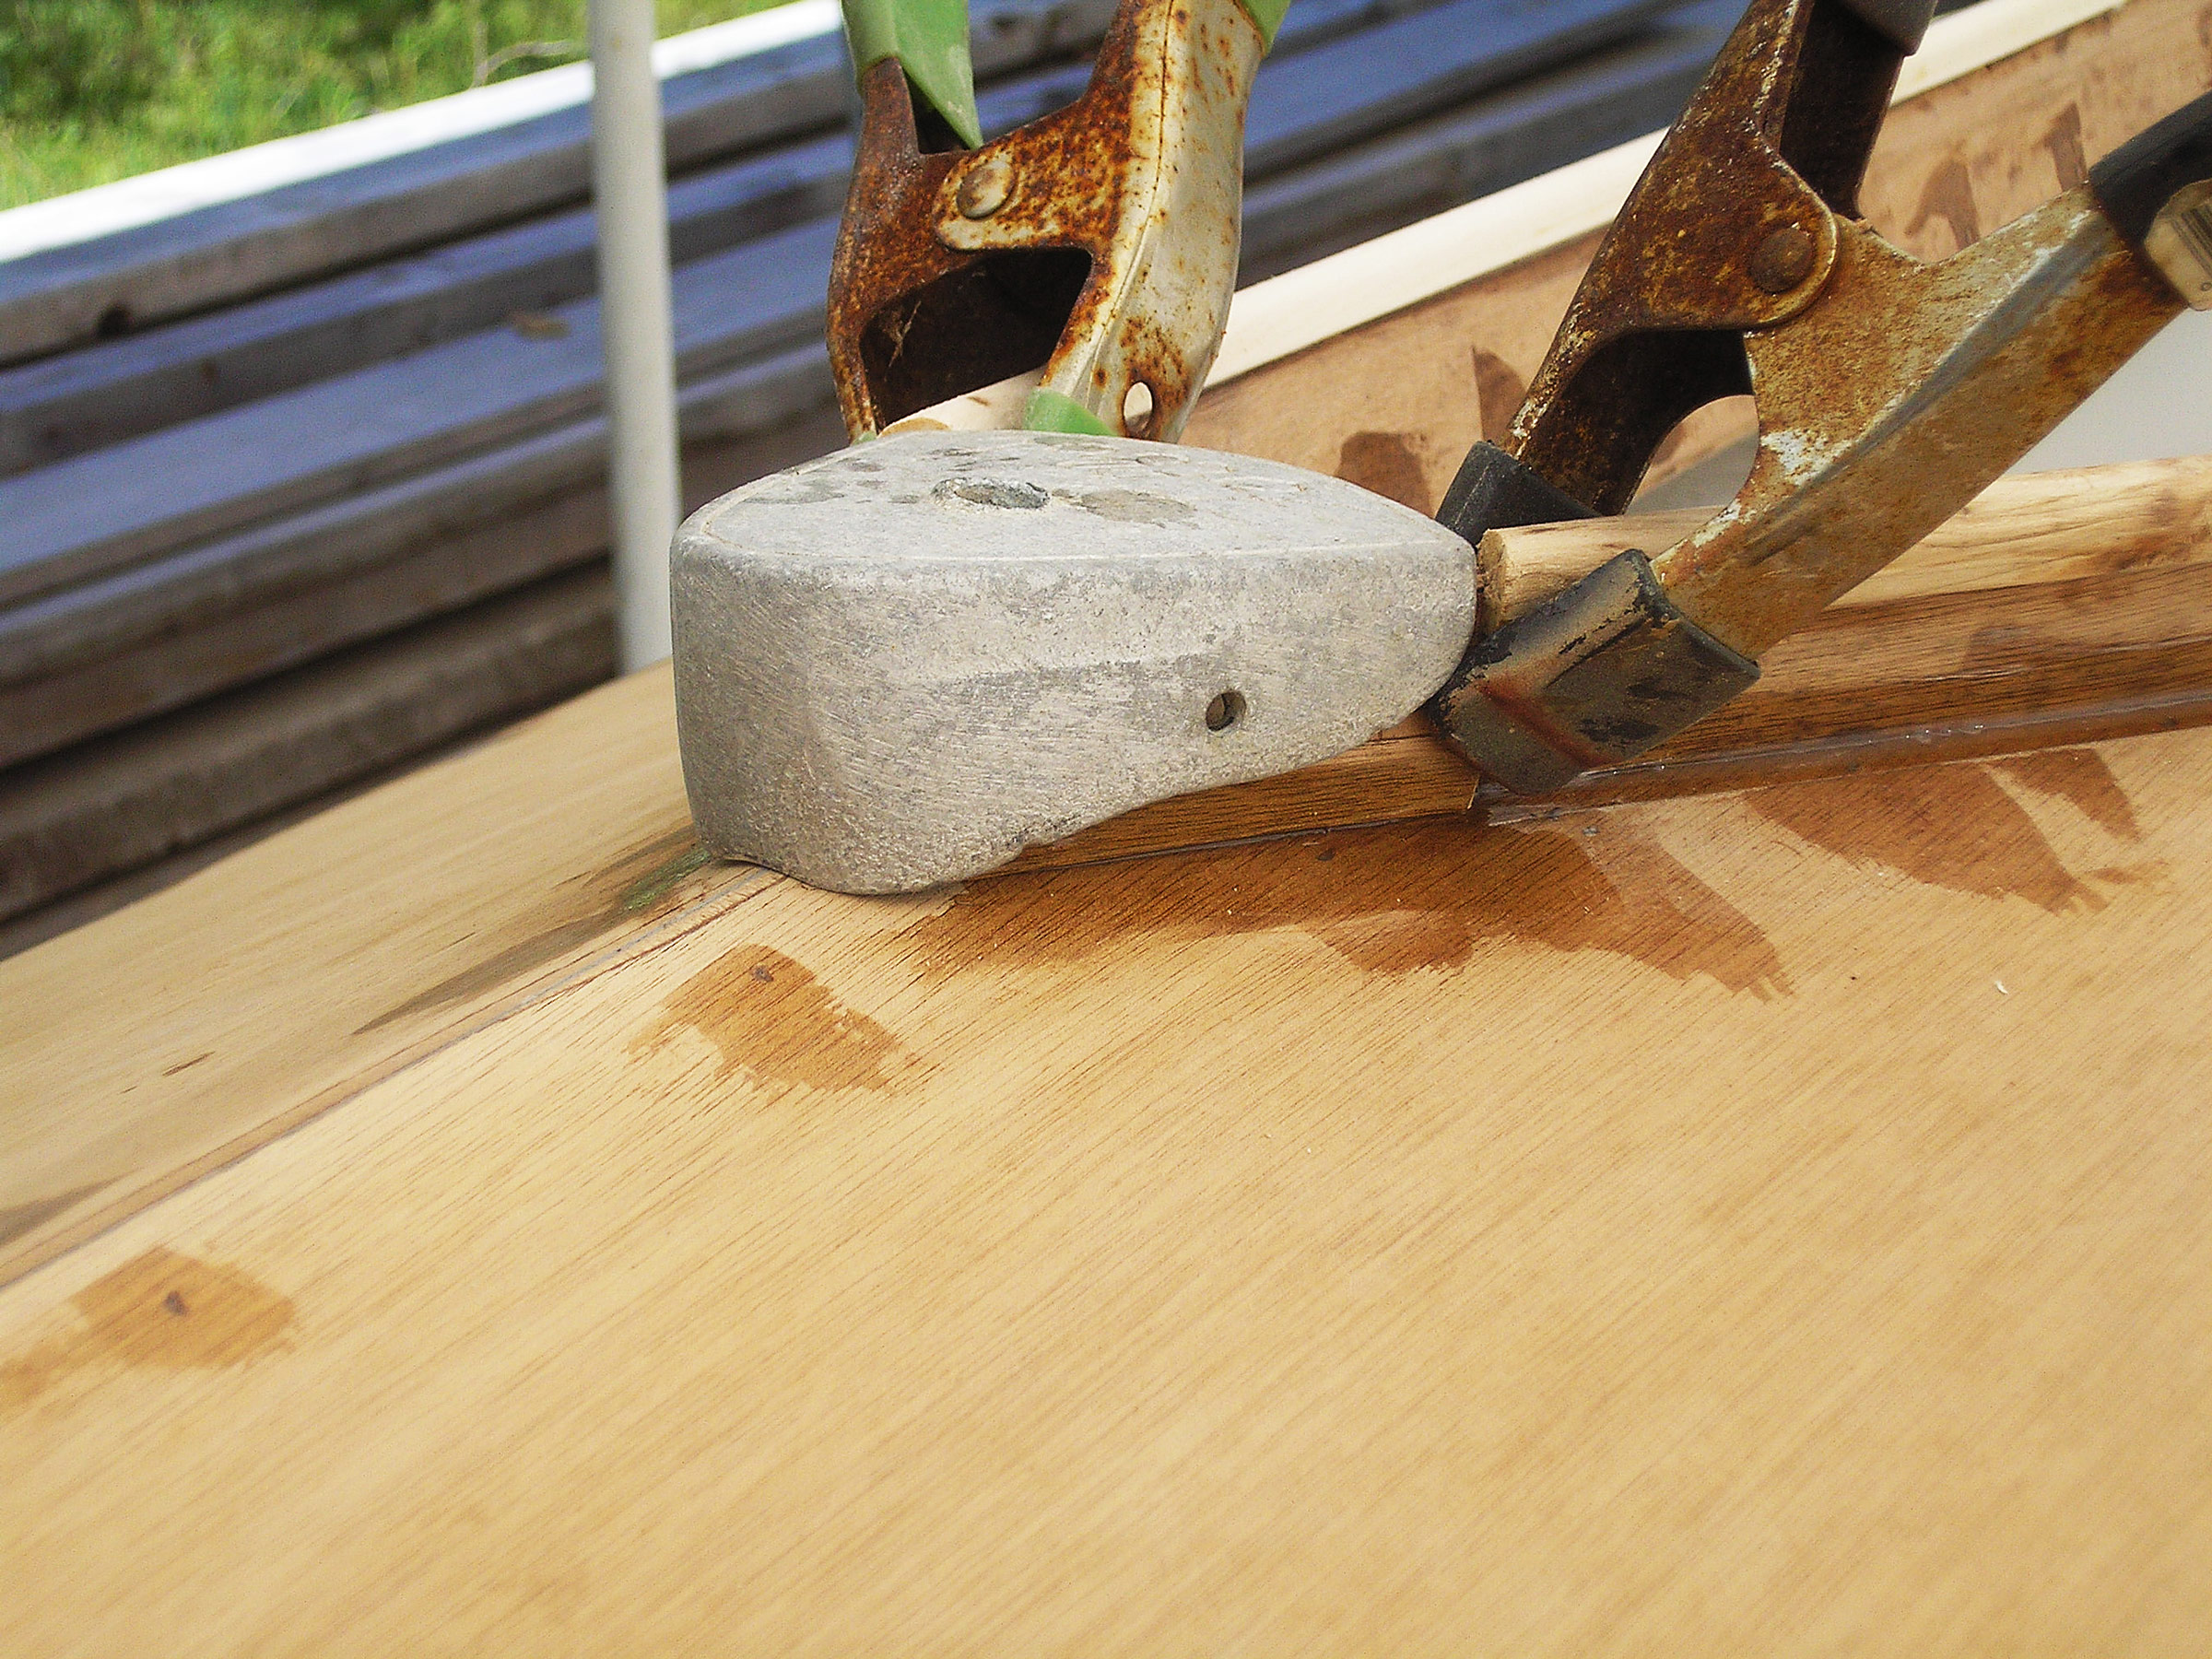
I used wood splints to coax the old bottom plank into some semblance of fairness. The reassembled frame indicated that the bottom plank was intended to be almost perfectly flat and straight—with no rocker at all. The splints were used to achieve that end. But to avoid any possibility of “hogging,” I built in a very small amount of rocker (about 1/4″ overall). The plywood-plank bottom had its edges rounded to work with the fabric covering. For the plywood garboards, I cut rabbets along the bottom’s perimeter to receive the 4mm plywood.

I spiled and dry-fit the 4mm garboards, using the first one to generate the opposite side one. When they were ready to be installed I epoxied them to the keel-plank rabbets and the beveled chine logs. I butted the joints between the plank sections and then eventually taped them with 2″ fiberglass tape, inside and out.
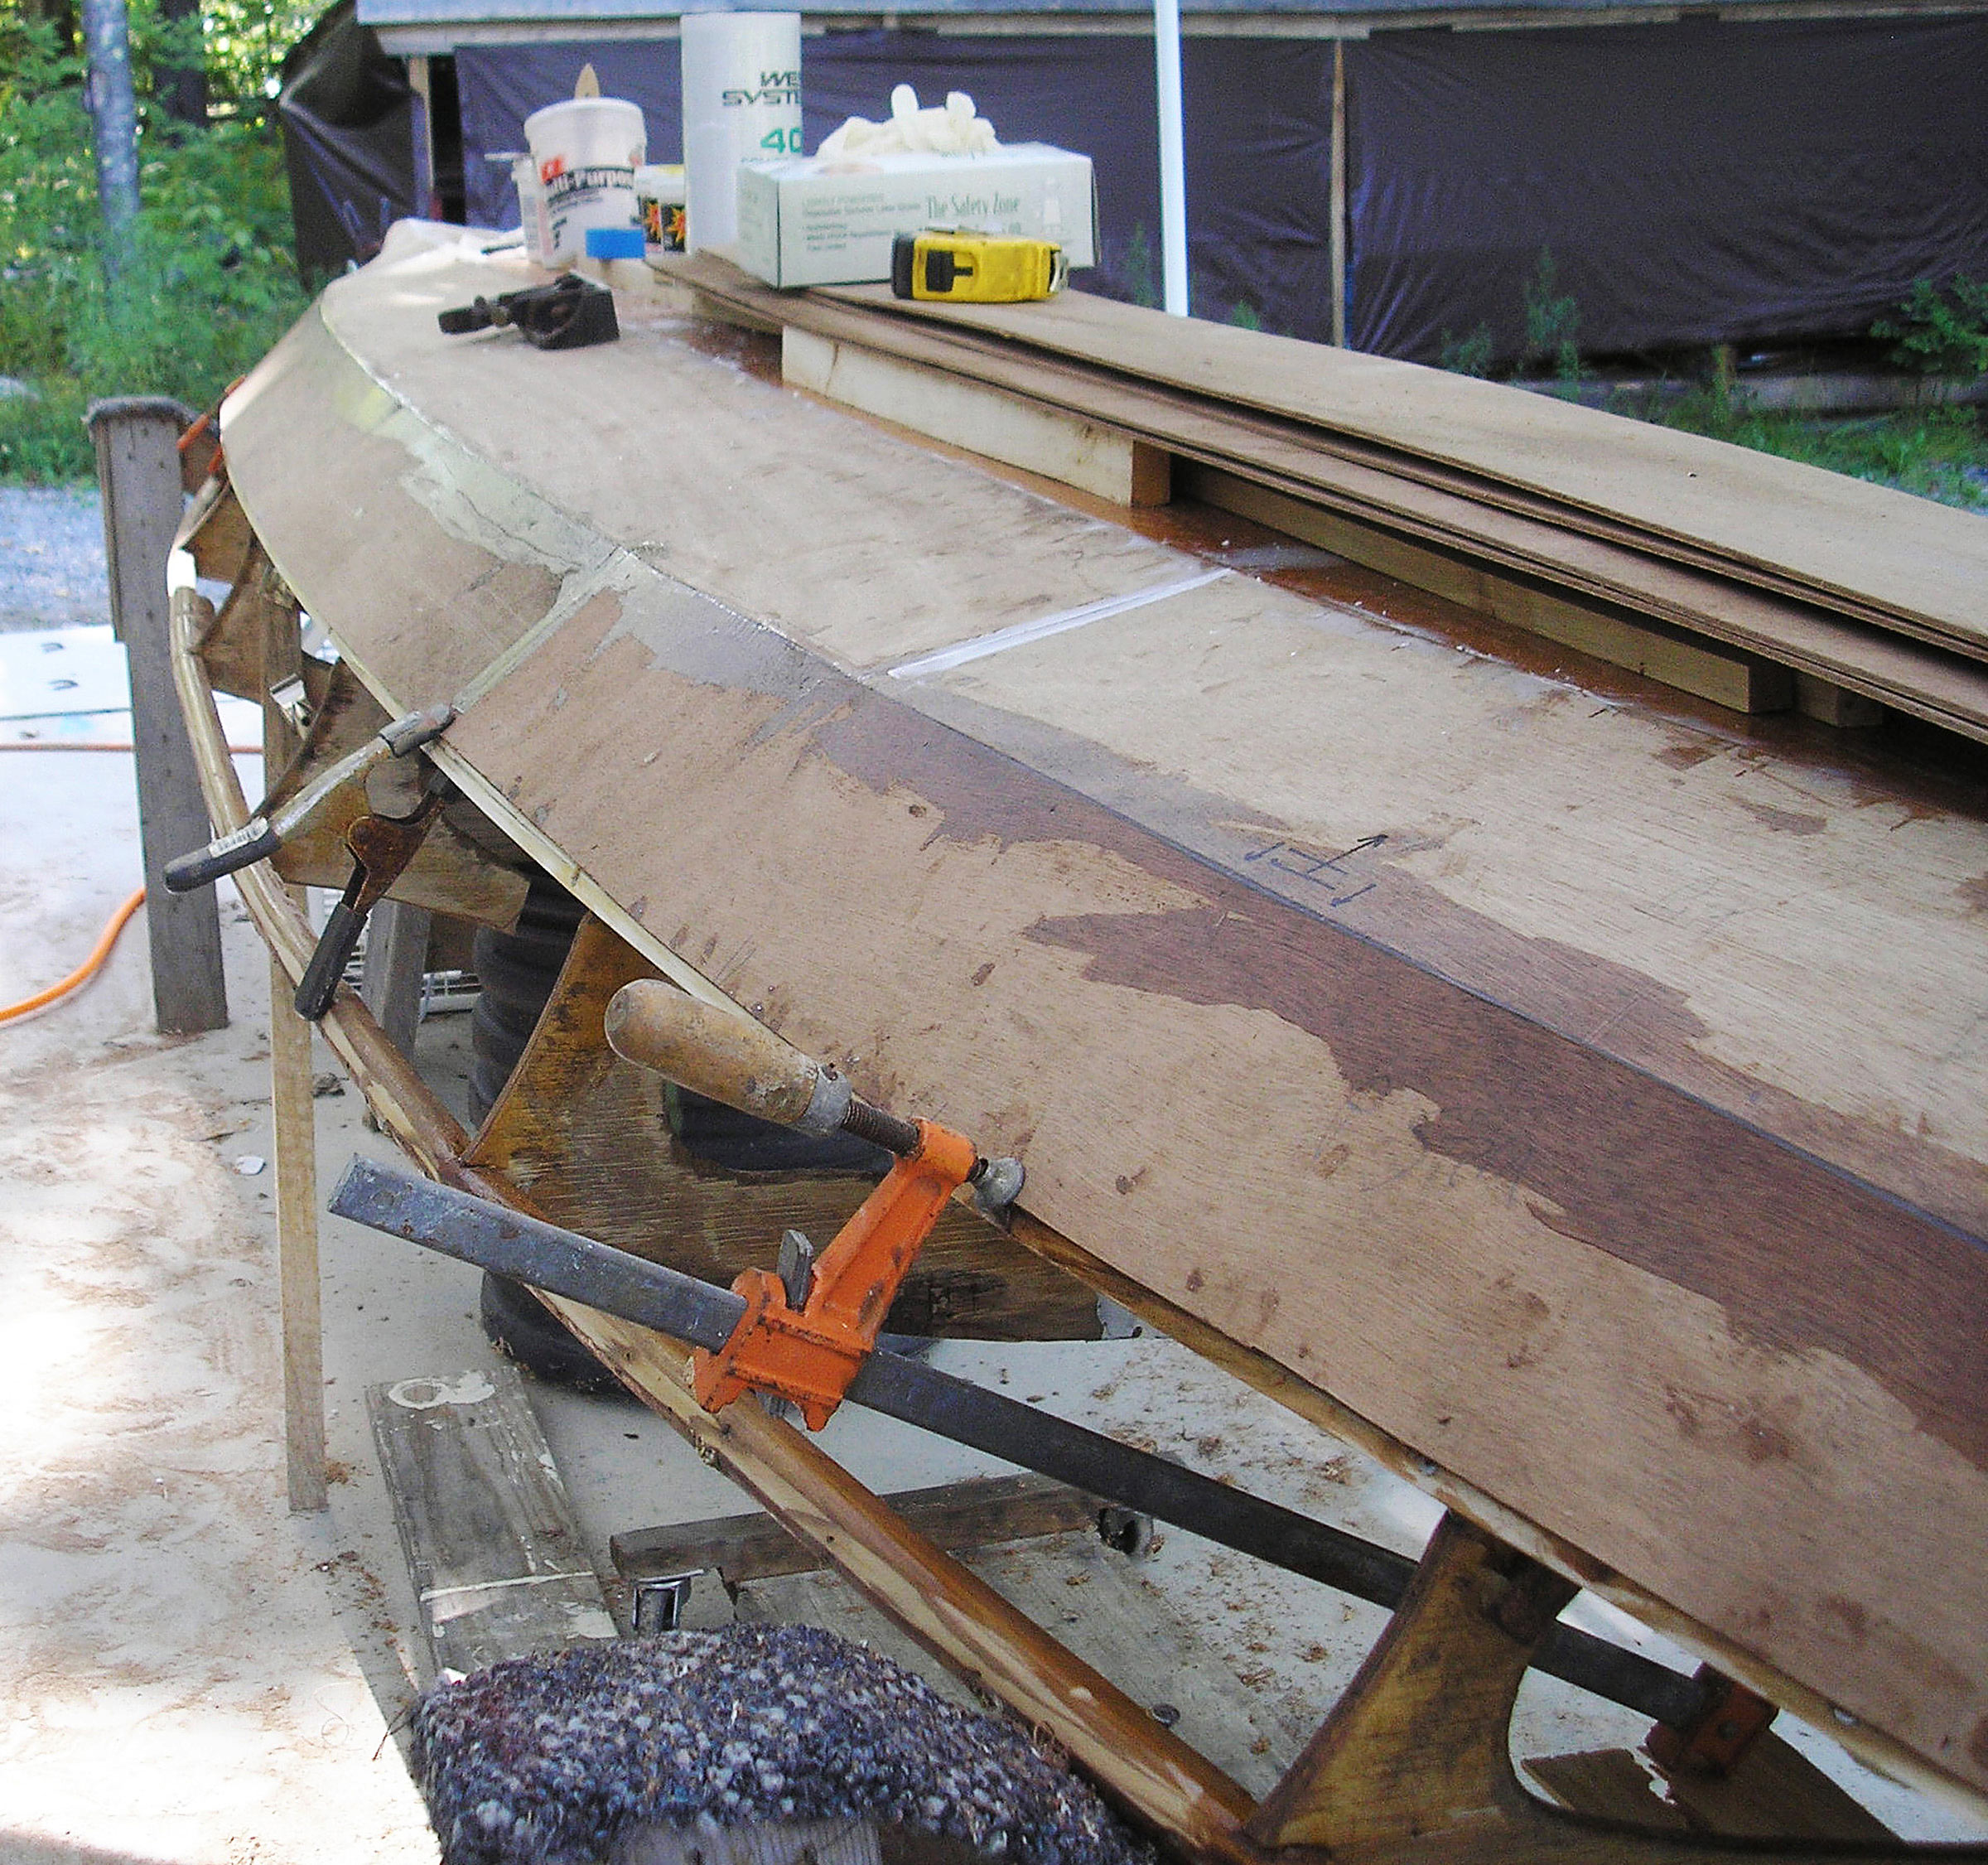
I made the remaining two strakes from 3mm okoume plywood. I fastened the planks to the chine logs with epoxy and galvanized brads installed with a pneumatic nailer. In places, I had to push or pull the stringers to achieve fair curves.

After installing the sheerstrakes, I countersunk and epoxy-puttied all nail holes and gaps, then sanded the hull fair. The original surviving bottom plank was some kind of double-sided MDO plywood. It was in better shape than any other original part of the boat, and I was careful not to sand through the MDO covering except where I had to hollow it out slightly for 2″ ’glass tape at the butt joint.
I turned the hull over (it was surprisingly light) and cleaned up the interior, sanding and puttying where necessary. I made and installed the cockpit carlins and deck stringers using both new rock maple and some of the original spruce, where I could salvage it (with cockpit carlins and deck stringers installed).
I taped all butt joints with ’glass and epoxy and saturated the hull interior using epoxy reduced with a 50/50 mixture of methyl ethyl ketone and toluene.
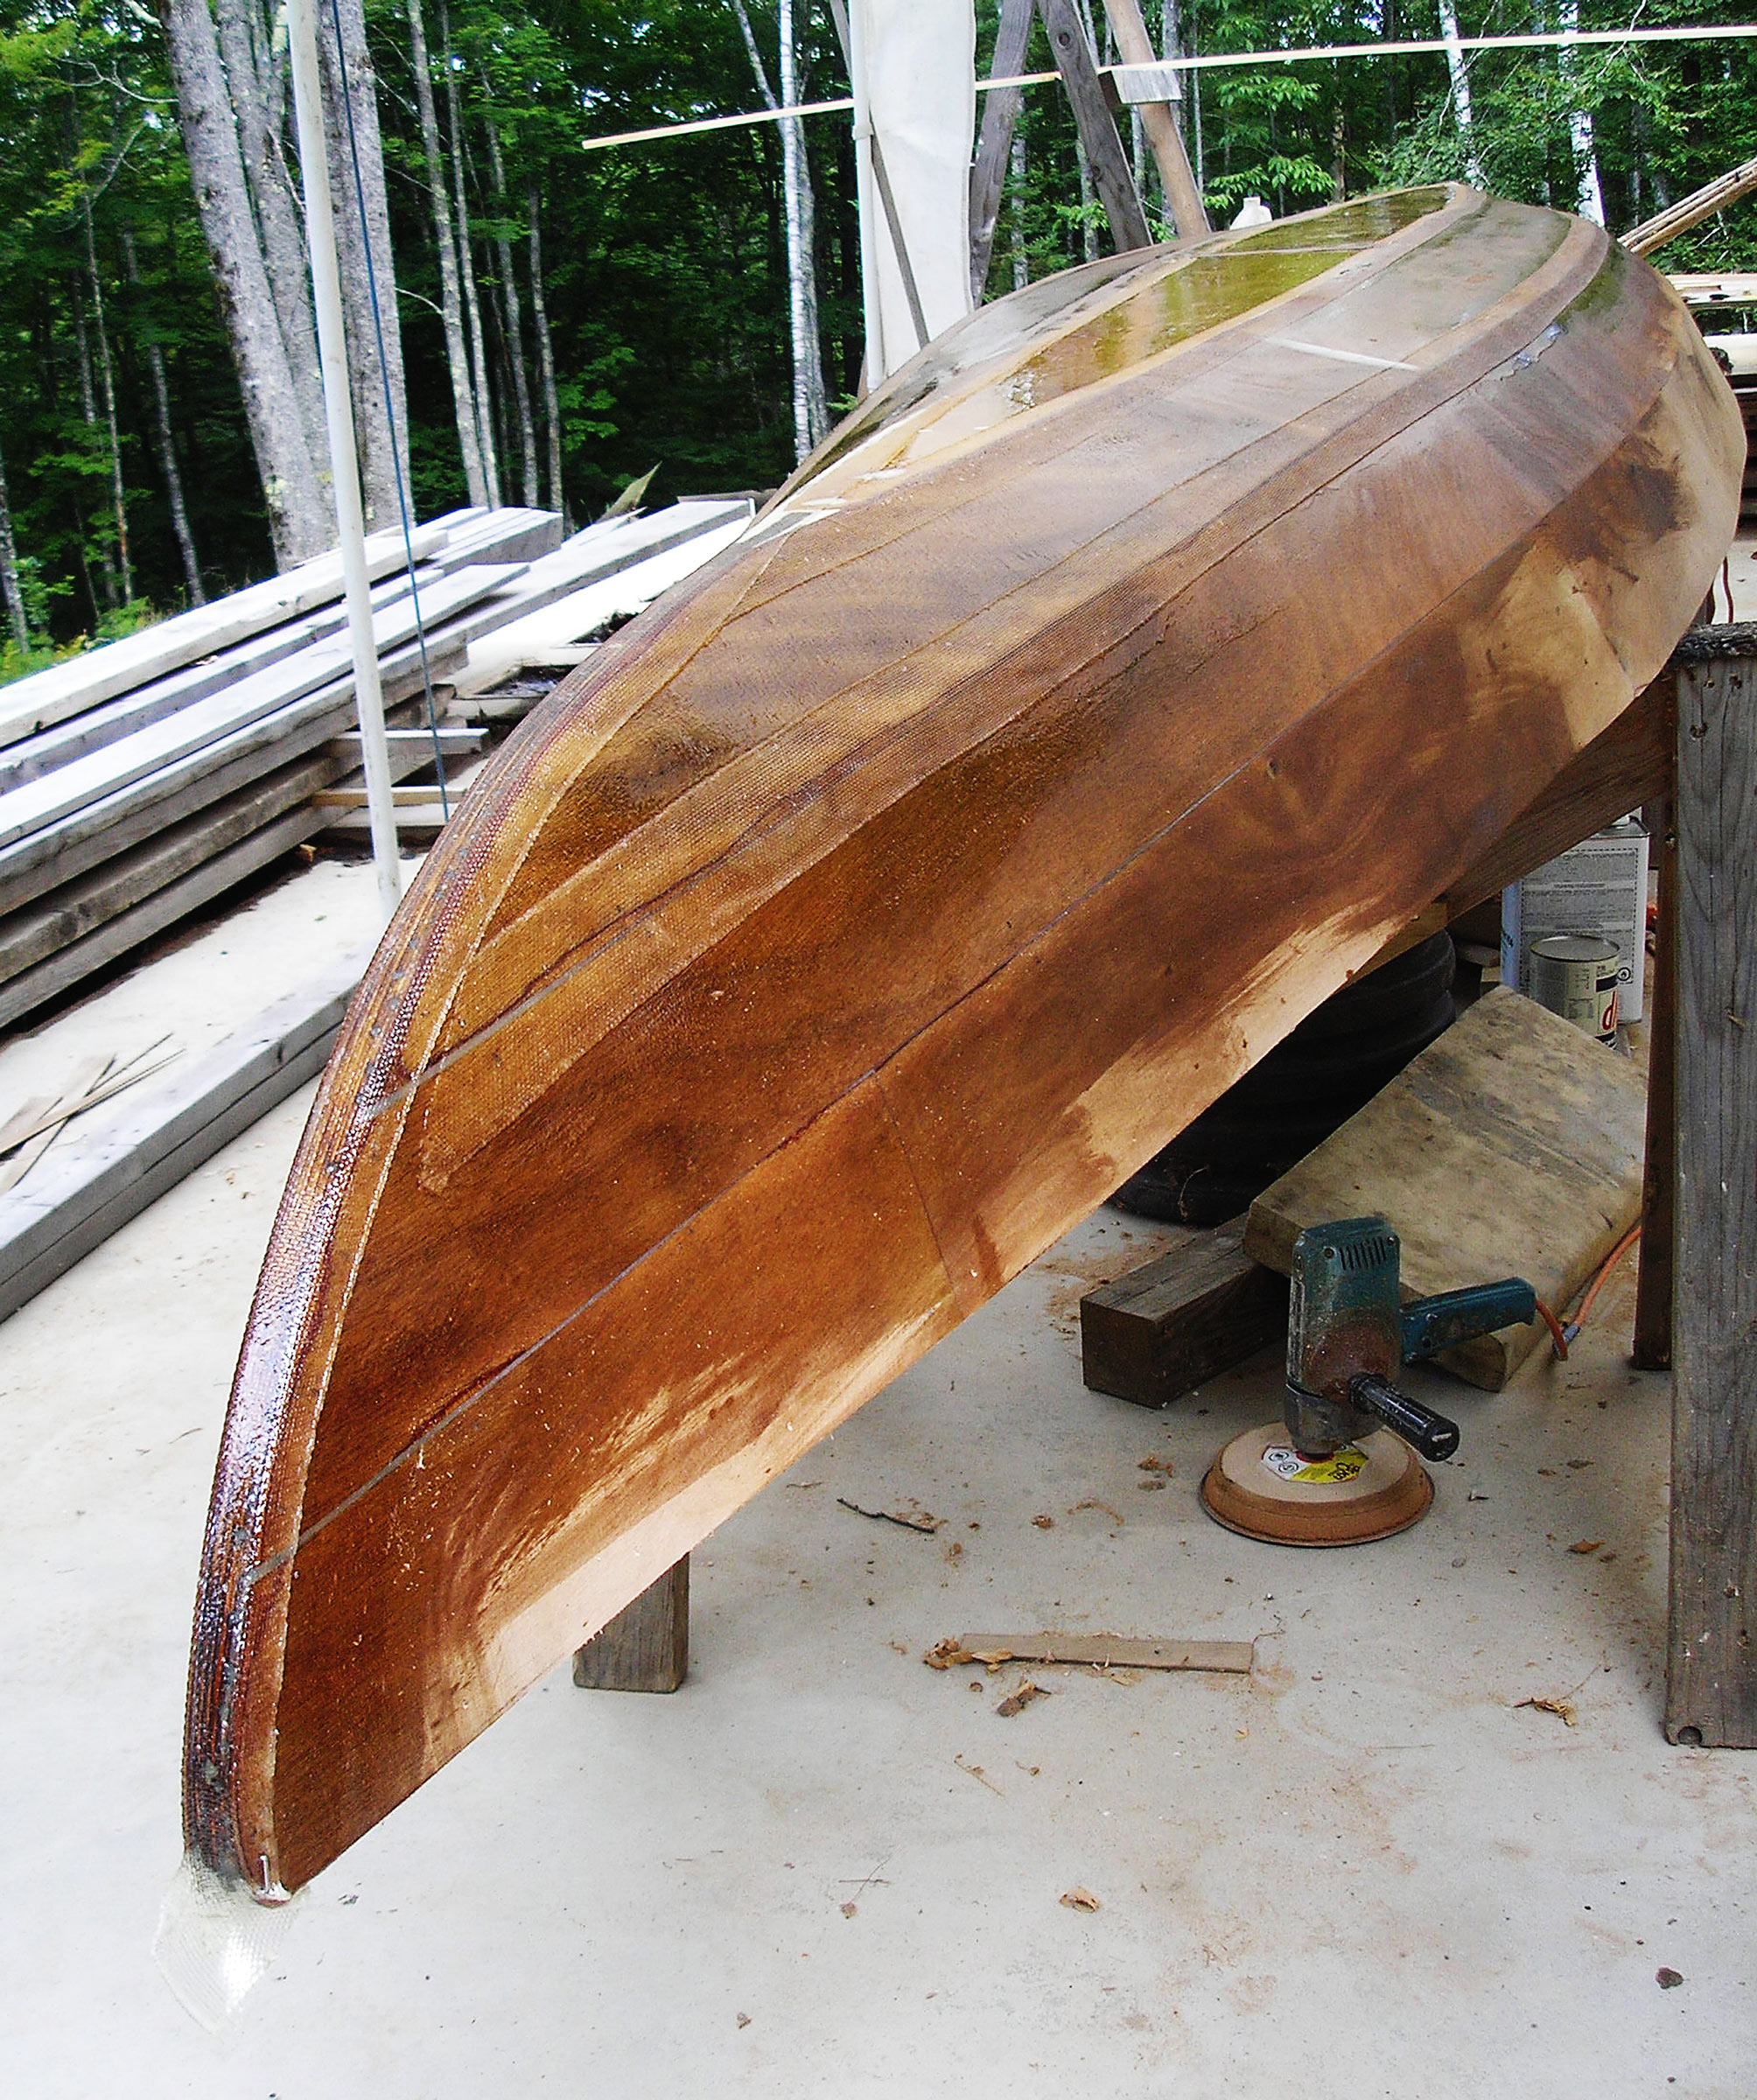
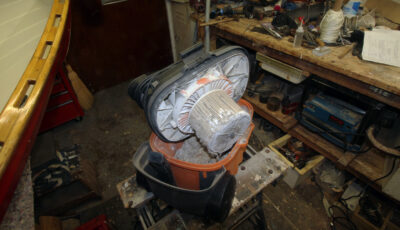
I turned the hull back upside down and finished the exterior, fairing the hull with a low-speed body grinder, seen on the floor, which was equipped with an 8″ soft pad and 80-grit paper. I then taped all underwater seams and butts using 2″ fiberglass tape soaked with epoxy.
When the epoxy had cured, I sanded the taped seams smooth to a feathered edge using the grinder. After a final application of epoxy putty where needed, I later finish-sanded the hull in stages: 80-grit, 120-grit, then 180-grit.
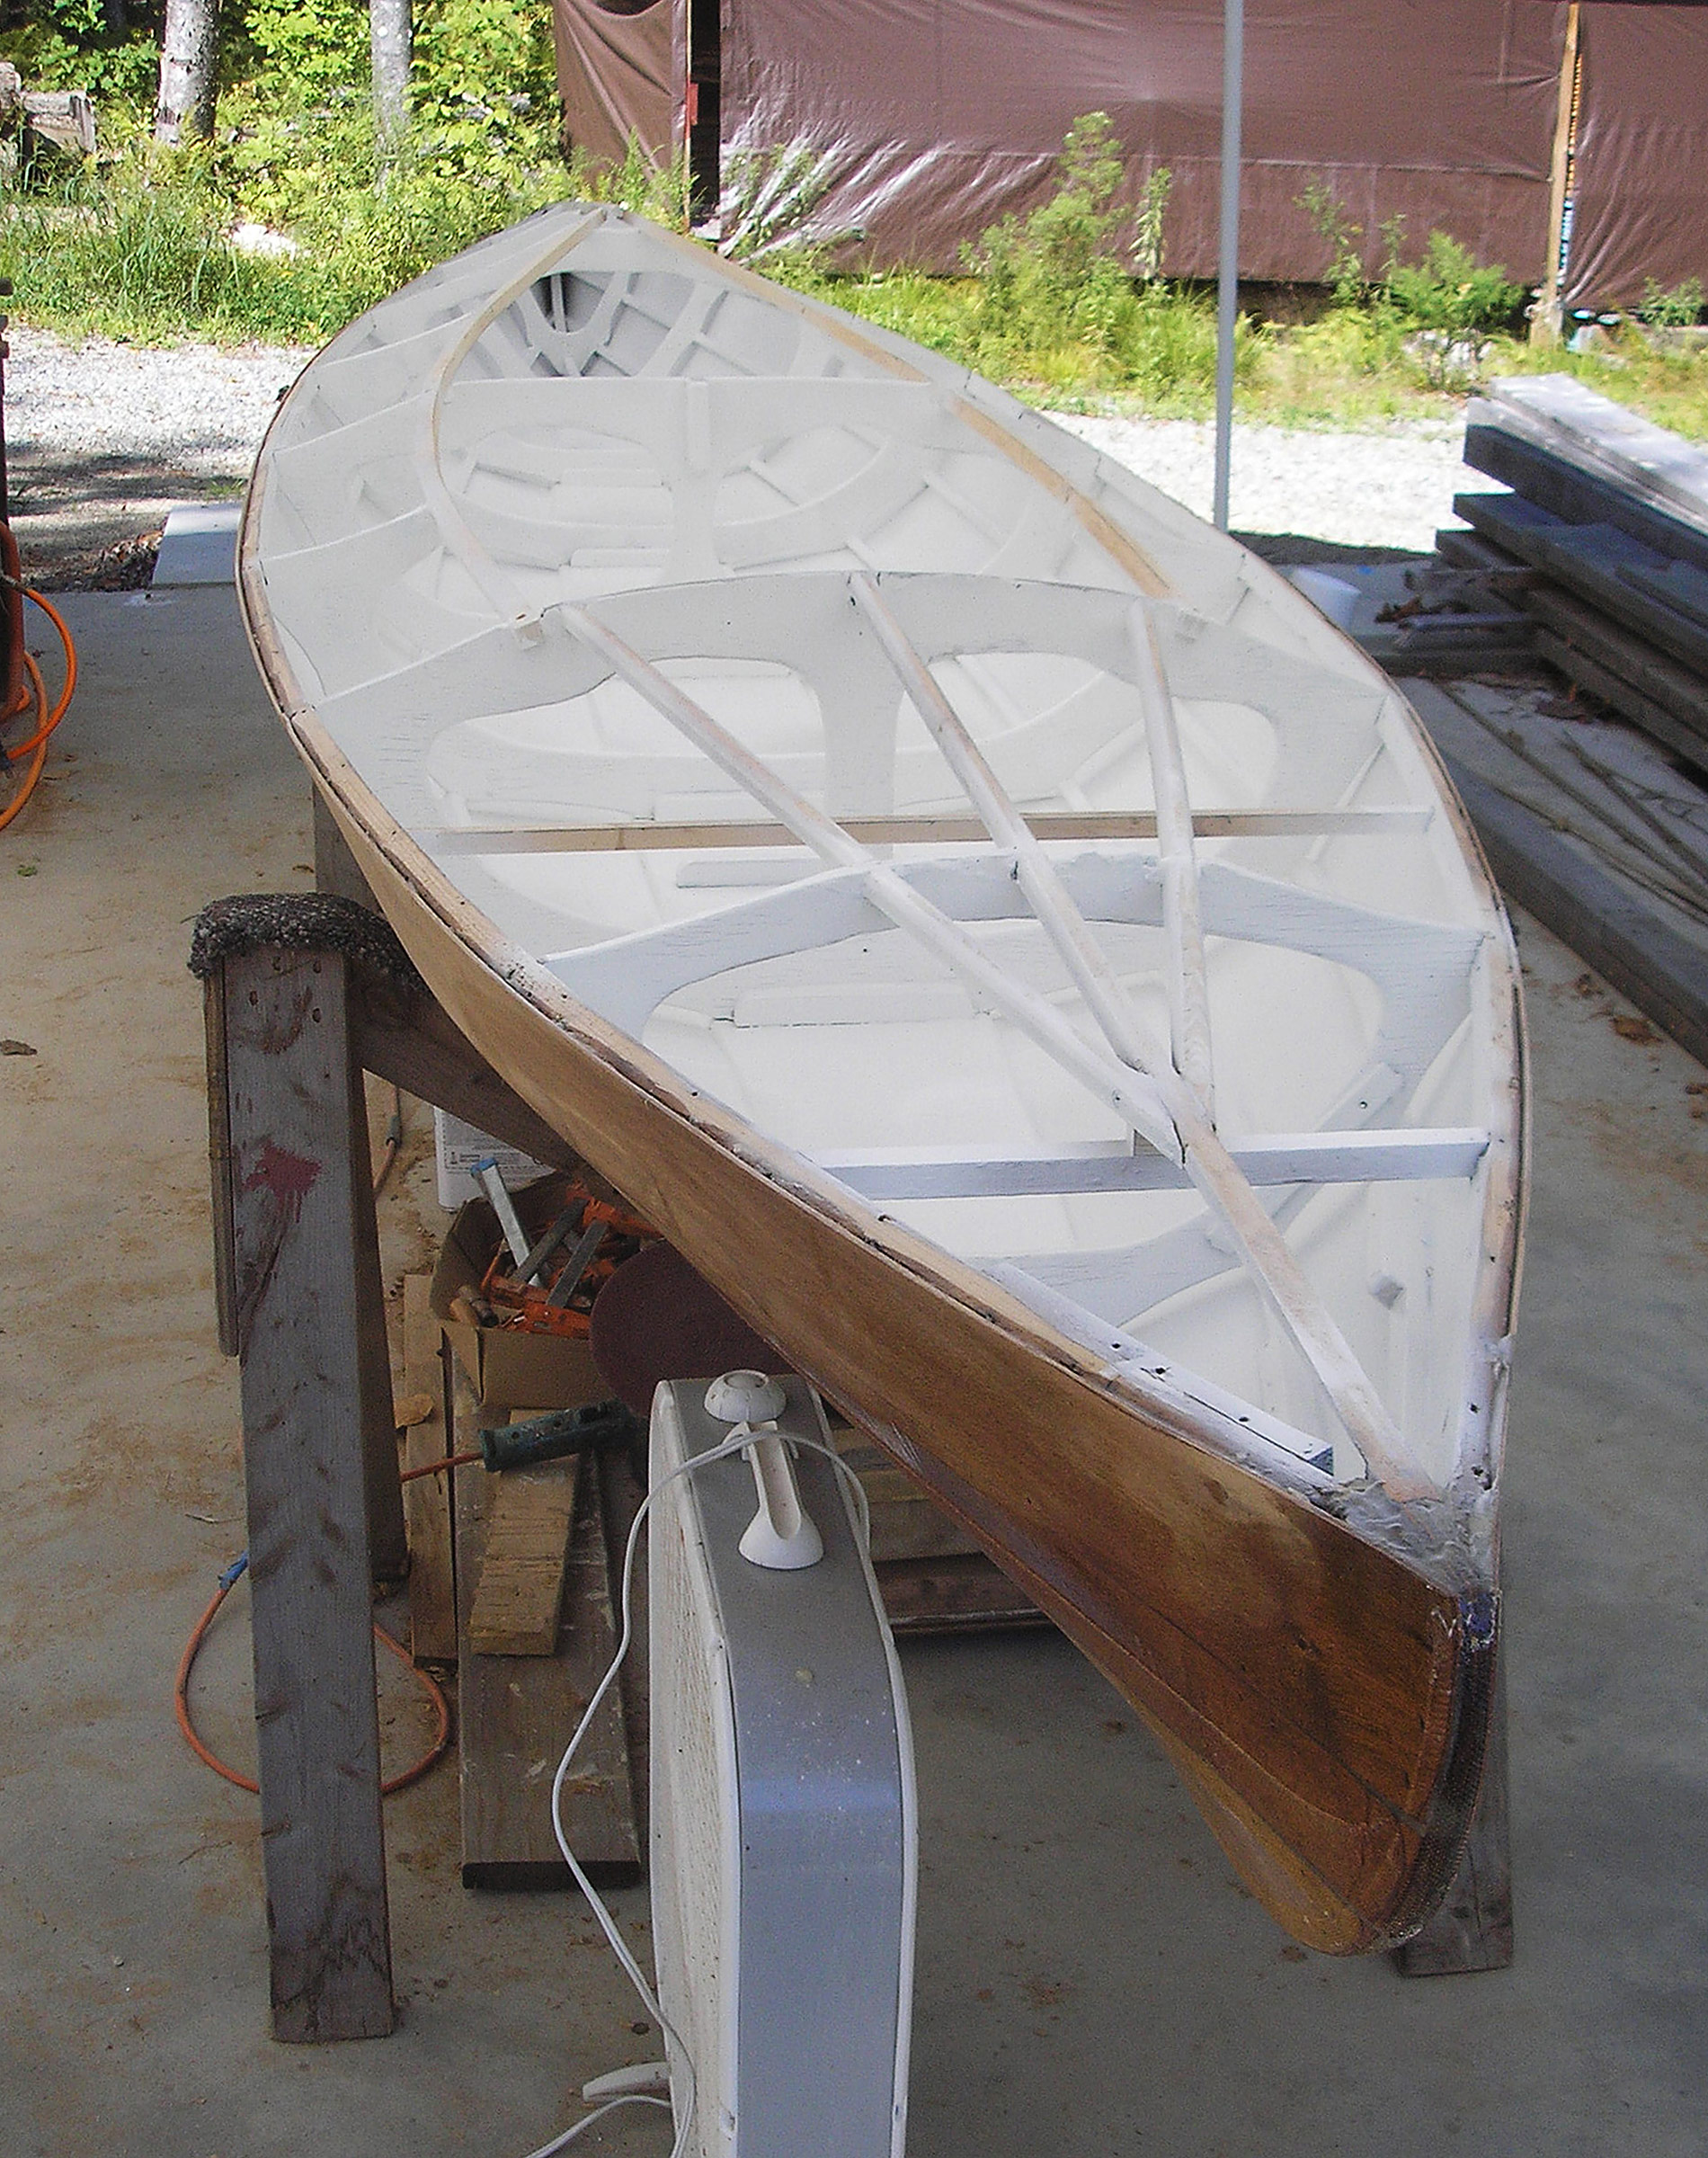
With the hull again righted, I lightly sanded the interior by hand and applied three coats of water-based white epoxy paint using an automotive “detail gun”—a small siphon-feed external-mix spray gun. After the first coat, I was able to see any gaps and flaws along the joints between stringers, frames, and planking (white paint is excellent for this). I used white epoxy putty to patch these areas.
I faired the deck substructure and hull sheers after applying epoxy putty in the gaps between stringers and planking. Because the kayak had originally been fabric covered, the sheer clamps were rounded along the upper outboard edges, leaving gaps between clamps and planking. These I also epoxy-puttied.
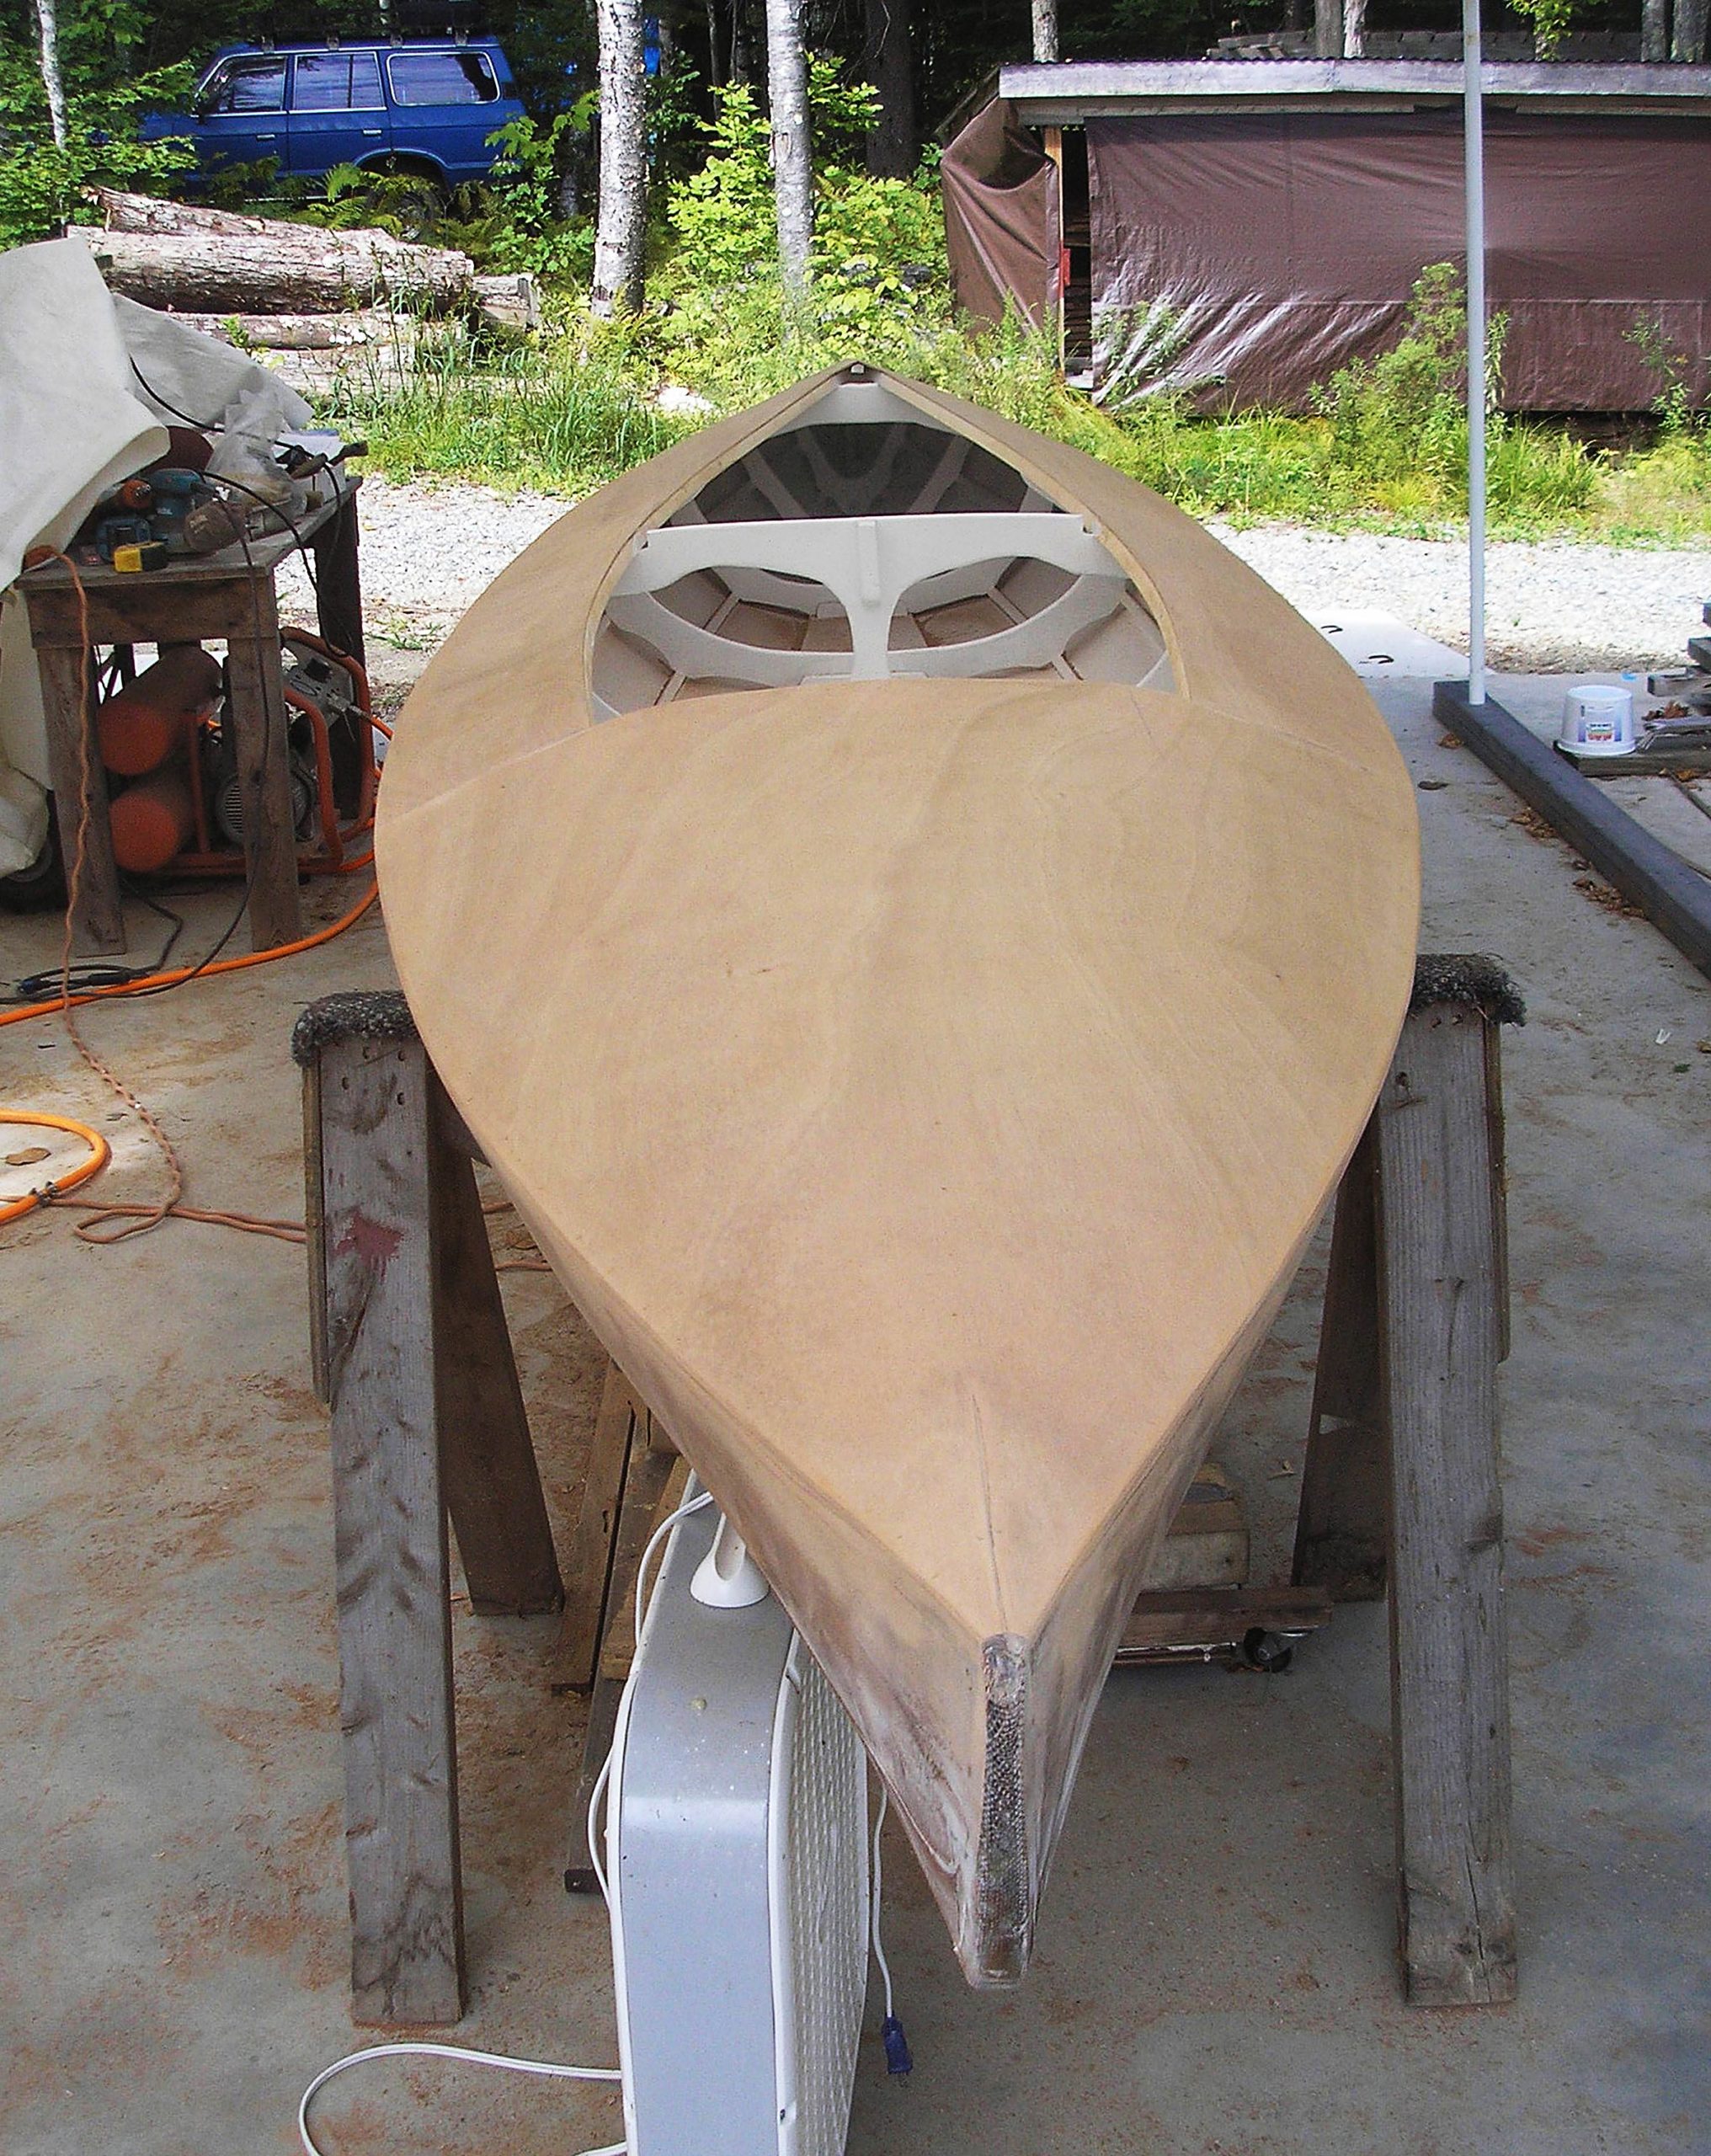
I braced the deck structure and sheer clamps where necessary to achieve fairness, and sanded the surfaces smooth prior to laying the deck. The deck consisted of two halves forward, joined on a centerline longitudinal, two pieces for the side decks, and one piece for the aft deck. I had to cut a small “dart” on the centerline aft where the radius of the deck curve became too small for the 3mm plywood. After curing, I routed the deck edges with a 1/4″ quarter-round bit, and epoxy-puttied all voids. I sanded the deck using progressively finer grits (up to 180-grit) as I did for the hull, using a 5″ orbital sander.
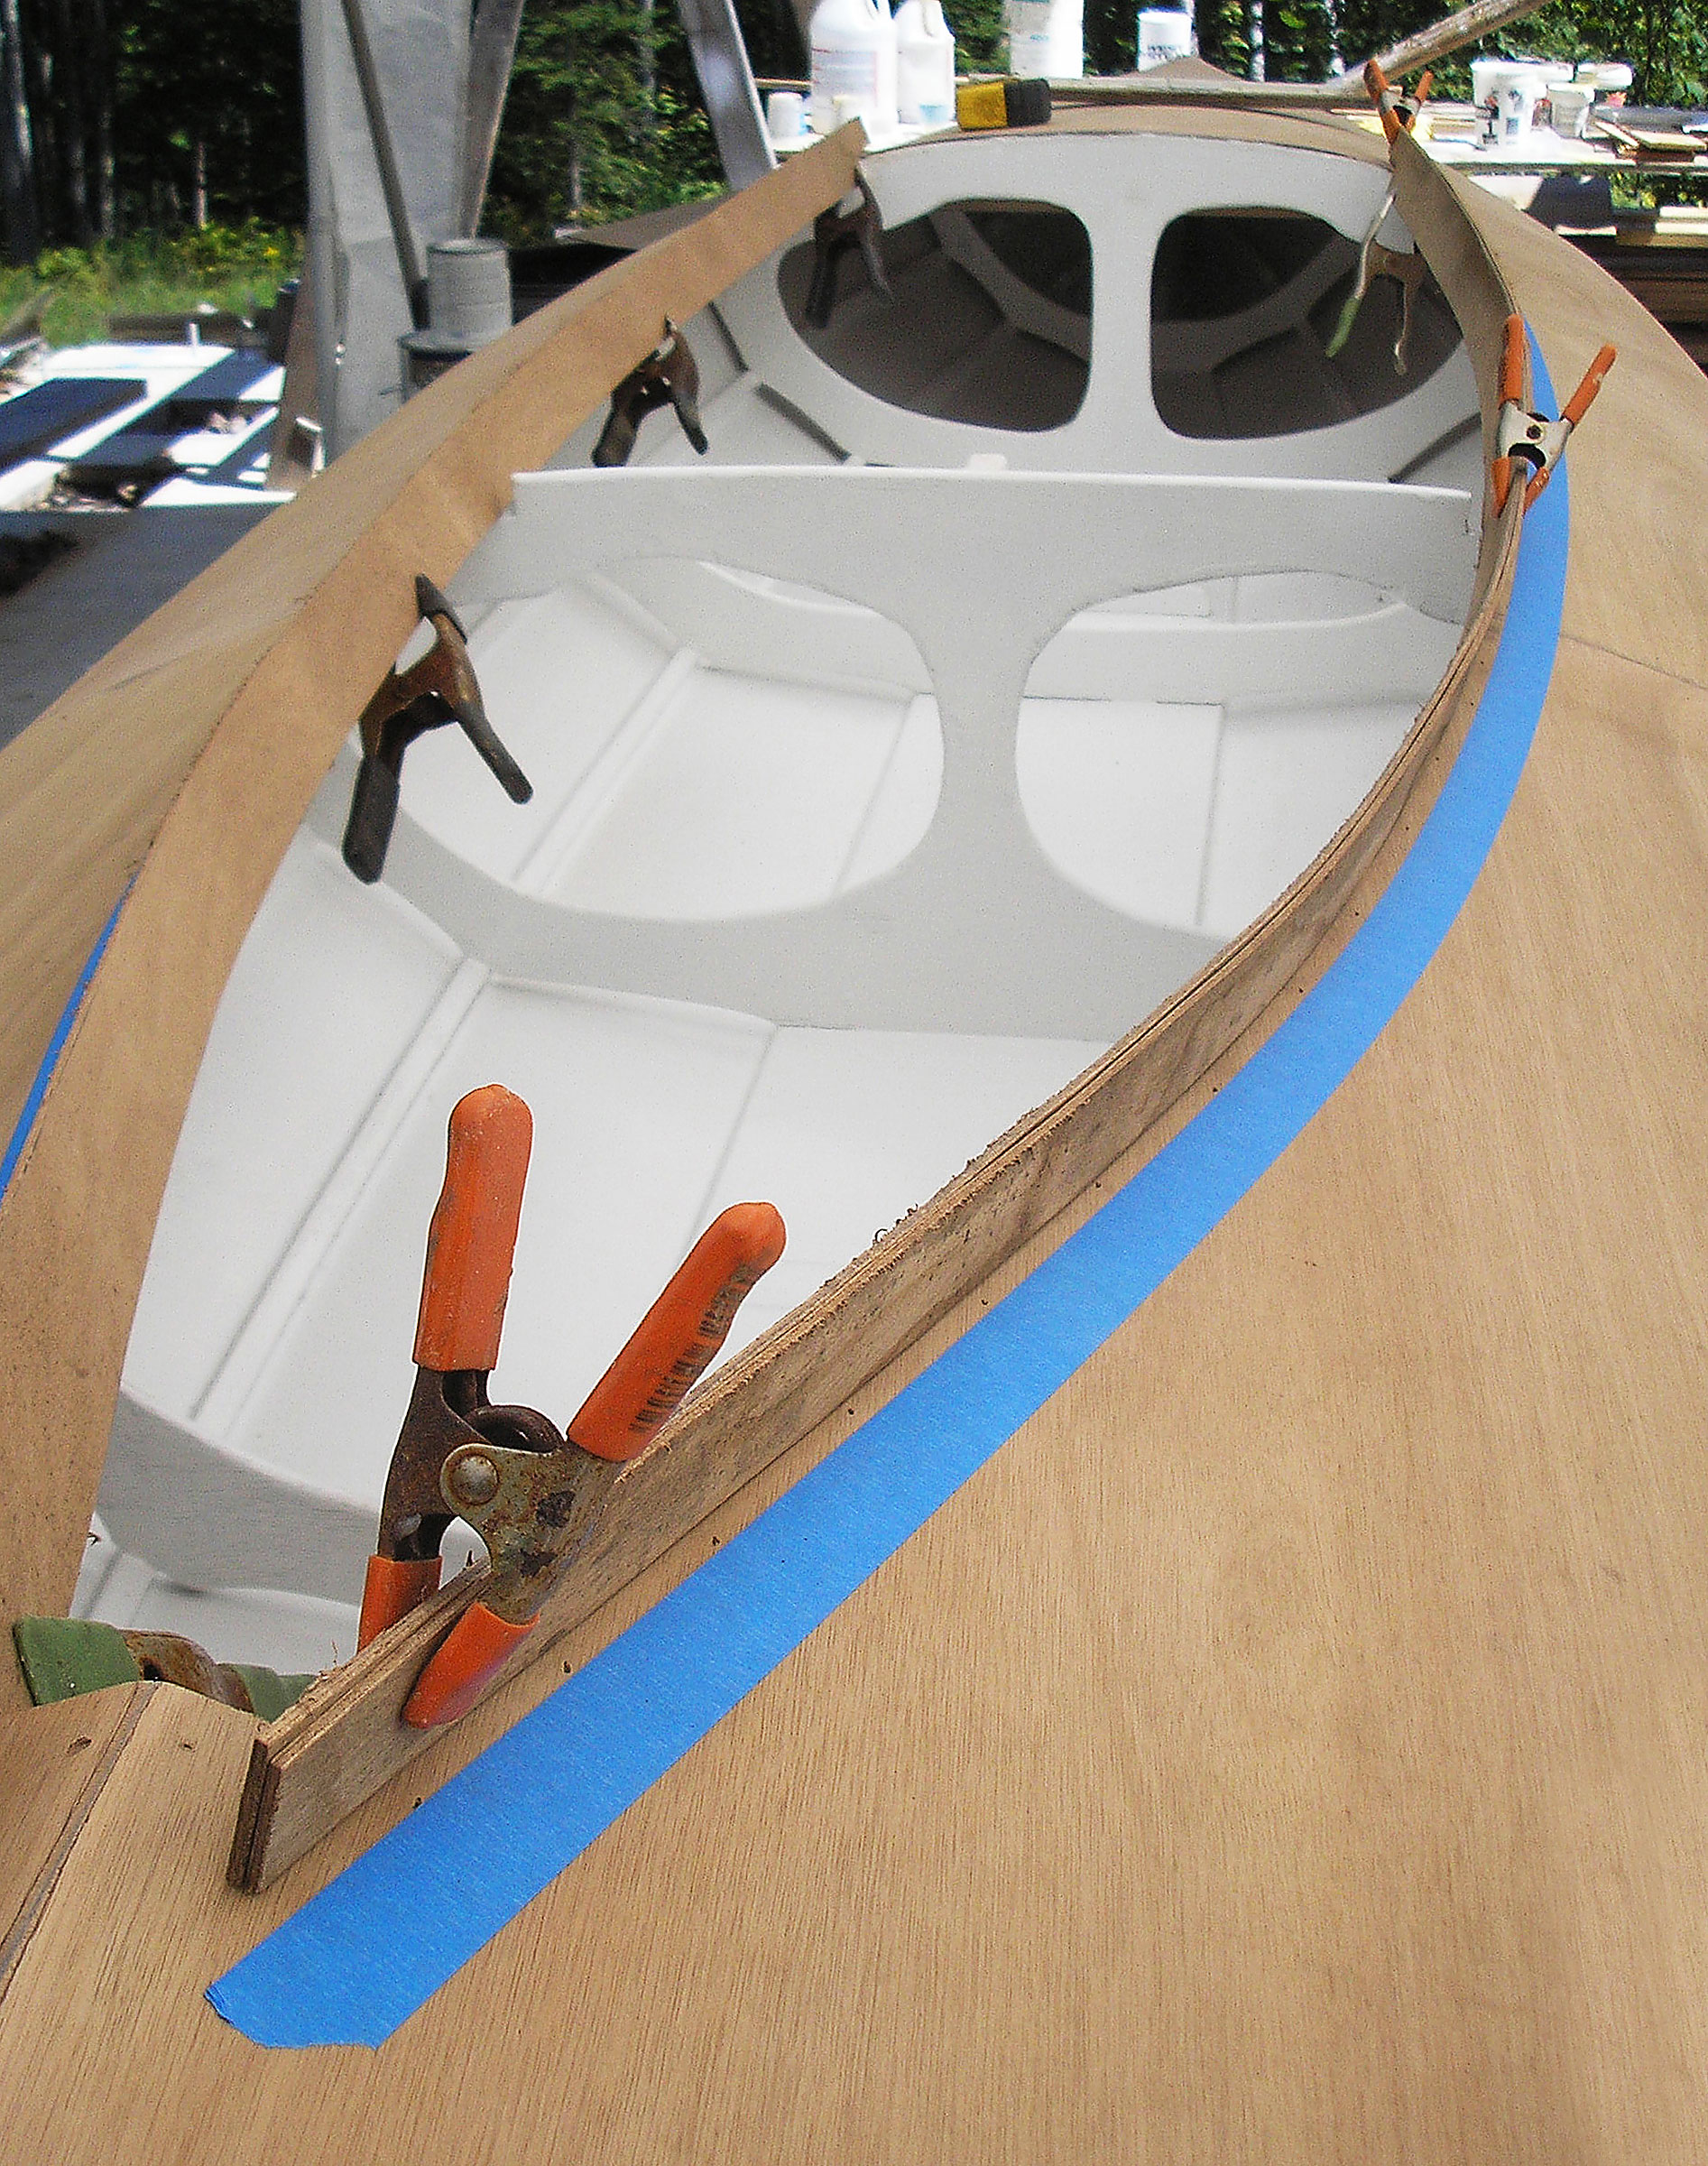
I cut four long strips of 3mm okoume from which to laminate the cockpit coamings. The first laminate overlapped the cockpit carlins; a second narrower laminate landed on the deck edge. I epoxied and pneumatically brad-nailed the coamings in place, adding epoxy “finger-fillets” along the joints between deck and coaming.
I used rock maple to make caps for the cockpit coamings. I used the table saw to cut dadoes into the undersides of the caps so that they fit snugly over the coaming’s top edges and then glued them in place with epoxy.
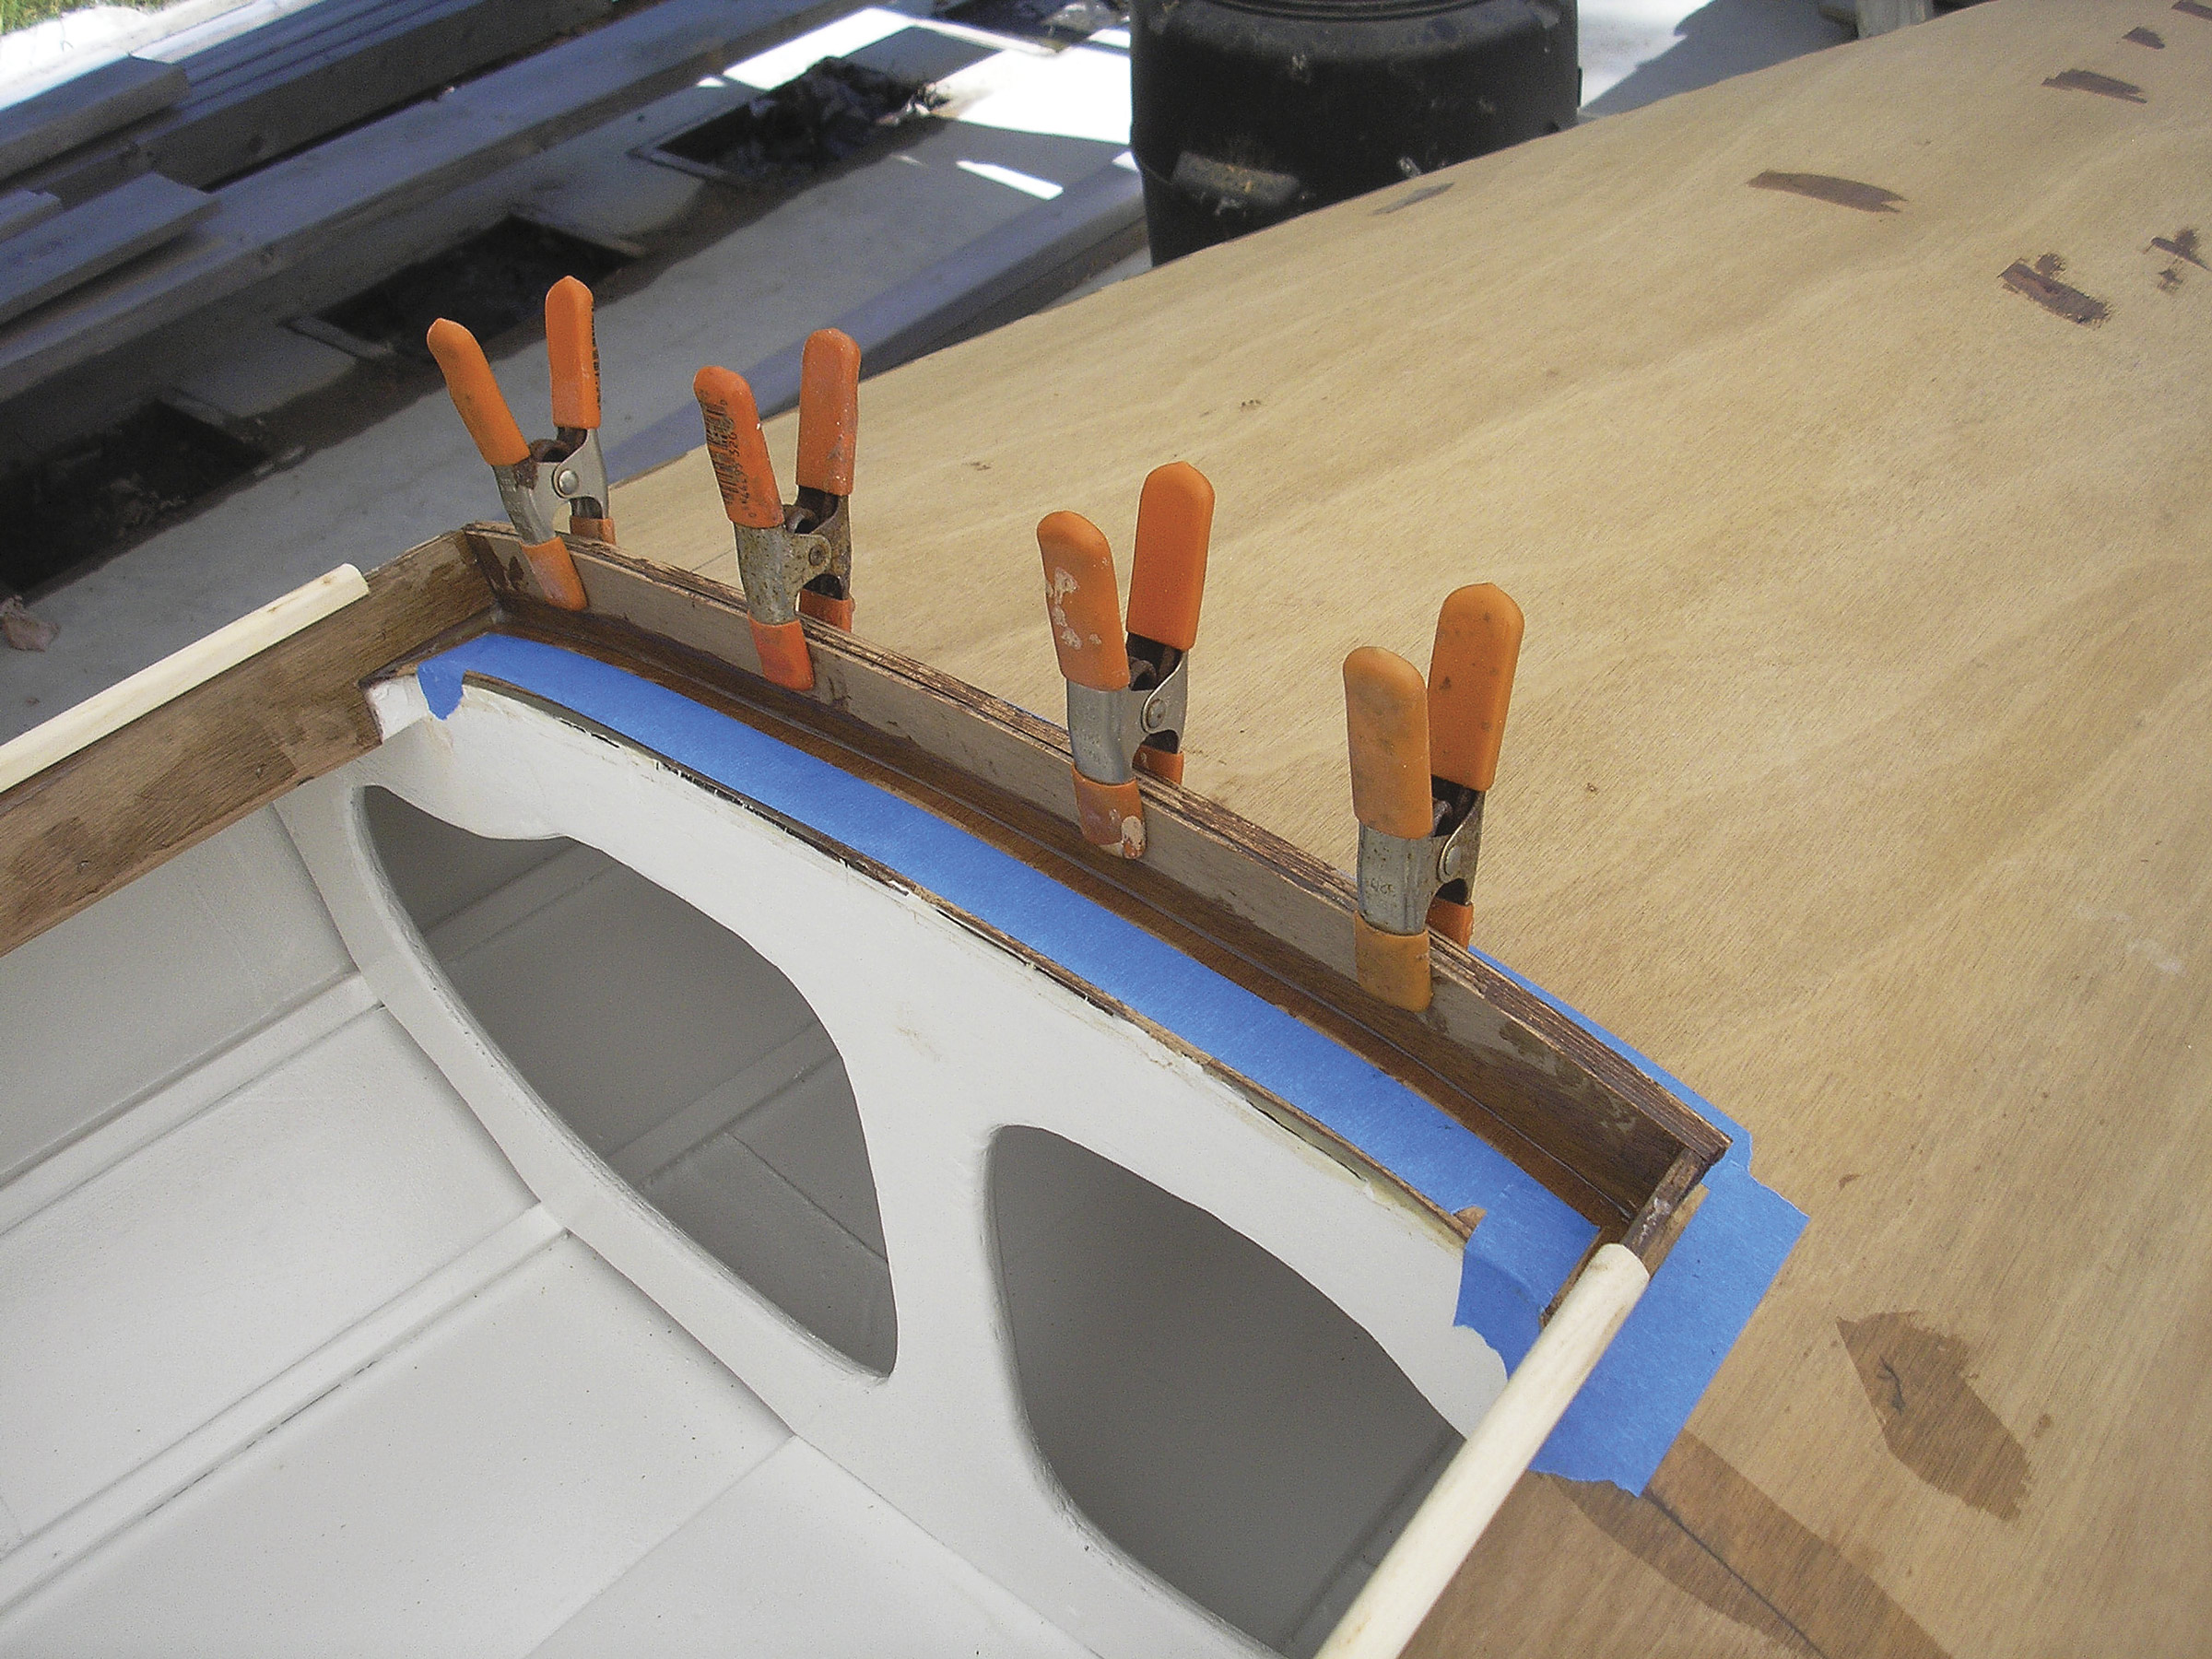
I laminated the aft cockpit coaming in place using four layers of 3mm plywood. The last of these laminates is narrow (1/2″) and located on the outside at the top. It holds a spray skirt in place.
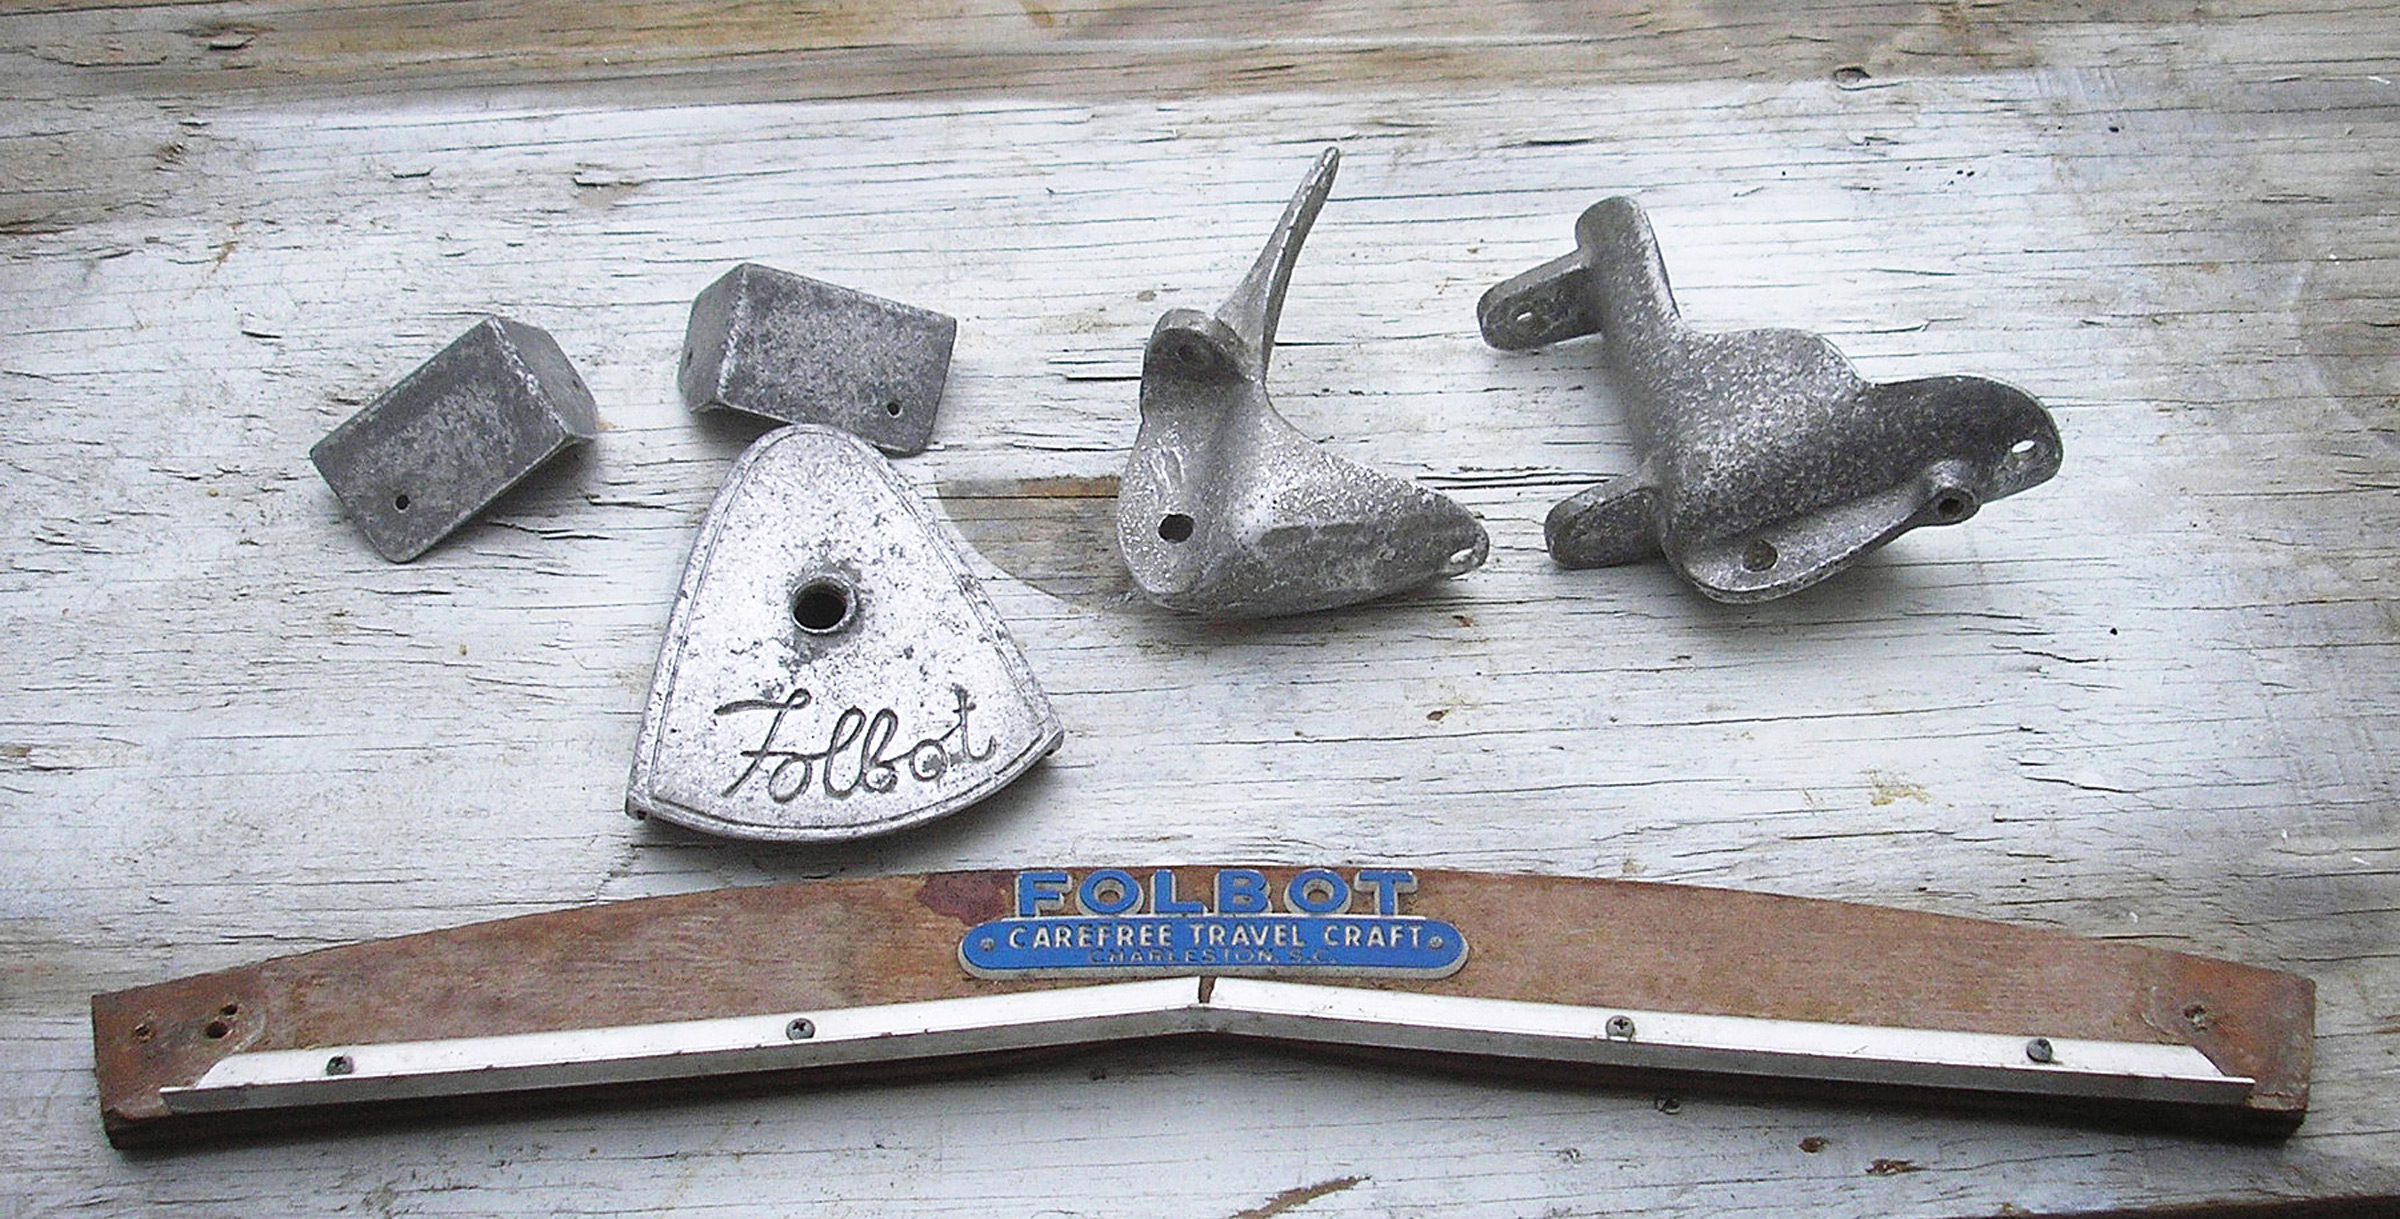
The original Folbot cast-aluminum hardware and name plaque
I sanded and puttied the coamings, rounding corners and shaping them to receive the original Folbot cast-aluminum hardware, which had miraculously survived for a half century (the real miracle was that I had not lost it!).

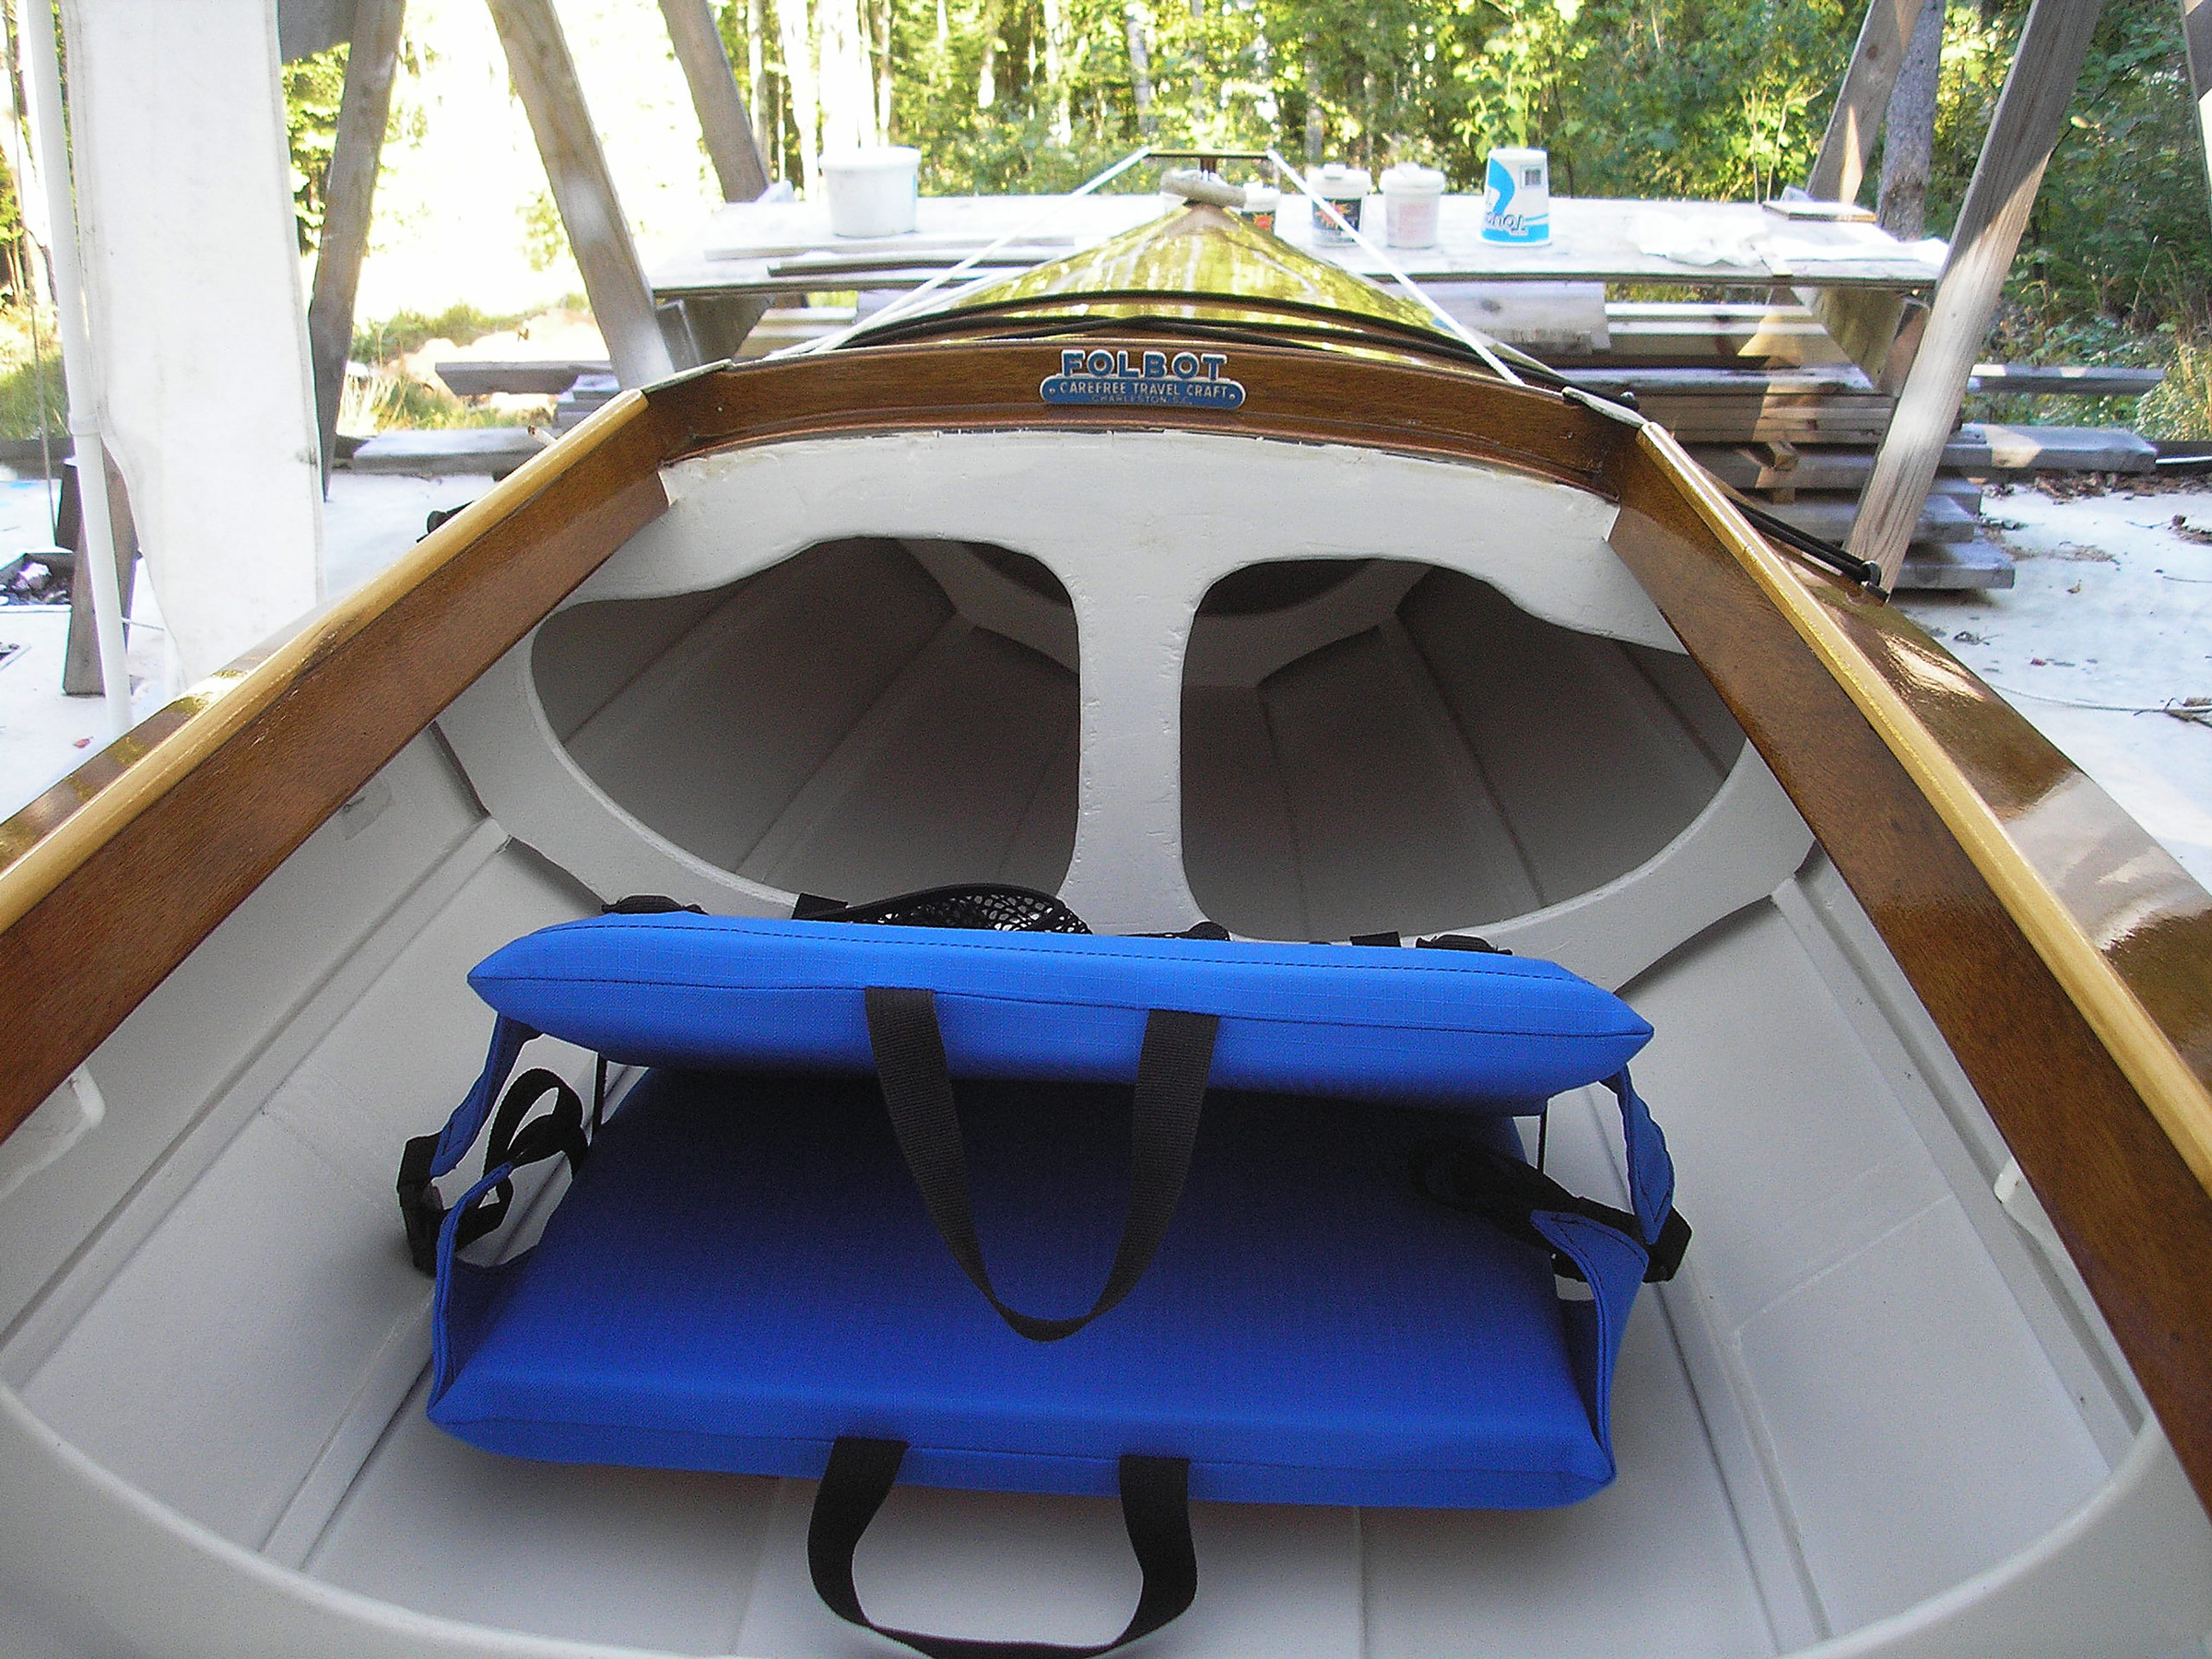
Note the large, unobstructed bow storage compartment under the foredeck. With the structural work completed, I turned my attention to puttying and sanding all exterior surfaces prior to epoxy saturating the okoume plywood deck and planking. I then sealed the planking with the same reduced penetrating epoxy. After it cured, I installed the original hardware, including bow and stern caps, prior to applying six coats of high-UV-filter varnish. I made seat platforms using 1/4″ mahogany plywood and installed them on the original Folbot cleats with bronze screws so that they would be removable.
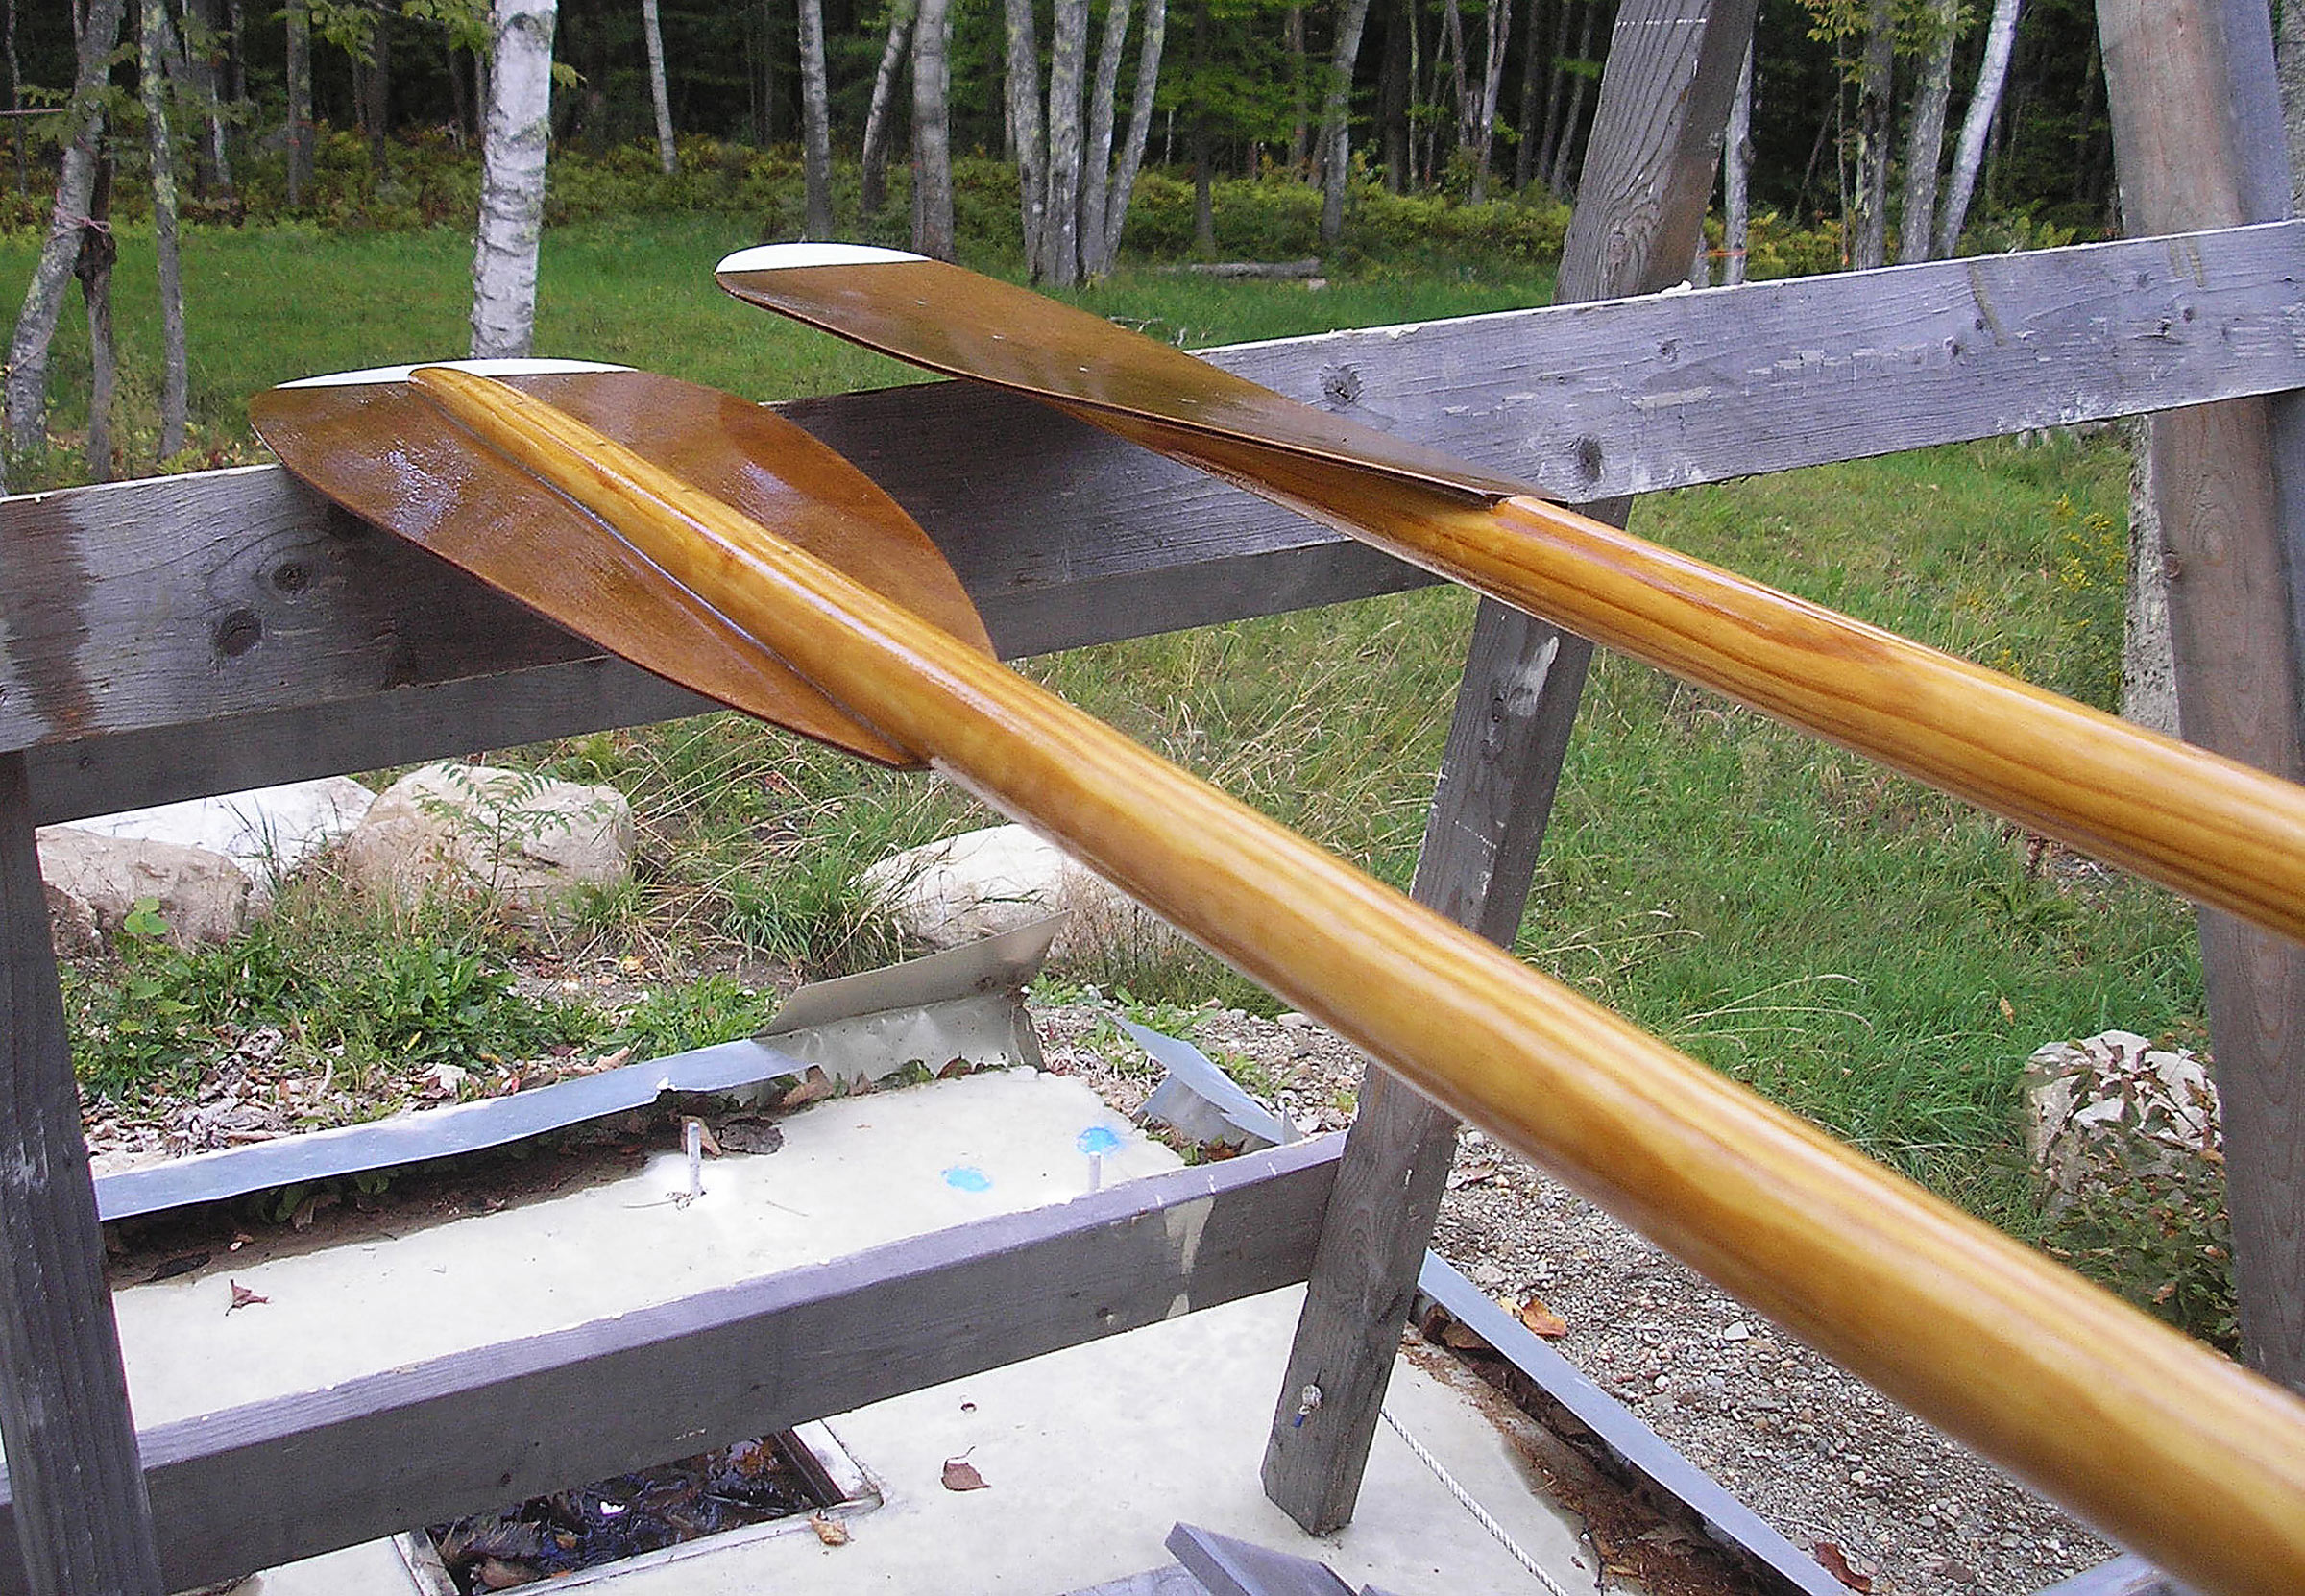
I made new paddles using a 1-1/4″ hard pine dowel and 3mm okoume plywood. I painted the tips with white epoxy so they may be seen in the dark, as well as to protect them from abrasion. Folbot paddles of the kayak’s vintage would have had aluminum guards.
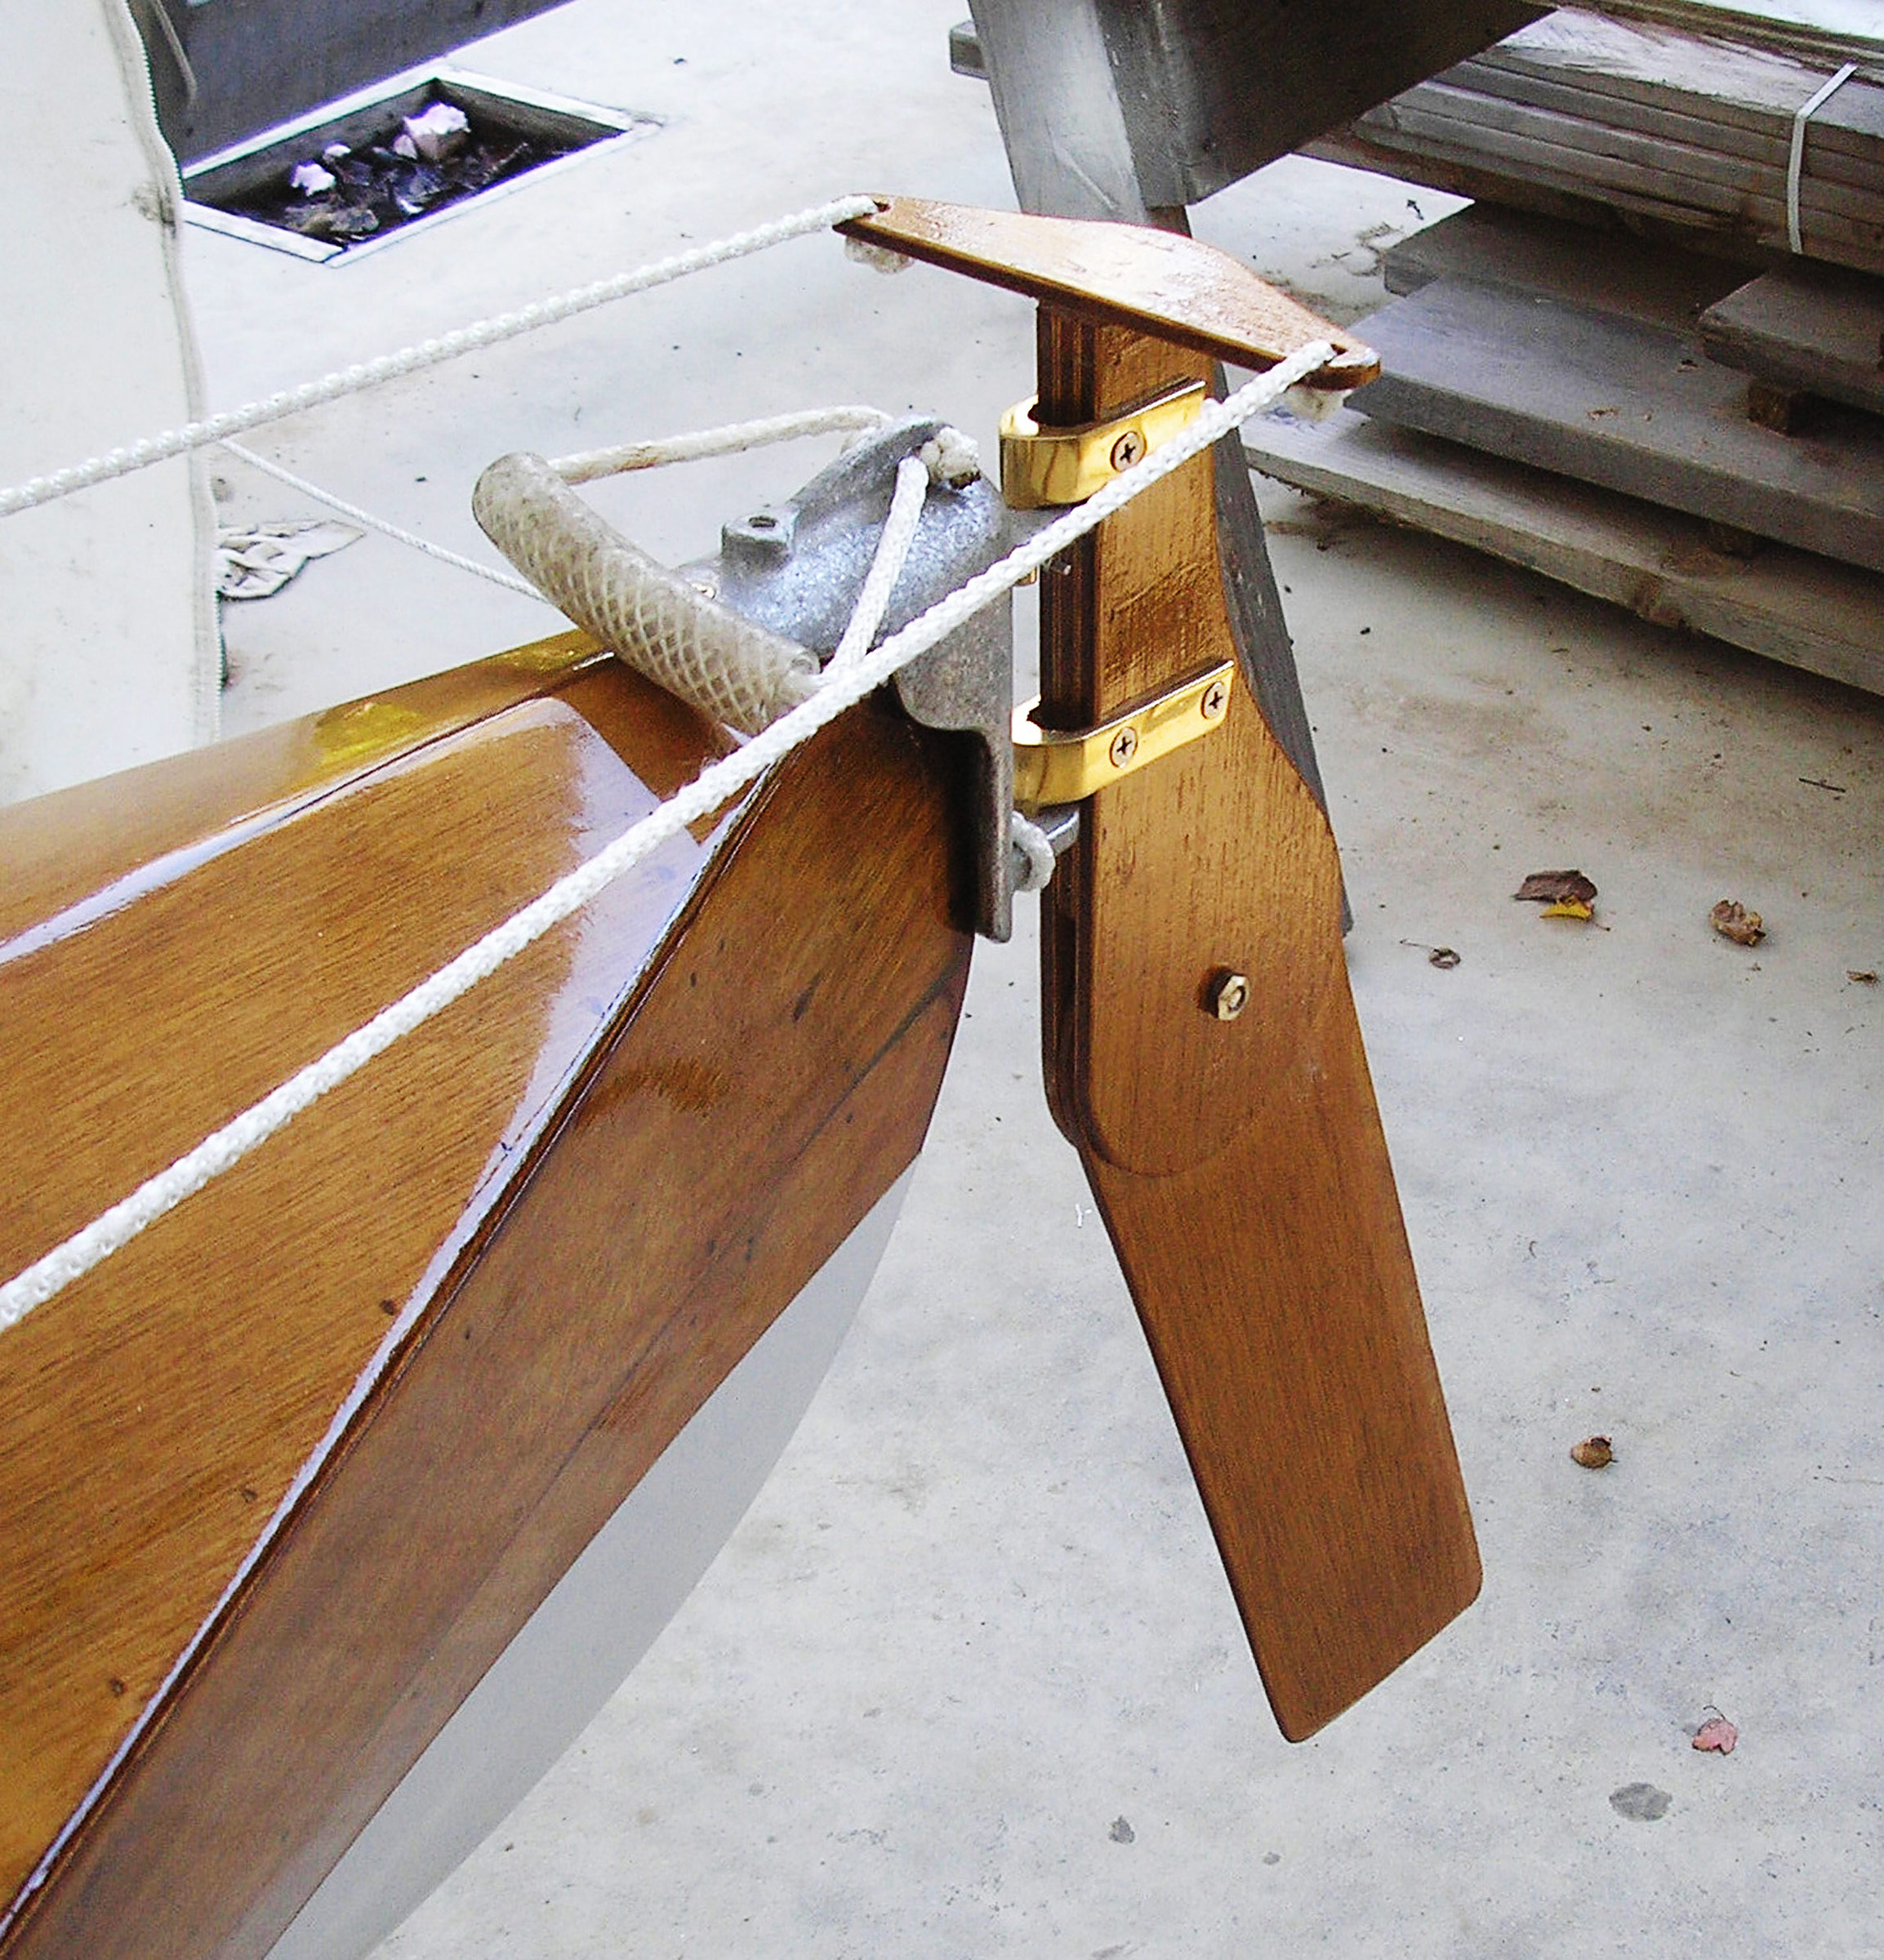
The original rudder, which would have had an aluminum blade, was lost so I made a kick-up rudder using ¼″ mahogany plywood. The stock consists of three laminates, the middle one being left smaller to permit insertion and pivoting of the rudder blade. I purchased cast-bronze pintles and modified them to fit the original cast aluminum Folbot rudder gudgeon. I used a yoke attached to a loop of line that passes around the cockpit coamings. Steering adjustments are made by reaching the line outside the coamings on either side and sliding the line fore or aft to turn the rudder. While this is not as convenient as having the original Folbot foot-pedal steering inside the boat, it is simple and effective, and I have used it before with success.
I attached the original Folboat hardware using thickened epoxy and small stainless-steel screws. I made plastic hose lifting handles for each end of the boat. I made up a painter and stern line, and installed bungees attached at plastic eye straps following the pattern Folbot now uses for its Greenland, the new version of this antique model.
I emailed Folbot for background information prior to starting the restoration, and the woman who replied to me explained that their factory and offices were destroyed in a severe hurricane many years ago—before she came to work for Folbot. Evidently nothing survived: no records, photographs, or drawings of any of the old models. By comparing the size and proportions of their new Greenland model to my own, I could see that the boats were quite similar in size, shape, and accommodations. The new boats now have aluminum frames and Hypalon covers, and can be assembled in 20 minutes. Mine took me four months! (albeit part time).
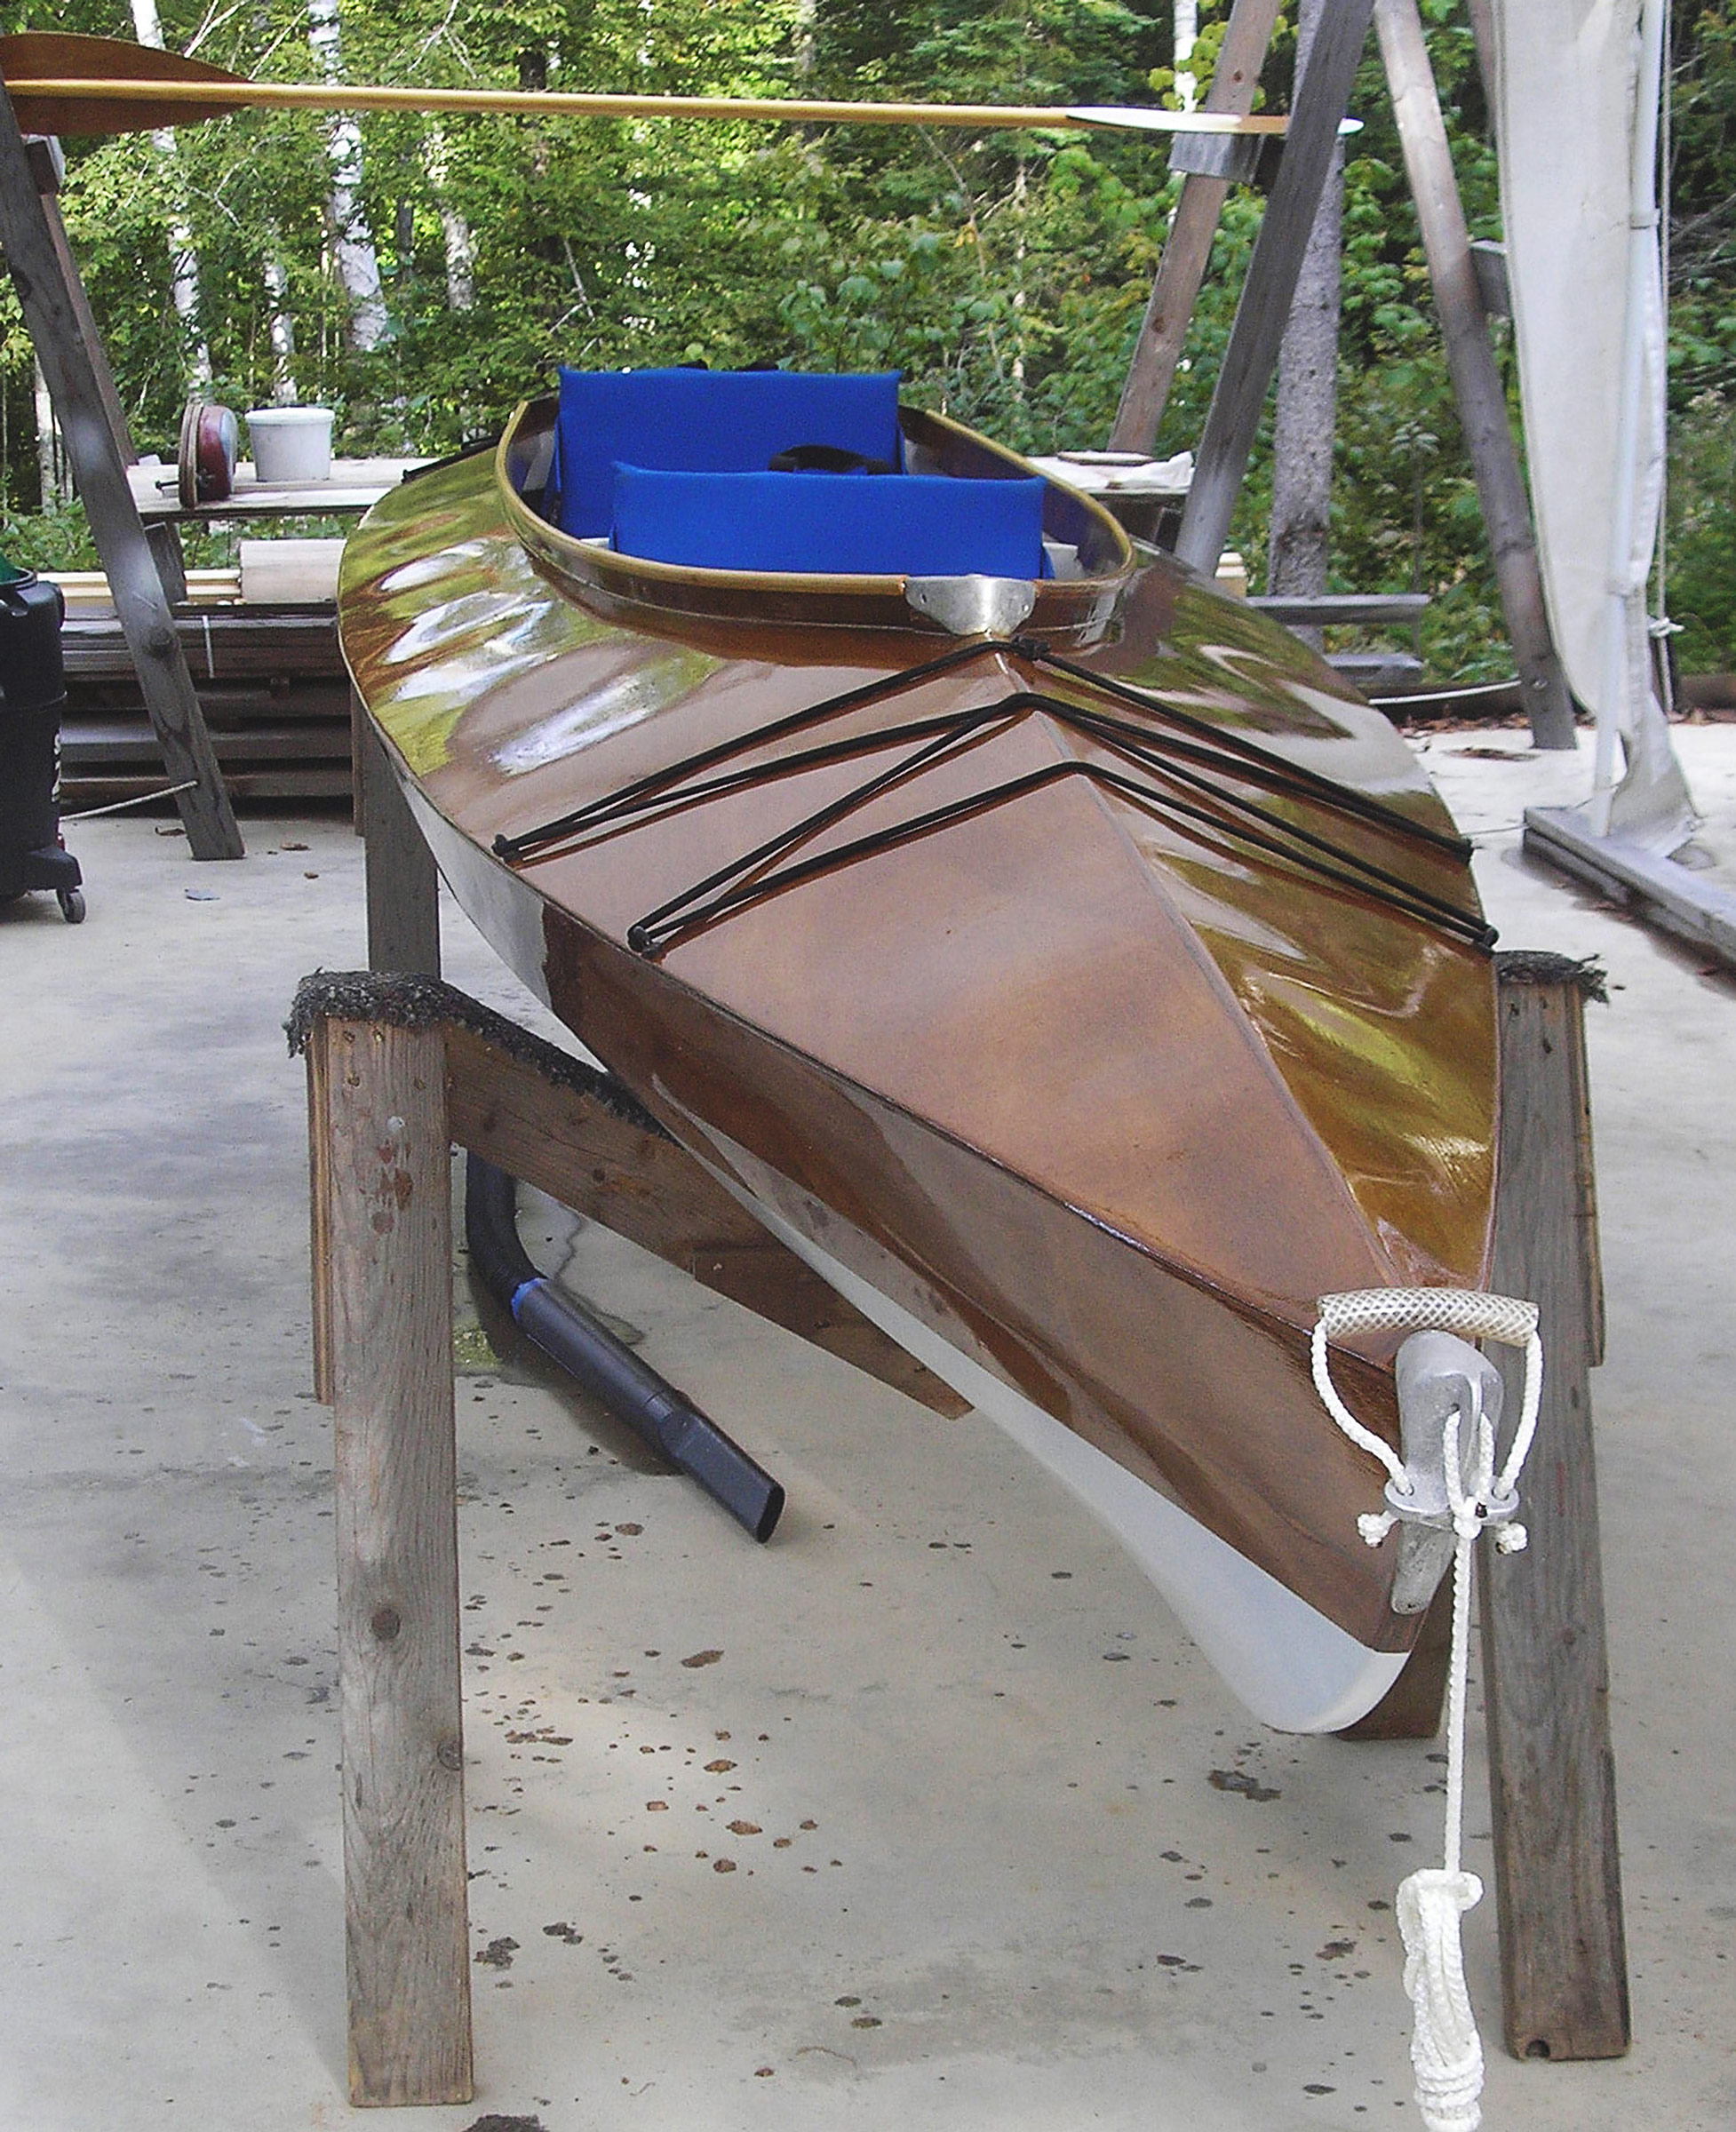
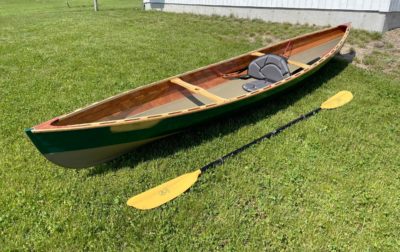
I painted the kayak’s bottom with light gray epoxy paint to protect it from abrasion. I used manufactured Crazy Creek chairs, which fit perfectly and strapped to the kayak’s frames as is they had been made to. The seats fit perfectly on the plywood seat platforms in the boat, and may be easily removed for sitting around a campfire while cruising among favorite islands and sleeping on the beach. They are made with closed-cell foam and don’t absorb water.
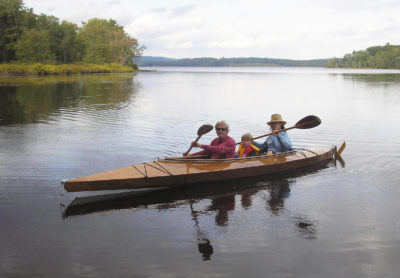
The new Greenland Folbot boasts a 500-lb carrying capacity. My restored antique Folbot can certainly carry that amount also. Both models are nearly 17-1/2′ long and over 3′ in beam. The huge open cockpit seats two adults and a small child, with additional capacity for at least 100 lbs of food and camping gear. The cockpit can be fitted with a spray deck with skirts for two adults. I haven’t purchased one, but I suspect the new ones available from Folbot will fit the old model, as they have nearly identical cockpits.
The aft “Crazy Creek” chair folds down to allow access into the kayak’s big stern storage compartment. I installed the original Folbot plaque inside the aft cockpit coaming above.

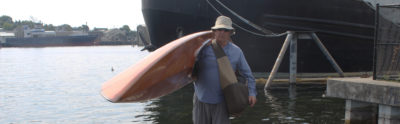
The completed boat was surprisingly light—about 75 lbs. Two people could easily load it onto the roof racks of my VW Golf, although it certainly dwarfed the car!
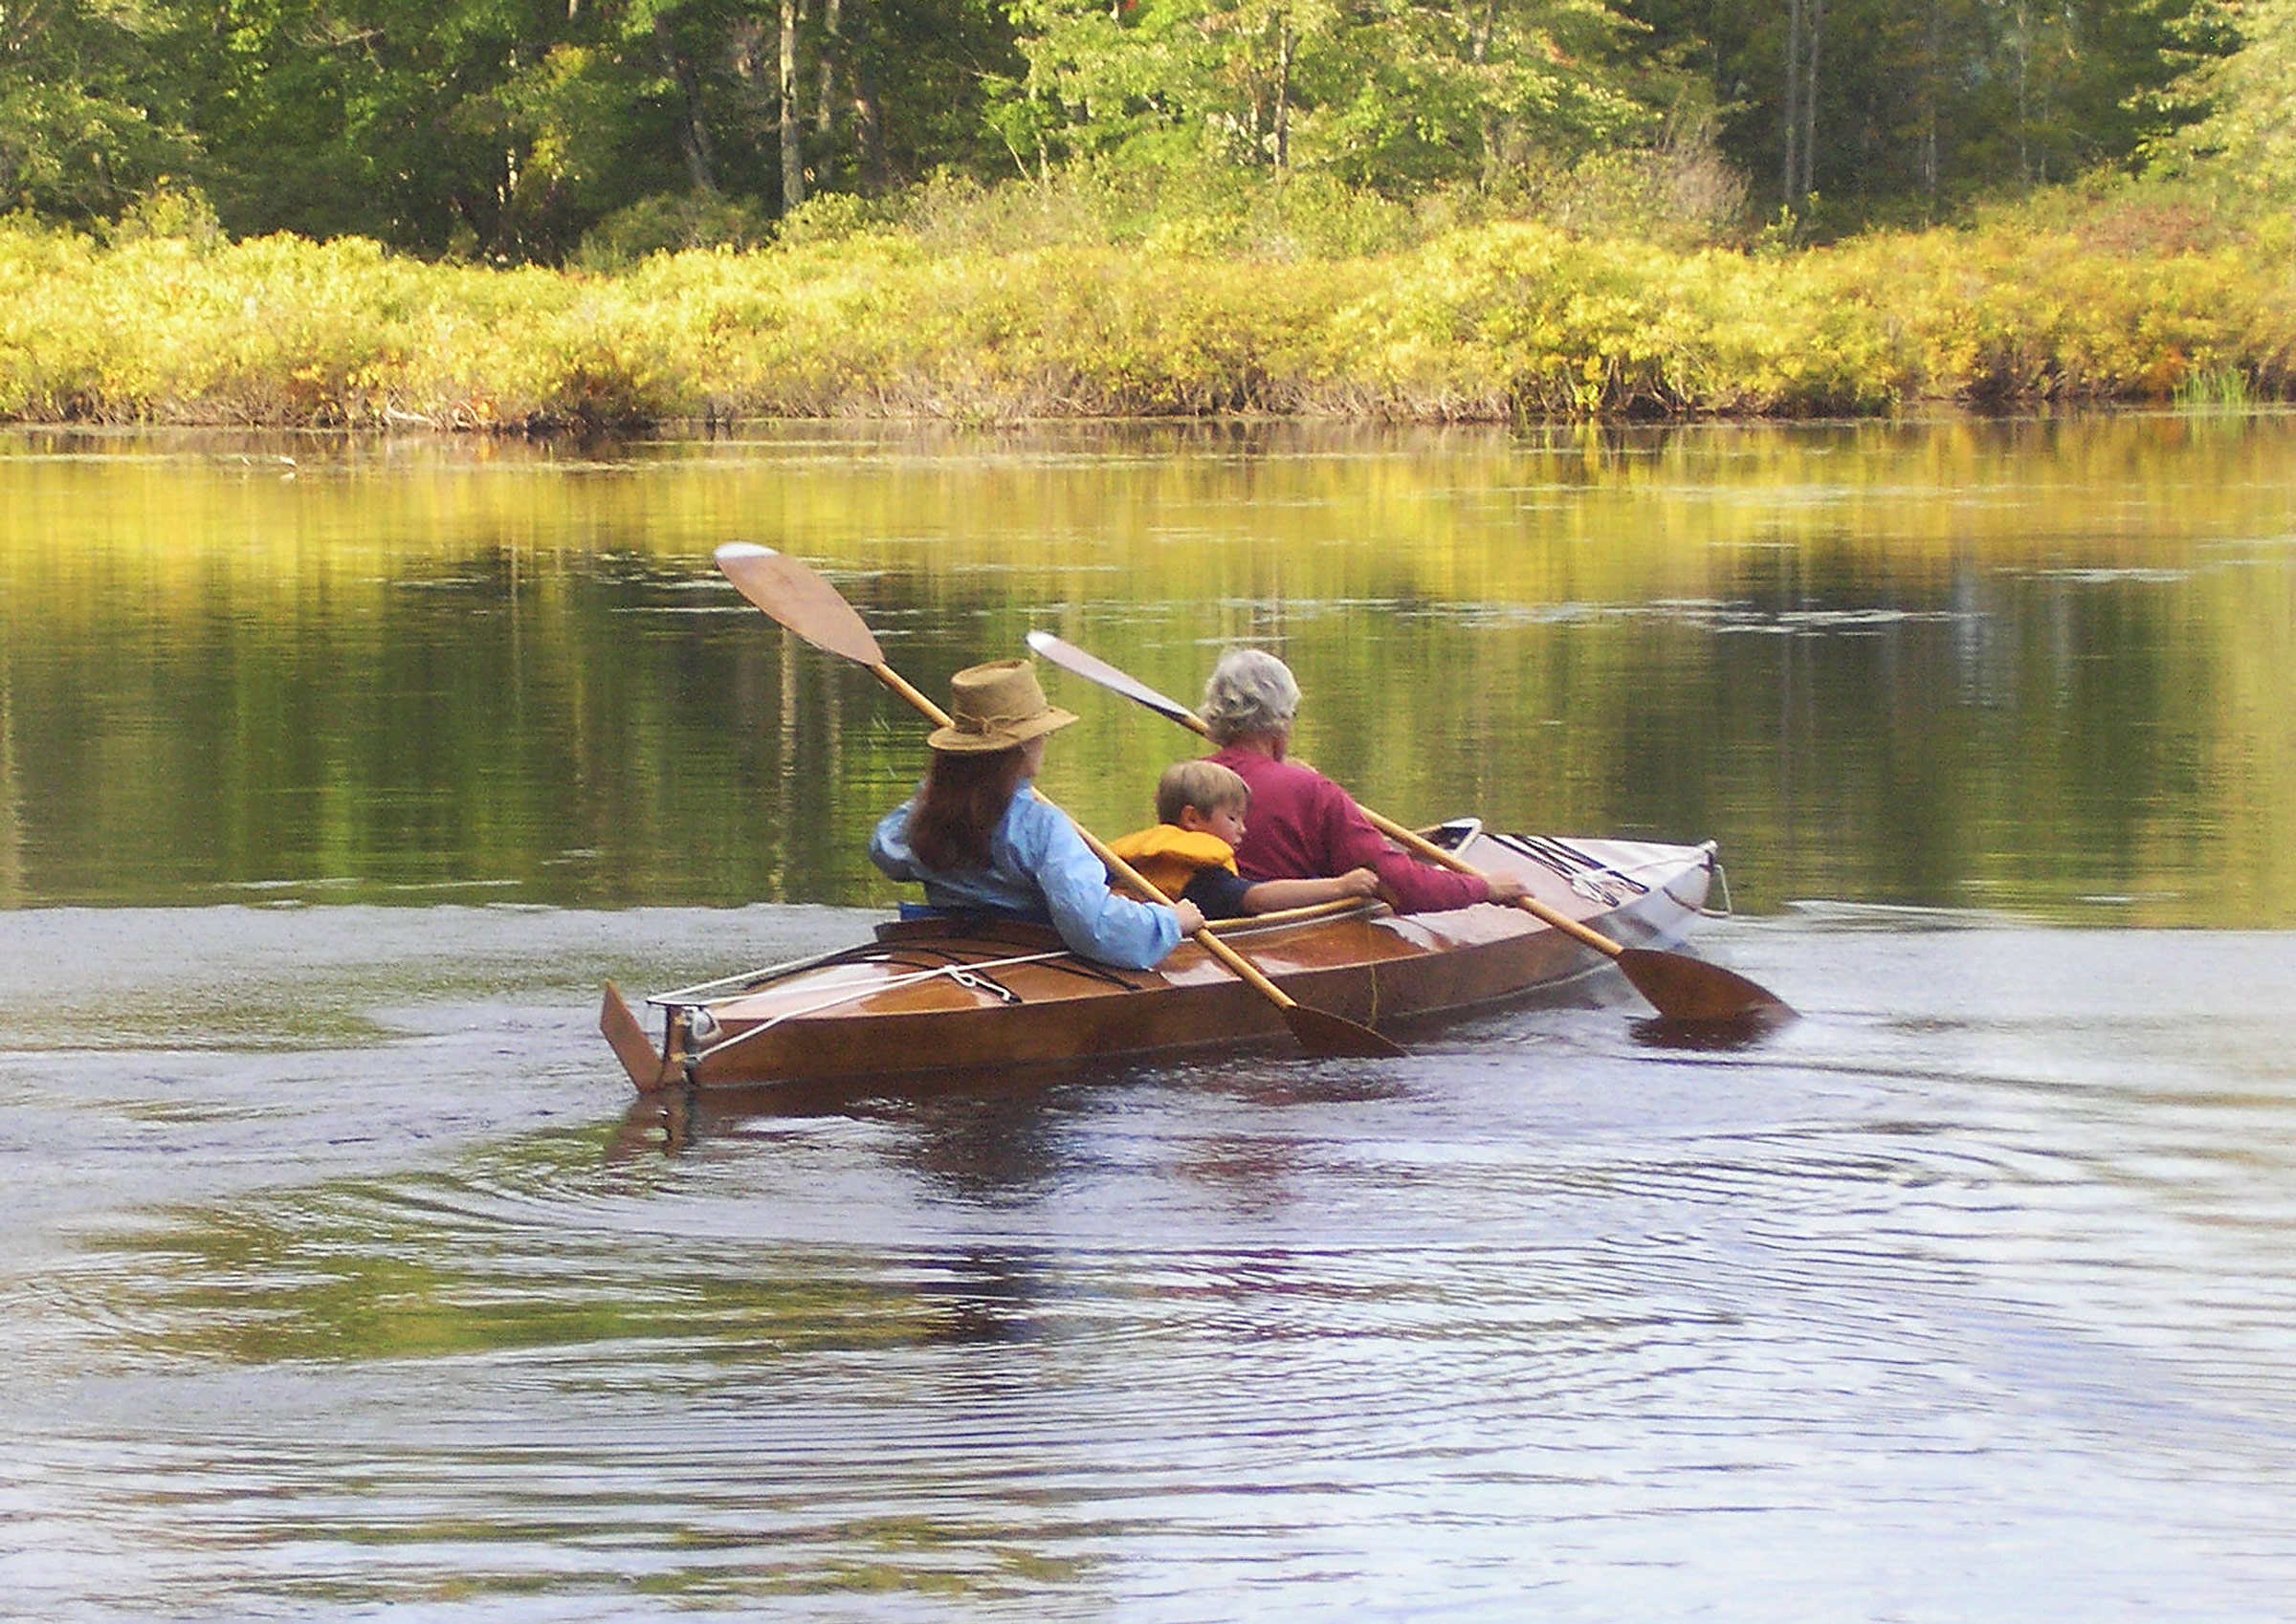
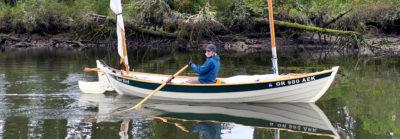
My neighbors, Tom, Claire and Cabot Lokocz-Adams, went with me to nearby Sennebec Lake where we performed paddle trials on a perfect fall day. The kayak was very stiff and comfortable, with room for big five-year-old Cabot to sit in front of his mom. The boat showed a good turn of speed with minimal effort, and we didn’t need the rudder. On a windy and choppy day, however, I suspect I would have wanted it down to help with directional stability.
The Folbot restoration occupied much of my summer in Maine, even though I worked on her part time in between other projects. As with so many restorations, we do it because we love it, not because we have any delusions about getting rich! And, I have the satisfaction of knowing I saved one more special old boat from the dumpster, and that I turned it into something beautiful, useful, and durable. There are undoubtedly more old skin-on-frame kayaks deserving of the same treatment. In the winter that followed, I often sat in front of the woodstove dreaming about kayaking down the St. George River. The next summer, I did just that! ![]()
Reuel Parker is a yacht designer, boatbuilder, and author who regularly contributes to WoodenBoat and Professional Boatbuilder magazines. A lifelong cruising sailor, he currently lives in the Bahamas aboard PEREGRINE and sails seasonally between Maine and Florida. He ventures farther as time and tide permit.
You can share your tips and tricks of the trade with other Small Boats Magazine readers by sending us an email.

Beautiful, nice work!
Your kayak looks so nice. Wow, so much work! It’s something I would like to do, but this is the Folbot I have today.
https://forums.wcha.org/threads/old-canoe-with-the-serial-number-0672.19742/
Back in 1977 I bought a Folbot Super kit, which is what you have here, At the time you could get it as a folding boat or a kit for one which was rigid but couldn’t be packed in bags in the closet. I was living in Ketchikan, Alaska, and put many miles it.
The boat came without a rudder, but you could buy a sail rig for it. This had a thwart which clamped across the front of the cockpit to support the mast and to hang the leeboards from. If I recall correctly, there was a tiller which hooked into a yoke at the top of the rudder which was pulled or pushed fore and aft.
The seats were plywood. The backrests were hinged to the frames so you could sit on them instead of being down inside the boat. I made use of this feature most of the time when weather permitted as it was more comfortable. I was working for the US Forest Service on the Tongass N.F. at the time, surveying roads on Prince of Wales Island. I sailed up from Naukati to our camp at El Cap and used the Folbot there. When we were transferred to the Whale Pass camp my crew helped me portage it across to the road system and then trucked it to camp. Later, I sailed it back to Ketchikan with my two huskies on board. That trip took three days with camping along the way.
Thank you for rejuvenating your Folbot, and the article which unleashed many fond memories!
Nice save!!
A beautiful article, thank you very much for sharing this, Reuel. I picked up what I believe is an already assembled Folbot Super a few years back from a gentleman that was moving to Japan for work; he couldn’t take it with him, for it can’t be disassembled. It is an enjoyable boat to paddle, it can carry a lot of gear with a total capacity of 660 lbs (boat, paddlers, gear); mine had a small sticker stating 300kgs capacity. Also, it sails well. When its skin eventually gives up the ghost I will do what Reuel Parker did with his. Thank you again, from the wet coast of Canada.
You tempt me so! I do not have a Folbot, but I do have ratty Chuckanut 12s from Dave Gentry that I have thought to redo in cedar strip.
I own an intact vintage Folbot of the same design, which I bought several years ago for a song. It is complete with the sail and rigging, including mast, rudder, twin daggerboards, paddles, seats, etc. The rudder mount was broken, so I had a metal worker create one out of stainless steel.
The vinyl fabric is intact, and seaworthy, though it is definitely showing its age. I have seen your boat published before, but not yet with such an extensive write up. Kudos, your boat looks great!
I had planned to reskin mine in a similar fashion last year, but I ended up building a new bathroom and master closet on my own house instead. Perhaps I will get to it this year!
I’ve got a Folbot I’m currently resurrecting here in Portsmouth, NH. These detailed pictures are priceless as I’m having to recreate several framings after the plywood separated like an old parchment paged book. The stern seat mounting frame is my biggest challenge at the moment.