At the age of 60, a widower and an empty nester, I wanted to build a boat not because I needed one but because I needed a new focal point for my life. Having grown up with runabouts in my family, I went to the Cleveland Boat Show looking for one but, after roaming aisle after aisle of fiberglass and aluminum boats, I found nothing appealed to me until I found some handsome wooden boats built by members of the Cleveland Amateur Boatbuilding and Boating Society. Inspired, I joined the group and decided I’d build a runabout.
I browsed the web for runabout designs and settled on the Alamitos, a 15′ V-bottomed dory designed by Jeff Spira of Spira International. The plans come as six 18″ × 24″ prints at 3/4″ scale along with detailed step-by-step layouts and easy-to-read measurements. Included with the prints is a 50-page booklet explaining procedures for building the strongback, cutting strips of plywood to accommodate the twist of the bottom at the stem, and handling fiberglass and resin, along with recommendations for interior outfitting such as building a console and seats.
 Tom Baugher
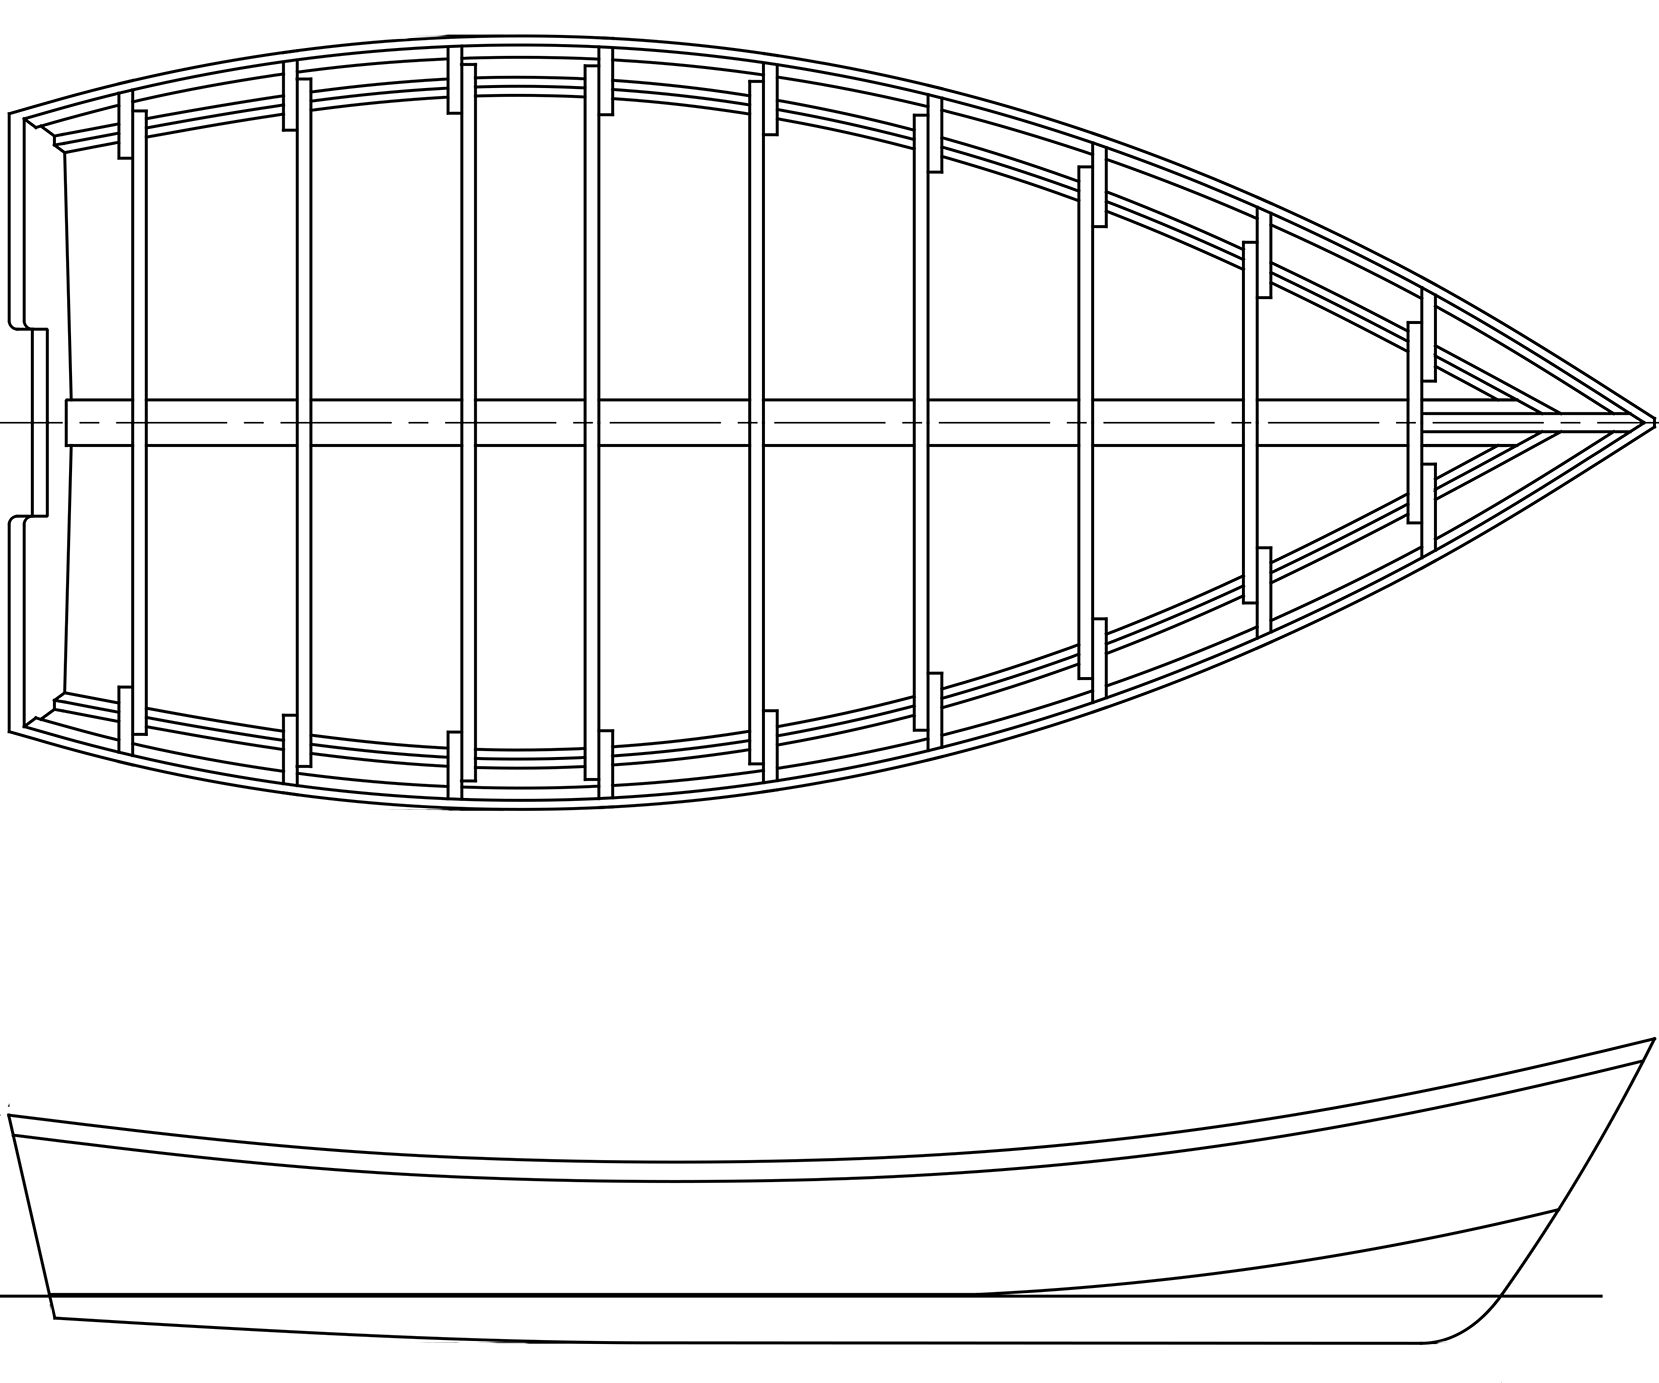
The plans call for frames constructed of common dimensional lumber and fir plywood for the bottom, sides, and transom.
I started building the frames from big-box-store 2×4s, as the plans suggested, but I started to feel nervous about the wood. I called Jeff about the construction-grade 2×4s, and he said there are many options for sealing wood and no matter what type of wood is used, if the boat is left outside and uncovered for months, it will start to rot. The longevity of a wooden boat is directly related to its care.
I thought that adding 4″ to the height of the sides would create a more comfortable sheer height for me, and Jeff saw no problem with the increased freeboard. He advised me on making the necessary changes: just raise the frame sides transom and stem by 4″.
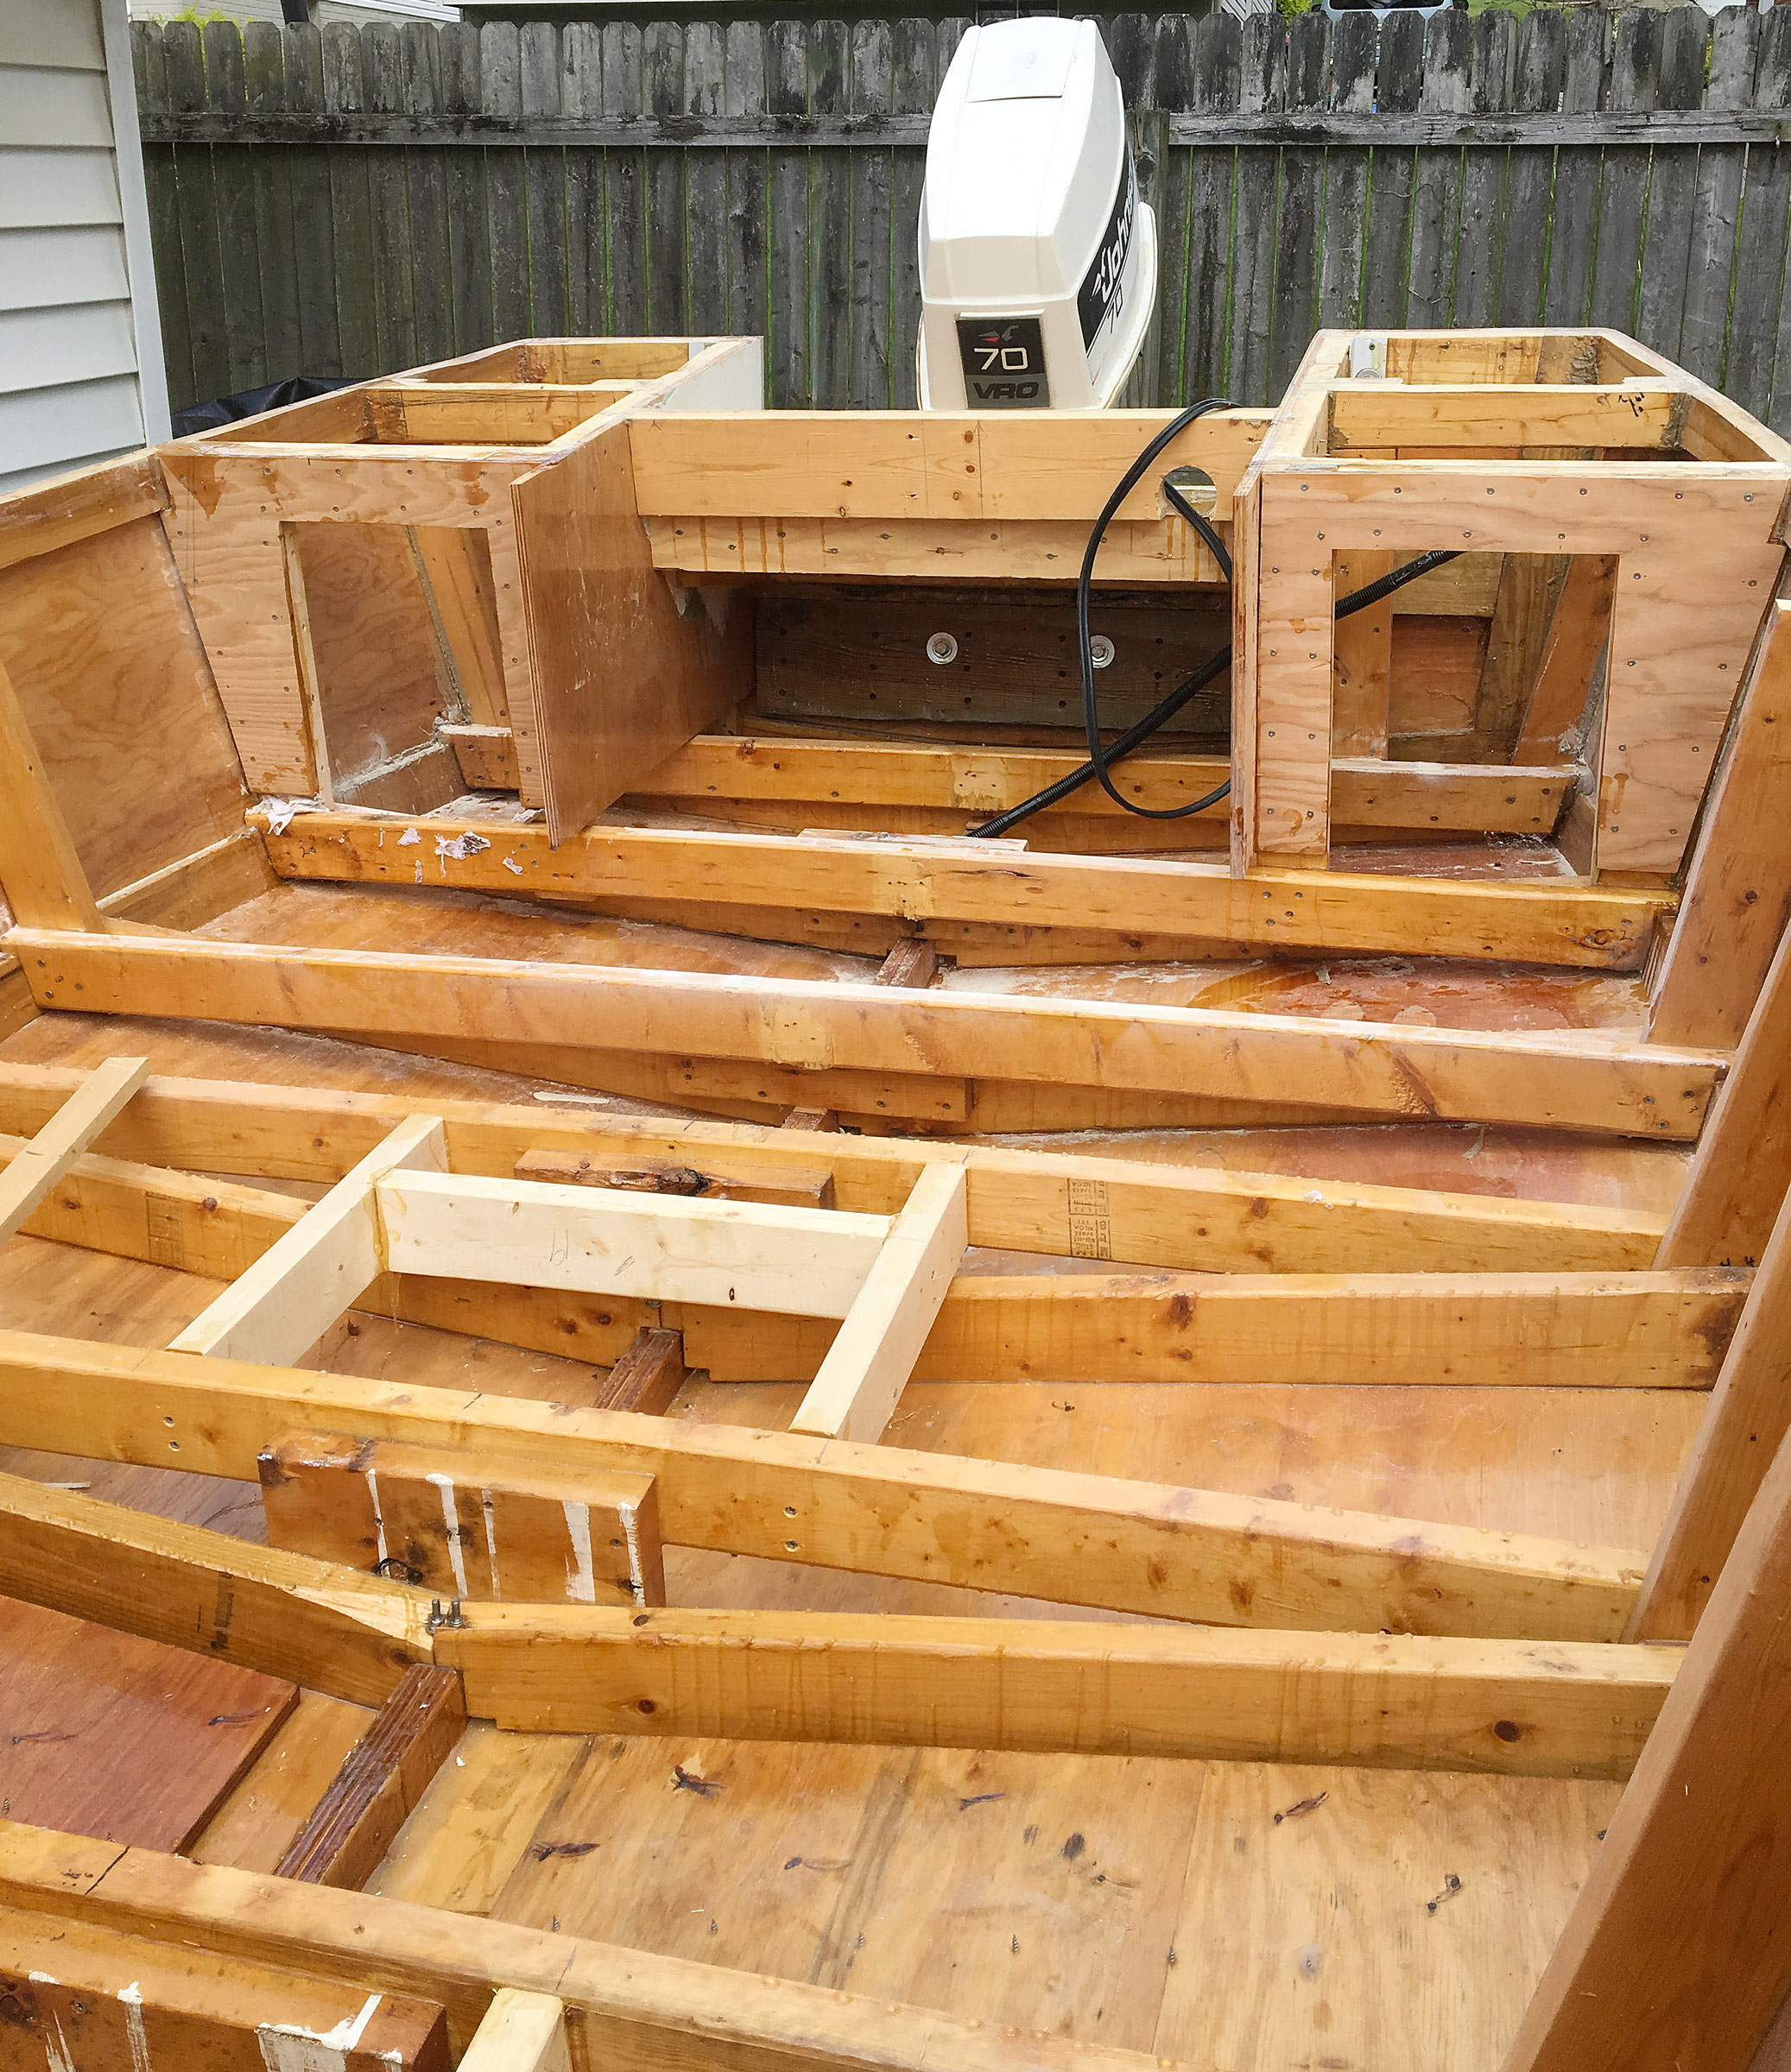
I used a 4×8 sheet of 3/4″ marine plywood set on two sawhorses as a work table; it would later become the transom, keelson, and stem. With wide sheets of kraft paper on top, duct-taped in place, I marked the rib measurements from the scaled drawings. With my power miter box set next to this table, I cut 2×4 frame parts to size and laid them down on the paper to position them for fastening with epoxy and 3-1/2″ stainless-steel deck screws. After I had assembled all nine frames, the 3/4″ plywood table top then became the transom and keelson parts. Marine plywood is optional in the Spira instructions; the primary recommendation is for the more common and less expensive AC plywood.
The frames, stem, and transom are secured on a strongback made of two 16′ 2×6s. The chines and inwales follow steamed in a plastic bag, 10′ sections at a time, to make the bends required for them to fit in notches cut in the frames. After the steamed pieces dried, they were epoxied and screwed in place.
 Ed Neal
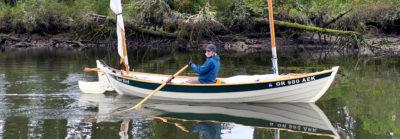
As with many Spira boats, the interior arrangement is left up to the builder. The author opted for the foredeck, center console, and stern storage compartments seen here.
Each of the 5/8″ plywood bottom panels is installed in two pieces, butted together and backed by plywood butt plates. There is a lot of twist in the forward ends; Jeff recommends cutting the 5/8″ plywood in 1 1/2″ strips spanning the keel to chine, a method I used to cover the last 3′ to the bow. I then filled the gaps and faired the surface with epoxy thickened with sawdust and ’glass fibers.
The plywood’s seams at the chines, keel line, and butt joints were then covered with staggered, overlapping strips of 4″ fiberglass tape. The entire hull was sheathed later in 6-oz fiberglass cloth set in epoxy, with three layers of cloth overlapping the bow to add stiffness.
After painting the hull’s exterior, it was time to find a crew to turn the boat over. Once flipped, the boat sat on a boat trailer to await completion of the interior. The layout is a matter of personal preference, and while several options are provided in the Spira booklet, the ultimate configuration is up to the builder. I followed some suggestions provided in the booklet for building the center console, and added a few elements of my own: a storage compartment on each side of transom and in between them, a splash well for the outboard.
 Ed Neal
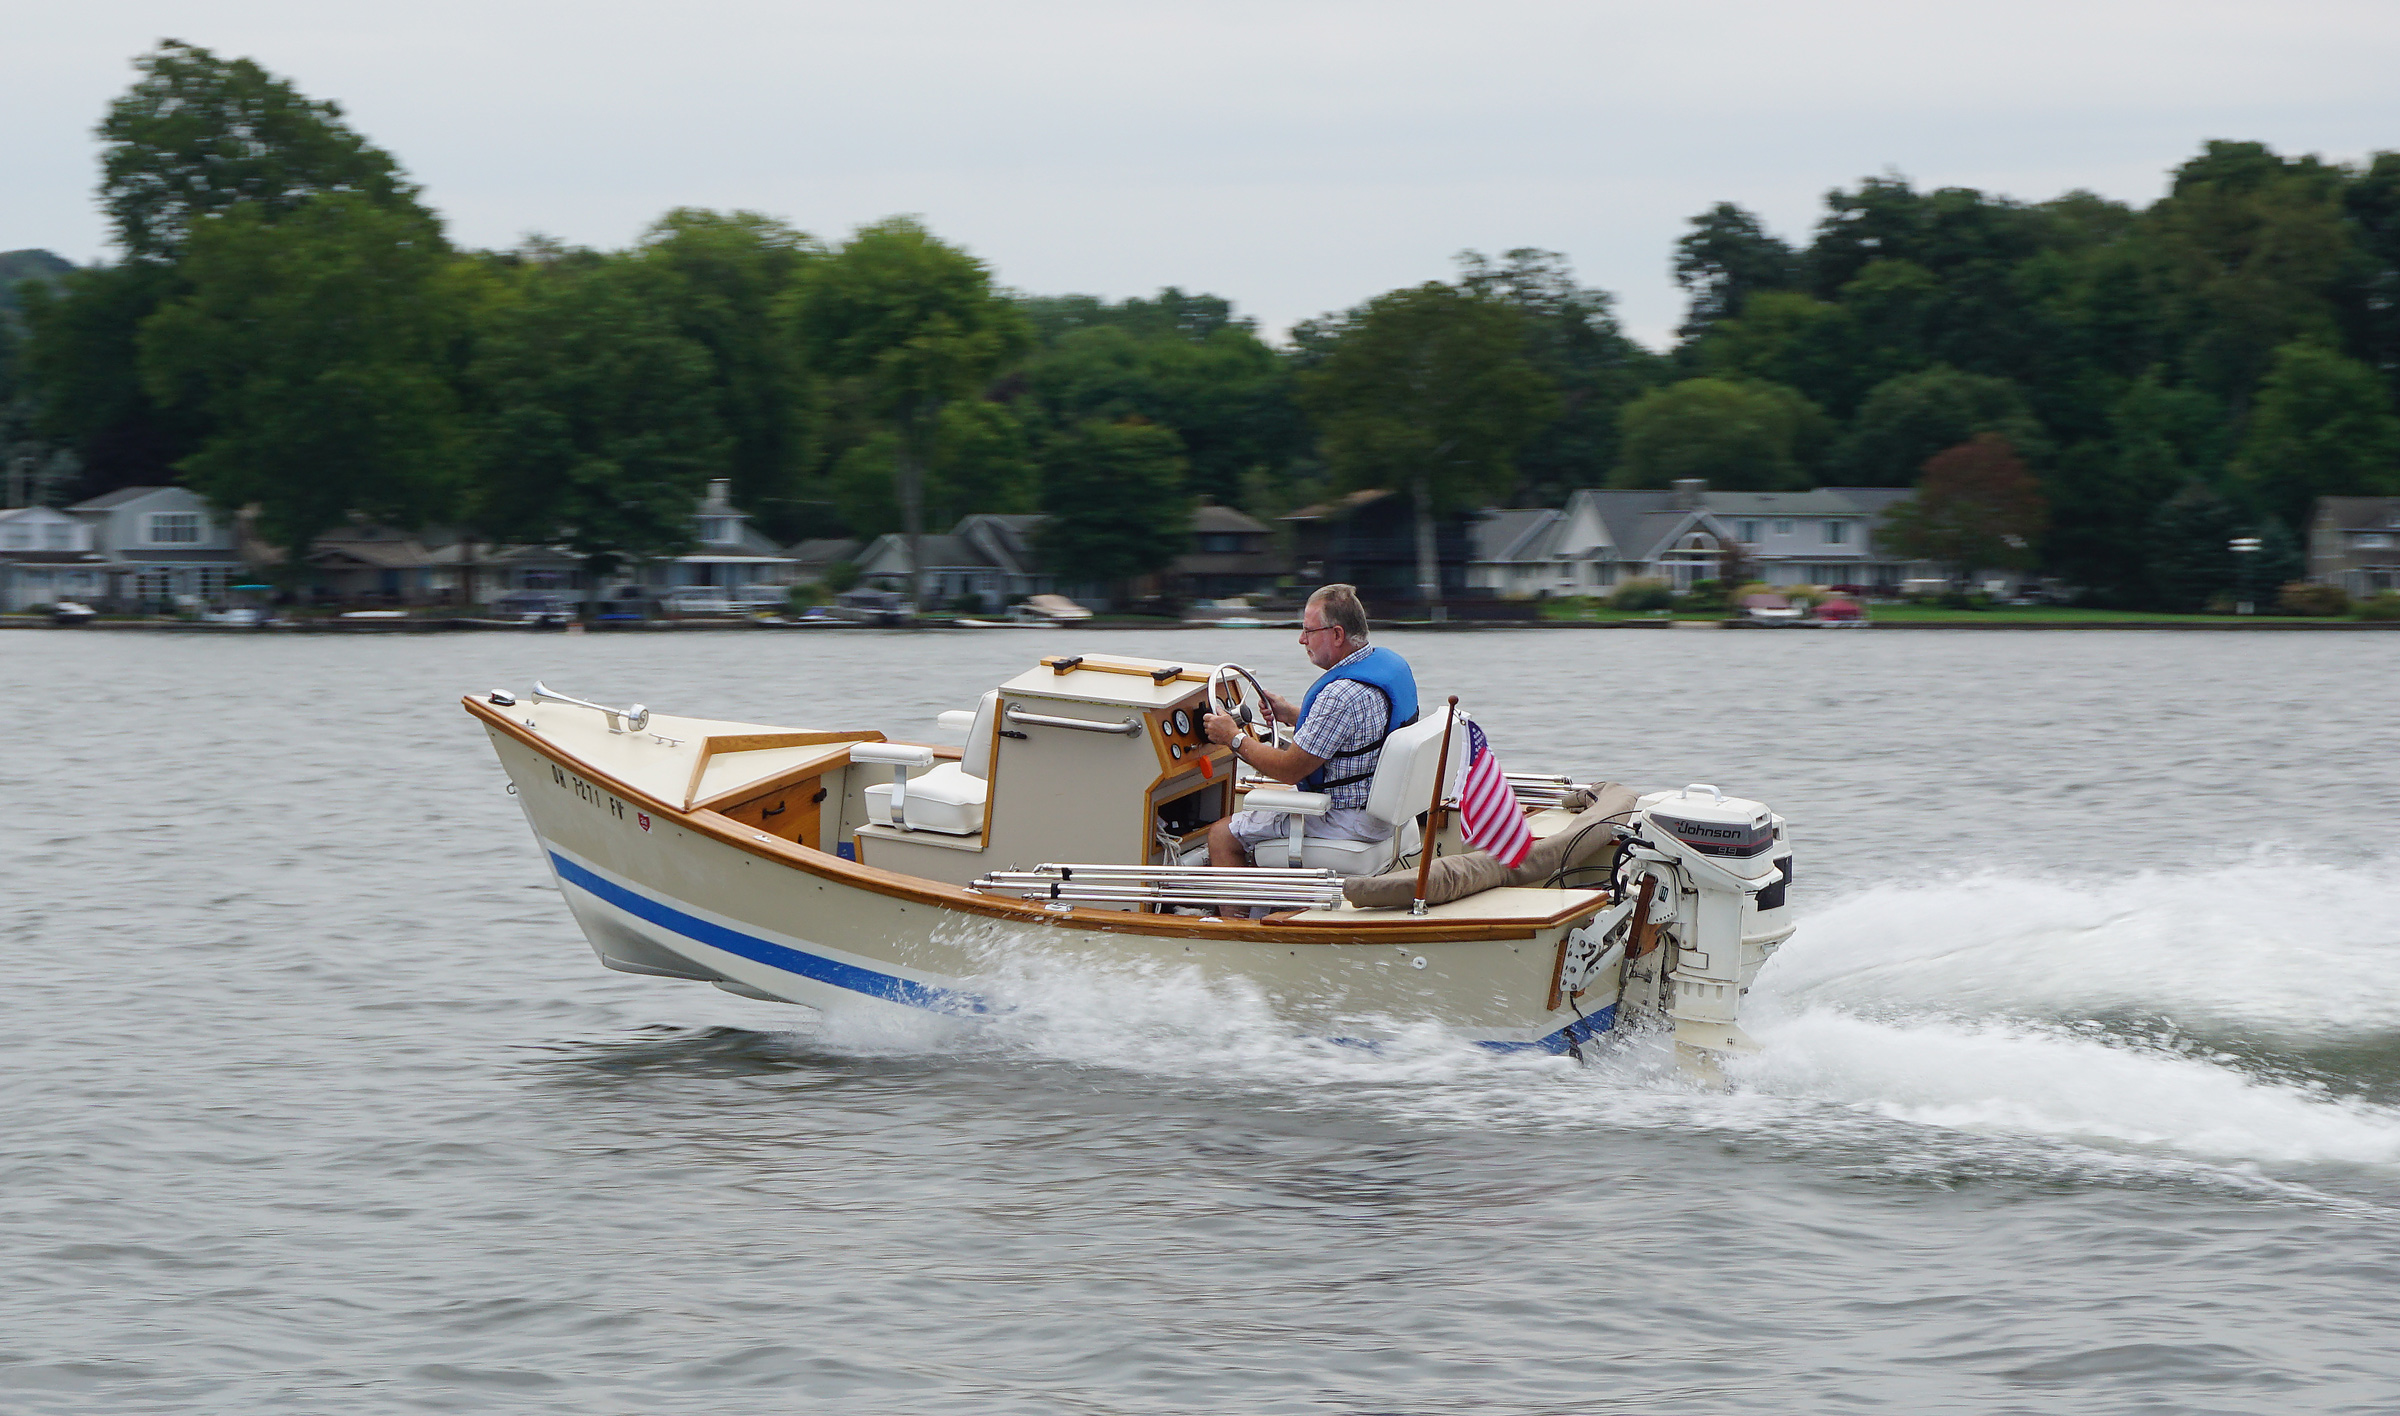
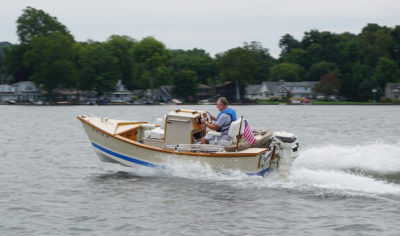
With a 1986 70-hp outboard providing power, the Alamitos can hit 40 mph.
I acquired two older outboards, a 1986 70-hp Johnson (the plans call for 75 hp, max) and a 1988 9.9-hp long-shaft kicker. When I first tested the 70-hp outboard, it was not able to get the boat on plane nor do more than 12 mph at full throttle. I took the boat and motor to a marina shop, and the 21″-pitch prop, meant for a lighter, faster boat, was replaced by a 15″-pitch and the motor was tuned. Wow, what a difference! The boat jumped out of the water, quickly got on plane, and hit 40 mph. But then it started porpoising badly at high speed.
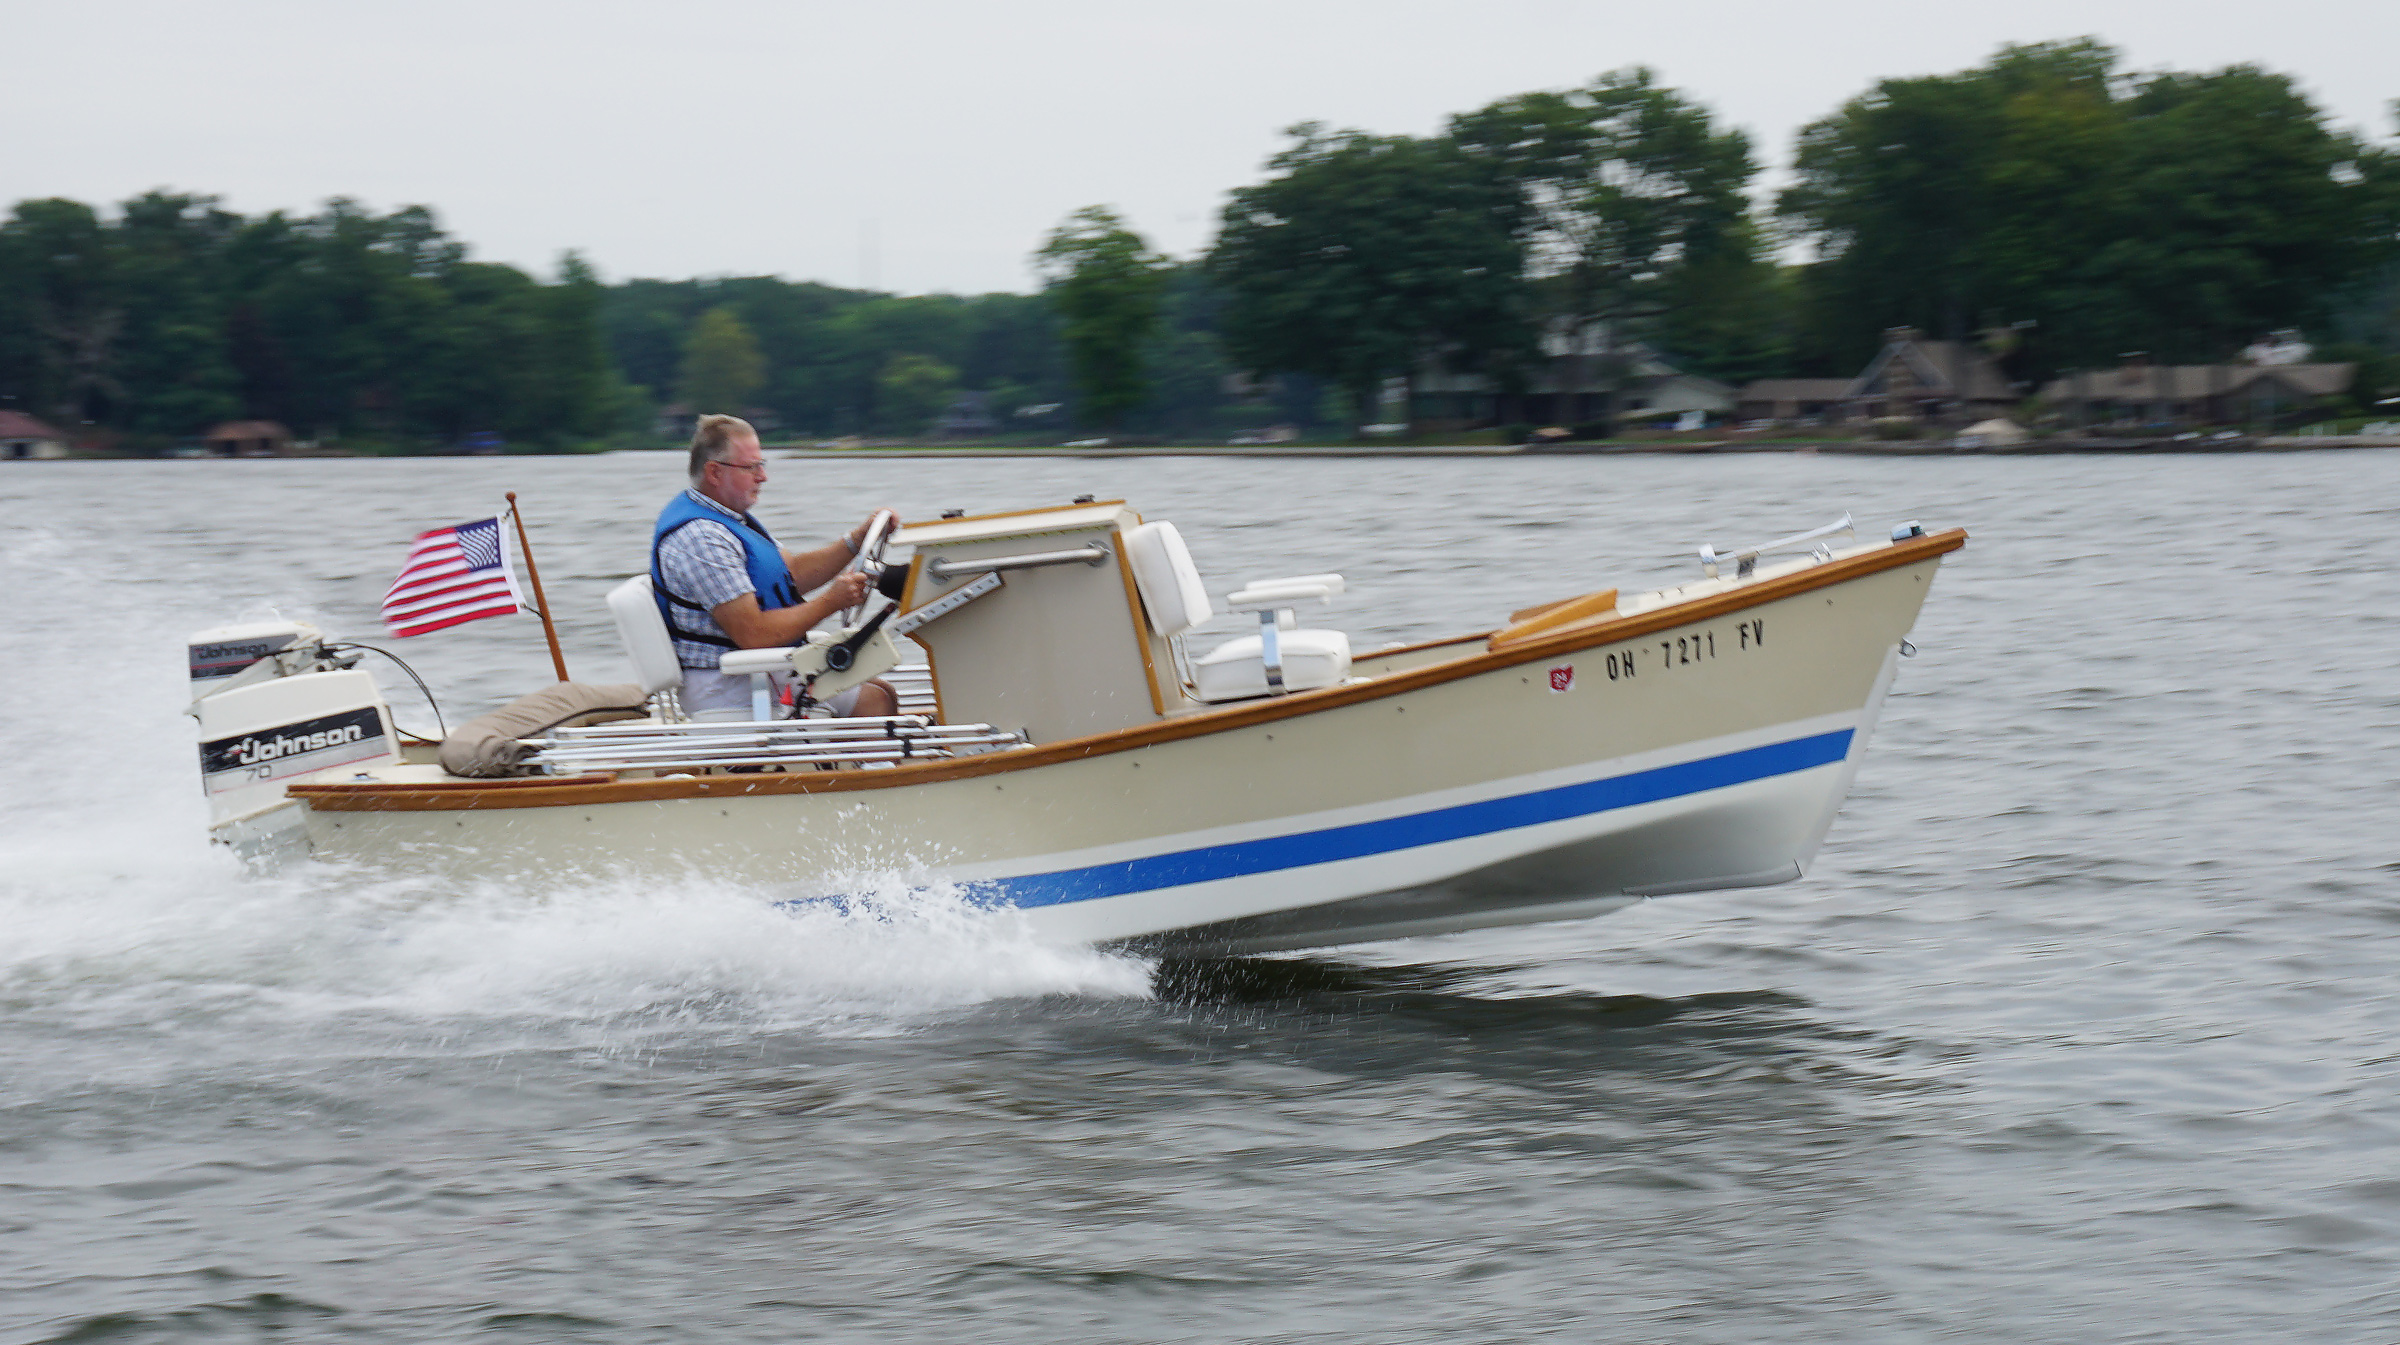
The shop folks said to place a wedge on the transom to pitch the motor back 5 degrees, add a dolphin fin to the lower unit, and mount transom trim tabs. Back on the water with these additions, the Alamitos remained stable up to full throttle with just minor bouncing at top speed.
 Ed Neal
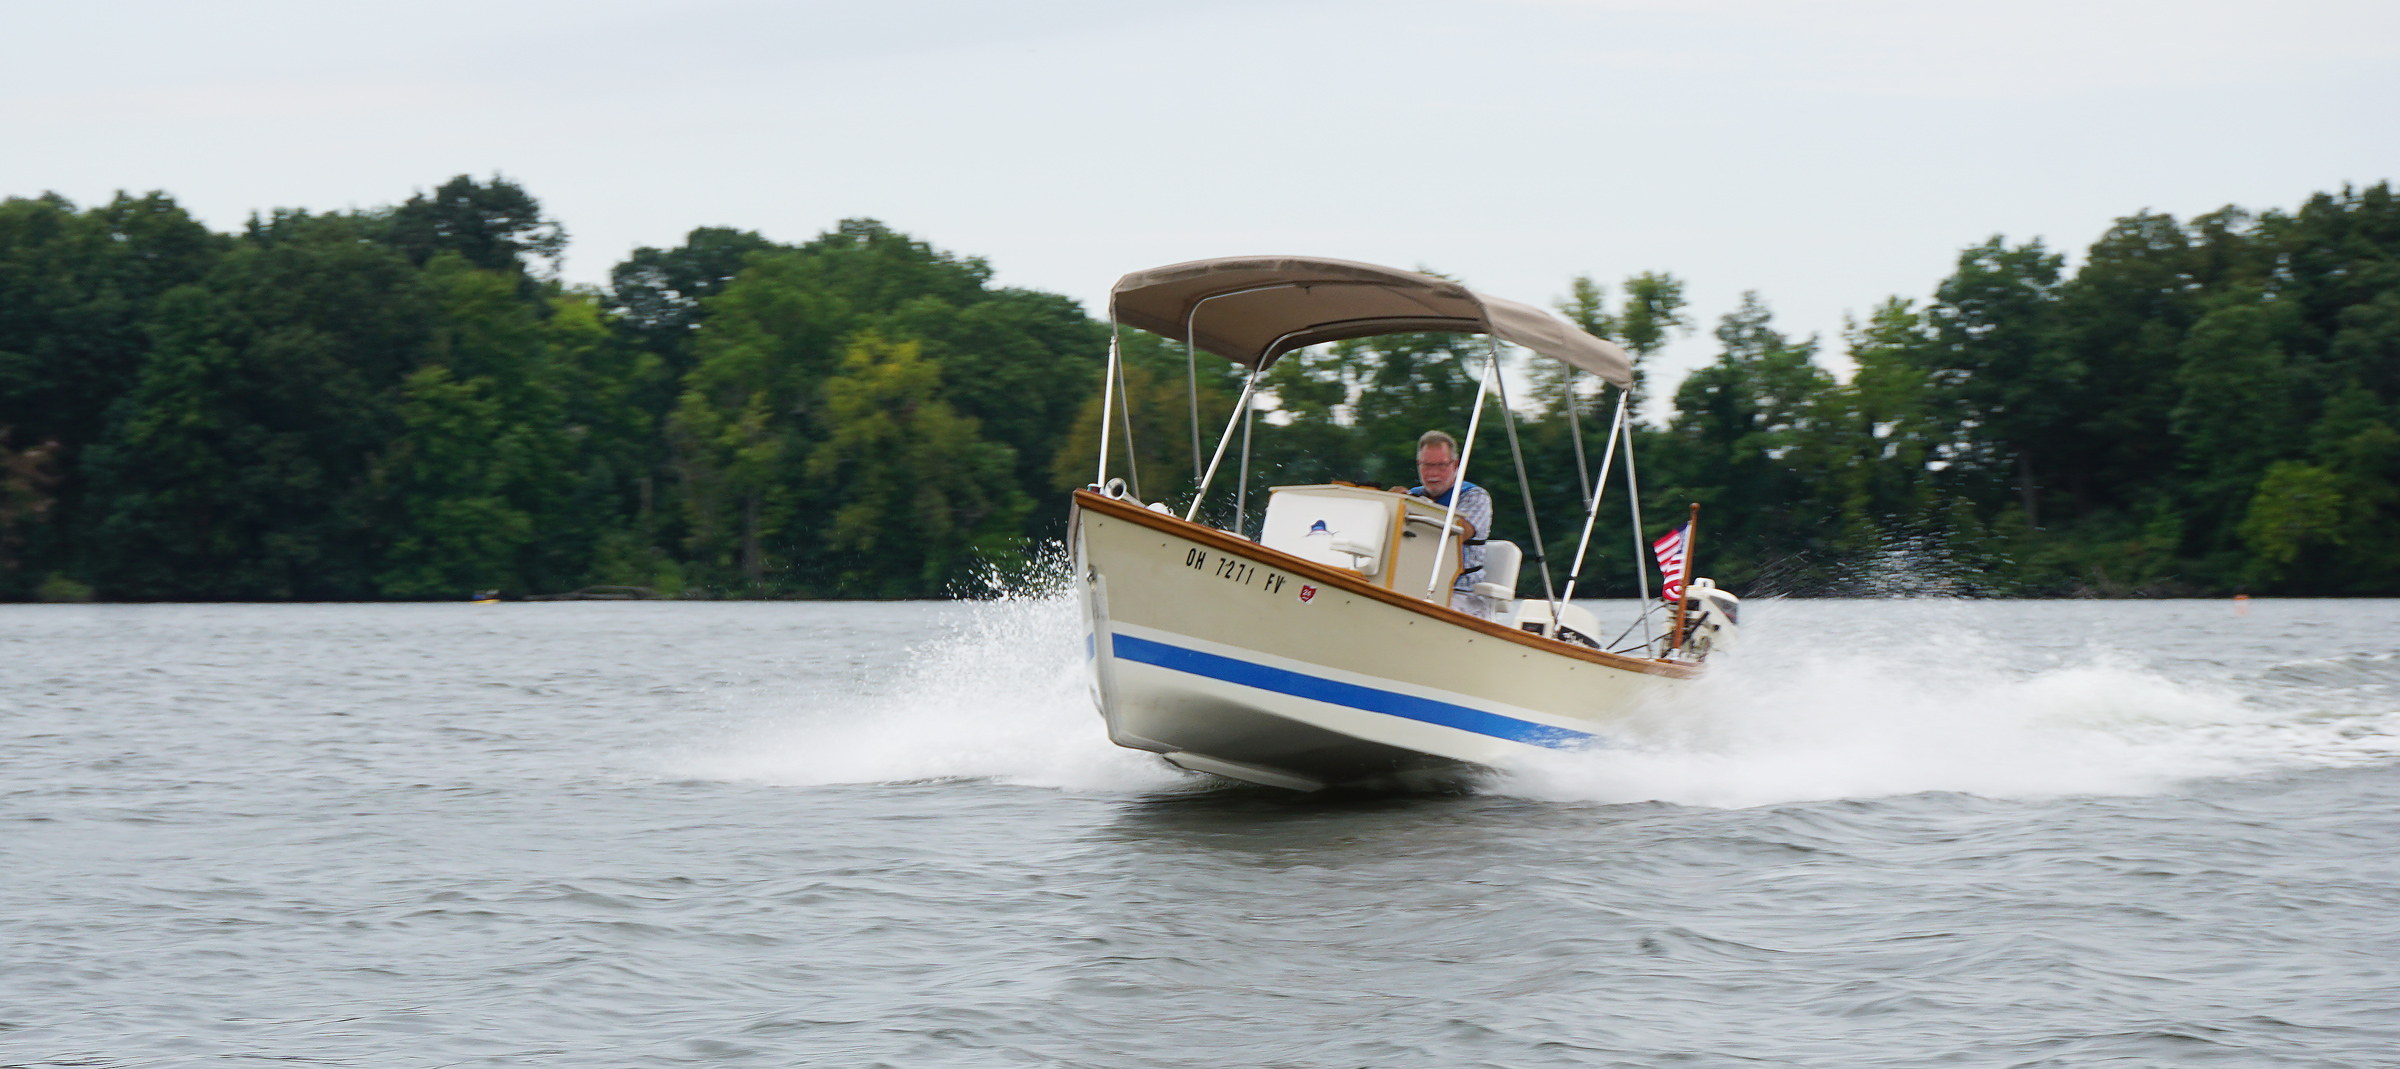
With the bow elevated, the forward end of the keel added to improve handling is visible.
The boat’s wide, smooth bottom and shallow-V aft made for very wide, skidding turns. I decided the boat needed a keel and designed one on my own. I used a 12′ length of 2-1/2″×6″ white oak for the keel. I cut a V-shaped channel in the top side to match the mating surface of the hull’s centerline, then tapered the keel from a beveled end near the bow and a 4″ depth at the transom. I fixed it in place with epoxy and fiberglass and various lengths of stainless screws.
 Ed Neal
The folding canopy is a personal touch added by the author for protection from the weather.
With the keel, the Alamitos handles much better, even in rough water: the dory turns quickly, handles heavy chop much better, and drifts less in heavy wind.
Building the Alamitos was quite rewarding. It took me four years to complete, and that’s working mostly outside in northern Ohio where you have to be patient with the weather. I take the Alamitos out whenever I can to explore fishing sites or to just cruise the lakes. The boat looks great—the custom canvas top adds to its appeal—and always receives positive comments from passersby. ![]()
Tom Baugher, a retired housing inspector, has built and remodeled several homes and made various types of furniture—along with building a boat, the most rewarding experience of them all. He wishes to thank Jeff Spira for answering questions about the Alamitos, and the Cleveland Amateur Boat Builders and Boating Society (CABBS) for advice and access to tools.
Alamitos Particulars
Length: 15′
Beam: 6′
Hull weight: 909 lbs
Recommended hp: 40
Calc. Max hp: 75
Update: Jeff Spira passed away unexpectedly in the spring of 2022. His website is no longer operating and his boat plans are no longer available.
Is there a boat you’d like to know more about? Have you built one that you think other Small Boats Magazine readers would enjoy? Please email us!


Nice job Tom! Time well spent – enjoy
You did a great job on your boat and I appreciate you detailing your modifications to smooth out the ride. You didn’t mention whether or not you had tried your 9.9 hp on the boat. I’m curious what the results were if you did.
Wonderful job! I tinker and build and have played with all kinds of boats from sail to power over the last 40+ years. I’ve watched a lot of Jeff Spira’s videos and loved his soft gentle tone. His approach to boats and boat building was calm and reassuring. Almost meditative to watch and listen to. Very sad to hear of his passing and that his boat plans re not available.
It’s a great looking boat. My cousins are watermen in the Northern Neck of Virginia, so I grew up (summers) down there. I would opine that Alamitos is a deadrise skiff rather than a dory. I just love the old deadrise workboats- cousin Lee used to have a round stern 40′ one for oystering- and would love to have a deadrise skiff of my own- just not sure it would be altogether appropriate in Hawaii! (Ocean out here is not the Chesapeake Bay!)