 Photographs and models by the author
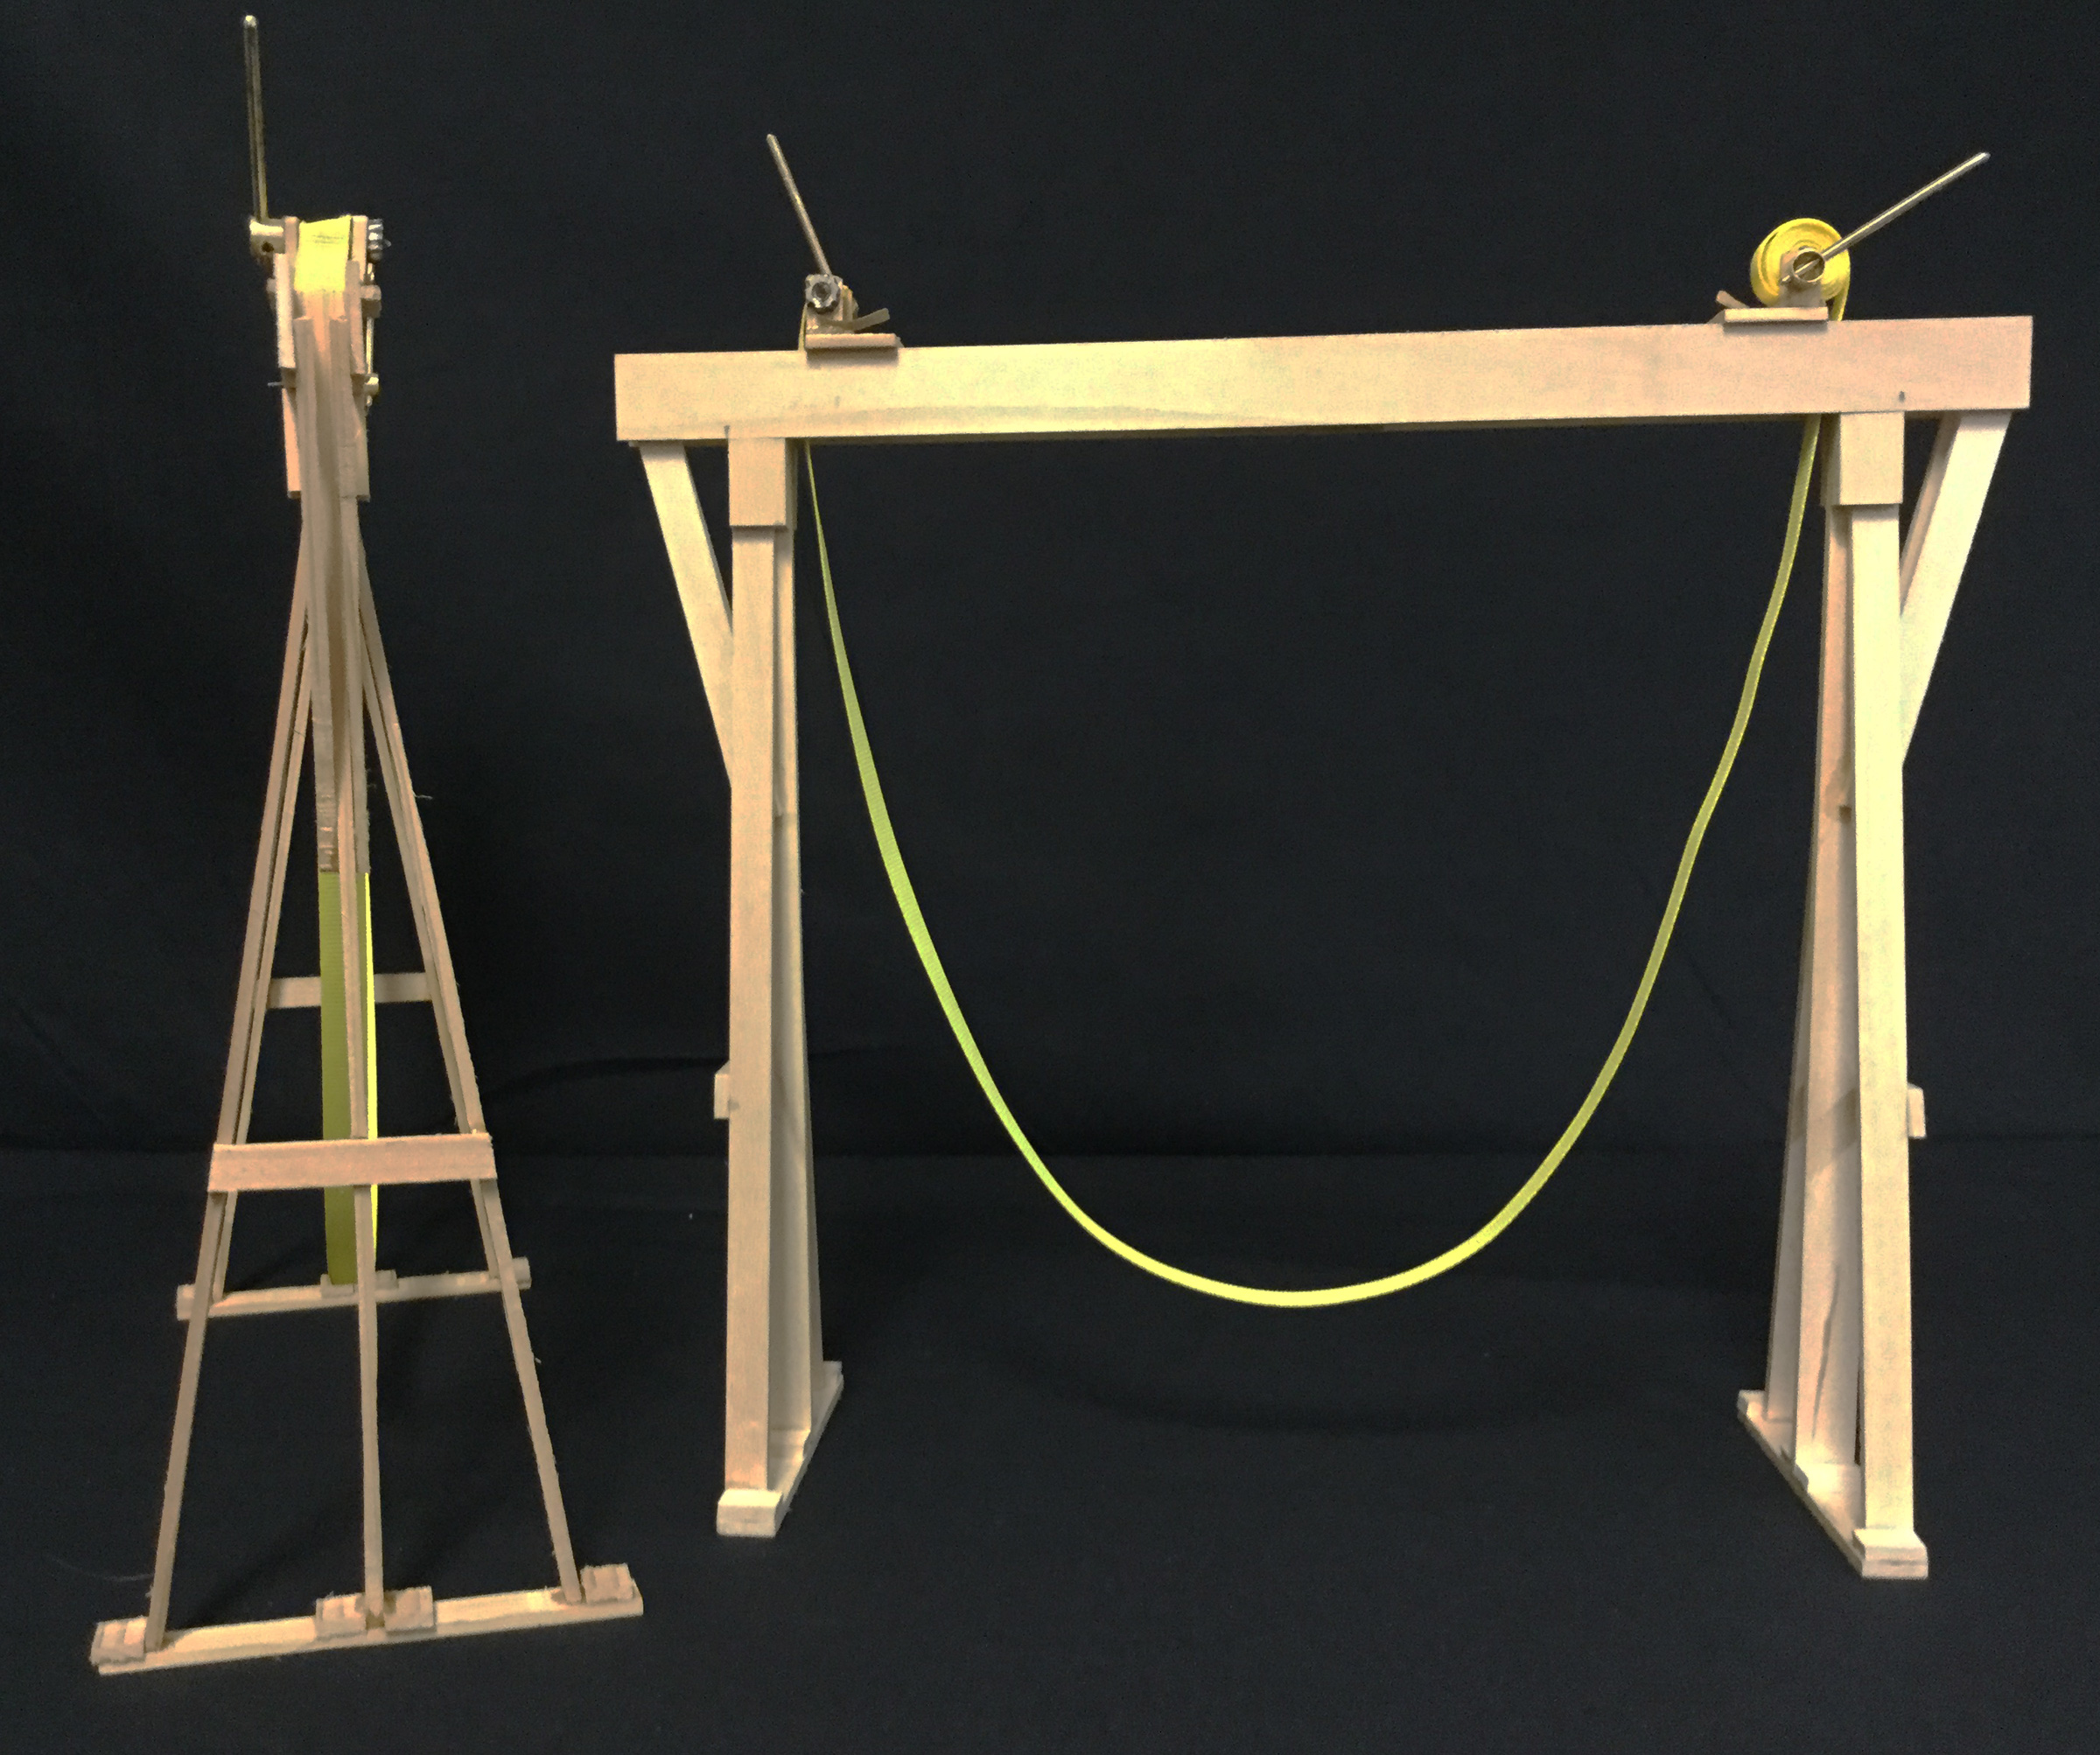
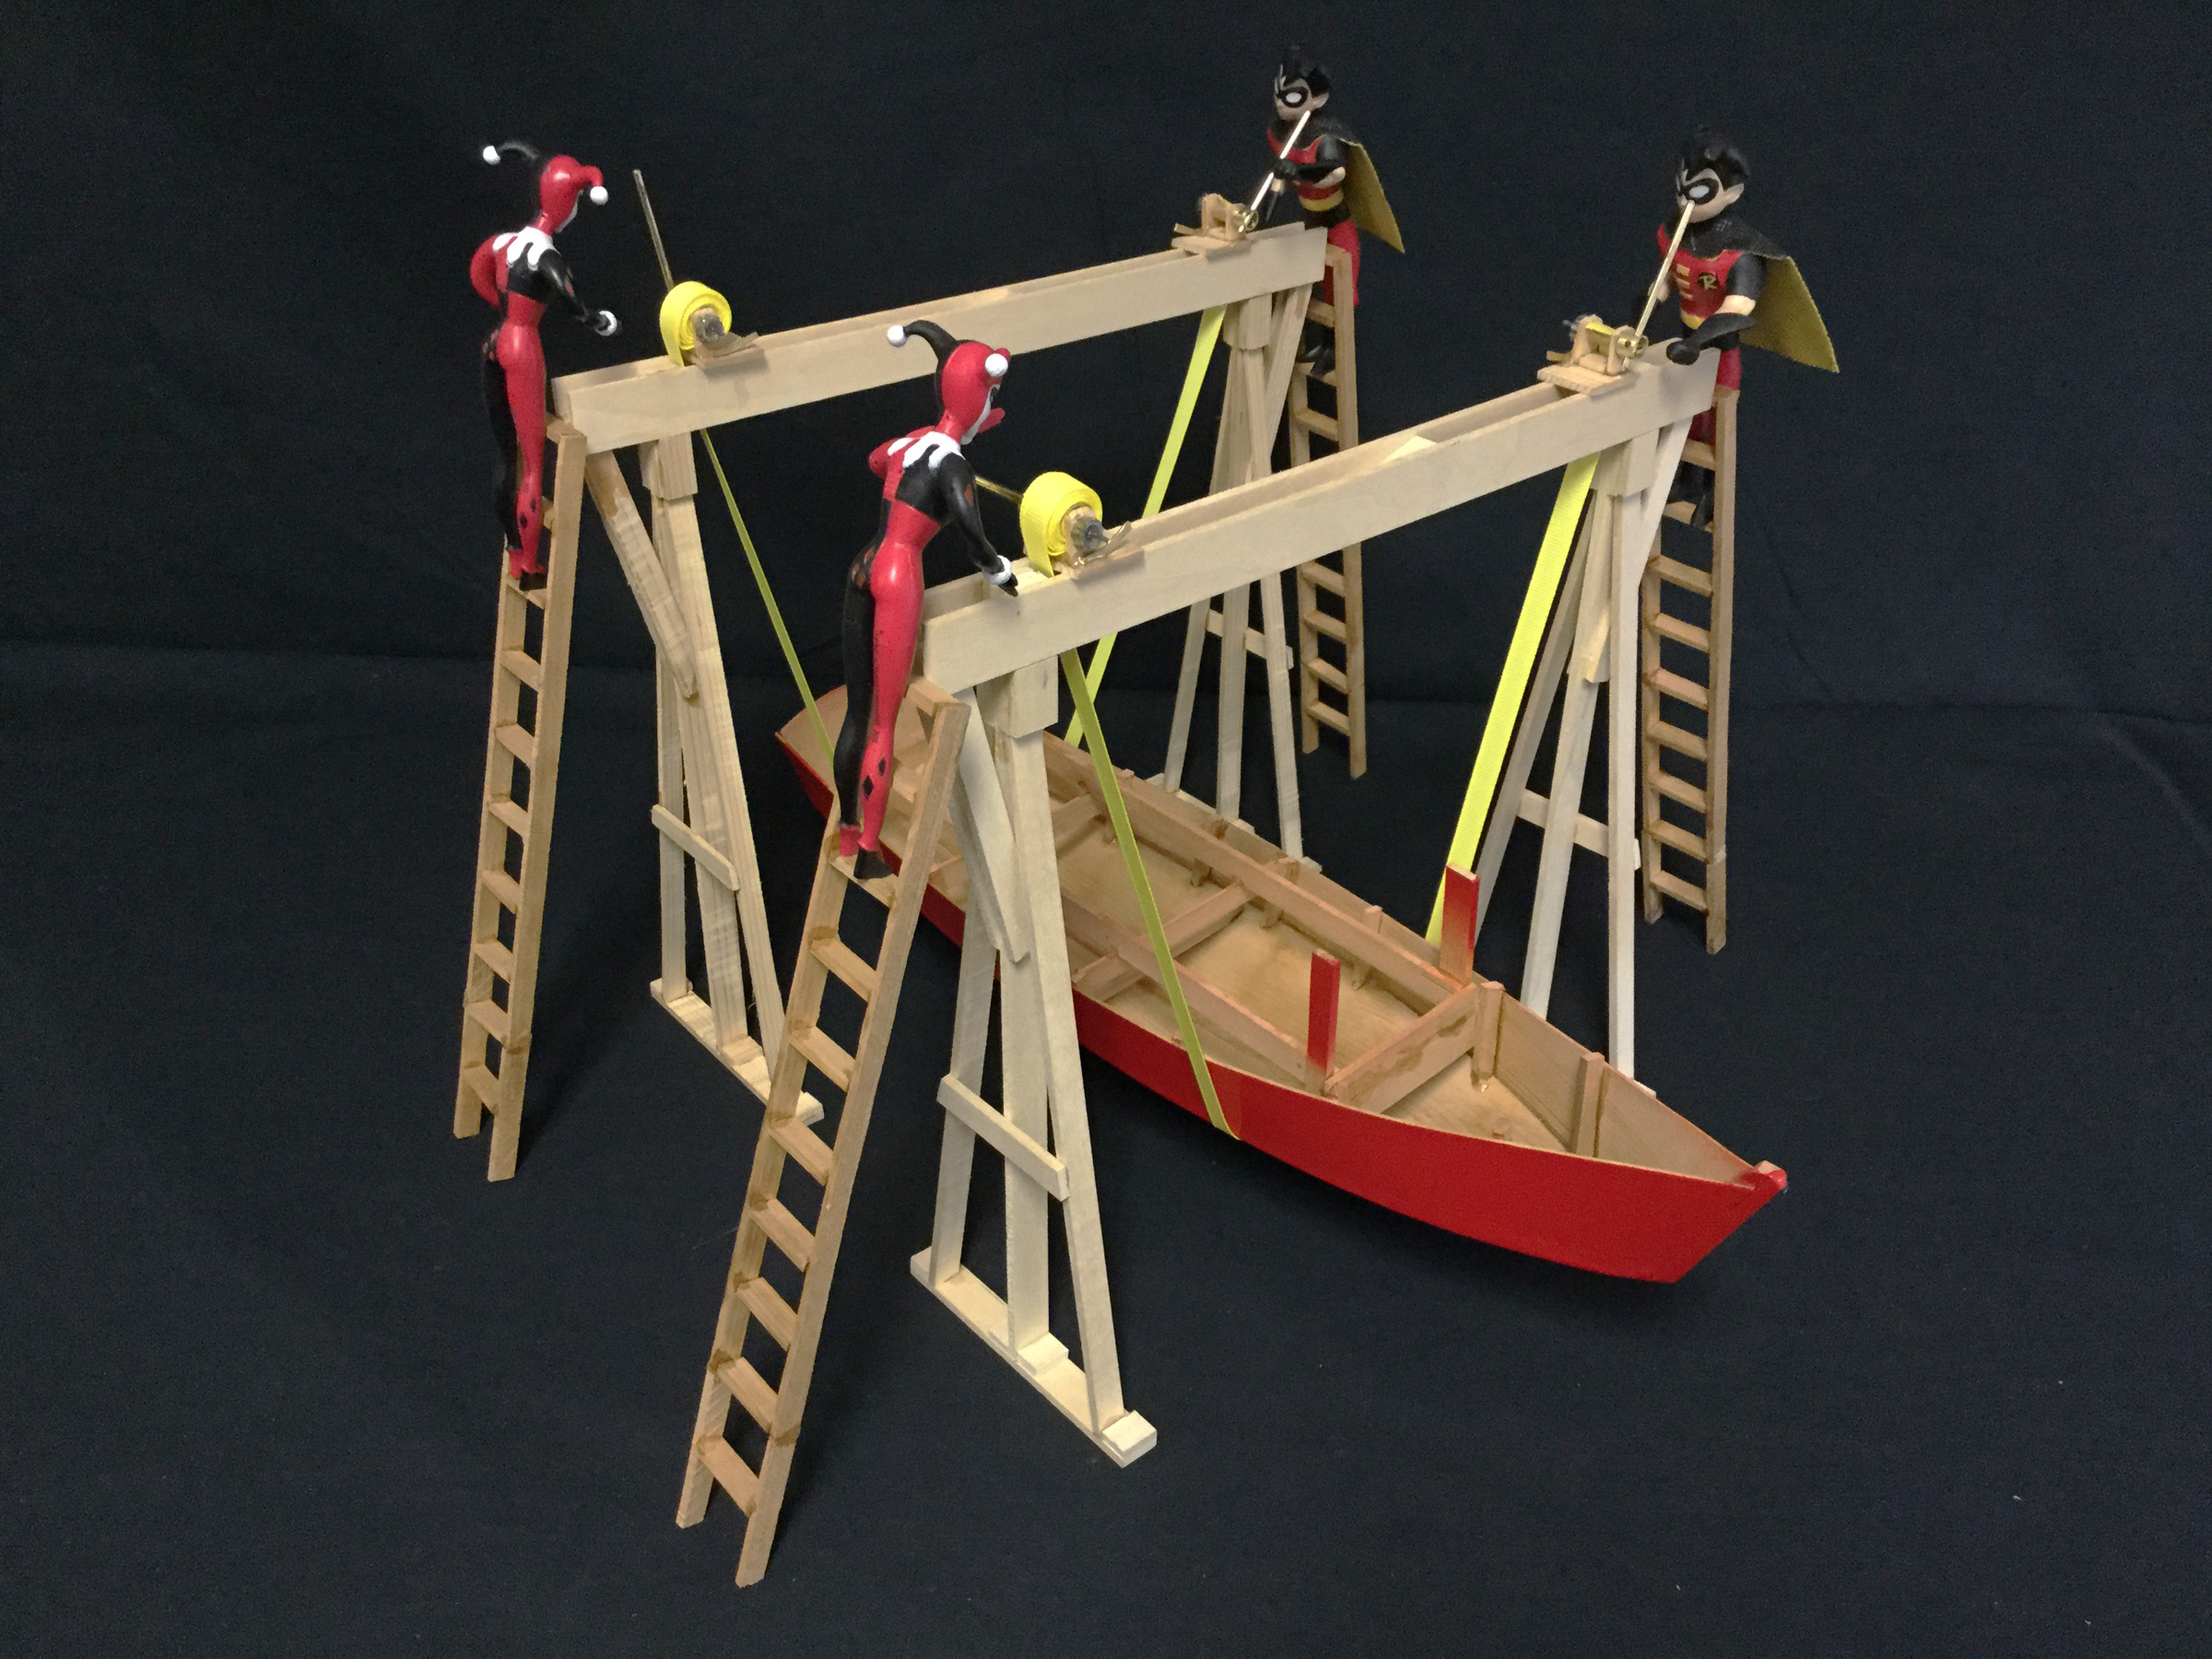
In order to ease the construction of my 18′ pocket cruiser, I built a pair gantry cranes. I dismantled them at the job’s conclusion, so I built models to illustrate them here. While the size and materials may be adjusted to the builder’s needs, my full-sized gantries had 12′ 2×8 horizontal beams, 10′ 2×6 vertical supports, 8-1/2′ 2×4 angled upright braces, 18″ 2×6 top spacer blocks, 8″ 2×6 top beam supports, and 4′ 2×6 bases. The handles for winding the winches are inserted here.
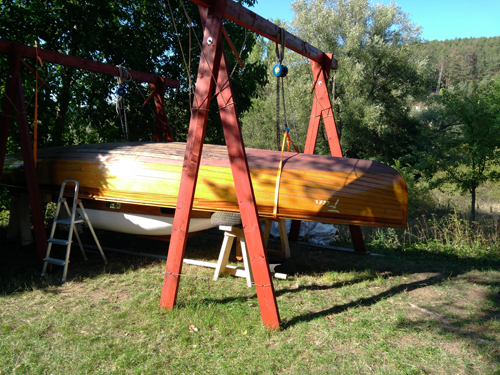
When I built my Glen-L Bo Jest, an 18′ x 8′ pocket cruiser, there came a time when I had to get the hull from upside down—the way it was built—to right-side up to finish construction. To do the job I made a pair of gantry cranes; I’ve long since dismantled them, as they were of no use after I trailered the boat away from the shop.
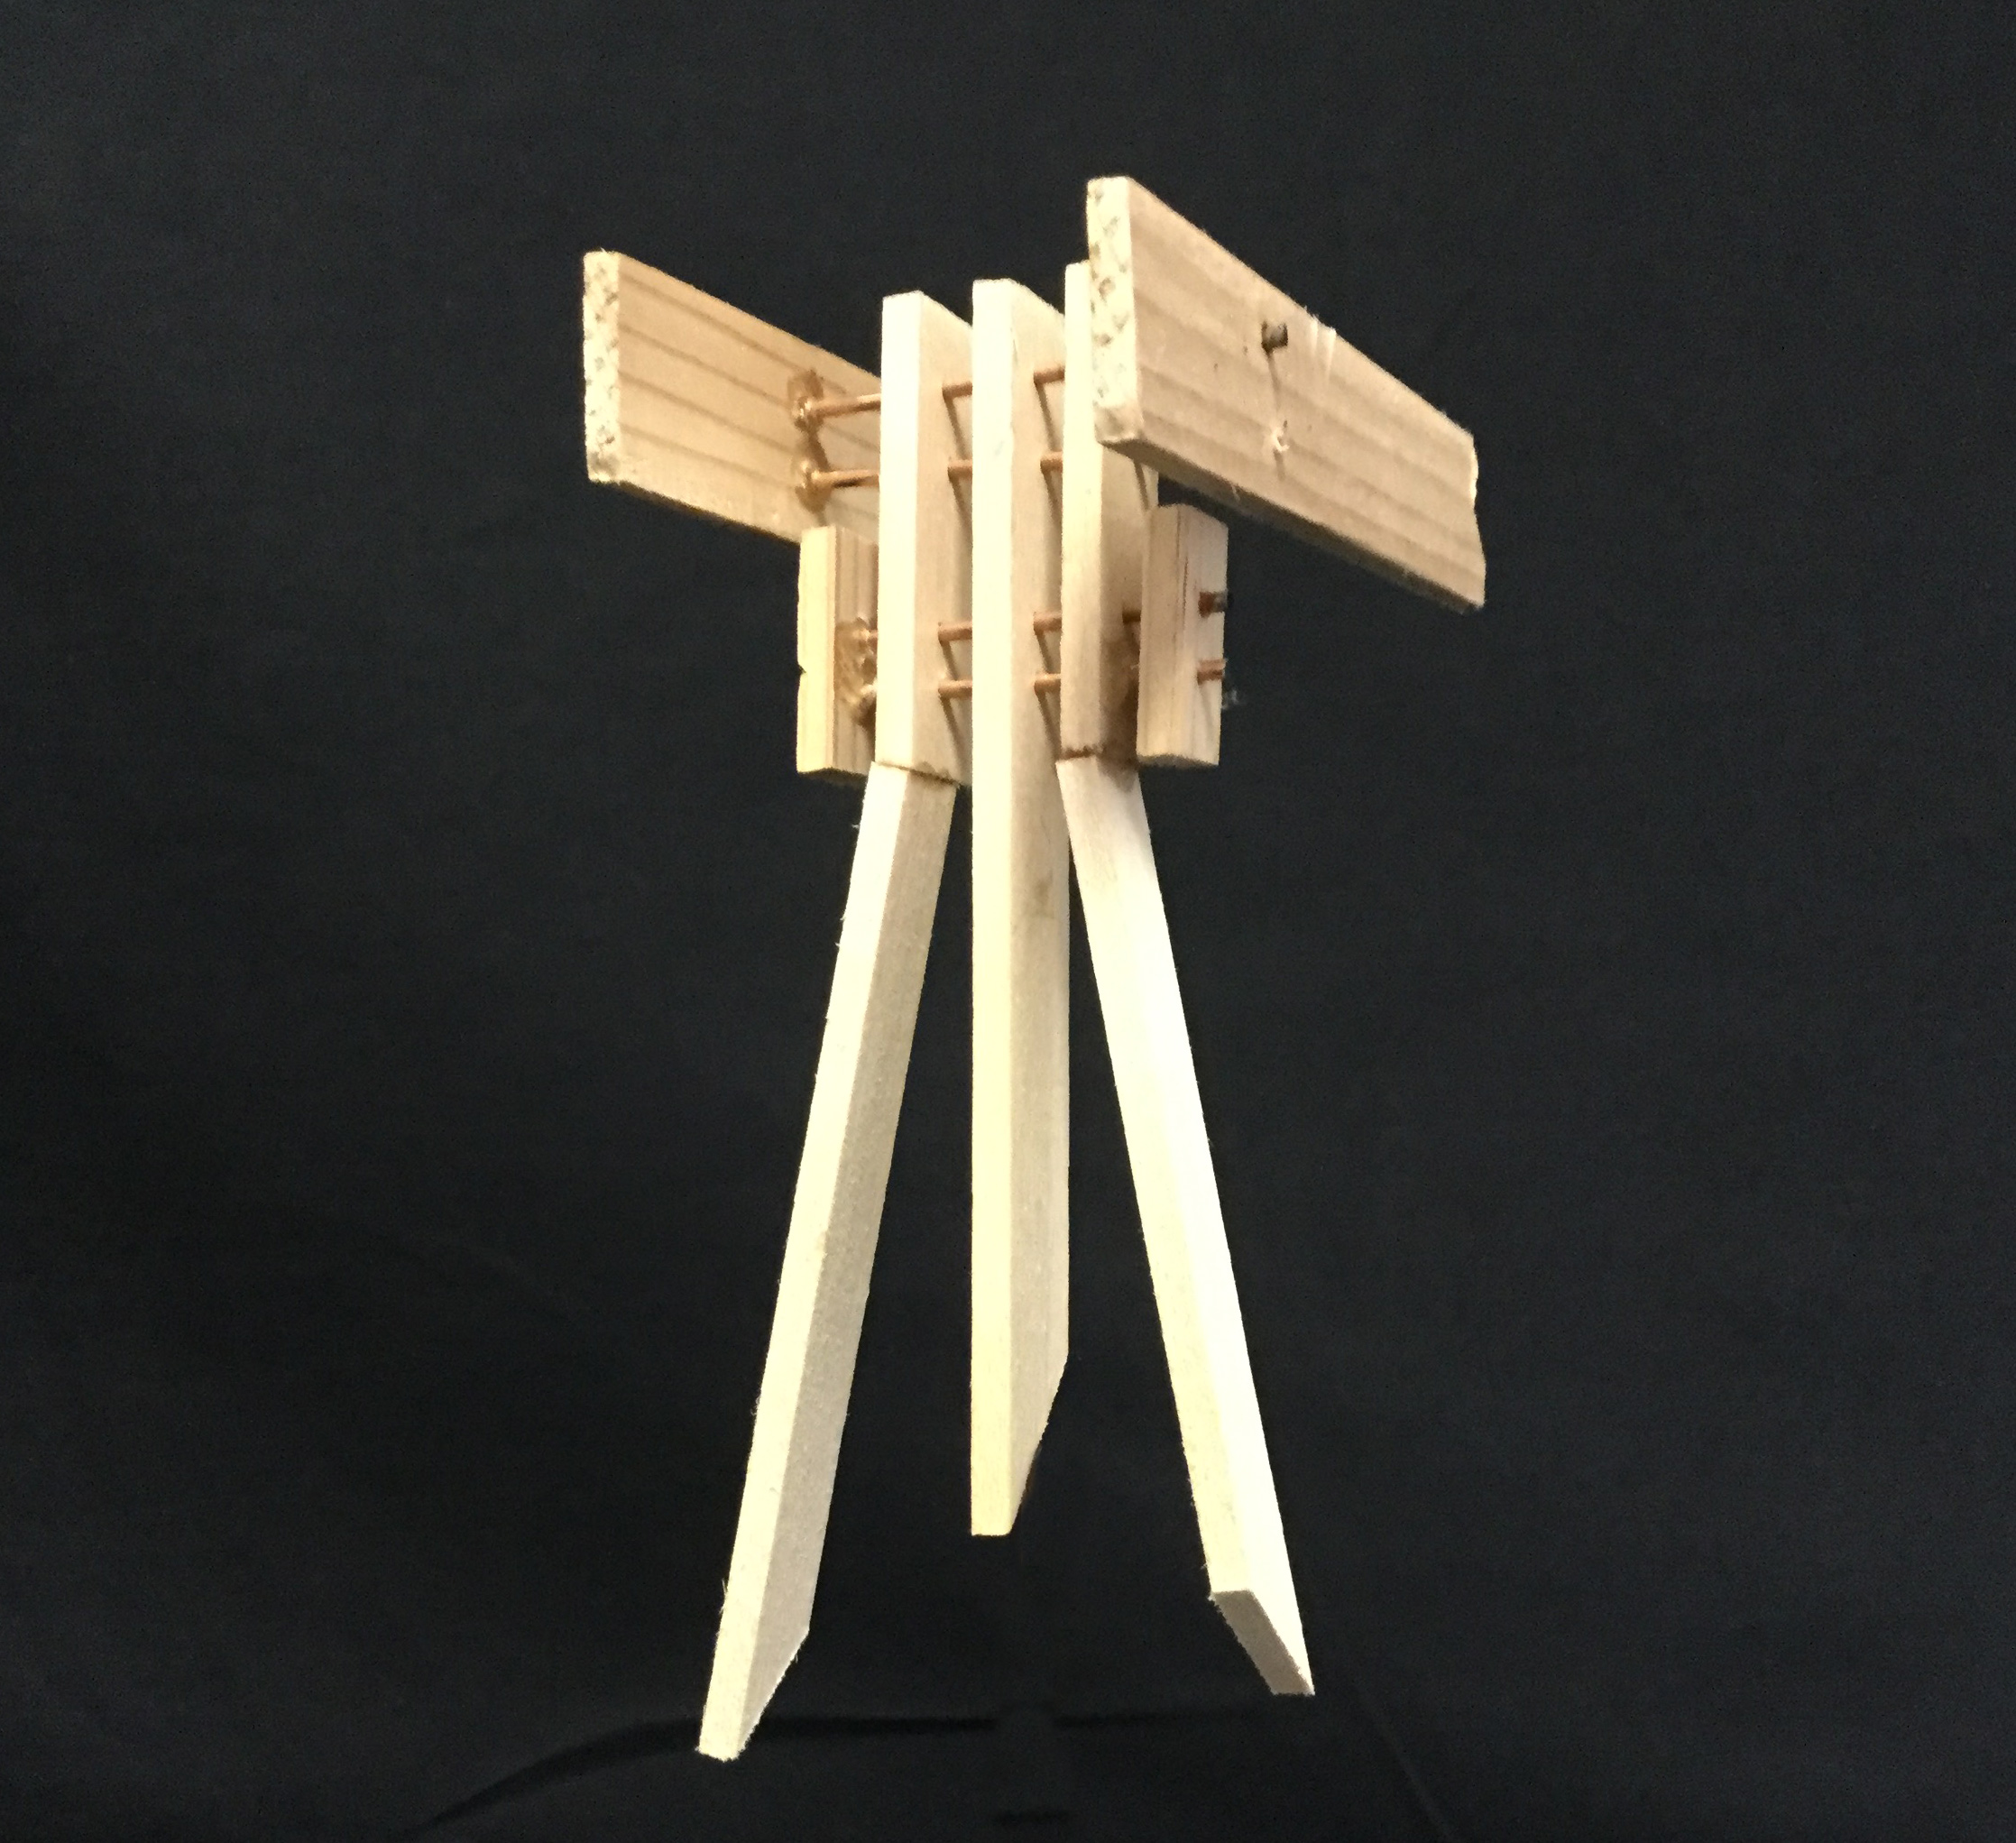
This exploded detail shows the arrangement of the corners of the frame. Omitted for clarity is the diagonal brace running from the ends of the beam down 4’ or 5’ to the vertical support to prevent side sway.
I made the frames of the full-sized gantries with dimensional lumberyard stock assembled with Torx self-tapping screws, along with 1/2″ bolts and fender washers where extra strength is needed. The lifting was done with the four truck winches and two 4”-wide, 5,500-lb-rated tie-down belts. Each winch was drilled with 3/8″ holes and mounted to the frames’ horizontal beams with long bolts. Steel plates, 8″ x 8″ x 1/4″, distributed the weight on the softwood gantry frame and kept the winches stable.
Rolling a hull of this size is usually an operation that requires a small army of helpers. Working with the gantry cranes doesn’t require so many people; it goes fastest with four winch operators, each on a safely secured ladder, and a couple of additional helpers on the ground to assist when needed. The cranes rotate the hull in place, keeping it from rolling and traveling across the floor—a benefit for working in a small space.
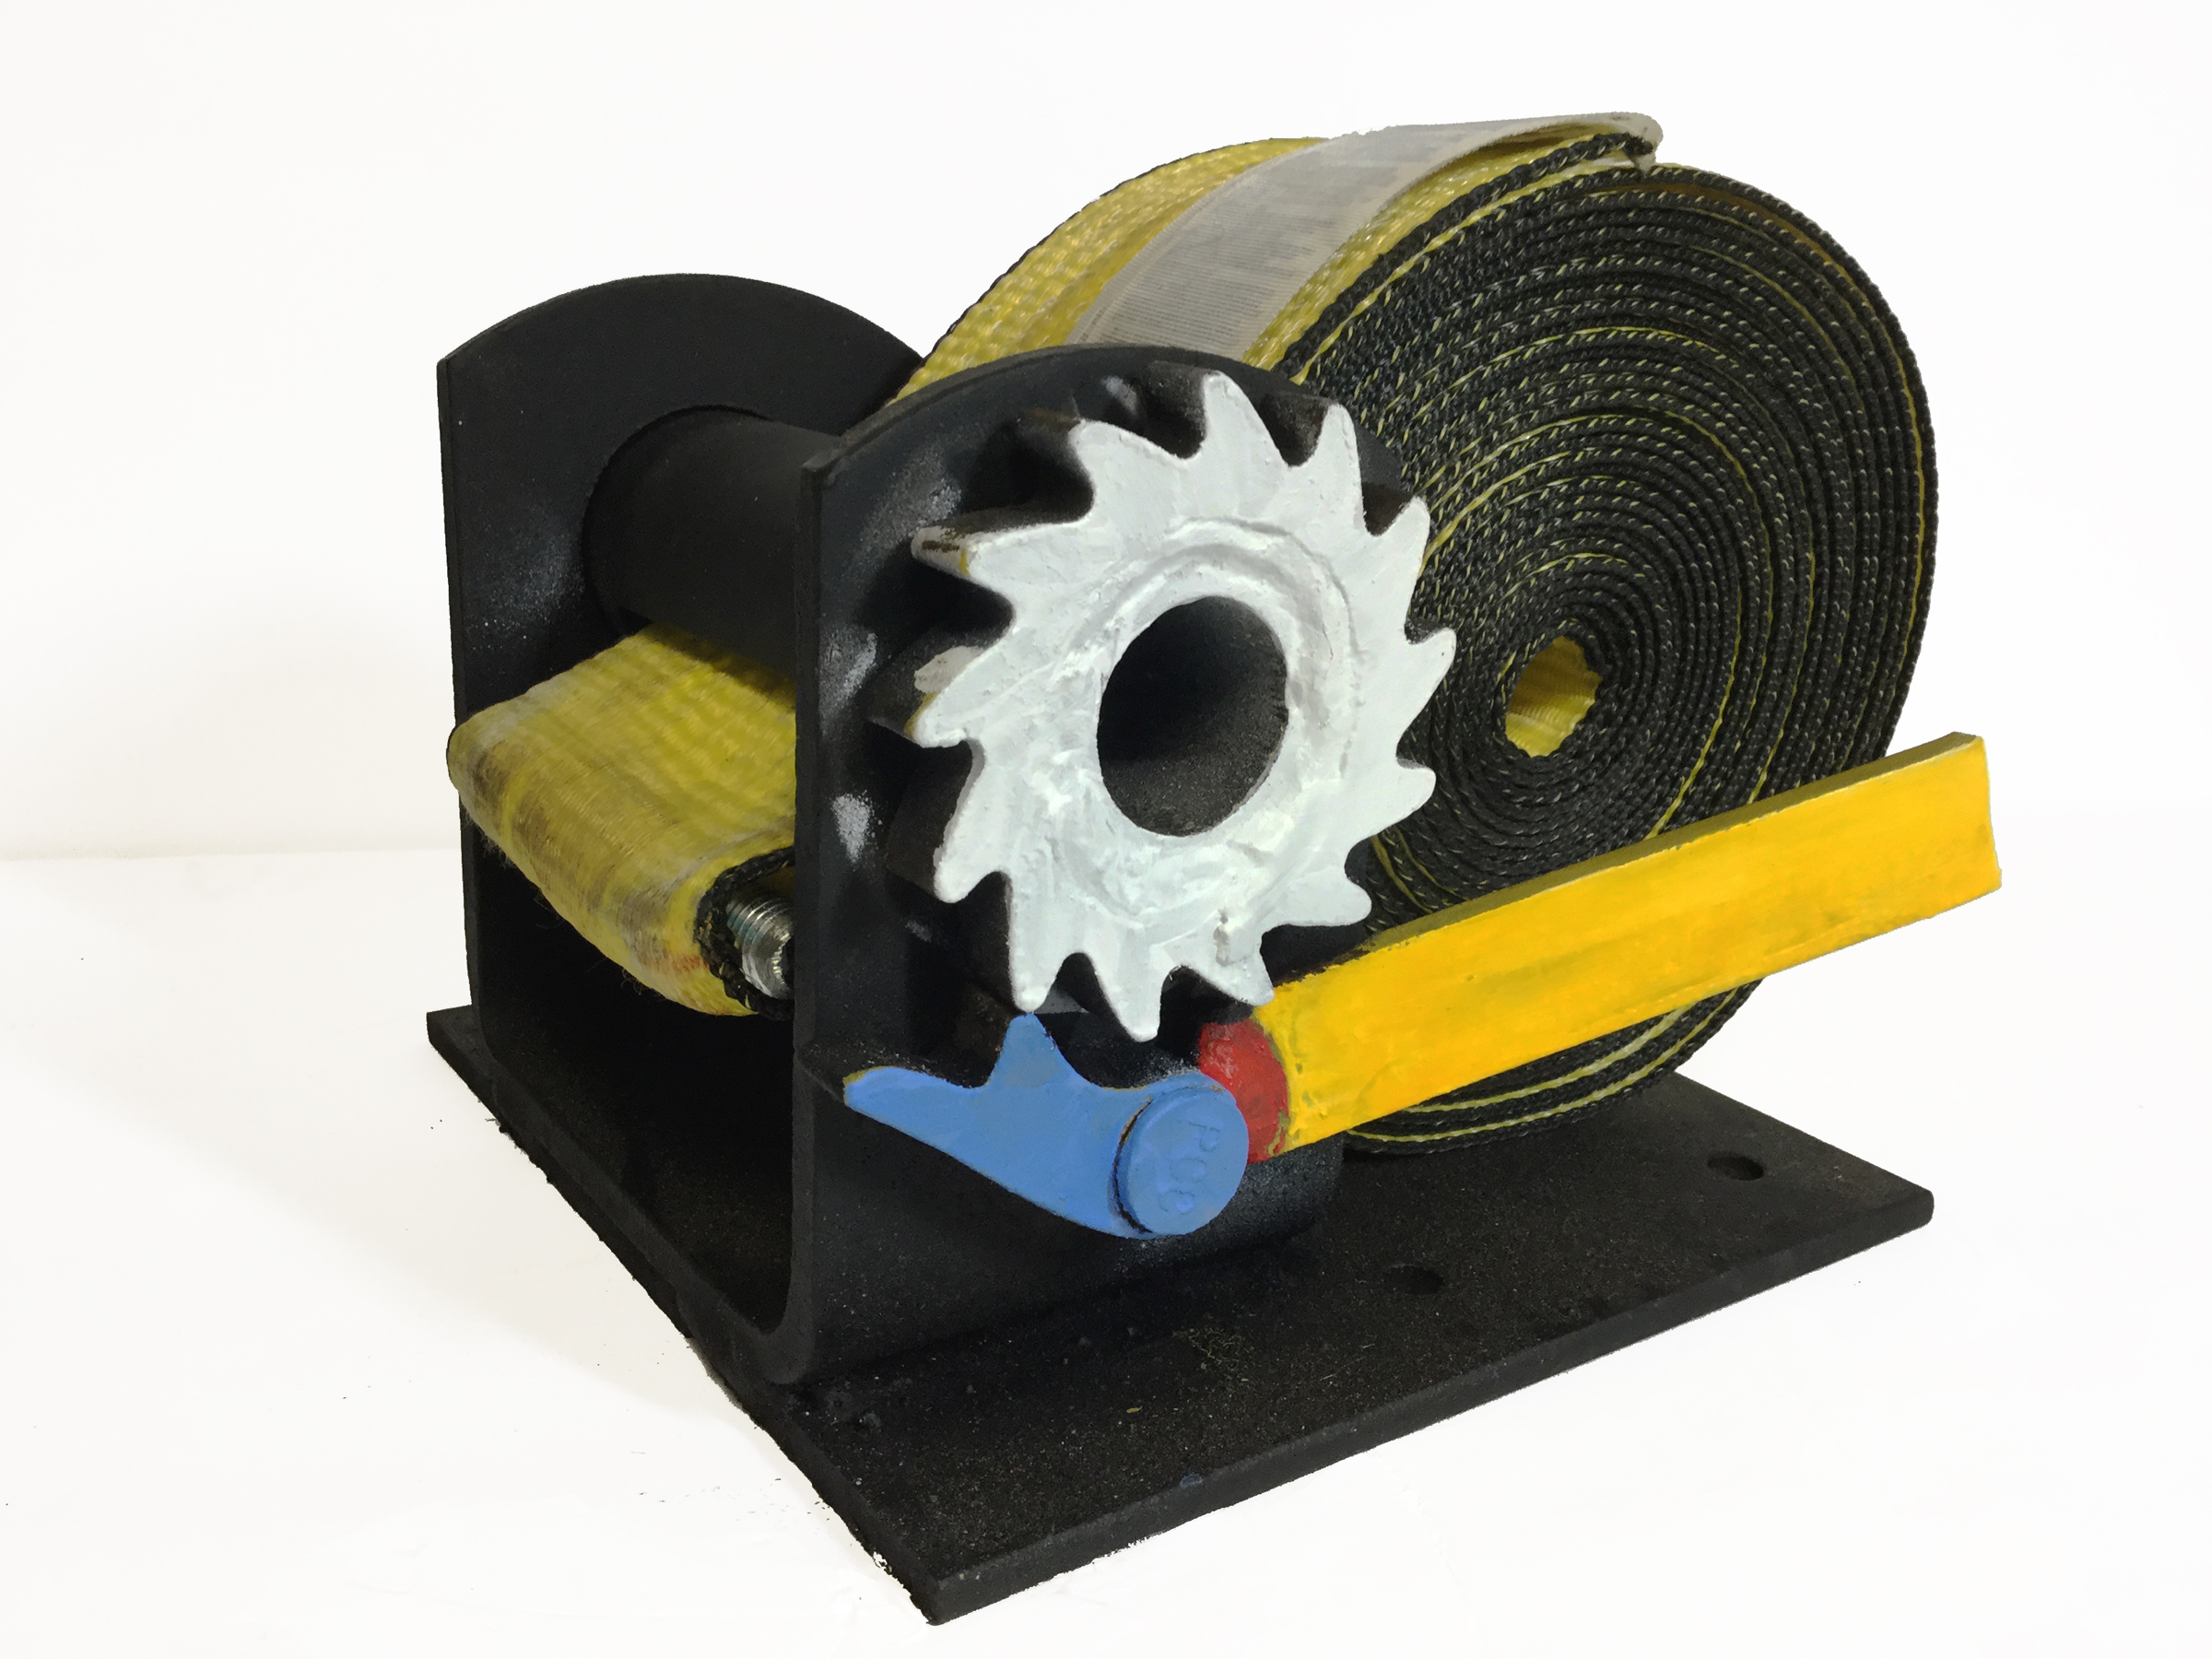
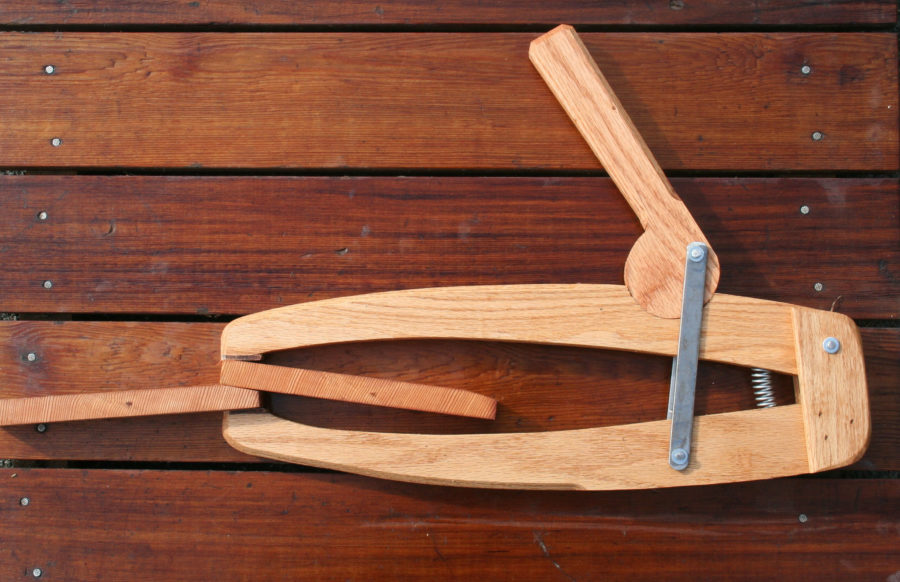
A modified tie-down winch is shown here with the webbing rolled up and its end loop threaded through the winch drum and a metal retaining pin inserted. The ratchet gear is painted white; the ratchet pawl is blue and the added handle is yellow. The weld joining the ratchet pawl and the handle is painted red. The weight of the handle pushes the pawl against the gear. When this type of winch is used on a truck, the pawl is on top of the ratchet gear pivots under its own weight to engage the ratchet. When the winch is mounted in this orientation, the added handle provides the gravity operation and allows the operator easy and safe release of the ratchet gear, as needed.
To use the cranes, lead the belts under the hull and load the ends on the winches. Tension the belts and lift the hull slightly to allow the building jig to be released and removed. Block the hull up and take the tension off the belts to reposition them on the winches, rolling most of the belts onto the winches on the same side of both gantries and leaving just enough on the winches opposite to begin rotating the hull. This method provides the most length for lifting. The loops sewn into the ends of the webbing must be threaded through the slotted drum of each winch and have a steel rod inserted to prevent the web from slipping out of the winch. A heavy load may unwind webbing that relies on additional wraps to keep them in place.
Winch the hull up a few inches and begin rolling the hull, keeping it parallel to the floor. Wind each belt from the full winch to the nearly empty one. The helpers operating the empty winches pull and reset the winch handles as needed, and the ratchets will lock themselves automatically with their own weight. The helpers on the other side paying out the belts will have to pull back on their bars slightly, lift the ratchet dog handle, let a few inches of webbing out, and let the ratchet relock.
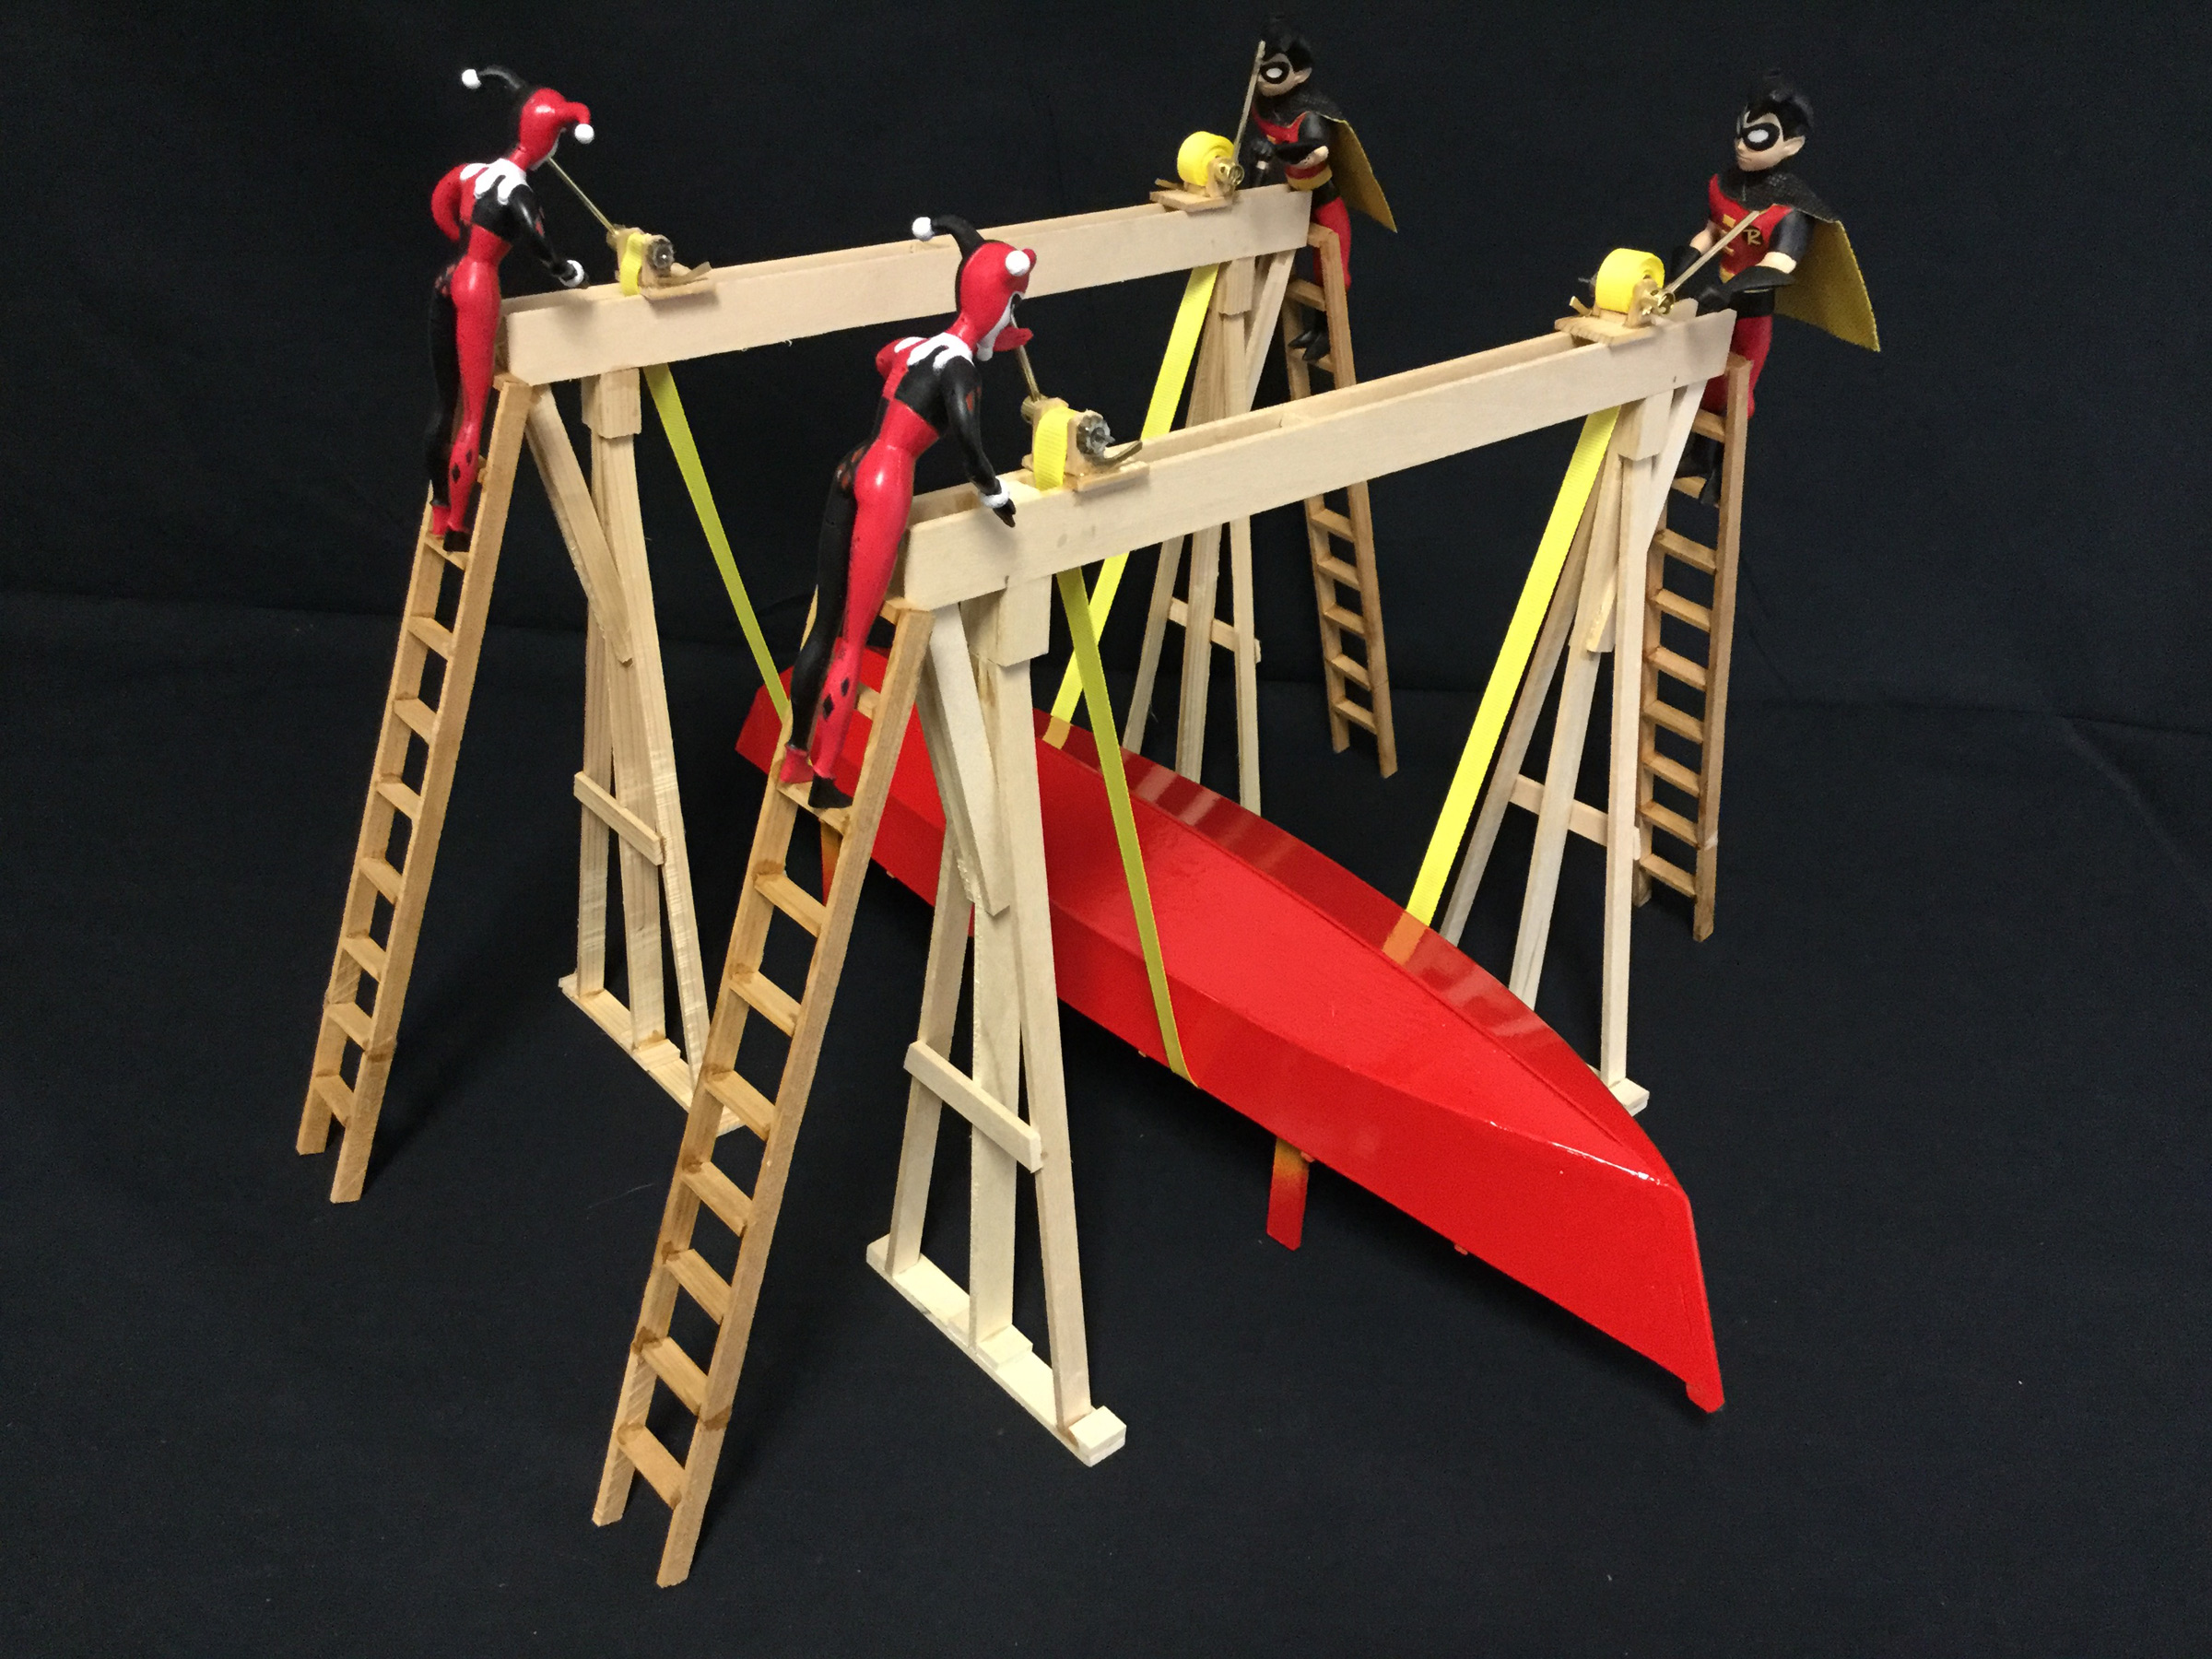
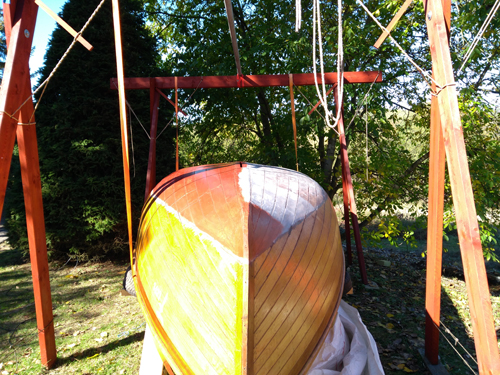
Twins of Harley Quinn and Robin have winch duty. As they wind the webbing from Robin’s side (right) to Harley’s (left), the hull rolls over.
The hull rolls as the process is repeated. The operation will progress smoothly if the teams coordinate their efforts between the winches paying out and the winches pulling in. Continue until the hull has rolled 90 degrees or slightly more. If the hull hasn’t reached the tipping point and the winches taking up the belts are now full, use some rope or a pole to get the hull to shift its weight across in a controlled manner. Once the tipping point has been passed, the hull should slide upright on its own, or with just a little coaxing, within the confines of the now static belts.
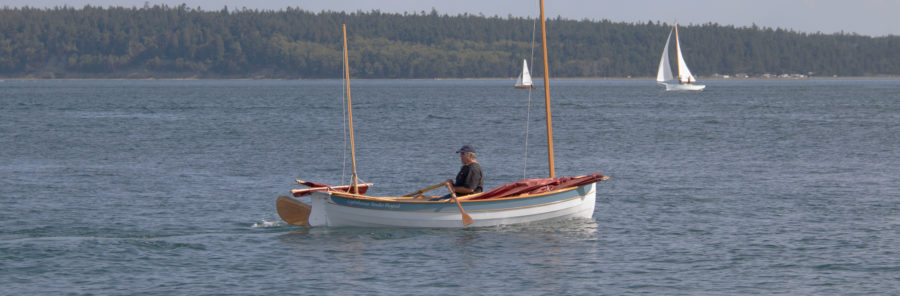
After the hull is upright it can be raised and then lowered onto a cradle or positioned on blocks. The 4′ bases on my gantries made them free-standing and allowed me to push them out of the way while the remainder of the construction continues. At the end of the build, the gantries lifted the finished 2,350-lb boat onto its trailer.
With the webbing shifted to the left sides, the hull is upright, ready to be lowered onto a cradle for the construction of the interior. The gantry cranes will be put aside and returned when the finished boat is ready to be lifted onto its trailer.
If your work space has strong, accessible ceiling joists or other overhead structures that can support the hull, you may be able to use truck winches without having to build gantries. The ratchet dog handles will work by gravity in the orientation shown; if they are used upside down, then a spring mechanism or a counterbalance opposite to the ratchet handle will be needed.![]()
Earl Boissonou, 81, lives in Corvallis, Oregon, and is a retired elementary-school teacher. He is a passionate artist who draws, paints, and sculpts. He began sailing in 1968 and built his first boat, an Adirondack guideboat, in 2009 to keep busy while recovering from a major operation. The Glen-L Bo-Jest that required the gantry cranes was his most recent build. He wishes to credit to his friend John Fruetel for coming up with the idea of the gravity-operated ratchet dog—a necessary component. At age 91, John still as an active and inventive mind.
You can share your tips and tricks of the trade with other Small Boats Magazine readers by sending us an email.

What weight and beam of boat did you lift?
Locally at the Apprenticeshop, Dale Young rigged tall boat stands to do this. A beam goes across them after the pads are removed. Sling is rigged, then the screw on the boat stands cranked up, one person on each side.
You said you used 5″ webbing – do you think 4″ would work or if not what about doubling the webbing? I have four trailer winches and do you think they will work? How much weight would you guess that one crane with chain fall would work to lift out V-8 engine from boat?
John
Question- what about relocating winches down lower so you wouldn’t have to use ladders . You could use steel shaft with roller at corner to allow webbing to go down to the lowered winches. Standing on ladders is not my idea of safety especially when you are talking about four ladders. The longer webbing with rollers would help ease weight distribution. Would suggest boat trailer rollers?
An eloquent description enhanced by excellent illustrations and a model which is a work of art. I was captivated by the ingenuity of the use of the webbing winches and the construction of the the gantries.
Thank you,
Rob
I have something similar done from 4 logs 16x5cm and one 16x8cm for the top. As diagonal stringers I use tensioned rope, it is not good for long term hanging, but for turning boat it was ok. There are also groves in the top log for the legs, this stabilize the crane a lot.

I wanted to create something that can be easily assembled and disassembled (and stored for later use).
It is used for my 600kg Jollenkreuzer. The size of the construction is around 3x3m. The greatest issue while turning the boat was that it is around 2m wide and there were not much space left, but it passed.
Great to see a practical way of safely handling your boat. An essential item with the Flying Fifteen weighing in about the 500 kg (1000 lbs) mark. When maintenance requires close attention to the fixed keel right the way around, many hours of 6000 wet-and-dry sanding to get a very slippery keel. A gantry is essential.
I question the use of ladders. A few turning blocks can lead belts safely to the ground. Secondly, if “rated” belts and slings are used, you may be surprised how small the belting is that you actually need. Always use tested and rated belts and slings. Use of modern cordage is also recommended as the Spectra range of cordage is rated well within the loads of boats up to 20′ or 6m, this gives scope for the use of a wide range of winches that may be secured to the sling.
Please keep your feet on the ground and never work under or on the vessel unless it is well and safely supported by heavy timber, which is usually at hand and is relatively inexpensive—often available as off cuts from your local timber supplier.
Lastly, crawling around under a boat is not wise. Having access to a safe hoist makes maintenance, and building for that matter, much safer and easier. Ask anyone with a fixed-keel boat that they trailer from home!
Very nice! I did something similar using two chain hoists and webbing with spreaders to lift my boat off the build frame and slip the trailer under. This made adjusting the trailer to suit the boat really easy.
You mention “truck winches+ as an alternative. Do those differ from common boat trailer winches with a webbed strap from the winch drum to the boat?
The winches noted in the article are truck tie-down winches. Here’s an example. Unlike a trailer winch, this type doesn’t have a hand crank.
Editor
But what’s the load rating?
Earl,
Thank you to responding to the requests for an article on gantry cranes.
Explore the world of DIY Gantry Cranes and unlock a new level of lifting capability! This guide provides insights and plans for crafting your own gantry crane, offering a versatile solution for various lifting needs. Whether you’re a seasoned DIY enthusiast or a novice looking to tackle a new project, this resource empowers you to build a reliable and efficient gantry crane from the ground up. Elevate your lifting game and set the stage for successful projects with a touch of DIY ingenuity!