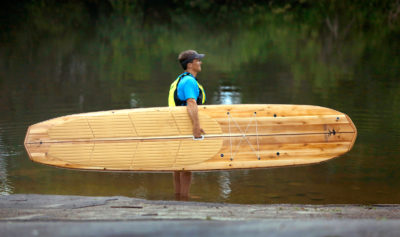
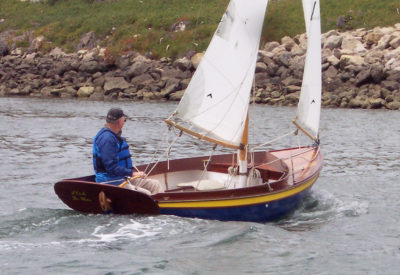
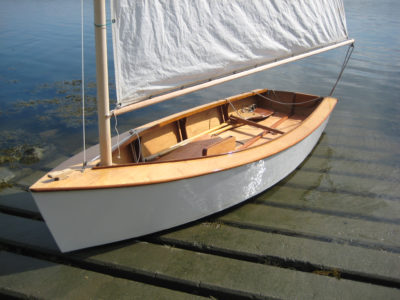
I’ve had a copy of Phil Bolger’s book Boats With An Open Mind for a long time, and I’ve always liked the looks of the Clam Skiff he designed for Harold “Dynamite” Payson. Payson, writes Bolger, “was a lobsterman before he began to write and teach. His orders for this design were for a solid skiff that could stand generous power, carry a big load, and have flat footing right out to the side. Nothing about it should be hard to explain.” At 18′ long and 5′3″ wide, the skiff will carry 1,100 lbs and draw just 3″; it seemed to me that it might be a very good companion for fishing trips in the North Country. When my brother Jon expressed an interest in a fishing boat, one he could easily trailer behind the family car and reach the many lakes and rivers in his part of Wisconsin, it didn’t take me long to talk him into the Clam Skiff.
I called Payson and ordered Bolger’s plan #606, called there a Workskiff, which came practically in the next mail. The drawings were clear and very easy to understand. After buying epoxy, plywood, and Douglas-fir lumber, I built a jig to make it easier to scarf the plywood sides. That turned out to be a waste of time, and I ended up scarfing the plywood by hand: I arranged the pieces for the sides stair-step fashion and cut the 8:1 scarfs using a power plane, a remarkably fast way to do it. A long, flat piece of 2×4 edged with sticky-backed 80-grit sandpaper flattened things out nicely.
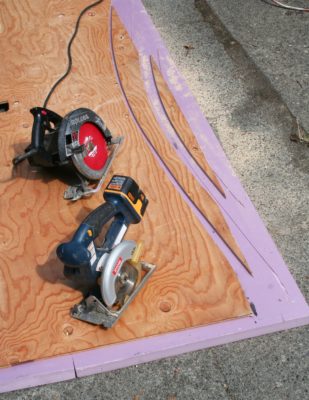
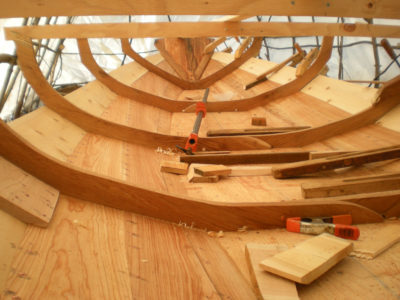
I cut the various plywood parts out with a circular saw with the plywood set on a sheet of 2″-thick rigid foam that later ended up as flotation in the boat. The transom is built up of four layers of ½″ plywood. Like the bulkheads, it is edged with Douglas-fir to give the builder something more substantial than plywood edge-grain to hold the screws that secure the sides. I scarfed together the plywood sheets to make the sides. I clamped the full-length panels together, then cut out the sides with the circular saw. While the bottom edges of the sides are nearly straight, the top edges have more shape, but the long curve of the sheer was easy to cut out with the circular saw. After I planed the sides up to the lines, I separated them and glued Douglas-fir chine logs along their bottom edges. I had cut the chine logs square and realized later that they’d hold water; next time, I’d cut a bevel on the top of them to let any water to roll off. Assembling the transom, sides, bulkheads, and stem was a two-person job and used just about all the clamps in the shop. Deck screws served as extra clamps when needed, and with two screw guns, things came together faster than anticipated.
 Peter Leenhouts
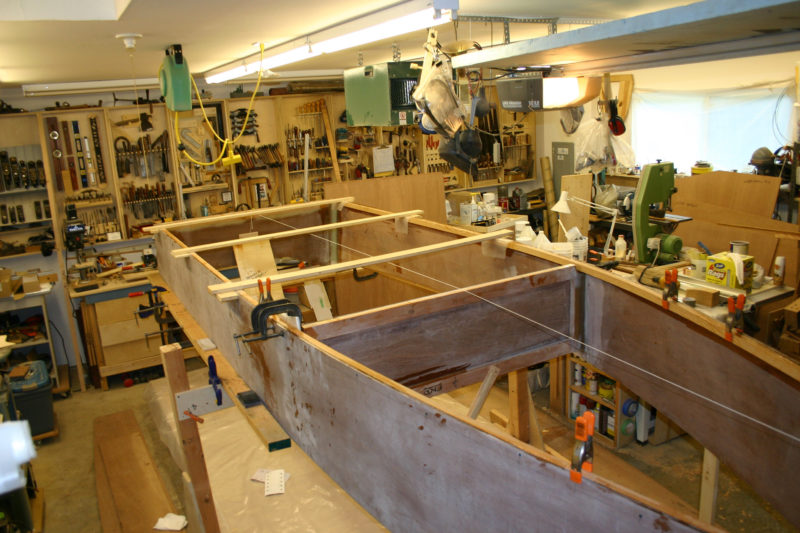
The sides, sprung to the transom, bulkhead, and stem, and constrained by a pair of temporary spreaders, determine the shape of the bottom.
There are two layers of ½″ marine plywood on the bottom, and the pieces are assembled and their scarfs glued-up on the boat. The bottom panels get cut slightly oversized and then trimmed flush with the sides at the chines. Bolger’s suggestion of installing temporary braces—2x4s laid on edge running from the transom to the center bulkhead—ensured the broad, flat bottom plywood panels did not sag.
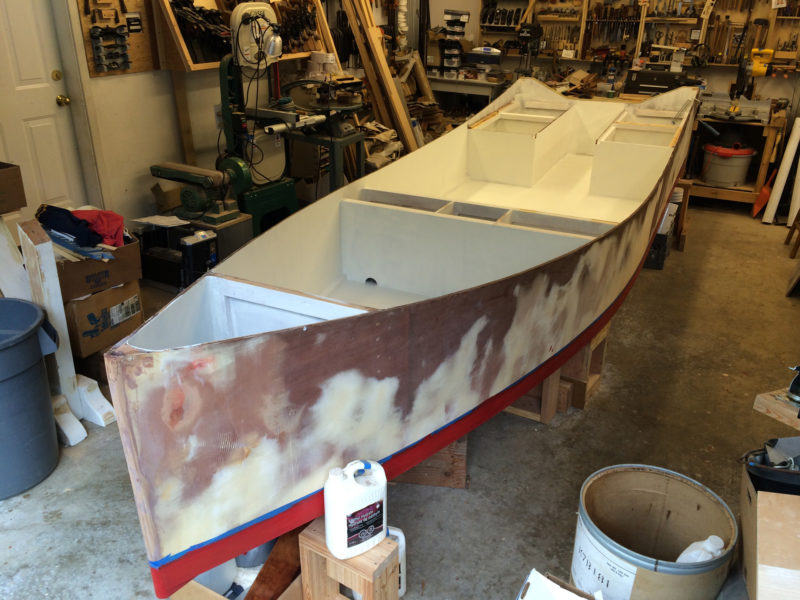
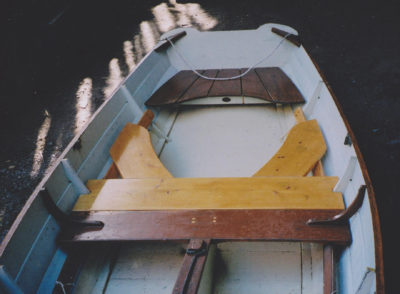
After ’glassing the bottom and sanding everything, a shoe built up of two layers of ½″ marine plywood went on and was ’glassed with 9-oz fiberglass, and exposed end-grain was sealed and protected with three coats of epoxy. After I painted the bottom of the boat with a deep red polyurethane paint, the boat was ready to turn over. It took two older men, two women, and one boy to lift the boat off its sawhorses and walk it out to the lawn. My wife and I then turned it over using our truck and a towing strap. With the boat right-side up and back in the shop, I installed a second amidships bulkhead and built the four compartments in the aft end of the boat. I radiused everything and made small fillets along the chines and all of the bulkheads to ensure that the boat would be easy to clean.
 Peter Leenhouts
Compartments in the bow. stern and amidships provide flotation. Scuppers through the center bulkheads allow water to drain aft.
After the gunwales and drain-plug tube went in, all that was left was to finish the painting. The noted New Zealand designer John Welsford had taught my wife and me how to roll and tip paint, and the finish came out beautifully. In dark blue, the boat looks fantastic. After taping off the inside of the boat and applying the first finish coat of white, a friend showed me how to get a good non-skid surface. He laid a 1″- deep layer of clean washed beach sand right on the wet paint, let it dry overnight, then vacuumed up the excess and painted the entire inside of the boat with two layers of finish paint. The painted beach sand provides an excellent nonskid surface for very little cost, and it looks great.
Life tends to get in the way of projects, so it took me five years, working occasionally, to build the boat. Payson said the Clam Skiff could be built in a month of weekends, and I’d have to agree with him. You could, as he did, save on the cost of materials by building the boat out of lumberyard ACX plywood, ’glassing only the chines, and painting the boat with latex porch paint. I doubt you’d notice any real difference other than the boat might be a bit lighter.
 Peter Leenhouts
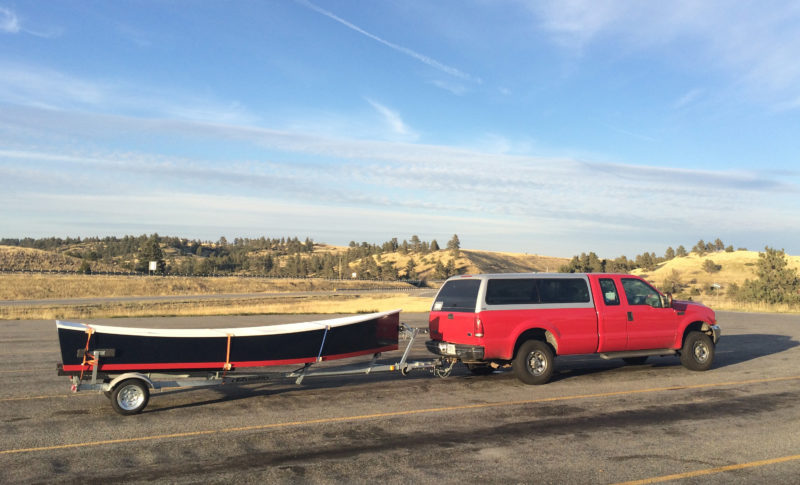
Out of the shop and onto the road, the skiff traveled 2,000 miles to get to its launching.
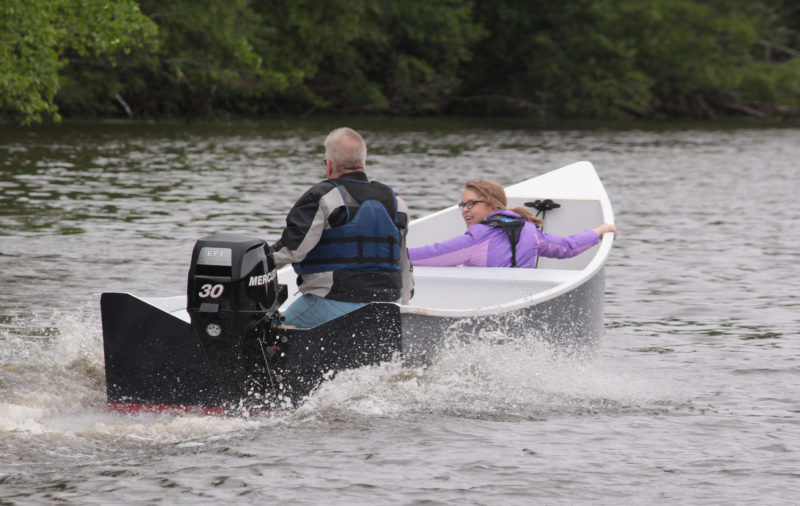
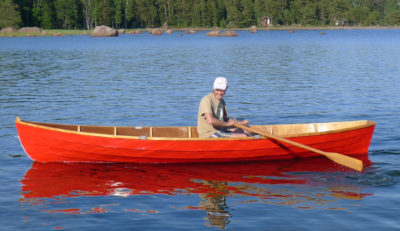
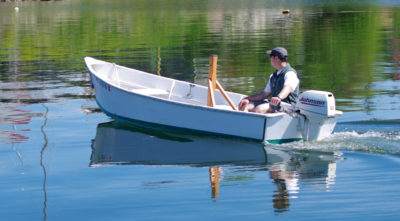
I towed the boat 2,000 miles from my shop in Washington State to deliver it to Jon in Wisconsin. With a used Mercury four-stroke 30-hp outboard engine bolted to the transom, he christened the boat FAMILY AFFAIR and launched her on a small lake near his home. Bolger said the boat could take up to a 40-hp engine, but I figure he had in mind a lighter two-stroke engine. The Mercury outboard my brother put on the boat weighs about 175 lbs, which worried me a little, but the boat sat right on its lines with the Merc, the operator at its tiller, and the 5-gallon portable gas tank aboard. Jon has since added a marine battery and a transom-mounted Minn Kota electric trolling motor with no appreciable difference to the way the boat sits in the water.
 Sonja Leenhouts
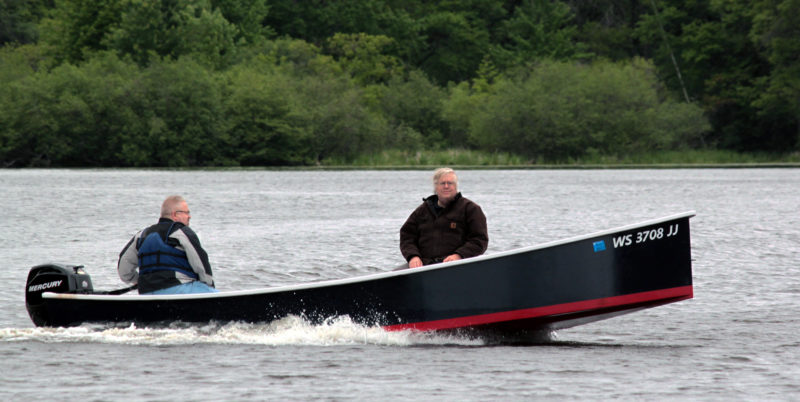
With his brother at the helm, the author enjoys the results of his 5-year project.
Launching and retrieving the boat with the trailer is very easy. While an extra pair of hands is always appreciated, the boat’s light weight makes it easy to manage alone. Powering up, the skiff climbs up and out of “the hole” quite quickly, and gets on a plane with no extreme rising of the bow. Similarly, when suddenly cutting the throttle from full speed, the skiff has a smooth runout and settles quickly without having the wake climb over the transom. Jon finds that opening the throttle about halfway provides a very comfortable ride in flat water or in a slight chop. At full throttle the stem rises up out of the water and the bow partially obscures forward vision from the from the operator’s station in the stern, so it’s important to keep a close watch on traffic or navigation hazards ahead. Having some additional weight in the bow improves visibility forward, so a passenger or a couple of sandbags will go there. The boat tracks straight and true and responds well to steering. Turning underway at any speed, the skiff remains flat without any uncomfortable heeling or rolling.
 Sonja Leenhouts
Jon and his daughter Keri take off. The tall transom, even with the notch for the outboard, requires a long-shaft motor.
While the boat is trolling or at anchored, two or three adults can easily move around without having it tip or roll, which is nice when you’re sharing a look at the fishfinder. From the transom 8′ forward of the bottom is dead flat, so moving about inside very easy and comfortable and the feel is solid and balanced. This is especially important when standing at the gunwale recovering an anchor—the boat just doesn’t want to heel. That said, there is little reserve stability in a boat with vertical sides, so, as always, caution is indicated until one gets the feel of the boat.
Phil Bolger’s Clam Skiff is a very simple, forgiving boat to build and use. It is elegant and tolerant on the water, and draws plenty of attention from others who admire its clean, functional lines. All in all, it is much more than what we both could have hoped for when I bought the plans.![]()
Pete Leenhouts, a retired naval officer, lives on Washington State’s Olympic Peninsula where he enjoys building, restoring and using his boats. His article on using rigid foam as a base for sawing sheets of plywood also appears in this issue.
Clam Skiff Particulars
Beam: 5′ 3″
Displacement: 1,100 lbs
Recommended outboard engine: longshaft 5–40 hp

H.H. Payson and Company (Payson died in 2011) has the plans listed as Workskiff for $45 on their website. Workskiff plans for a smaller version, at 15’6”, are also available.
Is there a boat you’d like to know more about? Have you built one that you think other Small Boats Monthly readers would enjoy? Please email us!


Join The Conversation
We welcome your comments about this article. To include a photo with your remarks, click Choose File below the Comment box.