I set out to build a boat to commute the two miles between the boat I was living aboard and my job at The Center for Wooden Boats (CWB) on the shore of Seattle’s Lake Union. I wanted something that would be inexpensive to build, big enough to carry a group of four friends, easy to row, and able to carry an outboard. I also wanted to build something with ties to the history of the local waters. I perused over 100 small-boat plans of many of Seattle’s famed yacht designers that have been cataloged and digitized by Paul Marlow of Puget Sound Maritime. The boat that caught my eye was a flat-bottom skiff designed by Edwin Monk in 1943 for Bryant’s Marina.
Ed Monk was a famous Seattle-based naval architect renowned for designing attractive motor-yachts; Bryant’s was a local yard that outfitted fishing vessels. This 13′6″ skiff was likely a meant to be a working tender for fishermen, one that could be quickly built by the yard. The stem and frames are all straight, so I thought the build would be a pretty straightforward, given that there would be so few curves to cut.
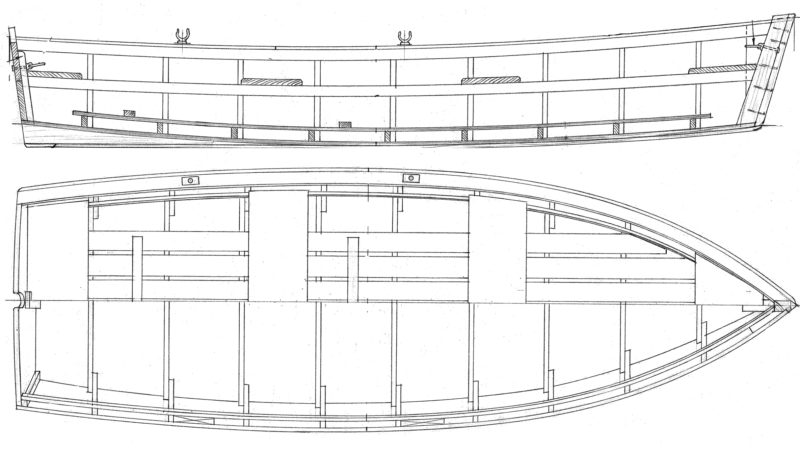
Monk’s plans consist of two sheets of drawings. The first has construction drawings with scantlings and materials. The second has simple lines drawings in plan and profile with the offsets on each station. The plan view depicts two hull options on the same centerline: one with a 4’6” beam on one side of the centerline, and one with a 5’ beam on the other. While there’s enough information provided to build the boat, to get a better feel for Monk’s building style, I read his book, How to Build Wooden Boats with 16 Small Boat Designs, published in 1934. Monk’s earlier boats utilized wide, old-growth red cedar that was readily available on the West Coast at that time. Most of his small-boat designs feature wide, flat sides and bottoms, with hard chines, shapes that readily lend themselves to substituting marine plywood for planking.
In the 1940s, waterproof glues improved and boatbuilders started to embrace the use of plywood, and Monk’s drawings for the Bryant’s skiff highlight that transition—a traditional lapstrake with 5/8″ red-cedar planks and a 11/16″ cedar bottom is detailed alongside a hull of 3/8″ waterproof plywood. For the latter, fewer frames are needed. The construction drawing indicates that they can be on 24″ centers rather than on 16″ specified for cedar planking.
 Josh Anderson
The plywood version includes chine logs to provide gluing surface at the edges. The cedar-planked version can use bronze or galvanized fastenings between the bottom and the side planks.
I constructed a 16′ x 4′ strong back on which to build the boat that would double as a lofting platform. Just four lines—the sheer and chine, each in profile and plan view—require drawing with flexible battens, making the skiff a great first boat for people to learn lofting. The plans show the heights and half breadths—to the nearest 1/8″—on the drawing rather than a table of offsets. I carefully lofted the lines for the skiff with the 4 6″ beam.
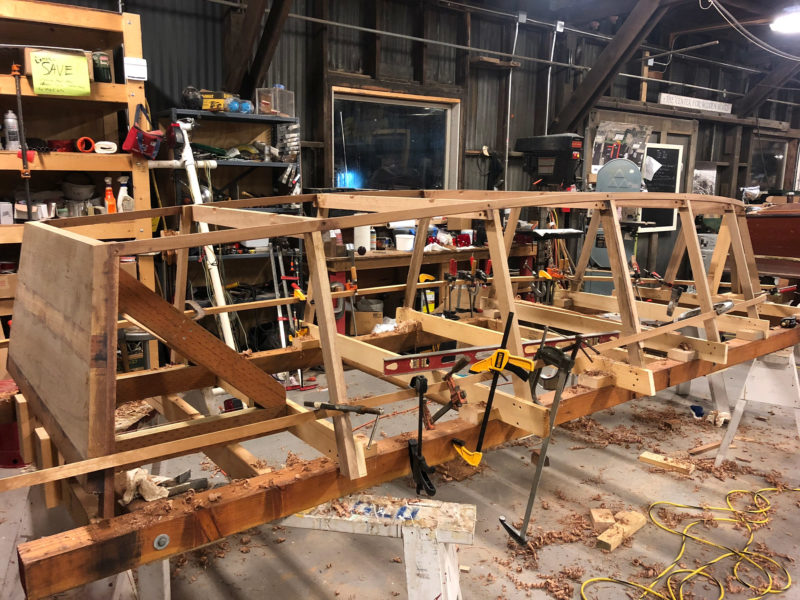
At each of the six stations I made a plywood pattern upon which I would construct the frames. The plywood patterns will quicken building more skiffs in the future; for a one-off build, the frames could also be assembled over drawings on the lofting. I marked the bevel for the planking on the patterns, as each frame is different, then started constructing the frames. Each consists of two sides joined to a bottom piece. A temporary cross spall, set to a baseline representing the strongback, helps keep each frame’s proper shape.
With the three frame pieces and cross spall on the pattern I joined the frame’s laps with three screws, securing the bottom frame to each side frame. A notch cut in the outer corner will accept a chine log. (The cedar-planked version is built without them.)
With the frames set up on 24″ centers on the strongback, the transom and stem are also put in place. The plans call for a transom of 1 1/8” yellow cedar. I used white oak instead, edge-glued with epoxy and biscuits. The inner part of the two-part stem—2-1/2″ oak on plans—gets a consistent bevel to receive the plank ends.
The chine logs were let in and secured with epoxy (though galvanized bolts are specified) tying the whole structure together
 Josh Anderson
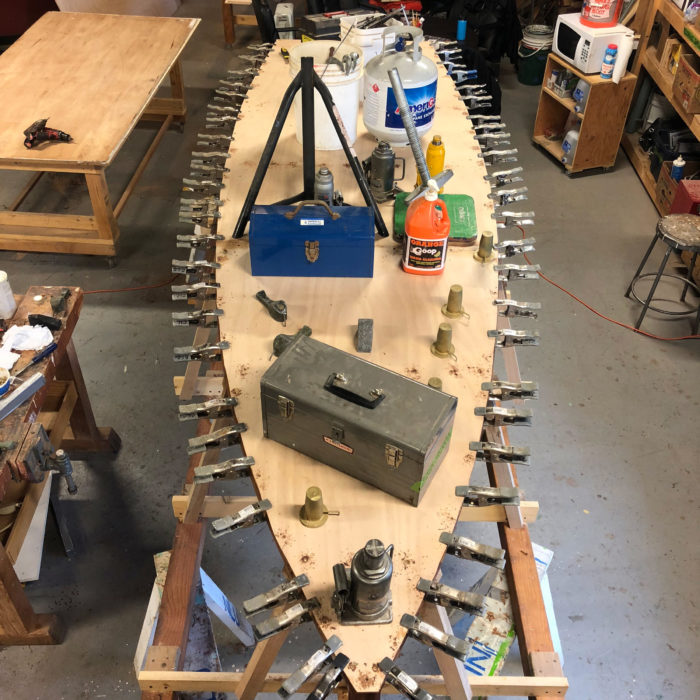
The optional plywood construction required fewer frames—6 instead of the 9 required for cedar planking—but a lot more clamps for the epoxy bonding.
The bottom consists of two pieces of 3/8″ plywood scarfed together, glued and fastened with screws into the bottoms of the frames. Gluing the bottom down took every clamp and heavy object I had in the shop.
For plywood construction, Monk specified a single broad sheet of plywood for each side. The cedar-planked version has three lapped strakes; I thought that lapstrake would look a little nicer, so I chose to do a glued-lap version with plywood planks. To squeeze the laps during gluing I used waxed sheetrock screws with washers under the heads.
 Josh Anderson
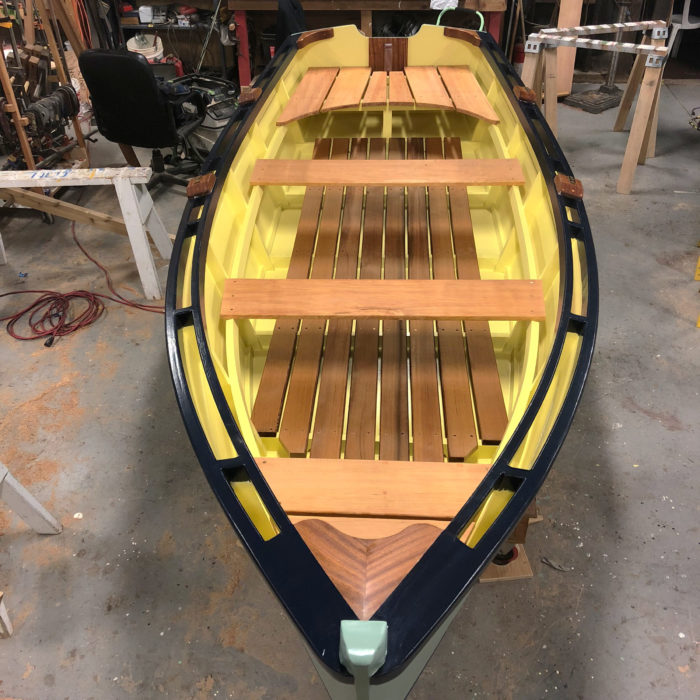
The plans call for a plain thwart in the stern and a sculling notch in the transom. The author built the skiff for motoring and installed stern sheets for more comfortable seating at the helm.
Once the planking was finished and the cutwater attached over the trimmed forward ends of the planks, I sanded and faired the hull. The plans call for paint at this point, but since this boat would live most of its life on the lake as a rental boat at CWB, I wanted it to be fairly indestructible. The bottom was fiberglassed and the rest of the plywood was epoxy coated three times. After the epoxy cured, the skeg and bottom runners were attached. The boat was then flipped upright, the frame ends were cut, and the sipo mahogany rub rail, inwale, breast hook, and knees were all installed with epoxy. I then cut out a notch in the transom so that a standard shaft outboard could be mounted. I also installed a beefy 2″-thick sipo transom knee and 1” pad to support the outboard. After the interior was epoxy coated, everything was primed and painted, expect the breasthook, knees, oar lock pads, and transom knee, which were oiled. I made the thwarts of vertical grain Douglas fir, and the sole of vertical grain red cedar, all of which was also oiled.
As I was building this boat, I realized this design would lend itself well to boatbuilding classes at CWB, and I made patterns of all the molds and parts so that they could be duplicated for future skiffs. Monk’s design would be easy for novices to understand and his plans could easily be used to teach either modern or traditional building techniques.
 SBM
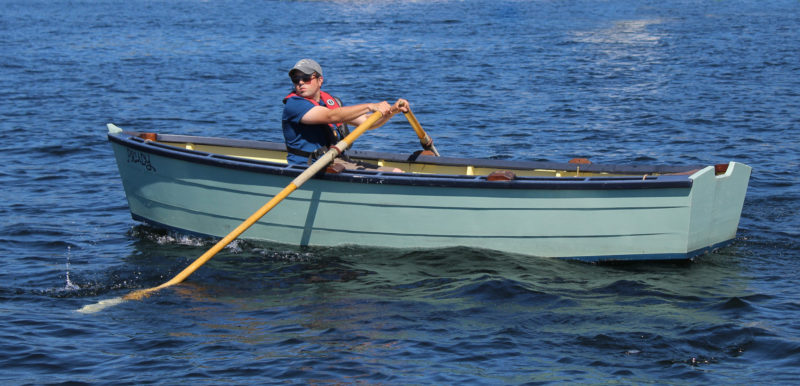
SBMThe forward station puts the boat in good trim with a solo rower.
On the water the skiff is quite stable—you can stand up and do jumping jacks in this boat and it will not toss you overboard. With its high freeboard, it can hold a lot of weight and accommodate up to five adults comfortably, with enough stability to switch seats in the middle of the lake.
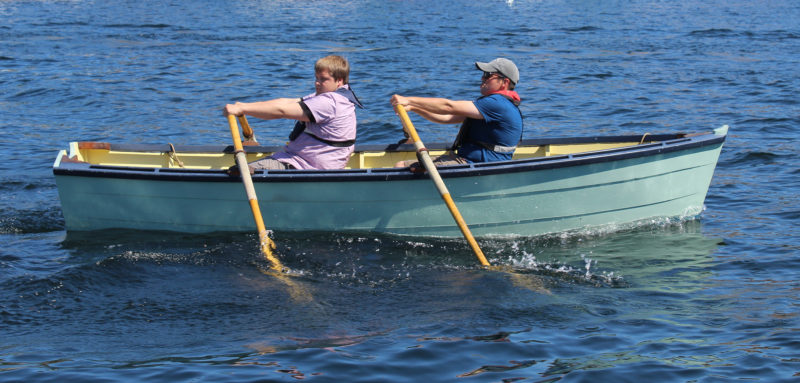
The two rowing stations are for either single or tandem rowing. For going solo, it rows really well from the forward station. The skiff’s flat bottom and low draft make it very maneuverable and responsive. Without a lot of weight aboard, it glides through the water easily. The high freeboard results in a fair amount of windage and in strong winds the boat gets pushed around a bit when under oars.
 SBM
SBMThe 4′ space between rowing stations gives a synchronized pair of rowers enough room to keep out of each other’s way.
Rowing in tandem significantly eases the work of getting the boat moving, especially with added weight aboard. The two rowing stations are 4’ apart, providing plenty of space for comfortable tandem rowing without clashing oar blades.
 SBM
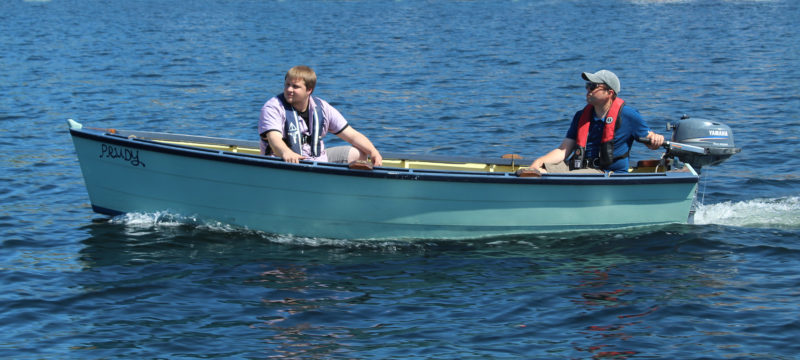
SBMThe skiff is at its fastest when there is some weight forward to keep the bow down.
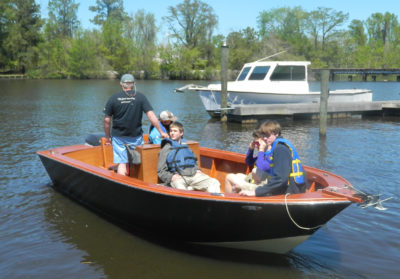
The skiff is very responsive and stable when powered by an outboard. It even handles very well in reverse. I’ve gotten the boat up to 5 knots with a Seagull outboard and up to 4 knots with an electric EP Carry outboard. With a 4-hp four-stroke outboard on the transom and two people on board, the top speed at full throttle was 6.5 knots.
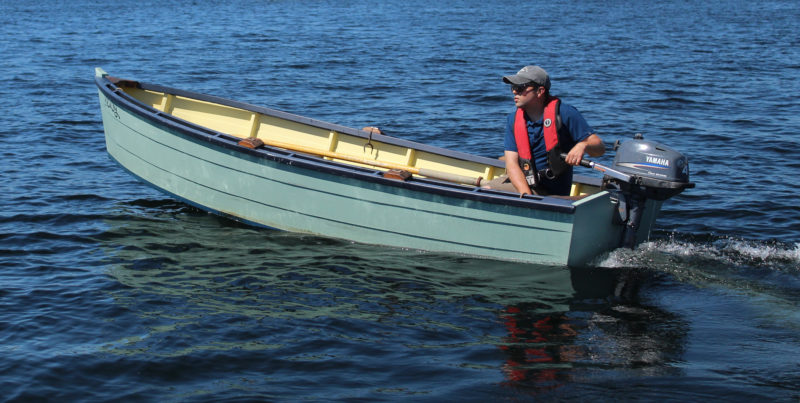
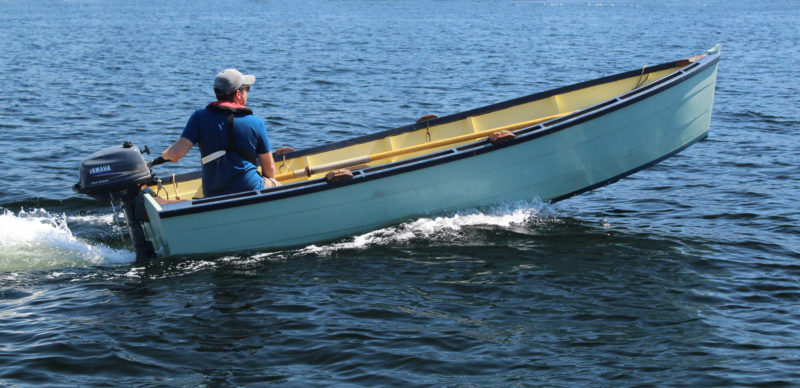
A passenger seated forward helps keep the boat trimmed along the water line. With the skipper motoring alone, the bow comes out of the water making it a little difficult to see, not surprising given the bottom’s rocker. The beamier version of the boat is 5” wider across the bottom of the transom and might be better able to support the weight of the motor and solo skipper. Nonetheless, the boat still handles well. With the outboard at full throttle, the speed for solo motoring was reduced a little bit, down to 5.5 knots.
 SBM
SBMWith the motor at half throttle, the skiff keeps in reasonably good trim with a lone occupant at the helm.
 SBM
SBMWith the motor at full throttle, the bow rises well out of the water.
To reflect the no-nonsense hardworking purpose of Monk’s skiff, I named it PRUDY, after my hard-nosed great-grandmother. By the time it was completed, I was no longer a liveaboard and no longer needed a boat for commuting, so PRUDY is now part of CWB’s fleet.
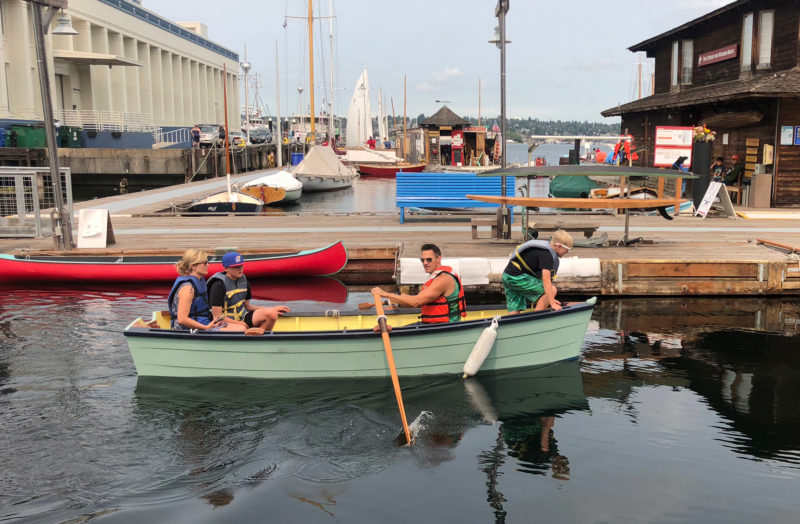 Josh Anderson
The ample stability and carrying capacity has made the skiff a favorite among the rental fleet at CWB.
Equipped with an outboard, she has served as a safety boat for our youth camps, and as a rowboat, she keeps busy as a rental in the livery. Renters at CWB often have never been in a boat before and Monk’s skiff, with its remarkable stability and carrying capacity, quickly puts them at ease. It has quickly become the most popular rental in the fleet.![]()
Josh Anderson attended the Maine Maritime Academy in Castine, Maine. With his wife, Sarah McLean, he restored a 25′ Friendship sloop, operated a charter business with it, and spent several years sailing the Maine coast. Josh also attended the Apprenticeshop boatbuilding program in Rockland, Maine, and built boats for Artisan Boatworks in Rockport Maine. He is now the Maritime Operations Manager at the Center for Wooden Boats in Seattle, Washington.
Thanks to Dustin Espey for his service as passenger and rower and to Shelby Allman for piloting the chase boat for the SBM photos.
Monk Skiff Particulars
[table]
Length/13′6”
Beam/4′6” (reviewed here) or 5′
Depth amidships/20.5”
Digital files for the two sheets of drawings for Monk’s skiff are available from Puget Sound Maritime. The charge is $50 for the first page, $10 for the second page. Orders are made as “Research Inquiries.” Specify Monk drawings 710-1 and 710-2 for the 13’6” x 4’6” skiff for Bryant’s Marina.
Is there a boat you’d like to know more about? Have you built one that you think other Small Boats Monthly readers would enjoy? Please email us!










I have question. When I purchase the plans (710-1, 710-2) for the Ed Monk skiff, would I also be able to trace the molds and parts that are available? Thank you.
I built the Monk Skiff in 2006 from the brief description in Monk’s book How to Build Boats, published in 1934. I wanted to try plywood construction and epoxy, both were new to me. I drew up my own plans and used okoume plywood, in 1/4”, 3/8″ and 1/2”. Some Spanish cedar for the thwarts and oars, and pine for frames. I used stitch-and-glue methods and clad the exterior with fiberglass cloth in epoxy. I scarfed the plywood to make the panels long enough. I worked out the bevels and cut them with a hand plane. I didn’t care for the wiring but persevered with it. The overall result was satisfactory; it rowed well, held plenty of people and was fun, except when I wanted to try it with an outboard it was in the days of 4-stroke motors and they are too heavy for the design of a relatively narrow transom. The boat sits in my boatshed and waits for me to repair the gunwales.
Hello, I have been searching for several years to find a rowing skiff that I grew up with since my boyhood days on the Chesapeake Bay of the late 1950s and 1960s. When the personal computer and Internet came to be, I thought it to be easy to find such a boat. Woah, no such luck and what was offered were the most disgusting boats of the new age – stupid as well. I did come across some fine rowing skiffs but no contacts. It was God sent when I came across this Monk Skiff rowing boat named PRUDY! It is a skiff that looks like a skiff. Almost 14′ long, which was the length of the rowing skiffs back in the day and which I had. This is what I desire to have, but can you help me find such a boat to buy or the plans for such?
Thank you very much
Finally, I found a rowing skiff that I have been looking for over the past 4 years. Reminds me of the days of the row boat my dad got in the 1960s. This so-called Monk Skiff is what I want and a perfect-looking boat! How I can acquire one?
Dave Crew