Conrad Natzio originally designed the 14′ Sandpiper for a workshop and demonstration at the Boat ’99 show in the United Kingdom. The first four of these attractive little sailing and rowing skiffs were built by groups of beginners with a bit of supervision over a four-day period at that show, using only the hand tools found in a typical do-it-yourselfer’s kit. The primary considerations in Sandpiper’s design were the ease and speed of construction. The Sandpiper is intended for sheltered, shallow water, and inland sailing or rowing. The weight was kept to a minimum to make trailering and launching quick and easy.
My 17-year-old son, Kyle, built the Sandpiper as his senior project that he needed to complete for graduation from high school. Neither of us had built a boat before, but a boat that could be built by beginners in four days gave us hope that we could complete the task in the four months left in the school year. Before ordering the plans, we spent a few hours taping together cardboard strips cut from cereal boxes to create some crude models and prove to ourselves that such an attractive hull shape could actually be achieved by using flat, straight-edged panels.
The plan set supplied by Conrad included two large plan sheets with scaled drawings, and a 10-page booklet—a reprint from Practical Woodworking, the magazine that sponsored the Boat ’99 project—with detailed instructions and helpful photos taken during the construction of the prototype. Our boatbuilding project was given a boost by a master-carpenter neighbor who agreed to become Kyle’s advisor for the project and let us move some of his power tools into our greenhouse-turned-workshop. While this gave us the advantage of having an array of tools considerably beyond the average household toolkit, as well as invaluable woodworking advice whenever we needed it, none of the techniques required to build this little skiff would be beyond the scope of the average skill set.
 Photographs by the author
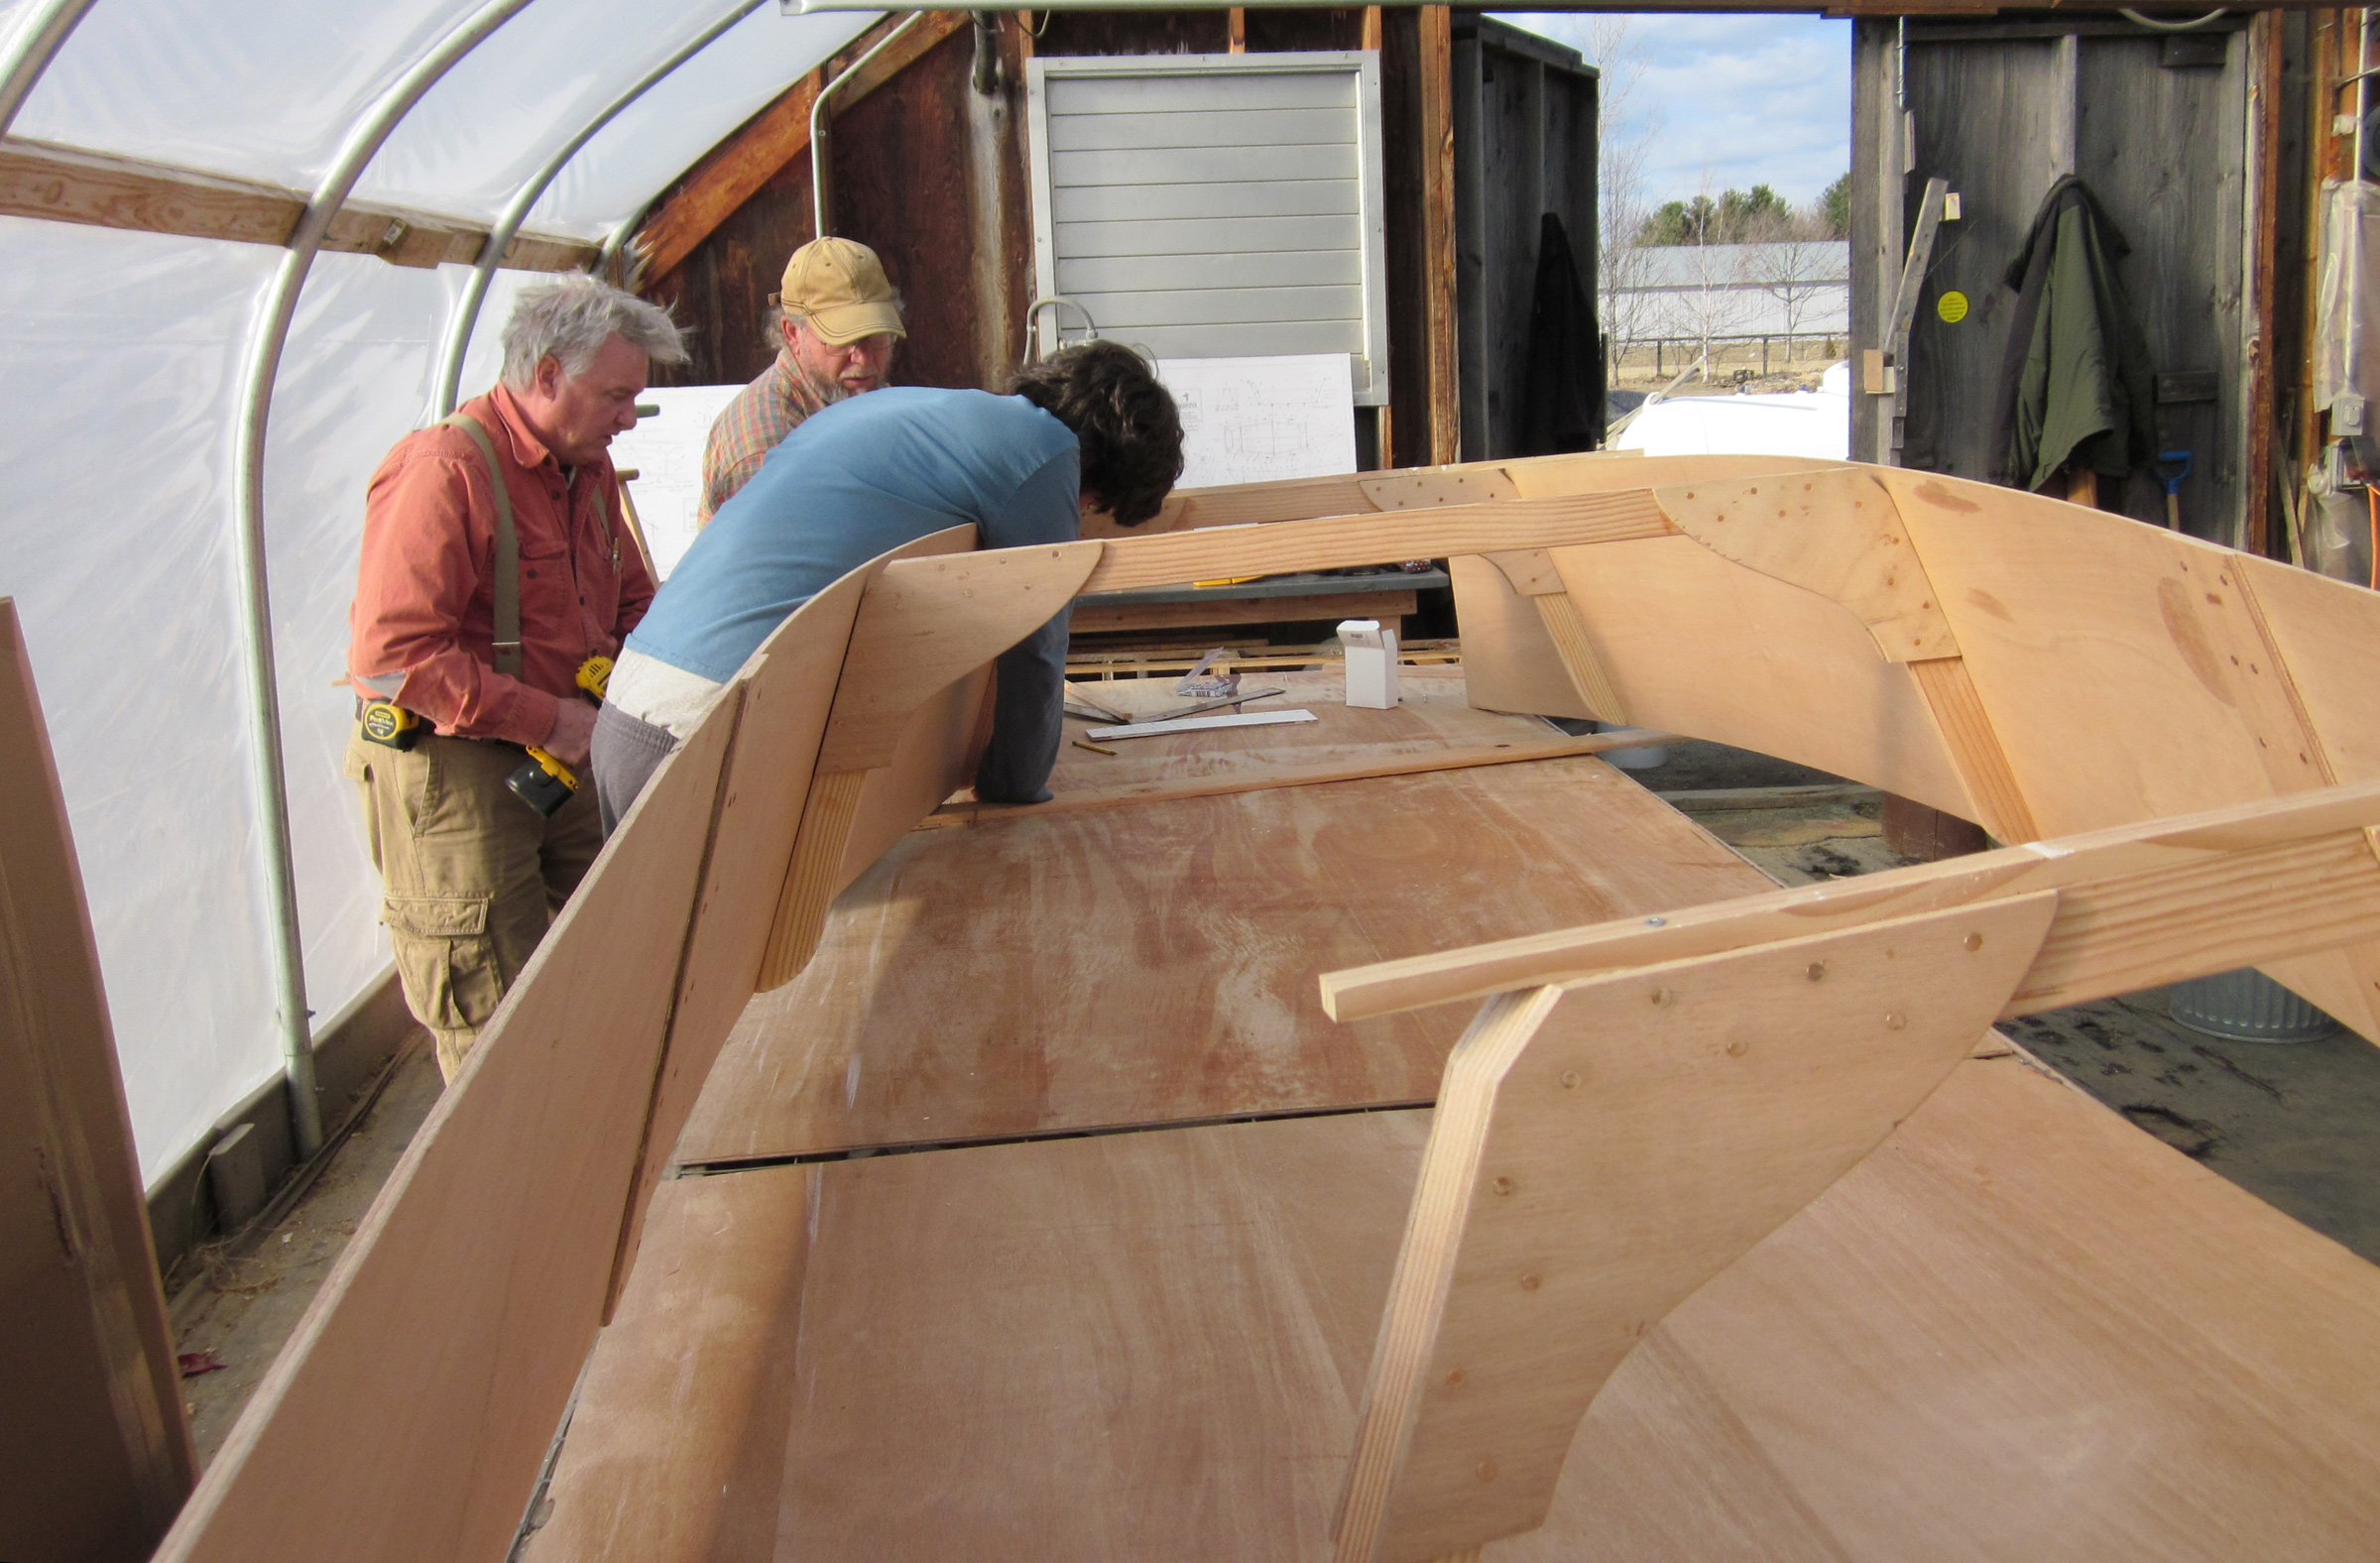
Instead of building the sides of the skiff around frames fixed to a strongback, the sides are bent and the frames are built into them. A long table extended with sheets of plywood supports the work; a strongback is not required.
Building the Sandpiper Skiff
Construction of the Sandpiper hull is fairly straightforward and requires four sheets of 1⁄4″ plywood and some 3⁄4″ lumber for frames and longitudinal elements. Neither lofting, strongback, nor building jig is required. A set of sawhorses that can be fastened to the floor bring the work up to a comfortable level and provides a firm foundation for any required planing or sawing.
We made the frames out of 3⁄4″ Douglas-fir that had been milled from big-box-store 2x4s and then assembled to the plan dimensions with double plywood gussets. (When our carpenter neighbor noticed the finished 3⁄4″ pieces, he remarked that we could have saved a lot of time by just by buying 3⁄4″ fir flooring.)
Most of the fastening was done with bronze ring-shank nails and polyurethane glue. The straight-edged side panels were glued up from two pieces of 1⁄4″ marine plywood, as was the bottom panel. To get the lengths needed for the sides and bottom, each panel required a butt-block joint, secured with glue and copper rivets. The 1⁄4″-thick butt blocks were hardly noticeable in the boat’s interior, and the smooth seams on the outside almost disappeared under a few coats of paint.
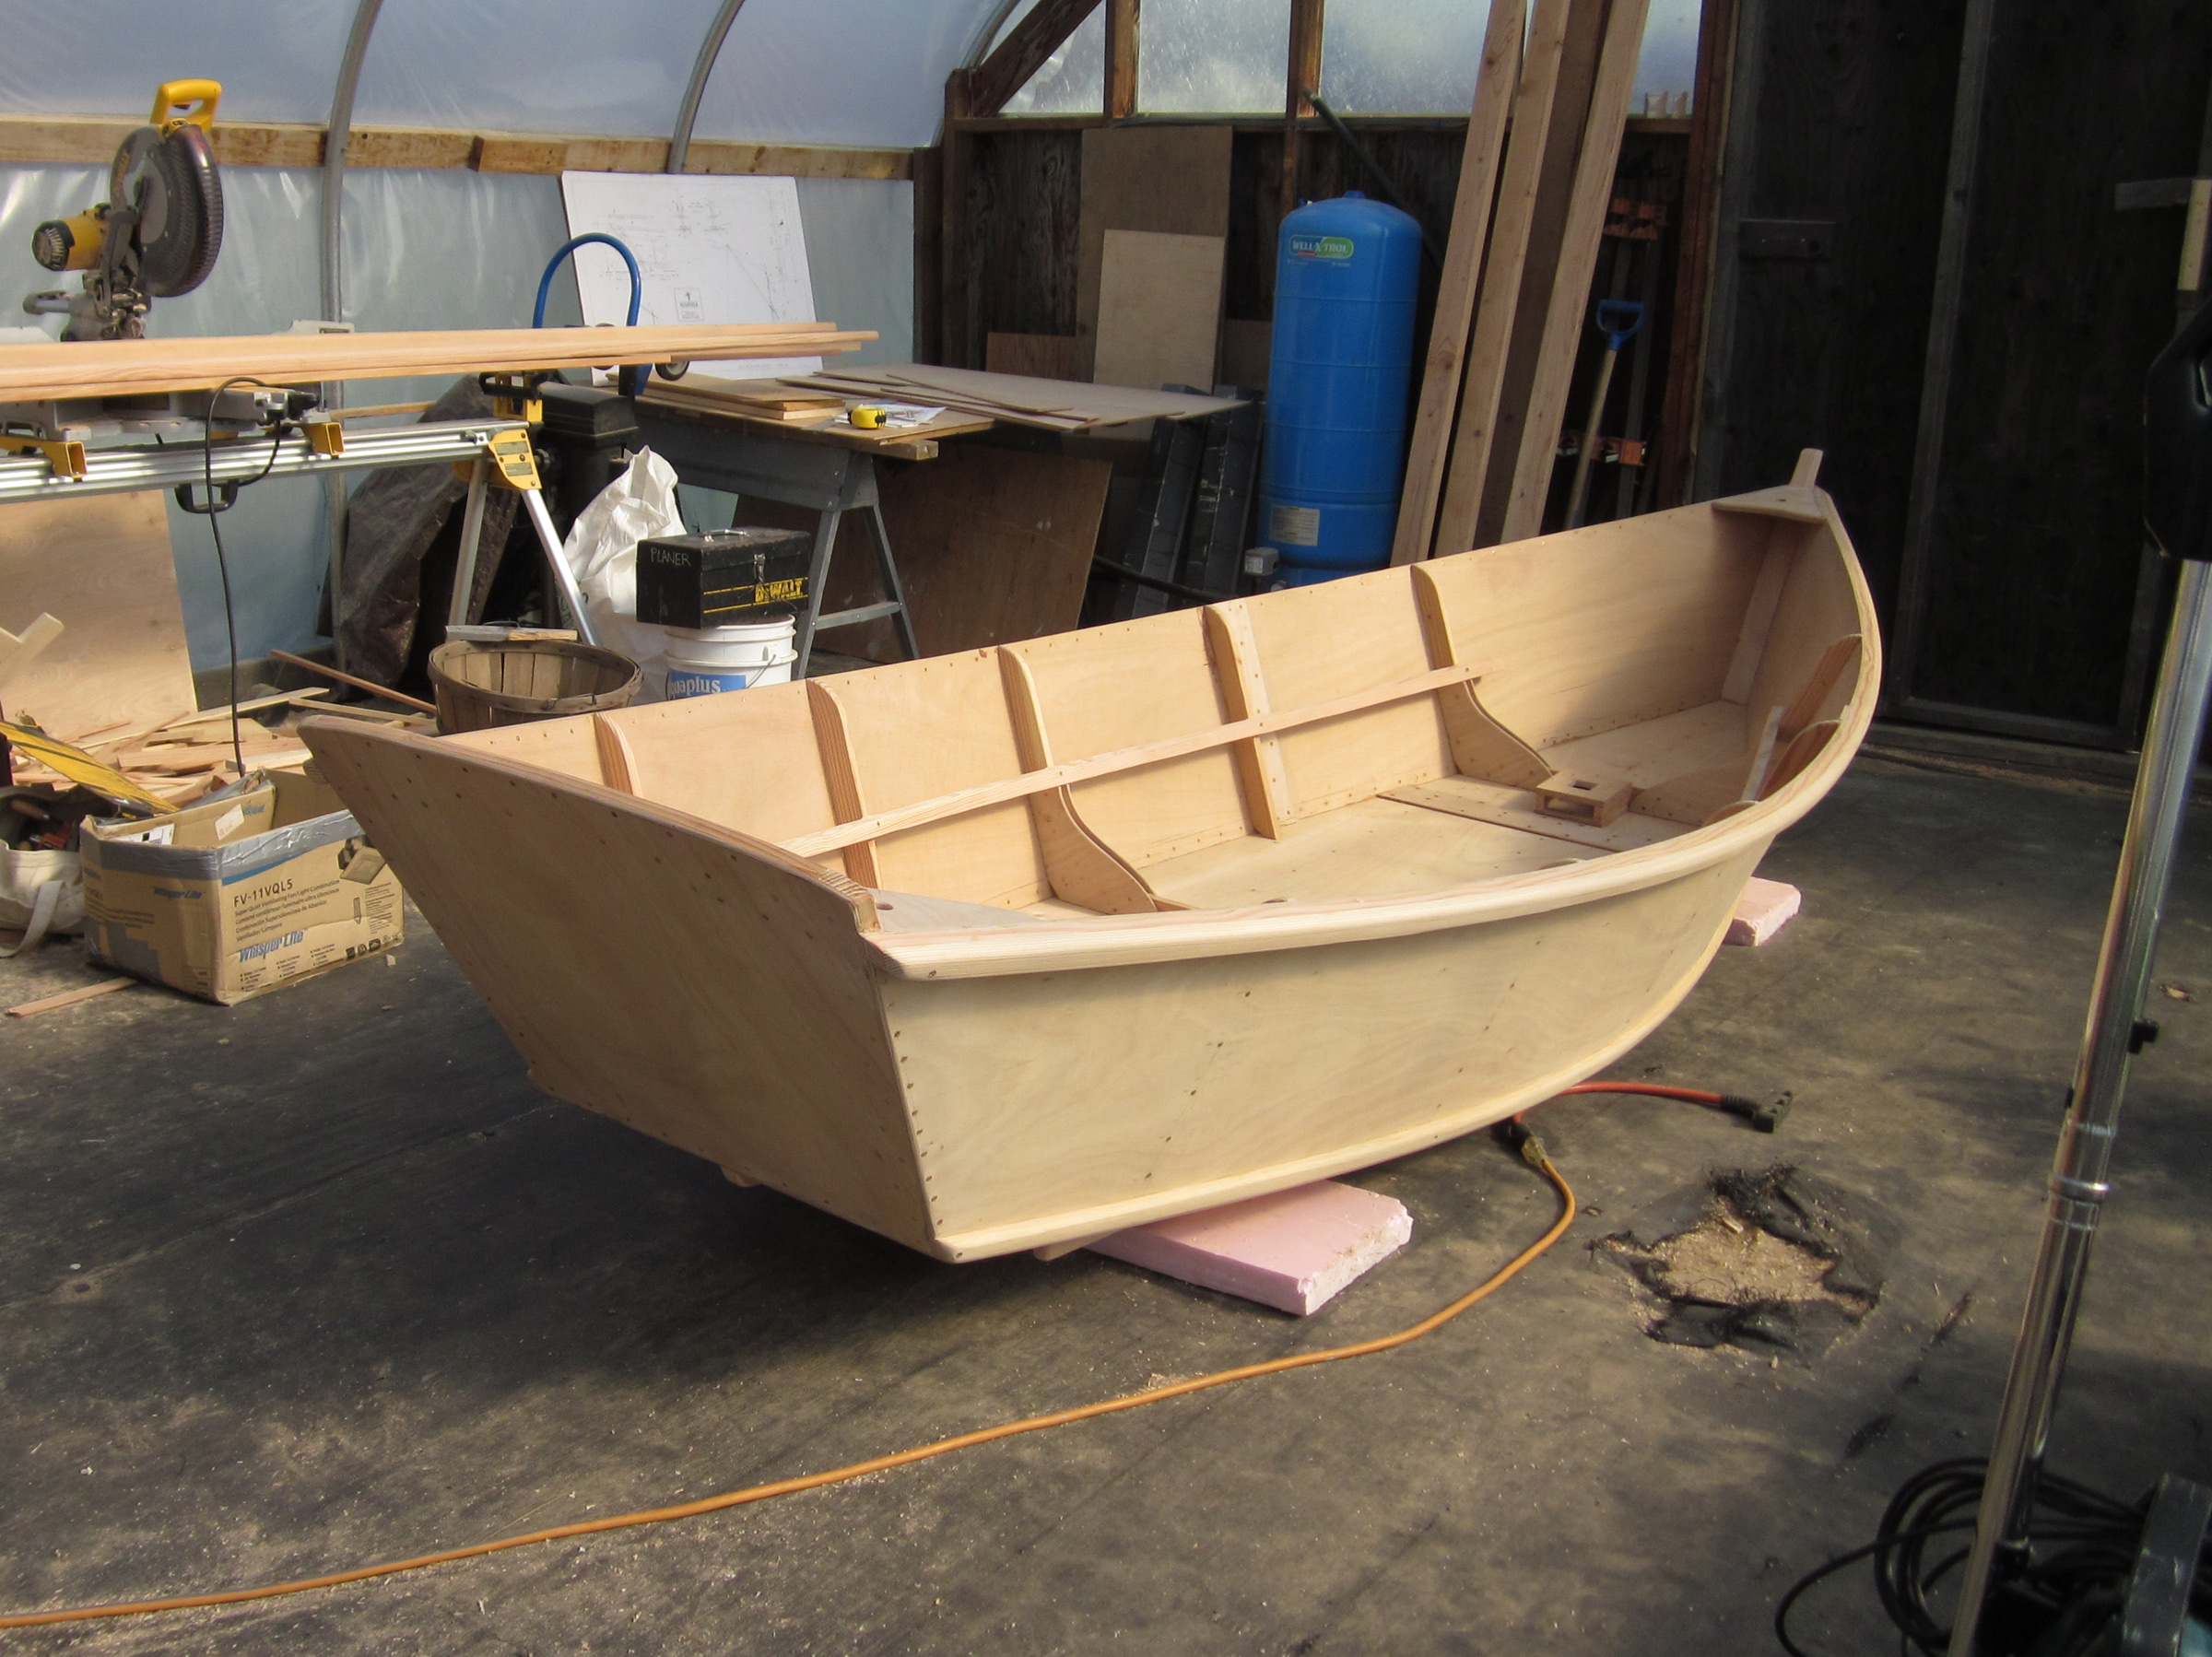
The straight-edged panels get their shape from the curve from stem to transom; the bottom gets its rocker and the sheer its sweep from the sides’ flare.
After the ends of the plywood sides were cut to the angle specified in the plans, the attractive hull took shape by bending them around the ’midship frame. We constructed the three main frames and the transom frame from our pile of 3⁄4″ stock, carefully choosing the best, knot-free pieces.
Once the sides were bent and secured to the frames and transom, we flipped the hull over onto a pair of sawhorses to work on the external chine logs, which provide a wide surface for attaching the bottom. They, along with the plywood sides they’re attached to, need to be planed to create a flat surface to accept the bottom piece. A 4′ level was all it took to check the accuracy of the bevel. The oversized bottom panel is held down with weights and traced inside and out to create a perfect fit.
Getting the Skiff on the Water
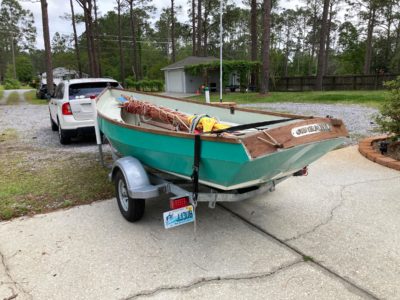
The completed Sandpiper was remarkably light. Conrad claims 132 lbs for the hull, and I think Kyle’s build came in very close to that weight. When doing any seasonal maintenance while the boat is on the trailer, I can easily lift one side up and slip a foam block or cushion under it to gain a little extra clearance over the trailer bunk. I can roll the skiff off the trailer singlehandedly, but I prefer another set of hands if I need to roll it over for any bottom work.
Trailering the Sandpiper is almost effortless, even with our four-cylinder car. It slides easily on the trailer’s carpeted bunks and, if we are planning to sail, we hang the rudder in advance.
The design calls for an endplate of double-layered 1⁄4″ plywood, 4 1⁄2″ wide on the bottom of the rudder, which keeps it even with the bottom of the hull. The endplate gives the rudder a better grip in the water, especially when the boat is heeled while sailing.
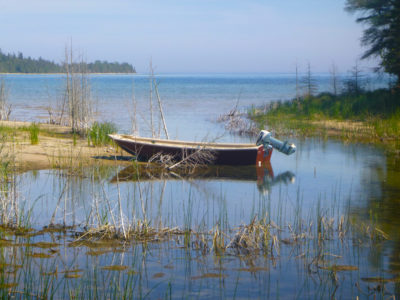
The twin bilge keels, as they are called in the plans, are 3″-deep runners on the bottom that are designed to give the Sandpiper windward sailing ability in thin water. They also serve as helpful guides between the trailer bunks to keep the boat aligned on the trailer during launch and retrieval. Set well away from the centerline, these runners turn the boat into a steady platform on the beach, and they help to protect the bottom when dragged over a log or gravel bar on the river.
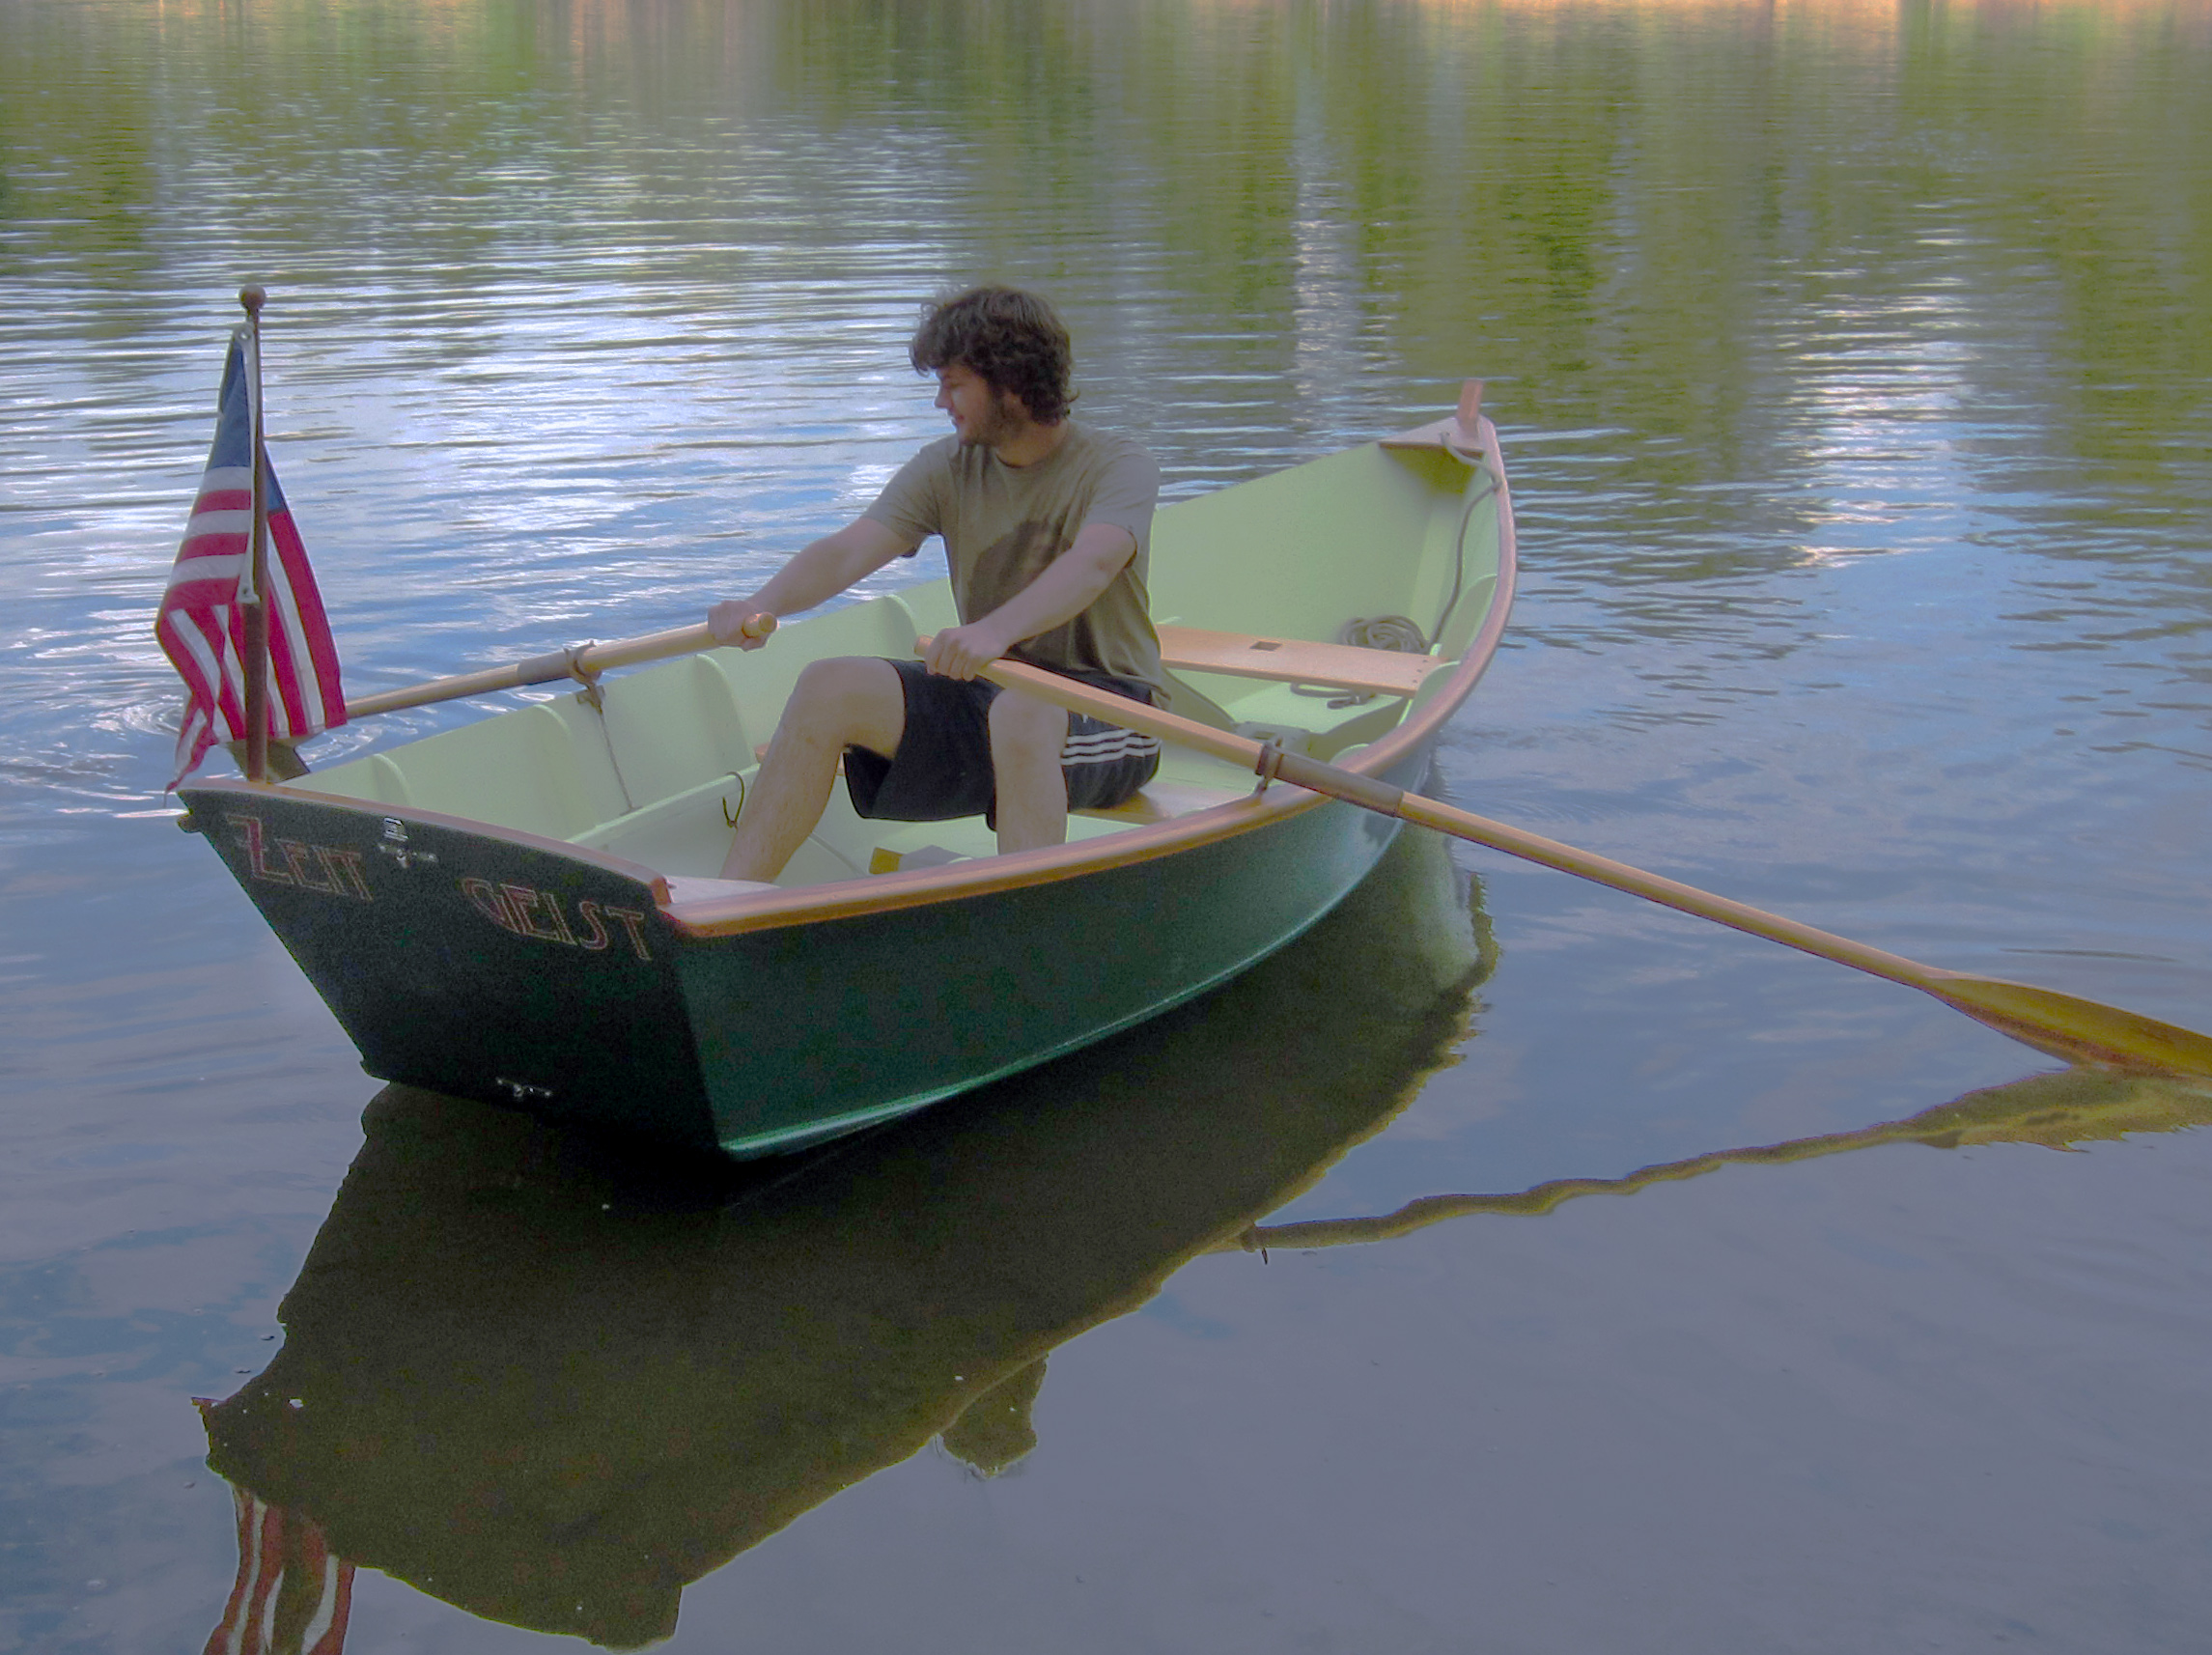
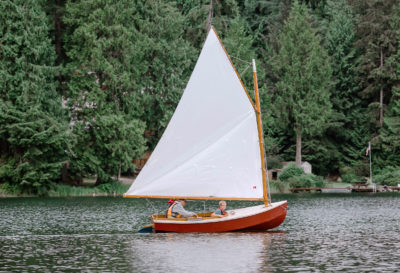
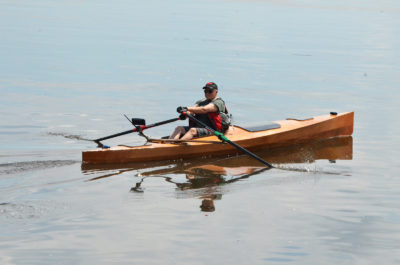
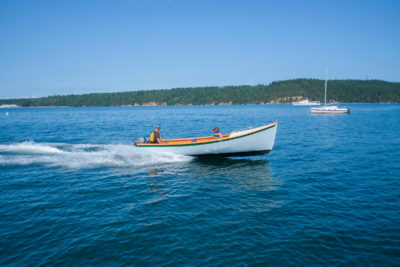
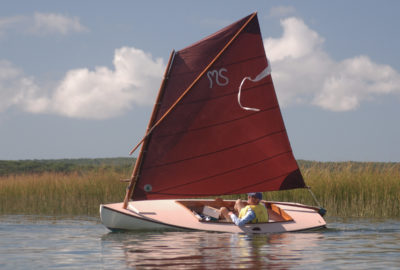
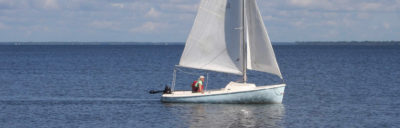
With a solo rower aboard, the Sandpiper sits lightly on the water.
The three thwarts in the design provide ample seating, and Kyle has made river rowing outings with as many as five young people aboard. The center thwart and forward thwart serve as the rowing stations. We have never shipped two pairs of oars, and that likely would require a passenger in the stern for trim. The bilge keels keep the Sandpiper tracking beautifully under oars while the generous rocker in the hull allows for easy, graceful turns. The boat carries its way well between strokes. The 8′ oars we use are too long to stow beneath the thwarts, so we usually bungee them to the seat risers on either side. When the boat is rigged for sail, the bow thwart is crowded by the mast, but it is still usable as a rowing station for short pulls without dropping the sailing rig.
The bilge keels help with windward sailing in shallow water, but for sailing in deeper water, Conrad includes a scaled drawing for a Bolger-type leeboard, which leaves the space in the center of the boat completely open. A passenger can sit on a cushion between the forward and center thwarts and, with an extra cushion for a backrest, have a comfortable, safe position low enough to be clear of the foot of the sail during tacks or jibes.
The absence of a centerboard trunk makes it easy to switch positions and stay on the upwind side. For our camping trips, we added two removable sections of slatted floorboards either side of the central frame to help keep gear and our rear ends dry. The floorboards would be useful for a solo camp-cruiser to provide a flat, dry platform for sleeping, but they also add some unneeded weight. Since we are mostly daysailing in protected waters, we leave them in the garage until they’re needed.

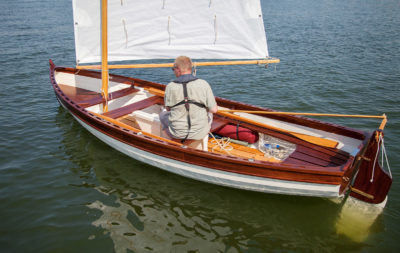
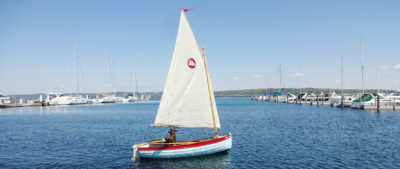
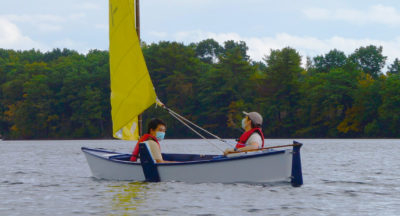
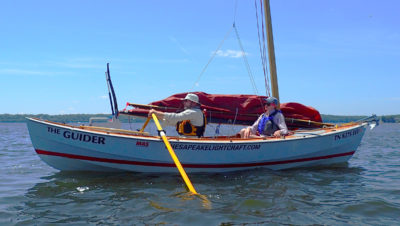
With three aboard, the boat still has plenty of freeboard.
Conrad gives some indications of possible flotation schemes for the Sandpiper in his booklet. Included with the plans are pictures of Conrad singlehandedly capsizing and refloating the boat, but it is evident that he is in shallow water on a calm day and probably standing on the bottom. There is room in both the bow and stern to build in airtight or foam-filled flotation compartments. We considered adding rigid foam under the thwarts or lashing inflatable beach rollers to the seat risers, and if more ambitious expeditions were anticipated, those type of additions might be wise. In our protected sailing grounds, we have not felt that those extra measures are necessary.
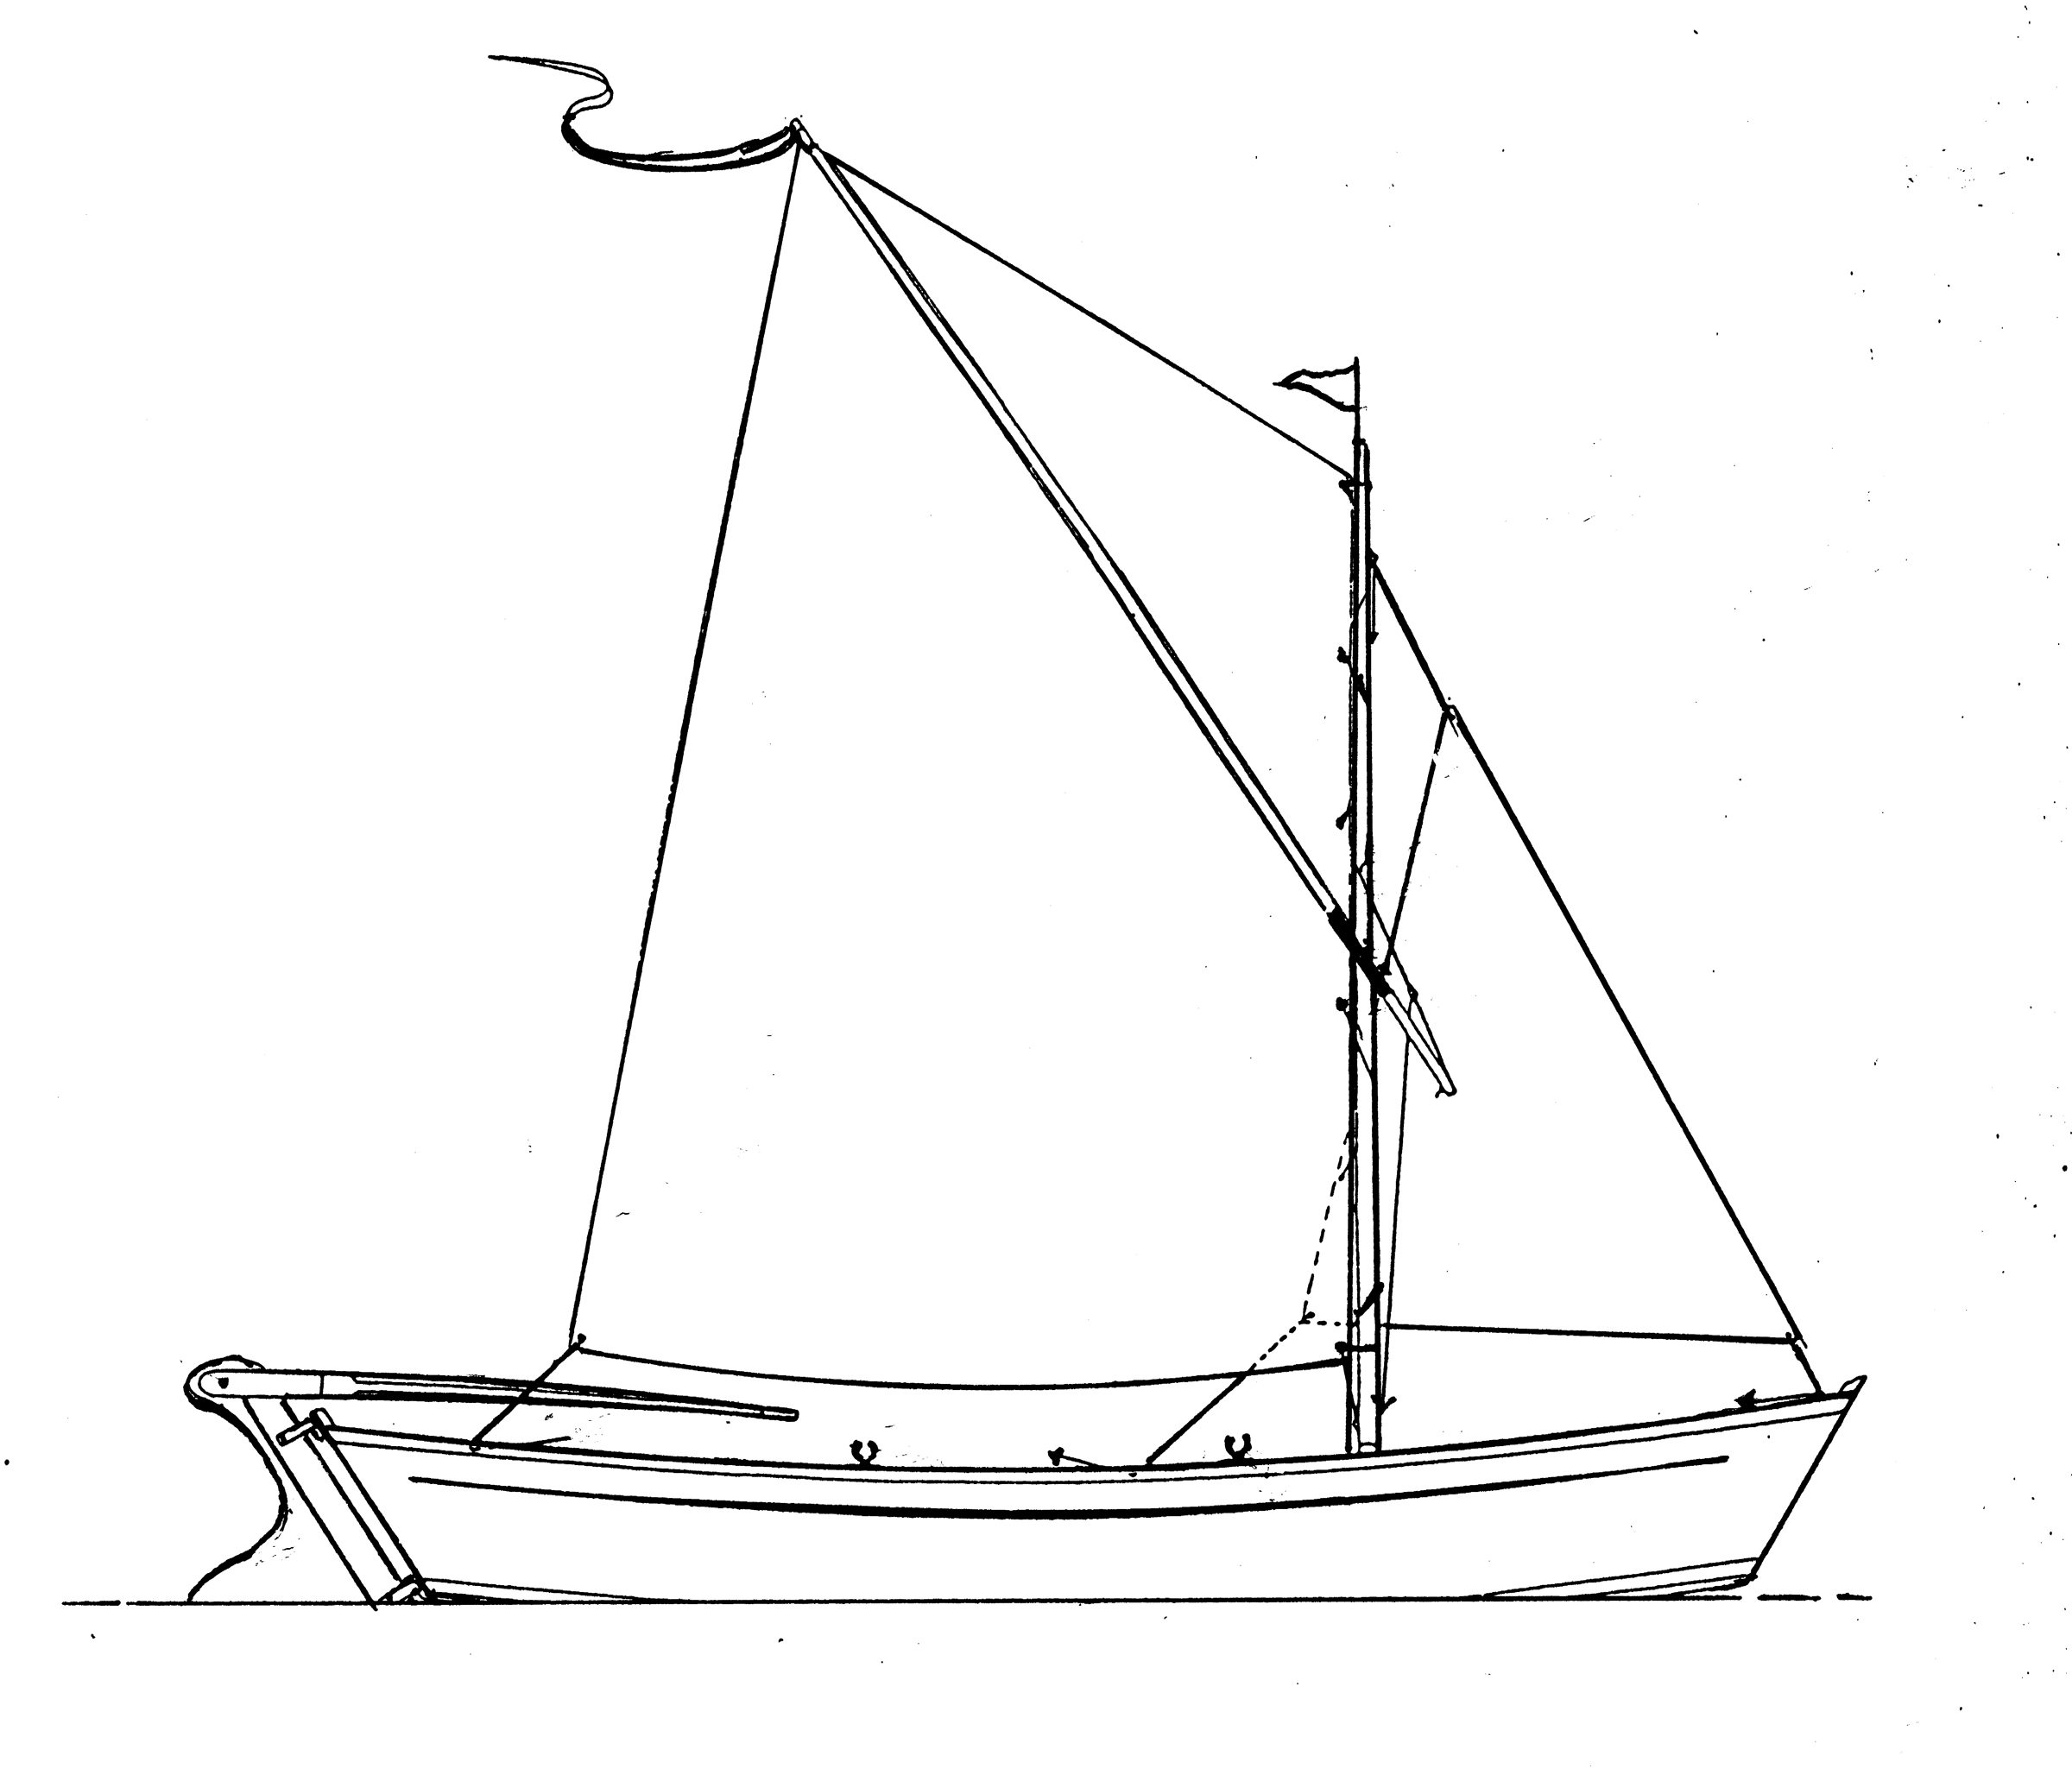
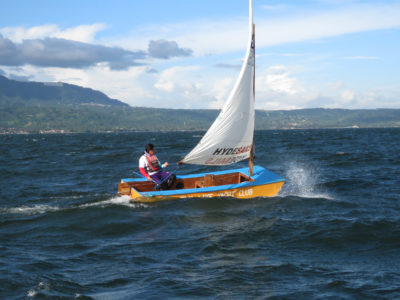
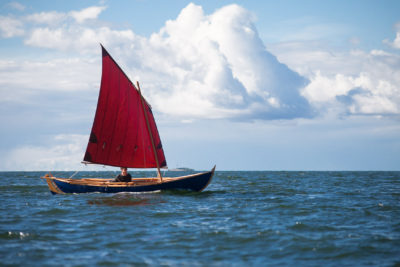
The plans provide drawings for a standing (balanced) lug sail or a spritsail sloop with a mainsail area of 57.6 sq ft and a jib of 12.7 sq ft; we chose the latter, and added a sprit boom to keep the sail in a better shape when going downwind while also keeping the cockpit free of low-hanging lumber. The spritsail rig appealed to us for its traditional look and the lightness of each spar. We anticipated a lot of close tacking while river sailing, and liked the idea of being able to back the jib to aid in those maneuvers.
The main is laced to the mast with the throat lashed to the masthead. While it can’t be lowered, removing the sprit and folding the sail along the throat-to-clew diagonal—known as scandalizing—is an effective way of reducing sail area. The jib has a halyard and its two sheets are led through cam cleats set in oarlock sockets (as learned from an article on techniques in this magazine). The mainsheet has evolved from getting looped behind the aft stub of the riser and changed from side to side on each tack, to running through a pulley lashed to the sprit boom and a fiddle block on a rope horse over the tiller.
The single leeboard slips over the gunwale; its two parallel legs, set inboard, straddle the central frame rib. The leeboard’s lateral area is especially effective for sailing closehauled and, with a little practice, the board can be raised easily when coming into a beach or to reduce drag when sailing off the wind. The leeboard sets parallel to the flared side, so it is close to vertical when set on the windward side, and sharply angled when to leeward, but we have not seen much difference in the leeway made from one tack to the other while leaving the board set on one side. The leeboard does not pivot, so we have suffered a few unfortunate groundings at speed that snapped one of the supporting legs. This season we will be experimenting with a pivoting board set on a robust frame.
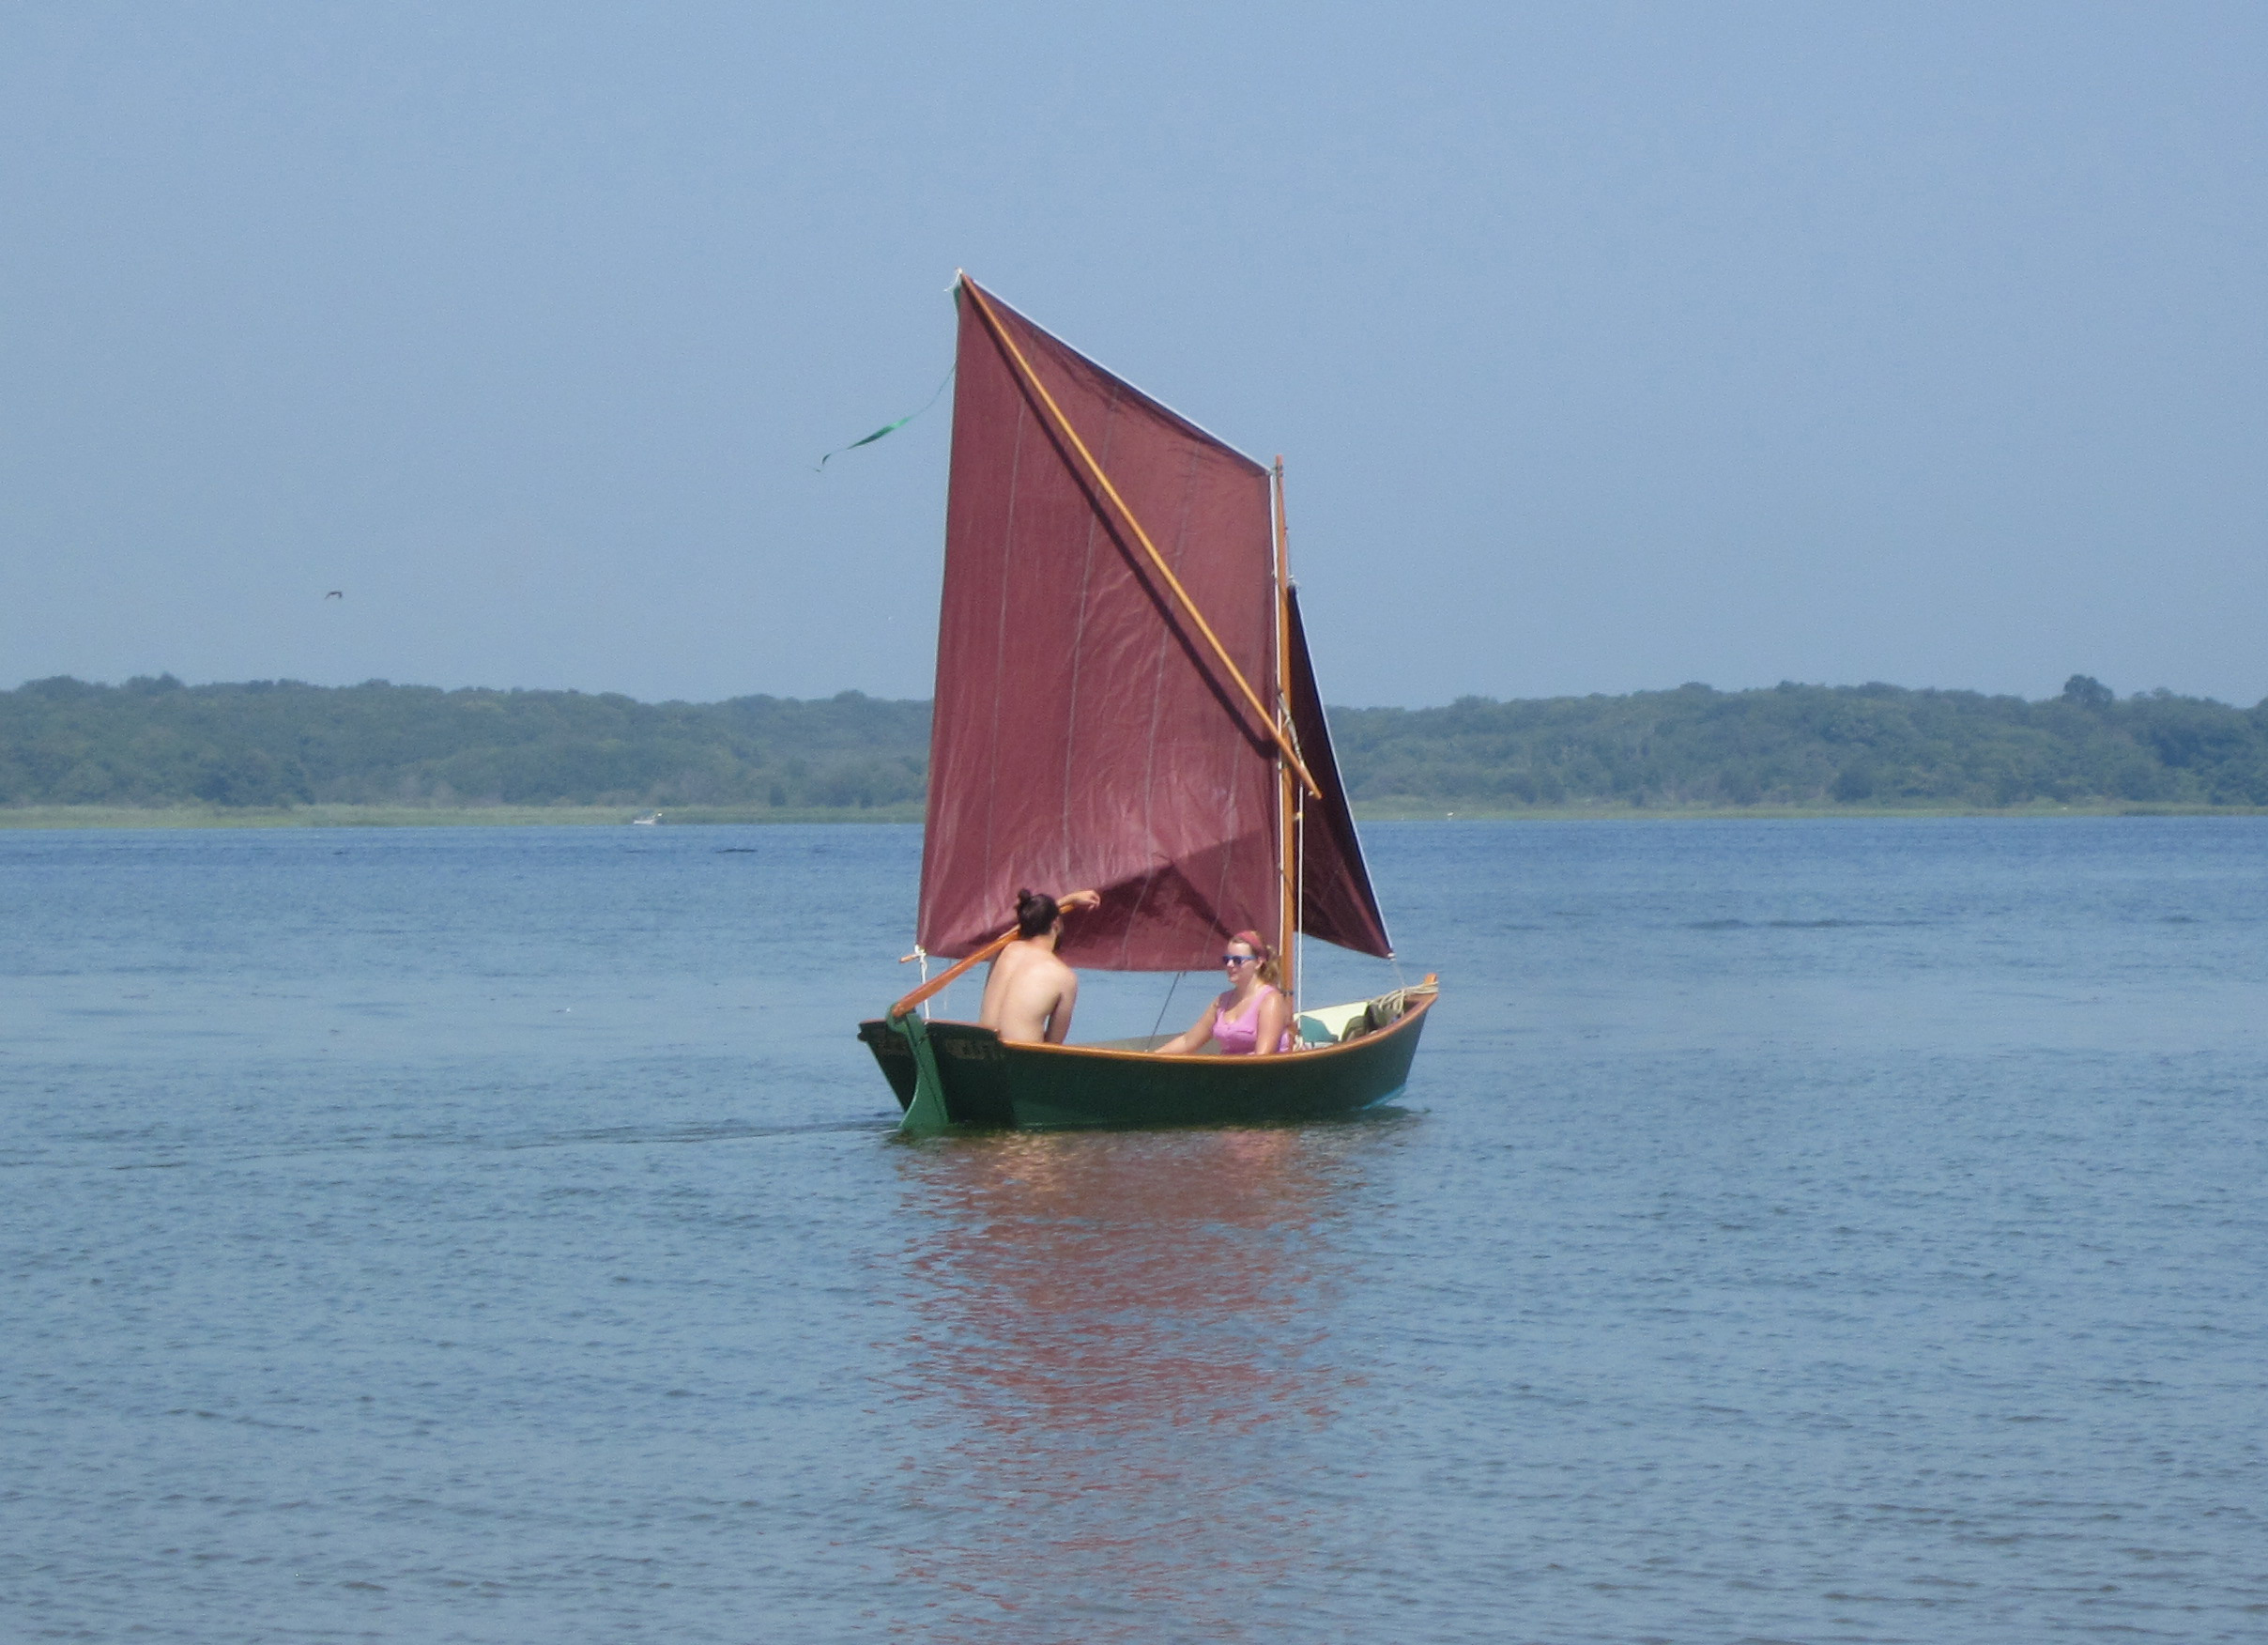
The spritsail sloop rig carries 57.6 sq ft in the main and 12.7 sq ft in the jib. The sprit boom was added by the builder to increase the spread of the main on downwind runs.
The only major modification we made to the original design was purely an accommodation for this aging skipper. The sprit rig uses three spars (mast, sprit, and sprit boom), which all stow within the boat for trailering. For 10 years, I was happy picking up all three spars with the sails laced on and slipping the mast butt through the forward thwart and into its step. But last year, on increasingly unsteady legs, I found it more difficult to get the mast raised safely. We have constructed an oak tabernacle so that I can easily and safely pivot the rig upright. With this new arrangement I hope to derive another decade’s enjoyment of this sweet little boat.
One of the nicest things about the Sandpiper is the number of gratifying compliments it receives, whether launching in the Connecticut River near our home, in coastal waters around New England, or sitting on her trailer in the driveway. The building, use, and maintenance of this fine little craft have taught us all some valuable lessons and provided countless hours of enjoyment. It can carry a small family to less crowded beaches for a picnic, handle a little rough usage by a group of teenagers, and, with a few more minor modifications, may yet propel this older person gracefully into the sunset. Easy on the eyes, quick to launch and rig, it is just plain fun to sail.![]()
Dan Pratt lives in the Pioneer Valley of Western Massachusetts where he almost swallowed the anchor 30 years ago to start a small organic farm. Canoeing on rivers, lakes, and ponds for over a decade left him wanting more than just the wind in his hair, and created a craving for wind in a sail. Having turned his back on small-boat racing and Buzzard’s Bay camp-cruising so many years ago, he was delighted when his youngest son took up boatbuilding.
Sandpiper Particulars
Length: 13′ 9″
Beam: 4′ 8″
Hull weight: 132 lbs
Sail area, sloop: 70 sq ft
January 2024: The designer’s website is no longer active but plans are still available. You can reach designer Conrad Natzio via email at [email protected] or by phone in the UK at +44 1394 382537.
Is there a boat you’d like to know more about? Have you built one that you think other Small Boats Magazine readers would enjoy? Please email us!


Beautiful design, simple although elegant. I have the plans for this boat and perhaps it’s time I get started building. While the price of ply is crazy right now, life is short at best. I bought these plans years ago when a check in Sterling was possible in my area, that said, I’d like a couple other of Mr. Natzio’s plans although have discovered it’s very difficult to obtain a check in Sterling now. Any suggestions?
Perhaps a mail money order or a bank transfer if Conrad Natzio gives you the bank account number. I think also PayPal could be used.
Thanks for the feedback.
I would be interested in the design of the tabernacle mentioned in the article. Also how is sailing with just the sprit sail, no jib?
Can anyone direct me to a link where I can order these plans?
Try email [email protected]
Also, his address:
15 Lanyard Place, Woodbridge, Suffolk IP12 1FE, United Kingdom.
These data are from his advertisement. In 2023 I bought Sandpiper plans.
I’ve been in touch with the designer and while his website is no longer active, plans are still available. You can reach designer Conrad Natzio via email at [email protected] or by phone in the UK at +44 1394 382537.
“Zeitgeist,” what a lovely name. Perhaps “Ballroom Blitz” under sail.