 Matthew P. Murphy
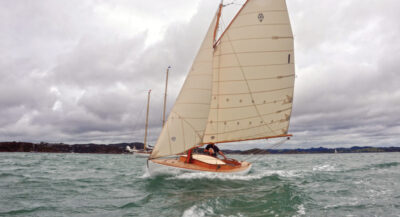
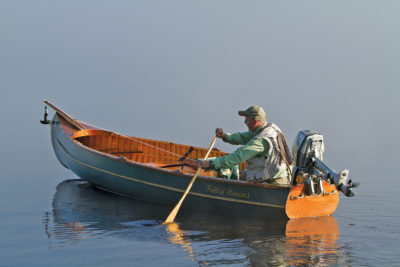
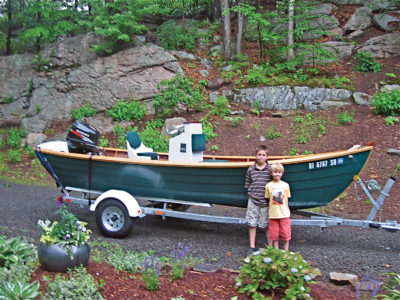
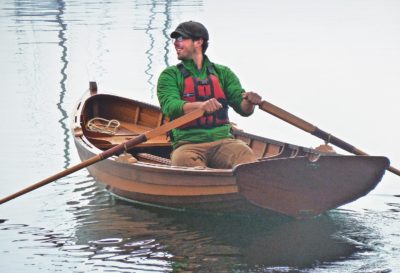
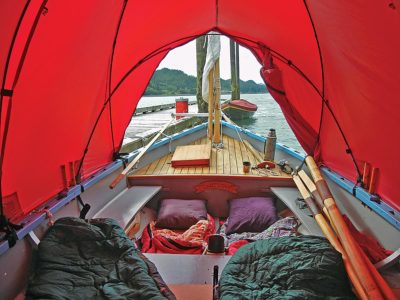
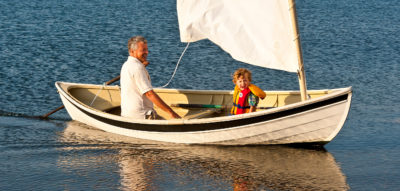
Canvas sheathing over a wooden framework makes Ned McIntosh’s 9’ dinghy extraordinarily light, at only 35 lbs, yet it remains a versatile tender that is easy and quick to build.
These 9′ ×3′ 3″ symmetrical double-enders have been around for many years. Oddly, they were born in Panama while Ned McIntosh and his wife, Alice, were there in 1942 in their cutter STAR CREST and Ned was working in a local boatshop. Although he first built himself a sharpie, Ned needed a lighter boat to get back and forth from STAR CREST’s mooring. First he tried a folding canvas dinghy, but it didn’t work out. Then came this fixed-frame, canvas-sheathed dinghy, which did work.
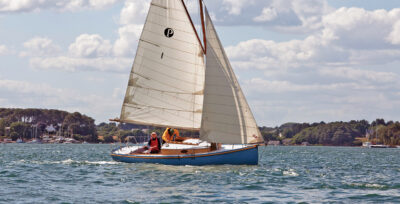
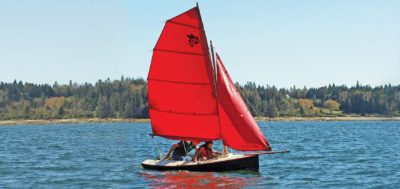
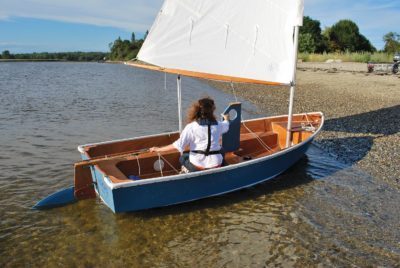
After Ned devised a sailing rig with leeboards and a small single sail, the boat became so popular that he and friends built about 20 of them. The group—which eventually formed the Panama Yacht Club—had a great time, racing them backwards as well as forwards. (To sail in reverse, Ned tells me, you have to hold out the boom to catch the wind, then steer backwards.) After returning home to his native New Hampshire, Ned continued to turn out many more of these useful little craft. And after he ceased building them, one or two other local builders began turning them out.
My first exposure to the boats came after sighting STAR CREST steaming into York Harbor early one evening about 50 years ago while Anne, our daughter Kathy, and I were there, living aboard our R-boat PENOBSCOT. We met Ned and Alice after they docked, and among all the neat features they showed us was their little canvas tender nestled nice as you please on this 35′ Atkin cutter’s deck. The dinghy could carry two people, yet one person could lift it out of the water and load it onboard. I never forgot our first viewing and, later on, noticed that other sailing yachts, most of them somehow connected to the McIntoshes, were also using Ned’s canvas boats as tenders. Conversations with their owners brought forth nothing but compliments.
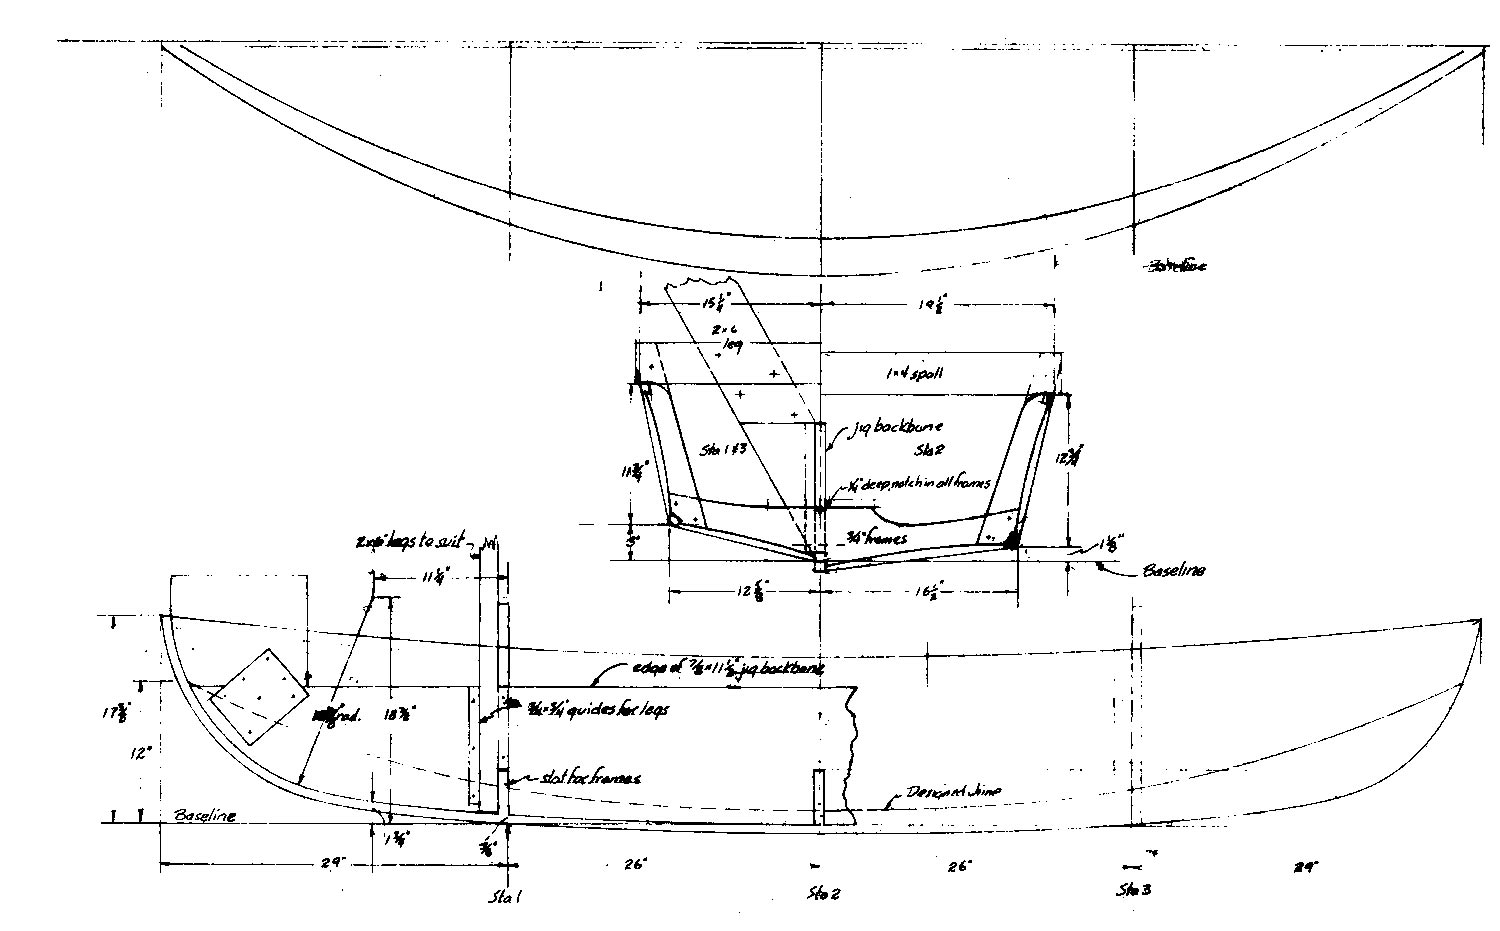
After seeing so many of these cute little boats here and there and hearing only good reports about them—including a story Waldo Howland once told me of Ned building some of them right in the living room for the Howland children—I longed to build one for us. As I understood it, there were no plans for the boat itself, although Ned sent me a drawing for the sailing rig. So it came down to finding a boat that I could measure, and Karl Webster offered his. I jumped at the chance and created a drawing that included a building jig I thought would work.
 Matthew P. Murphy
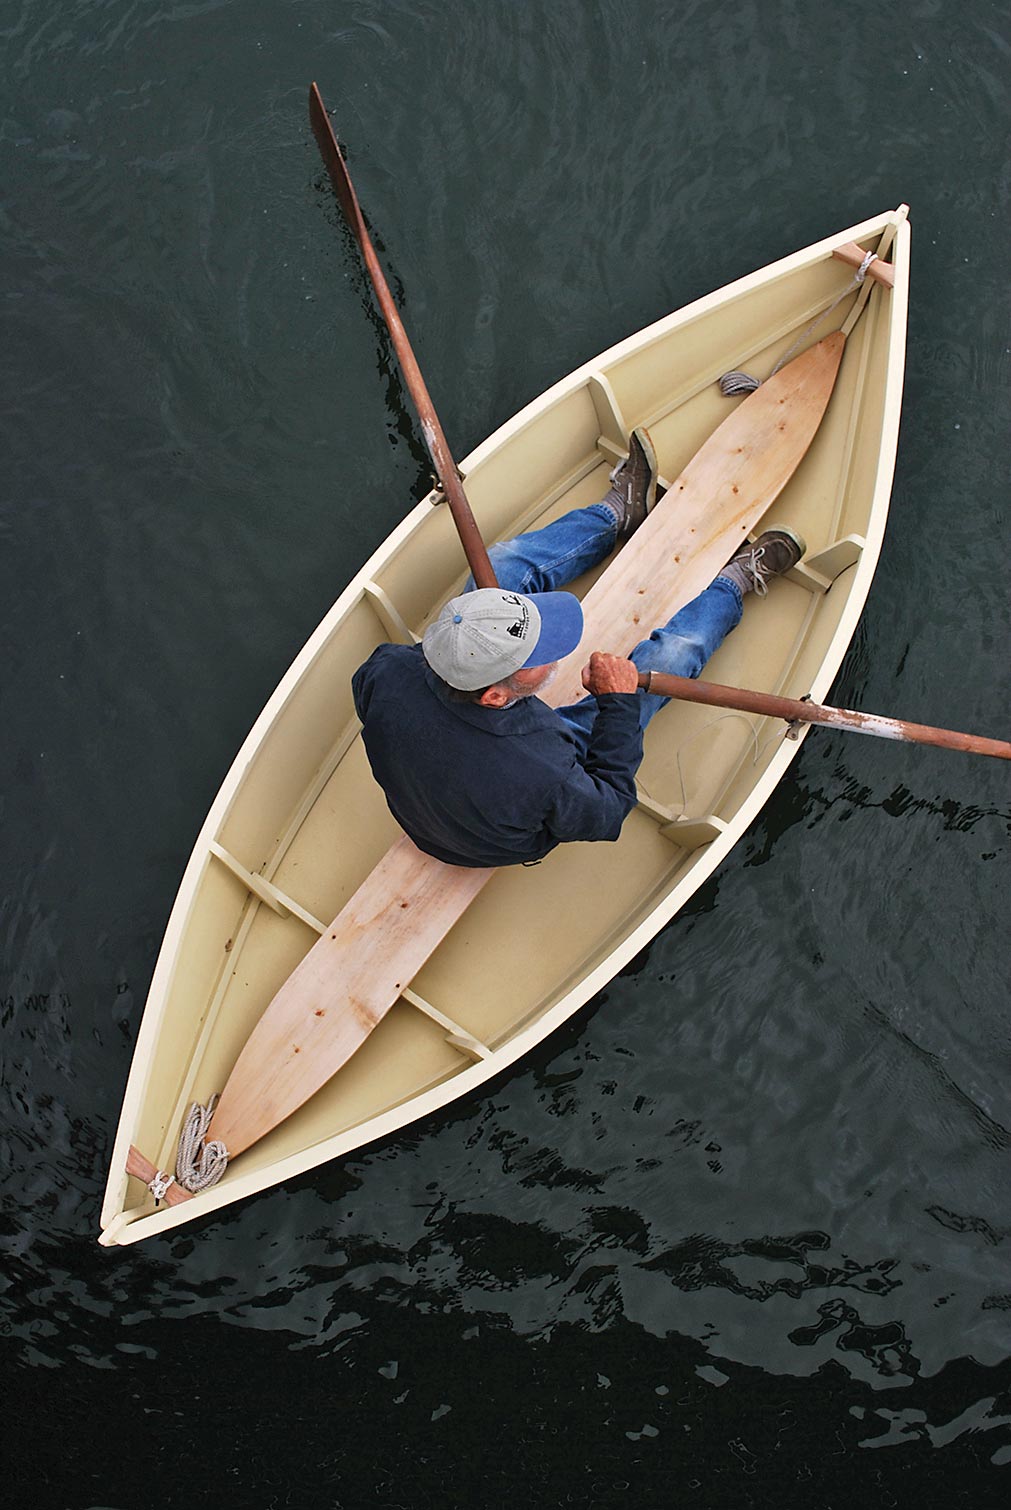
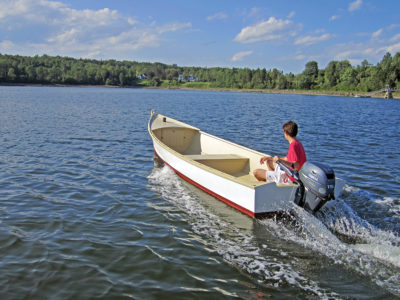
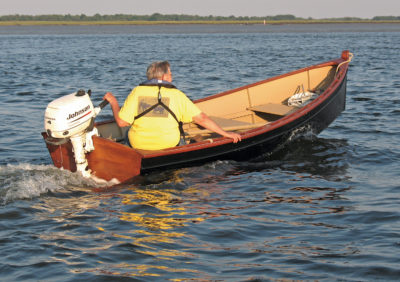
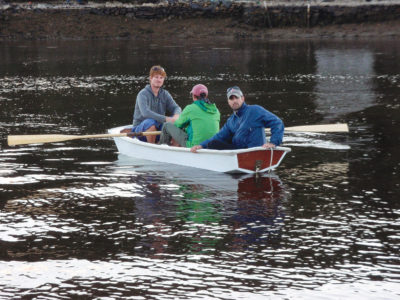
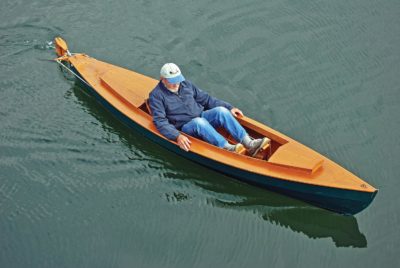
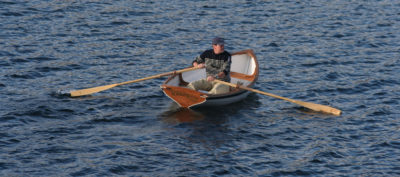
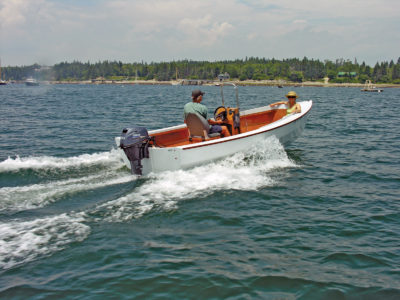
A single centerline seat permits shifts in crew weight. When a passenger is aboard, the oarsman turns around to get his weight toward the end, rowing the double-ender in the opposite direction.
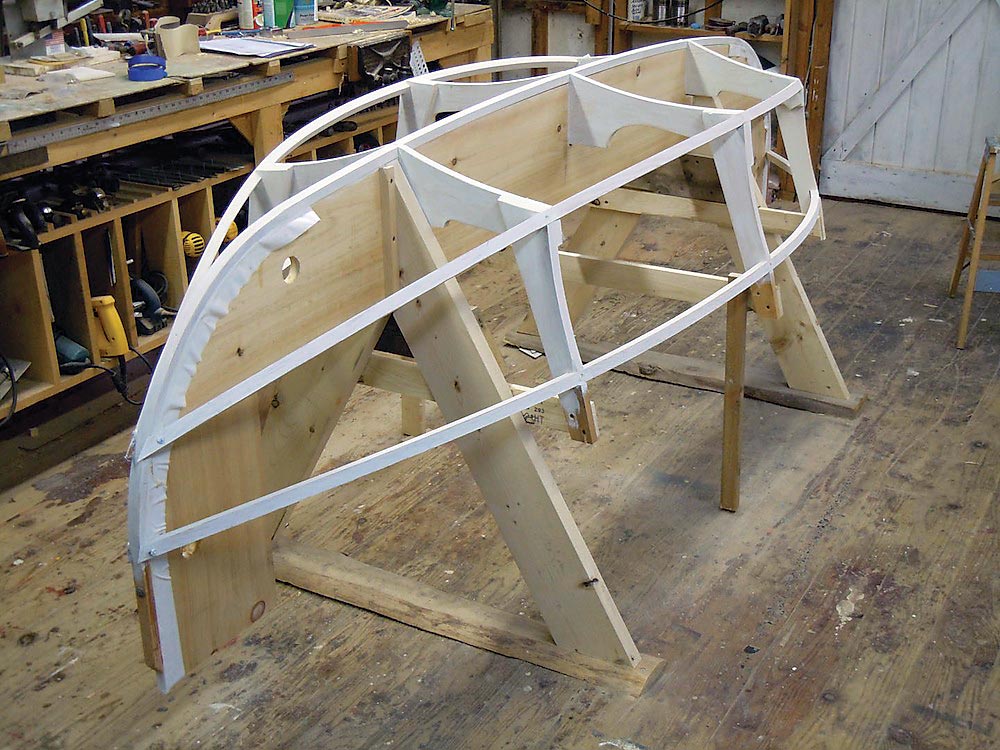
Except for the three frames, the pieces of which can be sawn out from common white pine boards, a set of stringers form the skeleton around which the canvas is draped, glued, and stapled. There are five of these stringers. The one for the keel bends at its ends to form the two stems. In addition, there are two chine stringers and a pair of sheer stringers. All of these longitudinal members have to be stiff enough to remain fair between the supporting framework. Pine is too springy; I used Douglas-fir because I had some on hand. But I think spruce, mahogany, oak, or ash would also work well. There’s considerable curve in these stringers as they spring around the hull, so they need softening by hot water or steam. The stems, which have a sharper curve, are easier to bend if kerfed and glued back together—or they, too, could be steamed.
Over this skeleton of inner stringers goes the canvas. Heavy 10-oz stuff (No. 2 is what Ned calls it) is what you need, and if it comes in the usual 60″ width then a single piece just makes it across the boat at the maximum beam—just as Ned advised me it would. Another of his suggestions was to staple the canvas first along the sheer, only just pulling out the wrinkles. (Don’t pull too tight, or when the canvas shrinks it will distort the stringers.) Then mark along the chine with a pencil and make a cut toward the middle from each end. Then, he says, staple the sides to the chine stringers, trim them, and spread a bead of 3M 5200 and staple on the bottom panels. Trim off the excess. Staples should be an inch or so apart along chine and sheer stringers.
Although perhaps it was a mistake, I felt more comfortable covering the bottom first, then completely cutting away the port and starboard overhangs and using them separately afterwards for the sides. This called for a continuous overlap along the chines, and amidships I found that my overlap was a little scant.
 Maynard Bray
A simple building jig accepts the keel, chine, and sheer battens, ready here to be covered with canvas.
In any event, my bottom piece draped nicely over the keel for most of its length but had to be cut along the centerline and overlapped at the stems, over a bead of 3M 5200. Closely spaced Monel staples hold the canvas to the skeleton and the adhesive makes the joints watertight.
After the bottom pieces were fitted, stapled, and glued where necessary, I stapled on the sides, doing the sheer first and then pulling out the wrinkles as I worked along the chines, over a bead of 3M 5200. I drove plenty of staples close together and hammered them flush afterward. You want these areas smooth for later installation of the outer keel, outer chines, and guardrails. A putty knife, pressed down hard and run along the overlap, helps squeeze out excess sealant.
Natural canvas was a pleasure to work with and goes on, if you’re careful, without much wrinkling. Ned tells me that his later boats were covered with a heavy synthetic material called Herculite, which makes for a more rugged hull that better resists puncturing. But it doesn’t have the “give” of canvas, so it doesn’t go on as smoothly.
At this point, after the adhesive has cured, it’s probably a good idea to spread on a coat of paint in order to seal the canvas against moisture. Either oil-based paint or latex will work, and you’ll find that both do a good job of shrinking any errant wrinkles out of the canvas.
Now come the outer stringers, which in order to bend around the hull need to be softened with steam or hot water, or else slit, or kerfed, lengthwise and glued into place in two layers. I chose the latter to prove the method, since I’d already used hot water for the inner stringers.
Also, this method kept the surfaces dry for gluing. To attach these outer stringers, I used thickened epoxy instead of 3M 5200 because it is easier to clean up and cures faster. Drywall screws with fender washers held things together until the epoxy kicked off.
For good looks, it pays to plane some taper near the ends of the chines and guardrails and nose them off a little. I also hollowed out their contact surfaces a little for a tight fit. Sinking screws permanently into their very ends always makes sense—just in case the epoxy lets go someday.
For finish, I ended up using a couple of coats of latex paint inside and out. The cedar plank used as a floor-board and seat (there’s no standing up in this boat) was to be left bare, so it went in after painting, held with oval-head screws so it could be removed for access to the bilge.
Oarlocks and breasthooks finished the boat. Unfortunately, I didn’t keep a log of the hours spent in construction, but I can tell you that the work goes fast. Using this design, not much time passes before you have a usable boat.
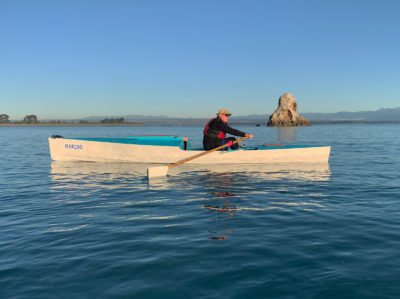
Because of its relatively high freeboard and double-ended symmetry, it’s surprisingly seaworthy for its size. Being so very light and with a single person aboard, it rises quickly to the oncoming waves. But, as with almost any 9-footer, a maximum of two people s about the limit for capacity, and you always have to be careful where you place your feet so as not to push against the canvas.
There’s only a single set of oarlocks, and you sit right down on the floorboard to row. To keep the boat trimmed right, you row in one direction if you’re alone, and get on the other side of the oars to row the opposite way if you have a passenger. Without a backrest, rowing is a little uncomfortable, but I suppose this could be and probably has been improved upon in other boats. Improvement, however, comes with more clutter and weight. It’s not an ideal “all-day” boat anyhow, so for short distances I think it’s fine as it is.
I can’t recall ever having rowed one of these boats previously, and I was amazed at how easily she picks up speed from a standstill, how quickly you can turn her, and how effortlessly she moves along. Six-foot oars are about the right length. We towed her behind either a powerboat or a sailboat most of last summer, and she bounced along happily at a variety of speeds. I got overzealous in pulling her alongside once while we still had headway and were leaving a wake, and she flipped upside down. That was quite a surprise, and I should have known better, but recovery was almost as rapid as the capsize. At only 35 lbs, she was easy to raise up by grabbing the rail, and once she shed the water it was easy to set her right-side up again.
New boats take getting used to, and all boats—including those you think you know—are able to teach you a lesson. This little double-ender, I’m sure, has more in store for me. ![]()
Plans may be obtained from Maynard Bray, [email protected].
 Maynard Bray
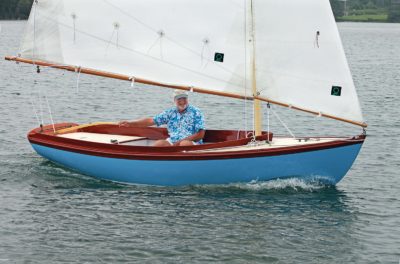
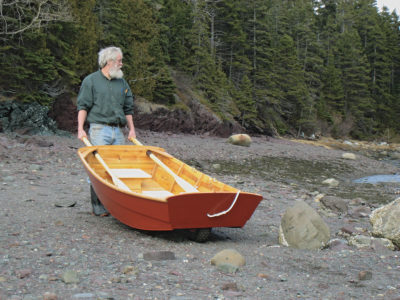
By measuring an existing boat, Maynard Bray developed construction plans so he could build one for himself. Because he intended the boat as a tender, he didn’t draw the sailing rig devised by designer–builder Ned McIntosh.
Particulars:
LOA 9′
Beam 3’3″
Draft not much


Very excited to have read this article! I’m currently finishing off a SoF canoe, with canvas skin. The first skin was sealed with a blend of shellac and beeswax, but SoF hulls are more flexible than an earlier cardboard maché version, and the hide crazed. Now I am soaking six layers of Tung oil (middle two blended with tar) into the canvas, after tests of six layers of Linseed in canvas held water for 24 hours. (Canoes and dinghies get pulled from water every night, even on voyages, so don’t need to be waterPROOF.) I also went to Tung oil from Linseed after learning not only that Tung is more water resistant, but linseed oil degrades canvas (One reason art painters seal their canvas with rabbit skin glue).
I was headed out on a wing and prayer and ideas and researching other industries, and a personal limitation of no materials poisonous to the earth. Super relieved to hear boatwrights have been at the technique for years.
Lovely article, Maynard.
from Ned’s second wife, Terry Picard
Forgot I read this article, right on three years ago. That is a really neat boat. I love all things simple, and dual purpose. The single plank floorboard/seat, and reversable for trimming one passenger or two… I have a stack of plans and dreams and most of the materials, but I have enough spare materials for this one and might see space for a brief detour of project path. I would use a boat like this, and might be reaching out for those plans, Maynard. Thanks for the write-up.
She is really quite pretty, too. That boat is nuts.