Clay Bar
 SBM
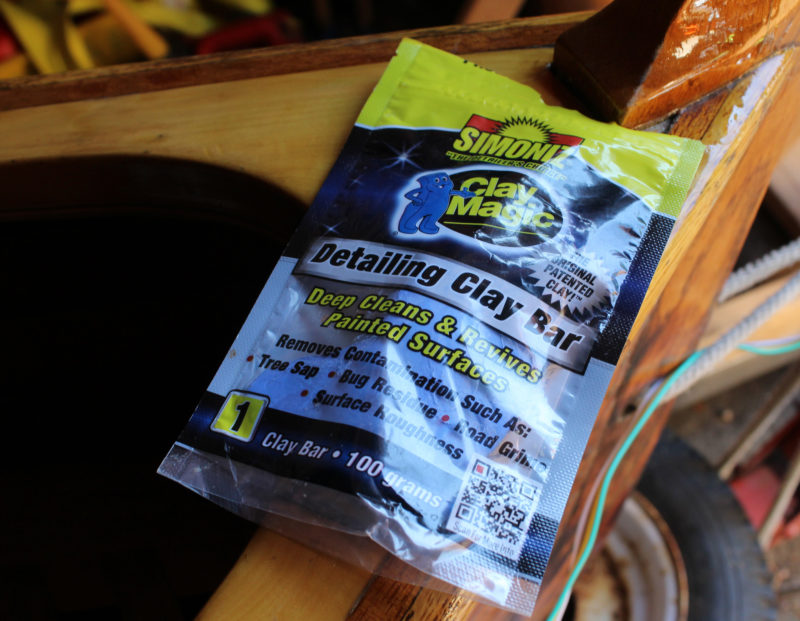
SBMClay bars are available at auto parts stores. They come in different grades (this blue bar is a #1/Fine) and sizes (at 100 grams, this is one of the smallest). It cost around $12 and comes in a resealable pouch to keep it from accumulating grit.
Tim Murfitt of Norwich, U.K., bought a classic car a few years ago, and while researching how to improve the paint work came across the clay bars car detailers use. Later, when he did the paint work and varnish on his Savo 650 in the same dusty shop he built the boat in, he was disappointed with the flaws to the finish and thought he would give the clay bar a go. It only took him 30 minutes to do the whole boat inside and out, and he was amazed at the transformation. It left both the paint and varnish feeling silky smooth.
 SBM
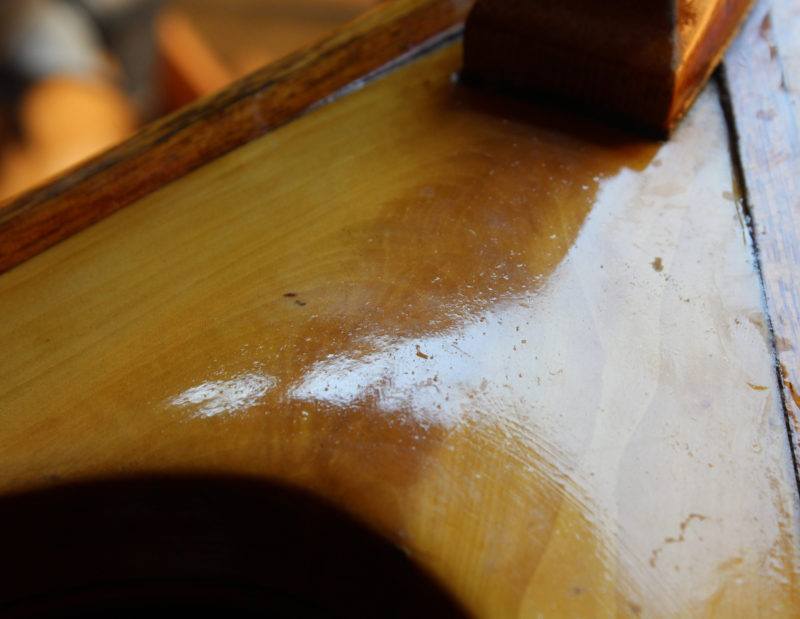
SBMThis apple-crook breasthook is a lovely piece of wood with a lousy dust-flecked varnish job.
 SBM
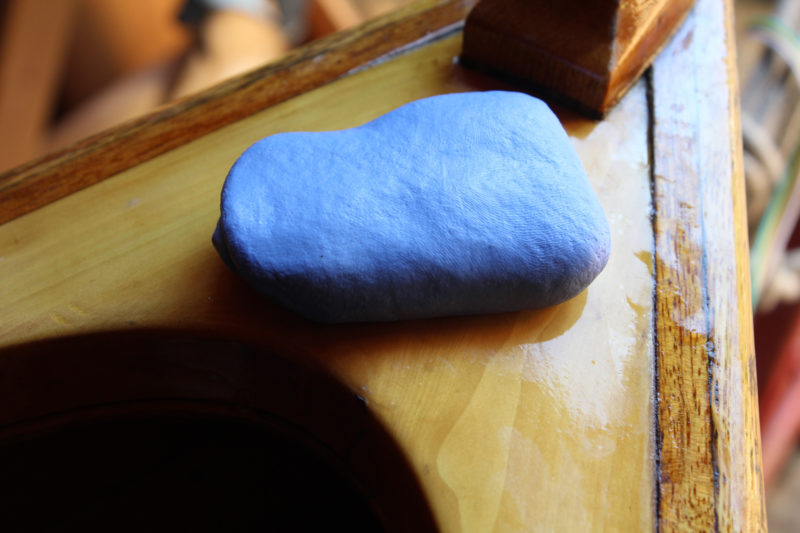
SBMThe clay bar needs a bit of soapy water on the workpiece to lubricate it and keep it from dragging. The bar is quite malleable and will contour itself around the workpiece.
 SBM
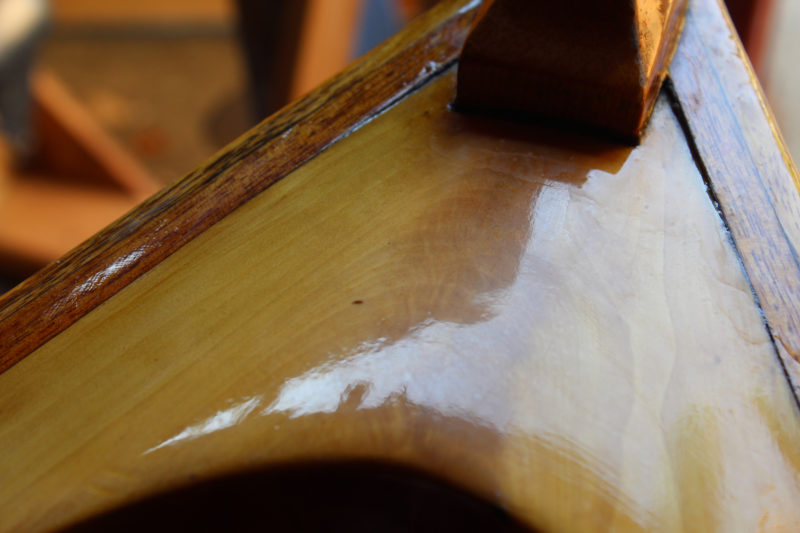
SBMAfter a quick rubbing with the bar, the varnish is smooth and glossy.
Editor Chris Cunningham bought a bar of detailing clay and unexpectedly got a chance to try it out sooner than he expected. He’d made a new bathroom cabinet with nice Douglas-fir, varnished it, and accidentally dropped the mirror frame while it was drying. It picked up a lot of dust so he let it dry a couple of days and just took the clay bar to it. A quick rub with the bar and some soapy water took off the imperfections and didn’t dull the shine.
Varnishing oars
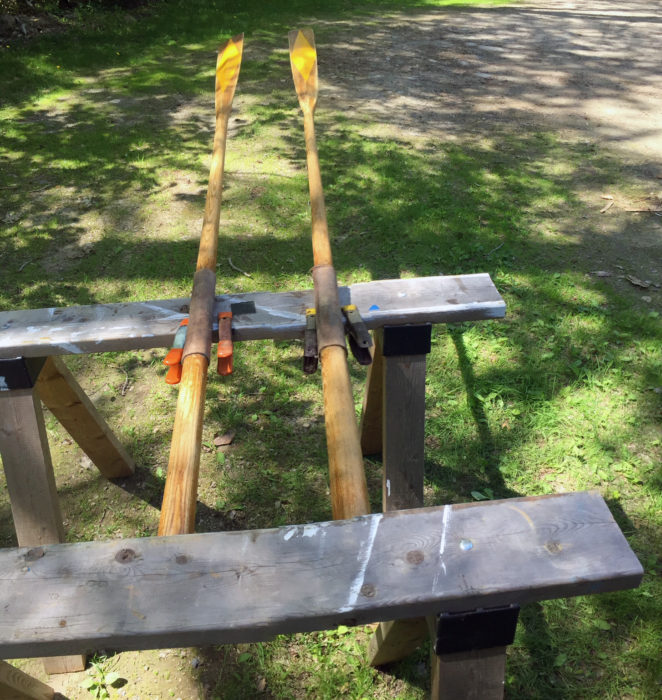 Ben Fuller
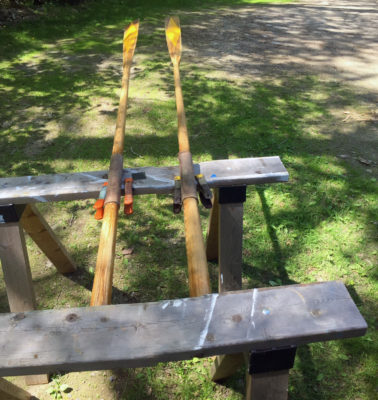
A pair of sawhorses make contact with only the handles and the leathers, leaving the rest of the oars free for varnishing.
If you find oars unruly subjects for varnishing, you can get them to behave themselves, as Ben Fuller of Cushing, Maine, does by cantilevering them on a pair of sawhorses. With the leathers resting on one, and the handles tucked under the other—weighted if necessary—nothing is in contact with the areas you’ll varnish. Spring clamps either side of the leathers keep the looms from rolling while you’re varnishing one side and allow you to turn the oar over to brush the other.
Rope cinches
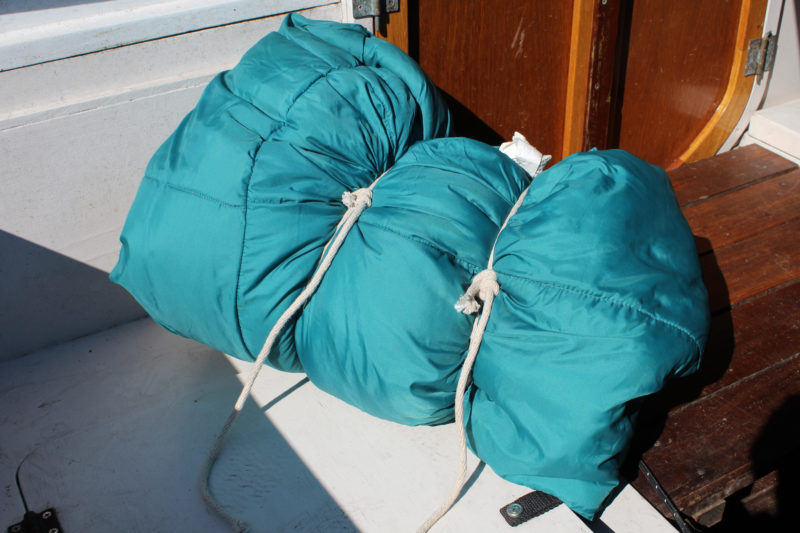 Christopher Cunningham
With a rope cinch, you can wrap the line around something like a sleeping bag, tie the rolling hitch, and then put the squeeze on. That’s easier than compressing something and trying to tie a knot at the same time. And unlike a bungee cord, the rope cinch has an unlimited range of adjustment.
Our editor occasionally uses a piece of rope as a belt, but it’s hard to get and keep it sufficiently tight while he ties a reef knot or a shoelace bow. A rolling hitch (Ashley Book of Knots, #1734, page 298) makes a belt that he can tie, cinch up, and have it stay tight. With repeated use the sliding knot will get tighter, so it’s best to start the next day retying the belt. Smaller versions of the rolling-hitch belt can take the place of straps and buckles for cinching sleeping bags or bundling spars and sails.
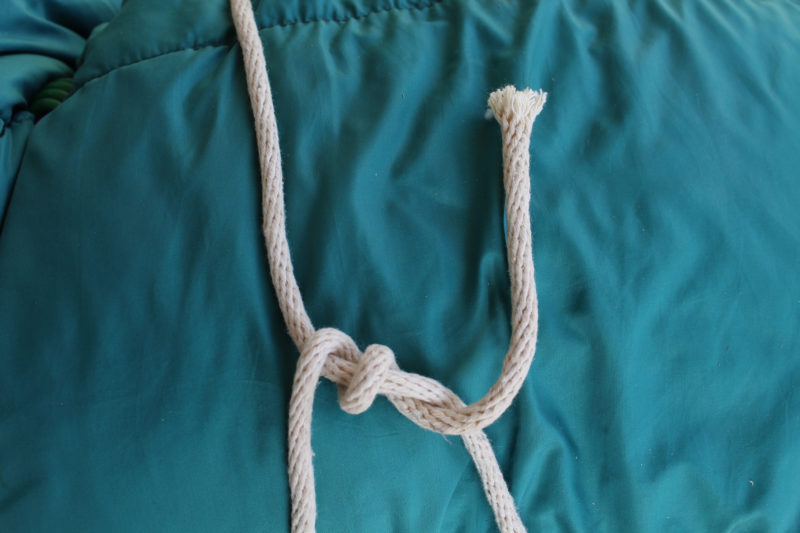 Christopher Cunningham
Start by taking two full turns around the standing part of the line. The standing part’s end is at the bottom; the cinch’s loop side is at the top.
 Christopher Cunningham
The working end then crosses over itself for another wrap, tucked under itself. The rolling hitch is like the more common clove hitch with an extra wrap.
 Christopher Cunningham
Tightened, the rolling hitch creates friction and when the cinch is tightened, the hitch puts a kink in the standing part, locking it in place.
Slotted Foredeck
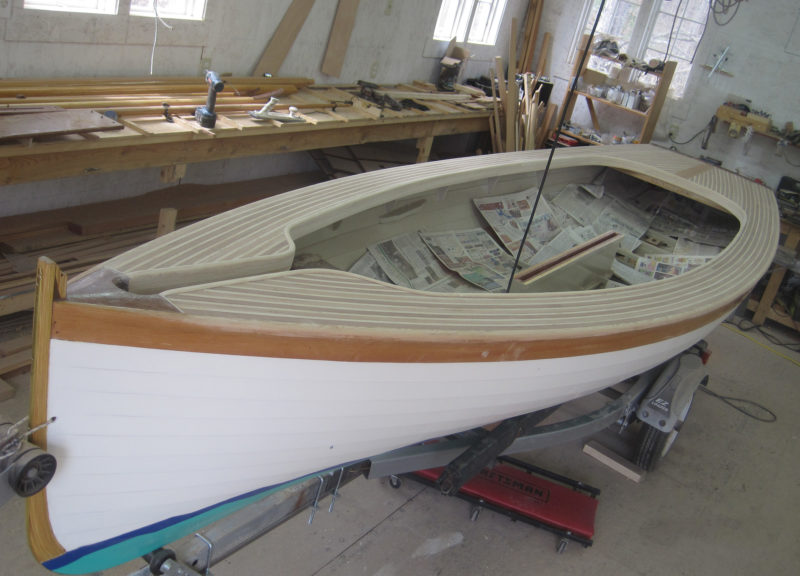 Patrick MacQueen
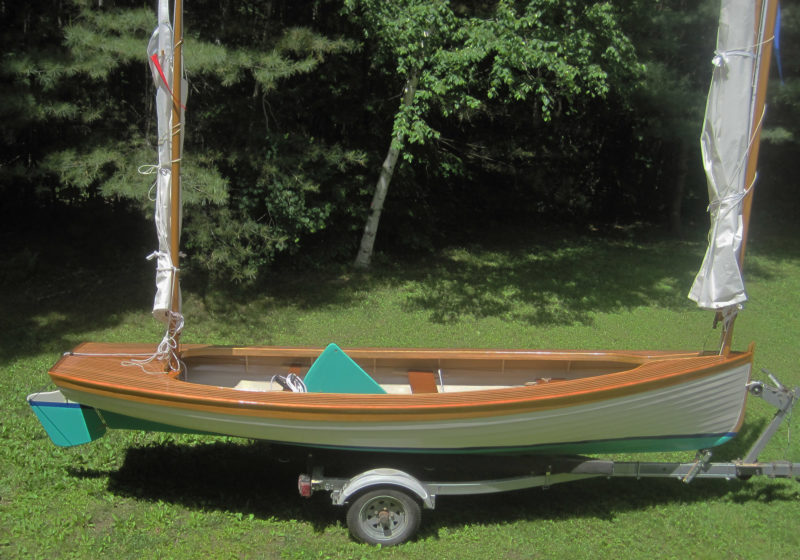
The slotted foredeck makes it easy to step the mast and raise it. For trailering, the spars all fit inside the boat by tucking one end under the aft deck and slipping the other down through the slot.
Patrick MacQueen of Hancock, New Hampshire, set out to build a Herreshoff Coquina and decided that wider decks for sitting and hiking out while sailing would be an advantage. The deck required another modification. Ordinarily the mainmast partner is set right into the breasthook and the narrow decks taper up to its corners. It didn’t seem to Patrick that the taper would be an elegant resolution for the wider side decks.
 Patrick MacQueen
Patrick MacQueen’s slotted foredeck and modification of the Herreshoff arrangement for the decks maintained the boat’s original functions and gave it a different but fitting appearance.
A foredeck would look better, but would make stepping the mainmast far more difficult. Patrick struck upon making a narrow slot running up to the partner at the rear of the breasthook; it would allow for easy stepping and unstepping. The Coquina’s decks had to look pretty, of course, so he glued 1/8”-thick strips of mahogany and ash on the 3/16” marine ply decks and finished them off with ash coamings.
Farrier’s Rasp
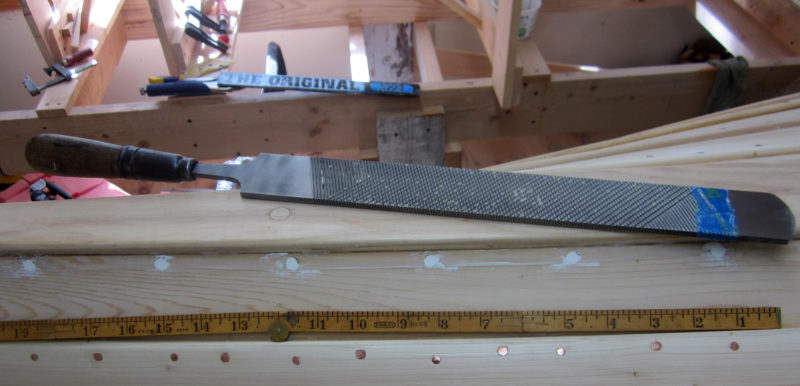
The farrier’s rasp that Tom DeVries, of New Braintree, Massachusetts, bought at an antique shop for $3 was designed for trimming and shaping horse hooves, but it also works beautifully for tapering ash stems, bringing oak bungs down flush, and rounding spruce oar handles. It’s quick, quiet, and relatively safe.
 Tom Devries
One side of the farrier rasp is a double-cut file for finer work.
One face has rasp teeth and the other is a double-cut file. The rasp side cuts even hardwood quickly down to size, and with a flip he can use the file face to finish smoothly. Tom has used his 17” farrier’s rasp to shape beveled stems on the double-enders he has built.
 Tom DeVries
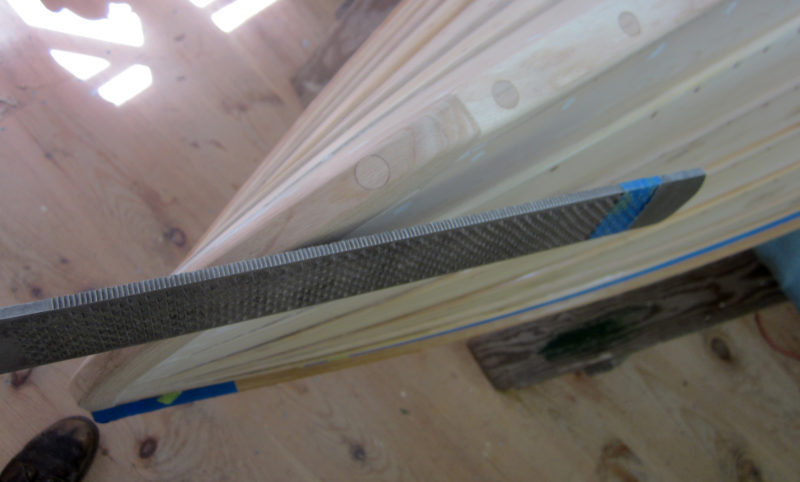
While the file side is working a hardwood stem, the teeth of the rasp side are visible.
The long, keen, shearing cut of this big file makes fairing bungs flush faster, with little of the risk of tearout created by chiseling bungs. He tapes the end of the rasp to prevent inadvertent scratches as the bung comes flush.
 Tom DeVries
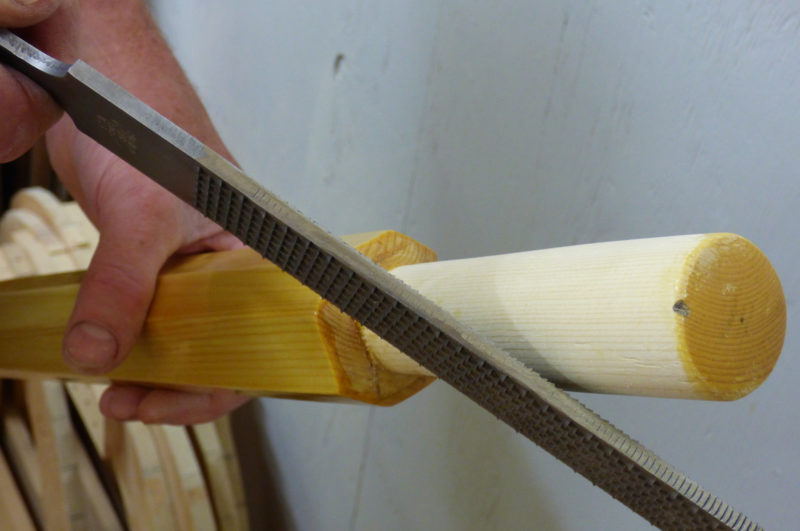
Tom took a grinder to this edge to remove the teeth, making a safe edge that could ride on an adjoining surface, like the shoulder of he loom, without cutting into it.
Both edges of a farrier’s rasp have teeth; Tom used a grinder to make a “safe edge” he can use to work tight to an adjacent surface. It comes in handy for working and oar’s grip up to the shoulder of the loom. Farrier’s rasps are readily available from many online sources.![]()
You can share your tips and tricks of the trade with other Small Boats Monthly readers by sending us an email.



Having grown up with both horses and wooden boats, farrier’s rasps have always had a place on my bench. To that end, farrier’s rasps come in many different grades: they’re all quite aggressive, but a “Black Master,” for instance, will give a smoother finish cut than a “Red Tang,” which is in turn better for fast stock removal (I use both). Good feed stores and farrier’s supply stores will have a selection of brands and models to choose from. And don’t buy the cheap ones; like any other tool, you generally get what you pay for.
Thanks, clay bar and farrier’s rasp. I will try both!
I learned a version of the rolling hitch in the Boy Scouts. It was called the Taut-Line hitch, and we used it to tighten the guy lines on tents, etc. Looks like pretty much the same knot.
Yes, the Taut-line hitch is the same thing. I should have mentioned that as it is pretty well known, but I didn’t find it by that name in Ashley’s. I had thought the taut-line hitch worked because the line looped through the eye of a tent stake, and the tension on the standing part of the line helped the knot function, but the rolling hitch creates friction and will hold itself in place even if the standing part of the line is slack.
We have used farrier rasps for years to clean up gobs of epoxy. They save a lot of 36-grit paper.
The sliding hitch reminds reminds me of the mountaineer’s Prusik knot (a loop of line used to ascend a rope), which I have used while boating.
The Prusik knot is another kind of friction hitch. It is usually tied with a closed loop of cord wrapped around a climbing rope and has two or even three turns on both the high side and the low side.
Another deceptively simple rasp is made by taking a large-grit sanding belt, say 36 or 40 and cut a piece of plank to fit inside it. Round the ends to avoid wear on the plank’s sharp edges. It should be tight enough fit that you have to get it on by drifting it – a bit at one end, a bit at the other, etc. You can remove large amounts of wood very quickly especially if you lean on it with both hands, yet by relaxing the pressure and taking care make some quite subtle curves. Very good for getting from octagonal or even square section timber posts, to circular section for masts, oars etc. Finish off with a finer grit belt either turned inside out and slipped over the oar, or cut open and used as a strong sanding strap (is there such thing?).
For wrapping things like sleeping bags, I prefer the last part of what I think is typically referred to as a Trucker’s Knot. For the sleeping bag, tie one end of your rope/line in a loop. I do this by doubling the end back 3″-4″ and tying the two in a paired Figure-8 because I’m fond of that knot, but a granny works fine too. Then wrap the bag with the rope, and poke final end thru the grannied loop. (Here is where we get to the last half of the Trucker’s Knot, search for it for better details). Pull rope tight like the grannied loop is a pulley. A bit of a pinch on the grannied loop will hold the drawn end tight amazingly well. Then take the drawn end and wrap it around the length of rope headed into the ‘pulley,’ double the end back to a loop and push that loop thru the hole made by wrapping the rope around itself, and yank that loop to make a new knot up against the grannied loop. That’ll not only hold amazing amounts of strain and even vibration without loosening, but a light tug on the loose end of the rope releases the entire knot.
Quite a few people know the Trucker’s Knot, but if you don’t, let me tell you this about it. It requires mere seconds to create, and even less time/effort to undo. I’ve strapped down heavy loads to my roof and traveled long distances at high speeds and/or rough roads, and the load won’t wiggle and the knot won’t loosen. Or, with a loop hanging from the ceiling and the other end up from, say, a boat being built, you can use the sleeping bag version above to raise/lower your workpiece to whatever heights easy at the moment. Go ahead and leave it till next weekend: it’ll stay.
My sister (who rides horses) gave me several farrier rasps and these are amazing tools. One side can hog off white oak at an astonishing rate. The other side can give you a finish-ready surface. Can’t recommend them too highly.