Some may think vacuum-bagging is intimidating, but it is an easy, multi-purpose technique that’s within reach of most amateur boatbuilders. While vacuum-bagging an entire hull may be beyond the means and requirements of the home boatbuilder, there are lots of small parts that would benefit from a simple vacuum system.
 photographs by the author
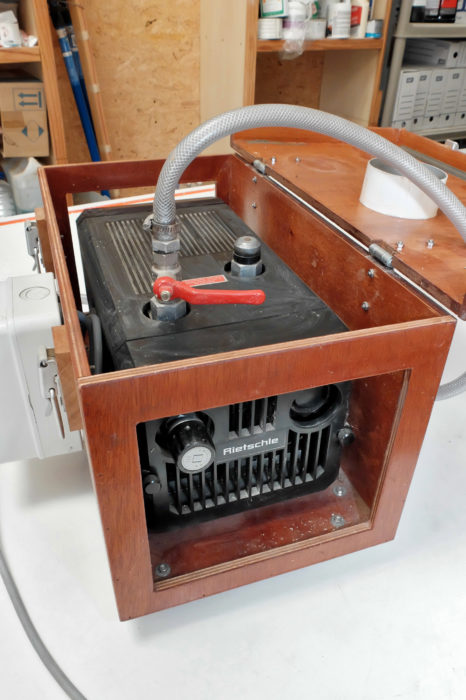
The author’s Rietschle Pico vacuum pump is now 22 years old and has a small capacity of 350 cu ft per hour, but it has been more than adequate for all the jobs he’s needed to do on his 20′ ultralight stitch-and-glue coastal trekker, including its 28′ carbon-fiber mast.
There are different types of suitable vacuum pumps. At the lower end of the scale, a salvaged refrigerator compressor is enough for occasional use. You can find compressors for under $100 on eBay. For more advanced work, rotary-vane pumps are the most popular, with second-hand prices beginning around $225 or less and around $675 new. My pump is an industrial-grade oil-free, graphite-vane pump with a small but sturdy 370-watt motor, designed to run continuously.
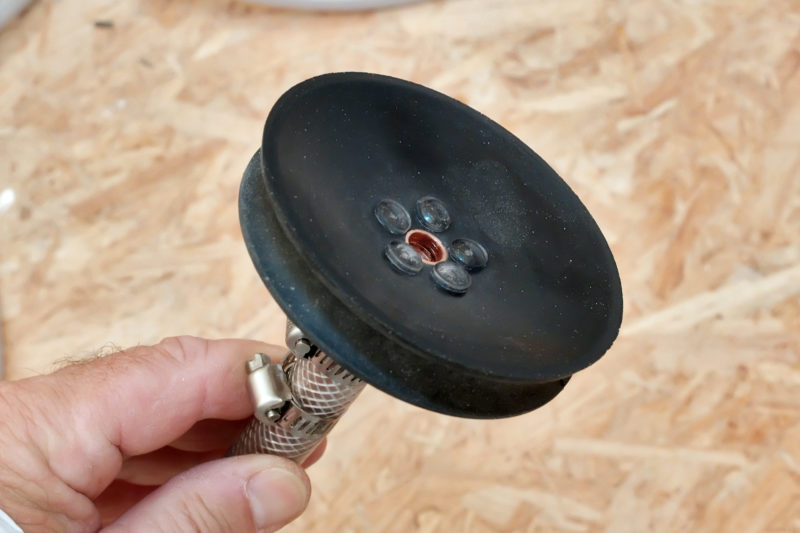
Small self-adhesive pads keep the airway open on this tile setter’s suction cup.
Connecting suction pipe to a vacuum bag can be done several ways. An industrial silicone vacuum cup is the most efficient, especially with a quick vacuum coupling (compressed air connectors cannot be used here because gaskets are designed to cope with internal and not external pressure), but it’s difficult to find and expensive. I use a $7 homemade alternative: The rubber disk of a tile setter’s suction cup with a piece of copper tubing, two hose clamps and some adhesive furniture pads. It works perfectly well, without any leaks. The pads prevent the cup from closing the hole in the bag.
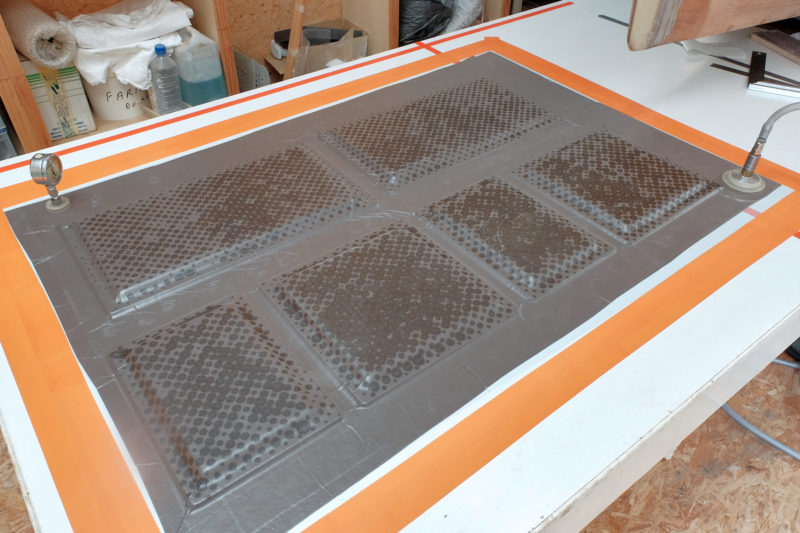
With the relatively flat locker doors, vacuum bagging has the advantage of working several of them at the same time. Excess epoxy seeping through the holes in the perforated release film is darkening the bleeder fabric. At right is the suction cup fitting at the end of the hose to the vacuum pump and the pressure gauge is at the left.
A vacuum gauge is very useful for maintaining pressure. For a laminating process, average pressure should be around 0.3/0.4 bar (4.3/5.8 PSI), and for gluing, pressure may be higher, up to 0.6/0.7 bar (8.7/10.1 PSI). A gauge helps also to check chamber airtight integrity. When pump suction stops, the gauge needle must fall very slowly. If it falls quickly, chase the leaks!
To make my 1/4″ plywood cockpit locker doors rigid so they’d seal properly against their gaskets, and to keep them light, I stiffened them with a layer of a 1/2” PVC foam and two layers of ‘glass.
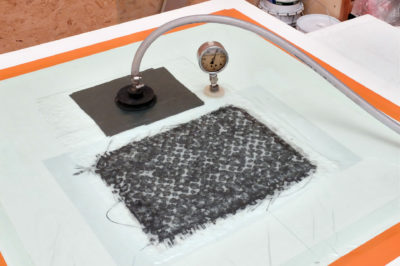
You need a mold (here a chipboard panel with a laminate surface) and a soft bag (warehouse polyethylene sheet or best, special composite nylon bagging film). A temporary gasket of double-sided adhesive tape or special automotive sealant tape between bag and mold makes the chamber airtight. Inside the bag, the first layer put on the laminate is a peel ply which helps soak excess resin and makes the surface ready for bonding or finishing.
The second layer is made of a perforated release film (obtained from a supplier of composite materials or bread packaging) to keep resin from sticking on the last top layer, the bleeder layer. Colored in brown here, it is used to suck air out of the chamber. It can be a non-woven geotextile fabric used in landscaping or a special polyester breather/bleeder film. If vacuum bagging is used to glue foam to wood or wood to wood for example, peel ply is not necessary because foam and wood have a ready-to-work surface.
When the workpieces are coated or saturated with epoxy as appropriate and all layers have been stacked, the bag is closed and a tiny hole is poked in a corner for the vacuum cup. Since my locker doors are less than 1” thick, I used double-sided adhesive tape to seal the perimeter of the bag, which is flexible enough to absorb deformation and leave the edges flat and easy to tape. The adhesive tape is easy to peel off without damaging the bag so it can be reused several times. I usually add adhesive tape—the orange tape here— all around to make a safe double seal.
The pump is started and begins to draw air out after bag is fully sealed. Air is sucked through reinforced water tubing; it resists a vacuum well and doesn’t collapse. Depending on resin formulation and workshop temperature, the pump runs for a few hours, the time for the epoxy to partially cure. Excess epoxy goes through the perforated film and slowly soaks the bleeder layer, which will later be discarded. The resulting ‘glass/wood composite is very uniform void-free laminate with just the right resin-to-fiberglass ratio, and extremely rigid and light.
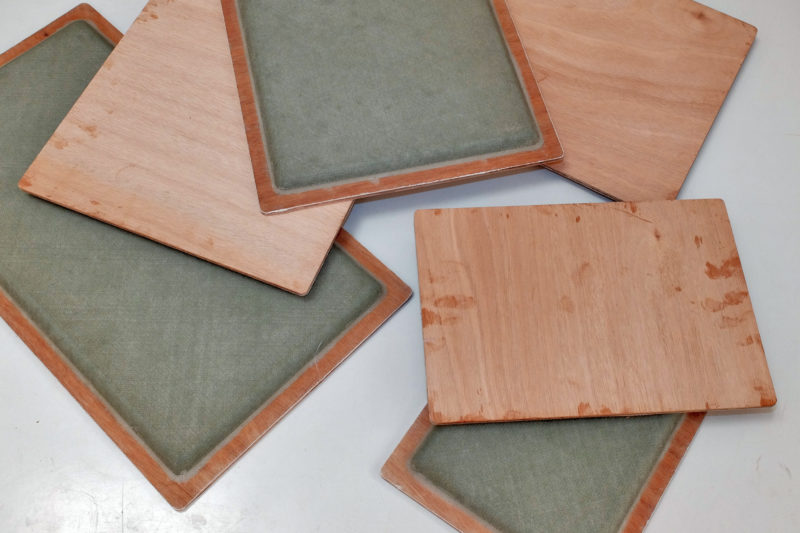
The combination of plywood, foam and fiberglass made the locker doors flat and quite stiff without making them heavy.
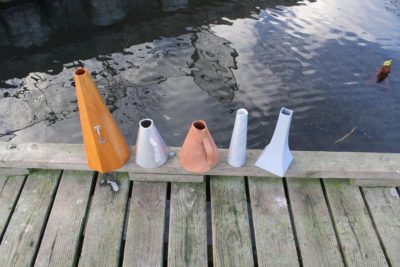
For my outboard motor bracket, I cut a simple mold from a polystyrene block with rounded corners to create strong curves, then covered it with an ordinary adhesive PVC white film. A plasticine fillet at the base under the adhesive film helped to make a large rounded corner.
Draped over the mold, the bag had a lot of wrinkles and the edge sealing must be done with a sealant tape (found in automotive or composite supply stores) which closes the gaps created by the folds. It was quite tacky and impossible to peel the bag off without tearing it into pieces.
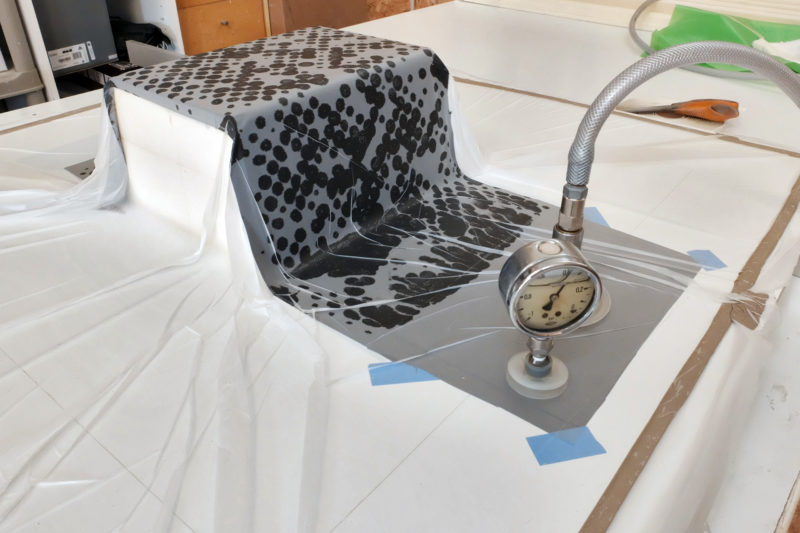
The outboard motor bracket had more depth than the locker door, requiring sealant tape to seal the pleats created in the vacuum bag.
To make the bracket as light and vibration-resistant as possible, I used a mix of ‘glass for shock and vibration resistance and carbon for rigidity.
Once the outside part of the outboard bracket was cured, I trimmed it to size and installed a plywood core held in place by second lamination done with the whole assembly inside of a small vacuum bag.
Inside laminates are done along with the outside layer, using it as a mold. The bag was made of two polyethylene sheets, sealant taped. The suction cup had to be placed outside of the laminate, because the vacuum level was a little bit lower under the connector and the cup would have created a bump in the laminate.
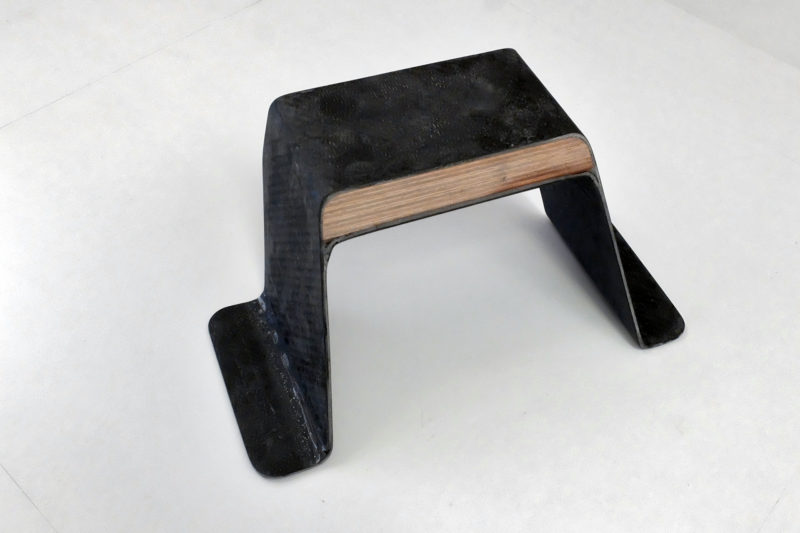
This motor mount will get a coat of paint before being put into service supporting an electric outboard.
The finished bracket weighs only 30 ounces. I used scraps of fabric and plywood, so the total cost was under $17, and that was mainly for the bag, sealant, and finishing.
Vacuum-bagging is a bit like steam bending—a bit mysterious before you try it; simple and effective afterwards.![]()
Jean-Yves Poirier is a dedicated amateur boatbuilder with 19 boats to his credit and is a freelance writer working in France. He is a frequent contributor to WoodenBoat’s sister publication, Professional Boatbuilder.
You can share your tricks of the trade with other Small Boats Monthly readers by sending us an email.


Join The Conversation
We welcome your comments about this article. To include a photo with your remarks, click Choose File below the Comment box.