I built a Bolger Bobcat back in 1998 and, while I very much enjoyed building and sailing it, three years later I sold it as I turned my attention to another boat. I soon came to regret selling my catboat. This past winter, with space in the shop and no project to tide me over, I decided to build another one and purchased Harold “Dynamite” Payson’s Build the Instant Catboat. This 42-page building manual notes that the 12′ Bobcat was designed in 1985 by Philip Bolger for H.H. Payson and Co. as a hard-chined, tack-and-tape plywood adaptation of the carvel-planked Beetle Cat designed in 1921 by John Beetle of New Bedford, Massachusetts.
In his book, Payson lays out the project in great detail and with frequent humor. He includes multiple detailed drawings, photos, and step-by-step instructions, including rigging the sail and what type of line to use for the halyards.
The hull panels and permanent bulkheads are drawn out on sheets of 1/4″ plywood; all of the parts can be made with 10 sheets, including the deck panels, centerboard trunk, centerboard, and bulkheads. Payson recommends marine-grade or AC exterior plywood; I went with fir AC. The plywood I got was excellent quality, and I had no problems bending the panels into the shapes they needed to be. The manual provides measured drawings for the hull planking—there is no need for spiling the shapes from the building form—and goes into great detail on drawing and cutting out the pieces.
 John Leyde
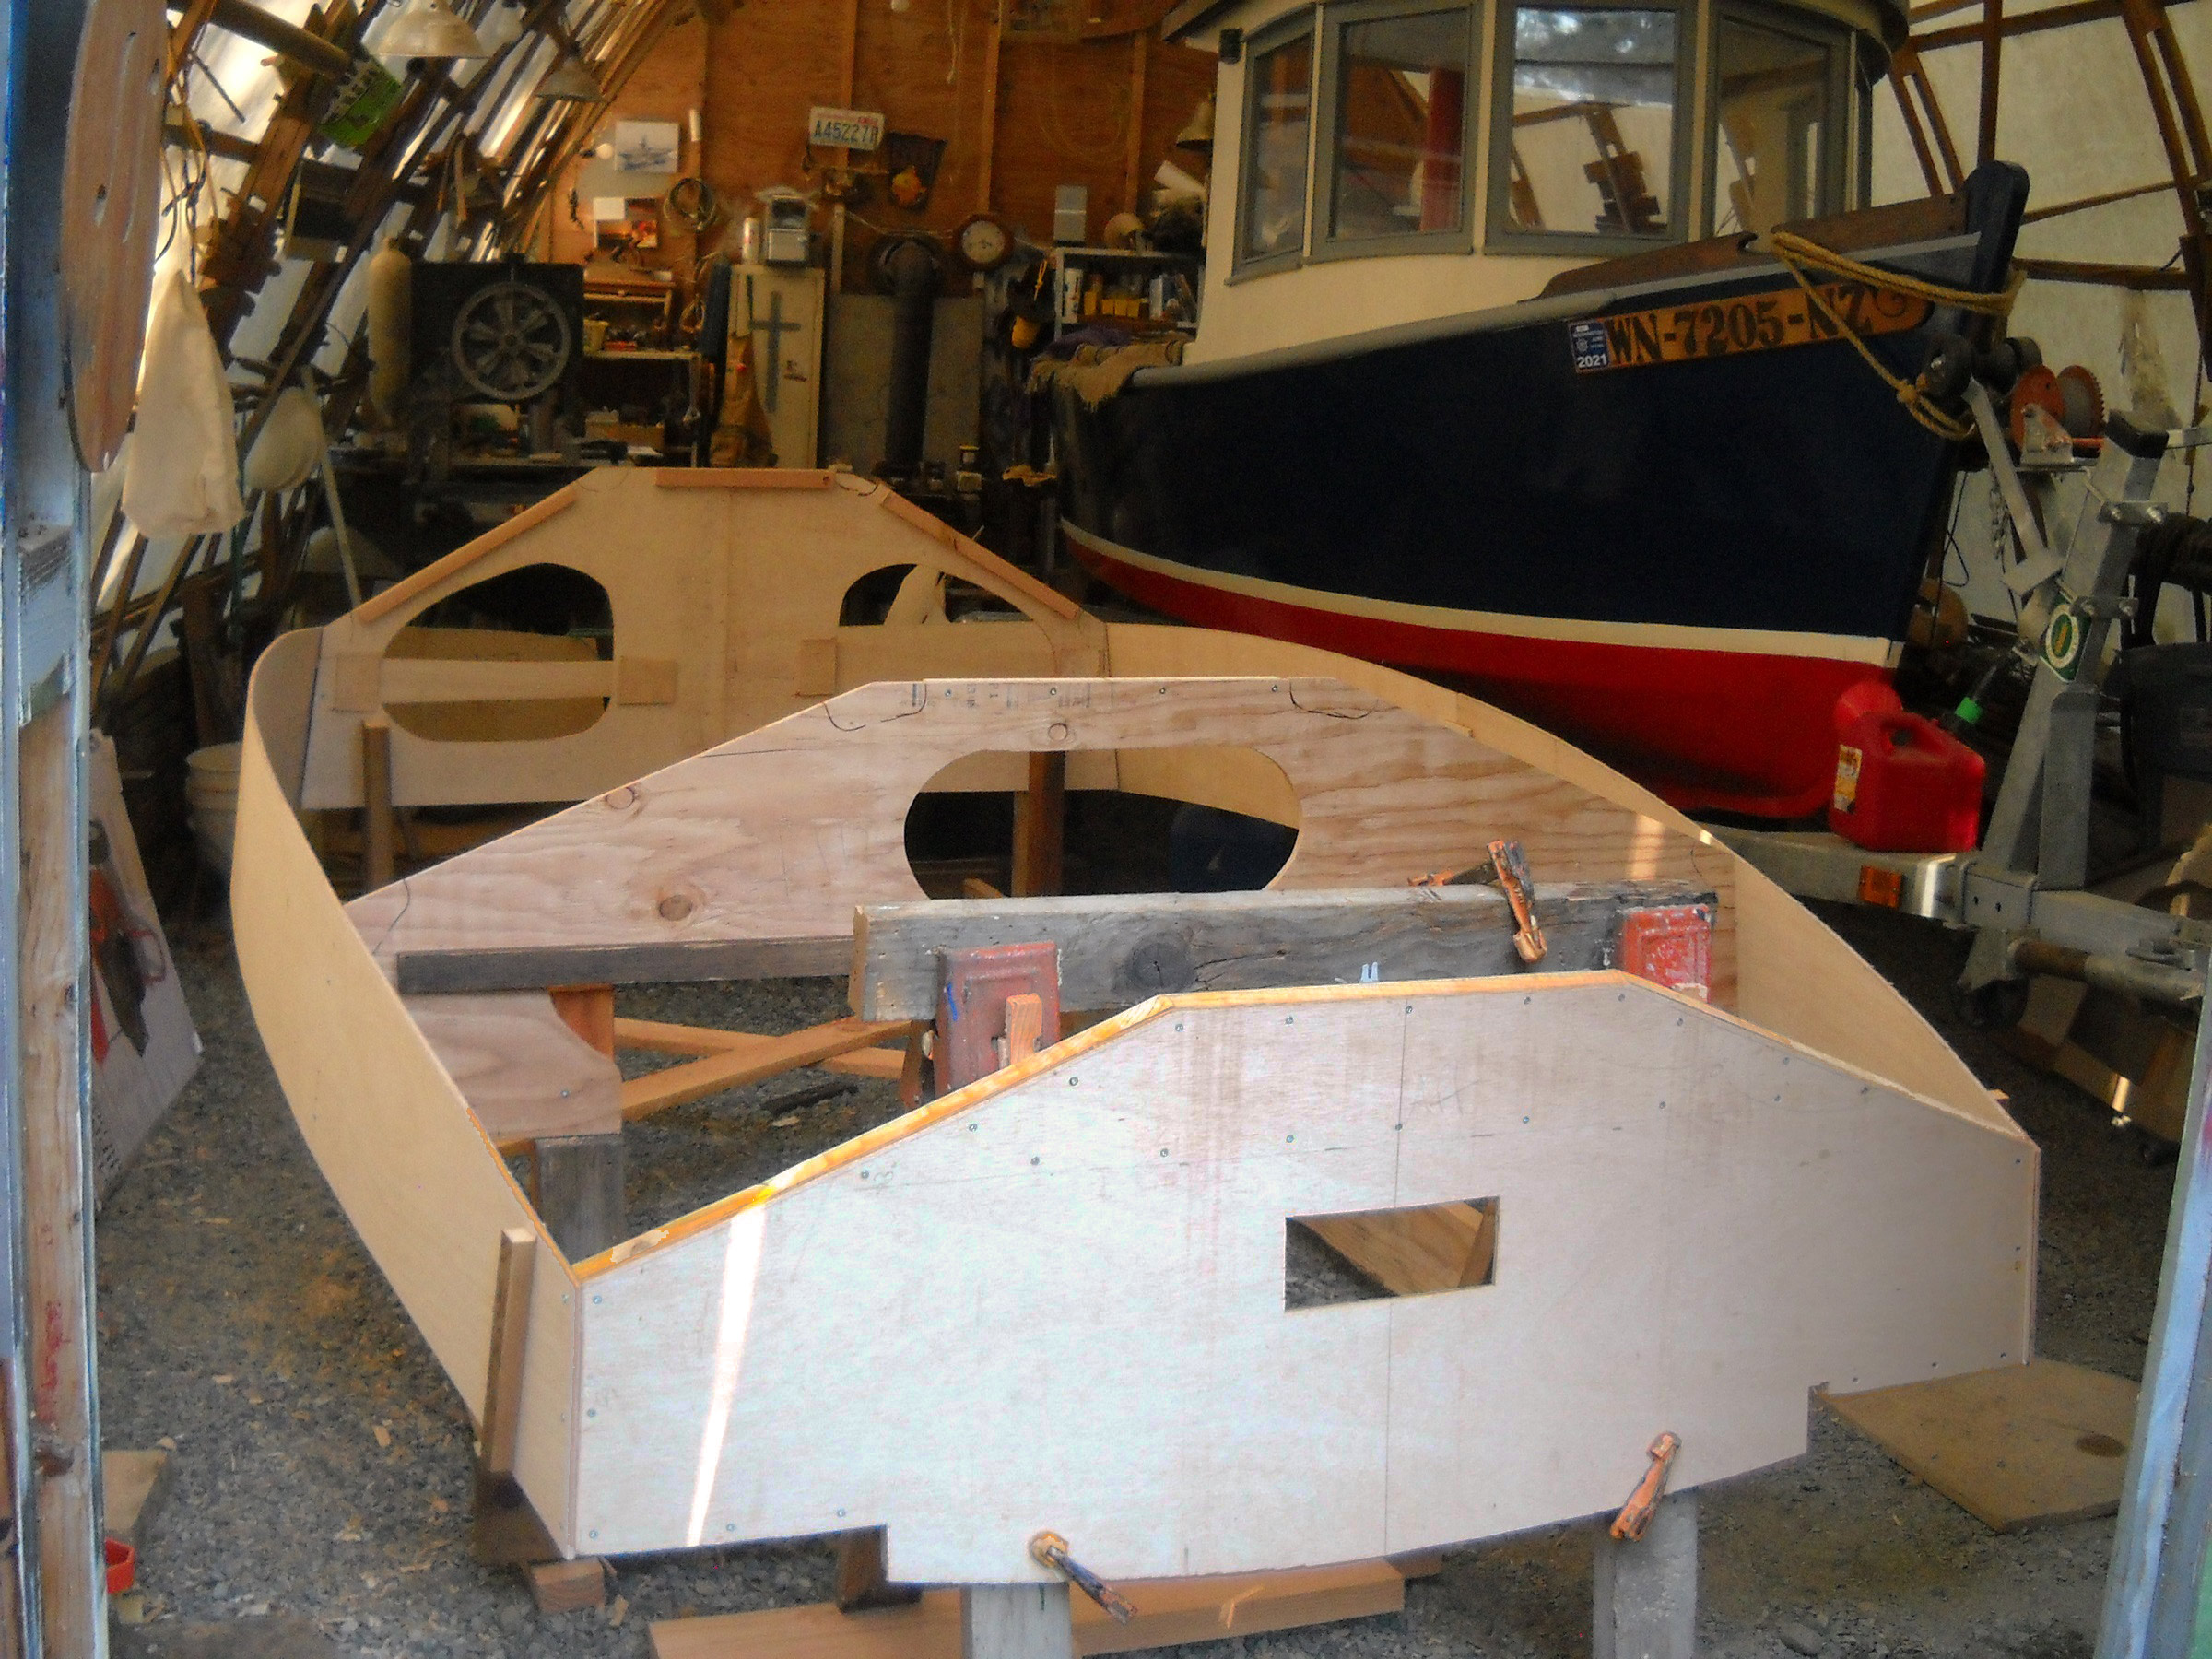
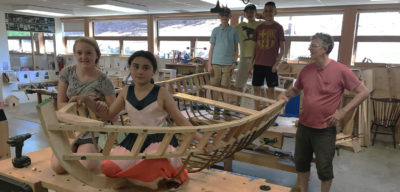
Assembly of the hull begins with the sides bent around the transom and two of the five bulkheads.
There are five bulkheads—designated A, B, C, D, and E from bow to stern—that serve as molds but are also permanent fixtures in the boat. Instead of setting all five up on a ladder frame, just bulkheads B and E and the transom are set up and around them the side panels bent by drawing their forward ends together. The rest of the bulkheads and the stem are then attached inside the side panels without requiring a ladder frame or strongback to support them. The bottom panel follows and is attached to the bulkheads.
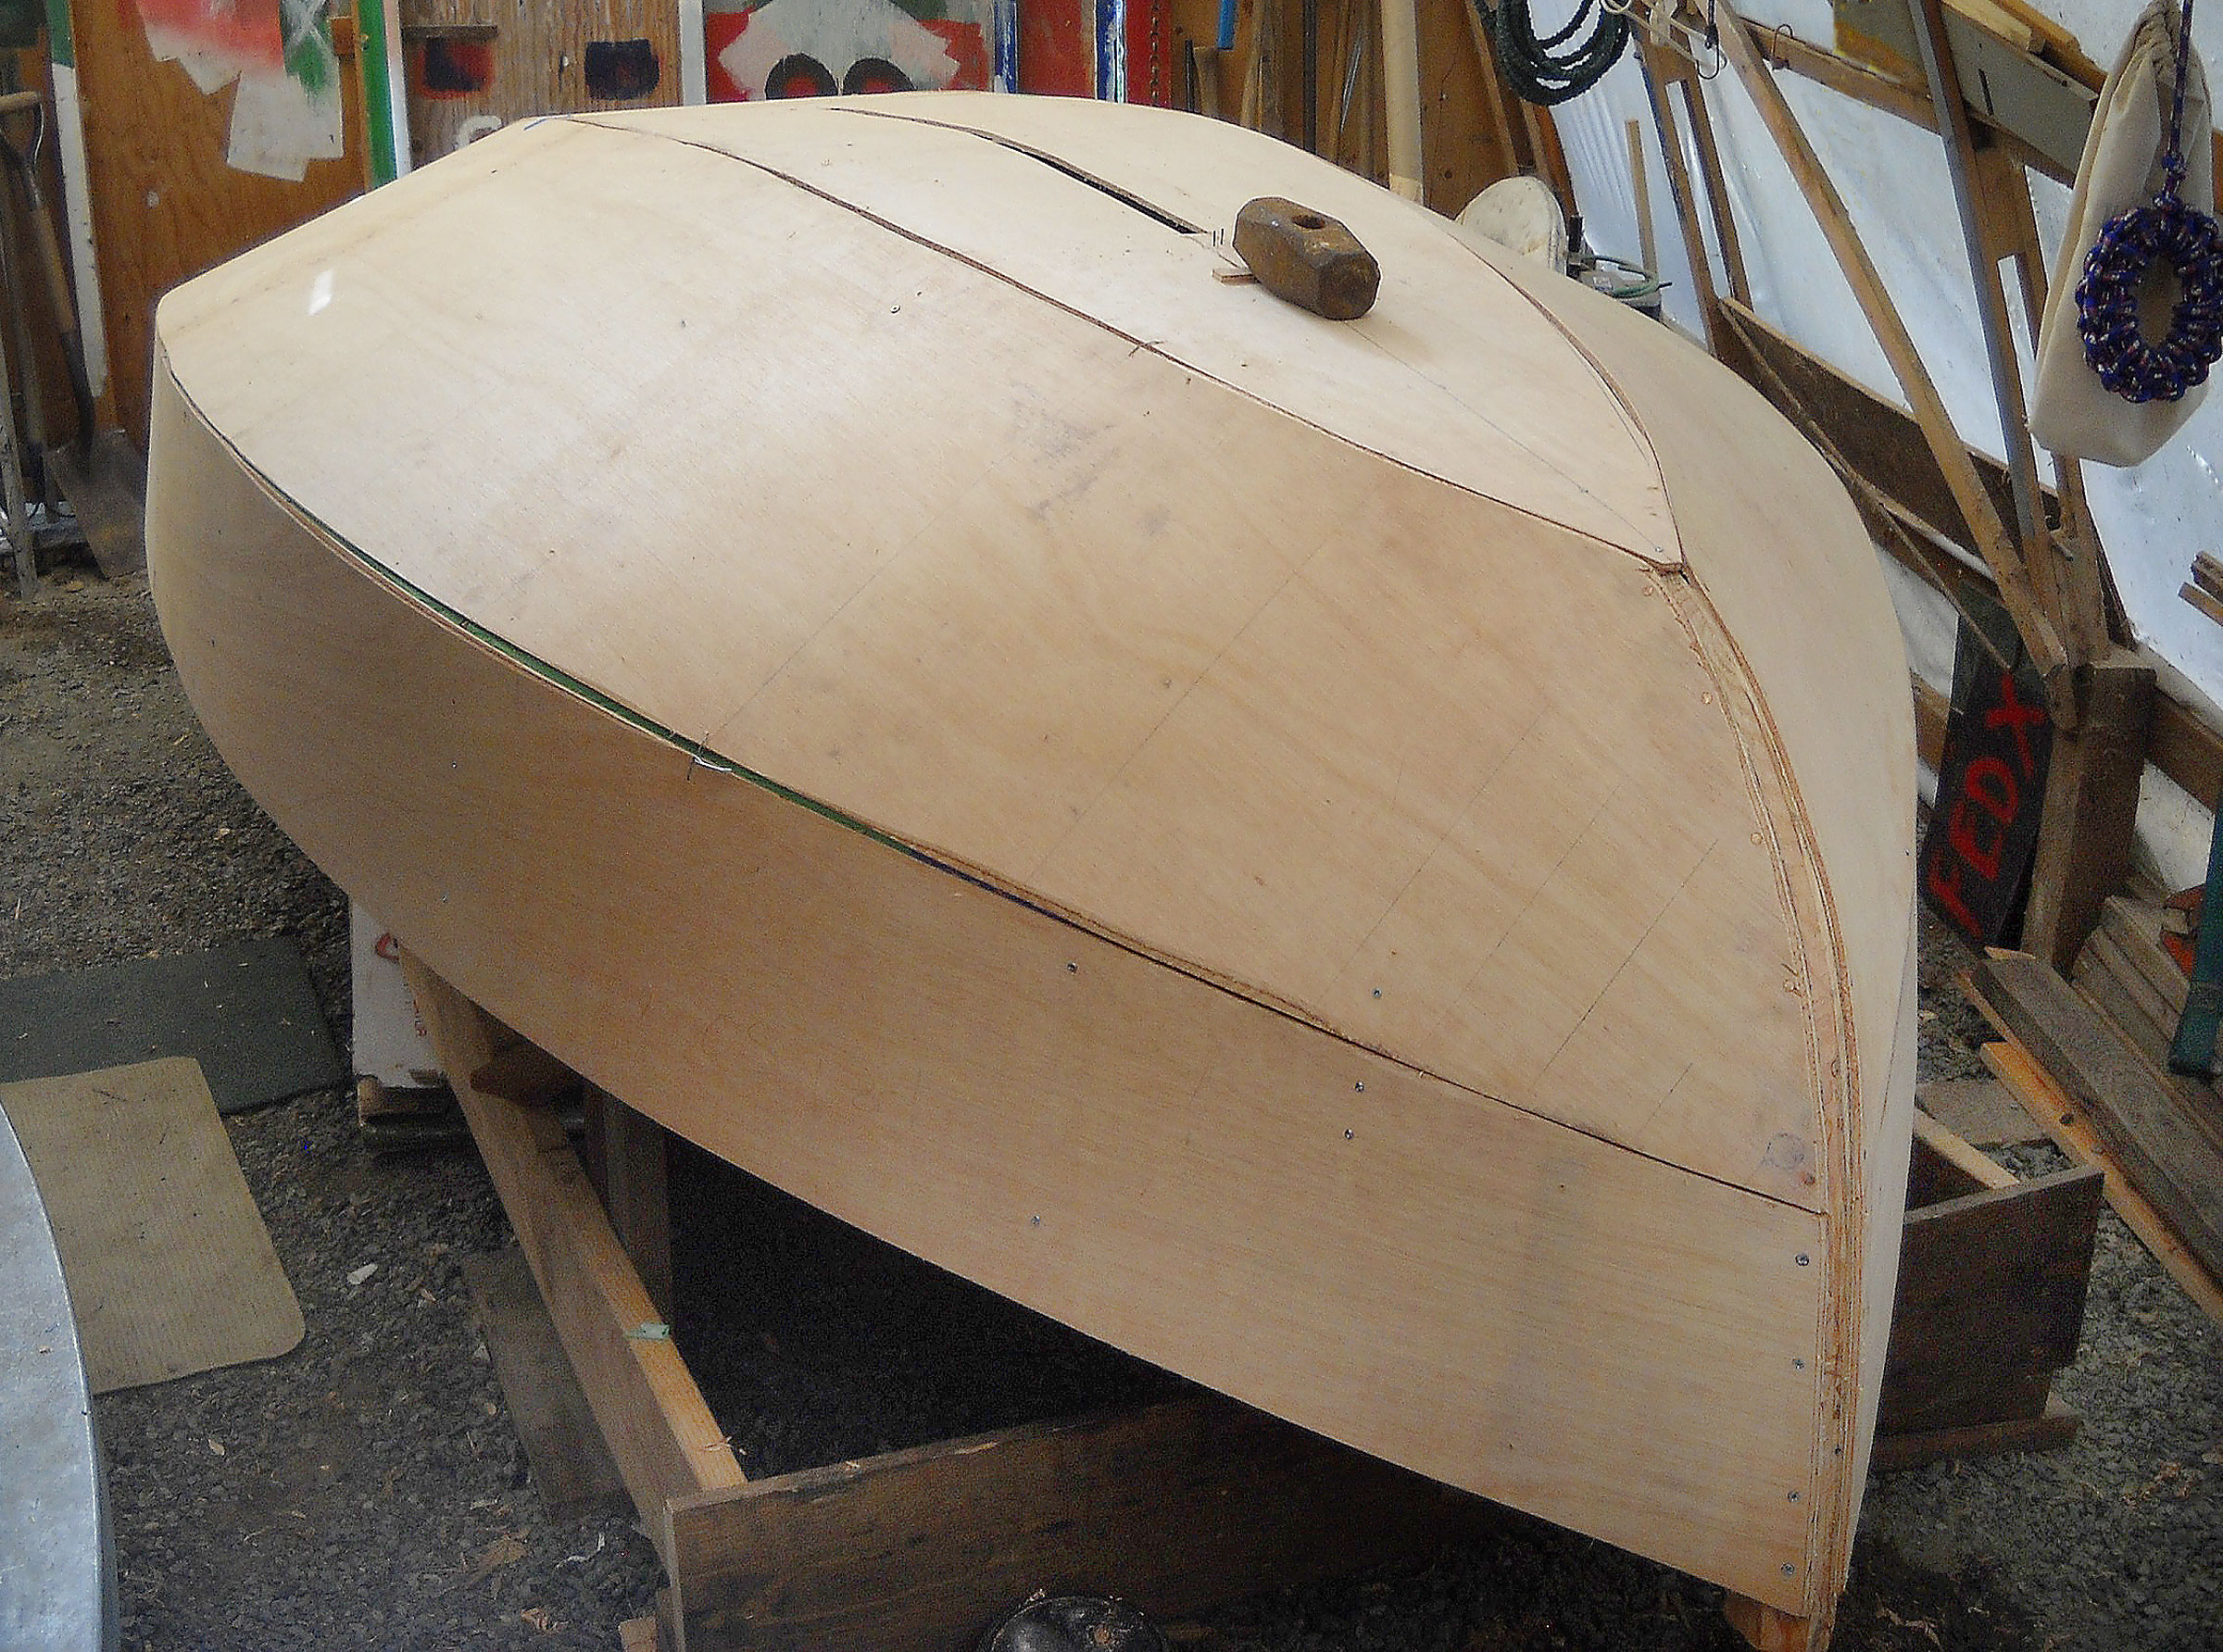
Attaching the bilge panels is the most difficult part of the hull construction due to their size, the compound curve at bulkhead A, and the twist to attach them to the stem. I applied towels soaked in hot water to the forward ends and was able to coax them into place without too much effort. Payson gives a good description and photos of the process and how he overcame the minor difficulty he had.
 John Leyde
The forward ends on the bilge panels get “tortured” into a compound curve by gentle arcs on the edges of the forwardmost frame.
As the bottom and bilge panels are added, they are temporarily screwed to temporary cleats on the bulkheads, until the seams are secured with fiberglass tape and epoxy, first on the outside and then on the inside after the hull is turned over and the inside joints are taped. This completes the basic hull.
The solid stock the plans require for the rubrails, deckbeams, skeg, and floorboards is 1×2 or 1×4 lumber. I was able to repurpose a pine 2×10 and leftover lumber, resawn to the dimensions I needed. I laminated the tiller from two layers of maple.
Payson recommends flotation in the bow and under the decks aft. Before installing the deck, I fit 2″-thick insulation foam between the deckbeams and filled the section between the forward bulkhead and stem with it. The hull’s exterior and deck are covered in fiberglass set in epoxy.
 John Leyde
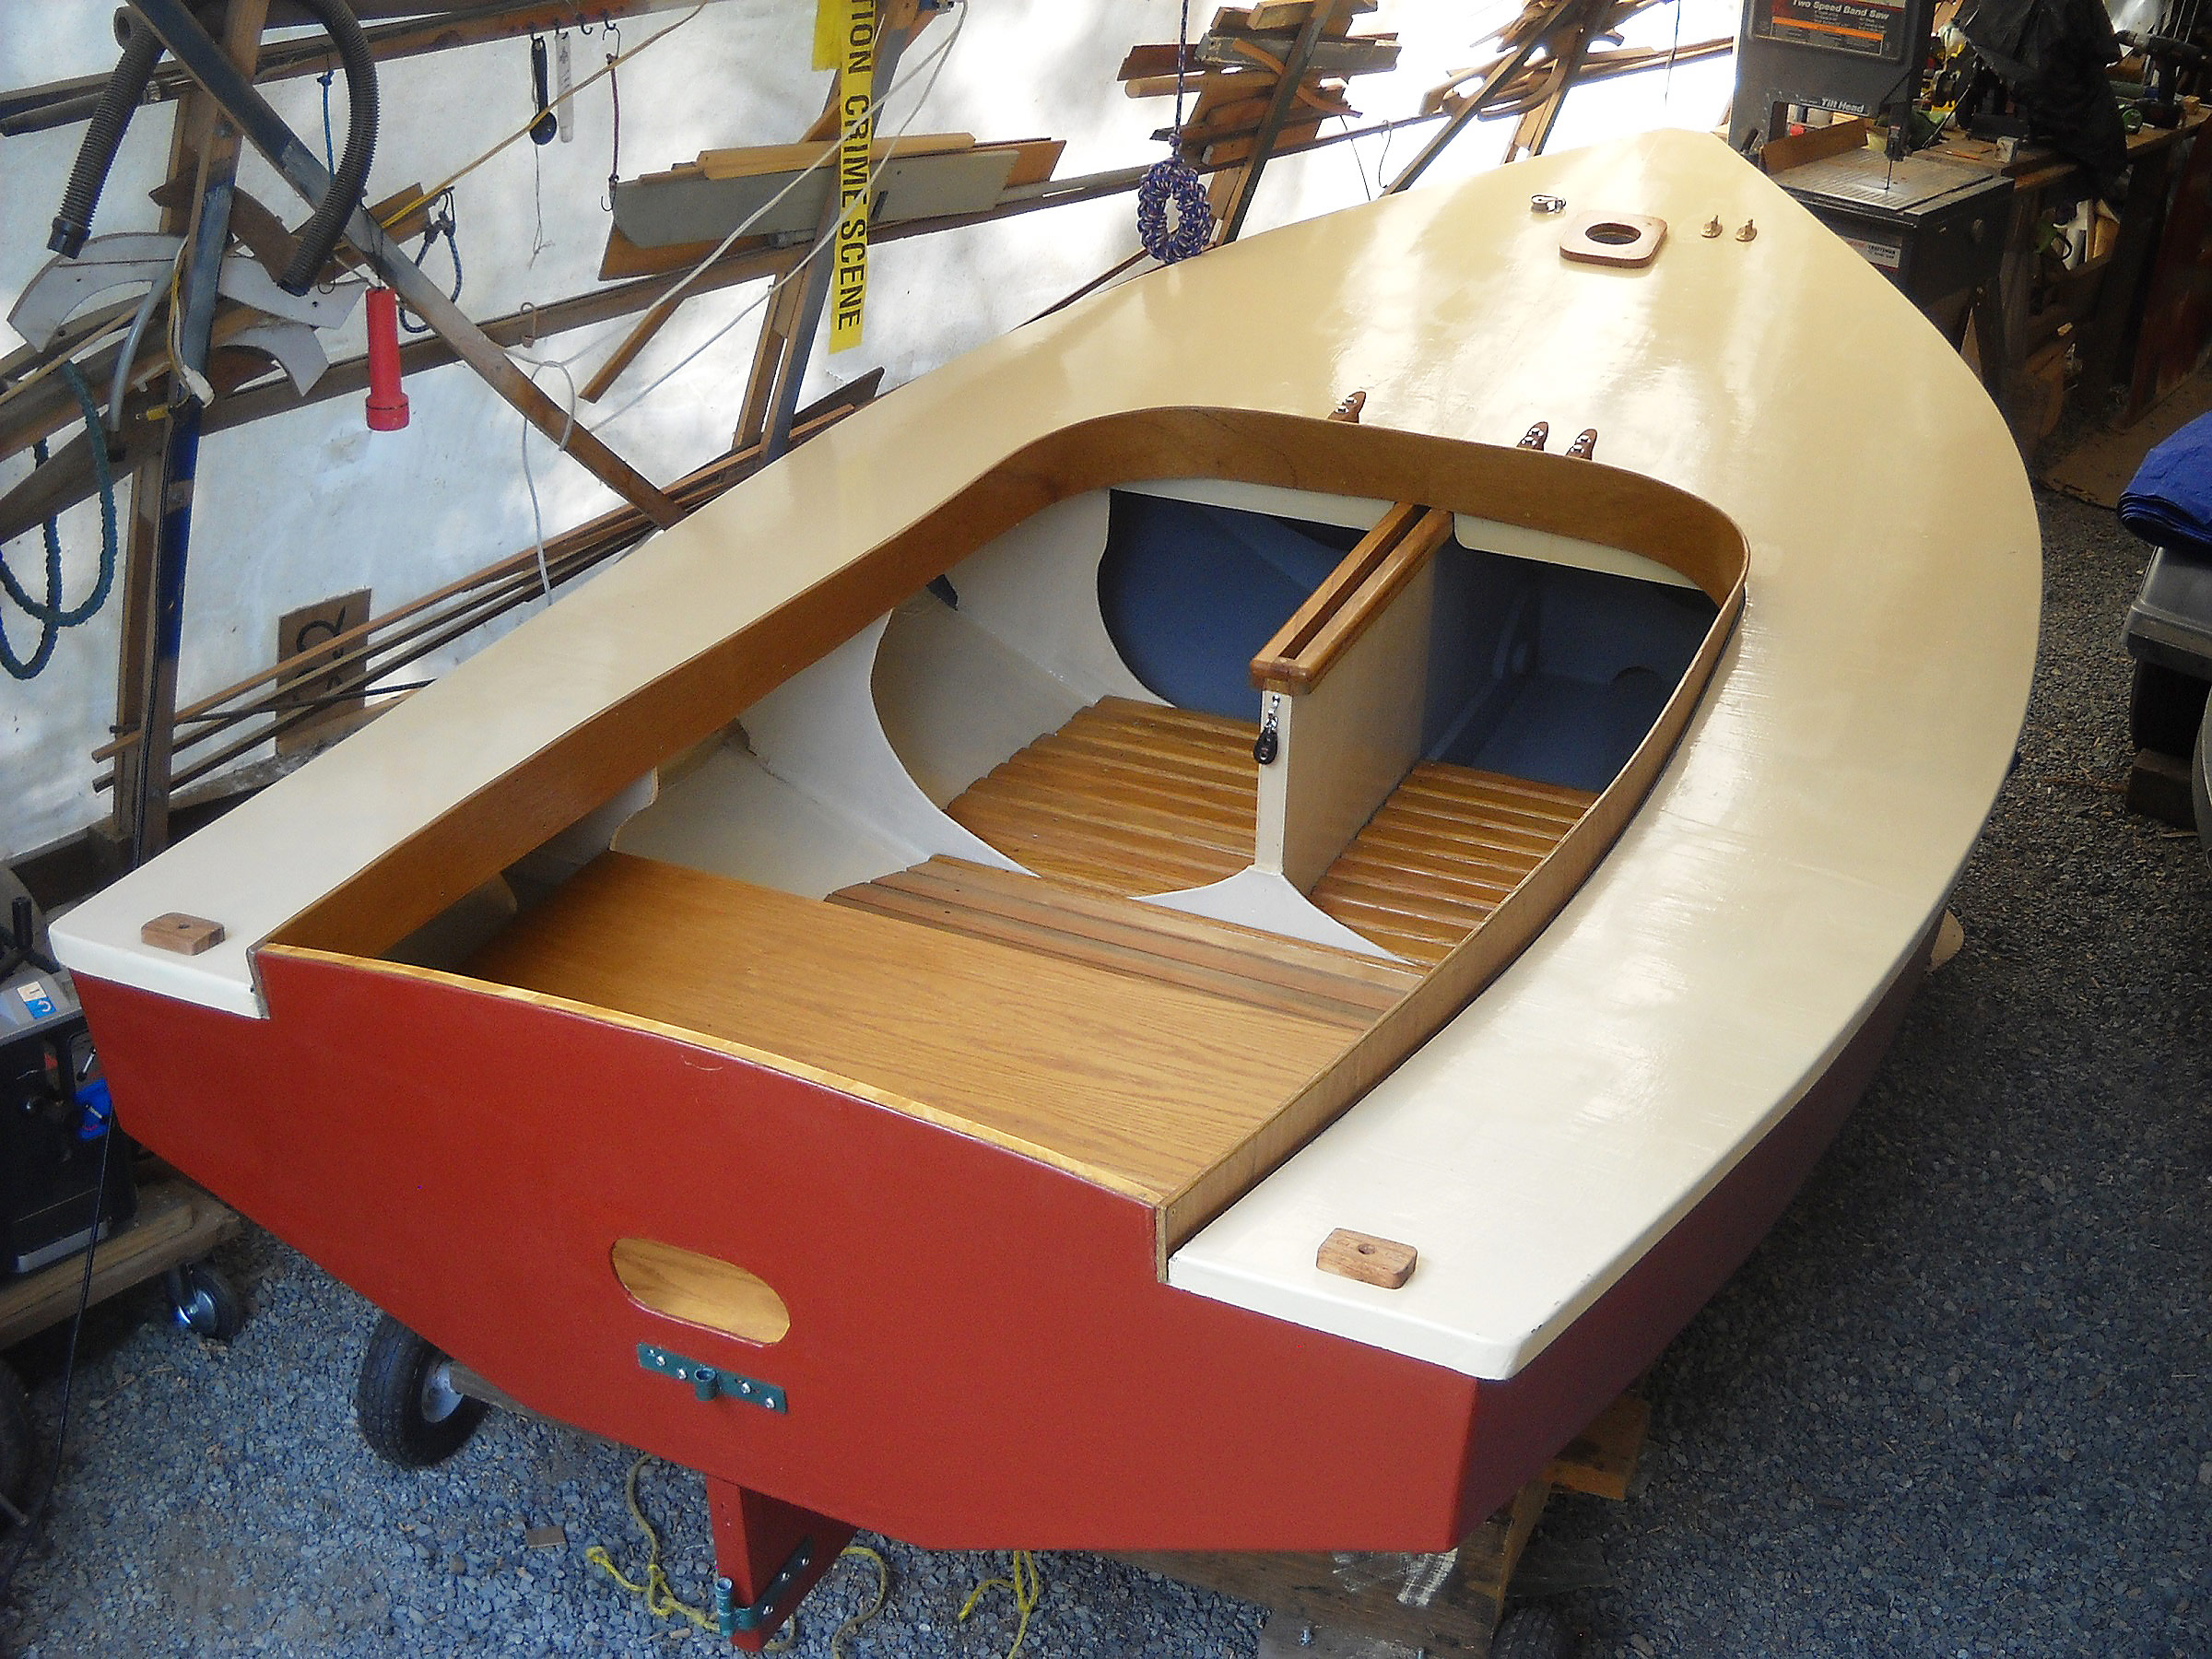
Only the aft half of the centerboard trunk intrudes into the cockpit. The forward half is under the foredeck.
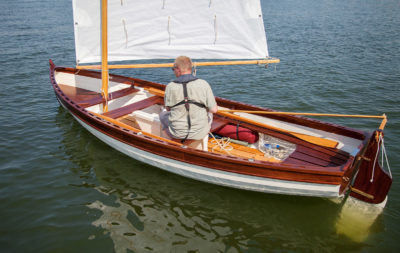
The plans call for a coaming made of 1/2″ plywood, installed in three sections joined with square corners. Bolger said of the coaming: “I haven’t duplicated the curved cockpit coaming of the Beetle Cat. I like the looks of it but it doesn’t seem to suit the style of the plywood boat as well, and there’s no functional advantage. It’s an economy in a shop with a steambox going all the time and a steady supply of fresh-cut oak coming in, but not so in a plywood-and-glue operation.” I thought that Bolger’s coaming looked too boxy, and laminated mine from three layers of 1/8″ mahogany plywood in one continuous piece with rounded corners. It was the only significant modification I made to the design.
The mast is 15′, the boom 13′6″, and the gaff 8′. The mast is built from two 3-1/2″ planks with 1/2″ spacers between them and tapers to 2-1/2″ the top 6′. The centers of the planks have a 1/2″-deep-by-1-1/2″-wide groove cut in them to make the mast hollow and save weight. I made several cuts with a circular saw and chiseled out the waste.
 Norina Leyde
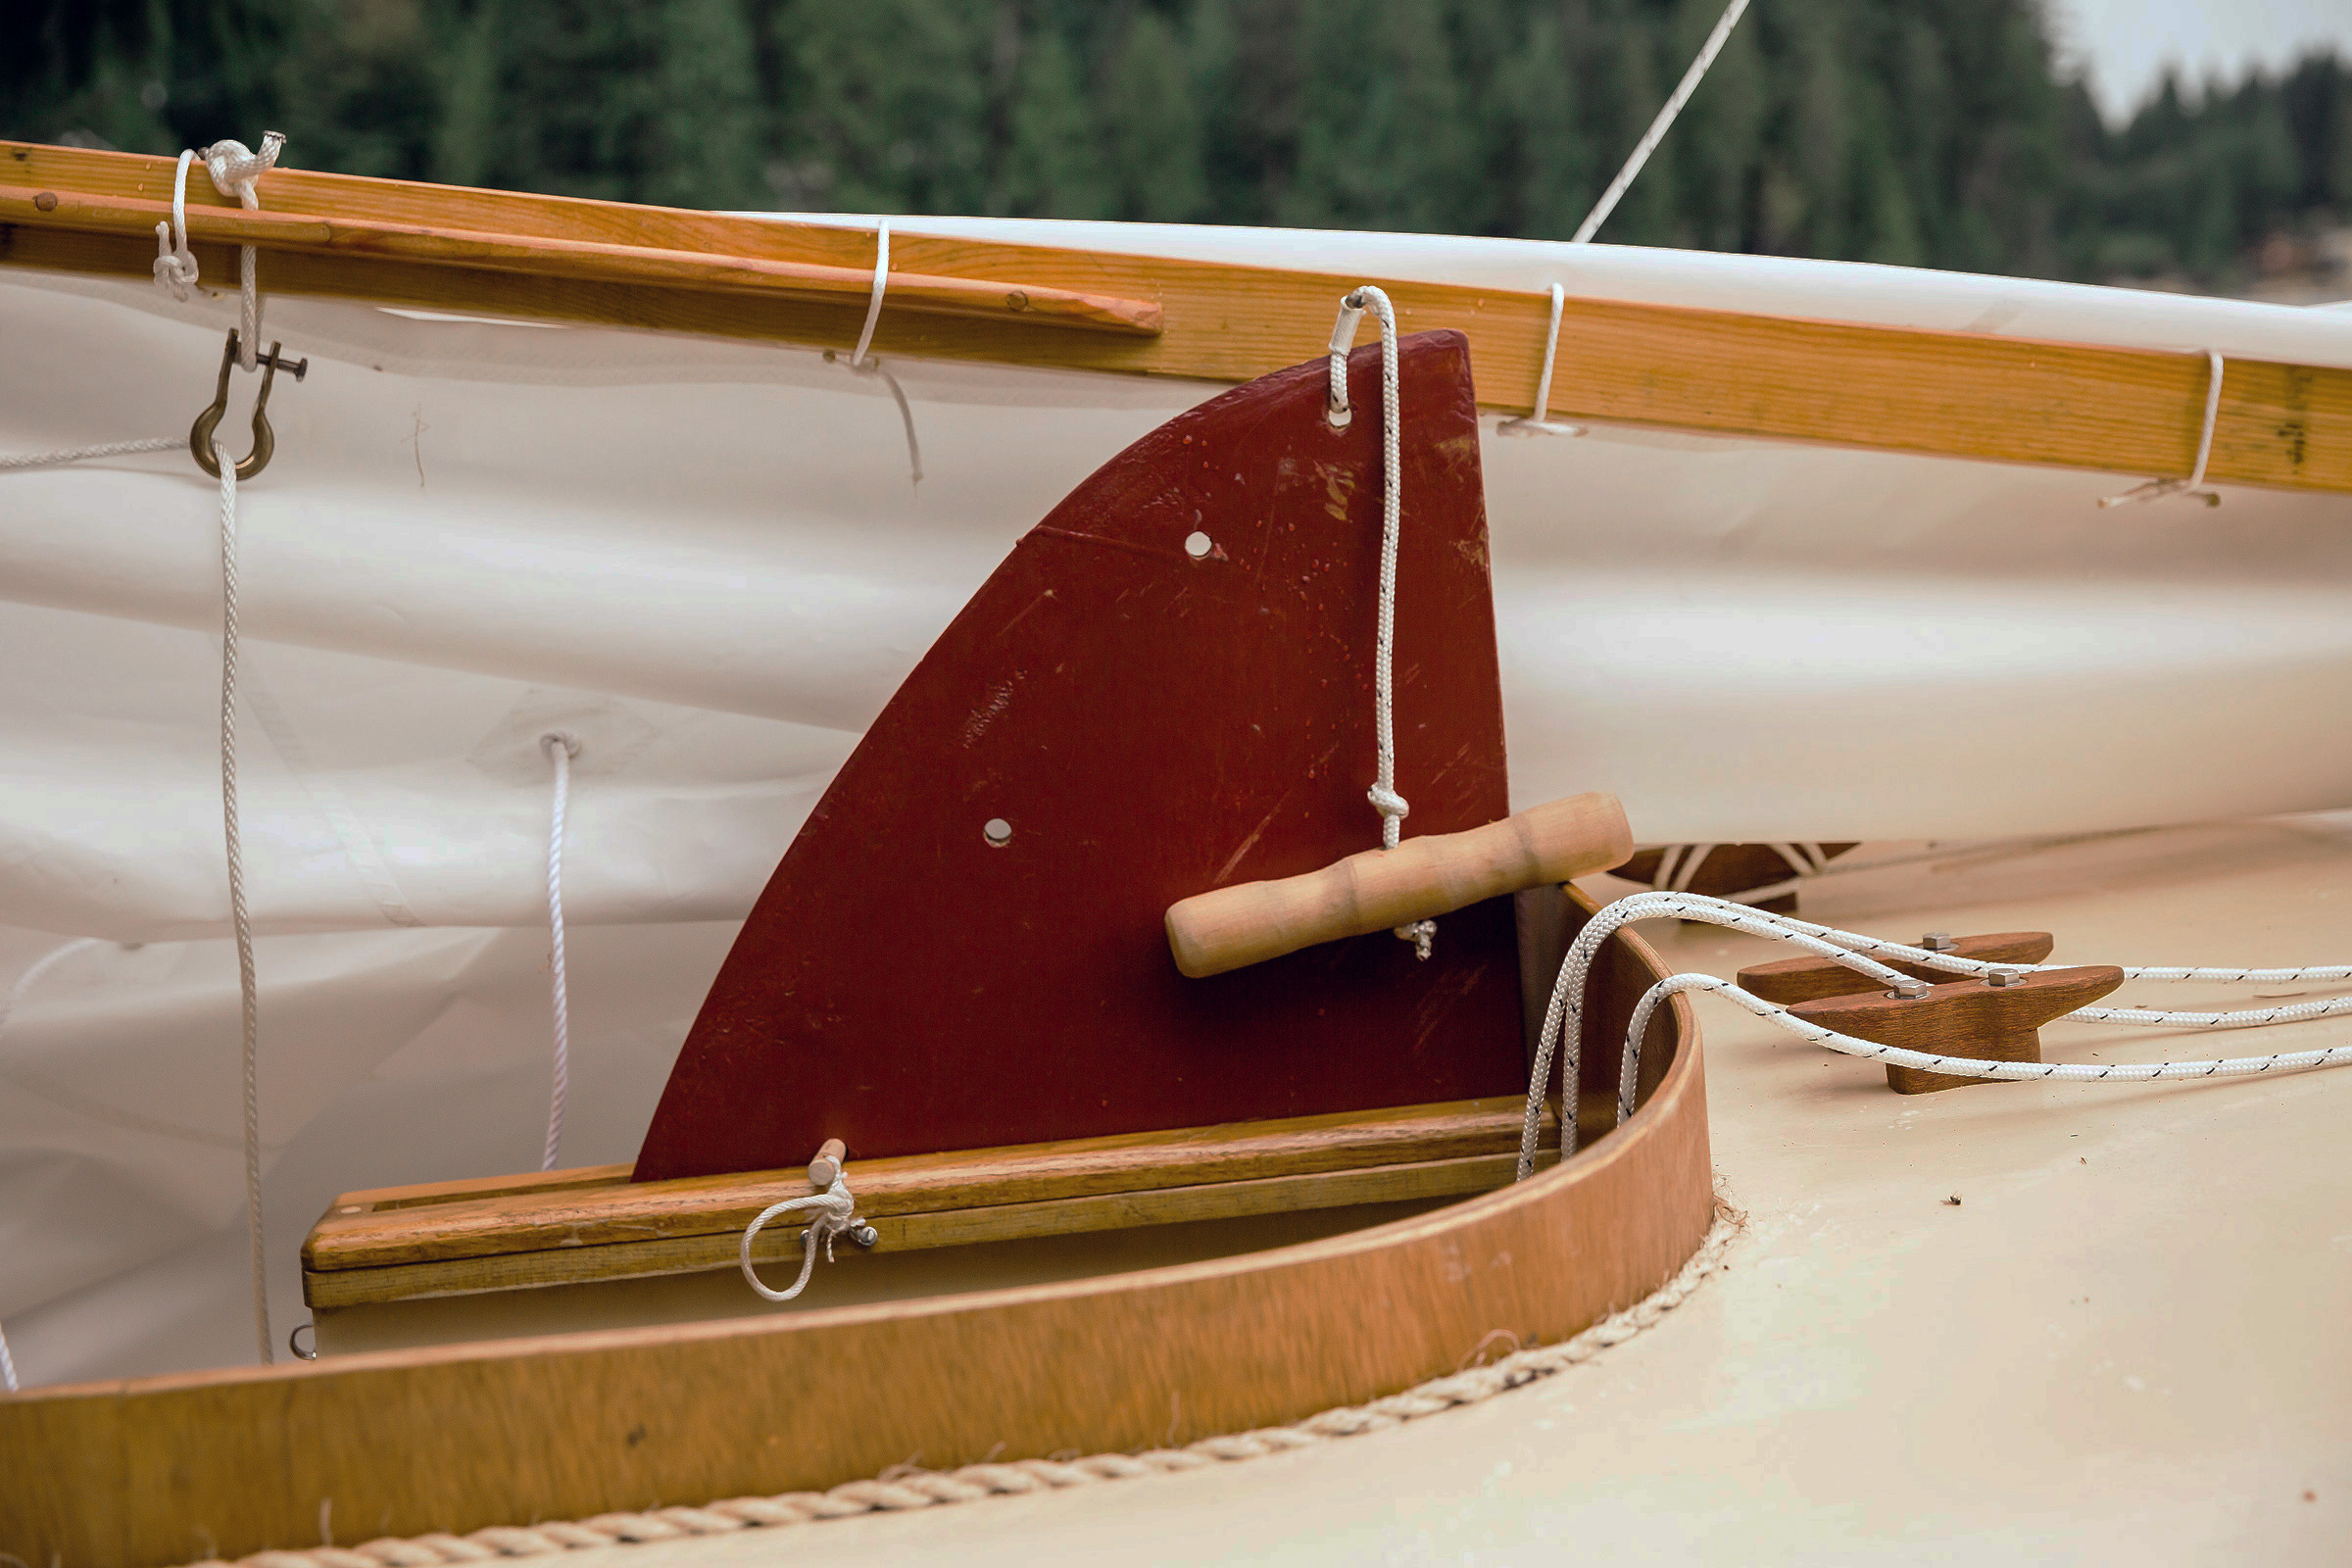
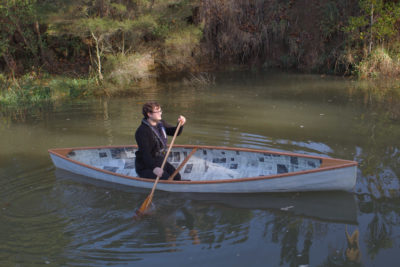
A lead weight in the centerboard pulls it down, and a peg in one of three holes holds it position for partial deployment. The toggle, on the end of an 8″ lanyard, is the final limiter. The curved coaming here is a departure from the square corners in the plans.
The Bobcat’s centerboard is made of three layers of 1/4″ plywood with a 6″ square cut out for weight—10.9 lbs of poured-in lead, according to the plans. In lieu of working with molten lead and its toxic fumes, I used lead shot, leftover from my reloading days, mixed with epoxy. The board, finished with a coat of epoxy, turned out well.
 Norina Leyde
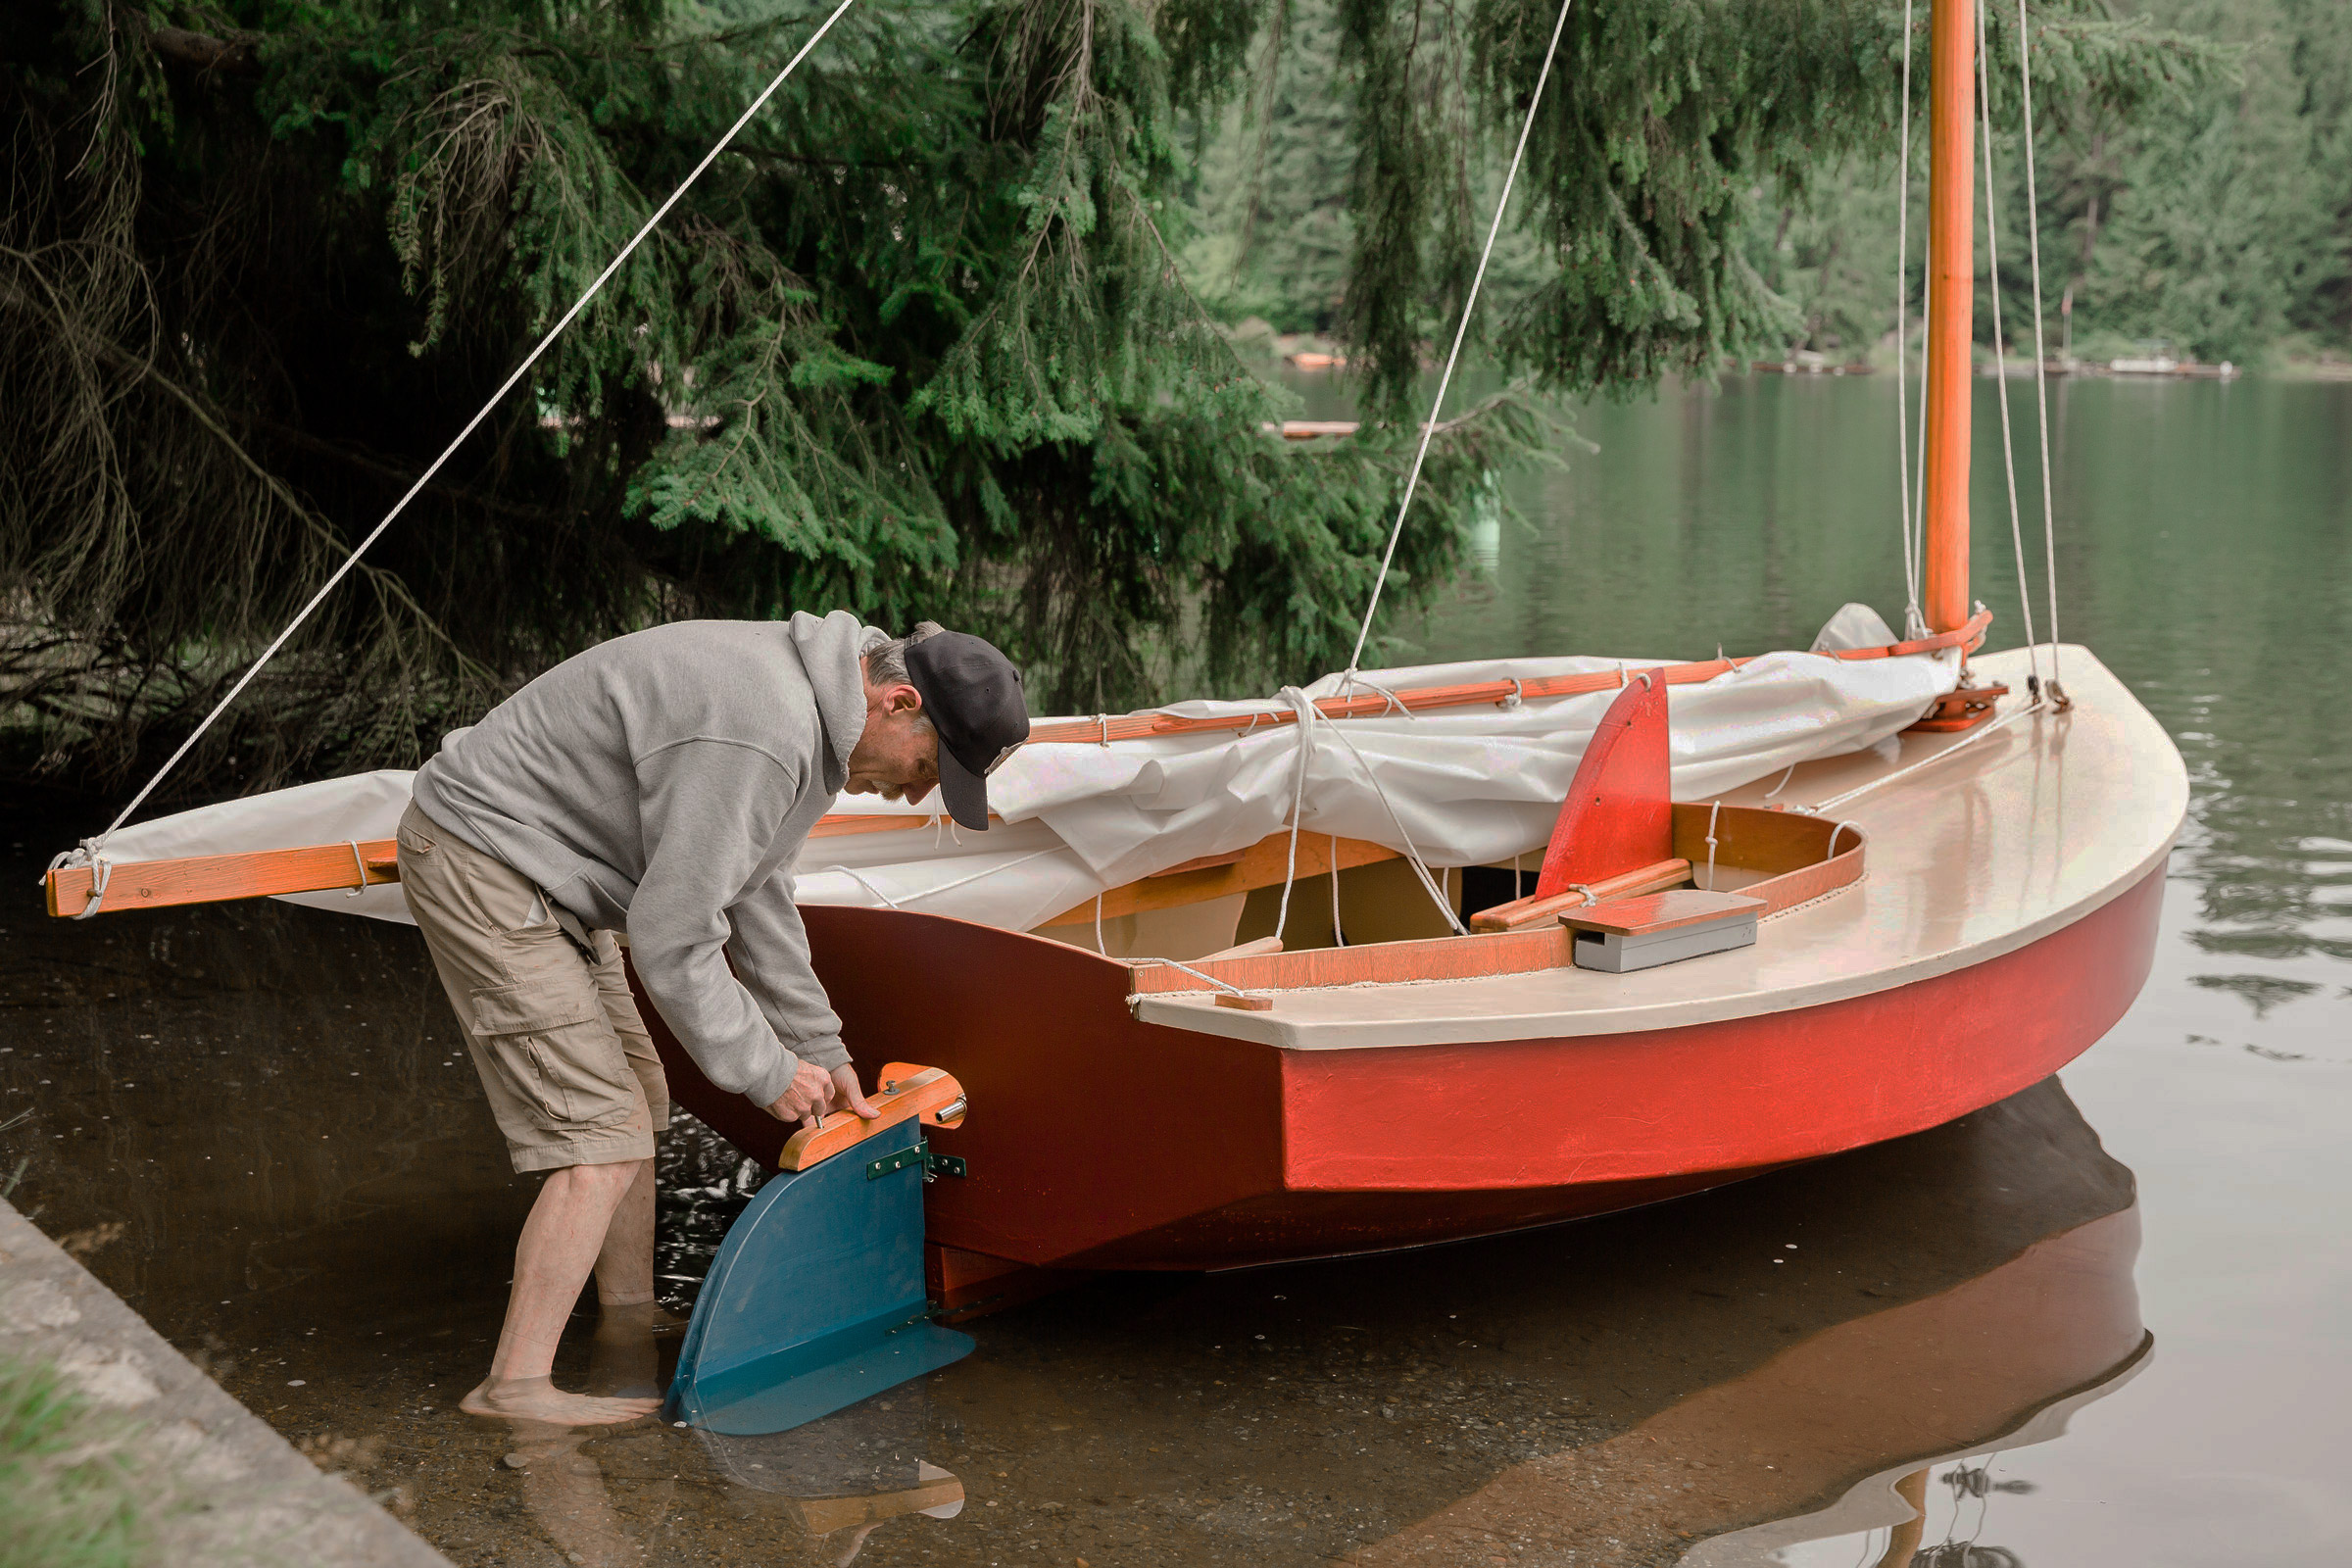
The barn-door rudder allows the cat to sail shallows and come ashore without being removed. Its horizontal bottom plate, seen here submerged, gives it a solid purchase when the boat is heeled.
The barn-door rudder is 24″ long, 16″ tall, and 1-1/2″ thick. I made mine of three layers of 1/2″ ply. Its bottom edge is even with that of the skeg and has a bottom plate that is 12″ wide and 23-1/2″ long. “Cats with shallow rudders,” wrote Bolger, “have a bad name for weathercocking against a hard-over rudder when they’re overpowered, but since I learned to put end plates across the bottoms of the rudders I haven’t had any complaints about this. It’s astonishing how shallow a rudder can be and still steer the boat, if the water is kept from rushing off the bottom of the blade.” Payson notes in his book that he hadn’t heard of this “horizontal foot” before seeing it in Bolger’s plans, but he was quick to approve of it: “I can vouch for its effectiveness on Bobcat, for her rudder holds right on when she heels over.” The plans call for a pair of brass or stainless straps on top of the rudder so the tiller can be quickly inserted through the transom and held to the rudder blade. Lacking a means to bend the metal neatly, I opted to bolt the tiller to the rudder.
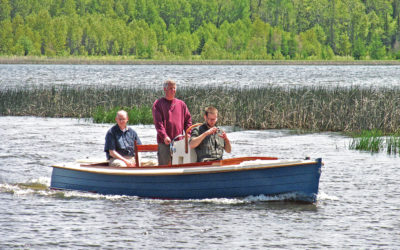
I have access to a lake a short walk from my home so I have not trailered this boat, but its light weight—I figure 250 lbs—shouldn’t be a problem for any automobile.
I can easily step the mast standing on the foredeck while the boat is afloat, and in about 20 minutes from start to finish I’ll have the boom, gaff, and halyards for the throat, peak, and topping lift in place. There is ample room in the cockpit for moving around, shifting weight, tending lines, etc. Standing to raise or lower the sail is no problem due to the stability provided by the wide beam.
The aft seat is large, but most of the time I sit on the floor or on the side deck. I built a pair of removable seats that slip over the coaming to make a more comfortable perch than the coaming’s edge. The low position of the boom blocks visibility to leeward, unless I’m sitting on the floorboards. There is a large area under the foredeck for storage with easy access.
 Norina Leyde
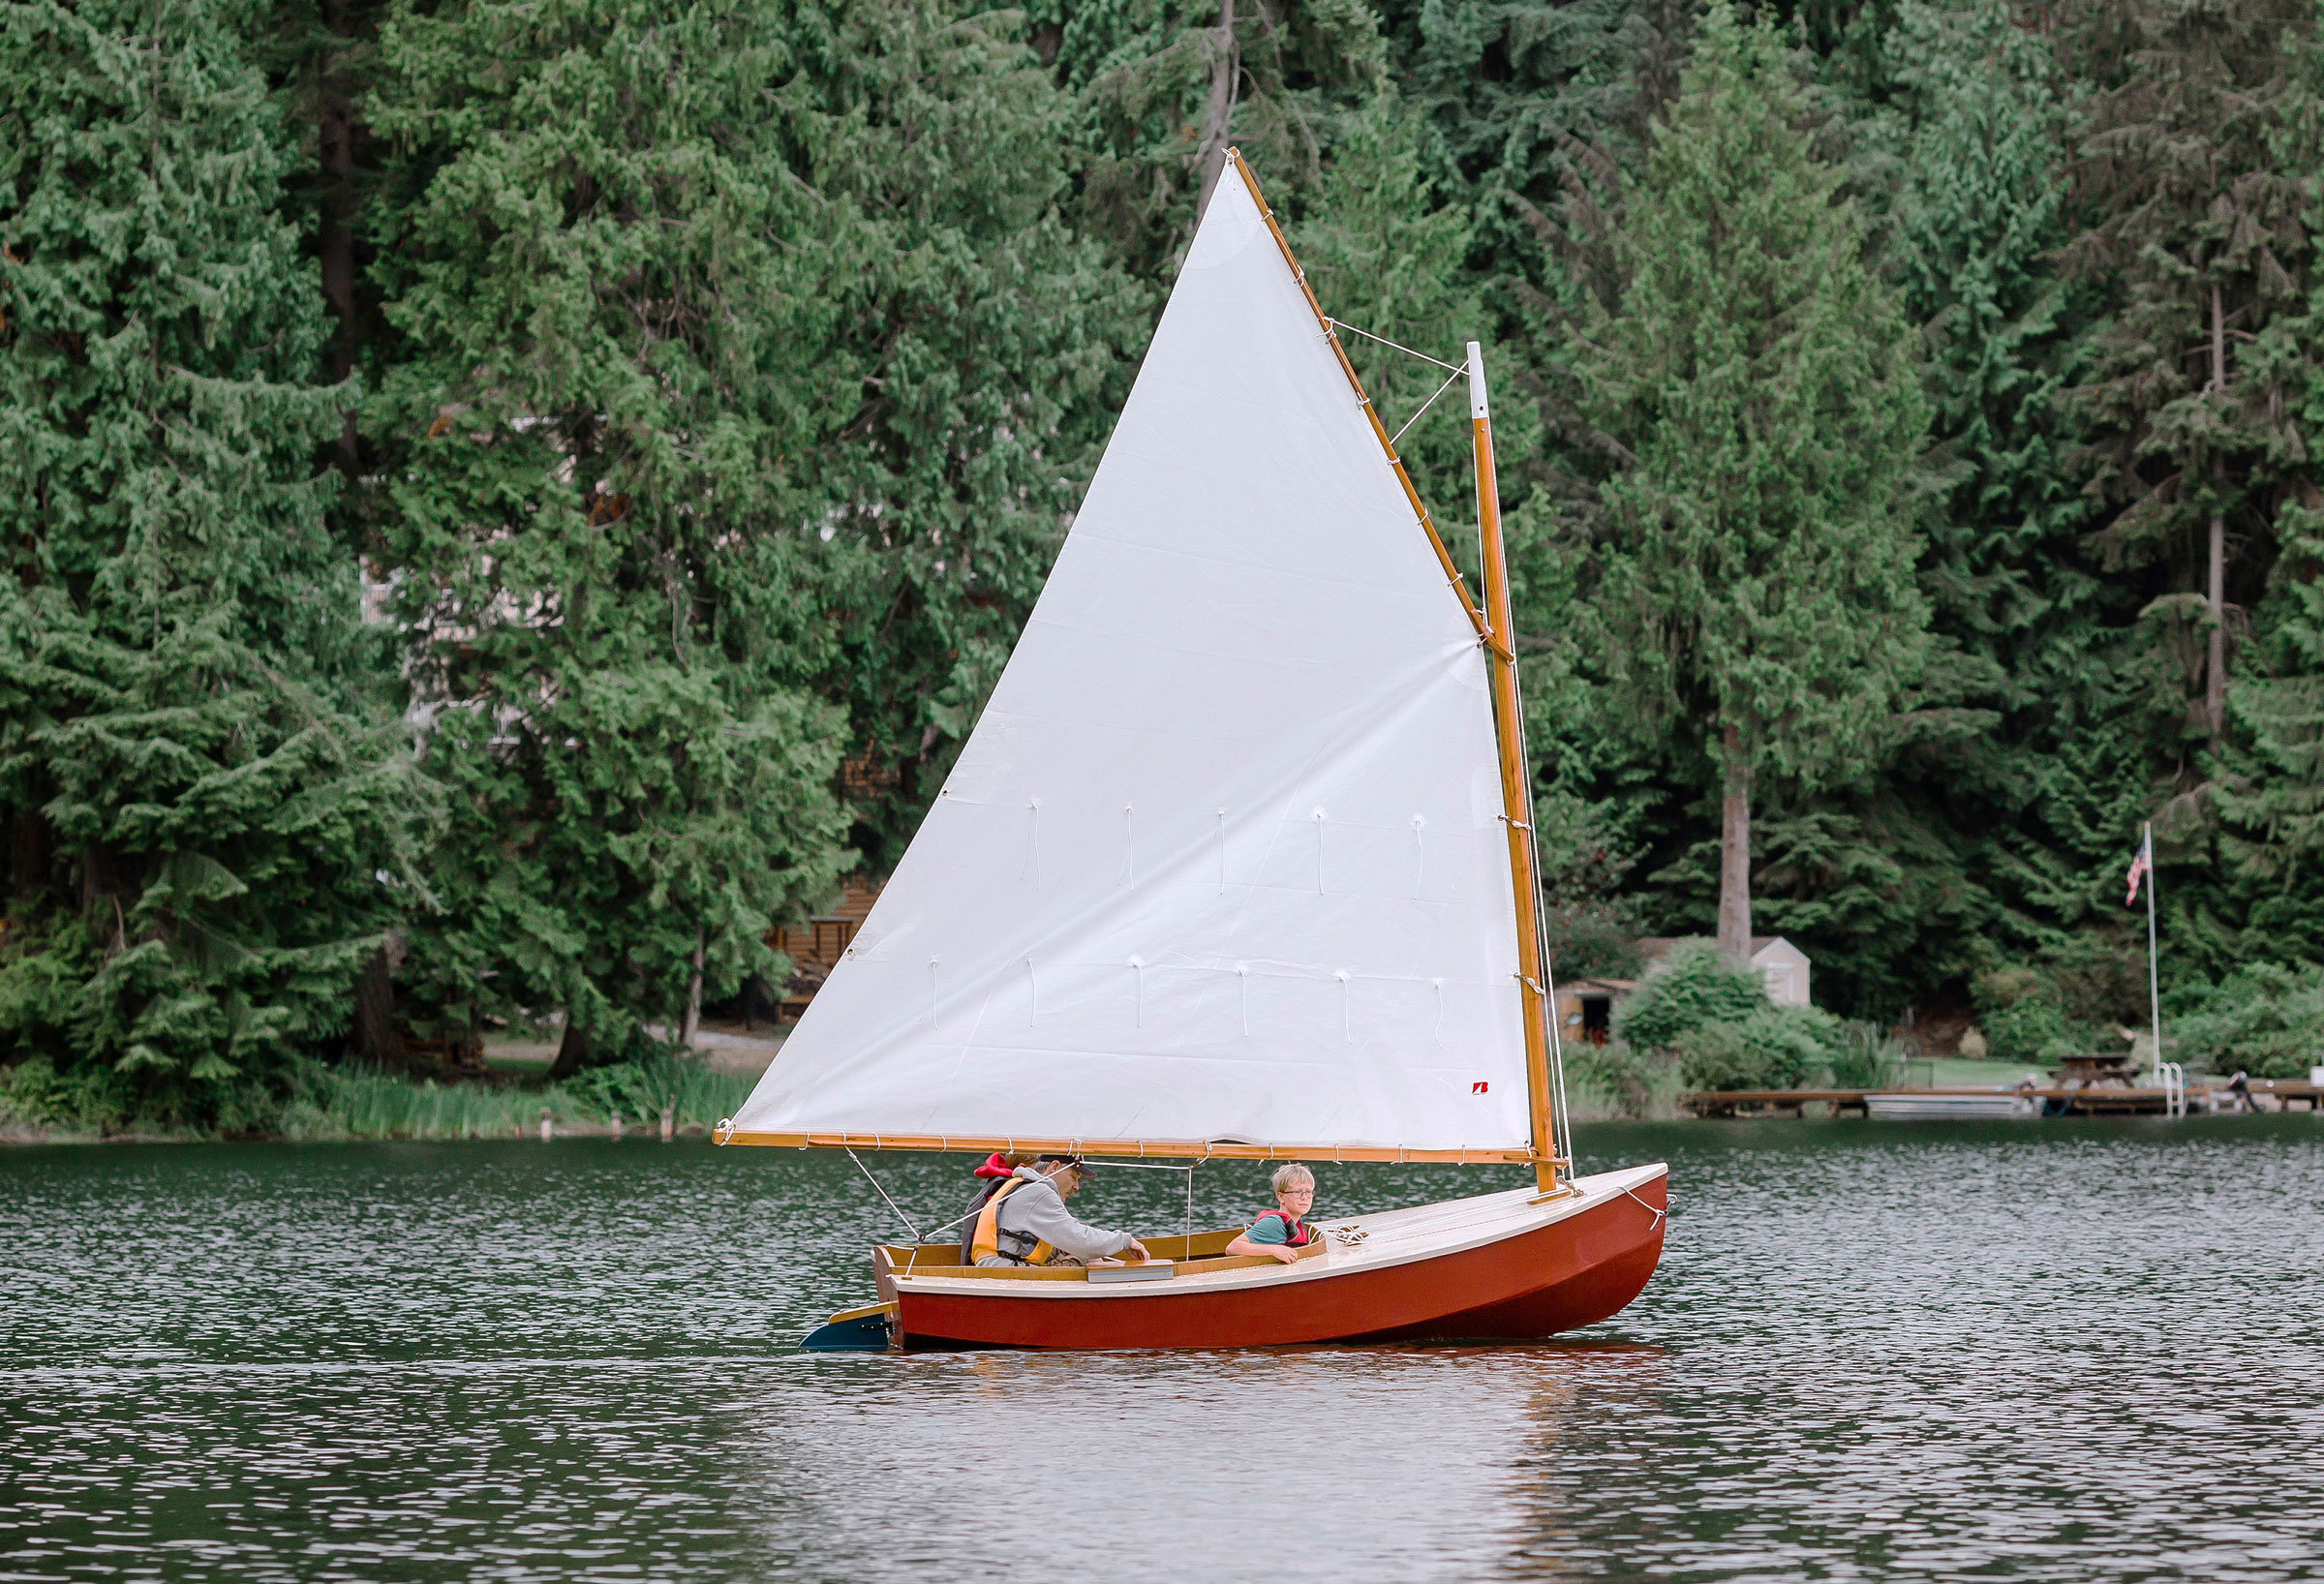
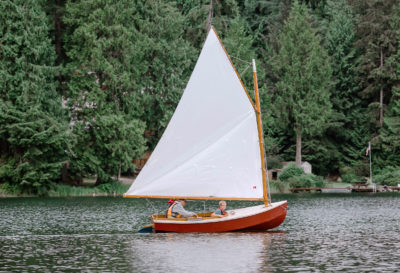
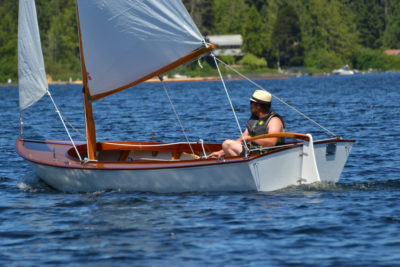
The Bobcat carries a 110 sq ft gaff sail. The two lines emerging from the masthead are the peak halyard and the topping lift.
I am very pleased with the Bobcat’s performance. For a 12-footer, it feels more like a big boat. The wide beam makes for a stable platform, and it is an excellent boat for a first-time sailor. It is surprisingly quick to windward. “A gaff sail like this can be cut as close-winded as a jib-headed sail,” according to Bolger. In my estimation, the catboat will tack as close as 30 degrees to windward. Coming about, it carries enough way to avoid getting caught in irons. It doesn’t seem to mind gusts; it just heels over only so far and stops, even when hit with a wind from a different direction, as happens in the lake I sail in. Typical of catboats, the Bobcat has a bit of weather helm which helps the cat round up in gusts. In a jibe, the gaff follows right along with the boom without any problem.
Accommodations for rowing—a seat and oarlocks—are not included in the plans, and rowing with a conveniently sized pair of oars is not possible due to the 6′ beam. I use a canoe paddle for auxiliary power; it is easy to store under the foredeck when sailing. I am considering integrating a small electric trolling motor alongside the skeg for auxiliary power. The boat’s light weight should make it easily driven.
I have a little over $2,000 invested in the boat, including the sail, which was the largest single expense and ordered from H.H. Payson Co. Their sailmaker has a five-month backlog, but I was advised that sometimes they find time for a quicker delivery to Payson’s customers.
I totally enjoyed building this boat again, and at no time had to sit in what Howard Chapelle calls the “moaning chair” to lament errors I had made. I’d an idea of what to expect, having built this boat before, but on the cover of Build the Instant Catboat is printed “A you-don’t-have-to-be-an-expert book.” And that’s true. Payson’s detailed instructions make the project well suited to a first-time boatbuilder with moderate woodworking skills. ![]()
Bobcat Particulars
[table]
Length/12′ 3″
Beam/6′
Sail area/110 sq ft
Weight/ approx. 250 lbs
Draft, board up /11″
[/table]
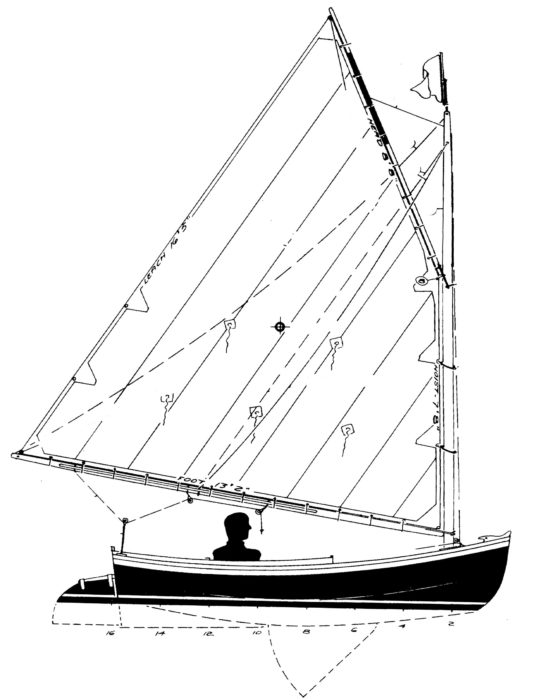
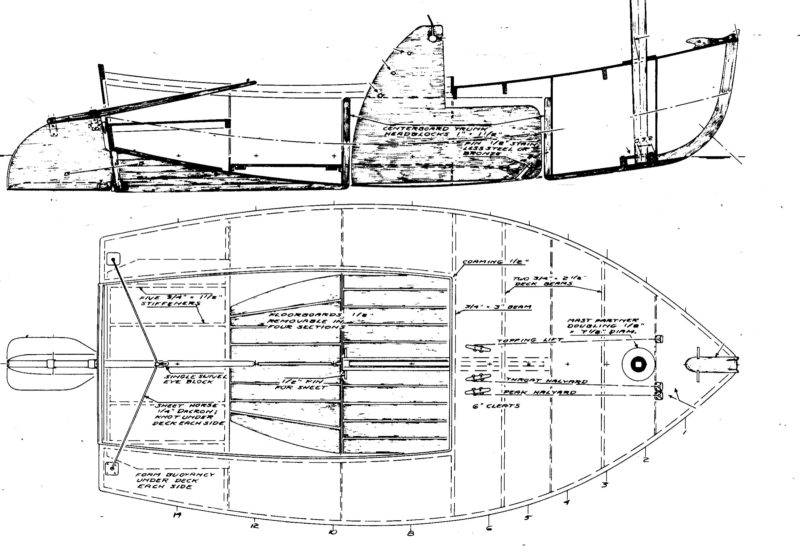
Plans ($45) and full-sized patterns ($105) for the Bobcat are available from H.H. Payson & Company. The boat goes by three different names: Bobcat, Tiny Cat, and the Instant Catboat. Small-scale plans and building instructions for Bobcat are included in Build the Instant CatBoat, by Dynamite Payson, available from H.H. Payson & Company and The WoodenBoat Store. The book’s small-scale plans were intended as illustrations only, not for reading text and numbers; the plans and patterns from H.H. Payson & Company are recommended for building the Bobcat.
Is there a boat you’d like to know more about? Have you built one that you think other Small Boats Magazine readers would enjoy? Please email us!












I built the Bobcat back in 2004/5. Got the plans and full sized patterns from Payton. It was an easy build and much fun sailing. I was initially skeptical of the rudder design but it proved to be excellent. Built a motor mount on the transom for a 2-hp Yamaha.
I’m wanting a motor mount for my Bobcat but haven’t found a suitable mount. Could you provide any details on how you attached it to the transom?
I built a Bobcat and can vouch for what’s reported here; it’s an excellent boat and build. Surprisingly close-winded, but 30 degrees? No. The stern seat’s useless; in my boat it serves only to hold an Opti flotation bag in place. I saved a ton of time and money by using the spars and sail from a wrecked Beetle Cat — identical above-deck dimensions except for the roach in the Beetle sail; requires minor fiddling with the step. Works fine.
No one has mentioned the planking. Is it scarfed or using butt blocks to get the length
needed ?
Great looking little sailor !
Regards
David Jackson
David,
Butt blocks are used.
Hi John,
What is the other boat in the pic of your workshop ?
Regards
David Jackson
David,
It is my steam launch, E. SCOTT HAMMOND.
There was an editorial about it in the October 2018 issue of Small Boats.
John
I miss my Bobcat! Here’s a little video I made sailing her last winter.
What a great video!!
Thanks for sharing it.
Thank you! Your piece was a great read! I am envious of your nearby lake. I buy and sell a lot of boats in need. The Bobcat is one I would definitely own again.
An observation about bending plywood panels: It is a time-honored practice to use hot water and towels for bending plywood, but in fact, the water adds nothing to the process (except to distribute the heat). The problem with this, besides the inevitable messiness, is that it also raises the grain, and means the wood has to dry out before moving on to other procedures. Fir plywood is especially problematic with grain raising. Instead, I like to use dry heat for bending (and it works on solid wood as well as plywood).
For a panel the size of Bobcat’s bilge plank, I’d use a well spread out, broad source of heat, such as an electric infra red space heater, the kind with a parabolic reflector. It only takes a few minutes’, especially with plywood as thin as 1/4″, to heat it sufficiently. You can check with a bare hand to tell if it seems hot enough. Apply bending pressure every so often, until you can feel the panel relax and start to bend. After withdrawing the heat, the wood stiffens up very quickly, and will hold its bent shape. If it still seems stubborn, it’s easy enough to reapply the heat for another try.
For smaller pieces, a heat gun works well. Be careful not to scorch the wood.
David, I built a Bobcat in the winter of 1999/2000. In a barely heated detached double garage in MN. I don’t recall any big problems bending the plywood. I’d previously built a Simmons Sea-Skiff and after bending the forward end of keelson at on that … The Bobcat was my first stitch and glue and I was more worried about how that would go, so I may have spaced bending problems.
An aside: My wife and I happened to be in Maine in 1999 and stopped in to say hello to Harold Payton. We chatted for a short time with Harold and his wife in his shop. I may have bought plans for the Bobcat that day. Later that day or the next I went to Bohndell Sails in Rockport and ordered a sail for the Bobcat.
I’ve always admired this design and have Payson’s book. That curved coaming is such a nice feature and it, along with your article, has renewed my interest building one for myself
My father and a group of his age or there abouts finished a bunch of cold-molded hulls, I believe purchased surplus right after WW II. The hulls were found some where in Delaware or Maryland by a friend. They ended up as sailing dinghies, 9′ long, mast about 18′, with 65 sq ft sail area, called Bobcats. They were centerboarders. They were a lot of fun for us as kids growing up with all kinds of racing and special events, i.e. scavenger hunts, pajama races, picnics, etc. Also frost-biting in the winter. This was at the yacht club in Sea Cliff, Long Island, New York, off western Long Island Sound. In the early ’50s they started another building program for Penguins.
I’m finishing a half-built Bobcat I dragged home from up north. I have a few sails in the Beetle Cat and so I deleted the rear seat for more lounge room. Can’t wait to hit the local waters next year. Have a Sailrite kit just waiting for those winter doldrums. Thanks so much for the article and photos.
John,
Nice article!
Has anyone thought of starting a Bobcat Owners Association?
It would be nice to share information about details of the build, trailering, adventures and observations.
This is my next build and more photos of the building process are always welcome.
I finished building a Bobcat from a half-built hull and converted a salvaged Beetle Cat rig for it, which works splendidly well. I do wish Phil Bolger hadn’t specified that wide seat-like object in the stern. You can sit there, but you shouldn’t; it throws the trim off and makes the boat look awkward. Check out the first photo in this article: the boat’s squatting with the bow out of the water. Look at where Bolger places the sailor in his profile drawing: forward of that horrid back bench. I put side benches in, which cramps the cockpit somewhat, but the boat sails like a dream with the better trim.
Andrew,
I agree the aft seat is awkward and I had thought about the side benches you mentioned.
I usually end up sitting on the side deck and made seats that fit over the coaming.