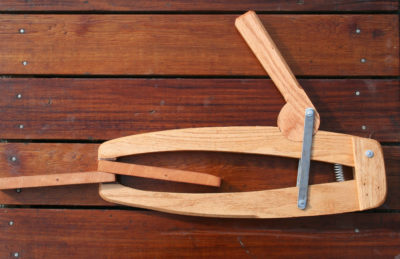
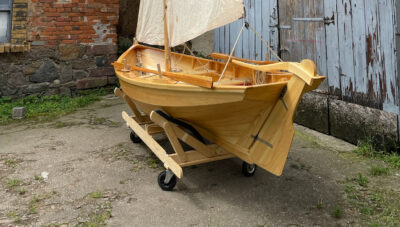
The yard and boom of the balance-lug mainsail in my Caledonia Yawl have parrels to keep them close to the mast, and parrel beads, which roll easily when raising or lowering the sail. A few years ago I made a square sail with an upper and lower yard but equipped neither with parrels. I could get away with setting and striking the sail in a very light wind, but in anything stronger both yards became rather unruly. It was time to make some parrels.
The traditional method for making wooden parrel beads is to turn them on a lathe, shaping several at once from a single length of hardwood. I have a lathe, but I know from experience that shaping a series of spheres is no easy task. My square-sail parrels would require about 18 to 20 beads, so I set out to find an easier way to make them.
 Photographs by the author
A plug cut with a holesaw is usually just waste wood, but it’s a good basis from which to make a parrel bead. If a plug is cut by a 1 1⁄4″ holesaw from a scrap of 3⁄4″ white oak, it cannot be shaped into a perfect sphere but can be made into a perfectly functioning parrel bead.
Plugs made by holesaws seemed like a good place to start. They’re already round and have a hole though the center. All that is required is to round the plugs from cylindrical to spherical. The holes through the plugs are drilled across the grain rather than parallel to it as in lathe-turned beads, but given the light loads put on parrels, that doesn’t matter.
My 1 1⁄2″ holesaw makes a plug that is 1 5⁄16″ in diameter, a good size for parrel beads on boats as big as the 19′ Caledonia Yawl. A 1 1⁄4″ holesaw’s plug, with a diameter of 1 1⁄16″, would be appropriate for smaller boats.
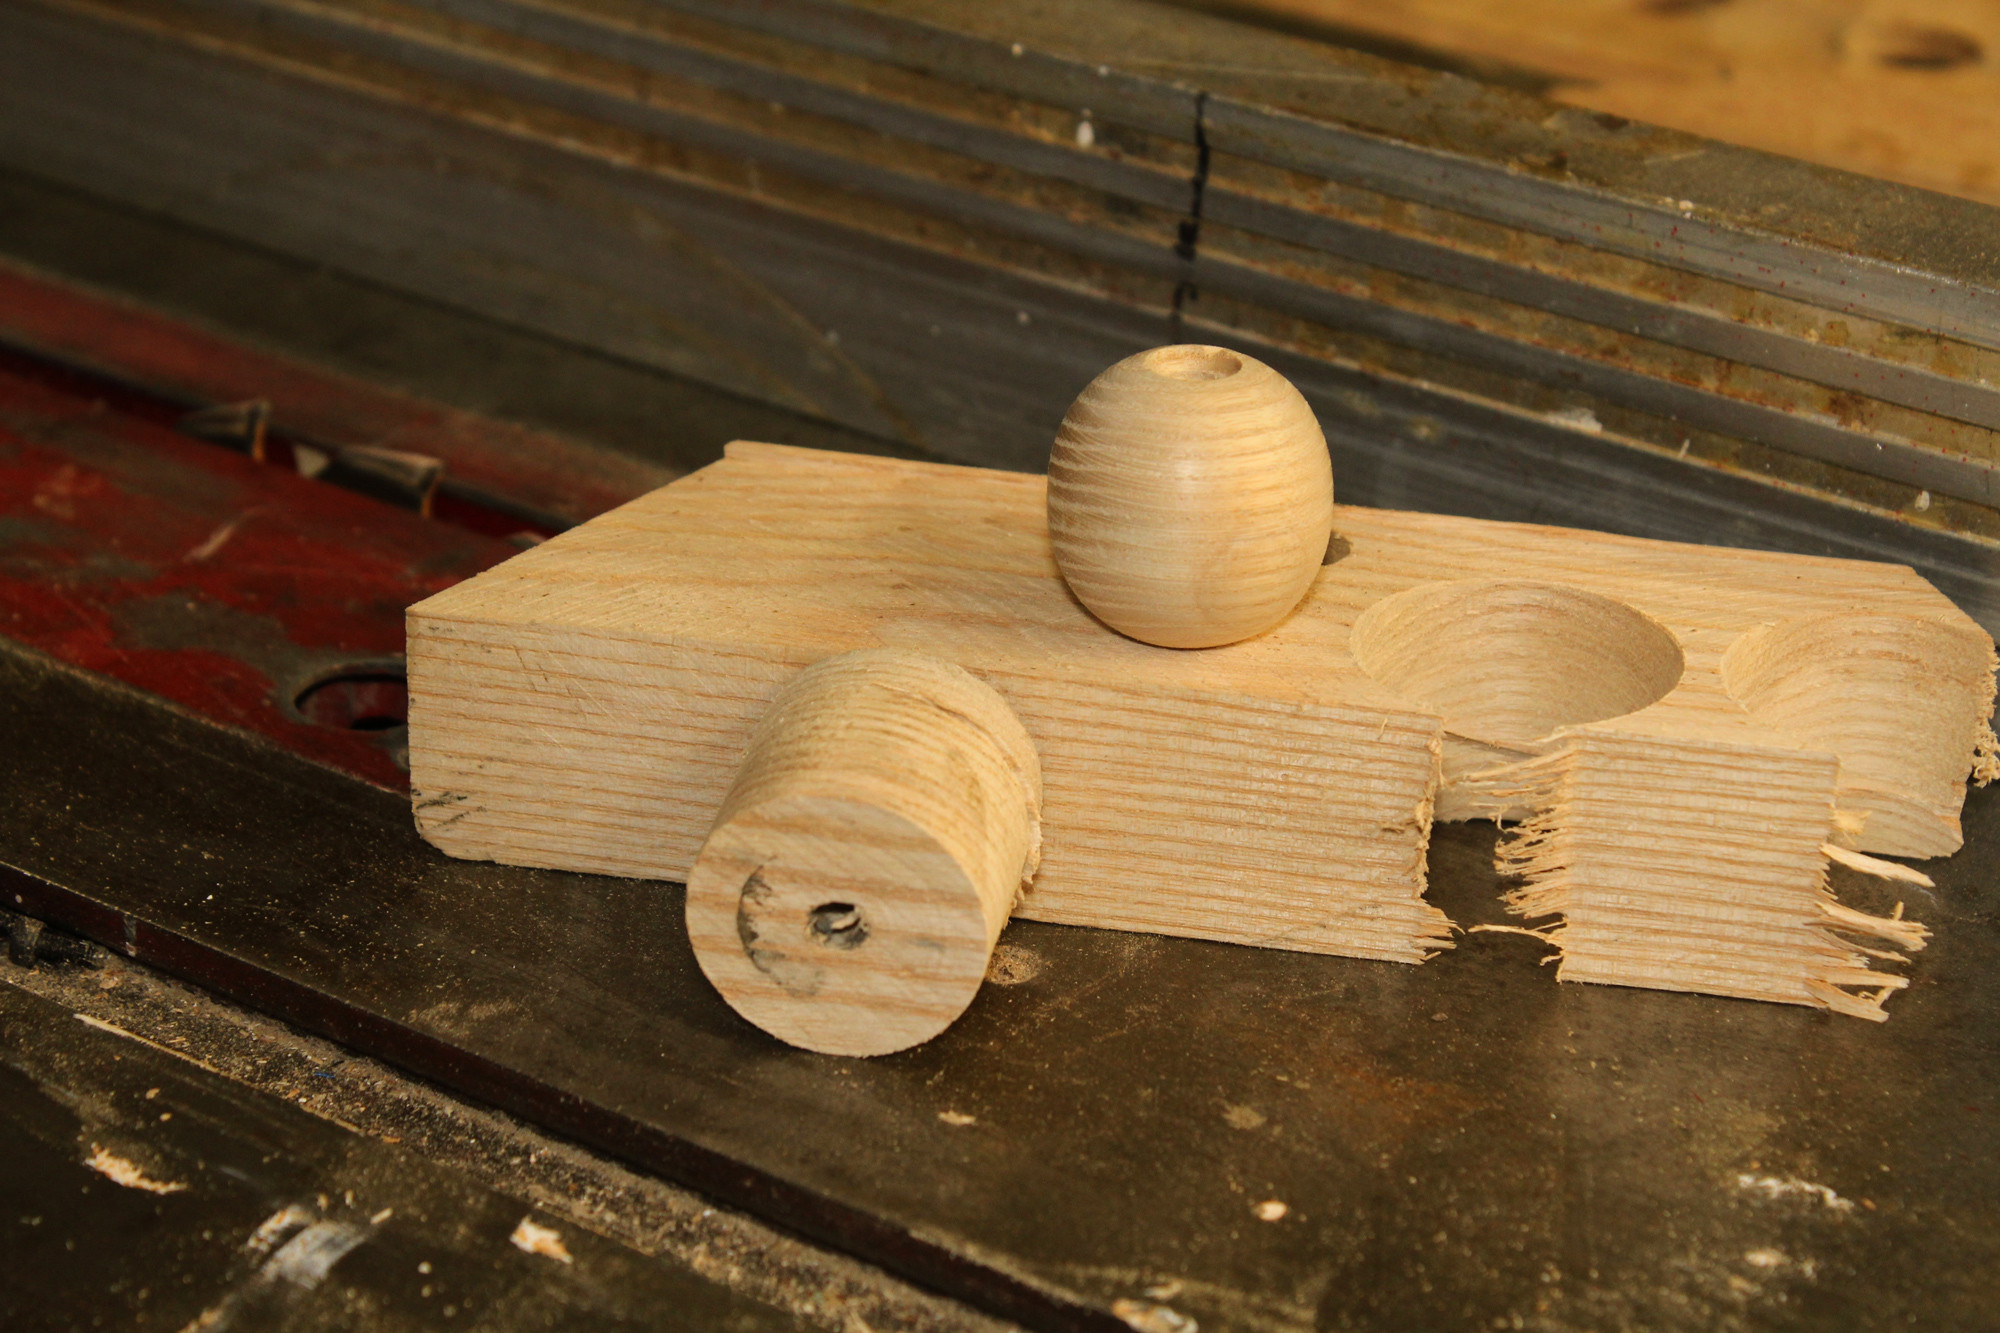
If the thickness of the plug stock is equal to the diameter of the plug, that plug can be shaped into a fully spherical parrel bead; it just takes a little longer to shape it.
To make spherical beads, the stock used should have a thickness equal to the diameter of the plug. Beads cut from thinner stock have a slightly oval cross section but will work just as well and are more quickly made, so for the new parrels I used 3⁄4″ hardwood, which I have in abundance in scrap pieces.
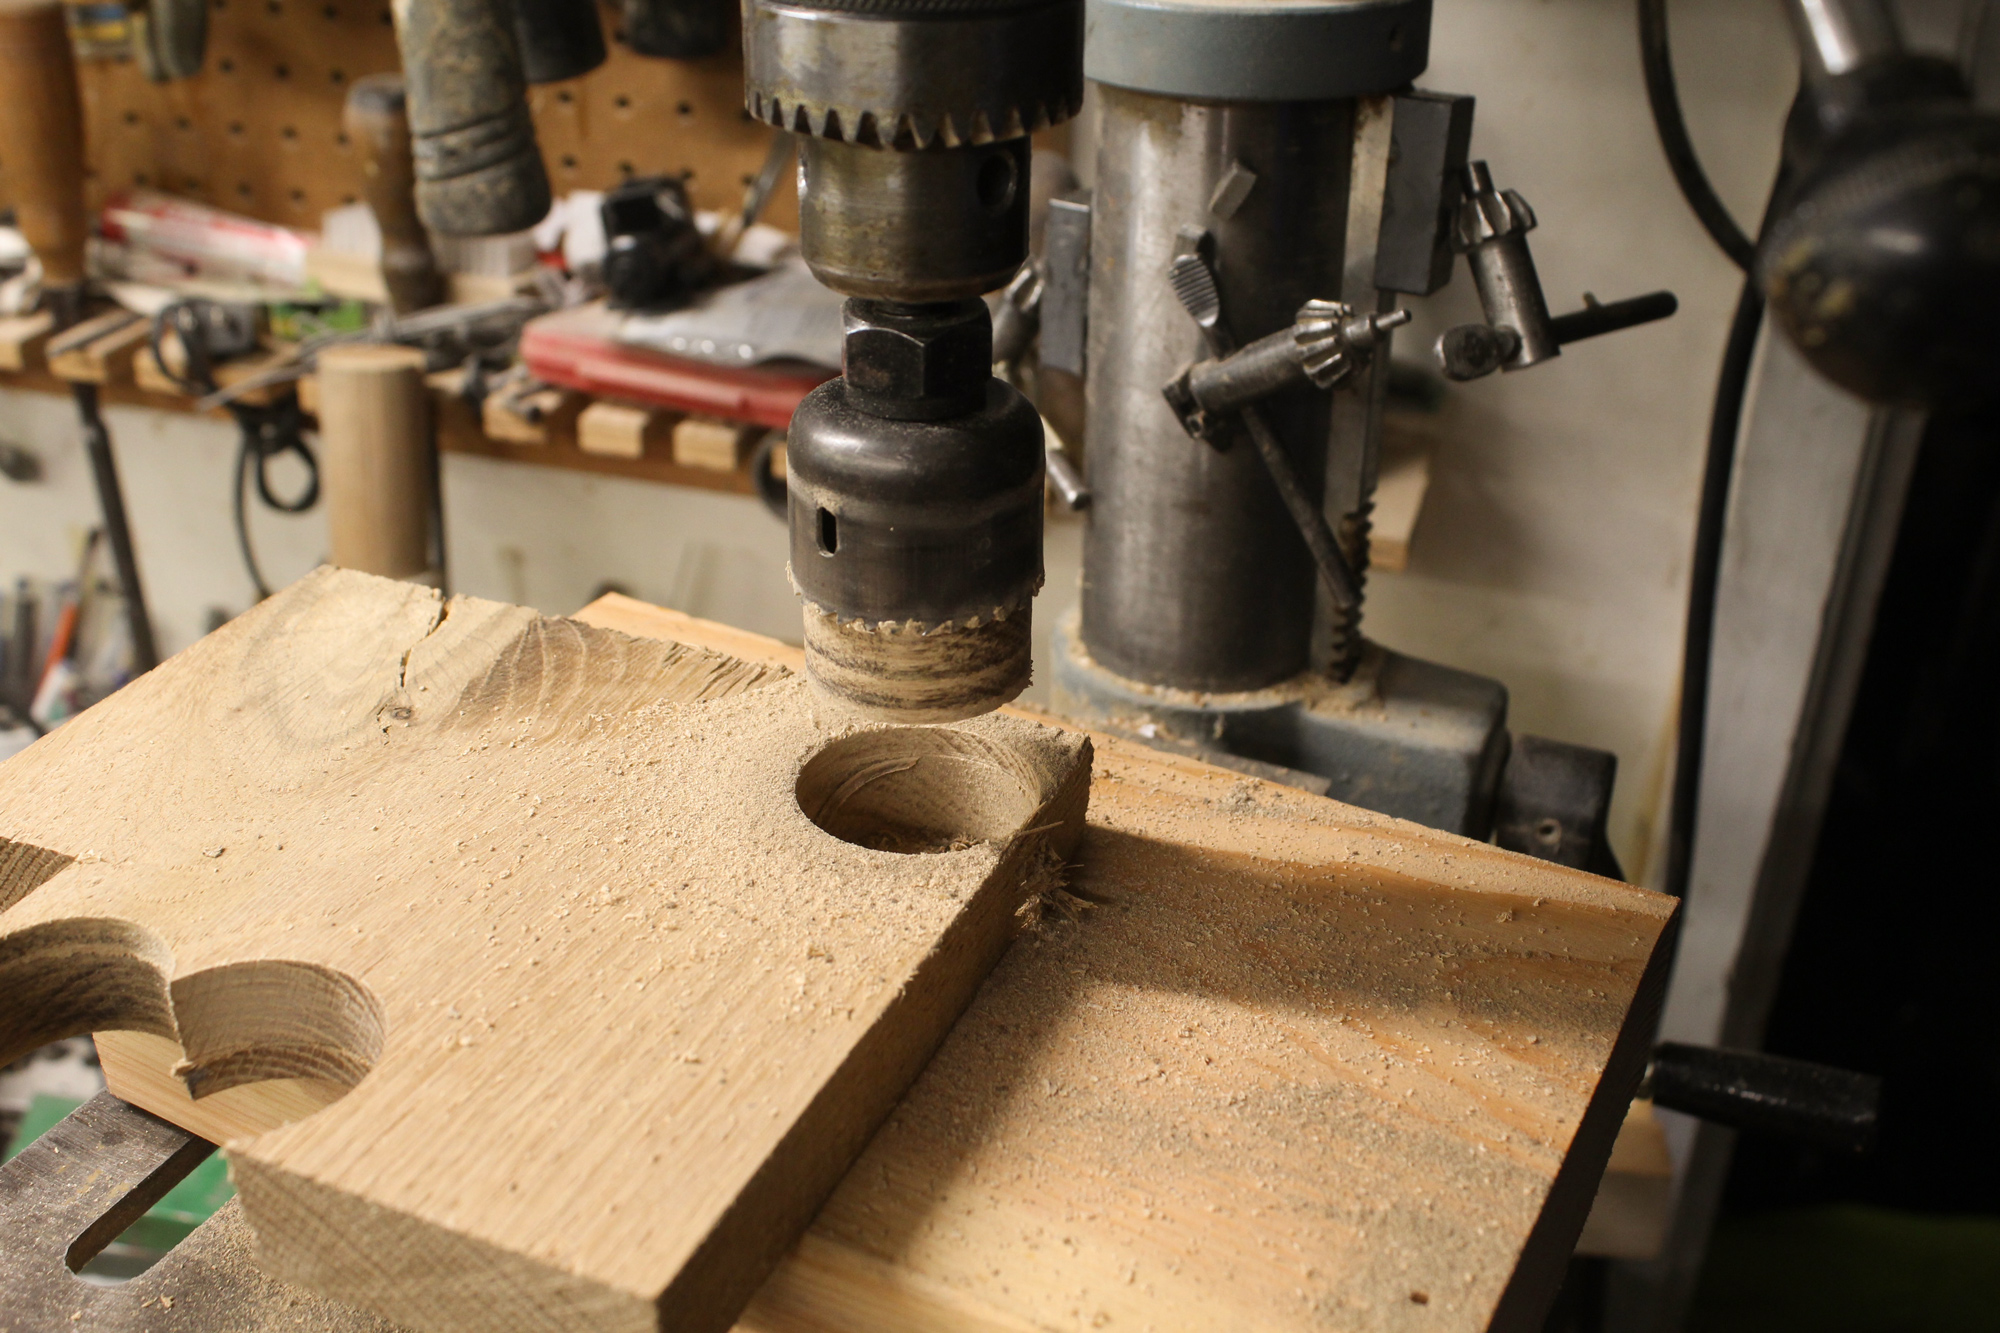
A drill press is the best tool to use with the holesaw. I set the depth of cut to let the pilot drill go into the sacrificial 2×6 on the drill press table and then held the saw teeth just shy of cutting into it. Going all the way through the stock would leave the plug fully captured by the holesaw. Making two cuts—one almost all the way through, and one from the other side to separate the plug from the stock—leaves plenty of exposed plug to pull on and very little to extract from the saw.
If you don’t have a drill press, you can use the holesaw chucked in a corded or cordless drill. While it may not cut perfectly square to the stock, the sides of the plug will still be parallel to the hole and fine for the shaping steps to follow.
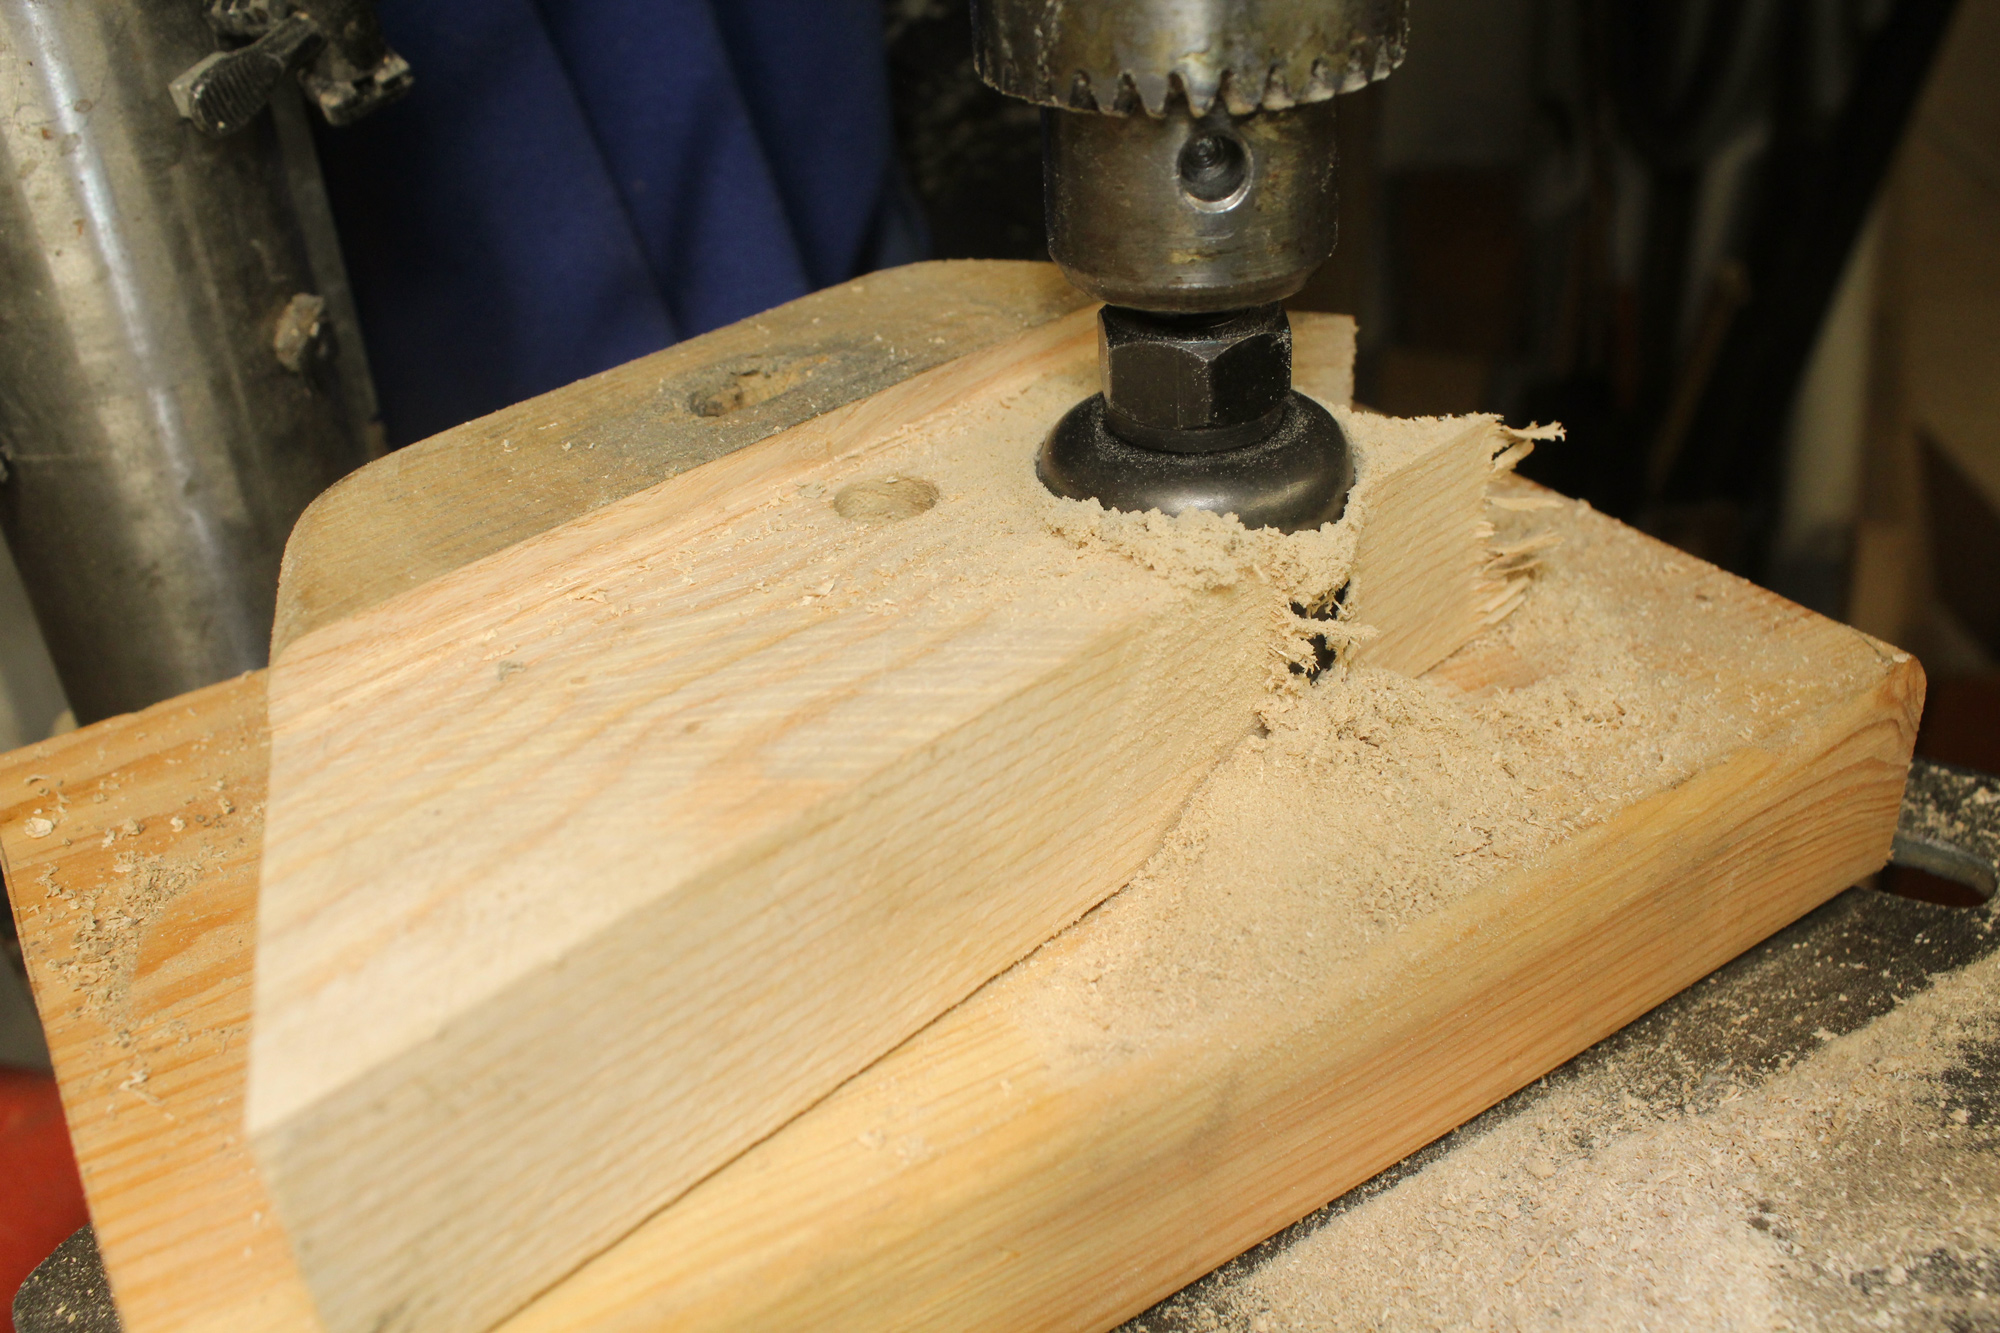
Setting the holesaw with its kerf on a tangent with the stock allows the sawdust to escape rather than get trapped. This makes it possible to make a continuous cut without having to retract the holesaw to clear the saw teeth.
Holesaws can choke on the sawdust that builds up in the kerf. This creates both heat—which isn’t good for the cutting teeth—and smoke, which isn’t good for lungs. If the kerf slightly overlaps and cuts through the edge of the stock, the opening provides an outlet for the sawdust; not only will this eliminate smoke and excess heat but also it allows the teeth to cut much faster. There’s no need to back the holesaw out repeatedly to clear its teeth.
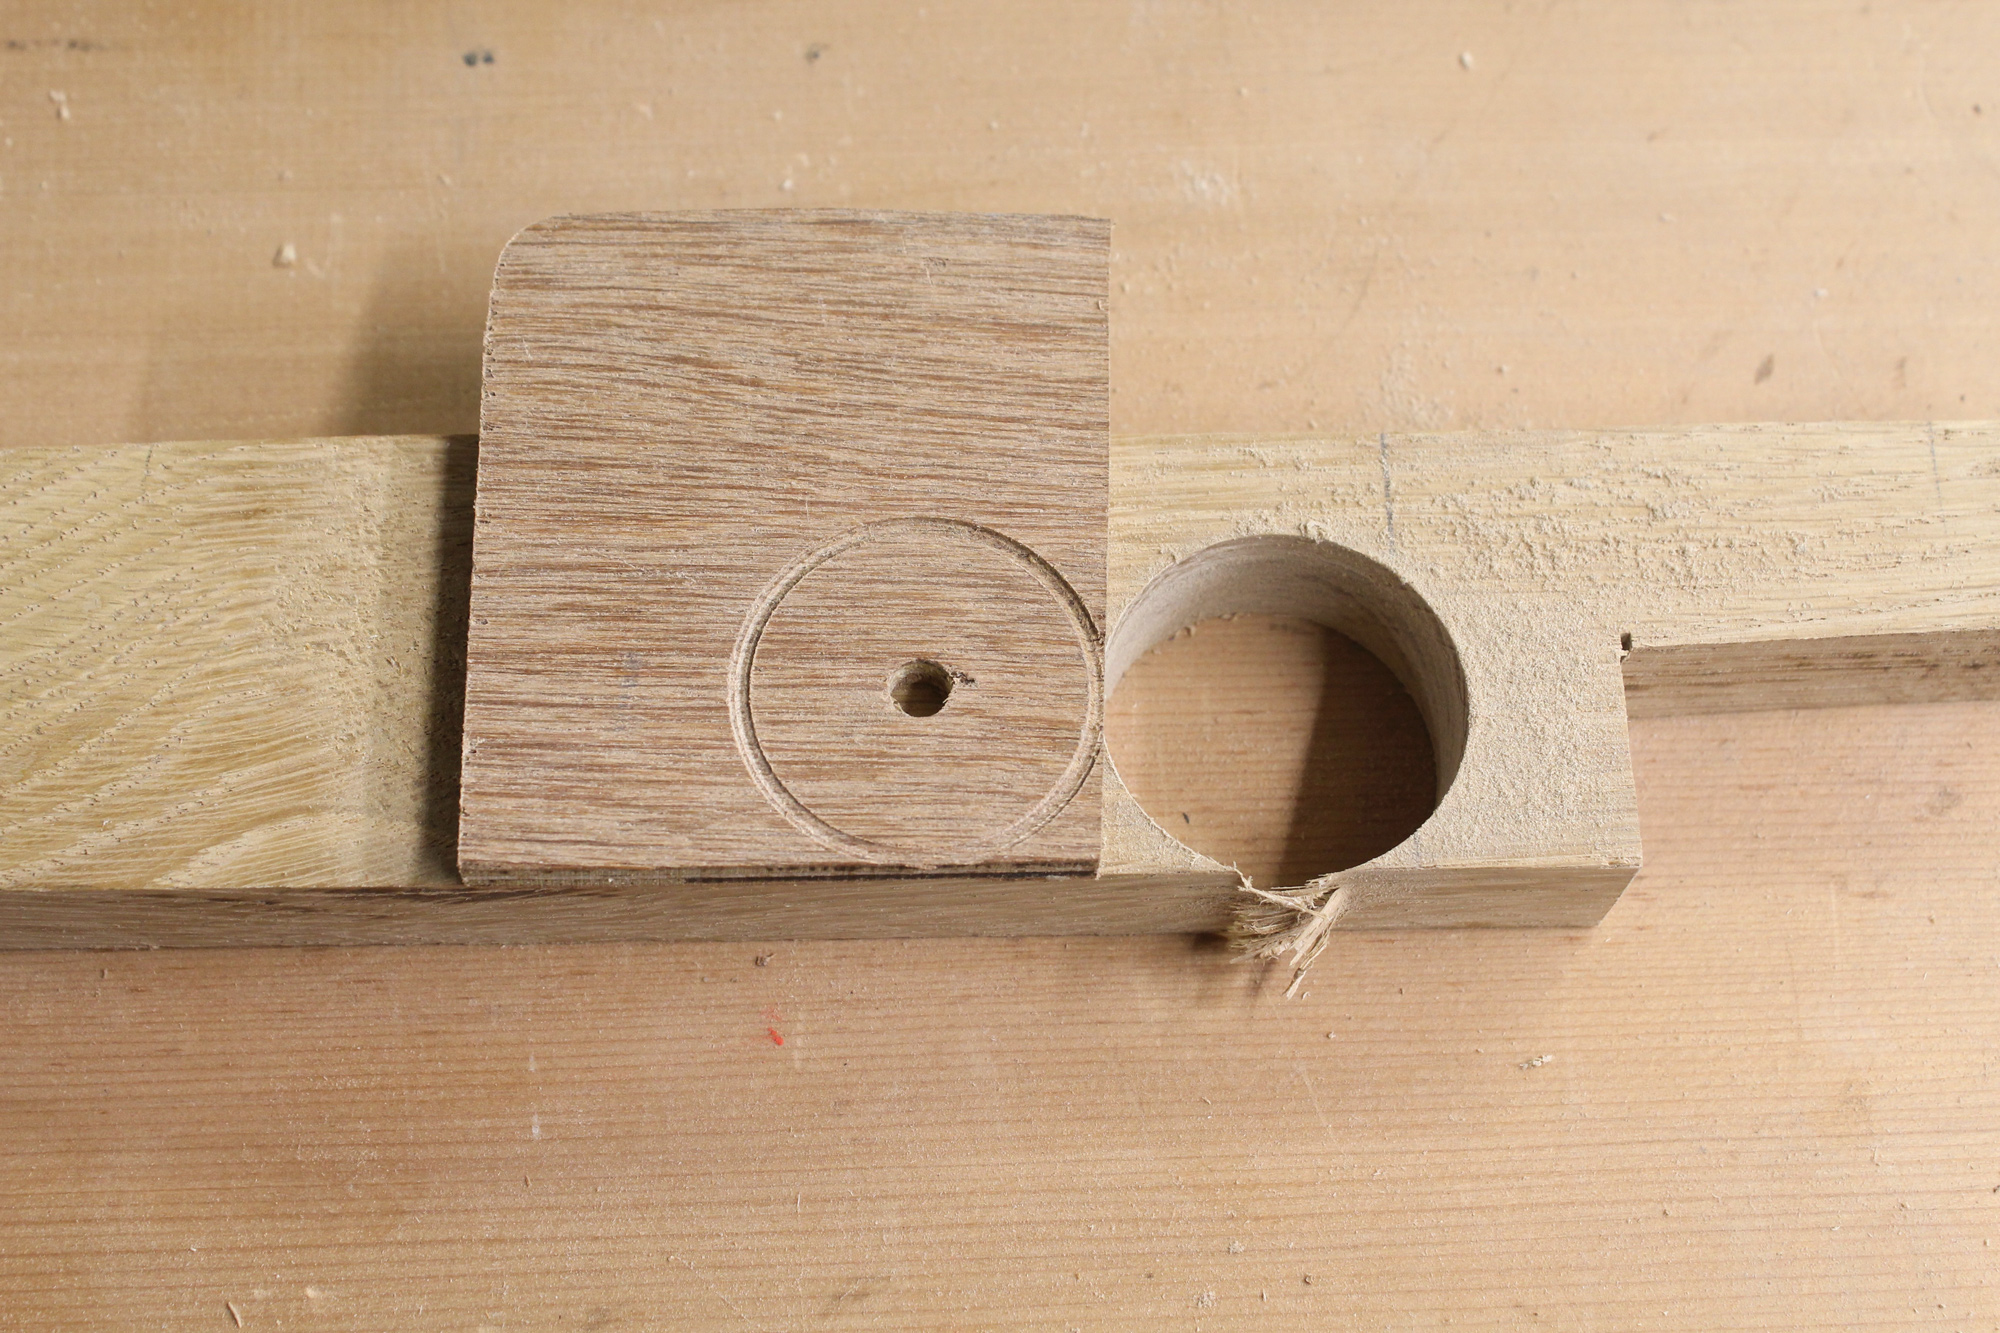
Because the holesaw’s pilot bit touches the wood well before its teeth engage, it is very difficult to get the 1⁄16″-wide kerf to intersect the edge of the wood by eye. This jig, made from thin plywood, has two of its edges sanded so that they land in the middle of the kerf. Marking the stock through the hole made by the pilot bit assures easy going for the next plug.
It’s not easy to get the pilot bit in the right place by eye, so a jig is helpful. This is made of a small piece of plywood with a pilot hole and a shallow kerf cut on both sides. Two edges of the jig are then trimmed—I use a disc sander—to intersect the kerf. Those edges are aligned to the edge of the stock and to any previously cut hole, both to make the vent through which to expel dust, and to minimize waste by keeping the holes as close together as possible.
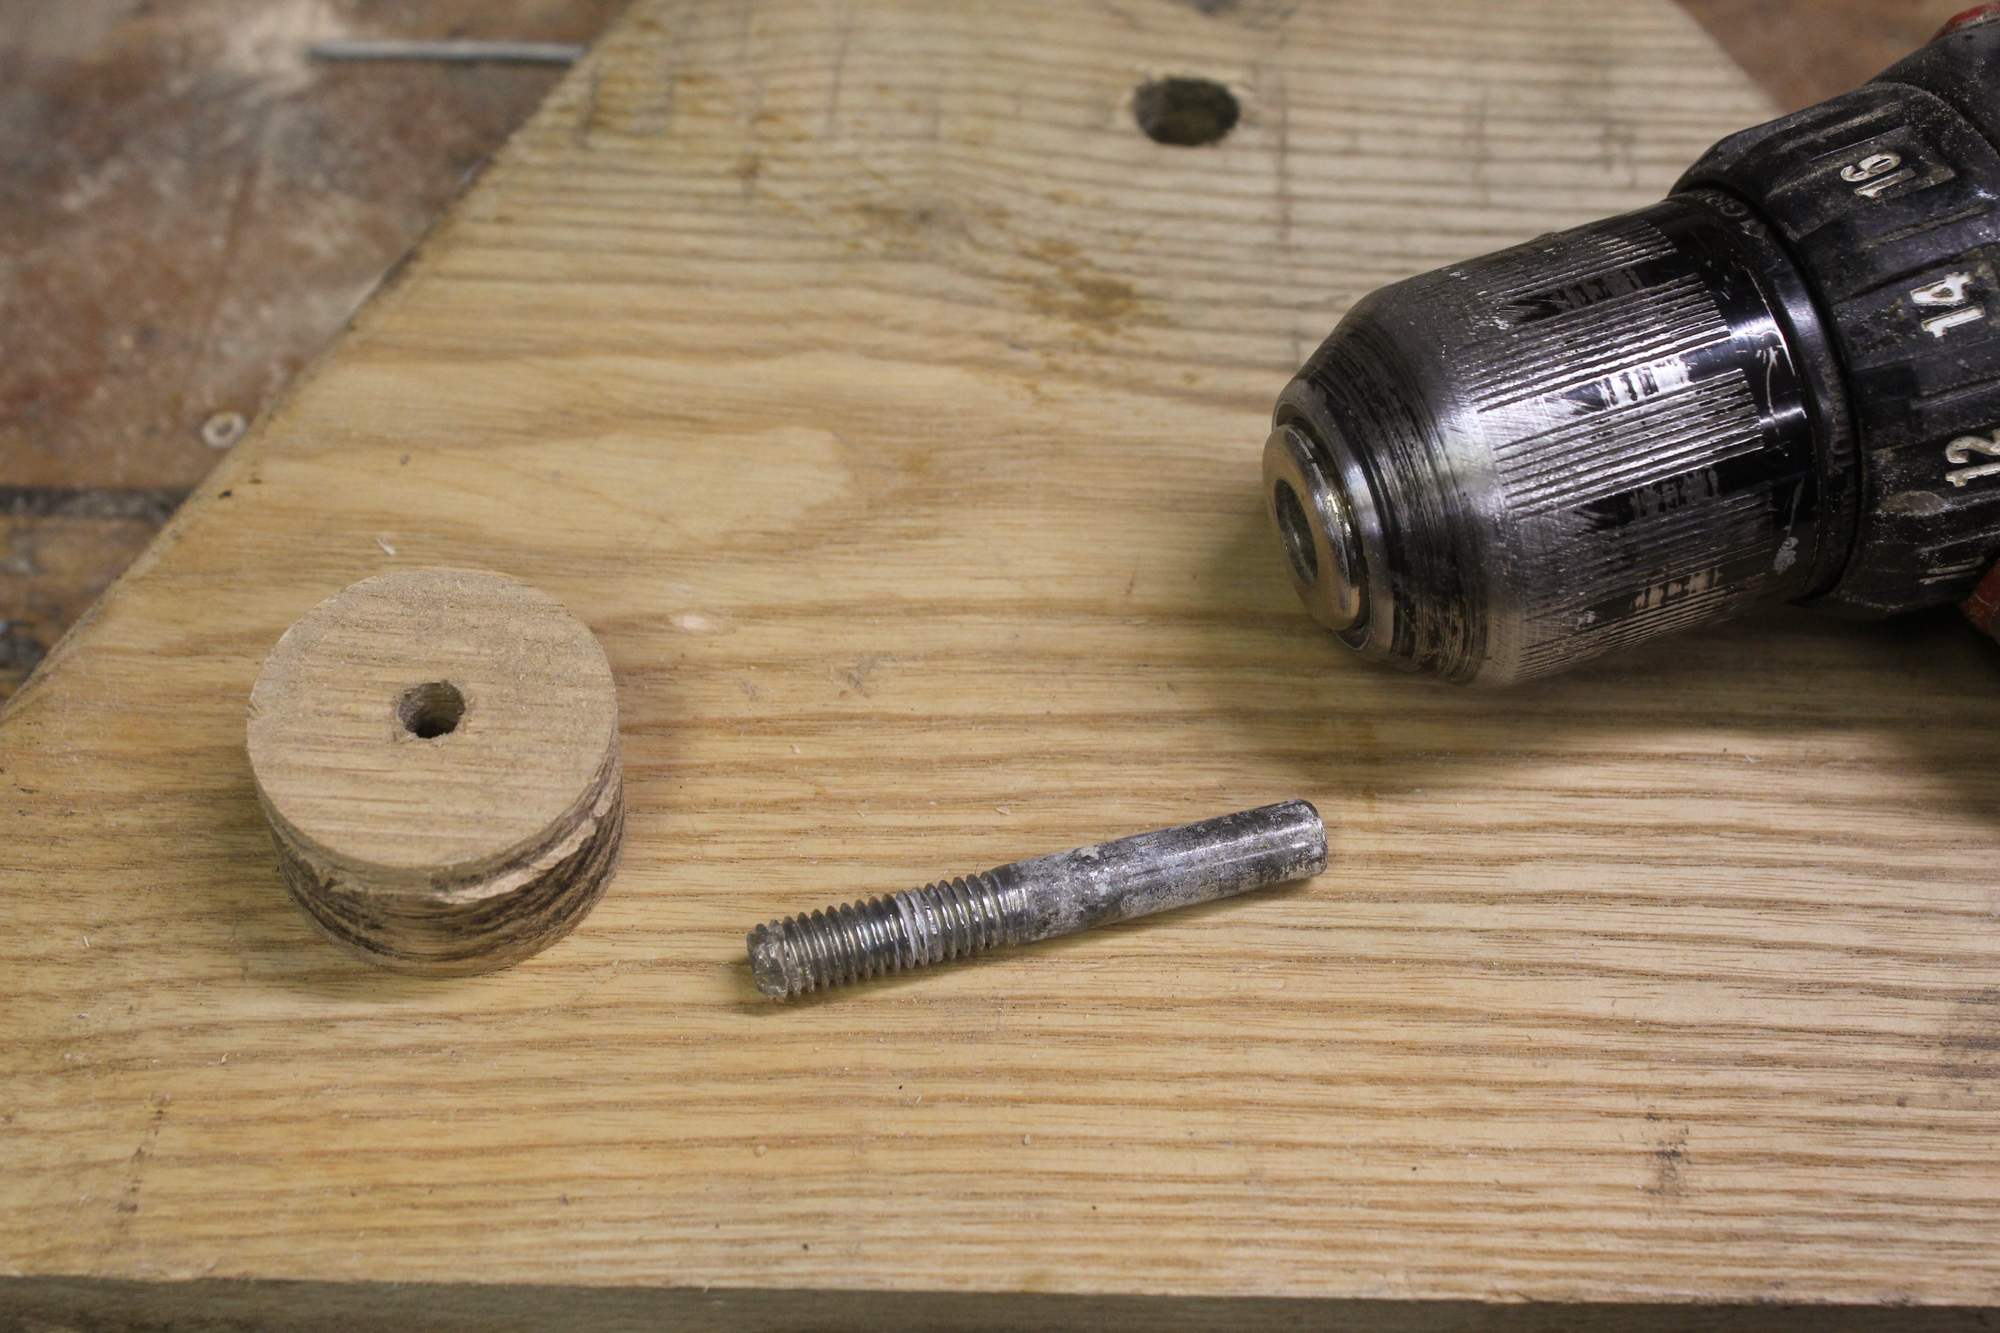
Plugs made by holesaws have a 1⁄4″ hole left by the pilot bit. A 5⁄16″ bolt, with its head removed and its threaded end filed to a slight taper, can be driven into the hole. The plug can then be spun for shaping.
To shape the plug, I spin it with a cordless drill. I use a 5⁄16″ bolt with the head sawn off and the threaded end tapered slightly with a file. Chucked in the drill and spun slowly, it can work its way into the plug’s hole in some woods.
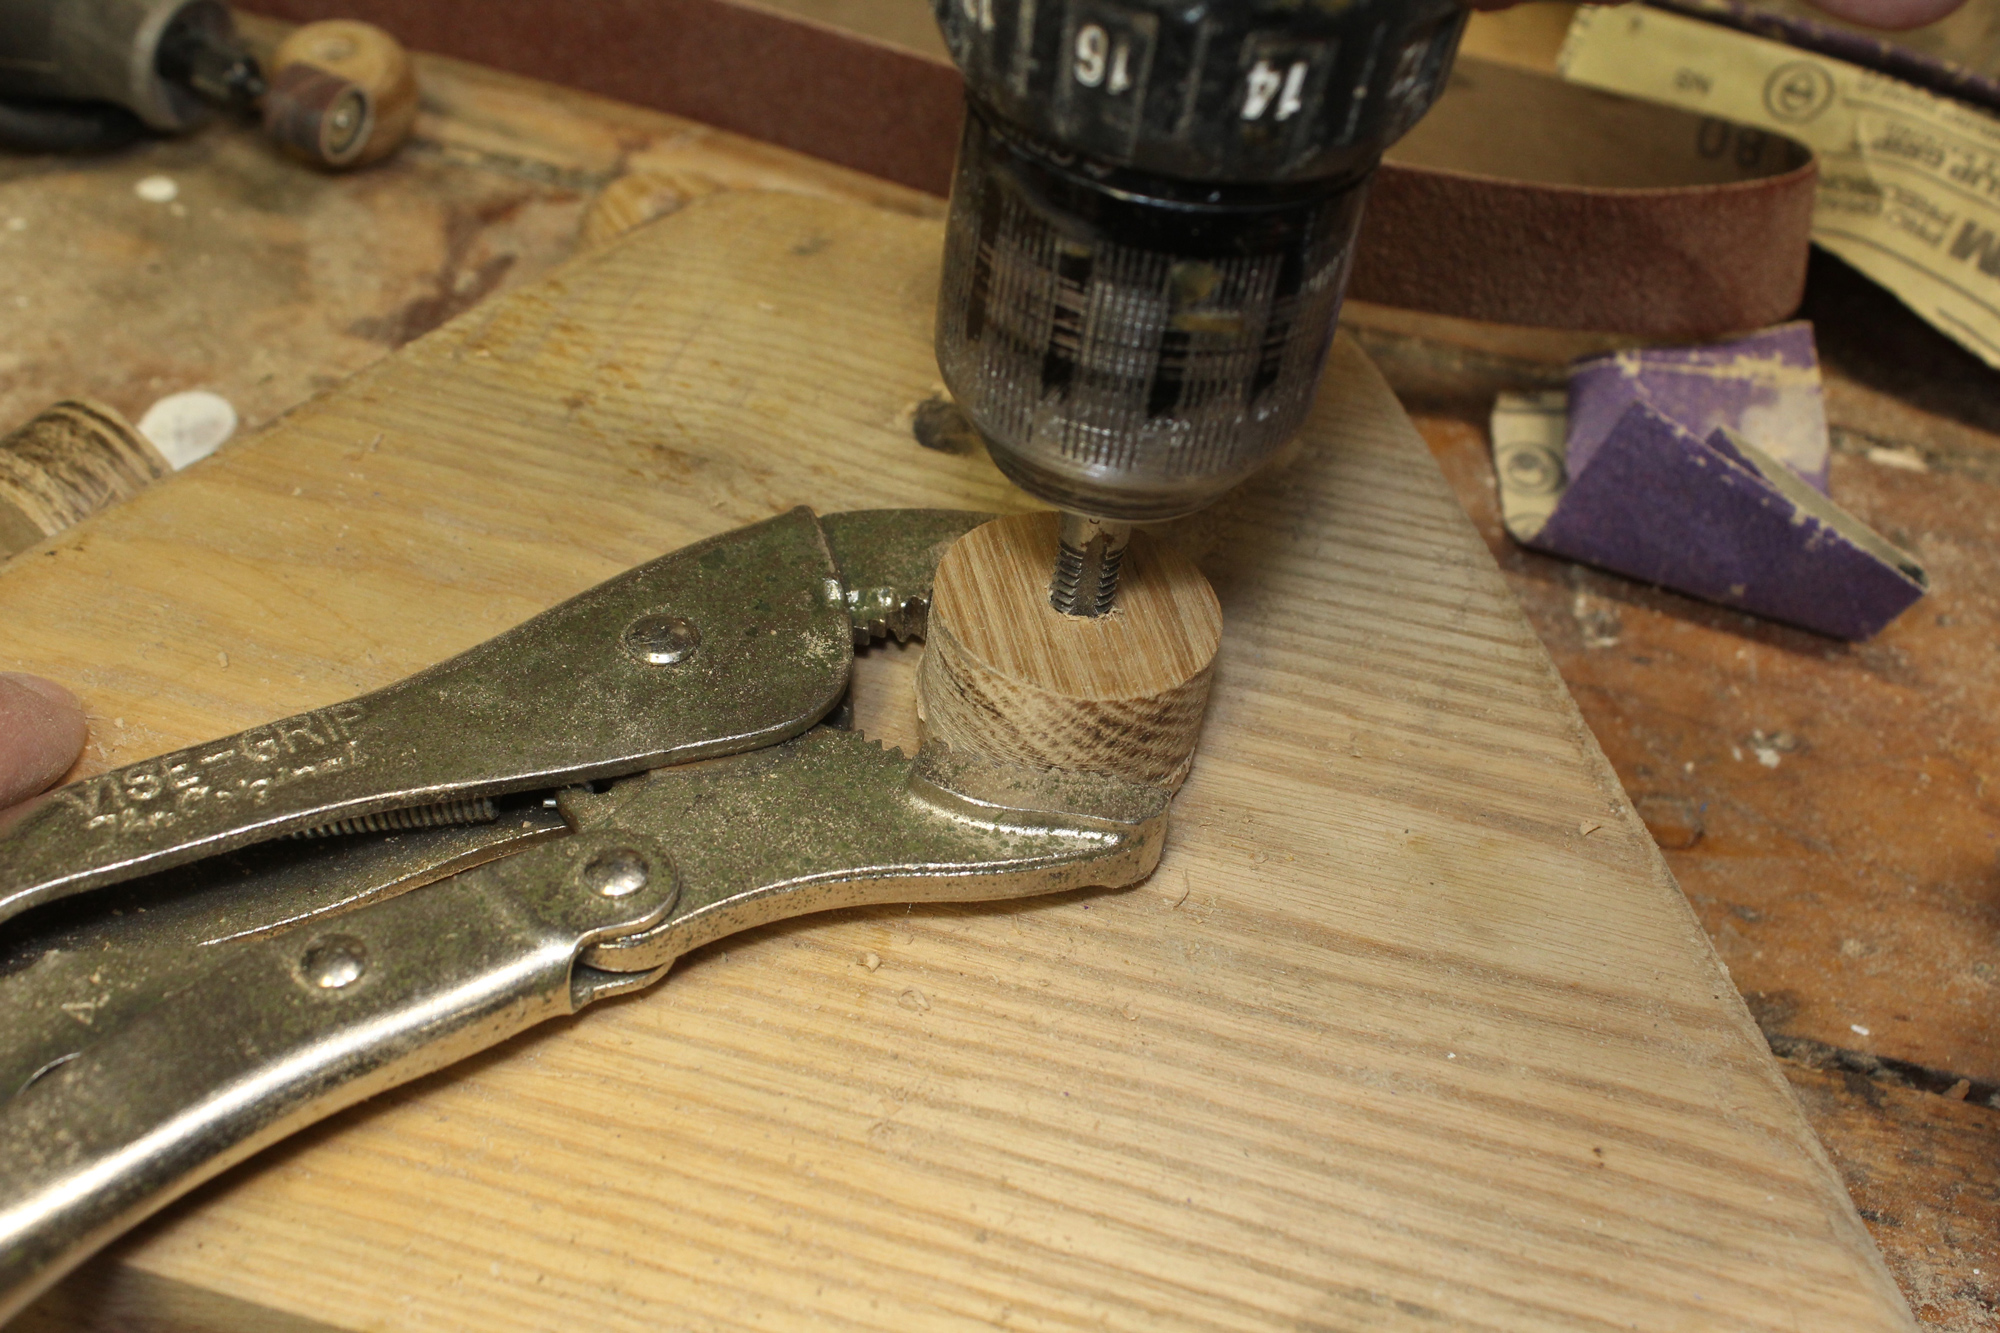
Installing the bolt in the plug can be made easier by first threading the hole with a 5⁄16″ × 18tpi tap chucked in a cordless drill.
If the bolt won’t easily thread its way into the plug, cut threads into the hole with a 5⁄16″ × 18tpi tap. Cut partway, not all the way, through; leave some wood untapped so the bolt will grip the plug without going through it. Holding the plug with pliers or Vise-Grips and resting it on the work surface will make the job easier.
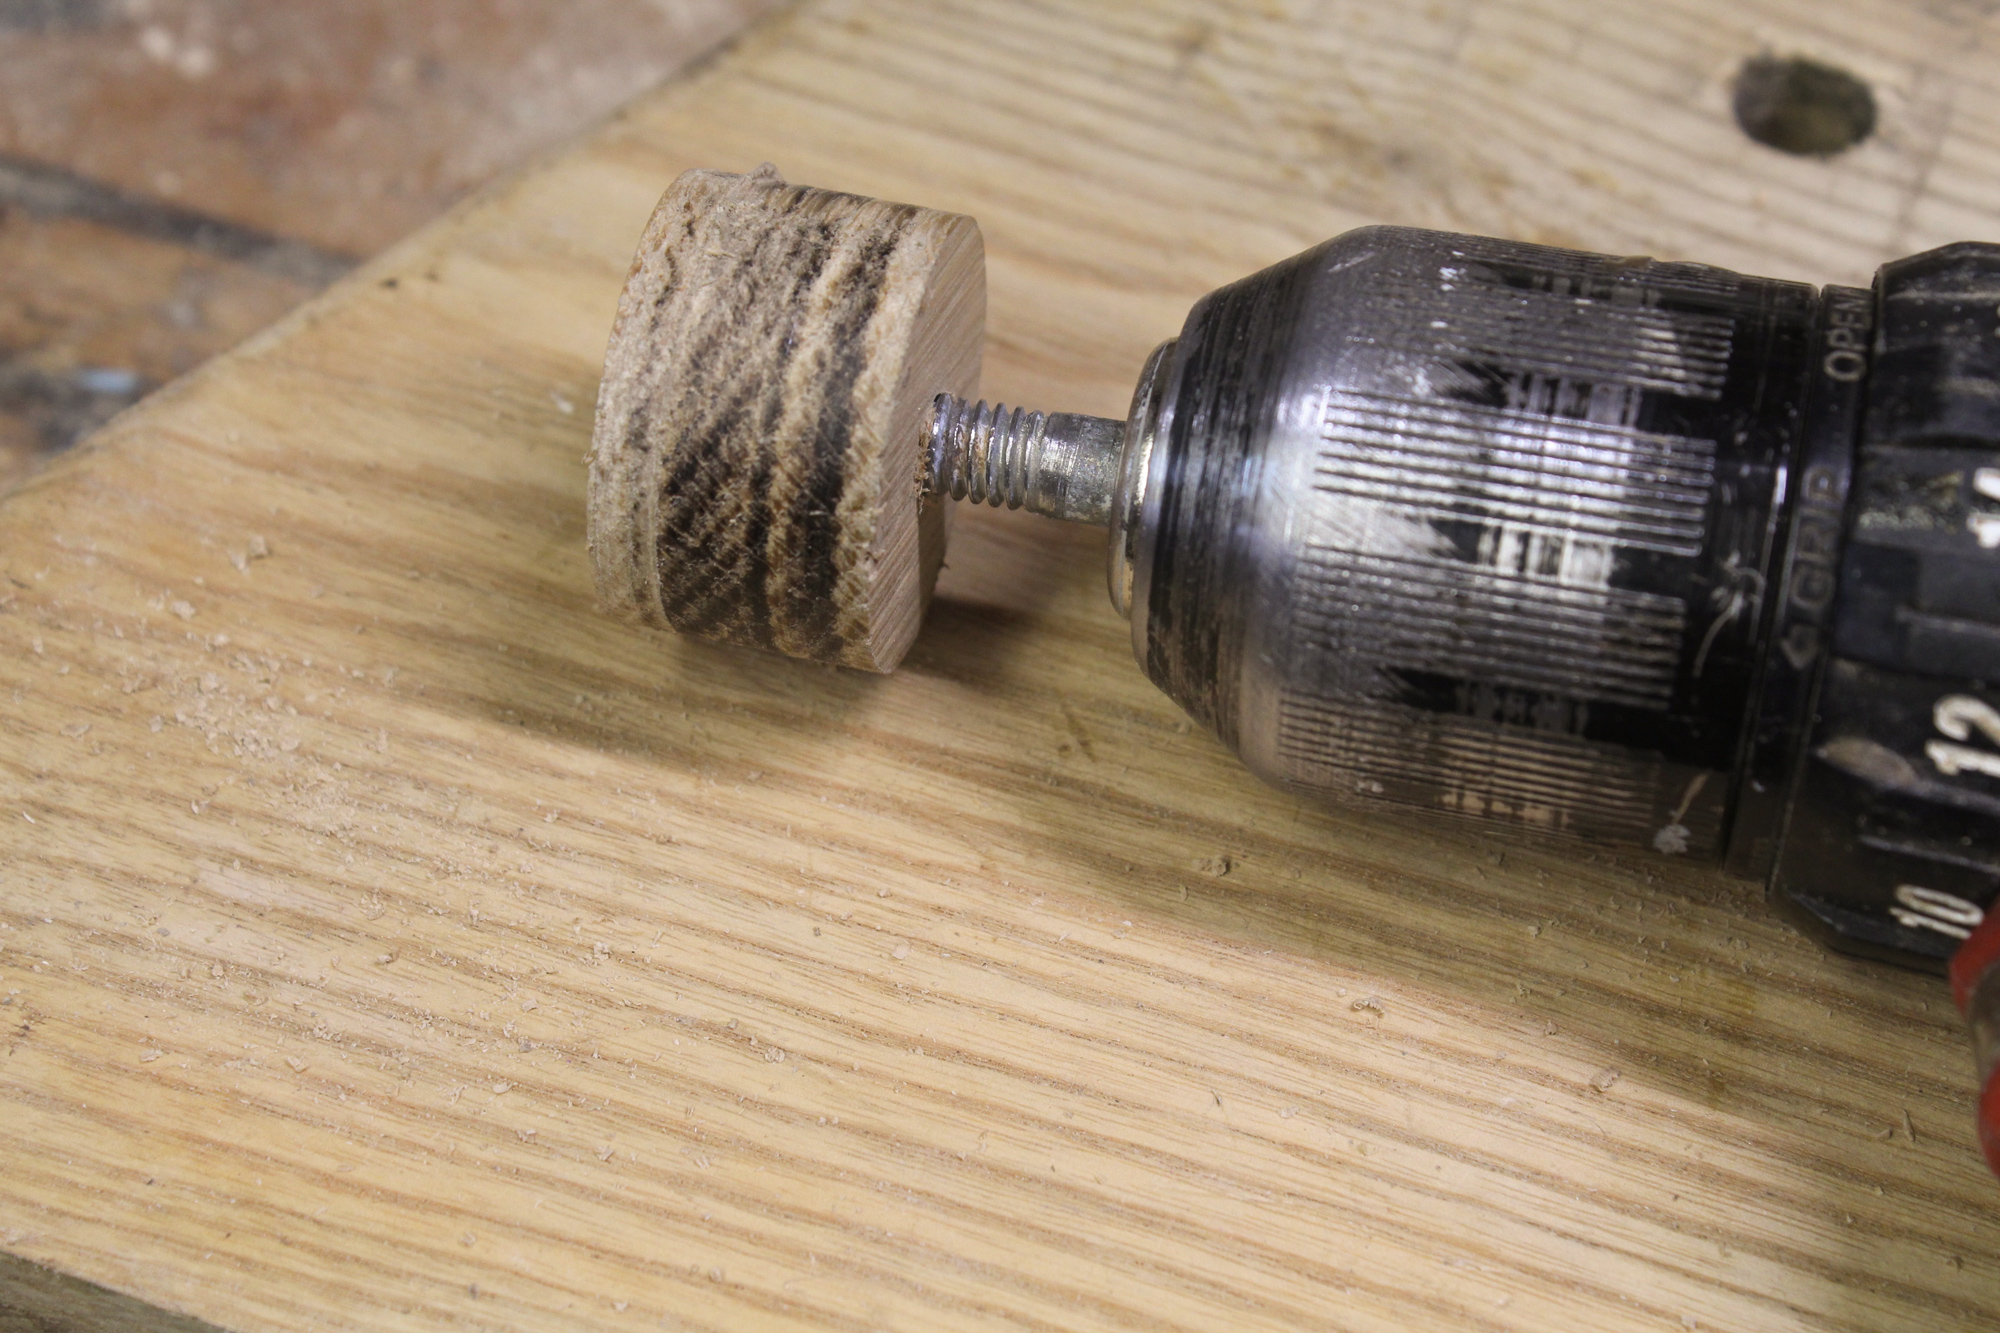
With the bolt twisted into the plug and chucked in the drill, the plug is ready for shaping.
The tapered end of the bolt can stray offline, so set the plug on the work surface, as shown with using the tap, and keep the drill upright. The bolt will align itself as it gets deeper into the plug.
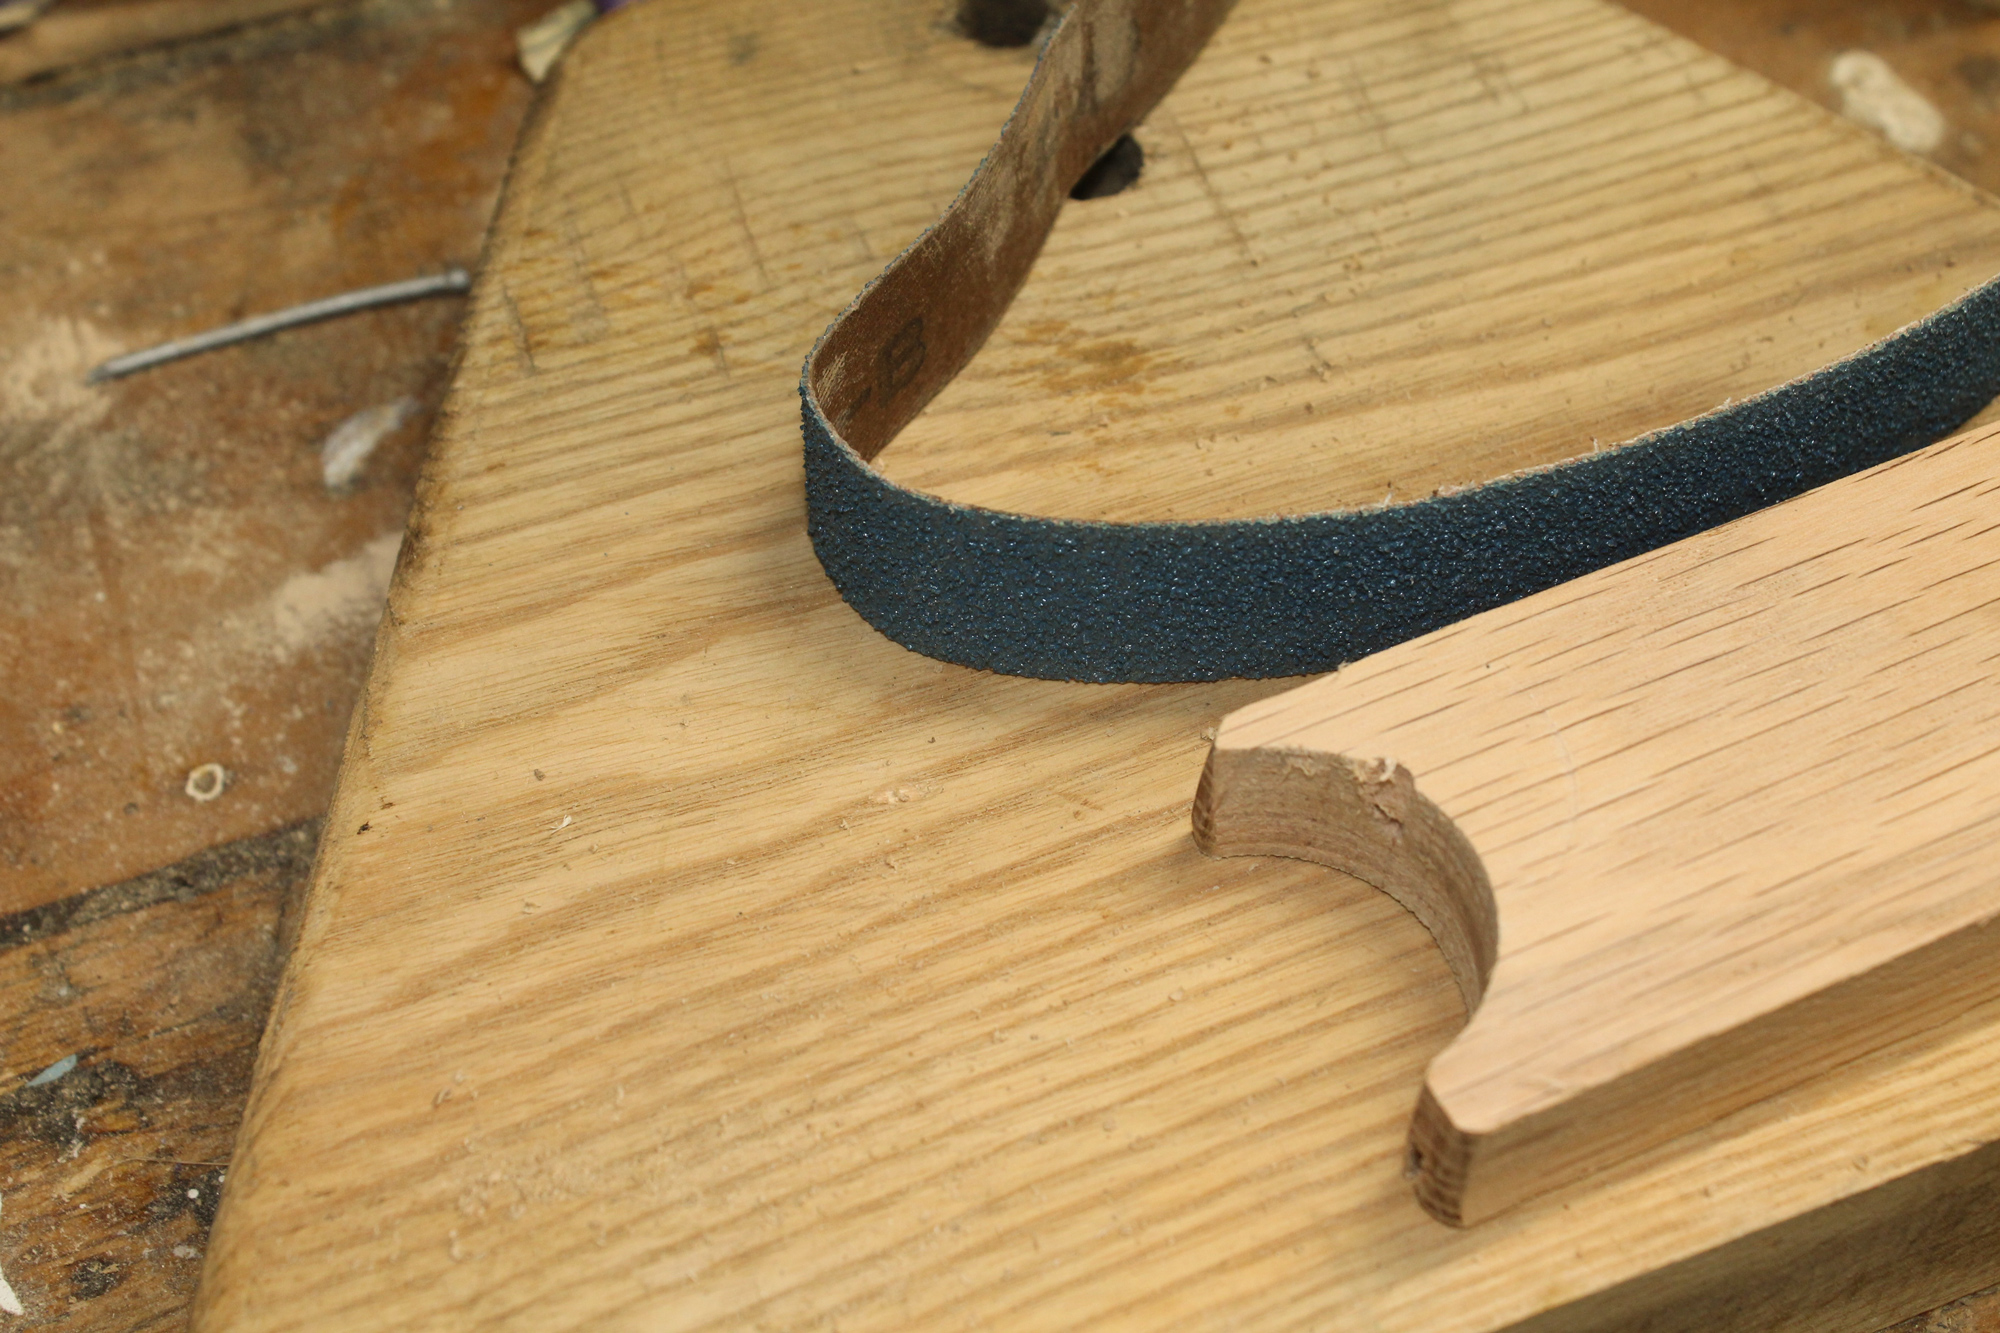
The arrangement for shaping the bead includes a sanding belt and a block of wood with a half-circle cut in one end with the holesaw.
To shape the beads, use a coarse sanding belt: 40-grit cuts quickly; a 1 × 30 belt works well, as do strips torn from a 3 x 21 belt. To make a holder for the belt, use the holesaw to cut a hole in a block of wood and saw off half of it, leaving a concave half-circle.
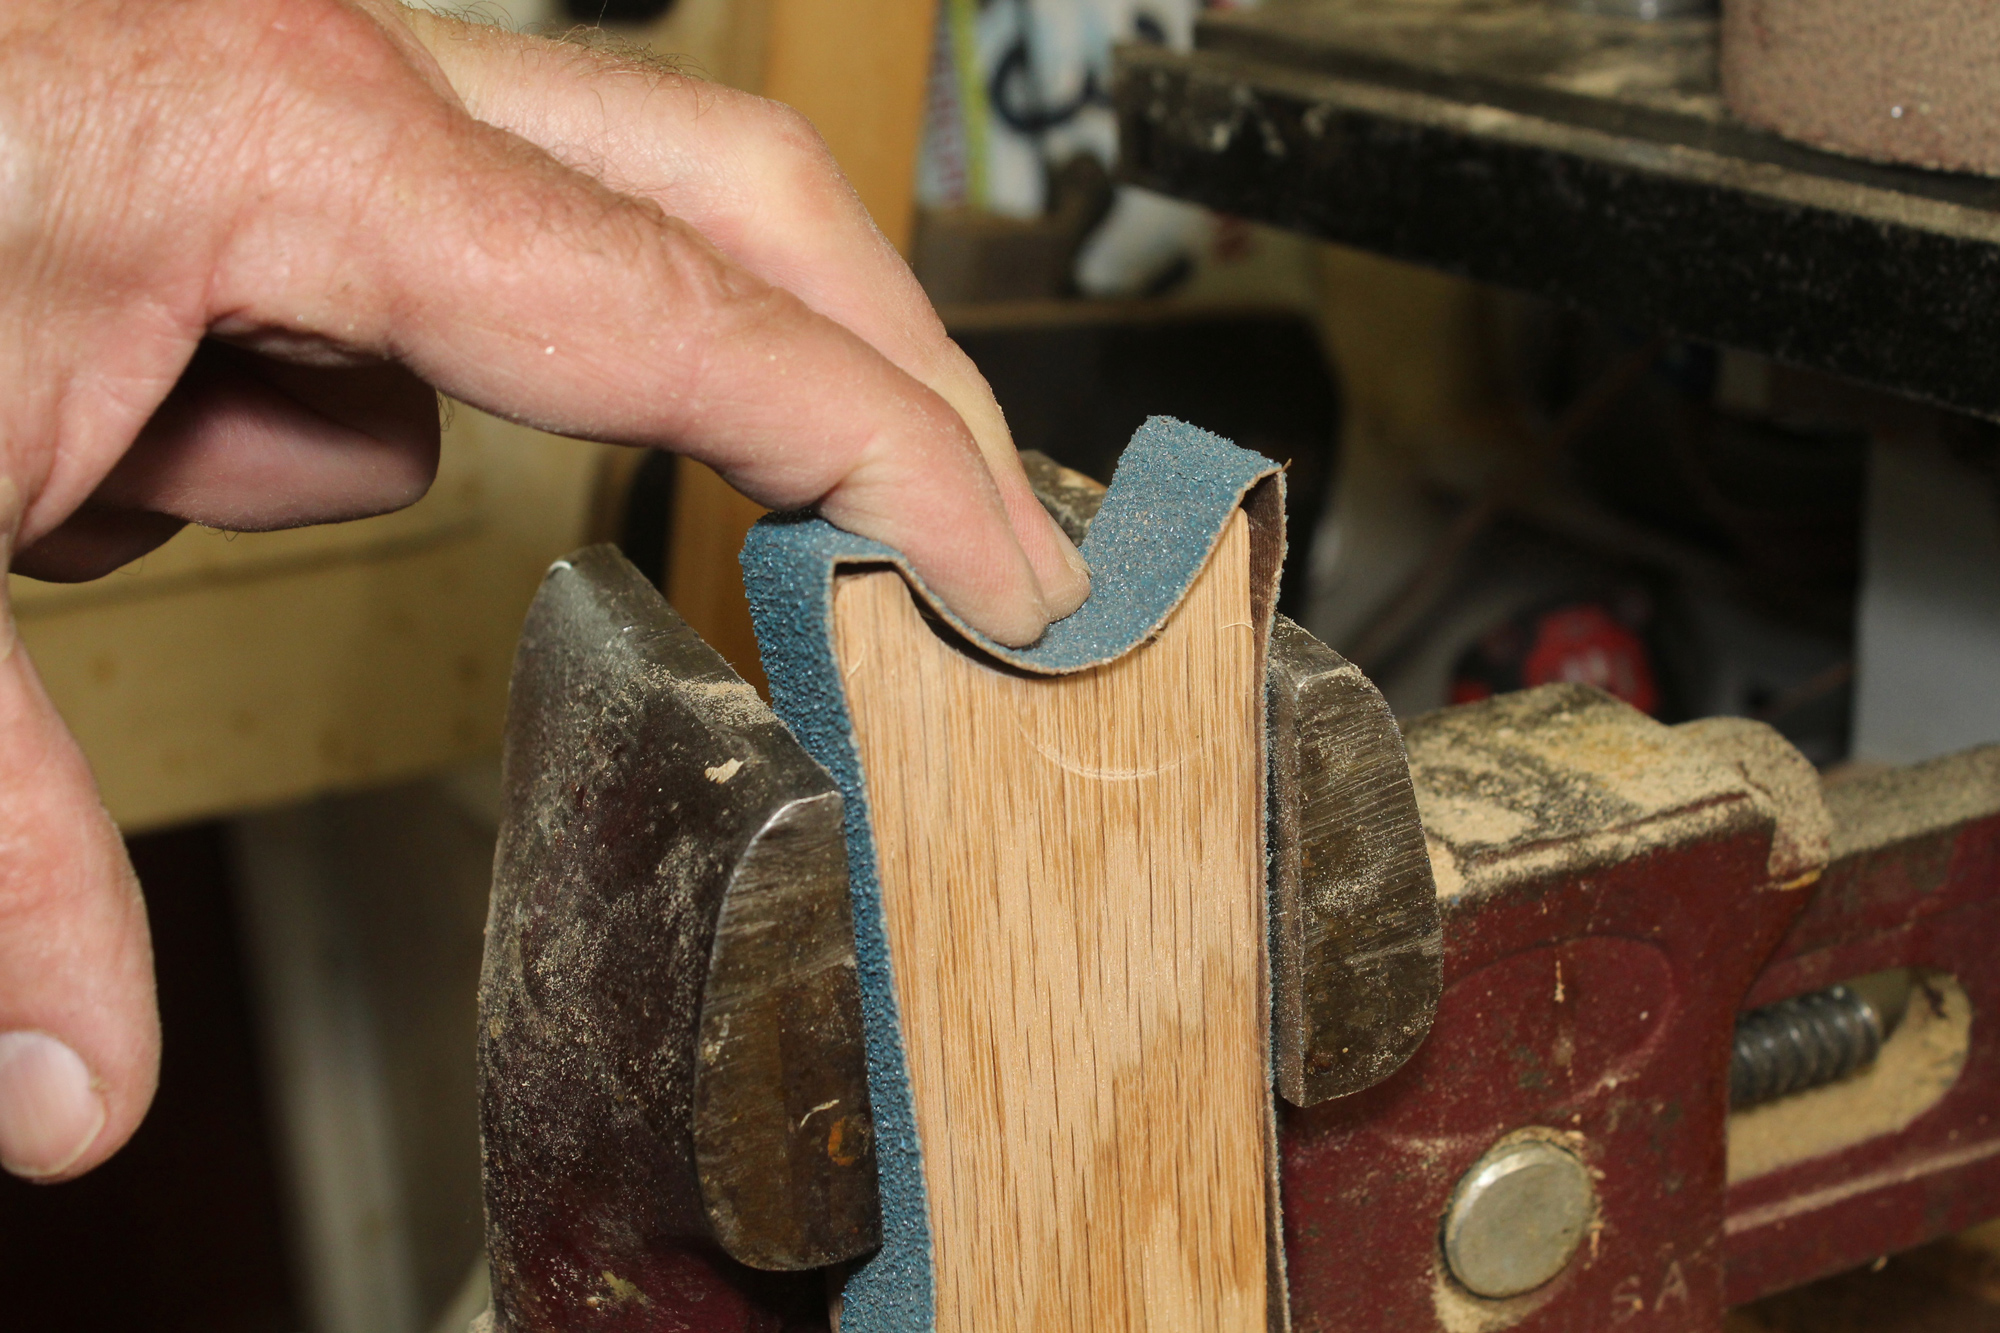
The sanding belt and block are held in a vise. The belt is left with enough slack to settle into the half circle. The 40-grit belts are stiff, but they will conform to the curve during the sanding process.
Press the sanding belt into the half-circle and fold the ends over the edges. Clamp the belt and block in a vise.
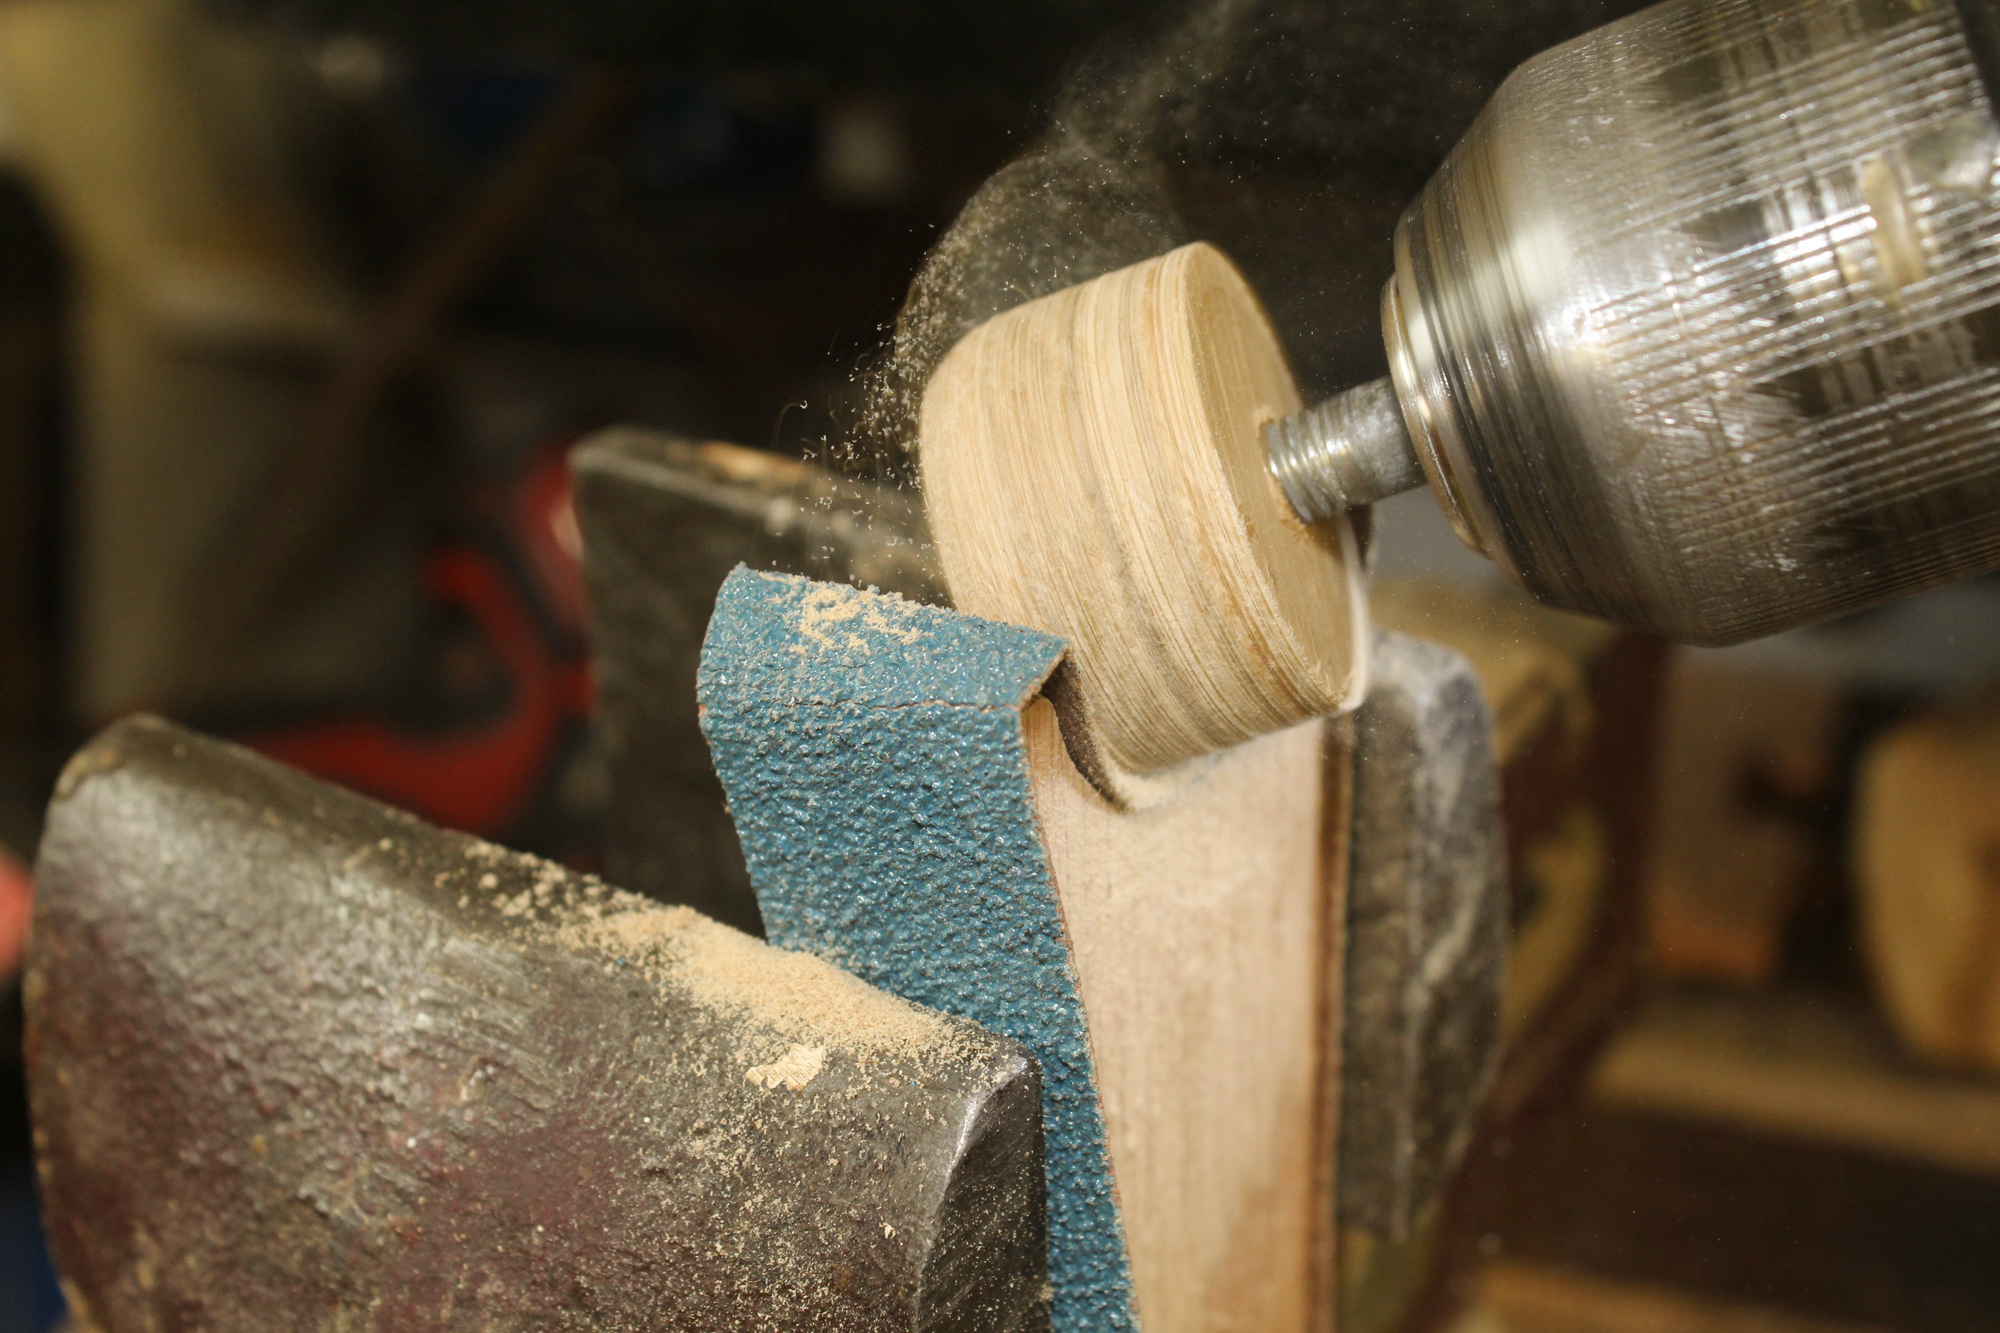
With the drill running at high speed, the sanding belt rounds the end of the plugs.
Activate the drill to spin the plug at high speed and press the plug against the sanding belt to settle it into the recess in the block. Pivot the drill up and down, even up to vertical, and from side to side to round the edges of the plug. To maintain a consistent diameter for a set of beads, do no more than a light smoothing of the center and focus your effort on rounding the ends. A plug cut from 3⁄4″ stock will have a length of less than its 1 5⁄16″ diameter, and sanding will not get all the way to the center of the ends. The finished bead will be somewhat oval in cross section rather than circular.
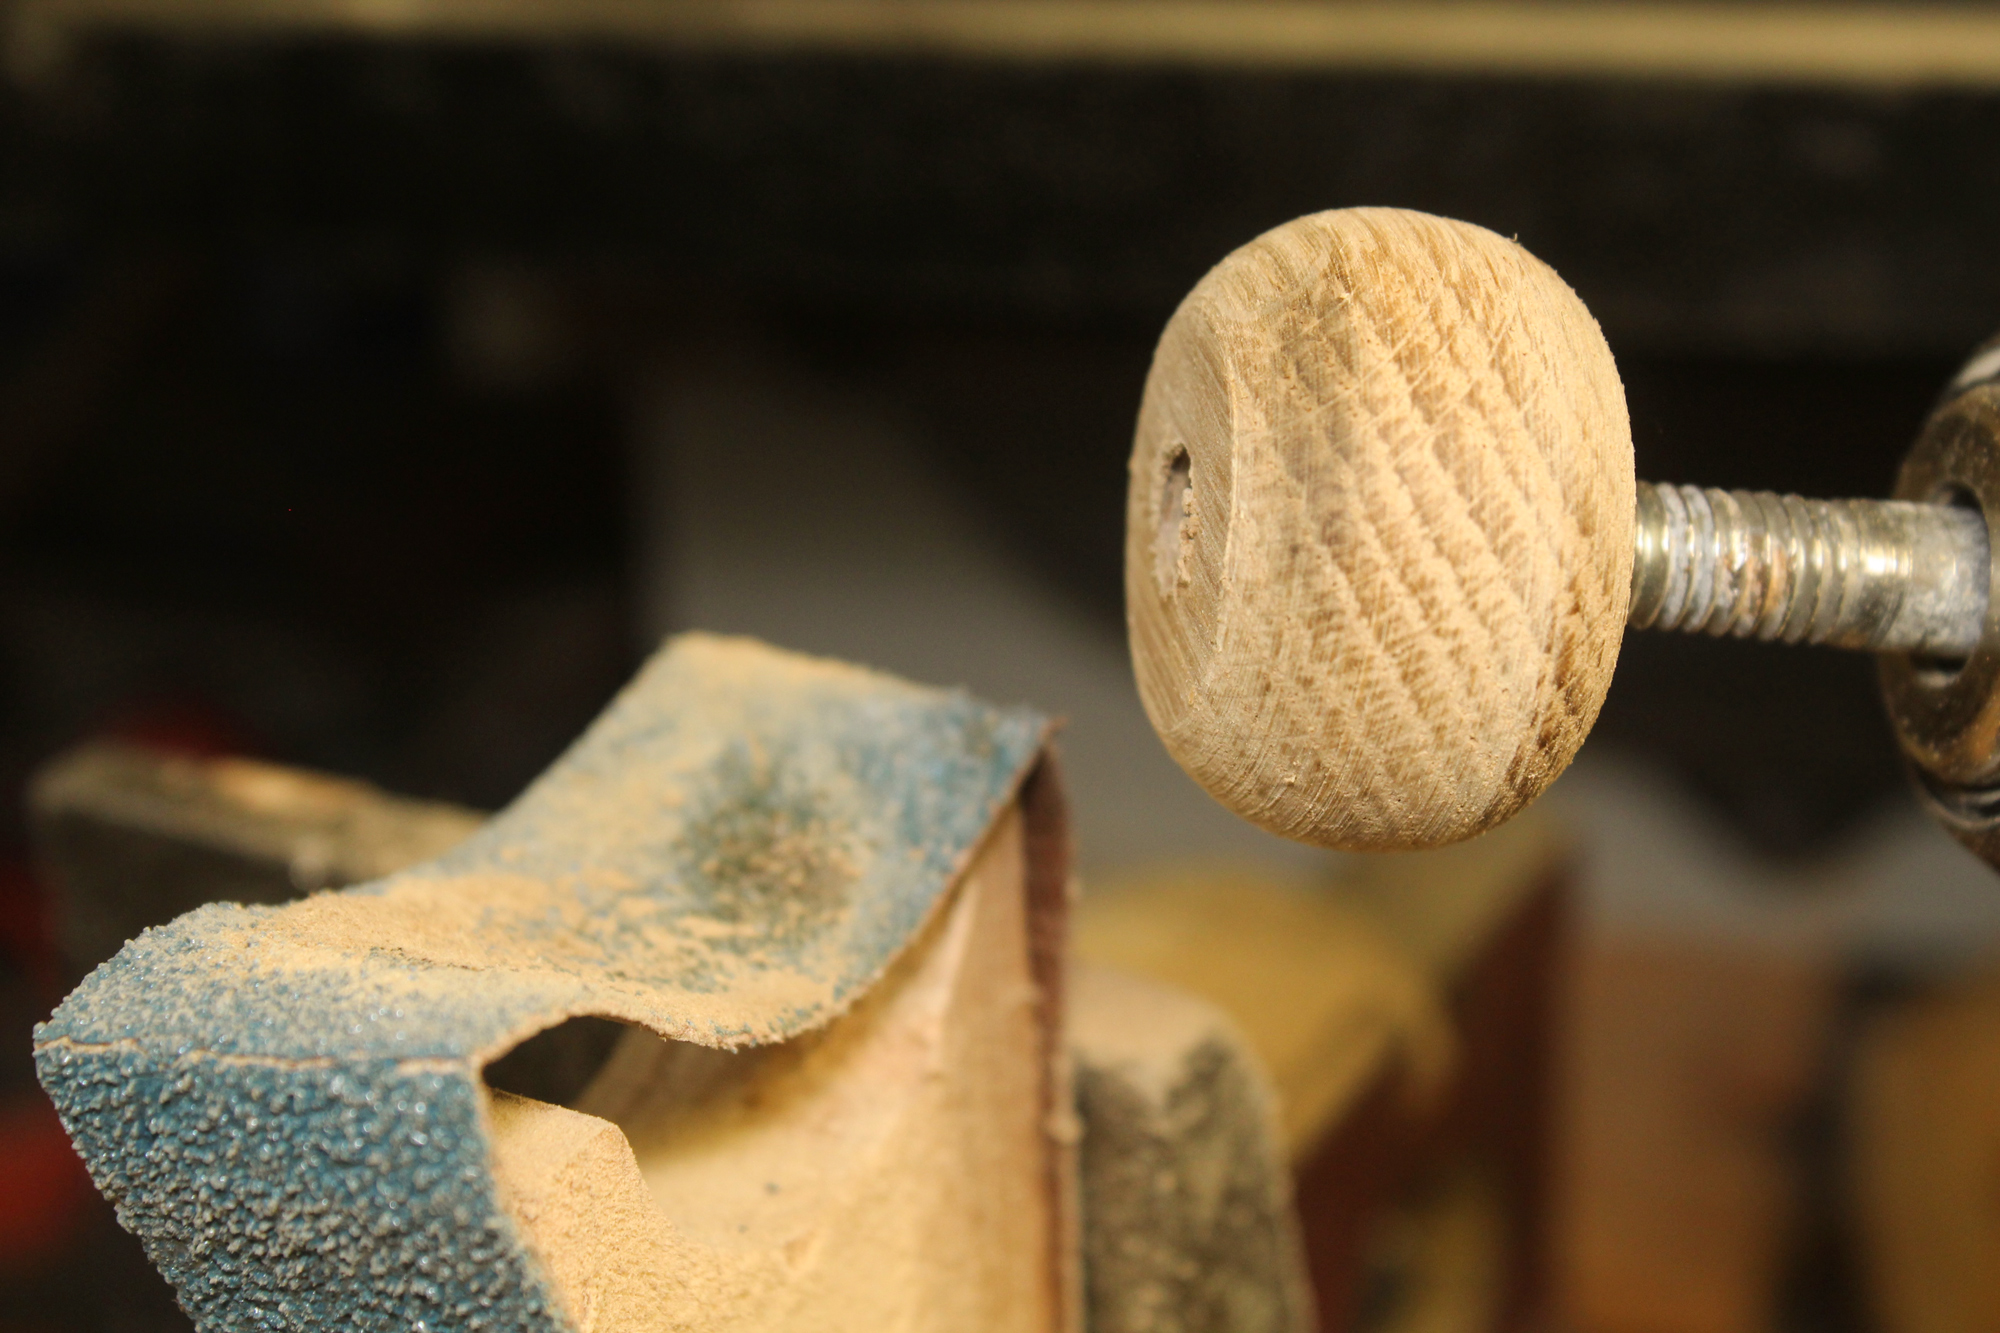
After one end is shaped, the drill is reversed to back the bolt out of the plug; the bolt is then driven into the other side of the plug. Because this plug was cut from 3⁄4″-thick stock using a 1 1⁄4″ holesaw, the end of the plug shows unsanded wood, which will be shaped by hand. The resulting bead will be somewhat oval in shape.
After shaping one end, remove the plug from the threaded bolt and turn it around to sand the other end. To get the most use from the sanding belt, work the bead from both sides to reverse the direction in which the plug spins against the grit. Shaping hardwood can wear a section of the belt quickly, so for each new plug you may need to shift to a new part of the belt.
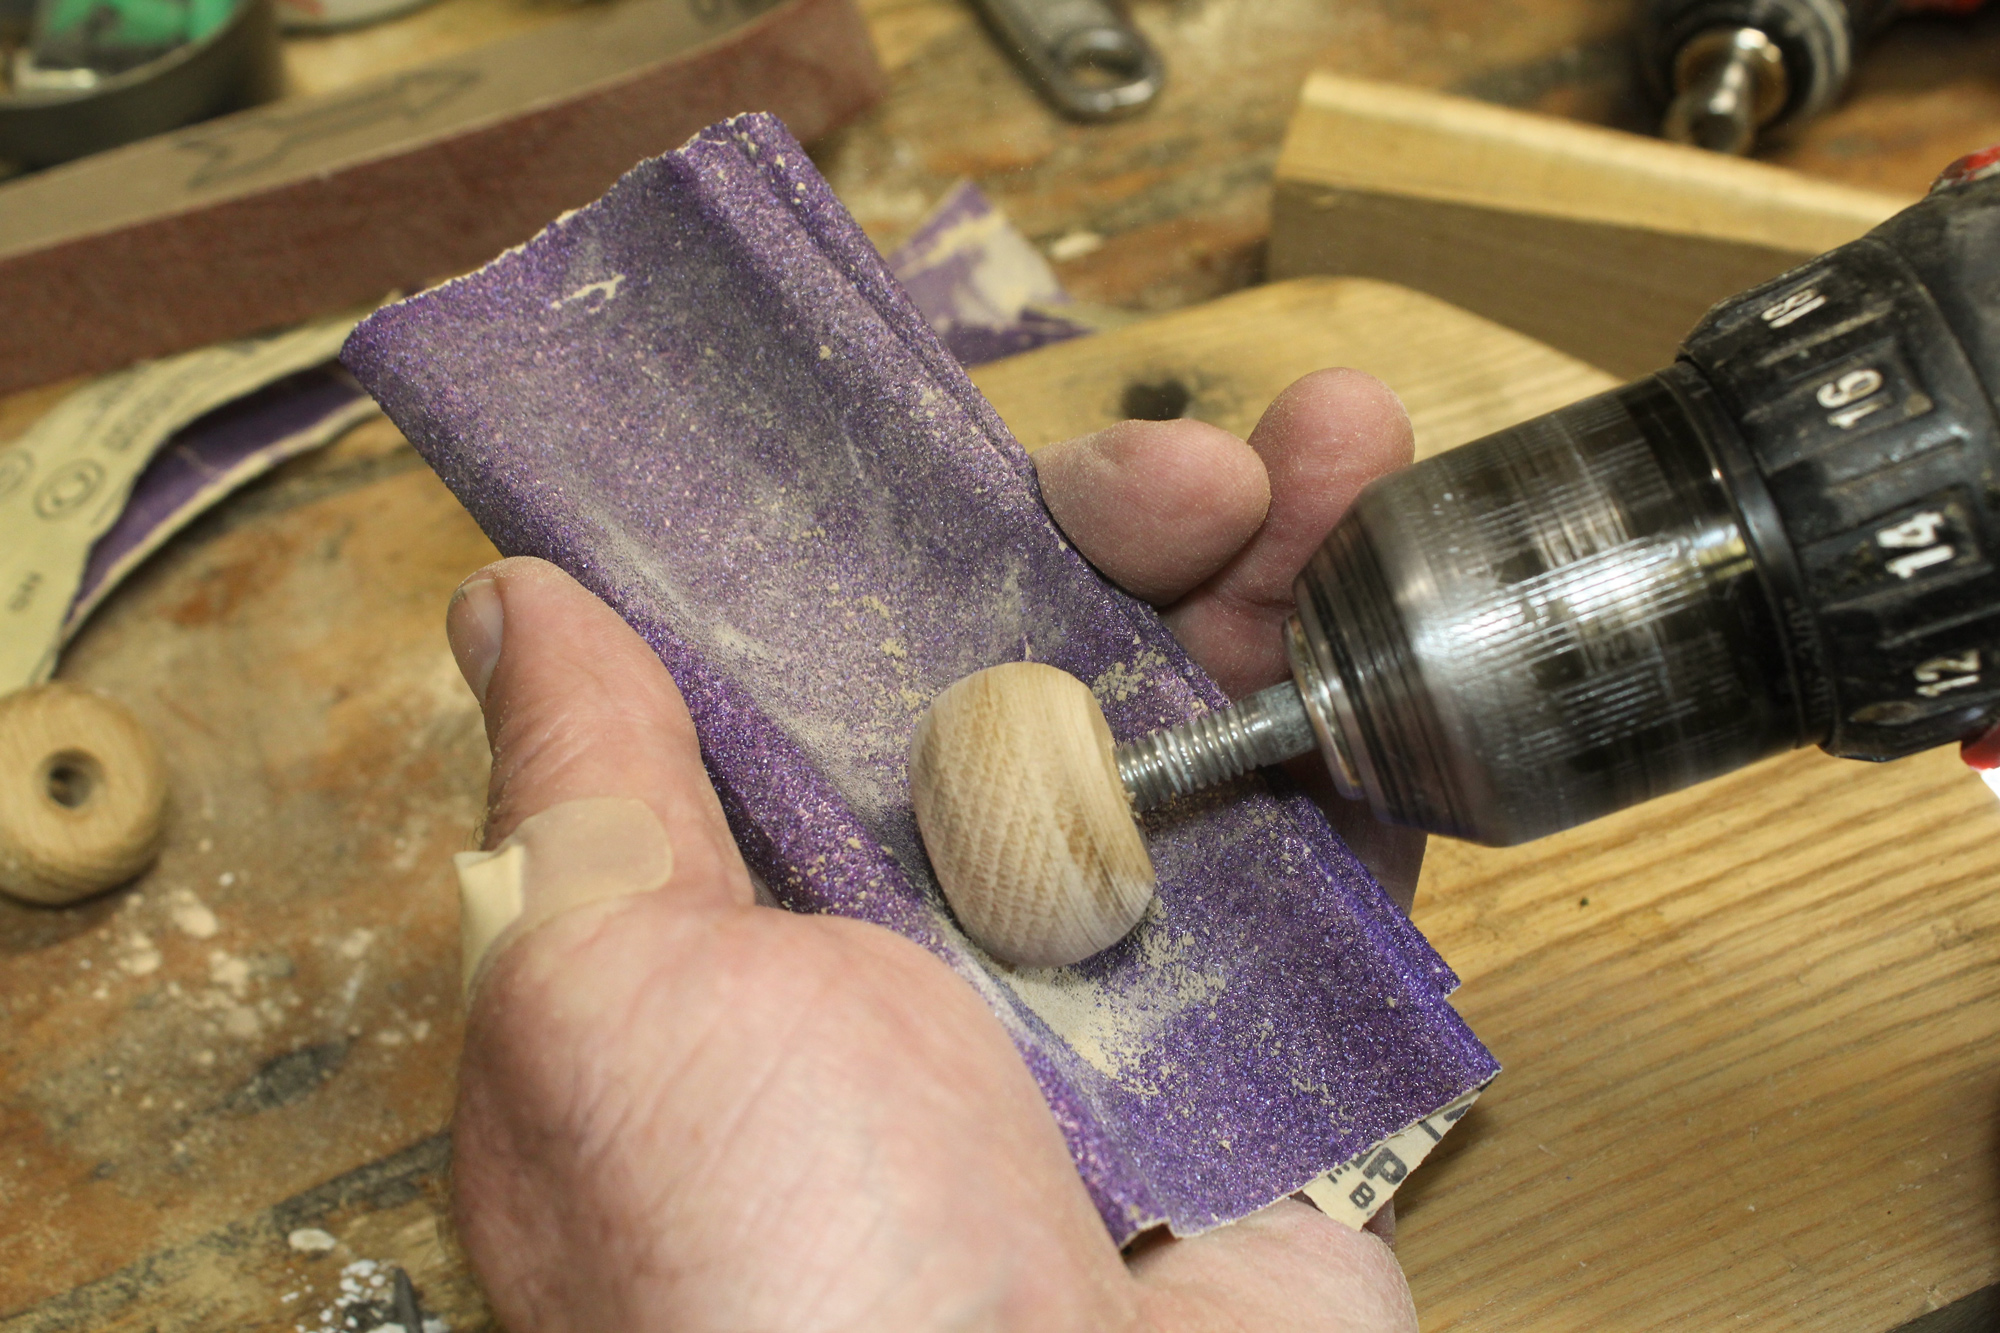
The final sanding starts with 80-grit and ends with 120. Curving the sandpaper and pivoting the drill smooths the shape at the end. Steel wool brings a shine to the wood.
Next, hand-sand the bead with half a sheet of 80-grit sandpaper, folded in thirds and held in a U shape. The final sanding is done with 120-grit, and then the bead can be polished with steel wool.
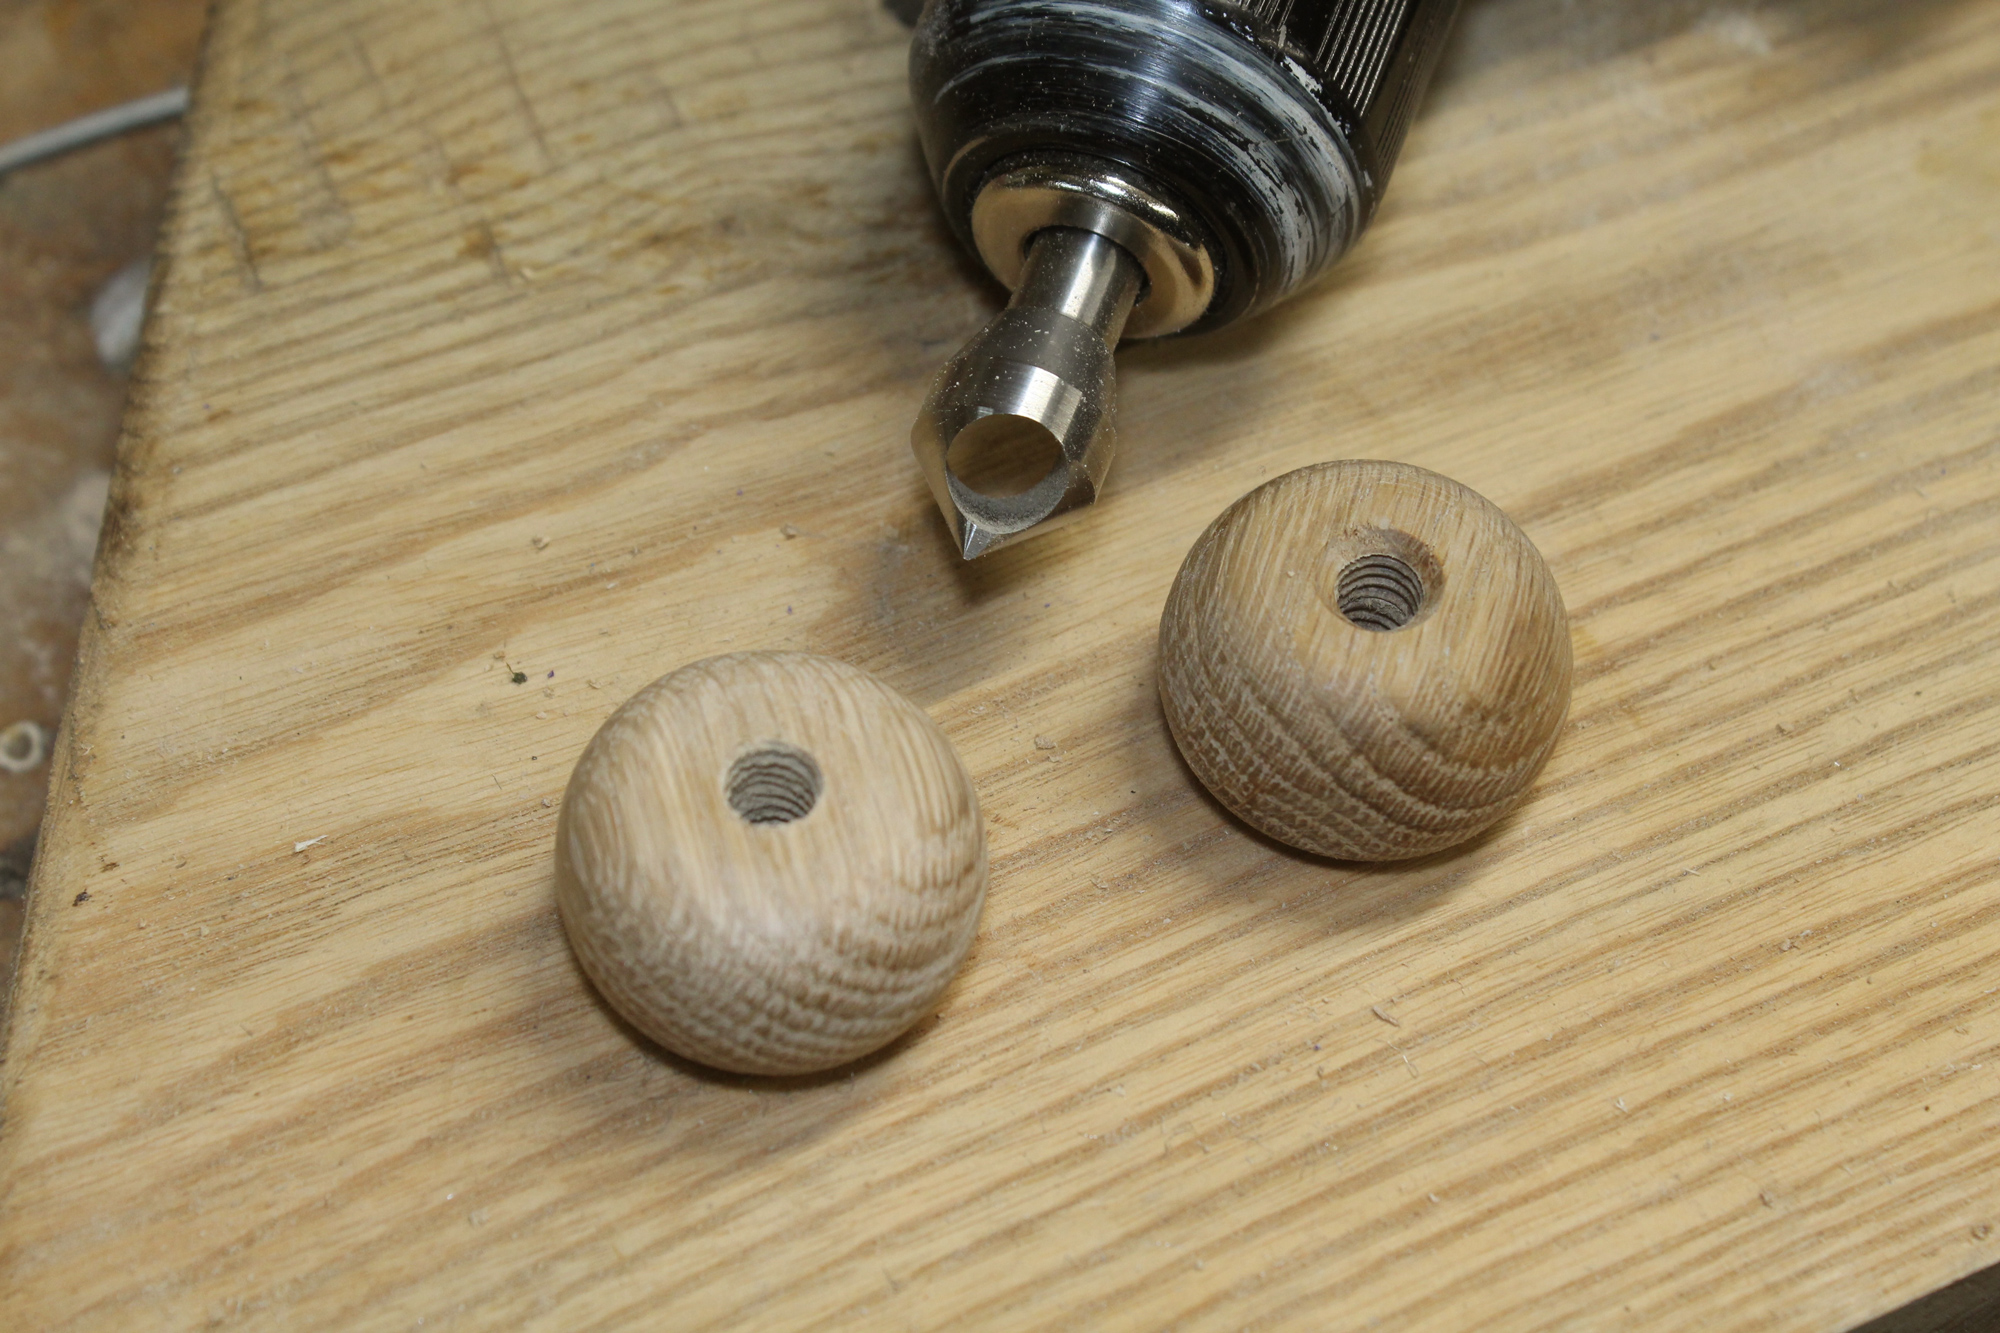
A zero-flute countersink cleans chamfers quickly and without the chatter other countersinks are prone to make. The threads, visible here inside the holes, will be smoothed by drilling through with a 5⁄16″ drill bit, which can require holding the bead with pliers or Vise-Grips with leather to pad the jaws.
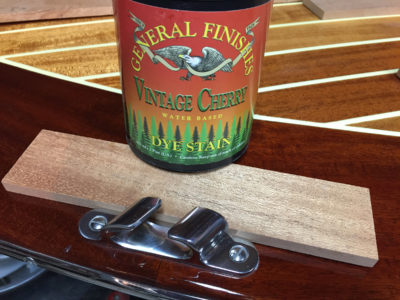
The final woodworking steps are to drill out the holes using a 5⁄16″ bit. This will remove the tapped threads inside the bead and accommodate a 1⁄4″ parrel line. Finally, countersink the holes (zero-flute countersinks do the smoothest job). Once finished, soak the beads in linseed oil.
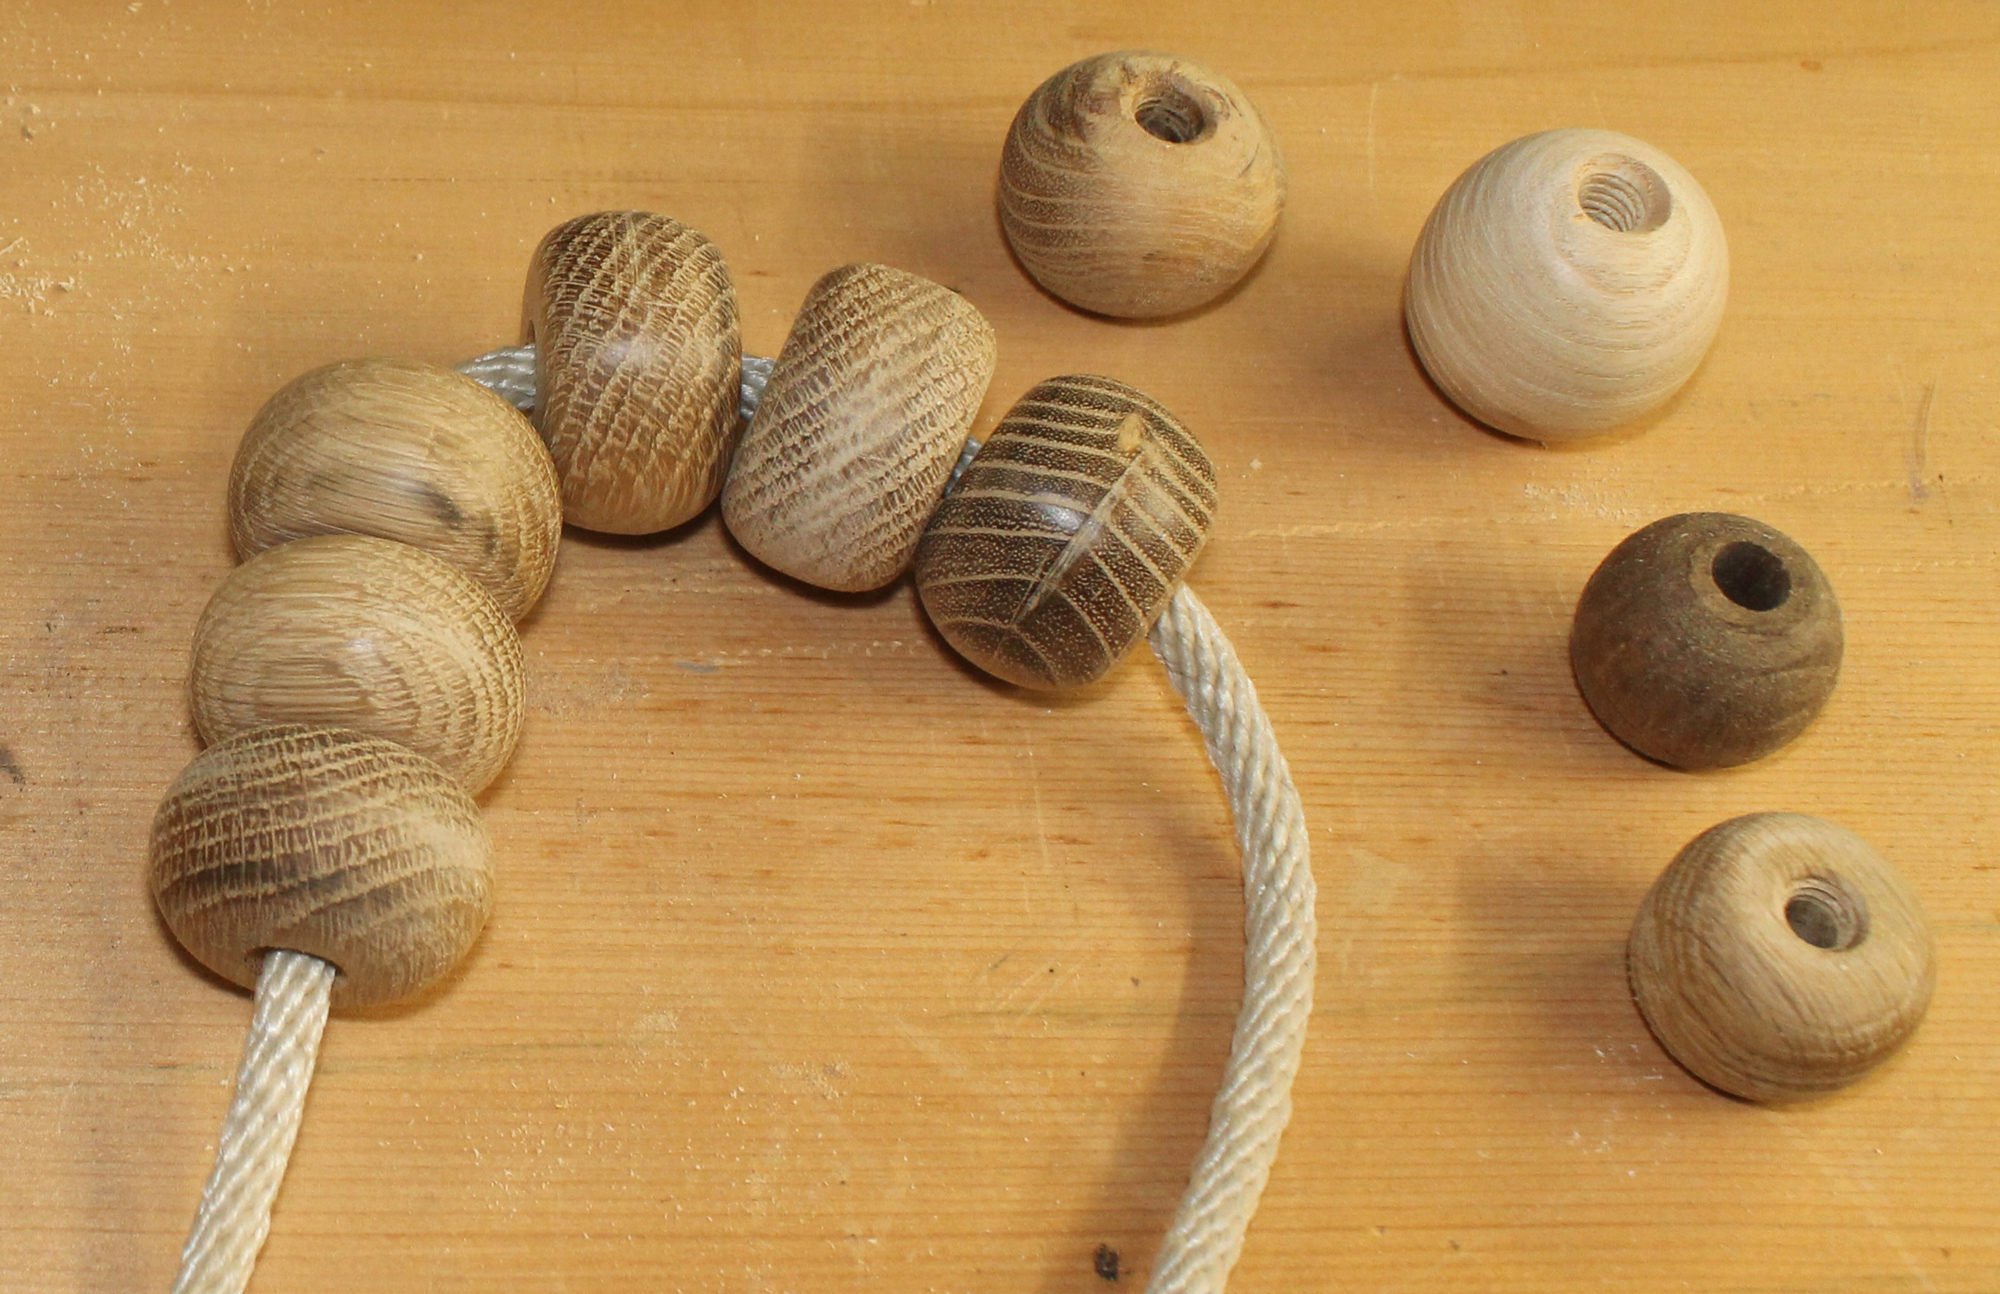
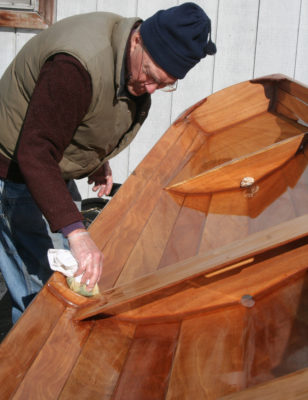
The finished parrel beads are threaded onto 1⁄4″ line.
In the middle of a run of beads, with everything set up for the job, I can get from turning on the drill press to having a bead ready for oiling in six minutes. While creating uniform beads can be a time-consuming challenge on a lathe, this sanding method is quick and easy.![]()
Christopher Cunningham is editor-at-large for Small Boats. He has been building, restoring, and rigging small boats as either a vocation or an avocation since 1977.
You can share your tips and tricks of the trade with other Small Boats readers by sending us an email.
For more time-saving shop ideas, see:
Sawing Laminates, setting up for a thin-strip jig on a tablesaw, by Christopher Cunningham
Sanding in Tight Spots, making and using simple tools to reach the unreachable, by Ben Fuller
Boil-in-the-Bag Plank Bending, using a portable steambox to steam planks, by Greg Rössel


Ingenious at every step, Chris!
I would like to replace my mainsail luff lacing with parrel beads, but I can’t find any instruction for tying the loop ends together in some manner that provides fairly easy release when I need to remove the sail. I have the usual rigging books by Brian Toss, Tom Cunliffe, and John Leather but there’s no recommendation anywhere in them. I’m probably missing the obvious, but I need advice. How would you do it?
Thanks, Larry. I haven’t used parrels on a luff, but off the top of my head, I’d string beads on the middle of a length of line, leaving long tails on the ends. Tie figure-8 knots in each tail close to the end of the beads. Wrap the parrel around the mast and thread the tails through the luff grommet from either side, then tie figure-8s in the tails up close to the grommet or at whatever position puts the luff where you want it in relation to the mast. When you want to take the sail off, untie just one of those figure 8s, leaving the parrels attached to the sail.
I’ve switched out my mainsail luff lacing for lengths of dyneema line (’cause I had some left over) at each grommet but what I have done could easily work with cheaper line and parrel beads.
I bought some wood toggles (with two holes in them) intended for clothing, like winter coat front closures. I whipped the toggles onto one end of each line and put a loop at the other end. A knot on the other side of the grommet fastens the line to the sail. Attaching to the mast is a matter of bringing the loop around the mast and inserting the toggle into it.
I should qualify by saying I haven’t actually out sailing with this set-up yet – I’ve only done a test in the shop using a piece of pipe the same diameter as the mast. We’ll see how easy it is to raise and lower the sail with the slippery dyneema. Parrel beads would likely work better and look shippier besides.
I think I will try this, always looking for a woodworking project.
I have them on my Bob Cat sail but they are smaller and don’t roll very well. I think the larger ones would work better.
Hi Chris. I like that method. Another approach I once used is to build a box that fits close over a belt sander — either a stationary unit or a handheld one clamped upside down on a bench. The box is closed on the top and open to the belt. Toss in the plugs or just start with cubes of wood. Turn on the sander and step back. It will make racket, but in due time the contents will become very nice spheres.
Many years ago, I saw that method somewhere—an old Popular Mechanics or something like that— and it was indeed very noisy. Before much shaping happened, one of the cubes jammed and the sanding belt tore. It might have worked better for me if the side of the box on the downstream side of the belt were angled to lift the cubes and keep them from jamming.
If you have the drill press , why change over to a hand drill for the rounding? Also would a rasp do for the rough shaping instead of course sand paper?
I’ve tried using a rasp and drill press and it doesn’t work well. A rasp has a single point of contact and the teeth clog quickly, even if you move the rasp across the plug. A bit of coarse sanding belt grit cuts much faster, and having the sanding belt in the semi-circular form also does the shaping for you, rather than having to do it by eye, likely resulting in beads not uniformly shaped.
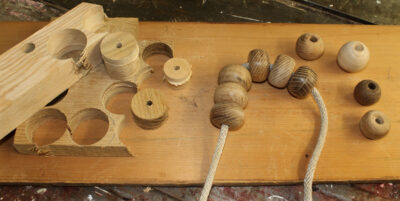
The mast on my boat folds down with a tabernacle. Single handing, I haul the halyards from the cockpit and sometimes the mast hoops catch on the hinge when raising the main. So I am replacing the hoops with wooden beads – hoping their shape and ability to roll will solve this pesky problem, especially while reefing. Google: “wooden bead maker”. This drill press bit comes with various size cutters – just drill and flip the board over. See the attached photo, finished beads strung on a wire makes for easy sanding.
I am working on a jig to hold the bead to enlarge the hole, as the center drill bit included is quite small. The oak I’m using is recycled from my father’s old rocking chair; it’ll be nice to have some sentimental wood aboard 🙂
Thanks, Robert, for the tip about the bead-cutter tool. I hadn’t heard of it. I did the search you mentioned and found that tool in two types: one, looking like yours, with seven interchangeable blades up to 25mm (1″) and another as three individual tools, each with a fixed blade up to 20mm (3/4″). The latter, I think, might make beads that are too small.
It may be too late for the set you’ve made already, but drilling the larger holes for the parrel cord might be easiest done while the beads are still anchored in the stock.
‘Enlarge the hole while the bead is still anchored in the stock’, that’s the best idea! The bead breaks free once you cut it from the other side. Having the hole enlarged before flipping the board is the way to go – thanks so much for the tip!
The beads require very little sanding, some have a ridge needing sanding where the two cuts meet. The largest cutter I have is 1”. To make round 1” beads without any flats requires > 1” stock. I found that this is easily done with Ash firewood of varying thickness as long as the center drill comes through the other side.
Thank you for replying.
After reading Robert’s comment, I thought a bead-making bit could be a useful tool for making parrel beads. I found many online identical to the one in his photo and bought one. The largest blade in the set of seven produces a ball 25mm (1”) in diameter, which seems rather small for the parrel beads I’d use on my boats. The listing for the bit notes: “Our C-shaped carbide milling cutters provide precise drilling capabilities in various wood types, including ebony, rosewood, mahogany, and sandalwood. Each bead produced has a near-perfect finish, requiring minimal sanding or polishing.” I tested the bit on mahogany and it did produce a fair finish, in need of only a light sanding. For the beads I’d use for parrels, I prefer using a wood that is more durable than mahogany.
Robert used oak, likely red oak, for his beads. In my tests with red oak, the bit scuffed the two sides of the bead where its cutter blade was working against the grain. That rough surface required sanding not only remove the wood raised above the surface but also to get to the bottom of the splits created below the surface. I did that sanding by hand but doing a set of beads efficiently would require drilling a larger hole in the bead to thread onto a bolt chucked into a drill.
The bead-cutter bit did poorly on the ash and locust I used for the beads I’d made earlier. The 2mm pilot drill bit is flexible and was diverted by the grain of the wood. The set included 9 pilot drill, suggesting they often break. (The bits have a small notch in the top end that engages a tab in the slot in the center for the cutter blade. That evidently would be to prevent the bit from getting stuck in the wood, suggesting standard 2mm bits, used as replacements, would get stuck.) Before continuing with cutting the bead, I had to retract the pilot drill and recenter the workpiece under it. The blade chattered as the cutting edges alternated between working with and against the grain. Where the blade cut against the grain, the surface was badly frayed. With one half cut done, I flipped the workpiece over and guided the pilot bit into the small hole where it had emerged during the first cut. When the second cut was finished, the bead spun free, with more chattering. The cuts from either side did not line up and the two halves of the bead were offset from each other, creating equatorial ridges on either side. Robert had the same problem. In his photo of the partially formed beads still in the working stock, one bead is missing, and in the hole it came from there is a light-colored arc indicating a ledge left by the offset cuts.
I tried the bit with the drill press at a higher speed. That spun the tip of the thin and flexible pilot bit in a small circle. I got it started in a hole to keep it in line. The same tearing of the grain was evident and the chatter was a bit alarming. The cutter must have snagged on some frayed grain and the workpiece lurched and the pilot bit broke. Higher speed was clearly a step in the wrong direction.
The ledges and the frayed wood grain would require sanding the beads to smooth them. Unfortunately, that would make 1” beads even smaller. There is another type of bead cutter that is made like a carbide router bit, with a solid, shaped body and blades permanently attached to it. It can cut a bead up to 30mm (1 3/16”) but it too has as 2mm pilot bit. It’s possible it might not fray the grain as much, but a larger pilot bit would be required to keep the bead halves consistently aligned with each other.
In my trials the bead-cutting bit didn’t produce the results I’d expected in the woods I tested and left a fair amount of work to be done on a bead after it was cut. I’m considering trying a 30mm bit that I saw online, but for now I’m going to continue with my hole-saw plug and sanding setup.
Lacking a hole saw, I cut sections from a one inch dowel. I drilled the center hole on my lathe but it was still difficult to get it perfectly centered.
I found it was just as easy to run the 5/16 tap into the center hole and use it to hold the stock rather that using the 5/16 bolt.