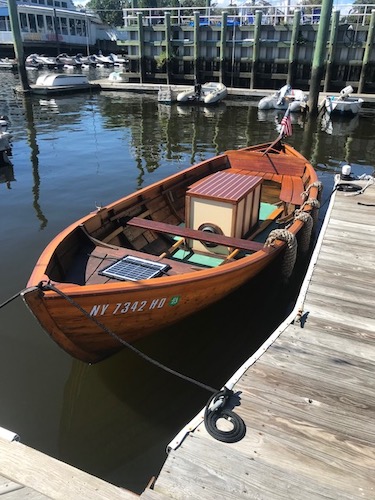
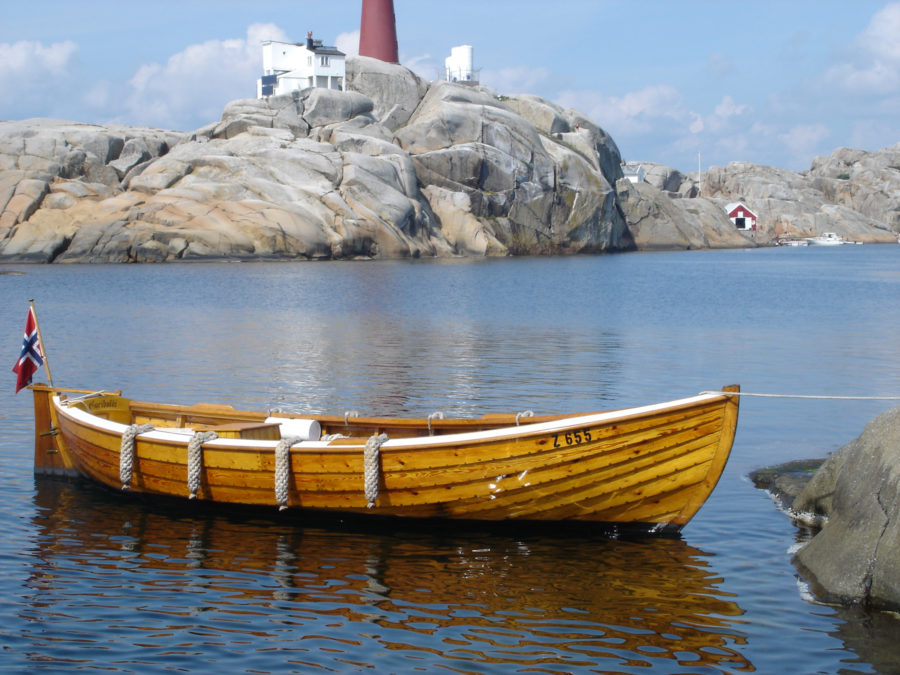
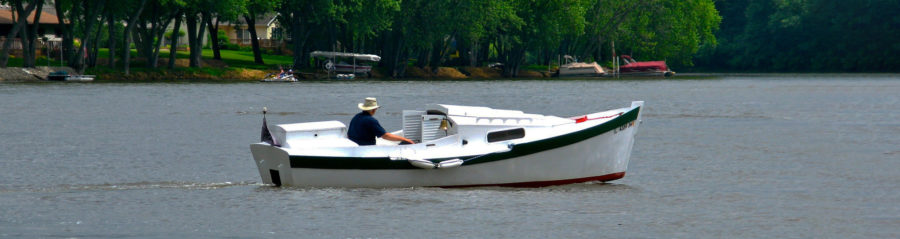
In the southeast part of Norway lies the beautiful little village of Stavern. Once a thriving community where fishing was the main source of income, today the town hosts the country’s largest collection of once dominating double-ended motor boats called Sjekte. The sjekte is a local name for the more common snekke boat type.
Most of the sjektes of Stavern wear manila rope fenders that serve to both adorn and protect the boats. It is said that during whale-hunting days, discarded towing lines were put aside by crewmen aboard the whalers. In their spare time, they used these spent lines to produce fenders according to the following design. The design is both simple and effective, and fenders can easily be made at home. There are many theories on how to hang them, their proper size, etc, but the following is my take on how it should be done, based on 30 years of scrutiny of the authentic fishing boats residing in the Stavern Canal.
 Opening photo by Paal O Solberg. All other all photographs and drawings by the author
All of the sjektes in this harbor are outfitted with traditional rope fenders.
Before the advent of nylon, natural fiber was the only option when purchasing rope for mooring. Rope could be made from grass, hemp, or other materials. Today manila is more or less the only classic rope available in Norway. Any well-stocked marine supply store should be able to provide the correct rope for the fenders, but prepare to open your wallet. Fenders should be sized proportionately to the boat. Fenders that are too large or too small will not look right or work properly, so rope diameter is critical. The “calf” is the core of the fender, and its length determines the final overall length of the fender. The calf is cut from the same diameter rope as the strands that will be used to braid the fender. The following table of has guidelines for selecting the correct size for sjektes.
• 19′ to 21′ sjekte, 2 dry planks: 7/8″ (22 mm) manila, 16″ calf
• 21′ to 23′ sjekte, 3 dry planks: 15/16″ (24 mm ) manila, 18″ calf
• 23′ to 25′ sjekte, 4 dry planks: 1″ (26 mm) manila, 20″ calf
The grading by the number of dry planks—strakes that are above the waterline when the boat is moored—is a local traditional measure of freeboard. The planks are typically about 5″ to 7″ wide and freeboard ranges from 15″ to 20″.
The rope’s diameter must be carefully proportioned to the length of the fender. If the rope is thicker than necessary for the fender’s length, or if the fender is too short for the rope used, the fender won’t lie properly against the outboard profile of the boat.
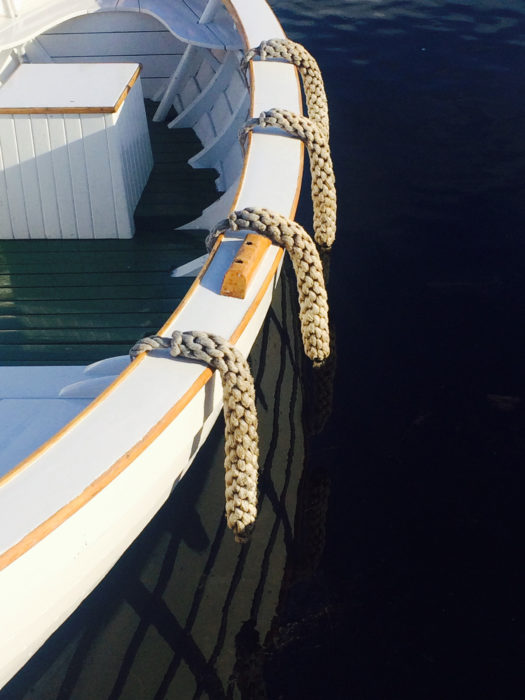
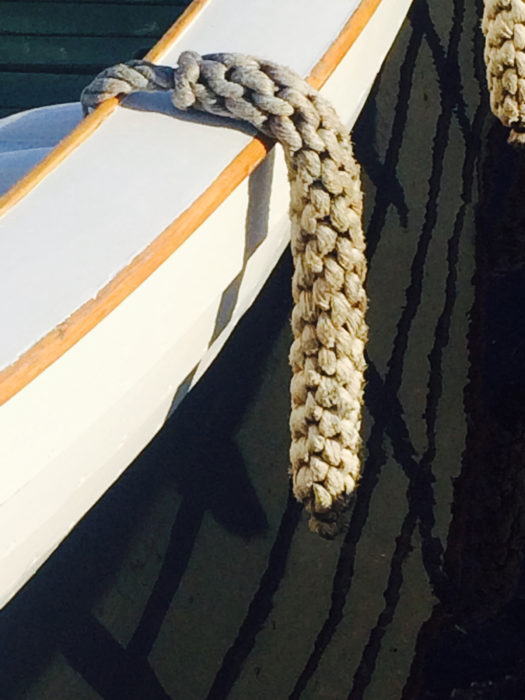
The length of each fender is matched to it position on the boat so that they all come about 3″ from the water no matter how much freeboard there is at its location. It is important that the fenders not be tightly woven. They must be loose enough to bend around the sheer and hang straight down.
There may be many ways to hang a fender, but the distance from the end of the fender to the surface of the water is the most important factor. The bottom of the fender should be about 3″ off the surface of the water. Higher than that and the fender may be pushed up out of position by the neighboring boat when moored; lower and the rope will start to wick water, causing the fender to rot prematurely. The fender’s first splice, called the crown, should rest on top of the washboard or side decks, just inboard of the rub rail. As the fender stretches over time, its eye can be pulled in farther to keep the lower end at the correct height, but there is no point in having the thick part of the fender protecting the side deck. Rigging the fender like this may jocularly be called “preparing for helicopter landing.”
For an average fender, you need 14′ to 16′ (4 to 4.5 m) of rope for braiding. In addition, you will need 16″ to 20″ (0.4 to 0.45 m) of rope for the calf at the core. A typical sjekte of about 23′ will carry eight fenders with an average of 15′ of line per fender; roughly 120′ of rope will be required in total. You will need 1/16″ marline or whipping twine for the ends and other uses. You may choose to use nylon or modern fiber for the calf; it will be completely covered by the braid and consequently no one will spot it.
Start by measuring for the fenders. It is common to have two different lengths, longer fenders forward where the sheer is higher, and shorter ones aft. Cut the calf to the appropriate length. If it is your first attempt, be prepared for the eventuality that the first fender may end up on the wall of your den instead of on the boat. Do not cut all your rope to length before starting to splice your first fender; you may wish to adjust lengths as you go.
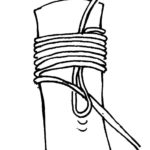
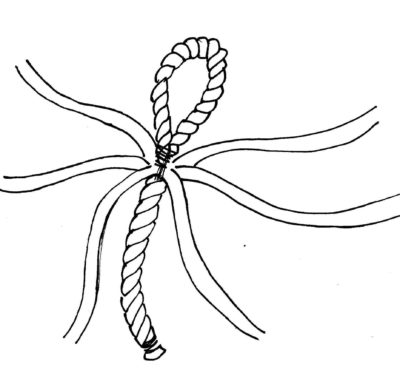
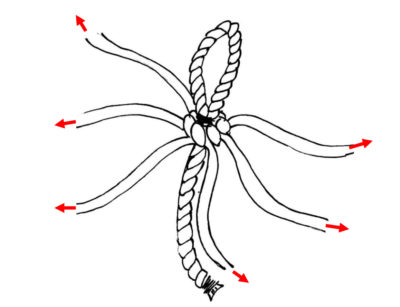
For a calf of 18″, cut the rope for the eye and braiding at 16′. Find the midpoint. Bend the rope in half to make an eye, about 3″ to 4″ in length. Use a length of marline to seize the eye, nice and solid with 8 to 10 turns. Unlay both free ends of line up to the seizing. Tape the strand ends to prevent them from unraveling. The unlayed strands will make the rope look like a six-armed octopus.
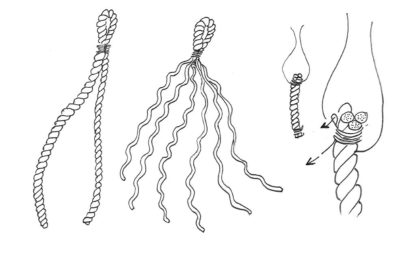
Cut a suitable length for the first calf and whip both ends. Feed two 2′ lengths of marline in between the strands just below one whipping. Pull them through the calf strands until you have four loose 1’ strands of marline at one end of the calf.
A simple whipping
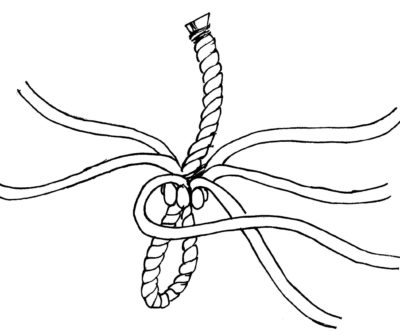
If you’re right-handed, hold the calf in your left hand. Put the octopus on top of the calf with its imaginary “beak” pointing down. (Note: Anyone who has read 20,000 Leagues under the Sea knows where the octopus has its beak. If you didn’t read it, do so before continuing!) Pull the calf’s marline lines over the whipping of the main rope and make several turns around the whipping.
Then secure the marline ends together with square knots, pulling them as tight as possible. This is essential to keep the calf secured inside the fender, preventing it from breaking loose and thus allowing the fender to sag in a year or two.
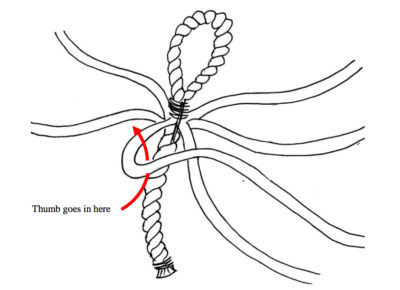
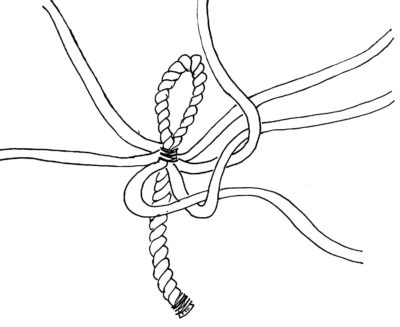
Hold the calf with your left hand again. Lift the strand to the left of your thumb around the thumb and over the next strand to the right, as shown in sketch.
Lift the second strand over the first and third.
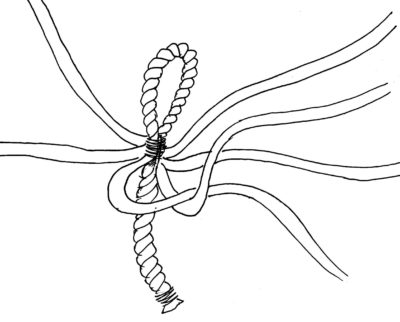
Continue like this around the fender.
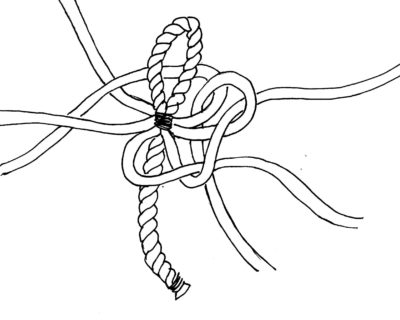
In the end there is just one strand left.
That last strand goes down through the starting loop that you first laid around your thumb.
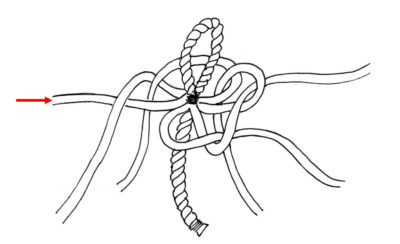
Tighten the strands evenly and in many steps, until you have a symmetrical crown around the eye. Twist the individual strands as you pull to counteract the tendency for the strands to unravel.
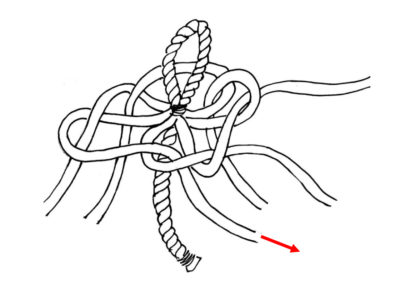
Now, turn the fender upside down. You can now hold onto the eye in the same manner as you first held the calf.
Repeat the procedure as you did with the first full round. While the first crown brings the strands parallel with the calf, the second crown, and all subsequent crowns, will result in the strands pulled outward from in between crowns and at right angles to the core. Make sure to tighten all the strands equally.
Repeat the procedure ad nauseam. If you lay the strands counterclockwise around the calf every row, you will see a spiral pattern in the braiding when it is complete. I prefer to switch direction between each layer, alternating between clockwise and counterclockwise layers. The resulting braid looks quite different, but the function of the fender remains the same.
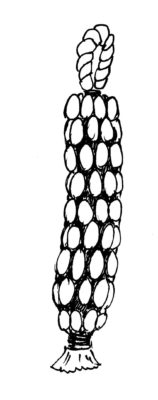
After 22 turns, more or less, you should have covered the calf all the way to the lower end. If you were careful tightening the strands equally, all the remaining strands should be about the same in length and there should be about 10″ of each strand left.
Finishing is very simple. Collect the strands below the calf and put a solid whipping over all of them below the lower end of the calf. This is a utilitarian work-boat fender, so any elaborated braiding to finish it looks out of place. This whipping should be sewn tight and is best done with a sailmaker’s palm and needle. Cut all the strands about an inch below the dressing, spread out the fibers, and voilà! You’re done.
When made and installed properly, the fenders will protect the sheer and resist riding up out of place when boats jostle against one another.
Braiding your own fenders is hard work—don’t plan for more than one or two a night—but the satisfaction of hanging your own fenders lingers on for a long time.![]()
Lars Solberg is an engineer living in Stavern, Norway. This article is an excerpt from his recently published Sjekteboka. An English version, Sjekte Book, is in the works for publication in 2016.
You can share your tricks of the trade with other Small Boats Monthly readers by sending us an email.


Nicely done article. When we started sailing, we purchased one of those plastic, blow-up, step fenders that eventually get sticky and ugly. Well the Admiral was having none of that, so I made up a knotwork one that did the same job, just saltier. Very similar construction to the above with the following changes: I started off with a back-to-back pair of eye splices, that measured about 24″ end to end. The eyes would be what I used to tie back to the rigging to support the step in a horizontal fashion. Then I cut and seized 6 lengths of the same 3/4″ line to act as bulk for the actual step, then seized the six lengths around the center core. Finally I made the round sinnet/braid back and then tucked again to completely cover and secure the entire step so that no ends showed. Hung it off the port side and adjusted the height to fit the Admiral’s step. Near perfection. Since then I’ve made another for our boat and two others on commission.
(Fo
I would love to see a video of the steps in this project, or just more good sketches of the steps.
Great article! I wish there was some video of someone actually making one of the rope bumpers. It looks like it could be a class at WoodenBoat School!! Thank you.
Perfect timing! I volunteer at the Buffalo Maritime Center, and our director just asked me to make some rope fenders for our Lake Erie Shallop and No Man’s Land boat. Thanks!
I have been making fenders from 3-strand polyester rope after being inspired by an article in WoodenBoat magazine April 1992, #105. This type of fender is probably larger in diameter than the Norwegian variety with smaller strands (translation: more braiding). Polyester is smoother to work with and is rot resistant, but the strands don’t hold together as well as natural fibre strands. Some clients prefer the clean white look.
I agree with Lars, braiding fenders is hard work. Although I sell my fenders online I doubt I make more than a few dollars an hour for my efforts. But working with rope is fun and the results are beautiful.
Al Szymanski and I have been corresponding since he posted his comment on his own version of rope fenders. He recently bought 100′ of used 5/8″ manila line and has kindly provided us with a video documenting his version of a Norwegian fender: “Tying a Rope Fender.” While his starting point is quite different, the weaving of the strands is similar to the method described in Lars’s article.
Christopher Cunningham, Editor, Small Boats Monthly
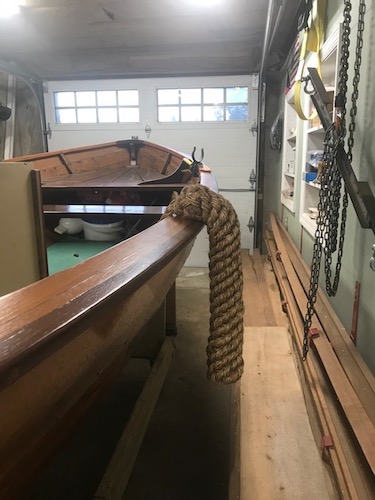
Starting is the hardest part, but after that it just takes time and patience. Best to hang it from above to work with. Here are my first and only ones I made for my 1969 Snekke I restored in Staten Island, NY where I live.