As a child growing up in south Florida with a canal in my backyard, I always wanted to build a boat. I had drawn several designs as a young boy, but I never fulfilled my dream of building one. I recently moved to South Carolina and, living near a wonderful lake now, I needed a boat. It had to be sturdy, have an open floor plan for fishing, and be stable enough for two adults moving about. To build the boat, it had to fit in my garage and still leave room for my truck. After looking at hundreds of boats online and in person I came across Spira International’s 15′ Hudson skiff. Designer Jeff Spira specializes in boats that can be built by amateur builders with basic woodworking skills and limited budgets. I ordered the print version of the Hudson plans: four 24″ x 18″ sheets and a well-written 50-page workbook with detailed instructions, drawings, and color photographs that are easy for the first-time builder to follow.
The plans call for inexpensive common dimensional lumber and plywood. While the frames are intended to be cut from 2x3s, the quality of the 2x3s that were available were not to my liking, so I bought 2x4s and cut them down to size. Surfacing the lumber with my jointer and thickness planer provided flat and true surfaces, making construction easier. The six frames are each made of three pieces, lap-joined at the corners and secured with 2″ #8 stainless-steel deck screws and PL Premium construction adhesive, as per the designer’s recommendations. The manual also specifies epoxy as a suitable adhesive. The bottoms of the frames have notches to set the keelson flush, with extra width to provide limbers on either side.
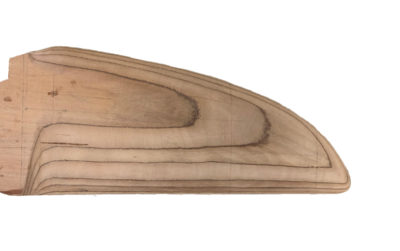
The transom is framed with 2x4s, which I also surfaced, reducing their size just a bit, but not significantly diminishing their strength. The manual indicates these frame members can be butted together and held by adhesive. The joints will get the strength they need when the transom’s plywood face and gusset are applied. I half-lapped the transom frame members, which took a bit more time but provided some extra strength. The stem is a straight 38-3/8″ length of 1×6, which gets beveled after the chine logs and sheer clamps are installed.
 Photos by and courtesy of the author
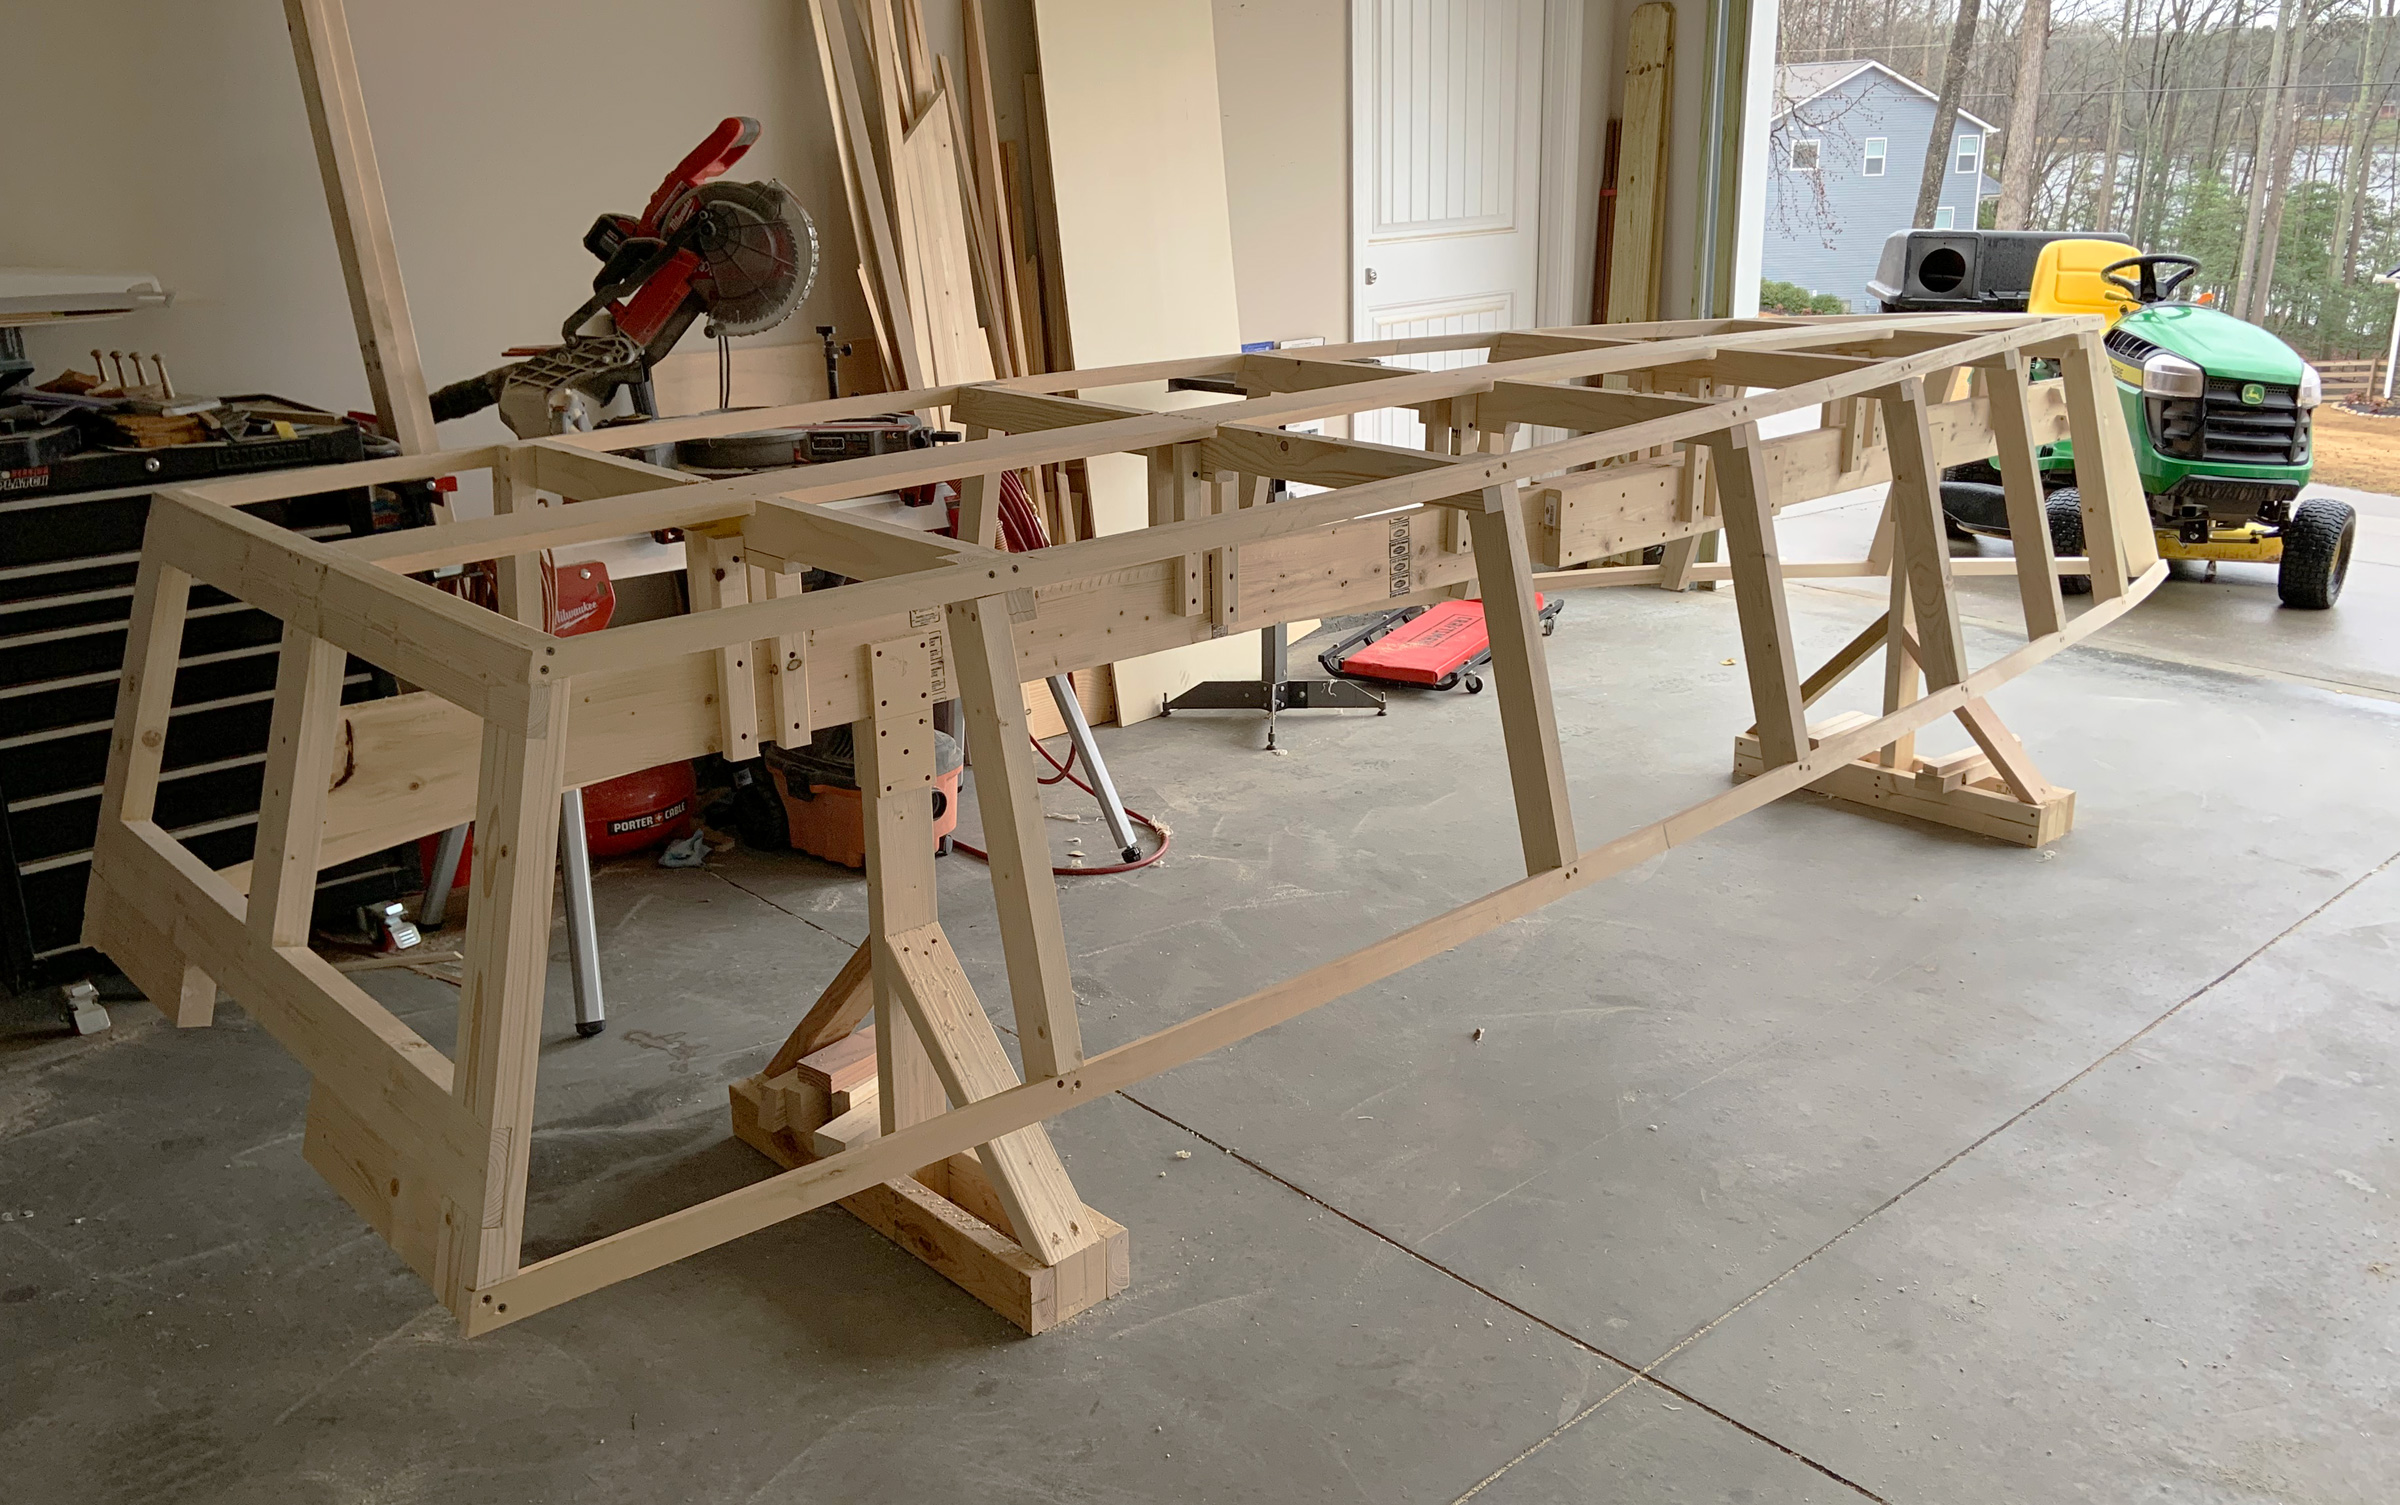
The framework for the skiff is assembled over a 2×6 strongback. The half-lapped joints in the transom framing are this builder’s option.
The frames are supported over a 2×6 strongback by scrap-wood pillars at specified heights and spacing for each frame. The locations provided are precise and assure fair curves on the sides and bottom. The transom is set at 15 degrees and the stem at 36 degrees by matching bevels on the ends of the strongback and temporarily held in place with sheetrock screws.
The plans specify a 1×6 for the keelson, and 1x2s for the chine logs and sheer clamps. To get the length needed for the logs and clamps, I scarfed two pieces together for each of the longitudinals. Following the designer’s recommendations, I secured the keelson to the frames using PL Premium and four 2″ #8 deck screws. A framing square assured the frames were square to the keelson.
The chine logs and sheer clamps are set in notches in the frames, transom frame, and stem. The manual suggests a backsaw for cutting the notches, but I used a multi-tool. Fine-tuning can be done with a rasp or file. I installed the chine logs and sheer clamps, fastening them to each frame with 2″ #8 screws. The chines and sheer clamps are let into the stem, establishing the bevel for the forward edge. With the skeleton of the hull complete, the frames, stem, transom, chine logs, and sheer clamps are all planed fair to meet the plywood sides and bottom.
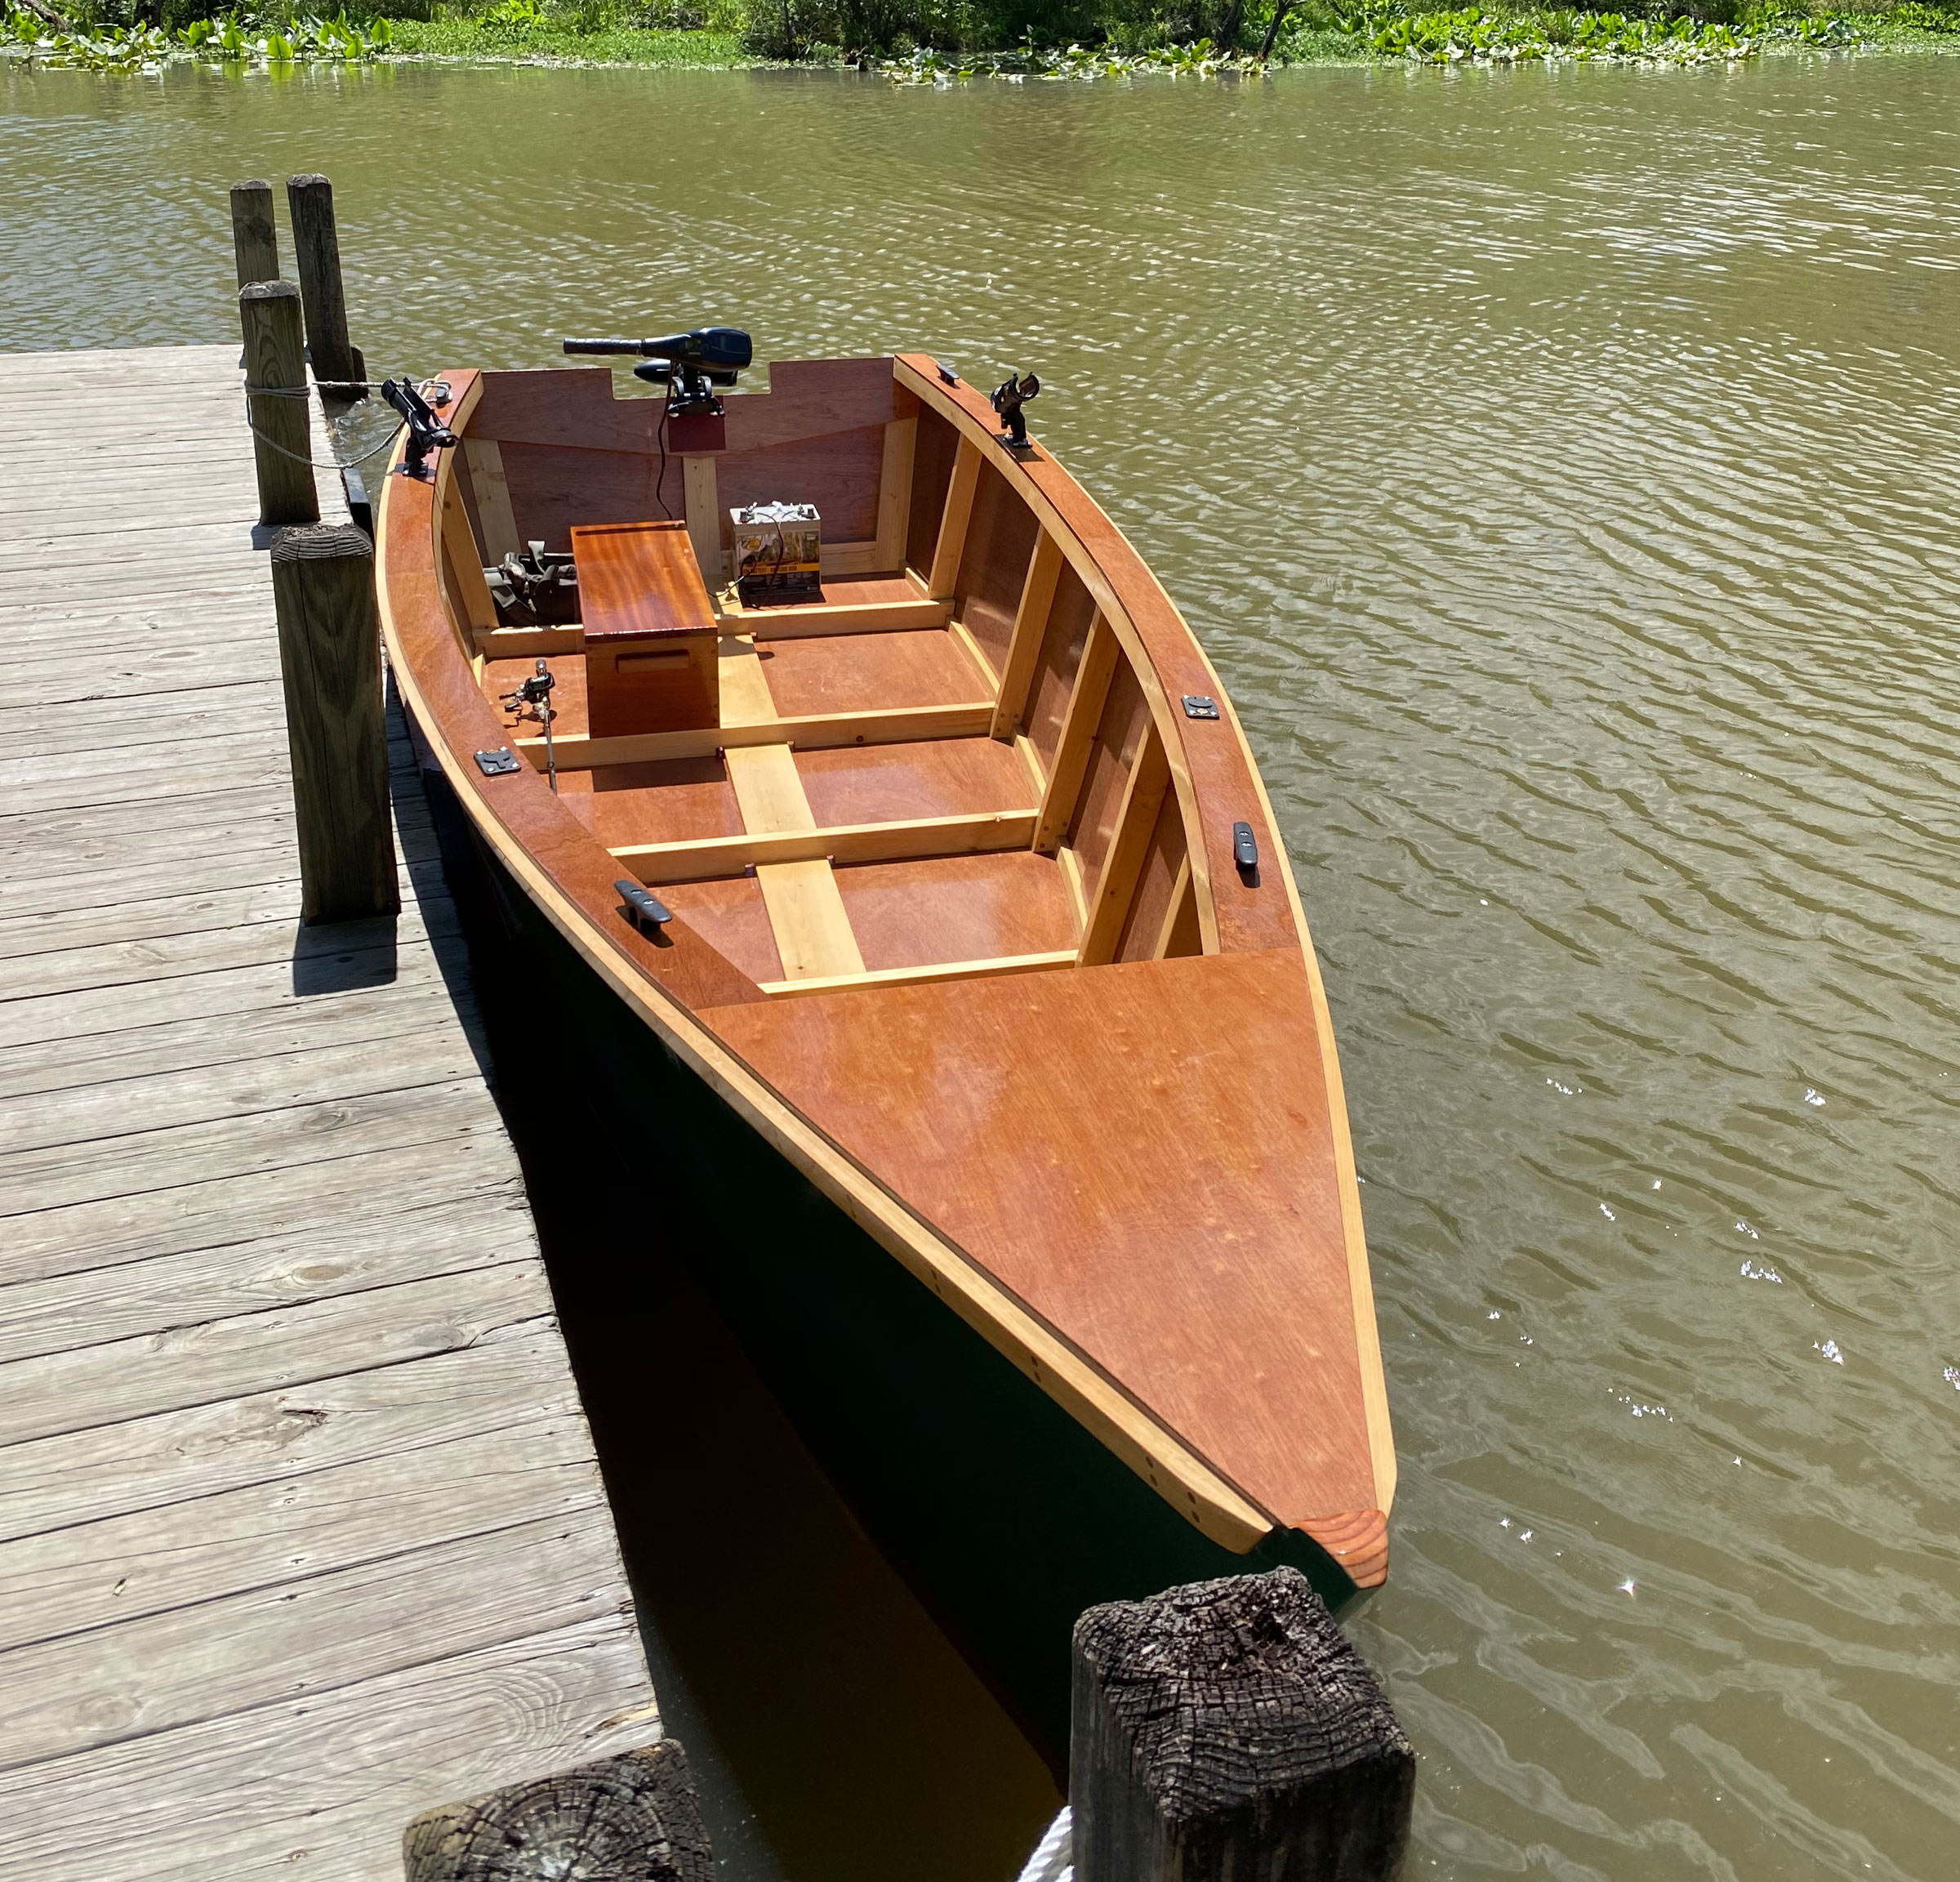
Spira designs typically leave the interior arrangements up to the builder. The decks and bench meet this builder’s needs. Floorboards will be added later to separate the occupants from water in the bilge and address the possibility of tripping on the frames.
The manual recommends using marine plywood if the hull is not going to be sheathed with fiberglass and epoxy, and ABX plywood if it is. I wanted to have a bright-finished interior, so after contacting Jeff and discussing different types of plywood, I went with marine-grade plywood with meranti faces.
The plans call for two 4×8 sheets of 1/4″ plywood for the sides and two sheets of 3/8″ plywood for the bottom. The transom gets 1/2″ plywood on the outside and a 3/8″ plywood gusset in the inside. The shapes for the plywood aren’t provided in the plans, avoiding any problems created by variations in individual boats, but taken directly from the assembled framework. To fit the plywood to the transom, sides, and bottom, I first dry-fit each sheet of plywood, clamping it in place, pre-drilling all the screw holes, and tracing the framework edges on the plywood. I then removed the plywood and rough-cut it to size using a jigsaw. Before installing the plywood permanently, I sealed the inside faces of the plywood, and any framing members that contact the plywood, with two coats of epoxy. I applied Thixo thickened epoxy to the frames just prior to assembly, to assure a better bond between frame and plywood. I used a lot of clamps to hold the plywood in place, then drove 1-1/4″ #6 deck screws every 2″.
 Steven Paci
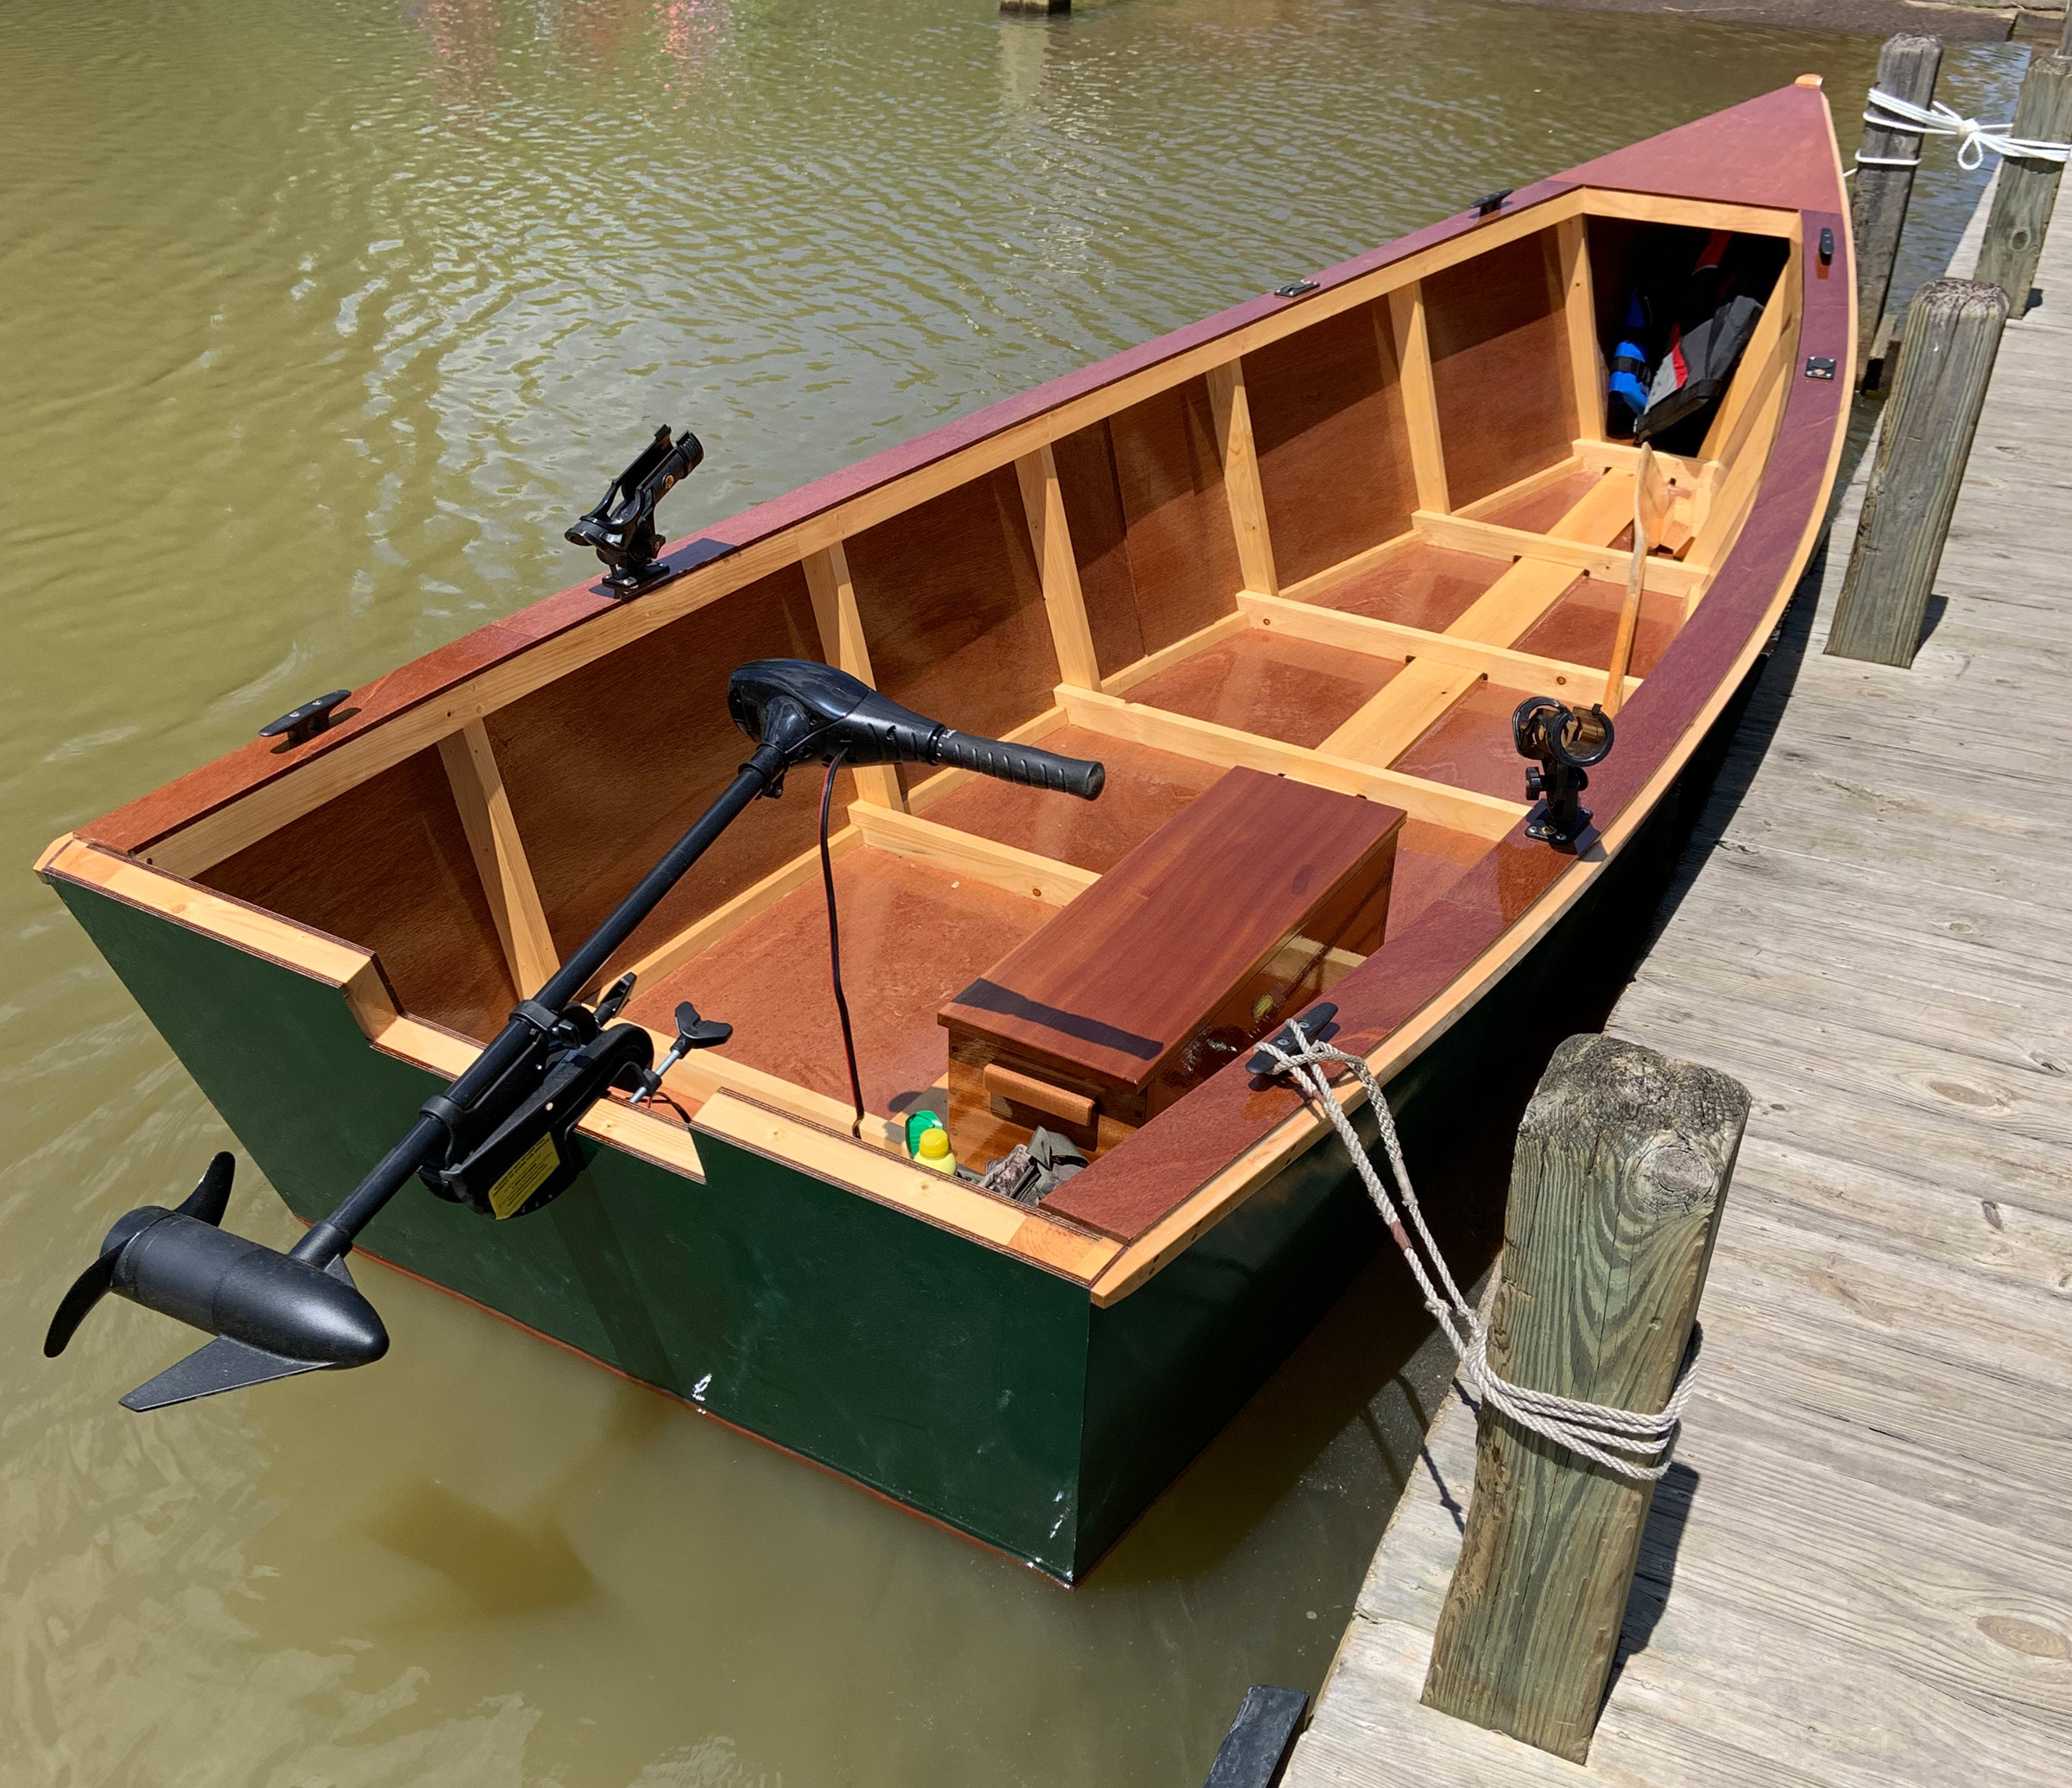
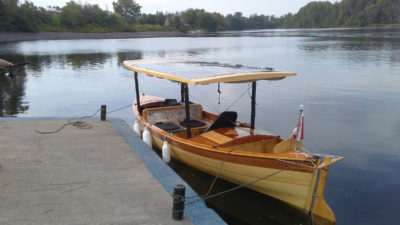
The builder added the foredeck to provide a covered storage space and side decks to support fishing-rod holders. The trolling motor is his preferred choice of power for the lake he frequents.
To cover the hull’s full length, the 8′ sheets of plywood are butted together in place on the frame and the seams are backed by plywood butt blocks, screwed and glued. After the plywood is all attached and the epoxy has cured, the proud edges of the plywood are planed flush with the chine logs and sheer clamps.
The plans do not call out a keel or skids on the bottom, but through my research I found that it was common practice for protecting the bottom and improving tracking and steering, so I followed suit.
The broad stern can support the weight of a small outboard and its operator.
To finish the exterior, I applied two coats of epoxy, four coats of a two-part epoxy primer to the bottom and two coats to the sides, then two coats of bottom paint and two coats of topsides paint. After the outside of the boat was complete, it was time to flip the hull over. It wasn’t heavy, so three friends and I easily lifted the hull off the strongback and righted it.
At this point, typical of the Spira plans, the arrangement of the interior is left up to the builder. I added a short foredeck to make a small storage space in the bow and installed inwales and railcaps for mounting cleats and rod holders. For seating, I made a fore-and-aft bench/storage box that allows easy access to the motor and still gives me easy access to the space of the open boat. I have not added any floorboards but intend to do so in the future. Although this boat can be rowed, I did not make any provisions for oars, since my mode of power will be an outboard and trolling motor.
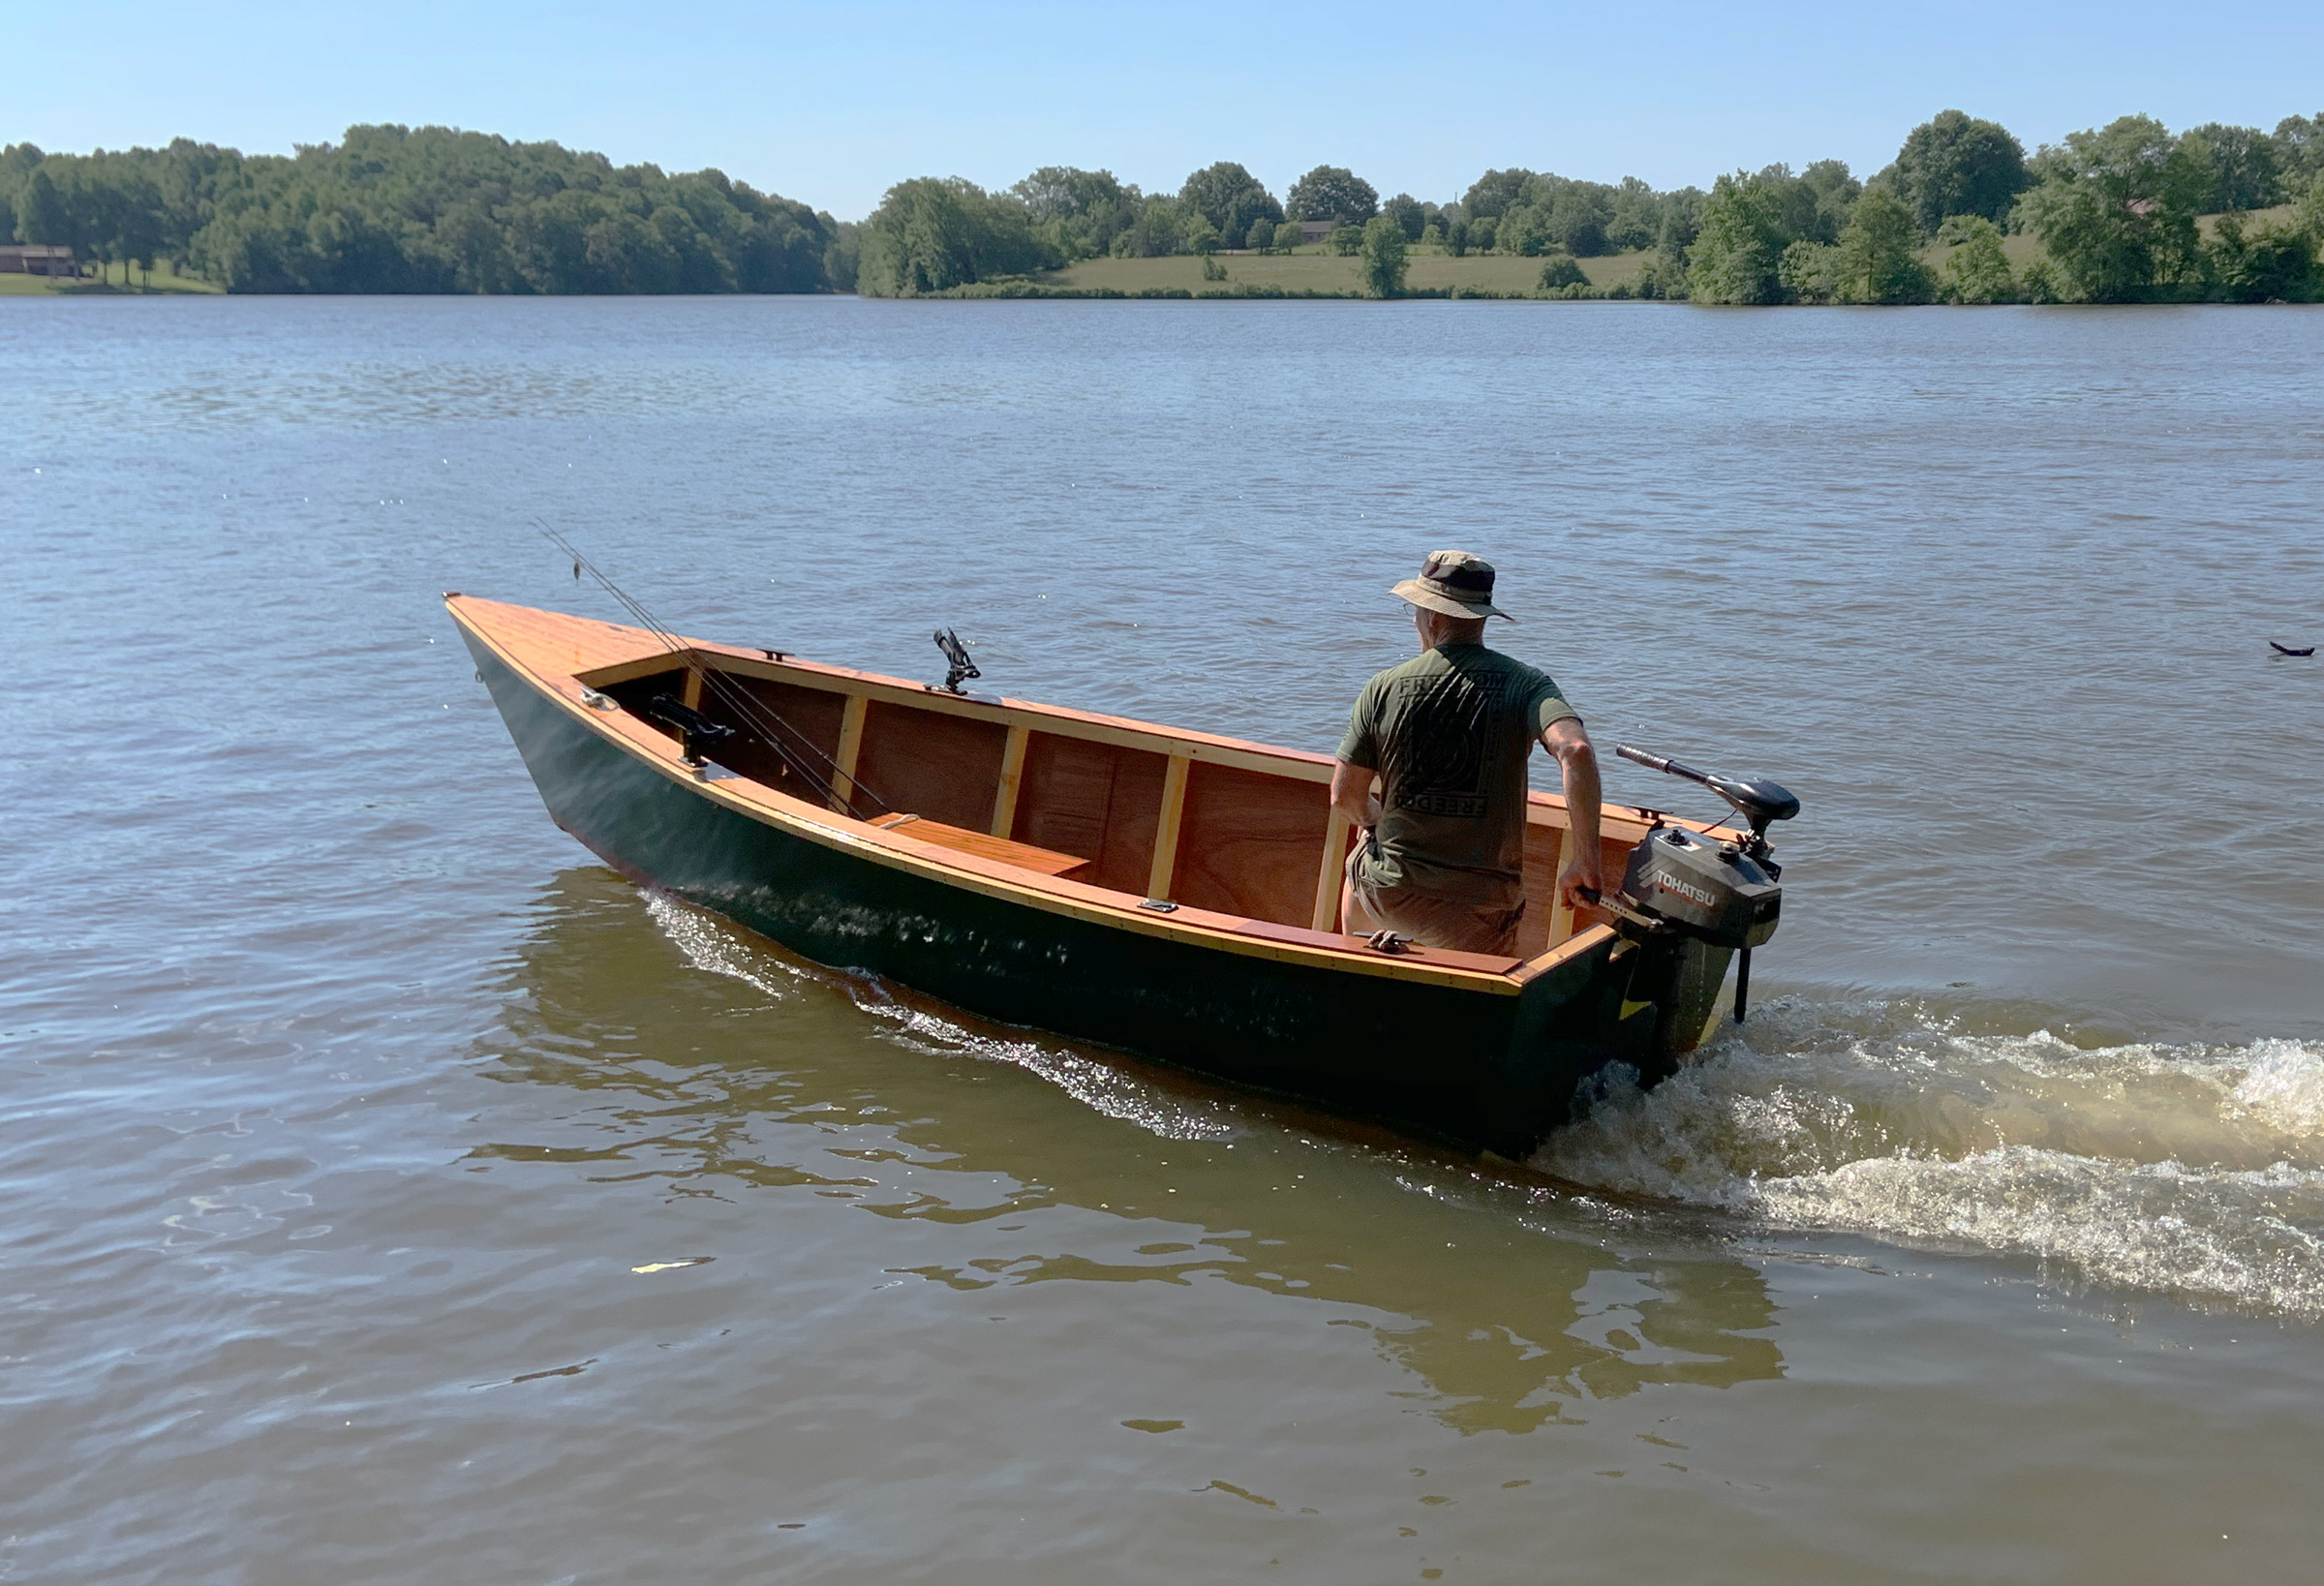
The designer recommends a 7.5 hp outboard for the skiff. The motor here is a 3.5 hp.
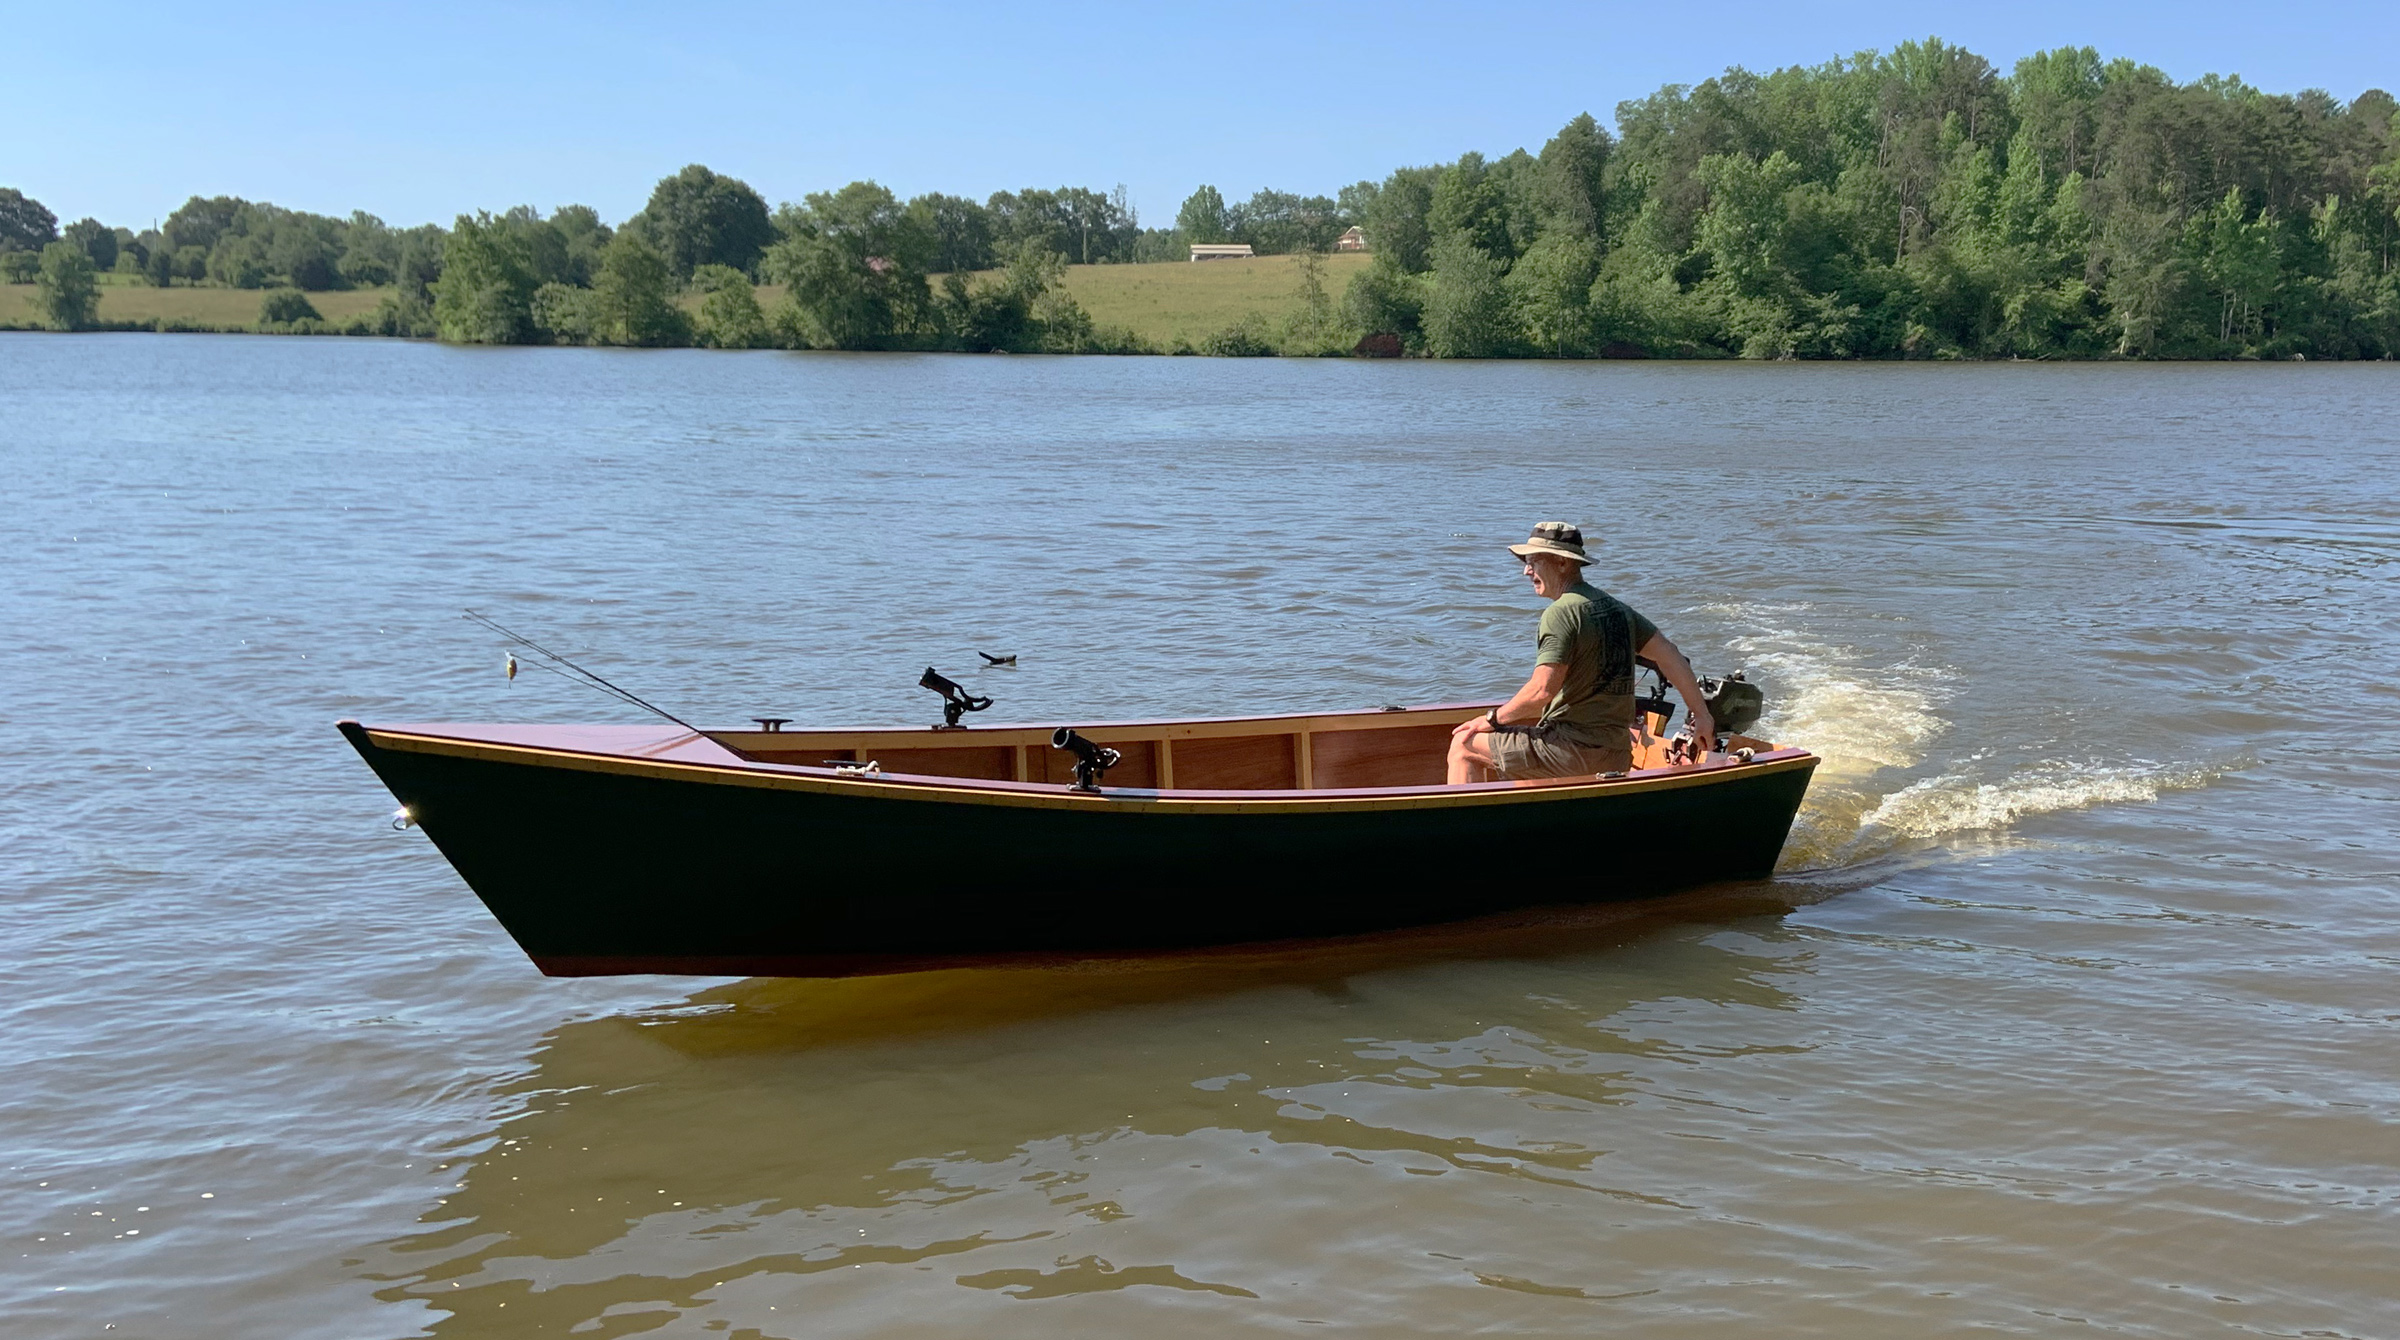
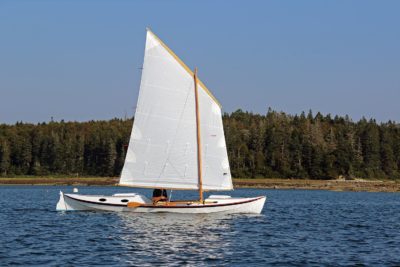
I have a full-sized pickup truck, so trailering the lightweight skiff is not at all difficult. Launching at the ramp is similarly not a problem; Hudson floated right off the trailer. Once in the water, it was perfectly balanced. The flat bottom makes the boat very stable, easy to move about in, and provides a comfortable platform for standing and casting. To be expected of a small boat, it will list whenever you move to the side, but only slightly. The plans recommend a 7.5-hp outboard for the Hudson, and set the maximum outboard size at 15 hp. I live on a lake that does not have rough seas or pounding surf, so I use a Minn Kota 30-lb thrust trolling motor for the skiff. A 9.9-hp outboard would likely get the boat on plane, but such a motor would cost twice what I spent on building the boat. I go out on the lake for enjoyment and relaxation so the trolling motor is easy to manage, quiet, and serves my needs. It has enough power to move the boat with three adults aboard even against a 15-mph headwind. With a 3.5-hp outboard, the boat clips along at a fair pace, though not on plane. With just me aboard, sitting well aft at the helm, a bit of the bow is out of the water and the waves could slap against the flat bottom. The skids I added seem to provide good directional stability for the boat; it tracks true. With the outboard’s tiller hard over, the Hudson turns on a dime.
I am so pleased that the Hudson skiff gave me exactly what I wanted. It was a straightforward, frustration-free boatbuilding project, and in the water it’s an easy-to-handle, lightweight boat that makes a perfect fishing platform.![]()
Steven Paci’s career spans many different fields—cabinet making, construction, machine design—but his bread and butter has always been industrial machine maintenance. He grew up near the water in Florida and later on the Great South Bay in Long Island, New York. He cared for an 18’ Thompson wooden boat and made a lot of furniture, so building a boat seemed the next thing to tackle. He now lives in South Carolina across the street from Lake Cunningham and was moved to fulfill his childhood dream of building a boat. He’ll use the skiff, christened BARBARA JANE, for fishing and spending days on the lake with his grandchildren.
Hudson Skiff Particulars
[table]
Length/15′ 8.9″
Beam/4′ 10″
Hull weight/140 lbs
Maximum Displacement/1,220 lbs
Recommended power/7.5 hp
Maximum power/15 hp
[/table]

Update: Jeff Spira passed away unexpectedly in the spring of 2022. His website is no longer operating and it is presumed that his boat plans are no longer available.
Is there a boat you’d like to know more about? Have you built one that you think other Small Boats Magazine readers would enjoy? Please email us!


Great boat–with a very nice finish. You did not mention the wood used for the frames. I suspect that just any 2×4 will not work well.
Yeah, what type of wood can be used for the frames?
Frames for these style boats are often Douglas fir and some are literally lumberyard selection of tight-knot framing studs. Some will try for CVG fir, although good white oak always works well, and southern yellow pine is a legitimate choice, among others.
What should one expect for year-to-year maintenance on a boat like this?
Depends on the finish and the amount of use. This interior is epoxy sealed with a couple of coats of epoxy and probably marine varnish over that. And the boat is moderately used, and otherwise kept covered. Then the clear wood parts probably should get a new coat of marine varnish every couple of years and that is it.
I would like to build a boat like this, where can I get the plans?
Unfortunately, Jeff Spira passed away without leaving someone to provide plans.
Editor