This article was originally published in WoodenBoat No. 145
What is the best way to store a wooden boat for the winter to ensure that the wood will be protected? Clearly the boat needs to be kept out of the elements, but what prevents the boat from drying out too much?
At the heart of the storage problem is a dichotomy: The goal is to keep moisture in the planking and hull timbers but to keep the elements, including precipitation, out of the boat. In general, the solution is to keep the boat under cover and apply a solution to the hull to help hold some of its moisture.
Protecting the hull
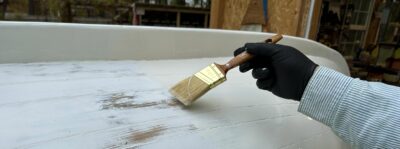
To keep the bottom moist, the best method is an old method. After the boat has been sitting for about a week, it is time to cook up an age-old preservative: linseed oil and turpentine. I mix 70% raw linseed oil with 30% turpentine in a pot that fits on top of my shop woodstove. I let the mixture heat to about 150°, at which point it has the consistency of water.
Using a paint roller and brush, I apply this mixture to the bottom of the boat right over the existing paint from the keel to the waterline, making sure to thoroughly coat the stem, sternpost, keel, rudder, and planking. The mixture should be painted on very liberally to assure good coverage and penetration. This mixture serves two purposes: first, some of it penetrates the bottom paint and adds its own moisture to the wood; and second, it acts as a vapor barrier, helping the wood to hold some of its existing moisture. During the spring refit, this finish can be given a light sanding, after which the bottom paint can go on right over it.
Keeping the hull moist will keep the seams from opening up during the winter. If the wood dries out, several things can happen. For one, as the planks shrink, the seams will open, allowing the caulking cotton to dry out and loosen. If this happens, it will be hard to make the boat watertight at launch time. In addition, as the planks dry out, the fastenings can loosen, which in turn allows the planks to loosen. Another problem is that a boat may have planks that are rather old but still adequate, but when these planks dry out they can split along the grain. If they are kept moist, these planks could still have some useful life, but once split they may need to be replaced.
How to cover a boat
The best way to store a wooden boat is inside a building with a dirt floor. Concrete or blacktop, which are found in a lot of boatyards these days, draw moisture out of wood. Some boatyards, when they have a wooden boat in their shop, will pile sawdust under the hull and hose it down to create a more humid environment which, in turn, helps prevent moisture from being drawn out of the wood. However, ideal indoor storage is not available to many of us. So the challenge is to find the best way to protect the boat outside.
There are several ways to cover a boat that is not stored in a building. The work involves constructing a framework that will support a covering material. The selection of a covering material will help to determine what kind of a framework will be needed. The covering choices are canvas, plastic tarpaulins, or heat-shrink plastic. A canvas cover, being heavier and holding more snow and ice than the slippery heat-shrink plastic, will need a comparatively heavy framework. Air circulation is critical: the worst thing you can do to a wooden boat in storage is to give it a cover that creates a pocket of dead air.
The best material for the boat is a cover of canvas, which will breathe and allow good ventilation. When the cotton canvas is dry, the weave is open, allowing the material to breathe. With this air circulation, any moisture that is trapped inside the boat can dry out. When it rains, the cotton fibers swell, tightening the weave and making the canvas watertight. Like canvas camping tents, canvas boat covers are treated, which also helps in repelling water.
The canvas cover can be made up of over-the-counter canvas tarps, or it can be custom-made to fit the boat, with access flaps and vents. Although the initial cost is high, a good-quality canvas cover will last many years. In the long run, canvas is the least expensive and the best for the boat.
As a substitute for canvas, a lot of people are turning to the common blue or green plastic tarps because of their significantly lower initial cost. These don’t have the breathing quality of canvas, but the fact that it’s impossible to get a really tight seal with them works in their favor: the overlaps typical when using these tarps allow good ventilation. Like canvas covers, these tarps should be tied down with breast lines running under the boat. Regardless of what kind of cover is used, it is important that it never be tied down to jackstands, which could be dislodged by the covering’s movement during a storm.
In recent years, a lot of owners have begun using heat-shrink plastic covers. These have the advantage of being quick to install, and they don’t need an elaborate or heavy framework. Because they are smooth plastic, they are the most effective at shedding snow. They also do not soak up rainwater, so they do not gain weight in a storm.
They have the disadvantage of being usable only once, although the plastic is recyclable. Another disadvantage is that for the most part shrink-wrap is not a cover that a person can install by himself. The material has to be bought in bulk, and it requires a specialized propane heat gun to make it shrink. Most boatyards have the ability to shrink-wrap boats, and in many areas there are specialists who go around to private homes as well as boatyards to install covers. Through the winter, these covers have to be watched for the development of holes, which need to be repaired with the heat gun and additional plastic.
But the biggest problem shrink-wrap covers pose to wooden boats is that they fit very tightly and do not breathe. In my work as a marine surveyor I see many cover installations, and I always find that the boats with tight-fitting, shrink-wrap covers are damp and steamy on the inside. If you are going to use shrink-wrap to cover your wooden boat, the proper way to do it is to plan for good ventilation at the time you install the cover.
What I recommend to my customers is that they build a framework that extends out-board of the sides of the boat and terminates well below the sheer. If the framework is built of 2 x 4s on edge, this will leave a 4″ air gap all the way around the perimeter of the boat. In addition, forward and aft vents must be cut into the cover. These should be fitted with vent scoops, which can be purchased from shrink-wrap installers or made from the shrink-wrap plastic itself.
The installation of shrink-wrap is easy. The plastic is cut in such a way that one sheet will pass over the boat from one side to the other. If more than one sheet is needed, the edges are rolled together, and when these are heat-fused, a watertight seam is formed. The outboard edges are then rolled up all around the perimeter framework. When heated, this all fuses together and tightens. The cover only needs to be lain over the frame. No fastenings are needed. When heated, the plastic shrinks the same way plastic home window covers do when heated with a hair dryer.
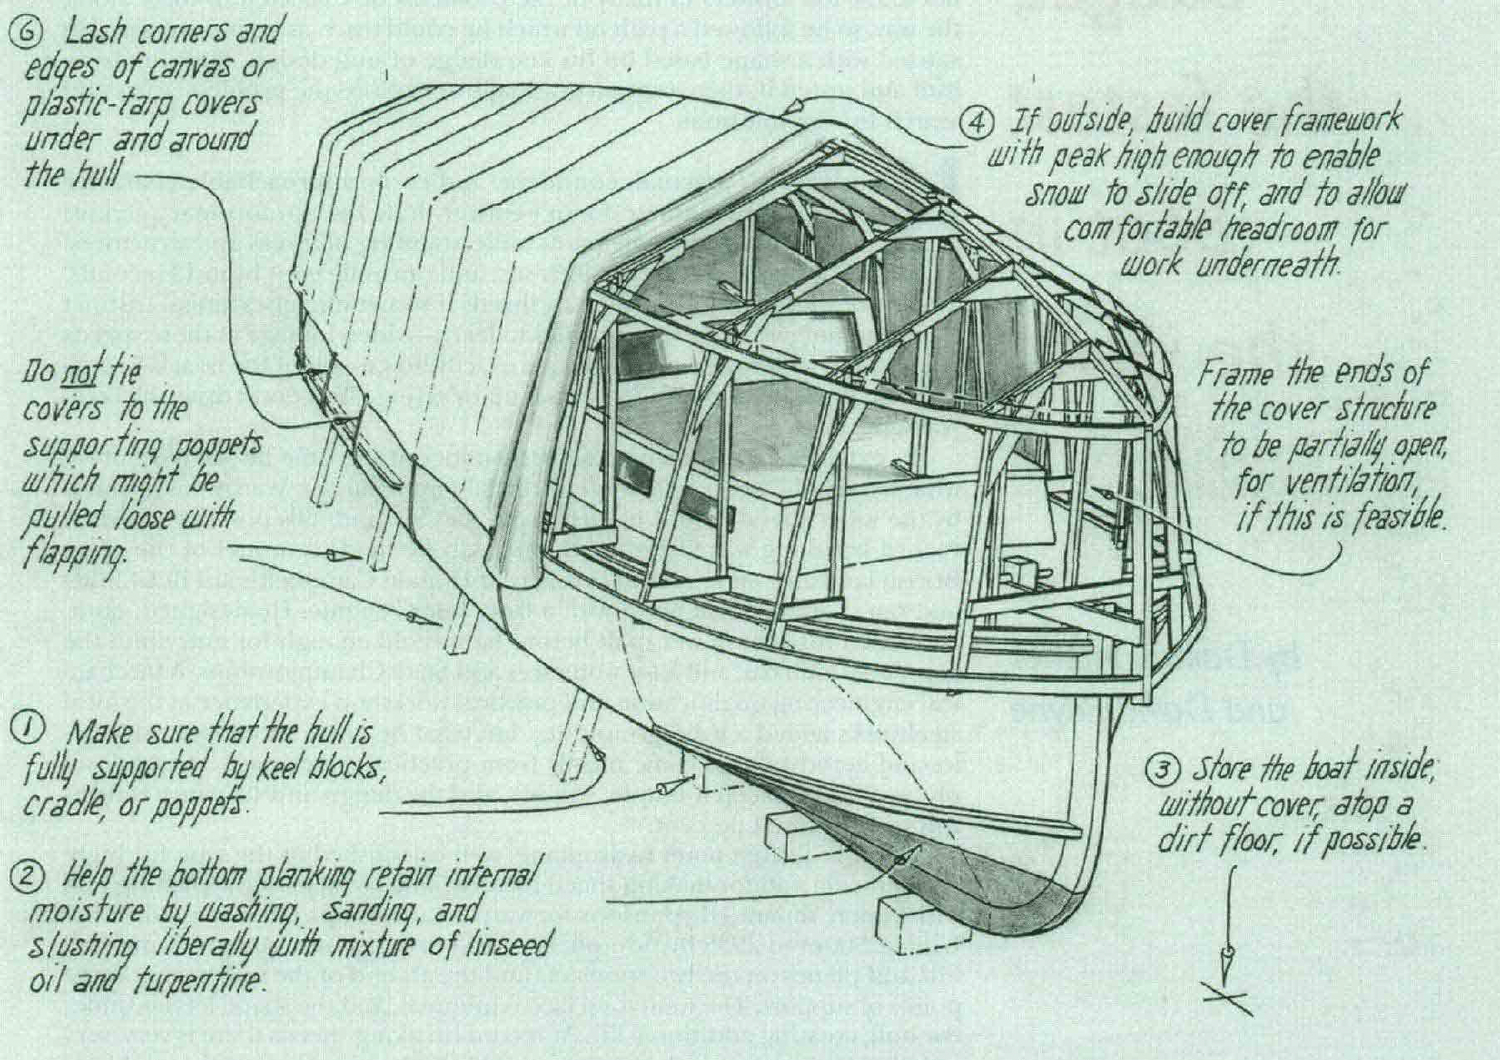
Constructing framework for covering a boat
The framework must be strong enough to support the material chosen and stand up to the elements. For two reasons, the framework should be constructed with a high peak: first, snow will slide right off; second, a high peak will give you headroom under the cover for working on the boat during the winter. A frame can be as simple as a series of, say, 1 × 4″ wood straps or as complex as a custom-made aluminum one that can be reassembled each year.
Aluminum framing can be made by bending it into shape with a conduit bender. The conduit and bender are available from local hardware stores. Bend a section of conduit in such a way that it will form an arch from one side of the boat to the other, with the top of the arch forming the peak of the cover. Frequently these arches are attached to the boat’s stanchions to give vertical support. A ridgepole is then formed with conduit, with U-bolts joining it to the peak of the athwartships arches. If a conduit bender is not available, an aluminum frame can be made using conduit unions of various angles to tie the sections together.
Wood framing is used in most cases with blue plastic tarps or canvas covers. To set up a wood frame, first construct a ridgepole of two sections of 1 × 2″ strapping the length of the boat and double them. This ridgepole forms an arch from the bow to the stern, and it is supported by 2 × 4s cut to the desired height of the cover. Additional 1 × 2″ strapping runs from the ridgepole out to the outside of the hull, to the deck edge or to the stanchions. The 1 × 2s and the 2 × 4s can be secured together with sheetrock screws. All sharp edges should be smoothed or covered with sections of car-pet to prevent punctures in the cover. In the case of canvas or tarp covers, breast lines should be tied to the edge of the canvas and passed under the boat and up to the other side.
Tips for attaching the boat cover to the framework
- Make sure that the hull is fully supported by keel blocks, cradle, or poppets
- Lash the corners and edges of the canvas or plastic-tarp covers under and around the hull
- Do not tie covers to the supporting poppets, which might be pulled loose with flapping
- Frame the bottom of the cover away from the hull so that there is full ventilation from underneath—especially with shrink-wrap covers

Finishing touches
When the boat is properly covered, the hatches, portholes, and companionway should be opened. Inside the boat, all the lockers should be left open. The purpose of opening everything is to allow air to circulate, which will help prevent mildew. This also helps keep the interior of the vessel dry and prevents pockets of moisture that could lead to rot over time. As a further retardant to moisture and mildew, some people leave a 110-volt light or a small fan turned on inside; these should be securely held in position so they will not pose a fire hazard.
Periodically during the winter, make sure the jackstands or other hull supports are uniformly snug but not overly tight. Check the cover to make sure it is holding well, and inspect the bilges for evidence of water. If the boat is not going to be launched until late in the spring or into the summer, then during April or so heat up another batch of the mixture of raw linseed oil and turpentine and apply another liberal coat to the hull from the waterline to the keel.
With a good cover that allows ample work space under it, a lot can be accomplished during the winter, and more time in the spring can be devoted to painting and other commissioning tasks. A proper cover will also give you the satisfaction of knowing you’ve done the best you can for your boat’s long-term health.
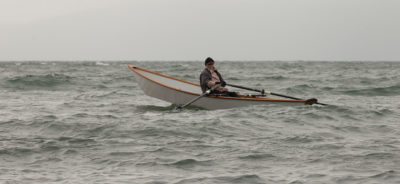
Get your boat ready for the winter
Covering and storing your boat is a big part of protecting it during the winter, but you still have some work to do. Check out our thorough guide for winterizing a small boat for more important steps.![]()

Join The Conversation
We welcome your comments about this article. To include a photo with your remarks, click Choose File below the Comment box.