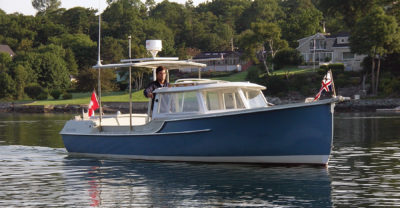
While waiting to find space to build a 22′ motoryacht based on a Lake Union Dreamboat and custom-designed by Paul Gartside, I decided to build the tender that would ultimately be needed to accompany it. The larger boat would be of traditional design and construction, and it was important to me that the tender matched it in style. I was also looking for a boat that would tow well and was small enough to carry on deck.
Paul Gartside’s Design 206 for an 8′ clinker pram of traditional construction suited my requirements exactly, and the beaminess created by the two transom ends provides good space in a small package.
 Cecil Rhodes
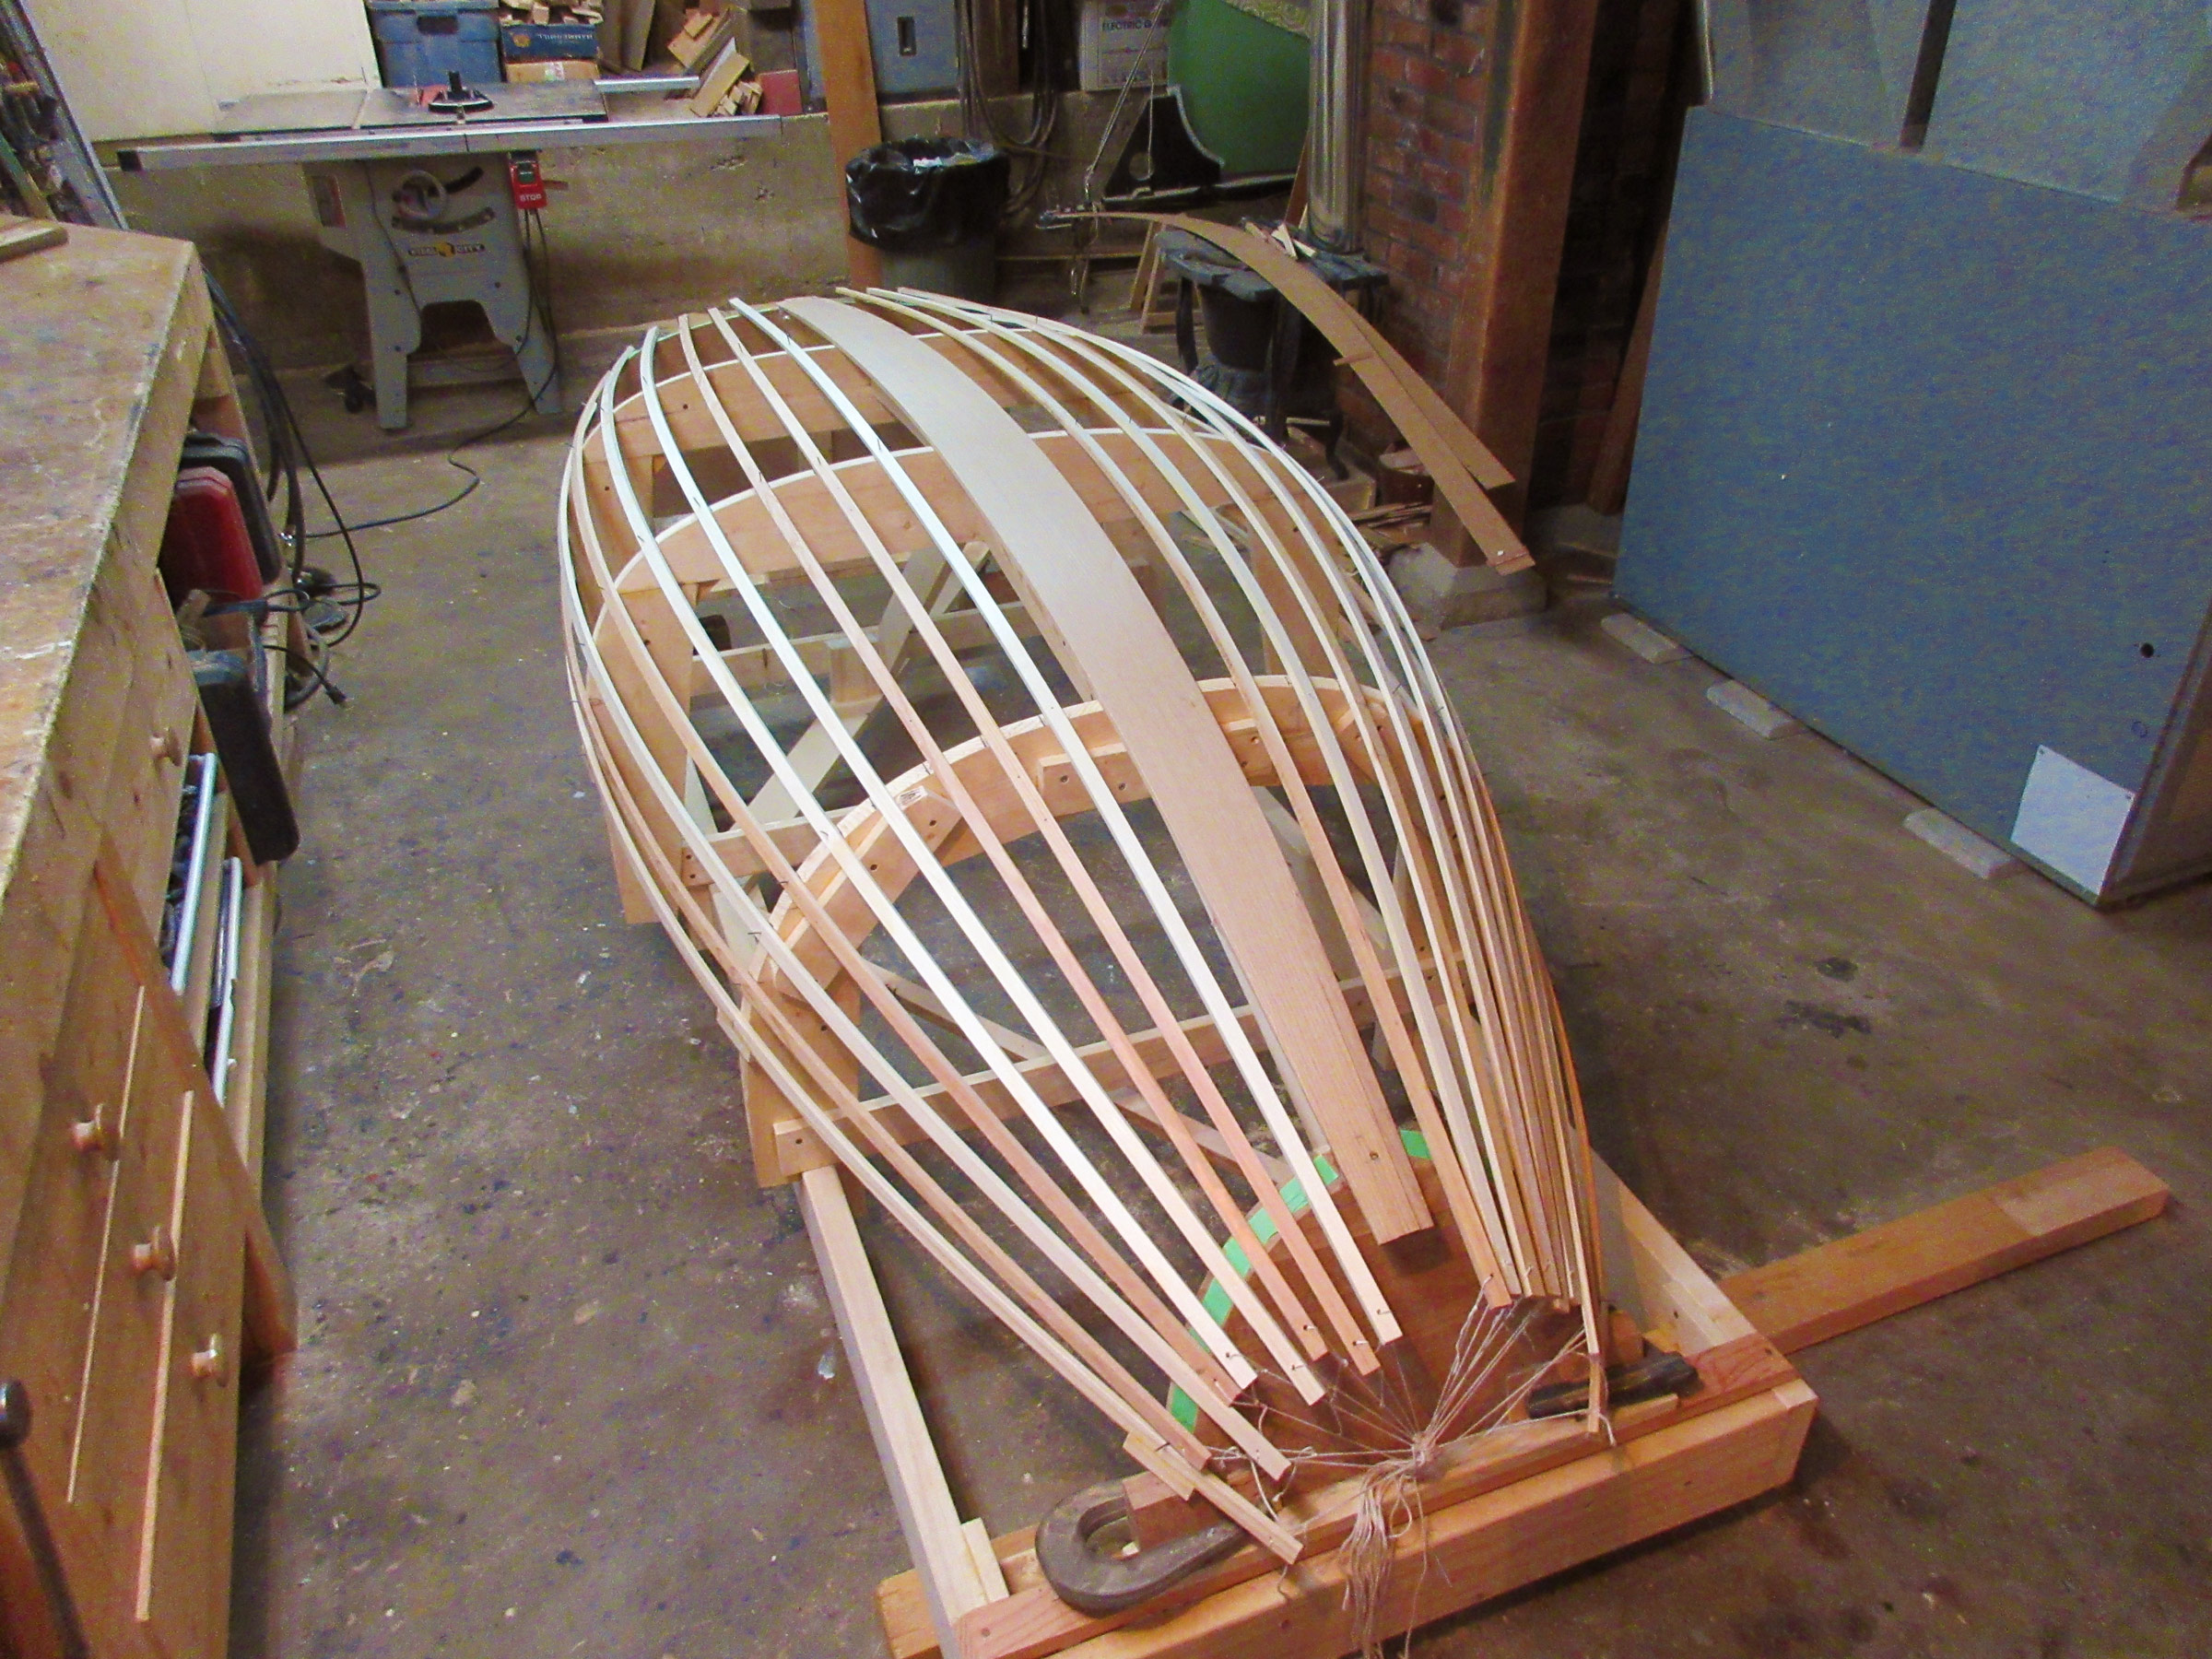
The pram is built upside down over a plug. Once the transoms and keel are set in place, the plank locations are lined off with battens. Even at this early stage the graceful arcs of the planks as they tuck up to the bow transom are evident.
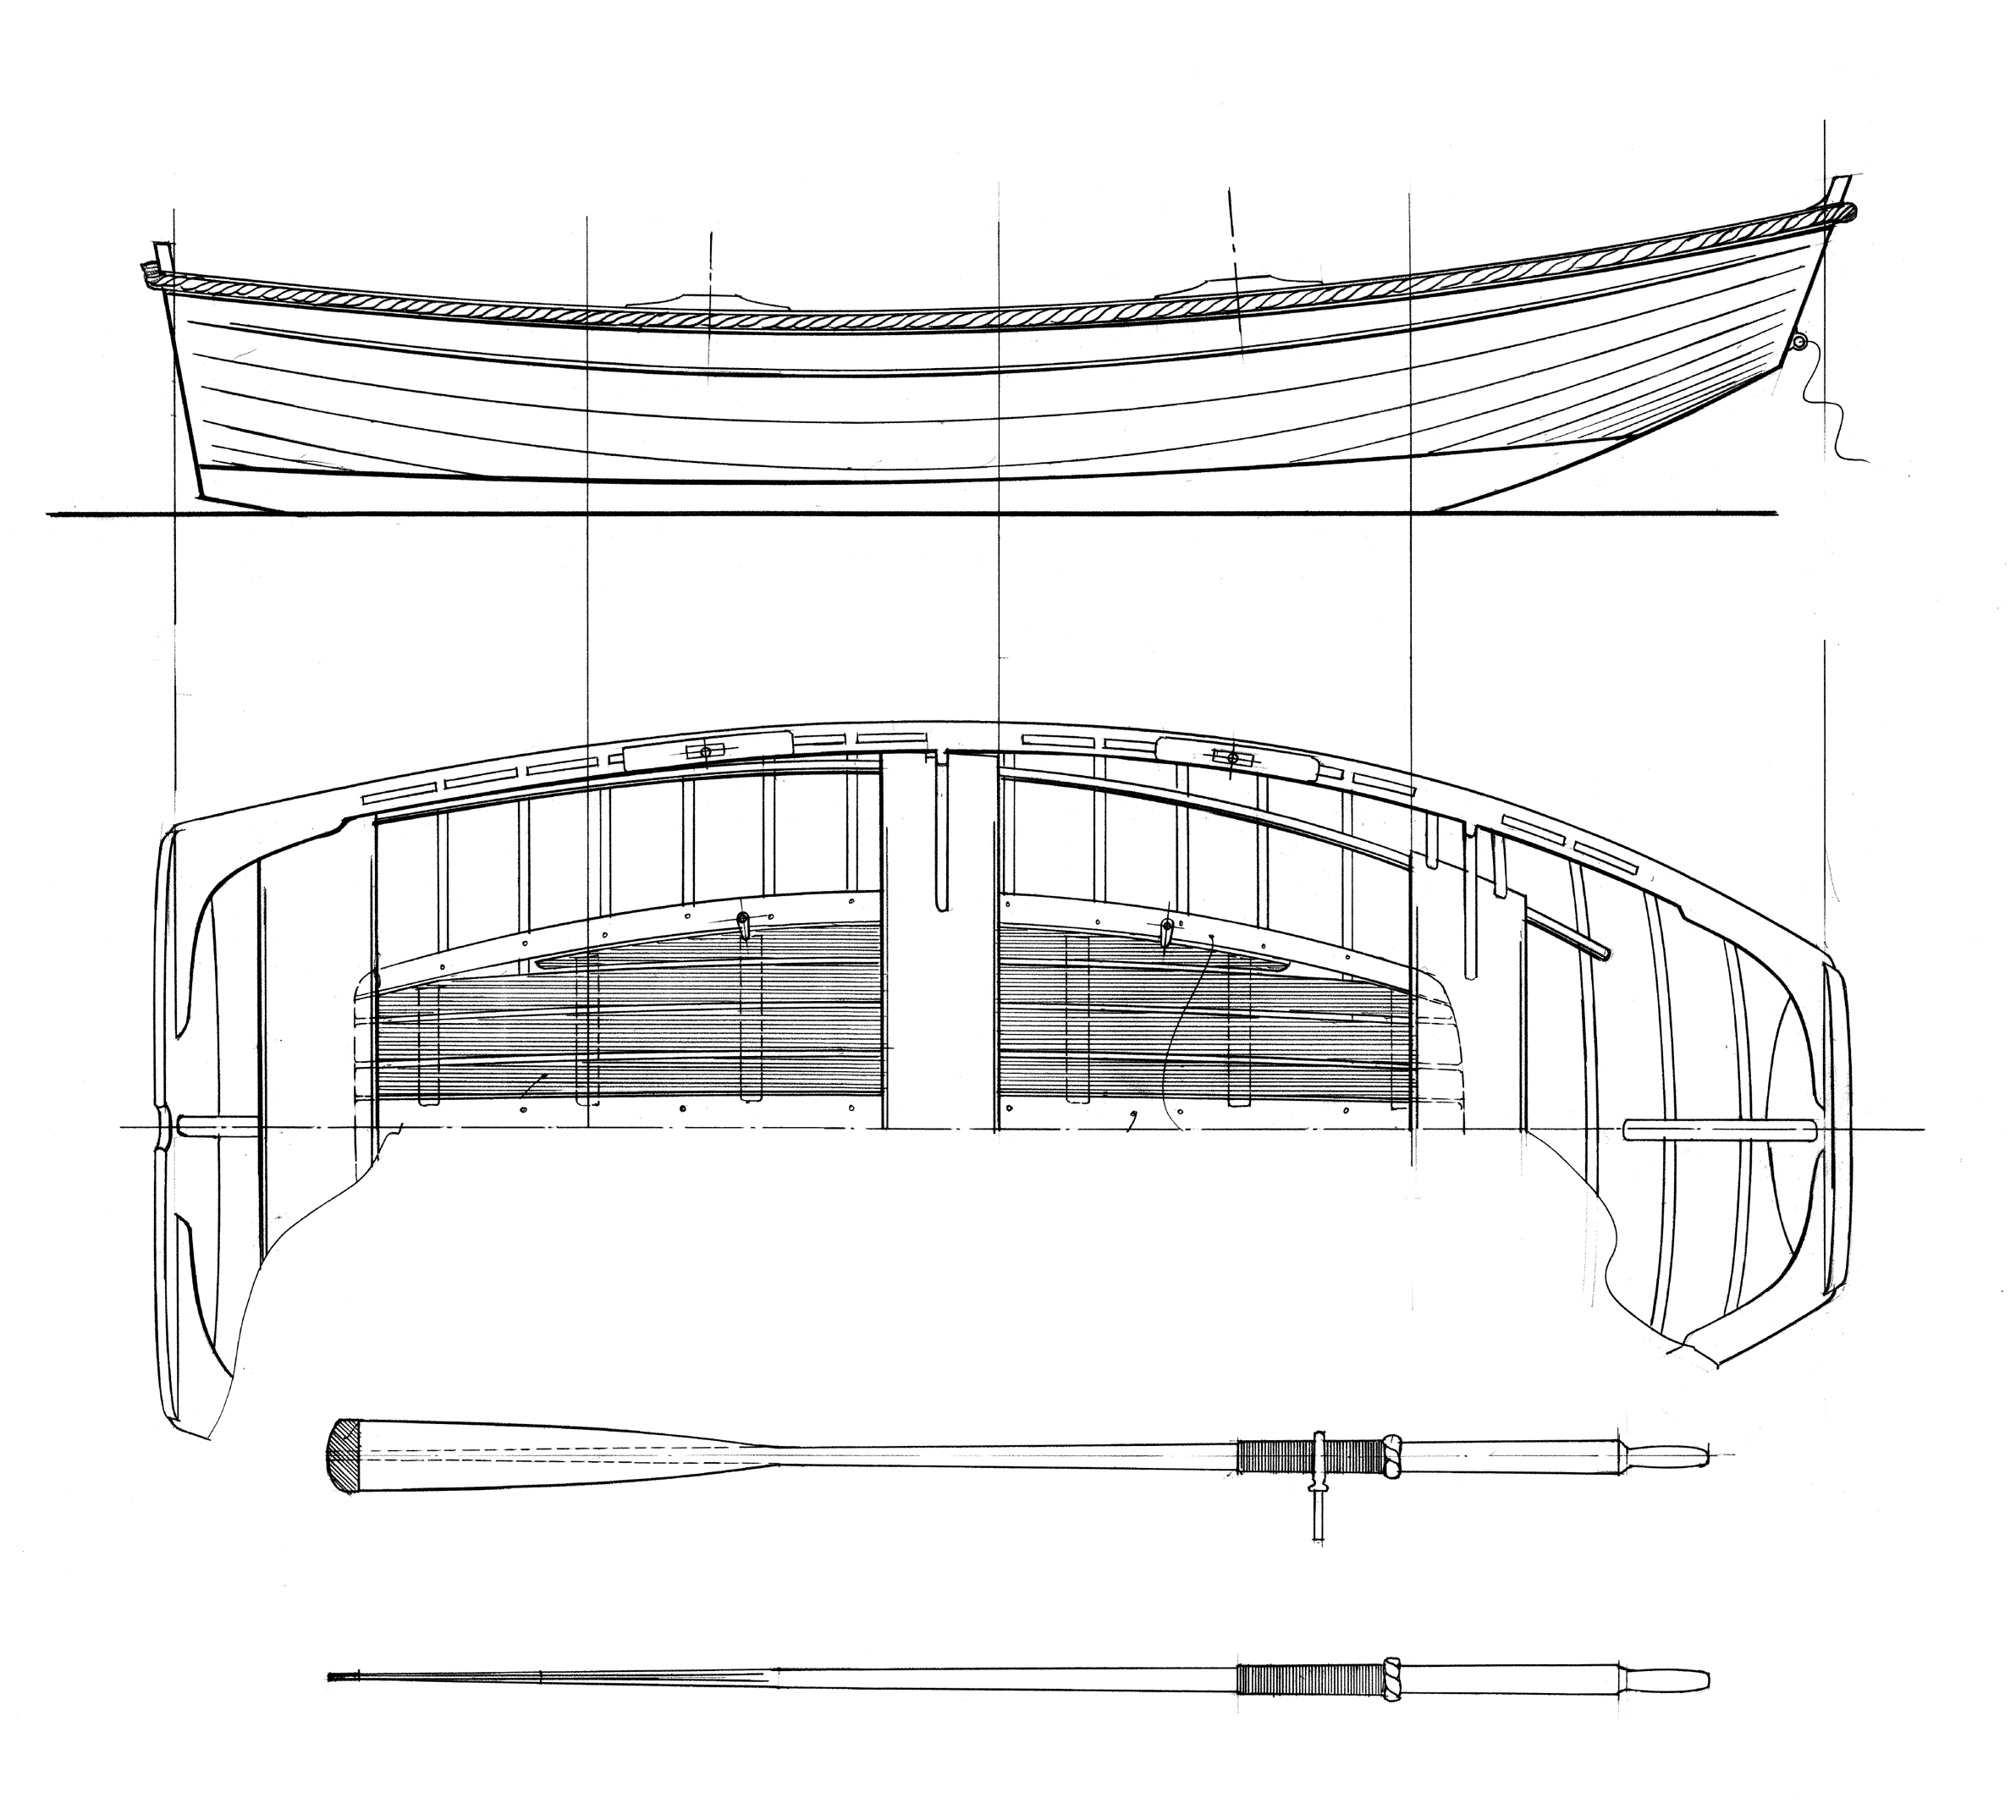
As a devotee of wooden boats, I have built several designs from varied sources and appreciate detailed plans that include what is necessary for the builder, illustrated with clear drawings and notations. Paul Gartside’s work not only achieves this standard but is guided by many years of building and using boats as well as designing a wide range of craft of all sizes. For this particular design, his five sheets of hand-drawn plans are a joy to use or just to look at.
Design 206 is a pram dinghy of traditional lapstrake construction, which requires a high level of skill and considerable time to complete. The investment of time demands that the project be completed with the best possible materials.
 Tyler Rhodes
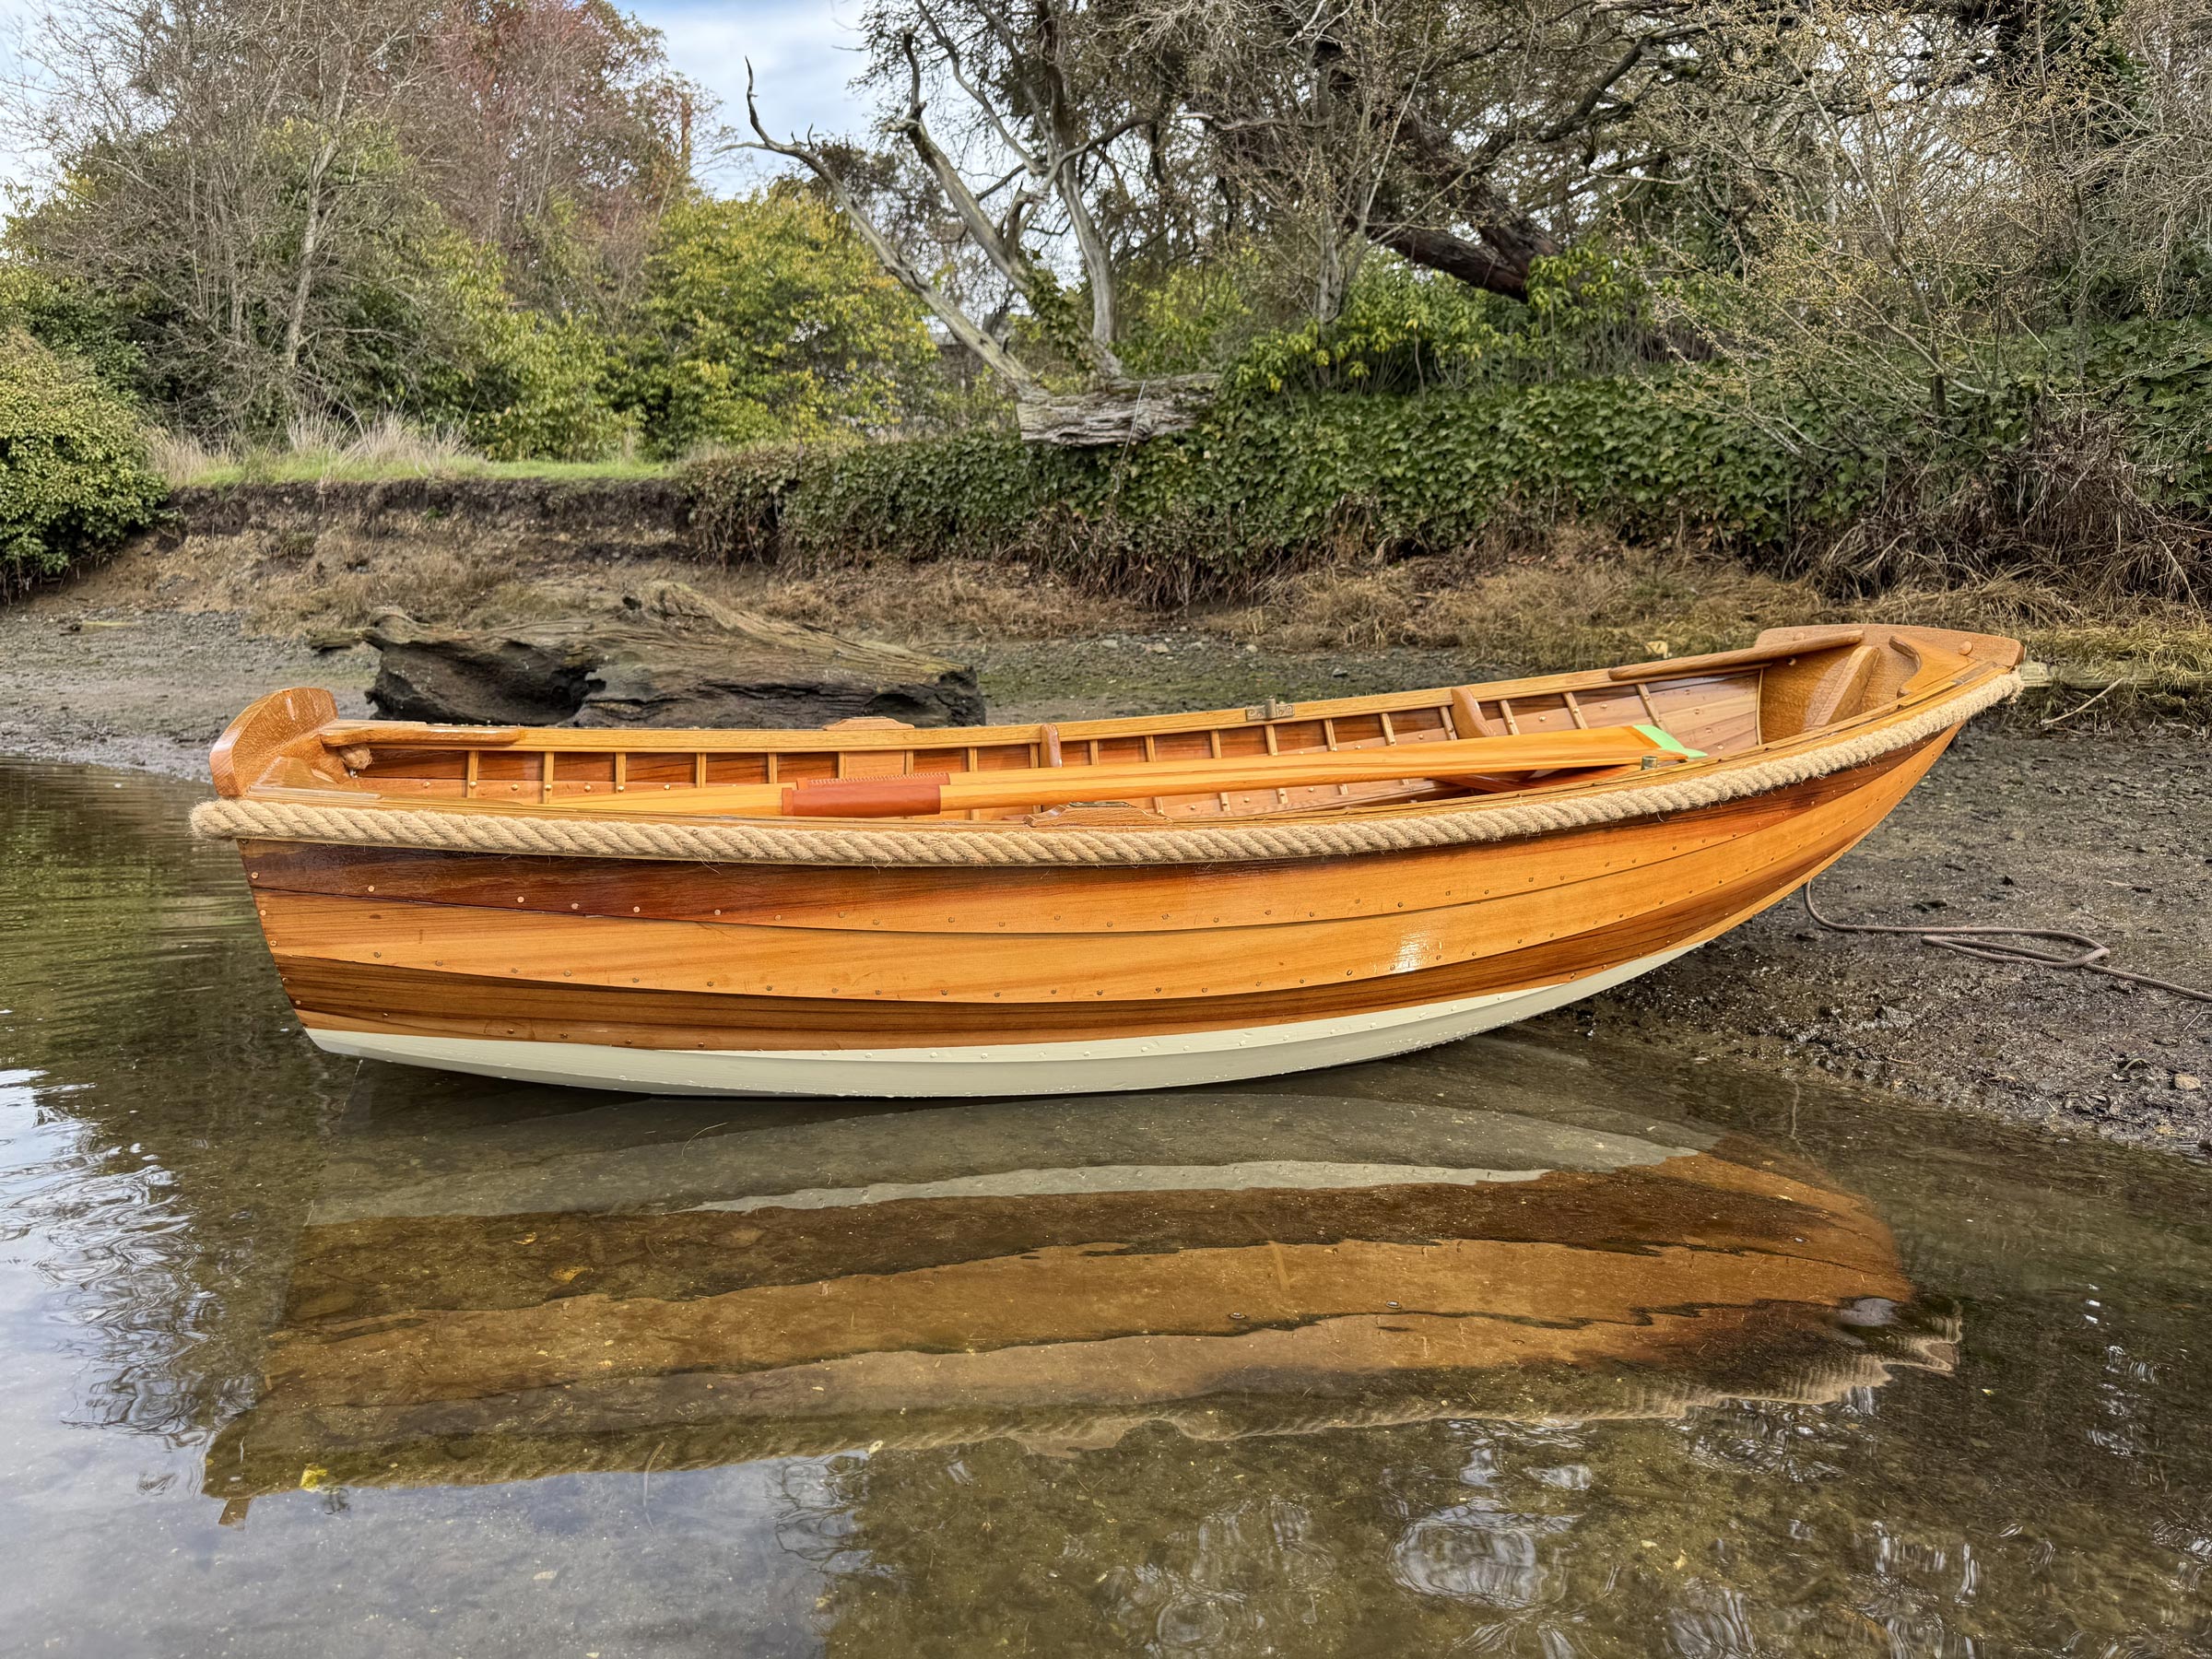
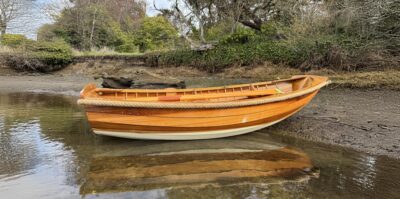
An eyebolt, placed low on the bow transom, serves well for towing the pram. Inside, the 8mm sprung floorboards are removable, making it easy to clean the hull after mud and sand are tracked aboard when launching the boat from a beach.
I followed Gartside’s recommendation of white oak—quarter-sawn for the transoms and other fittings, green for the 13mm x 11mm steam-bent frames—and old-growth fine-grained western red cedar for the 8mm planks, nine per side. Here in the Pacific Northwest good cedar is available, but for builders in other parts of the world Gartside recommends alternative planking material such as spruce or pine. Scantlings are only as large as is necessary to create a strong but lightweight shell—just over 100 lbs. Fastenings are copper boat nails and roves with a few bronze screws. The advent of the internet has greatly improved the ability to source bronze and copper fastenings of good quality from suppliers now few and far between; I bought Davey & Co. copper boat nails and roves from Fisheries Supply in Seattle.
Building Gartside’s Pram
Assembly of the keel, transoms, and planking takes place upside down on a form comprising three molds. The lining-off of the plank locations is done with battens followed by spiling plank shapes. Shaping the individual planks and cutting the laps and gains needs to be done with patience, using planes dedicated to the job and kept sharp. The planks are nailed to each other at the laps—with bedding compound at the gains and transoms—until the boat is turned over when roves can be added, and the steam-bent frames can be installed and riveted to the planks. As the hull slowly comes together the structure is somewhat unstable until the gunwales and bilge stringers are installed, then the boat becomes stiffer and ready to receive seats, knees, and trim. A word of caution: most of the build can be done by one person working alone, but when it comes to riveting (the boat takes about 850) and installing the 19 steam-bent frames, a second pair of hands is needed. It is at such times that you’ll find out who your friends are.
 Cecil Rhodes
Given its traditional construction, the pram is not especially light. Yet, it is small enough to be transported in the back of a pickup truck, from which it can be launched by one person if the truck is backed up close to the water.
The finished pram is light enough to be easily transported in a pickup truck, or lifted onto a deck or dock. The design calls for 9mm × 8mm oak reinforcing strips to be added to the lower edge of the lowest four planks to protect the boat during beaching or loading operations; they have already saved some scarring of the bottom paint and planks. It is possible for one person to load and unload the pram into the water from a truck bed if the vehicle is backed up close to the water, but to move it any distance on land requires either a dolly or two people.
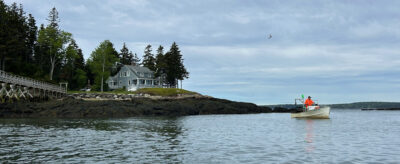
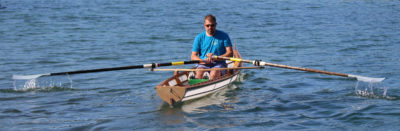
The boat can be rowed from either of two locations—amidships or forward—depending on load or number of passengers. Rowing alone with light loads is effortless and maneuverability is immediate. With two people, not much changes except that the rower moves to the forward seat. The pram’s broad, deep shape can carry a considerable load if required. The tightly spaced 8mm sprung floorboards protect the bottom of the boat and spread the load while standing, boarding, or distributing cargo. The boards are held in place by wooden buttons and can easily be removed when necessary.
 Tyler Rhodes
Even in a small pram it’s important to maintain the right fore-and-aft trim. For that reason, there are two rowing stations. When rowing alone, sitting on the center thwart is optimal, but when joined by a passenger or if carrying heavy cargo, the rower can move to the forward thwart.
I have used the pram for some time, and it has taken on no water. This suggests that the planking installation is well done and that the tightly spaced rivets are working to keep everything sealed—an important factor if the boat is to spend any time sitting on deck or otherwise out of the water.
For the oars and oarlock placements I followed Gartside’s directions, and they work well—oarlock location is extremely important to the long-term ergonomic satisfaction of using any rowboat. The 6′ 6″ oars are fine-grained old-growth Douglas fir as specified in the plans and are light and strong; the collars are leather, and the oars work quietly and smoothly.
 Cecil Rhodes
The plans show a traditional rope fender installed in a cove beneath the oak gunwale and turning onto the transoms by 150mm. More than just decorative, the fender works well to protect the pram’s gunwales and upper planks.
Using this boat is a pleasure. Even children can easily row it in safety and comfort. The benefits of the classic design and traditional construction will appeal to those who appreciate fine workmanship, don’t mind refinishing from time to time, or have a traditional parent ship that requires a complementary tender. It may be small, but such a boat will always get more than its fair share of attention; perhaps because of its rarity in this day of the ubiquitous inflatable boat, or simply because we have an unconscious appreciation of a good design well built.
If you’re looking for a pretty tender of traditional appeal, you surely won’t go wrong with Gartside’s Design 206.![]()
Cecil Rhodes is a retired architect living on Vancouver Island; he has built many small wooden boats over the years.
Gartside Design 206 Particulars
LOA: 8′
Beam: 3′ 10″
Depth amidships: 1′ 3″
Weight: 100 lbs

Full plans for Design 206 are available from Paul Gartside Boatbuilder and Designer, price $120 (electronic delivery) or $150 (printed and shipped). A detailed description of the design and the larger 206a can be found in Gartside’s book, Plans & Dreams Volume II, available from Paul Gartside and from The WoodenBoat Store, price $55.
Is there a boat you’d like to know more about? Have you built one that you think other Small Boats readers would enjoy? Please email us your suggestions.


Awesome, beautiful workmanship.
I’m extremely interested in the rope fender and would like to install one on my Wineglass Wherry. Do you have any photos of the cove that supports the rope? Also, how do you attach the rope to the cove along the side? What knots did you use at the stern, quite impressive? You could do a whole article on the rope fendering!!
Thanks for your interest Scott.
The cove is simply that, a small radius cut into the outer face of the trim. The glue can be thickened epoxy but in this case I used regular construction polyurethane glue. I believe this will make it easier to replace when the time comes. The rope itself took some time to find. As you say, it needs to be just the right size, and in this case a 4-ply rather than the usual 3-ply that always looks too small
Regards Cecil
Lovely little boat, and you did a beautiful job. A comment about the roped gunnel: it’s attractive and protects the mother ship’s topsides, but rope, especially large enough in diameter to look right, is heavy stuff. The canvas-covered foam type should be lighter (is it?). But it ain’t cheap.
I have built 2 or 3 Atkin “Tiny Ripples,” only 6′ long. That design is actually a good little dinghy, and according to Billy Atkin, should be able to serve as a lifeboat. I never got the chance to test that feature.
I also built a very nice little (6′ 6″) V bottom pram designed by Al Mason in 1945 (the date is actually on the plans). The entire plan is on a single sheet, and I still have it, and am very tempted to build another one. For such a tiny boat, it rows very well, even with a passenger aboard. I have no idea what happened to the first one. Like your boat, it has a lot of bottom rocker. The worst rowing dinghy I ever had was an 8′ skiff my dad built from a “How to Build 20 Boats” magazine dating back to the 1940s. Even the feature photo for the plan shows the stern squatting with a passenger along. It would stop dead with every stroke of the oars, as you were dragging half the ocean (lake, river, etc.) along with you. Solo, it rowed well enough.
One never knows exactly how a new build will perform until it hits the water. That is one of the reasons I like to stay with a good designer in the likelihood it has been thought through and built several times. In this case it is very nimble and yet feels stable for such a small boat. Exactly what ones needs in a tender.
I am not familiar with the “canvas covered foam” you describe but for my preference the rope is what it needed.
Cheers
I’m a super big fan of Paul’s design sense, I tend to prefer his renditions to standard pieces over any other’s. I have plans and materials for his 7ft pram, #80, and to my eye the sailable Porgie (#195) bests all other prams. Looks like a combo of a prancing porpoise and a perfect skipping rock.
Four strand rope, Cecil? That’s what gives the almost Christmasy ornate detail? I like it!
I’ve found the canvas covered foam to be labor intensive. Needs repainting or will flake, hard to pull the canvas tight, the little tacks are hard to tap in under the overhang then come out.
Rope&Cord has Unmanila a pseudo hemp-looking polyester three-strand available up to 2in, or there are Chris Cunningham’s tips on dyeing nylon and poly with deck stain.
I’ve wondered about tacking the twisted rope using punches to get tacks below surface, or lacing thru one of the twists. If I go traditional with rest of boat construction inc classic bumper, I’d hope to avoid modern adhesives on that final crowning element.
What diameter rope did you use, Cecil?
1. 1/4 inch 4 strand hemp.
Stunning boat. I am very tempted to give it a go.
Forty years ago I bought an 8’ 6” GRP shell and fitted it out. Unfortunately it was so good it was stolen!
It was not wood but it was proof to me the hull design is the best available at that length.
I am getting the plans. I have a shed full of eastern pine boards and may use those for a first attempt. I’ll fit a hardwood Hereshoff Gunwhale.