After 20 years spent building, then sailing our beloved 38′ ketch, a Herreshoff Nereia, on the Great Lakes and St. Lawrence River, there came a point when Louise and I agreed we were done with big-boat sailing. We wanted to be able to trailer our craft to lakes and rivers we had yet to explore. She was happy with her sea kayak; I wanted something bigger, faster, and more stable—a mothership I could keep on a trailer and ready for expeditions to Quebec’s Lower St. Lawrence and the Saguenay Fjord.
I needed a break from sail, and a motor, even an electric one, was never an option. The new craft would weigh less than 100 lbs, float in a puddle, be launchable and recoverable with either trailer or dolly, and have adequate storage for camping gear, a portage cart, and a week’s provisions. It would be as fast and weatherly as an ocean kayak and considerably more stable. Ideally, it would even be able to carry a passenger in comfort.
I combed the classifieds and small-craft websites and ultimately had to stop dreaming about finding the ideal boat and set my sights on building one. If I was to build, I would need to get the work done during the summer months, when I could turn our garage into my shop. Because I wouldn’t have time to loft and to build a strongback, it would have to be a stitch-and-glue kit.
In the spring of 2020, my son and I had been discussing what kind of boat we would need to compete in the Race to Alaska (R2AK). In the process, we looked at entries from previous years, including Colin Angus’s Rowcruiser. The pandemic put an end to our plans and two years of R2AK, but I found myself interested in another Angus sliding-seat design, his Expedition Rowboat. At 18′, with a beam of 35″ and a 3″ draft while carrying 300 lbs in three watertight compartments, the Expedition’s main access hatch is wide enough to accommodate a partially dismantled medium-sized mountain bike and collapsible trailer—or a passenger.
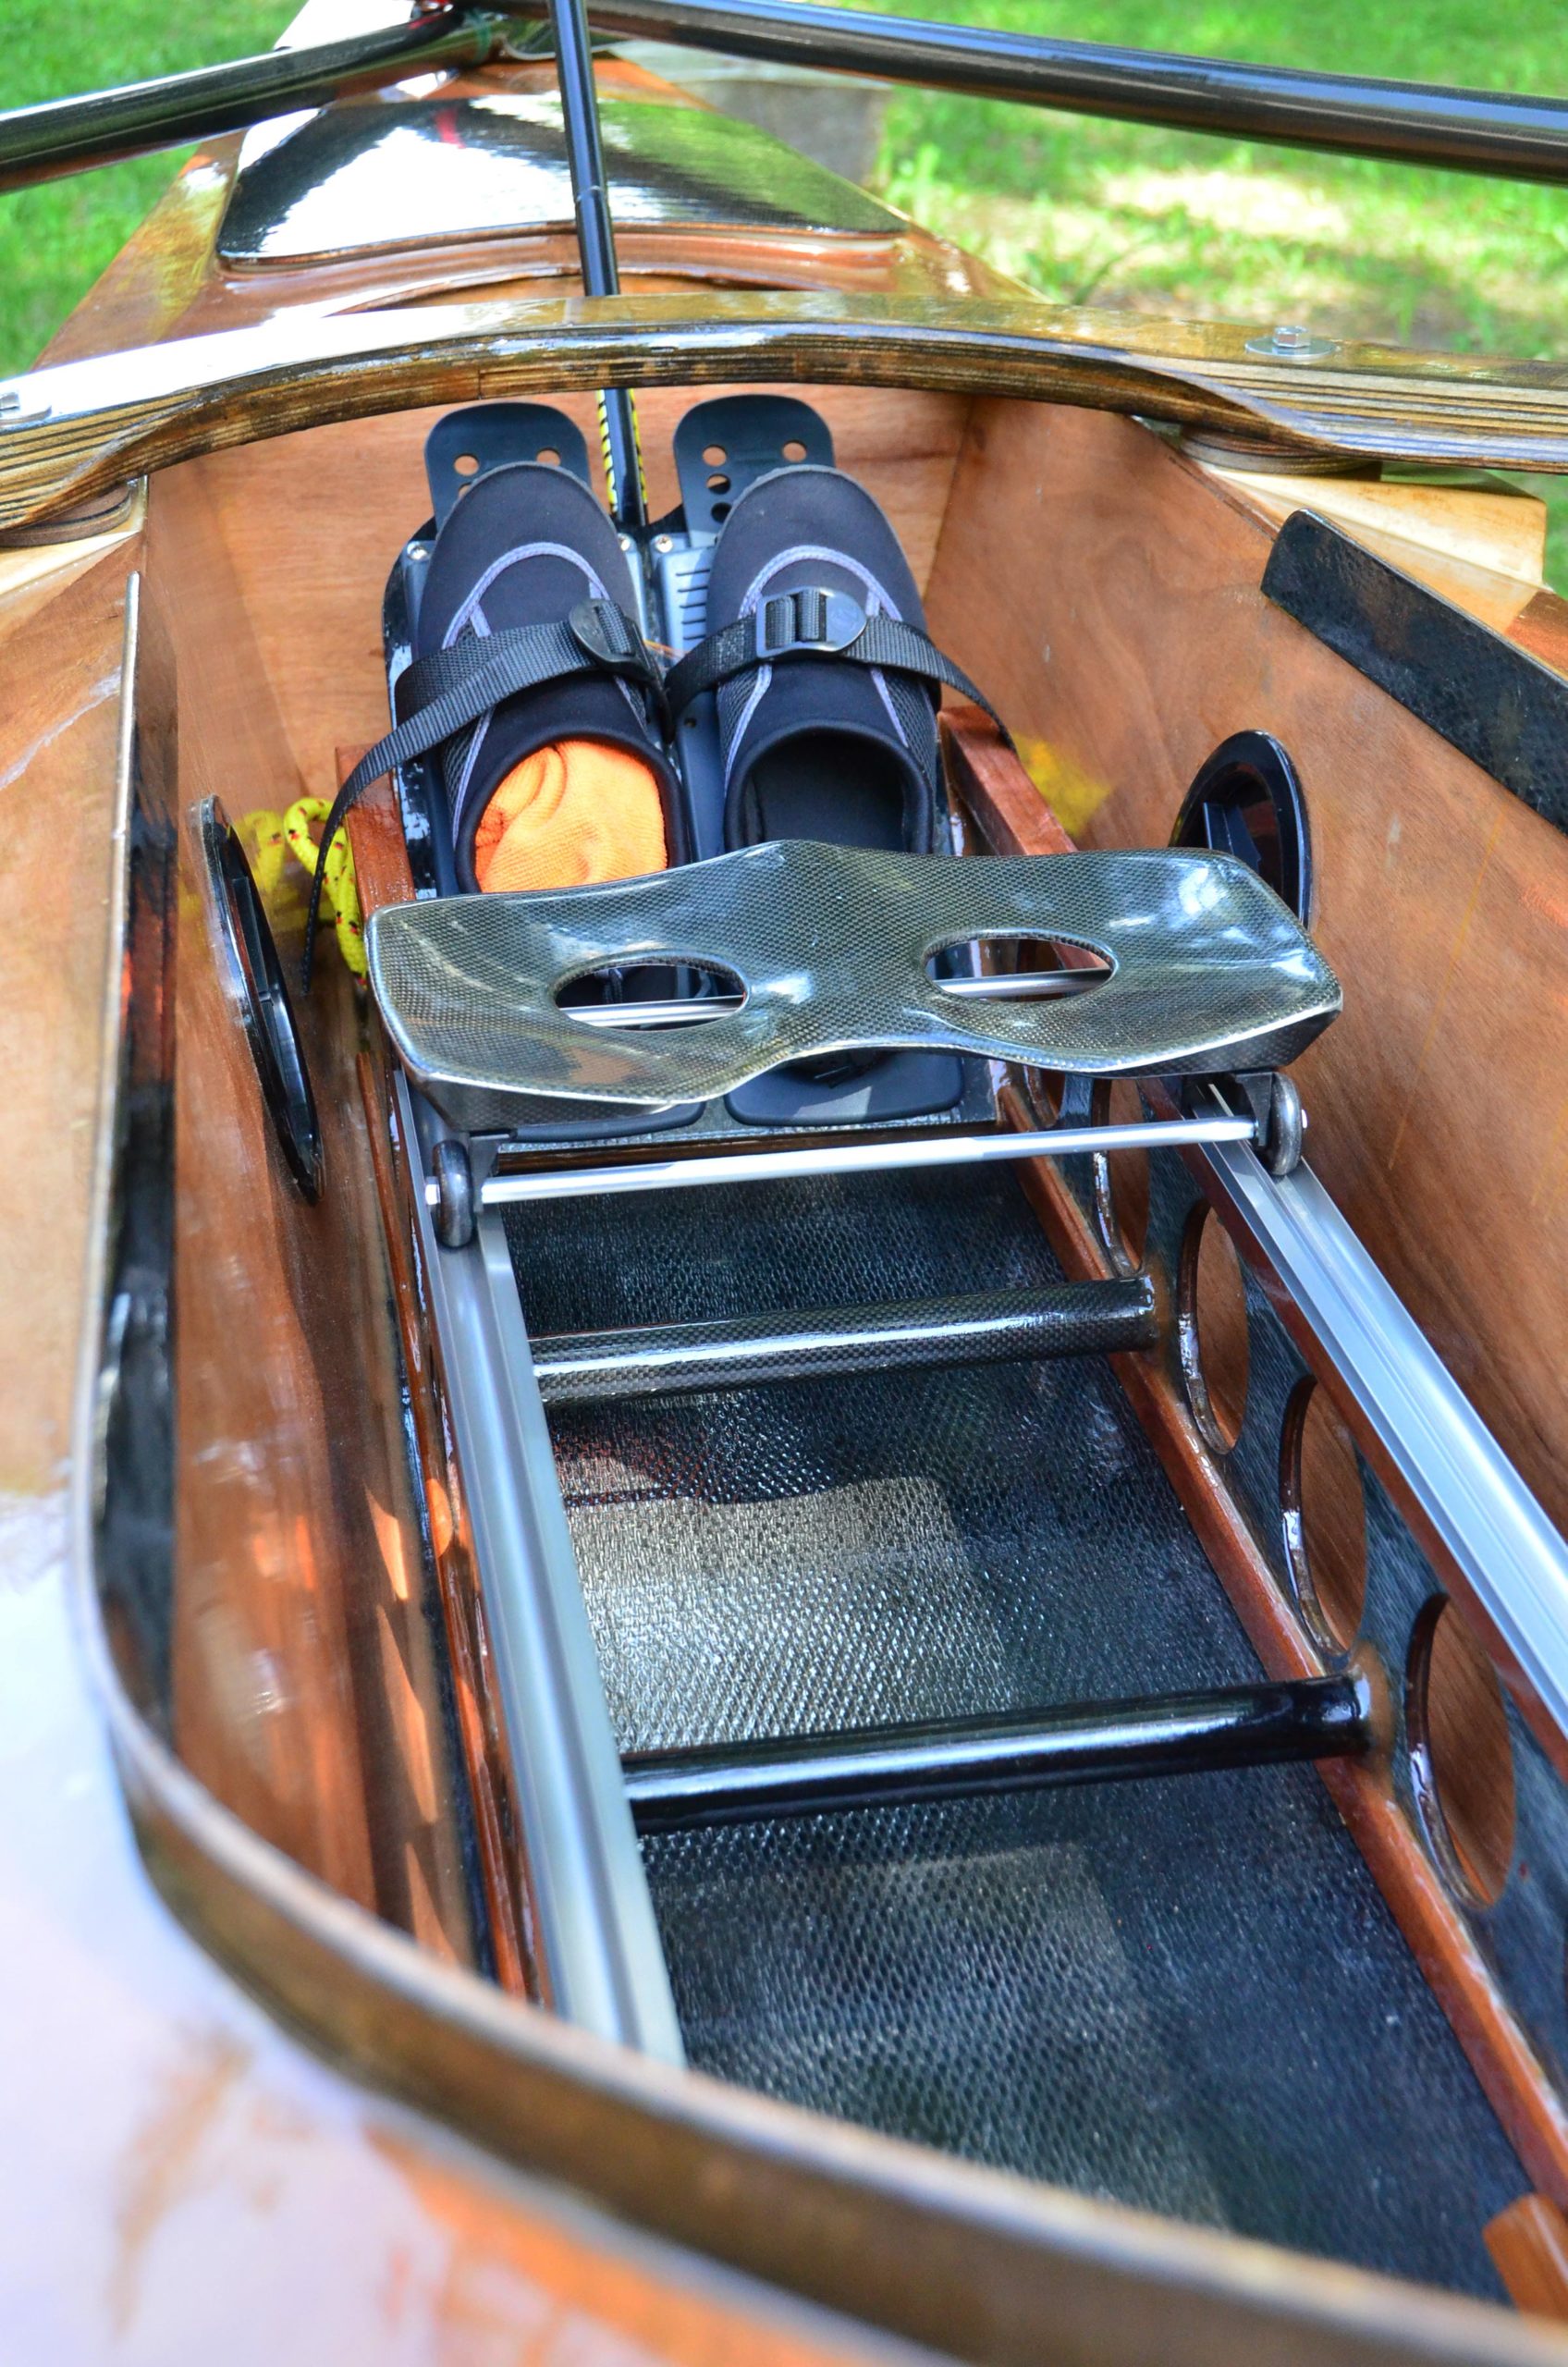 Photographs by Louise Duff
The sliding-seat kit includes a carbon-fiber seat which rolls on wheels with stainless-steel bearings. The aluminum tracks normally rest on a base made of common lumber; the arrangement here incorporates thin plywoods and carbon fiber to save some weight.
I ordered an Expedition kit and a sliding-seat kit. (The kits were among the last sold by Angus Rowboats; the company now sells paper digital plans as well as DXF files that a CNC-equipped shop can use to cut the plywood parts.) I’ve built or rebuilt a dozen boats from various states, but this was my first kit build. And as this boat was likely to be the last I’d build, my goal was to produce a natural-finish light-as-possible showboat with hidden hatch hold-downs and the addition of carbon fiber to add stiffness to the hull and, I admit, because I like the look. The manual gives builders a wide latitude in some construction aspects while cautioning where instructions must be followed. Angus also assumes a certain skill level. Often, I found myself consulting the Angus Builder’s Forum and Chesapeake Light Craft’s excellent how-to site.
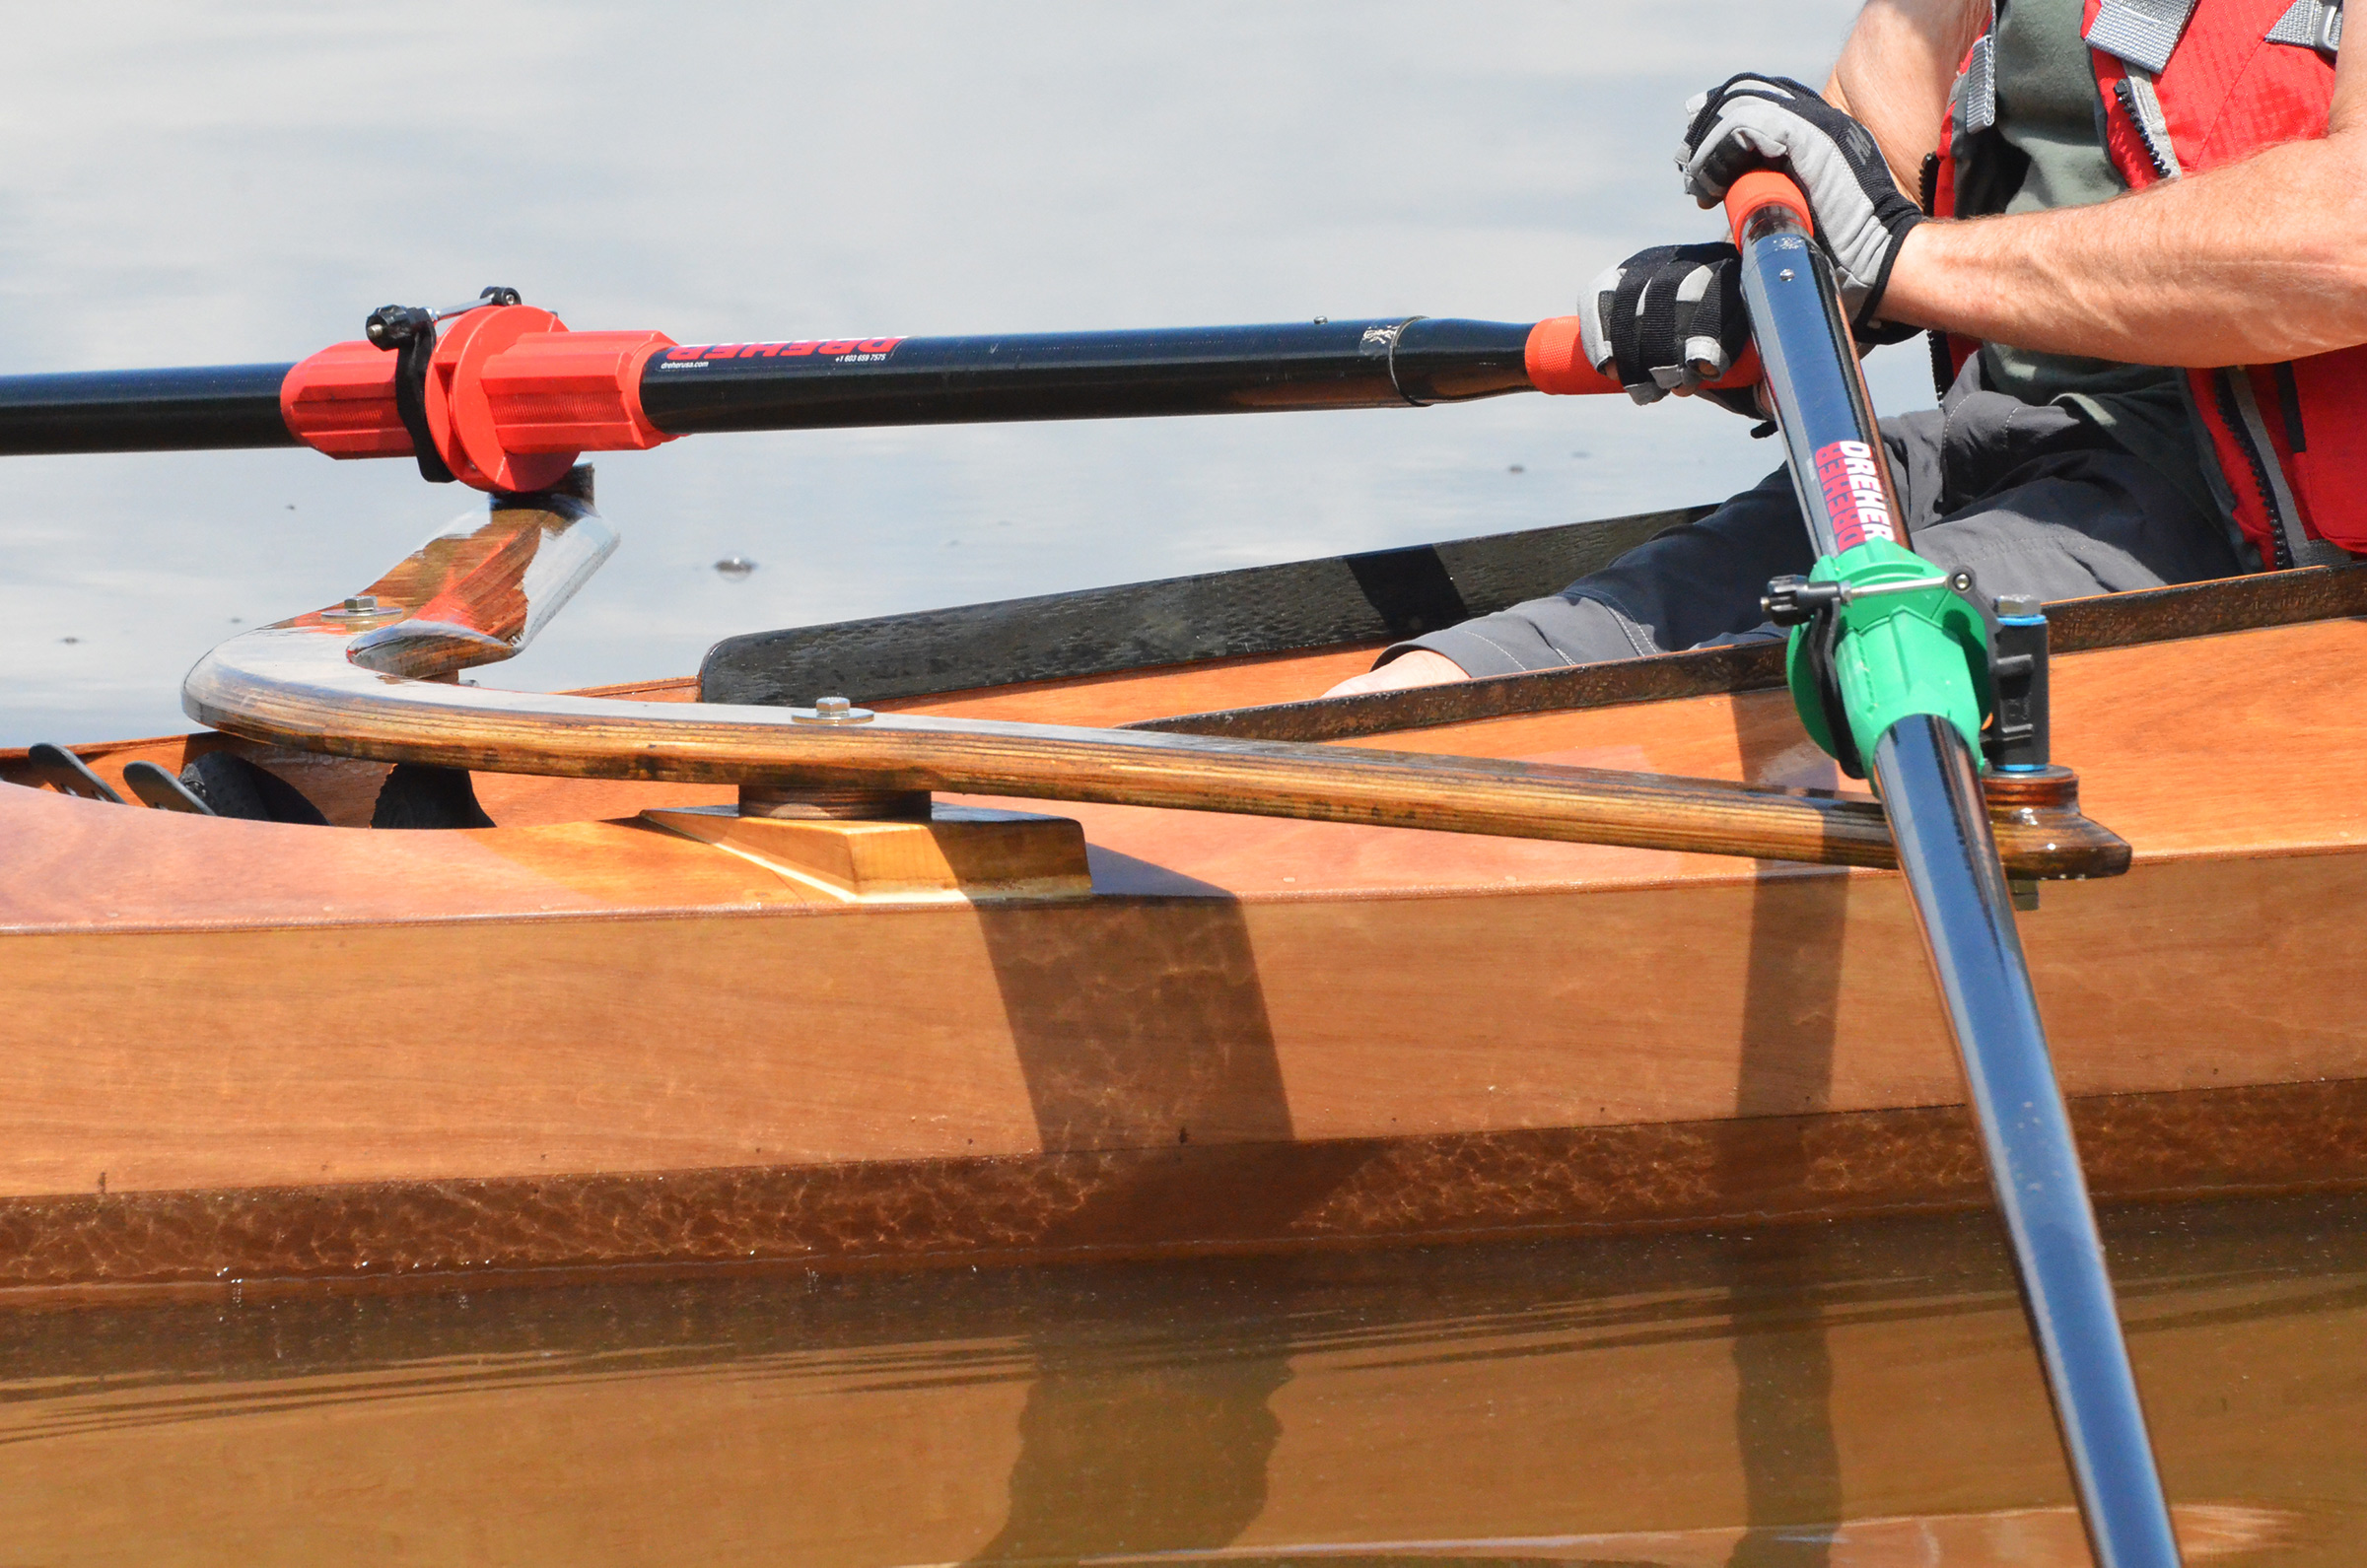
The outrigger, as specified in the plans, is made of pine or other softwood lumber to keep it light, and sheathed in fiberglass and epoxy to give it the strength and stiffness required to keep it from flexing.
The sliding-seat kit included a carbon-fiber seat, anodized aluminum tracks, Concept II oarlocks and footplates, stainless-steel hardware and a construction manual including full-sized templates required to cut the wooden components, which include parts for the ¾″ fir-plywood box frame that supports the tracks. A boomerang-shaped outrigger is separate from the frame and instead bolted to the deck, which, according to the designer, make a stiffer platform for the oarlocks than outriggers attached to the frame. His plans call for two 3/4″-thick pieces of pine or other softwood, lap-jointed in the middle and fiberglassed top and bottom.
I was determined to keep all-up weight of my Expedition below the designed 85 lbs. Having added roughly 7 lbs of carbon-fiber reinforcements, I would subtract those 7 lbs elsewhere, starting with the sliding seat. Built as designed, it would weigh 14 lbs. I used ¼″ sapele plywood, faced it with carbon fiber, and mortised it into 7/8″ Honduras mahogany rails top and bottom. My seat structure weighs just over 6 lbs. Like the designed version, it drops into the cockpit and is held in place with guides epoxied to the floor. The Angus-designed unit is held by slots that interlock with slots in the frame.
I saved some heft in building the outrigger to the same plan form but laminating two thicknesses of 1/2″ birch plywood and carbon fiber, and giving it a foil cross section. The rigger is bolted to two angled wedges epoxied to the side decks. I added 1/2″-thick blocks under the deck beneath the wedges to provide a more solid landing for the washers and nuts that anchor the bolts that secure the outrigger. I found the most challenging task was identifying and shimming the outrigger to the right height to put the oarlocks at the correct distance from the sliding seat. The manual directs builders to the Angus website, where the relationship between footrest, oarlocks, and sliding seat is well explained in considerable detail. A range of settings is possible, based on the size and experience of the user as well as on how the boat is to be used. For rough water, for example, adding spacers between the outrigger and its bases raises the oars to improve clearance over the legs during the recovery of the strokes.
Angus Rowboats offers plans for hollow-loomed spoon-bladed oars, but I opted to purchase carbon fiber Macon-blade Dreher sculls from Chesapeake Light Craft.
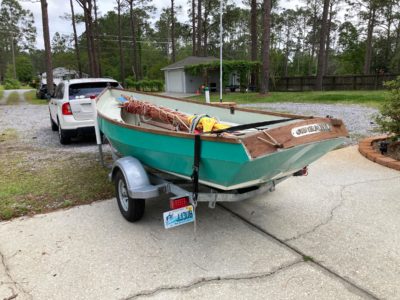
I modified a used trailer to fit the Expedition Rowboat. Two months after the kit was delivered, I launched my boat.
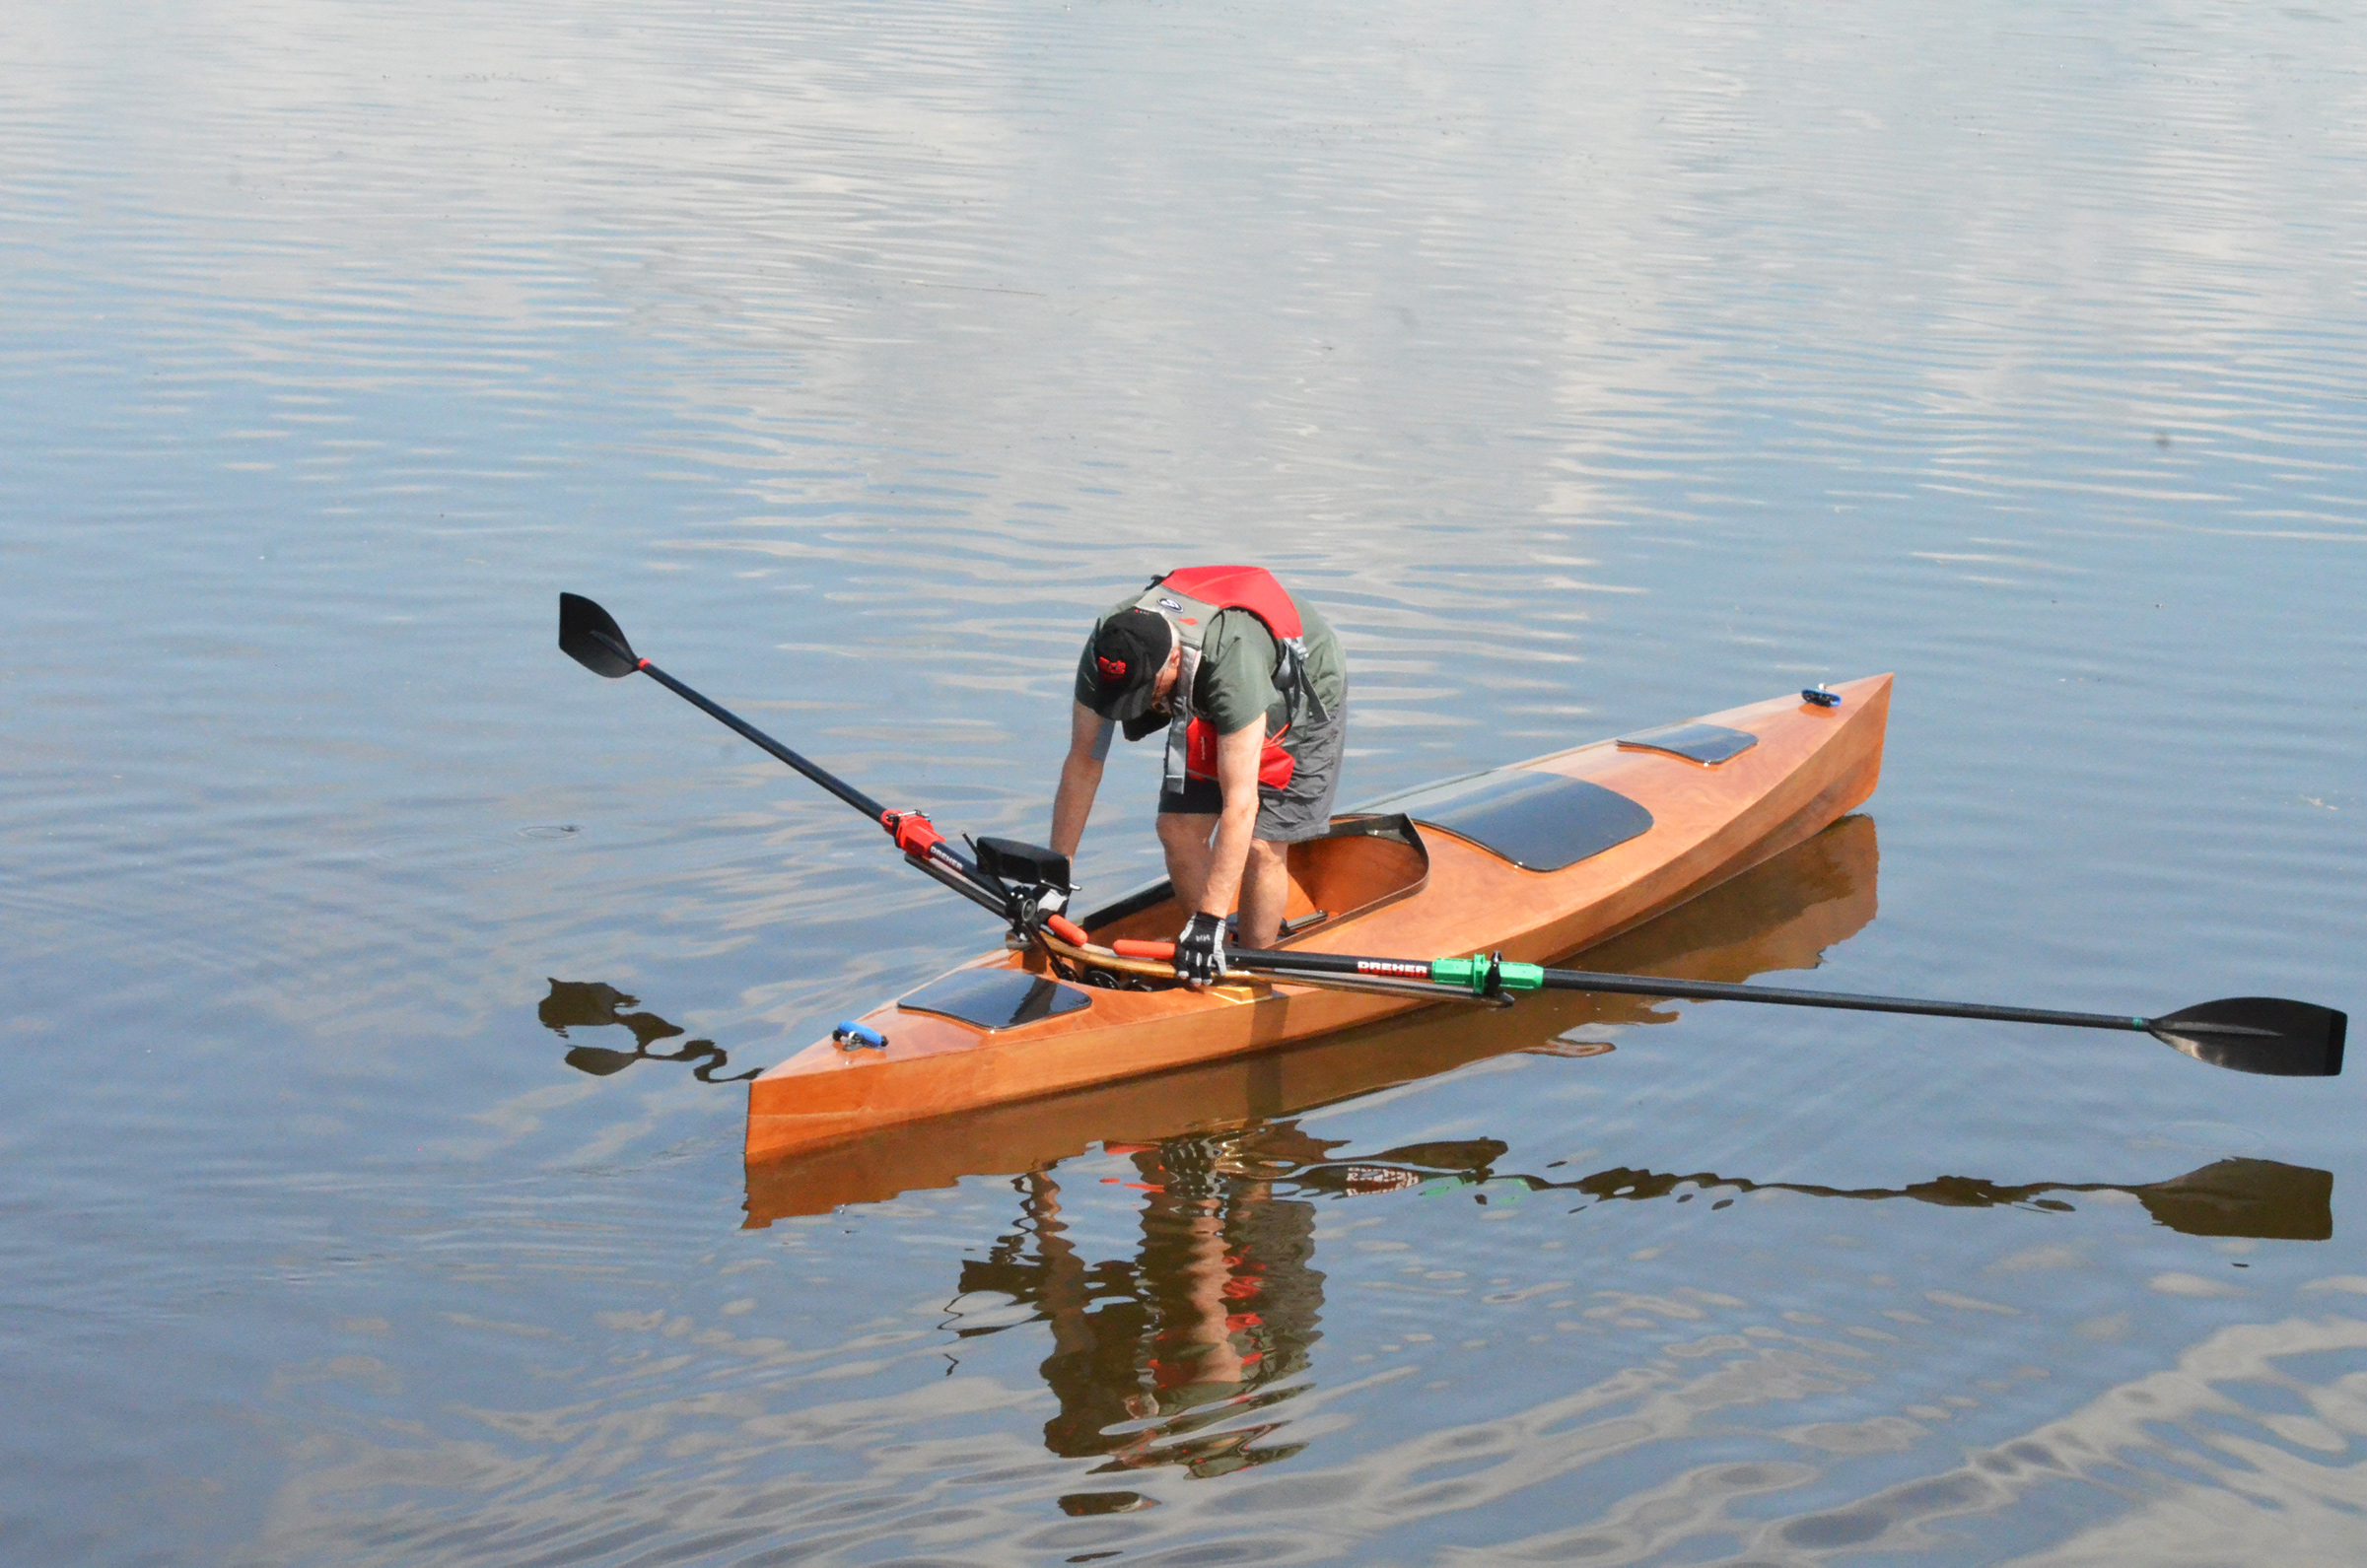
The hull provides sufficient stability for moving about in the boat. Gear stowed in the aft compartment can be accessed by moving to a kneeling position in the aft end of the cockpit.
Boarding the Expedition was a pleasant surprise. Compared to our kayaks, it provides a very stable platform. From the beach, with the boat afloat and parallel to the water’s edge, I grasp the outrigger arms with each hand, push the sliding seat forward, and place a foot in the middle of the cockpit floor. Then I shift over that foot and settle onto the seat. Boarding from afloat, I lift the near outrigger arm onto the dock, then lower myself in, and lift the arm from the dock by heeling the boat to the other side. On the water, I can take a break, hands off the oars, without having to head for the nearest dry land.
For a day’s outing, there is plenty of room for warm clothes, foulweather gear, floating towline, hand pump, food, and water in the rear watertight chamber, a roomy compartment immediately behind the outrigger accessed by a hatch secured with an internal bungee system. Everything inside is within arm’s length of the cockpit. Self-adhesive neoprene weather-stripping applied to the edge of the hatch covers serve as a gasket. The plans call for 1″ polypropylene straps to hold the hatches down; I use an internal bungee system. I have yet to see any water get past the gaskets.
The main cargo compartment is just forward of the cockpit and reached through a 26″ x 30″ hatch. A two-piece kayak paddle lives here, ready for tight situations when the boat’s 20′ oar span is a disadvantage. Paddling while facing forward and kneeling on the cockpit floor provides great control.
In sheltered waters, the main hatch can be removed and a folding seat installed—set against the bulkhead—to make ample space for an adult, two kids, or the dog to survey the passing scene in luxury.
I keep weight out of the compartment in the bow. Its 8″ by 10″ oblong opening is closed by the deck’s smallest hatch and there’s not much space in it compared to the two other compartments, but it’s ideal for storage of the pool noodles that serve as fenders when alongside a dock. I dog this hatch down tight for obvious reasons.
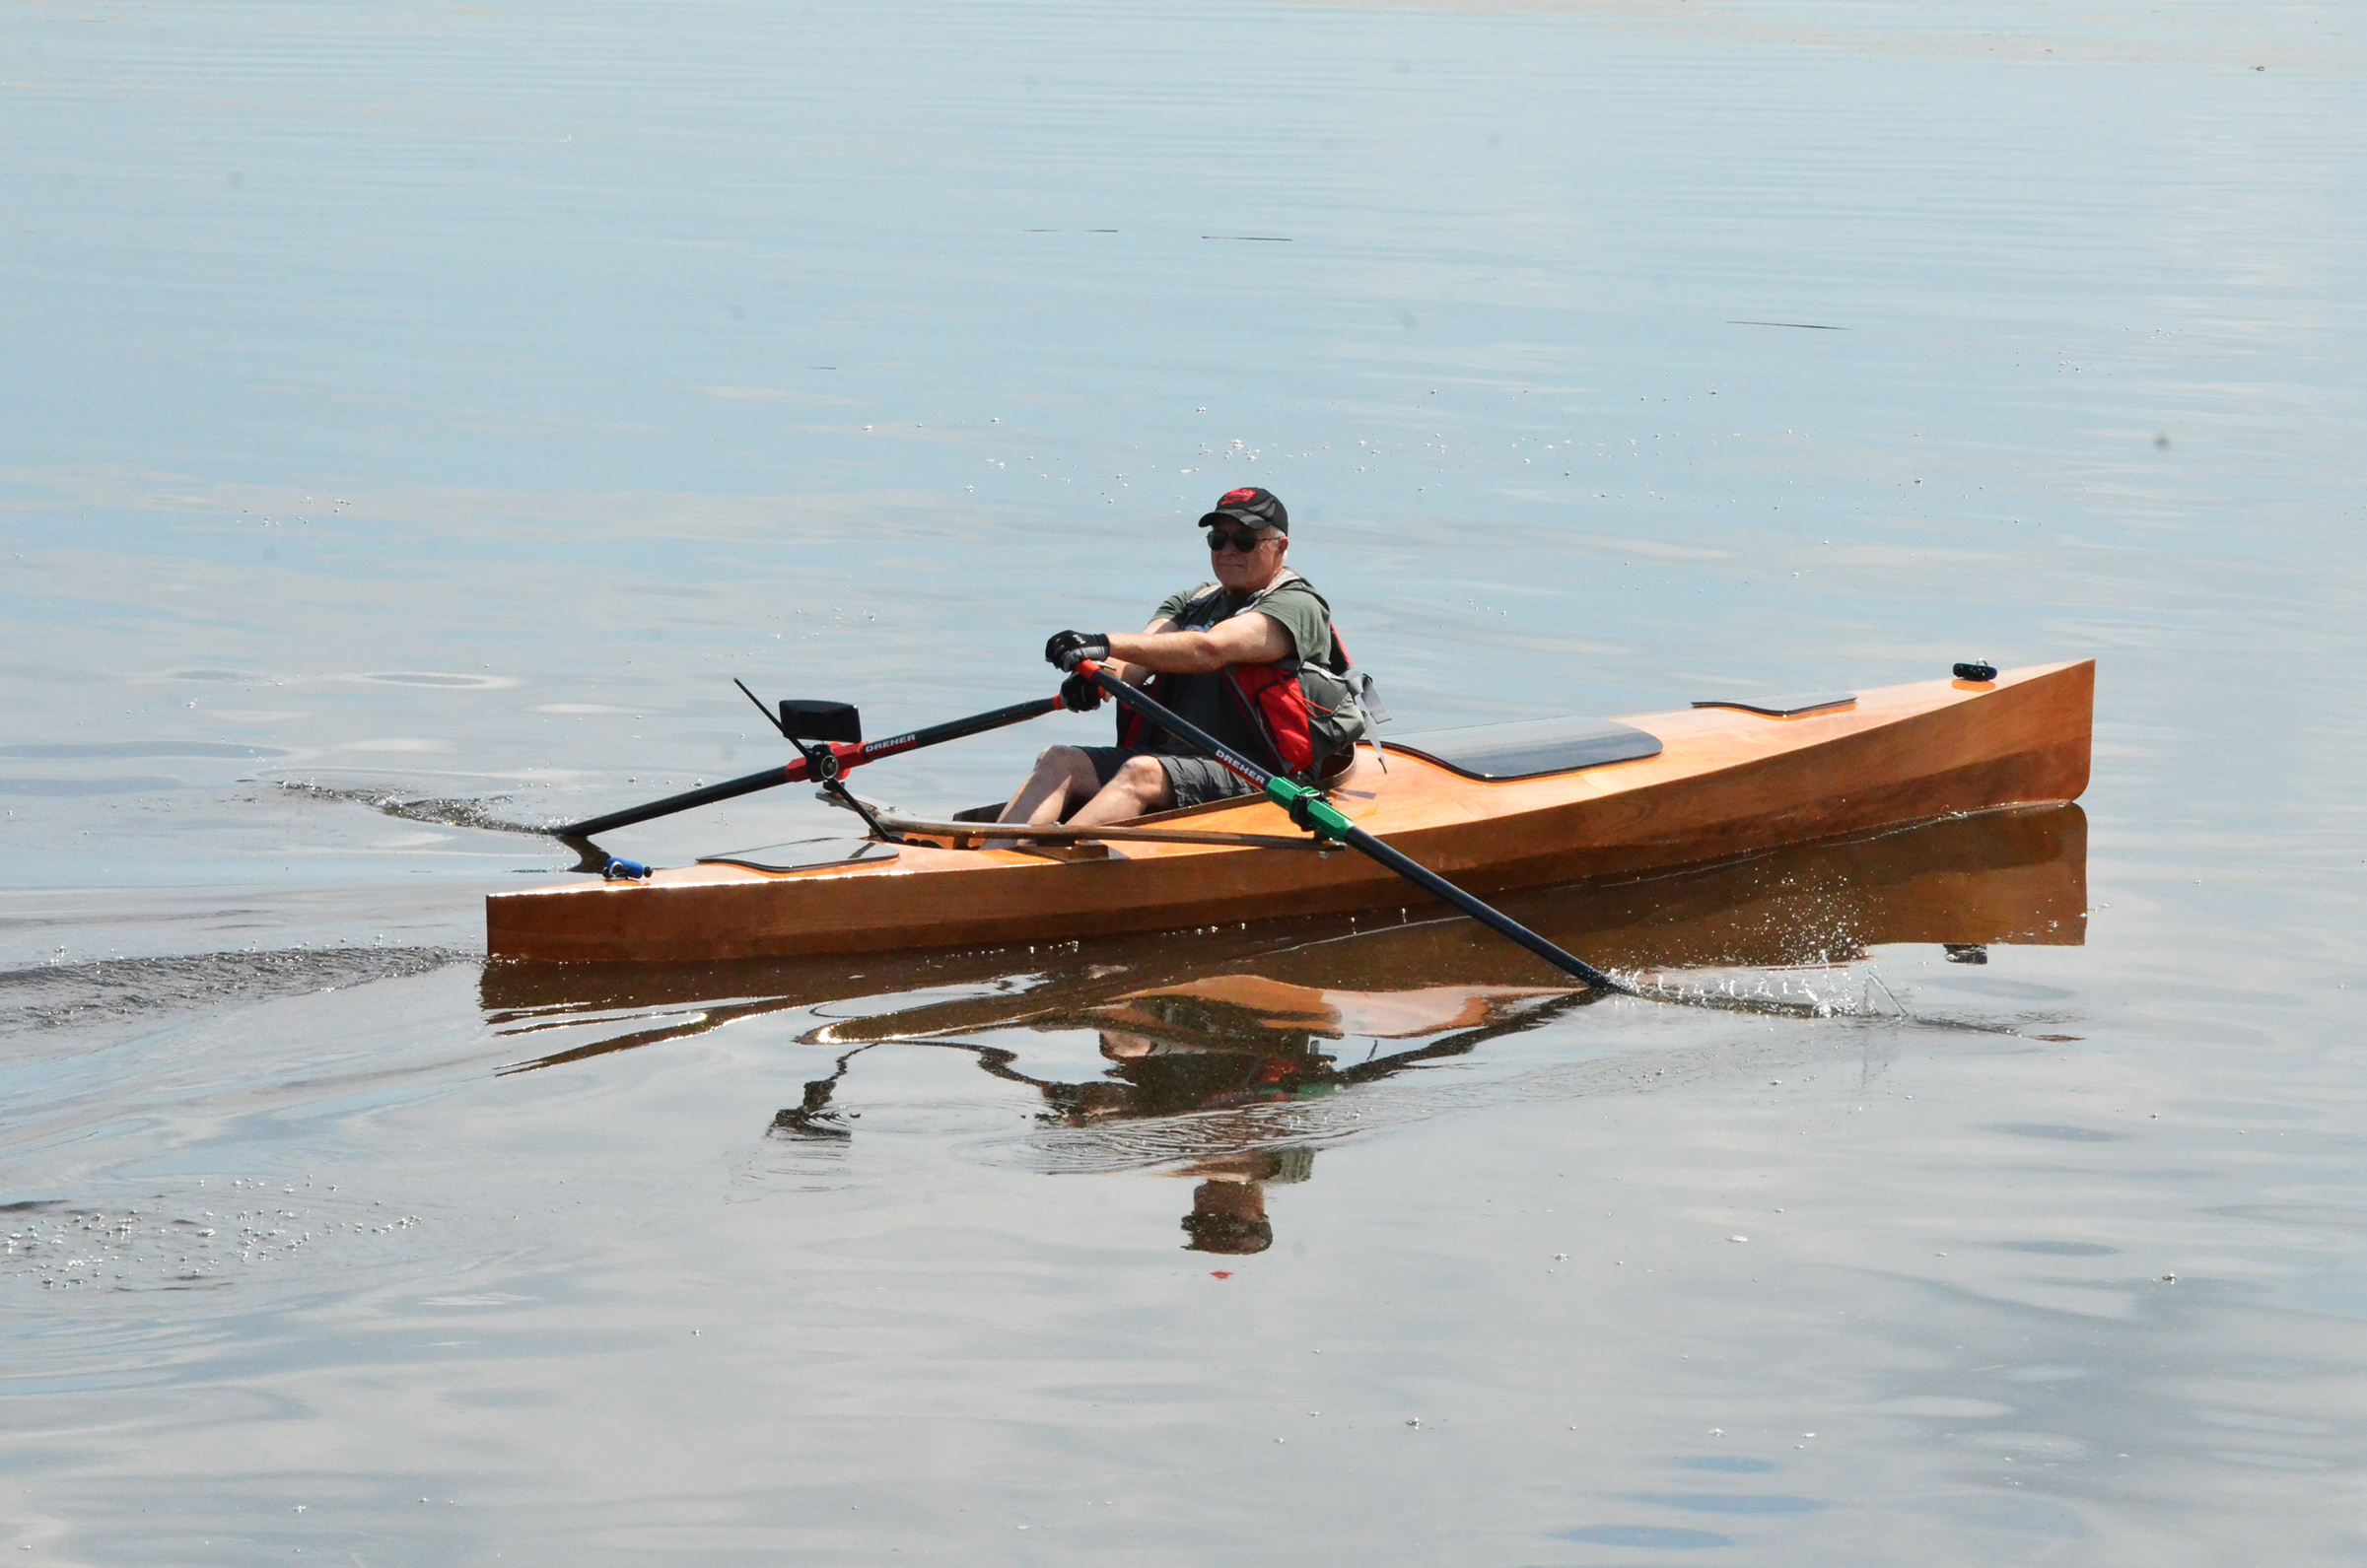
The author can easily maintain the Expedition Rowboat’s listed cruising speed of 4 knots. The manufacturer sets the boat’s sprint speed at 7 knots.
The Expedition accelerates to a cruising speed of about 4 knots and holds it with minimal effort at the oars. The speed made good is impressive, even with a novice like me at the oars. I stay even with experienced sea kayakers in all conditions and pull steadily ahead in rough water. Without a payload, the Expedition tends to pull its bow slightly clear of the water when the rower’s weight is in the stern at the catch, but the boat tracks very well, holding its course in most conditions without correction.
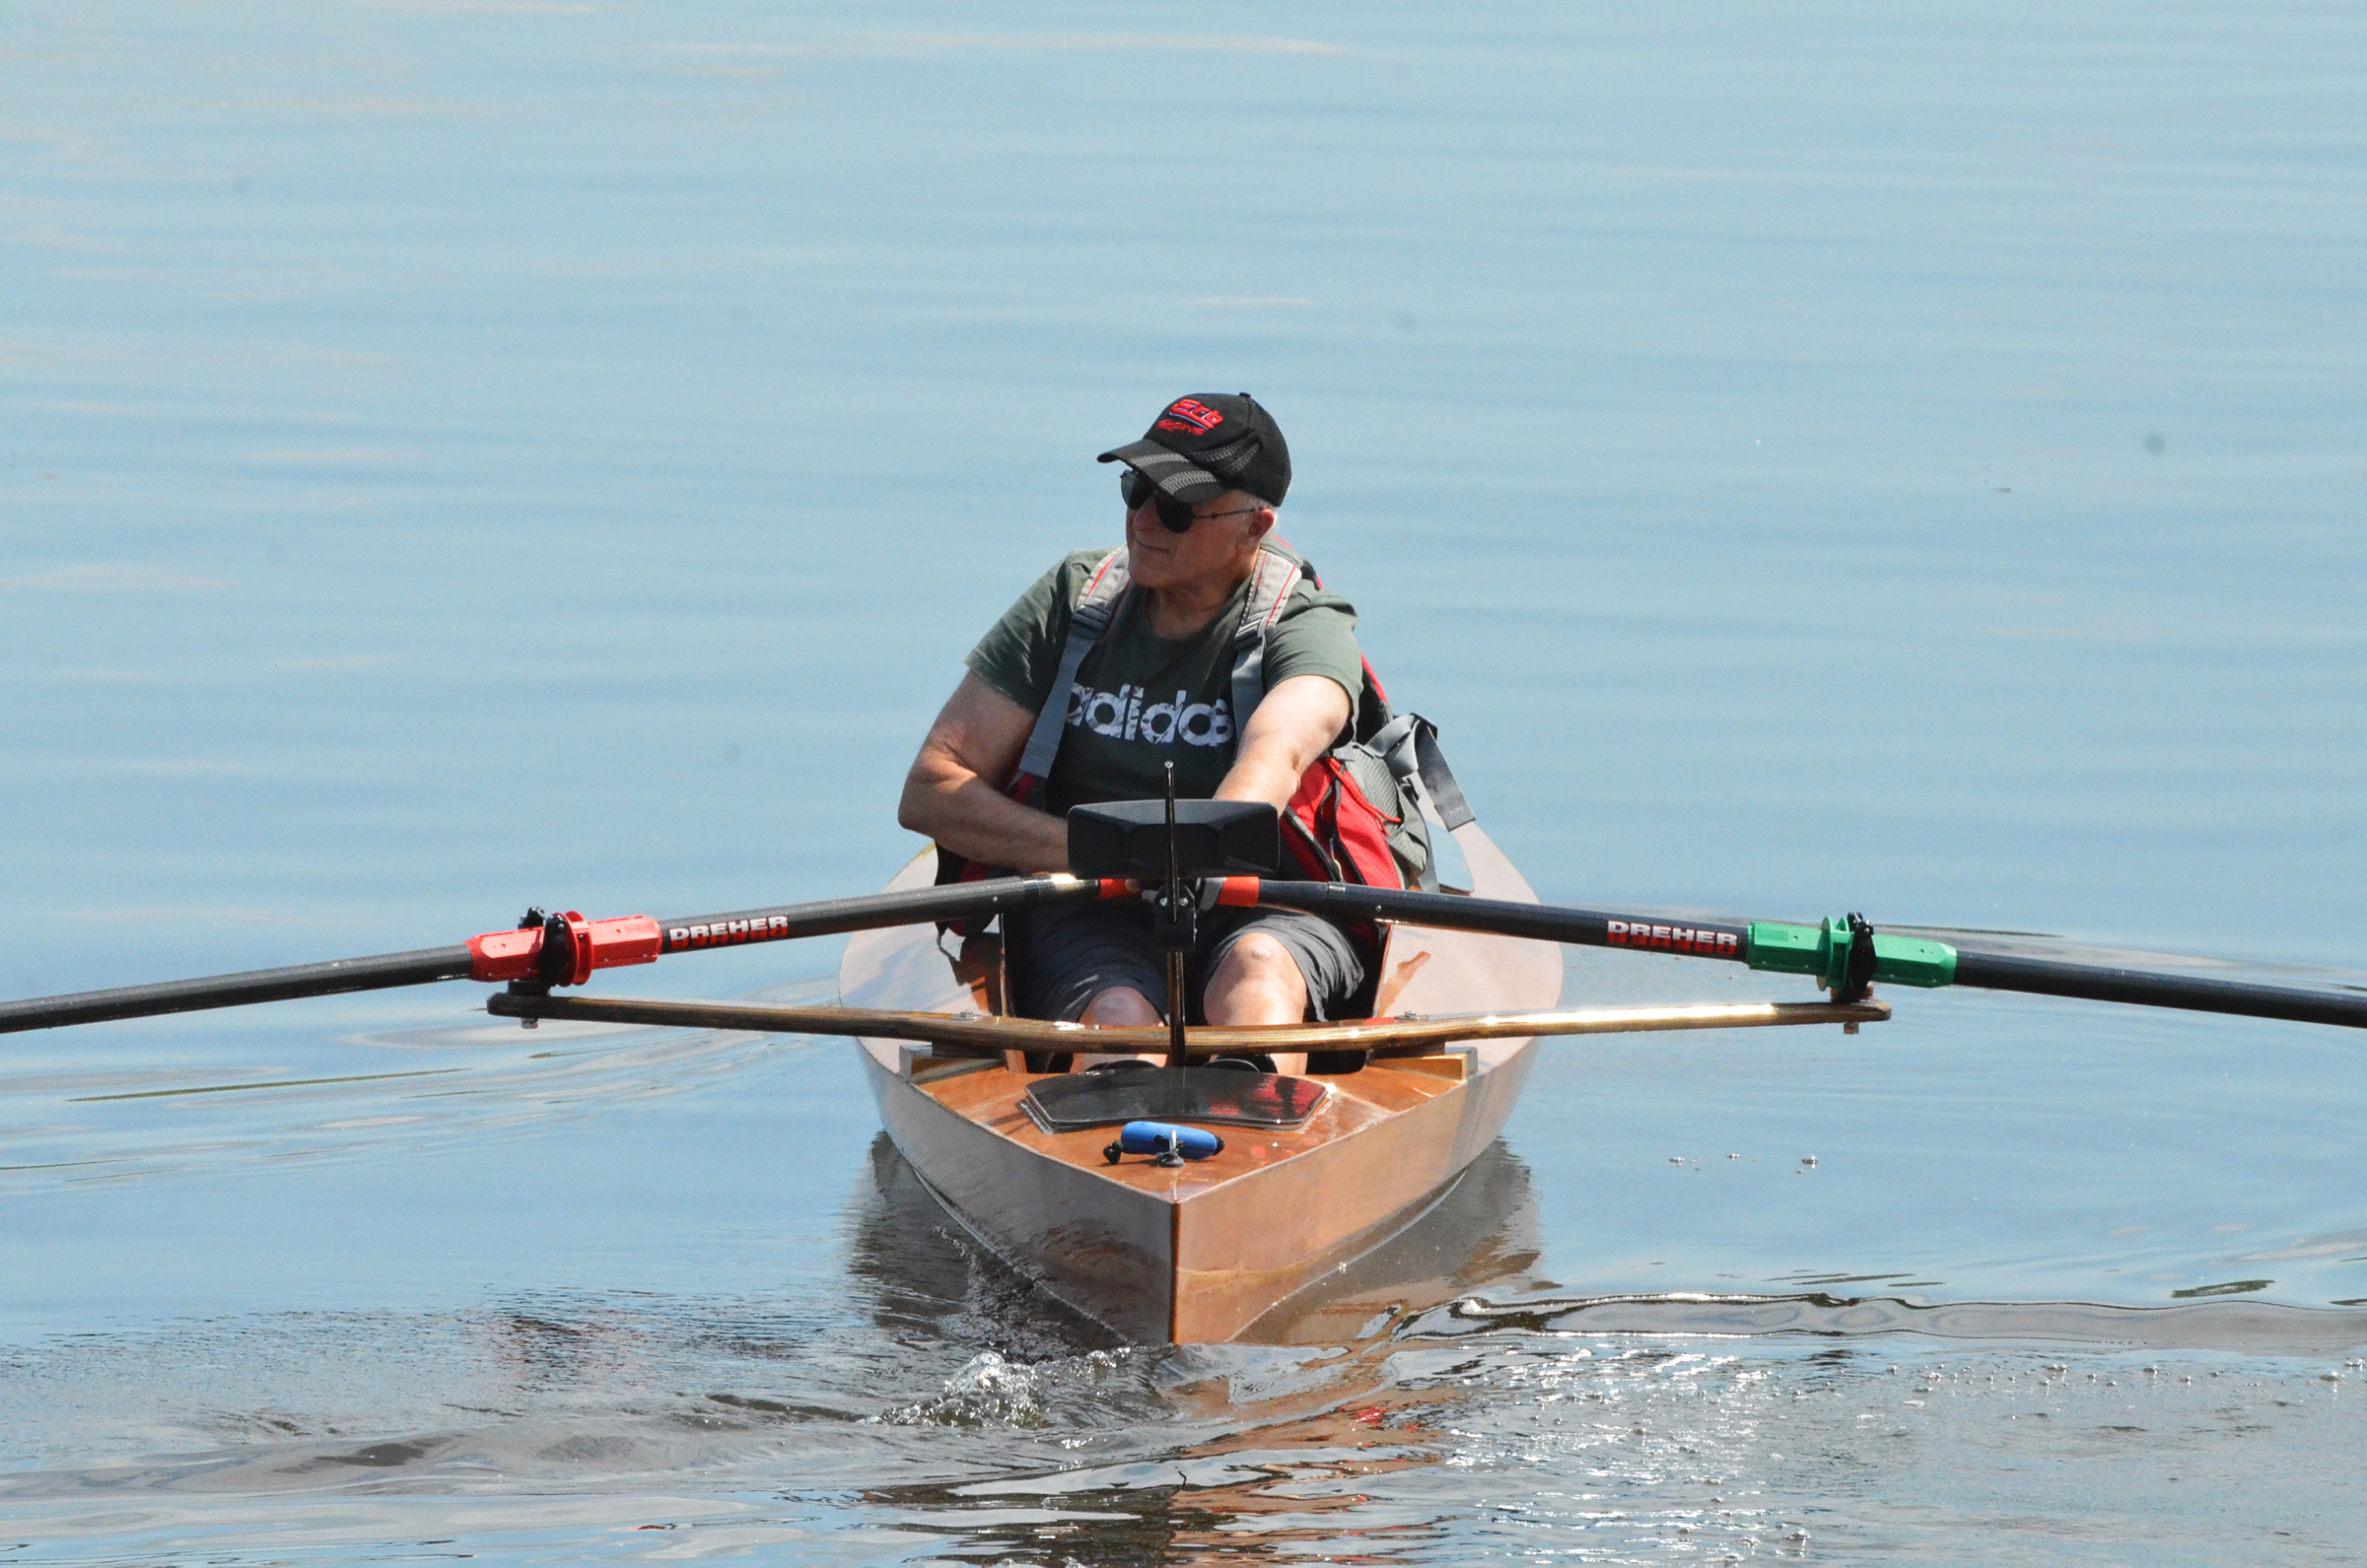
The view over the stern shows the 35″ beam, which gives the boat its stability and high cargo-carrying capacity.
The Expedition thrives in wind and waves. In late October, I headed up the Ottawa for a circumnavigation of Carillon Island, into the teeth of a northwest wind that built to perhaps 18 knots. Within an hour, the rollers were topping 3′ and a swell was building. I was able to average close to 4 knots upwind. The hatchet bow tends to cleave the waves, while the flat bottom, turtleback foredeck, and reserve buoyancy amidships contribute to a dry ride, even in choppy, confused seas. With the boat’s shallow draft and its lack of a keel or skeg, I could cross the sandbars downstream from the island. With the wind and waves on the beam, the boat would leecock, forcing me to pull harder on the leeward scull to hold a course, but at no point did the craft threaten to become unmanageable.
Off the wind in a big following sea, the Expedition is rock solid, something I often wished for in our kayak. Sometimes I raise the oar blades and hold them square to the wind like sails, letting the boat surf as I sit back against the coaming. Despite the absence of a rudder or skeg, there’s no tendency to broach or head up. Occasionally, a wave might break on the aft deck, but the water never makes it to the cockpit.
This coming summer, with Louise paddling her kayak alongside me, I’ll be rowing my Expedition Rowboat with a full payload of camping gear, including pots and pans, real food, and even a two-burner propane stove. Camp-cruising life is good when your boat can carry the comforts of home. ![]()
Introduced to sailing at the age of six, Jim Duff is a lifelong racing sailor and canoeing and kayaking enthusiast. An apprentice shipwright at 17, he has built or restored many boats, including a one-off aluminum Herreshoff Nereia. A semi-retired journalist, editor, and talk radio host, he has rediscovered the simple joys of rowing on the Lake of Two Mountains, a widening of the Ottawa River west of Montreal, where he learned to sail.
Expedition Rowboat Particulars
[table]
Length /18′
Beam/35”
Weight/85 lbs
Volume/62.3 cu. ft.
Cruising speed/ 4 knots
Sprint speed/ 7 knots
Maximum touring load/ 600 lbs
[/table]
Digital plans for the Expedition Rowboat which include full-size PDF plans, a detailed manual, and XF files for plans to be cut at a CNC shop are available from Angus Rowboats for $139. The carbon fiber sliding seat and rigger hardware kit can be purchased for $229.
Is there a boat you’d like to know more about? Have you built one that you think other Small Boats Magazine readers would enjoy? Please email us!
Colin did a really nice job with the Expedition Rowboat. And your build looks really nice.
I am a good friend and neighbor of Jim and I was able to witness his craftsmanship in the building of this boat, which is a kit, but Jim made so many of his own custom features it really is his boat and one of a kind. I love to see this baby in and out of the water, just a pleasure to look at from any angle. I would encourage another article on the building of it, what a masterpiece so many would enjoy seeing it put together.
Your comments are appreciated. Rob and Suzanne are hard-core wilderness canoe and kayak adventurers who spend their summers exploring Georgian Bay and myriad northern lakes. I fear my new boat can take a lot more than I can.
The Angus Expedition is an excellent boat for rough-water rowing — four of them, including my SHE AND AH, were entered in the recent Seventy48 race from Tacoma to Port Townsend. More than half the racers (including me) did not finish the race due to the extremely unfavorable conditions; but two home-built Expeditions (a father-and-daughter team) finished with admirable times. Before I quit the race about halfway through due to rowing-through-the-night exhaustion, I easily kept up with my companions rowing Aeros, and the cockpit stayed dry as I surfed the swells. I wouldn’t trade my Expedition for any other rowing boat out there.
Here’s how much gear I was able to stow for the Seventy48 event—with room for more!
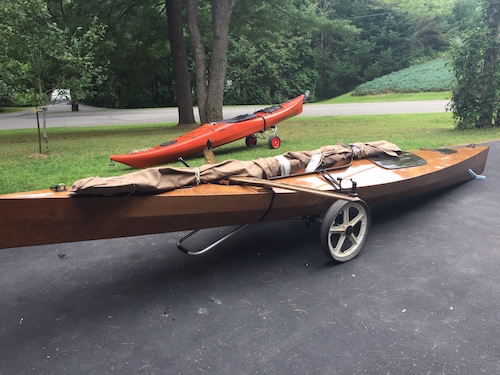
I’d love to hear what kind of portage cart Jim is using, as I’ve found the hardest part of touring with my Expedition is hauling it, fully loaded, on the beach for camping; it is just too heavy for me to pull up the shore using fenders as beach rollers. I need a better solution before my next rowing adventure!
Ricki-Ellen, at the moment I’m using a stock kayak dolly from Sail but the wheels are too small and the frame definitely too lightly built for a loaded Expedition. I’m in the process of repurposing a golf cart with 18″ wheels for a much more solid ride and I’ll share that when it’s done. The Anguses had one of their bike trailers stolen in France and McGyvered a new one with BMX wheels, which are just the right size. The trick is coming up with a design that dismantles without tools.
I cobbled together a lightweight dolly from a golf cart and a dinghy dolly. It weighs 12 pounds and fits into my main cargo hold. It easily carries the loaded boat. All I’m missing is the tongue and the bike yoke.
Great job building a boat like this. The first introduction said that this boat was for a trip, rowing from Scotland to Syria. If this trip eventuated, it would be good to see a report.
Cheers,
Ian
Colin and Julie Angus documented the trip in blog posts, a book, and a DVD. See the Rowed Trip page on their website.
—Ed.
G’day,
I’m a year or so late here but there is an “internal bungee system” mentioned which eliminates the straps and clips.
Does anyone have any diagram or links please?
Cheers from South Australia
Noel
Chesapeake Light Craft has a how-to article on an internal bungee system.
Hi Jim Duf,
i just read your article on your Expedition boat. I too have finished my Expedition build here in North Texas. As soon as the Red River fills back up, I plan to paddle down the Red River to the Mississippi and New Orleans. But I have a Honda Civic and no way to launch my boat yet. I noticed something on your boat that looked like a rearview mirror. Was that what I saw or something else? I am looking for a better solution to see behind me rather than those dinky little bicycle mirrors. Also, I have purchased the materials today for an aluminum cart for rolling it around to the waters, If anyone wants to see my build of this, let me know. I plan 20″ cart wheels from Amazon.
I got tired of a crick in my neck so I bought a $17 Kolpin UTV mirror and installed it in on a repurposed aluminum ski pole mounted on the back of my sliding seat assembly. Rugged, adjustable, removable and just what my neck ordered. I had looked at outrigger-mounted variations but they were in the way and neither rugged nor easily adjustable.
While I had been having conversations with the guy in the mirror, I’ll be replacing the ski pole with a longer carbon tube (another ski pole) because of a scary near miss in the Tay Canal last summer. The mirror concealed a rapidly approaching motorboat in the narrow waterway. It needs to be above head level to remove the blind spot.
Hi Jim,
Very nice article and boat! To be expected from you…I was happily surprised to see you here …and yes it is you!
Chris