Last year, I moved to a new home where, for the first time, I have a garage. The extra sheltered space got me thinking about buying a small skiff for rowing and sailing, but my new one-and-a-half-car garage posed some storage limitations. The overhead door would prevent me from hanging a boat directly above the car. There is floor space off to the side of the parking area, but my family needs that for bicycles and storage. I began to scheme about a way to lift the boat off the car and slide it sideways to hang over the storage area. What came to mind was a scaled-down version of the overhead bridge cranes used in factories to move heavy materials around.
 Photographs by the author
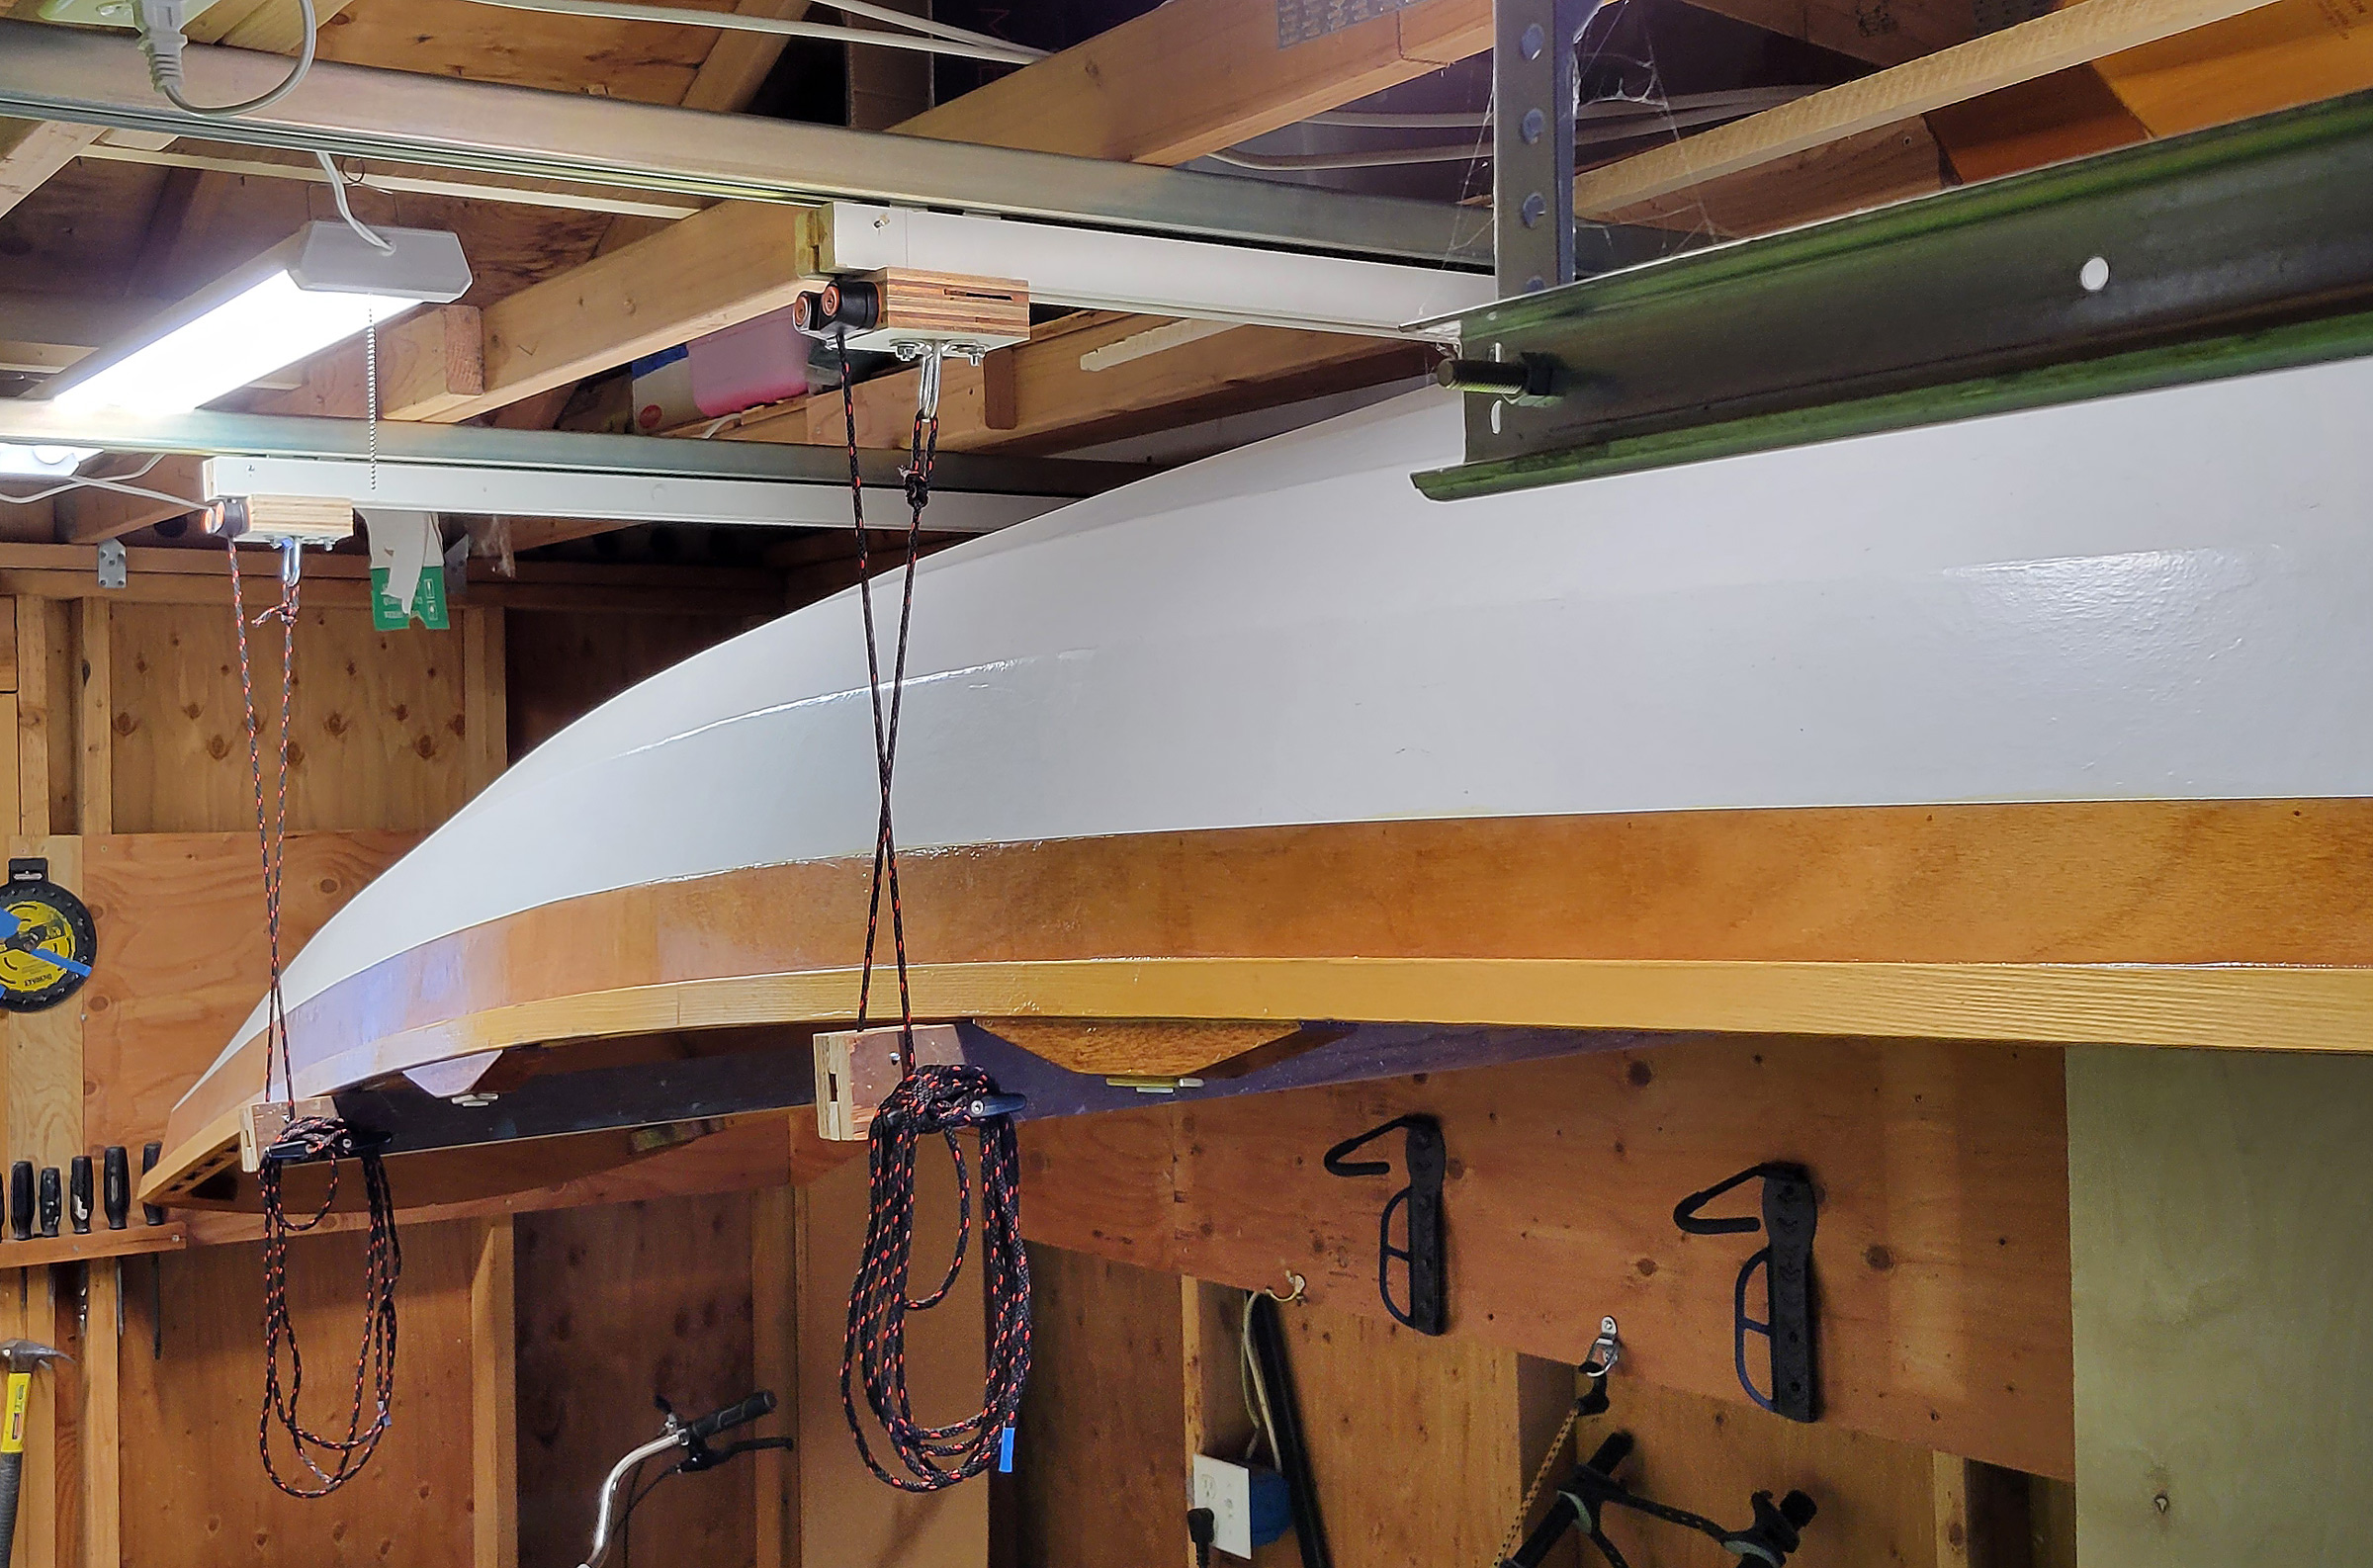
The lifting mechanism is attached to a beam that has a pair of ball-bearing trolleys attached on top. The trolleys run within the slot of the Unistrut channel fixed to the ceiling joists. Once the boat is raised to the desired height, the ball-bearing wheels allow it to be manually pushed sideways along the channel.
Having purchased a 14′ wherry that would fit the overhead space, I looked for lift hardware. There are several boat lifts designed for garage storage, but nothing that could move a boat both up and over. I considered barn-door hardware and stumbled across similar rolling hardware made by Unistrut for its slotted-steel channels, which are commonly used in construction projects for structural supports. The company offers ball-bearing trolleys that run inside the strut.
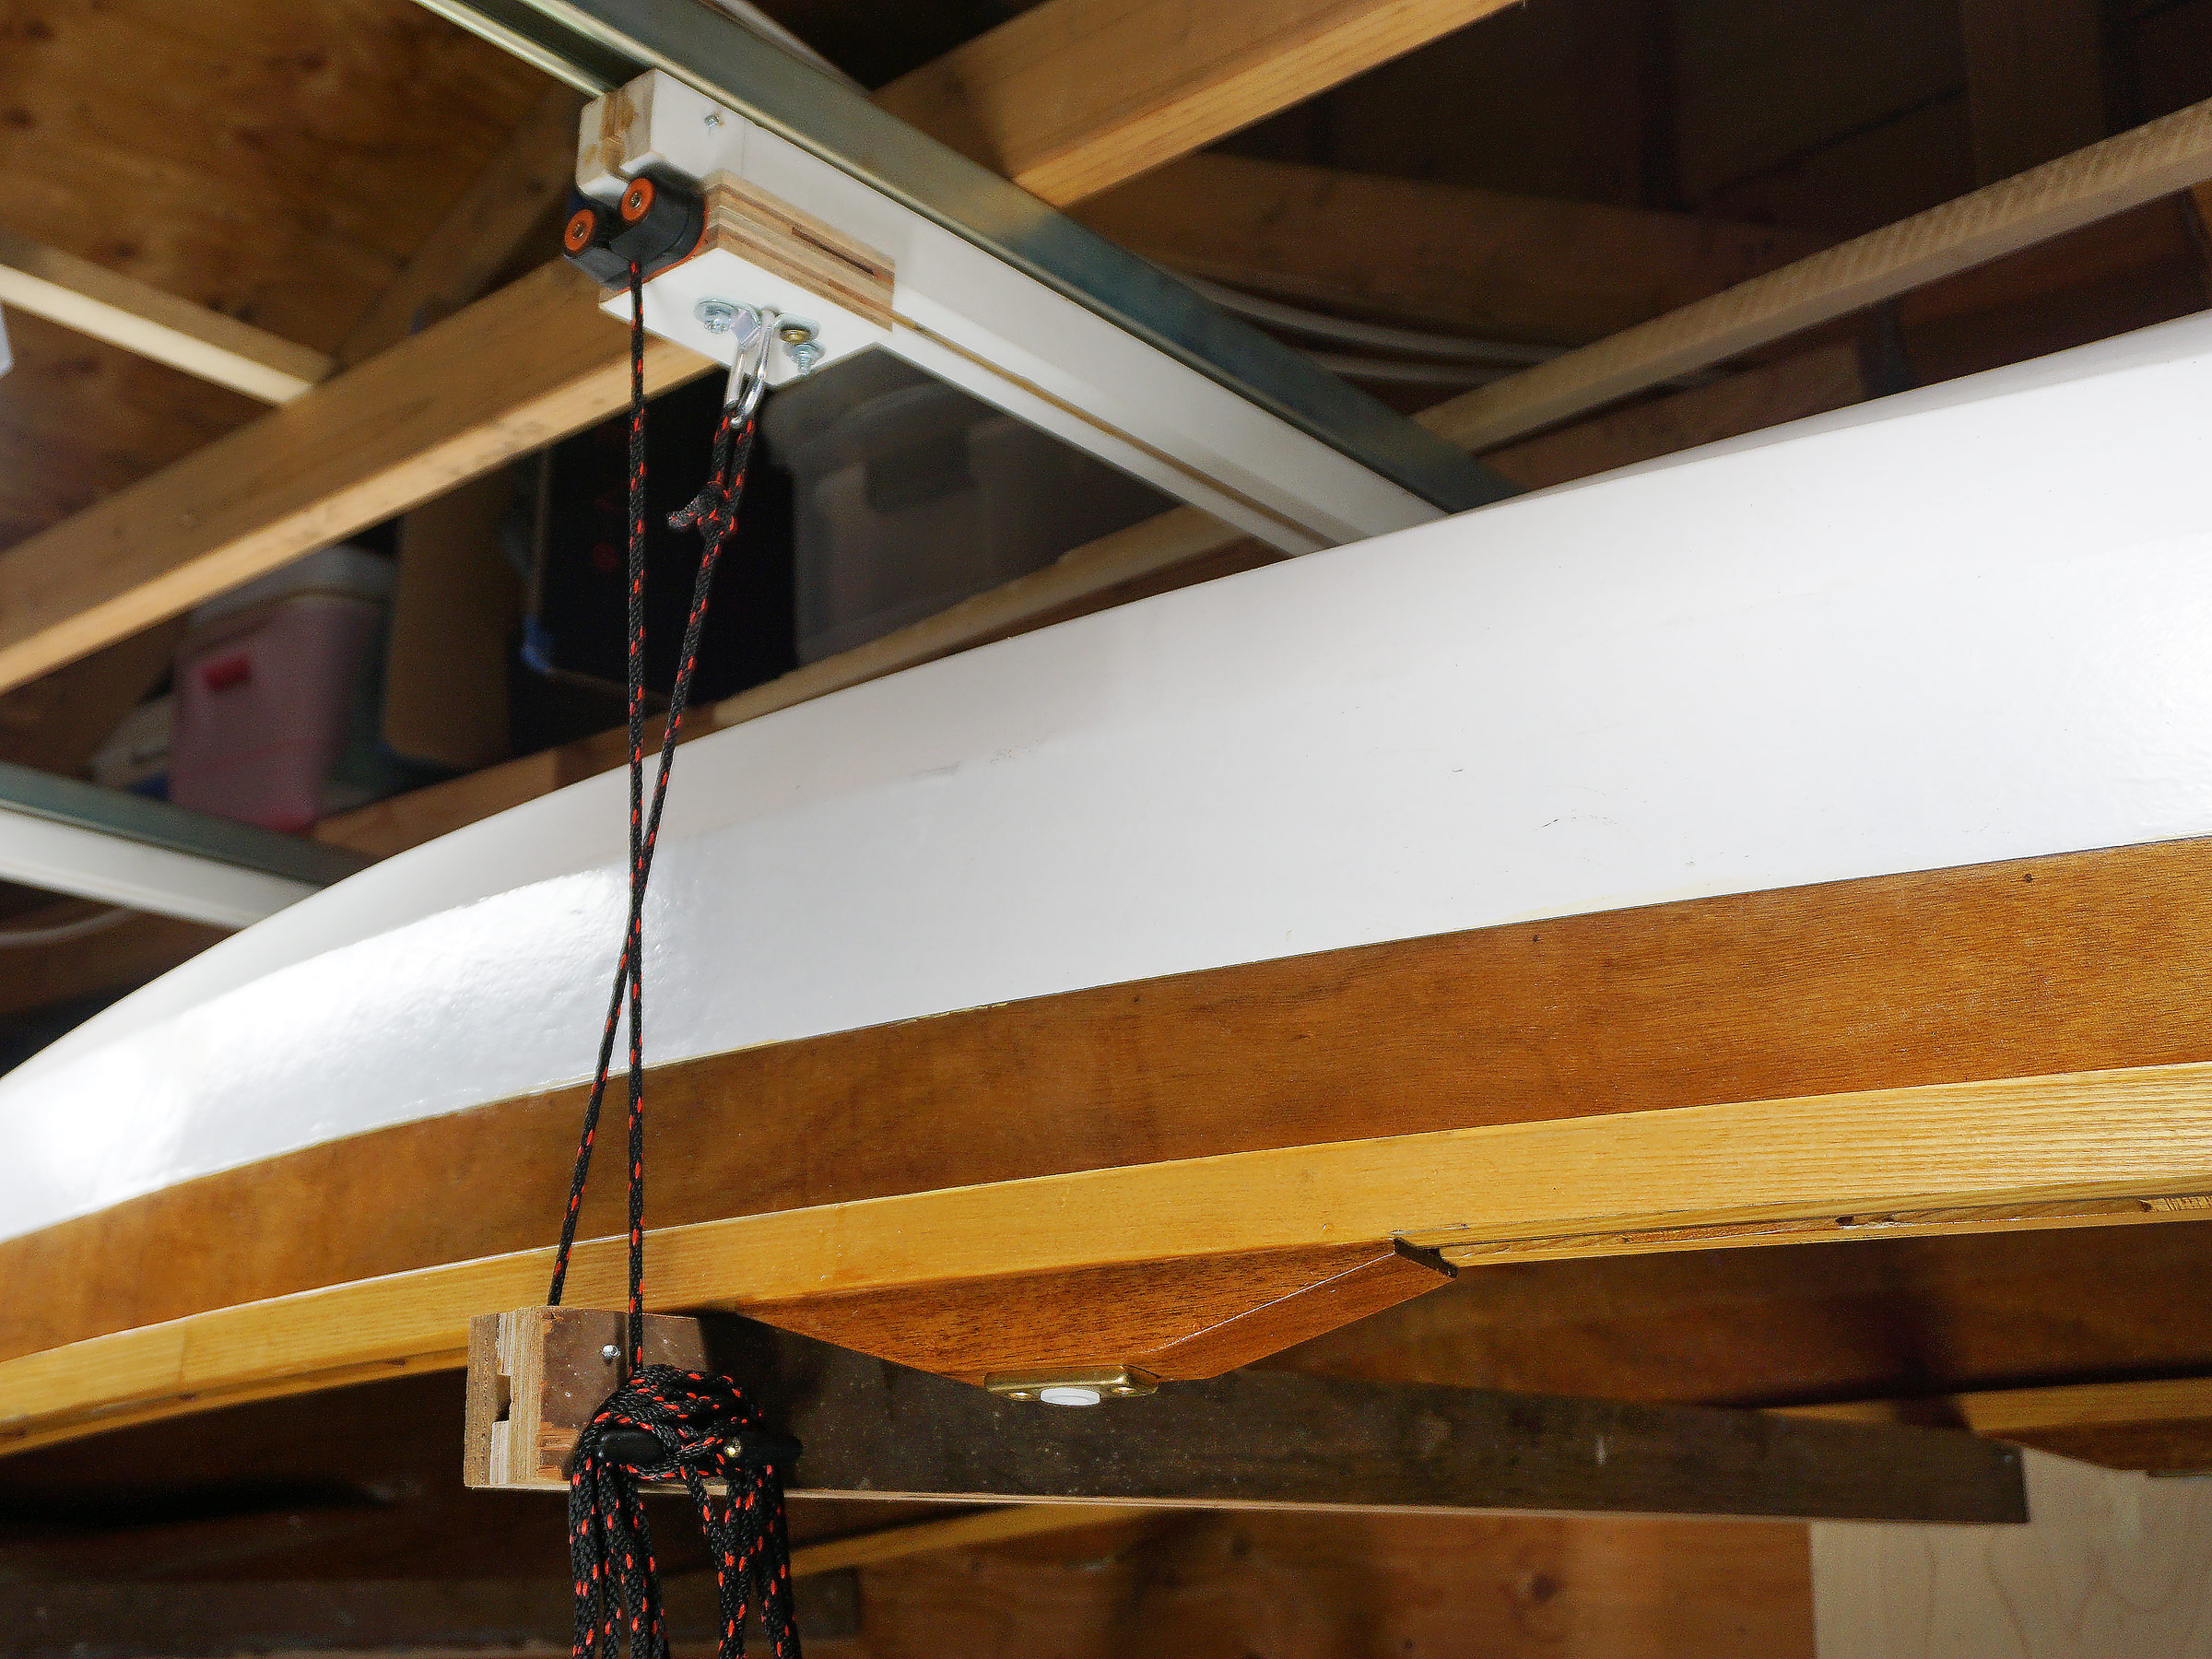
The trolleys are fastened to the ends of the upper beam . The black and orange lifting line runs across the top of the beam and down around 1″ sheaves. On this end, the working end of the line is led through a cam cleat.
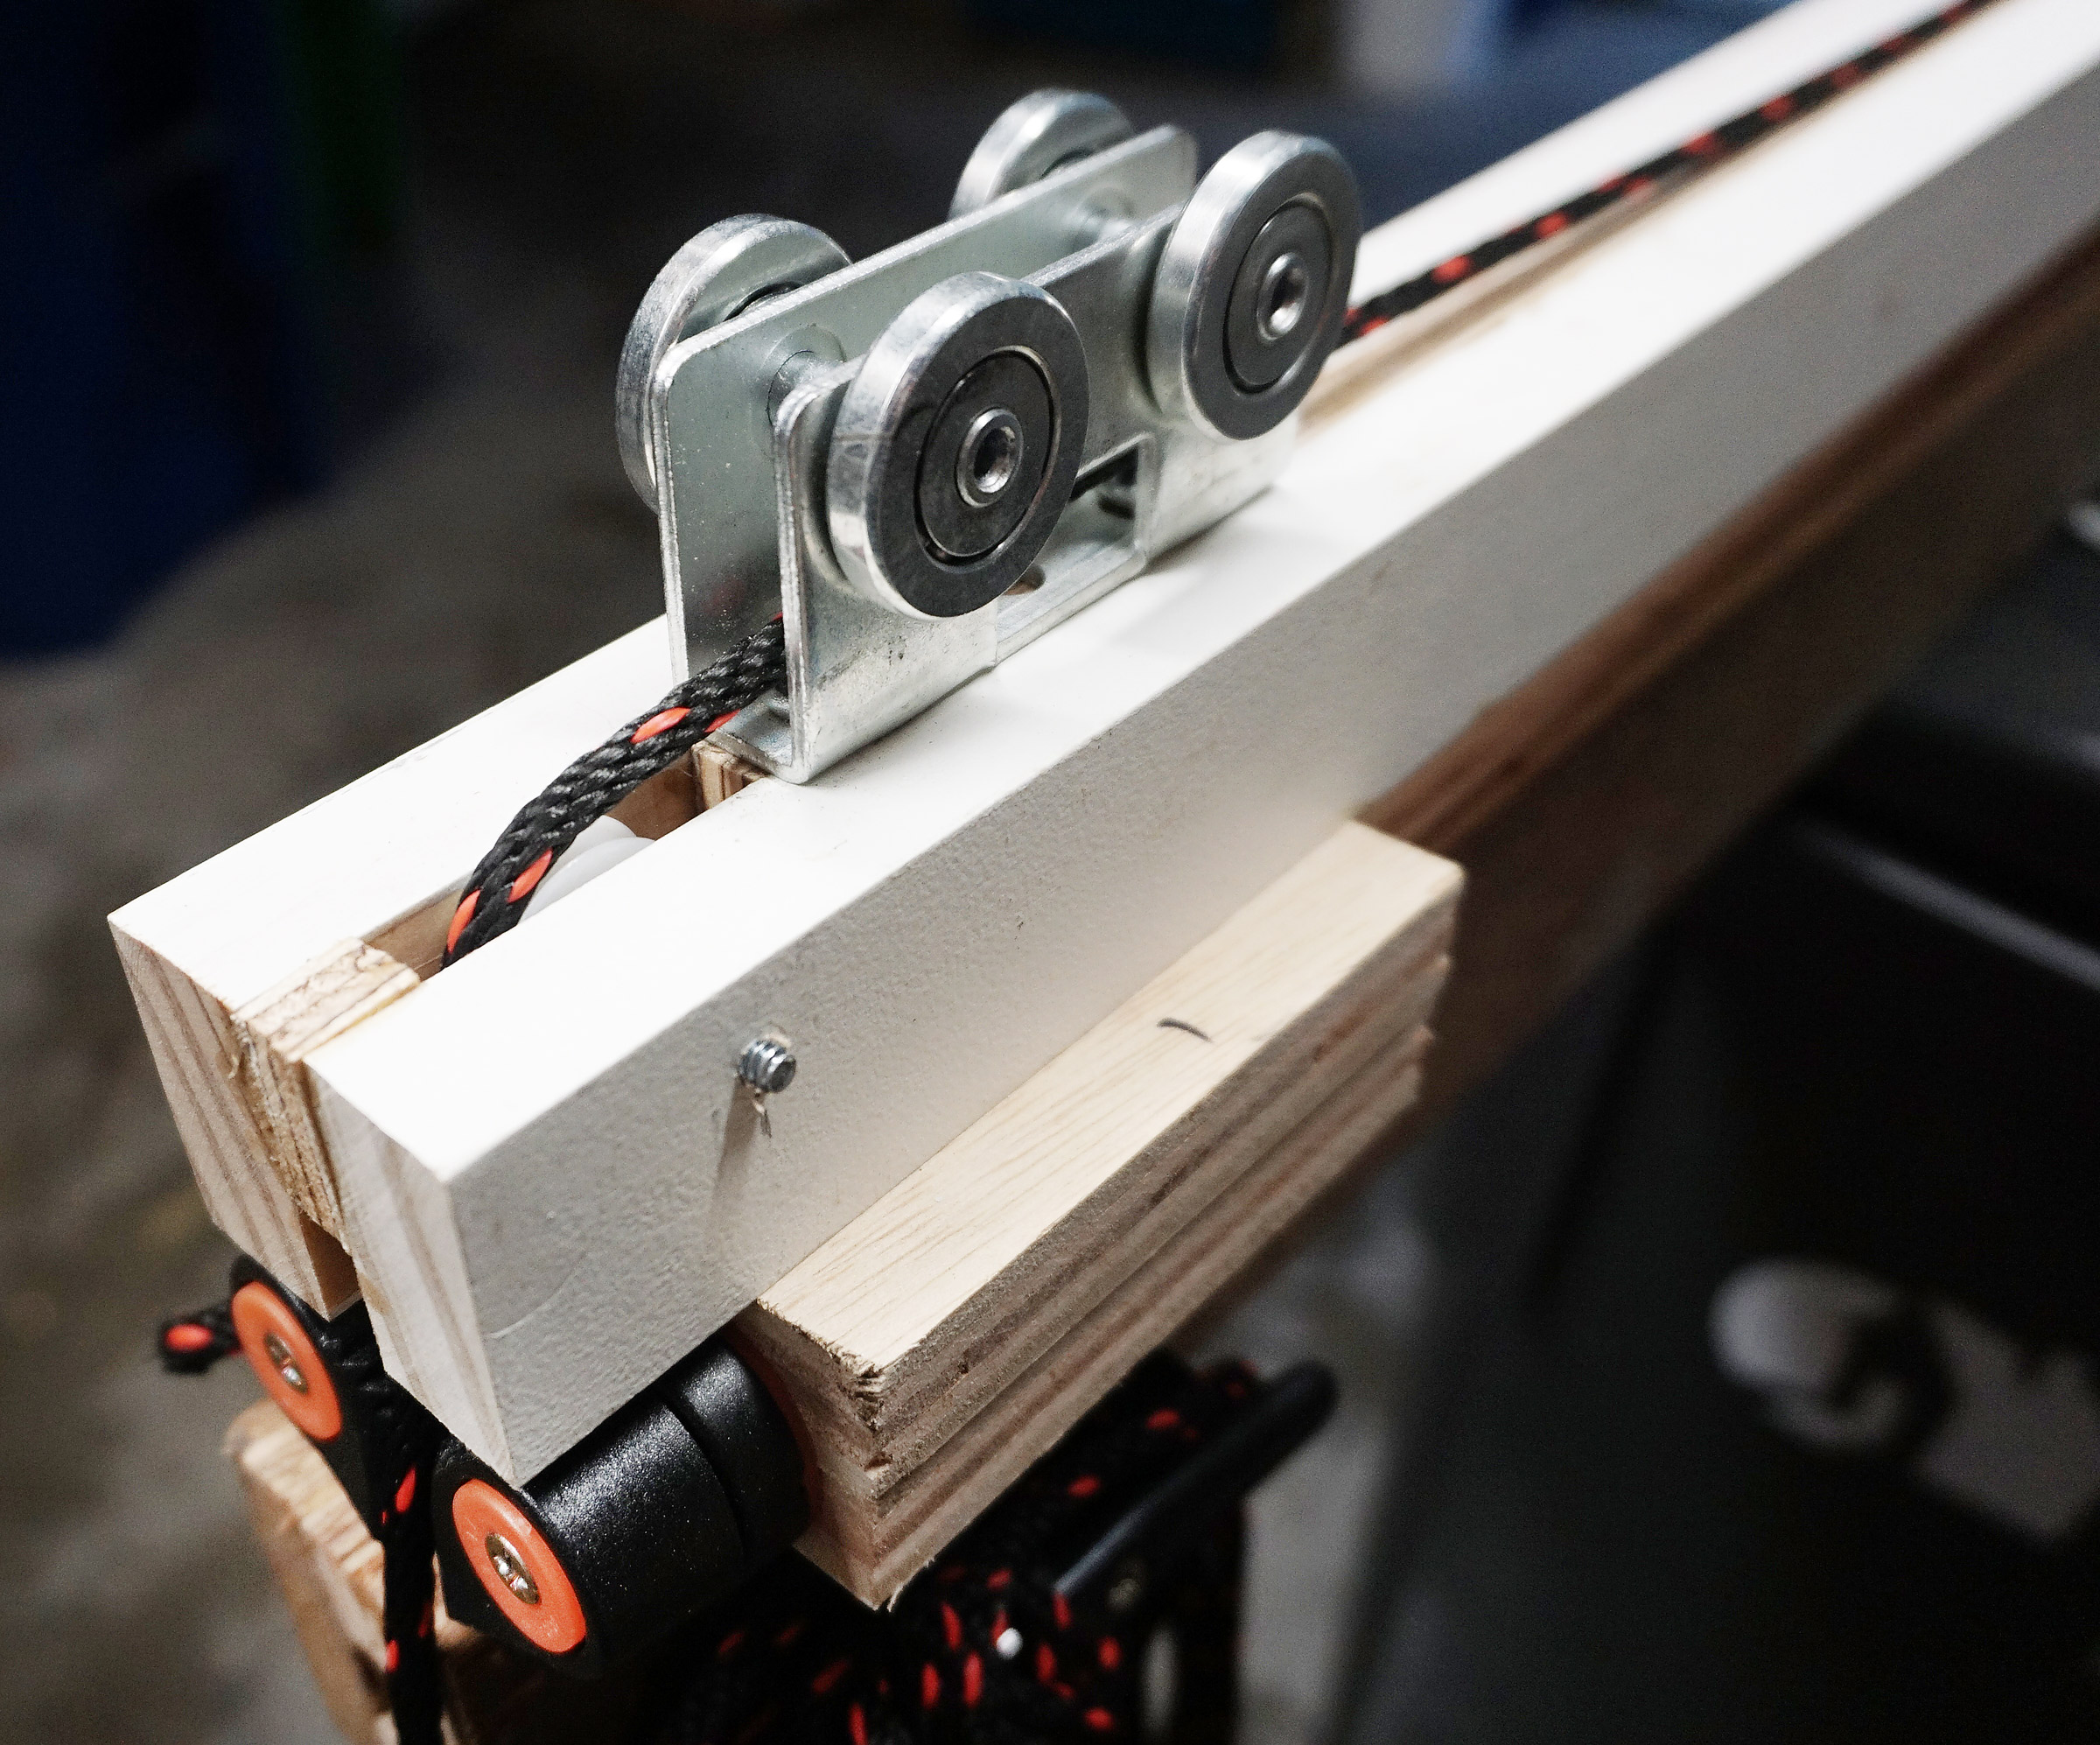
The channel comes in 10′ lengths, which is long enough to move the lifted boat from the car off to the side of the garage door. I installed two channels about 5′ apart. Fastening the channels directly to the overhead framing required a low-profile fastener that won’t block the trolleys. SPAX ¼″ washer-head Powerlag screws span the slot well and have plenty of strength. The four-wheel trolleys I bought have a load rating of between 300 and 600 lbs, and each of the Powerlag screws has a tensile strength of 1,600 lbs, so my lift system would easily support my 100-lb boat.
I positioned each lag screw at the end of the oval fastener openings in the channel to maximize contact between the screw head and the strut. After I inserted the trolleys into the channel, I fastened a block of wood in each open end of the channel to prevent them from falling out.
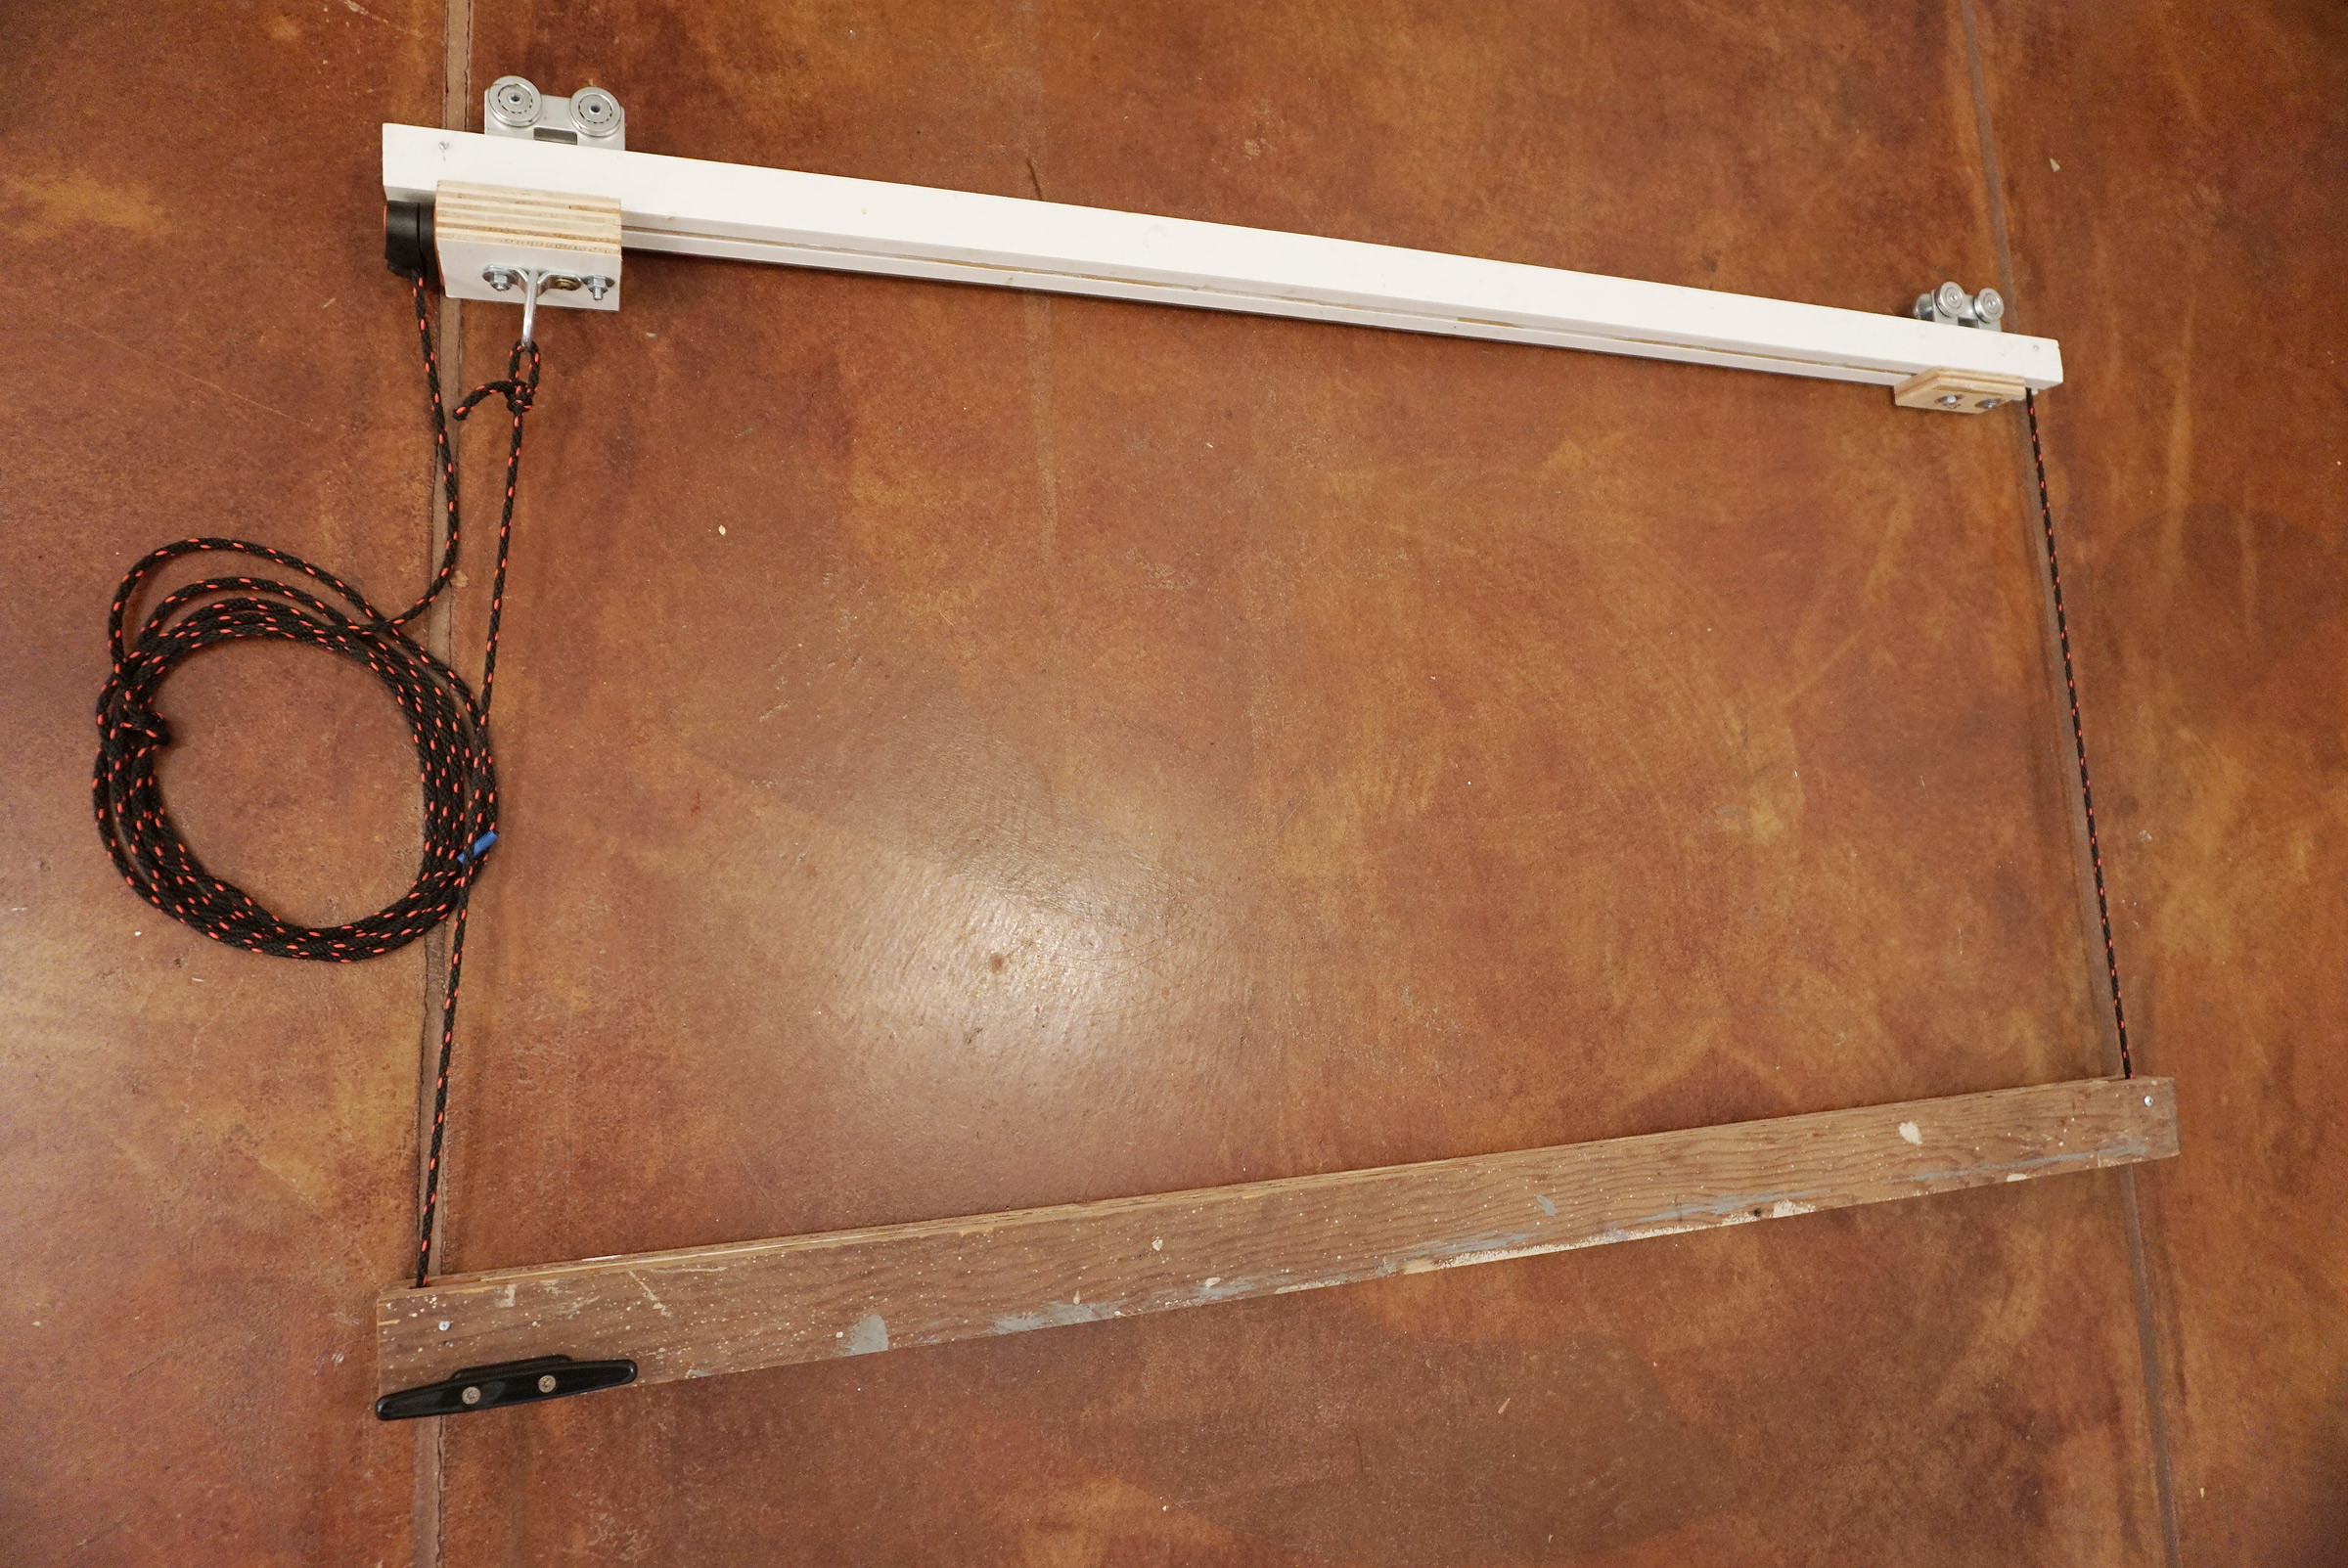
The lifting line is set up in a loop. At the standing end, it is fastened to an eyebolt below the trolley. From there it leads down to the lower beam, around a sheave, along the lower beam to a second sheave, back up to the first of two sheaves in the upper beam, along the center channel, and finally back out to the cam cleat.
The trolleys have flanges that are fastened to glued-up plywood beams constructed to create a center channel for two 1″-diameter sheaves for ¼″ line and the line that runs horizontally between them. For each of the two lifts, the line is anchored to an eyebolt fixed to the bottom of a trolley on one end of the upper beam, then led down and around the two pulleys in the lower beam, and then back to the upper beam and around its two pulleys, creating a loop. The loop, with its four sheaves, provides the same mechanical advantage as a block-and-tackle with two sheaves. A cam cleat mounted on the end of the upper beam provides control of the line for raising and lowering while a horn cleat on the lower beam provides a secure belay for the line.
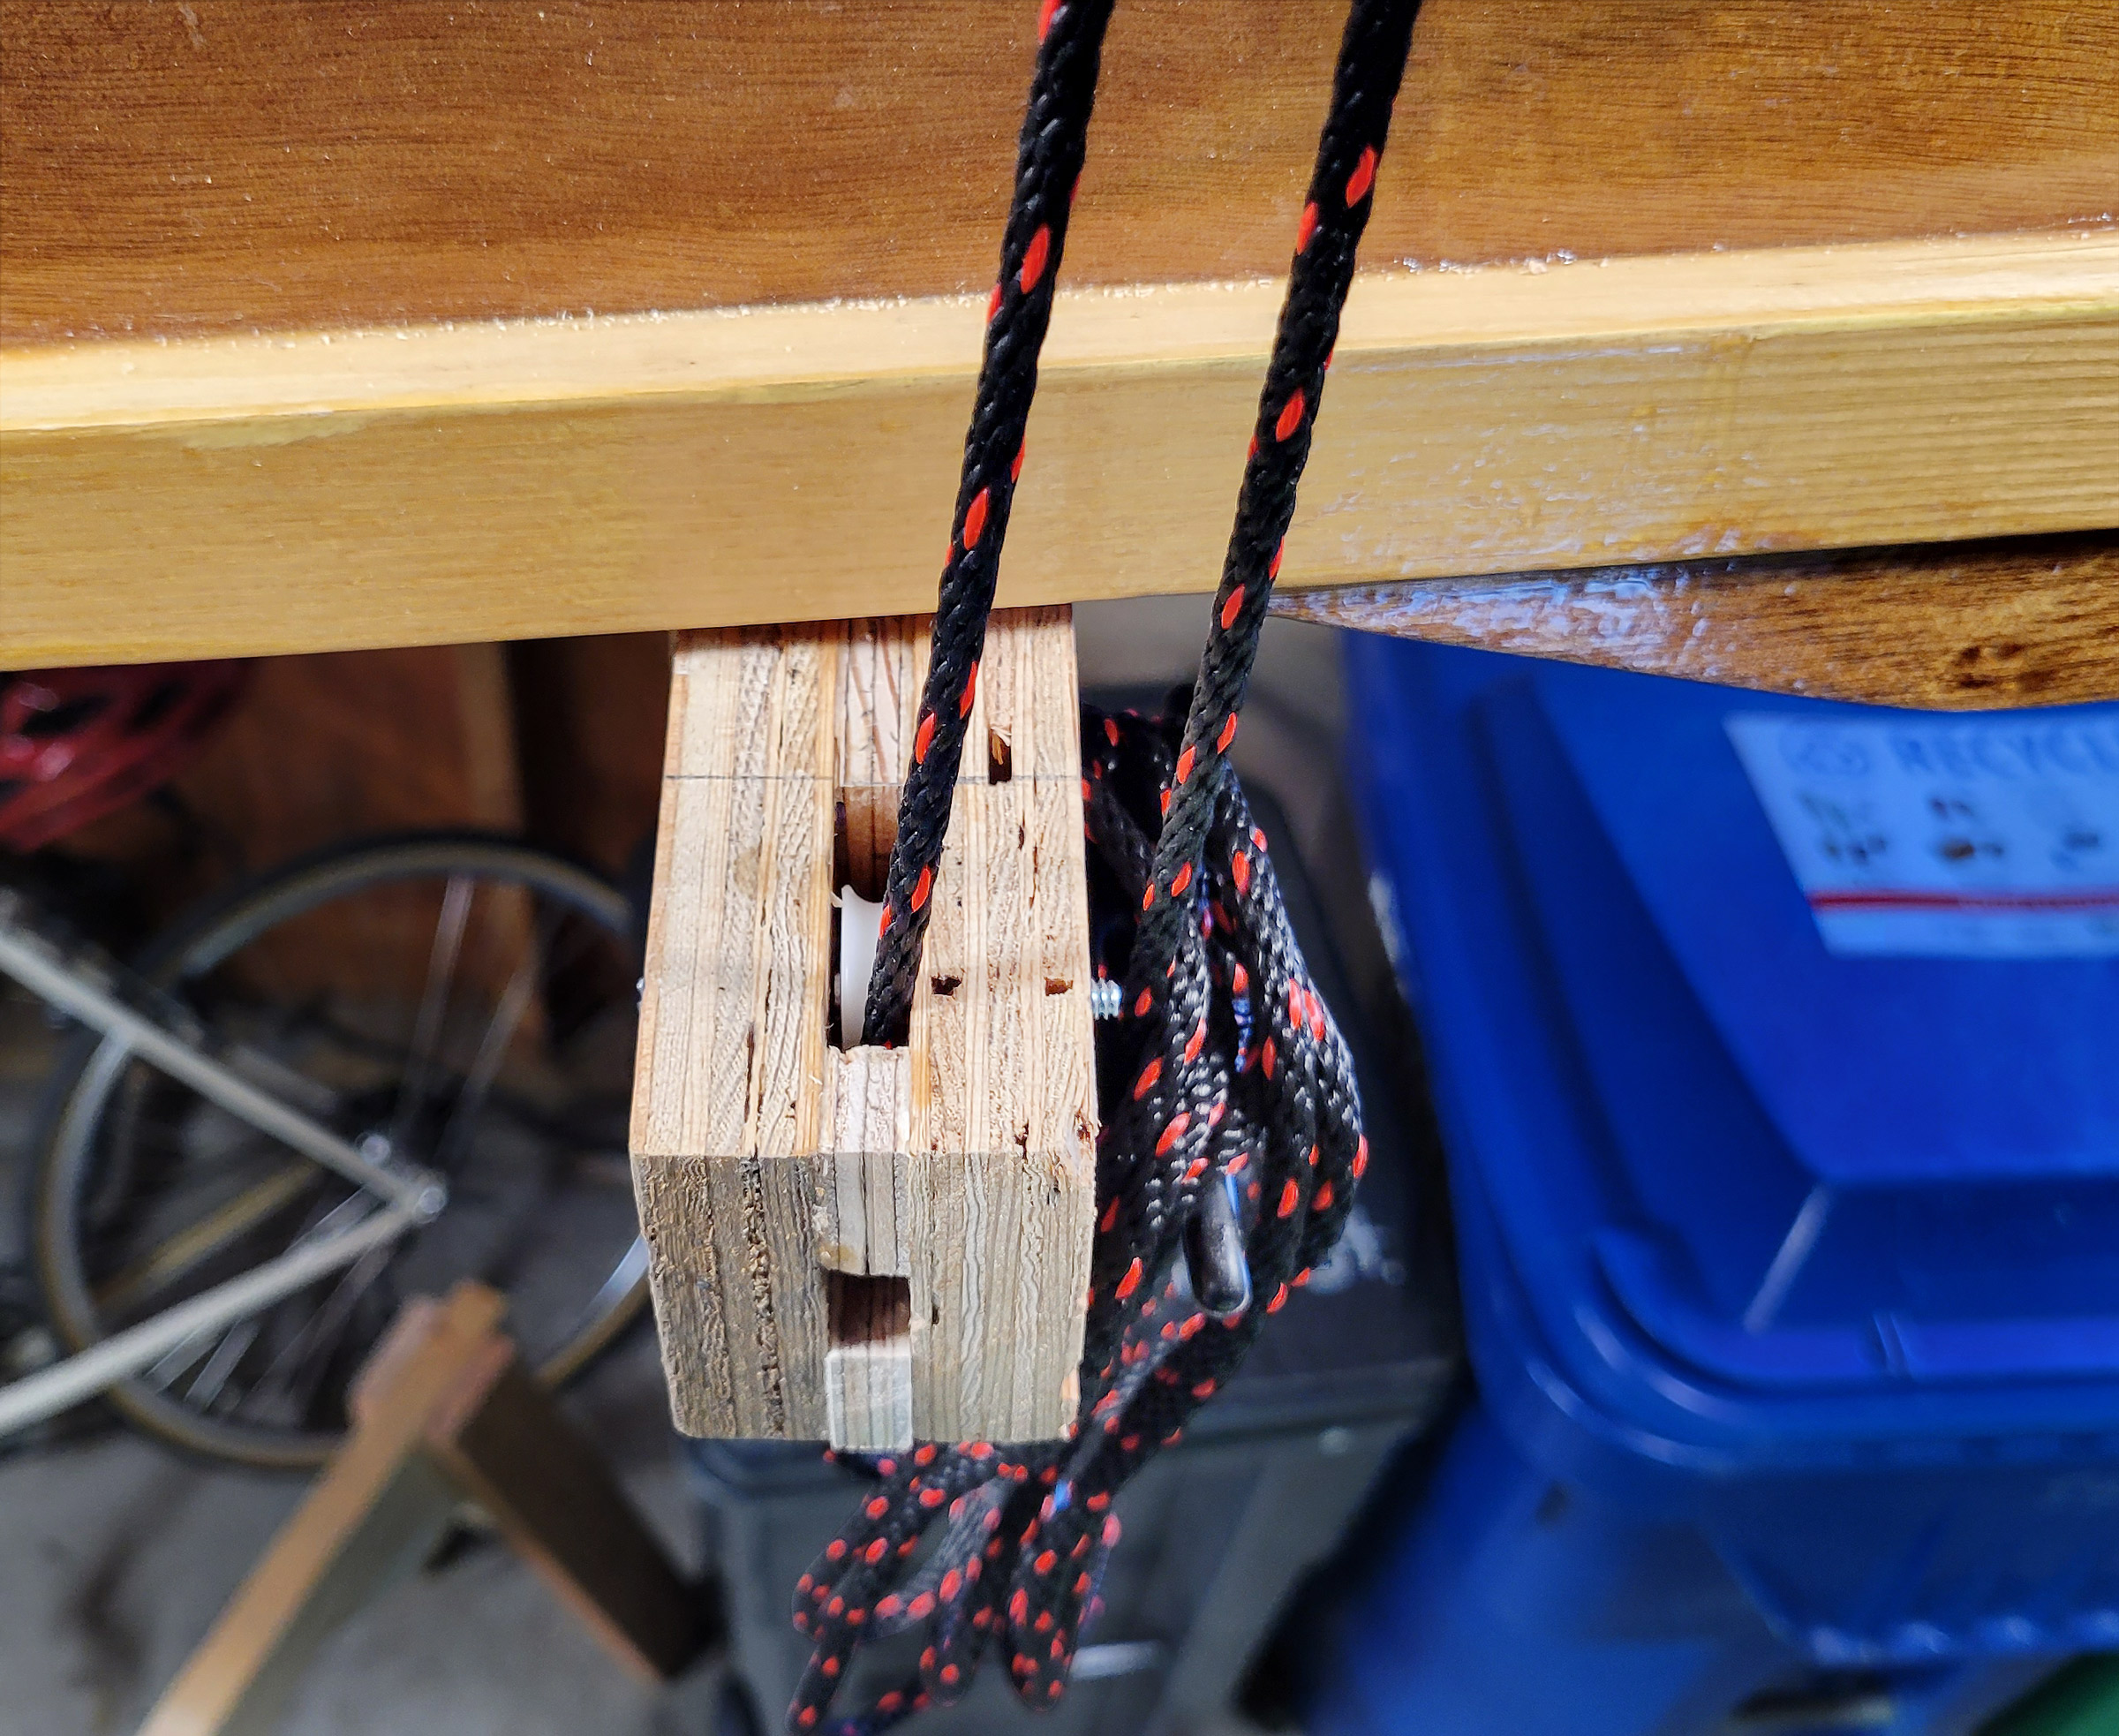
The beams are constructed of glued-up plywood, leaving a center channel for the pulleys and line. Seen here is (left) the line as it comes down from the eyebolt and passes around the sheave on its way to the far end of the beam and (right) the end of the line as it is led back down from the cam cleat on the upper beam to be secured—for safety—to the horn cleat on the lower beam.
I raise or lower one end of the boat at a time and find it best to work in 12″ increments, alternating between the bow and the stern. For safety’s sake, I tie off to the horn cleat after each move as a backup to the cam cleats. The boat usually remains level while being lifted but when I lower it, one side tends to descend faster than the other so I re-level the boat after I cleat the line. Once the boat is at the right height, I can slide it laterally with a shove or two and, while the motion of the trolleys is not silky smooth, the ball-bearing wheels roll easily in the channels.
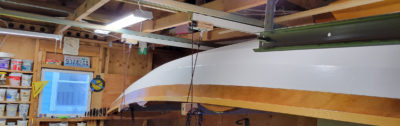
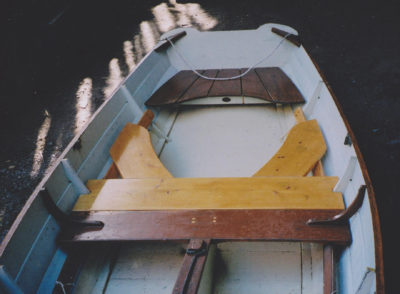
Raised and moved to the side, out of the way of the overhead door, the 14′ wherry is safely stored overhead, leaving floor space for family bikes and other gear.
The boat is stored at the back of the garage where it is off to the side of the overhead door’s tracks. Before I can lower it onto the car’s roof racks, it needs to be moved sideways along the channels, and then shifted forward on the lift’s beams. Once the weight of the boat is held by the roof racks, I loosen the lift lines completely so that the lower beams can be slipped aft and off the stern of the boat. Moving the car forward a few feet helps get the forward beam under the stern. If my boat is on a trailer, most of this maneuvering is unnecessary.
The lift allows me to store my boat where it doesn’t occupy space needed for other things and to load and unload the boat by myself. As with moving any heavy object, the key is to move slowly and methodically. I’m always happy to have help whenever it is offered and with an extra pair of hands, using the lift is a breeze.![]()
Paul West lives in a townhouse in Seattle, Washington, and manages capital projects for parks and recreation facilities. He rediscovered rowing a few years back and now rows every week at The Center for Wooden Boats. Paul hopes to camp-cruise with his wherry next summer.
You can share your tips and tricks of the trade with other Small Boats Magazine readers by sending us an email.


Great idea. I would love to know where you purchased your hardware. Mail order or local? I am in the Seattle area also.
Pretty much all the hardware should be easily available at most any BigBox store if you look around or ask a clerk. Sheaves might best be obtained from a boating supply house like Duckworks or similar, or if you’re handy they can be made from UHMW polyethylene or Delrin sheet stock, available from on-line plastics supply sources.
I bought a Harken-made lifting rig for my Waterlust canoe which “sleeps” off-season hoisted above my garage half so I can pull my Subaru in at night. The Harken’s fixed in place, doesn’t move the boat sideways, but makes an easy job of “putting things to bed” when when the time comes.
SP Clark is right. Most of the materials are available locally. The unistrut track is in the electrical department next to the conduit. There are several brands of the strut that are pretty much the same dimensions. I mailordered sheaves from a boating supply and the trolleys were ordered off a major internet retailer’s website. There are a few variations of these trolleys so it is good to consider your fastening system before ordering.
Very slick! A DYI bridge crane for home garage. Thanks for sharing idea and details.
If I understand this system correctly, you have to be able to drive into the garage with the boat on top of the car, lift the boat and then move it sideways which means the channels must be further into the garage than the overhead door tracks and the door opener power head. That means a fairly high door, resulting in long door tracks and a long garage.
My garage is 20′ deep. The 7′ tall garage door rides on tracks that extend 8′ back from the front of the garage. George Hume is right that when I lift the boat off the car, I cannot immediately move it to the side. I first have to work it backward on the beam-blocks. When I am ready to move it sideways, I make sure it is at a height that can clear the garage door tracks. I wait to lift it to its full height until it clears the tracks.