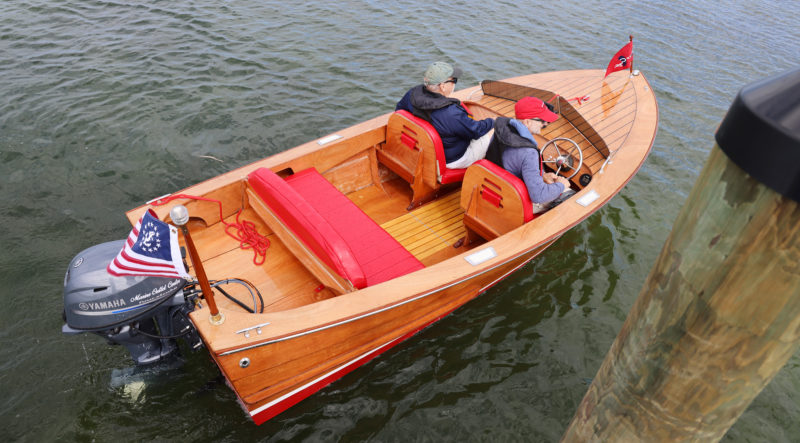
I wanted to build an outboard boat that would be fun to use in Florida, something eye-catching and different. I had always been drawn to classic runabouts, particularly the Chris-Crafts I see in more northern waters. While they are mostly inboard-powered, outboard motors are easier to maintain in Florida’s exceptionally saline waters. The Chesapeake Light Craft (CLC) Rhode Runner was just what I was hoping to find. It’s a kit-built outboard runabout in the classic Chris-Craft style of the 1950s. With bright-finished mahogany and faux planked foredeck, it exudes elegance and prestige and would stand out among the fiberglass boats on my Sarasota waterways.
 Rob Wucki
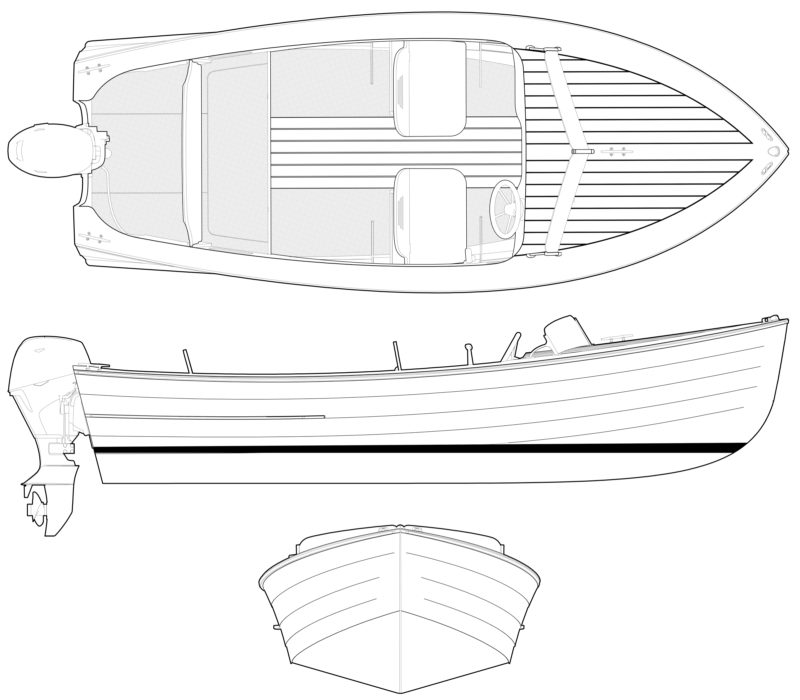
With its bright-finished mahogany and faux-planked foredeck, the Rhode Runner is a modern take on a vintage Chris-Craft runabout. There is plenty of storage space under the recessed deck between the transom and the rear seat, which is hinged to provide access.
As one of CLC’s ProKits, the Rhode Runner requires prior experience with stitch-and-glue construction. While I had previously built three stitch-and-glue plywood kayaks and one hybrid using cedar strips, as well as CLC’s Jimmy Skiff, I was unsure that I could take on this challenge; but after I spoke with John Harris, the company’s president, his confidence in my abilities inspired me to purchase the ProKit, which I completed six months later.
The builder’s guide for the Rhode Runner consists of 35 pages of computer-rendered drawings, and the construction steps are noted in a bullet list of two to six instructions, presuming the builder understands the standard boatbuilding processes. By comparison, the manual for the Jimmy Skiff II, one of CLC’s standard kits, has 160 pages, with each operation explained by one or more sentences and illustrated with a photo or drawing.
Even though the Rhode Runner guide was greatly abbreviated, it was well suited to my previous experience, and the boatbuilding I’d done previously made it easy to follow the instructions.
 Bob Silverman
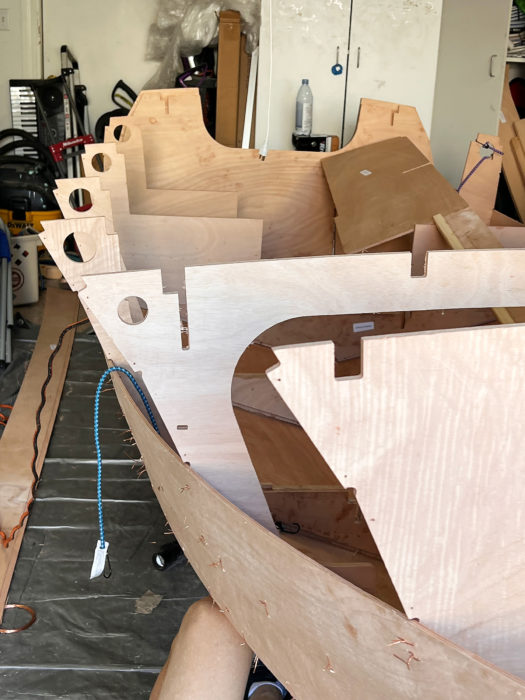
The Rhode Runner, one of CLC’s ProKits for stitch-and-glue construction, is assembled with neither temporary molds nor strongback. Here the starboard planking panels are being wired to the frames. Note that the frames are notched to ensure the planks’ proper alignment.
The quality of the okoume plywood in the kit was exceptional, and the milling of the CNC-cut pieces very precise. Each of the two interior stringers, two deck panels, two bottom panels, and four strakes is supplied in two pieces with interlocking puzzle joints. The mating pairs are self-aligning when epoxied together. The 3⁄8″ frames are strengthened with plywood doublers, and the aft ends of the bottom panels are sheathed with fiberglass and epoxy.
The Rhode Runner does not require temporary molds or a strongback. Assembly of the hull begins with stitching the 1⁄4″ bottom panels together along the centerline. The installation of the seven 3⁄8″ frames follows, aided by tabs that fit into slots milled in the bottom panels. Copper-wire stitches temporarily hold the pieces together. The 1⁄4″ planks in the four strakes have pre-milled rabbets that align the planks at the laps in CLC’s LapStitch method. The hull bottom gets ’glassed inside and out before the interior and the decks are installed.
The two 1⁄4″ deck pieces are tacked together along the centerline with cyanoacrylate glue, avoiding the holes required for copper-wire stitches. The top surfaces have been milled with grooves to accept contrasting strips of wood to create the appearance of a planked-and-caulked foredeck typical of vintage Chris-Craft runabouts.
 Rob Wucki
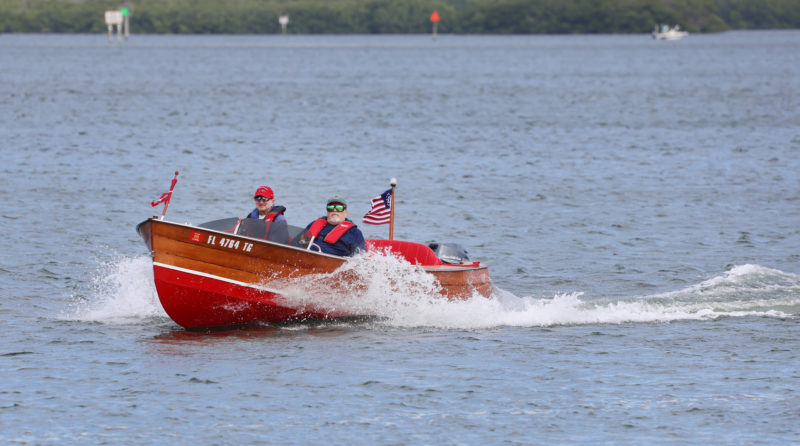
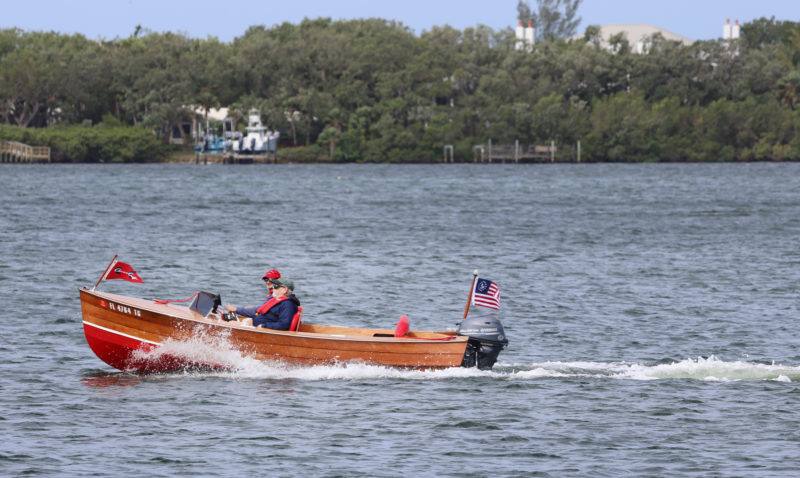
Stylish and fast when carrying one, two, or three passengers, with just the skipper aboard, the runabout can achieve a top speed of 27 mph with the 25-hp outboard.
The cockpit is all plywood sealed with epoxy. There are two storage compartments along the sides in the stern. They have access openings on their forward ends and are sealed by adhesive rubber-foam gaskets on the underside of a hinged stern bench. Between the compartments, in the center of the stern, there is room for a fuel tank. A seat backrest slides into slots provided by a pair of brackets. At the forward end of the cockpit there are seats for the helmsperson and a passenger, made of 18mm plywood. I bought the kit that included the two forward seats. They add flair to the look of the boat, and have narrow fiddled shelves on the aft side of the backrests that can hold beverages and other small gear.
I installed several optional features, including a period-looking windshield, running lights, stainless-steel rubrails, upgraded seats, and a complete electric package. Hardware for a windshield and for the motor’s throttle and gear shift is available from CLC. I added switches for the navigation lights and bilge pump and installed a Garmin navigation screen with depthfinder.
 Rob Wucki
With a 25-hp four-stroke outboard the Rhode Runner gets on plane easily. When at speed, the boat carves around turns rather than skidding through them.
To achieve the appearance of an original Chris-Craft, I went the extra mile and customized the upholstery with a local shop and located period-accurate flags, pennants, deck pads, and an original gas tank.
I purchased a single-axle, aluminum-frame trailer with a 1,600-lb load capacity, which supports the runabout’s weight—including motor and fuel tank—with ease. The boat behaves well on the road. It isn’t a heavy boat, so a pair of ratchet straps can keep it secure and centered on the trailer bunks. At the ramp, the Rhode Runner glides off and back onto the trailer very well.
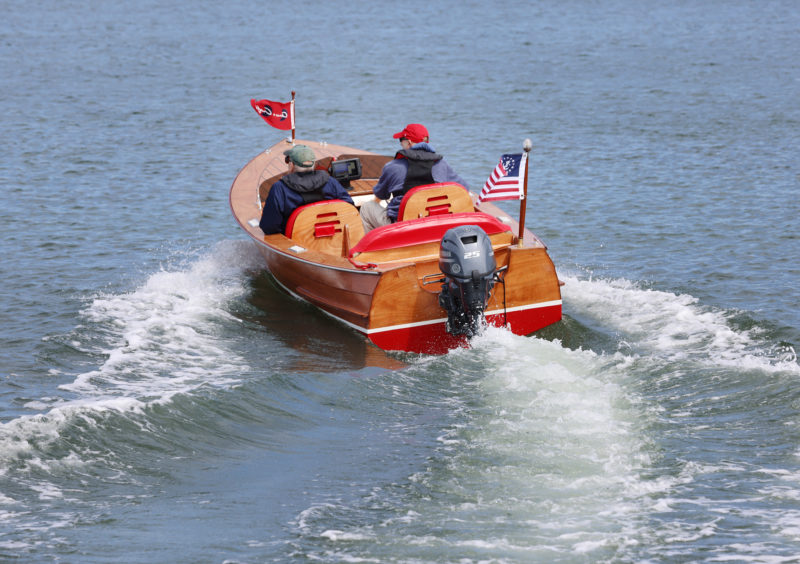
I equipped the Rhode Runner with a 25-hp Yamaha four-stroke outboard. Its 126 lbs is ideal for fore-and-aft trim, and it is smooth and quiet from idle to top speed. The boat went on plane with ease and remained perfectly trimmed with uninterrupted visibility over the bow. When underway, the Rhode Runner is incredibly stable, and you can feel the smoothness when accelerating. The boat rides exceptionally dry thanks to the slight flare of the foredeck that deflects the spray. I was pleasantly surprised by how well it cut through the waves when crossing the Intracoastal Waterway, even in choppy conditions. When cornering, the boat dug in and stayed the course, rather than swerving out of its direction. I was able to reach speeds of up to 27 mph motoring solo, and the boat slowed down comfortably without having the stern wave pile up against the transom. The ride is incredibly smooth and stable, making it a joy to operate. I’ve only run my Rhode Runner with two people aboard, and it balances very well. I don’t doubt that having two more passengers would be just fine and it would still get on plane.
 Rob Wucki
The Rhode Runner provides a smooth, stable, swift ride, and has ample space for four.
I’ve owned many boats, including Boston Whalers, flats boats, fishing cruisers, and pontoons, but if you’re after a fast, fun, and stable runabout, this is it. My Rhode Runner is an undeniable head-turner wherever I take it—both on land and in the water—with people constantly asking me how they can get one. With the quality of the kit and the easy-to-follow plans, I felt confident, after I got started, that I’d be able to complete a very solid, well-thought-out boat. Building this boat was one of the most rewarding experiences of my life. If you’d like a runabout with the look of a classic and you’ve already built a kit and are ready to take the next step as a boatbuilder, the Rhode Runner provides good value and will reward your efforts.![]()
Bob Silverman is a business-administration graduate from the University of South Florida and now a licensed real estate-broker specializing in developing mobile-home parks in Florida. Married with two grown children, he has lived in Sarasota for over 66 years. He has lived by the water most of his life and enjoys building wooden boats, kayaks, canoes, and even teardrop campers. He’s also a vintage Ford Mustang enthusiast, with ten restorations and showings under his belt. He’s currently building a hybrid stand-up paddle board with a trolling motor.
Rhode Runner Particulars
[table]
Length/14′9″
Beam/5′5″
Dry Weight (hull only)/350 lbs
Max Power/25 hp (200 lbs max outboard weight)
Min Power/15 hp
Motor Shaft Length/20″
Fuel Capacity/6 gallons (tank not included)
Passenger Capacity/4 adults
Max Payload without motor/1,000 lbs
[/table]
The Rhode Runner is available from Chesapeake Light Craft as a complete kit, with optional seats, for $4,998. Wooden parts only ($3,639), PDF plans with guide ($199), and many other options are available.
Is there a boat you’d like to know more about? Have you built one that you think other Small Boats Magazine readers would enjoy? Please email us!






Nice looking boat, reminds me of our 1959 Sorg 15, similar to the Lymans of the day. The Rhodes has a nice hull shape for those Florida waters, she’ll handle some chop.
Great job!
Cheers,
Clark and Skipper
Thanks, Kent. She rides really well in all kinds of waters. We don’t have a lot of these styles down in Florida and it is sure to turn heads. If you ever want a solid runner, she is easy to build and Chesapeake Light Craft helps out with questions and answers.
Thanks for your comment
Bob
My query is really just a minor nit, but I question the use of copper wire for the pre-glue stitching. I realize CLC specified this for their kayak kits, the idea being that the protruding wire on the exterior would be ground off, and the inside wire would be poked down into the chine, but I objected to that on a couple of grounds; first, that after gluing, the wire would provide virtually zero strength, and second, that the interior wire would make a lumpy job of the glass tape at the chine.
The Pygmy kayaks I have built (alas, they are no more) specified iron wire, which was to be removed after gluing. The glued joints are so strong that the wire serves no further function, and is quickly and easily removed. The resulting chine taping is easier and makes for a neater job.
Incidentally (and I may have commented on this previously), both convex and concave areas to be glassed, such as at stem ends, will be much easier and result in a better finish if one uses bias tape. I make my own (I doubt whether it can be bought), by laying a 4′ ruler diagonally across a sheet of cloth and cutting with a razor knife. I like to make mine about 4″ wide. The resulting strip of cloth conforms beautifully over both convex and concave shapes. I’ve seen many instructions and illustrations for glassing such areas that call for cutting gores in the tape, and overlapping the resulting flaps, which then have to be ground down to make them smooth.
An odd behavior of bias tape is that it can be stretched lengthwise, which makes it narrower, or manipulated to become wider, which makes it shorter.
I had a 14’ Trojan built in 1952. It had both forward and rear faux decking and lots of chrome. It was pushed by a 40 hp Merc probably at about 30 knots. It had seating capacity for six, although four was the most I had in it. I quit using it and it dry-rotted on the trailer and I left it in my barn when I sold the place.